Category: Linen Frock Coat
Finishing the Facings

Working from the outside of the coat, baste the facing to the forepart, about 1 inch from the inner edge of the facing. By working from the outside, you can ensure that the tension between the coat and the facing below are neutral, which will avoid any pulling or stress when the coat is finished.


Fold under the raw edge of the facing and baste it securely, as you did for the front skirt facing.

Leave about an inch of the facing free at the bottom, which should overlap the skirt facing.


Felling the Edges
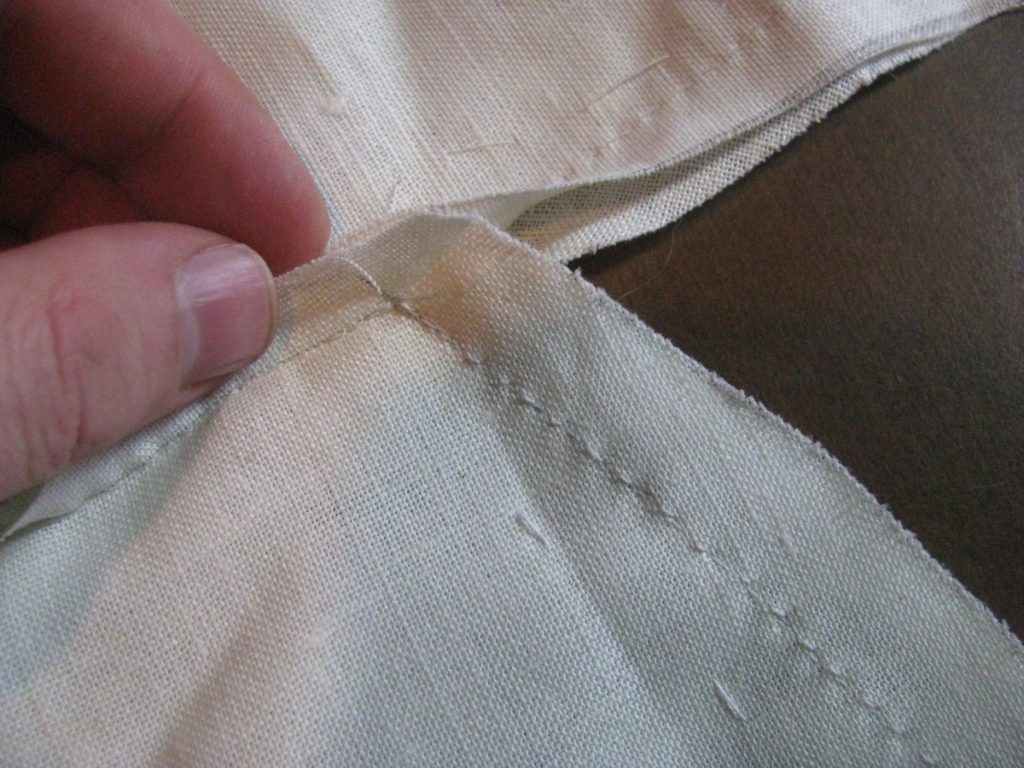
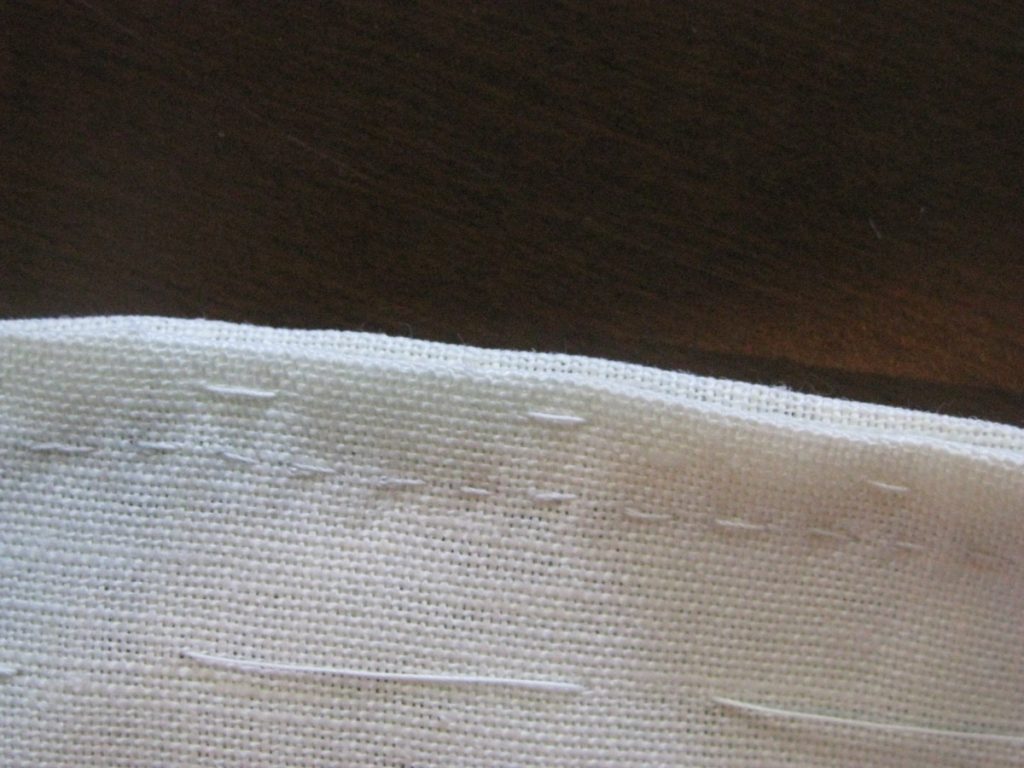
Starting at the waist seam, fell down the folded edge of the skirt facing. These stitches will be visible on the outside, so try to catch only a thread or two of the skirt fabric.


Continue felling all the way to the bottom of the skirt, and continue around the bottom of the facing.

Now that the skirt facing is complete, you can basted down the bottom of the forepart facing. Fold the raw edge under about 1/4″, or whatever looks best in your particular case.

Baste the facing down along the raw edge, starting at the shoulder seam . . .

. . . and continue to the waist seam, felling along the bottom edge, and then the first 1/2″ or so of the front seam (remember you had stopped the backstitches about 1/2″ to 1″ above the waist).

Now it is time to top stitch the edge of the coat facings, which serve to give a firmer edge to the coat, and also to prevent the seam from rolling out of its position. This could be done with either machine stitching or by hand, depending on your preference. I’ve chosen to use a side stitch here.
Begin at the top of the lapel, just at the lapel dart, and about 1/4″ from the edge. Ideally, you’ll catch the edge of the stay tape in your stitches. Work from the right side of the lapel at this point, as this is what will be seen when the coat is worn.

When you get to the roll line, turn the fabric over so that you are still working from the outside of the coat.

Continue stitching past the waistline, all the way to the hem of the coat.

If you wish, you can do the same thing to the facings on the back of the coat. I usually do not, as they are thinner in width and tend to stay in their proper position.
Basting the Facings
Since this coat will not have any of the pad stitching used normally to ensure a good roll of the lapel, we must take extra care in the basting of the lapel. Begin by trimming off some of the excess material at the tip of the lapel. Try to keep at least 3/8″, as linen ravels easily.

From the facing side, put in a row of shirring stitches. These are just running stitches, secured at one end with a few backstitches, used to help gather material.

From the coat side, pull the end of the shirring thread, gathering the excess material around the point of the lapel. Since it is linen, it may be slightly troublesome, just persevere. Press from the coat side when you are happy with the result. Be sure not to pull too tightly and end up with the crease on the inside of the sewing line.

Remove any basting stitches and the shirring thread, and turn out the lapel to the right side. You can use a pointed but blunt object to help smooth out the tip of the lapel. At the top of the lapel dart, you’ll want to remove any stitches from above the stay stitching you put in both the coat and facing.

Starting at the bottom of the roll line, from the coat side, baste about 1/2″ from the edge. As you go, roll back the coat edge slightly, so that 1/16″ of the lapel is visible on the outside edge. Baste to the lapel dart.


With the facing side up, baste from the bottom of the roll line to just above the waist line, about 1/2″ from the edge. This time, roll back the lapel so that the coat is visible by 1/16″ underneath. What this is all doing is ensuring that when wearing the coat, all you see is a nice finished edge, with no facing visible underneath.

As you’re basting near the roll line, keep the facing and coat exactly even for about 1/2″ above and below the roll line. This gives a smooth transition from below the roll line to the lapels.

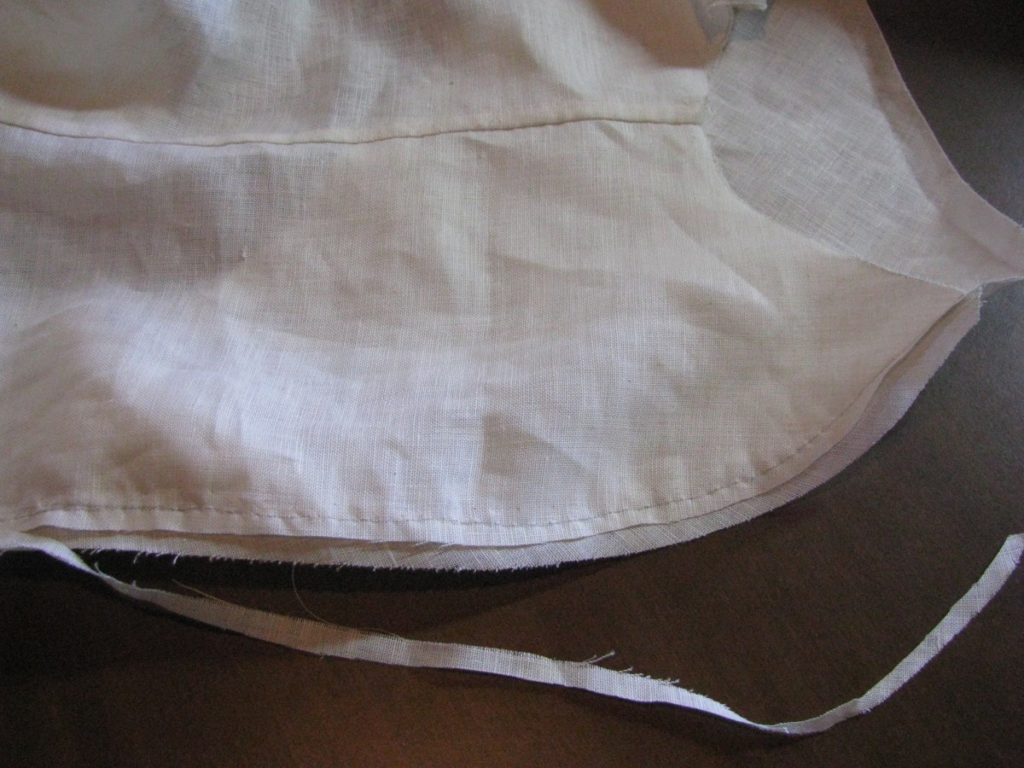
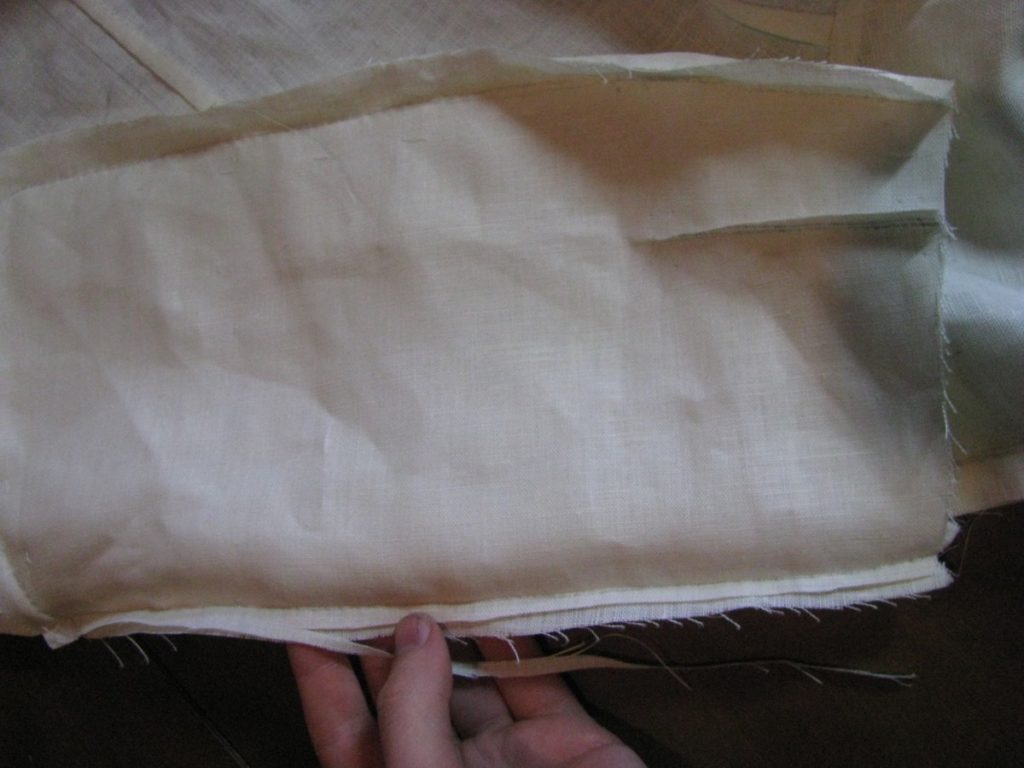
On the skirt, fold back the facing over the stay tape, making sure to not pull too tightly. Baste about 1/2″ from the edge from the waist to the hem.

At the hem, the facing will probably skew upwards a little, which is okay.

At the waist, allow the forepart facing to overlap the skirt facing.

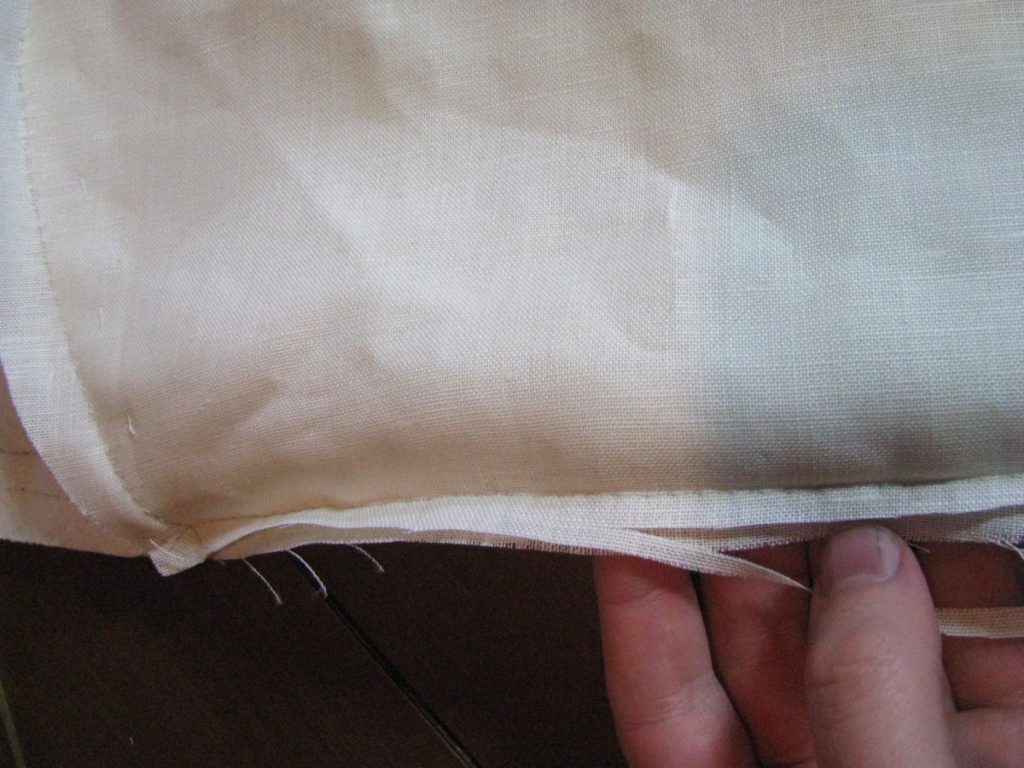
About 3/4″ away from the raw edge, baste down the inside of the skirt facing.


Turn under the raw edge and baste closed.


From the facing side, baste along the edge, just inside of the first row of basting stitches, from the bottom of the lapel to about an inch beyond the top of the roll line. At the top of the lapel, stay about an inch away from the edge.


Holding the coat with the lapel held in its final rolled position, make a row of basting stitches from the tip of the lapel, diagonally towards the roll line, stopping about 1/2″ beyond the line.

On the coat side, draw in the roll line lightly with chalk or a pencil. This is the last chance to make sure it all lines up properly. Baste using a running stitch from the bottom of the roll line to about 1″ from the top.

On the facing, draw a line from the top of the lapel dart, about 1/2″ from the top, to a point 1/2″ from the roll line. This should follow the top of the stay tape underneath. Make a mark to denote the end point.

Make a cut through the facing only from the neck to that point, as shown.

Fold the facing under from the cut to the lapel dart. The folded edge should be just above the top of the stay tape. Baste in place.

Lay the coat facing side up on the ironing board and press the lapel flat. This will give just the right amount of tension to the lapel, helping it to roll over nicely.
Hold the lapel into it’s position, creasing along the roll line, and press from the top of the roll line to two or three inches above the bottom of the roll line. This area is not pressed, but allowed to roll freely.


Attaching the Facings
It’s now time to attach the facing to the coat, which will give us a firm, crisp edge and help the lapel roll properly. To start off with, lay the facing onto the right side of the coat, right sides together. The outside edges should line up, and the bottom of the facing should extend about 1/2″ below the waist line.

Baste along the front edge of the facing, catching the stay tape underneath. Baste from the waist line to just below the top of the lapel.

At the top of the lapel, lower the facing vertically with your thumb, and baste in place across the top edge. This should give some extra fullness at the top of the lapel, and will allow the lapel to roll freely when it is completed. If you think about it, the length between the inside of the lapel, and the outside will be different, due to the curve. This step will achieve that.
I didn’t photograph this, but it’s a good time to make a stay stitch, or a few stitches in place, at the top of the lapel dart on the facing, at the seam line, to keep the dart from raveling. These stitches will be positioned right over the top of the stay tape underneath.

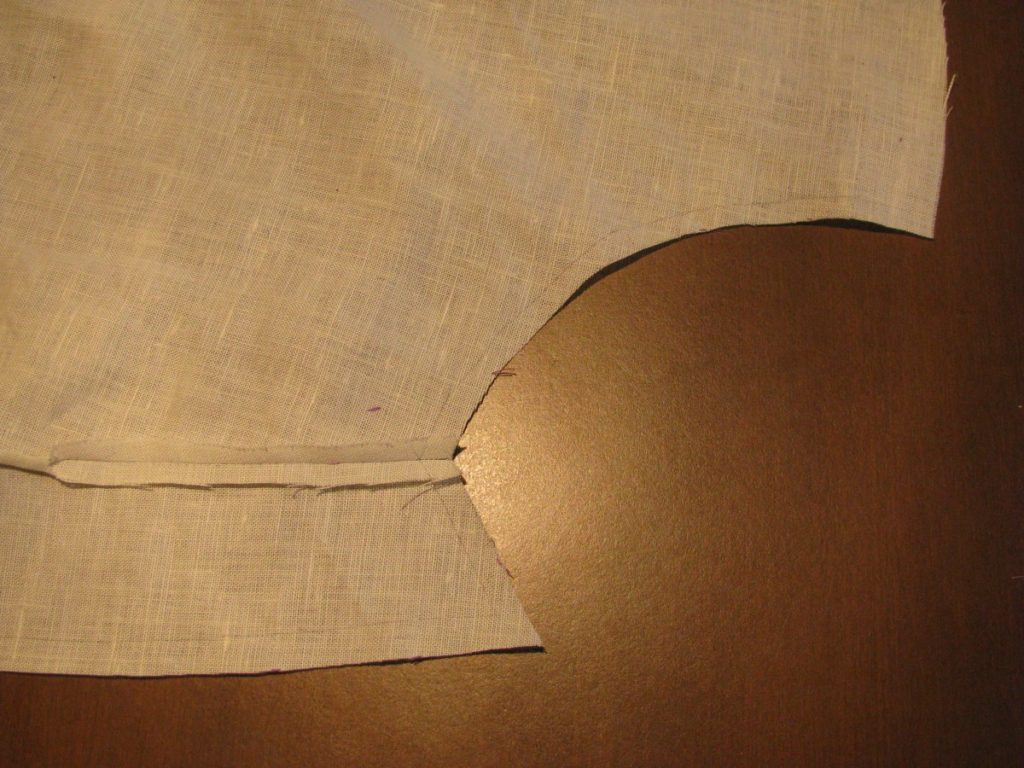
Stitch the facing onto the coat using either a back stitch or back and fore stitch. The stitching starts precisely at the dart, around the corner of the lapel, and ending about 1/2″ to 3/4″ above the waist line. The stitching should be 1/16″ away from the edge of the stay tape.

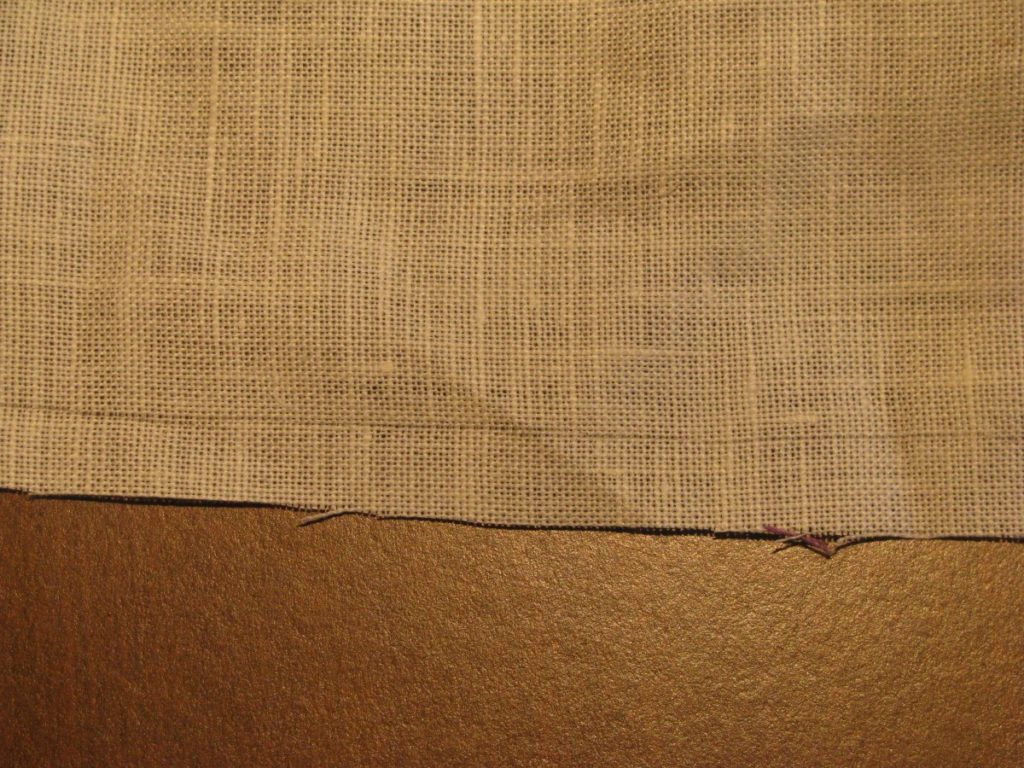
At the corner of the lapel, instead of making a sharp corner with the stitches, make two stitches on the diagonal to allow room for the seam allowance when it is turned right side out. See the diagram below for more clarity. Use backstitches in the corner area for extra strength. Also, note that the stay tape should indeed come right up to the corner. I had a slight mishap and lost about 1/8″, hence the gap at the corner.


Continue sewing to to about 3/4 above the waistline. This will later be finished by felling after all of the facings have been turned right side out – we need some room to move things around at this point.

Cutting the Facings
Drafting a pattern for the forepart facings is quite simple to do and relies more on your coat size and artistic skill than on specific numbers and measurements. At the shoulder, about 2 – 2 1/2 inches from the neck point, begin drawing your facing, following the general shape shown, and ending at the waistline, about 2 1/2 – 3 inches from the edge of the coat.
I usually just account for the seam allowance along the inside edge as I’m drawing, but you can add the 1/4″ seam allowance afterwards, if you prefer. It’s also a good idea to add an inlay to the top of the shoulder, and the bottom of the facing, and possibly along the neck and top of the lapel.

The first thing I did in actually drawing the lapels was to trace the outline of my forepart onto the linen. Remember to include all darts – lapel and gorge – and the roll line.

Here’s the bottom front edge of the facings drawn. I only traced in about 3 inches for the bottom of the facings. I accidentally left out the inlay at the bottom, which worked out okay anyway, but it’s best to put one in just in case.

Here I used a curved ruler to draw in the inside edge of the facing. You can see how open it is to personal preference, as I changed it two or three times before I was happy.

Here are the facings cut out. At this point, you’d add the tailor’s tacks and sew the darts as you did on the forepart.

Hemming the Skirts
Before attaching the facing, it’s a good idea to finish the hem of the coat before things get covered up. First, lay both halves of the coat on the table, with the back seams next to each other, and ensure that the back skirts are of equal length. Mark any adjustments, if necessary. Then take a look at the skirt and back skirt hems. Ideally, they would be equal, or the back piece slightly longer, but as you can see here, I must have made a measuring mistake, as I’m off by an inch.

Variations in length can also occur during the sewing process, as things can get accidentally stretched out of shape if you’re not careful.
Redraw the hemline on both sides as necessary. You can see why adding an inlay to the back is a good idea – it would have saved me redrawing the skirt hem, and would have been easier to shorten the back piece, which is just a straight seam.

Cut off the excess fabric from either the skirt or the back skirt, as necessary.

Mark a line 1/2″ from the bottom of the skirt, as a guide when folding over the hem.
Hemming the Skirt – Method One
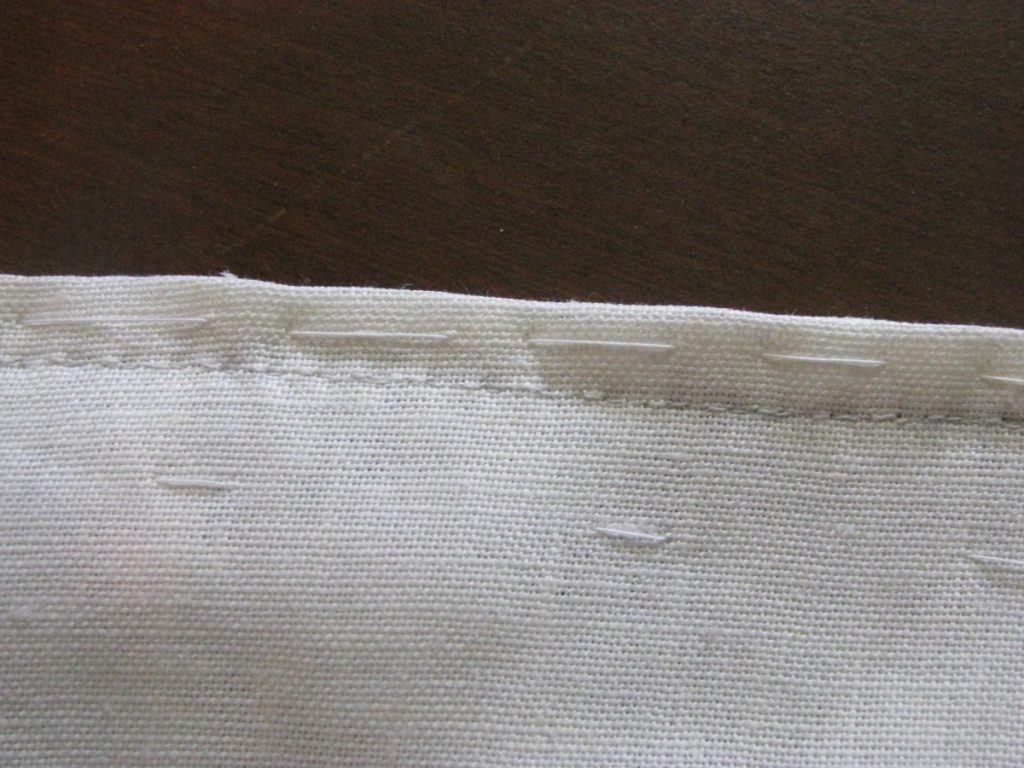
There are two methods to hemming the skirt, choose which ever one you prefer. The first is the simplest, and simply involves folding up the bottom hem 1/4″, and then folding that over again, concealing the raw edge. Baste and then fell down, ensuring the stitches catch only a thread or two of the right side of the coat.

When you get to the back pleat area, the pleat is opened up completely and then the hem folded over. While this method allows the pleats to drape more freely, it is also somewhat more rumpled looking near the bottom, and you’ll have to press the area more frequently.
Hemming the Skirt – Method Two
The second method, and the one I decided to use for this coat, involves first basting the pleat closed. The pleat should be the same width at the bottom as it is at the top. Baste from the bottom of the skirt to the bottom of the pockets. Here’s the view from the outside back of the coat.

The inside of the coat, showing the basting stitches holding down the pleat.

The hem is then folded up 1/4″ as in the first method, this time catching all layers of the plait at once. Fold the hem once more to conceal the raw edge, baste, and fell.

Taping the Fronts
Now we will apply stay tape along the center front of the coat, and the top of the lapel. This has a couple of purposes: it gives strength to the area and prevents the front from stretching out of shape, and it also provides a crisp and firm edge to the coat.
Beginning about 5/8 from the bottom of the coat, lay the stay tape onto the front, just behind the seam line you marked earlier. Baste in place as you work your way up the coat.
Ignore the lower line in this photo, that was an error on my part.

Continue basting up the skirt, past the waist.

This photo gives a good idea of the placement of the stay tape behind the seam line. It is not quite touching the line. I accidentally left this step out, but there should be a button stay under the stay tape at this point. The stay tape should extend off the edge of the linen stay by about a 1/16 of an inch. Pictures below for clarification.

Just below the roll line, make a back stitch in place to keep the tape from moving, and then work a little fullness into the stay tape, so that the lapel can roll freely.

At the top corner, the stay tape must be mitered to prevent bulk in the area. First trim diagonally to the corner of the lapel, stopping just at the edge (don’t cut all the way through the stay tape). The fold the tape into position along the top of the lapel, and trip off the overlapping area. This is hard to explain, so please watch the video below for a demonstration.

At the top of the lapel dart, trim the tape nearly all the way through, and place the remaining tape into position. The end of the stay tape should extend 1/2″ beyond the top of the roll line.

Fell down the stay tape along both edges, catching just a thread or two of the right side of the fabric. The stitches are about 3/8″ apart. The following photos show the stitching, as well as the placement of the stay tape on top of the button stay.


Button Stay
The top of the lapel dart is a weak point, especially during construction of the facing, so it should be reinforced with a couple of stitches in place, right at the seam allowance.

The stitches should ideally go through just the seam allowance of the dart, and be hidden in the crease underneath, but if they do show through it is not a major problem. That edge will be hidden from view under the lapels anyway.

The Button Stay
Since we are using lightweight fabrics in this coat, it is very important to give some extra support to the area where the buttons will be attached. If this is left out, the buttons will eventually tear holes in the fabric.
Cut a piece of linen the about an inch longer than the distance between the waist and the bottom of the lapel, by about 5 to 6″ in width. Press the linen in half lengthwise. If you are using an extra fine linen, you could make the linen piece wider and triple the thickness of the stay. In either case, the final width should be about 2 – 3 inches.
Lay the button stay on the inside, on the right half of the coat. The bottom of the stay should be about 1/4″ above the waist just to reduce bulk in the area. At the top, trim the stay back from the roll line by about 1/4″. As you can see in the photo, I should have trimmed mine a little further away from the roll line where it meets the edge of the coat. The button stay should be just behind the seam line you drew previously. Baste it down along both edges.

The folded edge should be towards the outside of the coat.

Along the inside edge of the stay, cross stitch the raw edge to the forepart of the coat. These stitches can be seen outside, so try to catch only a thread or two of the forepart with each stitch.

You can repeat the process on the other half of the coat, this time only using a single layer (or two if it’s a fine fabric) of linen, to form the buttonhole stay.
Optional Fitting and Seam Lines
Before we start the facings, it is a good idea to once more do a quick fitting, by merely sewing the shoulder and center back seams together, and of course putting the stay tape on the armscyes and around the neck. The purpose of this fitting is to check that the center front of the coat closes properly. The center should meet at the waist with a 1/4″ seam allowance, extending up to the roll line in a similar manner.
Pin the center front closed to be able to get a better view.
If above the roll line, you notice an excess of fabric, you may wish to put in a gorge dart, as shown in the drafting tutorial. This will not only take away some of the excess, but also enable the lapel to roll more gracefully and to stay in place. I highly recommend taking a photo of this fitting and posting it on the forum, so I can better help you determine if this gorge dart is necessary.
Marking the Seam Allowances
On a woolen frock coat, there would be a canvas inserted into the chest area which would give us the exact seam allowance, but seeing as we have no canvas, the seam allowance must be marked on the coat.
First trim off any inlays that you did not need along the neck and center front, if you had them.
Then mark the seam allowance (in my case, I used 1/4″), starting at the top of the neck, down towards the lapels . . .
and along the front of the coat.
Stop at the waist line.

Continue the line down the front of the skirt, remaining parallel to the front edge.

The line should be the same distance from the edge at the top and bottom of the skirt – then you know you are parallel.

Draw another line parallel to the edge, about 2 1/2″ from the edge. This is variable, and is equal to the final width of the skirt facing plus an allowance to turn under the raw edge.

Trim off the excess fabric along this second line.

The Back Seam
Trim the seam allowance of the side body to 1/4″, starting at the armscye.
Stop just above the waist seam, and avoid trimming through any of the stitches.
Trim off the excess at a slight angle, as shown.

Press the seam back towards the side body.

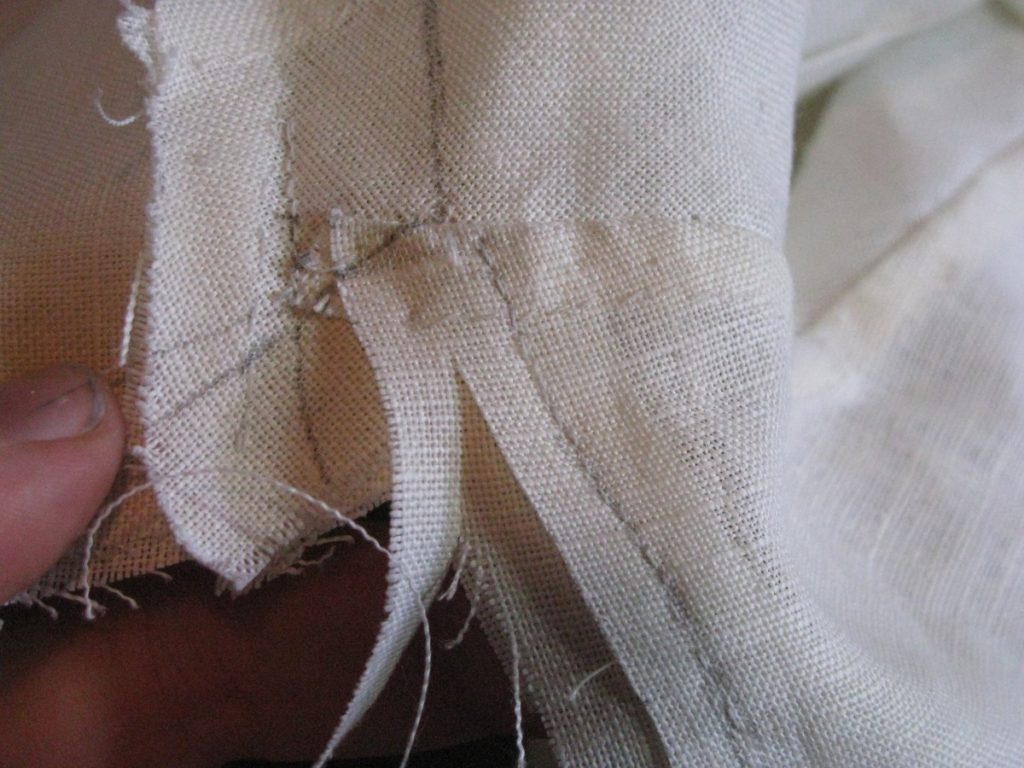
You’ll be folding this seam over to finish it, and if you take a look at the top of the pleat area, you’ll notice that you won’t be able to fold this area under.

To free up the seam allowance and allow it to be folded, snip the seam allowance of the back piece and the linen stay at the inner corner of the pleat. The cut should be only 1/4″ in length.

Now fold over the rest of this seam allowance up to the cut, baste, and fell closed. When felling, have the needle enter the seam perpendicularly, catching only a couple of threads of the outer fabric.

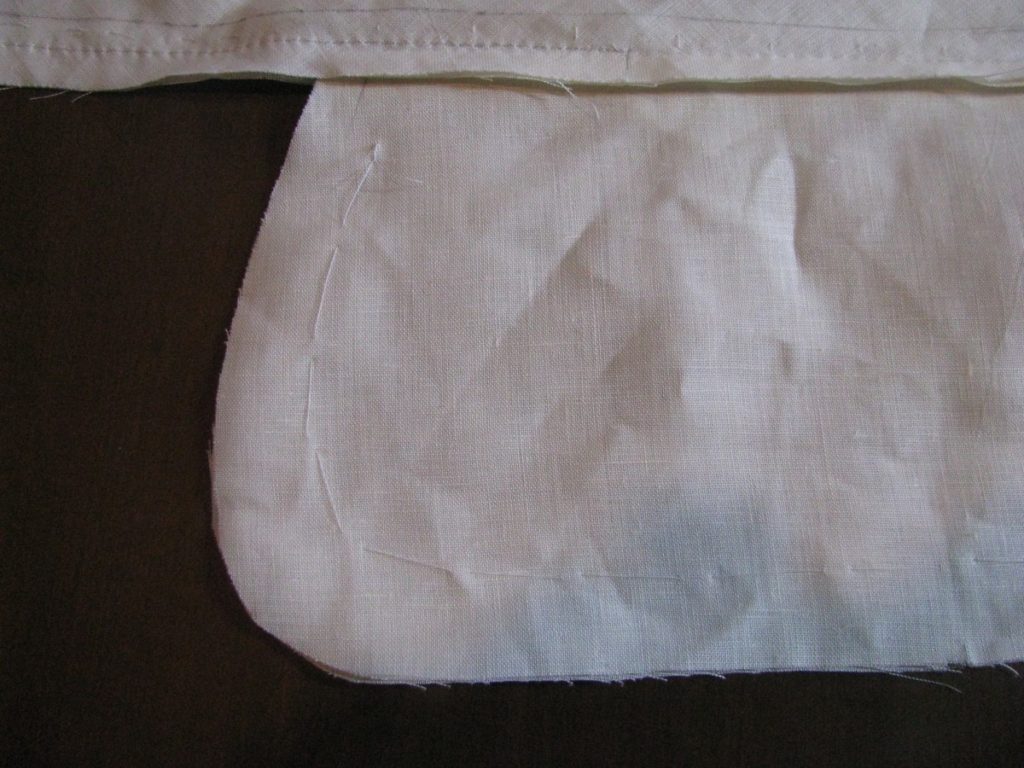
Here’s what the completed seam in that area will look like. Don’t worry, all of that ugliness at the waist will be covered up by a facing eventually.

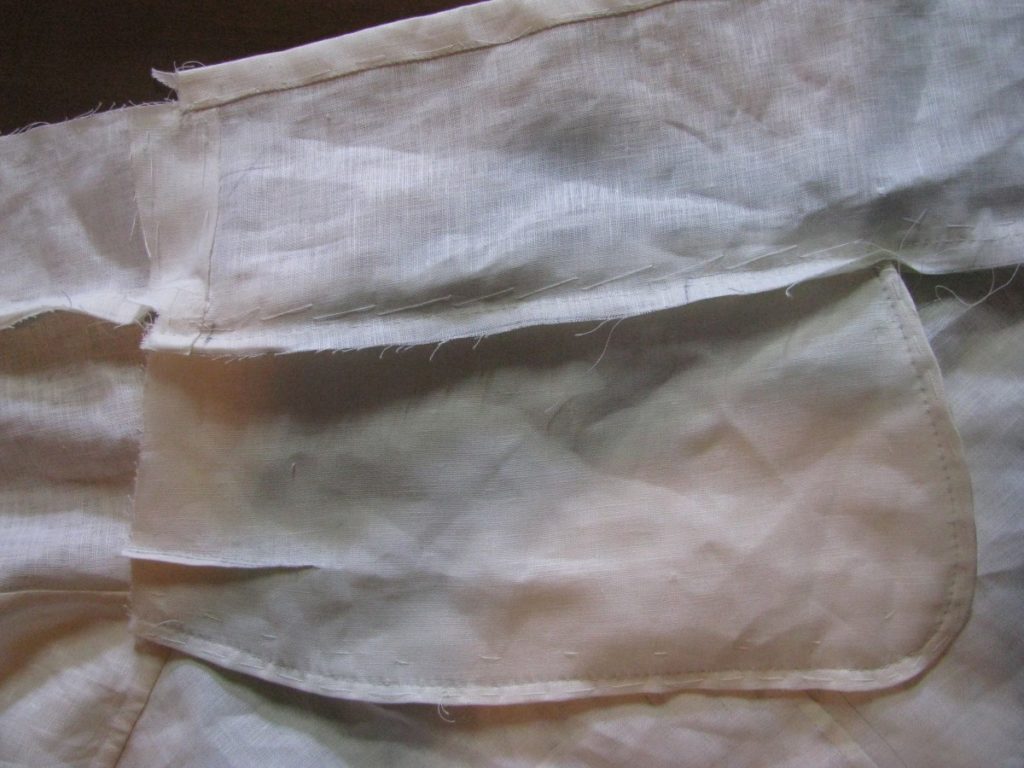
Now it’s time to finish up the lower skirt area. On the right side of the pocket (the back side), fold under the 1/2″ seam allowance along the length of the pocket. Baste this closed and fell, being sure only to catch the top half of the pocket underneath. You don’t want to end up sewing your pocket closed! Below the pocket opening, fell through all layers to give extra strength to this area.

The felling goes from the top of the pocket . . .

To the bottom of the pocket. Don’t sew any further, just continue folding the back seam allowance under.

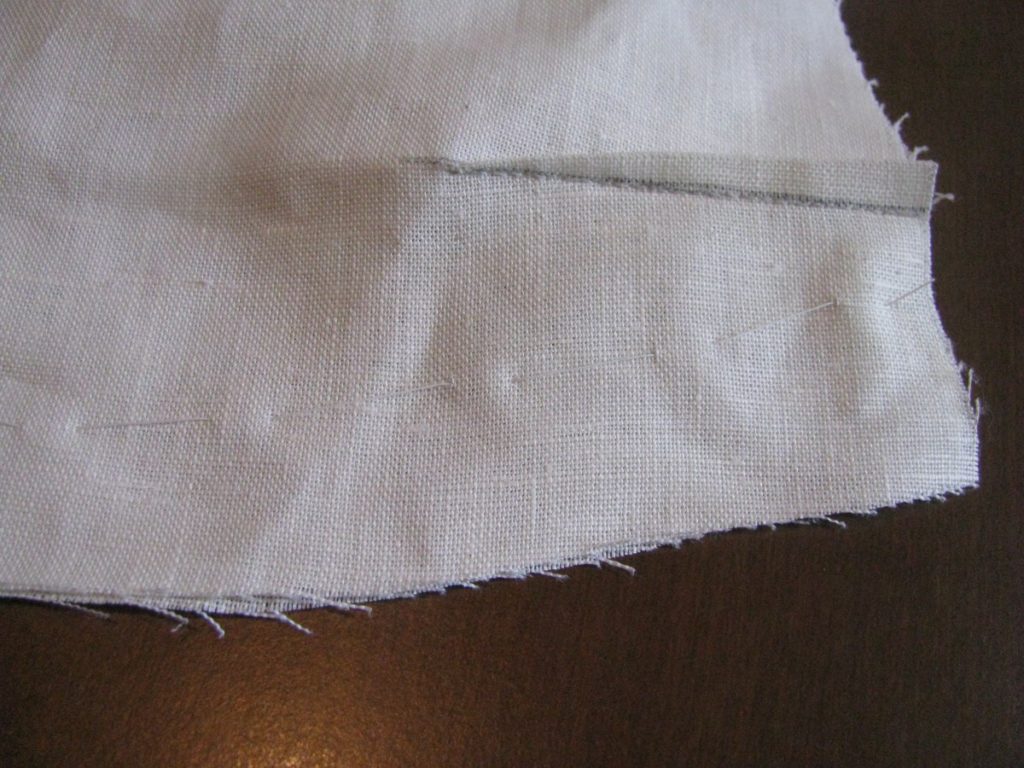
Here’s the rest of the back seam allowance, folded under and pressed with the fingernail.

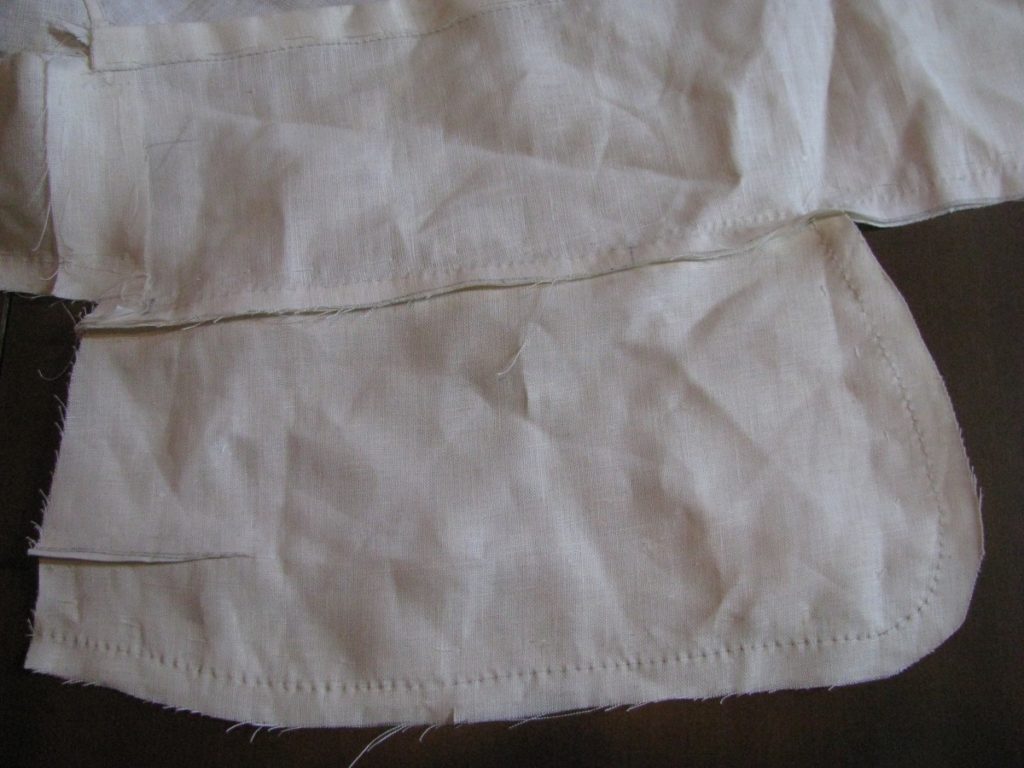
Turn to the wrong side, or skirt side of the pocket, and fold the other half of the seam allowance under, allowing the top seam to extend by 1/16″ extra. Fell.

Continue folding and felling until you get to the bottom of the pocket opening. Up to this point, the stitching can go through multiple layers of the pocket, for extra strength – just don’t go all of the way through. Continue felling across the pocket opening, being sure not to close the pocket. I like to keep my hand inside as I’m doing this.

Keep felling all the way to the top of the pocket.

For extra security, it’s a very good idea to put in two stays, or rows of stitching, at the top and bottom of the pocket mouth. This will prevent the seams from tearing with repeated use of the pocket. Open up the coat so that the pocket is isolated to the side, and stitch through all layers.

Here’s the first stay at the bottom of the pocket. I just stitched three or four rows of backstitching on top of each other, from the edge of the folded seam, to the edge of the stitching.

And repeat for the top of the pocket mouth.

Now it’s time to secure the tops of the pockets. It’s important that the pockets hang in such a fashion so that they do not interfere with the drape of the coat. Adjust the position of the pockets, so that there is a bit of excess in the skirt below.

Baste in place, just below the waist seam. At this point you should hold up the coat and check that the drape is to your liking. If you notice any tension or pulls, pull out the basting and adjust as necessary.

On the right side of the coat, be sure that the pocket is pulled back enough so that there is a sharp crease at the top of the pleats. There is a lot of fabric here so it is easy to have too much fabric here.

Once you are satisfied with everything, trim the top of the pocket to about 1/2″ above the waist seam. Careful, there is no turning back from here!

Cross stitch across the top of the pocket, being sure to catch only the seam below it. The stitching should follow the waist seam.


At the outer edge of the pocket, fell down the edge to the seam allowance, for a little extra security.

Finishing the Pockets
Now we’ll finish up the pockets and enclose the seams, as they will be visible on the finished coat.
Begin by basting the two halves of the pockets together.
Sew the pockets closed around the outside edges, making sure that the ‘right’ side of the stitching is on the same side as the back of the coat body.
When you get to the bottom of the pocket, the stitching should meet the original line of stitching that attached each pocket half to the skirts. Avoid catching any of the seam allowances.
Now trim the seam allowances of both pocket halves to 1/4″. Make sure you are cutting the pockets, not the skirts!
Working on the outer edge of the pockets, fold under, creasing with your fingernail, the lower seam allowance. This is the one that’s on the same side as the main skirt, which will be hidden later.

Fold over the top seam allowance of the pocket, overlapping the bottom by about a 16th of an inch. Baste.
Here’s the view from the underside of the pocket. Note the overlap, ensuring the wrong side will be hidden from view.
Here’s the pocket with the seam allowance fully basted in place. This hides all of the raw edges on the pocket. Working from the underside, fell down the seam allowance and remove the basting stitches.