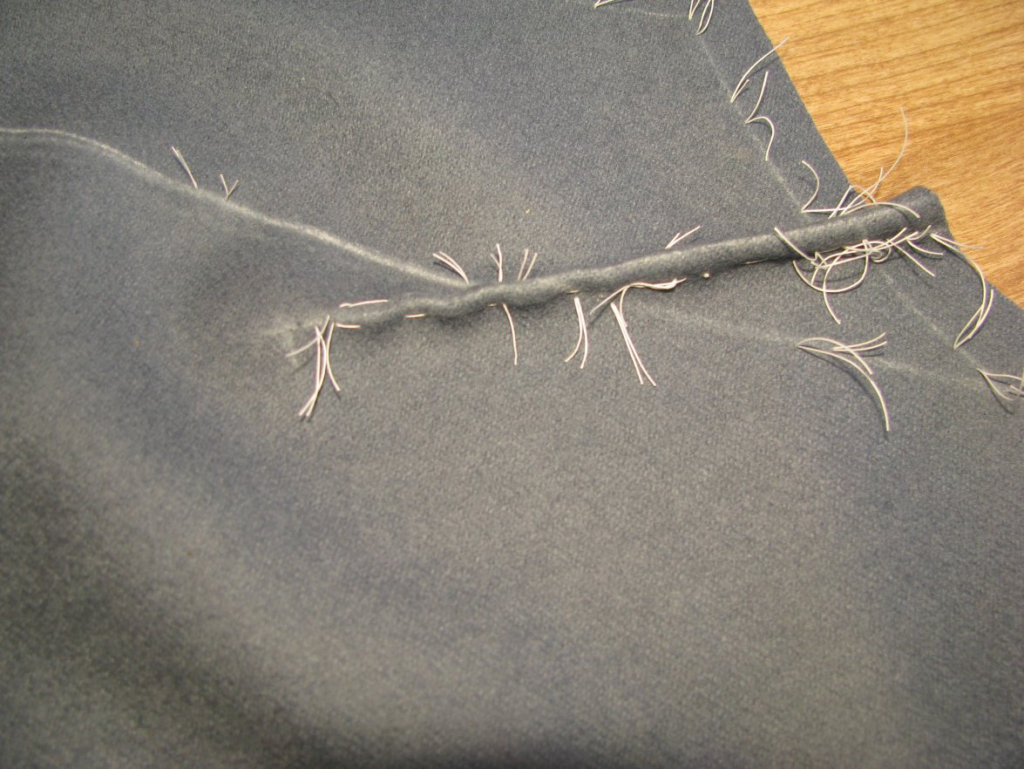
Category: Double Breasted Frock Coat
Drafting the Plait Pockets
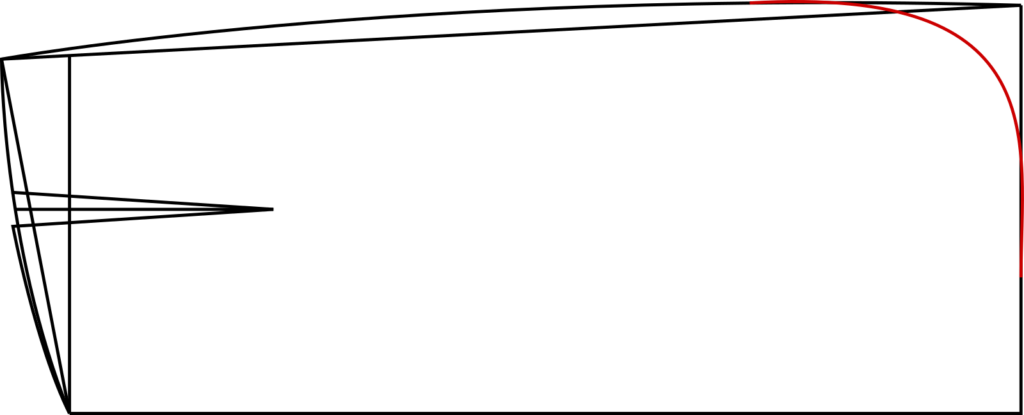
Begin by drawing a vertical line 14 inches long. On the right, or bottom of the pocket, square out another line 6 to 7 inches wide. These numbers are both variable according to how long your skirt is, and how large your coat is, but this is a good starting point. Also include the seam allowances in this measurement, so an extra 1/2 inch total.

On the left, or top of the pocket, draw a line square across that is about 1/2″ to 1″ smaller than the bottom width. Connect the two end points with another line, extending this line past the top of the pocket.
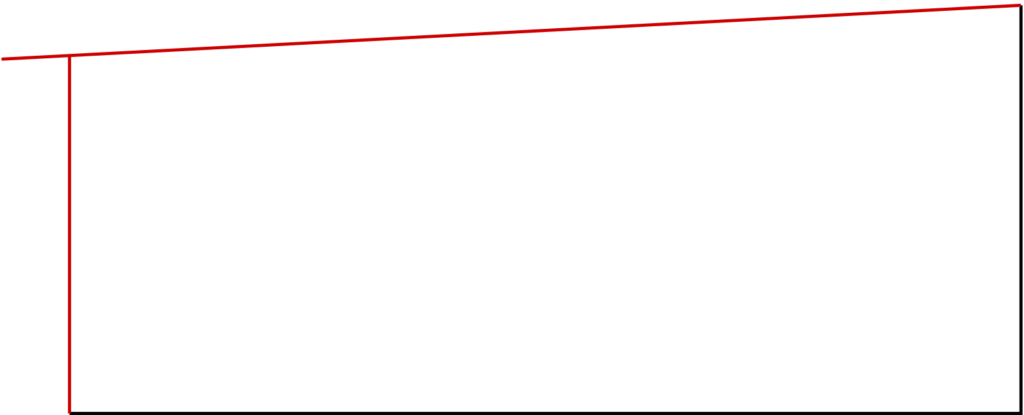
At the top, extend the first line about 1 inch, and redraw the top line at an angle.

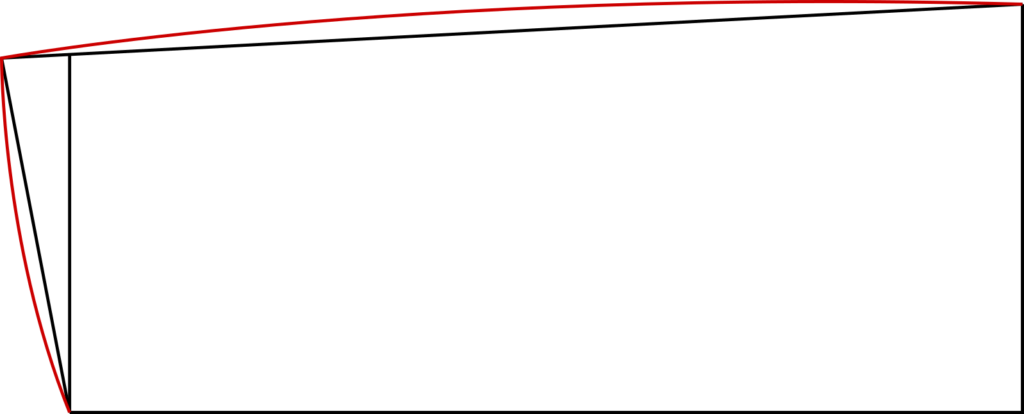
At the top and right sides, add curves to each. This will add fullness to the pockets, and allow them to hang freely without affecting the drape of the skirts.
Again at the top, add a dart to the pattern. This should be placed roughly in the middle of the pocket. The construction line of the dart comes down vertically about 2 to 4 inches. The total width is 1/2 inch. Finally, redraw the top seam so that the seams of the dart agree in length.
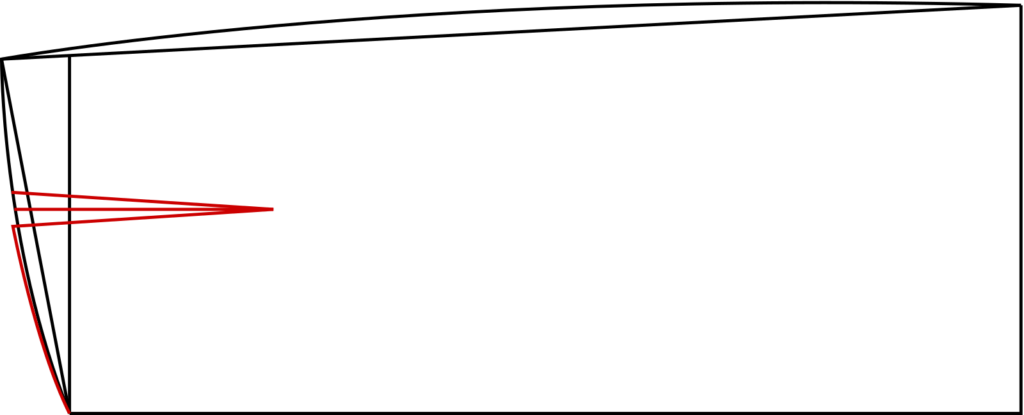
Finally, round the bottom outer corner to give a pleasing look and make it easier to retrieve items from the pocket.
Quilting the Skirt Lining
Begin by drawing the basic shape of the area to be quilted, on pattern paper. I drew the center line, and marked off 4 inches on either side at the top. The length is 6 inches, then I simply completed the triangle. These measurements are completely variable, and you should do what works best for your particular pattern.

I next sketched out the quilting design I wanted to use. These are spaced 1⁄4 inch apart, which made quilting easier due to that being the width of my sewing machine foot. However, you can make yours wider if you want, for example, a half inch. The quilting should be done in the same basic design, however, as the lines actually help shape the lining to spring out over the hips.

Cut out two pieces of interlining, the same size as the pattern. Cut out two pieces of wool batting, and trim them 1⁄4 inch smaller all around. This will help reduce bulk near the edges, giving us a smoother finish.

Baste the wool batting to the wrong side of the interlining. If you’re using wool flannel, there’s probably not much difference between the two sides. Using this special interlining, as described in module 1, I do happen to have a right side, which is slightly rough. This will help grip the inside of the wool skirt, giving a little more structure. When basting, I like to go straight down the middle, then around the edges.

You should stretch the two sides with the iron slightly. This will give the top edge a slightly concave shape, helping it fit the top of the skirt better.
Baste the interlining assembly, with the wool batting side down, to the wrong side of the skirt lining. The interlining should be 1⁄4 inch from the top edge of the skirt, to leave room for a seam later on. Baste down the middle, and around the edges again. I like to add more strength by basting from the centers of the other two sides as well. Preventing movement while quilting is the goal here, and the more basting stitches, the better.

Here is the view from the right side of the skirt lining, showing the pin pricks of basting. Note how the lining is fairly smooth, with no excess fabric in between the basting stitches.

To help guide the first row of stitches, I like to draw two lines around the outer edges, using my pattern and ruler as a guide.

When sewing, you will start at one edge, take the corner, and finish the stitching at the outer edge. Cut the threads, and start over again for the next row, 1⁄4 inch inside. The quilting stitches should be done at about 20 stitches per inch if using a sewing machine. The idea is not to see any individual stitches, only a solid line of quilting.

If you wish, this can also be hand quilted, using a side stitch. In this case, the design should be simpler, perhaps using 1⁄2 inch rows. Use about 10 stitches per inch, slightly pulling each stitch taught, to curve the fabric inward.

After the quilting is done, all basting stitches holding the interlining to the skirt need to be removed. I find it’s best to work from the wrong side, to prevent the seam ripper from catching the lining at all. Some of the basting threads may get stuck in the machine stitching. You’ll have to carefully remove those. Luckily, it doesn’t happen as much as you would think. Just take your time and don’t rush things. The basting stitches holding the batting to the interlining are not seen, and can remain permanently.
You’ll notice how the quilted area wants to pull inwards on itself. This is due to the feed dog on the sewing machine pulling the bottom interlining layer more than the lining material. This isn’t a bad thing, and will give even more shape to the area. After the basting stitches are removed however, this should be lightly pressed flat again. The lining assembly will still curve inward, but it will be much more subtle, which is what we’re looking for.

Pleating the Skirt Lining
Start with the construction line you marked in the beginning of this section. This line indicates the length of the pleat, and can be from 4 to 6 inches long, depending on preference.

At the top, mark 1⁄2 inch on either side of this construction line, and complete the dart shape.

Baste the dart closed, with right sides together, using the construction line as a guide.

From the right side, press the dart to one side.

Turning back to the wrong side of the lining, baste all three layers of the dart together, and remove the original row of basting stitches.

What this is doing is giving you a dart that is not permanently stitched down. The basting stitches are now visible on the outside, which will be removed when the coat is finished, leaving a pleat in place. This pleat will give the ease necessary to prevent the lining from pulling on the skirt.

Here is the completed pleat, showing how it should align with the side body seam.

The Skirt Lining
Since the back seam of the skirt is cut on the bias, it’s necessary to reinforce it with some linen. Cut a piece of linen about 1 1⁄2 inches wide by 2 inches longer than the skirt seam. Baste it on with a very slight tension.

Trim the bottom edge of the linen by about 1⁄2 an inch, so that it is out of the way when the lining is felled on later.

The top end of the linen should be trimmed to match the top of the skirt.
The Skirt Lining
It’s necessary at this time to cut out and prepare the skirt linings, as they will be attached during the pocket assembly. There are two methods you can use, depending on your preference. The first method is to quilt the area over the hips, giving extra support and spring to the area. The second is to simply put a pleat into the lining, to give extra ease over the hip area.
Regardless of which method you use, the skirt lining must first be cut out. It is necessary to add a seam allowance to the bottom of the skirt lining, for turning in later on. Either 1⁄4 or 1⁄2 inch will work – it’s up to you.
The skirt lining is also pieced together in the same method as the main fabric. If the widths of the fabric are different, the seam will be in a different location. Just remember to add double the seam allowance to the main piece as you are cutting out.

Lay the skirt lining on top of the wool skirt, and draw a chalk line at right angles to the top of the skirt, at the location of the side seam on the coat body. This will give our placement for both the pleat and quilting.
On the following two pages, you can choose to do either or both adding a pleat to the skirt and quilting this area for some additional padding around the hips.
The Back Skirts
It is time to commence construction of the back skirt, consisting of a self-facing and, which protects the edge of the garment from wear, and a lining.
Begin by laying both back pieces, right side up, as shown. The left side should overlap the right on the finished coat.. Take this left piece, and set aside the right piece. It’s important because each side is constructed slightly differently. The following steps all pertain to the left side.

Turn the left side of the back so that the wrong side is facing up. Trim away the inlays around the waist area, if you did not need them. If you made any adjustments to this area, then trim only the excess amount. In my case, I raised the back up by half an inch, so it was necessary to mark the new trim lines on the fabric. Also trim the inlay from the center back if you did not need it.


Cut a piece of linen two inches wide, by two inches longer than the back skirt at the waist. Stretch the linen with an iron to remove any sizing that might occur, and baste it to the wrong side of the skirt. Trim off the excess linen that shows from the right side.


Measure and chalk a 1⁄4 inch line at the bottom of the center back, and across the top of the center back vent, as shown. Again, make sure you are working on the left side of the coat before you continue. Make a small cut from the corner of this area to the intersection of those two lines, as shown. The cut should be made just to the lines, not extending into it, as the chalk has a width to it, remember.


Mark a vertical line, parallel with the edge of the cloth, about 1 1⁄2 inches from the edge. This line is where you will fold the cloth to. This should line up with the edge of the center back. However, this is variable according to how wide you wish the center back vent to be. Draw another line half way between the cloth edge and the first line, which will be the fold line.

At the top, draw another line across the top vent, 1⁄4 inch below the first line you drew.

Lay a length of stay tape along the inner edge of the fold line, basting it down. The stay tape should begin about 1⁄4 inch from the top, and end about 1⁄4 from the inlay at the bottom. About 8 inches from the bottom, make a backstitch in place. From this point on, hold the tape a little tight compared to the fabric until you get to the bottom. The tape should be about 1⁄4 inch tighter than the fabric, which is distributed equally along the 8 inches, as you baste. At the bottom, end with another backstitch in place.


The stay tape is then cross stitched into place, making sure the stitches do not show through to the right side. Remove all basting stitches from the tape.

Baste the top of the vent closed, press, and cross stitch it to the linen.

Next, baste the facing closed. When folding the facing over, do not pull hard. The fold should be very natural, with no tension, or you will get an ugly inward curl to the fabric.
Cross stitch the facing to the wool, being sure that no stitches show through to the right side.

Finally, press the facing from the right and wrong sides on a flat surface, to remove any wrinkles and puckering. Do not press any further than the edge of the facing, because there should be a slight fullness here from holding the stay tape tighter. This is the same principle as when shrinking the front of the forepart. The result should be a back tail piece that curves slightly inward, and helping to avoid it pulling away from the body.
Pick up the right back piece. This time, do not make the cut, but proceed to making the two vertical lines.

When inserting the stay tape, this time it’s permissible for the tape to extend slightly above the end of the vent. It should still end 1⁄4 inch from the bottom.

Baste over the facing section, and cross stitch in place. Note how the top of the right back piece is unfinished, whereas the left side is. The benefit is that when sewing the back together later on, only one half is clipped at the corner, giving more strength to the area.

Now cut out two lining pieces for the back skirt. This is cut the same as the wool, but is cut off about two or three inches above the vent area, cutting across in a horizontal line at the top.
The Lining
The back skirt lining is cut from the same pattern, though ending about three or four inches above the vent area.
For the lining corresponding with the left side of the coat, measure out 1⁄4 inch from the top of the vent and center back, and clip the corner to match. Fold over and press the top of the vent.


Fold over and press the along the center back of the skirt. Draw a construction line to help ensure everything is straight. You want to fold slightly more lining over than you did in the wool, so that the facing will show.

Place the lining on to the back skirt, wrong sides together. Baste along the folded edge, across the top, and then work your way back down the other side.

As you are basting, try to work in some fullness in the lining. You want the lining to be slightly looser than the wool, so as not to pull on the finished coat.

Finally, fell the lining down, using 10 – 12 stitches per inch, along the facing edge of the lining. On the side with the clipped corners, fell that down at the top, as well. It’s okay if the linen peaks out a little at the top, as it will be hidden by the upper lining later on.


The side without the clipped corner will be completely unfinished at the top.

The felling should end about 2 inches above the bottom inlays, allowing us to properly finish off the bottom after the main skirt has been lined.

Here you can see the two back skirts, fully lined and ready to be sewn to the skirts.

Attaching the Skirts
If you have not placed any darts into the skirt, it is then necessary to full some of the fabric at the hip area of the skirt. Place the skirt, right sides together, onto the forepart assembly, and tack down the end near the pleat area. Note how the side piece extends a 1⁄4 inch into the inlay area of the skirt. It should not follow the spring upwards, however, but instead continue in a line following the rest of the skirt.

Take up just the skirt. Using basting thread, start with two back stitches in place, about one inch from the side seam. Using small running stitches, sew about 4 inches towards the front of the coat, leaving the other end of the thread to hang free.

Repeat this process two more times, lining up the stitches with the first row. Doing the three rows of stitches will lock the gathering stitches into place, making it much easier to sew.
Baste the skirt from the back, stopping when you get to the gathering stitches. At this point, pull all three threads at once towards the front of the coat, gathering the skirt. The total amount gathered should be about one inch.

Baste across this area, locking the gathers in place. I use a smaller basting stitch in this area for extra security.

Continue basting the rest of the skirt in place. You should have about several inches of extra fabric at the center front of the skirt, which will be used later to self-face the skirt in the front. This also would be useful if you let out any of the inlays at the side seam or front.

With the skirt side up, on a tailor’s ham, carefully shrink out the fullness you put in. The iron should not extend more than 1⁄2 from the edge of the fabric, or you will shrink out all of the fullness, thus rendering all that work you did useless.


Sew the waist seam, skirt side down, from the front edge of the forepart, to the back edge of the side piece. Press to set the stitches on both sides. Open up the seam allowances on the wrong side, carefully using a tailor’s ham to press the curved areas. Press the right side.

Note how the coat will not lay flat. This is a good sign, and shows that considerable shape has been worked into the coat.
The Gorge Dart
As you may have seen during the fitting, the gorge dart is necessary to a good fit and roll of the lapel. After the coat has been taken apart again, you should re- chalk the lines of the lapel dart for more accuracy.
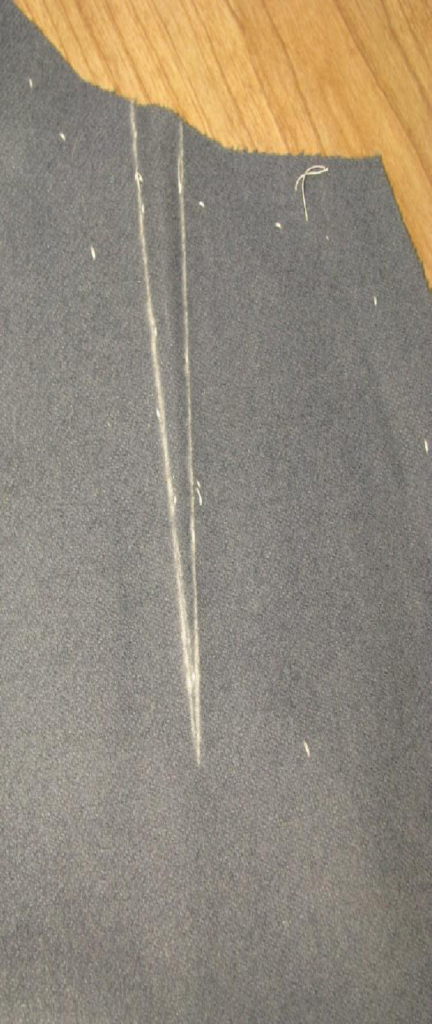
This is a scary step, but if you’ve done everything correctly and accurately, there should not be a problem. Carefully cut out the lapel dart directly on the chalk lines. We will be constructing this dart with no seam allowances.
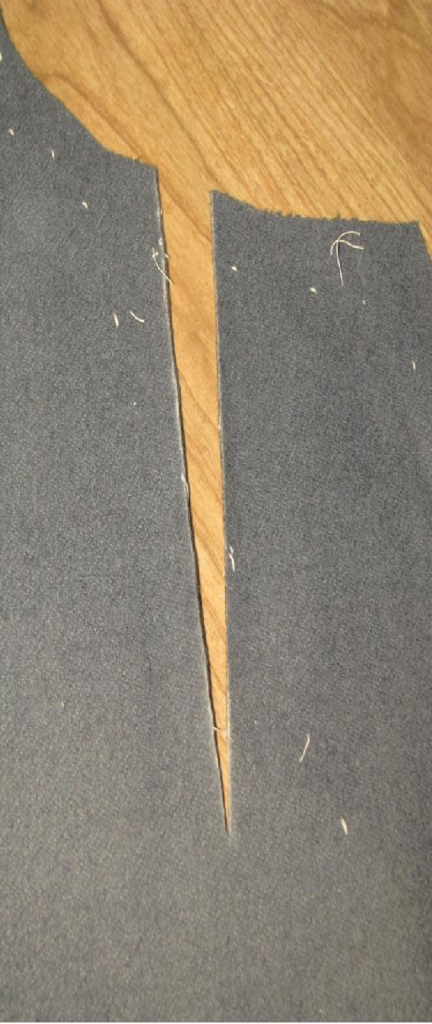
Starting at the point of the dart, hold the fabric together with your fingers and thumb, and stote the dart closed. Each stitch should be perpendicular to the dart, and not show through to the right side. I used about 12 stitches per inch.

When done, the lapel dart should look like this from the wrong side.

Note how on my coat, the seams do not line up at the top. This is due to not extending the front neck upwards when drafting the dart. Here I’ll use the inlays to redraw the seam line, making it even again. If you did this on the pattern, this step is not necessary.

From the right side, the seam should be almost invisible if done correctly. This seam is fairly strong, but can be ripped out if it is pulled too hard. However, when we pad the lapels later on, it will greatly strengthen this area. The benefit of stoting this seam is the greatly reduced bulk in this area, which will improve the fit of the coat and roll of the lapels later on.


As you can see, the lapel already wants to roll over itself. All of the steps pertaining to the forepart from now on will have the goal of helping this even further.

Darts in the Waist or Skirt
If you are placing darts either the waist seam of the forepart or skirt, now is the time. First, baste each dart together, ensuring the chalk lines are lined up evenly. I recommend drawing the chalk lines on the pieces with just the tailor tacks showing, as it’s slightly easier and more accurate. The basting should be about a quarter inch below the chalk lines, to keep it out of the way of your stitching.
Sew, using either a backstitch, or machine stitch, carefully following the line. Start from the top of the dart, and near the end, taper out gradually, to ensure a clean dart point. Press the dart on both sides to set the stitches, but do not let the iron move past the tip of the dart, or you will get creases that are very difficult to remove.
If the darts are wider than one inch, trim the darts so that there is a 1⁄4 inch seam allowance, but do not trim the points. Press this seam open over a tailor’s ham, carefully opening the tip of the dart with a pencil or other object. At the tip, gently shrink out any excess to smooth out the tip of the dart. If the darts are thinner, press them towards the back of the coat. From the right side, press the darts again, and allow the dart to dry thoroughly before moving on to the next one.
Welted Breast Pocket
Breast pockets are a feature not found on all original coats. If you wish to have a breast pocket, and the coat you are basing yours on has one, then follow this section. If not, you may skip to the section on the Gorge Dart. This breast pocket can also be used on waistcoats, just replace the wool pocket facing with the lining fabric.
Placement
During your skeleton fitting, mark the location of the pocket. Since I have to fit myself, I usually just mark the spot directly over the left breast. After the coat is taken apart again, I then mark the correct placement of the pocket. It should be about 5 inches long, sloping down towards the center front. The upper end of the pocket should begin about one inch from the armscye. The slope and length of the pocket are all variable according to your specific needs, but this is a good place to start.

Mark the line indicating the pocket on the wrong side of the coat, and at each end, a vertical line showing the precise ends. When making a pocket, precision is key, so try to sharpen your chalk as frequently as possible.
N.B. I am not including a pocket on my coat, so the pocket has been constructed on a scrap piece of wool. Pocket construction should be done before cutting out the gorge dart in the next section.
After drawing the chalk lines, place a row of basting stitches along the line to make it more durable. Then redraw the lines on the right side of the coat.

Linen
To make the pocket stronger, and also keep the coat from stretching out of shape, it is necessary to add a strip of linen to the wrong side. Cut a piece about 1 1⁄2 inches wide. The strip should be long enough to extend about one inch from the end of the lower side of the pocket, all the way to the armscye.

Stretch the linen with the iron to prevent shrinkage or warping later on. Baste the linen to the wrong side of the coat, centering it carefully over the pocket construction line.
Welt Pattern
It is necessary to make a pattern piece at this time for the welt. The final dimensions for the welt pattern should be twice the height, and one inch longer than the pocket itself. For my pocket, I want a one inch deep welt, five inches long, therefore the welt pattern will be 6 inches long by 2 inches deep.
To begin, place a sheet of paper against the pocket construction line, leaving enough room at each end to add an allowance (note that I did not do this . . .).

While the paper is held in this position, draw a line parallel to the chest construction line that you marked on the coat, which is cross grain of the wool.
From each end of the pocket, draw a line at right angles to the construction line you just drew.
Finally, draw a line indicating the bottom of the pattern piece. In my case, it’s 2 inches below the top of the paper, and parallel with it as well. At either end, add a 1⁄2 inch allowance, used for turning back the ends of the welt later on.

I also like to mark the cross grain line, for lining up the piece on the cloth accurately. This method of making the pattern is also great when working with striped fabrics. Simply transfer the lines of the stripes on to the paper, and line them up on your fabric before cutting out.

Cut out two welt pieces from your pattern, in wool. These pieces need to be identical, and not cut on the double, or you will have one piece either facing the wrong direction, or with the wrong side facing out.
The Welt and Facing
Line up the lower welt piece with the pocket construction line, making sure there is a half inch beyond each end. Baste it down, trying not to distort the fabric as you go. Being cut on the semi bias, this can sometimes be a problem.

Baste the top half of the pocket, which will form a facing on the inside of the pocket, to the forepart in the same manner. The pieces may be offset slightly at the ends in order to ensure there is a half inch allowance.

Re-mark the ends of the pockets in chalk on the welts. This is where you need to be as accurate as possible, with a very thin chalk line.

On the upper facing piece, Offset the lower end of the pocket 1⁄4 inch inward. This is so when the pocket is completed, the opening will not interfere with the edge of the pocket. Then draw 1⁄4 inch seam lines on each half of the pocket.

Sew the welt and facing on from mark to mark. You’ll note in my photo that the stitching goes past the lines a little. This is due to the fabric stretching out of shape while sewing. As long as the final dimensions are accurate, this is okay. Note how the ends on the right side are perfectly aligned, while on the left side they are offset by 1⁄4 inch.

Press each side of the pocket at this time to set the stitches, using a press cloth to prevent shine. All pressing should be done on a tailor’s ham, so as not to ruin the ironwork on the forepart that you put so much effort into.
The Pocket Bag
Lay your pattern on a doubled piece of brown polished cotton. Trace around the top and sides to give yourself the shape required. You’ll then have to extend the sides to the desired length of the pocket. I like to give myself some extra room here, so 5 inches deep is a safe depth to start with.

Cut out the pocket bags, and press over 1⁄4 inch at the top of each piece.

With right sides together, line the top of the pocket bag up with the free end of the upper facing piece. Baste the two together just a hair above the fold you just pressed in.
Note how the sides of the upper facing and pocket bag are parallel to each other.


Turn the pocket over so that the right sides are facing you, and fell the pocket bag, end to end, to the facing using almost invisible stitches. If you basted in the correct place, the basting stitches should be hidden, and can remain in the finished pocket.

Now baste the lower pocket bag to the welt piece in the same manner. The major difference here is that angle of the sides are not parallel. This is because the welt will be folded over itself, which will then allow the pocket halves to be parallel to each other. Mark 1⁄2 an inch from either end with chalk, and fell between these lines. You need some extra space at each end for the pocket bag to pass through the opening.


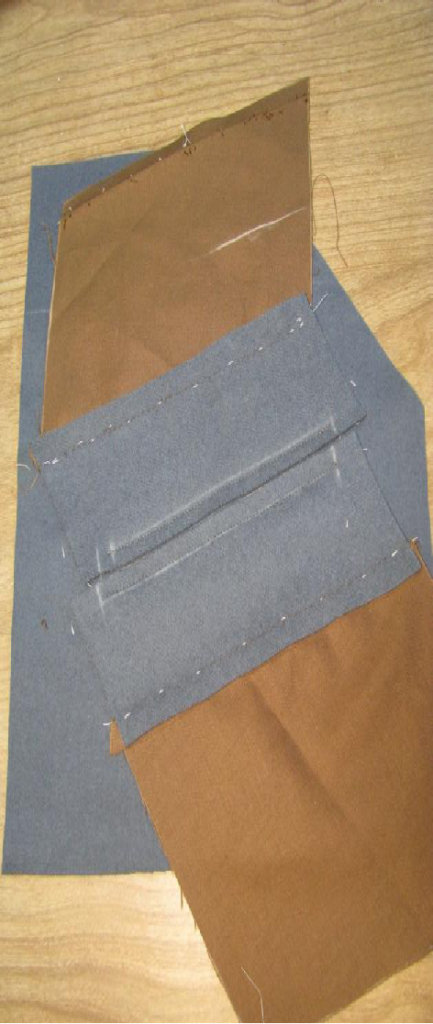
The photo is upside down, but you can see how the pocket lines up with the facing, while at the welt, they do not.
Opening the Pocket
It’s now time to carefully open the pocket. I like to fold the pocket in half lengthwise, and make a small snip in the middle with my shears. Then carefully cut open the pocket along the construction line. When you get to the lower end, where the facing is offset, stop cutting there. Take a pair of small scissors, and clip diagonally to the end of the stitching at the lower welt. You must clip exactly to the end of the stitching. If you do not cut close enough, puckers will form in the finished pocket. If you cut too far, you will end up with a hole in the pocket. Still at the lower end, cut upwards at a 90 degree angle to the pocket, directly to the end of the upper stitching that you offset 1⁄4 inch.
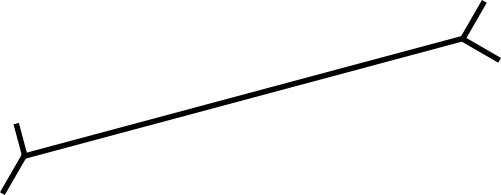
At the other end of the pocket, do the same thing, but but cuts are angled, starting 1⁄4 inch from the end of the pocket.

Now pass either the facing or welt through to the wrong side, and press open the seam. After pressing, I like to move the piece back to the right side and then bring the other half in to press in the same manner. This helps reduce bulk and gets things out of the way while pressing in such a confined space.

Each half should be pressed both from the right and wrong side to give a crisp, finished appearance without bulk.

After pressing, you should have this appearance, if both facing and welt are passed through to the wrong side. Note the little triangles at the end, and how the left one appears crooked. This is due to offsetting the stitches previously.

Finishing the Welt
Pass the welt to the outside, if it’s not there already. Fold the welt, wrong sides together, so that the top and bottom seams butt together, and baste to temporarily hold it closed.

At this point, give the welt a good pressing as shown, folding the coat out of the way so that any ironwork does not get shrunk away.

Remove the basting. Lay a length of stay tape just under the welt fold, and baste it in place. The tape should extend from end to end, and will give the pocket strength, as well as preventing the pocket from gaping open.
Cross stitch the stay tape to the pocket, being very careful not to let the stitches show through to the right side.

Turning the welt back to the inside, and serge the ends back together again, using silk thread.

Closing the Pocket Bag
Fold the pocket bag over so that the right side is up, and chalk two marks in a triangular fashion at each end. Trim each end, which will allow the bag to pass through to the wrong side with no wrinkling or bunching up.


Pass the pocket bag through to the wrong side, and align both halves of the pocket together. Baste across the facing, catching the pocket bag underneath.


Stitch the bag closed, using 1⁄2 inch seam allowances, from end to end. The depth can be variable, mine turned out on the short side due to the fact I was using scraps. At the bottom corners, make them rounded so that objects do not get stuck in the bottom of the pocket.

Pass the welt to the right side of the coat. Baste across the top to hold it in place while other work on the coat continues. The ends will be finished off later on, after the canvas has been installed. This will give us a much more secure pocket.


The First Fitting
At this point, you will baste together all pieces of the garment by hand, to test for fit one last time. Normally, in a skeleton baste, the tailor would baste in the padding, linings, and collar as well. Since you have yet to learn how to construct these pieces, we will forgo them for now. On your next project, you may put them in.
This is done just the same way as for the full muslin, except do not clip any seams. Treat the marking threads as the edge of the cloth, the inlays are there in case you need room.

After sewing the front lapel on, sew a length of stay tape to the front of the forepart to prevent the shrunk edge from stretching back out.
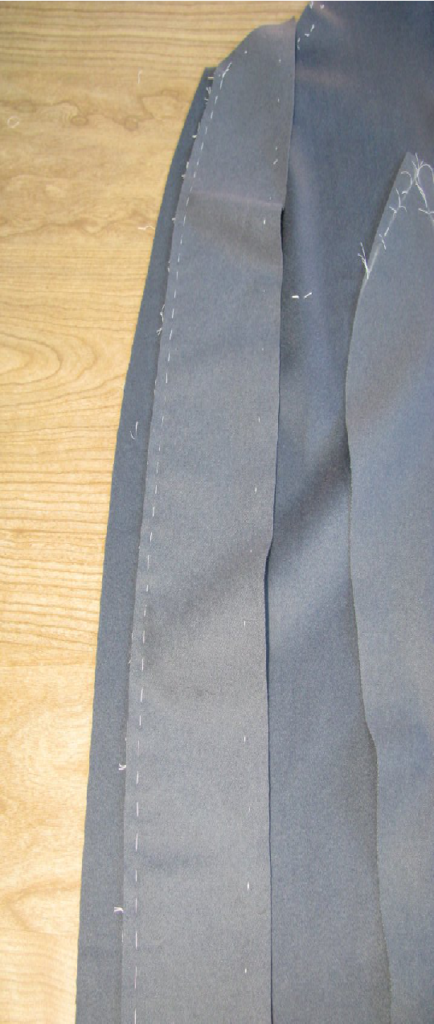

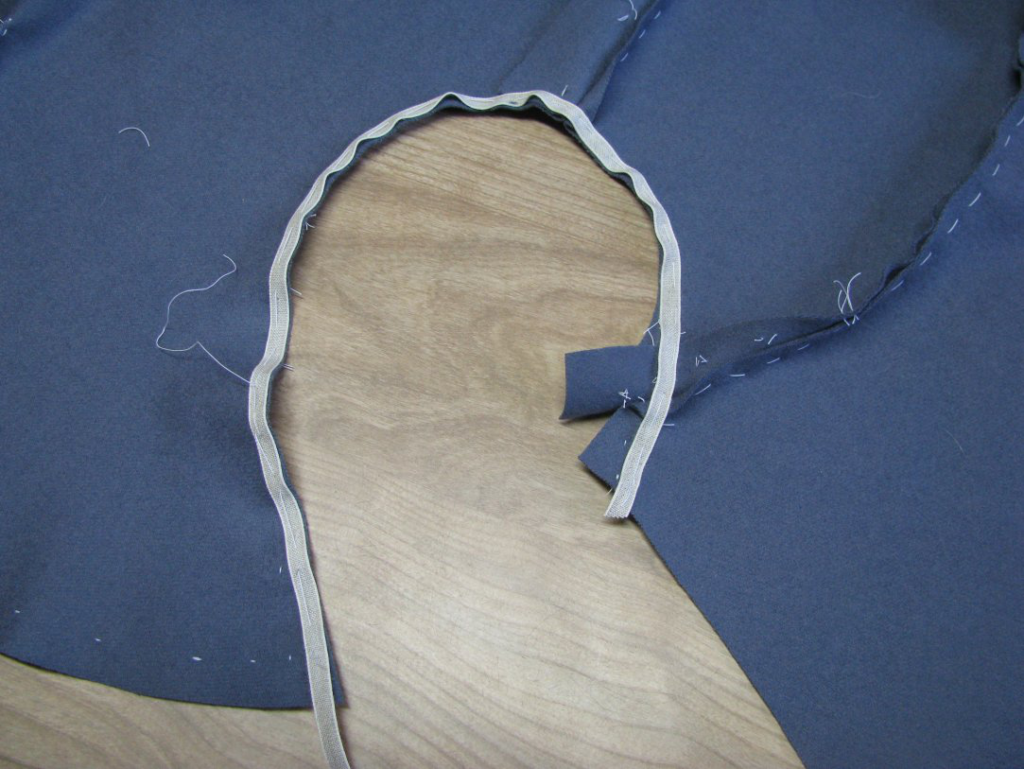
Do the same with around the armscyes when completed, as well as the neck, from lapel from lapel. The last thing you want is for all the careful cutting and shaping you performed to be ruined when trying on the coat.
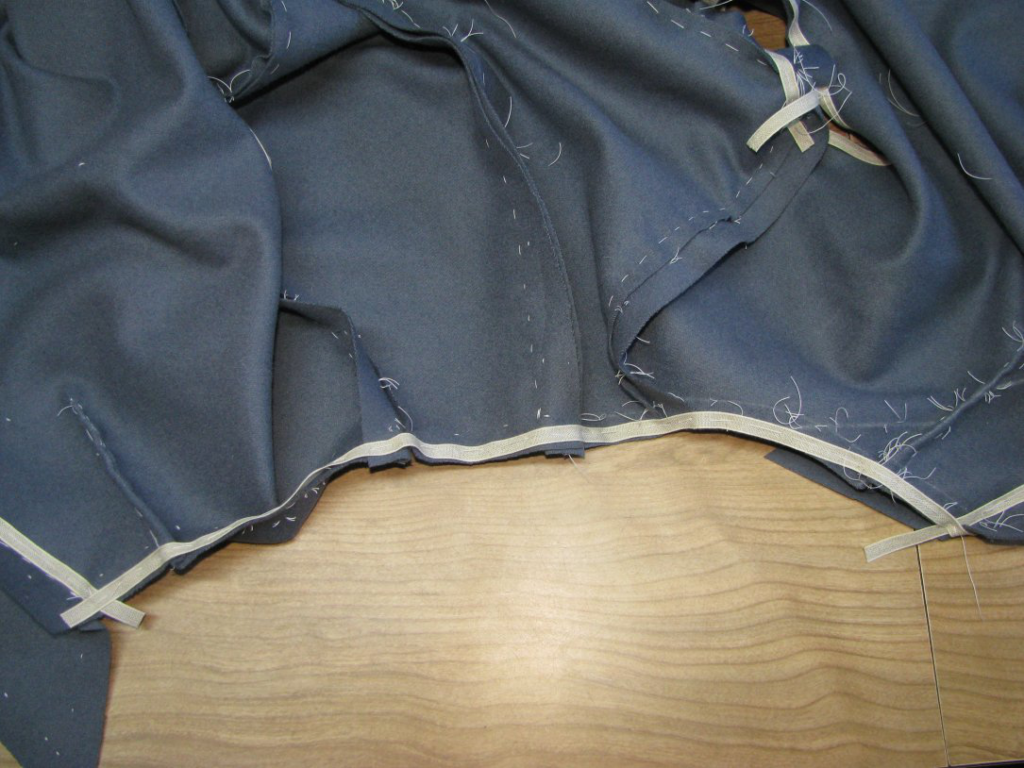
When you are basting together the center back seam, sew from the top to 1/4″ inch past the bottom of the inlays at the waist seam. Then you can get a good idea if the opening is at the correct height or not. Press each seam as you go, but only lightly. And when sewing each seam, stop when you hit the marking threads. You don’t want to include the inlays in the seam, as they are not technically part of the coat at this point.
First Fitting
Congratulations, you’ve made it to your first fitting intact! The main things to check for at this fitting are the same as at the beginning of this module. If you need to make adjustments, do so now by marking the amount you need to take in or out with chalk (just draw a line), and then removing the basting stitches, and rebasting. Remember, you need to leave room for the padding and lining, so don’t fit the front too tightly. Be mainly concerned that the back hugs the back closely, that there are no unsightly creases or folds, and that all seam lines are in their proper place.
The main things to look for are that the various seams are in the correct locations. Check in particular the placement of the back pleats and vent, that they are all aligned and at the correct height.
The waist seam should be about one inch below the natural waist, rising on the sides over the hips, falling back to the same level in the back.
The center front should meet in the front without any pulling, and should hug the front of the chest closely, thanks to the lapel dart.
And of course any mis-fitting pieces should be corrected.
There are endless issues that can occur, but rather than listing them all, I will correct each person’s work individually. Please post photos of this stage, for critique and helpful hints. Following are a few photos of the completed process.
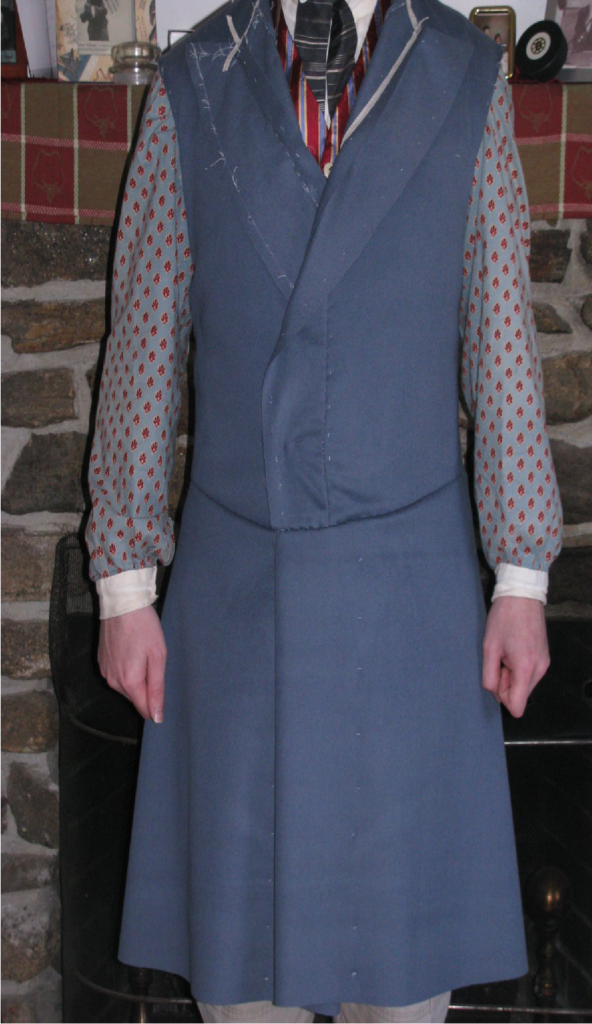
Front view. The distortions at the front are due to the pins holding the coat closed.
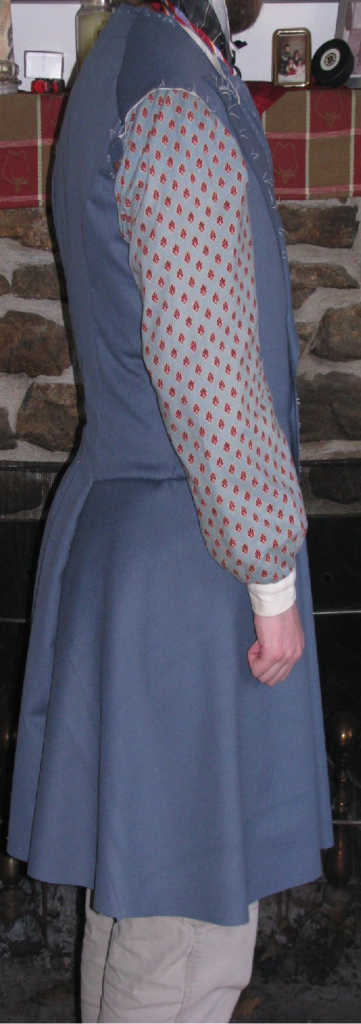
Note how the skirt drapes nicely in this photo. There are no drags across the hips, and the pleats hang nicely in back.
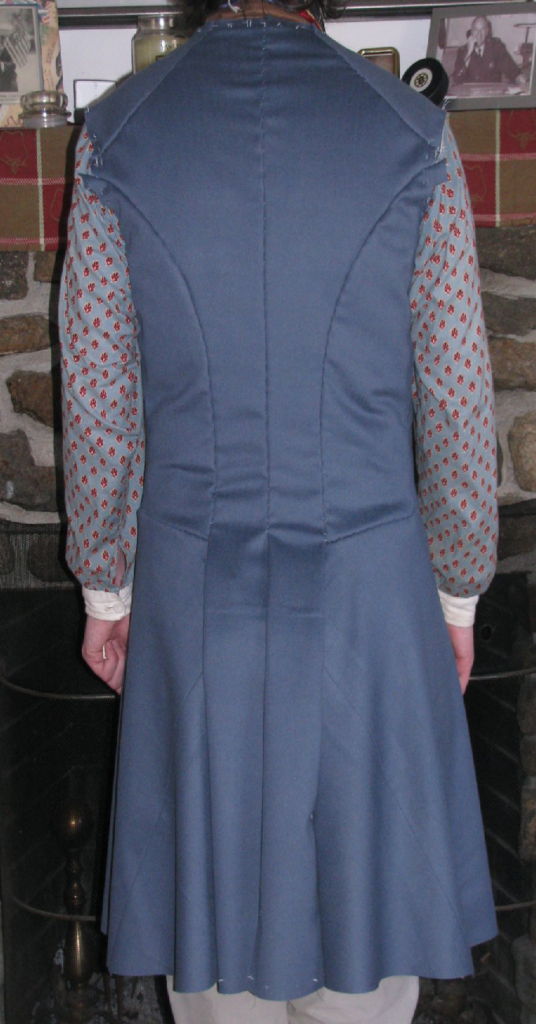
I still need to shorten the back slightly, to get rid of the wrinkles on the side-bodies and lower back. The ripples across the upper back are due to the stitching, I’m pretty sure, but I’ll investigate it just the same.
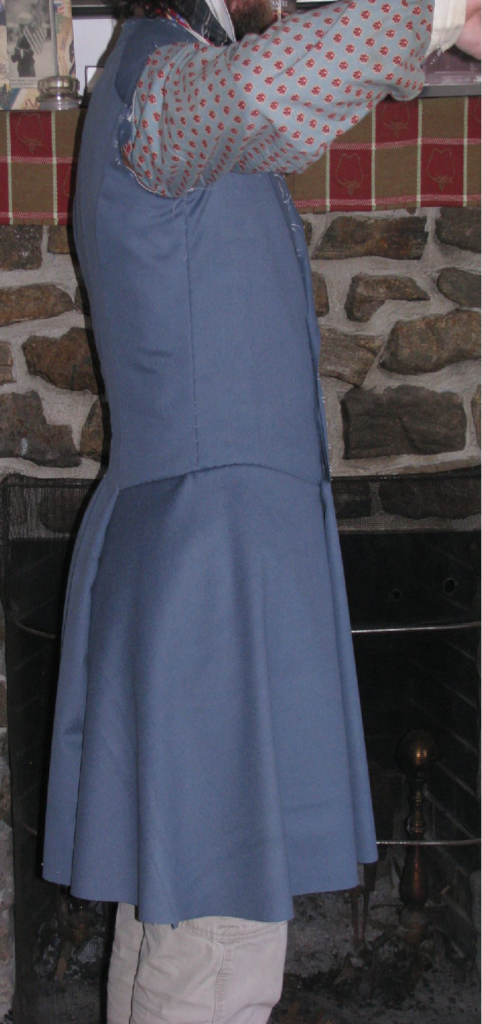
The fabric comes right up to the bottom of the arm. Slight amount of extra fabric in the front of the armscye will be carefully trimmed off. Notice how the coat does not move even when the arm is raised.
Darts or Fishes
Remarking the Roll Line
It’s likely that while shrinking the front edge of the forepart, that the roll line was nudged out of shape. At this point, take a straight edge and remark the roll line, then replace the marking tacks with new ones.
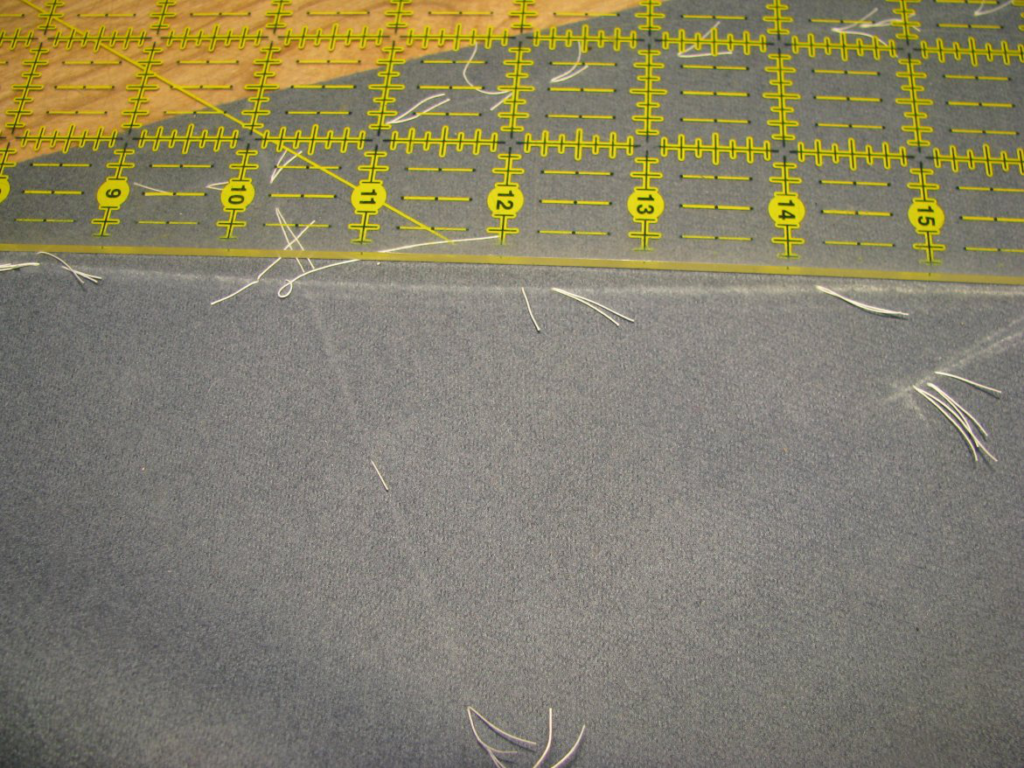
Darts
On the wrong sides, on both the skirts (if used) and forepart, mark the darts in chalk, carefully tracing the thread tacks you put in.
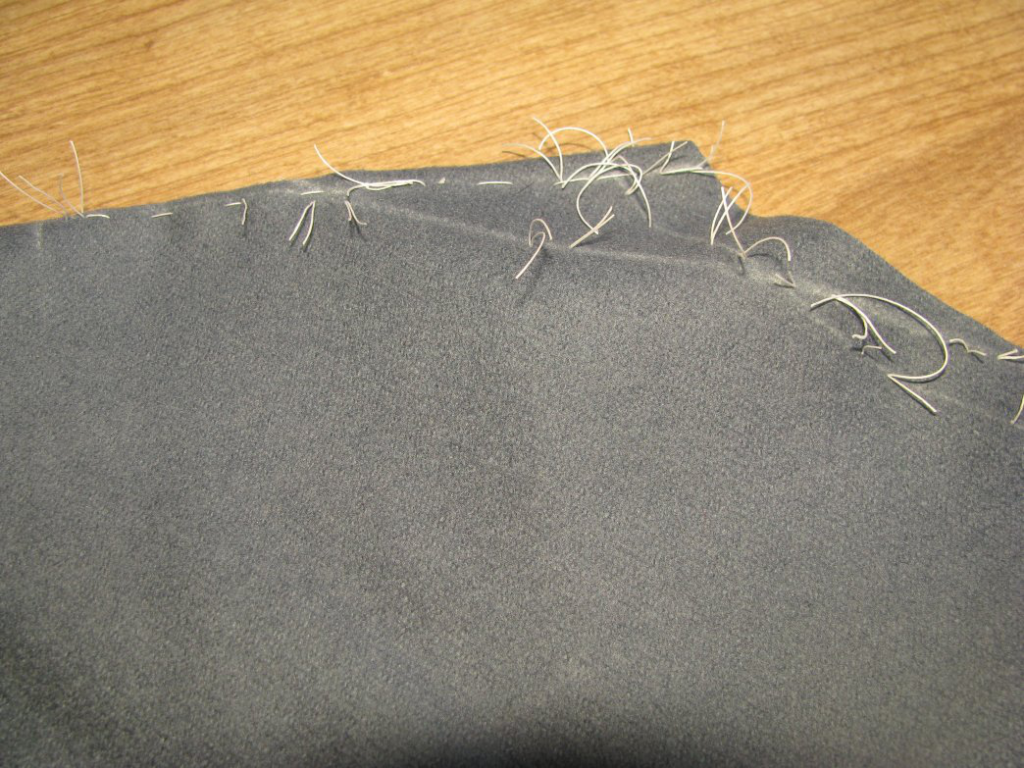
Next, baste the darts, starting with a couple of stitches in place to hold, then using the basting stitch. Make sure the stitching aligns with the chalk lines on both sides of the dart as you sew. Repeat for all darts – gorge, lapel, waist, skirt, etc.
