Category: Double Breasted Frock Coat
Piecing the Skirt
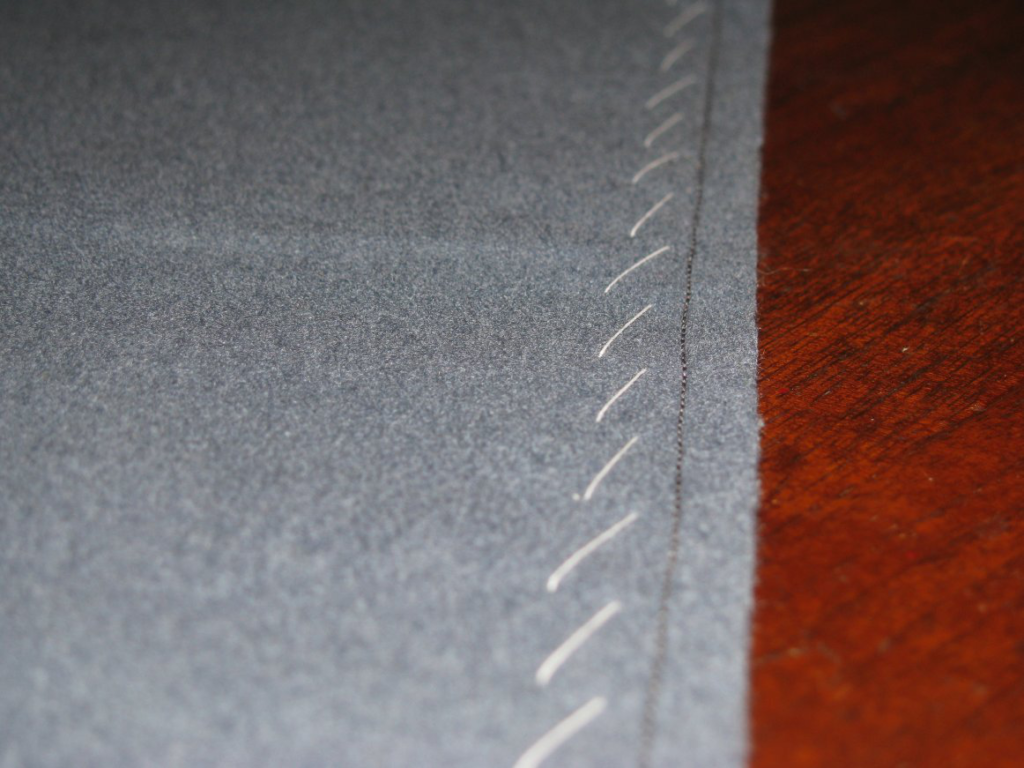
Now we will actually commence construction, starting with the skirt. Find the small triangular pieces you cut. Also be sure you have separated the two skirt pieces by cutting carefully on the fold line. Next, figure out which side is longest on the triangular piece, and line it up, right sides together, to the skirt piece. It may take some fiddling to figure out which piece goes where, but I assure you, they will line up, providing you added double the seam allowance when cutting.
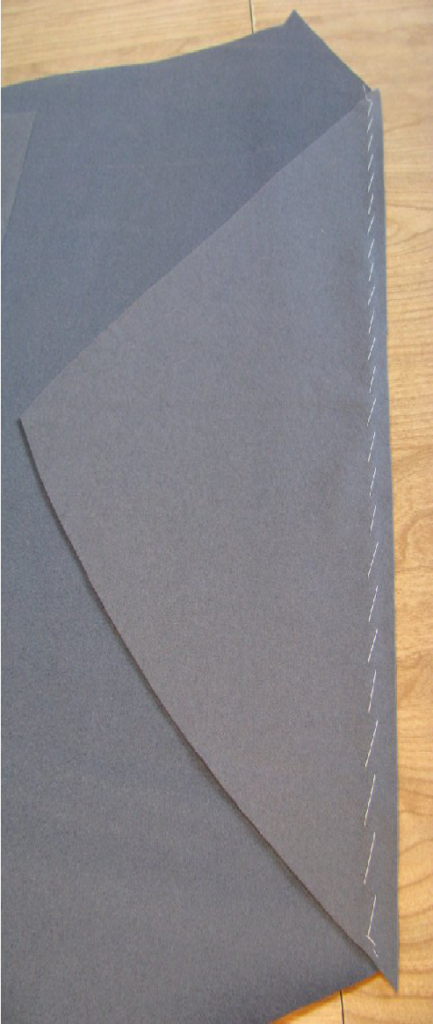
After they are lined up, baste together carefully, making sure there is no fullness on either side. Then, sew, using a 1⁄4” seam allowance, with either a backstitch, or machine stitch. If using the sewing machine, I recommend about 12 stitches per inch. Remember that machines of the period could not so backwards, so no back-tacking! Instead, leave about 4 inches of extra thread at the ends, pull the threads to one side, and tie in a secure knot. Remove the basting stitches.
Now, press the seam, using the following technique. After pressing, snip off the little triangular pieces that form at either end of the seam allowance.
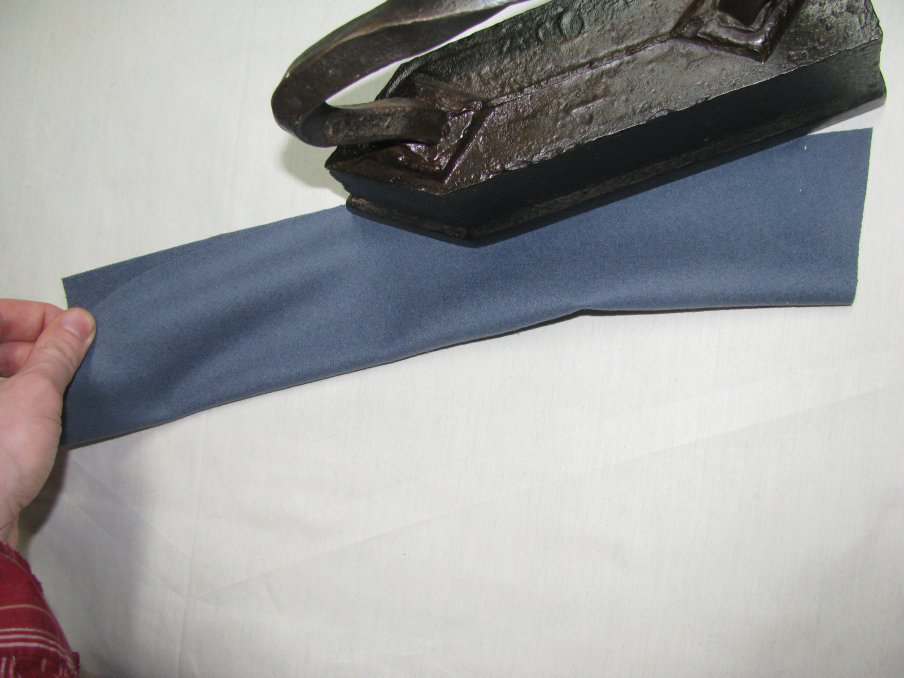
Pressing Technique and Opening Seams
The first rule of pressing is to not move the iron up and down the seam, as this has a tendency to stretch the seam and throw it out of shape. Begin by laying the pieces, still right sides together, on the ironing board. Go over with a hot iron, with a little steam, and press the seam. Use a press cloth made from a scrap of leftover wool to prevent shine on the fabric. Flip both pieces over, and repeat this process. What this is doing is setting the stitches, which will give us a tighter press of the seam.
Next, open up the seam from the wrong side, and press the seam open. Take your time, and do just a small section at a time. Hold the iron for a few moments, remove, then press with a heavy goose iron, or clapper, to really set the seam. We’re trying to avoid that rolled look to the seams that one so often finds, especially in coats made of heavy fabric.
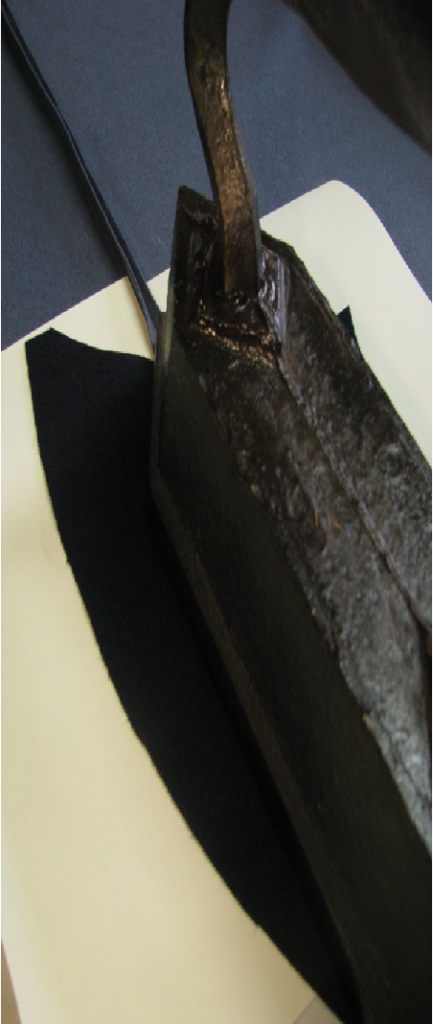
Turn the fabric over to the right side. Using a scrap of fabric as a press cloth, go over the seam again, with the steam iron, then the clapper or goose iron. When using the clapper, you may want to put the fabric seam on a hard surface such as a piece of wood. Make sure to use a press cloth whenever pressing the right sides of fabric, to prevent shine and imprinting the shape of the iron.
If you have the problem of the seam allowances showing through to the right side, press the seams with a piece of card stock underneath each of the seam allowances.
Ironwork
Forepart
We will begin our ironwork by taking up the forepart, and stretching the front of the armscye. The total amount of stretching should be about 3⁄4 of an inch. Hold the fabric at the shoulder point, and put pressure down with the iron, stretching as you go. Both layers of fabric should be stretched at the same time, to ensure they are stretched equally.
Next, stretch the shoulder seam, about a quarter inch total. This is one of those steps not explained in any book, but learned only through practice and critical thinking. If you measure the distance from the edge of the shoulder seam, and compare that to the edge of the back shoulder seam, you will see they are equal. If you add a seam allowance to that, there is no problem getting them to line up. This is what the majority of produced patterns do. Remember, we did not add a seam allowance, so instead, measure the distance of both seams, 1/4” from the edge. You’ll find that the back seam is 1⁄2” to 3⁄4” longer. By stretching the front shoulder seam, and shrinking the back shoulder seam, this distance is reduced, and the seams line up much closer.
Now, stretch the hollow point of the neck seam only, about a 1/4” as well. This gives a little more shape to the shoulder area, and helps the neck hug the body more closely.
Stretch the side seam as well, about 1/4”. This is not shown by Devere, but is necessary to get the seam to line up with the side piece.
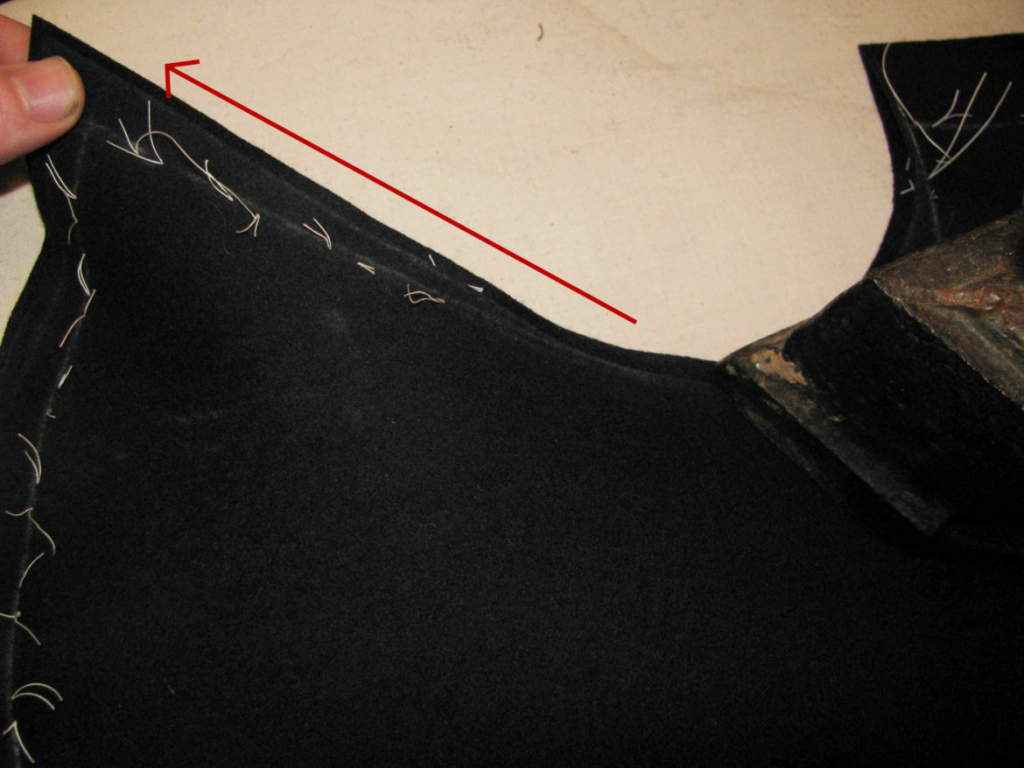
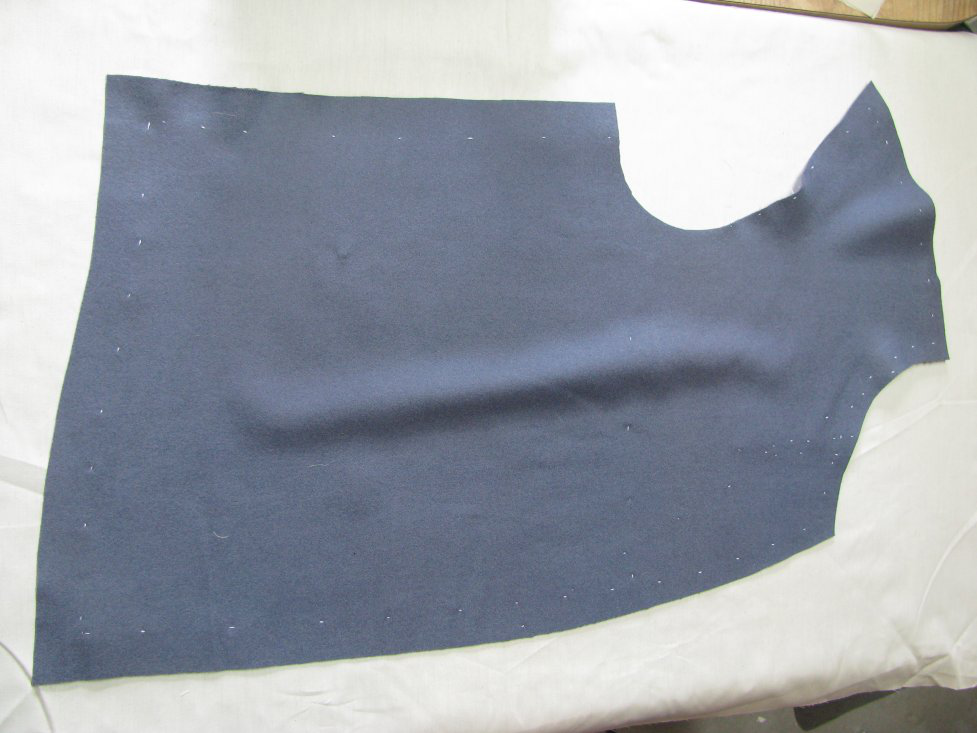
The center front needs to be shrunk now. If you notice a lot of frock coat reproductions, there seems to be a lot of fullness at the center front, right in the middle of the chest. The fullness actually needs to be moved to the breast area, to give that pigeon breasted look so common throughout the period.
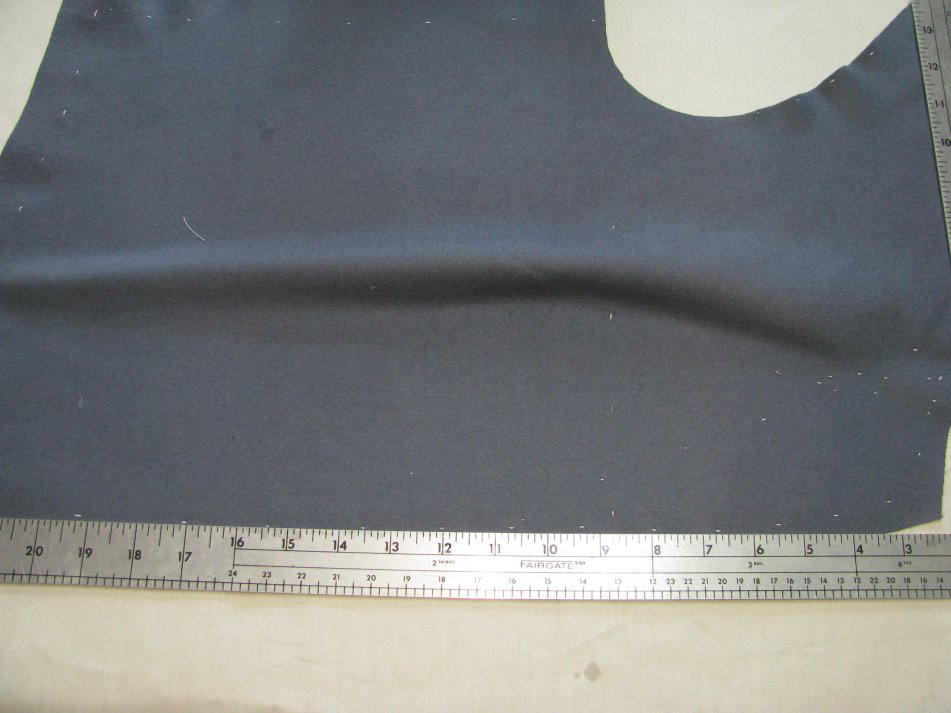
Place the foreparts with the center front facing you on the ironing table. Pinch up a small amount on the front, as if you were putting in a dart. A half inch at a time is good. Gently work the iron over the fullness, gradually pushing it towads the middle of the chest, away from the edge. Continue with this process until the front edge is almost entirely straight. The very top may still be slightly curved, but that is permissible, as it will help the lapel roll back on itself towards the chest.
Notice how the fullness is visibly in the center of the forepart now.
This will also leave room for the padding later on. The shoulder area should have a lot of shape to it as well.
Side
The goal of the ironwork on the side piece, is mainly to impart more shape into the coat. In this step you are basically folding the fabric over, and stretching the seams, while shrinking the middle. It will take some practice, but you will get it. Try not to crease the middle of the piece as you’re doing the ironwork, as it’s hard to get rid of.
The following is a description from The Art of Garment Making, by Phillip Dellafera.
Fold the sidebodies as indicated, then proceed by shrinking away all the ‘loose’ material that will show itself at the waist. This work must be done carefully, until a nice hollow is formed at the waist; it will then be seen that the outer edges will have become slightly stretched. This is exactly what is required, and it will be found that a well defined waist is obtained by adopting this method. Sometimes this effect is obtained by slightly stretching the seams in a downward direction only. This, of course, will certainly help to get the desired shape; but the best plan is to shrink the centre of the side body, which will automatically give the extra length to the seams.
Also, stretch the bottom of the side piece slightly, again about 1⁄4”.
Back
The back requires some shrinking, but we will be waiting until certain construction steps before we perform that work.
Video
Here is a video demonstrating all of the ironwork techniques used in this section. Hopefully it will further aid you in your learning!
Cutting and Tacking

This can be a nerve-wracking step for some people, especially if you are using expensive fabric like Hainsworth. It’s potentially hundreds of dollars down the drain if you make a major mistake. I remember reading about a tailor on Savile Row cutting an overcoat with fabric that was about $800 dollars a yard. He was very nervous as well! But, if you are careful, and check everything twice, you should be okay.
To cut, make sure the shears are held completely straight, not slanting to the left or right. This will help make sure both pieces are cut equally. Cut inside the lines, as the chalk line adds some width to each piece. Make sure you are cutting the inlays with the pieces! After a piece is cut, carefully move the pieces aside, keeping them together as one. This is necessary for the next step. It’s also a good idea to mark an X on the wrong side of each piece, especially if the right and wrong sides are similar in texture.
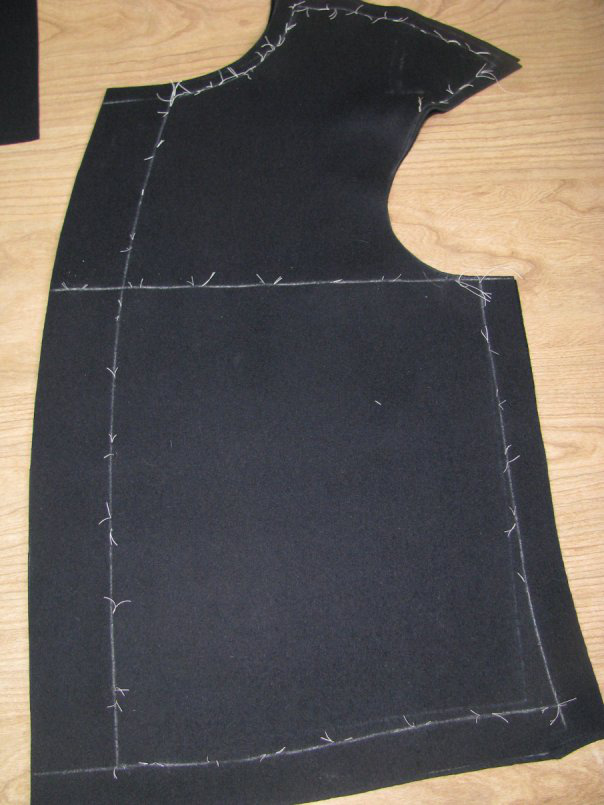
Tacking
Now, you must mark the inlays more permanently with thread, using tailor tacks. You learned the stitch in the previous module. Do the stitches, cut the threads, seperate the pieces slightly, and then cut the stitches in between. Make sure to mark any darts, as well as the chest line on the front of the coat, as well.
Keep the pieces together, still, for we have some ironwork to do.
Pattern and Inlays
We’re going to start right off with this Civilian Frock Coat workshop assuming you already have a double breasted frock coat pattern drafted and fitted. It’s now time to layout the pattern pieces on your fabric and begin the tailoring process!
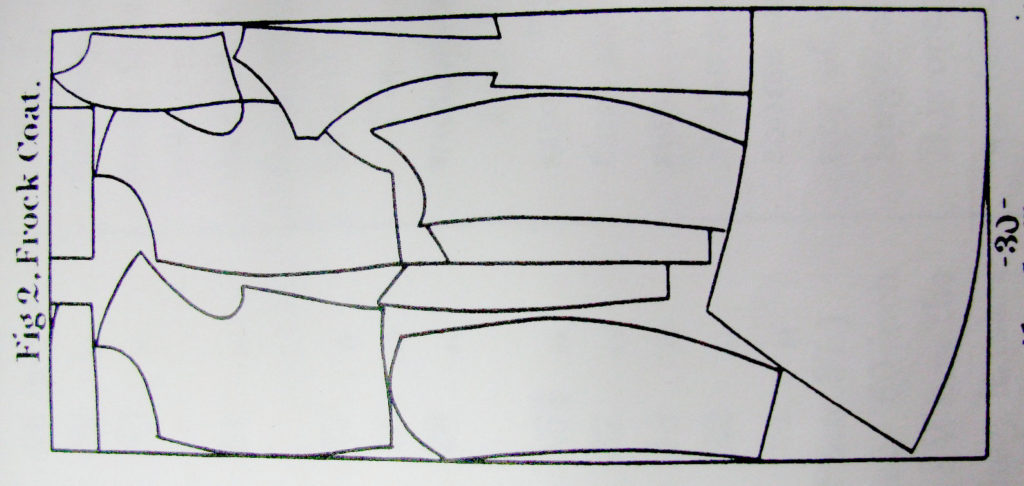
Pattern Layout
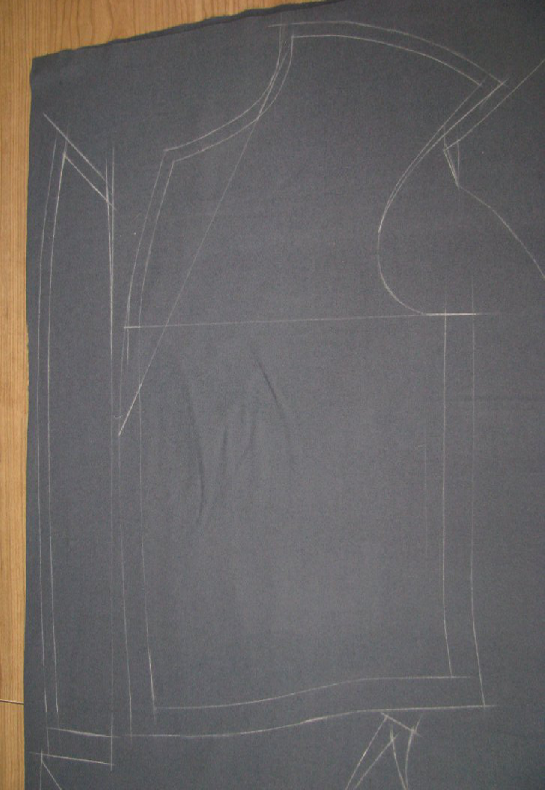
First, be sure you have drawn grain lines on all of your pattern pieces. If you have a nap on the fabric, you’ll have to lay out each piece in the same direction, with the nap heading down. If there is no discernible nap, the pieces can be laid either direction, as long as the grain line on the pattern piecies line up with the fabric. Try to fit pieces as close together as possible, but leave room for the inlays as described below. I find it easiest to lay out one piece, draw the inlays, then do the next piece, and so on. In the diagram, you can see a period fabric layout. They’re good to get some ideas, but don’t feel you have to follow them directly. Be sure to leave plenty of leftover fabric for the sleeves, facings, collar, and other odd ends. Remember, as you are striking the pattern, to use a sharp piece of chalk. I find I have to sharpen it between each piece, sometimes more often.
Inlays
As you layout each piece, it is important to add inlays, for fitting purposes. If you made a mistake in your drafting that you somehow missed, these inlays may save you from having to cut new pieces, or even saving your entire coat from ruin.
Add inlays to each piece as follows. As you are learning to do this, measure out each inlay carefully. With experience, you’ll eventually be able to do this freehand, and anticipate how much inlay to add based on the figure you are fitting.
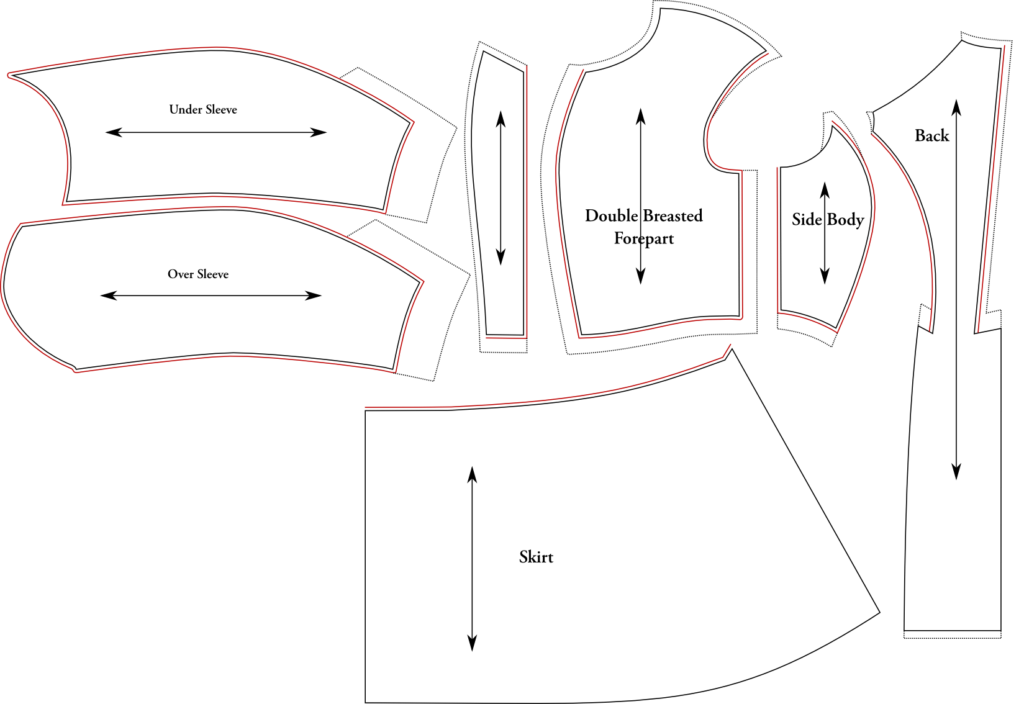
Forepart
At the side and bottom, leave 1” inlays. At the center front, leave 2 inches. This is very important, and if you forget, the coat will not button. At the neck and shoulder, leave 1⁄2 inch, and at the armscye, start at half an inch, tapering to nothing about halfway down the front of the scye.
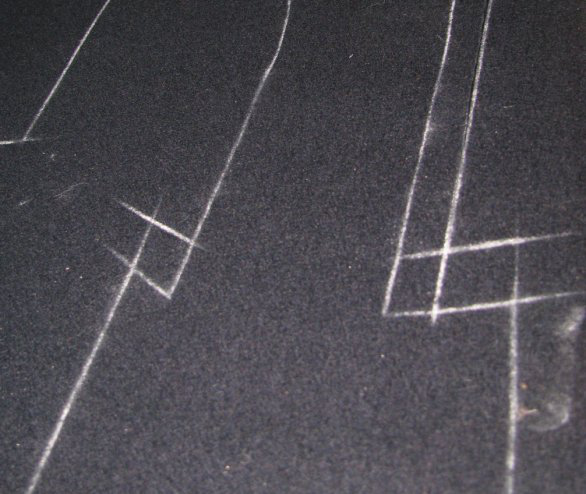
Also, if your pattern has darts, chalk those, and then close the bottom of the dart by drawing a line as if the dart were not there. The edges of the dart represent the seams, not the cutting point.
As you are laying out the forepart, transfer the chest line to the fabric. This will be helpful in aligning the front later on.
Lapel
For the lapel, I’ve actually removed all seam allowances. This works out well, because while the forepart is longer than the lapel, the curvature will be shrunk away, leaving the pieces of equal length. I would add a 1″ inlay to the bottom, and half an inch to the center front and top, just to have some extra room.
Side Body
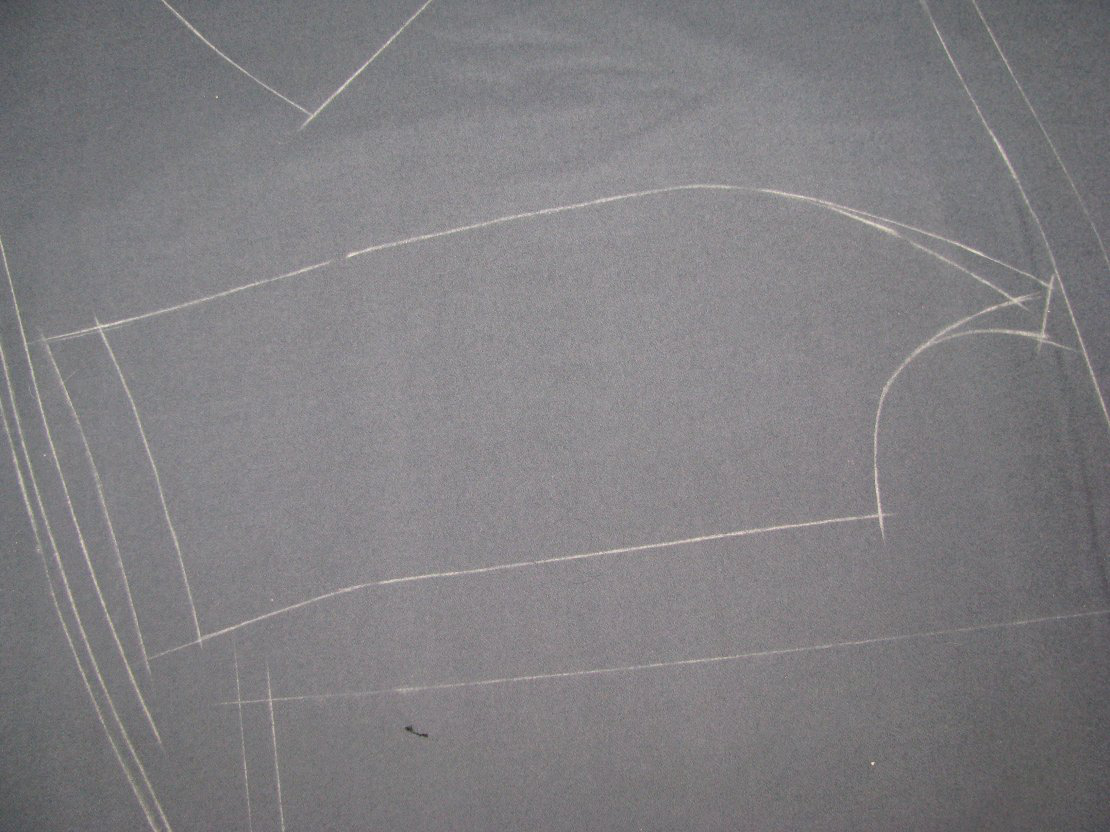
At the bottom, leave a 1” inlay. At the top, leave a small inlay, 1⁄2 inch at the widest point, tapering down, as shown.
Back Section
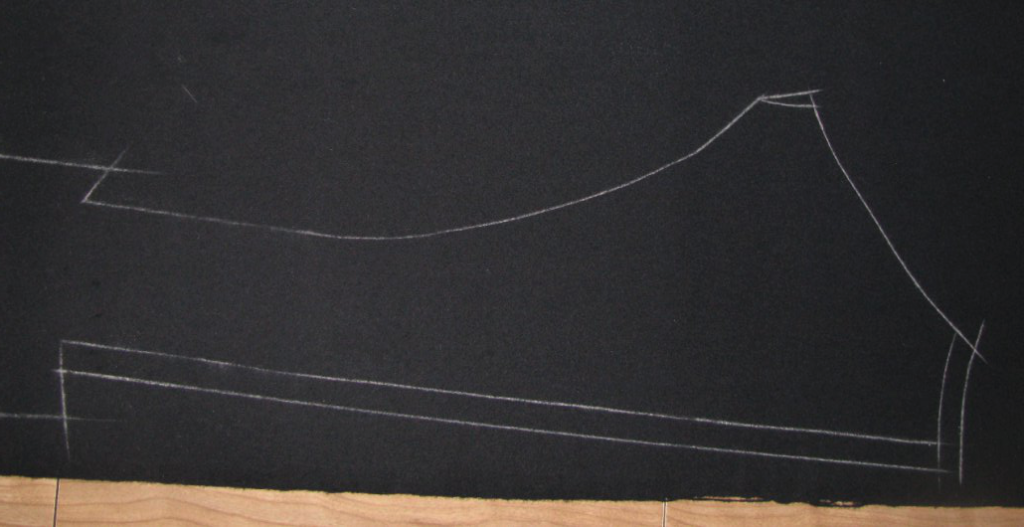
Leave a 1/2” inlay at the top of the neck, as well as down the center back, as shown. At the top of the plait areas, add a 1 inch inlay, extending the height. This is in case you need to raise the back button points up. And finally, at the bottom, leave a 1⁄2” inlay, to allow for any stretching of the back of the skirt that may occur during making up. When you’re laying out the back section, make sure the pattern is on the grainline. The center back should be on a slight diagonal when lined up properly.
Sleeves
Lay out the sleeve on the cloth in chalk, being sure the grain line is parallel to the selvage. You’ll need to add a couple of inlays for the cuff. On the top sleeve, along the curved outer seam, add a two inch wide inlay extending from the cuff, to about 5 inches above the cuff. At the bottom, add another two inch inlay, which will fold over to form the facing.
On the under sleeve, add the same two inch inlay to the bottom, to match the outer sleeve. At the curved outer seam, add a one inch inlay, which will eventually hold the buttons. Add tailor tacks to denote the inlays, and cut.
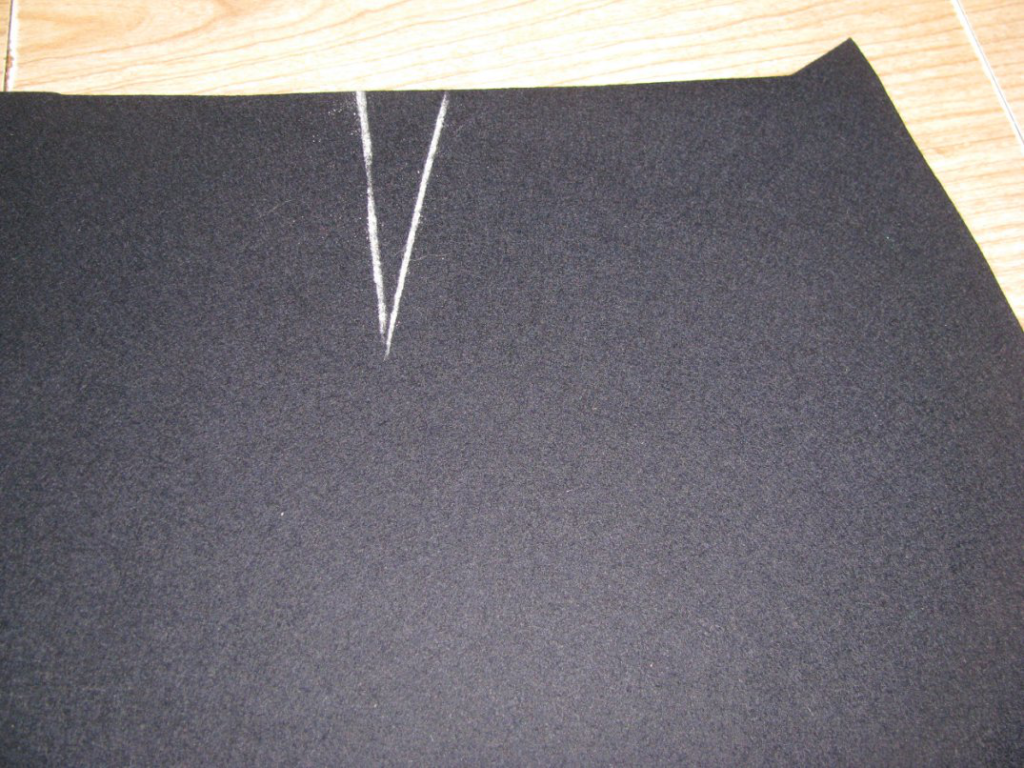
Skirt
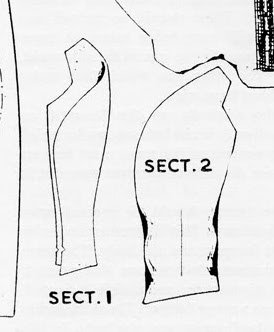
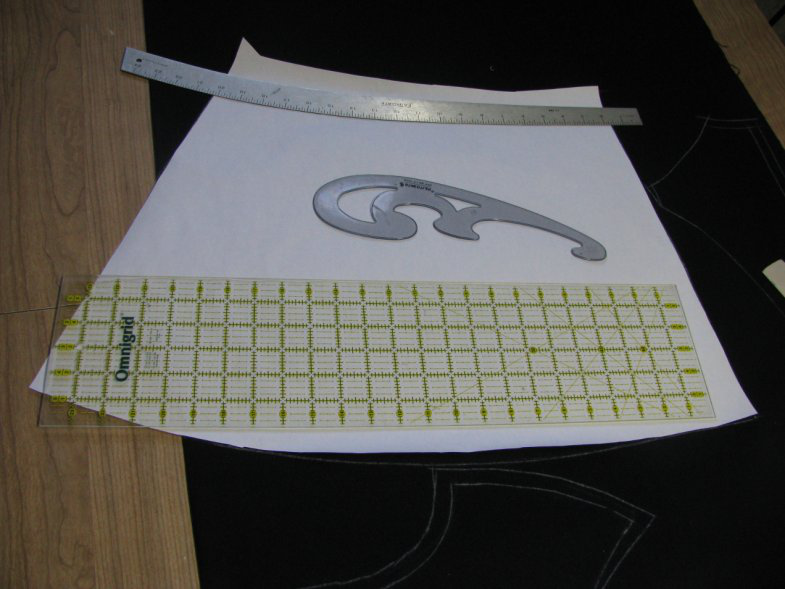
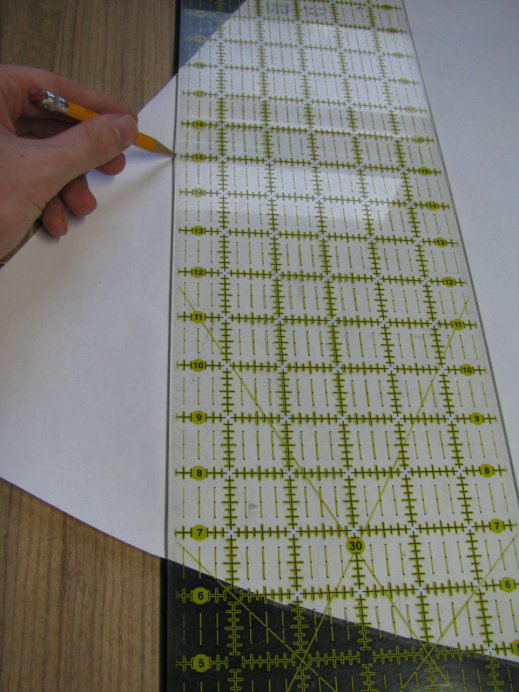
If you are adding any darts to the skirt, add 1 1⁄2” inlay to the front of the skirt. The skirt needs to be able to fold over itself in the front to form the facing, and you need room to do that. There is a special period technique for laying out the skirt pattern, that helps to save fabric. In the majority of cases, the skirt is too wide to fit on the fabric. Don’t turn it sideways or unfold the fabric! Instead, lay the pattern out, with the front of the pattern against the edge of the selvage. The back of the skirt should be hanging off the edge of the skirt. Take a ruler, place it on the edge of the fabric, on top of the pattern, and draw a line on the pattern, indicating the edge of the fabric.
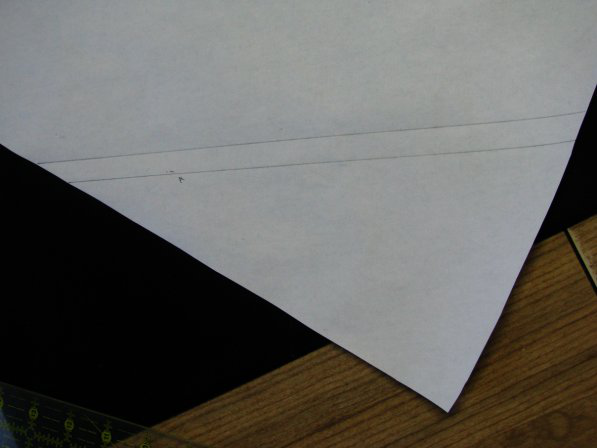
Now, add twice the seam allowance to this small triangle, which would be a 1⁄2 inch in our case (we’re using 1⁄4” seam allowances, remember. Then cut out this small piece of the pattern, and place it elsewhere on the fabric where it will fit. Snug it up into those little spaces you have still. The longest edge, which has the seam allowance, should be on the grain line.
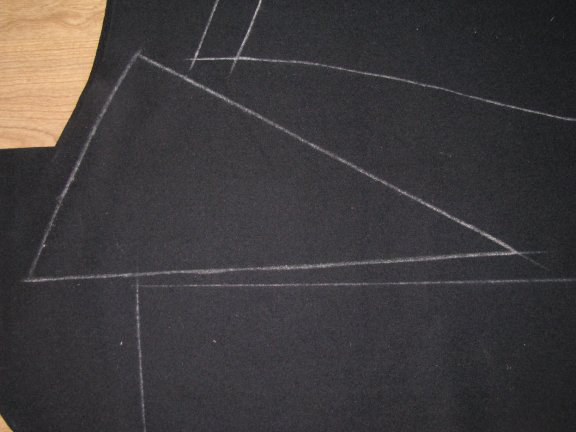
As you are chalking out the skirt, mark the darts, and then mark the seamlines as if you had not cut out any darts in the pattern. This is important as you will not cut out the darts. They are just seam lines. Very important.