Category: Double Breasted Frock Coat
Attaching the Undercollar
At this point in time, the undercollars were still mainly attached right sides together with a backstitch to the body of the coat. During the later 1860s and 1870s, collars began to be attached with the method still used today, by felling the raw edge of the collar to the coat. We’ll be doing the older method in this workshop, but it’s good to be aware of both methods.
Begin by trimming any unused inlays from the neck edge.
Line up the center back of the collar with the center back seam, right sides together. Baste from the center back to the roll line. At the deepest part of the neck, full on a little extra bit of collar to allow it to roll more easily. The roll line of the collar should line up with the roll line of the lapel if you’ve measured everything correctly. Repeat for the other half.
When you get to the area covered by canvas, you’ll want to pull the canvas back slightly so that you can baste just the wool together.
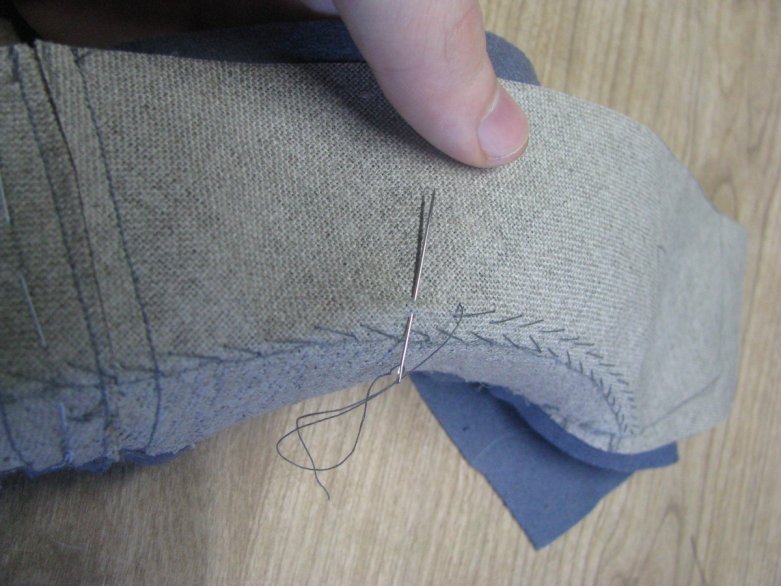
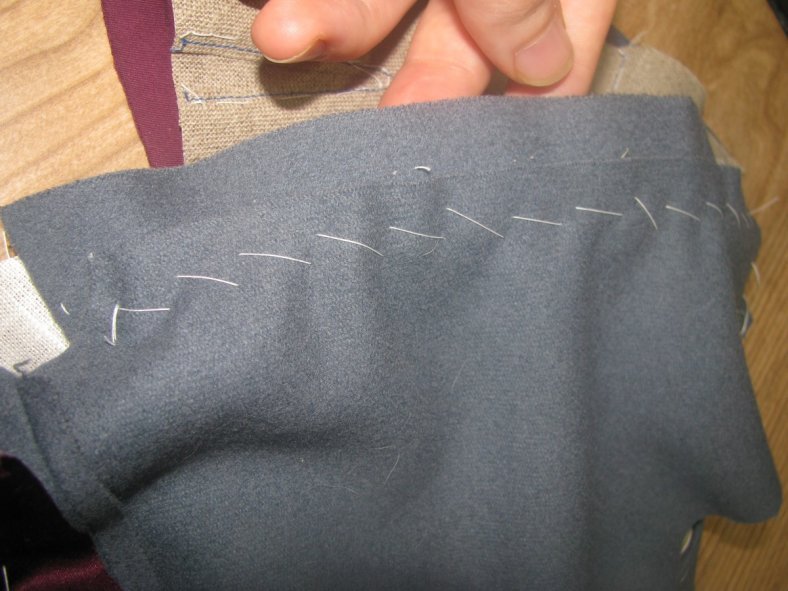
Backstitch from roll line, to roll line. I highly recommend doing this step by hand, because it is very difficult to get a machine in the right place due to the bulk and curves of the coat.
At either end, from the roll line, to the end of the collar, baste the raw edge of the collar to the back of the lapel. This gives a thinner finish to the area, allowing the lapel to roll more freely. Finish by felling the raw edge to the coat. The raw edge should just cover the seam line, 1⁄4 inch from the edge of the neck.
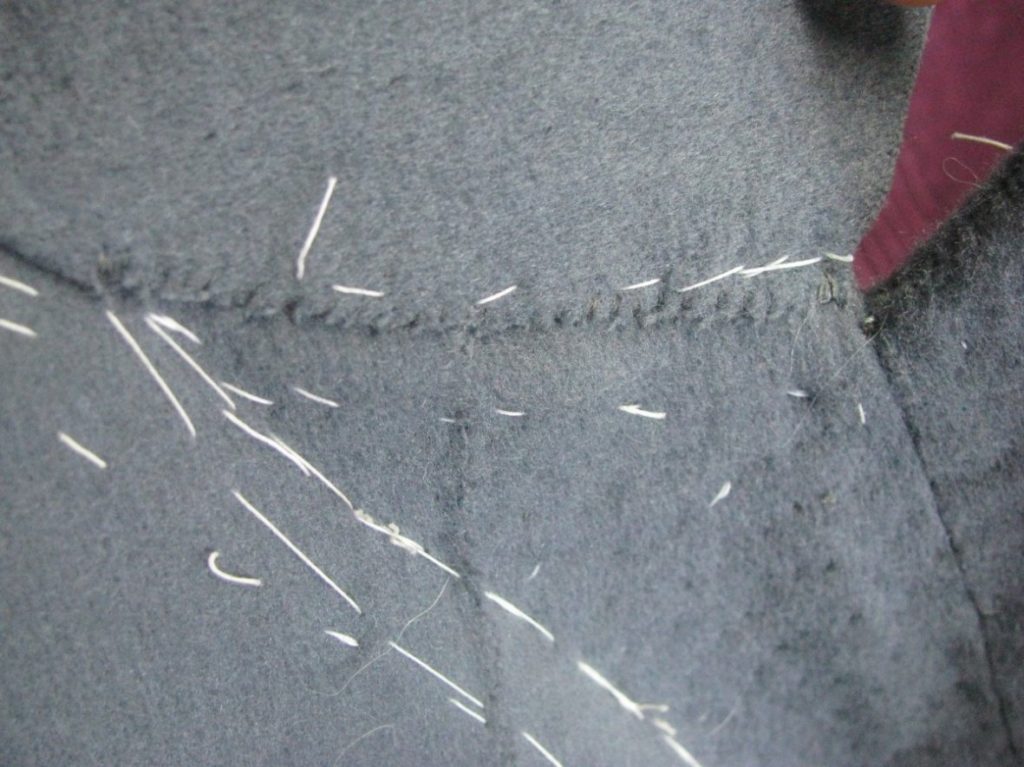
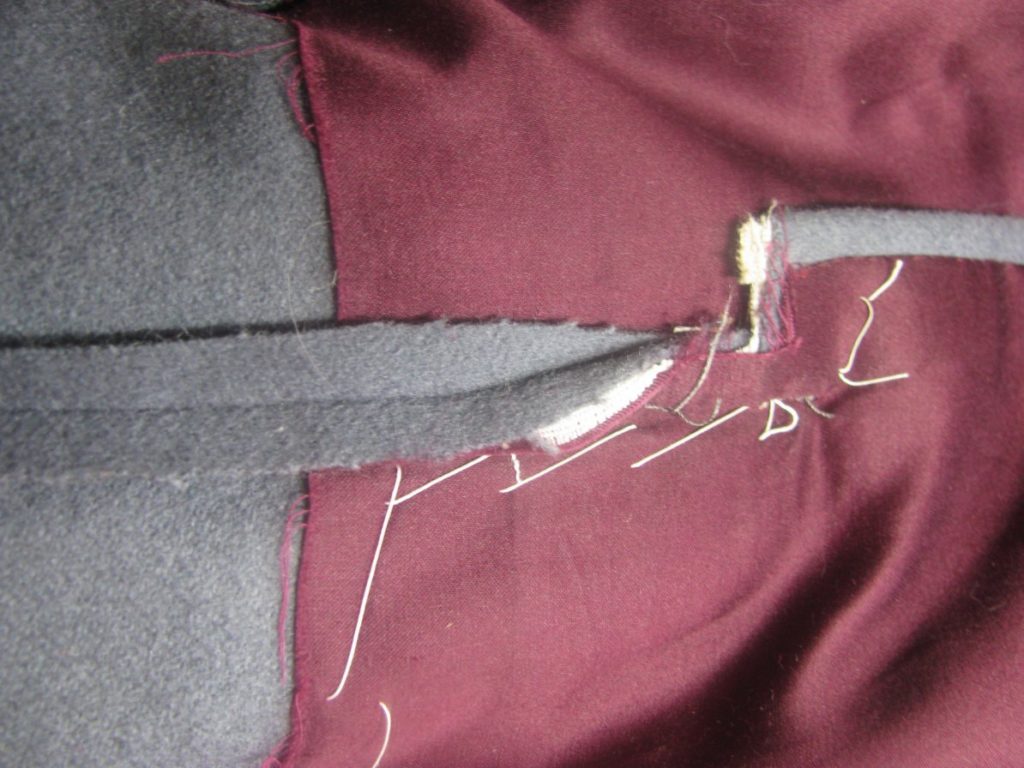
On the inside of the coat, snip the canvas and top layer of wool (the neck edge), just to the seam line. This will allow you to press the collar seam open.
From both sides, and using a tailors ham and press cloth, press open the collar seam from roll line to roll line.
Securing the Canvas
It is now time to completely secure the canvas into the coat. Beginning at the ends of the collar, at the collar notch, cross stitch the body canvas to the collar canvas.
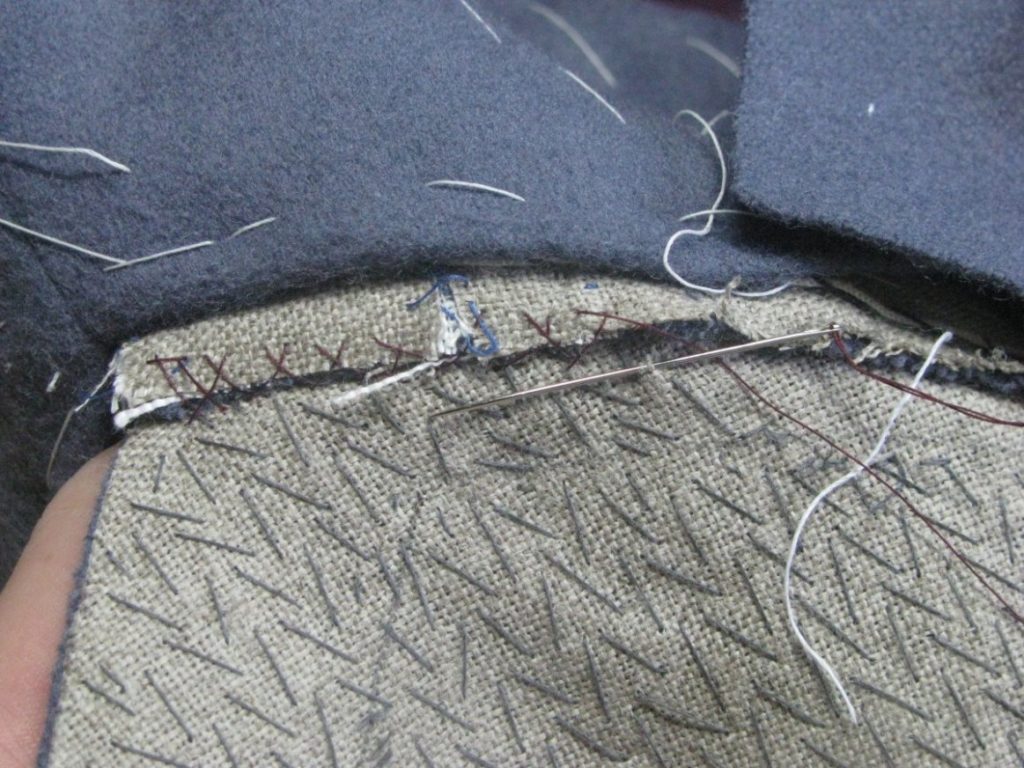
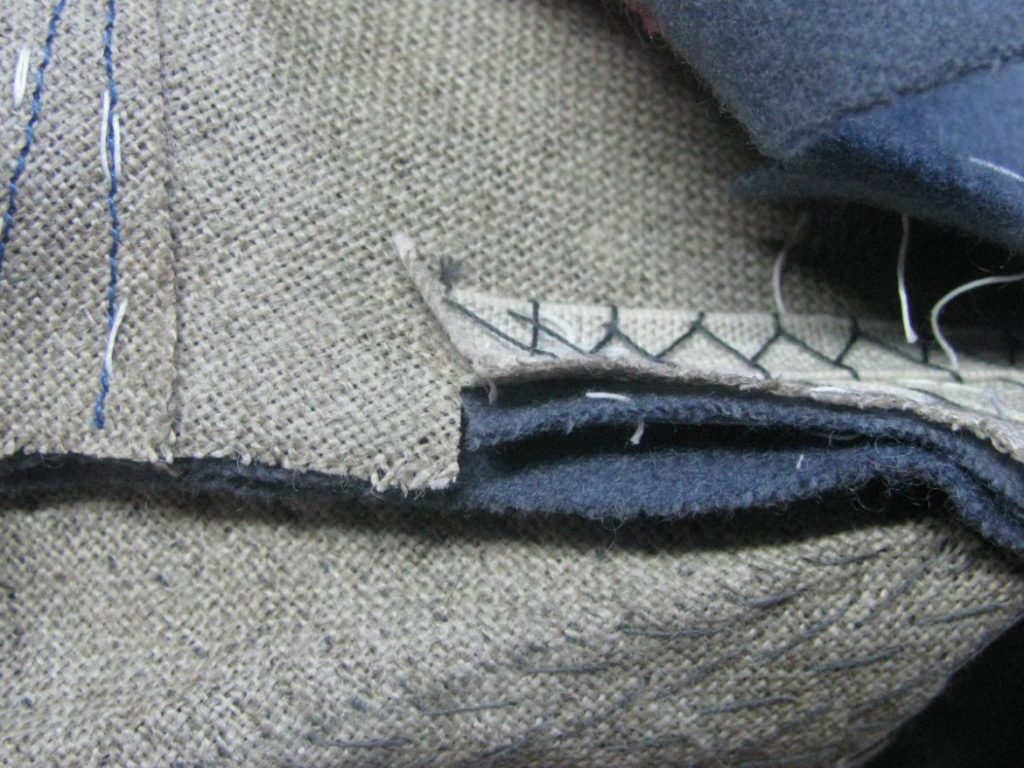
When you get to the section that has been snipped, fold the top layer of wool and canvas out of the way, and catch only the seam allowance of the undercollar, cross stitching it to the canvas. Continue this process until the entire collar is secured.
From the outside of the coat, baste the canvas back in place across thetop of the shoulder. While doing various constructing steps, the canvas has likely been loosened in this area. It needs to be secured in order to do the following steps more accurately.
From the inside, mark a seam allowance plus 1/16” inch along the neck edge of the body canvas. It needs to be slightly larger to allow the wool seam allowance to fold over without interference. Trim carefully along this neck edge, from the top of the shoulder, to the cut you made earlier in the canvas.

Along the very top of the shoulder, mark the position of the seam and trim the excess canvas. I find it’s easiest to use the groove of the shoulder seam as a guide for my scissors, but that does take some getting used to. Be careful!
From the outside of the coat, baste the shoulder inlay, forepart and canvas together, binding all three layers. This simply makes the next step easier.
Along the top of the shoulder, and down the neck edge, cross stitch the canvas to the inlay and seam allowances. The stitching will end at the cut in the canvas, just next to where the stay tape begins.
Securing the Back Canvas
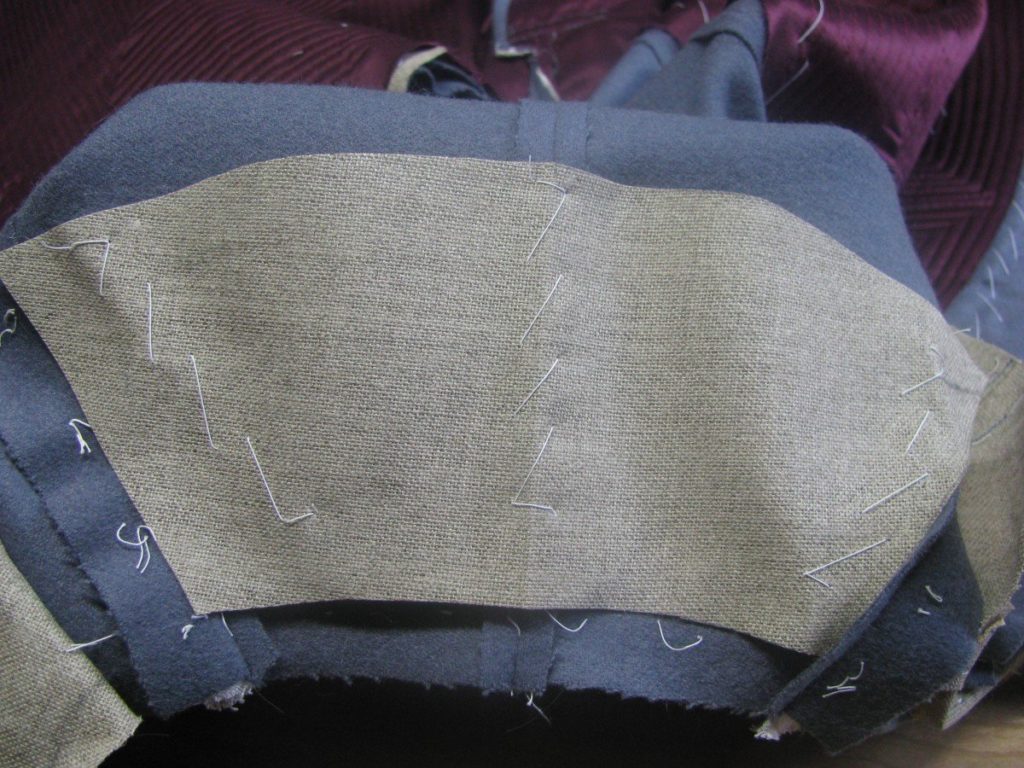
That little piece of canvas in the back needs to be secured as well. Add any basting stitches necessary, if it has become loose, and cross stitch the canvas to the shoulder seam, top of the back neck, and opposite shoulder seam.
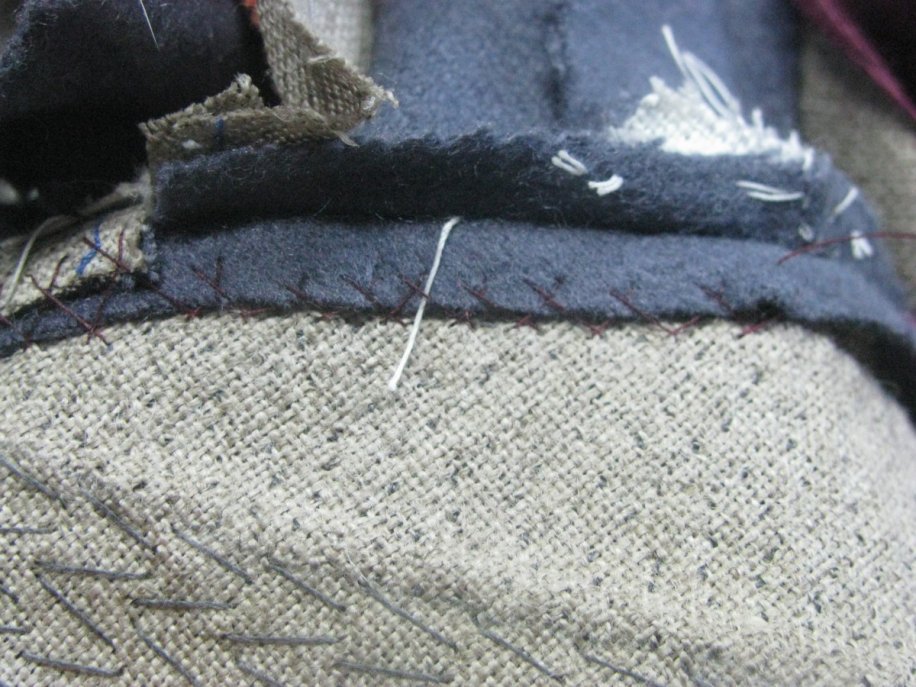
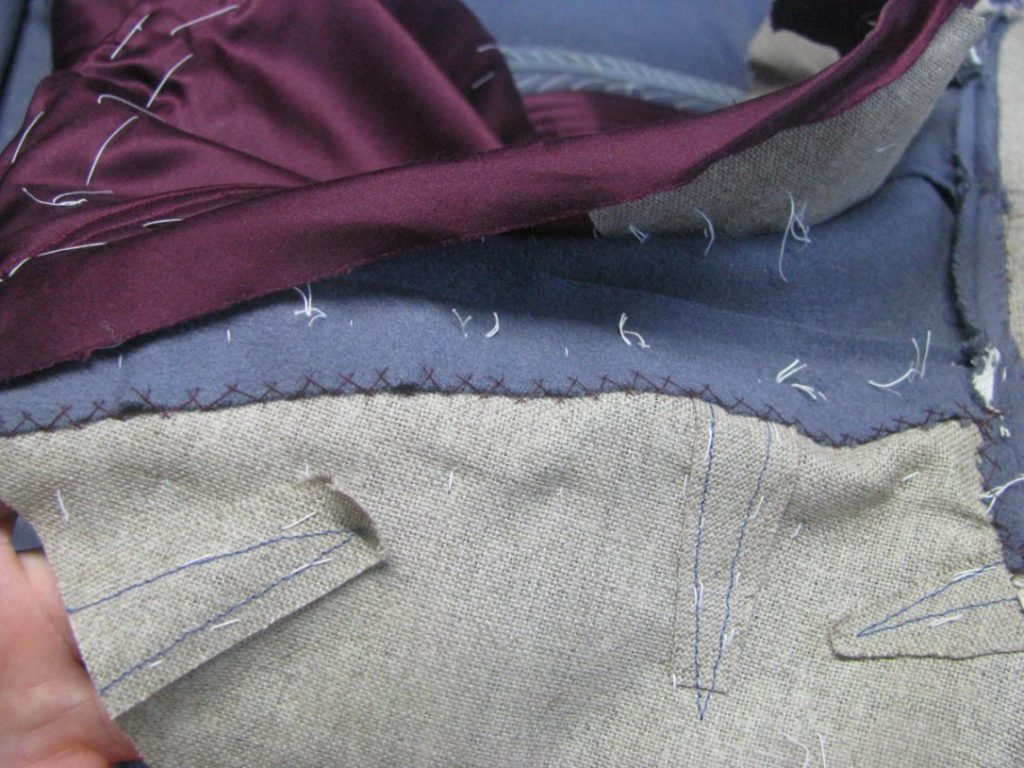
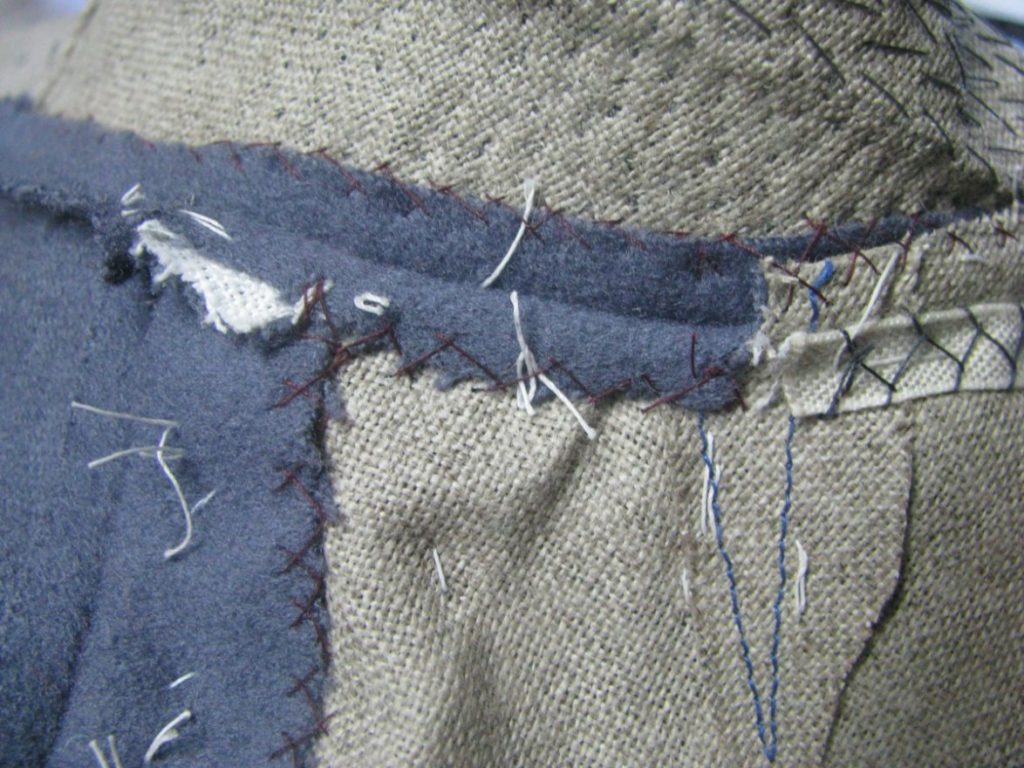
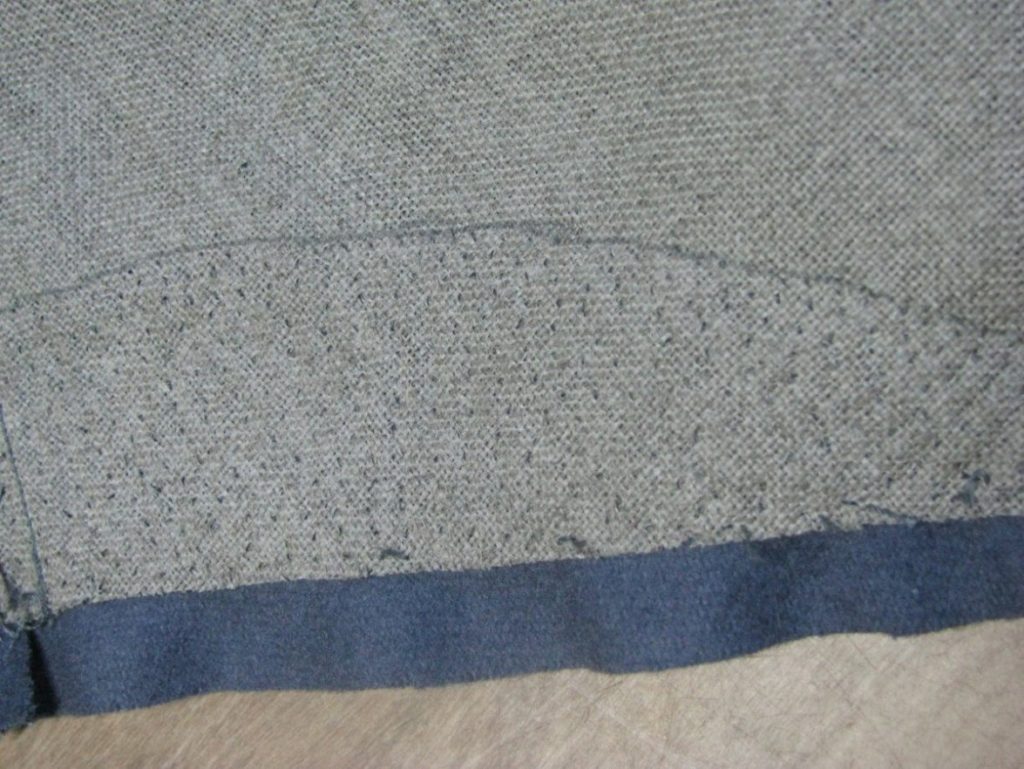
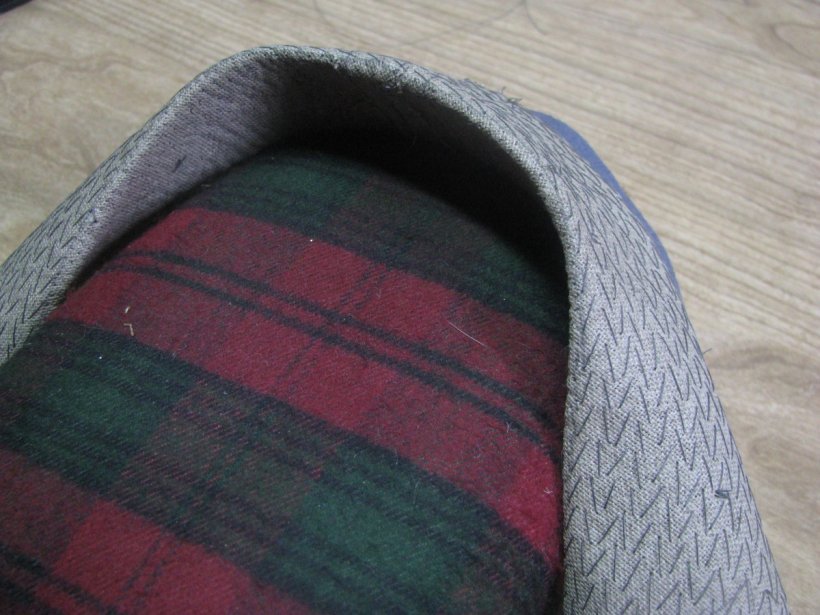
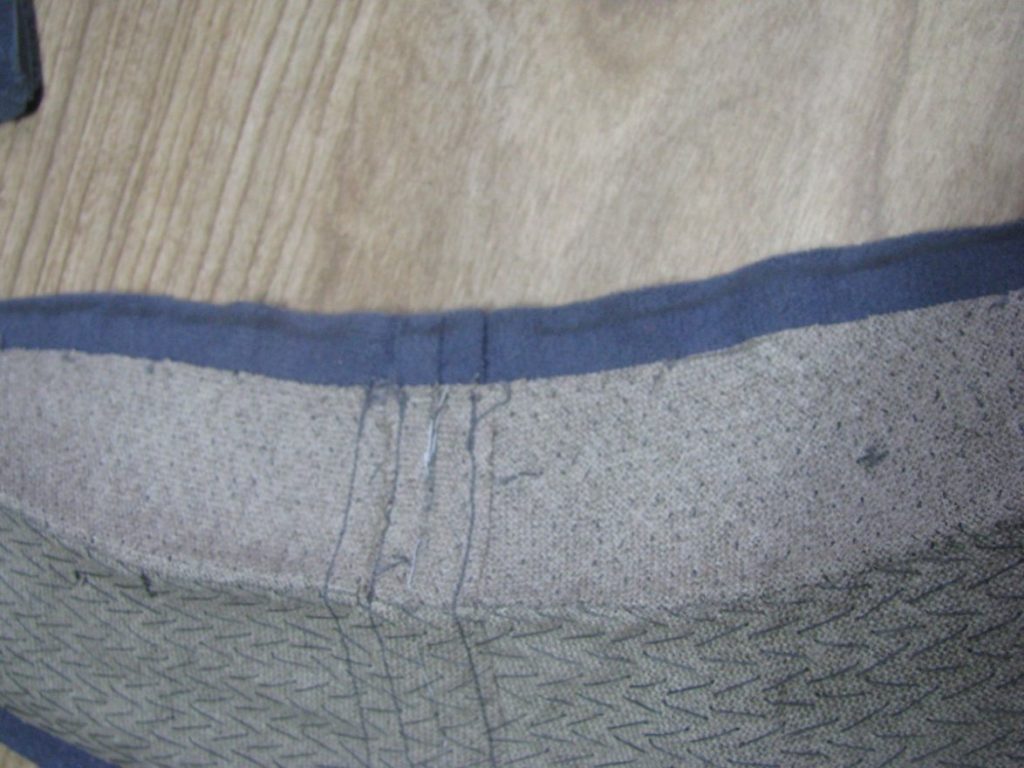
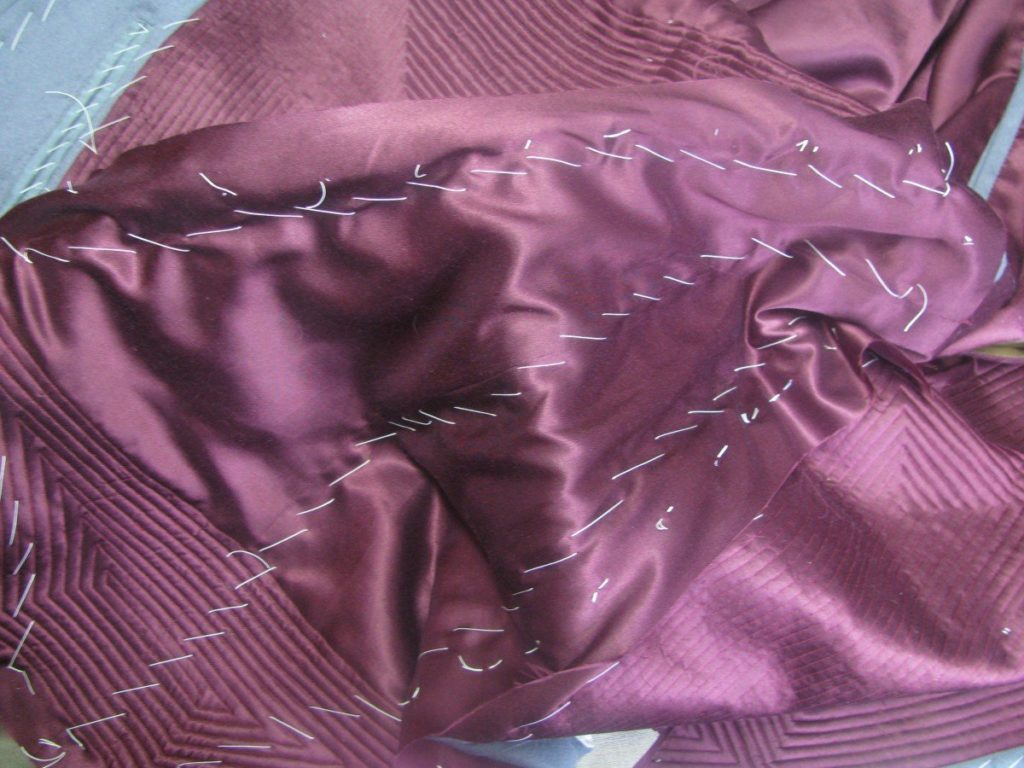
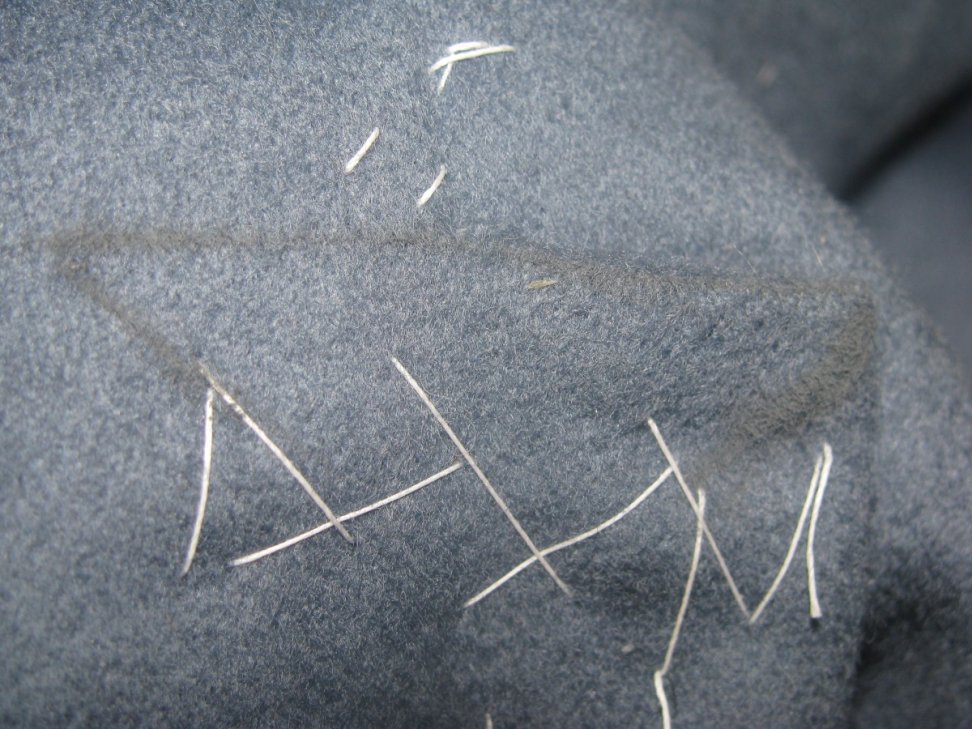
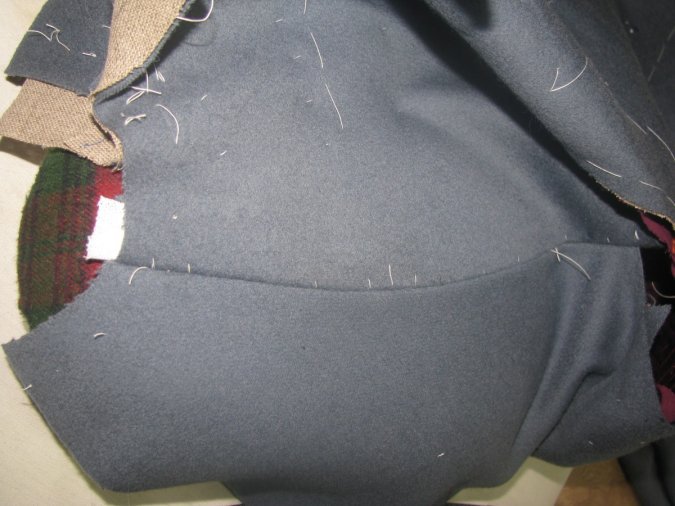
This photo shows the body canvas to the left, the back canvas at the top, and the collar canvas closest to the camera.
Padding the Collar
Now for the fun part! I find this next step incredibly relaxing, because after you figure out the technique, you can put yourself on autopilot and think about other things.
The Collar Stand
Just to the inside of the roll line, make a row of fine side stitches. The stitches should be between 1/8 and 1⁄4 apart, and just about invisible on the right side. As you are going, use your thumb and fingers to shape the collar as it will be around your neck. At the same time, pull each stitch just a tiny bit tighter than normal tension. These two techniques combined will help form the collar to your neck in a more stable way.
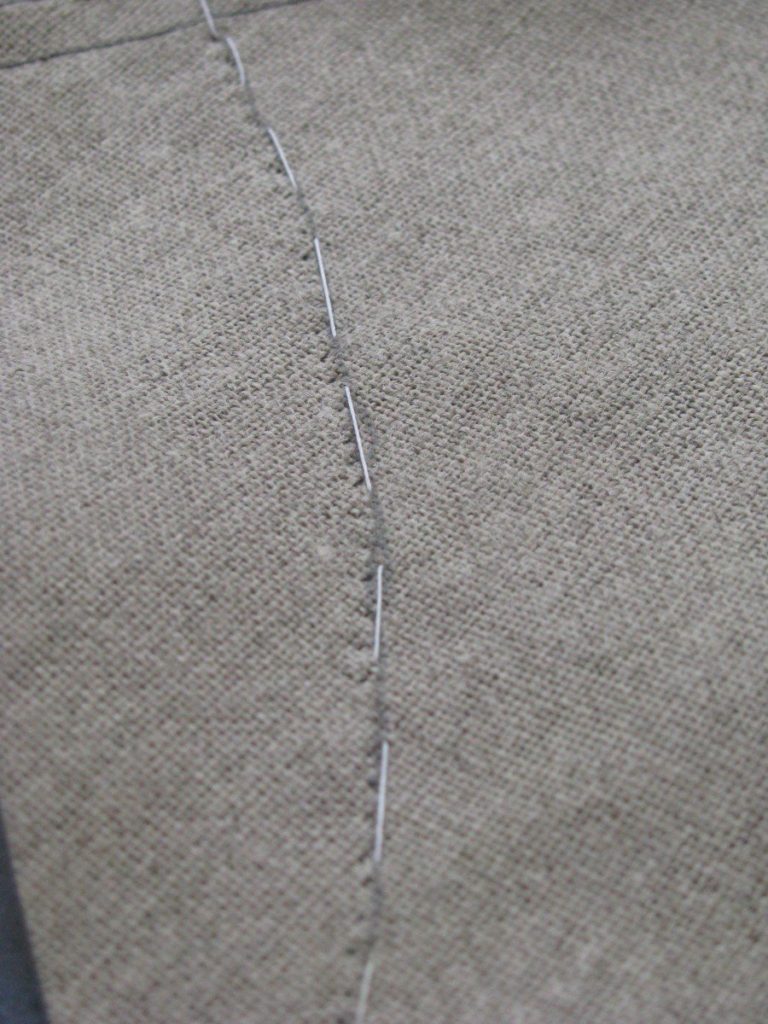
When you get to the other end of the collar, end your thread, and start again on the same side that you began stitching on. This is easier than going back and forth, because you don’t have to train your hands to go in both directions. The next row of side stitching should be about the same distance away as the stitches themselves – 1/8 to 1⁄4 inches. Try to line the stitches up in a honeycomb fashion, to avoid puckering in the finished collar, and give more stability. Continue to subtly shape the collar and give a tighter tension to the stitches as you go.
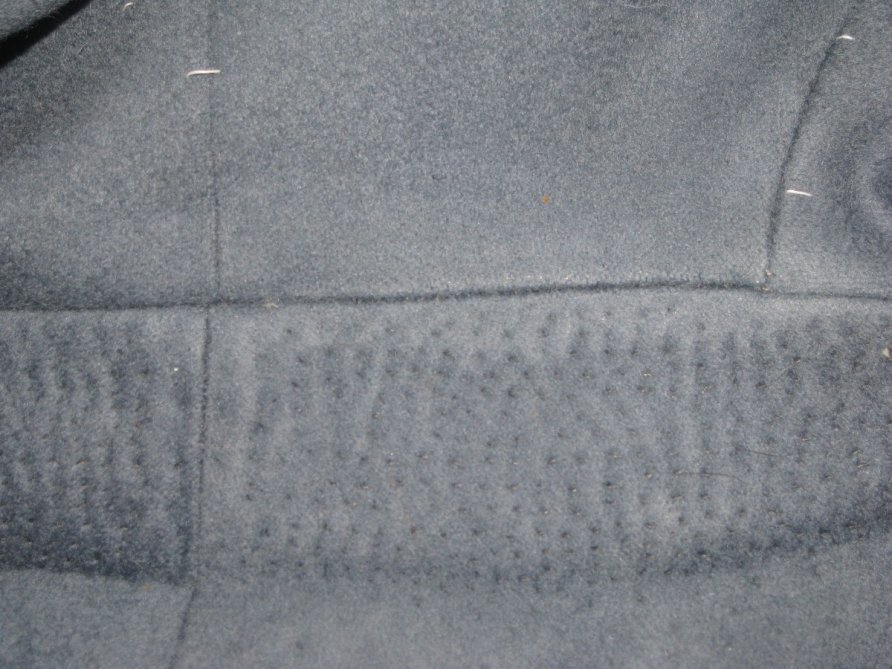
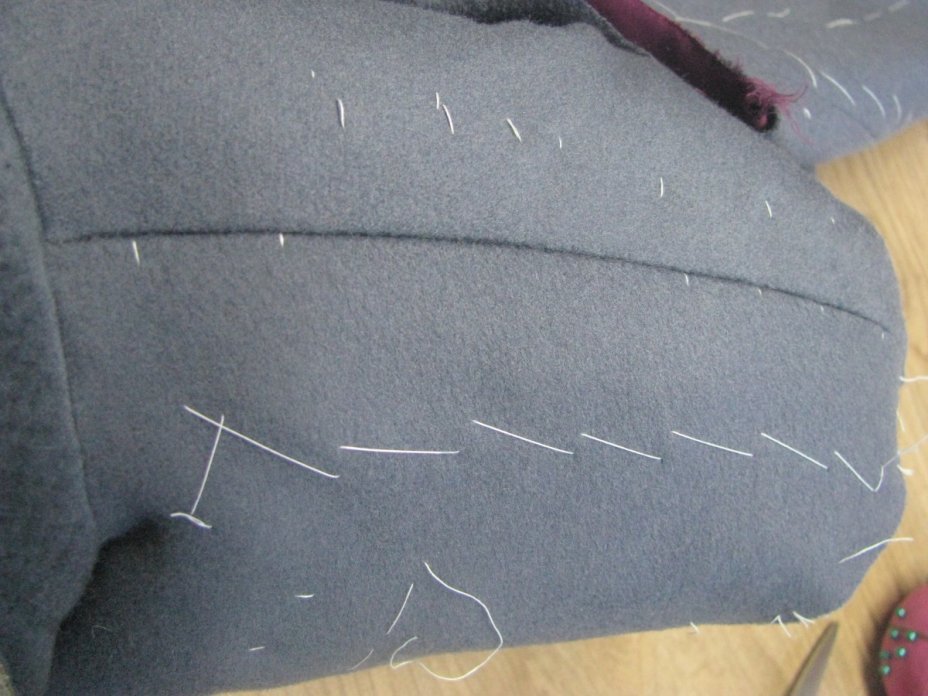
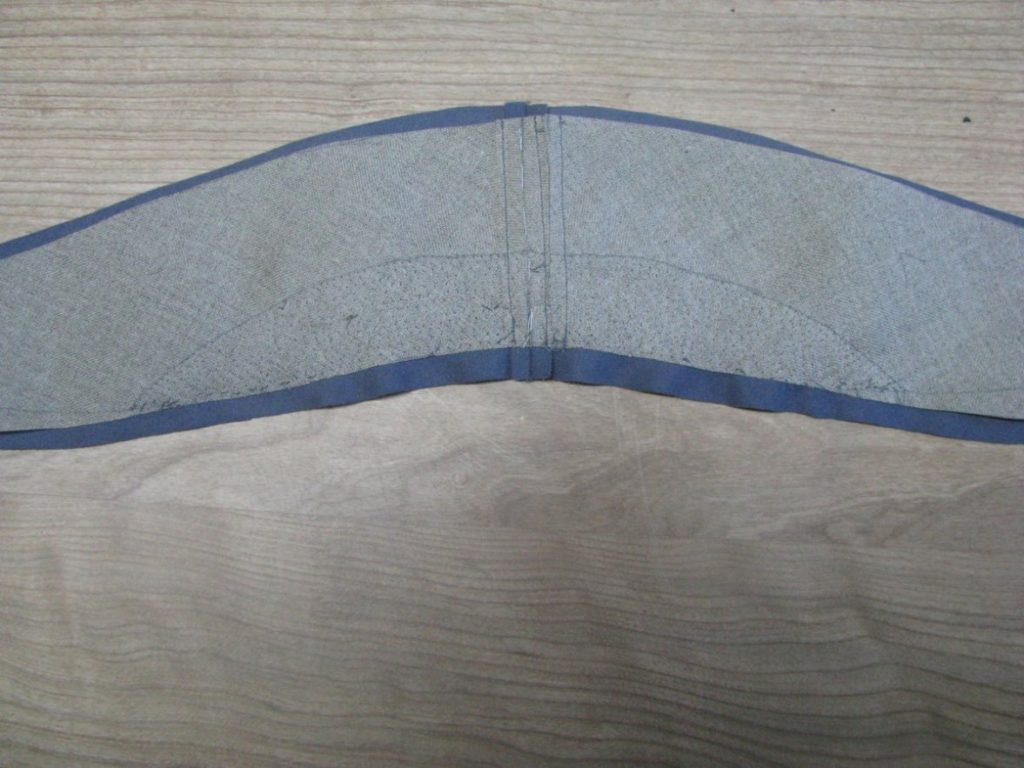
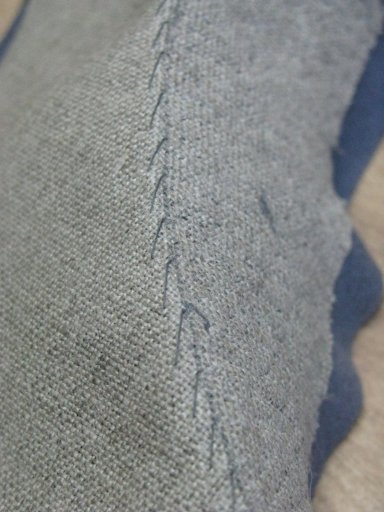
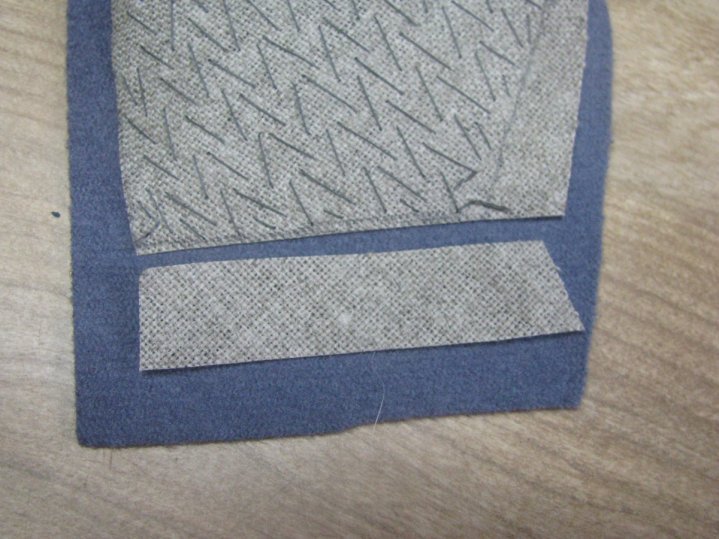
After completing the side-stitching of the collar stand, this is what the collar should look like. Though laid flat on the table, you can see some puckers along the bottom edge, due to the tensioning you put into the collar. As long as these puckers are at the bottom, and not in the collar area itself, you are in good shape.
Pad-stitching the Collar
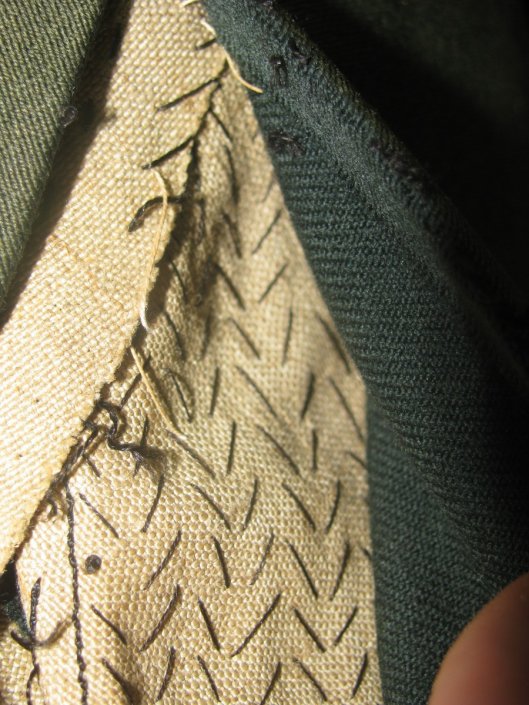
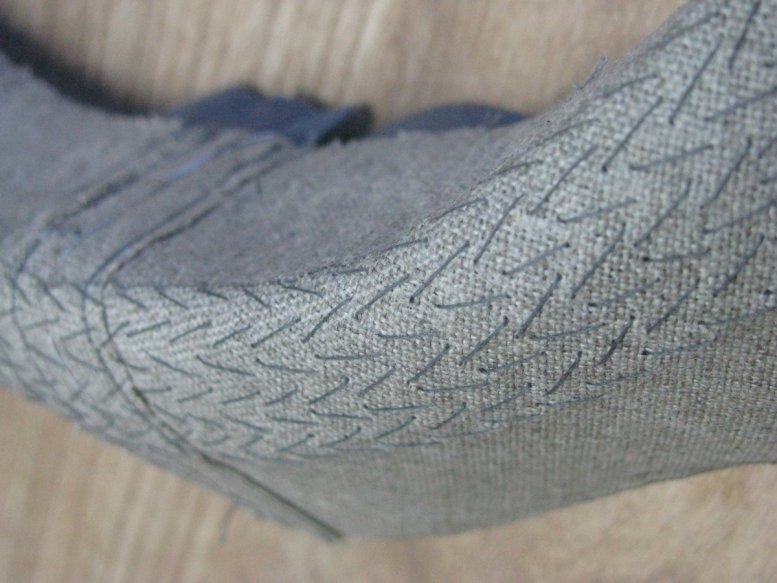
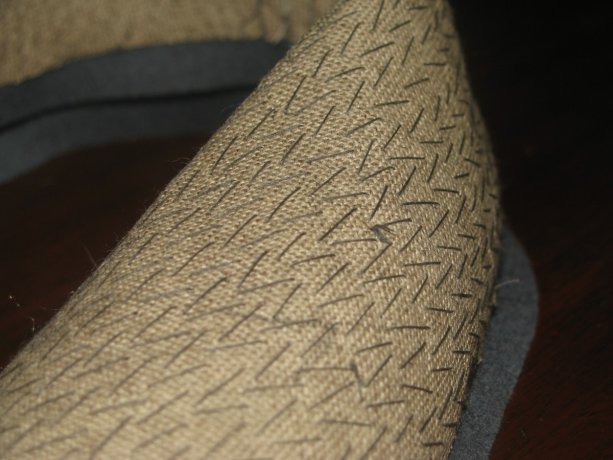
Most reproductions made today sadly lack the pad stitching in the collar, and the affect is very noticeable. The collar will blow around in the wind, lay in a different place every time the coat is put on, and more. Here is a photo of an original coat collar, pad stitched carefully and neatly. While some tailors will do some huge pad stitches, you’ll find that the collar will not be supported well enough, except on the very lightest of modern fabrics. It is much better to keep the stitching to about 3/8 of an inch at the most.
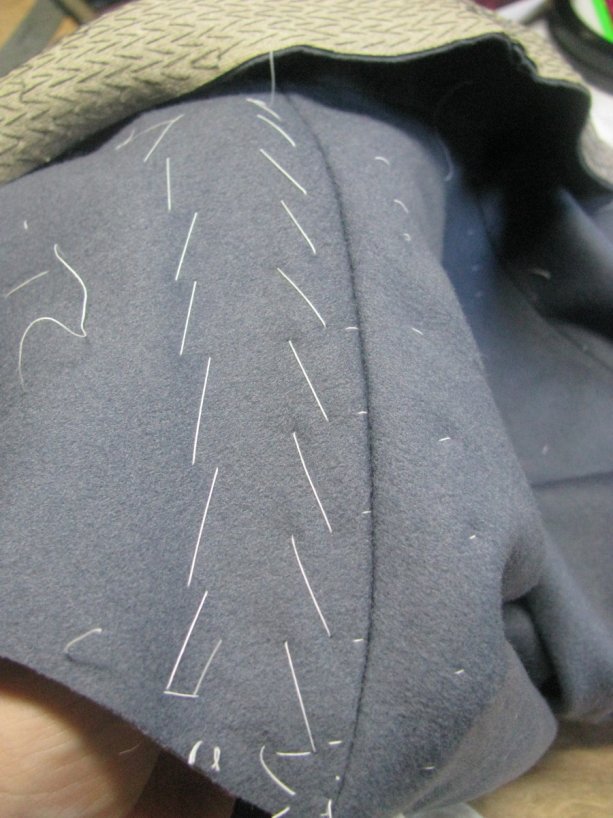
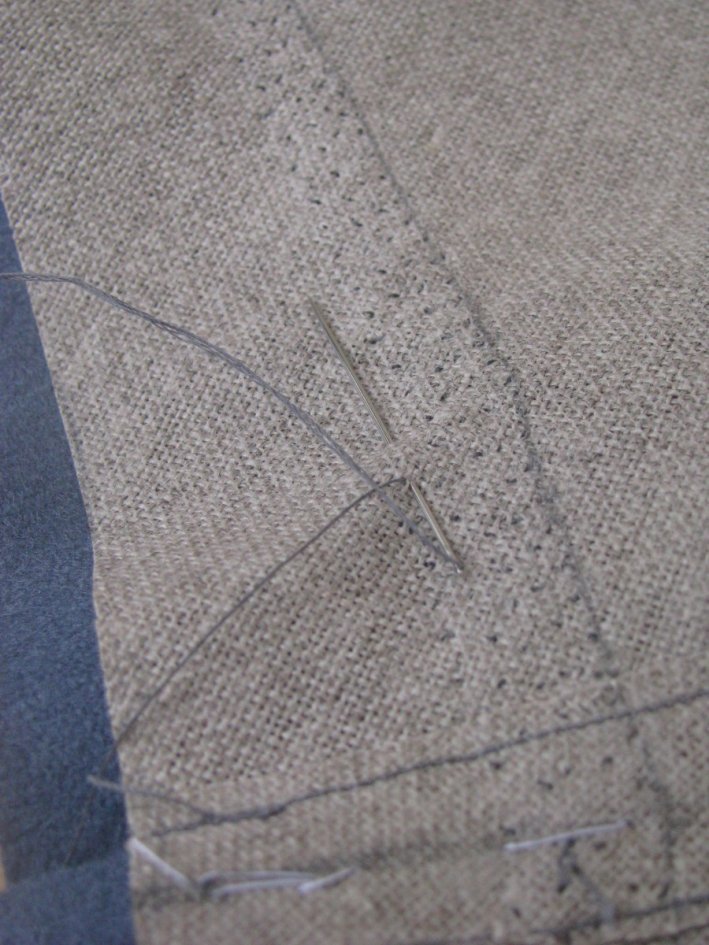
Starting on the other side of the roll line, make a single roll of pad-stitches, shaping the fabric gently with your thumb and fingers. This is the same technique used on the lapels earlier. You can see the collar really start to take shape at this point.
Continue the rows of pad-stitching until the entire collar is completed. At about the midway point, you may wish to check the fit again and adjust, before sewing the rest of the pad-stitches. Stop sewing until the inlays if you are not using them, or continue sewing all the way to the edge of the canvas if necessary. I ended up doing both on each end of the collar.

Pressing the Undercollar
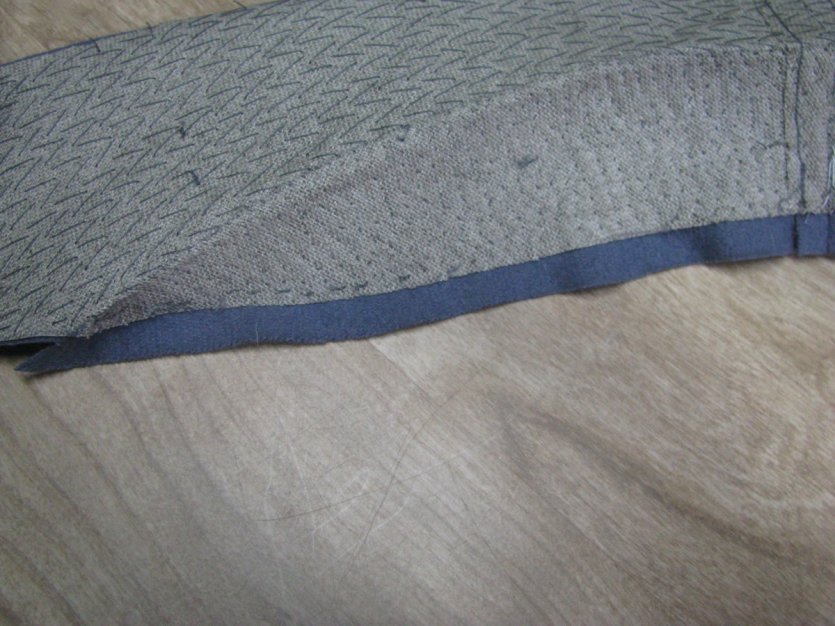
Fold the collar along the roll line by hand, to have more control while initially pressing it. Then laying the collar over a tailors ham, carefully press the undercollar as shown. If you’ve made any adjustments for a long or short roll, the collar will not lay flat. This makes it very difficult to press, but just take your time and you’ll get it.

Trimming the Undercollar
The undercollar canvas must now be trimmed to the exact size of the finished collar. Carefully trim away any unused inlays at this point.
Since the collar is on a bias, it may have stretched out of shape slightly while padding. Measure various points as necessary to make sure they concur with each other, and make any adjustments if necessary. You may end up cutting out a few stitches if things are way off.
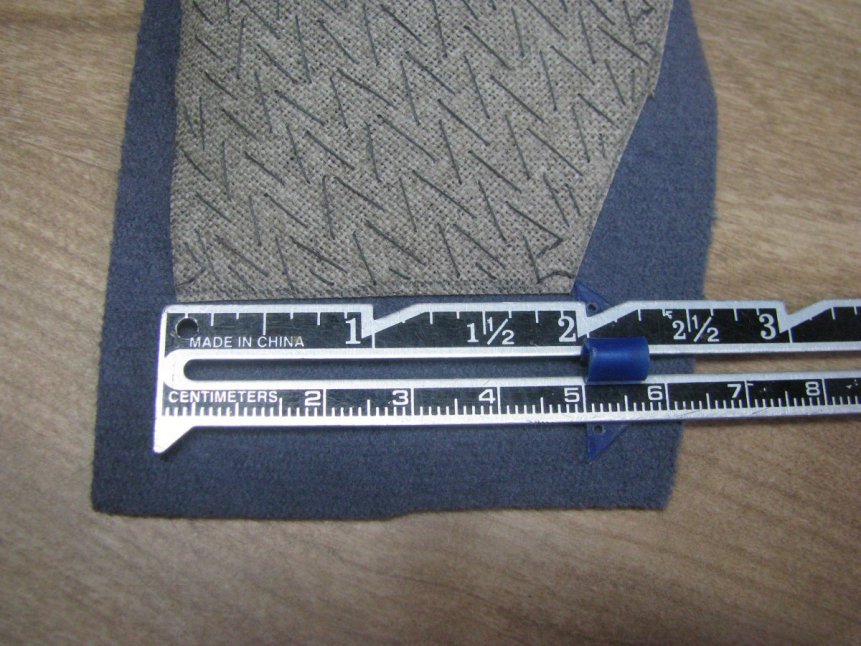
Along the bottom neck edge of the collar, mark out a precise 1⁄4” seam allowance on the wool, measuring from the edge of the canvas. Trim off any excess.
On the wool, extend the roll line from the canvas and mark with chalk, on both ends of the collar.
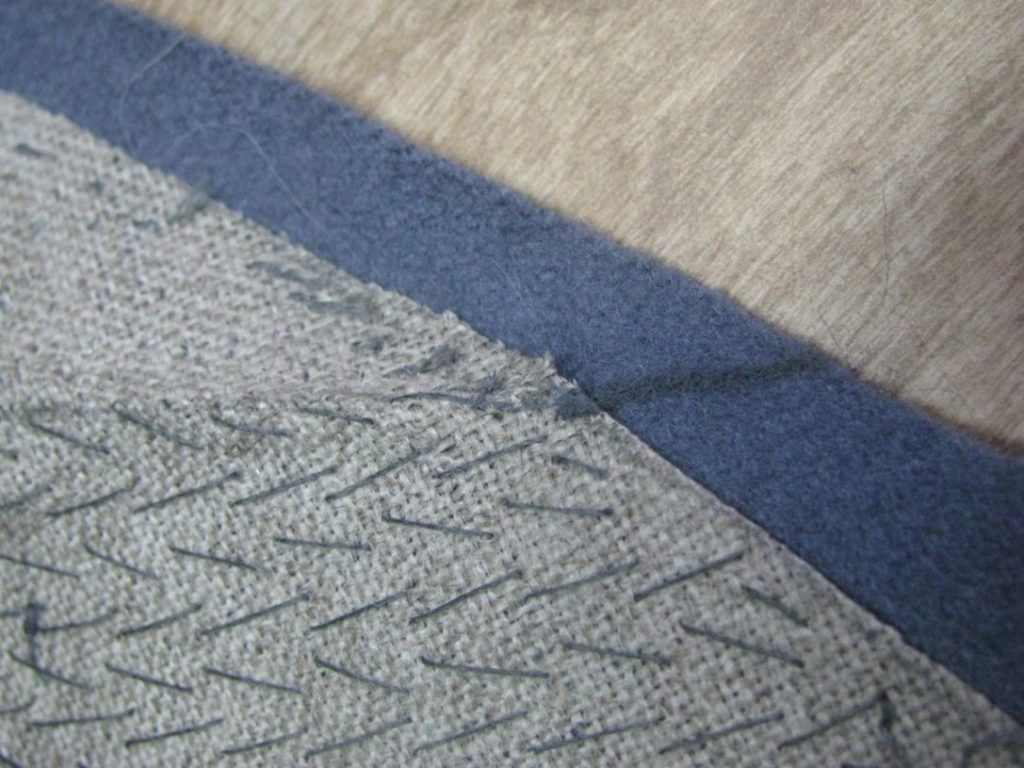
Trim along this line, stopping just before you get to the canvas.
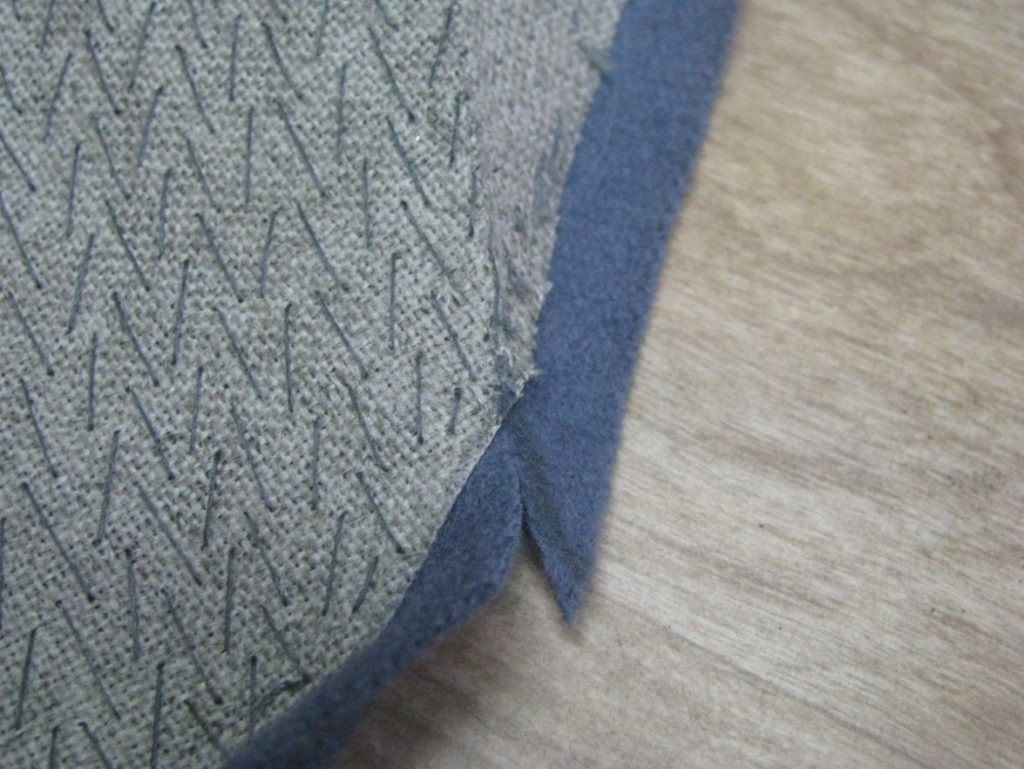
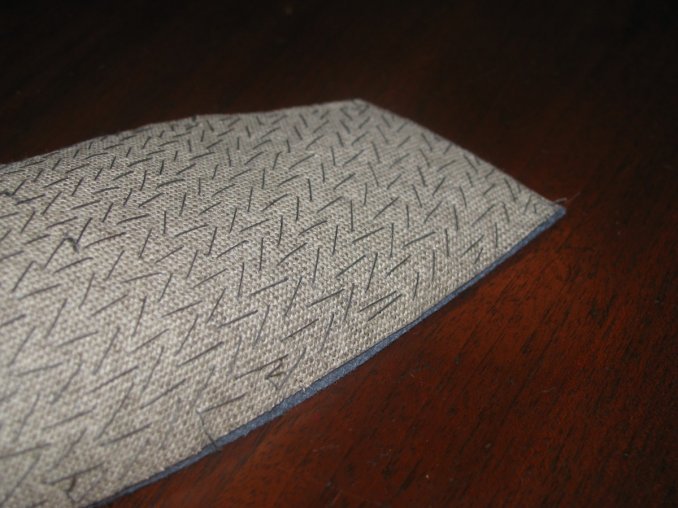
For the rest of the undercollar – the top, ends, and bottom until the roll line, trim away the wool so that there is about 1/16” showing beyond the canvas.
Constructing the Undercollar
Collars of the period, and even to this day, were constructed in two steps. The undercollar was first attached, and then covered by the overcollar, giving a nice thinness that is lacking when the collar is constructed using other methods.
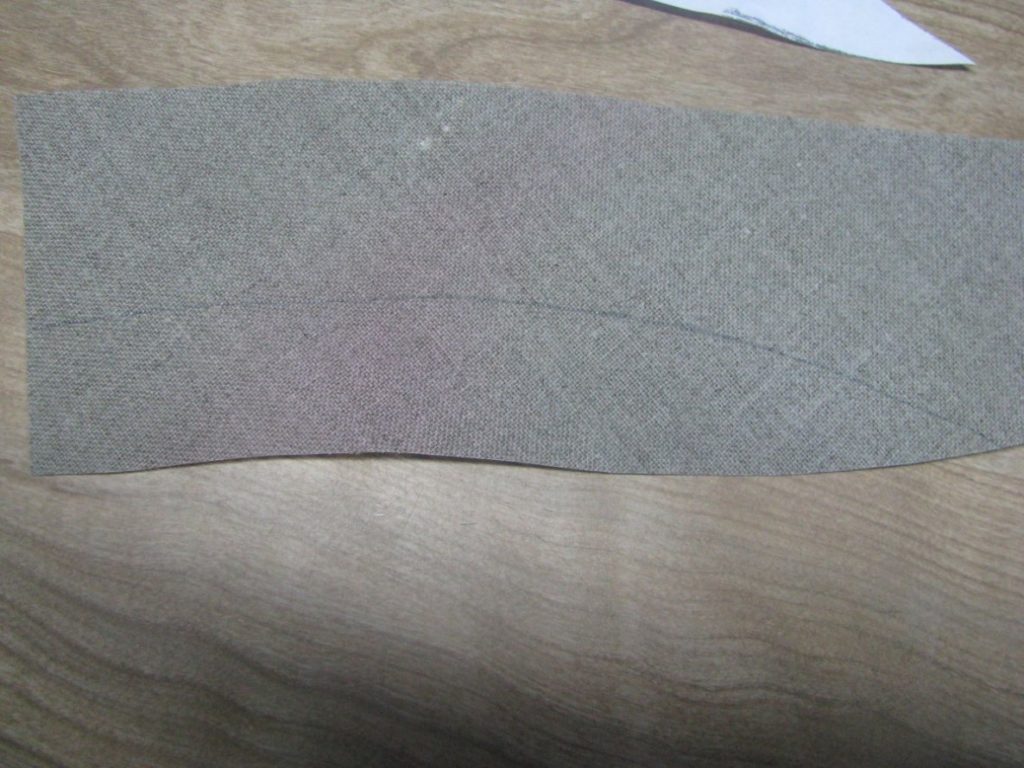
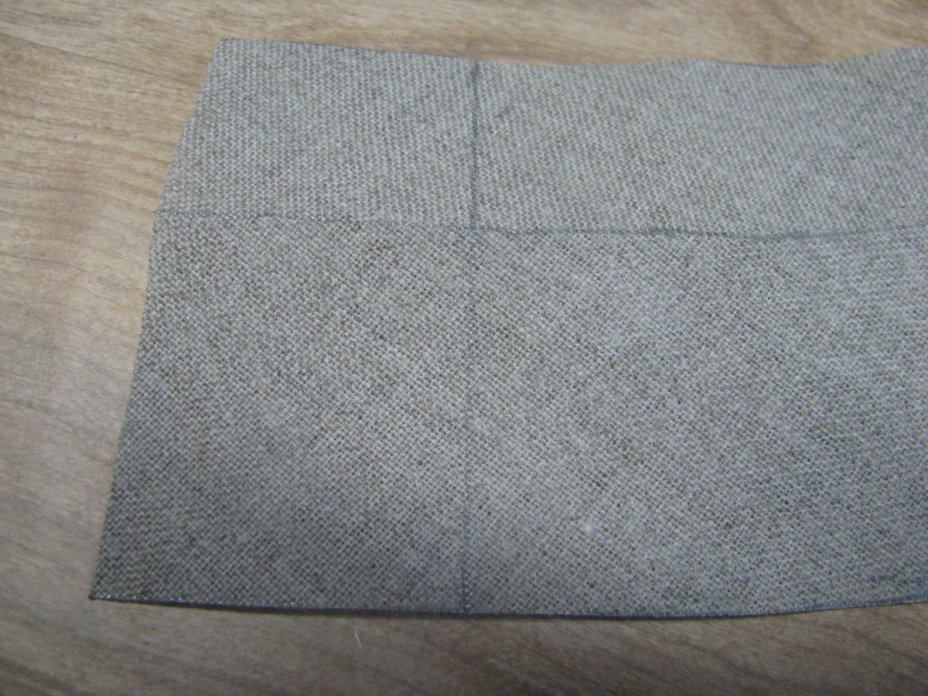
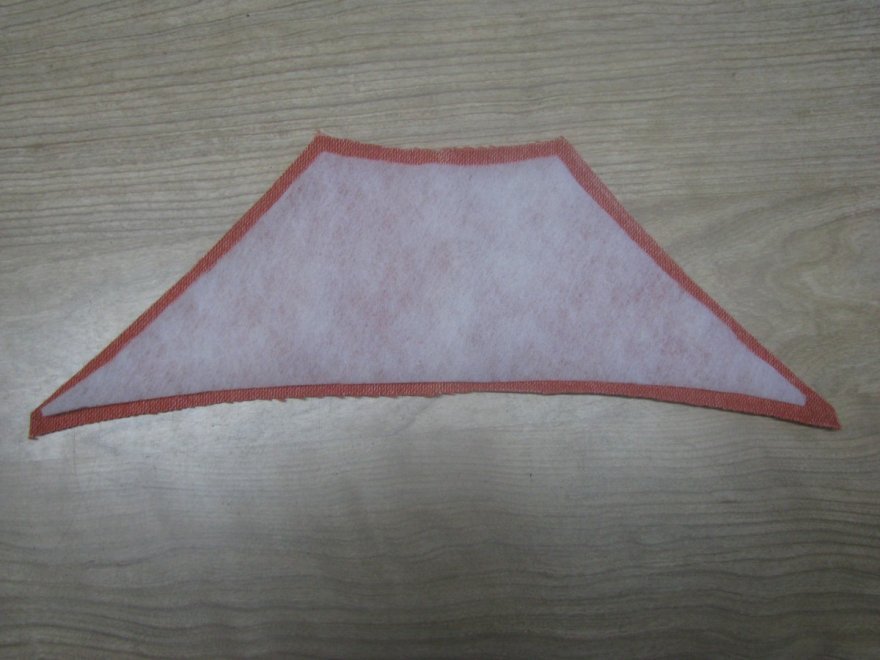
Begin by drawing a bias 45 degree line on your french collar canvas. Place the collar along the line, and carefully trace. The reason for the bias cut is to allow the collar to roll more gracefully and retain its shape.
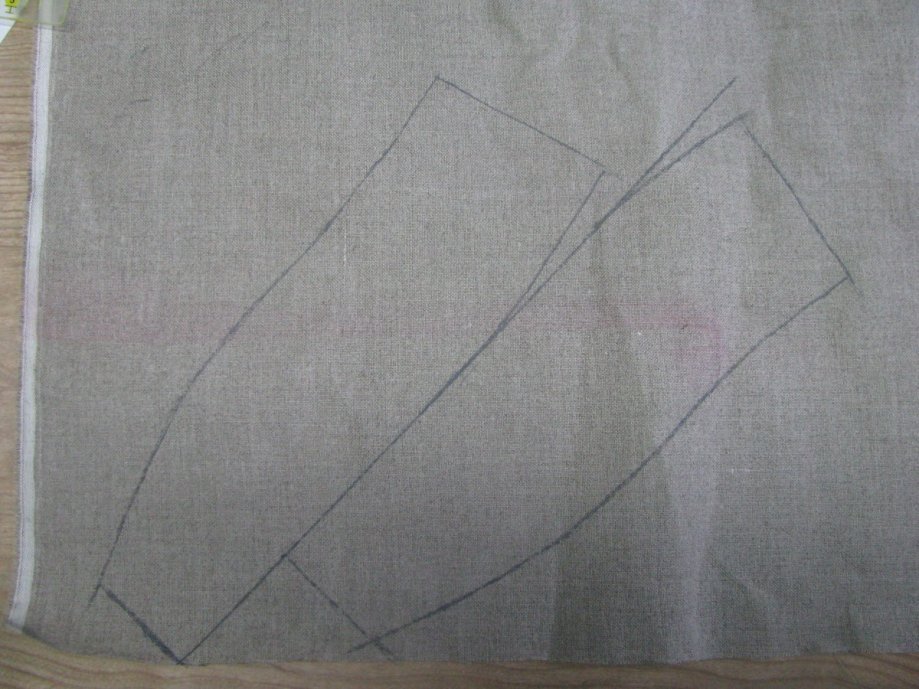
I highly recommend leaving room for a small inlay at both ends of the collar, so that you may adjust the fit more precisely.
The roll line must be marked on the collar. I find the easiest way is to cut the collar pattern along the roll line, and use one of those pieces to trace the line.
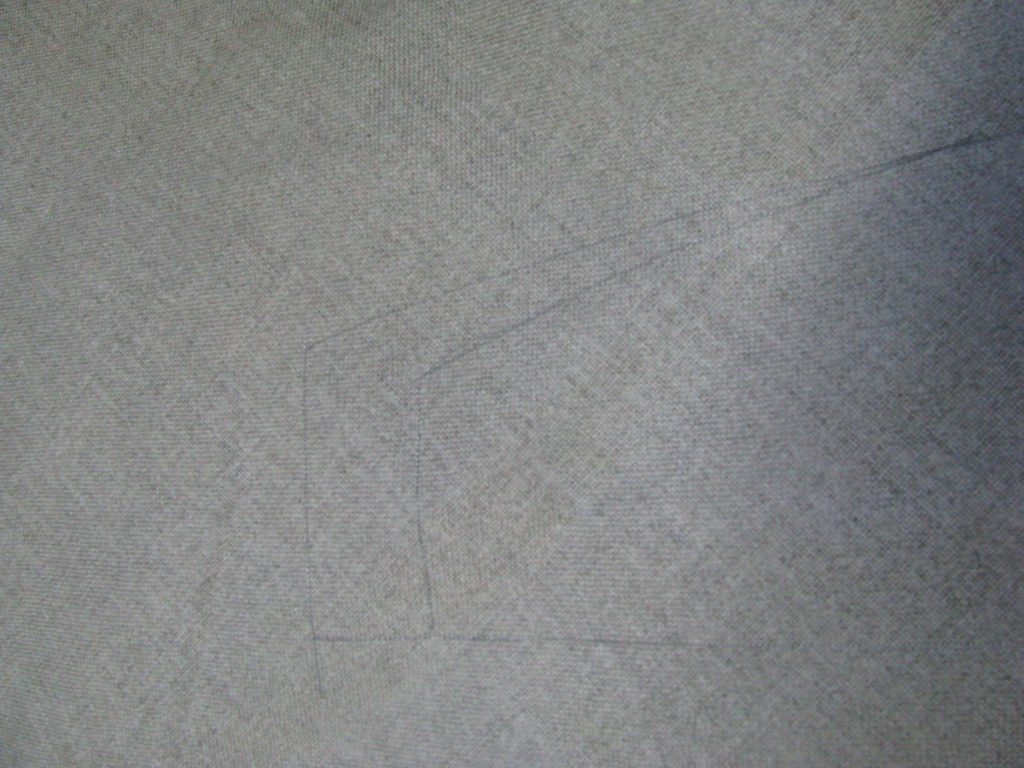
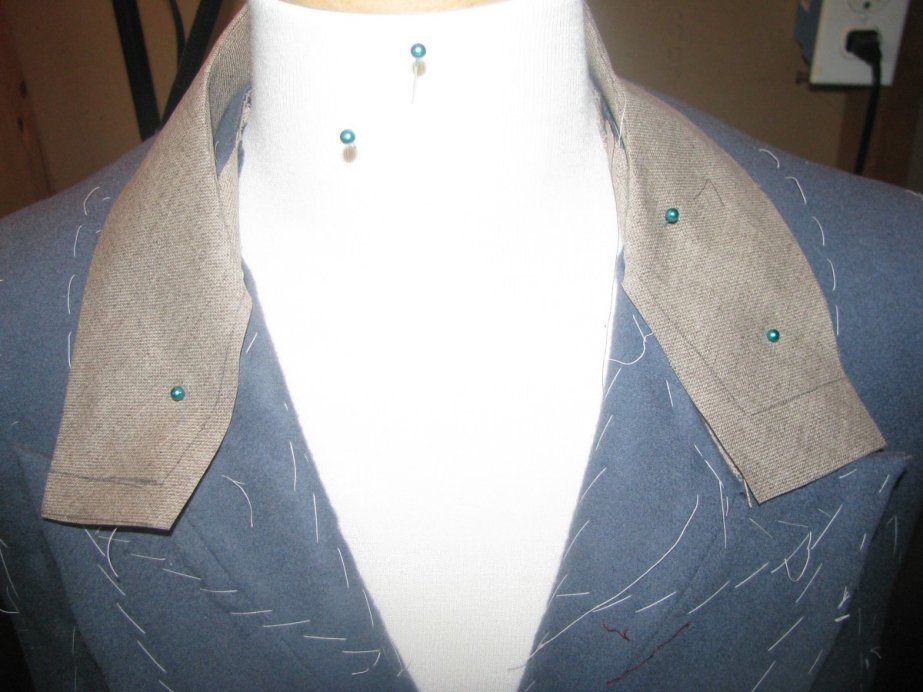
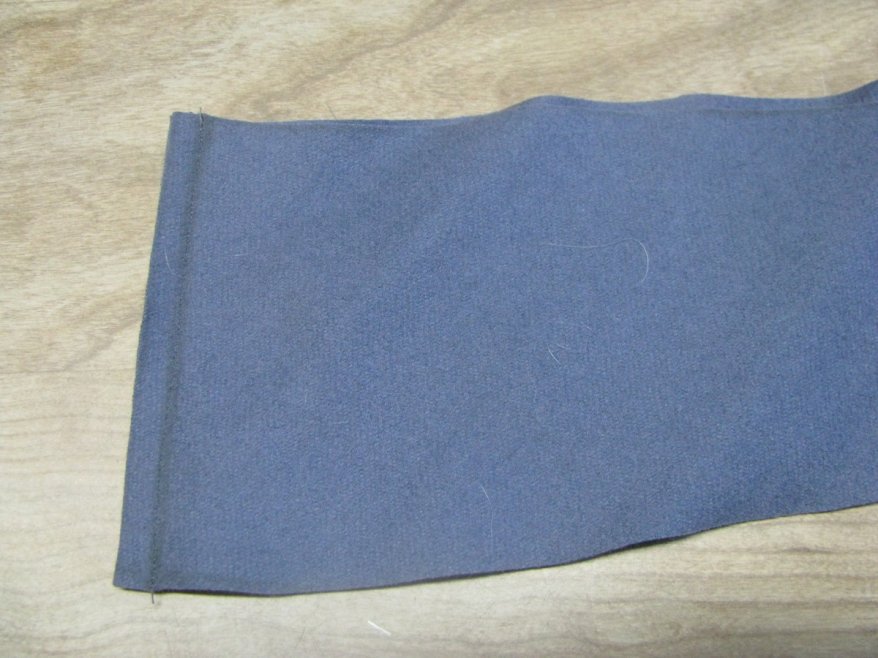
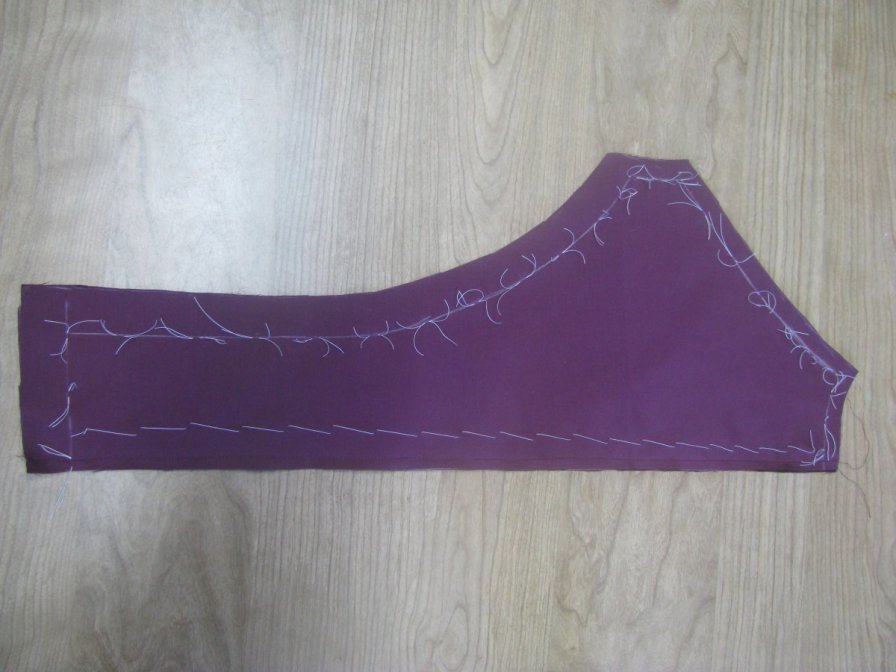
Place one half of the collar onto the coat. You may have to baste it if you do not have a tailor’s form, but either method works just as well. It’s hard to see, but I marked the location where the bottom edge of the collar intersects the center back seam of the coat body.
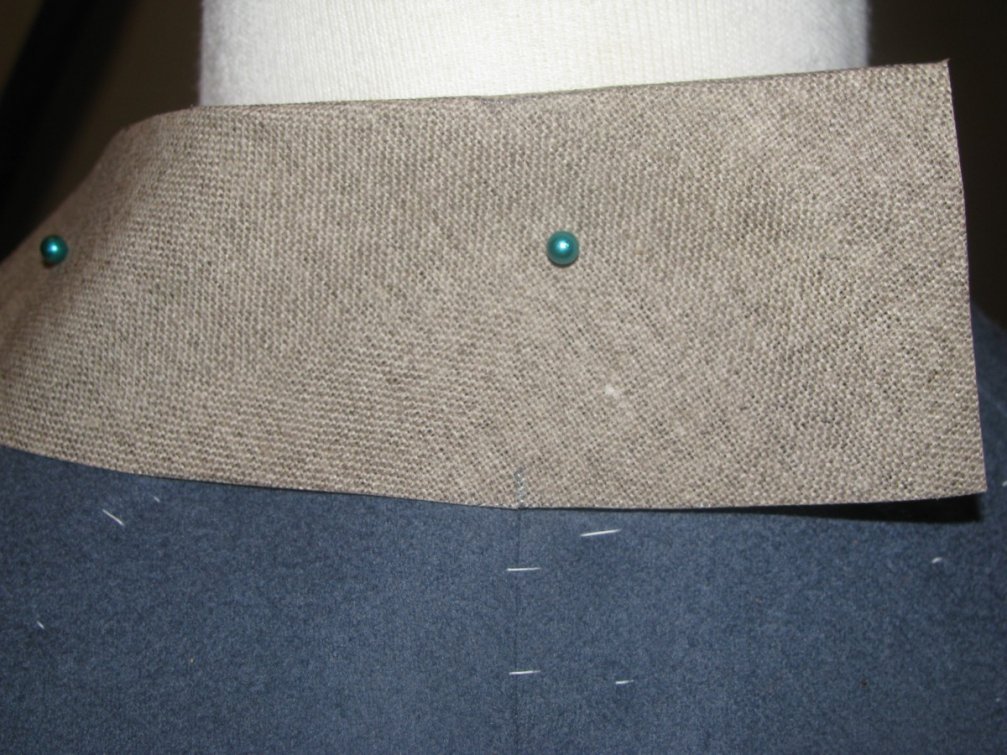
You can see in this case I ended up using all of the inlay that I added to my collar. Due to the age of Devere’s system of drafting, things sometimes do not line up as they would with a more modern system, so it’s best to be prepared for all occasions!
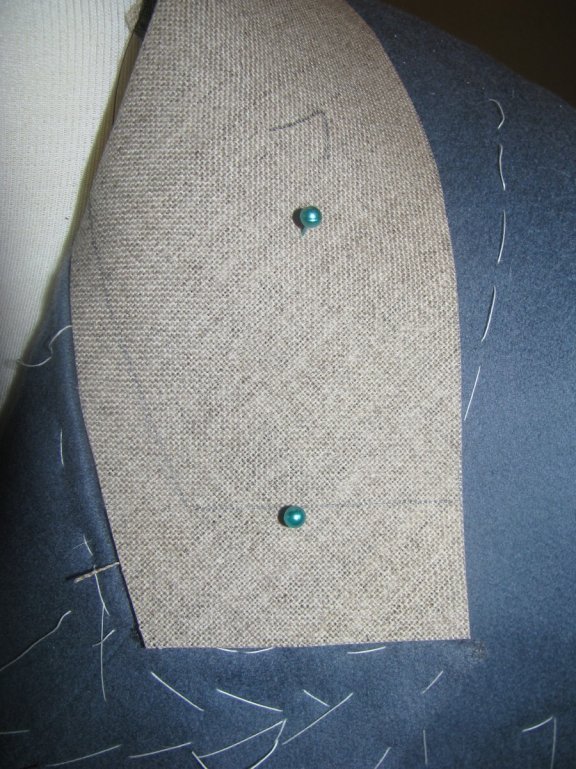
Lift up the collar in the back, and mark again where it intersects the back seam.
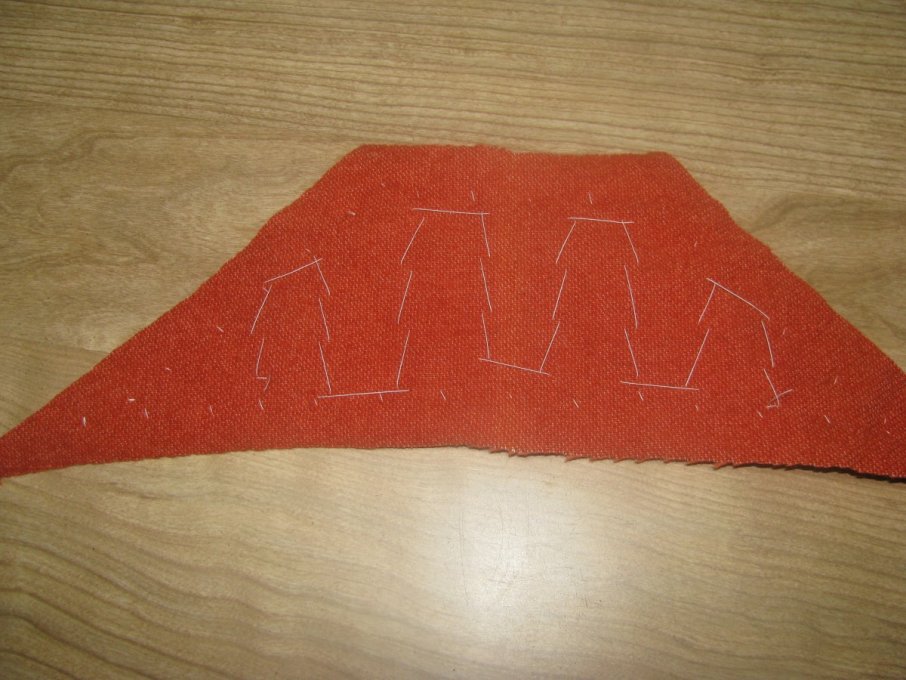
Draw a line connecting the two points you have marked on the center back of the collar. Repeat with the other half of the collar, marking in the same location.
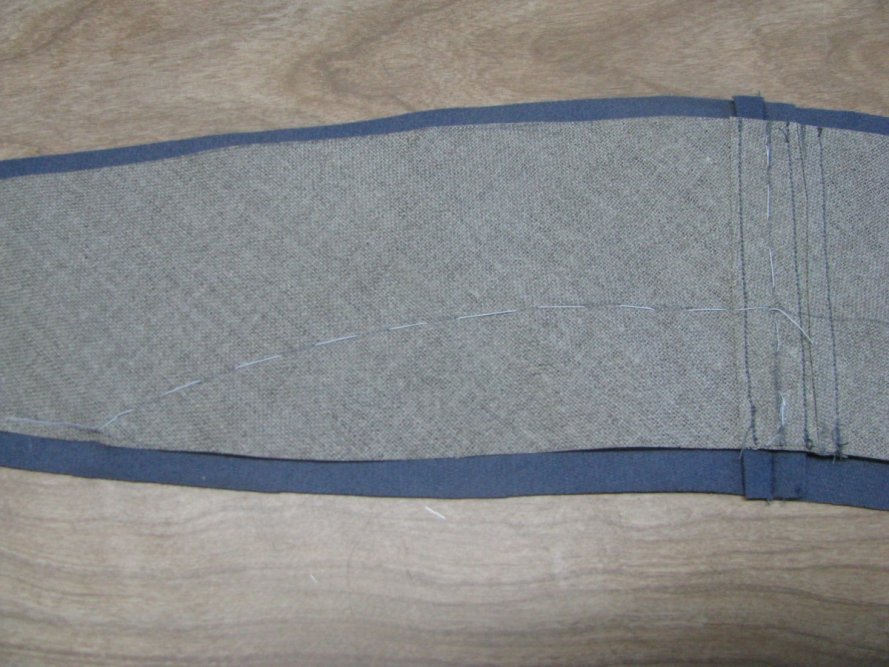
Baste the canvas pieces together, ensuring both lines are sitting exactly on top of each other.
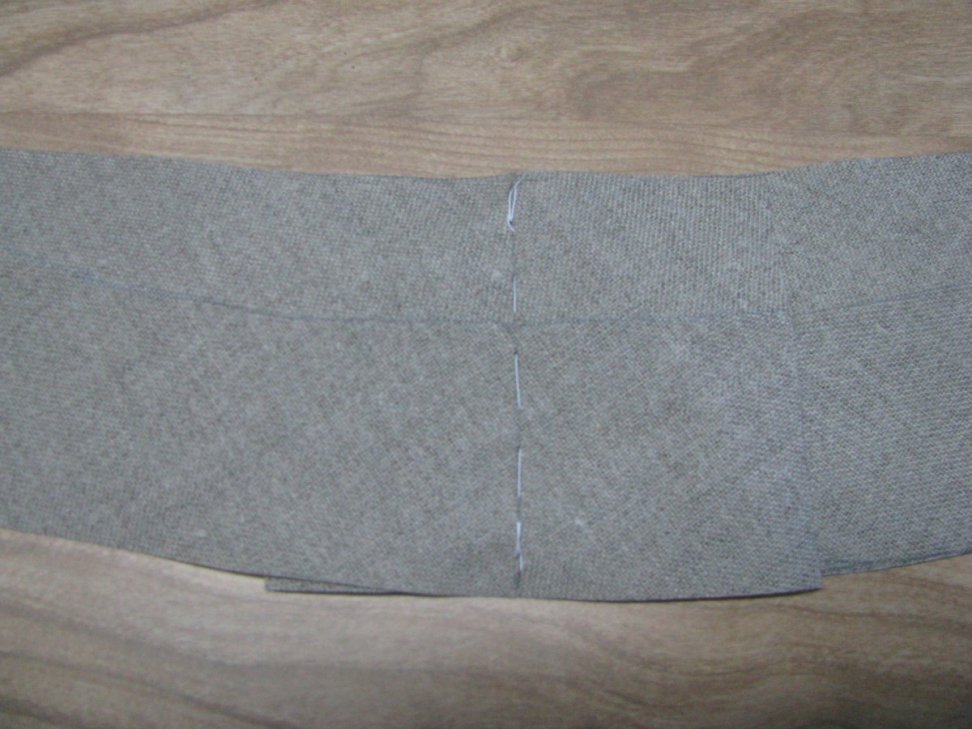
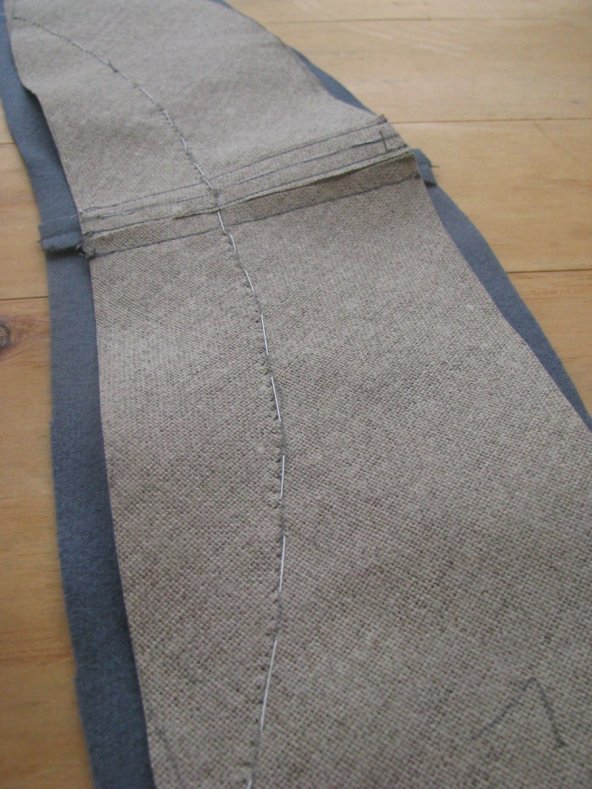
Place the entire canvas back on the coat, either pinning or basting in place. It’s simply one more chance to correct any small errors you may have. At this point you will also want to ensure that the roll line on the collar lines up with the lapel roll line.
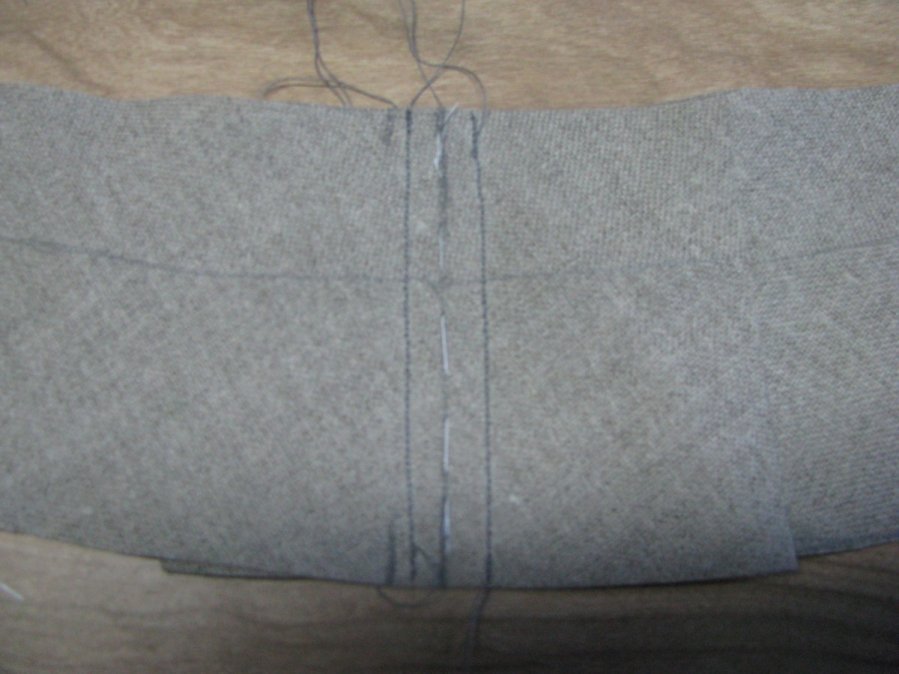
Machine or hand backstitch two rows of stitching on either side of the basting line. Trim off any extra allowance from the center back. Try to avoid what I did – cutting off the collar instead!
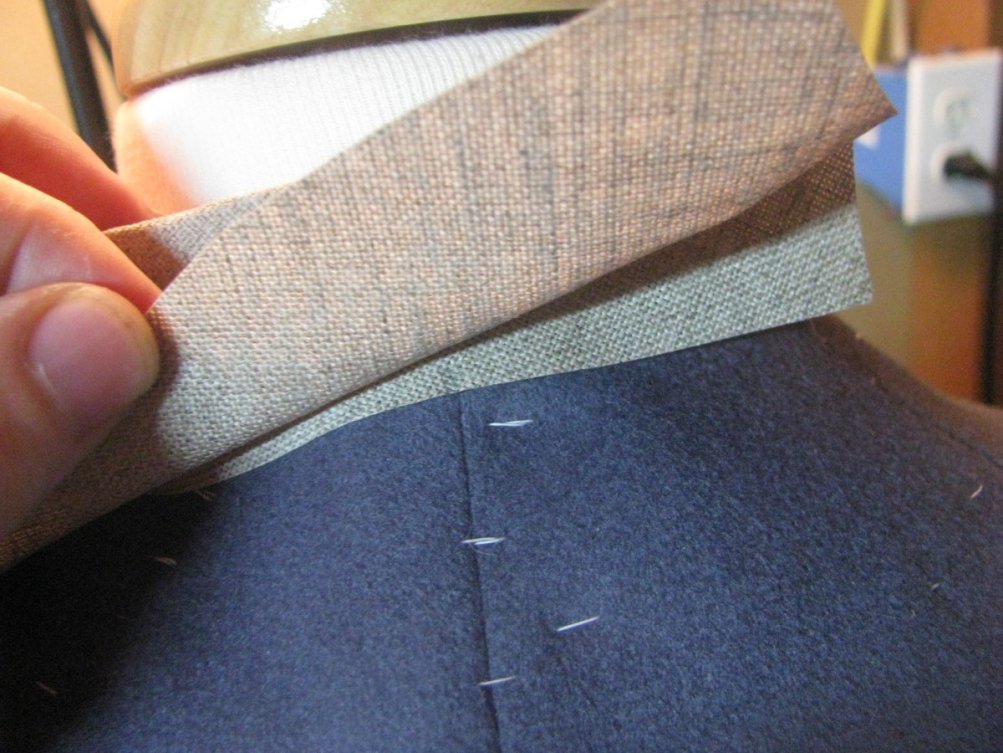
Cut the undercollar fabric in the same manner as the canvas, on the bias. Make sure to add about 1⁄2 an inch all the way around the pattern, as a seam allowance. This will be trimmed to 1⁄4 inch later, but it’s easier if you have some room to play with.
Sew the undercollar wool right sides together, at the center back. Fitting isn’t important, since that’s taken care of with the canvas.
Place the canvas on the wrong side of the wool undercollar, and baste together along the roll line.
Installing the Back Lining
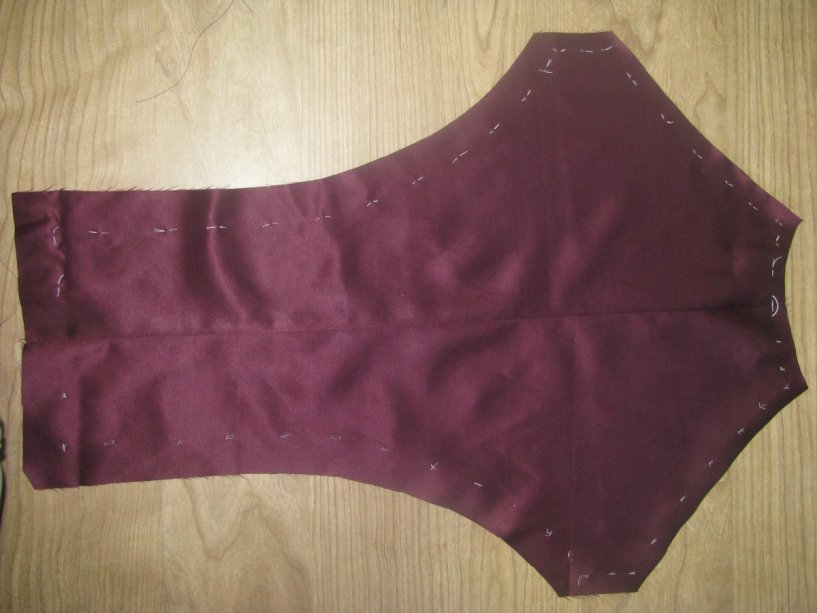
Line up the back lining carefully, being careful not to stretch the neck area of the coat. Baste down the center of the lining, catching the center back seam. Check to make sure everything is lined up as you baste.
Baste the shoulder seams down, staying about an inch away from the edge. Make sure there is a neutral tension with the coat underneath.
Baste along the side seams of the lining, again staying an inch away from the edge.
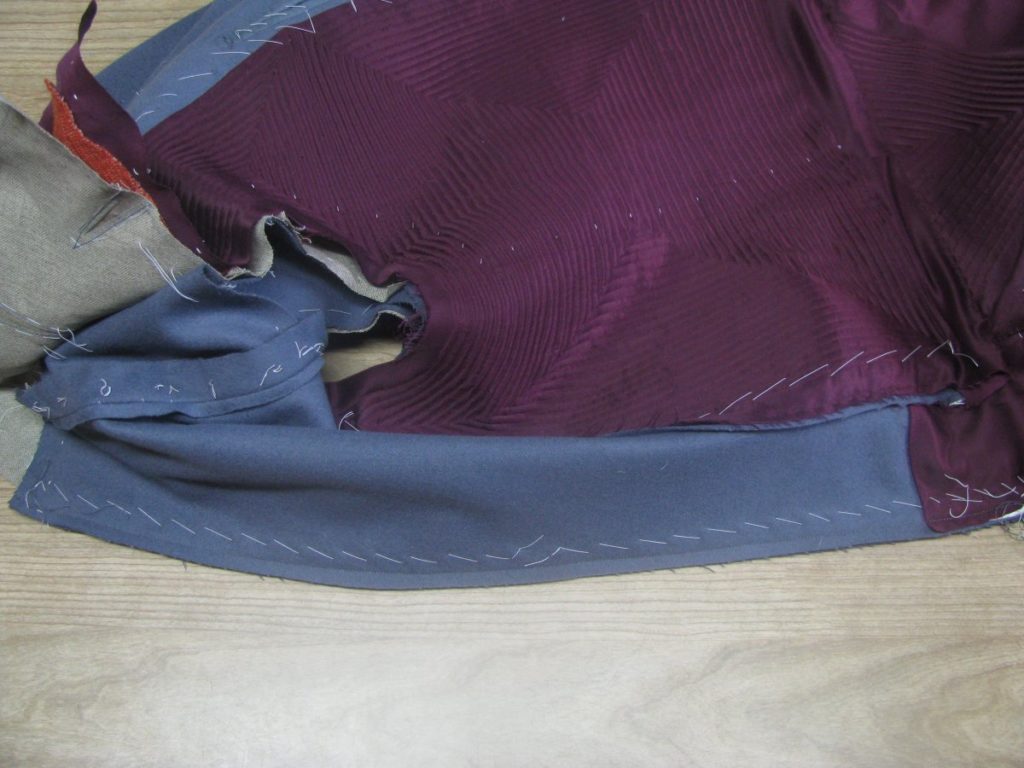
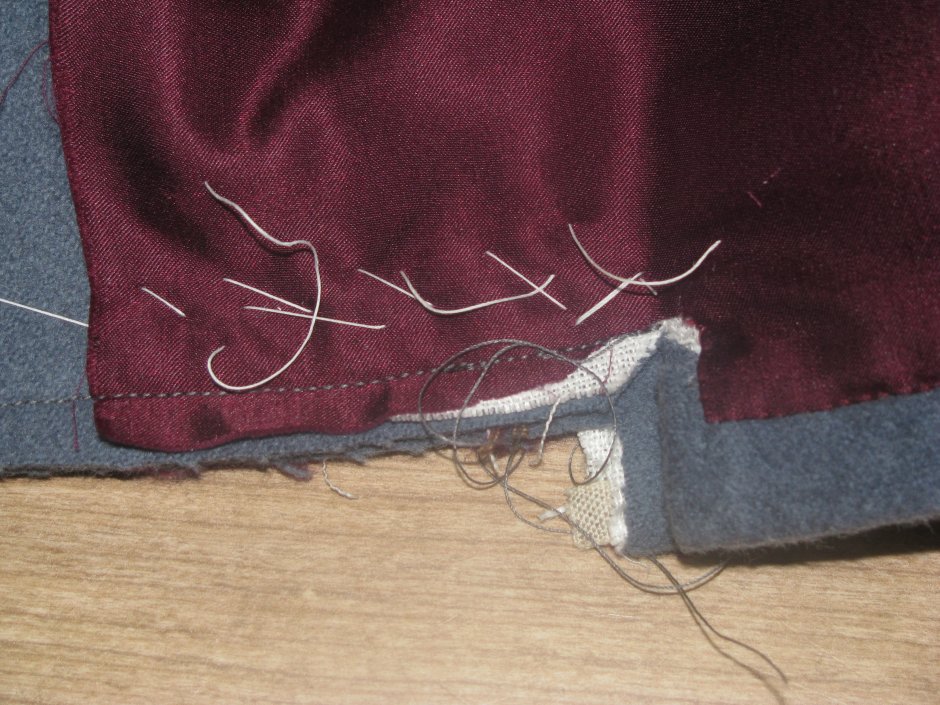
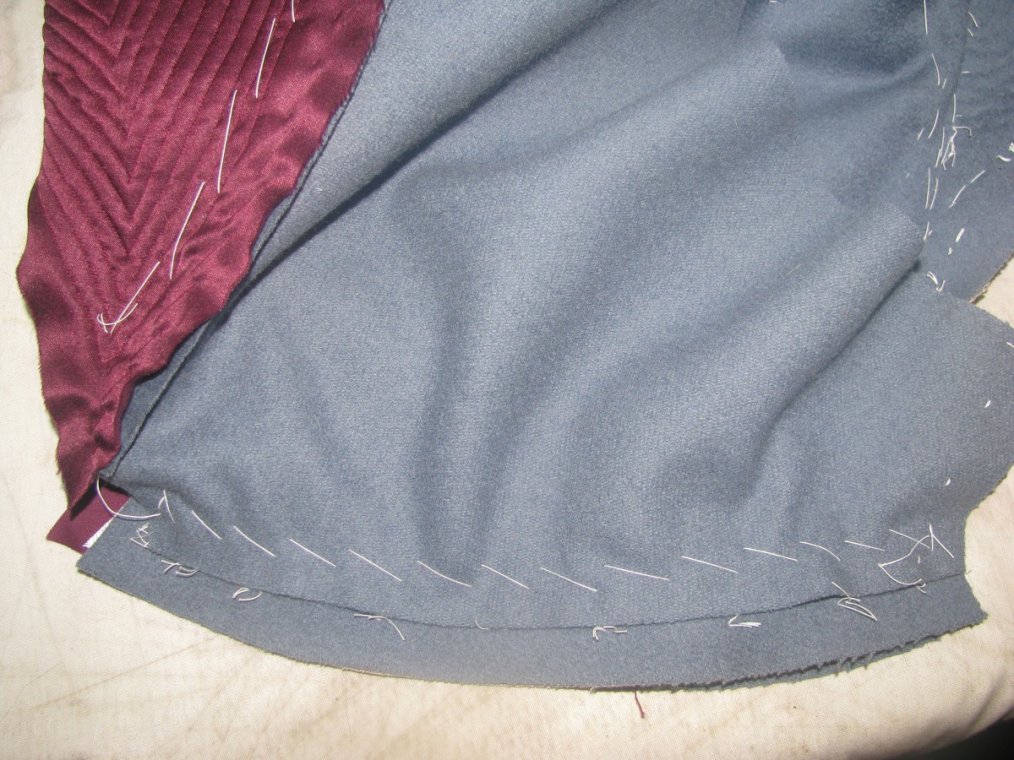
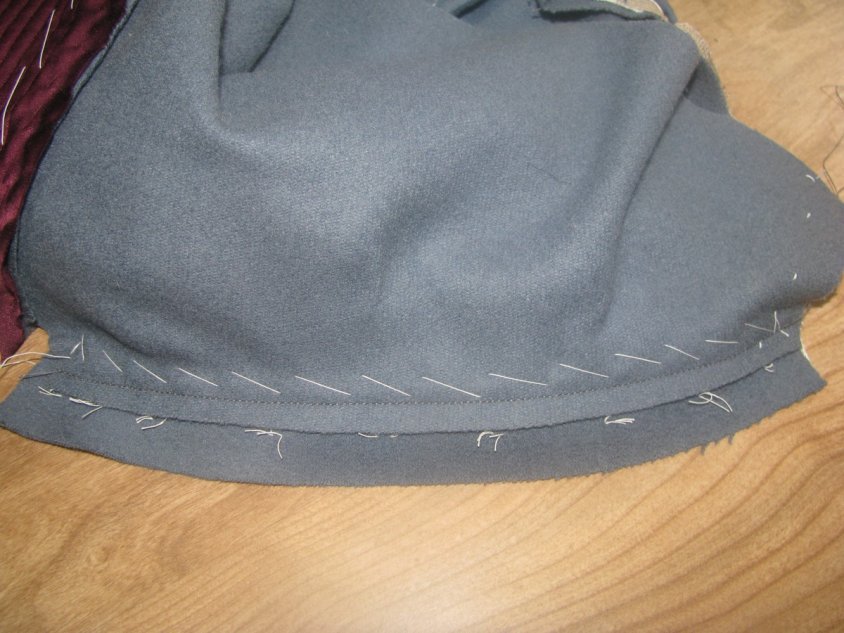
Along the edge of the side seams only, baste under the raw edge, making sure the forepart lining and silk basting stitches are covered underneath. Also turn under the raw edge at the bottom of the back lining, being sure to just cover the back vent area. Don’t allow the lining to extend too far below the back vent – a 1⁄4 inch at the very most – or you will affect the drape of the plaits.
Fell down the lining along the side seams and bottom. Do not fell the shoulder seams down, there is more work to be done there.

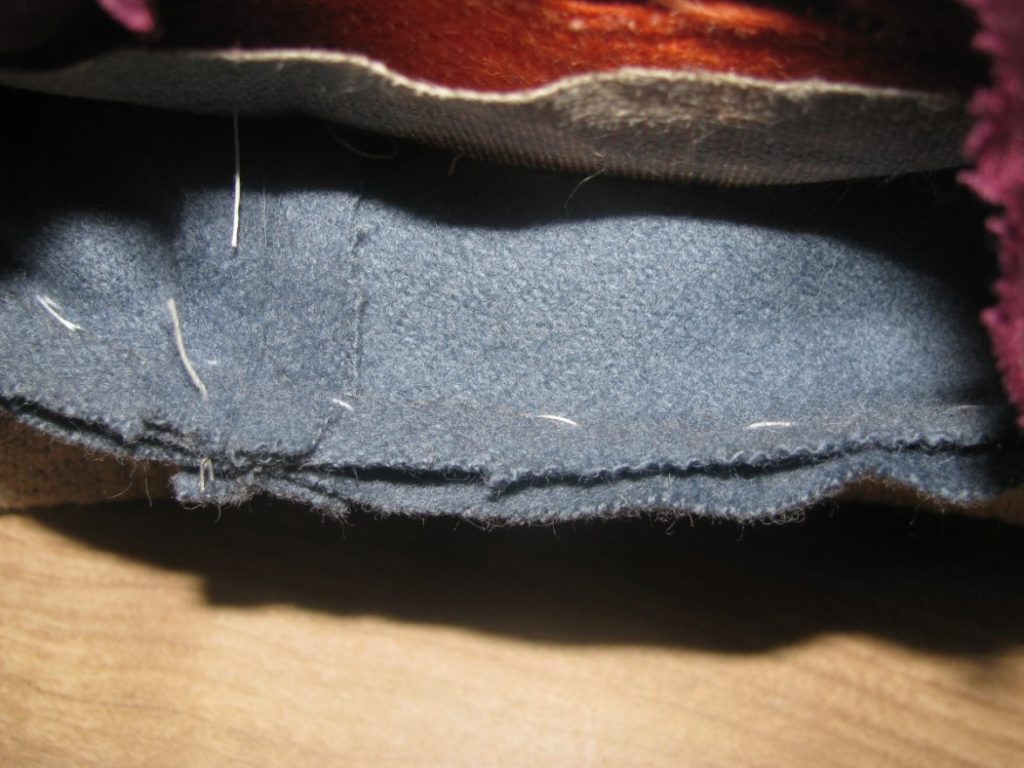
The Back Canvas
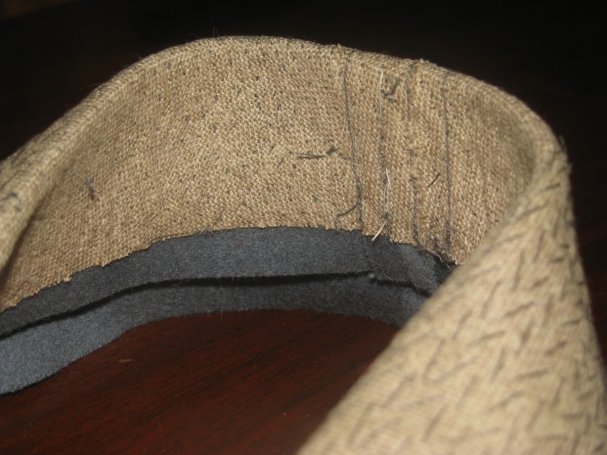
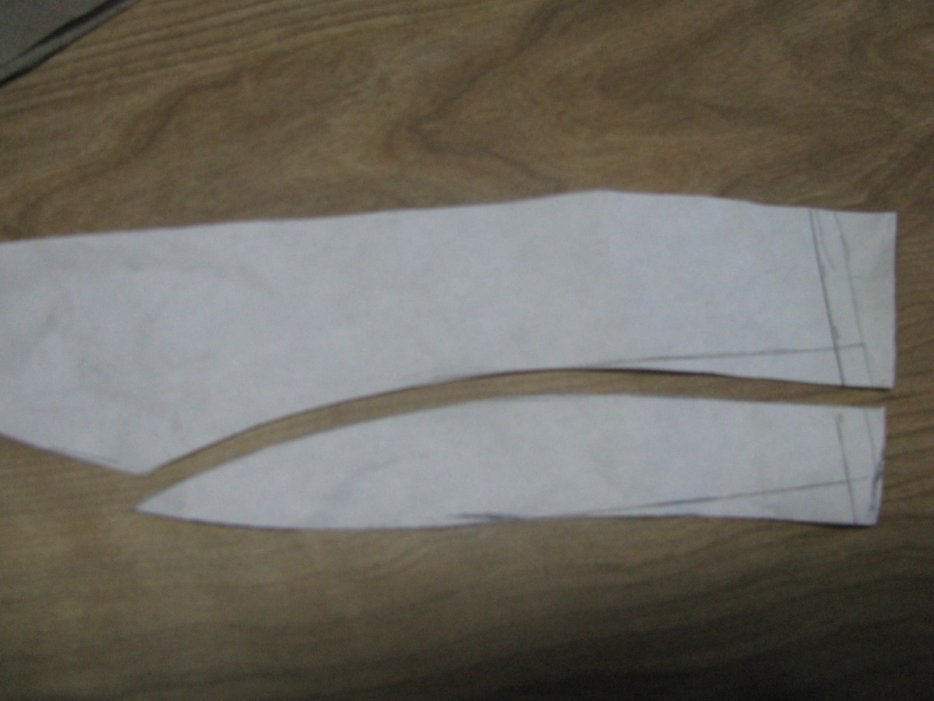
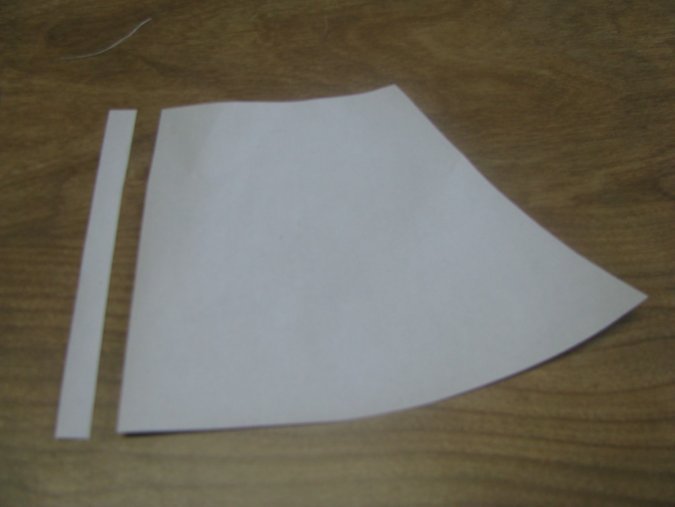
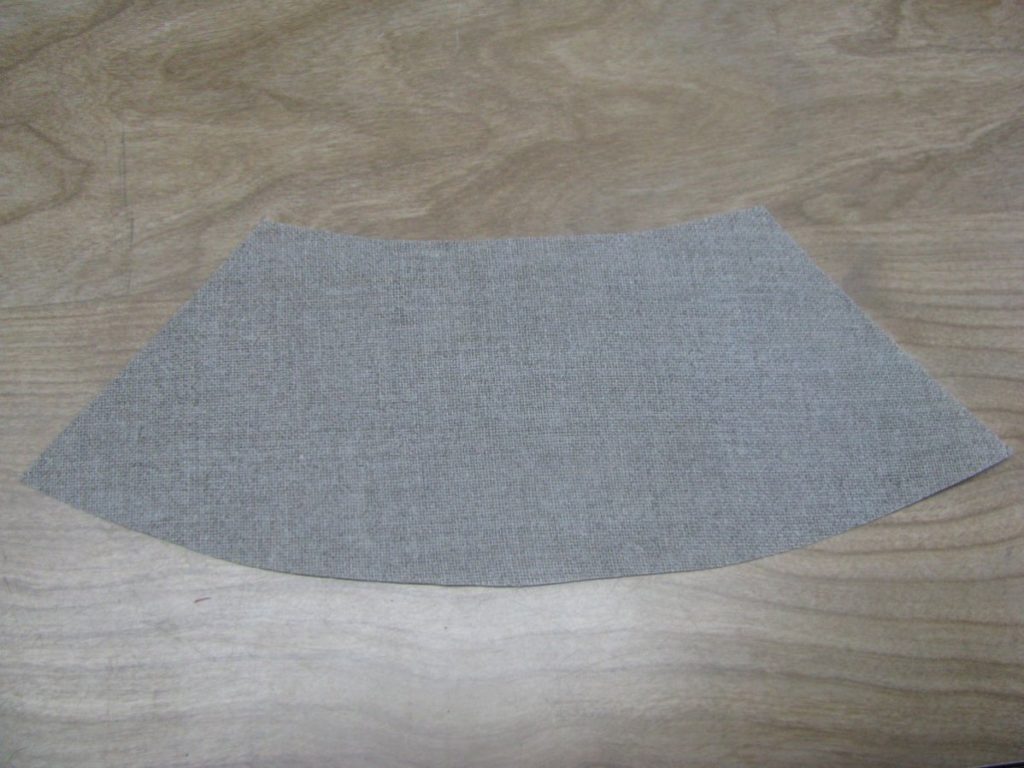
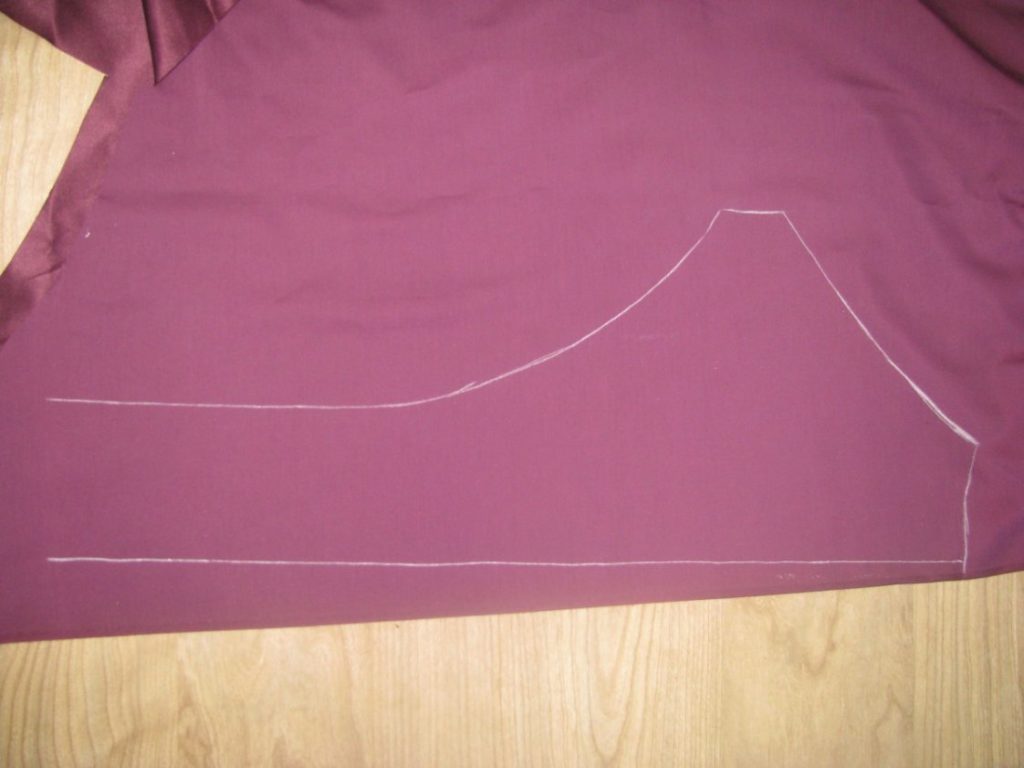
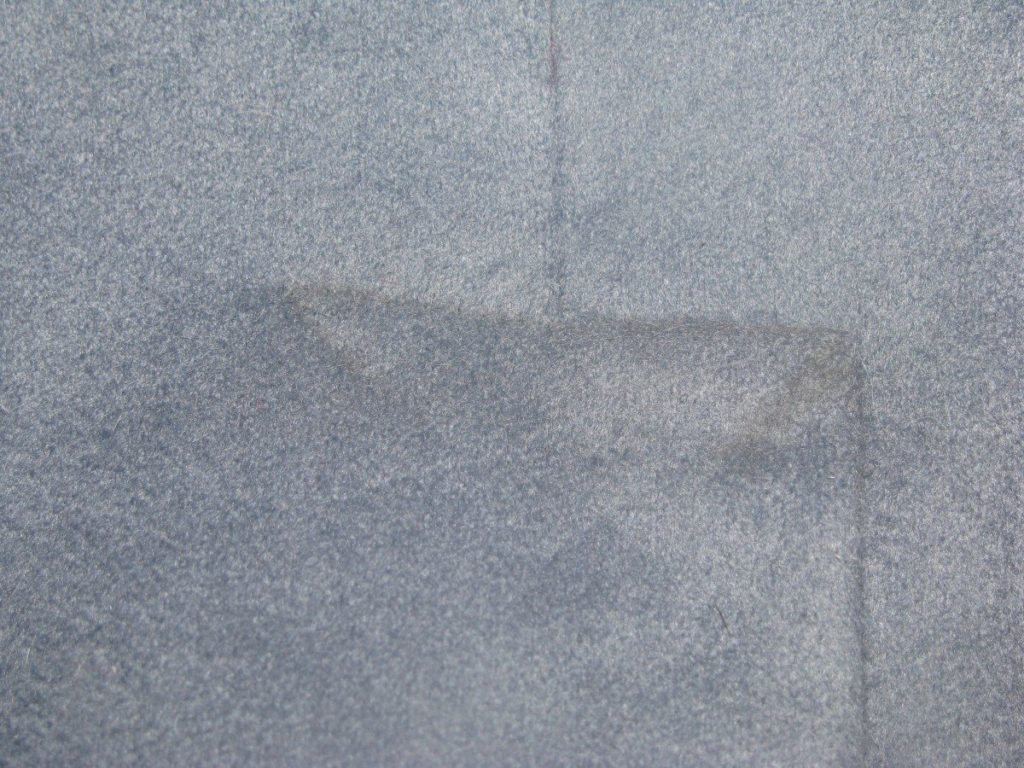
This is a feature I’ve never seen on a reproduction, but is sometimes found in originals. The purpose of the back canvas is to give a little more support and strength to the back. Trace onto paper the top of your back pattern. About 3 inches down the back and shoulder should be fine. Connect both with a graceful curve along the bottom, and trim off the seam allowance at the center back.
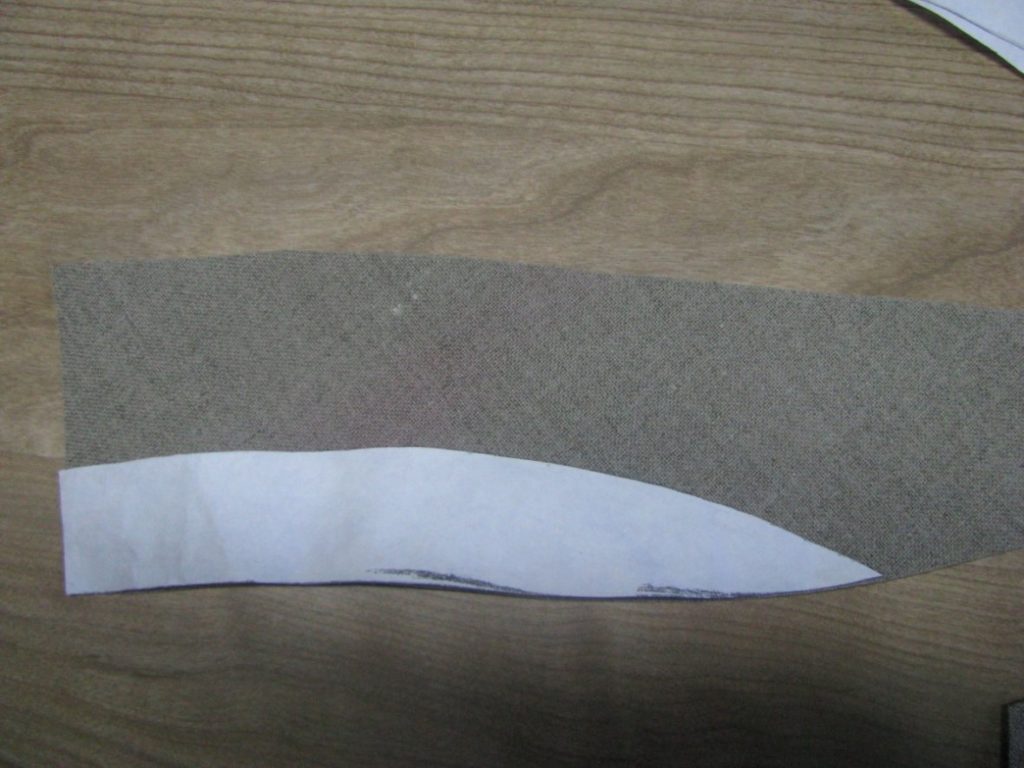
Cut out the canvas on the fold, and on the straight grain.
The canvas is lined up with the back, and basted down the center, securely along the back seam allowance.
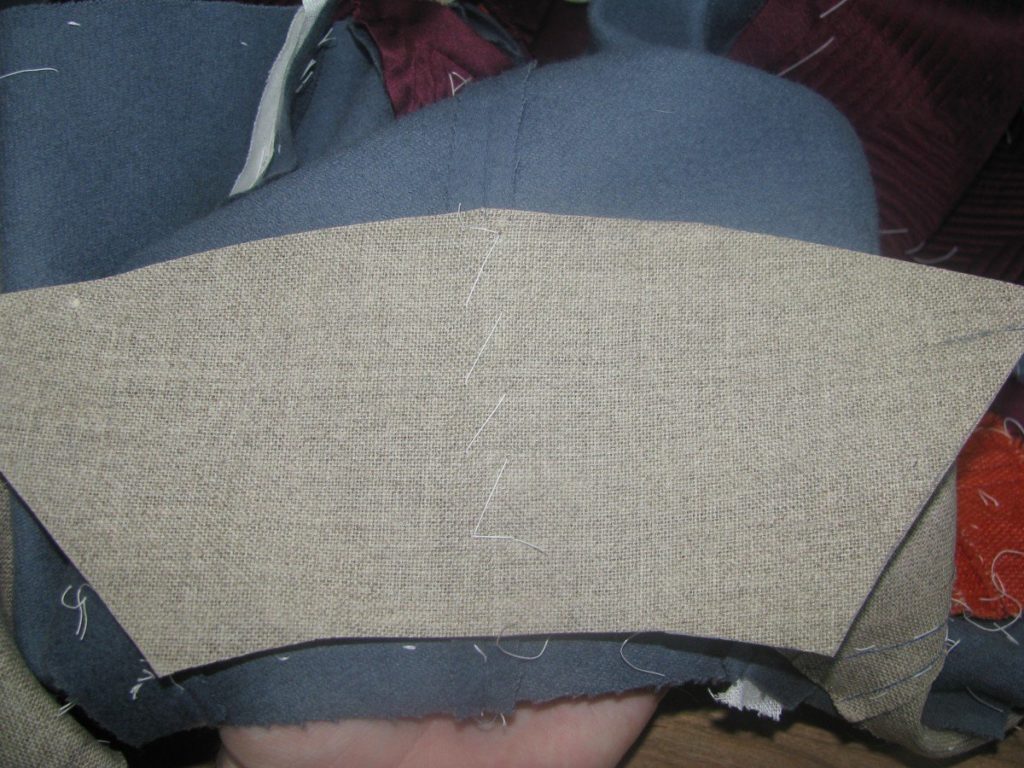
Baste each side to the shoulder seam, making sure not to catch the seam allowance underneath. You’ll want these free for later on.
Quilting the Back Lining
This is an optional step. If you do not wish to quilt the back lining, just skip this section.
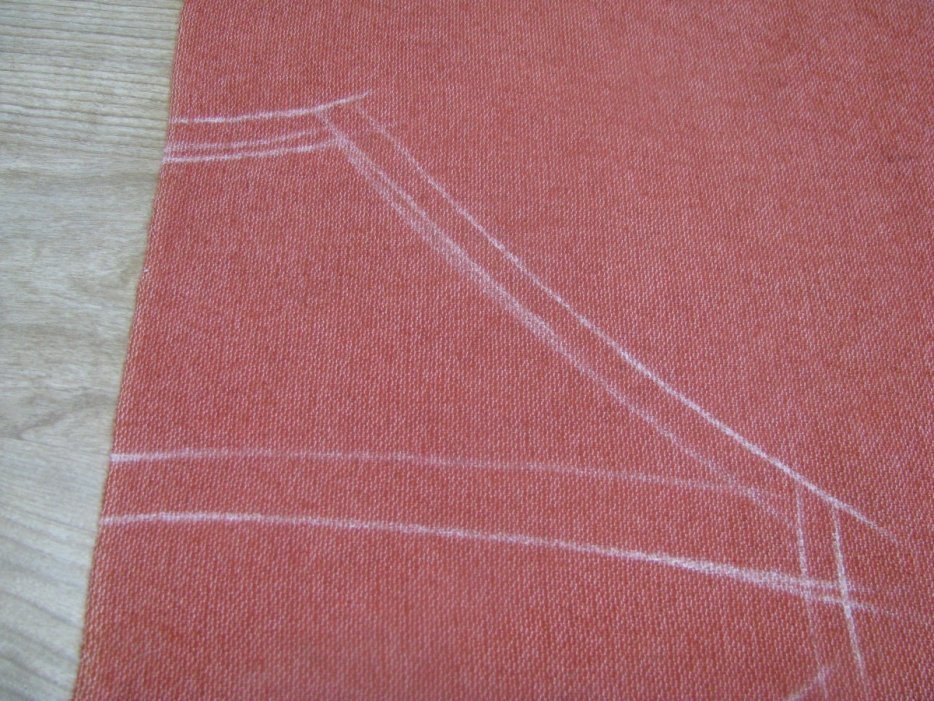
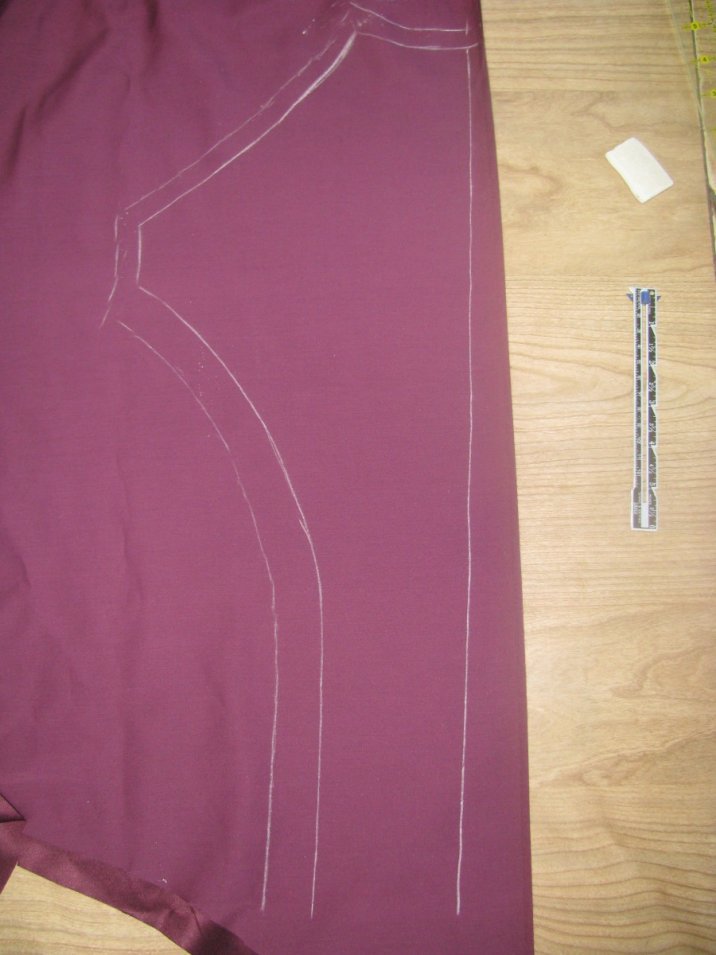
On the madder red interlining, trace out the upper half of the back, on the fold. Reduce the neck and shoulder seams by half an inch. The bottom should be approximately even with the middle or top of the armscye.
Cut this out, as well as some batting. You should be a pro at this by now if you’ve made it this far.
Baste the lining and batting together.
Baste the interlining assembly to the wrong side of the lining.
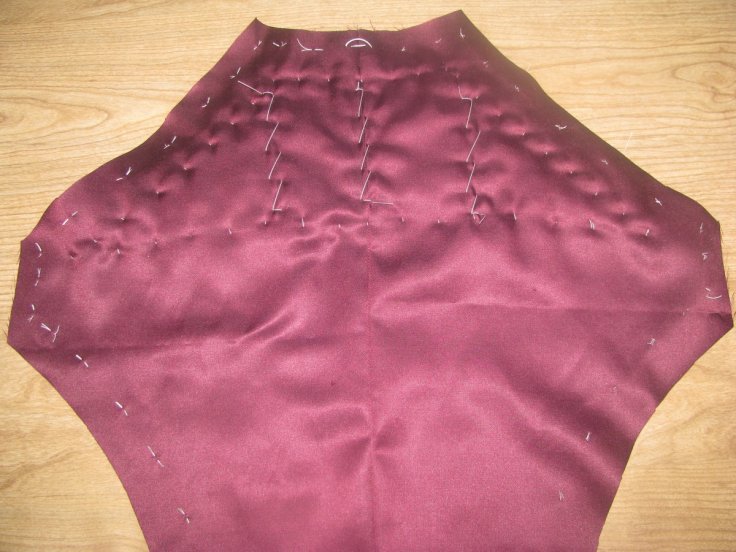
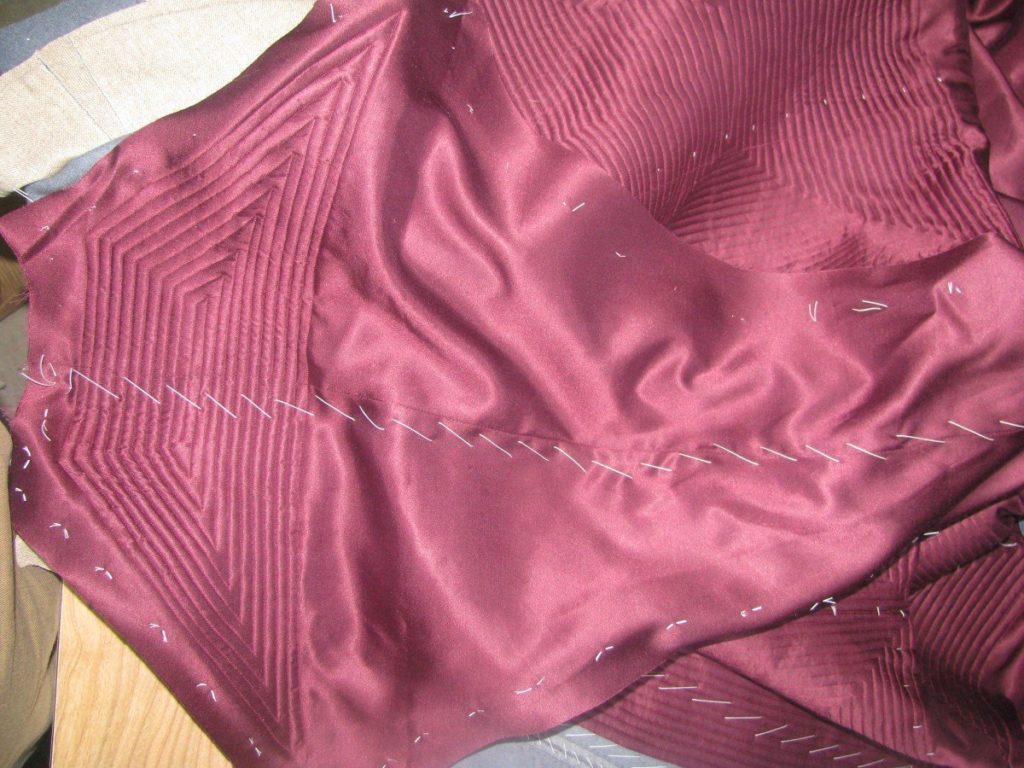
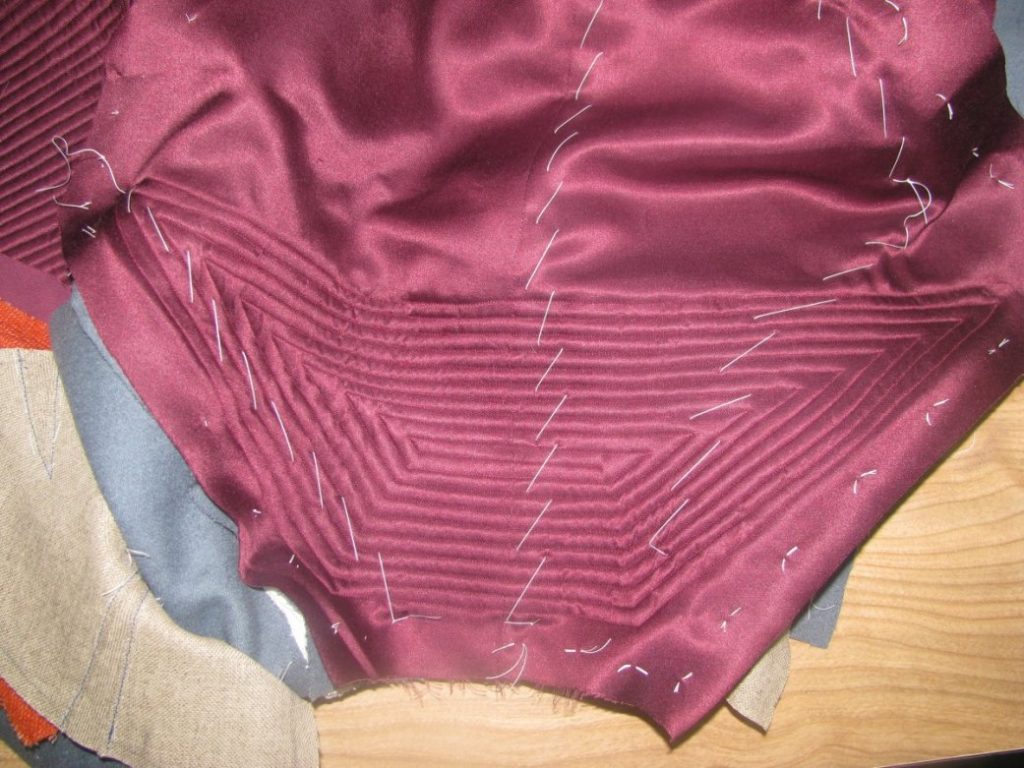
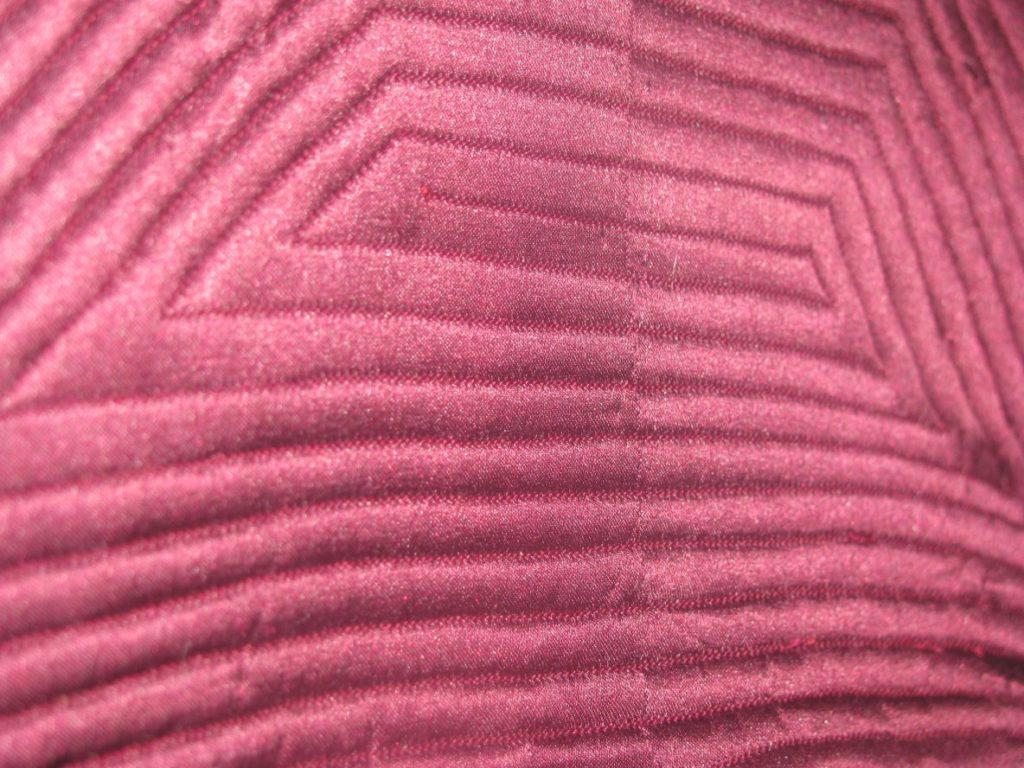
Quilt in a manner similar to the forepart of the coat.
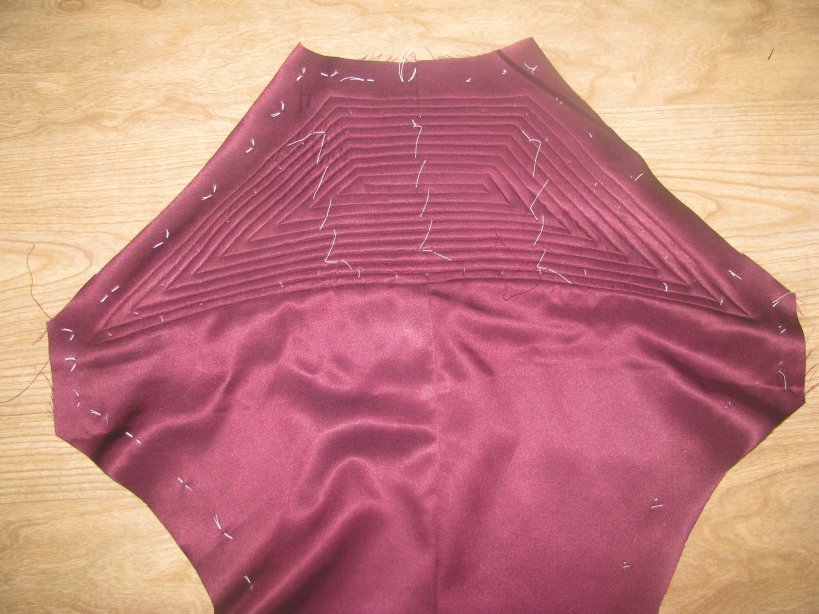
Remove all basting stitches.
The Back Lining
We will now begin the final piece of lining – the back. Using your pattern, draw out the back on your lining as usual.
It’s necessary to add some inlays, to make sure we have room to cover everything. I usually add 1⁄2 an inch along the neck, shoulder, and armscye, and an inch along the side seam.
Add about 1 1⁄2 inches at the bottom. You want to be sure you have enough lining to cover the back vent area.
Cut out the lining and add your tailor’s tacks as usual.
Baste the back seam, and machine or hand sew the back seam. Press open.
The Back Seam
It is time to finally close up the final remaining seam – the back. Lay the coat halves right side together, and baste the seam closed from the neck to the back vent.
At the back vent area, you can see how the left half of the coat differs from the right half. The right half extends slightly above, and the left half was trimmed to the seam allowance. Sew the back seam, ending just at the end of the cut. It needs to be as precise as possible.
Press the back seam open as usual. However, as you get near the back vent, the left right half is placed over the left half, and the seams are both pressed to the same side. This gives a lot of additional strength to a potentially weaker area of the coat.
Preferably while wearing the coat, pin the back vent closed. You need to make sure it is balanced correctly. The vent should neither open up on itself, or want to close, but should hang straight down, all the way to the hem. After you are satisfied with the balance, baste the vent closed, very securely.
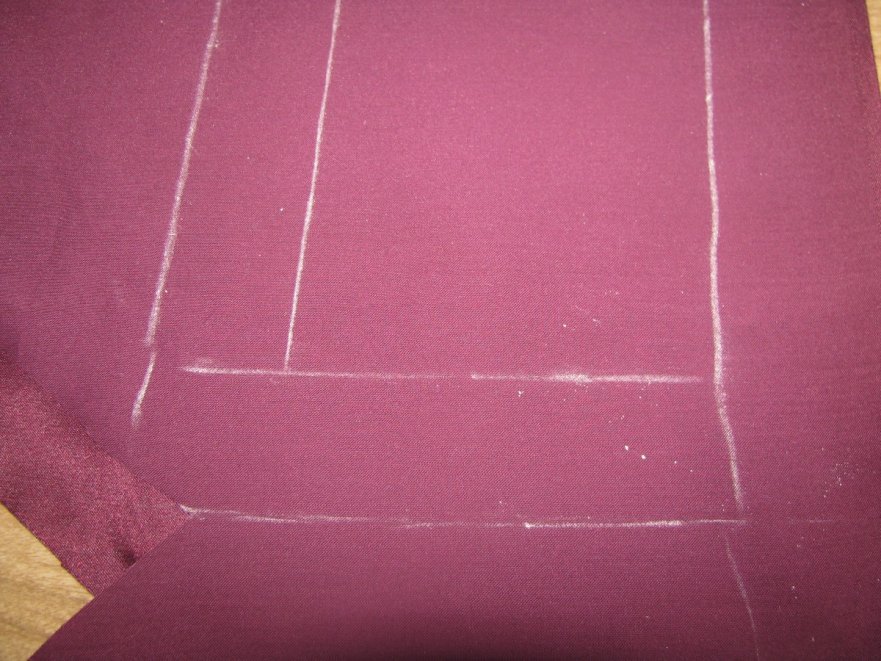
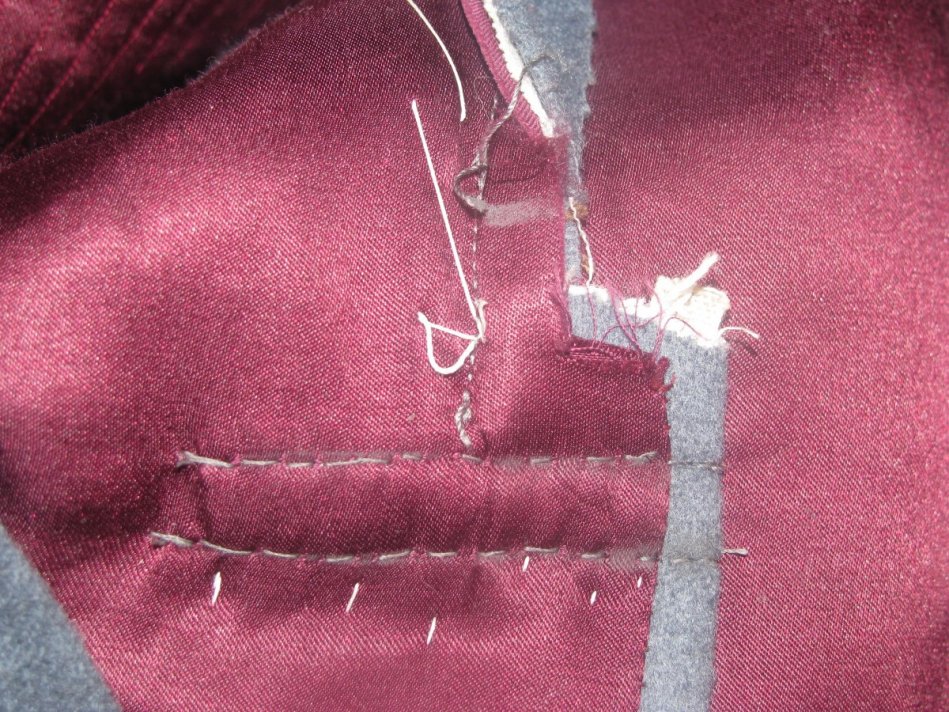
On the lining side, chalk out two parallel rows. The first is a hair below the top of the vent, and is perpendicular to the back seam. The second row of stitching is about half an inch below. Both rows are the length of the back vent. Stitch these lines using a back stitch, being absolutely sure the stitches do not show through to the right side. You only want to catch one layer of the piece below.
On the right side, chalk a line the length of the vent, just below the top. At either end, draw two 45 degree lines towards the center, each about half an inch long.
Although very hard to see (and that’s a good thing), use a side stitch, at about 20 stitches per inch, to secure the vent along the chalk lines. You really want these to be invisible and neat, as the area draws attention to itself.
The Shoulder Seams
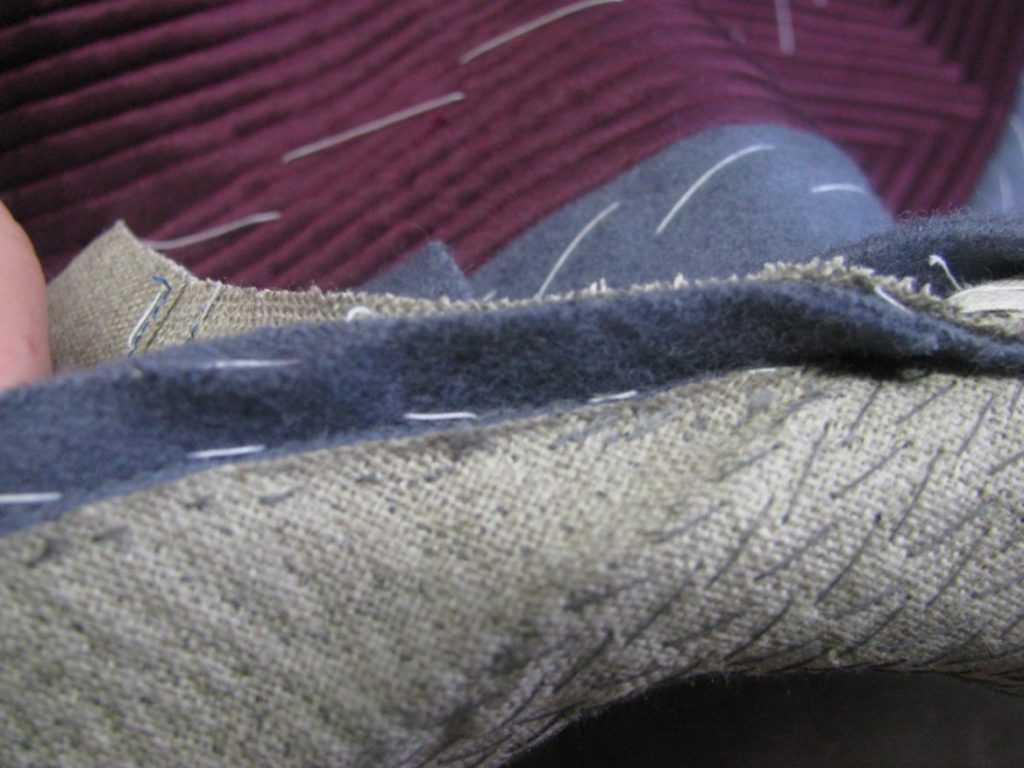
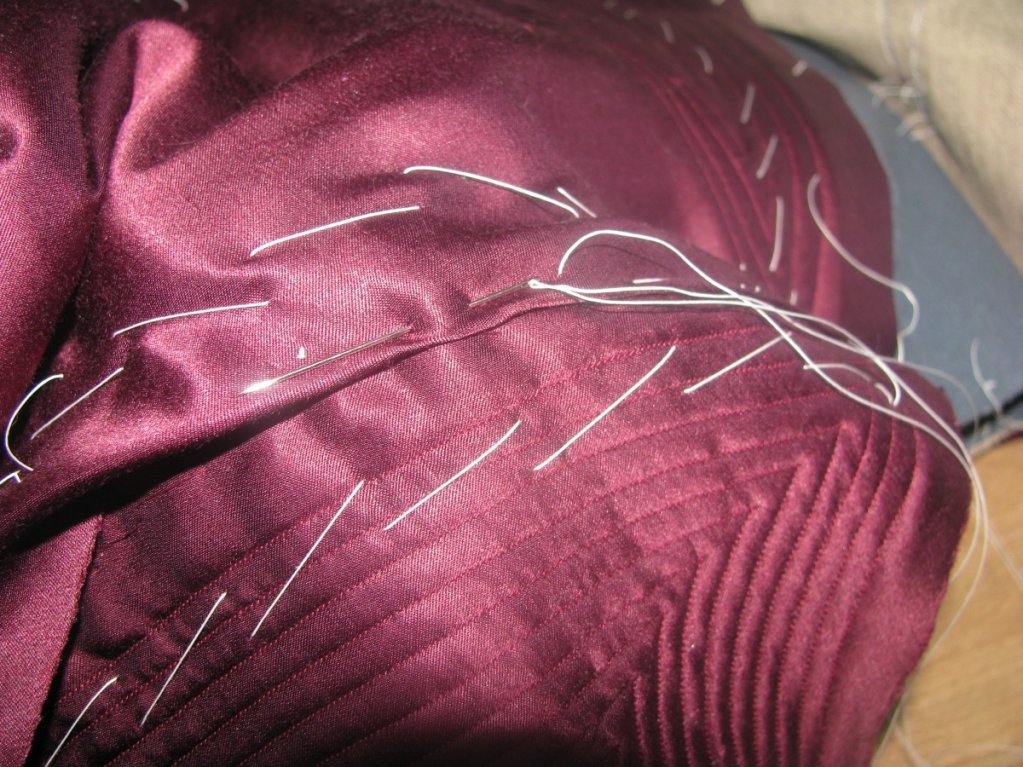
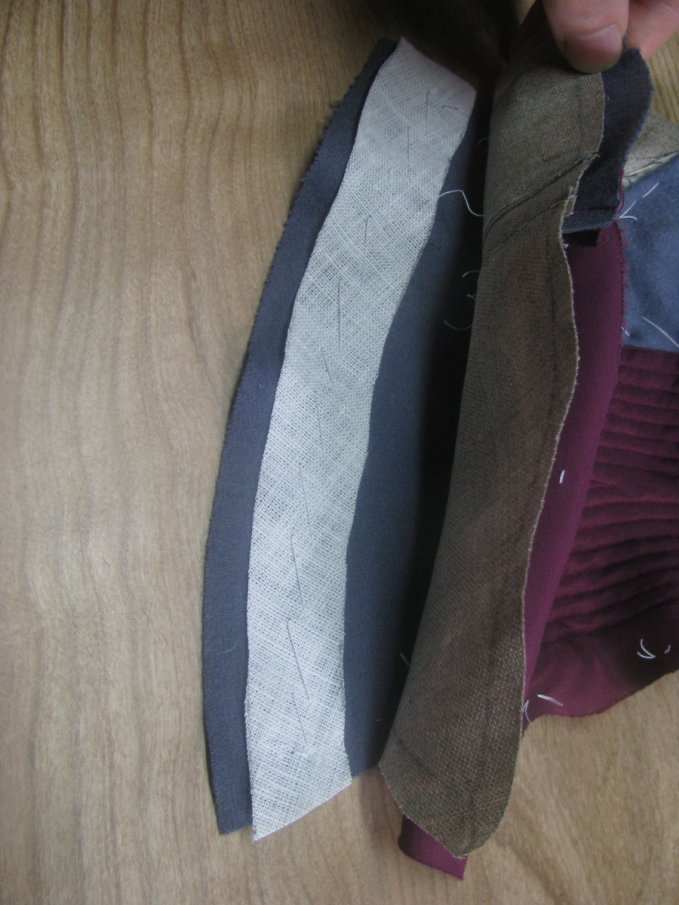
It is now time to close the shoulder seams. Since these seams are cut strongly on the bias, it is necessary to secure them with a strip of linen, to prevent too much stretching out of shape. The linen is cut on a slight bias, about 30 degrees, and is about 1 inch in width, and a little longer than the shoulder seam. Baste it on to the wrong side of the shoulder, on the forepart. You must fold the canvas and lining out of your way as you do this. Make sure the linen is centered on the seam line – don’t forget about the inlay.
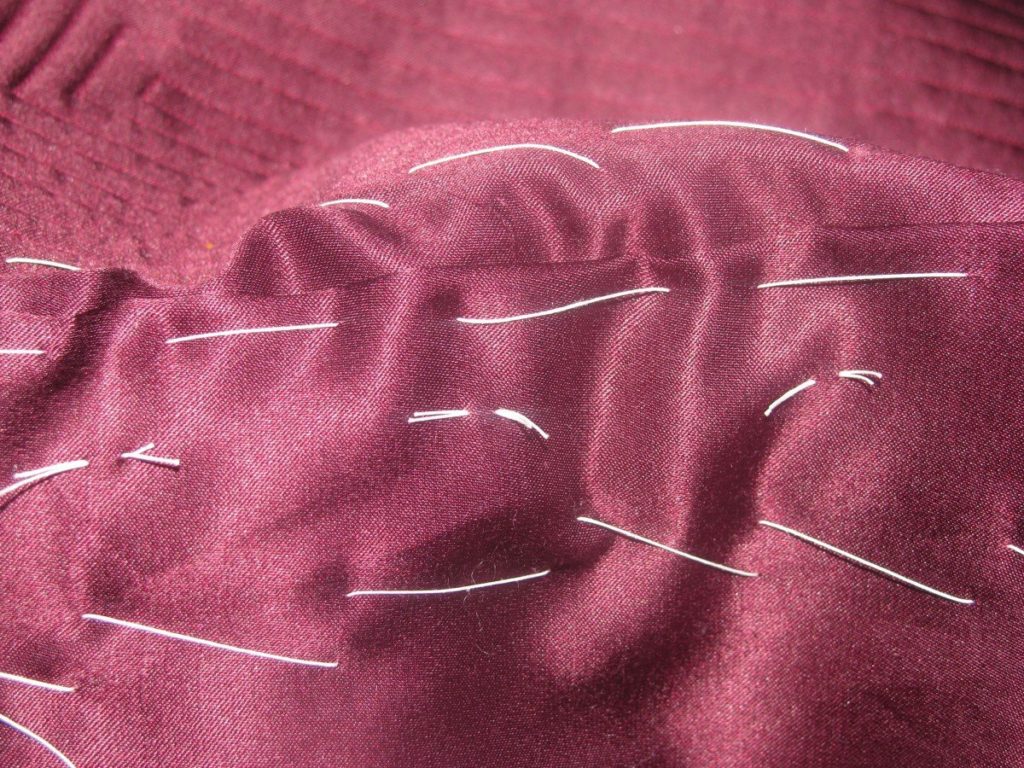
Pin one end of the shoulder seam closed, making sure it is flush against the inlay marking threads. On the other side, line up the seam, and baste. You will notice much fullness in the back, which needs to be eased throughout the entire seam.
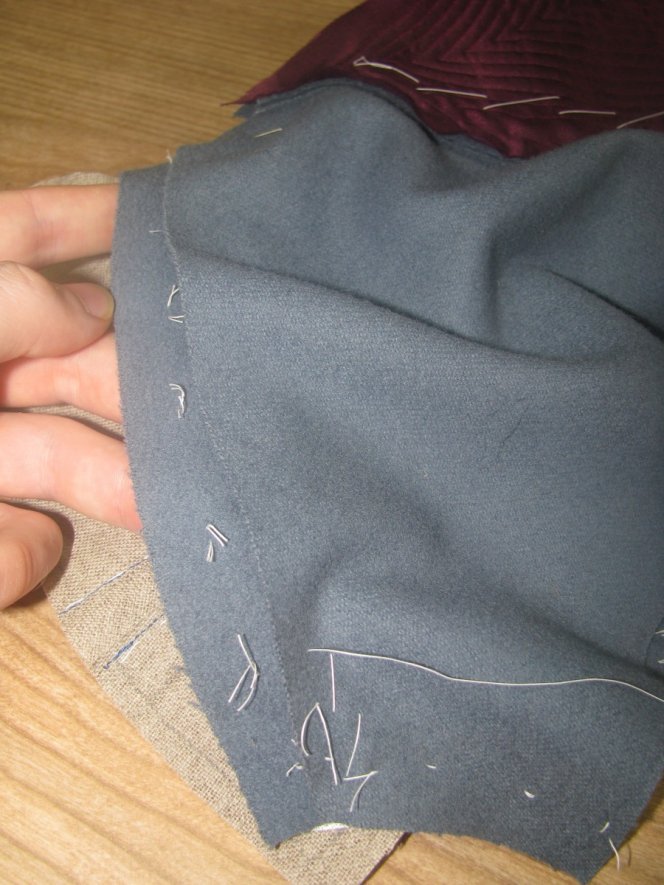
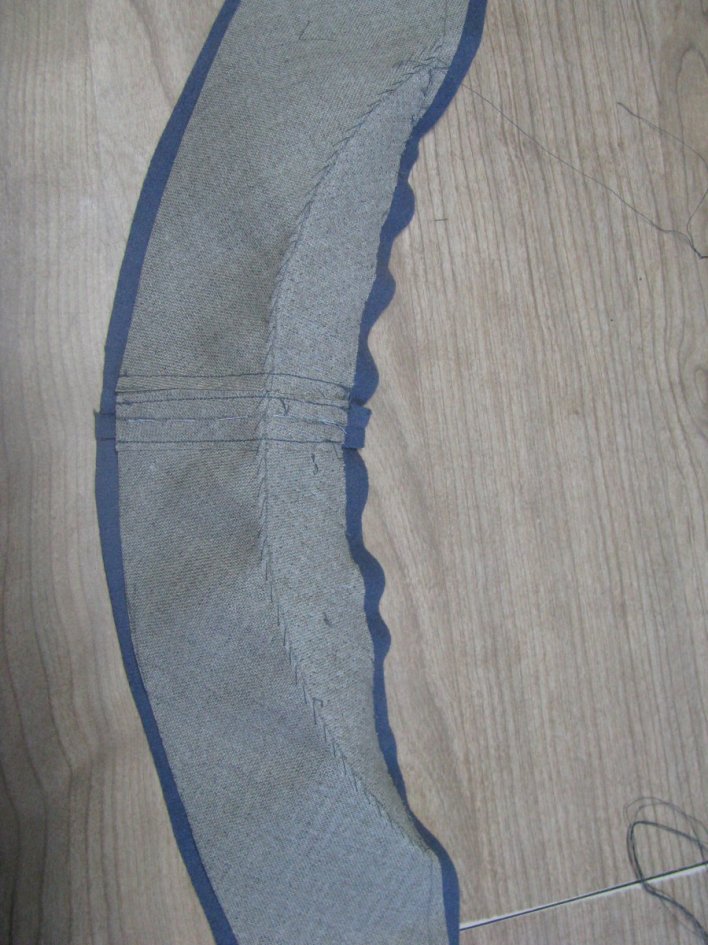
You can see the fullness in this photo, after the shoulder seam has been basted. This extra fullness will allow room for the shoulder blades and give a little room for movement. This is a great time to do a fitting – use a straight basting stitch in this case, and also close up the back seam. Now, the shoulder seam can be adjusted on you or your client to ensure a perfect fit.
Press the fullness out, being sure not to let the iron travel more than an inch onto the back, or you will shrink out all of the fullness, negating your work.
Sew the shoulder seam closed. Note the inlay is still in place, for future adjustment if necessary.
Remove the basting stitches and press well, using a tailor’s ham, as per the usual method.
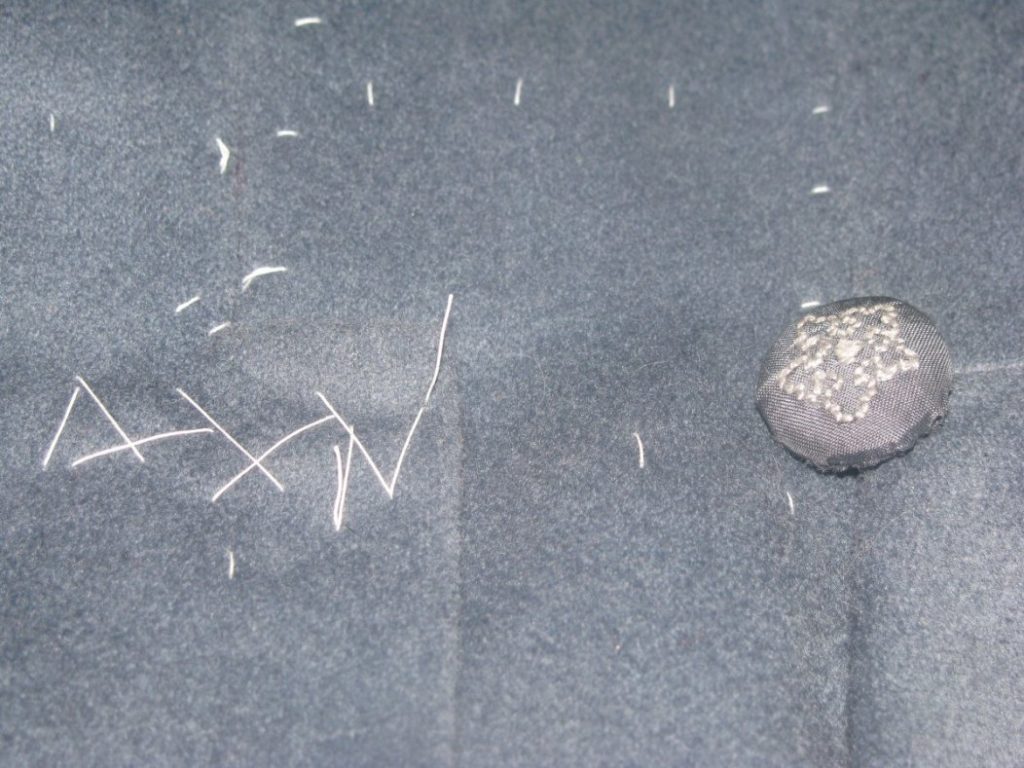
Plait Buttons
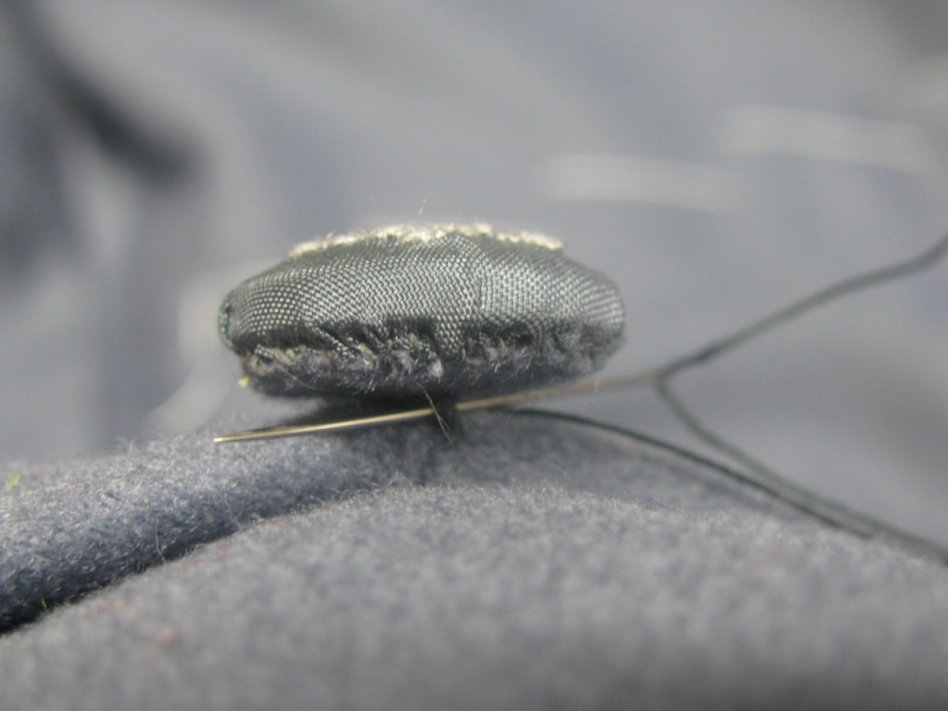
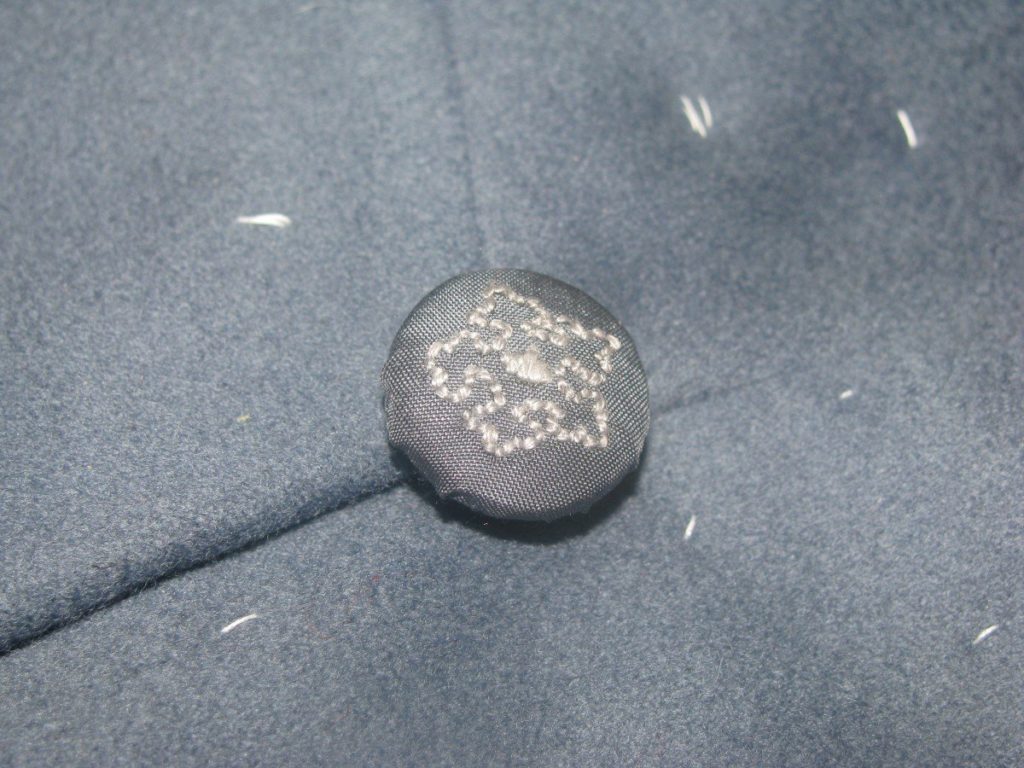
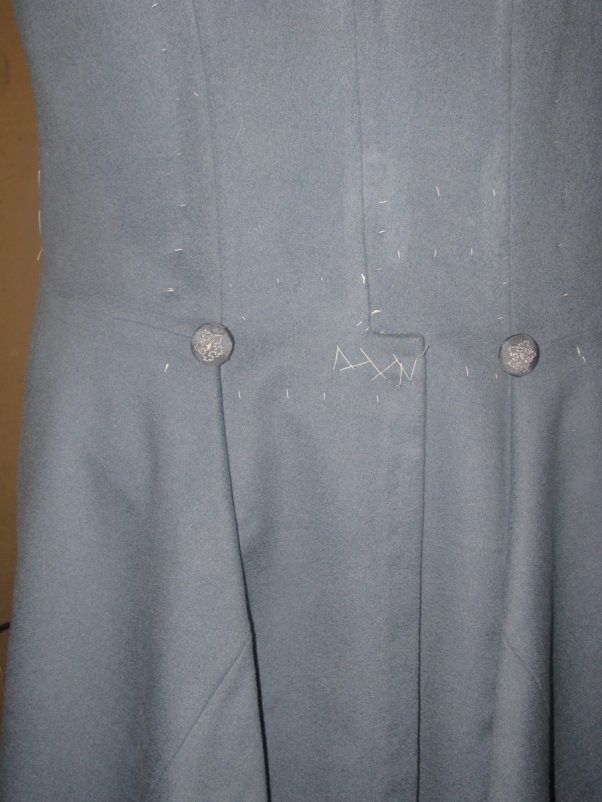
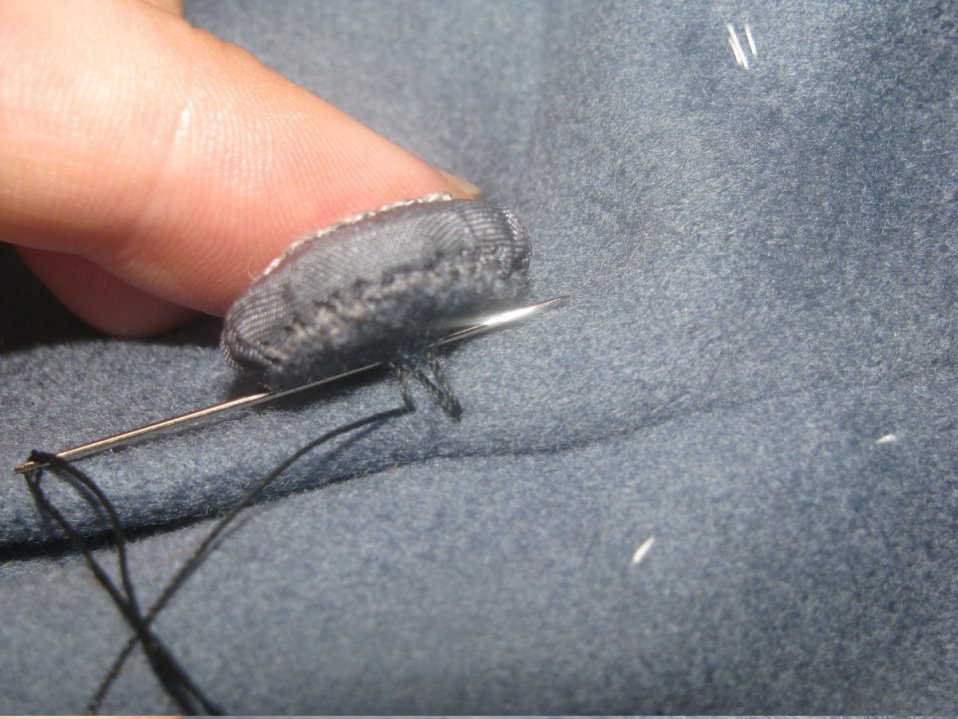
It’s time to finally move on from the linings – for a little while, anyway. Turn the coat right side up. This is the best time to put on the plait buttons, before we close up the shoulder and back seams. At the point where the waist seam meets the back, is the location for the buttons. Using the buttonhole twist left hanging from the back of your buttons, go through the fabric above the waist seam, and exit just below it. The thread does not pass through all layers, but through the top few only. Then pass the needle through the wool on the back of the button. Do not pull the thread tight, but leave about 1/8 of slack in the thread between the button and coat. This will form the shank. Repeat this process a total of six times for best security.
Pass the needle through the coat one last time. Upon exiting, wrap the thread around the shank you made, about four to six times. This will strengthen the button more. To finish off, pass the needle through the shank three times, from separate directions, and trim off the excess.