Author: James Williams
Lapels and Side Body
It’s now time to begin piecing the coat body together. I prefer to baste everything together before sewing for maximum control. It helps to ensure all the seams line up properly.
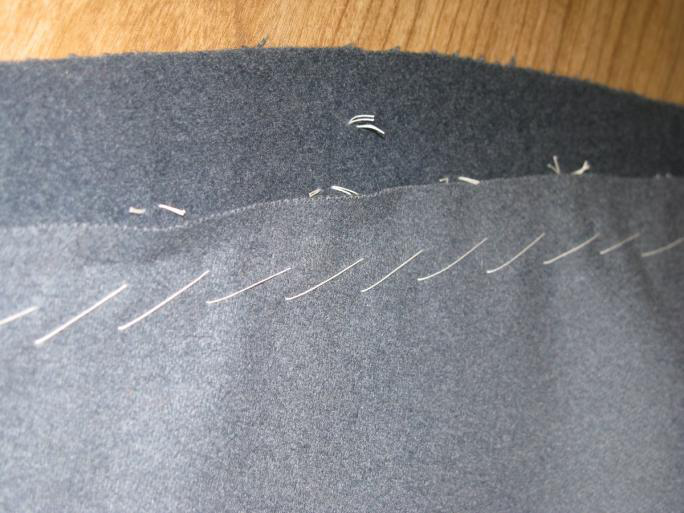
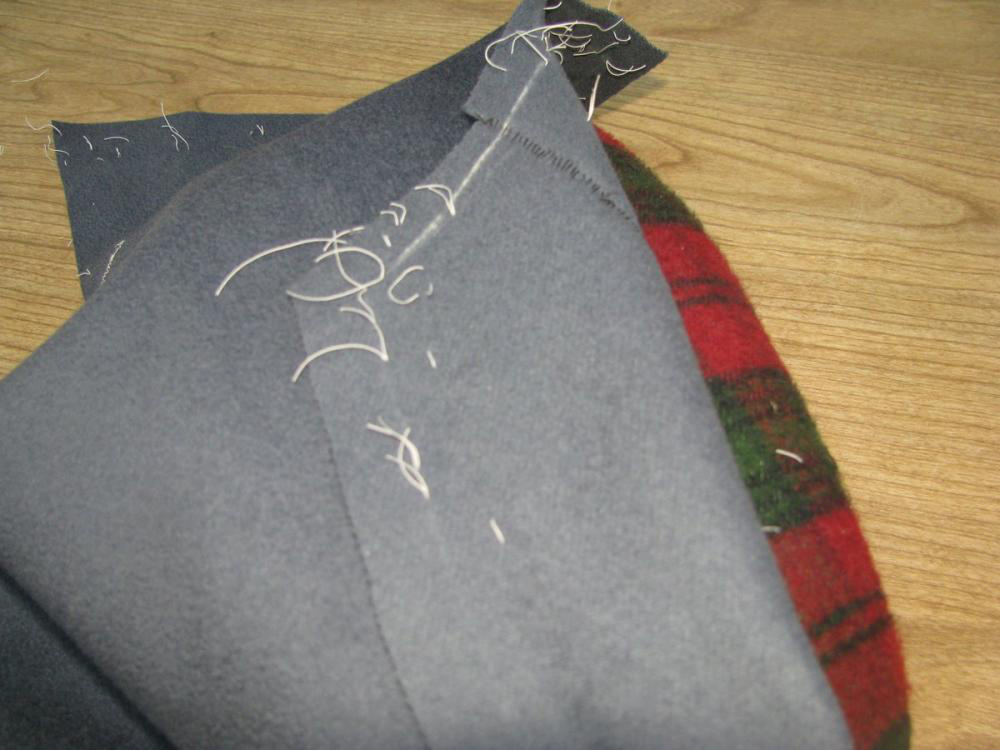
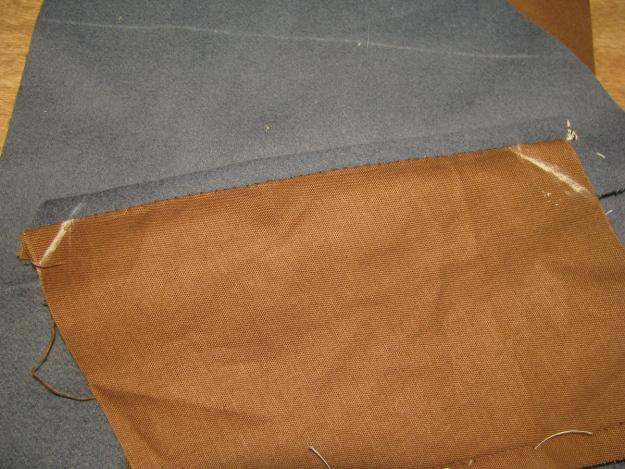
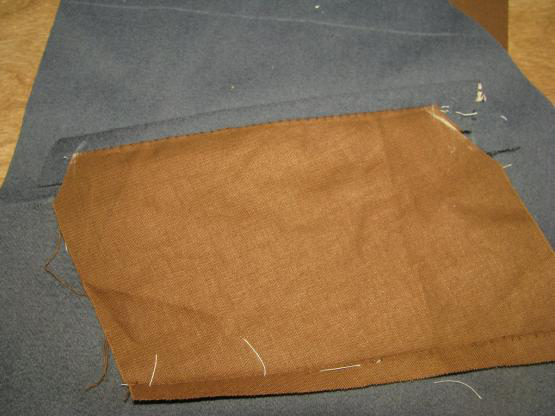
Begin by basting the lapels to the forepart, wrong sides together. The lapel should line up with the tailor’s tacks, unless you needed to make some alterations for a protruding stomach, which would then need to be marked.
Before sewing, you should trim off the inlay, cutting directly on the tailor tacks you put in earlier.
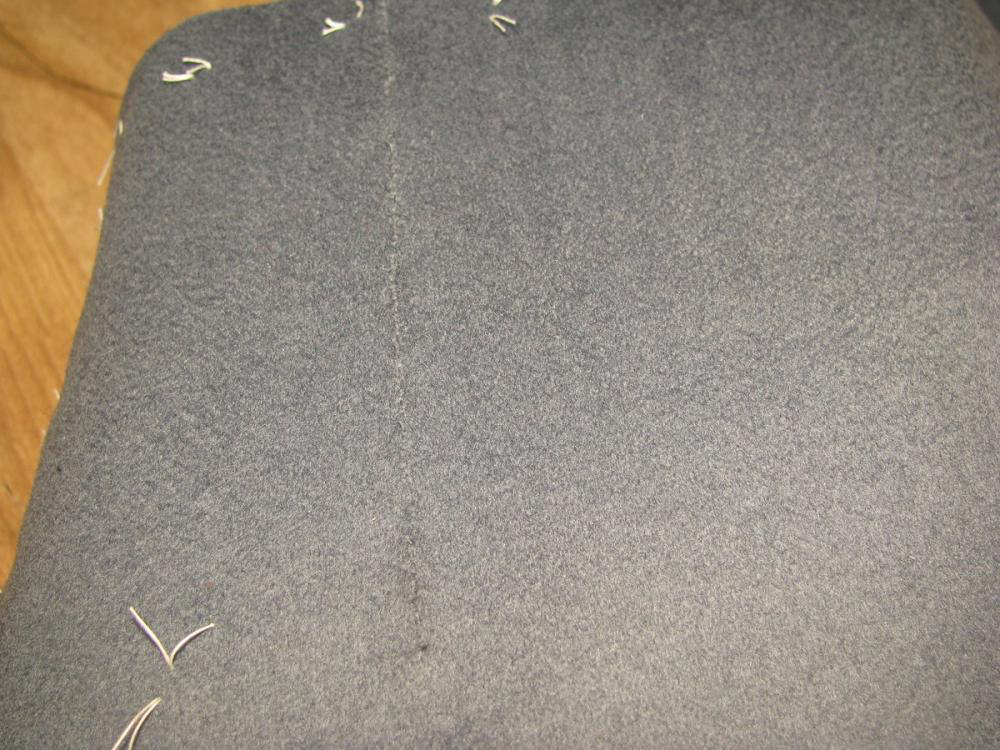
Sew the seams with a 1⁄4 inch seam allowance. Press the seam well on each side to set the stitches, then press from the wrong side, and finally from the right side. Using a tailor’s ham in extremely necessary for this seam, or you will lose all of the fullness that forms between the two pieces. All seams should be sewn in this manner.
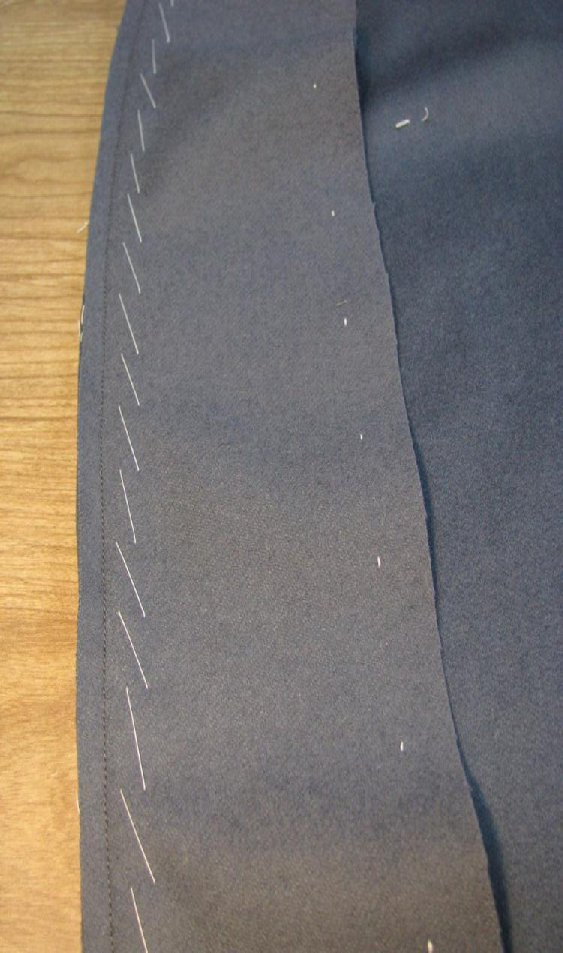
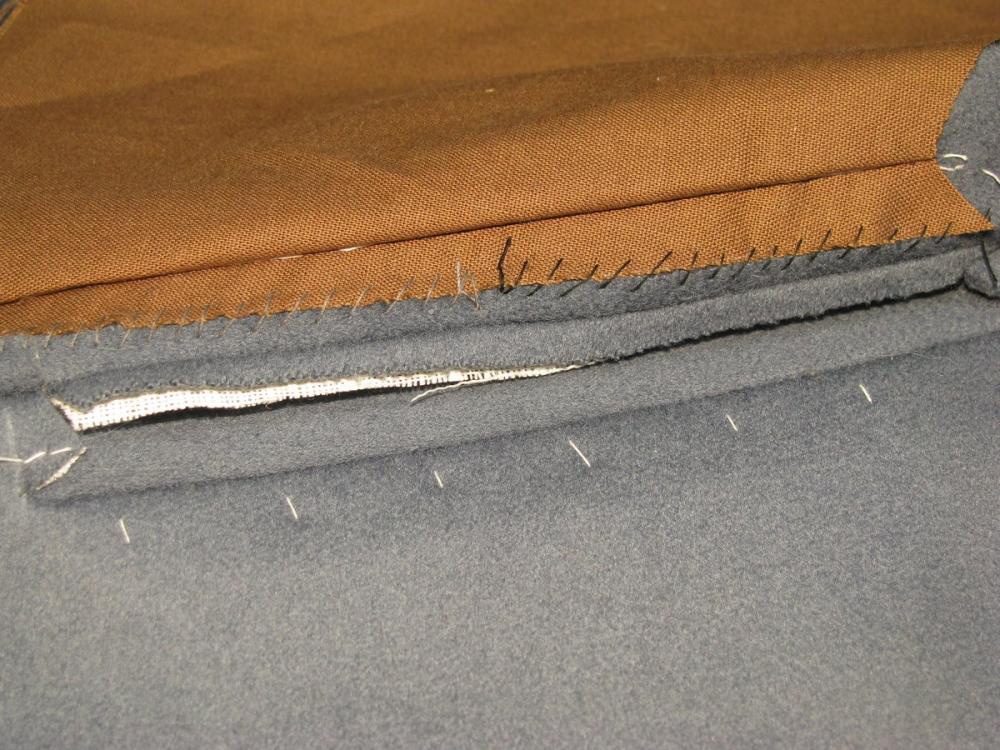
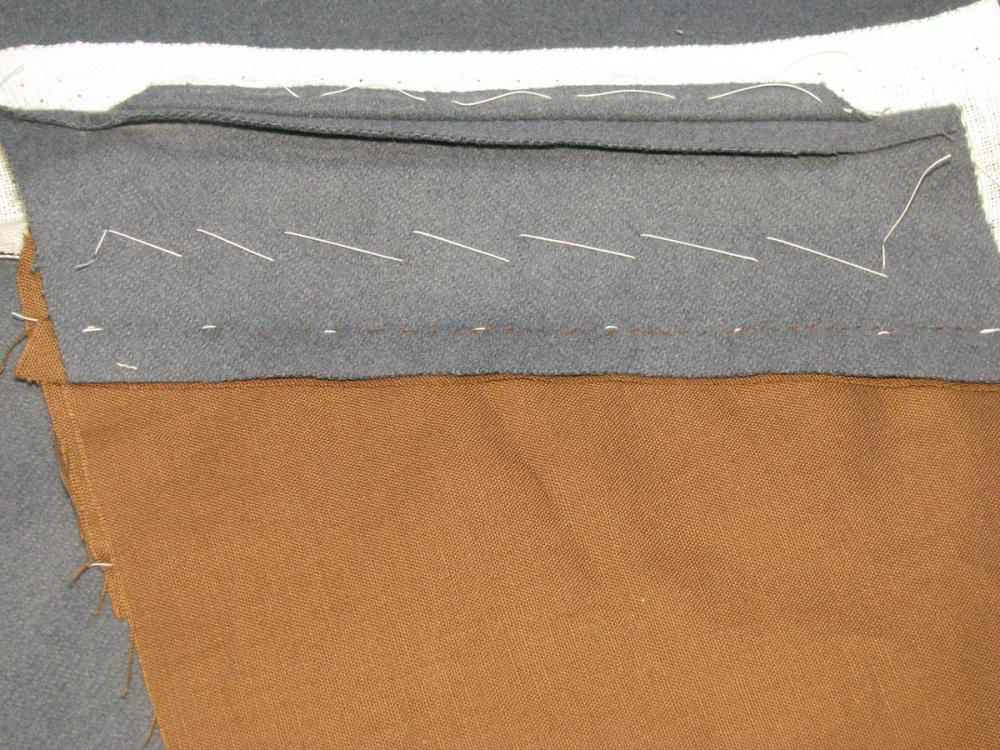
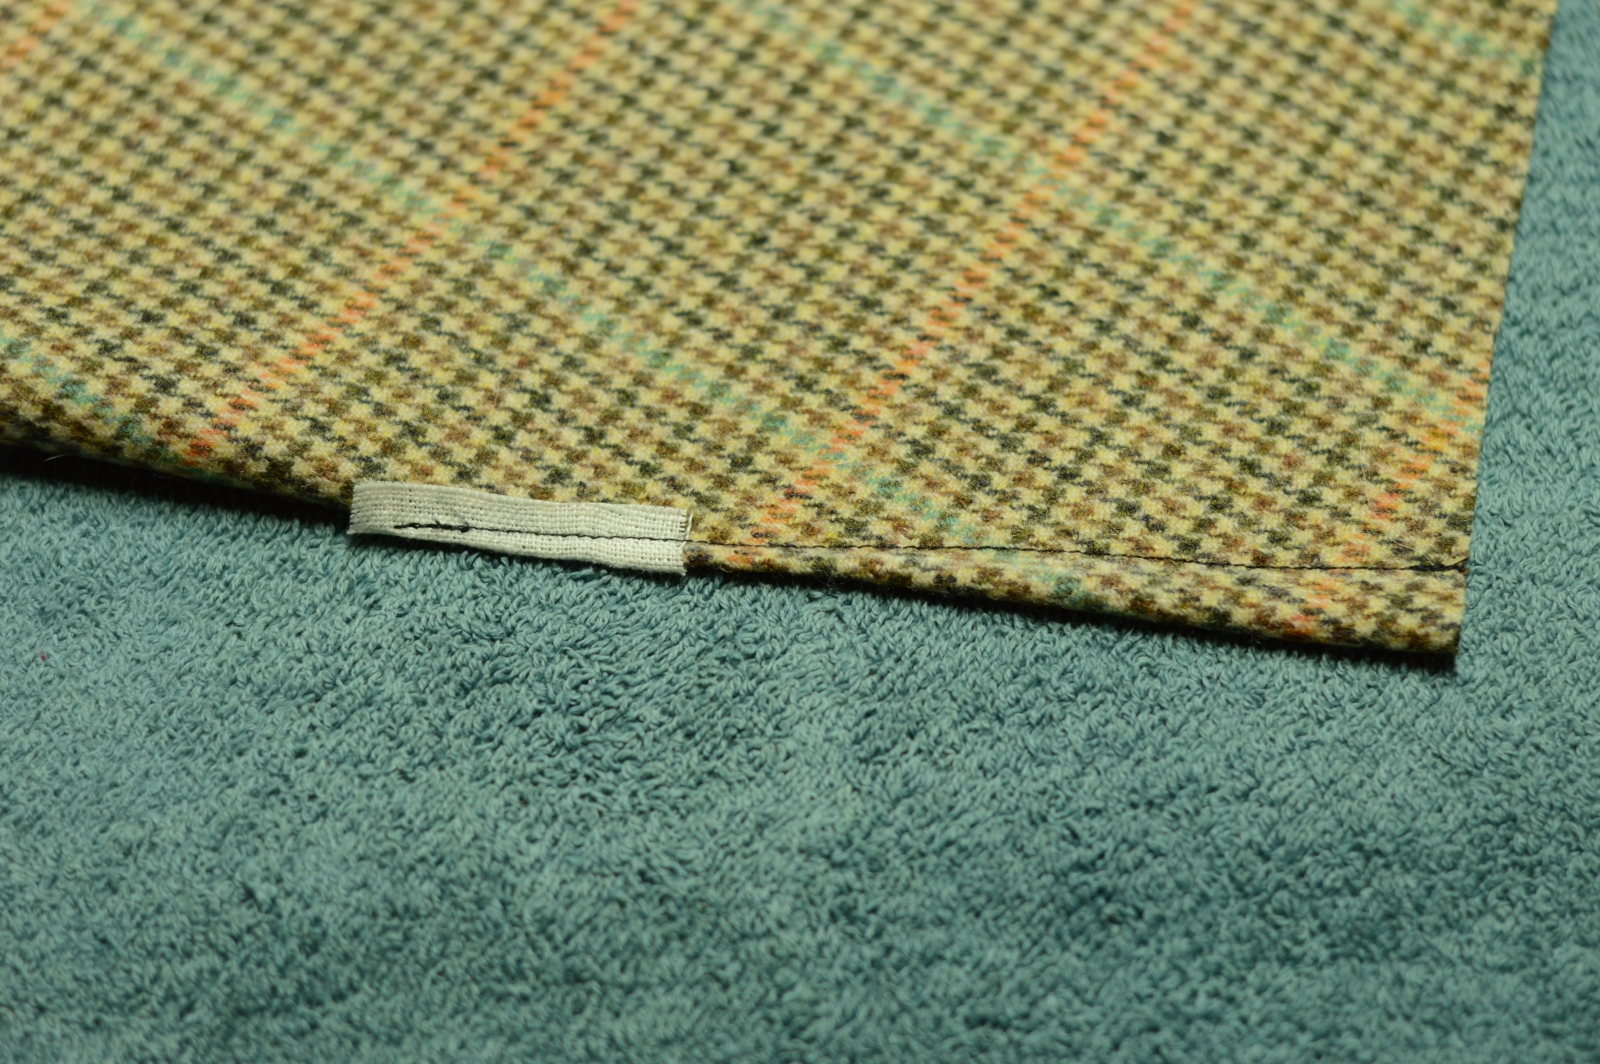
Note how flat the seam looks. There is no ‘roll’ to the seam. When pressed well, the layers of fabric are almost unnoticeable to the touch.
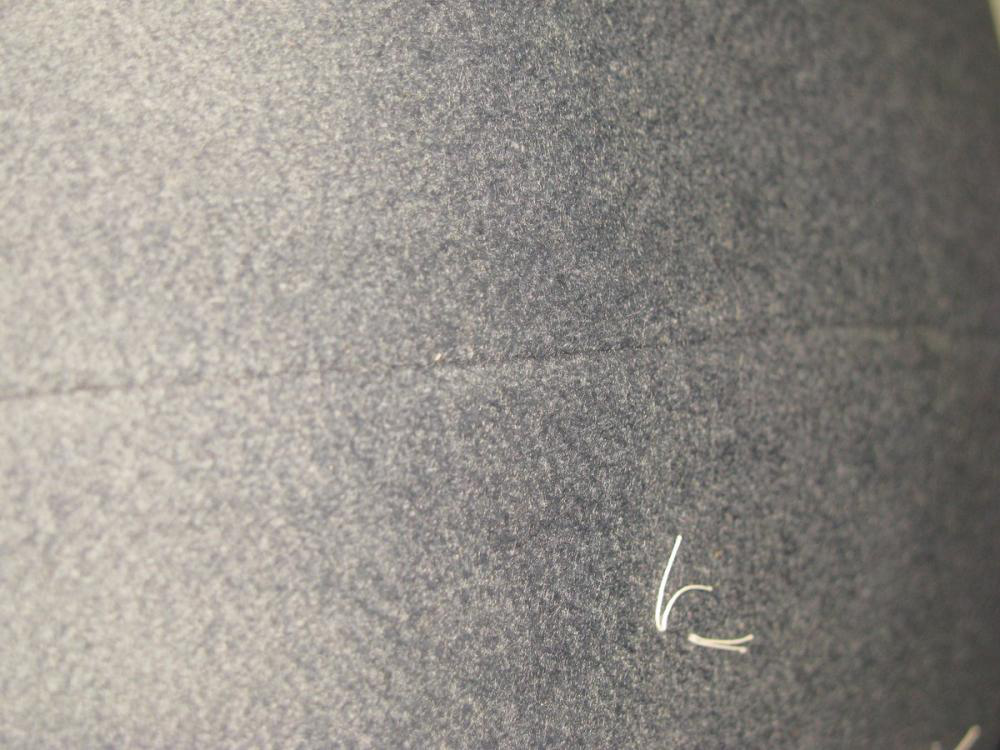
Note in this photo how the lapel extends a 1⁄4 inch below the forepart. This is due to adding the seam allowance there, which, after experimenting, I recommend not adding.
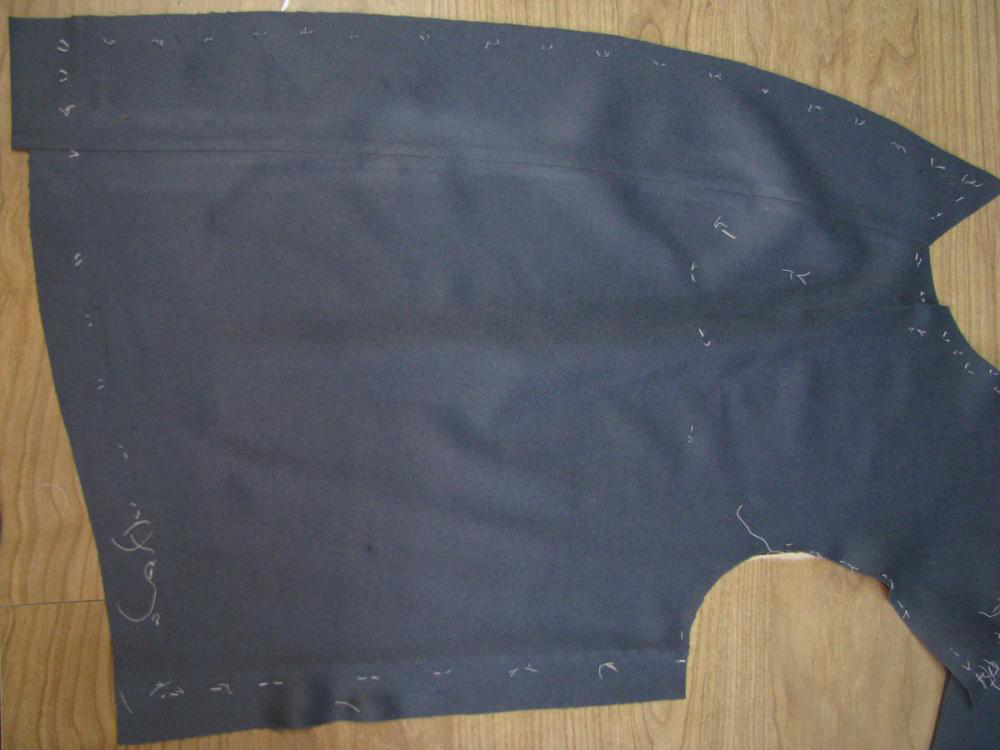
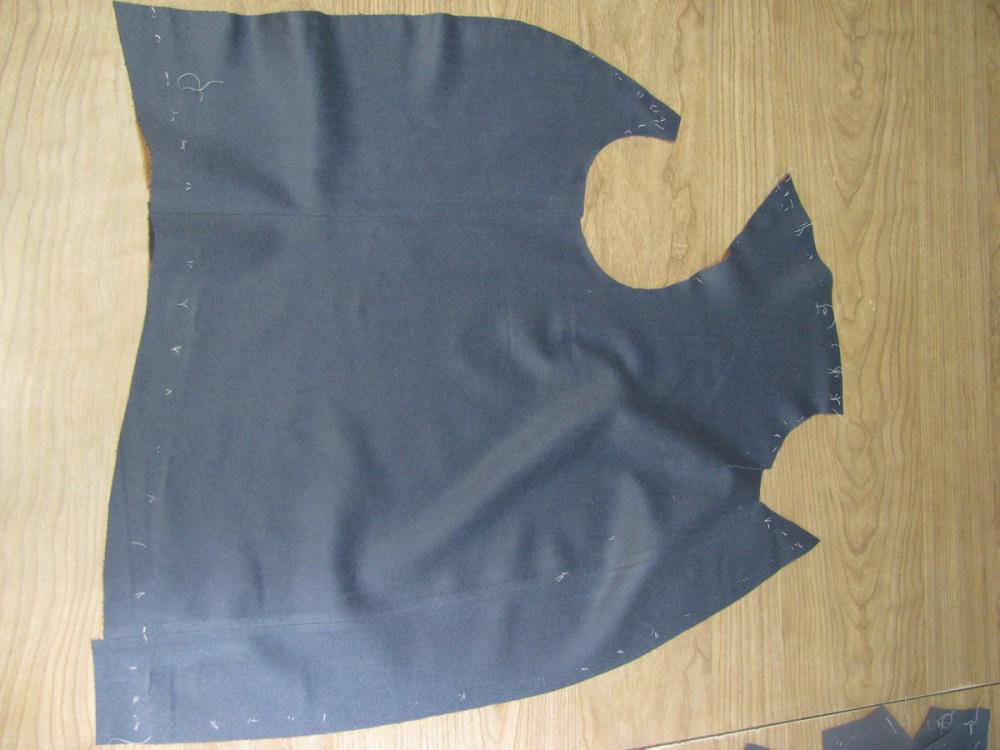
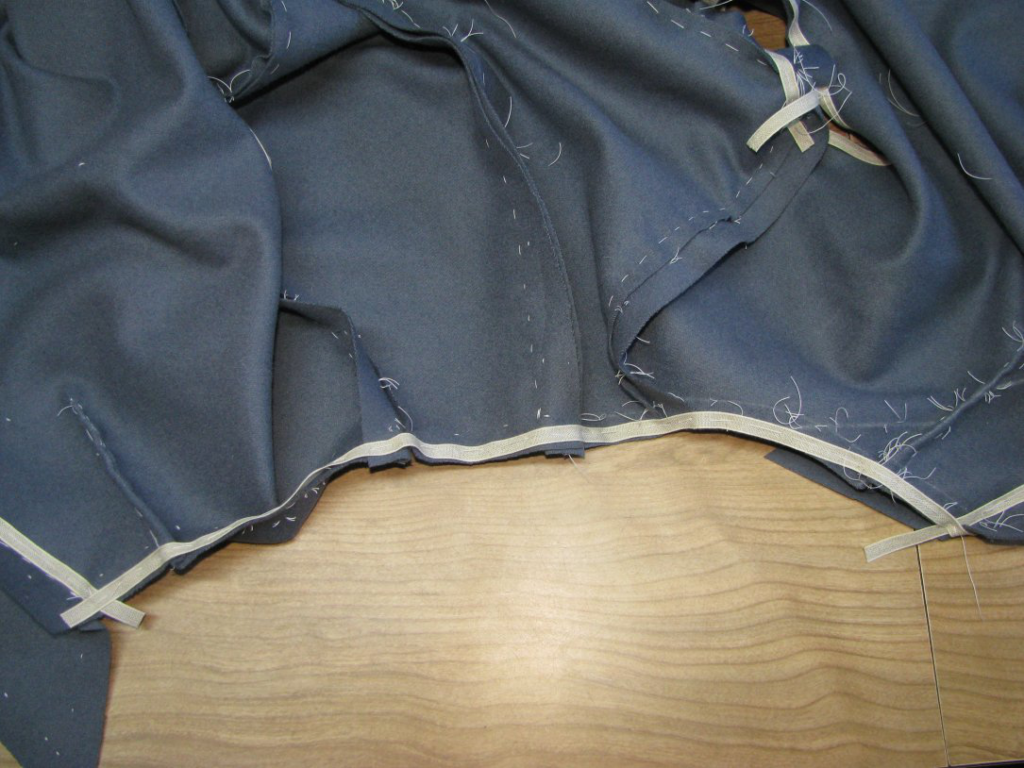
Side Body
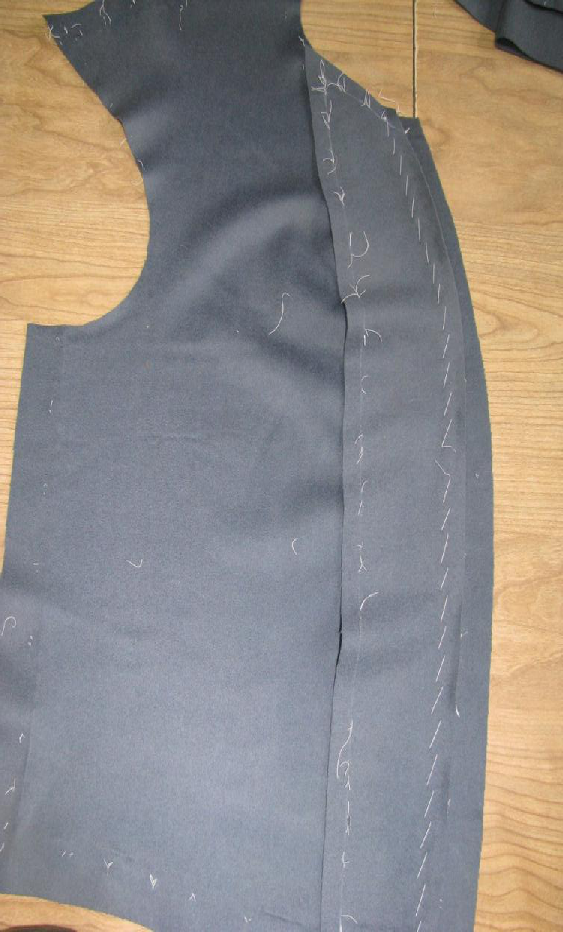
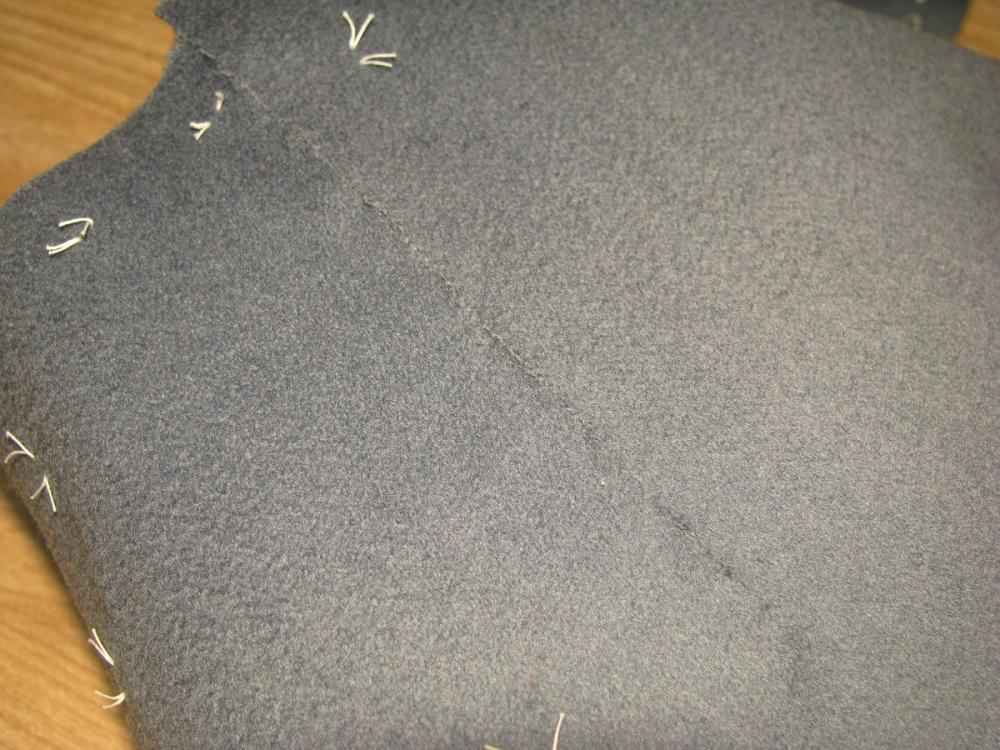
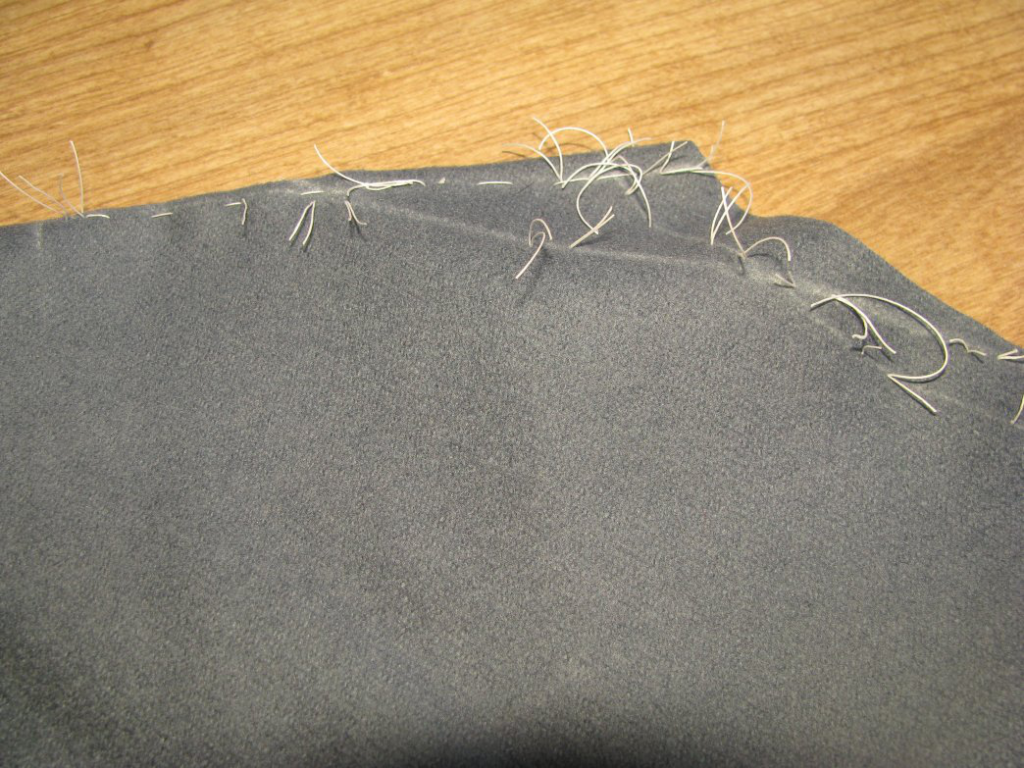
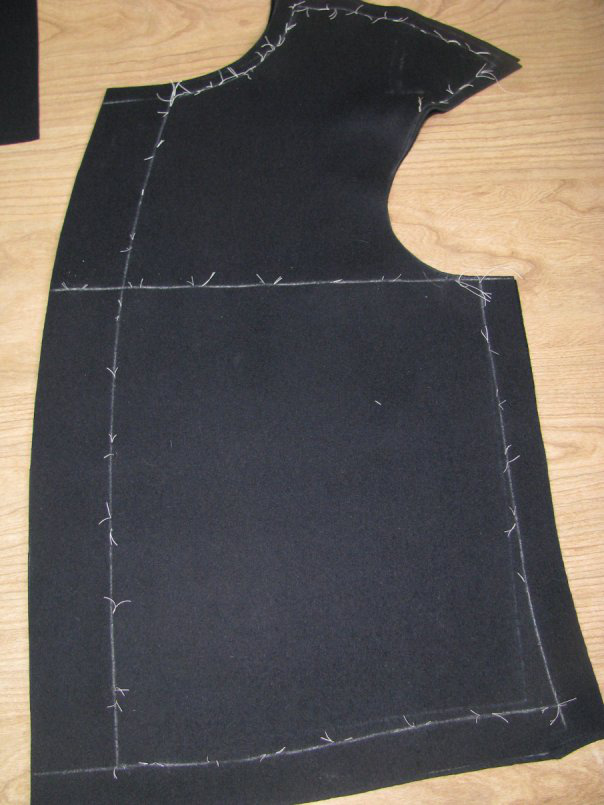
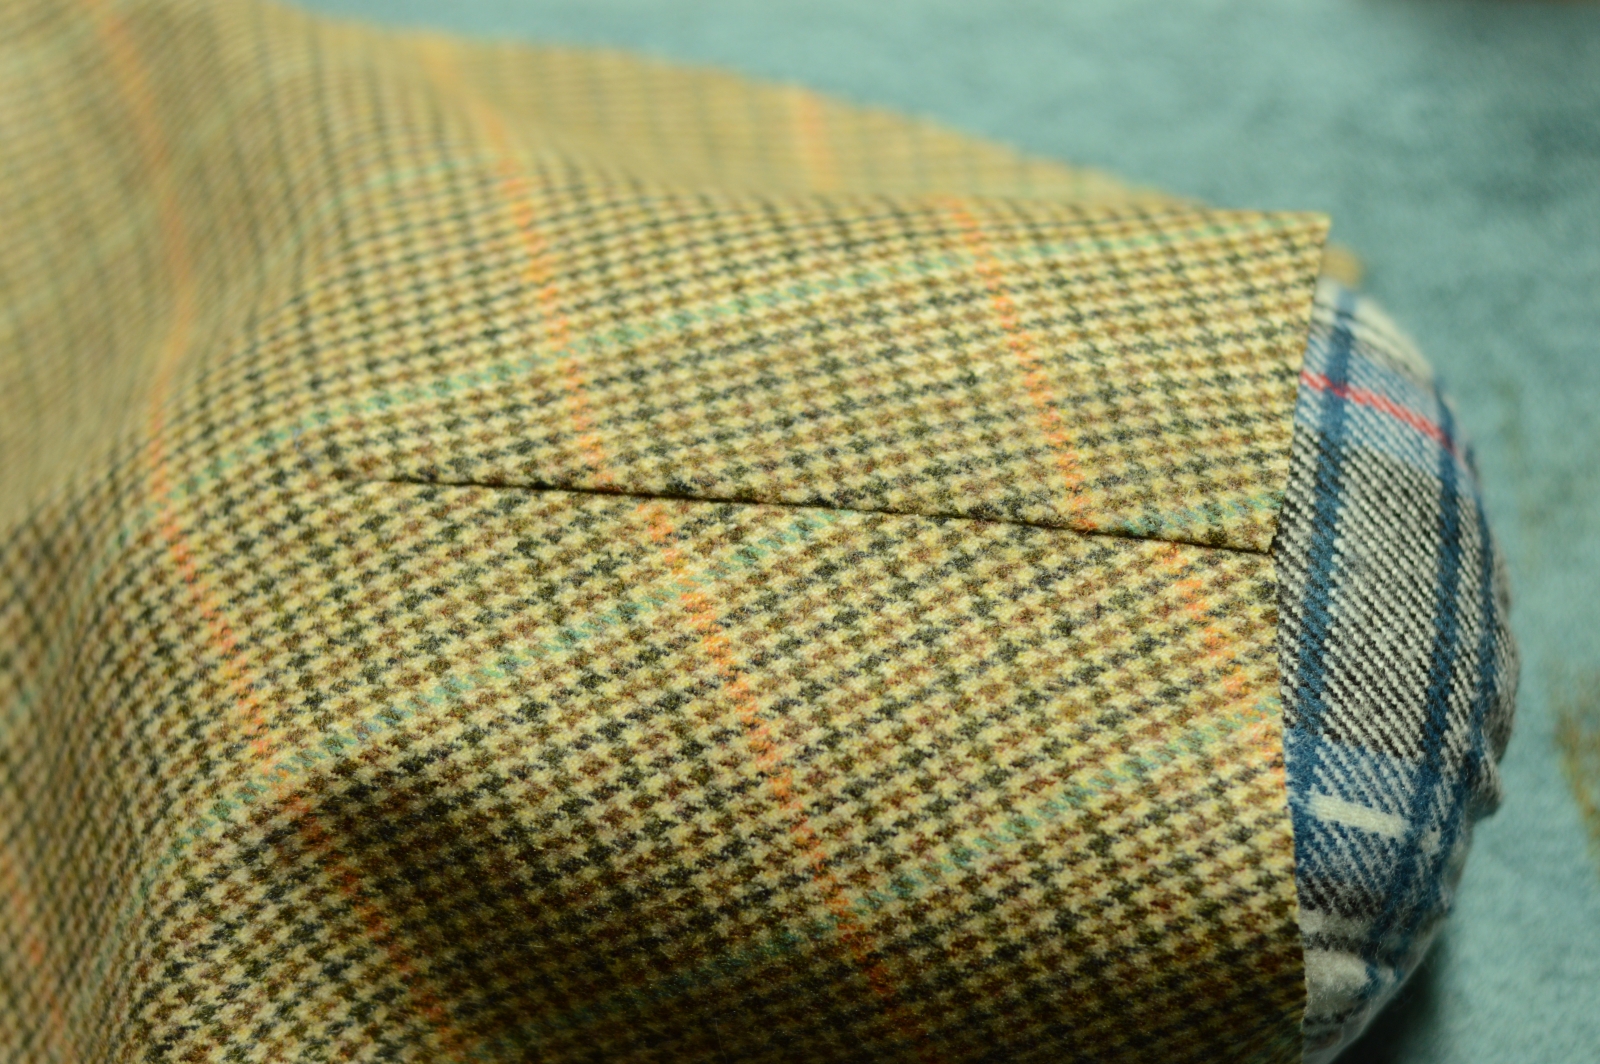
Now baste the side body to the forepart, right sides together. The seams should be the equal in length, but if you’ve stretched the two pieces in unequal amounts, you may have to stretch one of the seams again. Press open, using a tailor’s ham for the lower half.

Note that this is the only inlay that remains in the finished coat, as it is the easiest one to let out if necessary, and does not affect the pressing of the seam.
Fitting Issues
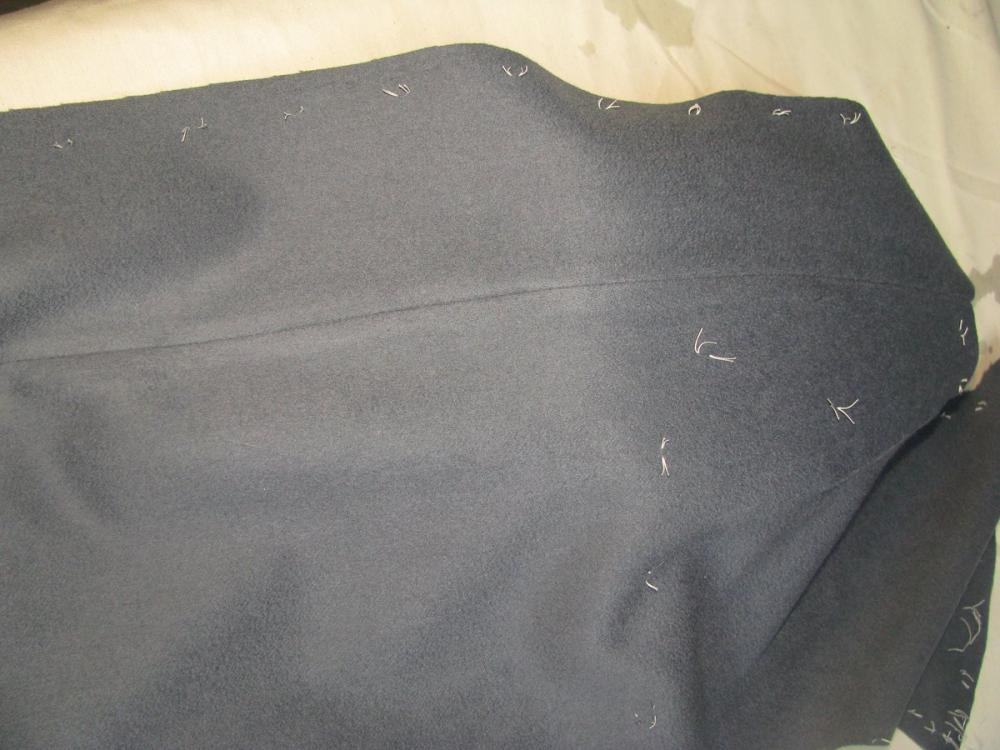
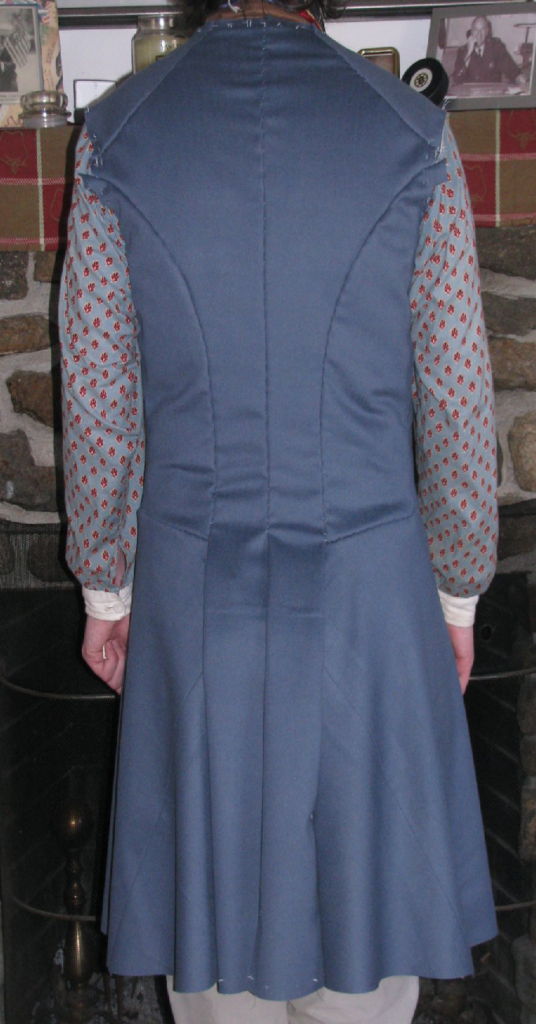
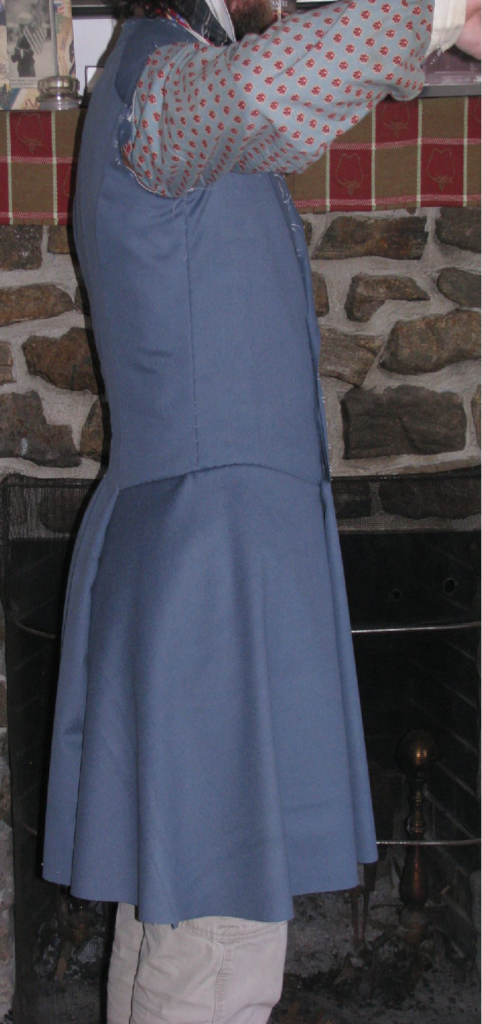
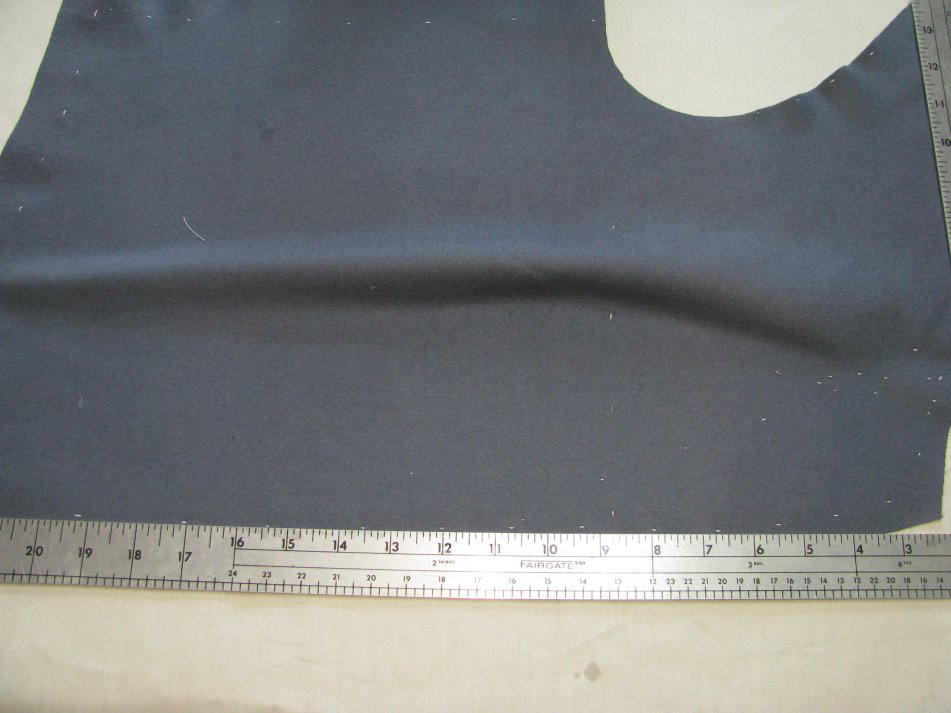
If you wish to do a fitting at this point, you may do so. I wanted to see the affects of some more ironwork I did, and also to check how the back looked after raising it a half inch. Note how the back falls smoothly to the waist now, and how the folds are almost completely gone from the side pieces. What remaining fullness there is will be taken up by the padding later on.
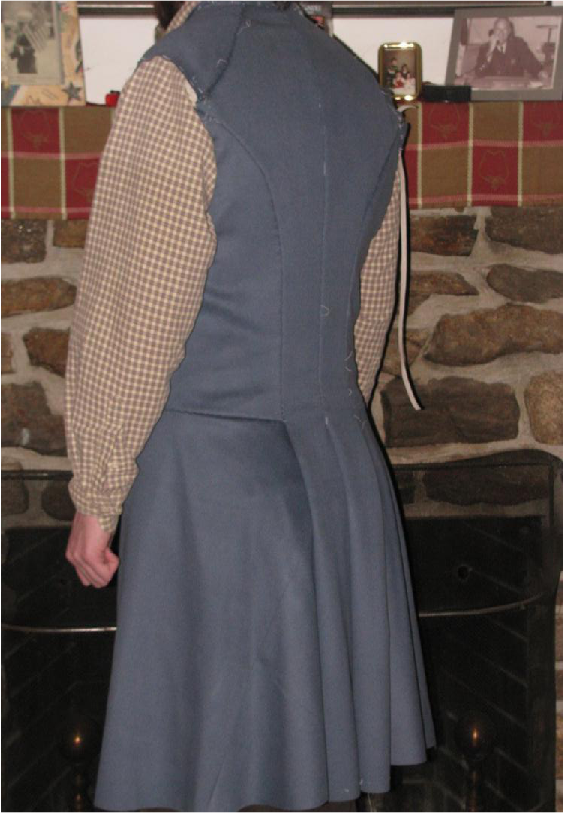
In this photo, you’ll notice that the waist seam is uneven in the front. This is something that occurs on all double breasted coats, even modern coats. To fix, you will need to raise the front waist on the right side of the coat 3/8 of an inch, tapering into the regular seam about 7 inches from the center front, as shown.
At the back, you can see the alteration I did to raise the side body and back waist.
After you are satisfied with the alterations, trim off the inlays following the remarked lines.

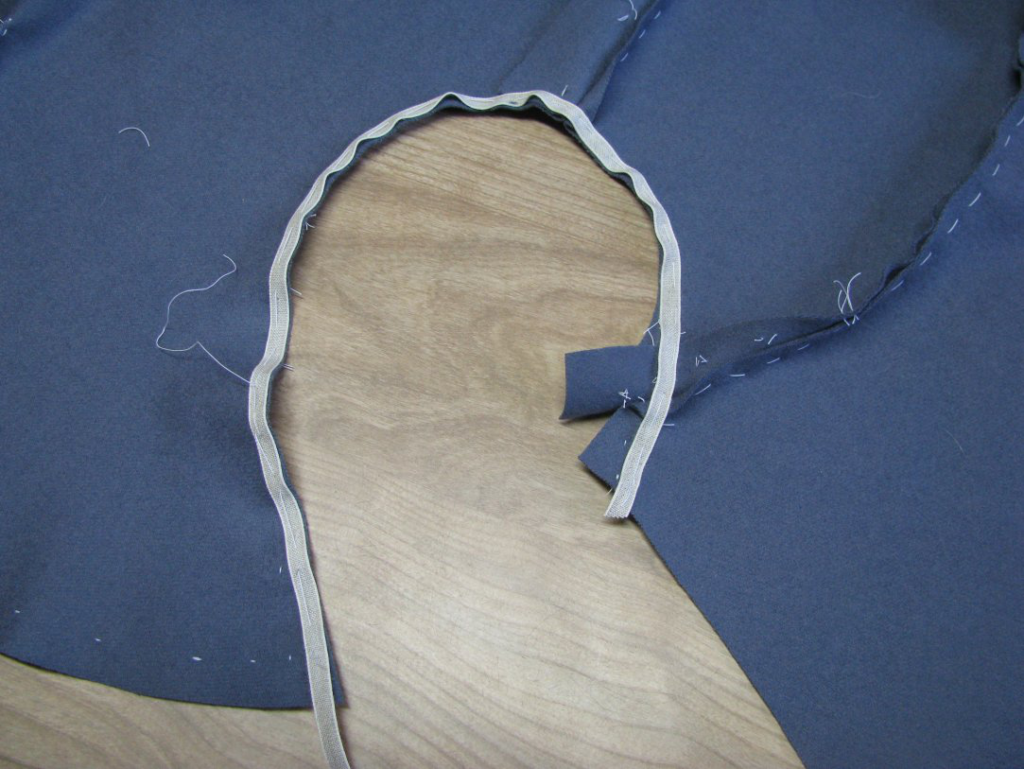
The Gorge Dart
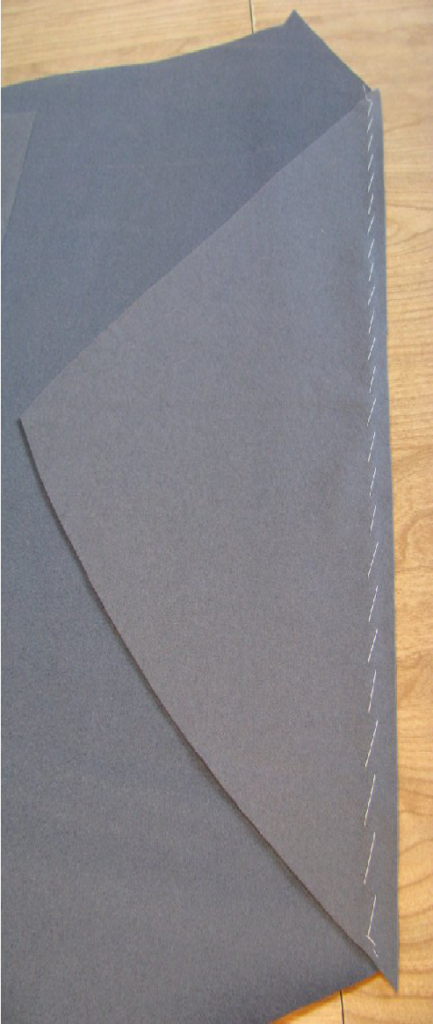
As you may have seen during the fitting, the gorge dart is necessary to a good fit and roll of the lapel. After the coat has been taken apart again, you should re- chalk the lines of the lapel dart for more accuracy.
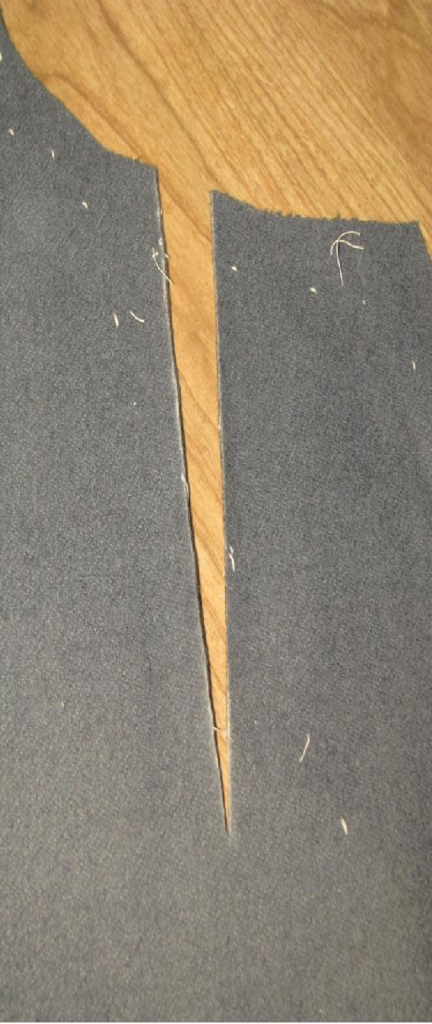
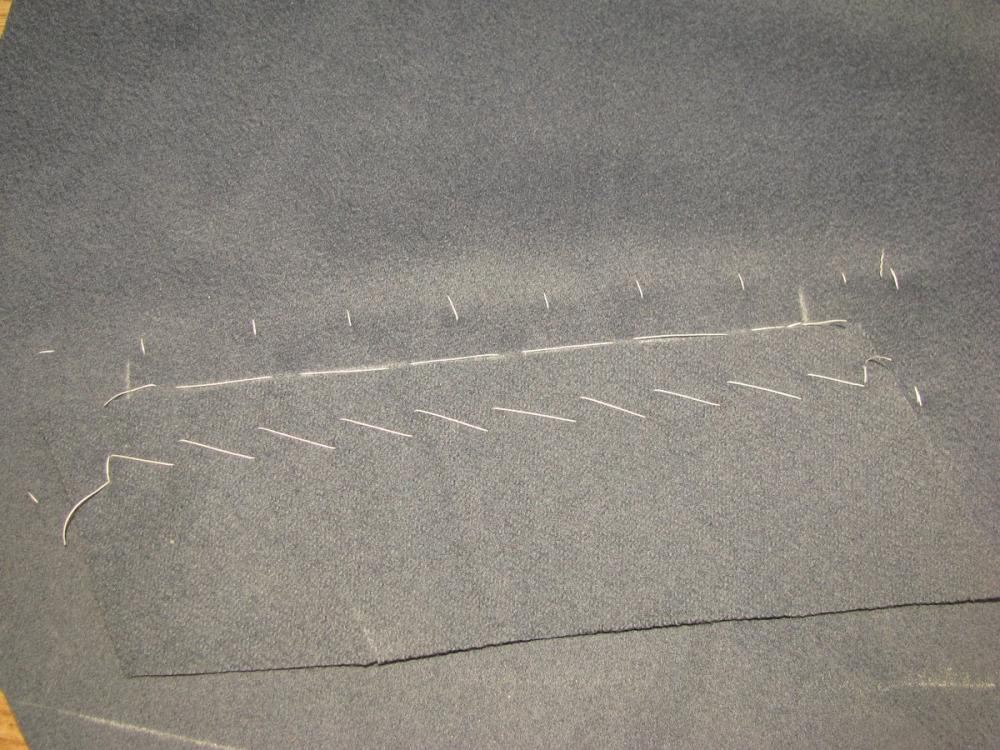
This is a scary step, but if you’ve done everything correctly and accurately, there should not be a problem. Carefully cut out the lapel dart directly on the chalk lines. We will be constructing this dart with no seam allowances.
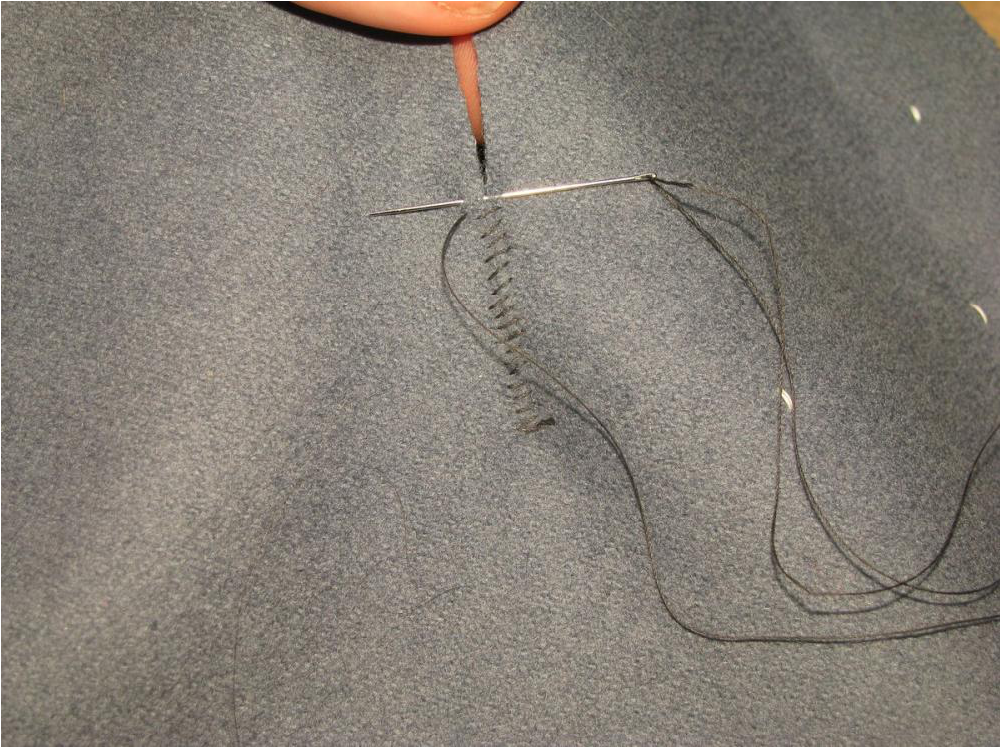
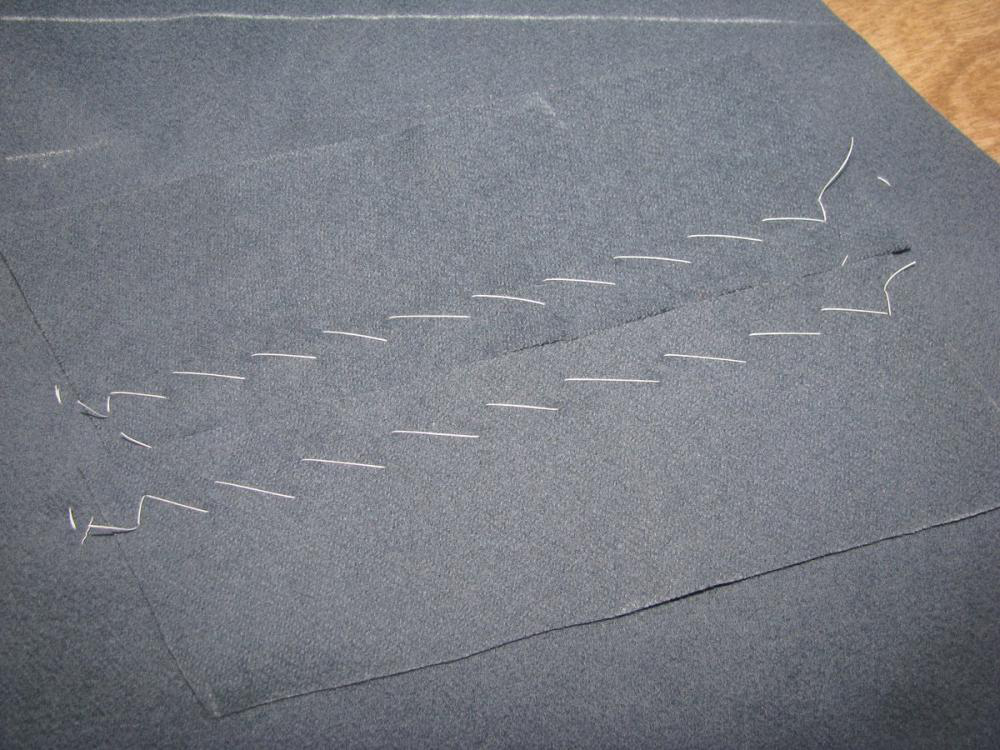
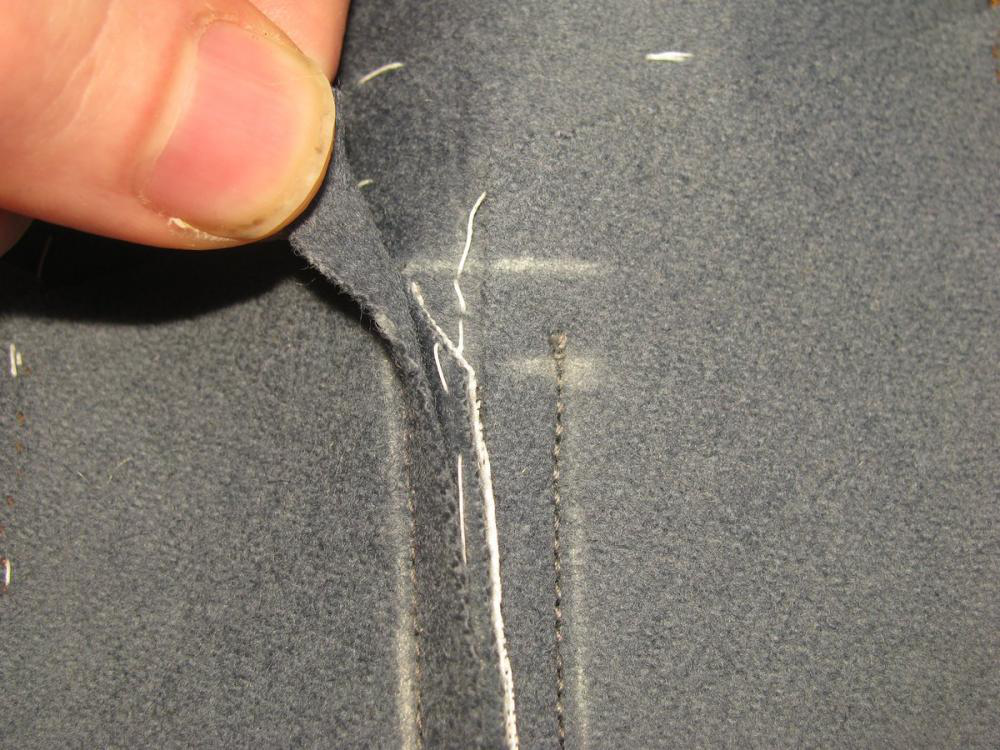
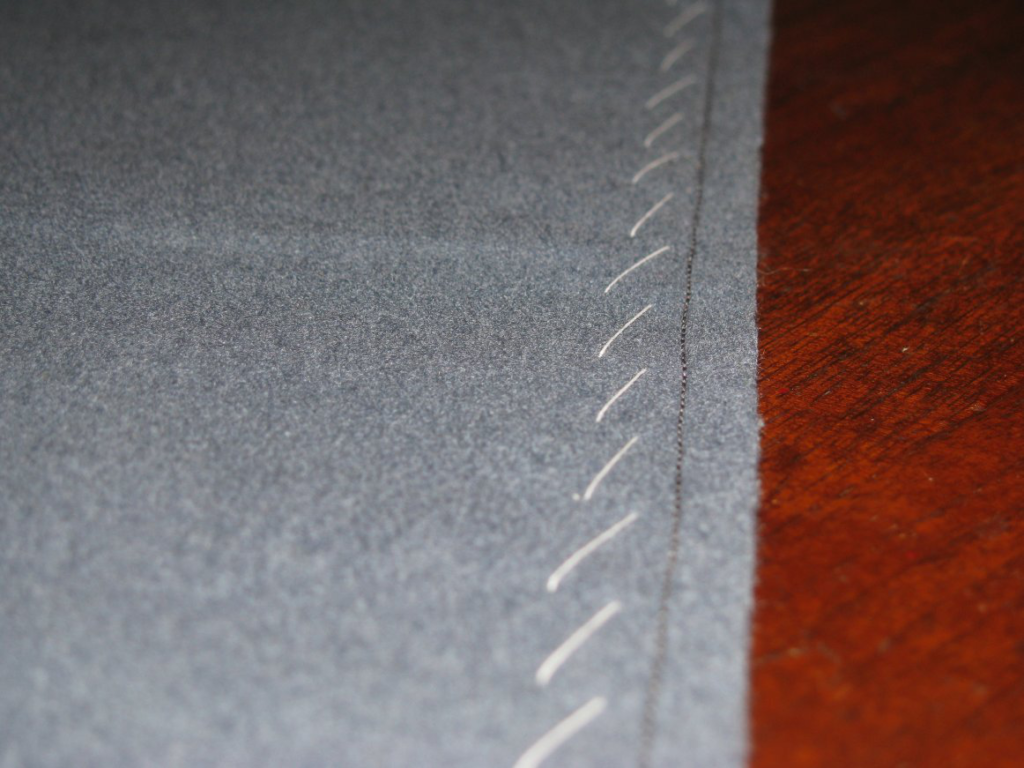
Starting at the point of the dart, hold the fabric together with your fingers and thumb, and stote the dart closed. Each stitch should be perpendicular to the dart, and not show through to the right side. I used about 12 stitches per inch.
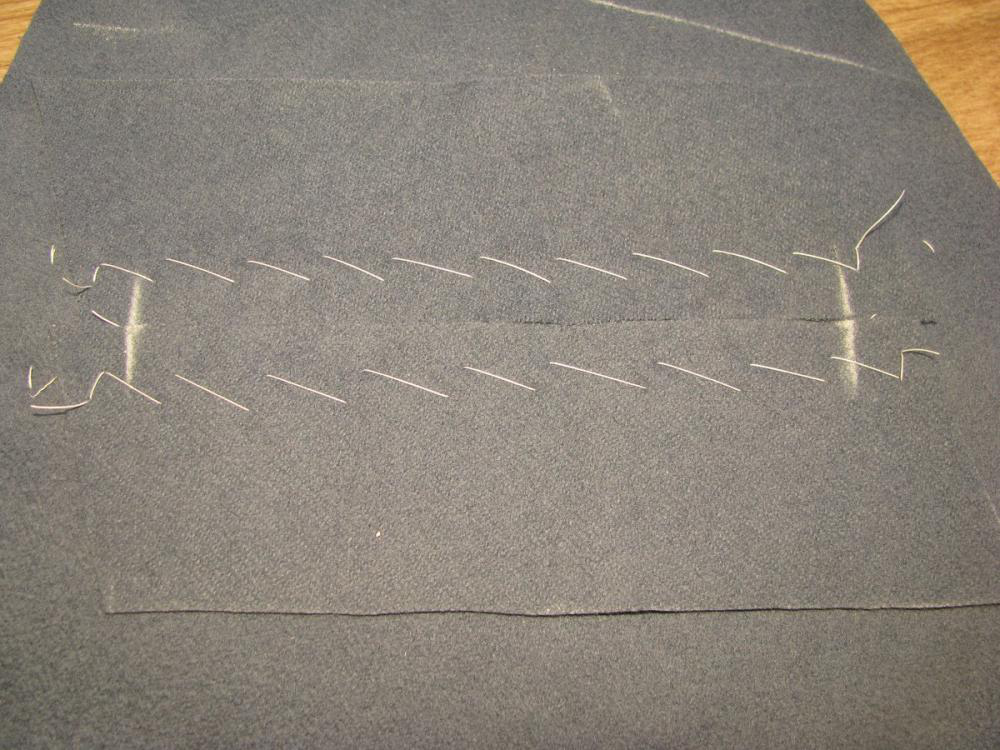
When done, the lapel dart should look like this from the wrong side.
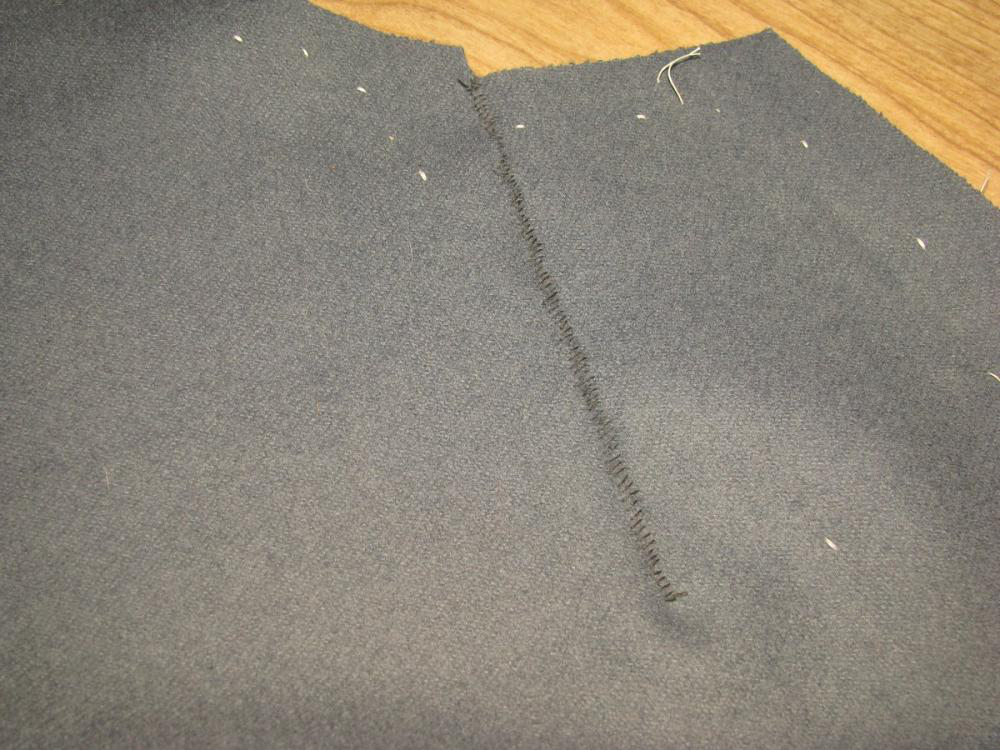
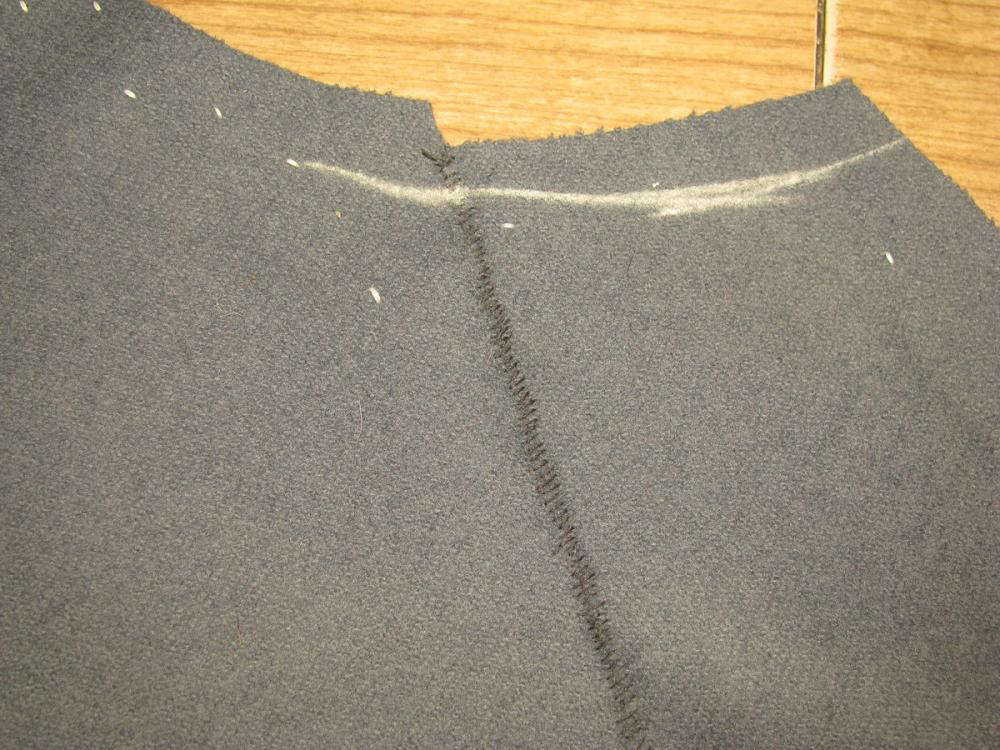
Note how on my coat, the seams do not line up at the top. This is due to not extending the front neck upwards when drafting the dart. Here I’ll use the inlays to redraw the seam line, making it even again. If you did this on the pattern, this step is not necessary.
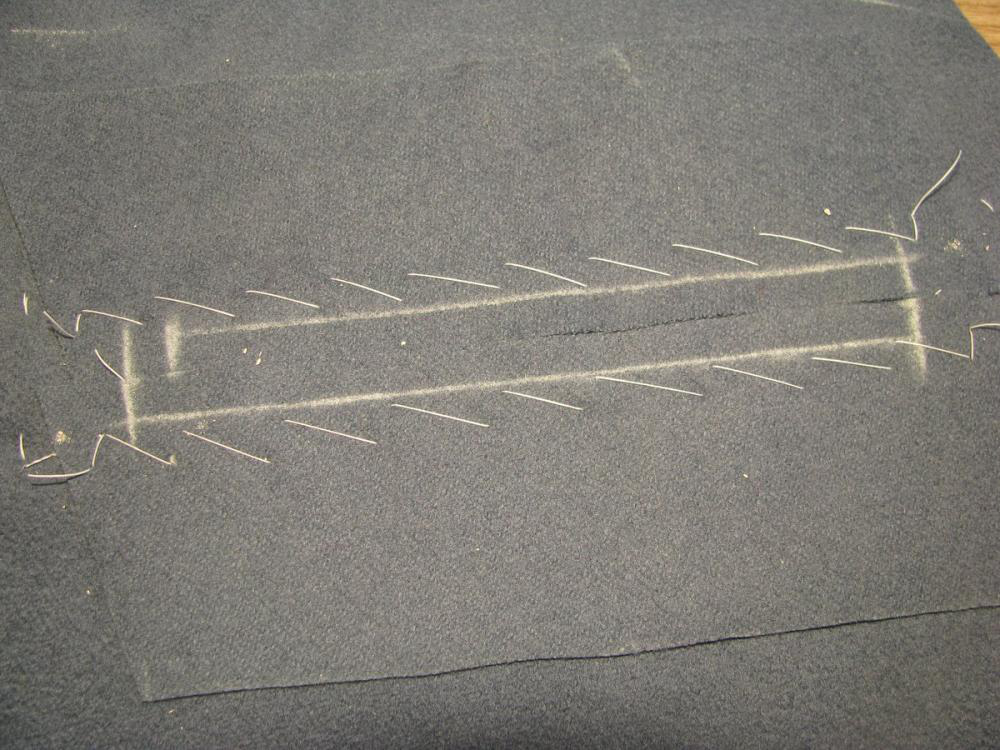
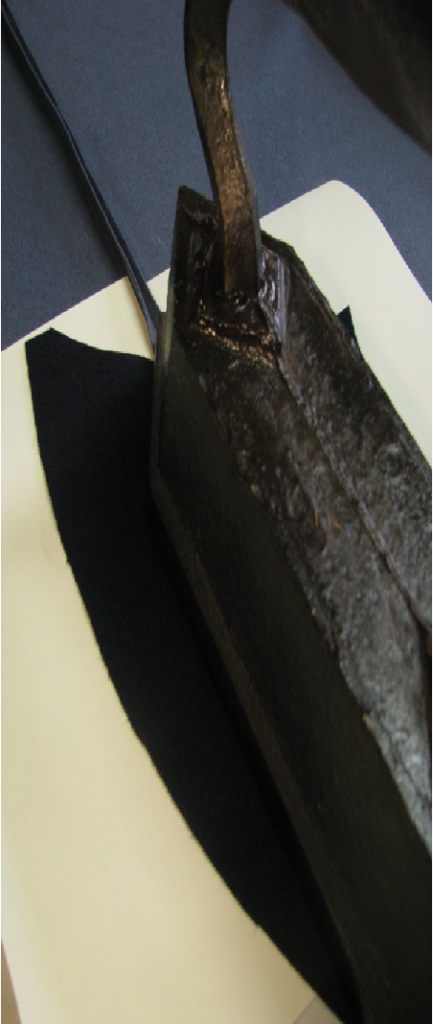
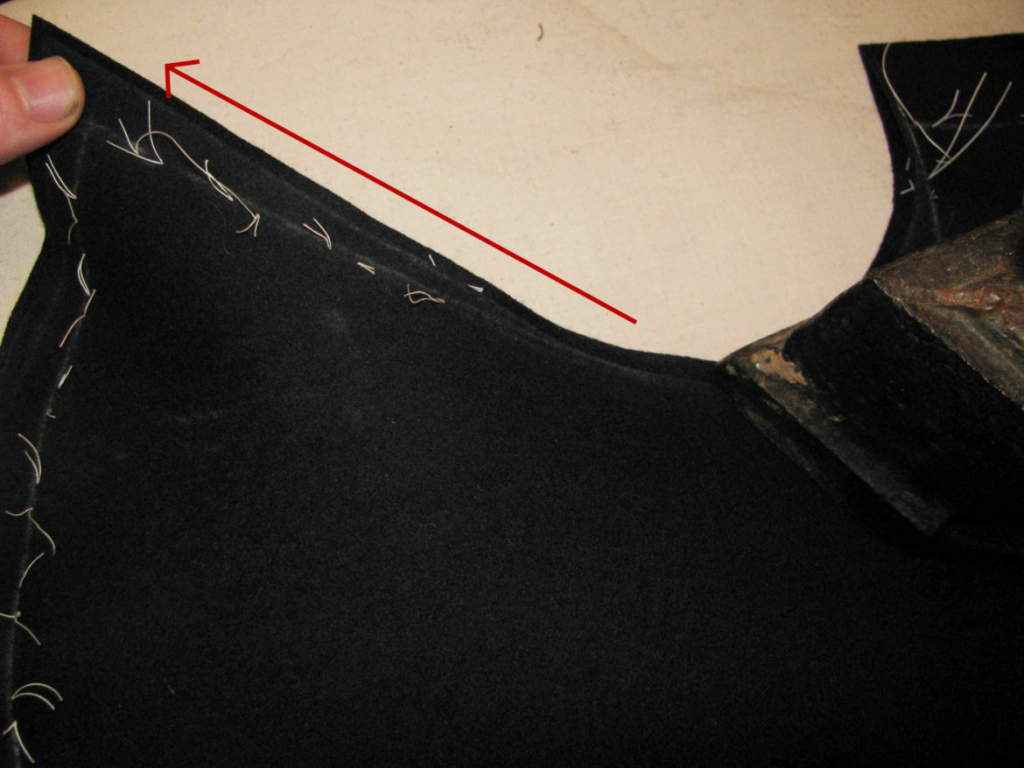
From the right side, the seam should be almost invisible if done correctly. This seam is fairly strong, but can be ripped out if it is pulled too hard. However, when we pad the lapels later on, it will greatly strengthen this area. The benefit of stoting this seam is the greatly reduced bulk in this area, which will improve the fit of the coat and roll of the lapels later on.
As you can see, the lapel already wants to roll over itself. All of the steps pertaining to the forepart from now on will have the goal of helping this even further.
Darts in the Waist or Skirt
If you are placing darts either the waist seam of the forepart or skirt, now is the time. First, baste each dart together, ensuring the chalk lines are lined up evenly. I recommend drawing the chalk lines on the pieces with just the tailor tacks showing, as it’s slightly easier and more accurate. The basting should be about a quarter inch below the chalk lines, to keep it out of the way of your stitching.
Sew, using either a backstitch, or machine stitch, carefully following the line. Start from the top of the dart, and near the end, taper out gradually, to ensure a clean dart point. Press the dart on both sides to set the stitches, but do not let the iron move past the tip of the dart, or you will get creases that are very difficult to remove.
If the darts are wider than one inch, trim the darts so that there is a 1⁄4 inch seam allowance, but do not trim the points. Press this seam open over a tailor’s ham, carefully opening the tip of the dart with a pencil or other object. At the tip, gently shrink out any excess to smooth out the tip of the dart. If the darts are thinner, press them towards the back of the coat. From the right side, press the darts again, and allow the dart to dry thoroughly before moving on to the next one.
Welted Breast Pocket
Breast pockets are a feature not found on all original coats. If you wish to have a breast pocket, and the coat you are basing yours on has one, then follow this section. If not, you may skip to the section on the Gorge Dart. This breast pocket can also be used on waistcoats, just replace the wool pocket facing with the lining fabric.
Placement
During your skeleton fitting, mark the location of the pocket. Since I have to fit myself, I usually just mark the spot directly over the left breast. After the coat is taken apart again, I then mark the correct placement of the pocket. It should be about 5 inches long, sloping down towards the center front. The upper end of the pocket should begin about one inch from the armscye. The slope and length of the pocket are all variable according to your specific needs, but this is a good place to start.

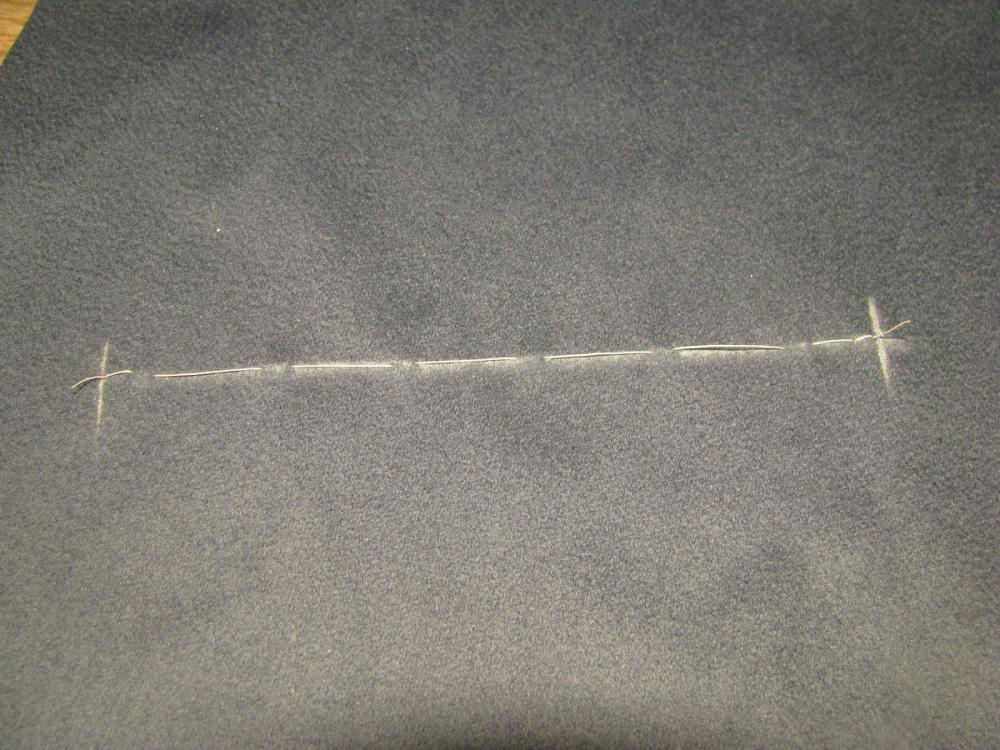
Mark the line indicating the pocket on the wrong side of the coat, and at each end, a vertical line showing the precise ends. When making a pocket, precision is key, so try to sharpen your chalk as frequently as possible.
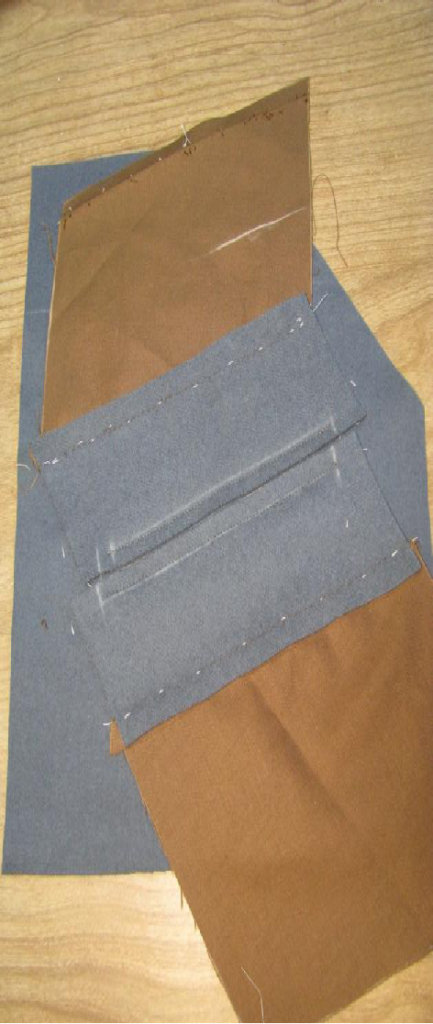
N.B. I am not including a pocket on my coat, so the pocket has been constructed on a scrap piece of wool. Pocket construction should be done before cutting out the gorge dart in the next section.
After drawing the chalk lines, place a row of basting stitches along the line to make it more durable. Then redraw the lines on the right side of the coat.
Linen
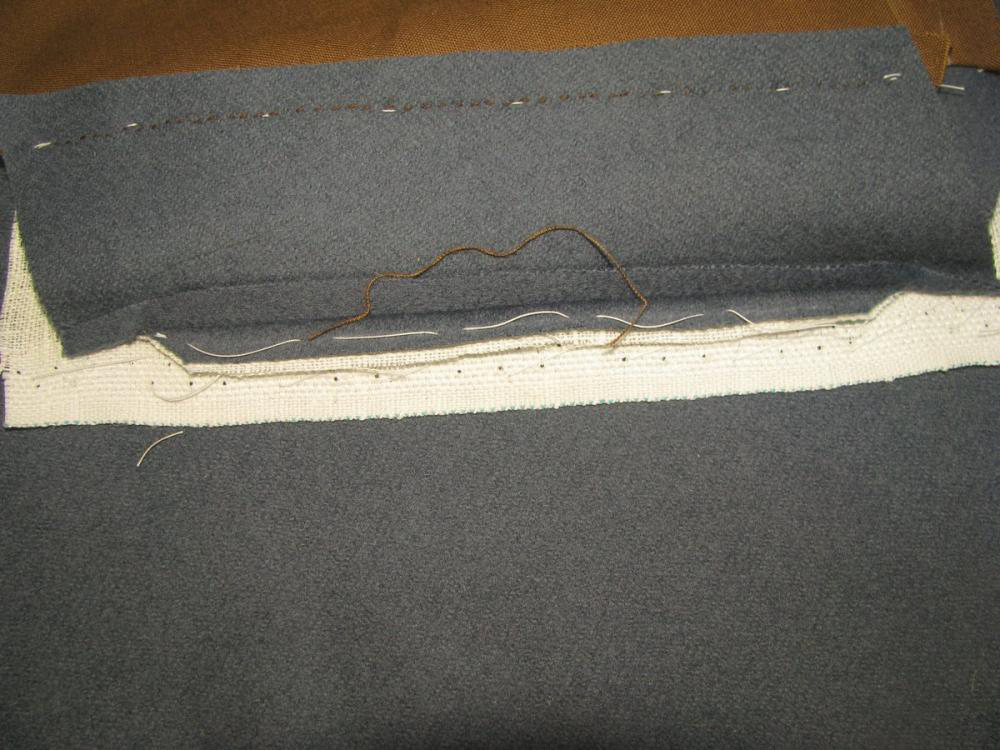
To make the pocket stronger, and also keep the coat from stretching out of shape, it is necessary to add a strip of linen to the wrong side. Cut a piece about 1 1⁄2 inches wide. The strip should be long enough to extend about one inch from the end of the lower side of the pocket, all the way to the armscye.
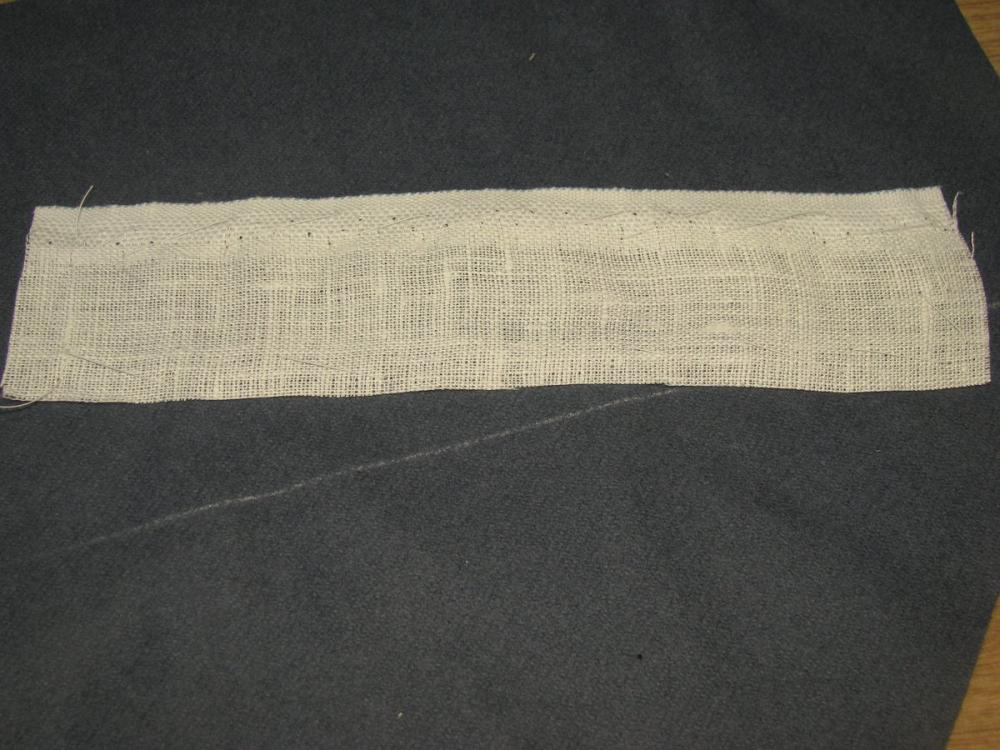
Stretch the linen with the iron to prevent shrinkage or warping later on. Baste the linen to the wrong side of the coat, centering it carefully over the pocket construction line.
Welt Pattern
It is necessary to make a pattern piece at this time for the welt. The final dimensions for the welt pattern should be twice the height, and one inch longer than the pocket itself. For my pocket, I want a one inch deep welt, five inches long, therefore the welt pattern will be 6 inches long by 2 inches deep.
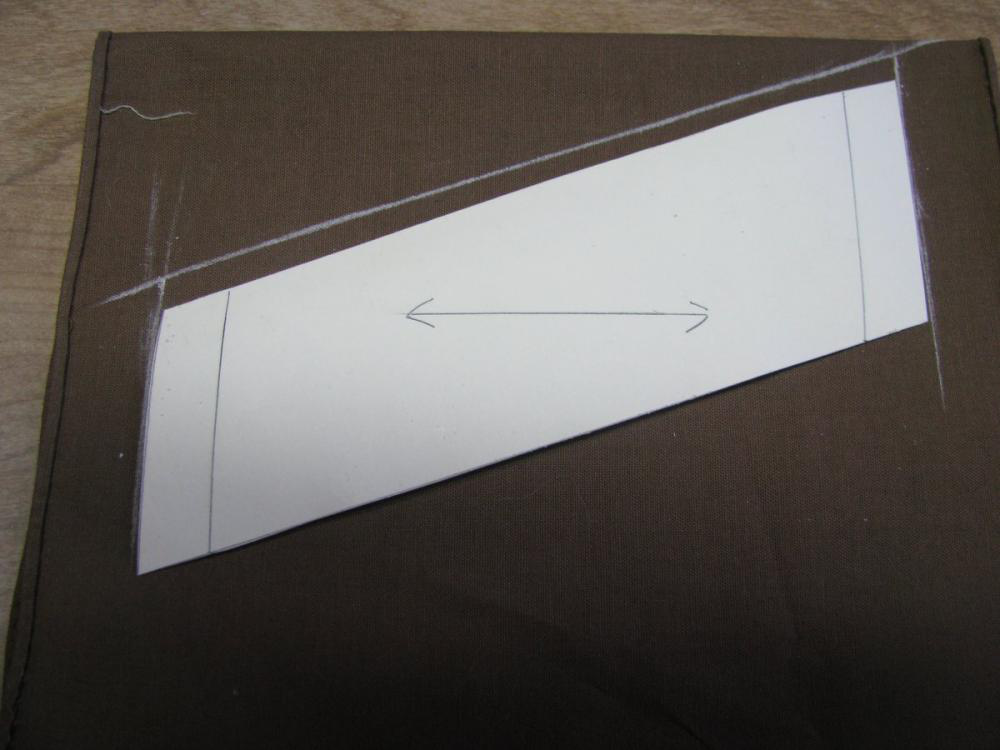
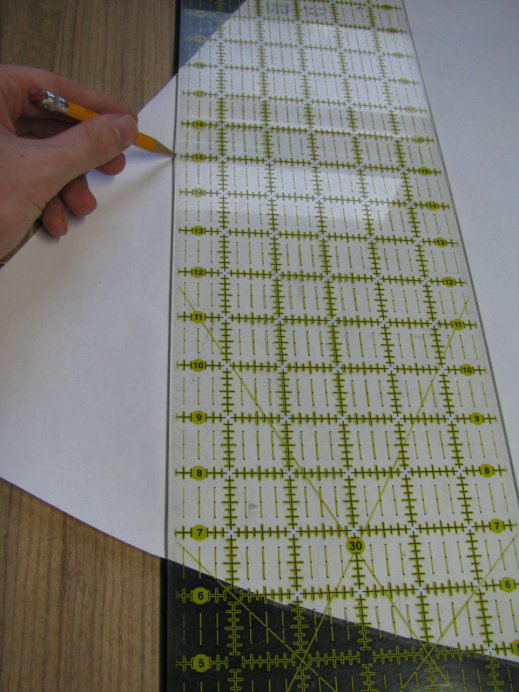
To begin, place a sheet of paper against the pocket construction line, leaving enough room at each end to add an allowance (note that I did not do this . . .).
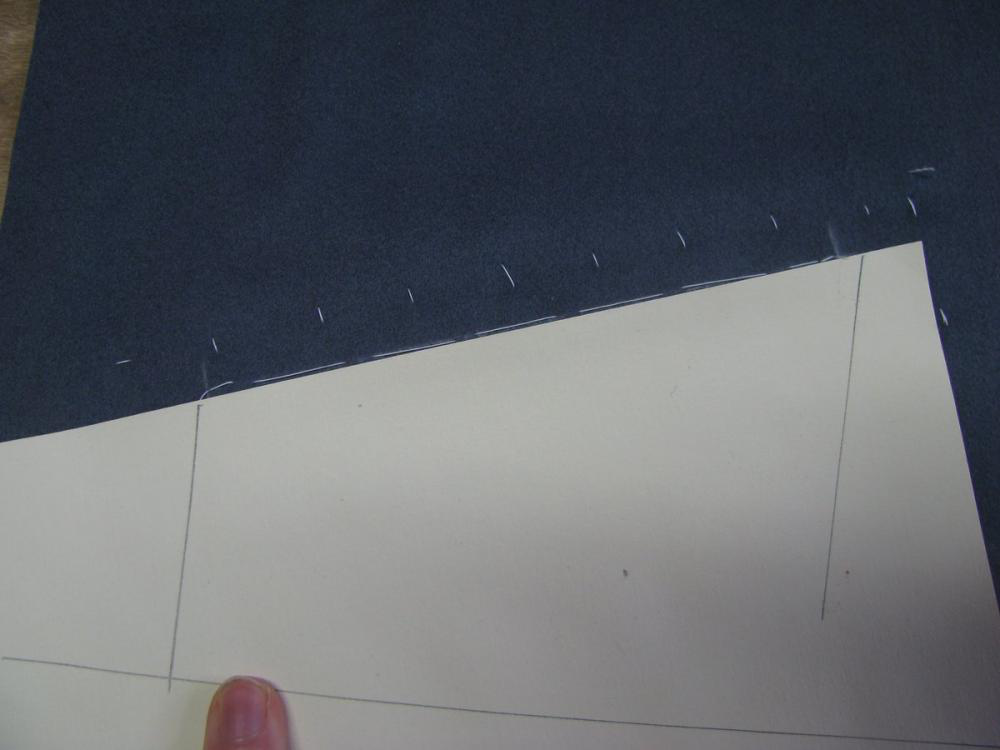
While the paper is held in this position, draw a line parallel to the chest construction line that you marked on the coat, which is cross grain of the wool.
From each end of the pocket, draw a line at right angles to the construction line you just drew.
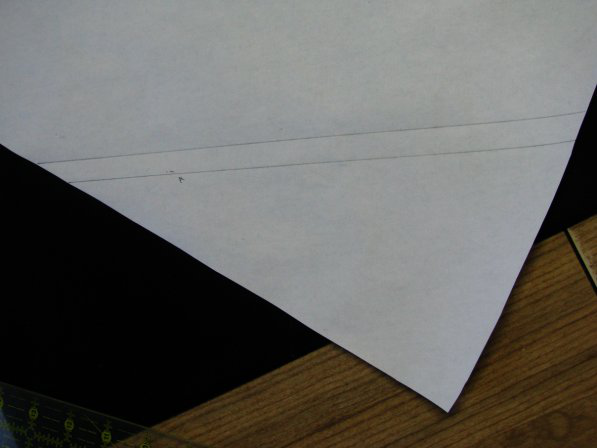
Finally, draw a line indicating the bottom of the pattern piece. In my case, it’s 2 inches below the top of the paper, and parallel with it as well. At either end, add a 1⁄2 inch allowance, used for turning back the ends of the welt later on.
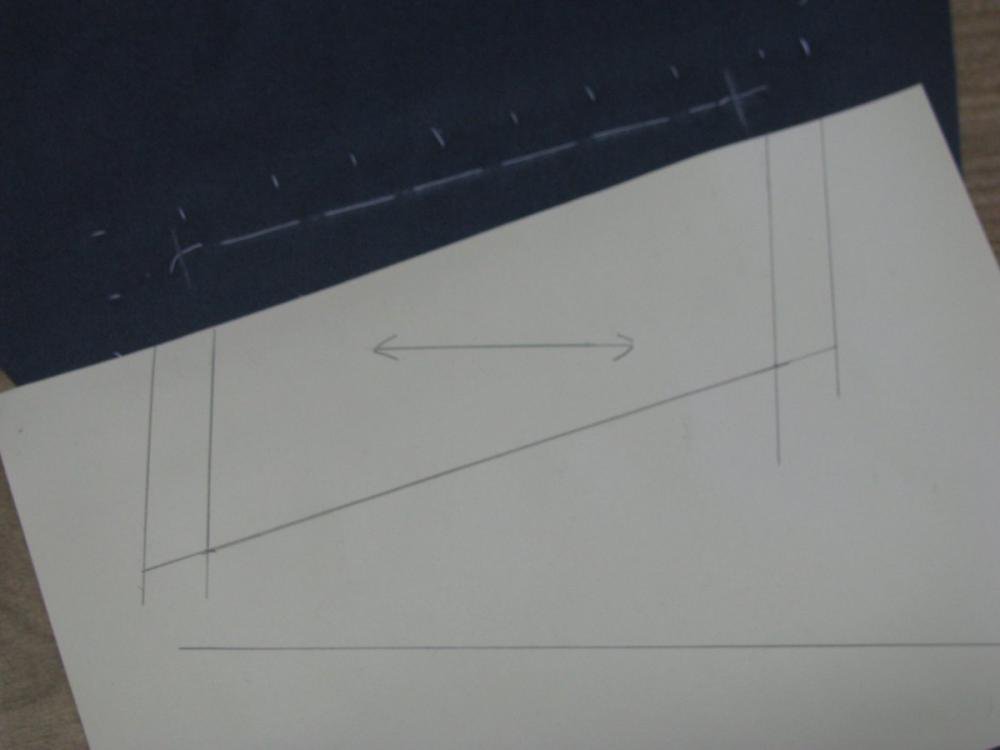
I also like to mark the cross grain line, for lining up the piece on the cloth accurately. This method of making the pattern is also great when working with striped fabrics. Simply transfer the lines of the stripes on to the paper, and line them up on your fabric before cutting out.
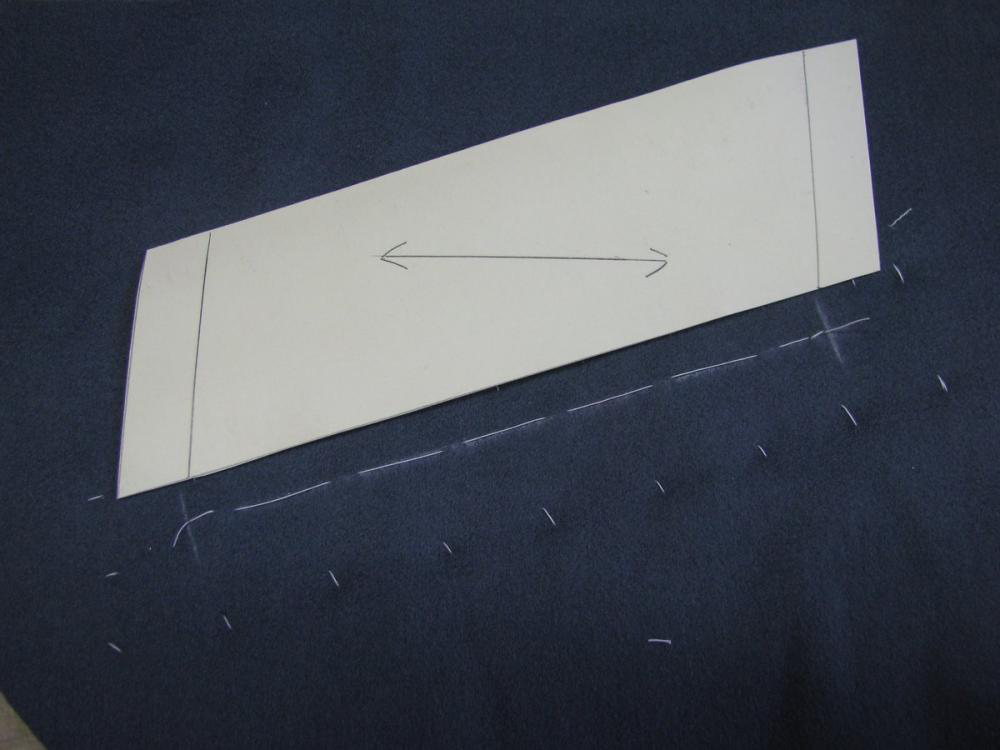
Cut out two welt pieces from your pattern, in wool. These pieces need to be identical, and not cut on the double, or you will have one piece either facing the wrong direction, or with the wrong side facing out.
The Welt and Facing
Line up the lower welt piece with the pocket construction line, making sure there is a half inch beyond each end. Baste it down, trying not to distort the fabric as you go. Being cut on the semi bias, this can sometimes be a problem.
Baste the top half of the pocket, which will form a facing on the inside of the pocket, to the forepart in the same manner. The pieces may be offset slightly at the ends in order to ensure there is a half inch allowance.
Re-mark the ends of the pockets in chalk on the welts. This is where you need to be as accurate as possible, with a very thin chalk line.
On the upper facing piece, Offset the lower end of the pocket 1⁄4 inch inward. This is so when the pocket is completed, the opening will not interfere with the edge of the pocket. Then draw 1⁄4 inch seam lines on each half of the pocket.
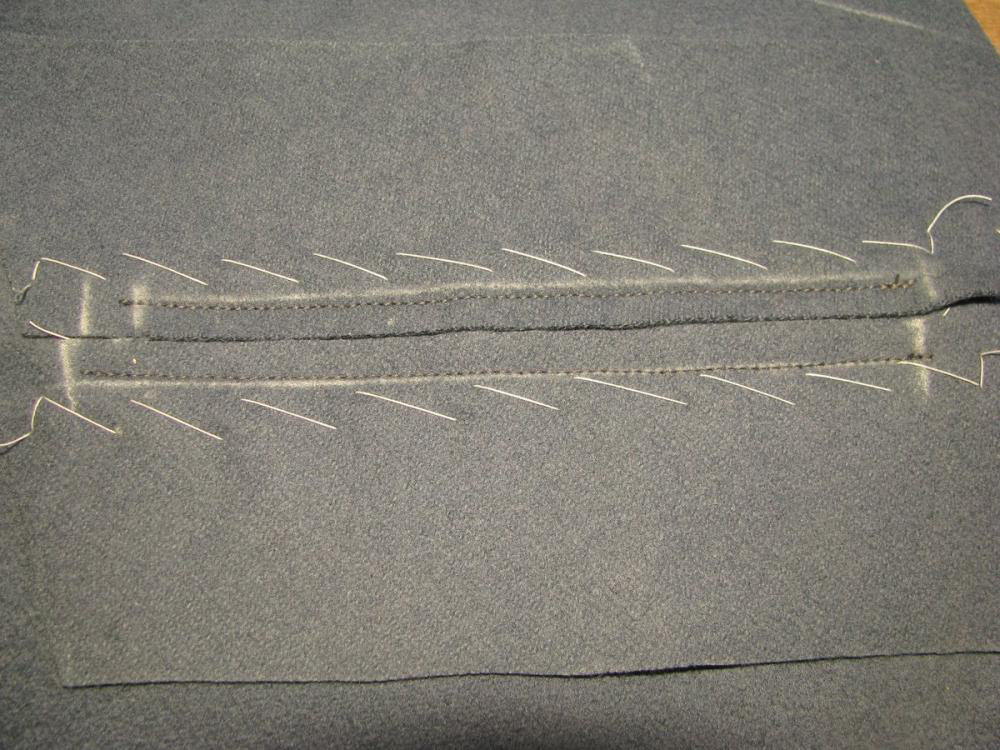
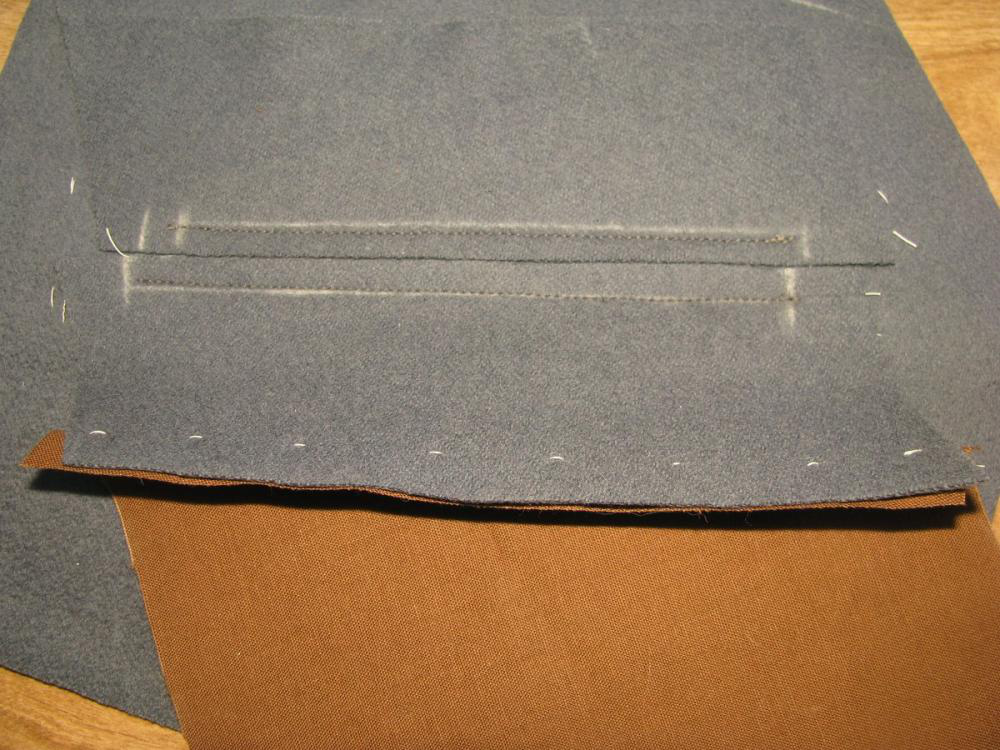
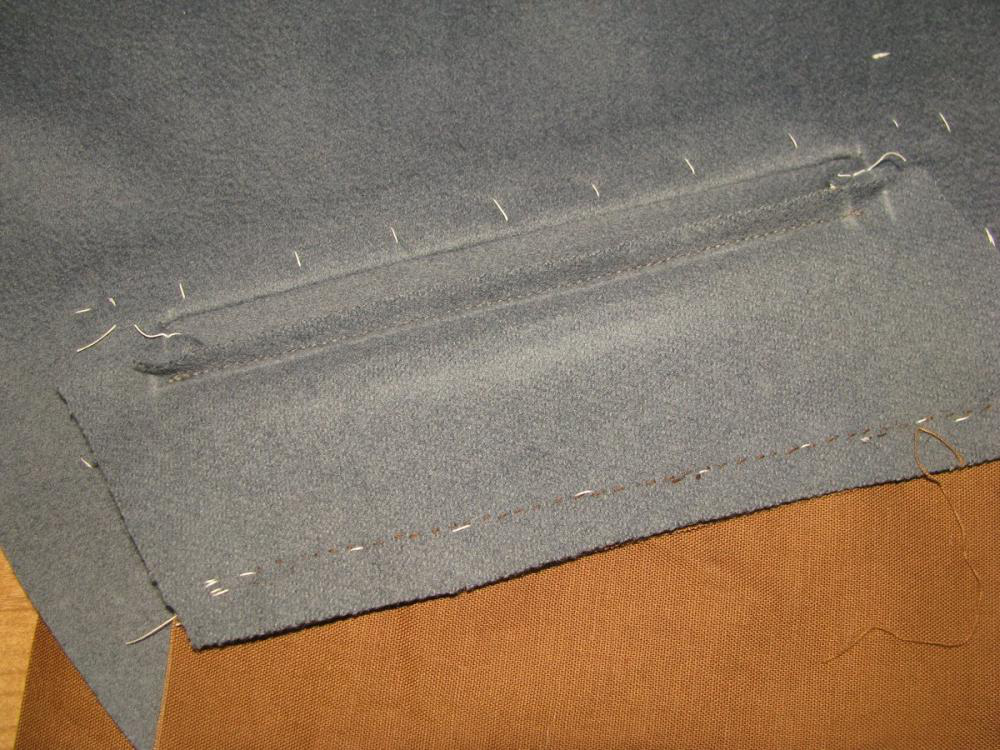
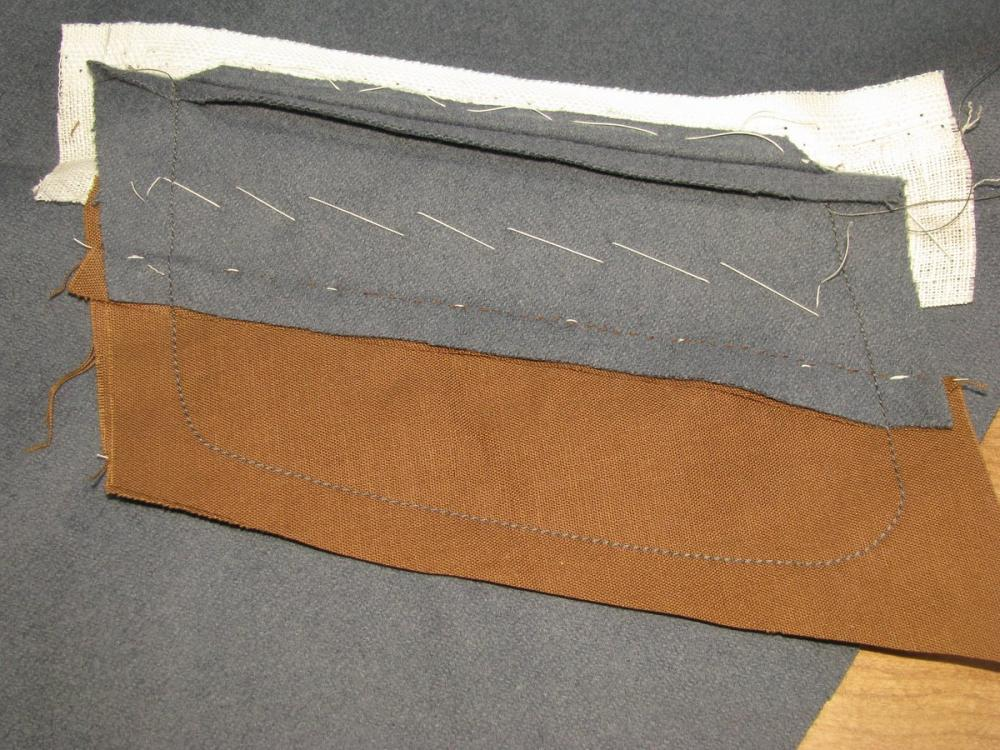
Sew the welt and facing on from mark to mark. You’ll note in my photo that the stitching goes past the lines a little. This is due to the fabric stretching out of shape while sewing. As long as the final dimensions are accurate, this is okay. Note how the ends on the right side are perfectly aligned, while on the left side they are offset by 1⁄4 inch.
Press each side of the pocket at this time to set the stitches, using a press cloth to prevent shine. All pressing should be done on a tailor’s ham, so as not to ruin the ironwork on the forepart that you put so much effort into.
The Pocket Bag
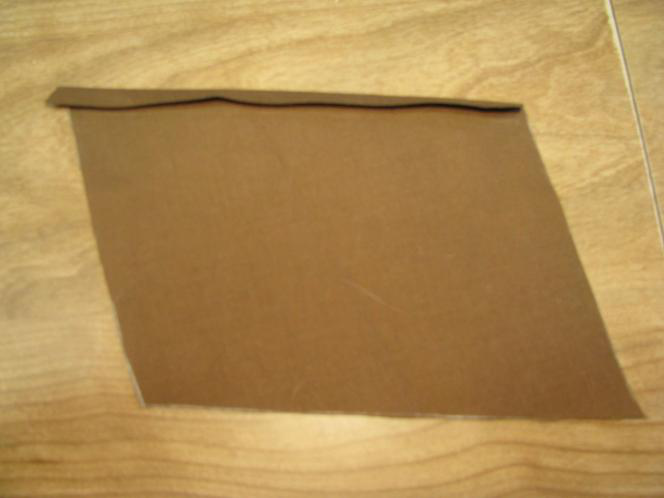
Lay your pattern on a doubled piece of brown polished cotton. Trace around the top and sides to give yourself the shape required. You’ll then have to extend the sides to the desired length of the pocket. I like to give myself some extra room here, so 5 inches deep is a safe depth to start with.
Cut out the pocket bags, and press over 1⁄4 inch at the top of each piece.
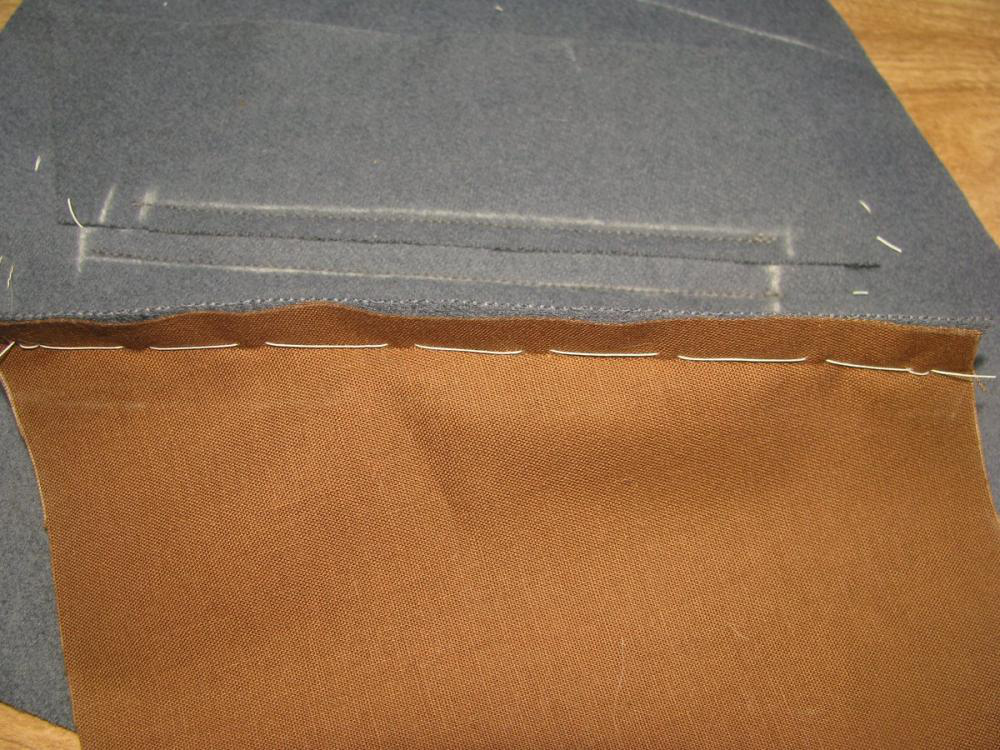
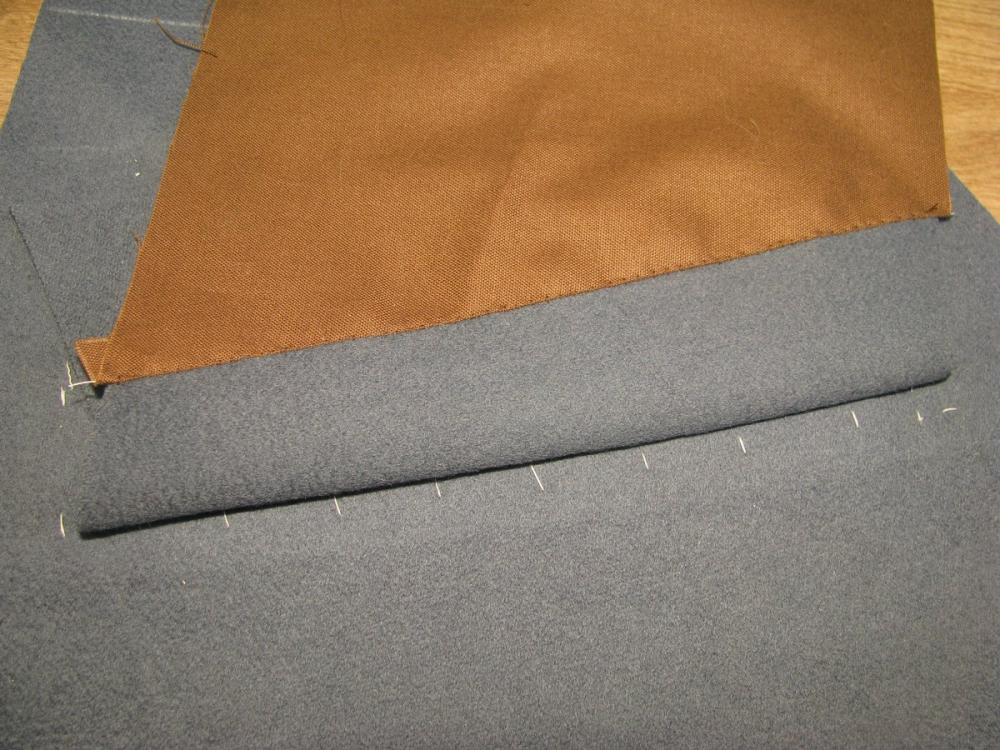
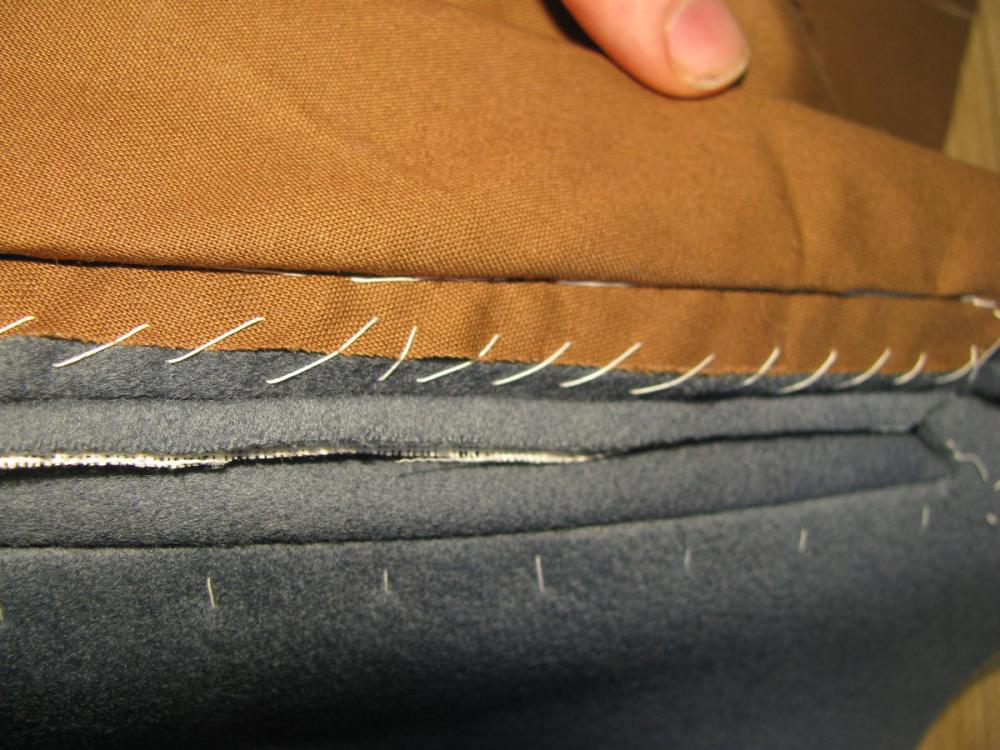
With right sides together, line the top of the pocket bag up with the free end of the upper facing piece. Baste the two together just a hair above the fold you just pressed in.
Note how the sides of the upper facing and pocket bag are parallel to each other.
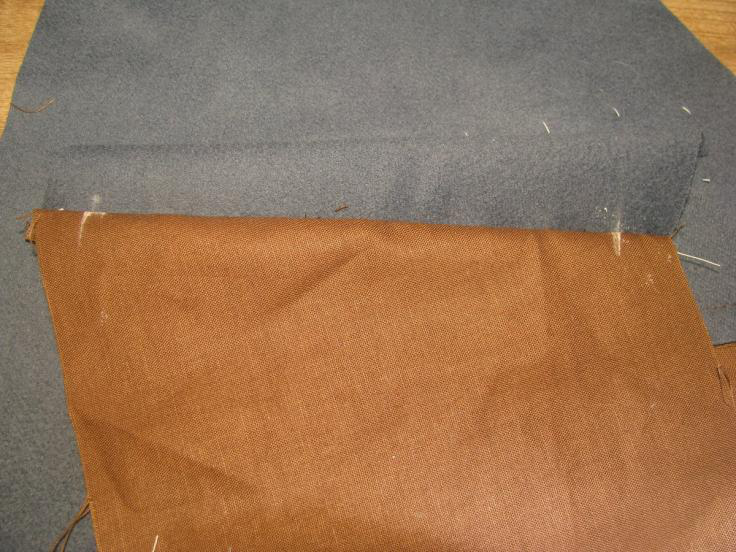
Turn the pocket over so that the right sides are facing you, and fell the pocket bag, end to end, to the facing using almost invisible stitches. If you basted in the correct place, the basting stitches should be hidden, and can remain in the finished pocket.
Now baste the lower pocket bag to the welt piece in the same manner. The major difference here is that angle of the sides are not parallel. This is because the welt will be folded over itself, which will then allow the pocket halves to be parallel to each other. Mark 1⁄2 an inch from either end with chalk, and fell between these lines. You need some extra space at each end for the pocket bag to pass through the opening.
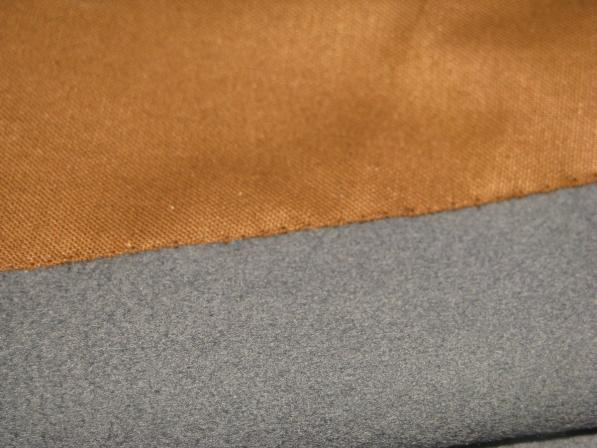
The photo is upside down, but you can see how the pocket lines up with the facing, while at the welt, they do not.
Opening the Pocket
It’s now time to carefully open the pocket. I like to fold the pocket in half lengthwise, and make a small snip in the middle with my shears. Then carefully cut open the pocket along the construction line. When you get to the lower end, where the facing is offset, stop cutting there. Take a pair of small scissors, and clip diagonally to the end of the stitching at the lower welt. You must clip exactly to the end of the stitching. If you do not cut close enough, puckers will form in the finished pocket. If you cut too far, you will end up with a hole in the pocket. Still at the lower end, cut upwards at a 90 degree angle to the pocket, directly to the end of the upper stitching that you offset 1⁄4 inch.
At the other end of the pocket, do the same thing, but but cuts are angled, starting 1⁄4 inch from the end of the pocket.
Now pass either the facing or welt through to the wrong side, and press open the seam. After pressing, I like to move the piece back to the right side and then bring the other half in to press in the same manner. This helps reduce bulk and gets things out of the way while pressing in such a confined space.
Each half should be pressed both from the right and wrong side to give a crisp, finished appearance without bulk.
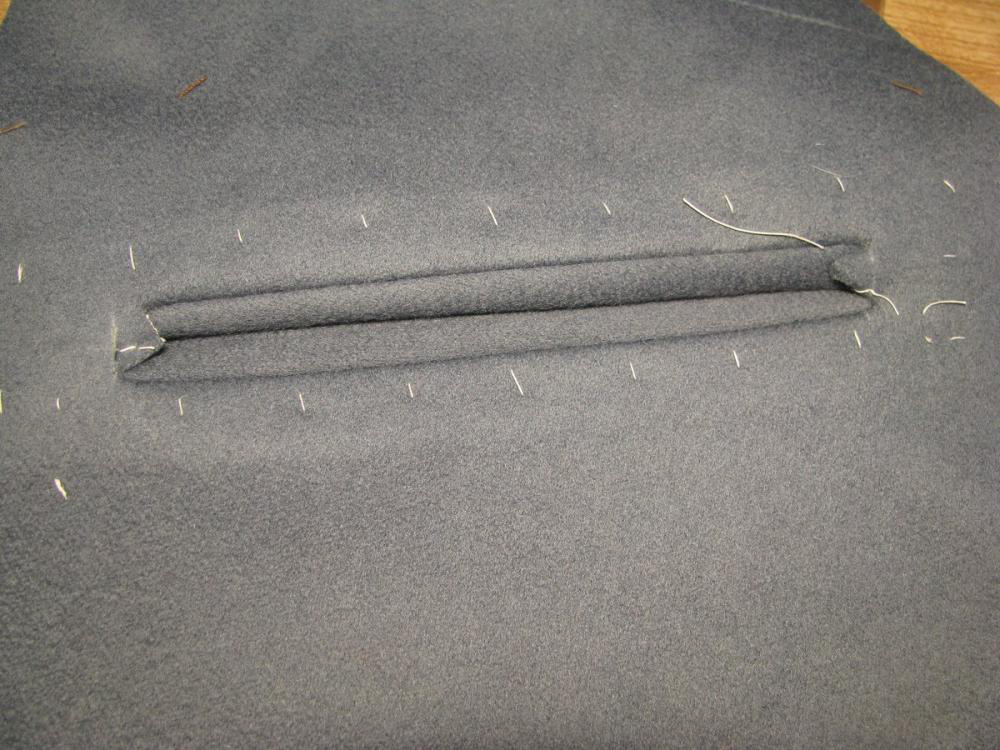
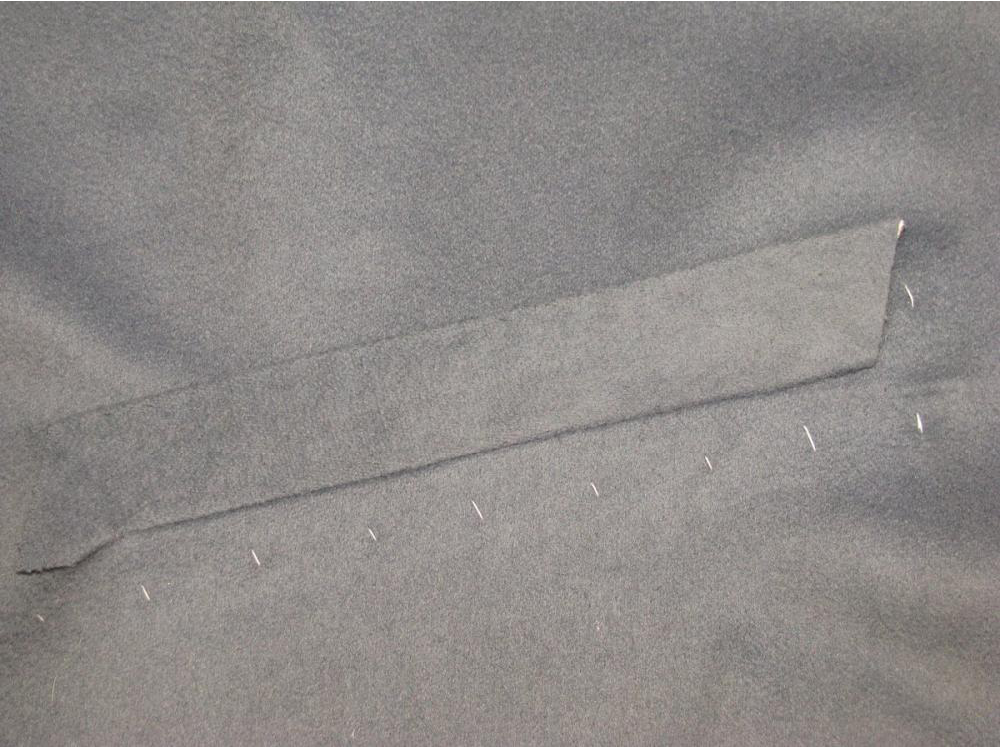
After pressing, you should have this appearance, if both facing and welt are passed through to the wrong side. Note the little triangles at the end, and how the left one appears crooked. This is due to offsetting the stitches previously.
Finishing the Welt
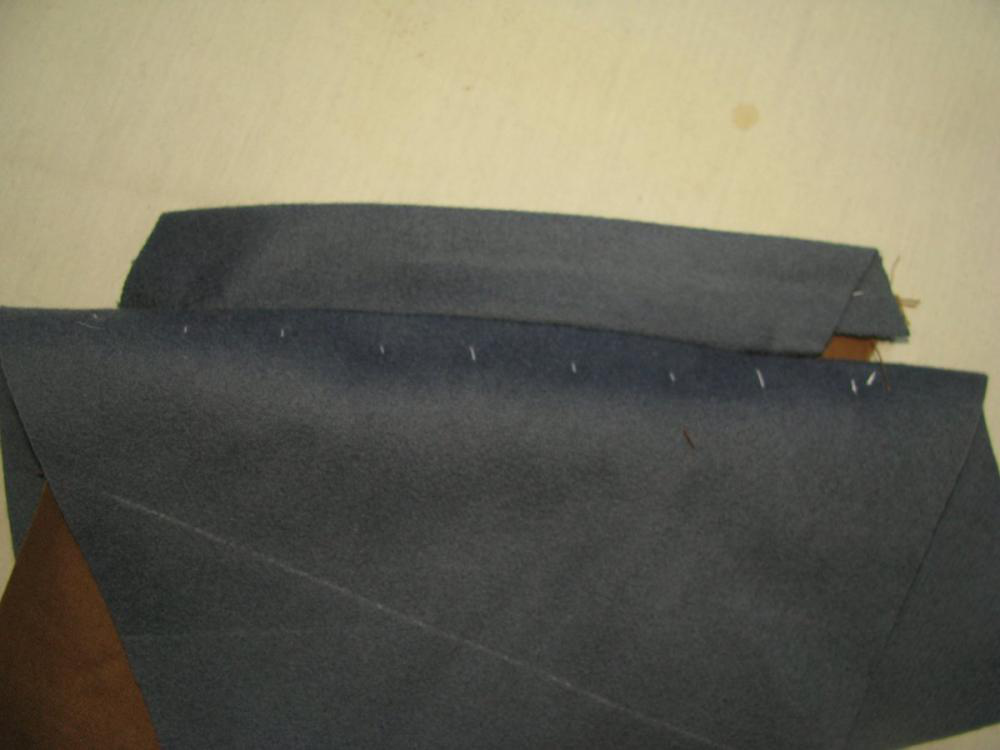
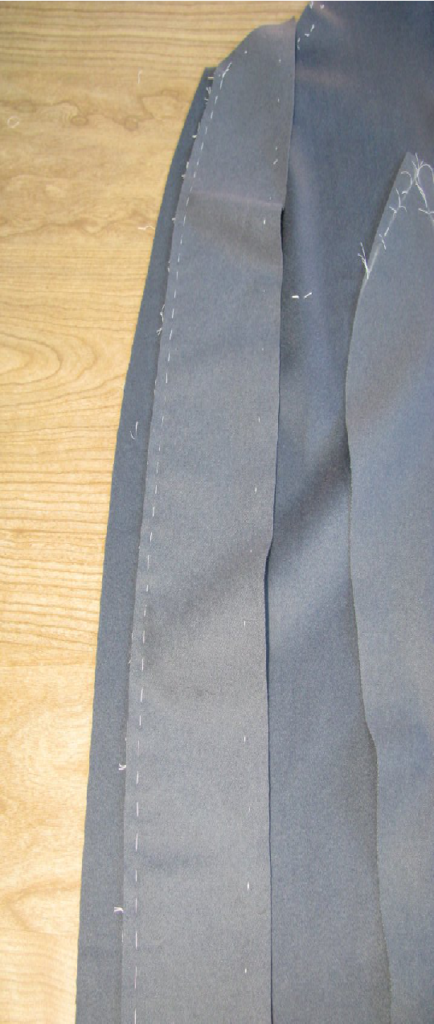
Pass the welt to the outside, if it’s not there already. Fold the welt, wrong sides together, so that the top and bottom seams butt together, and baste to temporarily hold it closed.
At this point, give the welt a good pressing as shown, folding the coat out of the way so that any ironwork does not get shrunk away.
Remove the basting. Lay a length of stay tape just under the welt fold, and baste it in place. The tape should extend from end to end, and will give the pocket strength, as well as preventing the pocket from gaping open.
Cross stitch the stay tape to the pocket, being very careful not to let the stitches show through to the right side.

Turning the welt back to the inside, and serge the ends back together again, using silk thread.
Closing the Pocket Bag
Fold the pocket bag over so that the right side is up, and chalk two marks in a triangular fashion at each end. Trim each end, which will allow the bag to pass through to the wrong side with no wrinkling or bunching up.
Pass the pocket bag through to the wrong side, and align both halves of the pocket together. Baste across the facing, catching the pocket bag underneath.

Stitch the bag closed, using 1⁄2 inch seam allowances, from end to end. The depth can be variable, mine turned out on the short side due to the fact I was using scraps. At the bottom corners, make them rounded so that objects do not get stuck in the bottom of the pocket.
Pass the welt to the right side of the coat. Baste across the top to hold it in place while other work on the coat continues. The ends will be finished off later on, after the canvas has been installed. This will give us a much more secure pocket.

The First Fitting
At this point, you will baste together all pieces of the garment by hand, to test for fit one last time. Normally, in a skeleton baste, the tailor would baste in the padding, linings, and collar as well. Since you have yet to learn how to construct these pieces, we will forgo them for now. On your next project, you may put them in.
This is done just the same way as for the full muslin, except do not clip any seams. Treat the marking threads as the edge of the cloth, the inlays are there in case you need room.
After sewing the front lapel on, sew a length of stay tape to the front of the forepart to prevent the shrunk edge from stretching back out.

Do the same with around the armscyes when completed, as well as the neck, from lapel from lapel. The last thing you want is for all the careful cutting and shaping you performed to be ruined when trying on the coat.
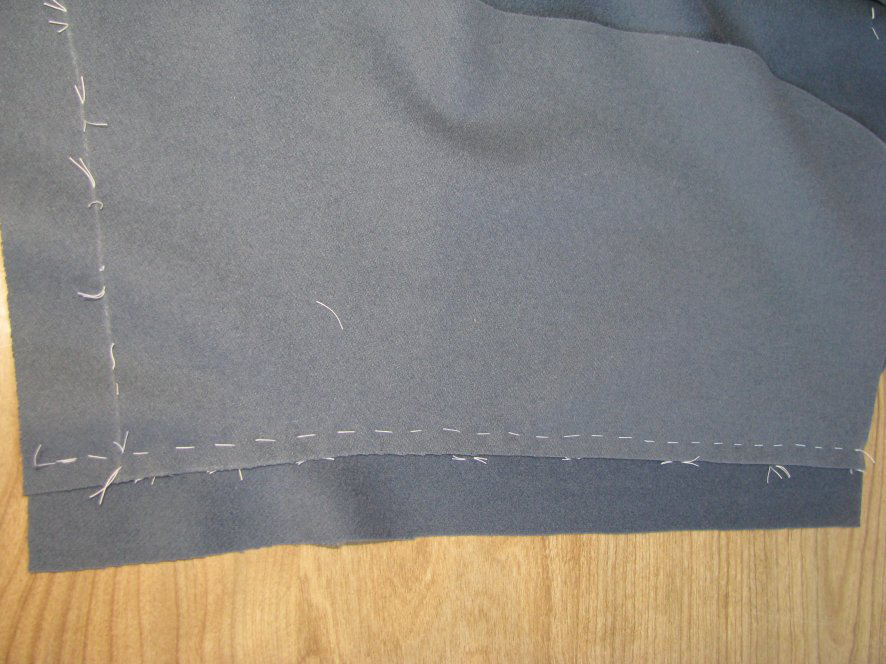
When you are basting together the center back seam, sew from the top to 1/4″ inch past the bottom of the inlays at the waist seam. Then you can get a good idea if the opening is at the correct height or not. Press each seam as you go, but only lightly. And when sewing each seam, stop when you hit the marking threads. You don’t want to include the inlays in the seam, as they are not technically part of the coat at this point.
First Fitting
Congratulations, you’ve made it to your first fitting intact! The main things to check for at this fitting are the same as at the beginning of this module. If you need to make adjustments, do so now by marking the amount you need to take in or out with chalk (just draw a line), and then removing the basting stitches, and rebasting. Remember, you need to leave room for the padding and lining, so don’t fit the front too tightly. Be mainly concerned that the back hugs the back closely, that there are no unsightly creases or folds, and that all seam lines are in their proper place.
The main things to look for are that the various seams are in the correct locations. Check in particular the placement of the back pleats and vent, that they are all aligned and at the correct height.
The waist seam should be about one inch below the natural waist, rising on the sides over the hips, falling back to the same level in the back.
The center front should meet in the front without any pulling, and should hug the front of the chest closely, thanks to the lapel dart.
And of course any mis-fitting pieces should be corrected.
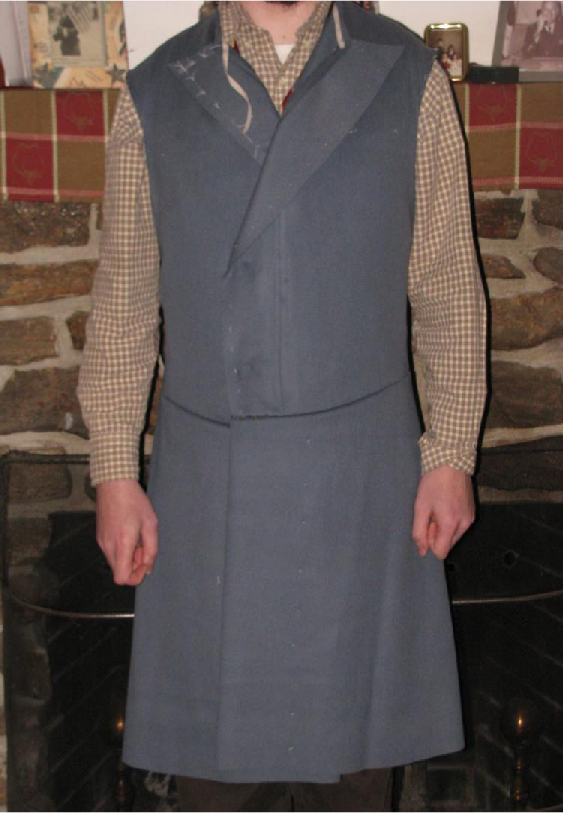
There are endless issues that can occur, but rather than listing them all, I will correct each person’s work individually. Please post photos of this stage, for critique and helpful hints. Following are a few photos of the completed process.
Front view. The distortions at the front are due to the pins holding the coat closed.
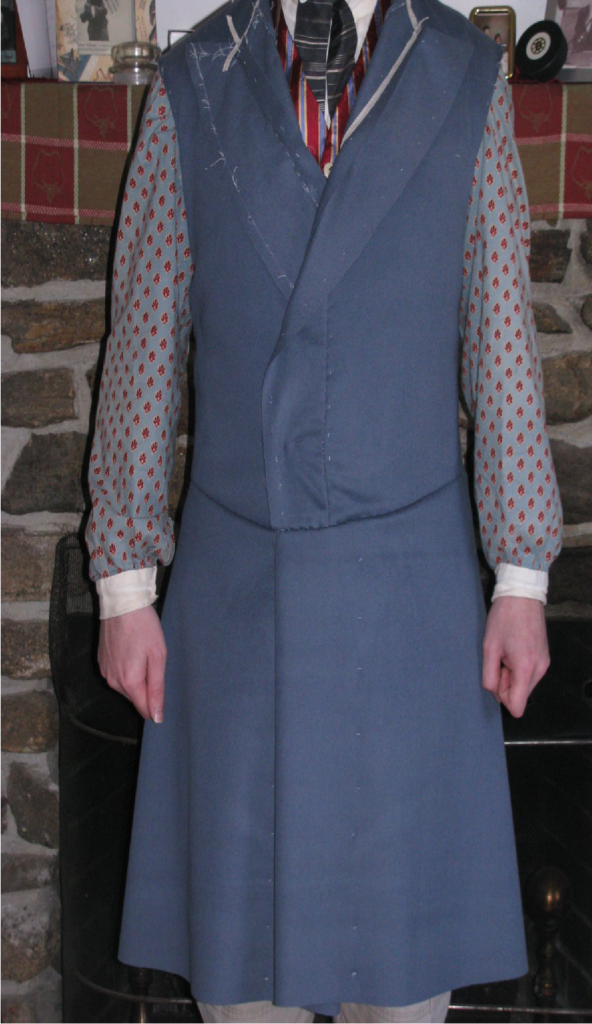
Note how the skirt drapes nicely in this photo. There are no drags across the hips, and the pleats hang nicely in back.
I still need to shorten the back slightly, to get rid of the wrinkles on the side-bodies and lower back. The ripples across the upper back are due to the stitching, I’m pretty sure, but I’ll investigate it just the same.
The fabric comes right up to the bottom of the arm. Slight amount of extra fabric in the front of the armscye will be carefully trimmed off. Notice how the coat does not move even when the arm is raised.
Darts or Fishes
Remarking the Roll Line
It’s likely that while shrinking the front edge of the forepart, that the roll line was nudged out of shape. At this point, take a straight edge and remark the roll line, then replace the marking tacks with new ones.
Darts
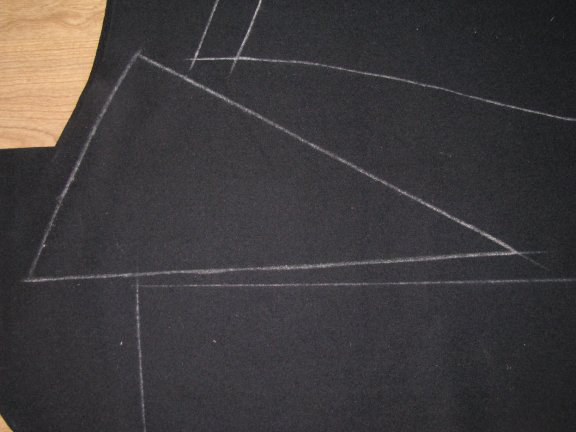
On the wrong sides, on both the skirts (if used) and forepart, mark the darts in chalk, carefully tracing the thread tacks you put in.
Next, baste the darts, starting with a couple of stitches in place to hold, then using the basting stitch. Make sure the stitching aligns with the chalk lines on both sides of the dart as you sew. Repeat for all darts – gorge, lapel, waist, skirt, etc.
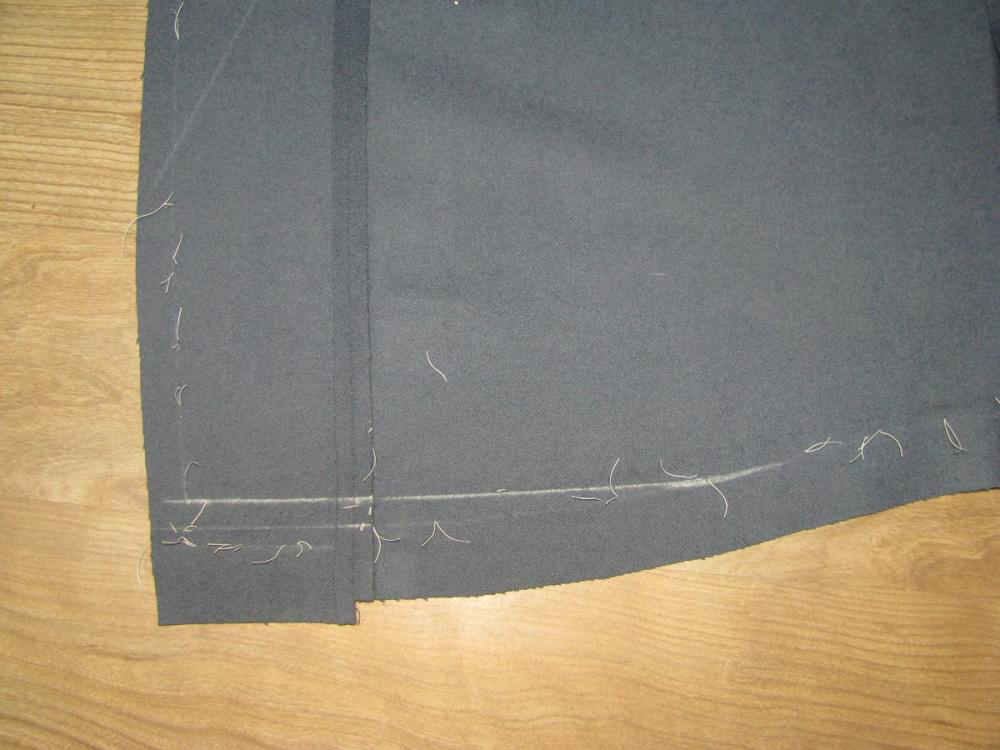
Piecing the Skirt
Now we will actually commence construction, starting with the skirt. Find the small triangular pieces you cut. Also be sure you have separated the two skirt pieces by cutting carefully on the fold line. Next, figure out which side is longest on the triangular piece, and line it up, right sides together, to the skirt piece. It may take some fiddling to figure out which piece goes where, but I assure you, they will line up, providing you added double the seam allowance when cutting.
After they are lined up, baste together carefully, making sure there is no fullness on either side. Then, sew, using a 1⁄4” seam allowance, with either a backstitch, or machine stitch. If using the sewing machine, I recommend about 12 stitches per inch. Remember that machines of the period could not so backwards, so no back-tacking! Instead, leave about 4 inches of extra thread at the ends, pull the threads to one side, and tie in a secure knot. Remove the basting stitches.
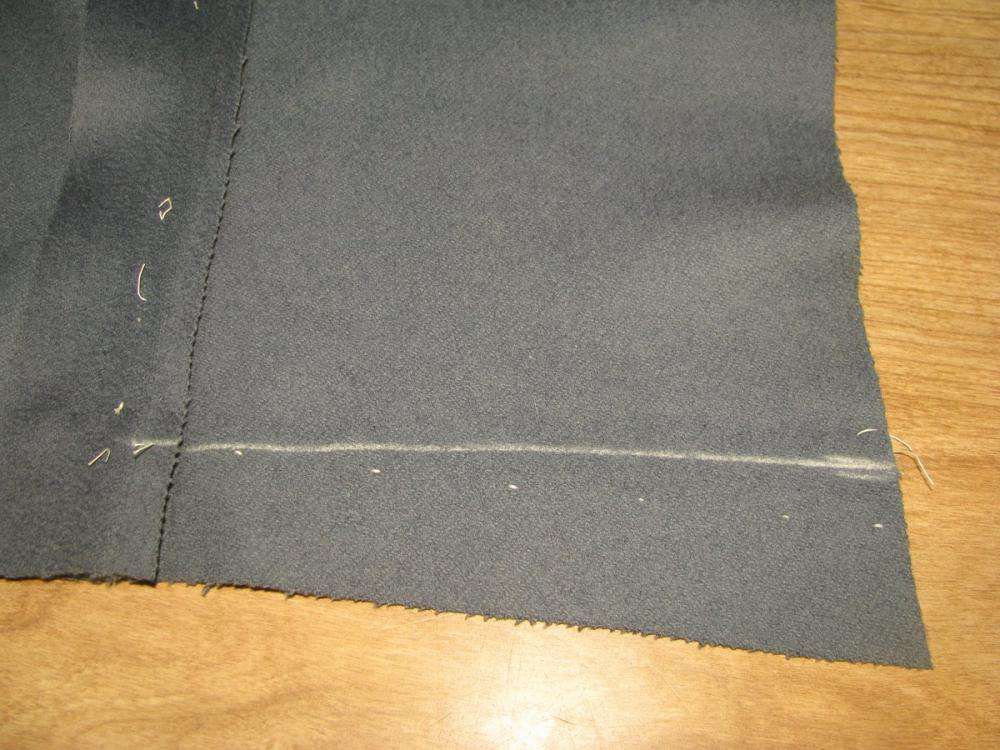
Now, press the seam, using the following technique. After pressing, snip off the little triangular pieces that form at either end of the seam allowance.
Pressing Technique and Opening Seams
The first rule of pressing is to not move the iron up and down the seam, as this has a tendency to stretch the seam and throw it out of shape. Begin by laying the pieces, still right sides together, on the ironing board. Go over with a hot iron, with a little steam, and press the seam. Use a press cloth made from a scrap of leftover wool to prevent shine on the fabric. Flip both pieces over, and repeat this process. What this is doing is setting the stitches, which will give us a tighter press of the seam.
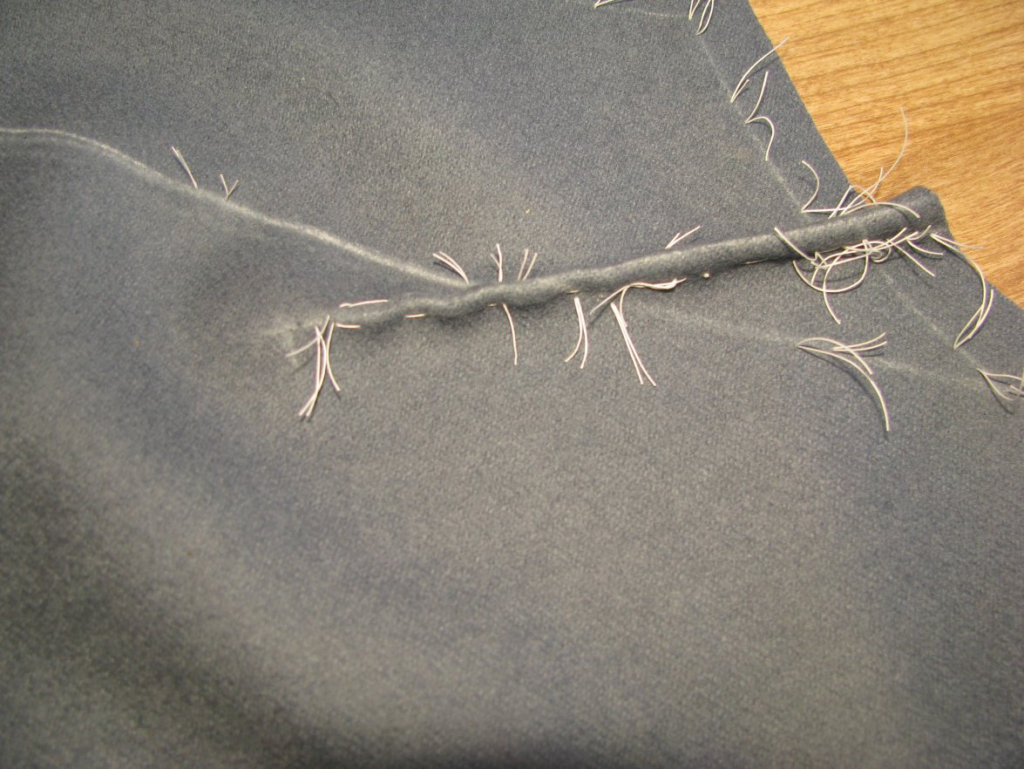
Next, open up the seam from the wrong side, and press the seam open. Take your time, and do just a small section at a time. Hold the iron for a few moments, remove, then press with a heavy goose iron, or clapper, to really set the seam. We’re trying to avoid that rolled look to the seams that one so often finds, especially in coats made of heavy fabric.
Turn the fabric over to the right side. Using a scrap of fabric as a press cloth, go over the seam again, with the steam iron, then the clapper or goose iron. When using the clapper, you may want to put the fabric seam on a hard surface such as a piece of wood. Make sure to use a press cloth whenever pressing the right sides of fabric, to prevent shine and imprinting the shape of the iron.
If you have the problem of the seam allowances showing through to the right side, press the seams with a piece of card stock underneath each of the seam allowances.
Ironwork
Forepart
We will begin our ironwork by taking up the forepart, and stretching the front of the armscye. The total amount of stretching should be about 3⁄4 of an inch. Hold the fabric at the shoulder point, and put pressure down with the iron, stretching as you go. Both layers of fabric should be stretched at the same time, to ensure they are stretched equally.
Next, stretch the shoulder seam, about a quarter inch total. This is one of those steps not explained in any book, but learned only through practice and critical thinking. If you measure the distance from the edge of the shoulder seam, and compare that to the edge of the back shoulder seam, you will see they are equal. If you add a seam allowance to that, there is no problem getting them to line up. This is what the majority of produced patterns do. Remember, we did not add a seam allowance, so instead, measure the distance of both seams, 1/4” from the edge. You’ll find that the back seam is 1⁄2” to 3⁄4” longer. By stretching the front shoulder seam, and shrinking the back shoulder seam, this distance is reduced, and the seams line up much closer.
Now, stretch the hollow point of the neck seam only, about a 1/4” as well. This gives a little more shape to the shoulder area, and helps the neck hug the body more closely.
Stretch the side seam as well, about 1/4”. This is not shown by Devere, but is necessary to get the seam to line up with the side piece.
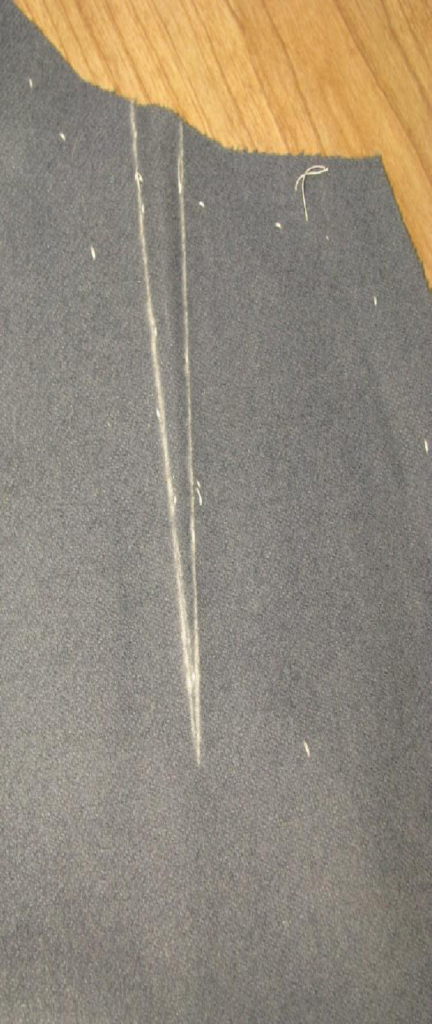
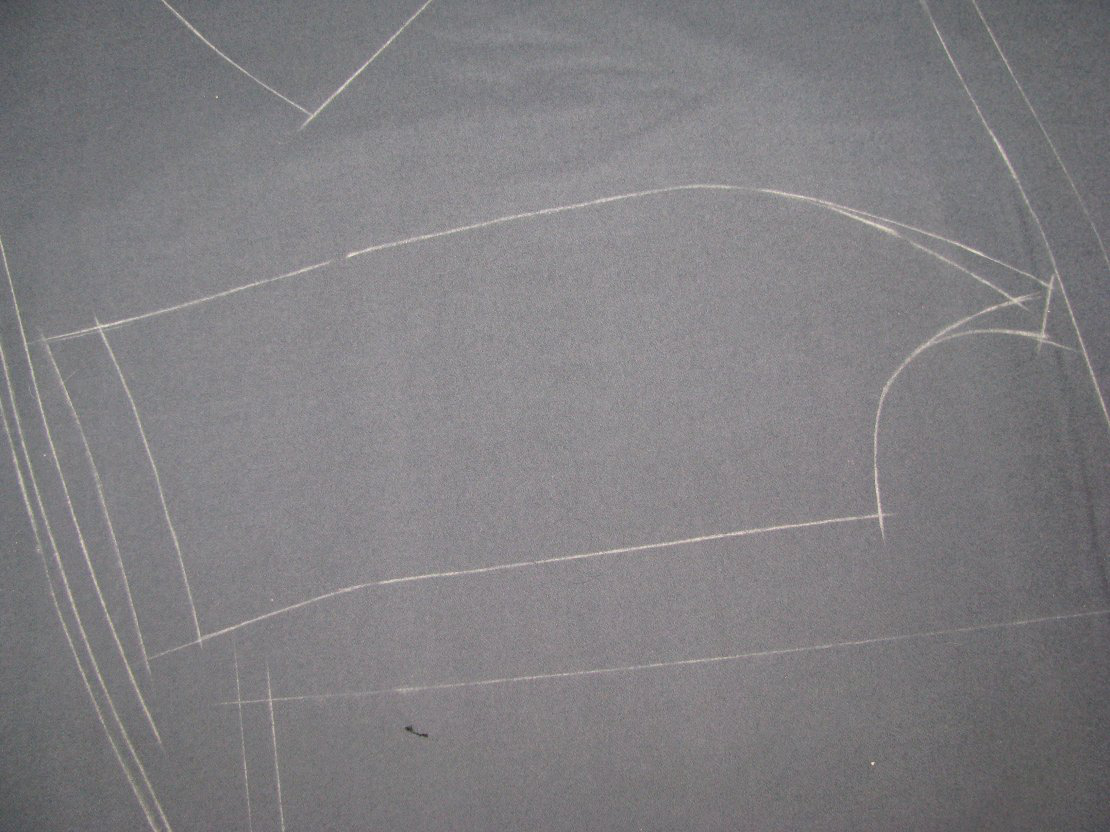
The center front needs to be shrunk now. If you notice a lot of frock coat reproductions, there seems to be a lot of fullness at the center front, right in the middle of the chest. The fullness actually needs to be moved to the breast area, to give that pigeon breasted look so common throughout the period.
Place the foreparts with the center front facing you on the ironing table. Pinch up a small amount on the front, as if you were putting in a dart. A half inch at a time is good. Gently work the iron over the fullness, gradually pushing it towads the middle of the chest, away from the edge. Continue with this process until the front edge is almost entirely straight. The very top may still be slightly curved, but that is permissible, as it will help the lapel roll back on itself towards the chest.
Notice how the fullness is visibly in the center of the forepart now.
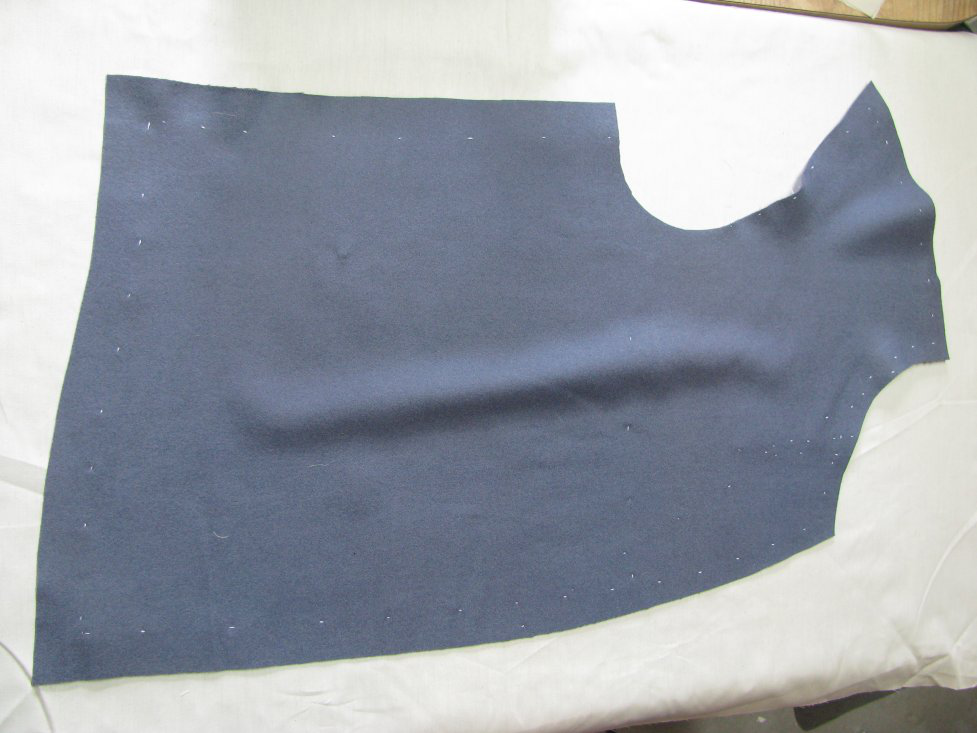
This will also leave room for the padding later on. The shoulder area should have a lot of shape to it as well.
Side
The goal of the ironwork on the side piece, is mainly to impart more shape into the coat. In this step you are basically folding the fabric over, and stretching the seams, while shrinking the middle. It will take some practice, but you will get it. Try not to crease the middle of the piece as you’re doing the ironwork, as it’s hard to get rid of.
The following is a description from The Art of Garment Making, by Phillip Dellafera.
Fold the sidebodies as indicated, then proceed by shrinking away all the ‘loose’ material that will show itself at the waist. This work must be done carefully, until a nice hollow is formed at the waist; it will then be seen that the outer edges will have become slightly stretched. This is exactly what is required, and it will be found that a well defined waist is obtained by adopting this method. Sometimes this effect is obtained by slightly stretching the seams in a downward direction only. This, of course, will certainly help to get the desired shape; but the best plan is to shrink the centre of the side body, which will automatically give the extra length to the seams.
Also, stretch the bottom of the side piece slightly, again about 1⁄4”.
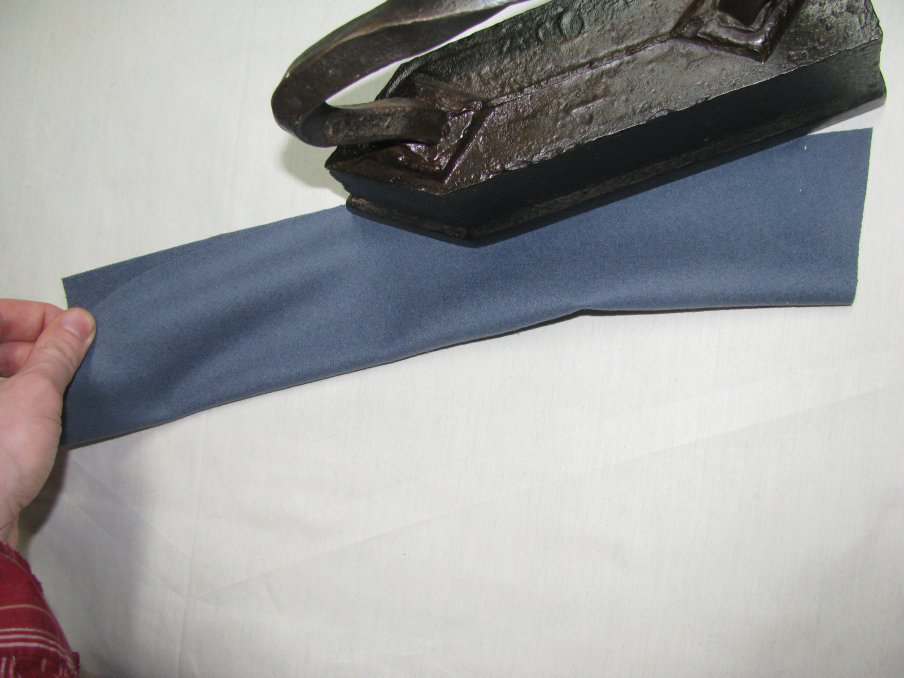
Back
The back requires some shrinking, but we will be waiting until certain construction steps before we perform that work.
Video
Here is a video demonstrating all of the ironwork techniques used in this section. Hopefully it will further aid you in your learning!
Cutting and Tacking

This can be a nerve-wracking step for some people, especially if you are using expensive fabric like Hainsworth. It’s potentially hundreds of dollars down the drain if you make a major mistake. I remember reading about a tailor on Savile Row cutting an overcoat with fabric that was about $800 dollars a yard. He was very nervous as well! But, if you are careful, and check everything twice, you should be okay.
To cut, make sure the shears are held completely straight, not slanting to the left or right. This will help make sure both pieces are cut equally. Cut inside the lines, as the chalk line adds some width to each piece. Make sure you are cutting the inlays with the pieces! After a piece is cut, carefully move the pieces aside, keeping them together as one. This is necessary for the next step. It’s also a good idea to mark an X on the wrong side of each piece, especially if the right and wrong sides are similar in texture.
Tacking
Now, you must mark the inlays more permanently with thread, using tailor tacks. You learned the stitch in the previous module. Do the stitches, cut the threads, seperate the pieces slightly, and then cut the stitches in between. Make sure to mark any darts, as well as the chest line on the front of the coat, as well.
Keep the pieces together, still, for we have some ironwork to do.
Pattern and Inlays
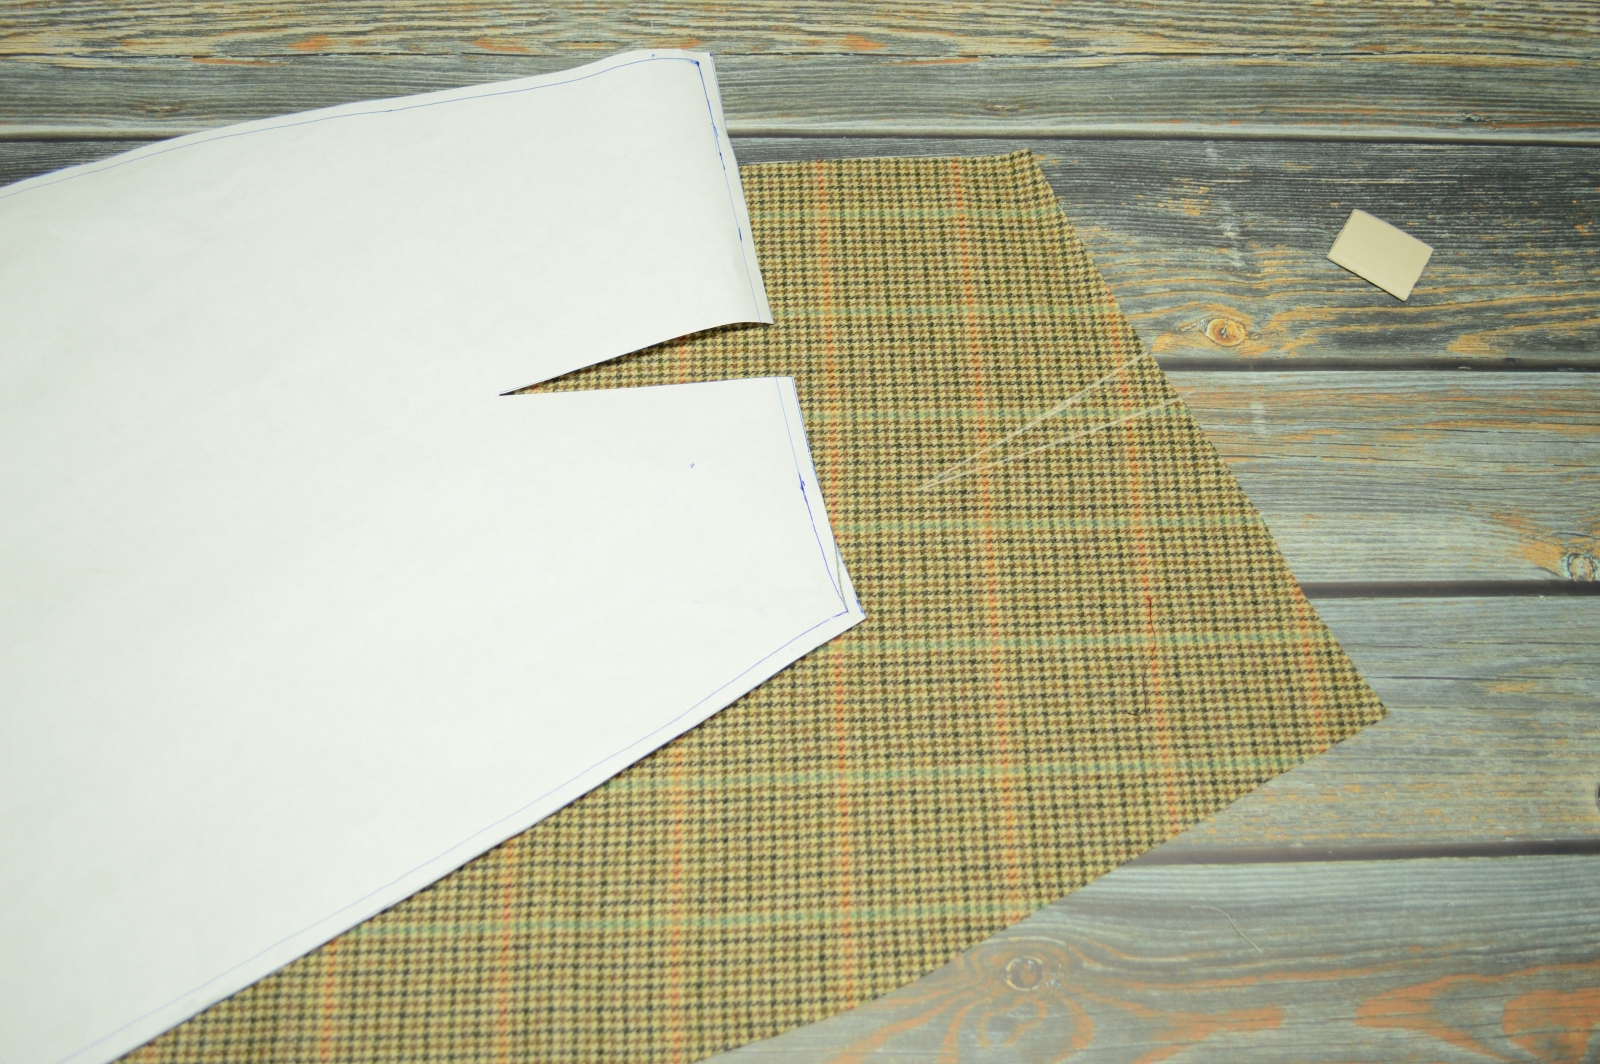
We’re going to start right off with this Civilian Frock Coat workshop assuming you already have a double breasted frock coat pattern drafted and fitted. It’s now time to layout the pattern pieces on your fabric and begin the tailoring process!
Pattern Layout
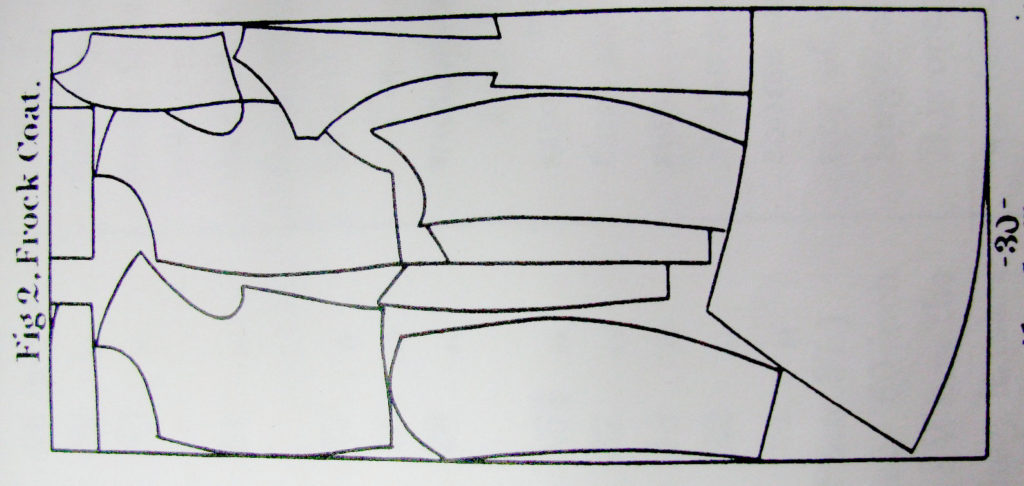
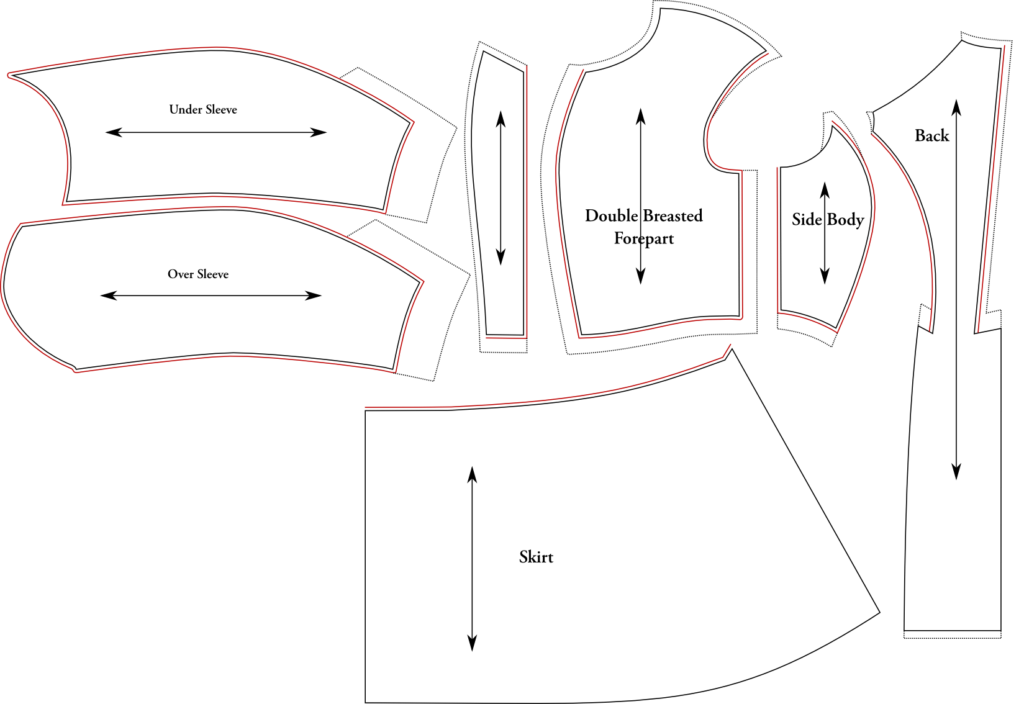
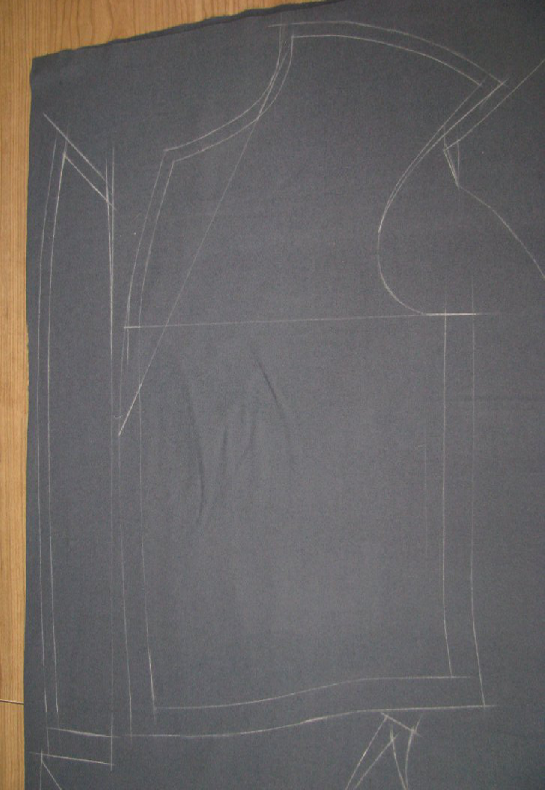
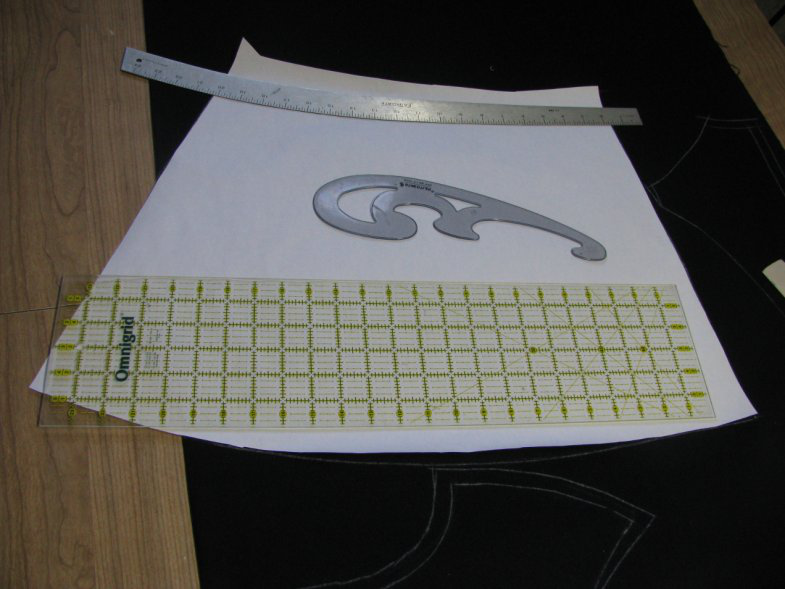
First, be sure you have drawn grain lines on all of your pattern pieces. If you have a nap on the fabric, you’ll have to lay out each piece in the same direction, with the nap heading down. If there is no discernible nap, the pieces can be laid either direction, as long as the grain line on the pattern piecies line up with the fabric. Try to fit pieces as close together as possible, but leave room for the inlays as described below. I find it easiest to lay out one piece, draw the inlays, then do the next piece, and so on. In the diagram, you can see a period fabric layout. They’re good to get some ideas, but don’t feel you have to follow them directly. Be sure to leave plenty of leftover fabric for the sleeves, facings, collar, and other odd ends. Remember, as you are striking the pattern, to use a sharp piece of chalk. I find I have to sharpen it between each piece, sometimes more often.
Inlays
As you layout each piece, it is important to add inlays, for fitting purposes. If you made a mistake in your drafting that you somehow missed, these inlays may save you from having to cut new pieces, or even saving your entire coat from ruin.
Add inlays to each piece as follows. As you are learning to do this, measure out each inlay carefully. With experience, you’ll eventually be able to do this freehand, and anticipate how much inlay to add based on the figure you are fitting.
Forepart
At the side and bottom, leave 1” inlays. At the center front, leave 2 inches. This is very important, and if you forget, the coat will not button. At the neck and shoulder, leave 1⁄2 inch, and at the armscye, start at half an inch, tapering to nothing about halfway down the front of the scye.
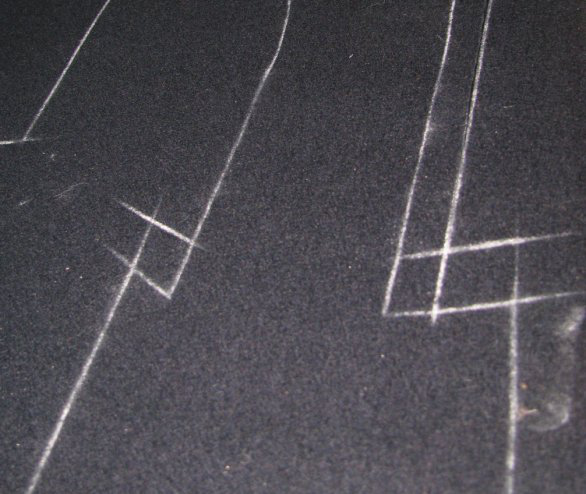
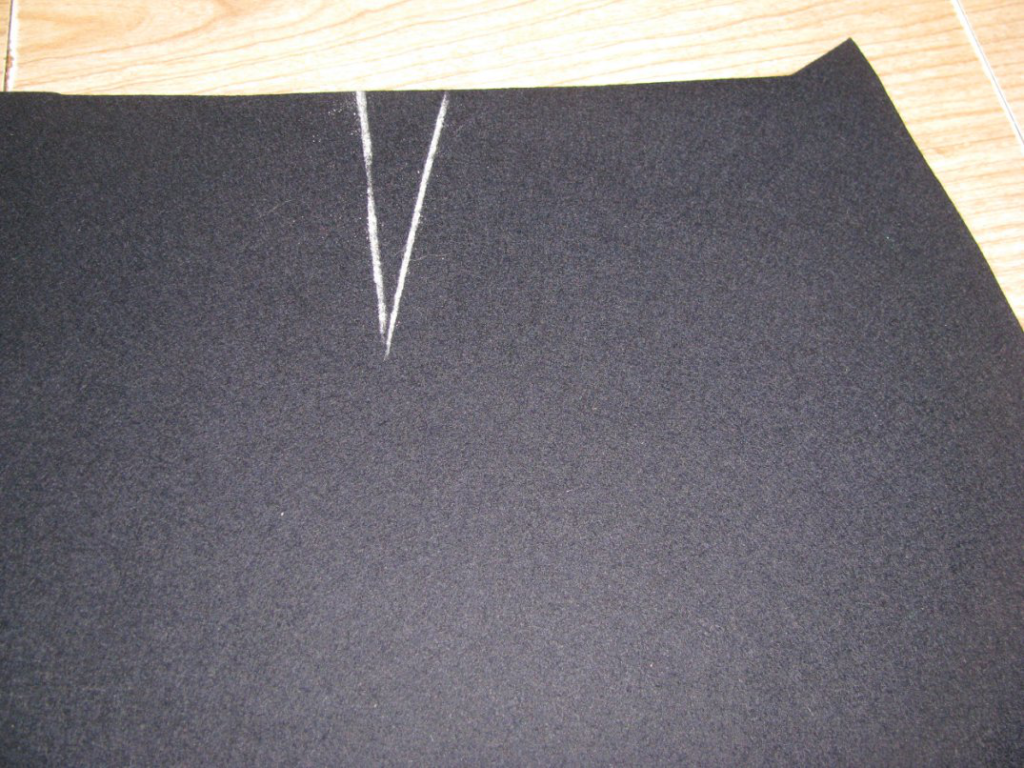
Also, if your pattern has darts, chalk those, and then close the bottom of the dart by drawing a line as if the dart were not there. The edges of the dart represent the seams, not the cutting point.
As you are laying out the forepart, transfer the chest line to the fabric. This will be helpful in aligning the front later on.
Lapel
For the lapel, I’ve actually removed all seam allowances. This works out well, because while the forepart is longer than the lapel, the curvature will be shrunk away, leaving the pieces of equal length. I would add a 1″ inlay to the bottom, and half an inch to the center front and top, just to have some extra room.
Side Body
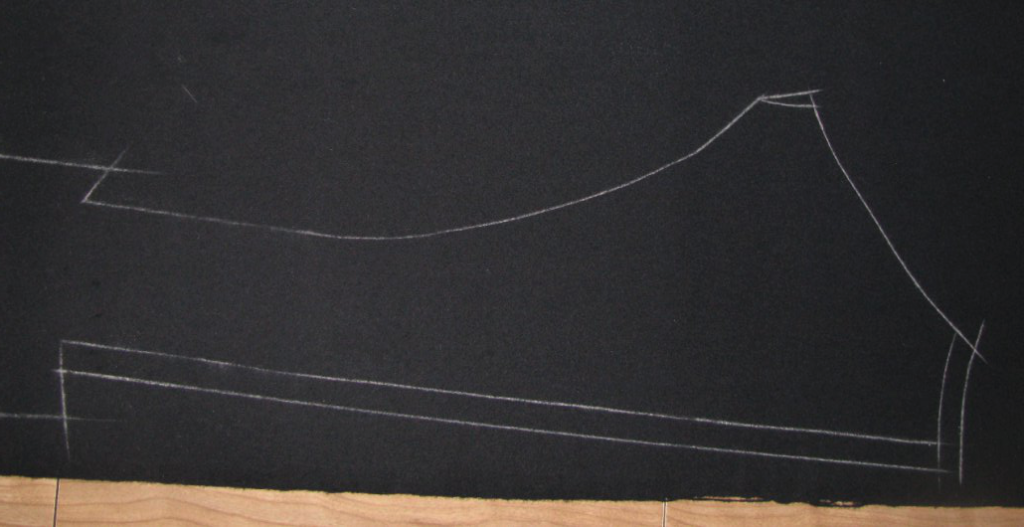
At the bottom, leave a 1” inlay. At the top, leave a small inlay, 1⁄2 inch at the widest point, tapering down, as shown.
Back Section
Leave a 1/2” inlay at the top of the neck, as well as down the center back, as shown. At the top of the plait areas, add a 1 inch inlay, extending the height. This is in case you need to raise the back button points up. And finally, at the bottom, leave a 1⁄2” inlay, to allow for any stretching of the back of the skirt that may occur during making up. When you’re laying out the back section, make sure the pattern is on the grainline. The center back should be on a slight diagonal when lined up properly.
Sleeves
Lay out the sleeve on the cloth in chalk, being sure the grain line is parallel to the selvage. You’ll need to add a couple of inlays for the cuff. On the top sleeve, along the curved outer seam, add a two inch wide inlay extending from the cuff, to about 5 inches above the cuff. At the bottom, add another two inch inlay, which will fold over to form the facing.
On the under sleeve, add the same two inch inlay to the bottom, to match the outer sleeve. At the curved outer seam, add a one inch inlay, which will eventually hold the buttons. Add tailor tacks to denote the inlays, and cut.
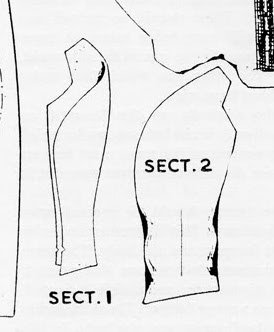
Skirt
If you are adding any darts to the skirt, add 1 1⁄2” inlay to the front of the skirt. The skirt needs to be able to fold over itself in the front to form the facing, and you need room to do that. There is a special period technique for laying out the skirt pattern, that helps to save fabric. In the majority of cases, the skirt is too wide to fit on the fabric. Don’t turn it sideways or unfold the fabric! Instead, lay the pattern out, with the front of the pattern against the edge of the selvage. The back of the skirt should be hanging off the edge of the skirt. Take a ruler, place it on the edge of the fabric, on top of the pattern, and draw a line on the pattern, indicating the edge of the fabric.
Now, add twice the seam allowance to this small triangle, which would be a 1⁄2 inch in our case (we’re using 1⁄4” seam allowances, remember. Then cut out this small piece of the pattern, and place it elsewhere on the fabric where it will fit. Snug it up into those little spaces you have still. The longest edge, which has the seam allowance, should be on the grain line.
As you are chalking out the skirt, mark the darts, and then mark the seamlines as if you had not cut out any darts in the pattern. This is important as you will not cut out the darts. They are just seam lines. Very important.
Dart Construction
If you have any darts in the back of your trouser pattern, now is the best time to construct them, so that both fronts and backs are ready at the same time for the pocket construction later on.
Begin by transferring the dart lines to the wrong side of each trouser piece.
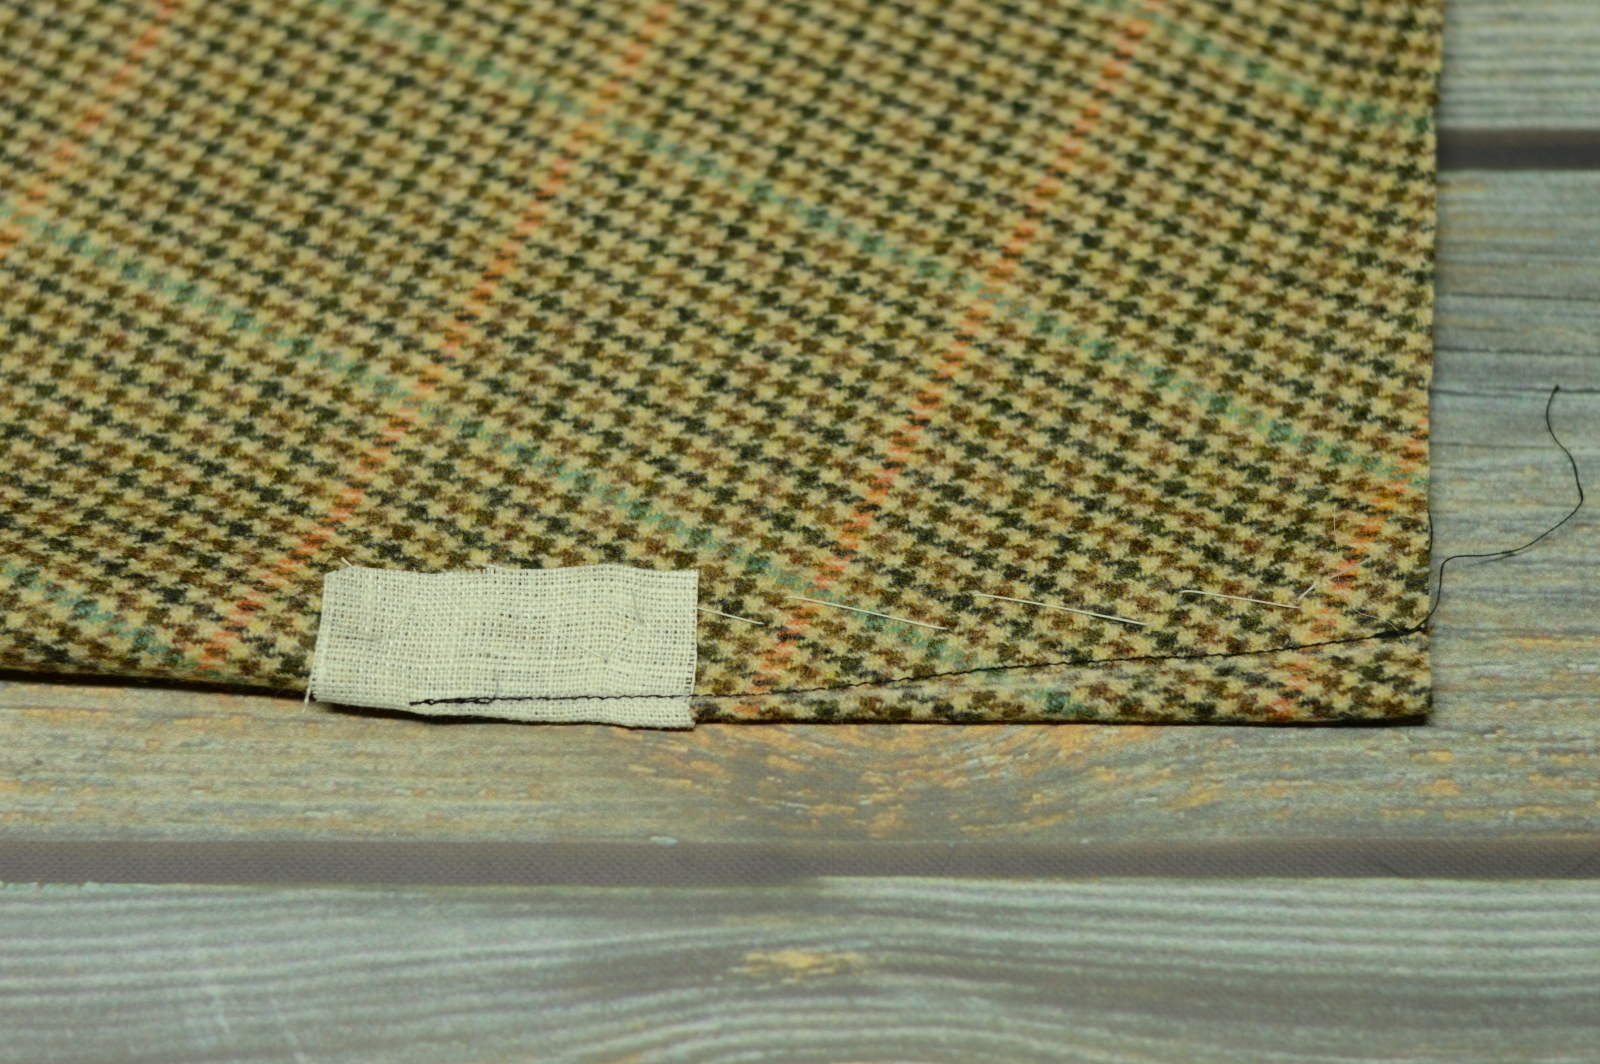
Next, fold the dart in half lengthwise so that both sides are equal in width and the seam lines are aligned with each other. You can poke a pin through the layers to make sure they’re accurately aligned if you wish, but after a while you’ll get a feel for it and can do this by rock of eye. Baste along the length of the dart, about a quarter inch from the seam line.
Also cut out a 1″ to 1 1/2″ square of linen if you are using thinner wools or less durable fabrics for your trousers, to reinforce the tip of the dart.
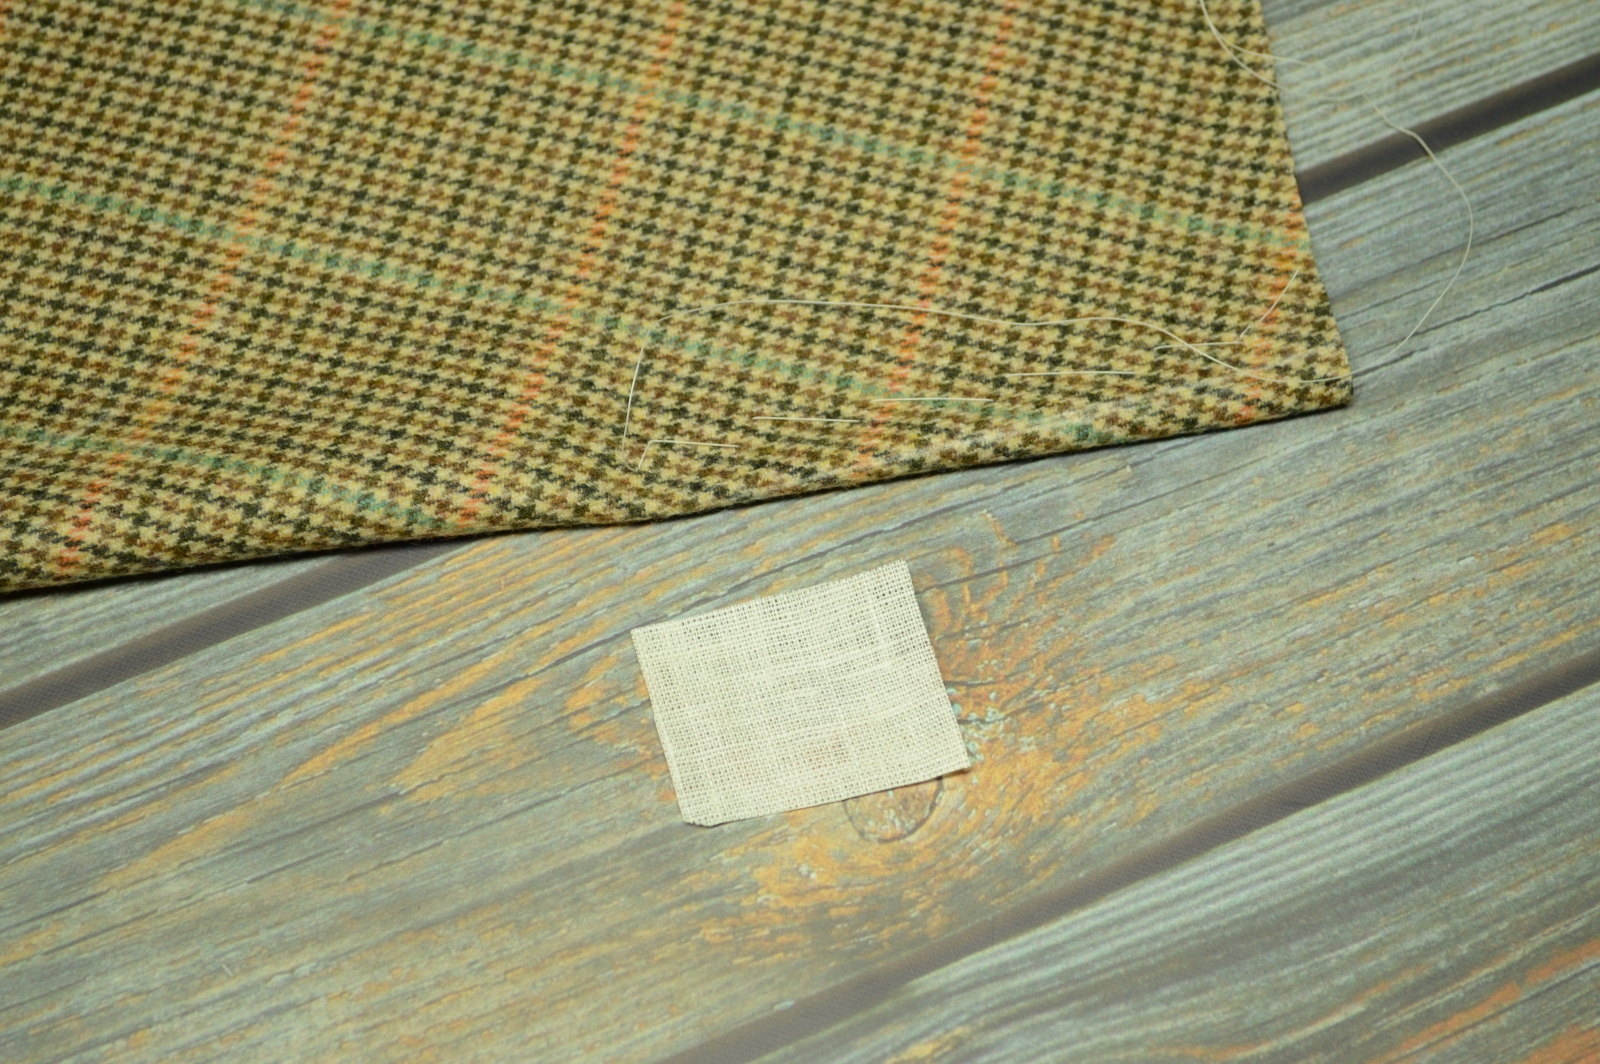
Fold the linen in half and place it firmly against the folded edge of the dart, with the tip of the dart being near the middle of the linen. Baste the linen, and then redraw the seam line on top of the linen piece if you need to.
Note how the tip of the dart is located more towards the bottom edge of the linen, so that we don’t waste any of the linen and get more strength.
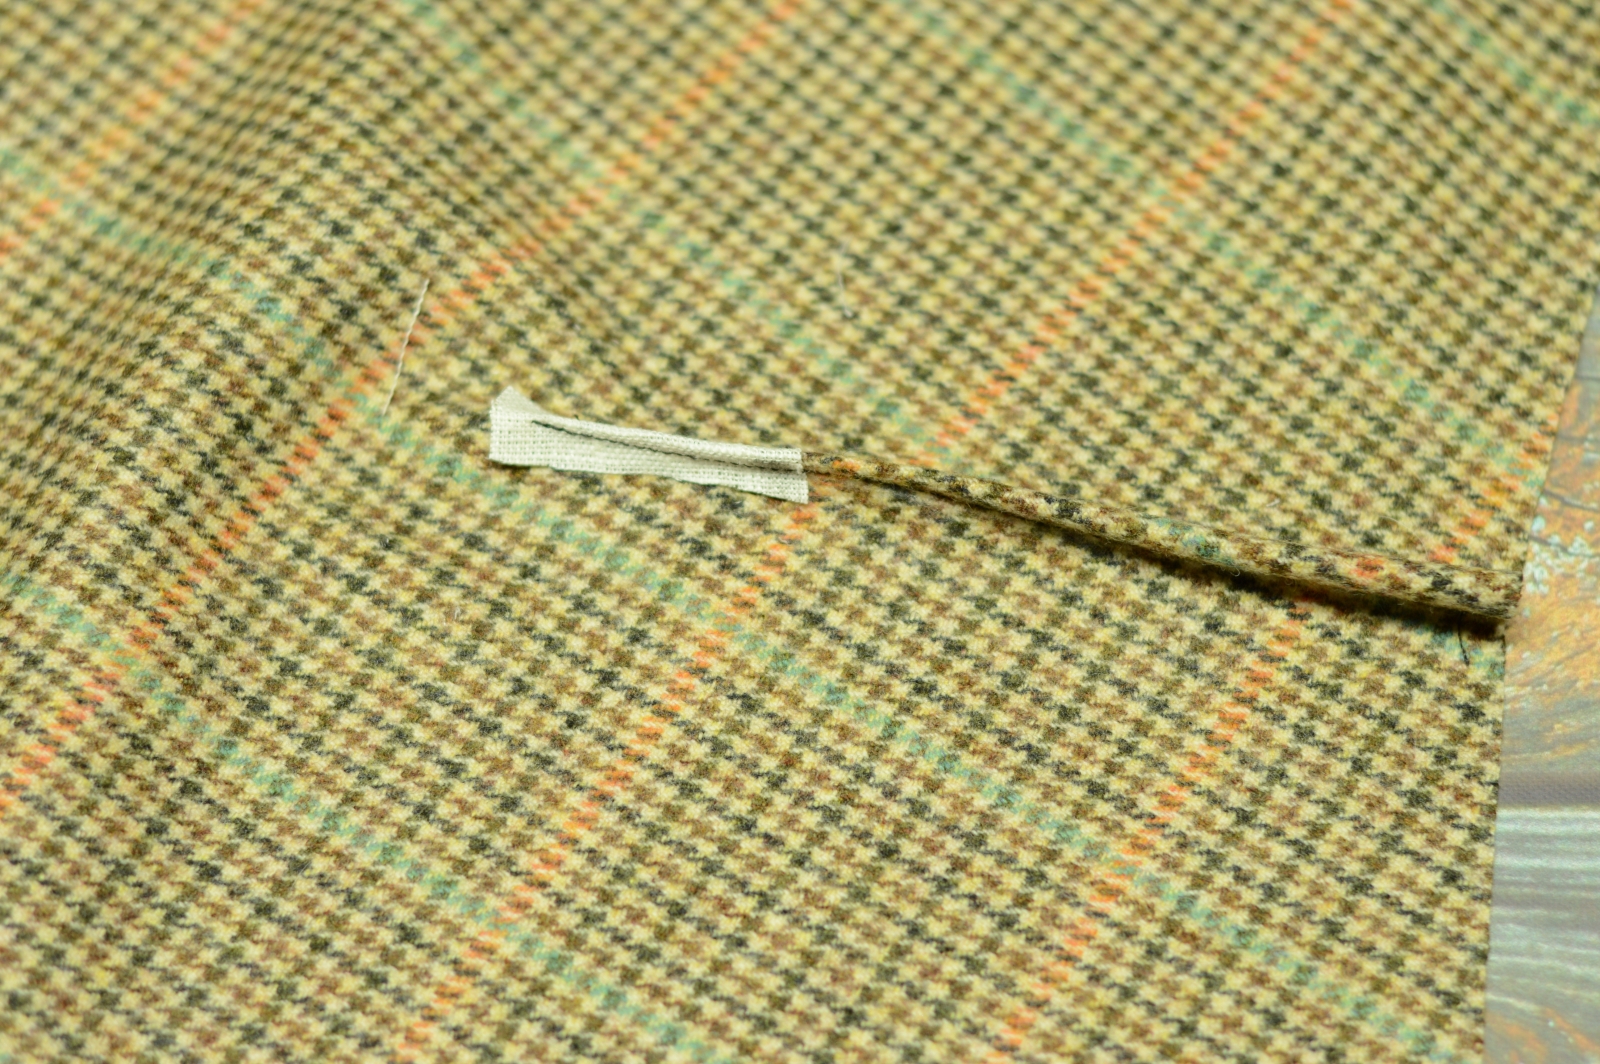
Sew the dart from the wide edge down to the tip either by machine or with a backstitch. At the very tip, the idea is to catch just a thread or so of the fabric in the stitching, rather than going off the edge. This gives a crisper and firmer finish to the tip of the dart.
Now trip the excess linen to about 1/4″ from the stitching. I cut a little too closely in the photo than I’d like due to being distracted by filming at the same time. Shouldn’t be a problem though.
Now press the darts from both sides to first set the stitches.
Then press the entire dart to one side, towards either the seat seam or side seam. Try to be consistent between both sides of the trouser. Make sure to use a tailor’s ham in order to preserve the shaping this dart creates.
I typically do not cut and press the dart open unless the dart is wider than 1/2″.

Turn to the right side and press the dart again. Just below the tip I like to gently shrink away the excess fabric to create a clean transition and better appearance.
Don’t miss the video for additional instruction.