Author: James Williams
Belt Loops II – Modern
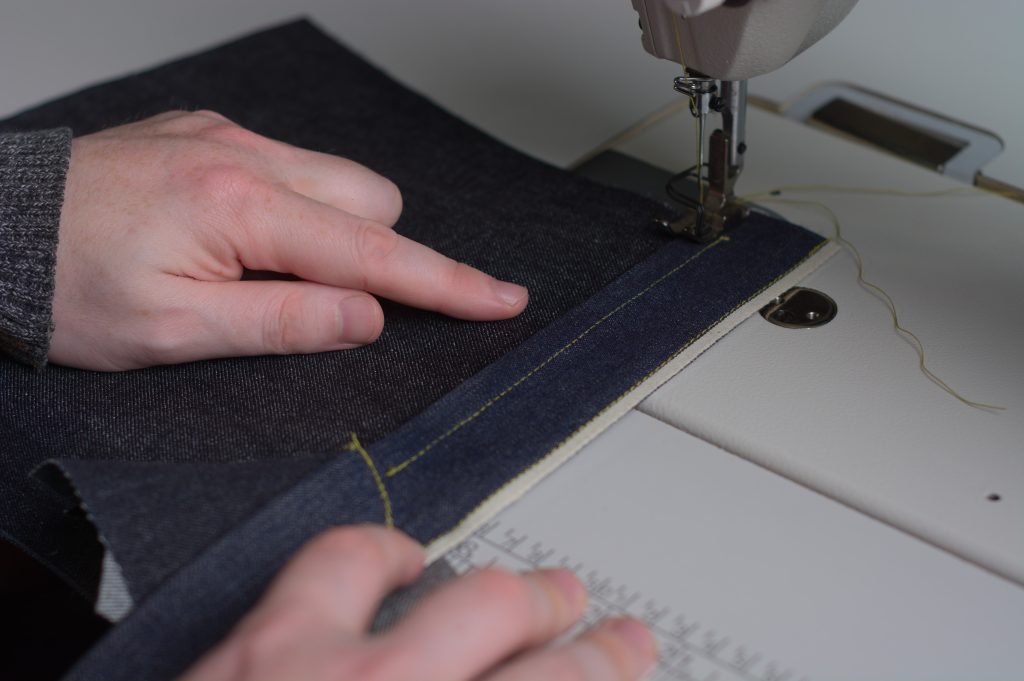
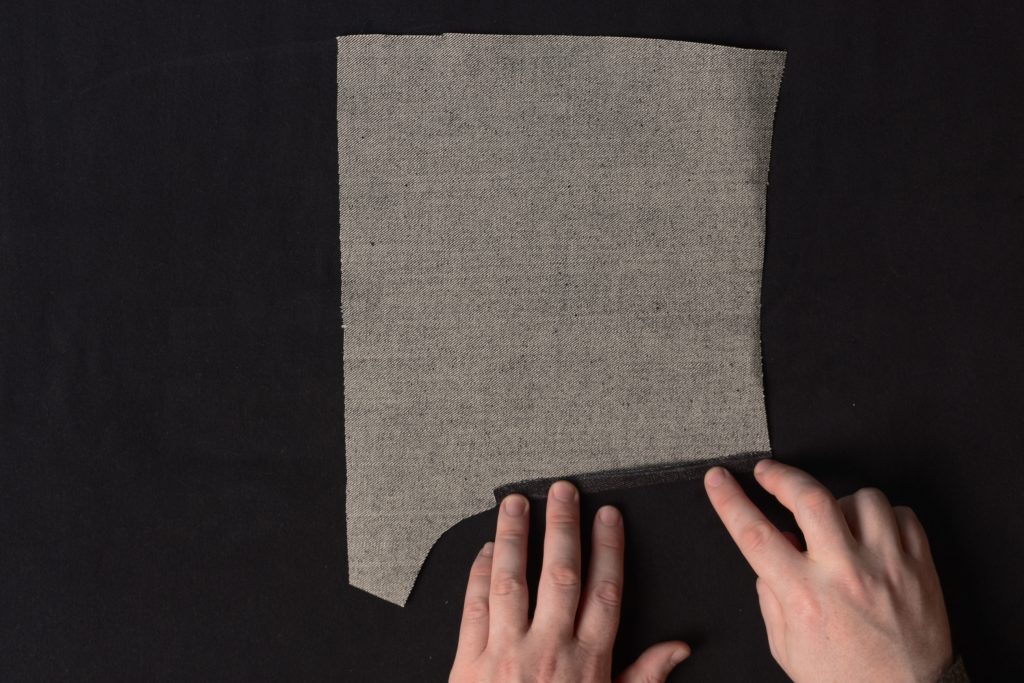
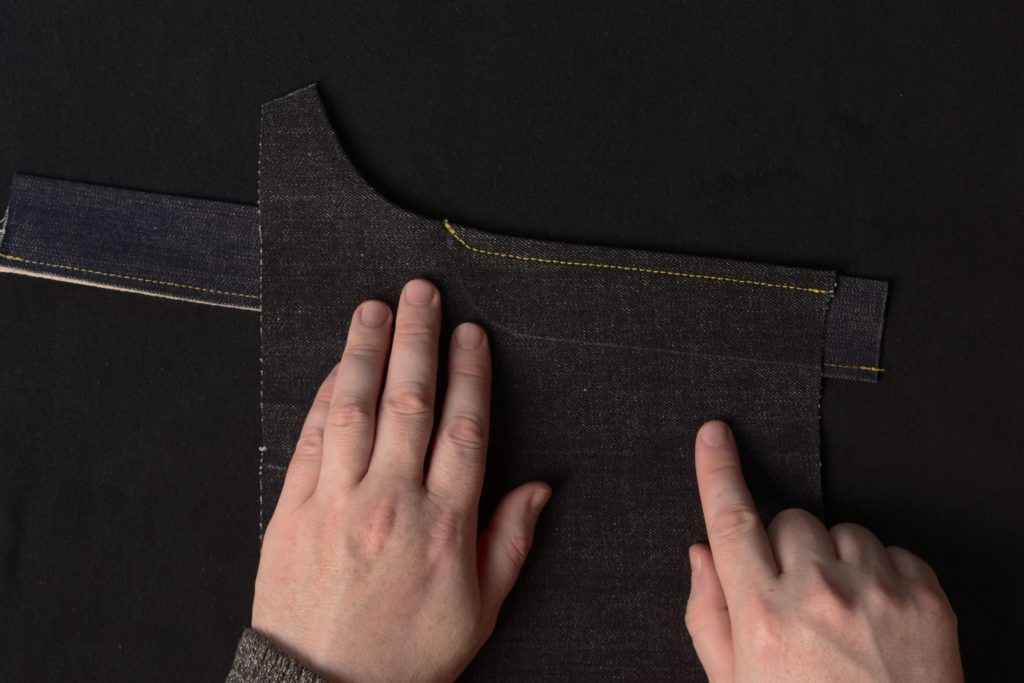
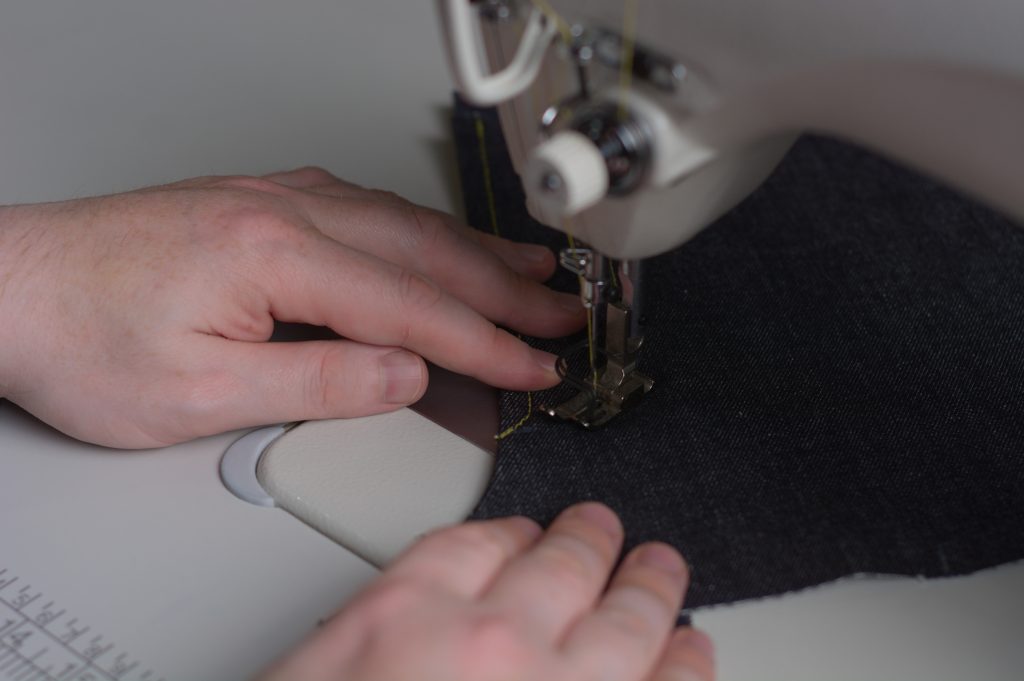
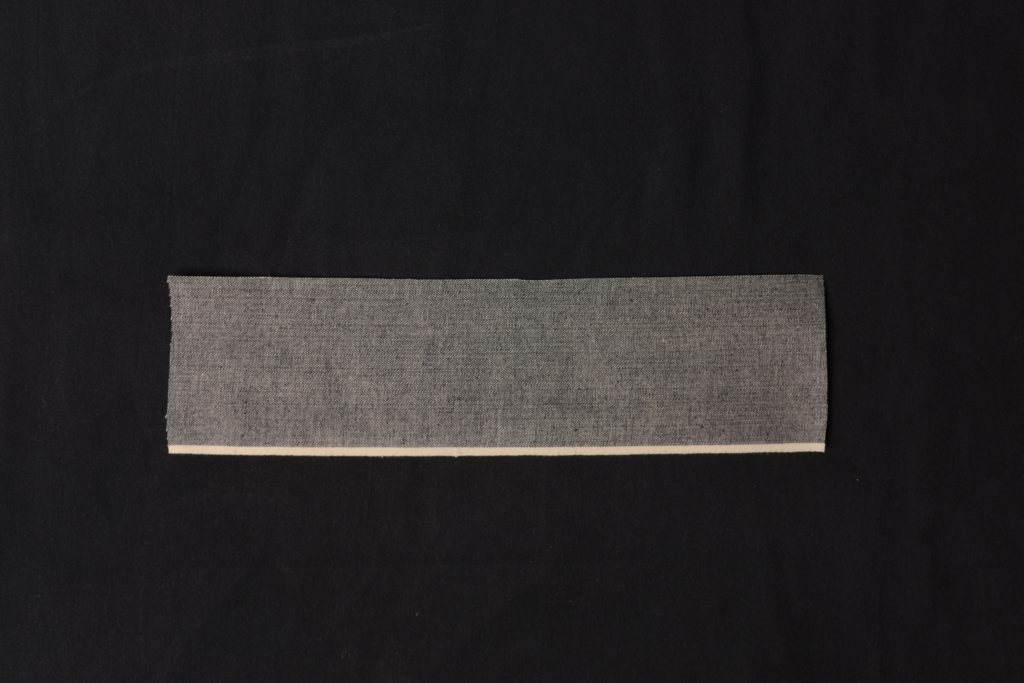
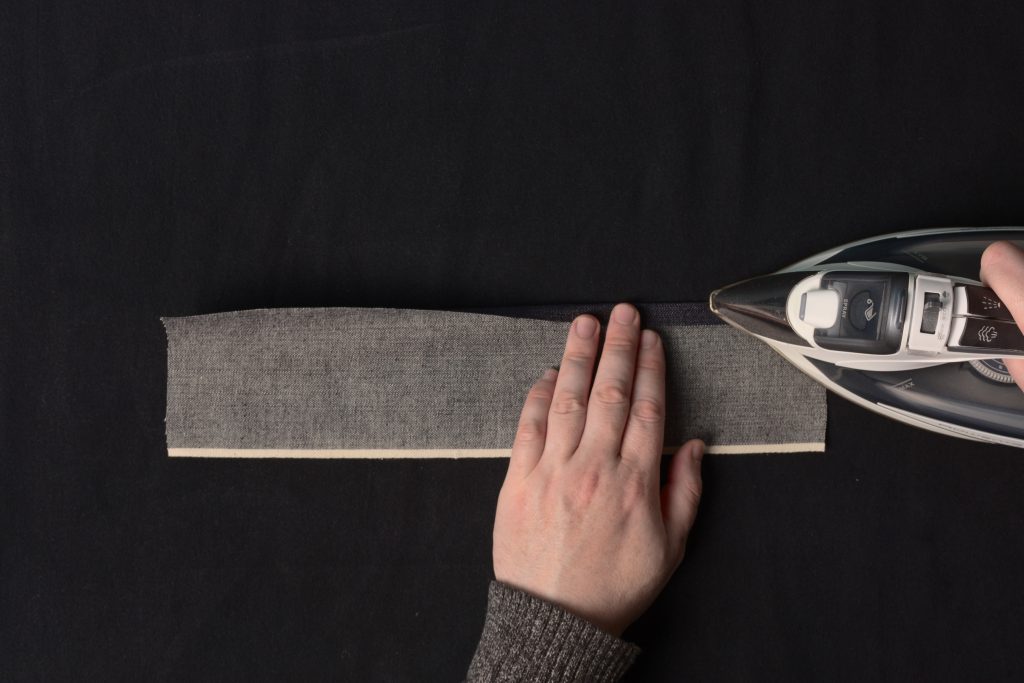
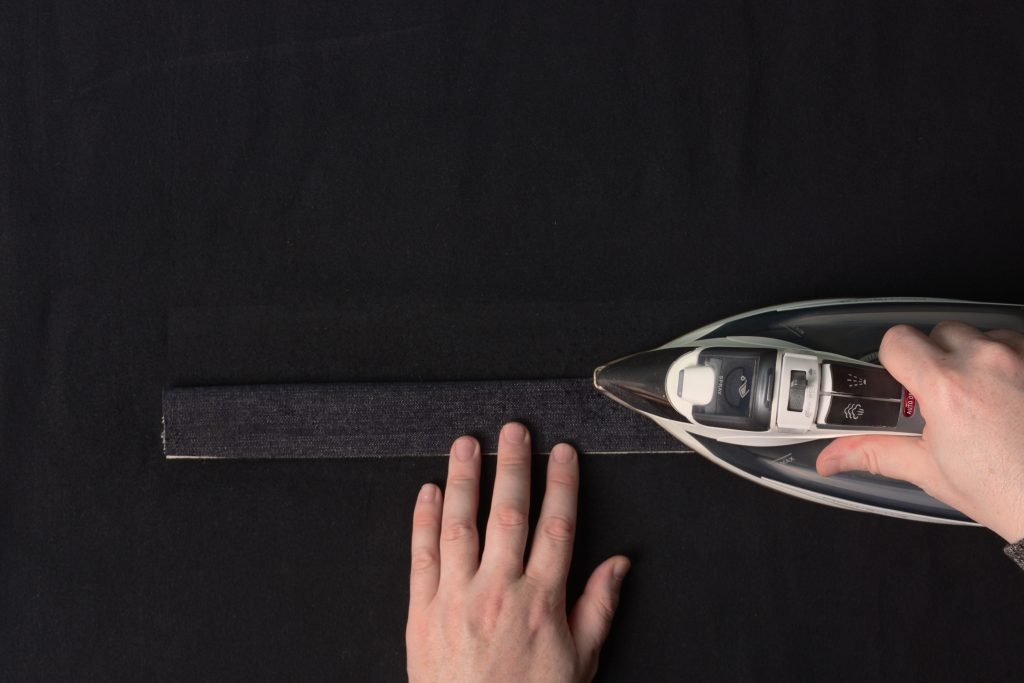
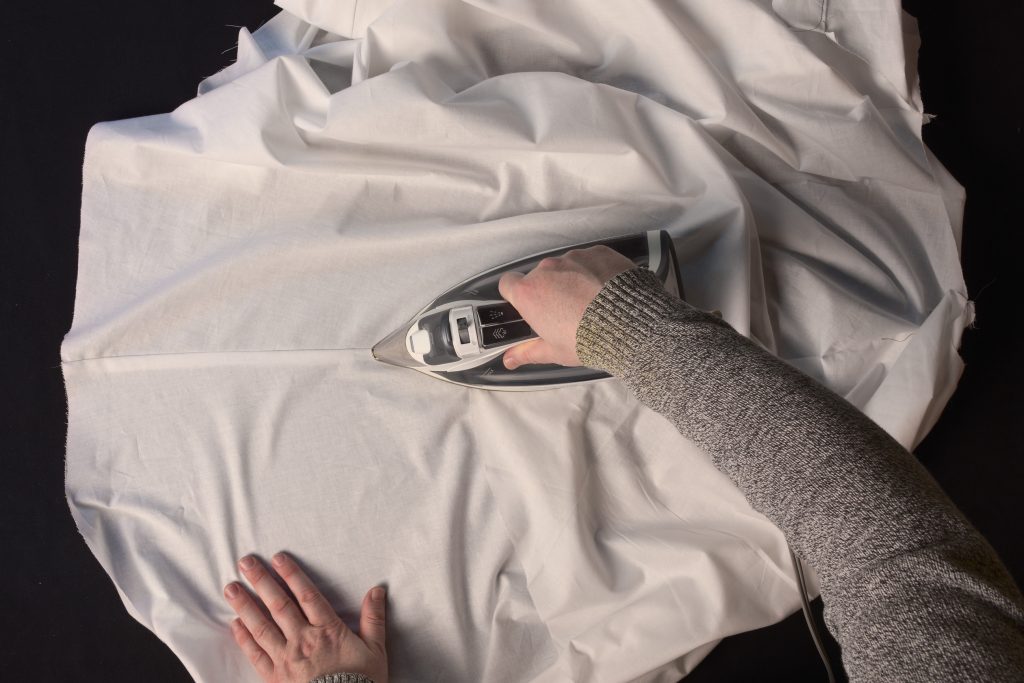
With the waistband installed and top stitched, we can turn to finishing all of the belt loops (if you’re using them). If this is your first time or two, I recommend measuring and marking this first step, but otherwise I usually do it by eye.
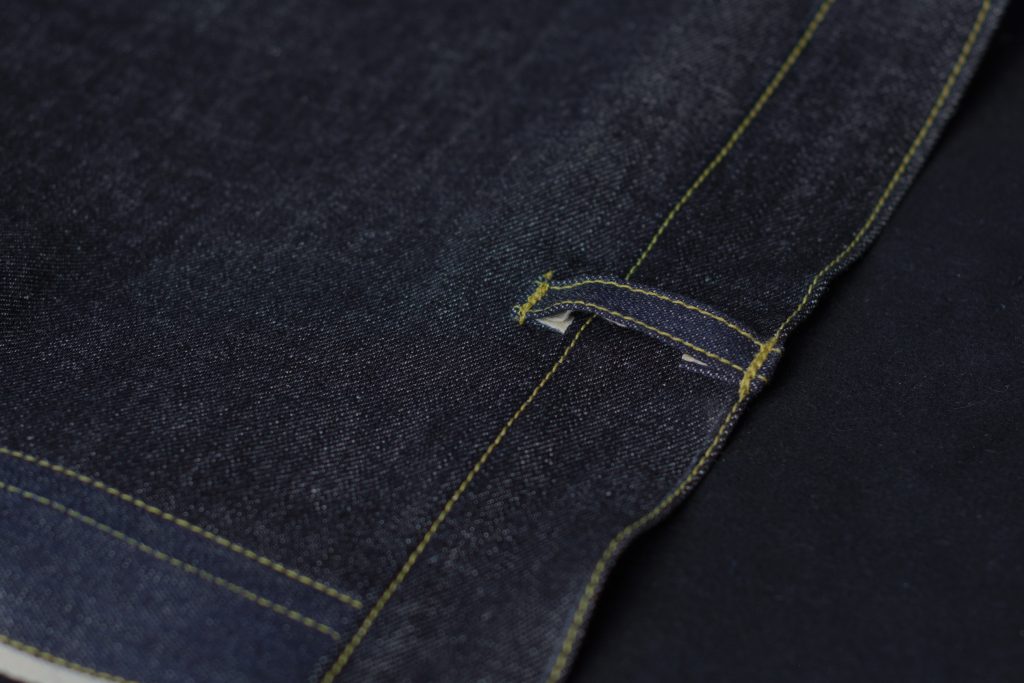
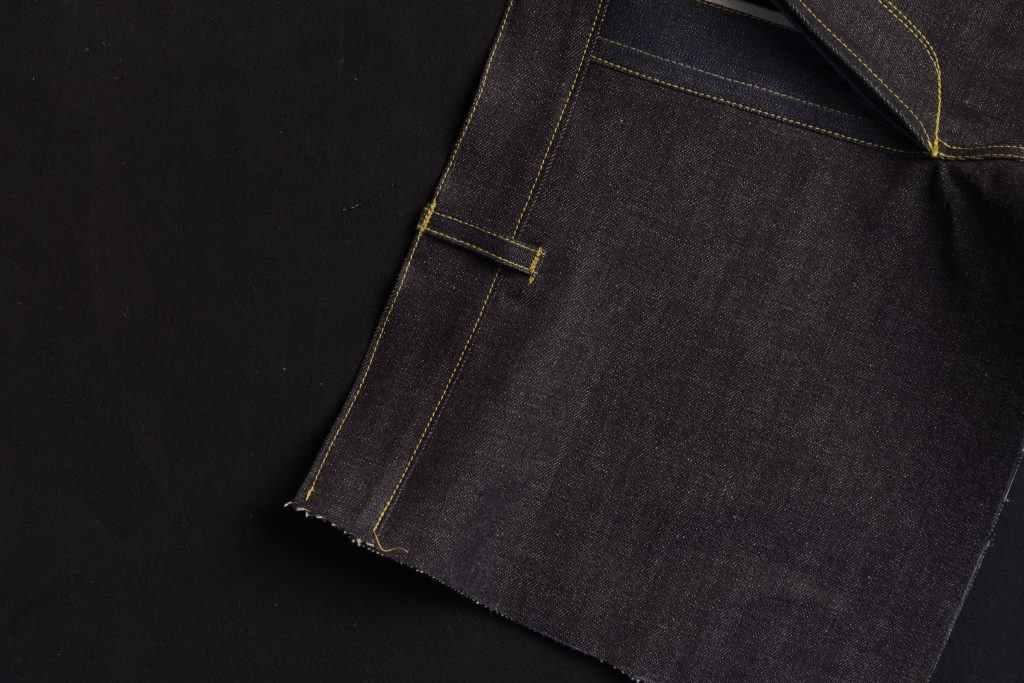
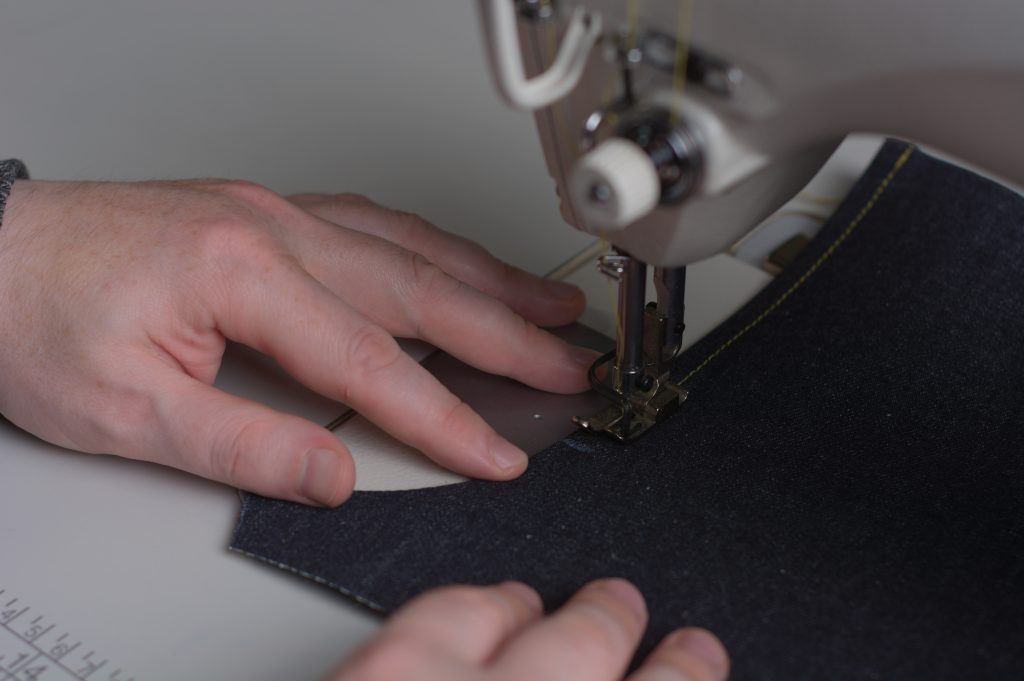
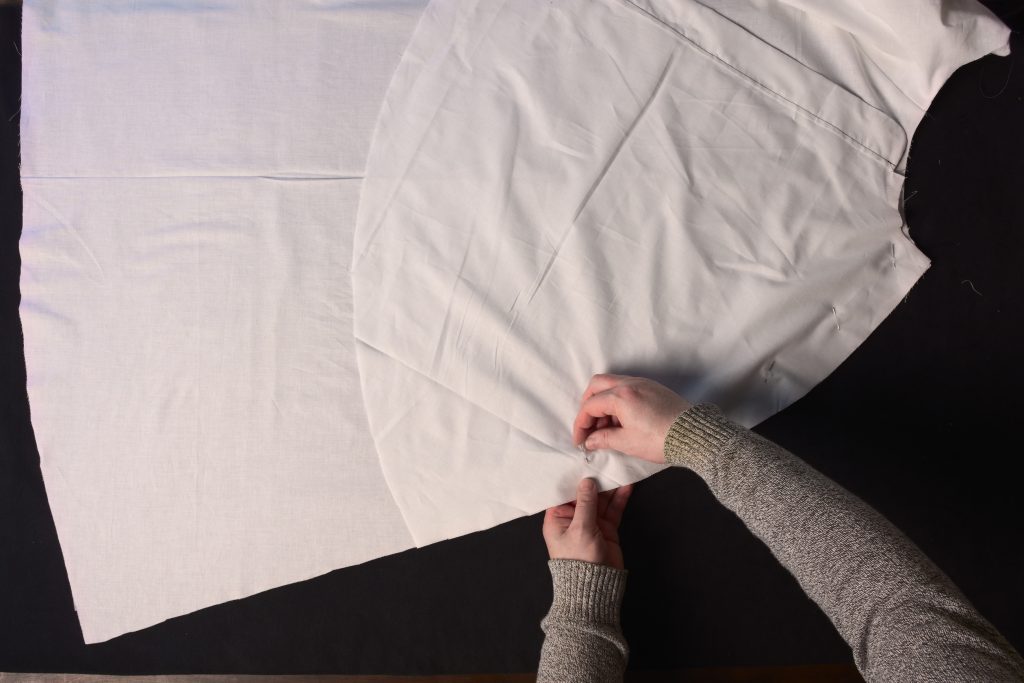
Align the belt loop so it’s square to the waistband, and laying right sides together with the leg underneath. Measure down about 3/8″ to 1/2″ and bar tack across the belt loops by stitching forwards and back multiple times.
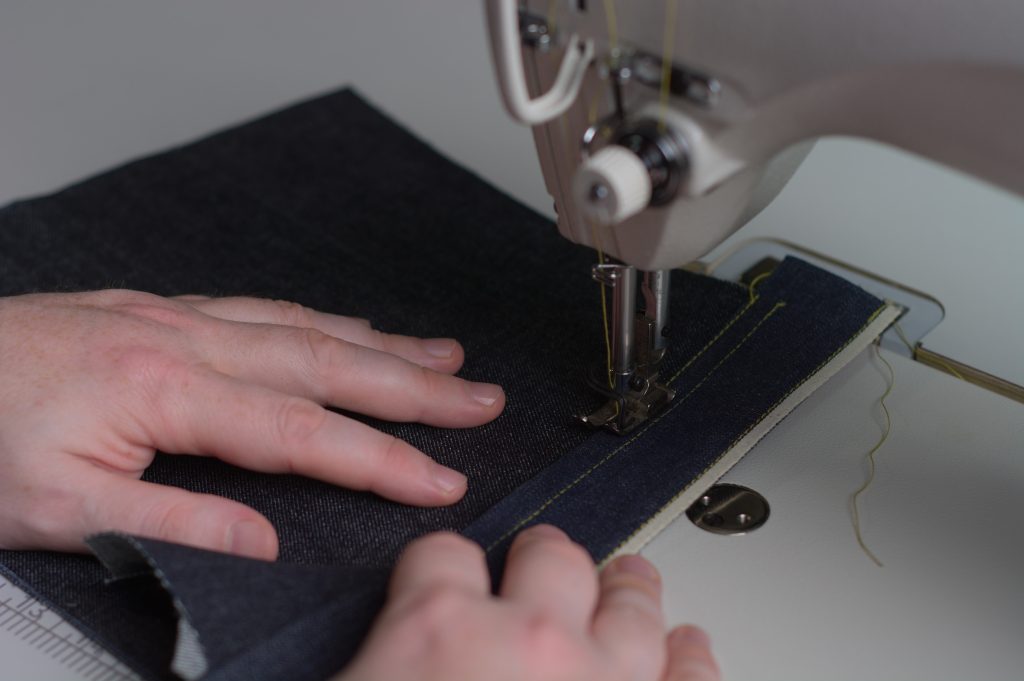
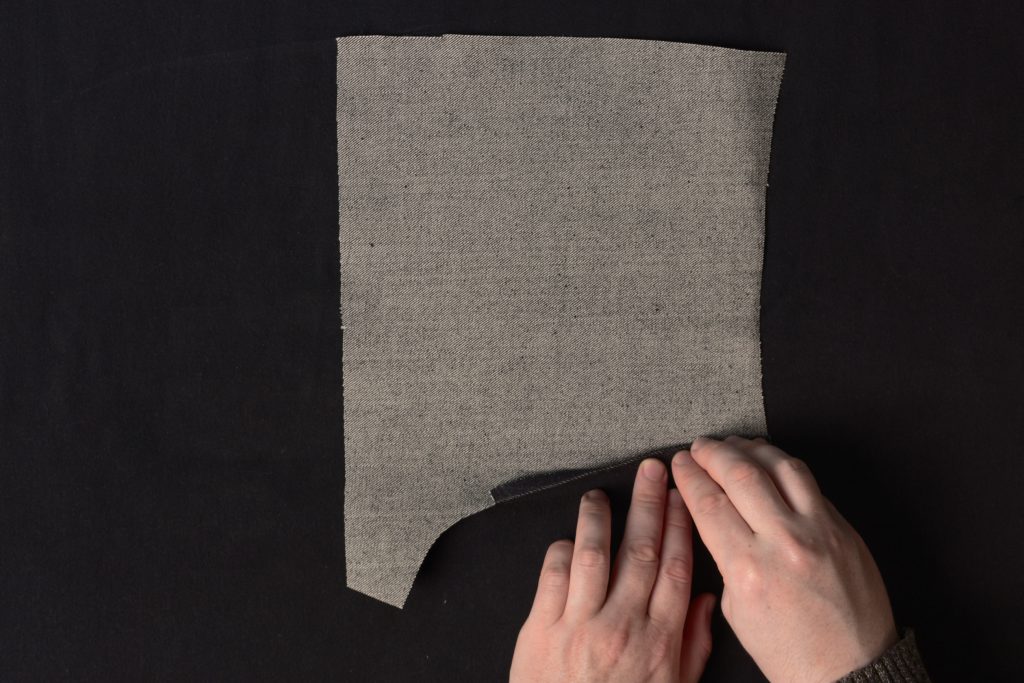
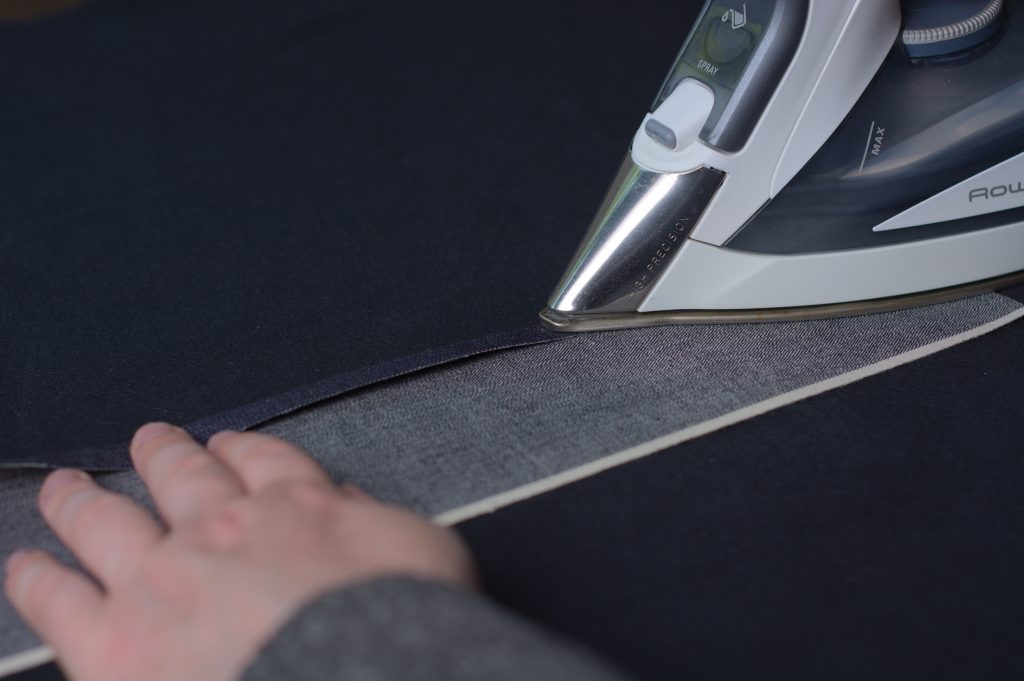
Fold and press the belt loop up across the waistband, again keeping it square.
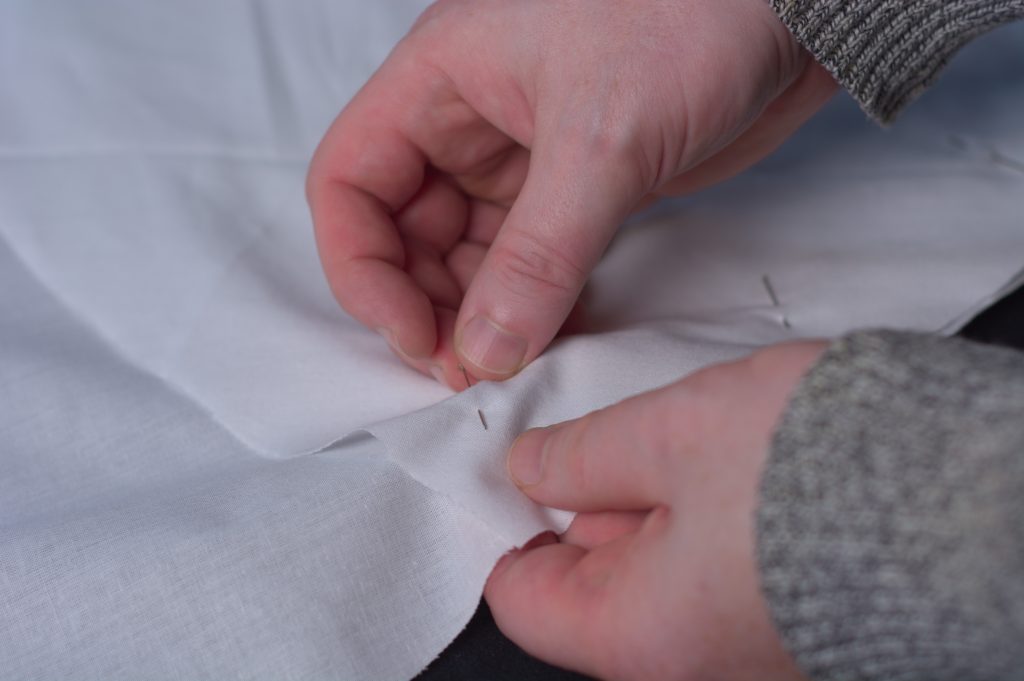
Again, bar tack across the bottom of the belt loop, about 1/8″ from the bottom.
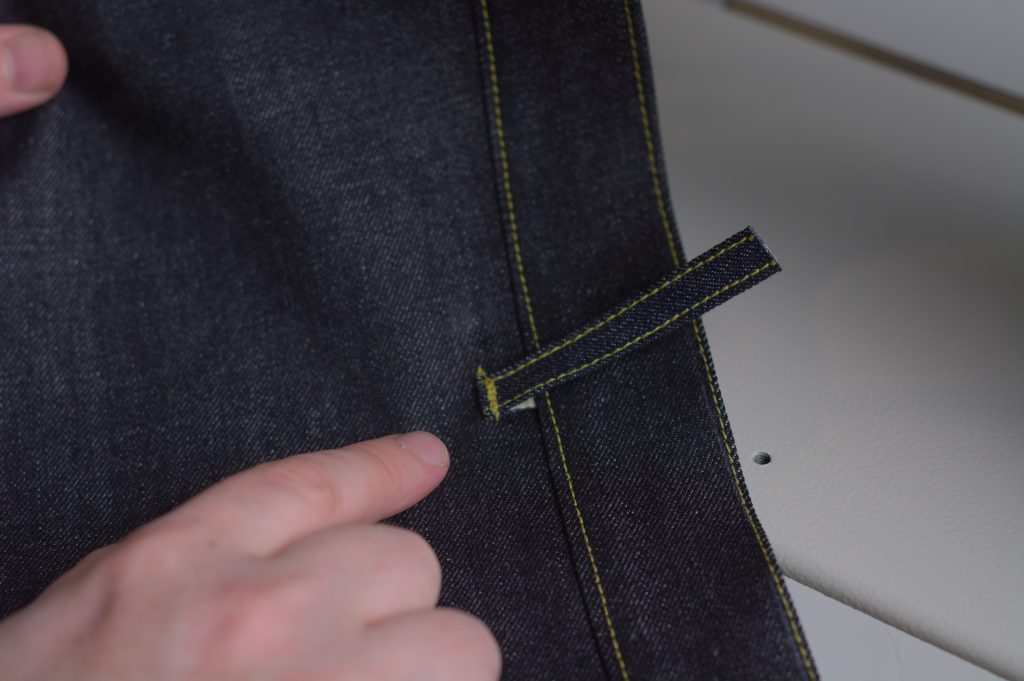
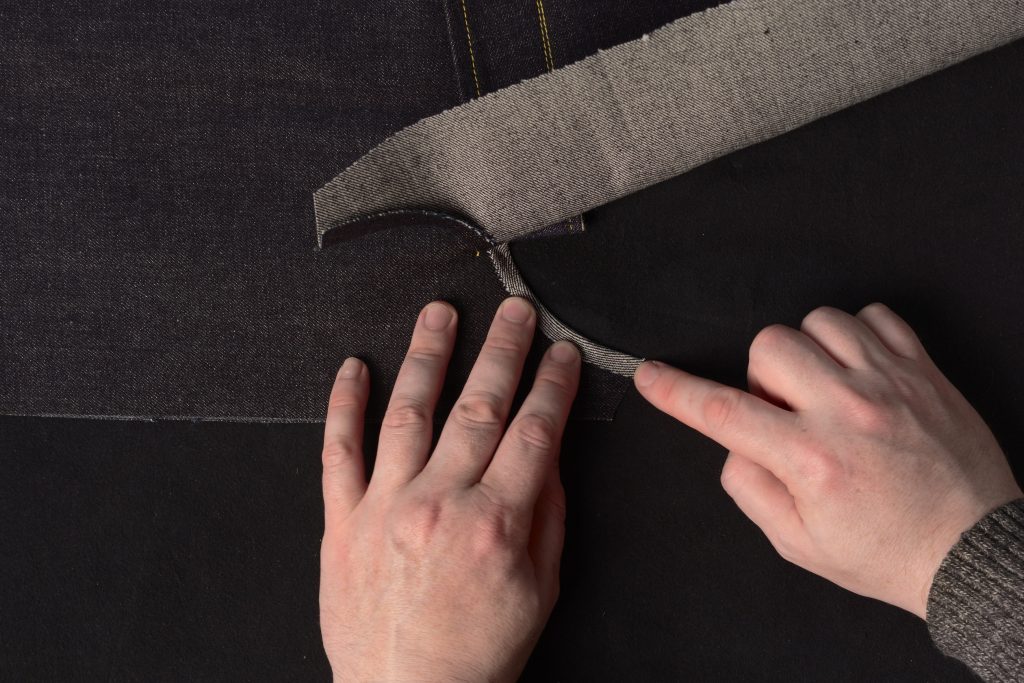
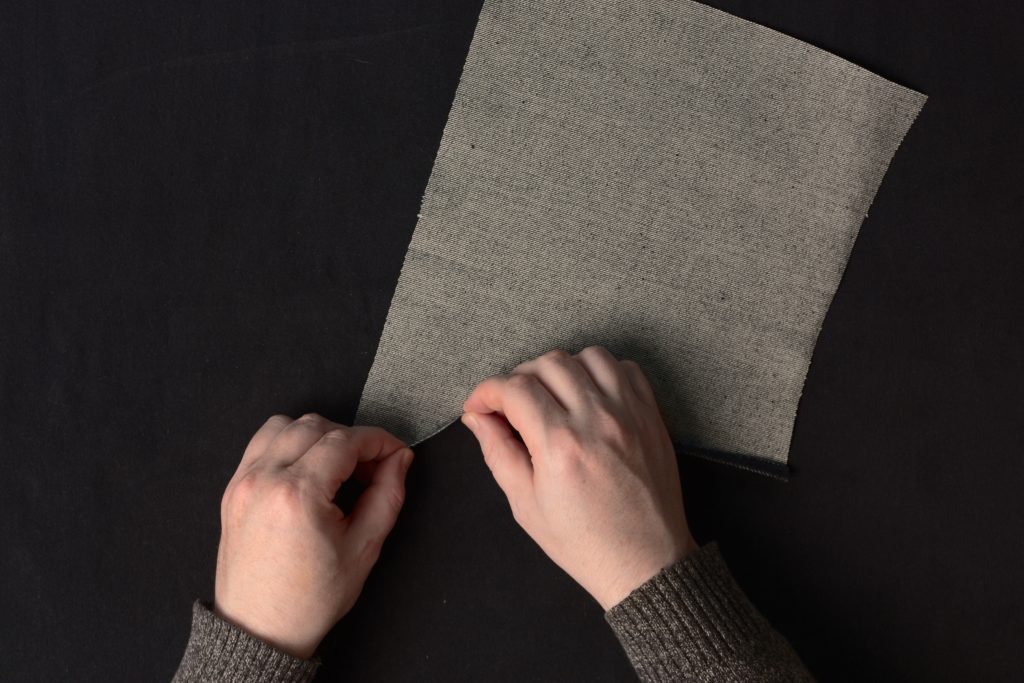
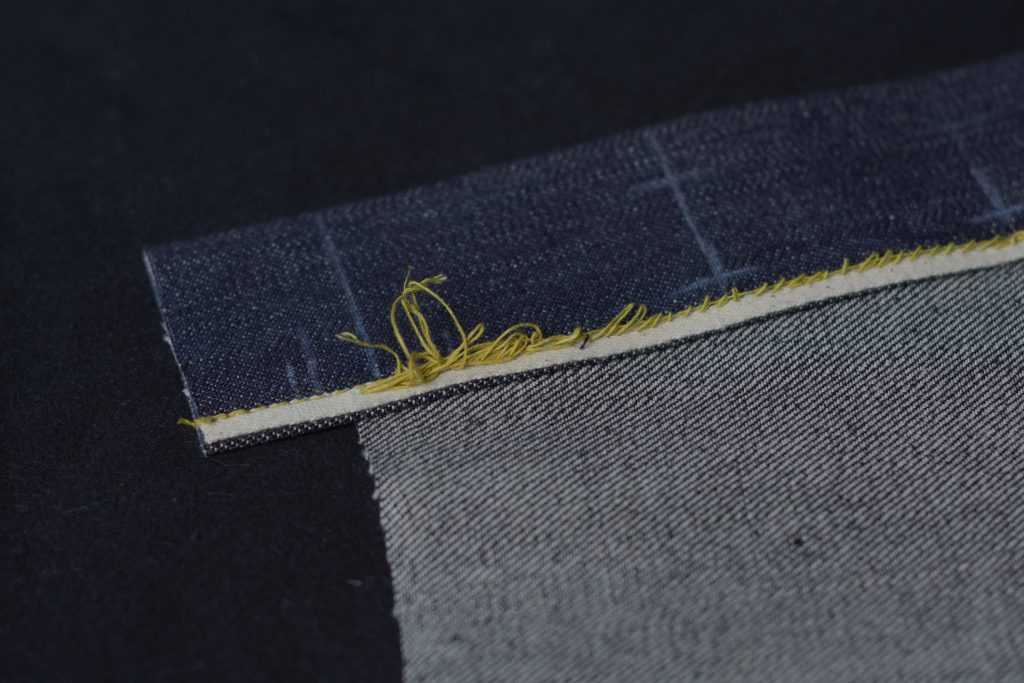
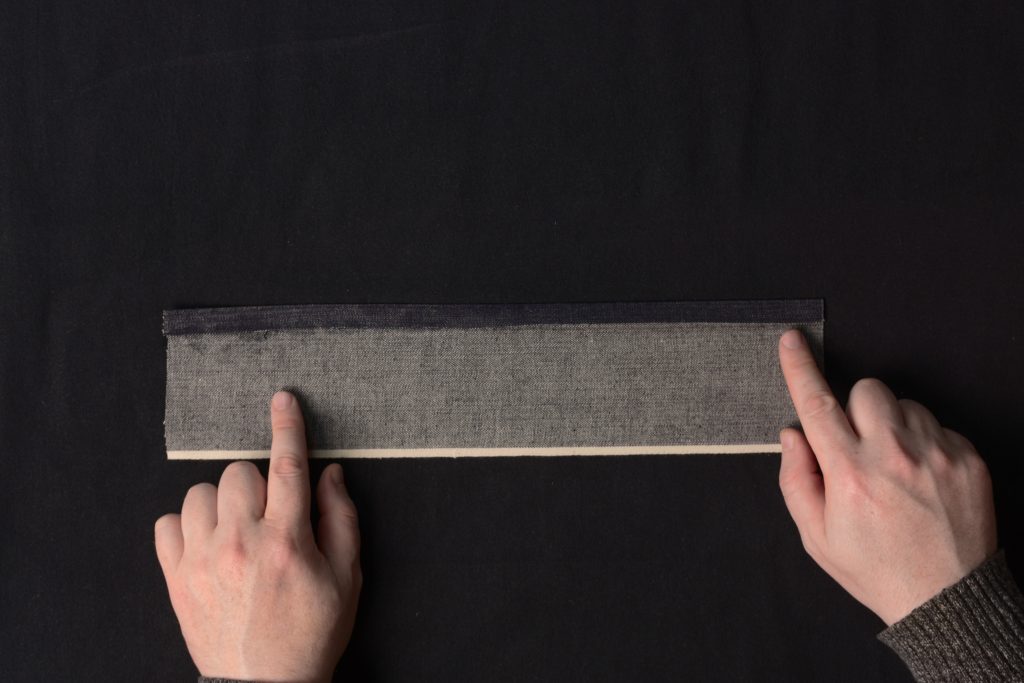
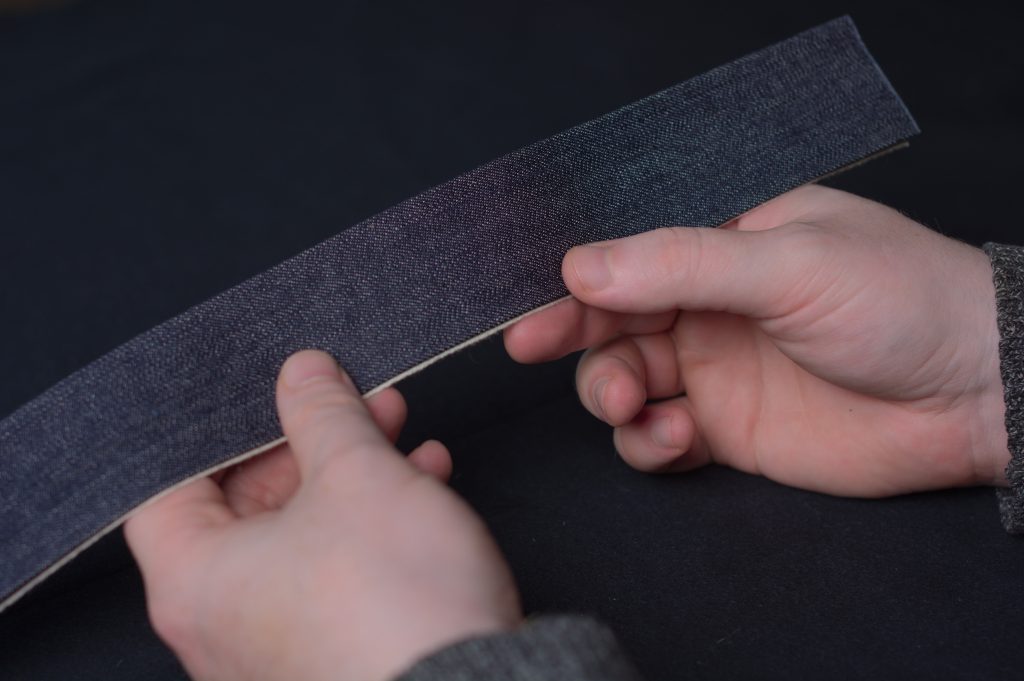
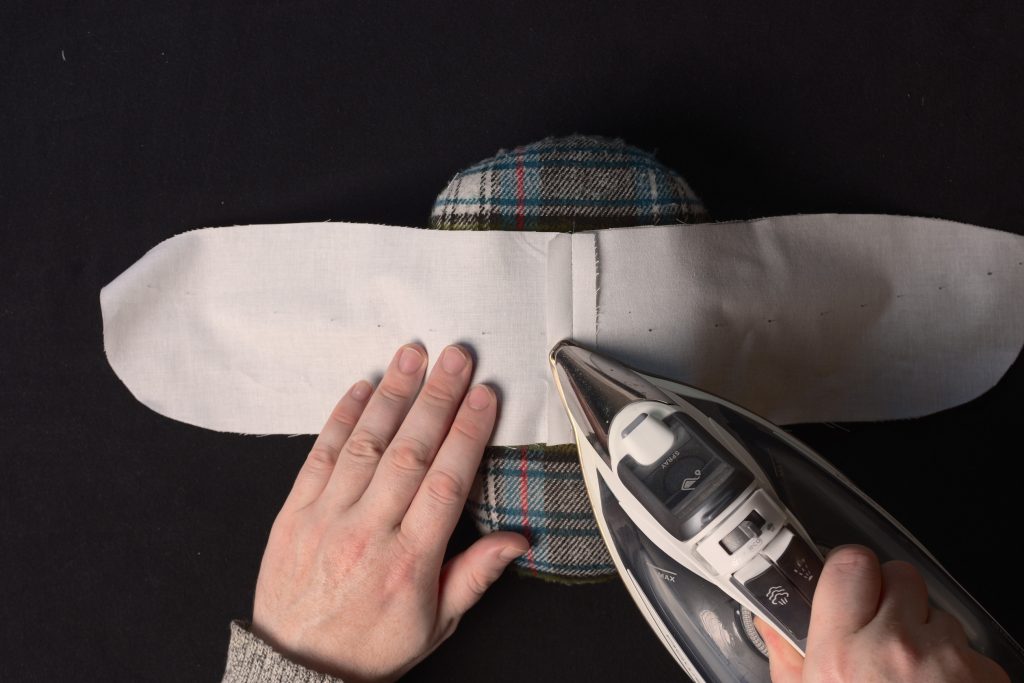
Fold the top edge of the belt loop so that the fold is about 1/8″ above the top of the waistband. This will build in some ease for thicker belts. Trim any excess belt loop material at this point, but I like to leave at least 3/8″ on the underside of the fold.
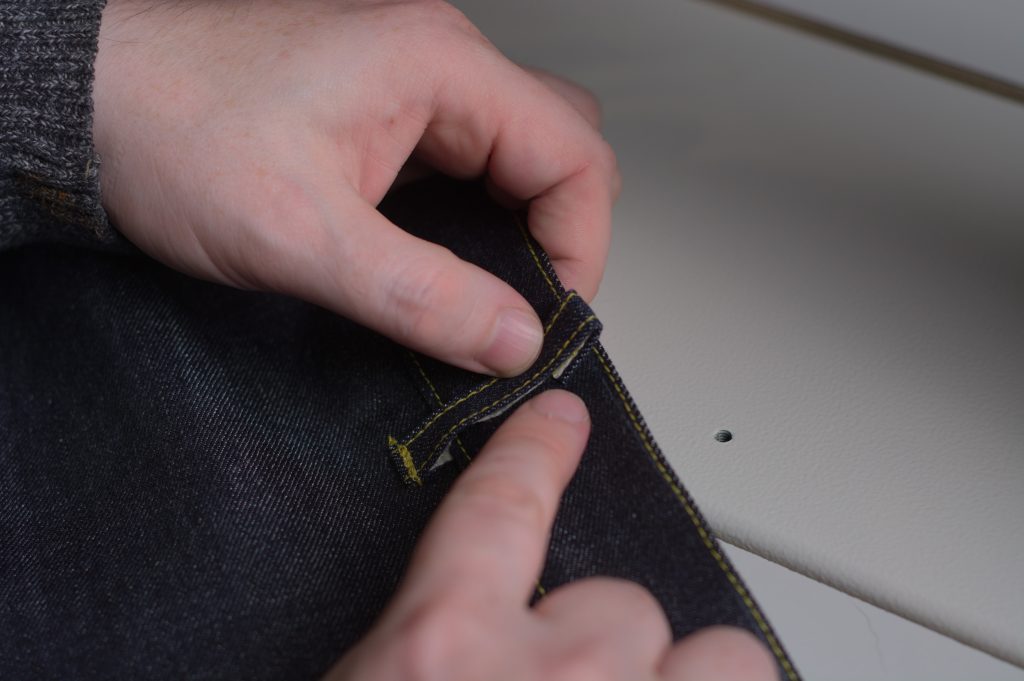
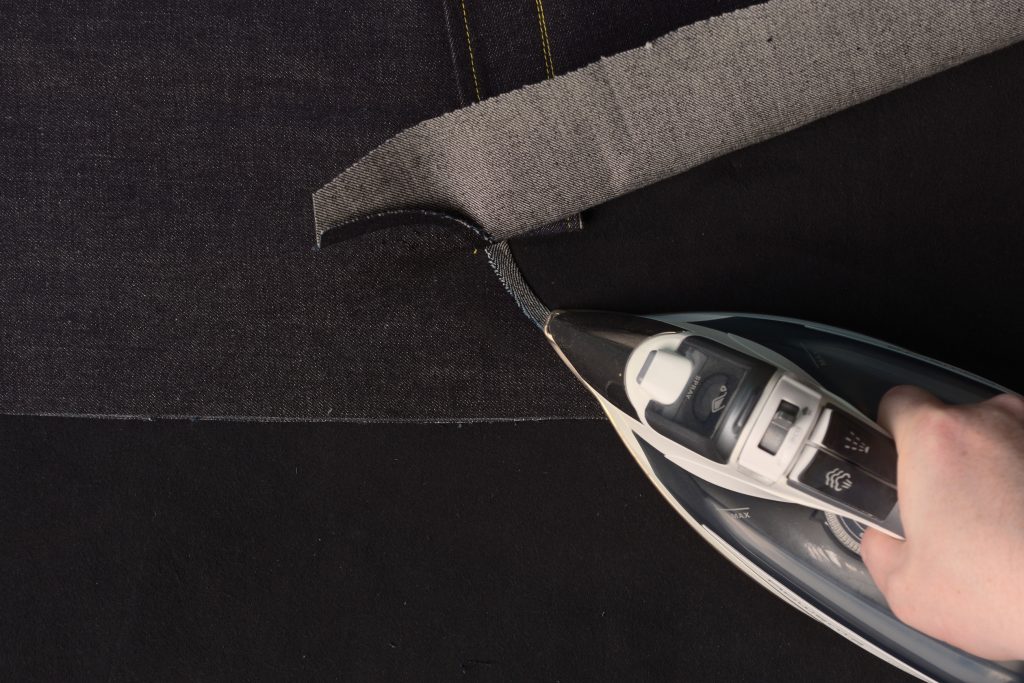
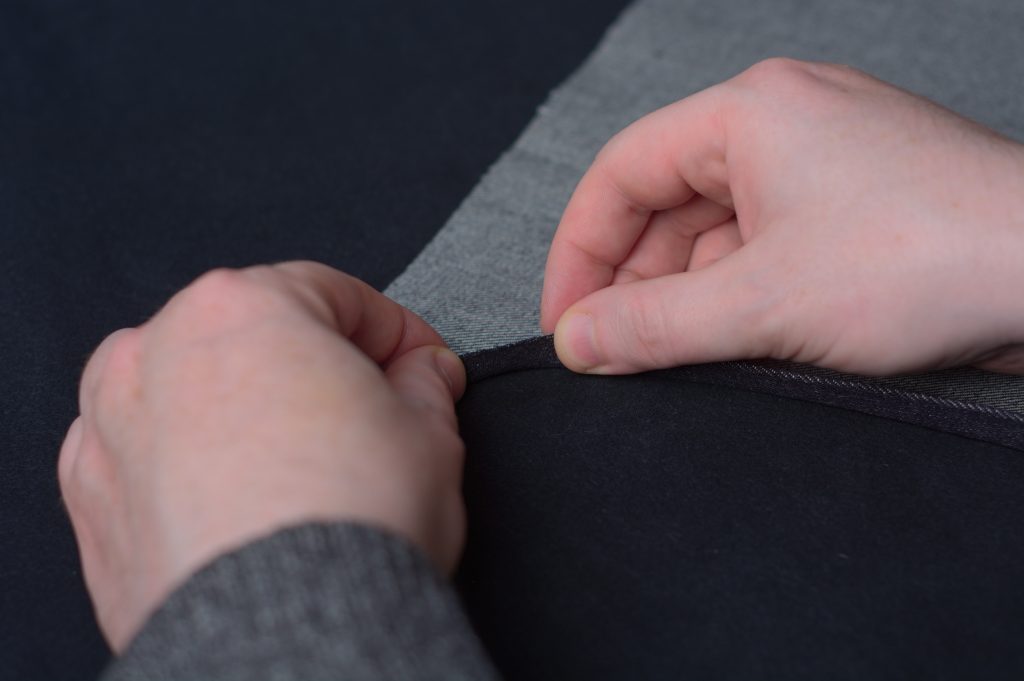
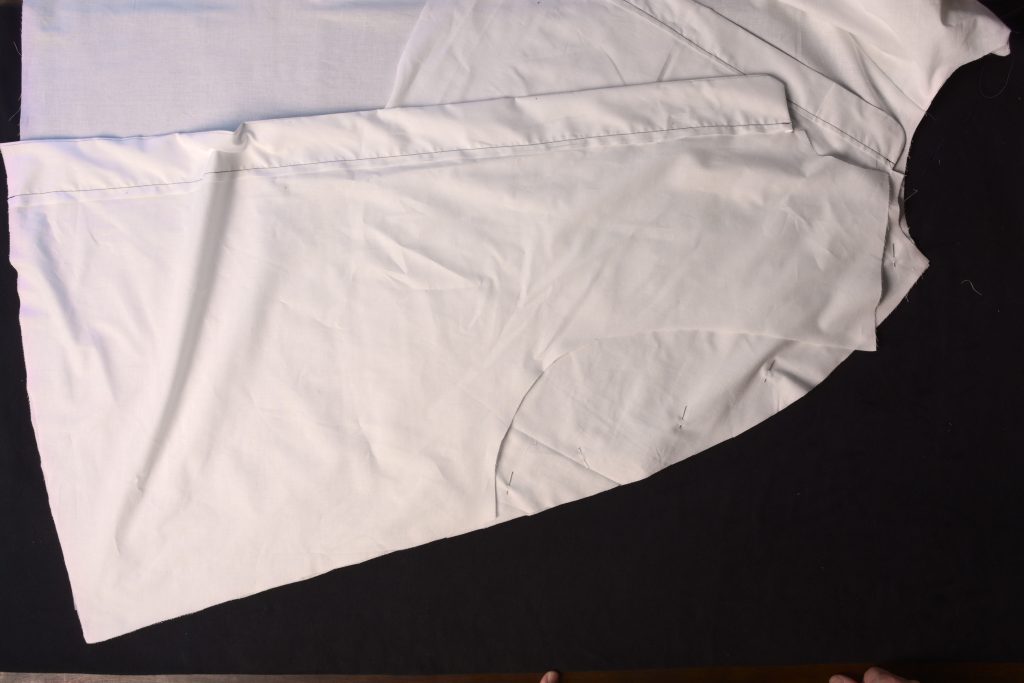
Slide the belt loop down so that the fold is even with the top of the waist band. Make sure everything is square.
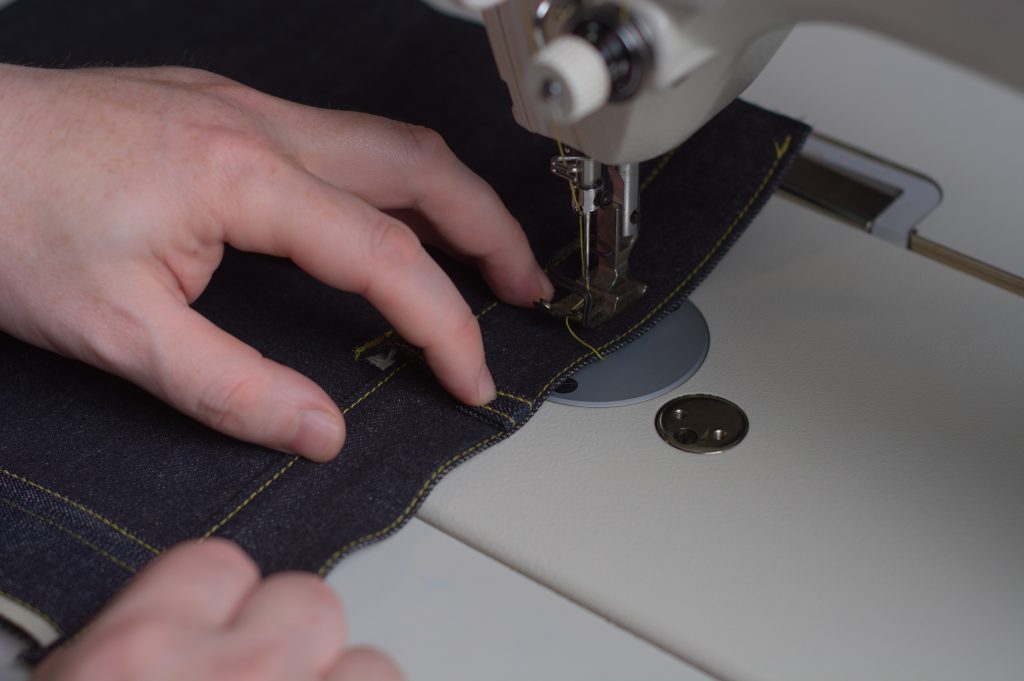
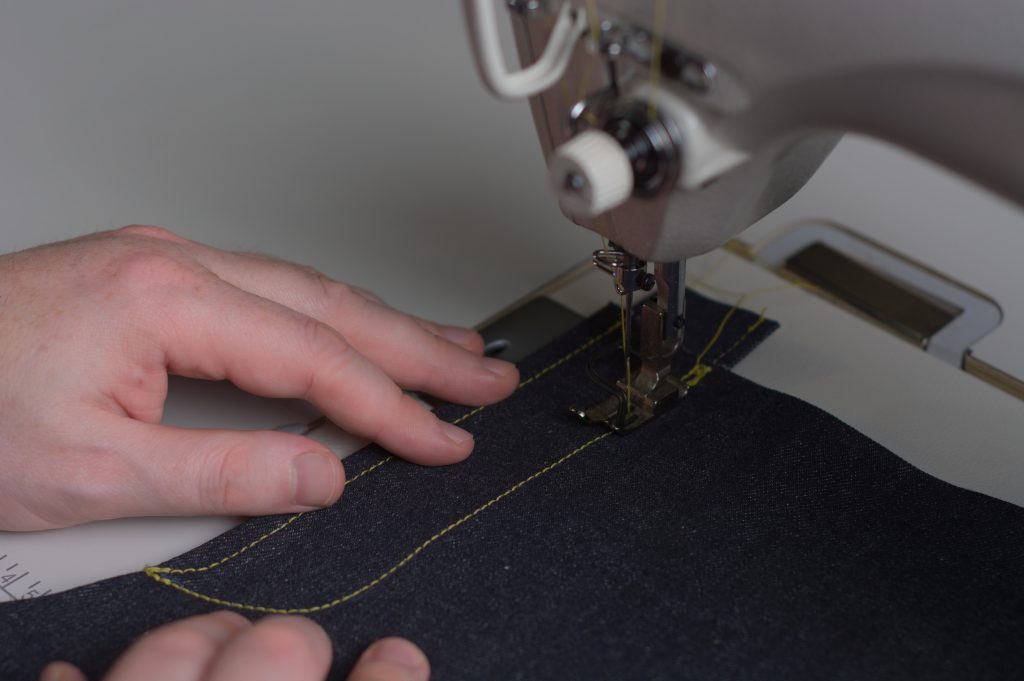
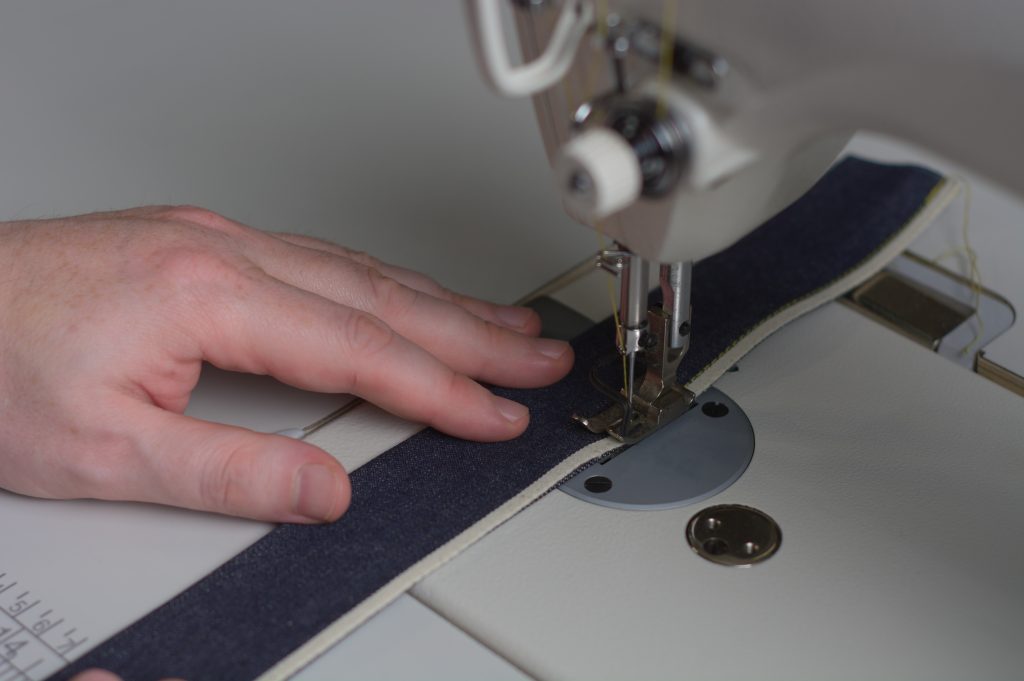
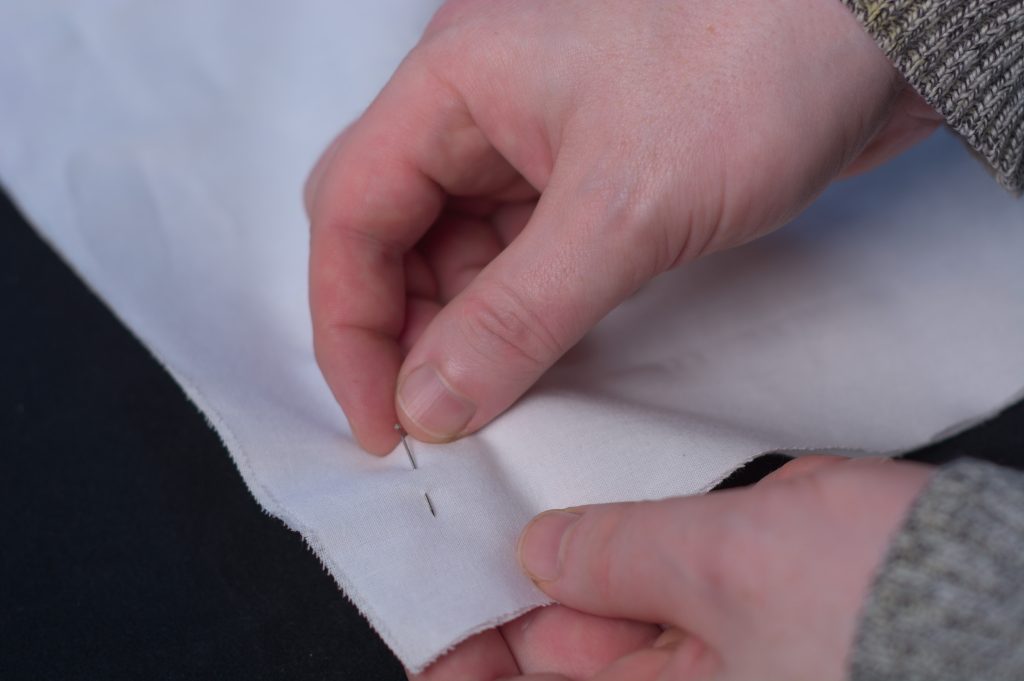
And bar tack thickly across the top of the belt loop.
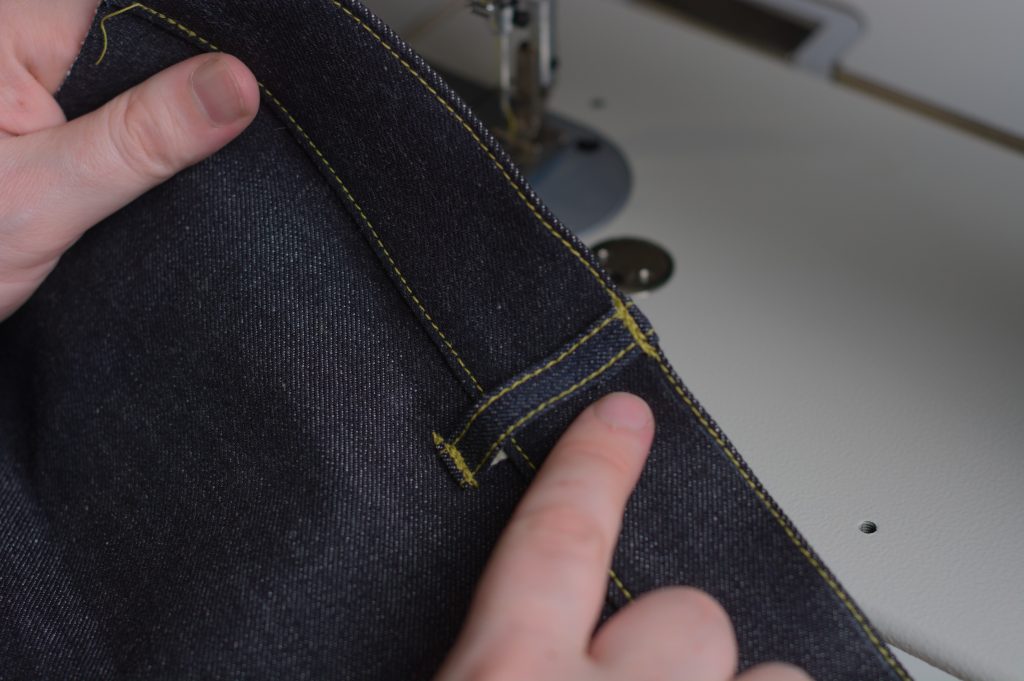
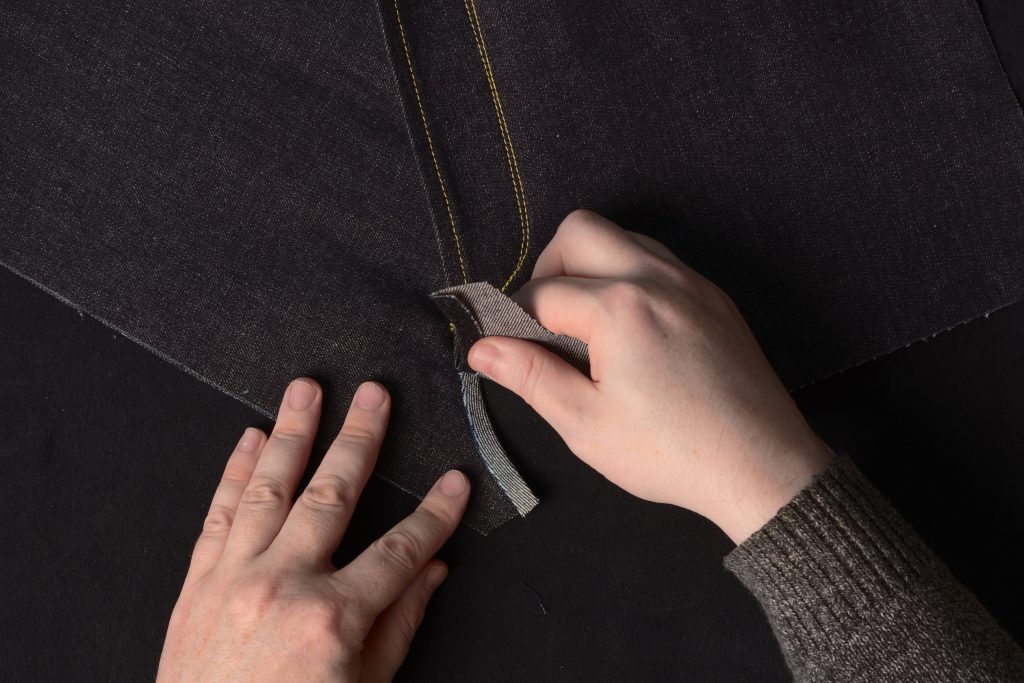
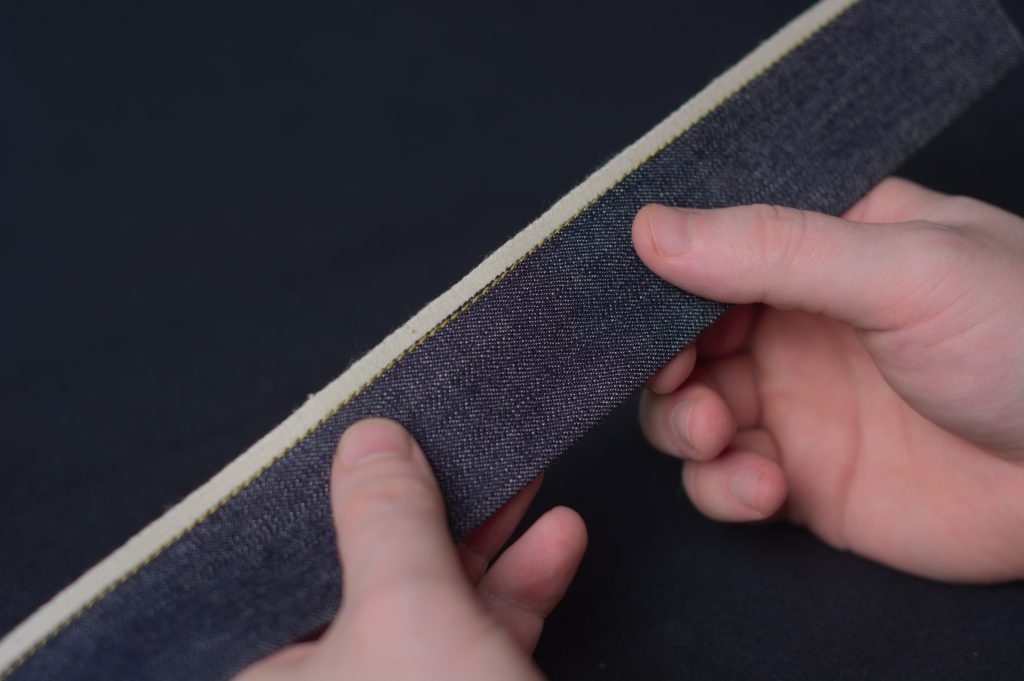
Repeat for the remaining belt loops.
Buttonholes
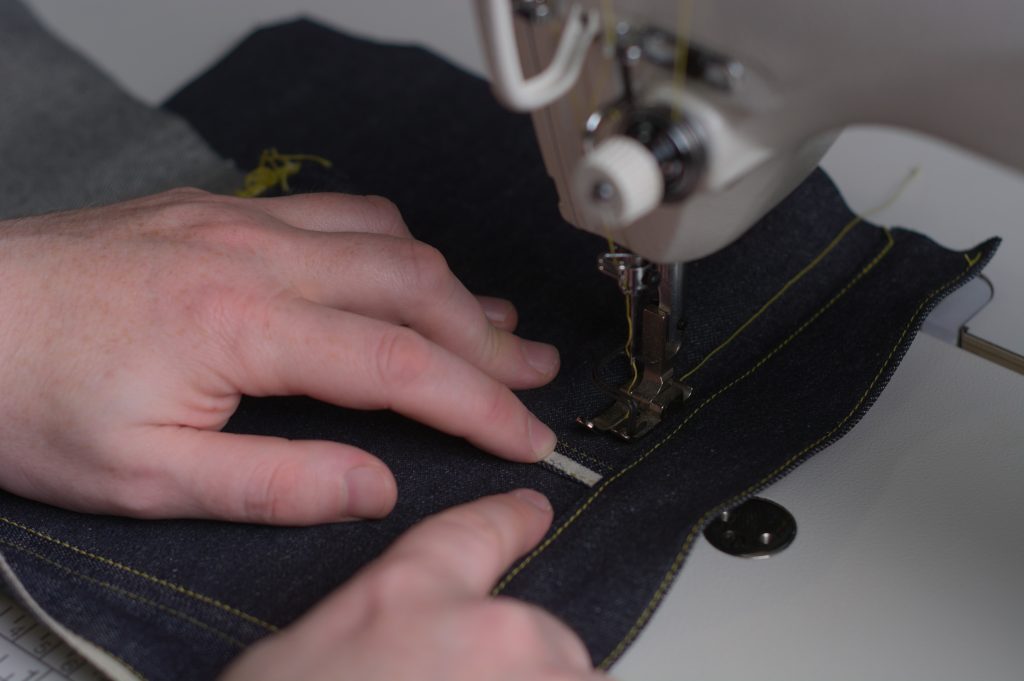
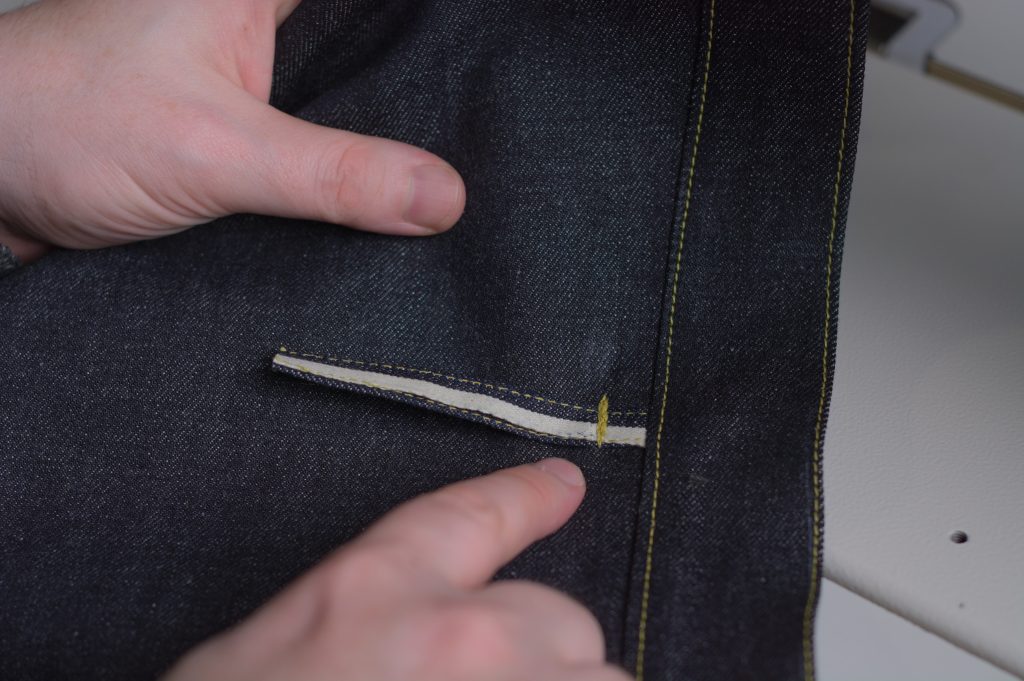
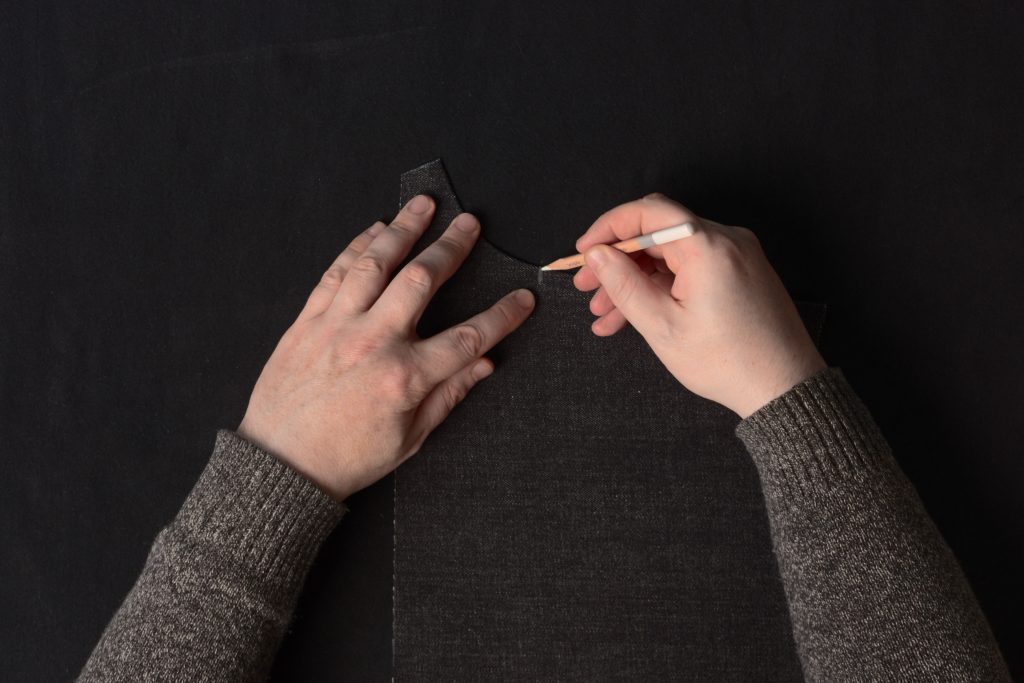
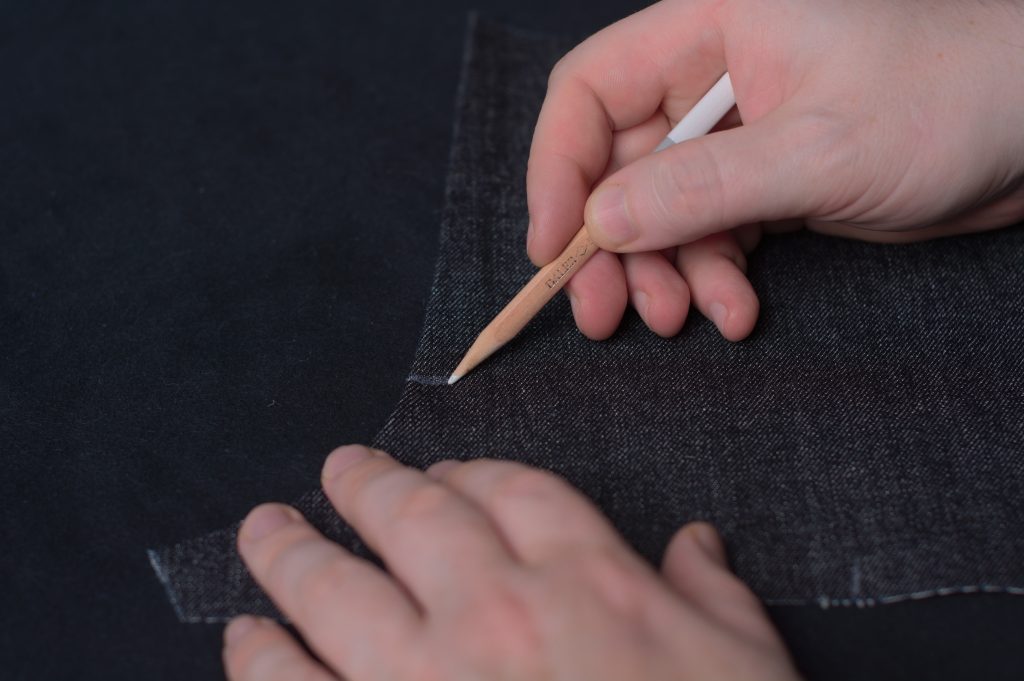
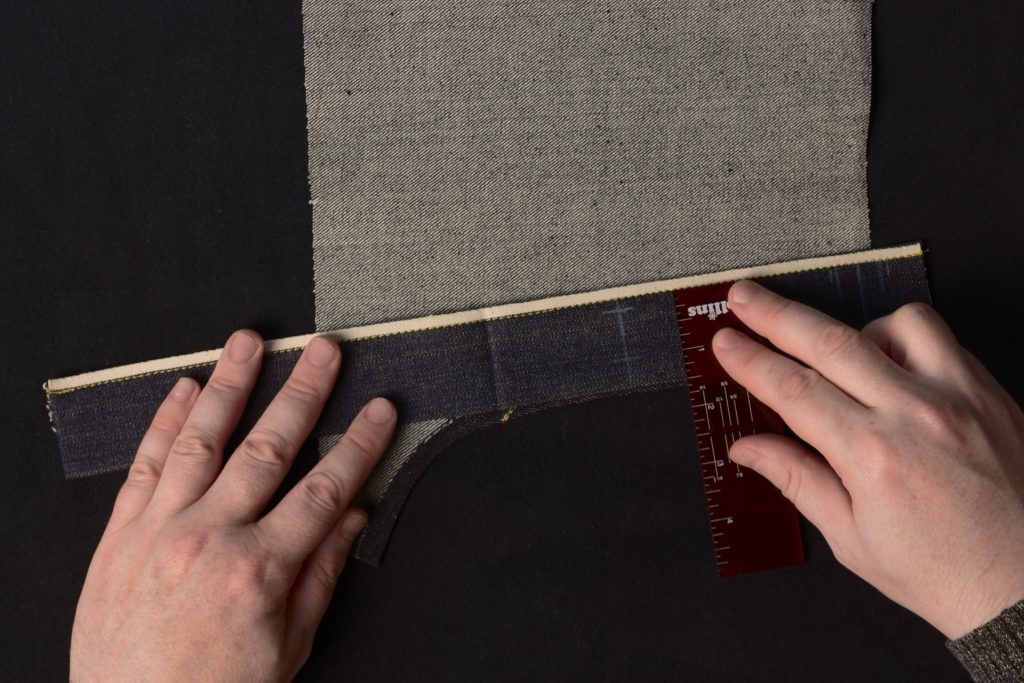
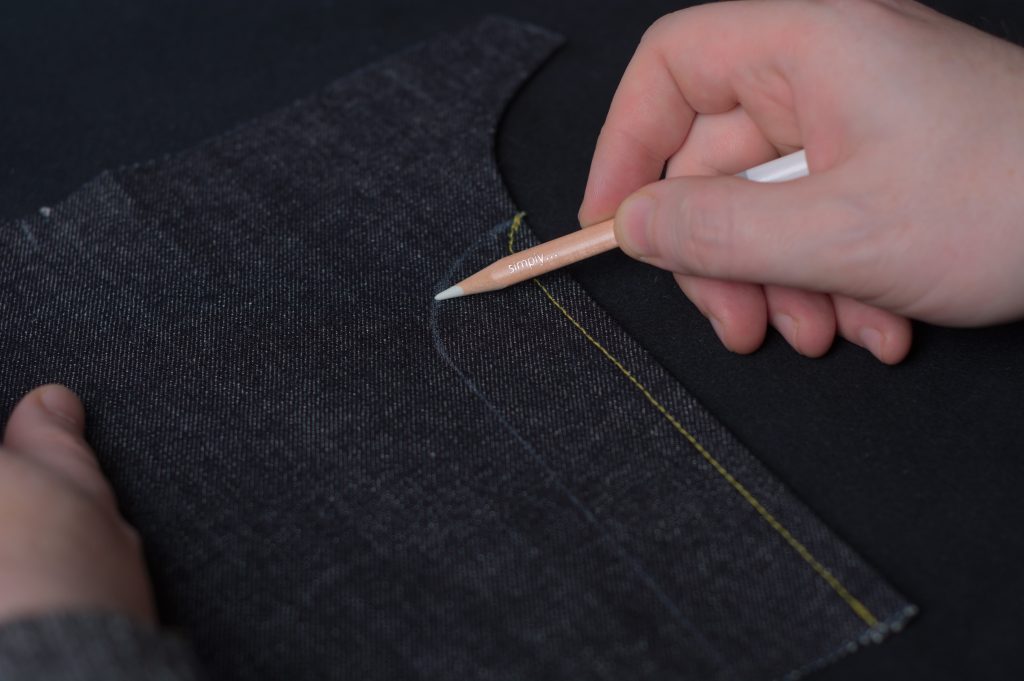
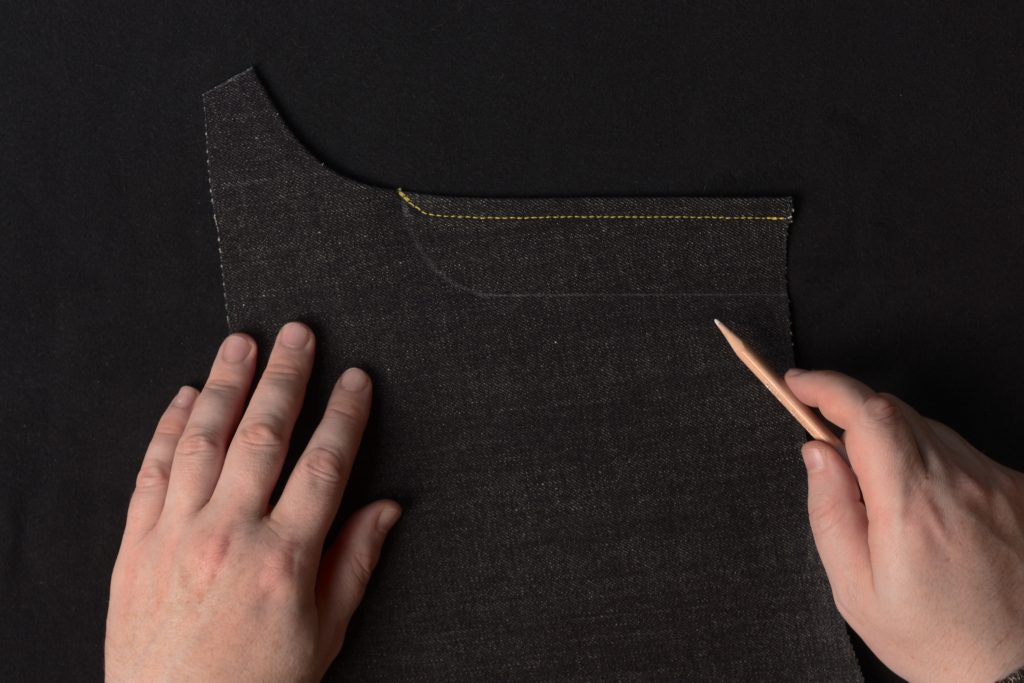
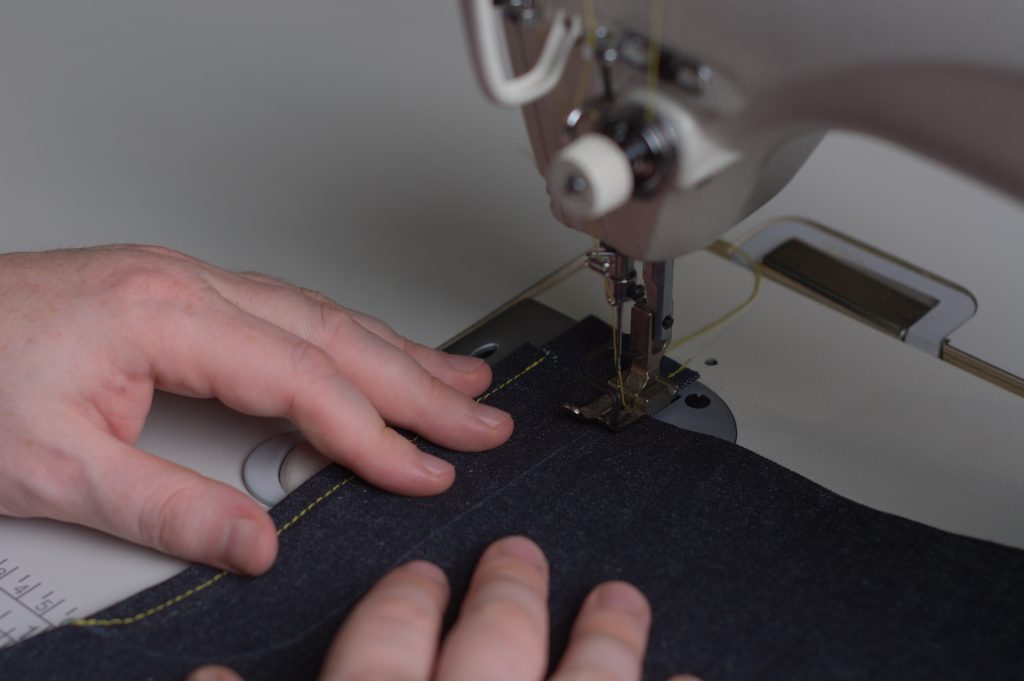
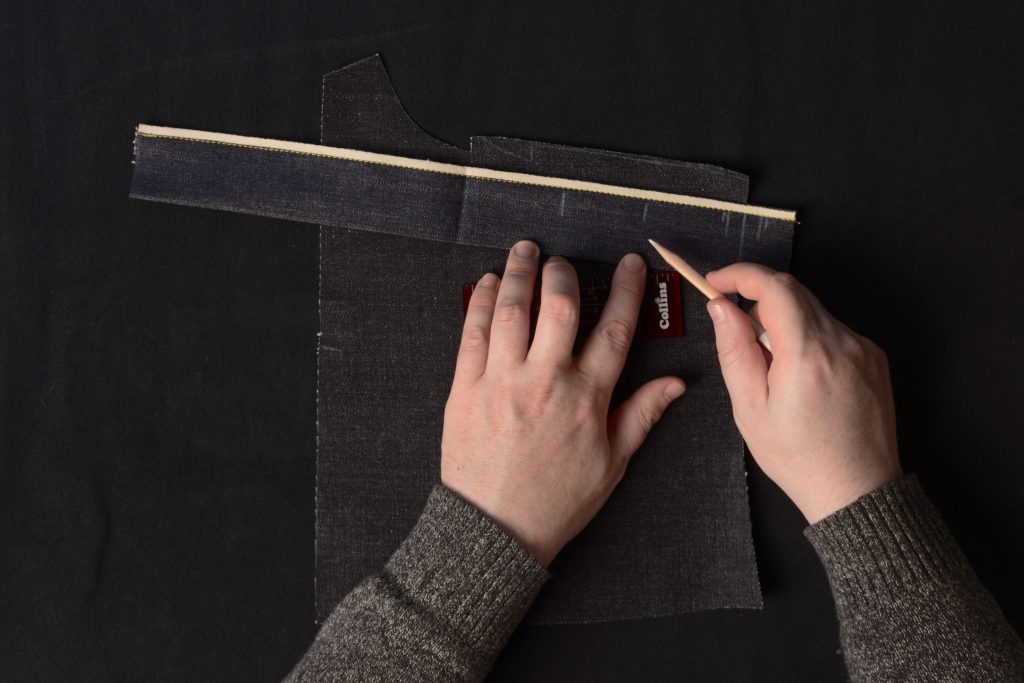
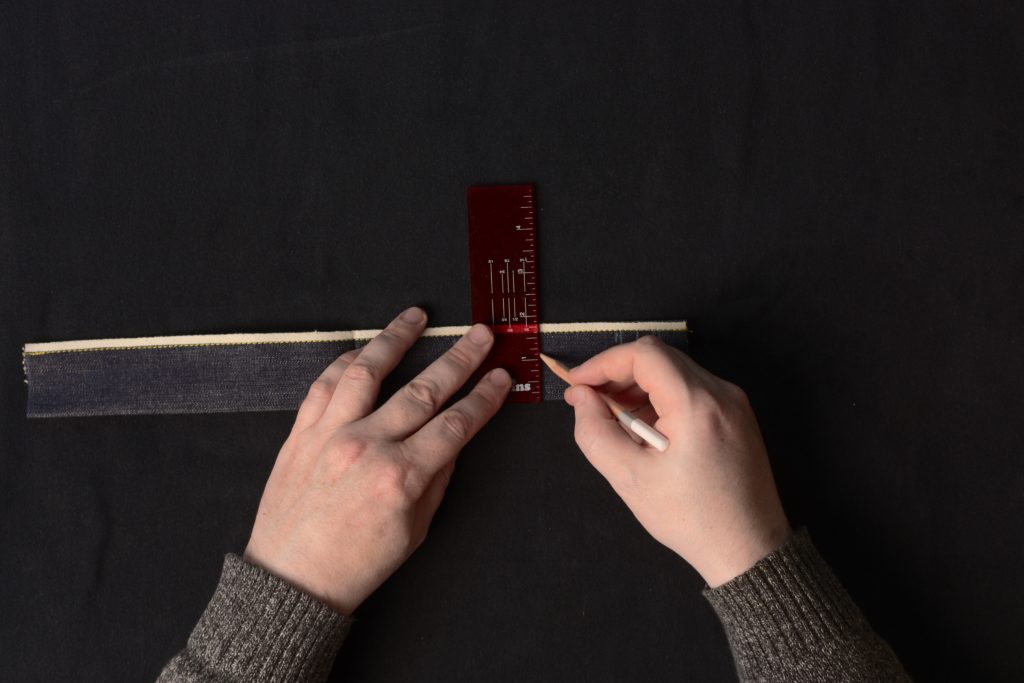
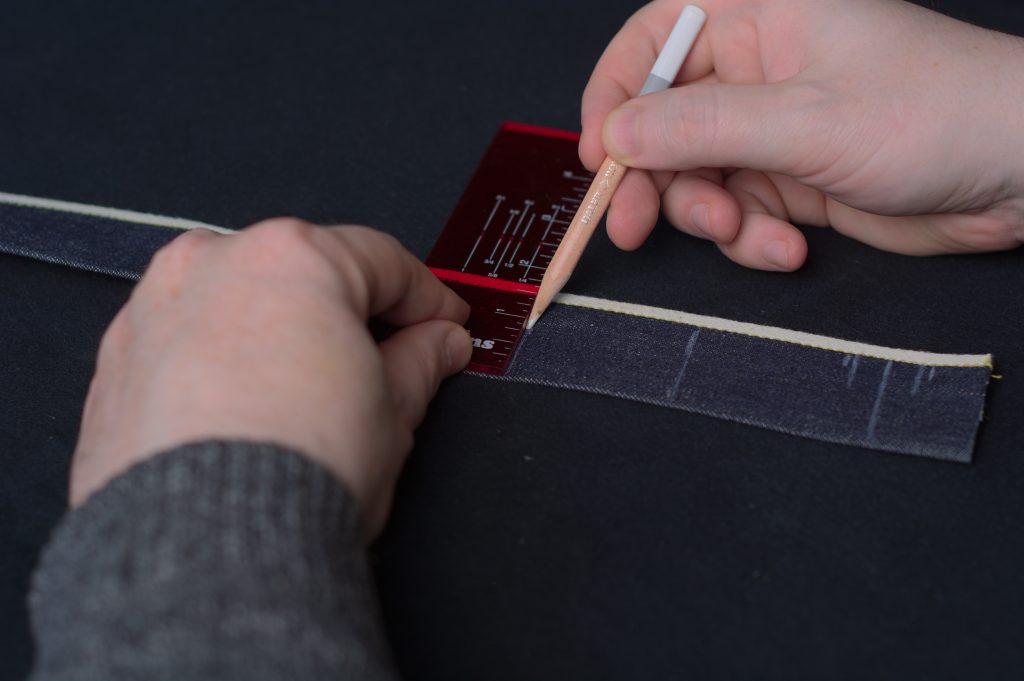
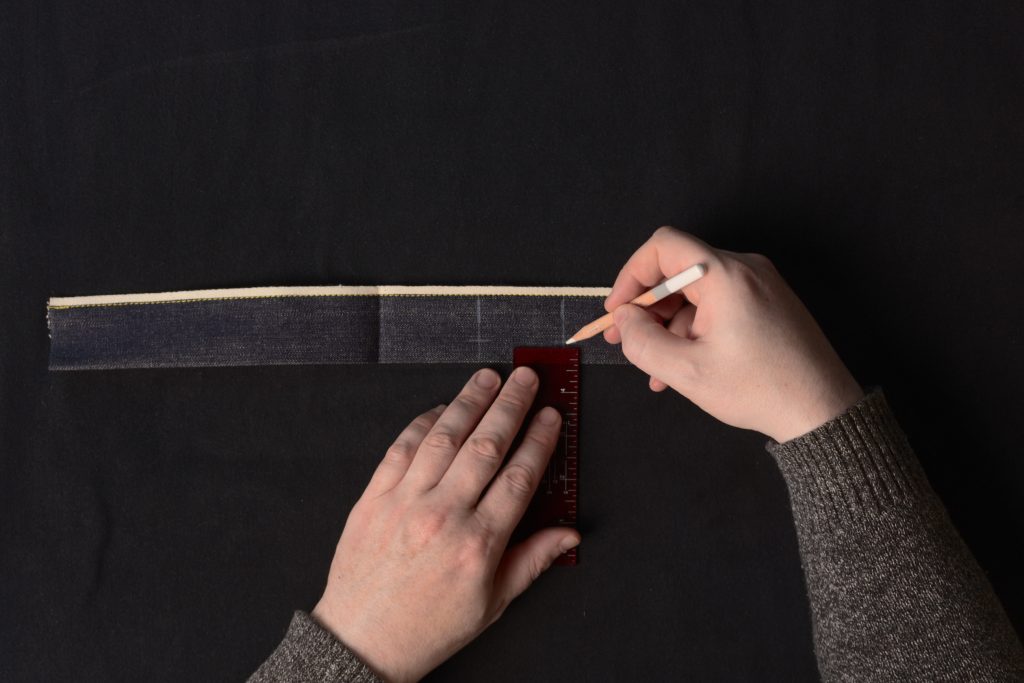
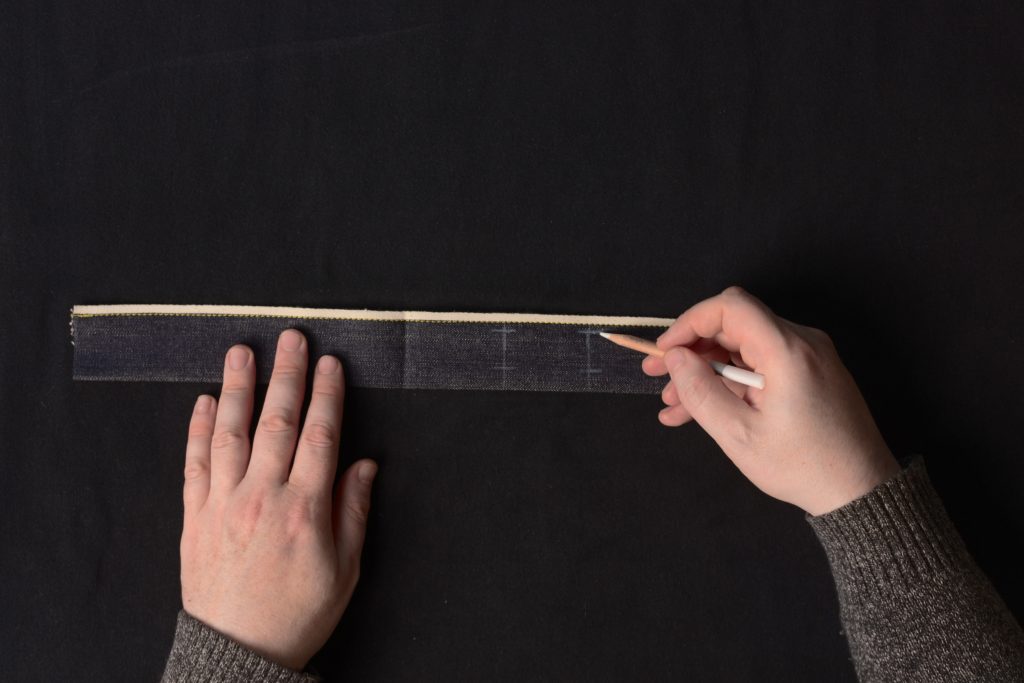
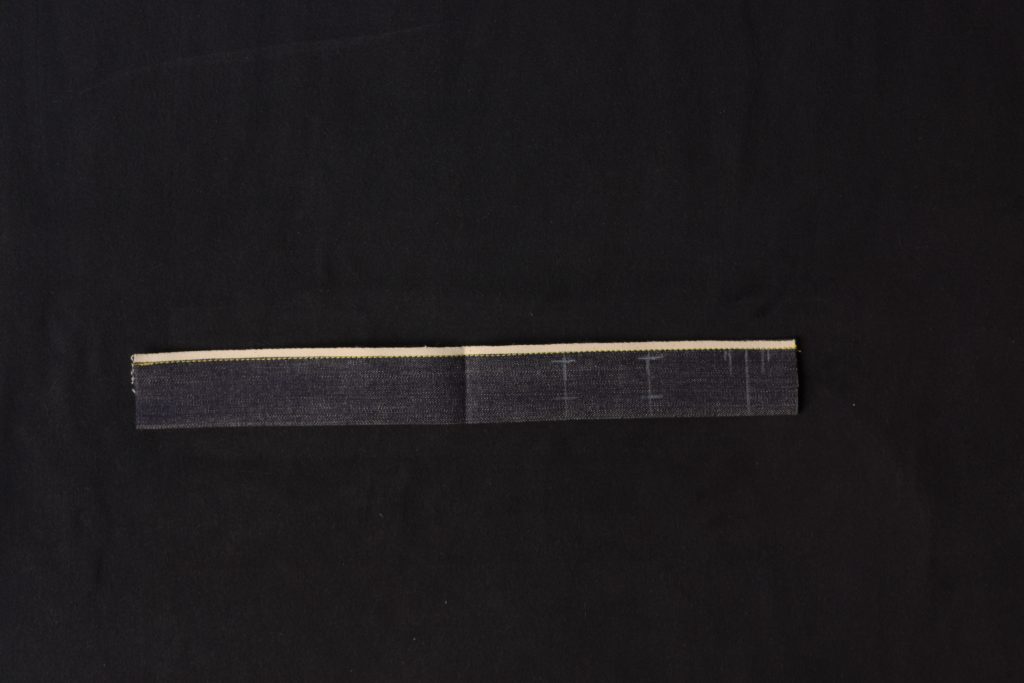
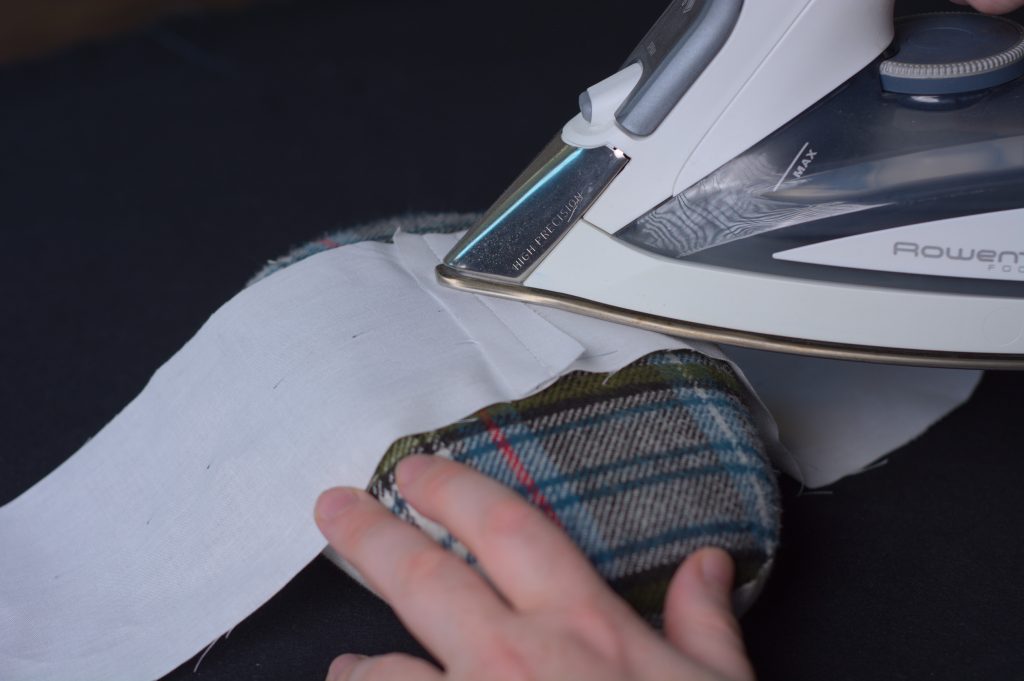
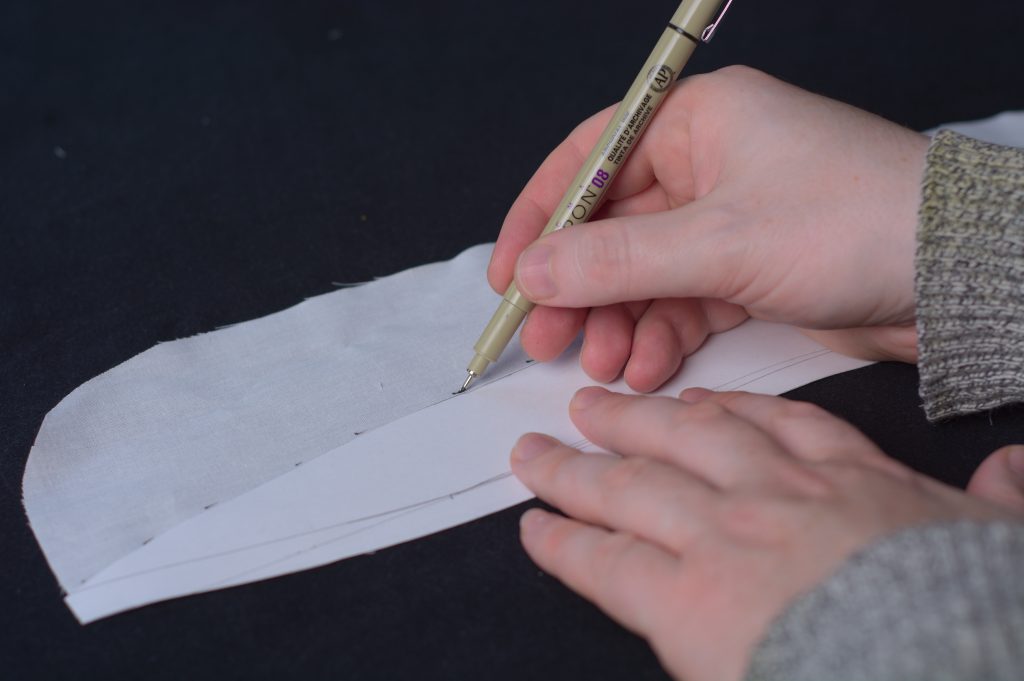
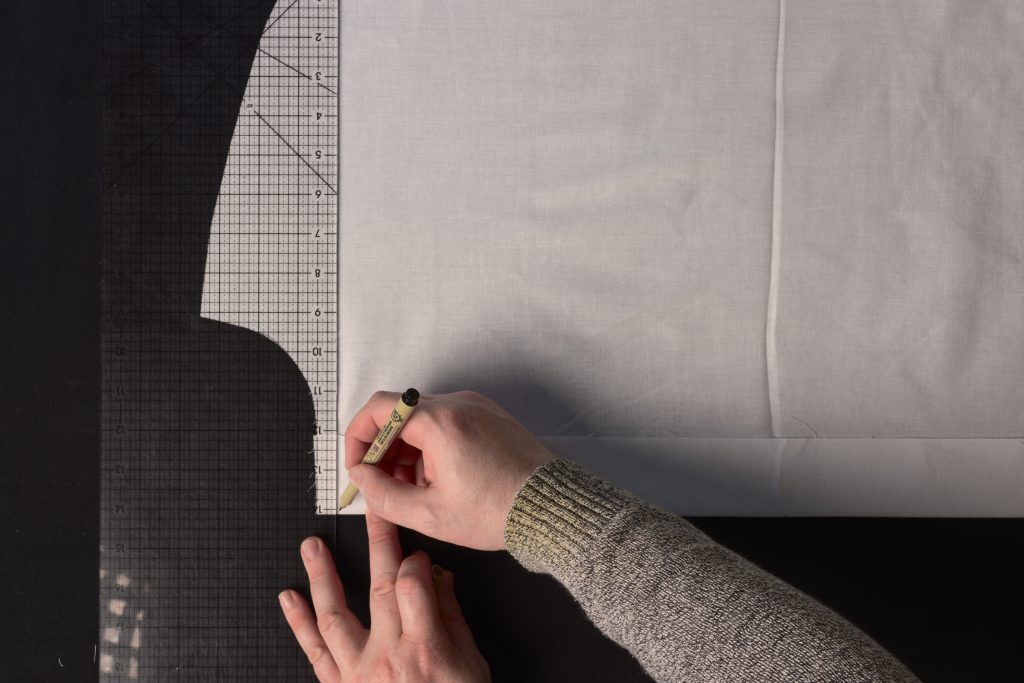
We need one last buttonhole to close the waistband and top of the fly. Begin by drawing a horizontal line across the center of the waistband on the left side. It should be 3/4″ from both the top and bottom of the waistband.
Mark the widths for the buttonhole, about 1/2″ from the end of the waistband, and then another 3/4″ for the width. The buttonhole should be about 1/8″ wider than your buttons.
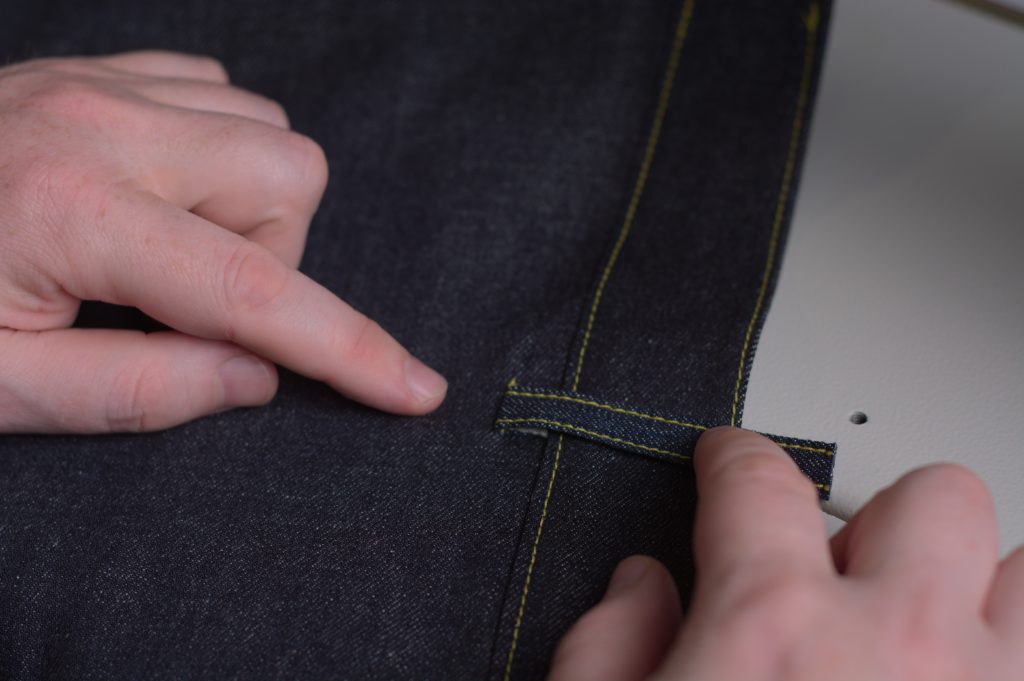
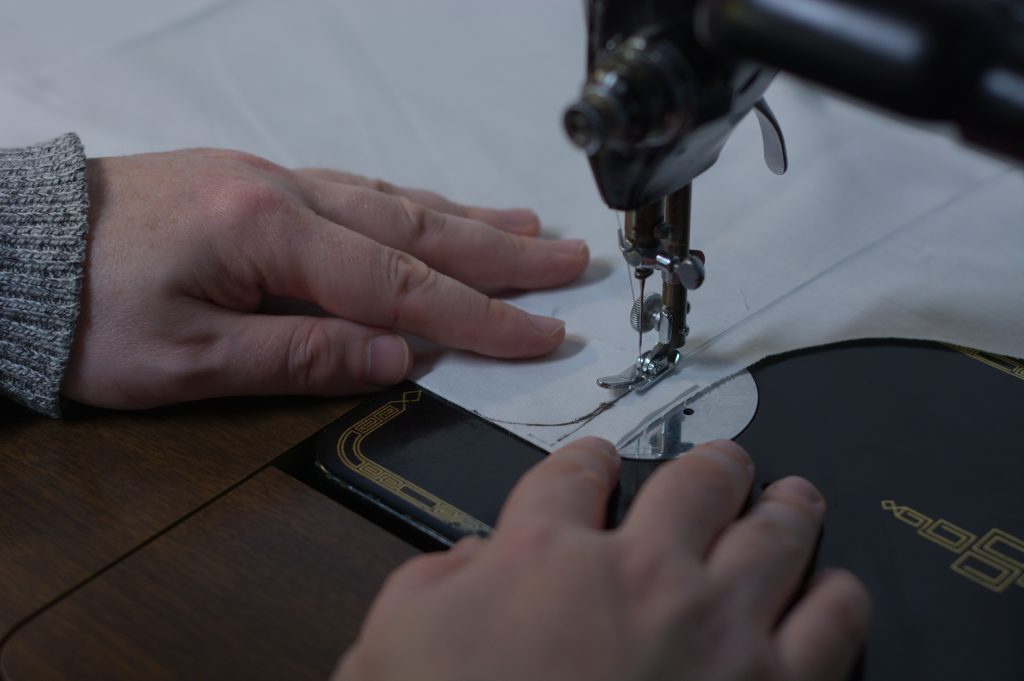
Finally, cut open the buttonhole and work the buttonhole stitch as shown earlier.
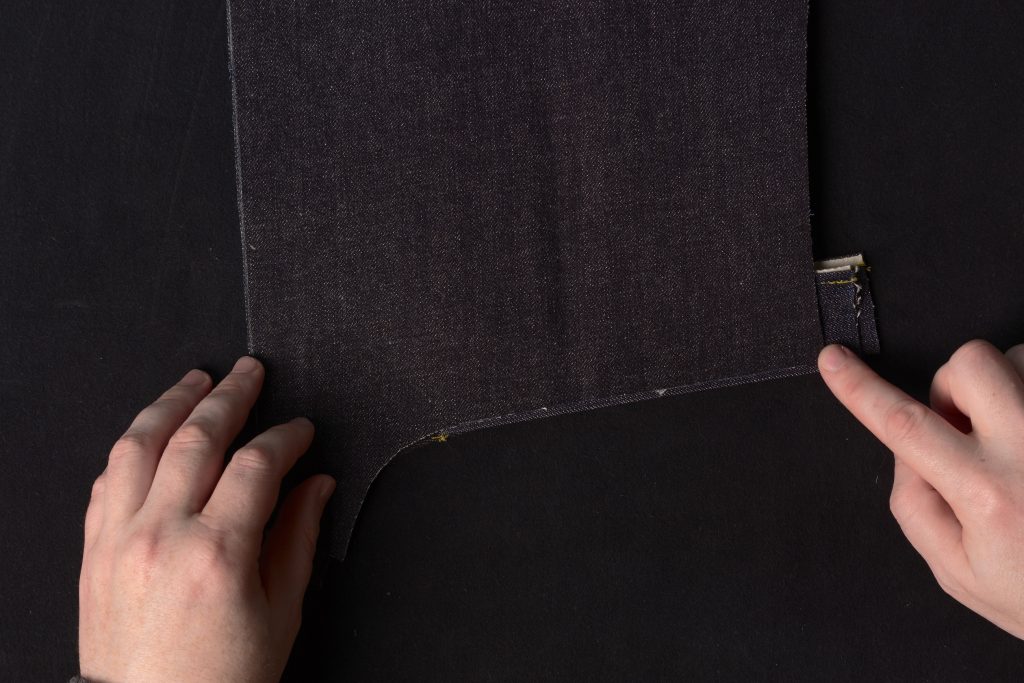
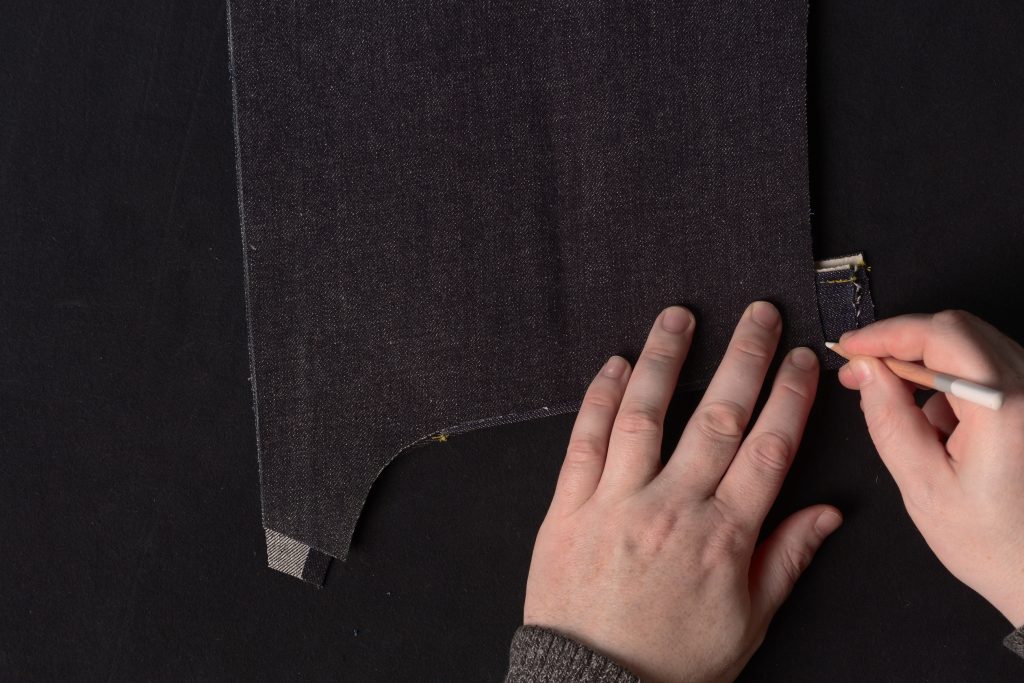
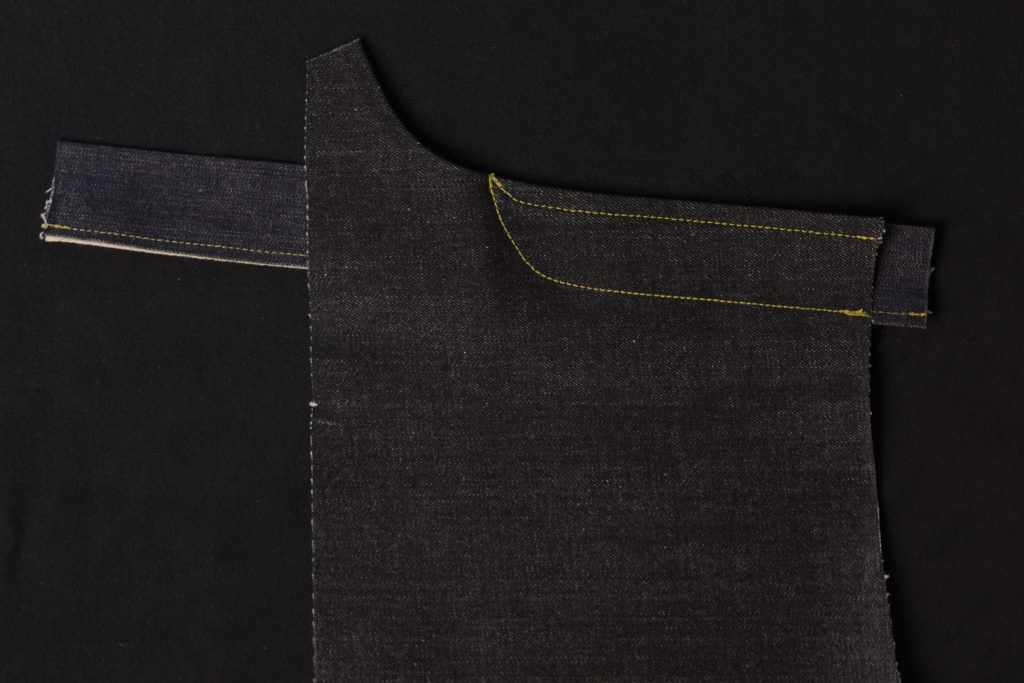
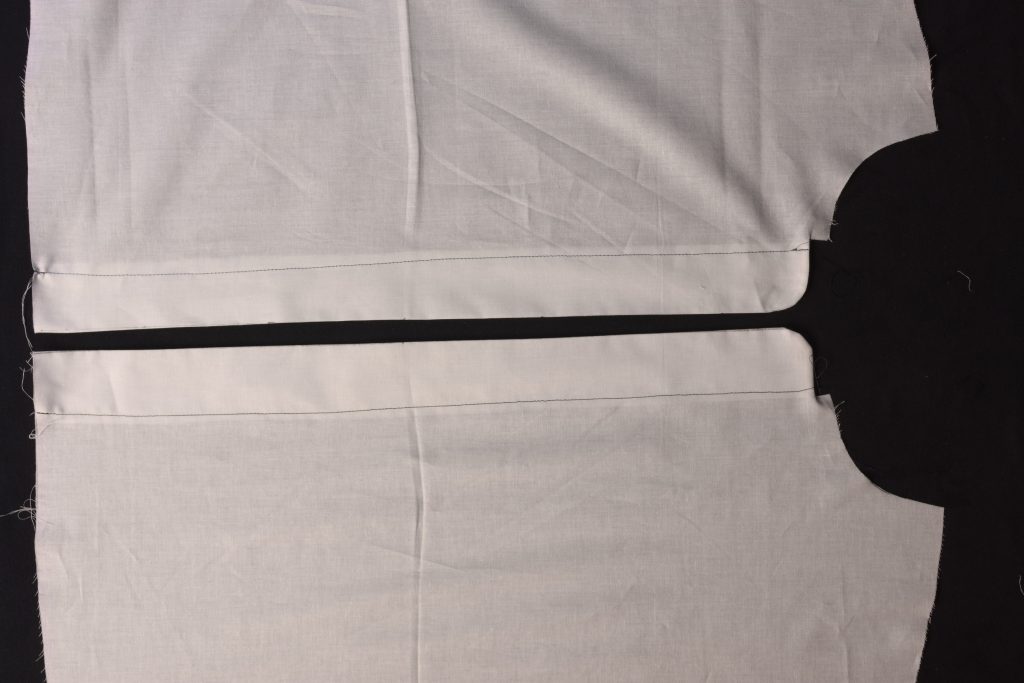
One Piece Fly – Part II
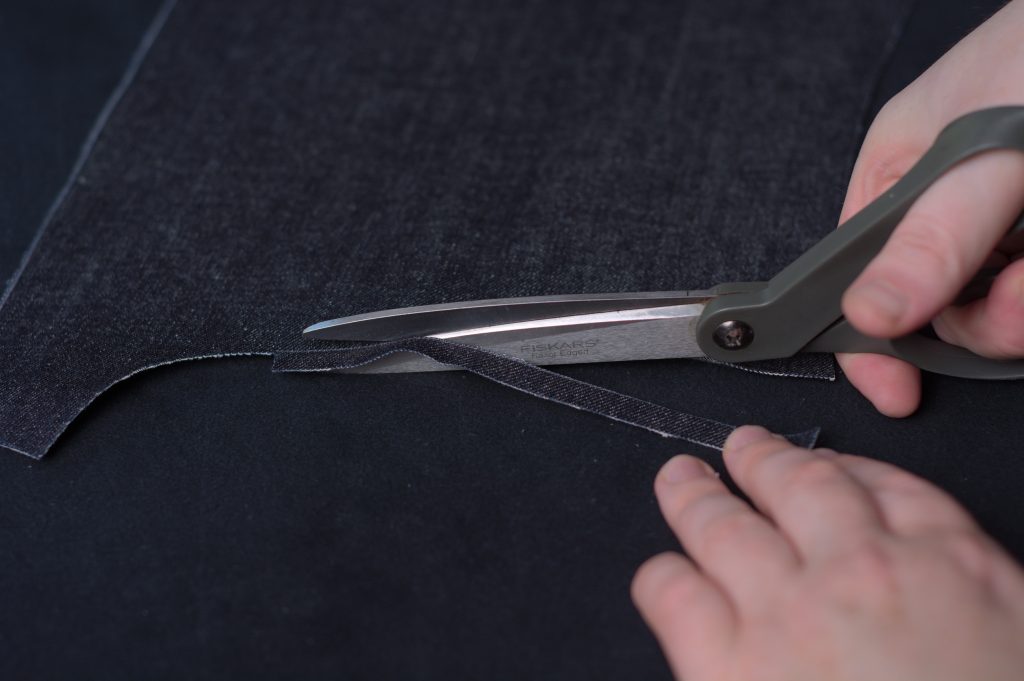
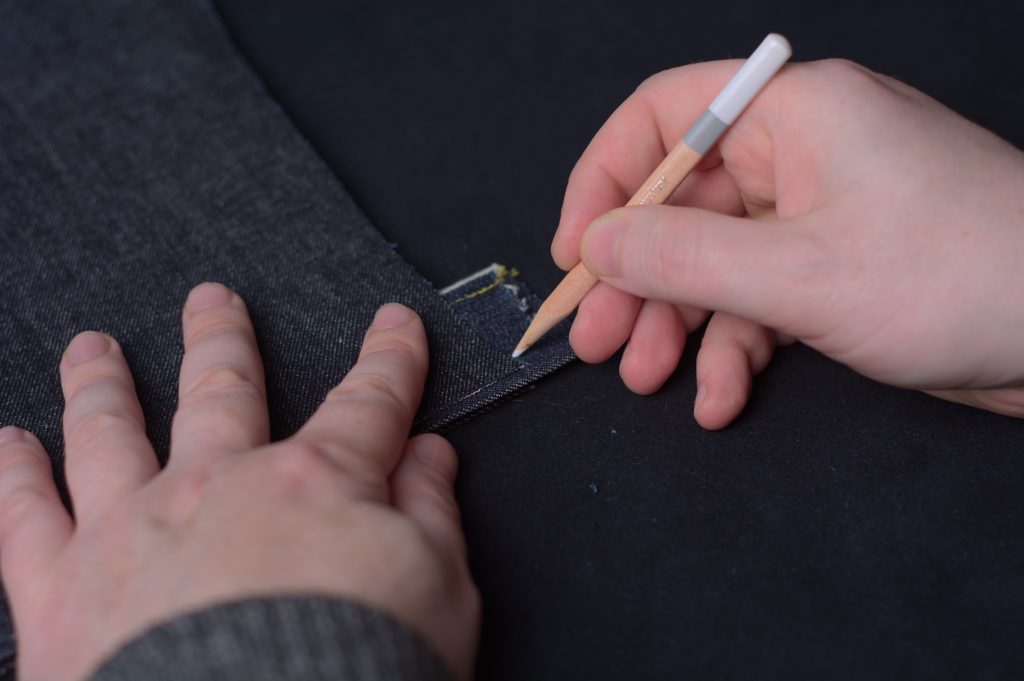
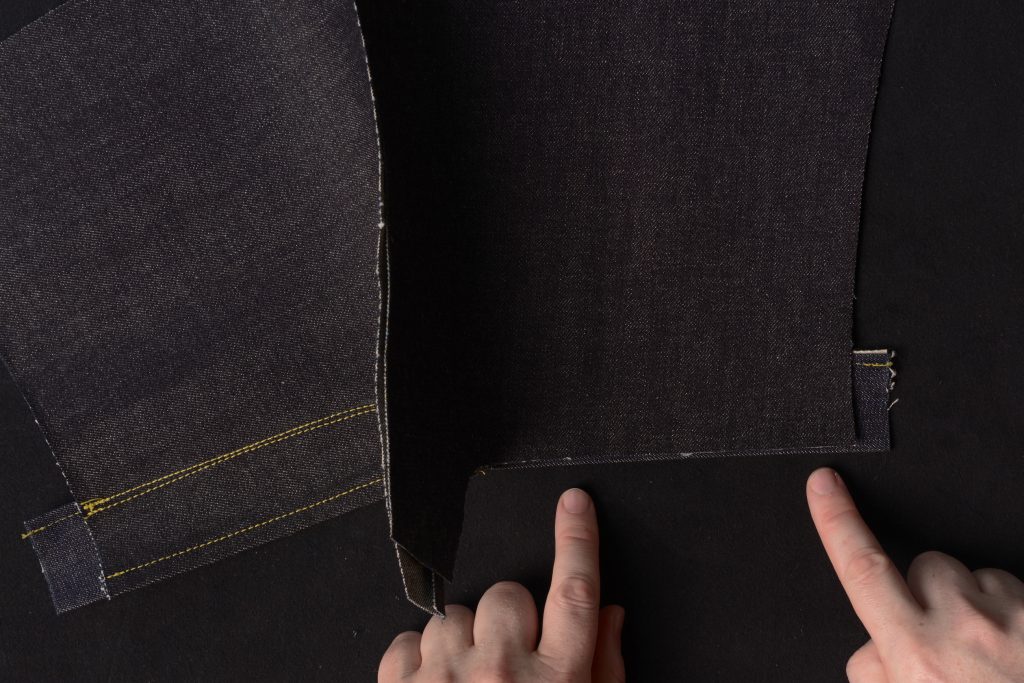
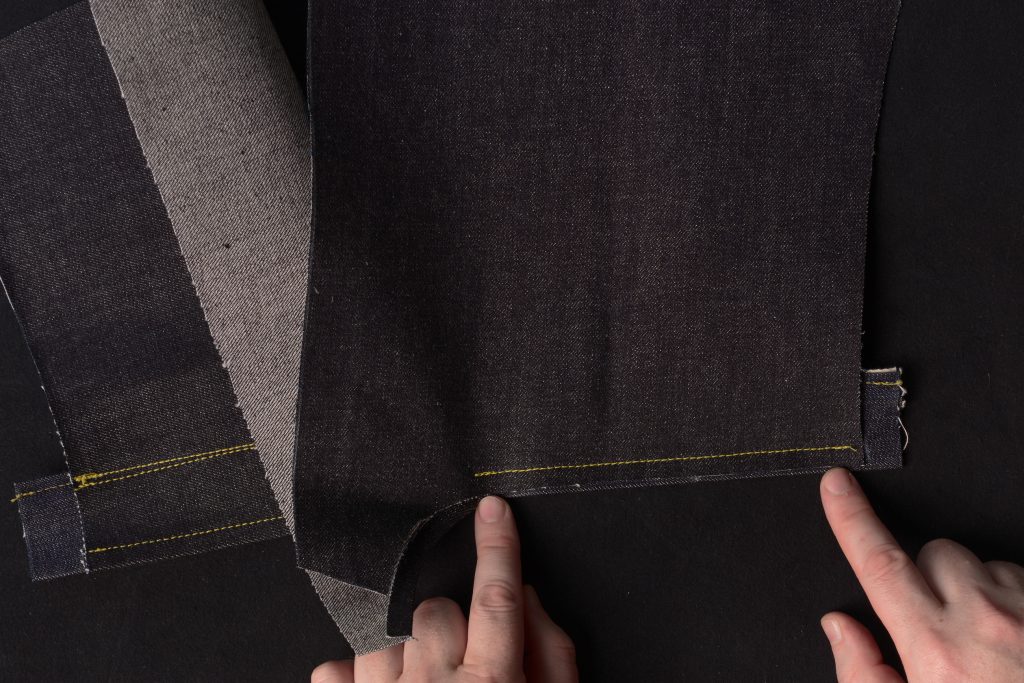
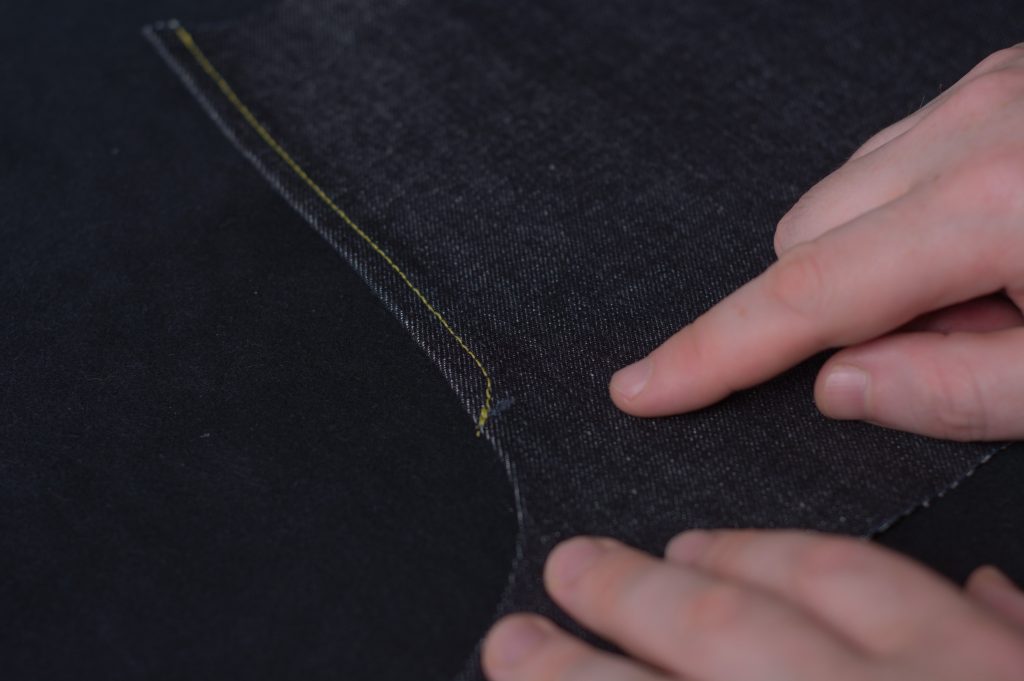
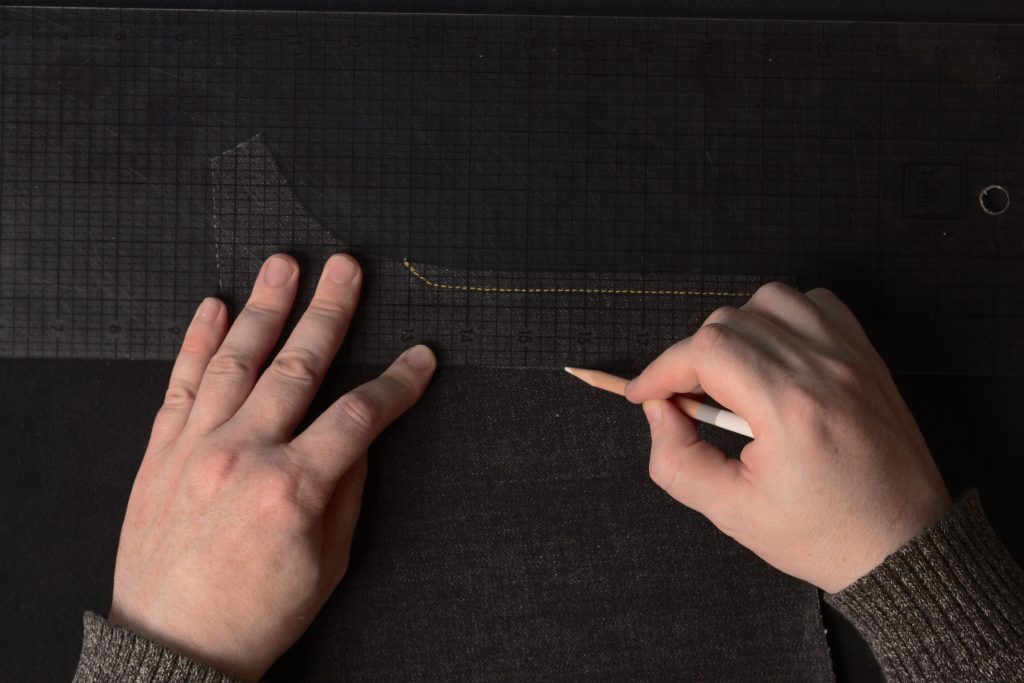
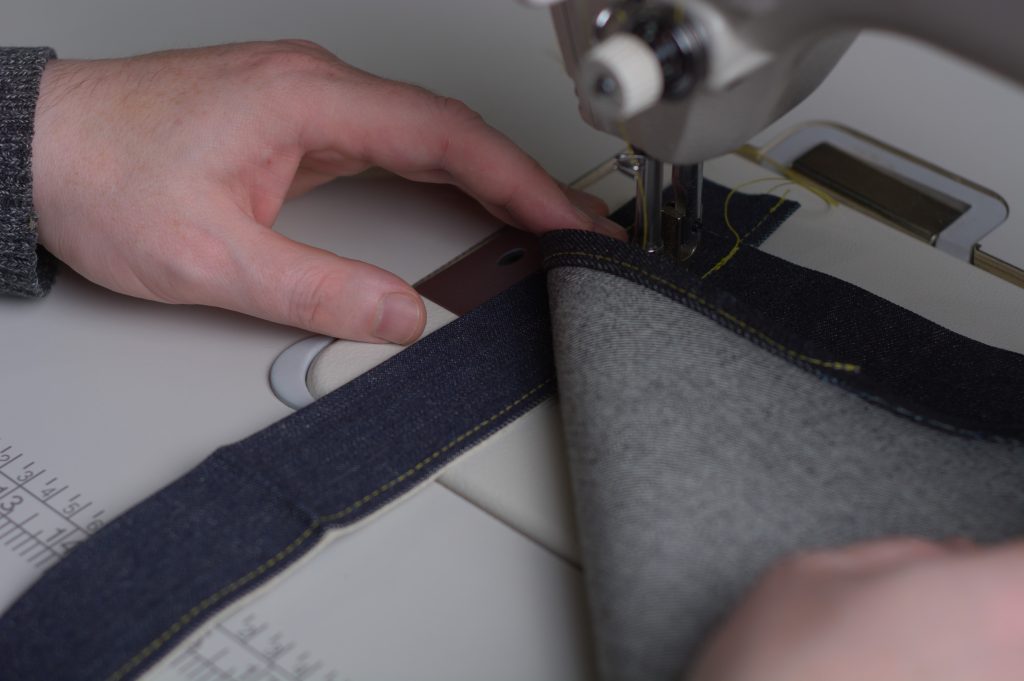
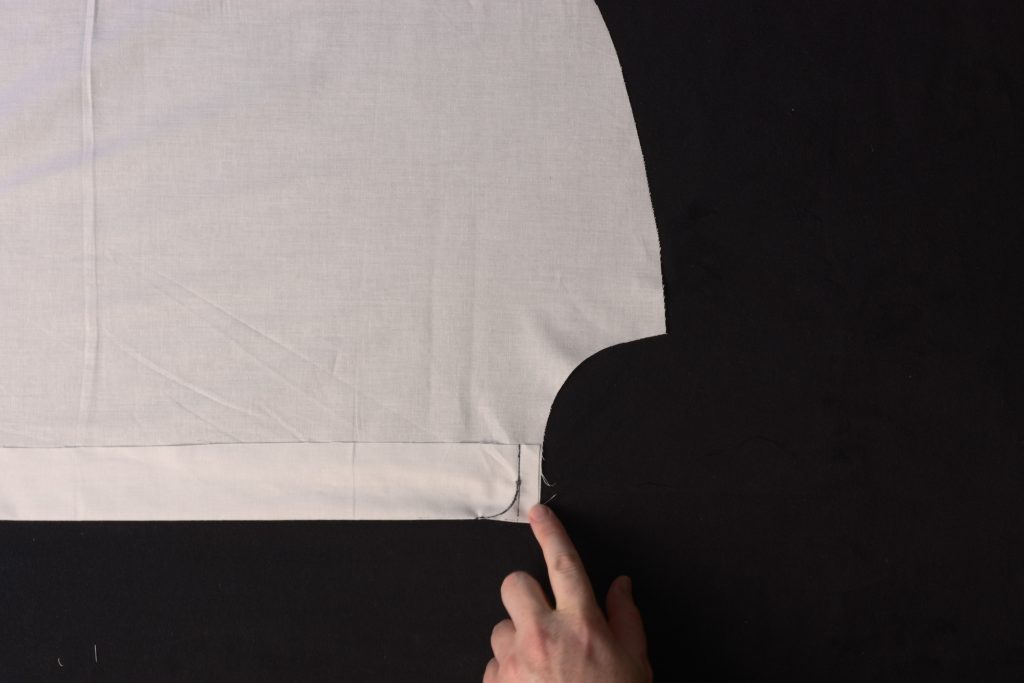
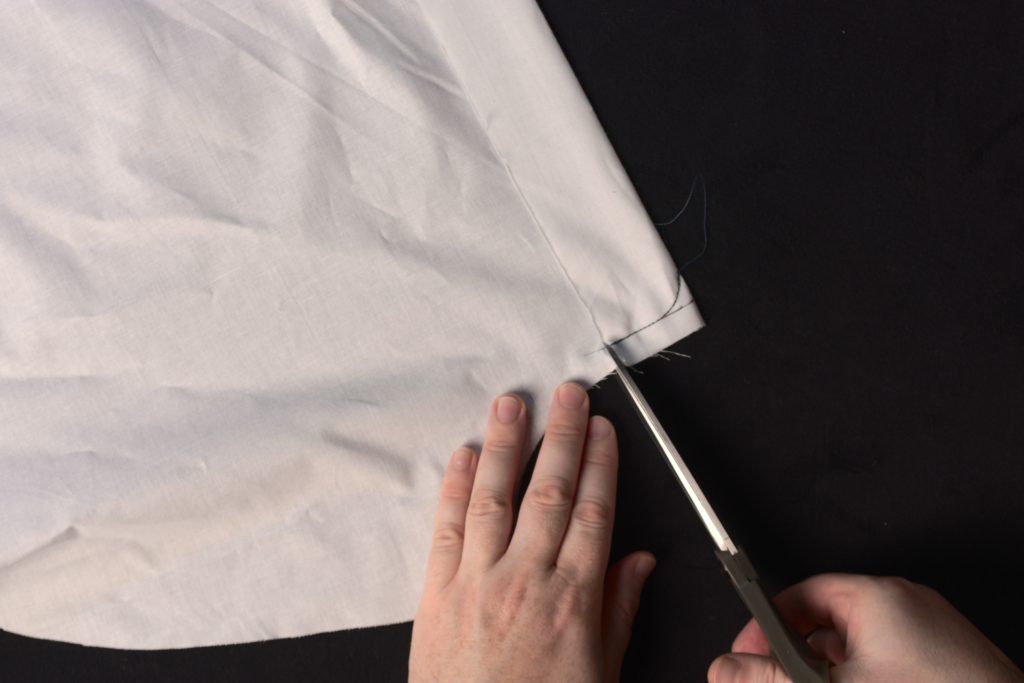
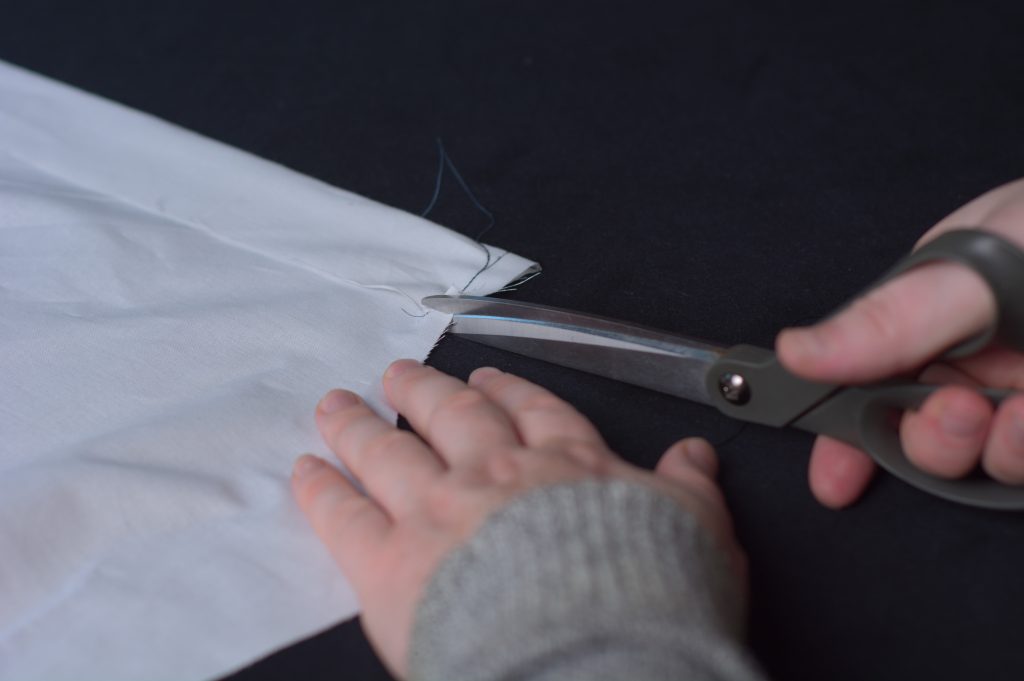
Turning to the right leg now, lay it right side up on the table and draw a line 3/8″ from the edge of the fly extension.

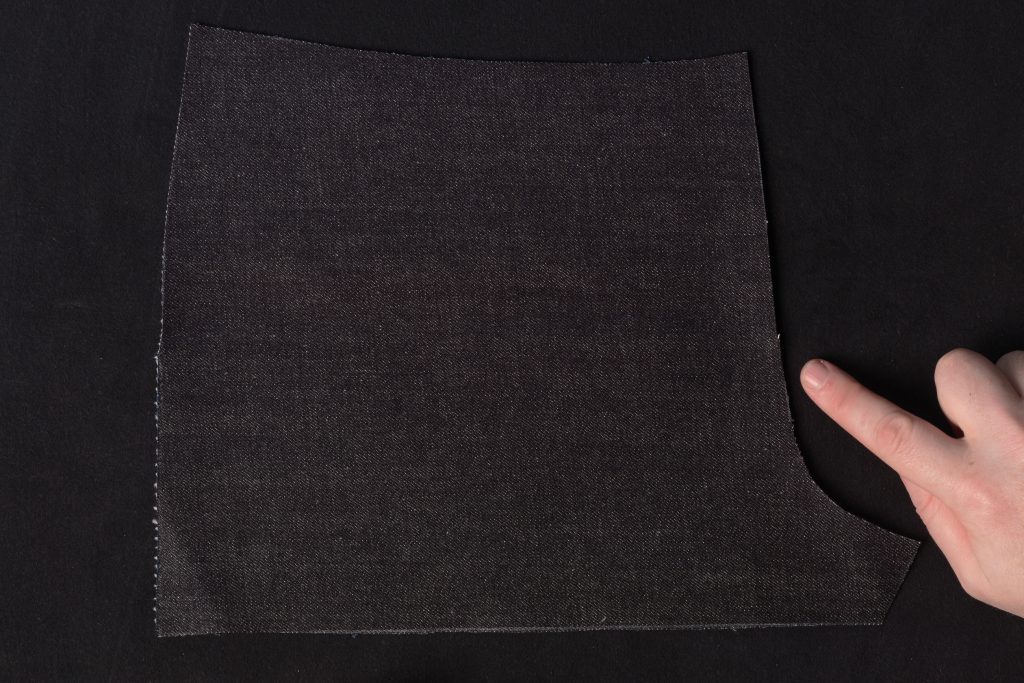
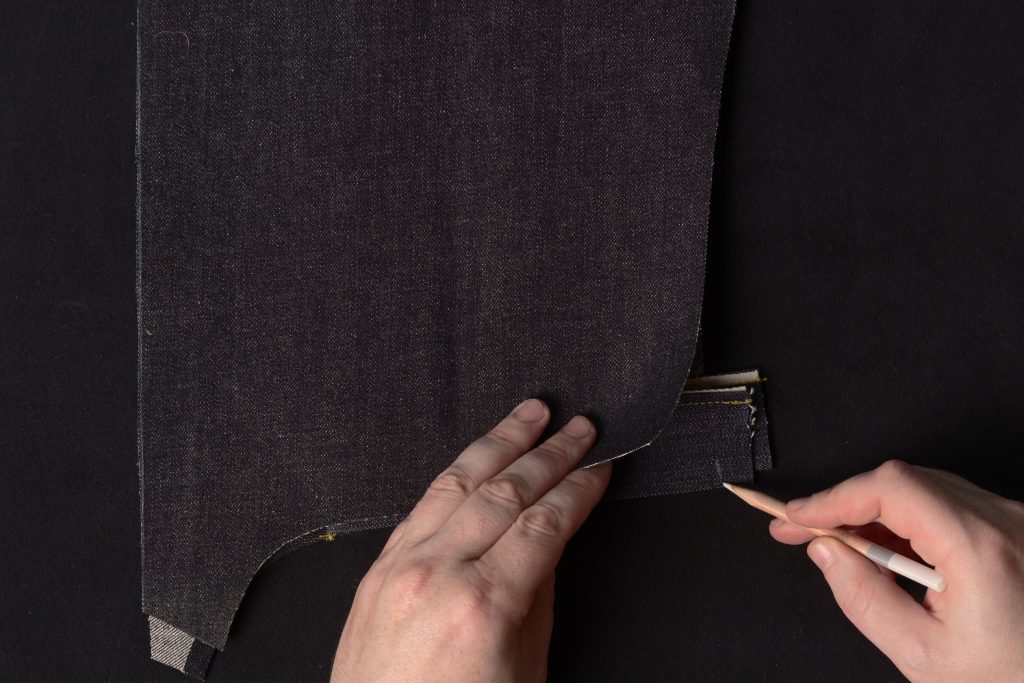
Cut off the fly extension piece.
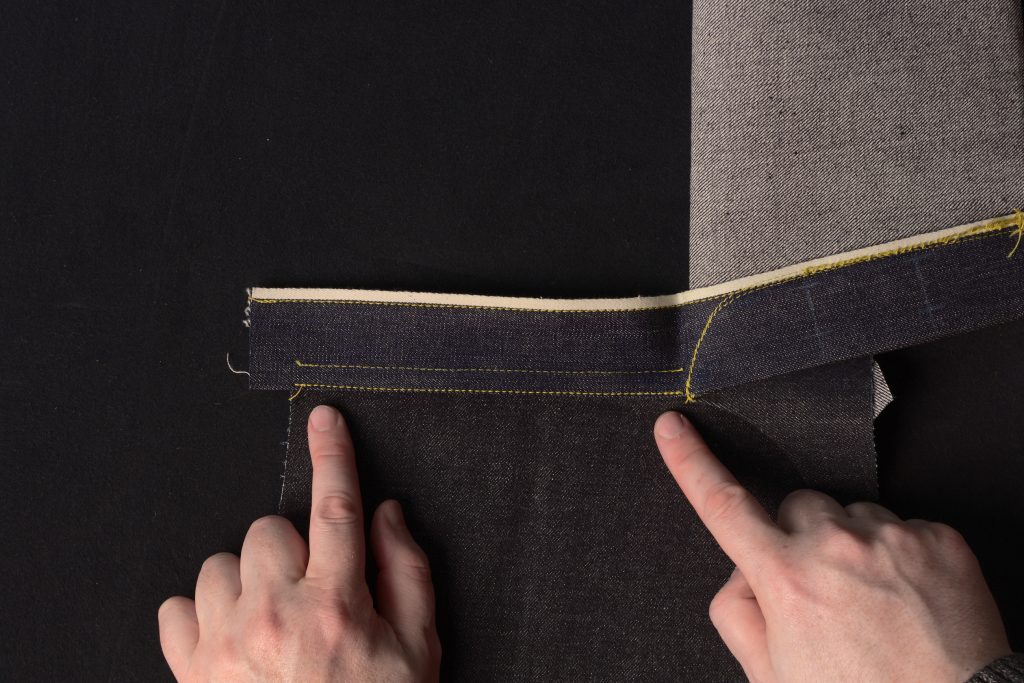
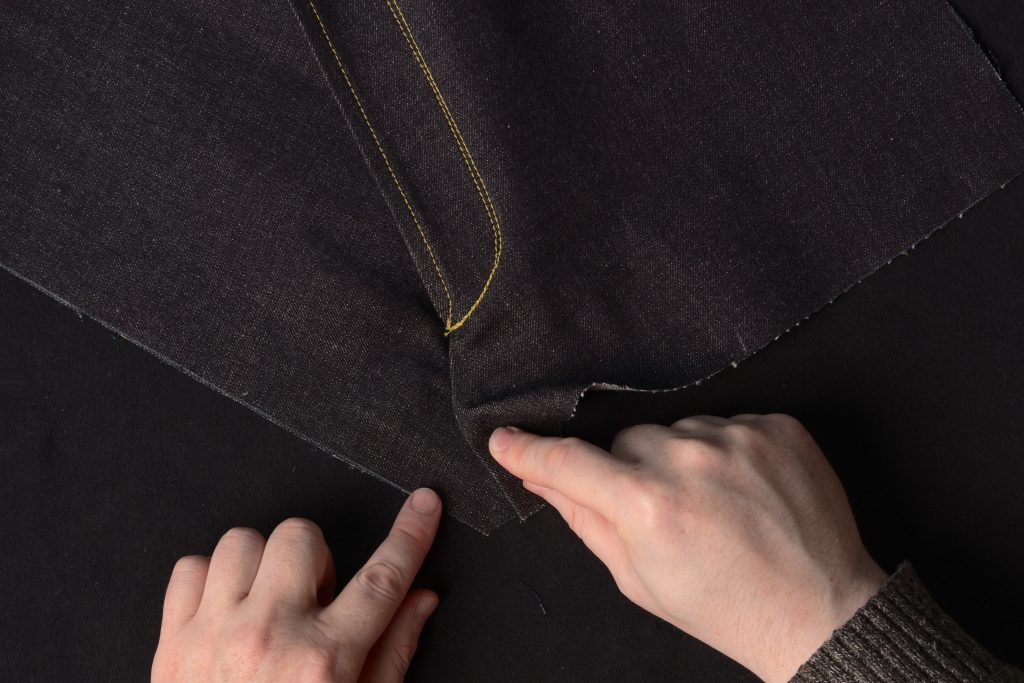
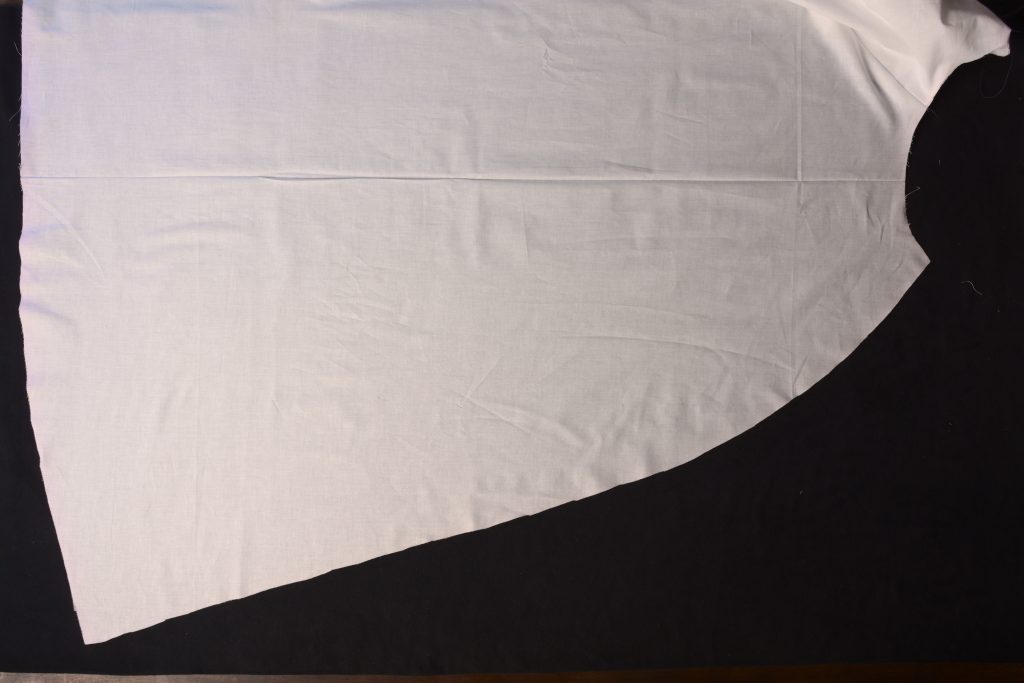
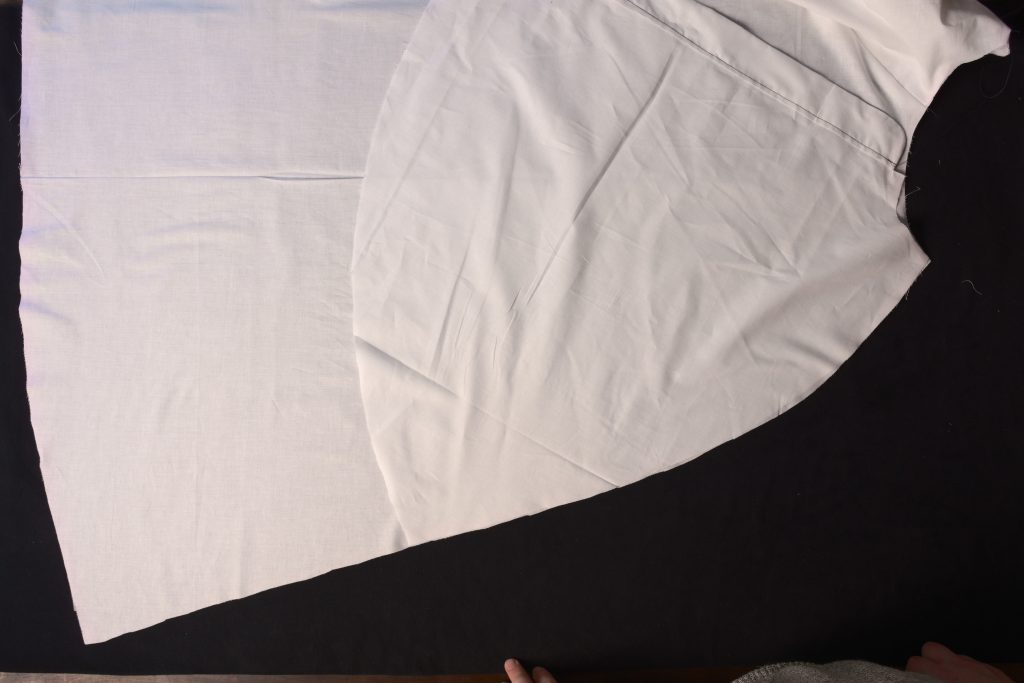
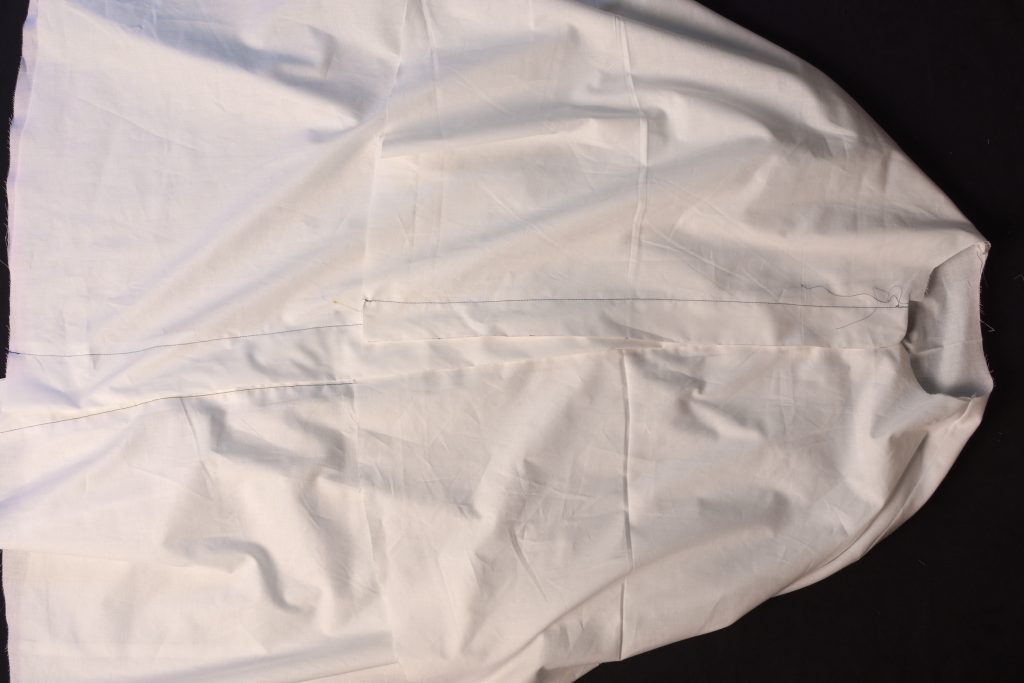
The entire fly / crotch seam should be nice and even now.
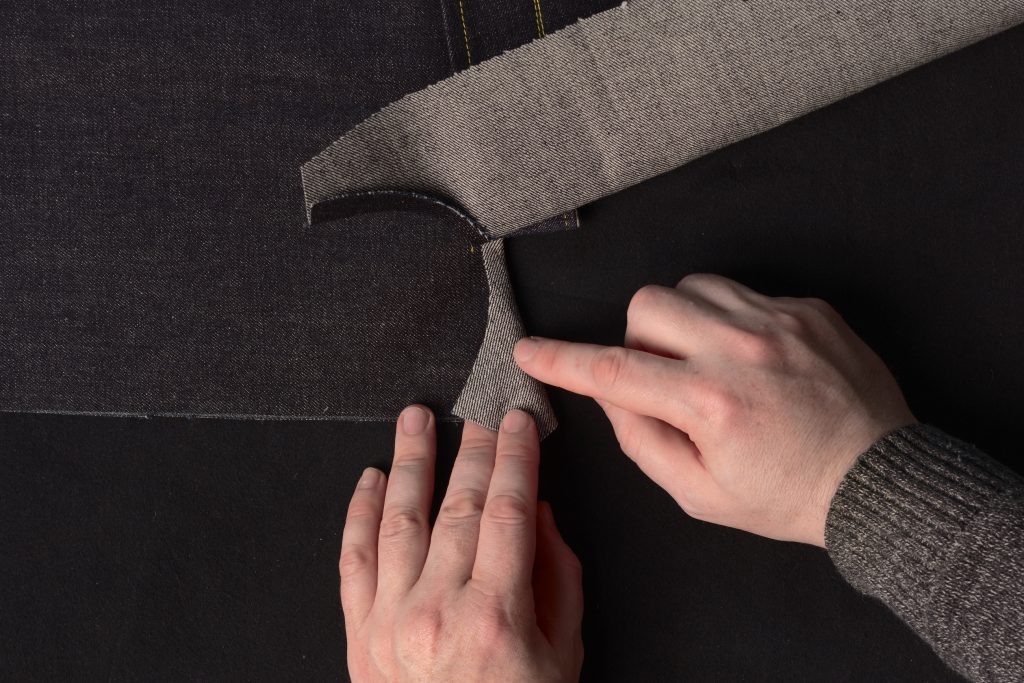
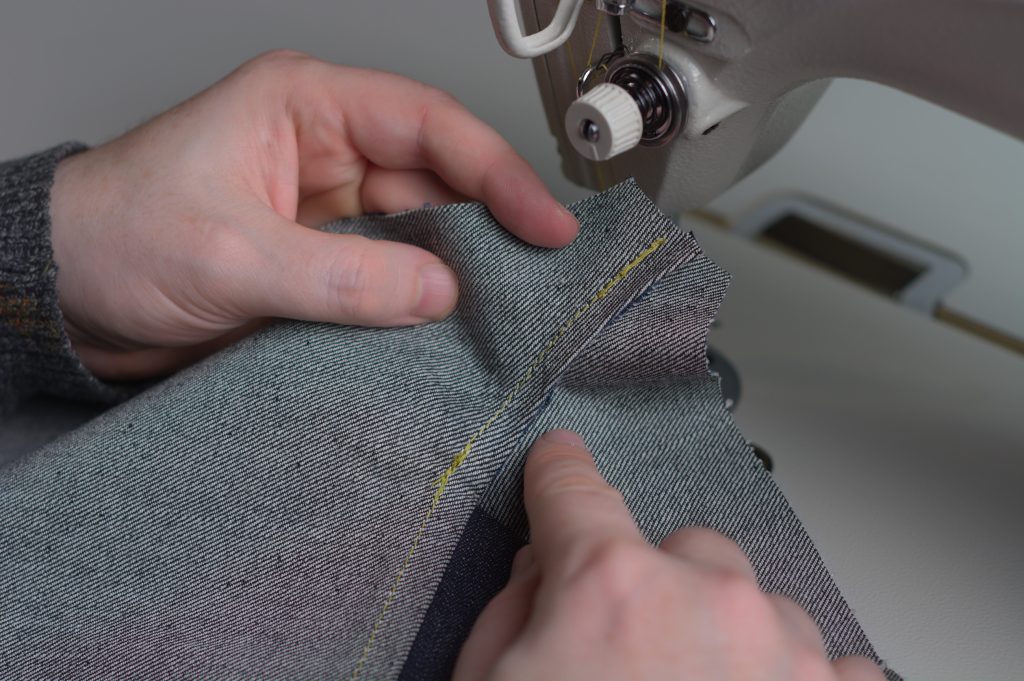
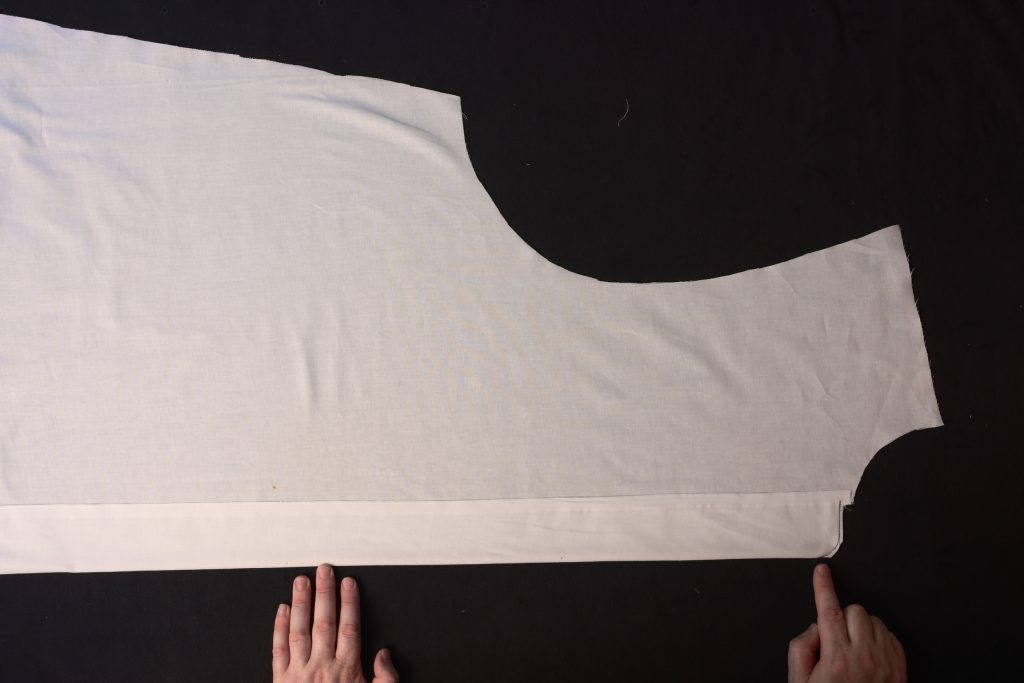
This next step is a little non intuitive at first, so I’ll break it down into very small steps. Setting aside the right leg for a moment, lay the left leg on the table, wrong side up. Fold the fly into position along the crease at the bottom.
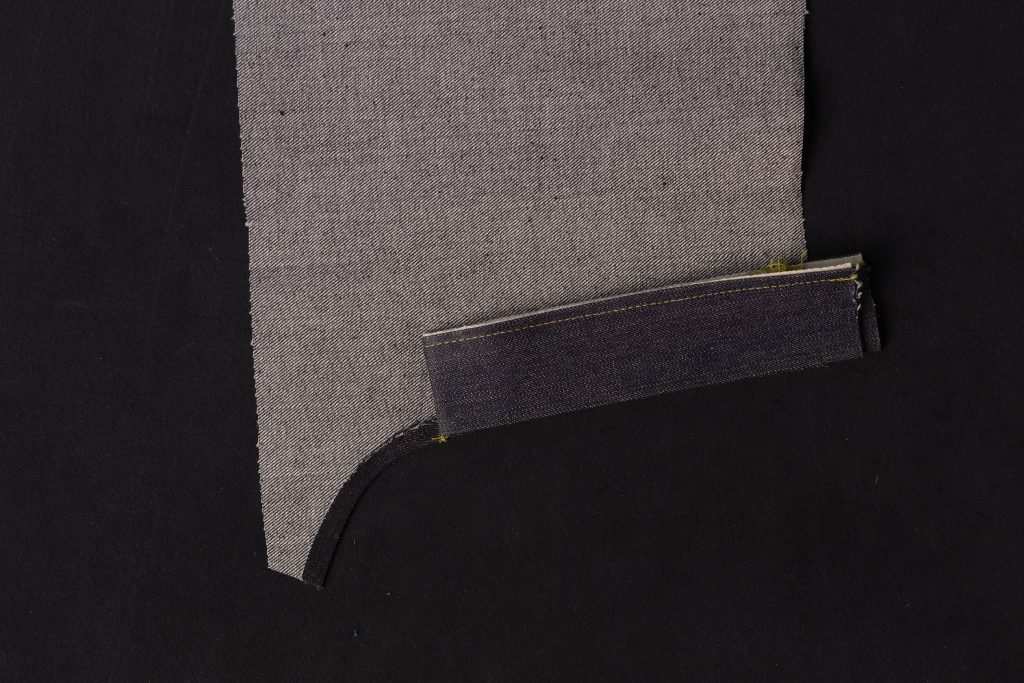
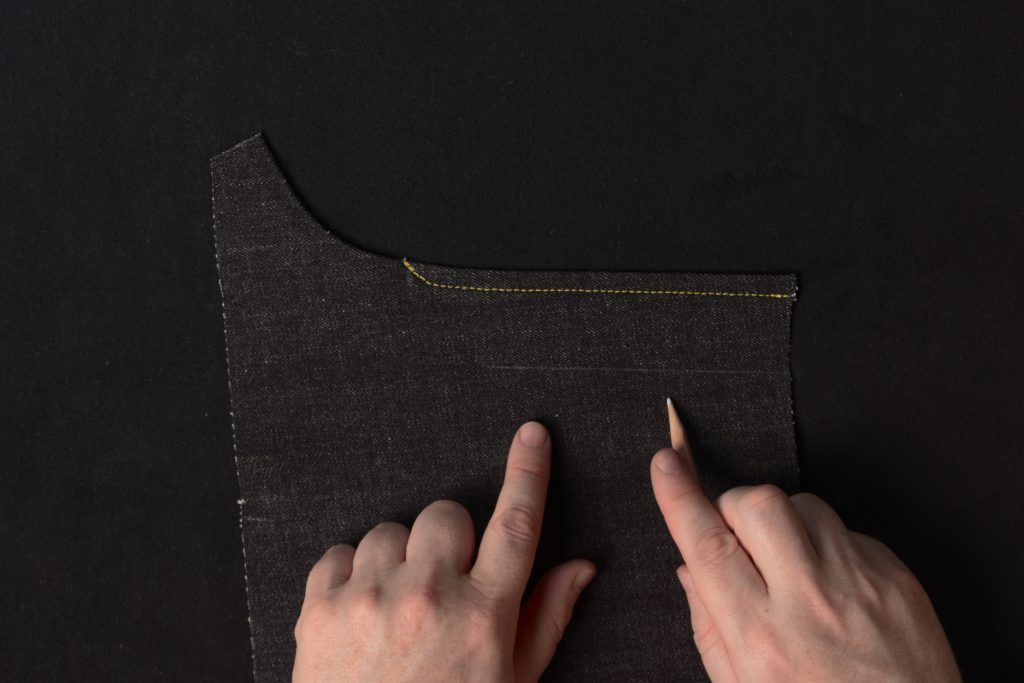
Now lay the right leg back in place on top, right side up, or wrong sides together – which is very unusual. Align the waist seam, and set back the right leg’s crotch / fly seam about 1/8″ from the edge of the fly underneath.
Mark the fly at the top of the waist seam. This is just in case things move out of alignment on the way to the sewing machine.
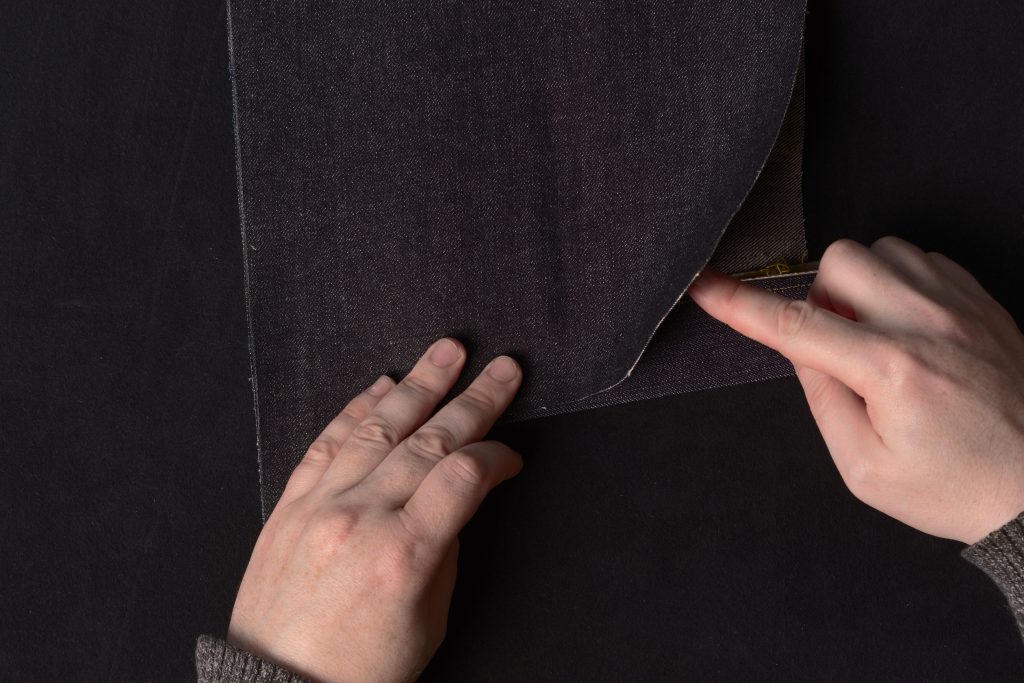
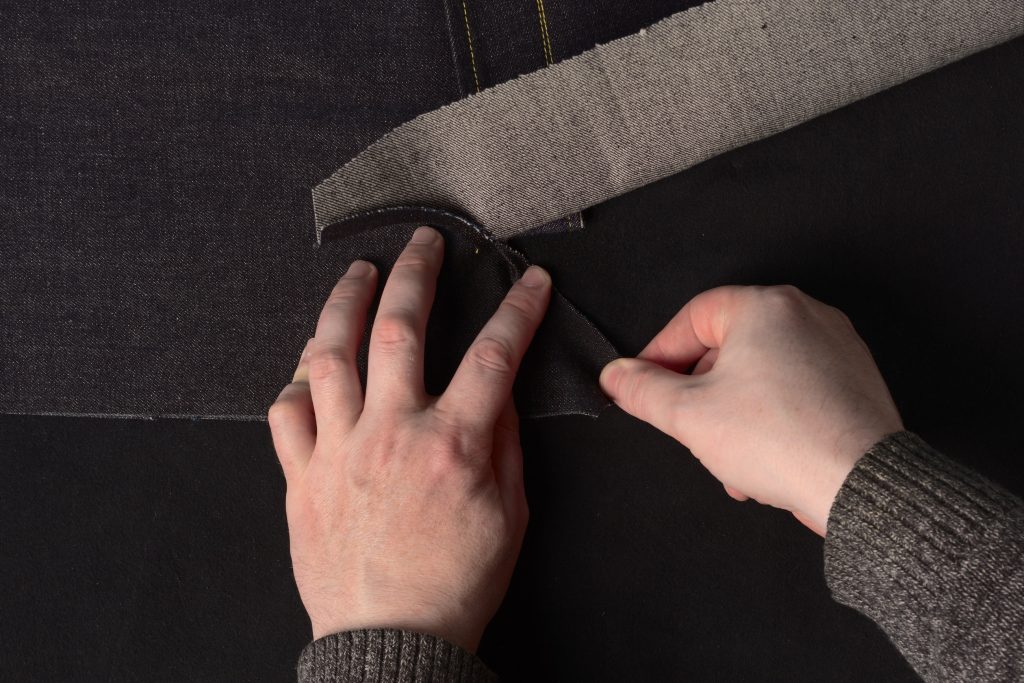
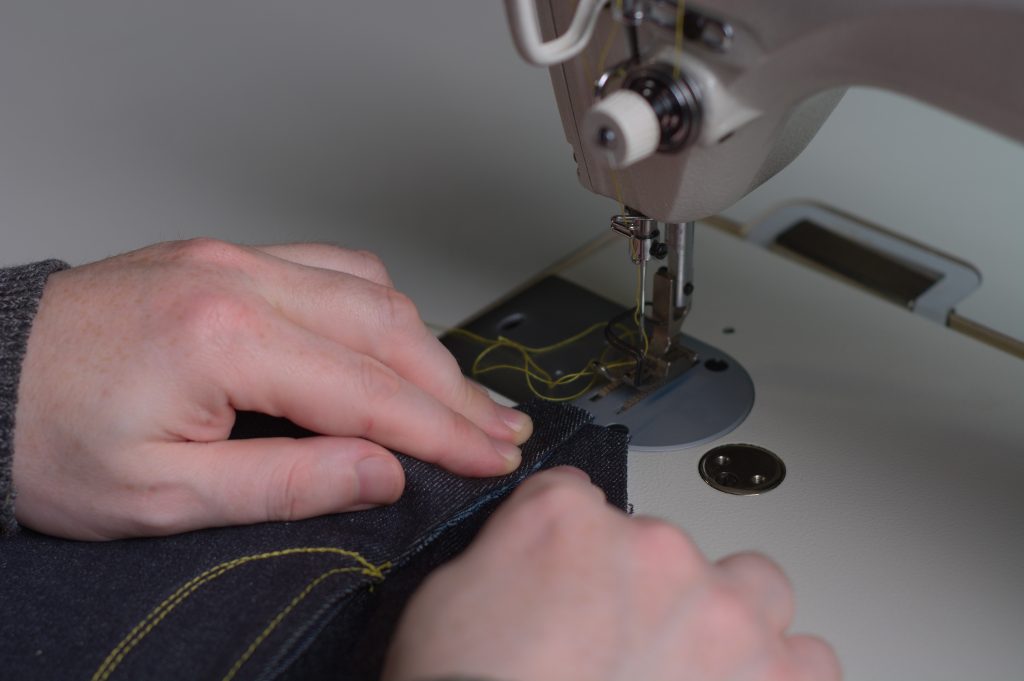
Holding the right leg and fly in place, move the left leg and fly out from underneath, in effect opening up the fly into a straight piece underneath. Take the right leg and fly and carefully move everything to the sewing machine.
Keeping the waist seam in alignment to the mark on the fly, and the crotch seam set back 1/8″ from the edge of the fly, stitch from the waist towards the bottom of the fly with a 3/8″ seam allowance.
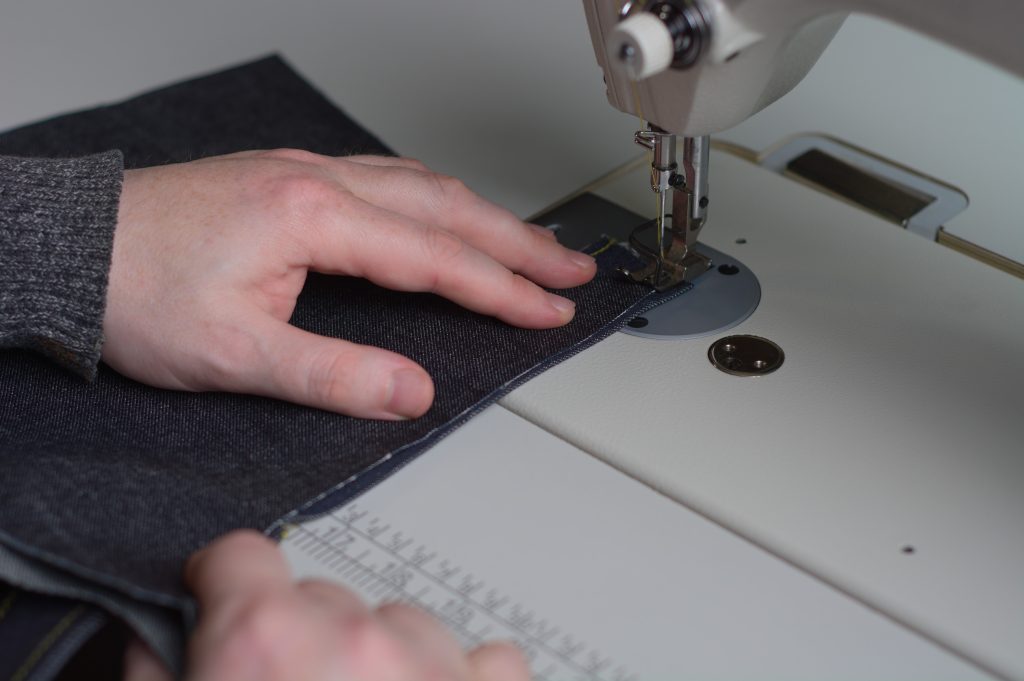
Keep everything in alignment as you sew.

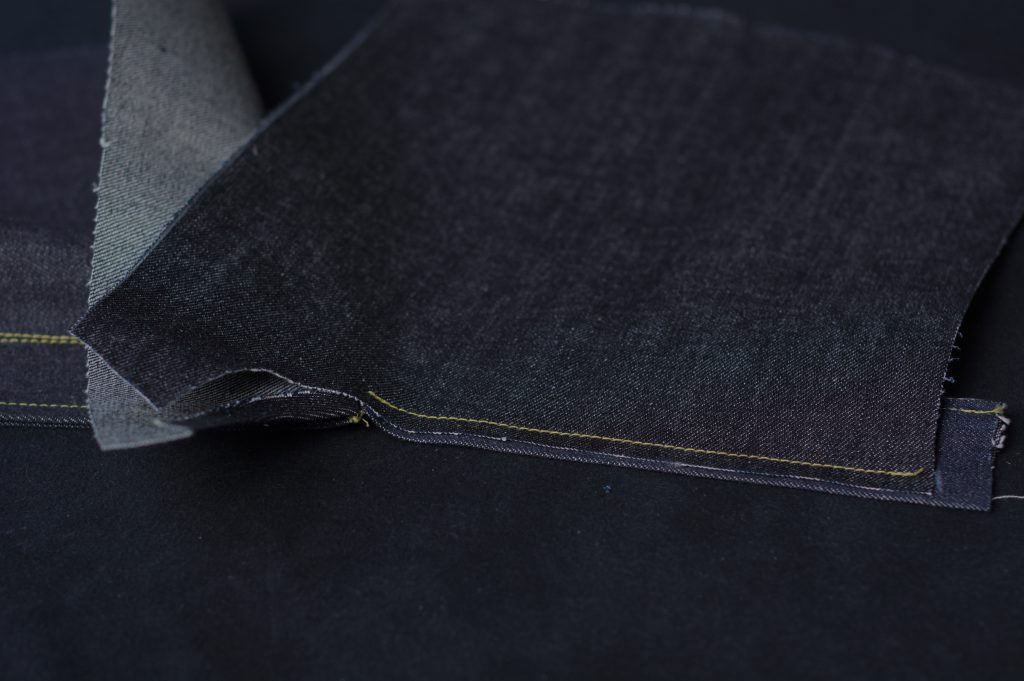
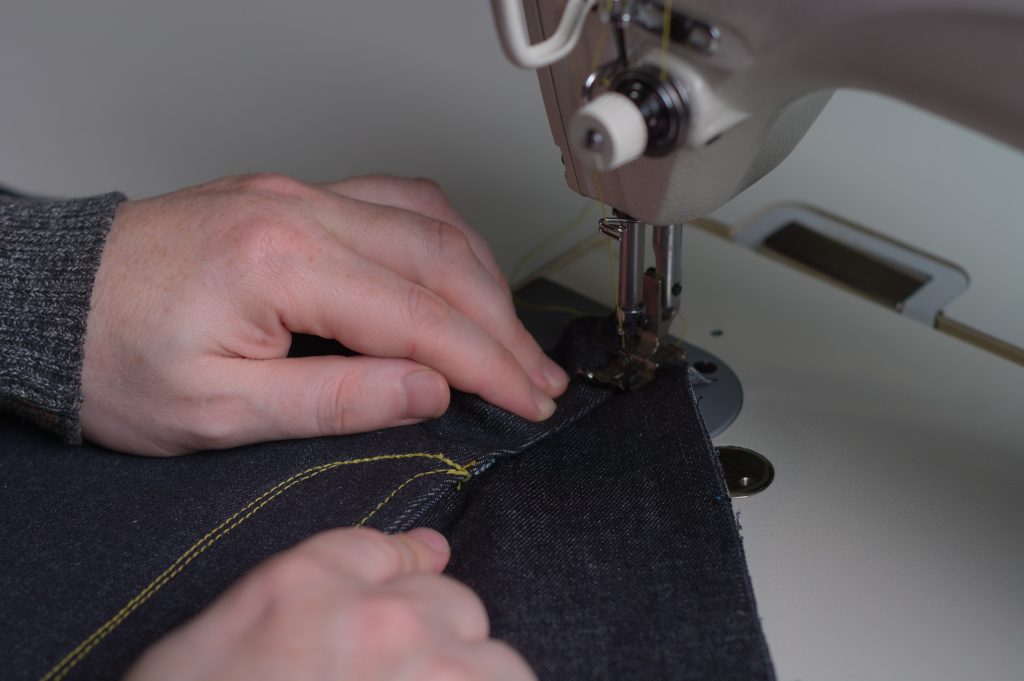
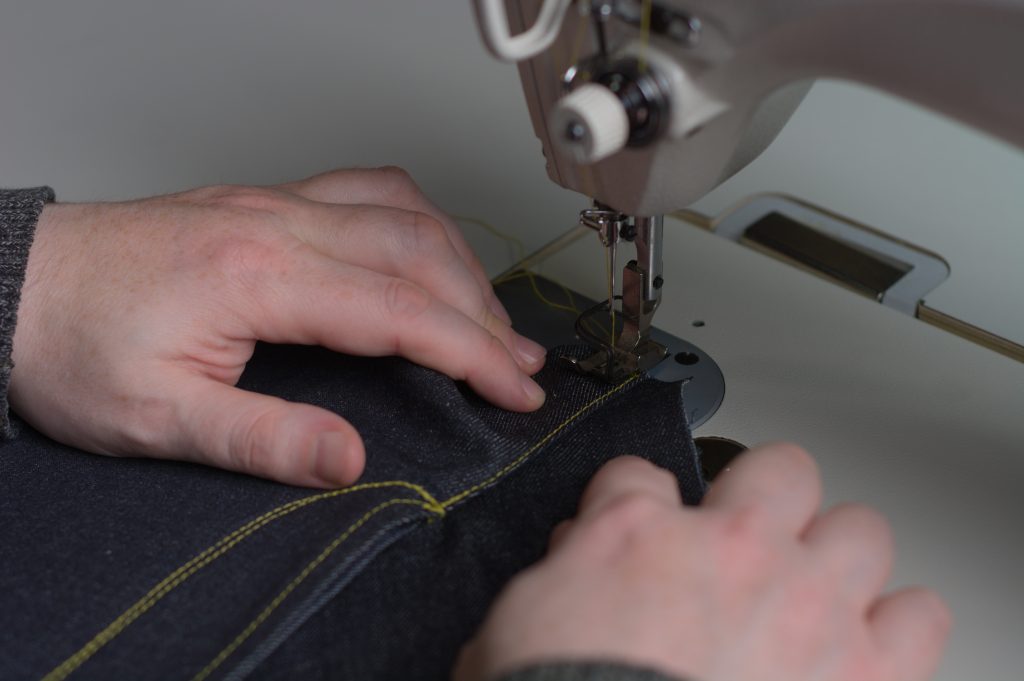
Sew to just a ‘smidge’ away from where the left leg crotch seam is folded underneath. You don’t want the stitching to hit it, but get as close as you can.
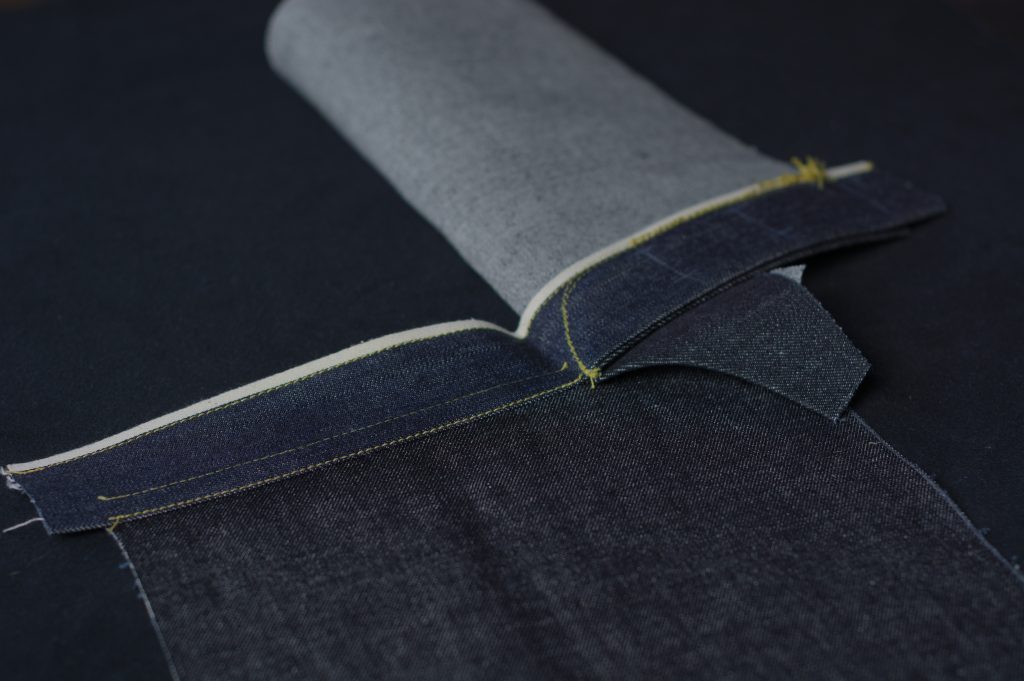
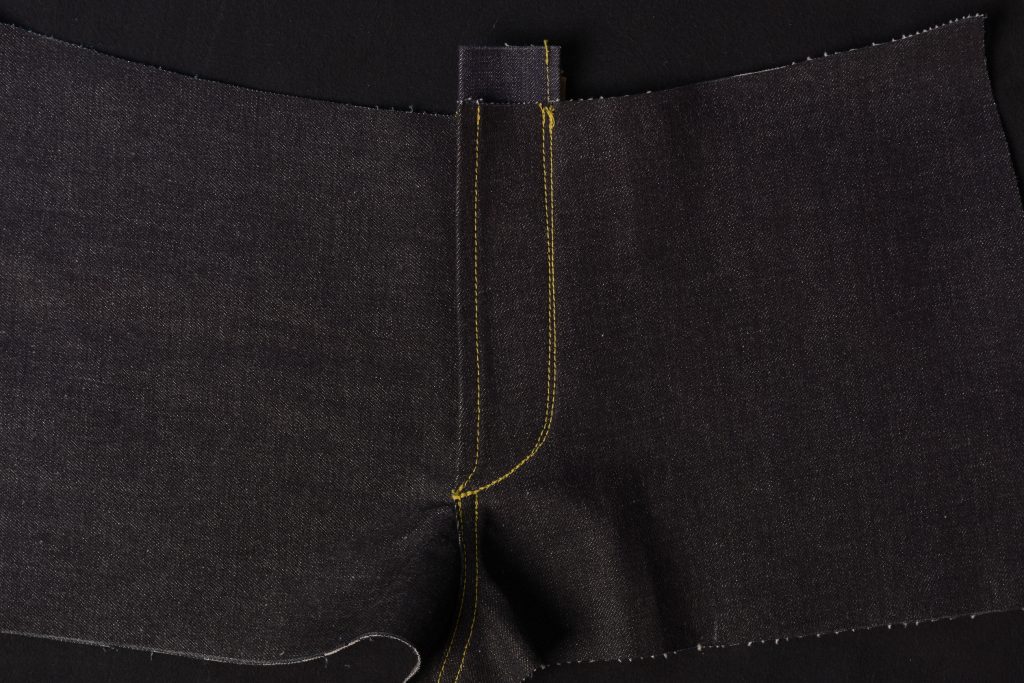
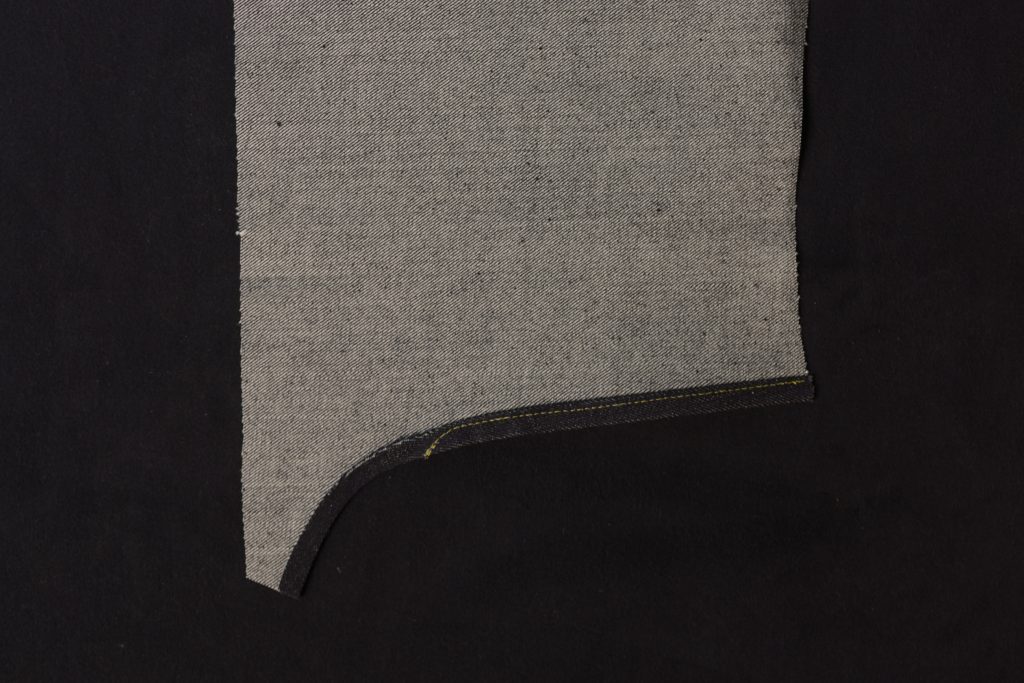
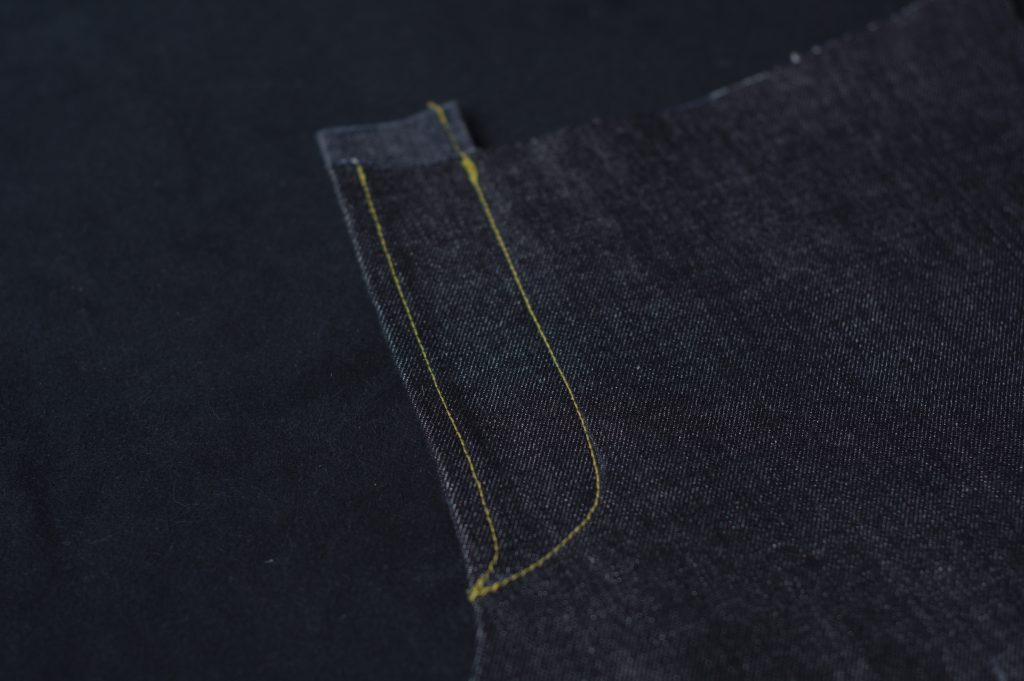
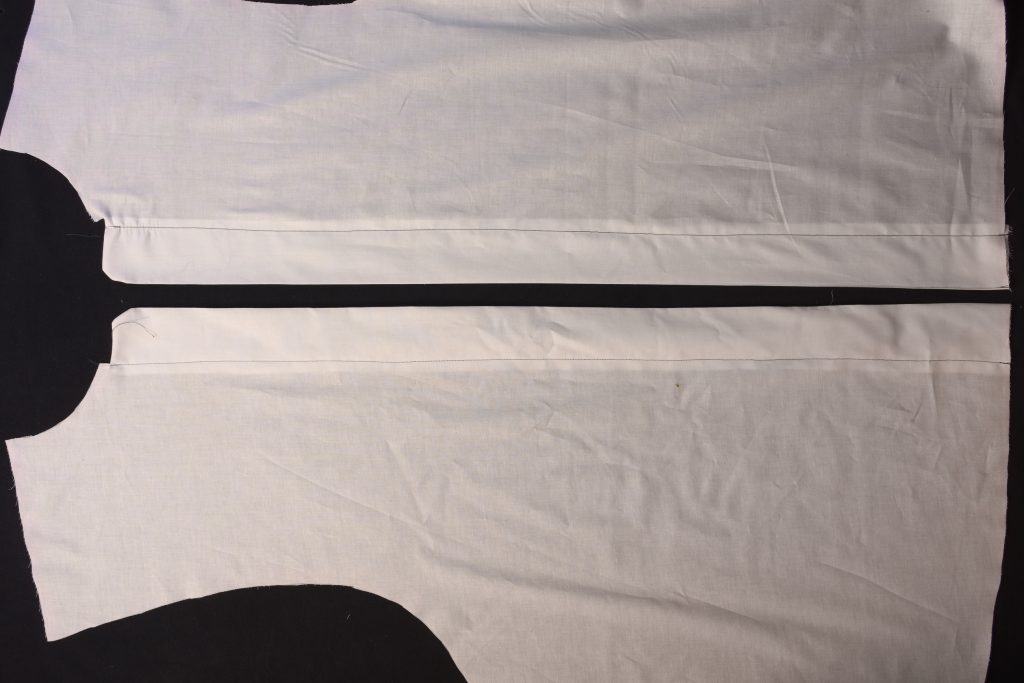
Here’s the seam after sewing.
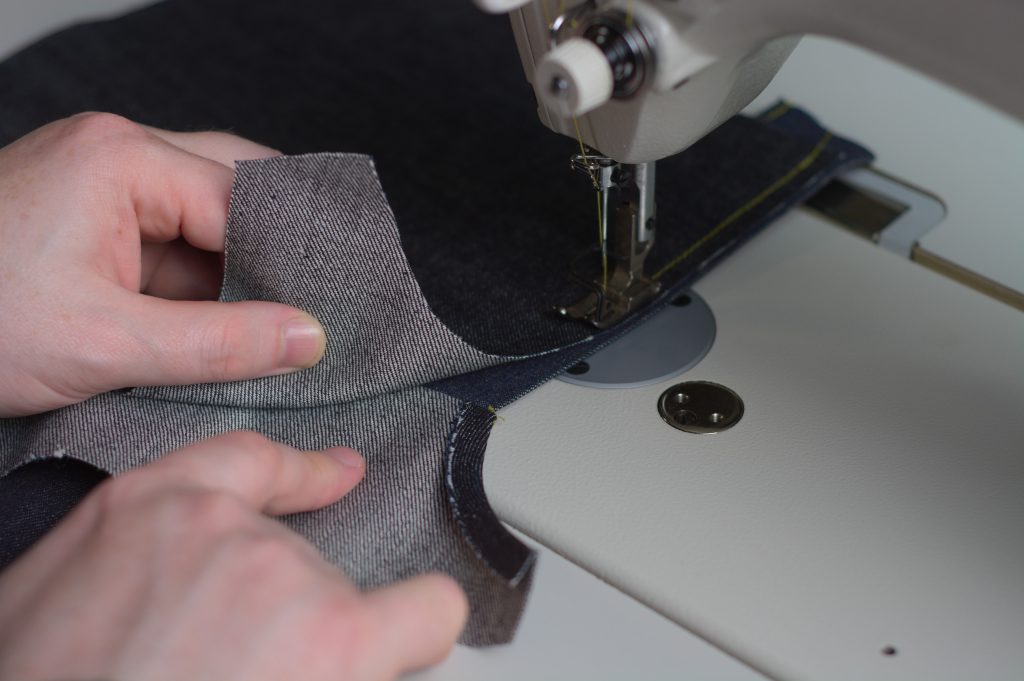
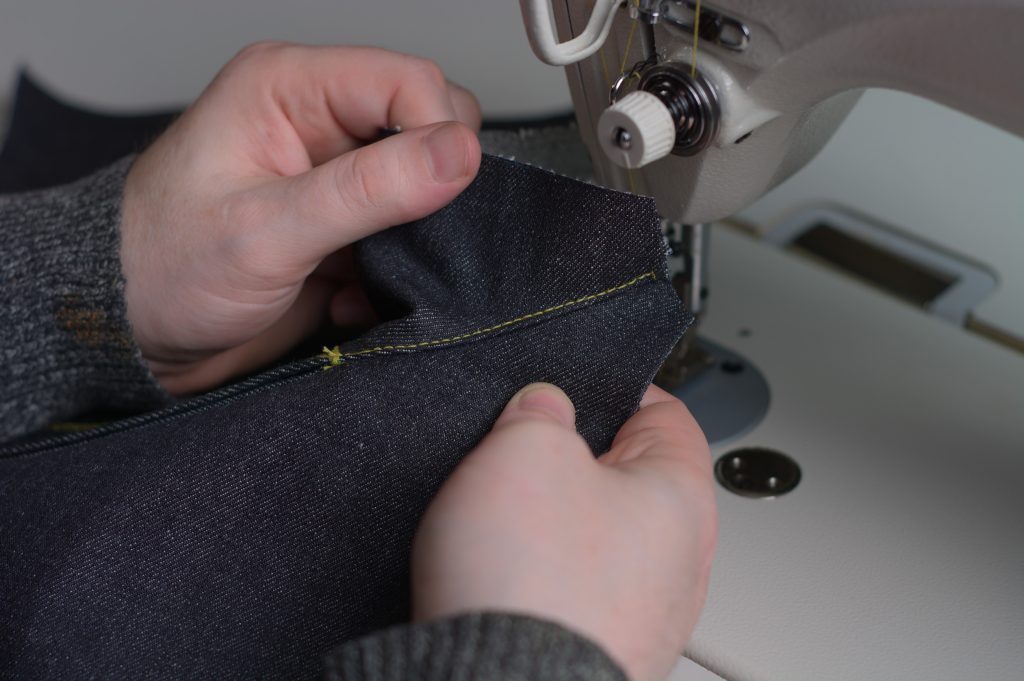
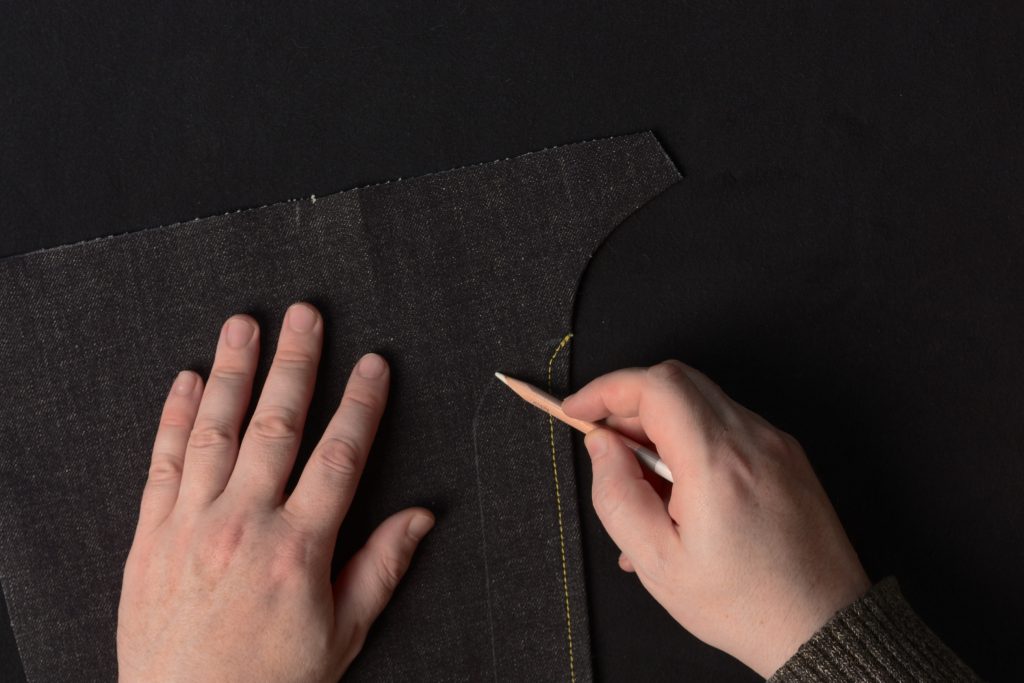
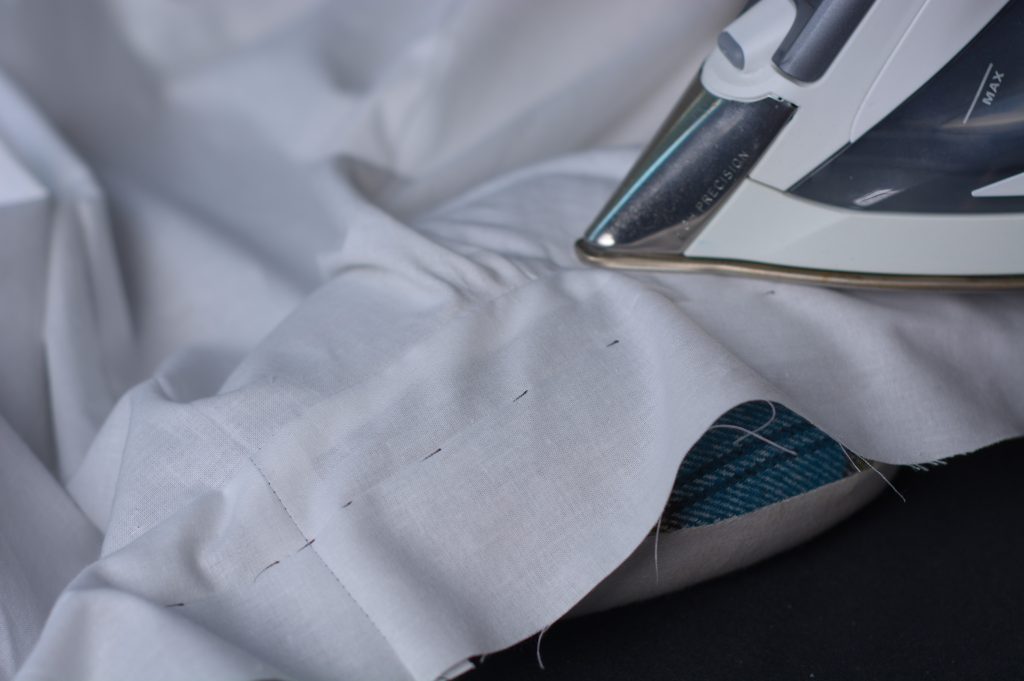
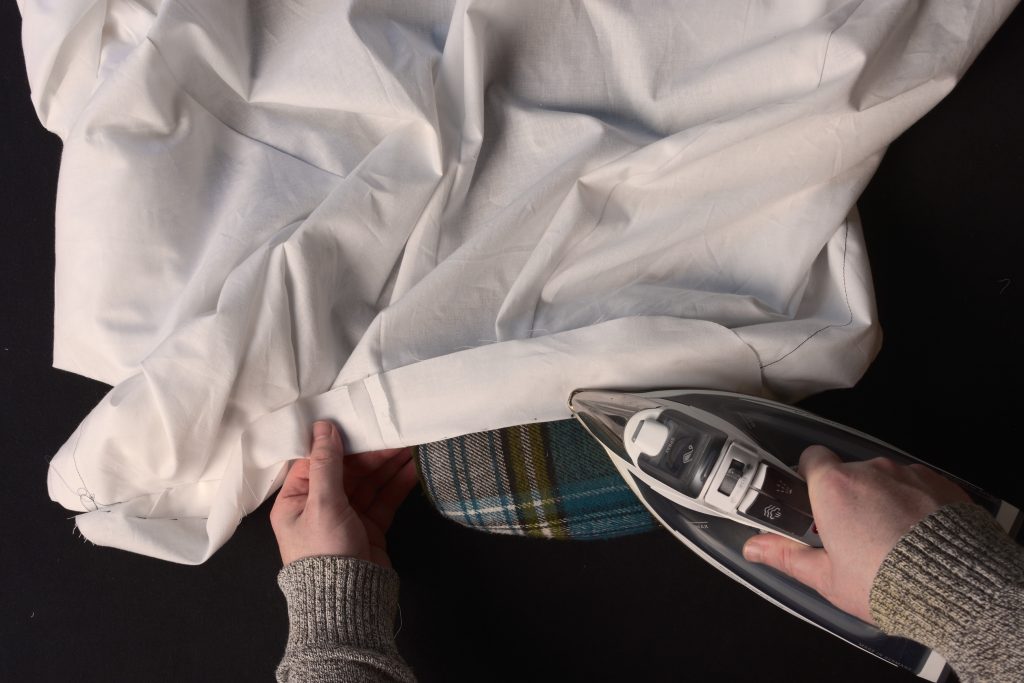
Now open up the fly on the right leg as shown, turning it to the right side.
And give it a good pressing.
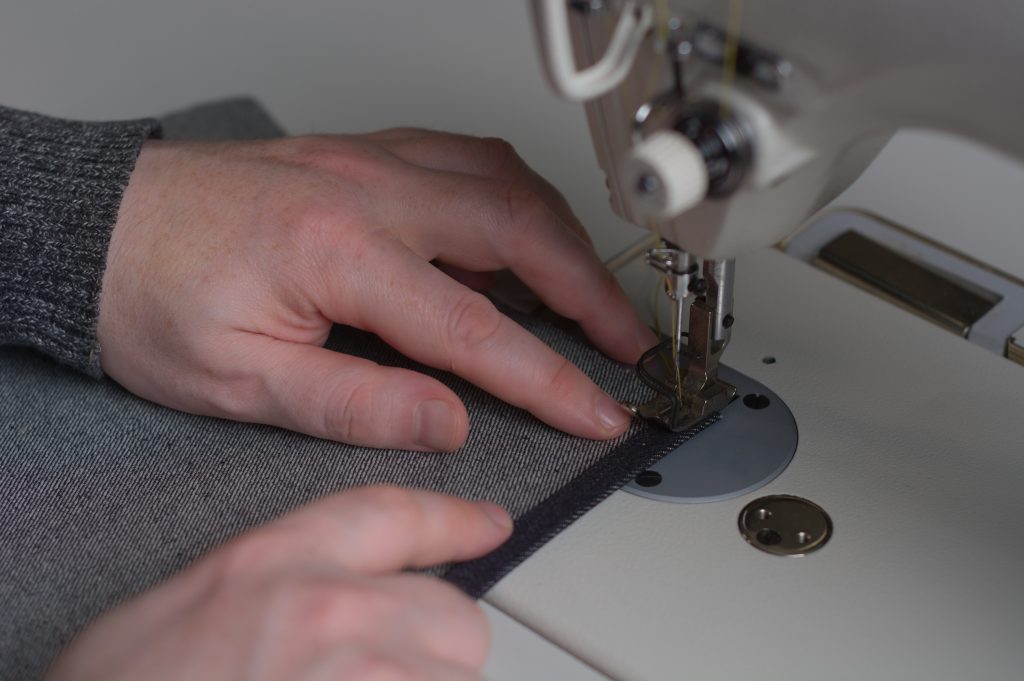
Go back to the sewing machine and top stitch about 1/16″ to 1/8″ from the edge of the fly.
End the stitching at the same place as the first row of stitching, just before you get to the crease in the fly.
This actually completes the fly construction! It’s a little confusing at first but quickly becomes second nature once you wrap your mind around how it works.
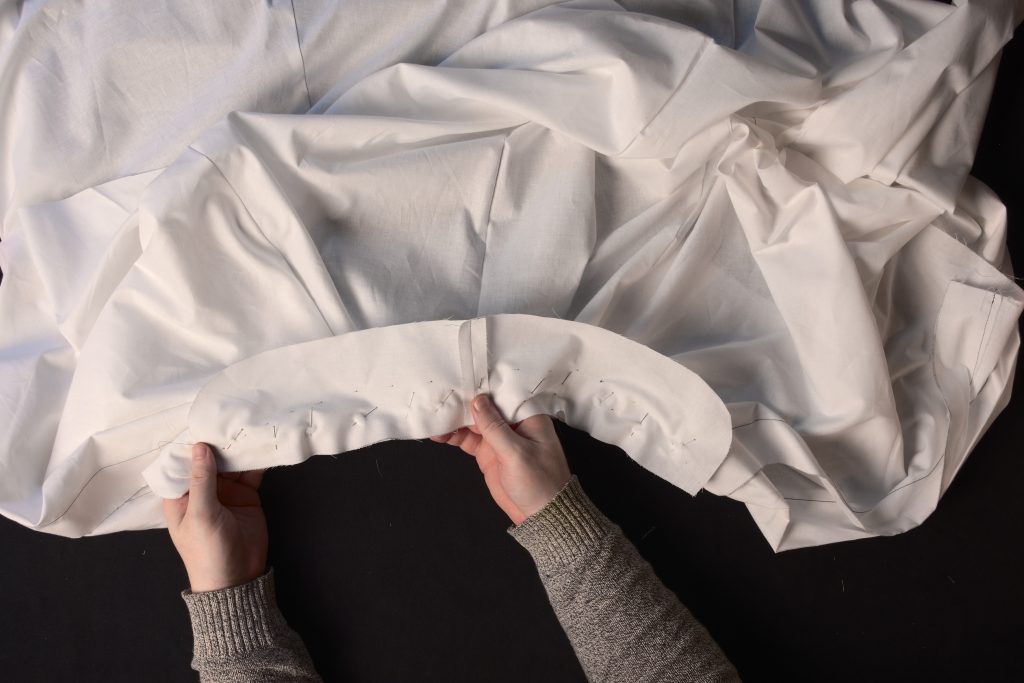
Crotch Seam
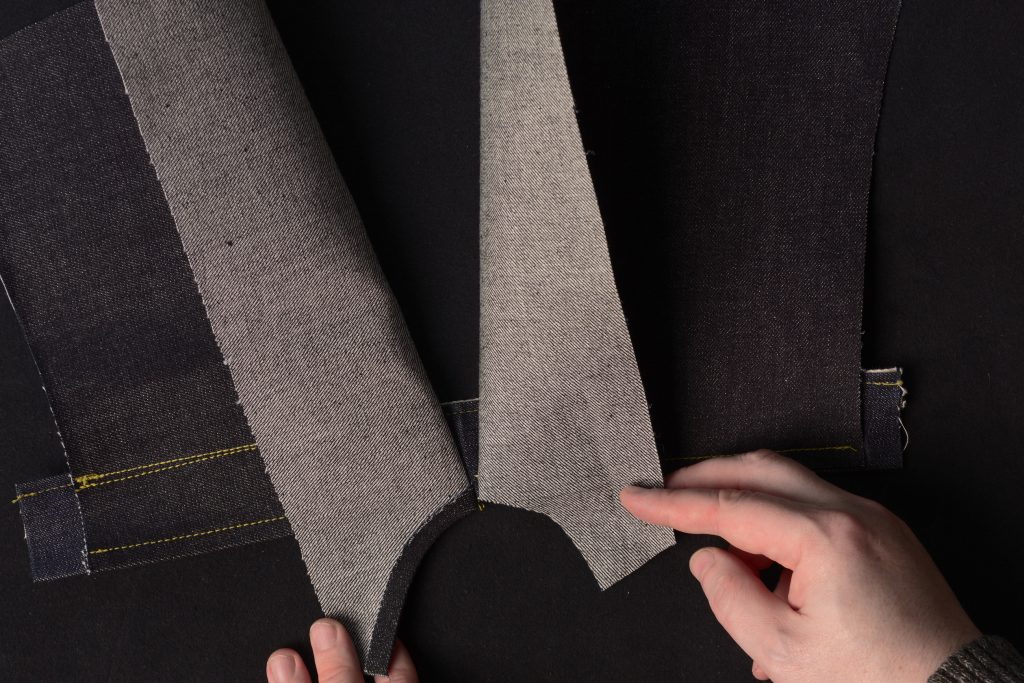
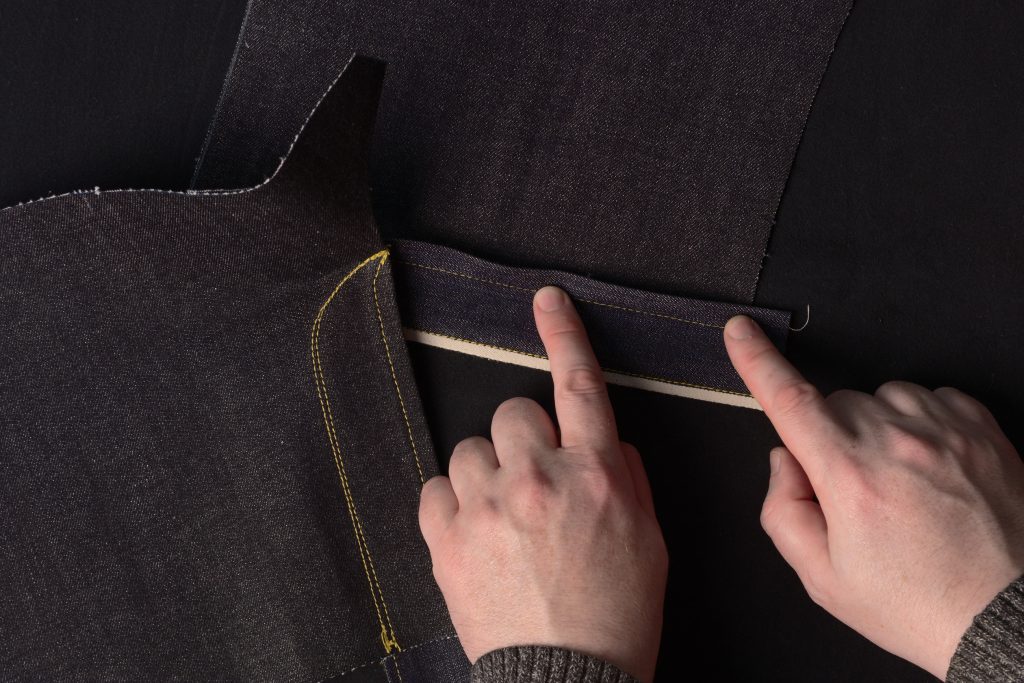
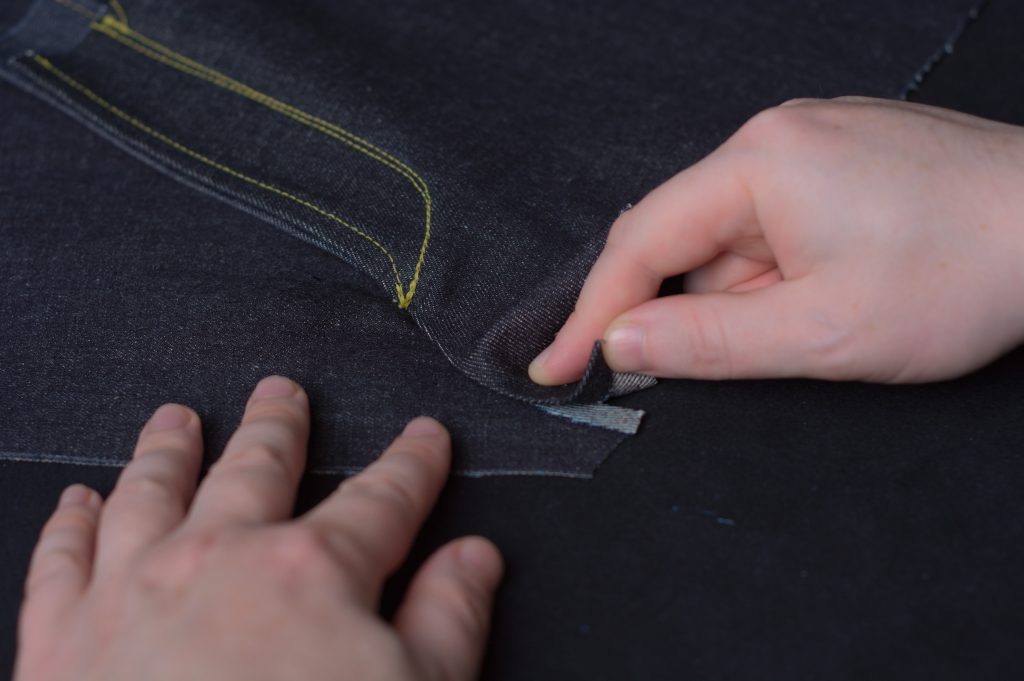
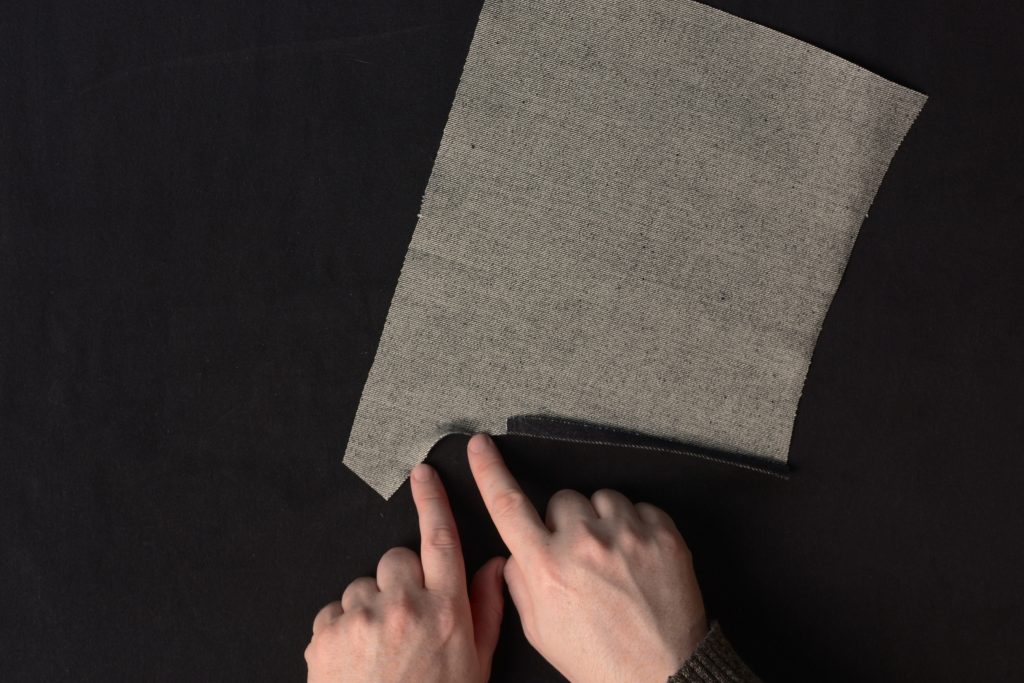
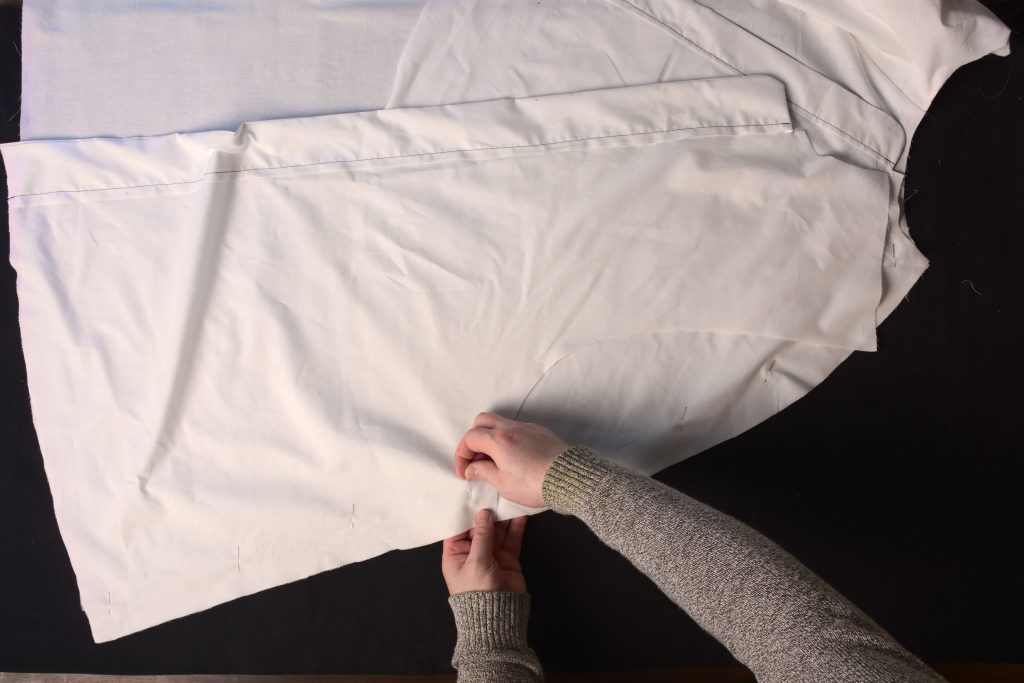
We must still finish the crotch seam however, and it’s a little different in construction than a typical seam, as we can’t exactly get right sides together anymore. Lift away the left leg and you’ll see how the right crotch seam is folded to about 1/4″ in width due to the fly. We want to maintain that seam width all the way around the curve.
Gently stretch the right crotch curve in the seam allowance area only.
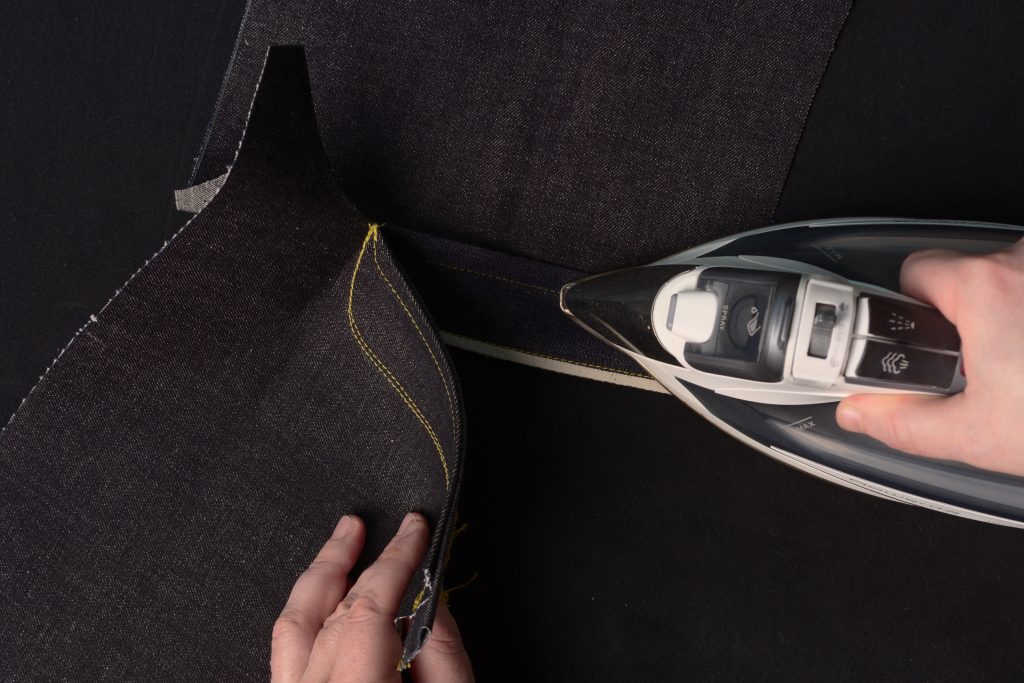
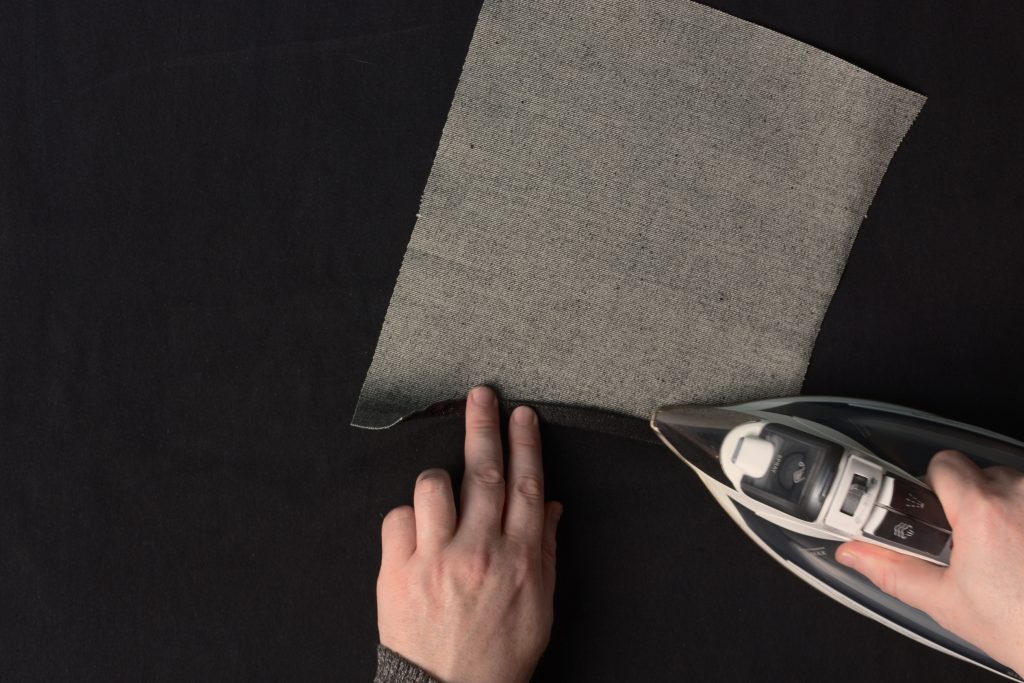
Crease the crotch curve seam allowance over about 1/4″. This may vary depending on how you sewed the fly and what allowances you used – the important thing is to keep the same width around the curve.
And give it a good pressing with steam.
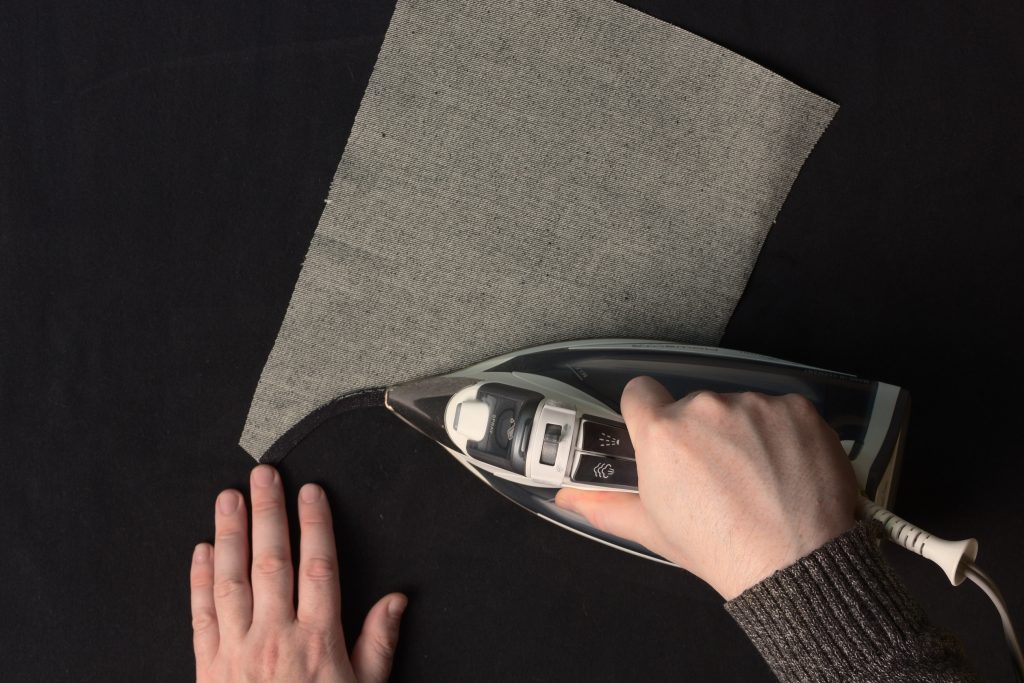
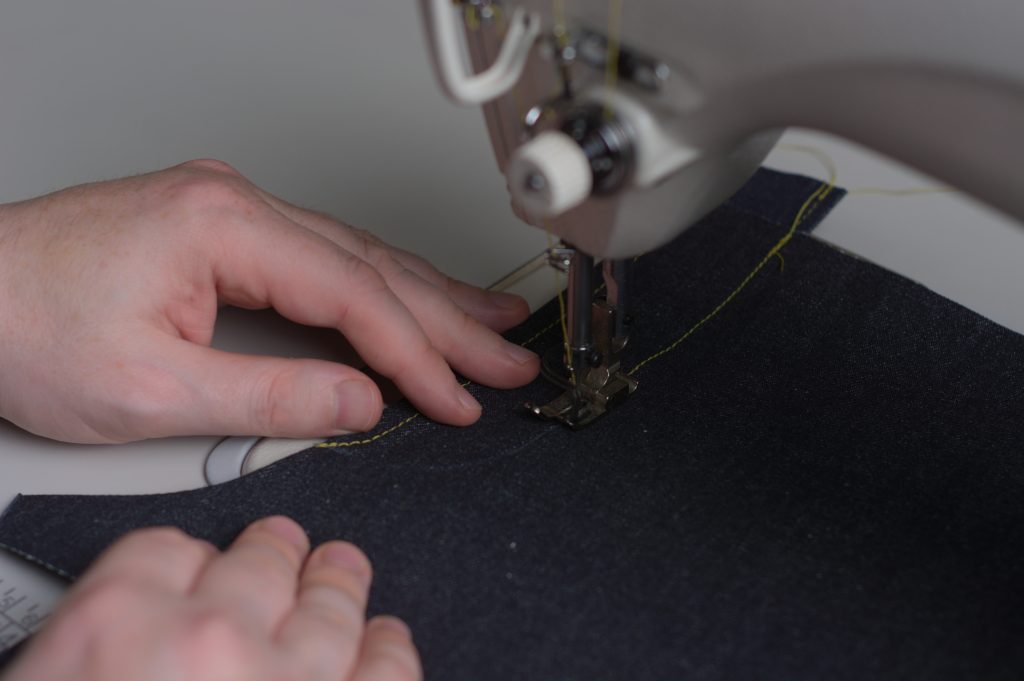
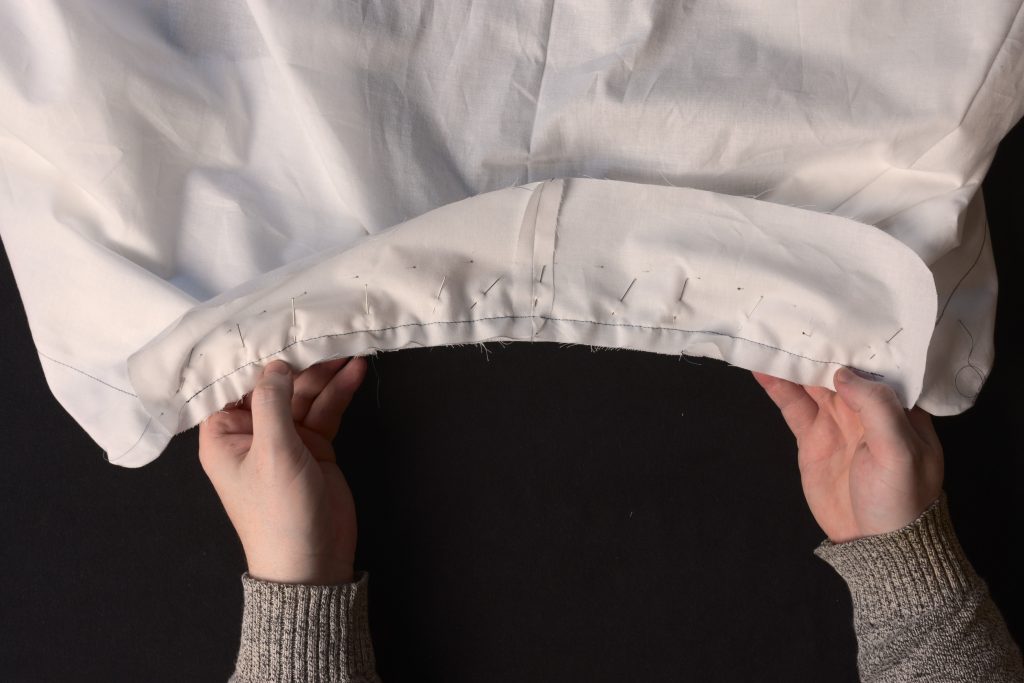
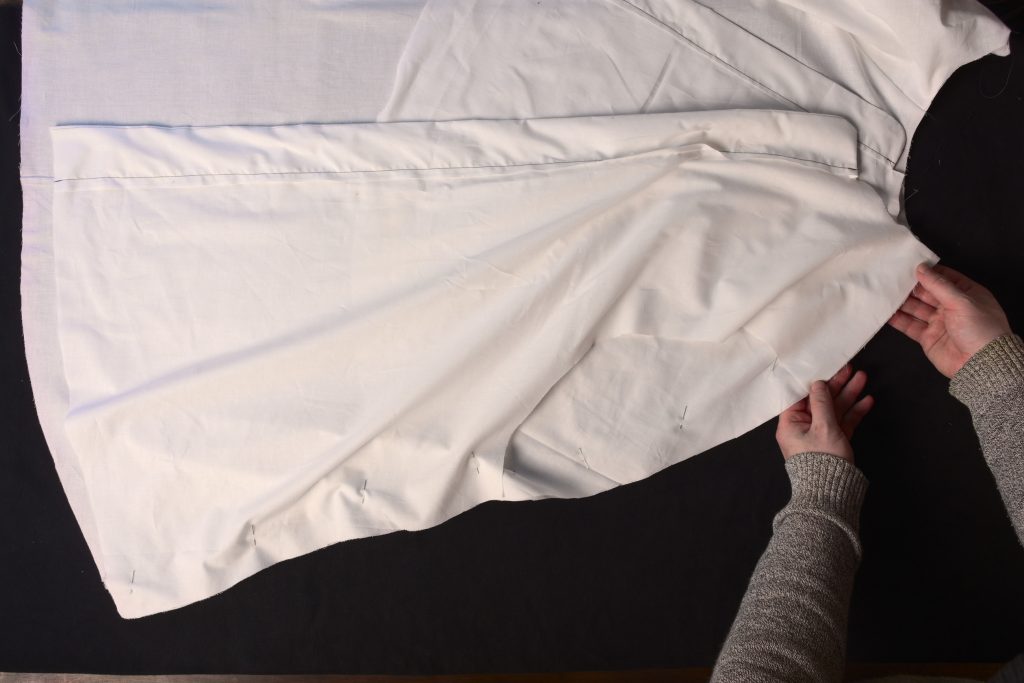
Now this part is tricky and will definitely take some practice, but it’s well worth learning in the long run. Slowly lay the left crotch seam on top of the right, observing the relationship between the two halves. You want the folded edge of each seam to cover the raw edge of the opposing seam as they overlap each other.
Continue laying the right on top of the left until you get to the end of the crotch seam. Ideally they should line up perfectly but if you’re within an 1/8″, just go with it.
Now begging at the bottom of the crotch curve, align everything up as closely as possible, and begin top stitching through all layers, 1/8″ or so from the folded edge of the left leg. You’ll need to continually check for alignment here and manipulate the fabric as your sewing. It’s tricky work but you’ll get it! Don’t be afraid to use that seam ripper as necessary.
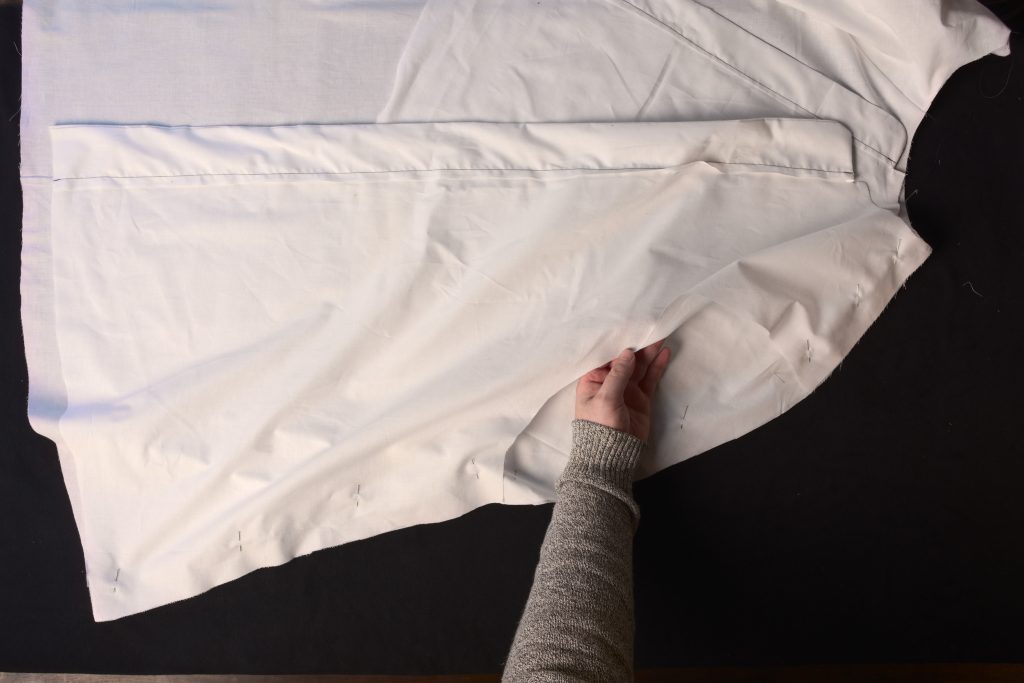
The stitching stops just as you get to the bottom of the fly.

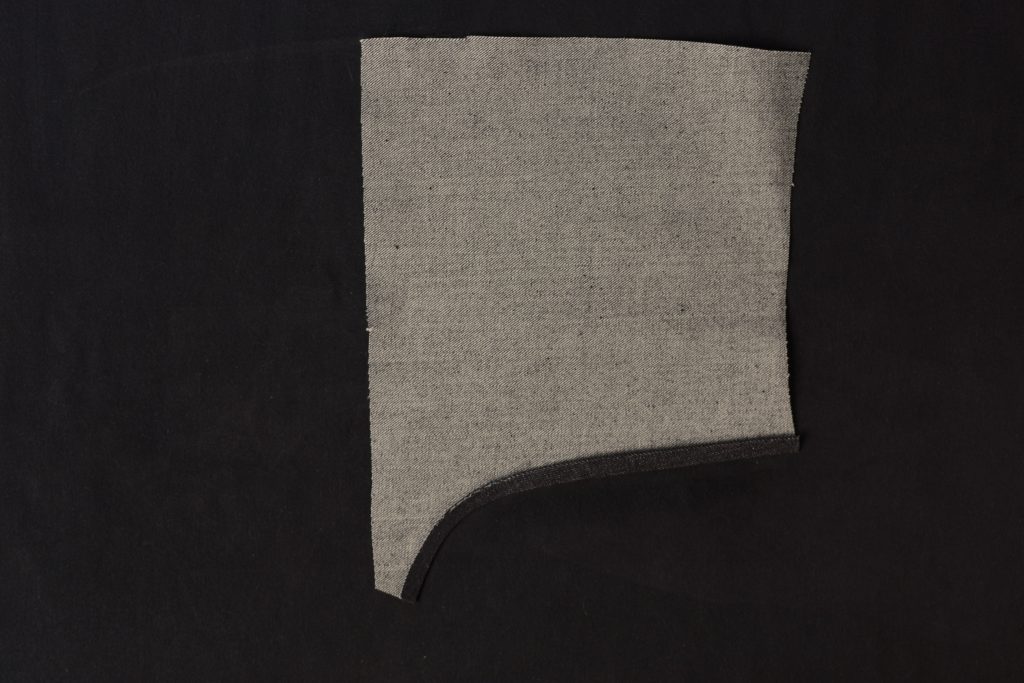
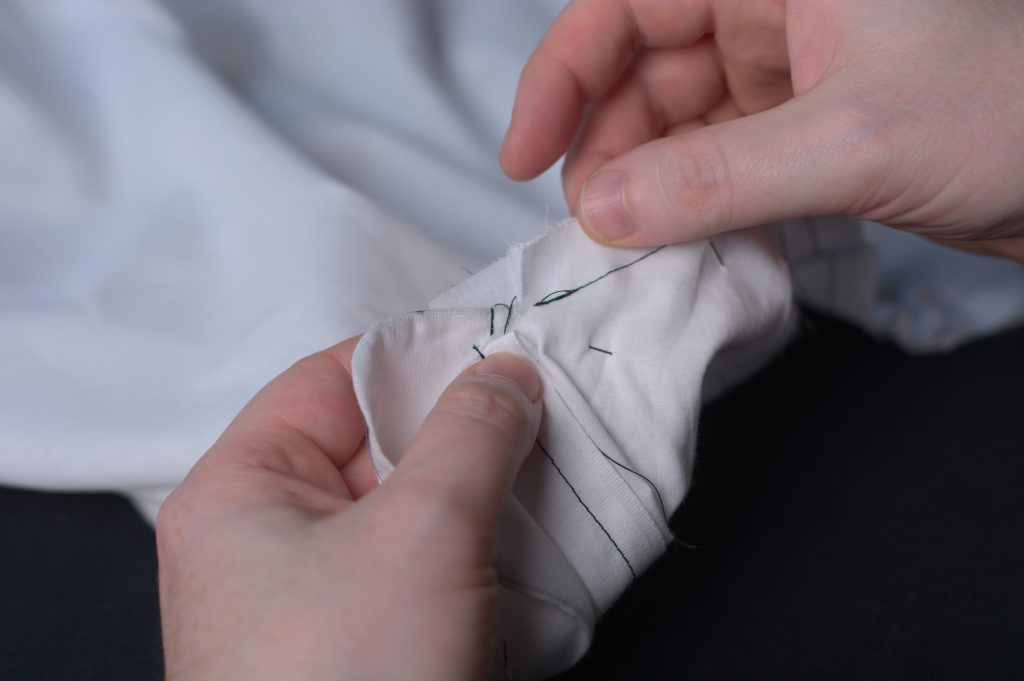
Here are the results so far.
And from the inside.
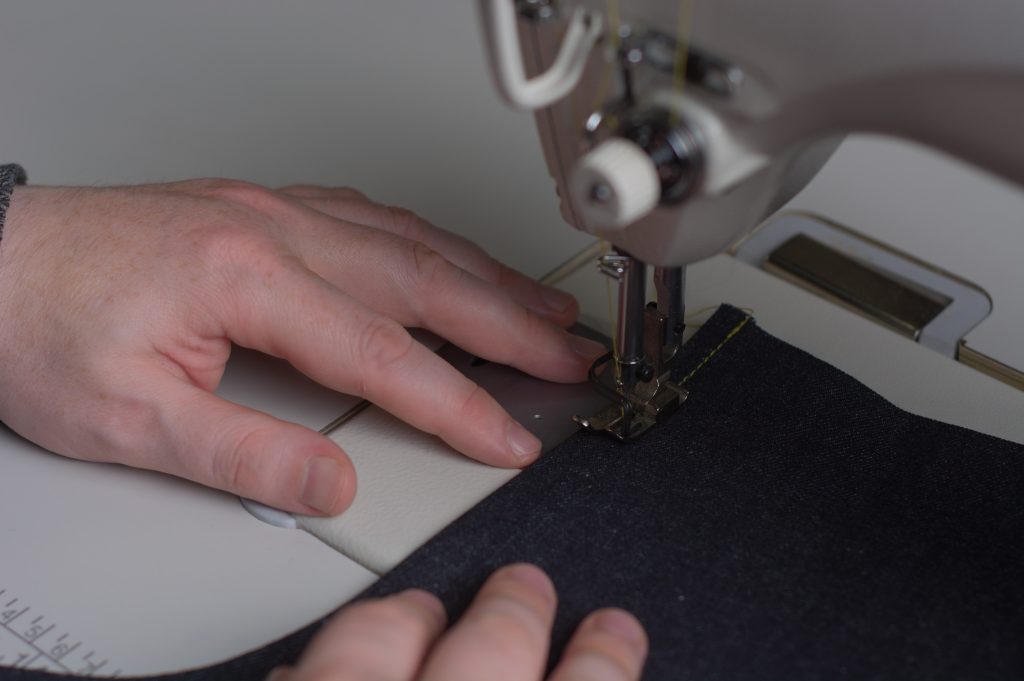
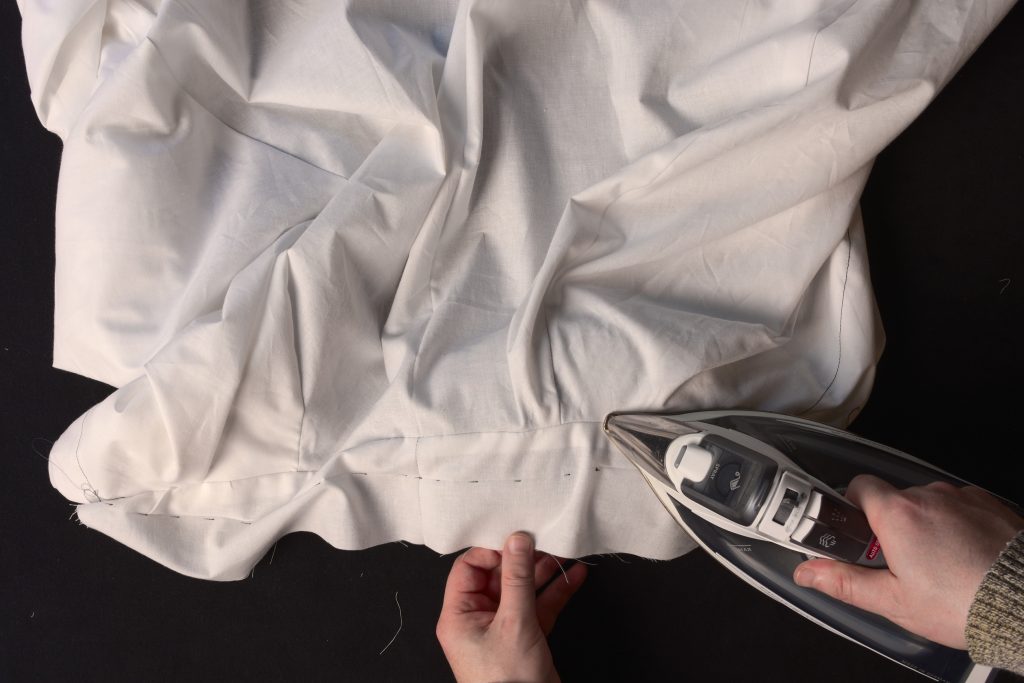
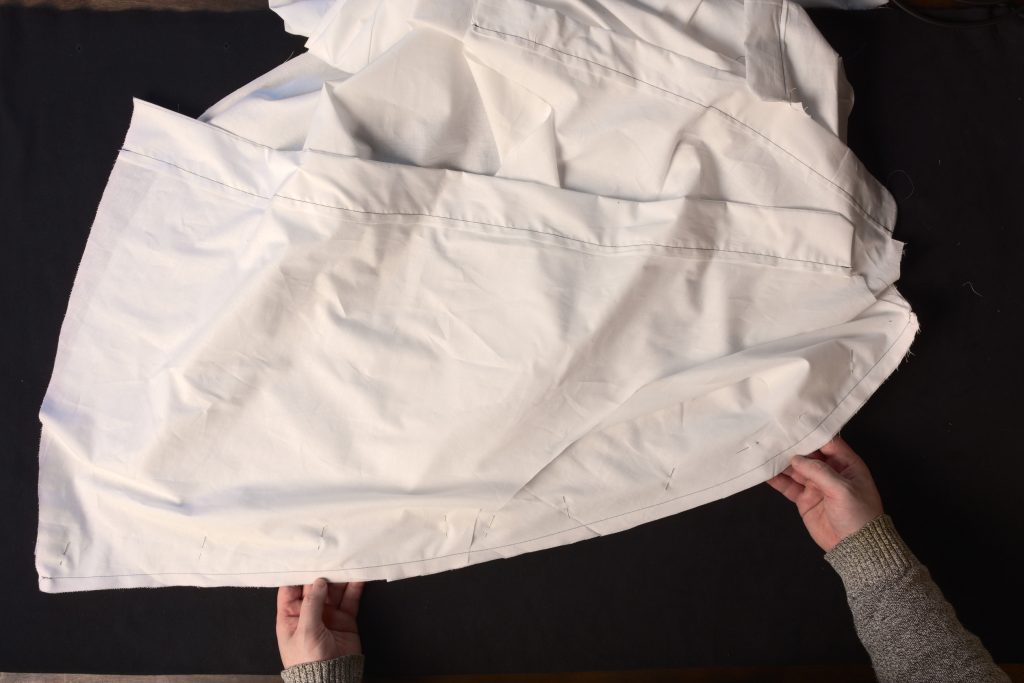
Now top stitch a second row about 3/8″ (or just under) away from the first row. It’s important to catch the other edge of the seam here and not run off.
Here’s the crotch seam after sewing.


This completes the one-piece fly and crotch seam.
One Piece Fly – Part I
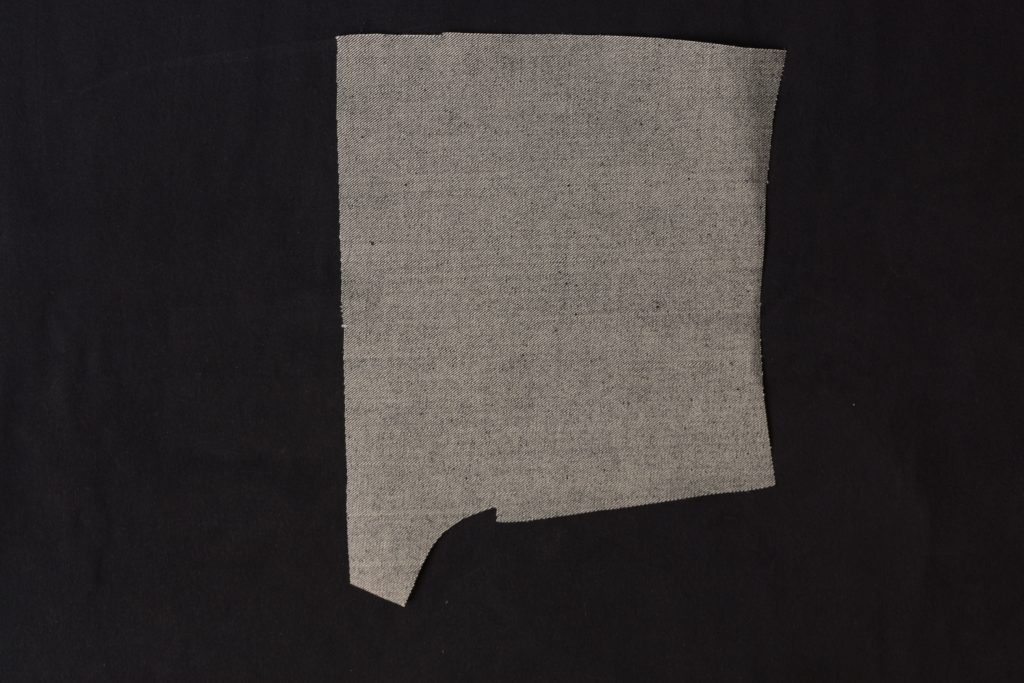
Note I’m using a sample here to demonstrate the one piece fly. Just imagine the leg extending to the left of the cut line just below the crotch. Will replace the photos when I make my next pair.
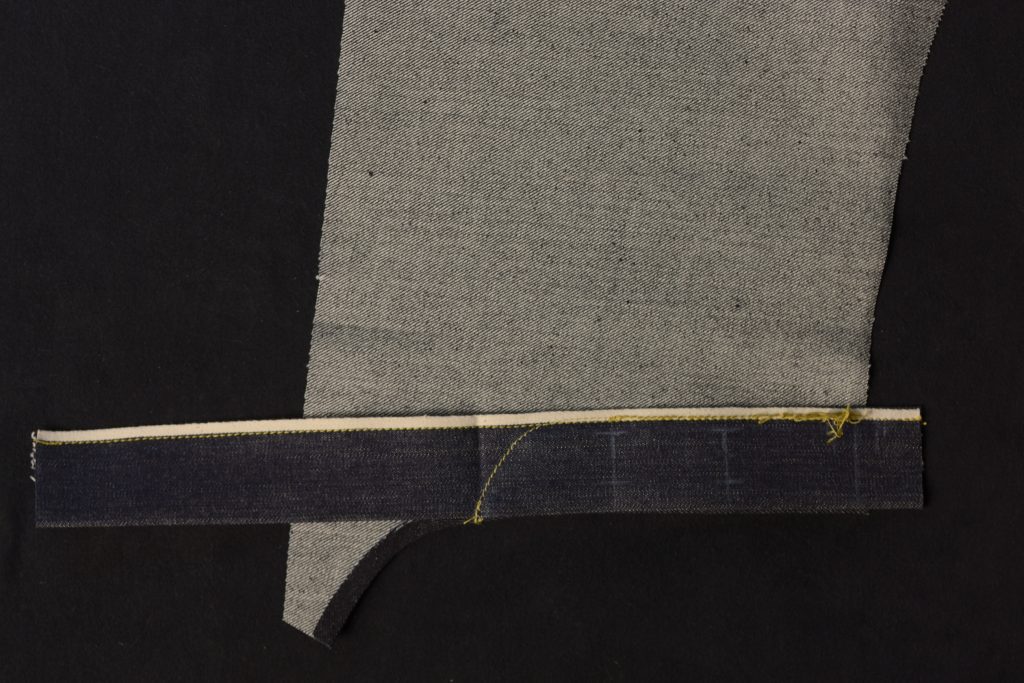
To begin constructing the one piece fly, lay the left leg wrong side up on the table.
Fold over the fly extension 3/8″ towards the wrong side and press.

Now turn the folded edge and the entire fly seam over a further 3/8″.
When you get to the curved crotch area you’ll need to gently stretch the seam allowance with your fingers, to give it length to roll over nicely. Don’t stretch past the 3/8″ seam allowance or you’ll start to distort the jeans themselves.
Here you can see the extra length that has been added by stretching.
Continue folding and pressing from the waist down to the crotch.
A bit of steam will help the crotch curve lay flat.
And here’s the left fly and crotch seam after folding and pressing.
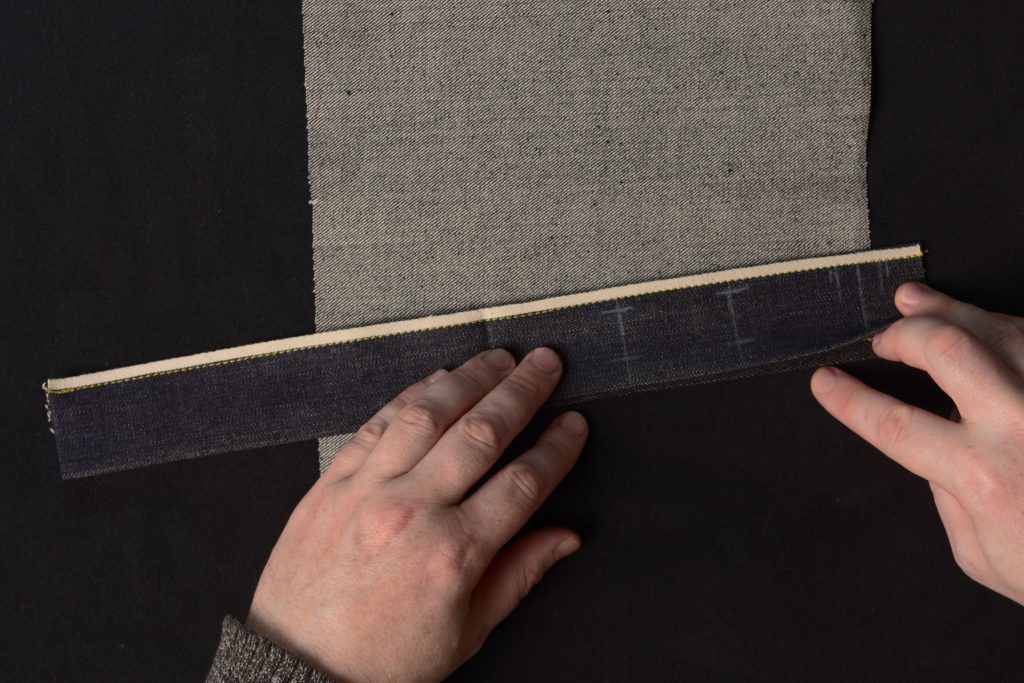
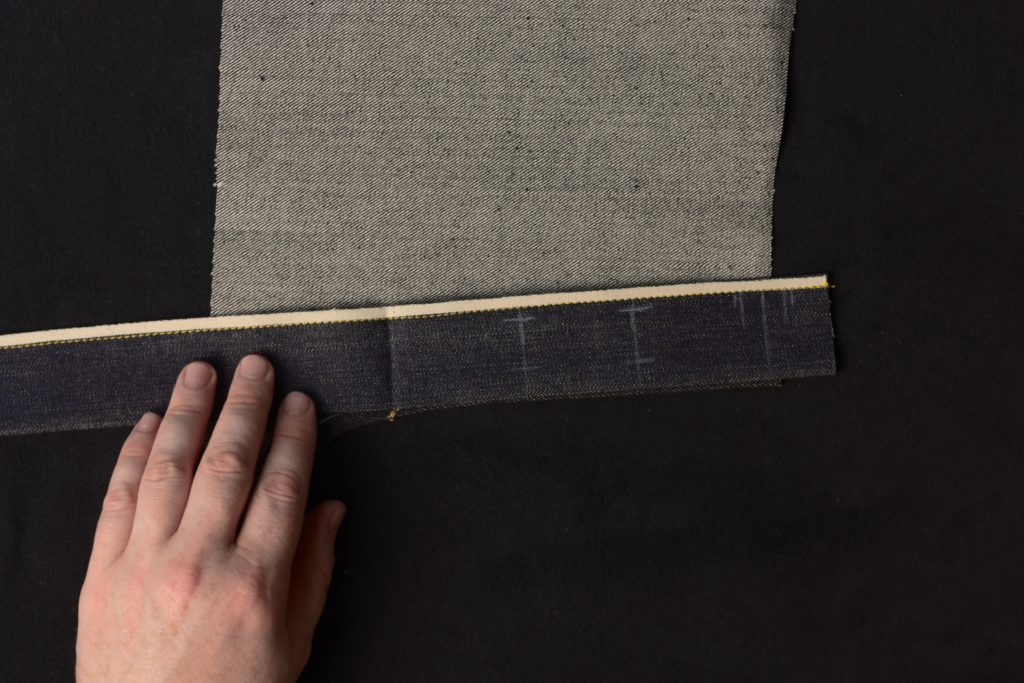
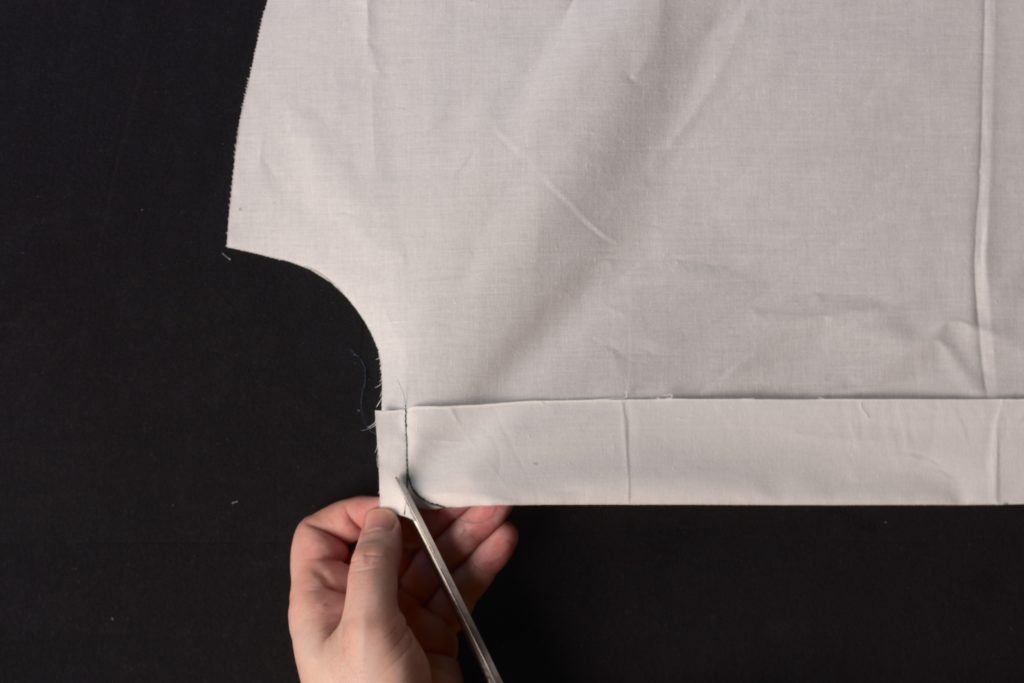
Turn to the right side and mark the bottom of the fly extension – where it goes from three layers to two.
Go to the sewing machine and from the wrong side you can gauge the correct spacing of the top stitching – about 3/8″.
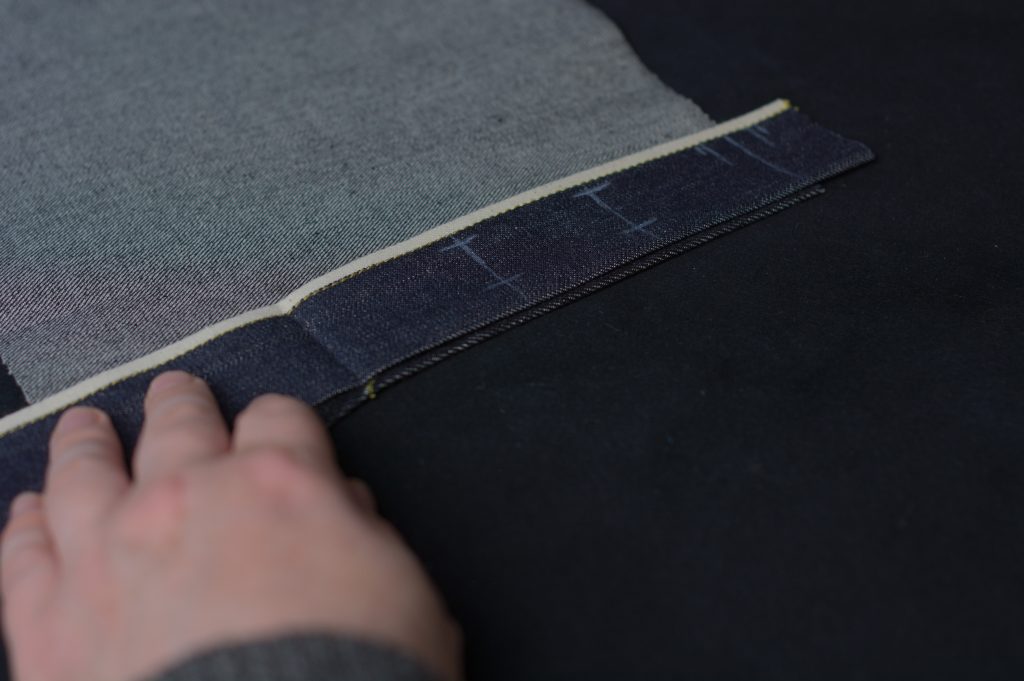
Top stitch from the right side using a 3/8″ seam allowance.
As you get to the bottom, curve in towards the mark at the edge of the fabric.
Here’s the result from the right and wrong sides.

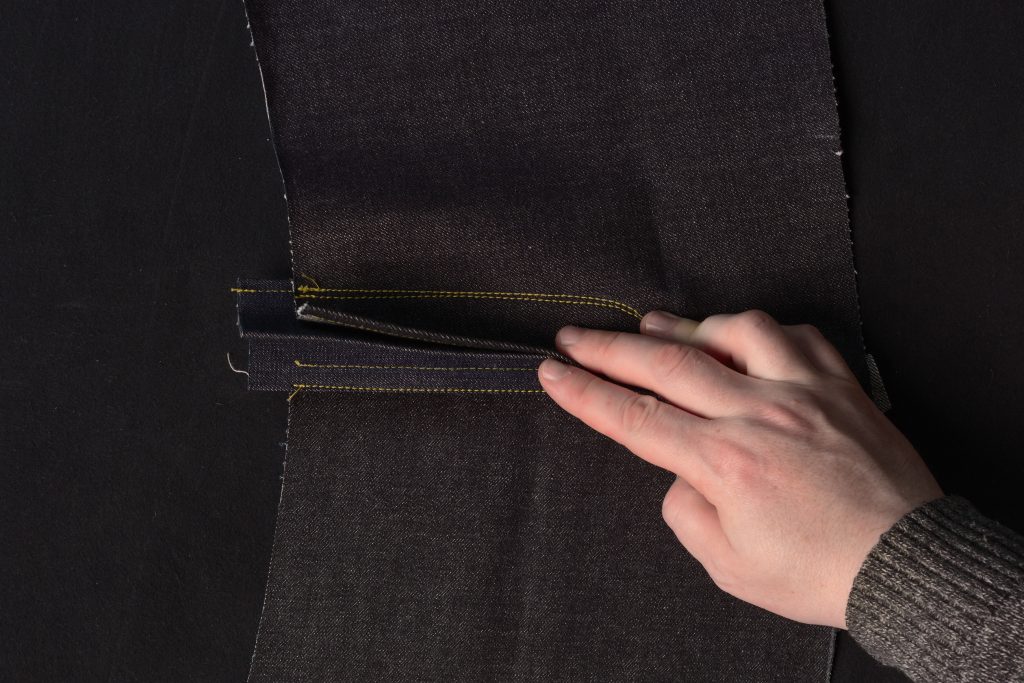
Attaching the Fly
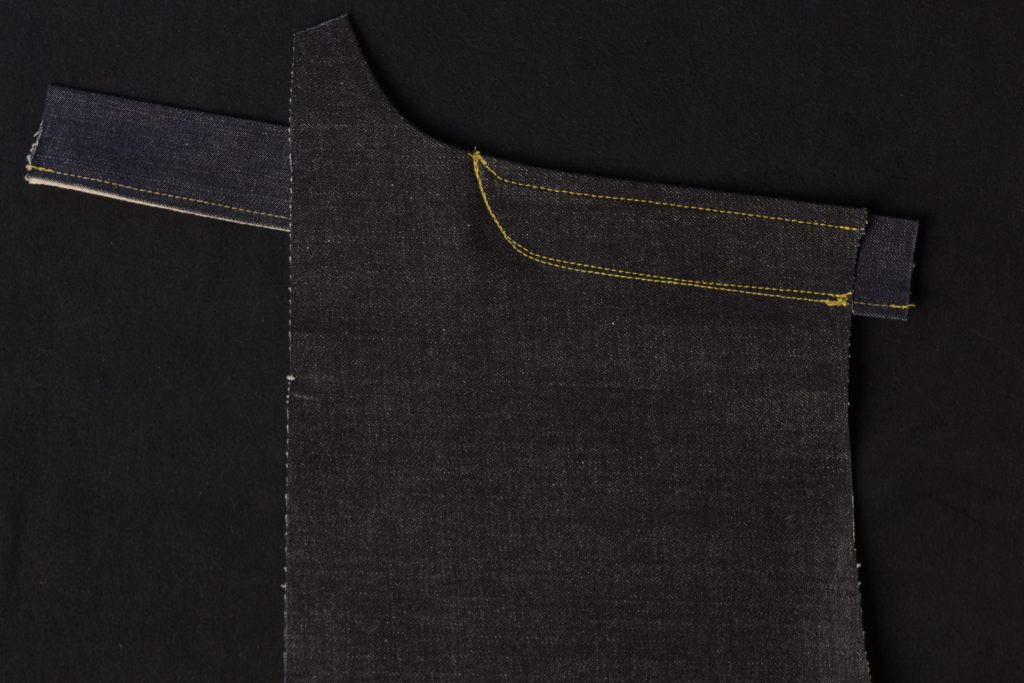
Lay the left jeans leg right side down and lay the buttonhole fly on top, the right sides of the buttonholes facing up.

Move the fly into position, aligning the waist mark with the waistband, and setting the front fly edge back about 1/8″ from the leg underneath.
Measure the distance from the edge of the front fly seam to about the edge of the selvedge and take note of the measurement.

Turn to the right side of the left leg and draw a parallel line that same distance from the front edge.
At the bottom of the fly, use your hand as a compass and draw in a curve towards the bottom of the stitching you did previously.
Lay the fly into position on the wrong side again. The most important thing here at this point is to make sure the crease lands directly at the bottom of the fly extension and stitching underneath.
While carefully holding everything in position, flip back over to the right side and take the fly and left leg to the sewing machine.
Sew a line of top stitching along the line you marked out, ending at the exact place where the previous top stitching ends.
As you’re stitching, flip the leg back every inch or so to ensure the fly is still in the correct position. It’s easy to let things slip, finish the stitching, and find out your fly is a half inch from where it should be.
Curve around towards the crotch seam, keep as smooth a curve as possible.
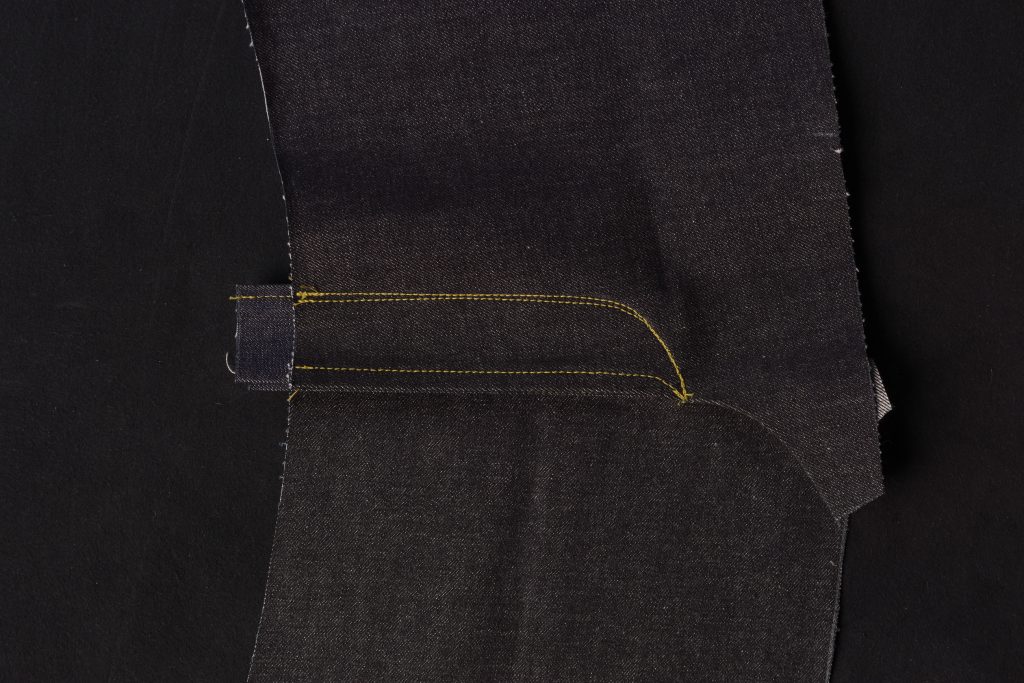
Here’s the fly after sewing the first row of top stitching.
Double check the wrong side to ensure your stitches landed on the fly correctly. And yes, my tension was wildly loose for some reason . . . showing here as an example to avoid!
Finally, turn back to the right side and make another row of top stitching just to the inside of the original stitching. Try to keep it more parallel than I did (don’t check cameras while sewing!), and then taper the second row of stitches into the first as you round the curve to the crotch seam.

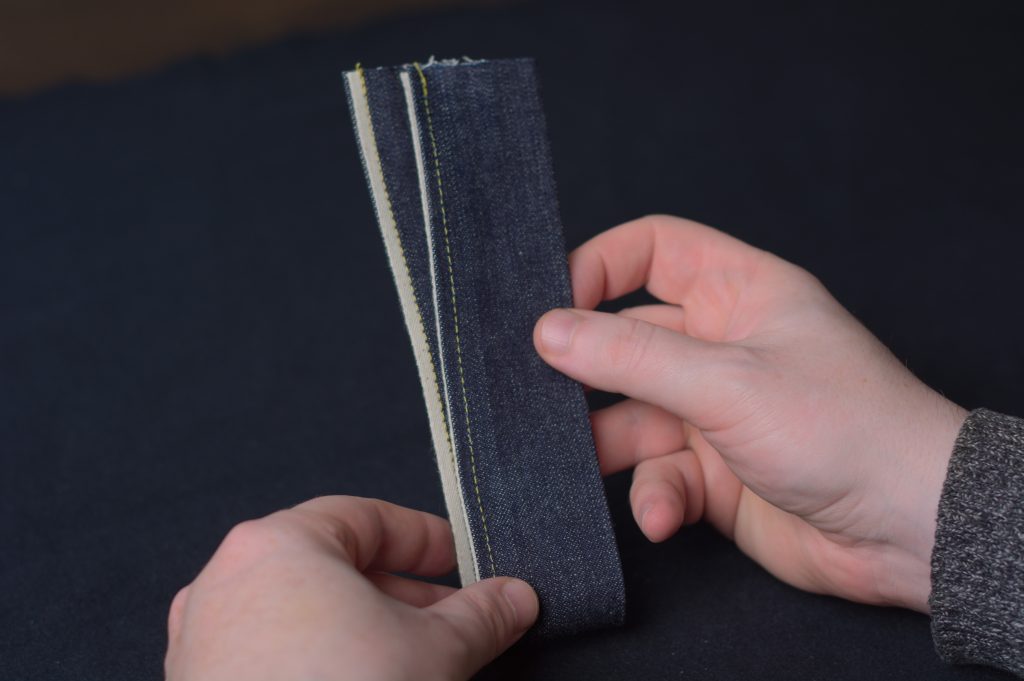
Preparing the One-Piece Fly
The one-piece fly is my preferred method of fly construction, and I believe it to be the strongest method as well since you’d have to literally wear through the bottom of the fly for it to fail.
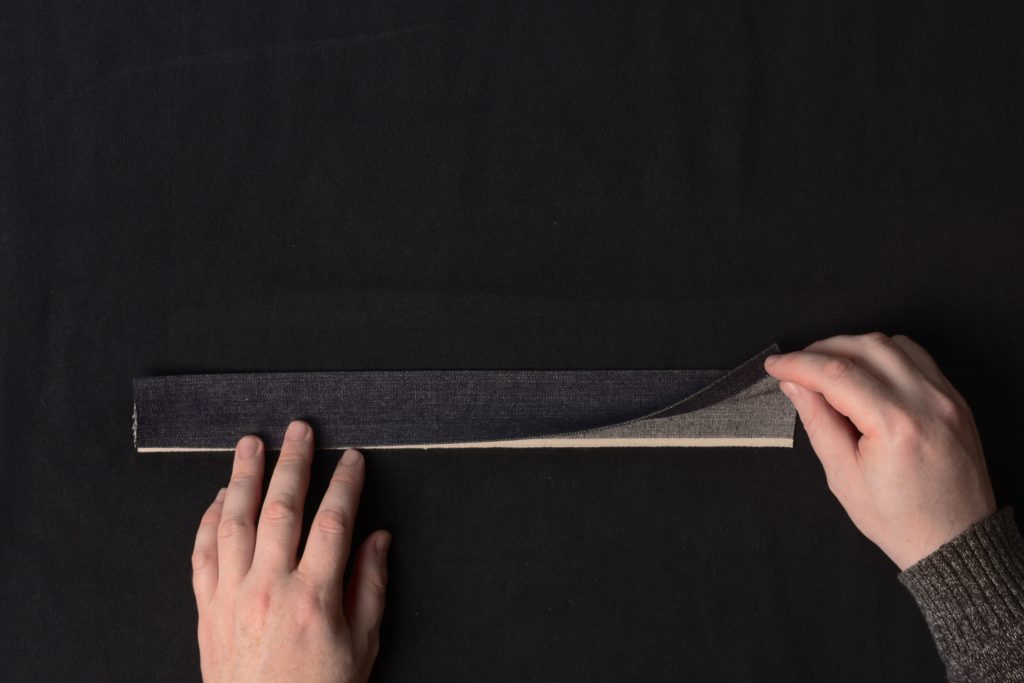
Begin with a piece of selvedge denim about double the length of the fly plus 2″. The width is up to you but I’d recommend 4″ total, or 1 3/4″ finished width front and back plus a 1/2″ seam allowance.
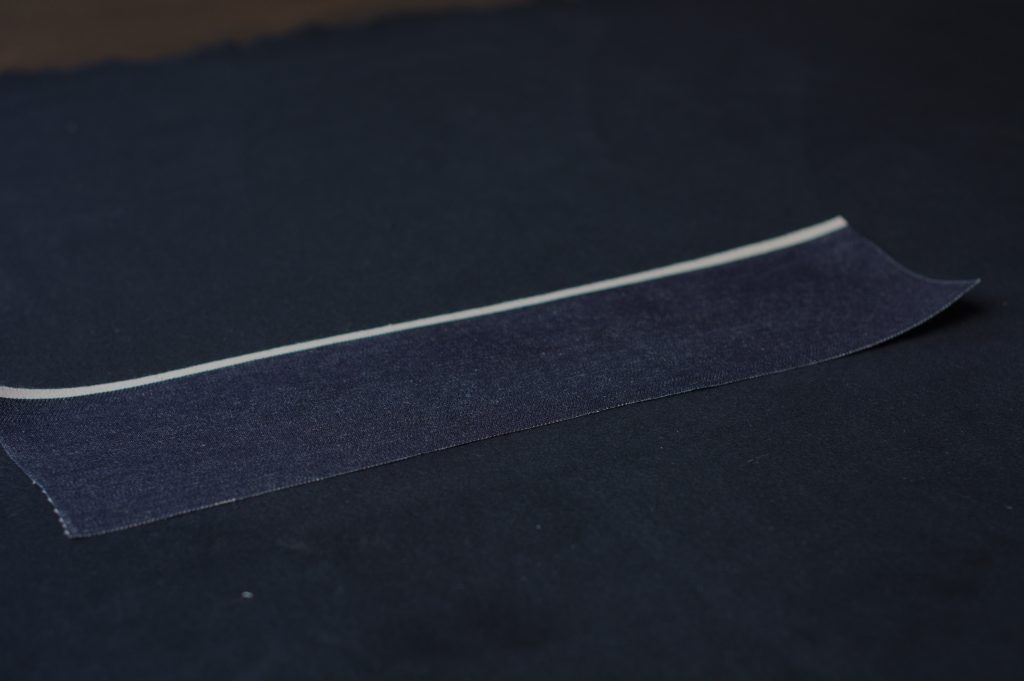
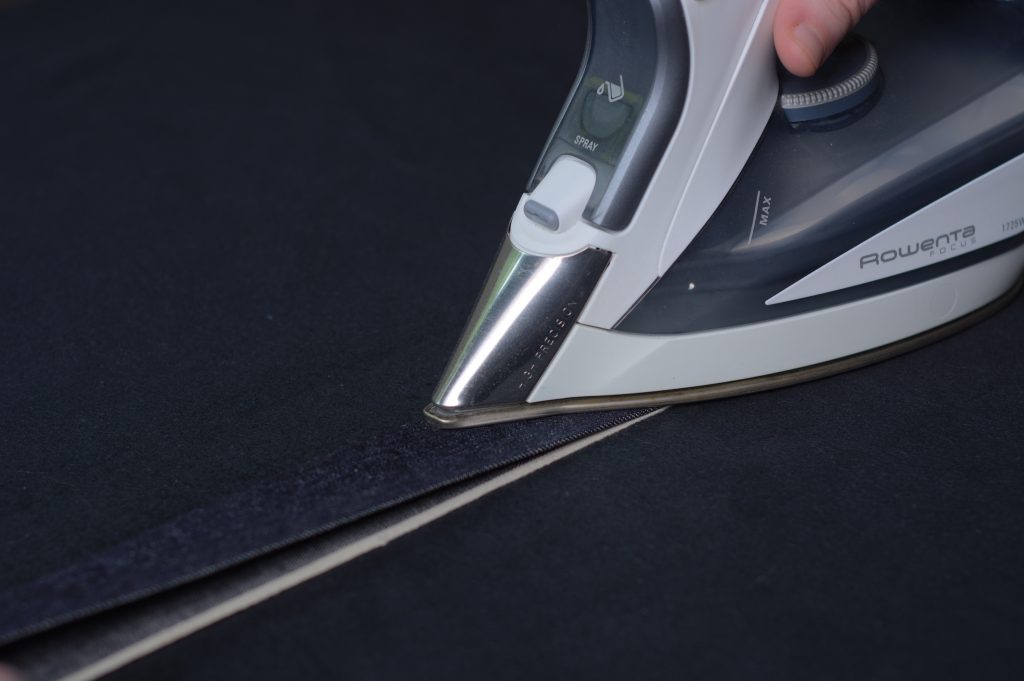
Fold over and press the 1/2″ seam allowance to the wrong side. You can measure this out but I usually do it by eye.
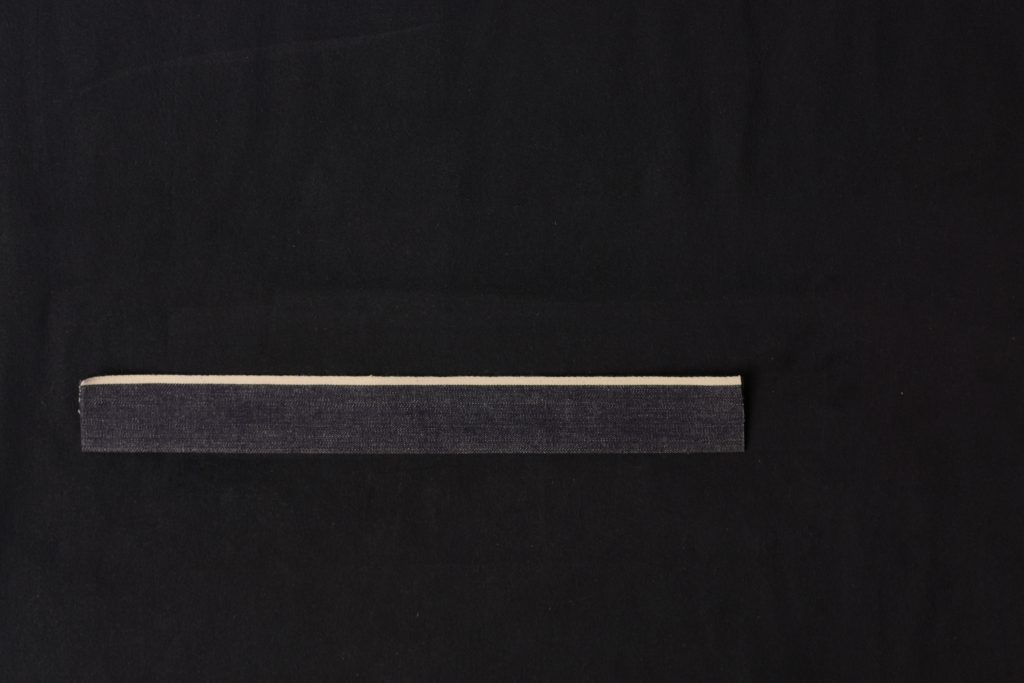
Now fold the fly in half lengthwise, positioning the folded edge ever so slightly behind the selvedge edge underneath. This way it won’t be visible in the finished fly. Press.
Here’s the fly so far after pressing.
Just showing here how the folded edge is set back from the selvedge by maybe 1/16″.
With the selvedge side up, sew the fly closed along it’s length. I like to keep the stitches just to the side of the selvedge for a tidy appearance.

Now fold and press the fly across the middle.
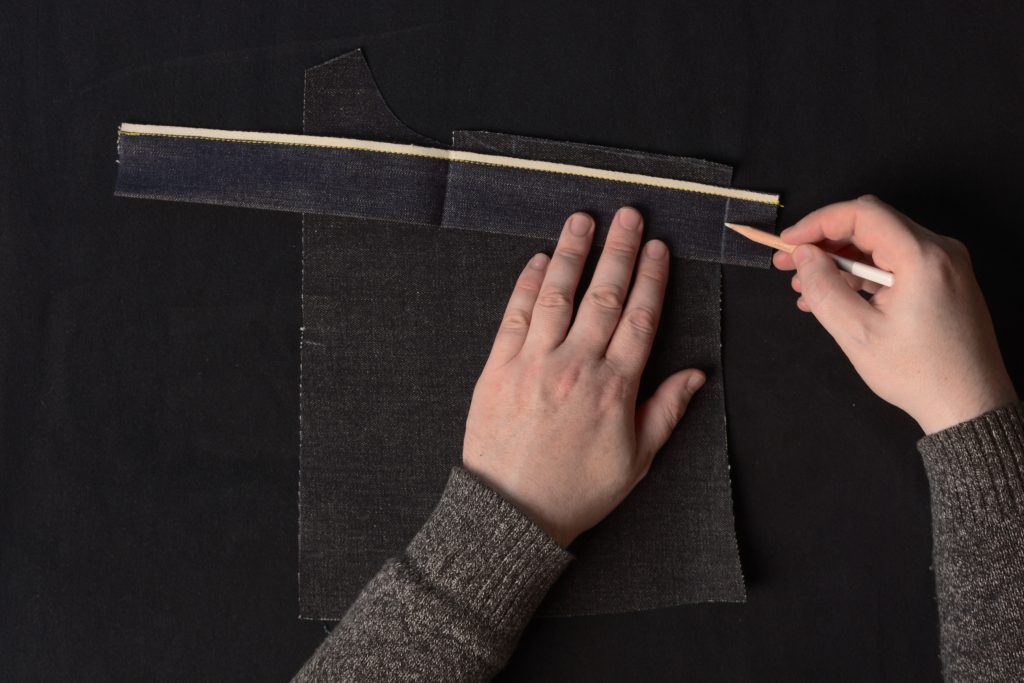
Buttonhole Positions
Orient the fly as they would appear in the finished jeans. The half closest to the camera is the inside of the jeans which the buttons will be attached to. The farthest selvedge edge is where the buttons will be placed.
Open up the fly keeping the same orientation, and place the buttonhole section of the fly onto the jeans front as shown. The fold should align with the fly extension on the jeans front and there should be about an inch of extra fly at the waist.
Mark the position of the waist as shown.
Then make another mark 3/8″ above the waist which will denote the top waistband buttonhole.
Mark another point 3/8″ below the waist indicating the seam. This just helps to clarify the positions of everything.
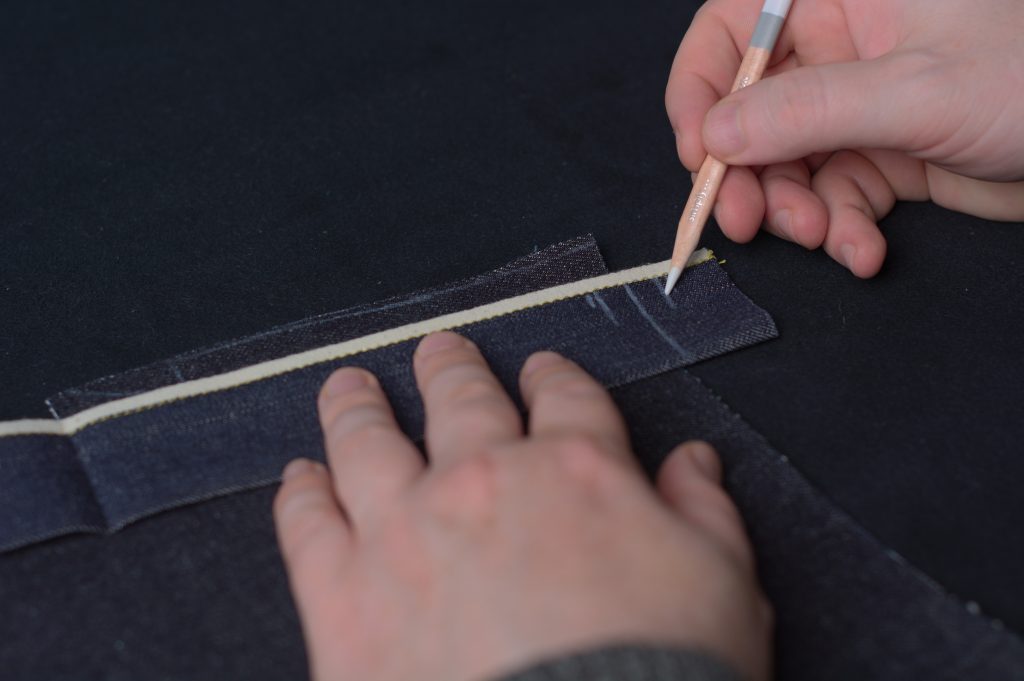
Now mark the position of the lower buttonhole about 2″ to 2 1/4″ above the fold in the fly.
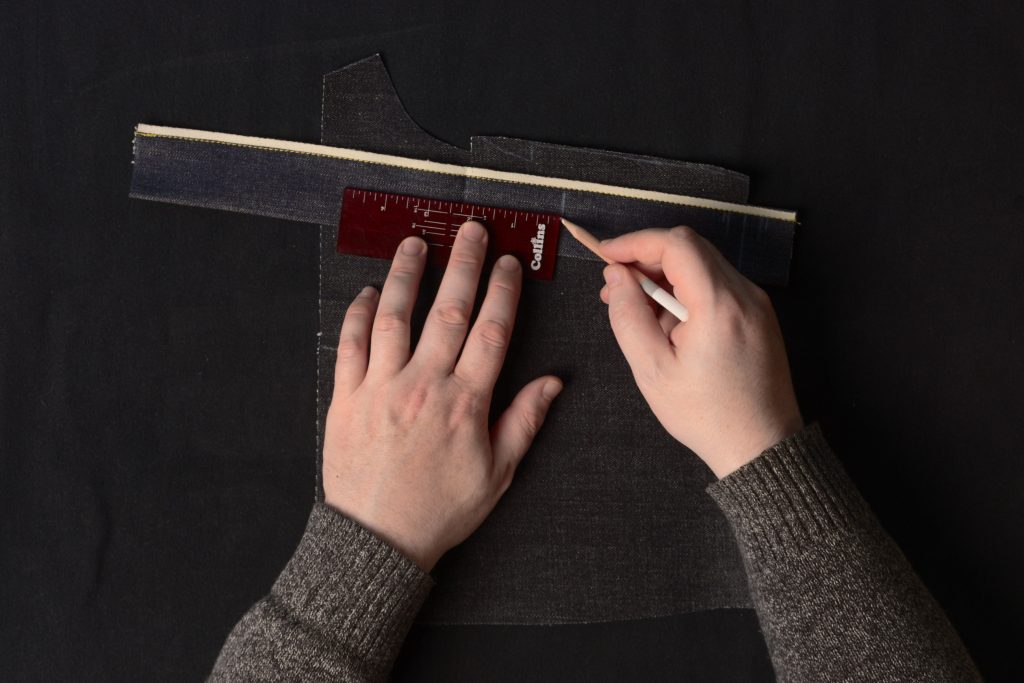
And mark the positions of the remaining buttonholes, evenly spacing them between the lower buttonhole mark and the upper mark that’s above the waist.
I just realized while writing this that I spaced mine improperly, using the seam allowance mark in place of the top buttonhole mark.
The number of buttonholes really depends on the length of your fly. This is a really short fly so two or maybe three buttonholes work best. On my personal pair, I like a very high waist so have 7 buttonholes, including the waistband buttonhole.
When you’re happy with the positioning of the buttonholes, square the marks across width of the fly.
Now mark the outer edge of the buttonholes about 3/8″ from the folded edge.
And finally, mark the inner edge of the buttonhole, at your desired width. Buttonholes in general should be about 1/8″ larger than the buttons. I ended up going with 3/4″ buttonholes.
And here’s the completed fly with the buttonhole positions marked out. The markings indicate the right side of the buttonhole, so go ahead with the next section and work all of the buttonholes with this in mind.
The Collar
Finally, we can move on to attaching the collar. Begin by sewing the collar halves together along the center back seam using a 1/2″ seam allowance.
Press open the center back seam.
We now have to find and mark the collar roll line. I find the easiest way to do this is to simply cut the collar pattern along the roll line.
Then use the lower piece to mark the roll line as shown.
Here’s the finished collar with the roll line marked.
Lay the cape on the sewing table right sides up, with the neck closest to you. Now pin the collar to the neck line at the center back, right sides together. Then work your way to the left, and then to the right, pinning the rest of the collar as necessary.
Don’t worry too much at this point if your collar is slightly too big along the length – we’ll adjust and fine tune that later on.
Sew the collar along the length of the neck seam from where the foreparts have been snipped earlier.

Press the collar and seams up towards the collar.
And finally, press the collar back down along the roll line, using a ham as necessary for the curved areas.
The Cape Body
The Inverness Cape can seem quite confusing at first as to how all the pieces go together, but assembling the pieces of the cape body is actually pretty straightforward.
Begin by laying out the back piece, unfolded, right side up on the table.
Lay the appropriate cape on top, right sides together. The neck seam should align with the back neck and the curves along the side seam should be similar.
Pin the cape into position from the neck down towards the hem, keeping the pins about 1 inch away from the edge (so you have no chance of sewing over them). By working from neck to hem, you ensure that the bottom of the cape falls in the proper position.
Now lay the appropriate forepart on top, wrong side up, or in other words, the right side of the forepart should be towards the right side of the back.
Begin pinning the forepart to the back at the hem, working your way up to the armscye. There should be at least a few inches where the forepart, cape, and back all overlap each other.
Then take the shoulder seam and pin that into position on top of the cape, pinning from the neck seam to the armscye to ensure it is positioned correctly.
Here’s the right half of the cape assembly all pinned and ready to sew.
Sew the cape pieces together from neck to hem (or vice versa) using a 1/2″ seam allowance through all layers.

Now press all of the seams toward the back of the cape.
Repeat for the other half – this completes the body assembly.
Front Button Facings
Before using a new pattern – particularly a historical draft – on your expensive fabric, it’s a good idea to create a muslin toile to check the overall fit and to be sure you aren’t making any major errors.
Note that this is very much a simplified construction designed to get you to the fitting stage quickly, so there will be some slight differences when constructing the final garment.
Begin by taking the cape pieces and marking the fold line for the front button facing 2 graduated inches from the edge (this should already be marked on your pattern). I’ll be treating this as the right side for this toile construction.

Fold and press the fabric along this line, right sides together.
At the neck, draw in the 1/2″ seam allowance across the top of the button facing.

Using a suitable round edge, mark a curve at the top of the button facing from the seam allowance at the top, tapering into the folded front edge.
Sew the facing along the top edge and curve into the folded front edge.
Clip the neck seam to the end of the stitch line, avoiding cutting into the facing.
Trim the seam allowance to about 1/8″ around the curve to the clip.
Turn the button facing right side out and press once more.
Finally, top stitch through both layers along the inner edge of the button facing. You can pin it first if you want to help keep everything in place as you sew.
Repeat the process for the opposite cape.
Turning now to the foreparts, repeat the same process, only starting with a wider button facing of about 2 1/2 graduated inches.

The upper curve has been sewn and clipped here.
And here are both foreparts after turning and top stitching.
Drafting the Collar
Drafting the collar is fairly straight forward, though it does take some artistic expression. Something to be aware of is that when using a larger sized graduated ruler, above around size 45, the collar will start to become ridiculously large – so you’ll need to adjust the heights to a more manageable size. Feel free to contact me for help with that.
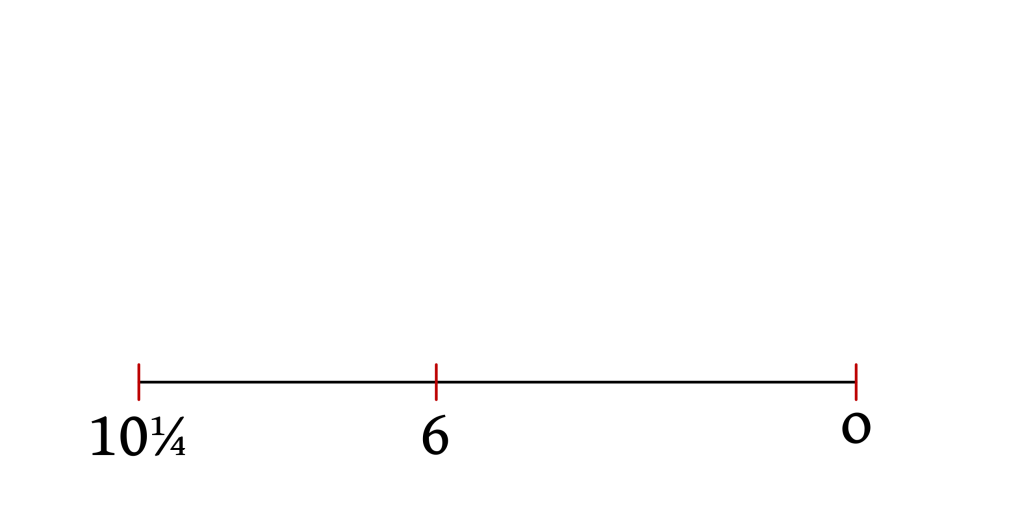
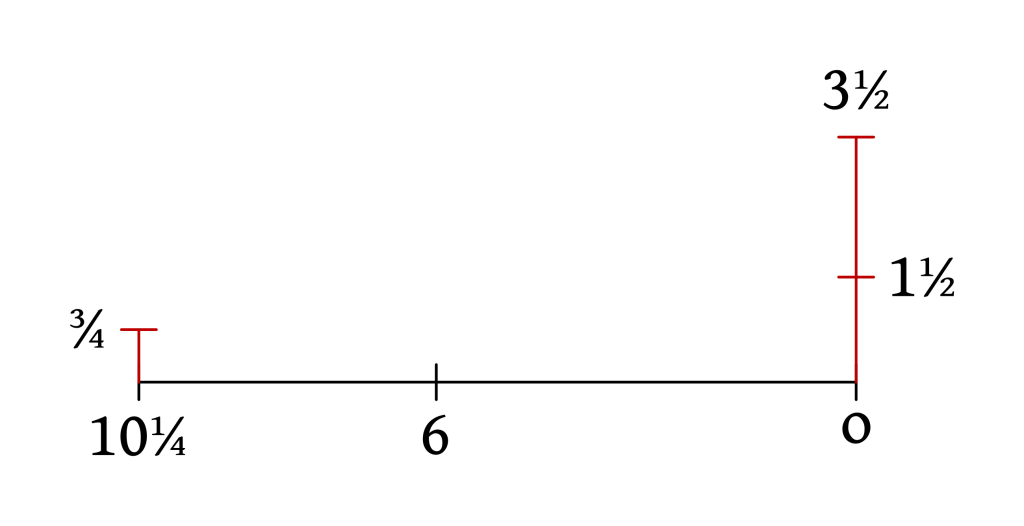
To begin, draw out a baseline and mark out the following points from O:
- 0 to 6 graduated inches
- 0 to 10 1/4 graduated inches
Now square upward and mark the following points. This is where you’ll definitely need to adjust those heights for larger sizes.
- 0 to 1 1/2 and 3 1/2 graduated inches
- 10 1/4 to 3/4 graduated inches
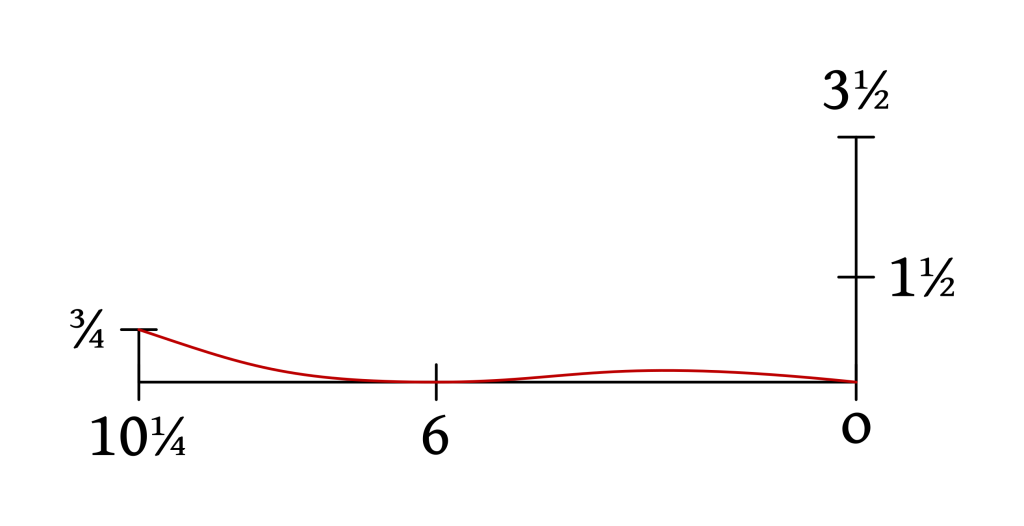
Now draw in the neckline. From 3/4 to 6 it’s a gentle curve. From 6 to 0, curve in the opposite direction, about 3/16 to 1/4 graduated inches above the baseline. This compound curve will add some tension to the collar, helping it to hug the neck closely and roll properly.
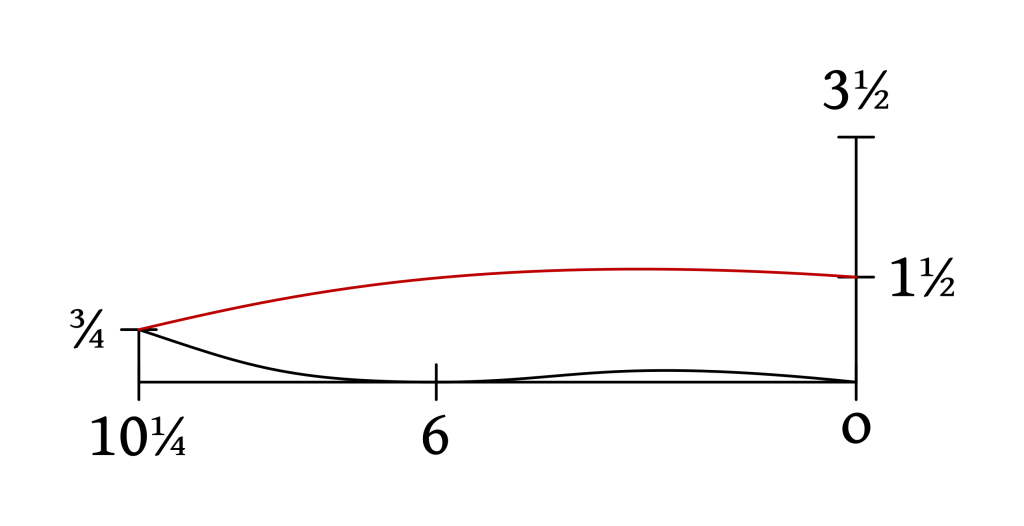
Now draw in the roll line with a gentle curve from 3/4 to 1 1/2. This line should keep roughly the same distance from the neck line from 6 to 0.
Here’s where the artistic expression comes into play, as there are no real measurements given for this part of the collar.
Starting vertically at 3/4, draw a deep curve, extending the curve a bit higher the 3 1/2 point, and gradually curve into 3 1/2. Continue the line about 3/8 graduated inches beyond 3 1/2.
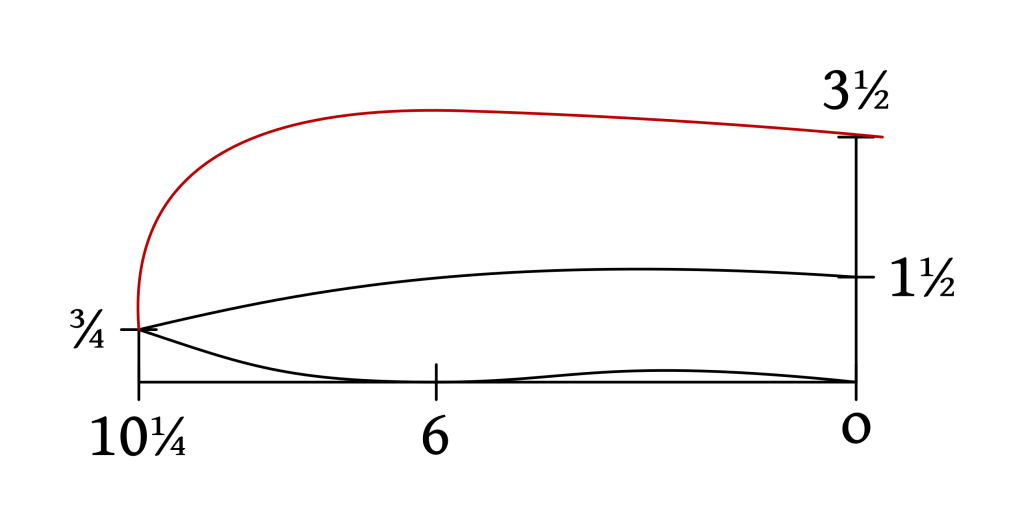
Draw a gentle curve from the point beyond 3 1/2 to 0, keeping both ends at right angles to their corresponding lines (or as close as possible at least).
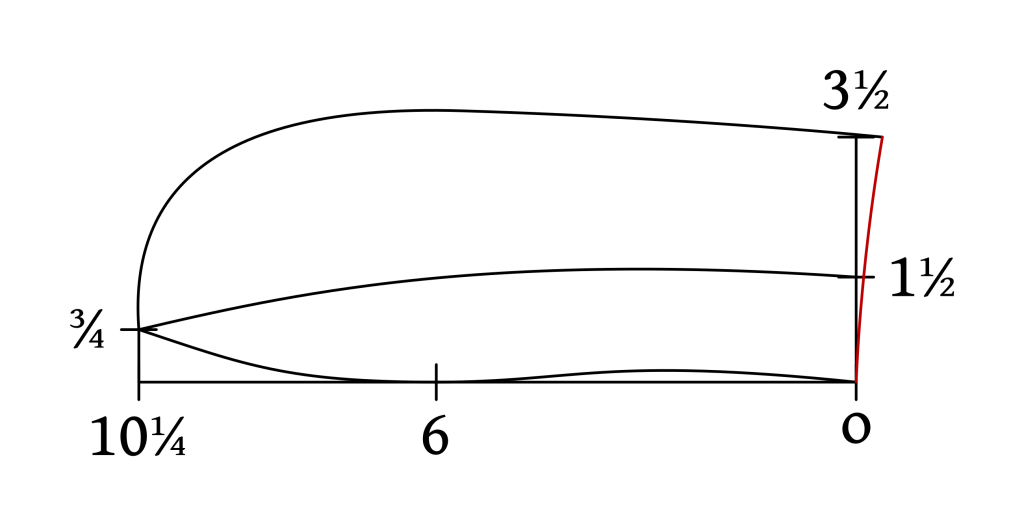
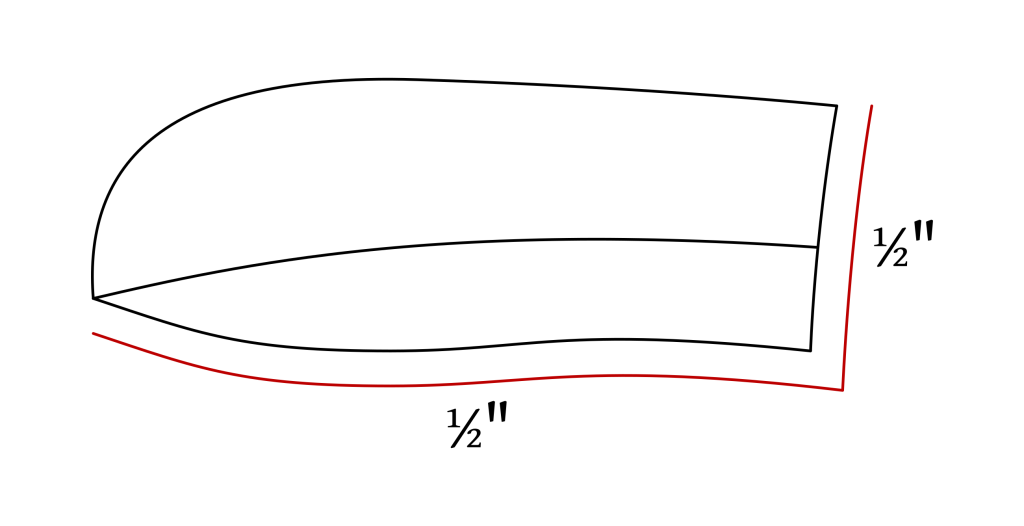
Seam allowances for the collar are a bit odd, and we’ll be adding extra material to both the top and under collar when the time comes. For fitting purposes with the toile, simply add 1/2″ seam allowances to both the bottom and center of the collar as shown. Cut out the collar pattern.
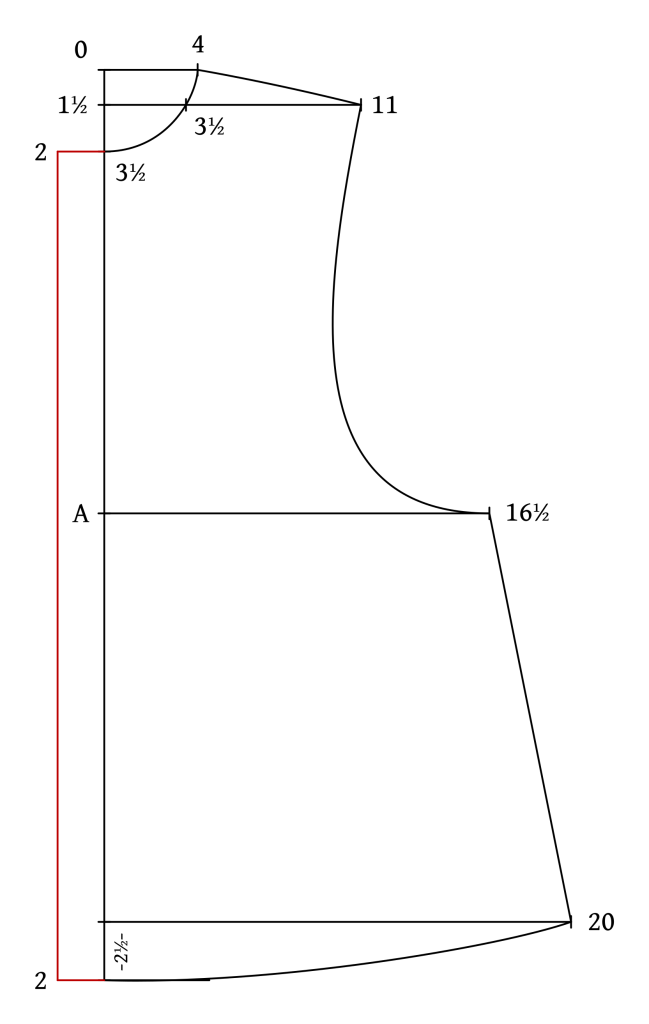
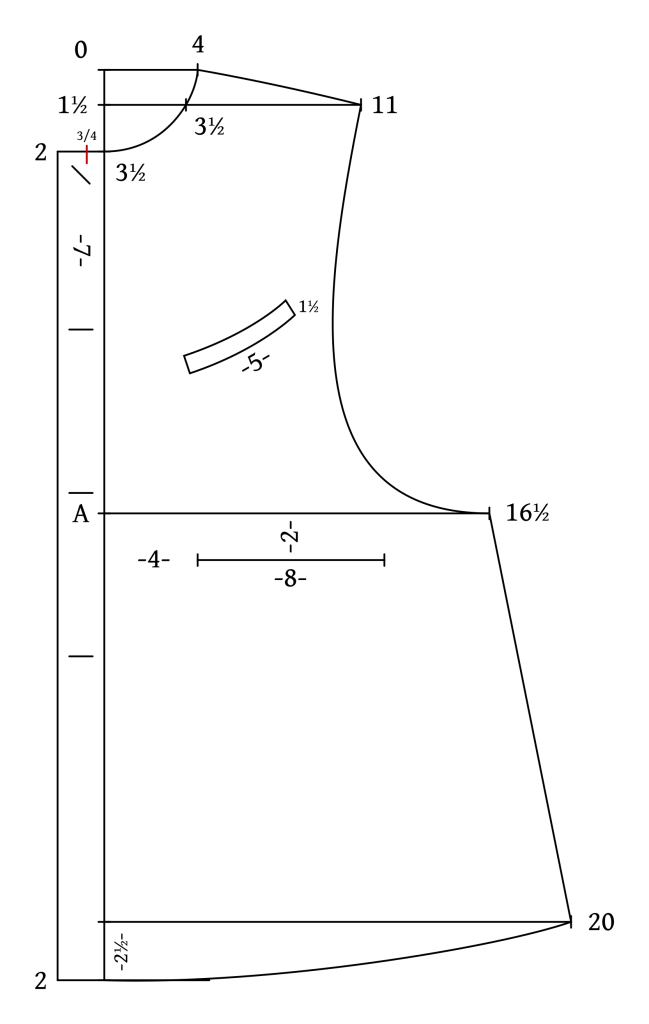
Drafting the Front
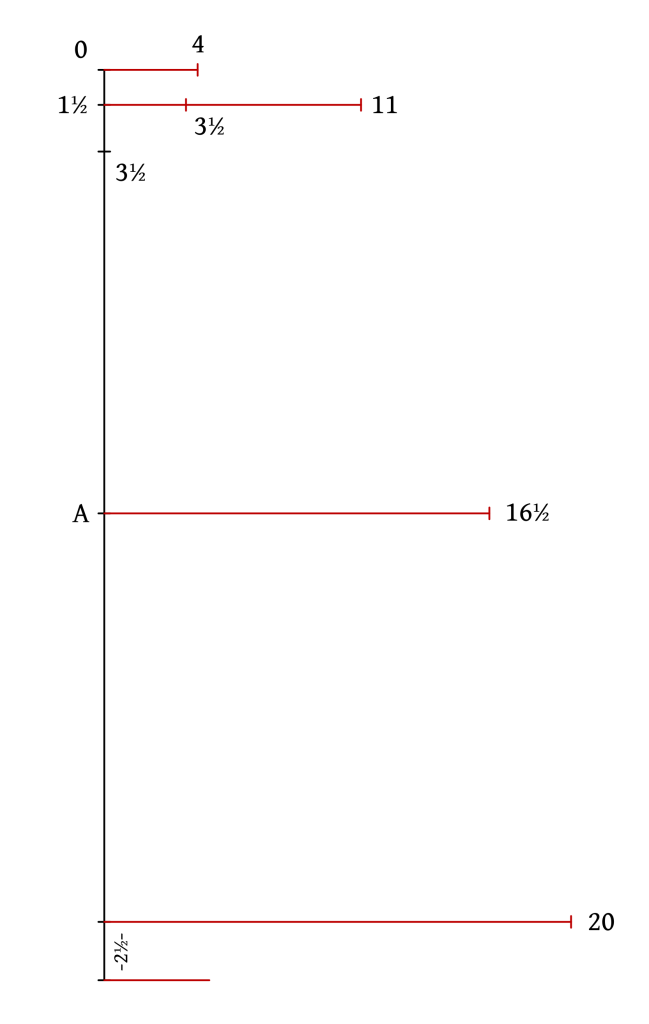
On to drafting the front, again draw a vertical line from 0 and mark out the following points.
- 0 to 1 1/2 graduated inches
- 0 to 3 1/2 graduated inches
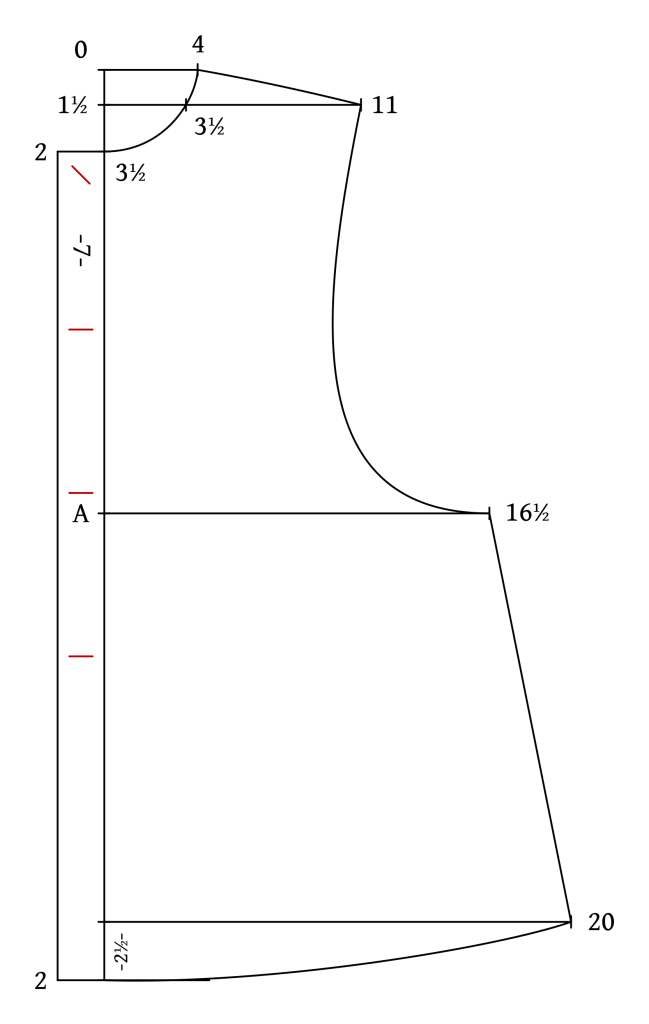
- From 3 1/2 to the bottom is equal to the back length measurement minus 2 1/2 graduated inches.
- Make another mark 2 1/2 graduated inches from the bottom.
- Measure from 0 to the bottom, and divide it in half to find A.

Square Out
Square out the following points.
- 0 to 4 graduated inches
- 1 1/2 to 3 1/2 to 11 graduated inches
- A to 16 1/2 graduated inches. (originally 18 1/2, scaled down to get a slightly better fit).
- Second line from bottom to 20 graduated inches (originally 24).
- Square out the bottom about 4 graduated inches.
The Curves
Now draw in the following curves:
- 3 1/2 through 3 1/2 to 4 for the neck.
- 4 to 11 in a very slight curve for the shoulder.
- 11 to 16 1/2 forms a very deep armscye of sorts. You’ll want to curve inwards from 11 an inch or two before deepening the curve into 16 1/2.
- 16 1/2 to 20 is a straight line.
- Start with a right angle at 20 curving into the bottom hem at 2 1/2.
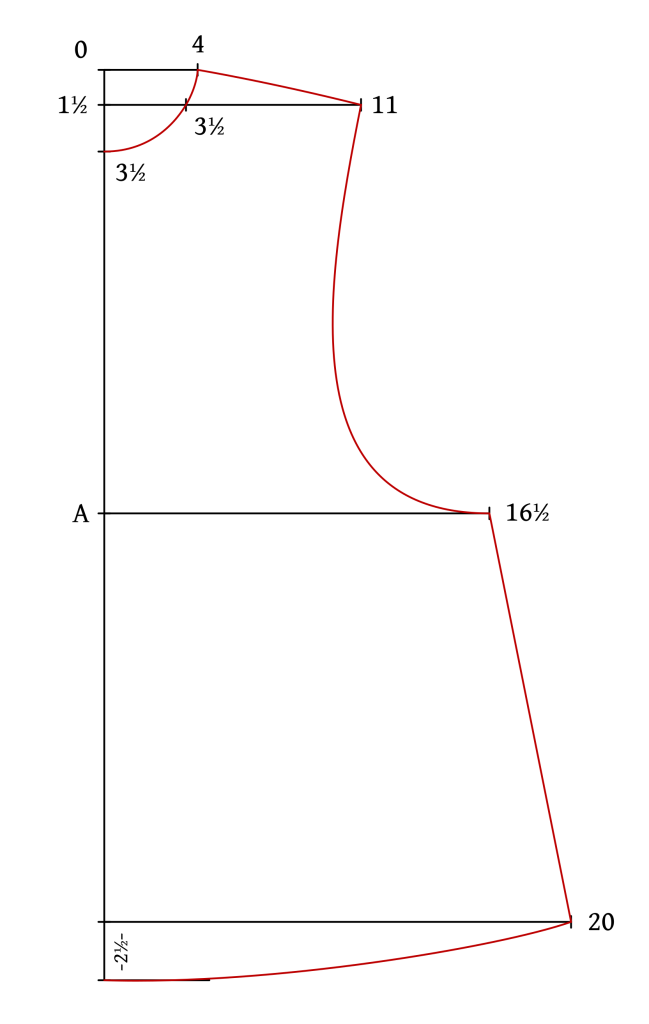
Square to the left 2 graduated inches at 3 1/2 and at the bottom and connect the two new points with a vertical line to form the button catch.
Buttonholes
Begin laying out the buttonholes. These should be about 1 to 1 1/4 in length, depending on the button size you choose. The top buttonhole is about 3/4 below the top edge and sits at a 45 degree angled, centered in the button catch area.
The remaining 3 buttons are space 7 graduated inches apart. You may have to adjust this spacing depending upon your size. Just try to space them out equally with the lowest one roughly in the same area as shown.
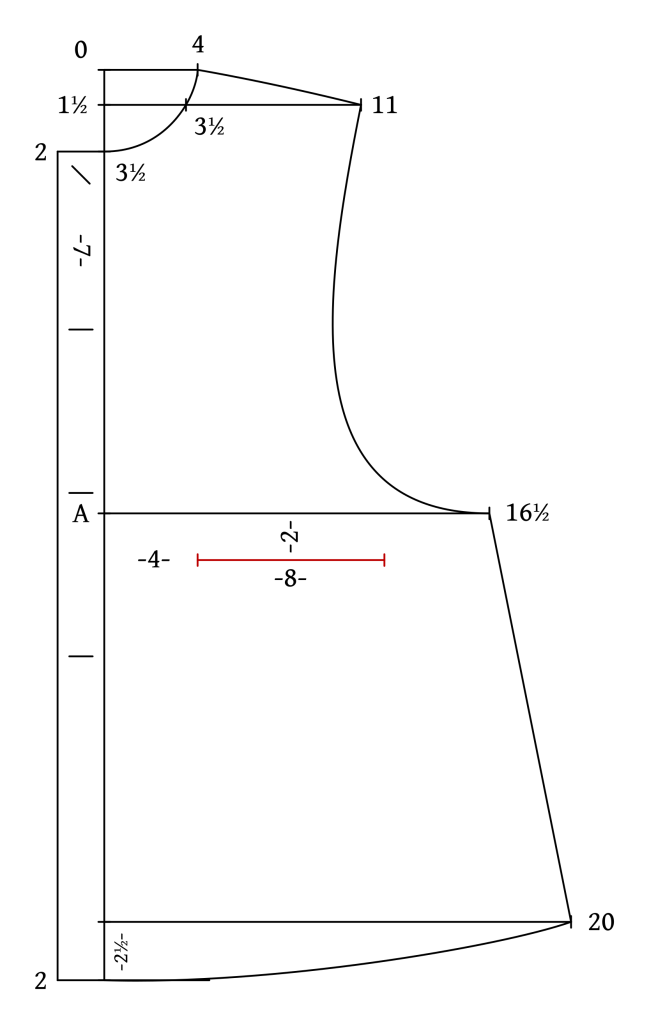
Pocket Positions
The lower flapped pocket is positioned about 2 graduated inches below the line from A. It begins about 4 graduated inches from the original baseline, and the pocket itself is about 8 graduated inches in width. You’ll definitely want to narrow it a little on the larger sizes – there’s no hard and fast rule about the size, but you’ll want something that suits your own proportions.
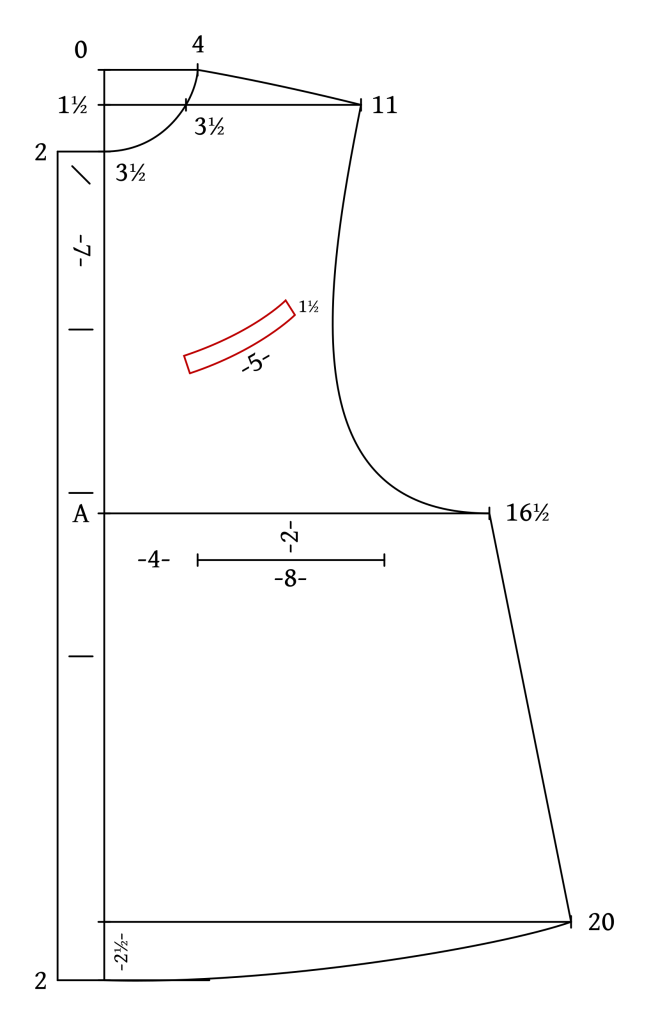
The breast pocket is almost never given precise measurements – it’s definitely more of an artistic matter. Generally speaking, this one is about 5 inches wide, with the left side about 1 1/2″ from the armscye. It should be angled roughly as shown, and around the level of the second buttonhole. The height should be 3/4 to 1 graduated inch, it’s really up to personal preference.
Finally, at the neck, make a mark 3/4 graduated inches to the left of the main construction line. This basically represents the center front (technically it’s an additional 1/4 graduated inch over), and will be the point the collar ends at. You’ll want to make sure to transfer this mark to your fabric pieces when you cut them out.
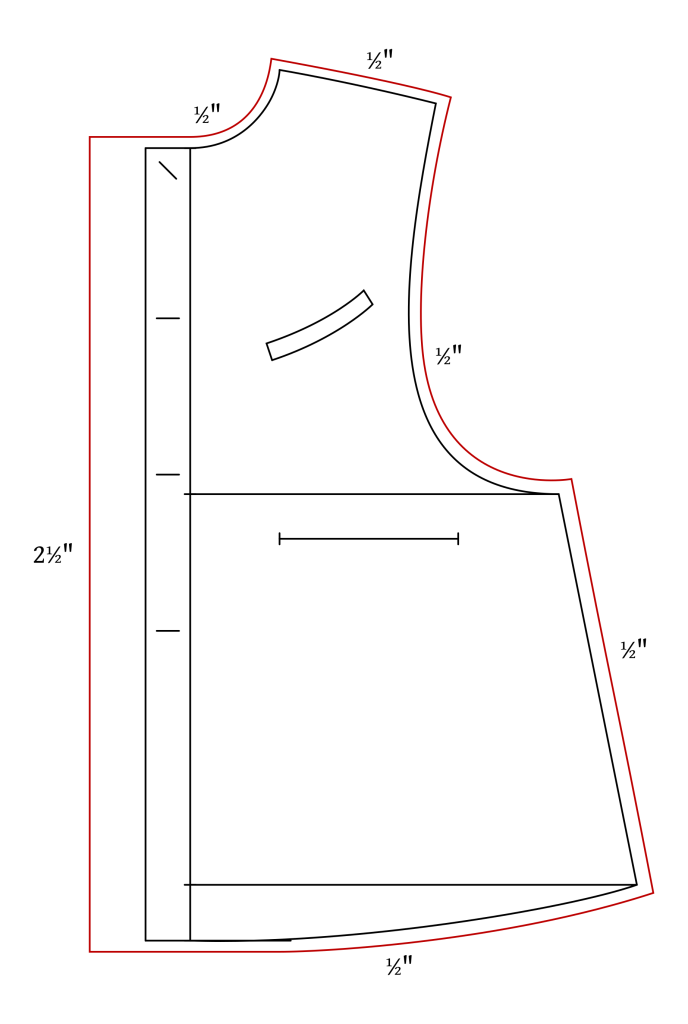
Seam Allowances
For the seam allowances, we need to add 2 1/2 graduated inches to the front edge (or 3″ if your fabric frays a lot). Then add 1/2″ (regular inches) to the neck, shoulder, armsyce, side seam, and hem. Cut out the pattern when you are finished.