Author: James Williams
Cutting the Facings
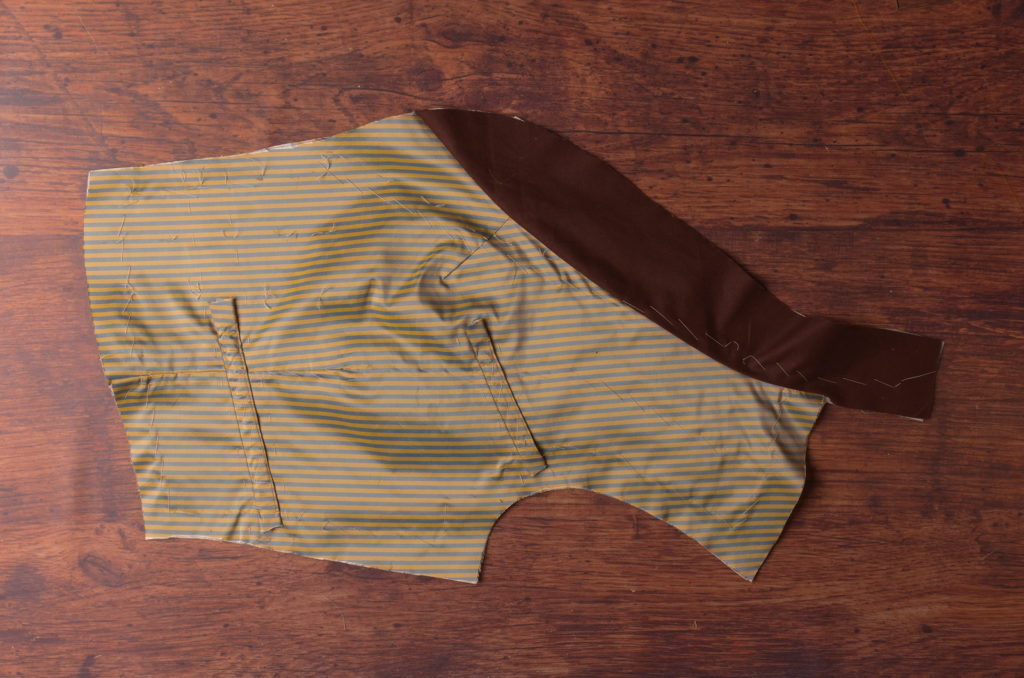
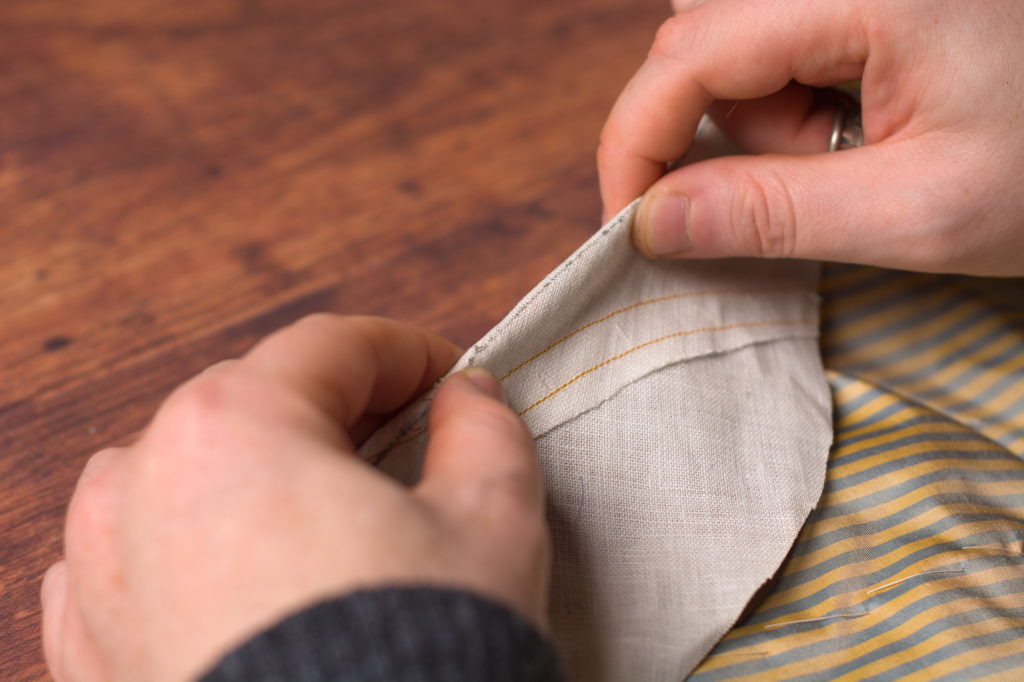
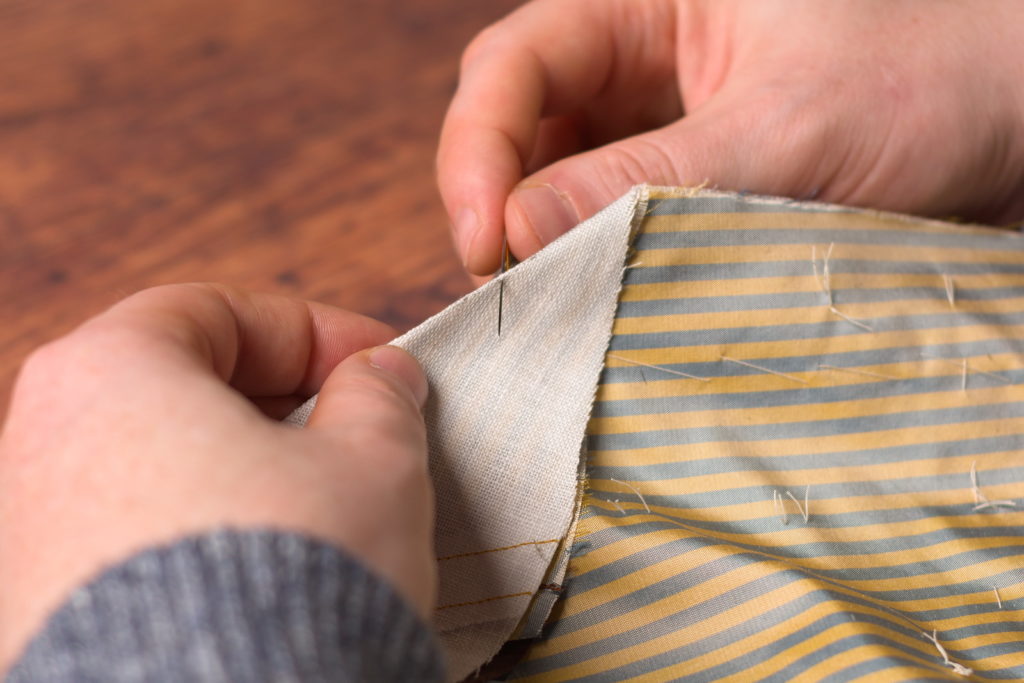
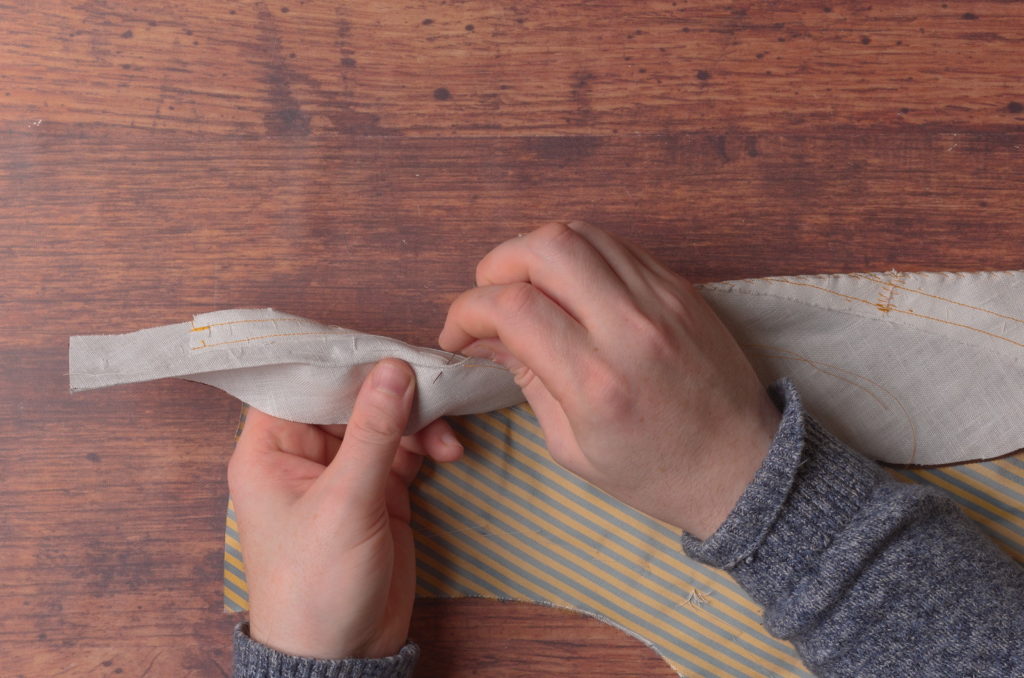
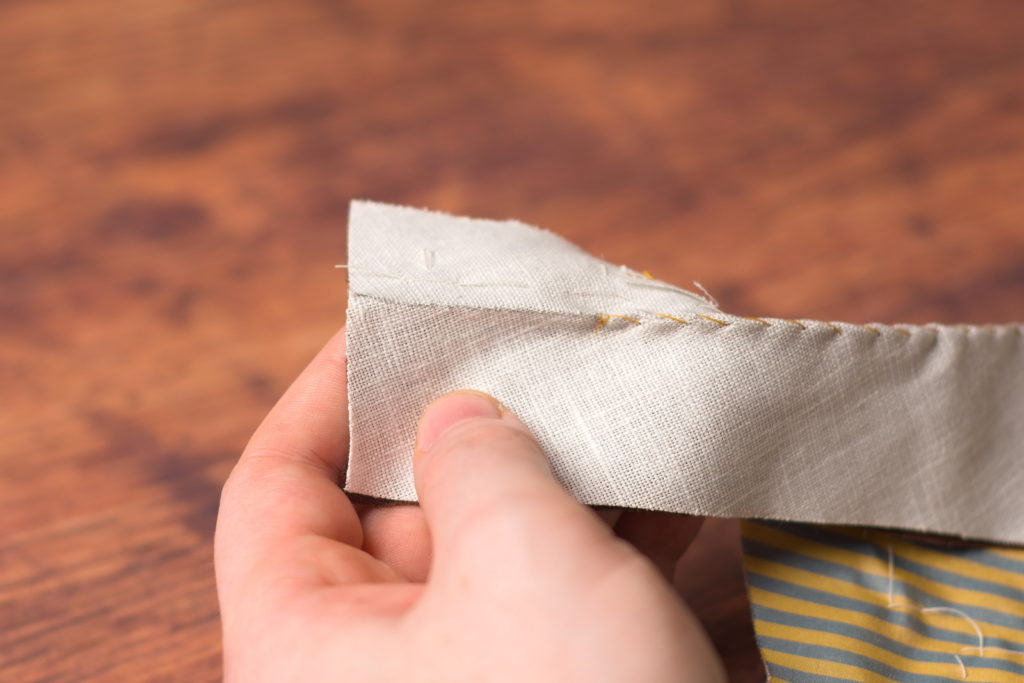
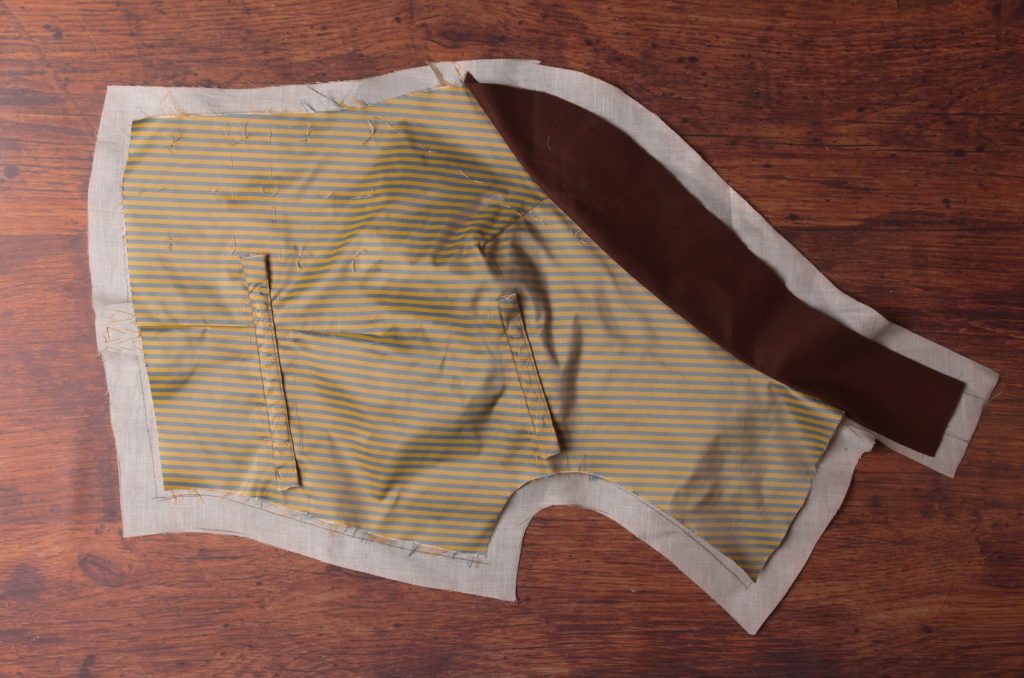
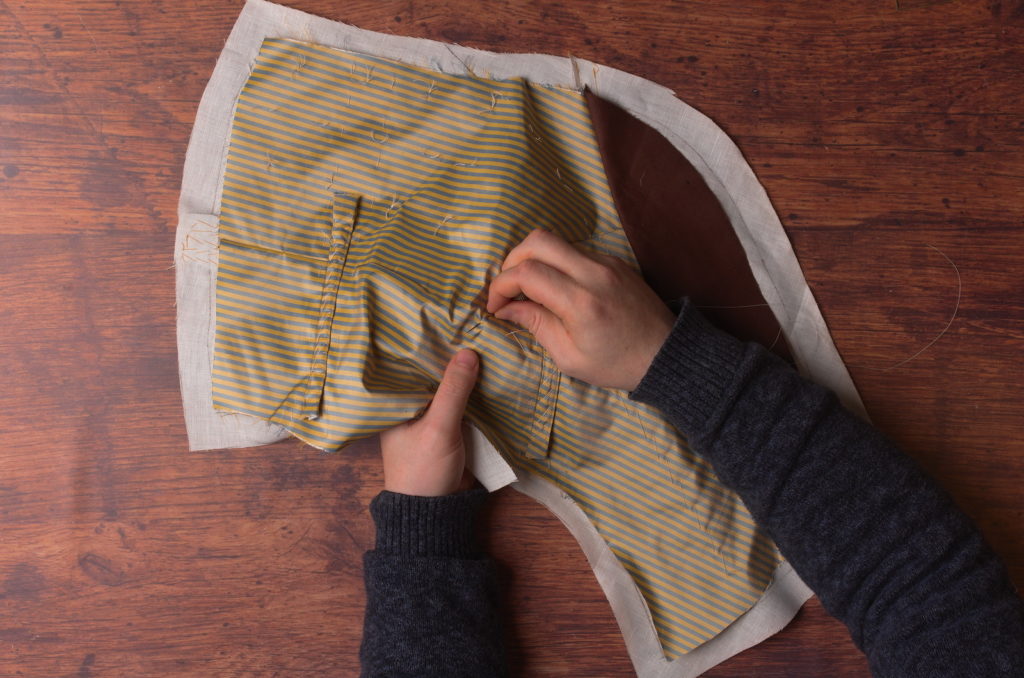
It’s time to cut and prepare the facings for installation. Traditionally, the facings were cut with the collar in one piece to maintain a more seamless look to the finished waistcoat. To accommodate the lack of darts as well, the facings are cut with an additional allowance so that the facings can be manipulated into place. I’ll be demonstrating the ‘quick’ method for getting the pattern pieces, but if you’re using a plaid or more prominent stripe pattern that you want matched, take care in the layout of everything and use more precision as necessary.
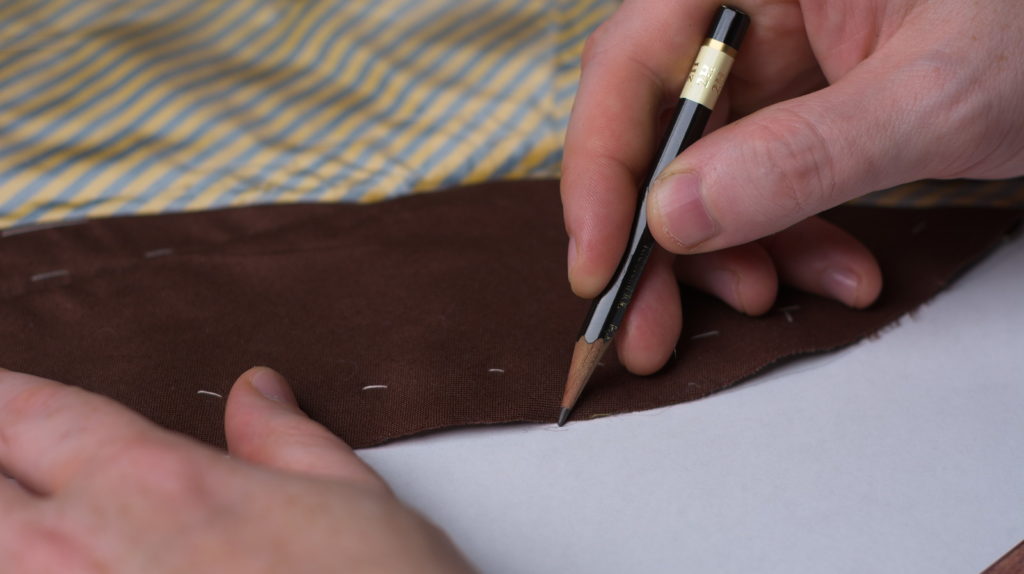
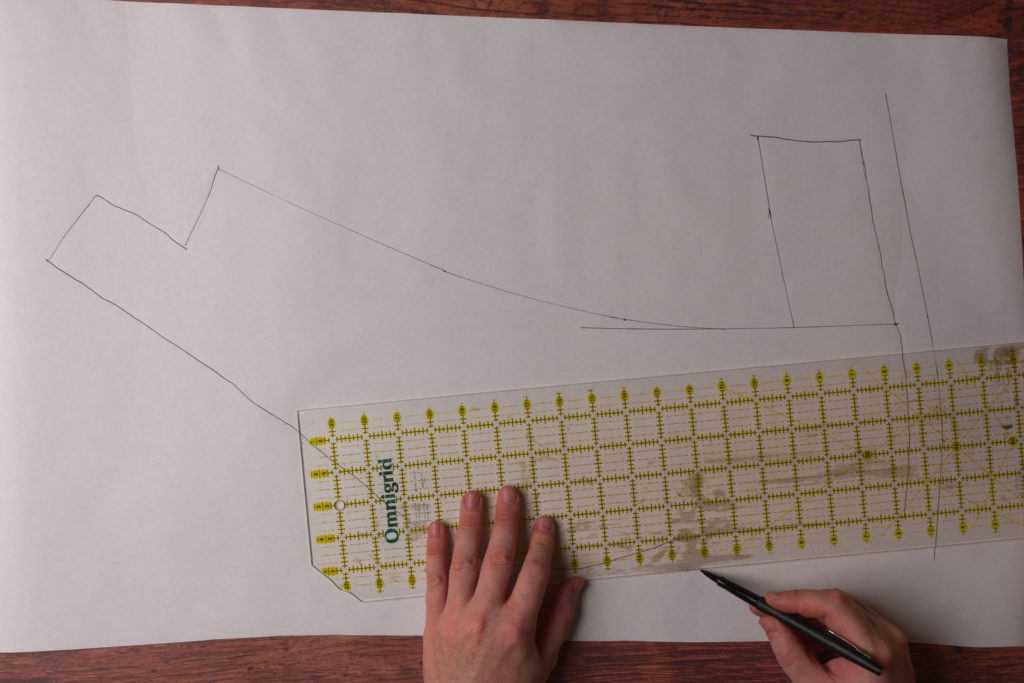
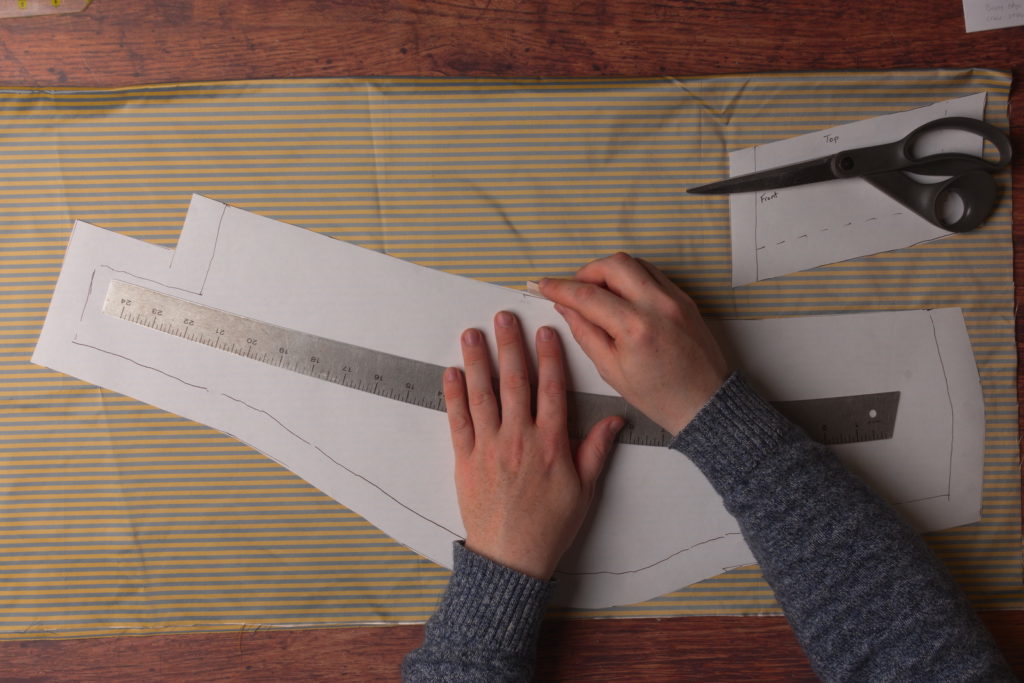
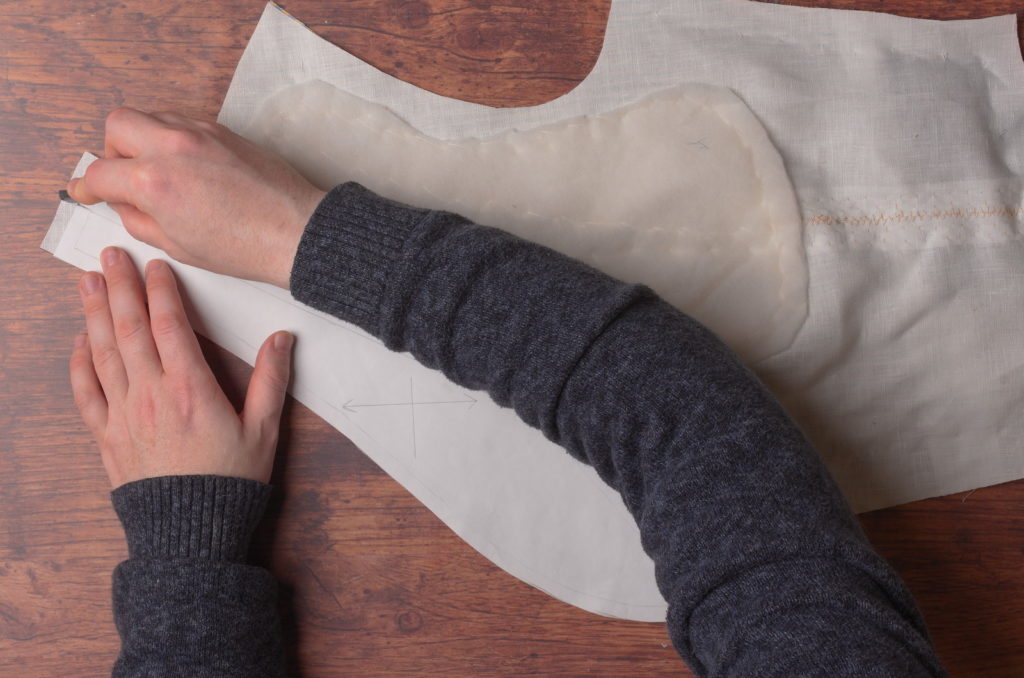
Begin by laying out the waistcoat on to a fresh sheet of paper and tracing around the lower side seam, the bottom, the front, the collar, and shoulder seams.
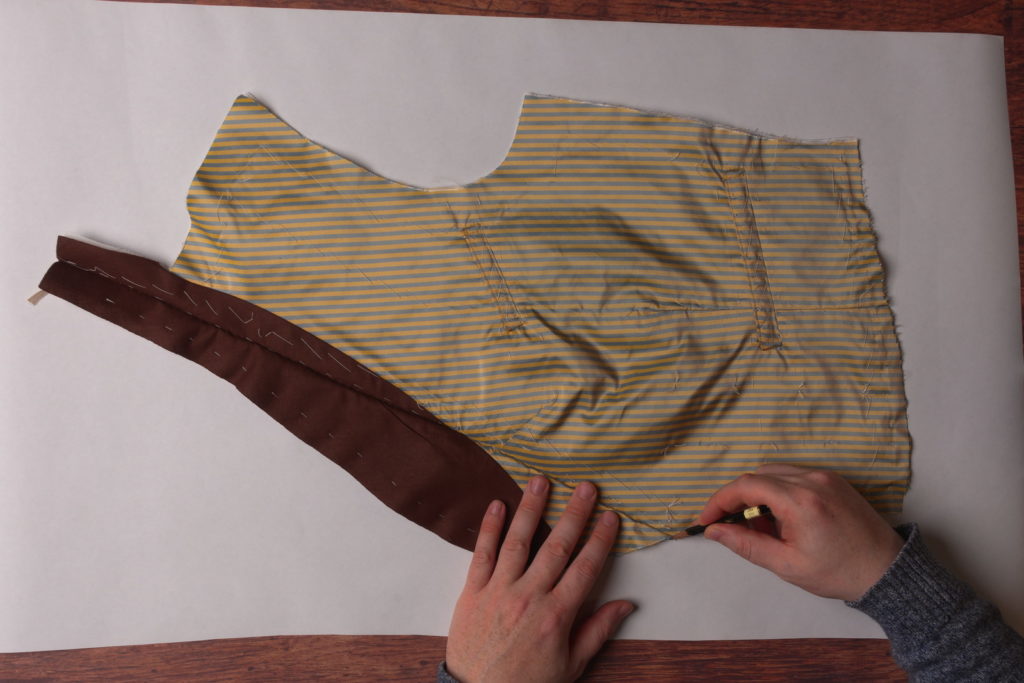
I’m using a pen here so that you can see everything more clearly, but I recommend a pencil so that you don’t accidentally get ink on your waistcoat.
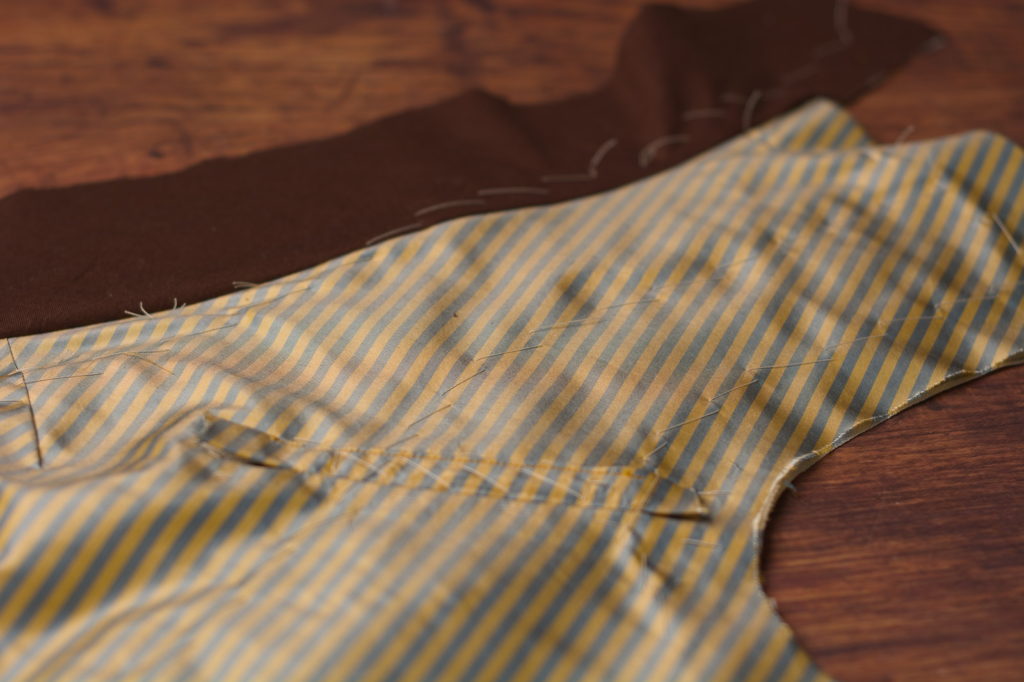
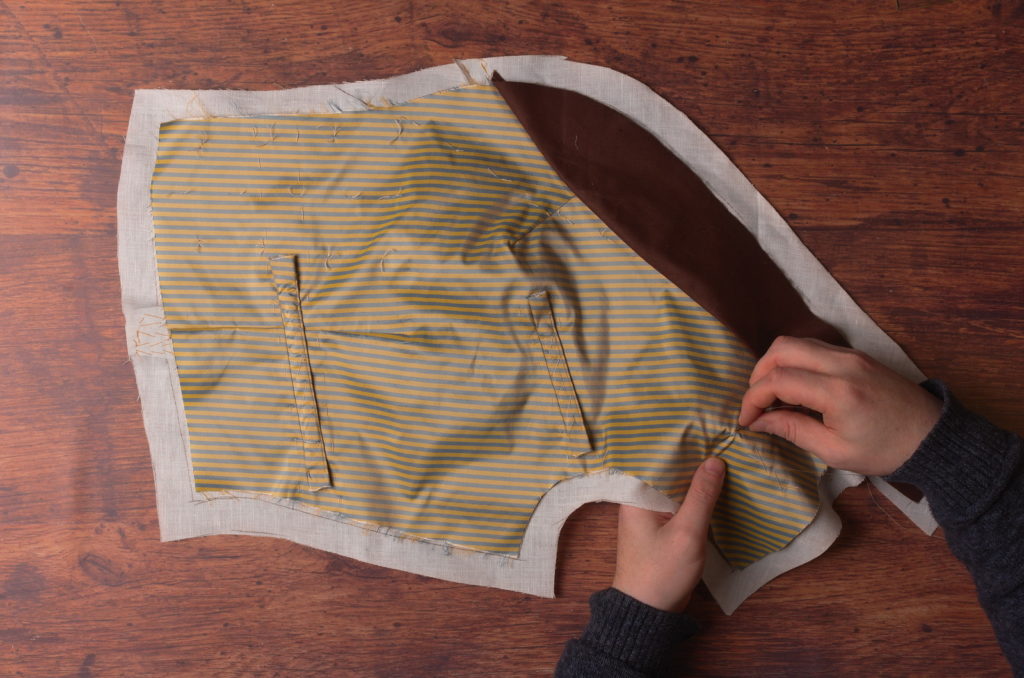
As you’re tracing around the collar and shoulder area, try to hold everything in a neutral position. The pieces will want to distort due to putting the three-dimensional fabric on the flat paper.
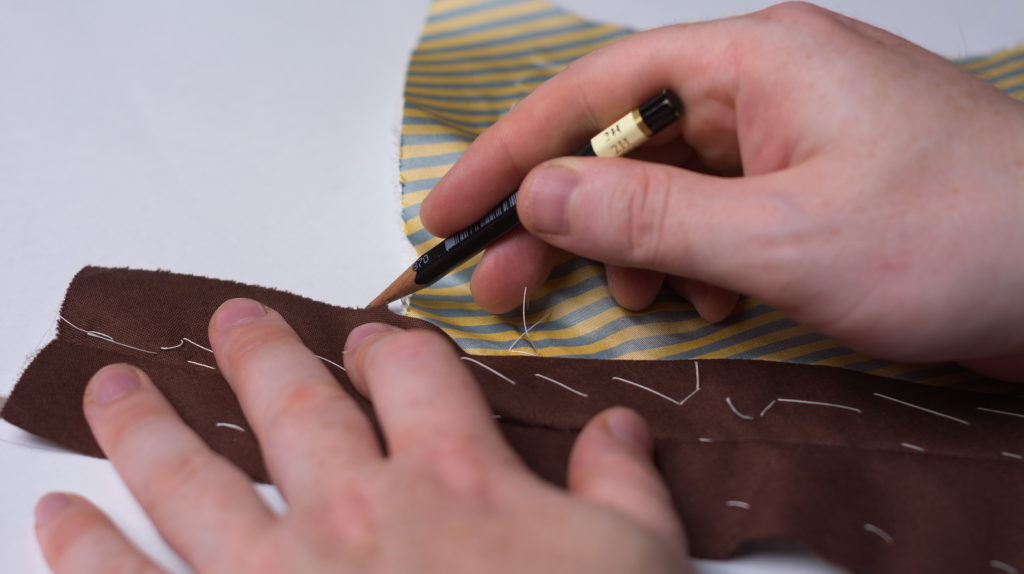
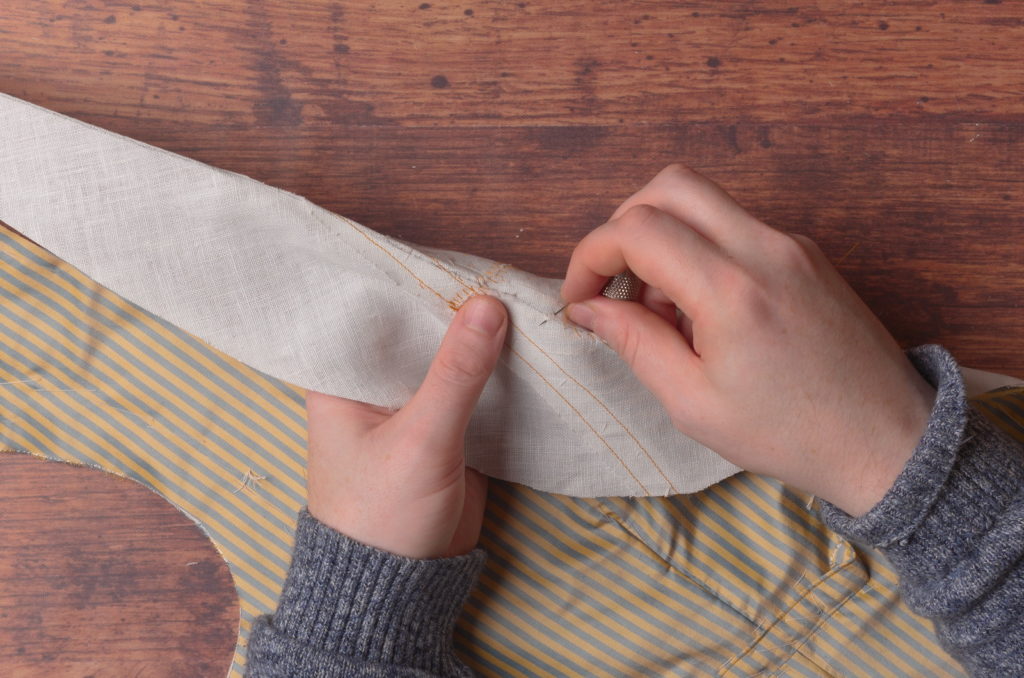
Before removing the waistcoat, slide it over slightly and determine the outer edge (including a seam allowance) of and how wide you want the facing to be. I made mine end just before the dart and about two inches from the inside buttons.
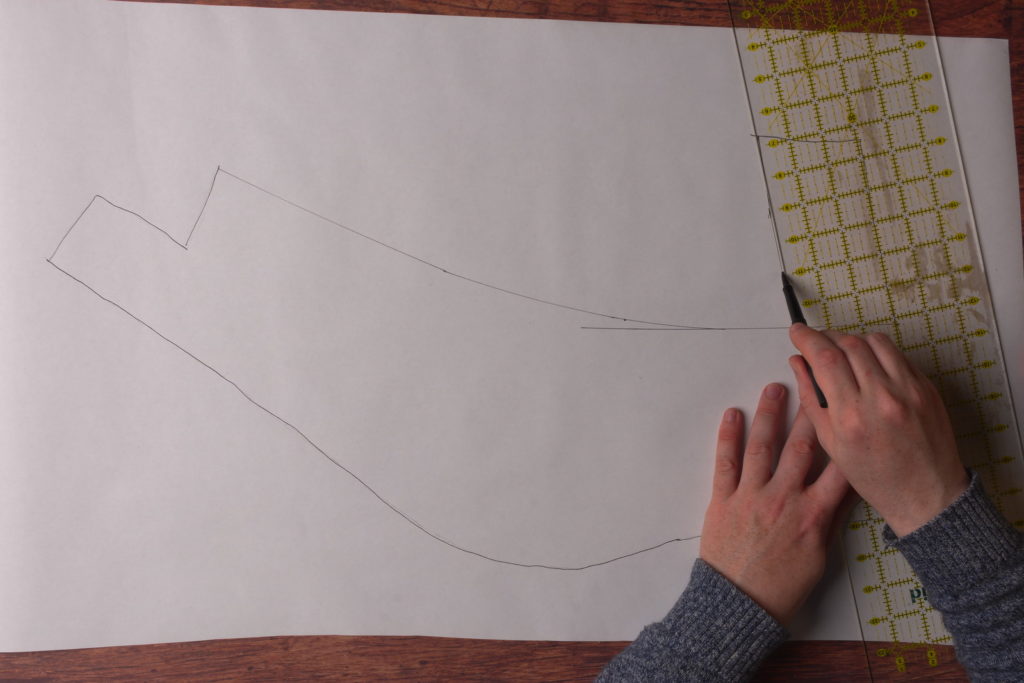
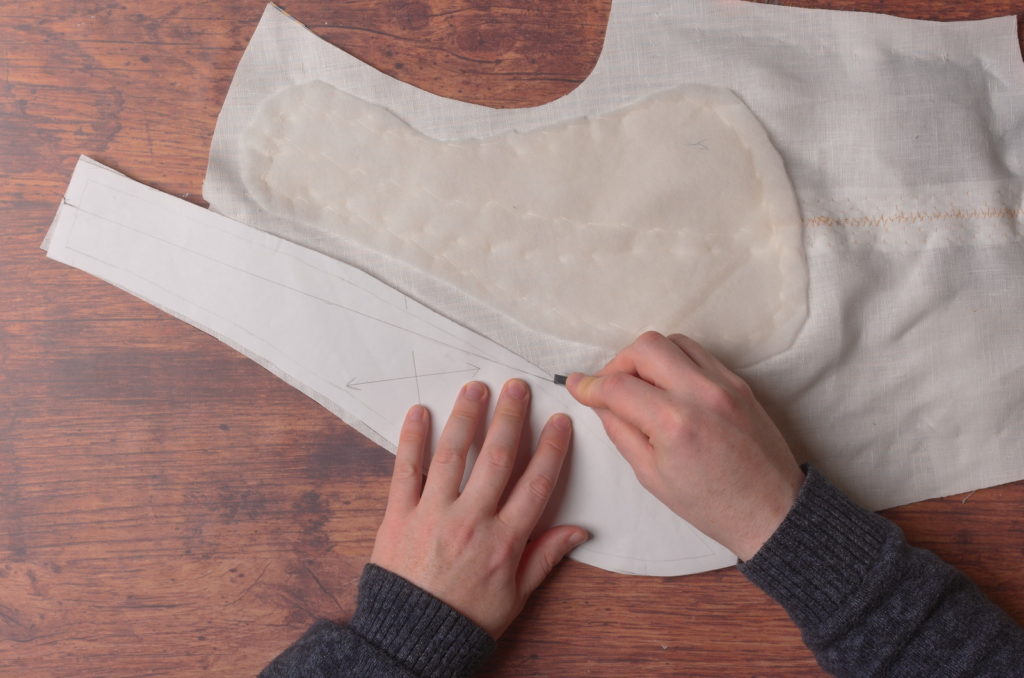
Then use a hip curve to draw in the desired shape of the facing on the inner edge. It should meet the shoulder about 1 1/2″ to 2″ from the collar (remember this includes the seam allowance).
The shoulder should meet the facing in as close to a right angle as possible to make the sewing a little easier and the lines more pleasing. Finish the curve as necessary using the hip curve or French curve.
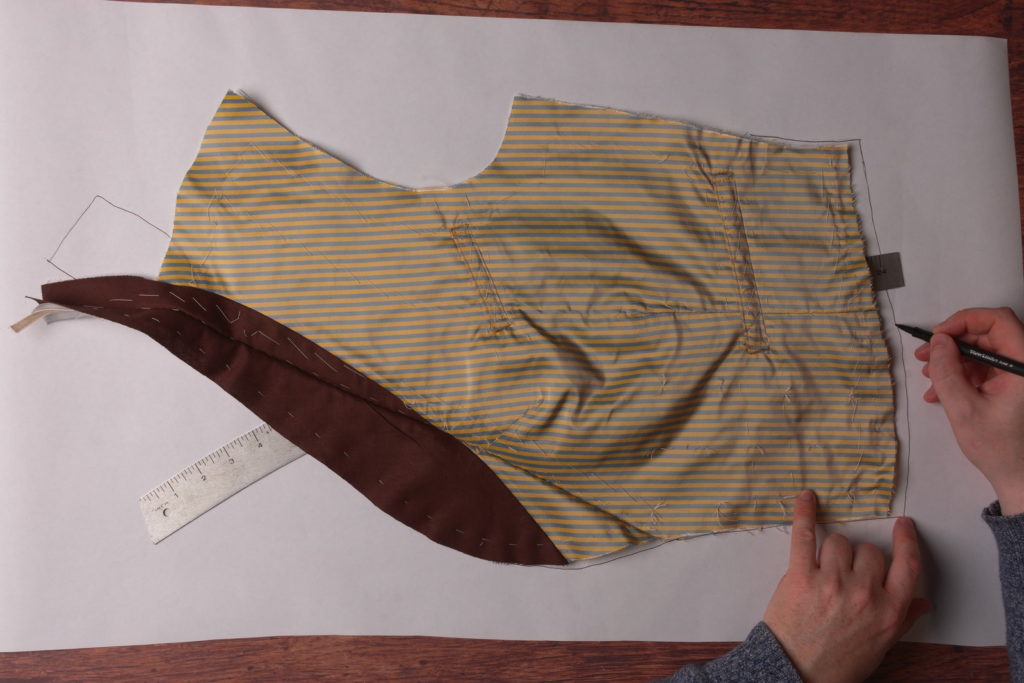
Now draw in the lower facing, about 3″ or so above the bottom of the waistcoat, following the shape of the outline. This does again include a seam allowance on the upper / inside edge, so choose your widths accordingly.
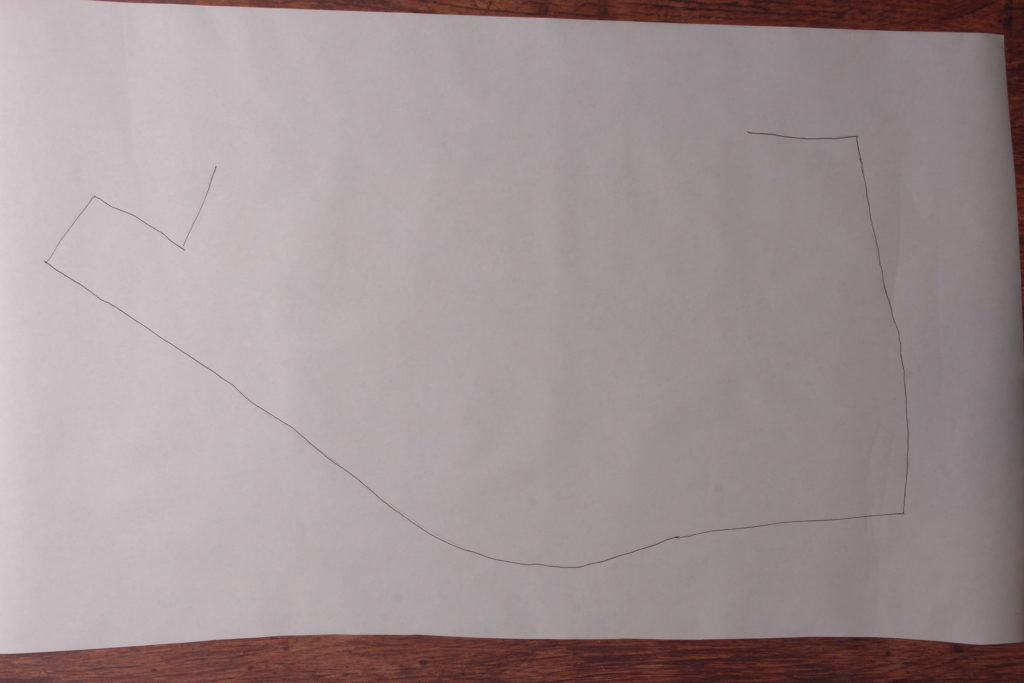
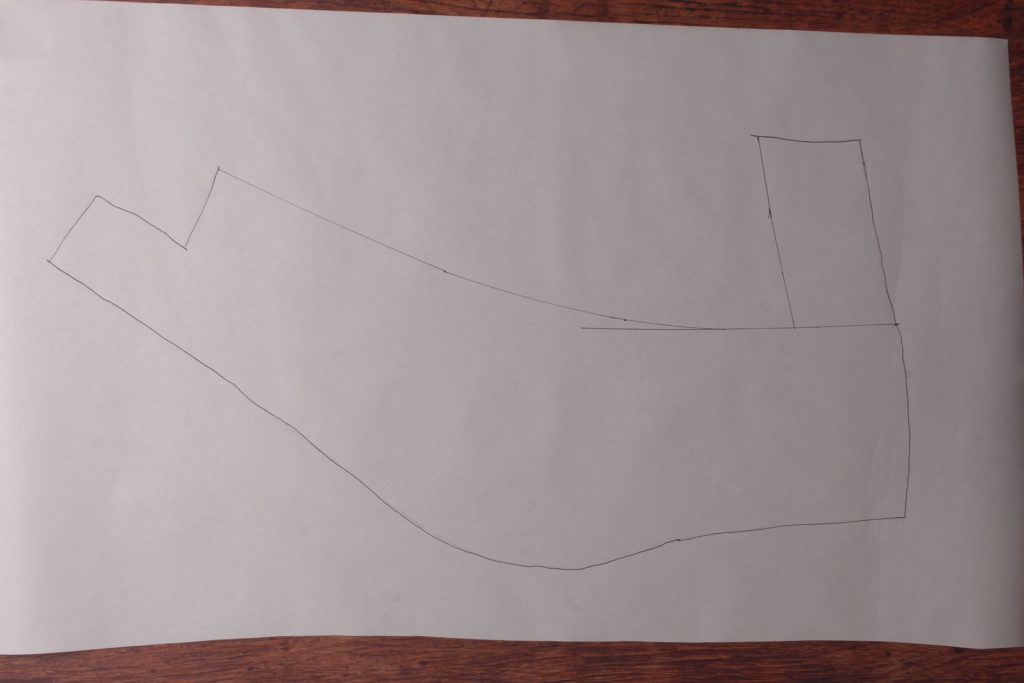
Here’s what I’ve got so far for my facing pattern. You could actually cut this out as one piece if you have enough fabric, but I’ll be constructing mine with the two separate pieces. We’ll add a seam allowance for that in a bit.
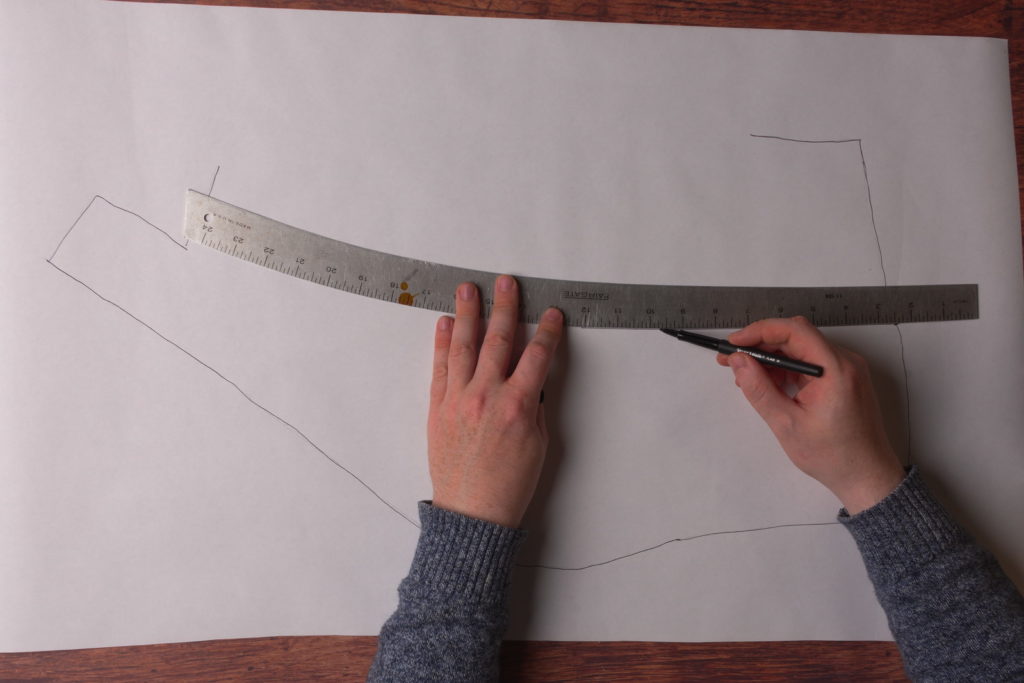
Now along the side, bottom, front, collar and shoulder seams, add an additional one inch (or more if you’re not feeling as confident) allowance to the pattern. This will allow us to manipulate the fabric around the shaped areas of the collar and darts.

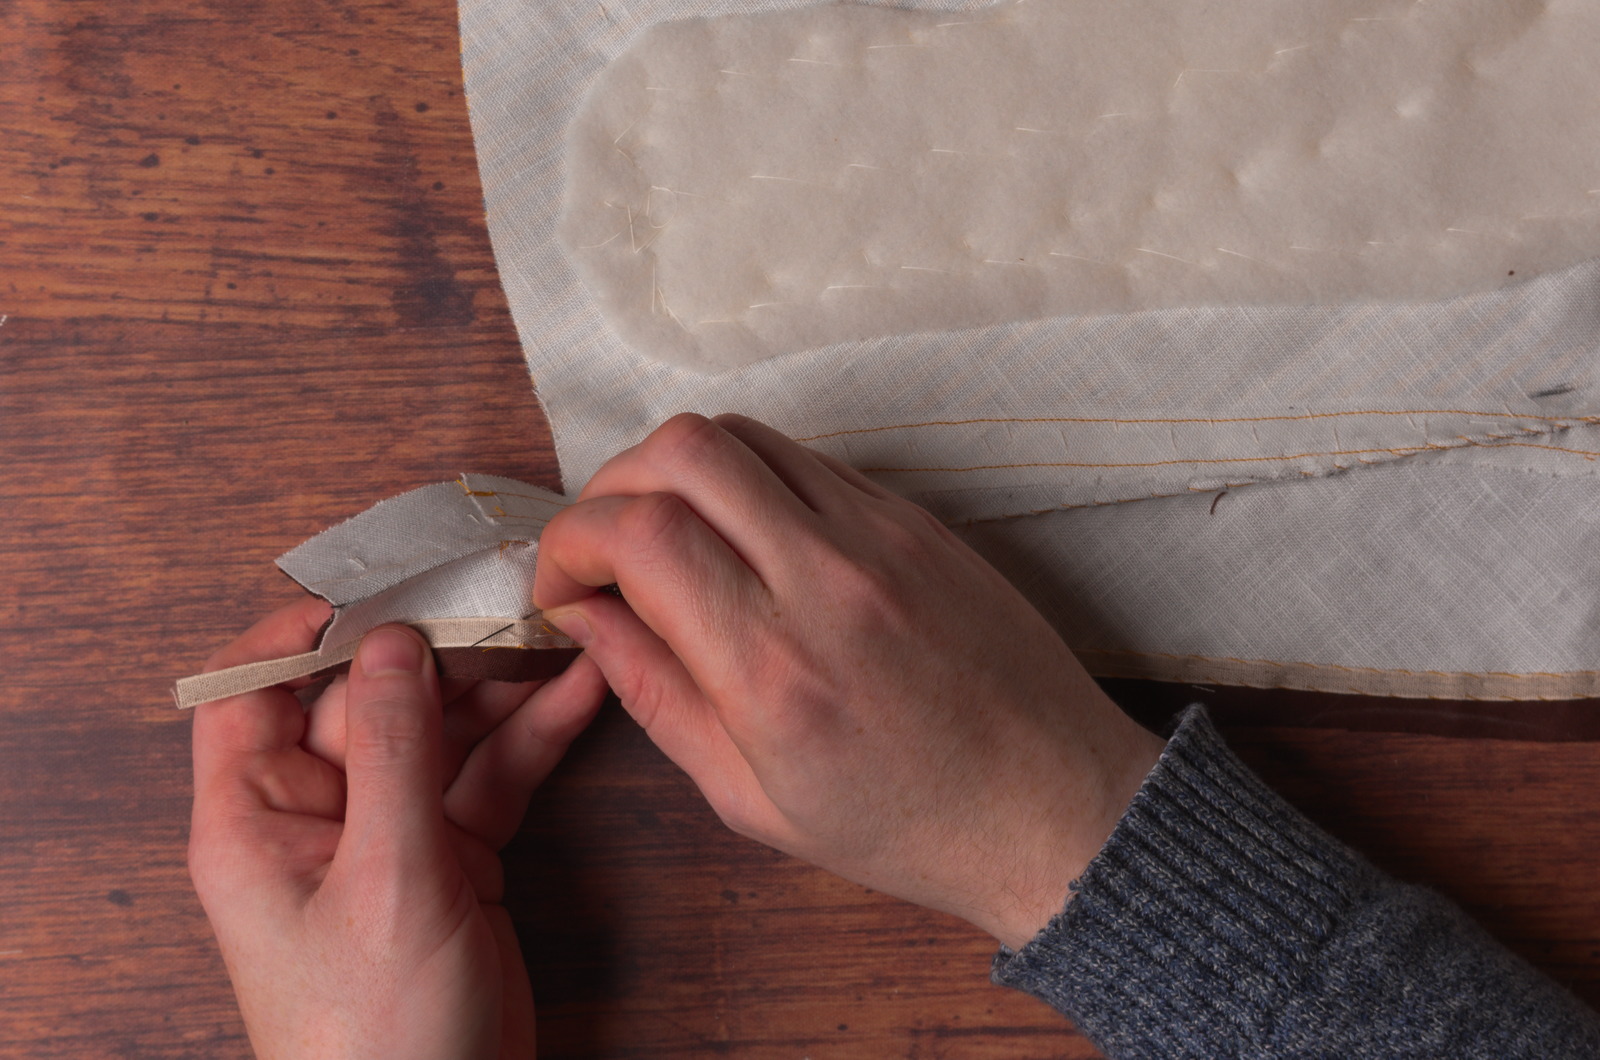
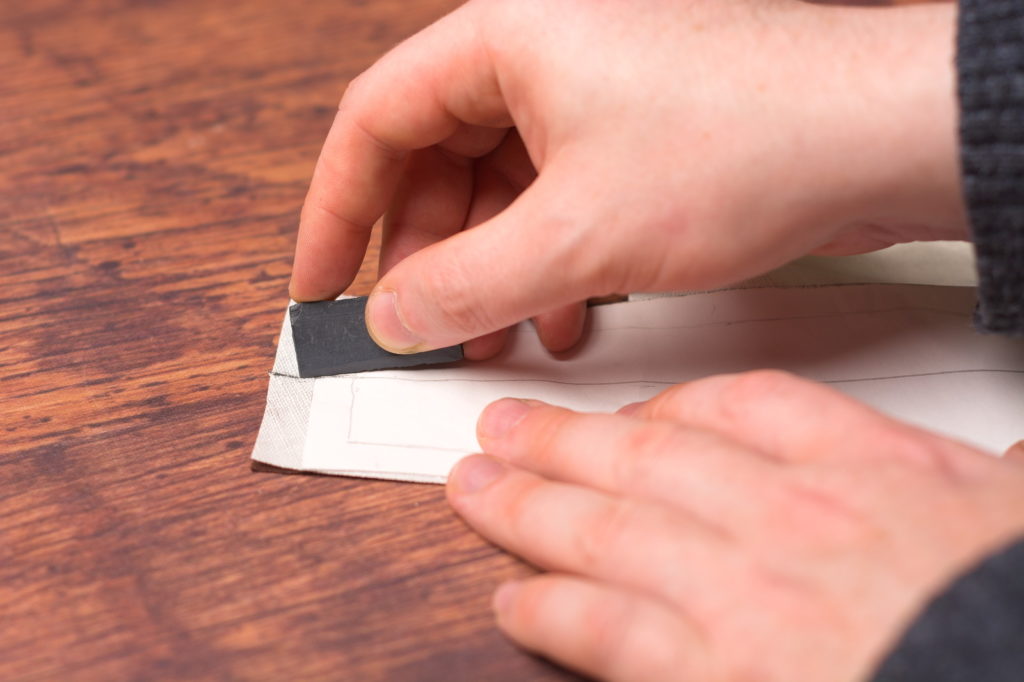
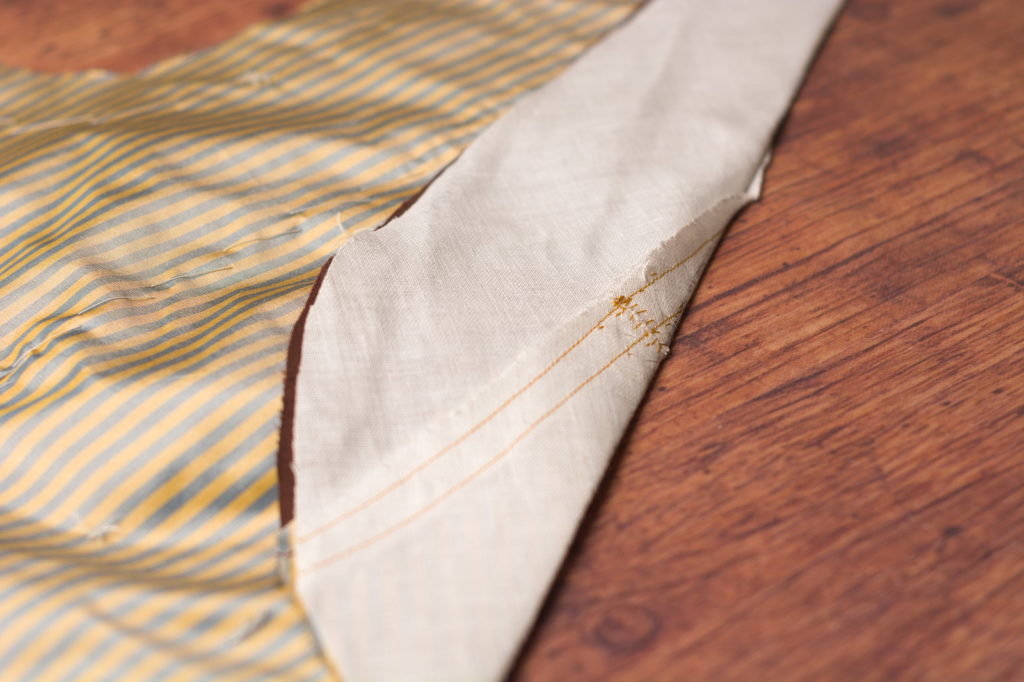
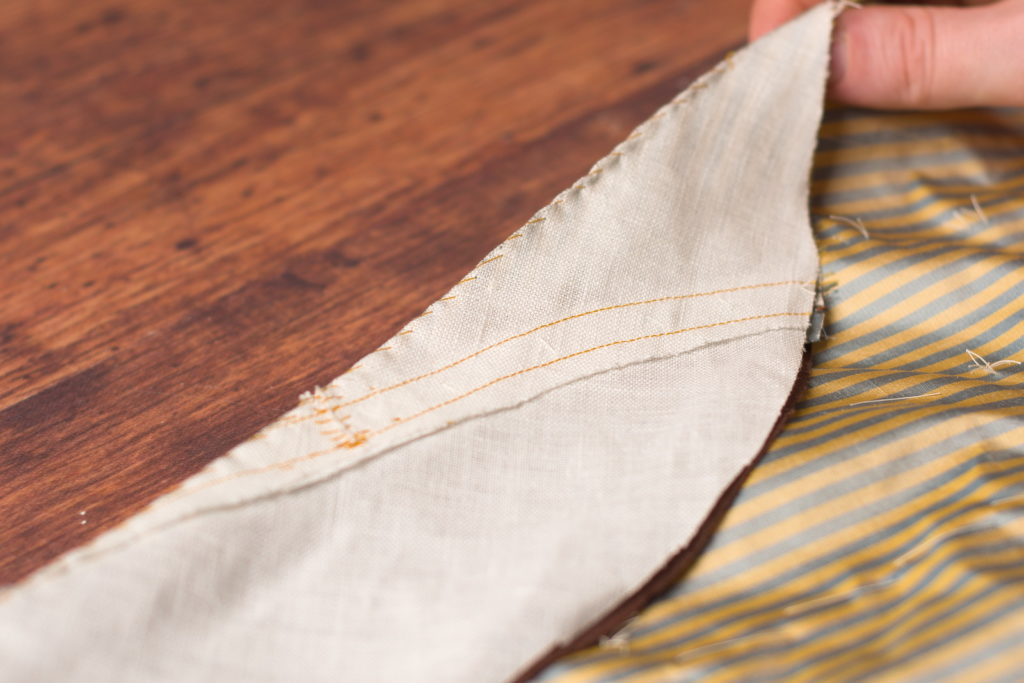
Now on a fresh piece of paper, trace out the lower facing along the outer edge (with the 1″ we just added). I drew in the original seam line with a dashed line for clarity, though no need to do that really.
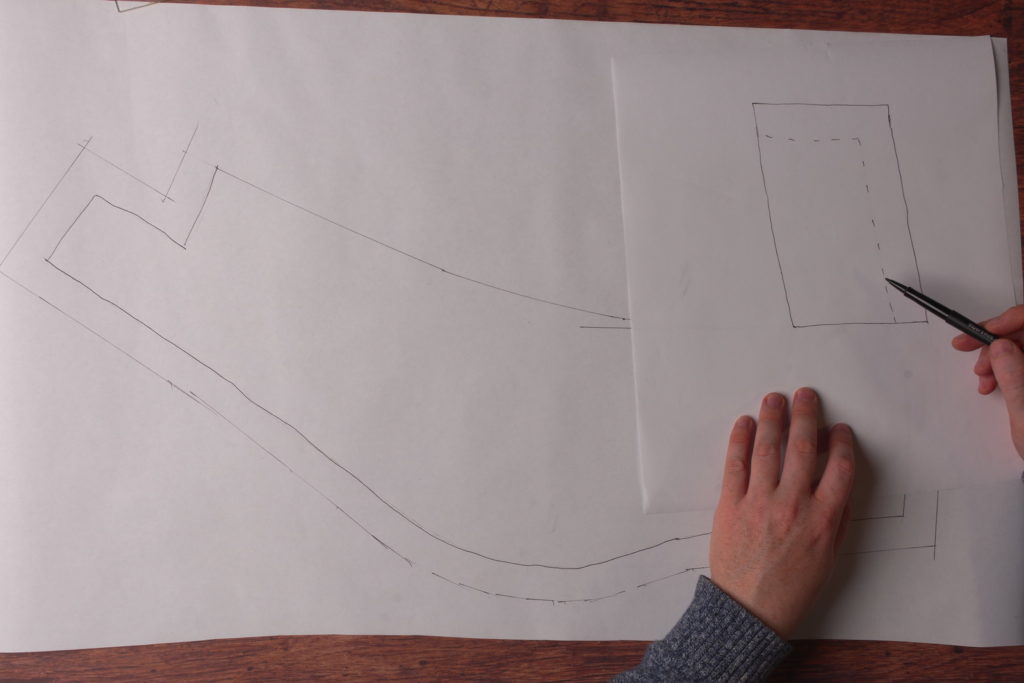
I also marked the top and front edges, since it’s easy to get this piece mixed up. Then, I added a 3/4″ seam allowance along the front edge, double the usual seam allowance. It occurred to me just now that I probably could have used a 3/8″ seam here, since we included the seam allowance on the main facing piece, but the extra allowance won’t hurt anything.
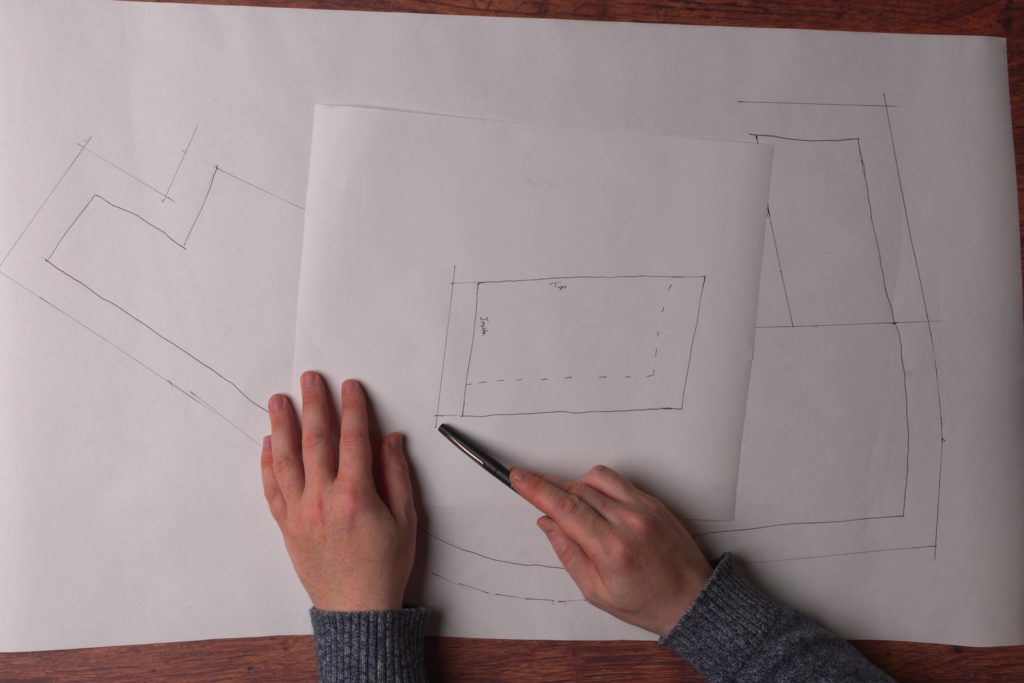
Cut out both facing pieces.
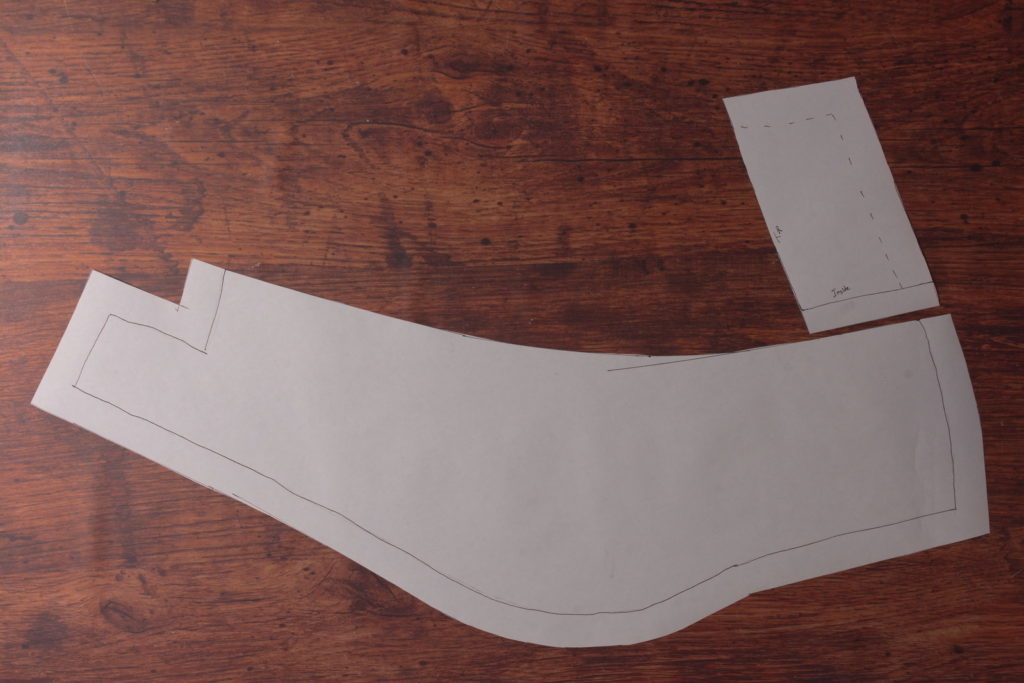
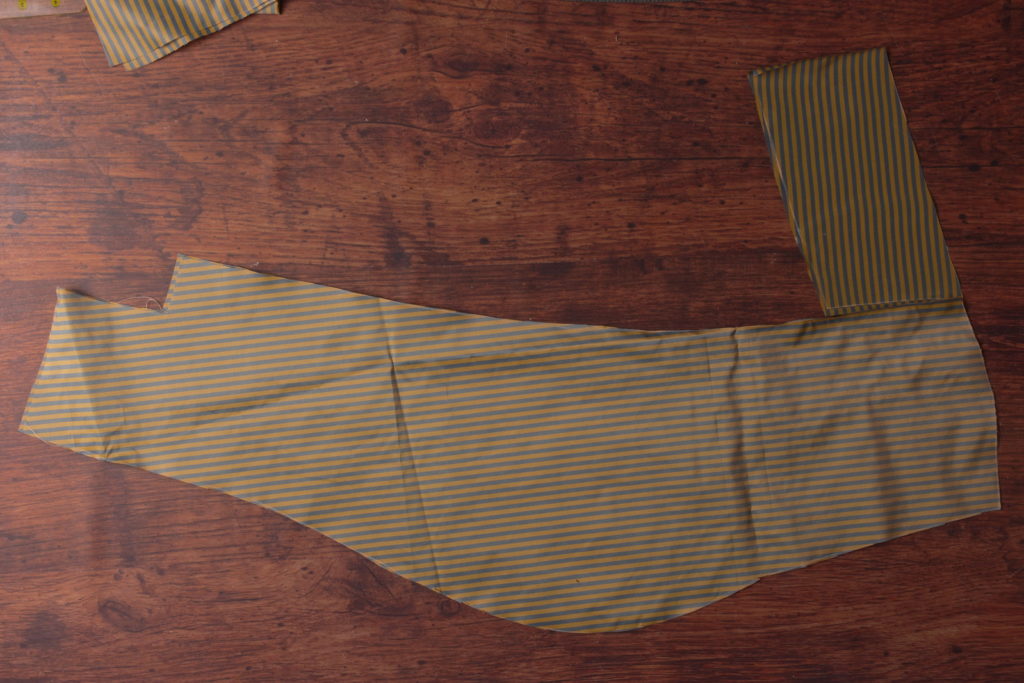
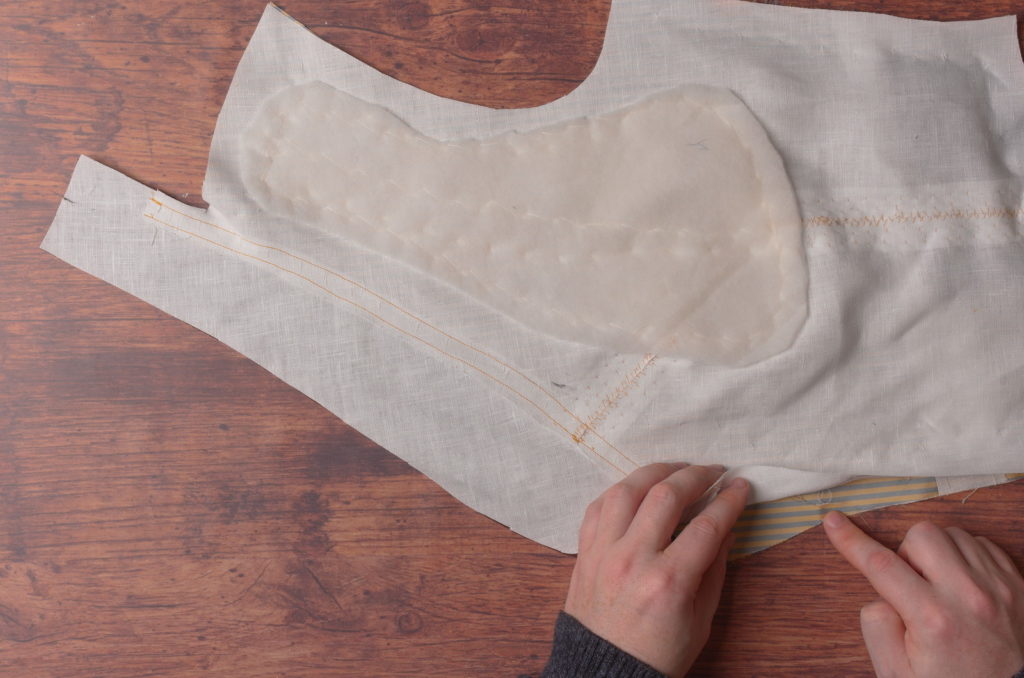
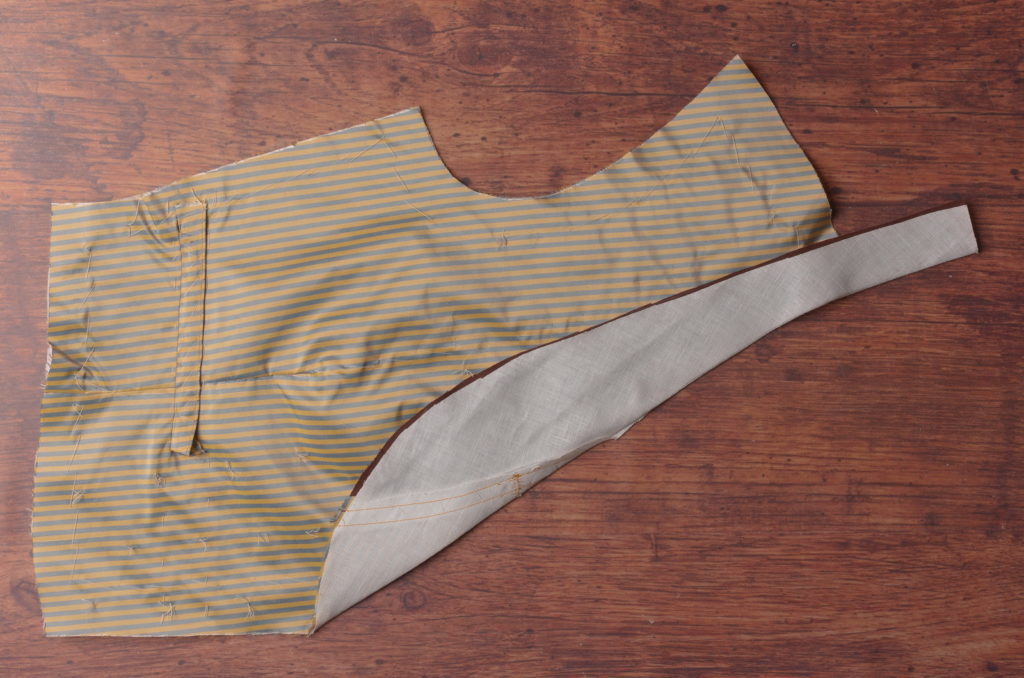
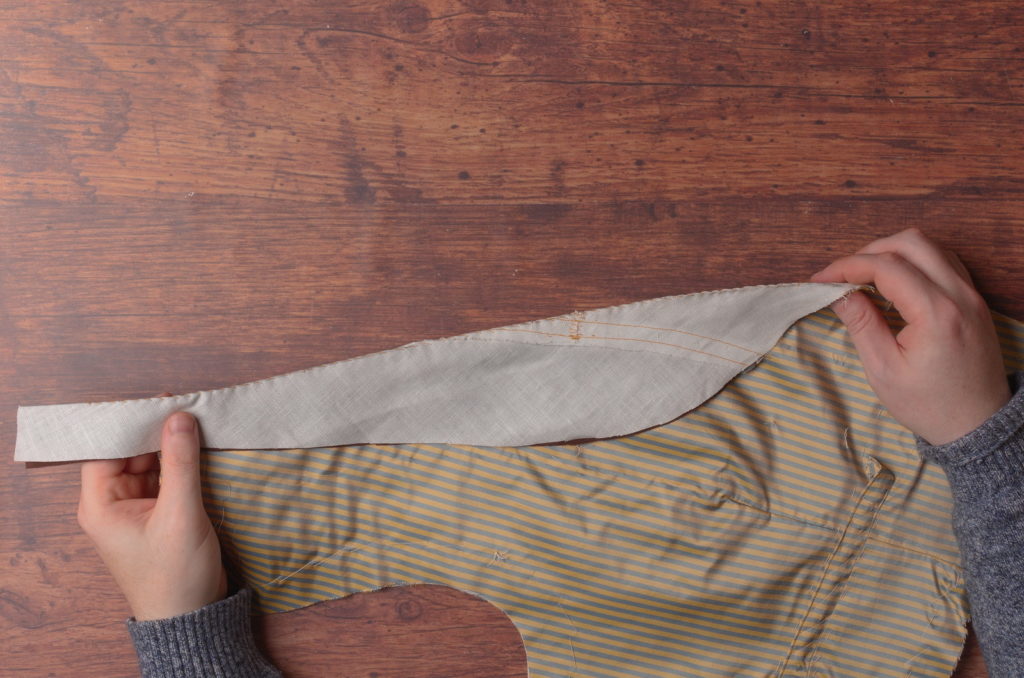
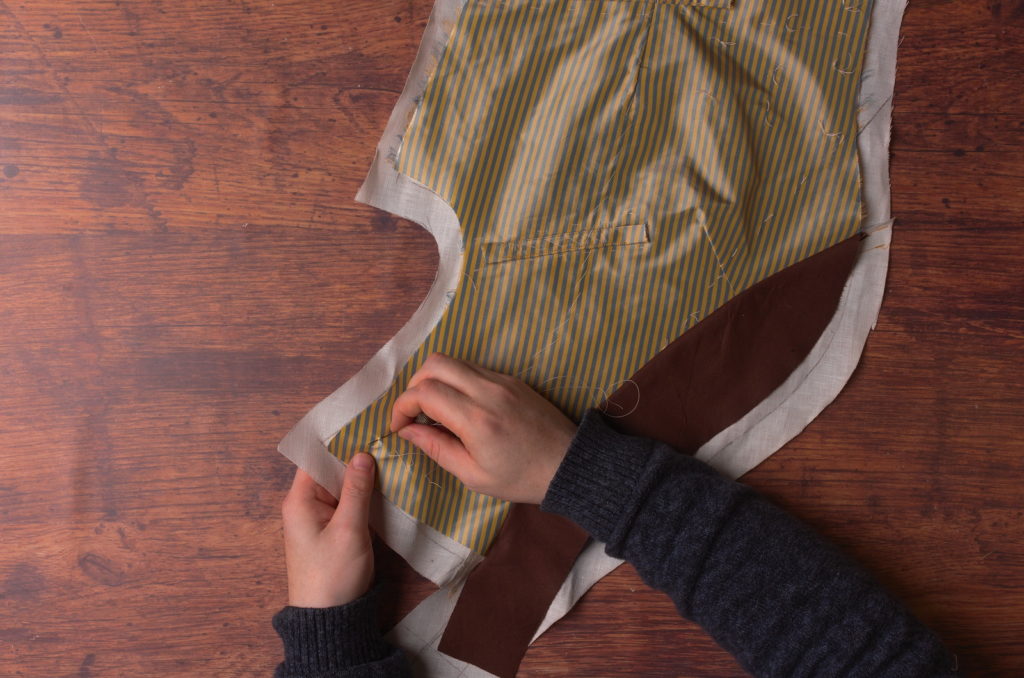
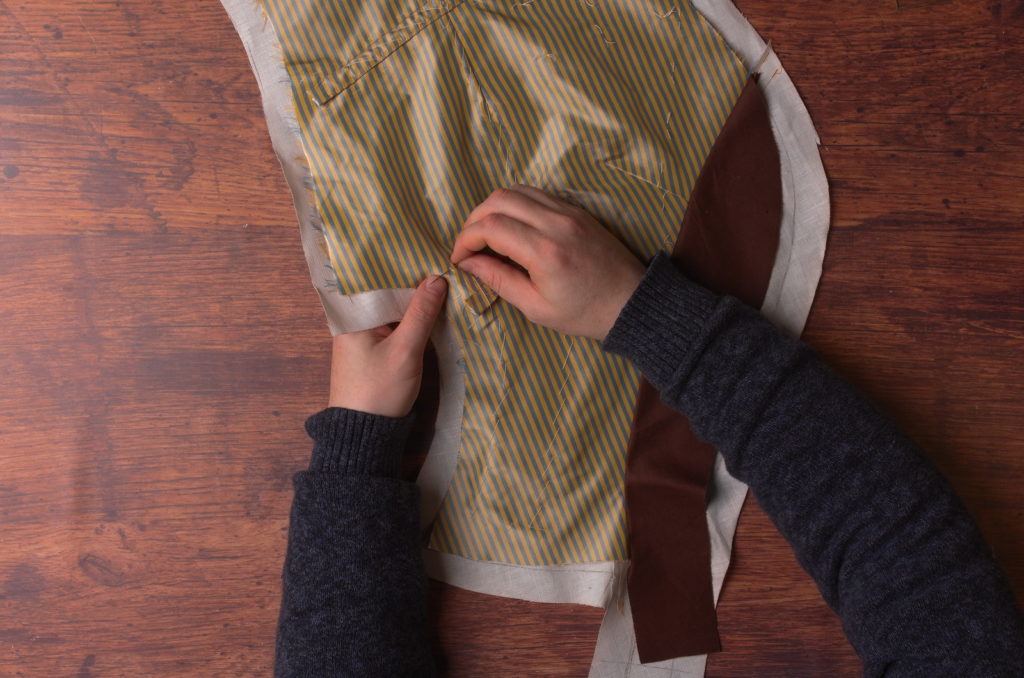
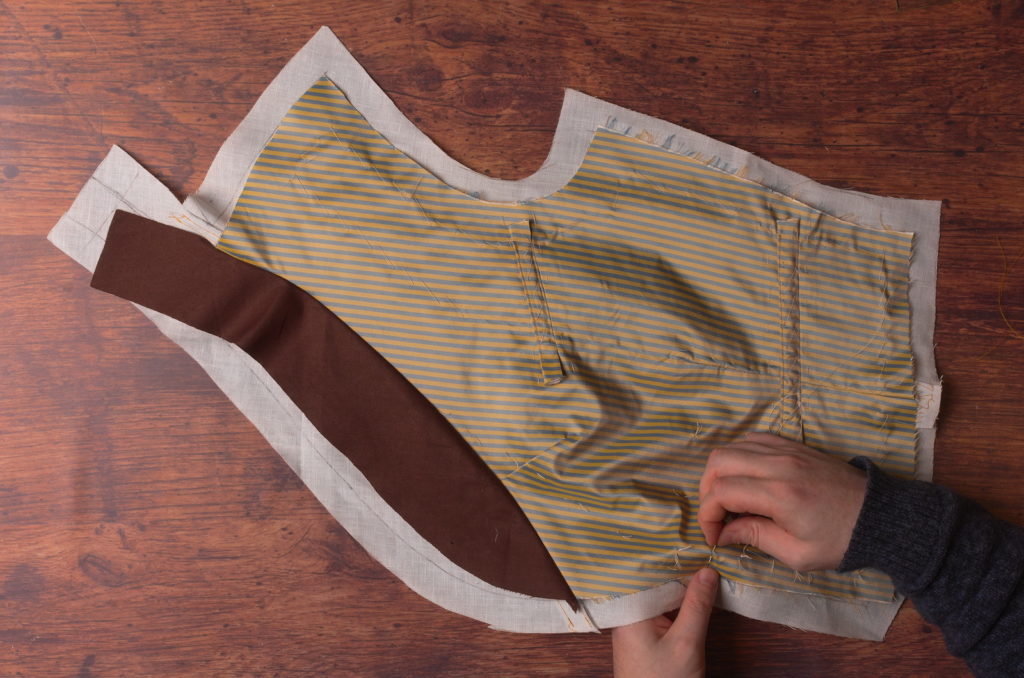
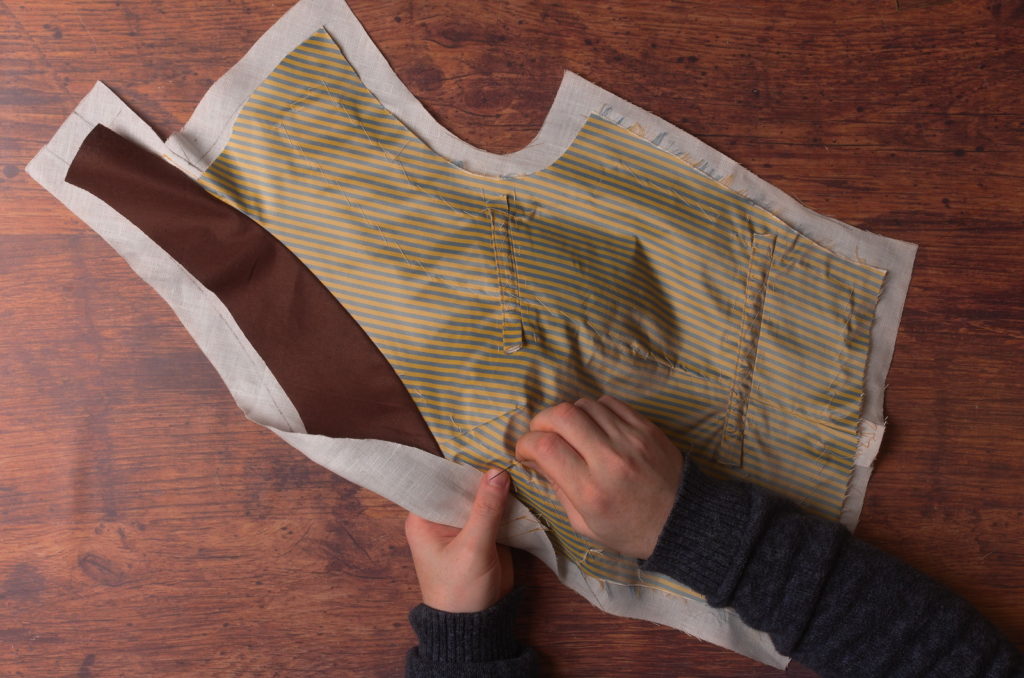
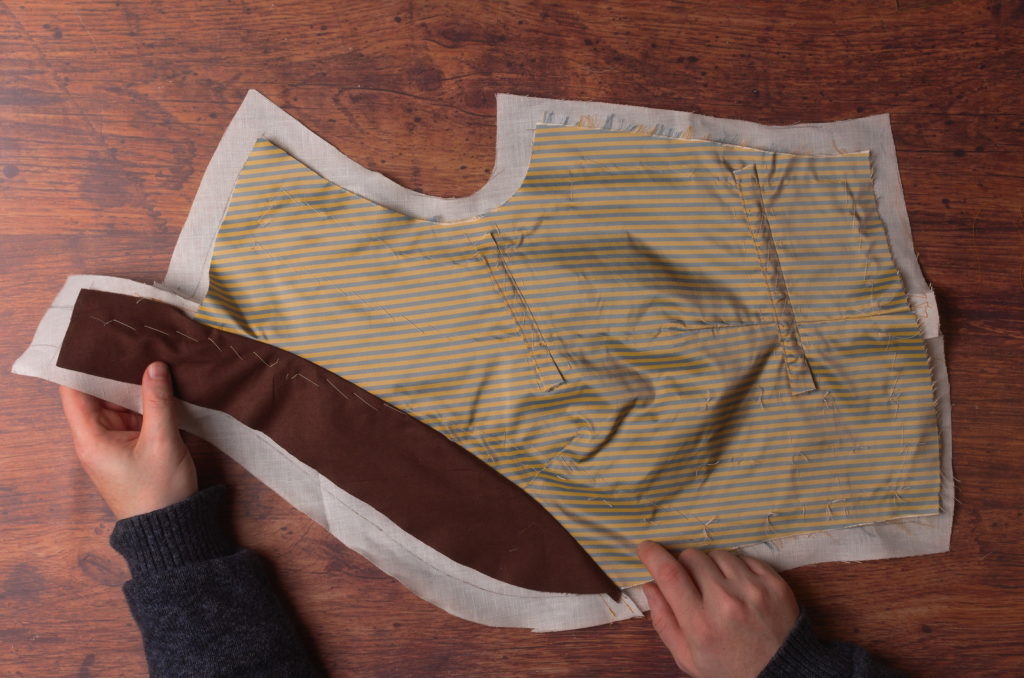
Now trace the facings on to your fabric. I kept the original grain lines for the alignment, but you could also feel free to experiment with this to get different stripe alignment on the collar area.
The lower facing could be cut on the grain as well, but I rotated it in order to save fabric, a common practice during the period.
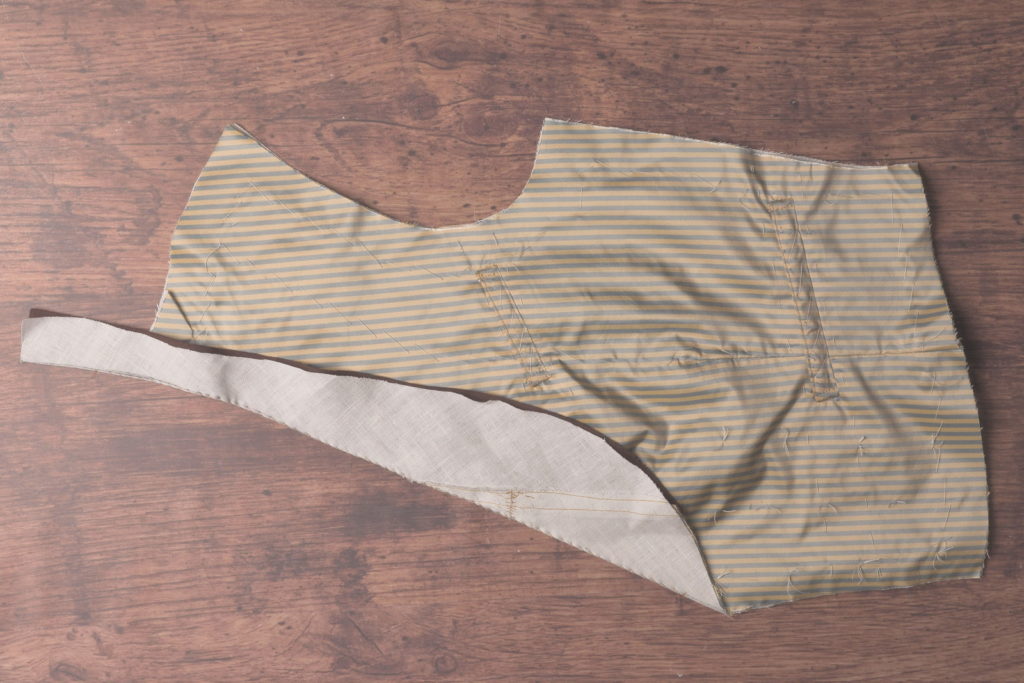
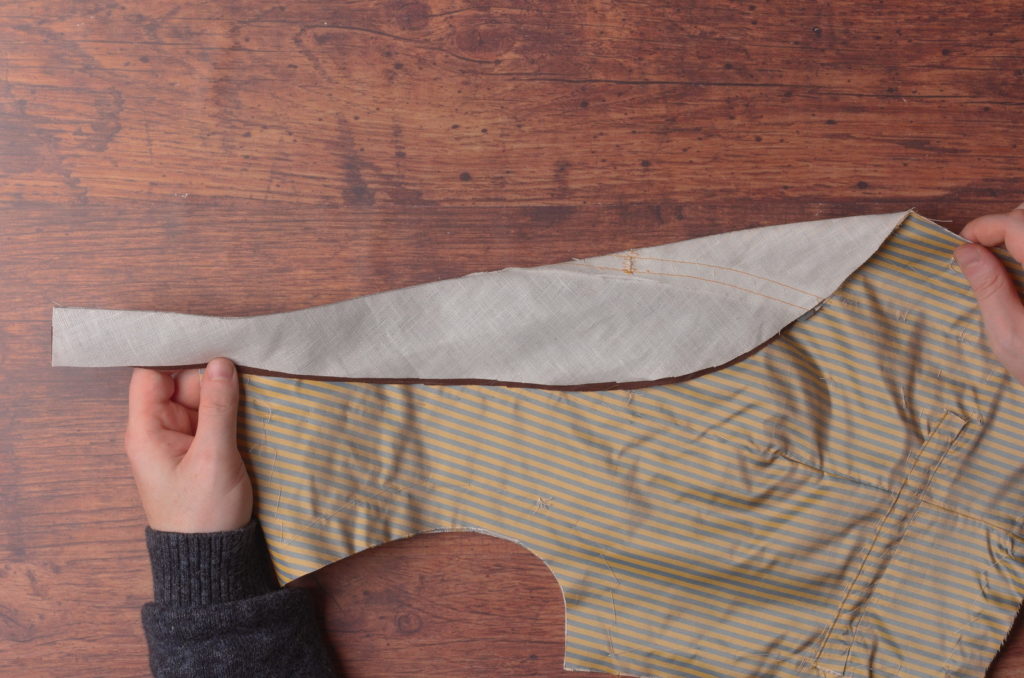
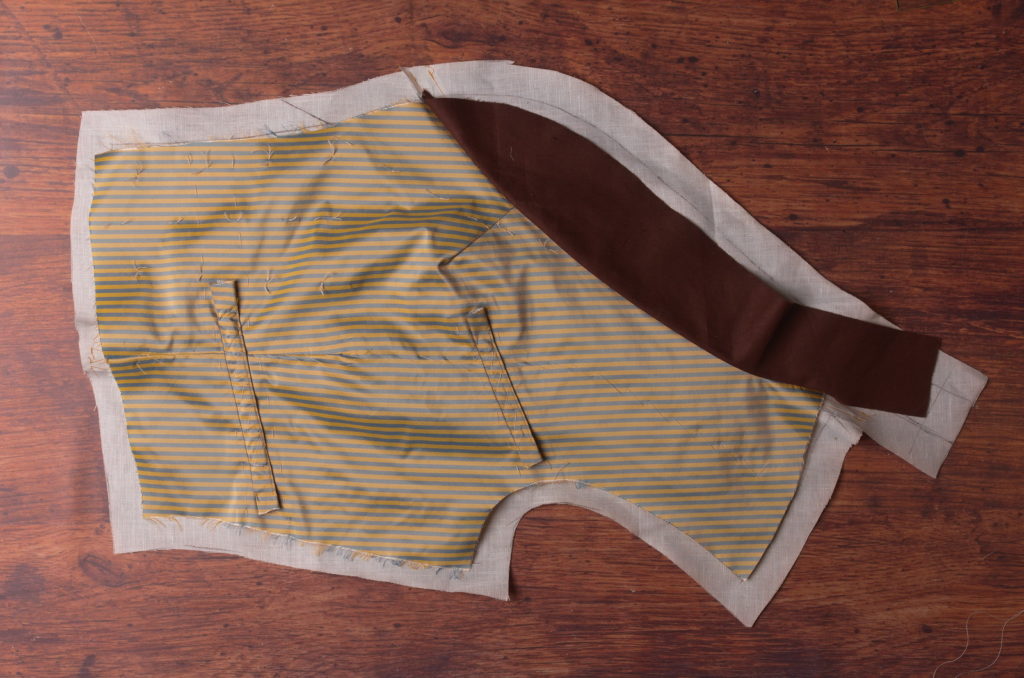
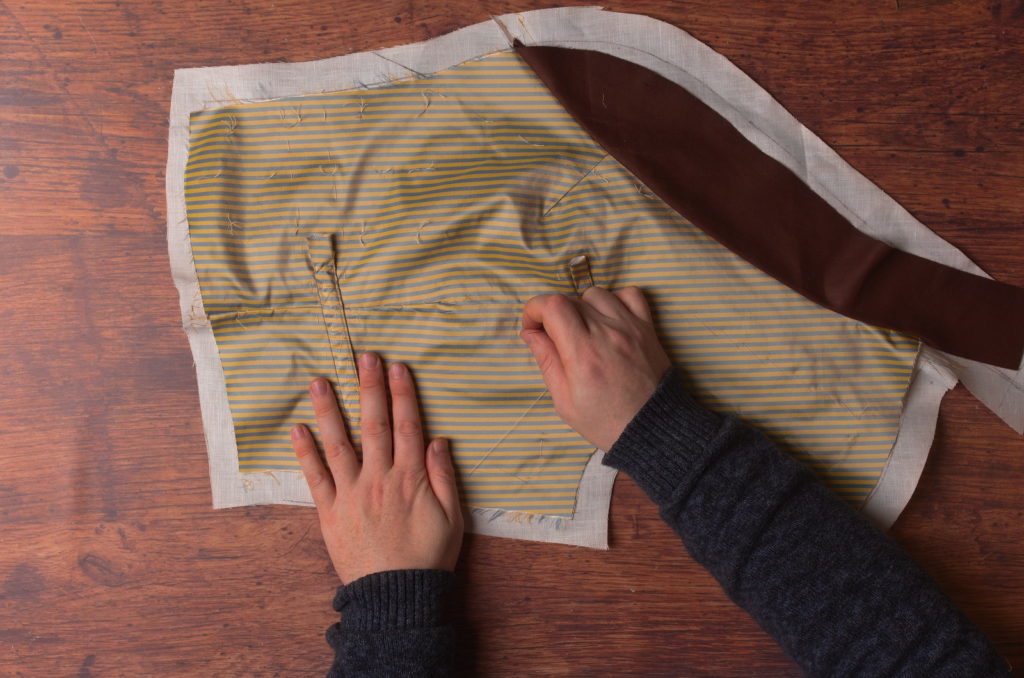
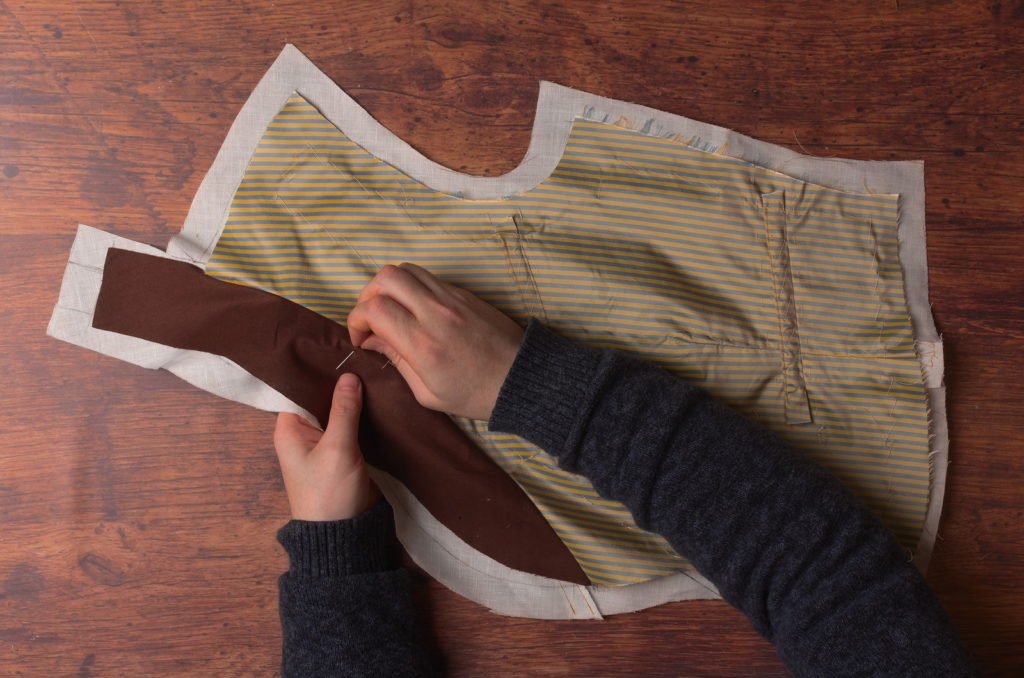
And then cut out the facings as usual. Here’s what mine looks like so far.

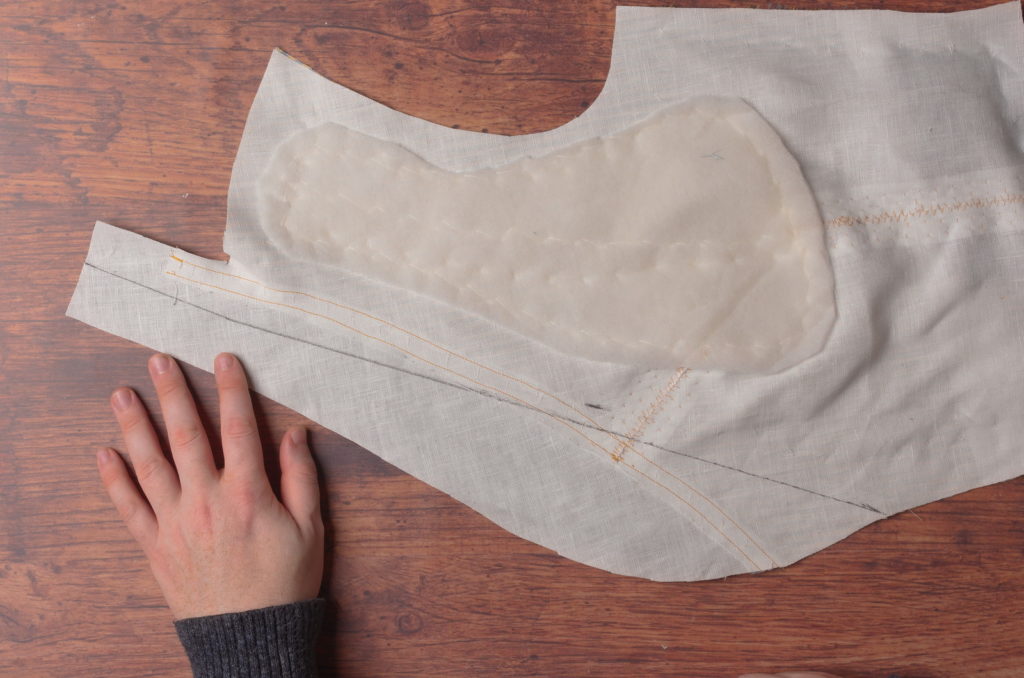
Stay Taping the Forepart
Before installing the facings, I like to reinforce the edges with linen stay tape. This gives a firmer and crisper edge to the waistcoat and prevents the seams from rolling out of position over time.
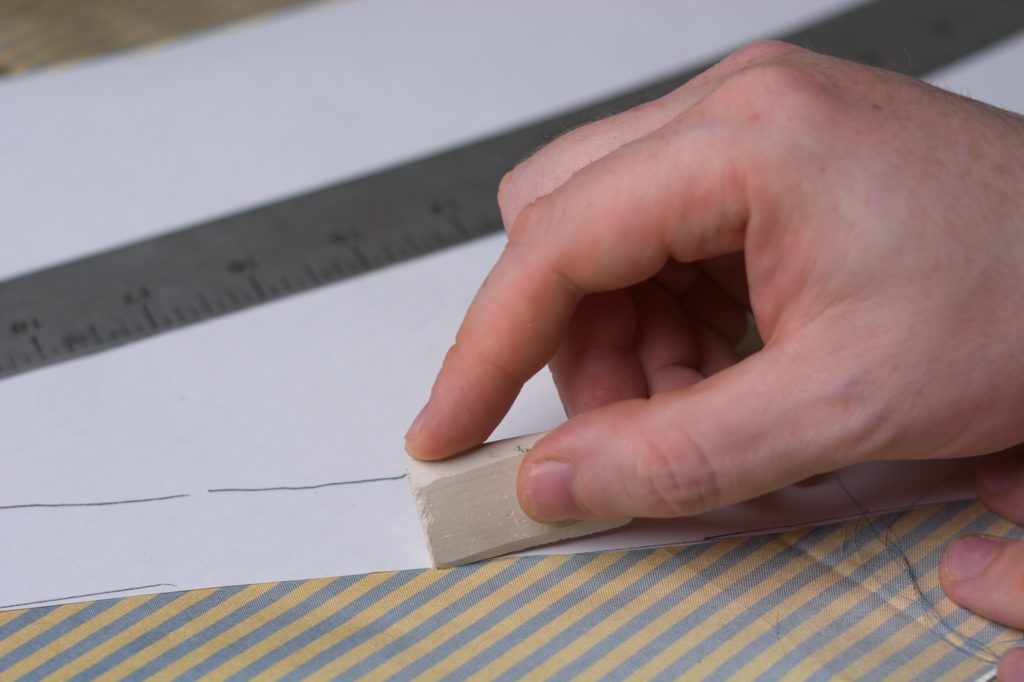
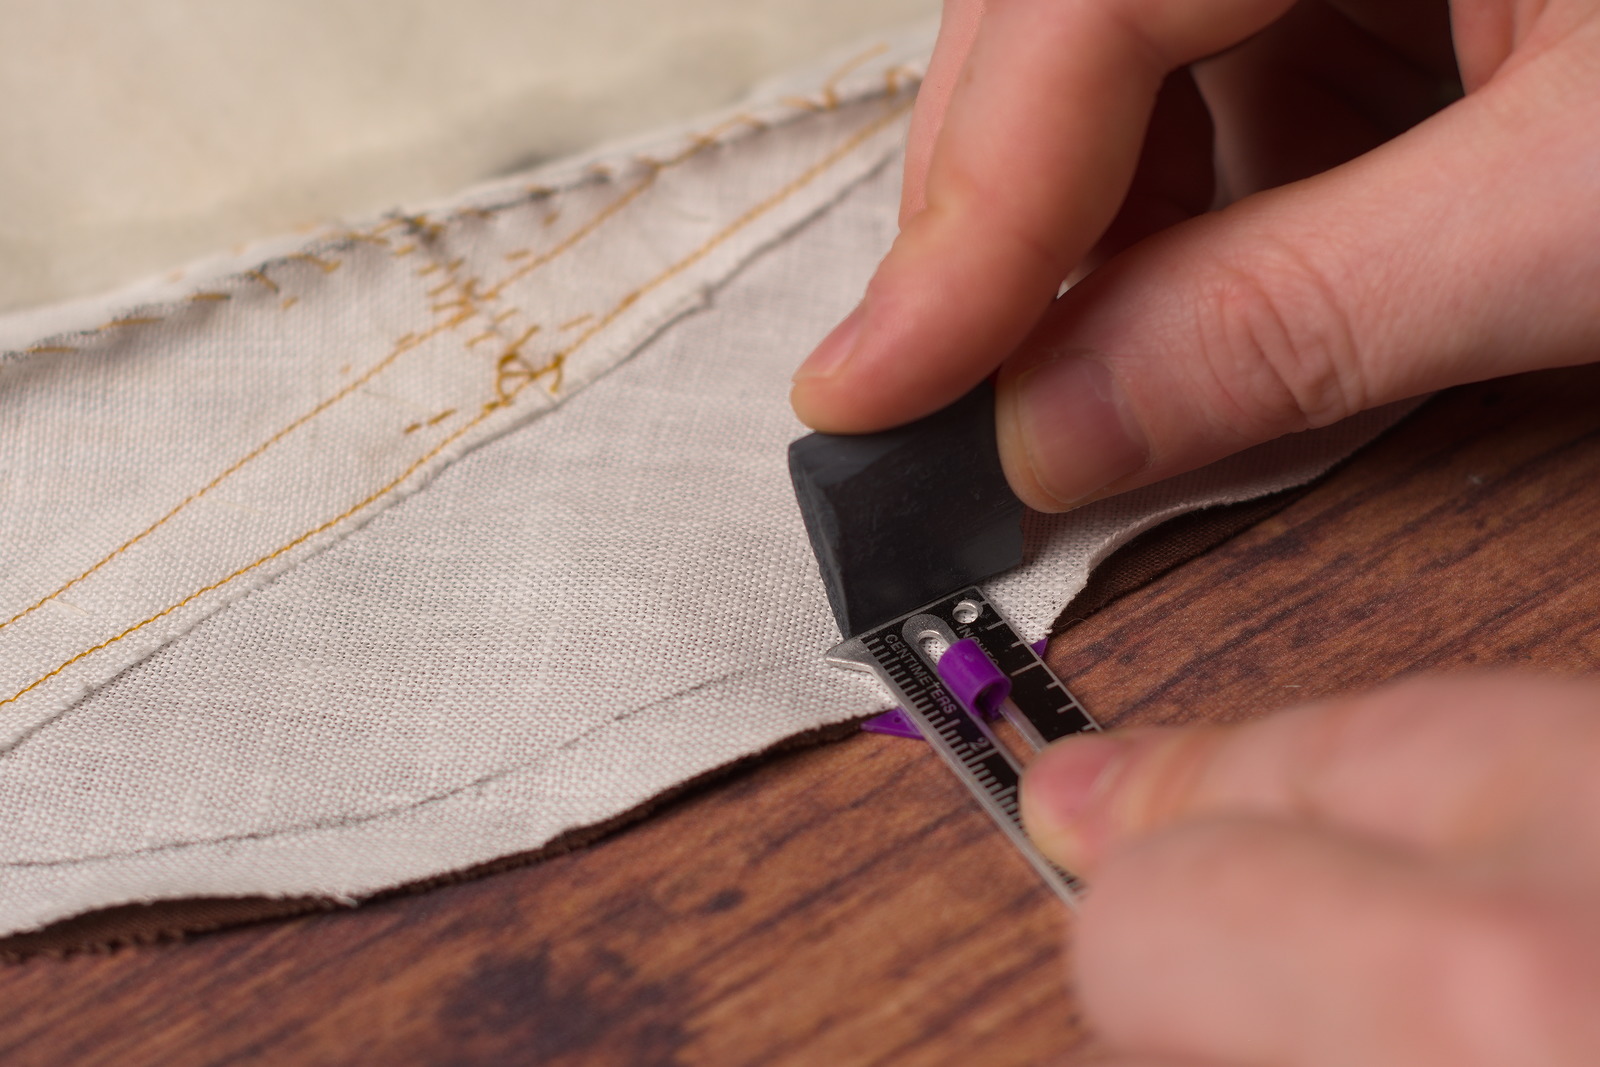
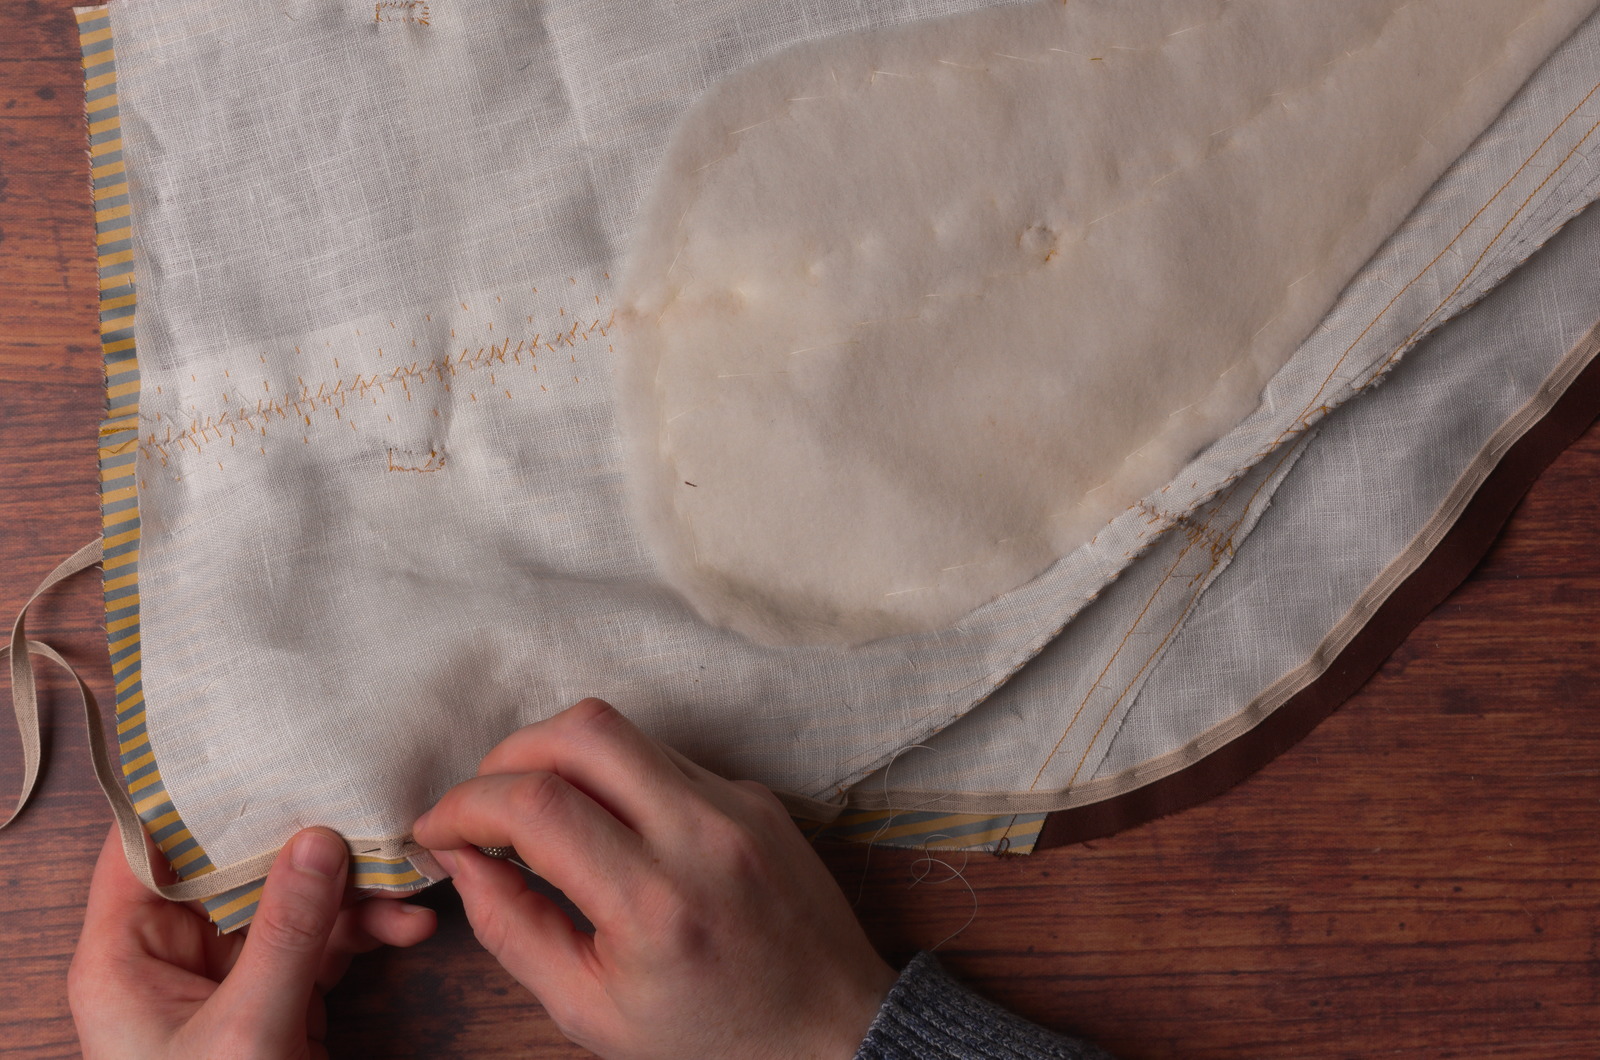
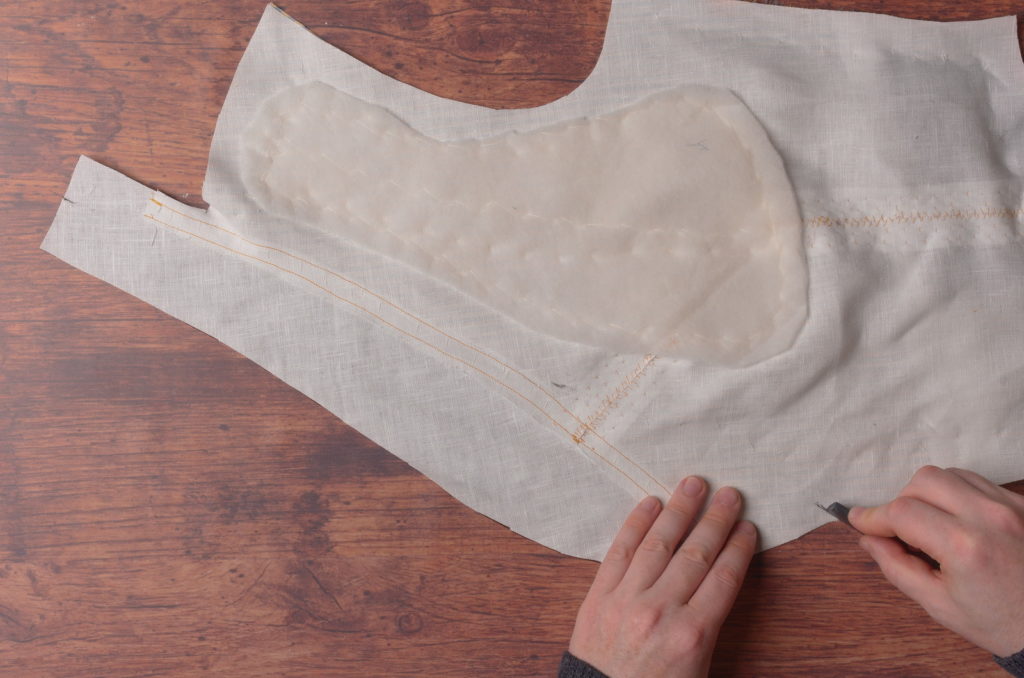
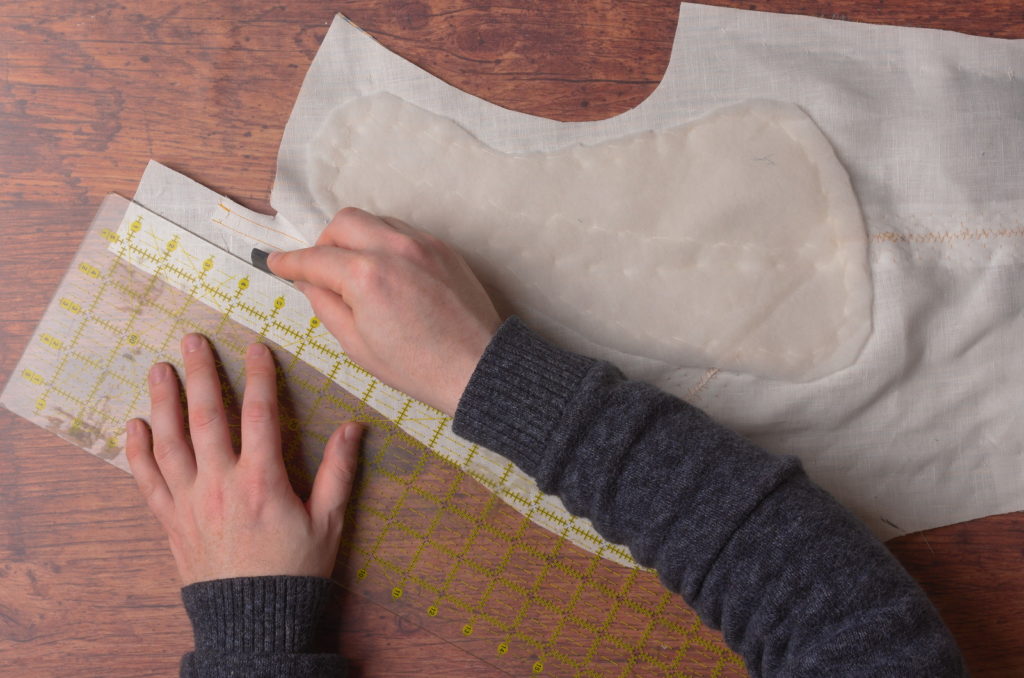
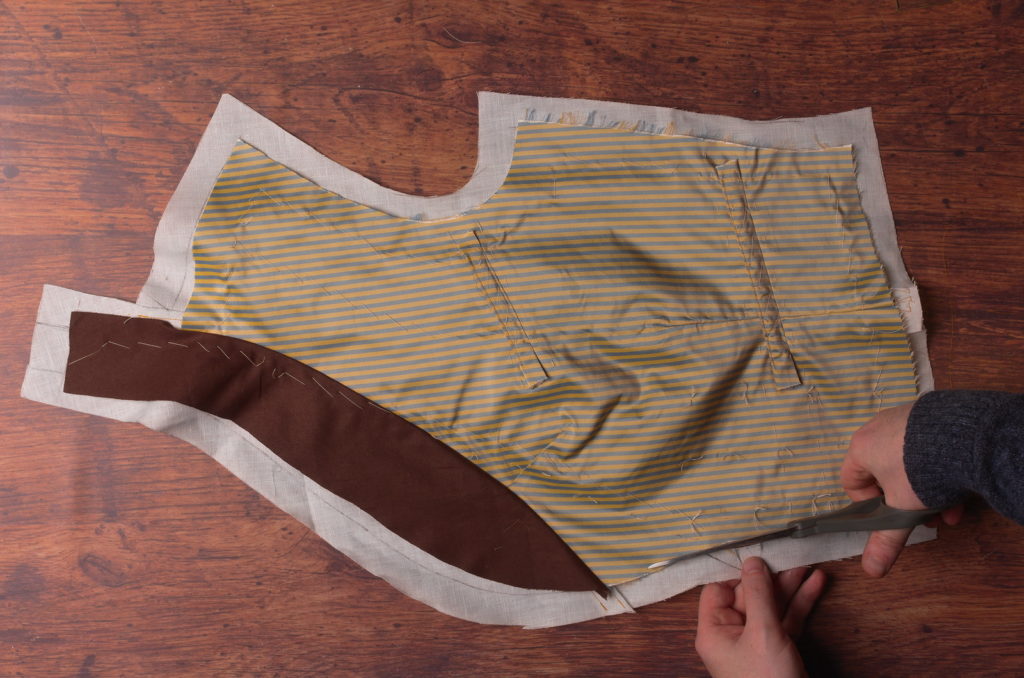
Begin by marking out the seam allowances (3/8″) along the bottom edge using a ruler and chalk or pencil.
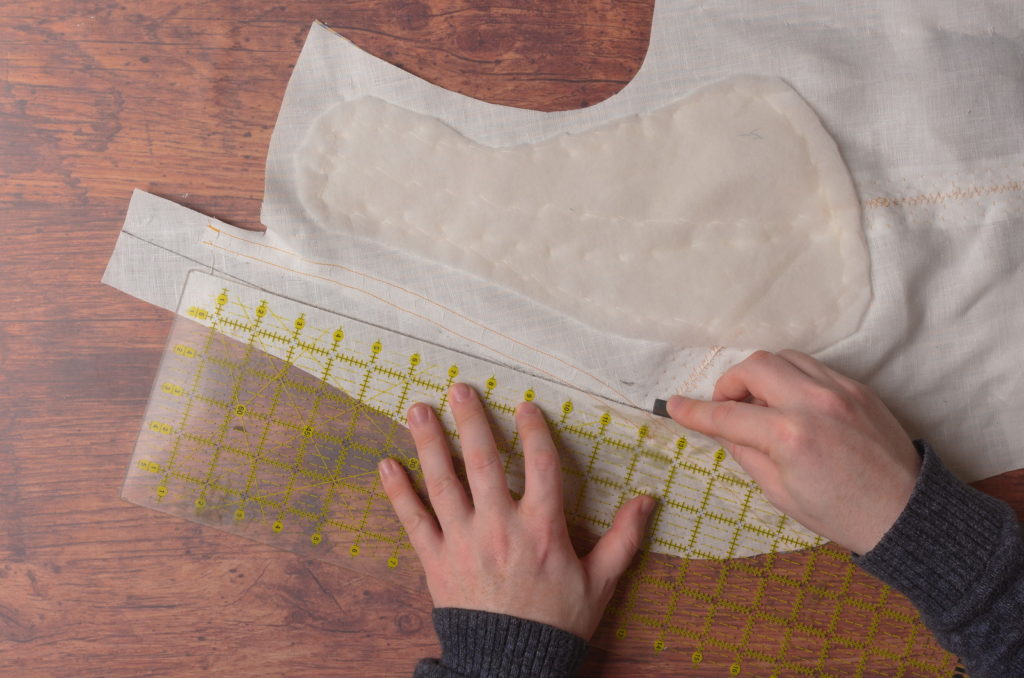
Continue marking along the front edge and around the collar.
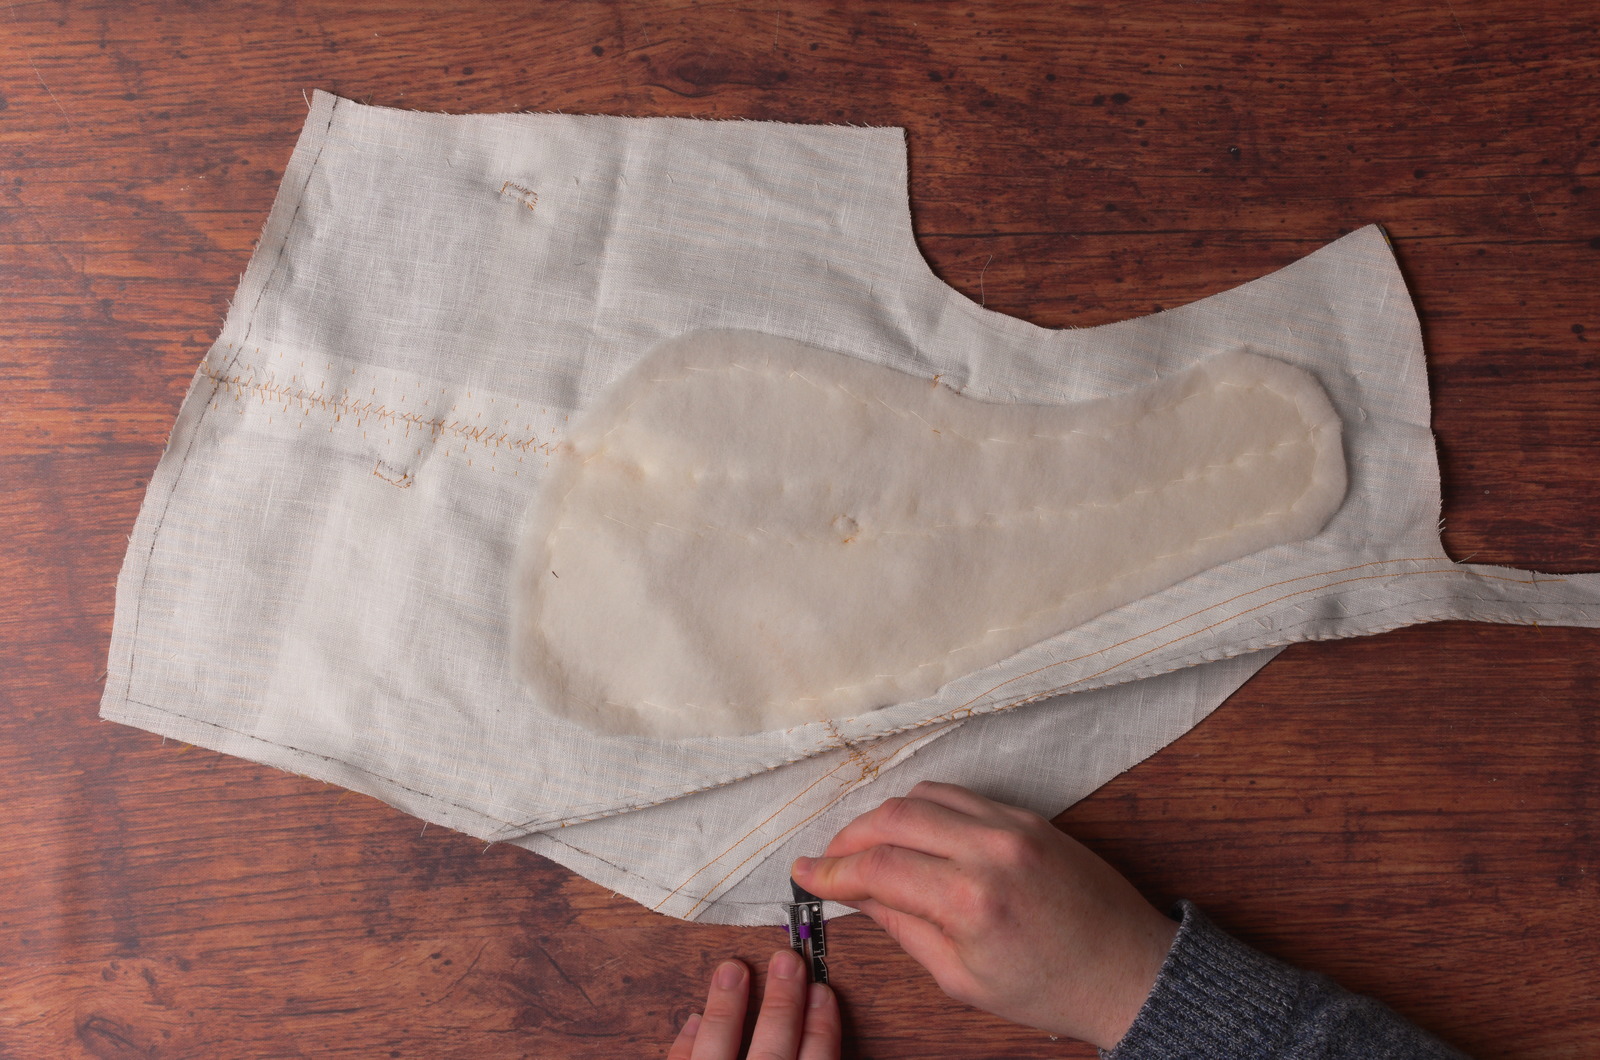
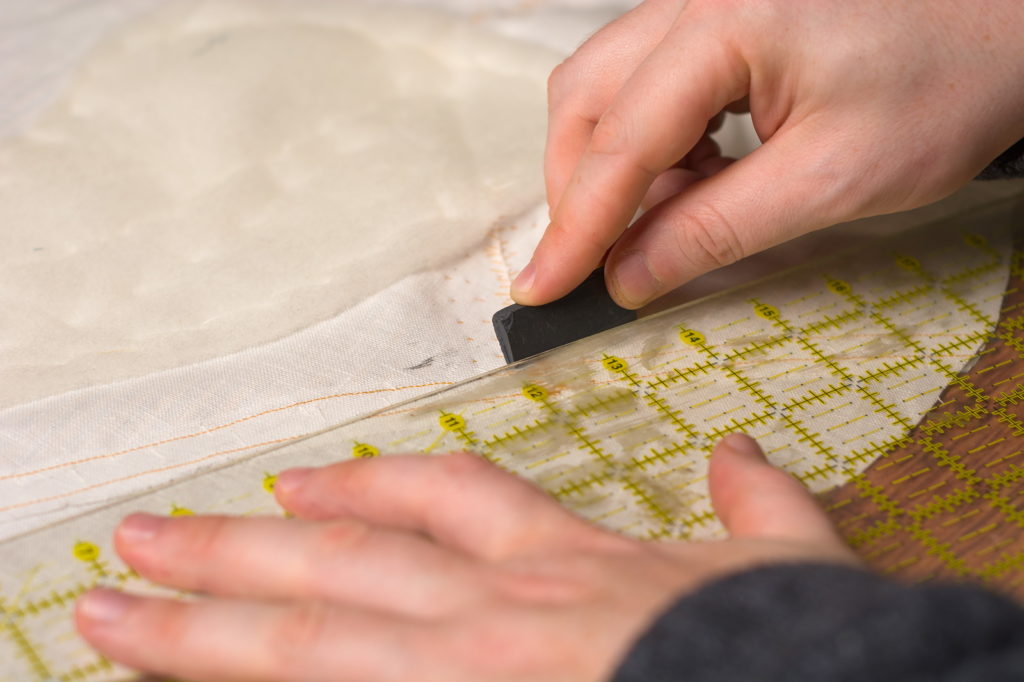
Trace all the way to the center back of the collar.
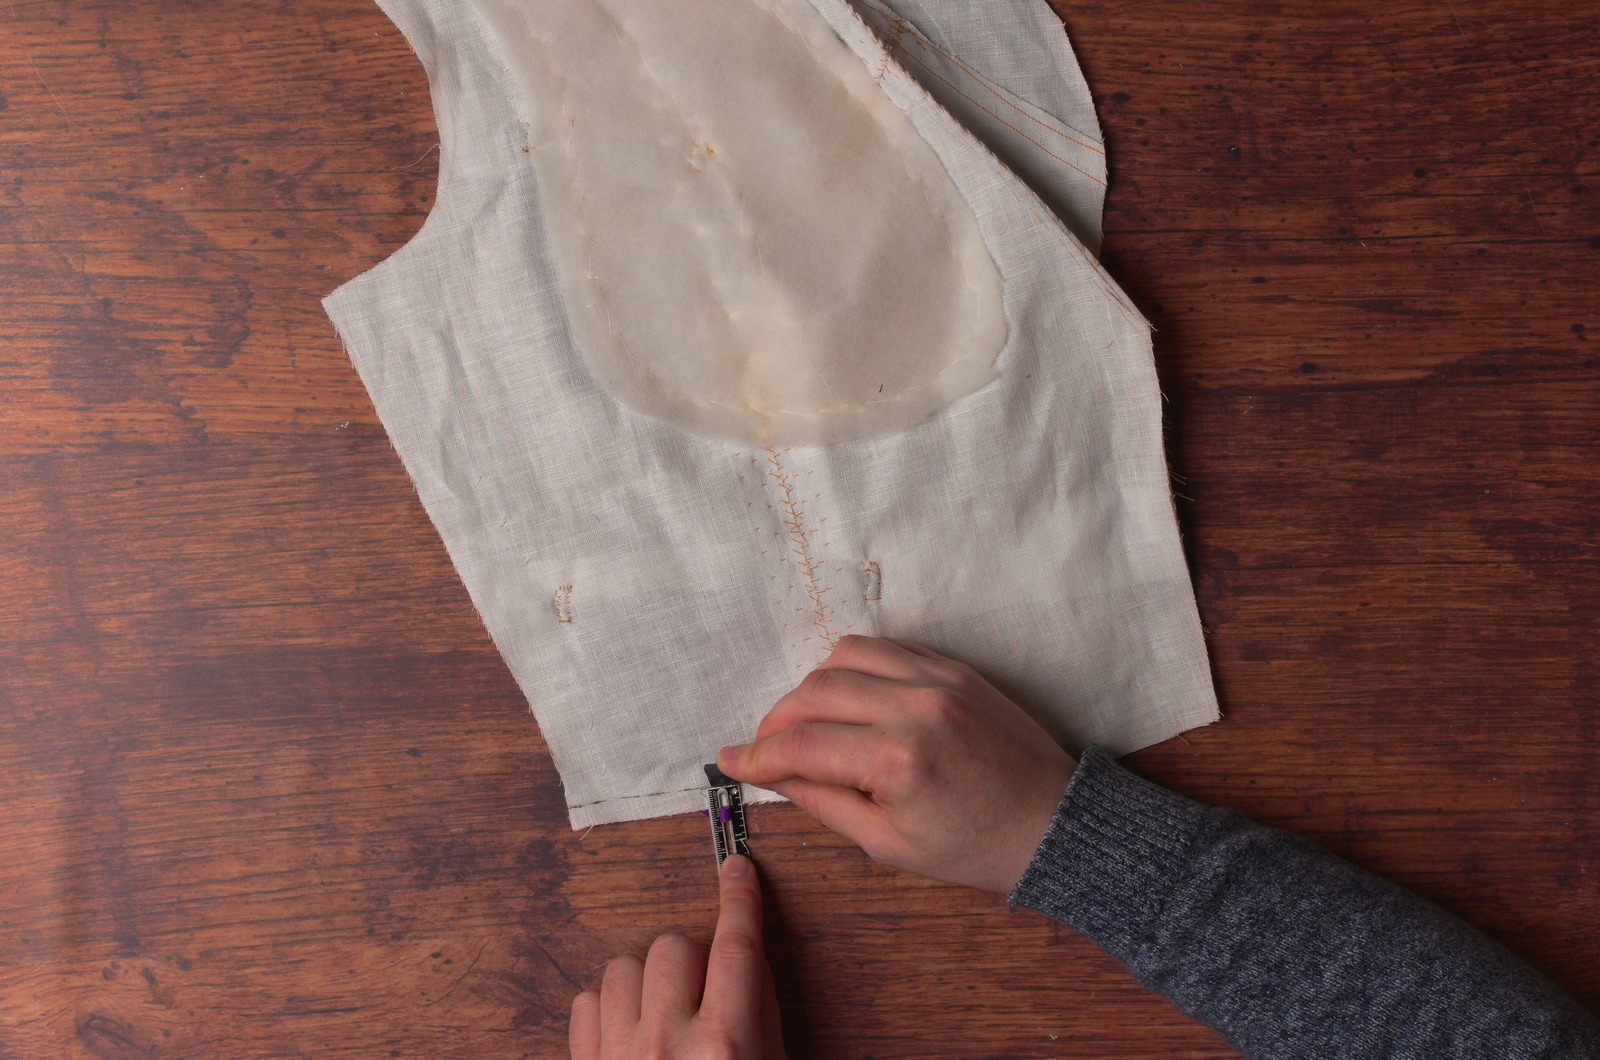
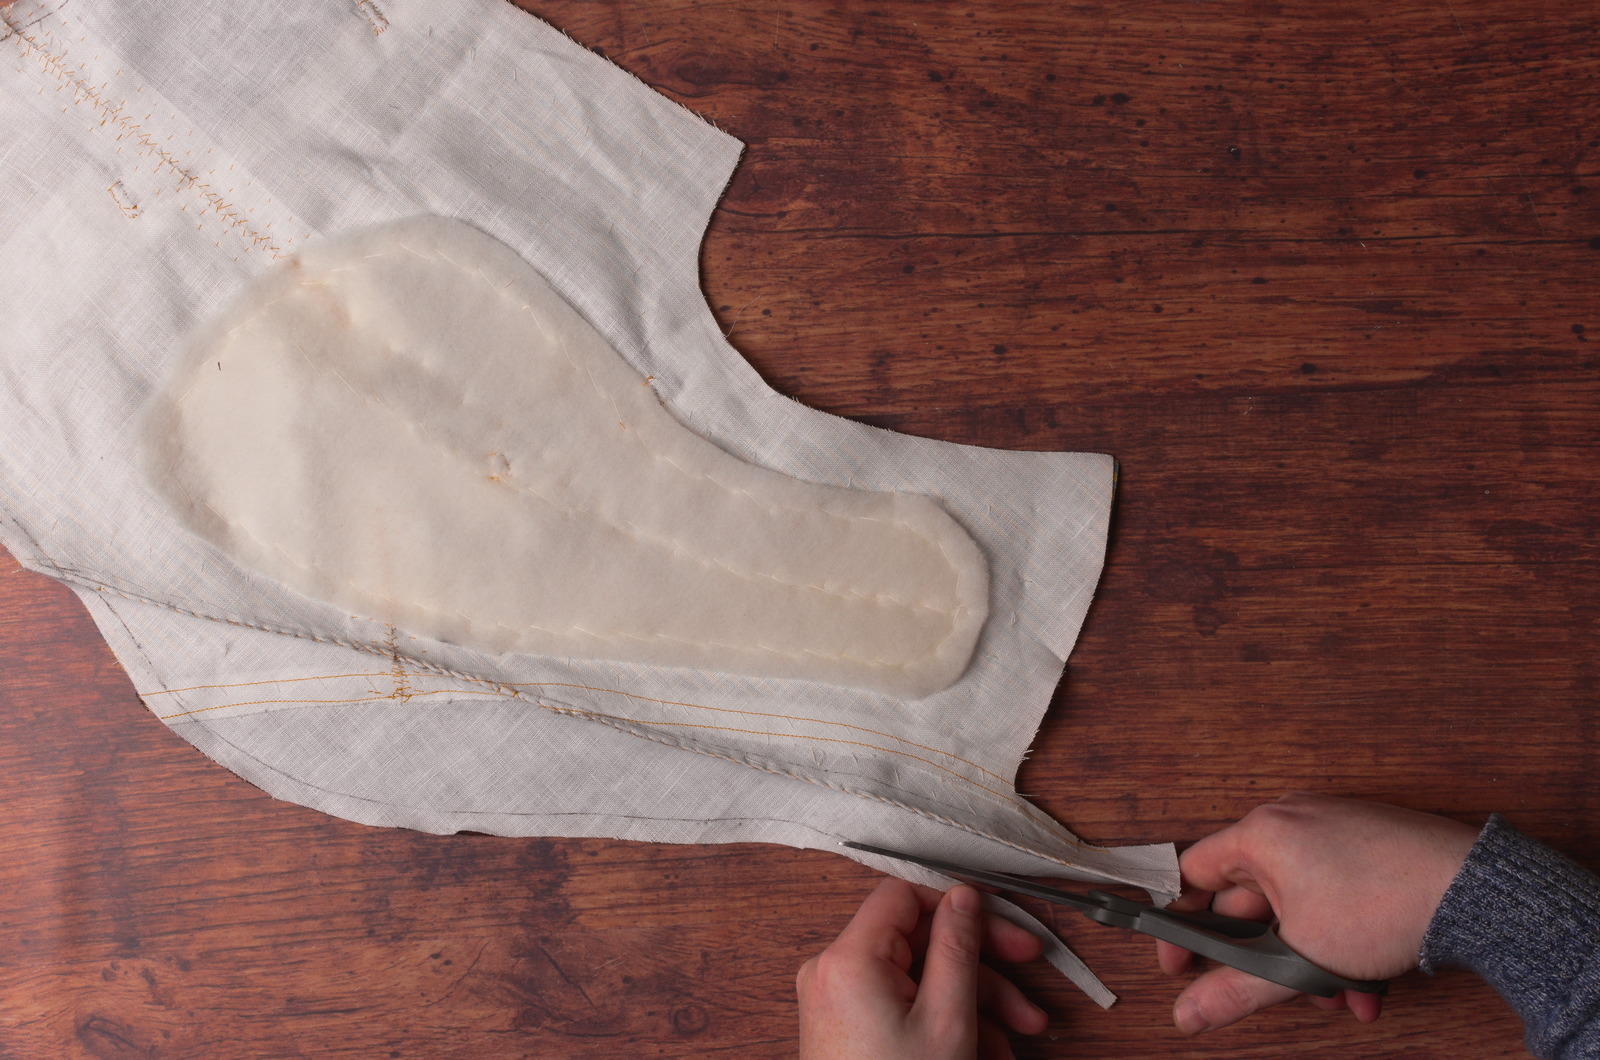
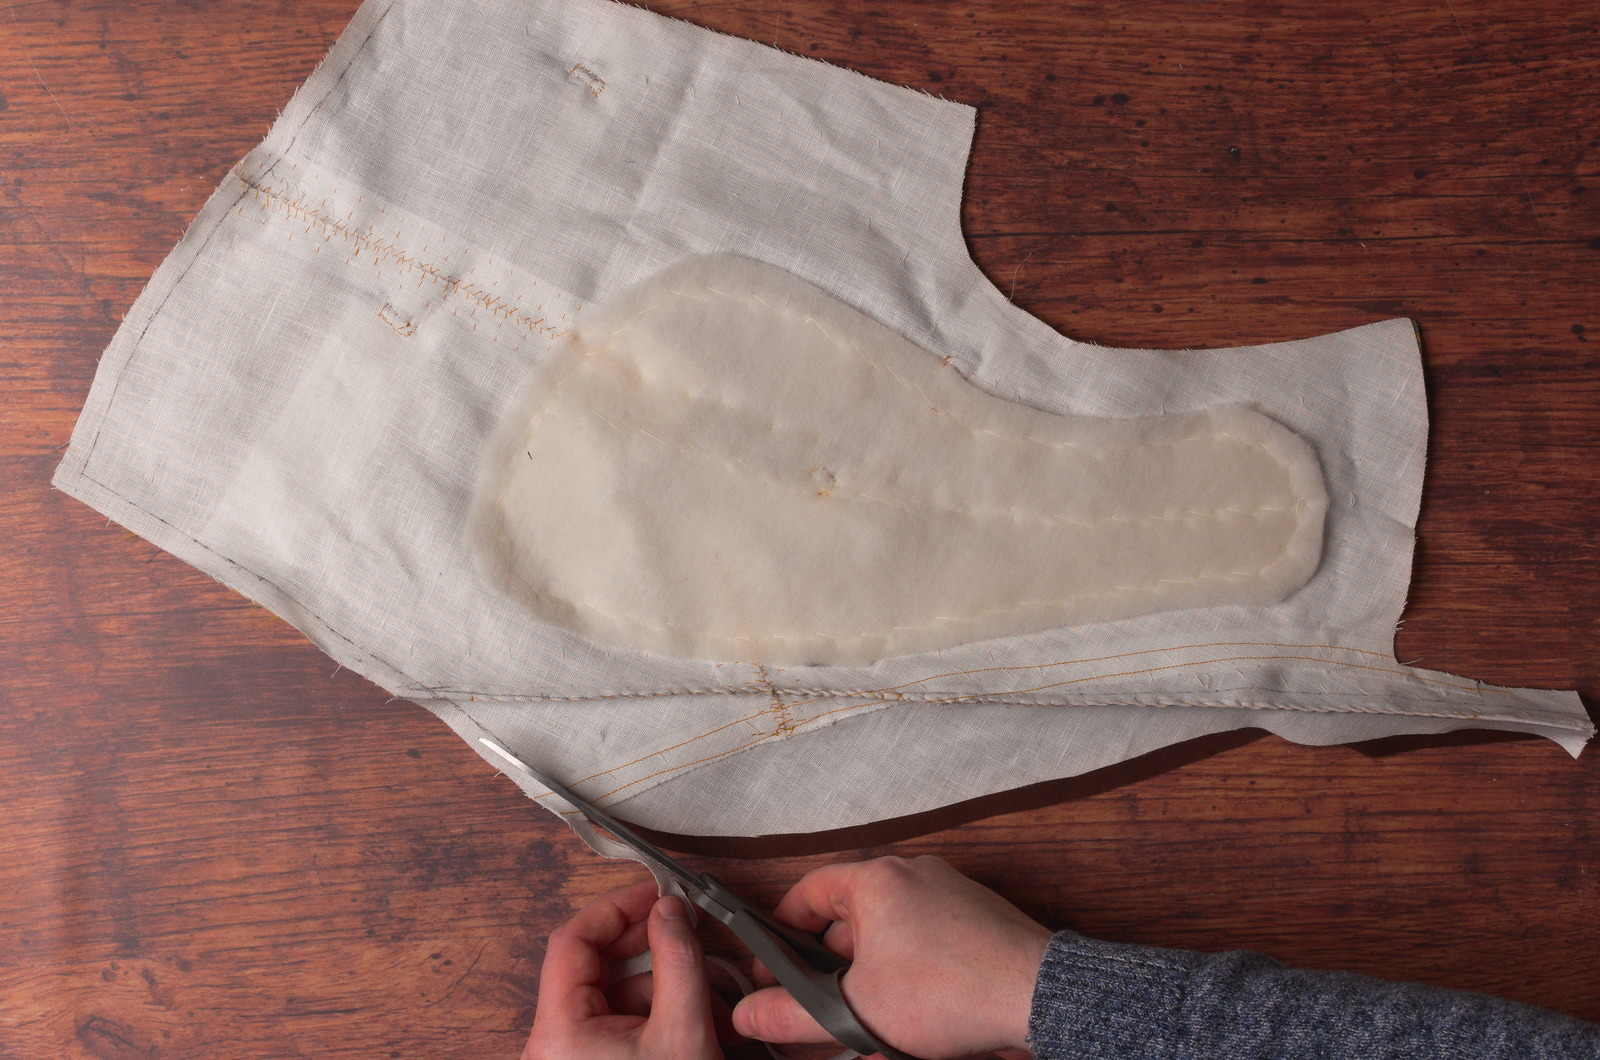
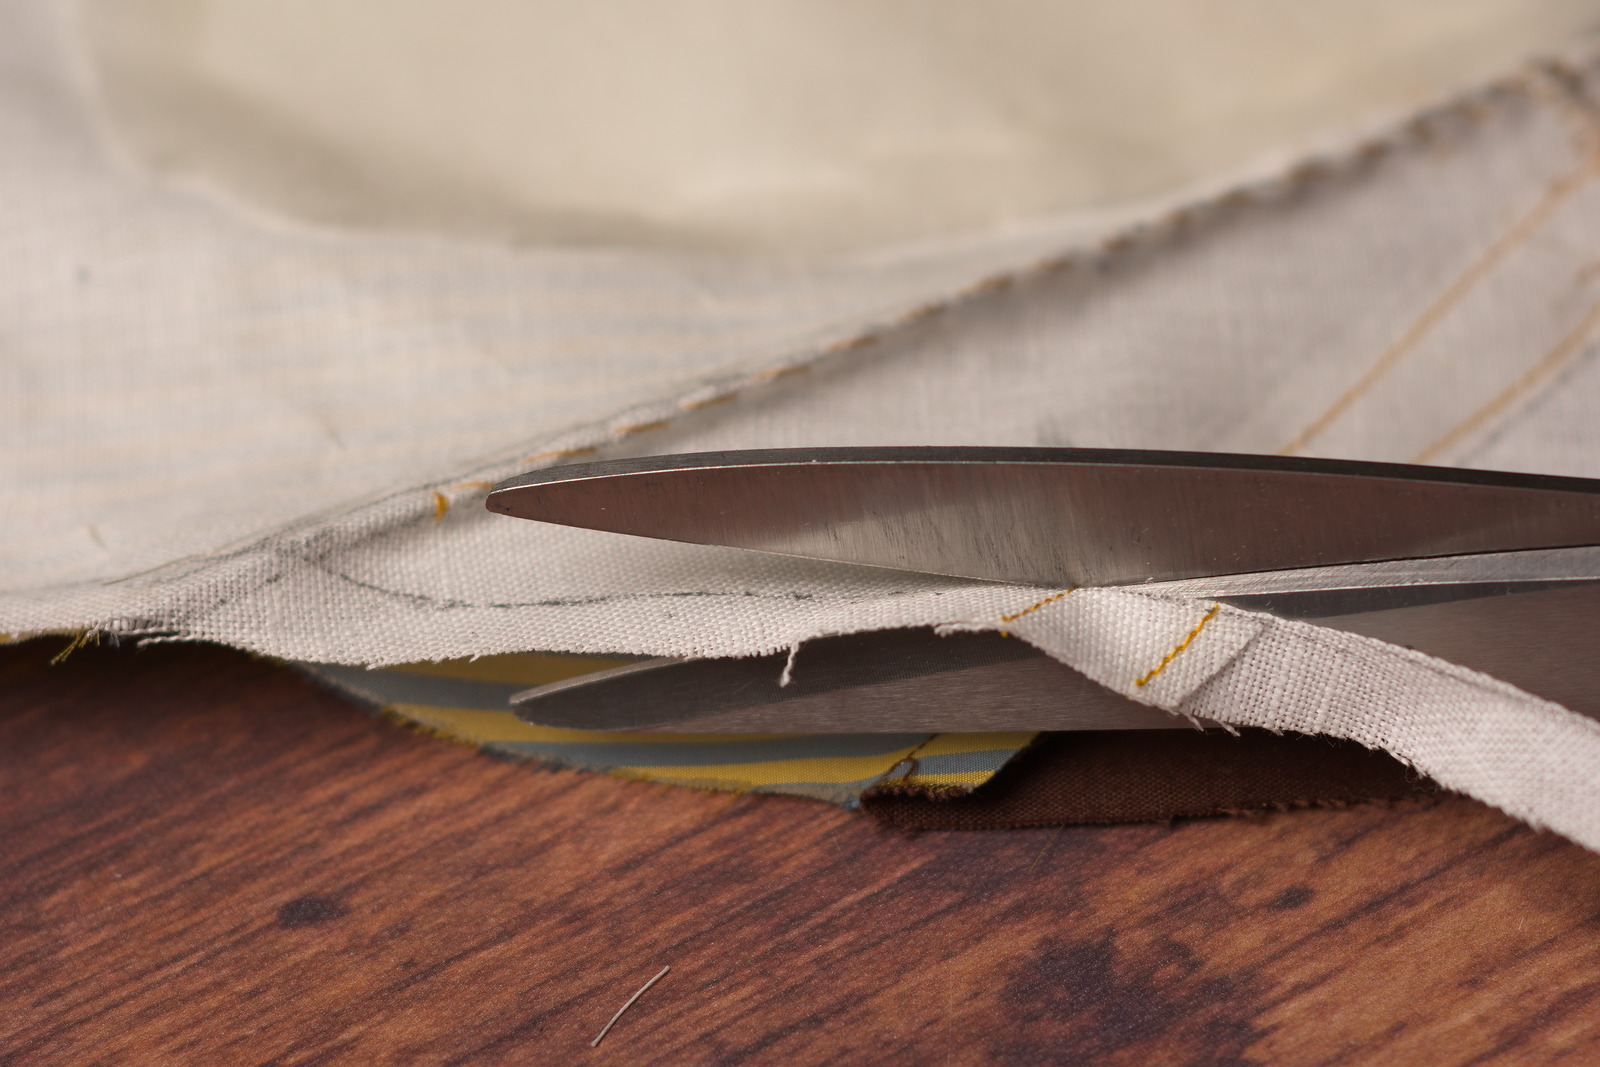
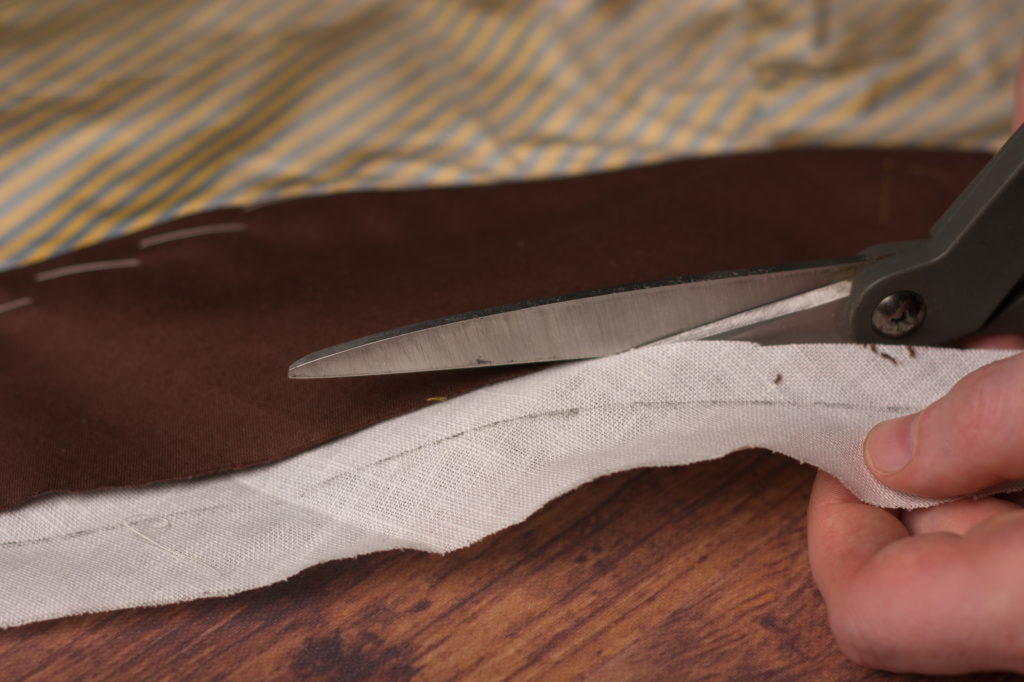
Carefully trim away the seam allowance from the canvas only, being careful not to cut into the fabric underneath.
Be extra careful near the fold of the roll line – it’s so easy to accidentally cut through to the right side. I accidentally made a very small snip through the silk, but luckily caught it in time before too much damage was done.
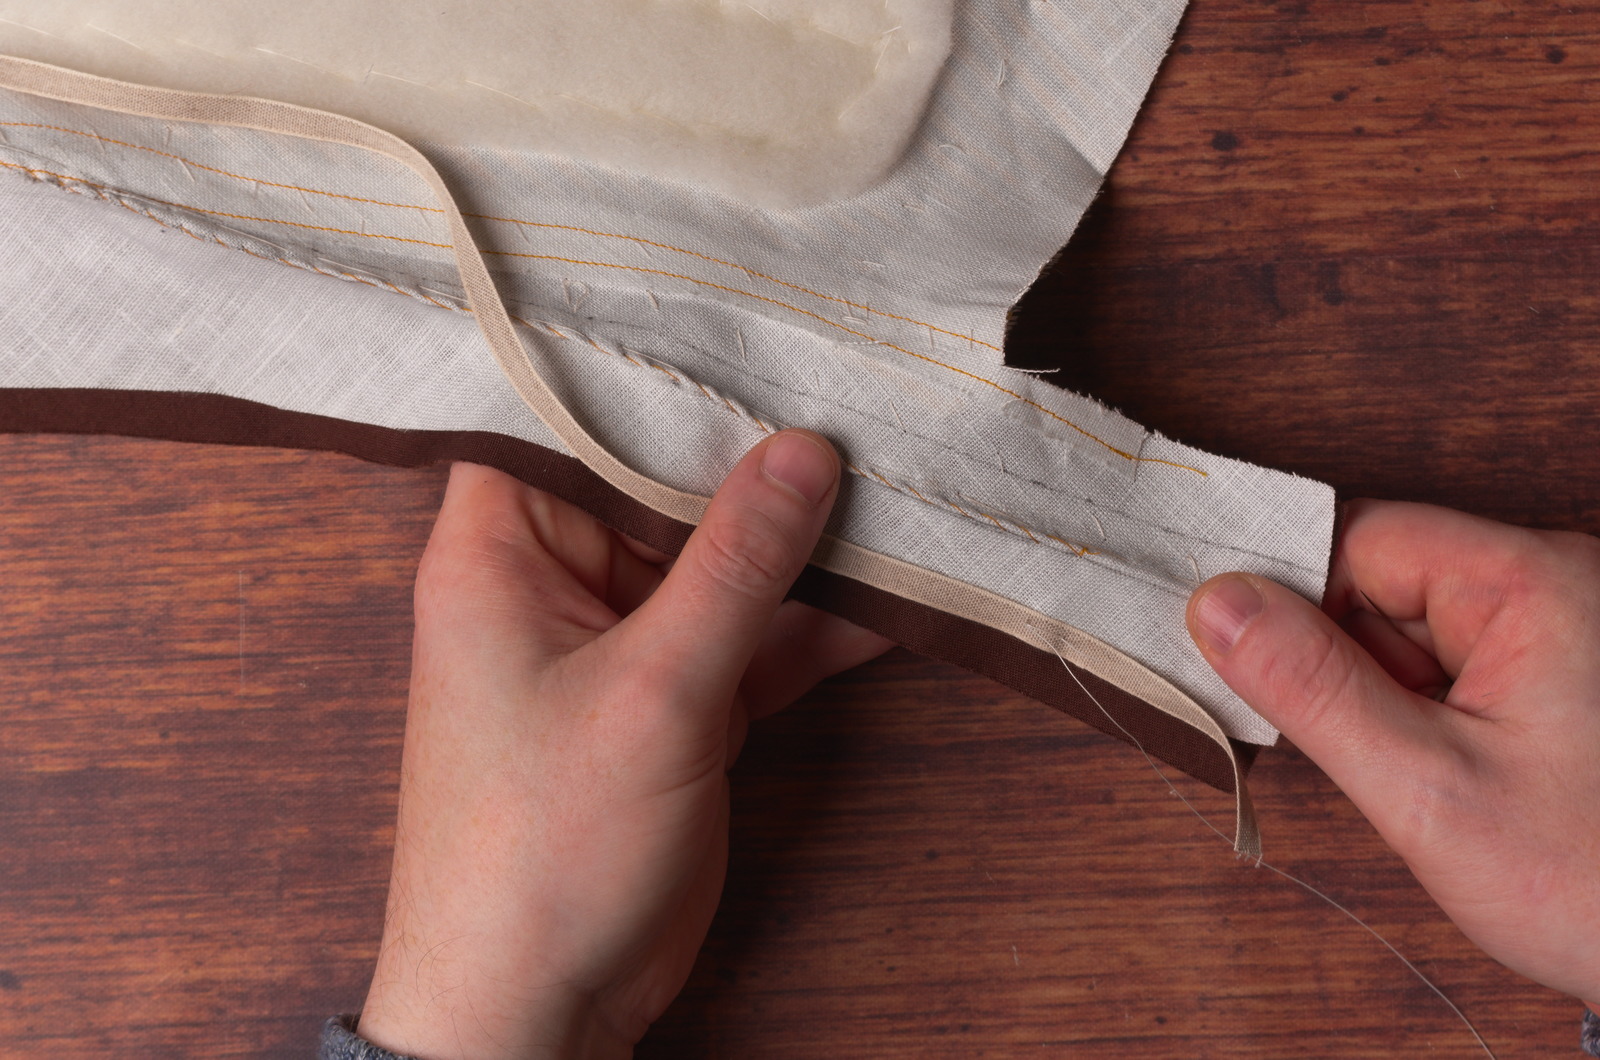
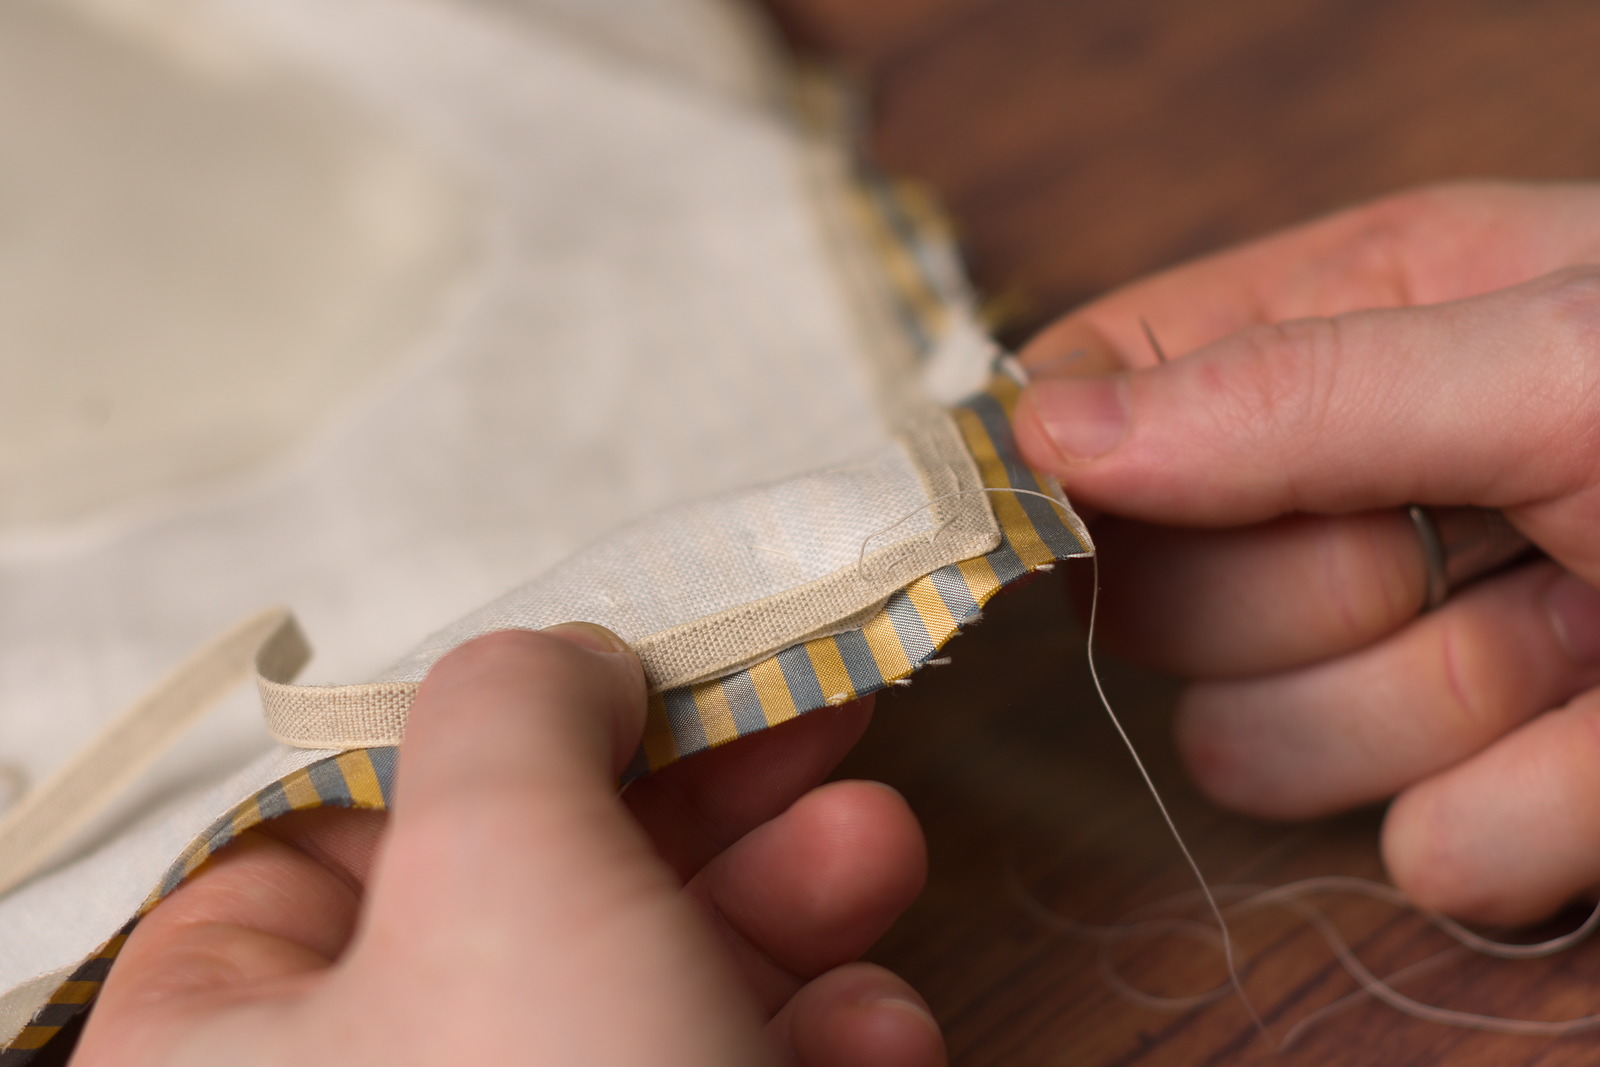
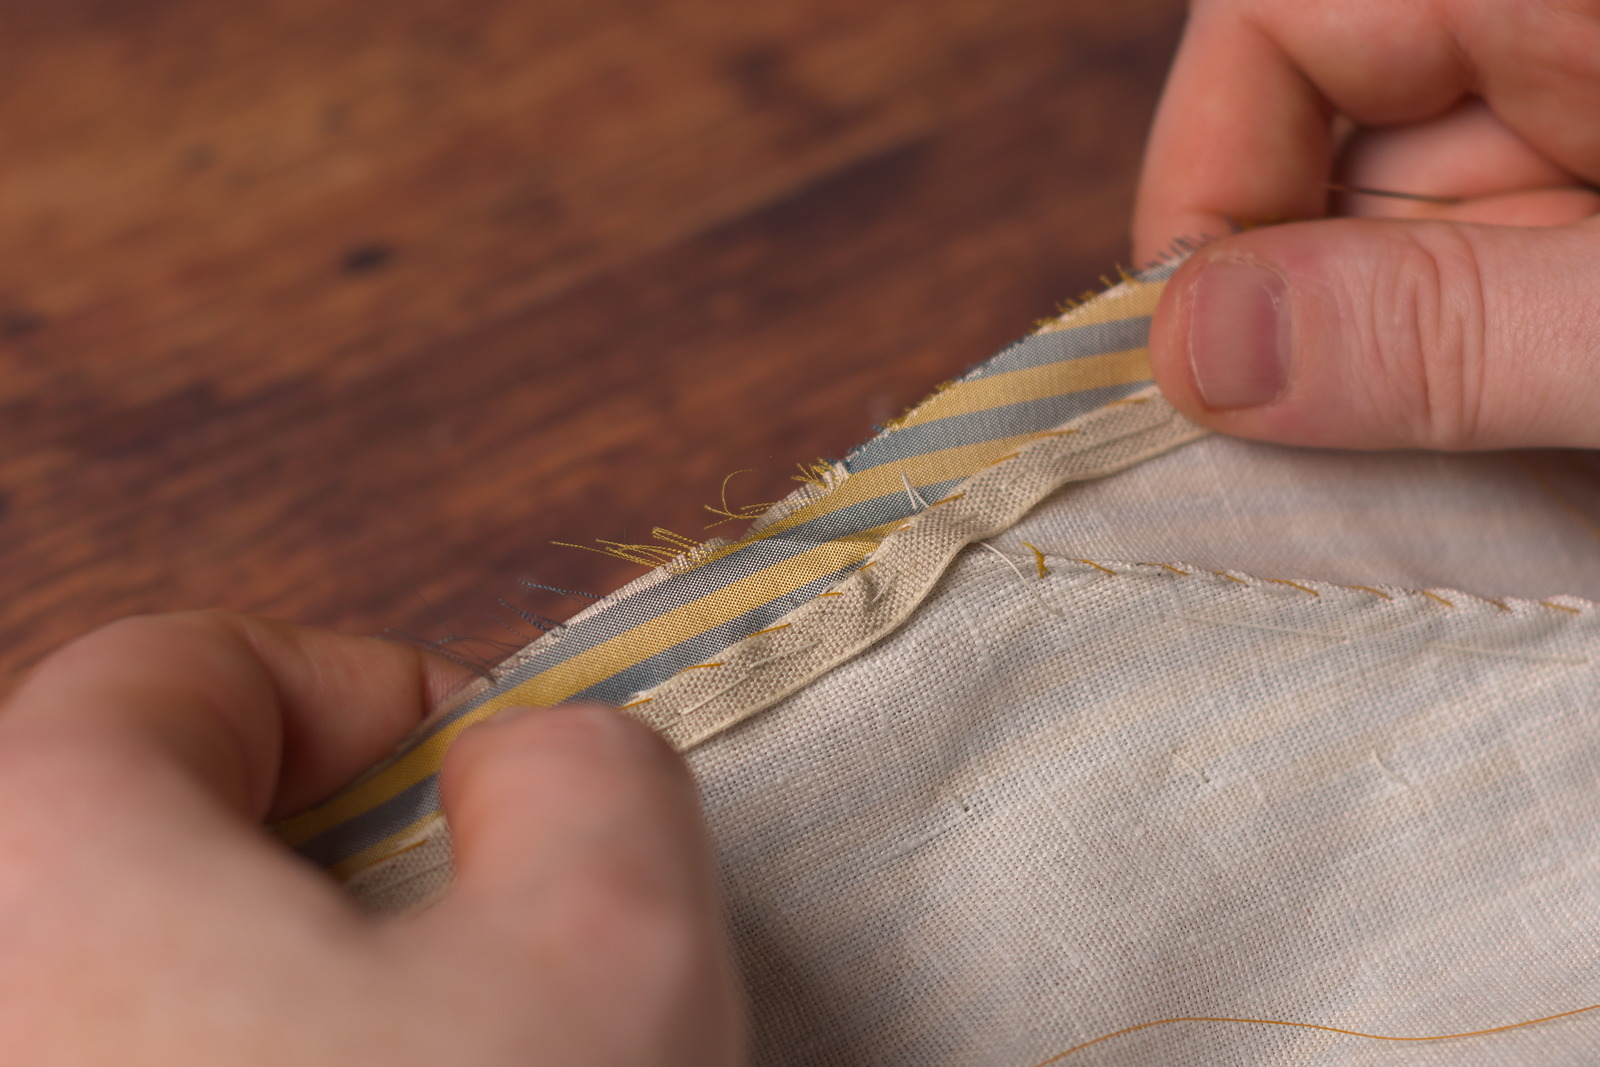
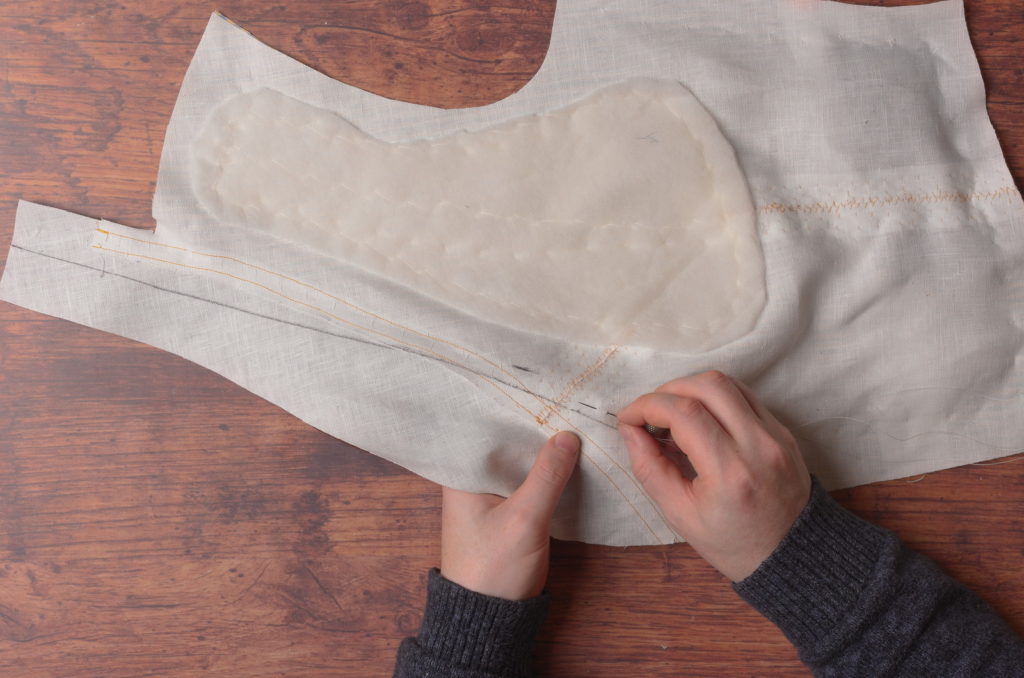
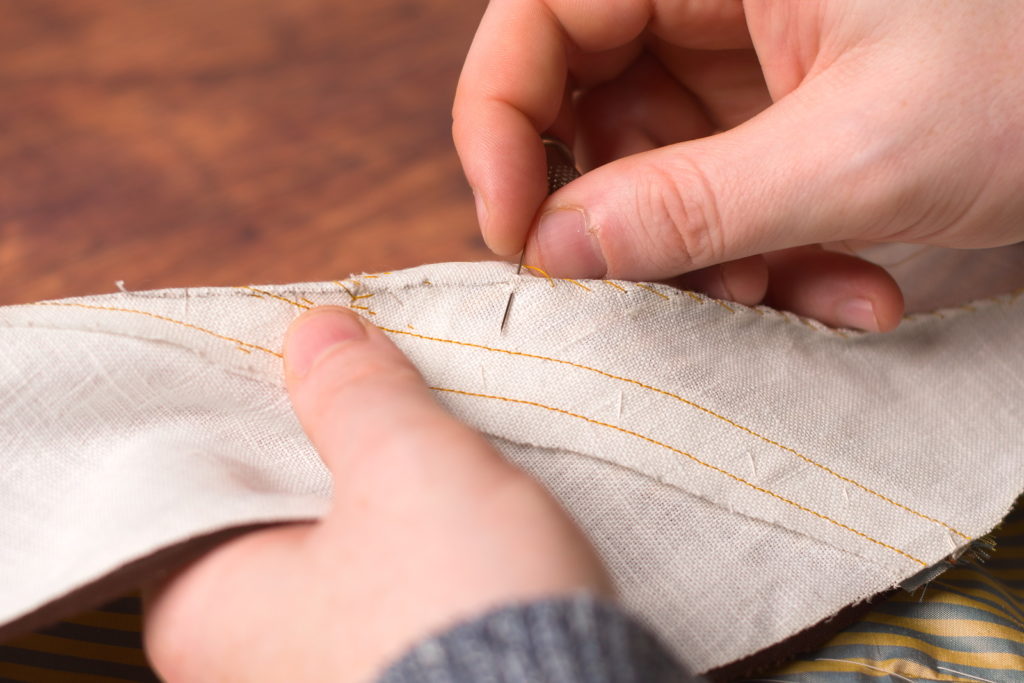
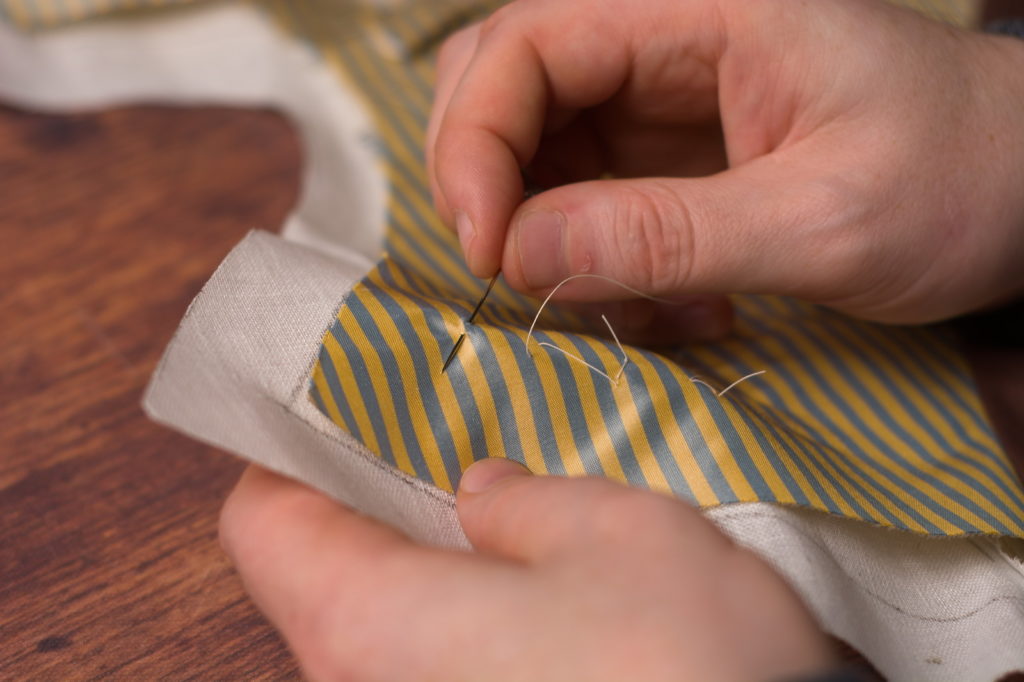
Lay the stay tape along the edge of the collar, just barely overlapping into the seam allowance. Begin basting about an inch above the shoulder, keeping the end of the tape free to finish up later.
Continue basting the stay tape to the waistcoat through all layers, along the collar.
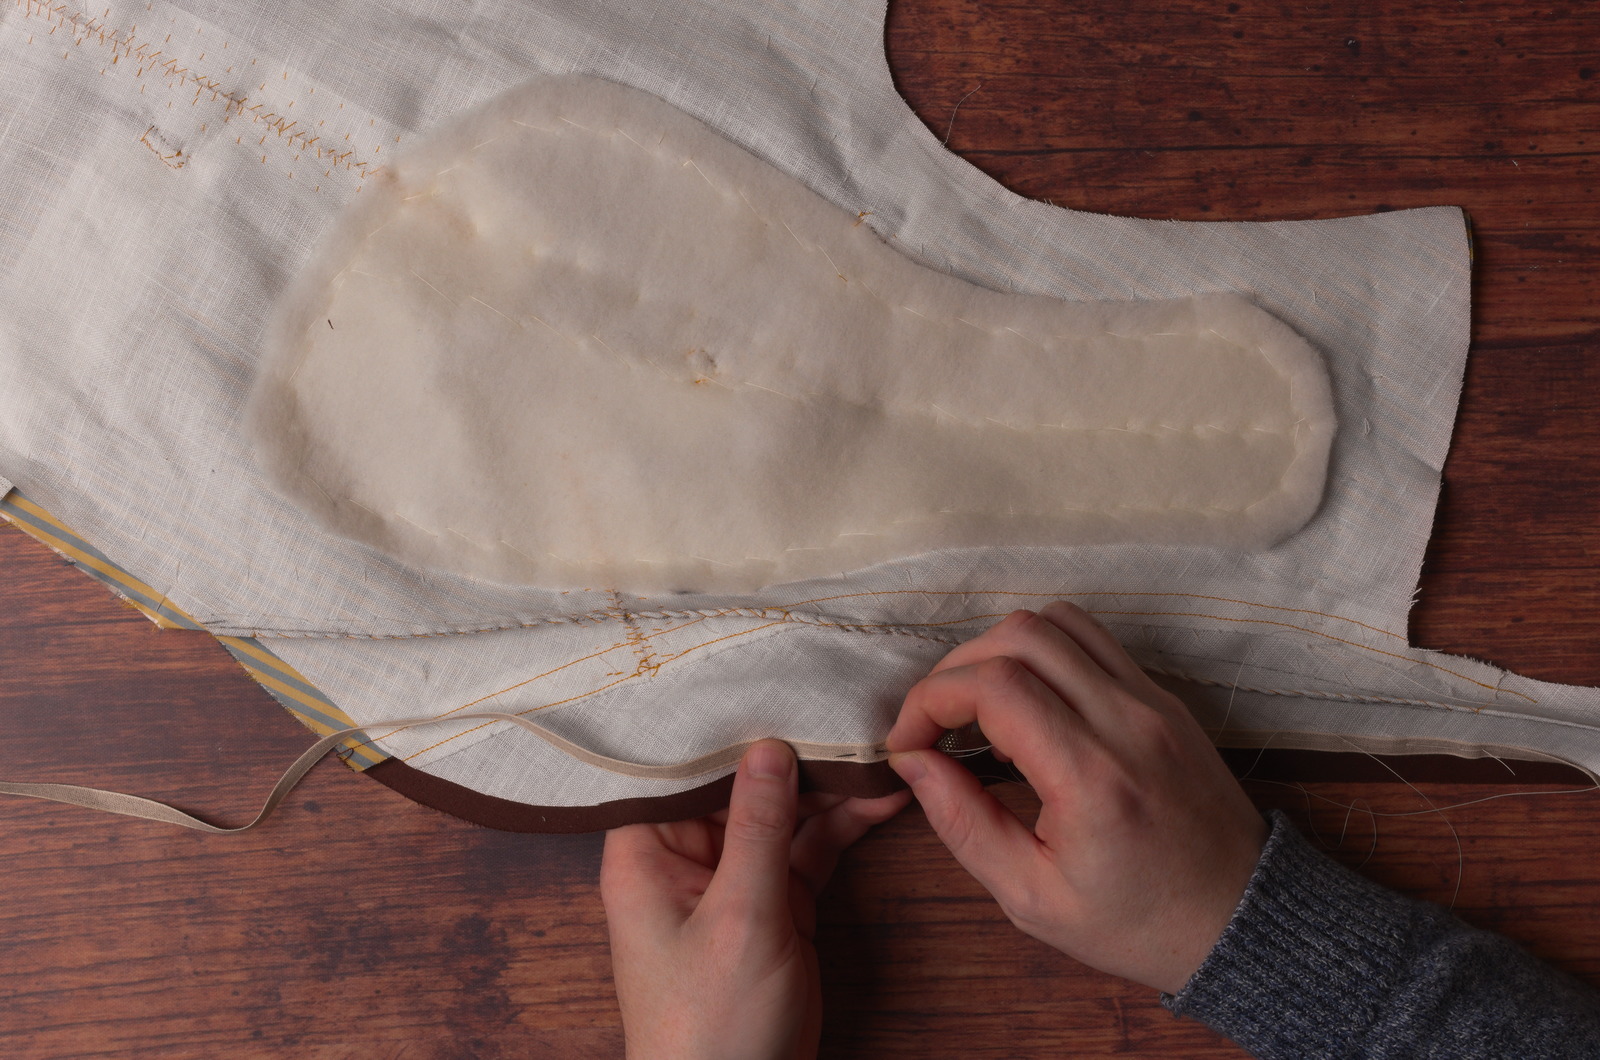
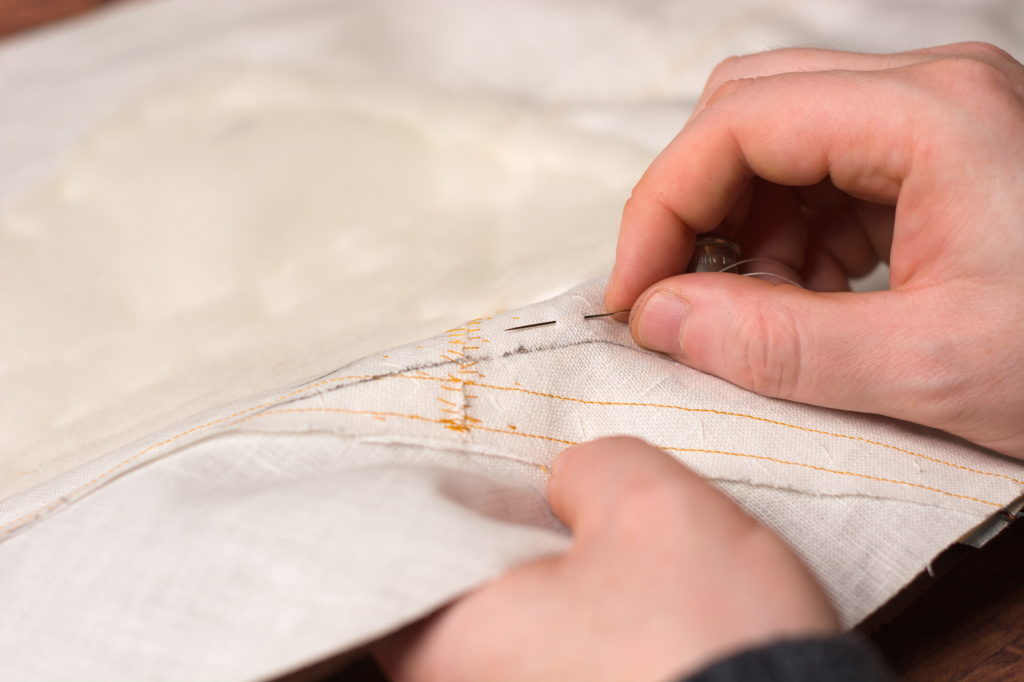
About an inch above the roll line, take a stitch in place to lock the stay tape in place.
As you continue basting across the roll line, allow a little excess stay tape with each stitch. This excess is needed so that when the collar is folded in place, there will be enough slack in the tape to allow it to fold nicely without pulling back away from the body. Make one more stitch about one inch below the roll line to lock everything in place again.
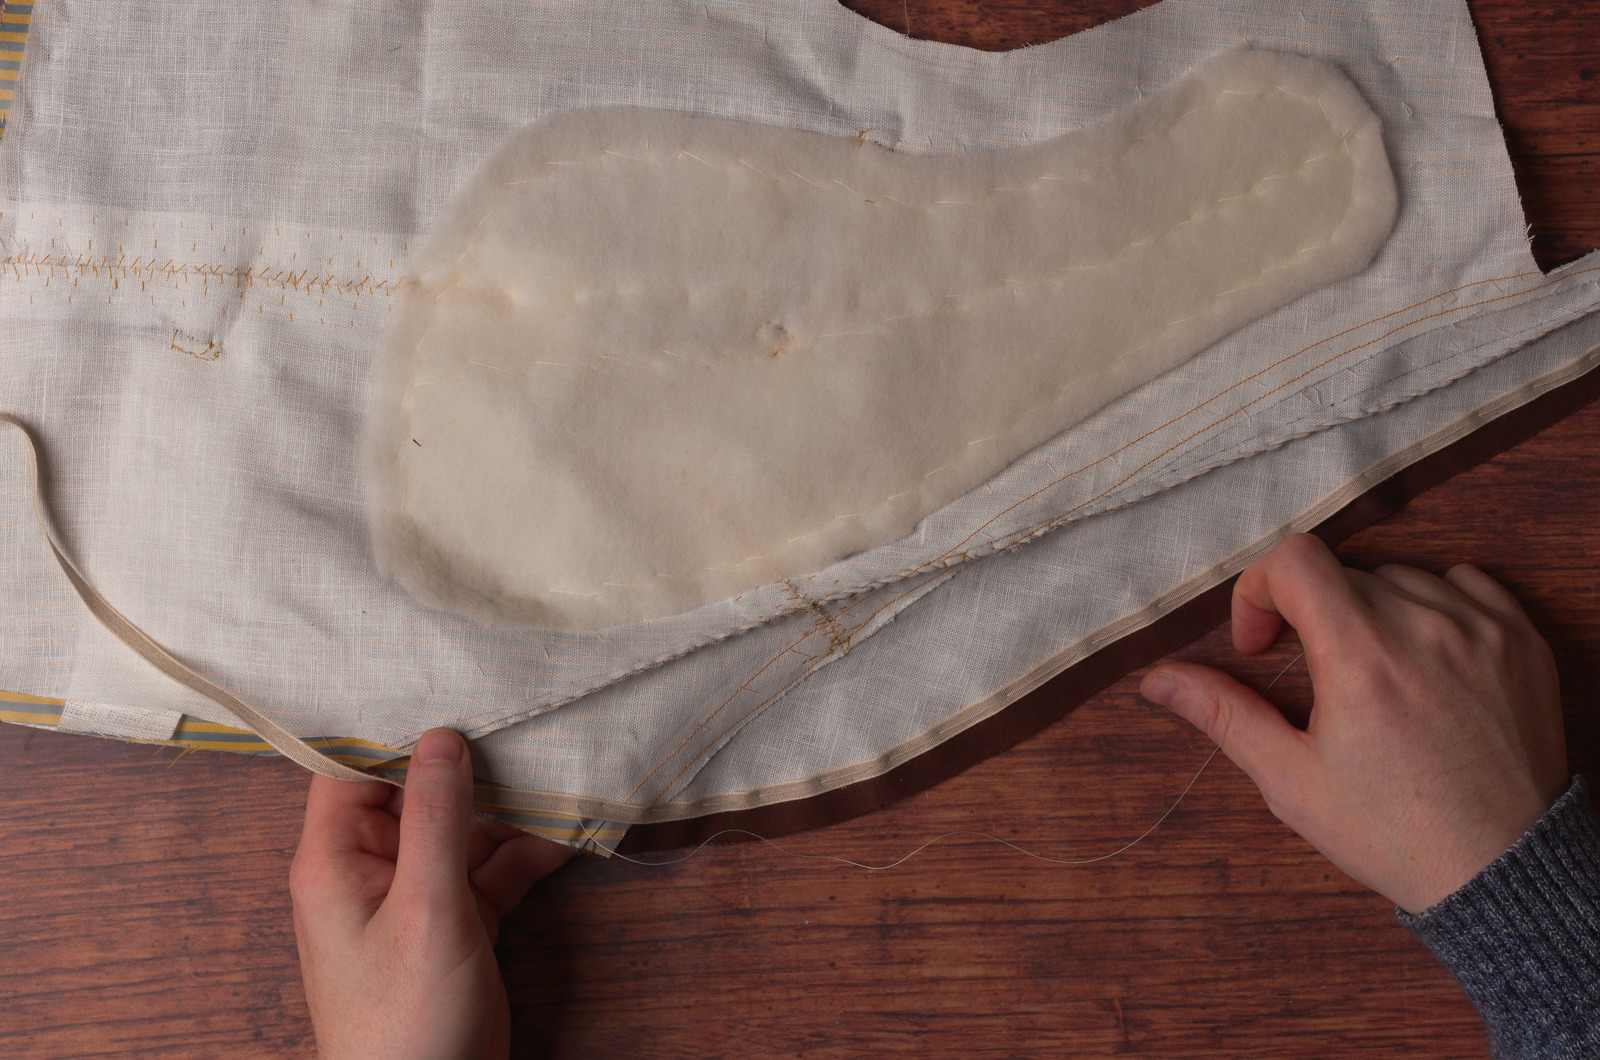
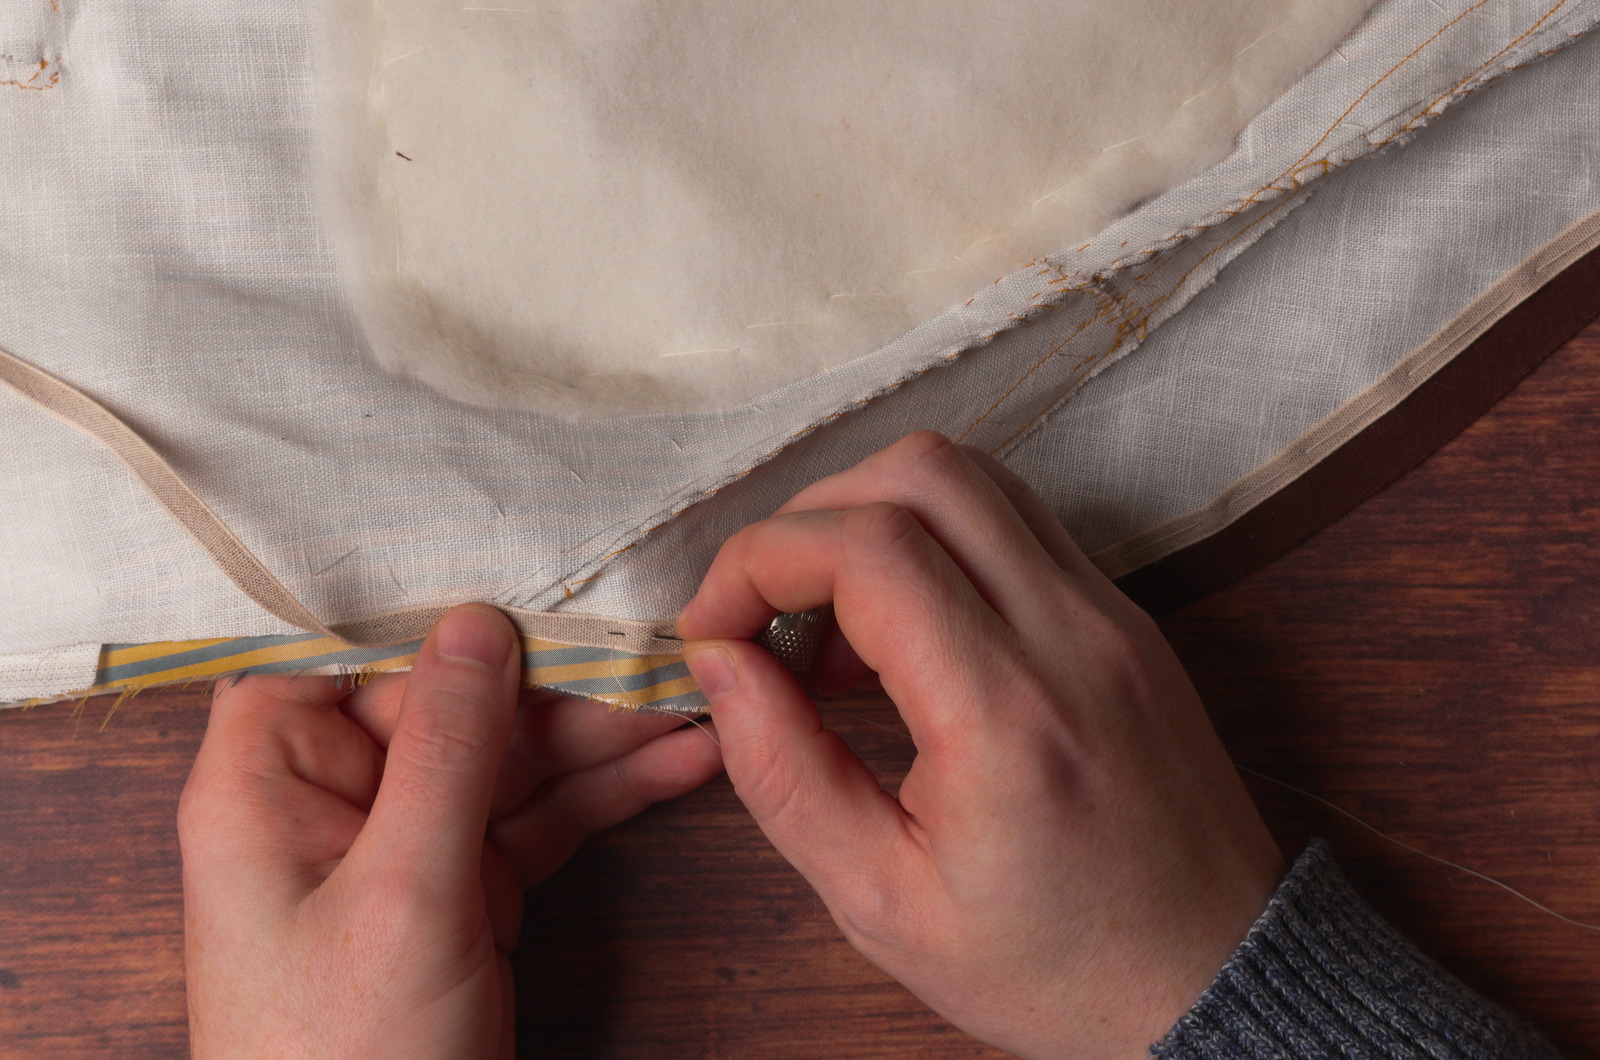
Continue basting the stay tape to the forepart along the front edge. When you get about two inches from the bottom edge, make yet another stitch to lock everything in place. From here to the corner, hold the stay tape a little tight as compared to the forepart. This will draw the corner of the waistcoat inwards a little, helping it to stay in place when worn.
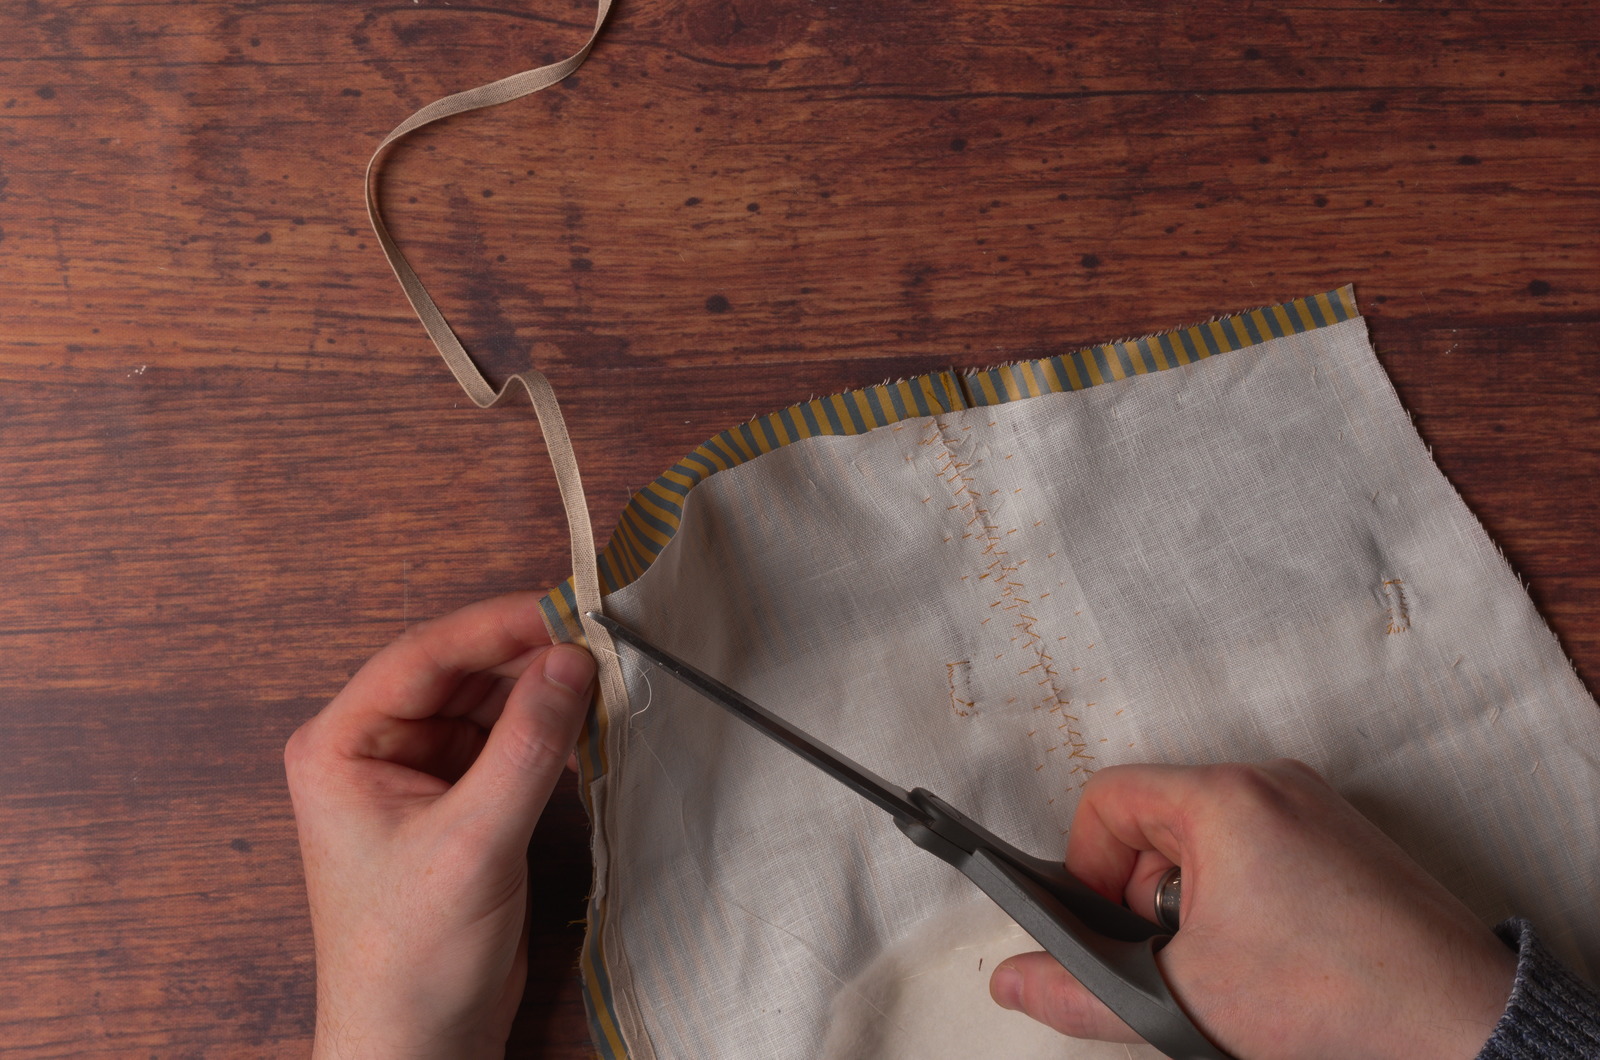
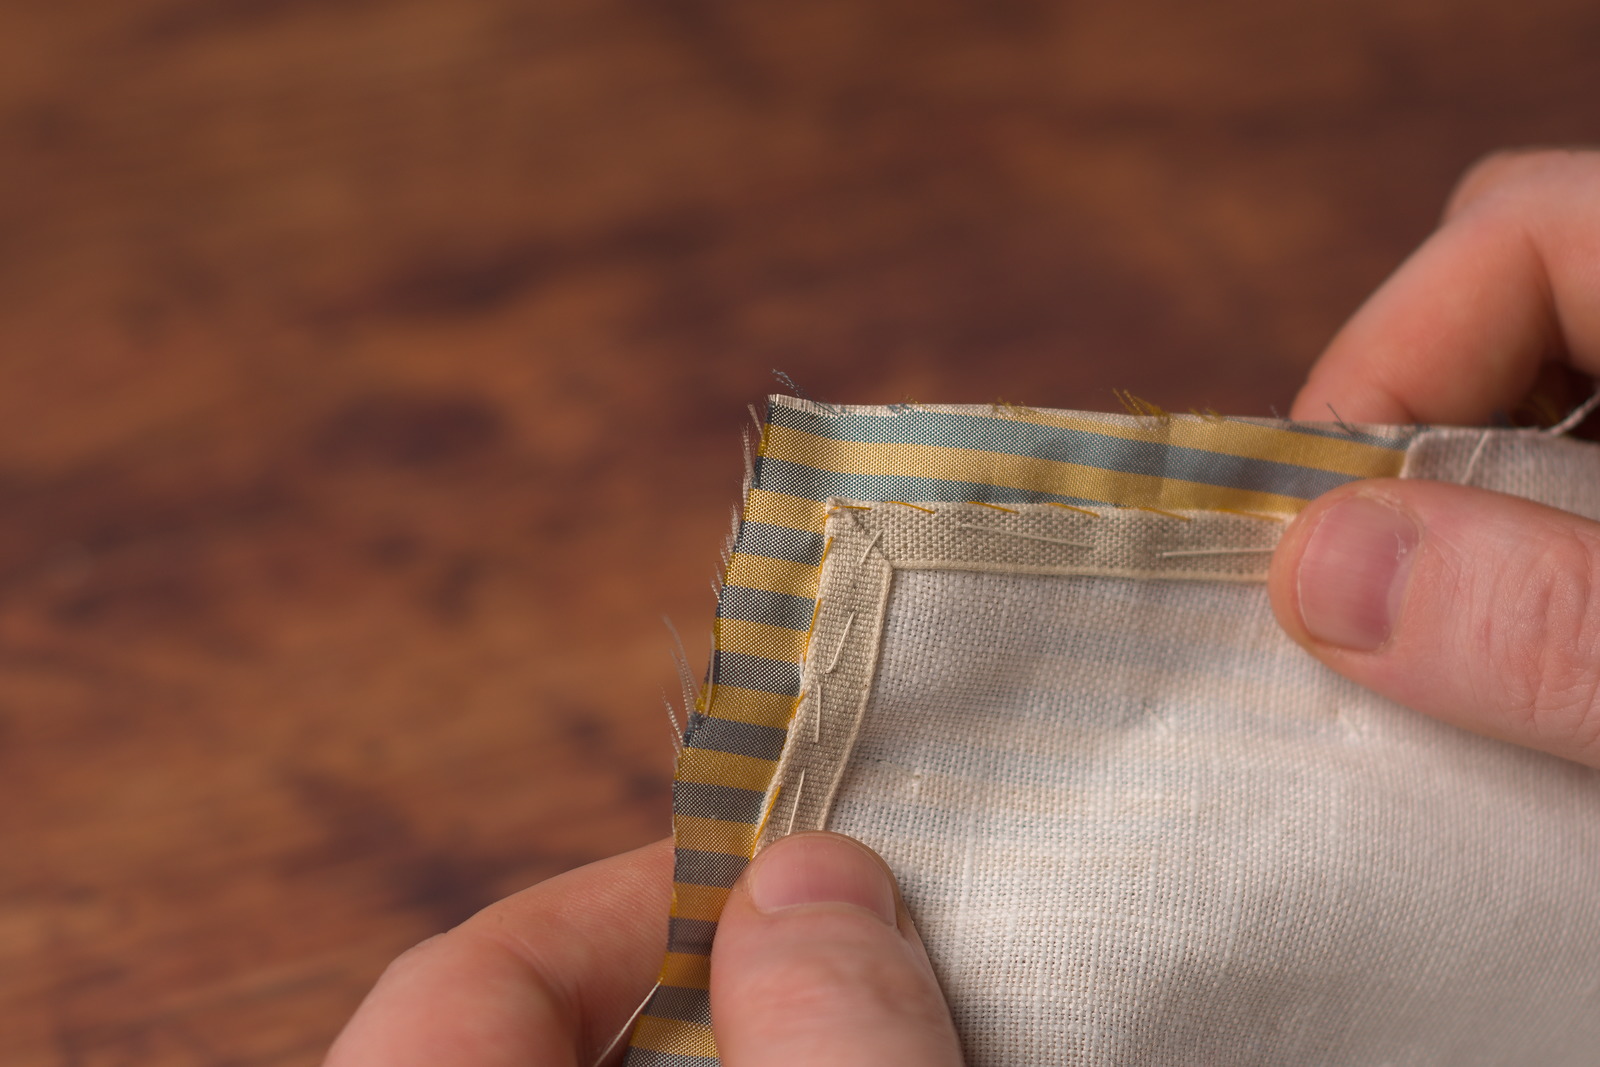
When you get to the lower front corner, take another stitch in place to lock everything, keeping about 1/2″ from the corner itself to give yourself room to work with. Then at a 45 degree angle, cut the stay tape almost but not quite all the way through. The end of the cut should ideally be right over the corner of the canvas underneath.

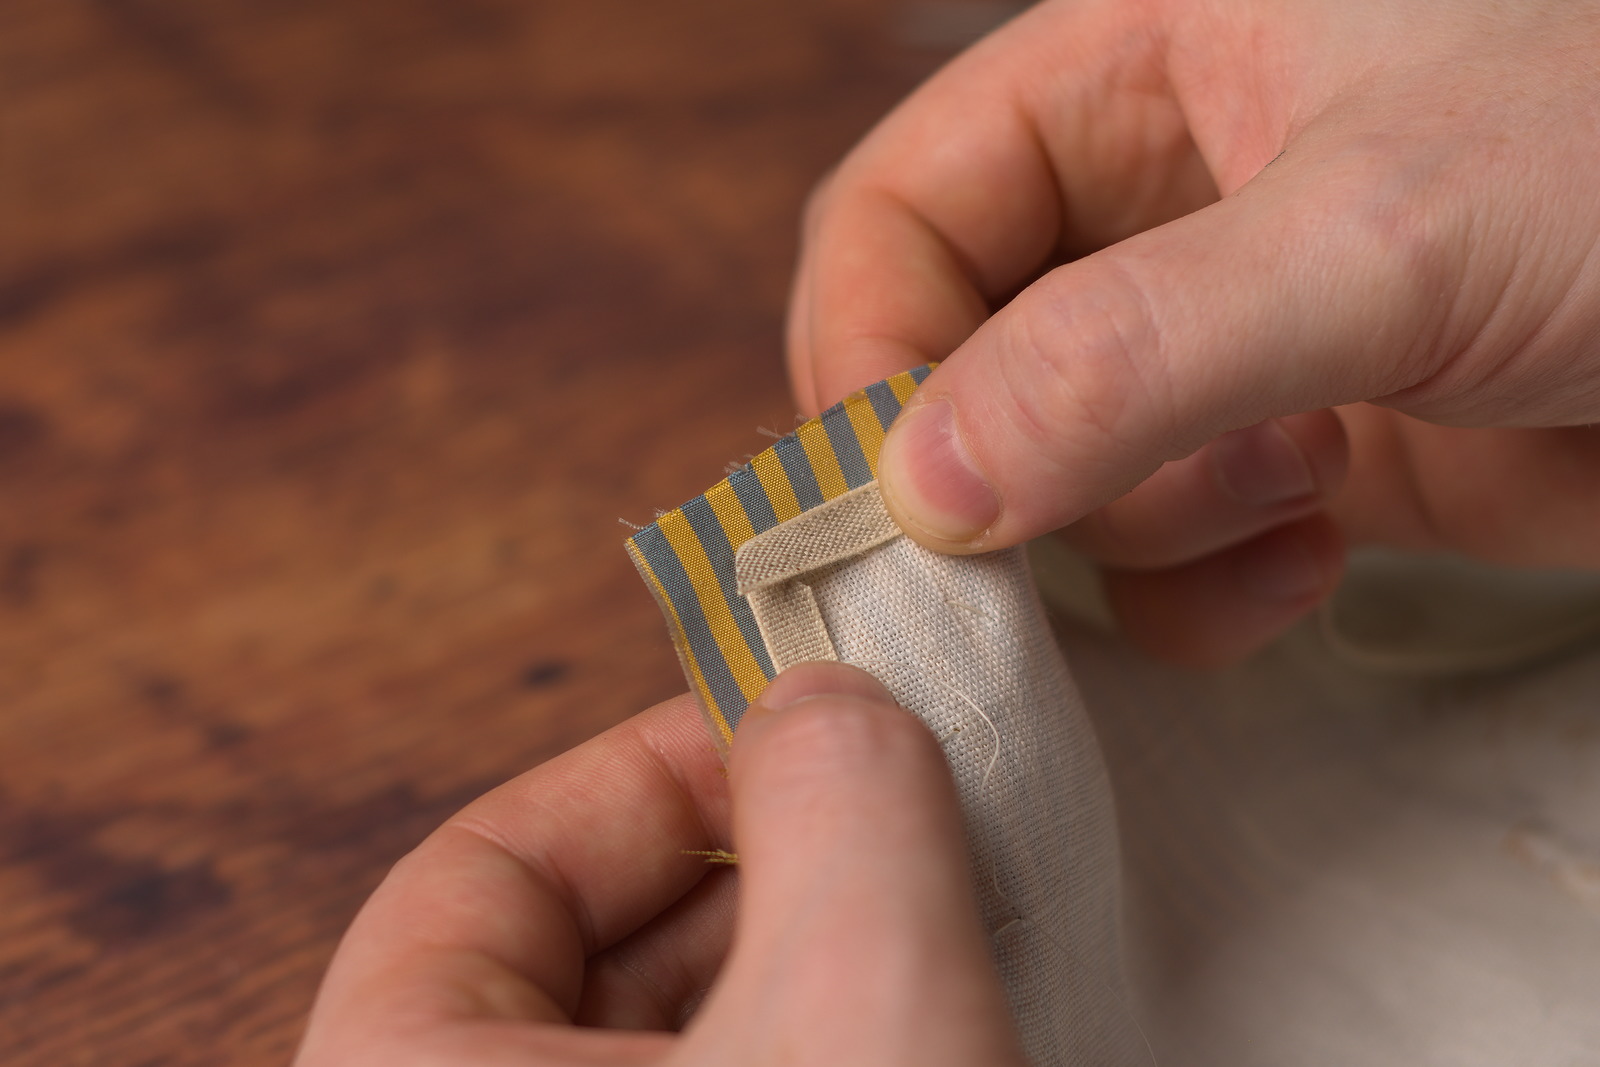
Now fold the stay tape in place along the lower edge.
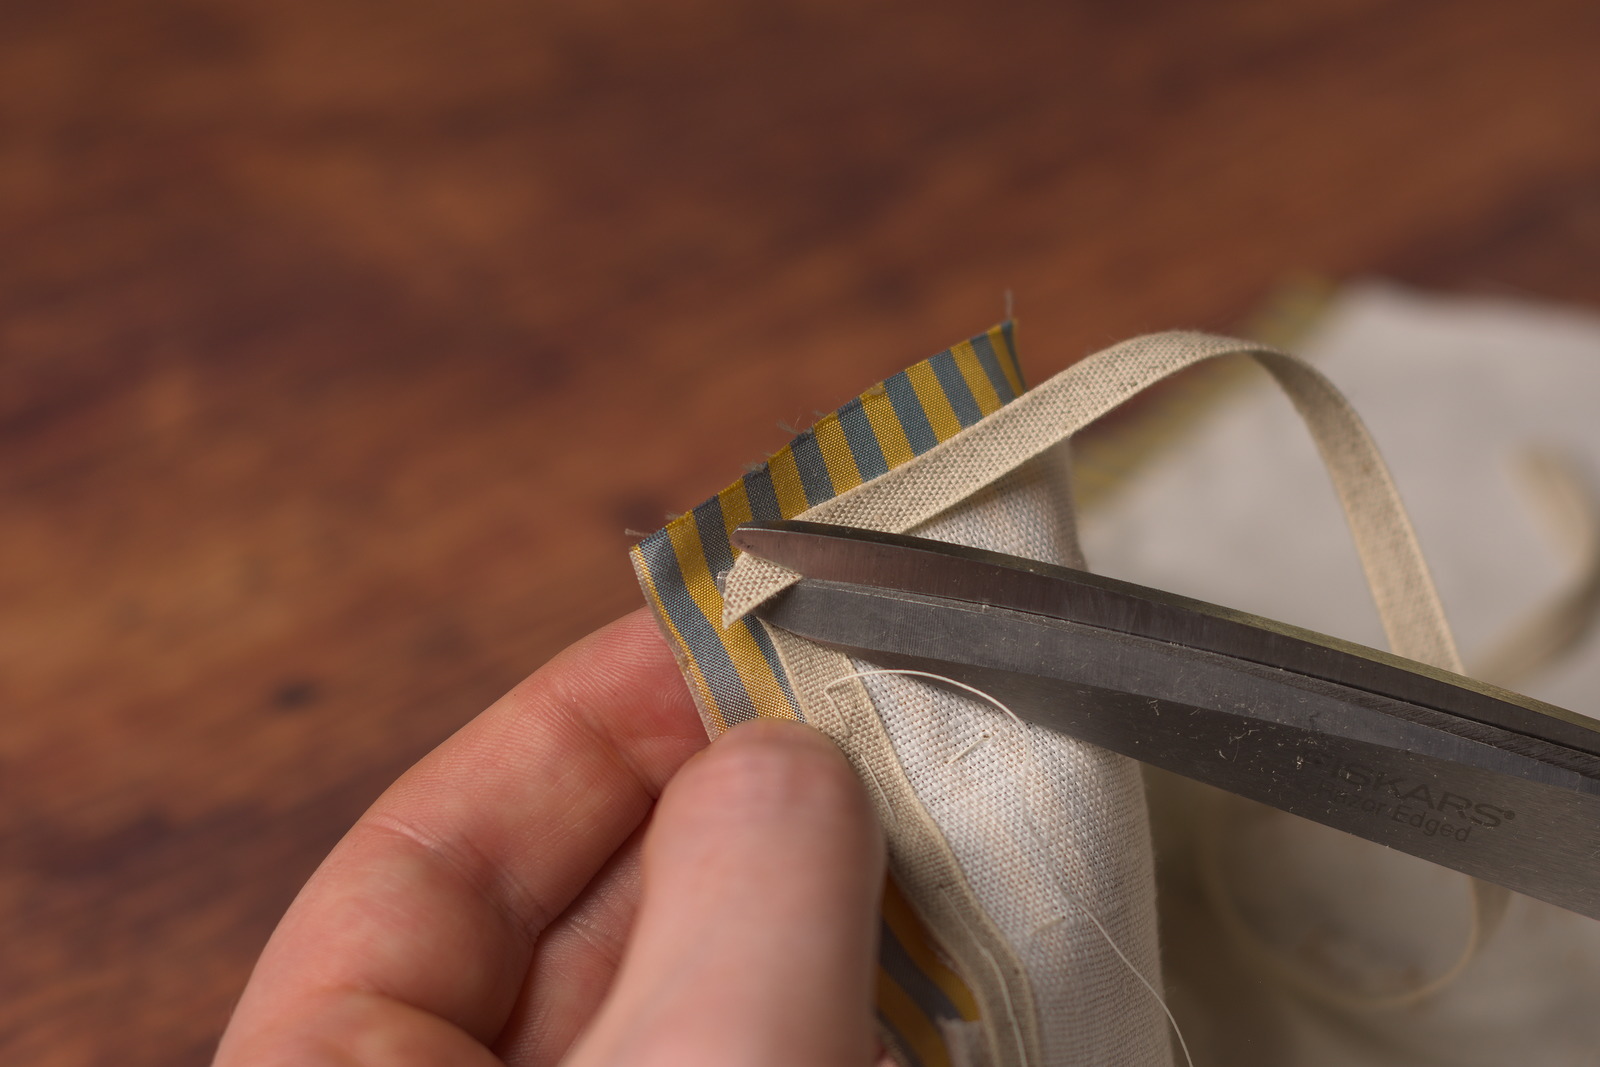
Clip the overlapping section of stay tape at the same angle.
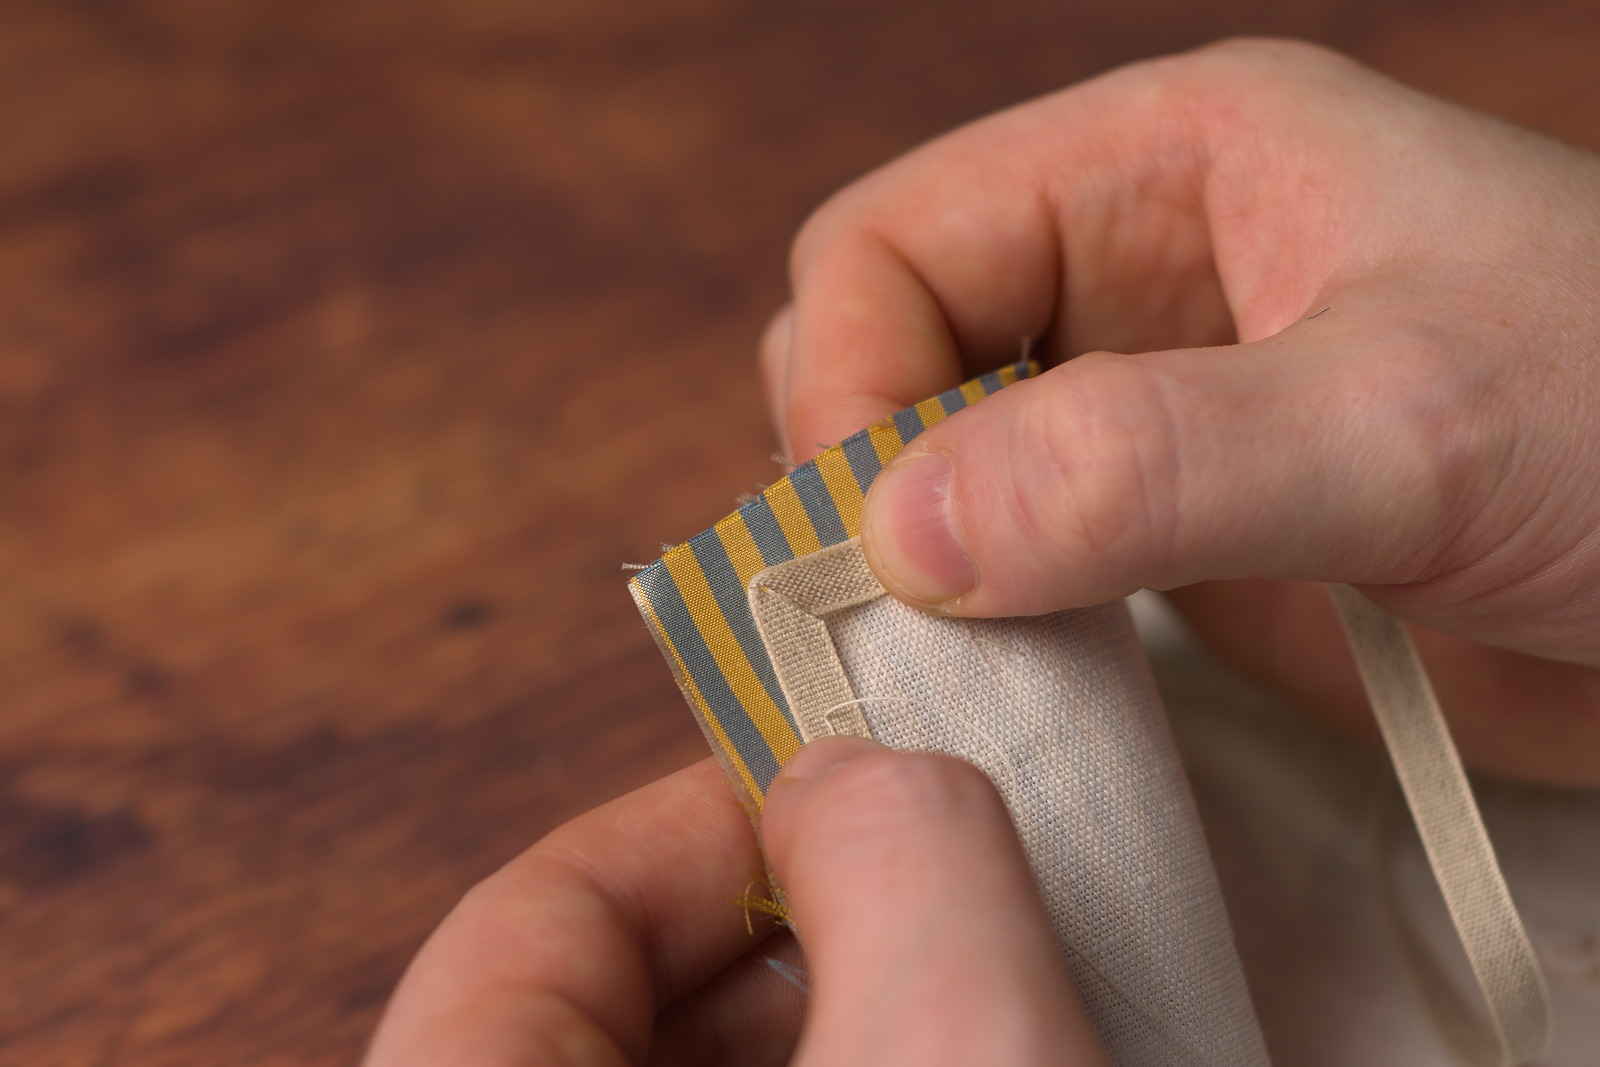
When done, you should have a nice crisp miter that won’t leave any extra bulk in the area. This one came out pretty nicely, but as I like to say, it ‘miter’ been better.
Make another stitch in place, and again hold the tape tight to the forepart for another inch or two along the bottom edge.
Continue basting until you get to the side seam.
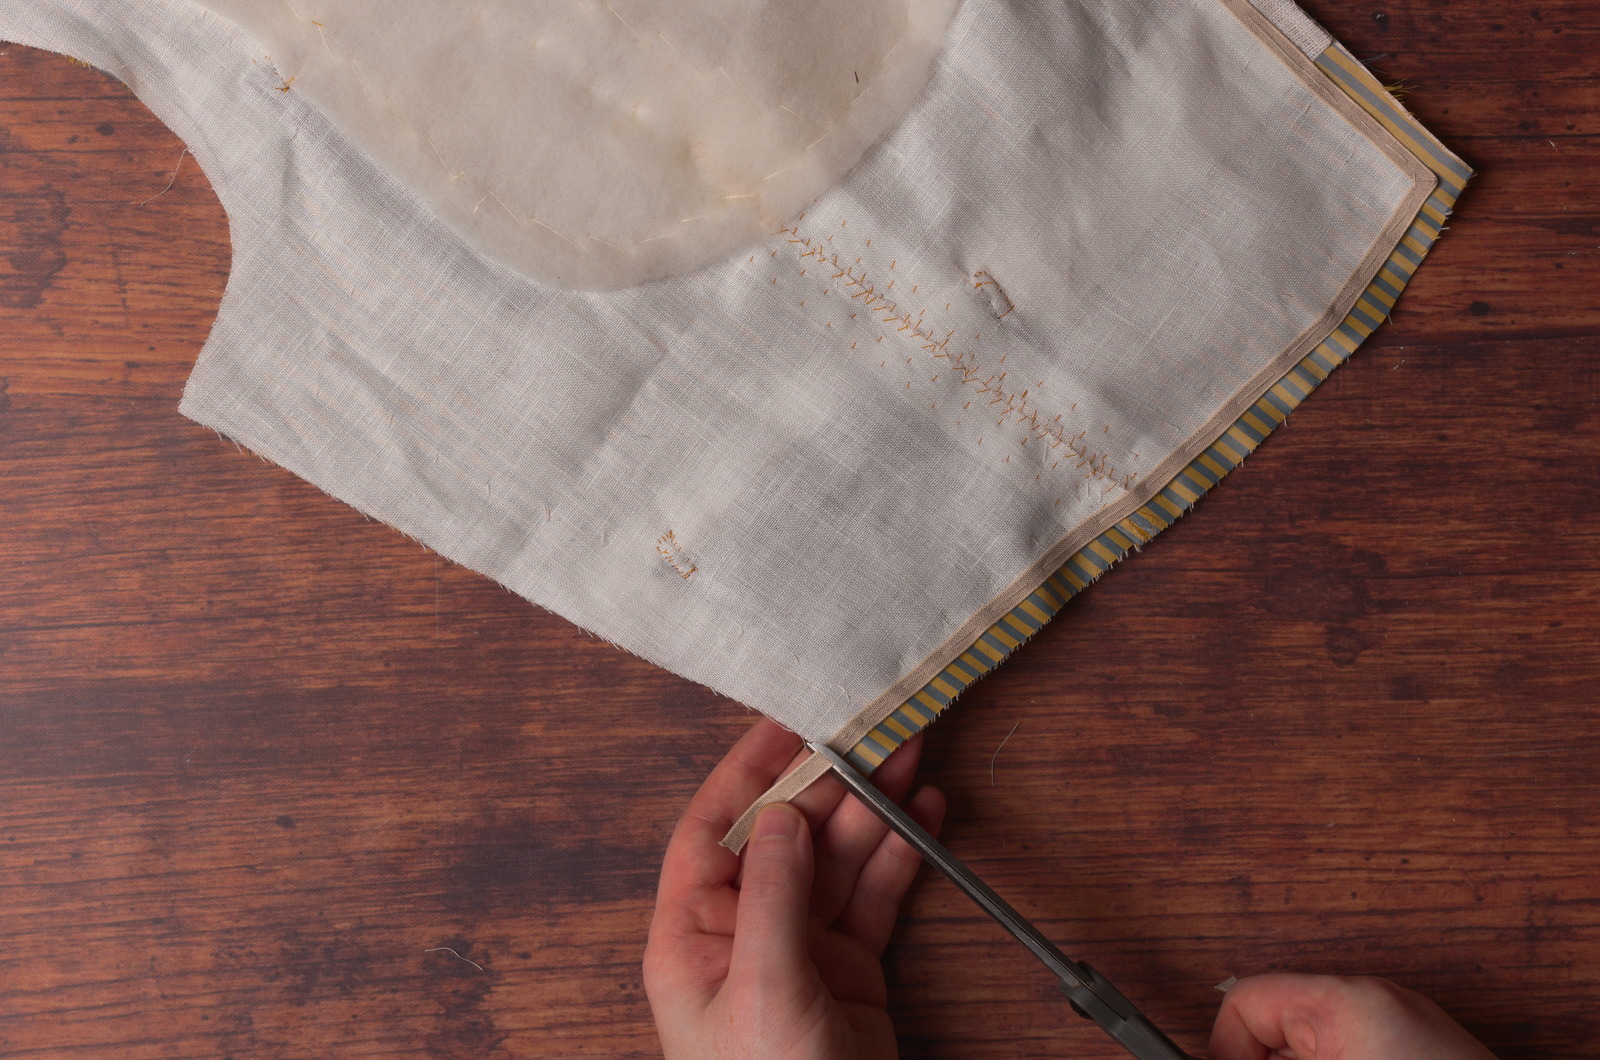
Trim the excess flush with the side seam.
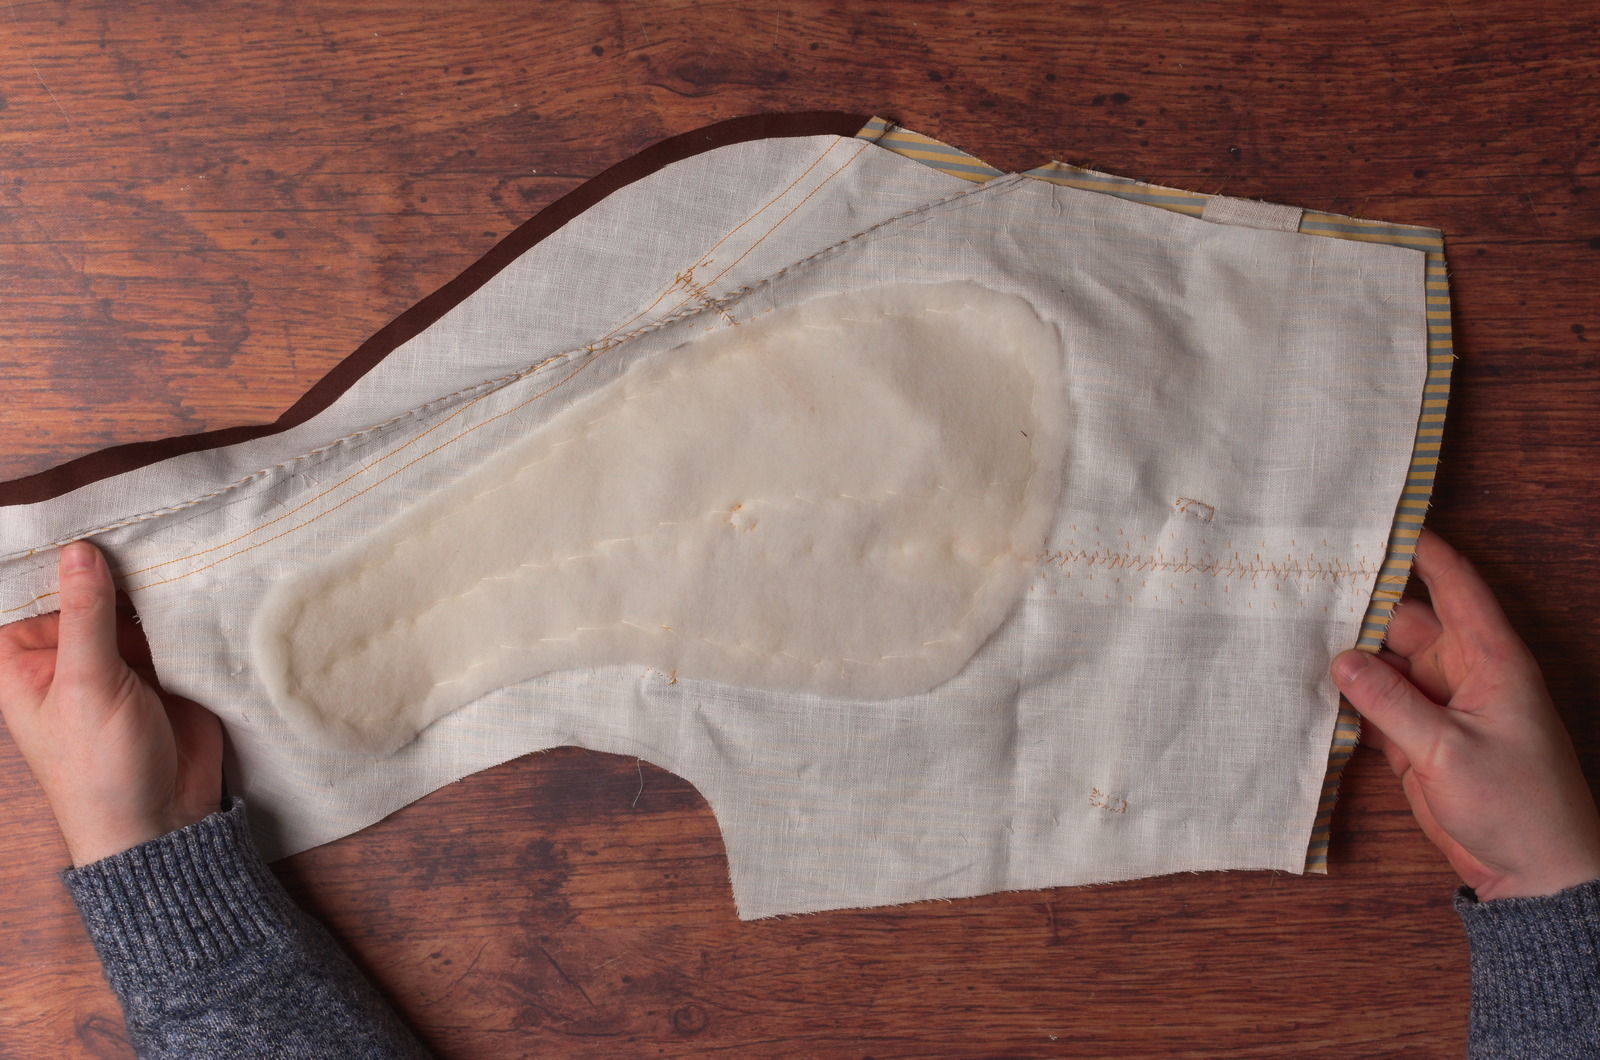
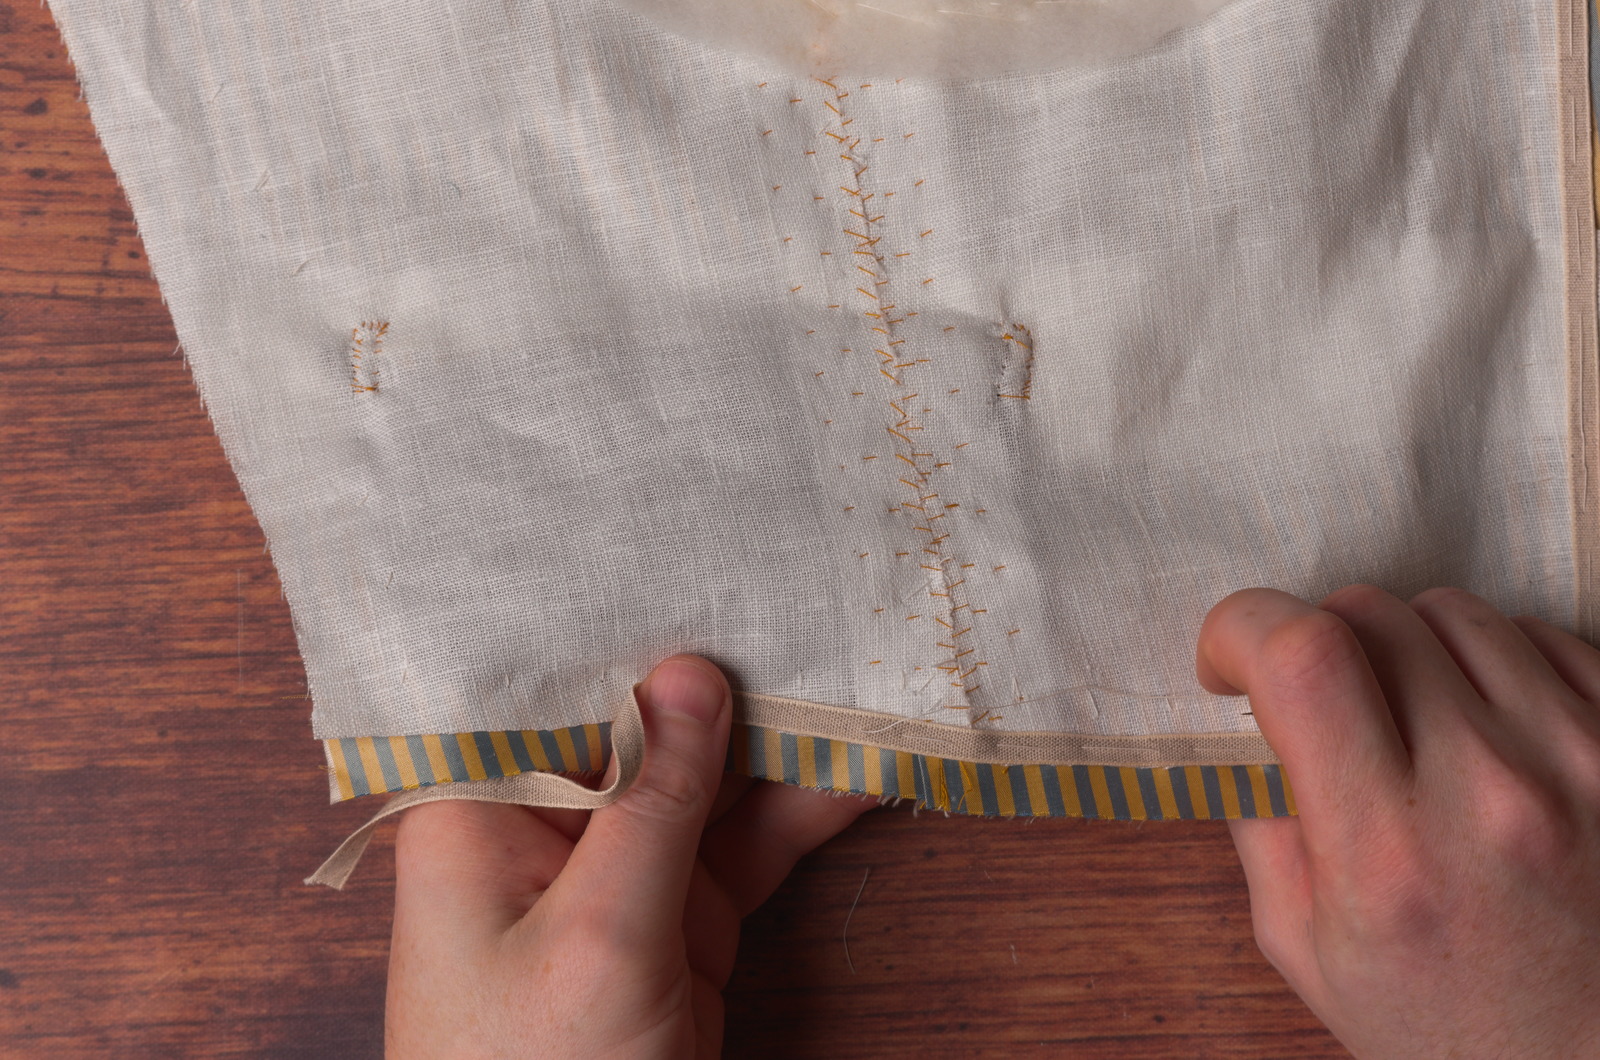
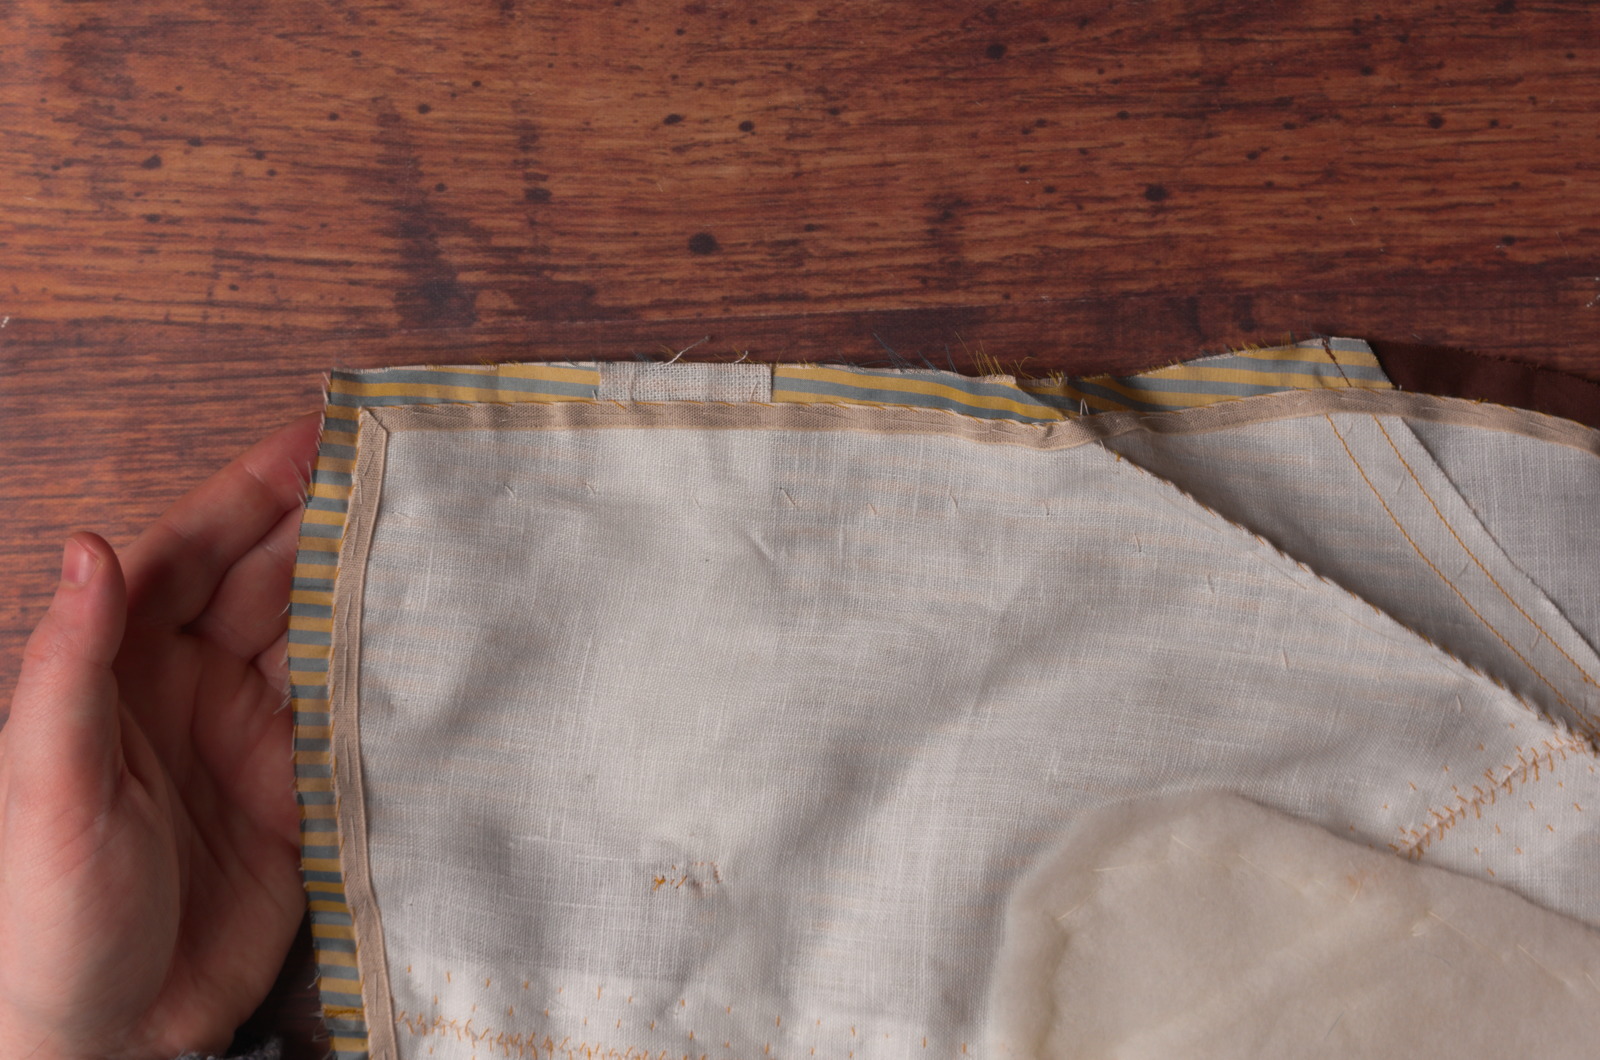
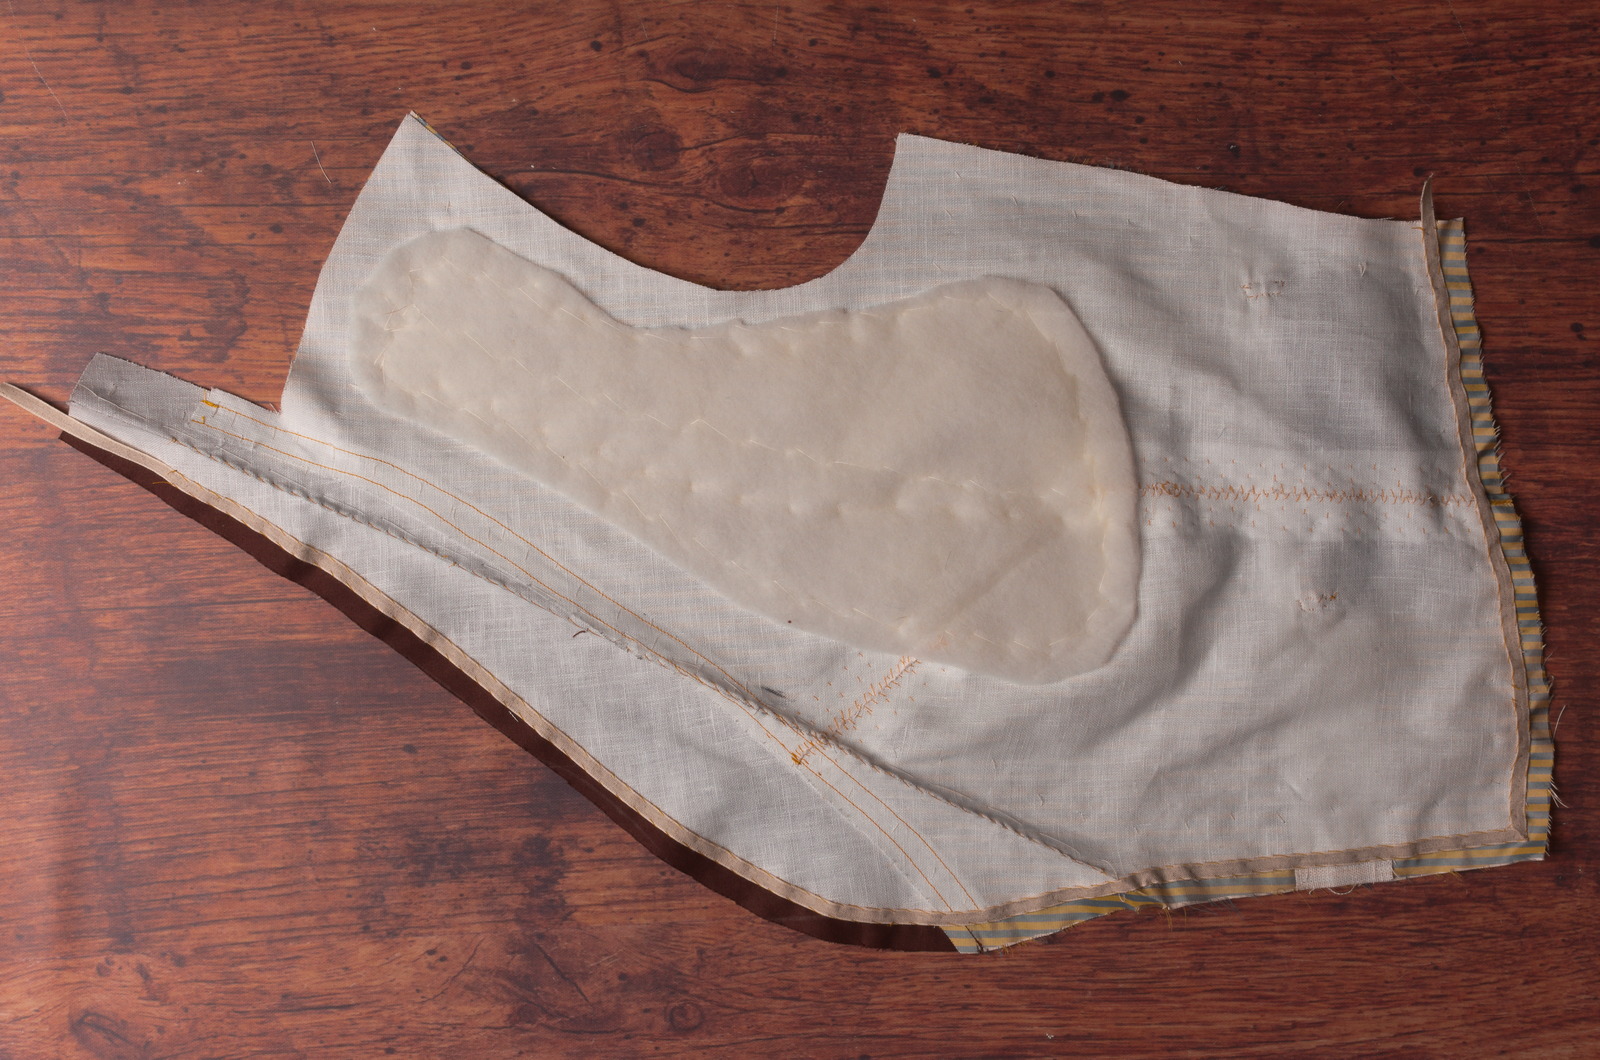
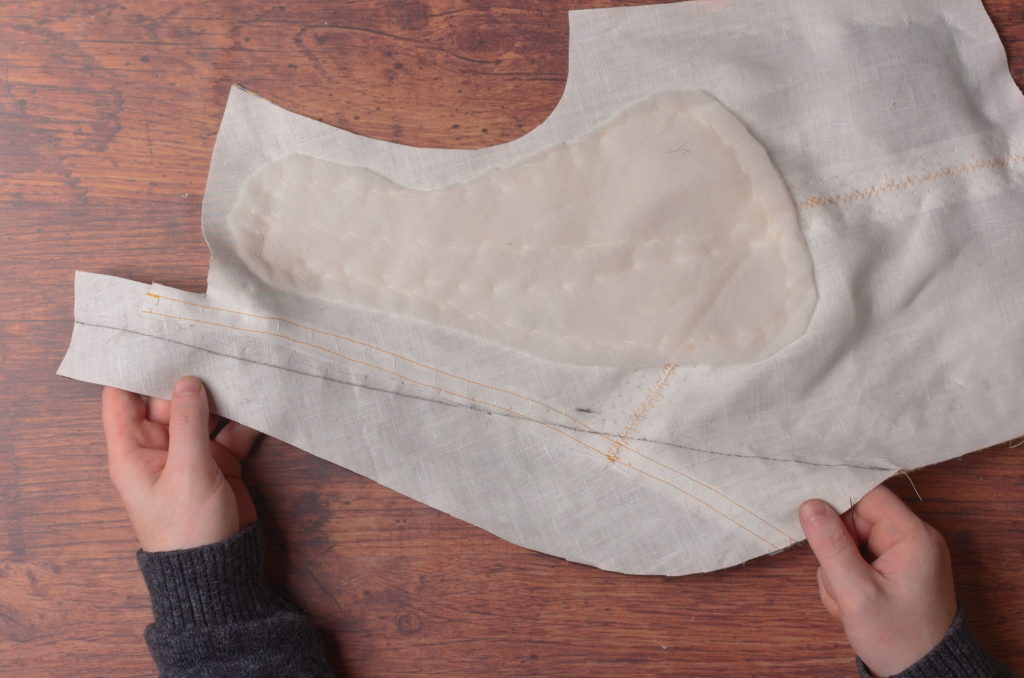
Here’s the forepart so far after basting on the stay tape.

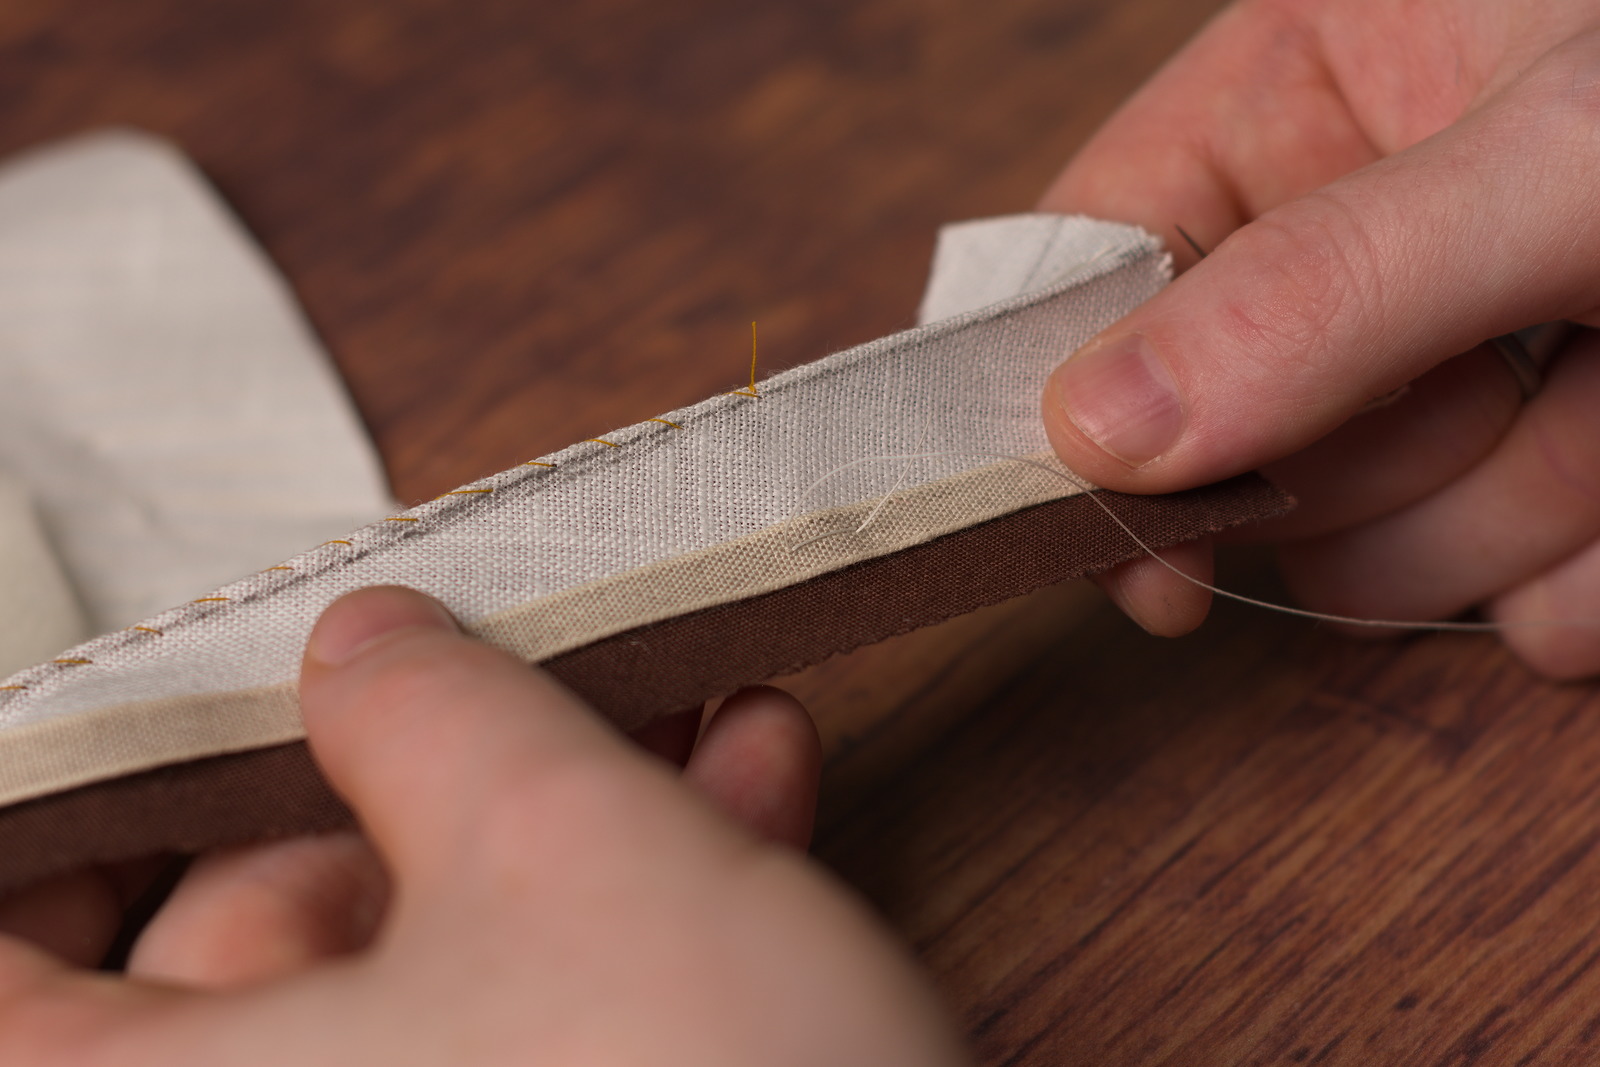
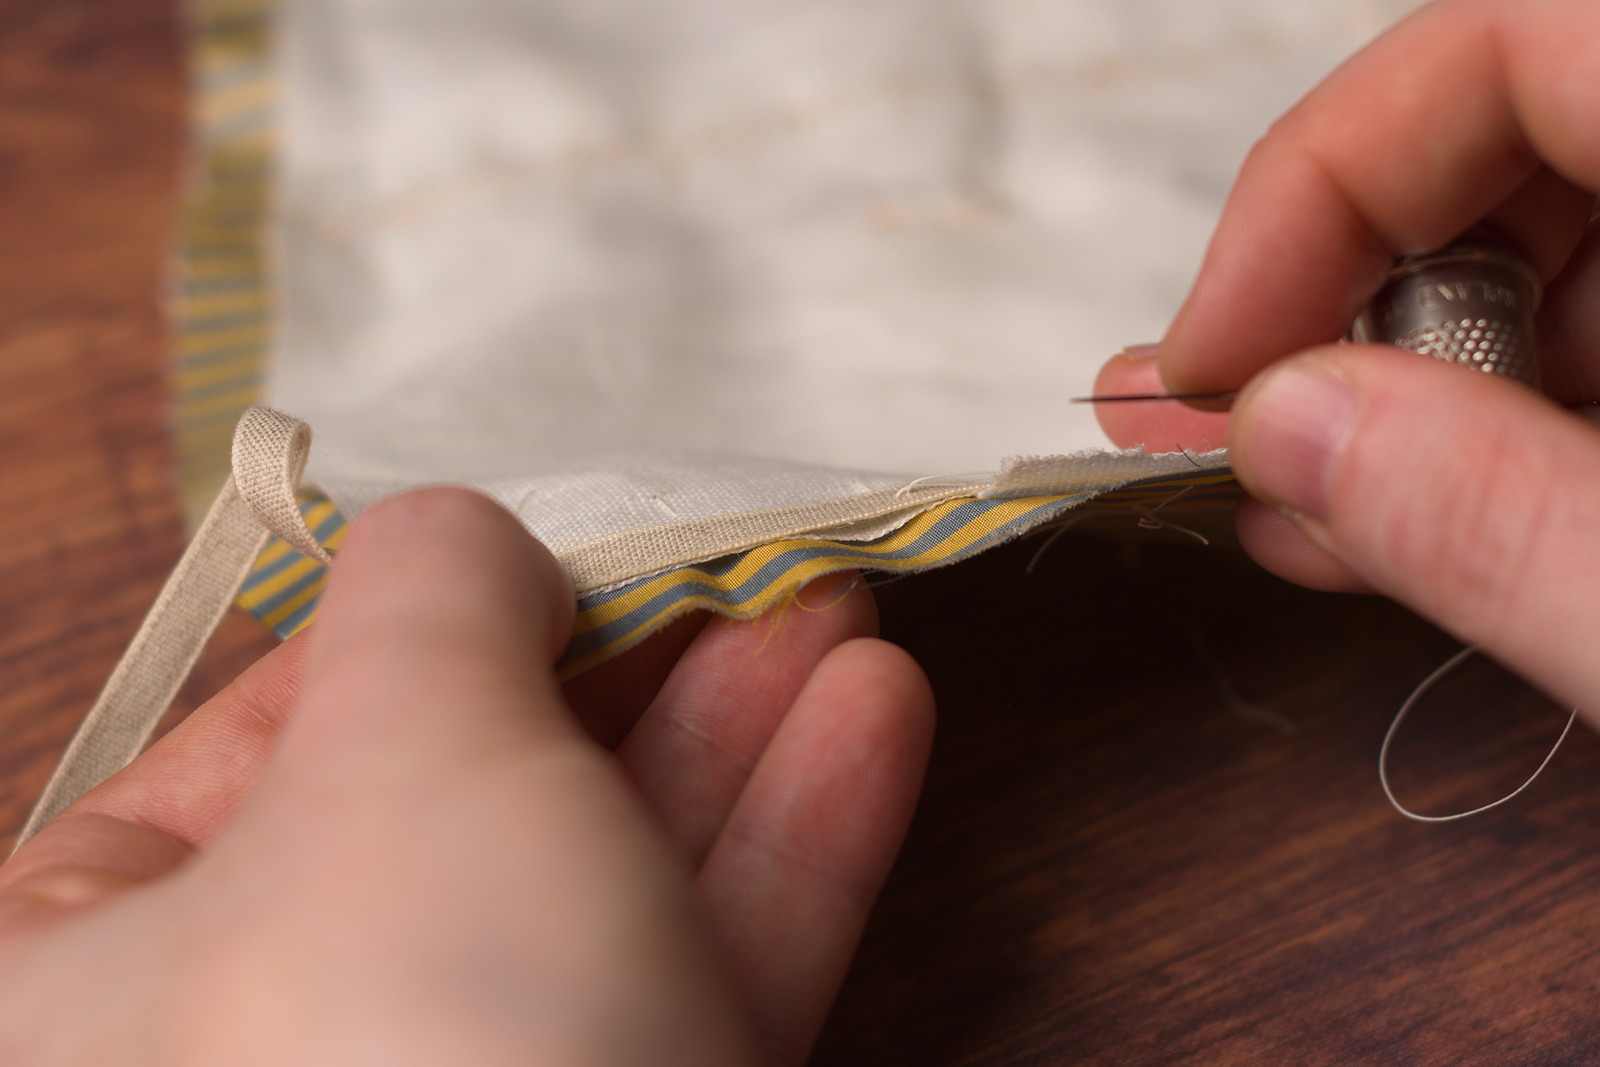
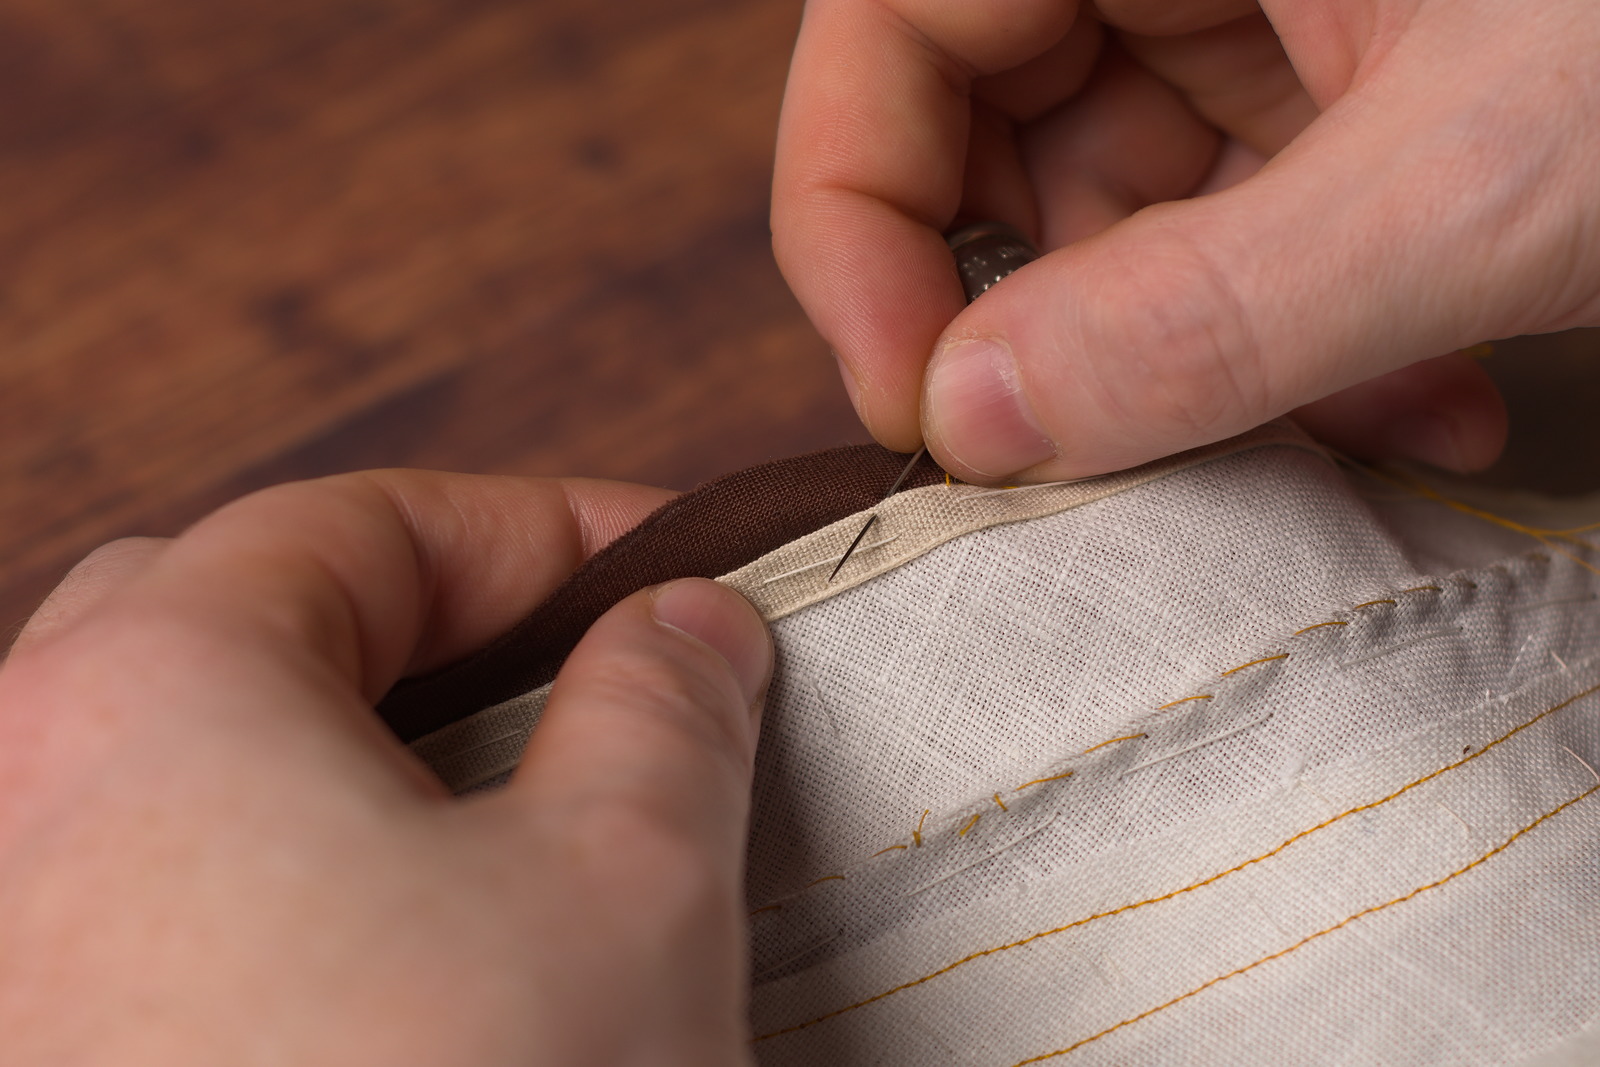
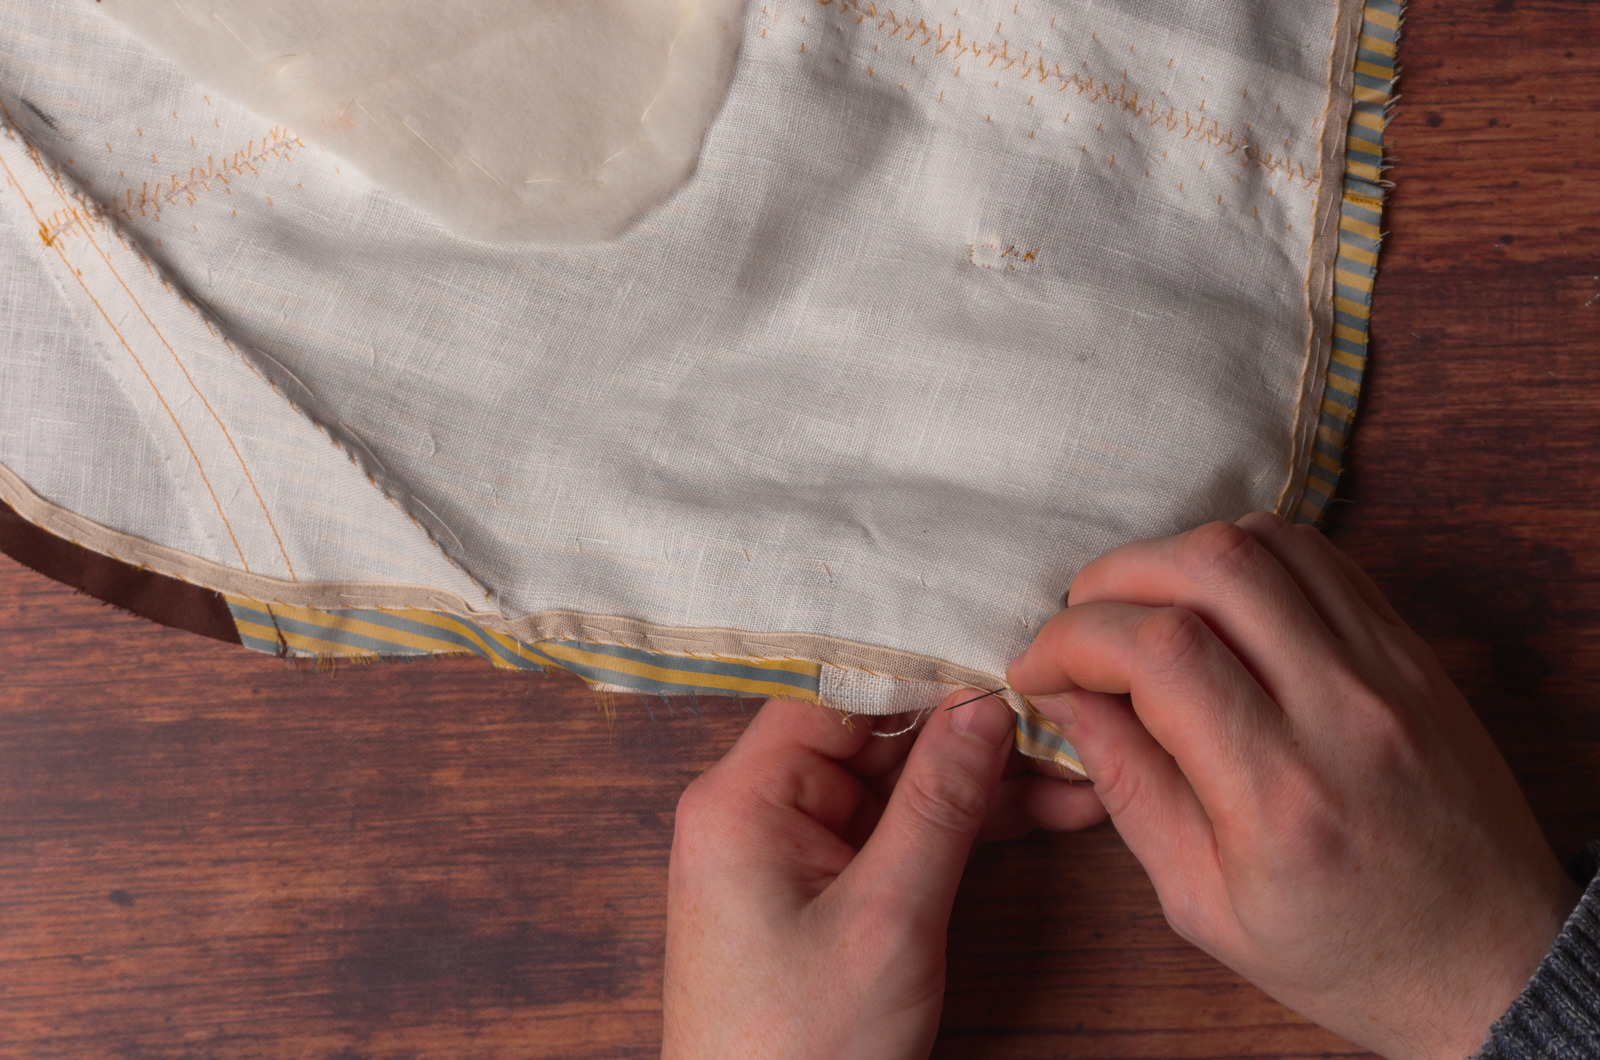
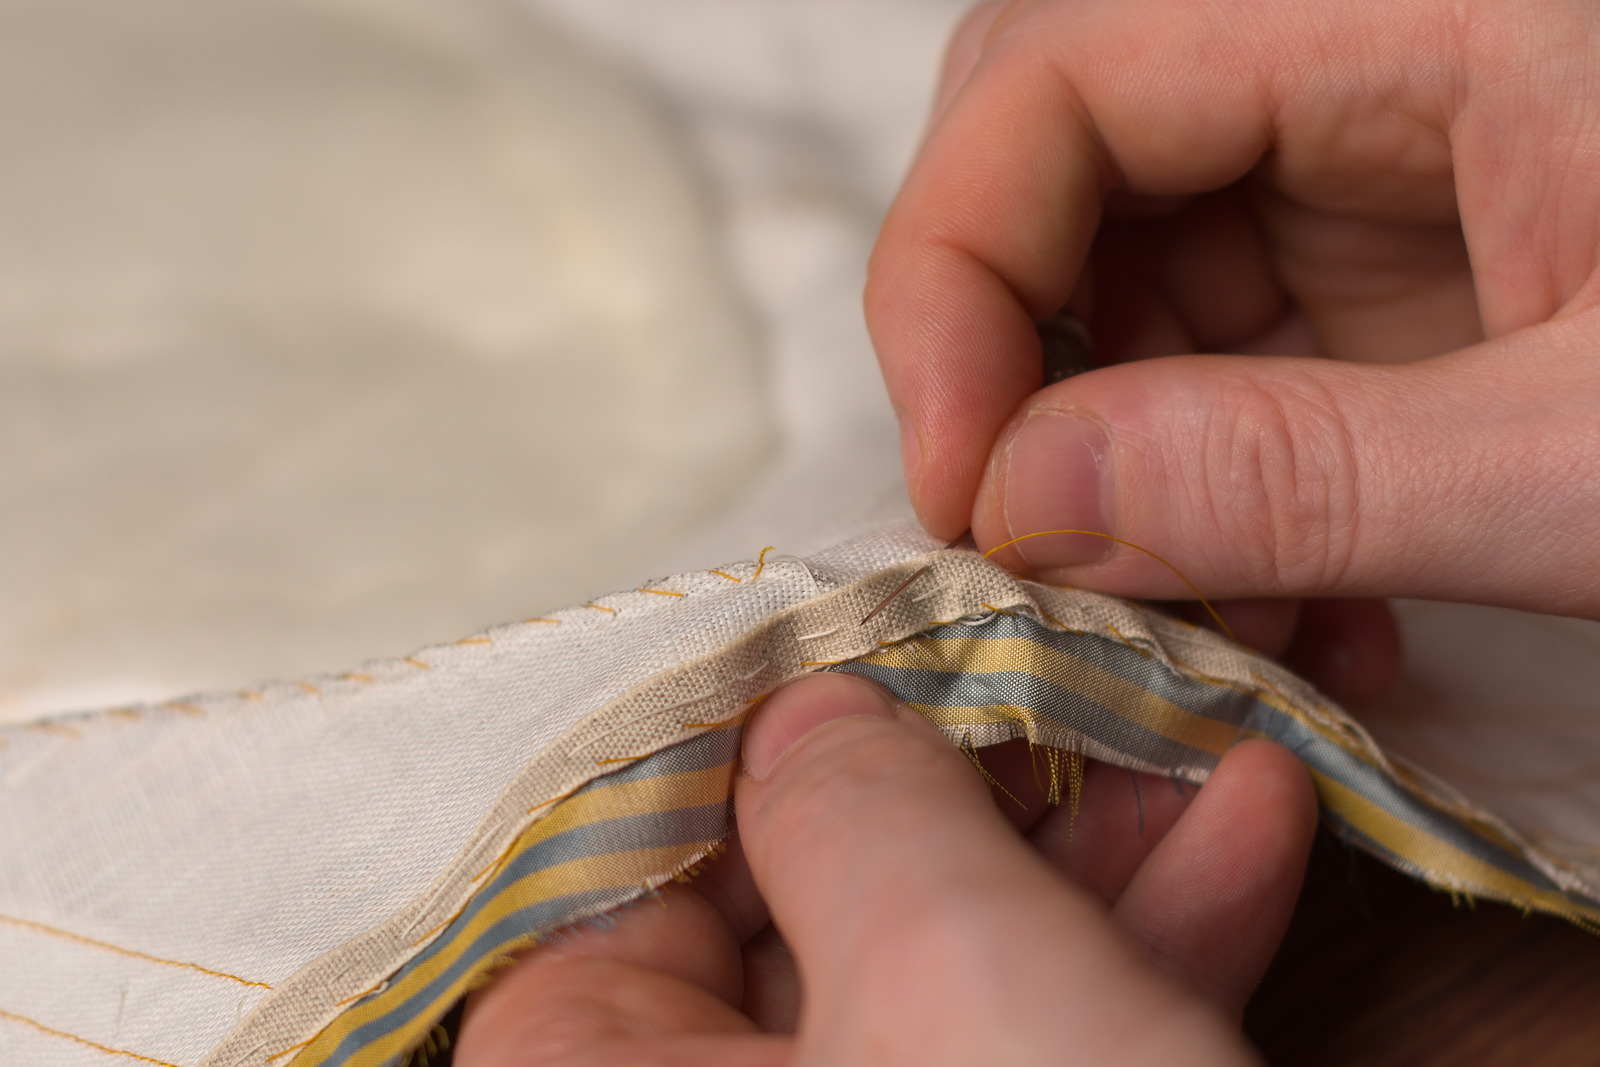
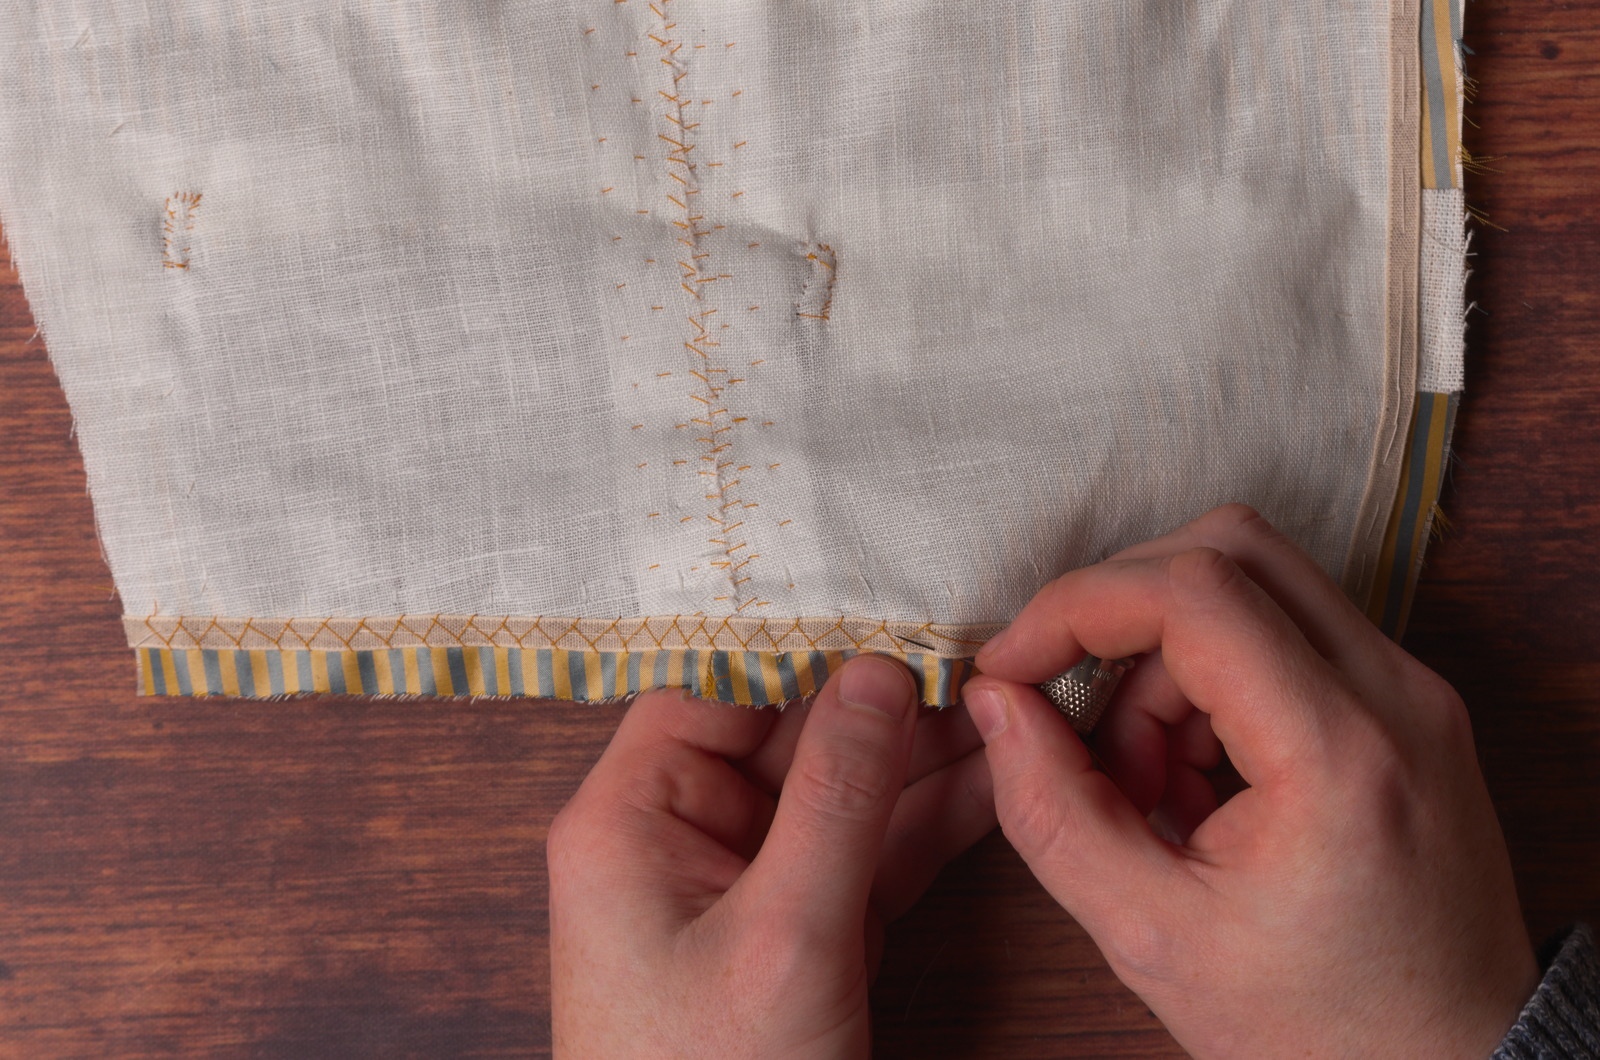
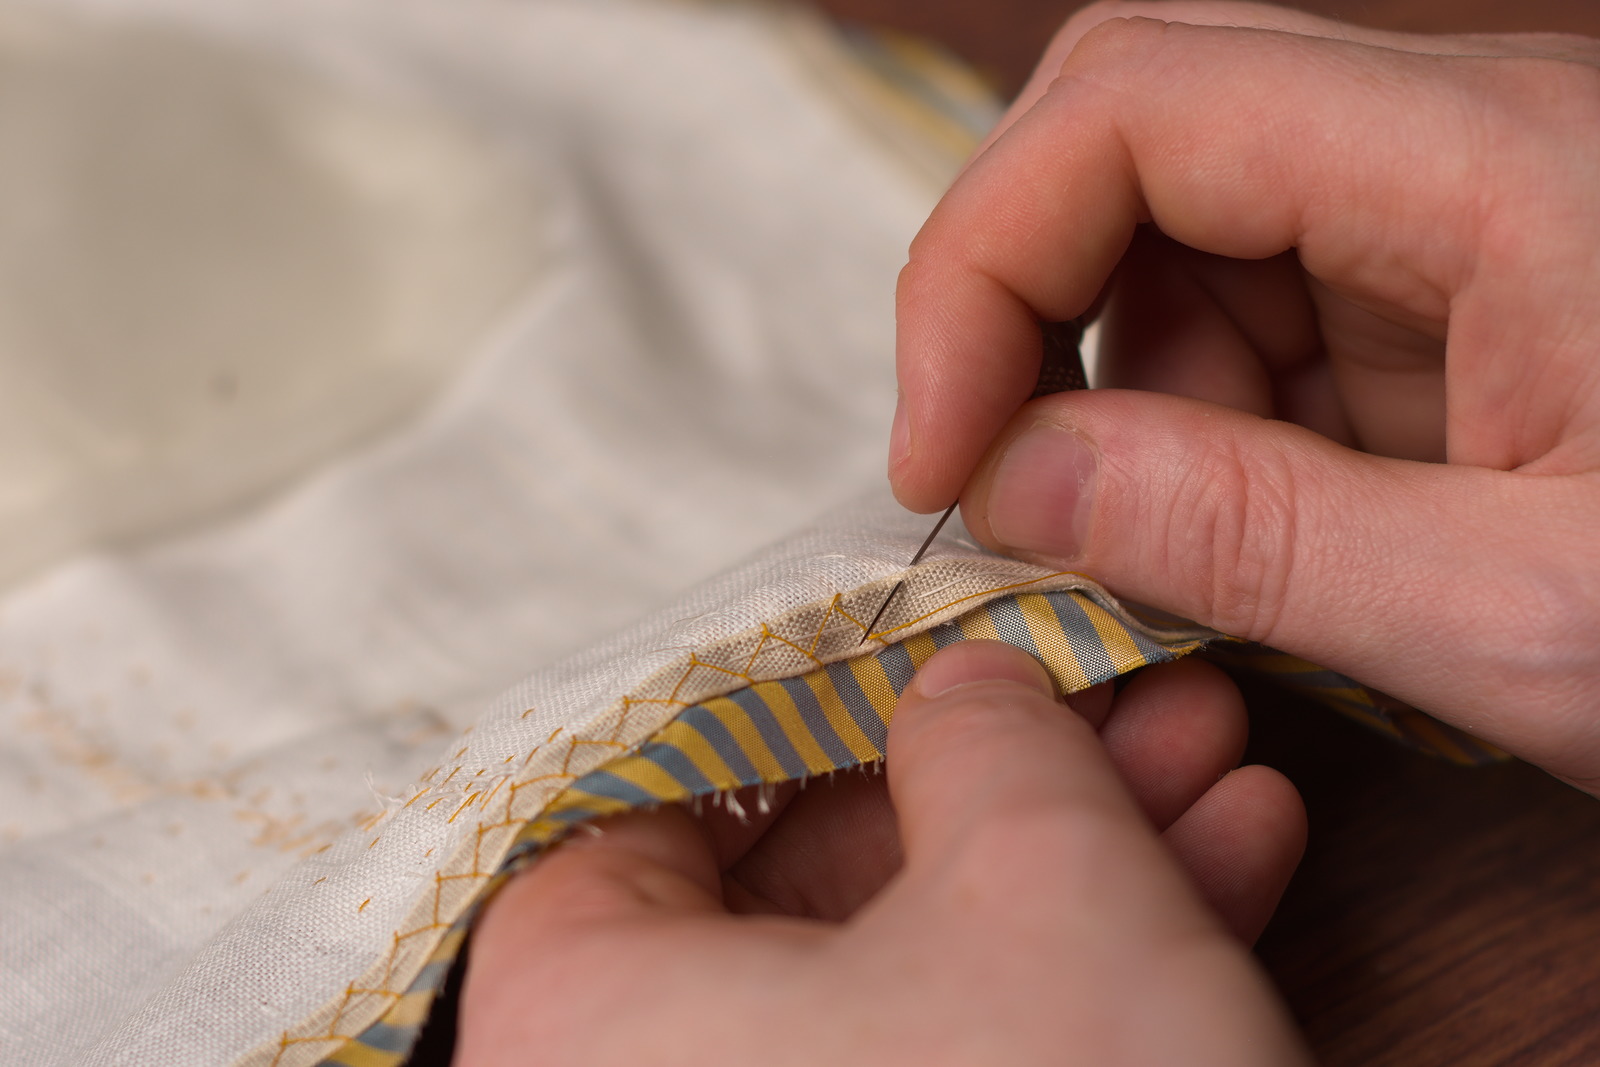
Beginning at the top of the collar, one inch above the shoulder line, begin stitching down the stay tape along the outer edge using a bit of a felling stitch. The stitches are about 3/8″ to 1/2″ apart, and the needle enters at a slight diagonal, catching only a couple of threads on the right side. You can also use a cross stitch, shown at the end of this lesson.
Stitch along the front outside edge, past the roll line.
And continue down along the center front and waist line.
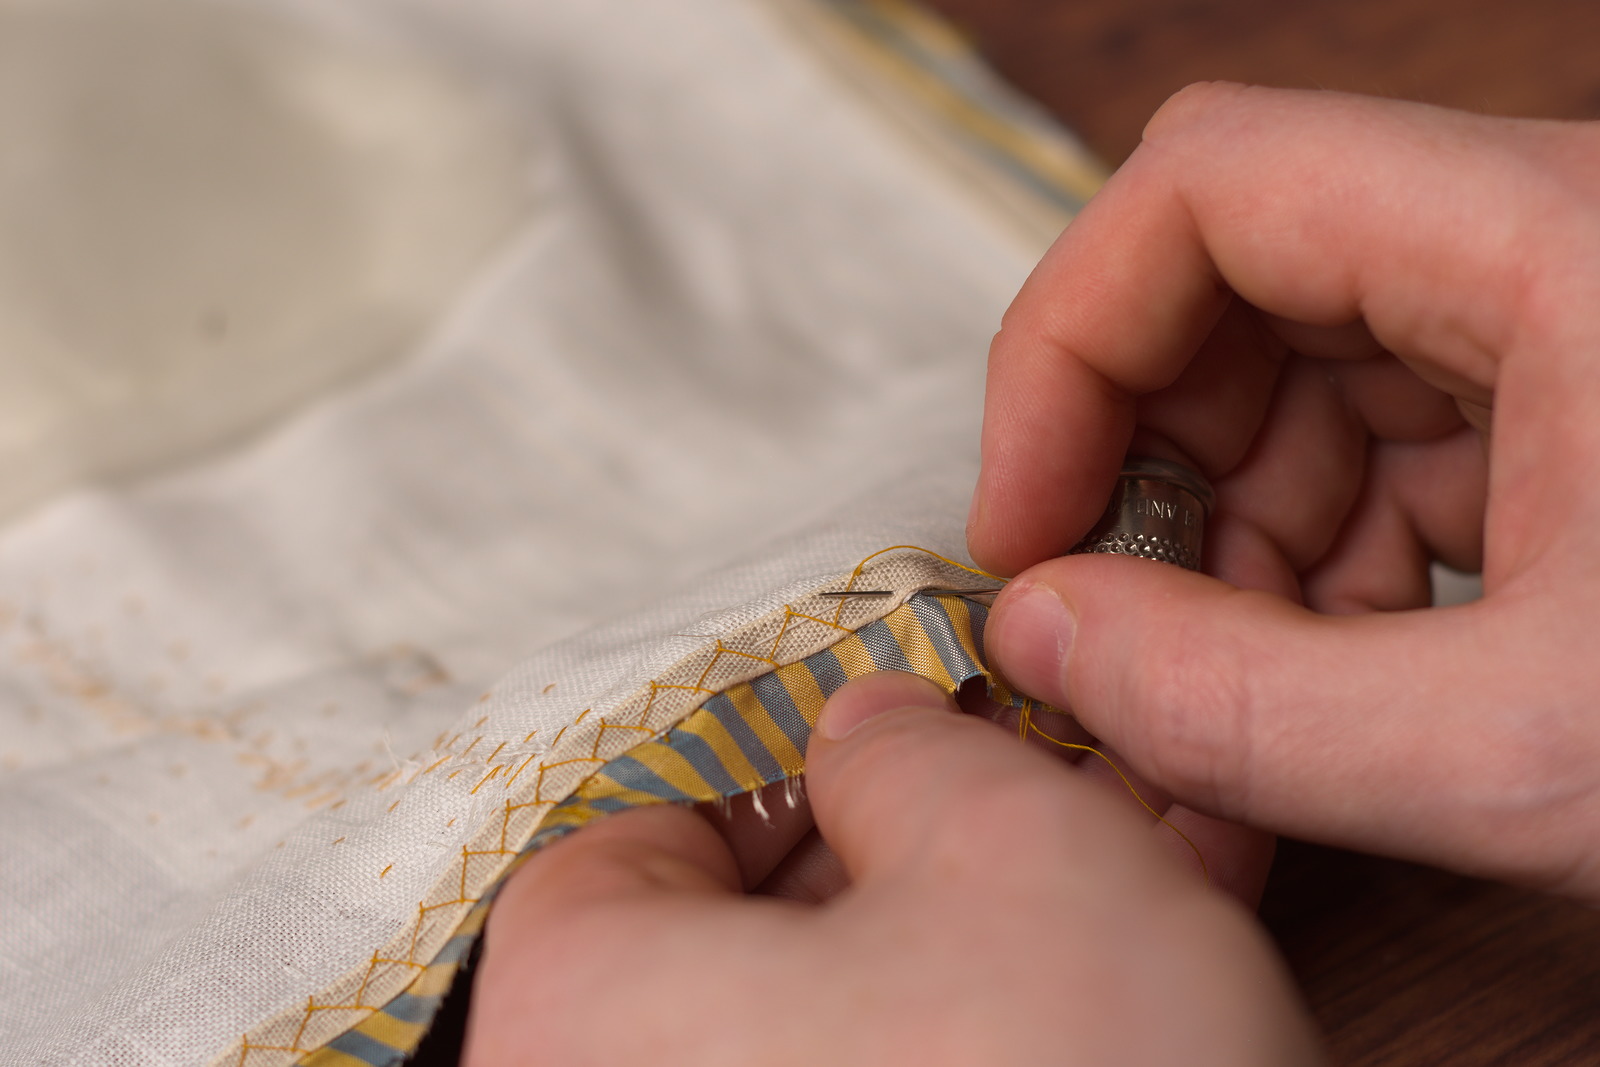
Then repeat the process, this time on the inside edge of the stay tape, and catching only the stay tape and canvas with each stitch, as these are in a more visible location looking from the right side.
Again, end the stitching about 1″ above the shoulder line. This entire area needs to be free to work with later on.
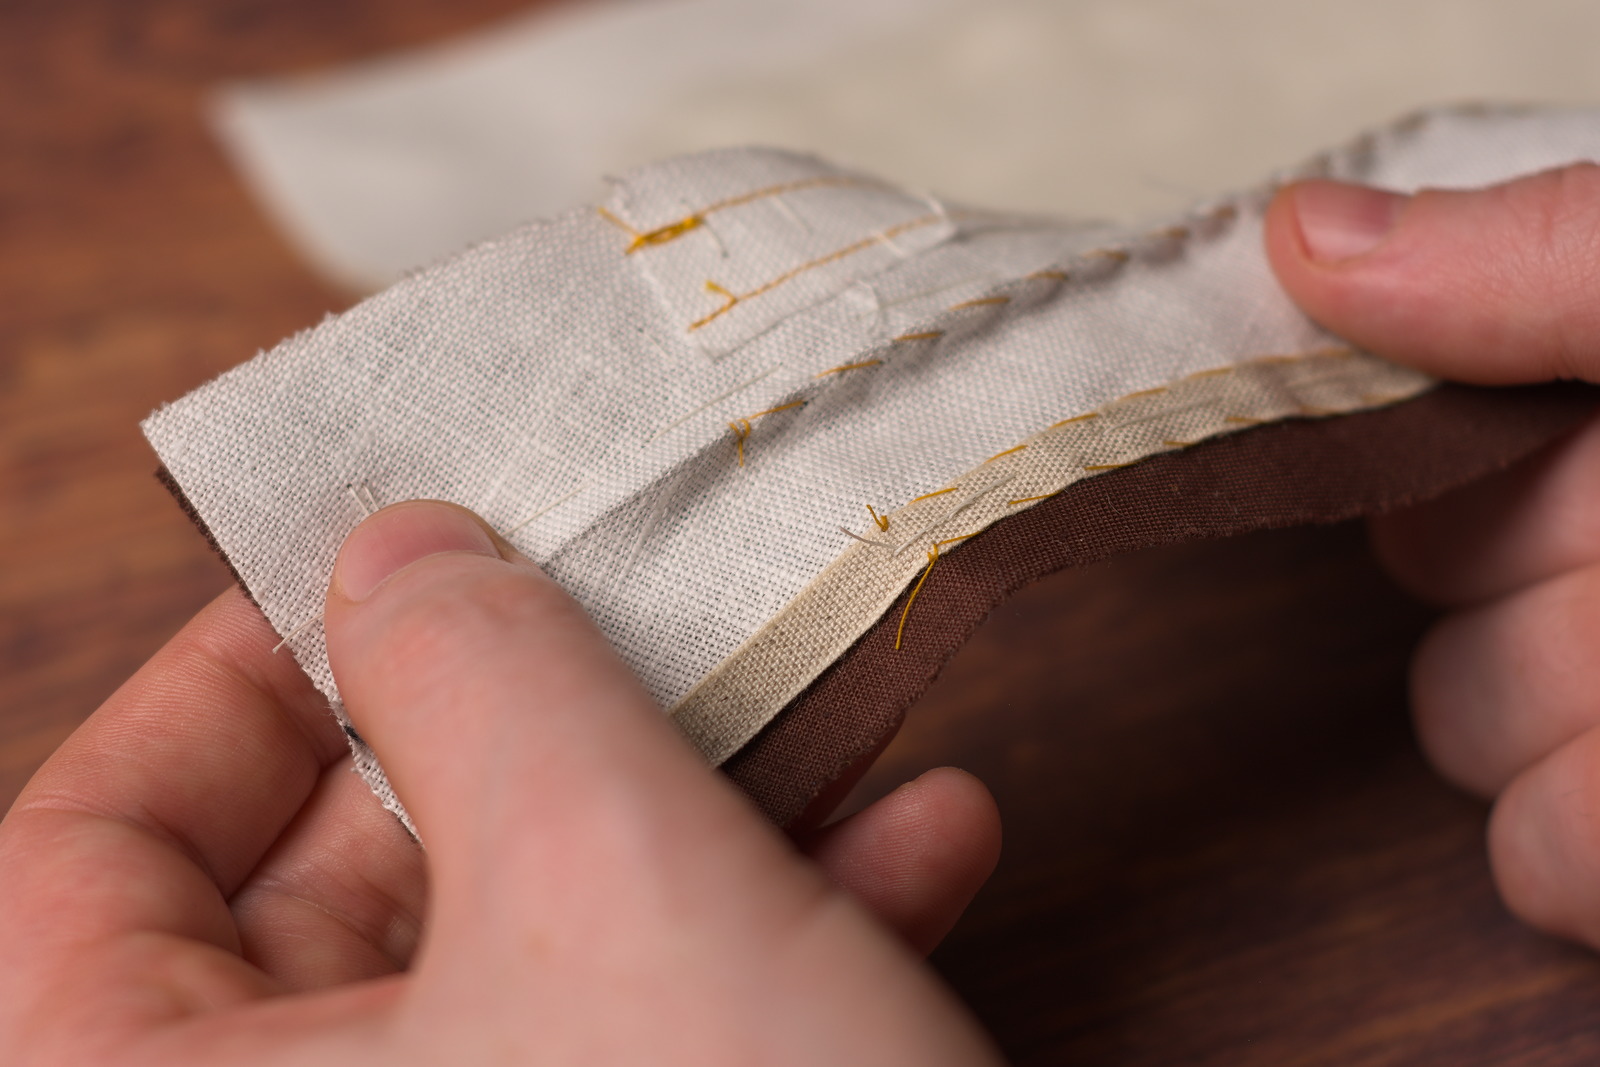
As an alternative, you could also cross stitch the stay tape to the forepart. The results are the same, but I do find this stitch is better at distributing any fullness, for example, around the roll line. It’s up to you which version you choose.
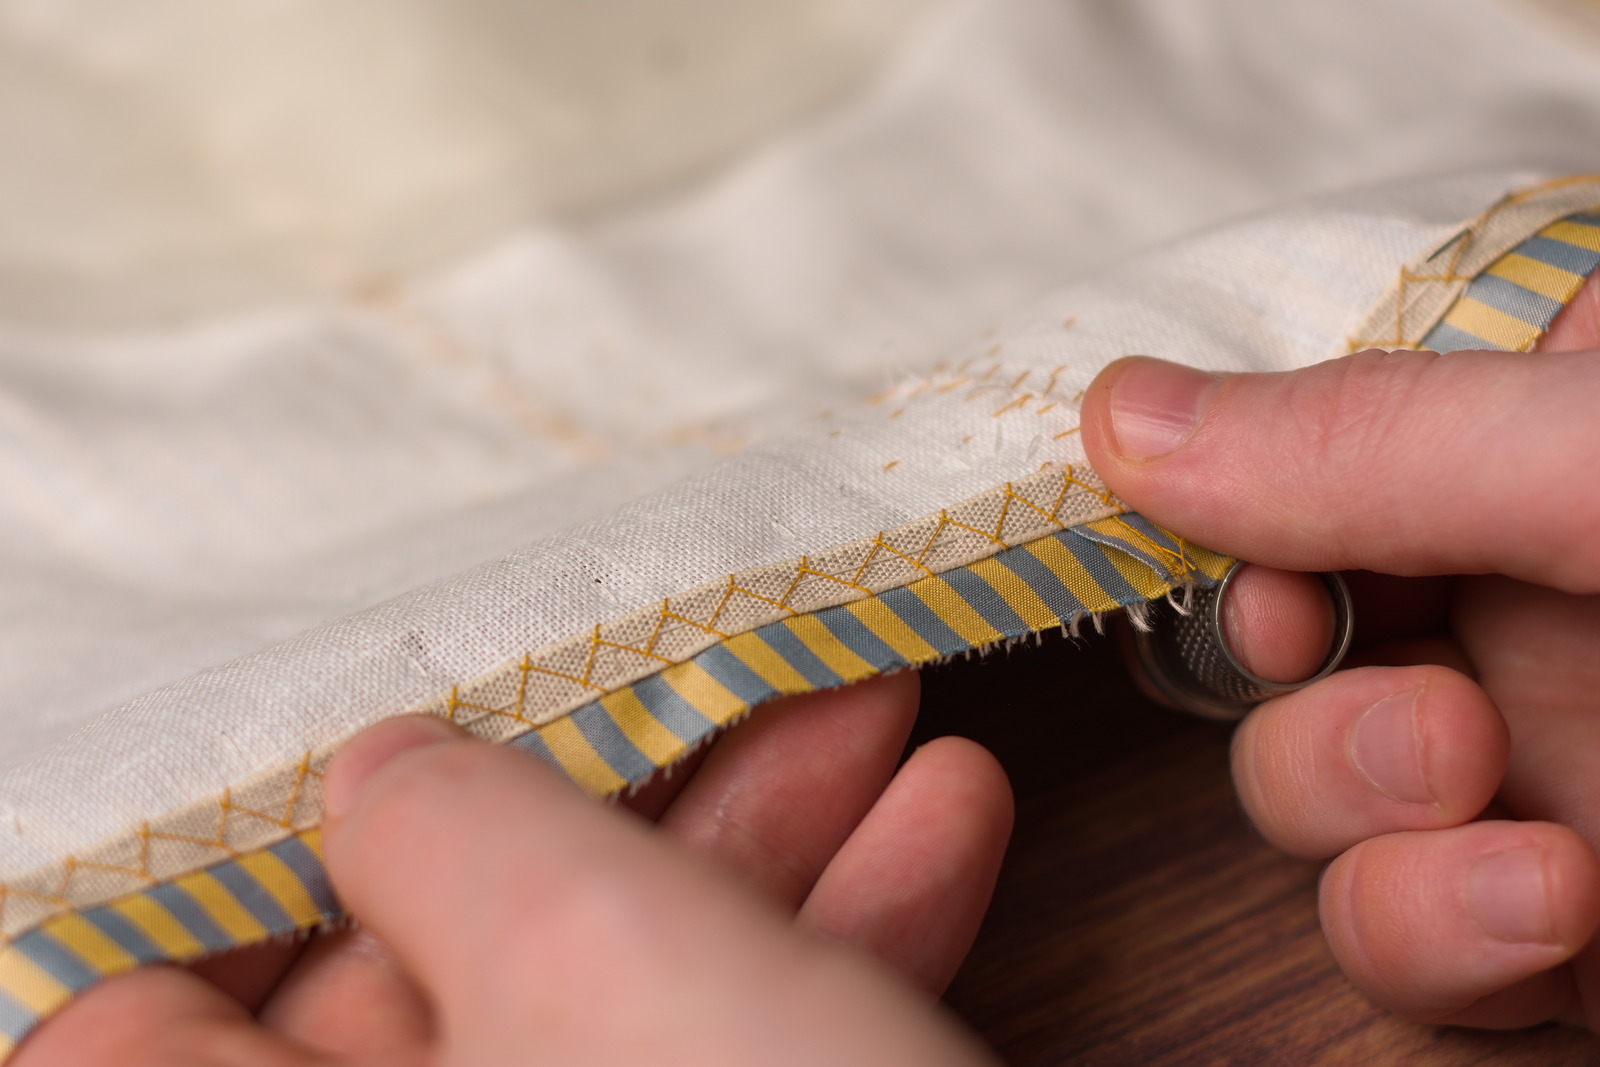
Finally, remove the basting stitches – they’re so much easier to remove now than later if you forget.
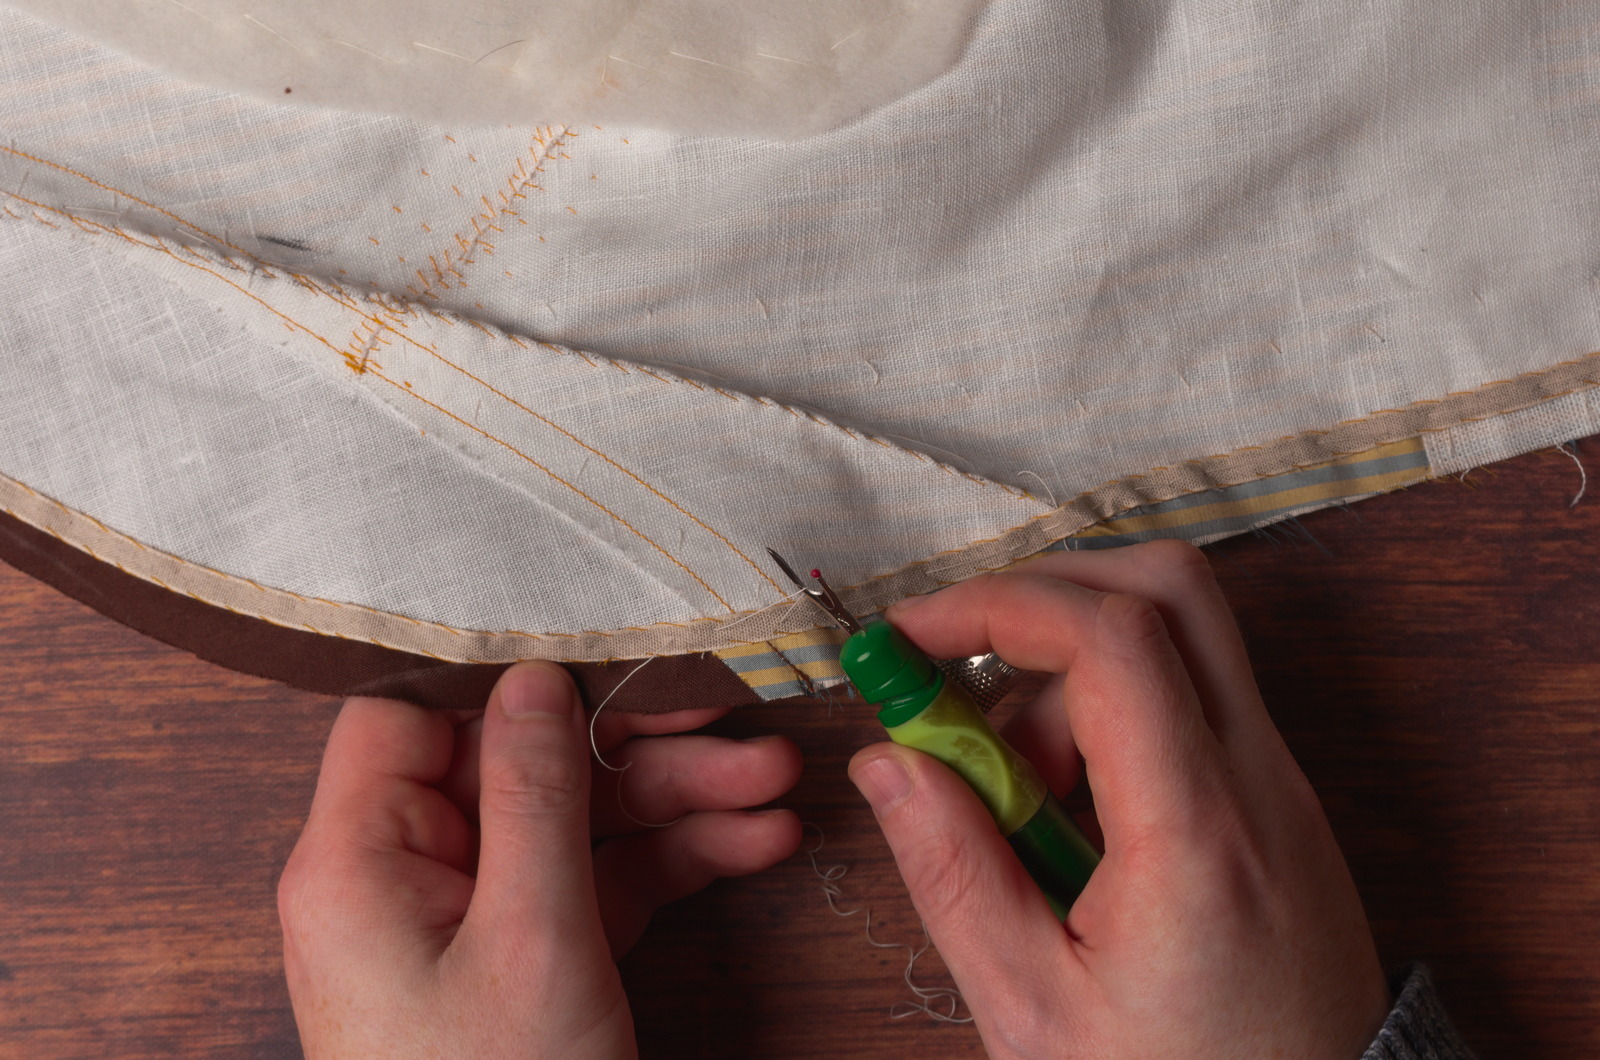
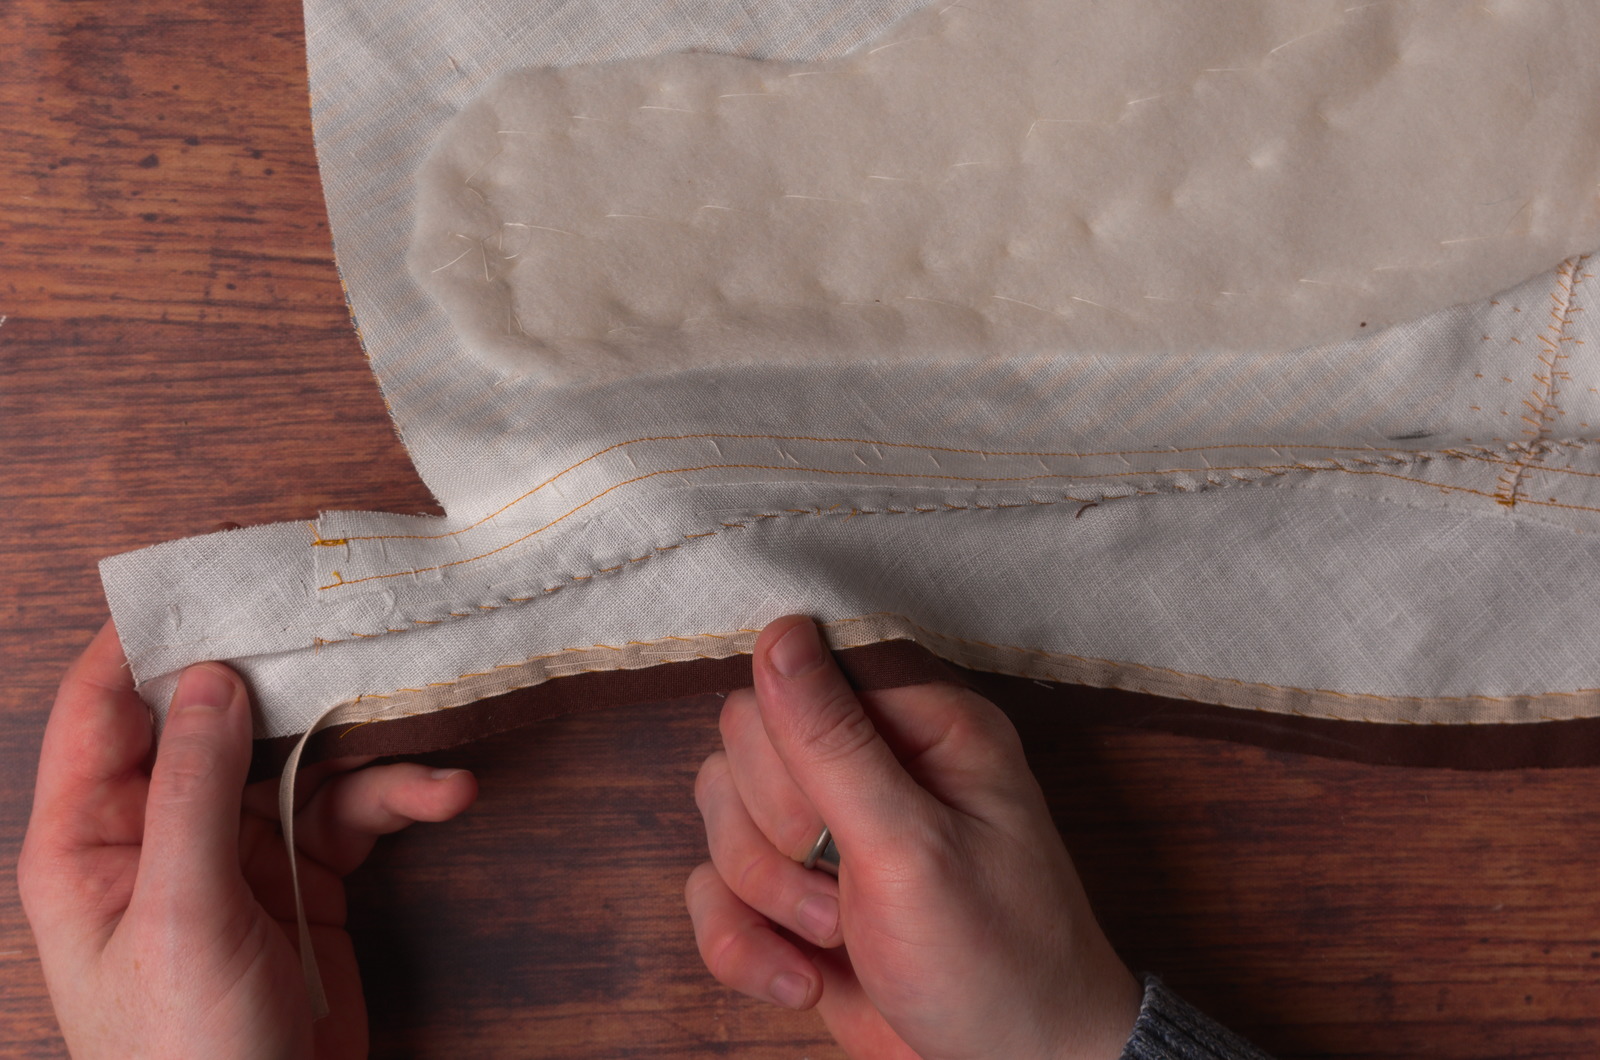
Here’s the forepart so far after installing the stay tape.
Tacking the Pockets
To complete the installation of the canvas, we’ll again turn back to the pockets, which we left unfinished at the ends. We’ll now trim the ends, turn them under, and tack them down through all layers, including the canvas, which will give them additional strength and prevent the canvas from shifting during wear.
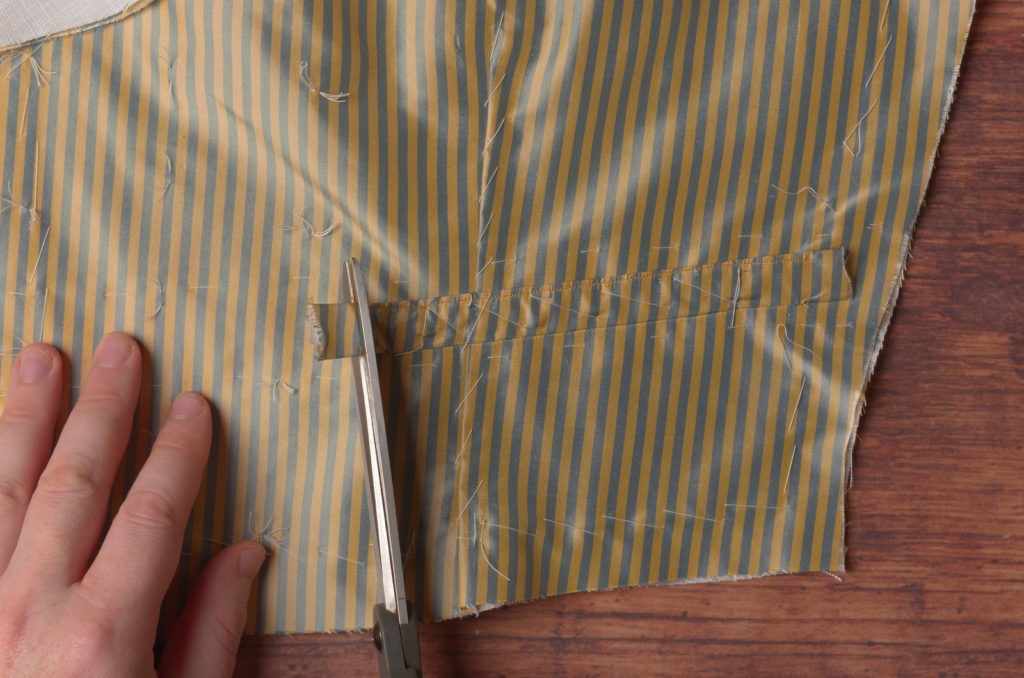
Begin by trimming the raw ends of the pocket welt down to about 1/4″ or 3/8″, either square across or more of an angle if you want more of a ‘boat’ shape to your pocket ends.
Fold the raw edge under, forming the shape you want, and pressing firmly with your fingers against the table.
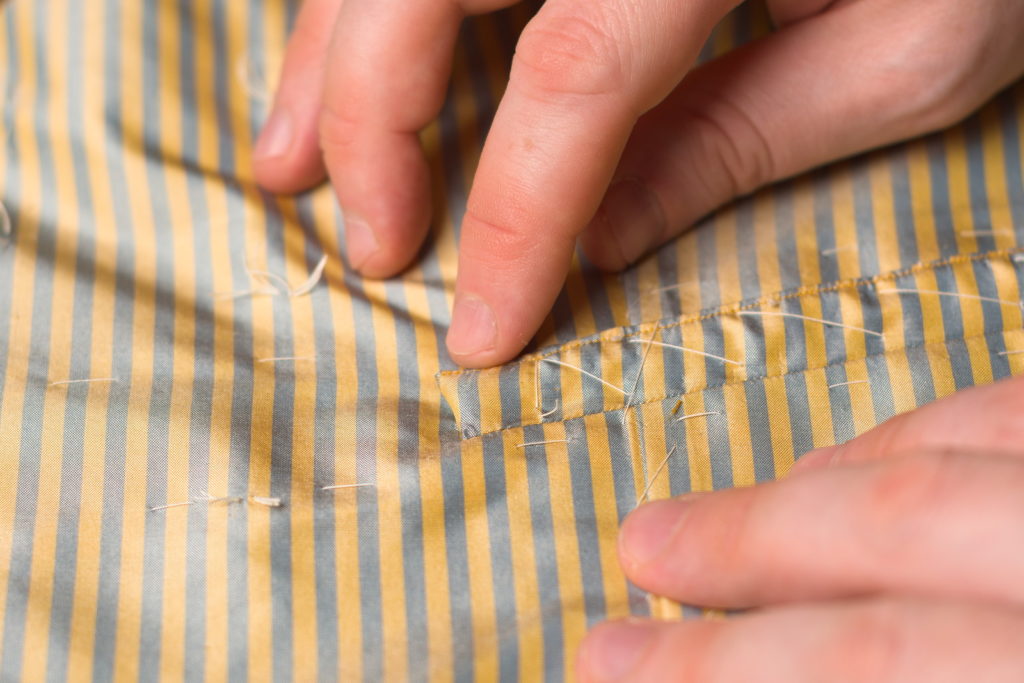
Depending on the angle of your pocket, you may have a little excess fabric poking above the top of the welt. You’ll have to push this under the welt with your fingernail as you fell the top edge.
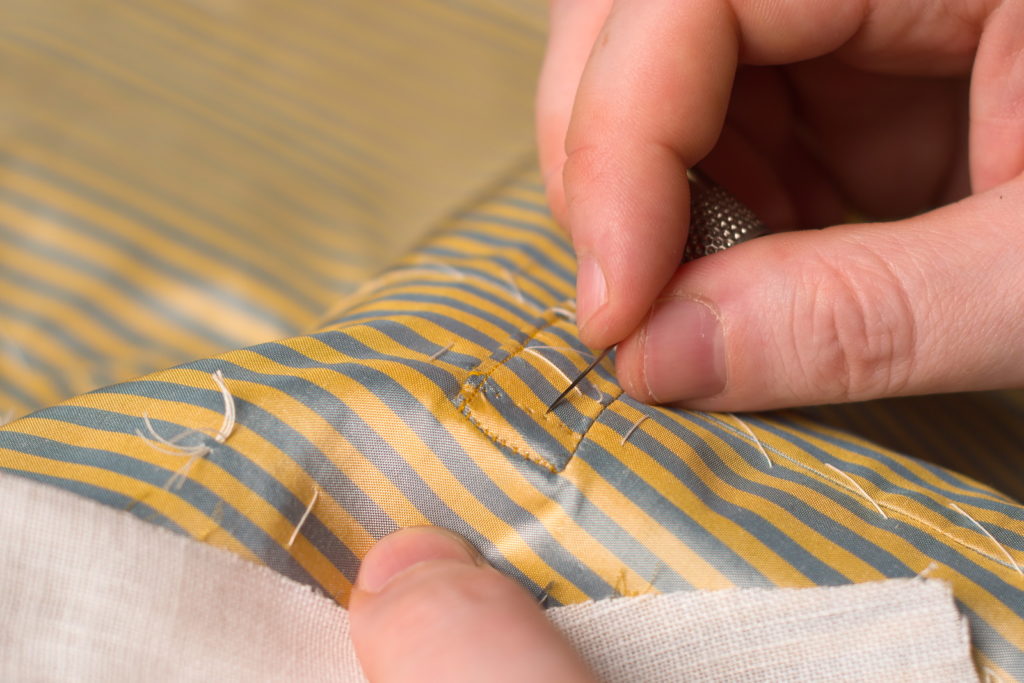
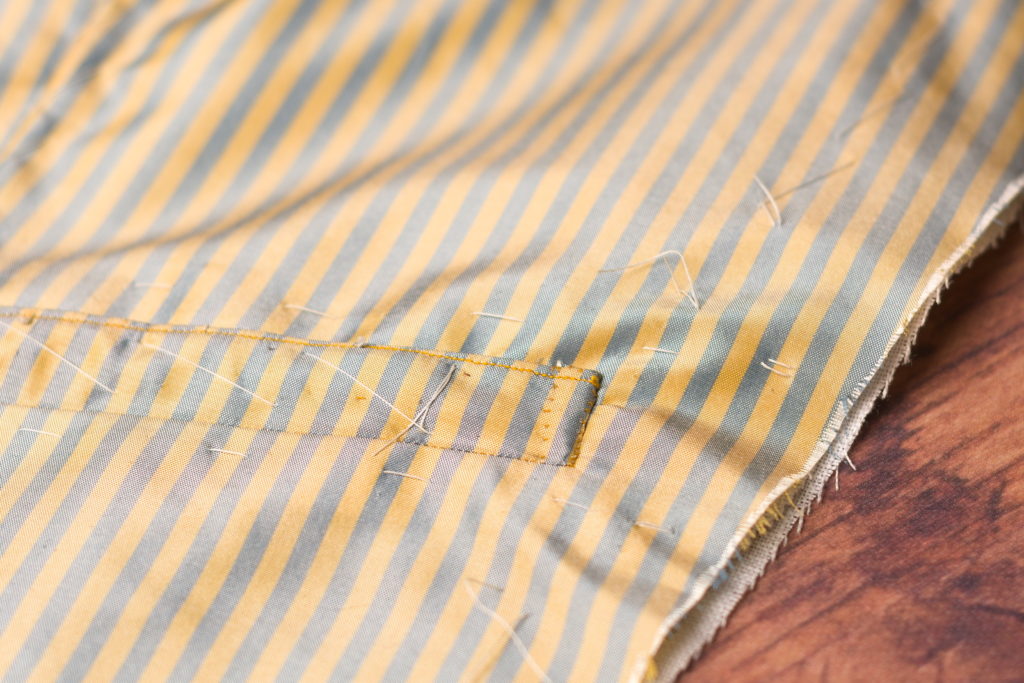
Along the top of the welt, about 1/4″ from the end, form 4 – 5 felling stitches in place, going through all layers. You may need to make this a prick stitch – that is, passing the needle all the way through to the underside, in order to get through all of the layers. This is the point of the pocket that takes the most stress, so the additional stitches in place are necessary.
Continue felling along the top edge of the pocket towards the end, through all layers.
Then continue felling down along the end of the pocket itself, taking as small a stitch as you can into the welt to minimize the stitching that’s visible. It’s a bit tricky in silk, but it can be done.
Here’s the end of my pocket after felling.
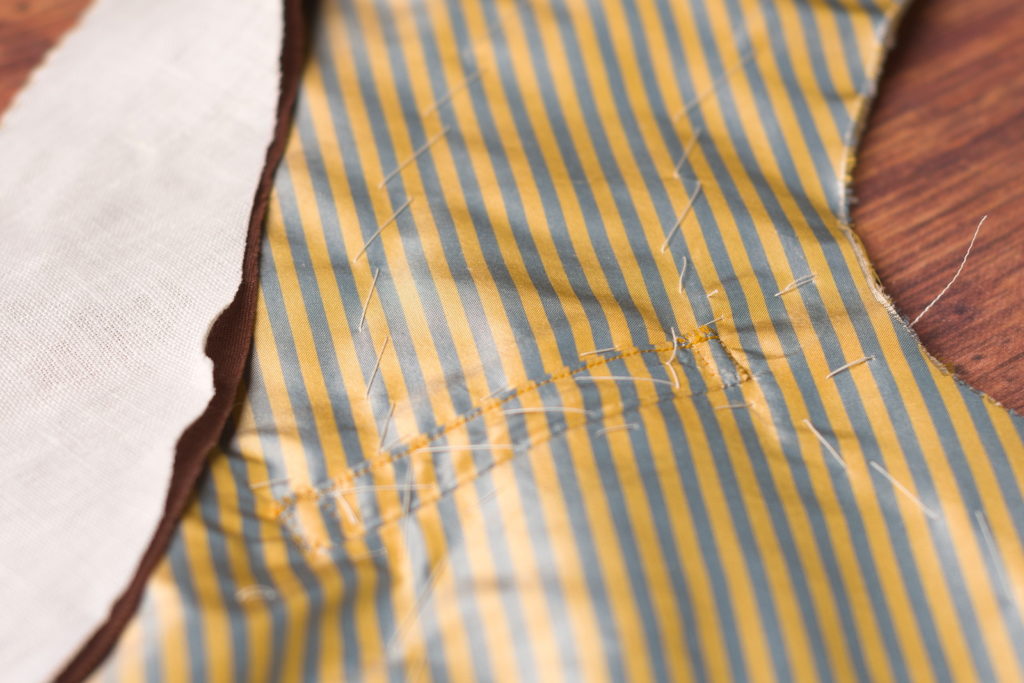
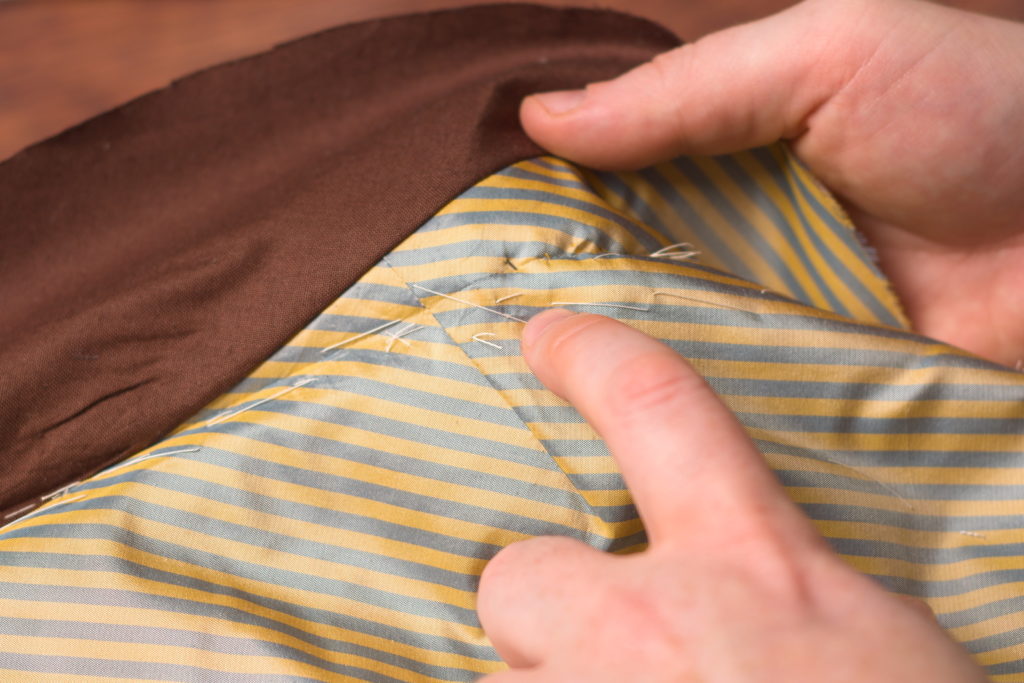
Now pass the needle and thread to a point about 1/4″ from the end of the pocket, and along the bottom edge. Make your first stitch by passing the needle to the right side of the waistcoat.
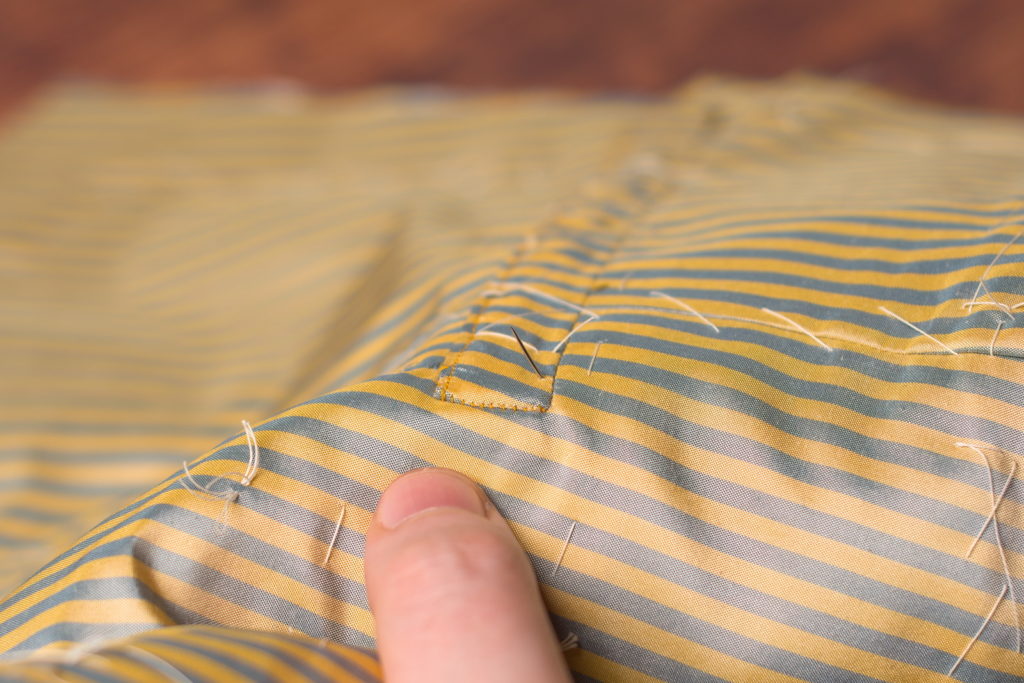
Now pass the needle back into the fabric through all layers, immediately to the side of the first half of the stitch. This is what’s called a side stitch, and due to the way the stitch is formed, is very strong, perfect for this situation.
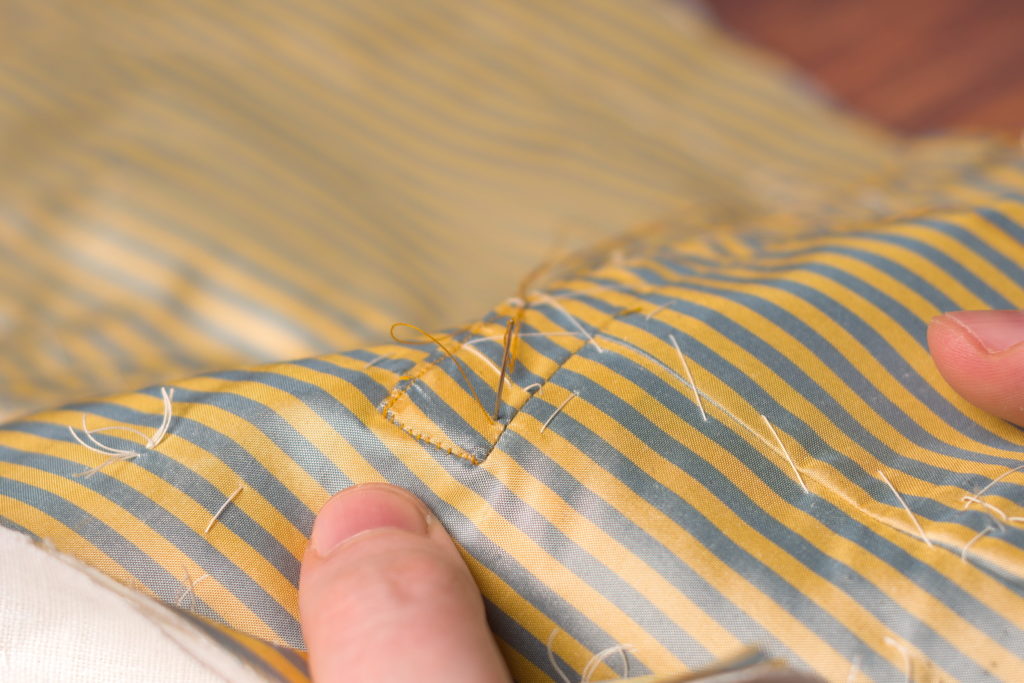
The stitch should be very small – almost invisible. The one I made here is a little large. Now, draw a line visually with your mind from that first stitch to the original group of overcasting stitches you made. Continue sewing in as straight a line as possible back towards those stitches.
I was kind of disappointed with how these came out, while they look good, I was not concentrating on aiming for those original felling stitches and shifted a little off towards the end of the pocket rather than keeping parallel to it. Alas …
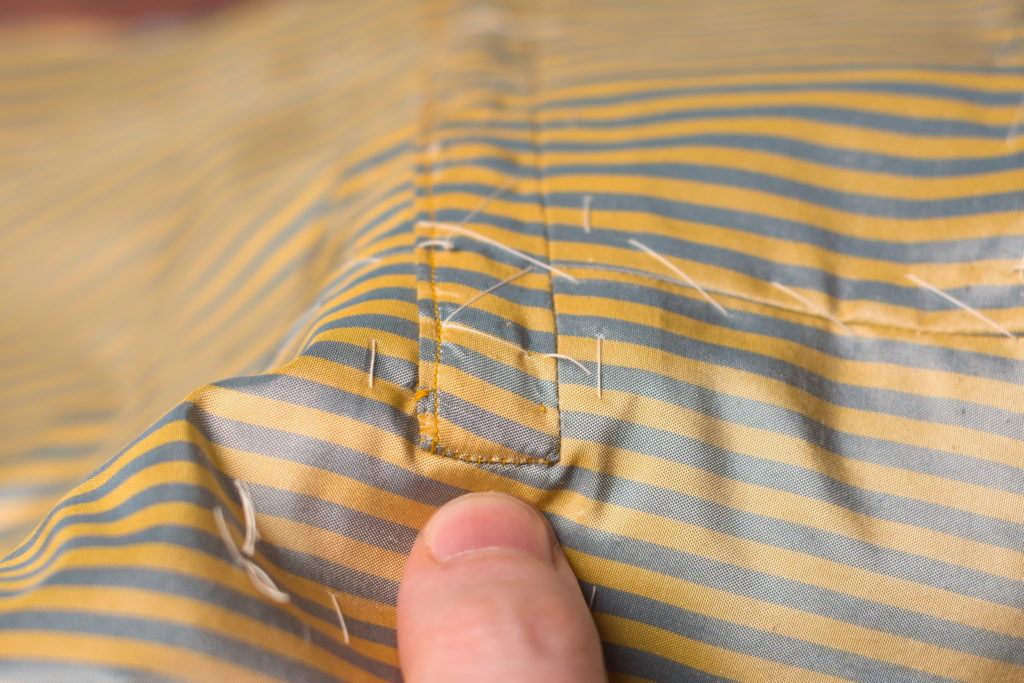
Finish off the pocket from the wrong side with a few stitches in place.

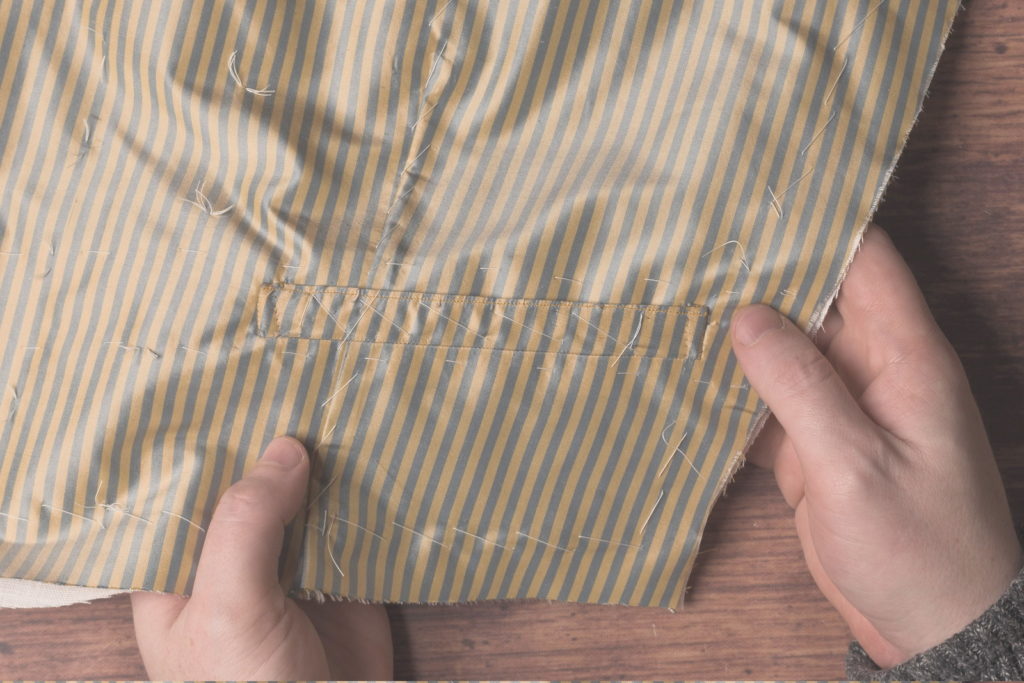
Repeat for the other end of the pocket, though you’ll probably be working in the opposite direction – just takes a little getting used to. So here I started from the bottom of the pocket on the outside edge, worked my way up, and across the top, making the felling stitches in place to tack it down, and then side stitching down the pocket.
Here’s one of the completed pockets, continue with the remaining pockets.
Collar Roll Line
With the canvas installed, we can move on to finalizing the position of the roll line. Take your collar pattern and align it on the collar canvas as closely as possible. Slide it down about 1/4″ to expose the linen underneath and make a mark at the top of the collar along the roll line.
Then mark the roll line at the bottom edge of the collar pattern. This point most likely won’t align with the final roll line position due to the dart, but it’s useful to see the amount of adjustment.
Finally, pull back the canvas to find the location of the bottom of the roll line, which should have been marked on the forepart.
Mark the bottom of the roll line as closely as possible. I usually just do this by eye but you could make a tailor’s tack through all layers from the right side to find the location that way.
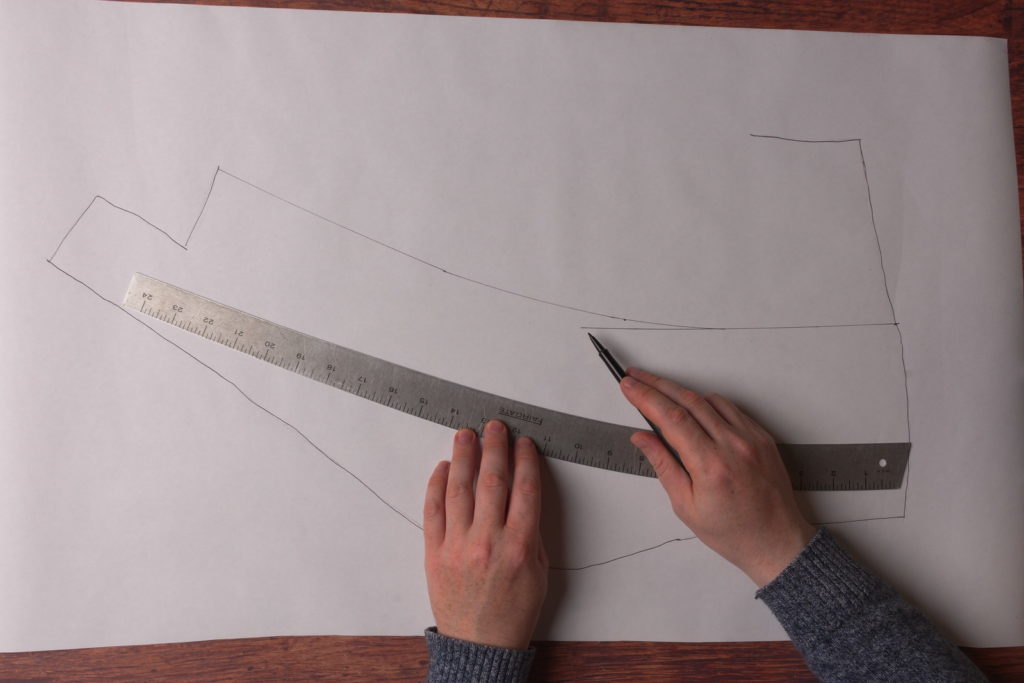
Now start marking in the final position of the roll line. In the original draft, it’s indicated as a straight line from top to bottom, but I find that doesn’t actually work so well in practice, and a bit of nuance is needed in the positioning.
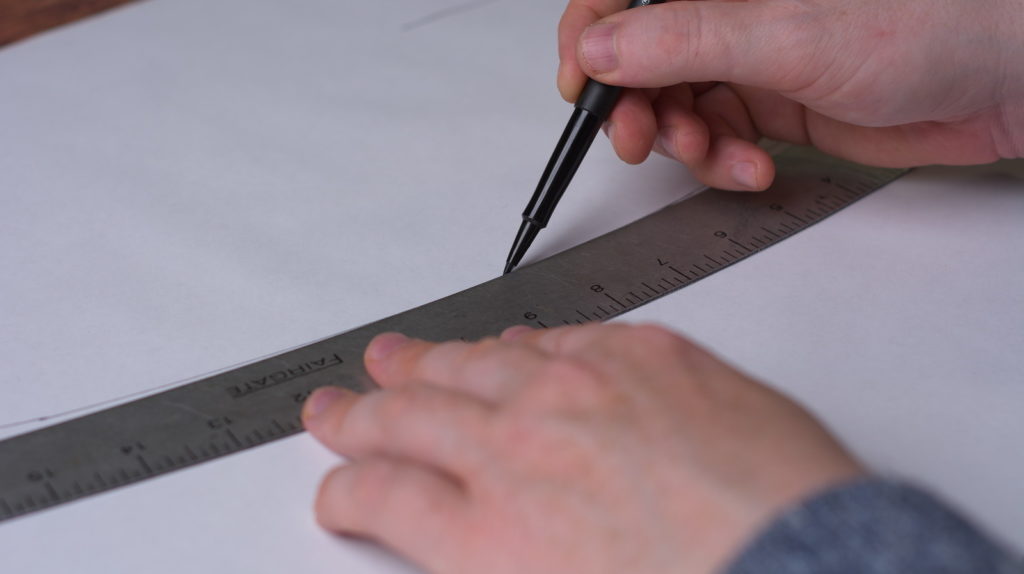
At the top end of the collar, keep the roll line parallel to the lower neck edge (closest to the top of the photo) for the first 3 inches or so, to about level with the shoulder.
Then ever so slightly shift the ruler so it aligns with the bottom mark, and draw in the rest of the roll line.
Here’s the roll line all marked out, you can see the slight angle we put in. When the waistcoat is worn, this will help everything stay closer to the neck.
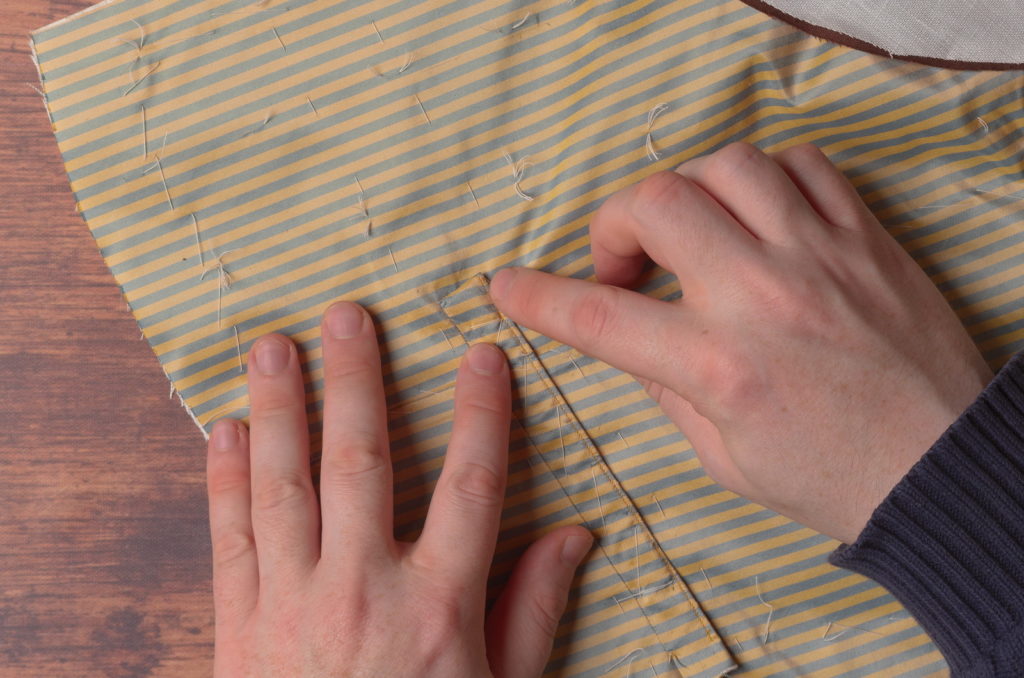
Keeping everything flat and aligned between the layers, baste a row of straight stitches about 1/4″ away from the inside of the roll line.
It occurred to me afterwards that it might be easier to just baste directly down the center of the roll line, that way the layers will stay together even better without much effort on your part.
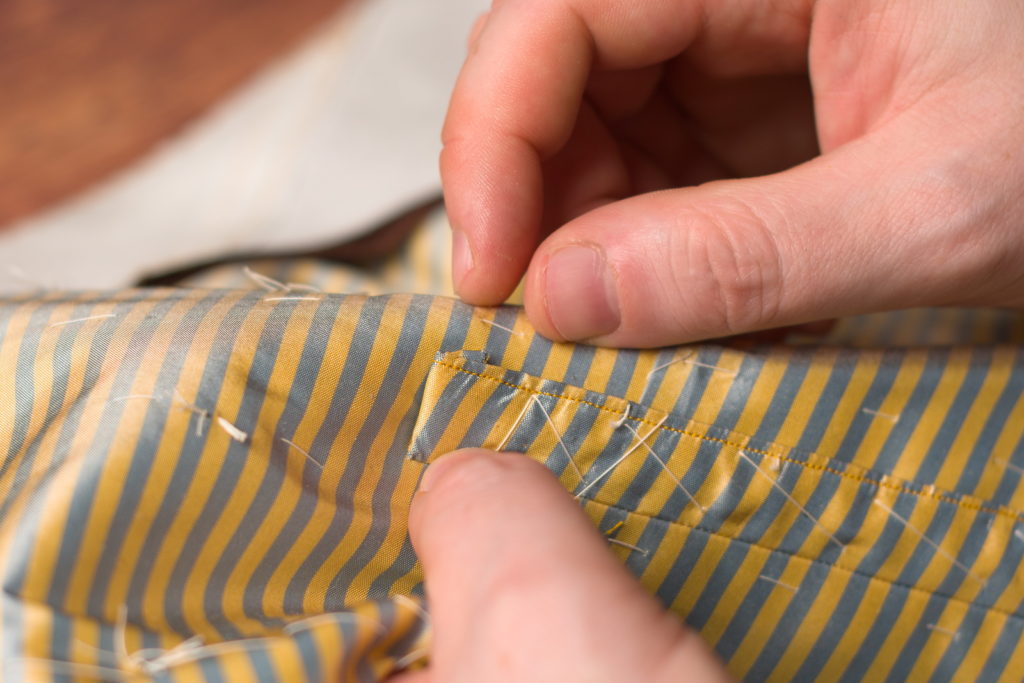
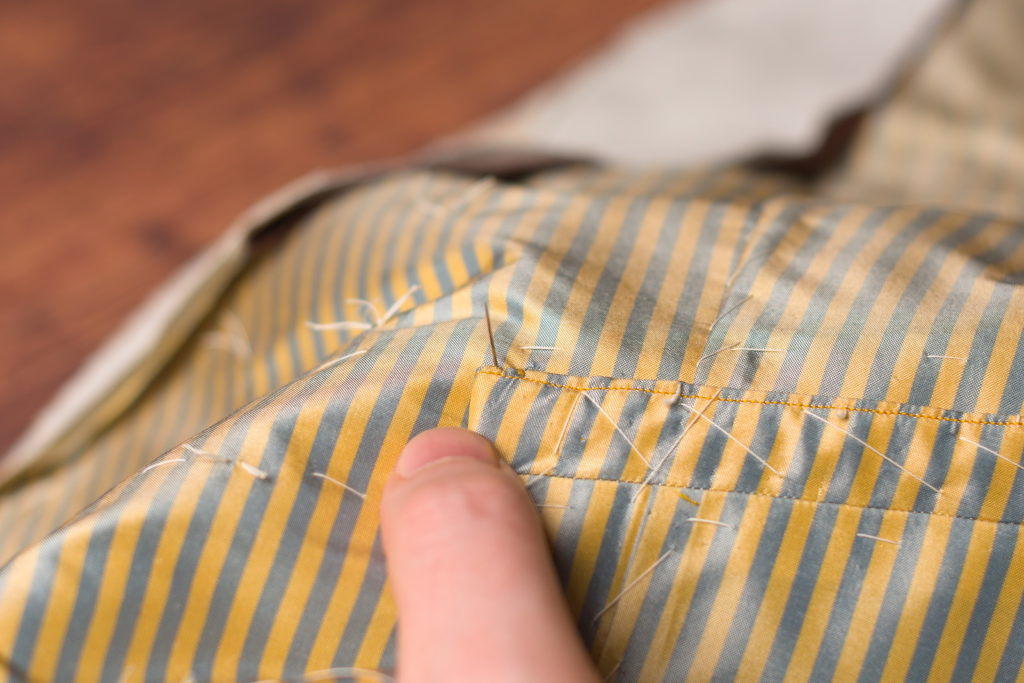
The roll line after basting.
Now crease the collar along the roll line with your fingers, as closely as you can to the marked line.
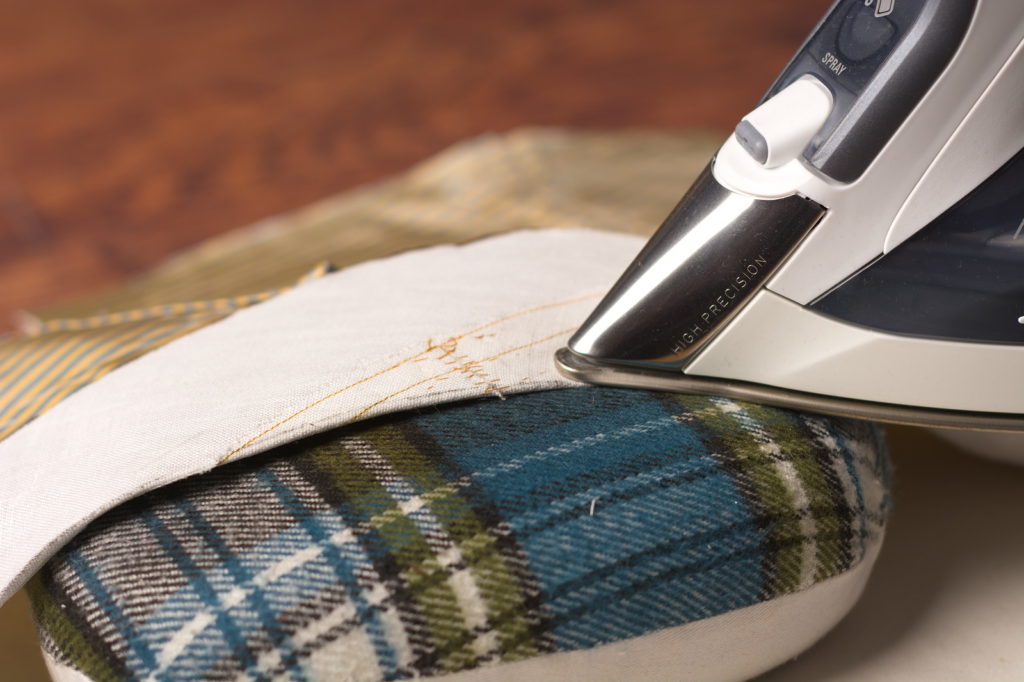
Press carefully and firmly over a tailor’s ham, as the collar and roll line have a good deal of shaping built in thanks to the dart.

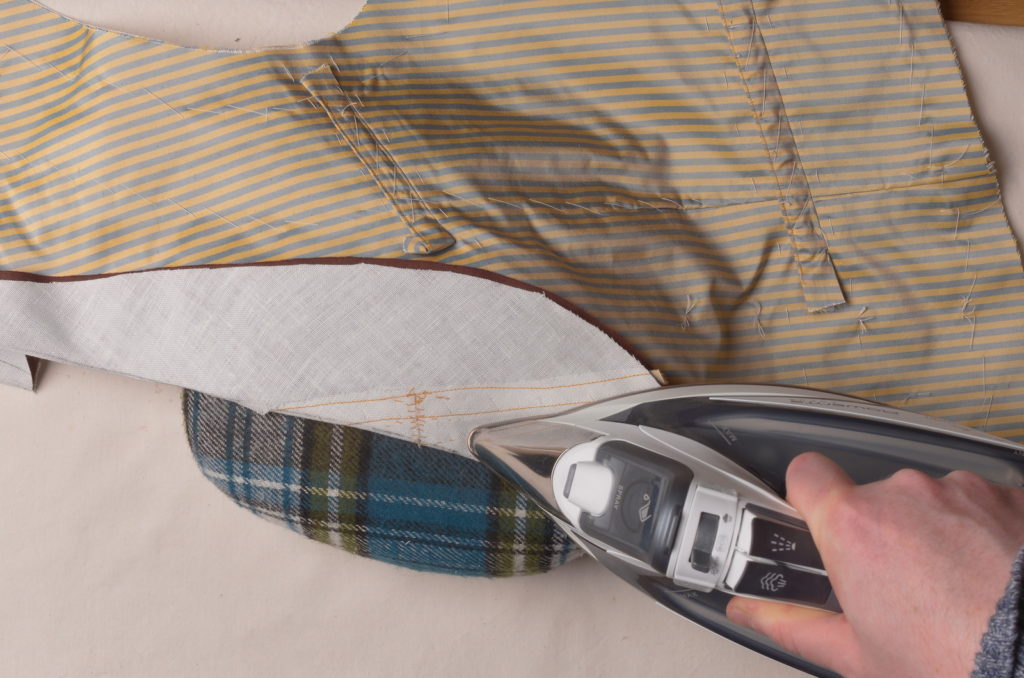
Here’s the entire forepart so far after pressing the roll line.
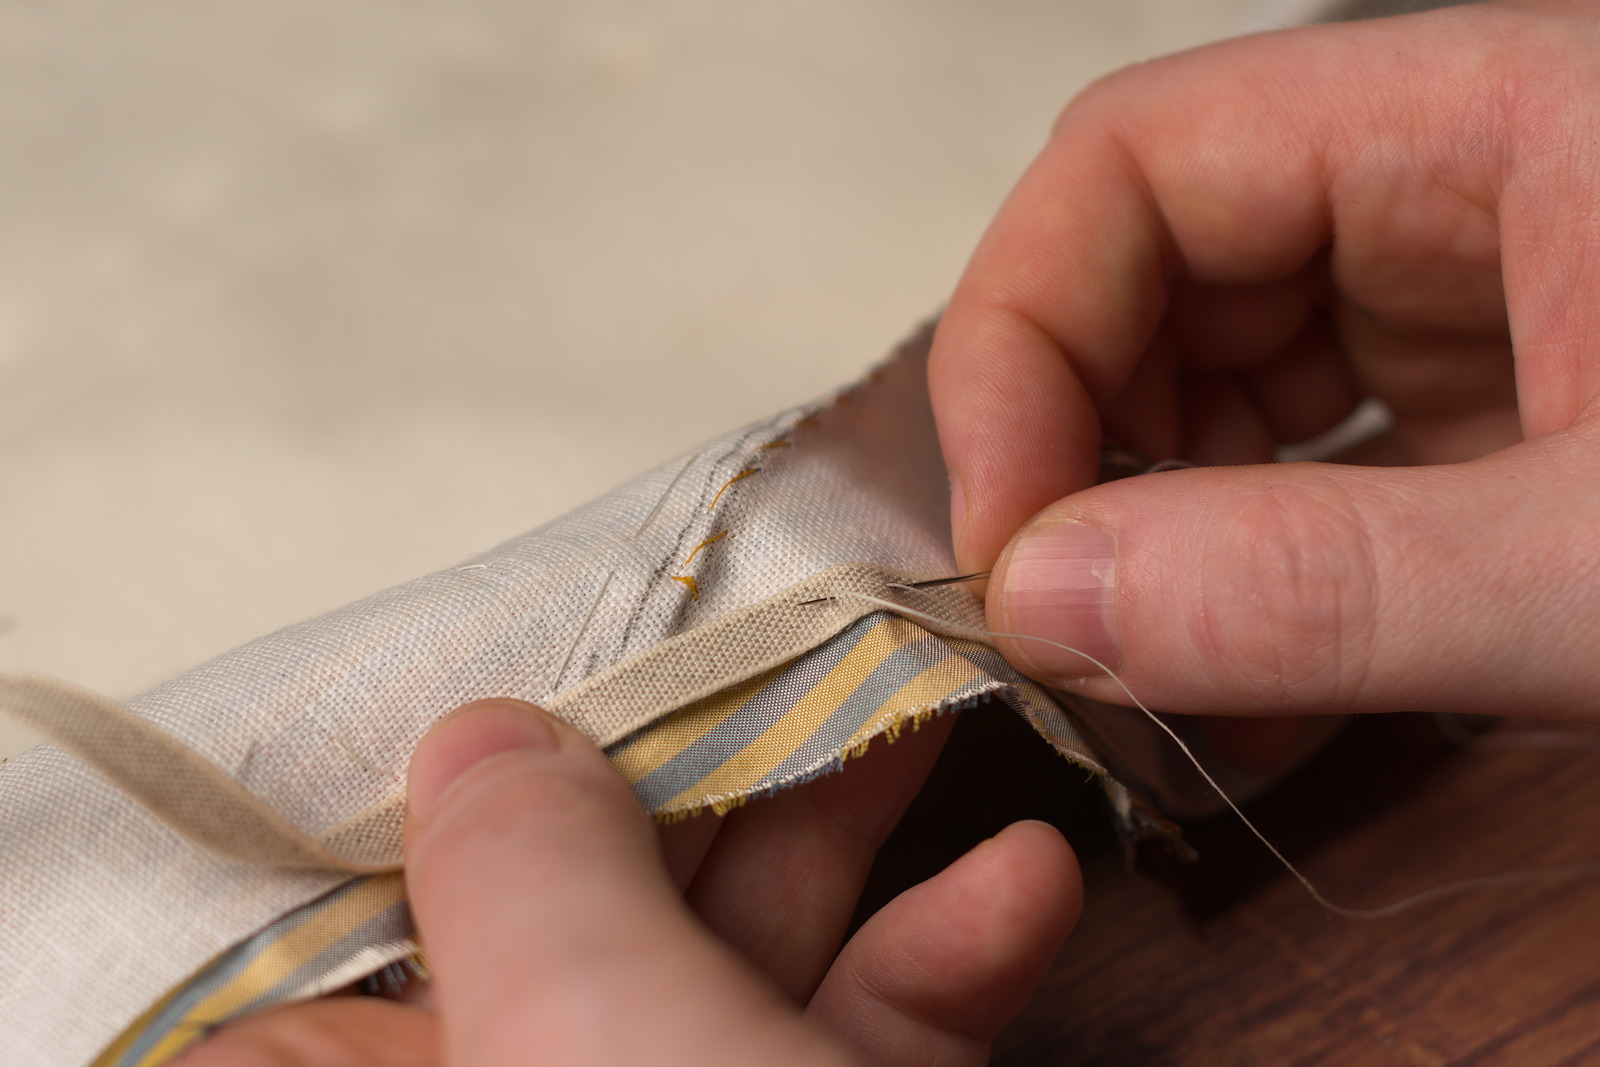
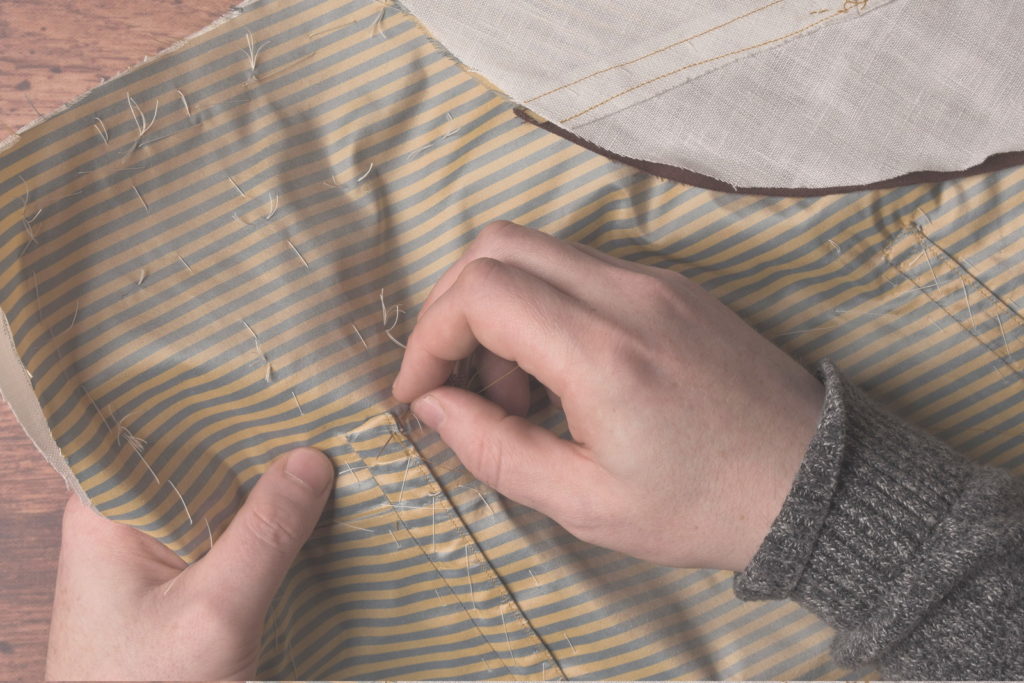
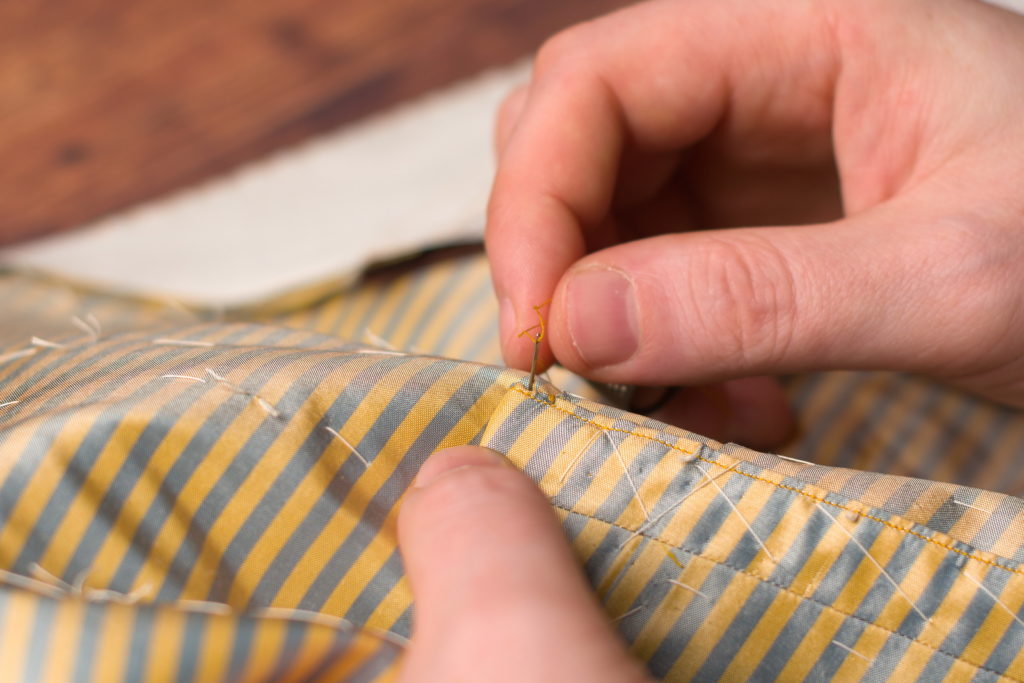
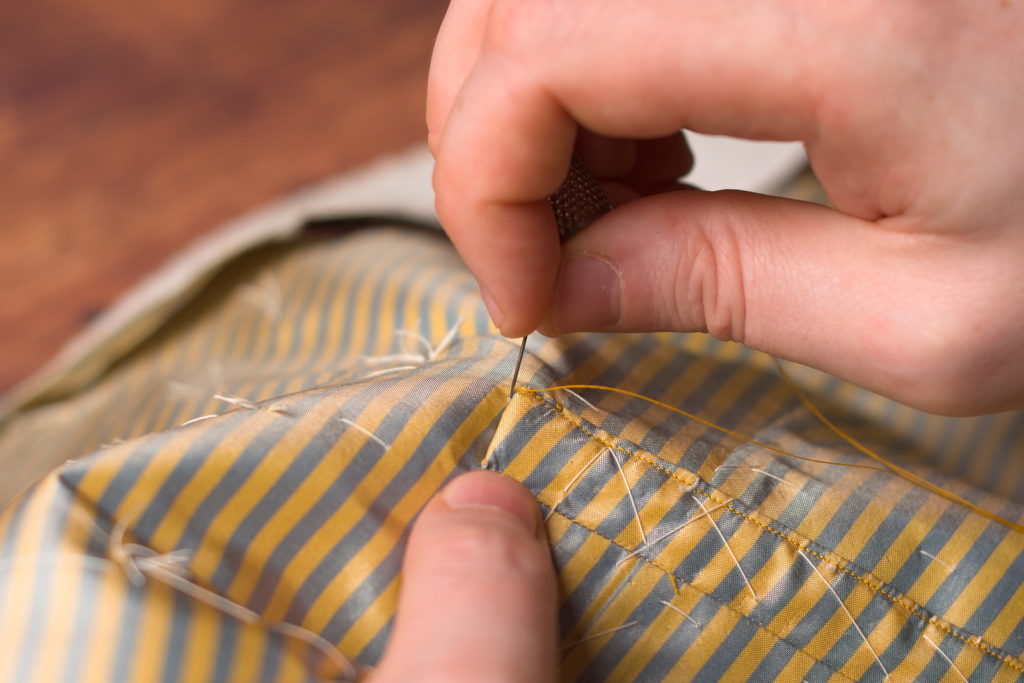
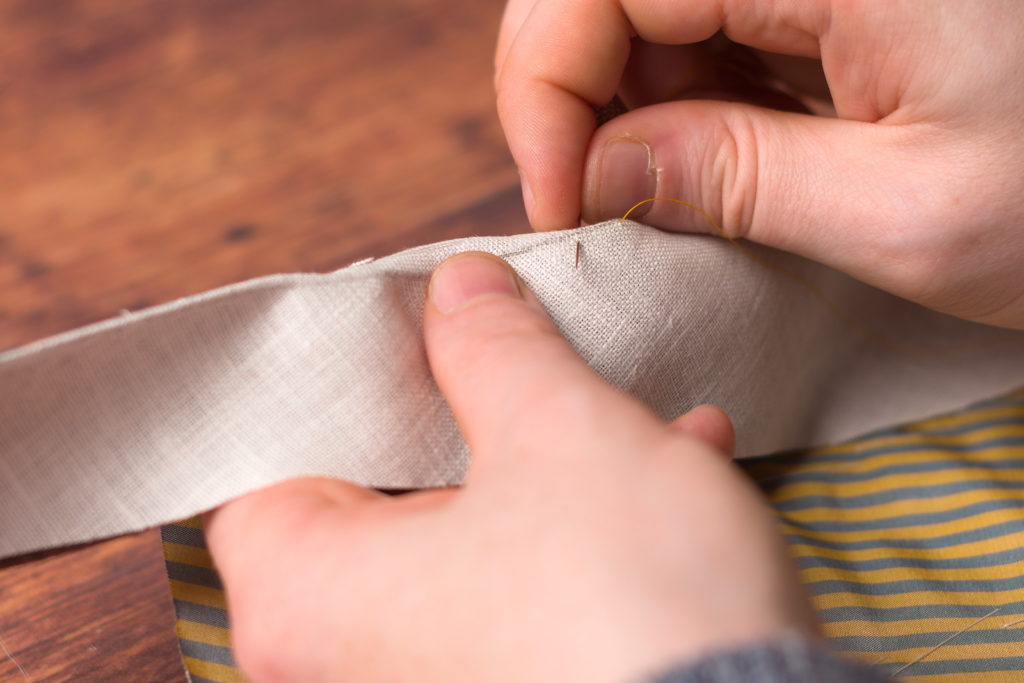
Now starting about an inch from the bottom of the roll line, begin overcasting the folded edge, being sure to catch all of the layers with each stitch. Keep the stitches between 1/8″ and 1/4″ apart.
The stitching is started an inch from the bottom so that we can open the collar back up and do a bit more work around the edges of the waistcoat.

I started with three or four stitches in place.
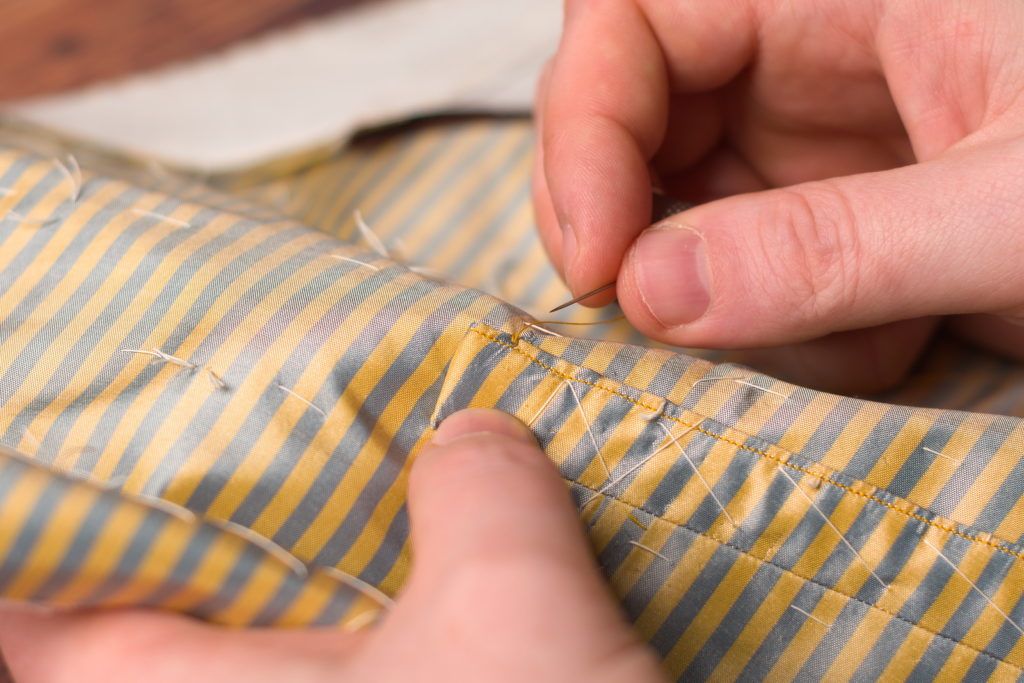
Since I had basted to the edge of the collar, I found my stitches were missing the silk layer underneath, so I opened up the collar and press the silk into the crease with the finger of my left hand while I made the stitch.
It’s a good idea to check every once in a while to make sure you’re catching every layer.
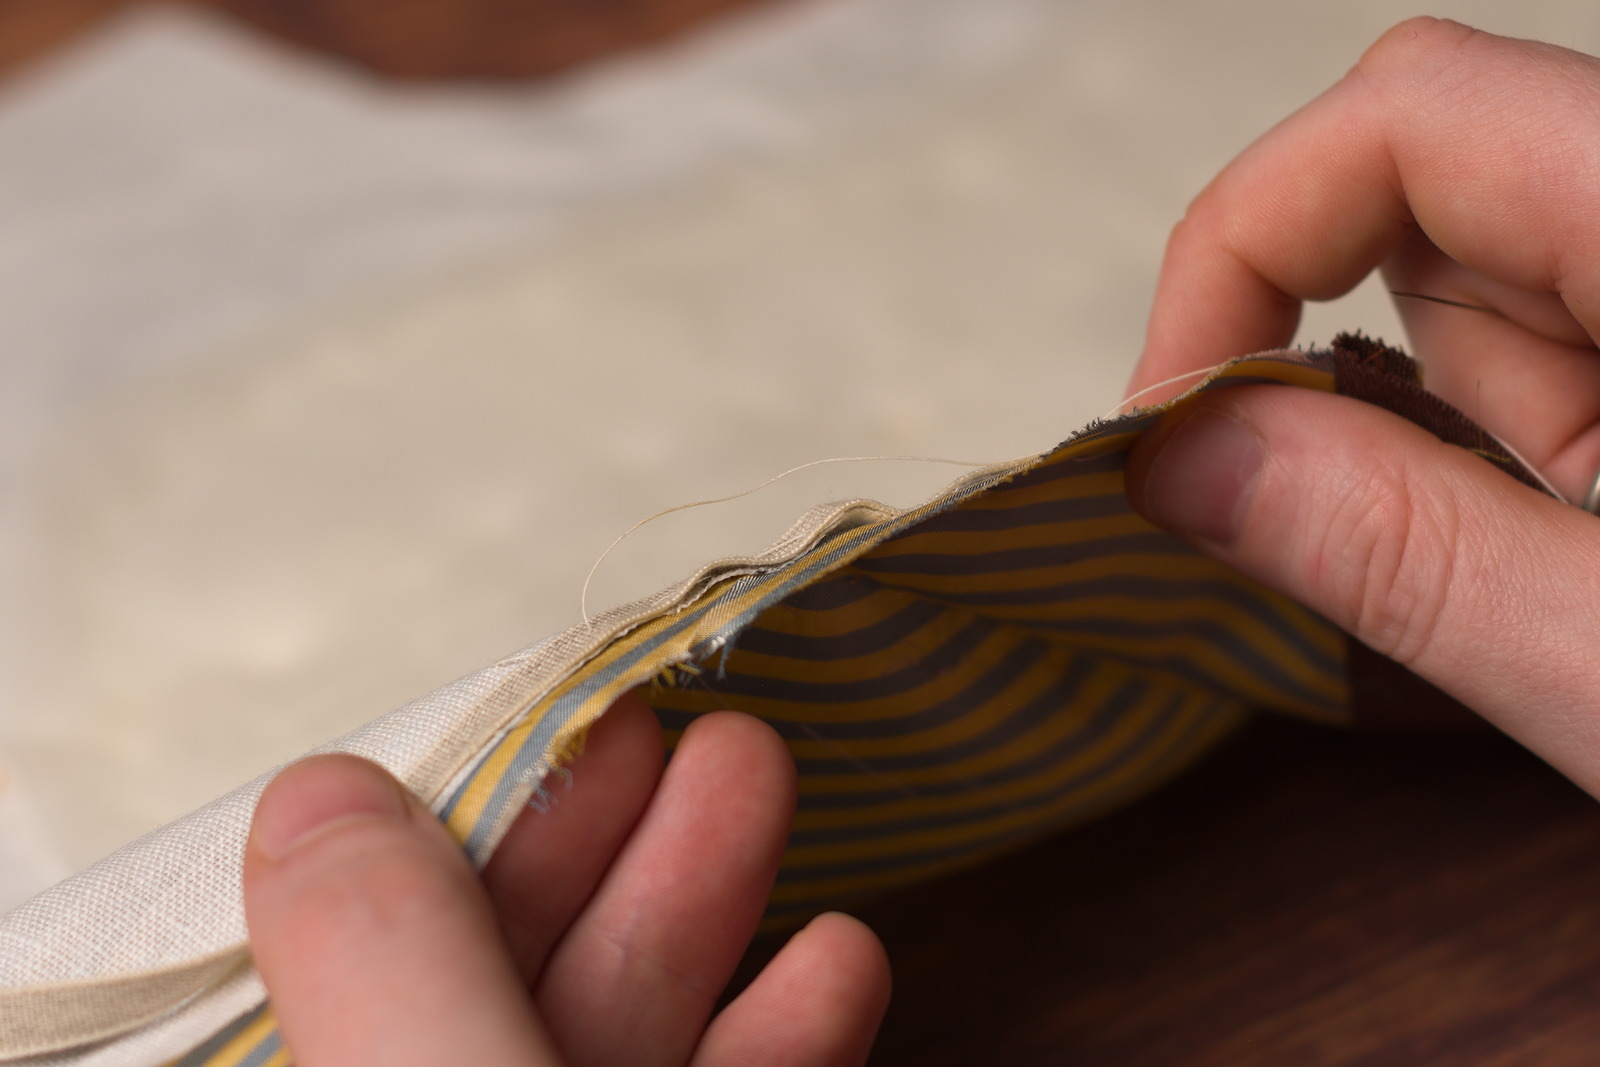
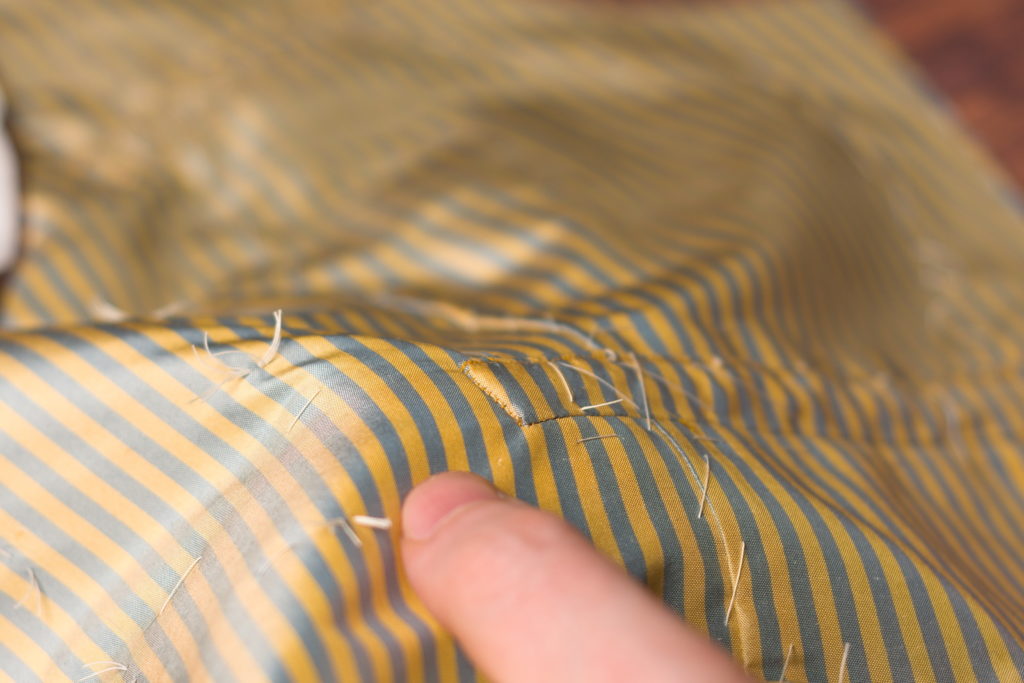
Continue sewing towards the center back of the collar in the same manner.
End the stitching about 1 1/2″ to 2″ from the back of the collar. We need this free so we can join the collar halves together with a seam later on.
And here’s the completed roll line and collar after stitching.
From Photograph to Pattern
Working on the John Wilkes Booth photograph itself, I found that adjusting the contrast did not really help at all with this particular image, so I went into Inkscape for the following. Inkscape is more of an illustration program and allows you to draw what is known as vector lines, lines that maintain their resolution and crispness no matter how far you zoom in.
I’ll use Inkscape to help me lay out proportions and various angles as necessary. The main tool you’ll want to use is called the pen tool, and allows you to draw straight and curved lines with extreme accuracy. Using Inkscape is a little outside the scope of this tutorial, but if you search Youtube or elsewhere there are plenty of good tutorials.
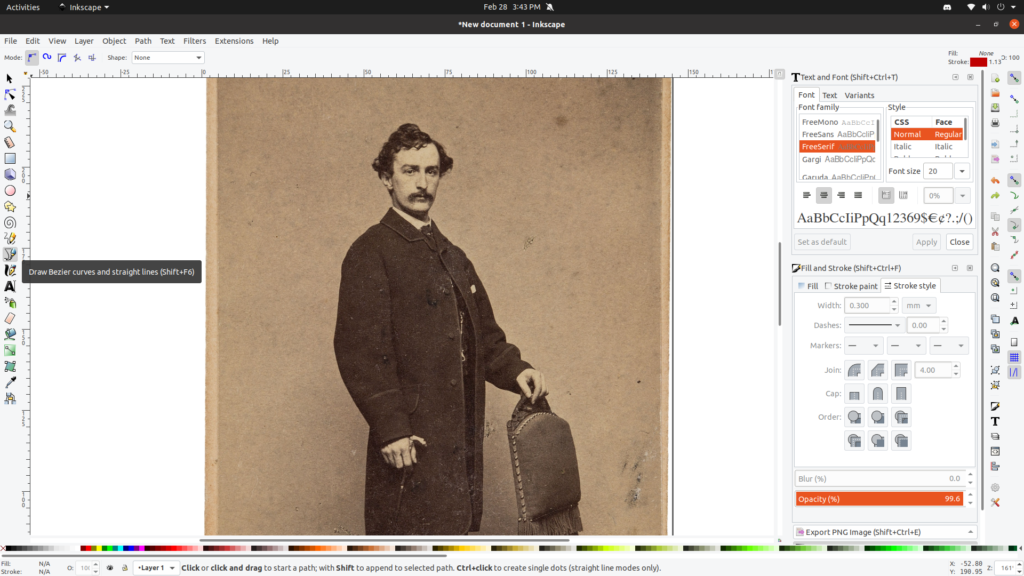
First, I tried to lay out the proportions of the body as best I could. It’s a well-known principle of anatomy that the human body is 7 1/2 to 8 heads tall, so I drew a horizontal line at both the top and bottom of his head. Then I duplicated the lines and shifted them downwards so that the upper duplicated line overlapped the lower original line at the bottom of the head, and repeated the process down the body. It doesn’t quite work due to the perspective of the photo and angle of his feet, but it should be plenty close enough for our purposes.
John Wilkes Booth was 5’8″ tall. So by dividing that by 7 1/2, that should give us the approximate distance between each of the lines. 68 / 7.5 = 9.06. 9 inches is definitely close enough.
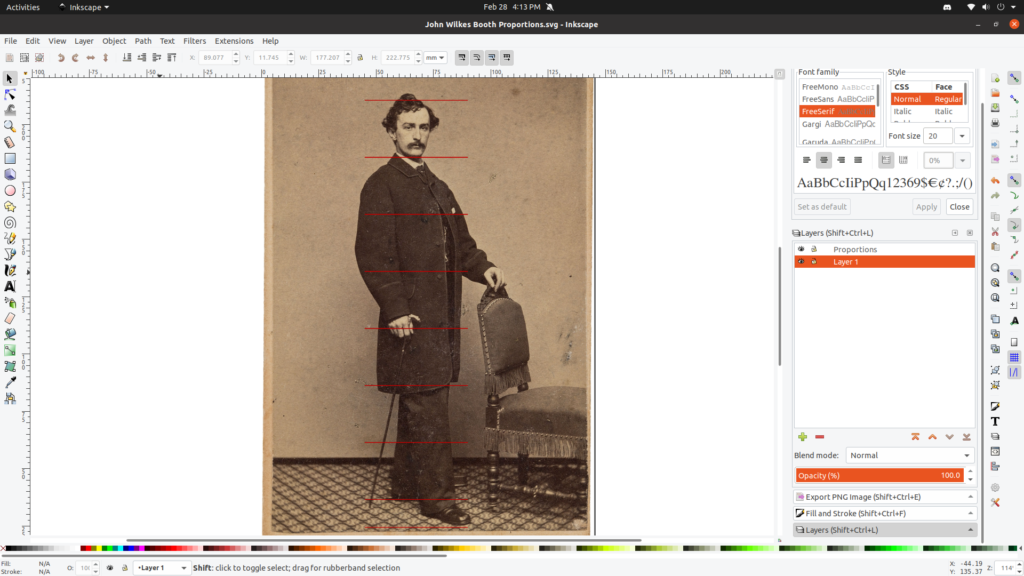
We can divide that 9″ head measurement in half for the half head measurement of 4.5″. I made a square with the square tool the size of that half a head, and as long as I don’t accidentally change the size, that square is equal to 4.5″ in both directions. Now I can go and place that square anywhere on the photo and it will give me a fairly accurate sense of size. You could subdivide that square if you wanted to but it’s not really necessary for this coat.
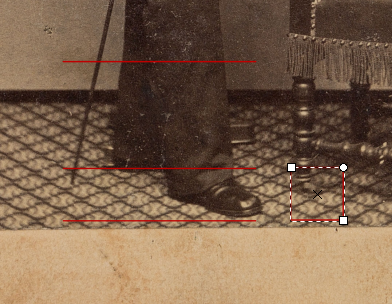
Going over the coat now, I can make the following observations. The bottom of the coat ends at a point two or three inches above the knee (that odd line indicates the height of the knee as best as I can tell from the wrinkles and aligns with the anatomical placement. I know that length for a coat is generally what was fashionable for the time period, and most patterns end up around that length as well.
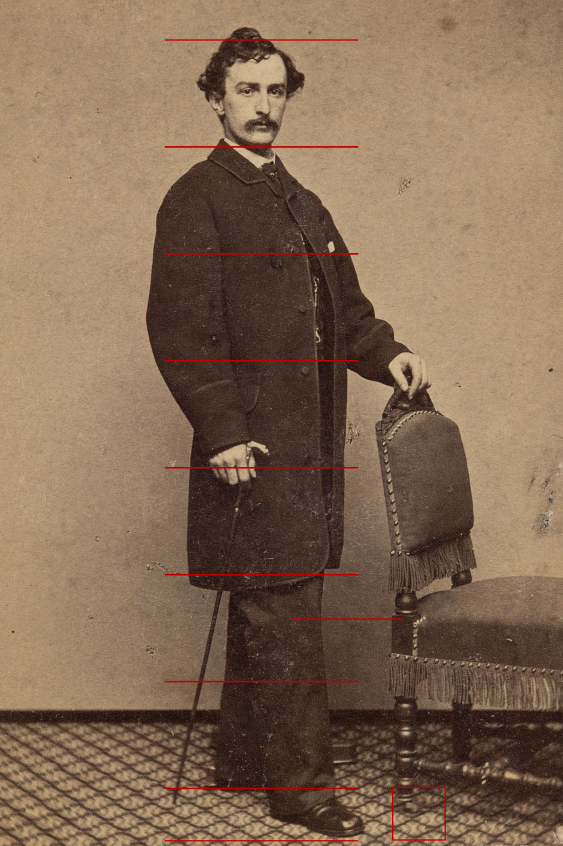
The center front of the coat looks relatively straight, but may have a slight flair out at the bottom of the skirt and another very slight round to the chest. This would be determined more on your own particular body shape and size though – what looks good on John Wilkes Booth may not work for you.
Bottom front is rounded, look like the curve starts three or four inches from where the point would be. The bottom edge looks relatively straight, but has a curved appearance from the angle of the photo.
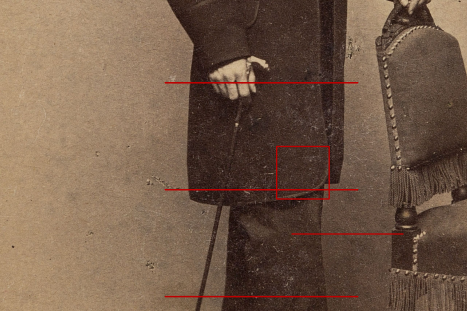
Still referencing the same image, I can see no sign of a waist seam along the front, and in addition there is a hip pocket, telling me that this is a paletot rather than a frock coat. Frocks typically did not have waist pockets – that’s more of a modern interpretation / ‘steampunk’ fad.
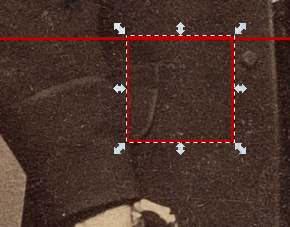
The pocket itself looks to be a 1/4 of a head high, or 2 1/4″ inches. However, that seems a little small to my eye (have to develop that rock of eye!) and I suspect that the pocket is more like 3″ in height. Will have to experiment with that to see what looks best. Alas, there’s no way to tell how wide the pocket is as his arm is covering most of it, so I’ll go with what I can find from period drafts.
Edit: I was reading the photo incorrectly, it does indeed look more like 3 to 3 1/2″ in height.
It looks like the coat has four buttons, the top one being hidden in the roll of the lapel. I’ve seen photos of Booth wearing a very similar coat with five buttons and yet another with only three, so there’s room for artistic expression here.
There does appear to be a breast pocket (with a handkerchief sticking out) but the style can’t be determined from this photo – most likely a common welt pocket.
Finally, the coat is trimmed with silk, I’m not going to try measuring that, but I’m going to guess it’s about 3/8″ wide in this particular version. That width can be determined more by your preference and skill though, as well as the thickness of the materials you are working with.
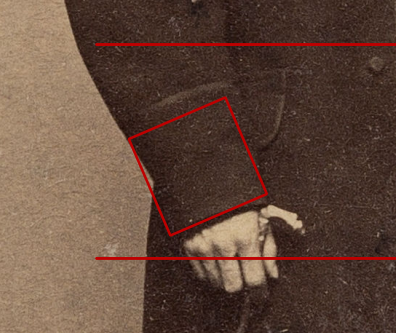
The sleeve also has a row of silk trim, I’m going to say about 5 1/2″ to 6″ above the bottom of the sleeve, and about the level of the top of the pocket. I rotated the square to help better determine the height. This too will be determined more by the individual wearer and what suits his build, but this is a good starting point.
That’s about all of the information I was able to glean from this photograph. However, there are several other photographs around showing Booth wearing what I thought were the same coat, though they turned out to be just slightly different. Turning to one of those now:

Looking a little closer at the chest area, I can note a few other details.
The breast pocket is clearly a welted pocket, looks to be on the narrower side, maybe 1/2″ to 5/8″ in height.
The trim along the front and collar edges is definitely a bit thinner, I’d guess 3/16″ to 1/4″ in width.
You can make out some tell tale signs of the ‘crooked cut’ of the shoulder, so common during the 19th century, with the gentle folds of fabric at the front of the shoulder going into the bottom of the armscye.
The sleevehead is finely set into the armscye, probably shrunk into place to fit even better. Contrast that to the gentleman in the white coat in the previous lesson with his waterfall sleeves.
Self-covered buttons complete the coat, there appear to be three in this version if you look at the complete photograph. The buttons look to be set back quite a distance from the center front of the coat, maybe 1 1/2″. This was probably to give him room to ‘expand’, and the buttonhole that’s visible is closer to the edge of the coat, about 1/2″ away. I’m wondering if this offset of the buttons will throw off the positioning of the lapels – will have to experiment.
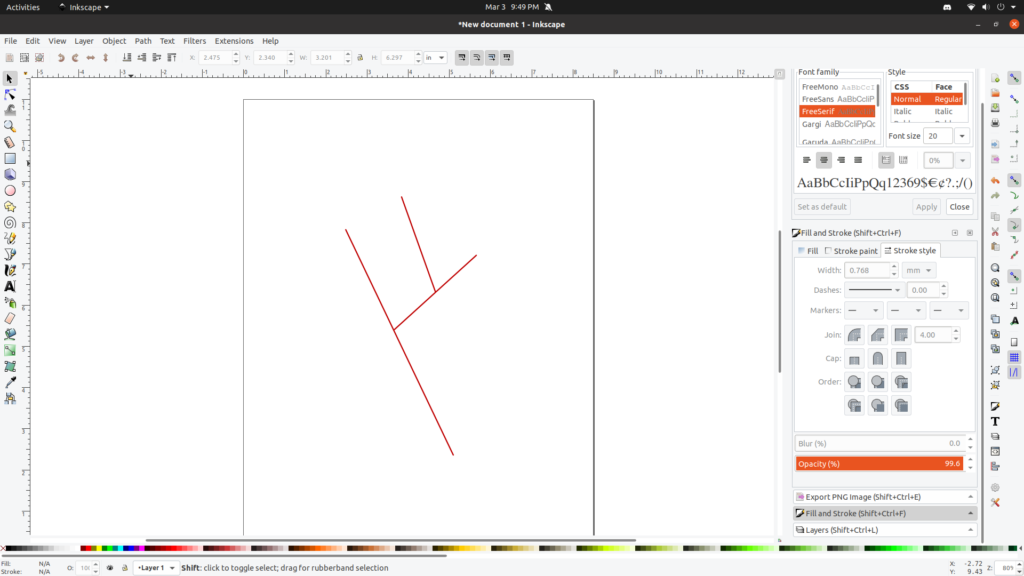
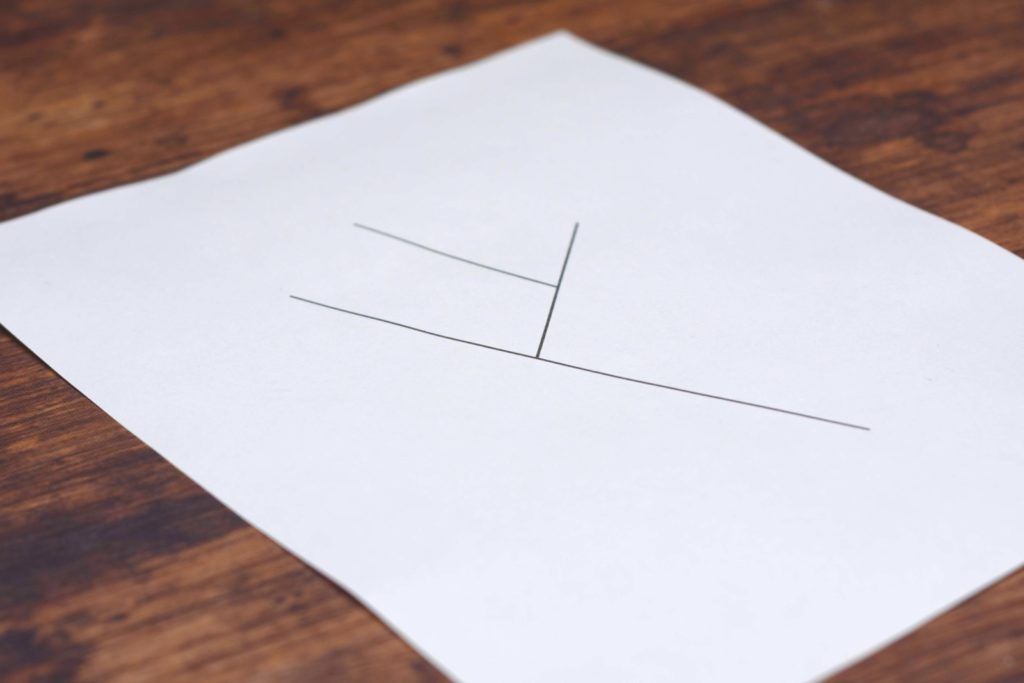
Finally, back in Inkscape, the final thing I like to do is copy the angles on to cleaner lines to compare with my draft later on. The perspective of the photo is close enough to straight on that I can simply figure out these angles without too much distortion, though it won’t be perfect.
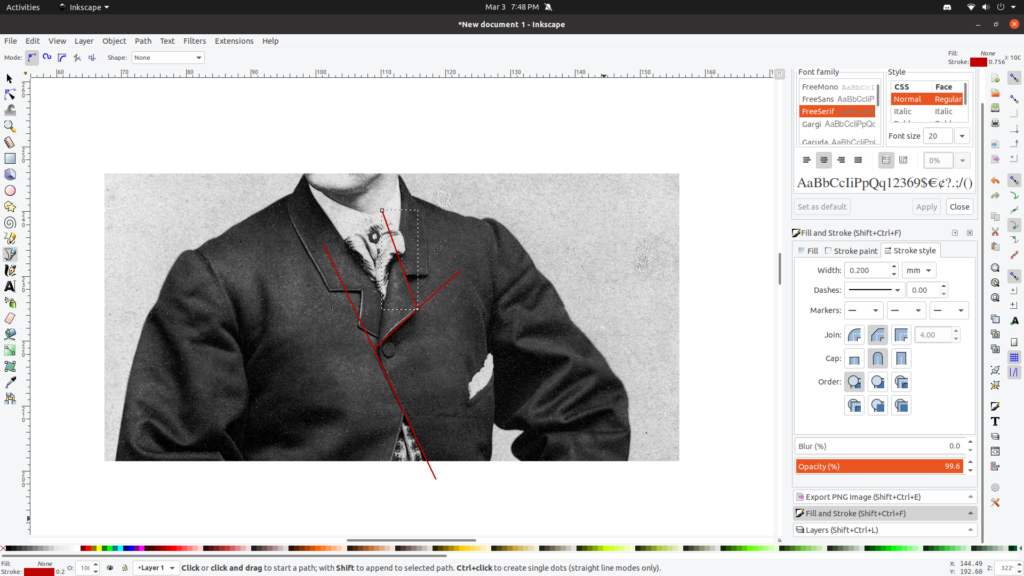
First, I drew a line along the center front of the coat, extending a bit just for more area to reference from. Then I drew the bottom edge of the lapel and then the top.

I then changed the paper size to 8 1/2″ x 11″ under File > Document Properties and deleted the photo from the open document, leaving me with just the three reference lines. I also scaled up the pattern to make it large enough to work with – the exact size doesn’t really matter as that will be determined more by your coat pattern, we’re really just after the angles here.
Finally, print out the pattern and set it aside for when you begin drafting the coat.
Extracting Details from Period Photography
Now that we’ve chosen a photograph to work from, it’s time to get into the details and see what information we can extract from said image. I’ll be using two programs for my work, both of which are completely free and perfectly adequate. The first is the GNU Image Manipulation Program (GIMP), used for editing images and in our case, gaining more information from them. The second program is called Inkscape, and rather than being used to edit the images, I use the program for diagramming (all the patterns on this website) and figuring out different angles, as I’ll demonstrate later. So feel free to download and install either of those if you want to follow along or delve into your own photographs.
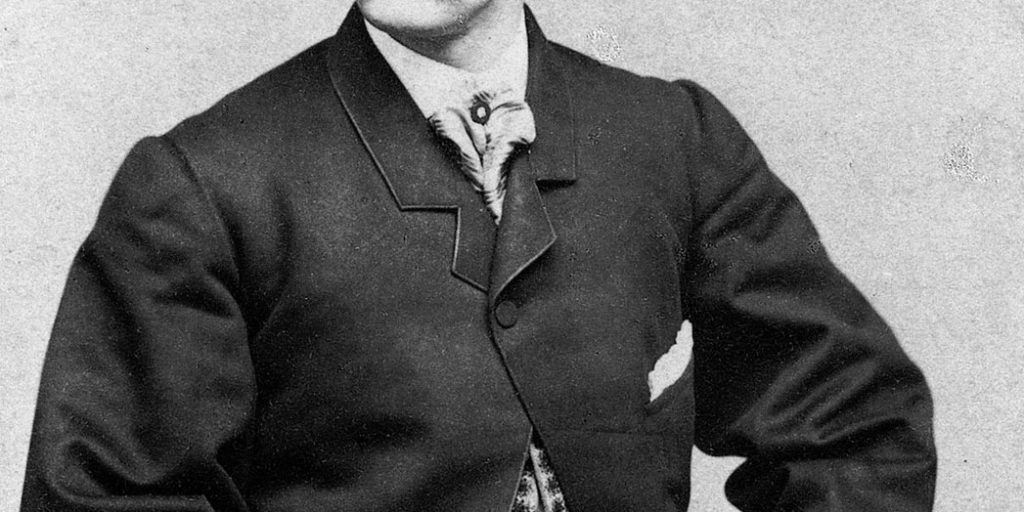
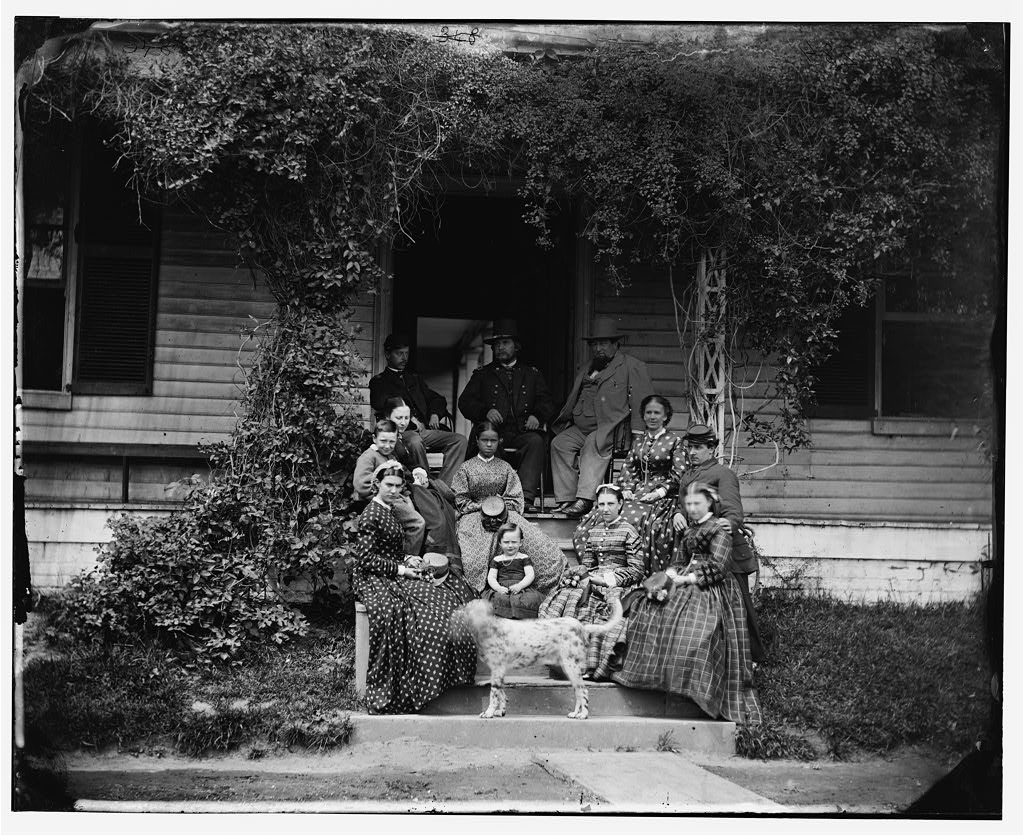
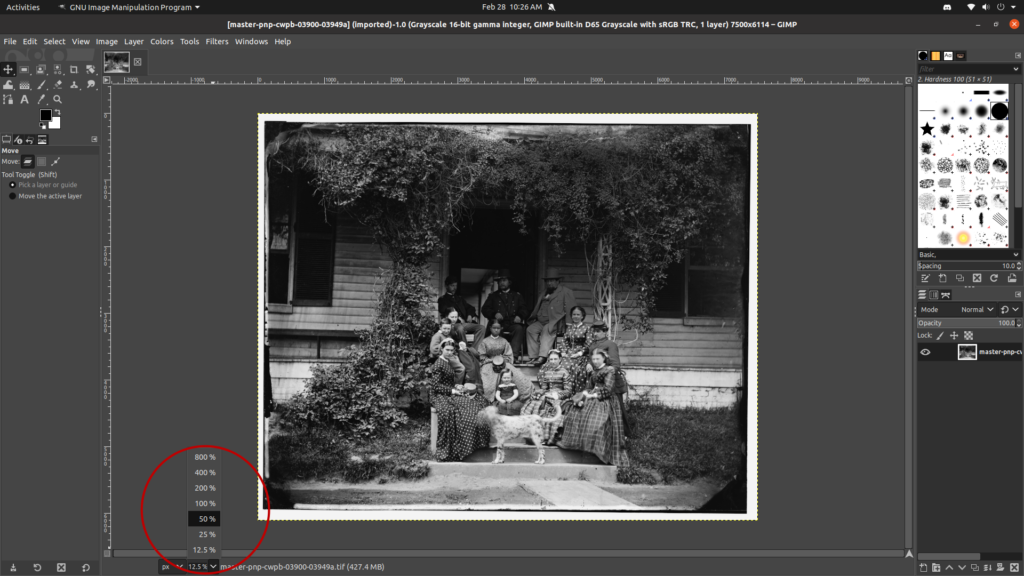
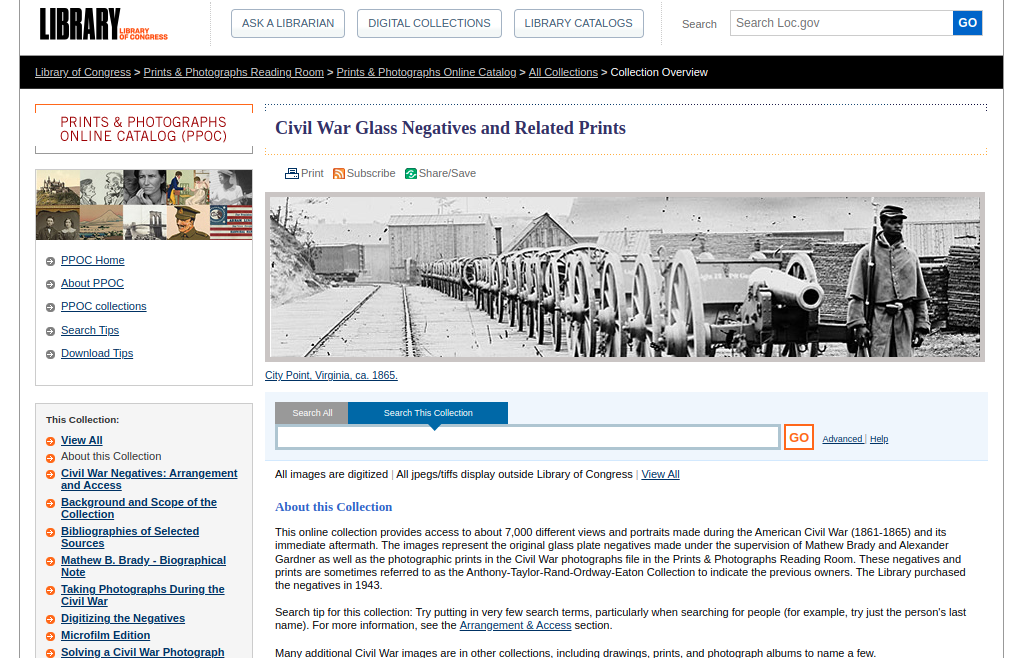
For the examples in this tutorial, I’ll be using this image from the Library of Congress. As you can see, the JPEG version, while nice, does not give us very much detail. Looks like the gentleman on the right has a nice suit but that’s about all I can see. The two on the left appear to be officers of some sort.
Size Manipulation
To get more information from the photo, we need to download the TIFF version. Be aware that it’s a very large file at 87.5mb, so it’s possible you’ll freeze up your computer if it’s older or lacks enough memory. Open the file in GIMP.
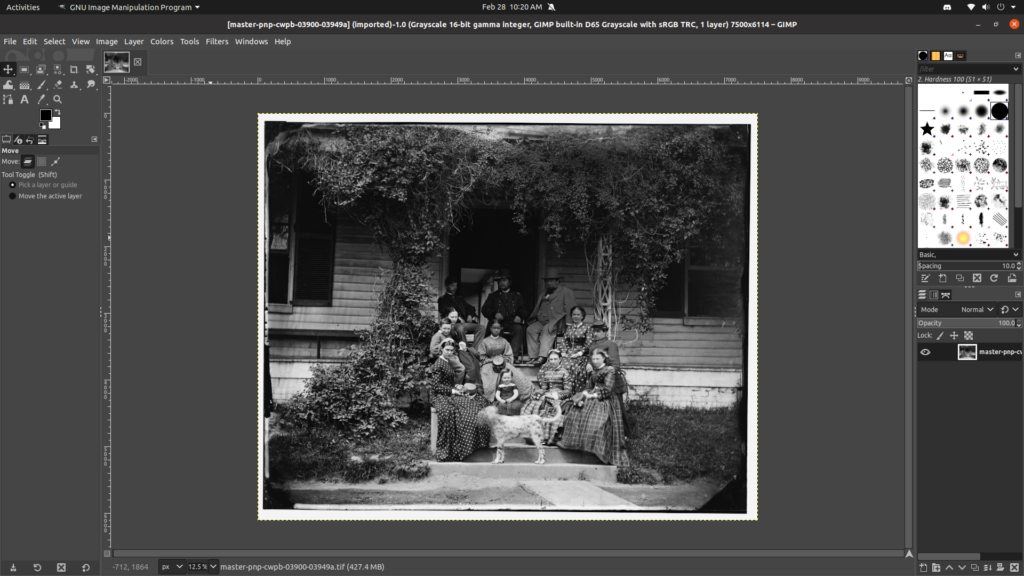
With the file opened, glancing down towards the bottom right, we can see that the image has been zoomed out to 12.5%, meaning we can zoom in quite a bit without losing any of the details.
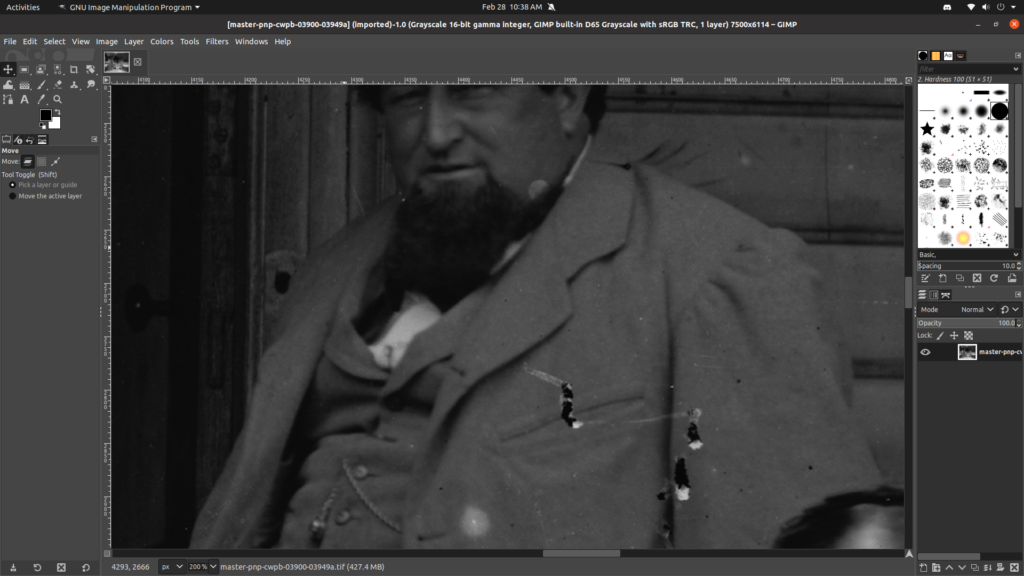
I was able to zoom in to 200% without losing too much information – more than that and you start to see pixelation, though that will depend on the particular image you’re editing.
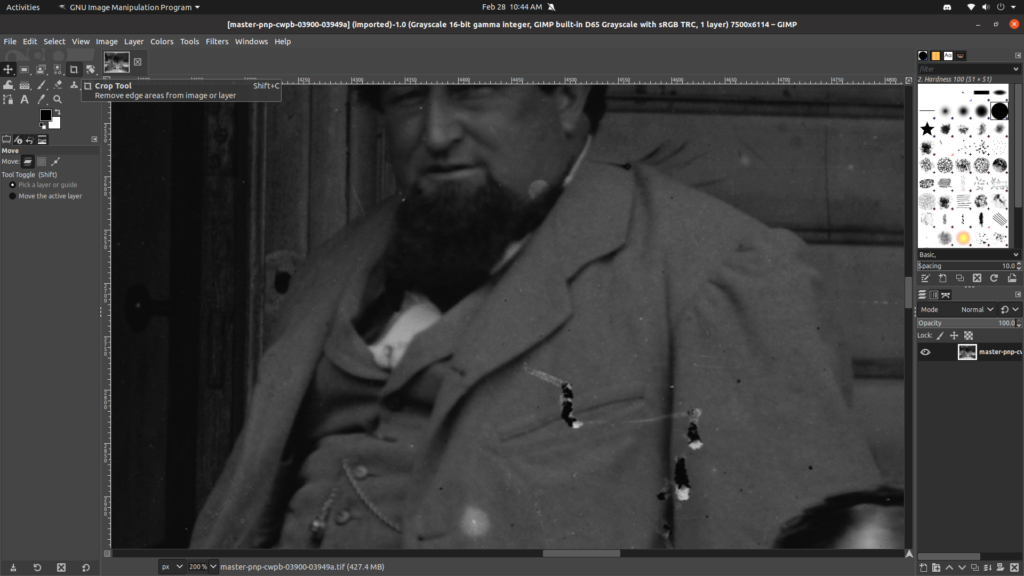
If you want to save a particular part of the image, you can also crop to that section with the crop tool. I’ll often crop the section I need, undo with control+z and crop another section as necessary.
Simply select the area you want with the crop too and adjust as necessary. When you’re happy with the crop, press enter to crop the photo.
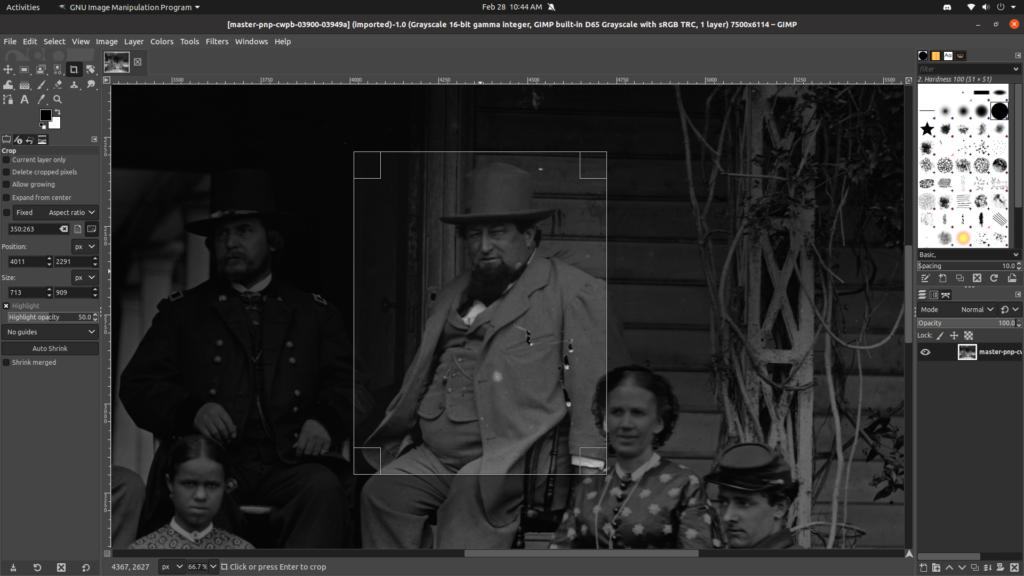
This gives us an image we can more easily share with others or save for our own use. There may be times when you want to crop the image right away, and others where you’ll want to do other manipulations before cropping, so it really comes down to preference and your particular photograph.
Author’s note: I really feel like a nut case using words such as ‘zoom’ and ‘pixelated’…
Adjusting the Contrast
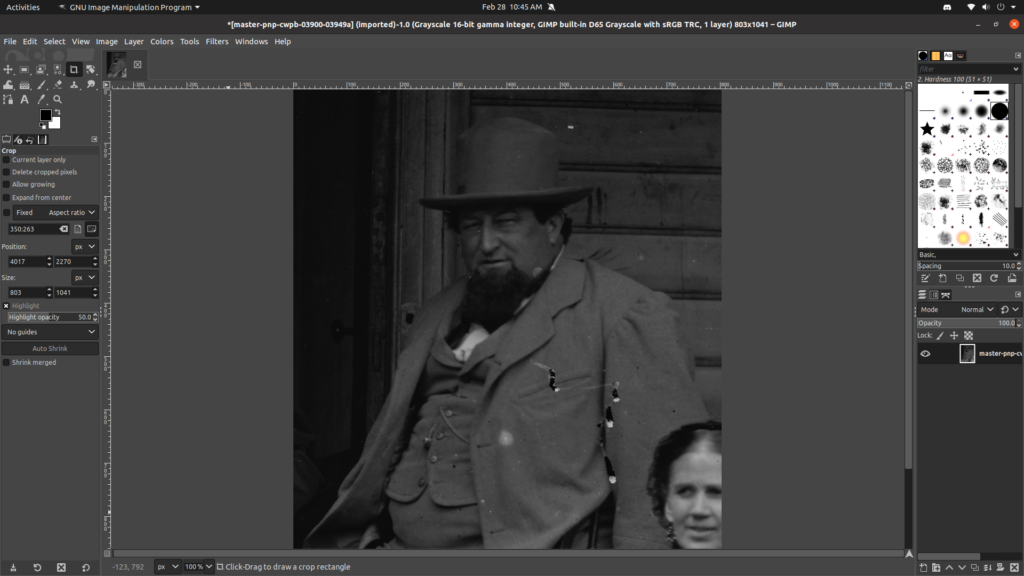
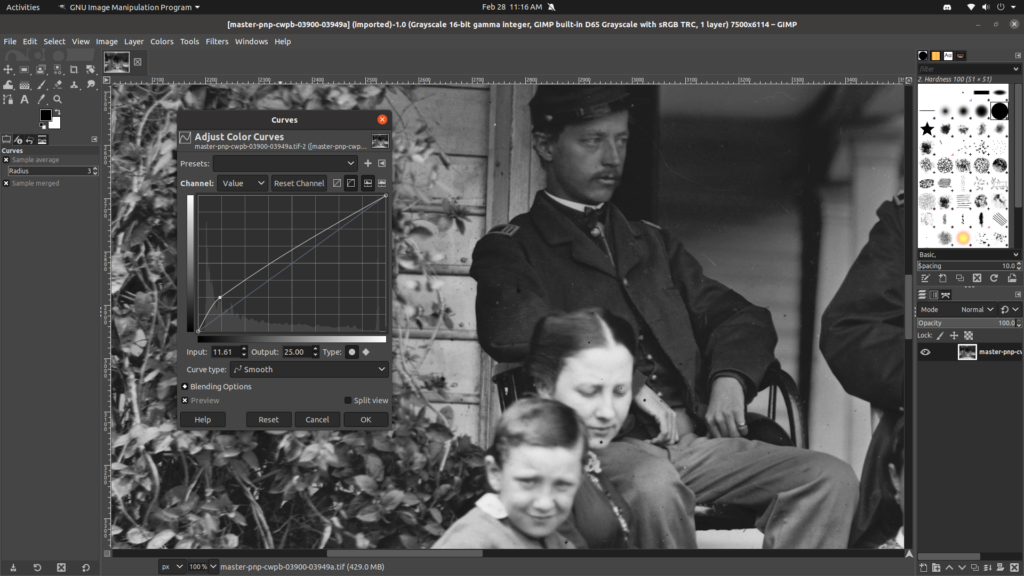
There may be areas of the image where even with zooming in, you will not be able to make out the details due to the image being too dark (or too light in some cases), as is the case for the officer in this photograph. By adjusting the contrast, we may be able to recover some of those details if the image is of high enough quality.
I like to adjust the contrast using the curves tool – while it’s the most complicated way, it’s also the most powerful, and isn’t that difficult to use for our simple needs. Begin by going to Colors -> Curves in the main menu.
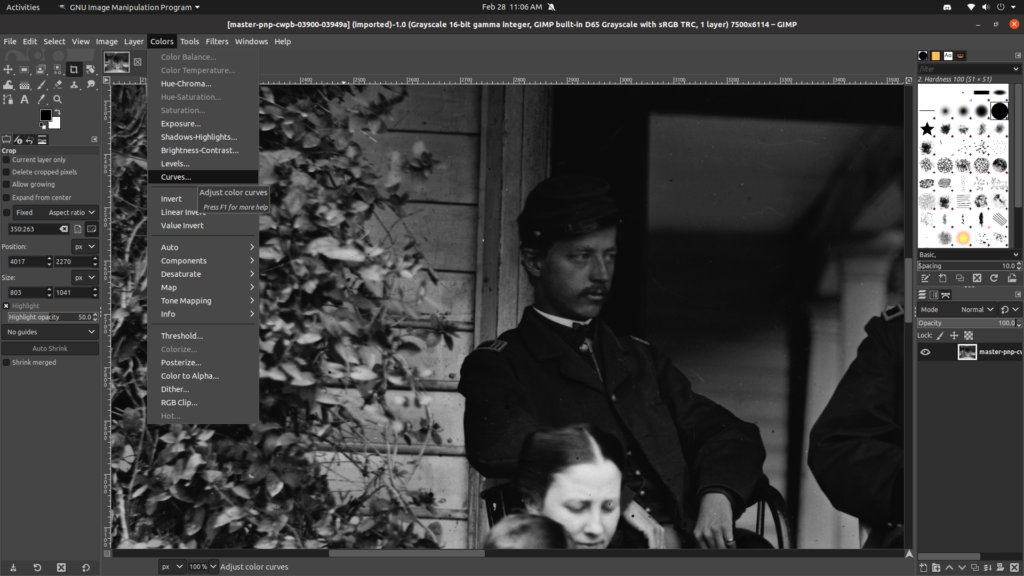
This opens the Curves dialogue. Briefly, the graph along the bottom is showing us just where the dark and light values are appearing in the photograph. As you can see, most of the image is on the darker side, so we’ll need to adjust that.
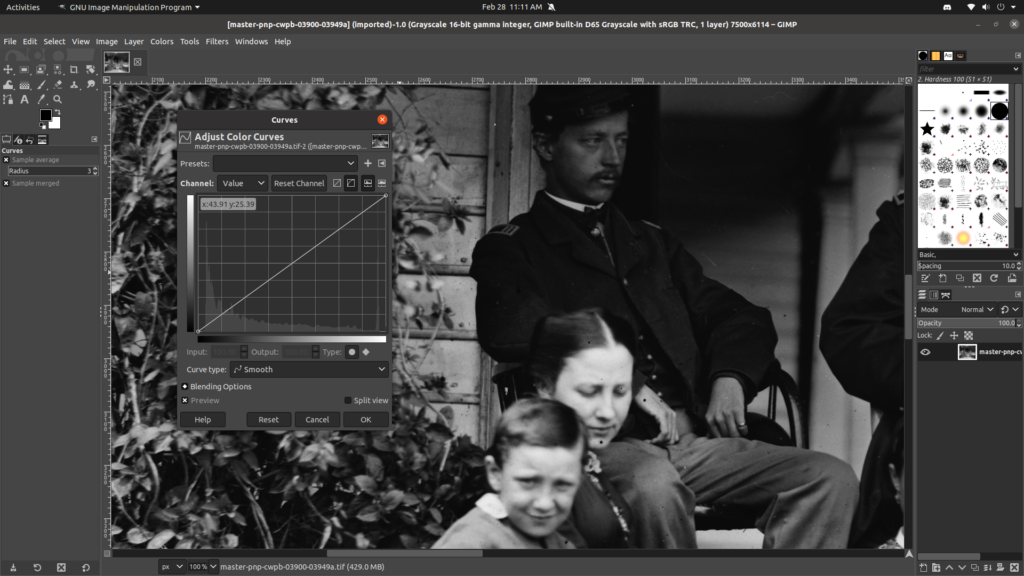
Click on the diagonal line near the darker part of the graph to form a point.
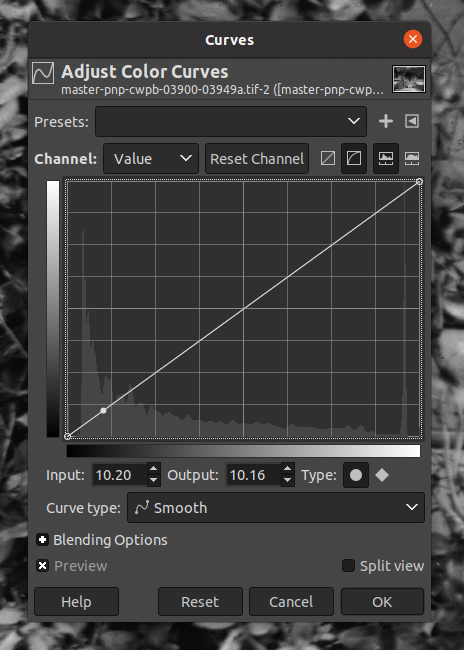
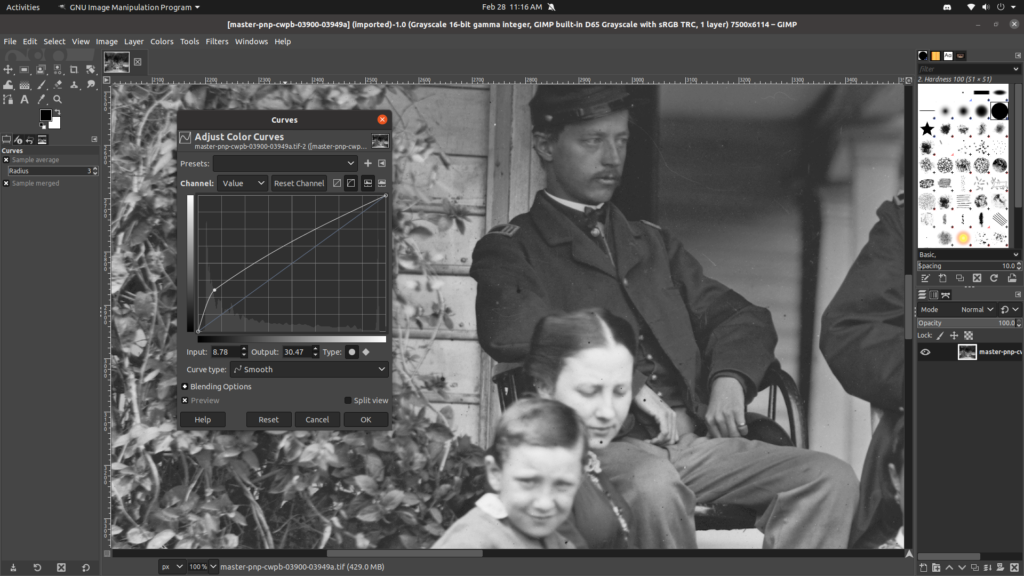
Then begin to drag that point upwards, adjusting as necessary until you can bring out the detail you are looking for (as possible of course). Here we can begin to see some of the details of the collar and lapels coming out.
I went a little further and now you can really start to see the details in his coat. Any further than that and I found I was starting to lose more information than I gained.
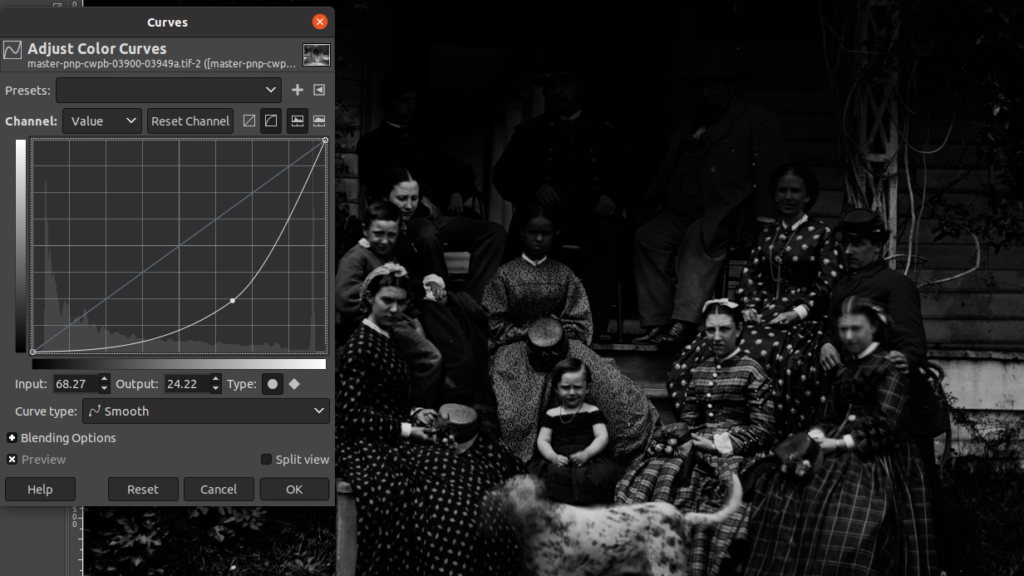
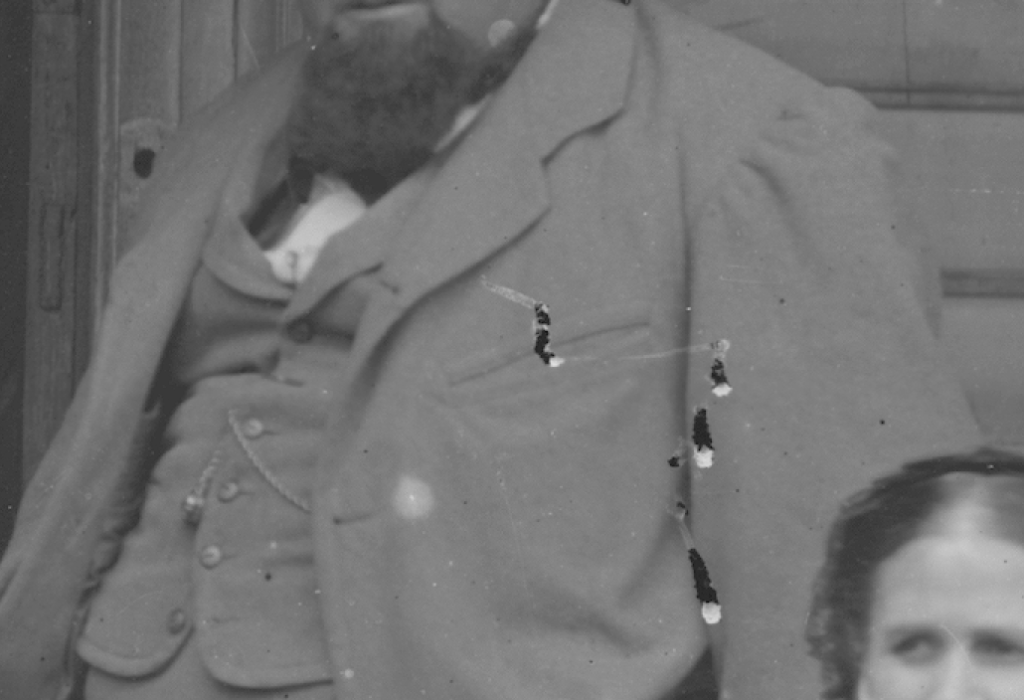
Now you’ll want to be careful with this, as while I was getting detail from this officer’s coat, I was losing detail from the gentleman to his right wearing the lighter coat, and especially with the women on the steps. So this might be a case where I’d crop each section of the image as necessary and then do the adjustments for the contrast.
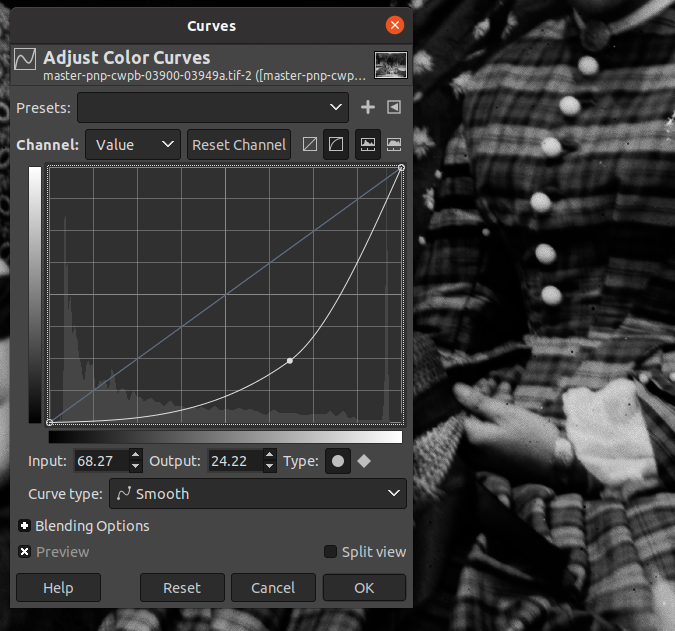
There are times when you might go the opposite direction with the contrast, particularly on lighter clothing where bringing out the faint shadows might help you determine how a piece was cut or how it drapes over the body. For example, by drastically lowering the contrast (the rest of the image is pretty much black at this point) I was able to bring out some details in this woman’s sleeve, which might help me determine how much fabric was used here.
As you can see, the men have practically disappeared with this setting.
Picking Out the Details
Those are the main techniques I use for manipulating the historical photographs. Now I’ll go briefly through the photograph and show you what I was able to gain from the image.
Starting with the gentleman on the right, I was first struck by his unique breast pocket. Rather than the usual welt pocket, it appears to have a jetted pocket with rather bold diagonal stay stitching on each end. His larger size made the sleeves a lot bigger, and it appears that his tailor struggled to get the sleeve set correctly, leading to more of a ‘waterfall’ affect on the sleeve head.
The bottom of the waistcoat has a nice curve to it, and I’d estimate the topstitching to be about 3/8″ to 1/2″ from the edge.
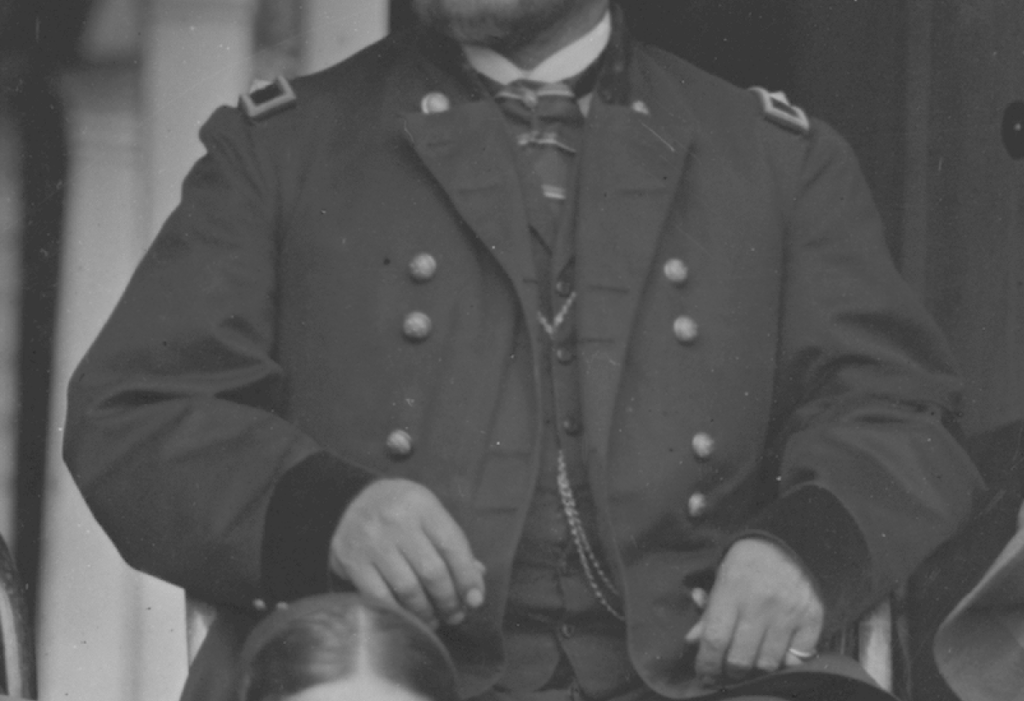
I’m not an expert on military uniforms, so these are just some quick observations. The officer in the middle appears to have a stand up military collar along with an interesting cravat and cravat pin. Also noted are the velvet cuffs on the sleeves.
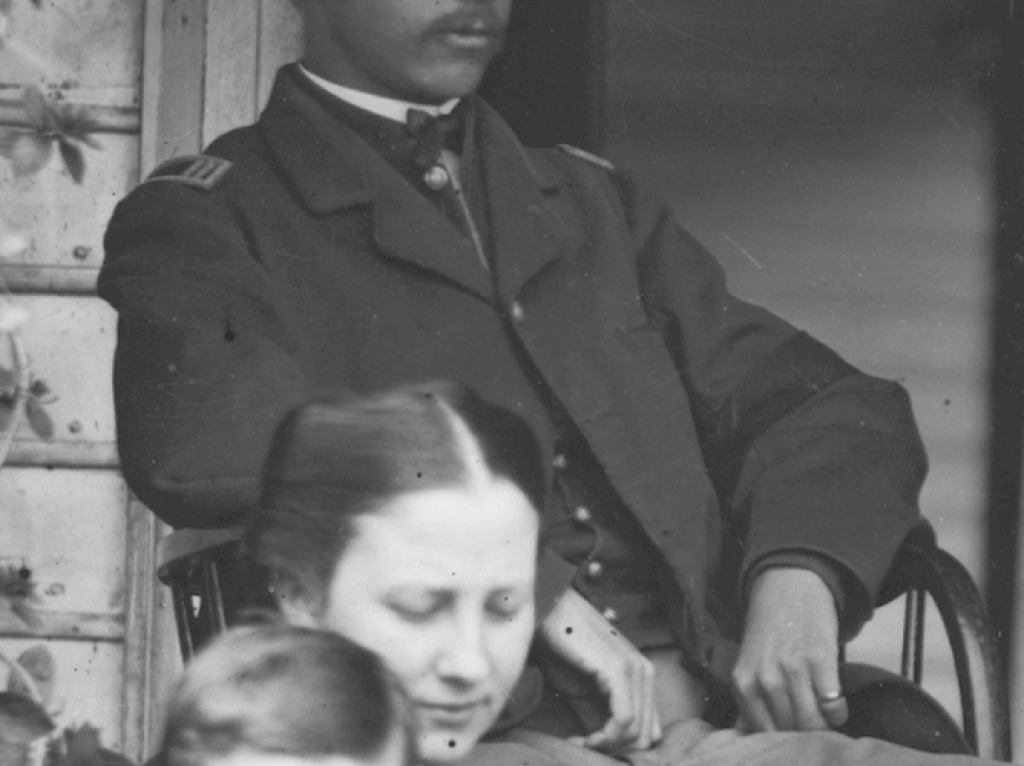
This officer on the right is my favorite, with how much detail I was able to bring out. We can see now that he was a lieutenant, and appears to be wearing a sack coat with I’m going to say four buttons (can’t see the lowest one). He’s got a welted breast pocket, a thin cravat, and a military style waistcoat. We can also make out the lines around the lapels, collar, and gorge line which are very helpful in drafting the coat as I’ll show in the next section.
There are of course more things you can learn from this entire image but I’ll leave that as an exercise for the reader. My next step if I were to recreate one of these officer’s coat would be to look up the specific regulations for that particular coat and then match each detail in the description to the photograph as I drafted my pattern.
Taking Measurements for your Paletot
The first thing to do in preparation for making a coat is to take good, accurate measurements. Since this is more of an introduction to coat making, I’m going to simplify the measurements as best I can to make it easier for you to get started right away.
All measurements should be taken over what you will wear underneath this coat, if possible. That’d mean a period shirt, trousers, and waistcoat if you have them. If not, I’d recommend adding maybe an inch to your measurements if just measuring over a regular shirt, for example.
A good idea is to tie a length of twine or ribbon around the natural waist so that all of your measurements are referenced from the same points. This should be tied around the waist at about the level of the naval.
While it’s possible to measure yourself – I do it all the time – for beginners I’d recommend having someone measure you if you can. If all you’ve got is your self, you’ll just have to contort your arms into various positions while trying to keep your body as straight as possible. For some of the more awkward measurements like the back width, I’d probably measure another coat or waistcoat that fit me well.
And in general, try to keep your body relaxed in its natural position when taking the measurements. Don’t try to stand extra erect like a dashing officer if you don’t stand like that in real life, for example.
With that all said, on to the measurements!
Measurements
There are a number of measurements you’ll need to take for your coat. I’ve included a chart in which you can right them all down for convenience. Listed out, you’ll need the following measurements:
- Breast (written as half the actual measurement)
- Waist (written as half the actual measurement)
- Total Length
- Back Length to Hip Buttons
- Side
- Chest
- Width of Back
- Sleeve
- Sleeve + Back (optional)
Breast
This is the most important measurement and determines which size of graduated ruler you will use for your draft. Measure around your chest at the fullest point, just under the arms. Take note of the full measurement to choose your ruler size, but the measurement is written down as half of the total, since we are drafting half of the pattern on the paper.
Waist
The waist measurement is taken at the level of the natural waist, about even with the naval. Again this is written as half for use when drafting.

Total Length
Measuring down the center of the back, start at either the base of the collar or at the 7th vertebrae if you don’t have period clothing available (the bony part on the back of your neck). Measure from there, pressing the tape against the hollow of the back, down to the bottom of where you’d like the coat to be. This is mainly a check measurement to compare with what we’ve drafted later on.

Back length to Hip Buttons
Again starting at the base of the collar, measure down the center of the back to the position you’d like the back hip buttons to be, usually a couple of inches below the natural waist. This is another check measurement to compare with the draft.
Side
Put the measuring tape under your armpit, though not too high up, and measure straight down to the waist seam. Yet another check measurement!

Chest
Sometimes when drafting, especially with these older drafting systems, our body’s widths will not be perfectly distributed from front to back. This is a good measurement to take to compare with the front of your draft.
The chest measurement is taken across the fullest part of the chest, from armscye seam to armcye seam.

Width of Back
This is similar to the chest measurement, but taken straight across the back from armscye to armscye at a level just at the bottom of the armpit.

Sleeve
The sleeve can be a little troublesome to take, especially for a beginner, but it’s easy to fix during the fitting process if necessary.
To take the sleeve measurement, stand with your arm extended horizontally, and bend the elbow at 90 degrees. Measure from the armscye along the back of the sleeve, around the elbow, to just past the wrist (sleeves were longer in the 1860s than they are today).
You can also take the same measurement from the center of the back, that way you can compare the two measurements and look for any discrepancies. I’ve included a video demonstrating the two measurements.
How to Use the Measurements
As you’re drafting your pattern in the next section, take note of the various lines in red, and compare their lengths to the measurements you took. If they’re far off, it indicates something may be wrong, and that you should investigate before moving on and potentially compounding the problem. This can happen especially with larger sizes, above size 46 – 48.

Finding Original Photographs
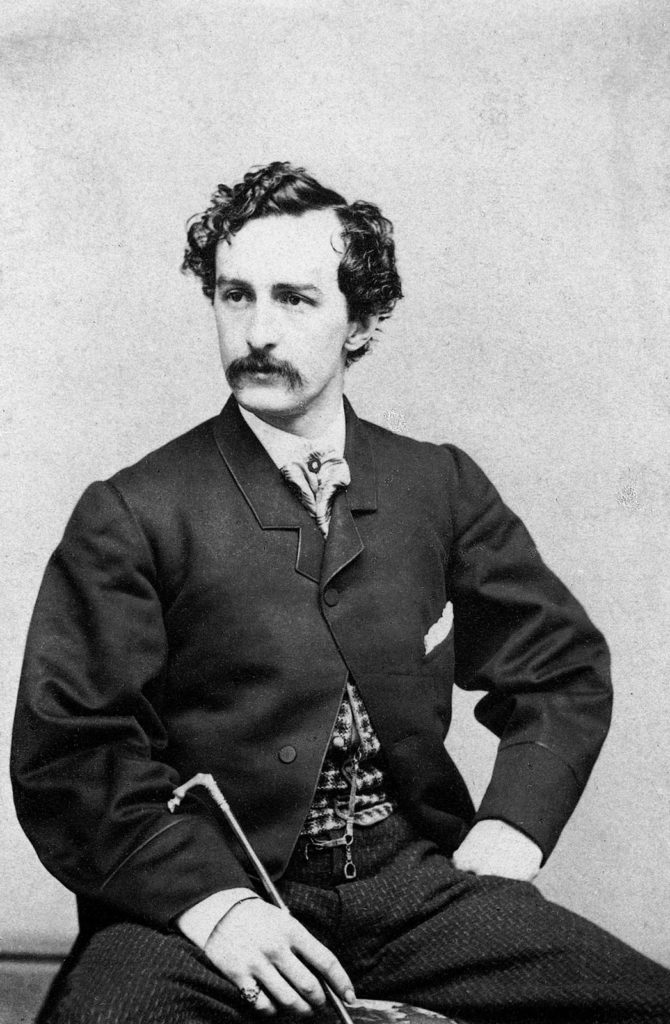
As we reproduce the paletot worn by John Wilkes Booth, we’ll be referring to several photos I’ve found of him wearing the same style of coat. Being a rather infamous character of history, it was easy to find photographs from different angles, which definitely helps us out.
Generally speaking though, there are some great sources out there for period images that you could use for other future projects, and in this article, I’ll discuss how to find them and how to manipulate the images to bring out more details.
Sources for Original Photographs
With the internet, it’s possible to find all kinds of good period photographs these days to use as inspiration for historical reproductions. From a quick Google search, to using something like Pinterest, or Ebay, to going to more focused websites such as the Library of Congress, a high-quality image is only a few clicks away most of the time. Though do take care to check for copyright information – if it’s just for personal use most of the images are probably okay, but anything more take due diligence. For example, one image I found through Google of John Wilkes Booth wanted something like $400 just to be able to use the image–definitely frustrating!
The key is finding the largest resolution, highest quality images as possible, so as to gain the most information from the photograph. Though you can usually gain some information from even poor quality images if necessary.
Library of Congress
The Library of Congress has a great number of high quality images in their online collections, though it can be a little difficult to actually find what you’re looking for, and the website itself often has problems loading. I usually start my search from Google with something like “Library of Congress 1860s civilians” to at least get me closer before getting to the actual Library website. Their main page for Civil War images appears to be https://www.loc.gov/pictures/collection/cwp/ though I’m sure there are other ways to get there.
From there you can click through the various collections and often strike upon something good. I’ll leave that for you to do at your leisure though, as there are thousands of images to browse through.
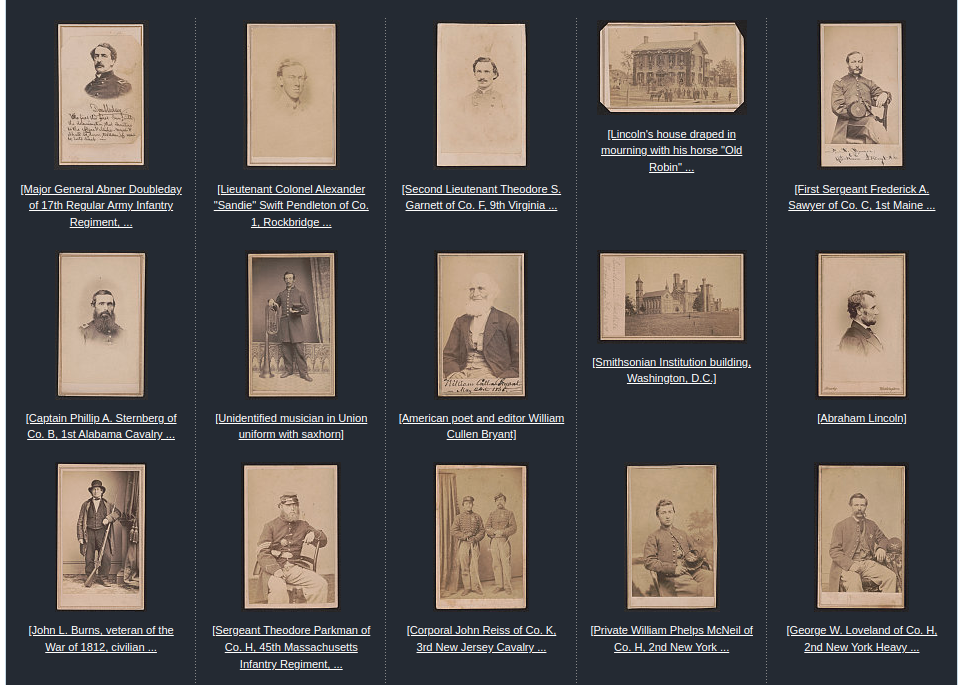
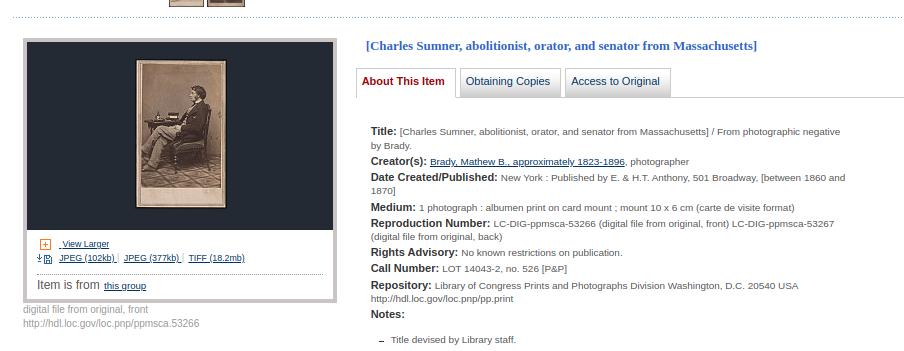
I found this image of Charles Sumner which seemed to hold some promise, along with some other information about him, such as the publisher, medium, and rough date the photograph was taken.
You’ll notice under his image on the left there are several options to download the photograph. The JPEG versions are of the poorest quality, but the quickest option if you just want to take a closer look before making a decision to go forward or not. But the highest quality image is the TIFF image, and holds as much of the original information in the photograph as possible. I highly recommend downloading that option if you want to see as much detail as possible.
The image downloaded within seconds just now as I’m writing this, but yesterday I kept getting errors on the website. So I guess if you have problems, just wait a few hours for things to calm down and try again.
Google Images Search
Google Images is another great place to search for period photographs, though you do have to be more aware of copyright issues. Simply enter your search terms and click on ‘images’.
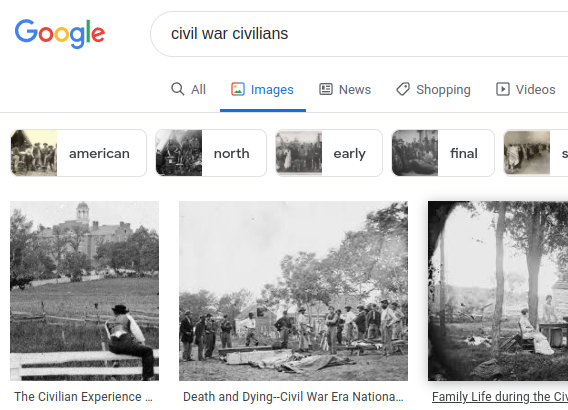
You can refine your search by filtering out the lower quality images by clicking on the Tools button at the upper right, and choosing Large under the Size option.
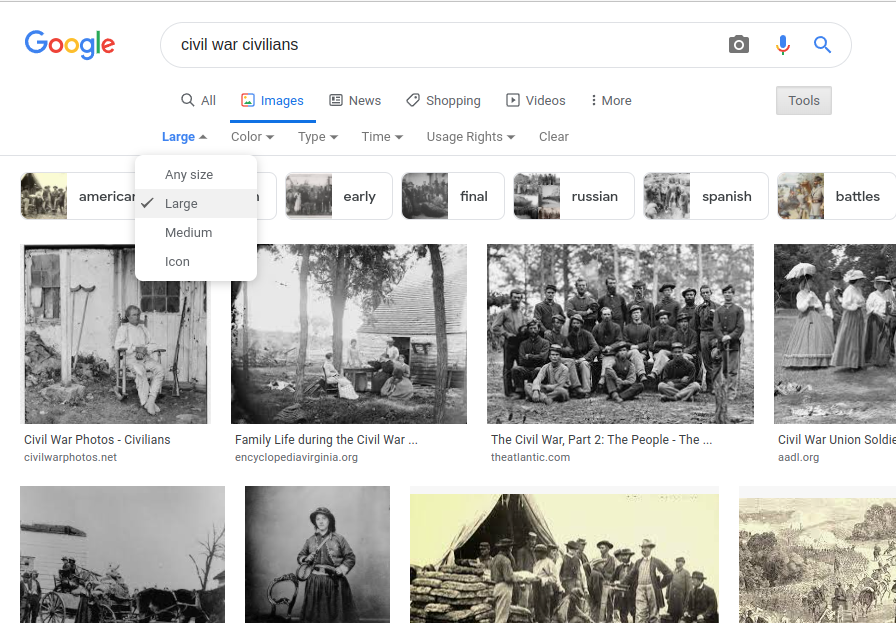
I was able to find a good number of images this way, including some from the Library of Congress that eluded me thanks to their clumsy system.
There are of course other search engines and websites you can search from, but these are my main sources, from which I can dig in to find further information on specific websites.
Planning and Research
As you probably know, the basis for any historical clothing reproduction begins with diligent research into the styles, patterns, fit, and construction techniques of the time period. It occurred to me while commencing my latest project that it might be a good idea to go into the particulars of my thought and research process of the particular coat I am copying. In this article, we’ll go over the very basics of the various types of research one can get into for a historical garment, and in subsequent articles I’ll go more deeply into the various details that I’ve used to reproduce John Wilkes Booth’s paletot.
While I’ve broken the different types of research into four distinct groups, please note that they definitely do overlap in various ways depending on the particular project.
Costuming
The first type of historical reproduction (and I use the term loosely here) has a wide variety of historical accuracy and level of construction. You might have on the one hand the typical lowest quality ‘sutler row’ garment made in some factory overseas with just the minimum of ‘research’. You’ll often notice the poor quality entirely machine made construction, misplaced seam lines, and can tell right away that they were made from modern patterns. These types of garments might fool the general public who has no knowledge of historical clothing, but for most of us we know to keep well away. Often, those just starting out in the world of historical reenacting or living history will fall into this category unless they have a mentor to guide them – I know I did at first!
On the opposite end you might have clothing made for the theatre or film. These types of clothing could very well be made by extremely skilled and knowledgeable hands by those who have done their researched as per the rest of this article, but at the same time, allowances are made to allow for quick changing of costumes, perhaps adding a zipper or two, or in the interests of getting a better fit, the clothing might be based on a modern pattern with the stylized details added afterwards to make it look period correct.
Even I’ve taken this more of a costume approach to a garment or two on occasion. For example, I recently was commissioned to make a pair of 19th century trousers for a gentleman in Australia to wear at his wedding. While the construction itself was done entirely with historically-accurate techniques, I ended up using a more modern 1940s pattern (with his permission) to ensure a good fit, since time and expense prevented us from doing any fittings. The result was a pair of trousers that looked as though they were 19th century to the vast majority of people, even if a couple of the seam lines were slightly different.
Fashion Plates
A good first step to improve your knowledge is to study fashion plates of the period. These could be found in a variety of magazines and publications, catering to everyone from ladies at home looking for the latest fashions with Godey’s Magazine and Lady’s Book, which was extremely popular during the mid-19th century and featured illustrations and even patterns for women’s wear, to trade journals such as the Tailor and Cutter Magazine that focused more on pattern drafts for men along with the illustrations.
 |
And of course there were many other magazines and sources for fashion plates during the period. I used to have access to a French website with thousands of men’s fashion plates from I believe the 1830s through to the 70s or 80s, which I really need to find again.
These fashion plates are great for getting ideas for your historical clothing, but it does come at a slight disadvantage. If you try to copy one exactly, you may discover that they really were more artistic representations rather than exact copies of garments worn during the period, and you run the risk of making a garment that is more a product of the imagination than one based on historical practice. Look in particular at how thin the waists are, or the way some of the clothing drapes – it can get ridiculous! That said, they’re an excellent resource for inspiration, especially in conjunction with the two options below, and I’ve got more than a couple of saved for future use, such as a hunting ensemble I found years ago in one of those French fashion plates (sorry I can’t remember the name!).
Photography from the Period
 |
Studying original period photographs is by far the easiest and surest way to make an accurate reproduction, and something that is pretty much accessible to everybody. With the invention of the camera in the early 19th century, by the 1850s and 60s, photography was becoming more and more common, and offers us a superb glance into what was worn during these years. While to some extent, people tended to dress up and pose for the camera, there are plenty of more informal photographs to be found of, for example, men at work, and it’s possible to gain a great deal of information from such images on what and how they wore their clothing.Studying original period photographs is by far the easiest and surest way to make an accurate reproduction, and something that is pretty much accessible to everybody.
Most of these photographs are just a quick web search away. In particular, the Library of Congress has thousands of old photographs on its website, which are very easy to download in extremely high quality and resolution to examine more closely. It’s also possible to find websites dedicated to clothing construction with images detailing the various aspects of the garment, which can be an invaluable resource. In next weeks edition, I’ll be delving into how to get the most out of these period photographs and showing you the process with which I went from photograph to drafted pattern, going into detail the decisions I made from the information I had at my disposal.
Studying Original Clothing
Of course, nothing beats the study of original clothing in person to be able to learn about the construction of 19th century clothing. The only trouble is the difficult one might have to go through to be able to study them.
The easiest way would probably be to look out for various conferences and workshops on historical clothing, sadly not very common these days. About a decade ago I had the opportunity to attend several conferences and examine by eye and photograph hundreds of pieces of original clothing, which have aided me greatly to this day. By seeing the clothing in person you can see just how each piece was constructed, at least for the most part, and develop a good sense on how to construct just about any piece of clothing out there.
Another good option is frequenting antique shops, especially in historical areas pertaining to your interest. I know in Gettysburg, Pennsylvania there were a couple of shops I frequented, one in particular had a beautiful Federal enlisted frock coat for sale for an absurd amount of money that I got to stare at through the glass case and make mental notes. Likewise I was able to pick up some late 19th century clothing at nearby antique stores for much less money, which I still have to this day to be able to refer to and perhaps some day make reproductions of. There are also those digital antique shops known as Etsy, Ebay, and Pinterest which can often give you some surprising good finds.
Finally, there are also museums and historical societies at which you could also view a great deal of period clothing, though mostly through glass cases as well. Depending on the museum (usually the smaller ones are more open to this) and how friendly you are with them, you might be able to get the opportunity to examine some clothing in person, though great care needs to be taken not to damage the clothing in any way.
In conclusion, in reproducing a particular piece of original clothing, the actual process involves a little bit of each of these options, save maybe the first. For example, I’ll see in a photograph a particular coat I’d like to reproduce, draw on my knowledge of clothing construction from examining original garments, draft an appropriate pattern based on my measurements, and perhaps take a little bit of inspiration from the fashion plates along the way for various accessories or accompanying clothing. Remember that each person’s journey of historical tailoring is different, and we each pull from different areas according to what we have access to, and our own preferences with regards to style and construction details, leaving us with unique garments that have our own mark upon them while maintaining good accuracy for our particular time periods.
Installing the Canvas
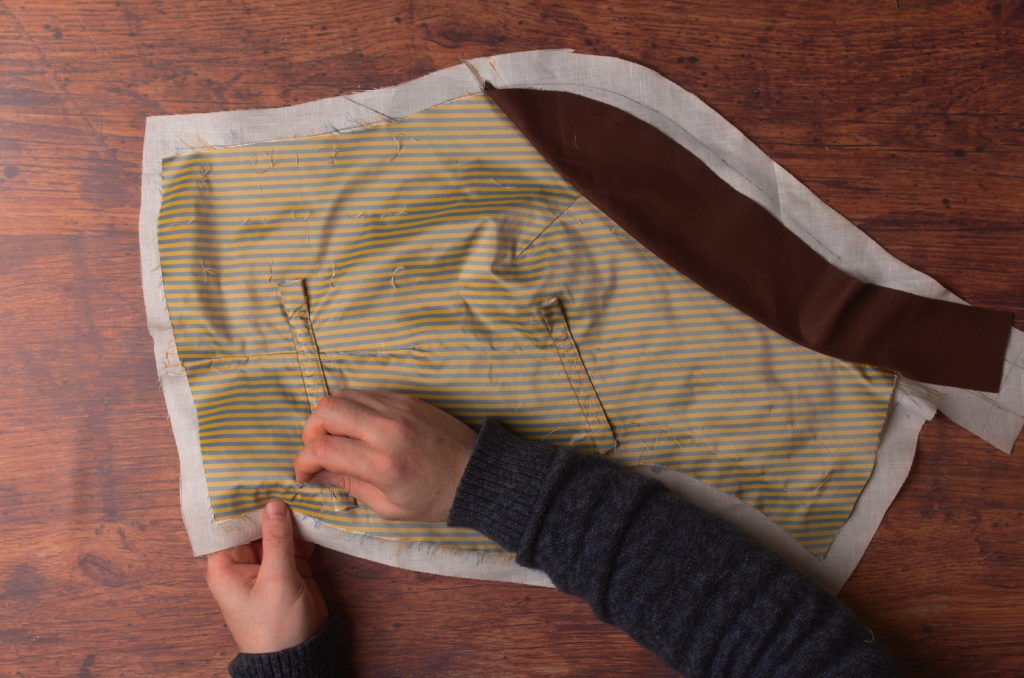
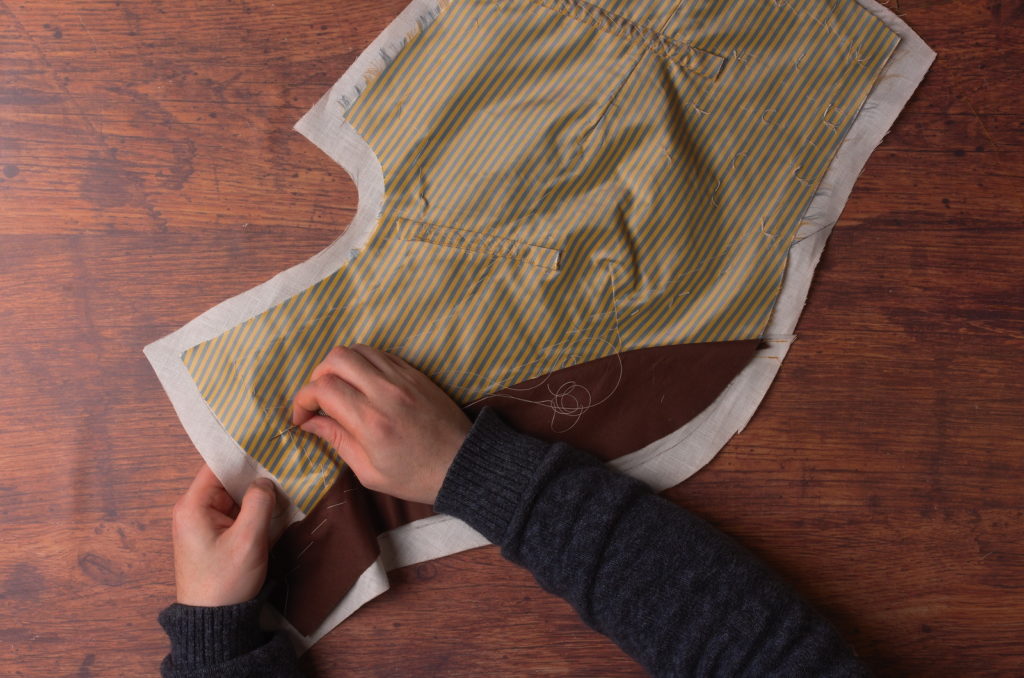
With all the preparatory work out of the way, we can begin installing the canvas. Begin by laying the forepart on top of the canvas, right sides up, and aligning the forepart at the darts, collar, and other visual landmarks. If you’ve not done this before I’d recommend starting on the side with the 1″ allowances marked on the canvas.
Also note that the upper part of the collar, along the bottom edge, should align exactly with the edge of the canvas, since we didn’t add any allowance there.
The following process basically consists of basting the forepart to the canvas down the center, and around the edges, all the while supporting the shape with your hand underneath and smoothing out any excess in the forepart. This is the general order I use to install the canvas.
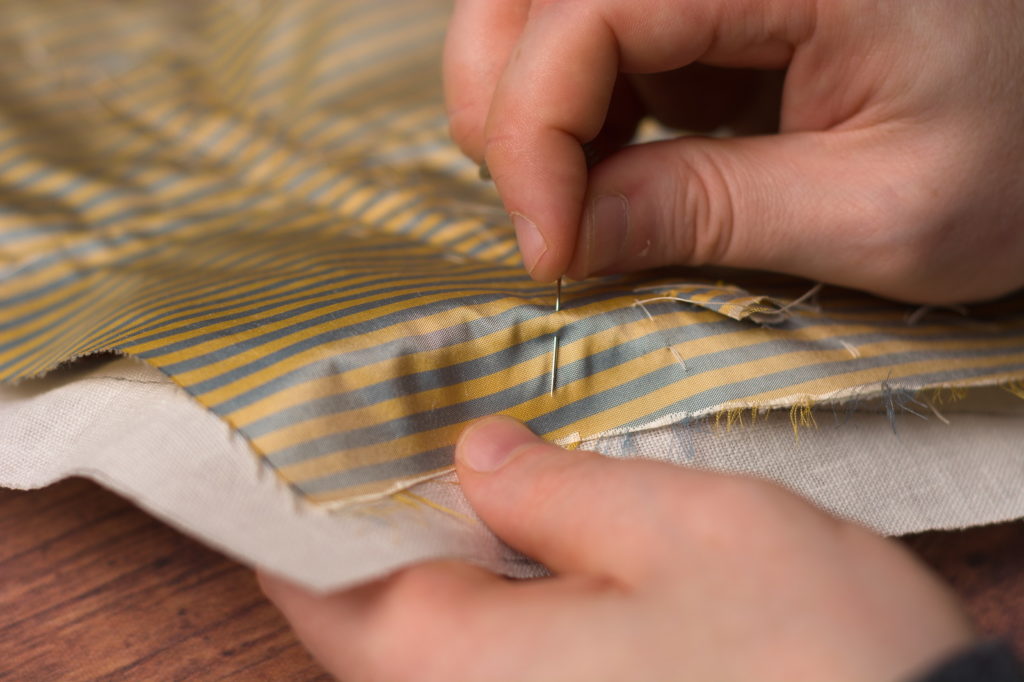
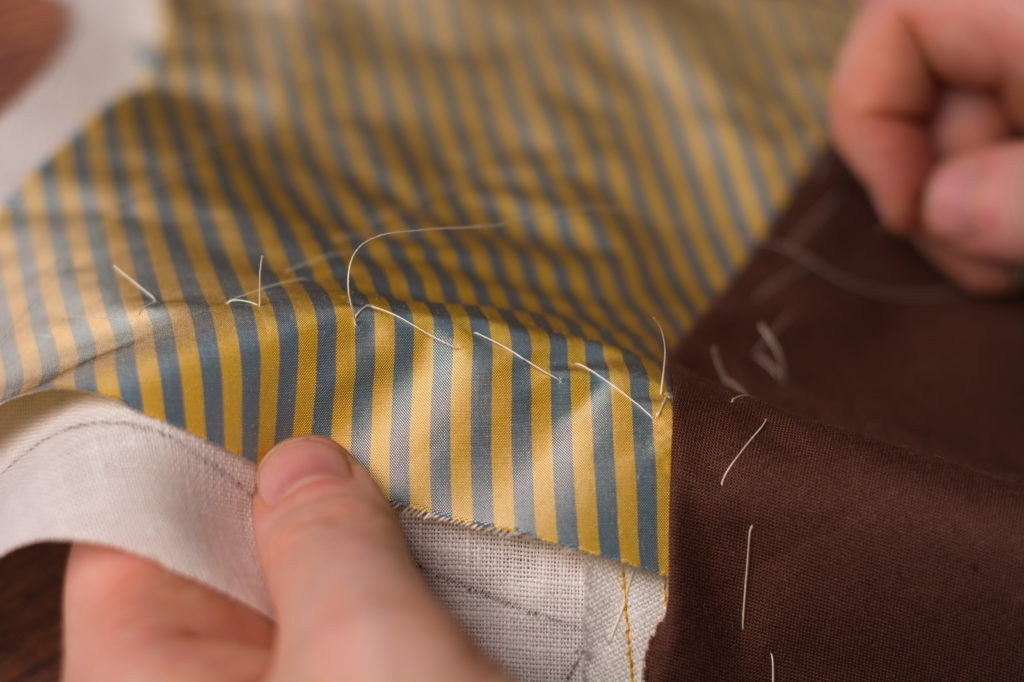
Begin in the center of and about an inch below the shoulder, basting down the front, smoothing out the excess fabric in the forepart as you work. You can use either a straight basting stitch or a diagonal stitch – I tend to vary depending on the angle I’m working at.
When you get below the chest level, aim for the center of the waist or the location of the dart, if you have one. Continue smoothing out the fabric as you work – please see the video for a demonstration of this.
Stop your stitching about 1″ above the waist. You need room to do some work there later.
Starting at the same point as the previous stitching at the shoulder, baste along the shoulder towards the armscye, again keeping 1″ from the edge.
Continue basting along the armscye, pushing any excess down and away from the center of the waistcoat and away from your stitching.
And continue basting along the side seam towards the waist. Here you can see me pulling gently on the forepart with my left hand in an effort to smooth everything out.
Keep basting to 1″ from the waist.
Also, try to keep the basting away from the ends of the pockets. We need those free to be able to turn under shortly.
Then baste across the bottom of the waist to the dart, keeping again 1″ from the edge of the forepart.
Finish up installing the canvas by basting from the bottom of the dart towards the front.
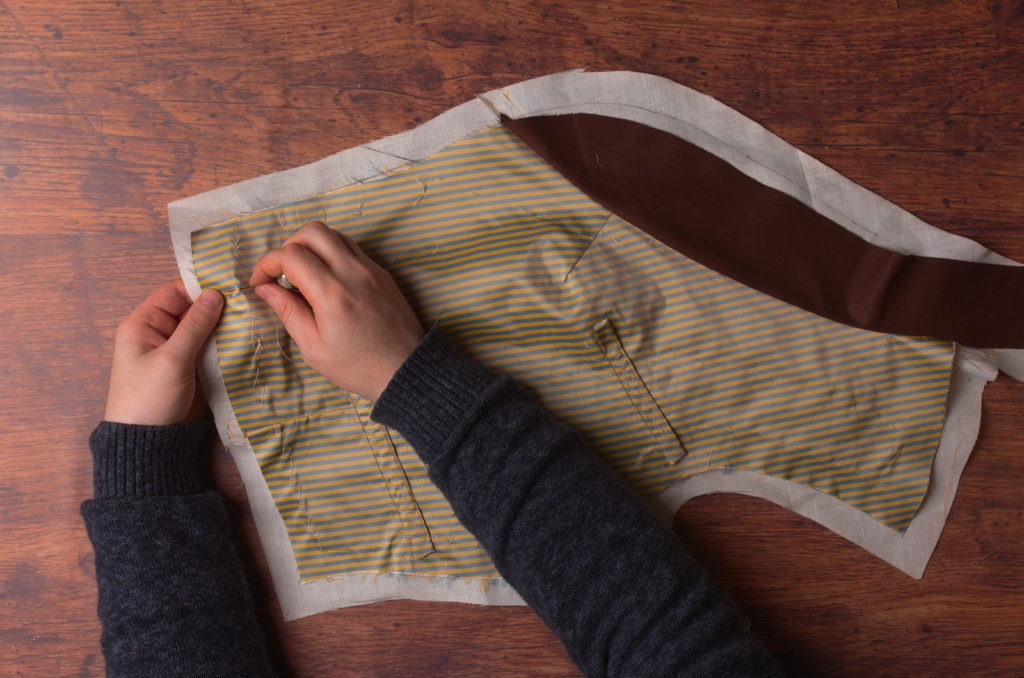
Keeping 1″ from the edge of the forepart, baste up along the center front of the waistcoat, smoothing the fabric as you work.
When you get to the roll line, turn and continue basting following about 1″ below the roll line. We still need to finalize the position of the roll line, so don’t worry too much about following it perfectly.
Continue basting below the roll line onto the collar. I neglected to draw the roll line in on my collar, so I’m just keeping the stitching near the lower edge of the collar.
Continue basting to the end of the collar, stopping 1″ from the end. It gets a little tricky near the shoulder due to the tighter curves, so just be aware of any excess, smoothing as you stitch.

Finally, baste from the edge of the collar across the shoulder to the midpoint, where you started, just to get that area secured.
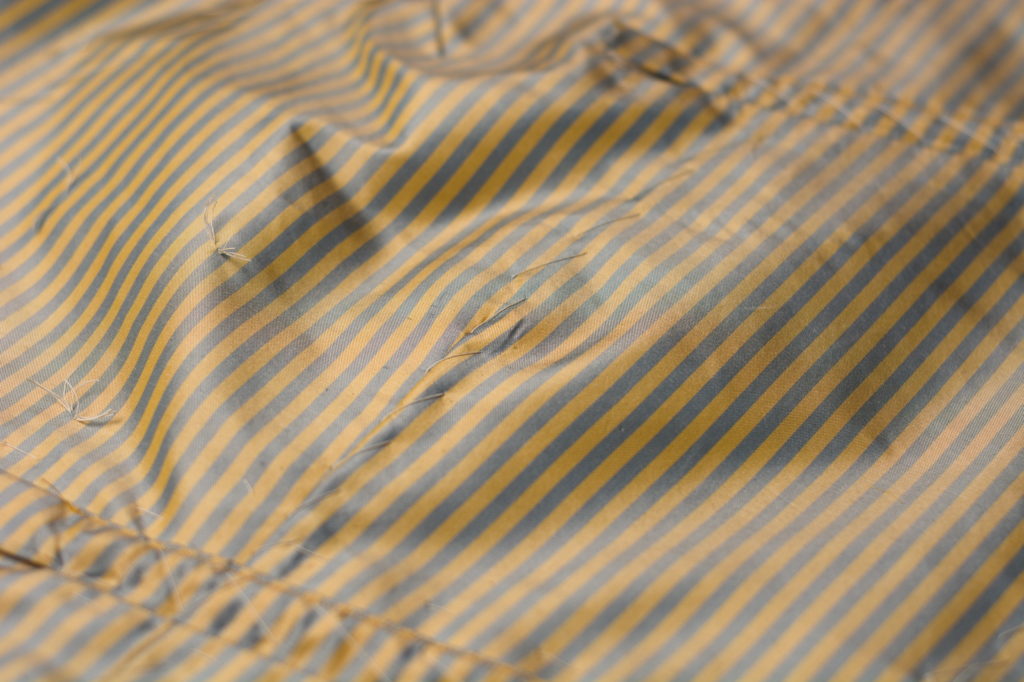
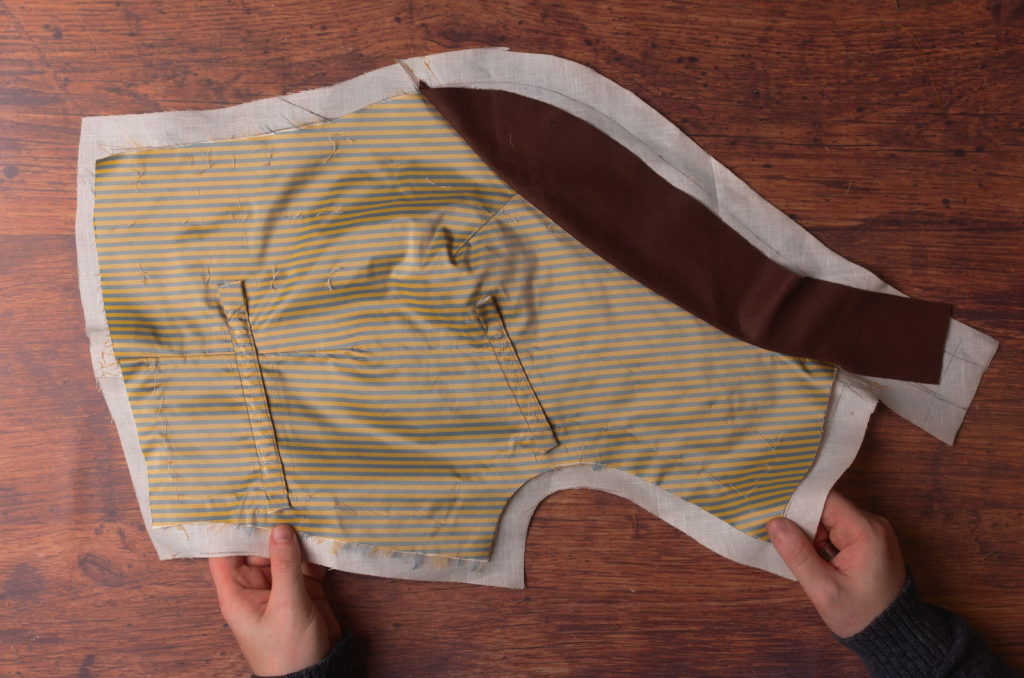
After you’ve finished basting, hold up the waistcoat, on yourself or a tailor’s form, and check to see how well you did – are there any wrinkles or excess fabric still remaining in the forepart? If so, you may need to go back and re-baste. Kind of a pain but well worth the effort.
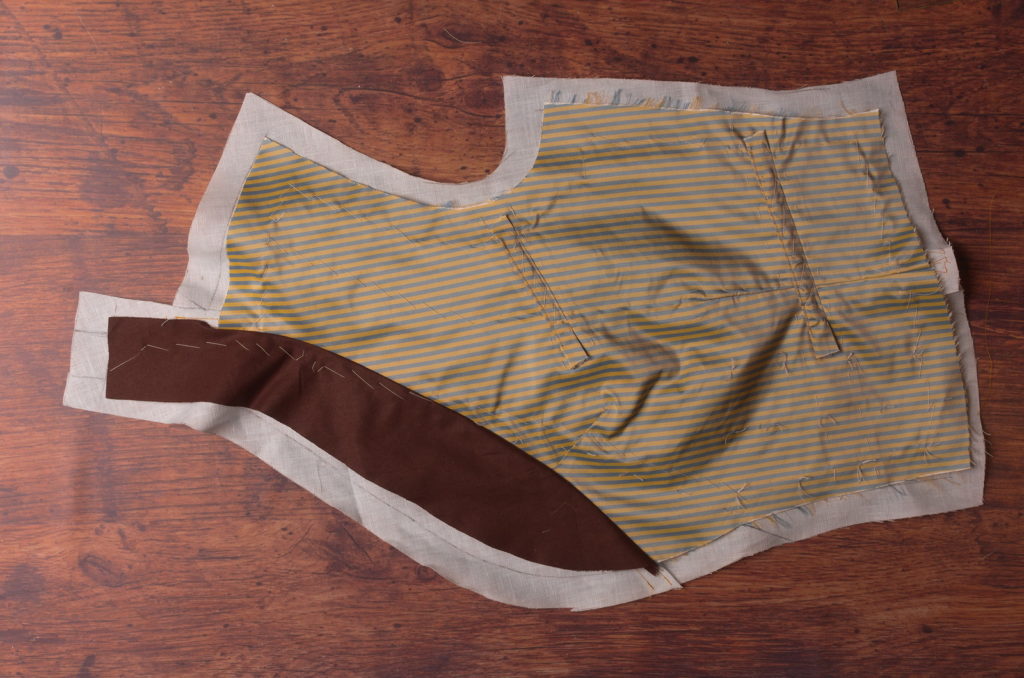
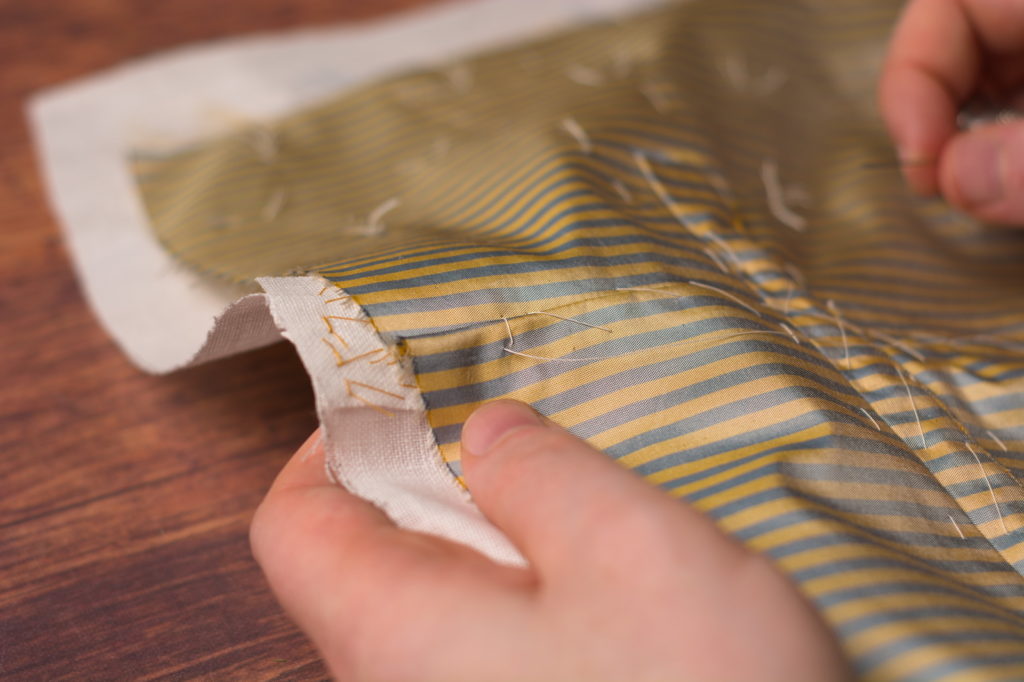
When you’re happy with everything, carefully trim the excess linen away from the forepart.
This completes the installation of the canvas.