Category: Selvedge Jeans
Hemming
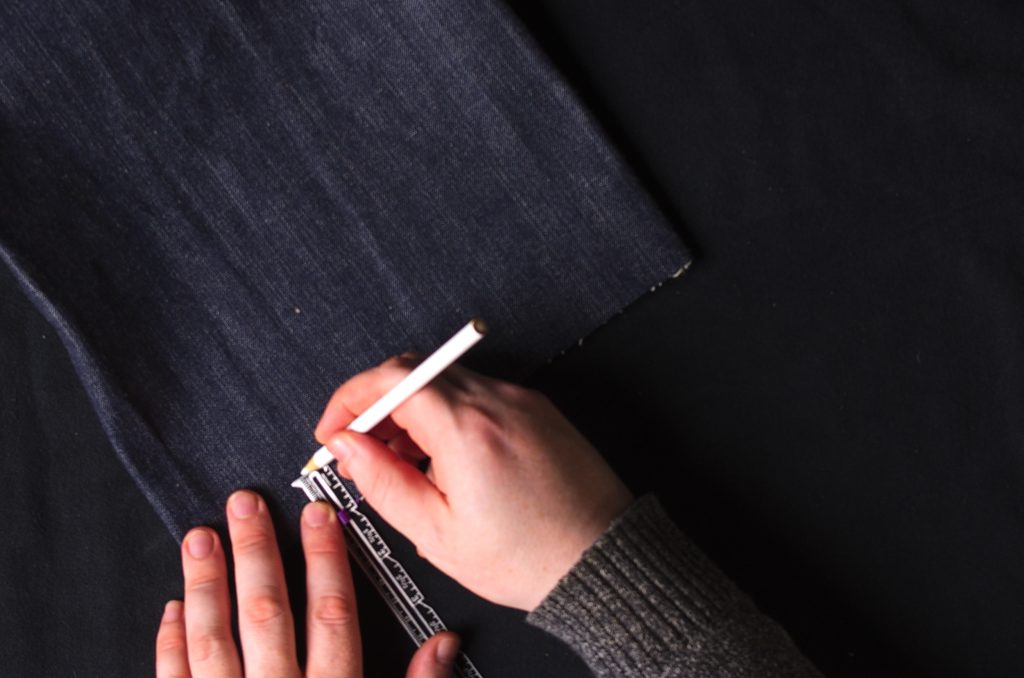
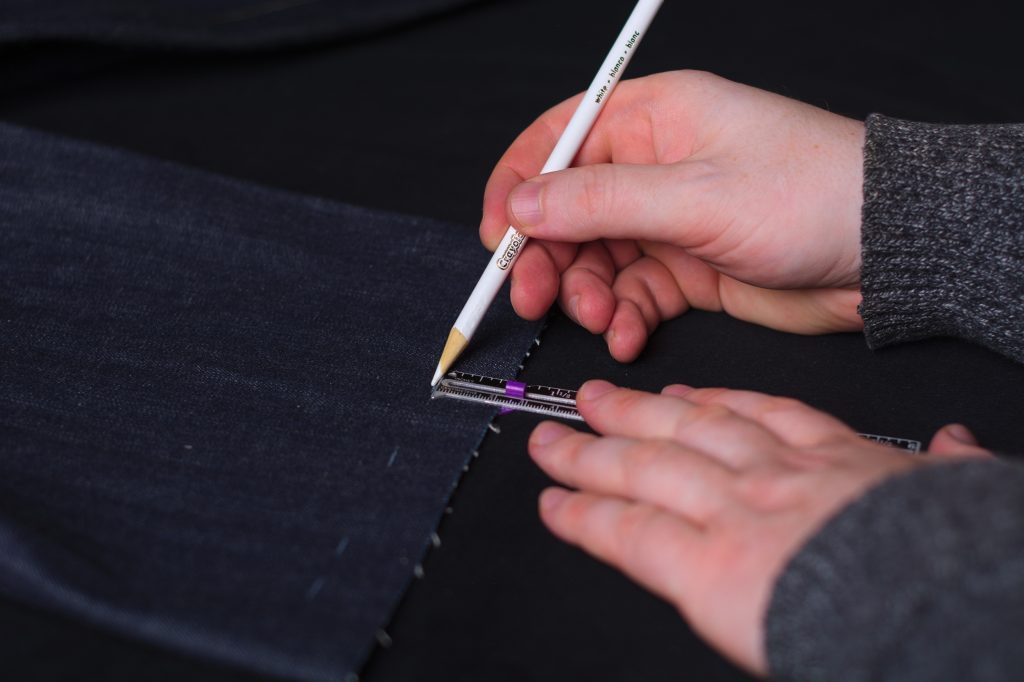
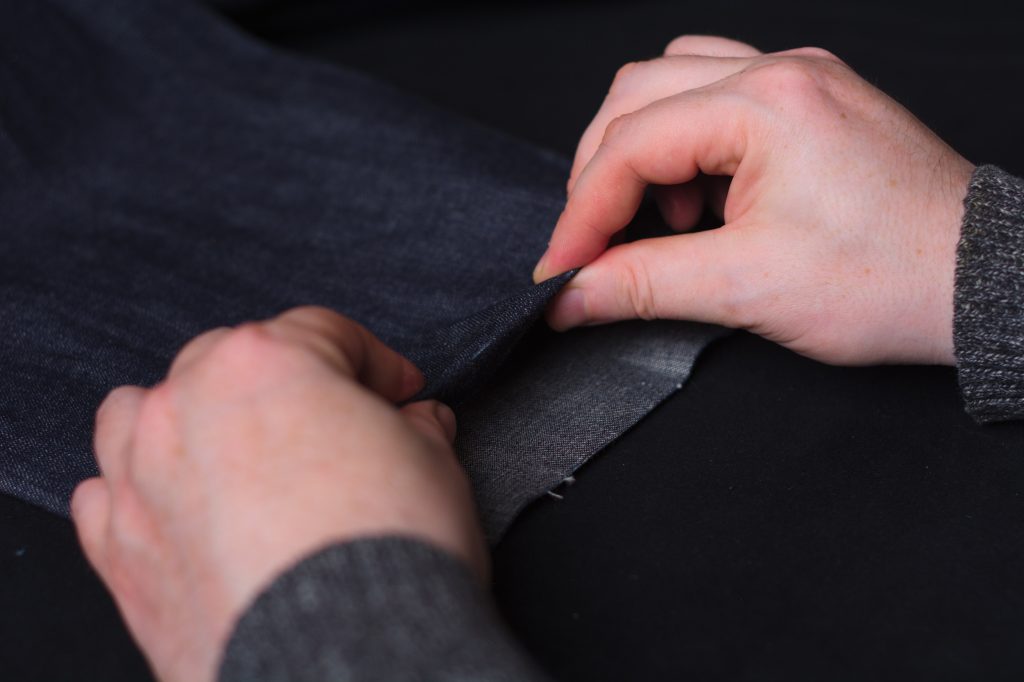
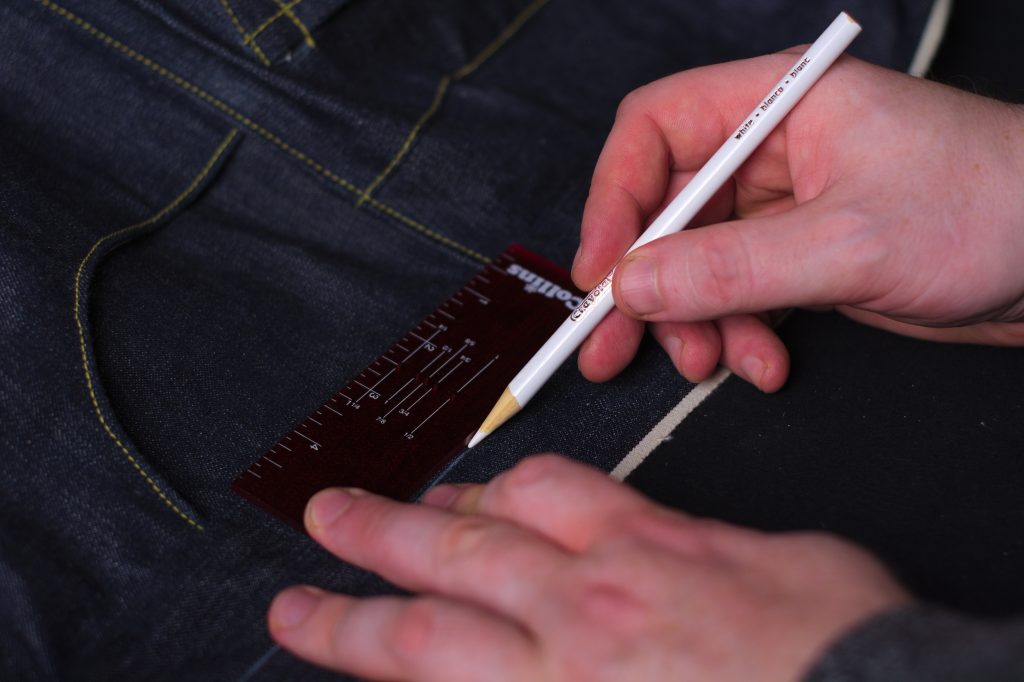
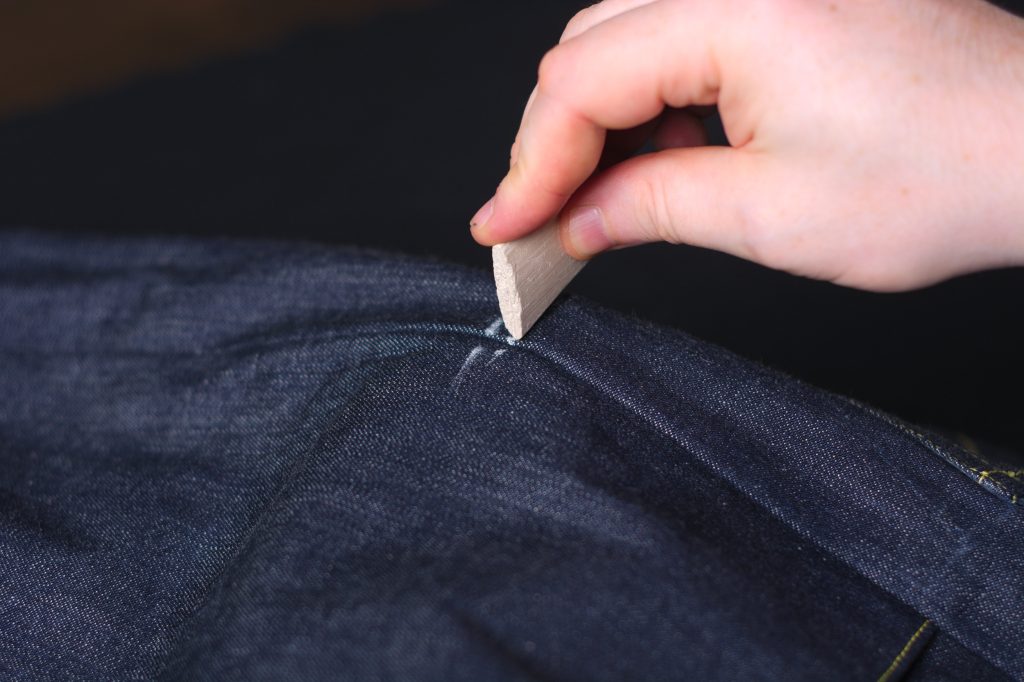
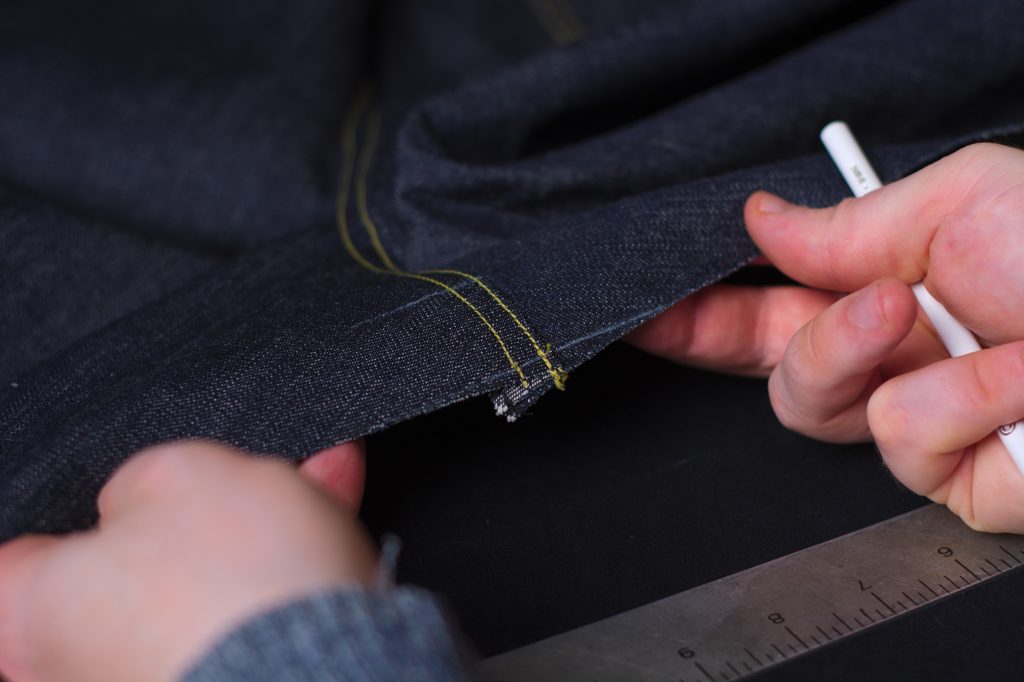
Moving on to the hem, mark a series of points 7/8″ from the bottom. This gives us two 3/8″ seam allowances plus 1/8″ to account for the width of the fabric when turning.
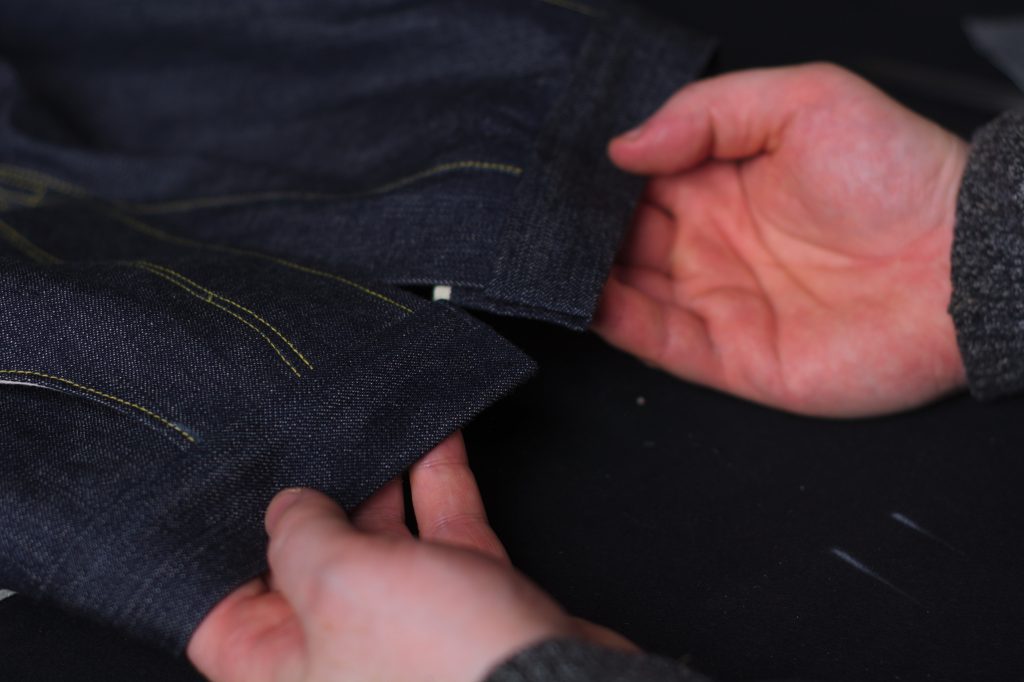
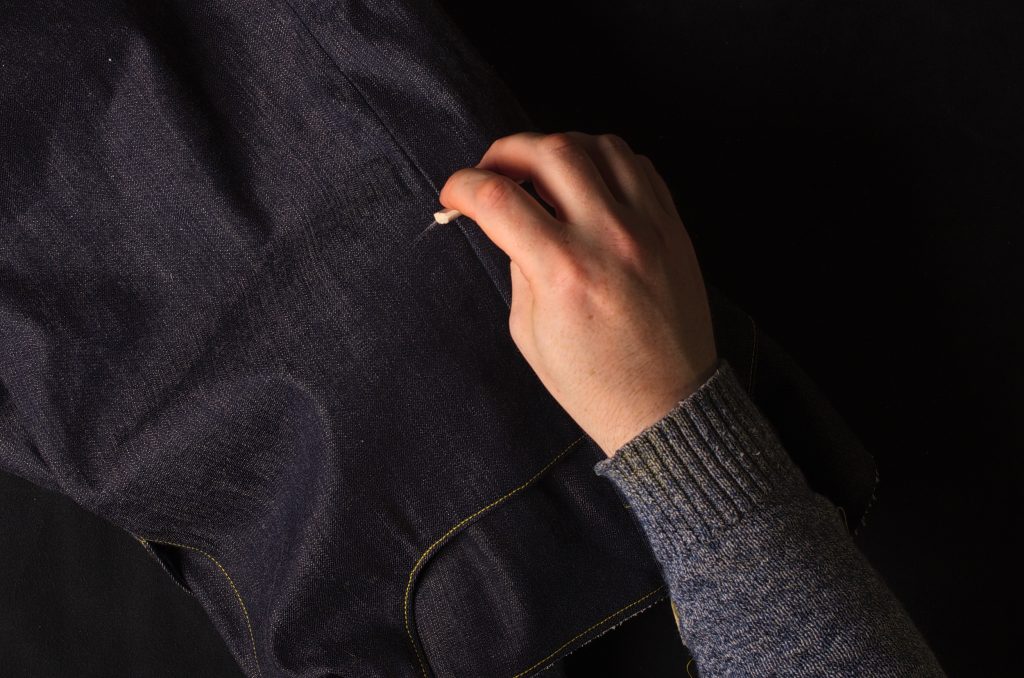
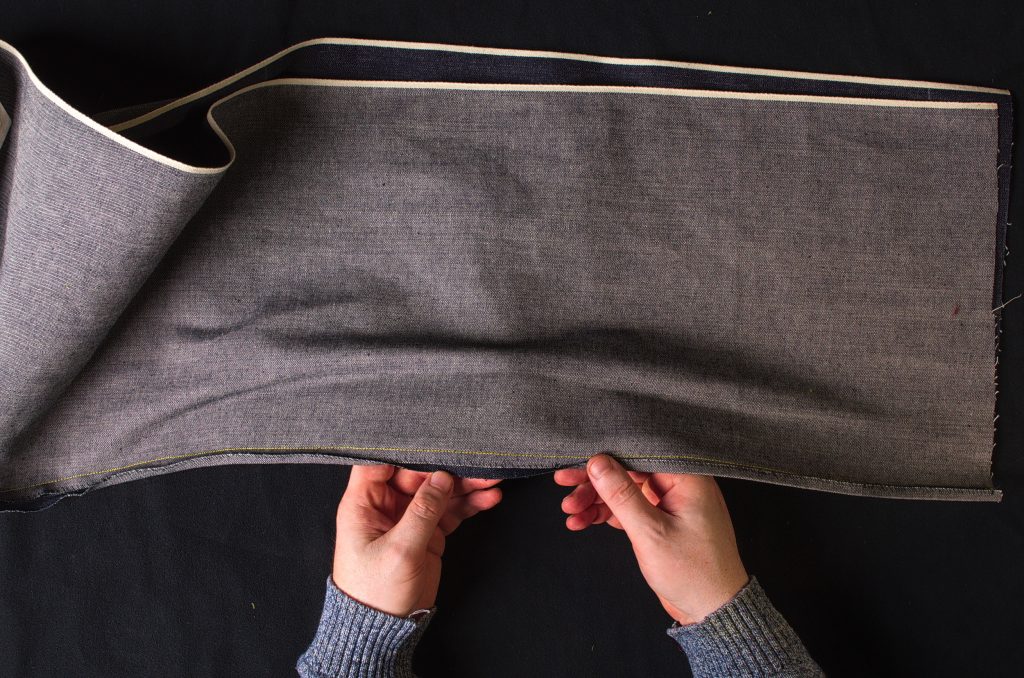
Now turn under the hem towards the wrong side, aligning the fold with the points you just made, and crease with your fingers.
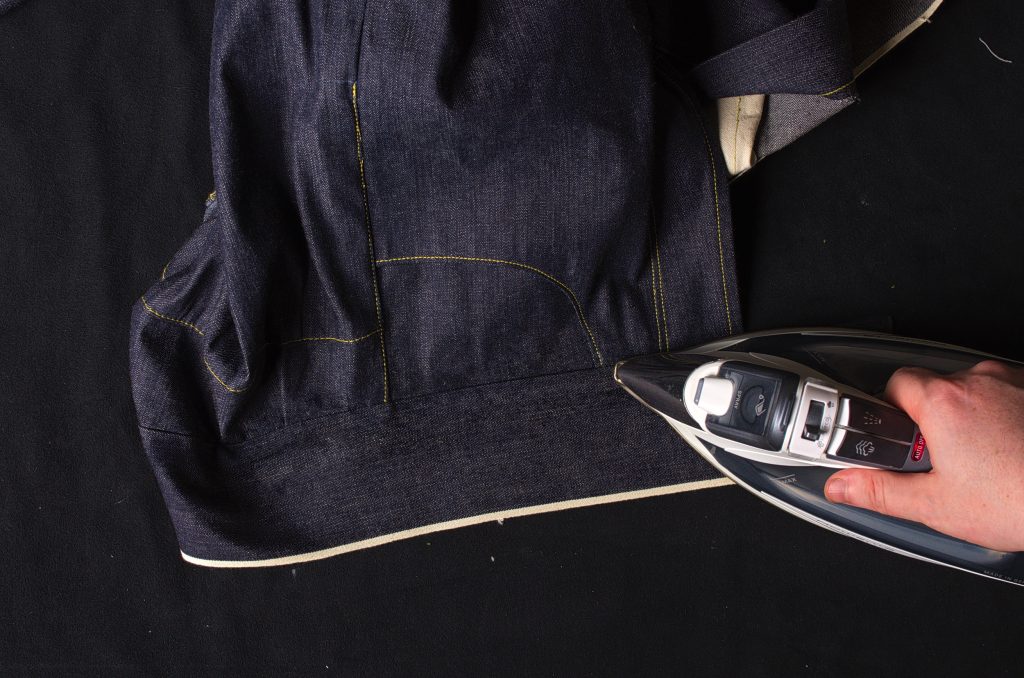
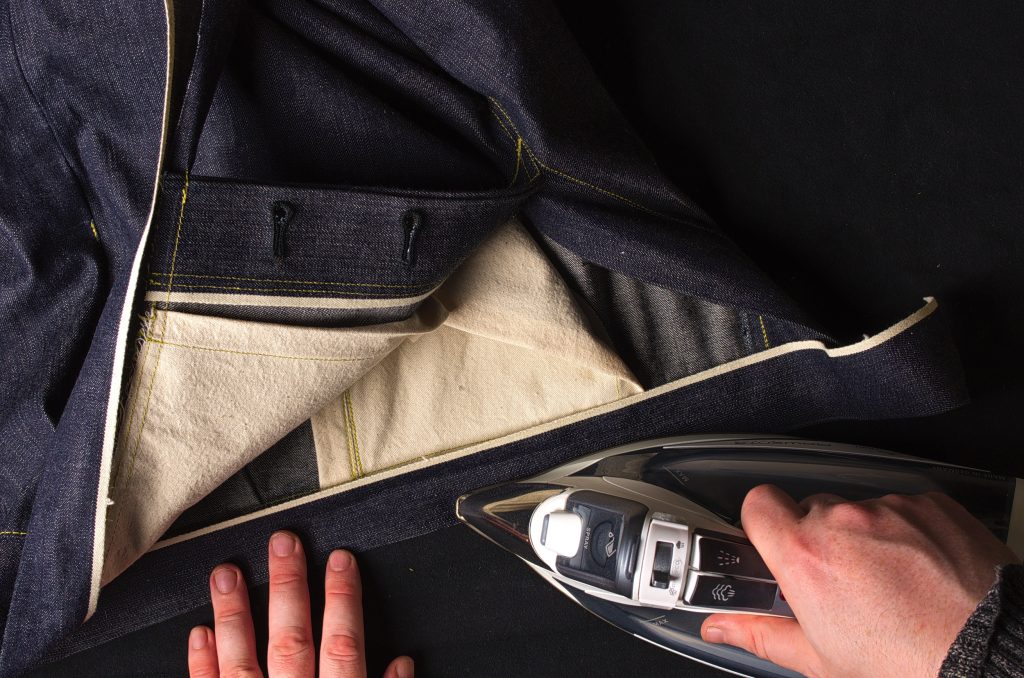
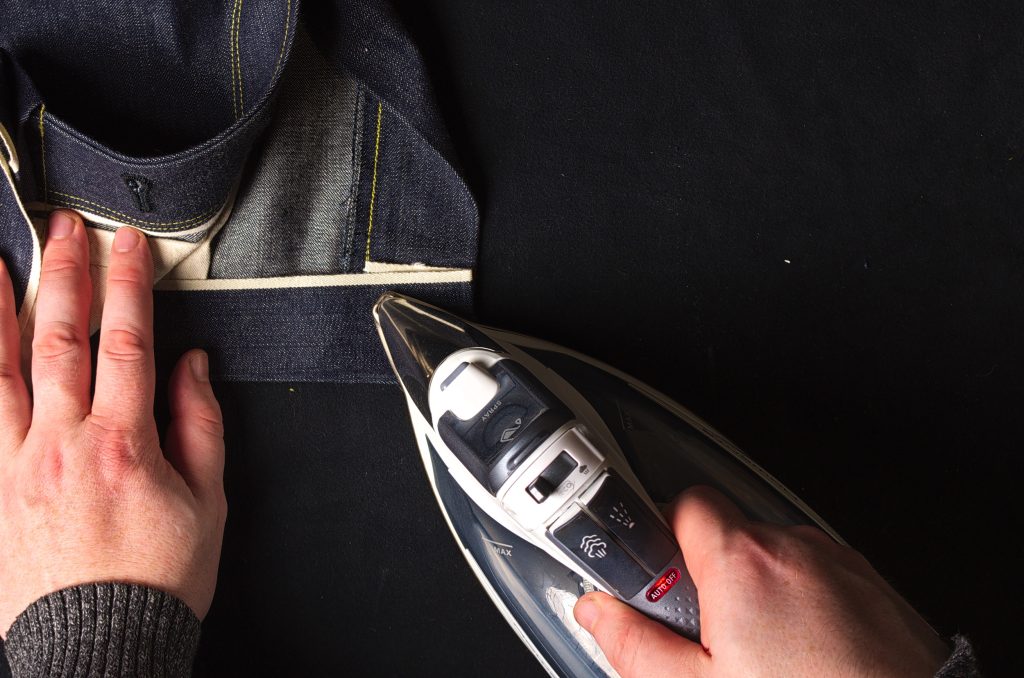
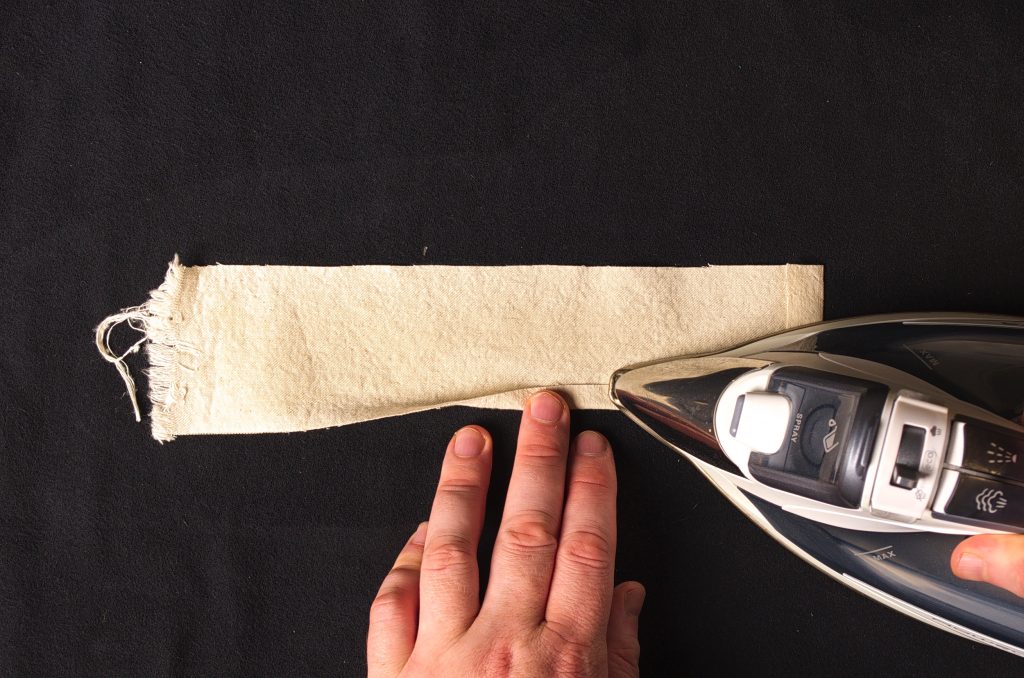
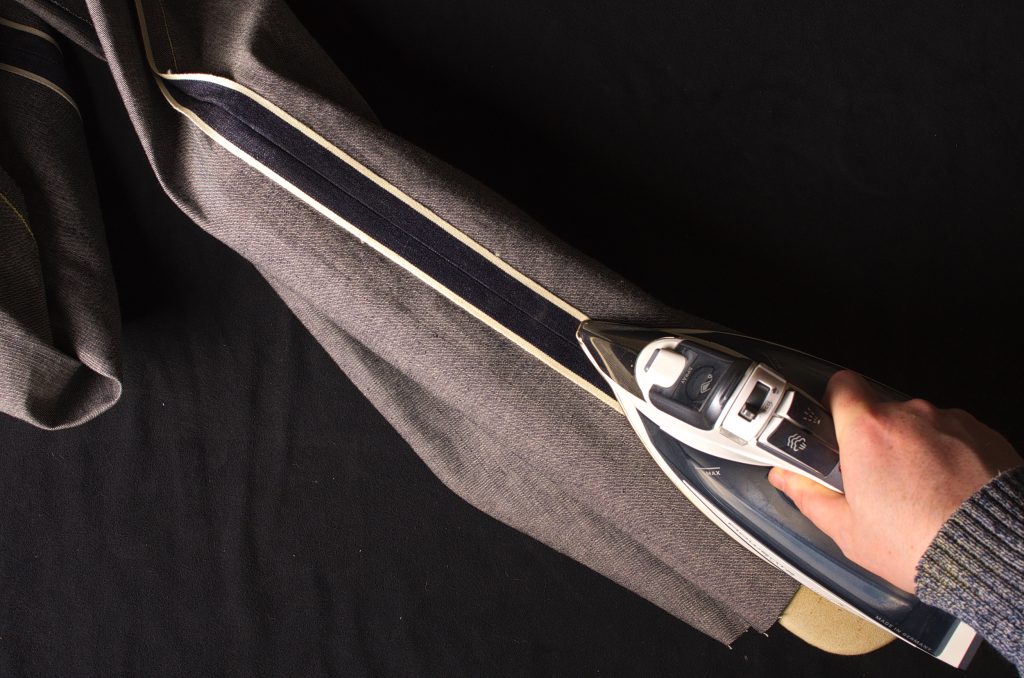
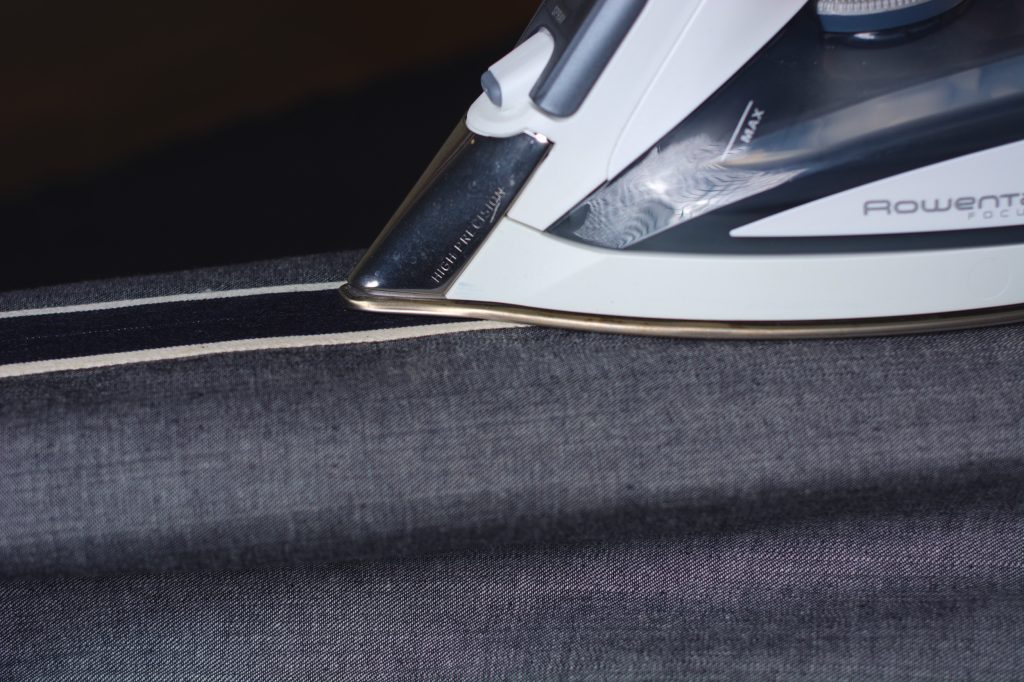
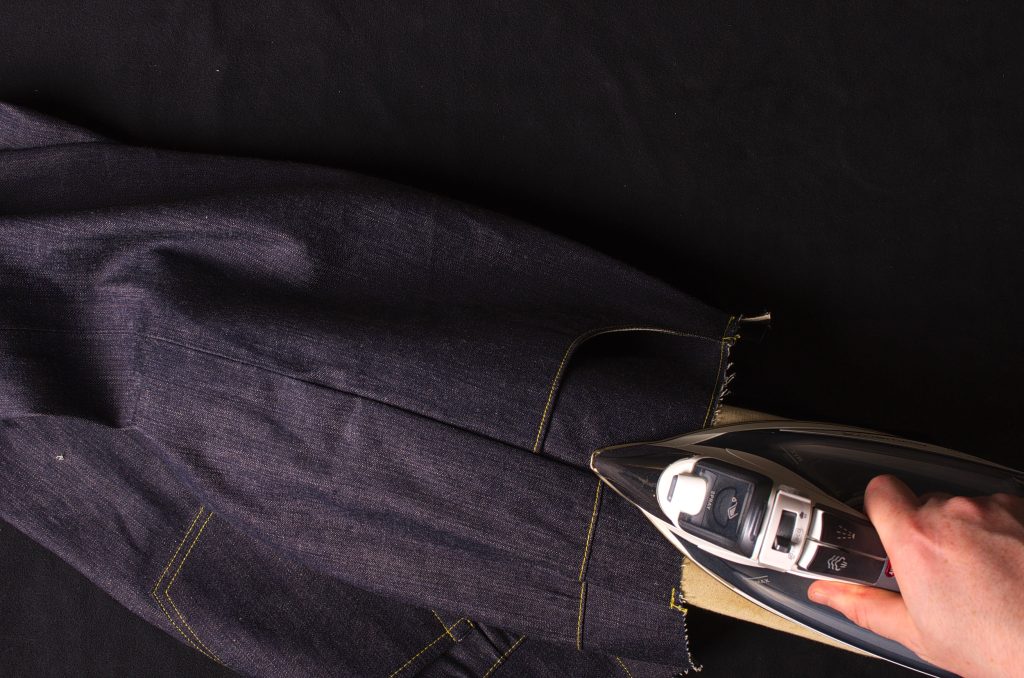
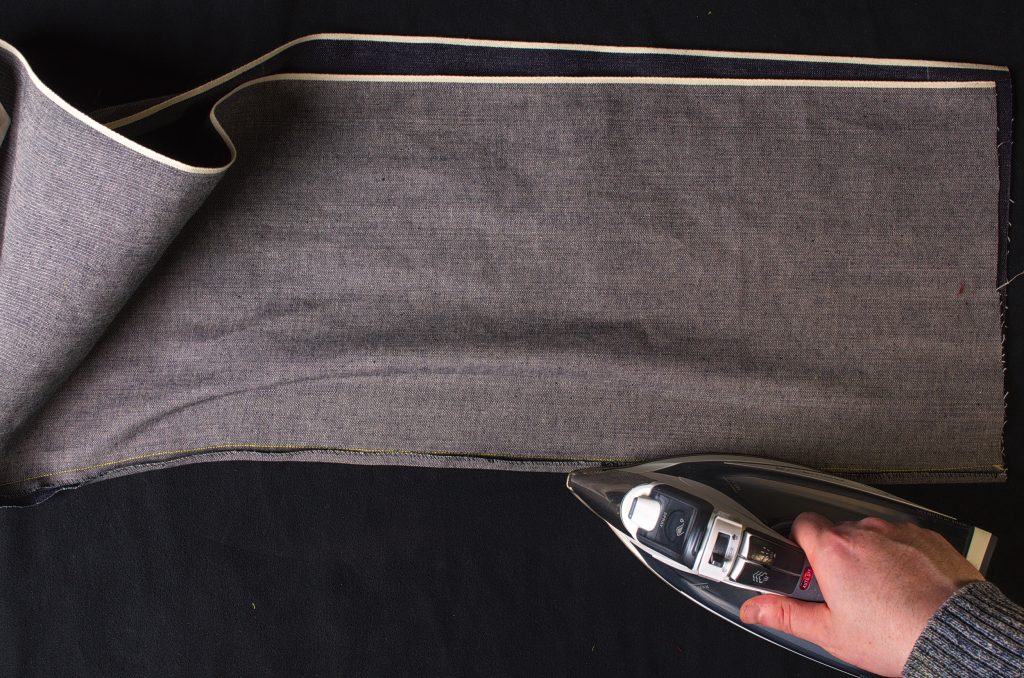
Now iron the hem all the way around the leg, concentrating especially on the seams.
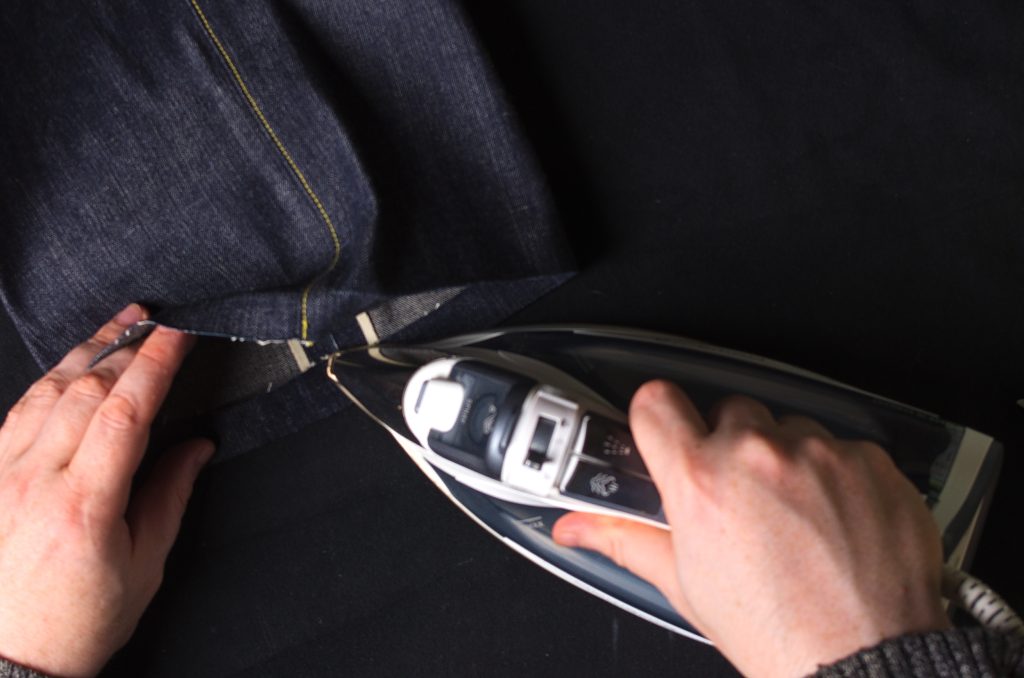
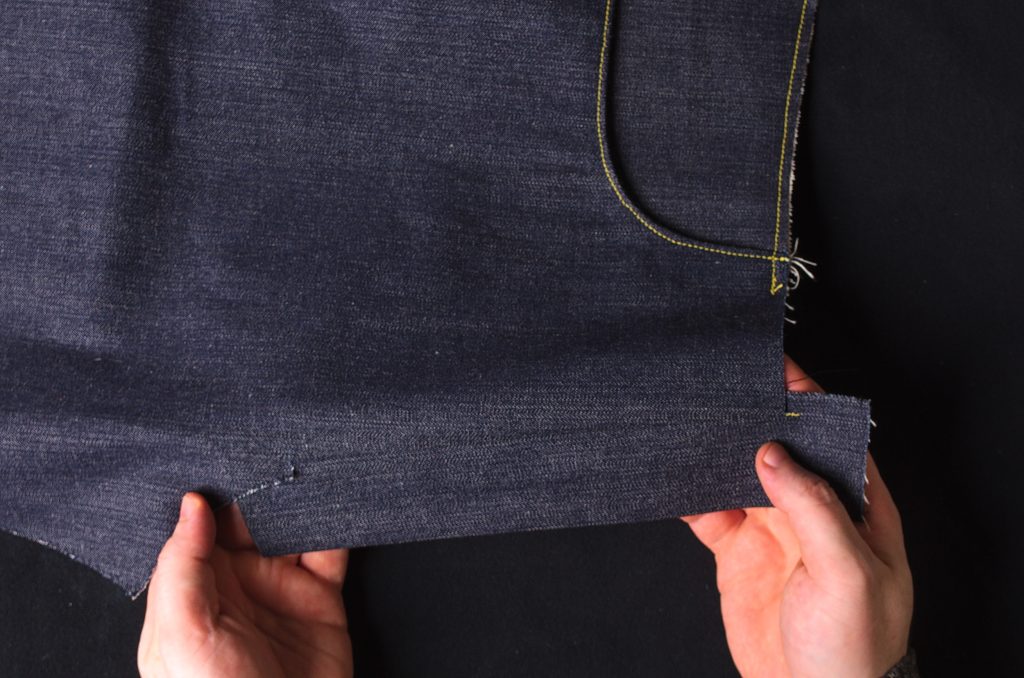
Here’s where my side seam was slightly off when sewing, so I just smoothed out the difference when folding the hem.

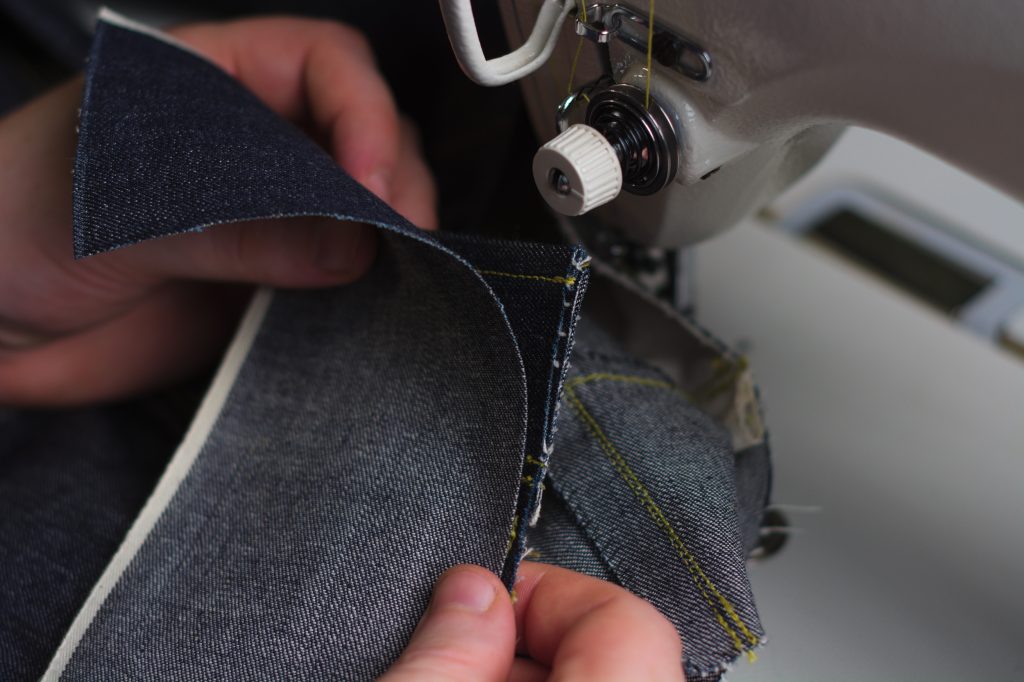
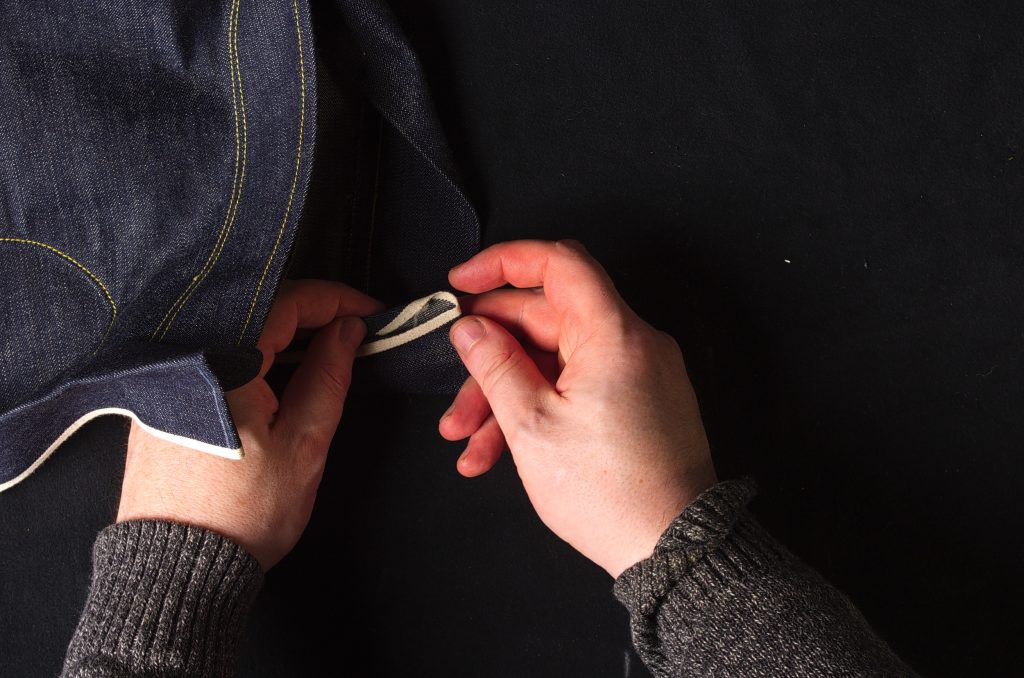
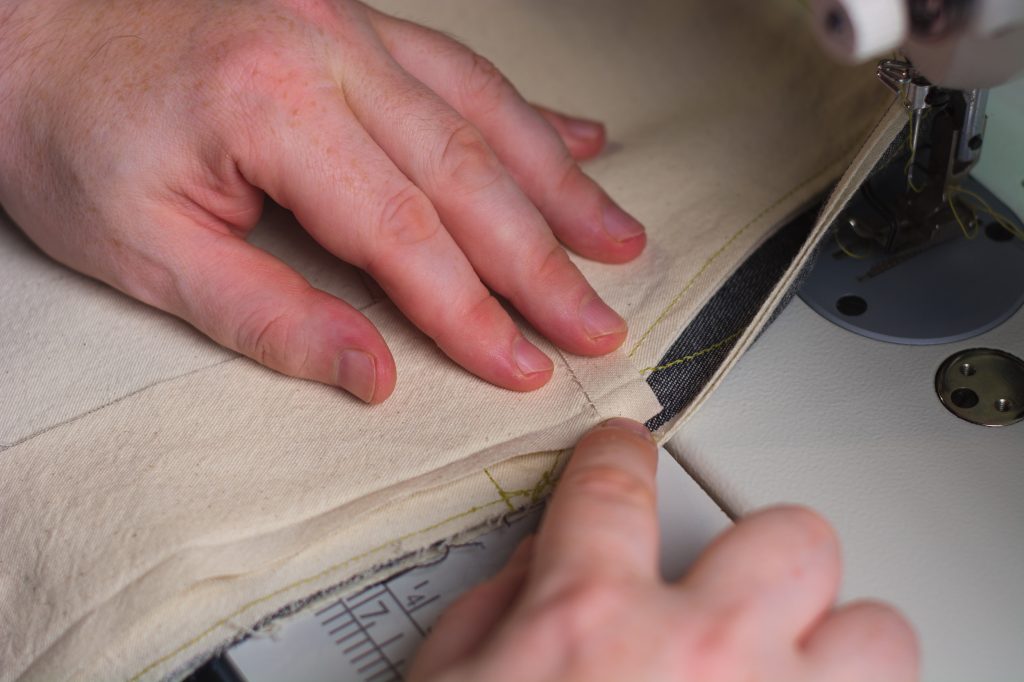
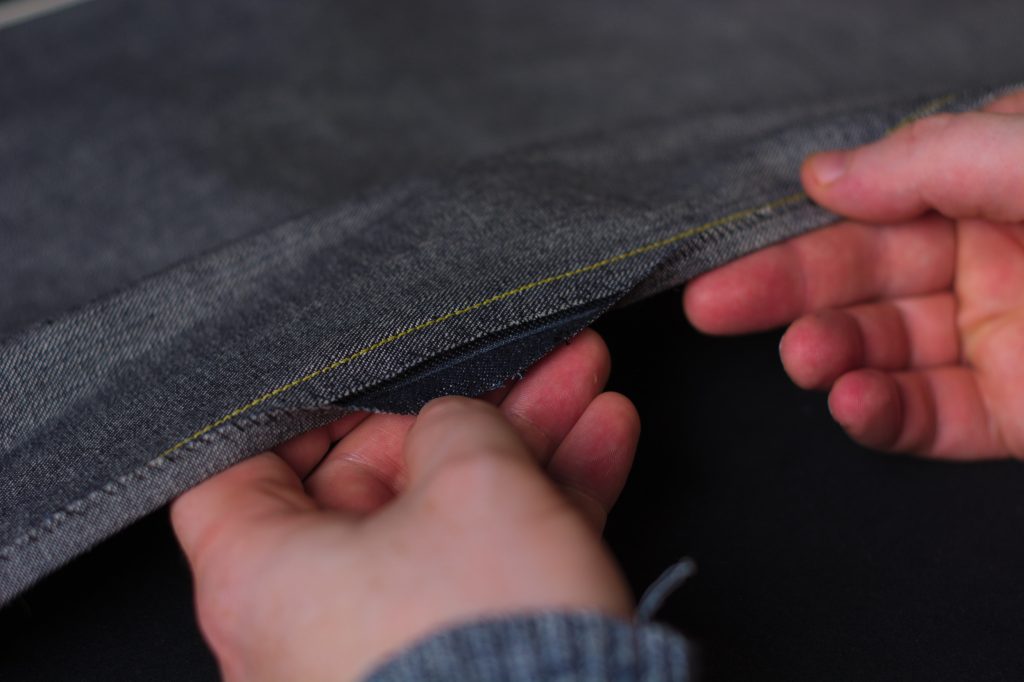
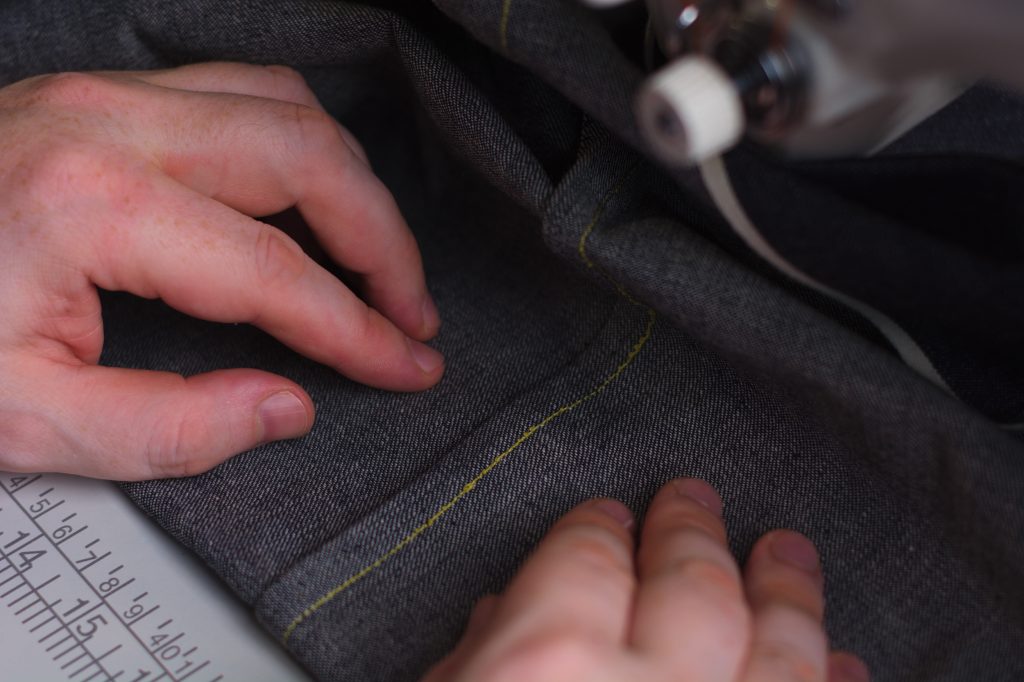
Now fold an inch or two of the raw edge under itself, forming the final hem, and crease with your fingers. Rather than turning and pressing the entire hem again, we’ll just turn a little bit at a time and sew it down as we go.
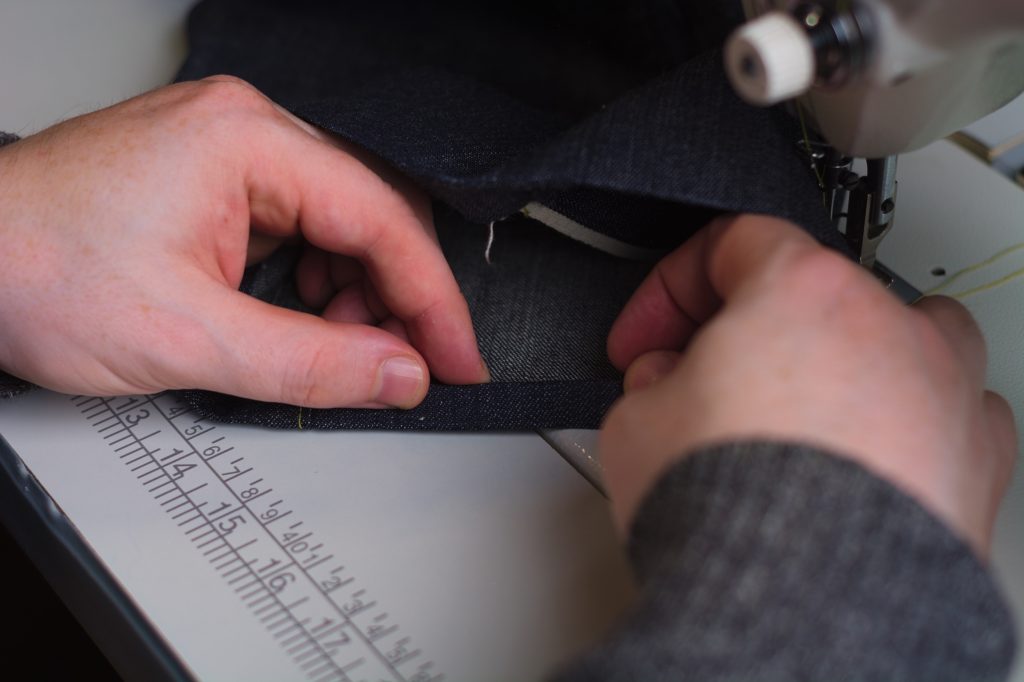
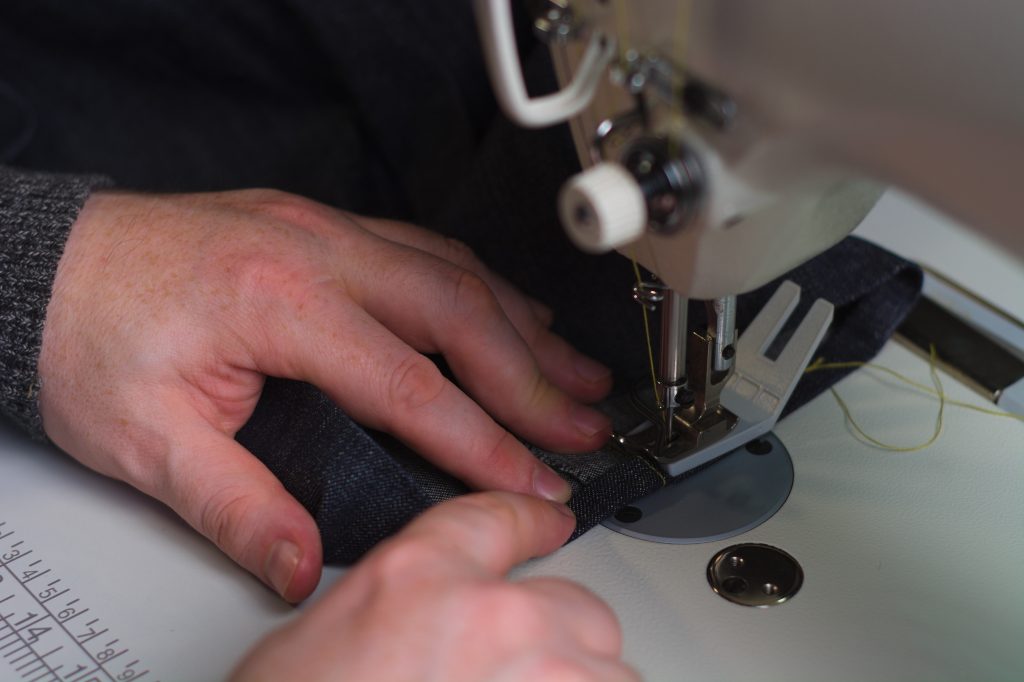
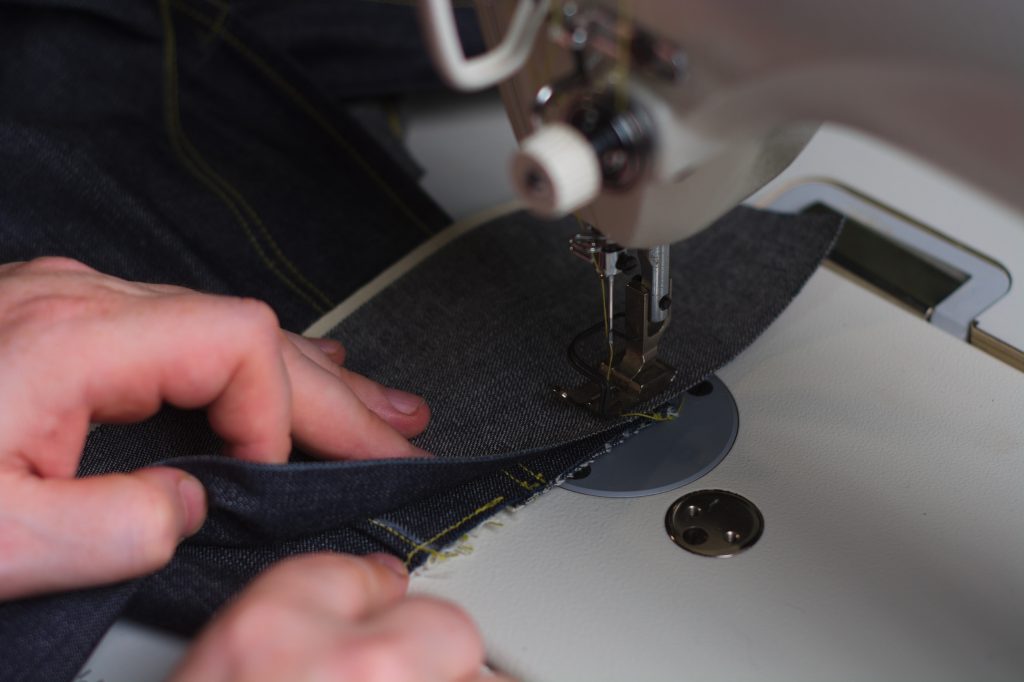
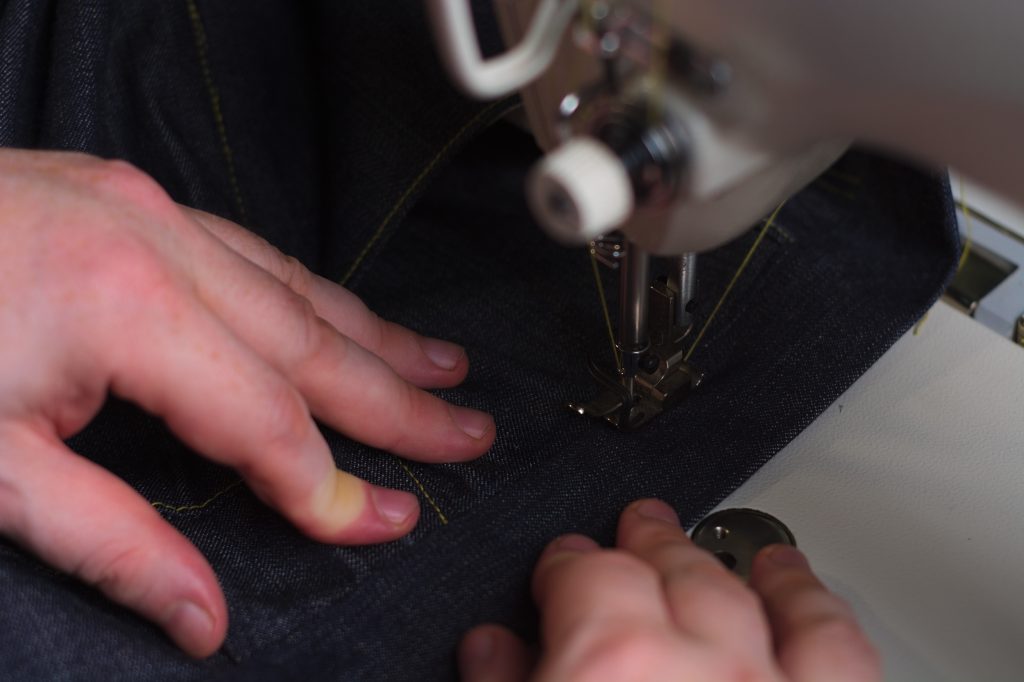
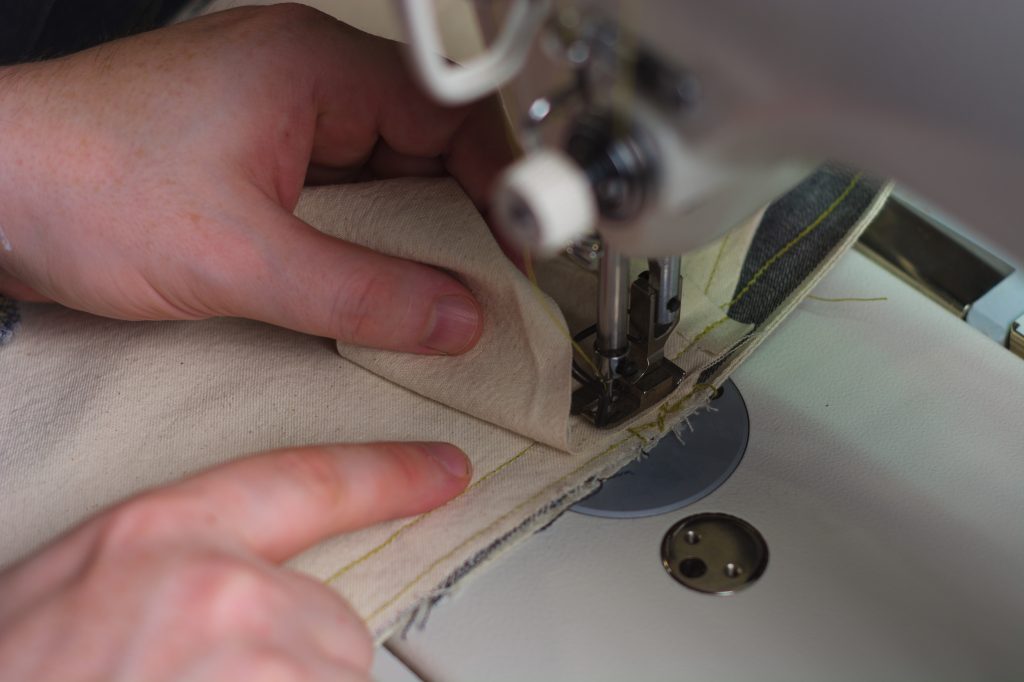
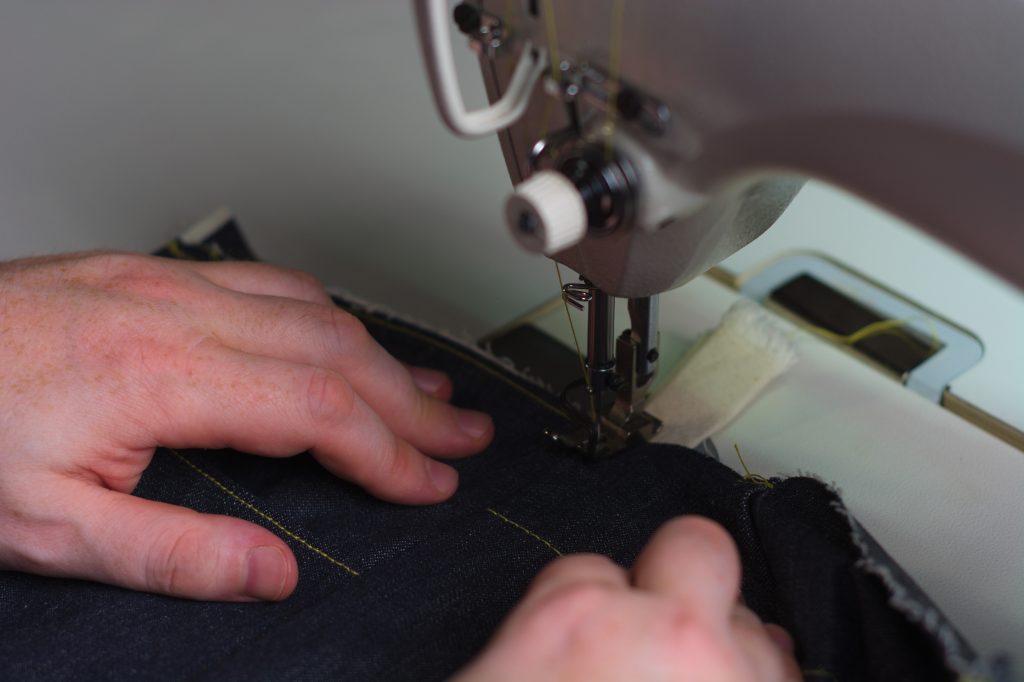
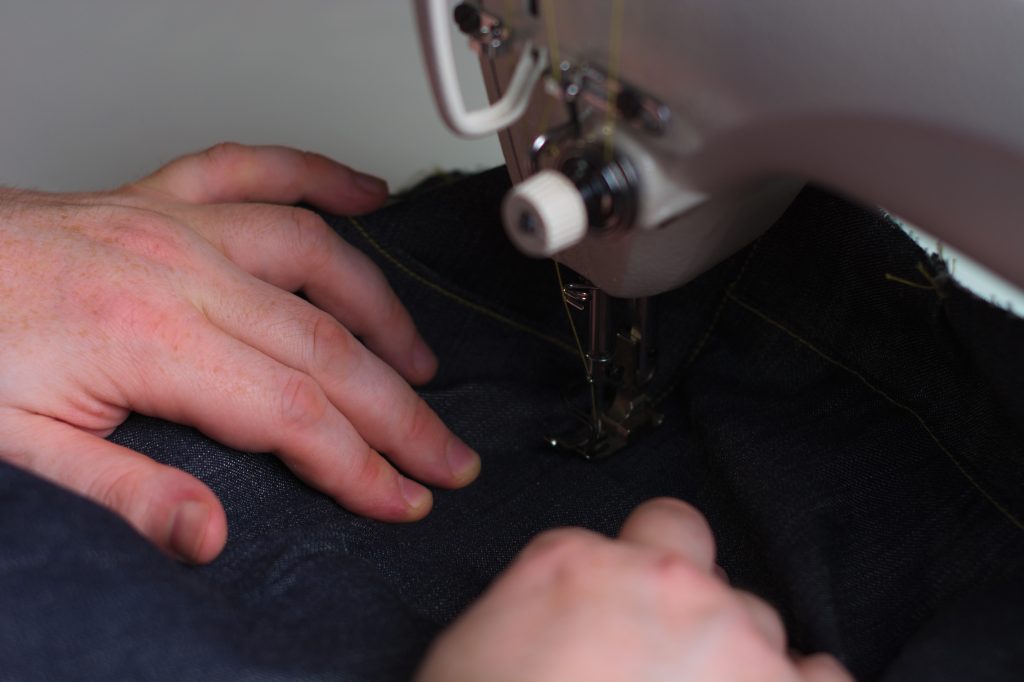
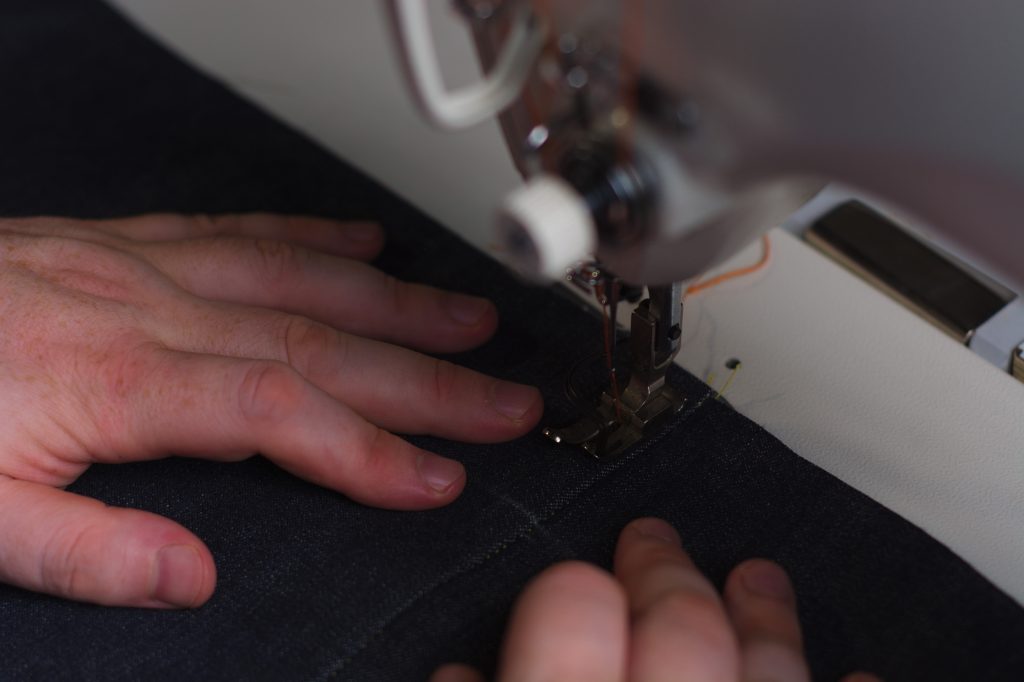
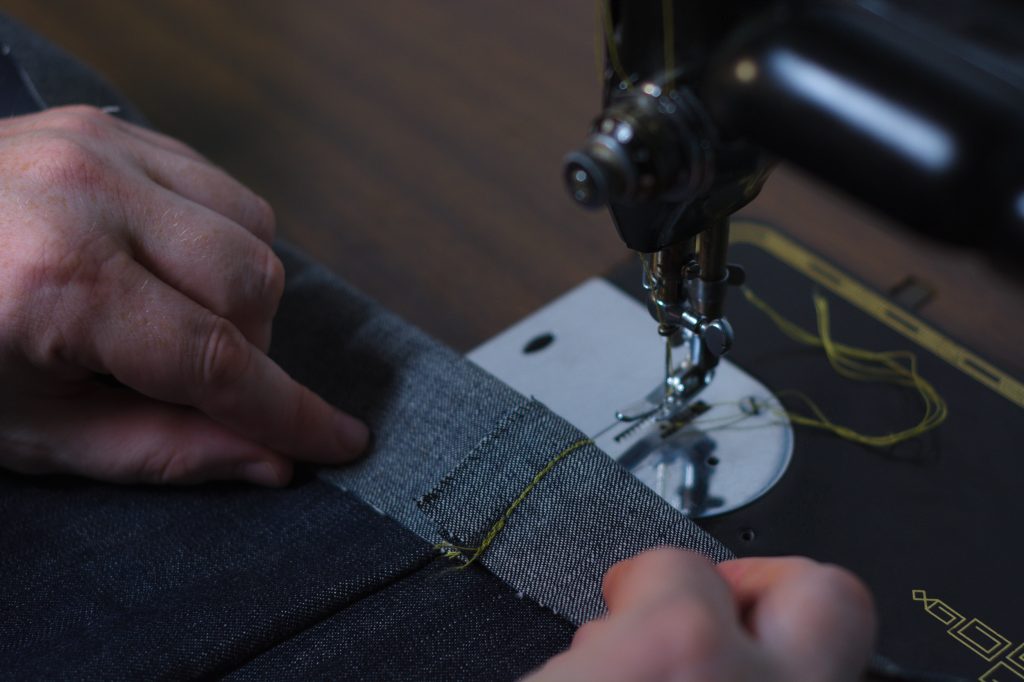
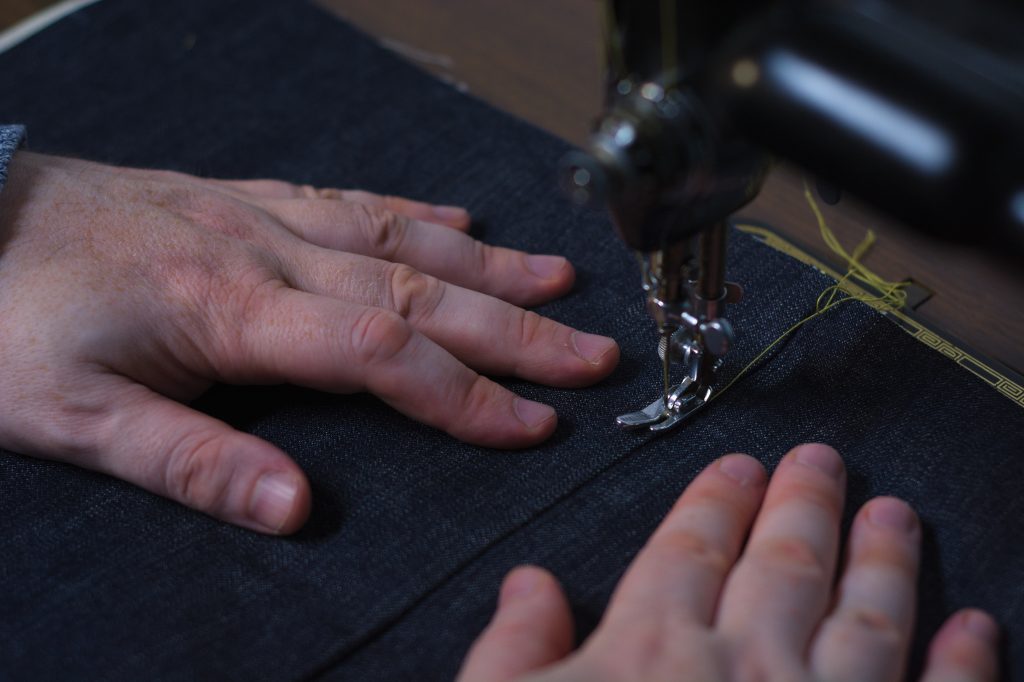
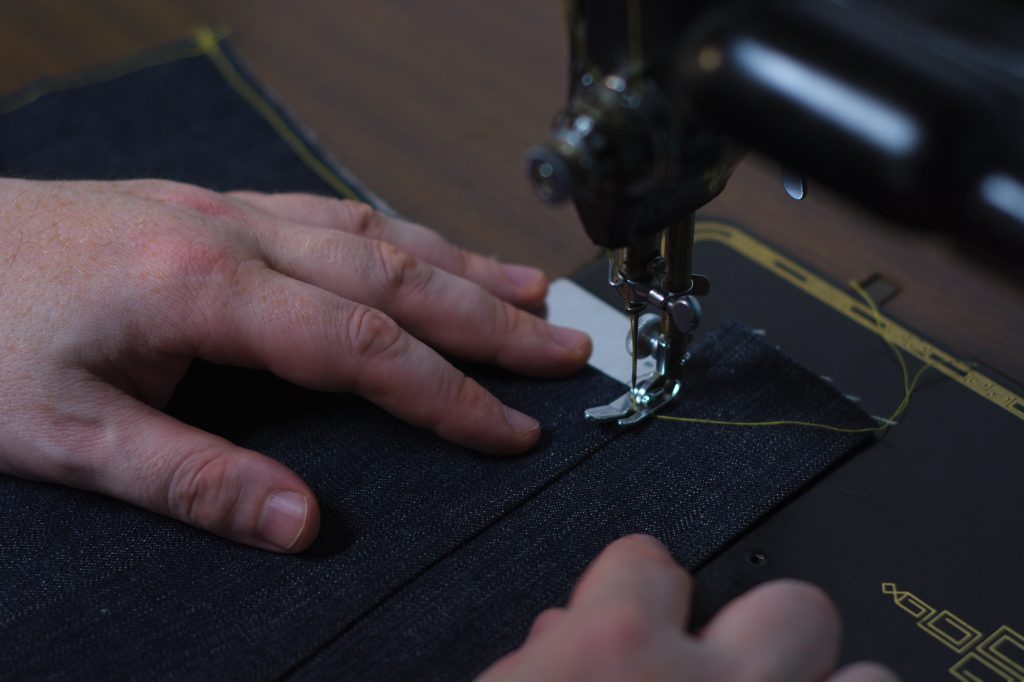
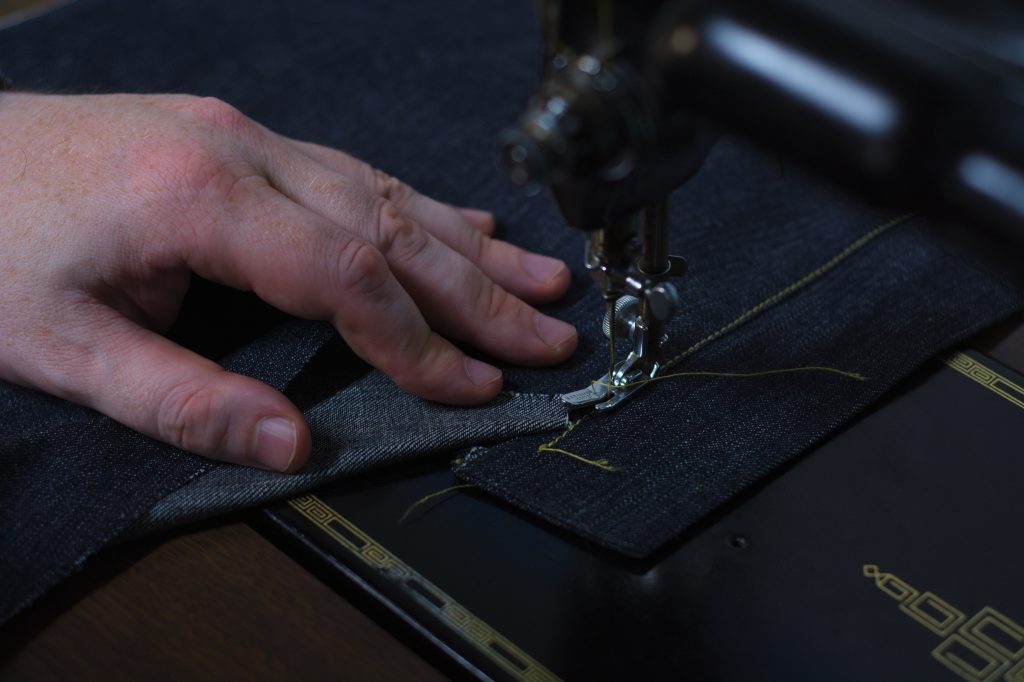
Starting near the inseam, a couple of inches before it, begin sewing down the hem using a 3/8″ seam, sewing from the wrong side.
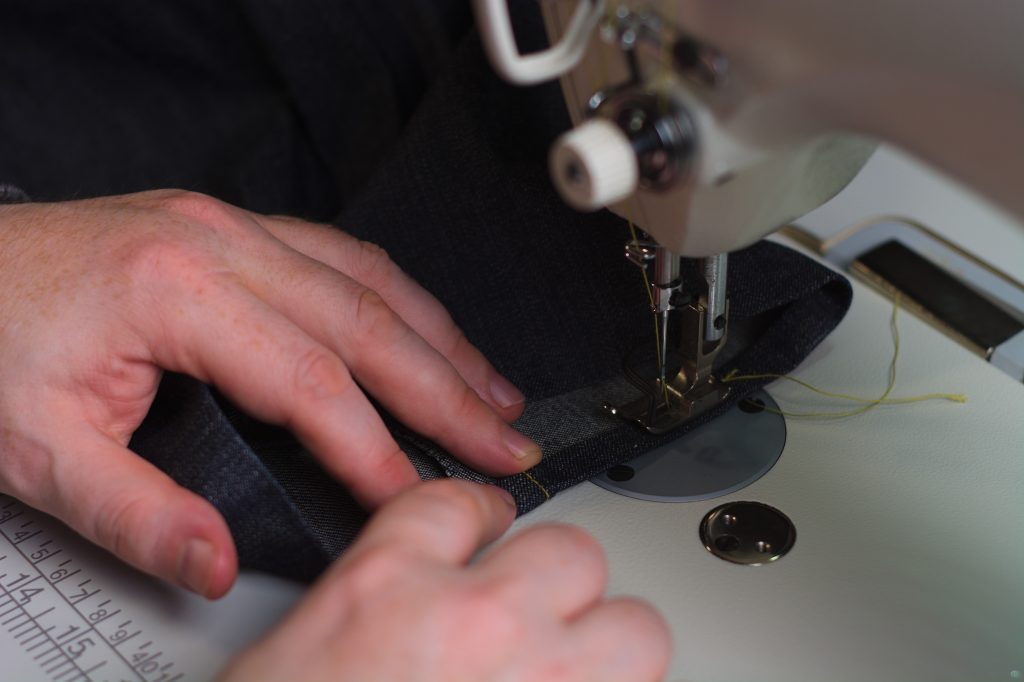
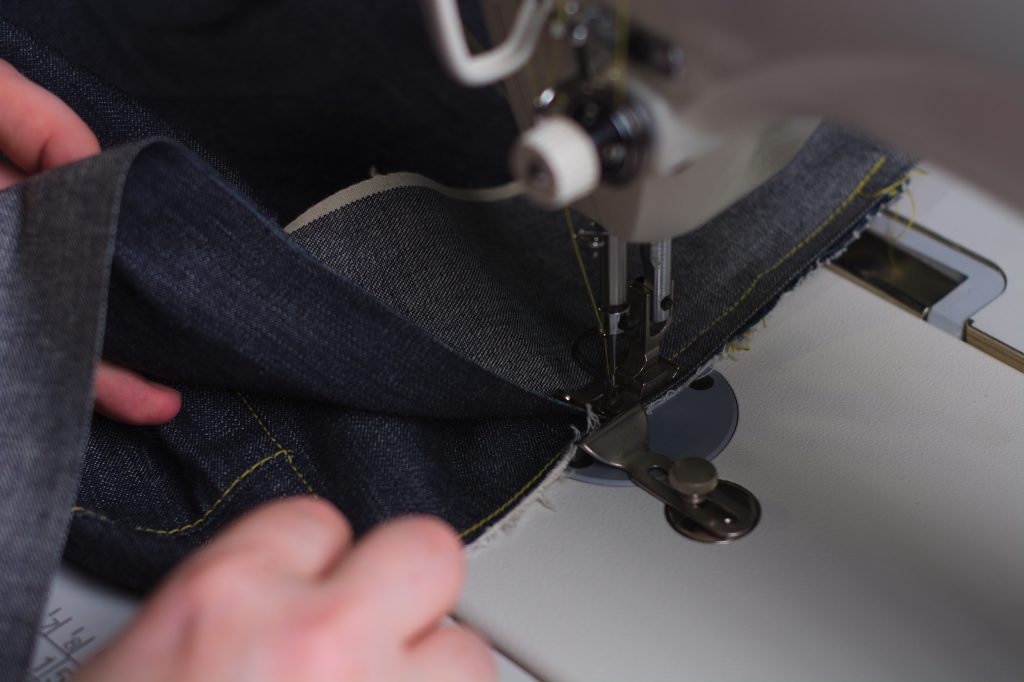
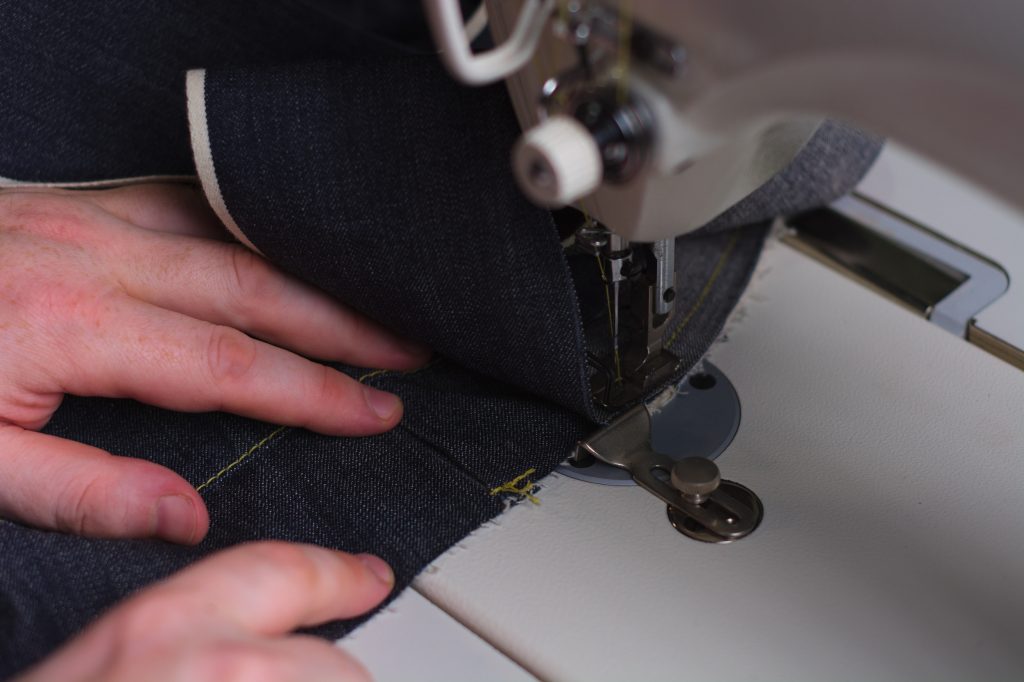
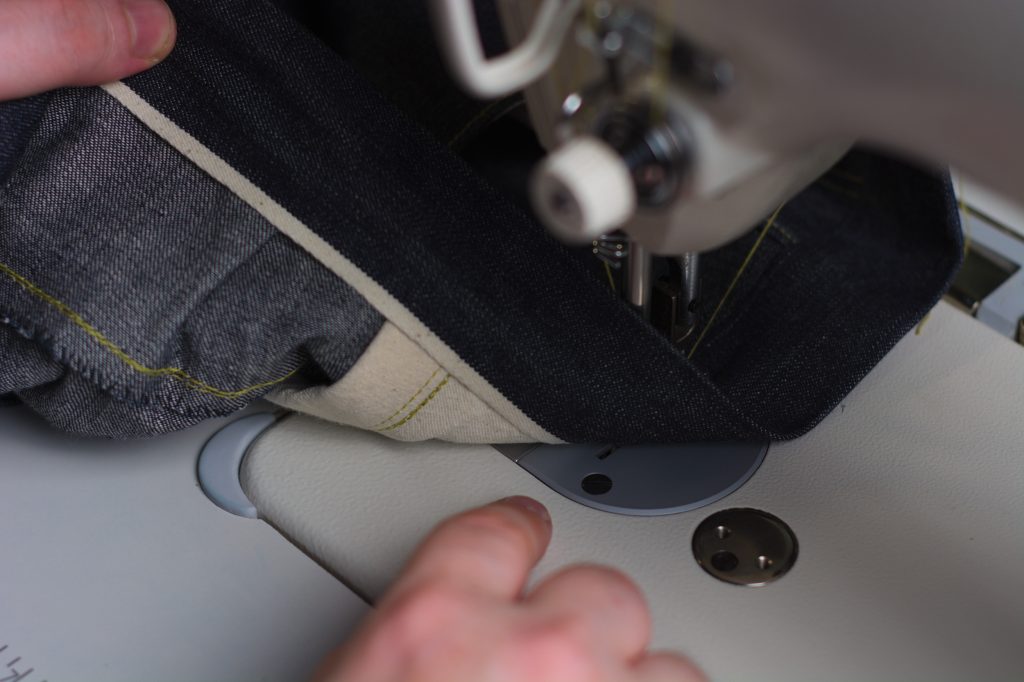
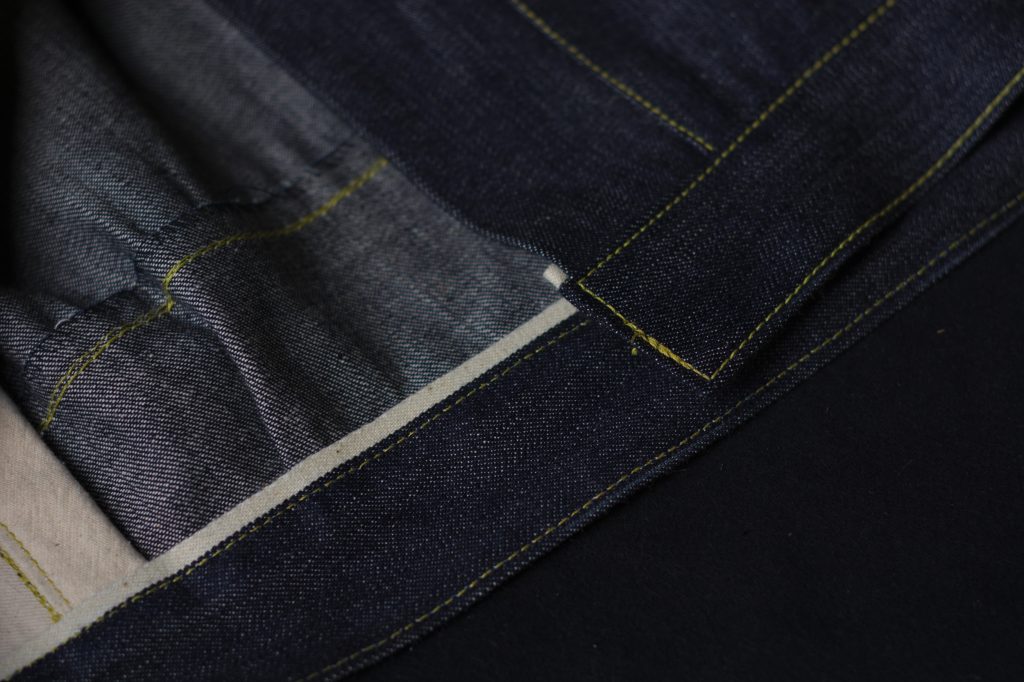
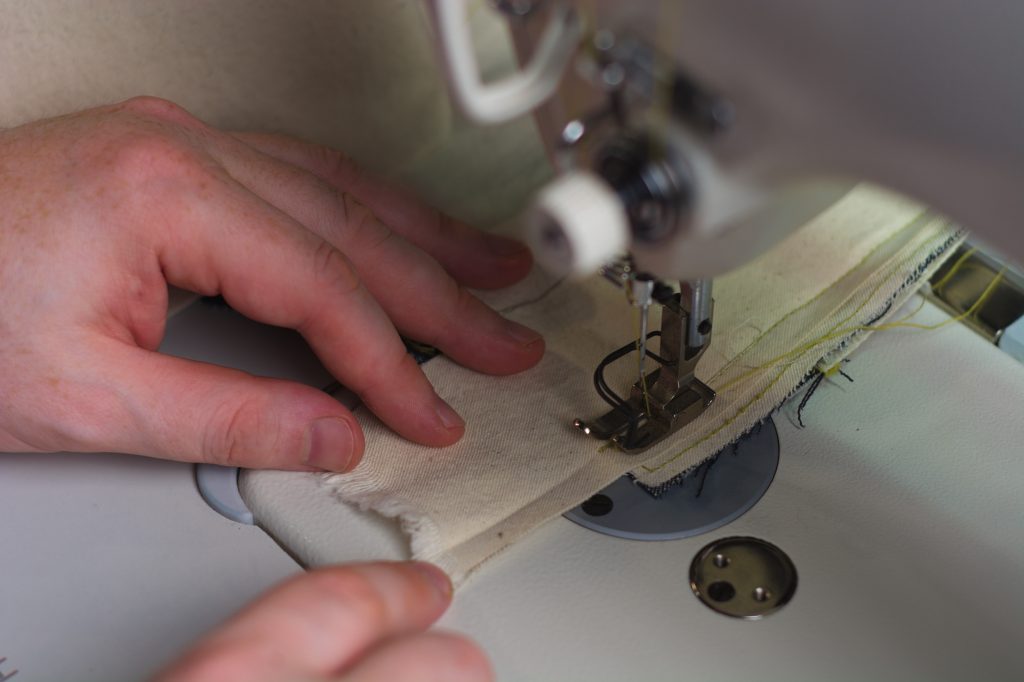
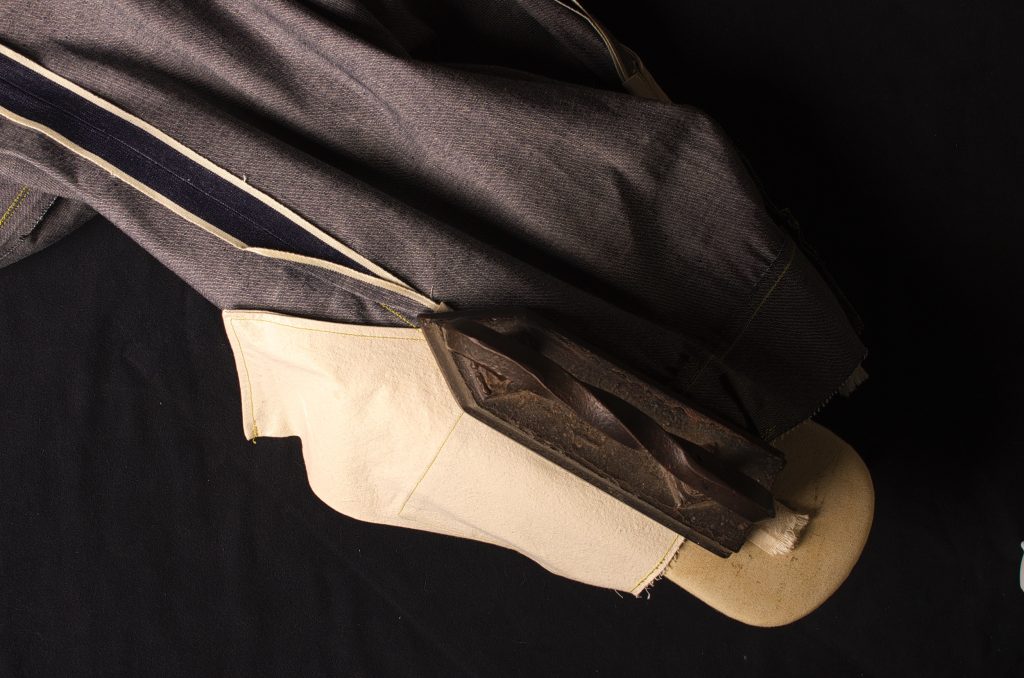
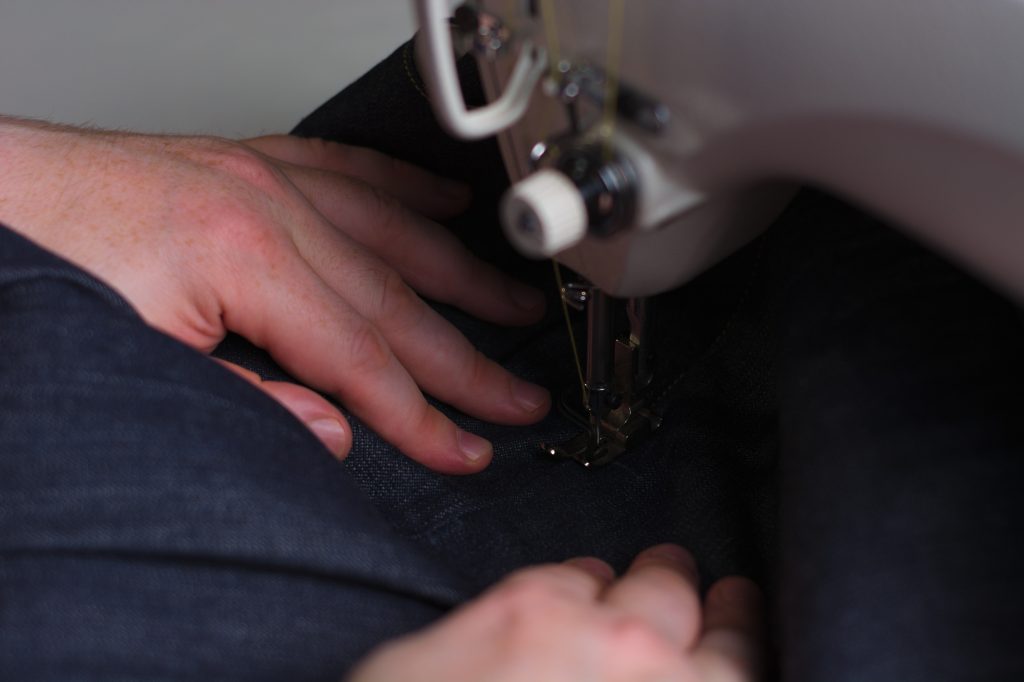
When you get to the inseam, you’ll definitely want to use the seam jumper, especially if you’ve done the felled seam.
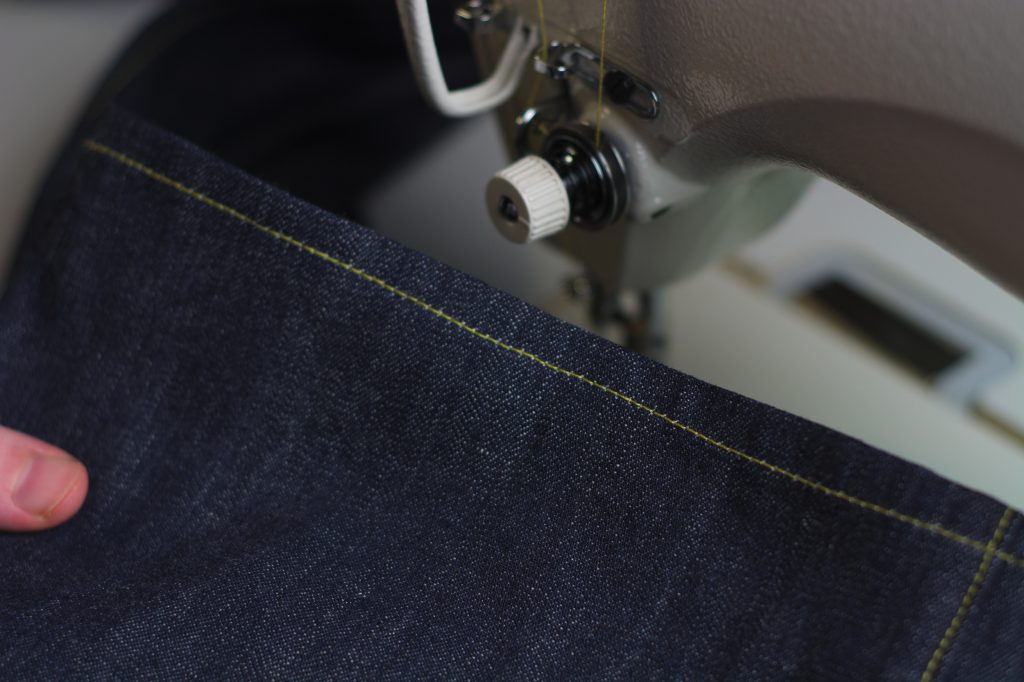
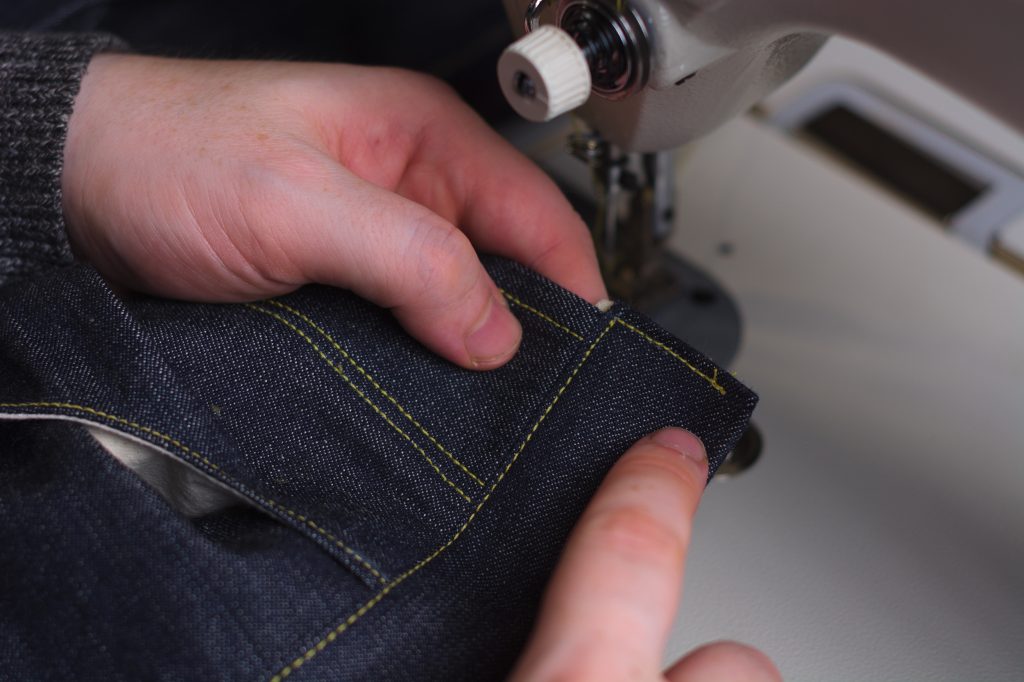
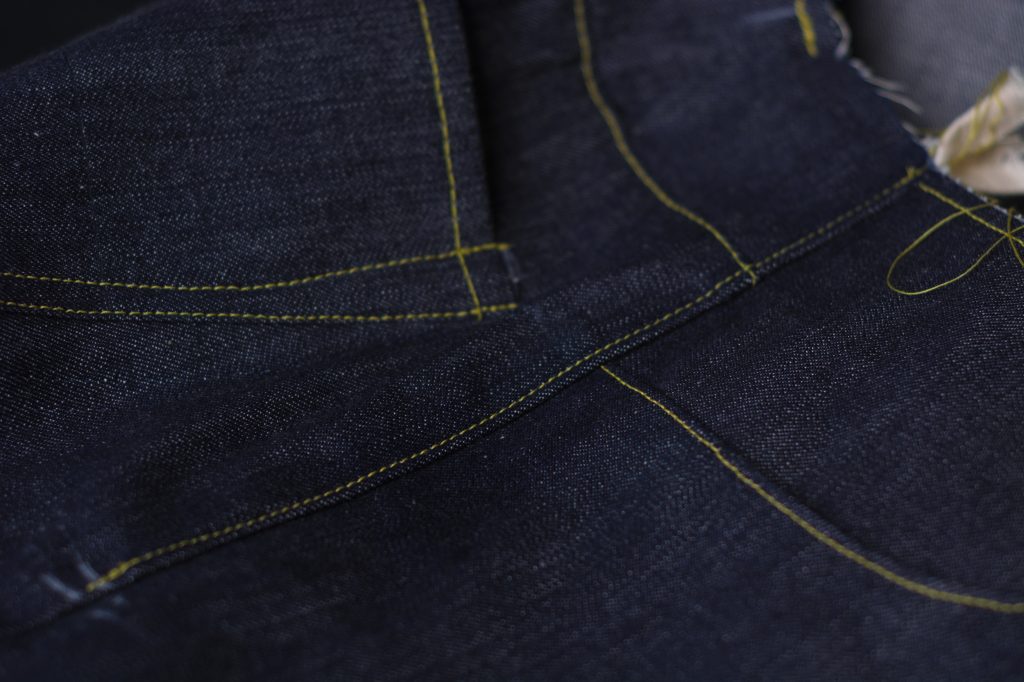
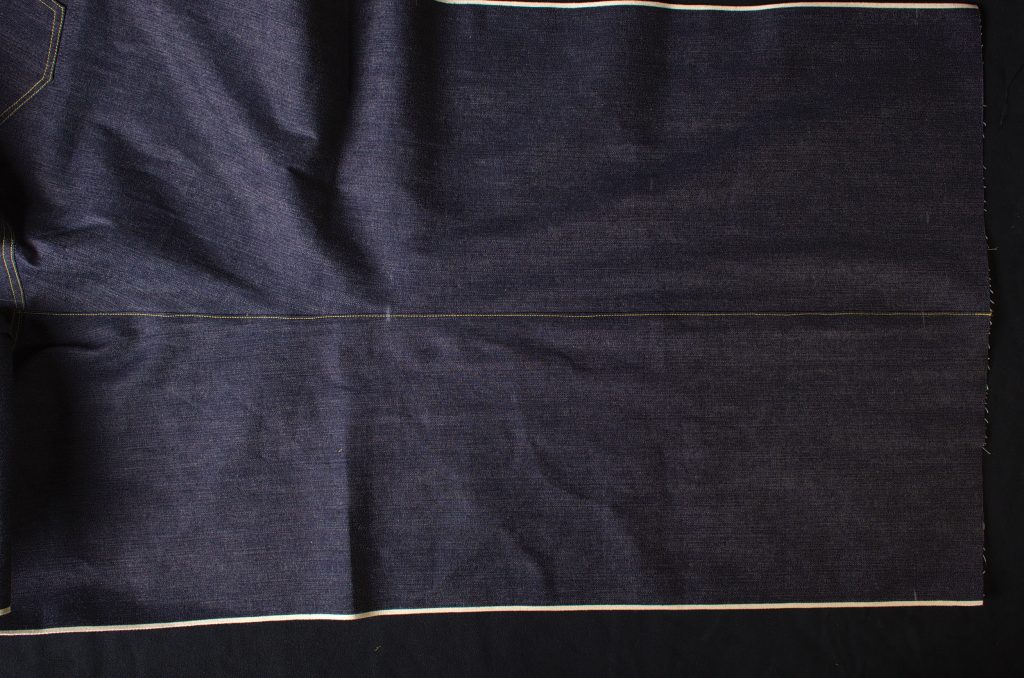
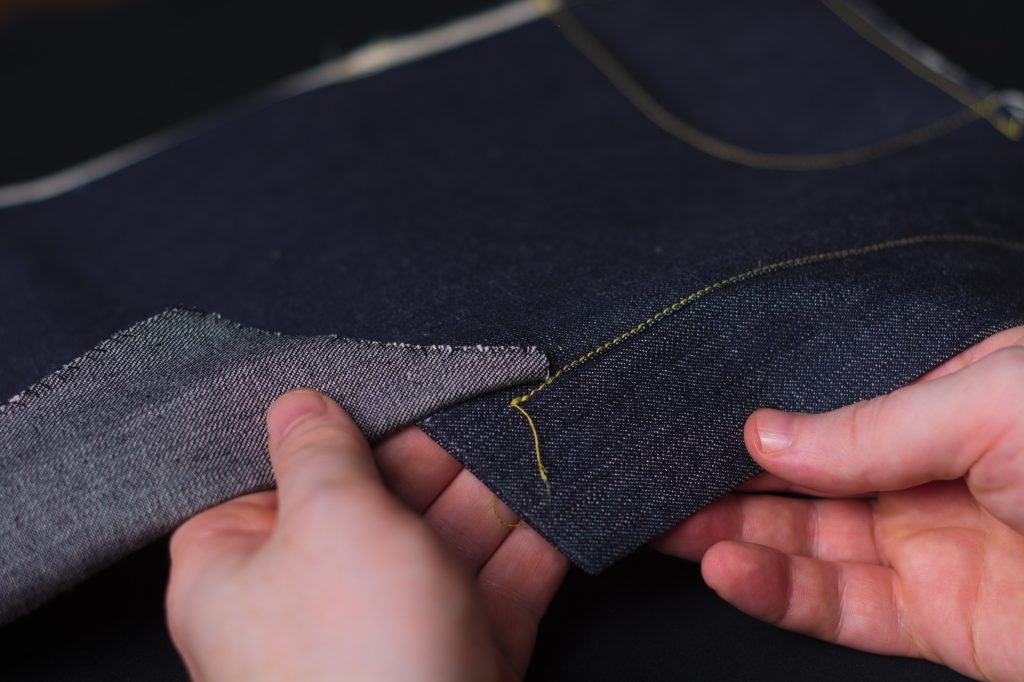
Here’s the result from the outside after sewing completely around the hem.
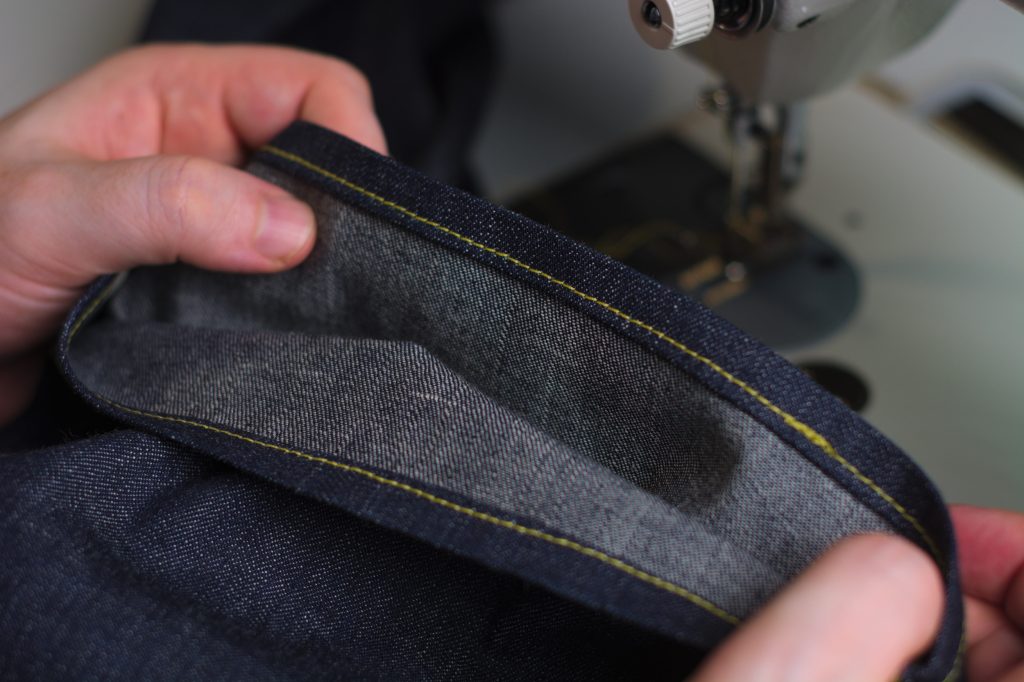
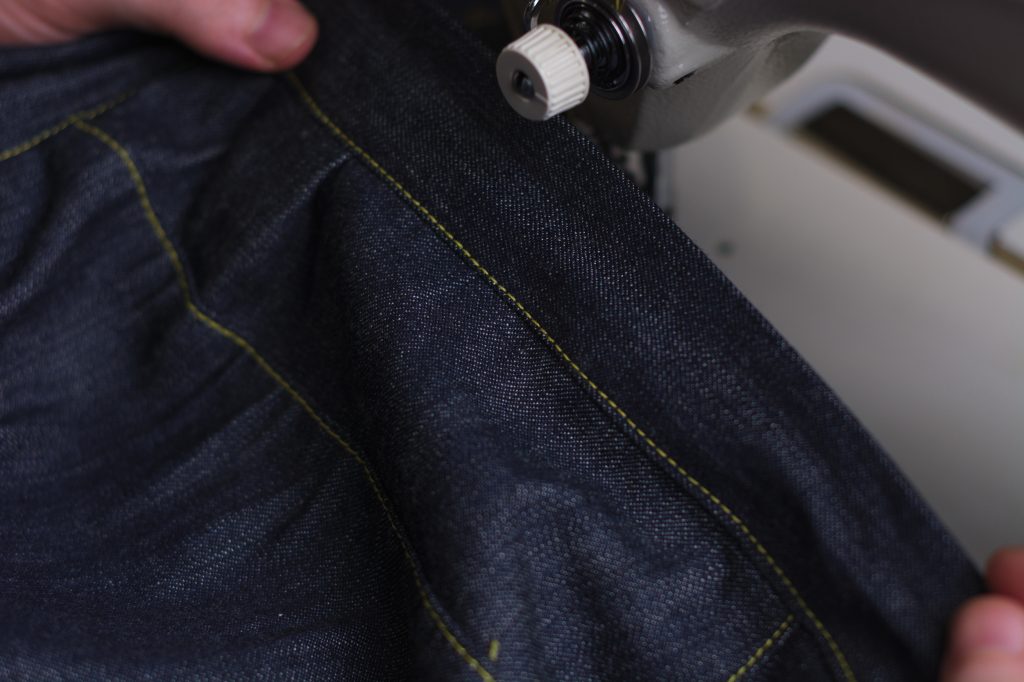
And the inside of the leg.
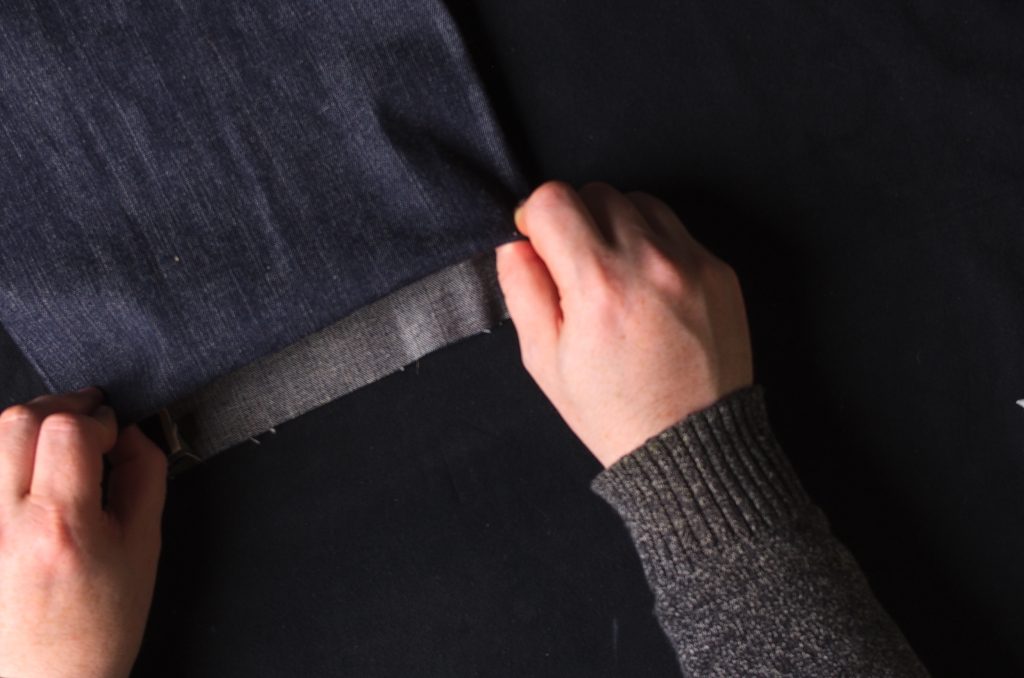
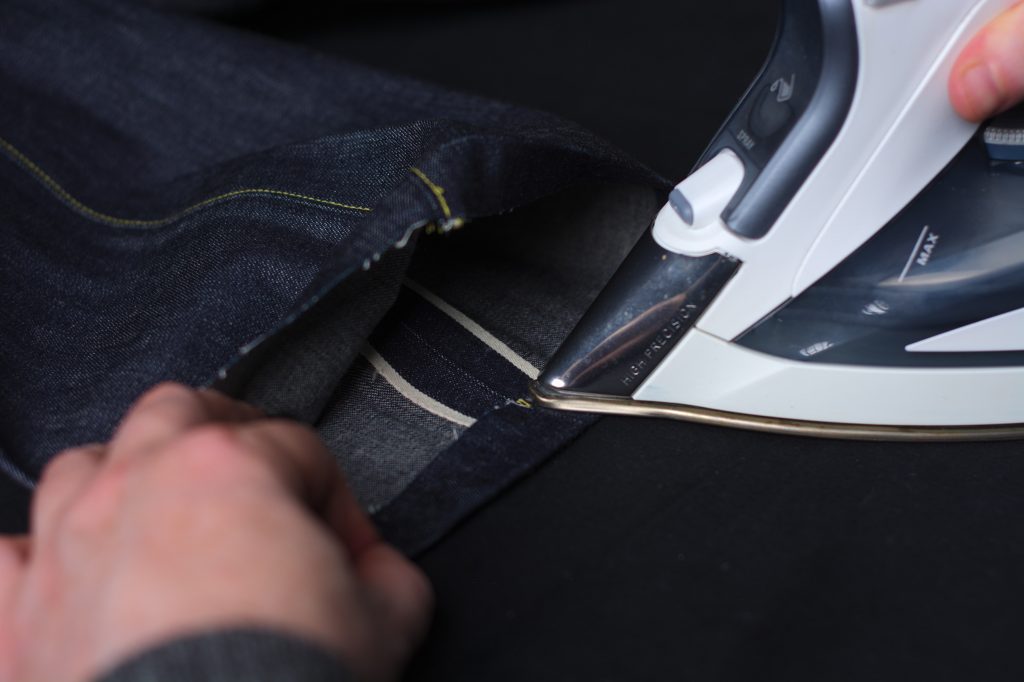
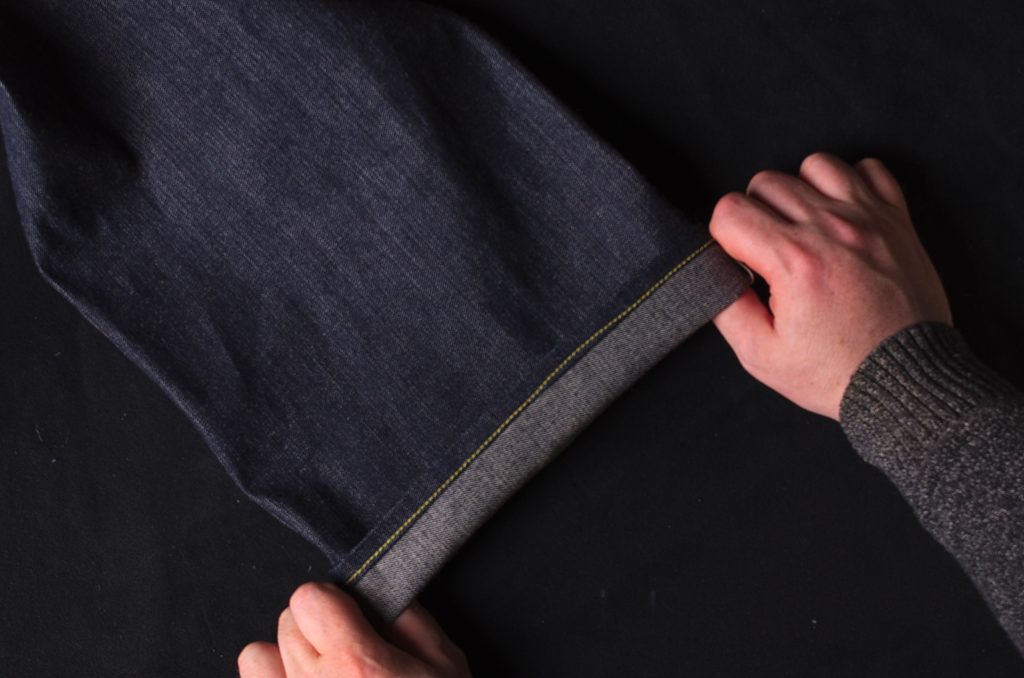
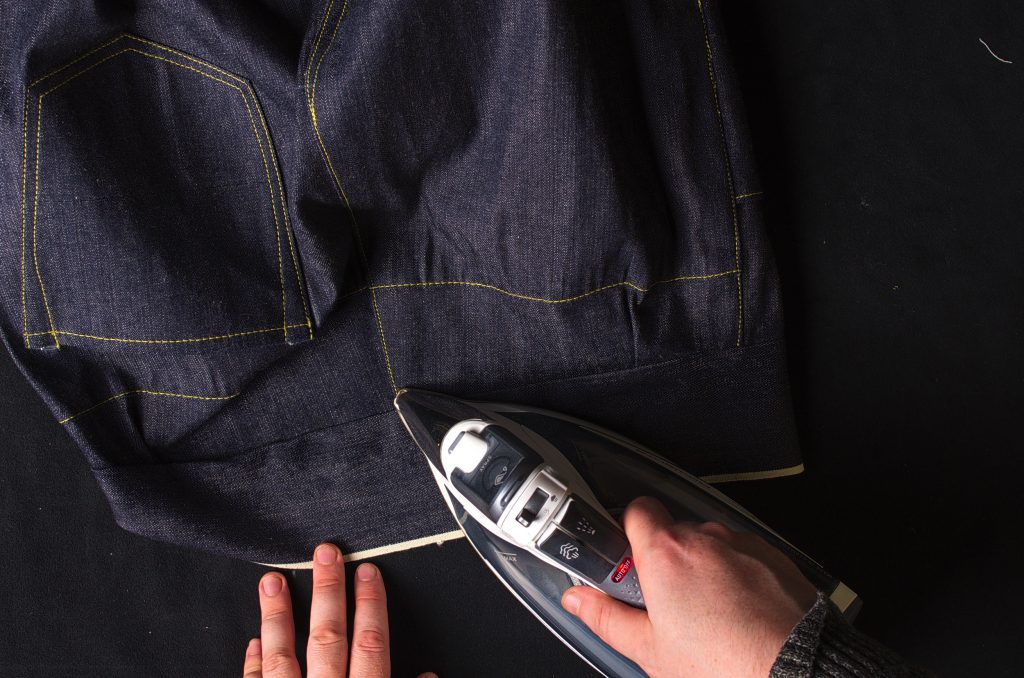
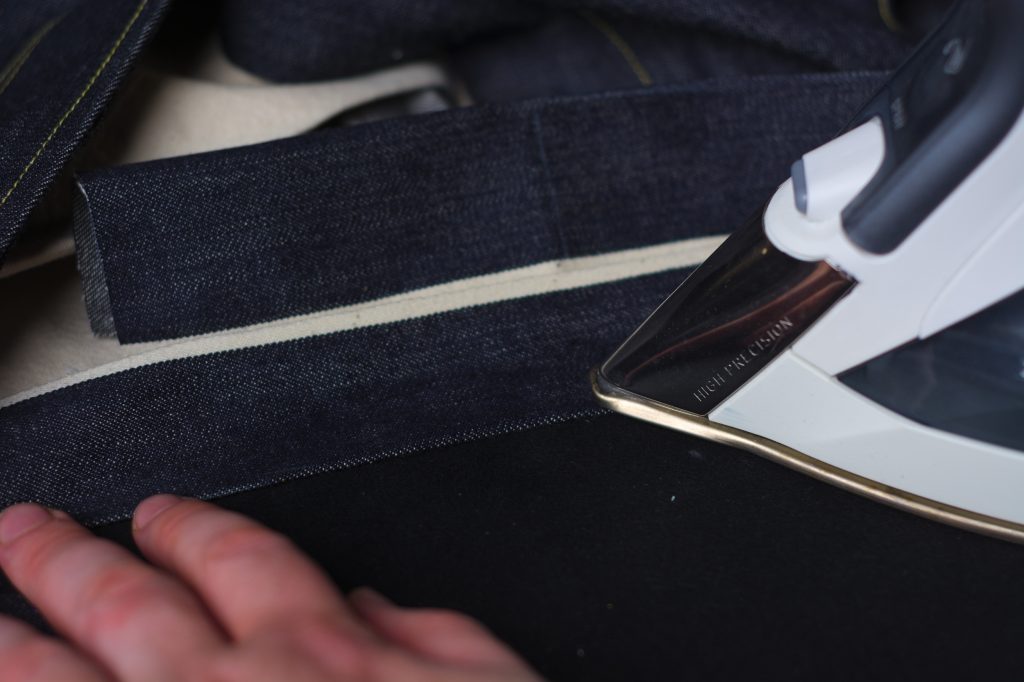
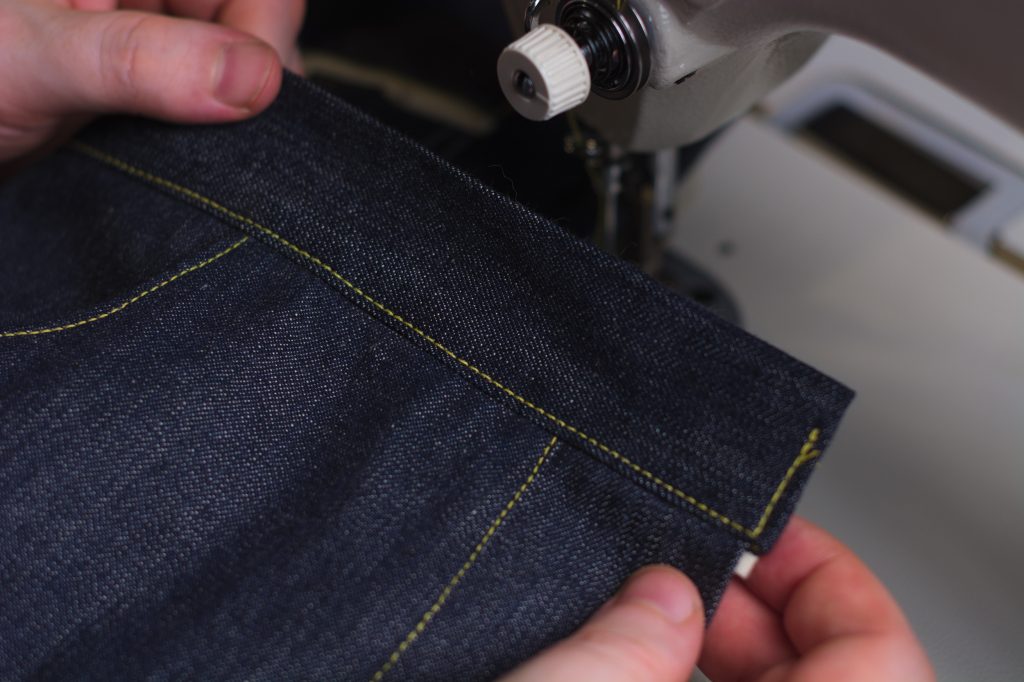
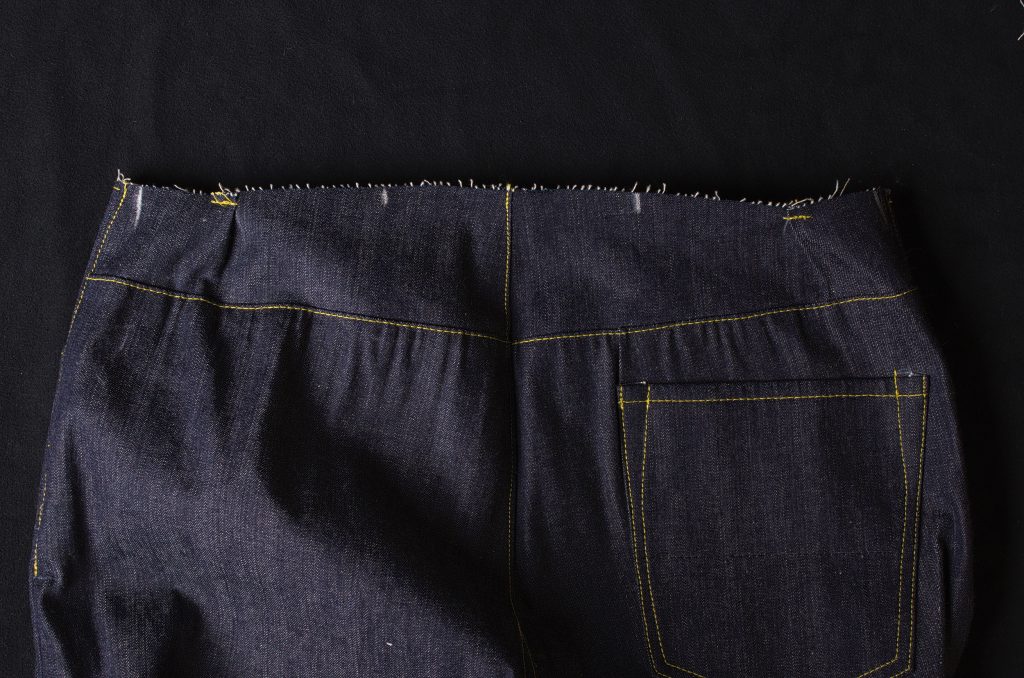
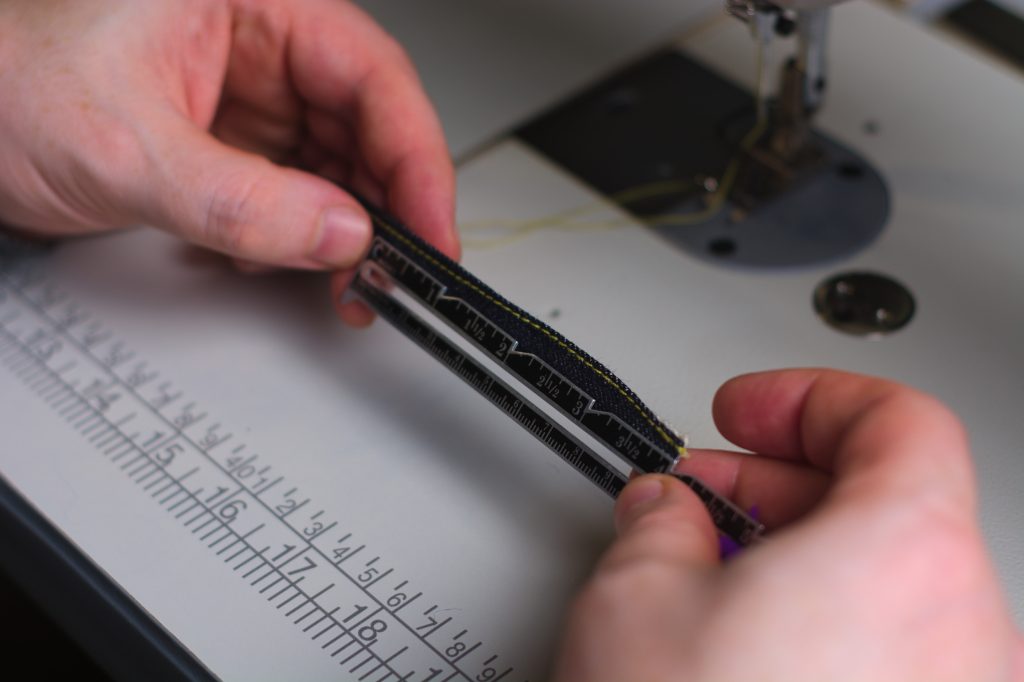
Turning to the outside of the leg, turn up the hem about 1 1/2″. Originally, the jeans were sold unhemmed or hemmed very long, and the amount of turn up would vary appropriately, but 1 1/2″ is a good starting point.
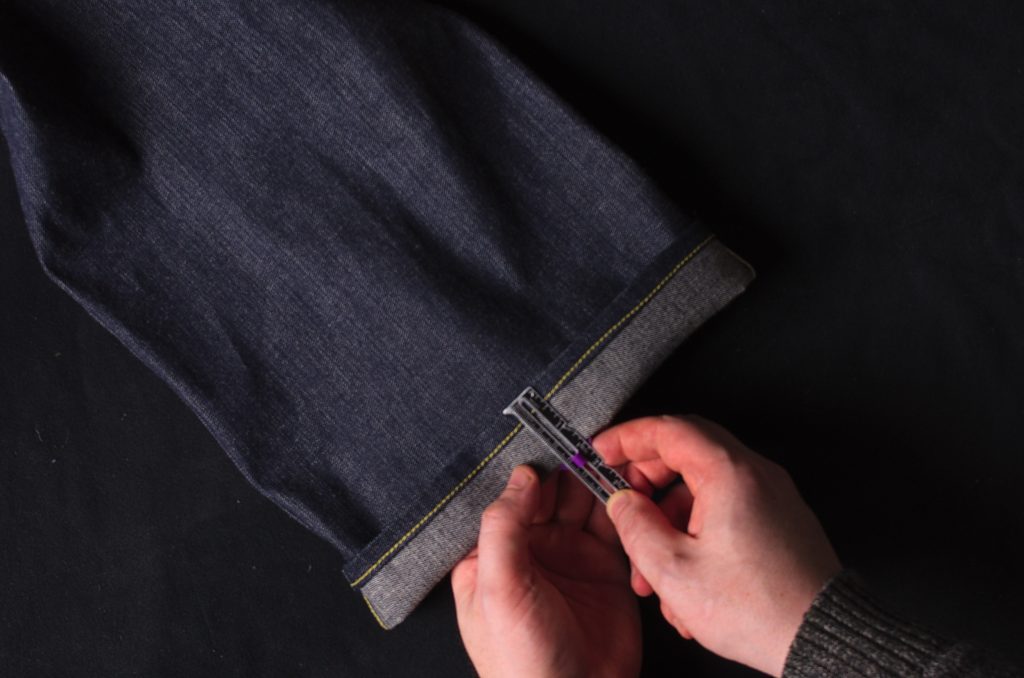
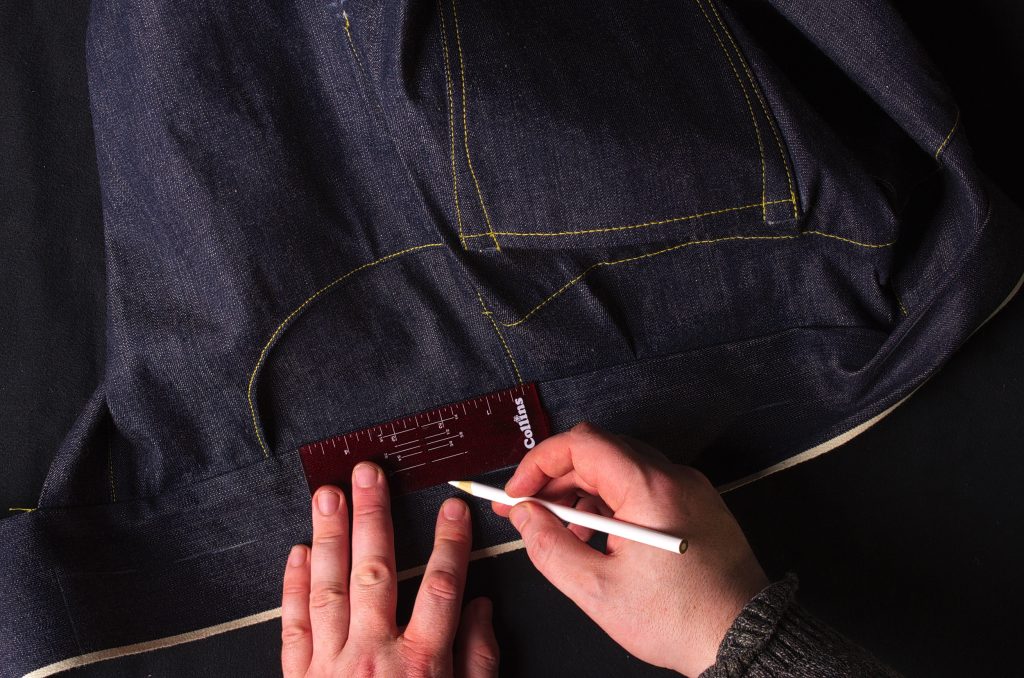
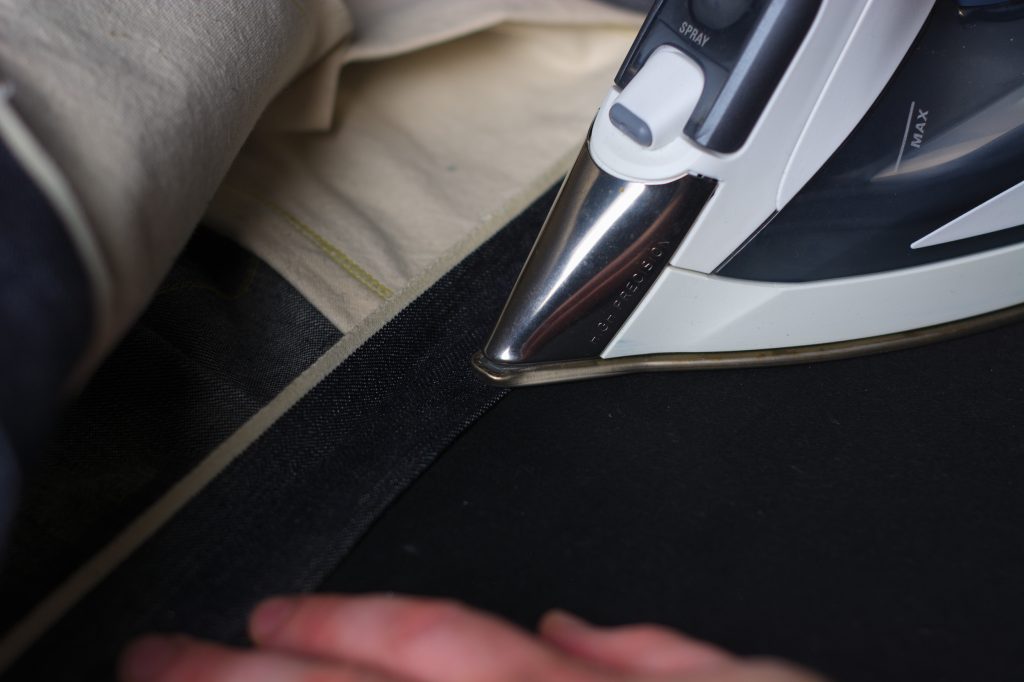
Use a ruler to get the correct width of the hem, and press the crease with your fingers as you work.
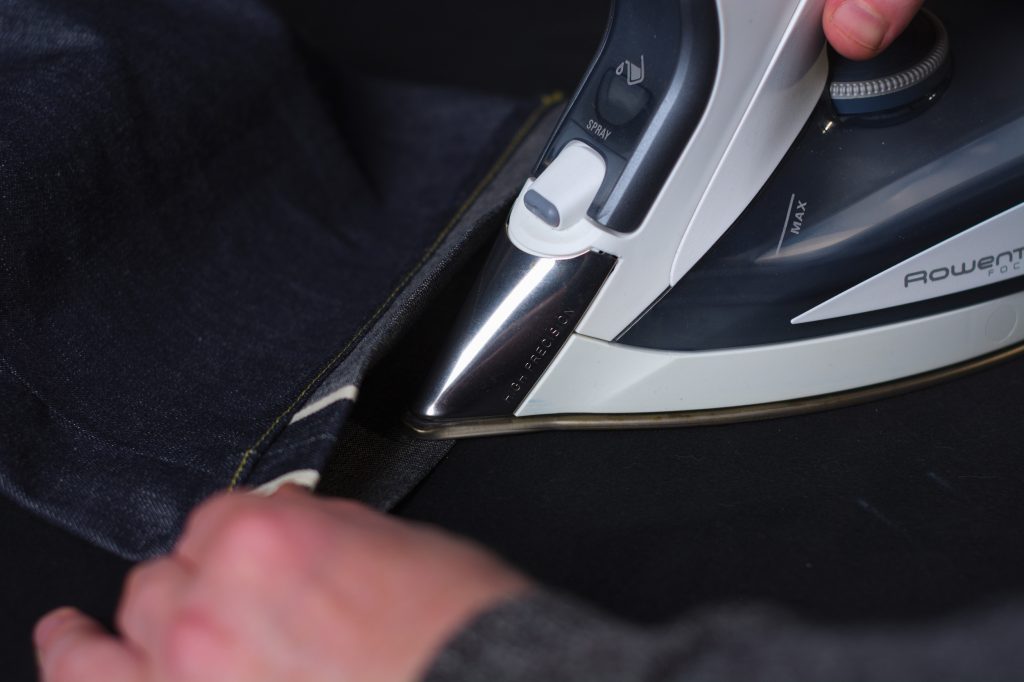
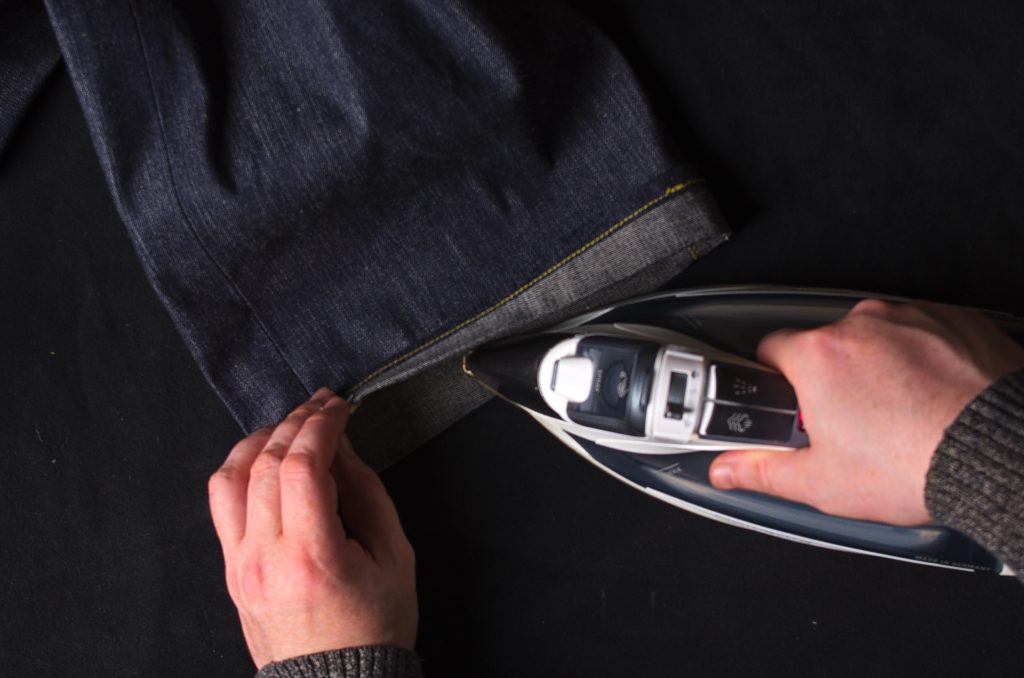
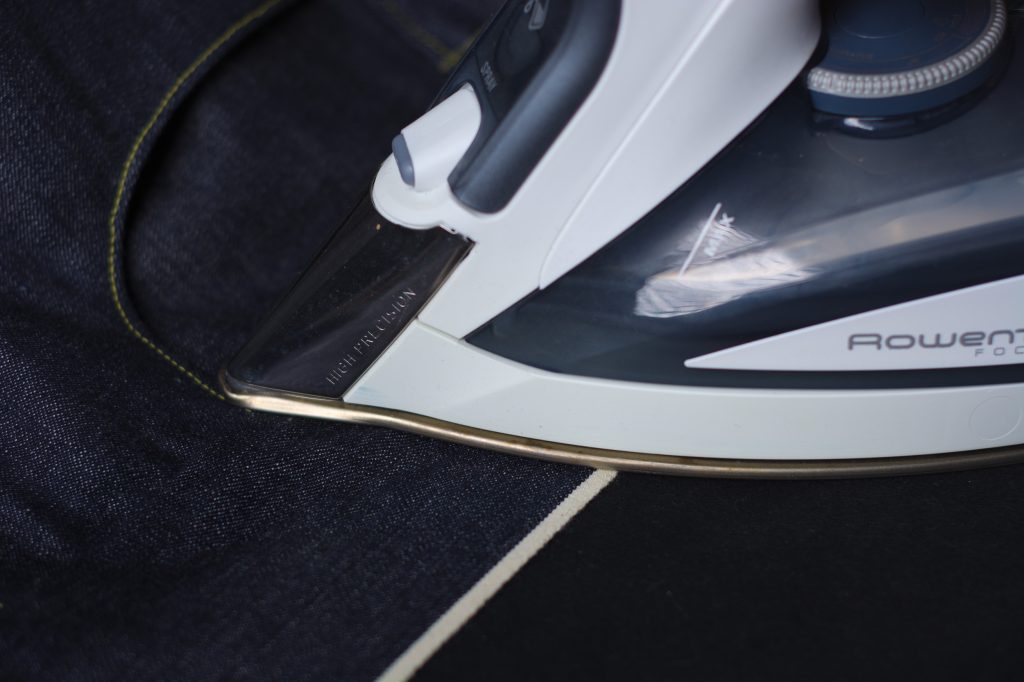
Finally, crease the turned up hem with the iron for a firm finish. You may want to wait for this step until you’ve completed the jeans entirely just to make sure you’ve got the hem spot on.
The Waistband
Finally, it’s time to sew on the waistband, giving us something that actually looks like a pair of jeans. Due to the thickness of the denim, I sew the waistband on freehand without pins or basting. It takes a little bit to get used to but is a great skill to develop.
Begin by aligning the waistband to the left fly along the waist, right sides together, with the waistband extending about 2″ beyond the edge of the fly.
Begin sewing just at the edge of the fly using a 3/8″ seam allowance — you’ll kind of have to feel for the edge of the fly underneath. Flip the waistband back occasionally as you sew to make sure everything is lined up.
I used a seam gauge to ensure I was doing a proper 3/8″ seam the entire length.

Manipulate the denim, moving it into position and checking your work as you sew to make sure everything is aligned, particularly near the side seam where the angles change slightly.
As you’re sewing, ensure that any pleats (for the 1873 jeans) or belt loops are in their correct position before you sew over them. Continue sewing through to the right fly, where you should have another couple of inches of extra waistband.
Pressing
Now open the waistband and press the waistband and seams up towards the top of the waistband.
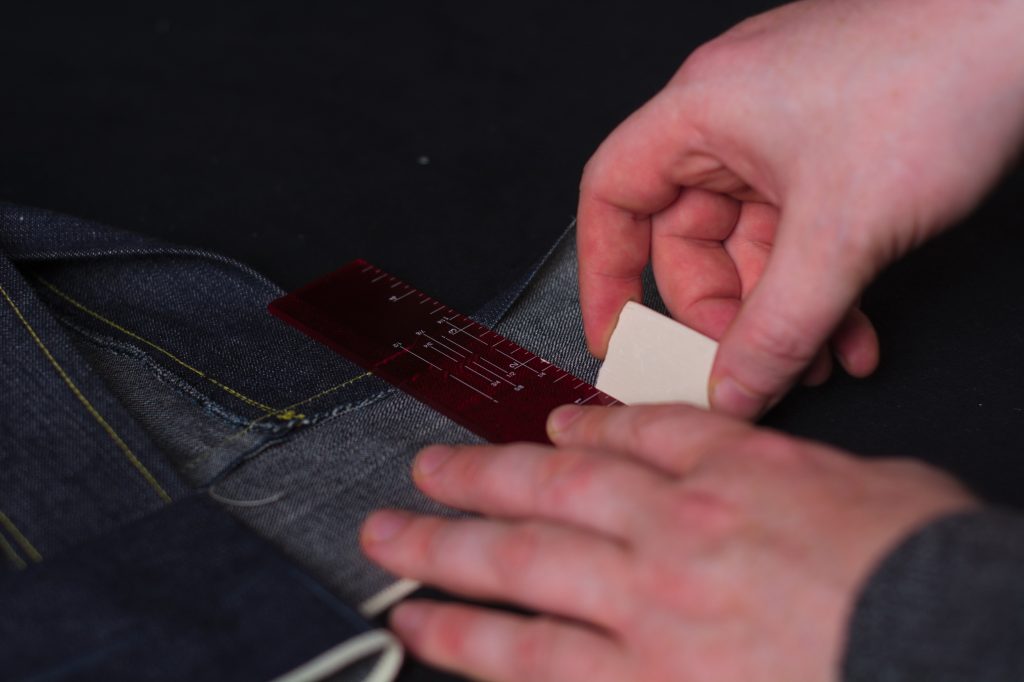
Use a ruler to mark the fold of the waistband, 1 1/2″ from the waist seam. My ruler just happens to be 1 1/2″ wide so it’s a lot easier to turn it sideways and use that for marking. Mark across the entire waistband with light marks so they’re not visible in the finished garment.
Now press the waistband in half along its entire length, turning the marks just slightly to the inside.
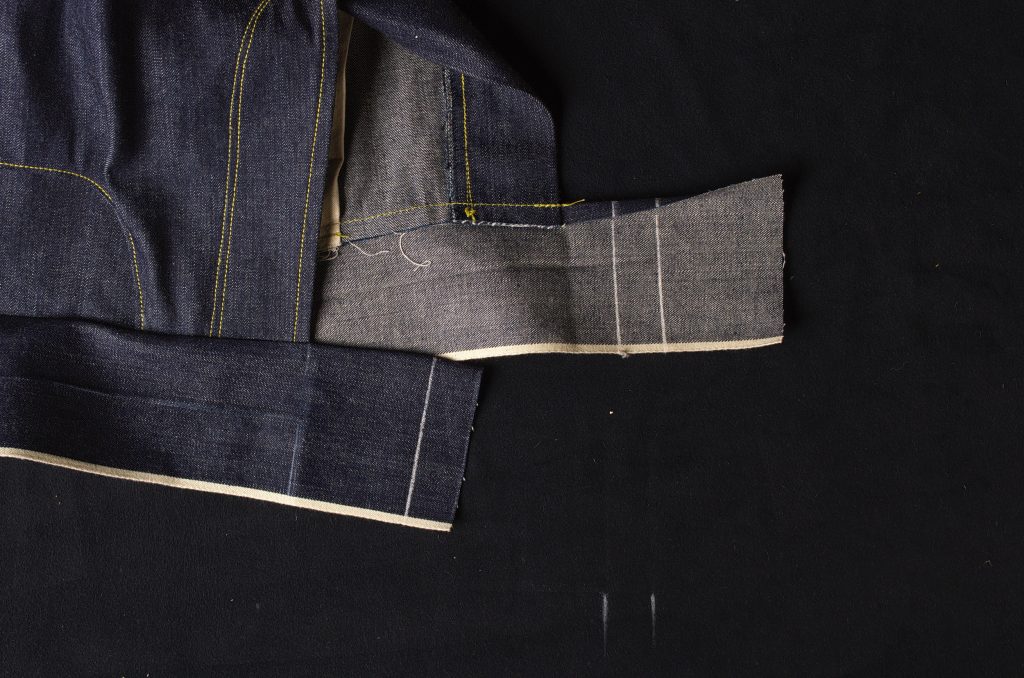
Open up the waistband on the wrong side and at each end, mark a line square with the waistband just at the edge of each fly. Press the ends of the waistband in along these two lines (not shown).
Now make another two lines about 2″ square from the edge of the fly at the ends of the waistband. You want enough here to be able to turn the ends cleanly in and have enough room for the buttonhole and button. Made a little miscalculation on the right fly area, hence the two lines.
Trim off the excess waistband material.
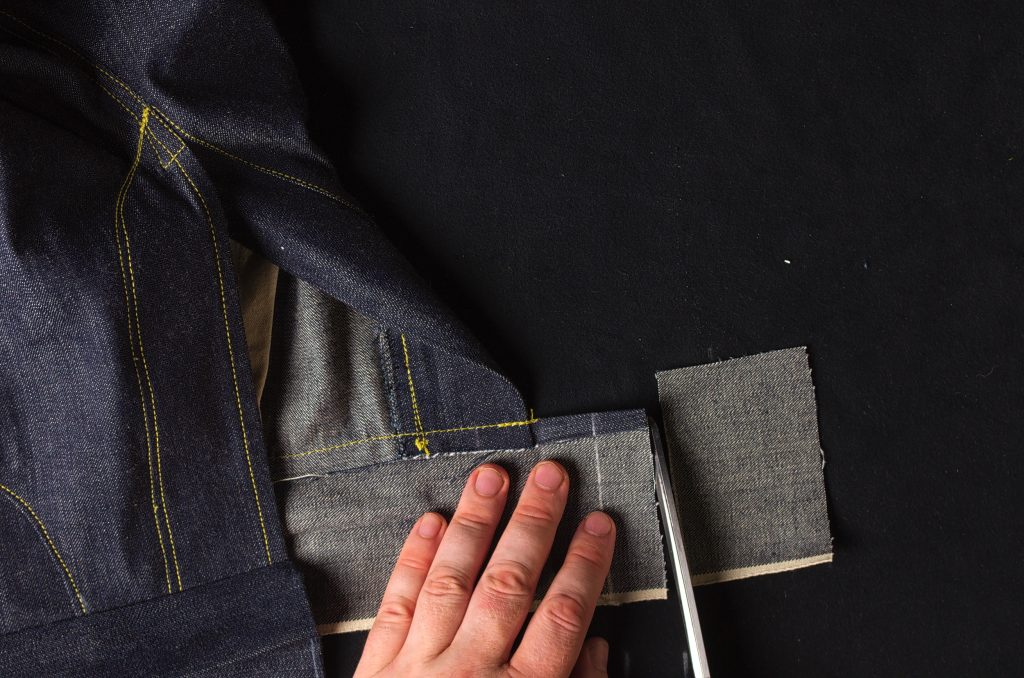
Now press the ends of the waistband over so that they’re just about aligned with the edges of the fly. The waistband should be kept square at the ends both for appearance, and so you don’t lose width if you were to cut it at an angle to match the fly.
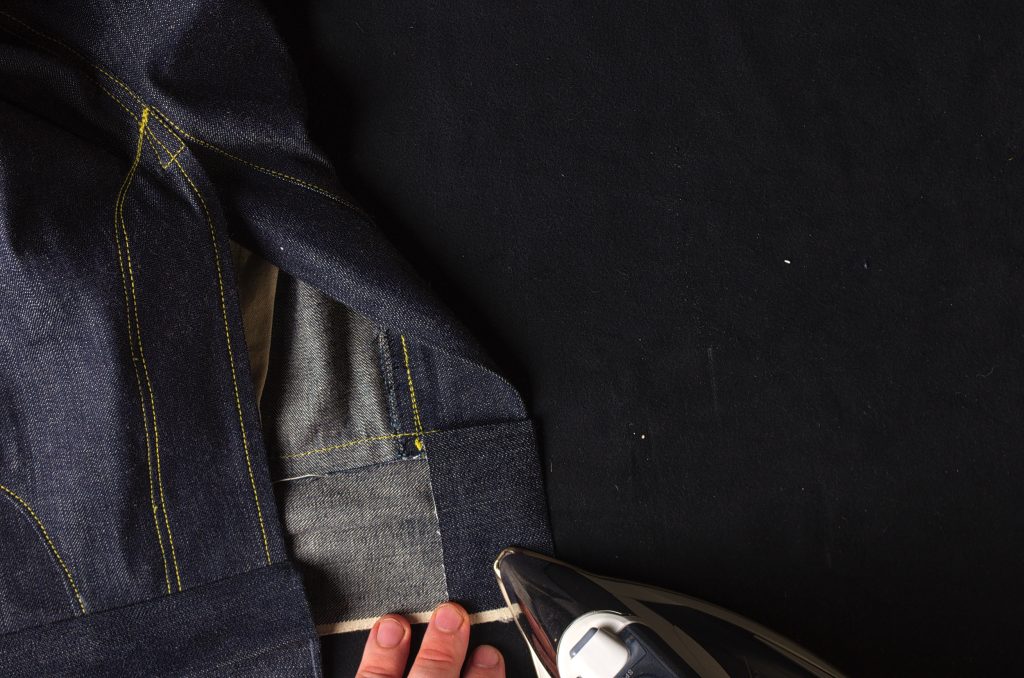
Press the waistband in half lengthwise again just to ensure a firm, crisp finish.
If you want, you can fold the cut selvedge edge under again at a bit of an angle to completely hide the cut at the end of the waistband. Press once again.
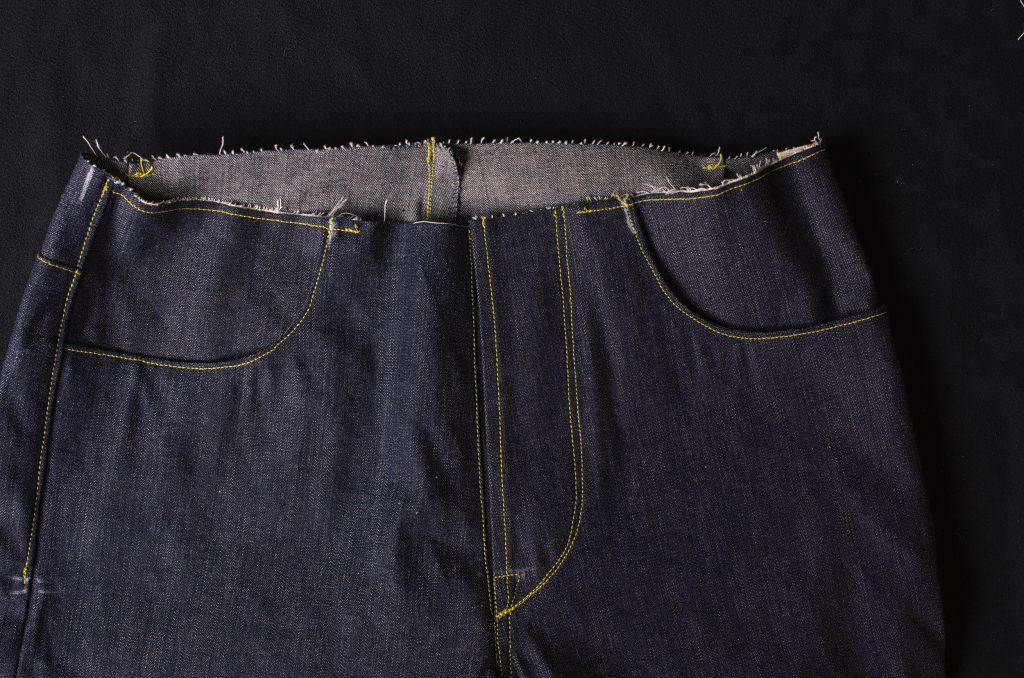
Here’s how your waistband should look after all of the pressing.

Top Stitching
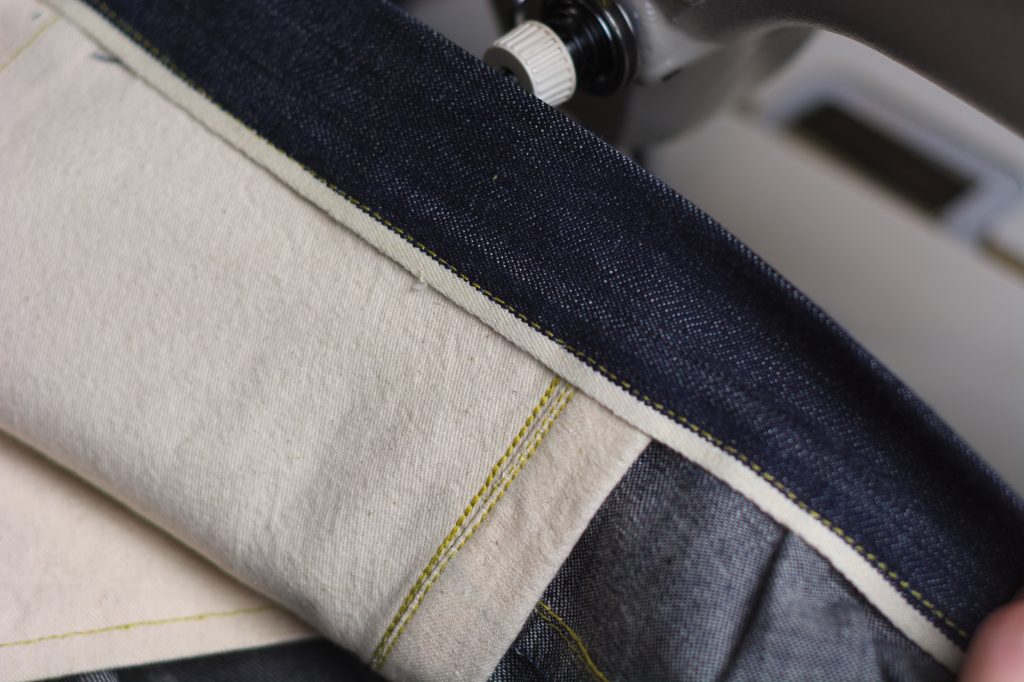
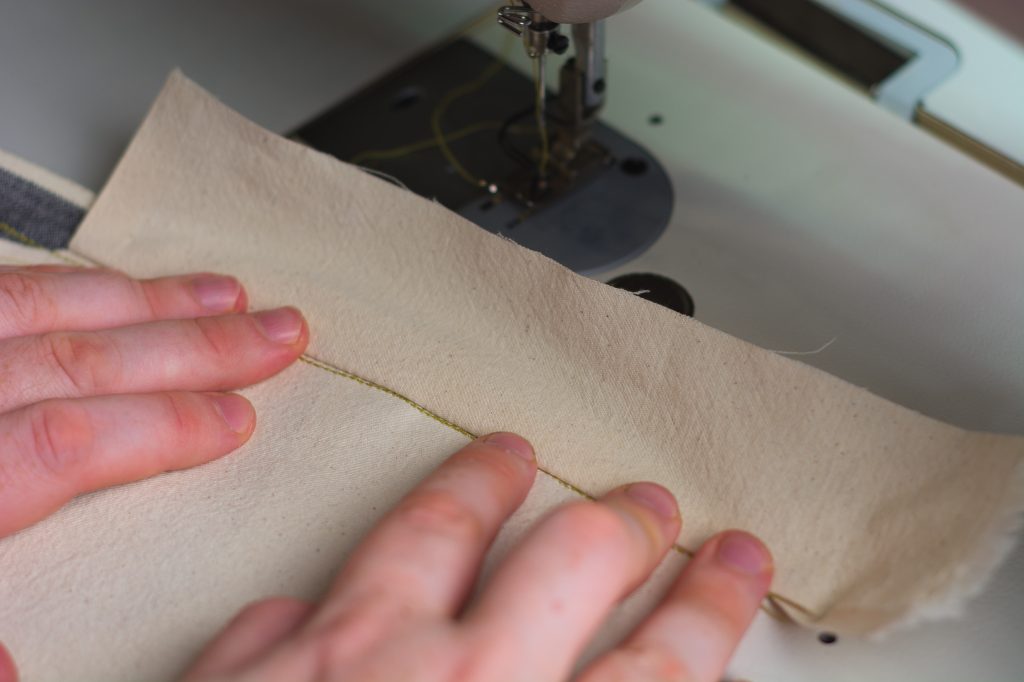
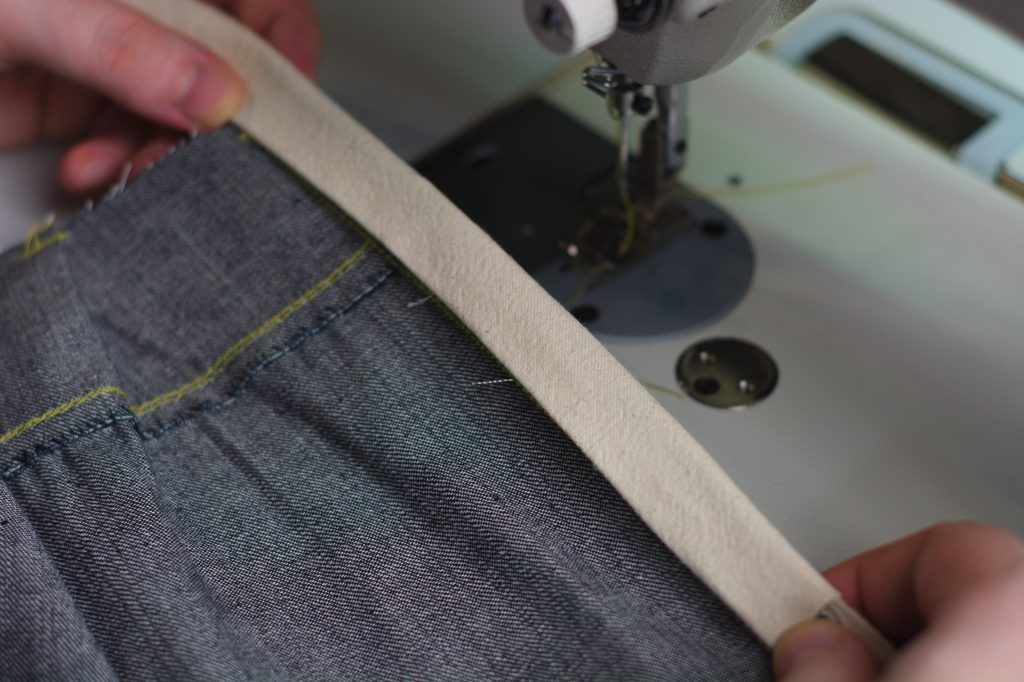
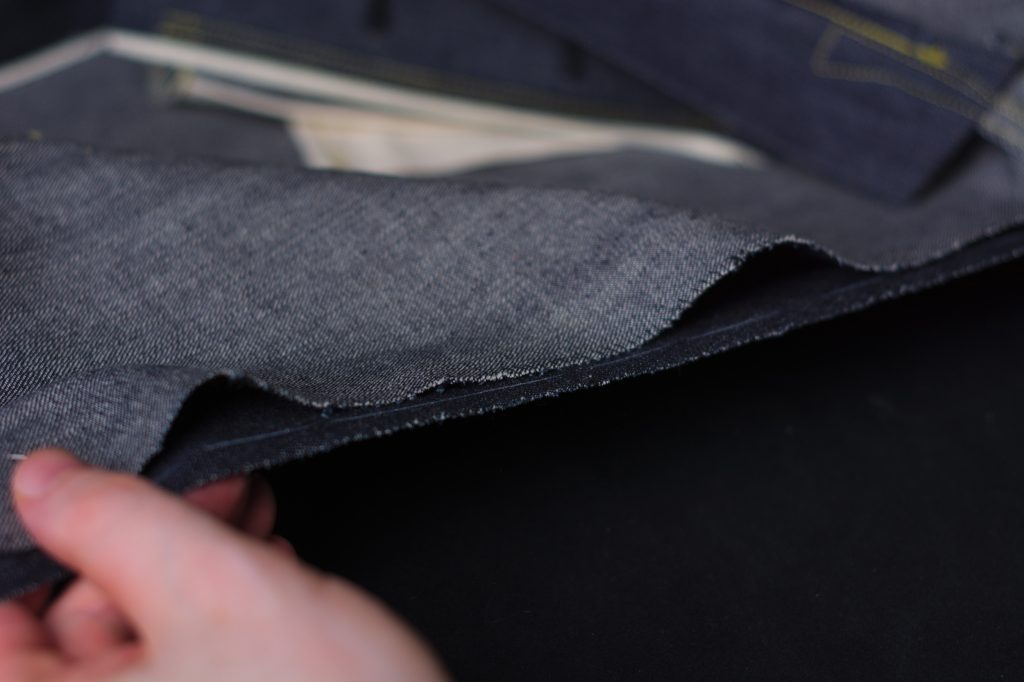
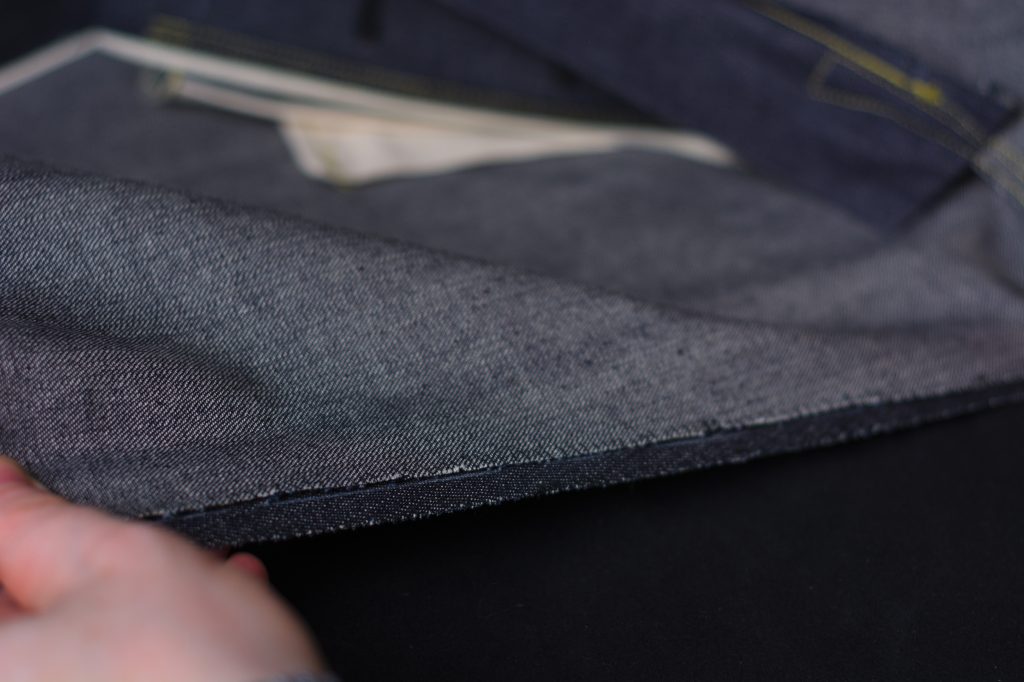
To finish securing the waistband and prevent the layers from shifting, the waistband is top stitched all the way around. Before starting, you should take a look underneath and ensure that your selvedge edge extends about 1/4″ to 3/8″ below the waistband seam, ensuring it will be caught in the top stitching.
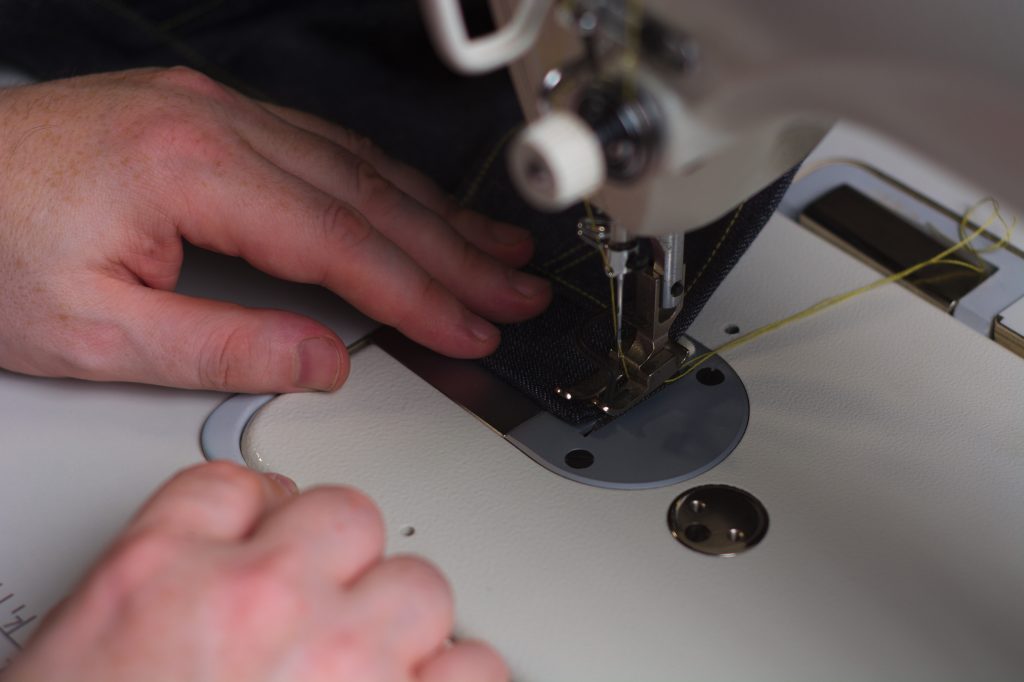
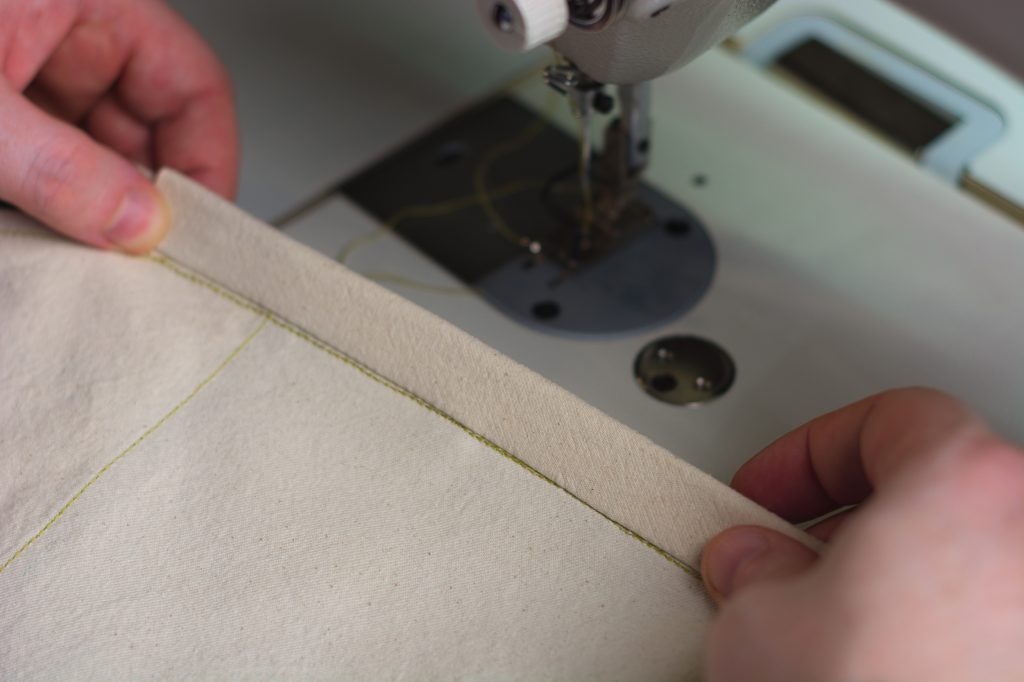
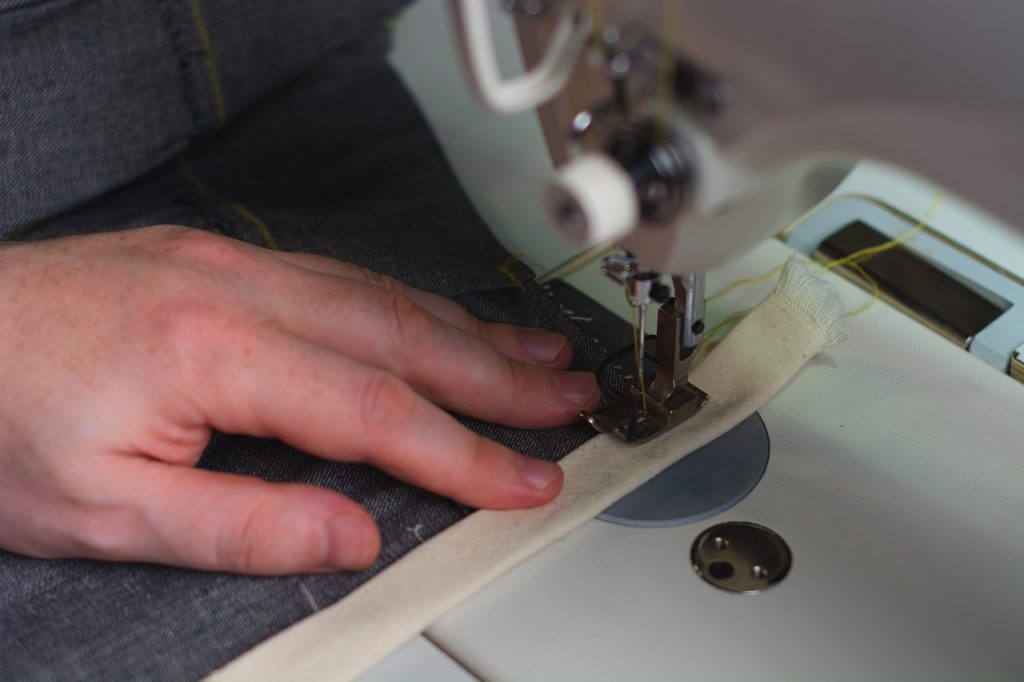
The following two photos just demonstrate the alignment of the sewing needle, about 1/8″ from the waistband seam, in relation to the selvedge underneath.
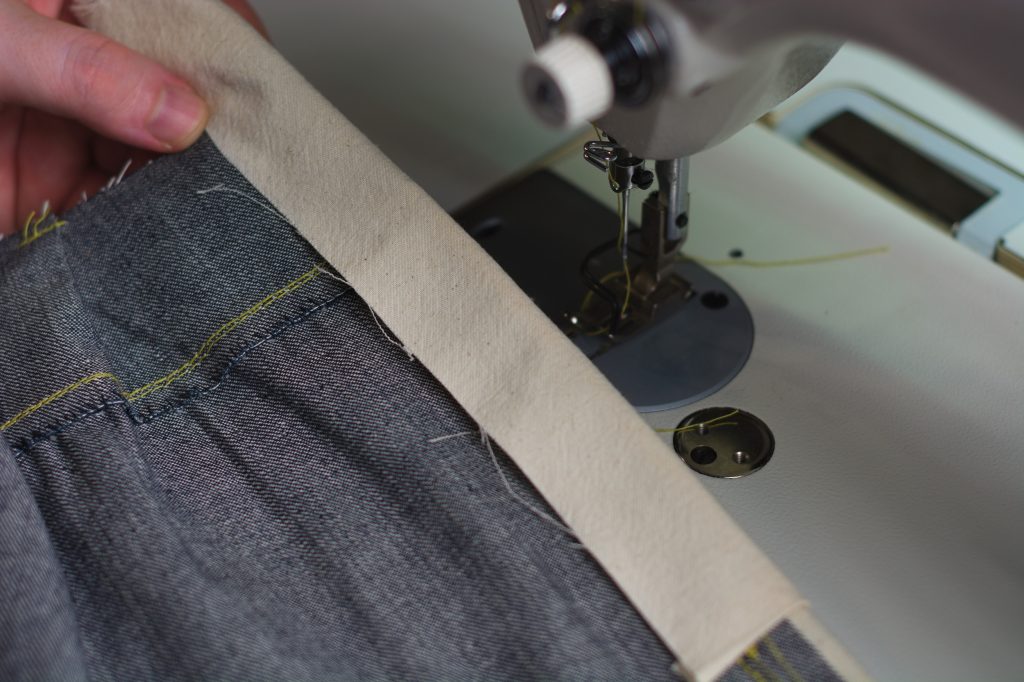
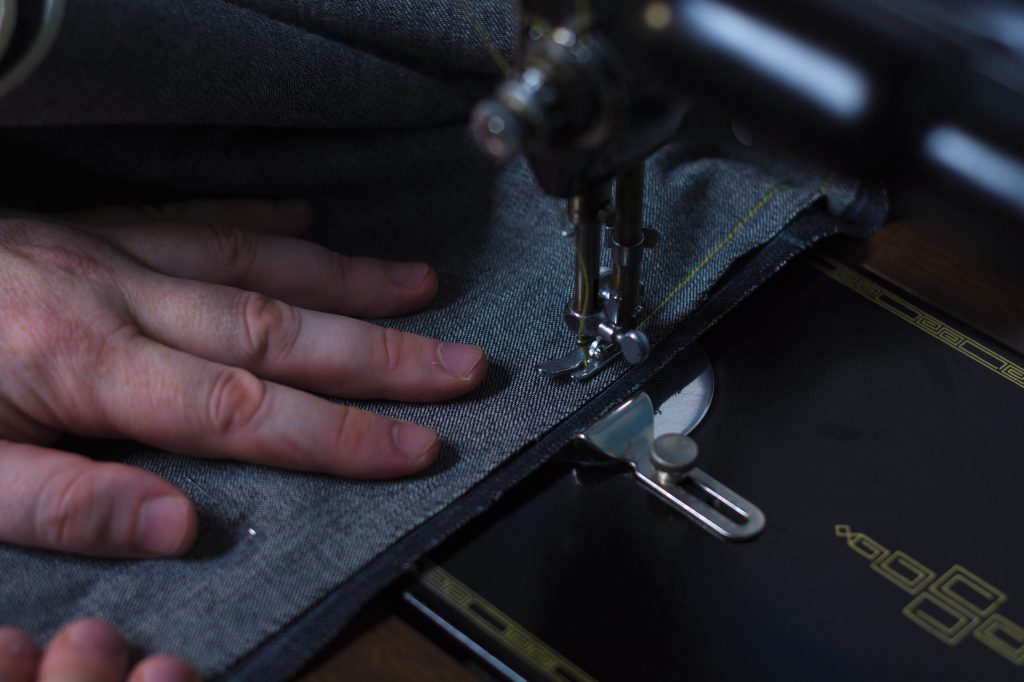
Begin top stitching at the front edge of the waistband at the left fly, down to and across the waist seam, using a 1/8″ seam allowance, being sure to catch the selvedge underneath as you sew.
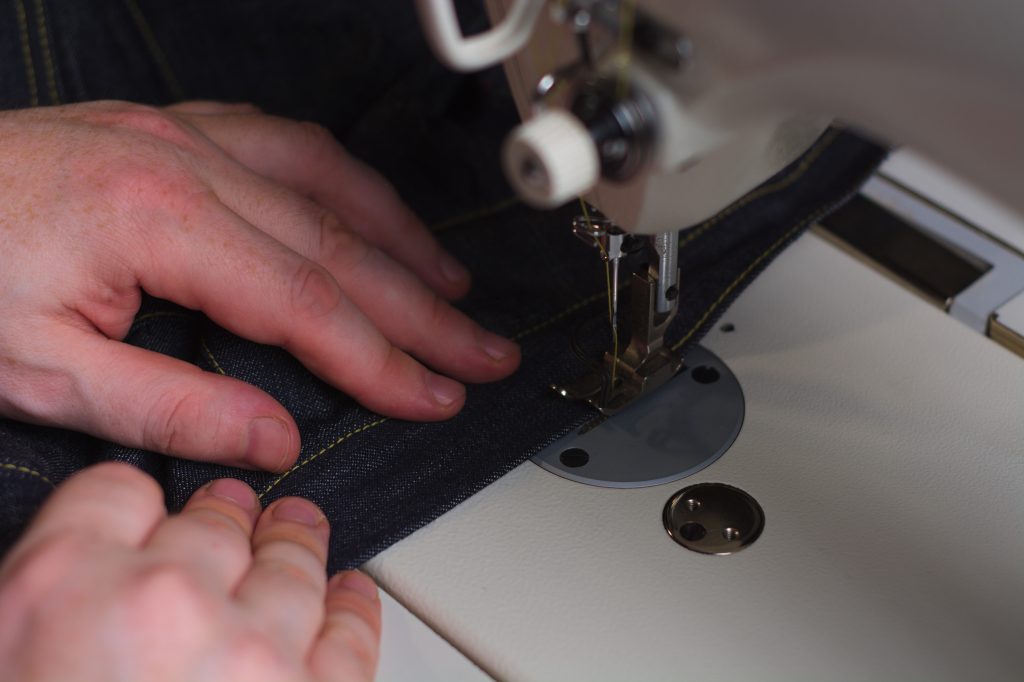
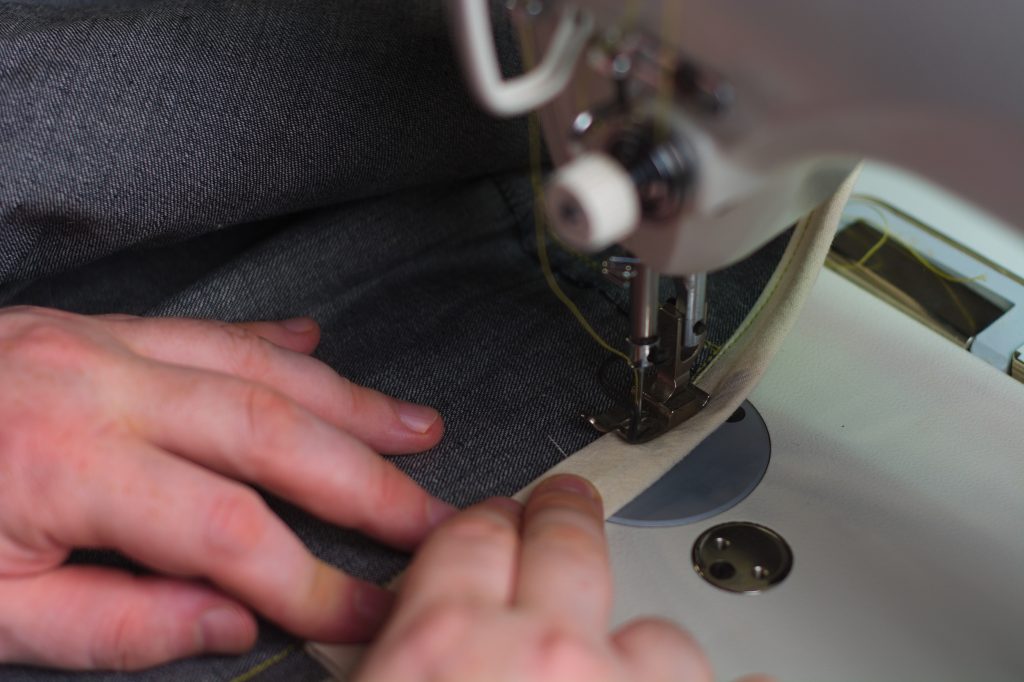
I recommend sewing a couple of inches at a time, turning back the waistband after to ensure a perfect alignment.
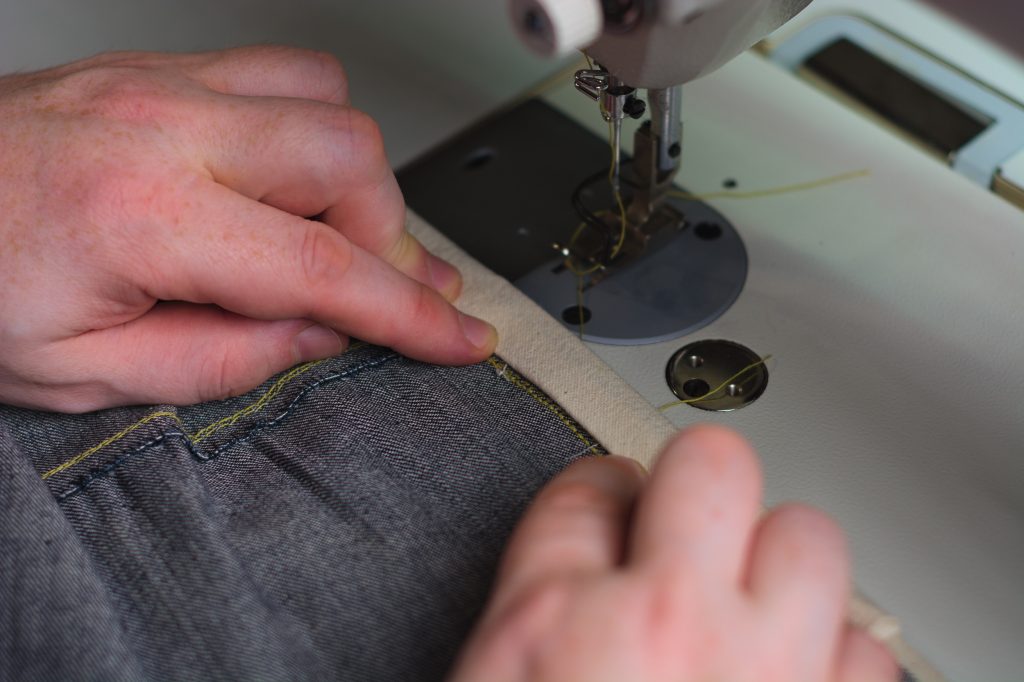
Continue sewing to the other end of the waistband, and about halfway up the right fly. The top stitching is done in two passes so that we don’t have to have the entire pair of jeans under the arm of the sewing machine as would be the case if we kept sewing.
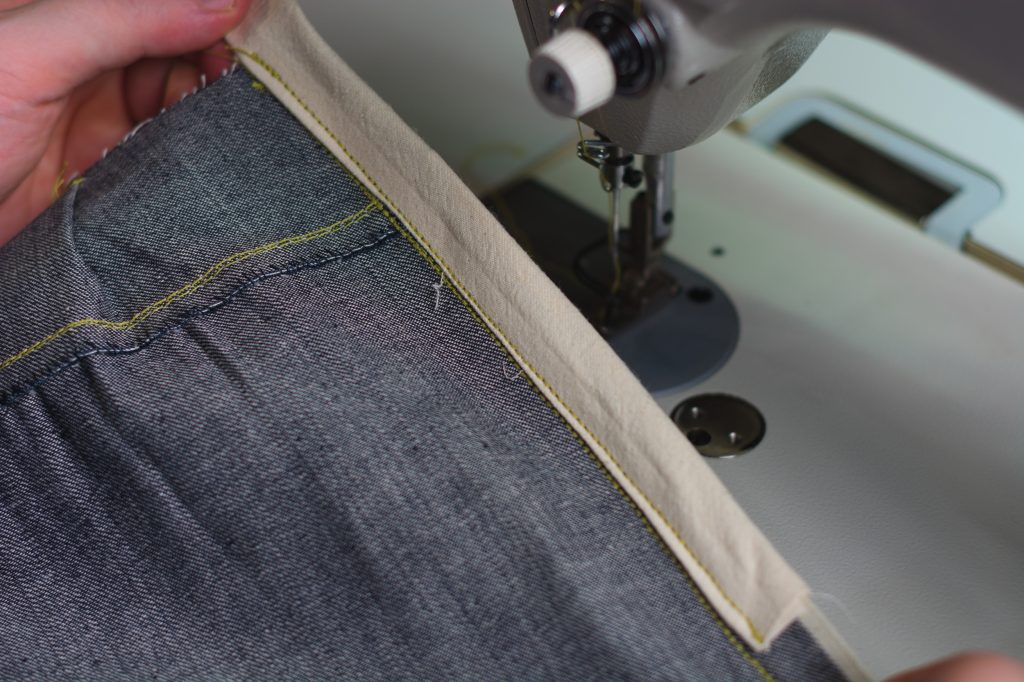
Double check your work here to ensure the stitches are properly aligned underneath. I’ve accounted for the seam allowances in the waistband pattern so that the stitching should ideally end up just above the selvedge.
Starting again at the left fly, top stitch the remaining fly end, and then turn and top stitch the top edge of the waistband.
Sew across the top of the waistband.
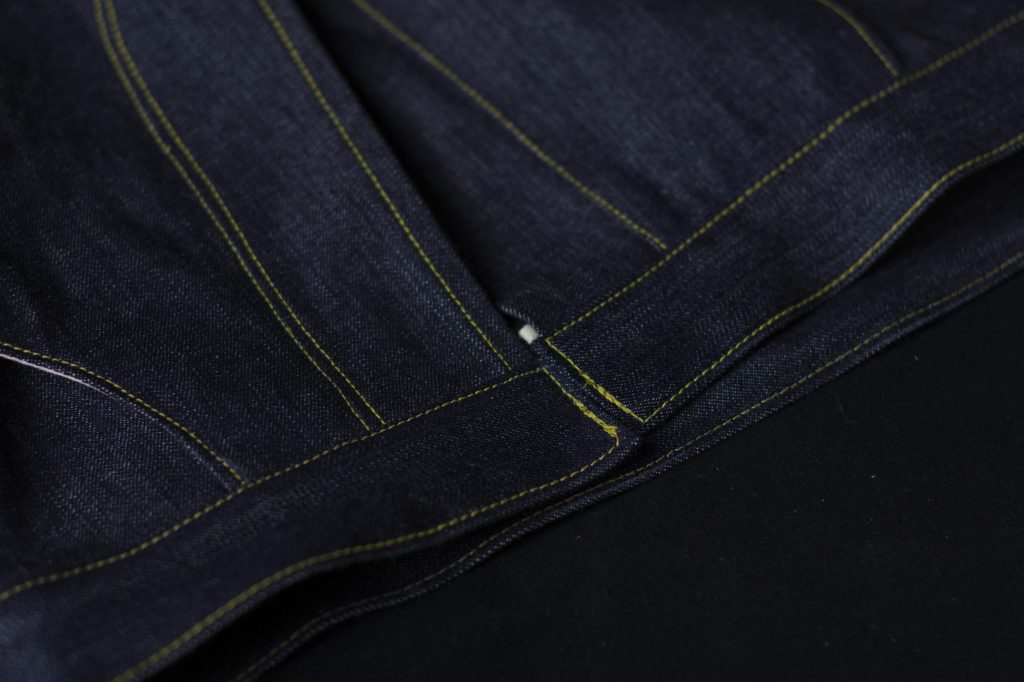
Here are the results of the top stitching. There should be some overlap of stitches at the fly ends, but everything should be nice and square and even across the entire waistband.
Belt Loops I – Modern
For those making a modern pair of jeans, now is the time to begin attaching the belt loops. Note that I’m using the 1873 pair here only as a demonstration – will update this when I make another modern pair.
Positioning the Belt Loops
To determine the positions of the belt loops, first lay your front pattern on the front leg and find the center line. This is usually at the point where the waistband meets the pocket opening. Move the point 1/2″ in either direction (whatever looks best to you) to make sure there is room for the rivet. Repeat for the other leg.
Then about 1/2″ past the side seam towards the back, mark another point for the next belt loop. Depending on your size and preference you might want one spaced evenly between the two.
Turning to the back side, evenly space out two or three more belt loops (you could have one at the center back). This was a smaller pair and the belt loops were close enough together without adding a third.
The key is no matter how many you add, to keep them spaced evenly.
Cutting the Belt Loops
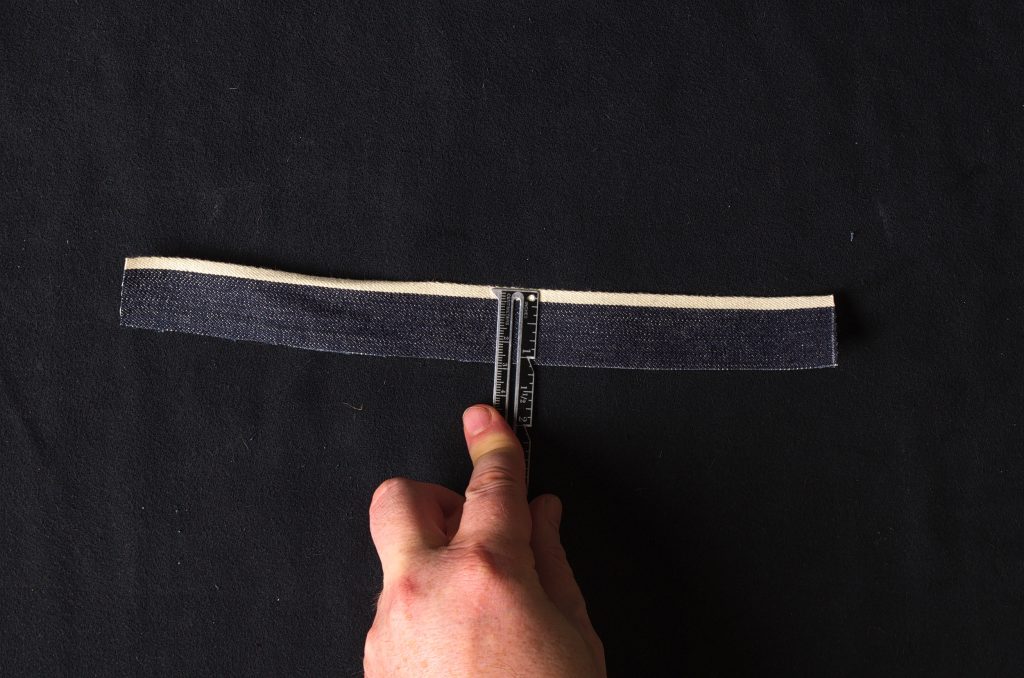
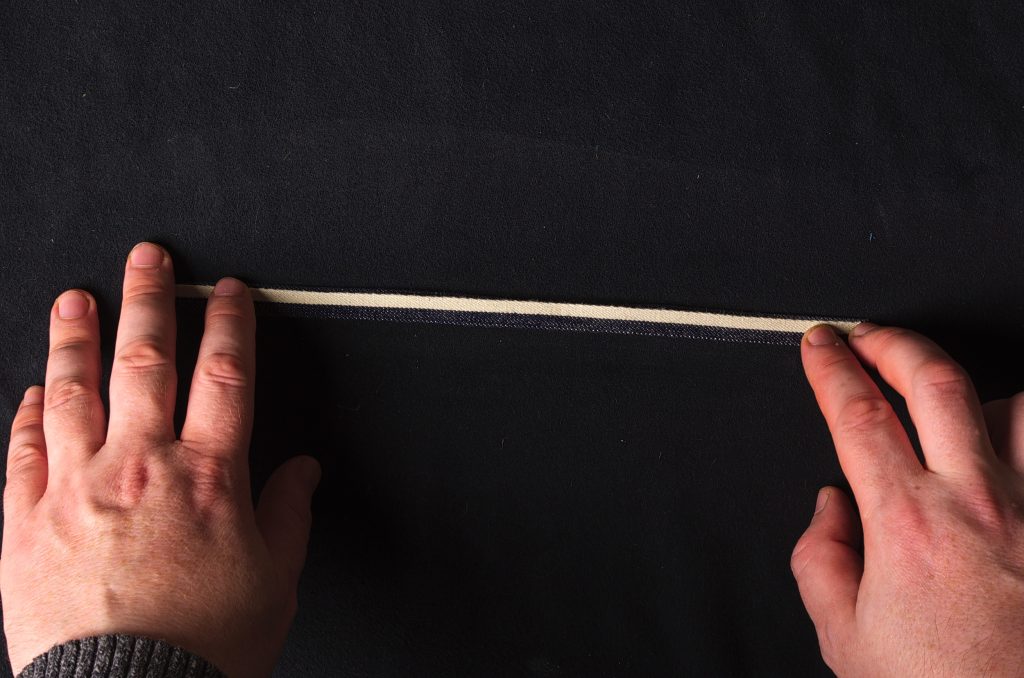
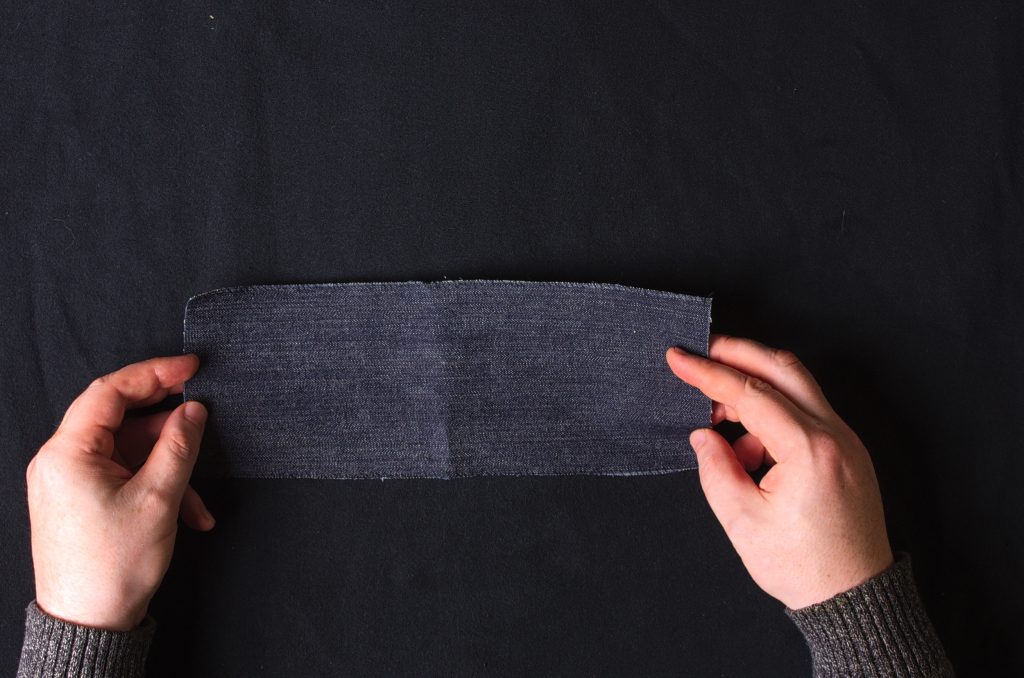
Mark out a length of denim, ideally on the selvedge, giving 4″ minimum for each belt loop, and about 1 1/2″ wide for a 1/2″ belt loop. The final width is up to you, but I find 1/2″ is a good size for the finished belt loop.
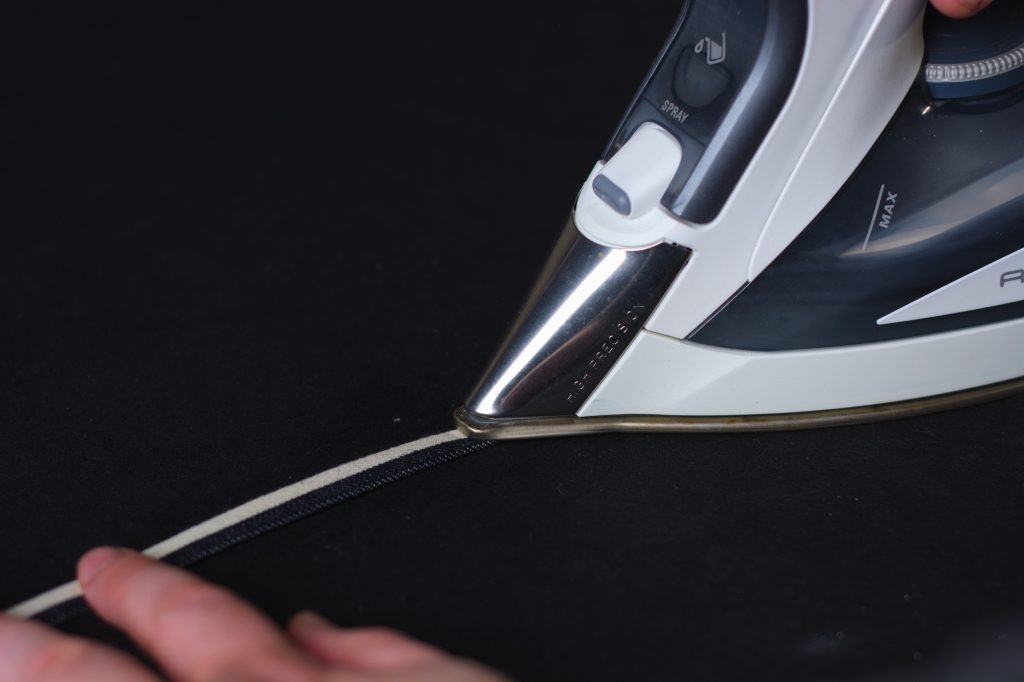
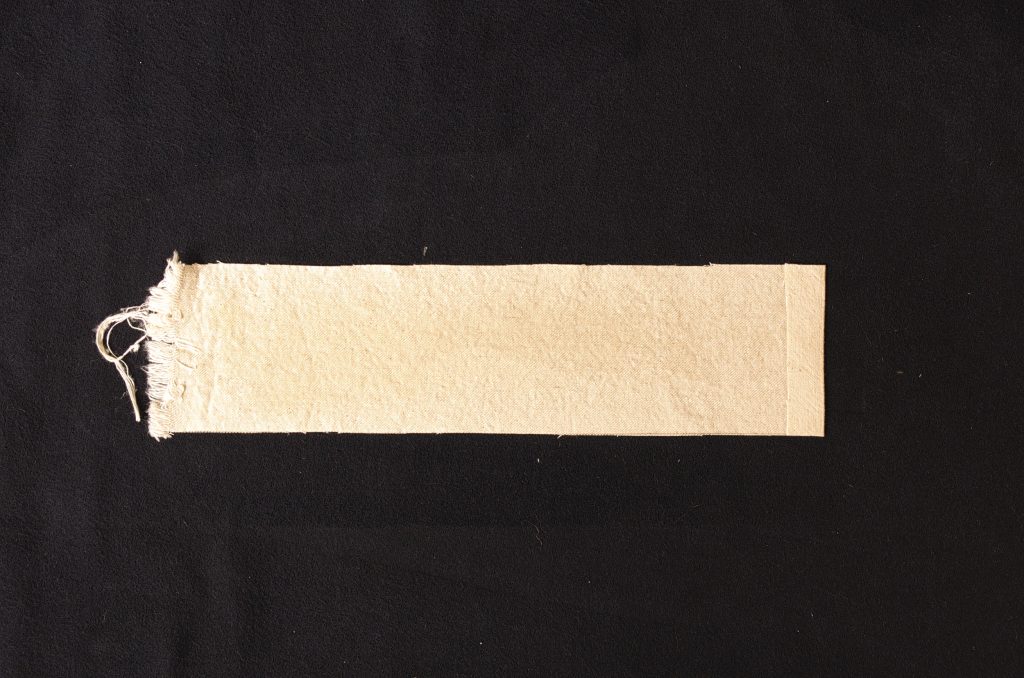
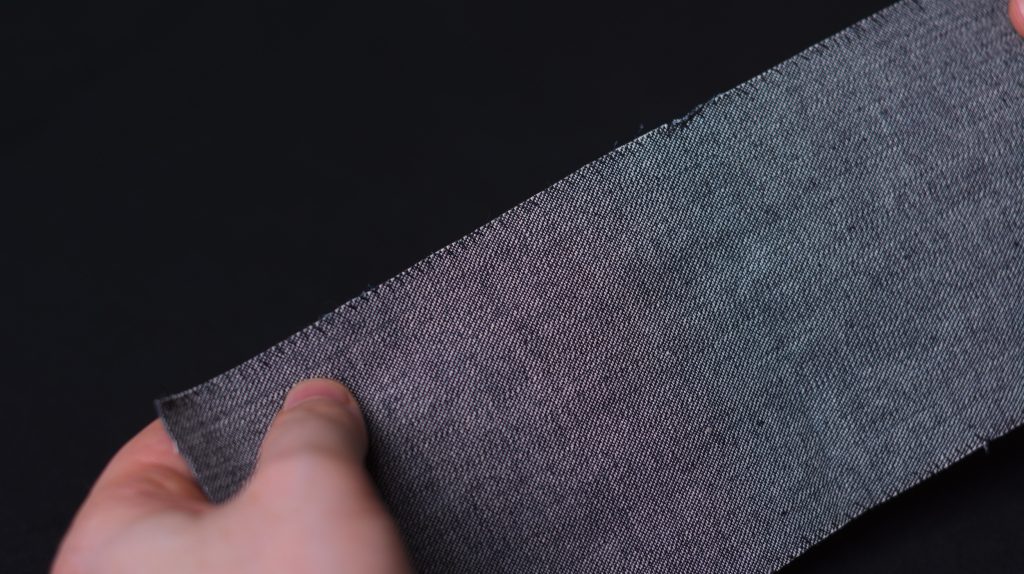
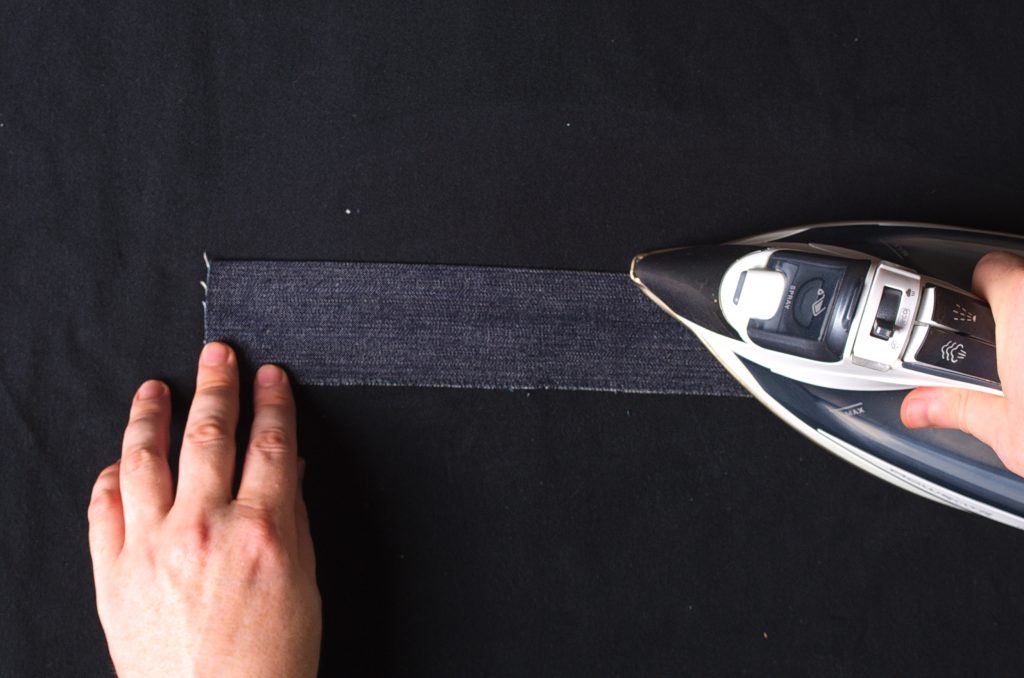
Press over the raw edge to the wrong side by just under 1/2″.
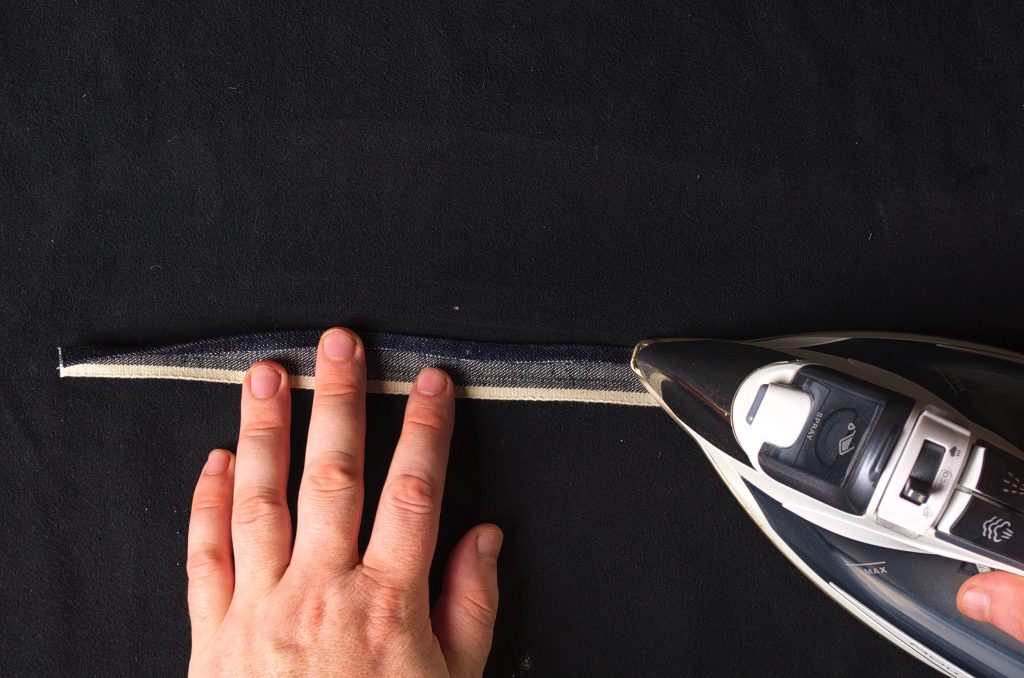
And then press over the selvedge edge, giving you the final 1/2″ width. Normally you’d have a much longer piece to cover all the belt loops – just demonstrating with a smaller piece.
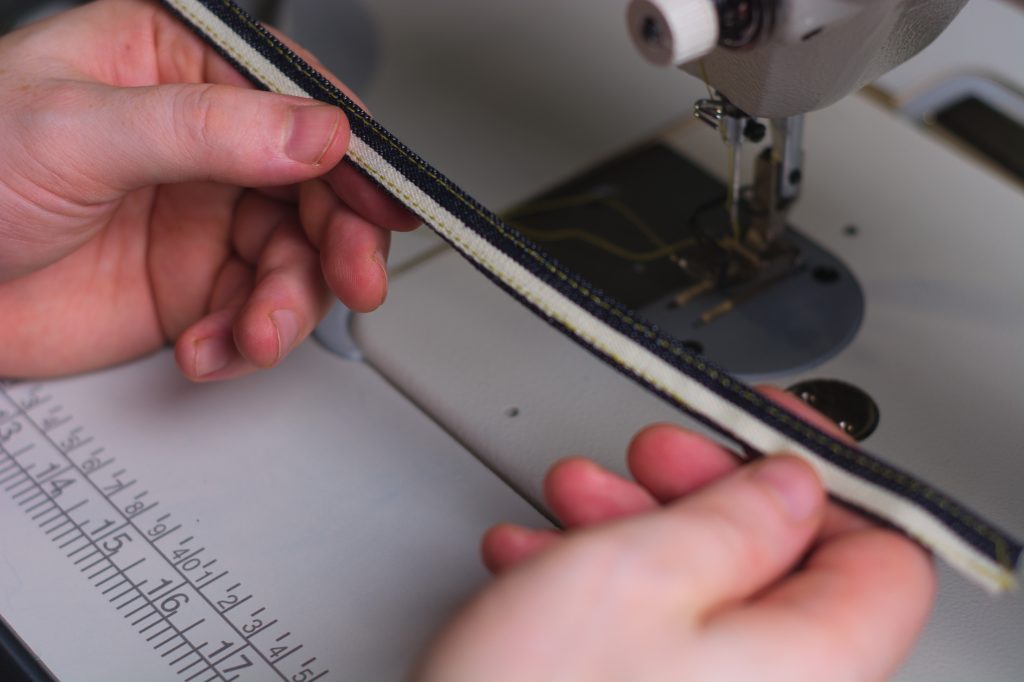
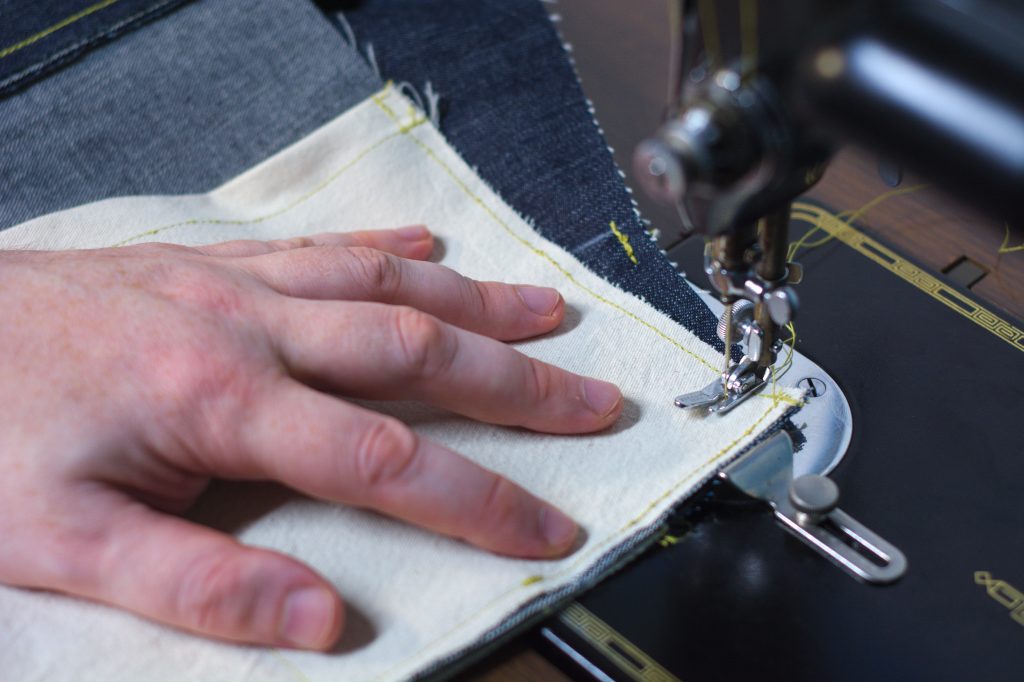
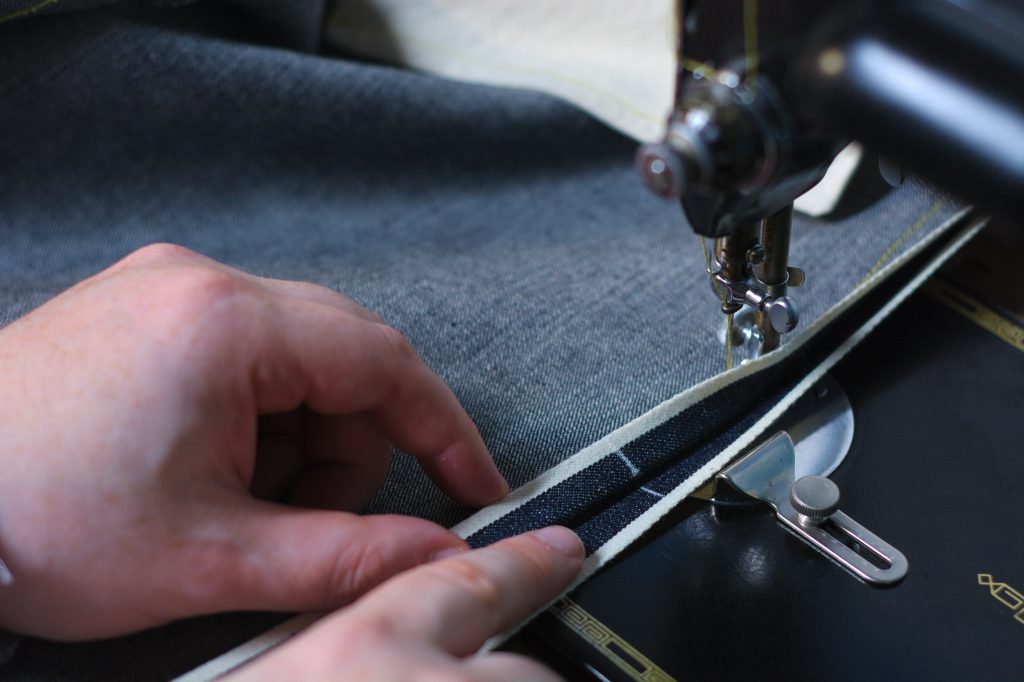
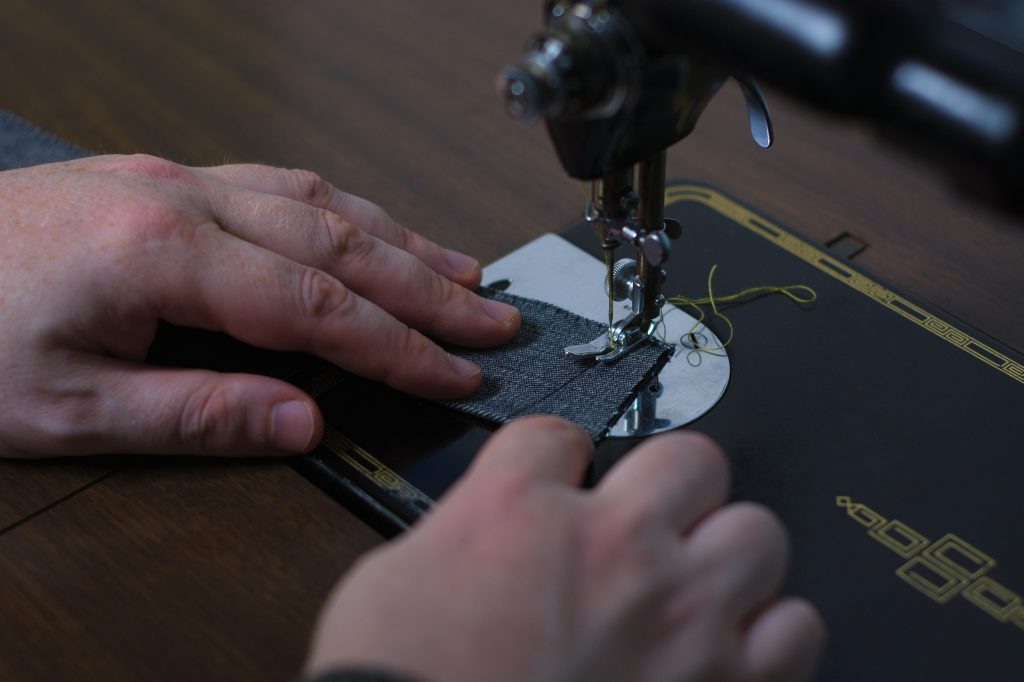
Top stitch along each long edge of the belt loops, about 1/16″ from the edge.
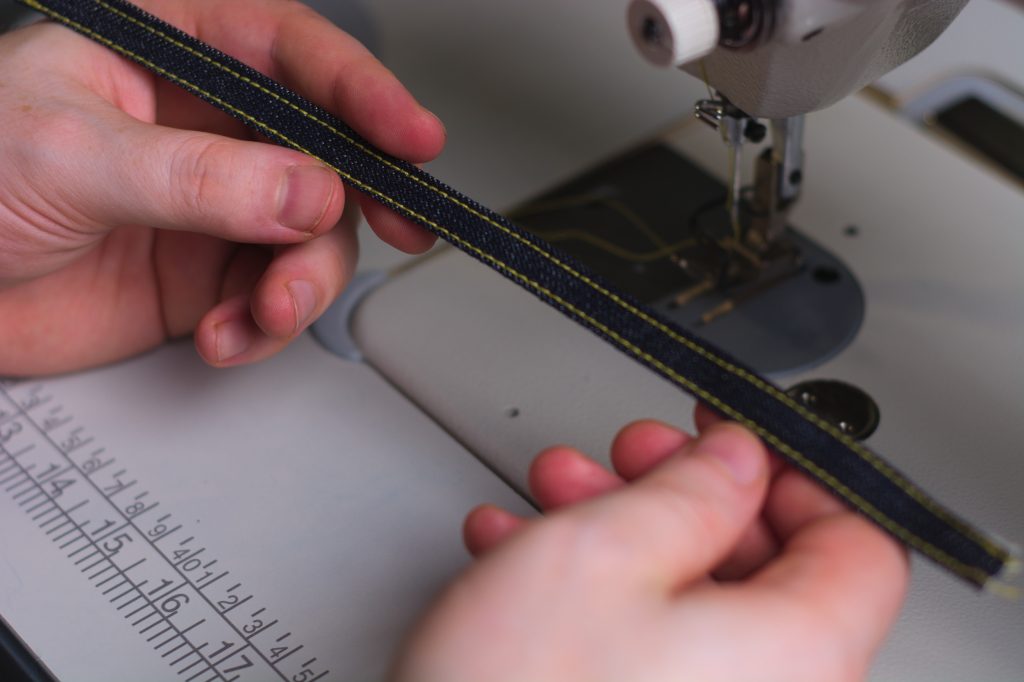
The stitches should catch the selvedge completely underneath.
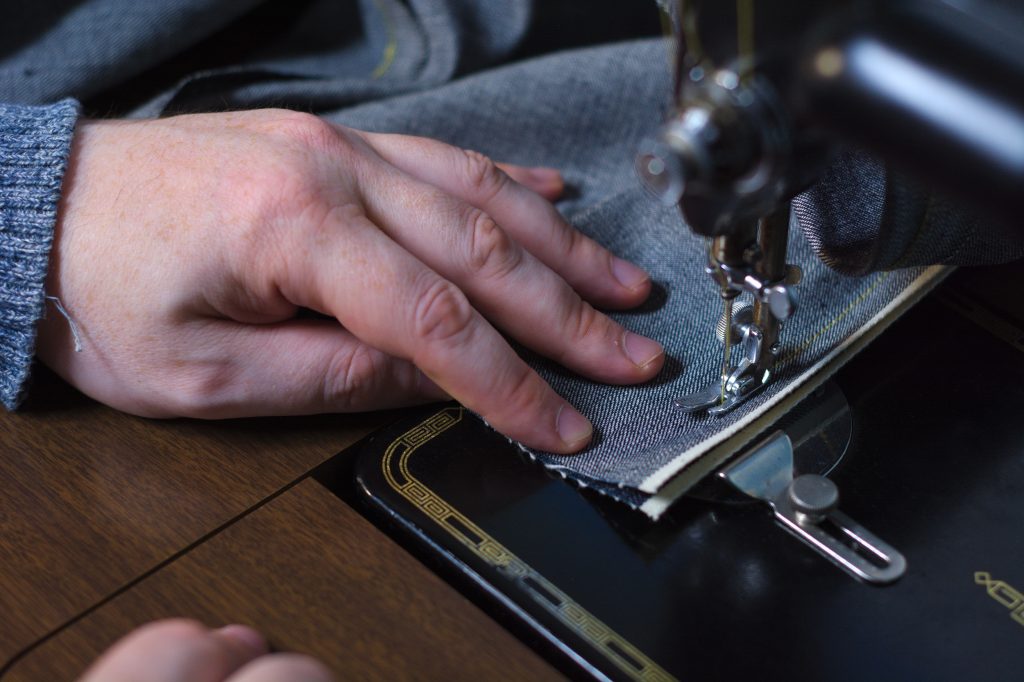
Here’s what happens if you run off the edge.
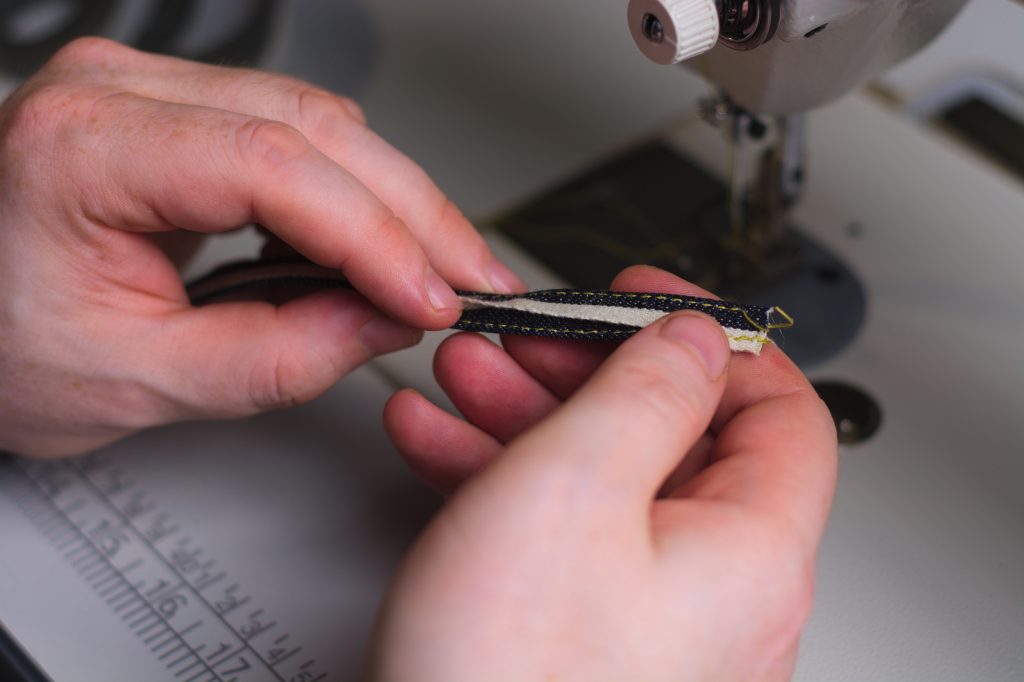
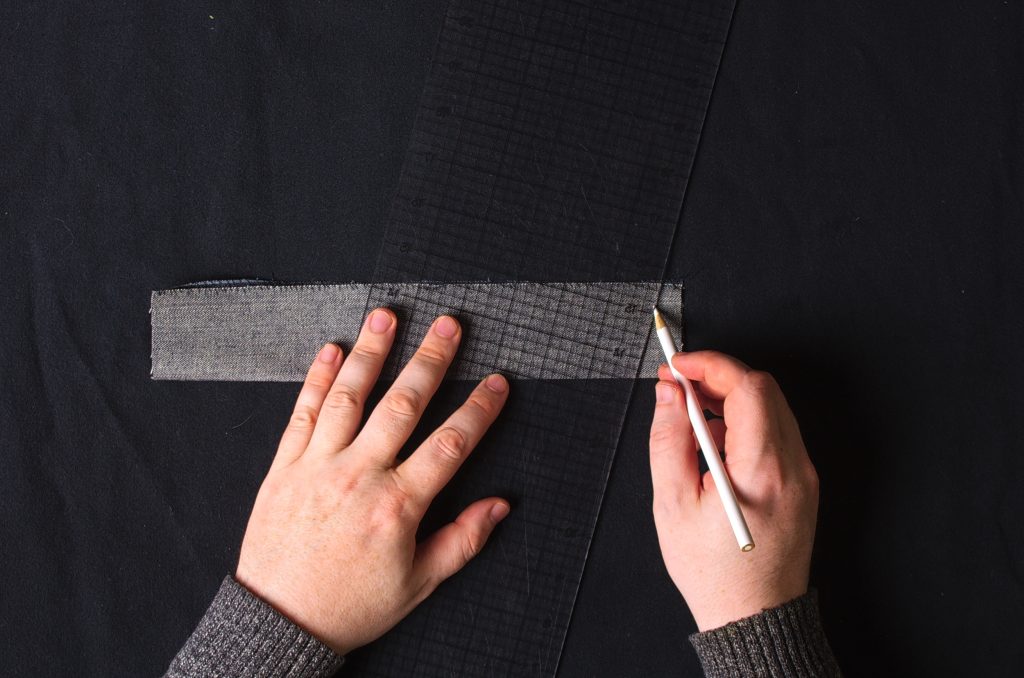
Mark off about 4″ per belt loop and cut each one to length.
Place the belt loop in position, right sides together, on the mark you made at the waist (I should have shifted this one over to make room for the rivet).
Ensuring that the belt loop is at right angles to the waist seam (use a ruler if necessary), bar tack across the belt loop about 1/4″ from the waist. This way the bar tack will be hidden under the waistband.
Repeat for each belt loop.
The Side Seam
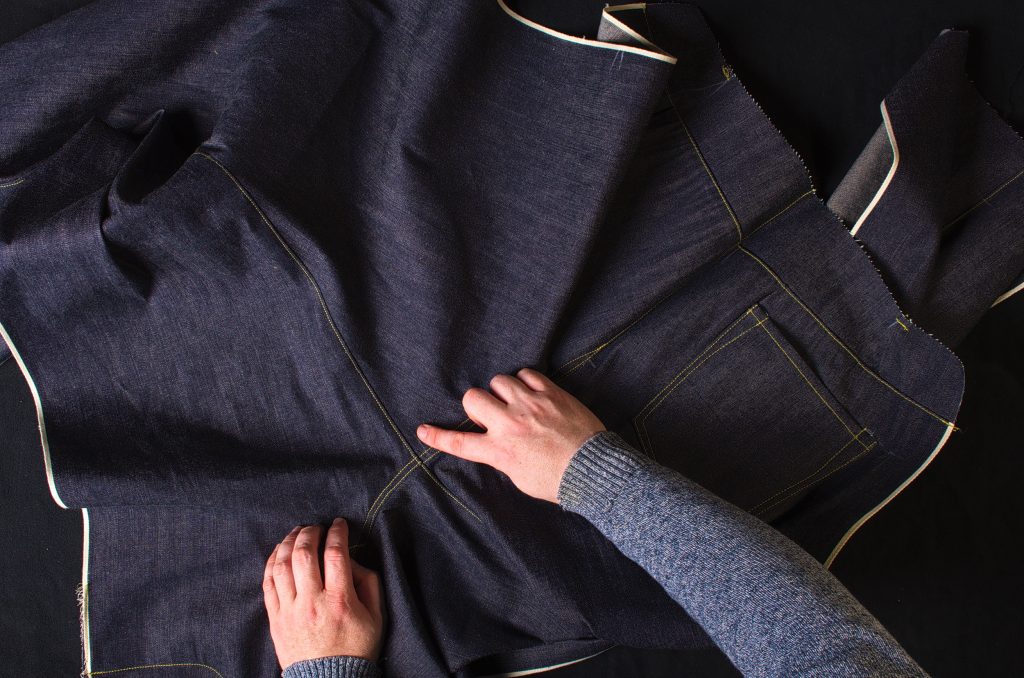
Before sewing the side seam I like to open up each leg to ensure I’m sewing the correct seams together.
Fold each leg in half, right sides together, matching the side seams at the waist and hem. You can pin this if you like, but it’s a good skill to develop to not need the pins. If you are going to pin, pin the waist and hem, then the knee and hip marks, and then in between as necessary.
Beginning at the waist, sew the side seam through all layers using a 3/4″ seam allowance.

As you’re sewing, be sure that the hip and knee marks are aligned. If not, you’re basically introducing a twist into your legs.
Continue sewing until you reach the hem. Ideally, the hem should match up perfectly with the underside but it’s possible you’ll be slightly off. As long as you’re within 1/4″ I’d say don’t worry about it.
Pocket Covering
This is an optional step to cover up all of the raw edges of the pockets that are left on the side seam. On the 1873 originals, these were just left raw. I’d recommend using a light to medium weight muslin – if you have an industrial machine you can use the pocketing fabric itself like I am. It just introduces a lot of layers that may make your machine struggle.
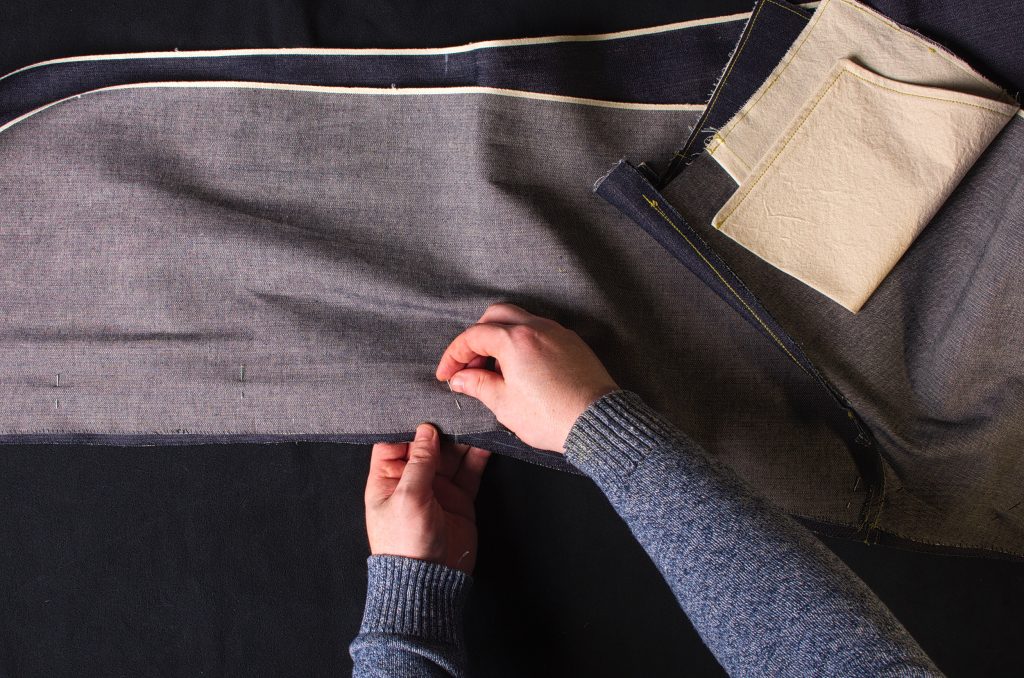
Begin by cutting a rectangular piece of muslin or pocketing a couple of inches longer than the pocket at the side seam, and about 2 1/2″ wide. Press over about 1/2″ at one of the narrow ends. or you could use the selvedge instead, something I prefer to do.
Now along one long edge, press over about a 3/8″ seam.
Now open up the muslin along the long seam and lay the it onto the pocket just inside the side seam’s seam allowance, so that the folded narrow end is just meeting the pocket on that curved seam. Keep the long fold about 1/8″ away from the side seam.
Begin sewing along the long folded edge, lifting the muslin as necessary to make sure you’re still in alignment.
Continue sewing to the waist seam.
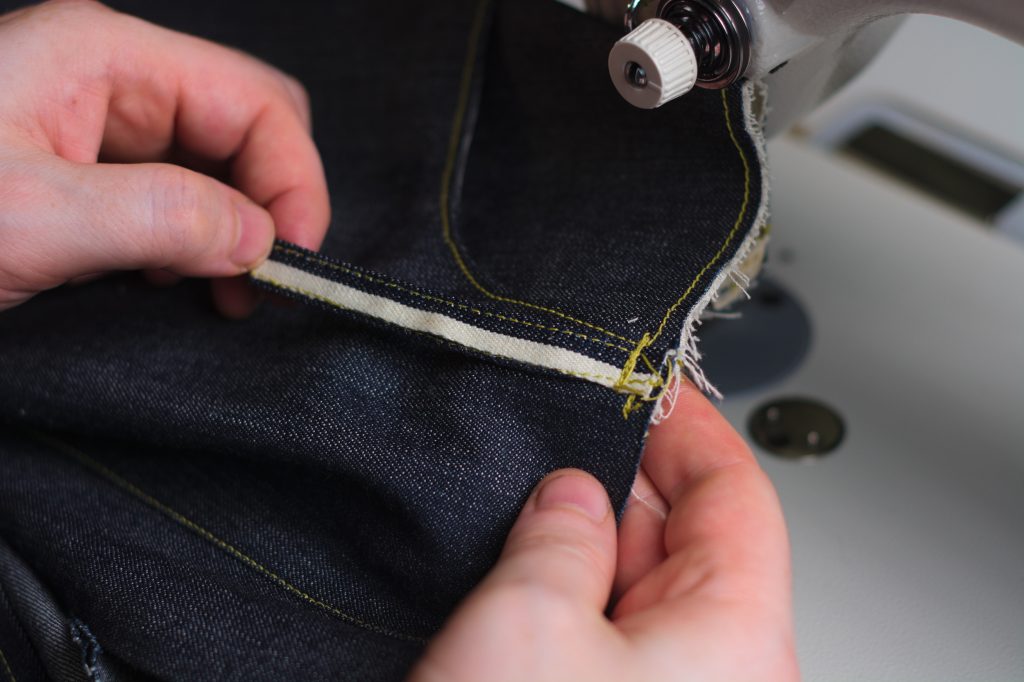
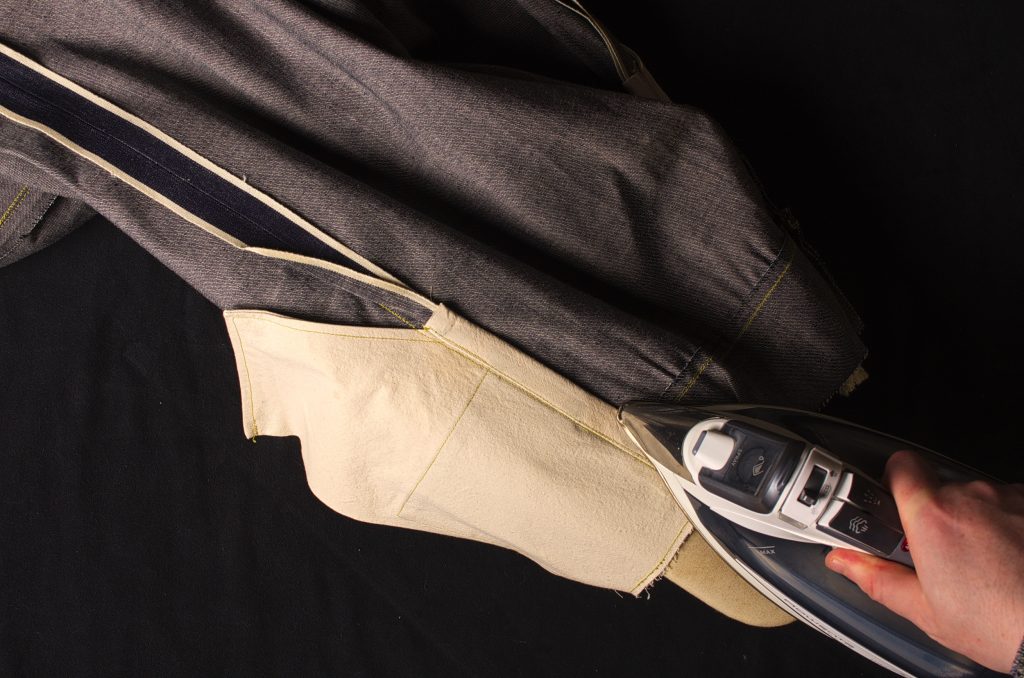
Press the muslin firmly towards the selvedge.
And wrap it around the selvedge to the back side of the jeans.
Here’s the view from the back leg side of the jeans (that’s the yoke near my left hand).
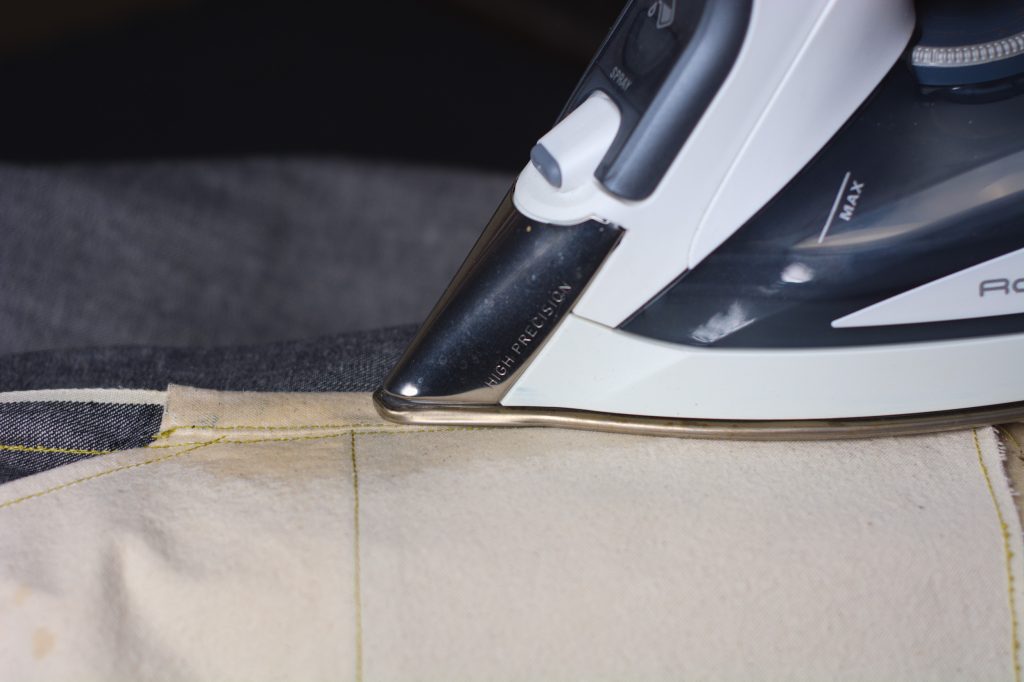
Turn under the remaining long raw edge, again positioning the fold about 1/8″ from the sewn seam underneath.
You can press this to keep everything in place a little more easily.
Now sew the pocket covering closed about 1/8″ from the folded edge along the length of the muslin.
Here’s what it should look like. It’s just a very clean way of finishing the pocket’s raw edges.
Pressing
Turning out attention back to the side seam, press the side seam open from the hem to a couple of inches below the pocket.
At the pocket area, press the pocket and covering towards the back, as firmly as you can. Then press the front side seam at a diagonal so that it can open up fully again.
There are a lot of layers here so I like to press the pocket area very firmly.
Turn the jeans right sides out and press the side seam and pocket area again as necessary.
Top Stitching
From the right side, feel for the bottom of the pocket covering and mark along the side seam about 1/4″ below that. Repeat for the other leg, ensuring both marks are positioned identically.
Couldn’t make up my mind here . . .

Beginning at the waist, top stitch the side seam through all layers of the pocket / seam allowance / muslin covering to the mark. Space the top stitching about 1/8″ from the seam towards the back leg.
Sorry the pictures are hard to see! It’s kind of tricky to sew here, be sure to keep the underside clear of any other parts of the jeans as you sew.
Here are the jeans after top stitching the side seam. The top stitching ends just below the pocket because it’s basically impossible to sew much further due to the closed legs.
Finally, I like to trim any excess from the top of the fly.
And then trim the tops of the pocket coverings flush with the waist as well.
The Inseam
Now that both the front and back legs are complete, we can finally begin joining them together.
If you haven’t already done so, trim the back and front crotch so that there is more of a smooth transition between the two legs.
I used my hip curve just to smooth out the crotch by about 3/16″. It really does make a big difference with the ease in which things go together.
Be sure to overcast the cut area again to prevent fraying.
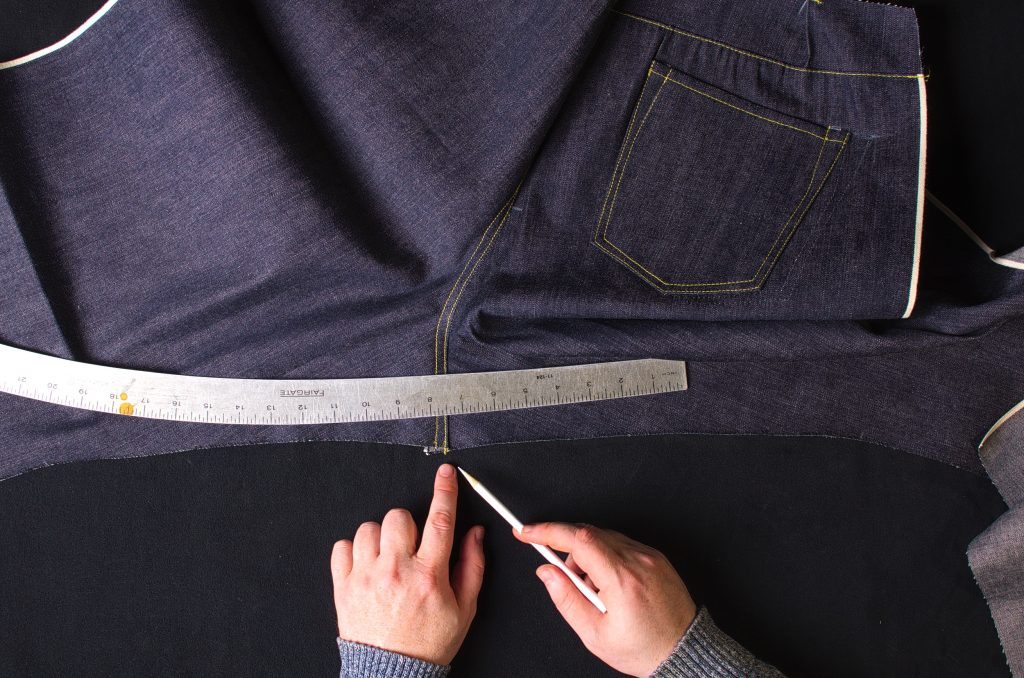
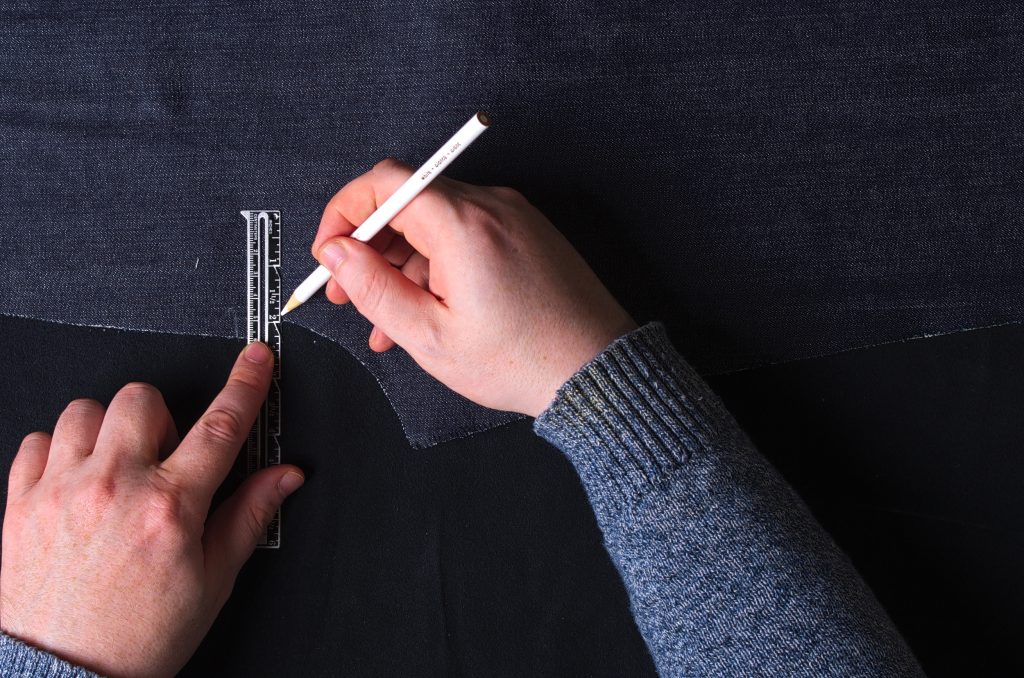
Mark a 3/8″ seam allowance on the back inseam, from hem, through the crotch, to the other hem.
Lay the front legs on top of the back legs, right sides together. Align the edge of the front inseam with the line you just marked, just barely covering the line.
Pin the inseam together at the knee mark, hem, and crotch area. Then pin in between these points as necessary.
As you’re pinning between the knee and the crotch, you may notice some excess in the front leg. If you gently stretch the back leg with your hands, you can pin away this excess.
Here’s what your jeans should look like after pinning the inseam together.
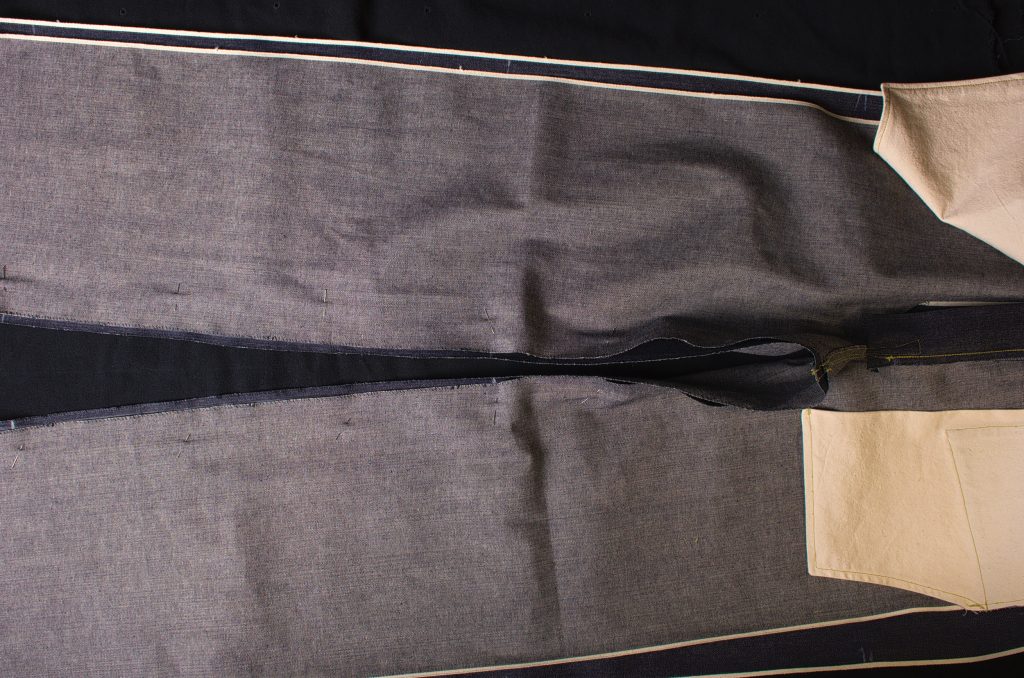
Sew from hem through the crotch to the hem along the inseam, using a 3/4″ seam allowance. You’ll be 3/4″ away from the edge of the back legs, and 3/8″ away from the front inseam.
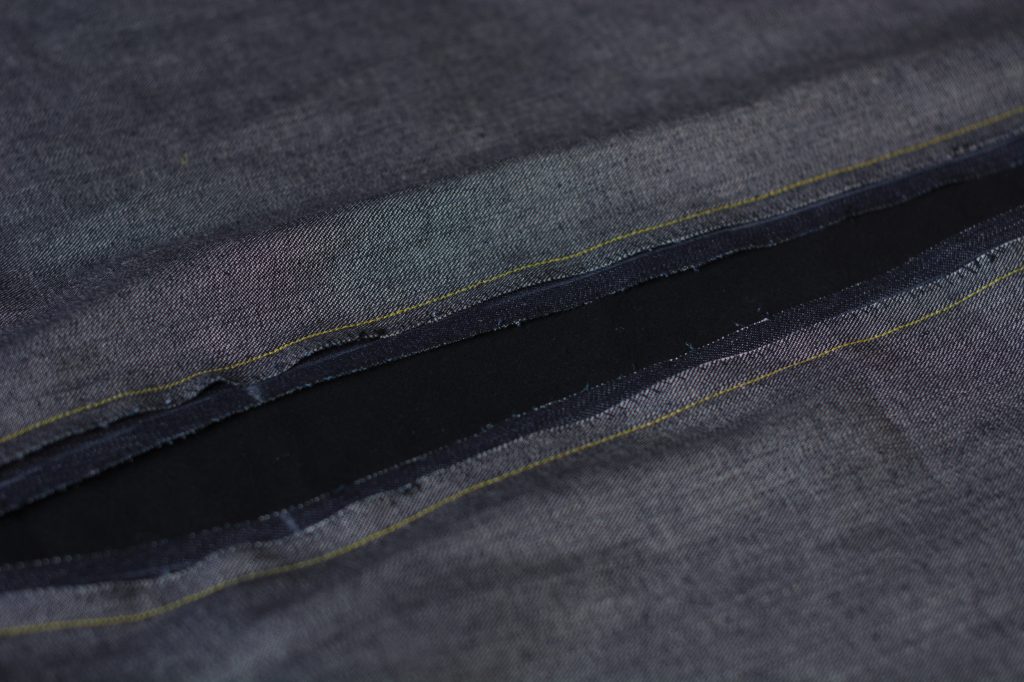
Here’s the inseam after sewing. There are two ways to finish the inseam, shown in the next section below.
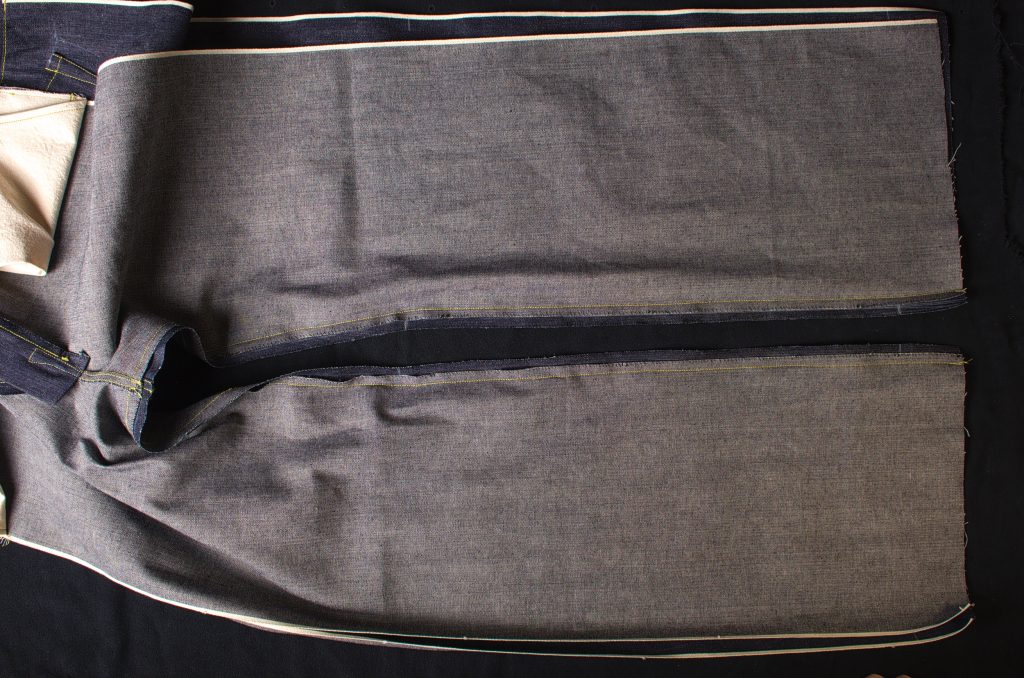
Hopefully your crotch seams line up properly – mine shifted slightly out of position.
Which leaves the slightly misaligned seams on the front. It’s up to you if you want to redo that or not – I chose to press on as the originals were definitely not perfect either.
Finishing the Inseam – Modern Jeans
If you’re doing a more modern pair of jeans, and your sewing machine can handle the 16 layers, this is the method that provides the best finish. For the 1873 jeans and those that have a less powerful sewing machine, you’ll want to stick with the 1873 version below.
Begin by pressing the back leg seam allowance over the front inseam by about 3/8″, or just before it touches the stitch line.
Now here’s the tricky part. Open up the legs, keeping them right side up. About 3/8″ from the seam, top stitch through all layers. You’ll have to check frequently that the crease you put in with the iron is still in place as you’re sewing. Top stitch from the hem, along the inseam through the crotch, to the other hem.
You can put a second row of top stitching about 1/16″ – 1/8″ away from the seam if you want but I usually just do the one row.
Here I’m flipping the leg to the underside to make sure the seam is still in place.
I’ll be adding additional photos here when I make my next pair of modern jeans. Be particularly careful around the crotch area and use a hammer to flatten all of those layers, along with the seam jumper when sewing.
Finishing the Inseam – 1873 Jeans
For those doing the 1873 jeans, or with less powerful sewing machines, this is the method to use.
Begin by pressing the seam allowance of the inseam towards the front leg, so that the larger seam allowance is covering the smaller one.
Top stitch from the hem, through the crotch, and down the other half of the inseam to the hem, through all layers, about 1/8″ from the seam. Be sure to check the underside frequently as you’re sewing to be sure that everything is still in its proper place. It’s easy for things to shift out of position.
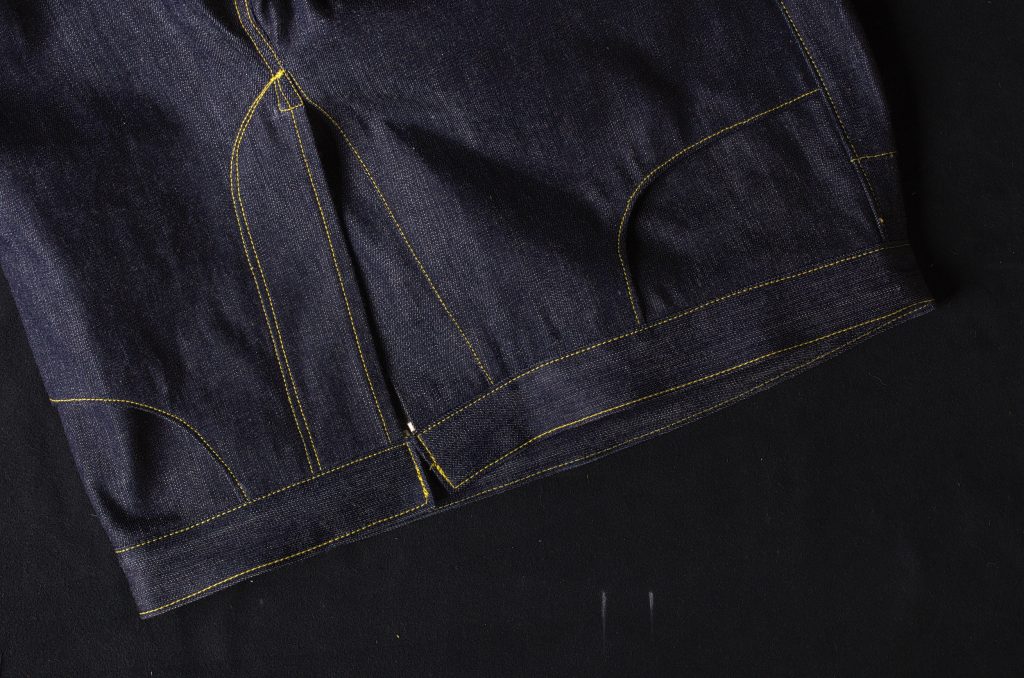
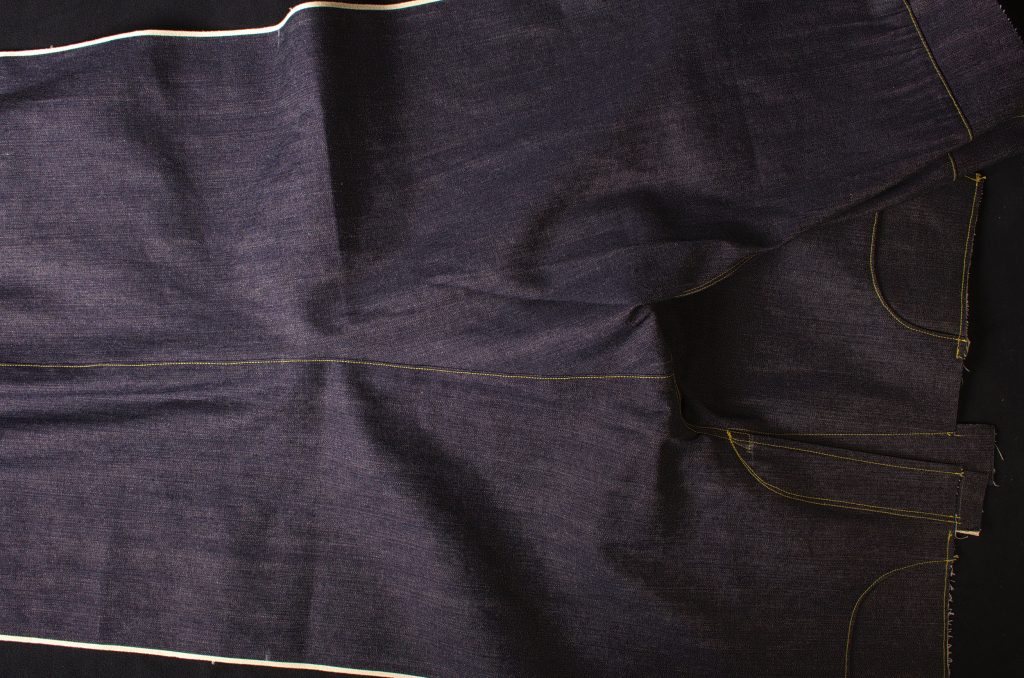
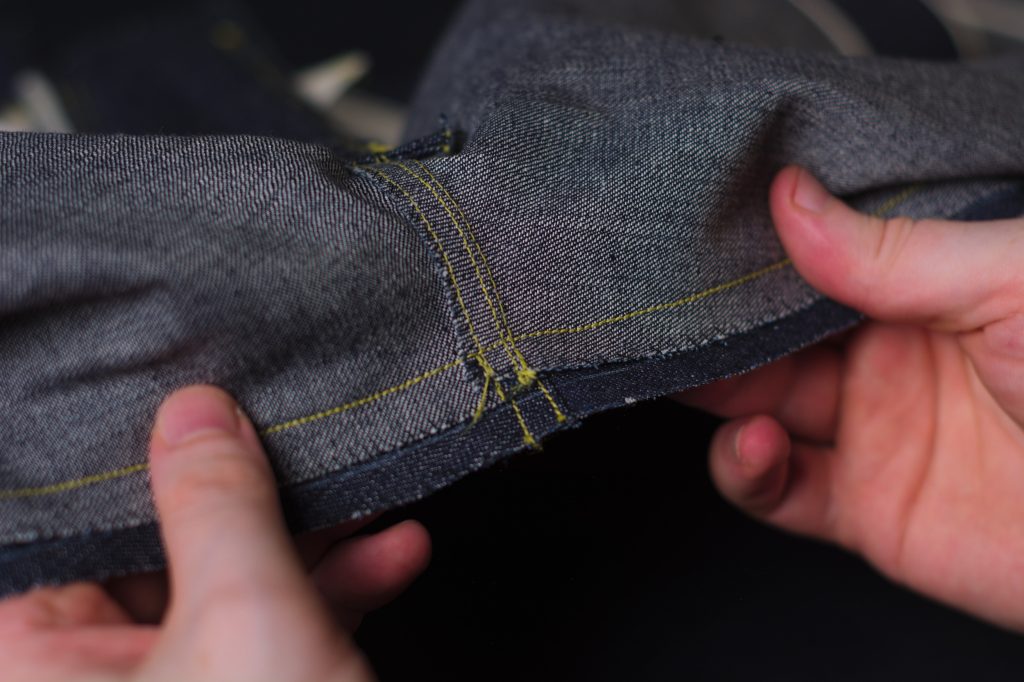
Here’s one half of the inseam after top stitching.
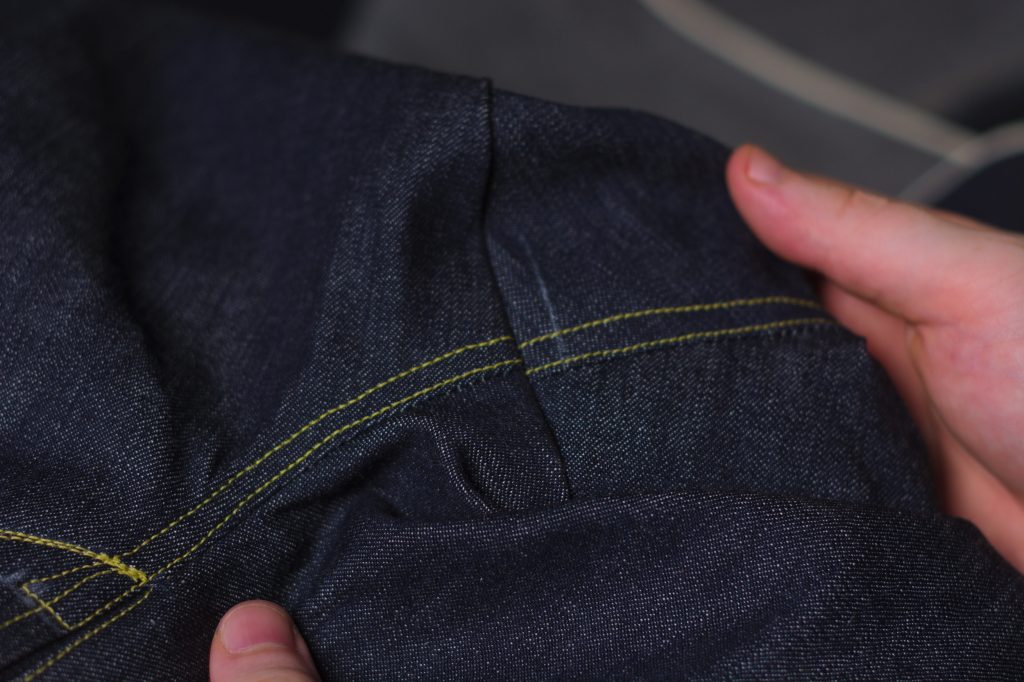
And here’s a photo of the crotch area. The misaligned top stitching is barely noticeable now.
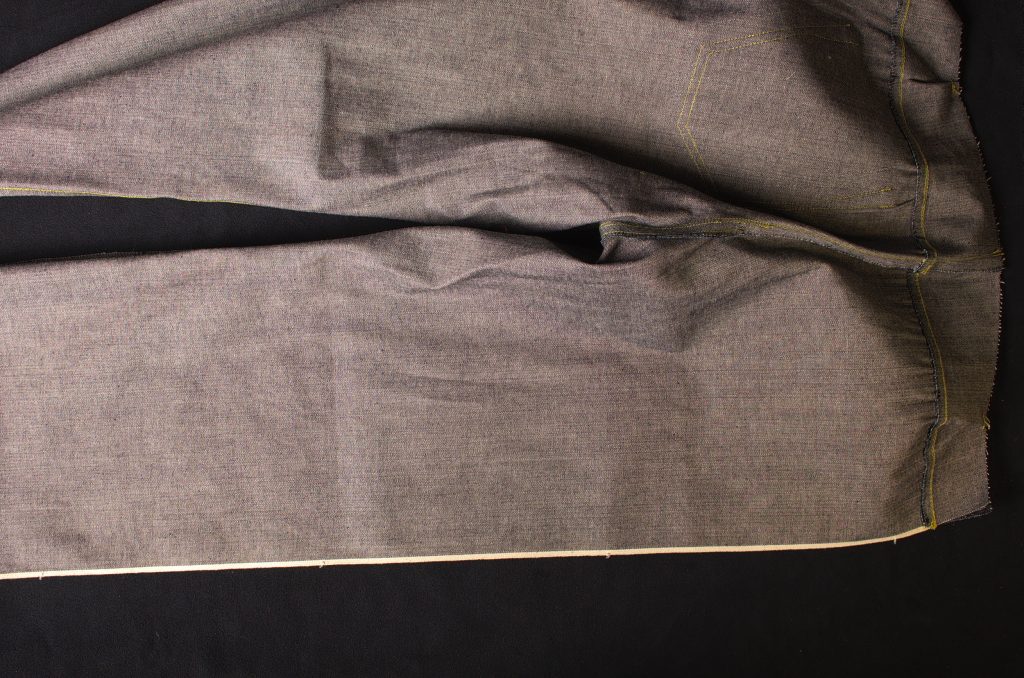
A view of the wrong side of the inseam after top stitching.
Zipper Fly
Coming soon!
1873 Button Fly – Part II
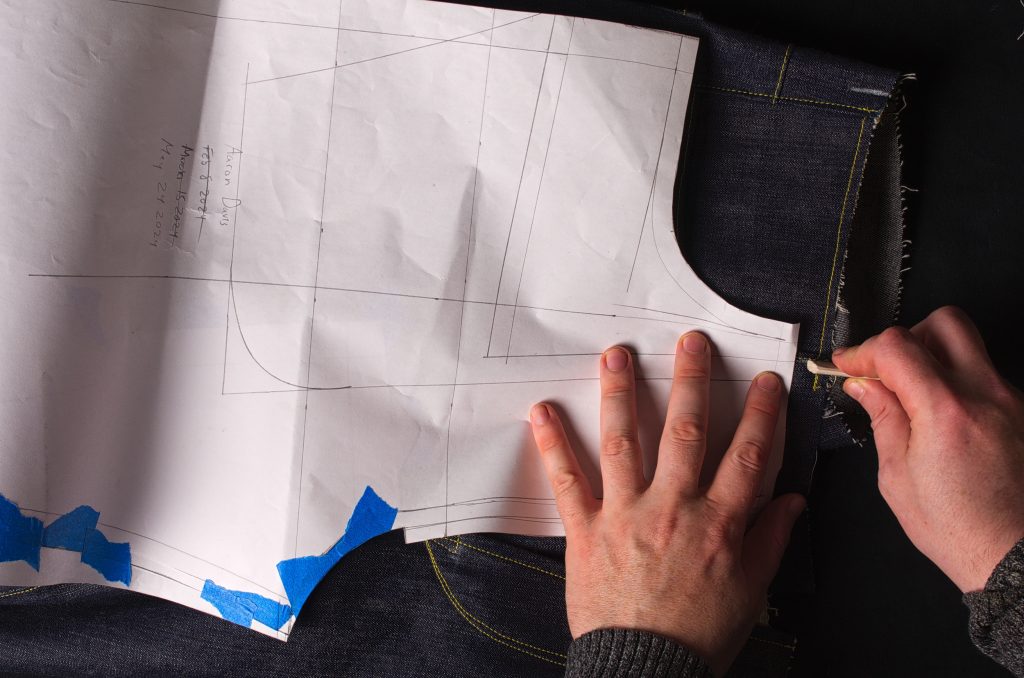
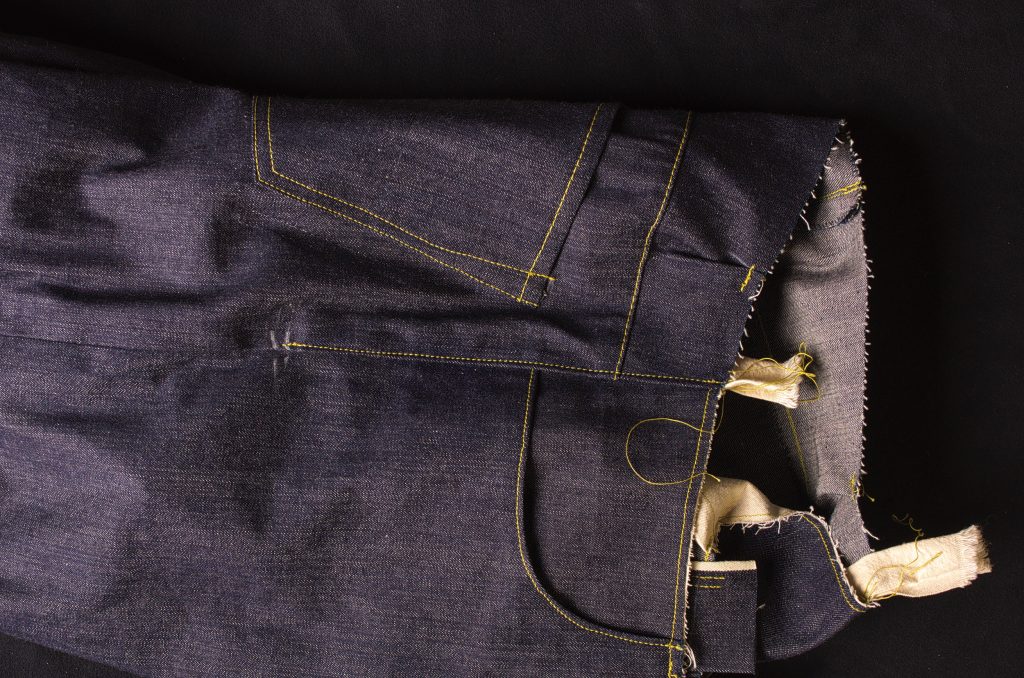
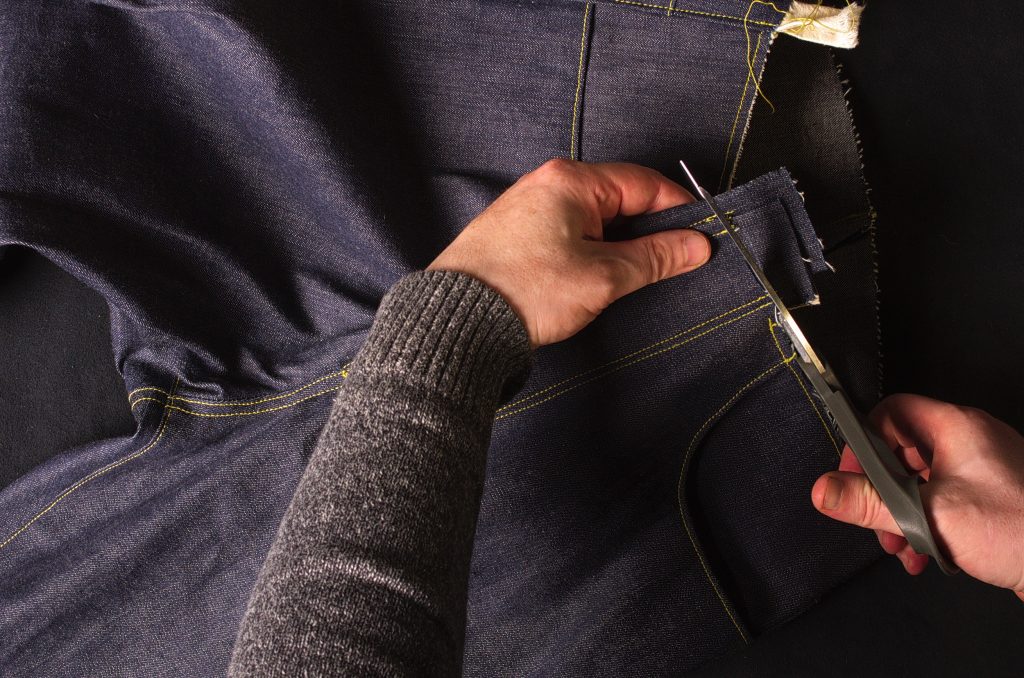
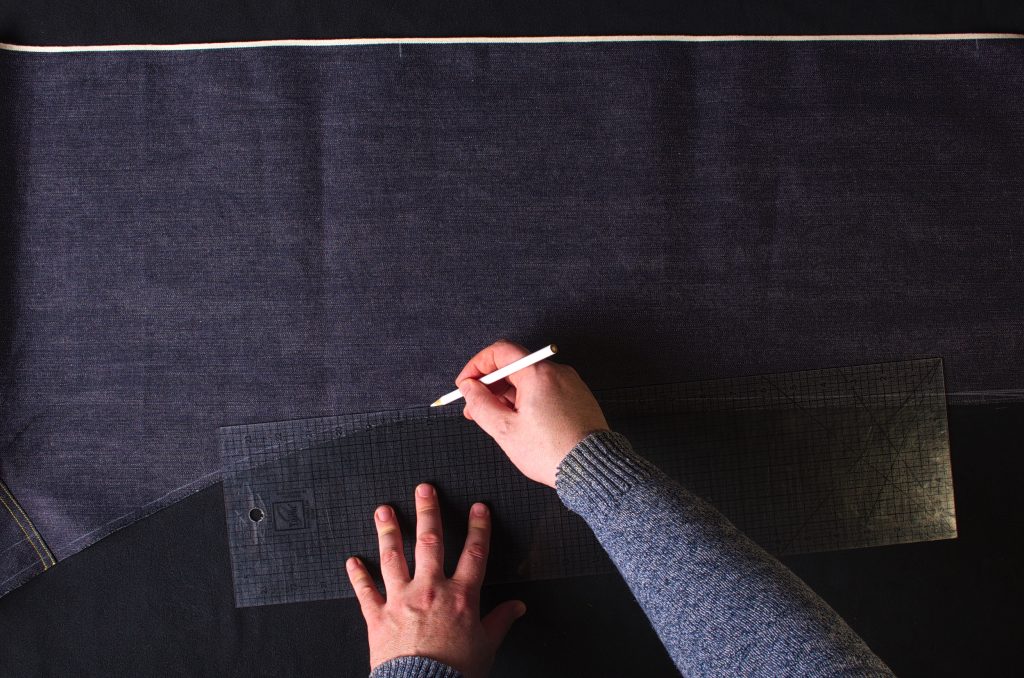
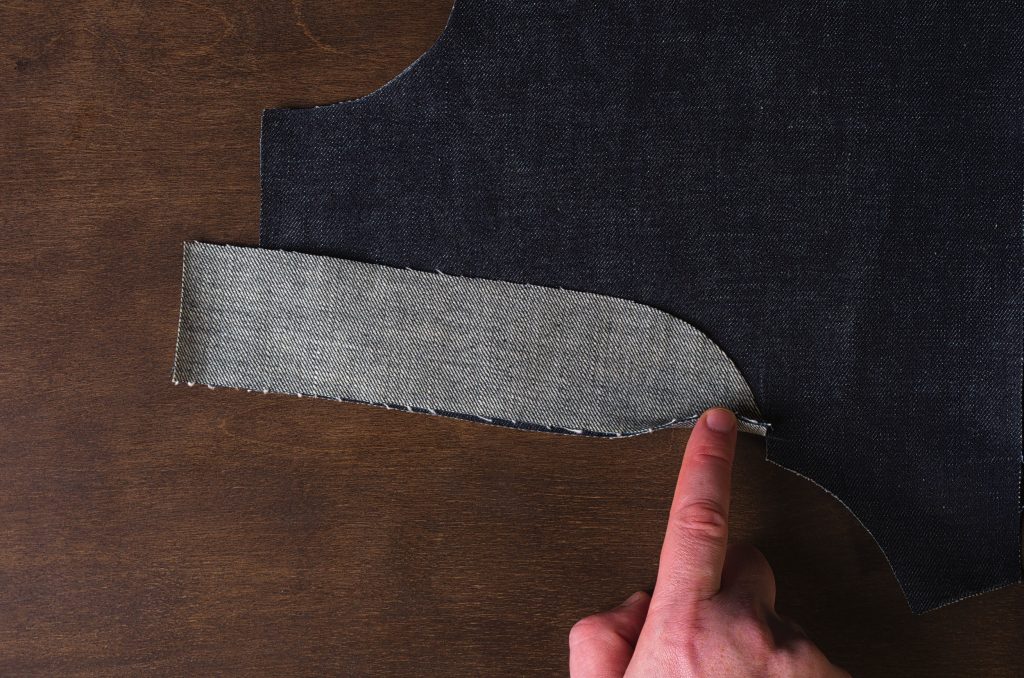
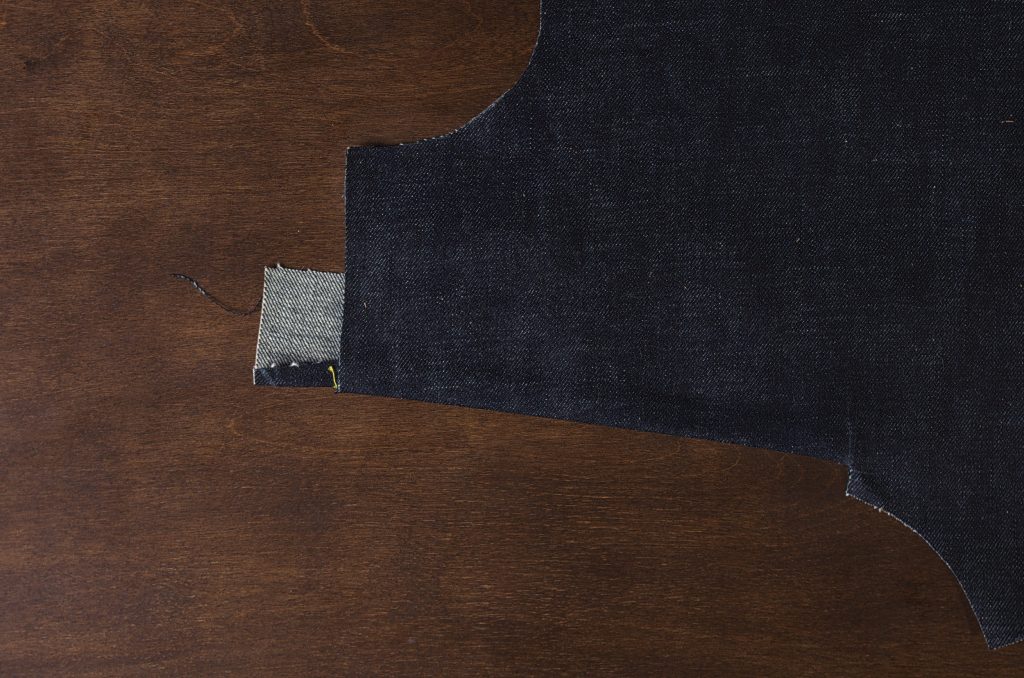
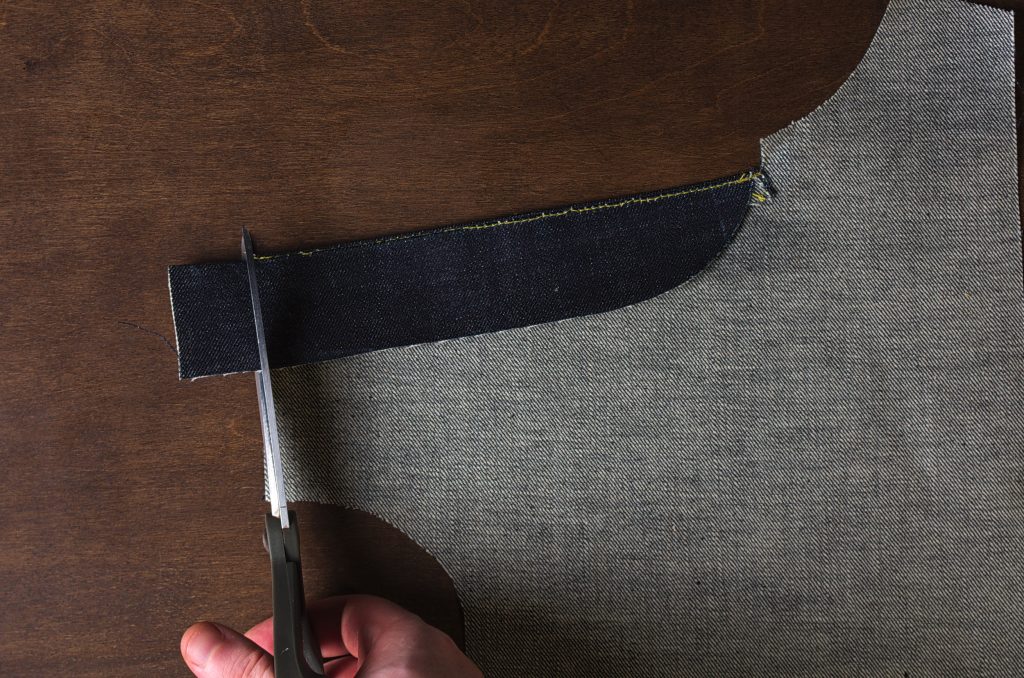
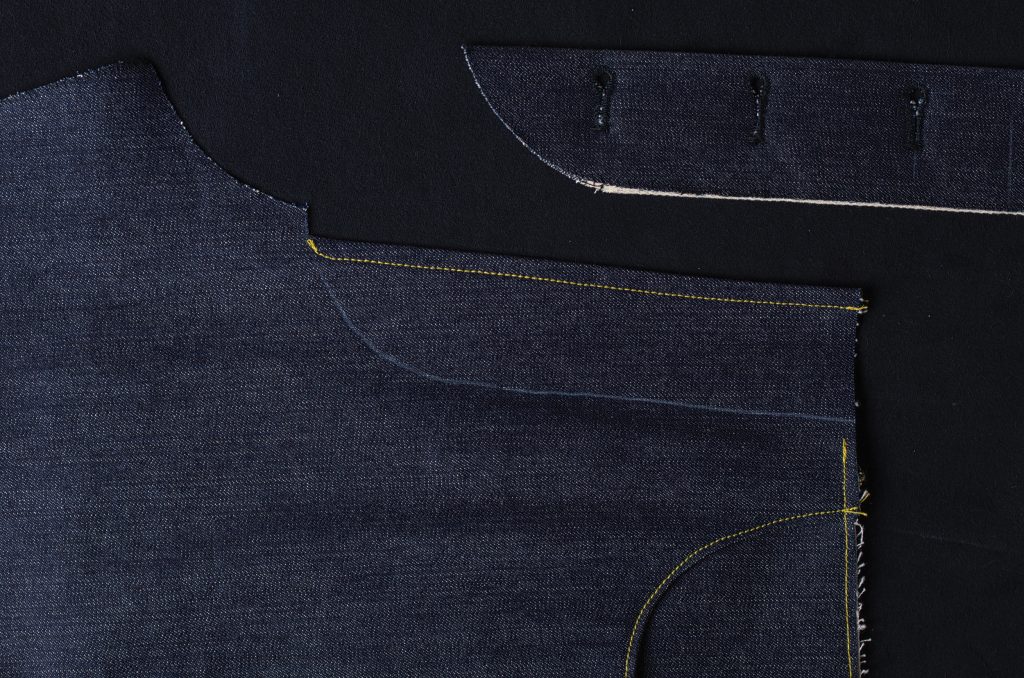
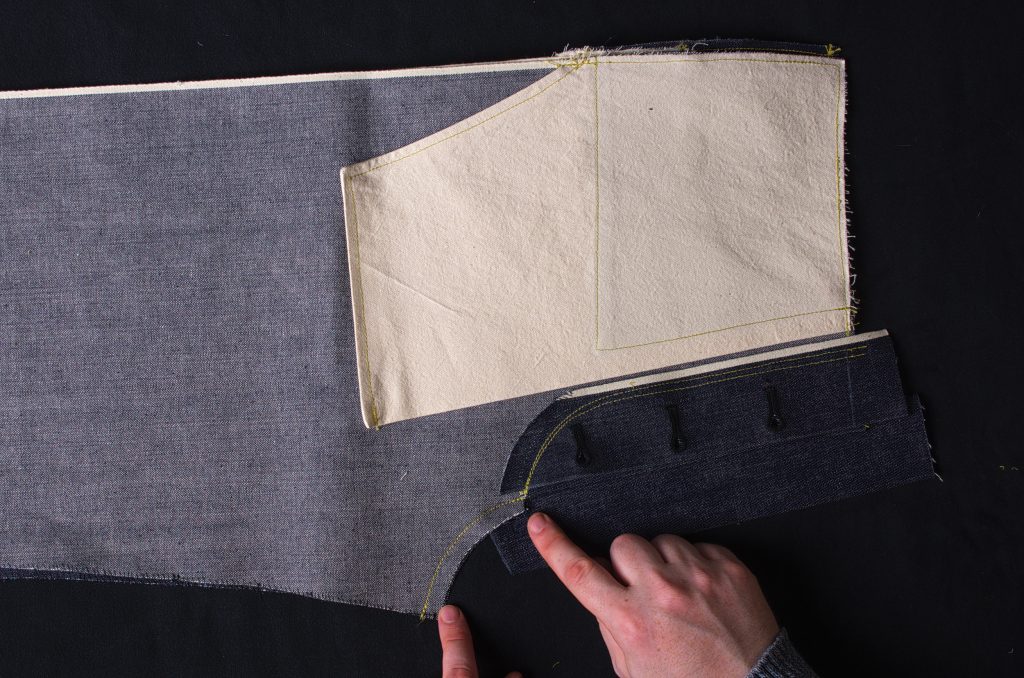
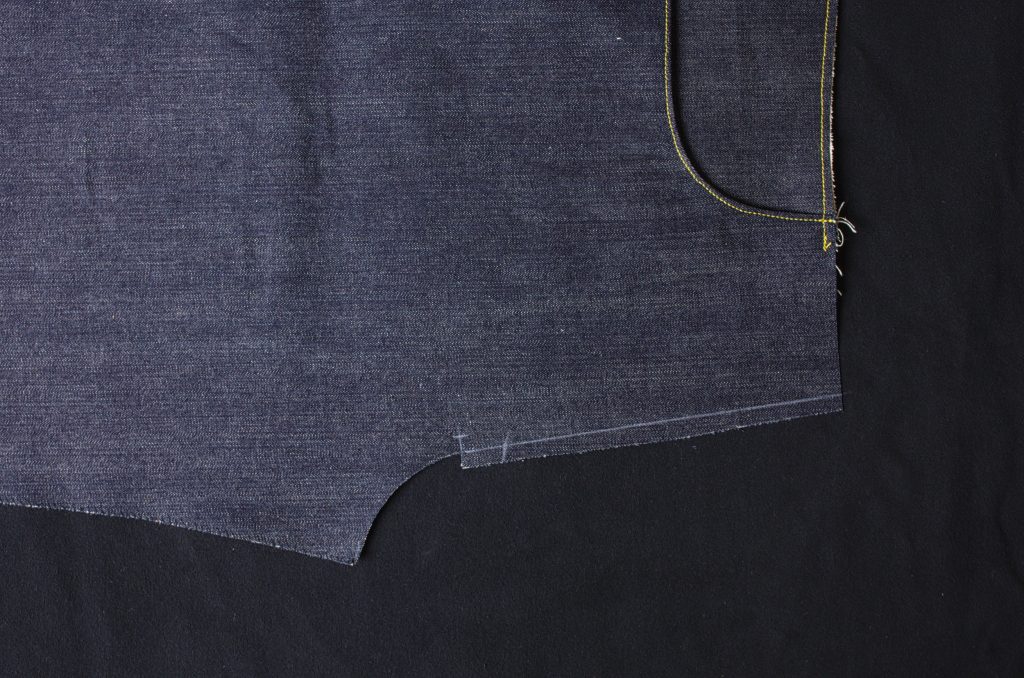
Moving on to the left side of the trouser, we’ll construct the buttonhole fly. Cut out a fly facing by laying your fly piece on a scrap of denim as shown, leaving an additional 3/8″ for a seam allowance along the straight edge (please ignore the extra chalk marks, had it backwards at first). Also add a 1″ inlay to the top of the fly facing.

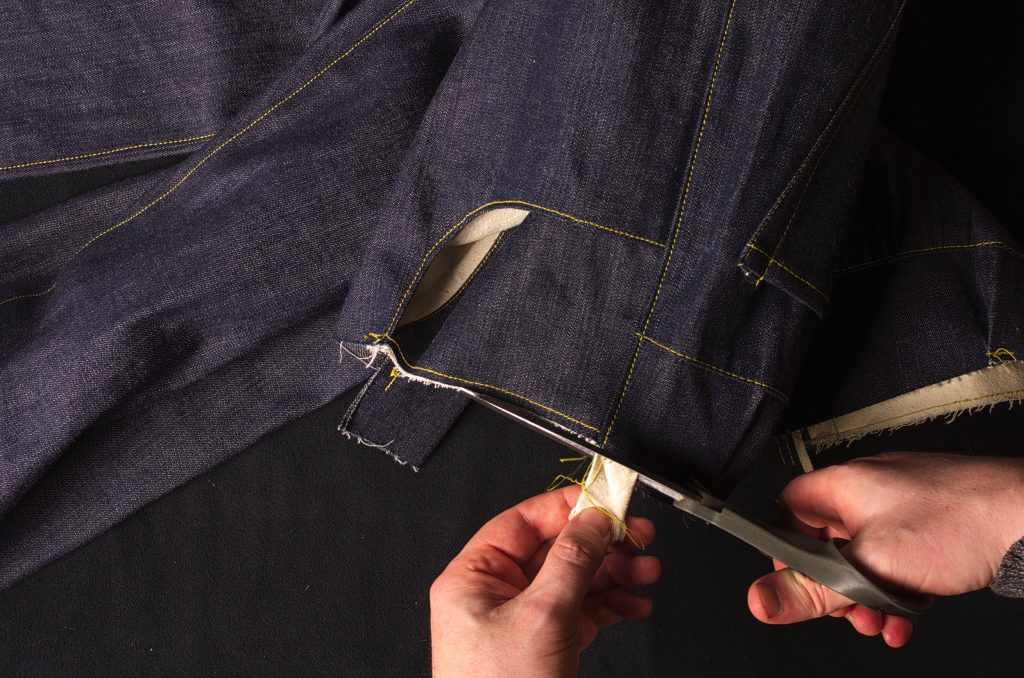
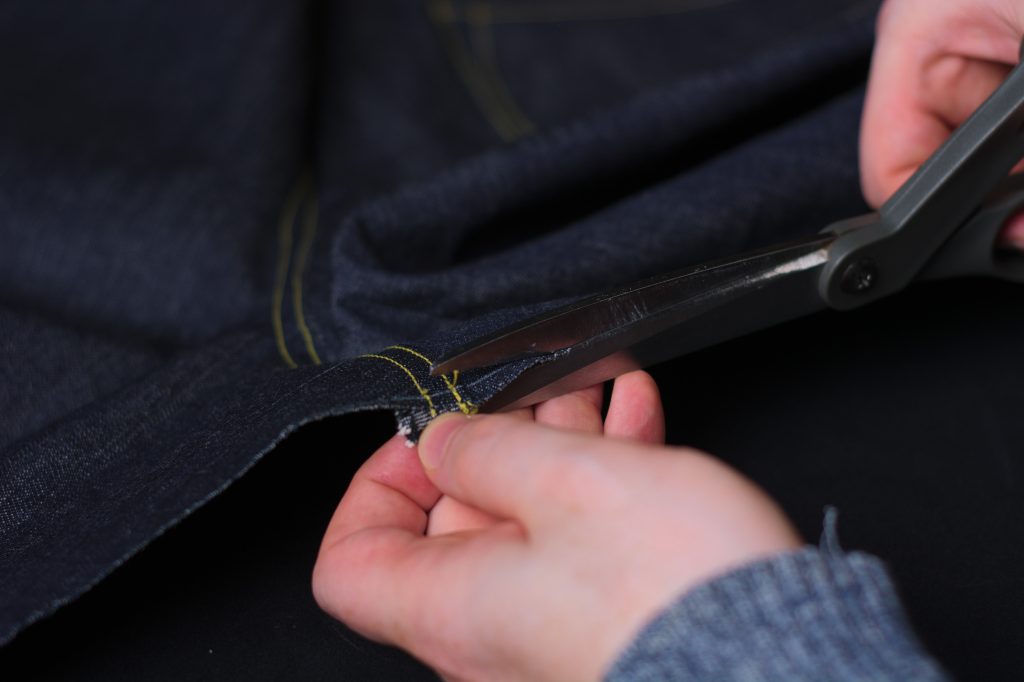
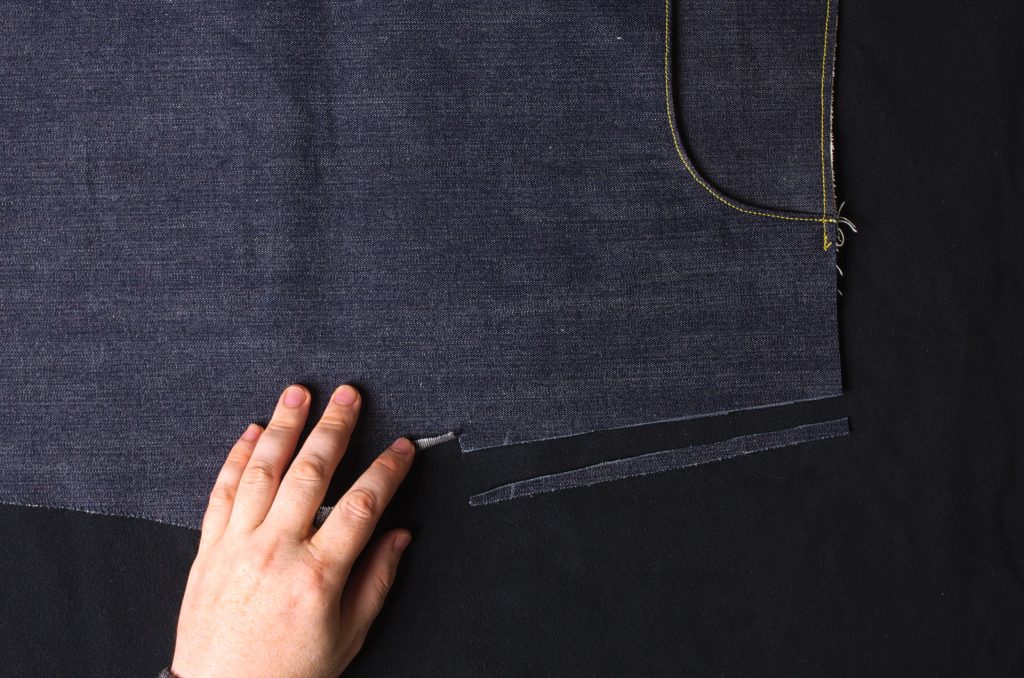
Cut off the 3/8″ wide fly extension on the left leg and snip 3/8″ at the bottom, as you did for the right side in the last step.
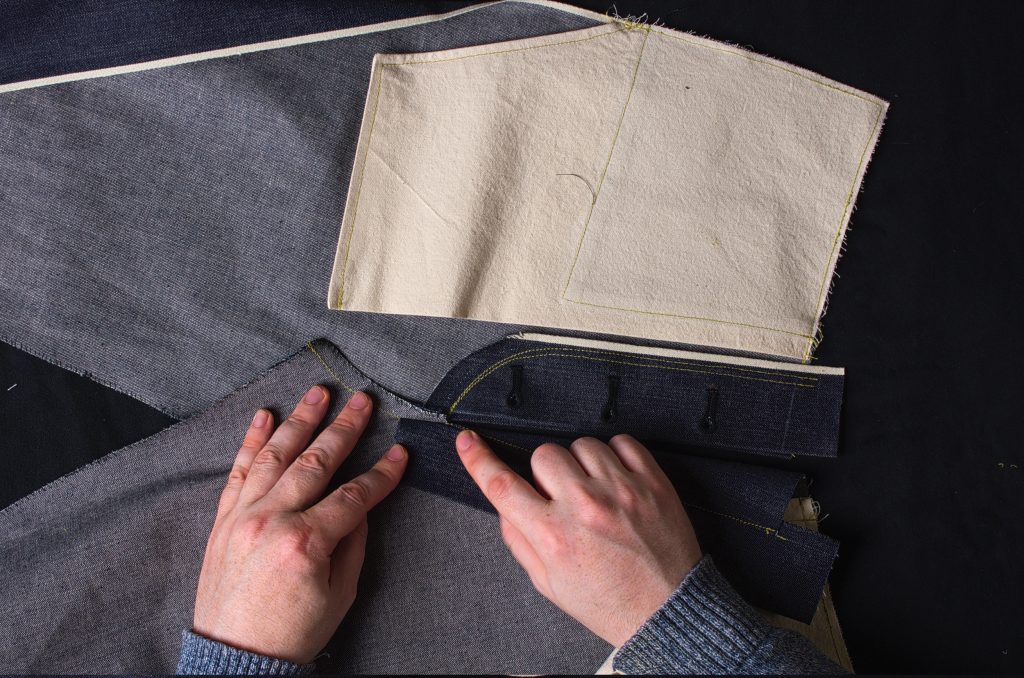
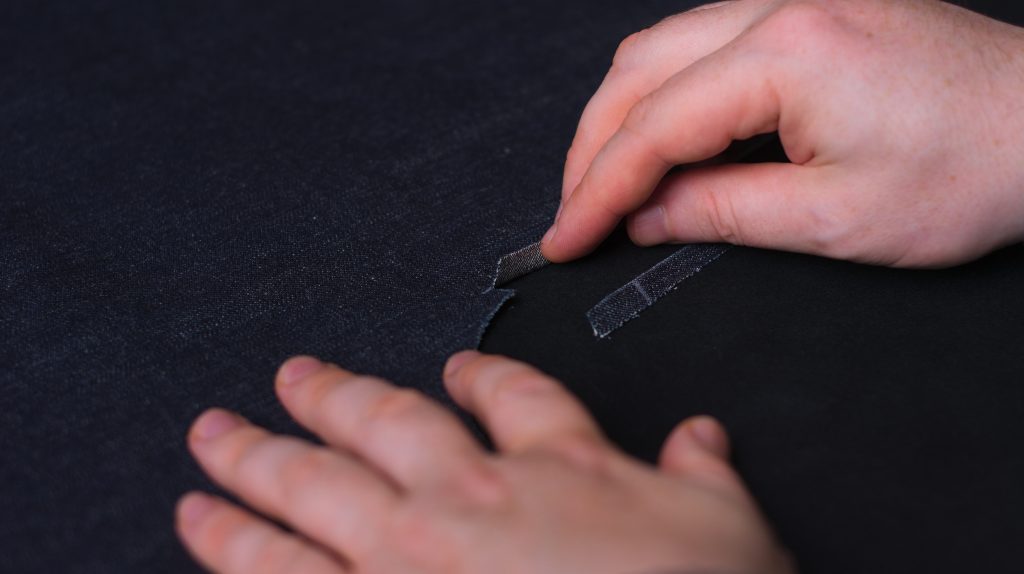
Lay the fly facing in position on the left leg, aligning the bottom edge with the cut.
Stitch from the waist to the cut using a 3/8″ seam allowance.
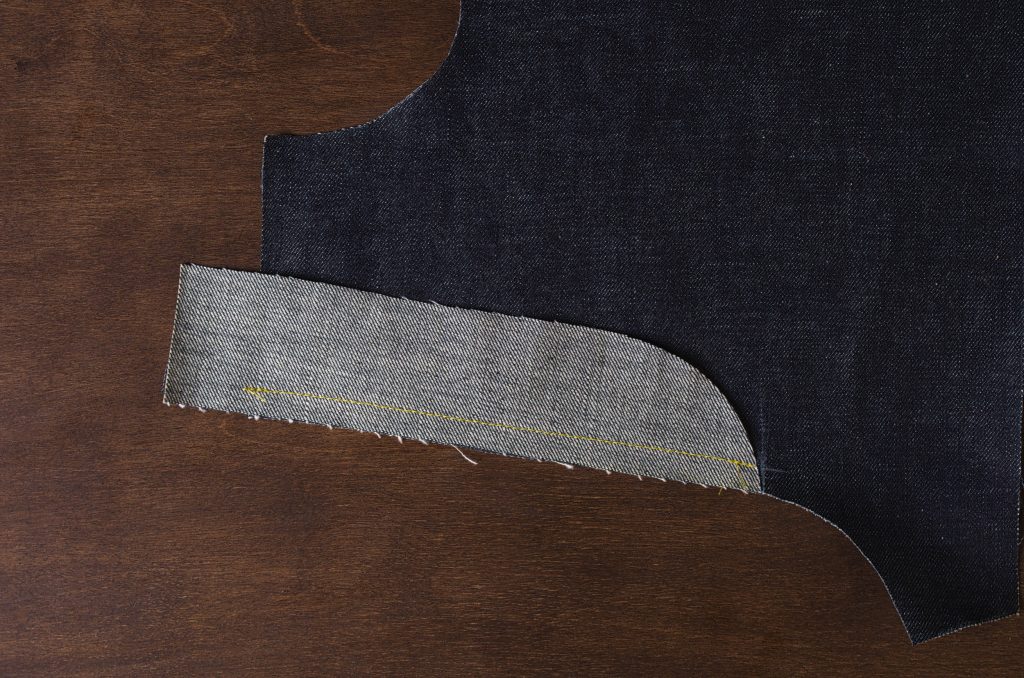
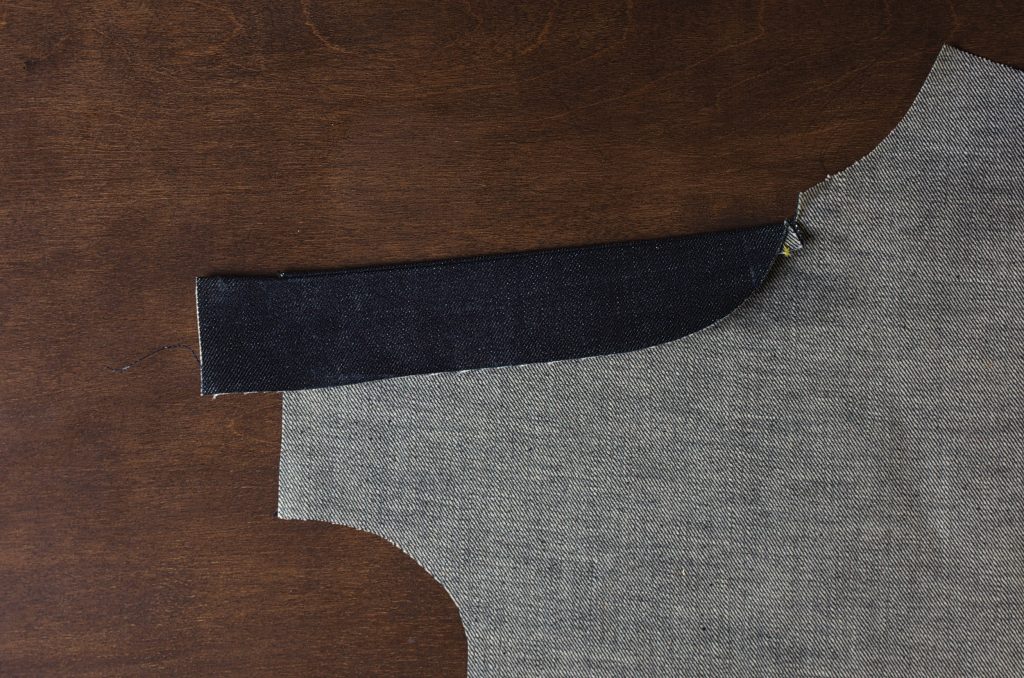
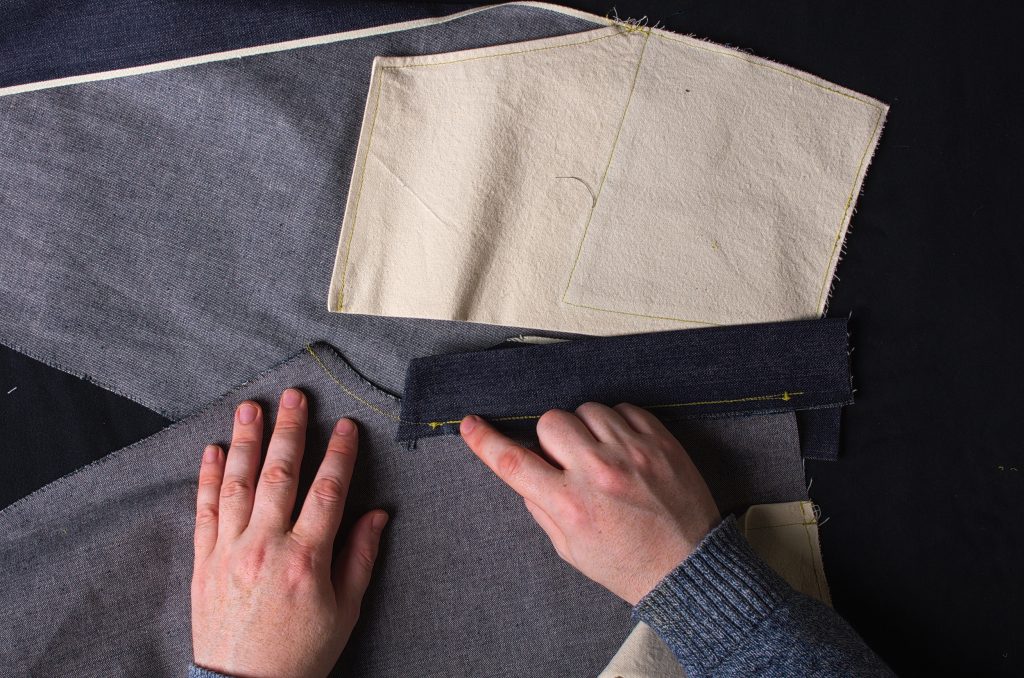
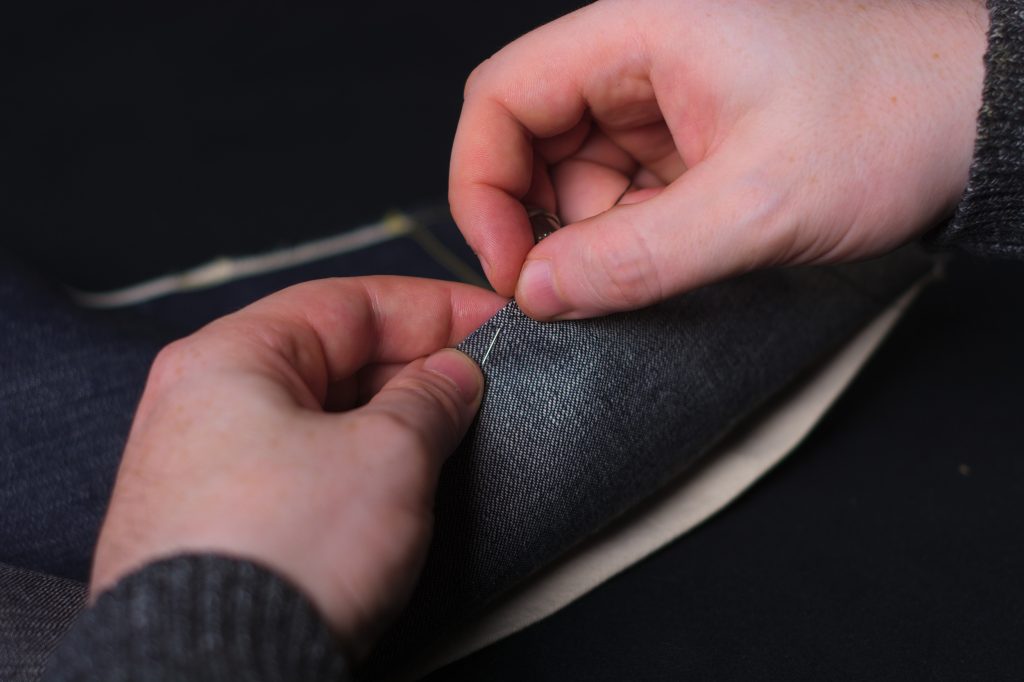
Press the fly facing and seam allowances away from the leg.
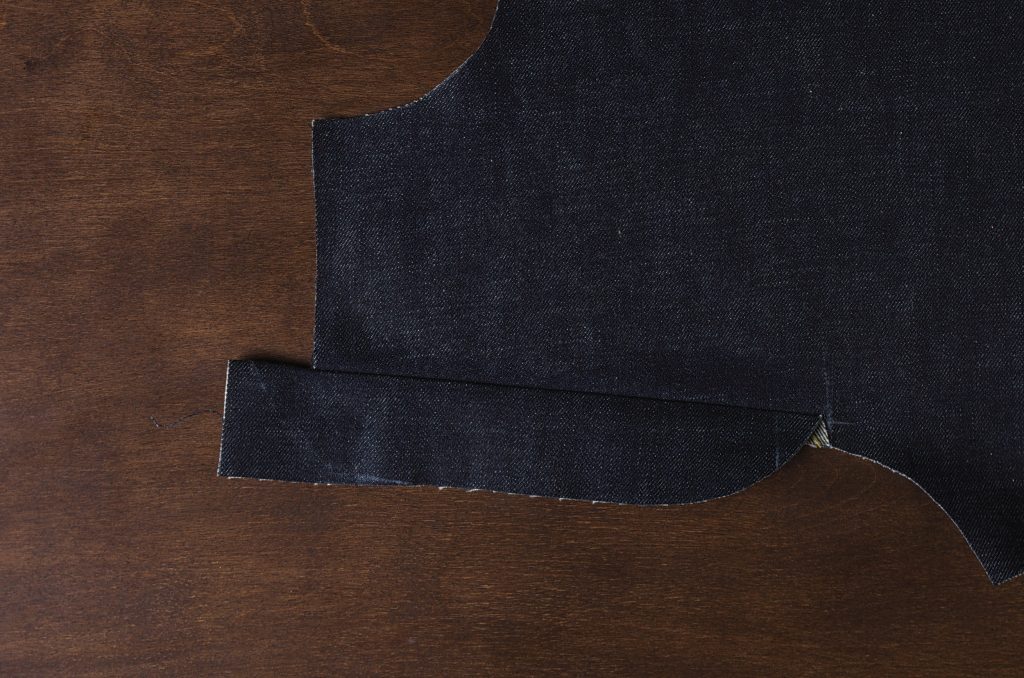
And then press the fly and seams under.
Set back the edge of the fly facing about 1/8″ to hide it from view. It’s possible that they also used a cut-on fly facing here – a facing cut as one piece with the leg and simply folded over. I’m going to investigate this aspect more and will update this in the future.
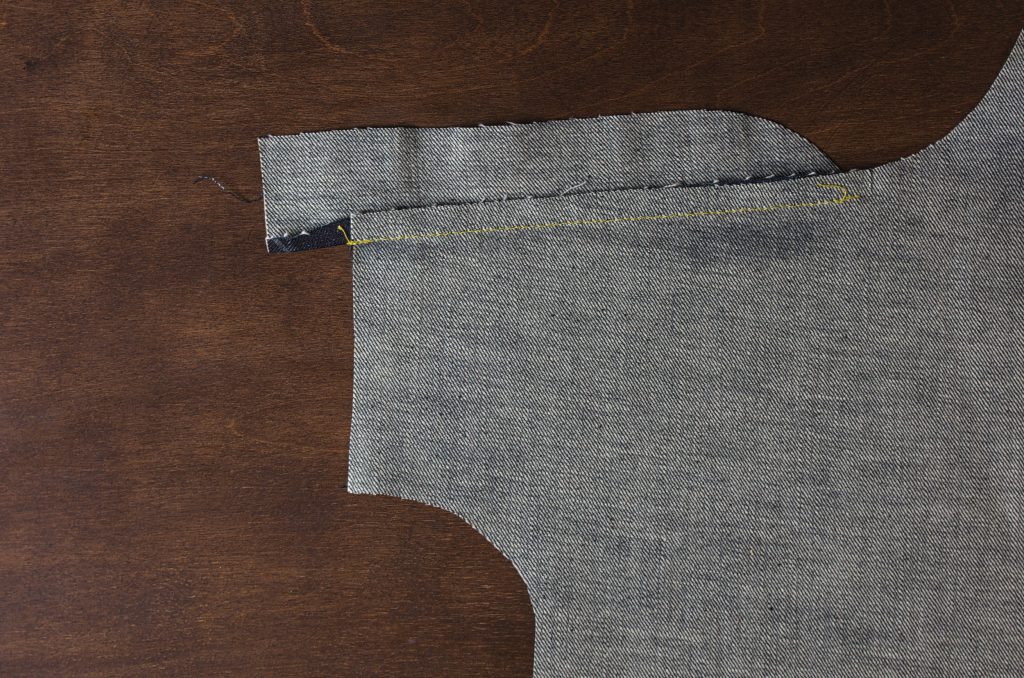
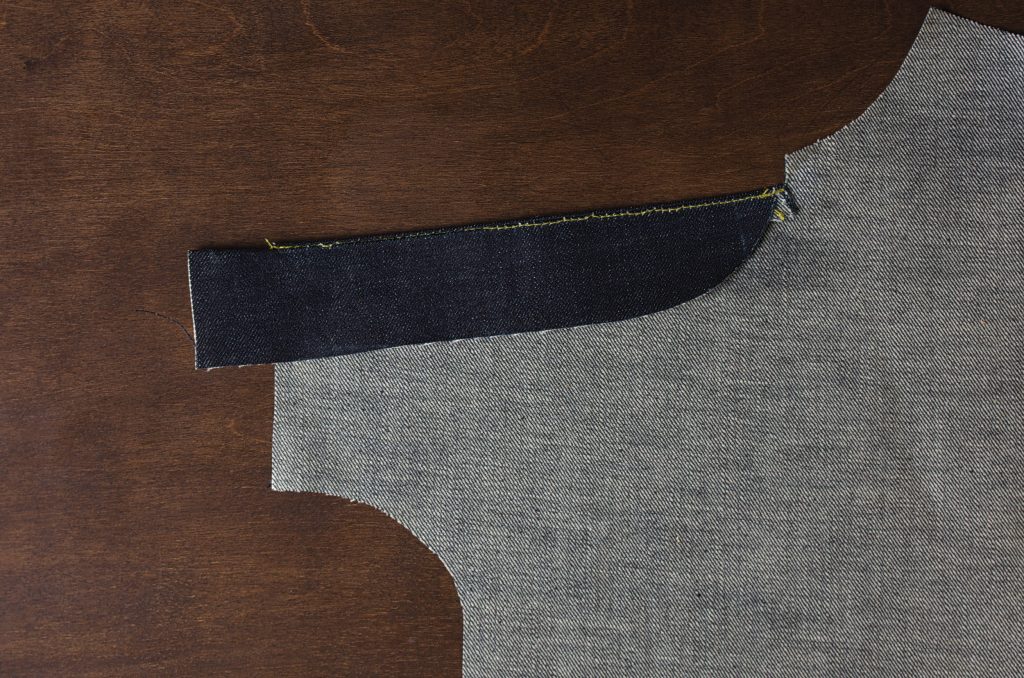
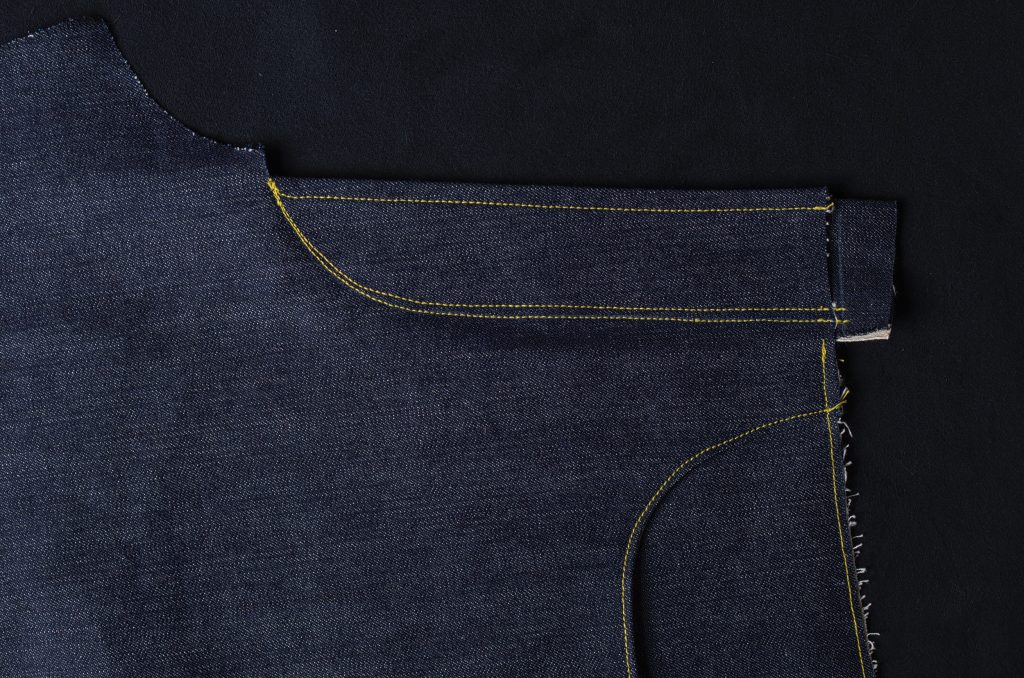
Now top stitch from the waist to the cut, about 1/8″ from the edge.
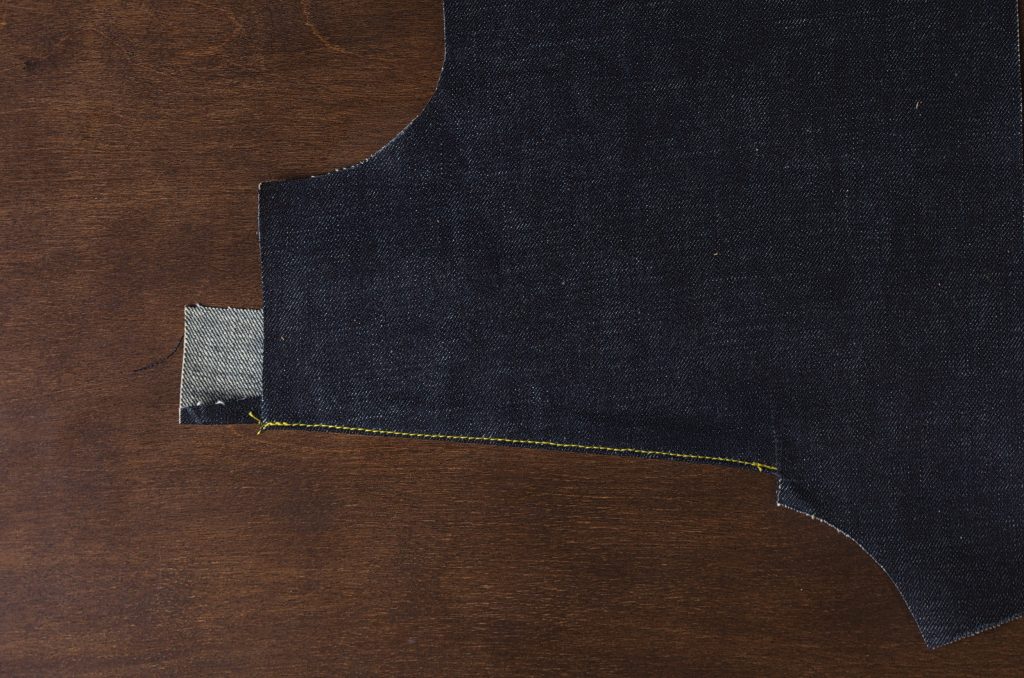
Here’s the view from the underside – my stitching ran off the folded edge and the tension was messed up. Sigh . . . fickle sewing machines!
Trim the fly facing flush with the waist (you should do this from the right side, much easier to see what you’re doing).
Here’s where you’d add on the button fly (shown right below this). I had made a small mistake on an earlier version and redid this section, but you may notice the top stitching is different in the following photos.

Button Fly
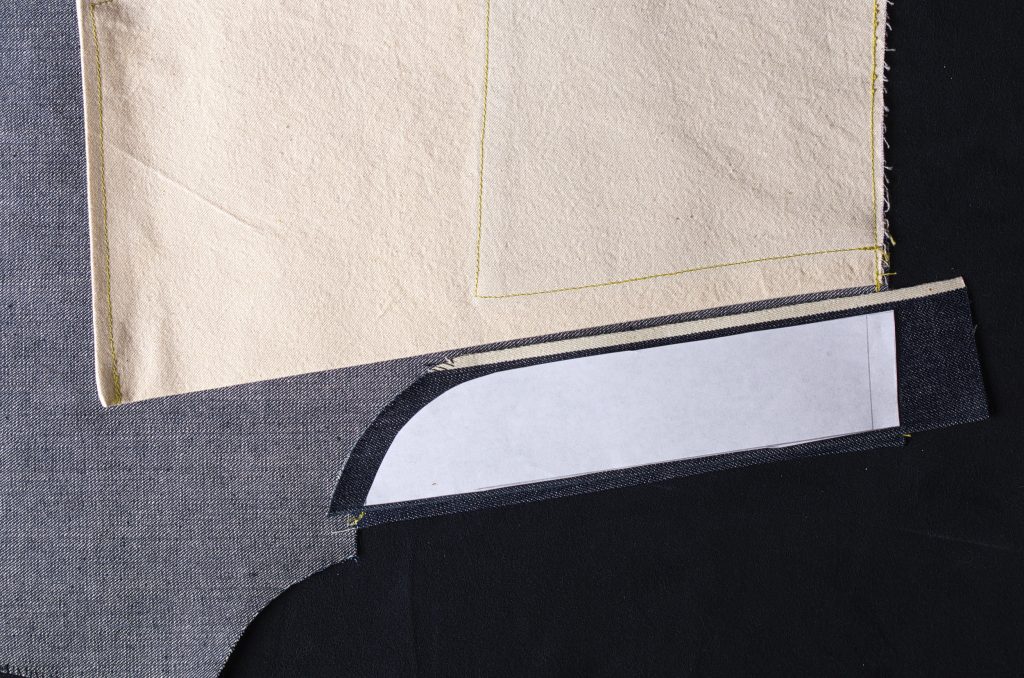
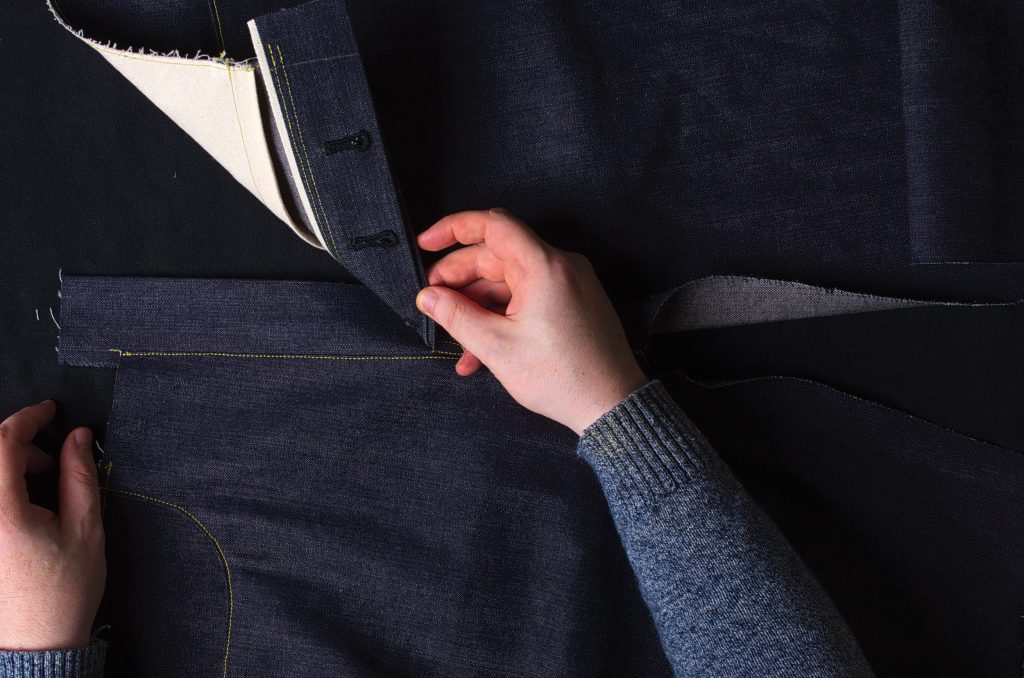
Turning to the wrong side of the left leg, align the button fly on top of the facing, setting it back from the edge about 1/8″, and lowering the bottom edge so it overlaps the cut by about 1/4″.
Add the paper pattern on top to get a feel for the positioning of the top stitches you’ll want in the next step.
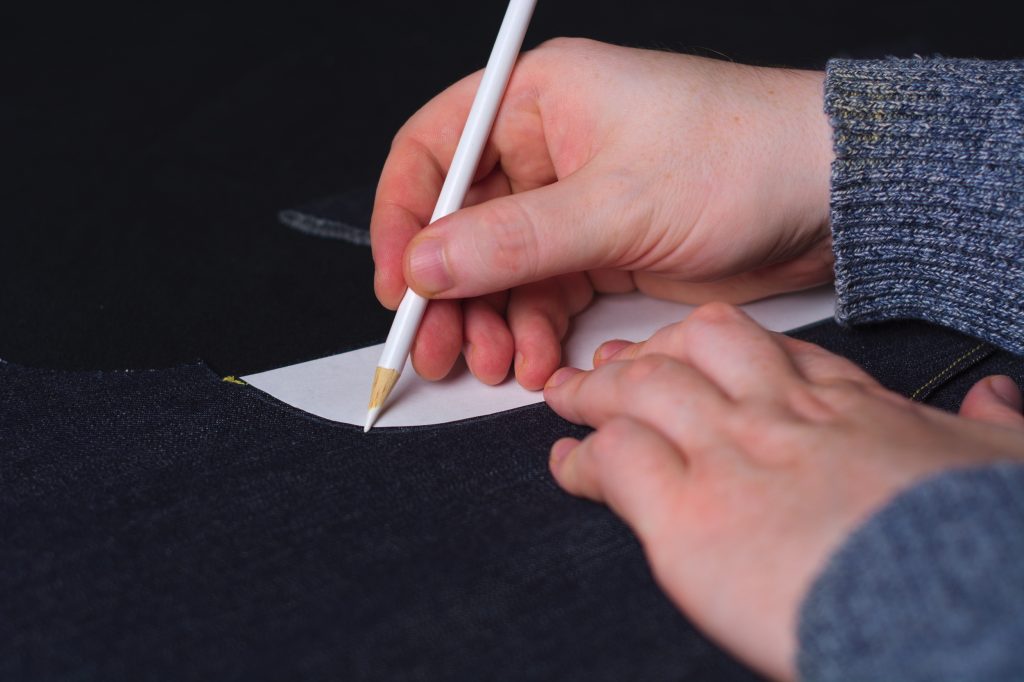
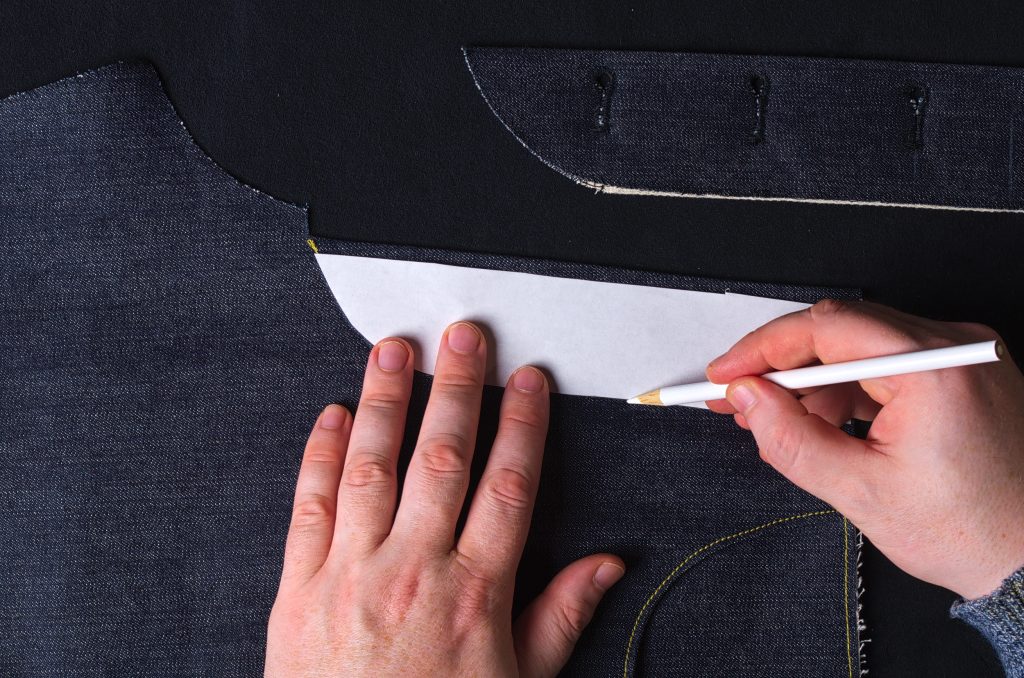
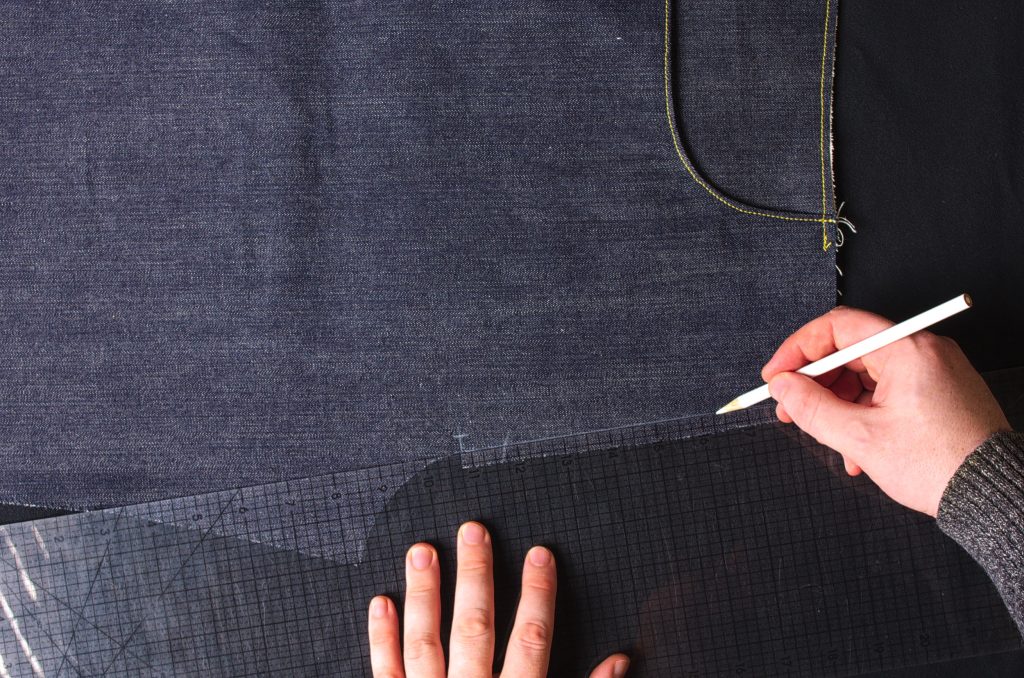
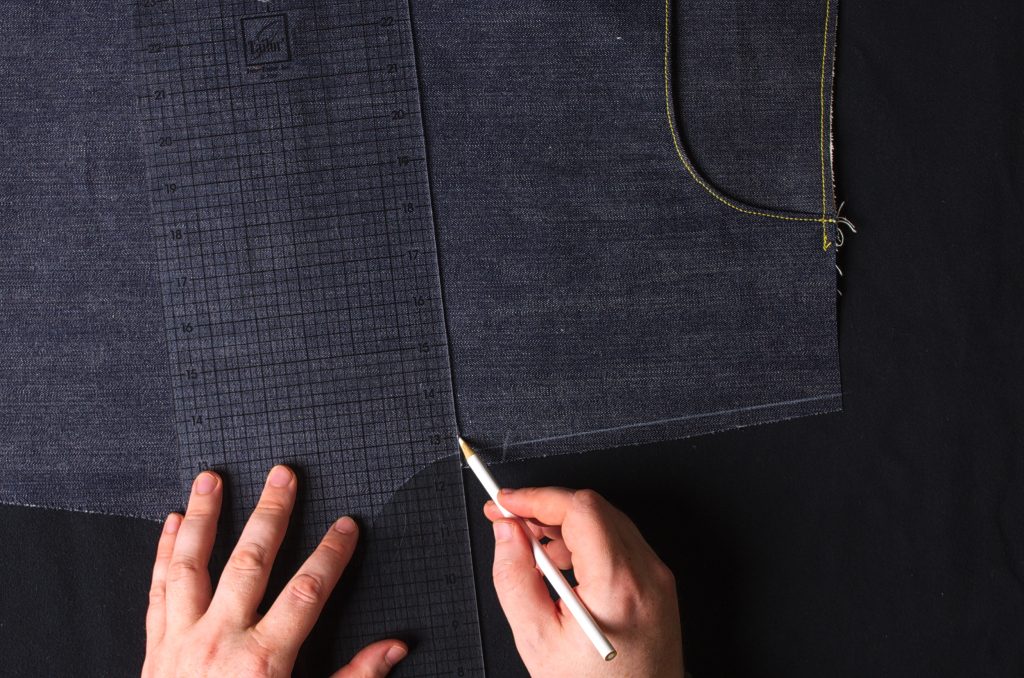
Turning to the right side, add the paper pattern into position so that the bottom edge is aligned with the snip, and that the pattern is set back at roughly the same distance as the previous step.
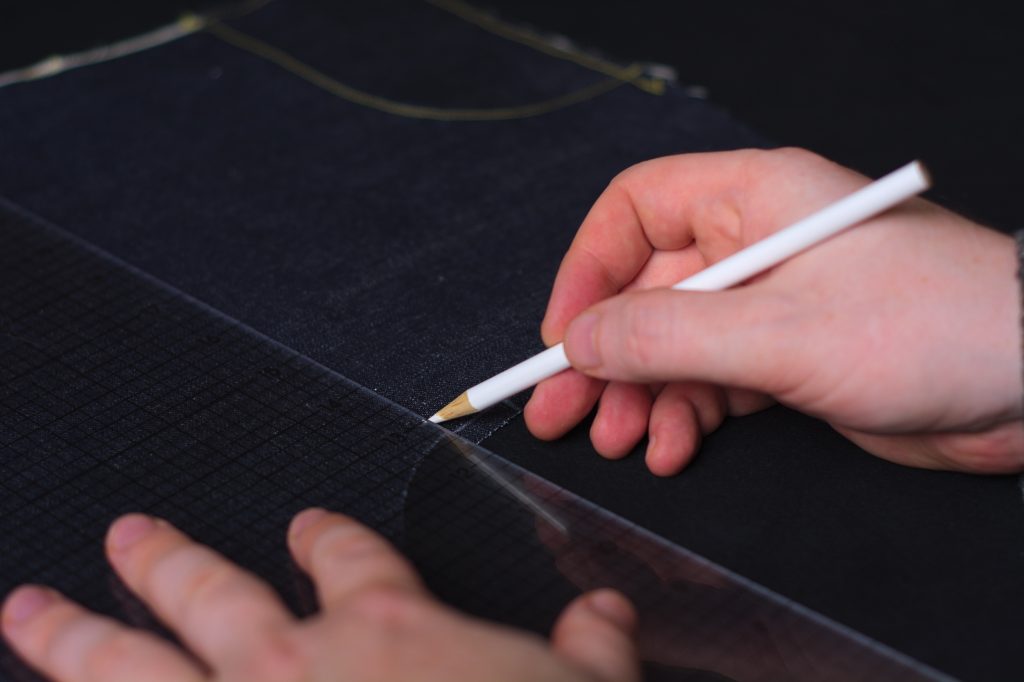
Trace around the outside curved edge of the fly pattern.
(Here’s that mistake I mentioned earlier with the top stitching – the top stitching should be closer to the edge, about 1/8″).
Now carefully place the button fly into position underneath the left leg. You can baste or pit it if you like, but it’s a good idea to learn to sew this without doing either – just be sure to check the alignment of everything as you sew.
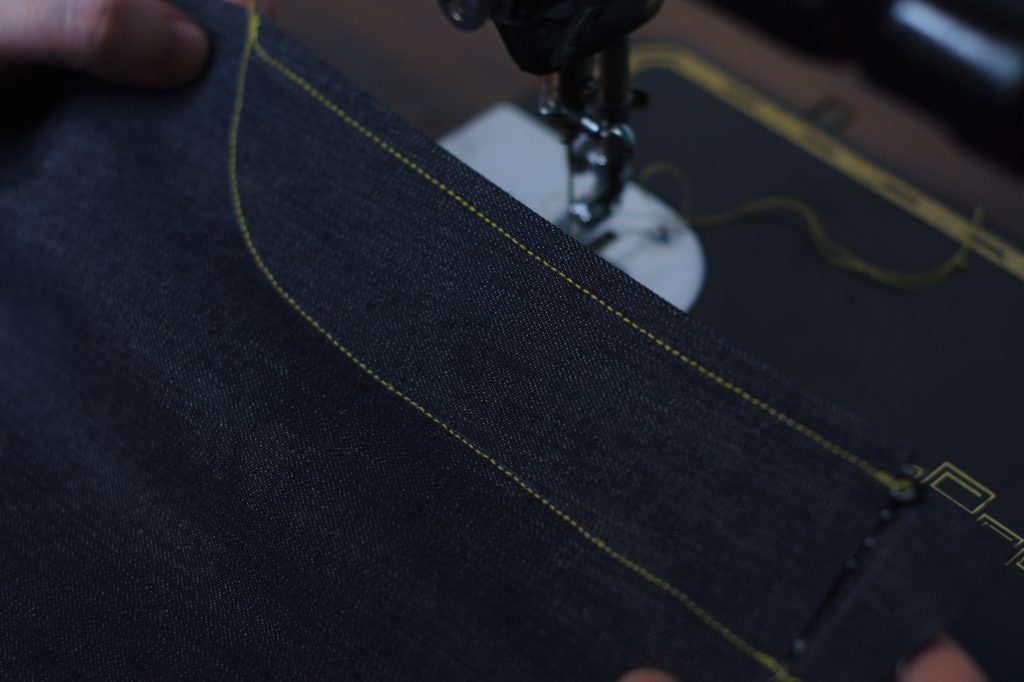
Top stitch first along the line you chalked, curving into the the snip you made. Then repeat just to the inside, about 1/8″ or slighly more apart, and sew a parallel row of stitching towards the snip. You can taper the curve in as shown, but I’m pretty sure the originals keep parallel the entire time and that I need to fix that.
After the first row of top stitching.
Joining the Front Legs
Now lay both legs right sides together, aligning the crotch points and the snips you made. Here are photos from both sides.
From the right leg side here the button catch has been folded back just to help show alignment.
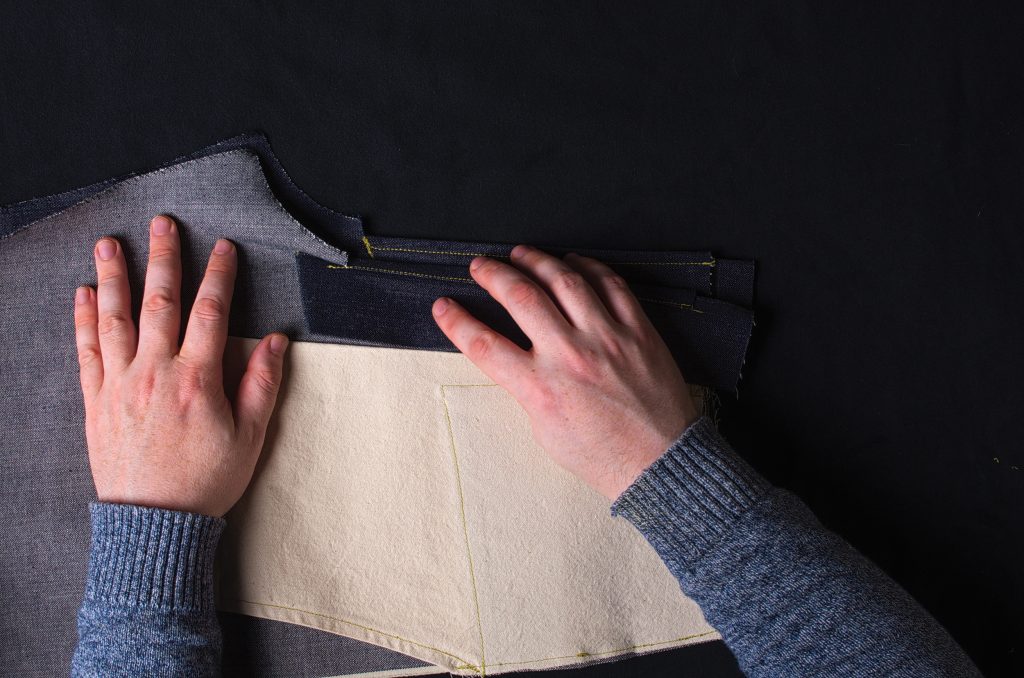
You actually want the button catch to be laying open as shown here with the left leg on top.

Sew from the snip at the bottom of the fly through both leg layers as well as the button catch underneath to the crotch point using a 3/8″ seam allowance. This will give some extra strength to the area after those snips that were cut in.
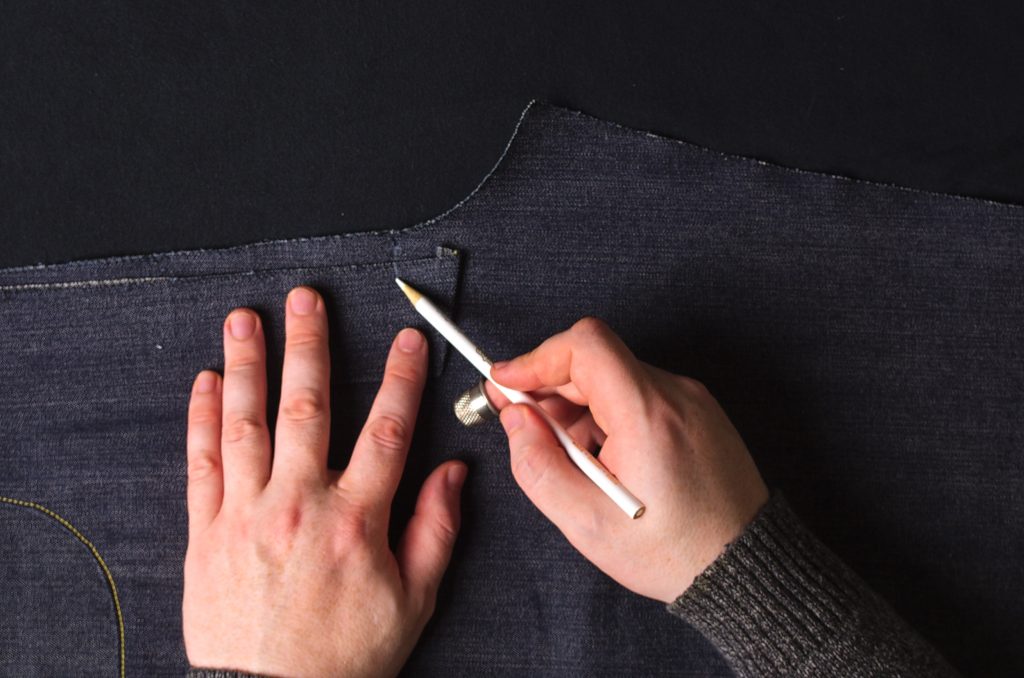
Now open up the legs to the right side. At the bottom of the fly, make a line across the fly about 1″ from the bottom. Then mark a point on that line about 1/2″ away from the edge of the fly (those three little marks you see in the photo, I couldn’t make up my mind).
From the inside of the legs, here’s what it should look like (the button extension is folded back just to show). Make sure everything looks aligned properly.
Fold the button extension into place. Note how the crotch seam allowances all go towards the left leg, naturally.
From the right side, beginning at the crotch point next to the folded edge of the seam, top stitch through all layers along the folded edge, up to the horizontal line, over that 1/2″, and taper back down into the other side of the seam, about 3/8″ or so from the original stitch line.
As you’re sewing, be sure all of the seam allowances are pointing in the correct direction, and that nothing else gets caught under your stitching.

Here’s the result from the wrong side. You can see how the crotch seam allowance was just caught by both rows of stitching.

And with that, your fly is complete!
1873 Button Fly – Part I
The following are instructions for the 1873 fly. This two piece fly is also appropriate for modern jeans, and is typically what you see on most button fly jeans made today. The main weakness of this method is having to clip the seam allowance on both front legs, though the construction does reinforce that.
Begin by marking a line 3/8″ from the edge of the fly extension on the right leg.
Also mark 3/8″ from the bottom of the fly extension.
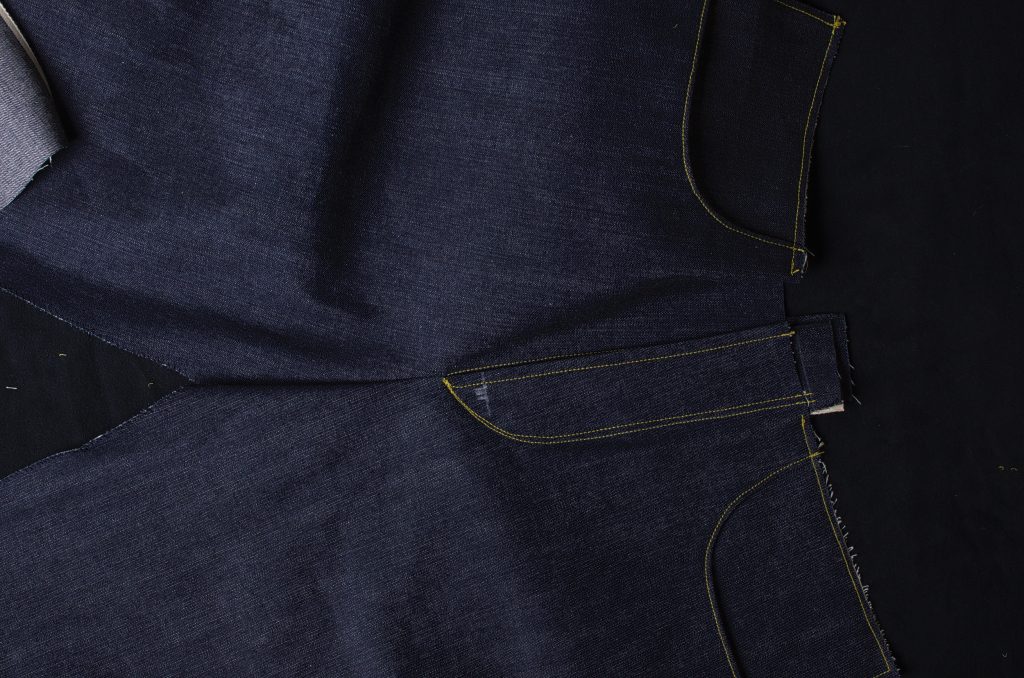
Here’s what it should look like so far.
Now trim off the fly extension, and then clip 3/8″ to the mark at the bottom as shown.
Now overcast the raw edges along the entire length of the left fly from the waist to the crotch point. I like to stop and start a new thread at the cut just so there’s no interference or weak points for the thread to break.

The Button Extension
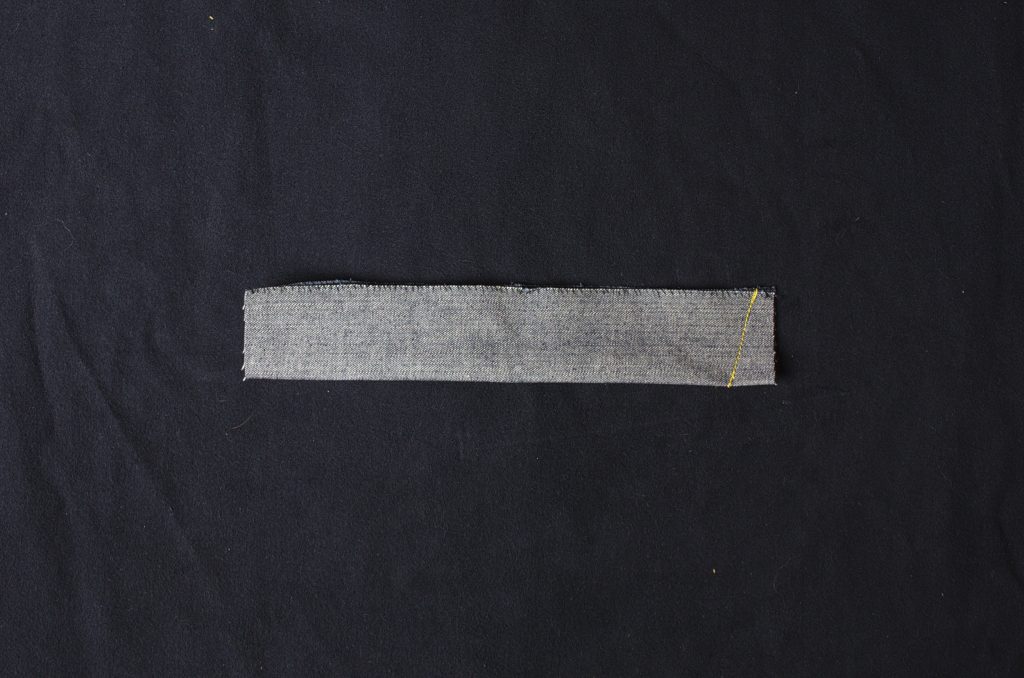
Cut out a rectangular piece of denim 4 1/4″ wide, by about 3″ longer than the fly extension. The width comes from the 1 3/4″ width of the fly, two times, plus two 3/8″ seam allowances.
Overcast the long edges.
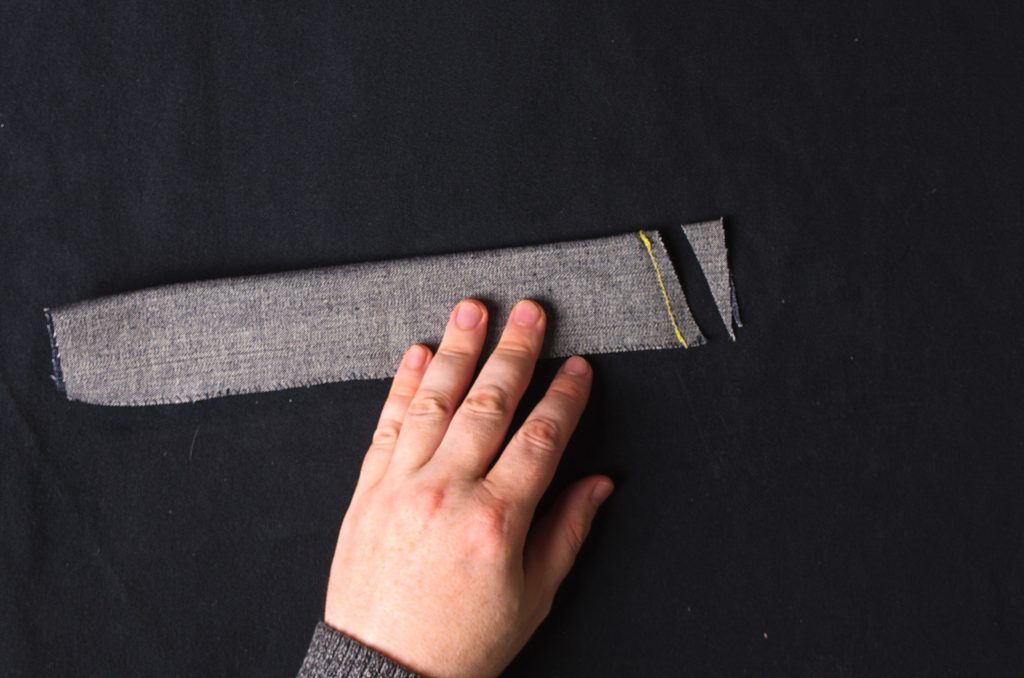
Fold the button extension in half lengthwise, right sides together. At one end (either side works I think), about 1/2″ from the bottom, draw a line at about 30 degrees, sloping towards the folded edge as shown.
Sew along the line you just made.

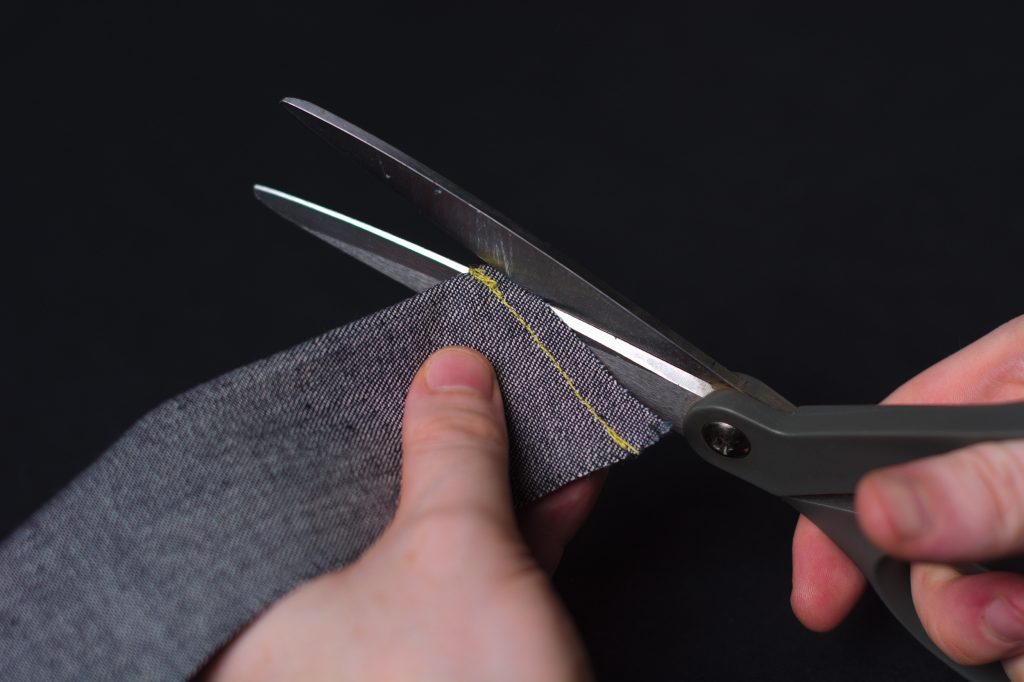
Trim the seam allowance down to 1/4″.
And then taper the seam allowance to within about 1/8″ from the seam at the folded edge.
Turn the button extension right sides out, using a point pressing tool to get a nice crisp corner.
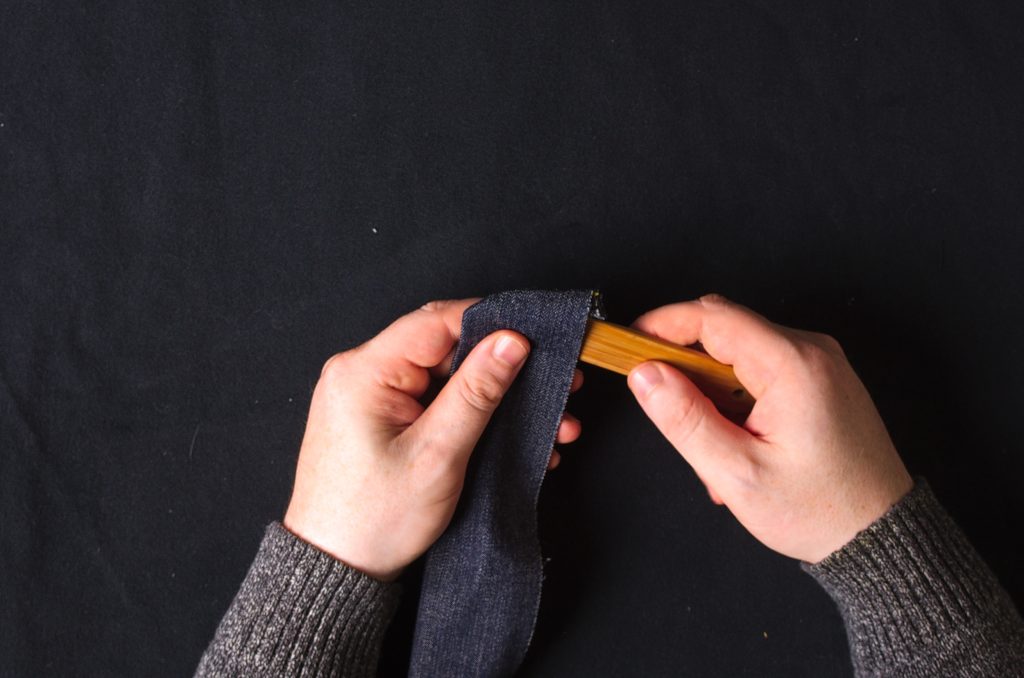
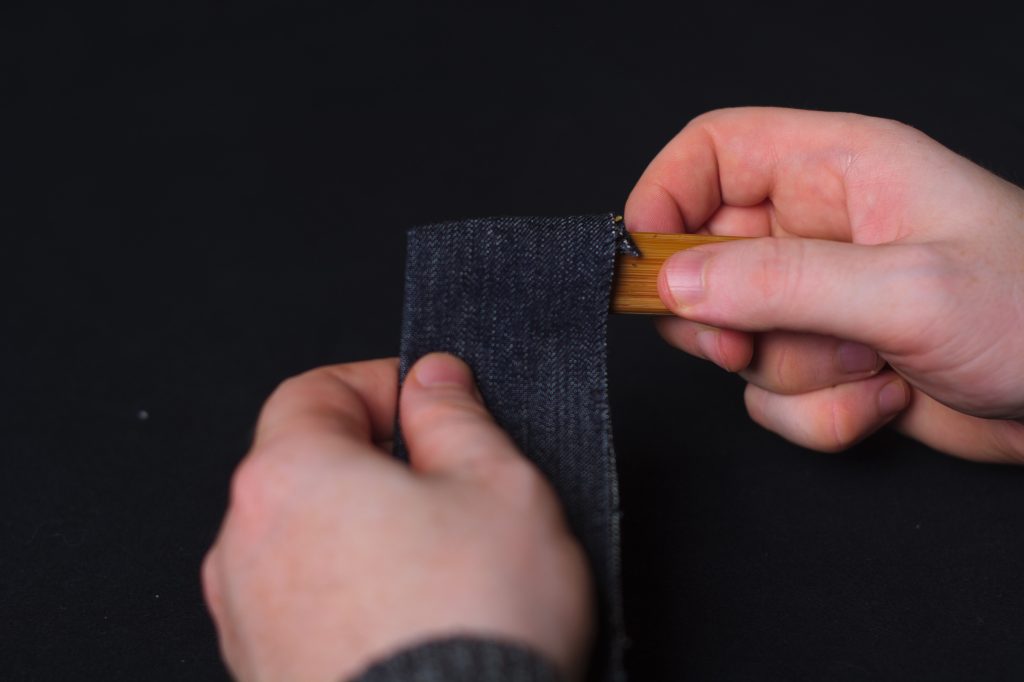
Press the button extension firmly, keeping the cut edges aligned.
Lay the button extension on the right trouser leg, aligning the three raw edges. Make a mark about 1″ from the bottom of the button extension. Line this mark up with the clipped seam you made earlier.

Sew the button extension to the right leg using a 3/8″ seam allowance, from the waist to the bottom cut. Sorry I forgot to take a photo of this!
Open up the button extension and press all of the seams towards the pocket. The seam allowance in the curved area should be kept flat, below the button extension.
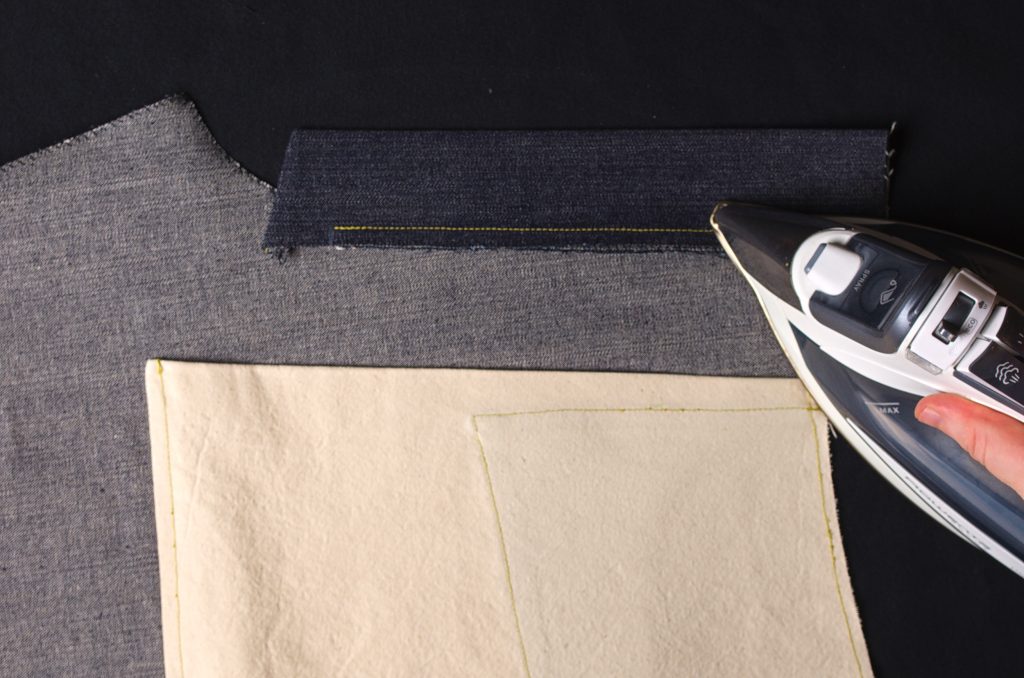
Here’s what it looks like from the right side.
Now top stitch the button extension just on the leg side of the seam through all layers. This holds all the seam allowances in place. Begin at the waist seam.
Continue sewing towards the bottom cut.

When you get to the bottom cut area, fold the curved section out of the way and continue the stitching for another 1/2″ or so. This keeps the end of the stitching hidden as well as provides just a little more strength I think.
Here are the results so far.

Working the Buttonholes
With the gimp attached, we can move on to the actual buttonhole stitch. The stitch isn’t technically hard, but it does take some practice to get a feel for it and get the correct spacing and such. The original 1873 buttonholes were definitely not this good so don’t worry if yours are not perfect yet either.
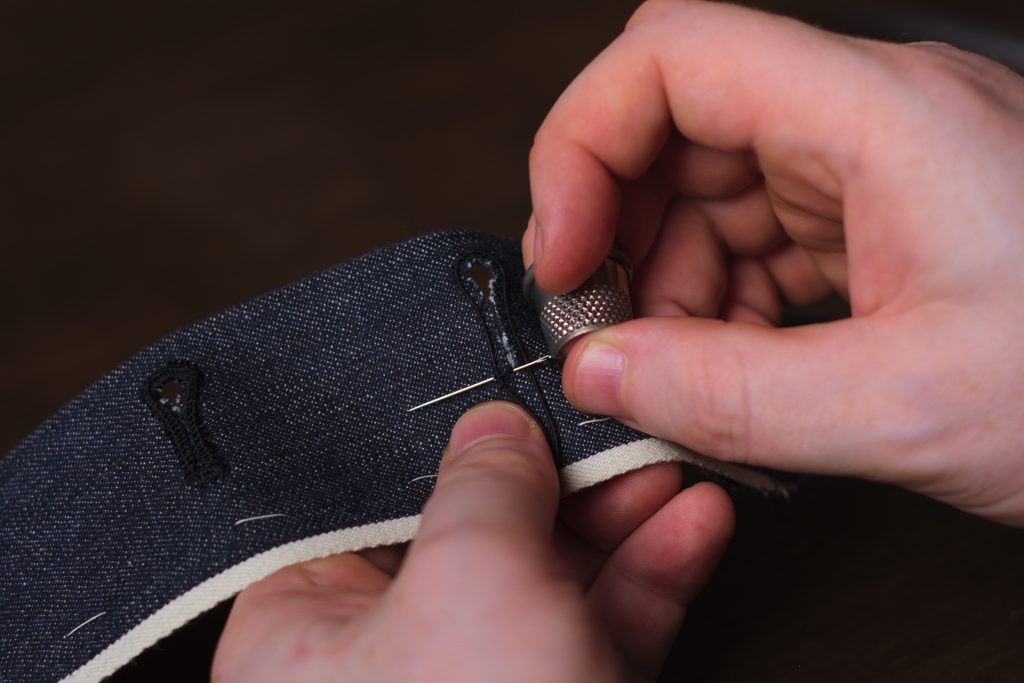
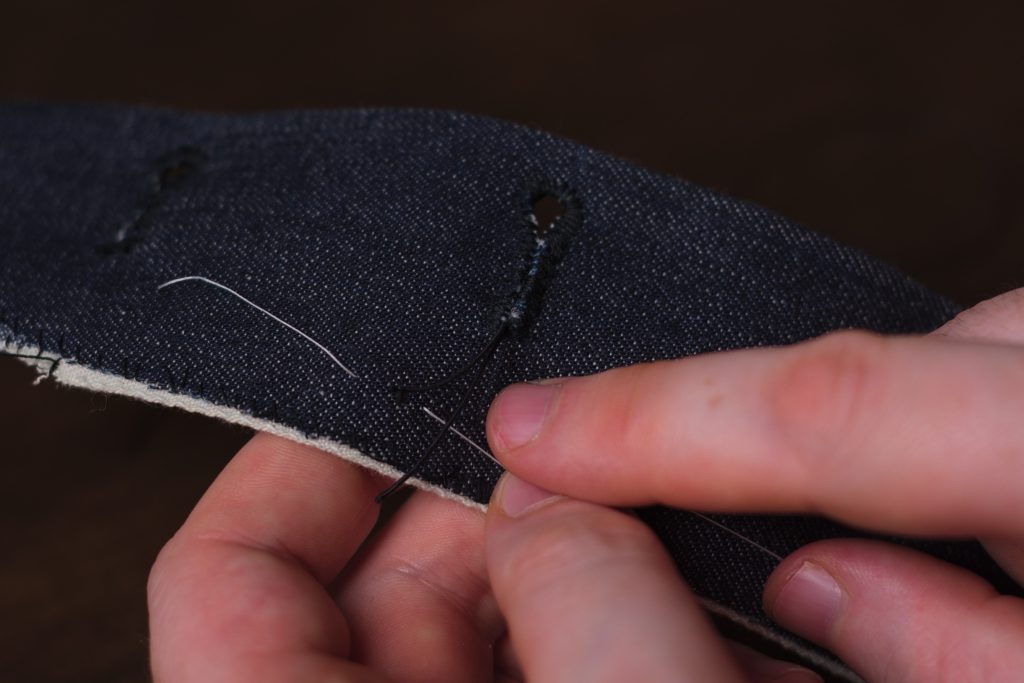
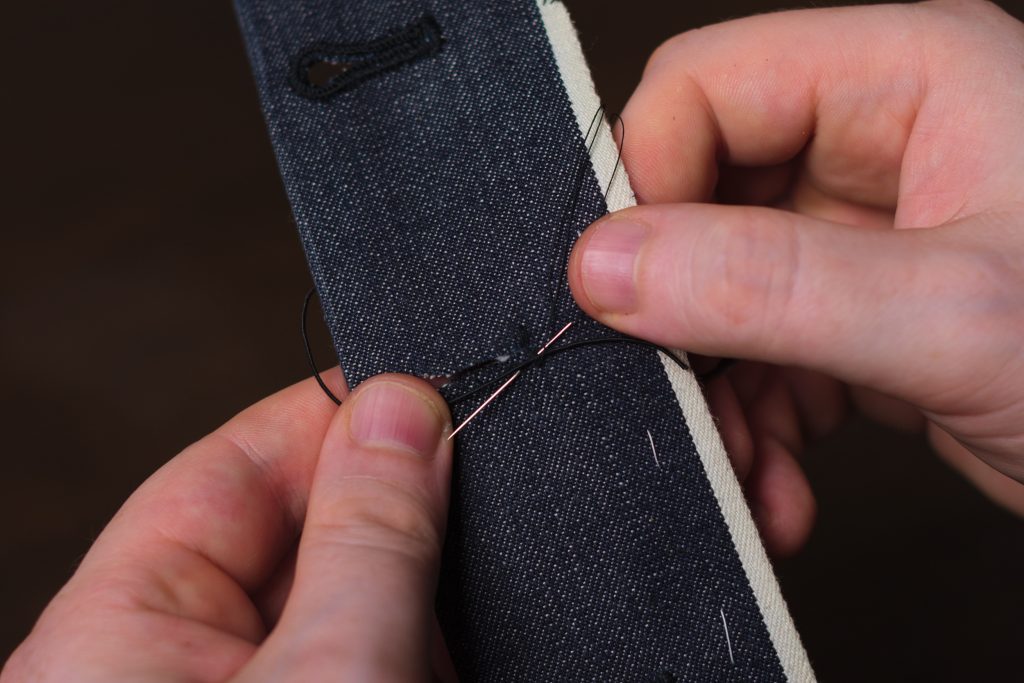
Begin by taking a strand of waxed silk buttonhole twist, about 1 yard long. Knot one end, and pass the needle in between the two layers at the end of the buttonhole, poking your needle out just beyond the gimp.
Going through the center of the buttonhole this time, make a stitch through all layers, the needle coming through just next to the original stitch. Don’t pull the needle all the way out, yet.

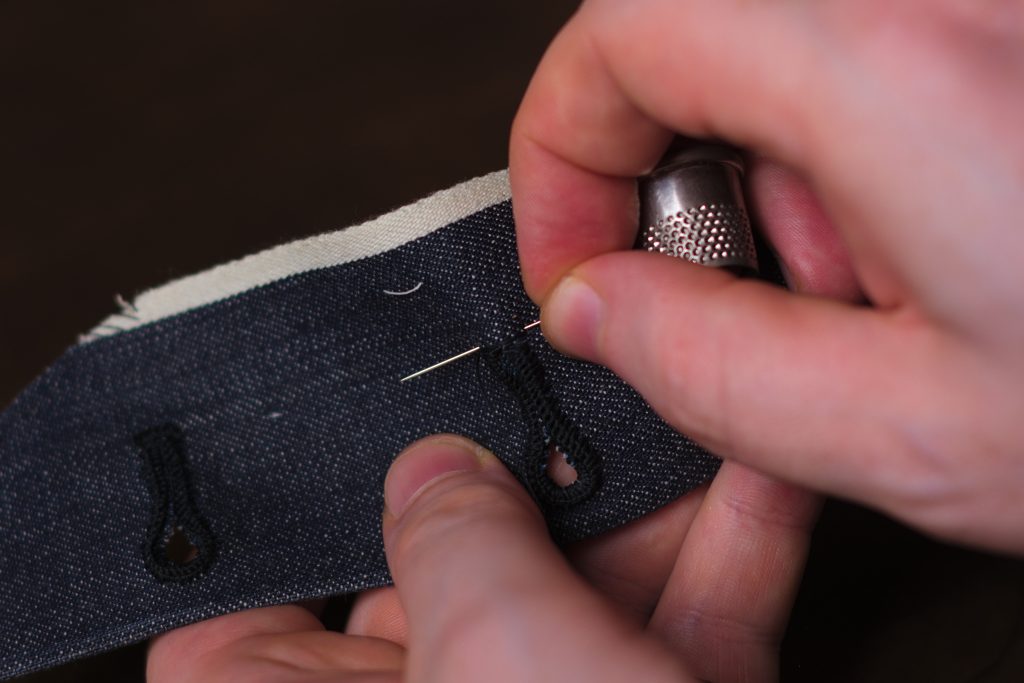
Instead take the two strands coming from the needle’s eye and wrap them clockwise underneath the point of the needle.
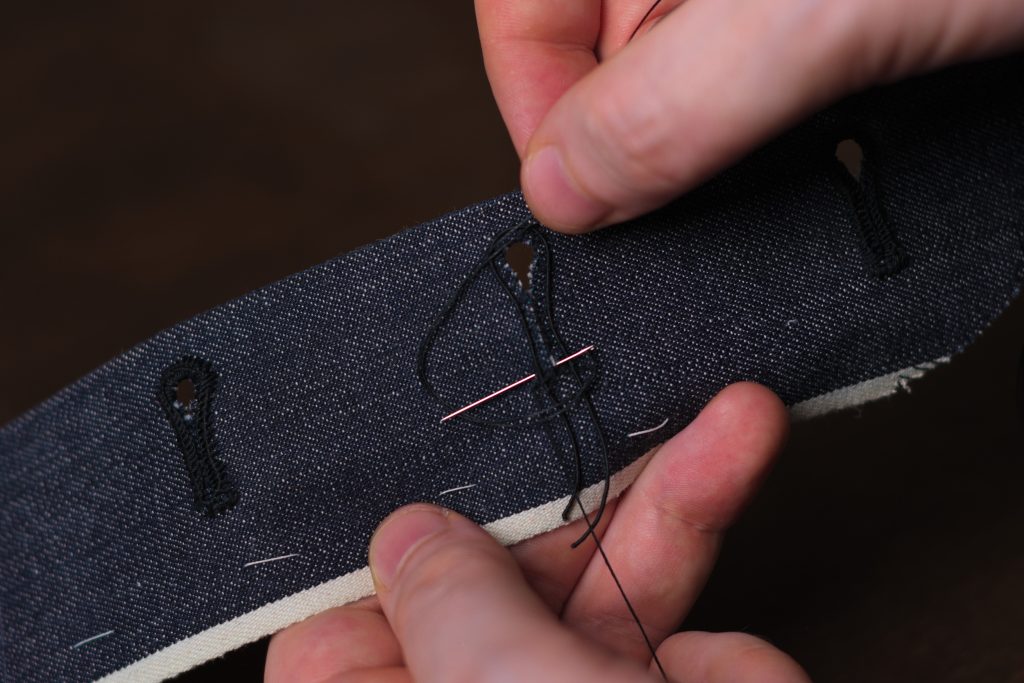
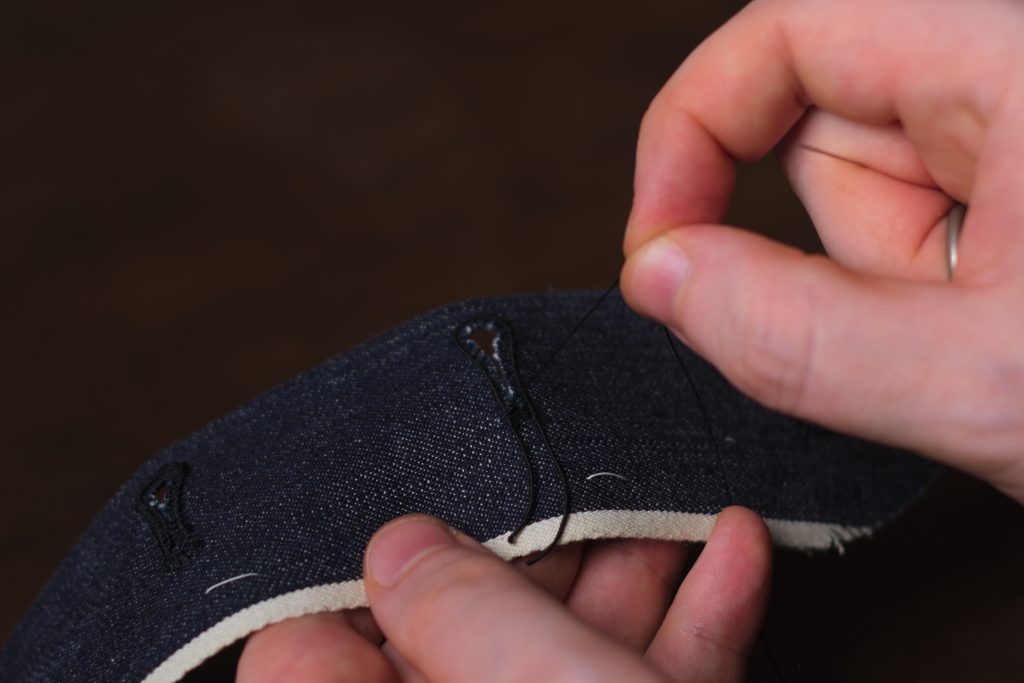
Then gently pull the needle and thread taut, beginning to form a purl.

Just as the purl is formed, pull upwards on the thread, so that the purl is formed more on the upper part of the buttonhole, rather than inside it. You can play around with this and see what looks best to you, positioning the purl more inside of or on top of the gimp.
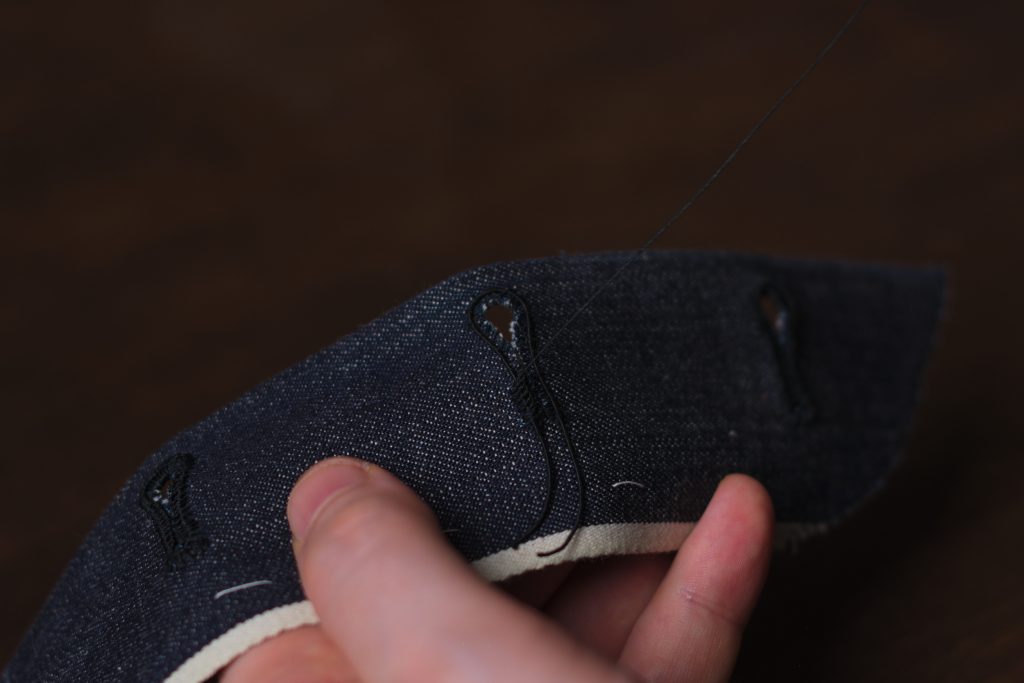
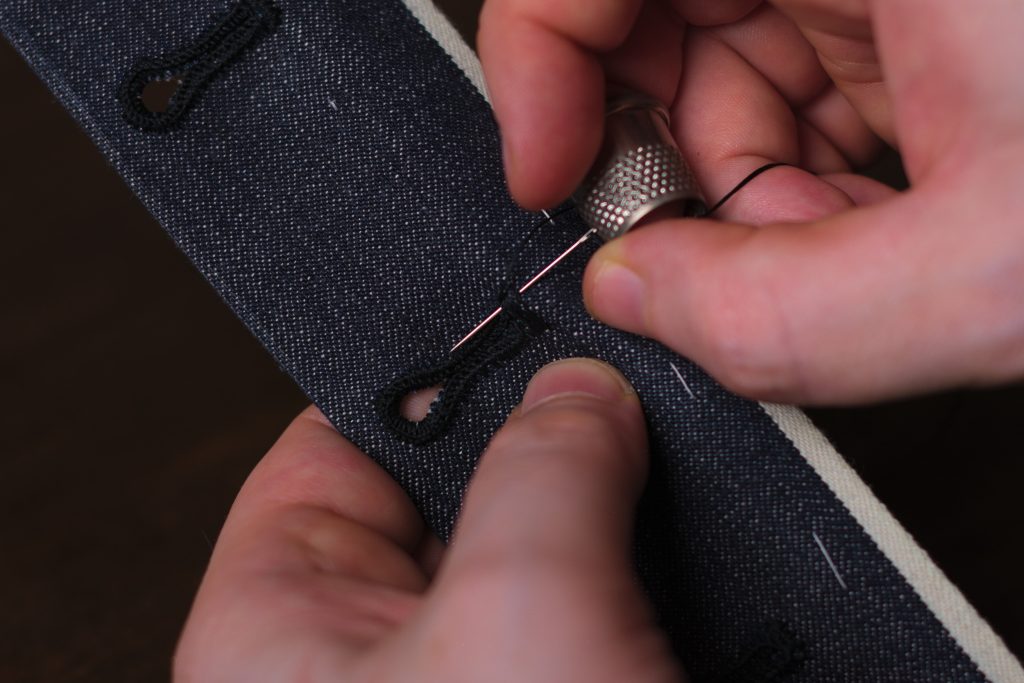
Repeat this stitch going along the straight part of the buttonhole as shown. The depth of the stitches should be about 1/8″, and they should be fairly close to each other, but it really depends on your fabric, thread, skill level, and so on as to how closely you position them.
As you get to the eyelet, gradually begin moving the purl to the top of the gimp. This moves the purl out of the way so you can maintain your stitch density without the knots getting in the way.
Continue around the eyelet with the purls on top, kind of like spokes on a wheel.
As you get to the end of the eyelet, gradually taper the purls back into the position they were in when you started, more to the side.
Continue the buttonhole stitch until you get to the end of the buttonhole. Make one last stitch as if you were going to make another buttonhole stitch, but instead just let the thread lay to the side instead of forming the purl.
Keeping the thread out of the way, turn your attention to the ends of the gimp, and pull them both firmly through the buttonhole opening to the underside as shown.
Now go back to your needle and thread, and insert the needle next to the first buttonhole stitch, coming out at the last, through all layers, forming the beginning of a bartack. Repeat this three more times, for a total of four stitches across the end of the buttonhole, being sure to wrap the stitches around the gimp that’s underneath.
Then turn your work sideways, and make small stitches into the fabric and around the bartack, forming a series of loops. I usually make about 8 stitches across the end of the buttonhole in this manner.
After the last stitch, pass the needle and thread to the underside.
Carefully trim the excess gimp just past the bartack on the underside.
Now pass the needle through the underside of all of the buttonhole stitches towards the eye.
Turn the work around and repeat in the opposite direction. And turn the work around and repeat for a third time. Trim the thread.
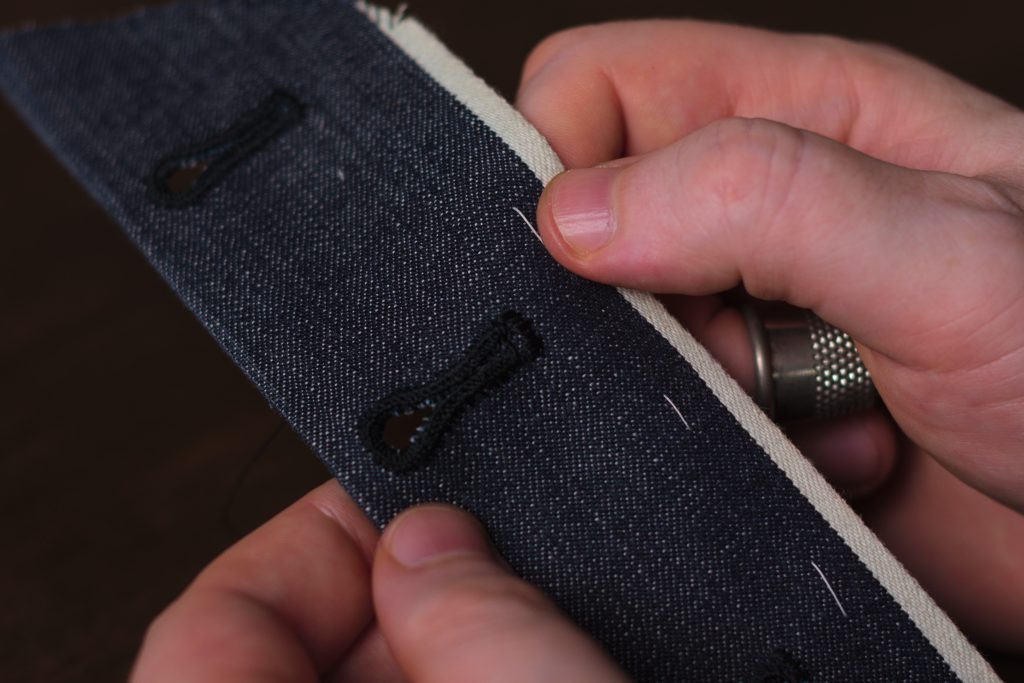
Here’s the completed buttonhole. If yours doesn’t look quite this good don’t worry, with time and practice I know you can get there.
Here’s the underside of the buttonhole. It will never be quite as neat as the right side, but it’ll come naturally over time.
Preparing the Buttonholes
Before actually forming the buttonholes, there are a few preparatory steps to ensure a good result.
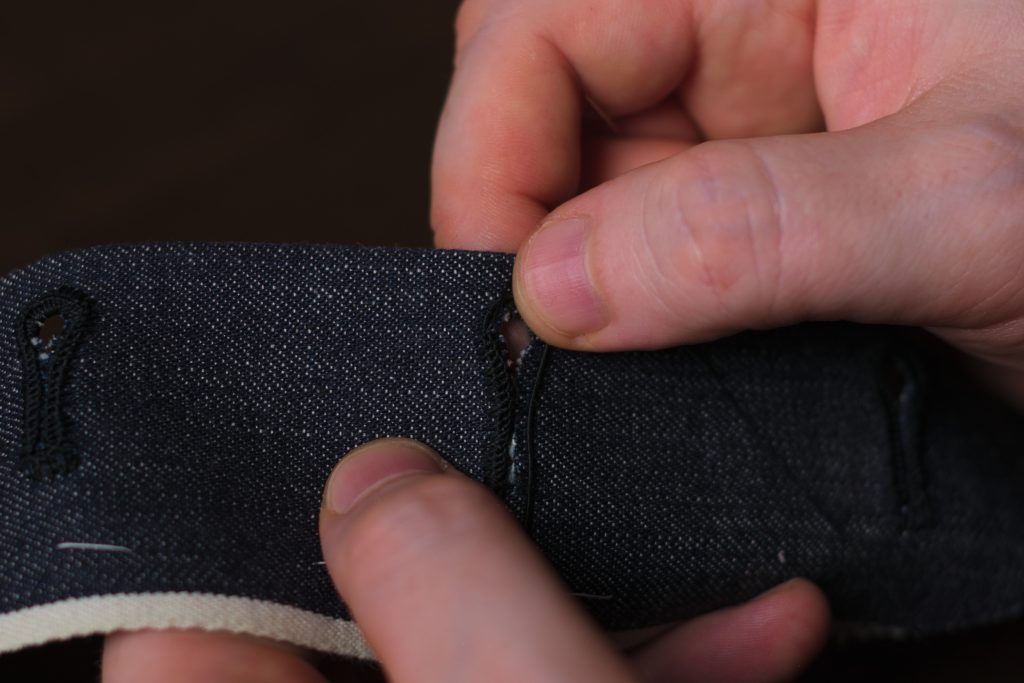
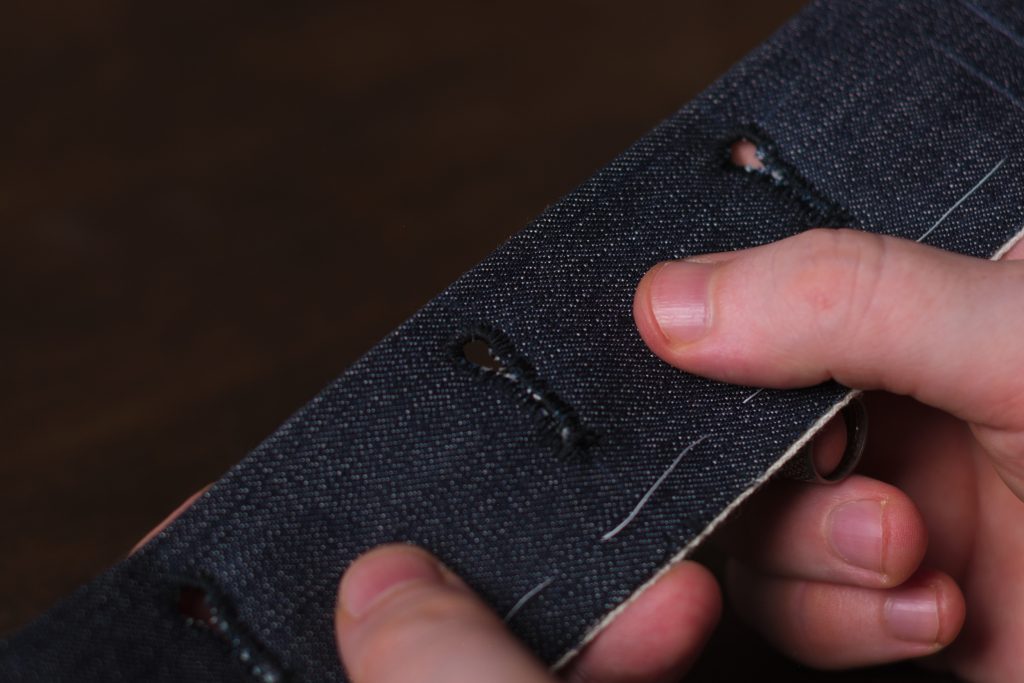
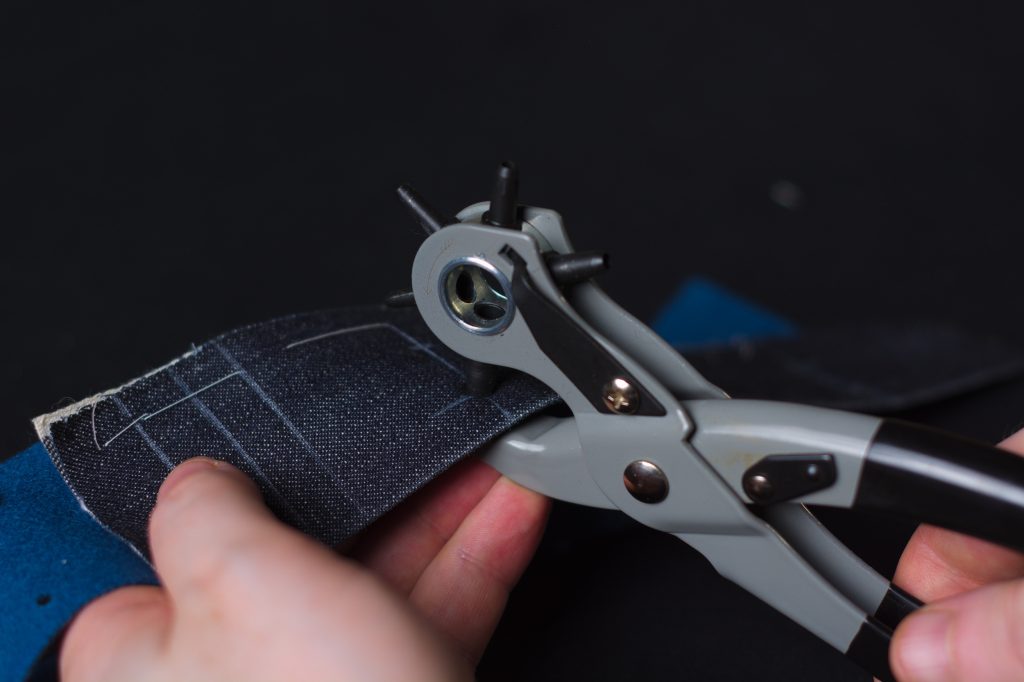
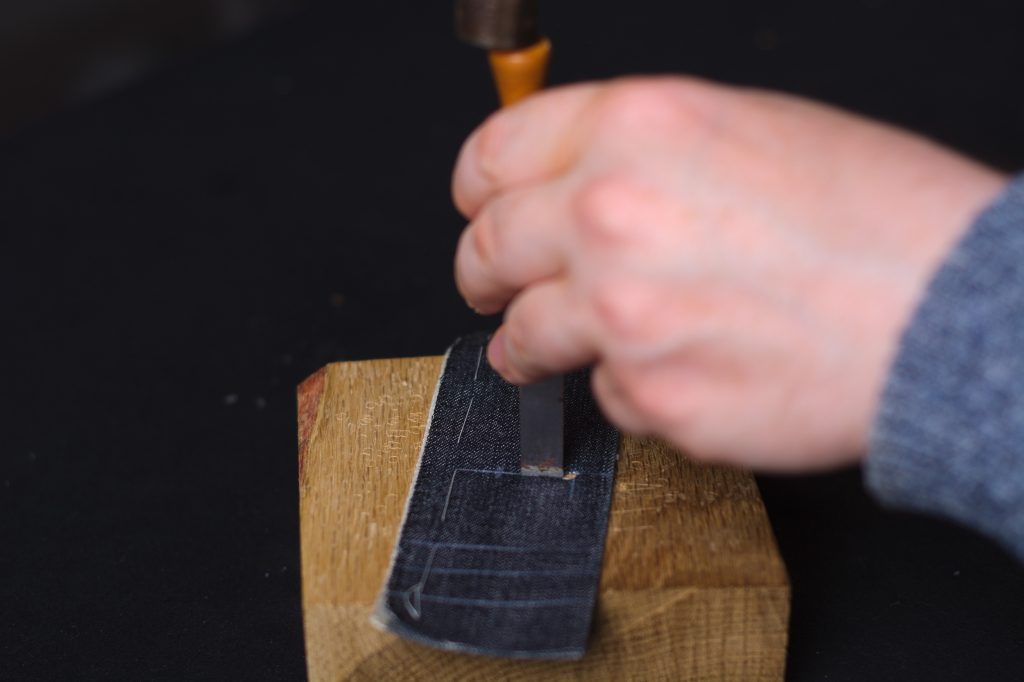
I use a leather punch on a 3/16″ setting to punch out the buttonholes – 1/4″ would be better but I haven’t been able to find one yet. Align the device at the intersection of the layout marks near the folded edge and press firmly. It helps to have a thicker cloth underneath to ensure a clean cut.
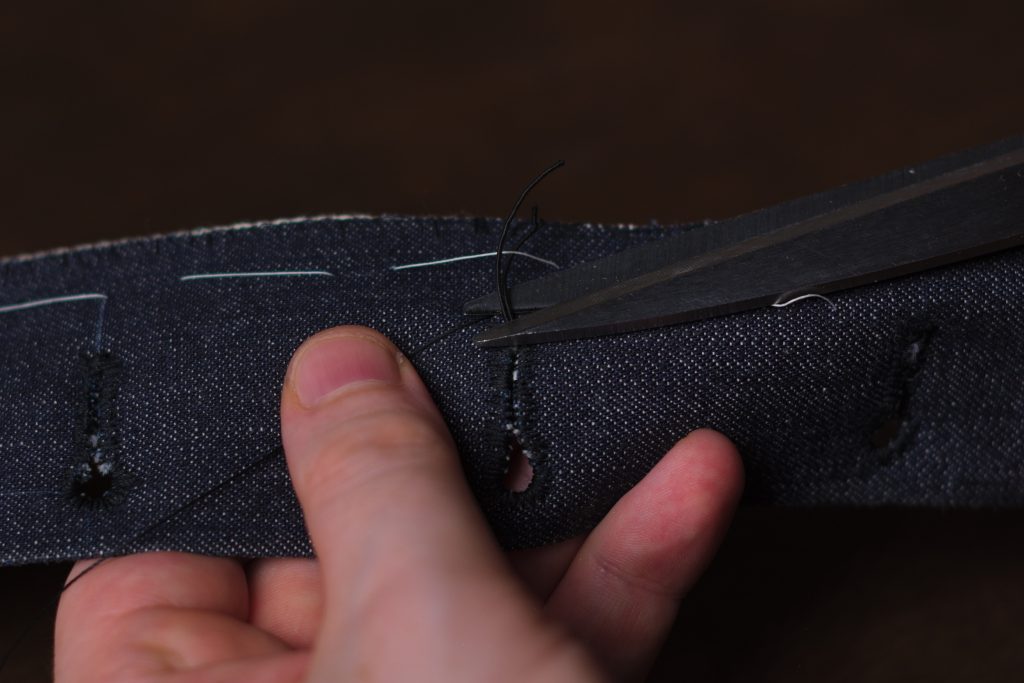
Next, using a 1/2″ chisel (or the exact size if you have one), carefully cut through the straight part of the buttonhole. Slide the chisel along to the next cut rather than lifting it out entirely to help maintain your alignment.
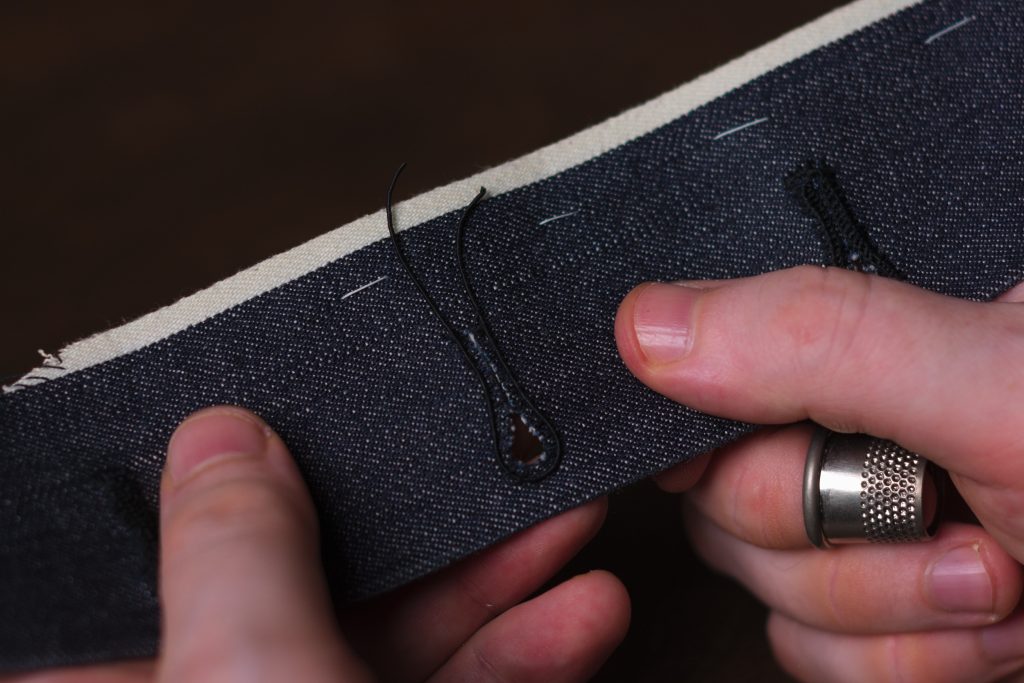
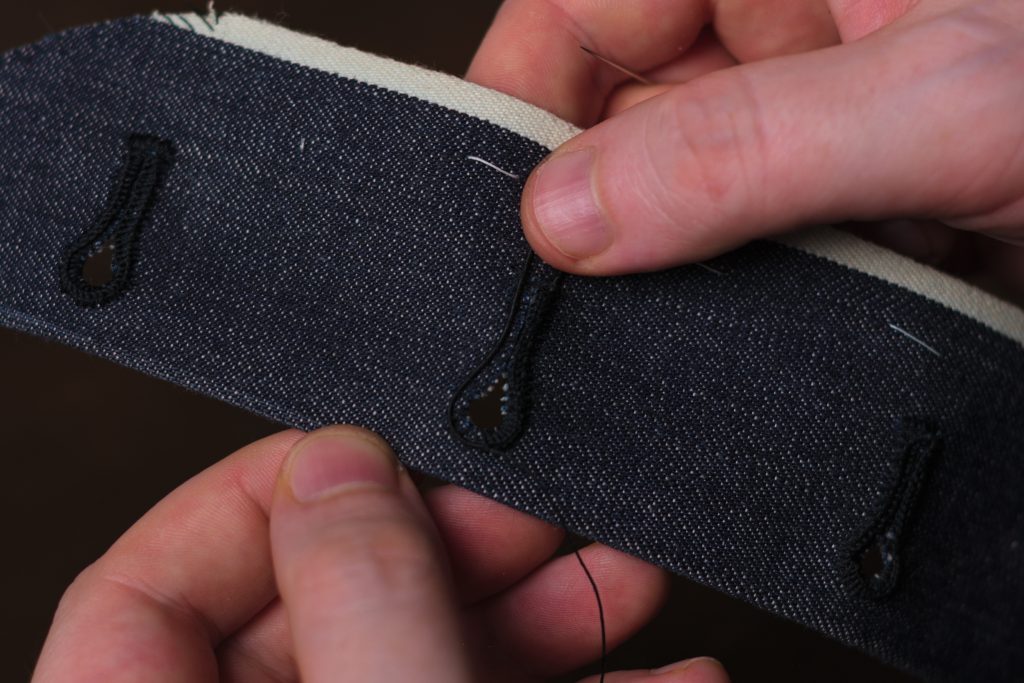
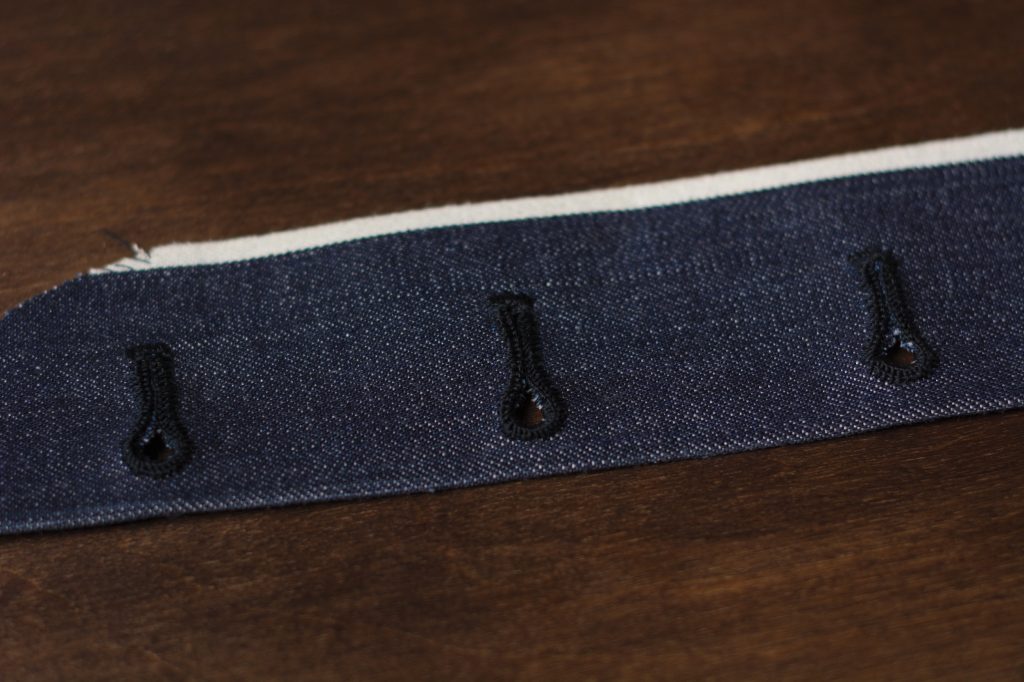
Then using a pair of small scissors, cut out a little triangular piece on both sides of the hole, forming a tear drop shape, for a more elegant buttonhole.
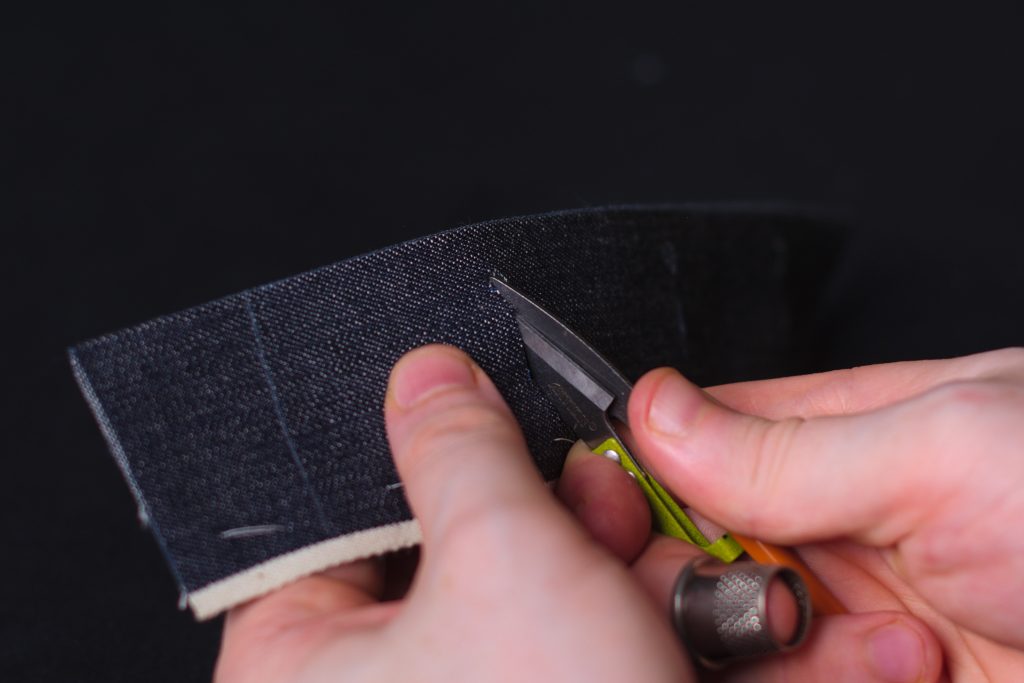
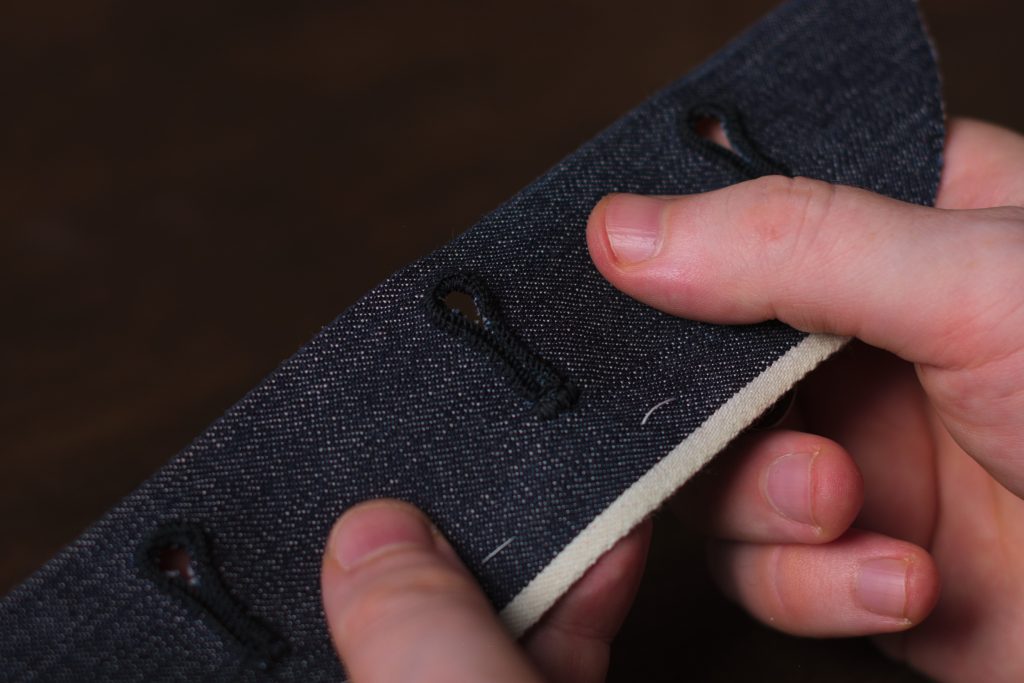
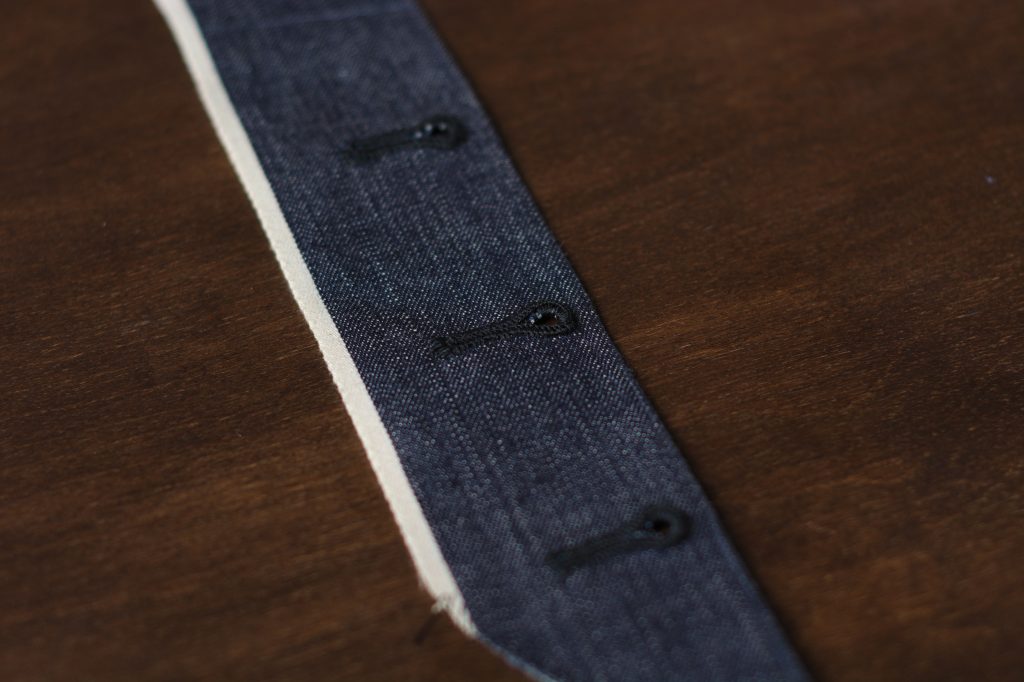
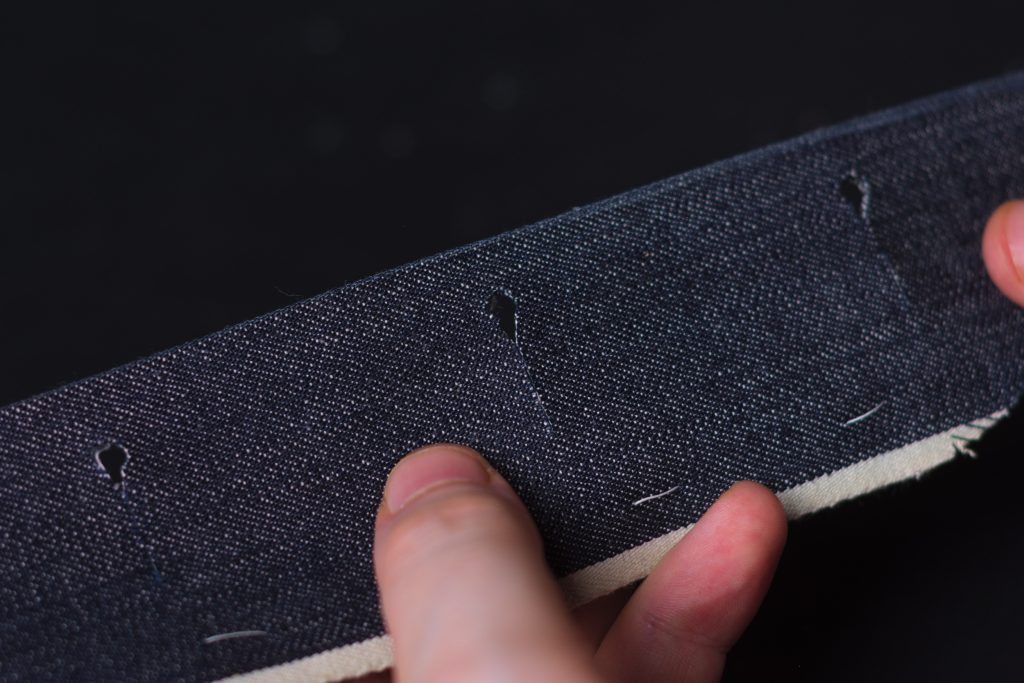
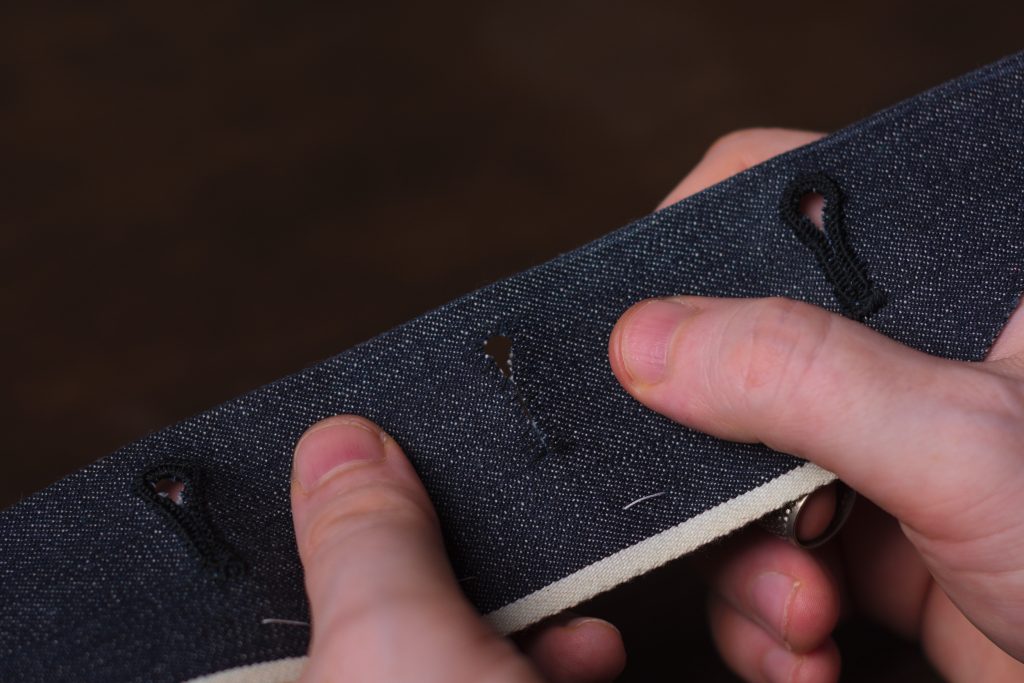
Here are the result so far.
Note that in my other buttonhole tutorial, I baste around each of the buttonholes before cutting them out. I find that with the thick denim and the small size of the fly, that that step is unnecessary here.
Felling
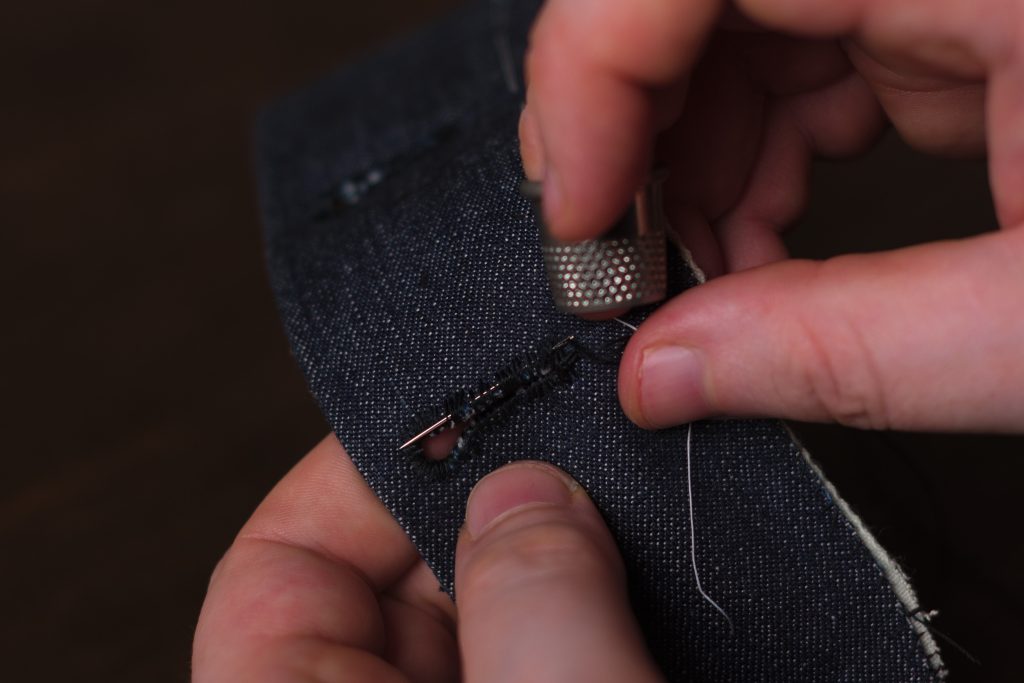
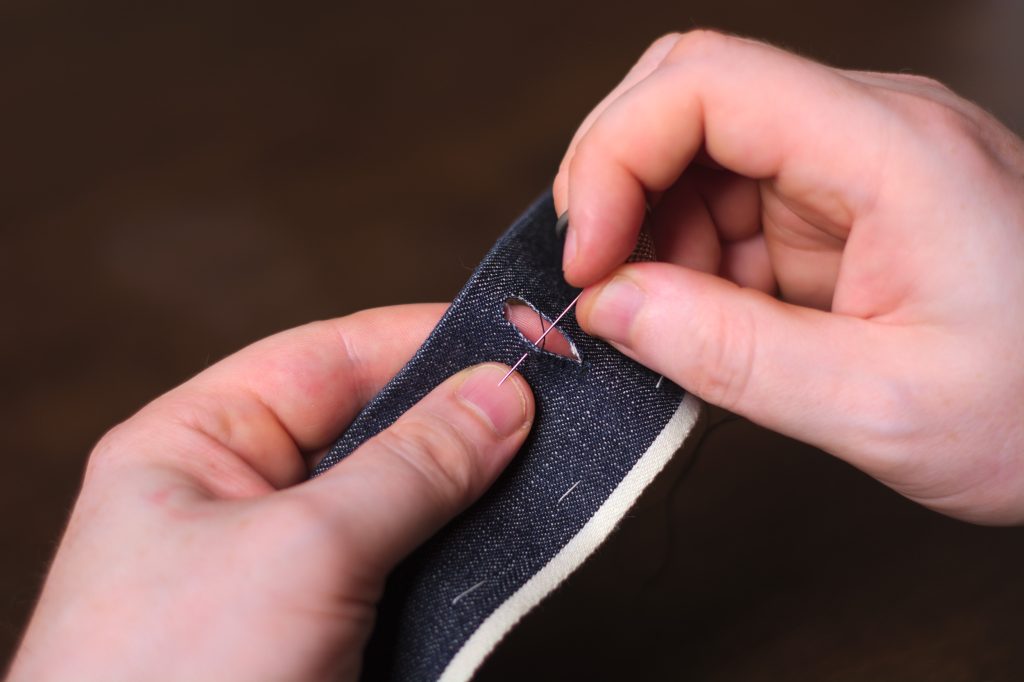
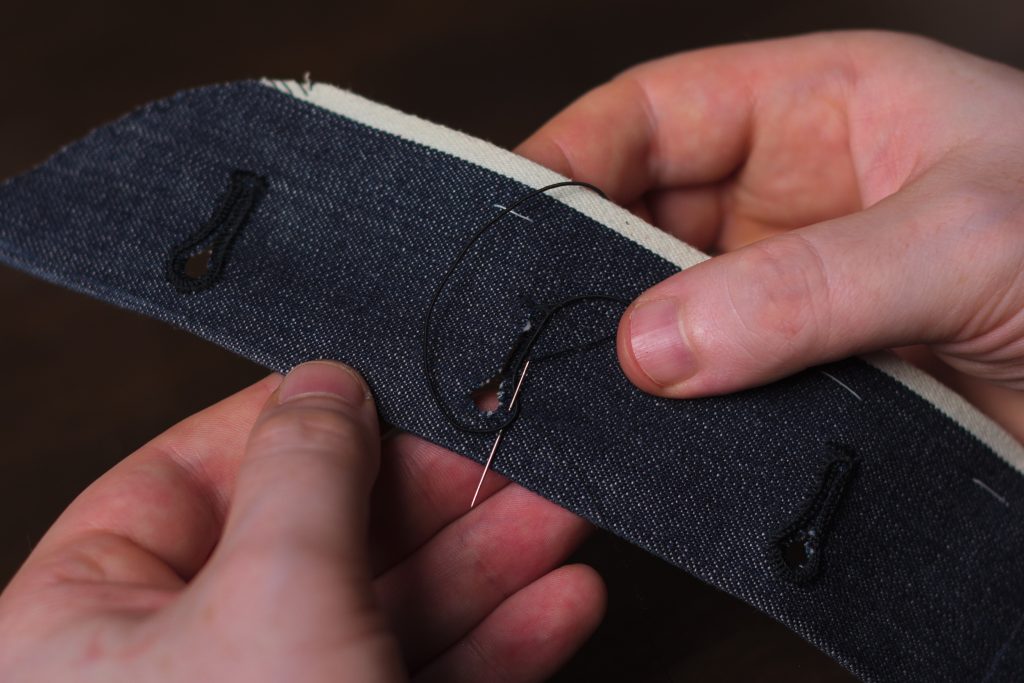
Now take up a needle and some sewing thread, and first passing the needle through the hole at the base, and back out about 1/8″ from the edge, make 3 or 4 stitches in place to secure the thread.
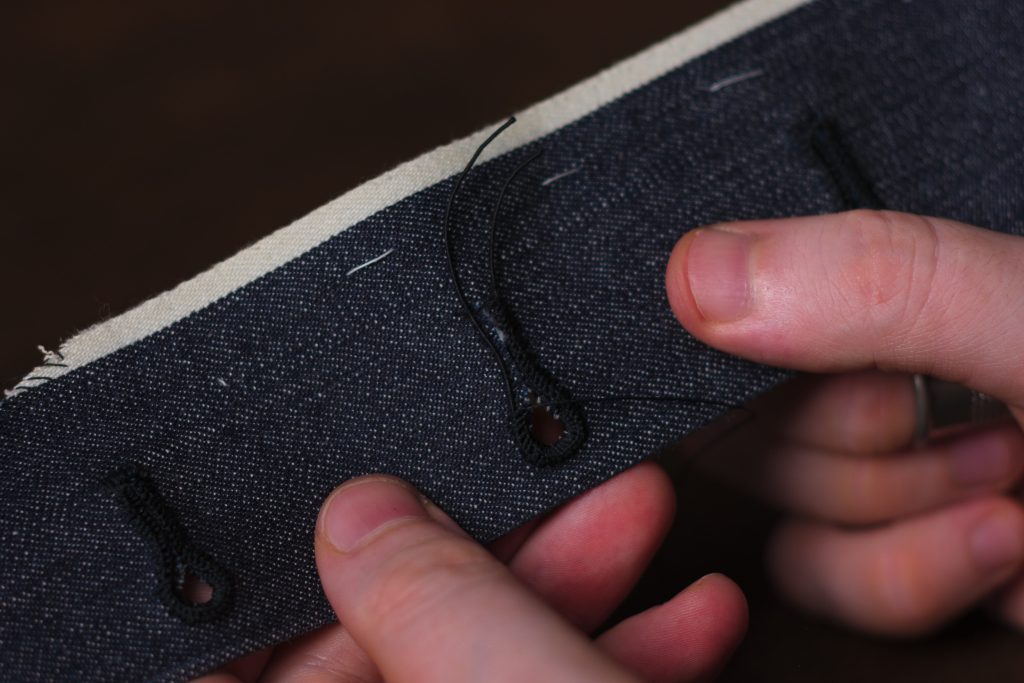
Begin densely felling around the buttonhole, keeping the stitch about 1/8″ in depth and about 1/16″ to 1/8″ apart from each other. Be sure to catch both layers as you work.
Continue felling around the eyelet in the same manner.

And back to the end of the buttonhole, making a few stitches in place at the end.

Here’s the buttonhole so far. Sorry it’s so difficult to see! I’ll have to redo these photos in a brighter thread.
Gimp
Now we need to add in a piece of gimp to give strength and structure to the buttonhole. It helps raise the buttonhole above the surrounding fabric giving us that beautiful finish of a tailored garment.
I’ll be using a gimp I bought from Gutermann a number of years ago, though sadly it’s not available anymore. Below is a video I made on making your own using silk buttonhold twist, or you could use a thin twine and experiment to find something that you like, something about 1/16″ should work.
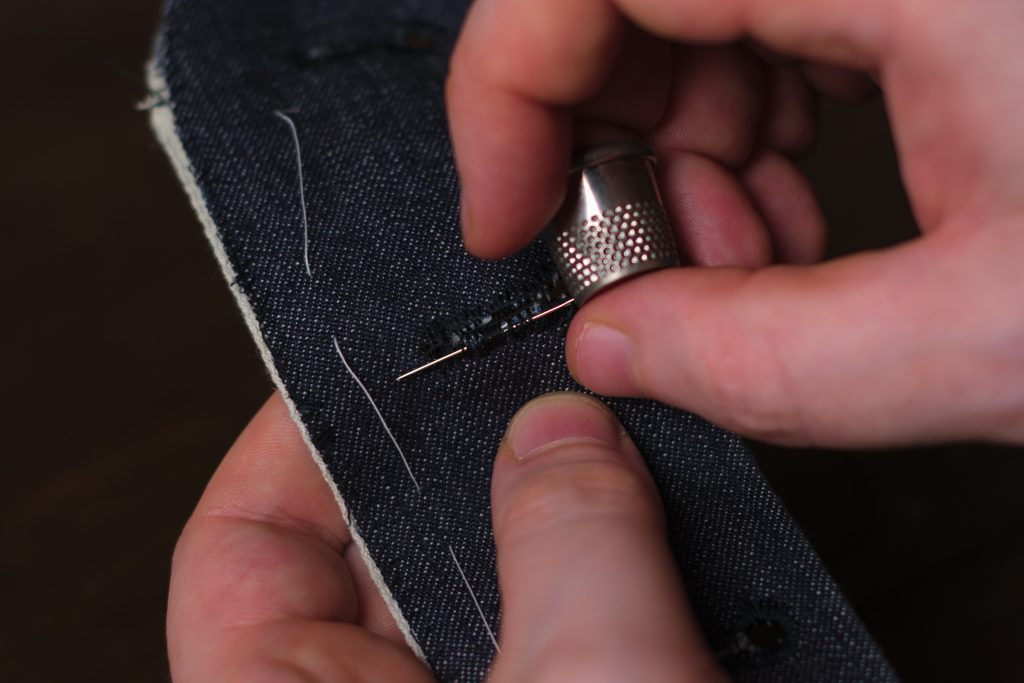
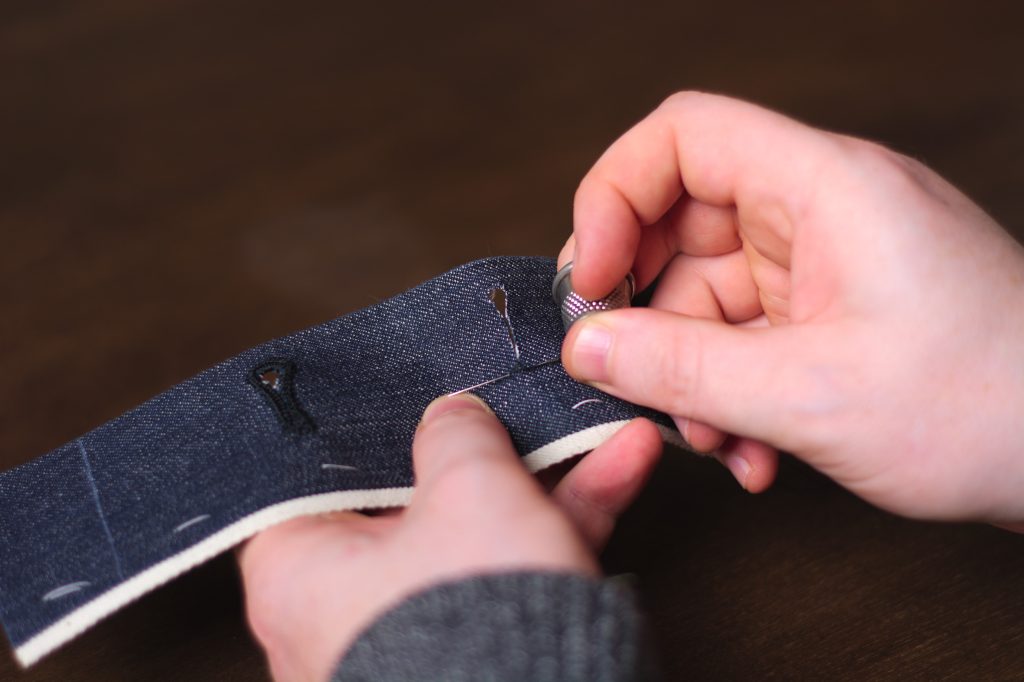
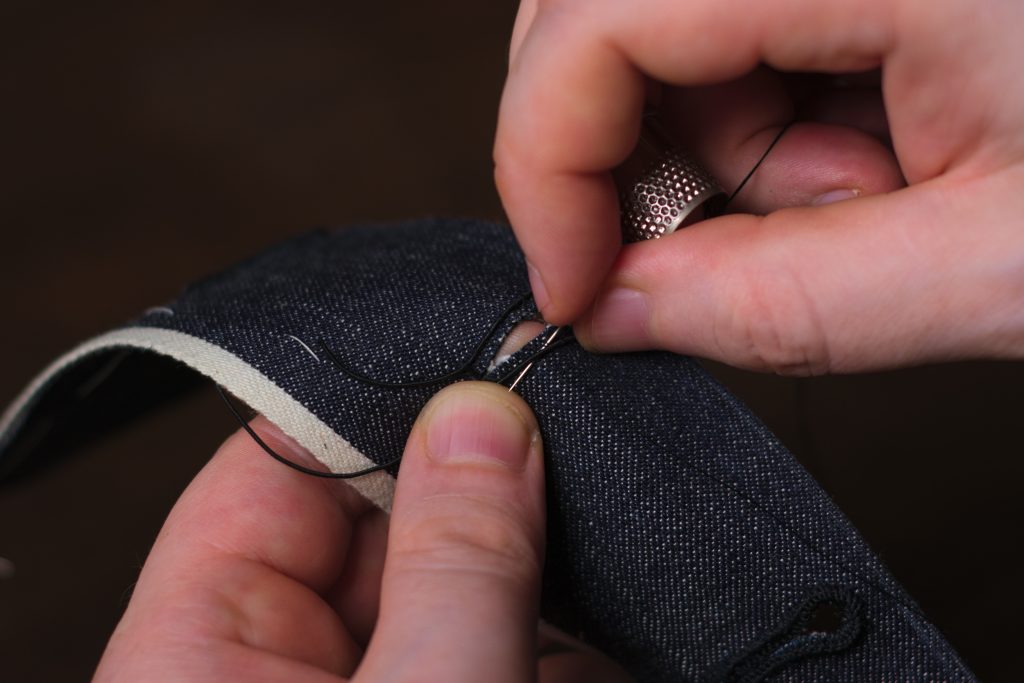
To attach the gimp, take a few stitches in place again as if you were going to fell. On the last stitch, leave a little loop of thread open and slide the gimp in to hold it in place.
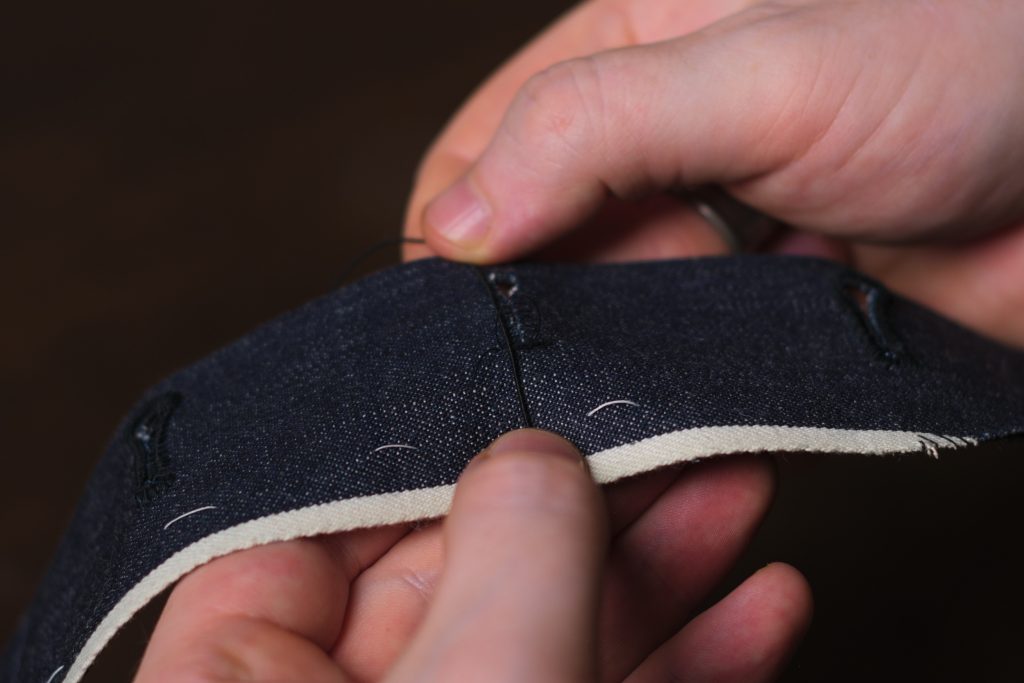
Now take another stitch at the same place, this time going into the top layer of denim, under the gimp, and out through the top layer again, to really secure the gimp. Leave about 1″ of gimp at the start of the buttonhole to finish off later.
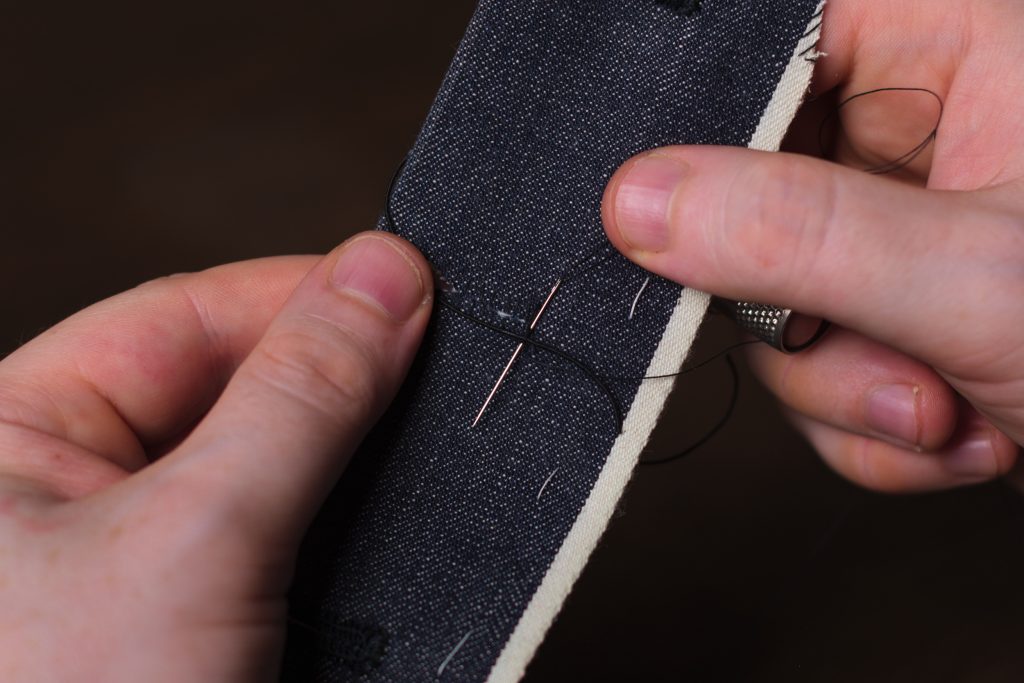
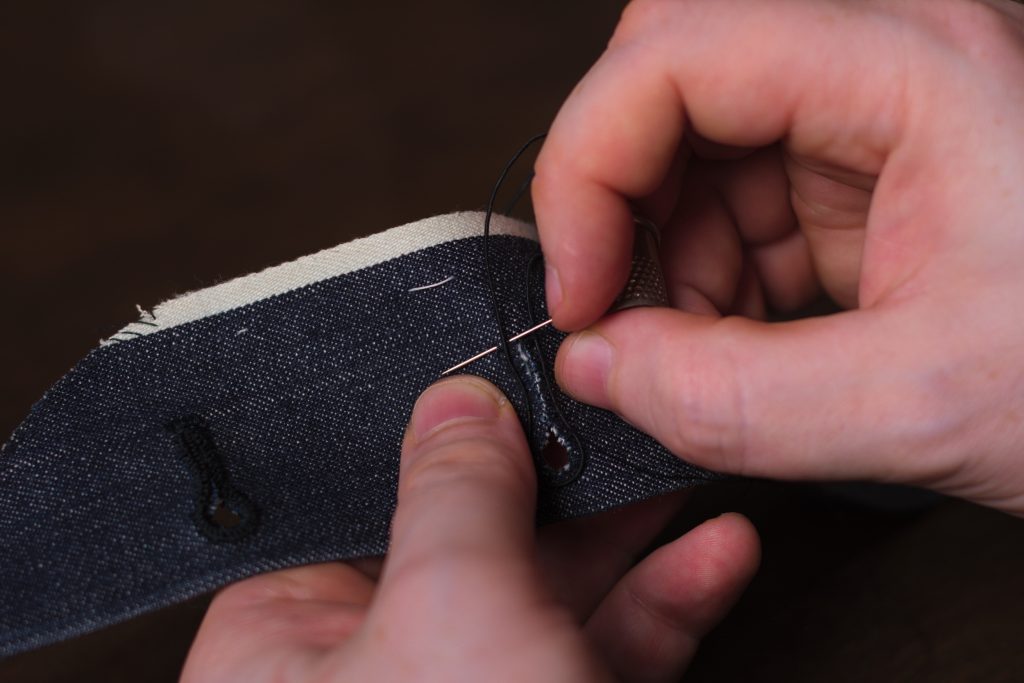
Now take another stitch, entering at the same place (all these stitches so far have been in the same place), under the gimp at a diagonal, and coming out at the other side of the gimp about 1/8″ from the first stitch.
This is called a couching stitch, often used to secure braid and trim to military garments, and we’ll be using this stitch to attach the rest of the gimp.
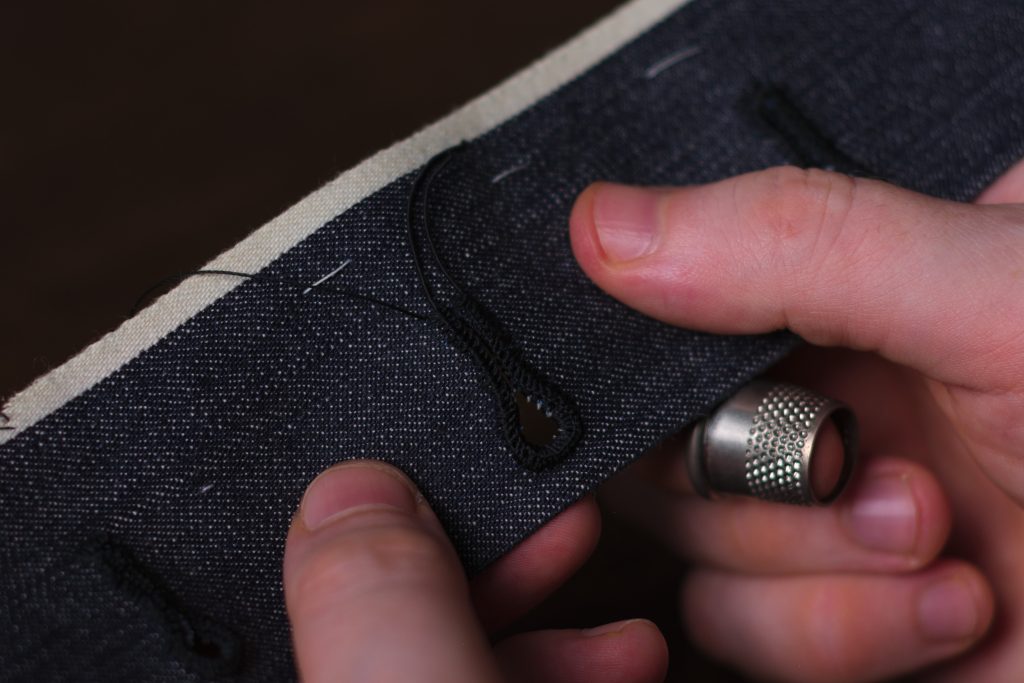
Continue securing the gimp to the fly with the couching stitch, shaping the gimp around the buttonhole as shown. The gimp should be about 1/16″ from the edge, maybe a little farther around the eye.
A couching stitch in progress.
When you get to the end, take a few couching stitches in place to secure the other end. Trim the ends of the gimp so they’re about 1″ long.
Here is the buttonhole so far after attaching the gimp.