Category: Double-Breasted Waistcoat
Preparing the Canvas
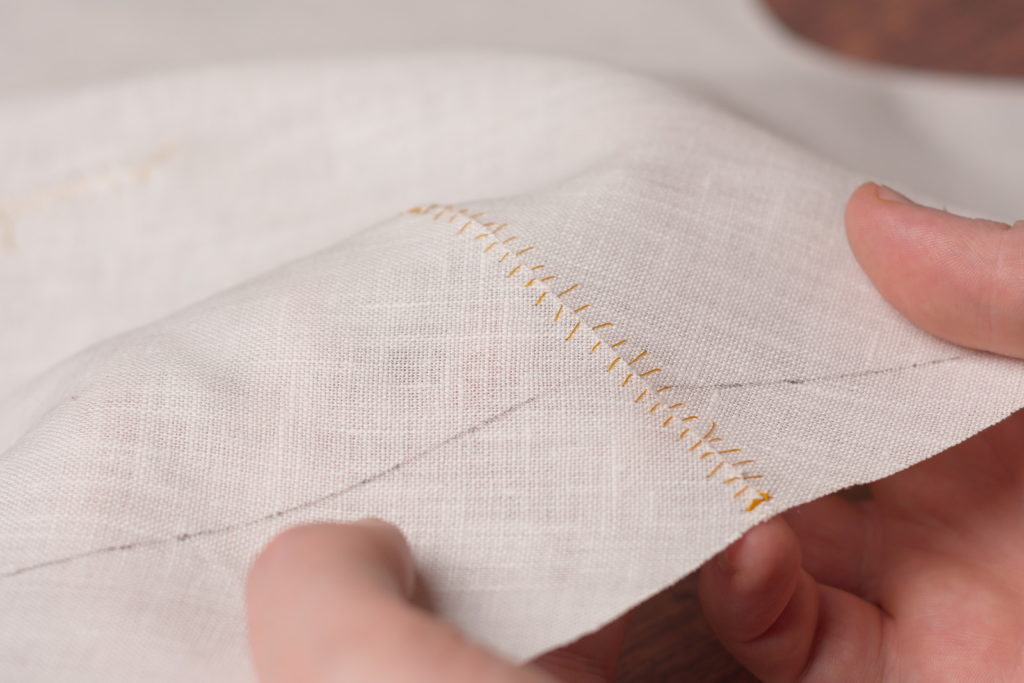
With the canvas cut, we can move on to the construction, which involves closing any darts we may have to give shape to the waistcoat. We’ll be closing the darts along their raw edges – no seam allowances – to minimize the bulk in the canvas.
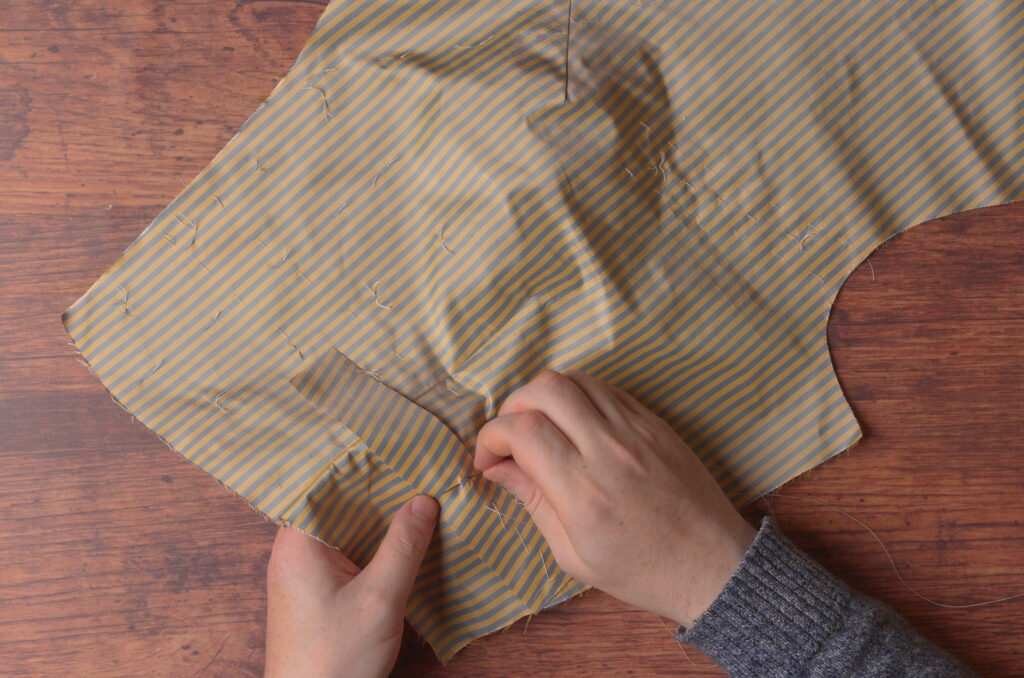
With the right side up (you should have two opposite facing canvases), hold one of the darts closed, raw edges butted together, and work a few stitches in place near the end to hold the dart together while you work.
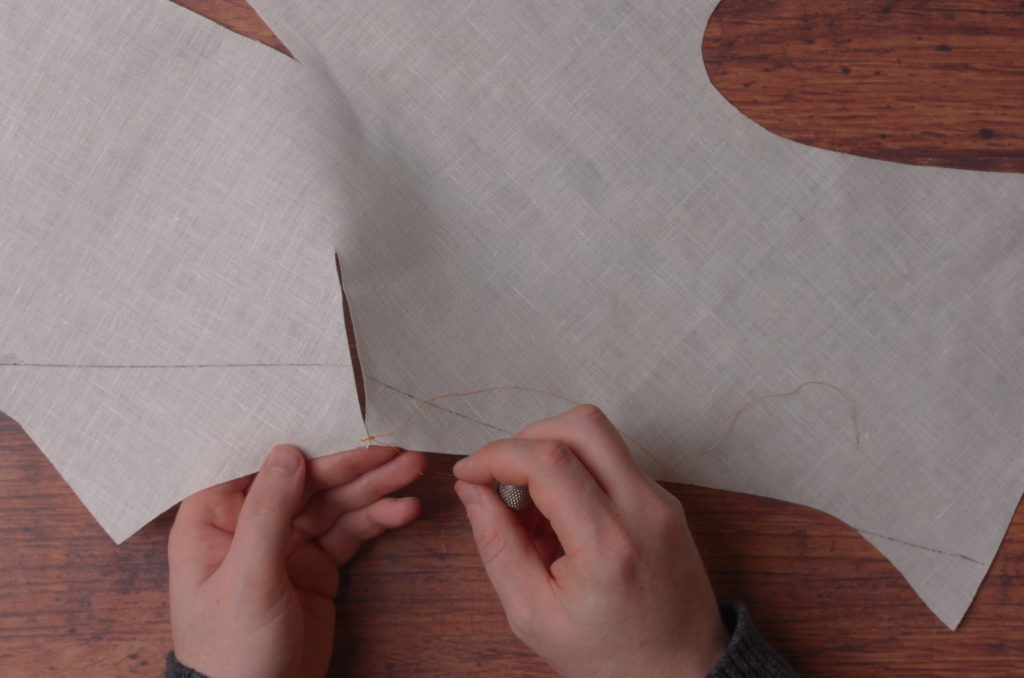
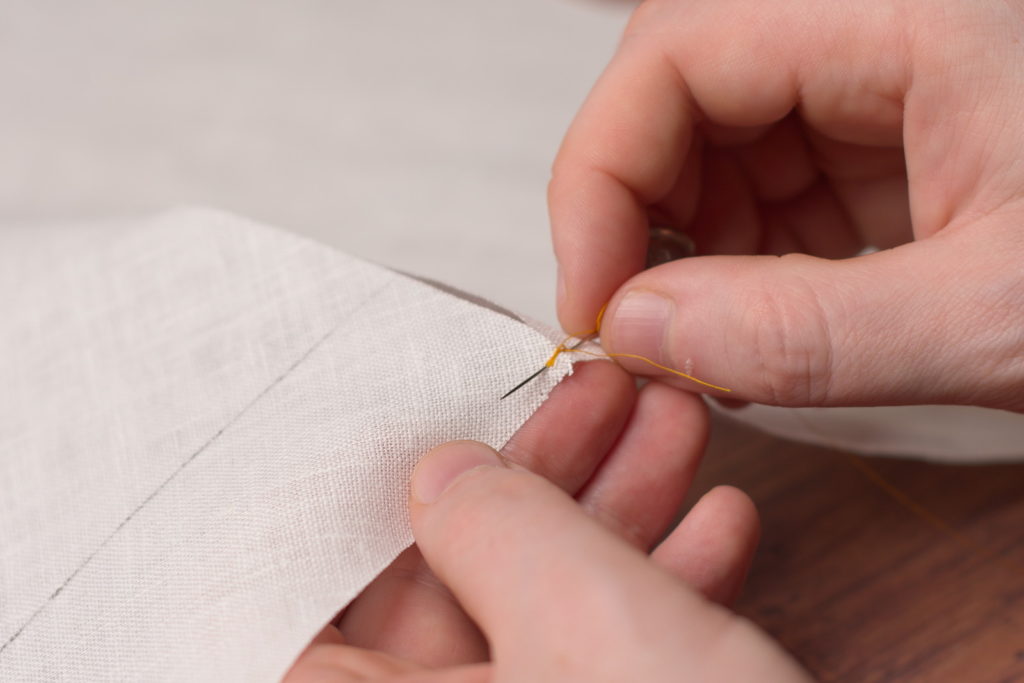
Then passing the needle through the opening in the center of the dart and under the canvas, poke the needle up through the canvas about 1/8″ to 3/16″ away from the opening.
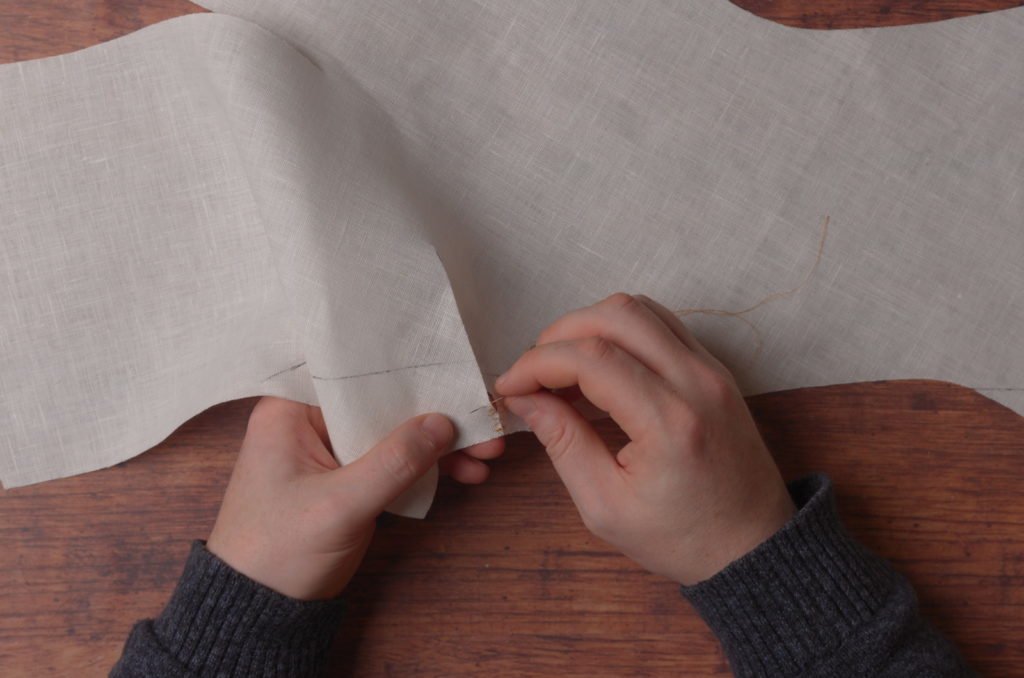
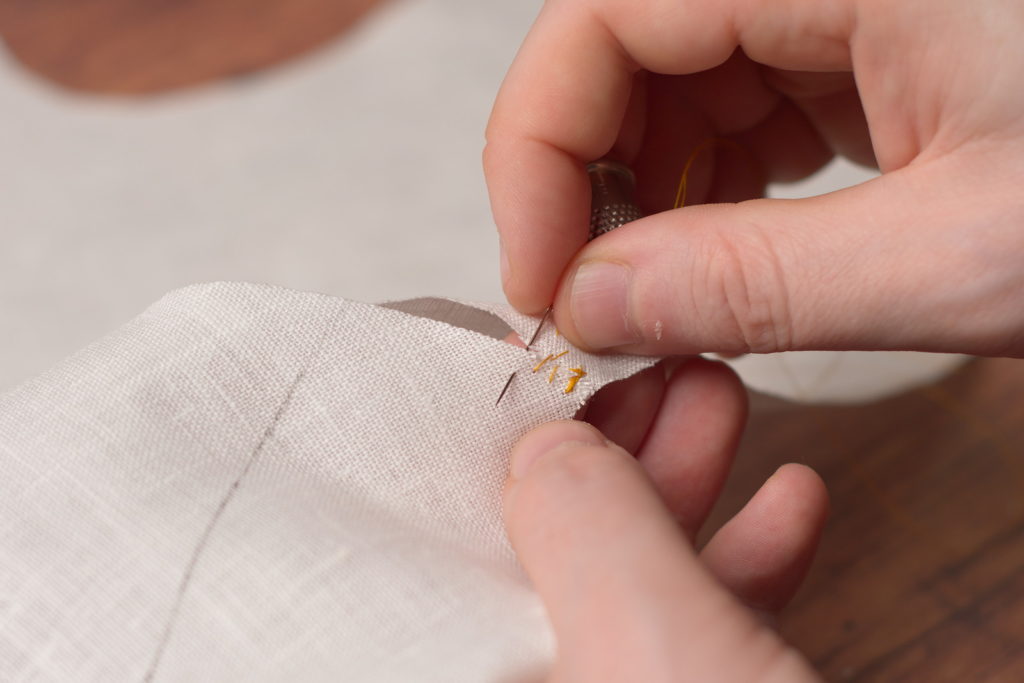
And do the same on the opposite side. Keep each group of stitches about 1/8″ from the previous, and continue working your way along the dart, closing it up as you go.
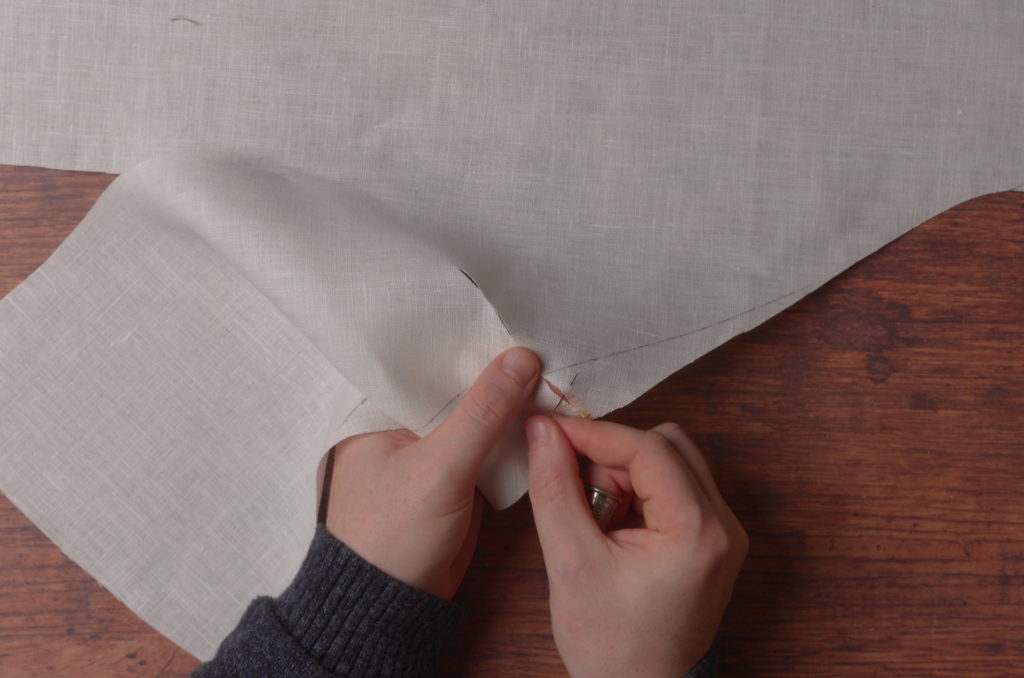
Feel free to rotate the work while stitching so as to make it easier on your hands. I had to contort my fingers to get a good photograph.
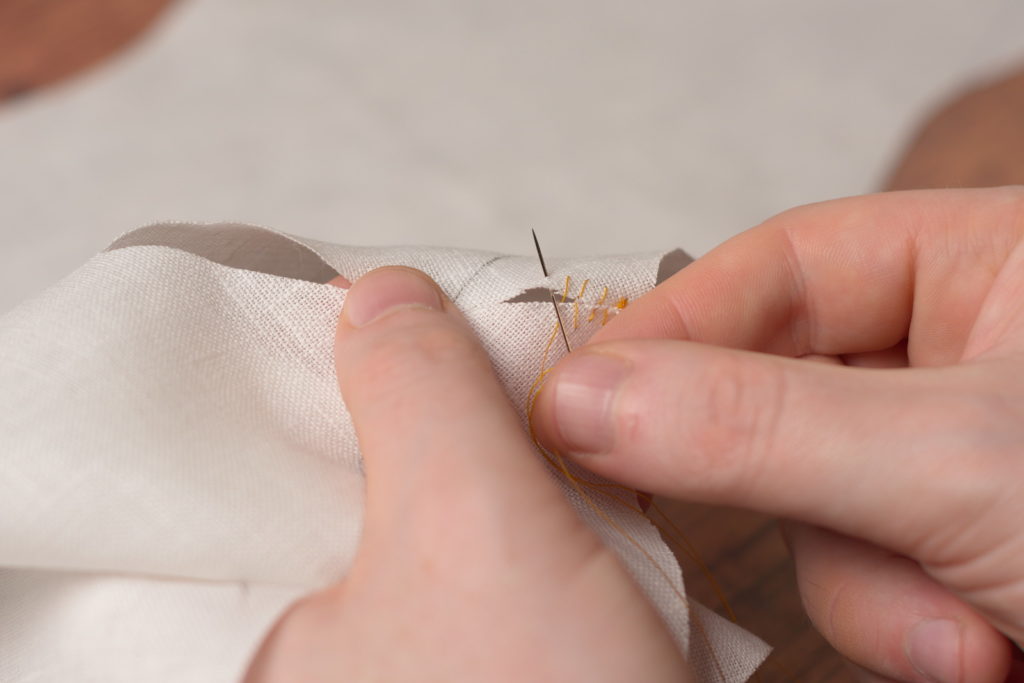
Continue working with alternating stitches until the dart is closed, being sure to keep both sides even with each other.
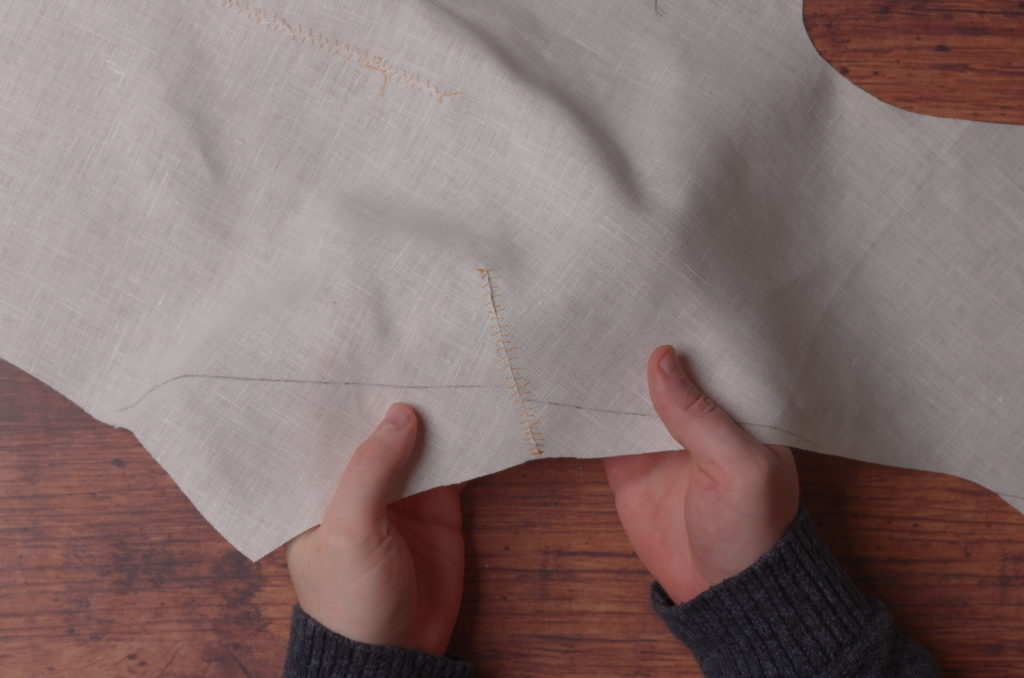
The waist dart is a little trickier due to its length and more complex shape, so try to keep both sides evenly aligned with each other as you work.
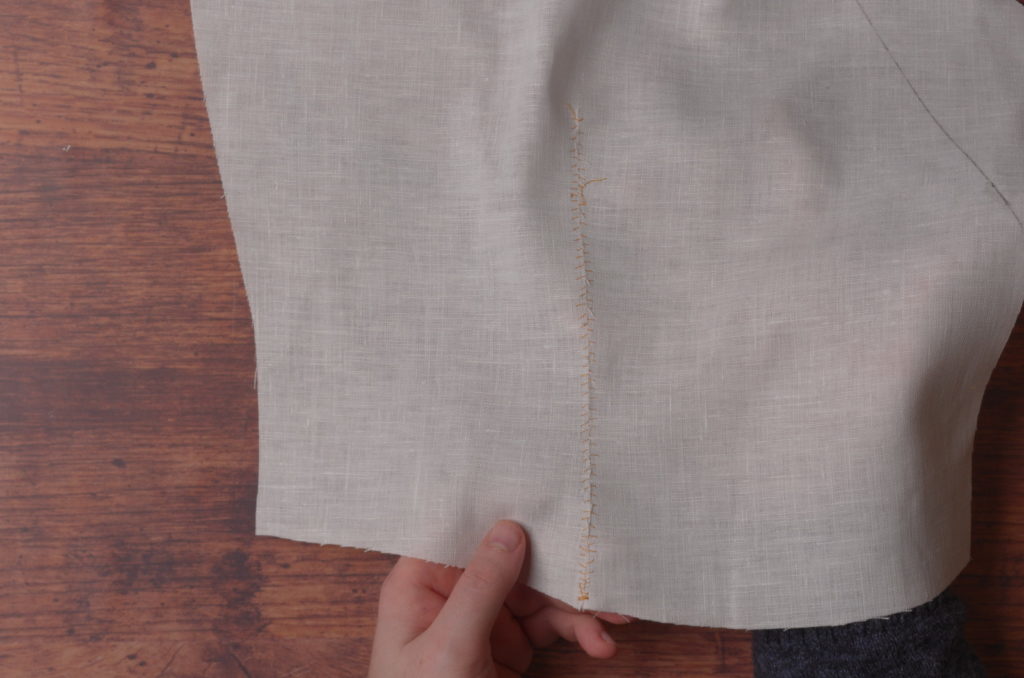
Pad Stitching the Darts
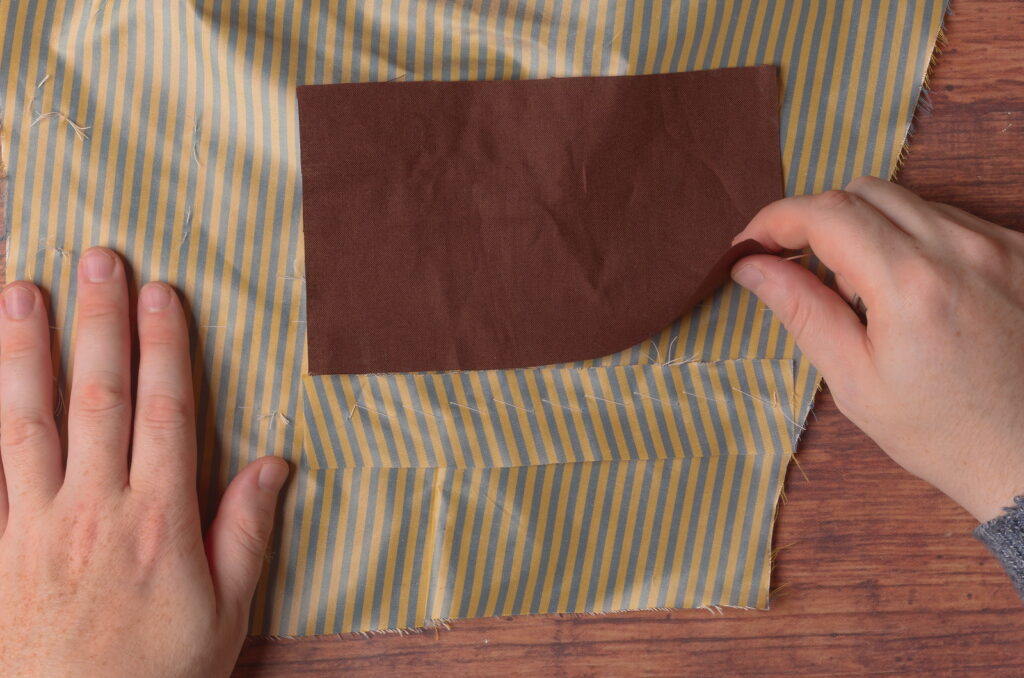
While this stitching does hold the darts closed, it’s obviously not very strong, and so additional work is necessary to keep them from ripping open. Cut strips of linen about 1″ wide by about 1″ longer than each of the darts.
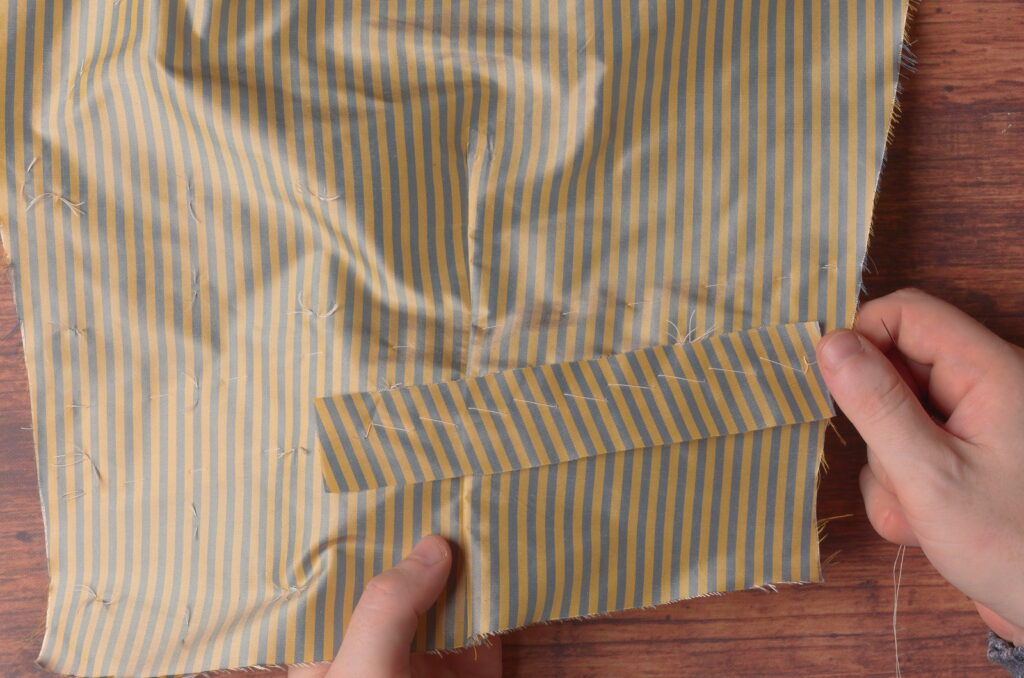
Center the strip of linen on the dart, extending the strip about 1/2″ beyond each end.
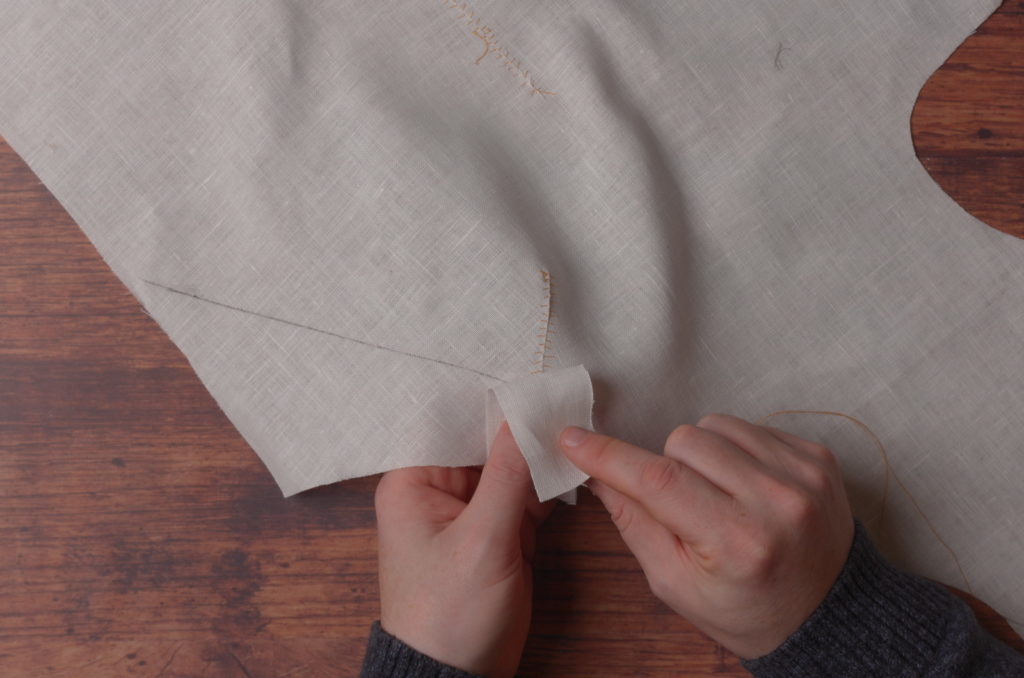
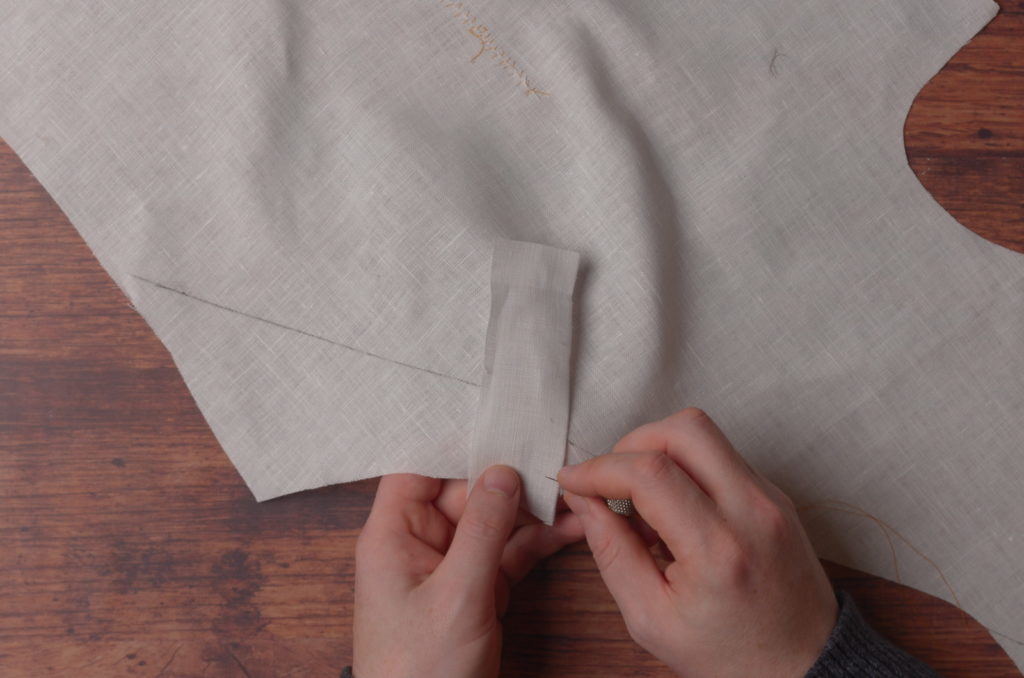
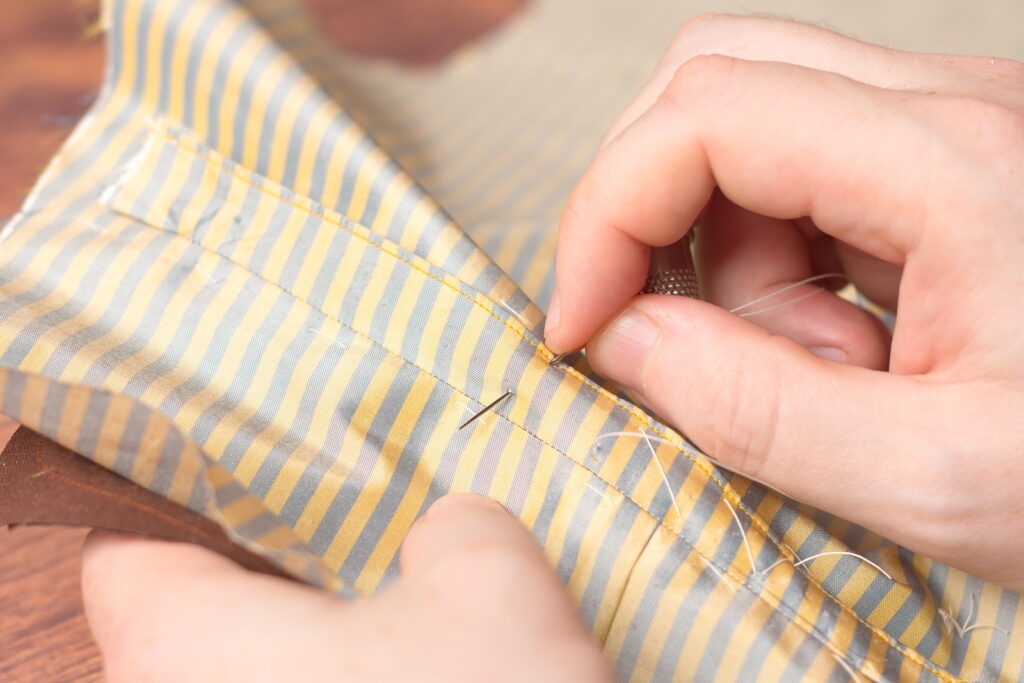
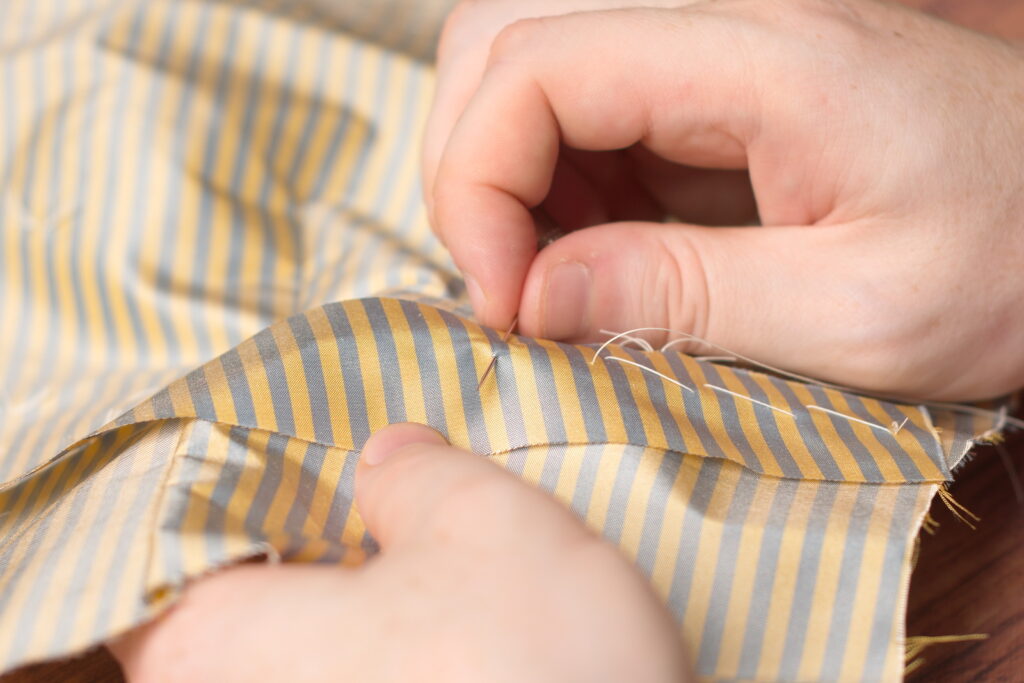
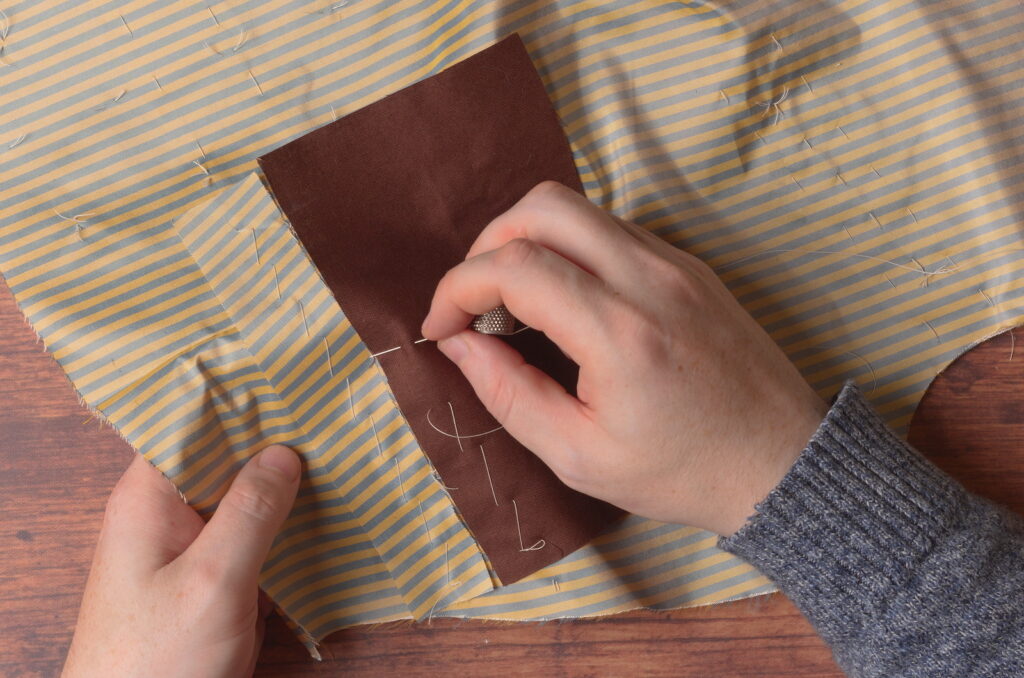
Now using a small pad stitch, about 3/8″ to 1/2″ in length, pad stitch along the center of the linen, ideally catching the center of the dart underneath. The stitch itself is about 1/8″ wide.
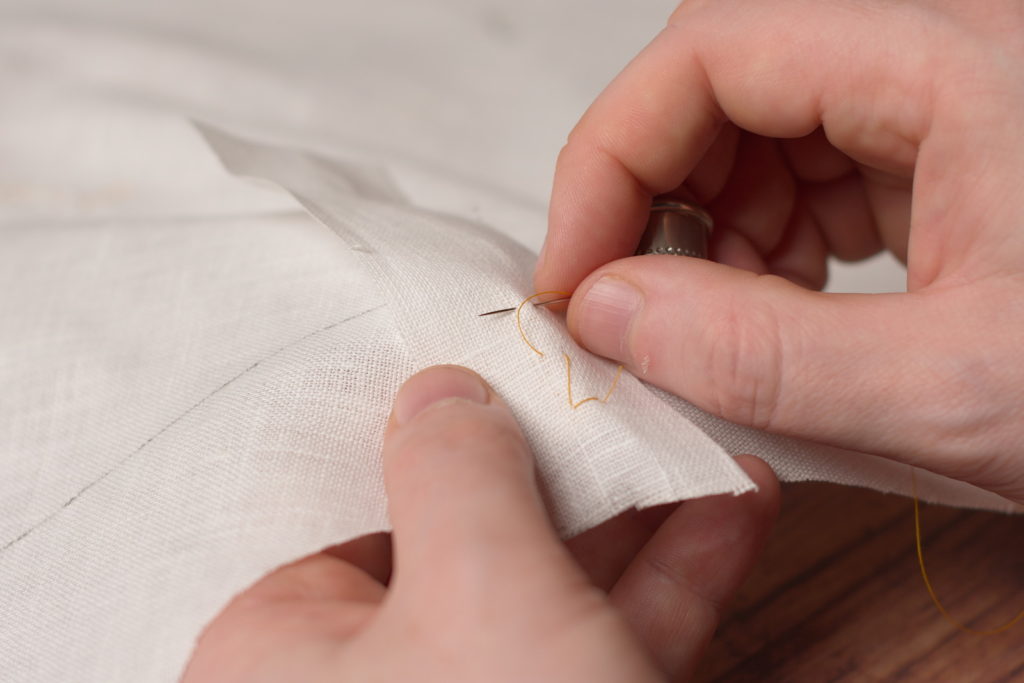
As you work, flip back the linen strip to ensure you’re still centered on the dart.
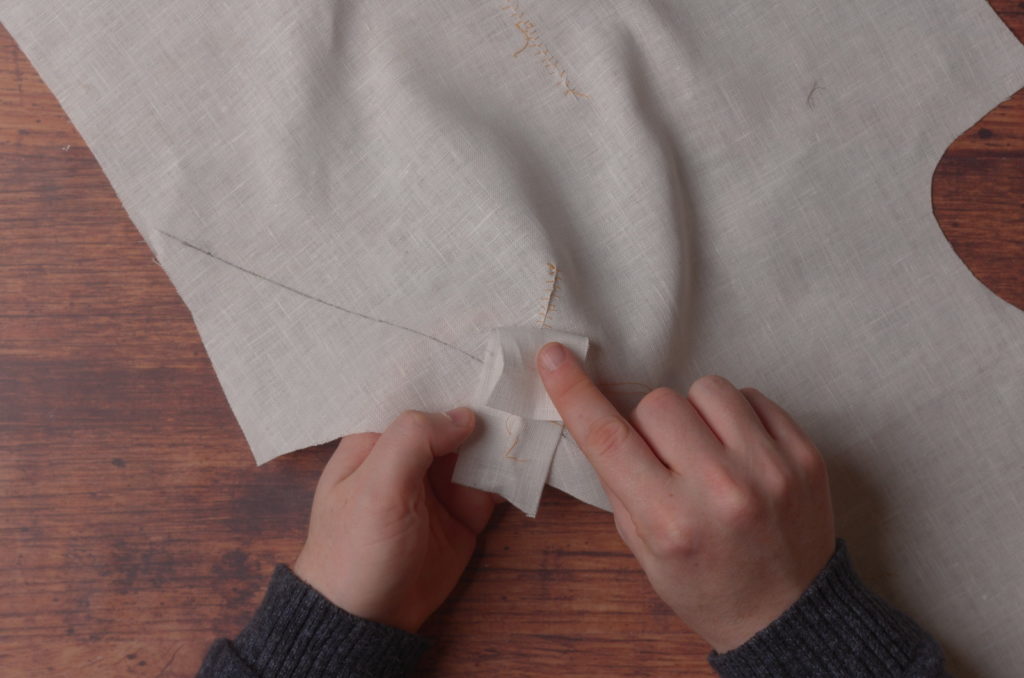
Here’s the first row of pad stitching complete.
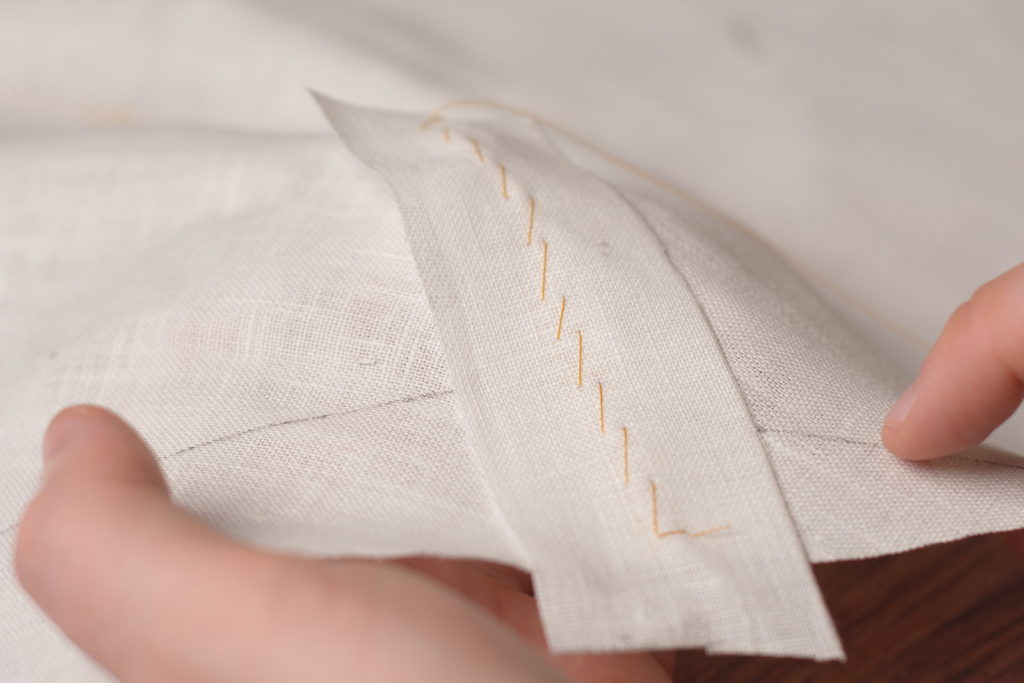
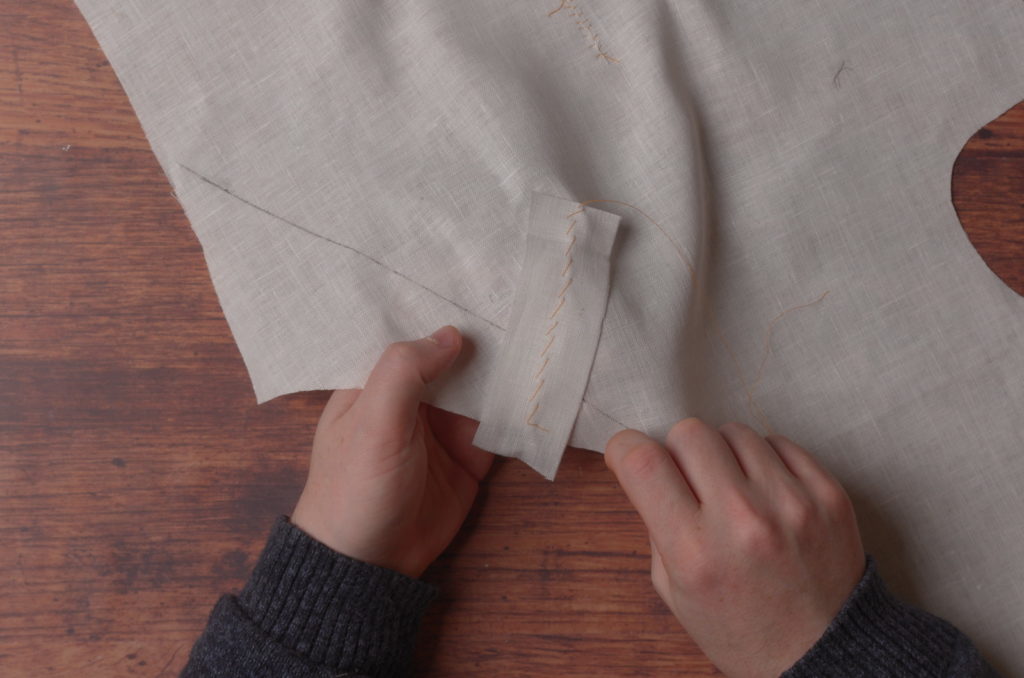
Then continue pad stitching the dart closed with two rows on one side. Try to work in a little additional shape to the dart by holding the linen strip taught and just barely pulling the forepart in towards your hand. It’s very subtle and you’ll barely see the movement, but it’s worth it if you can pick up the technique.
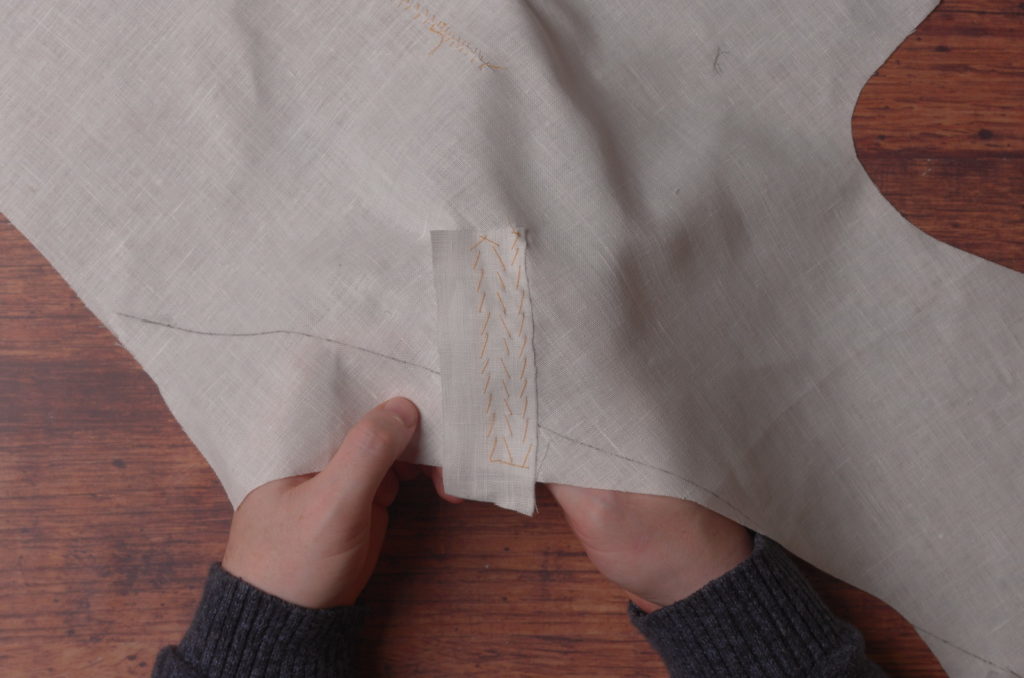
Followed by two rows on the other side. Unless you’ve cut your linen wider, I find five rows to be perfectly adequate.
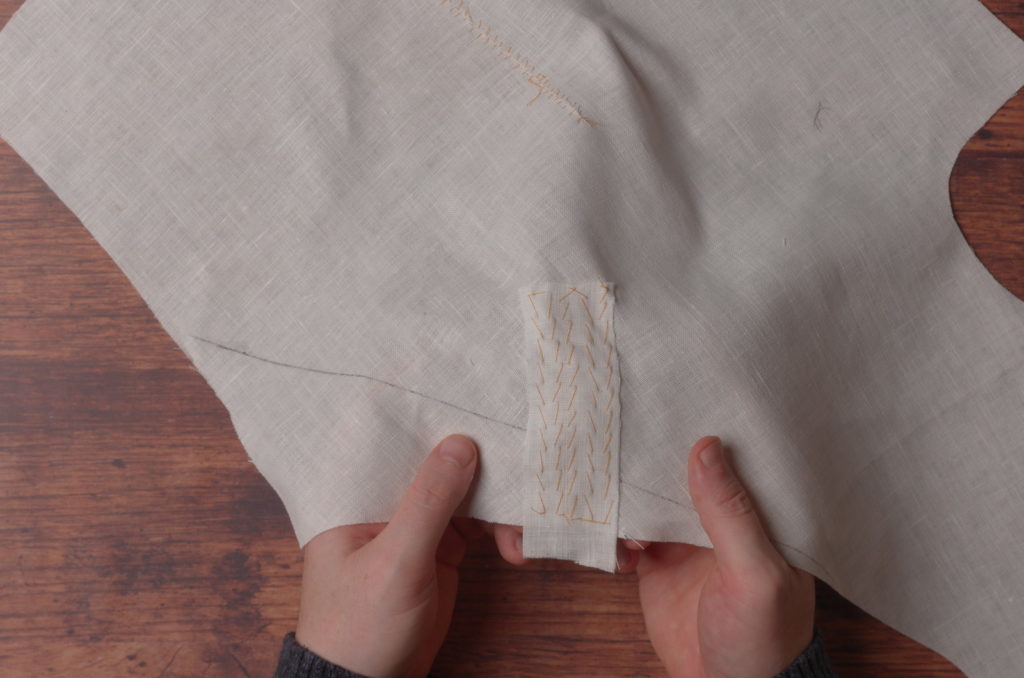
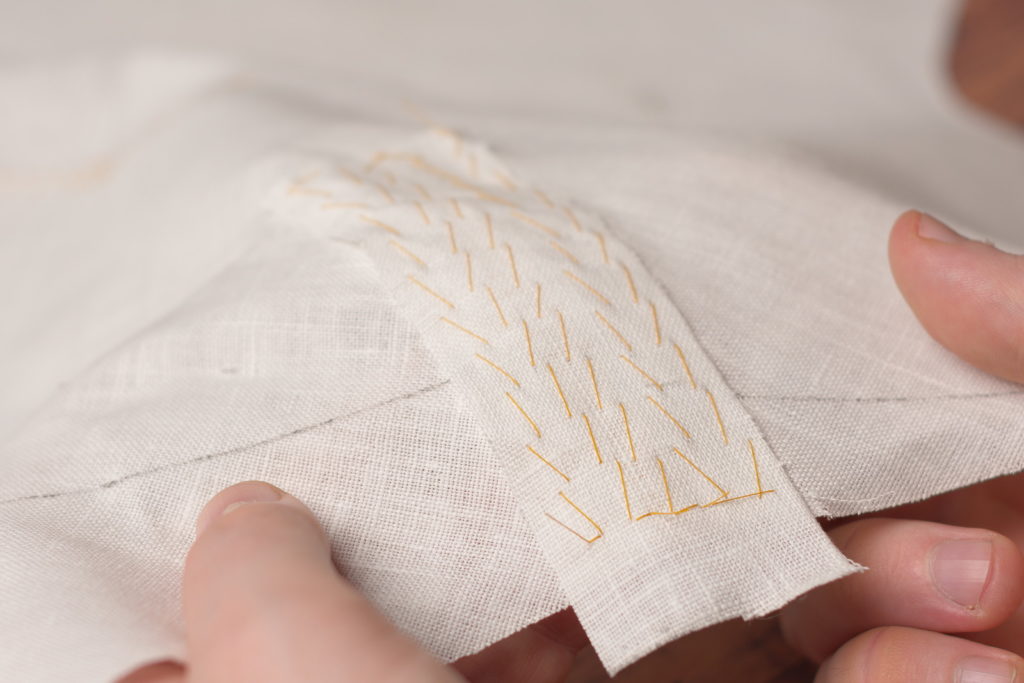
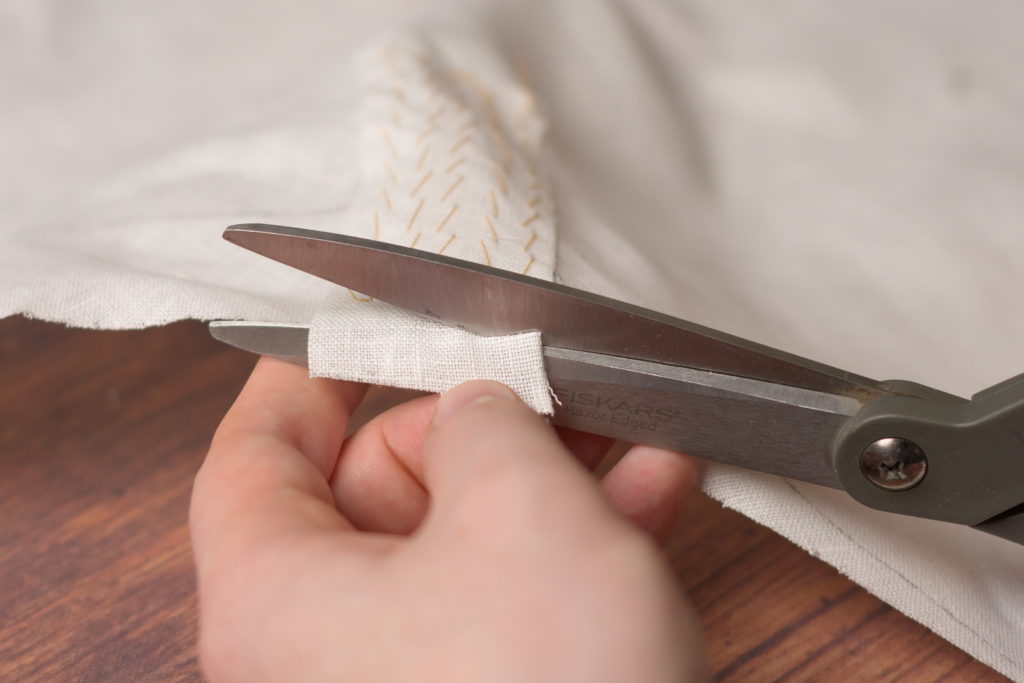
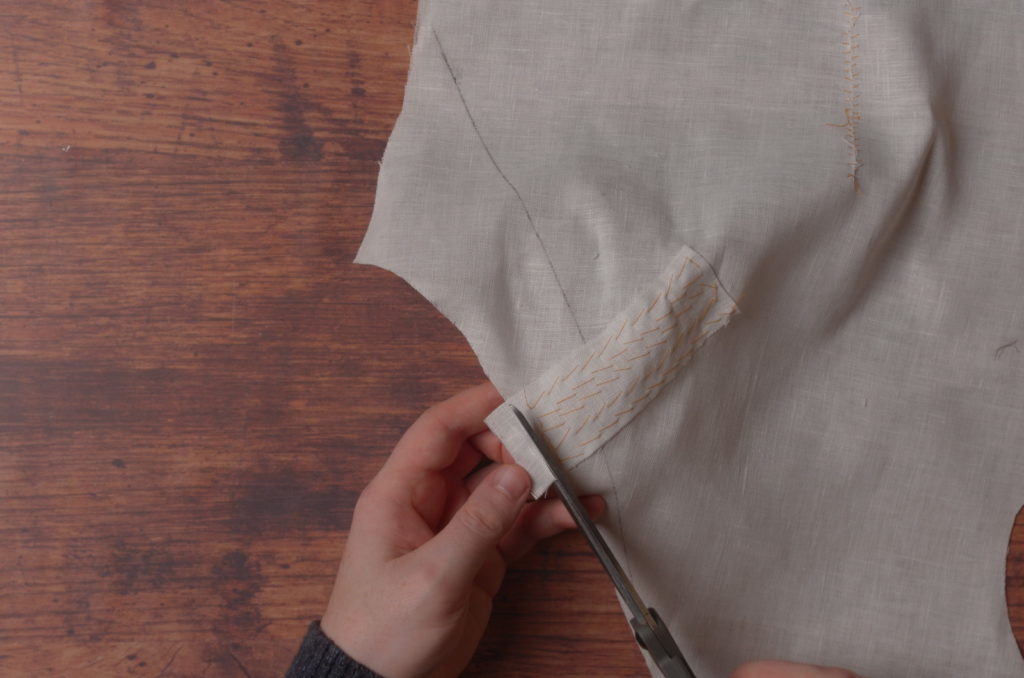
Finally, trip the ends of the linen strips flush with the canvas. Repeat with any other darts you may have. You can see how much shape we’ve worked into the canvas, which will make the waistcoat fit all the better.
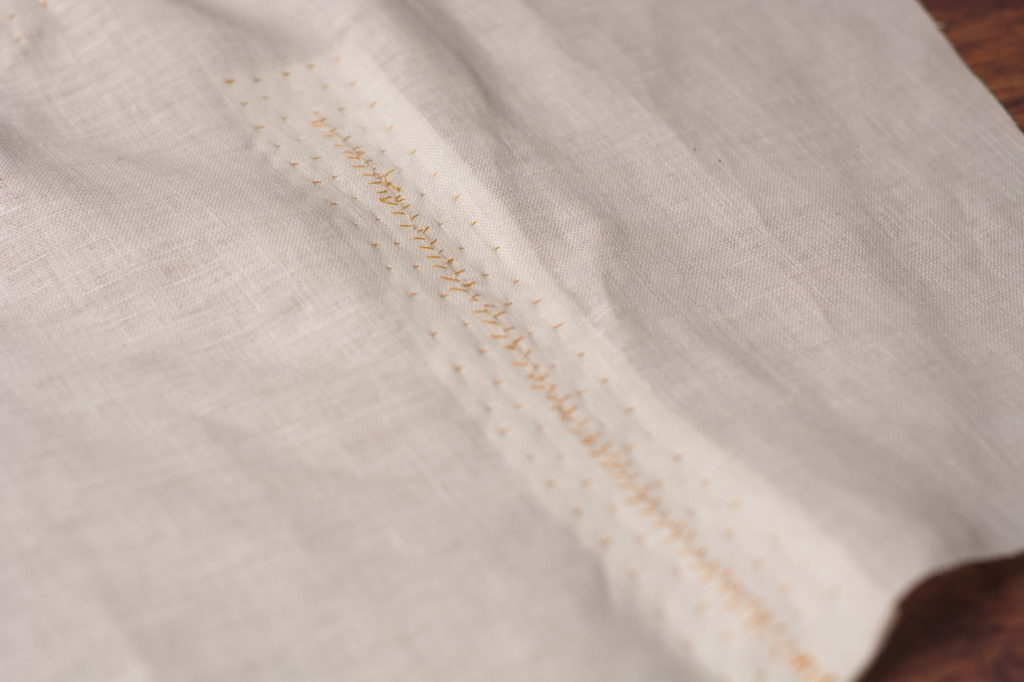
One quick shot showing the underside. Again you can see the shape we’ve built in.
Cutting the Canvas
With the pockets completed, it’s time to move on to the canvas construction. The canvas in a waistcoat or coat provides structure and shape to the garment and is usually made of linen. In my case since the waistcoat fabric is rather lightweight, I’m just using a piece of regular medium weight linen.
Begin by laying out the collar and waistcoat patterns on the linen, being sure to keep the grain lines parallel and leaving at least 1″ around the edges.
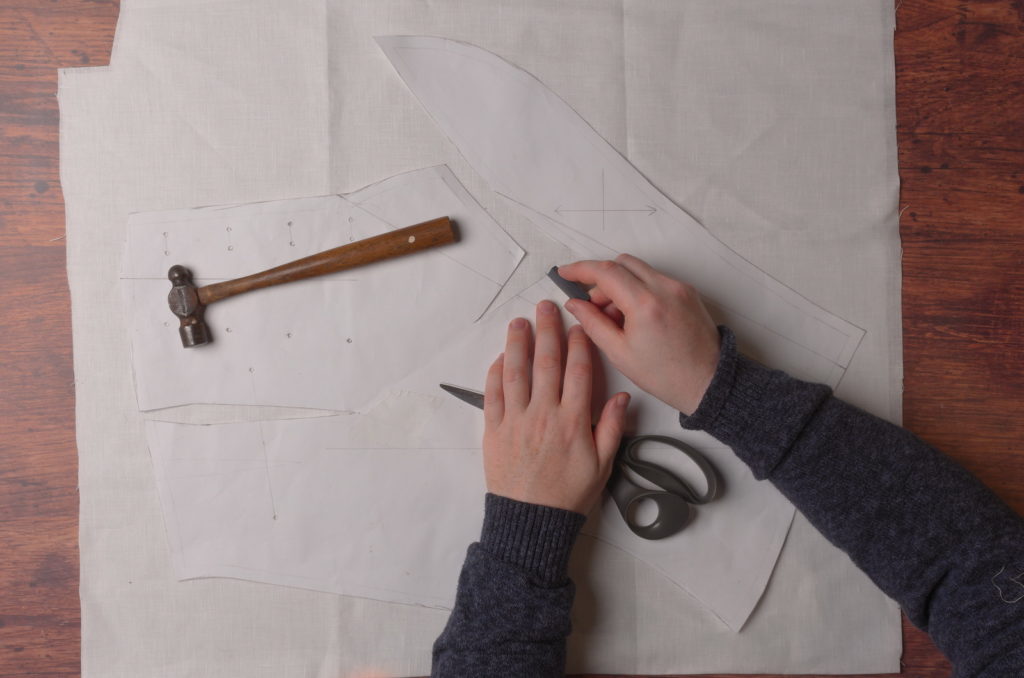
Trace around the entire pattern, including any darts.
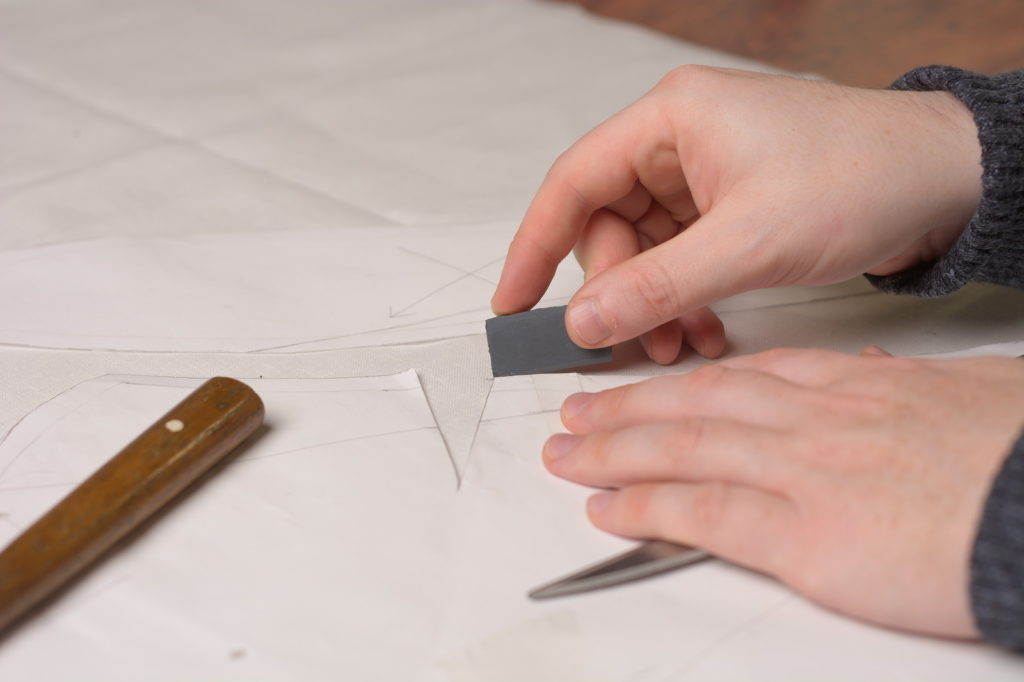
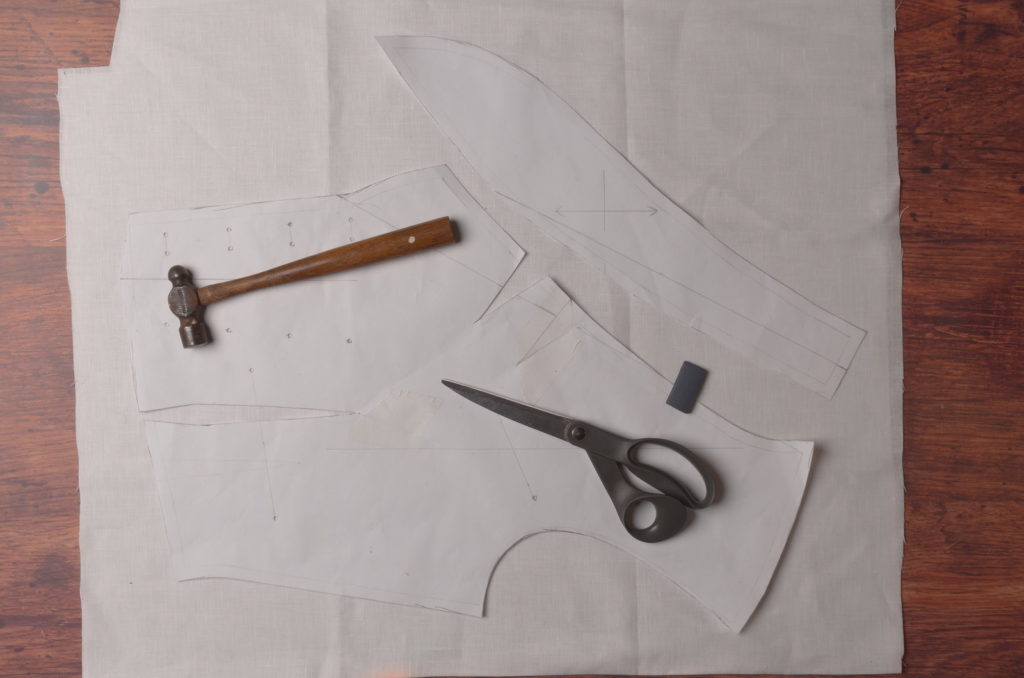
Also draw in the roll lines for the collar, though we’ll be editing them a little later.
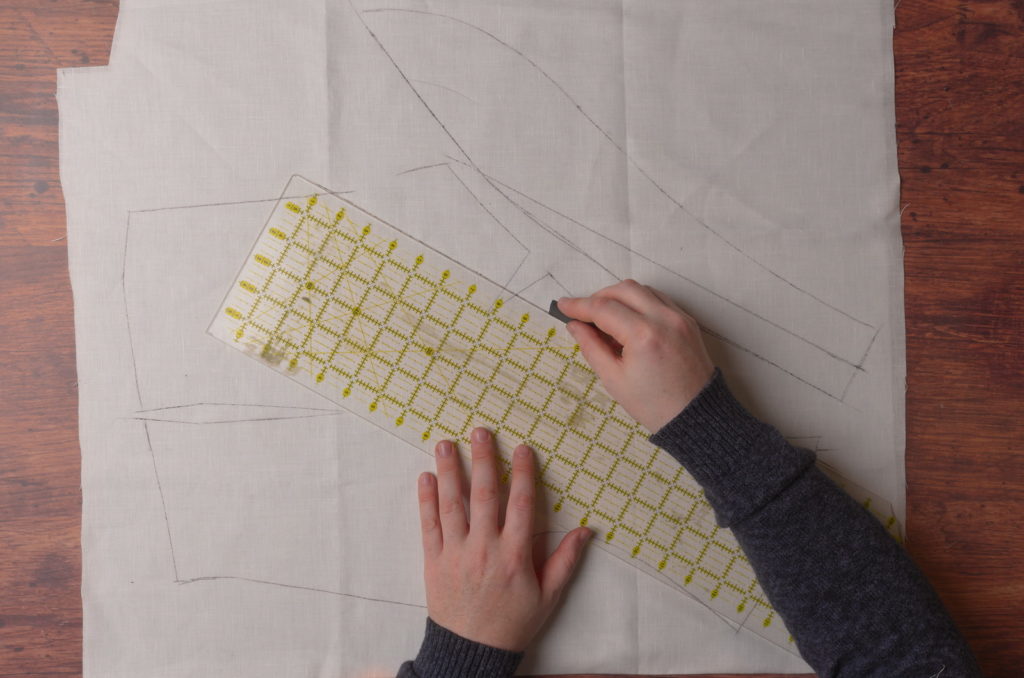
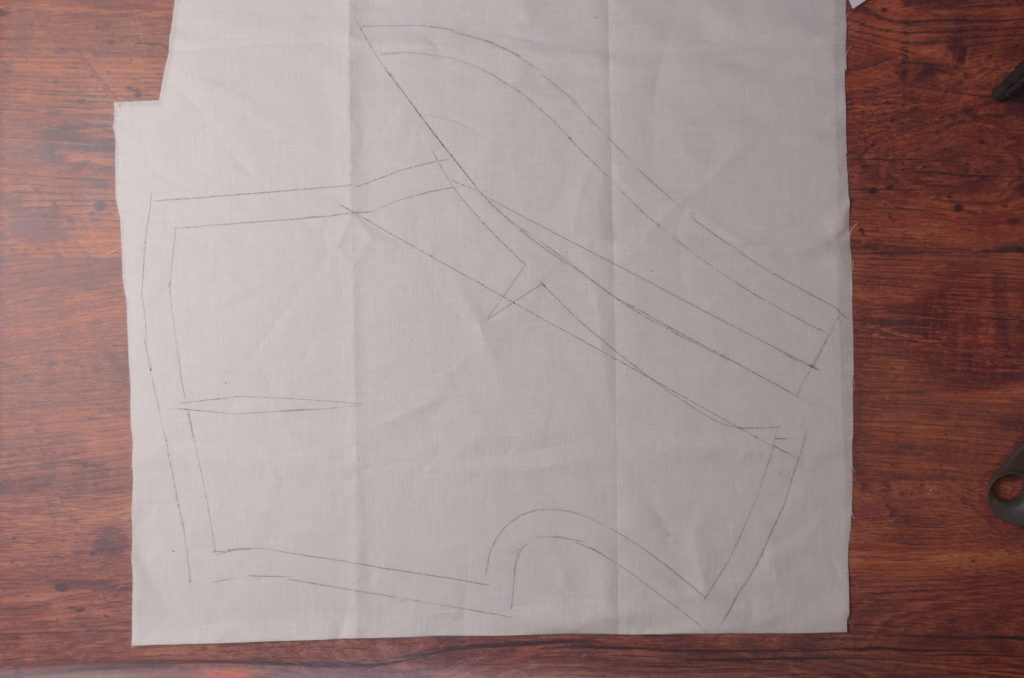
Here’s what you should have so far.
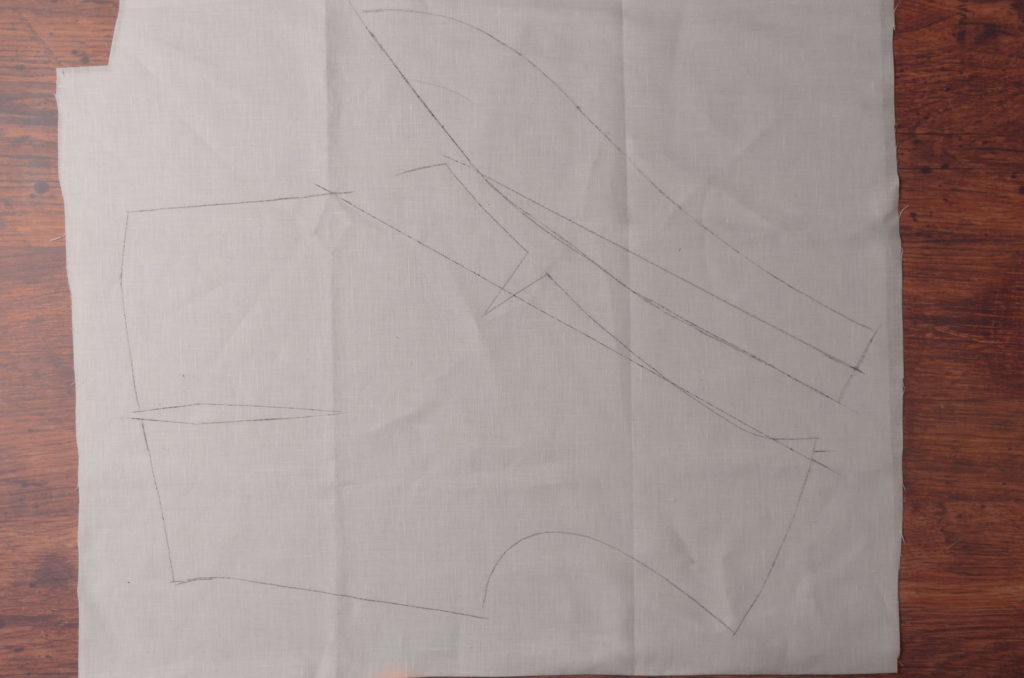
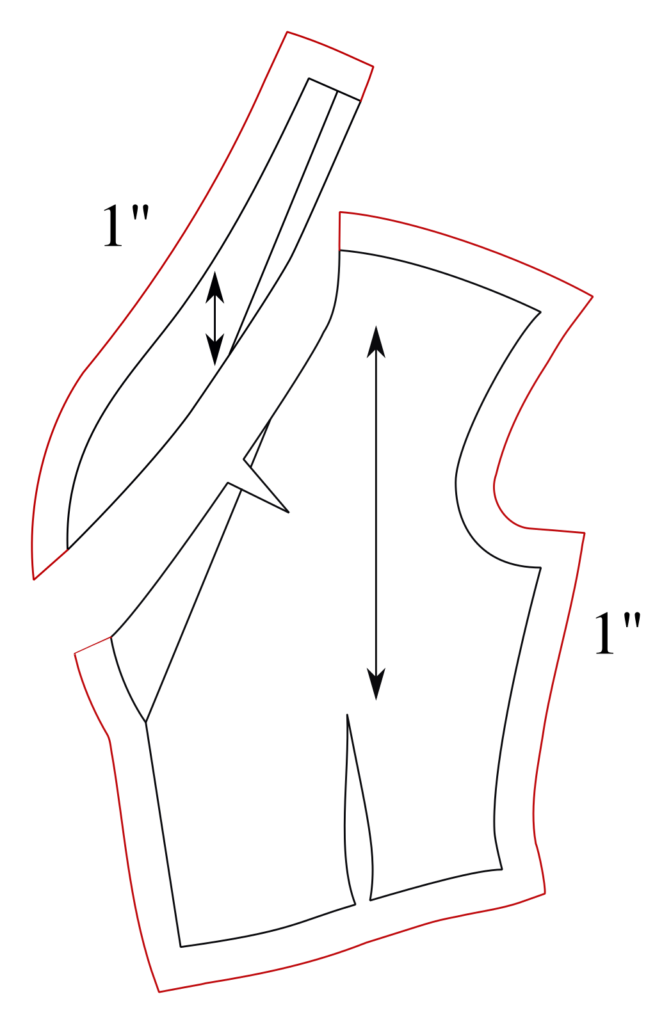
Now add 1″ around the outside of the waistcoat and collar, along the front edge, bottom edge, side, armscye, and shoulder, and the outside of the collar.
No extra material is added to the inside of the collar or the neck edge, as these have seam allowances already and will be sewn together.
The extra material added here aids in installing the canvas later, giving us a little more room to work with.
Don’t forget to add extra material to the center back of the collar – it slipped my mind here and I added it off camera.
Here’s a diagram showing all of the extra fabric added.
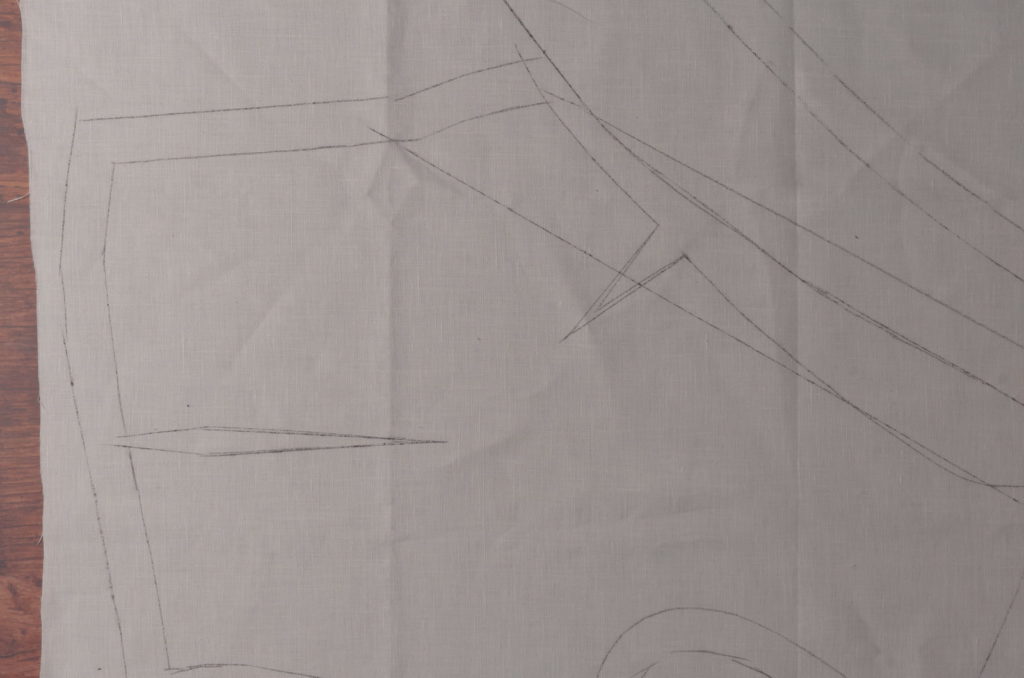
Next, extend the length of any darts by one inch, redrawing the dart lines as necessary. This prevents all the darts from stopping at the same point, allowing the shape to be a little more gradual and subtle.
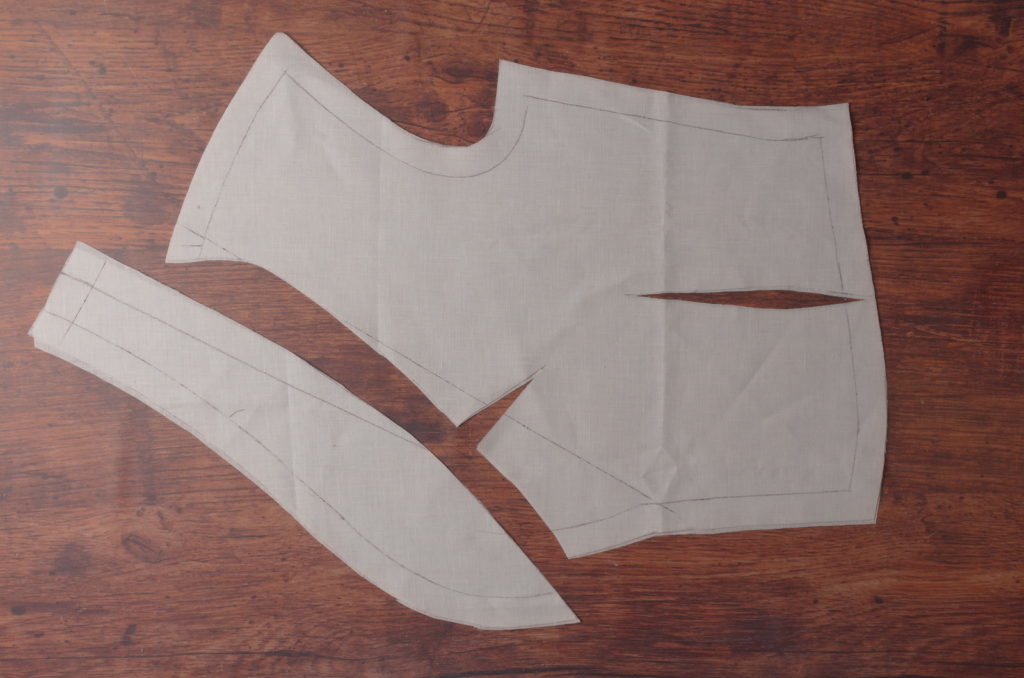
Cut out the canvas pieces for the forepart and collar, including the darts directly along their seam lines.
Breast Pocket
The remaining breast pocket is constructed in the same manner as the other pockets, but the angle is a little steeper, so I thought I’d show a few little details to help you out.
Here I’ve transferred the stripes to the pattern piece. The lack of a dart in this area makes it a little easier to match the stripes, though the bias cut negates that a bit.
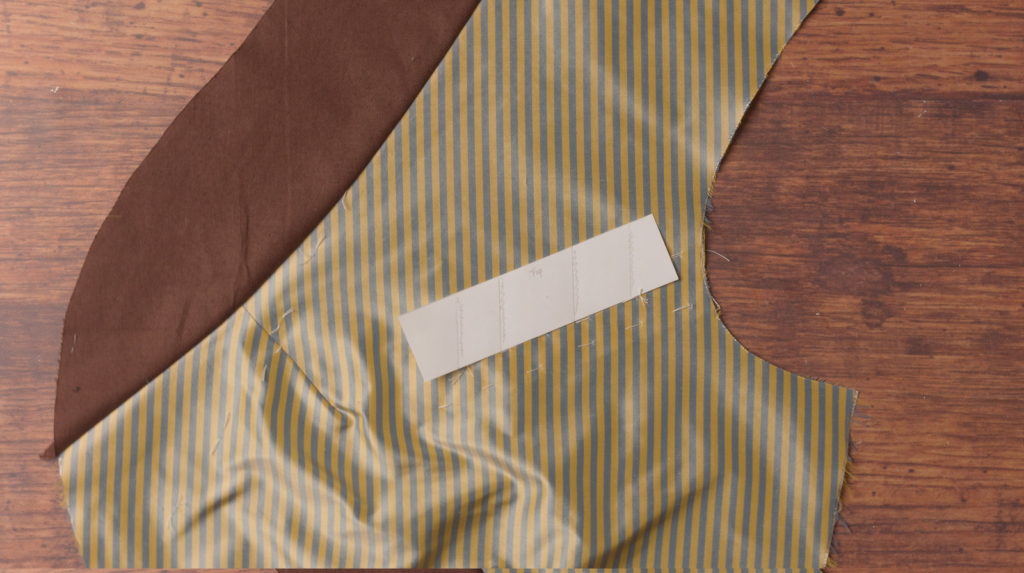
Here I’ve basted in the pocket welt and the upper pocket bag. I like to cut the pocket bags for these angled pockets a lot wider than I need them, so that I don’t have to figure out the exact angle of the pocket bag, which is much more prone to error. By cutting them larger, the angles can simply be drawn in later and the pocket bag trimmed to size.
Be careful when basting in the pocket welt – since it’s cut on the bias, it has a tendency to want to stretch out of place.
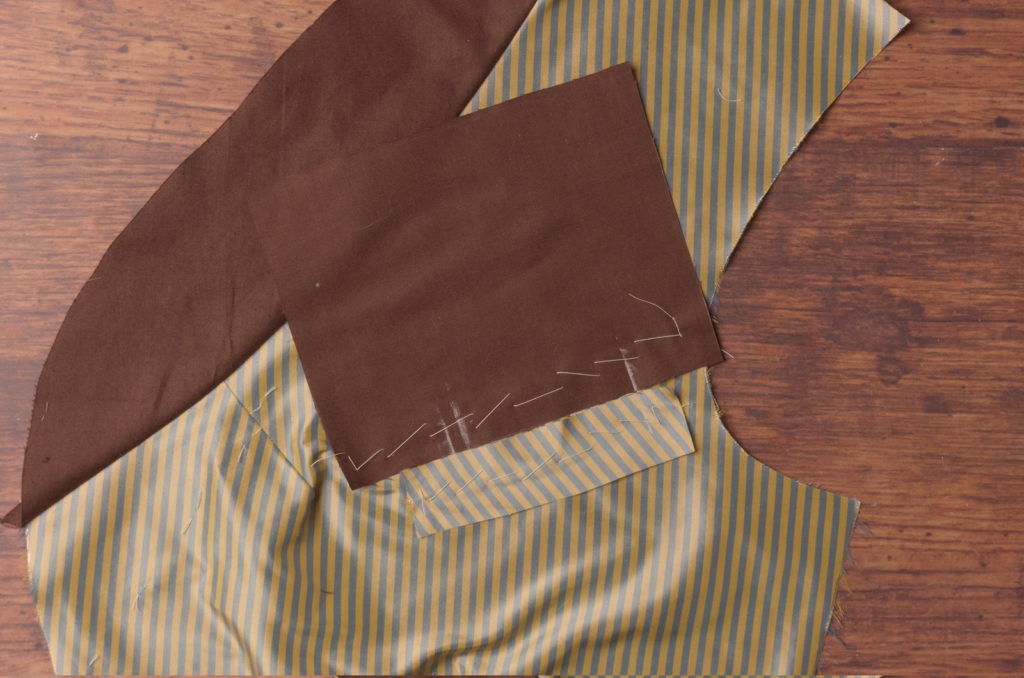
My stripes ended up being ever so slightly off, about 1/32″ at most.
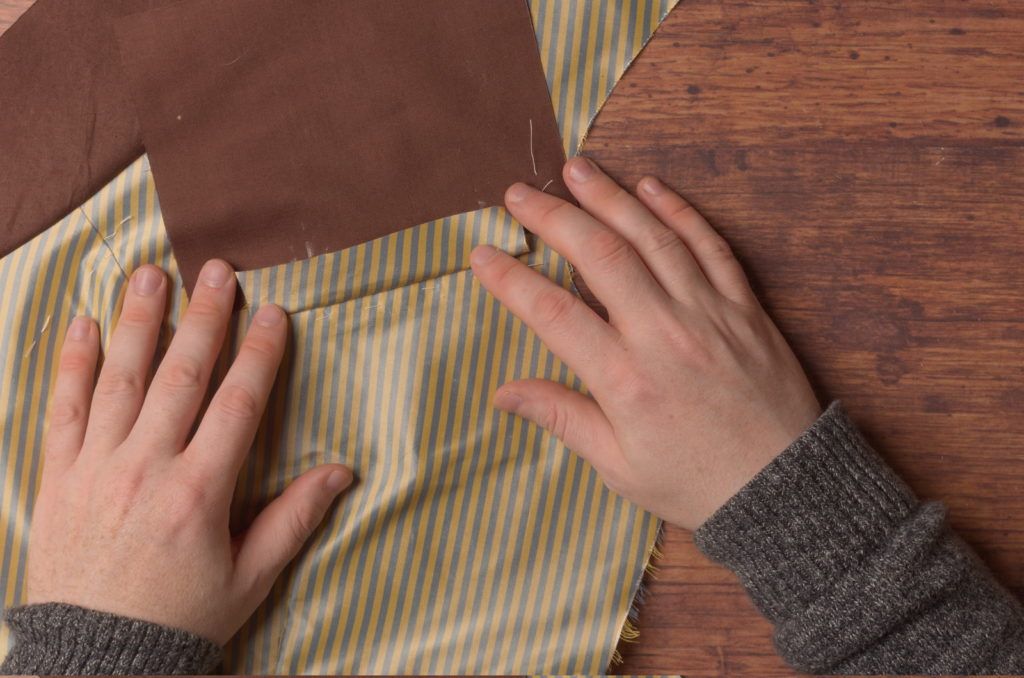
After sewing in the lower pocket bag, you can determine the angle of the pocket itself. I’m keeping my lines about an inch away from the pocket bag seam line, they’ll be trimmed more closely later after sewing the bag closed. The lines should be vertical.
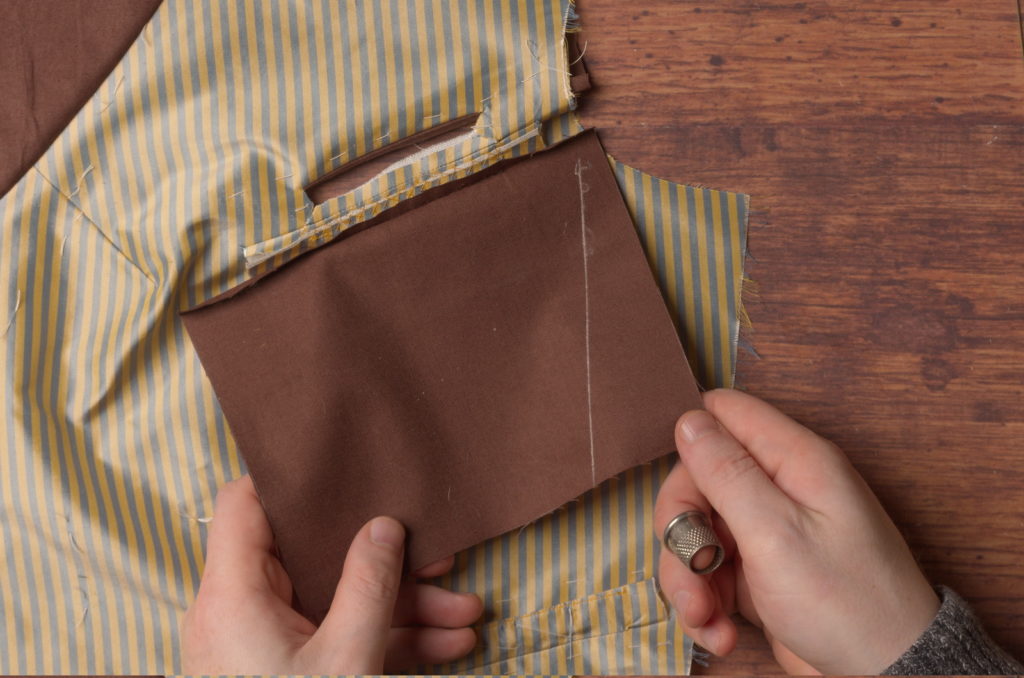
Trim the pocket bag on either side.
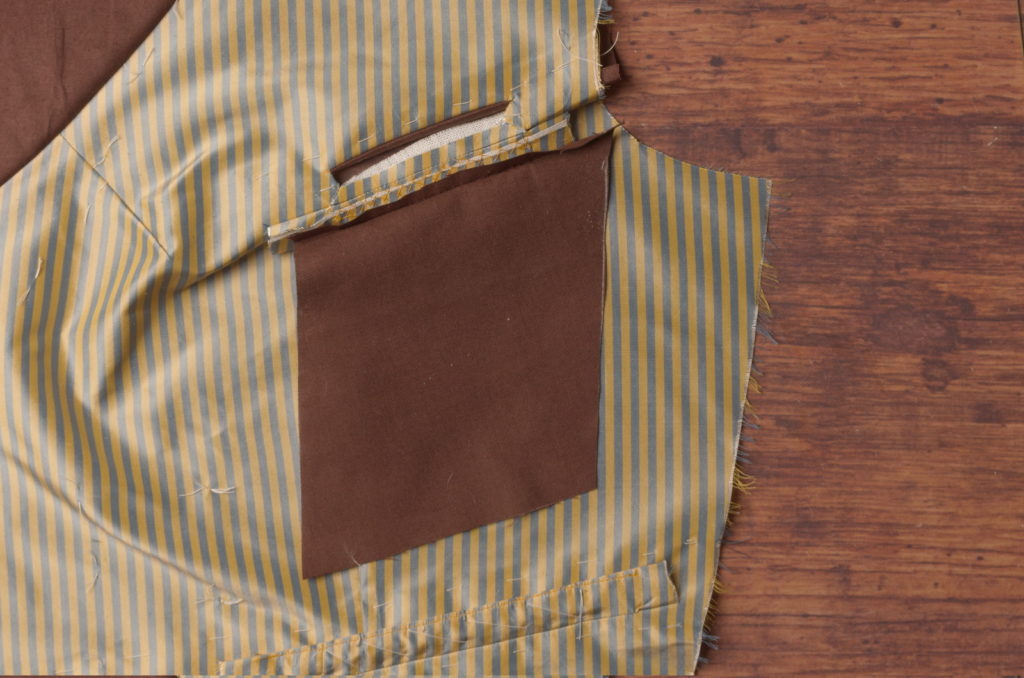
Now taper the pocket bag with two cuts, right to the ends of the stitching on the pocket welt. They’ll be a bit larger and deeper compared to the lower pockets, due to the extra fabric we still have, and the angles involved.
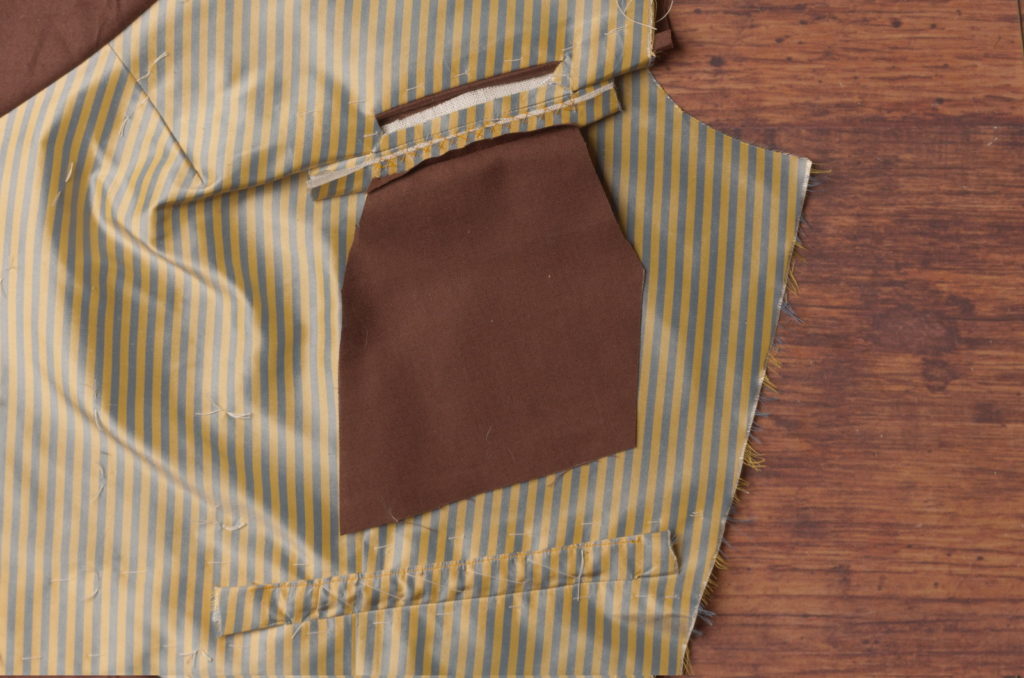
With the pocket bag trimmed, you can pass it through to the inside of the waistcoat.
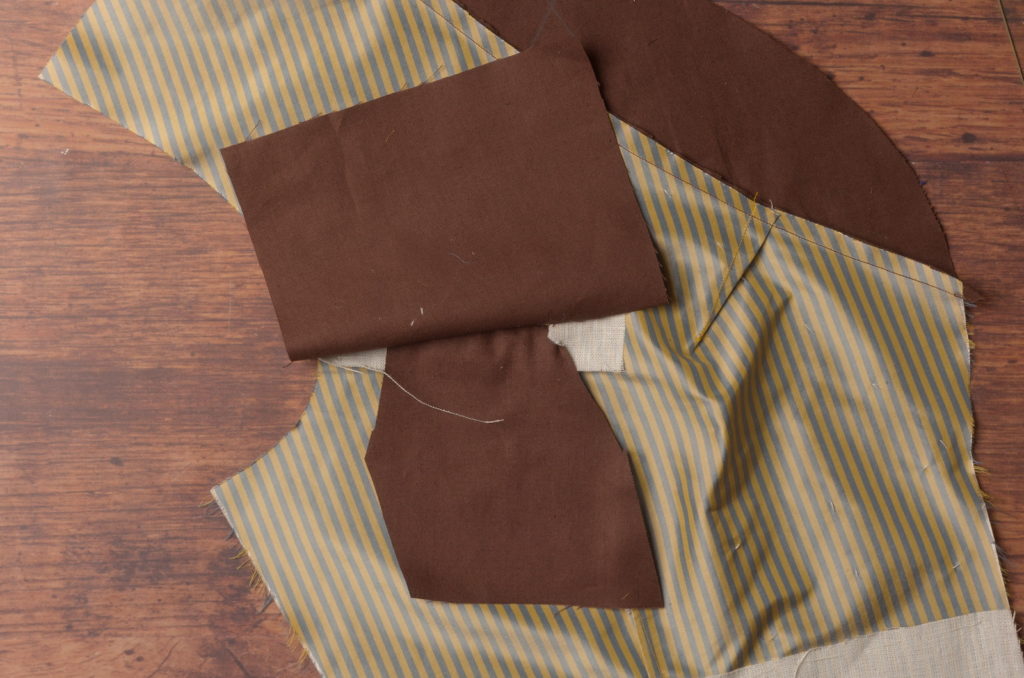
Lay the other bag on top, and draw in the pocket bag seam lines, beginning and ending at the ends of the pocket welt. I tend to make these pockets about 3 inches deep, the bottom edge slightly slanted towards the center front. Curve the lower corners of the pocket as well. Before sewing, double check that the lines you’ve drawn overlap the pocket bag below.
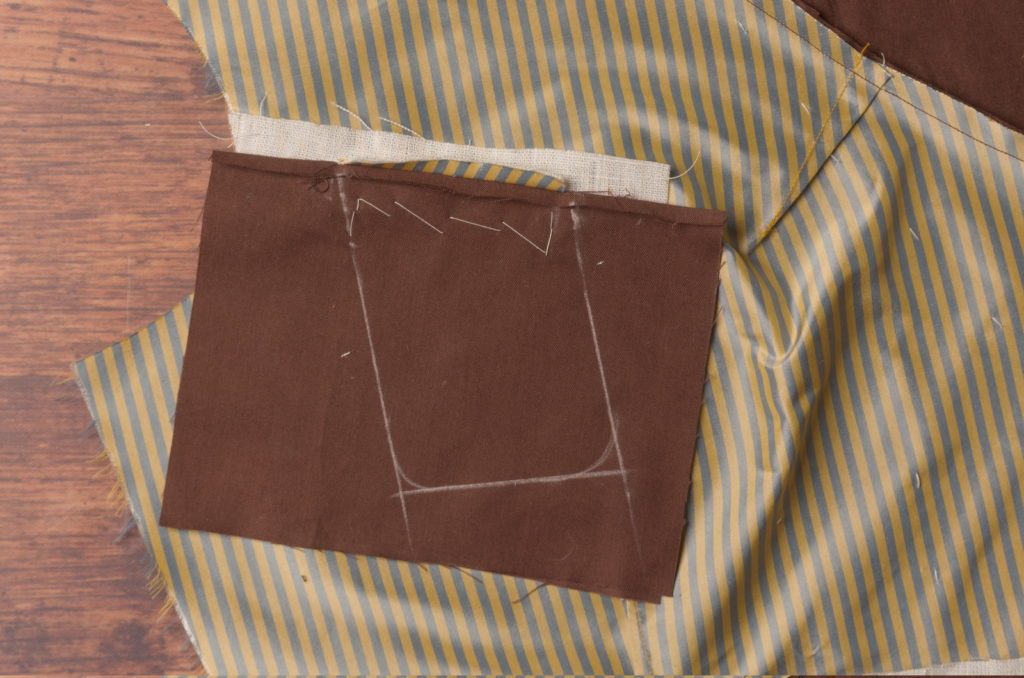
Sew the pocket bag closed and trim the seam allowance to 1/4″.
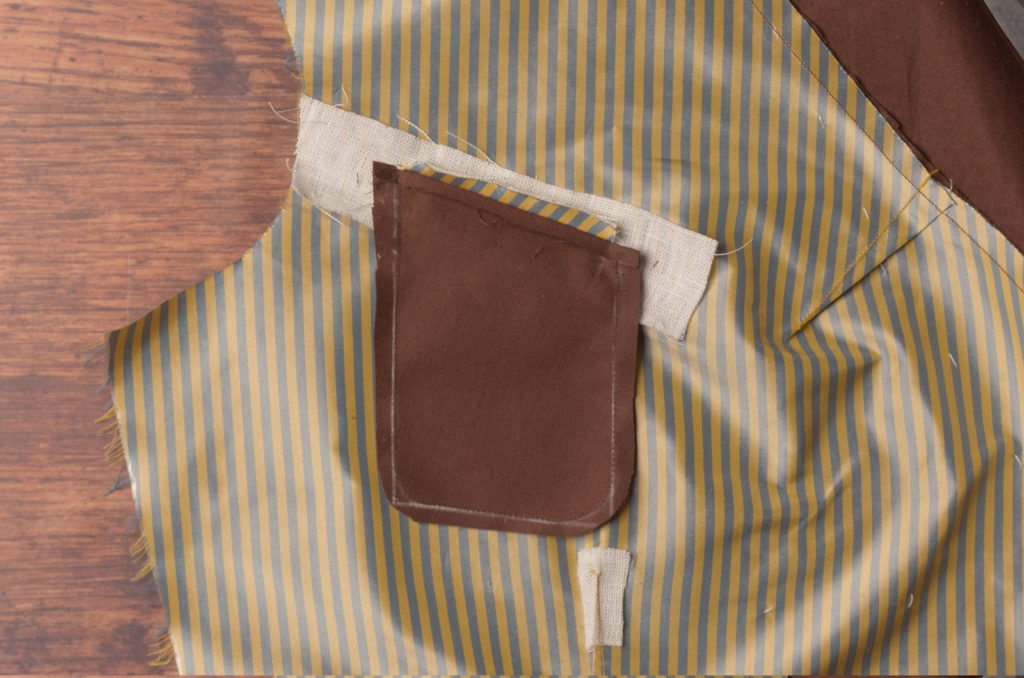
And here’s the completed breast pocket. The ends will be tacked down after the canvas is installed.
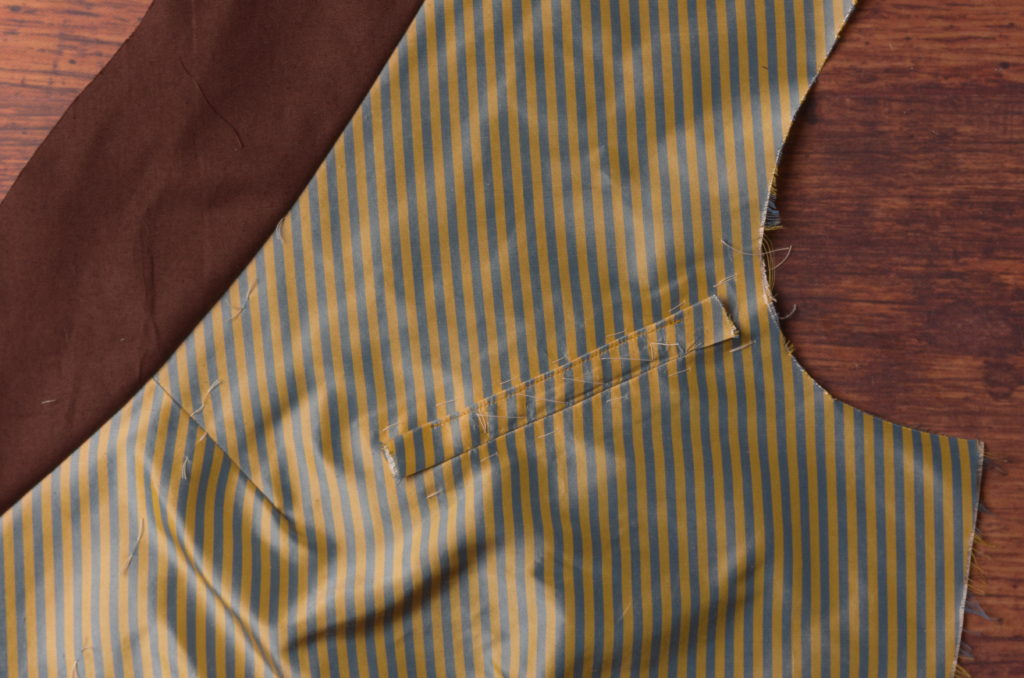
The Pocket Bag
Take the other half of the pocket bag and fold under one long edge to the wrong side by 1/4″ to 1/2″ – doesn’t really matter as long as you have a deep enough pocket.
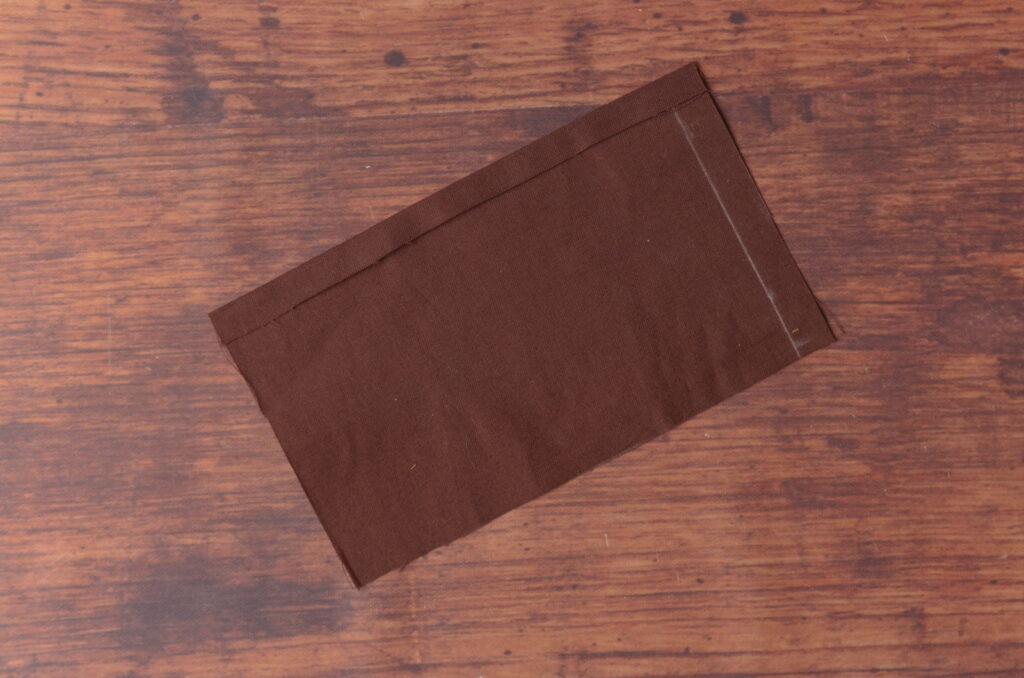
Baste the pocket back to the pocket welt, wrong sides together, about 1/4″ below the top, or at least covering all of the stitches and raw edges on the welt. Keep about 1″ at either end free from the basting stitches.
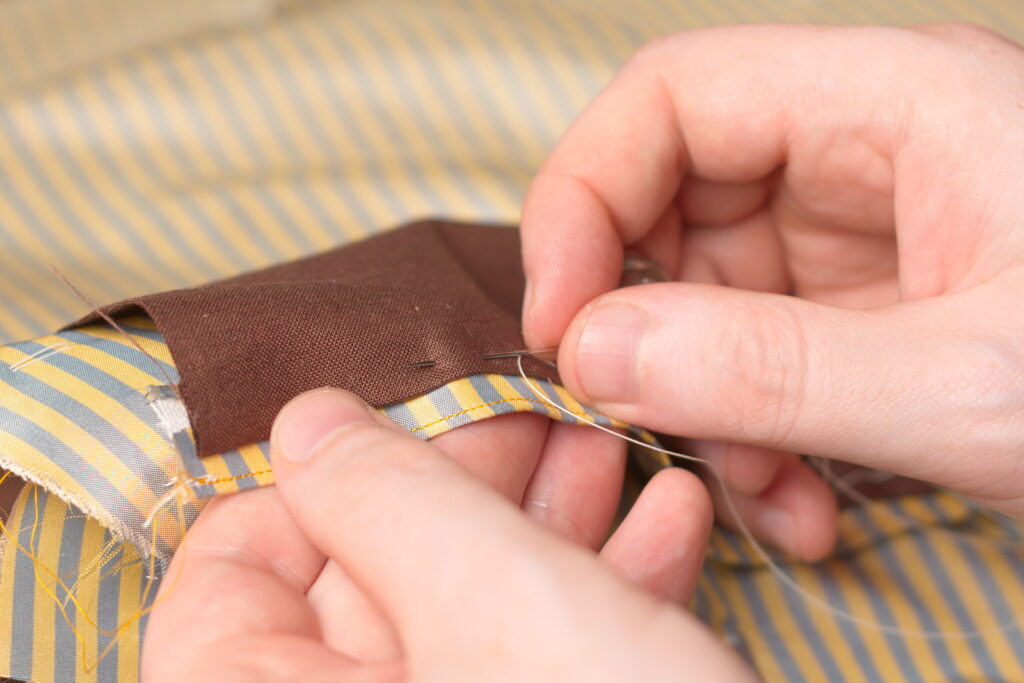
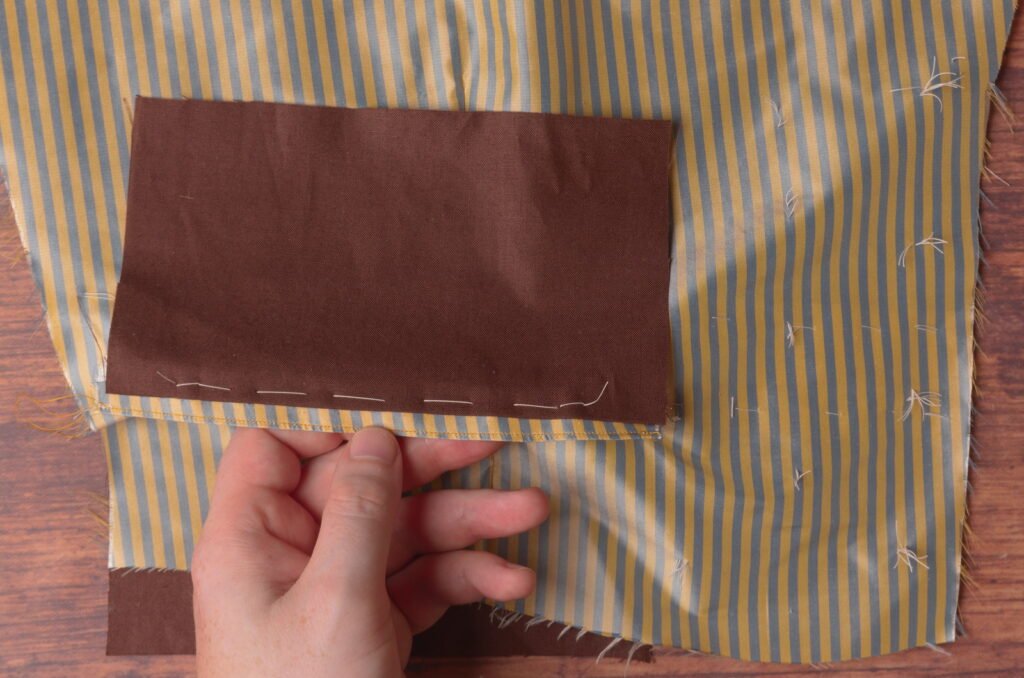
Now you need to mark the ends of the pocket stitching on this pocket bag as well. I find the easiest way is to roll back the pocket bag, find the end of the stitching, and crease the pocket bag at that location. Repeat for the other end as well.
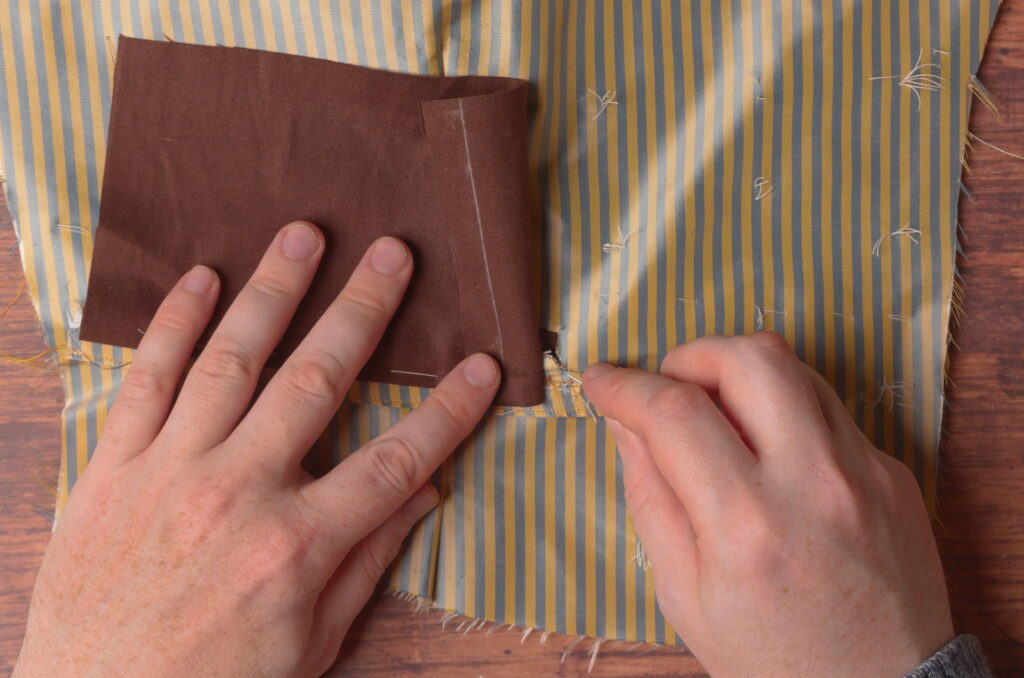
Then mark the creases in chalk on the right side of the bag, just so you can see the ends of the pocket more clearly.
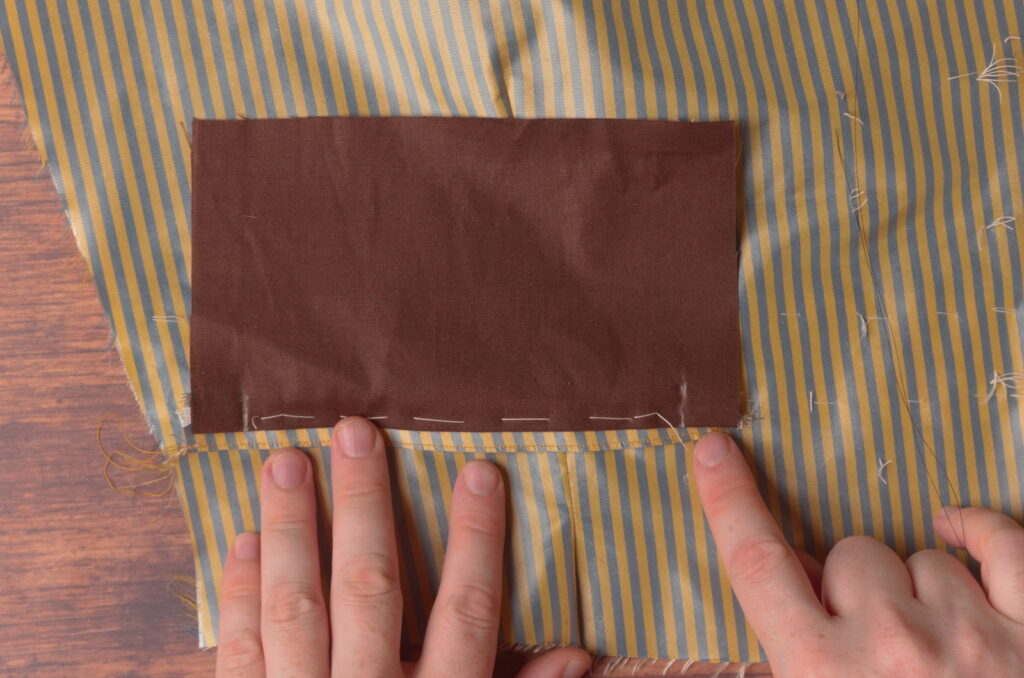
Now fell the pocket bag to the welt from mark to mark, being careful not to let the stitches show through on the right side – not too difficult as there are so many layers now.
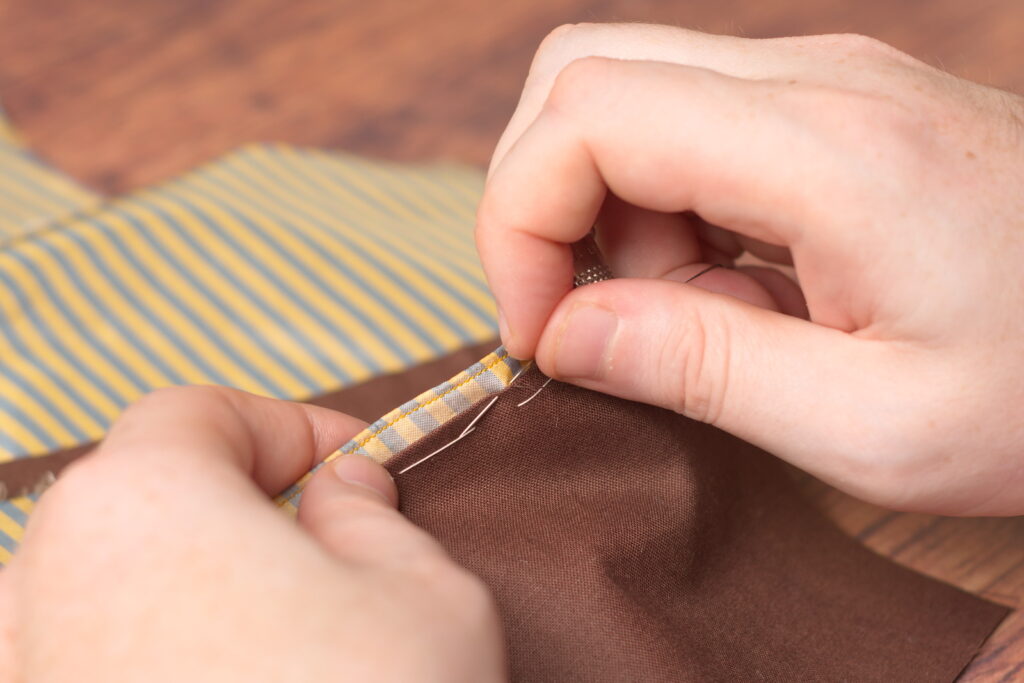
I meant to show you the stitches in this photo but they’re so small they’re almost impossible to see! Just slight dimples in the fabric.
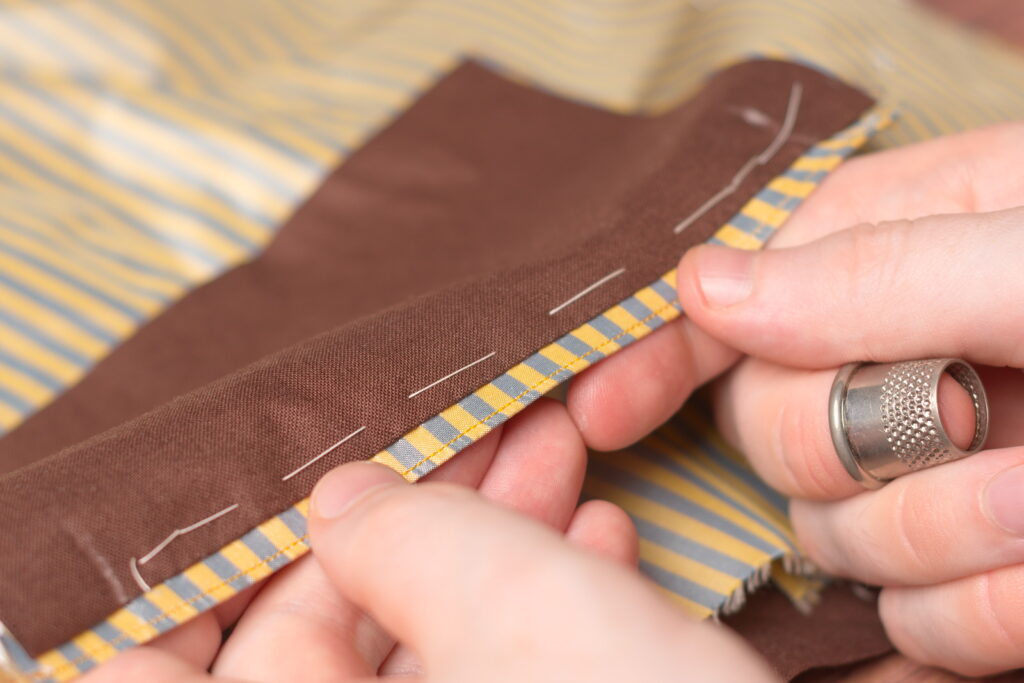
Here’s why we ended the stitching at those marks. The excess fabric needs to be trimmed off to help the pocket bag fit through the opening. I don’t usually draw these chalk lines, but it’s a good idea for the first couple of tries. Mark the lines from the end of the felling stitches at a steep diagonal, to a point on the edge about halfway down the pocket bag.
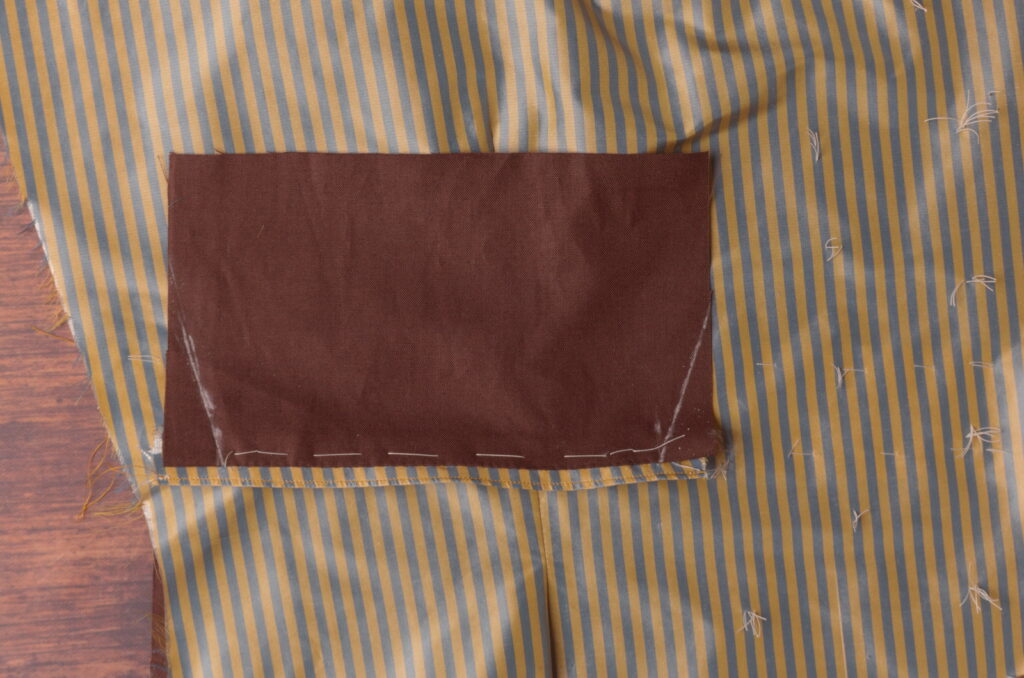
Trim the pocket bag at each end.
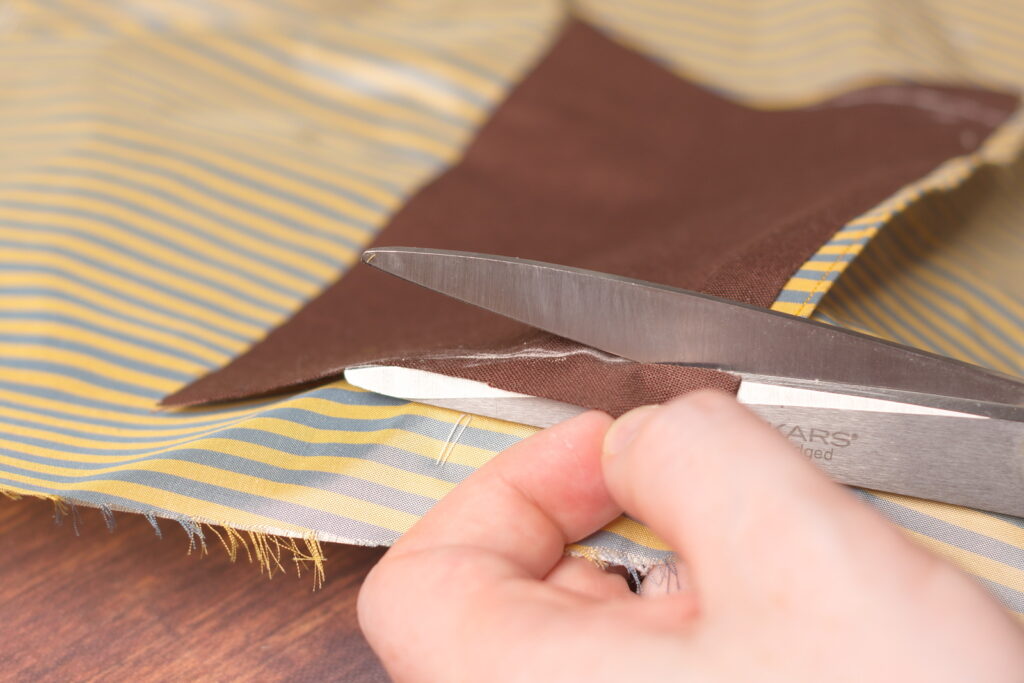
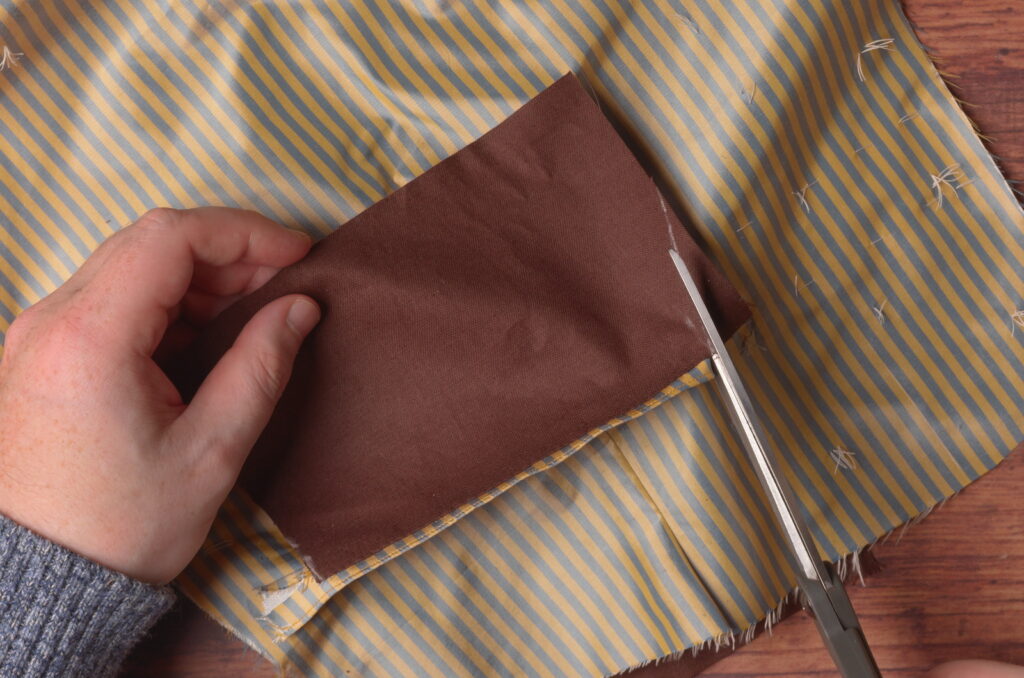
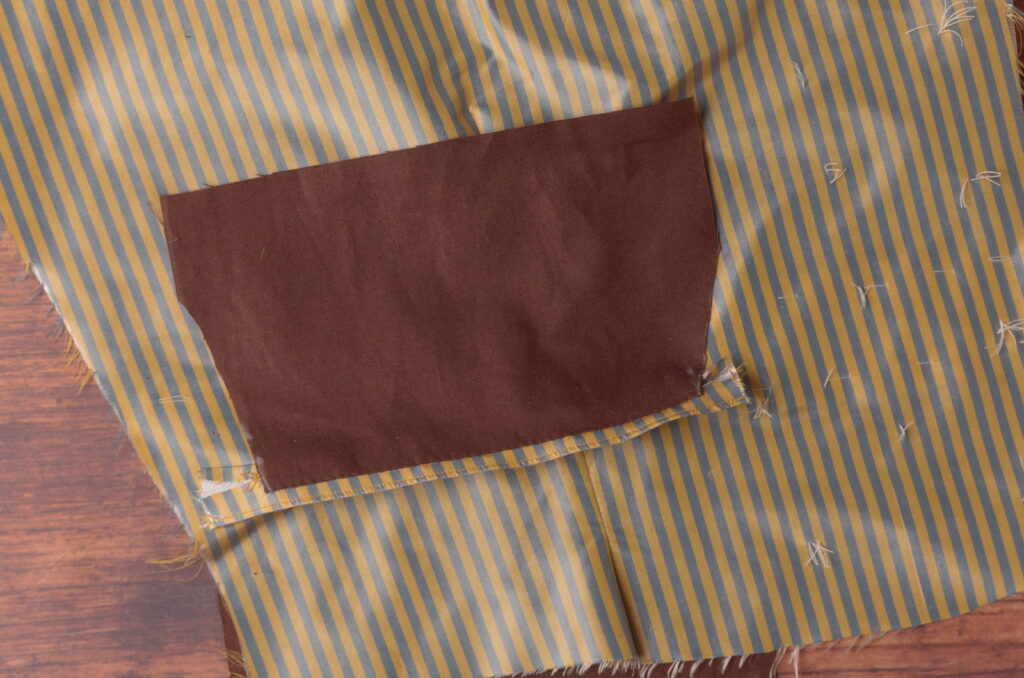
Pass the pocket bag through the opening to the wrong side. If you’ve done everything correctly it should all lay smoothly in place.
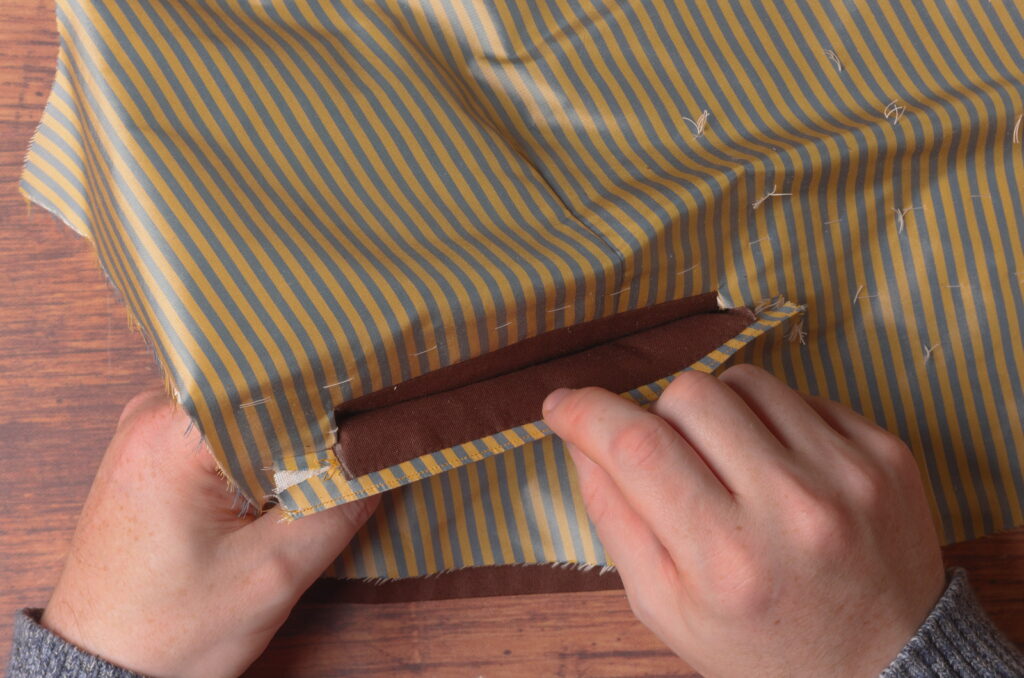
Working on the wrong side now, get everything laying as smoothly and as flat as you can, removing any tension between the two halves of the pocket bag, and making sure the opening and welt are aligned properly. Grasp both pocket bags with one hand and baste them together right below the pocket opening. This keeps everything from moving while we close up the bags.
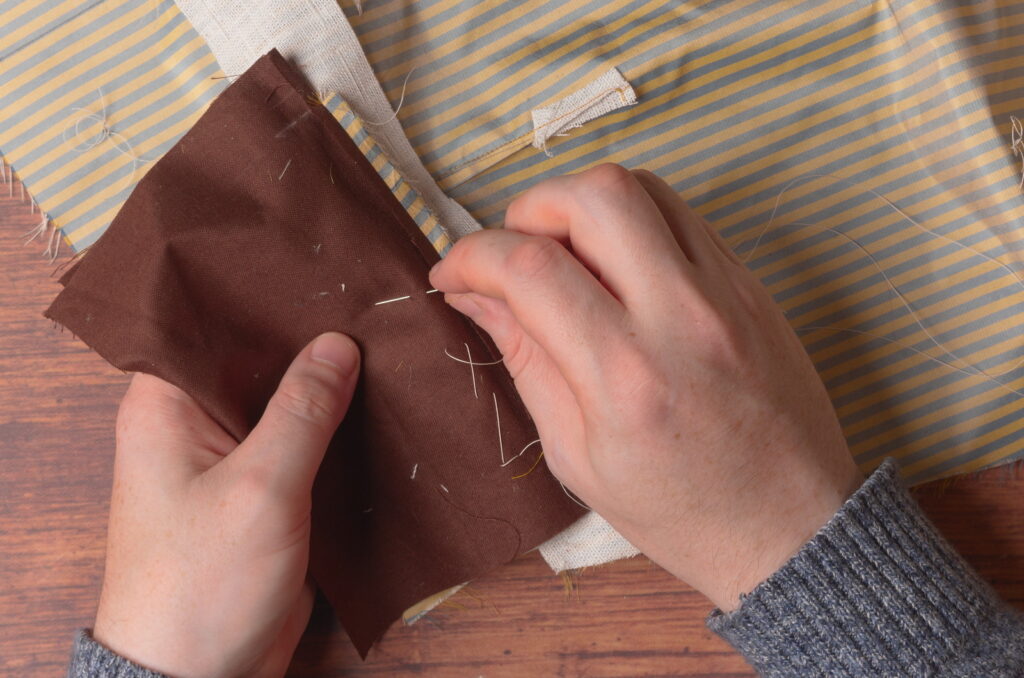
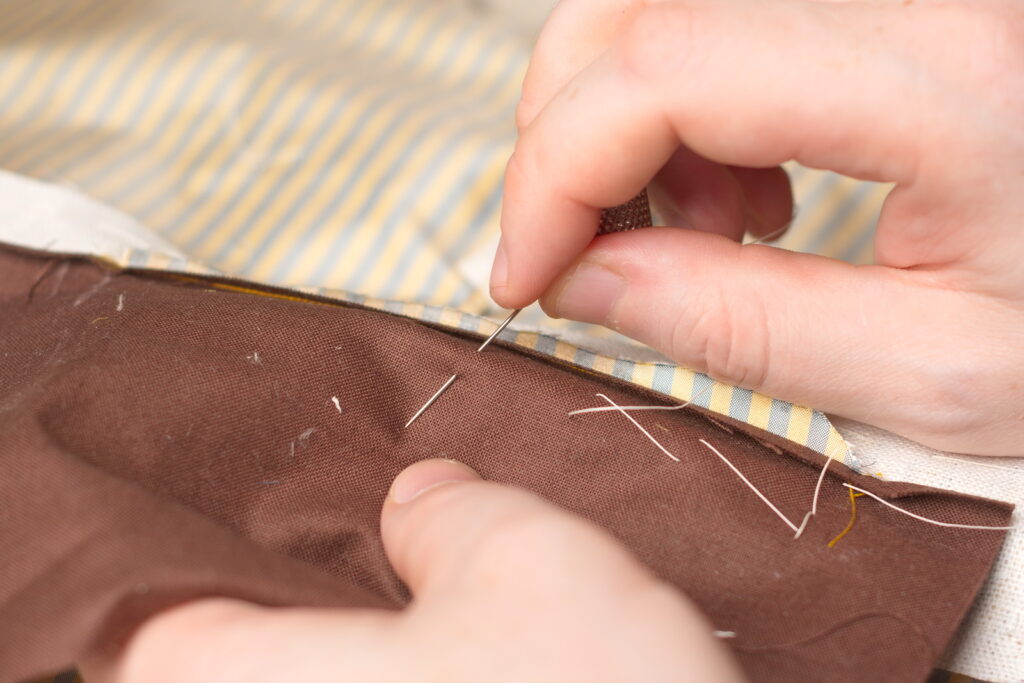
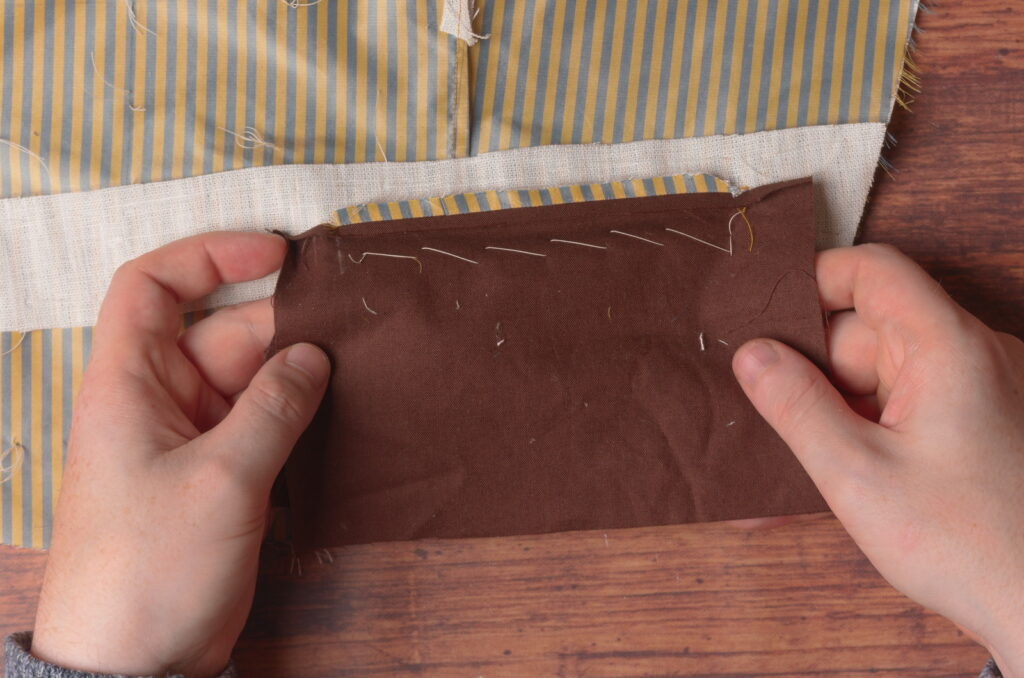
Now draw in the seams for the pocket bag. The sides should be parallel to the grainline of the forepart, or at least as close as possible.
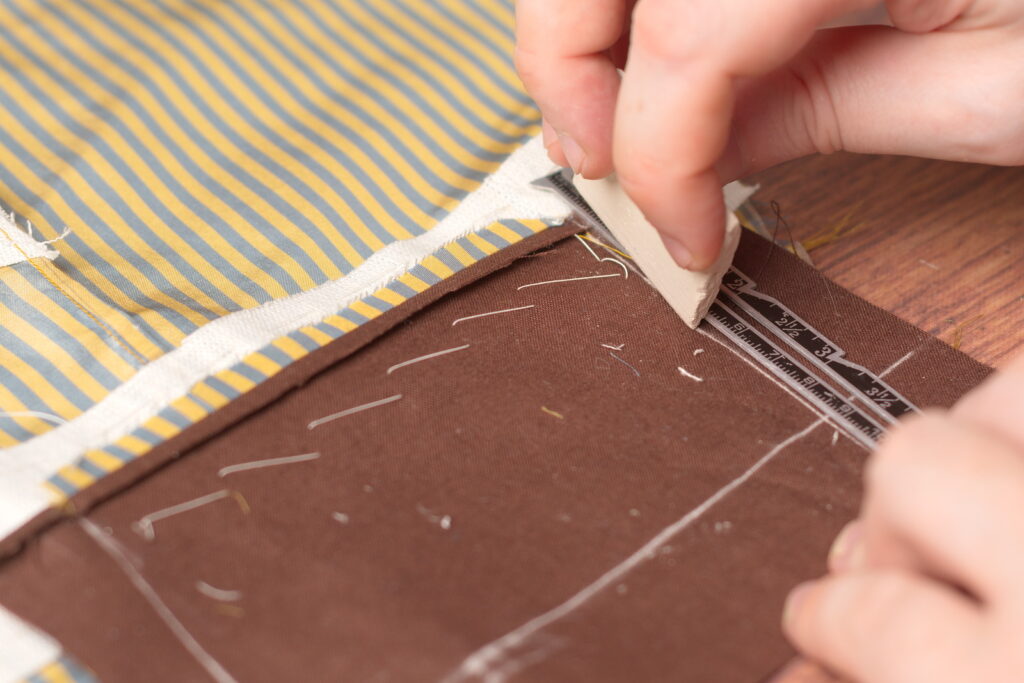
And draw the bottom of the pocket bag roughly parallel to the waist line on the forepart, and at least 1/2″ or 3/4″ away from the bottom, to keep room for the facing seam.
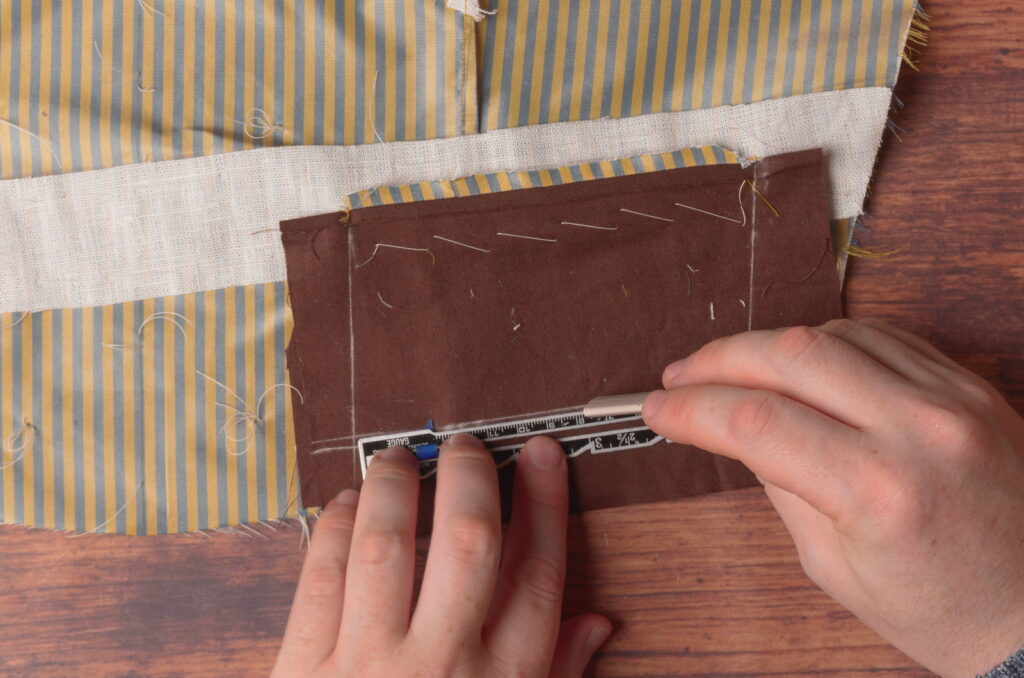
Finally, I like to curve the corners of the pocket to make it easier to get things out. You can do this freehand, as I usually do, or use some round object to draw in the curves.
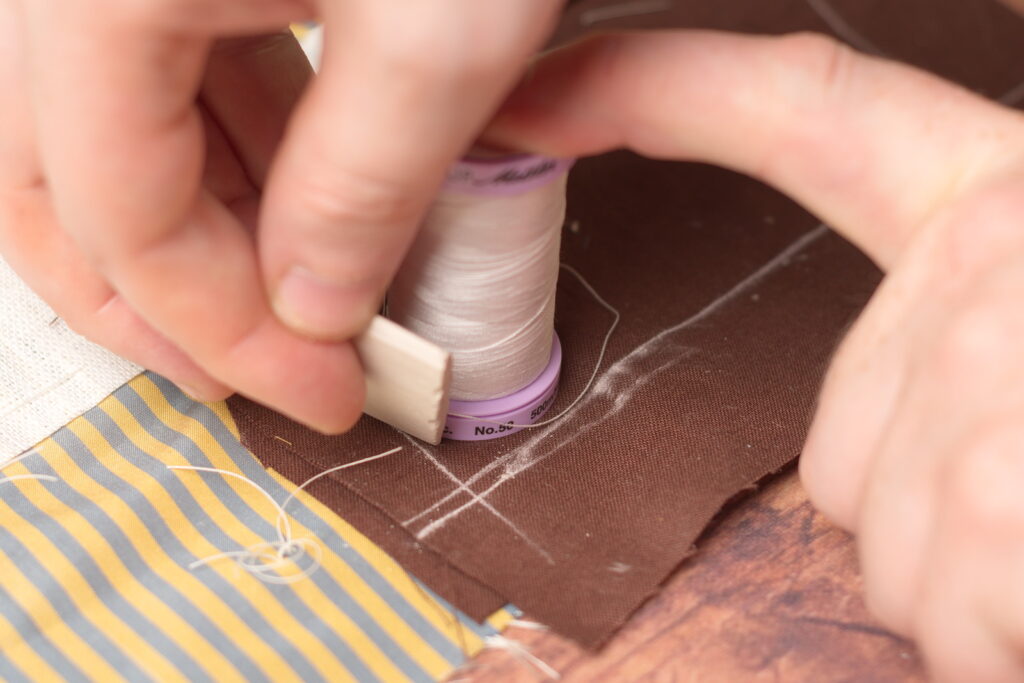
Now stitch the pocket bag closed following the line, getting as close as you can to the top of the pocket, being sure to fold the rest of the forepart out of the way.
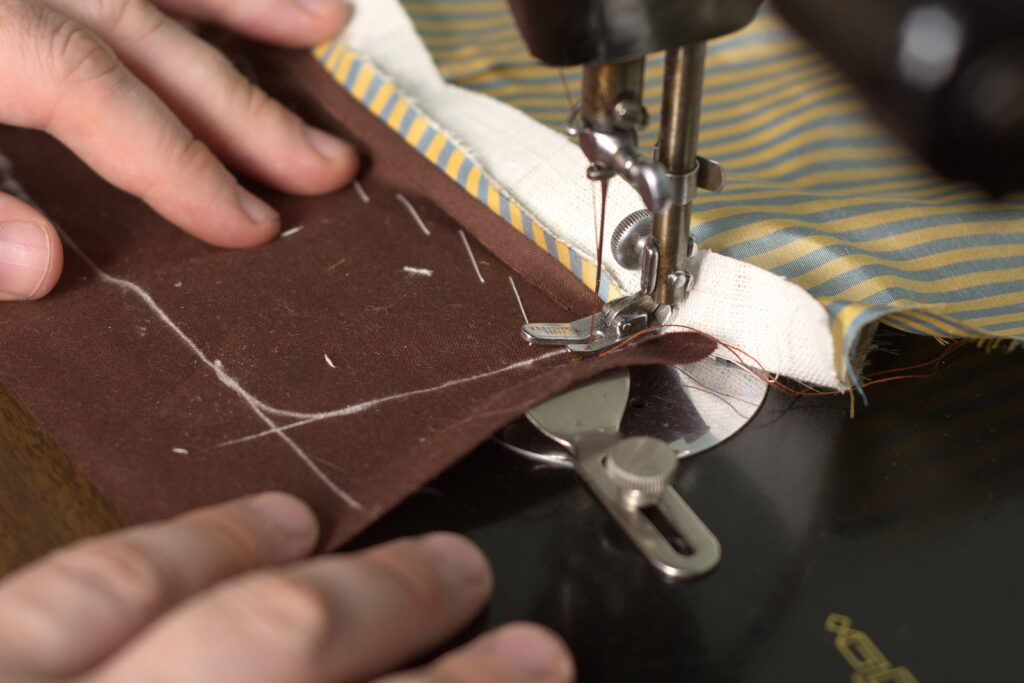
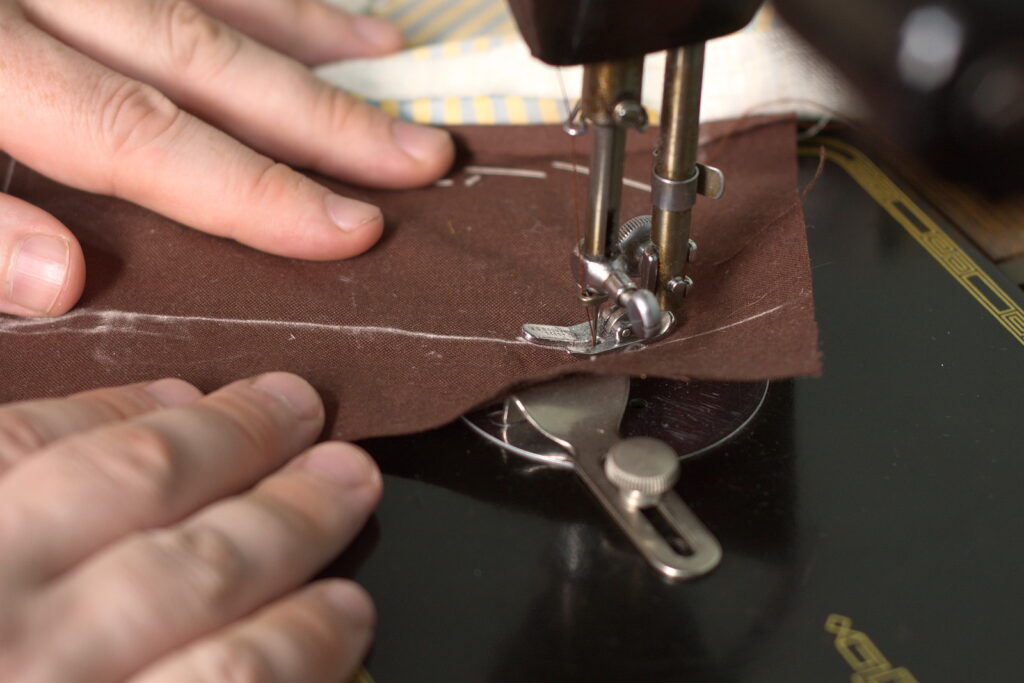
Here’s the pocket bag after stitching closed.
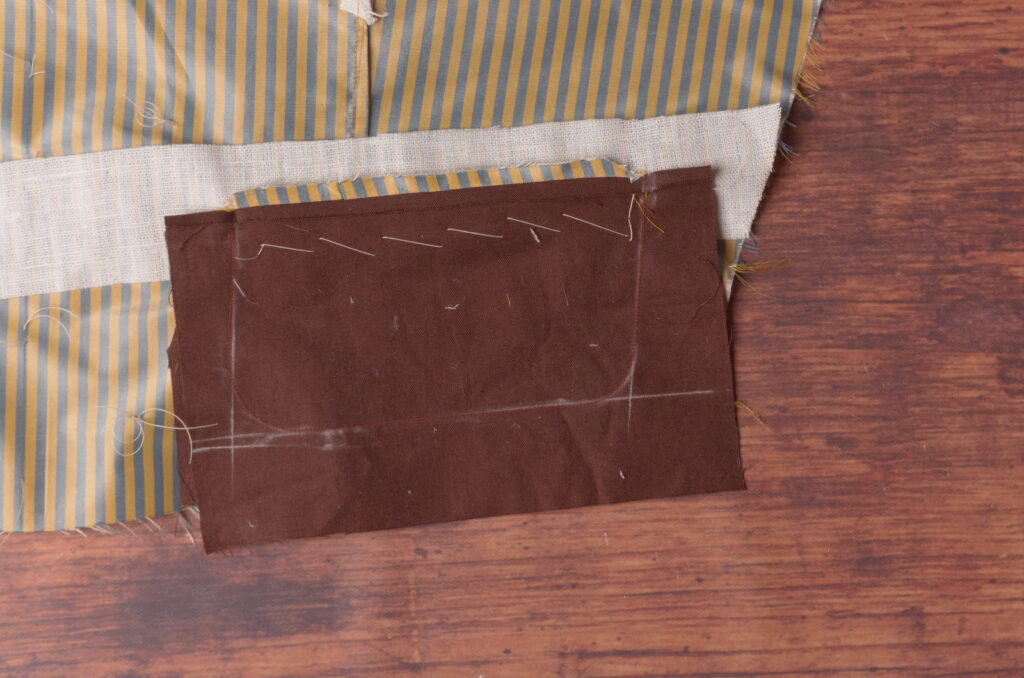
Now trim the excess from the pocket bags down to a 1/4″ seam allowance.
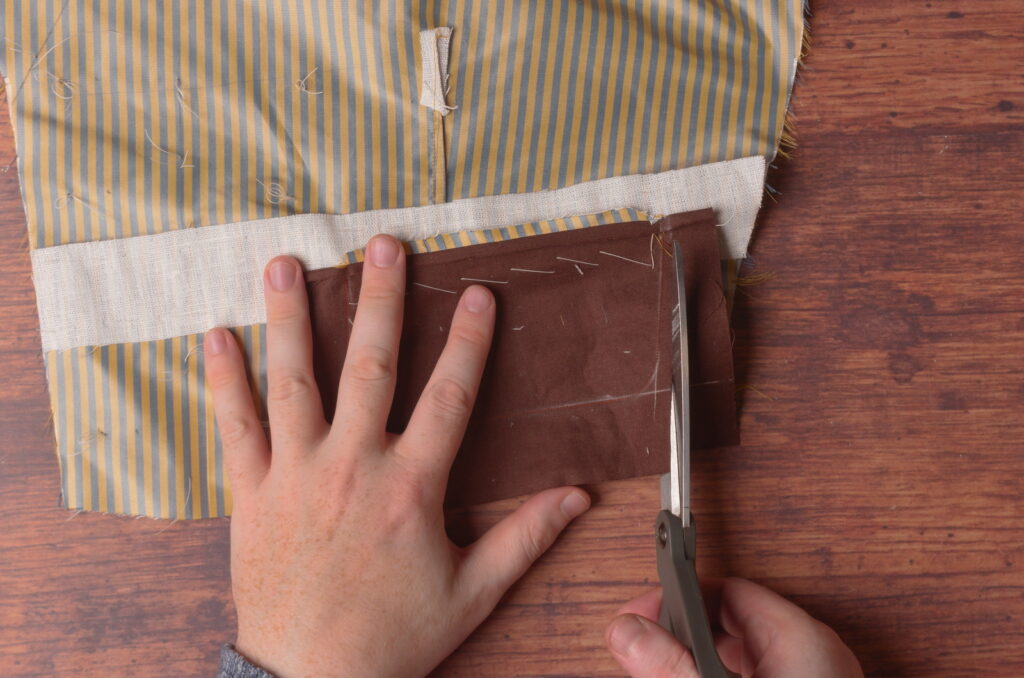
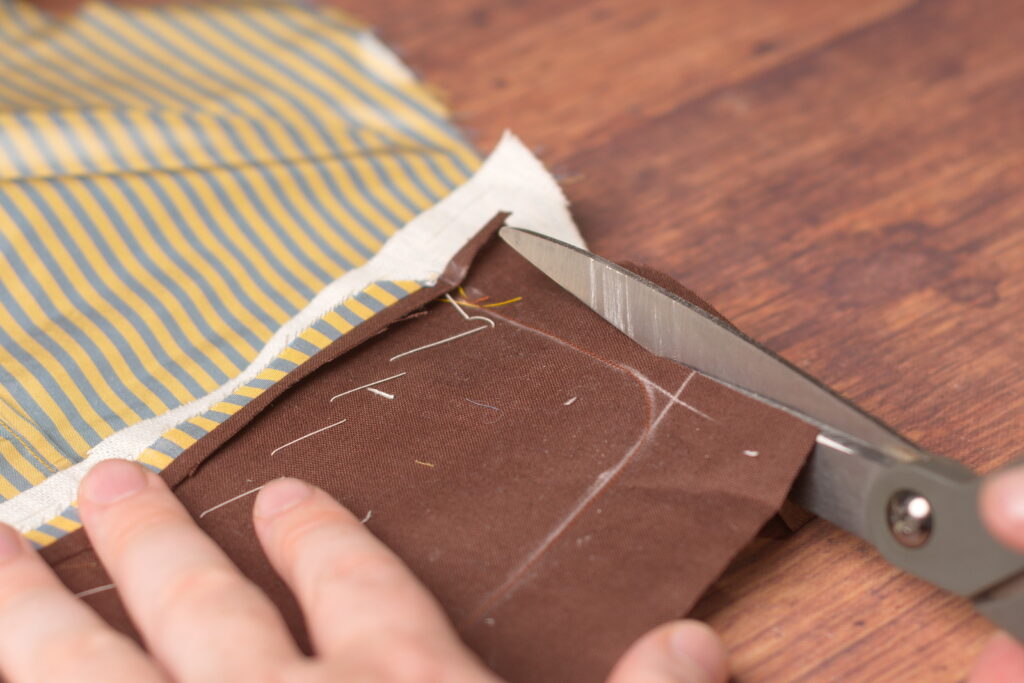
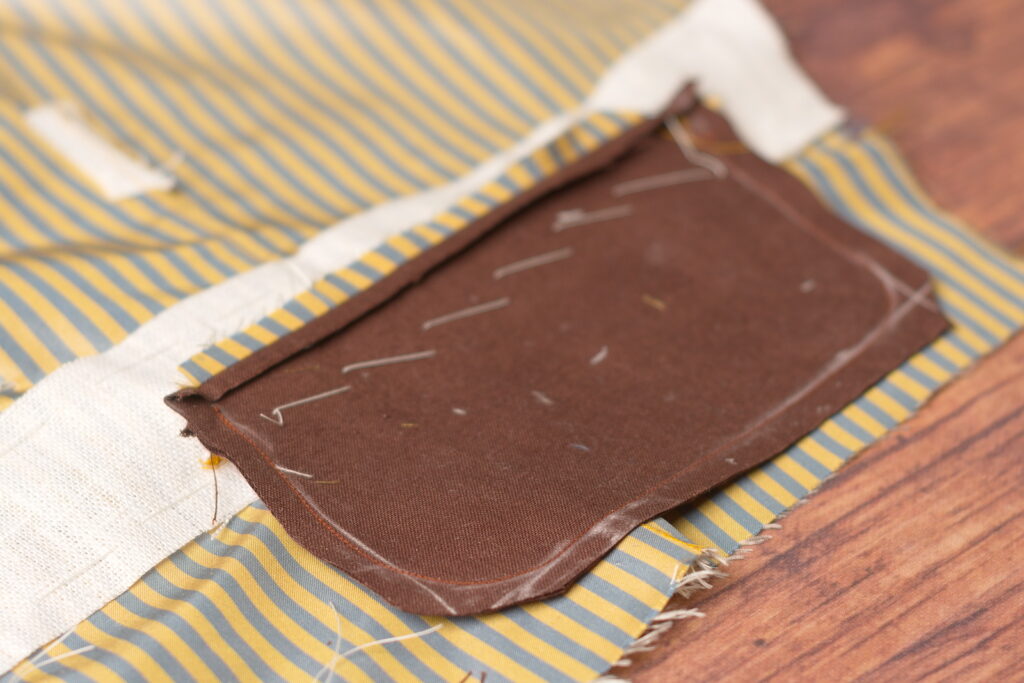
One last look at the pocket from the inside. Remove the basting stitches from the pocket bag at this point, as they’re a pain to remove later if you forget.
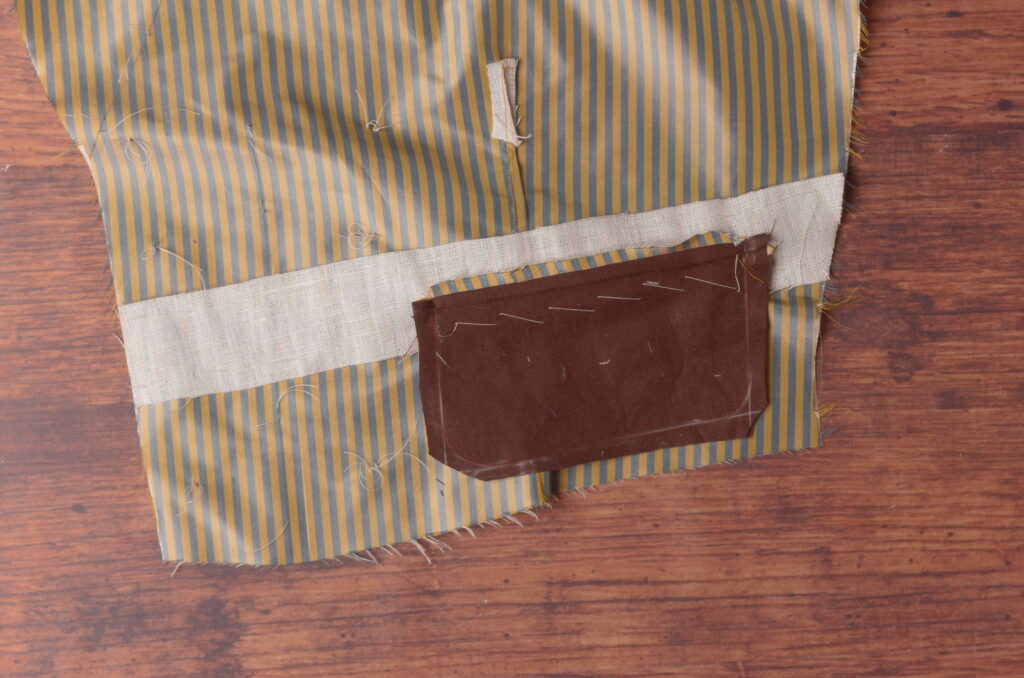
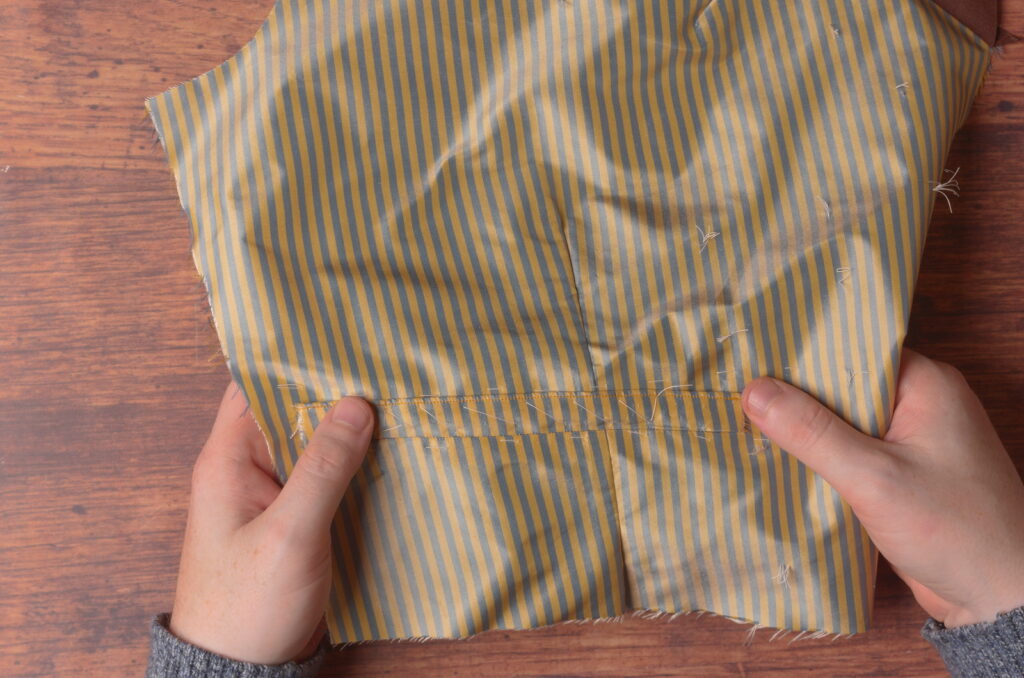
Finally, turn to the right side of the forepart, and baste the pocket welts to the forepart along the length through all layers, keeping about 3/4″ from either end.
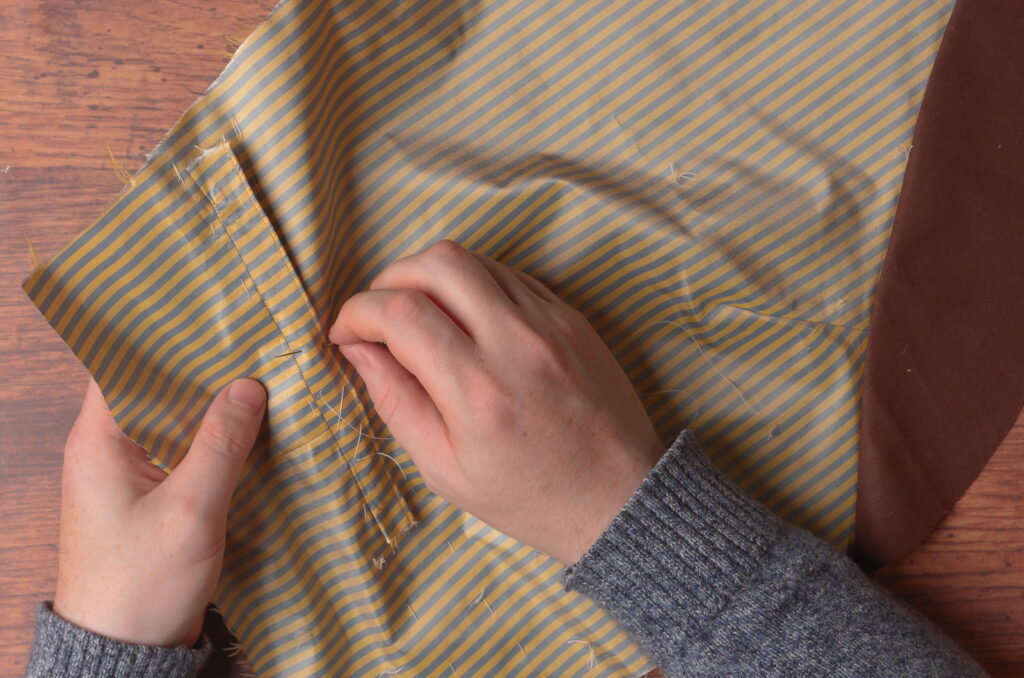
And with that, I consider the pockets completed. We’ll need to tack the ends down after the canvas is installed in the next step.
The Pocket Welt
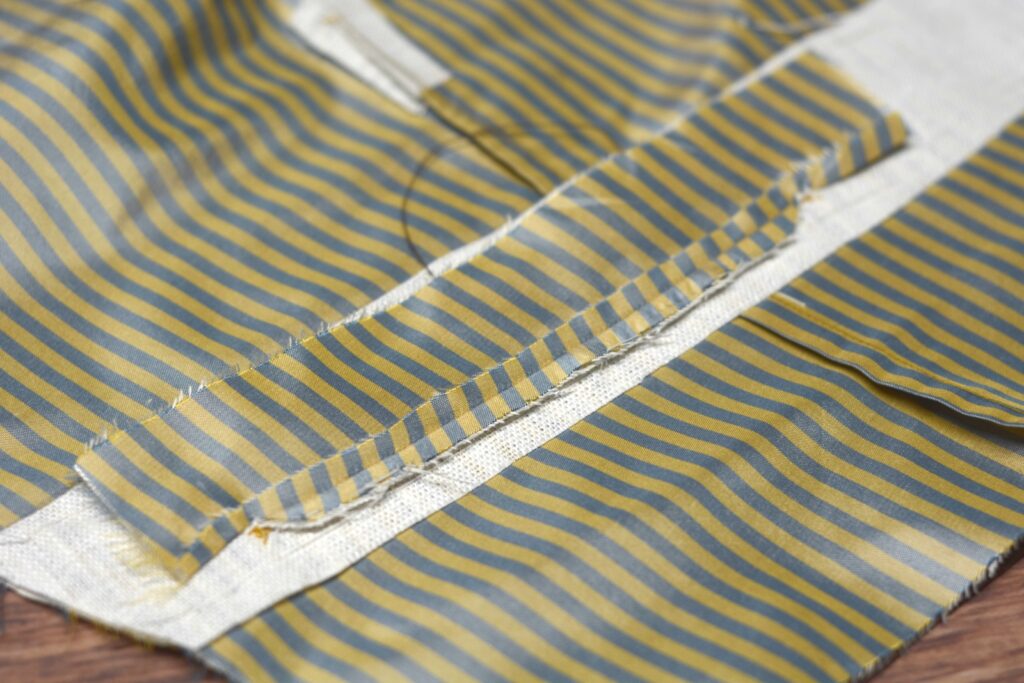
Now we’ll begin to form and reinforce the pocket welt to help it last a long time through all the abuse that will be thrown at it. First, cut a strip of linen on the grain, a little longer and wider than the pocket welt itself.
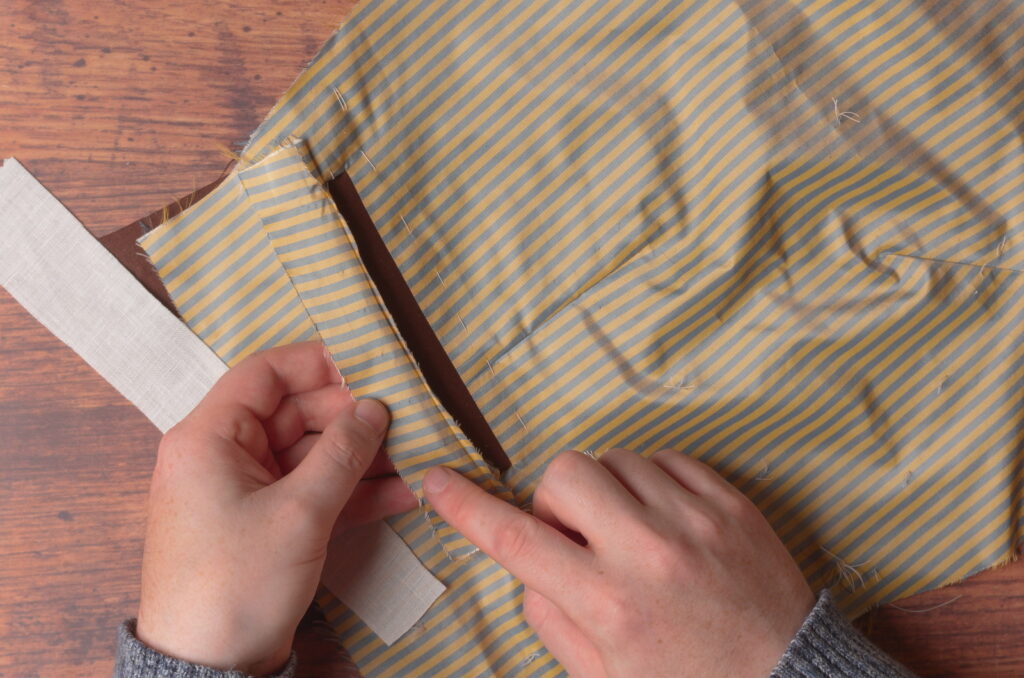
Baste the linen to the wrong side of the pocket welt, keeping the edge aligned with the welt’s seam line.
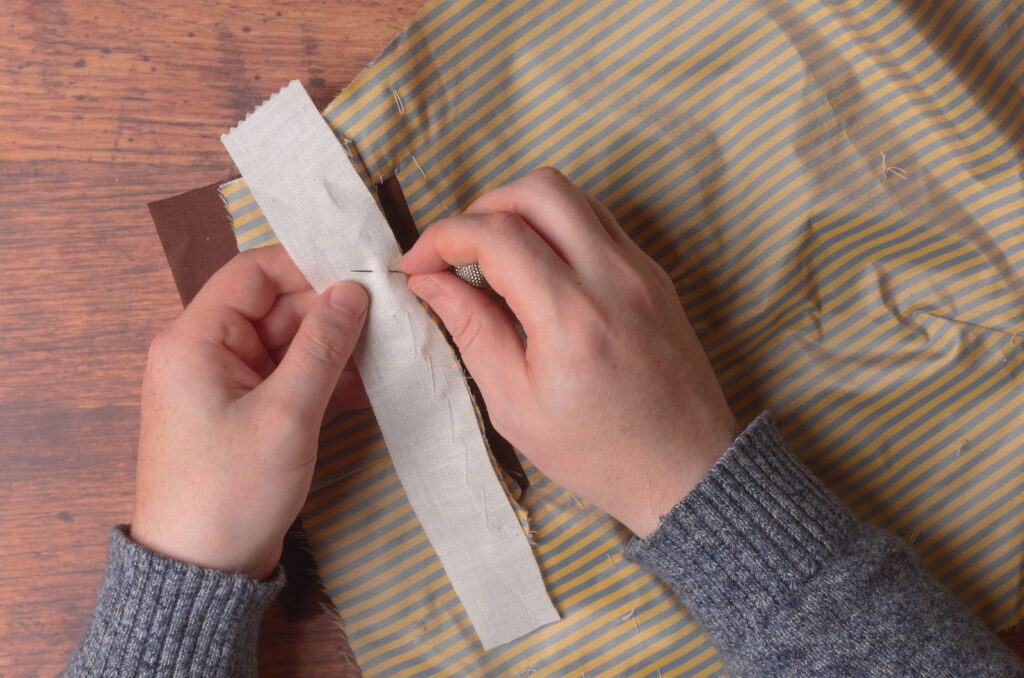
The linen should fall just to the side of the stitch line to give room for the seam to fold over the linen.
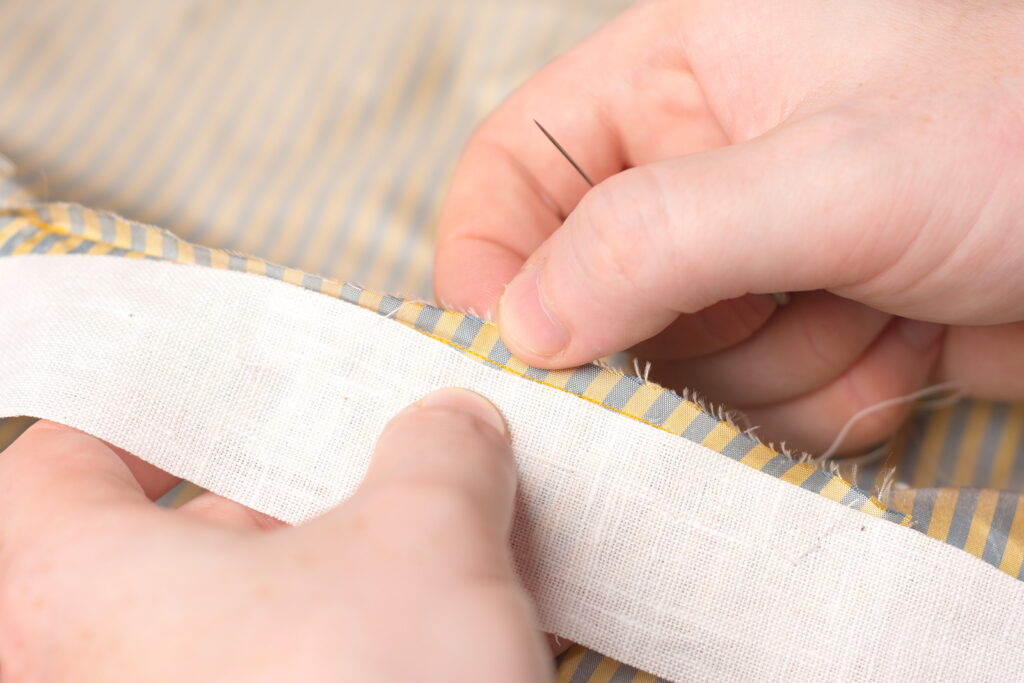
Trim the linen flush with the welt along the sides and top edge.
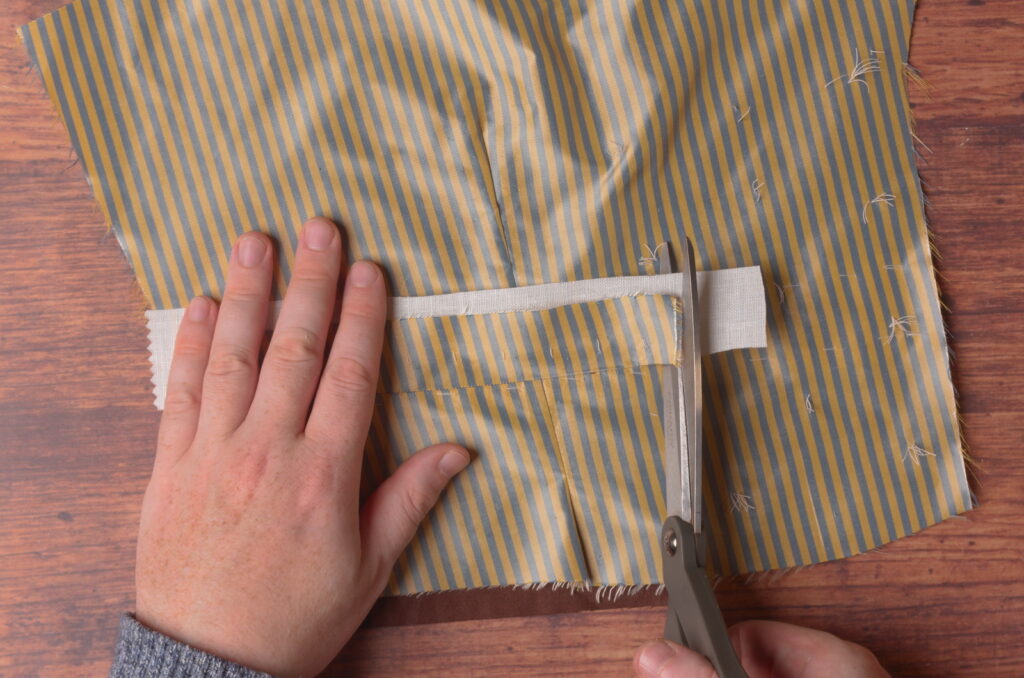
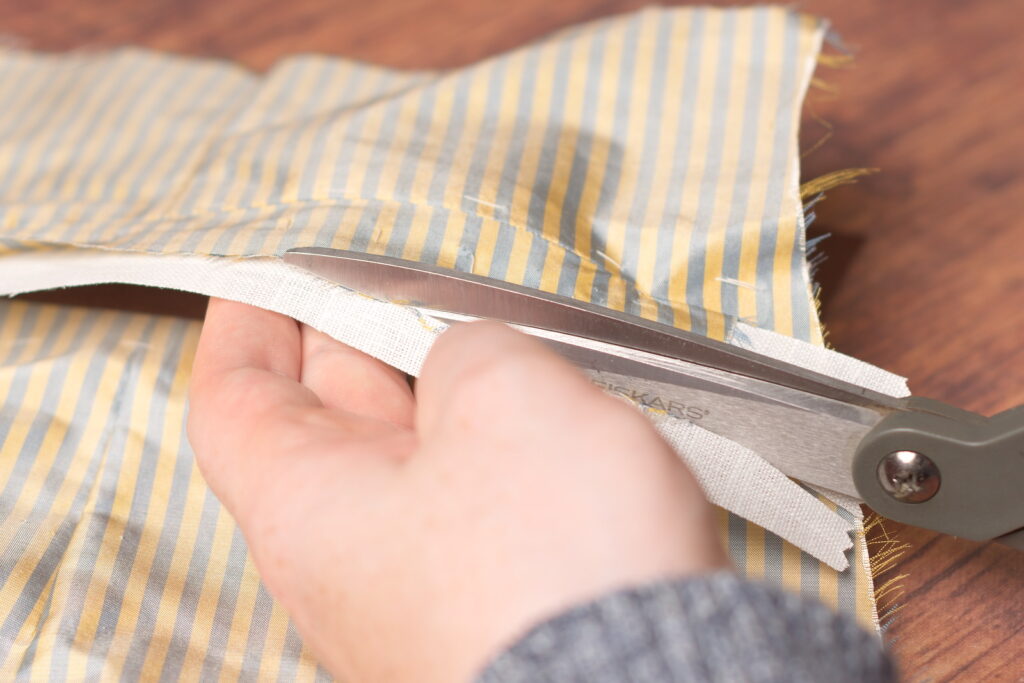
Here’s the linen interlining after basting to the pocket welt and trimming.
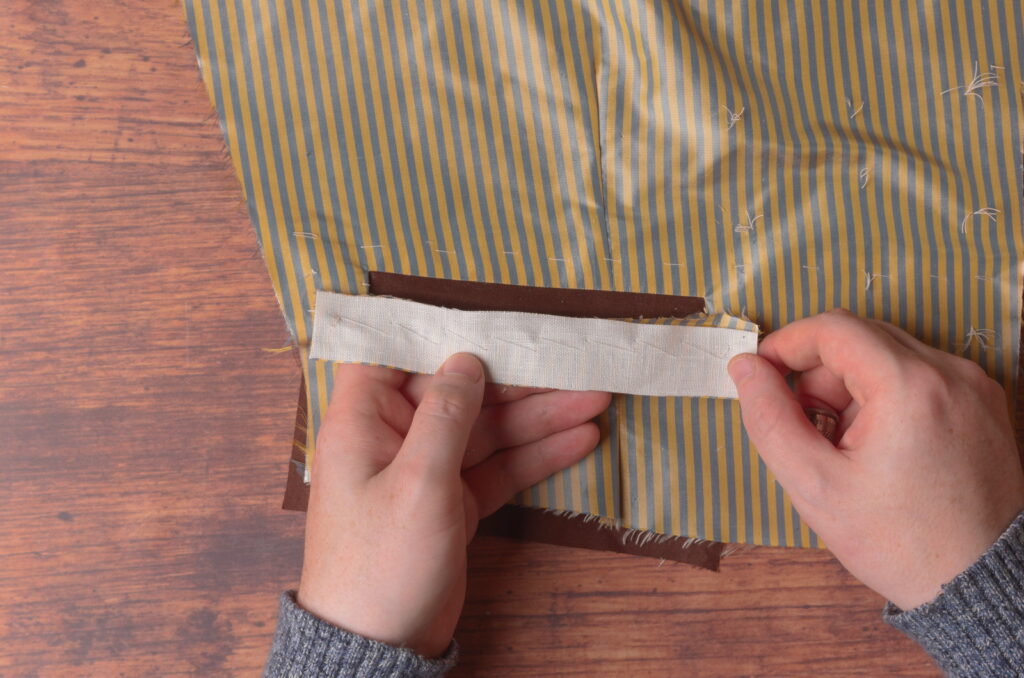
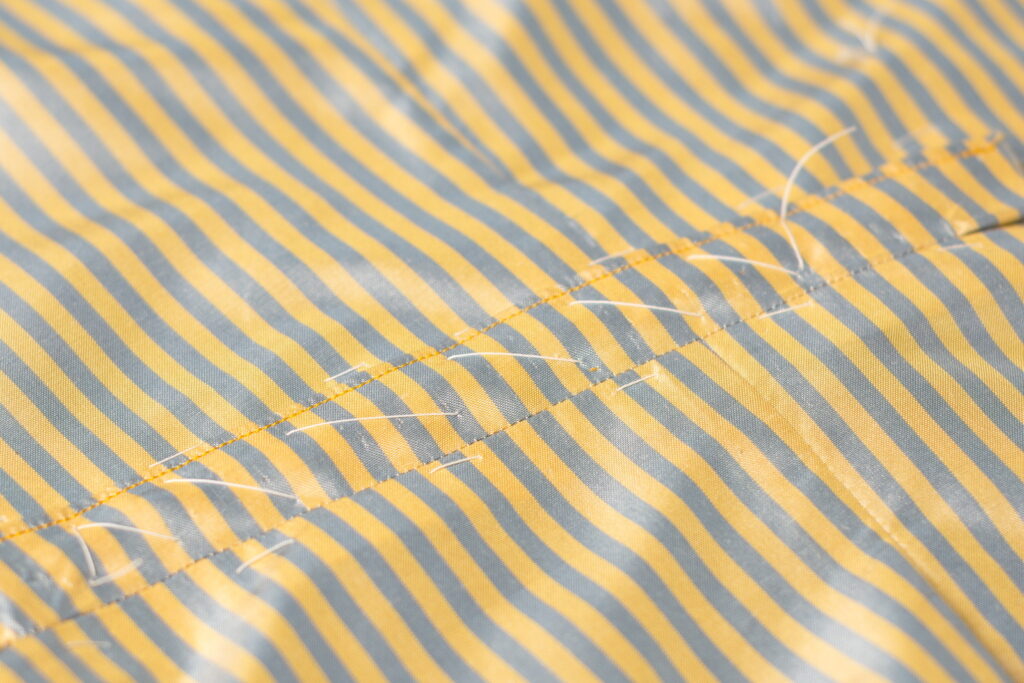
With the seam allowance in place over the linen, cross stitch the seam allowance to the linen interlining, being sure the stitches do not show through on the right side. With a thin fabric like silk, you’ll want to catch only the linen in your stitches. I began and ended the stitching about 1/4″ beyond the pocket opening.
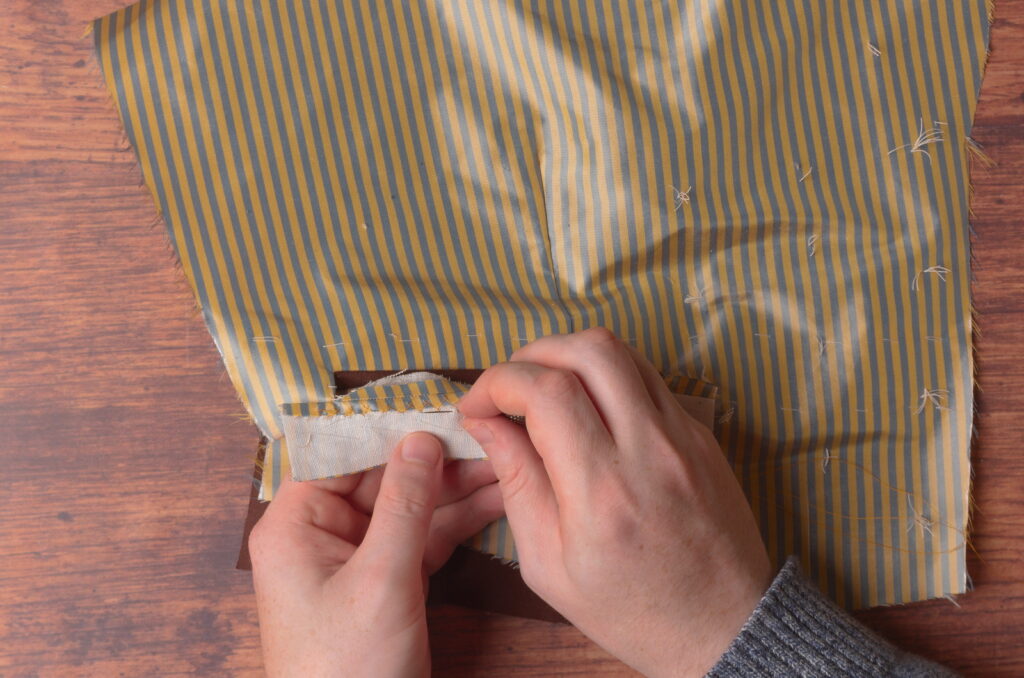
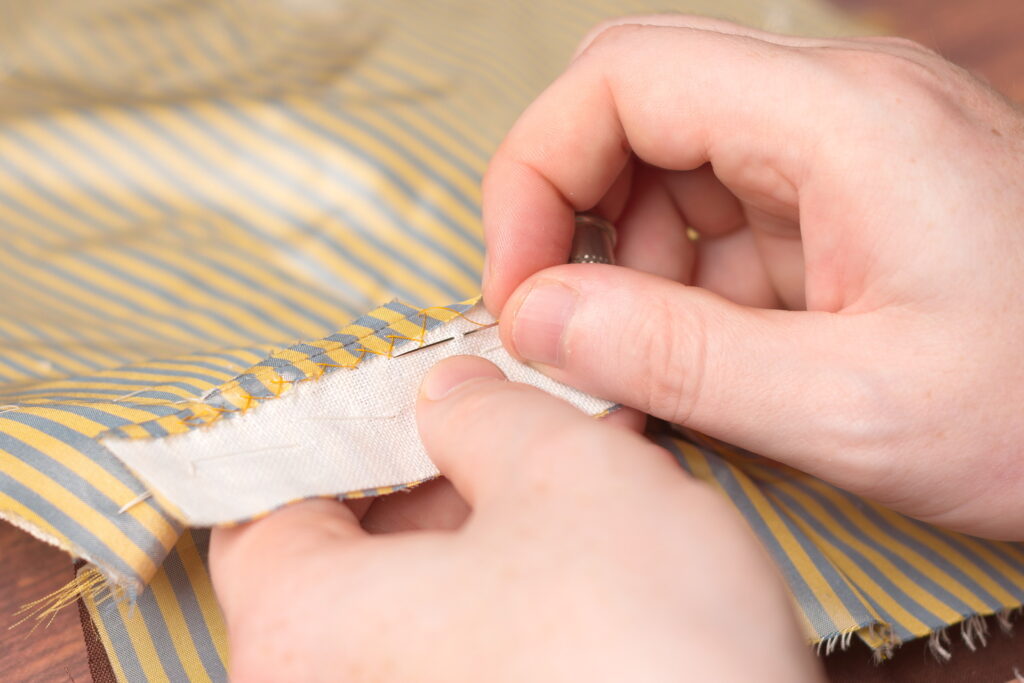
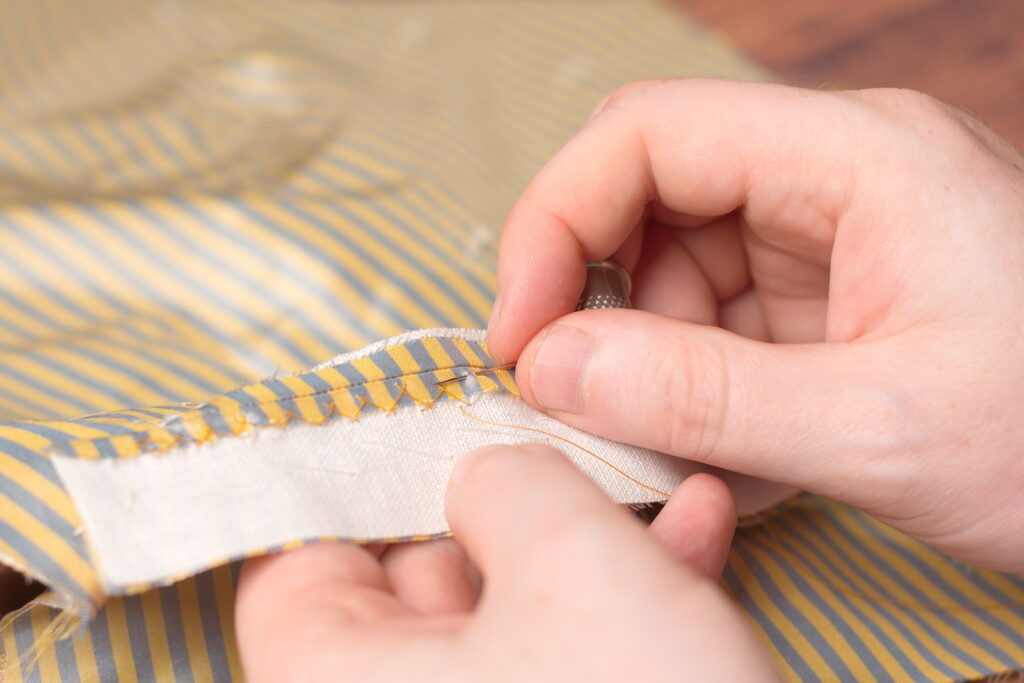
The pocket after cross stitching the seam allowance.
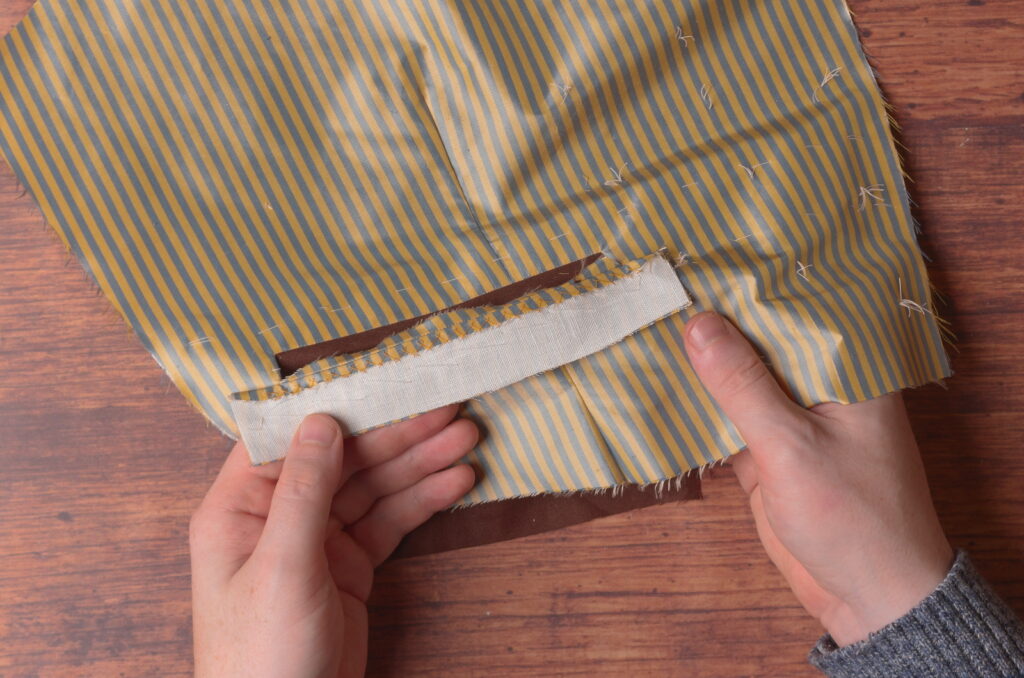
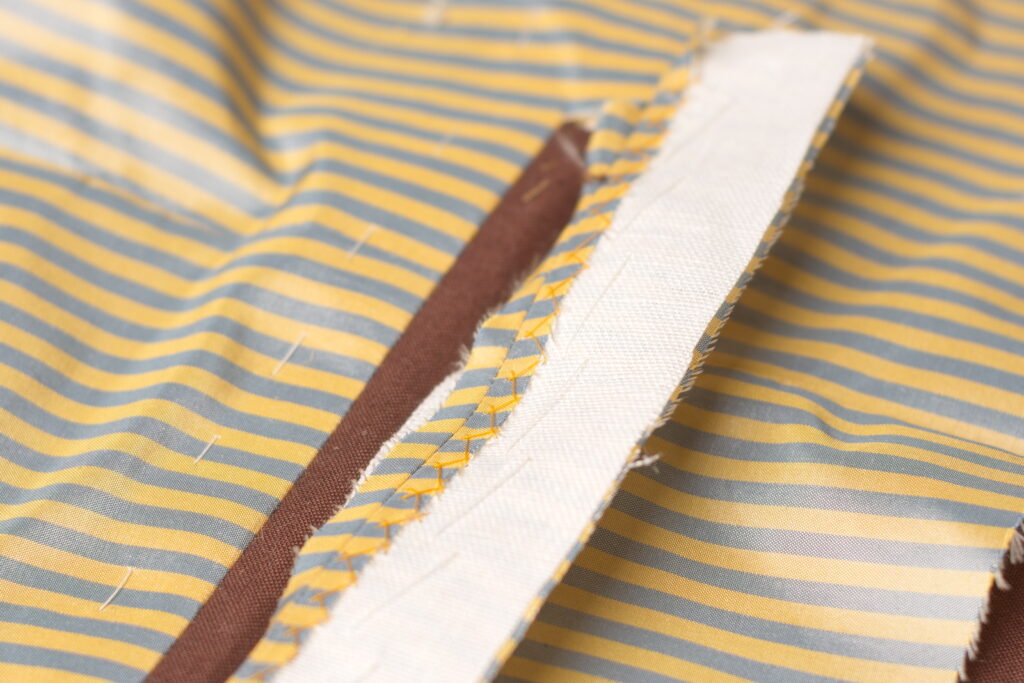
Now fold the pocket welt and linen along the long edge, so that the raw edge meets the raw edge of the seam allowance. Try to keep everything as even as possible – you’ll want to double check from the right side of the welt to make sure the width is equal along the entire length of the pocket.
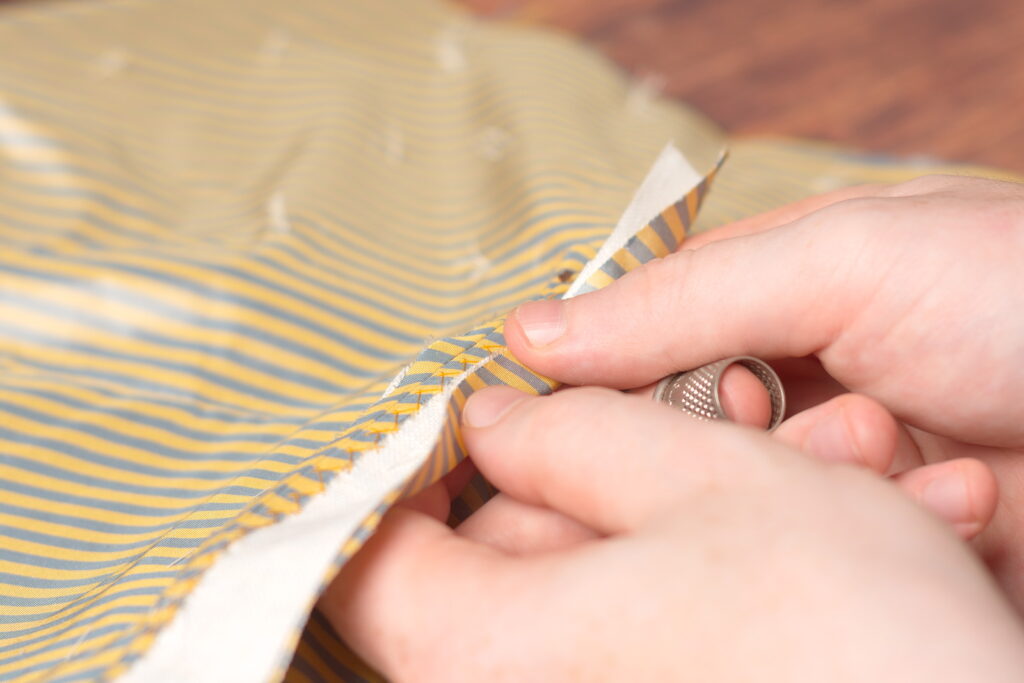
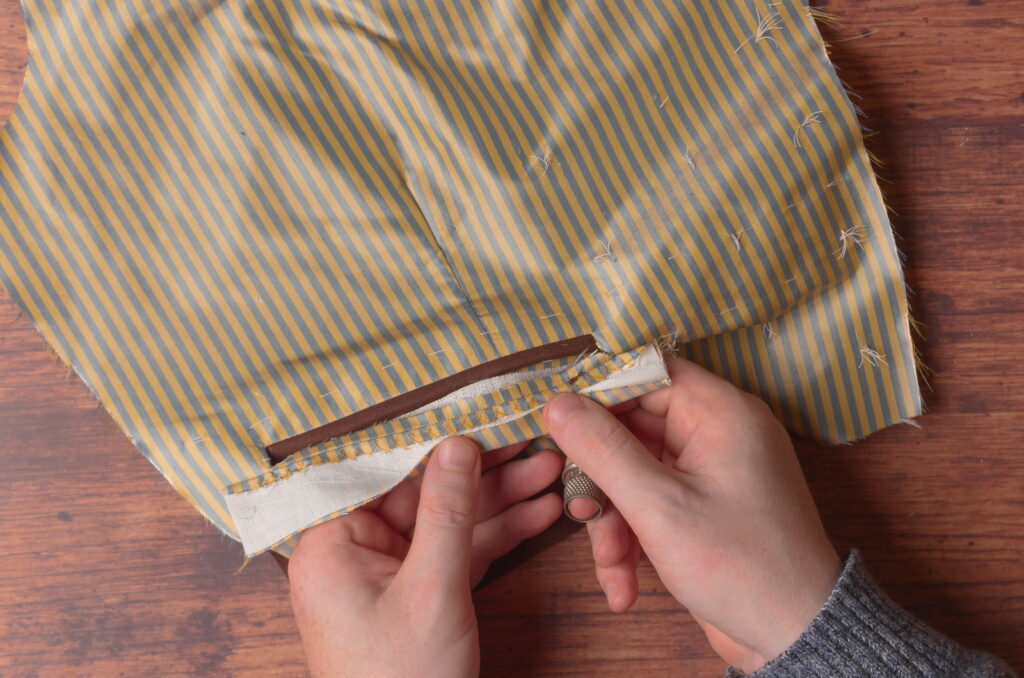
Baste the folded pocket welt closed.
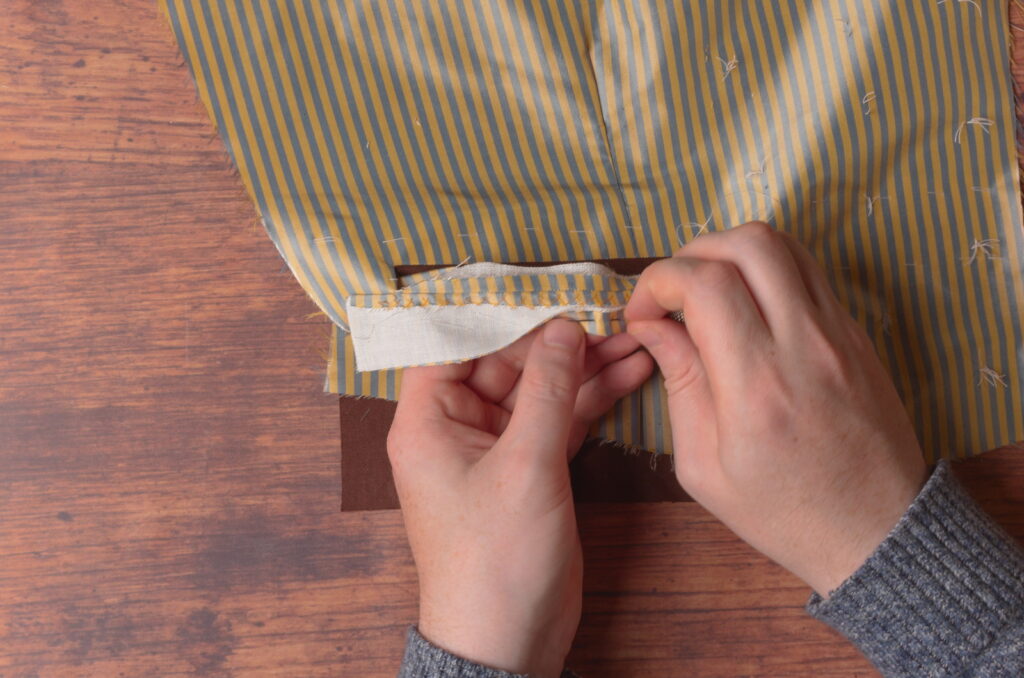
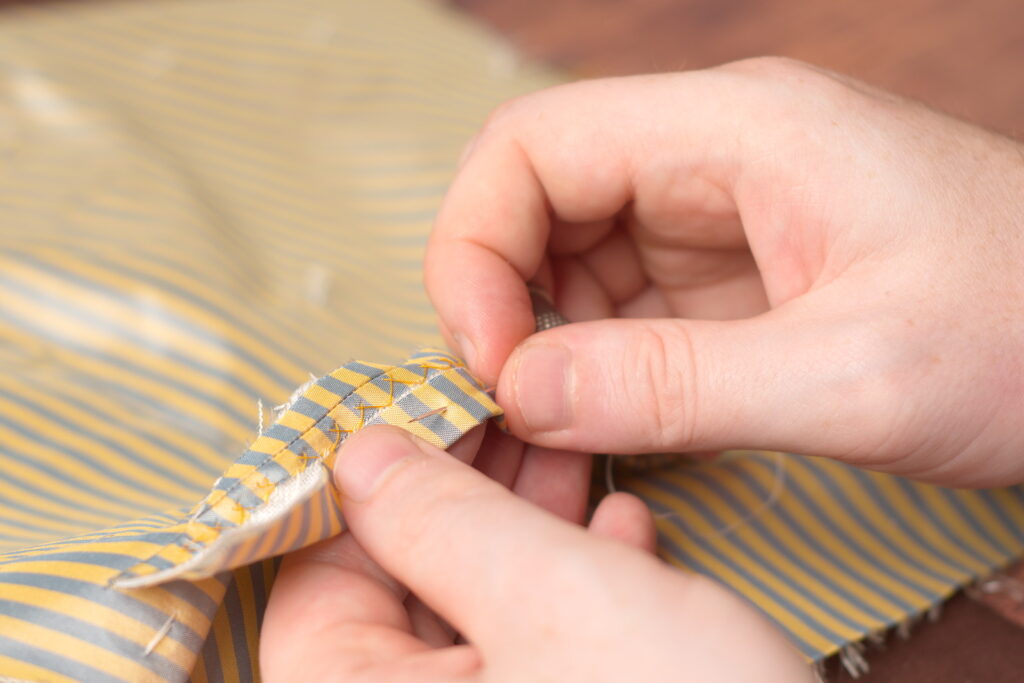
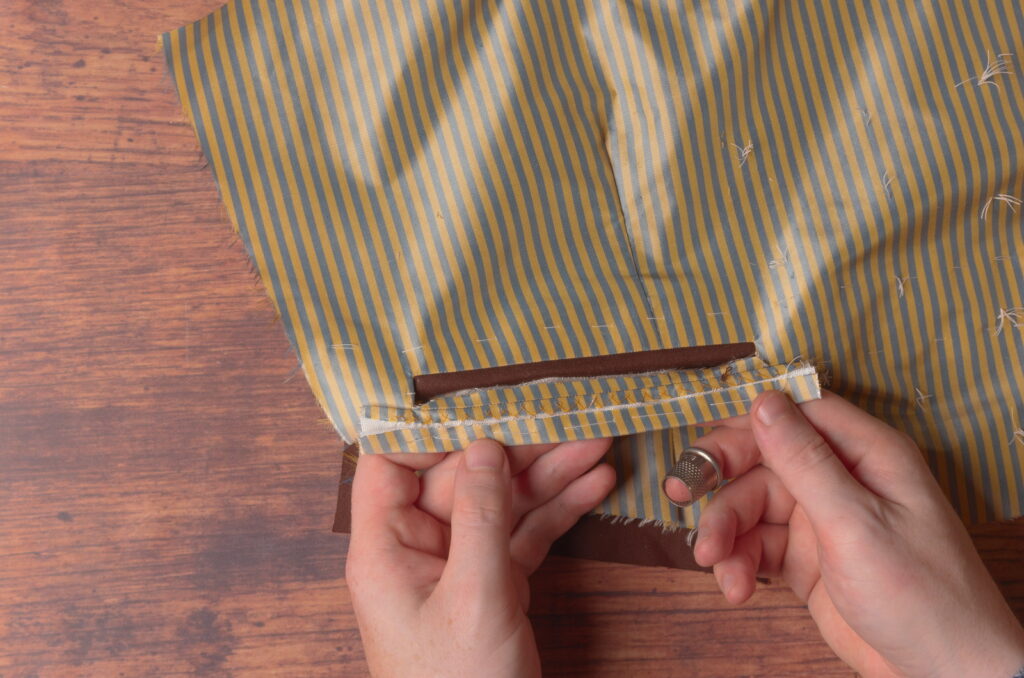
Turn to the right side of the welt one last time to ensure everything is aligned properly. This is also the first real chance to see how well the stripes were aligned. Mine ended up aligning more on the right [front] side of the pocket rather than the left as I had intended. Not too bad though.
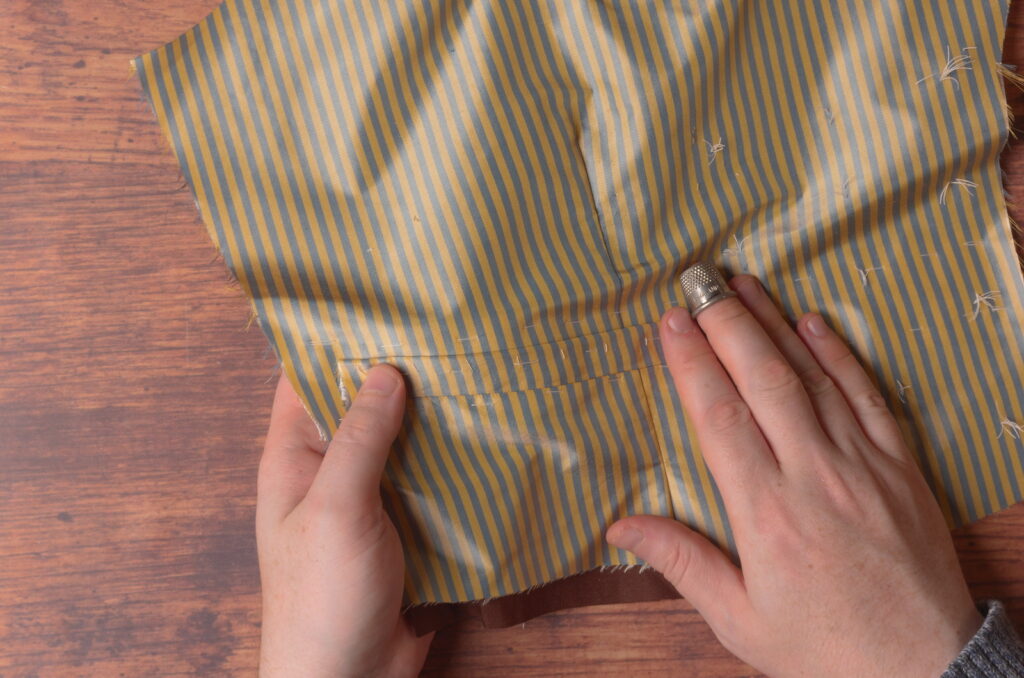
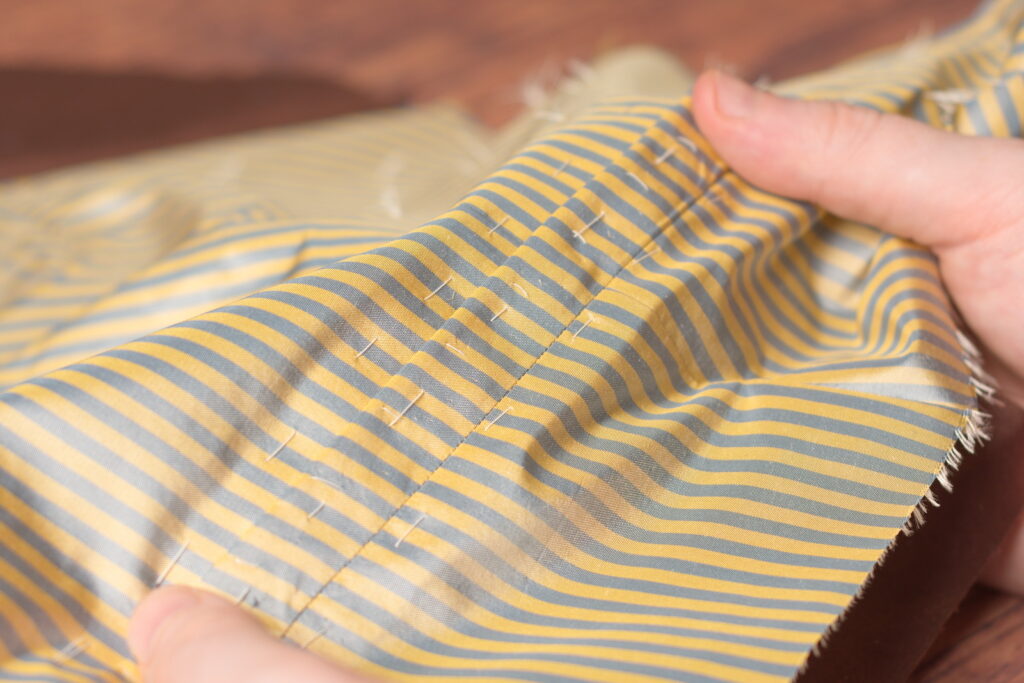
Cross stitch the remaining raw edge of the pocket welt to the linen as well. It’s a little easier this time as there are more layers in which to hide your stitches without letting them show on the right side.
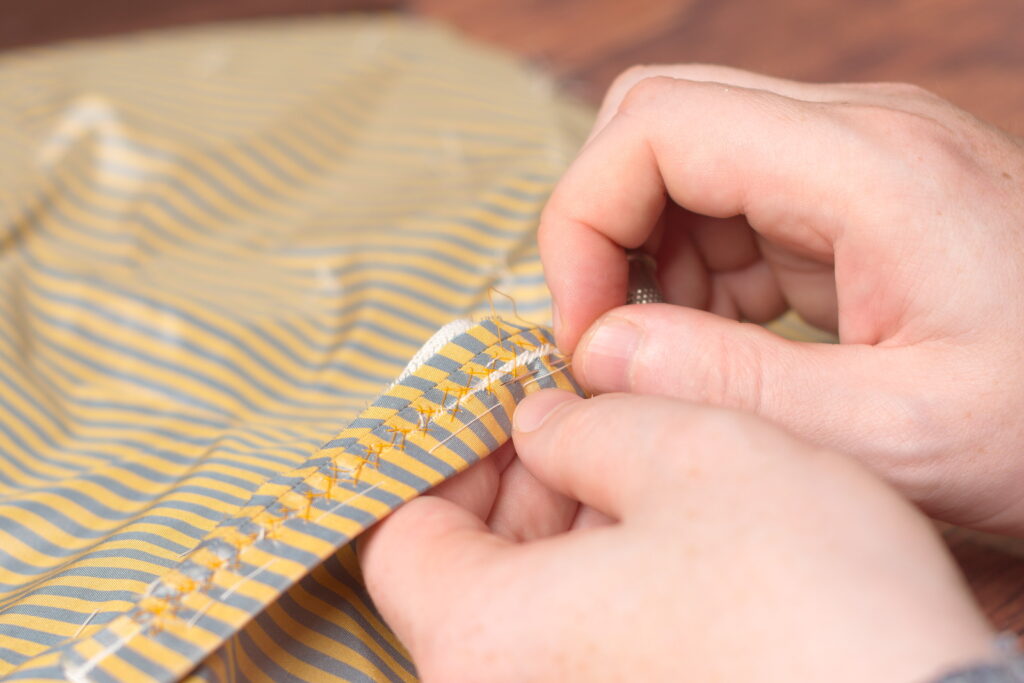
I like to top stitch the pocket welt here to give it additional strength and consolidate all of the layers into a firm edge. This could be done by machine as I’ve done, by hand, or you could leave it out altogether.
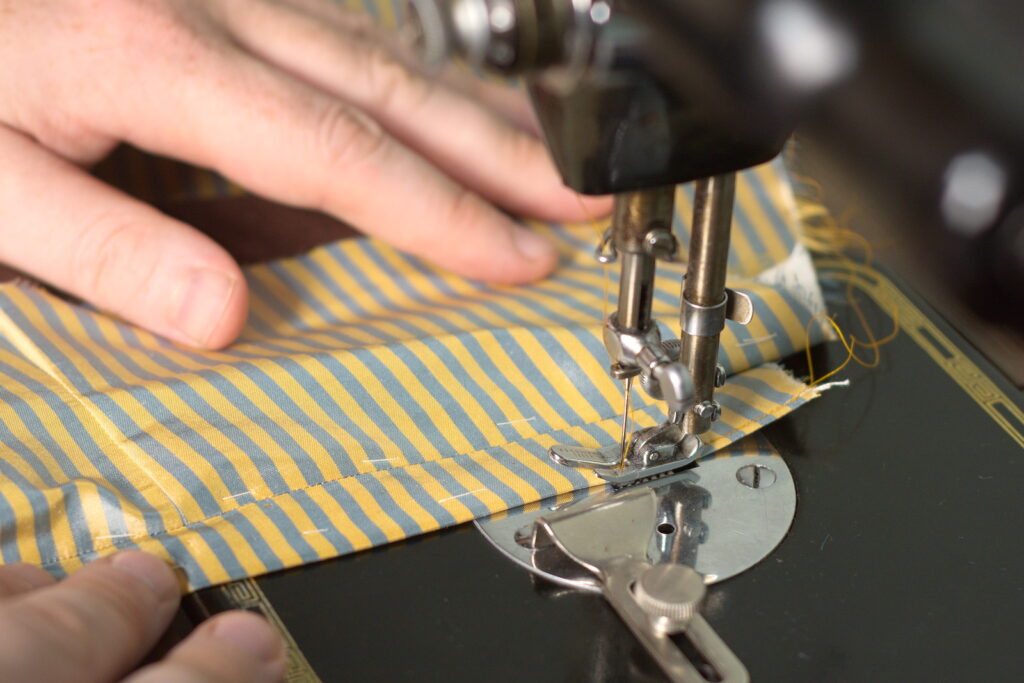
The pocket welt after top stitching.
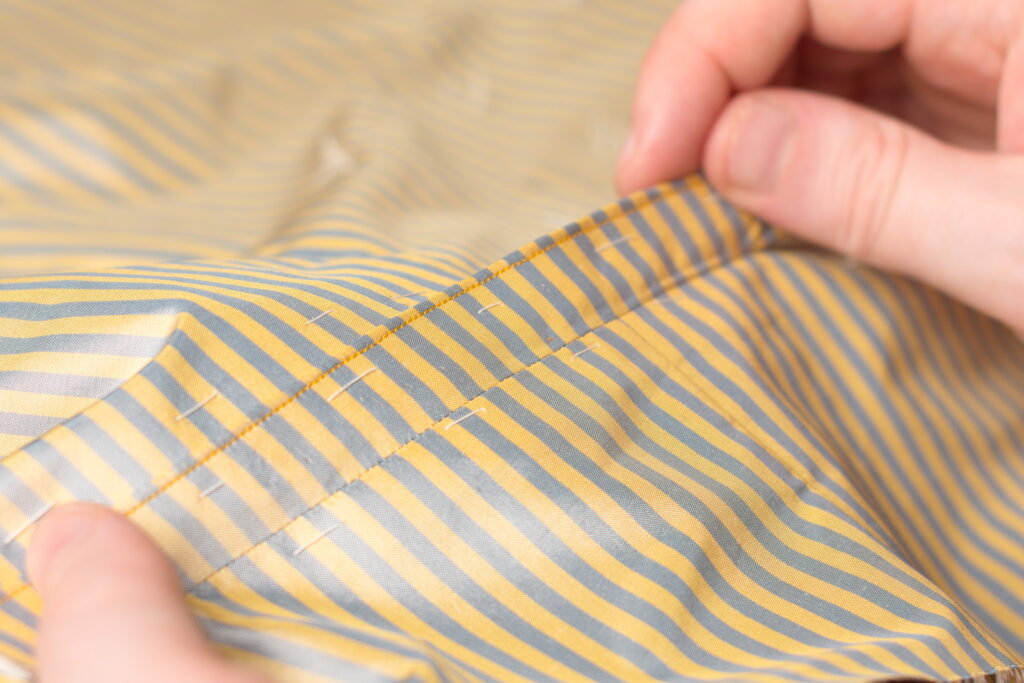
Now that I look at this in the photographs the width of the welt looks all uneven. Hope it’s just a camera distortion!
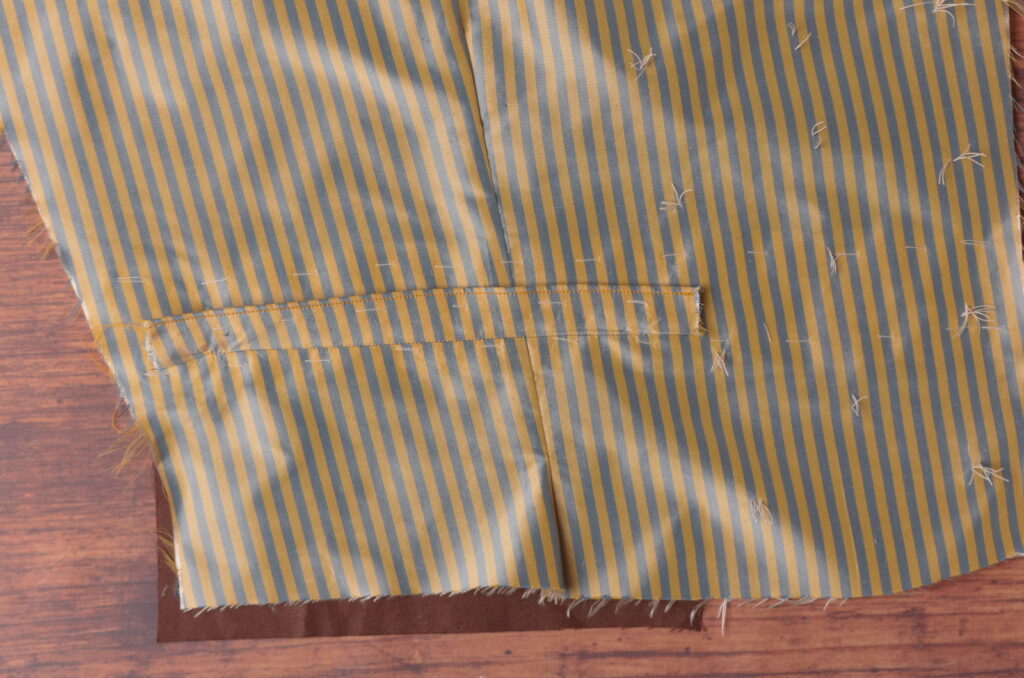
Remove the basting stitches from the welt before it gets too difficult.
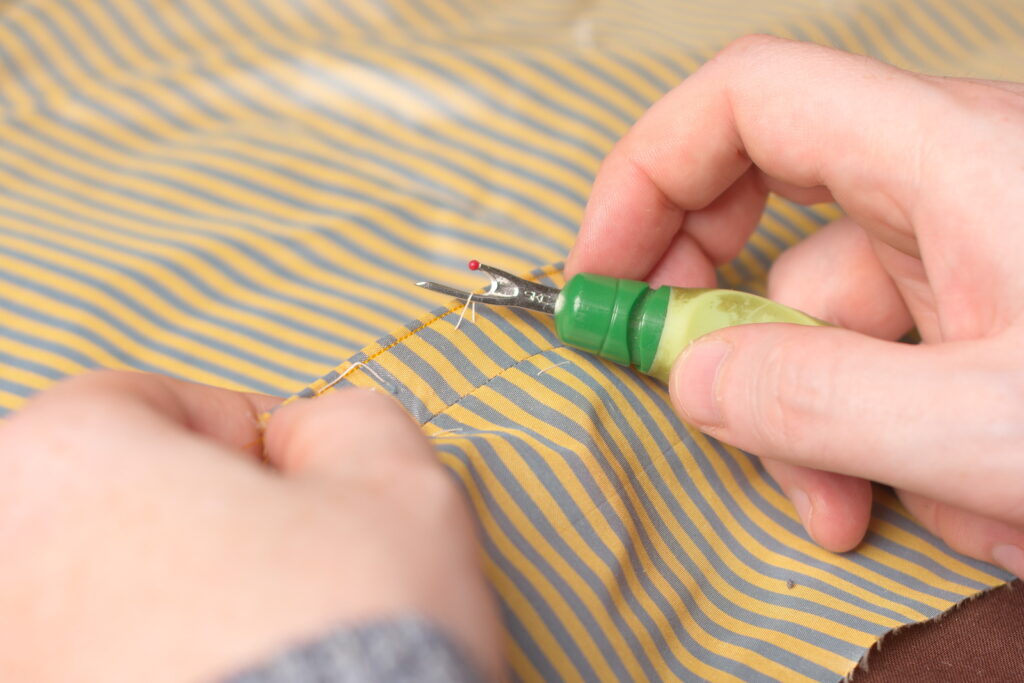
Cutting Open the Pockets
Now that all the preparatory work is out of the way, we can carefully begin to cut the pockets open.
First, fold the pocket in half along its length, aligning what will be the pocket opening as closely as possible.
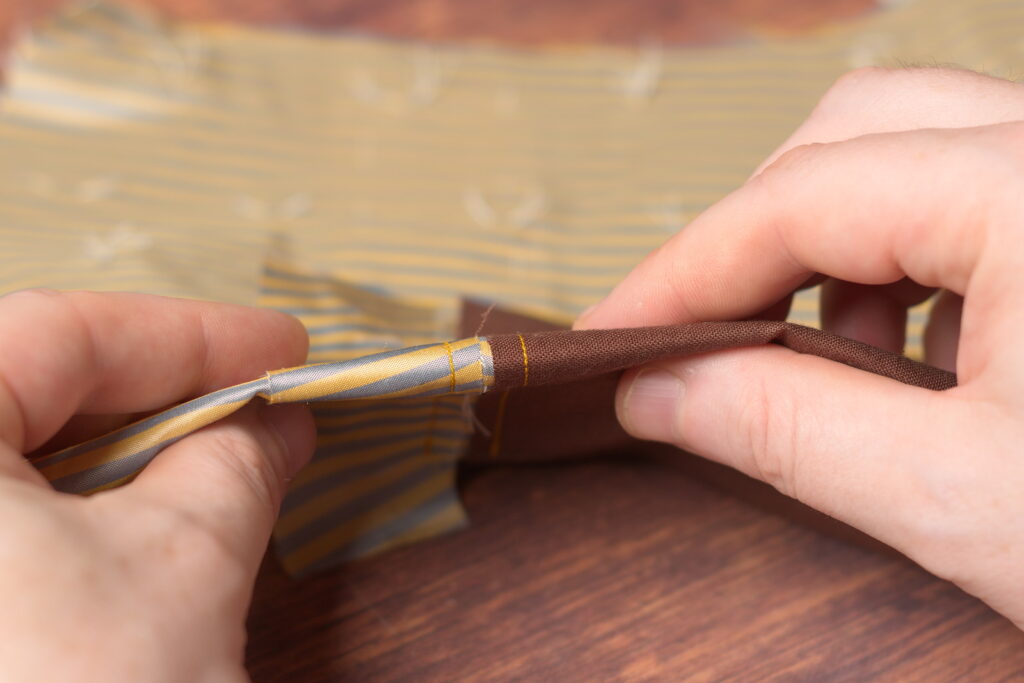
Then take a single cut with the scissors, about 1/4″ deep, from the folded edge, keeping in the center of the pocket.
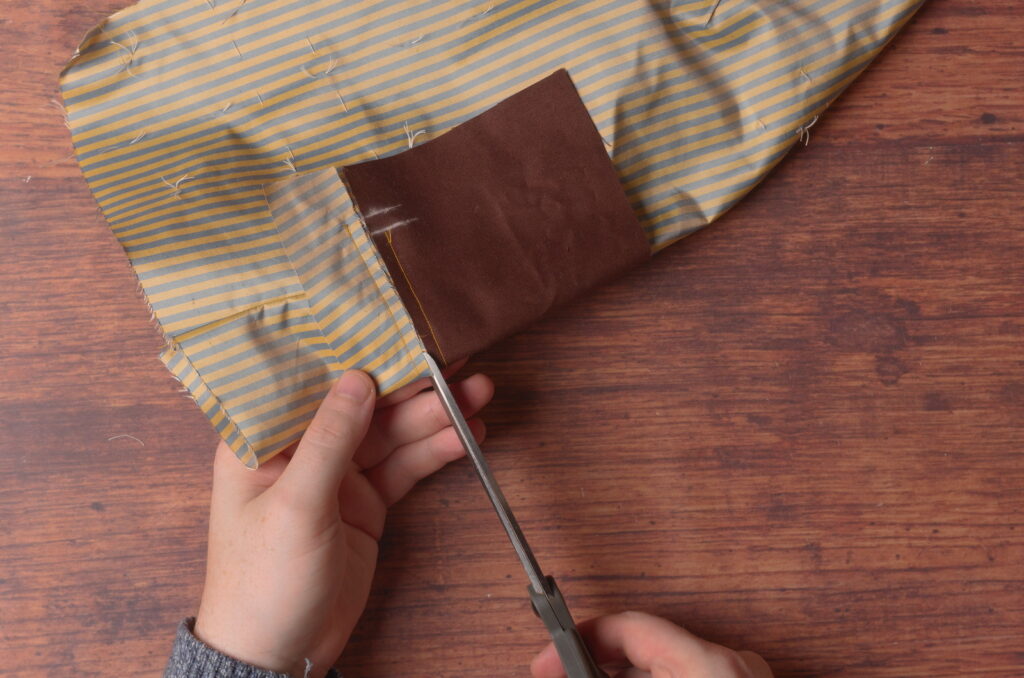
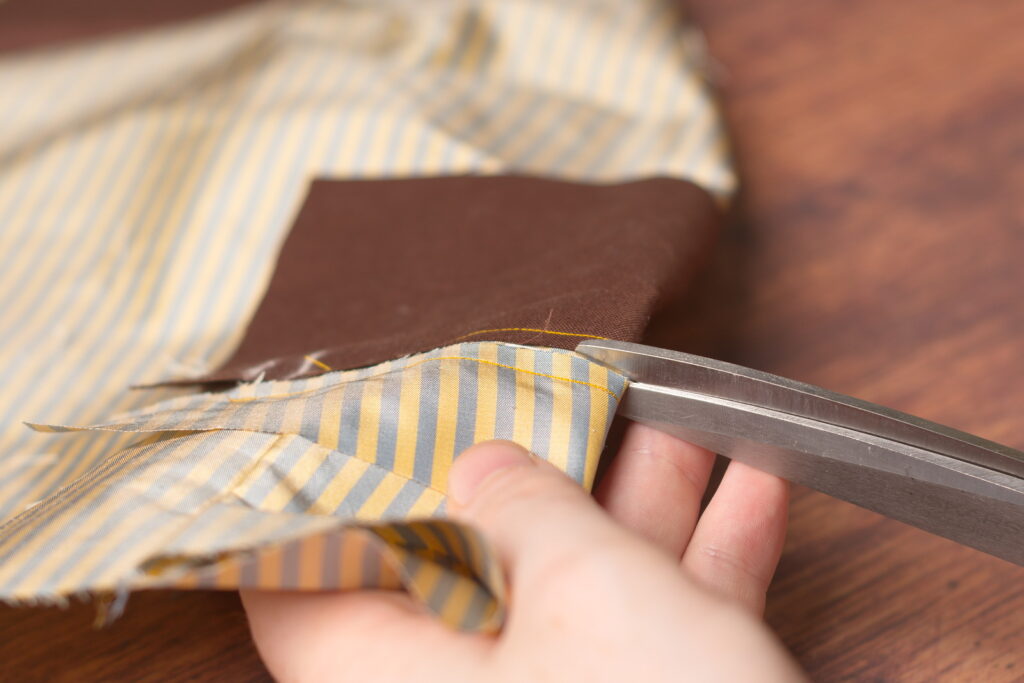
Unfold the pocket, and inserting your scissors into the opening, continue cutting open the pocket. On the lower end of the pocket, stop even with the inner marking on the pocket bag. On the upper end of the pocket, end your cut about 1/2″ from the end of the pocket.
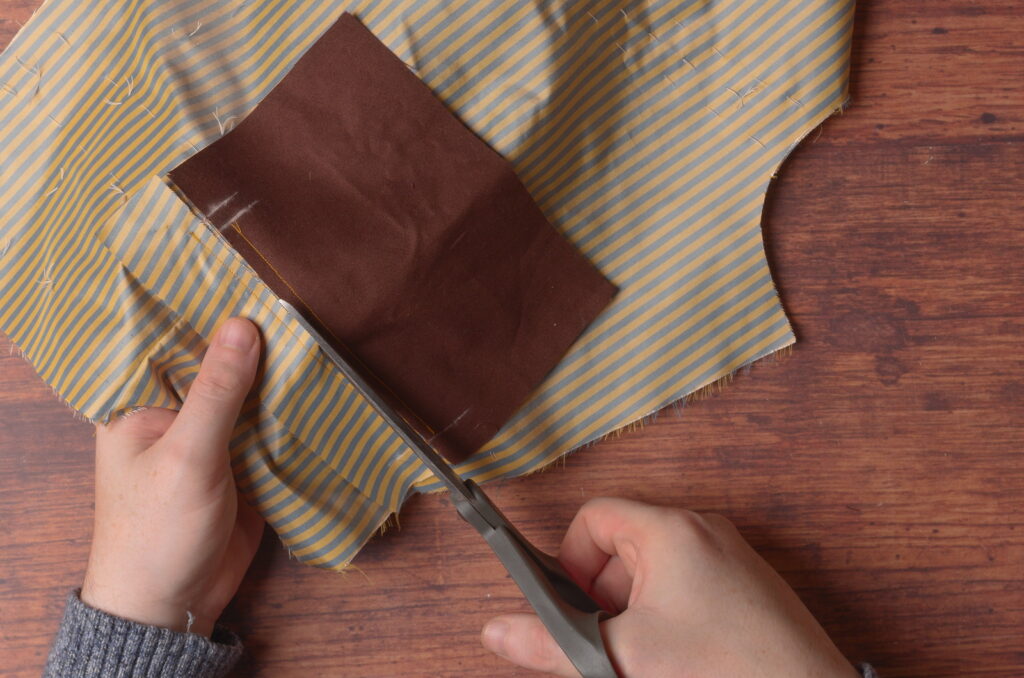
Here’s the cut pocket so far.
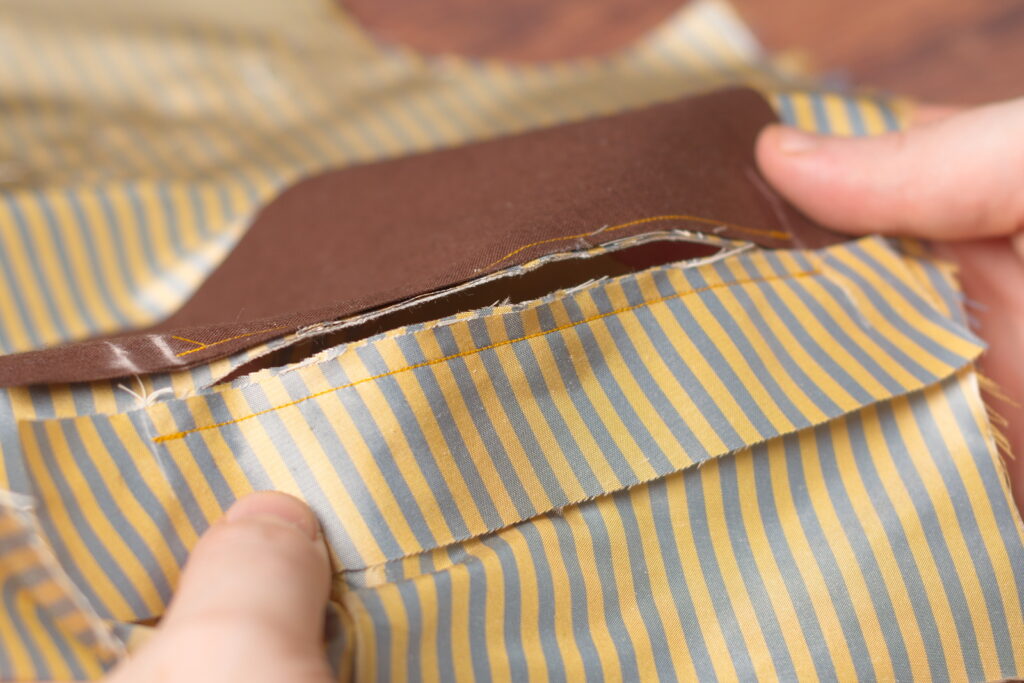
On the lower end of the pocket, cut on a diagonal towards the end of the pocket stitch line. You want the cut to end just at the end of the stitching without actually cutting the stitches or going beyond them. Hold the seam allowance of the welt out of the way – you’re just cutting through the forepart and linen layers here.
This part can be a little tricky but just take your time and you’ll get it. It’s important to be as precise as possible, as cutting too far will give you ugly gaps in the pocket as well as weaken it significantly, and not cutting close enough to the stitching will make it difficult to get the pocket bags through the hole, leading to bunched up fabric in the pocket.
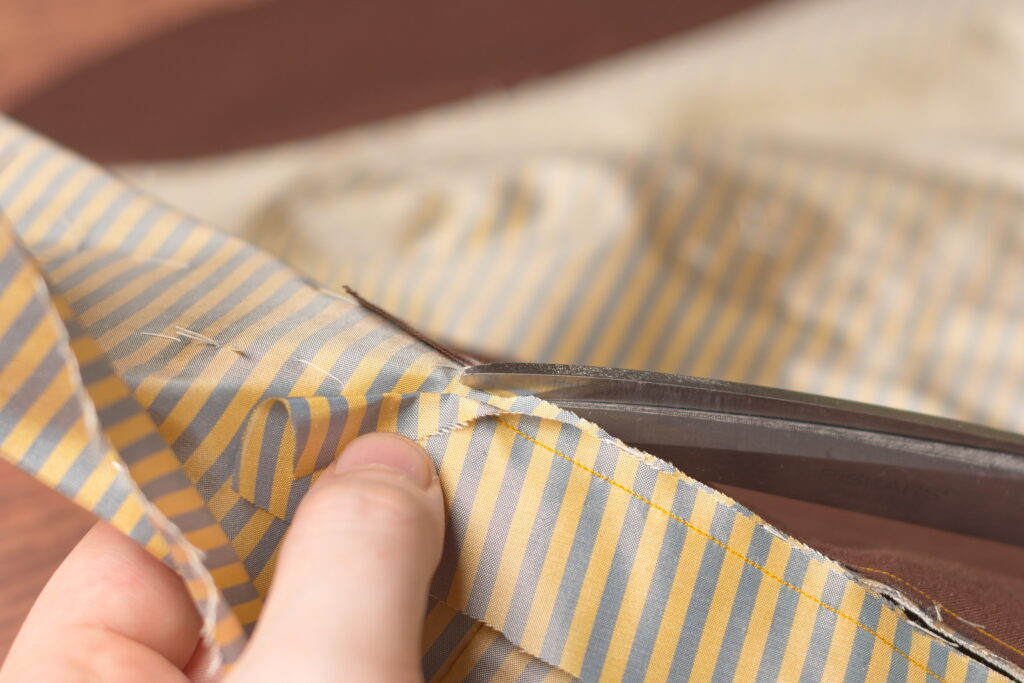
And again on the lower end, cut straight up at a right angle towards the end of the pocket bag stitching, again keeping the pocket bag and seam allowance out of the way.
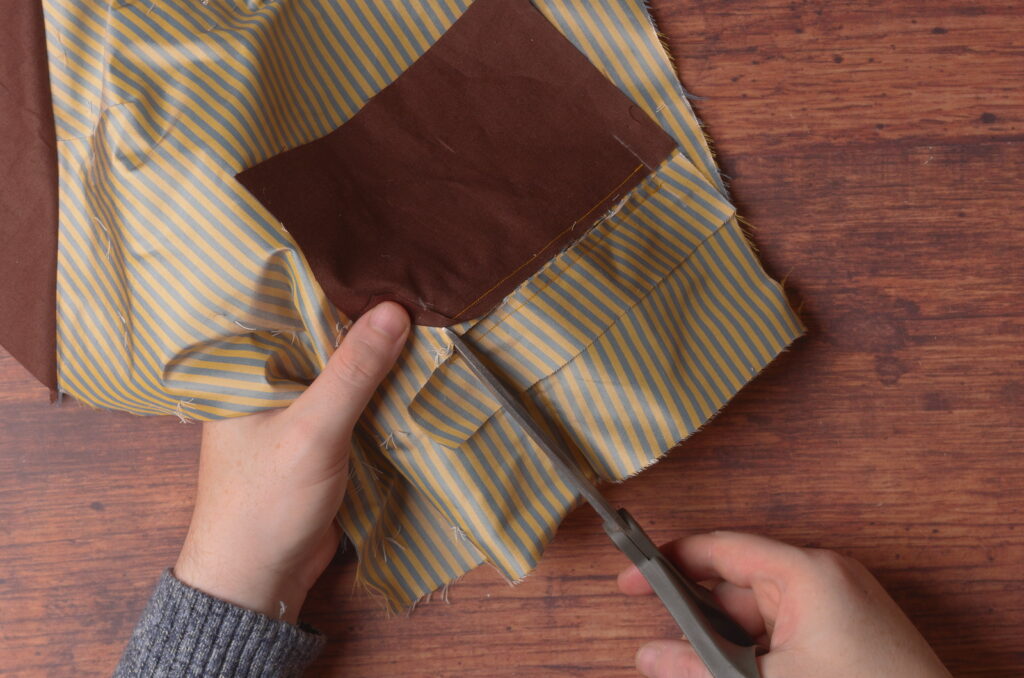
Then repeat the process for the other end of the pocket, this time cutting at diagonals towards both the pocket welt and bag stitch lines. At this time, handle the pocket very carefully as it is in a weakened state – one wrong pull could tear the pocket open or stretch something out of position and you’d have to start all over again with the waistcoat.
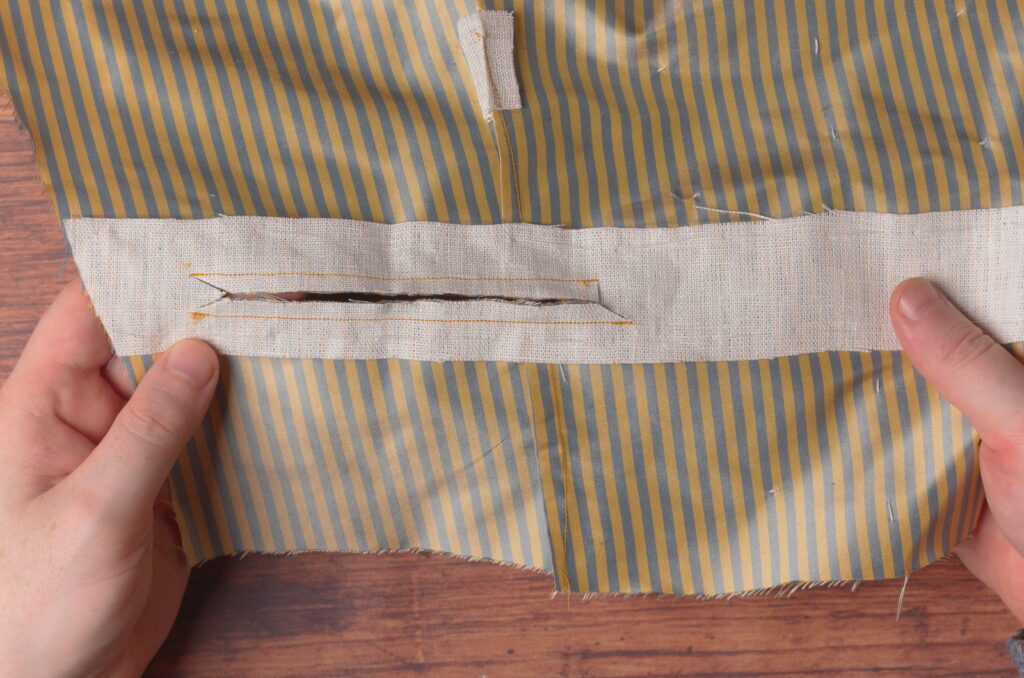
Here’s a diagram further showing what the pocket should look like after stitching and cutting it open.

Pressing
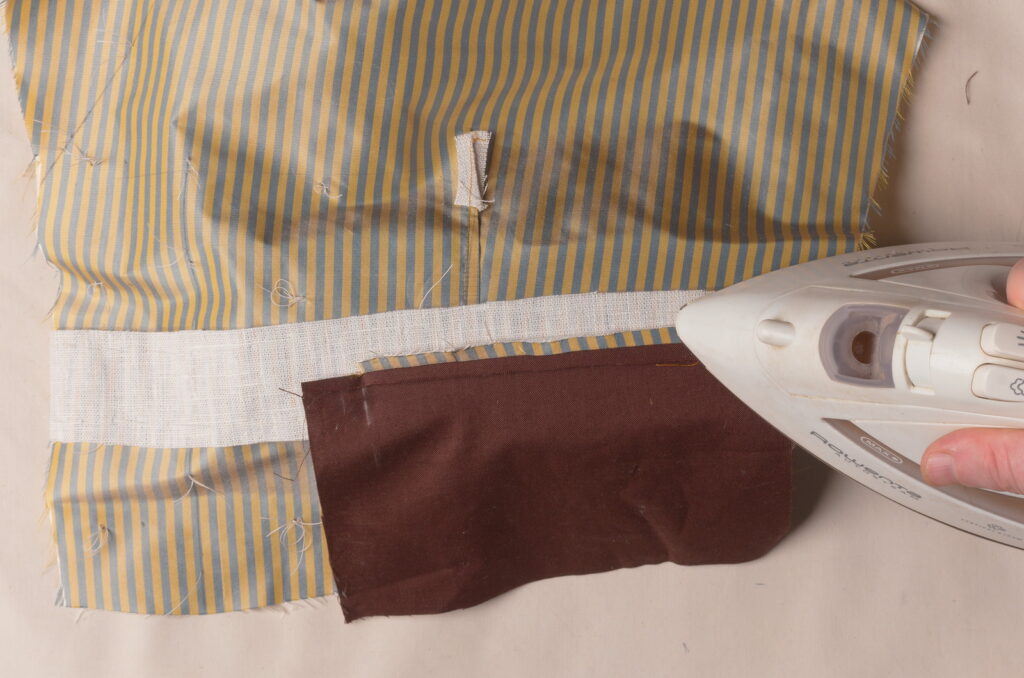
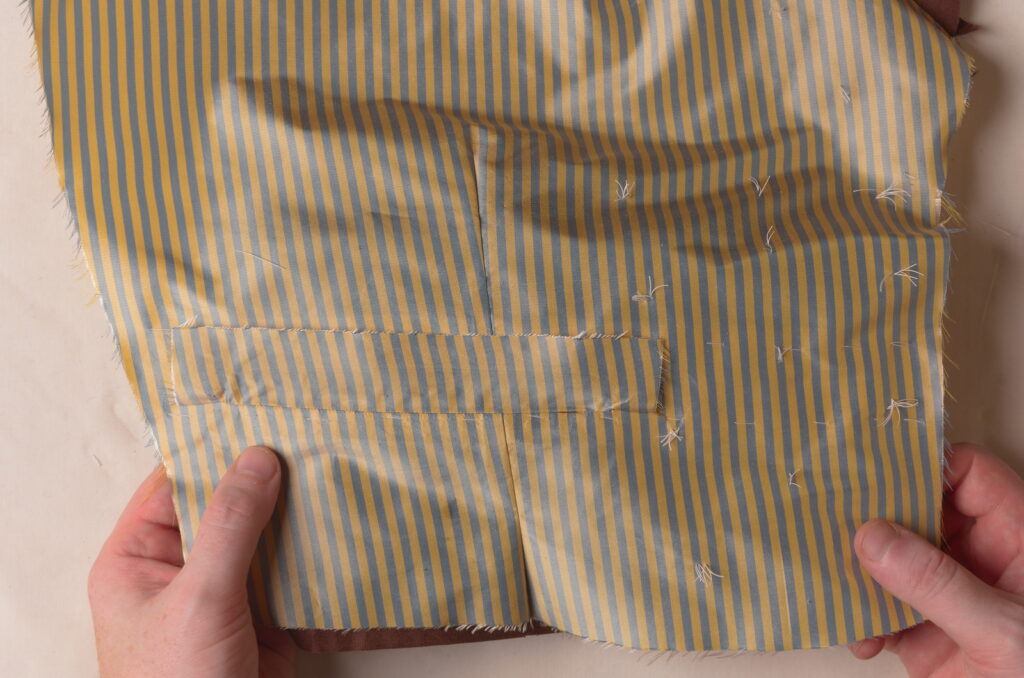
With all of the cutting out of the way, we can turn to pressing the various parts of the pocket open. Begin by pressing everything flat from the right side of the forepart, just to set the stitches an ensure everything is in its place.
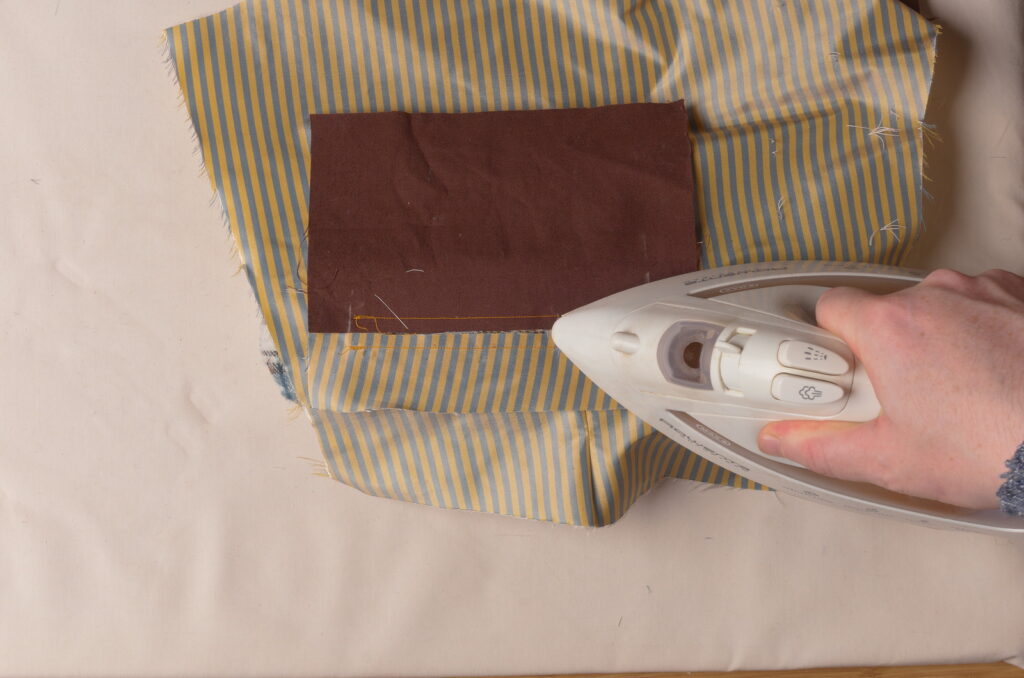
Flip the forepart over to the wrong side, and carefully pull the pocket bag through to the wrong side as well. If you’ve cut accurately, the pocket will want to hang nicely at both ends, otherwise it may take a little effort to get everything laying appropriately.
Just a little tip that I didn’t really photograph, I like to press the ends of the seam allowances first on the pocket bag, at either end. This helps them to stay in place when pressing the rest of the seam.
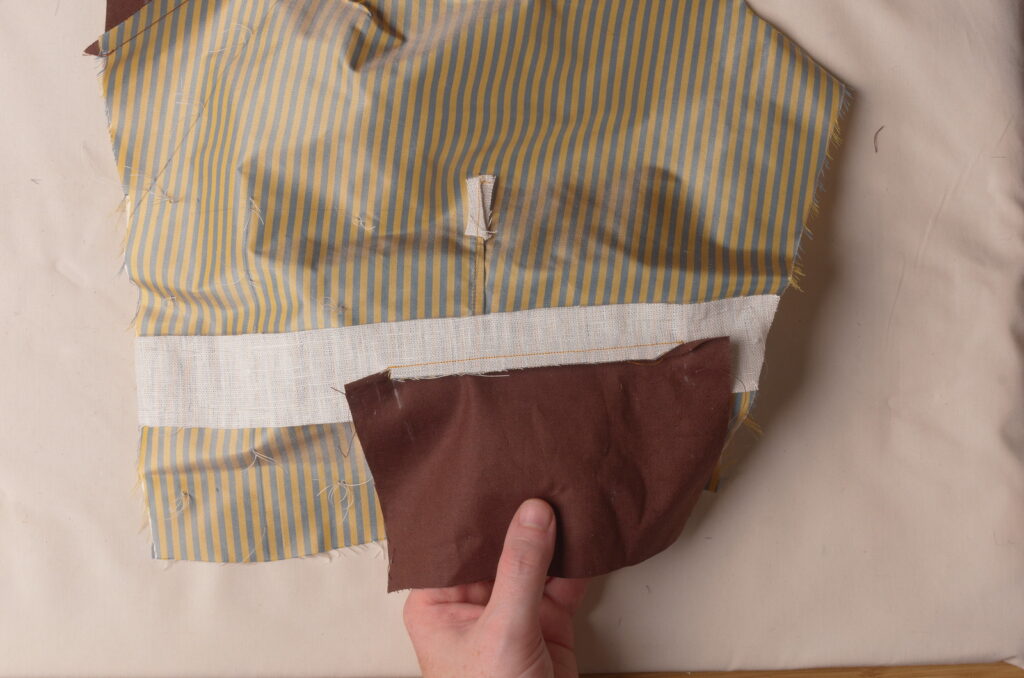
Then open the rest of the seam allowance with your fingers, separating the pocket bag from the forepart’s seam allowance, and press firmly and carefully.
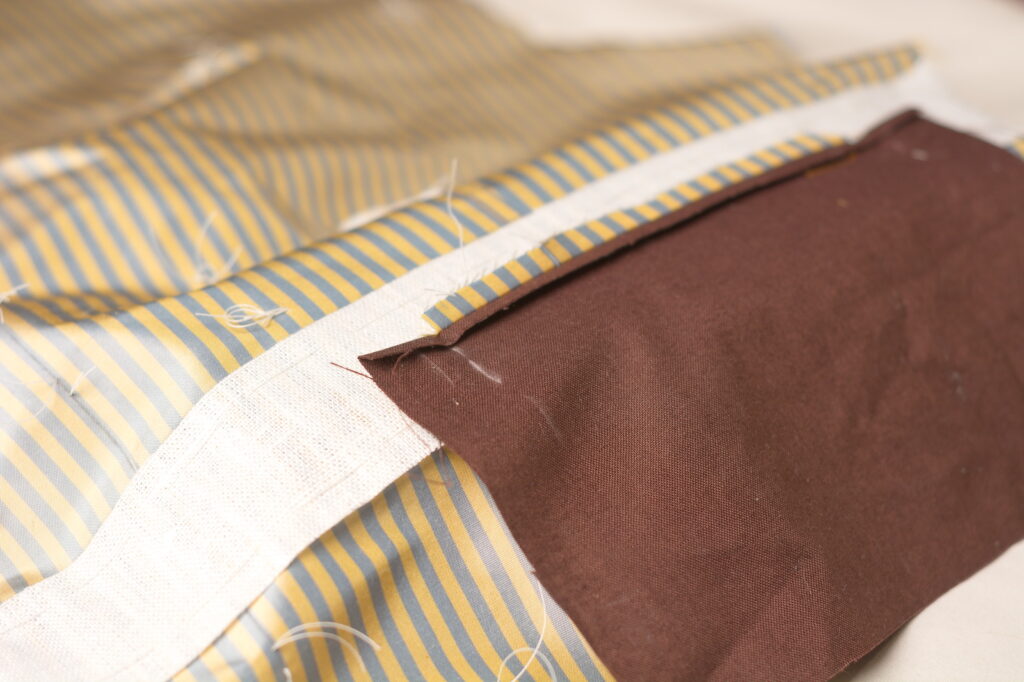
Pass the pocket bag back to the front and out of the way, and bring the pocket welt to the wrong side to press in the same manner.
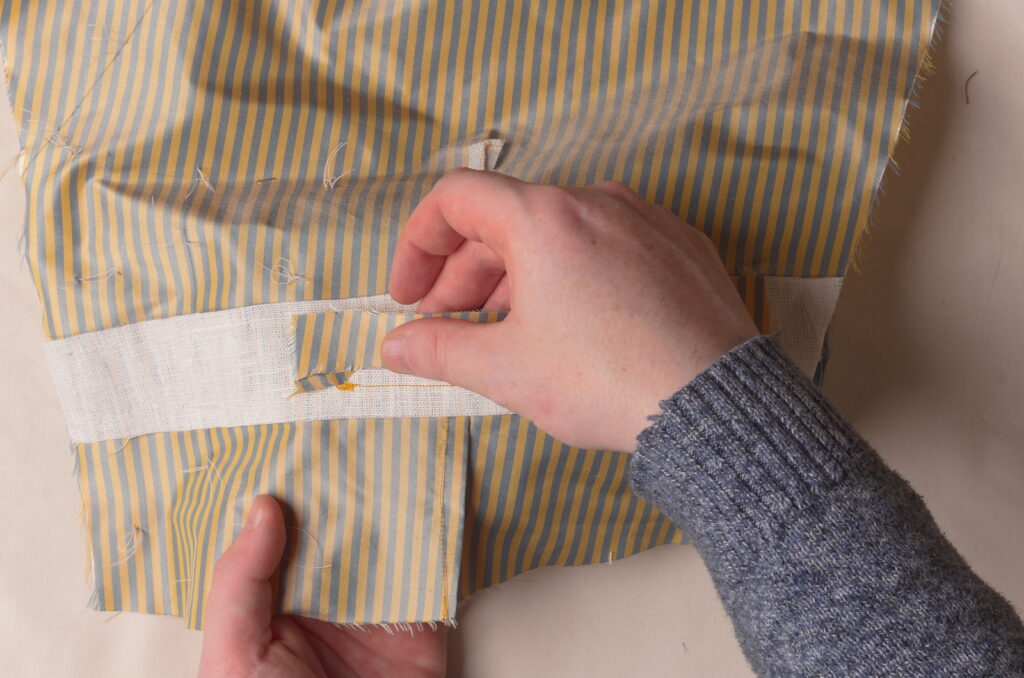
I pressed the ends first. The slight bias cut makes it a little tricky, as the fabric tends to want to pull out of position.
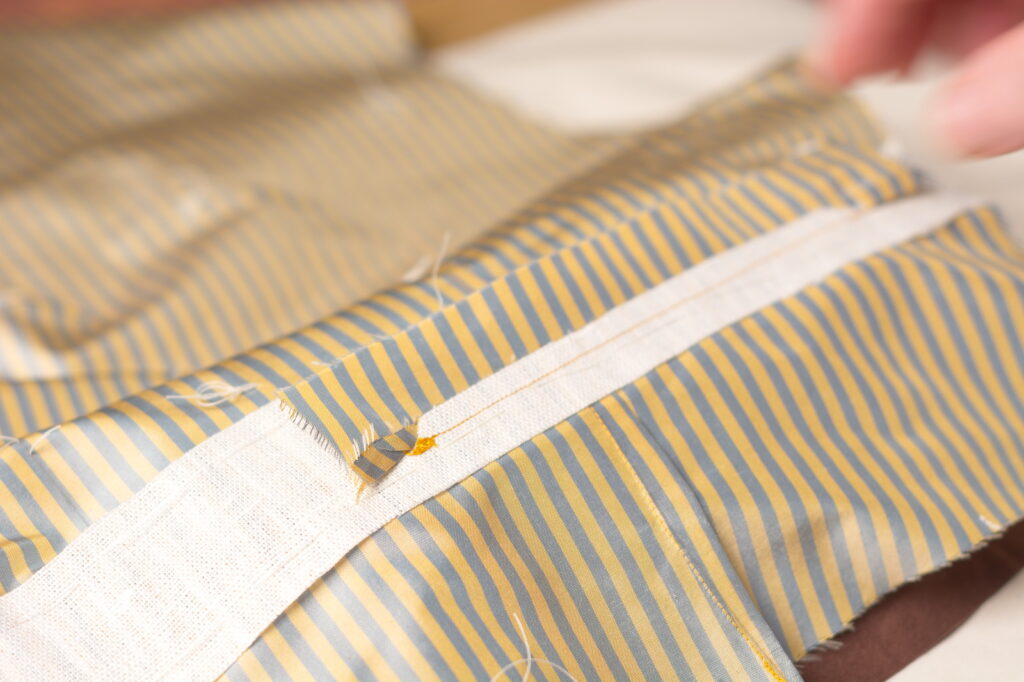
And press the rest of the seam open.
Turning back to the right side again, you can press the pocket welt and bag (not pictured) again for a crisper finish.
Attaching the Pocket Welt
With the pocket areas reinforced, we can begin working on the pockets themselves. Although the waist pockets and breast pockets are constructed identically, there are a few slight changes in the breast pocket due to the steeper angle, so we’ll begin with the waist pockets. If you’ve never made a pocket like this before, I highly suggest practicing once or twice on some scraps just to get the process worked out in your mind.
First, draw out the pattern for the pocket welts, you’ll need one for each pocket. The pattern should be rectangular, 1 1/2″ longer than the pocket opening (3/4″ on each end), and twice the width of the finished welt. I like my welts to be 5/8″ wide, slightly more substantial than 1/2″, yet not looking too blocky or bulky like those above 3/4″ do.
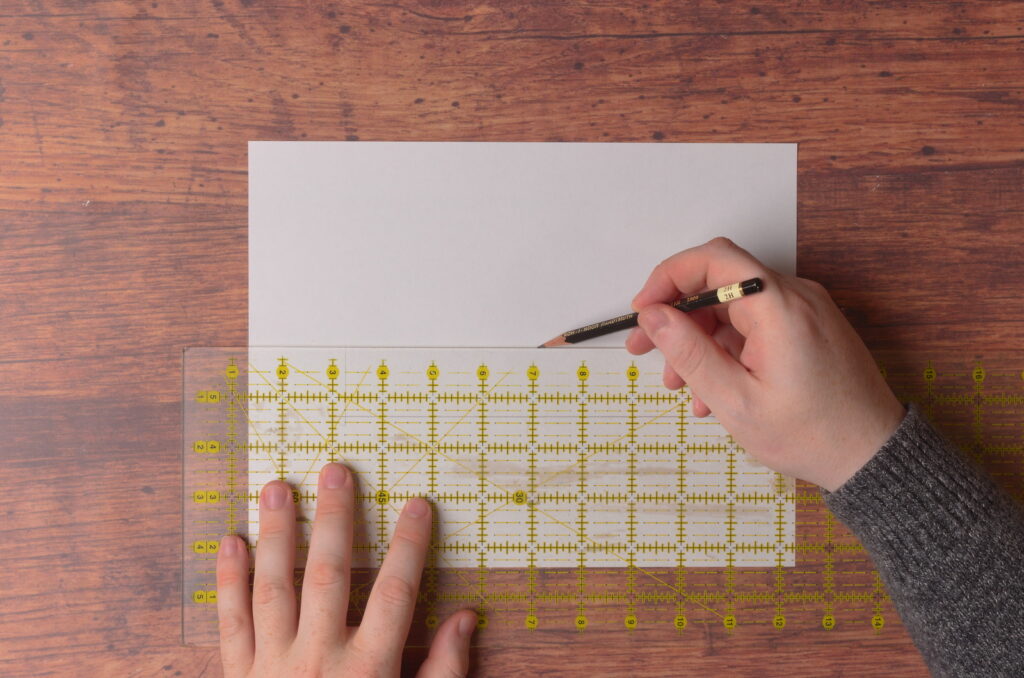
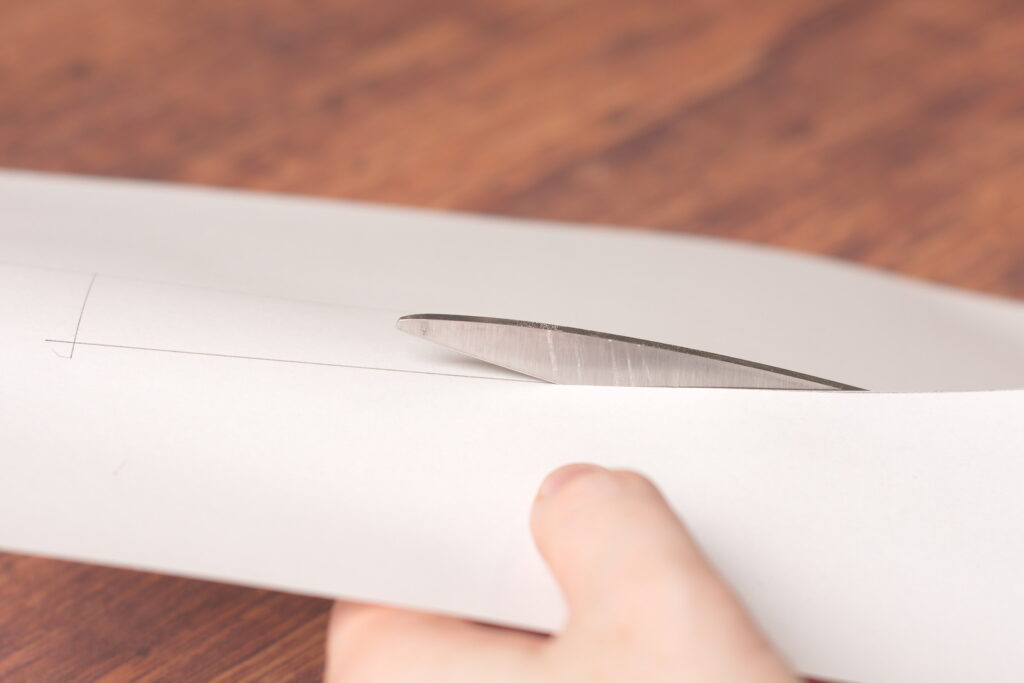
Cut out the welt patterns, again, one for each pocket.
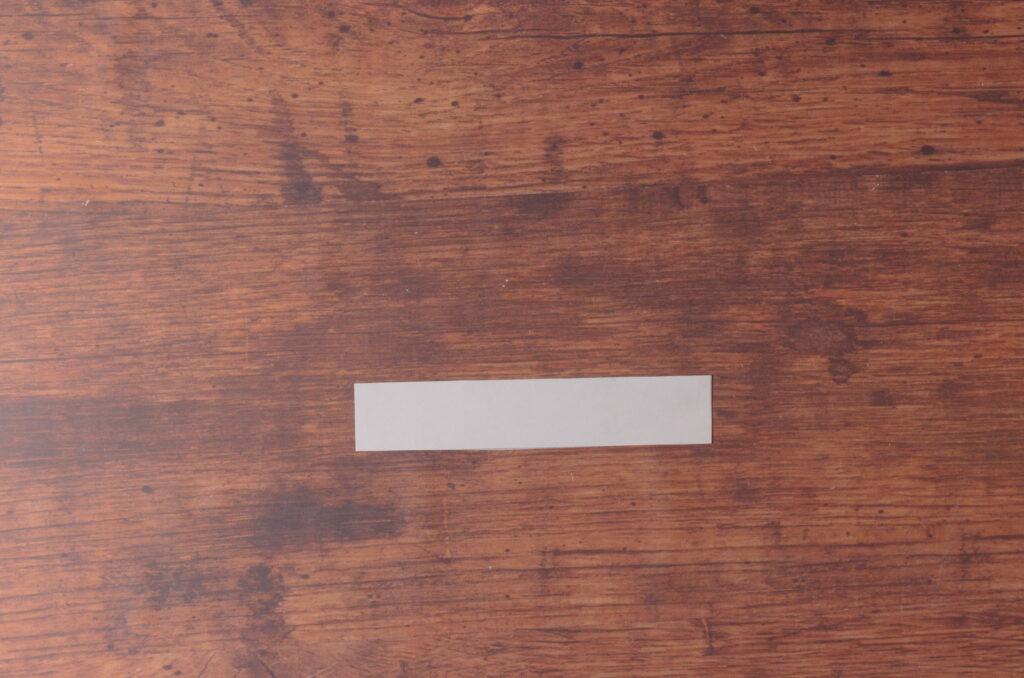
Now, to decide how you want to align the stripes, if you have any. Originals could be anything from perfectly matched, to completely mismatched and even sewn on the bias. So it’s up to you how you want to go about doing things.
If you’ve installed a dart into the waist, you’ll only be able to match the stripes along one side or the other most likely, unless your dart happens to perfectly maintain the distance between the stripes.
Lay the pattern onto the pocket, aligning it with the basting stitches indicating the pocket opening, and centering it so 3/4″ extends beyond the opening on each side.
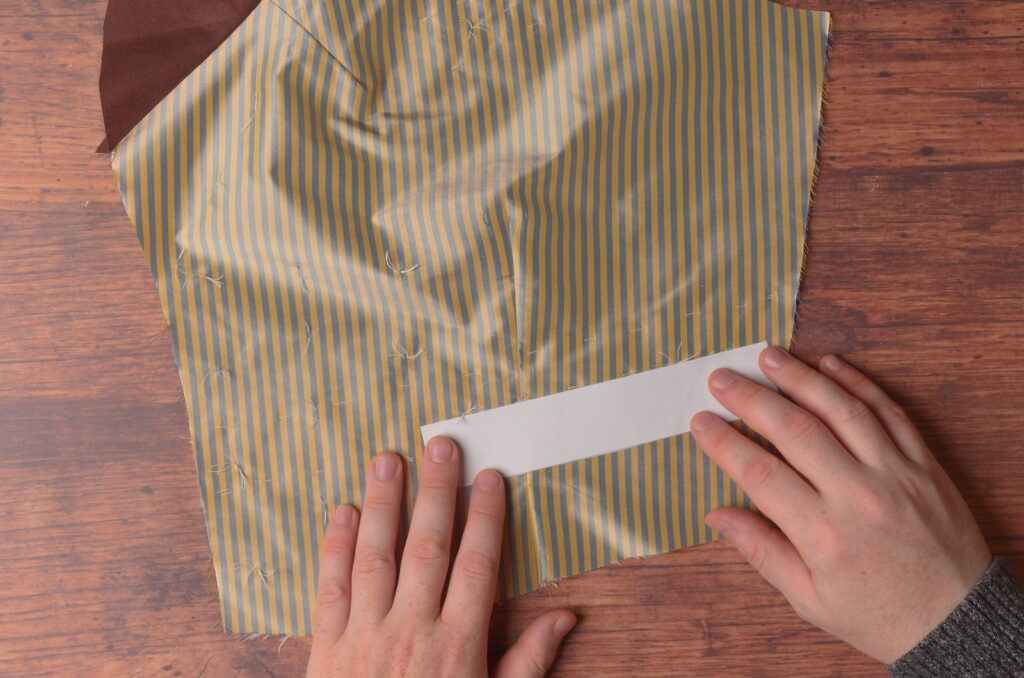
I chose to align the stripes on the pocket near the side seam, as the area is bigger and slightly more noticeable. Lay a ruler along one of the stripes, and draw a line indicating that stripe on the pattern.
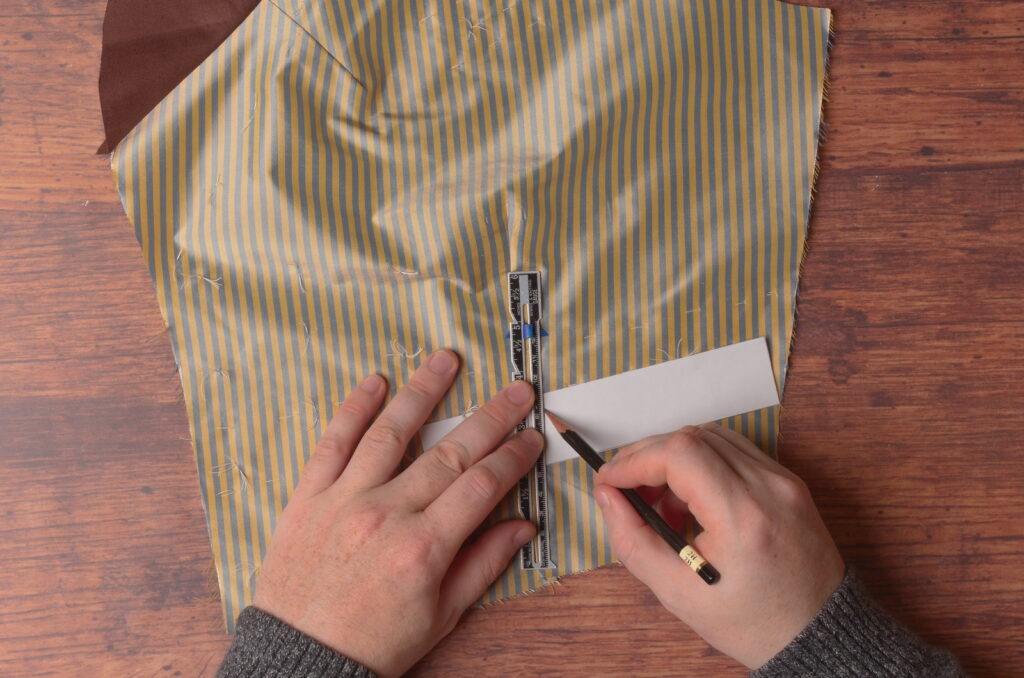
Draw as many of the stripes in as you feel you’ll need. I like to draw them across the width of the pocket to try to get the positioning more accurately. Just be consistent though and keep your lines on the same side of each stripe.
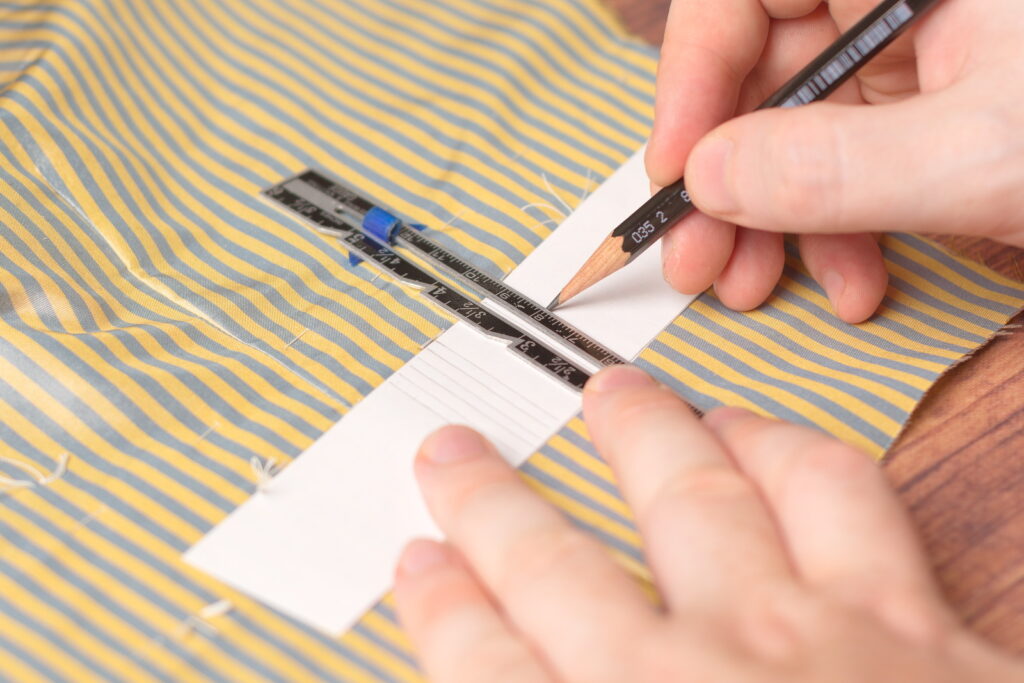
Here are my two patterns for the left and right sides. Note how they’re mirror images of each other.
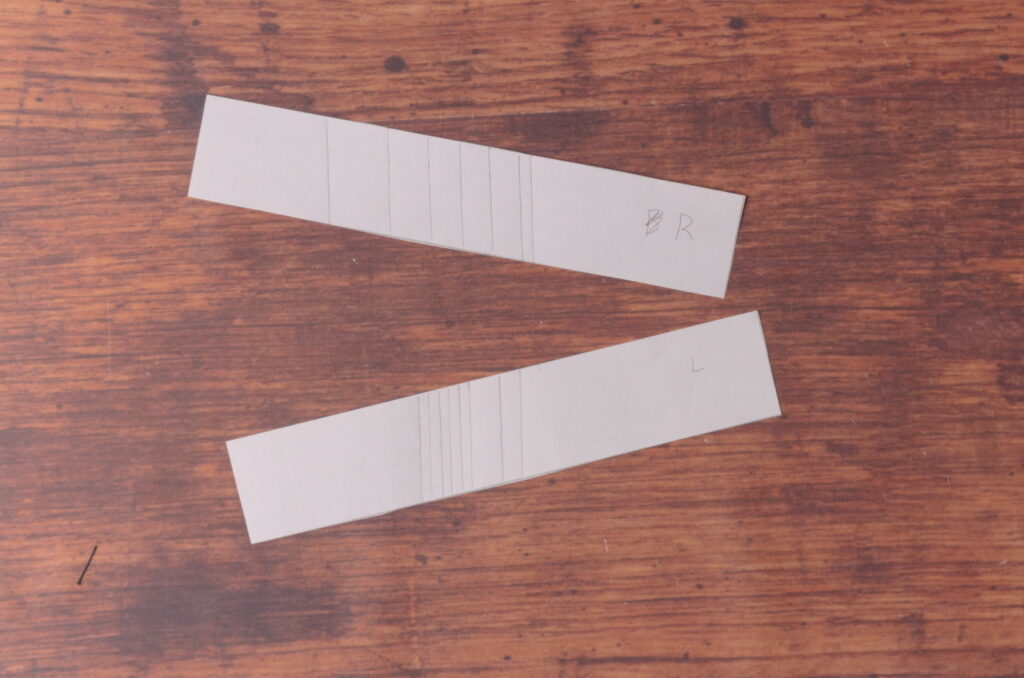
Now you can use the patterns to lay out and cut your welt pieces. Just align the lines on your pattern with the stripes on the fabric and you should be good to go.
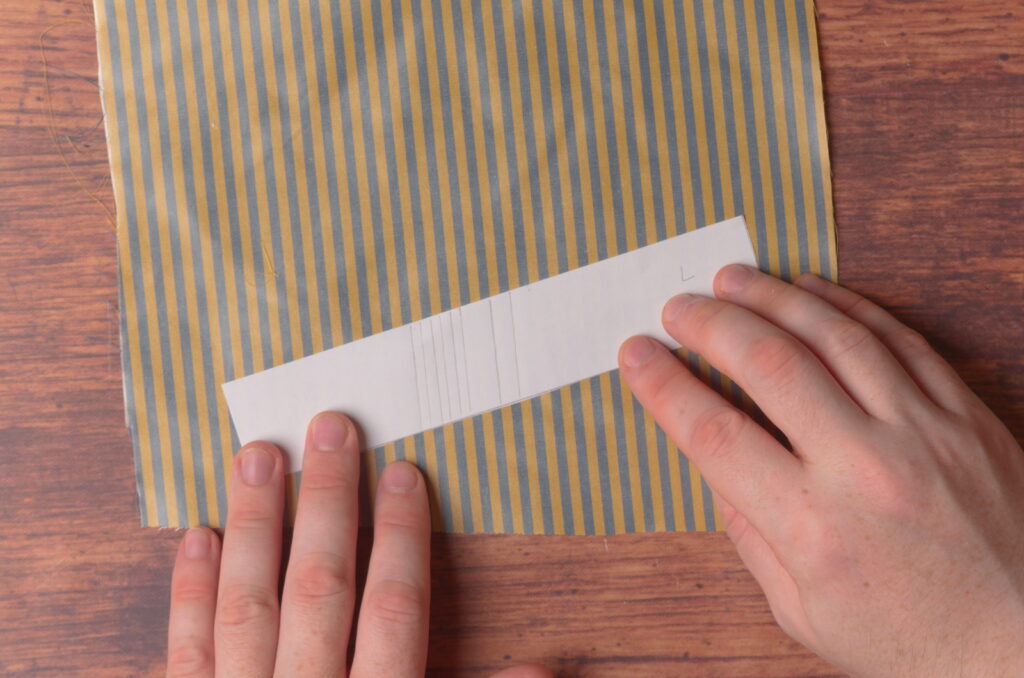
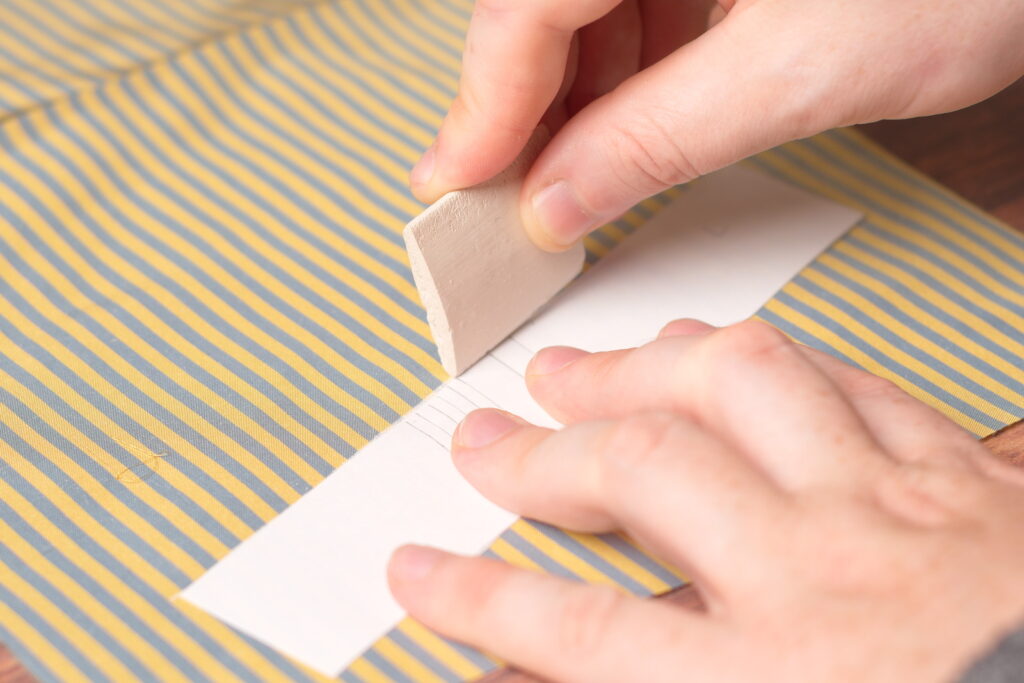
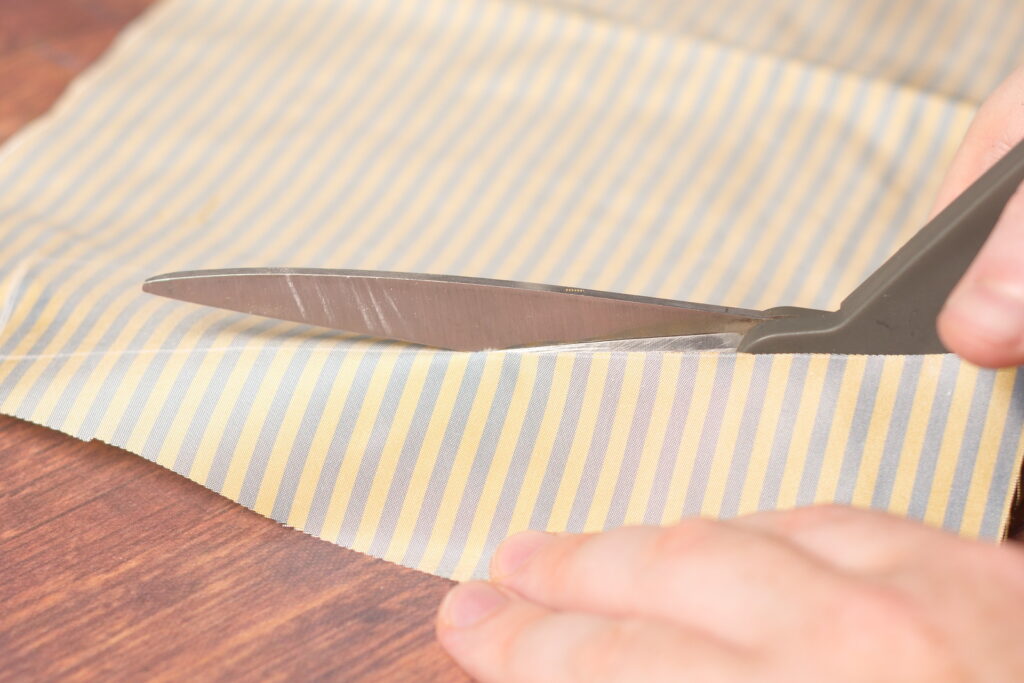
Now lay your welt piece into position on the forepart and see how you did with your alignments. Everything looks good so far here. The angle distortion from the dart even helps to align the stripes a little on the left side, so we’ll see how that turns out.
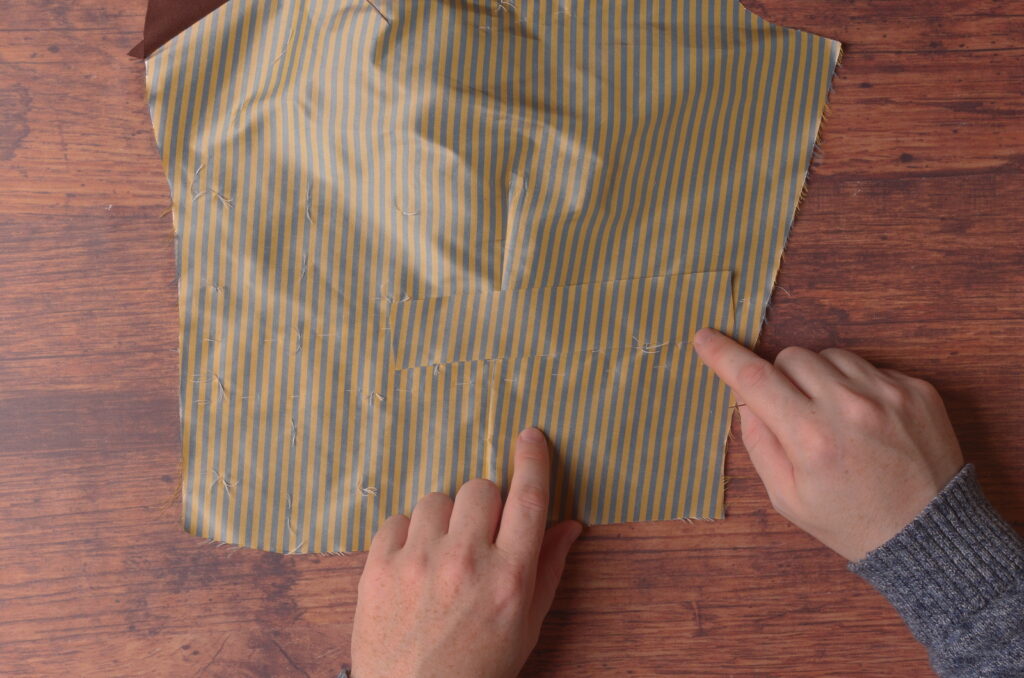
Now actually sewing the dart is where it gets tricky. It takes a bit of practice and developed skill to be able to get the alignment just right.
Flip the pocket welt over the marked opening so that right sides are together, realigning it as necessary so that the edge of the welt is just touching the marked pocket opening. Now shift the welt over ever so slightly so that the stripes align not at the edge of the cloth, but 1/4″ inch from the edge, were the seam will be sewn. I’ll add a closeup in the next photo.
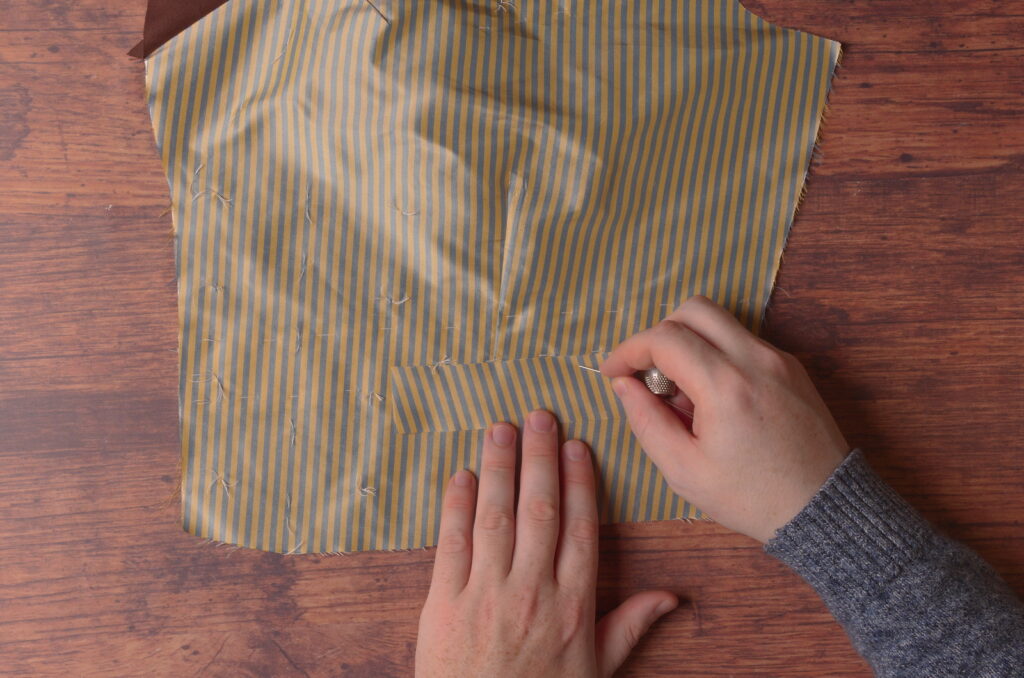
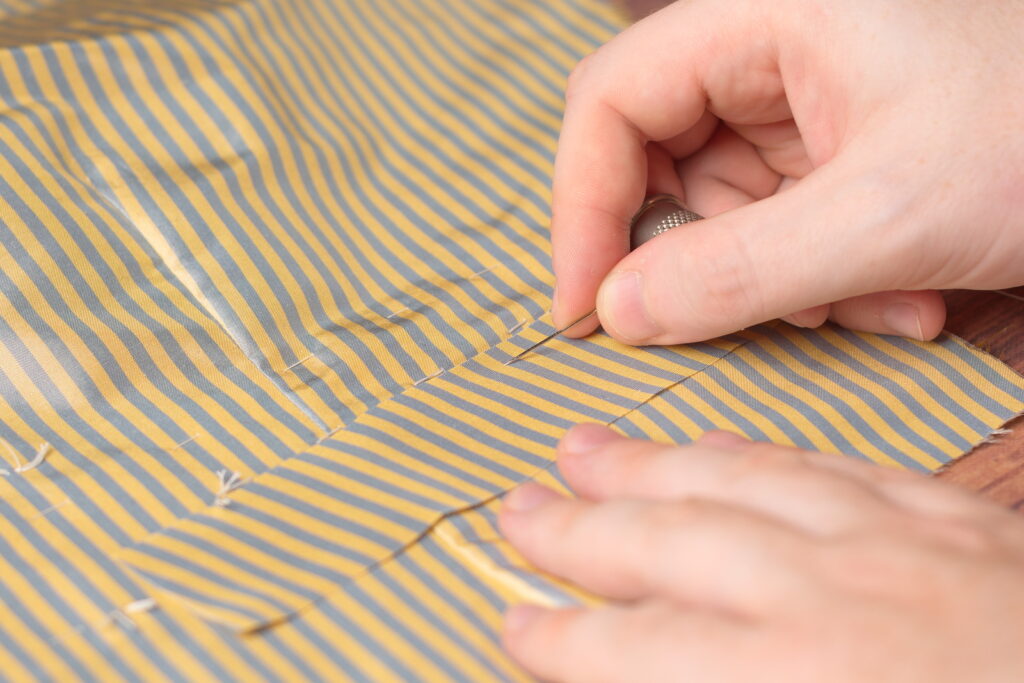
As you can see here in the closeup, I’ve matched as closely as possible the 1/4″ seam allowance, the diagonal stripe on the welt itself, and the vertical stripe on the forepart, all converging on that one intersection. And this must be done for each stripe, though after you get one the rest generally fall into place.
And if you look closely enough in the photo, you’ll see that mine isn’t even perfectly aligned. I’ve ever so slightly offset it to account for the turning of the fabric, which takes up a very slight amount in addition to the seam allowance. This is the part that takes a lot of practice, but I know you can get it with a little effort on your part.
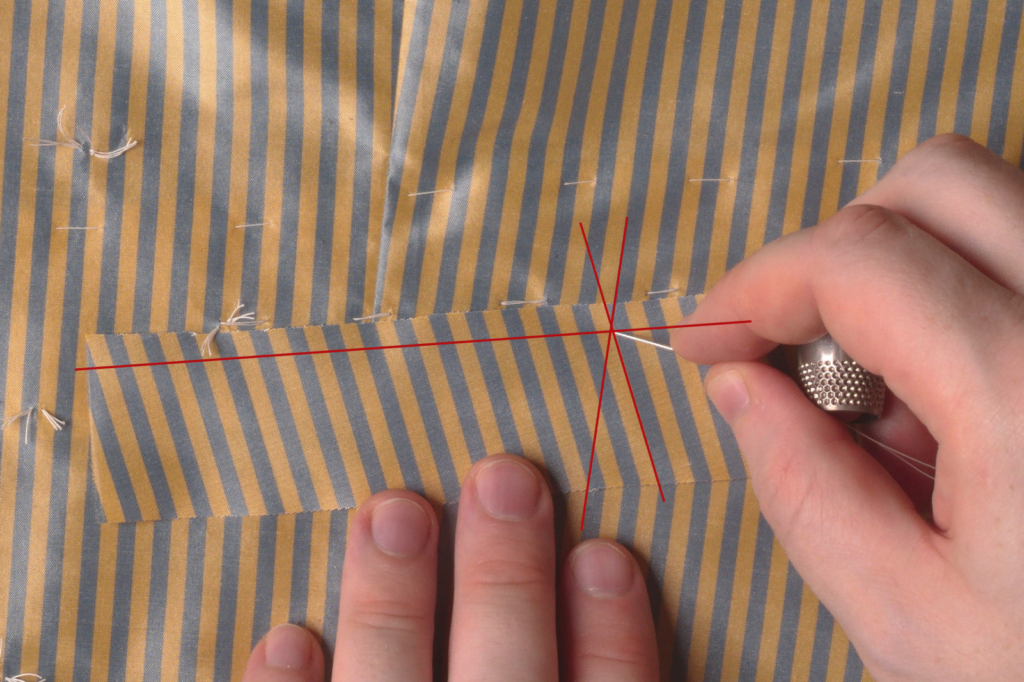
Now baste the pocket welt into position, fine tuning the alignment of the stripes as you go. This can be a little tricky, depending on the angle of your pocket, because the slight bias cut has a tendency to encourage stretching of the welt in comparison to the forepart underneath.
Here’s the welt after being basted on. You can see how the stripes got out of alignment to the left side of the dart.
Turning to the pocket bags for a moment, cut a four rectangular pieces (two for each pocket) 1 1/2″ longer than the pocket opening by about 4 inches in depth. I like to cut them a little over sized, as they’re so much easier to trim to the exact size later on.
Lay one pocket bag, right sides together, on the forepart, just above the pocket opening, aligning it evenly with the pocket welt below it.
And baste the pocket bag to the forepart in the same manner as the welt. Much easier this time since there aren’t any stripes to match!
Here’s the pocket so far.
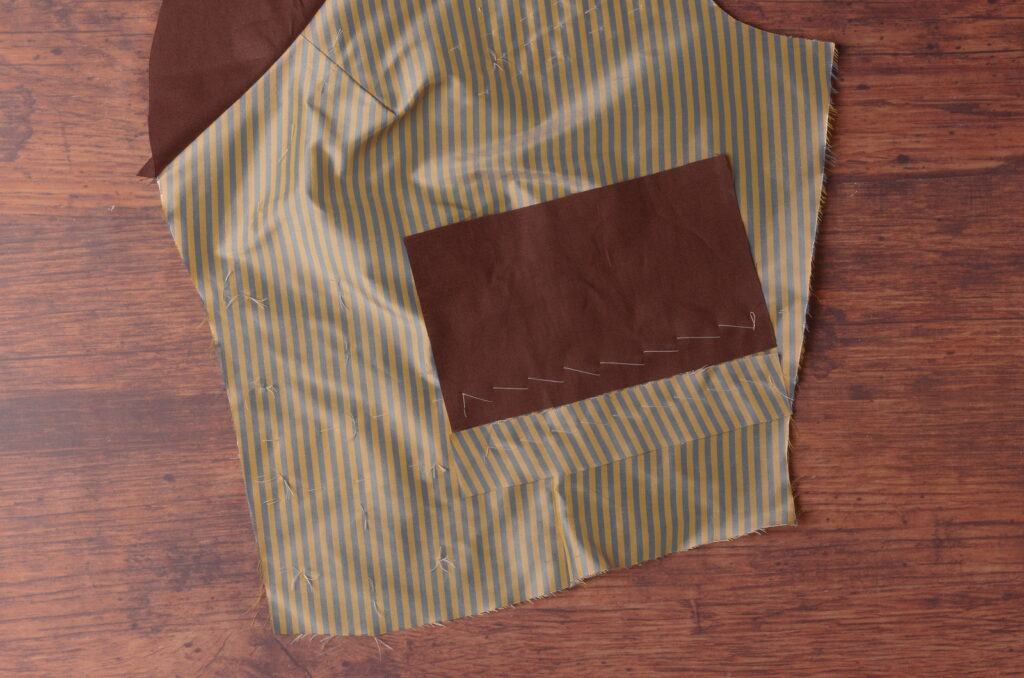
Now mark the ends of the pocket opening as precisely as possible on the pocket bag and welt at both ends.
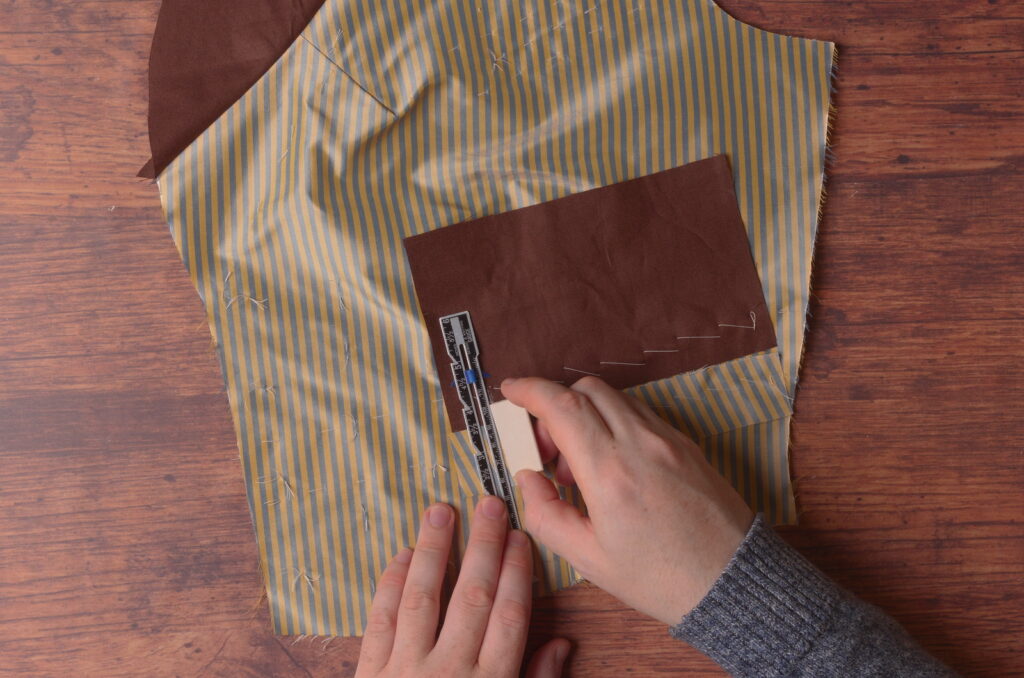
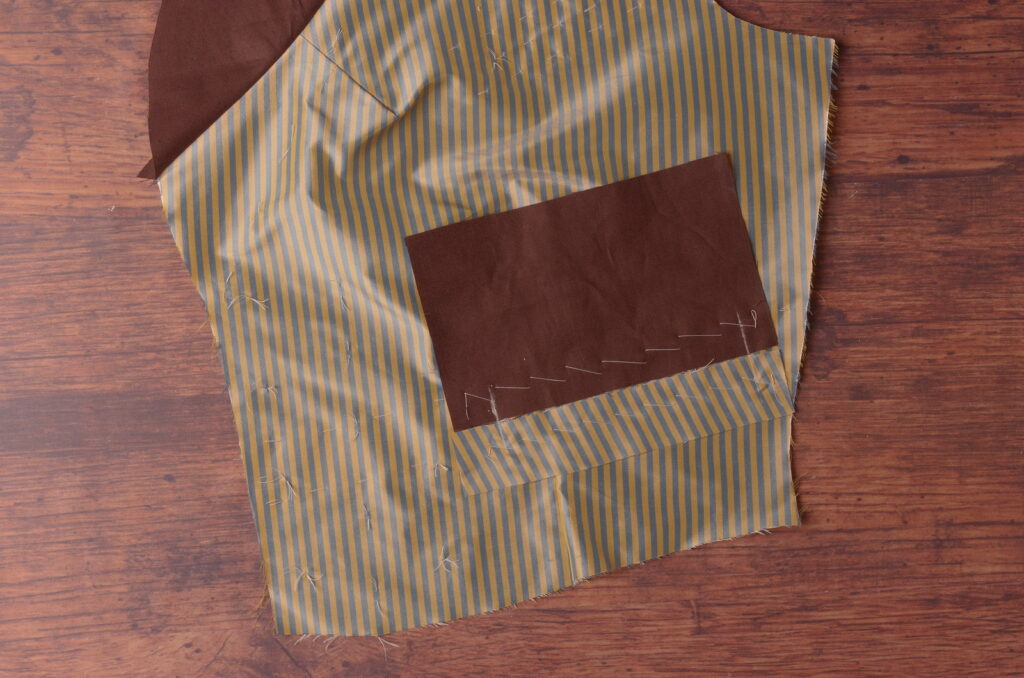
And on the lower end of the pocket bag, mark another line 1/4″ away from the original. Since the pocket is on an angle, we need to end the stitching a little early to make room for the turning in of the pocket ends. This extra quarter inch gives the relief needed.
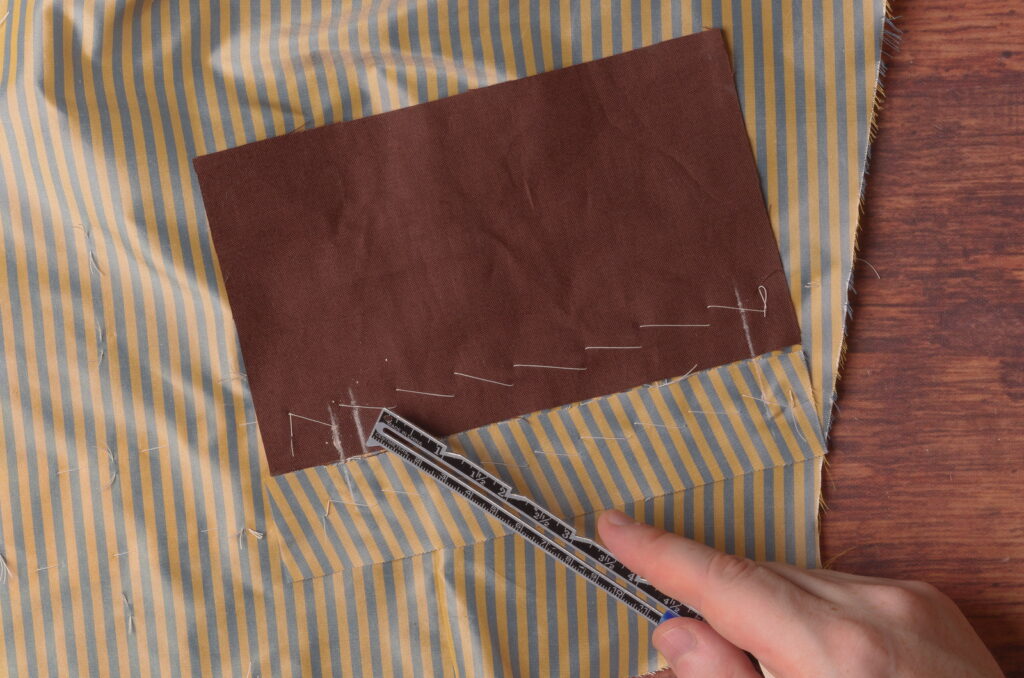
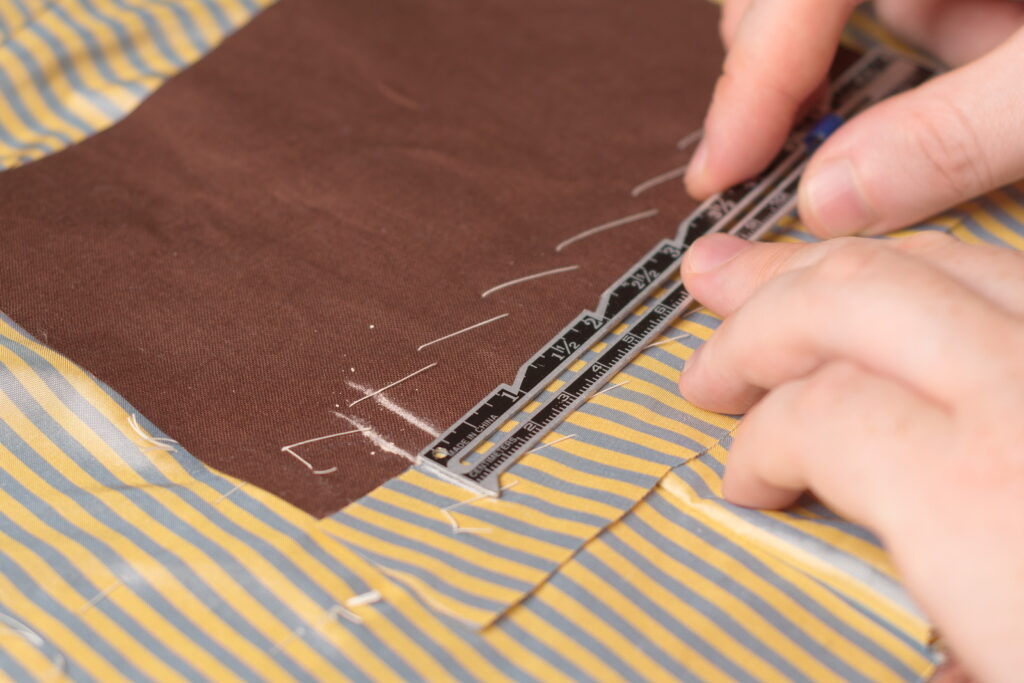
Now carefully sew the pocket welt to the forepart using a 1/4″ seam, from chalk mark to chalk mark. My presser foot happens to be 1/4″ in width so I use that as a guide. Take care, as the slight bias cut has a tendency to stretch the welt out of alignment.
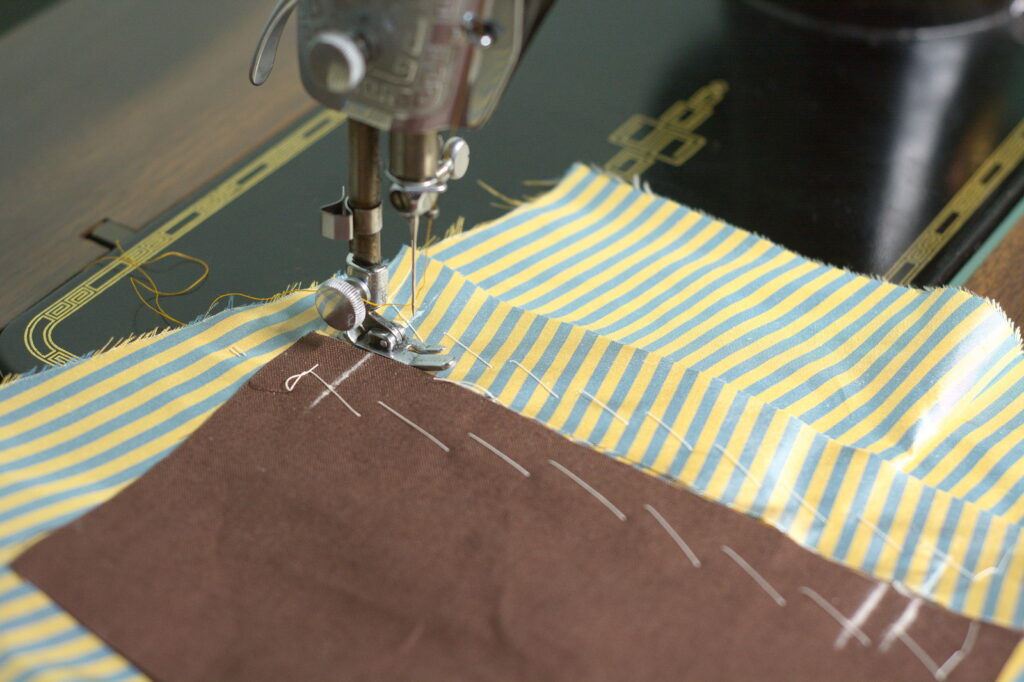
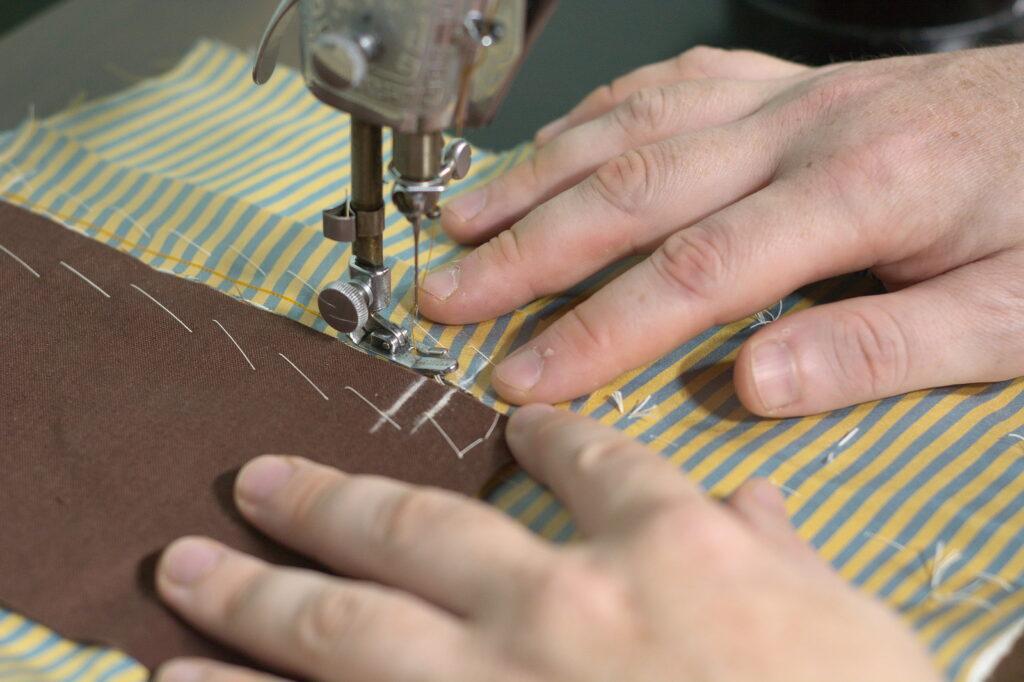
Repeat for the pocket bag, remembering that the stitching is offset at the lower end by that 1/4″.
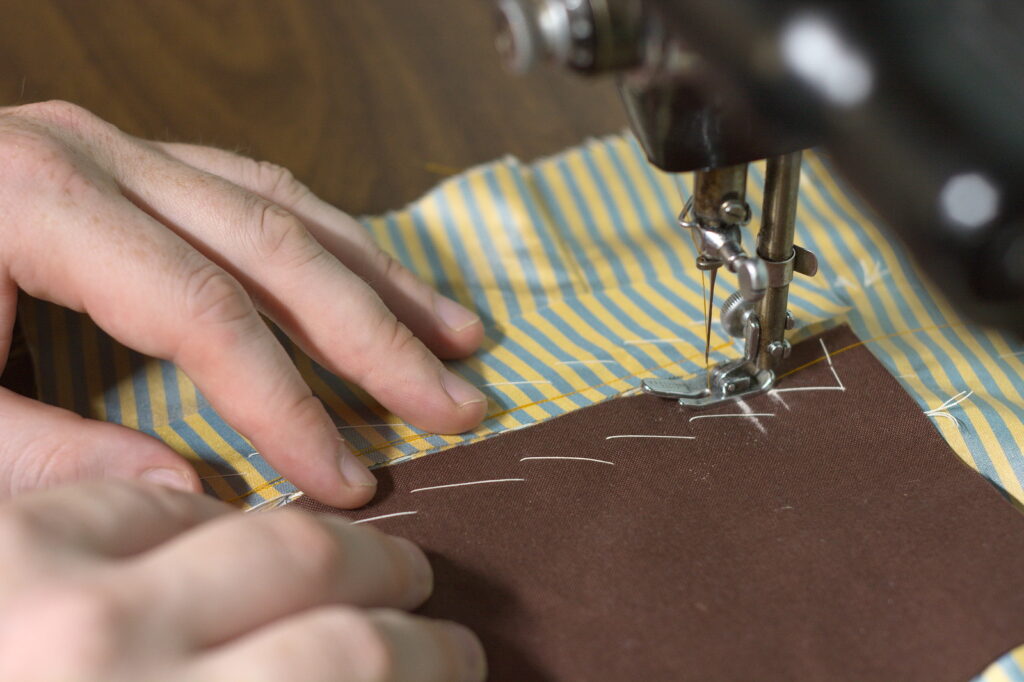
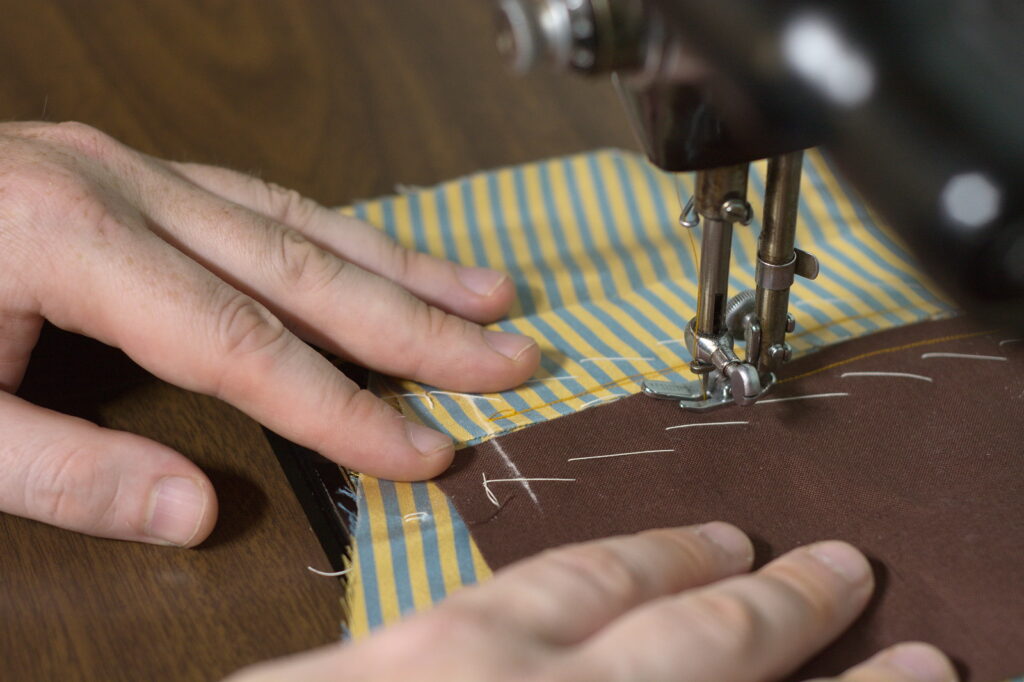
Here’s the lower end of the pocket after sewing with the offset stitching on the pocket bag.
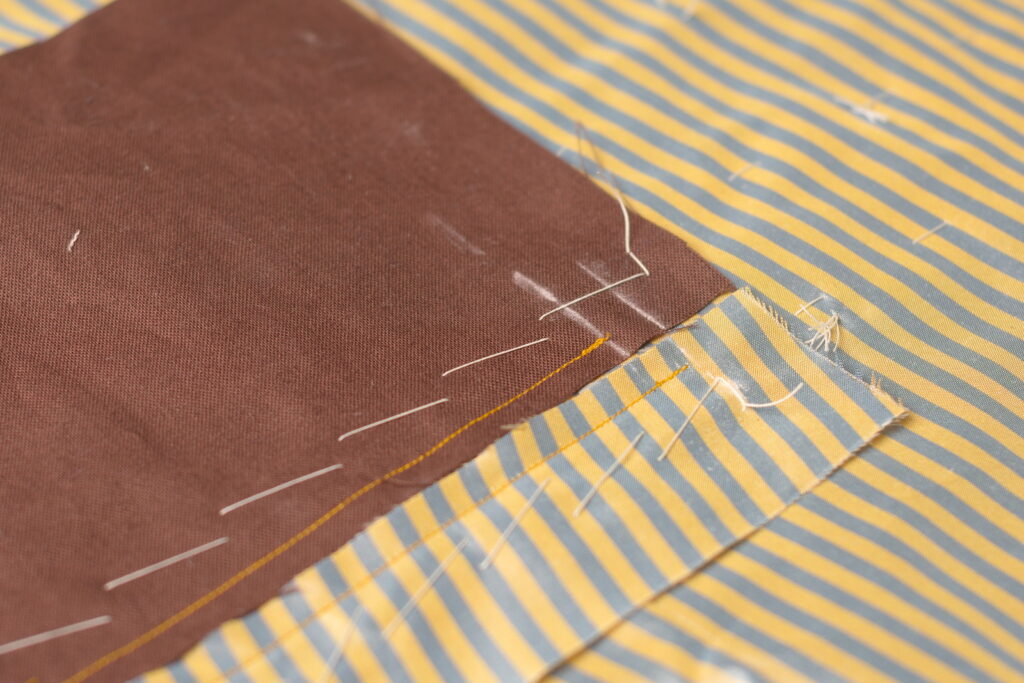
And on the other end of the pockets, the stitching should align as closely as possible.
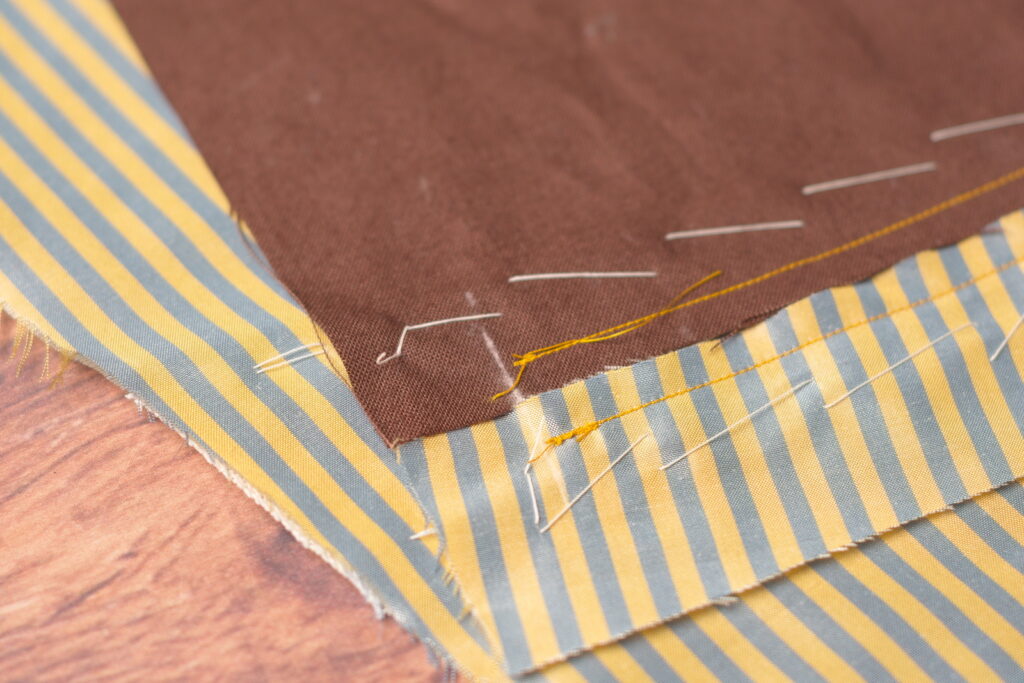
Here’s the stitching from the wrong side. On the left, lower side of the pocket you see the offset stitching, while on the right, upper end, the stitching should align as closely as possible. This one happened to be a little bit off but I wanted to show my errors so you can learn from them. In this case, I wasn’t too worried as the very slight offset won’t affect much.
Not sure what happened with all that thread at the lower left corner. Hmm.

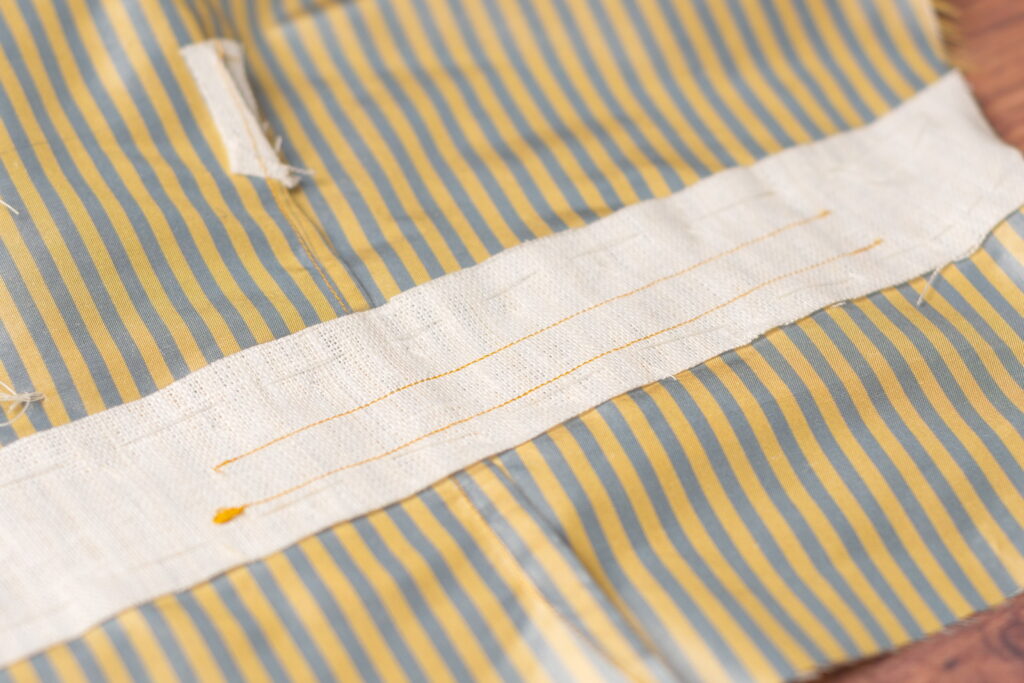
And here’s the final view from the right side, of the opposite pocket.
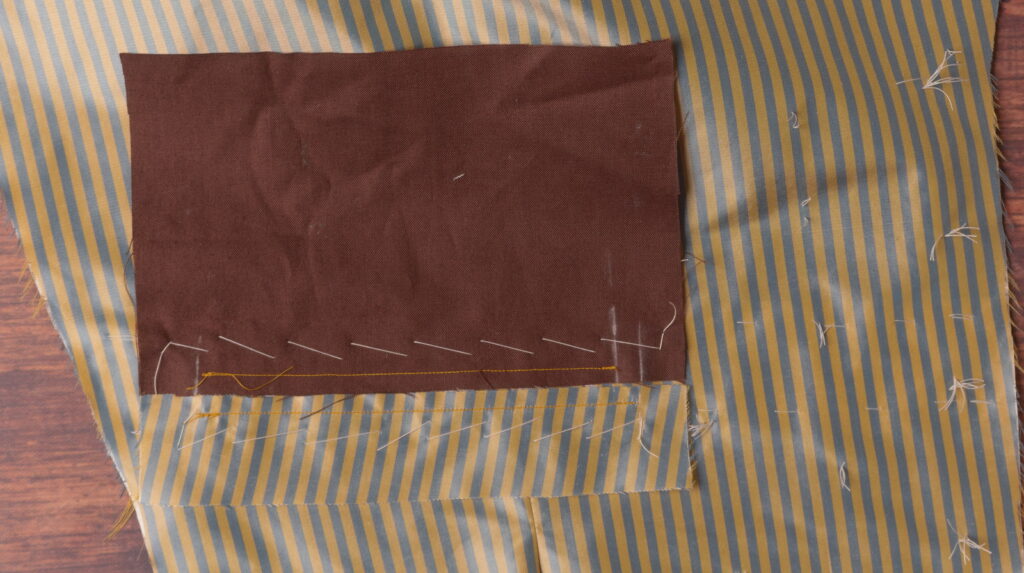
Finally, remove the basting stitches from the pocket welt and bag. It’s best to do this before cutting open the pocket when there’s more strength in the area.
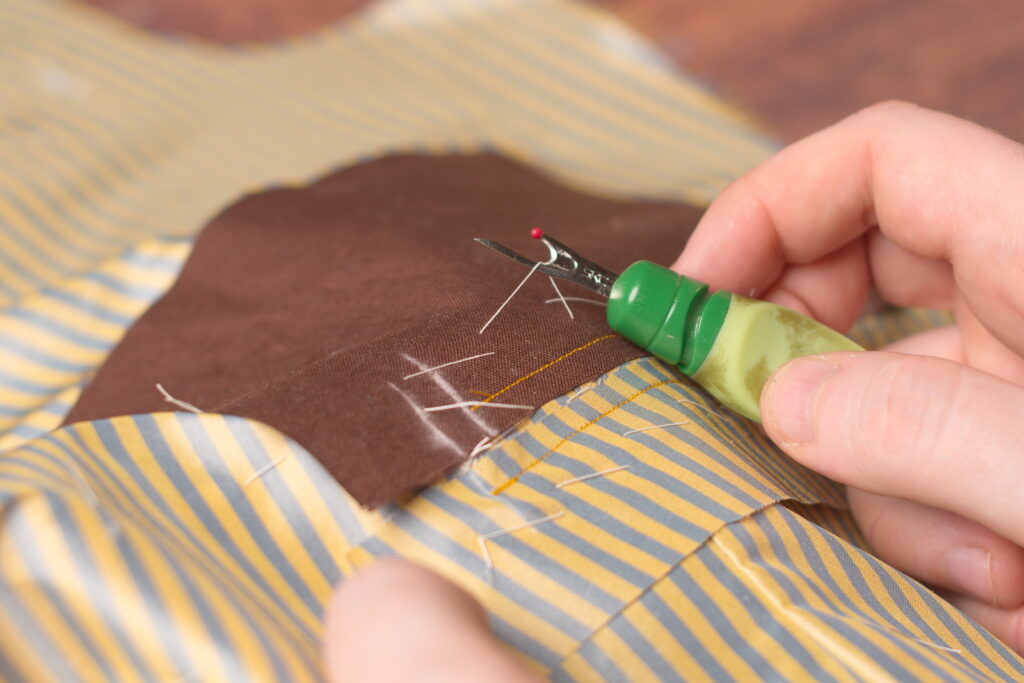
Reinforcing the Pockets
Before installing the pockets, it’s a good idea to reinforce the area around them with linen stays, particular in more delicate fabrics like silk. In addition, since the pockets are on a slight bias, these stays prevent any unwanted stretching.
First, begin by finalizing the position of the pockets on the wrong side of each forepart. If you’ve installed a waist dart, it will have thrown the position and size of the pocket off. Hopefully you marked the ends of the pockets with tailor tacks earlier. Simply connect the two points with a chalk line, extending the line if necessary due to the loss of width from the dart.
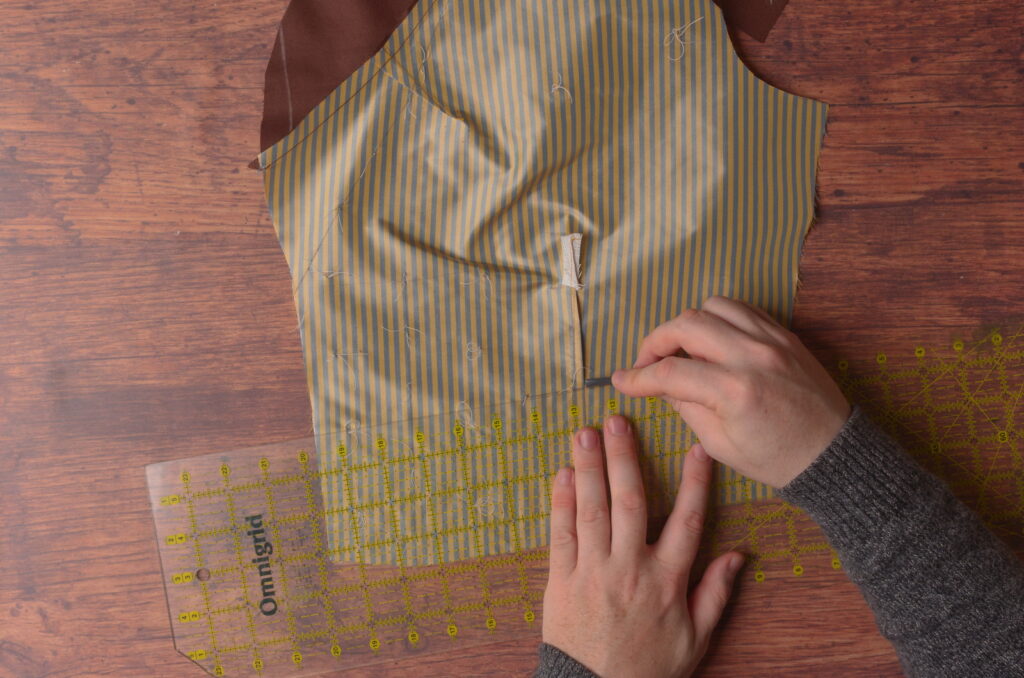
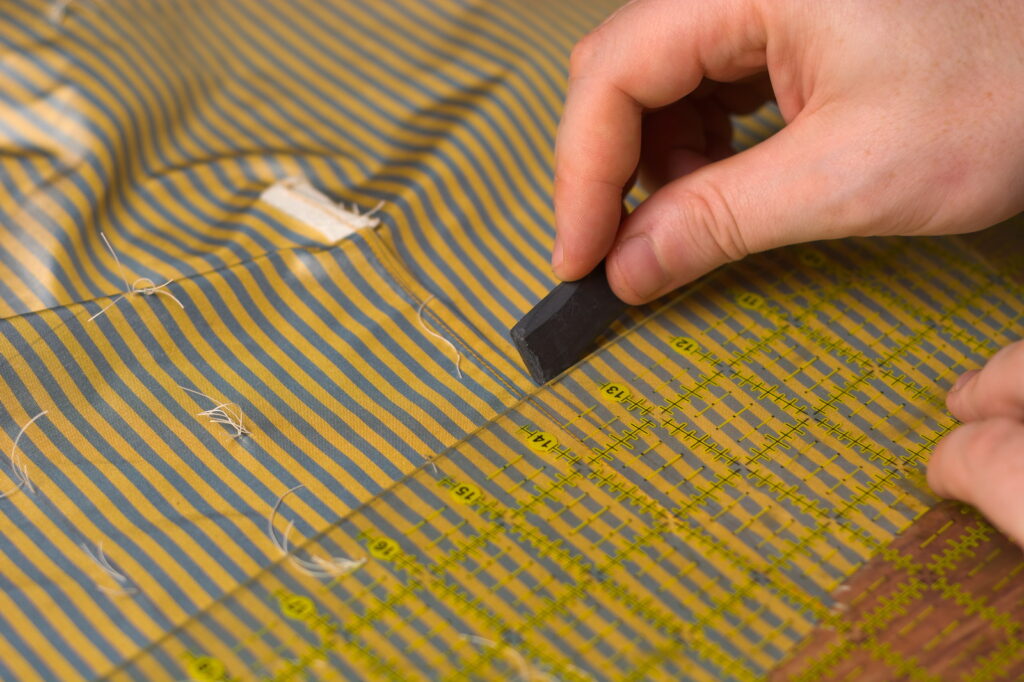
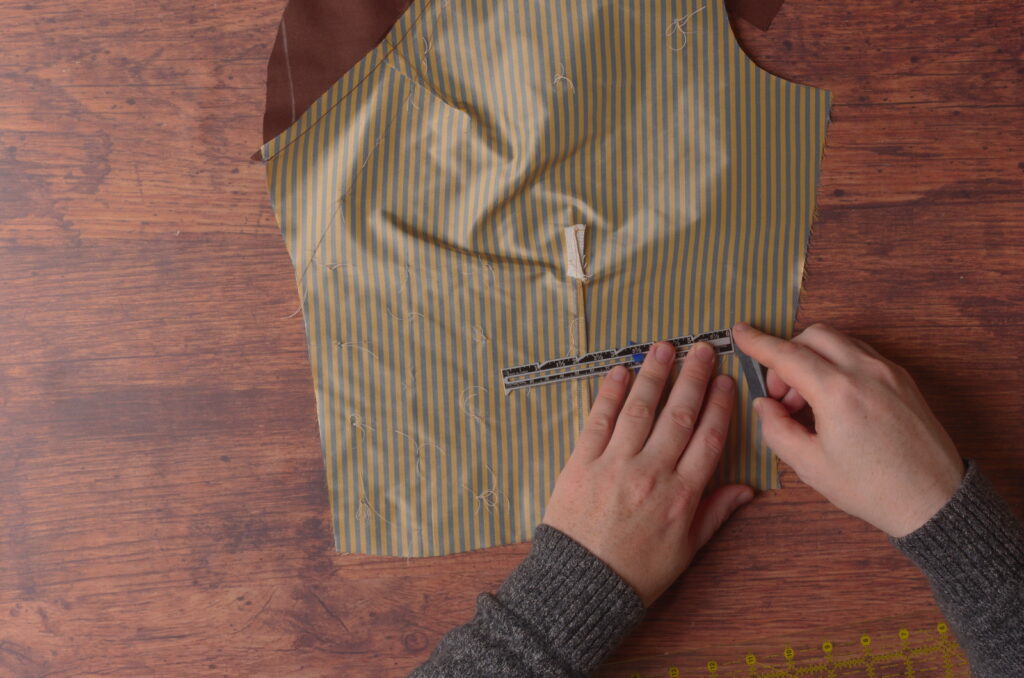
Then measure out the exact width you’d like the pocket. Anywhere from 5″ – 6″ works well, depending on your size. I made mine 5 3/8″. Repeat this immediately for the other pocket to be sure you mirror it correctly.
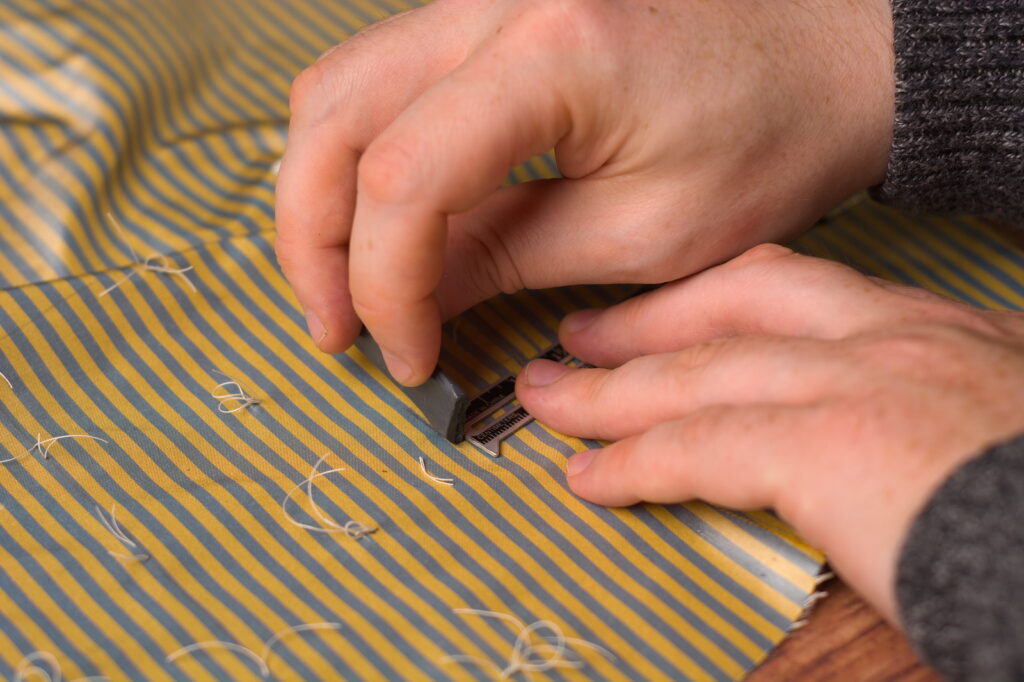
With a double over basting thread, run a row of running stitches along each of the refined pocket lines. There’s no need to cut these open as they’re only going through a single layer, not both halves of the waistcoat at once as before.
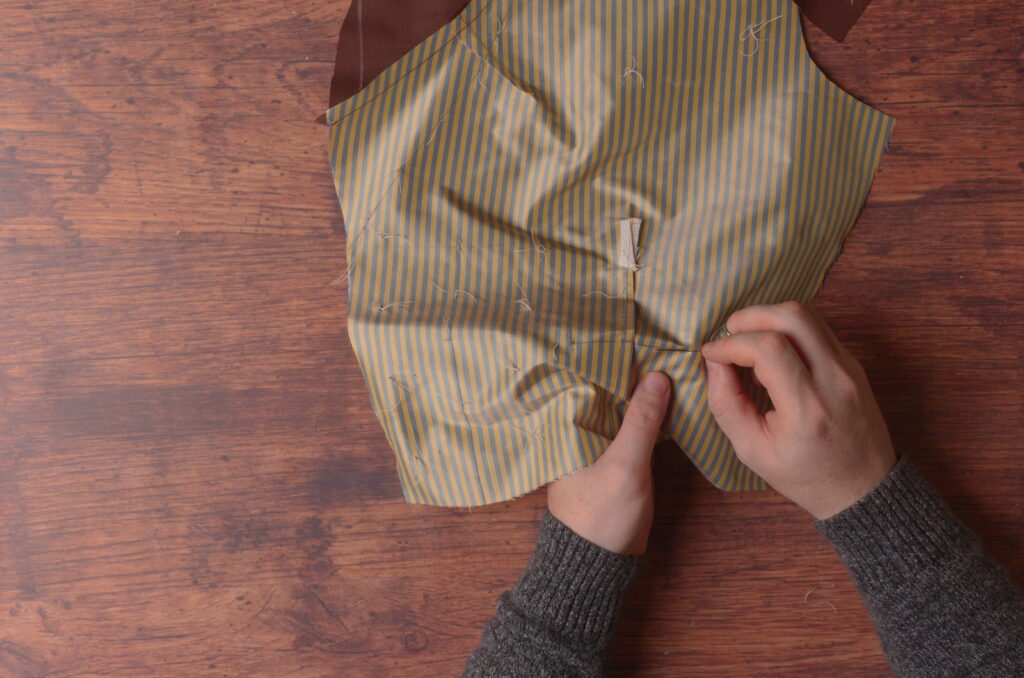
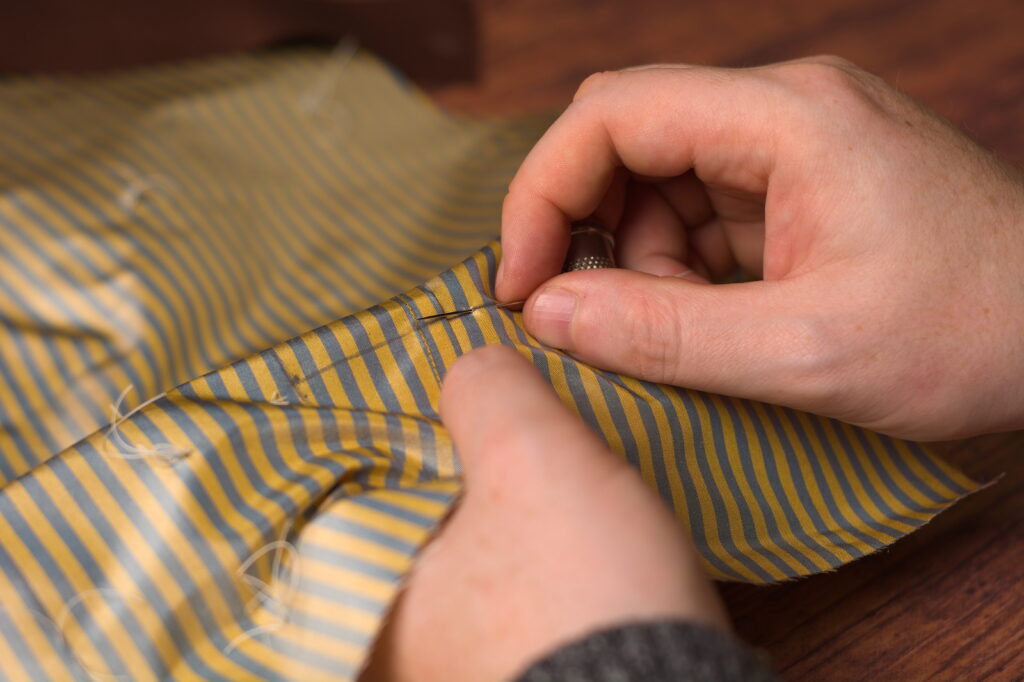
Here’s my pocket after redrawing and marking the lines.
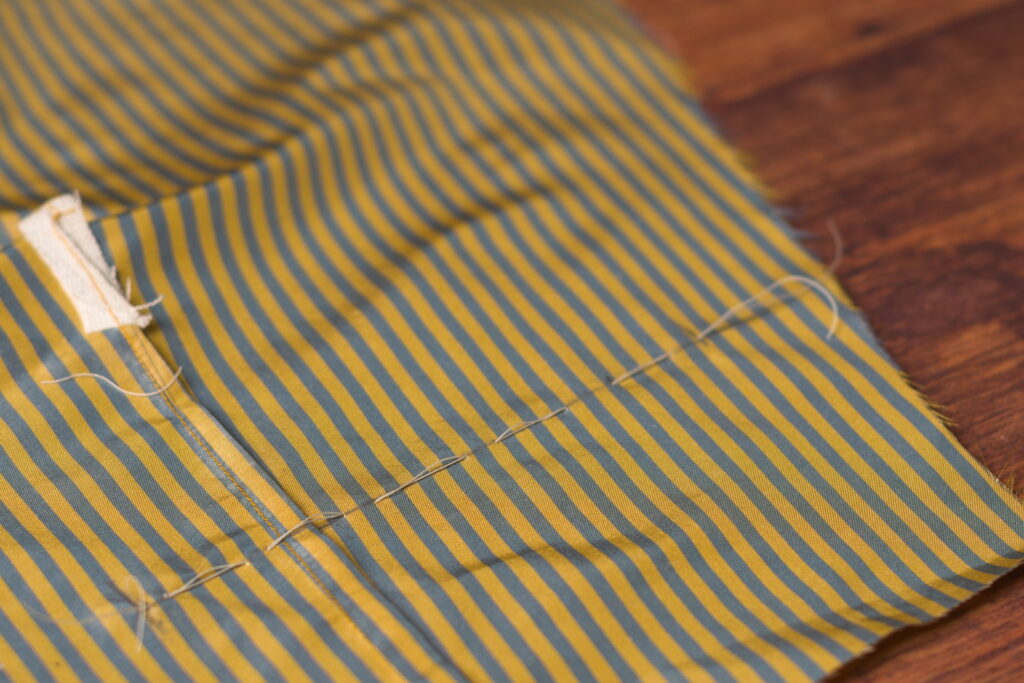
Now draw a line across the entire forepart, parallel to and 1″ above the pockets.
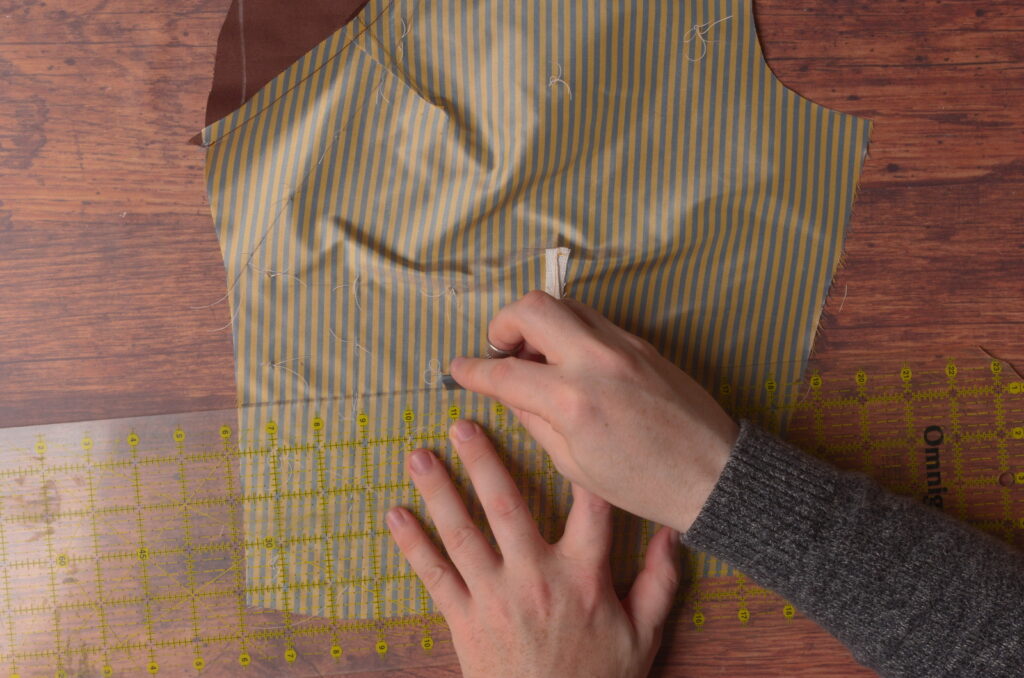
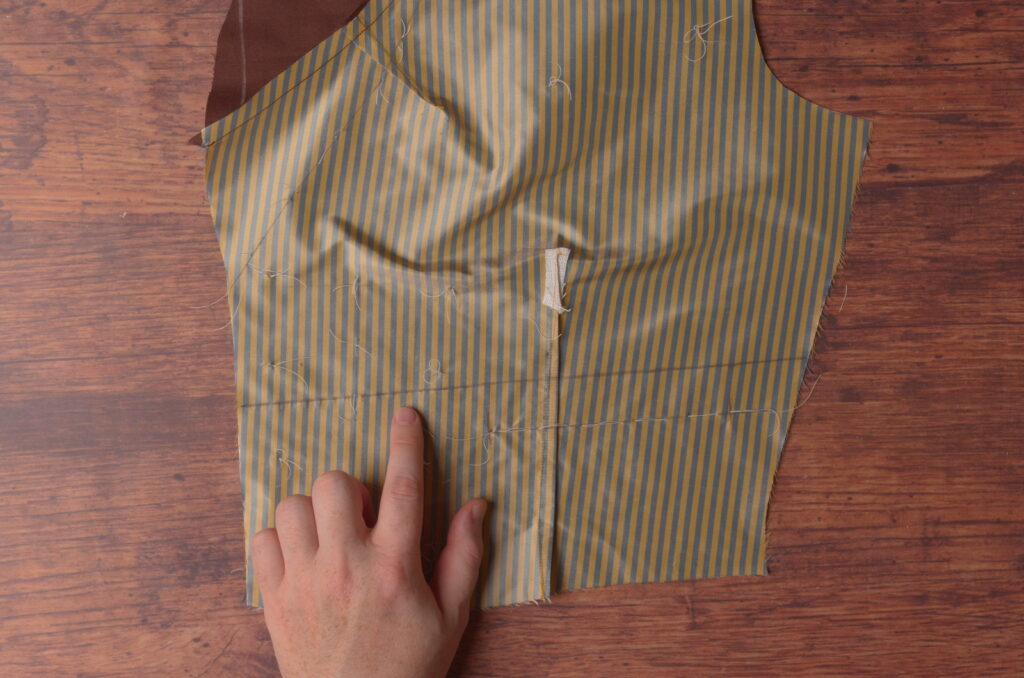
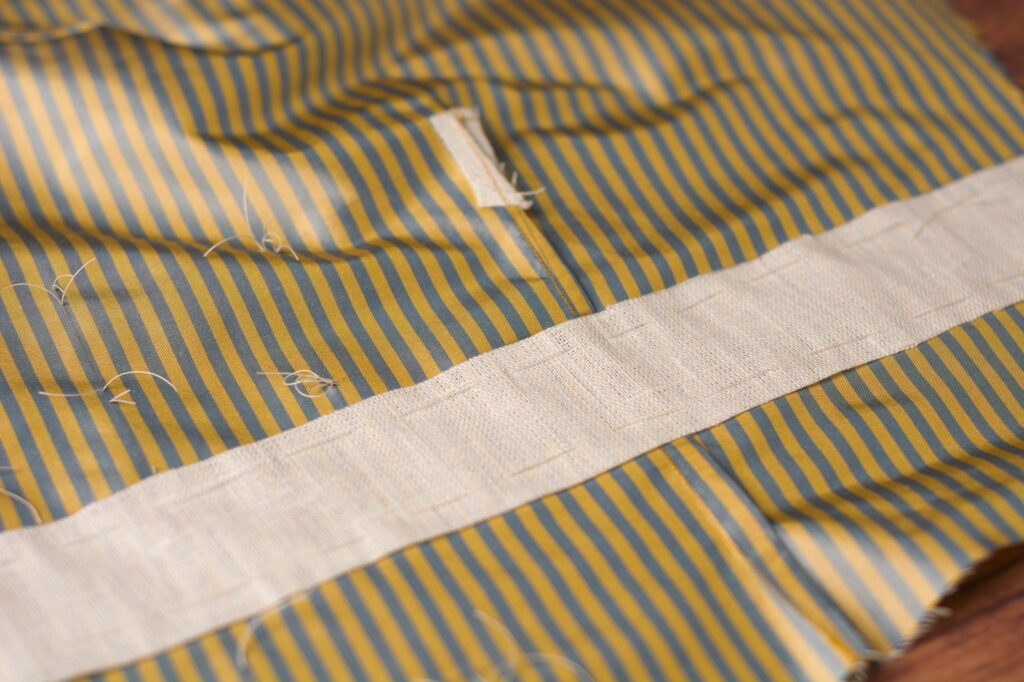
Now cut a strip of linen 1 3/4″ wide and a little longer than the width of the forepart. Place it on the wrong side of the forepart over the pocket, aligned with the line you just drew. Ideally there will be about 1″ of linen above the pocket, and 3/4″ below, to provide an area for the pocket to be attached to.
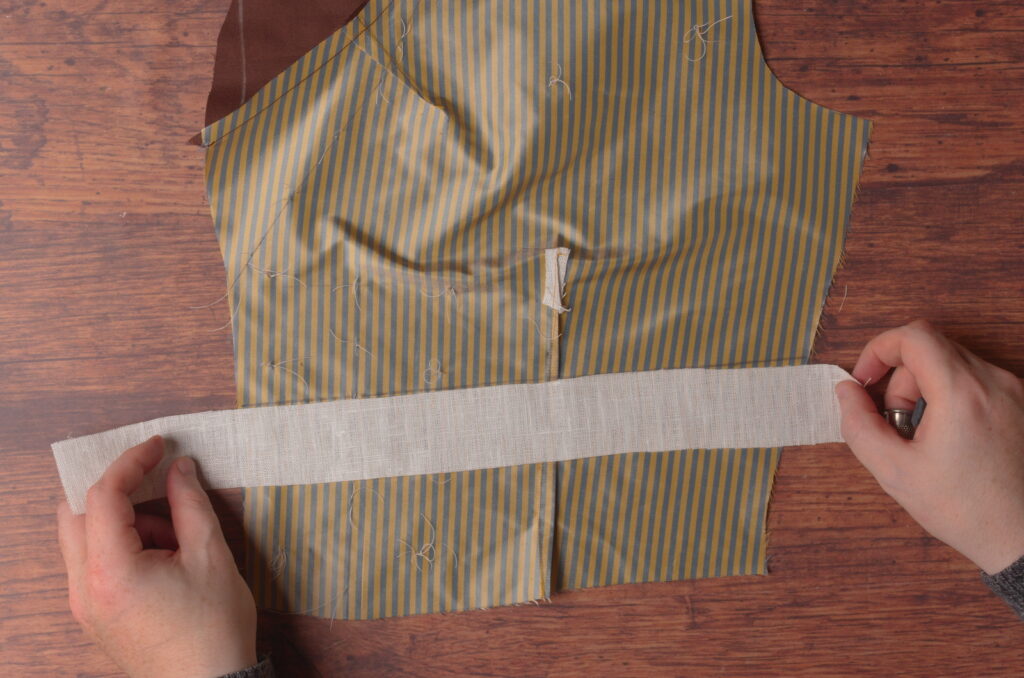
Baste across the top and bottom of the linen strip, about 1/4″ from the edge, using a straight basting stitch. Try to keep a neutral tension between the linen and the forepart.
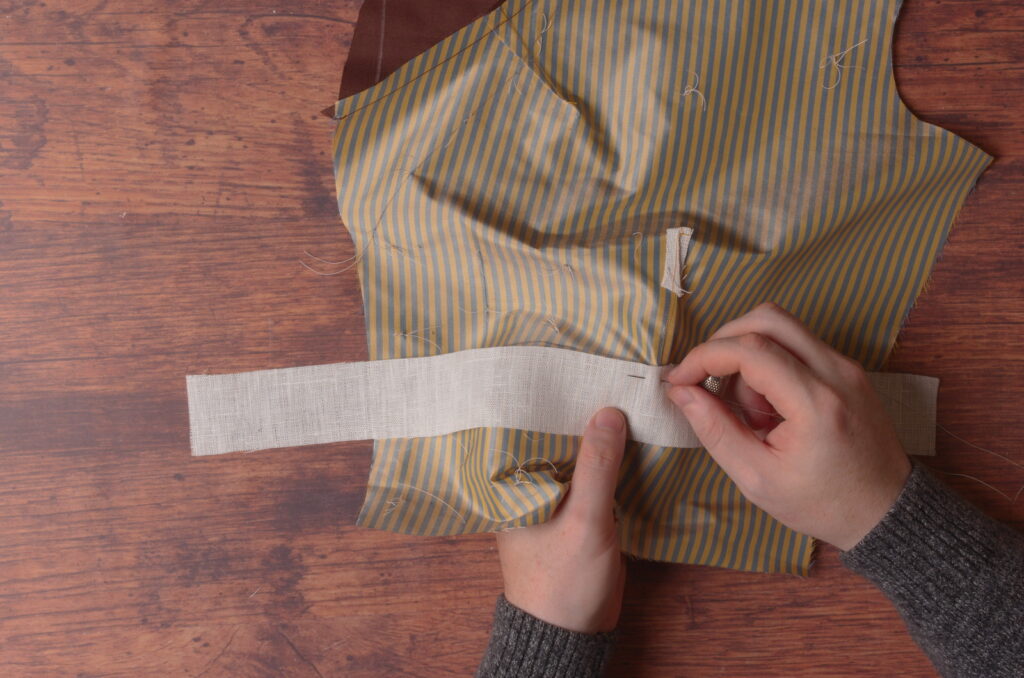
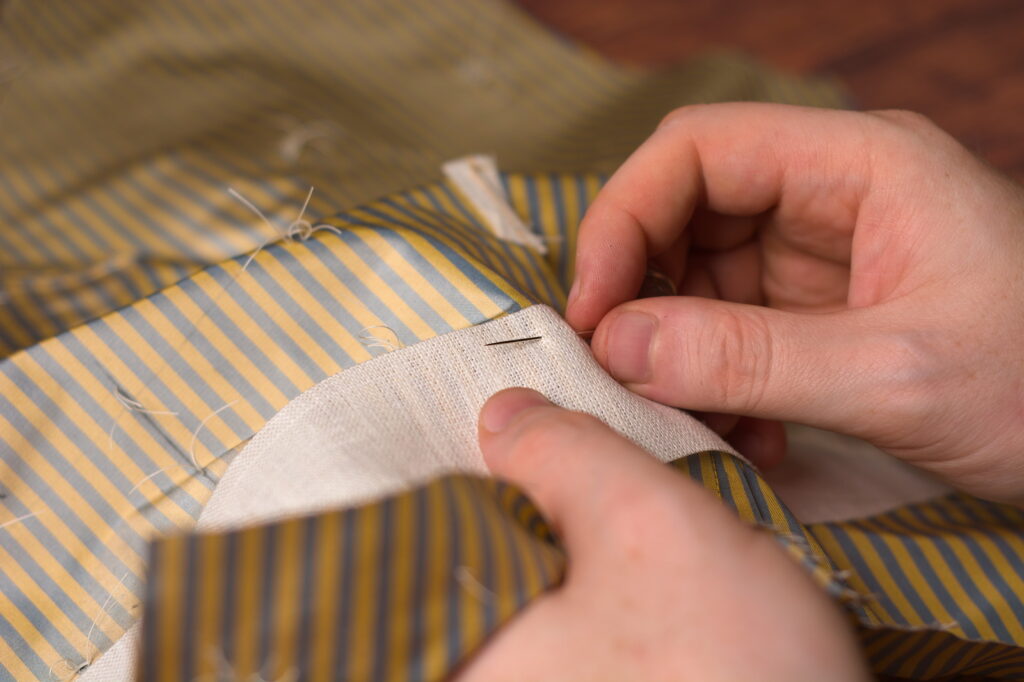
The linen stay after basting.
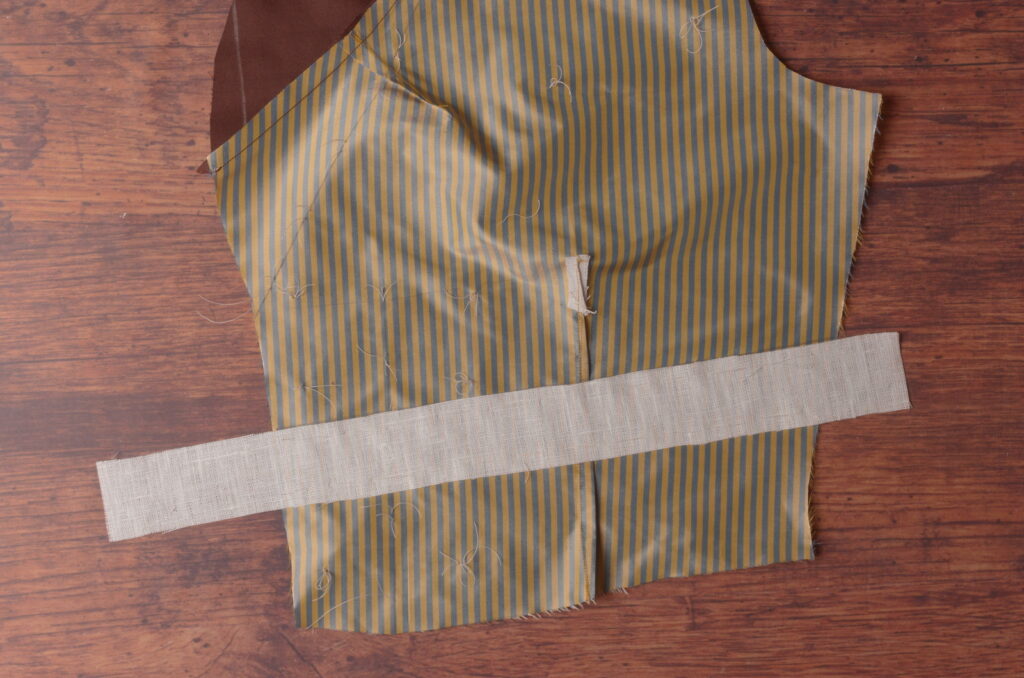
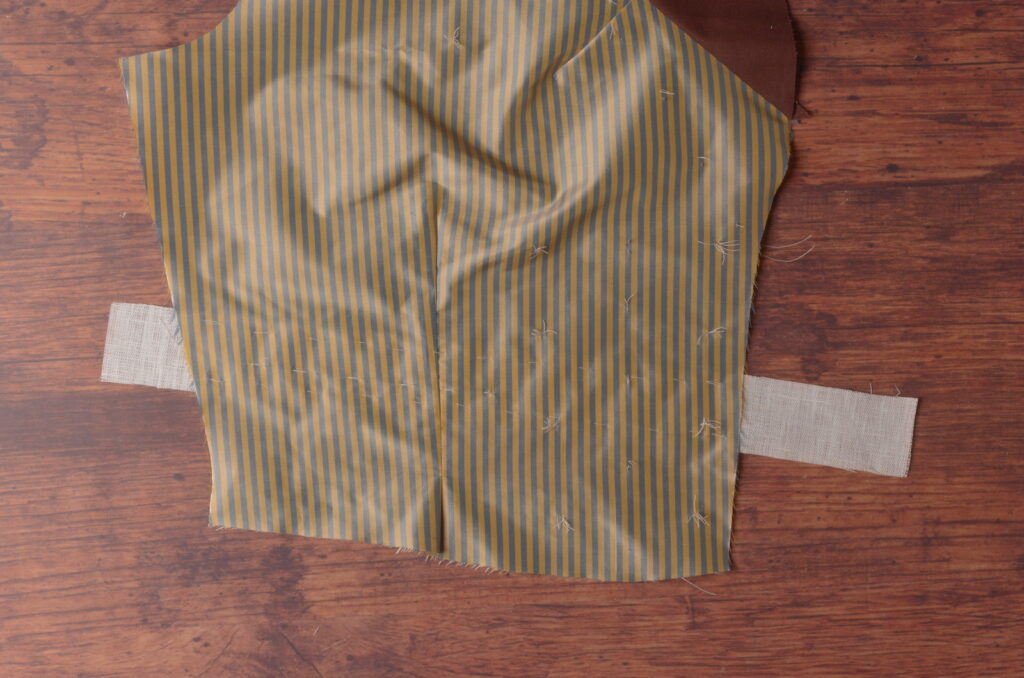
Now trim the linen stay flush with the edges of the forepart.
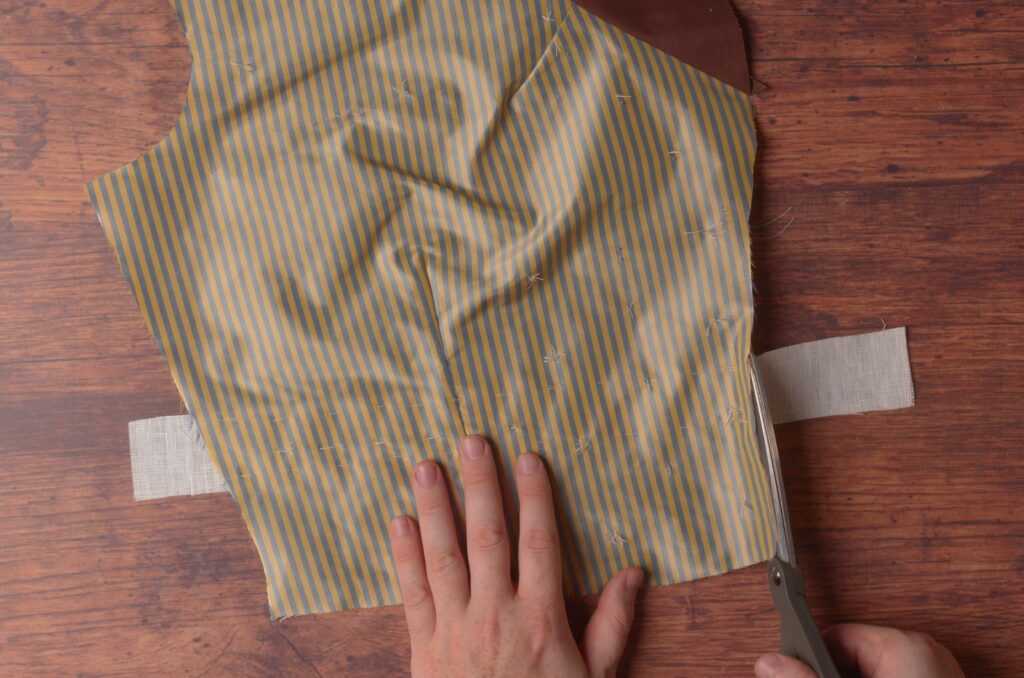
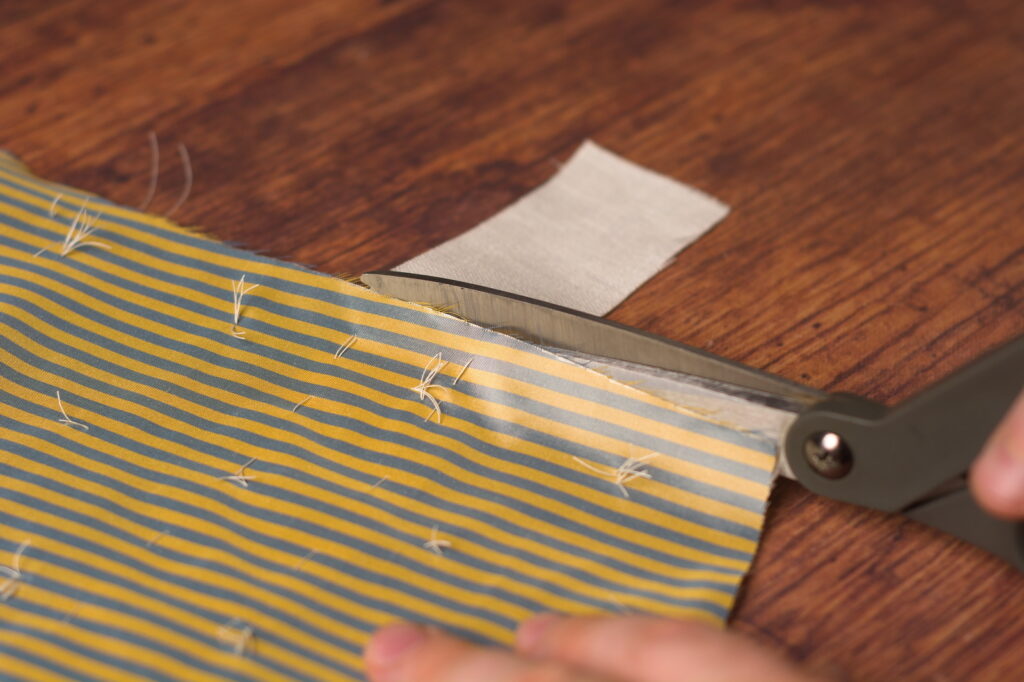
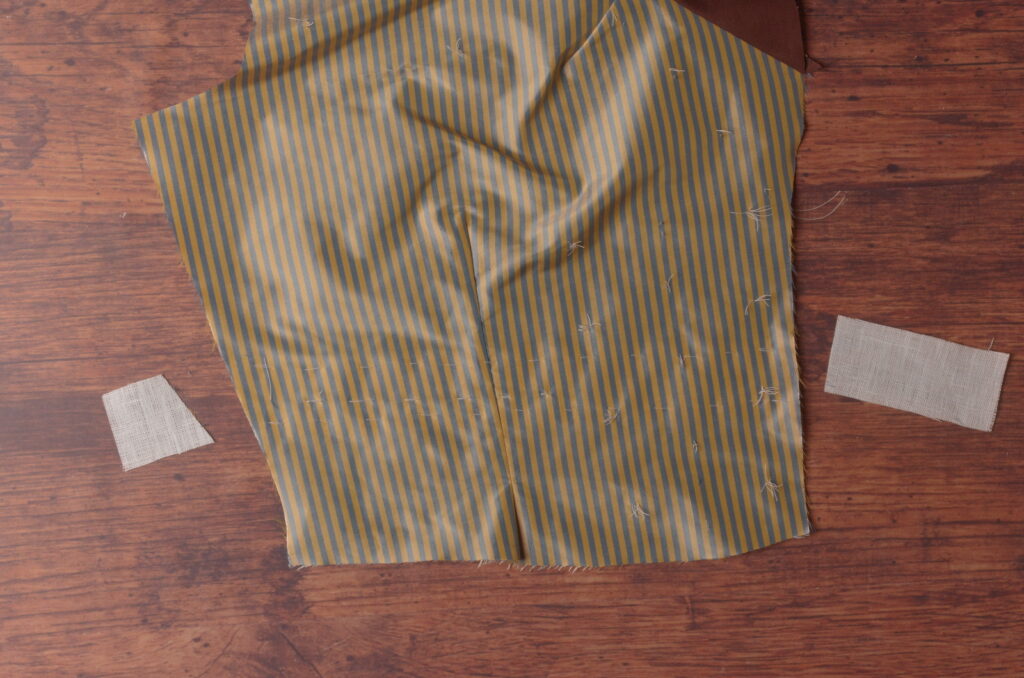
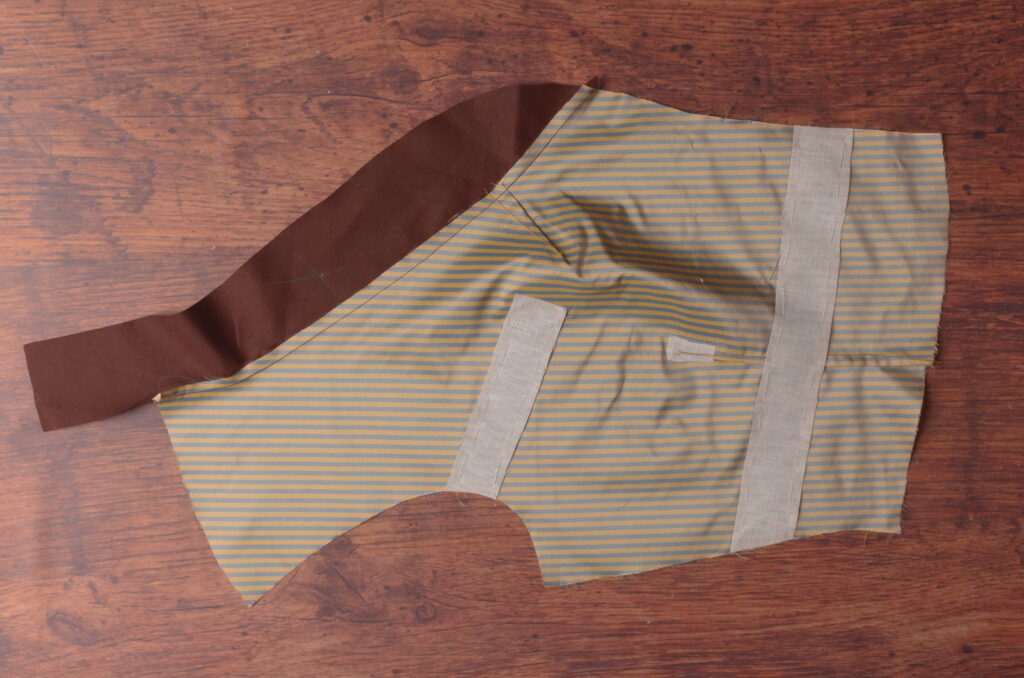
The breast pocket(s) is stayed in the same manner, but rather than extending the linen across the entire forepart, I go only about an inch beyond the inner edge of the pocket, to avoid the linen from interfering with the roll of the collar.
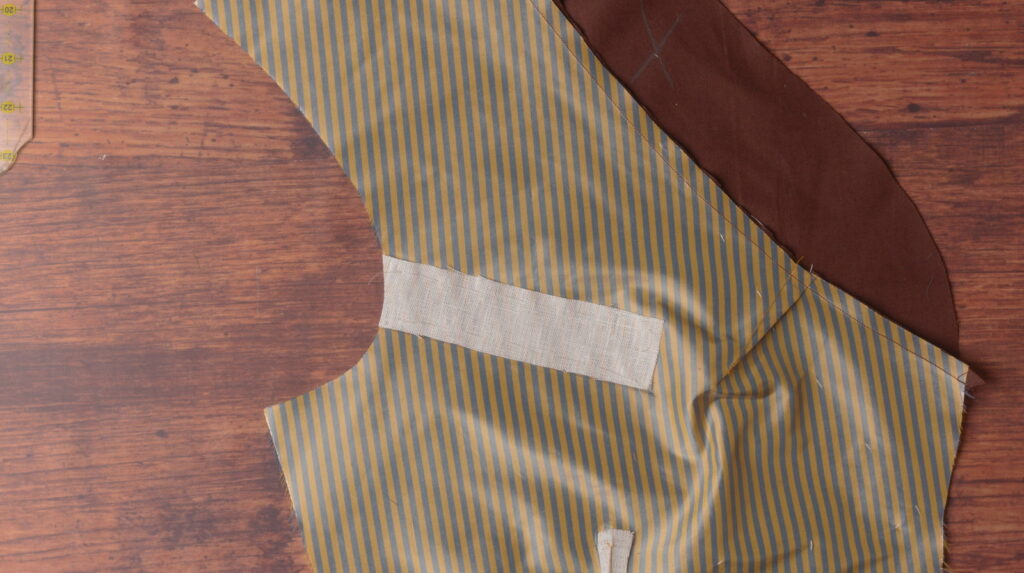
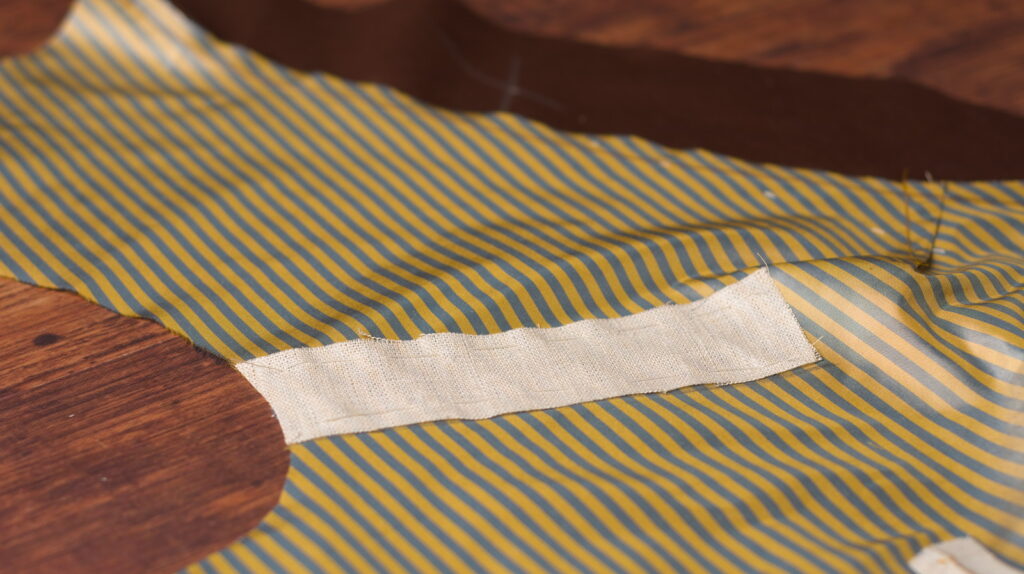
Here’s the left forepart after staying the breast and waist pockets (I’m not installing a breast pocket on the right side).
The Under Collar
Next we’ll install the under collar onto the waistcoat forepart. Lay the collar on top of the forepart, right sides together, and ensure that the proper, shallower edge of the collar is next to the neck line.
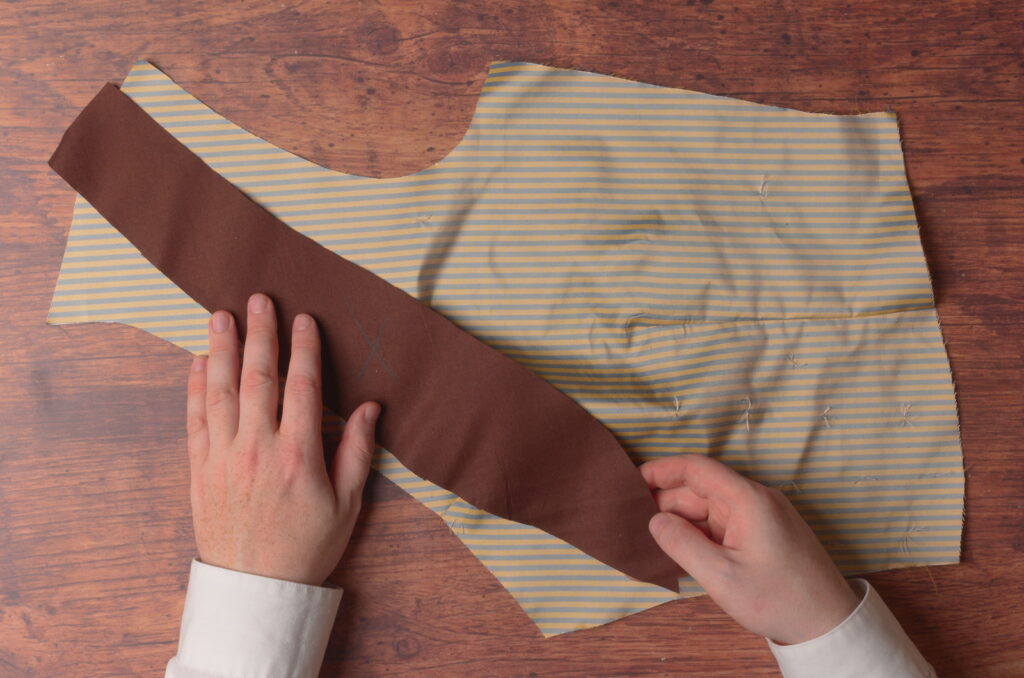
Align the bottom of the collar so that the 3/8″ seam allowance meets the edge of the forepart.
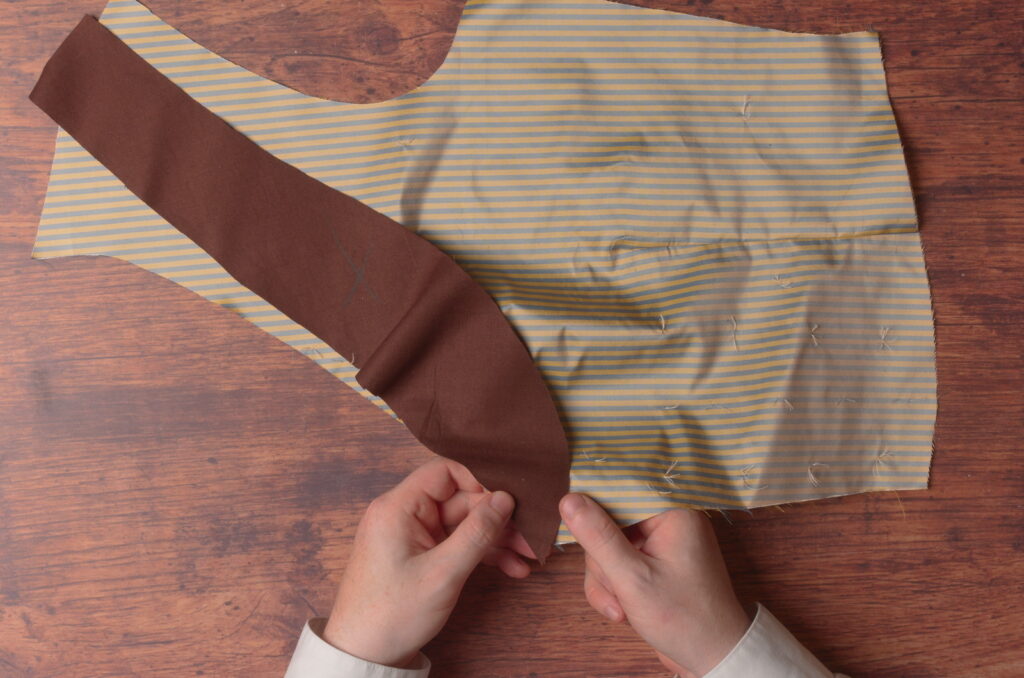
You can use a ruler here to make sure you get the correct position.
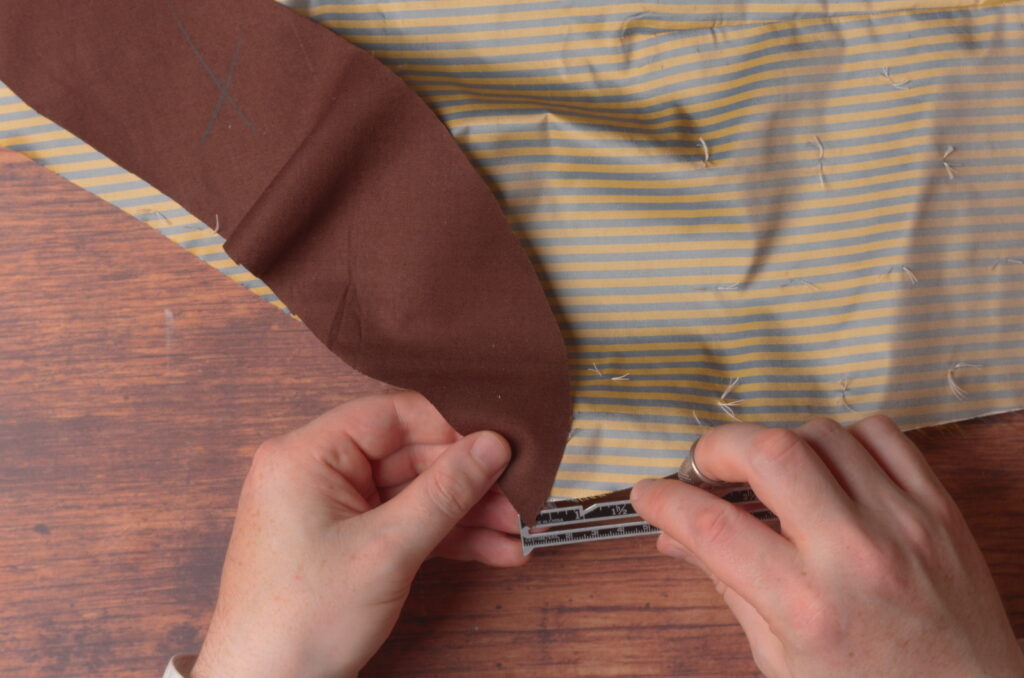
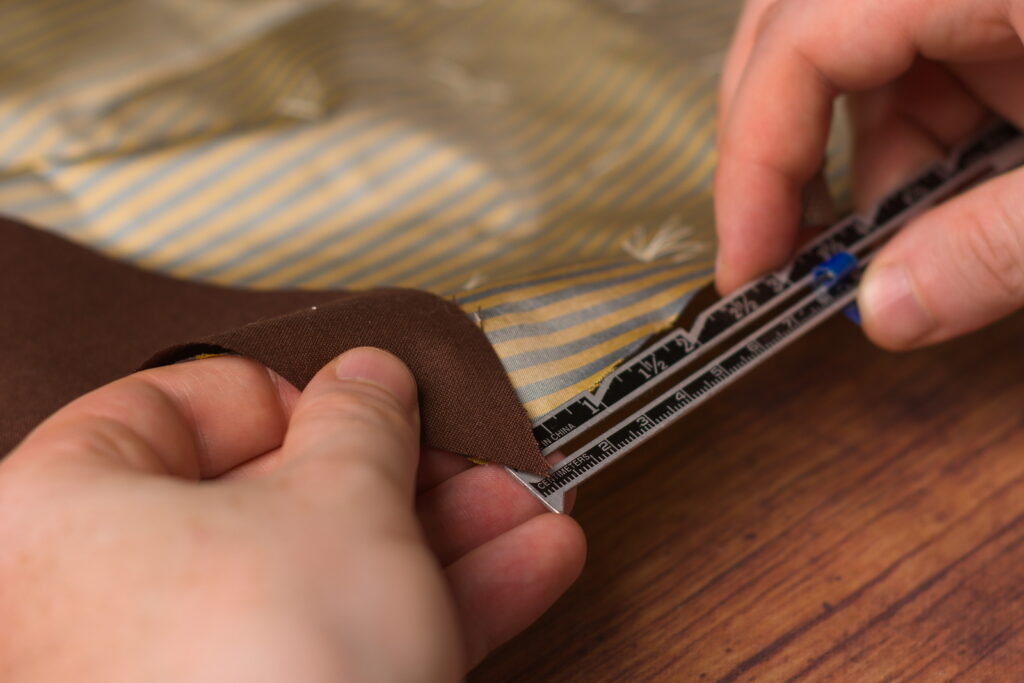
Begin basting the under collar to the forepart, beginning at the bottom of the collar. Try to keep a neutral tension between the two pieces – the collar will naturally want to fall into the correct position as you baste, though it may take a few tries before you get the hang of it.
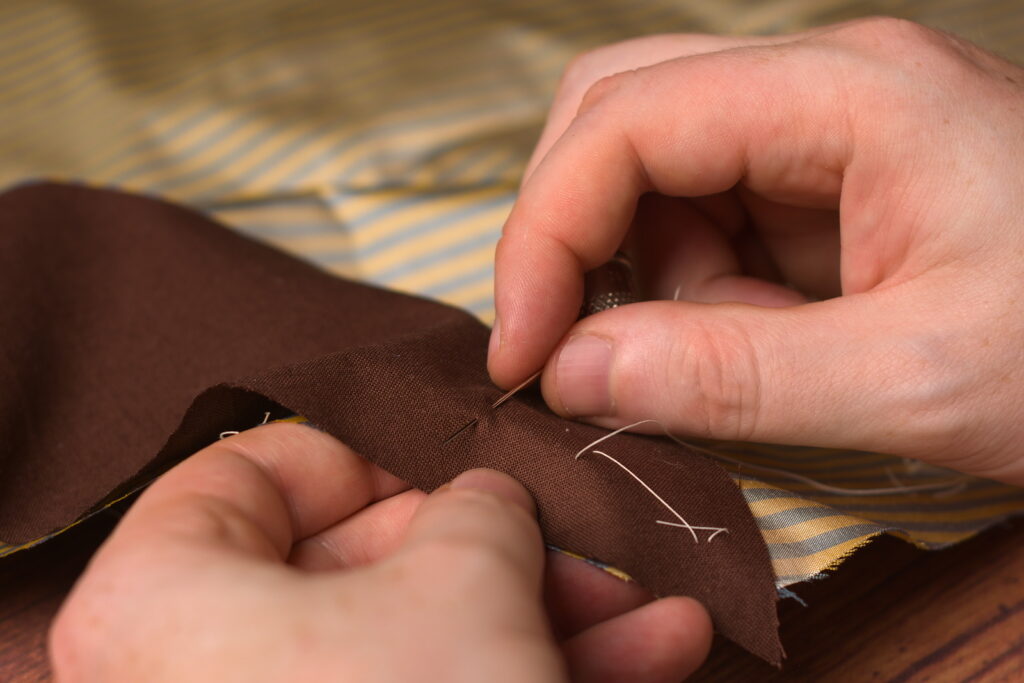
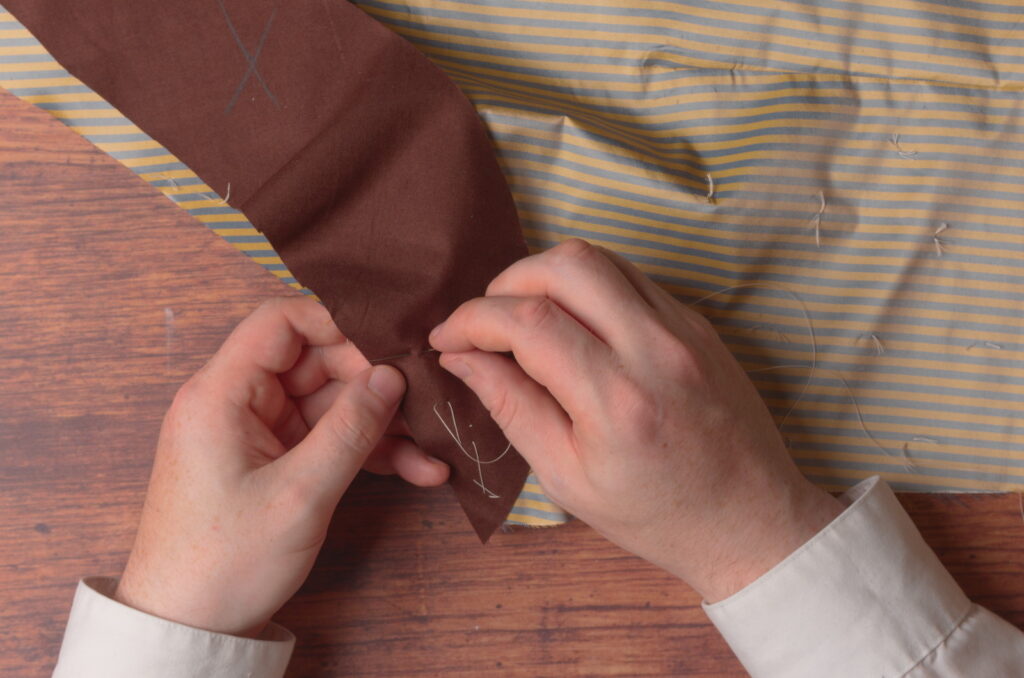
Here’s the under collar after basting. If you look closely, I did take slightly smaller basting stitches in areas where the curve deepens, for example near the shoulder at the top of the collar, and anywhere I could feel the tension between the two pieces needing the extra support.
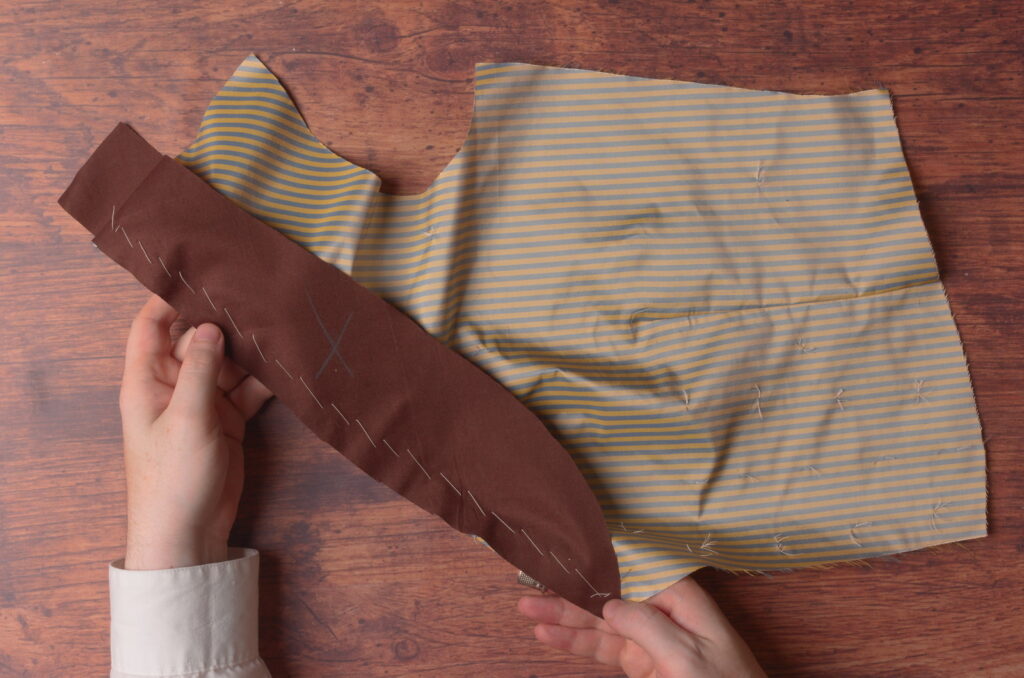
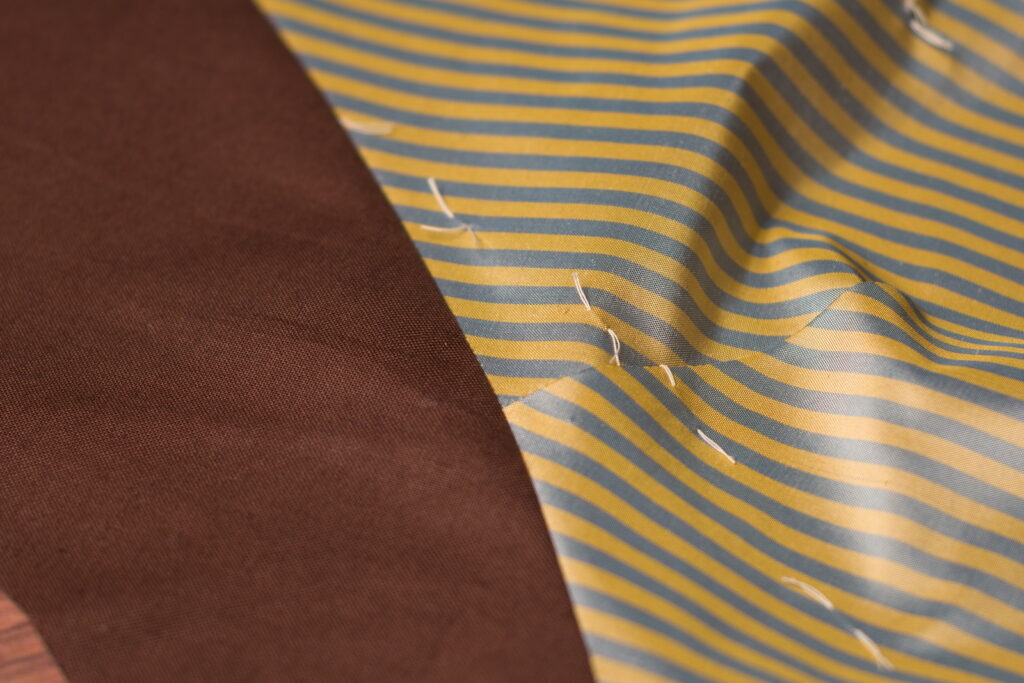
Here you can see the tension that is naturally built into the under collar seam, due to the opposing curves of each piece. This will help the collar and neck line stay closer to the body.
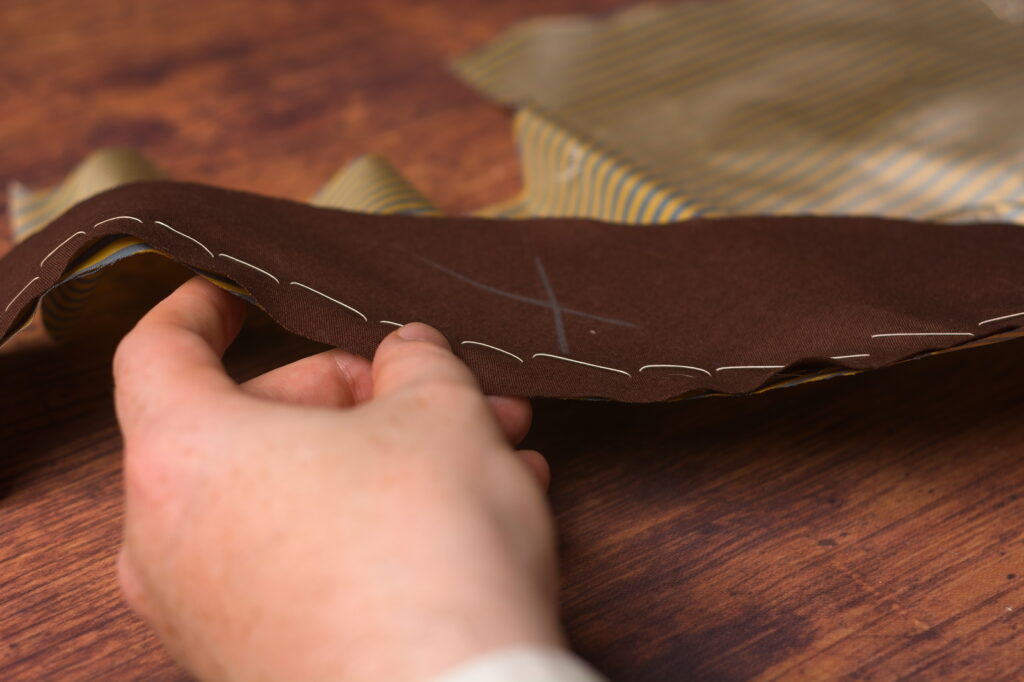
One last look at the bottom point of the collar before sewing. It’s so important to get this alignment just right.
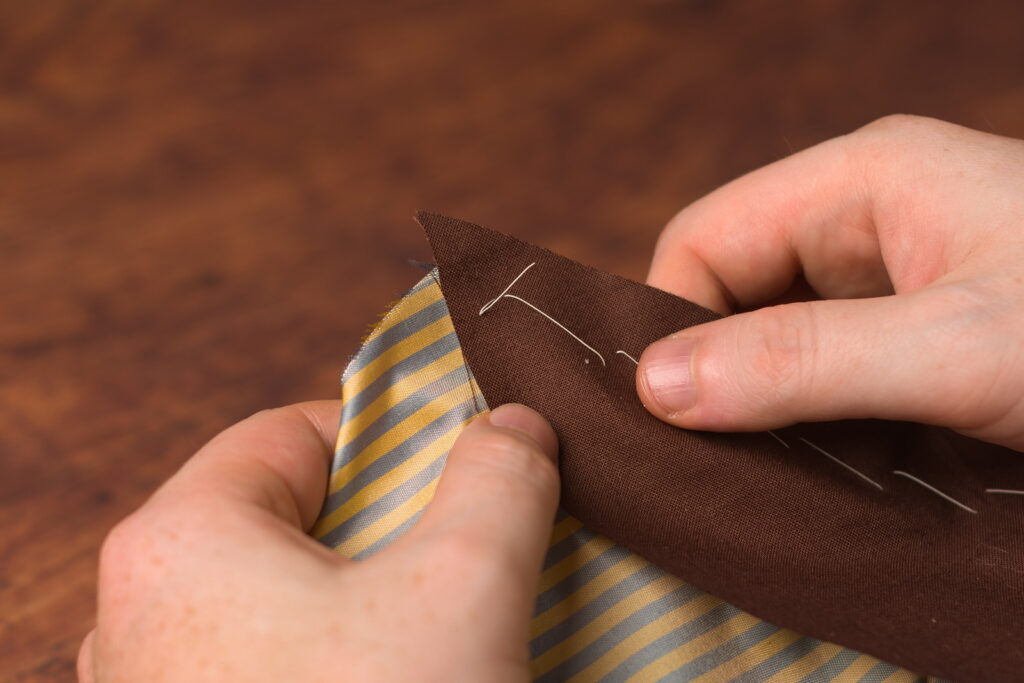
Sew the undercollar to the forepart from the top of the shoulder the shoulder to the bottom of the collar, using a 3/8″ seam allowance. I recommend sewing with the underside of the forepart facing up, opposite from what is shown.
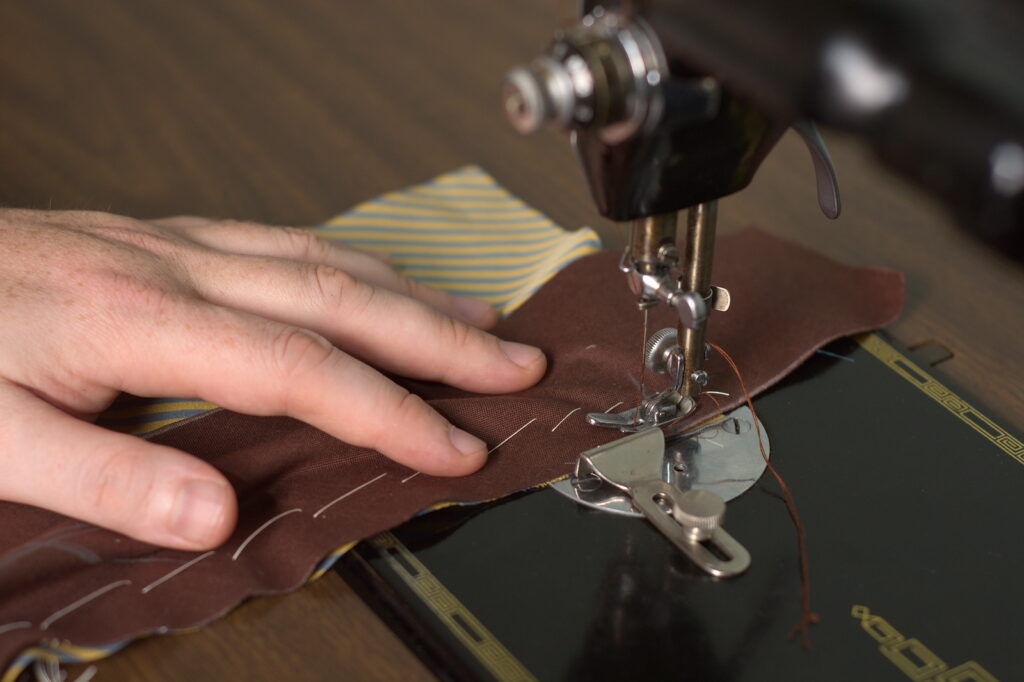
You can see some of the excess fabric from the under collar in this photo. While it works just fine as shown, you’ll have to manipulate the fullness with your fingers as you sew, whereas if the under collar was underneath, the presser foot would help distribute this excess.
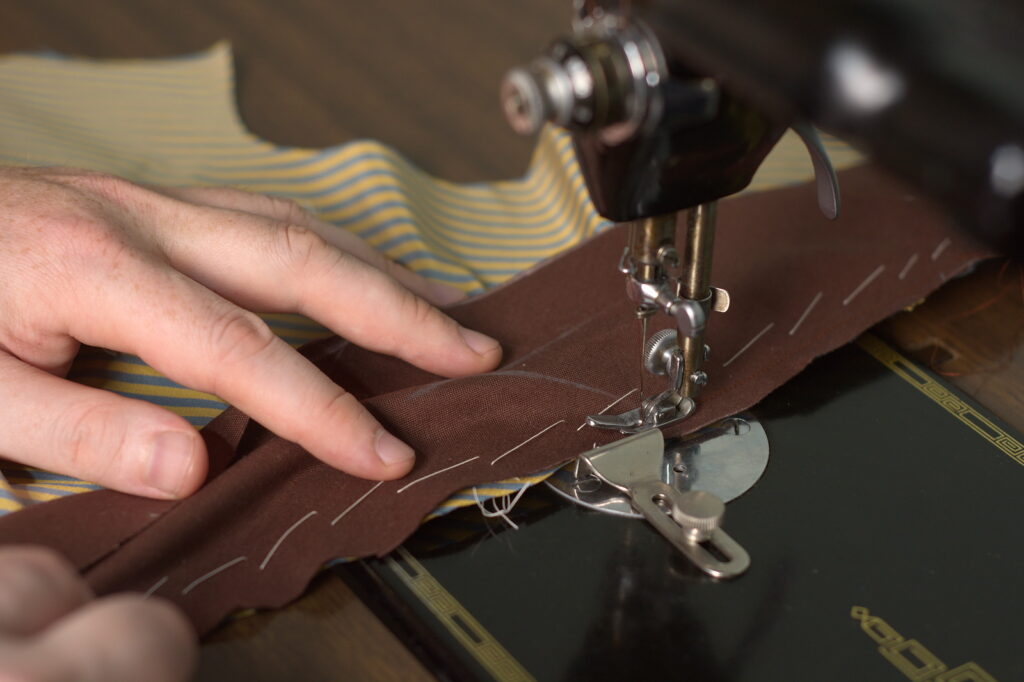
And continue sewing right to the edge at the bottom of the collar, ensuring the pieces are still properly aligned.
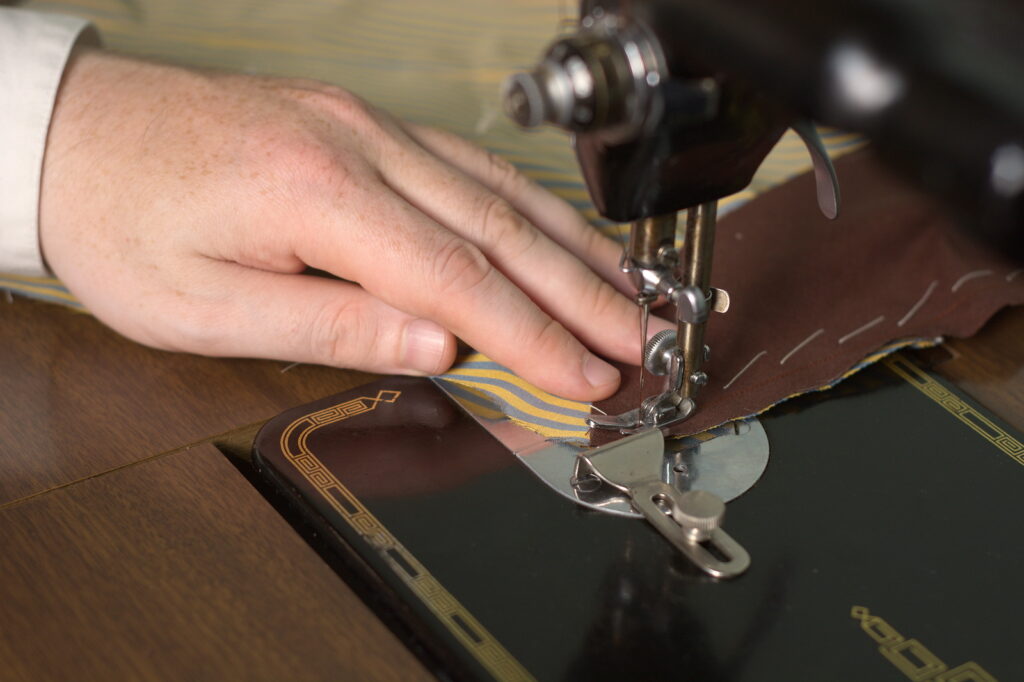
Here’s the undercollar after being sewn.
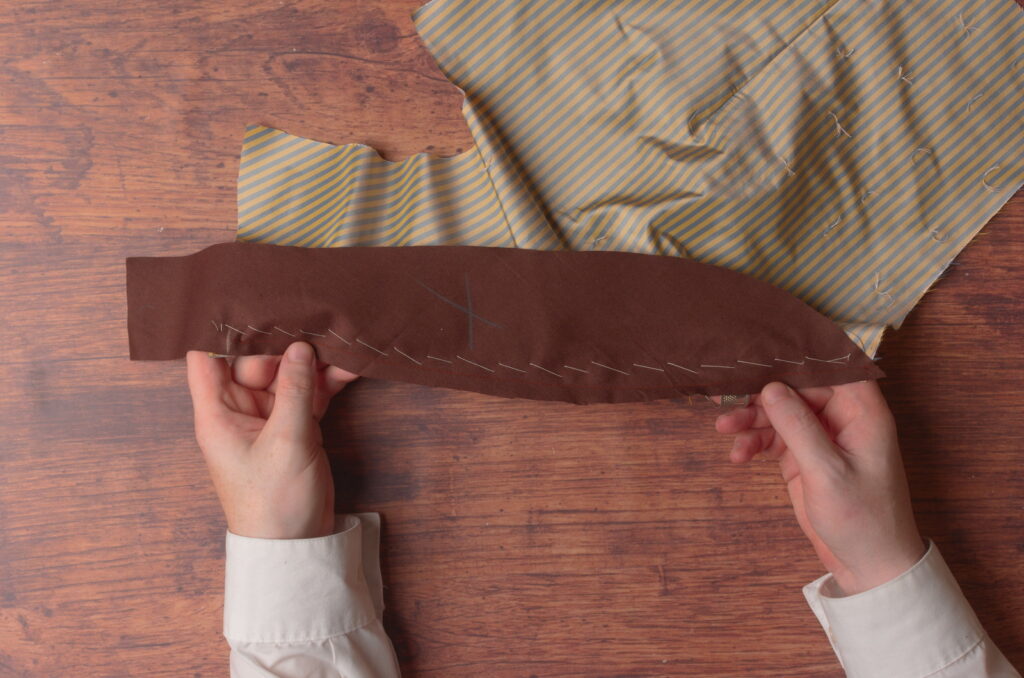
The bottom of the collar showing the alignment of the two pieces in relation to the seam line.
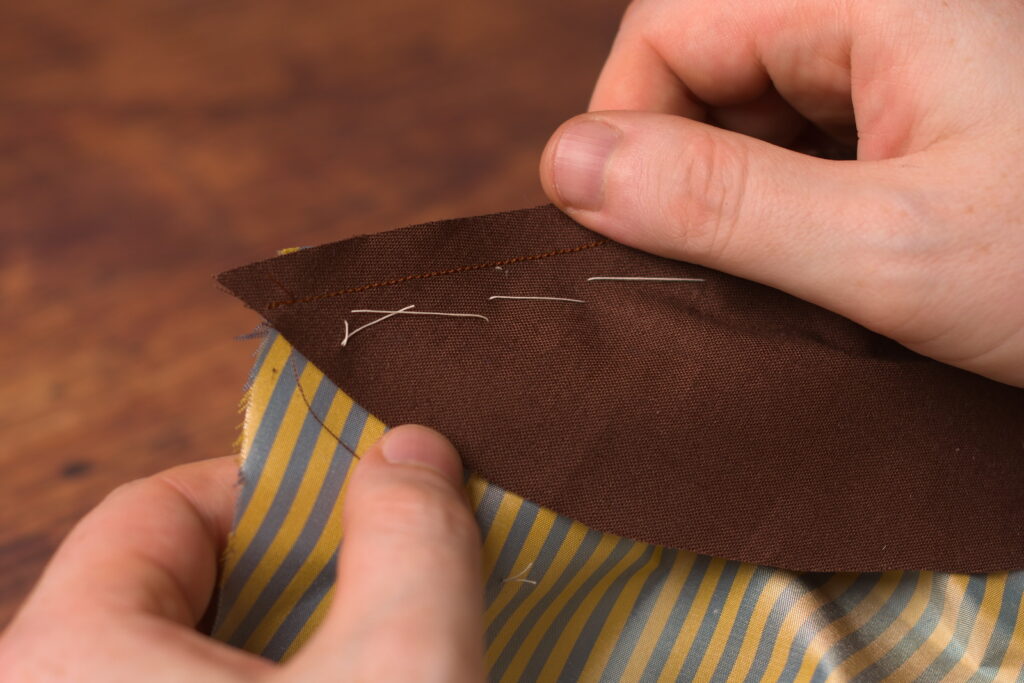
And shown here is the top of the collar at the shoulder. Ignore the little mark I had made there – made a mistake with overthinking things and ended my stitching there instead of at the very edge of the shoulder.
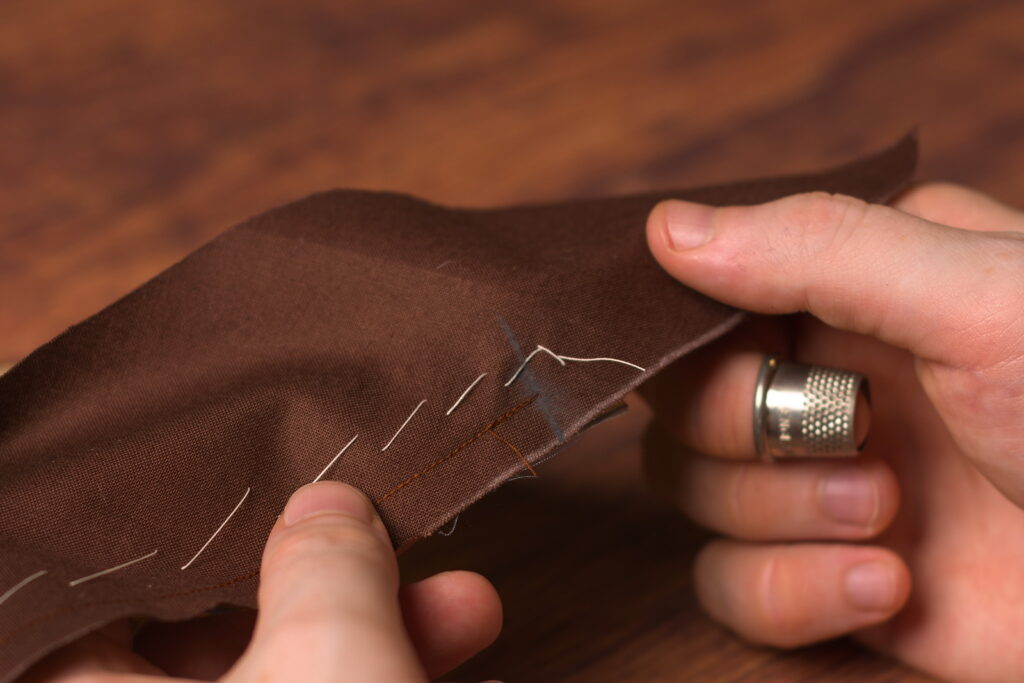
Pressing
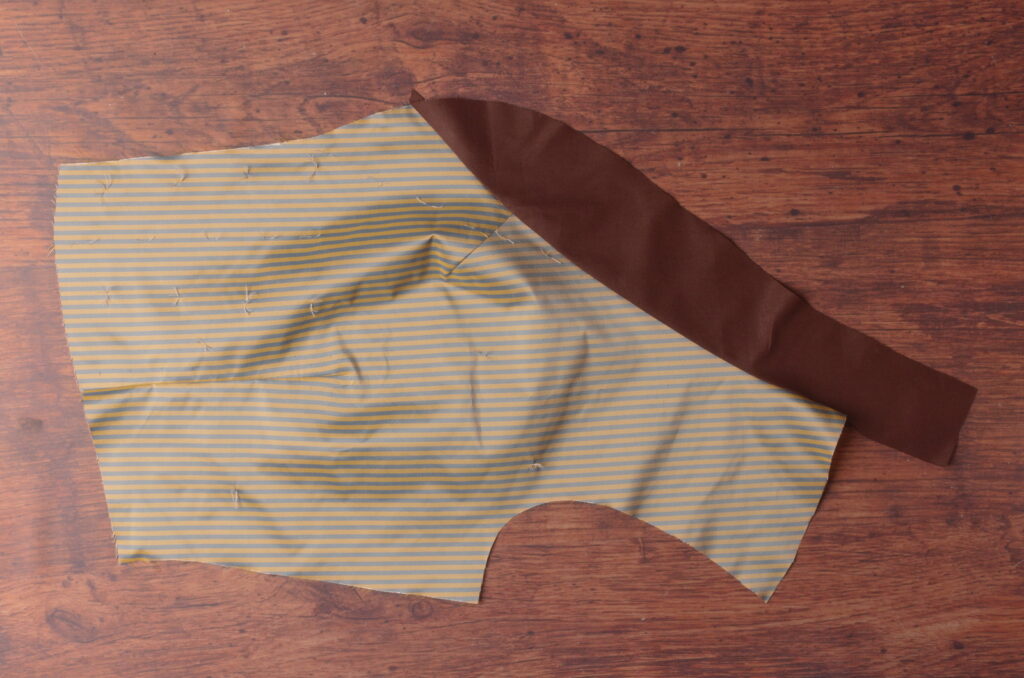
Press the collar and seams up away from the forepart, beginning from the wrong side. Definitely use a tailor’s ham here due to the curved nature of the seam.
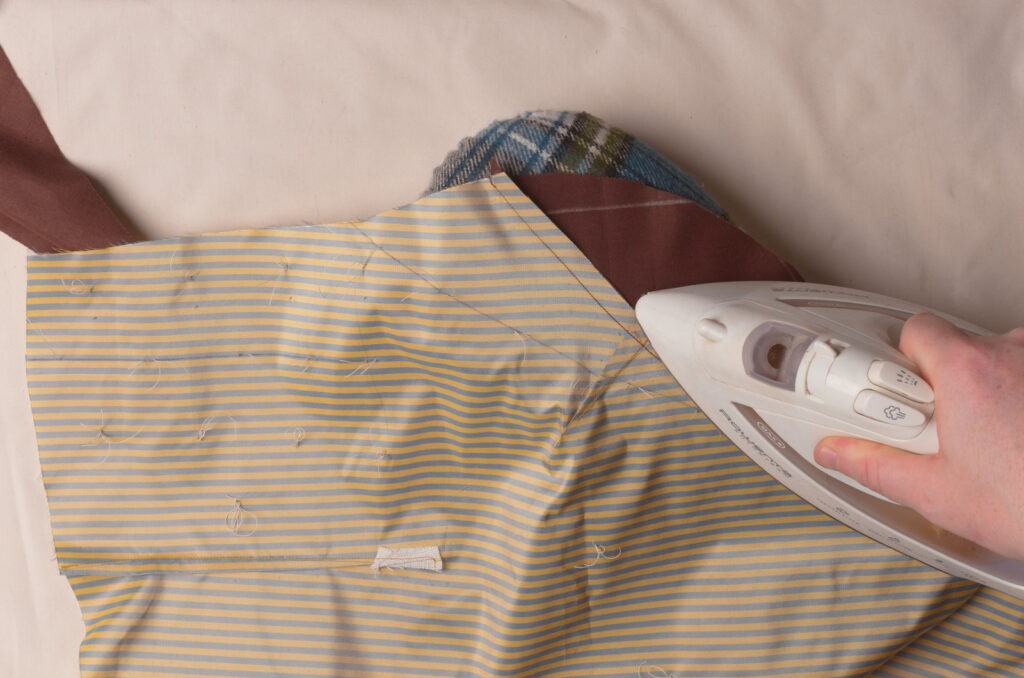
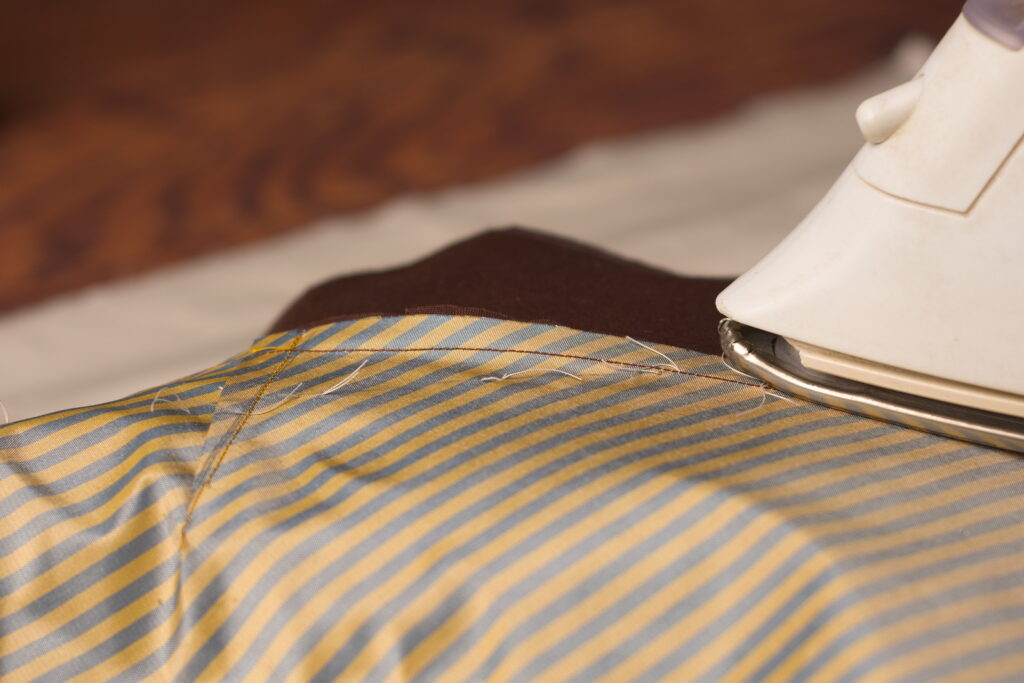
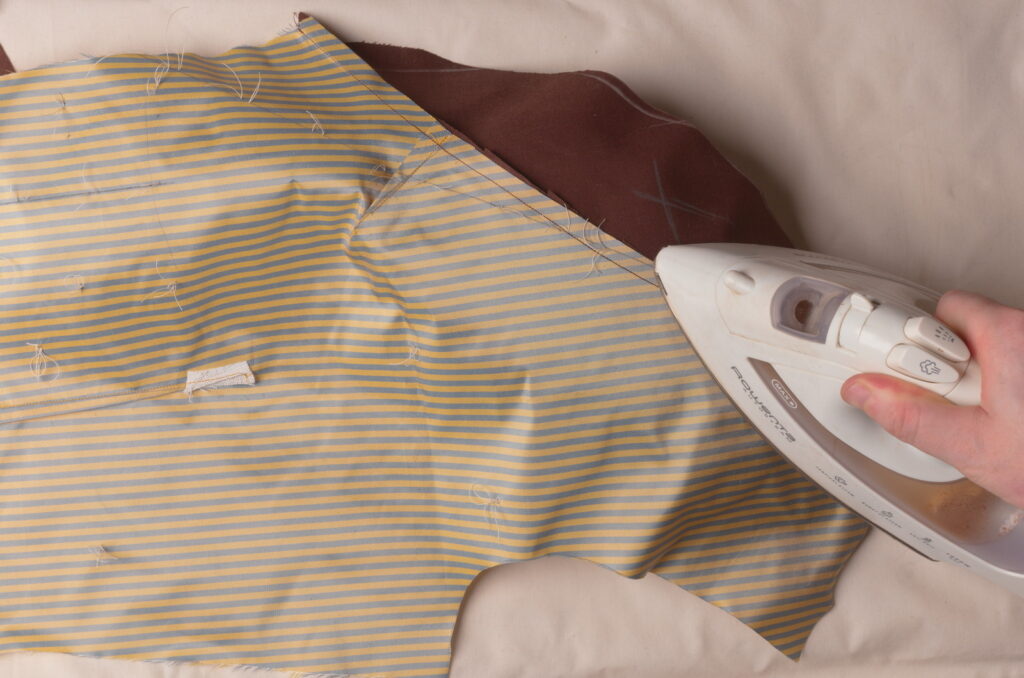
Turn the forepart over and press from the right side as well. I didn’t use any steam here because it wasn’t necessary, but also because the steam can cause the polished cotton to lose its special finish.
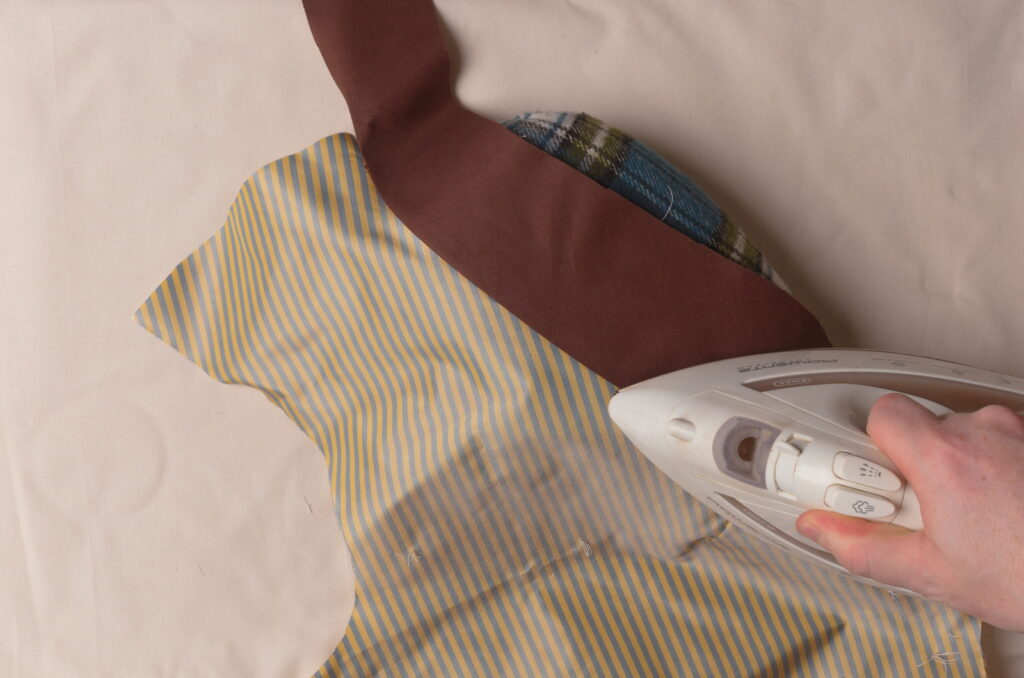
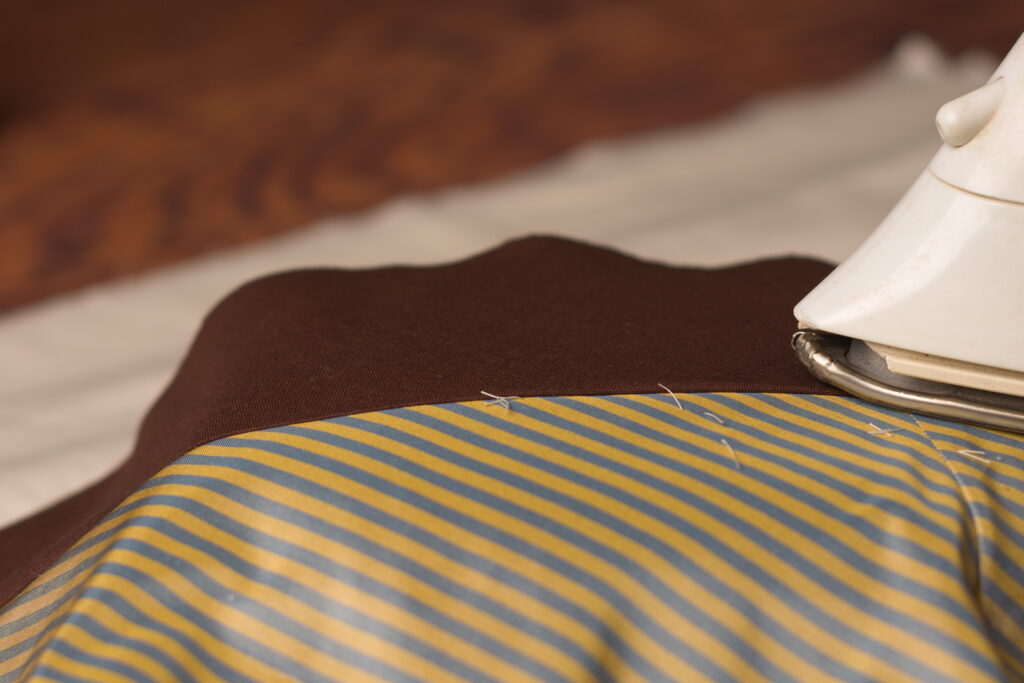
Here’s the forepart so far after attaching the under collar.
The Darts
I like to transfer the darts to the remaining side of the forepart by just tracing them with the original pattern, rather than using the tailor’s tacks. It seems to be a little more accurate, and quicker as well.
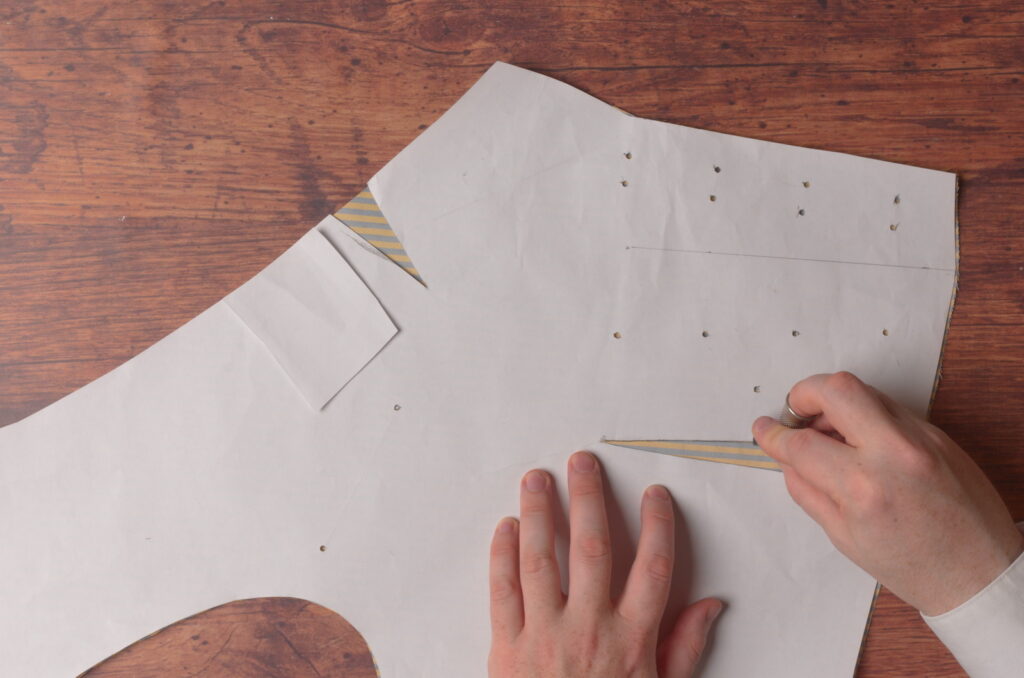
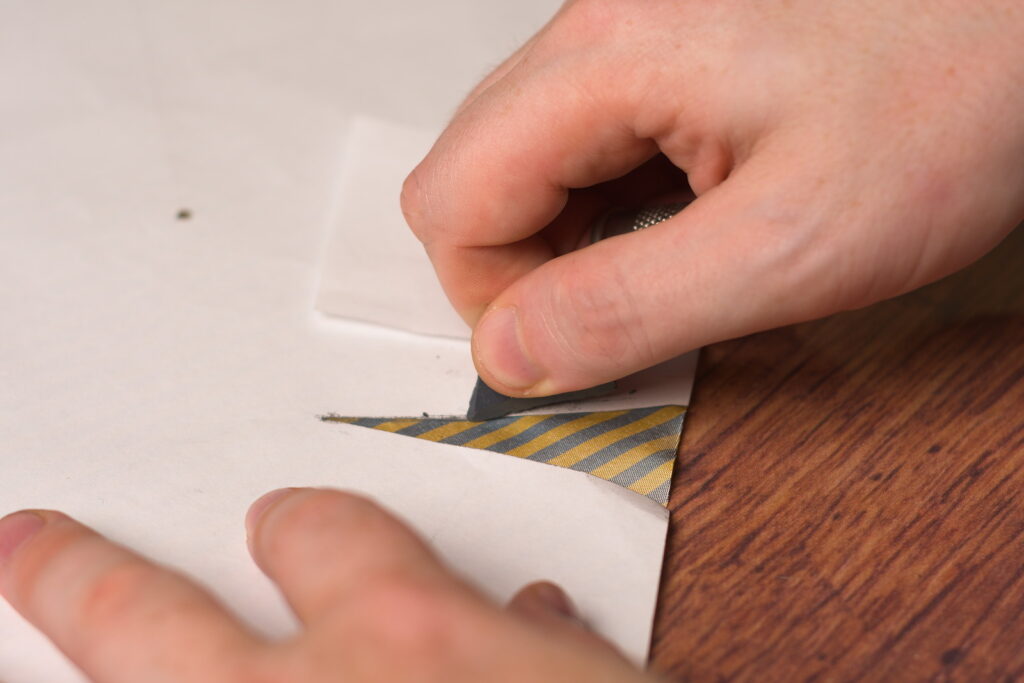
Fold each of the darts in half, aligning the sides as closely as you can. Shown here is the neck dart.
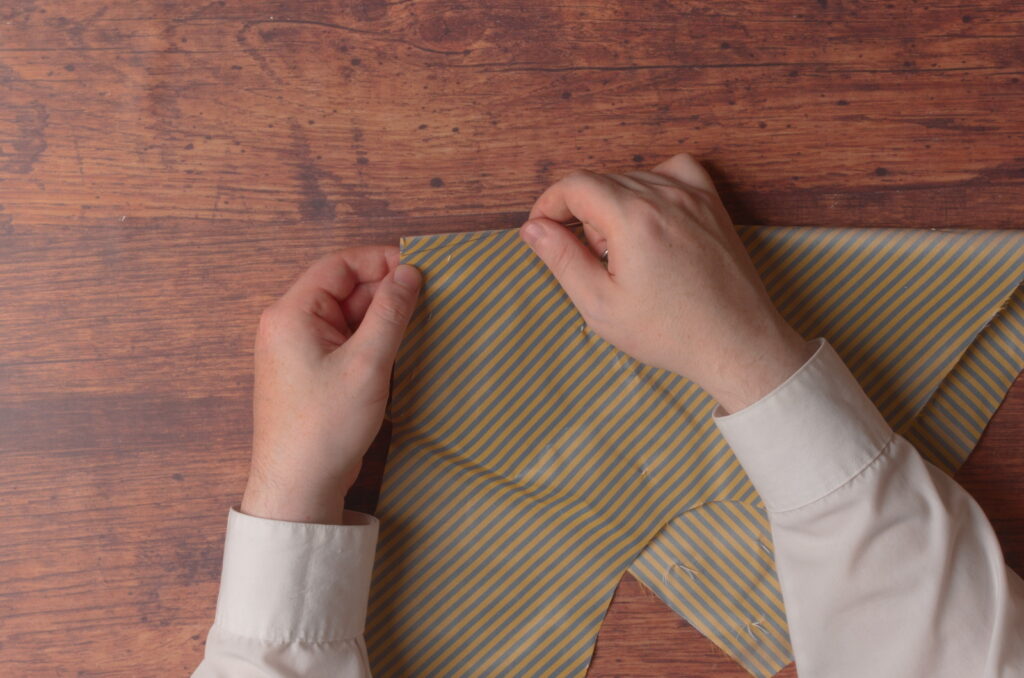
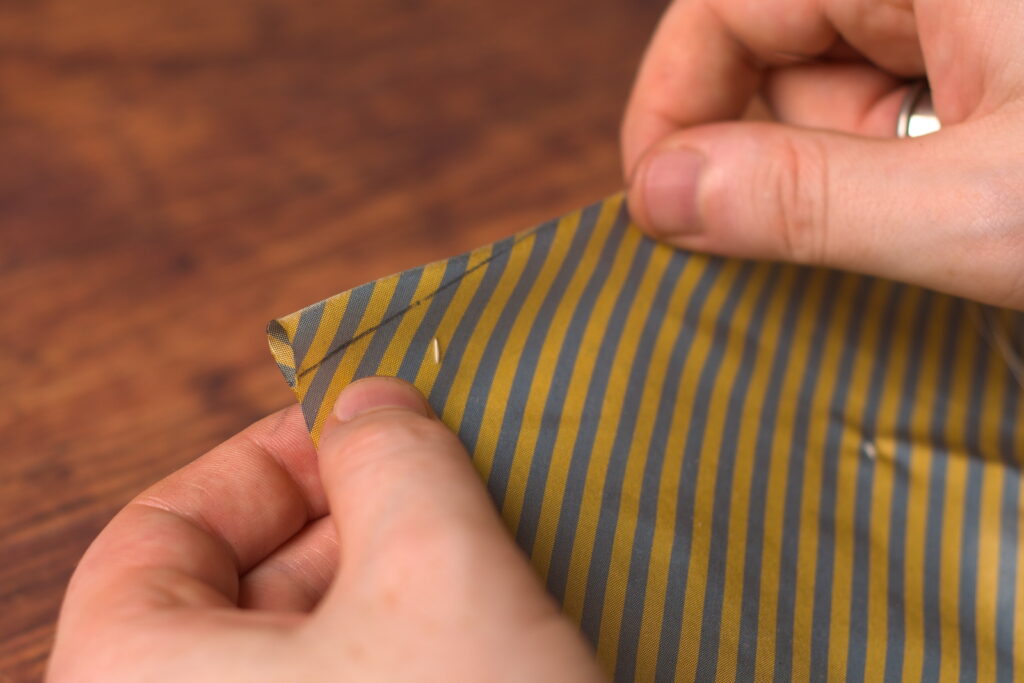
Baste the dart closed, keeping about 1/4″ away from the lines.
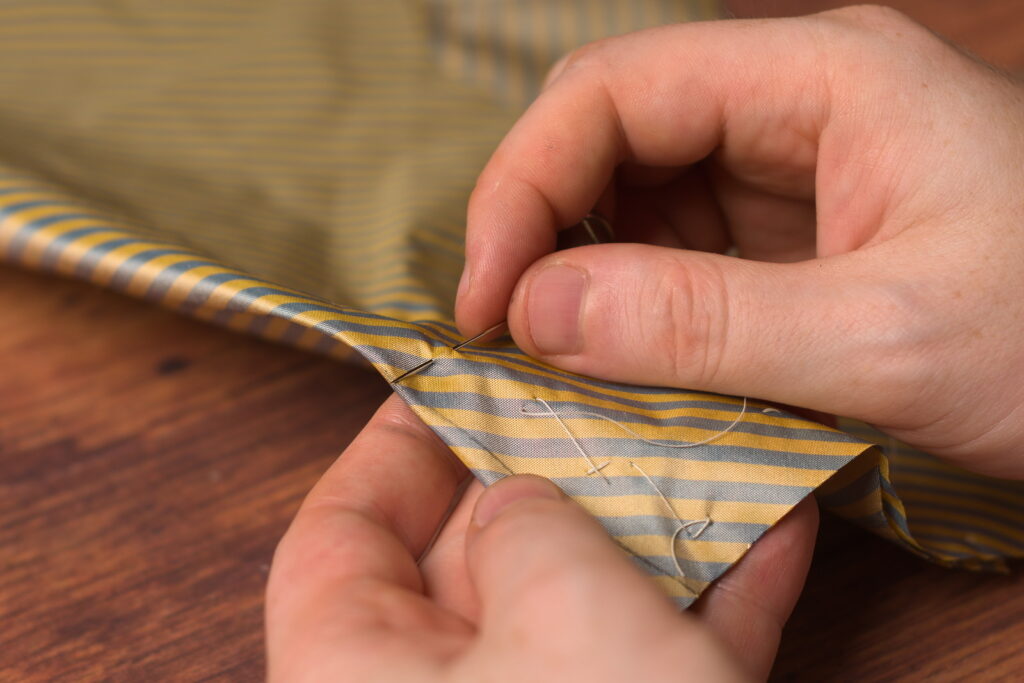
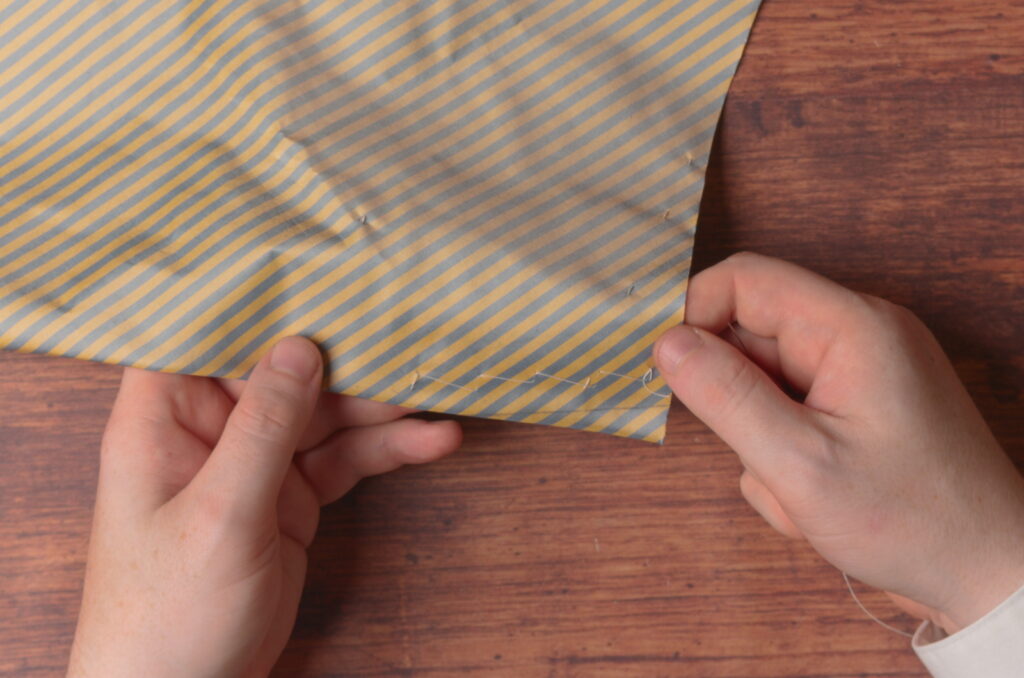
Do the same with the rest of the darts if you’re putting them in. Here’s my waist dart going in (again not recommended unless you have the proper figure).
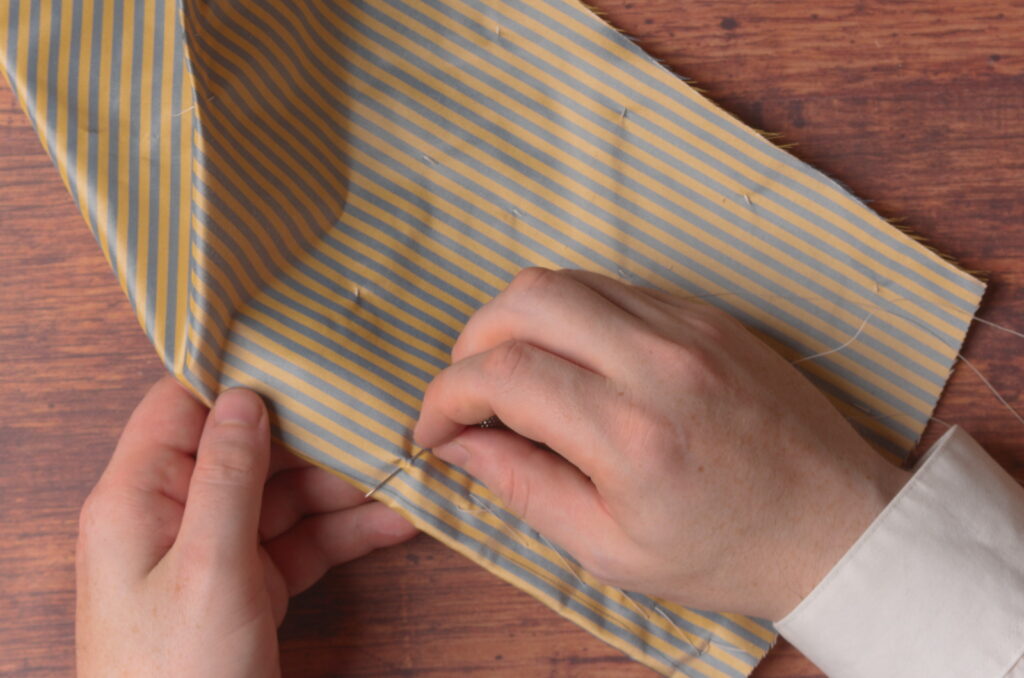
To check my alignment, I like to stick the needle directly through the dart and see how close it is to the opposite line. Then I’ll adjust accordingly.
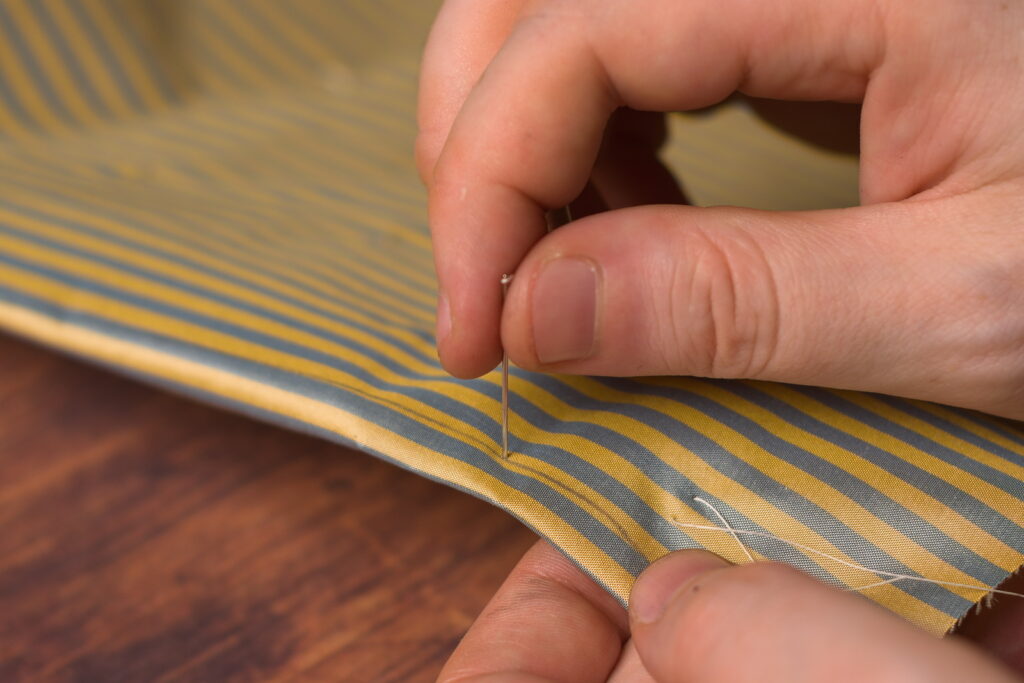
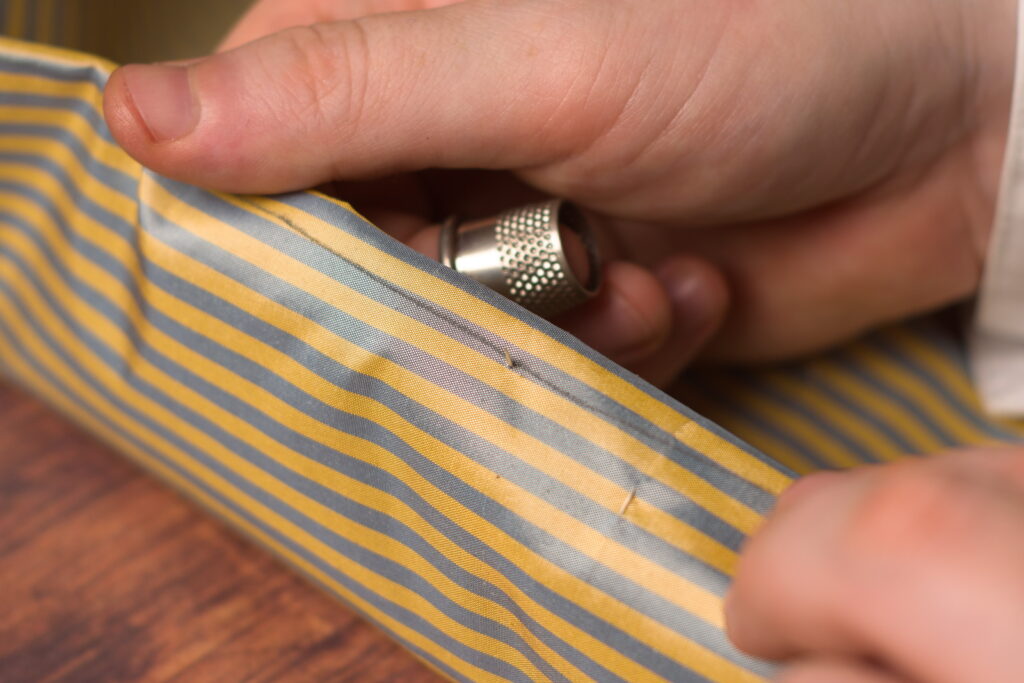
Continue basting. It’s easier to get both sides to line up, the closer you get to the end of the dart.
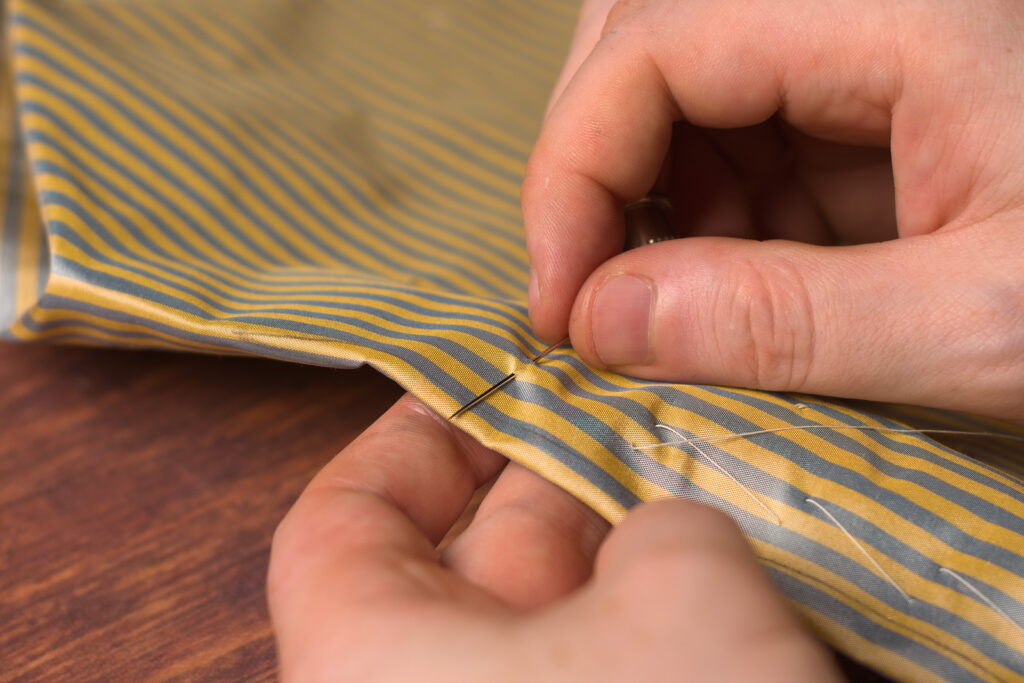
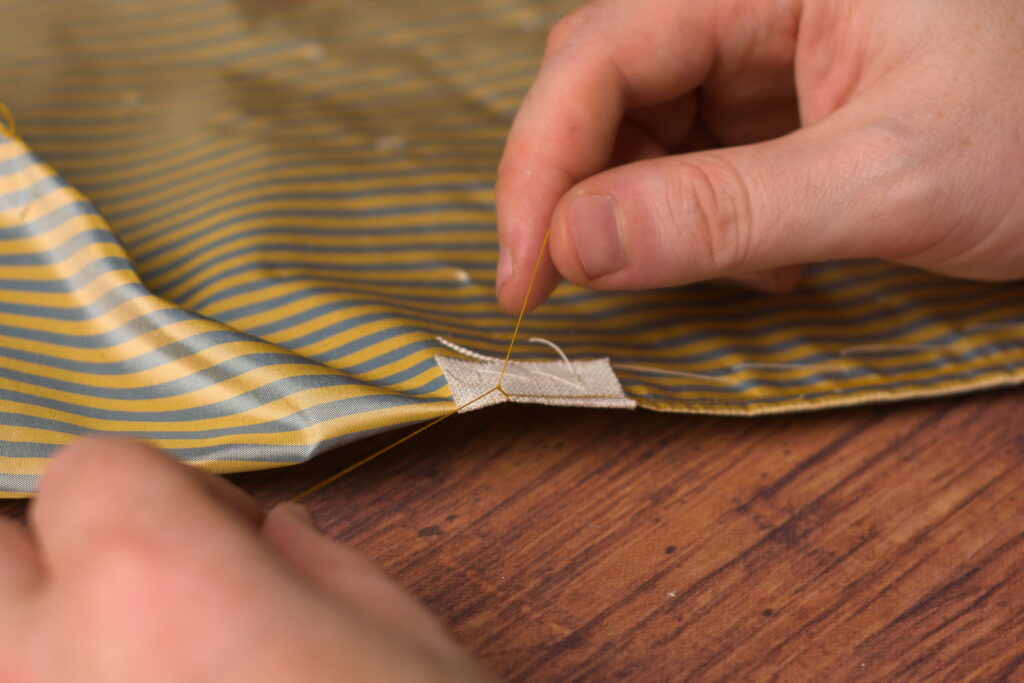
For any darts that take a strain, such as the waist darts or perhaps a dart in the armscye (not covered in this course), I like to reinforce them with a piece of linen to strengthen the area. I left them out of the neck dart so as to facilitate the roll of the collar and because it doesn’t take much stress.
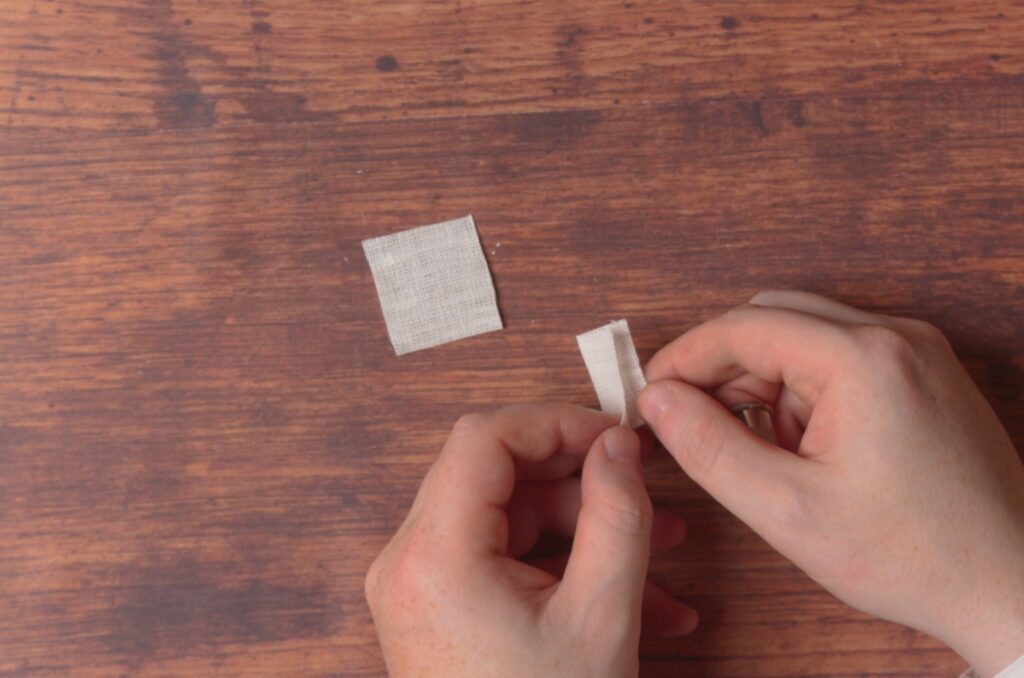
Take a square of linen, about 1″ to 1 1/2″ square, and fold and press it in half.
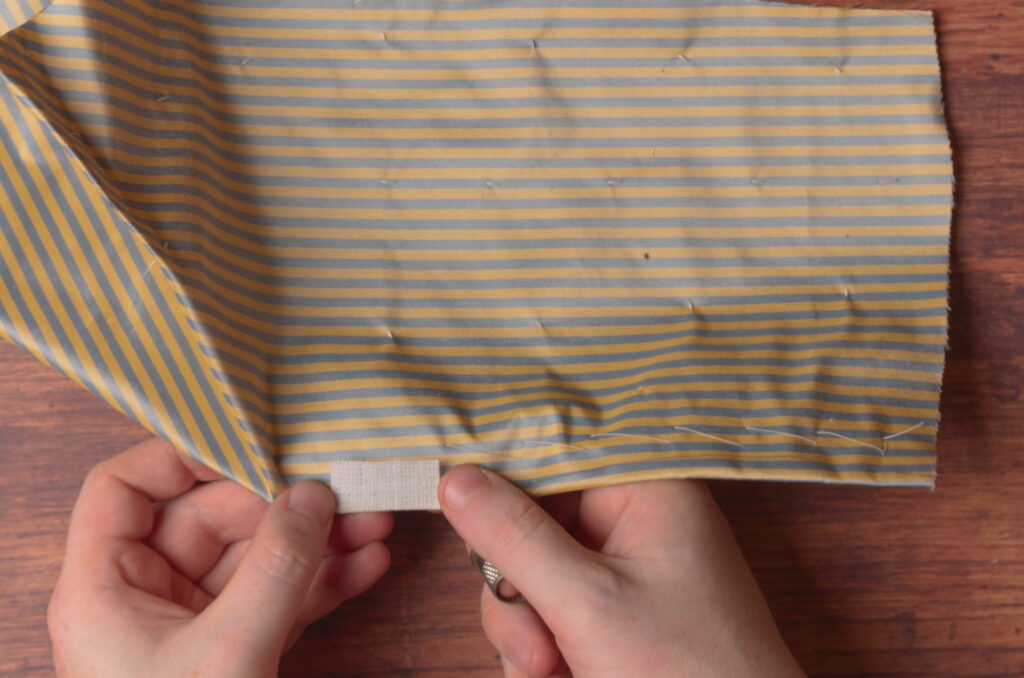
Place the linen firmly against the dart, so that the end of the dart falls in the middle of the linen.
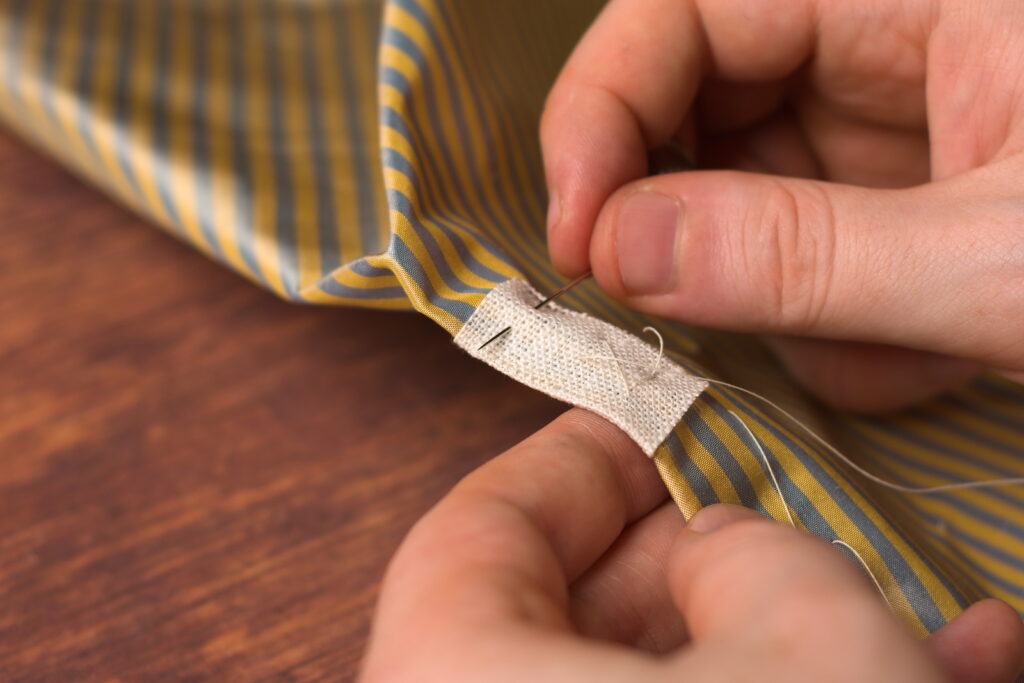
Baste the linen piece in place through all layers.
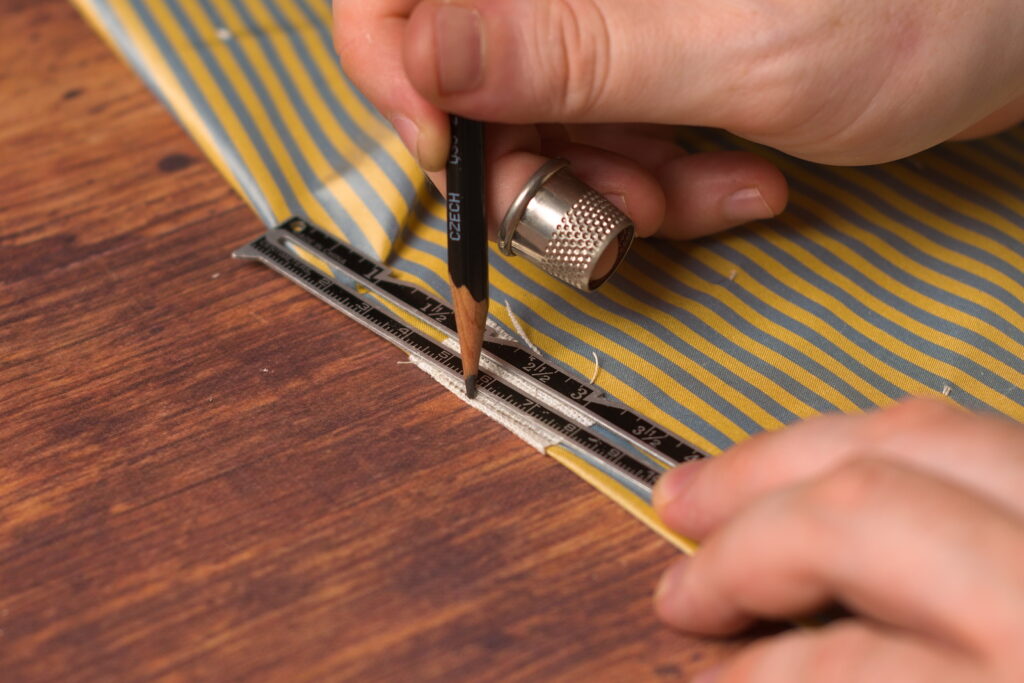
Now redraw the line at the tip of the dart over the linen as necessary using a sharp pencil (should take my own advice). Just line a ruler up with the rest of the dart and redraw.
Starting at the edge of the dart, begin sewing on the outside of the chalk line towards the tip.
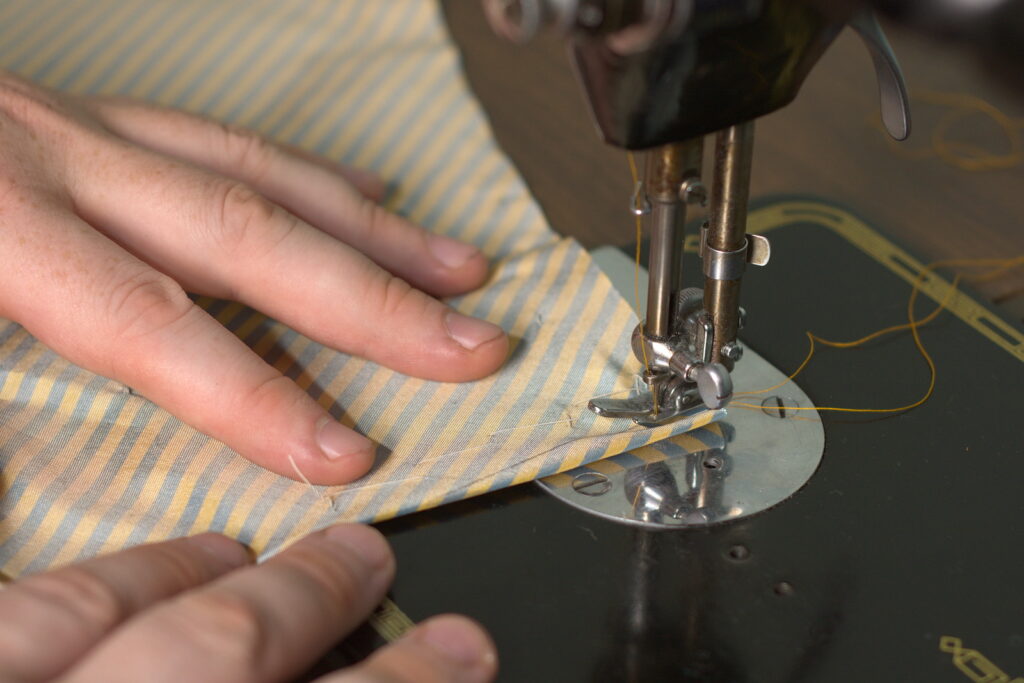
As you get near the tip, adjust your sewing machine to take smaller stitches, to firm up the area.
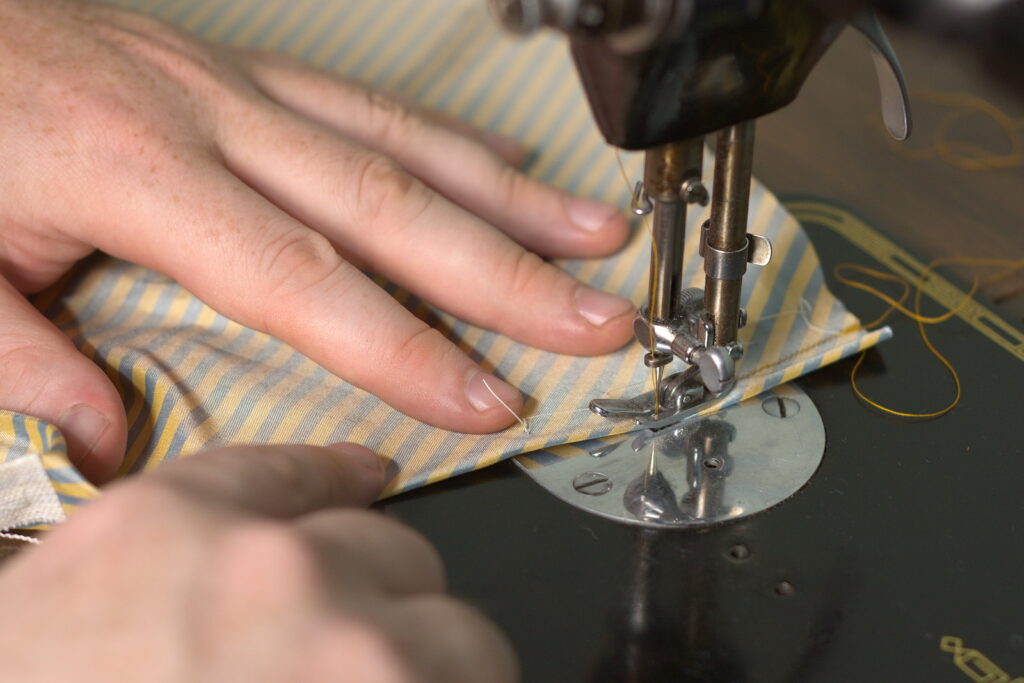
The idea is to pretty much sew right off the edge of the fabric, after tapering out very slightly at the tip.
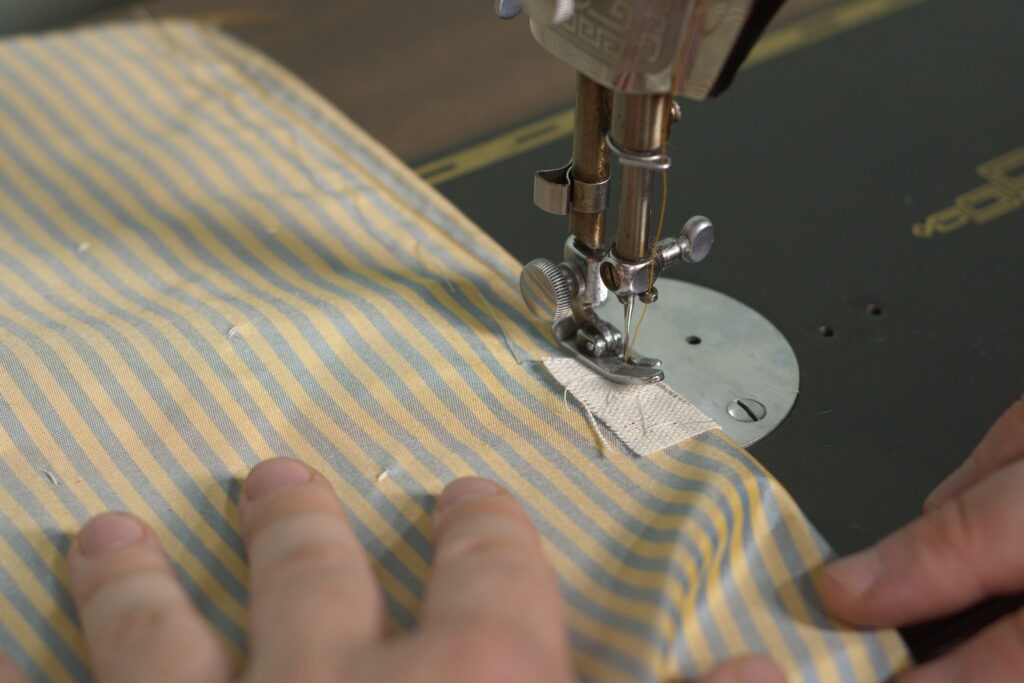
Leave the threads long after sewing so that you can tie them off by hand, rather than trying to back stitch with the sewing machine on such a narrow area.
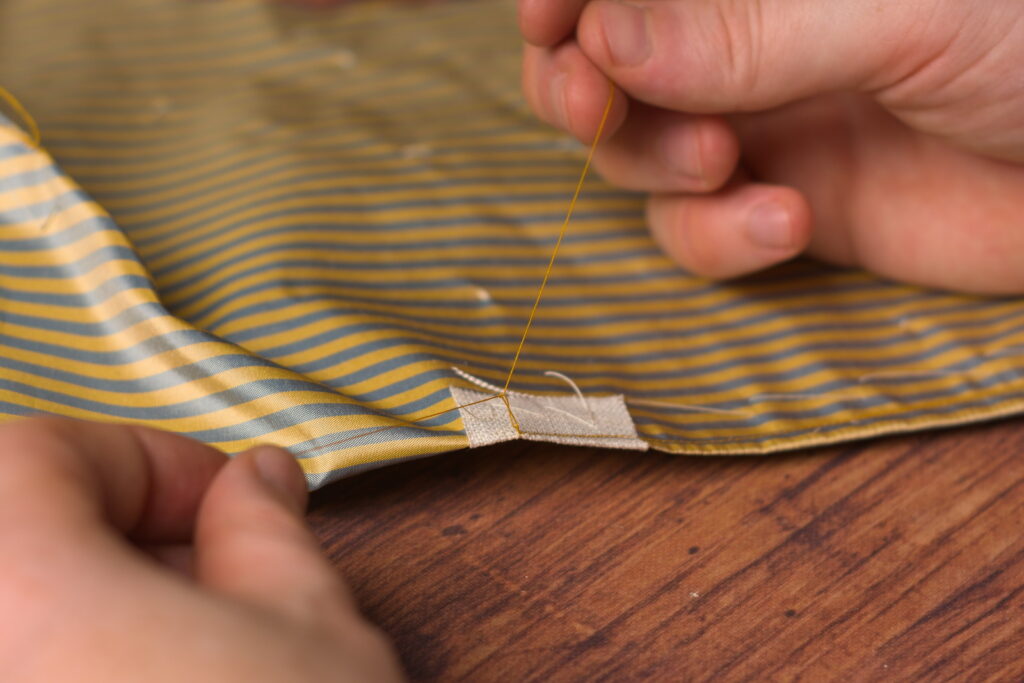
Here you can see how the stitching gets smaller as it approaches the tip of the darts.
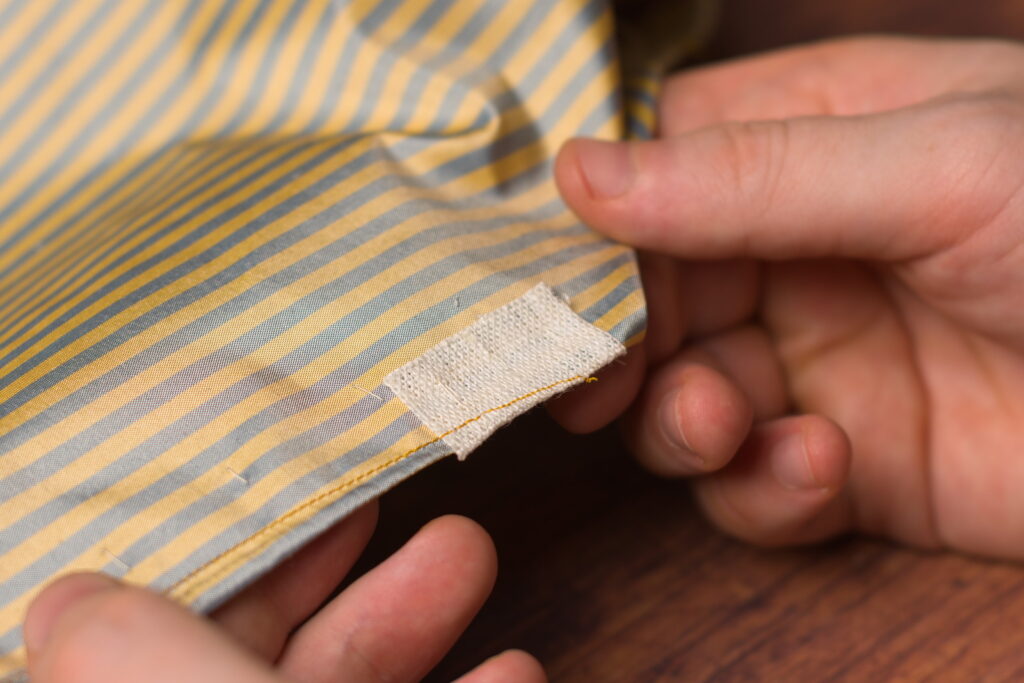
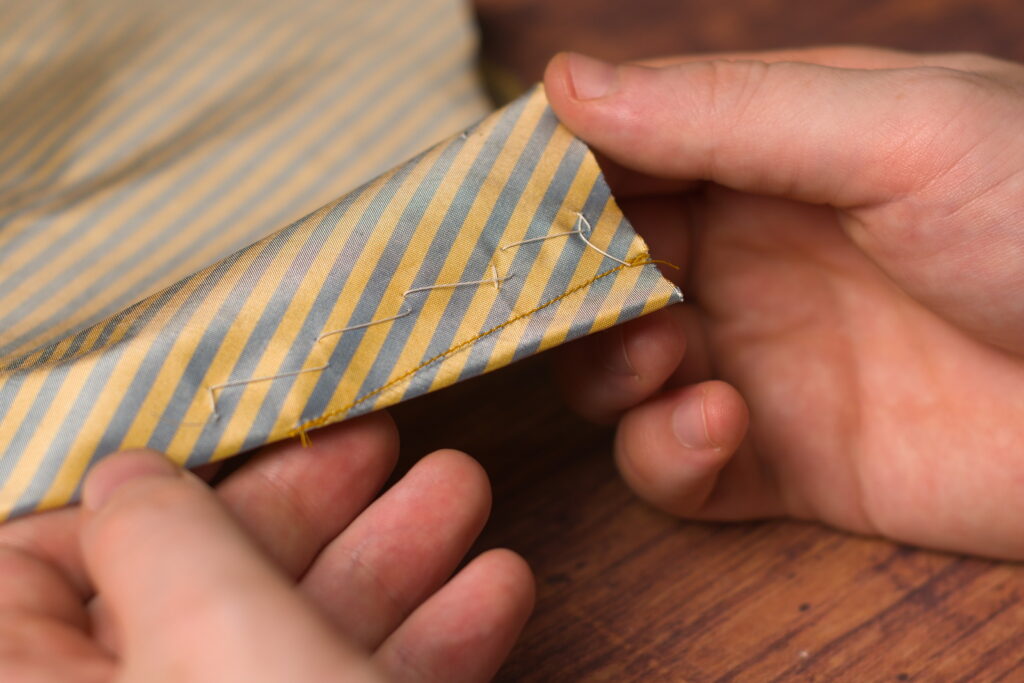
Now trim the linen on each side down to about 1/4″.
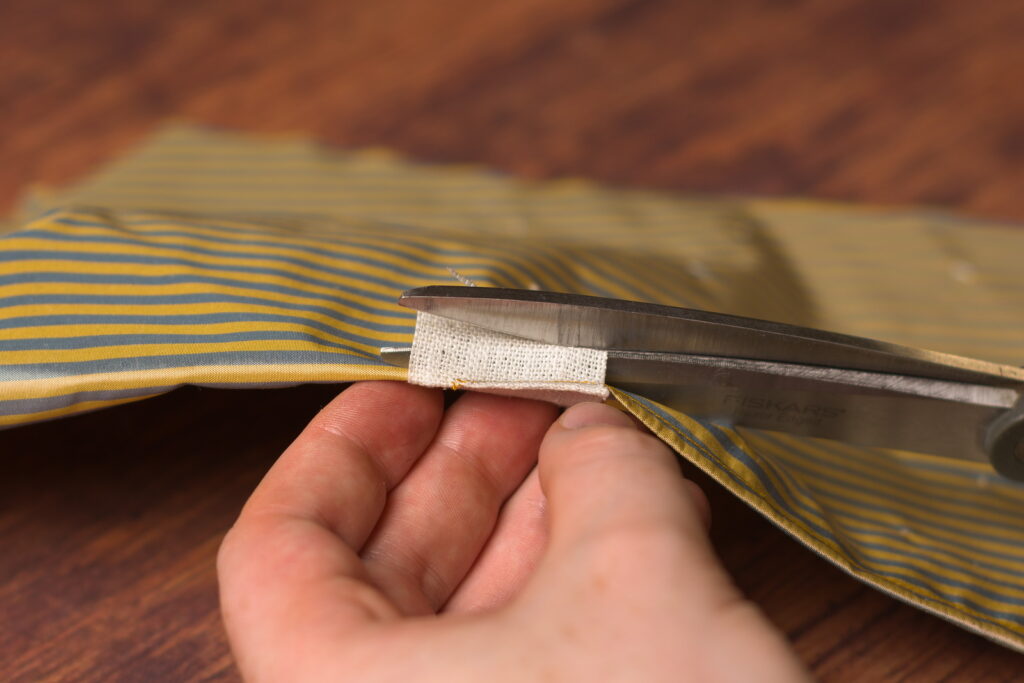
Pressing
Pressing the darts is fairly straightforward. Begin by pressing the dart along its length while it is still folded in half. Don’t press beyond the tip though or you’ll begin creasing the waistcoat itself.
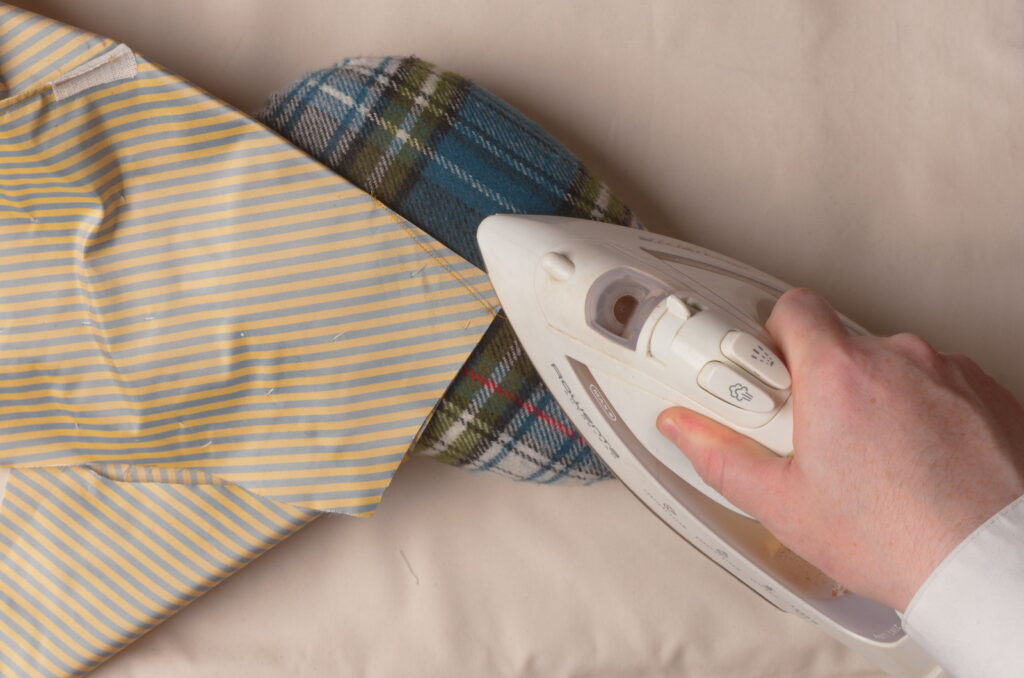
Using a tailor’s ham, press the dart over to one side or the other, from the wrong side. Here for the neck dart I’m pressing the dart downwards so that it won’t be fighting gravity the entire time.
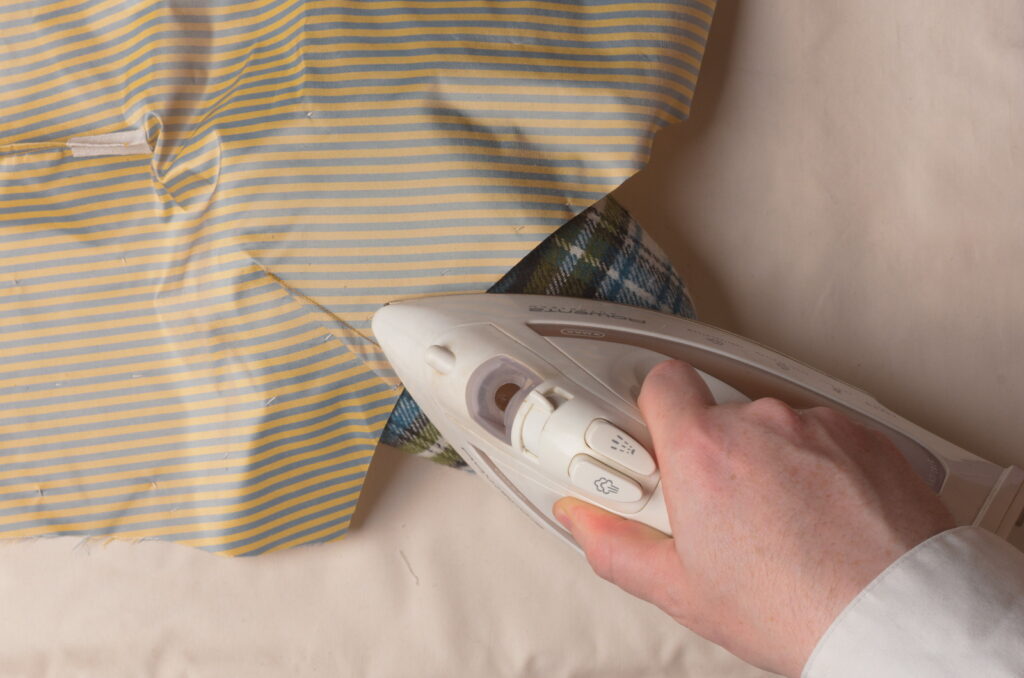
Then turn to the right side and press the dart again along its length. Pay particular attention to the tip of the dart and get it smoothed out as nicely as possible.
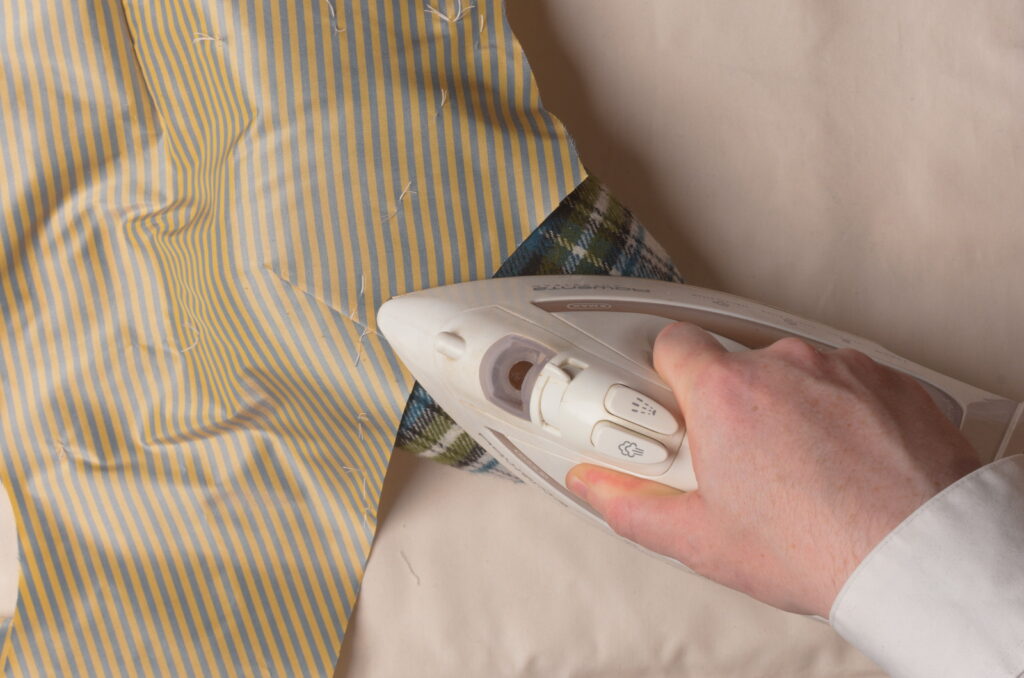
The waist dart is a little trickier since it’s more of a compound shape. Press the dart while folded in half.
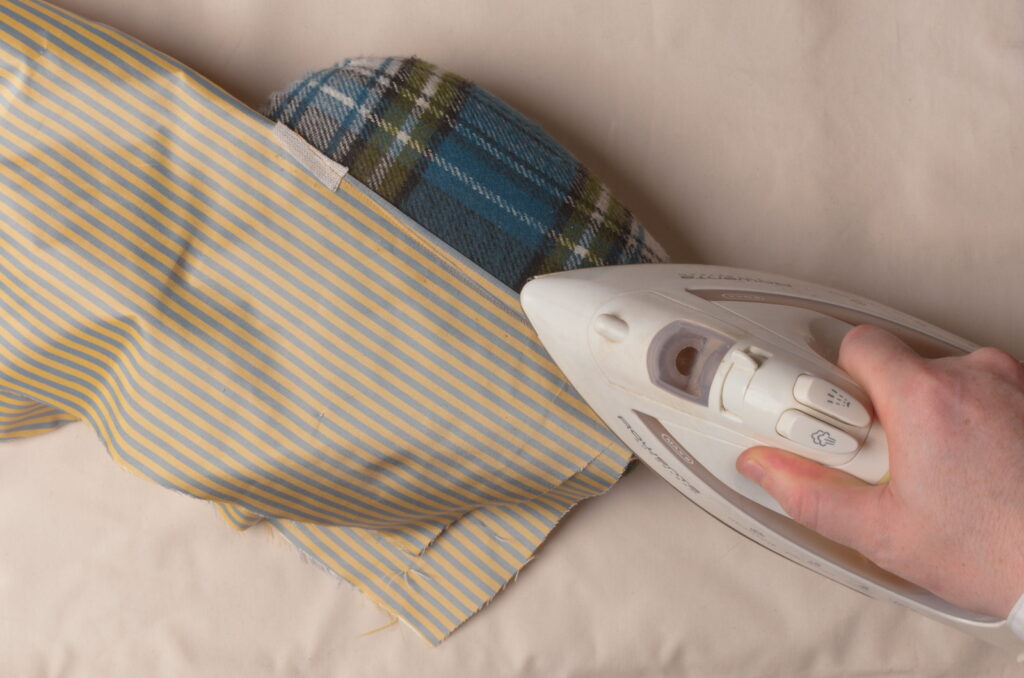
Then press the lower portion of the dart to one side, being sure it’s fully opened underneath.
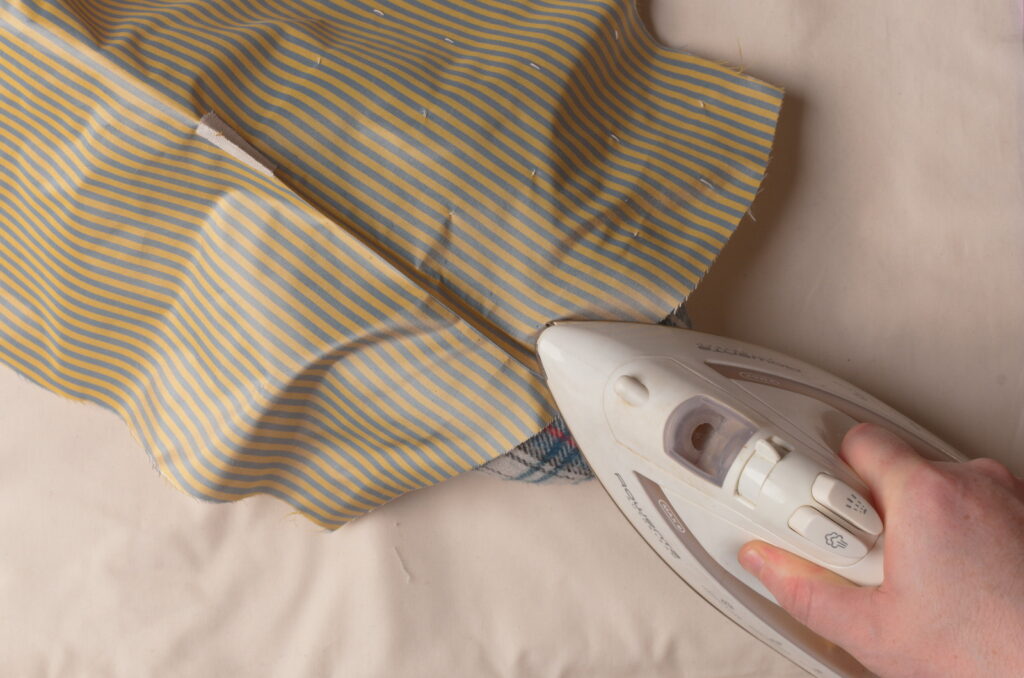
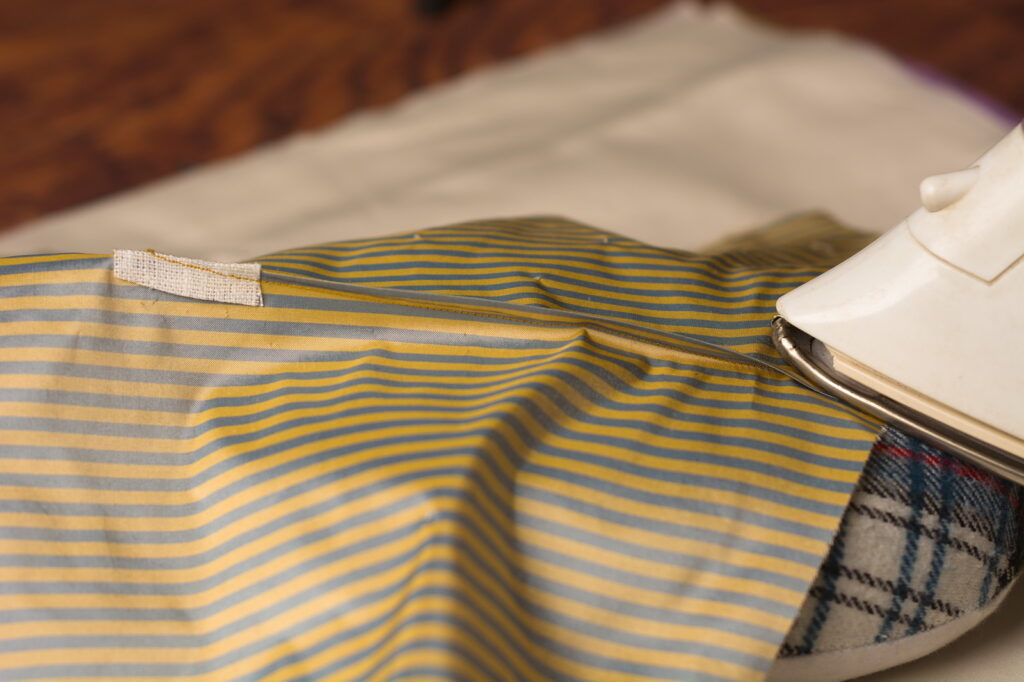
Then readjust the dart over the tailor’s ham and press the remaining bit of dart in the same direction.
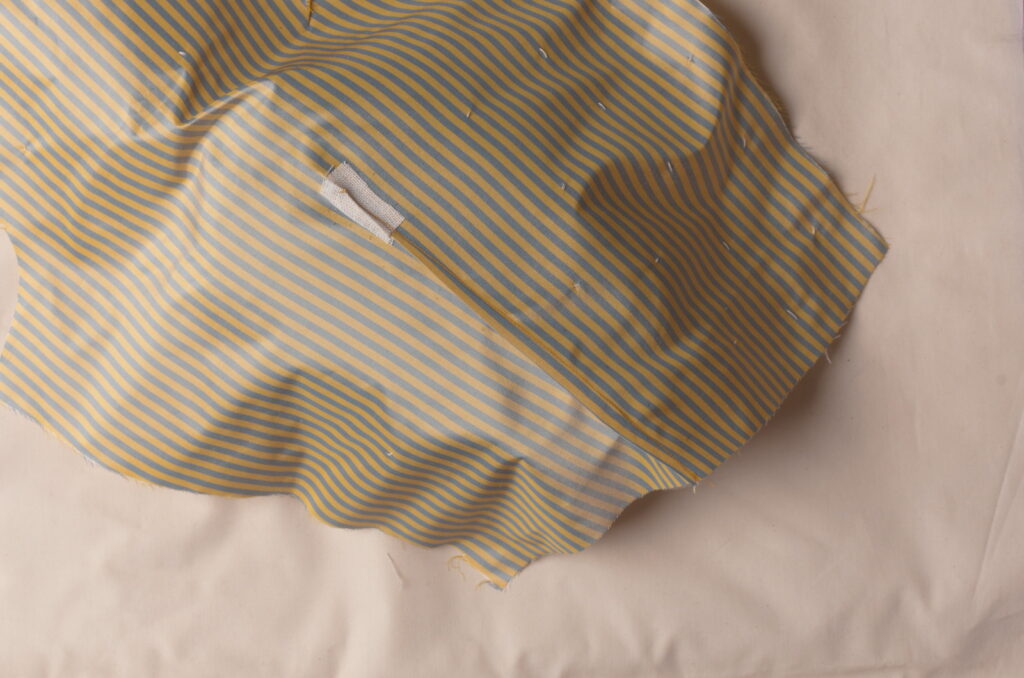
Flip over and press from the right side.
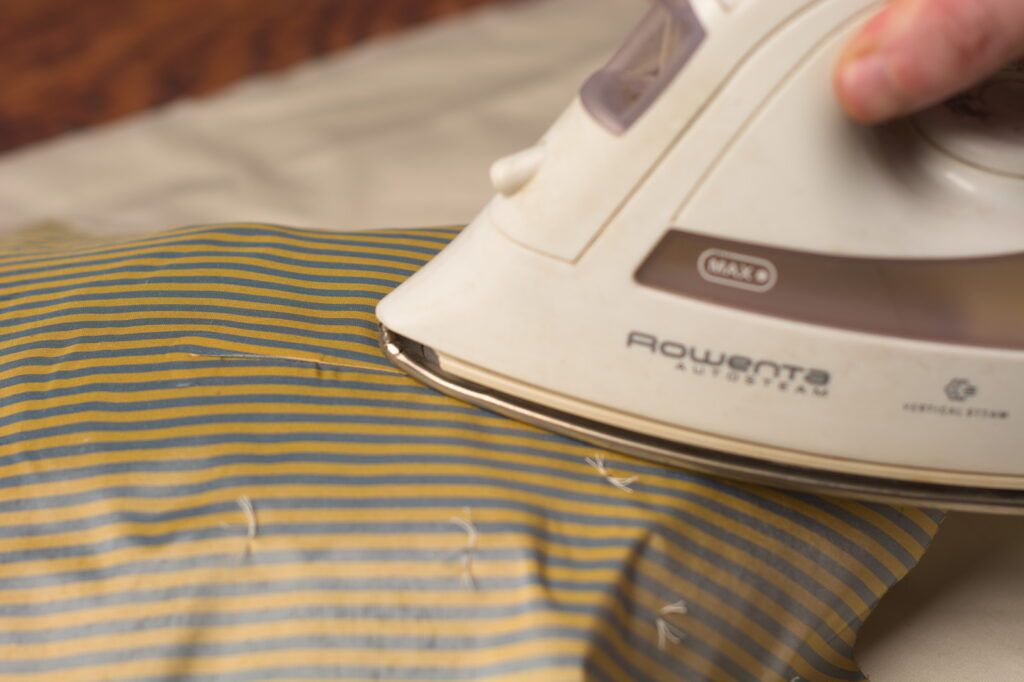
Here’s the forepart so far after installing both darts.
