Category: Double-Breasted Waistcoat
Installing the Lining
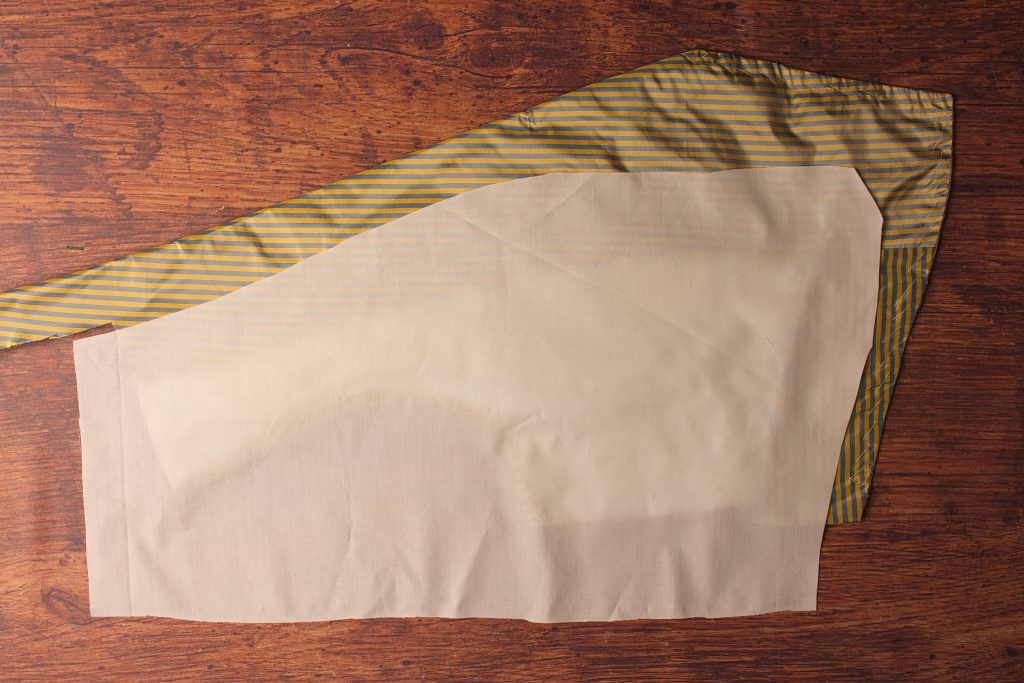
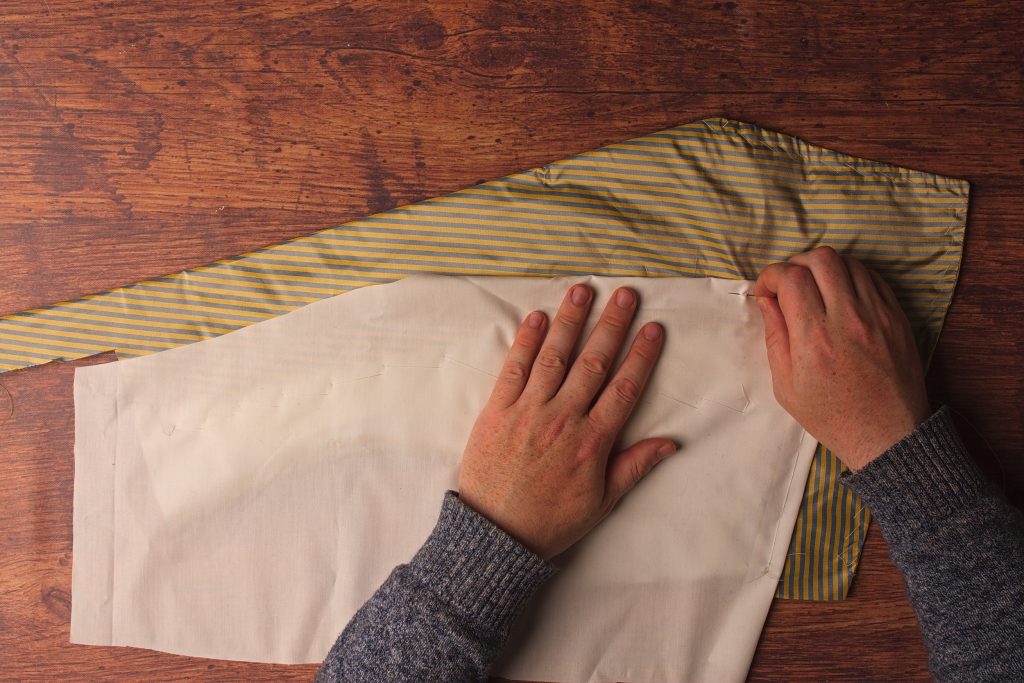
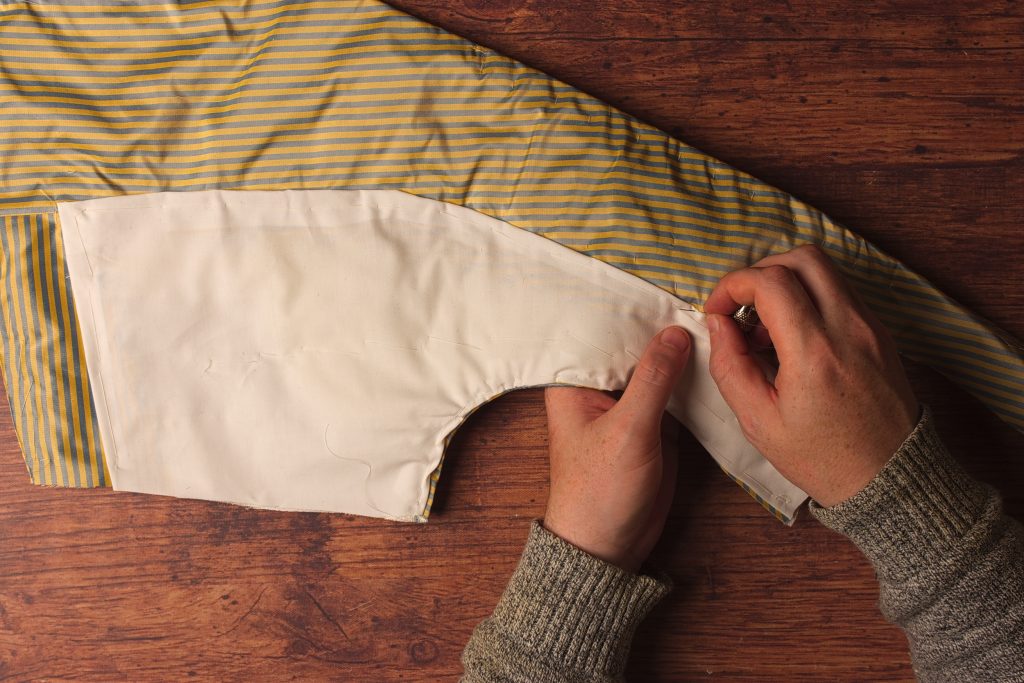
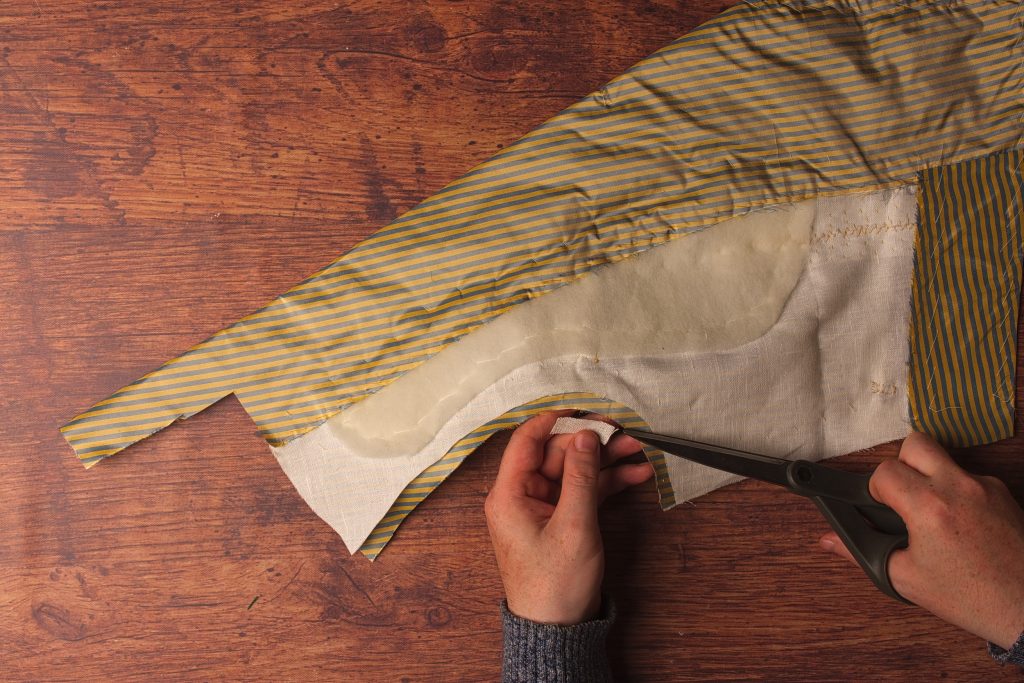
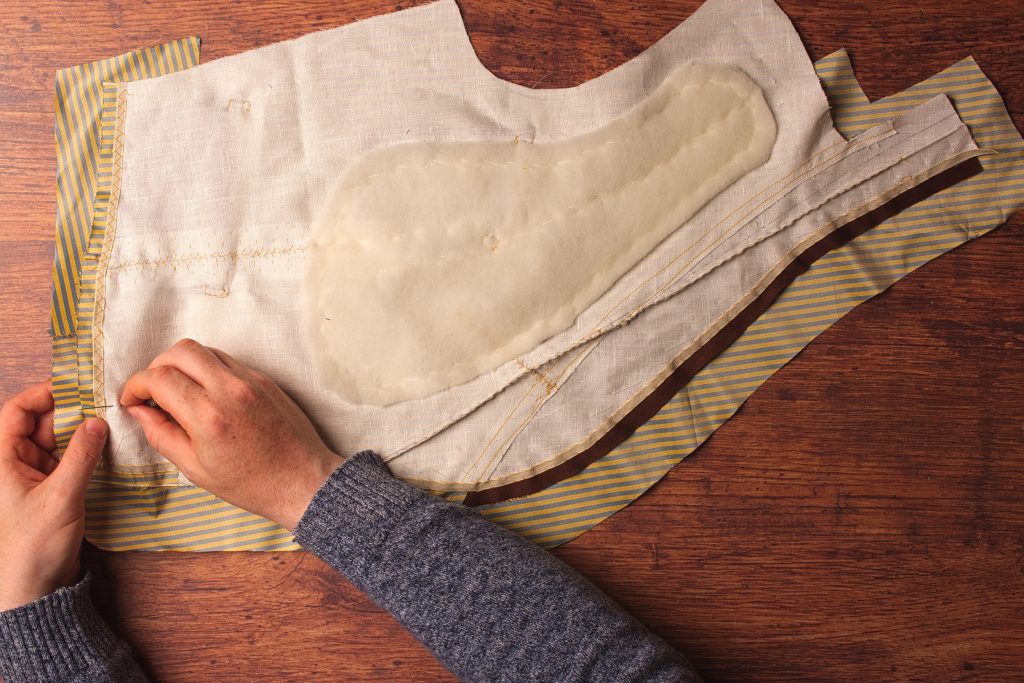
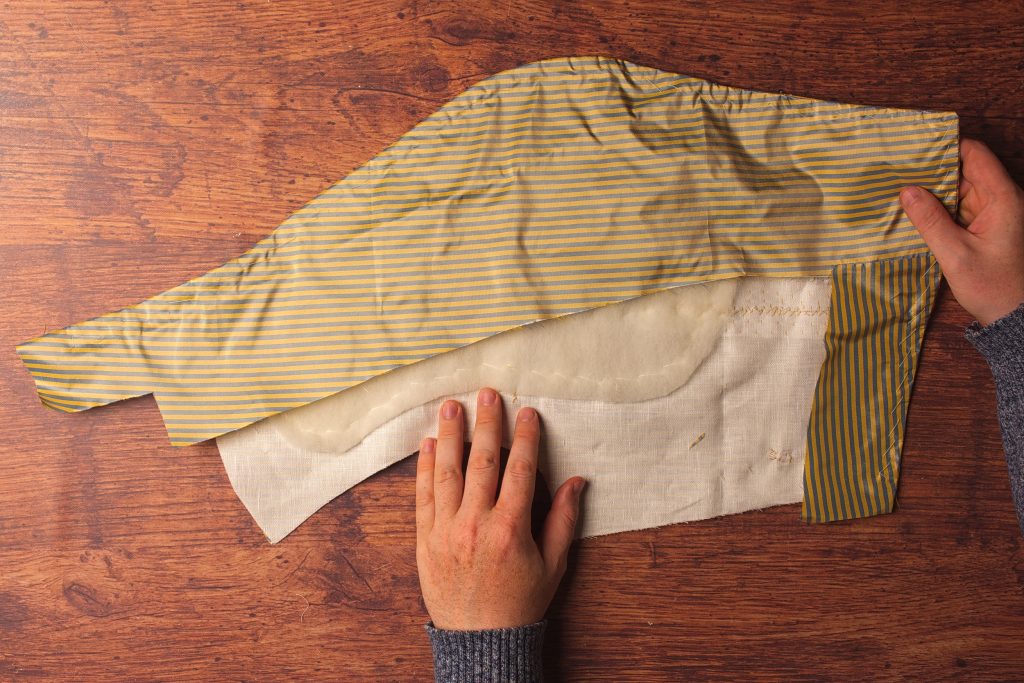
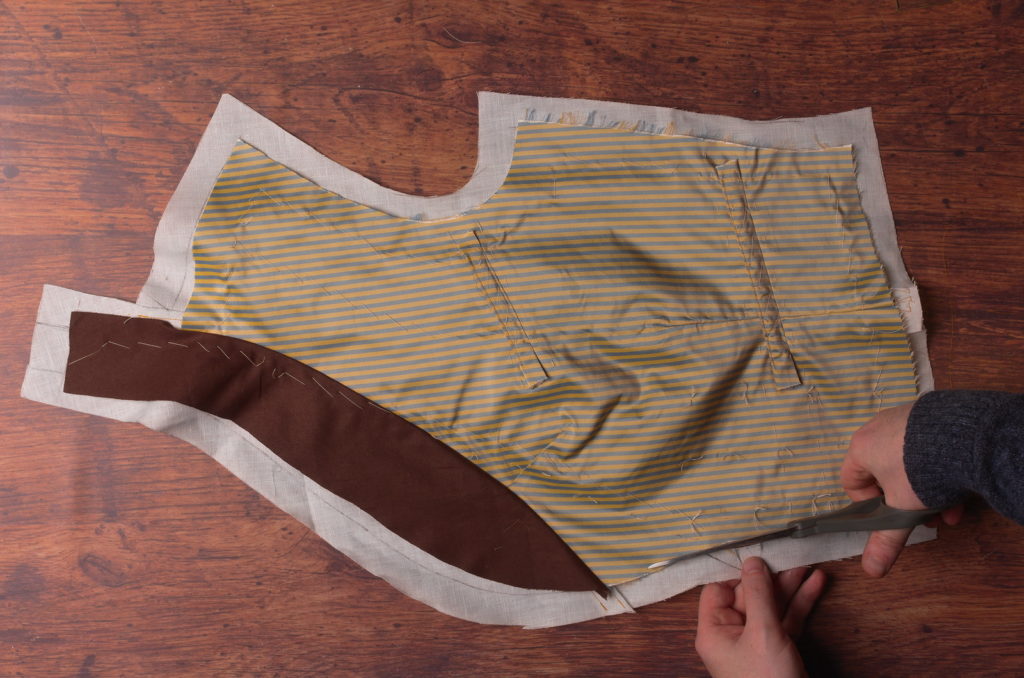
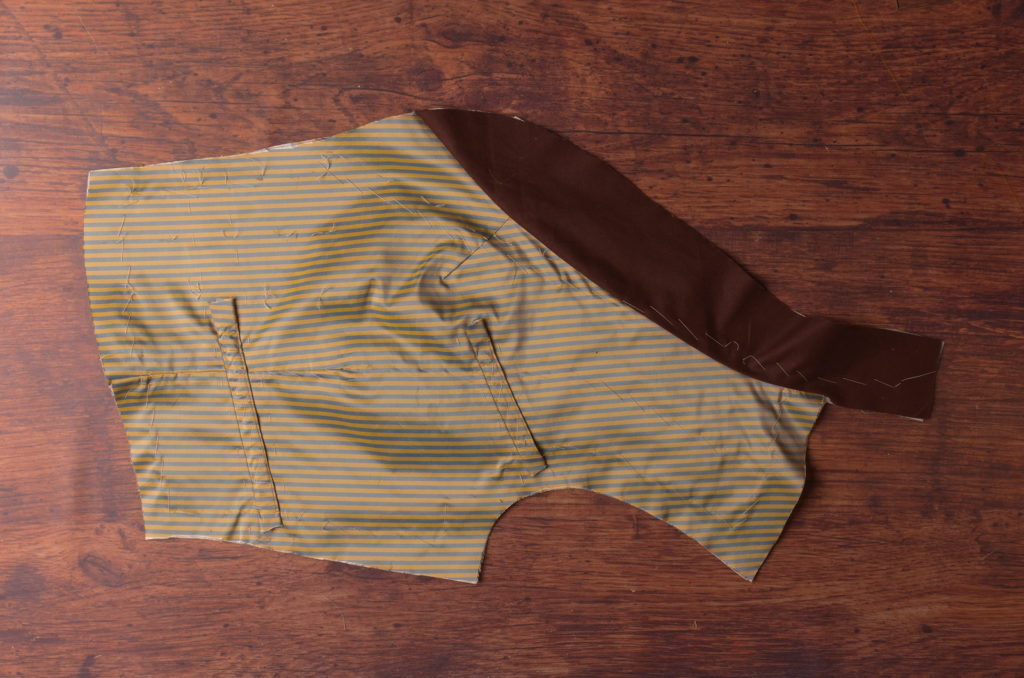
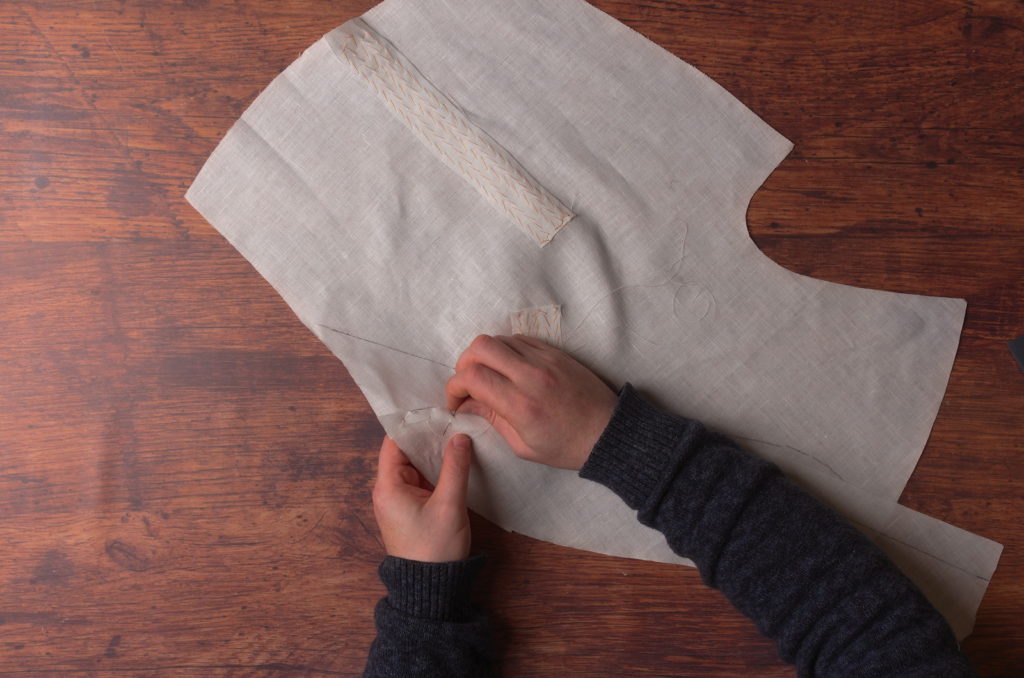
Instead of making a paper pattern for the forepart lining, I like to simply cut the fabric a bit larger than necessary and gradually trim it down.
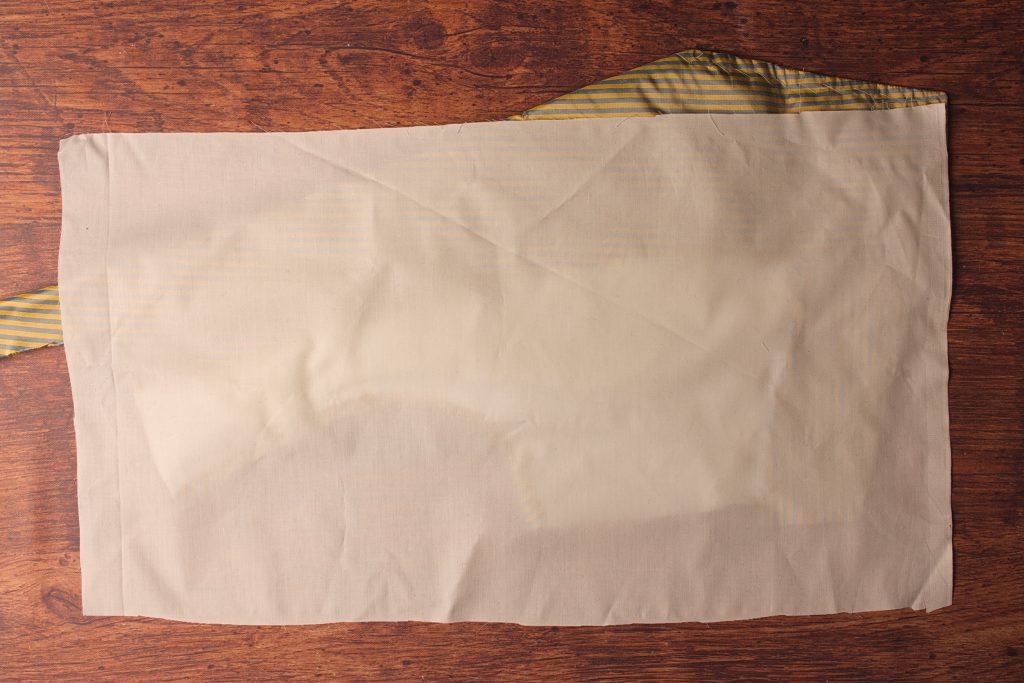
Lay the forepart on your lining fabric and cut out a rectangular piece roughly the size of the forepart.
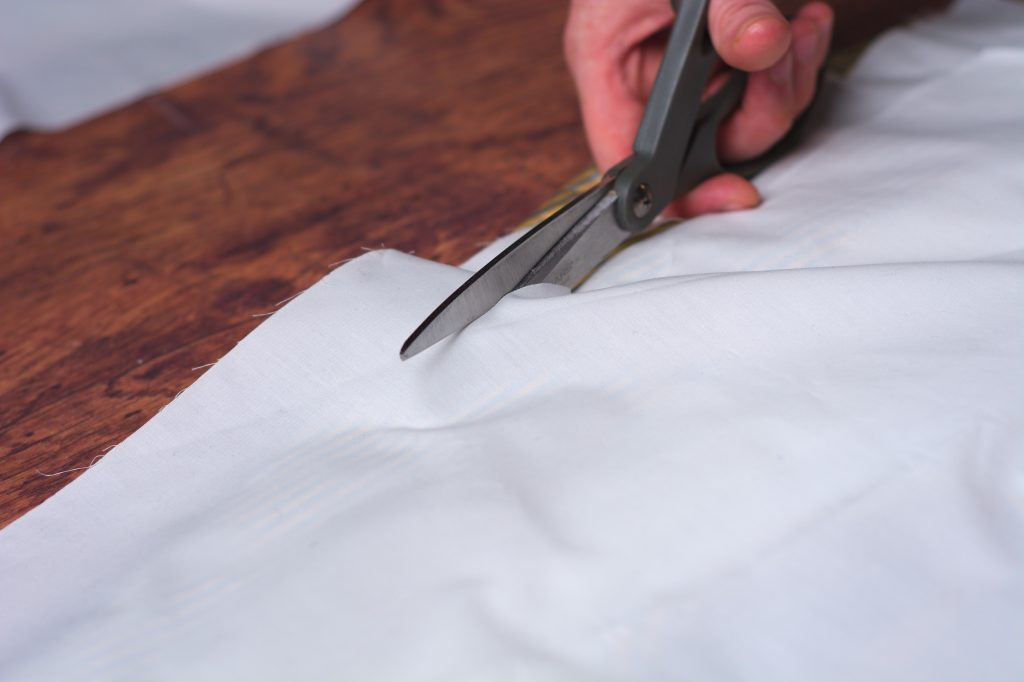
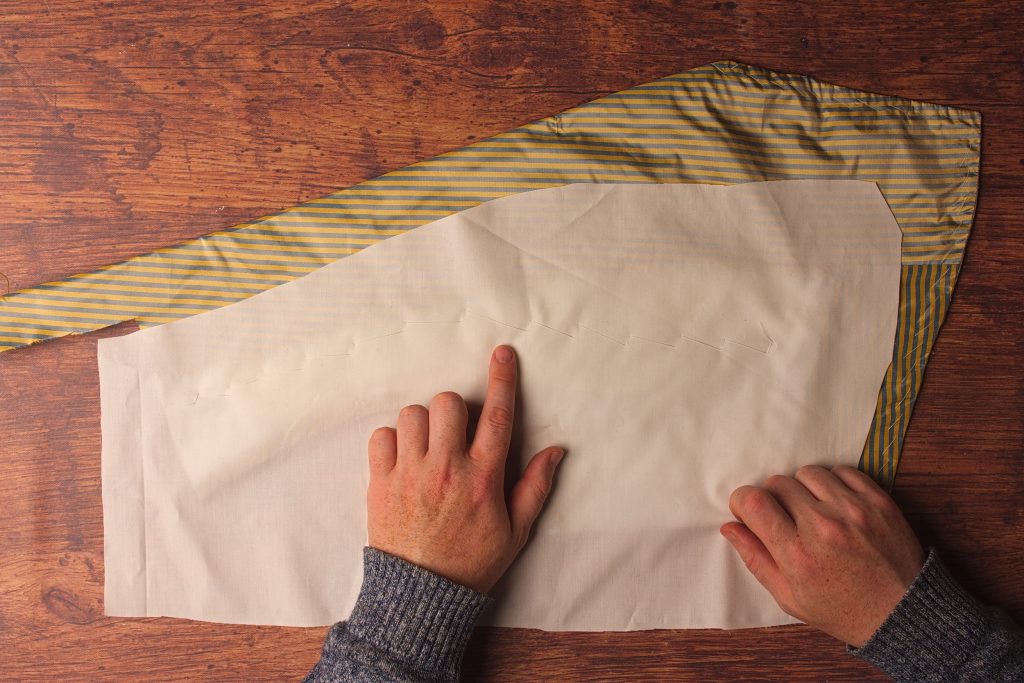
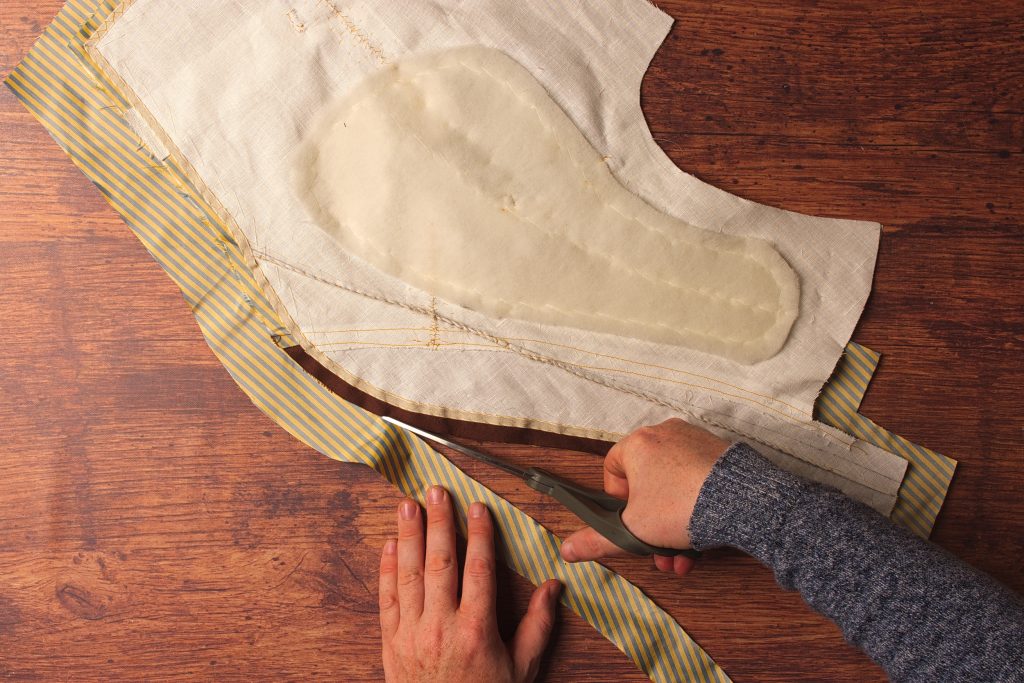
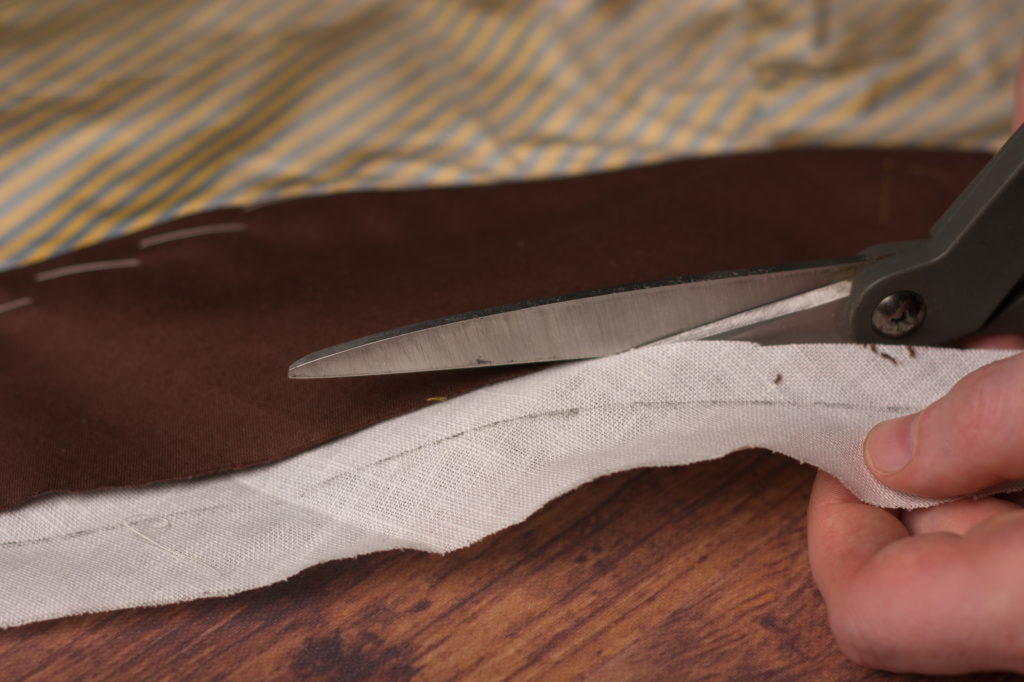
Now trim away the fabric about 1″ to 1 1/2″ away from the edge of the facing.

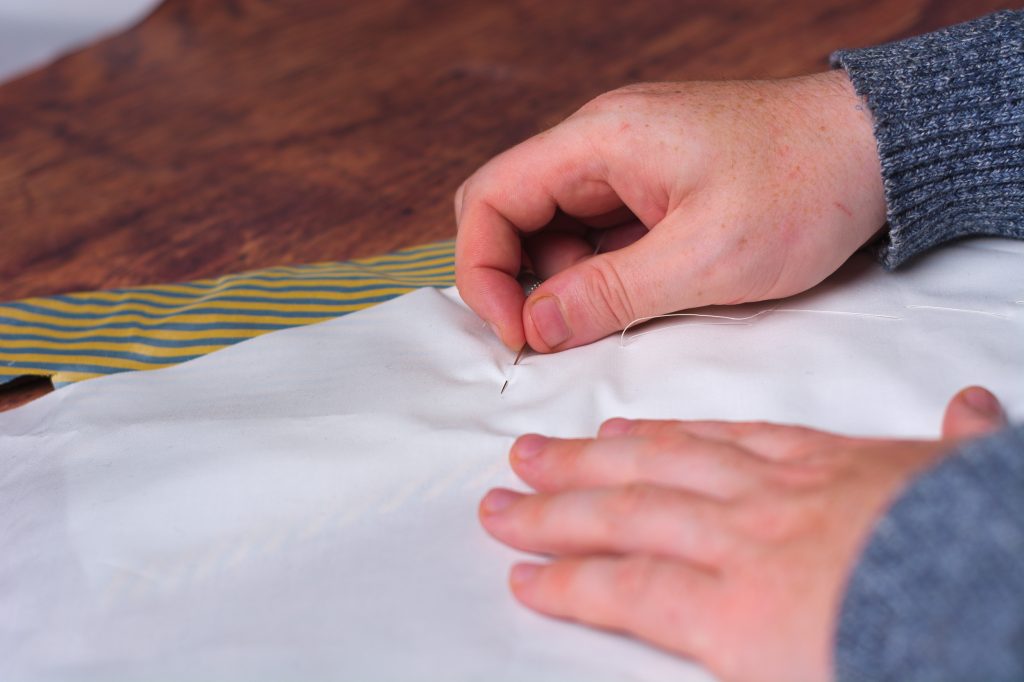
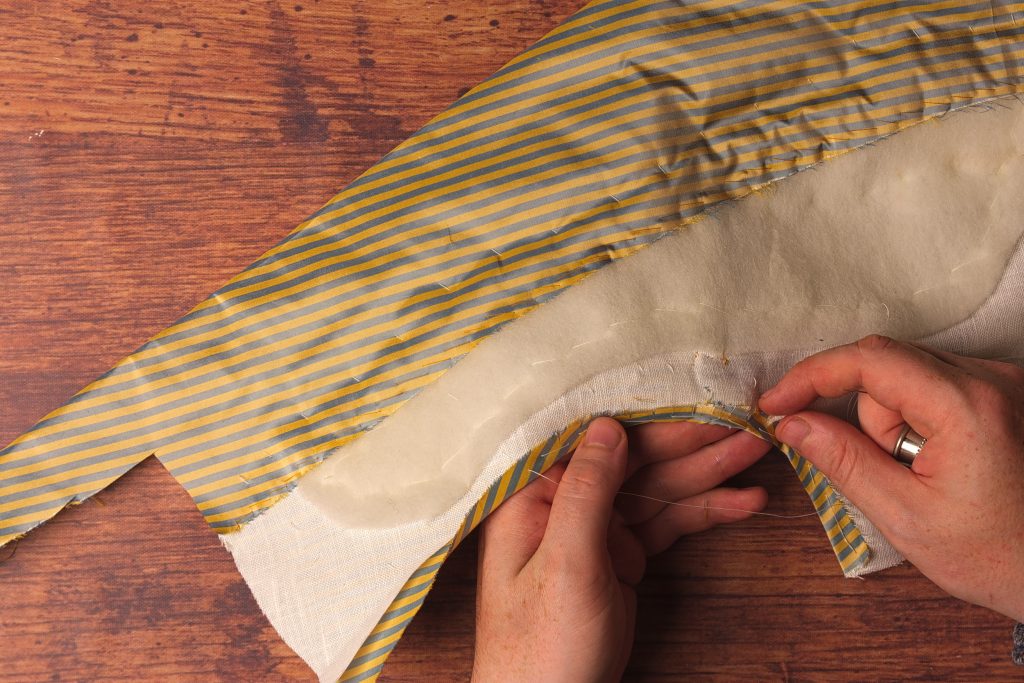
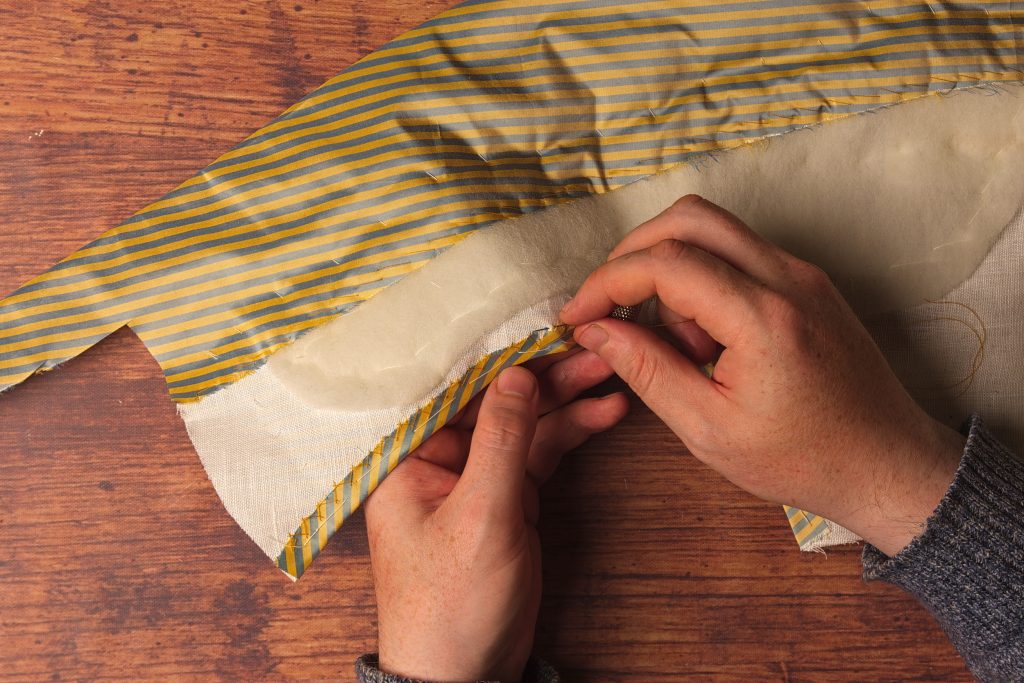
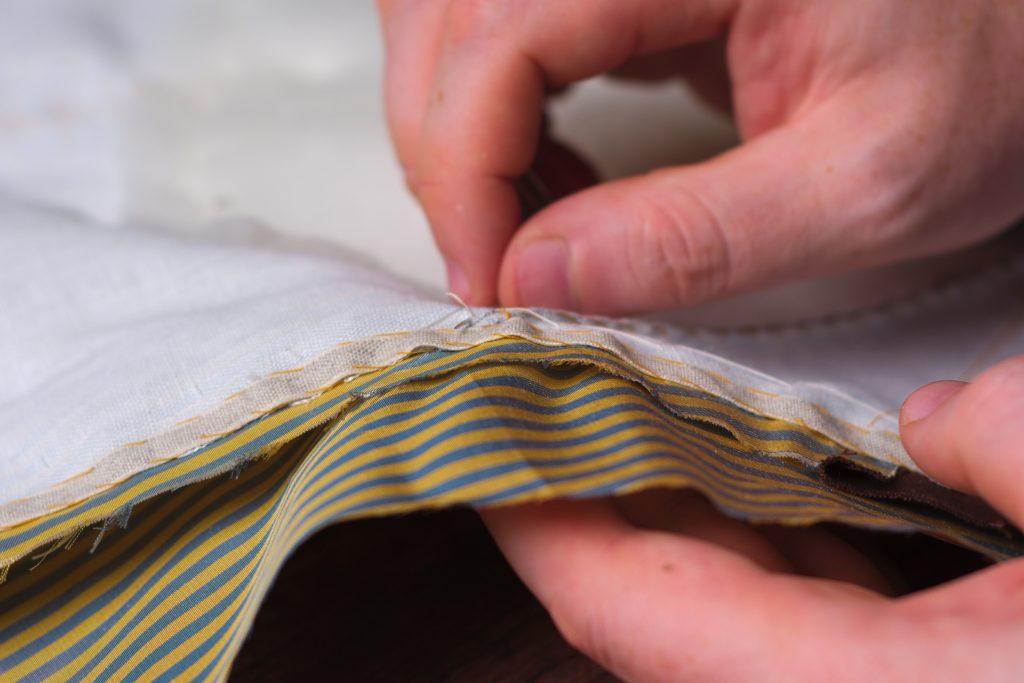
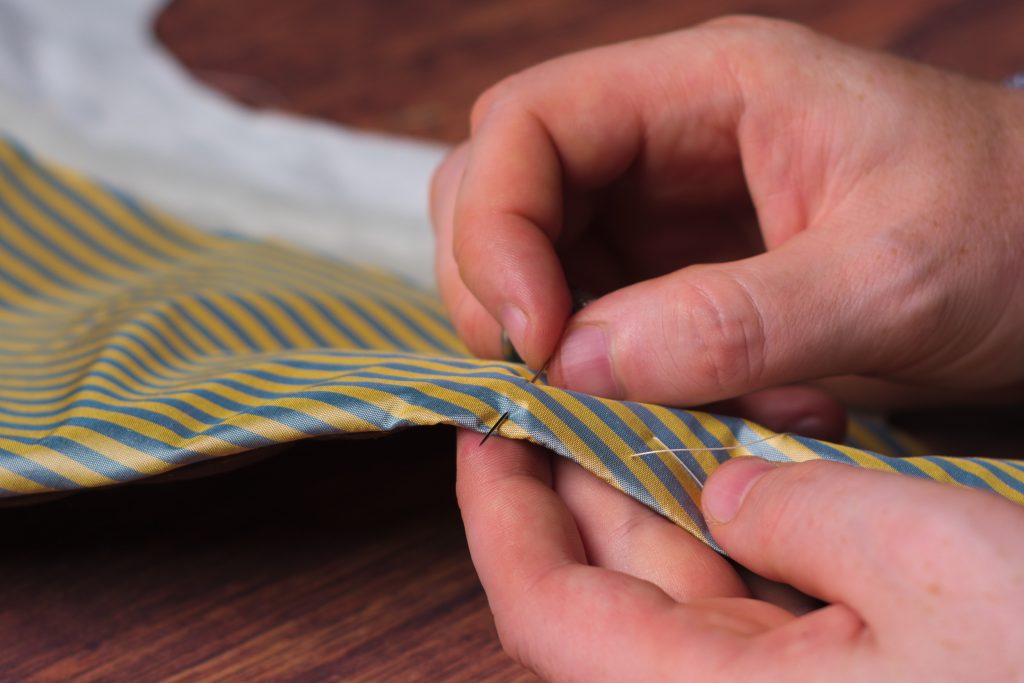
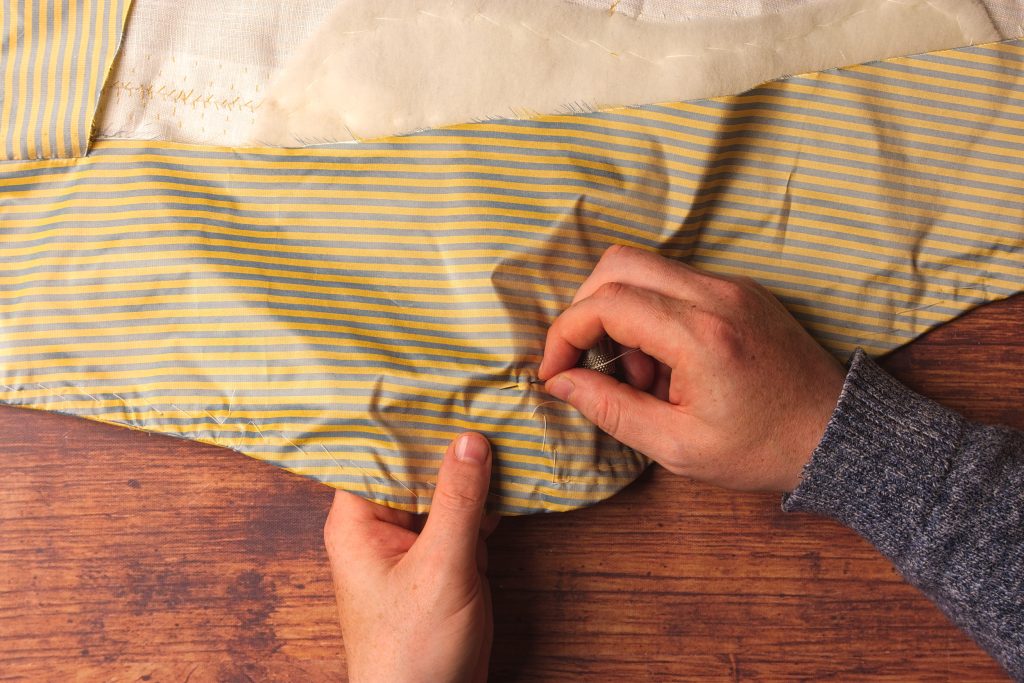
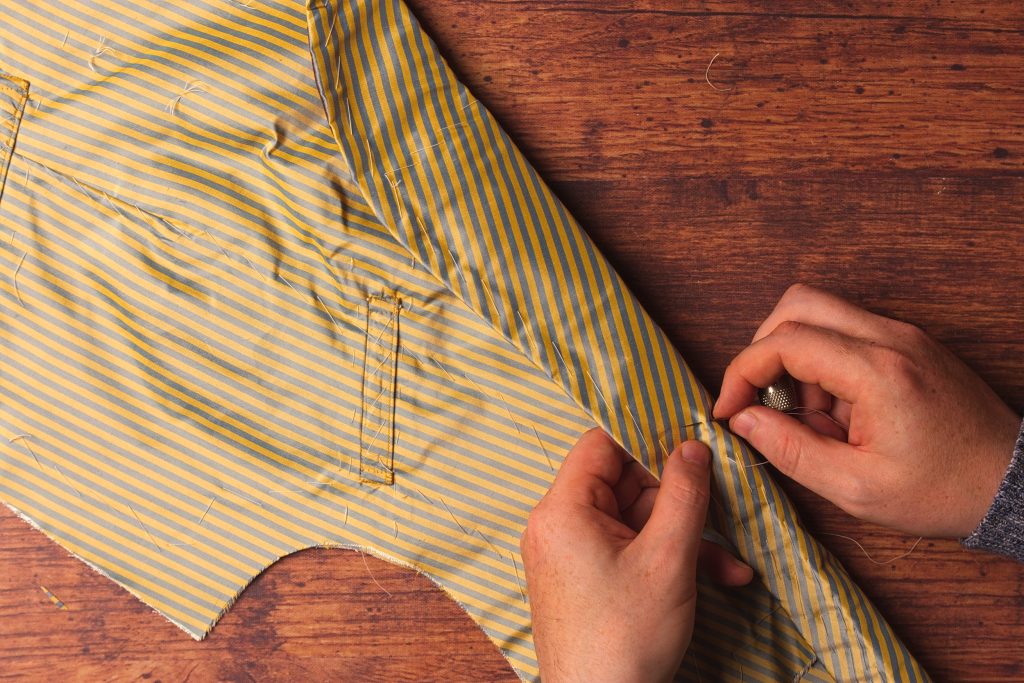
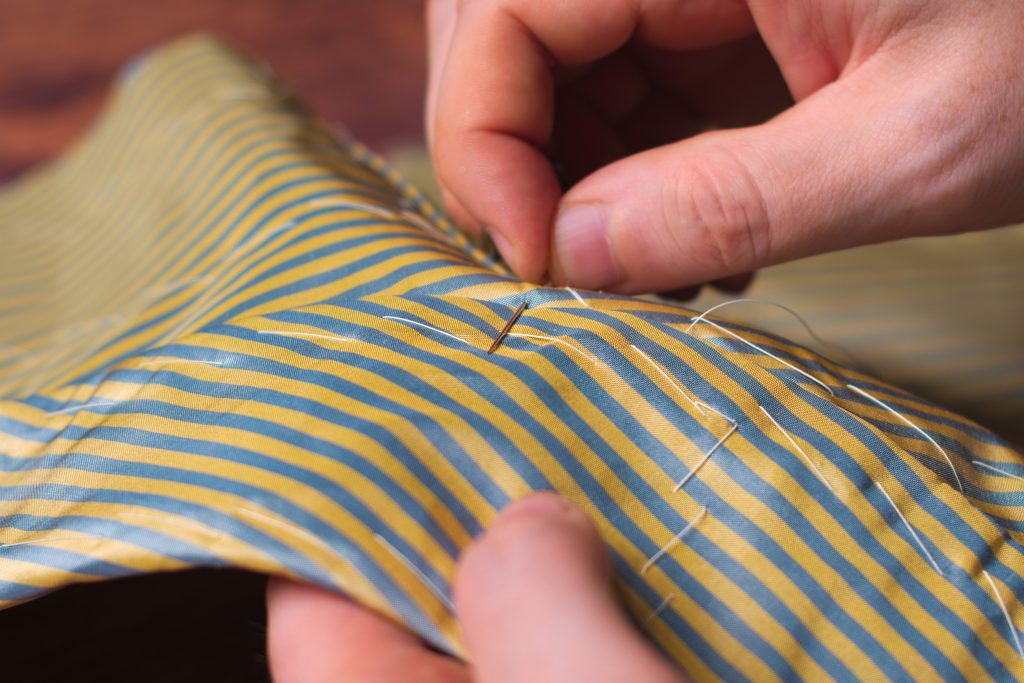
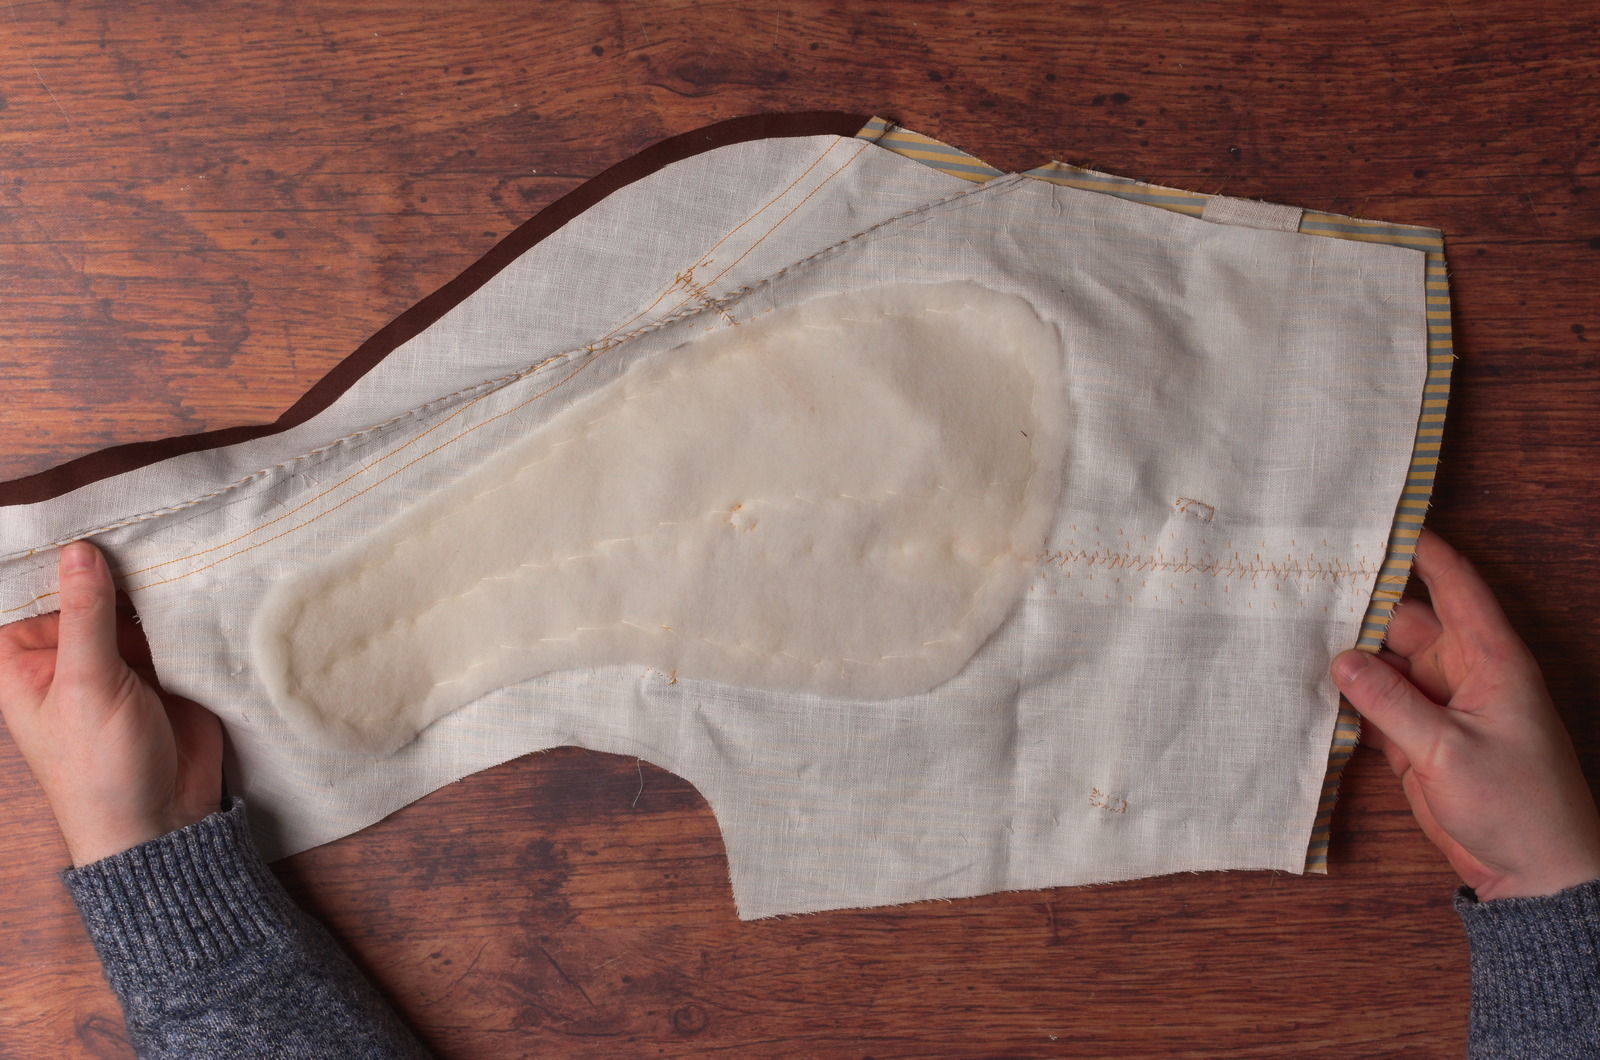
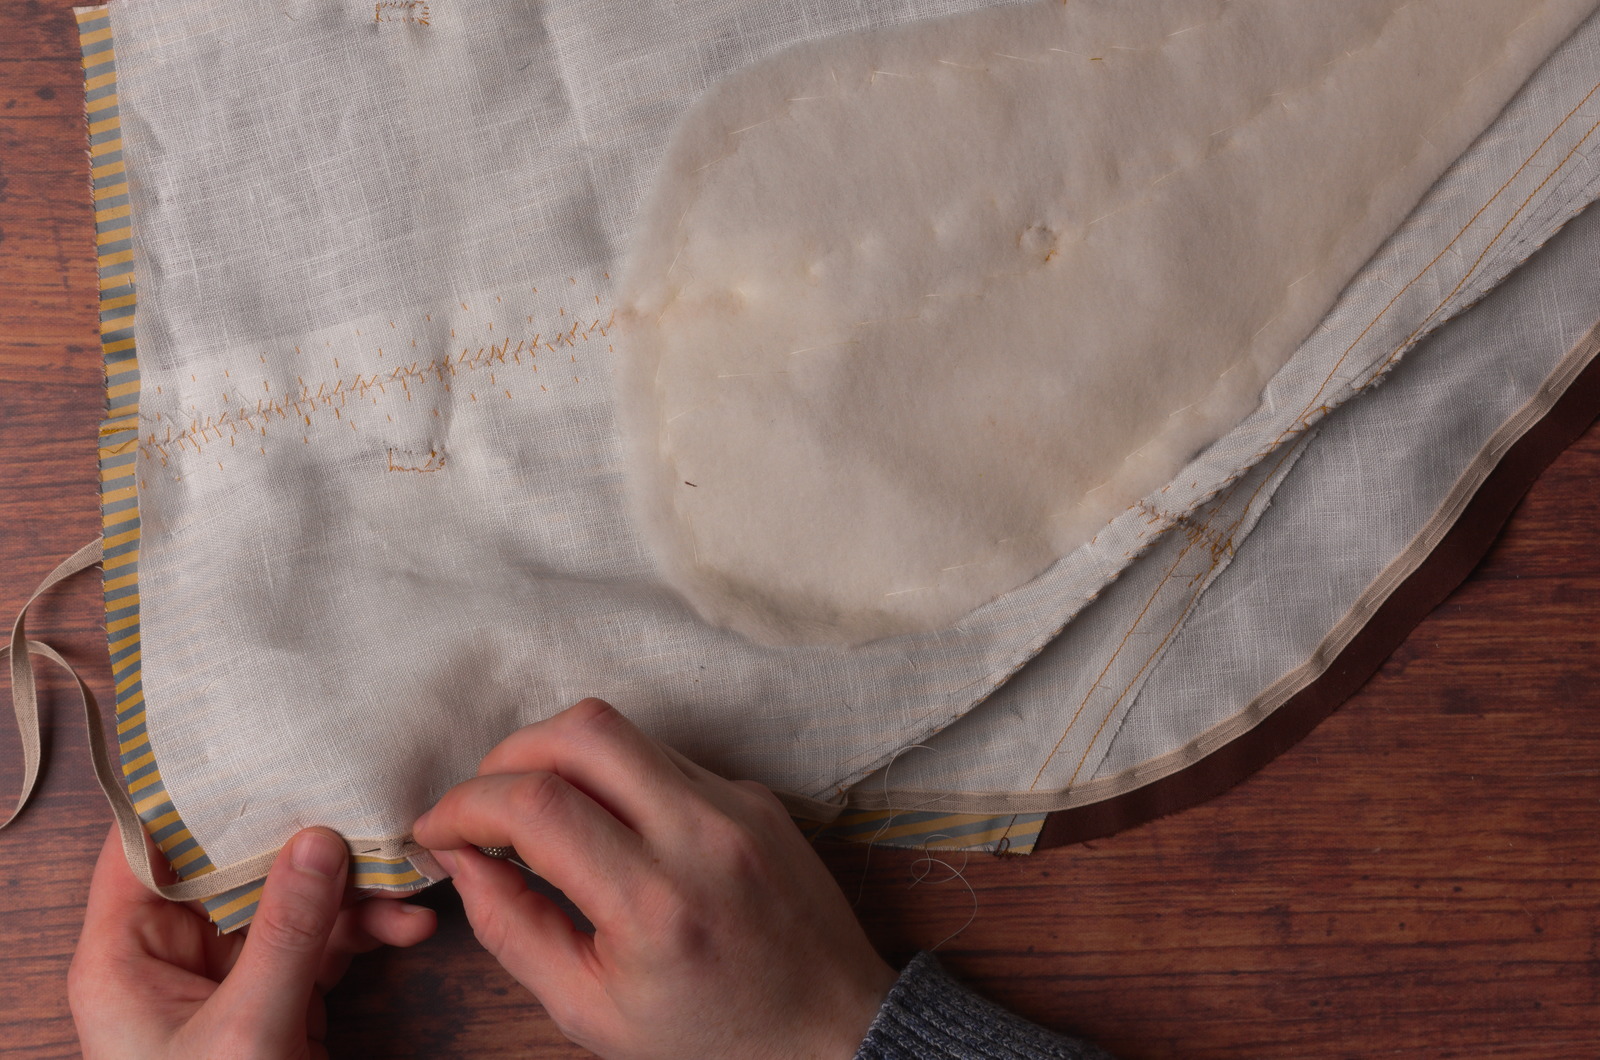
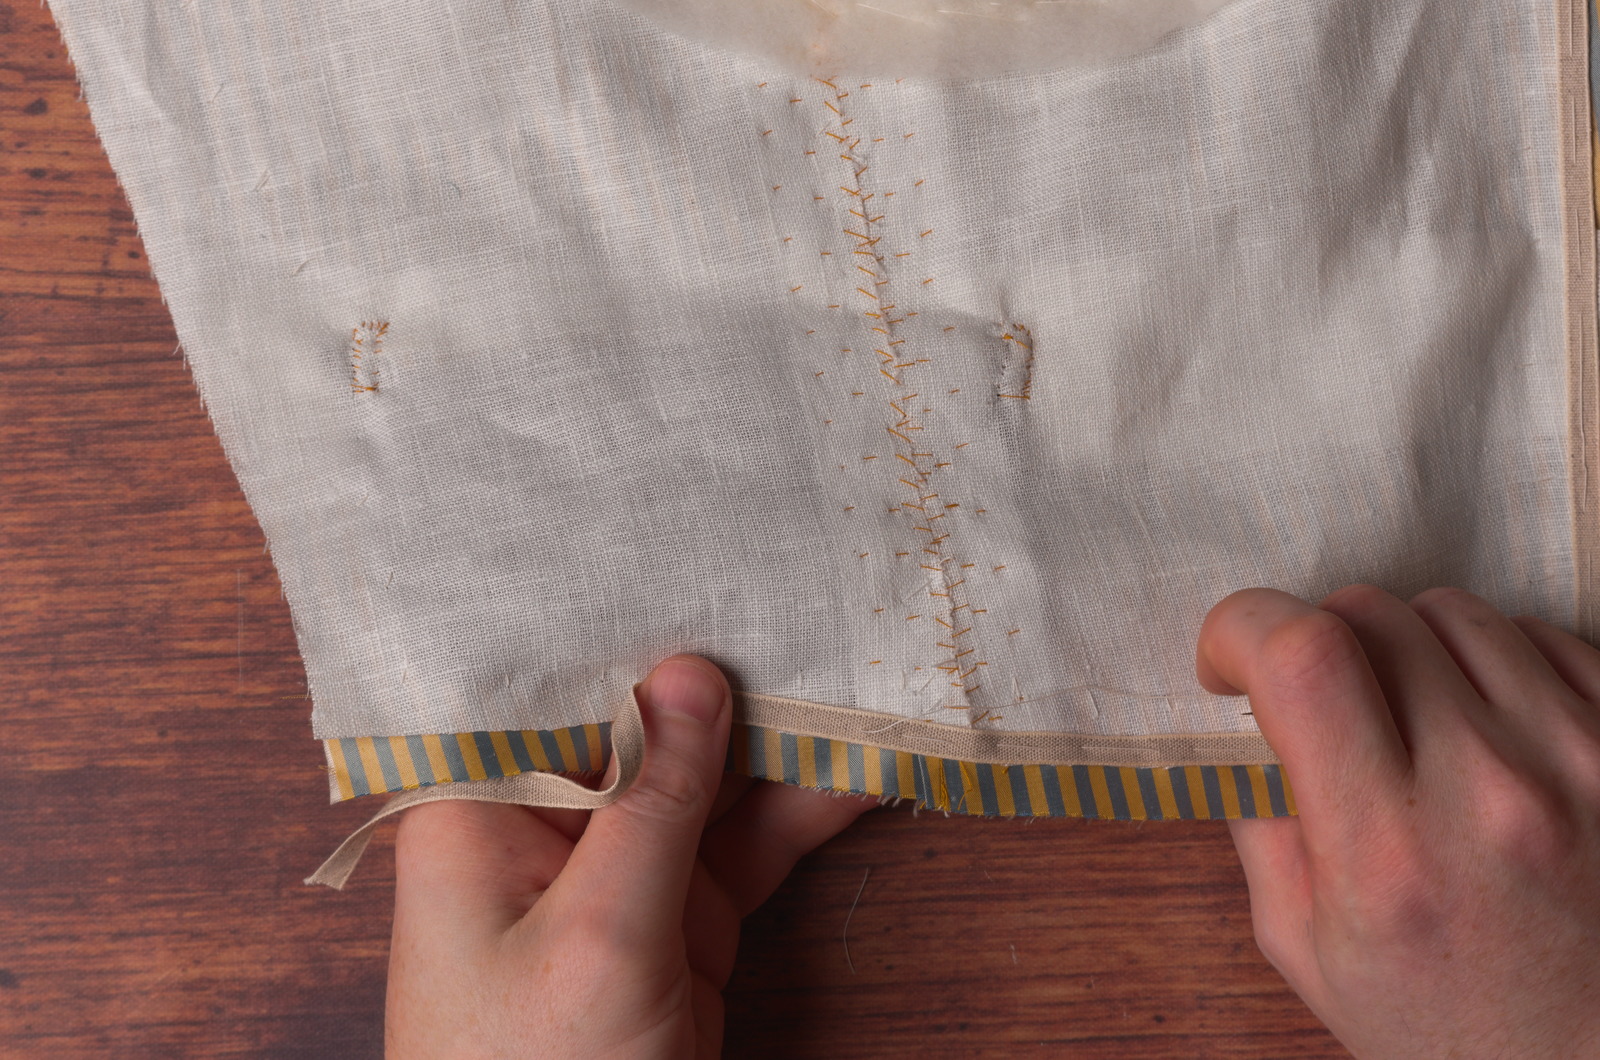
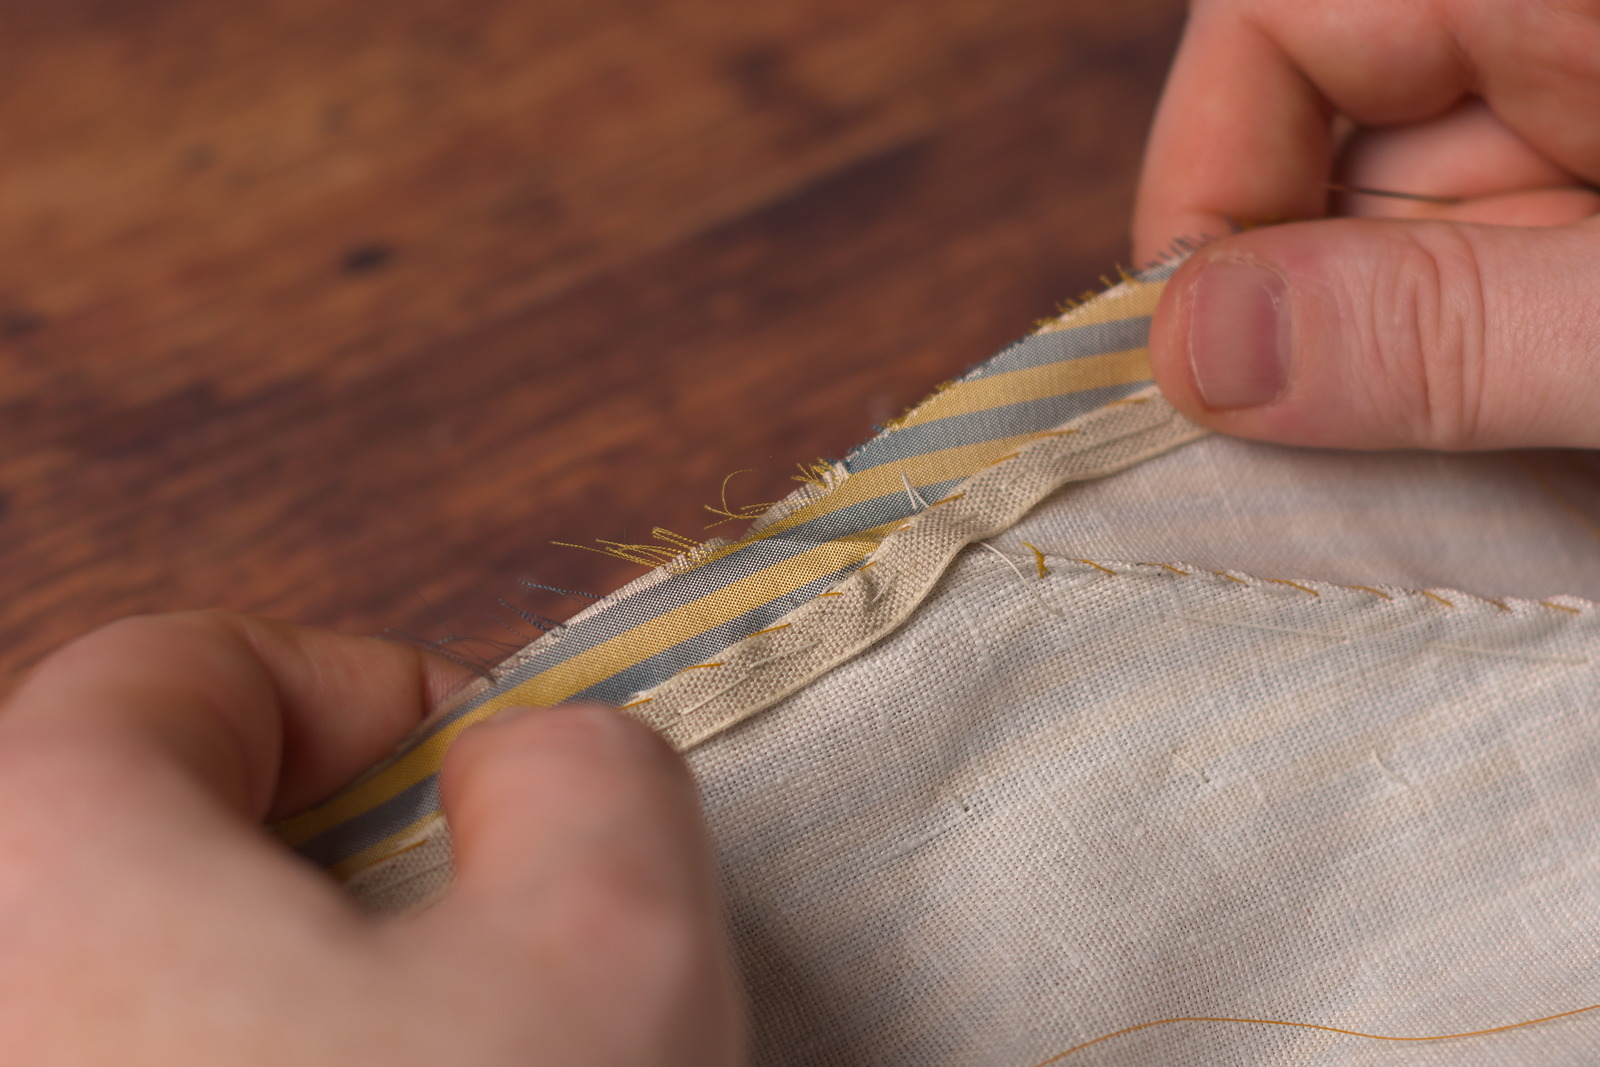
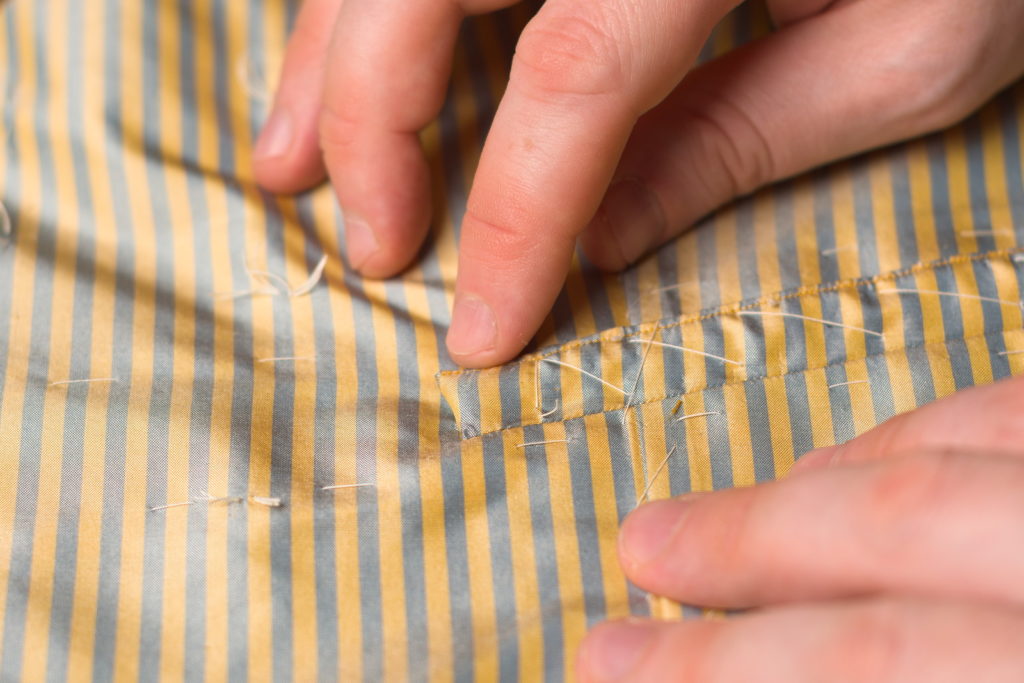
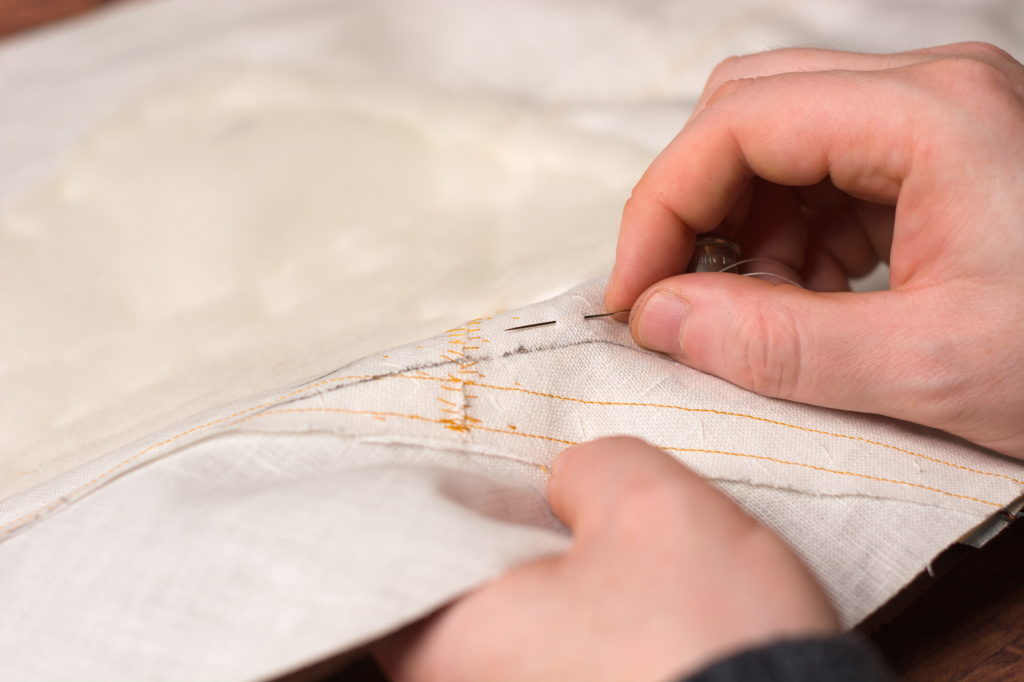
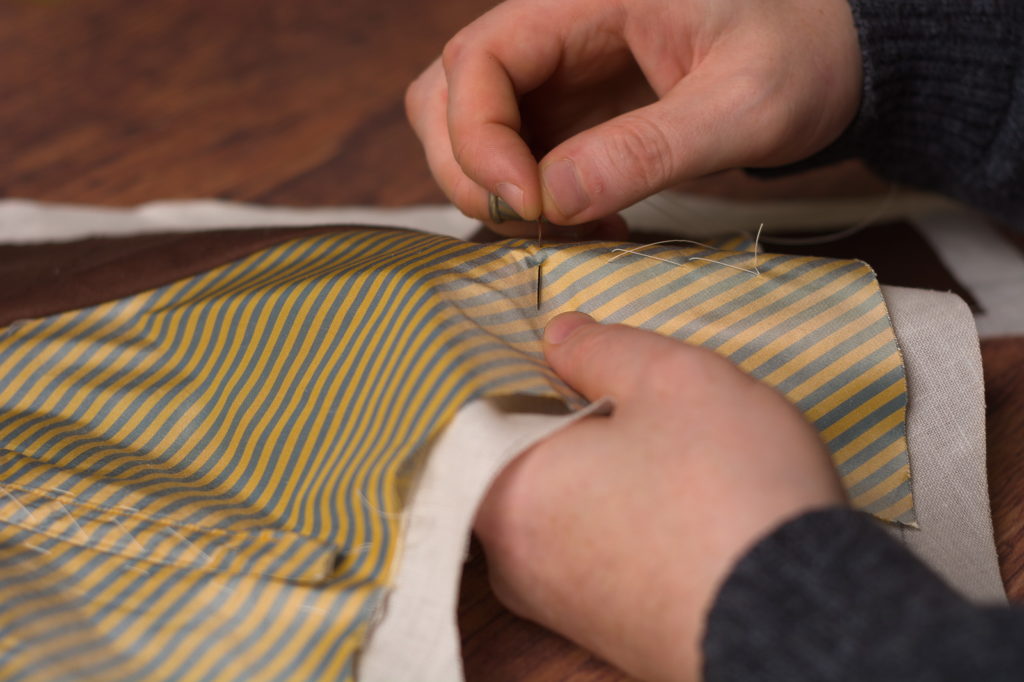
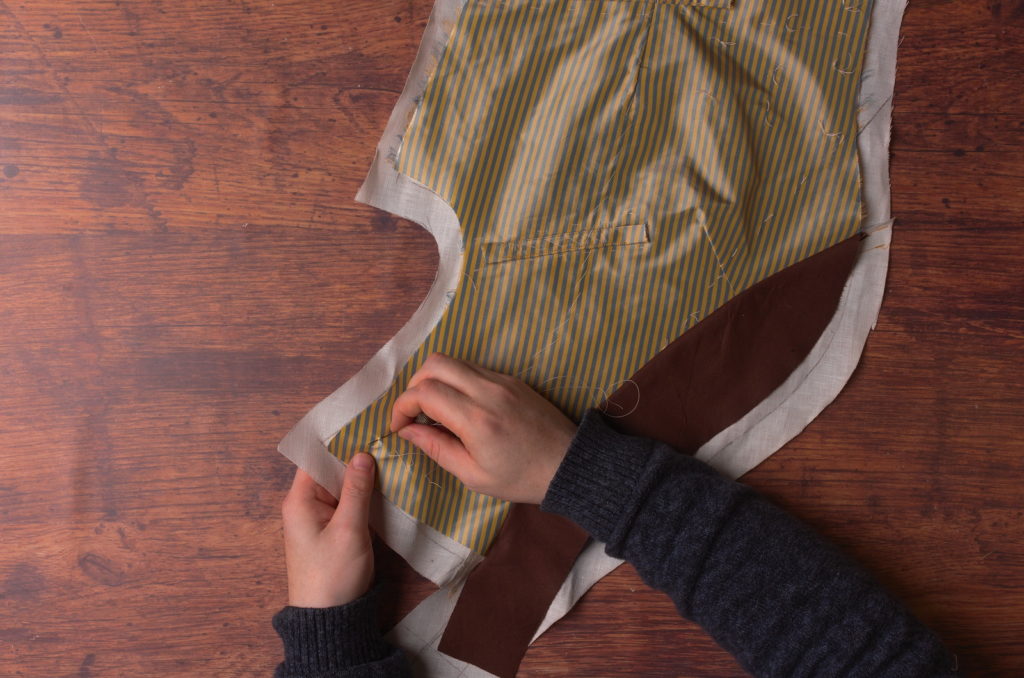
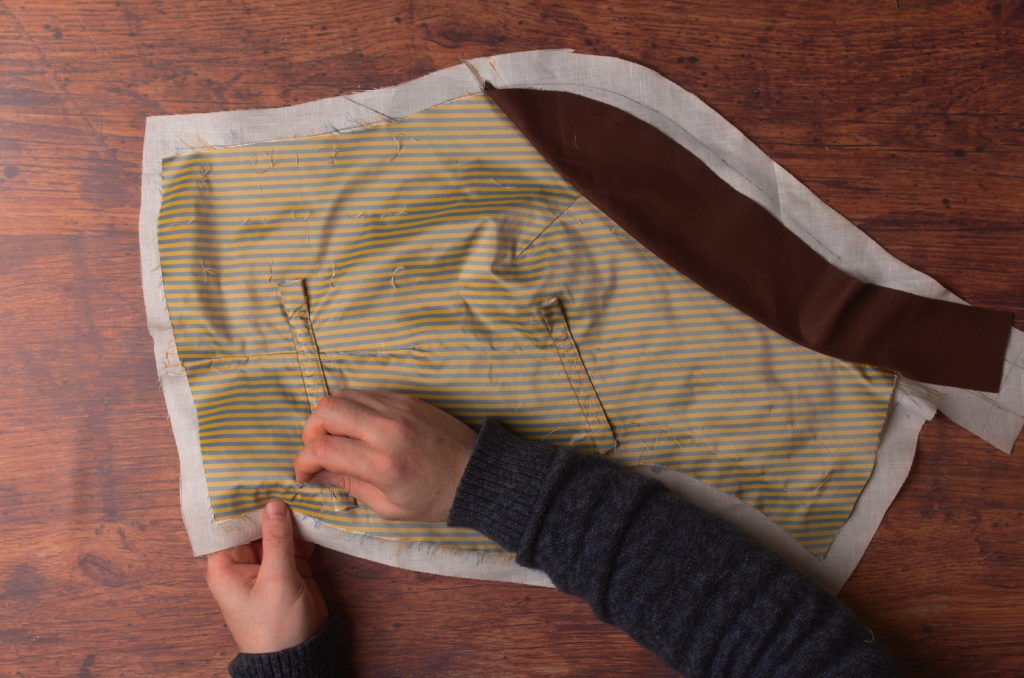
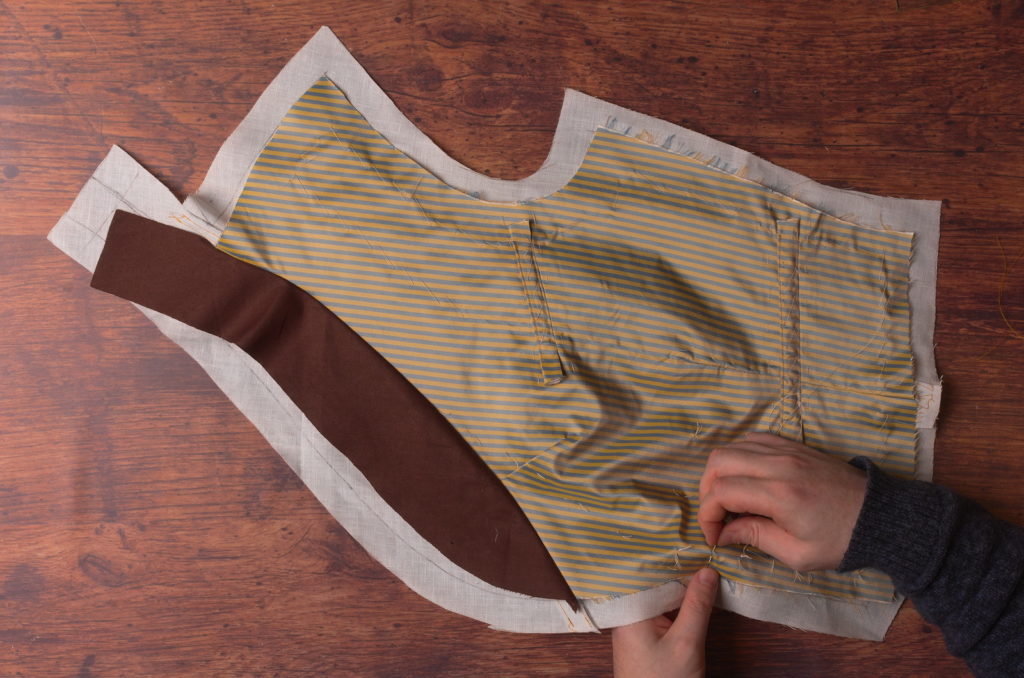
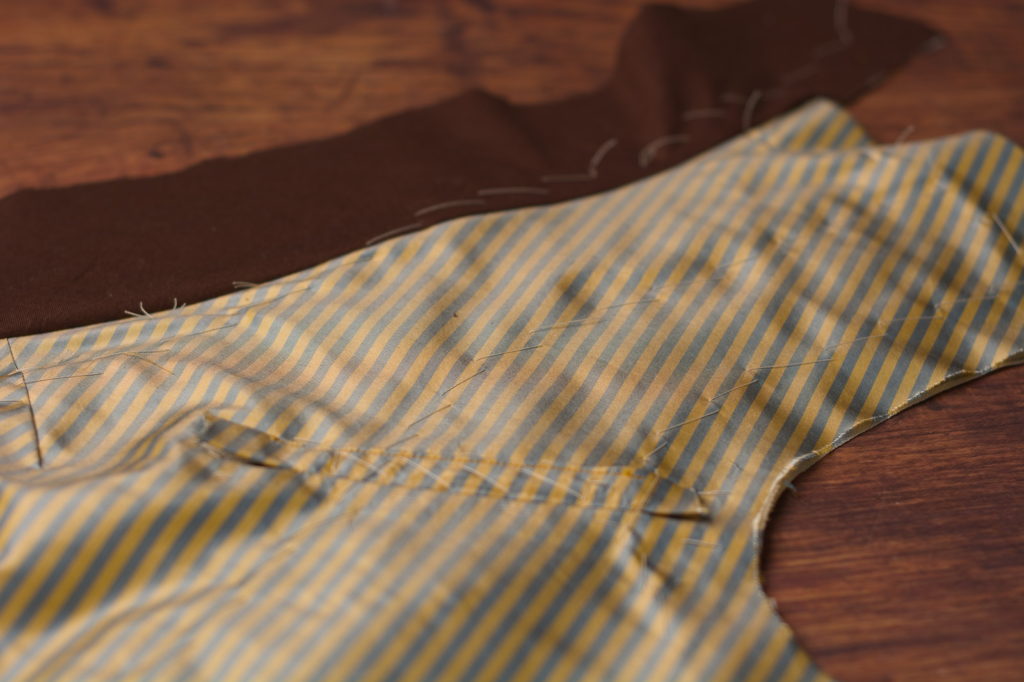
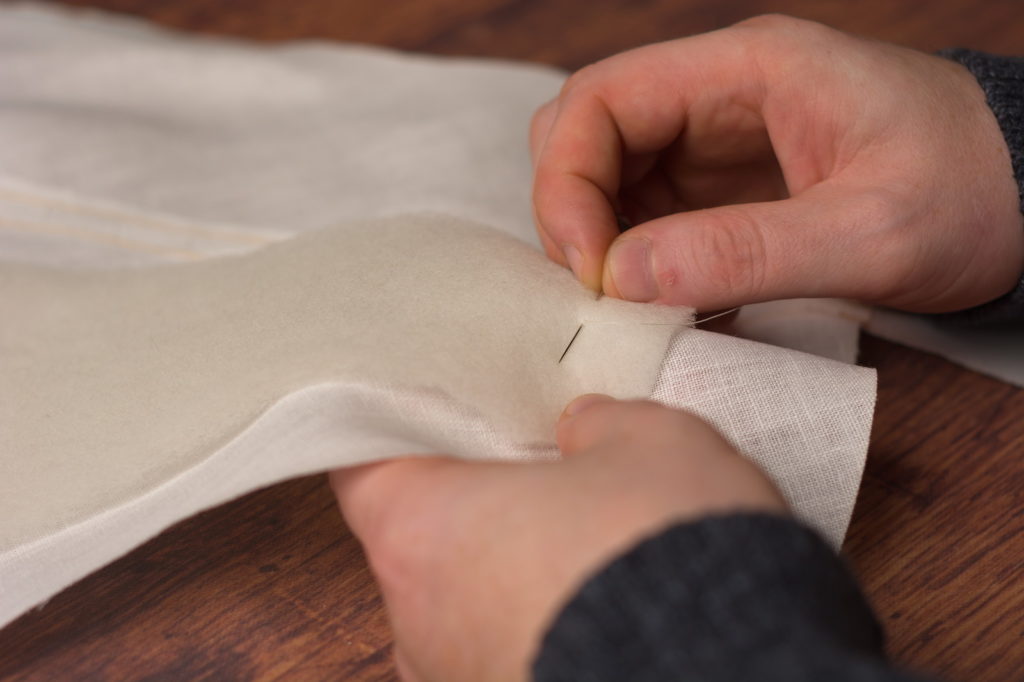
Now begin basting along the edge of the front facing, keeping the stitches off the facing itself by about 1/2″.

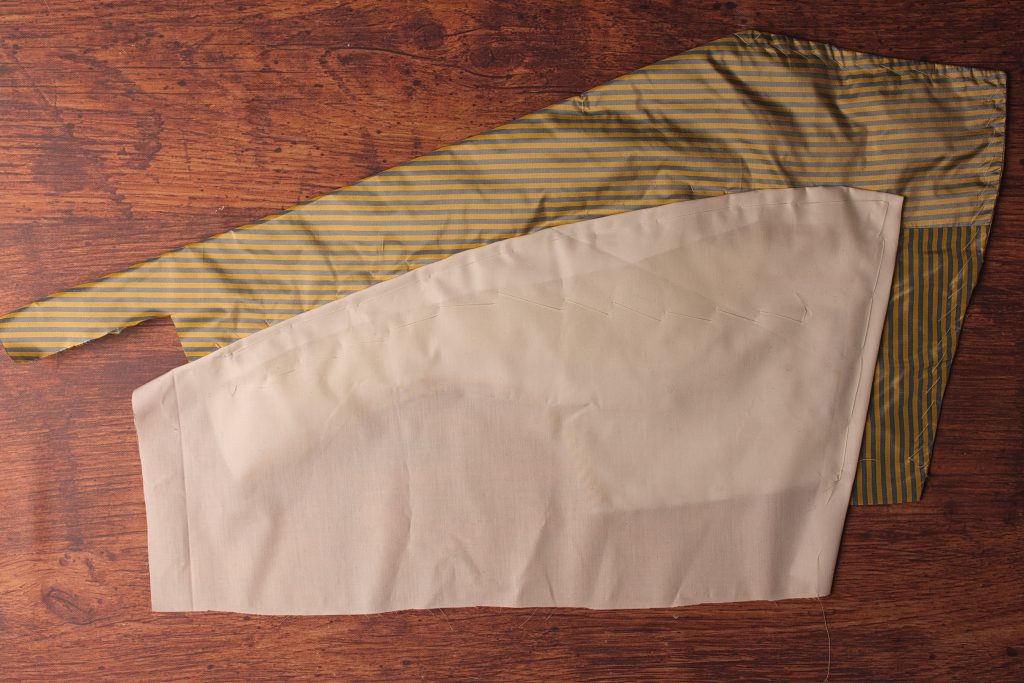
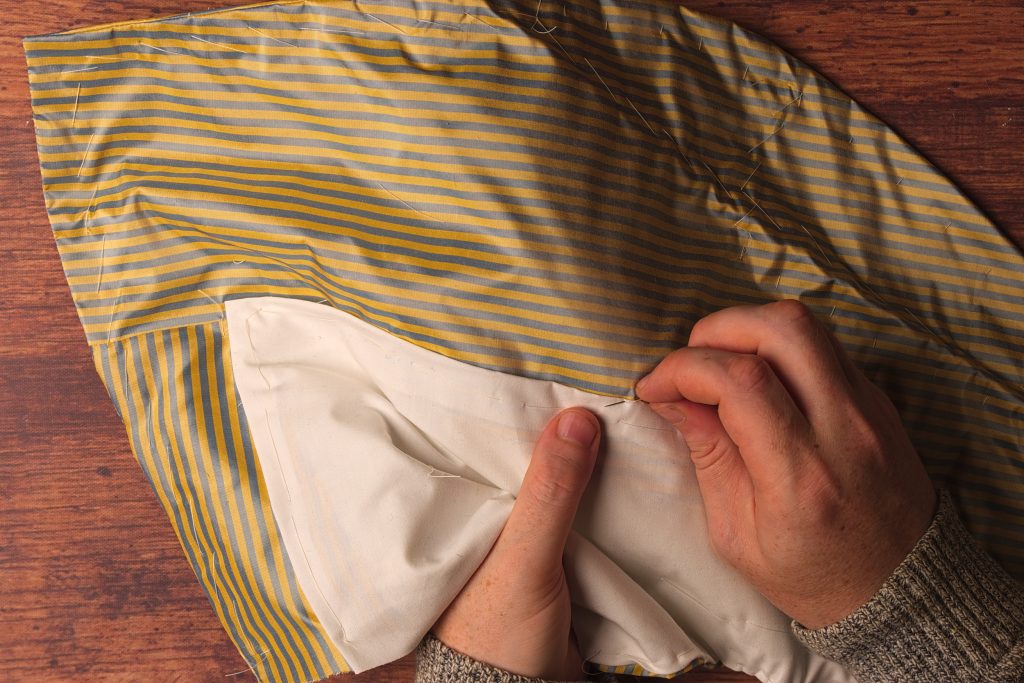
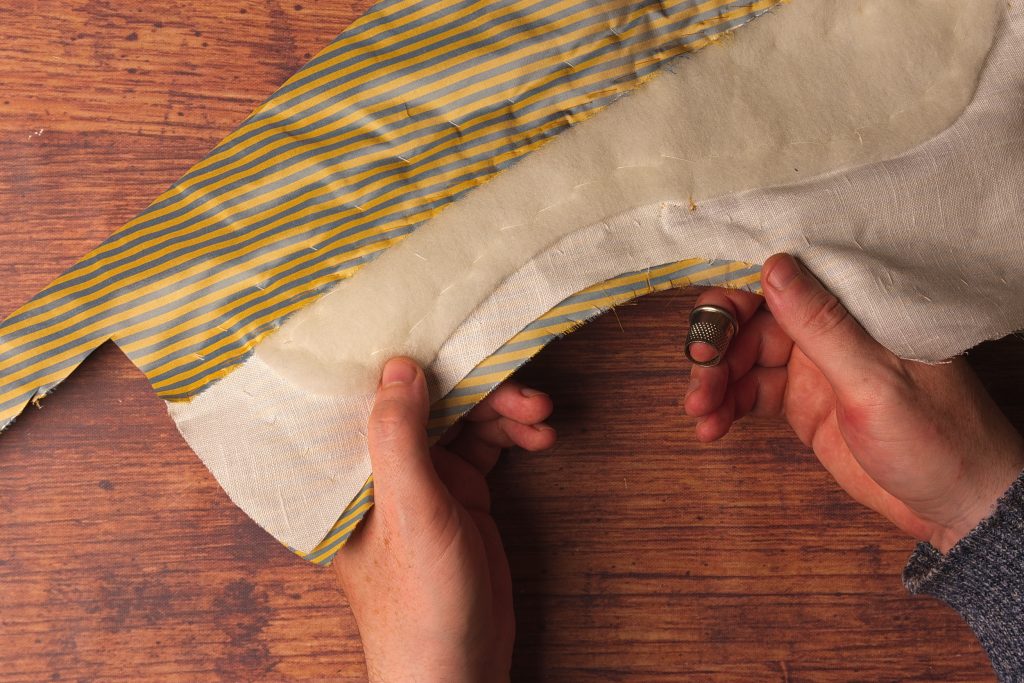
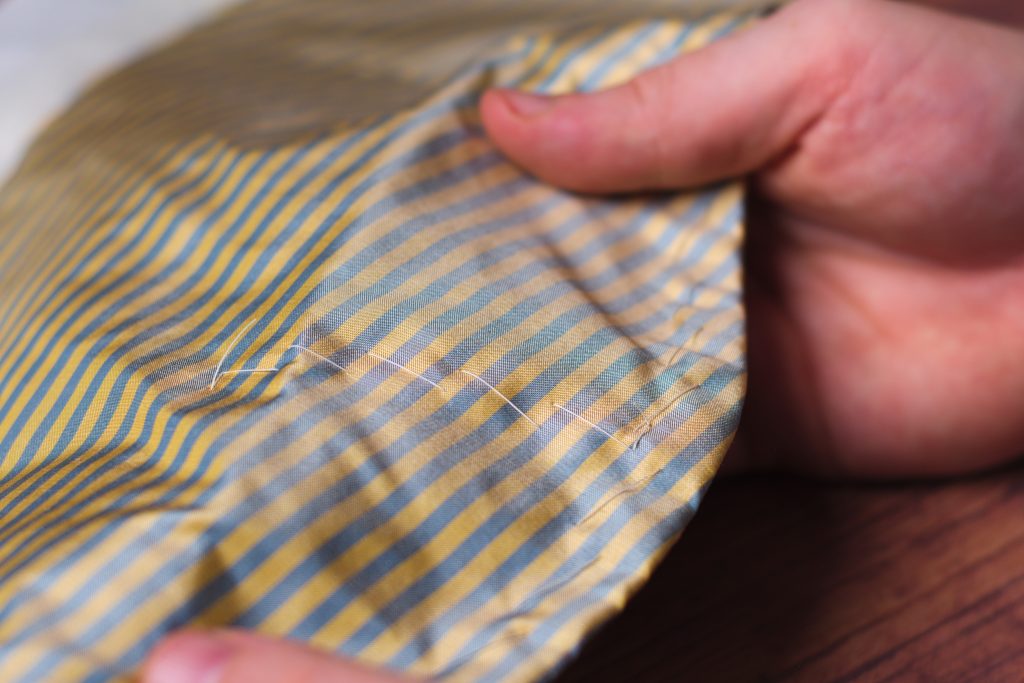
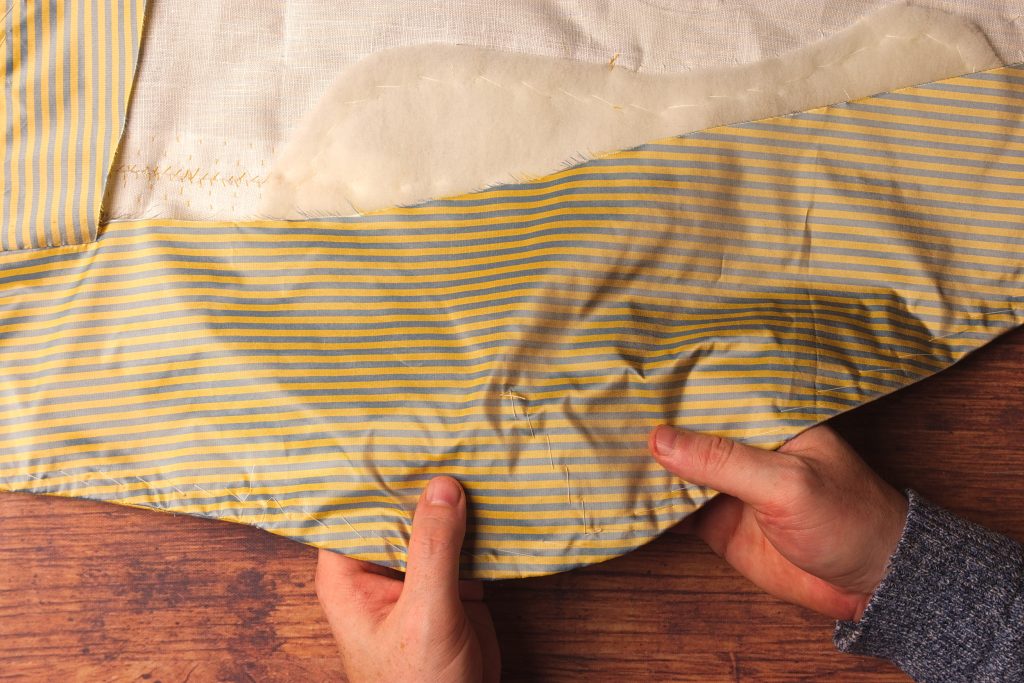
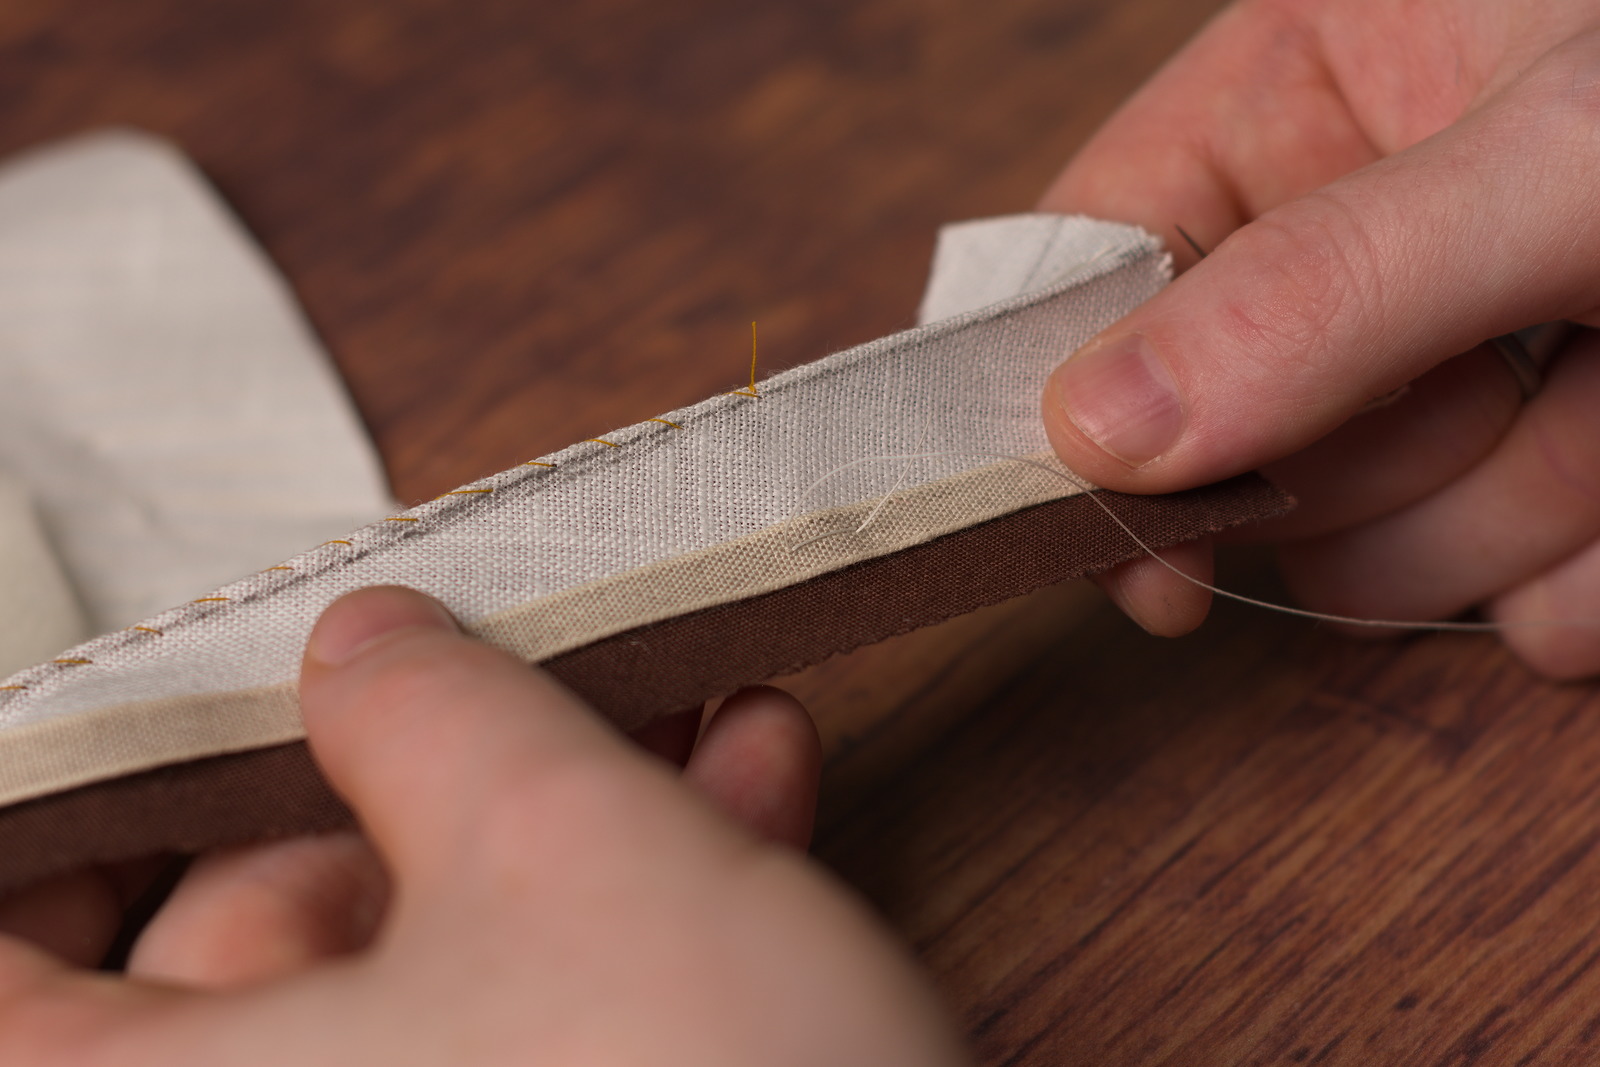
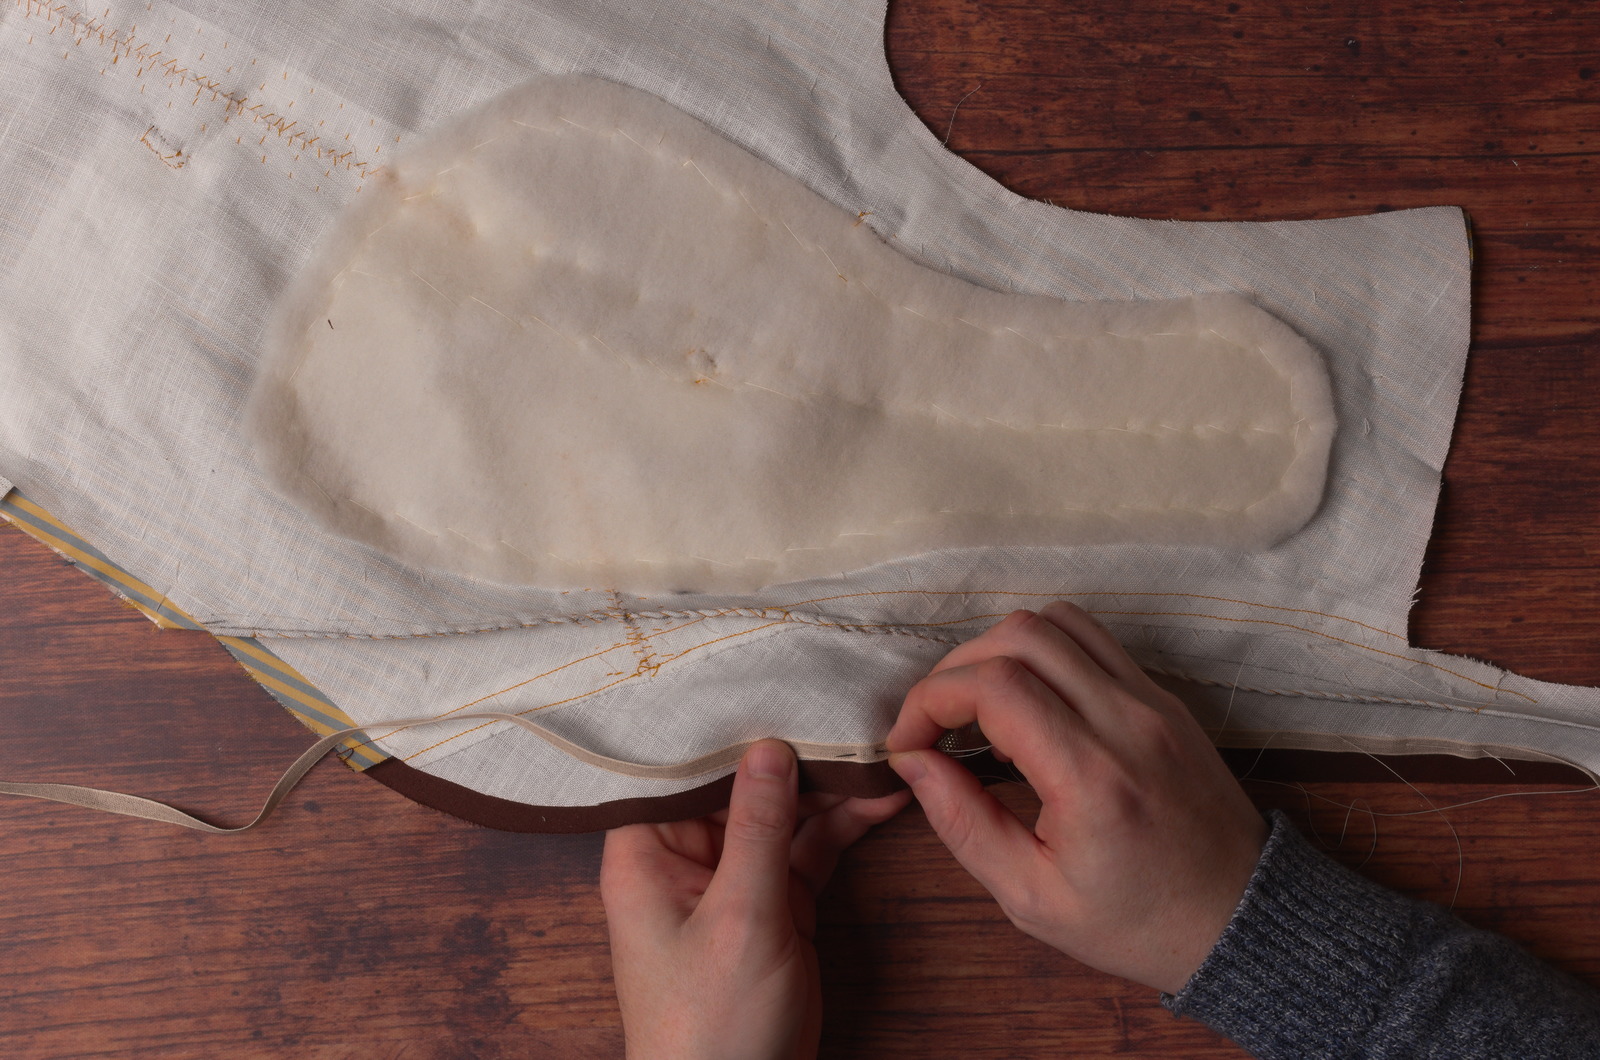
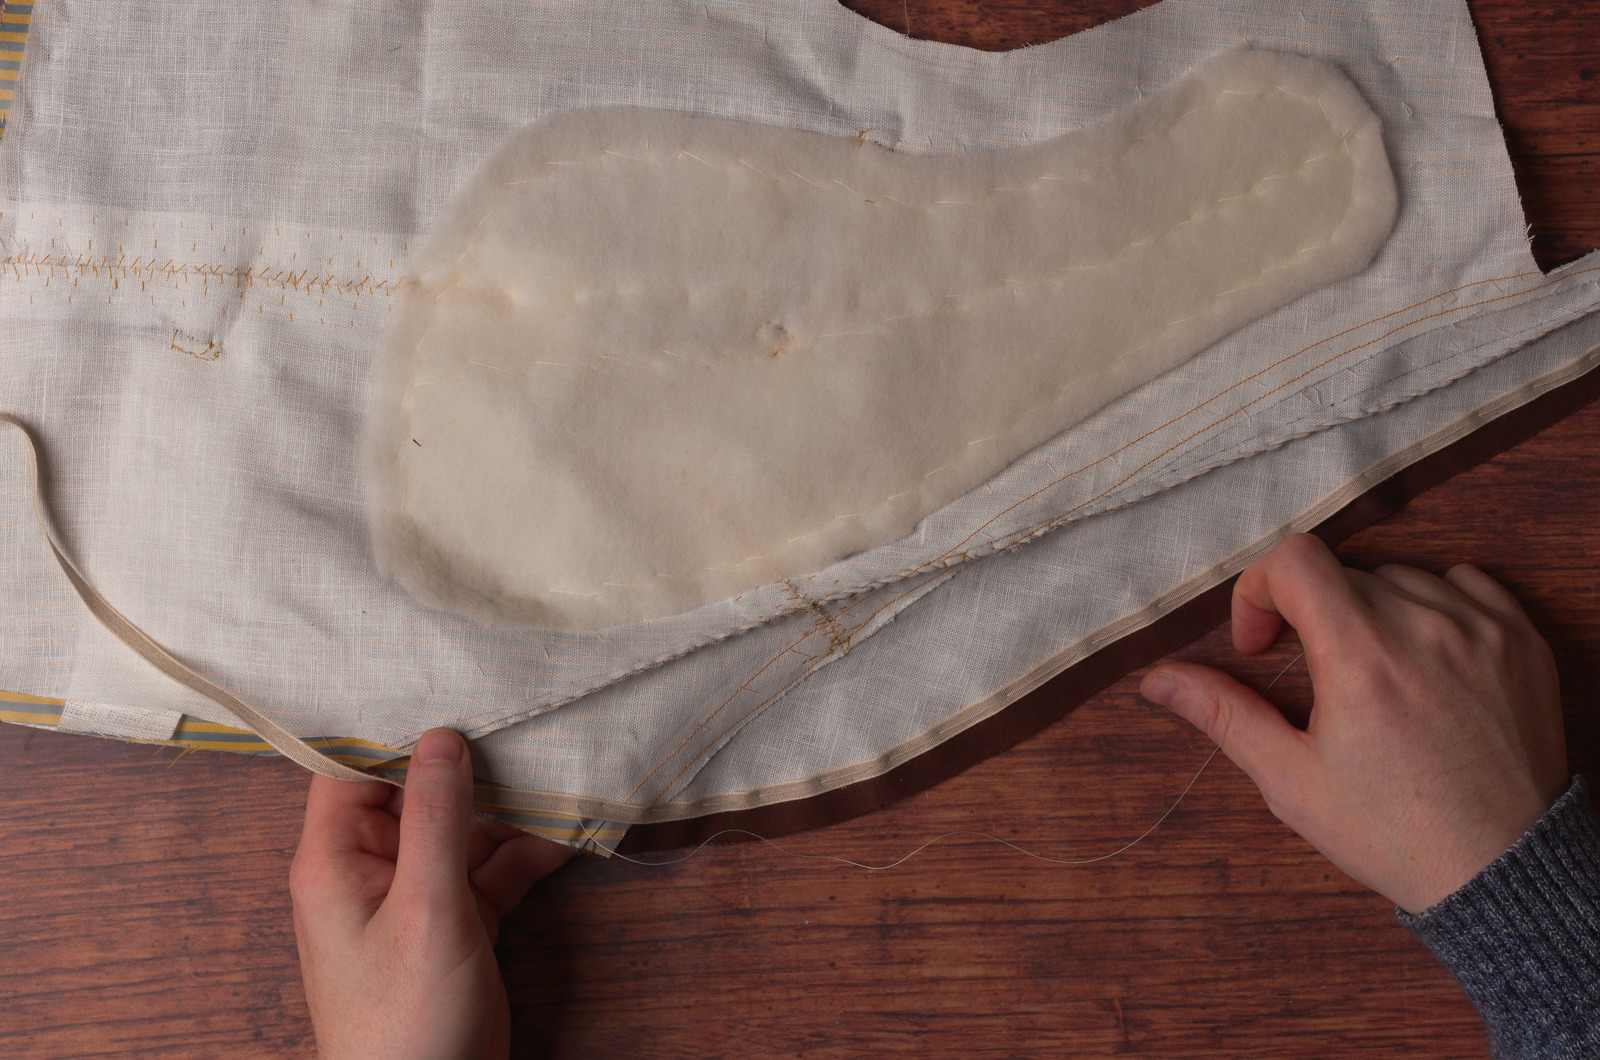
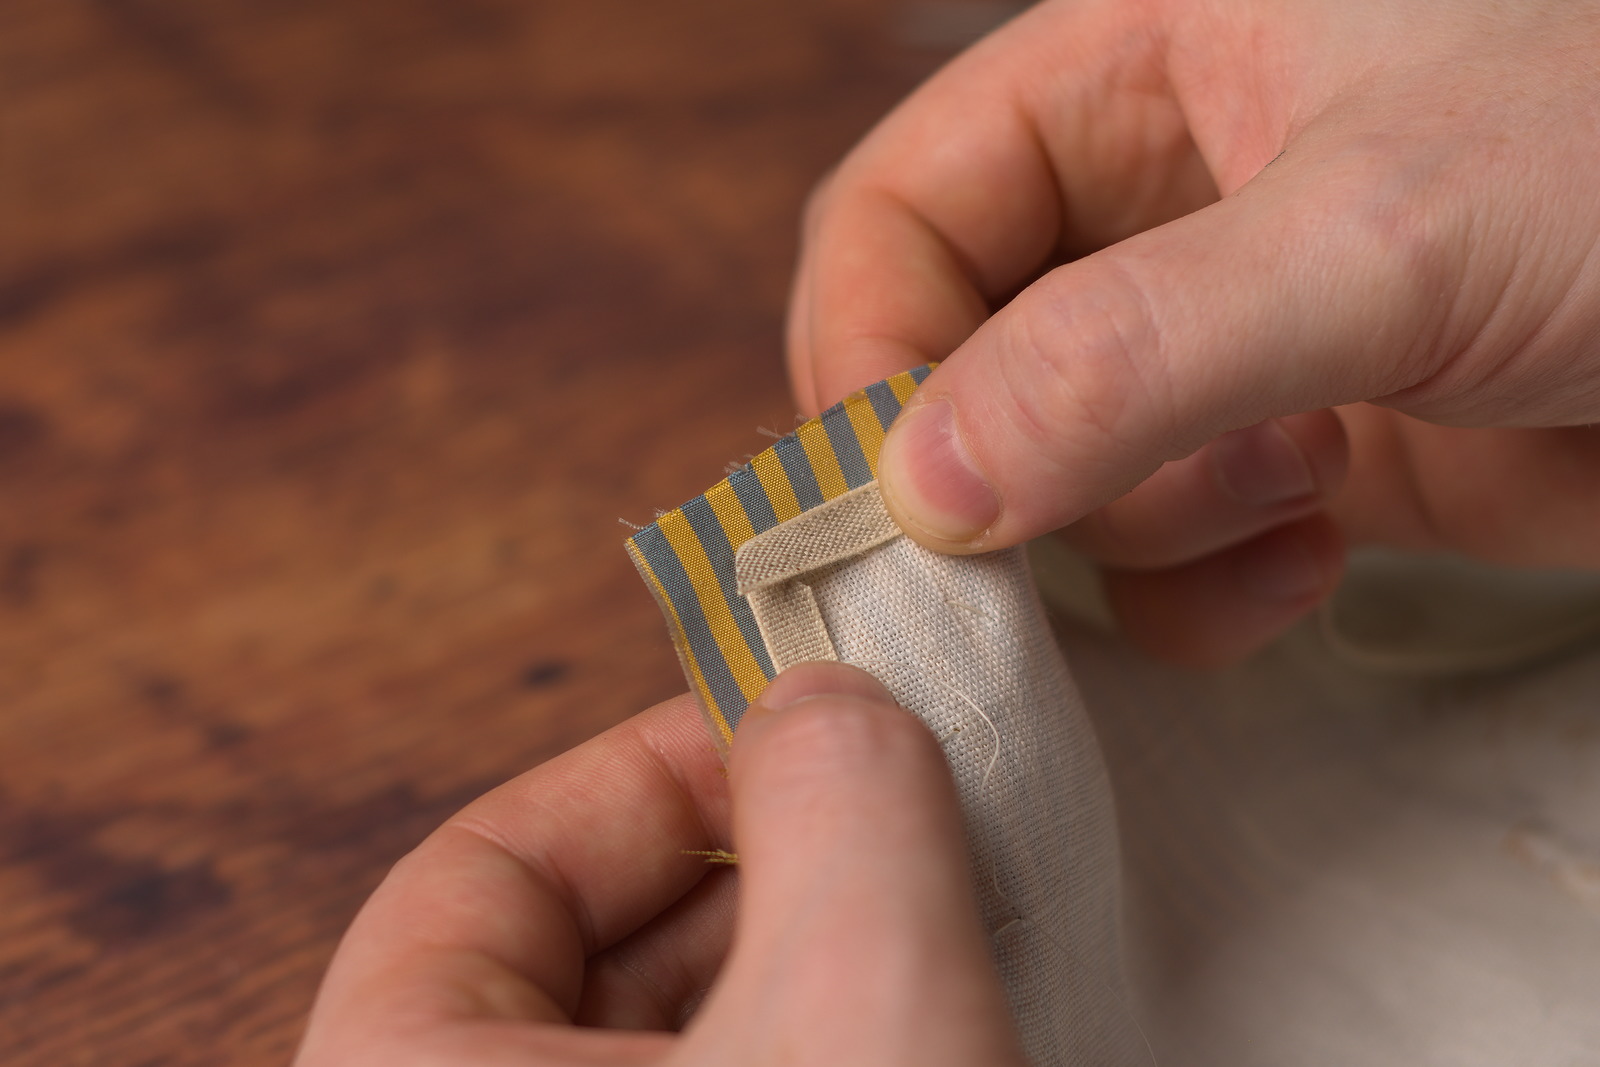
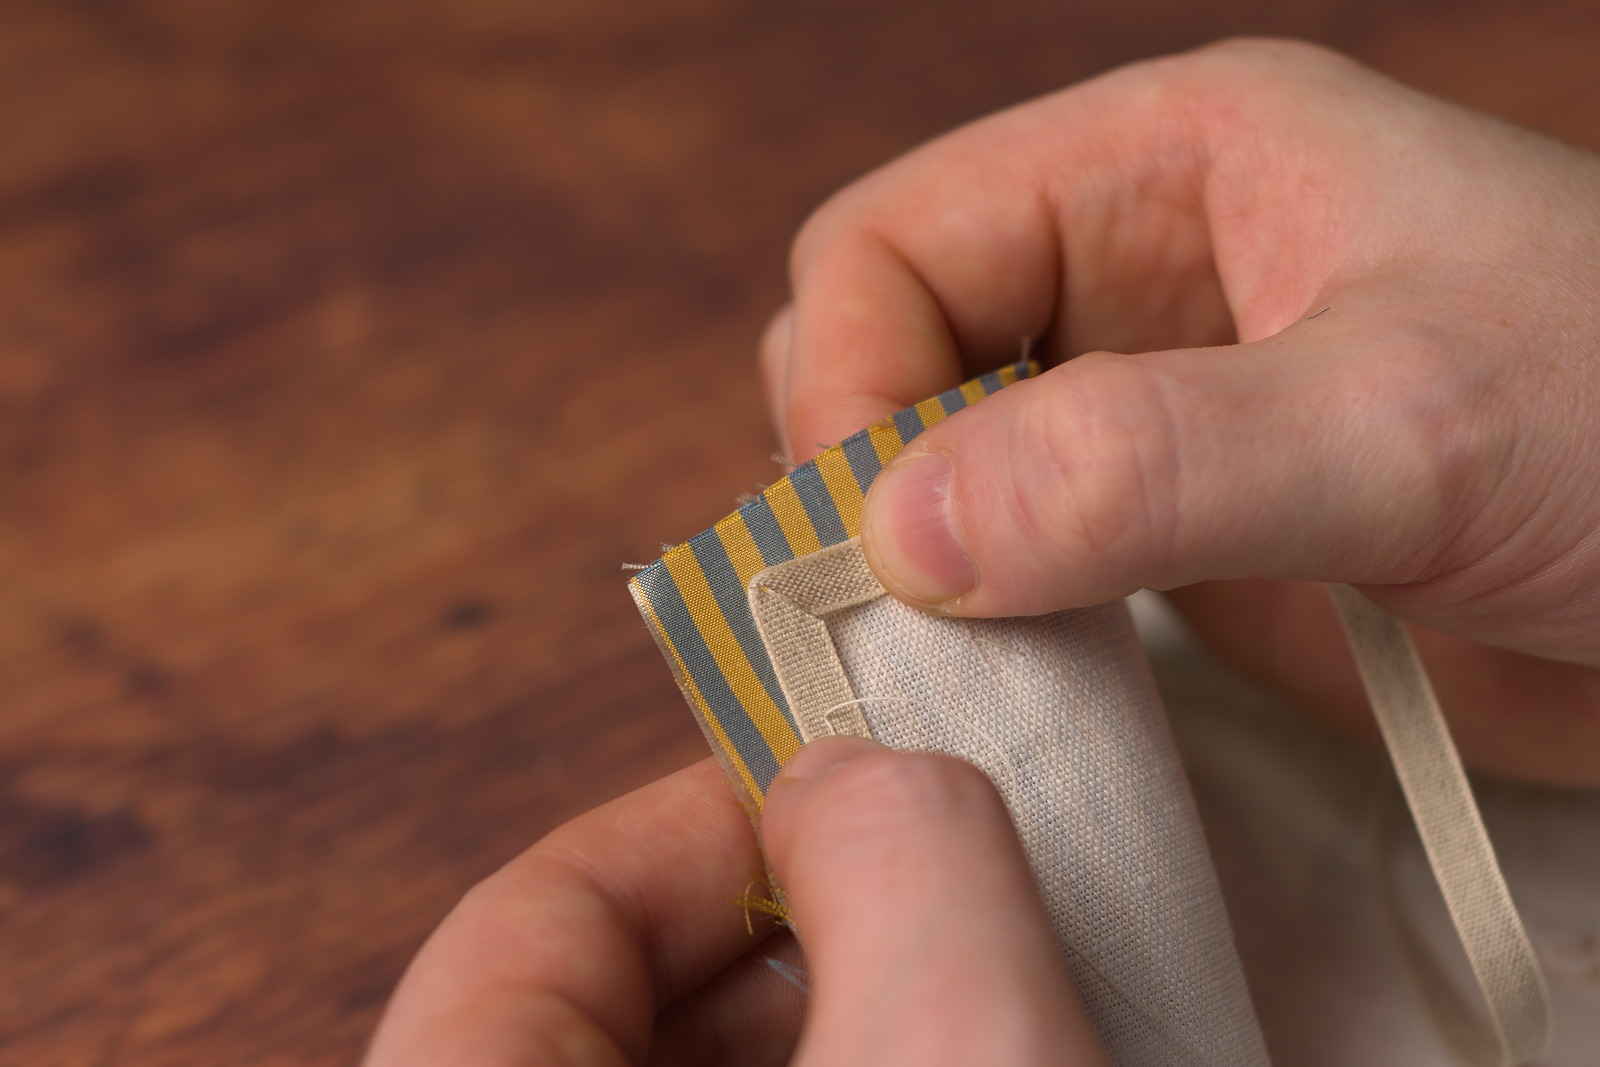
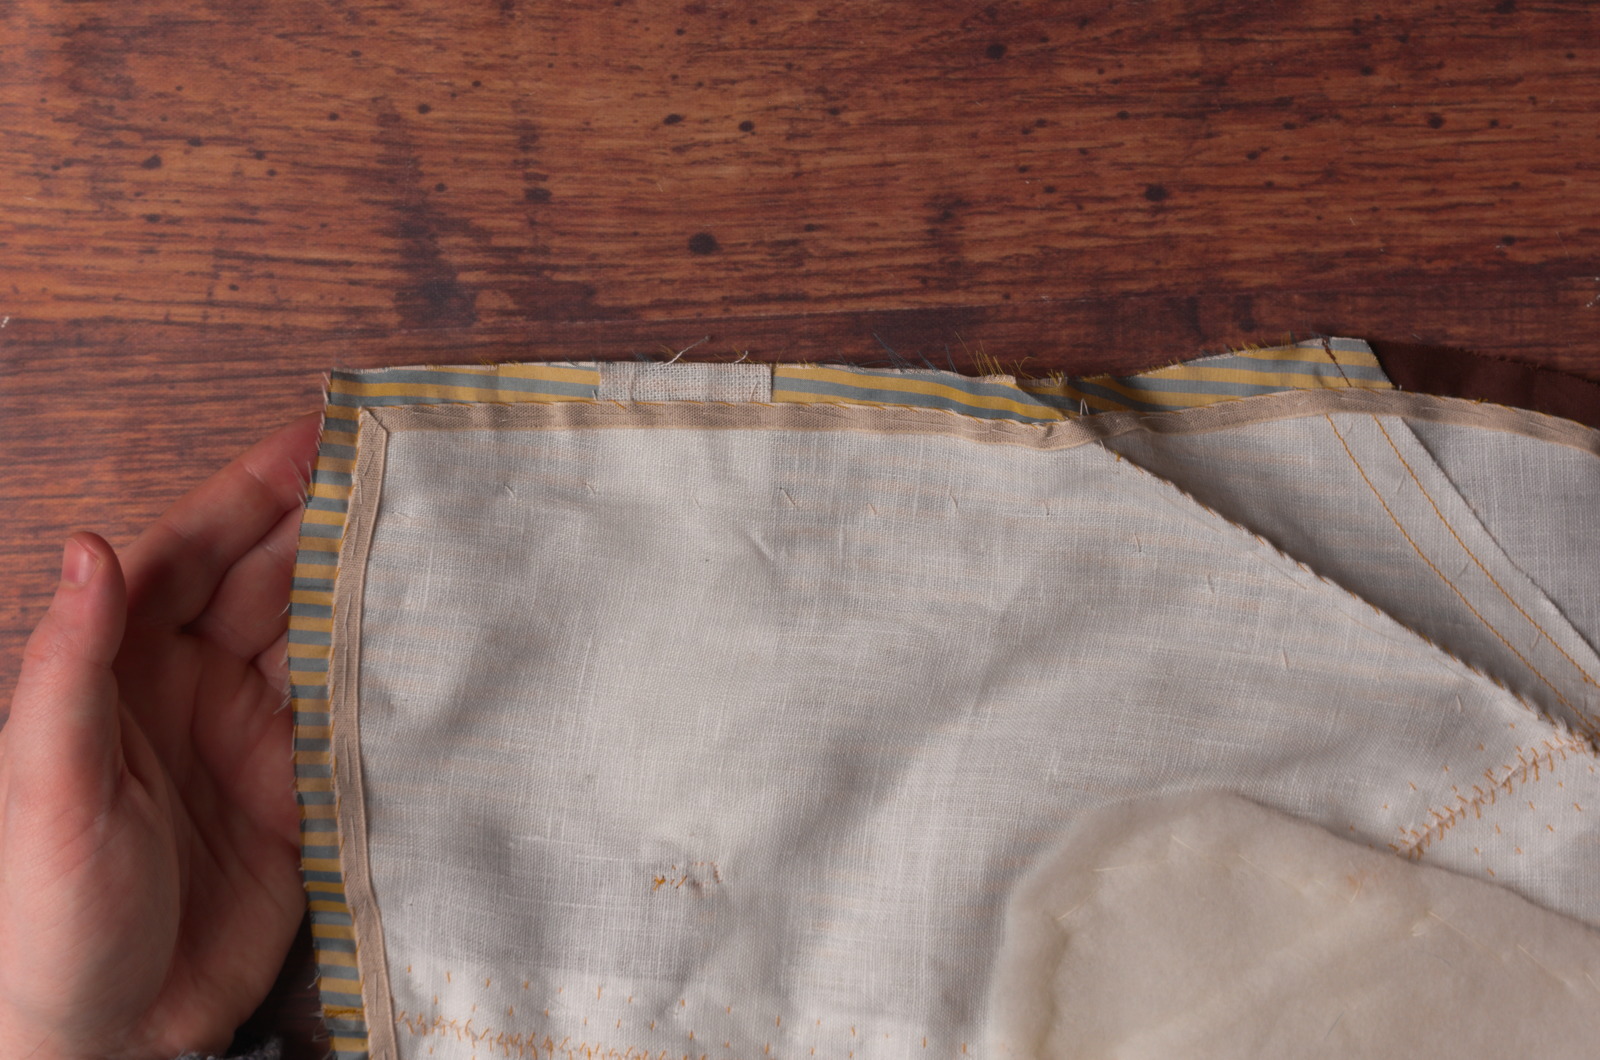
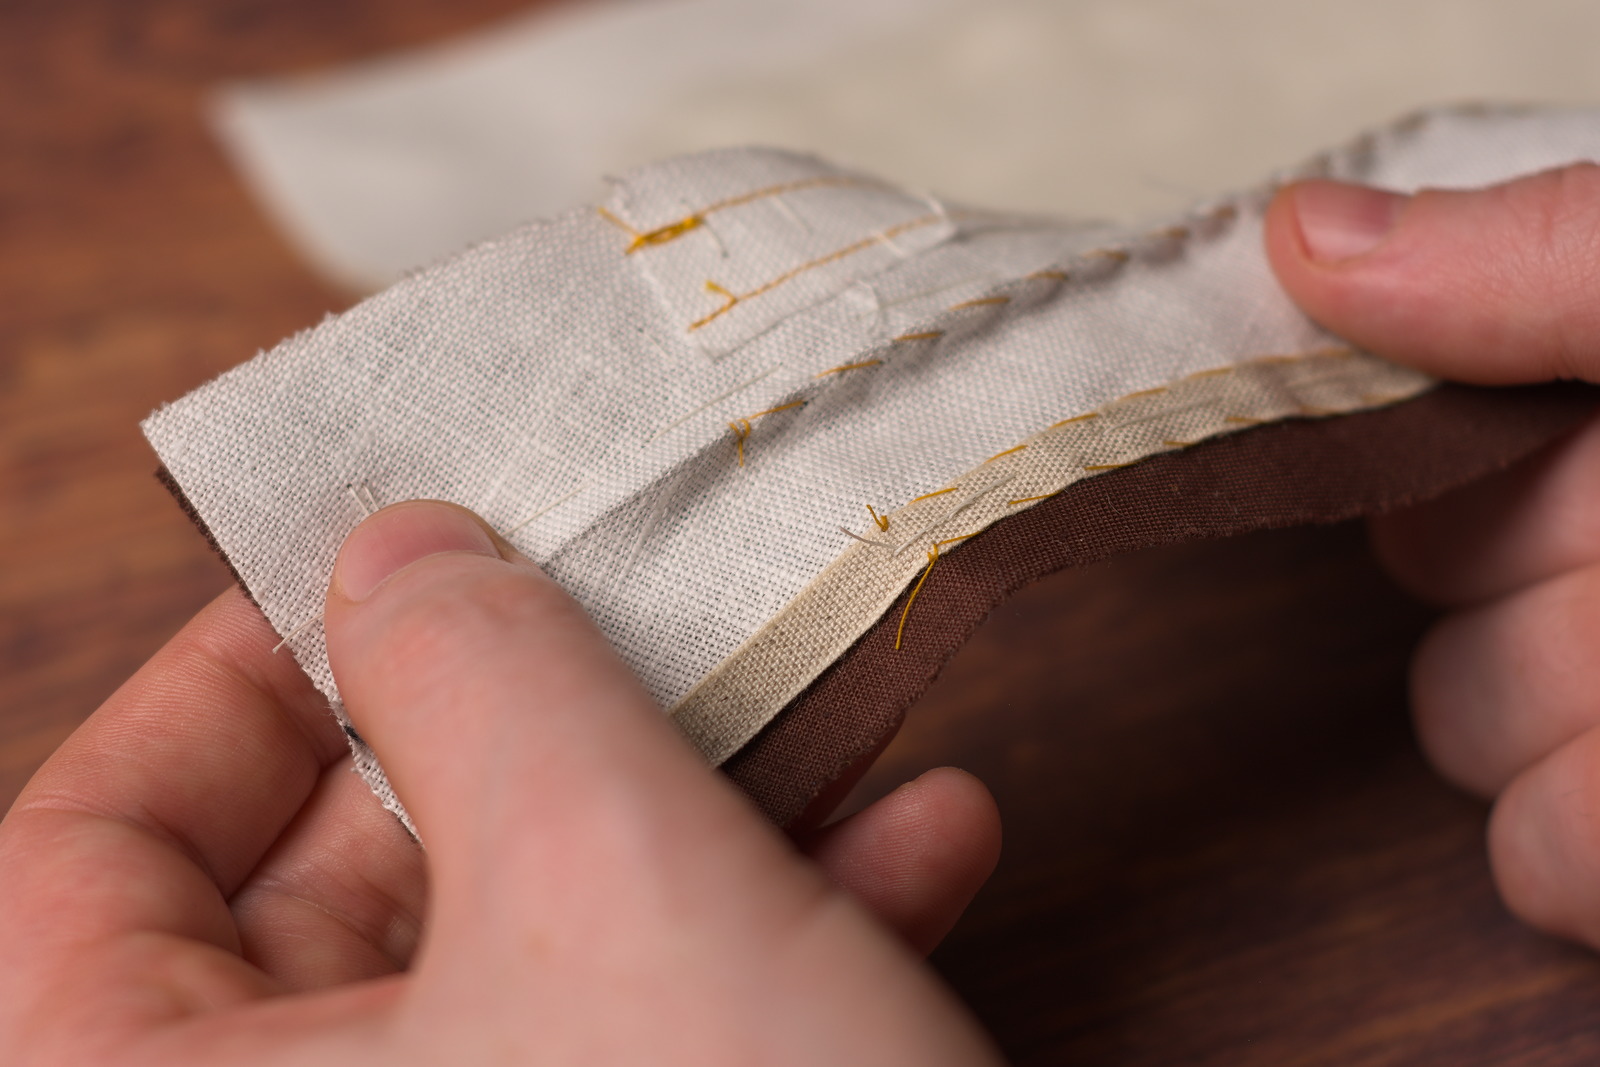
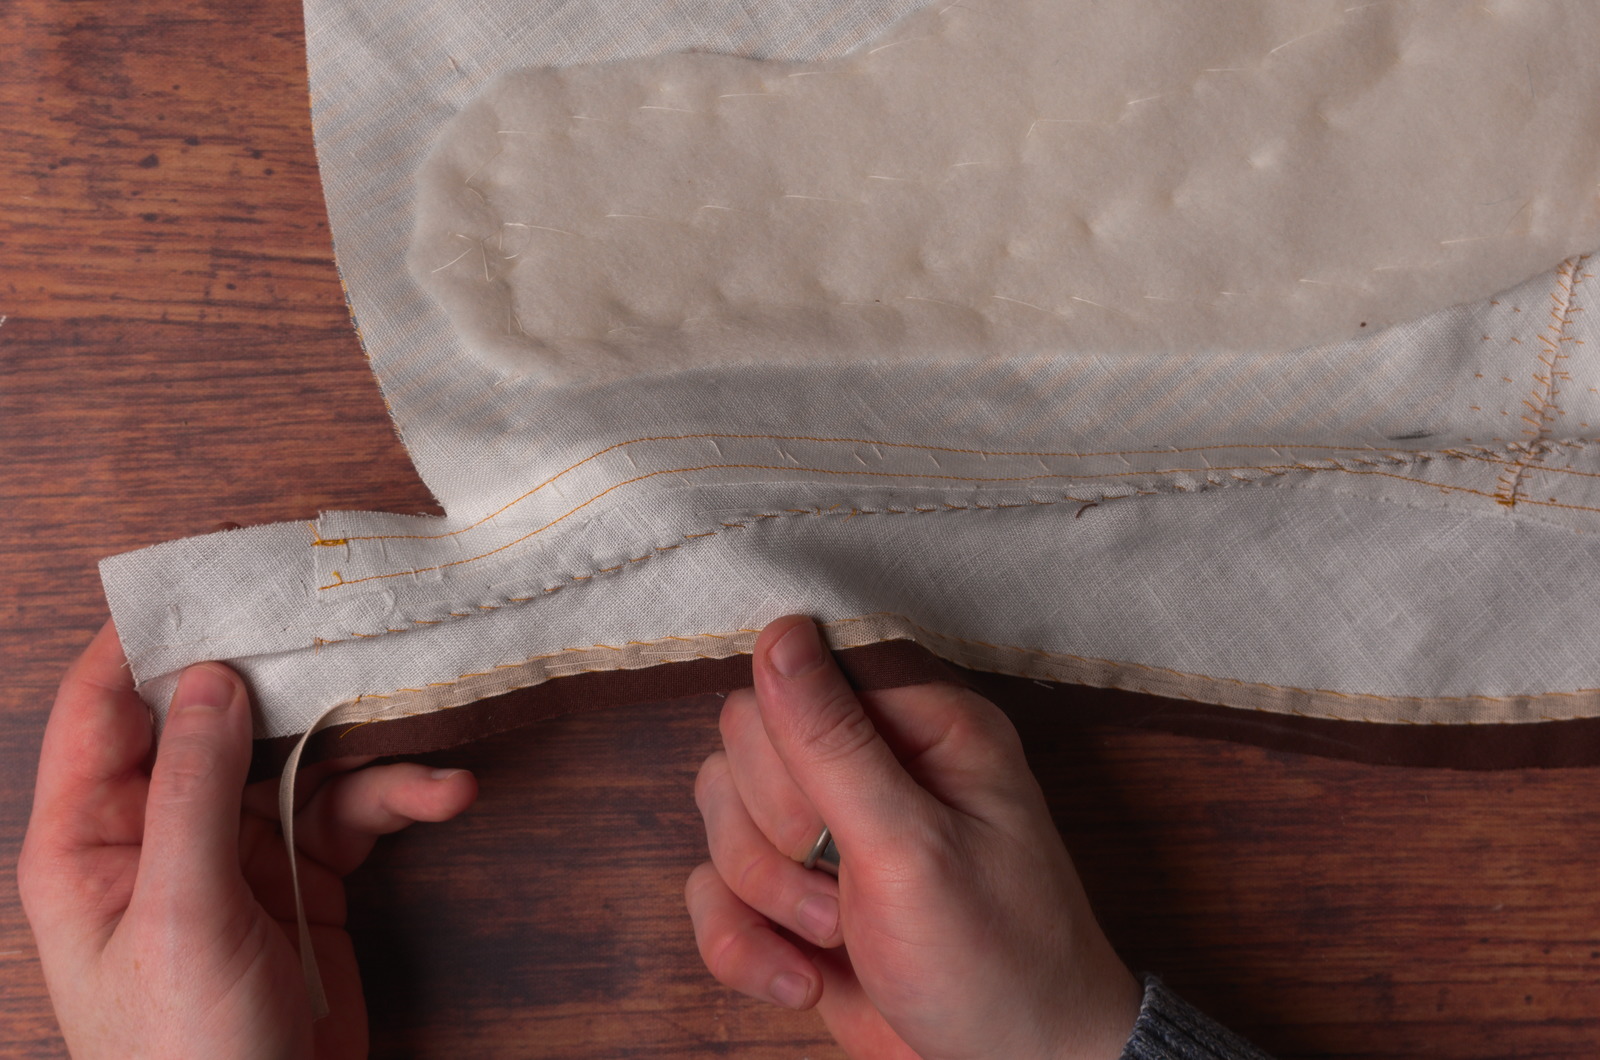
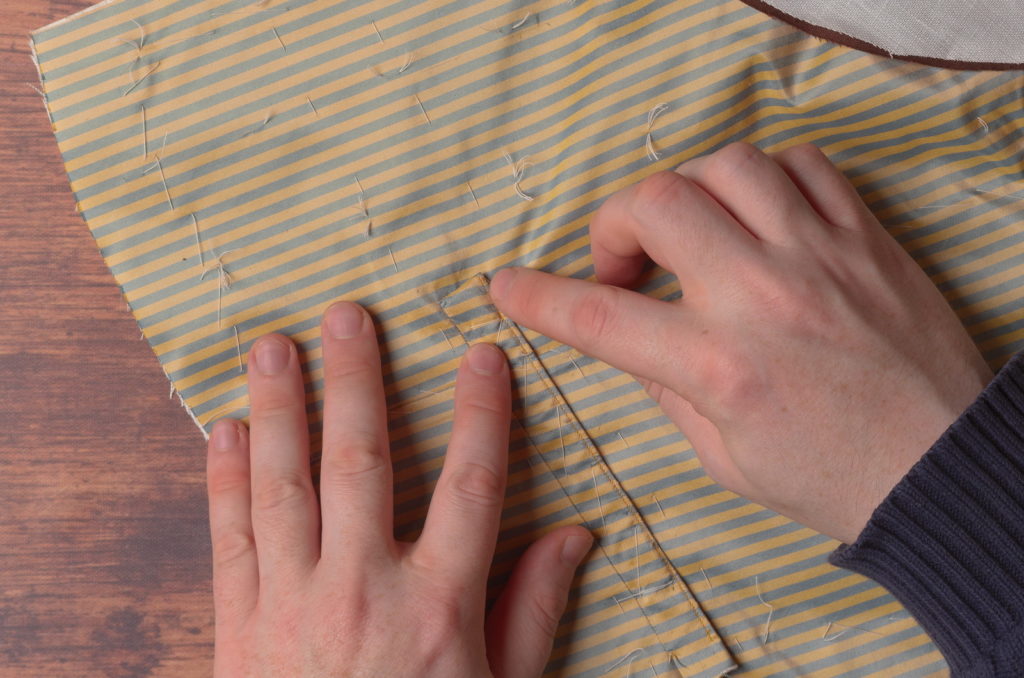
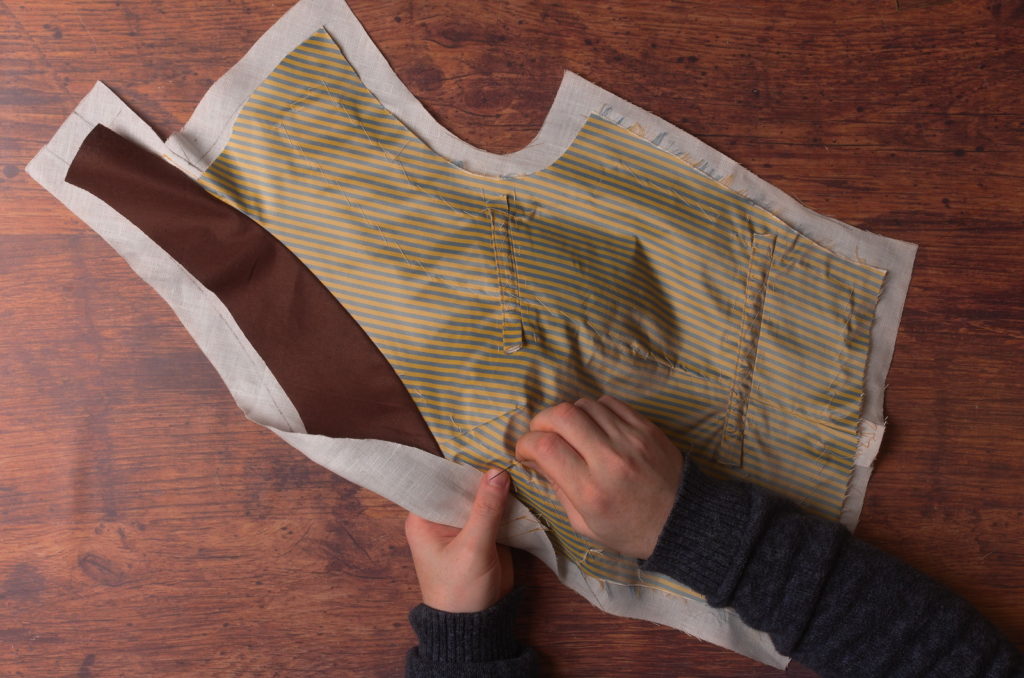
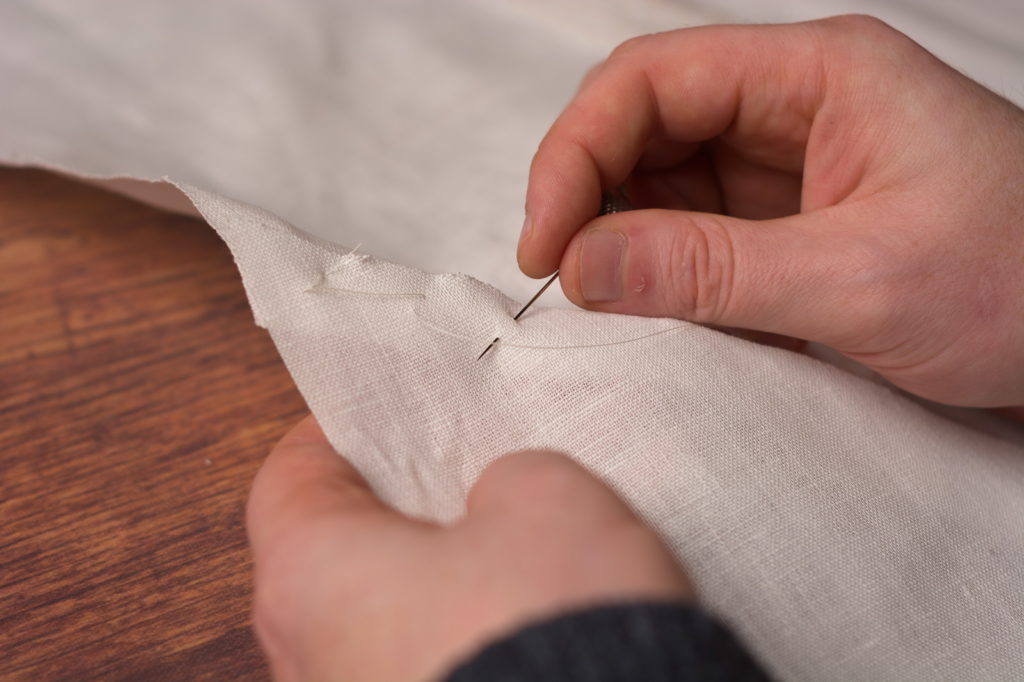
Now fold the bottom edge of the lining under itself and crease the fold with your fingers when you’re happy with the position. It should cover the permanent basting stitches in the facing without any pulling or tension in the fabric.
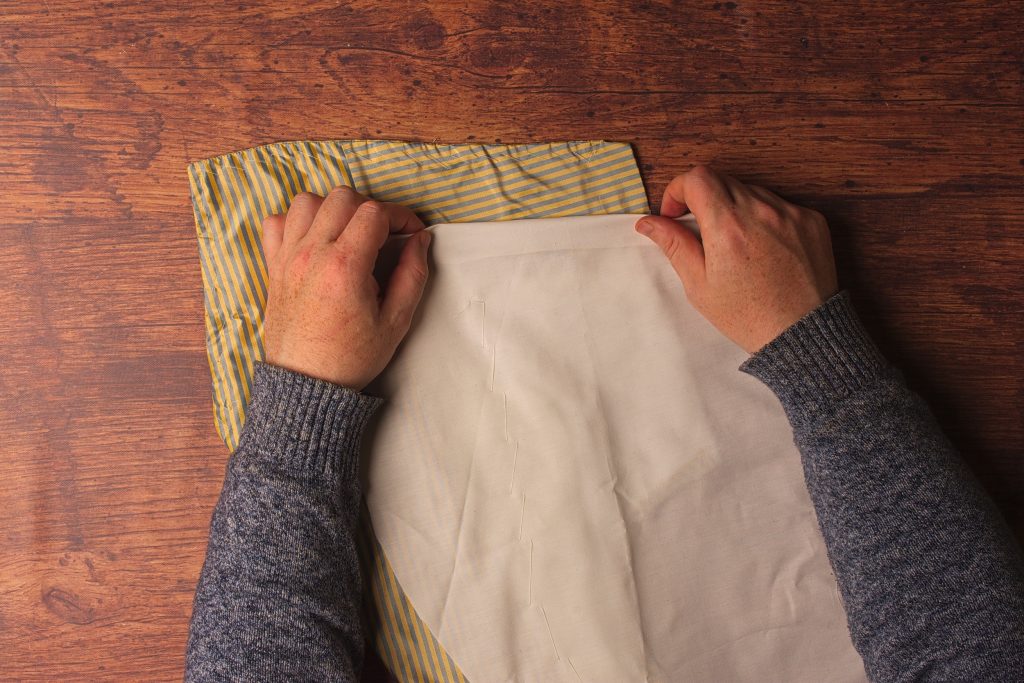
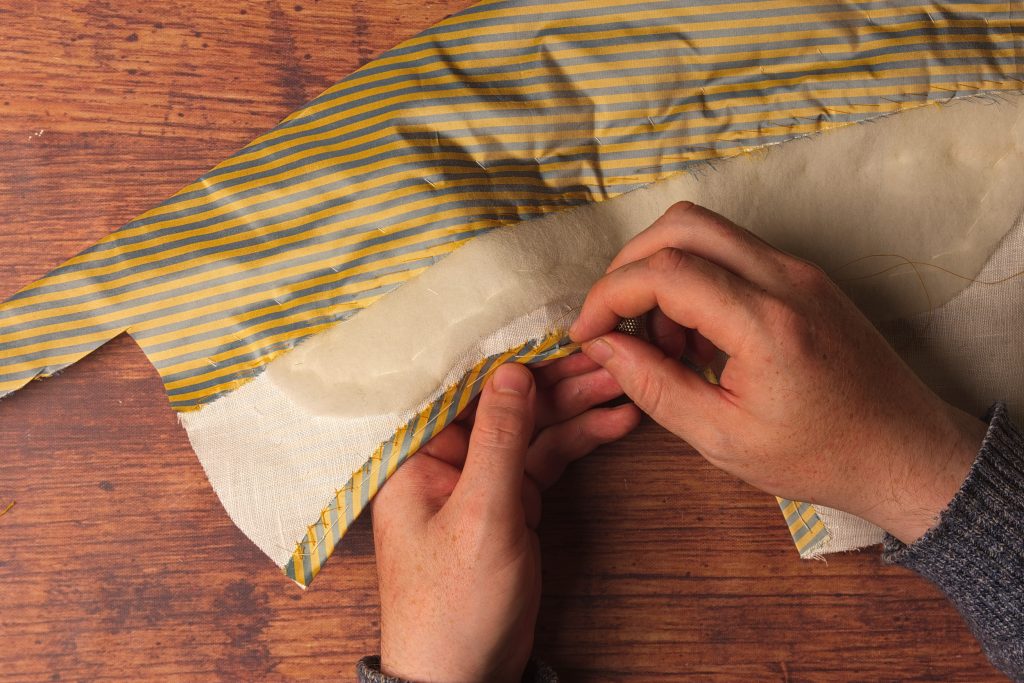
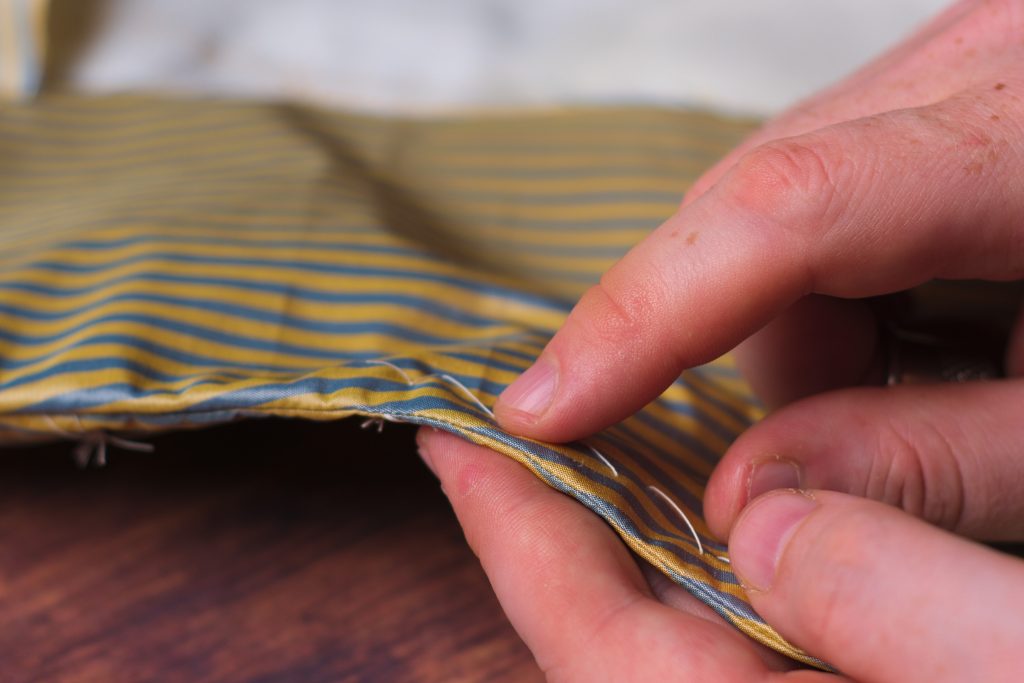
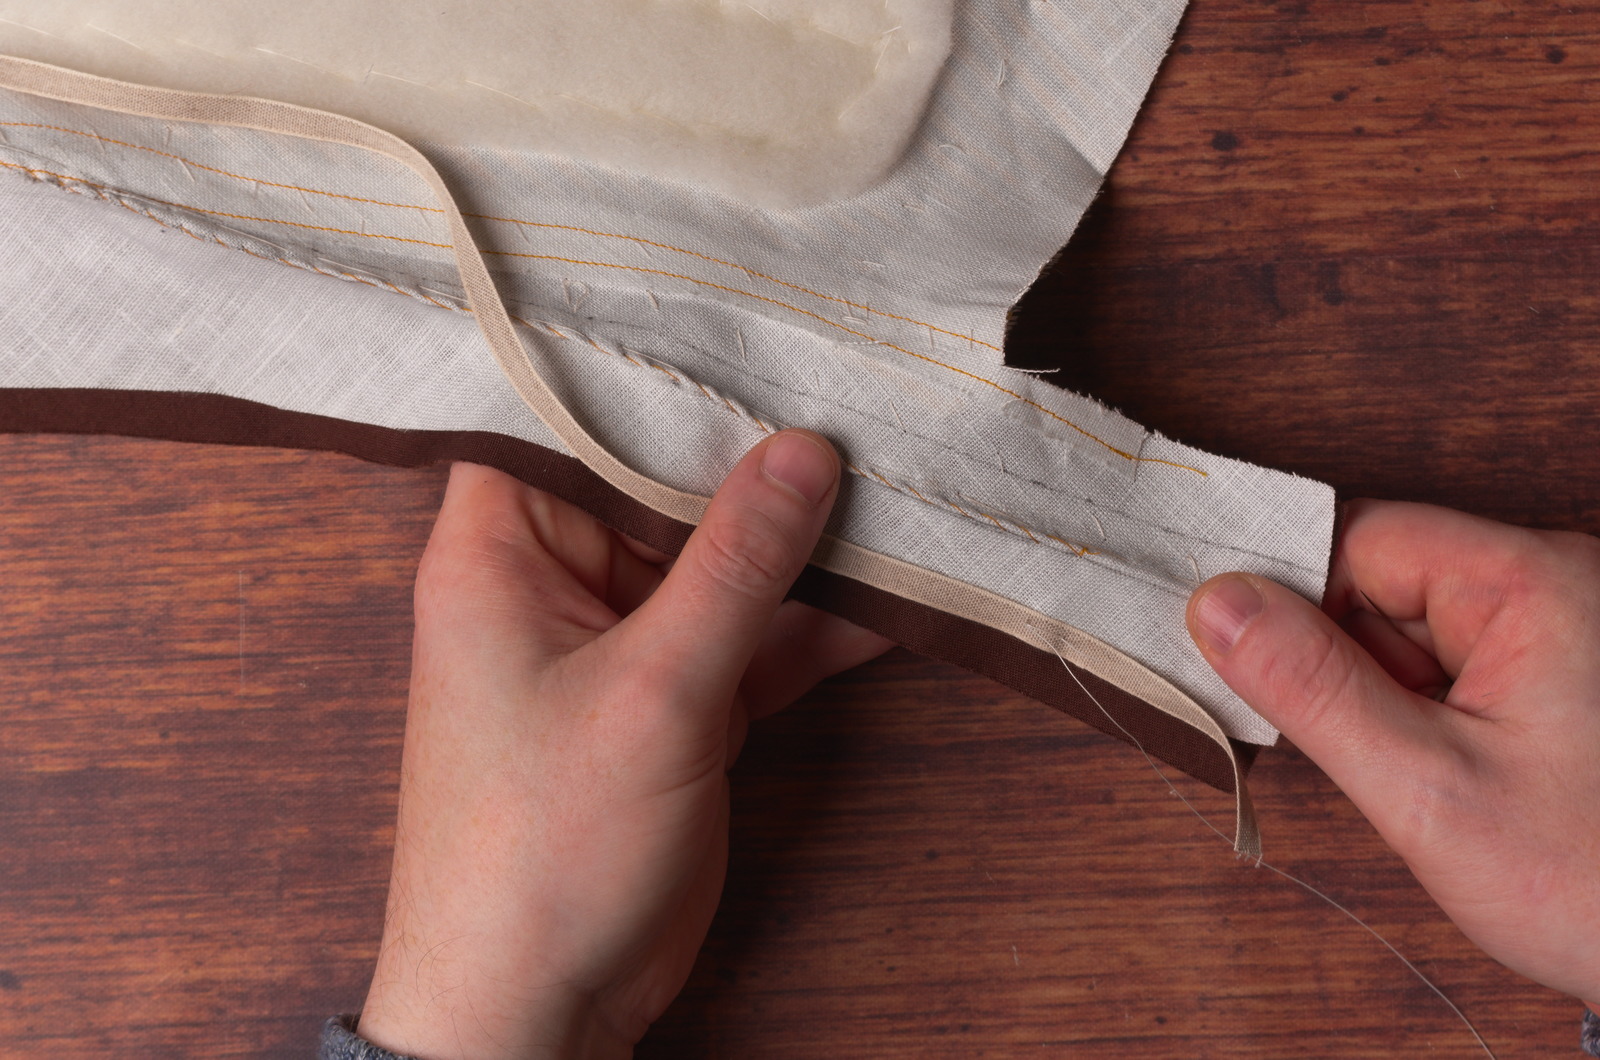
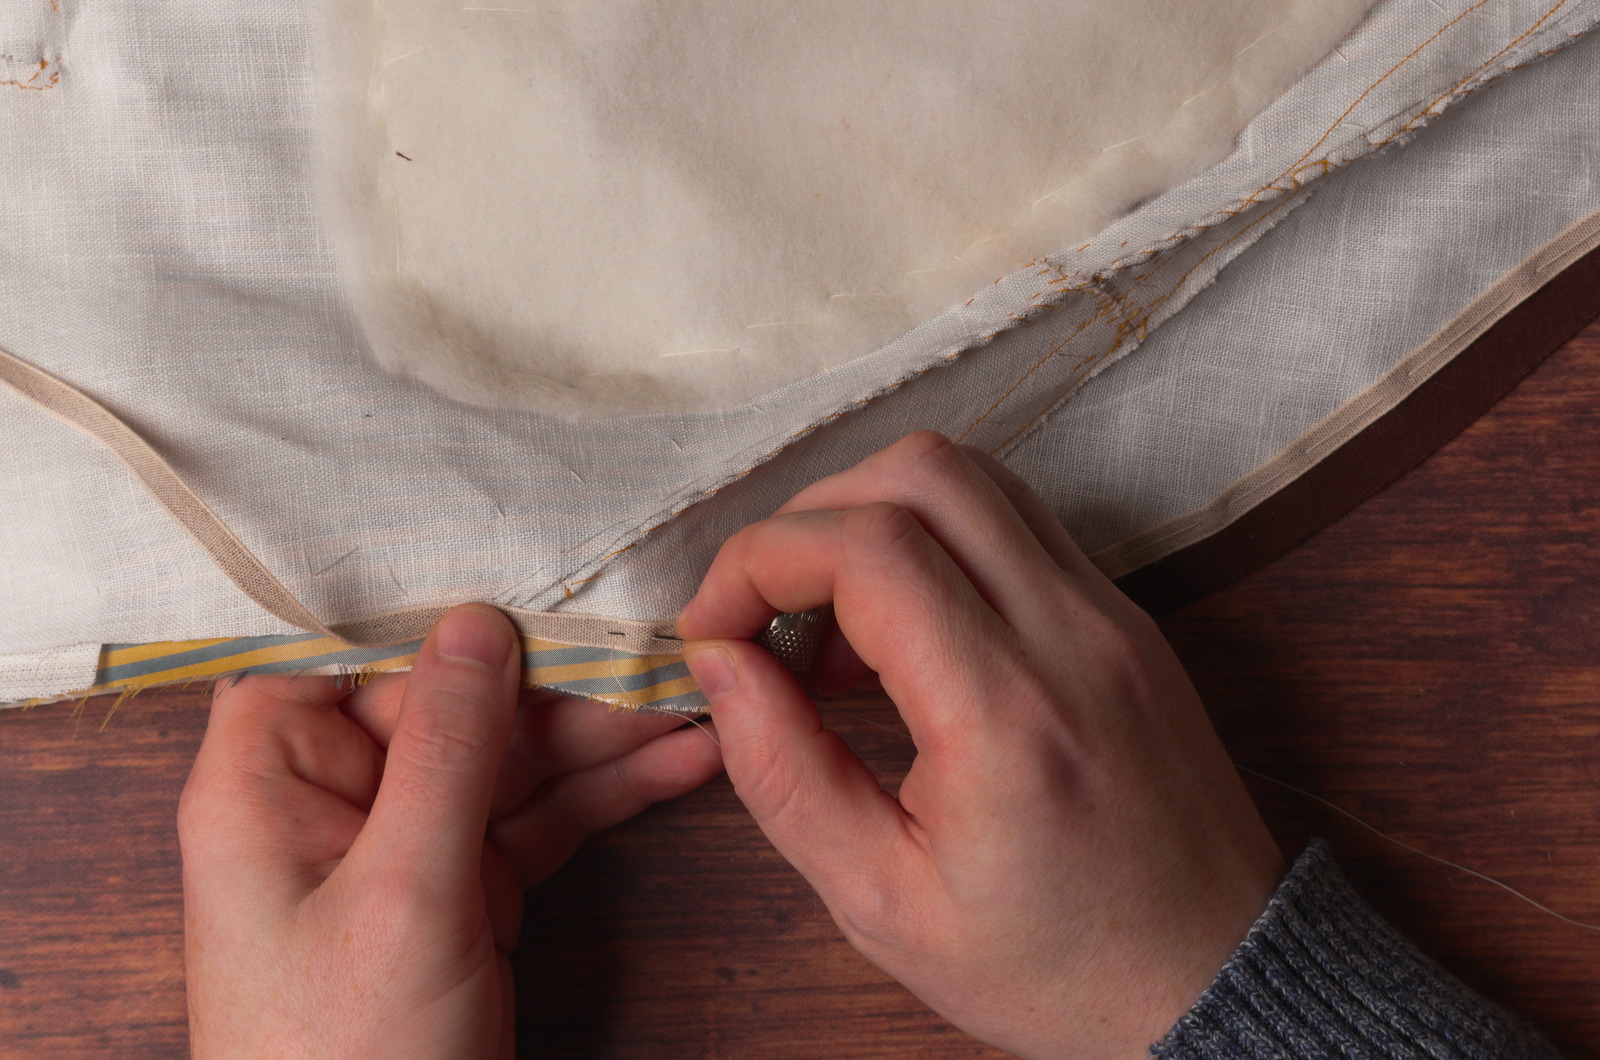
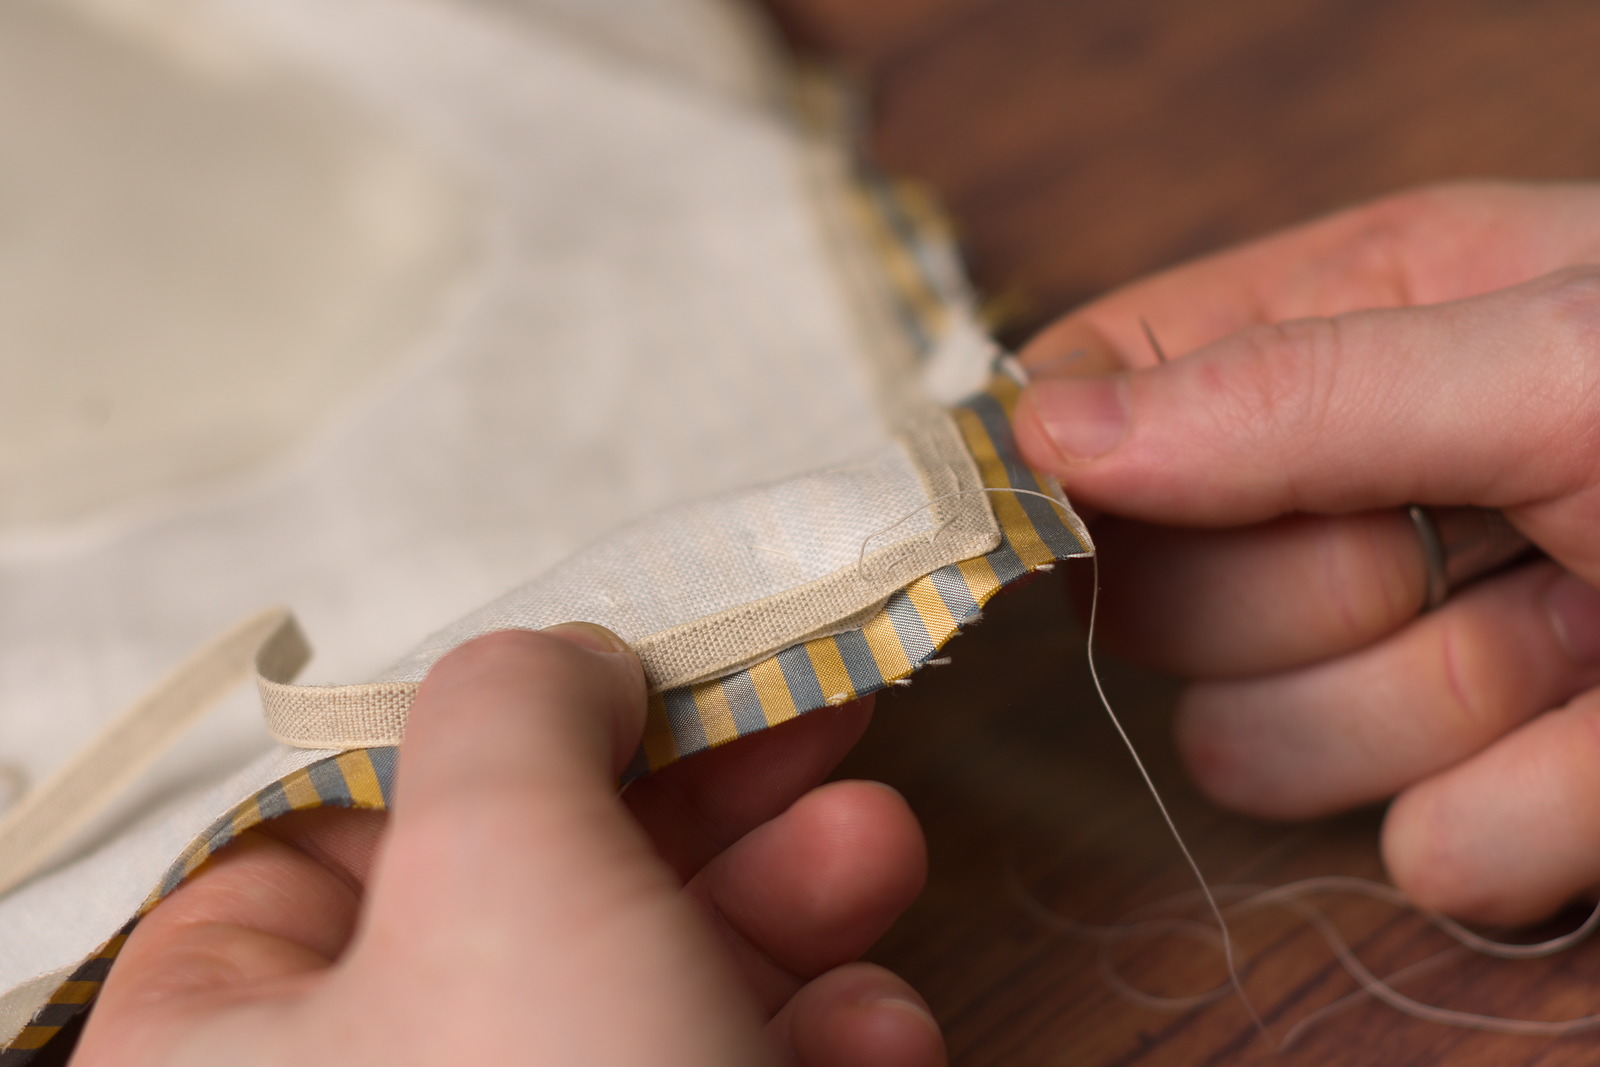
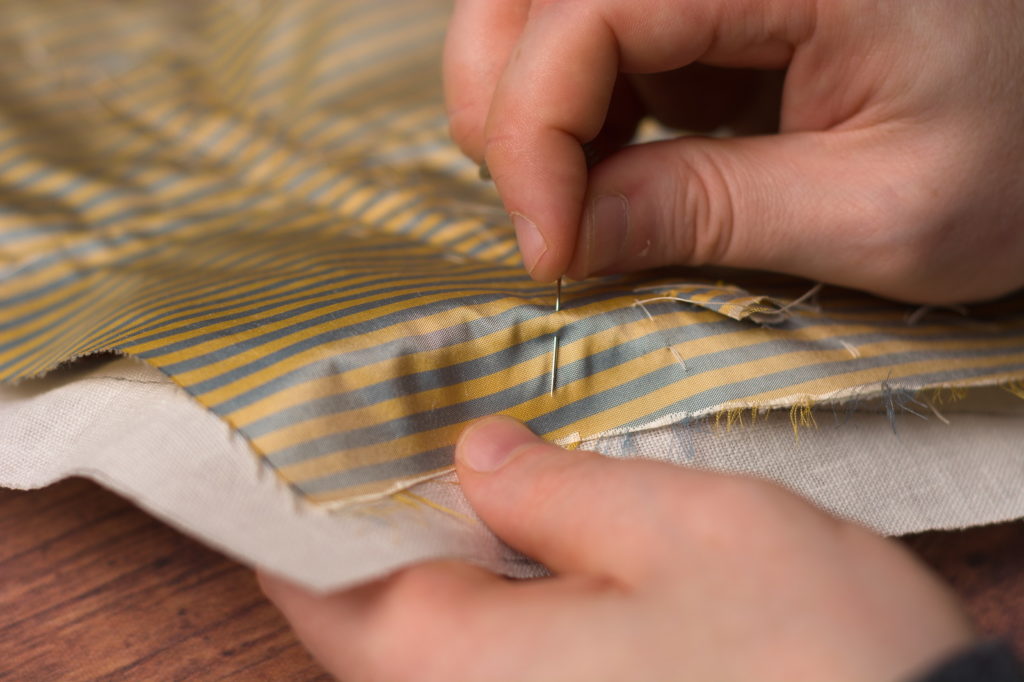
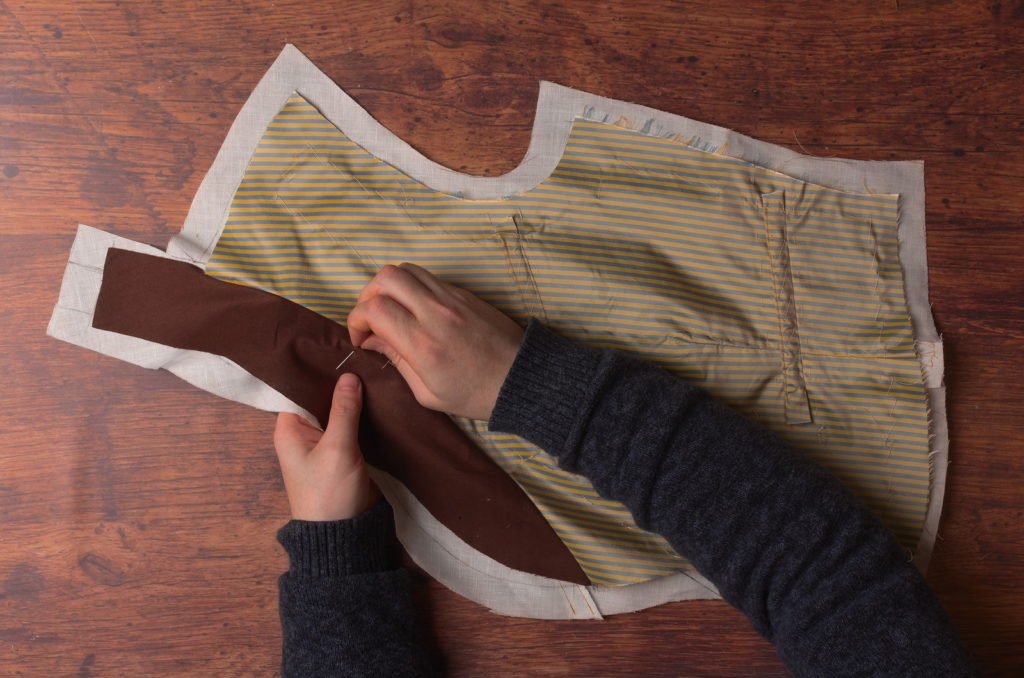
Baste along the folded edge of the lining. When you get near the front edge of the lining, fold that under in a similar manner and continue basting to the shoulder.
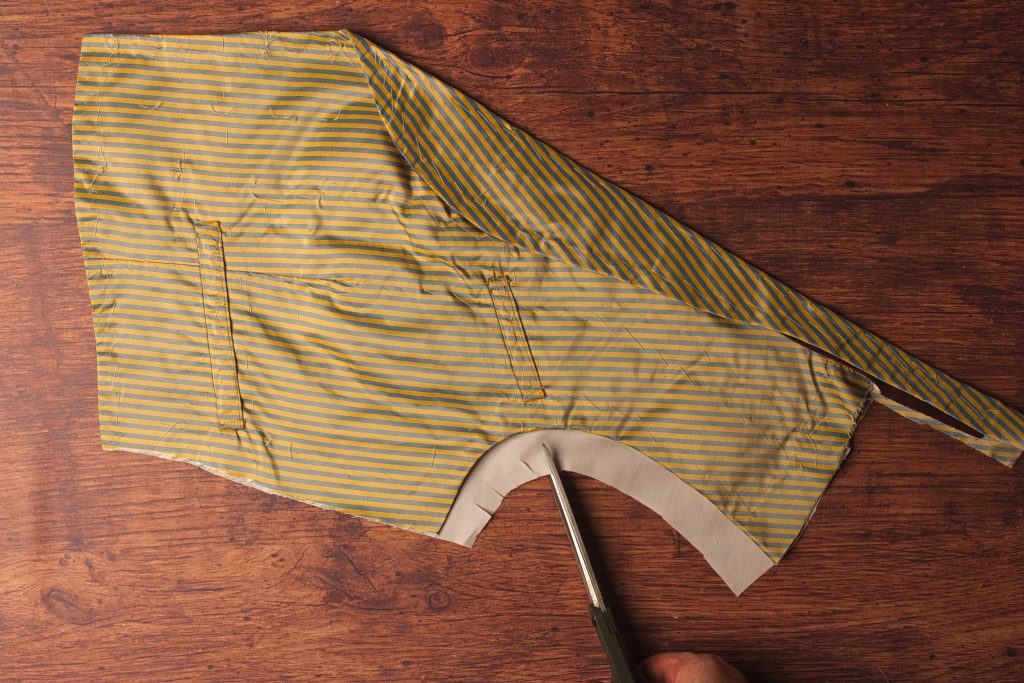
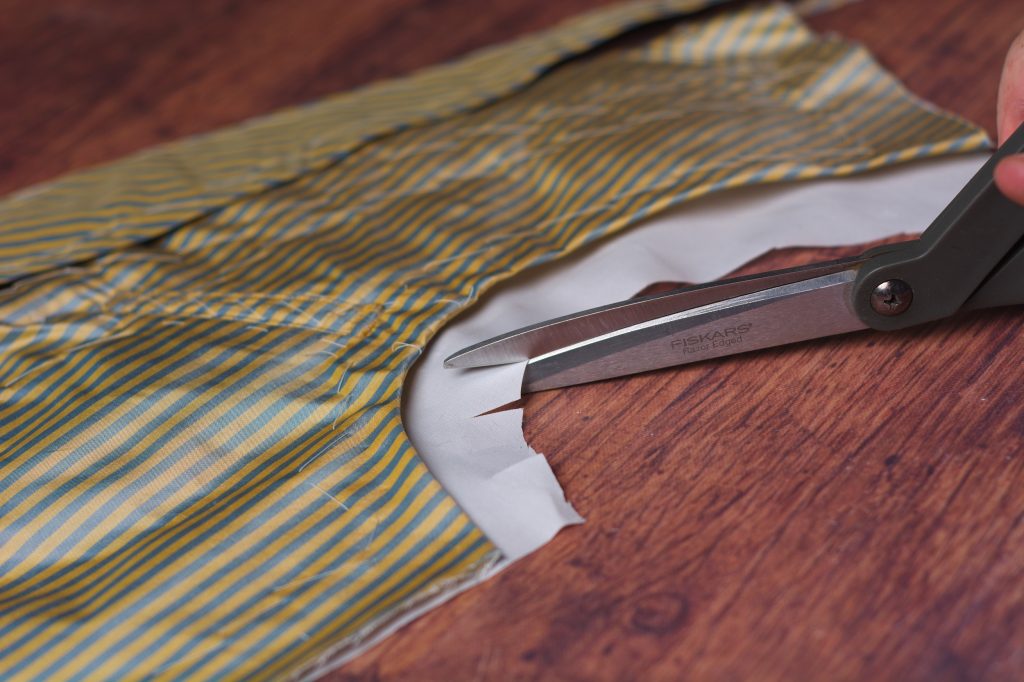
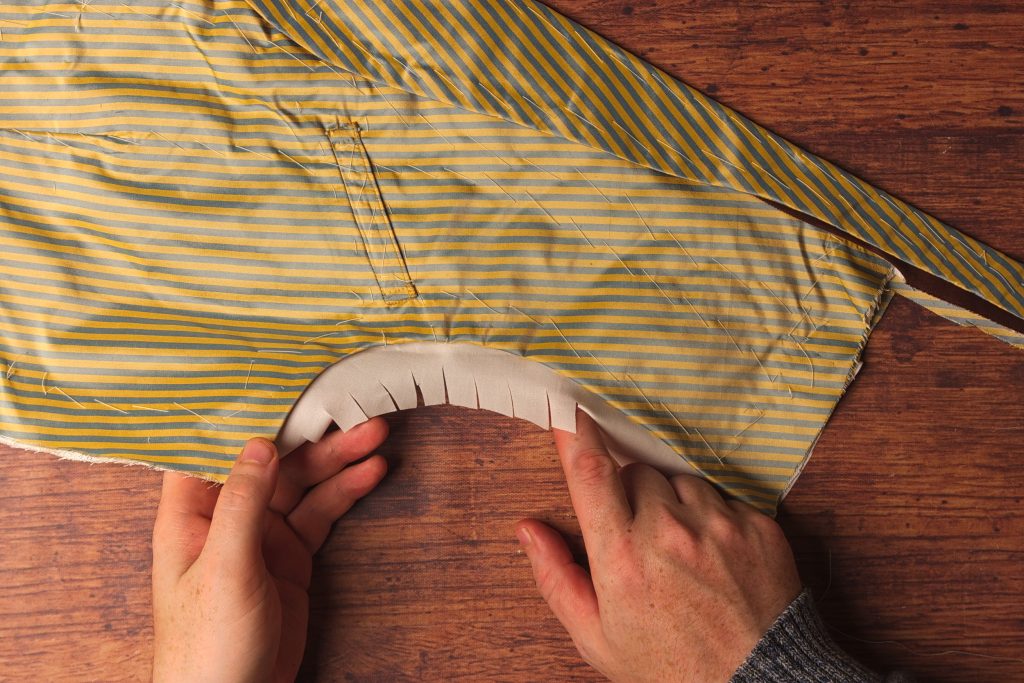
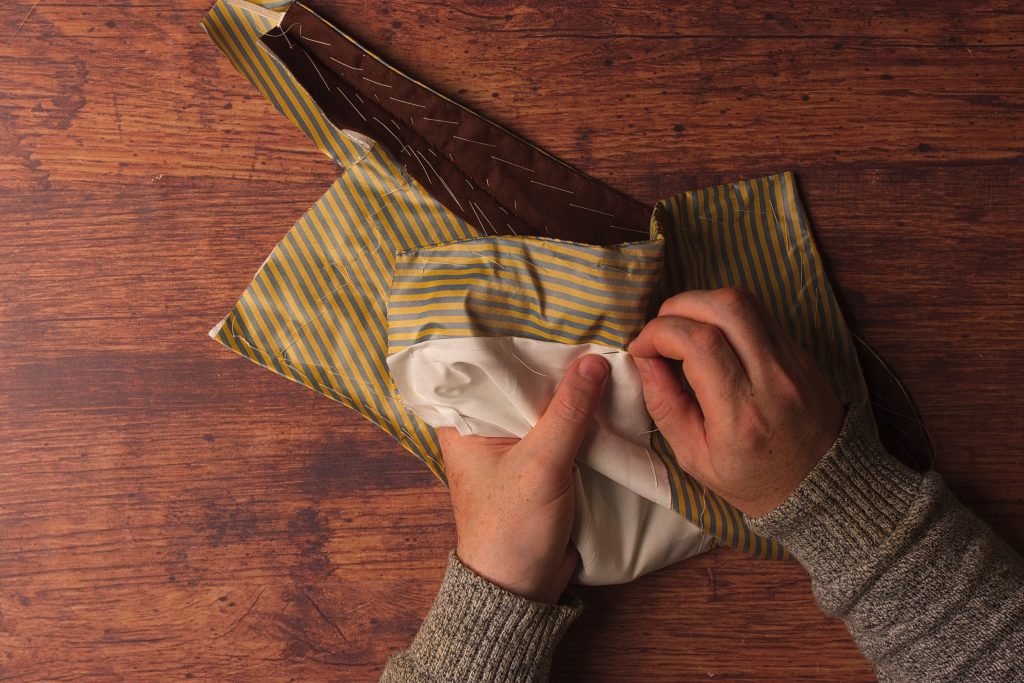
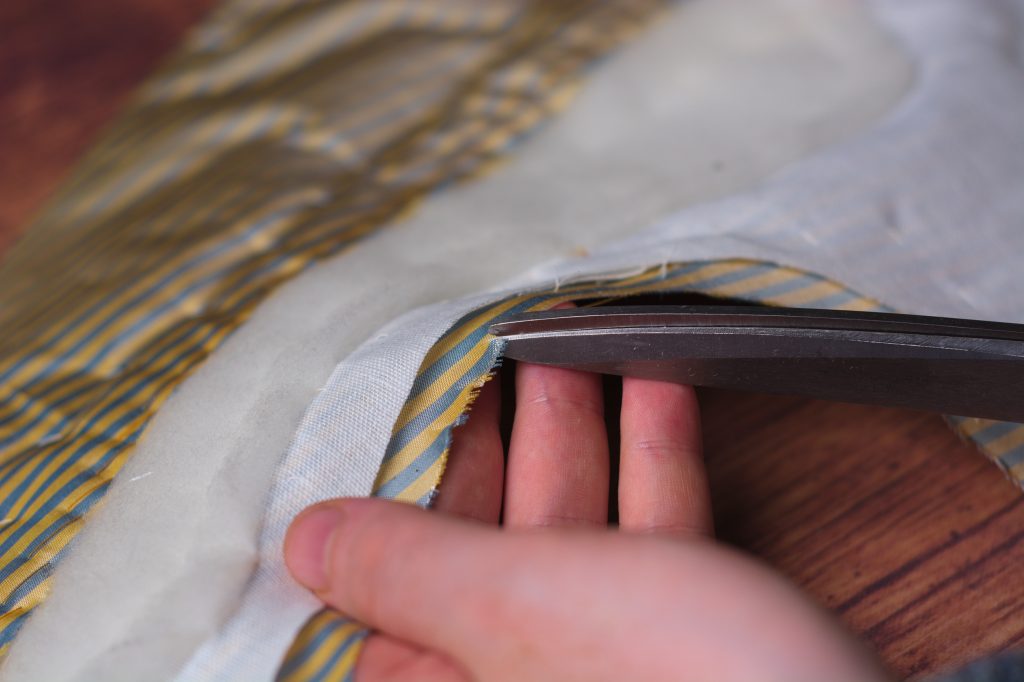
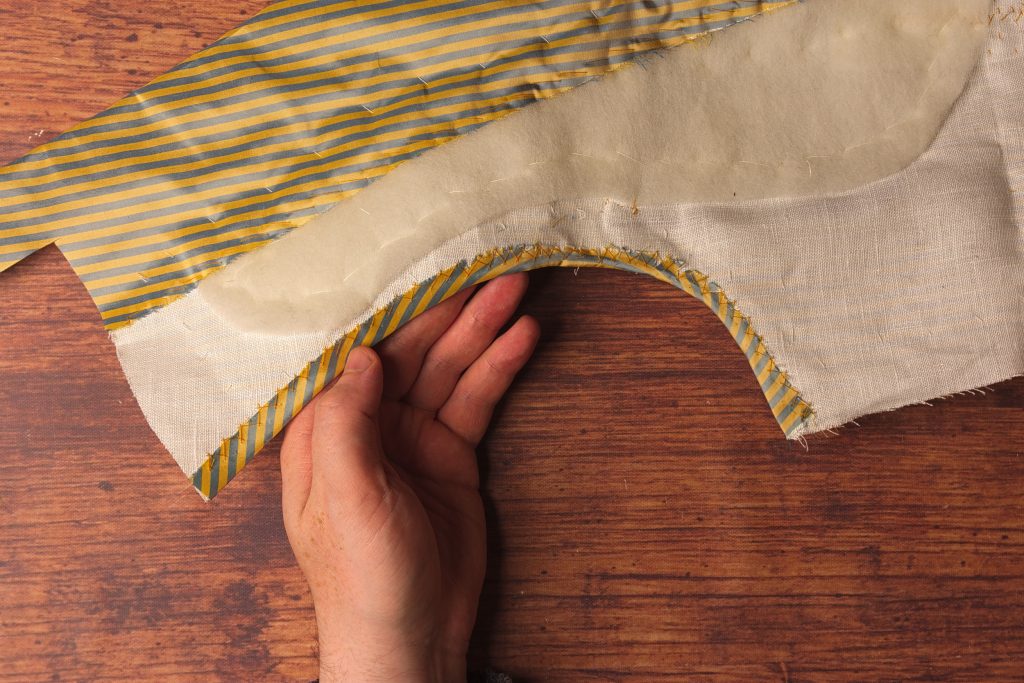
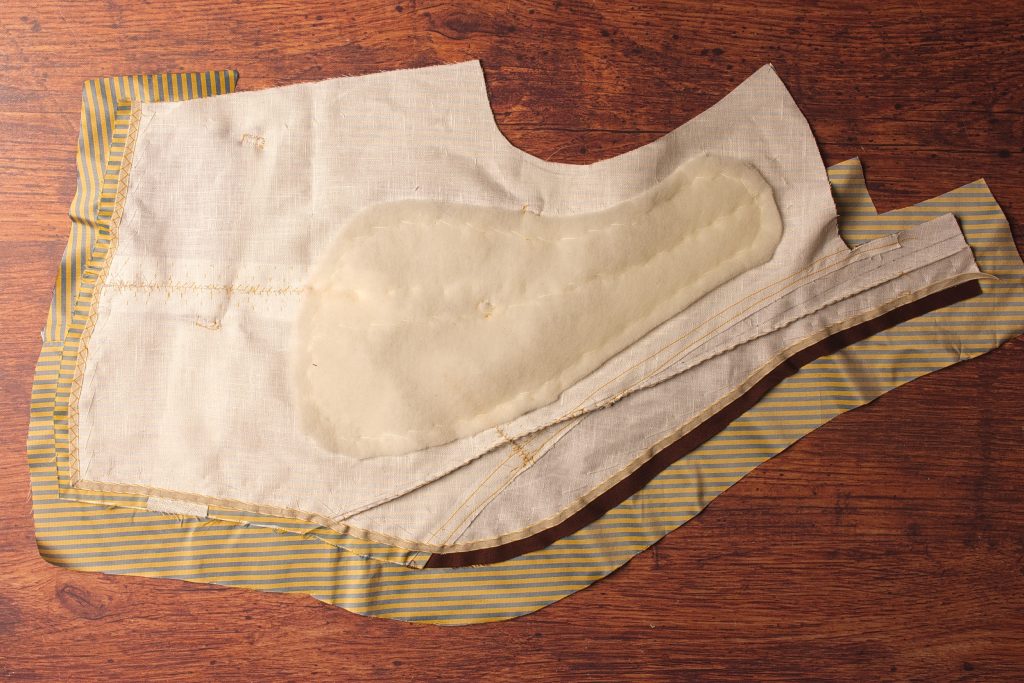
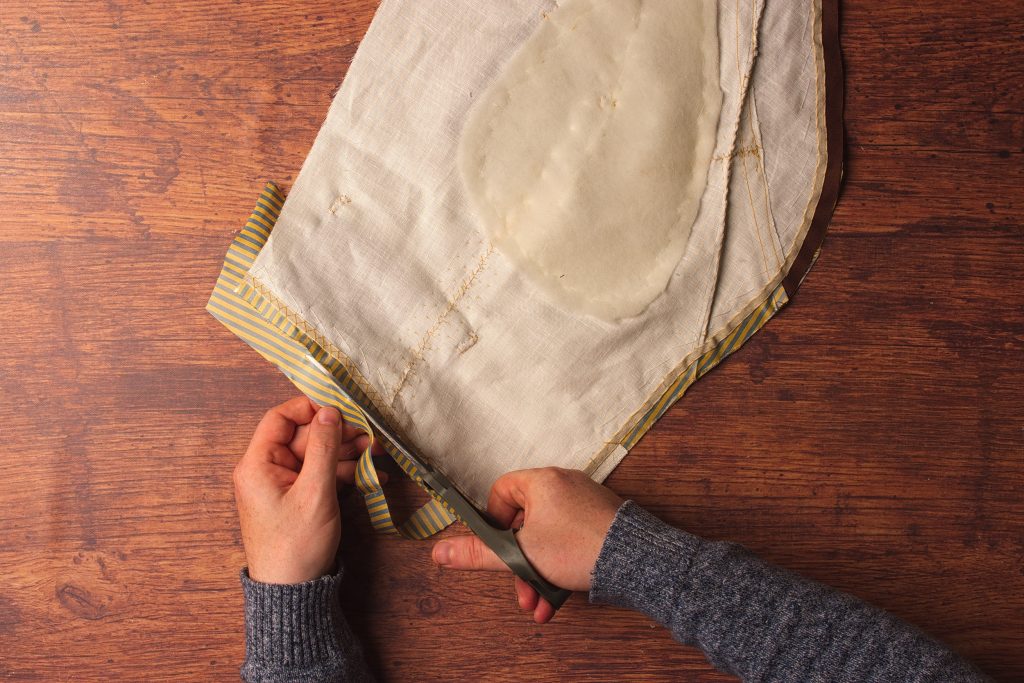
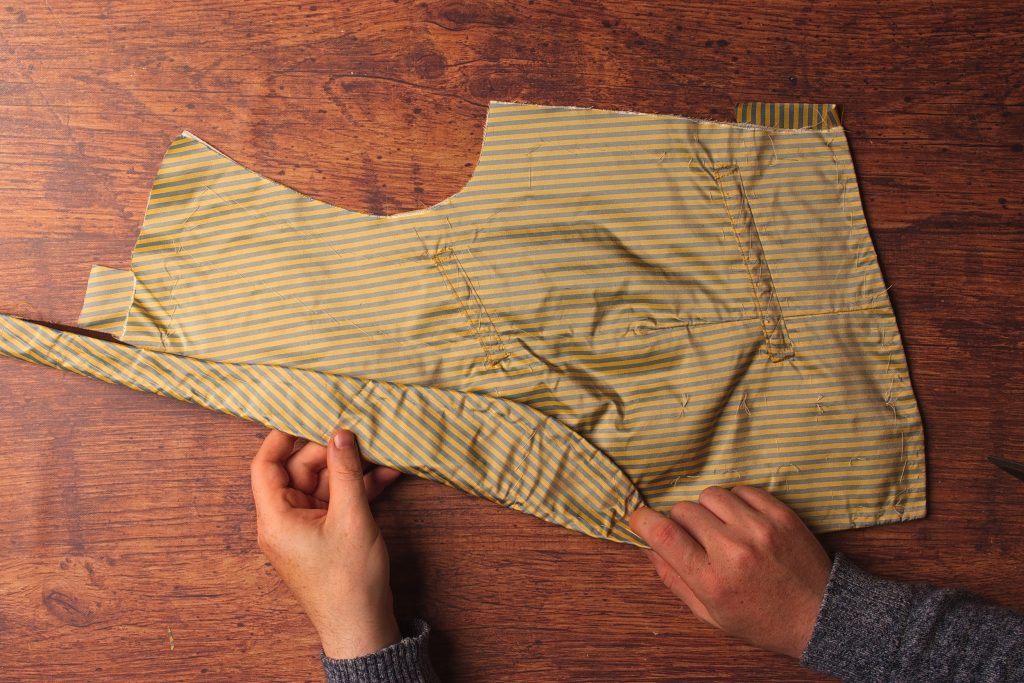
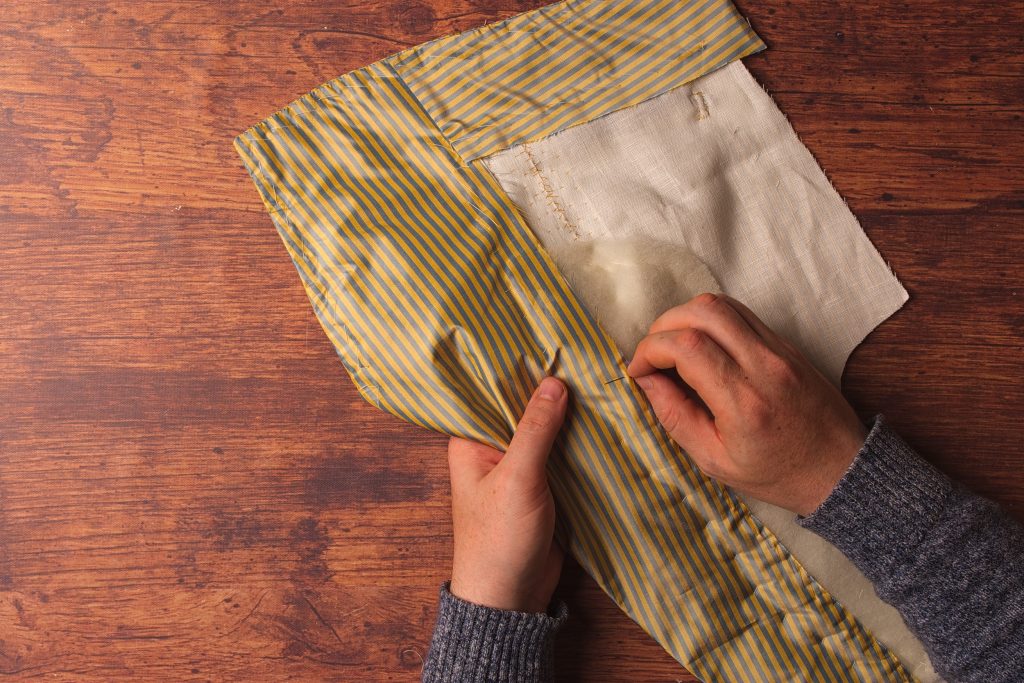
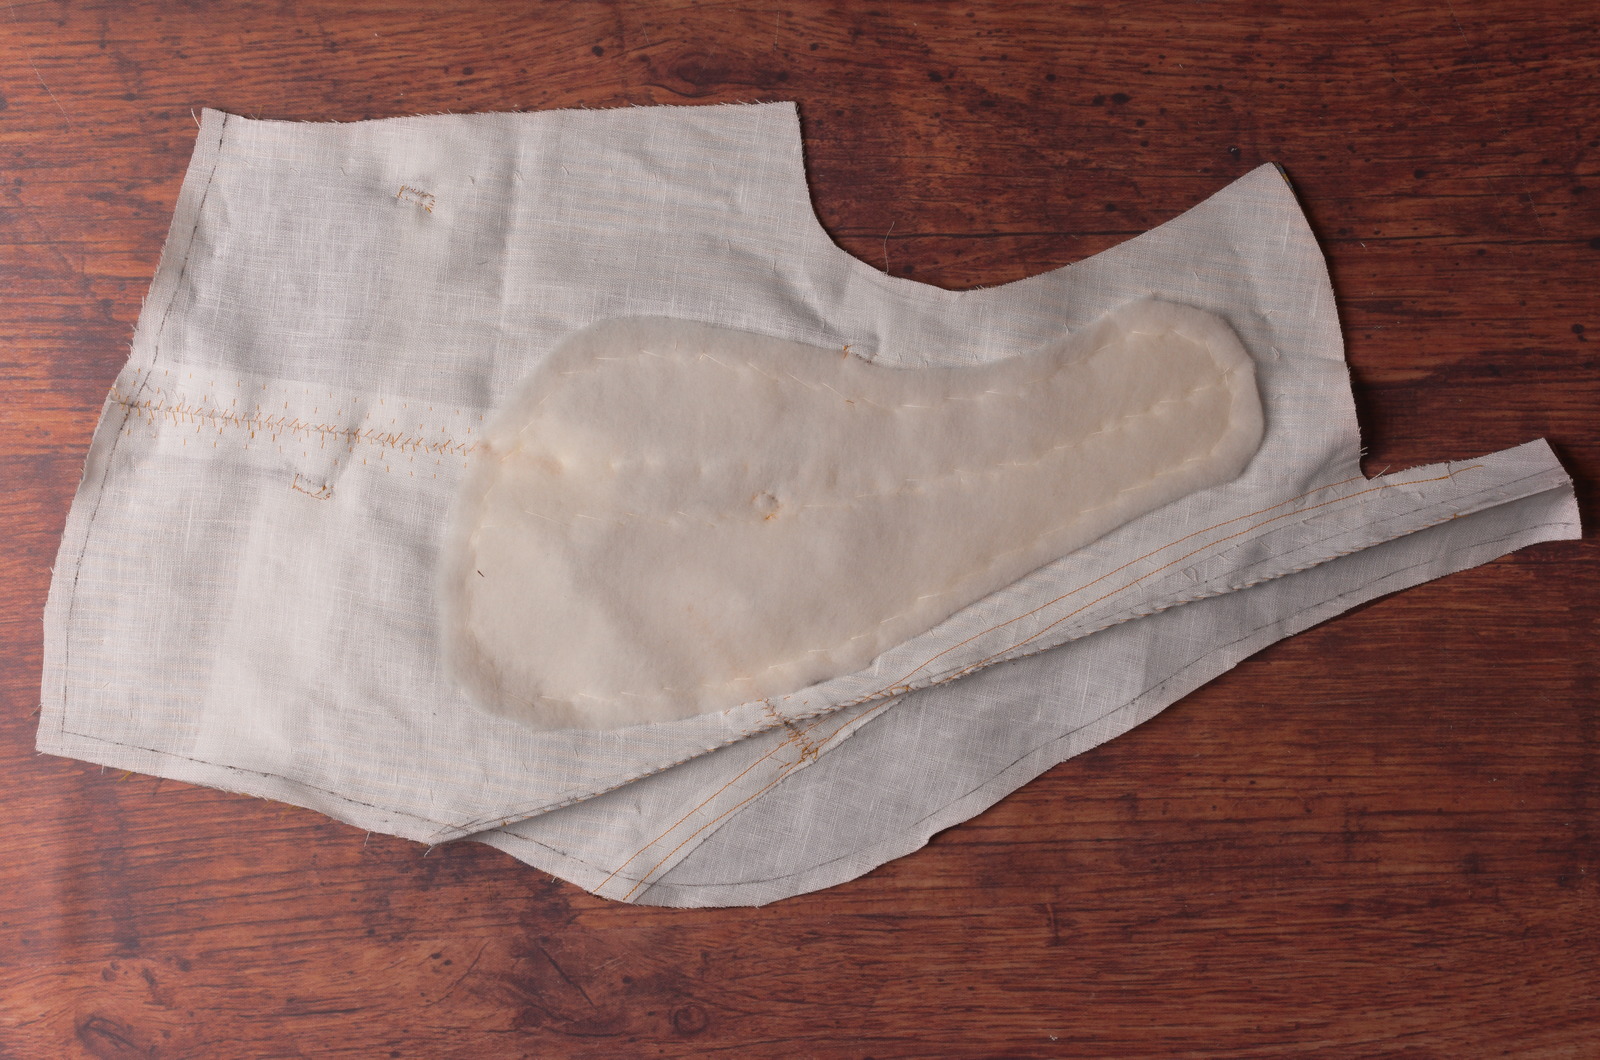
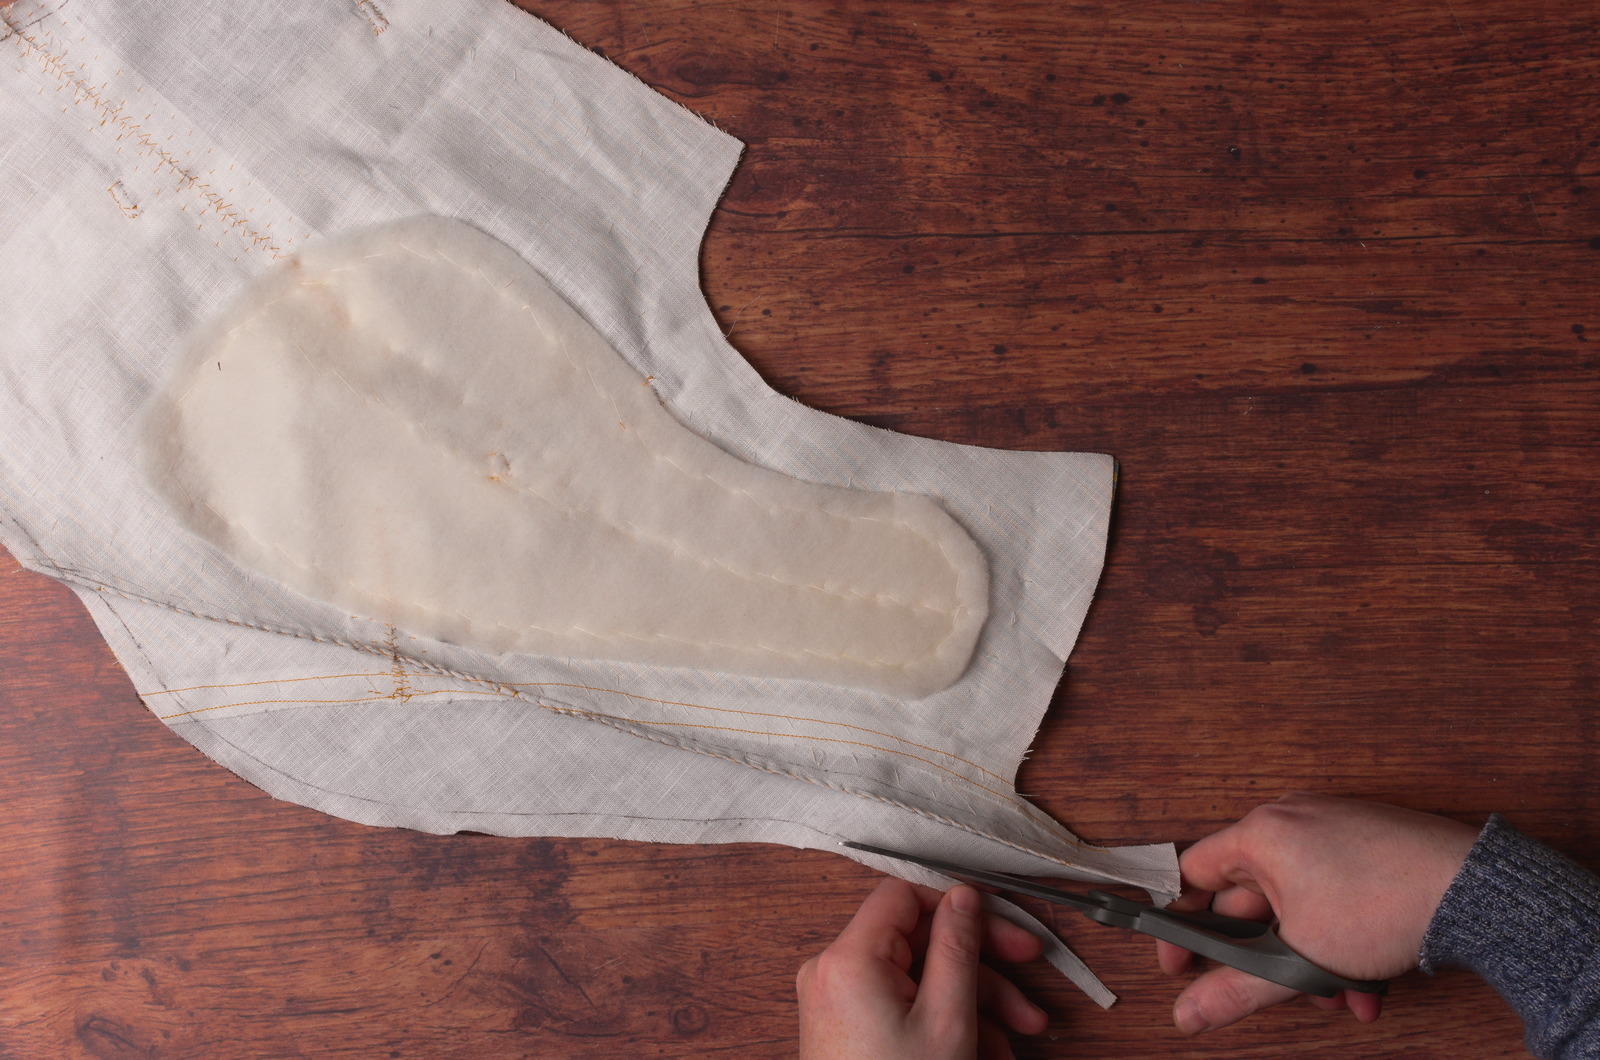
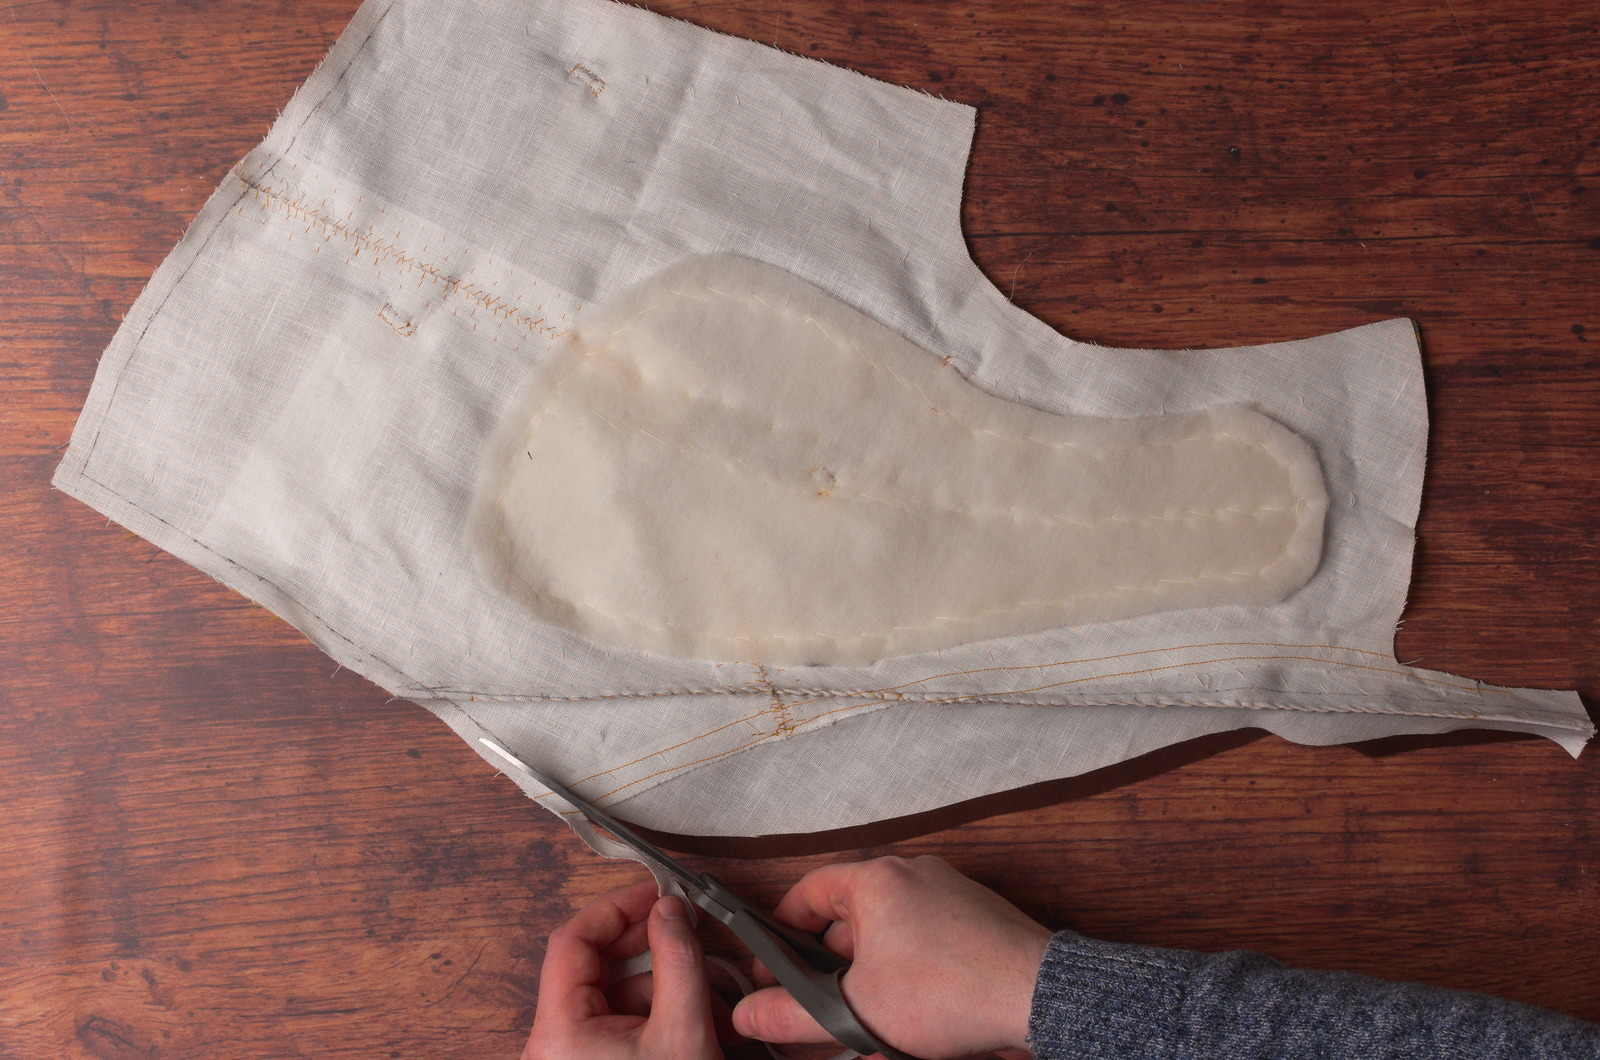
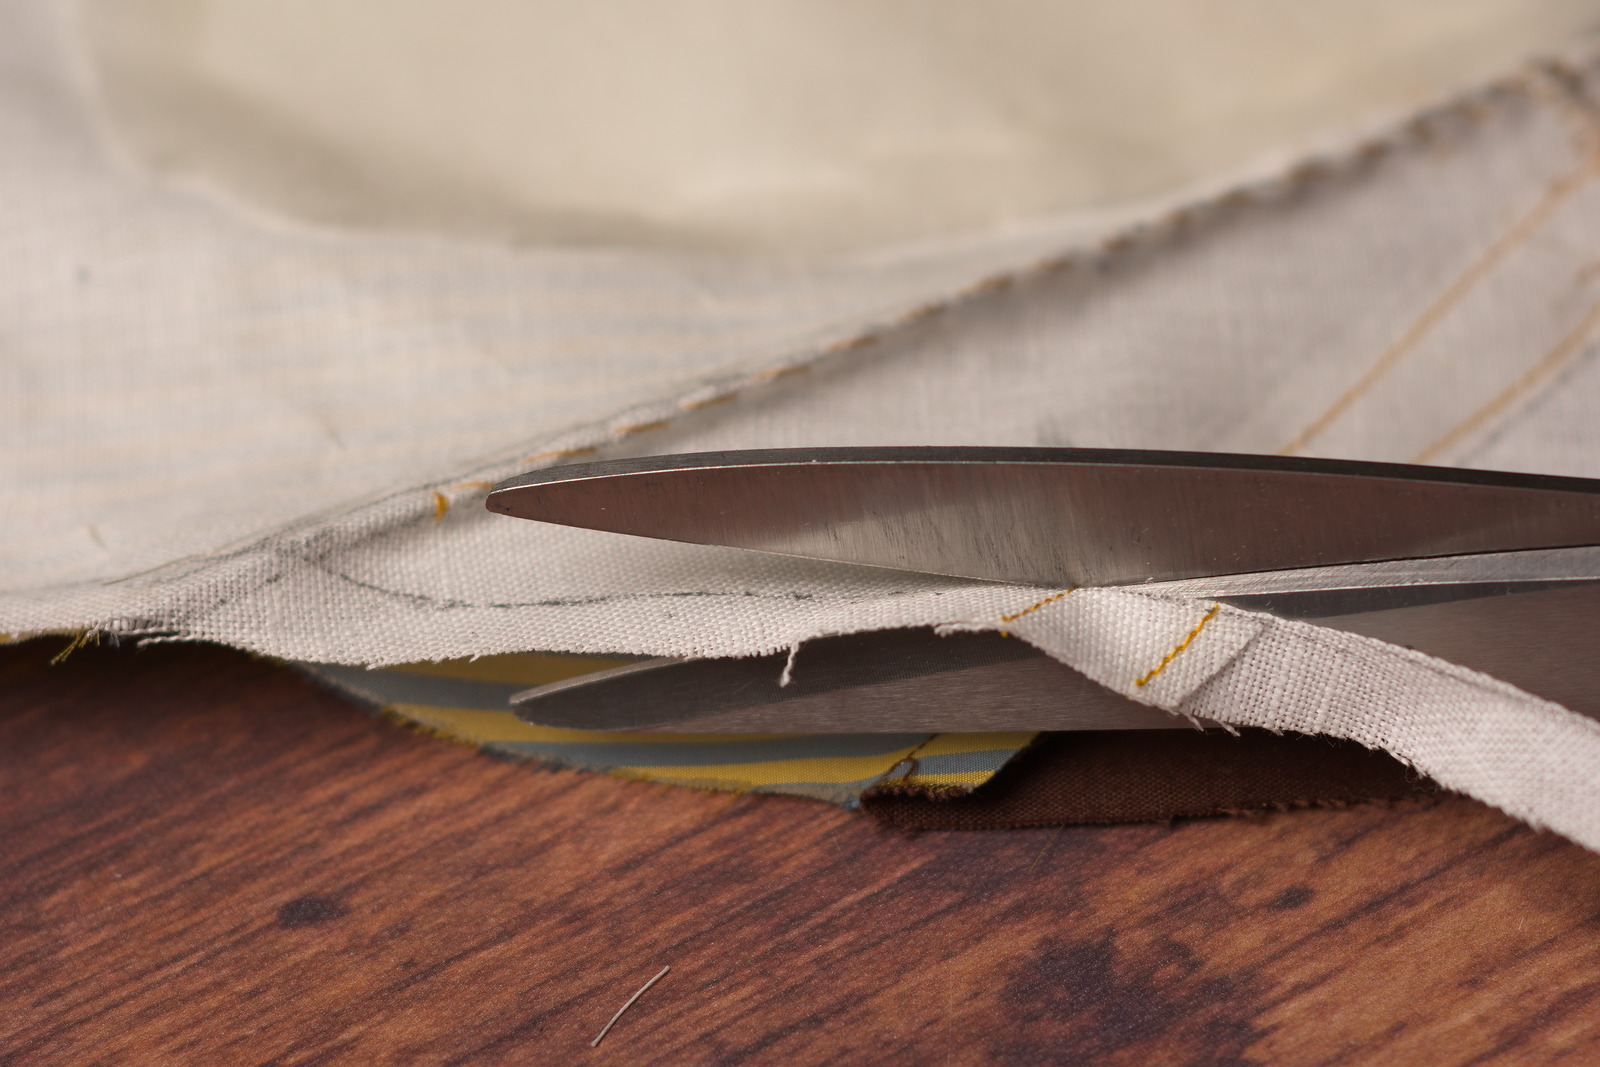
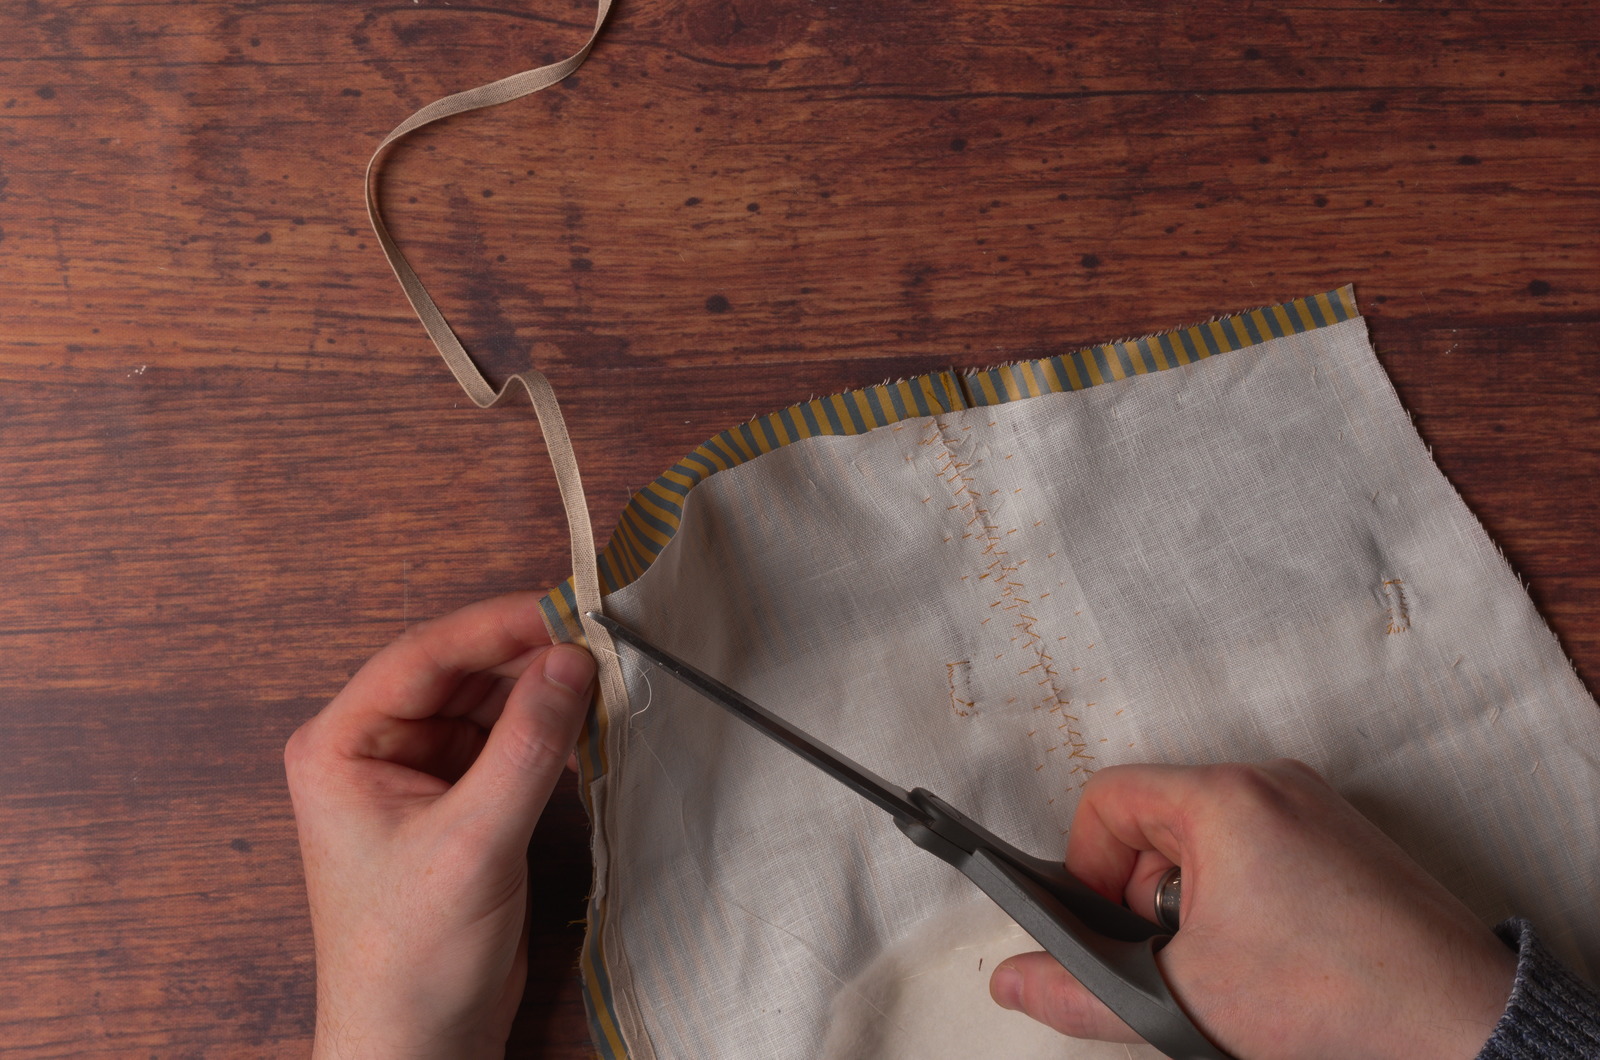
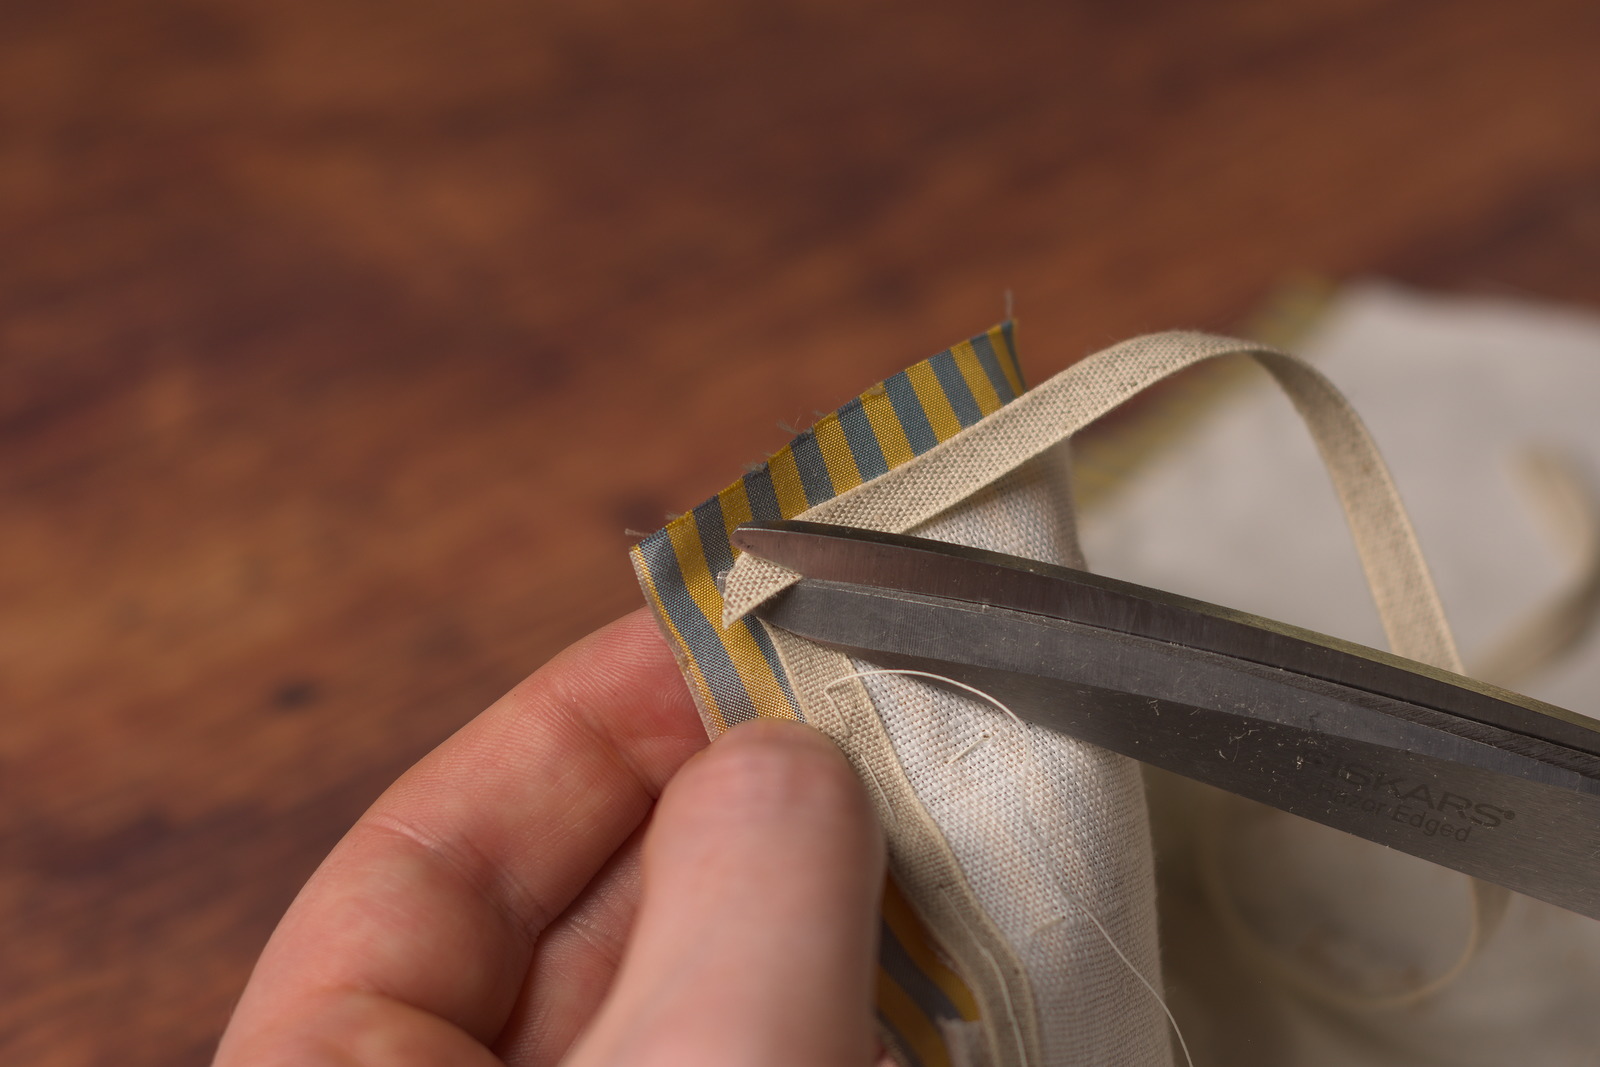
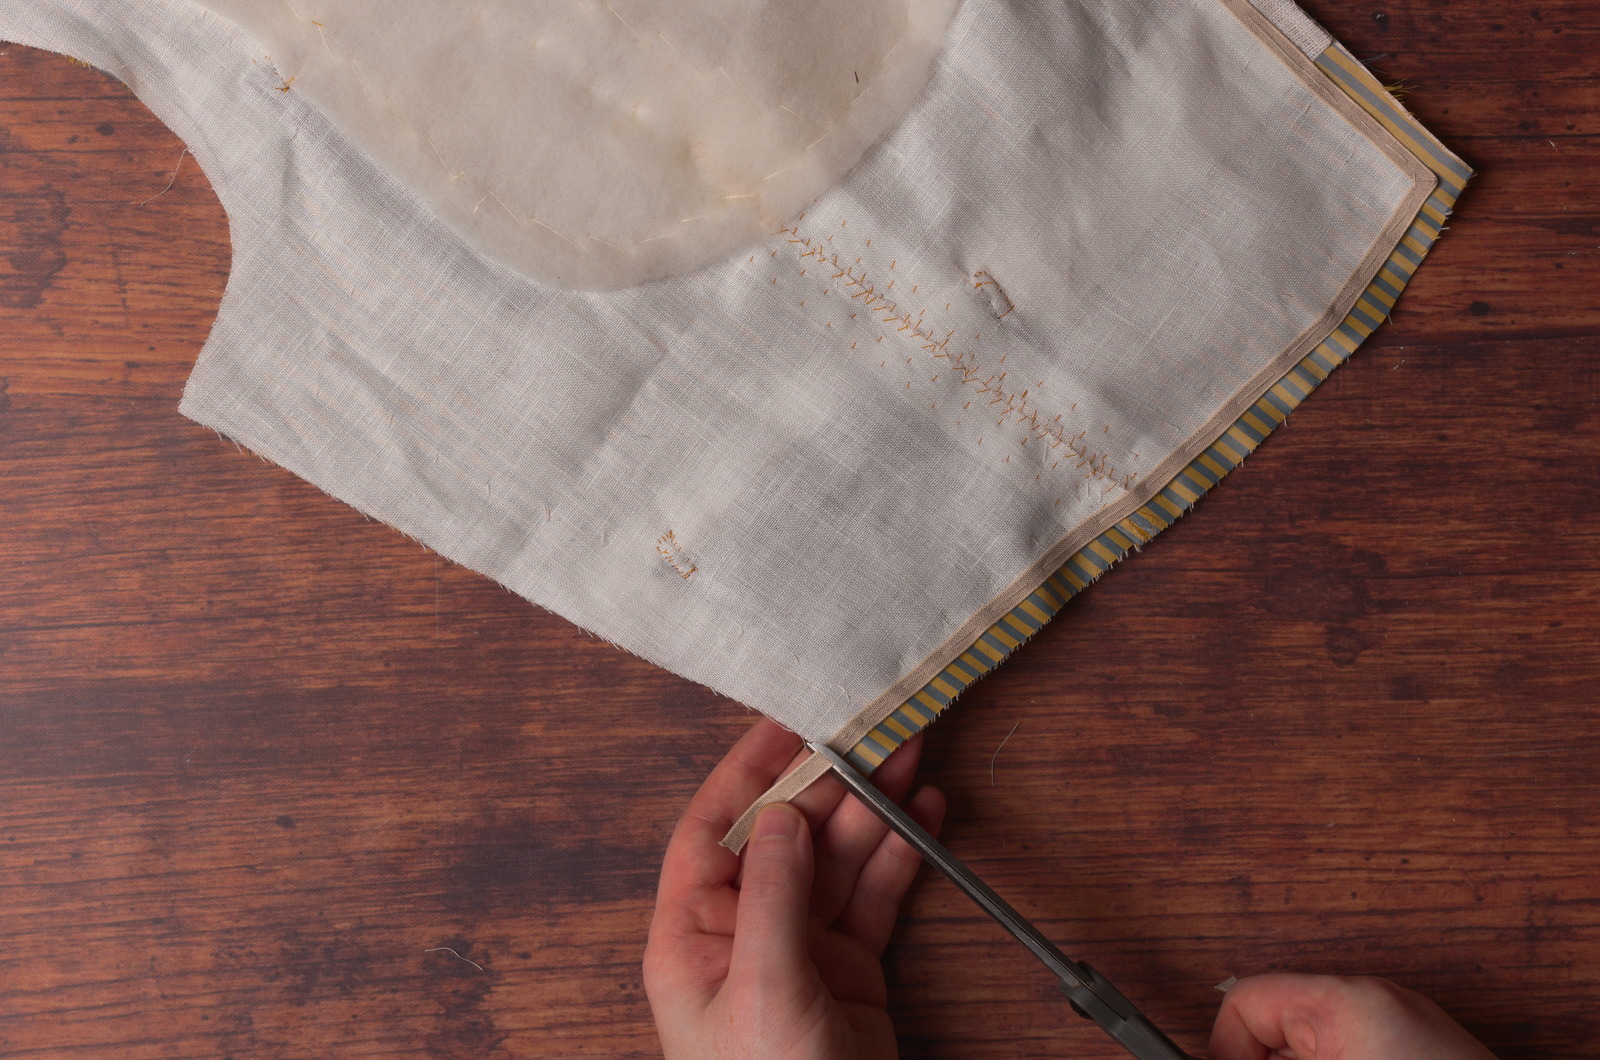
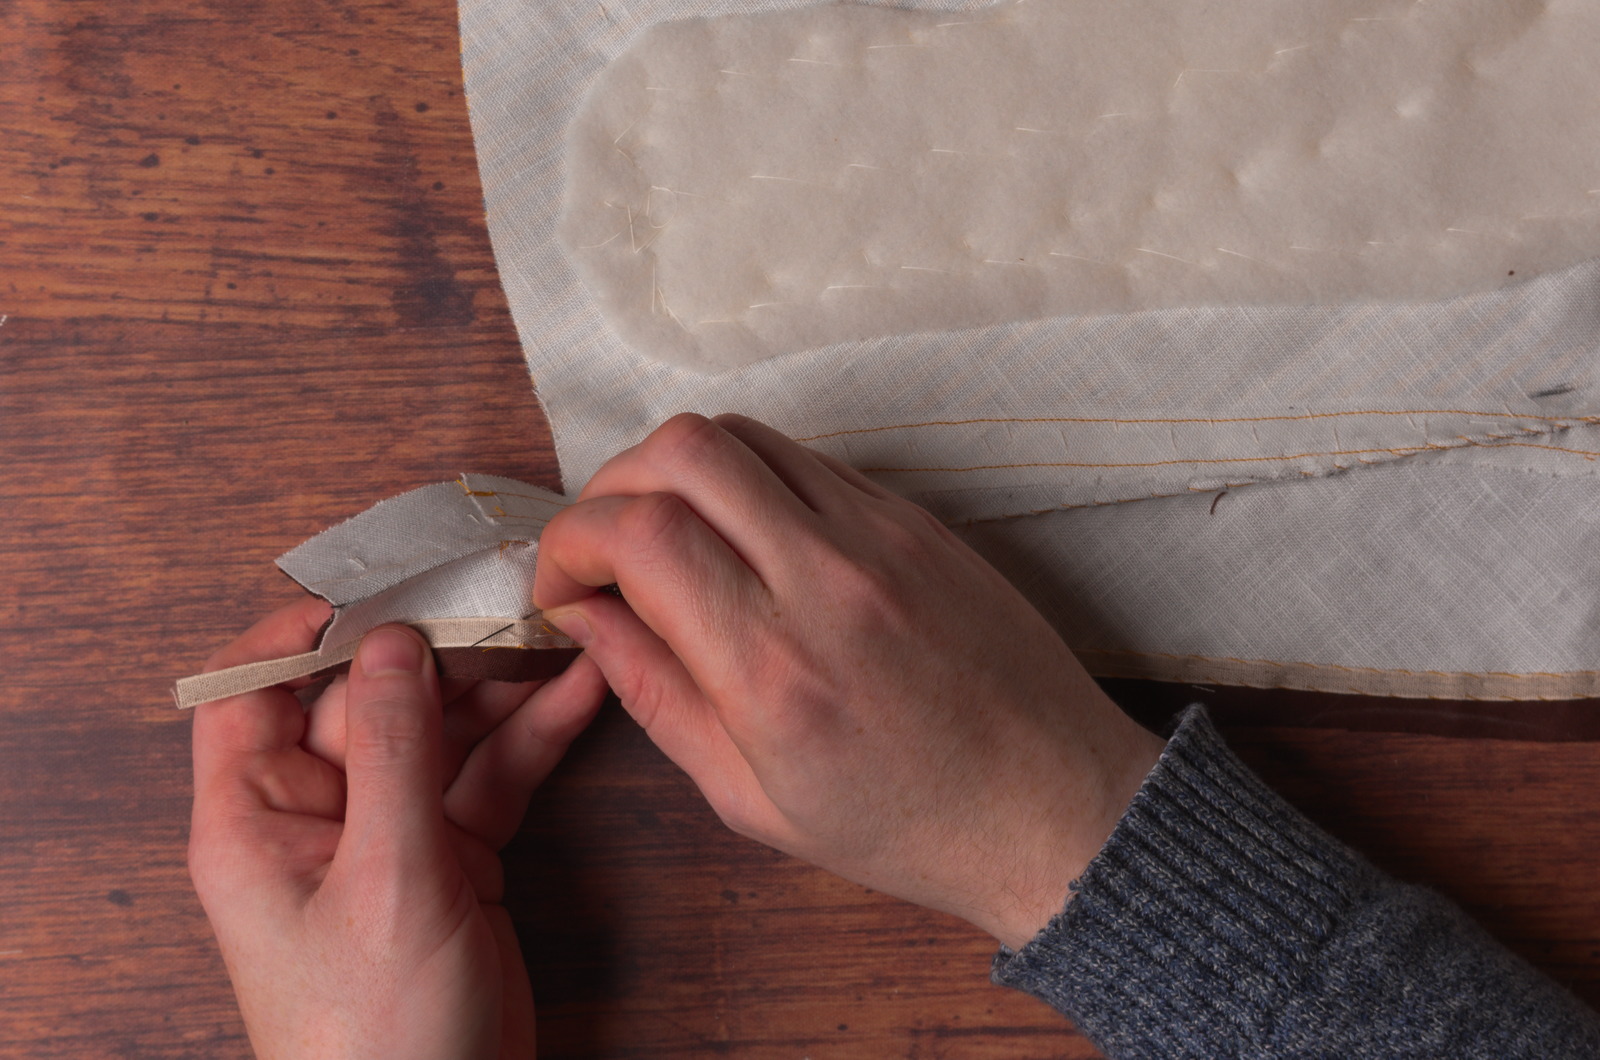
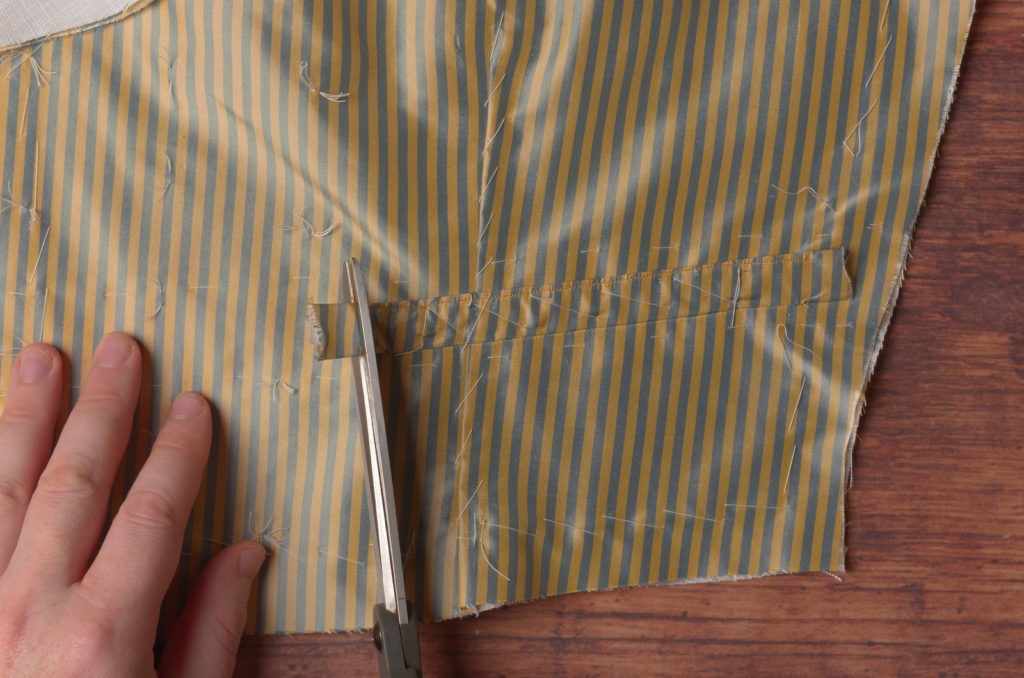
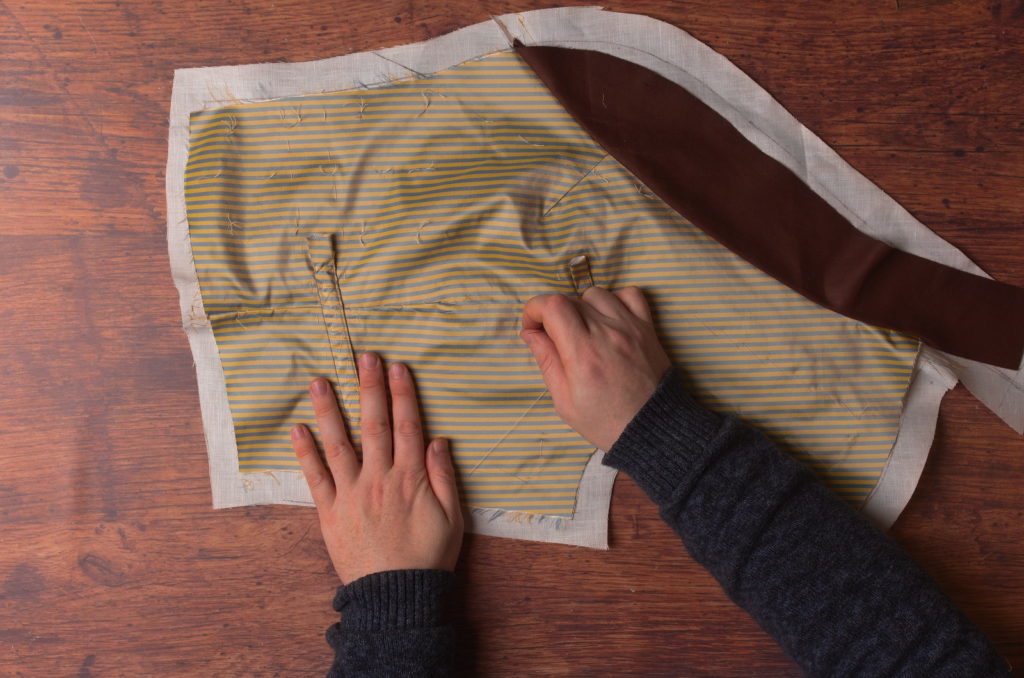
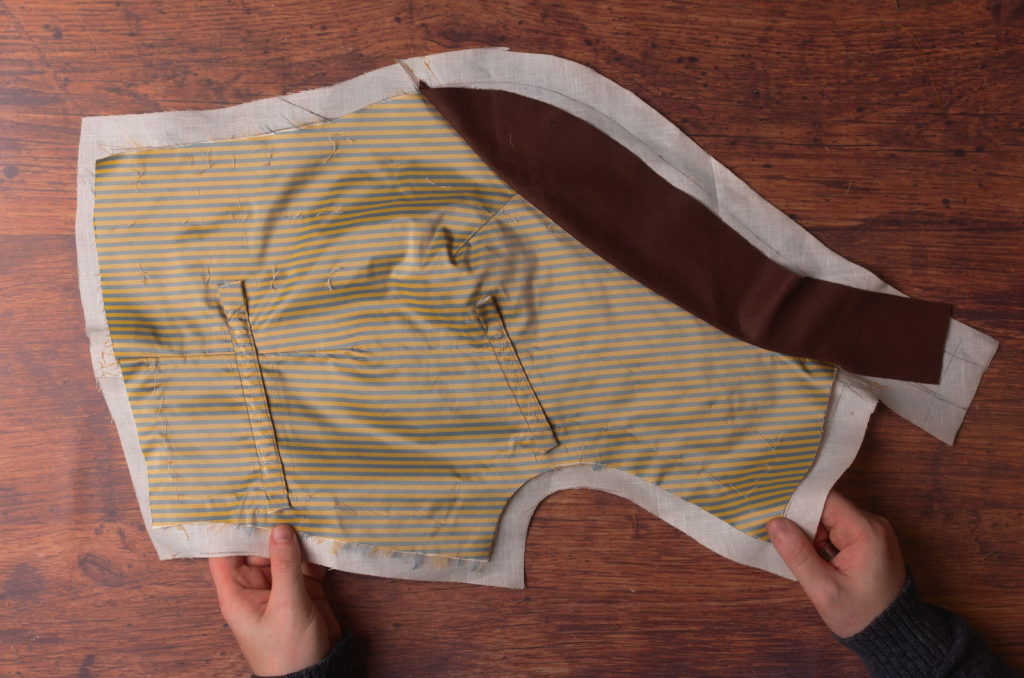
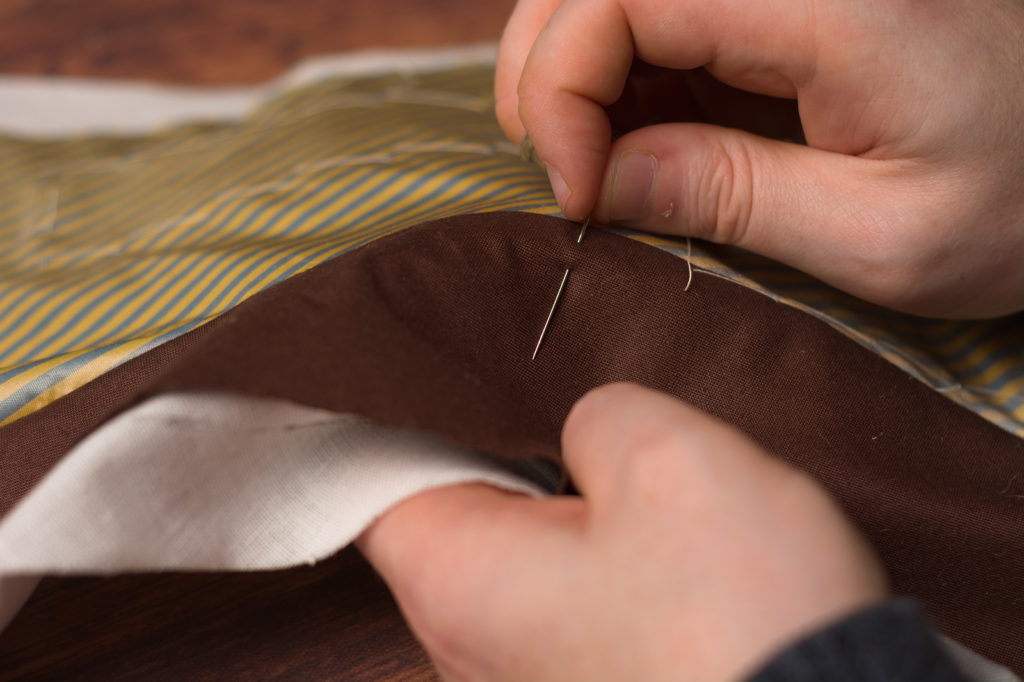
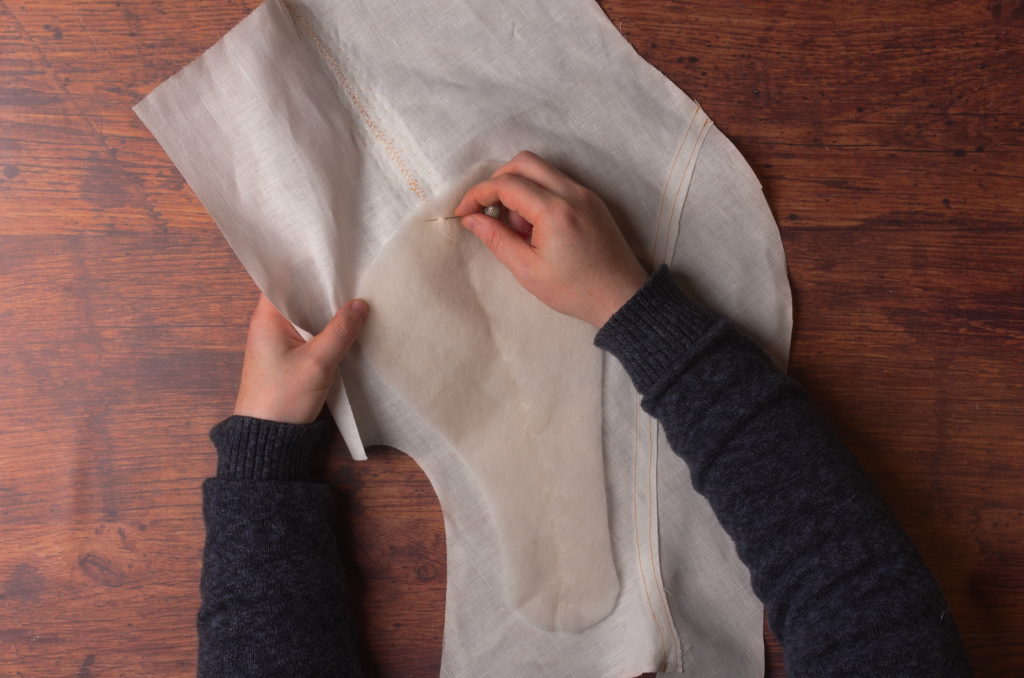
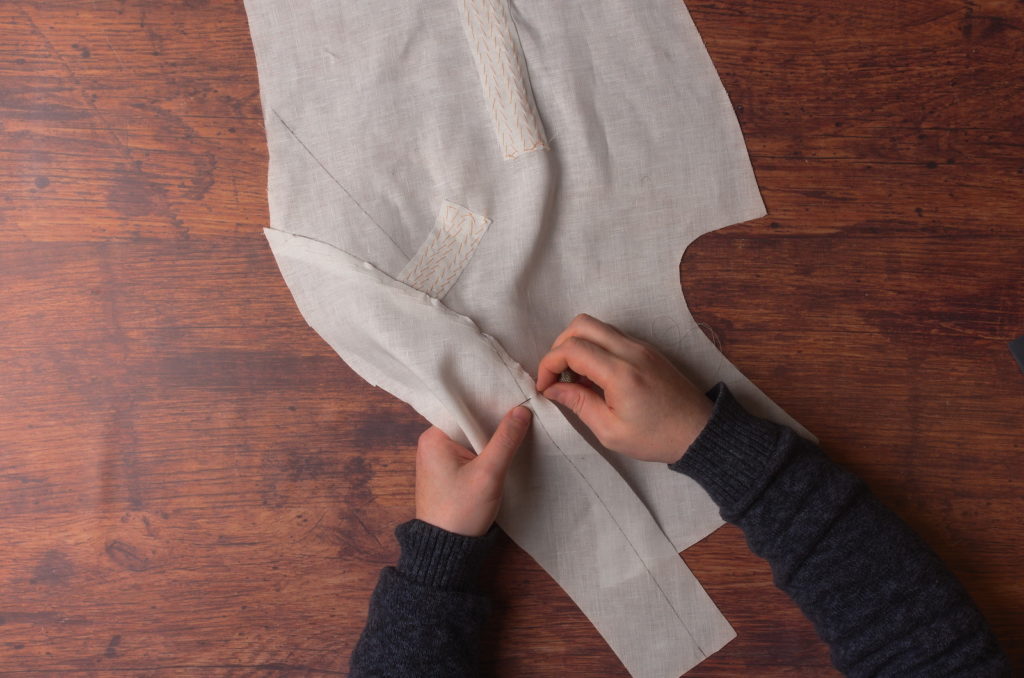
Now flip the forepart over and trim the lining at the armscye about an inch larger than the forepart. And at the side seam, trim the lining completely flush.

At the armscye, clip the deepest part of the curve to within about 1/4″ of the forepart itself.
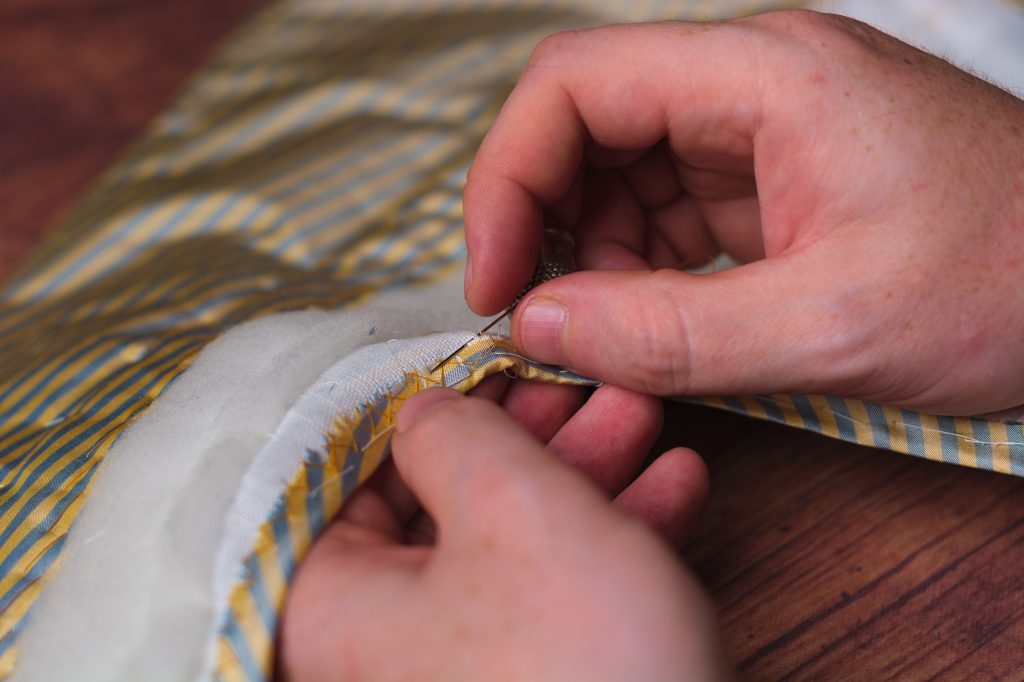
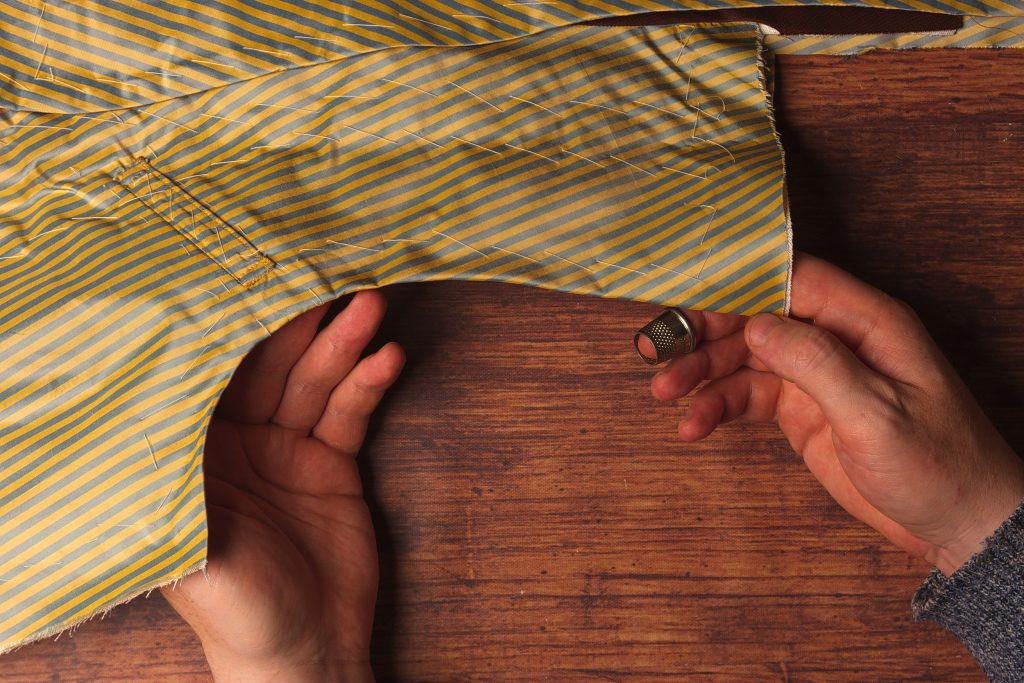
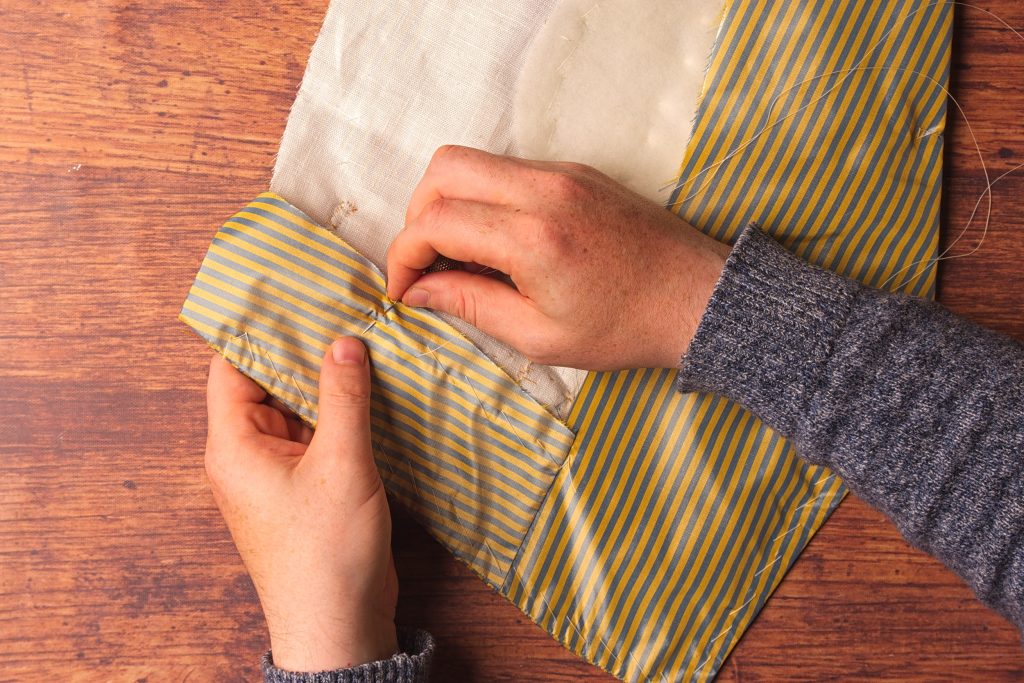
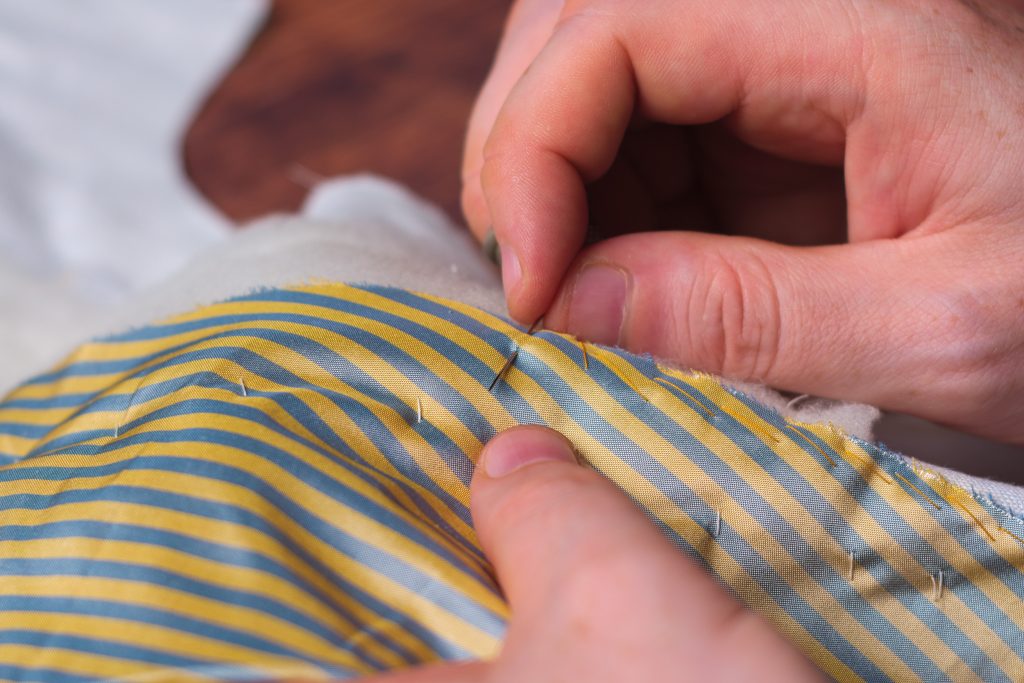
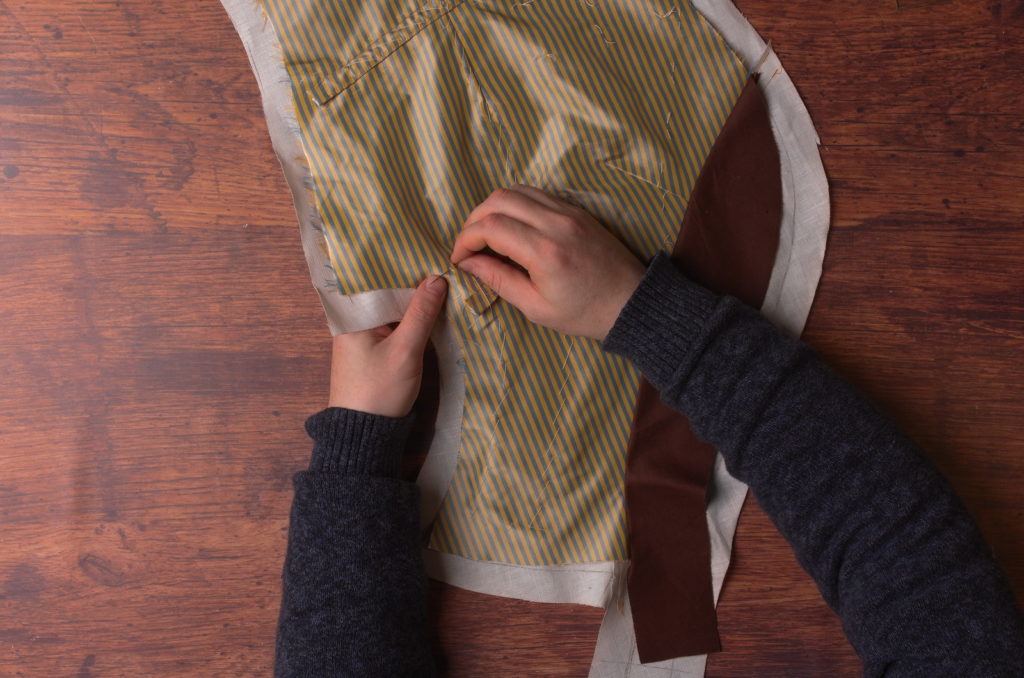
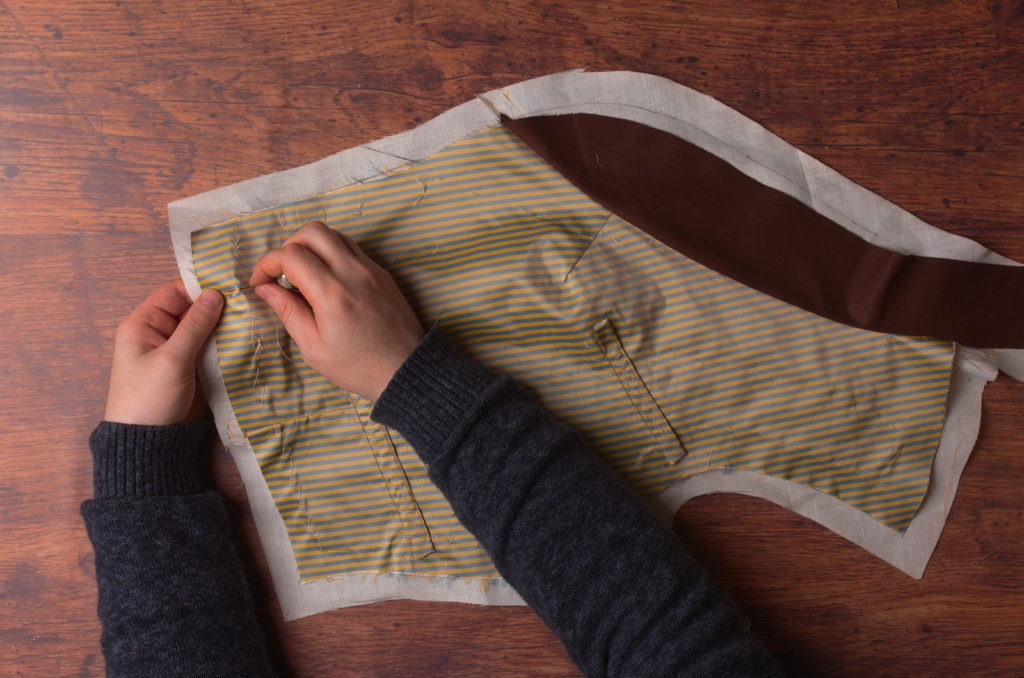
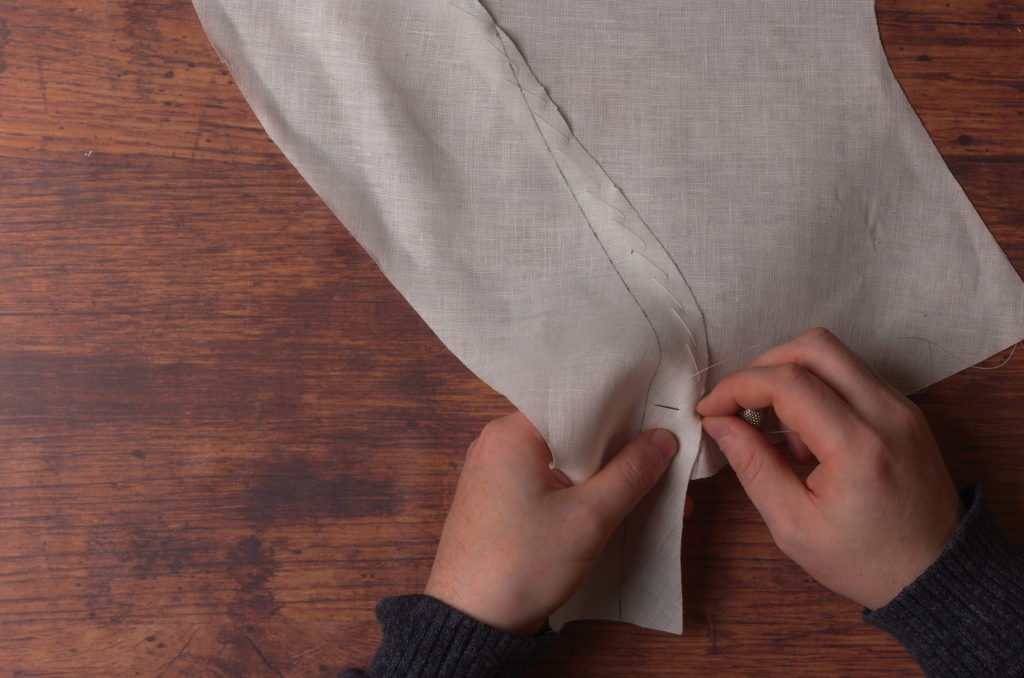
Baste about an inch away from the armscye through all layers, catching the lining underneath.

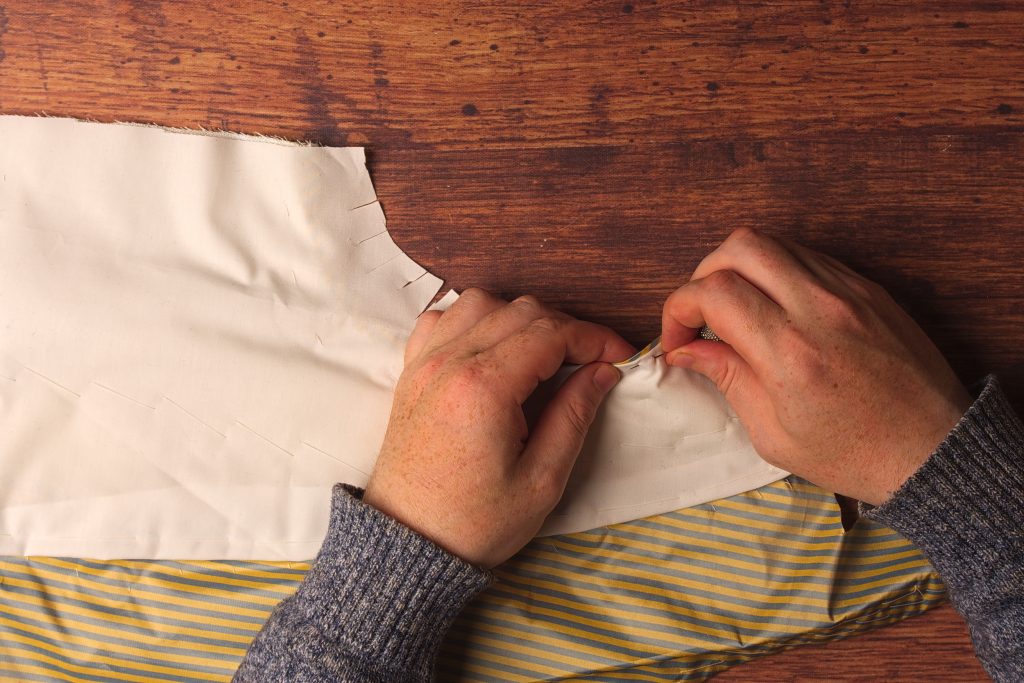
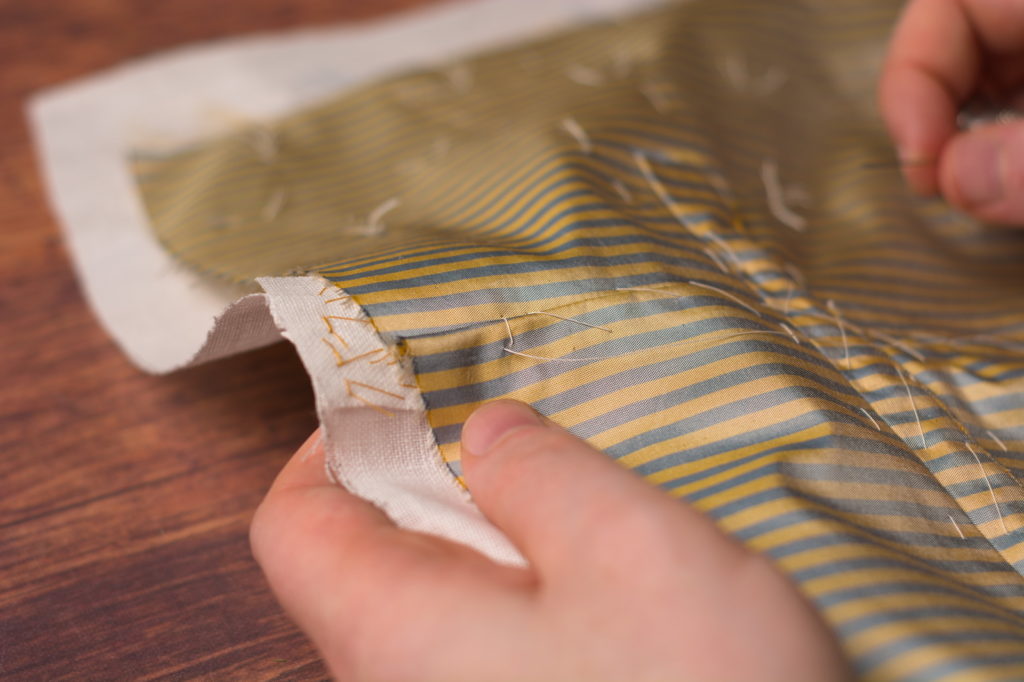
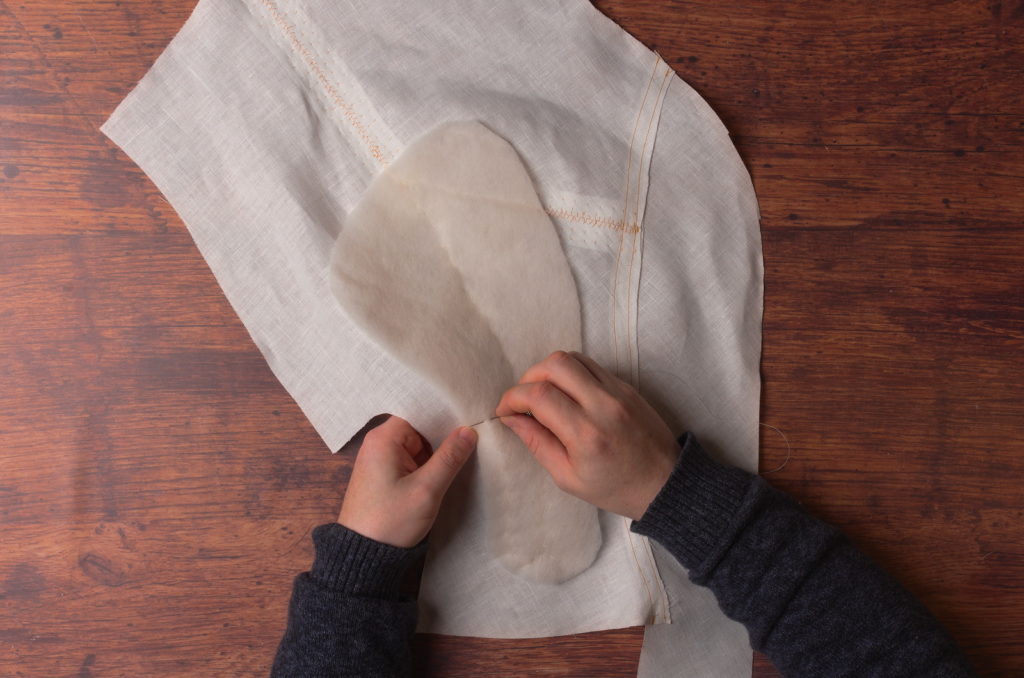
Turning to the wrong side, fold the lining in on itself along the armscye and baste in place. For the deepest part of the curve, I find that gently stretching the lining with my fingers helps get everything to lie smoothly.
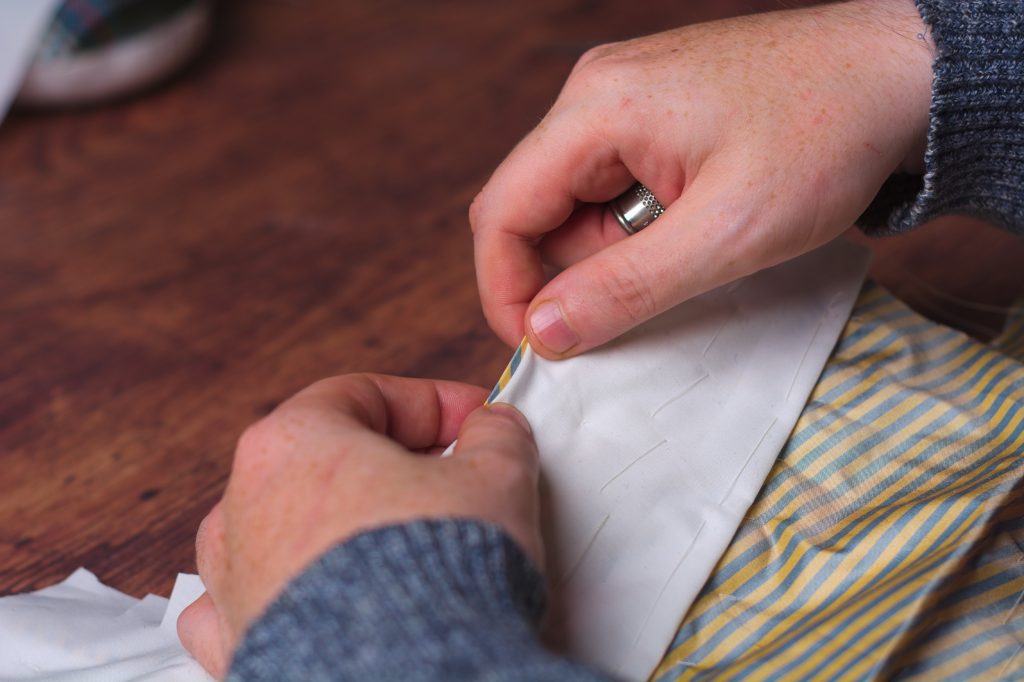
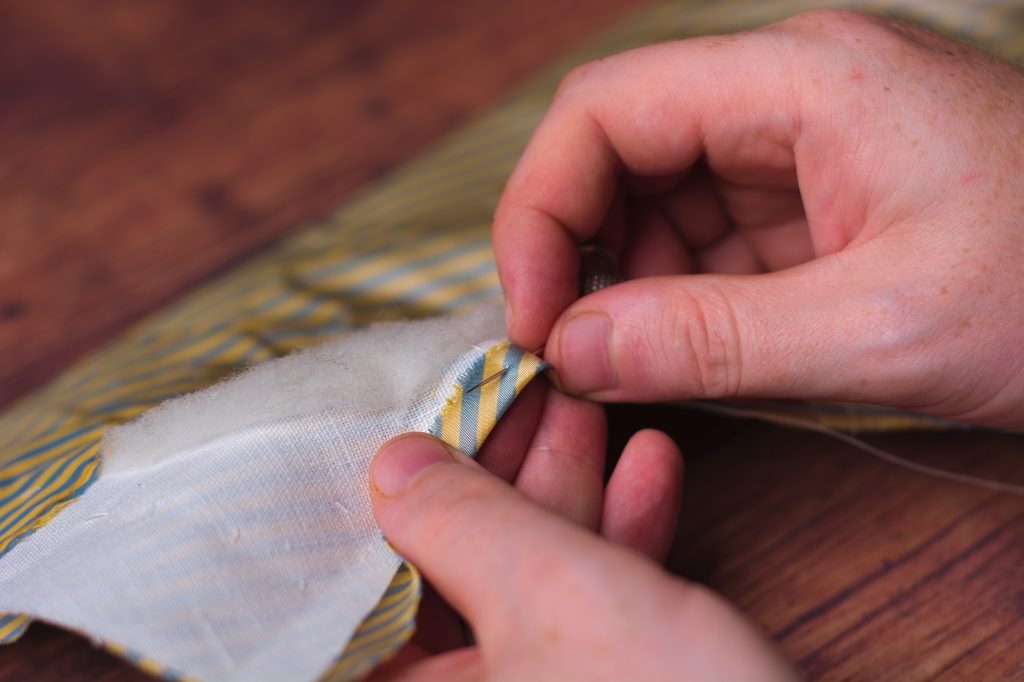
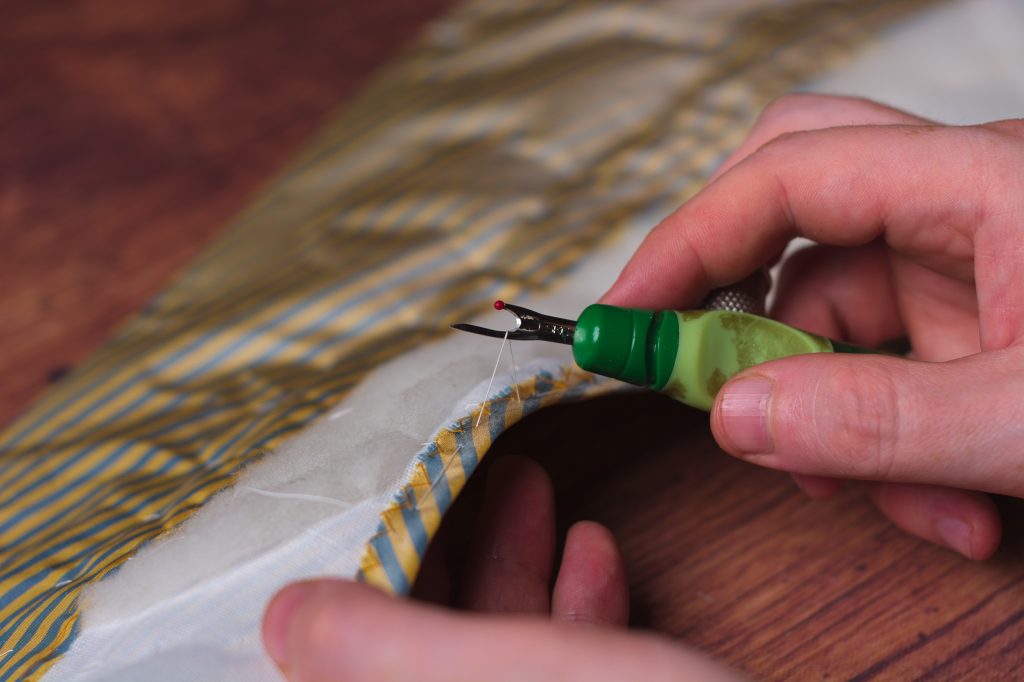
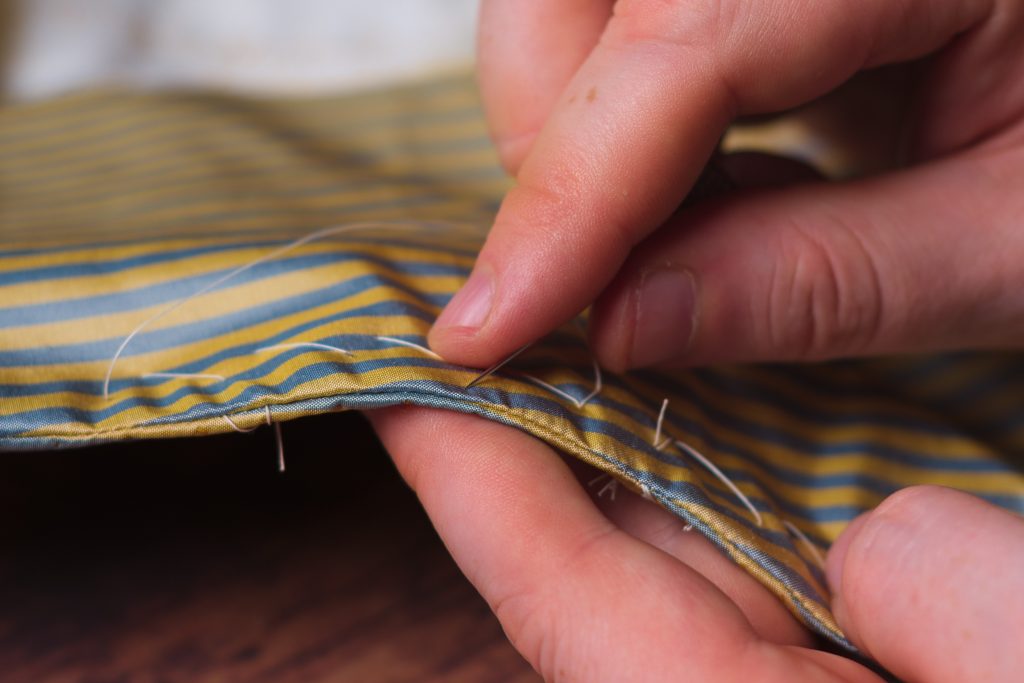
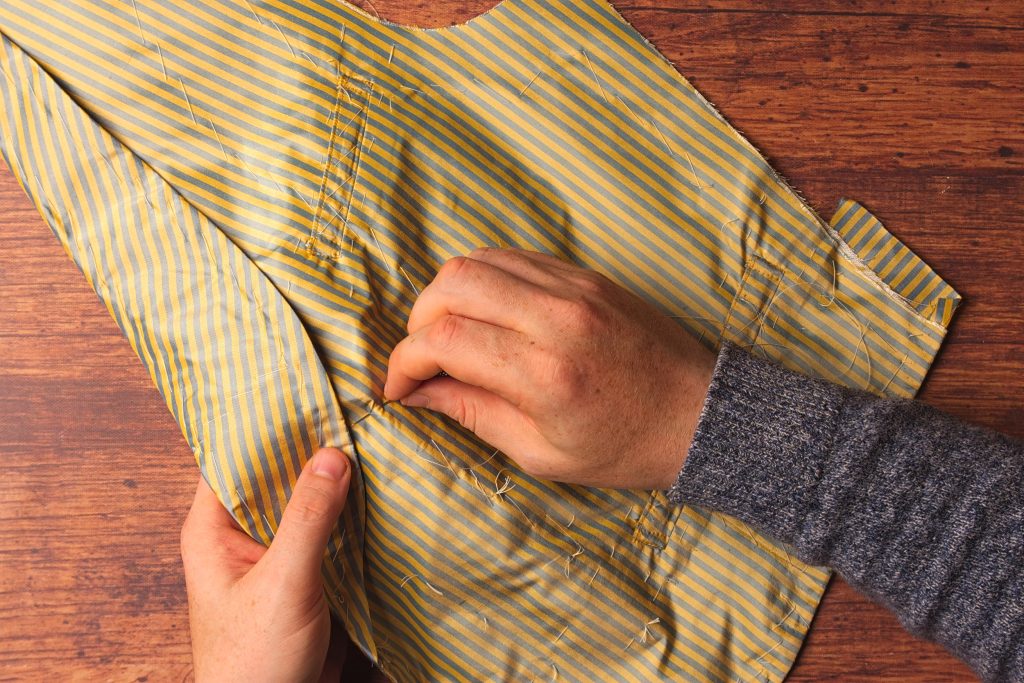
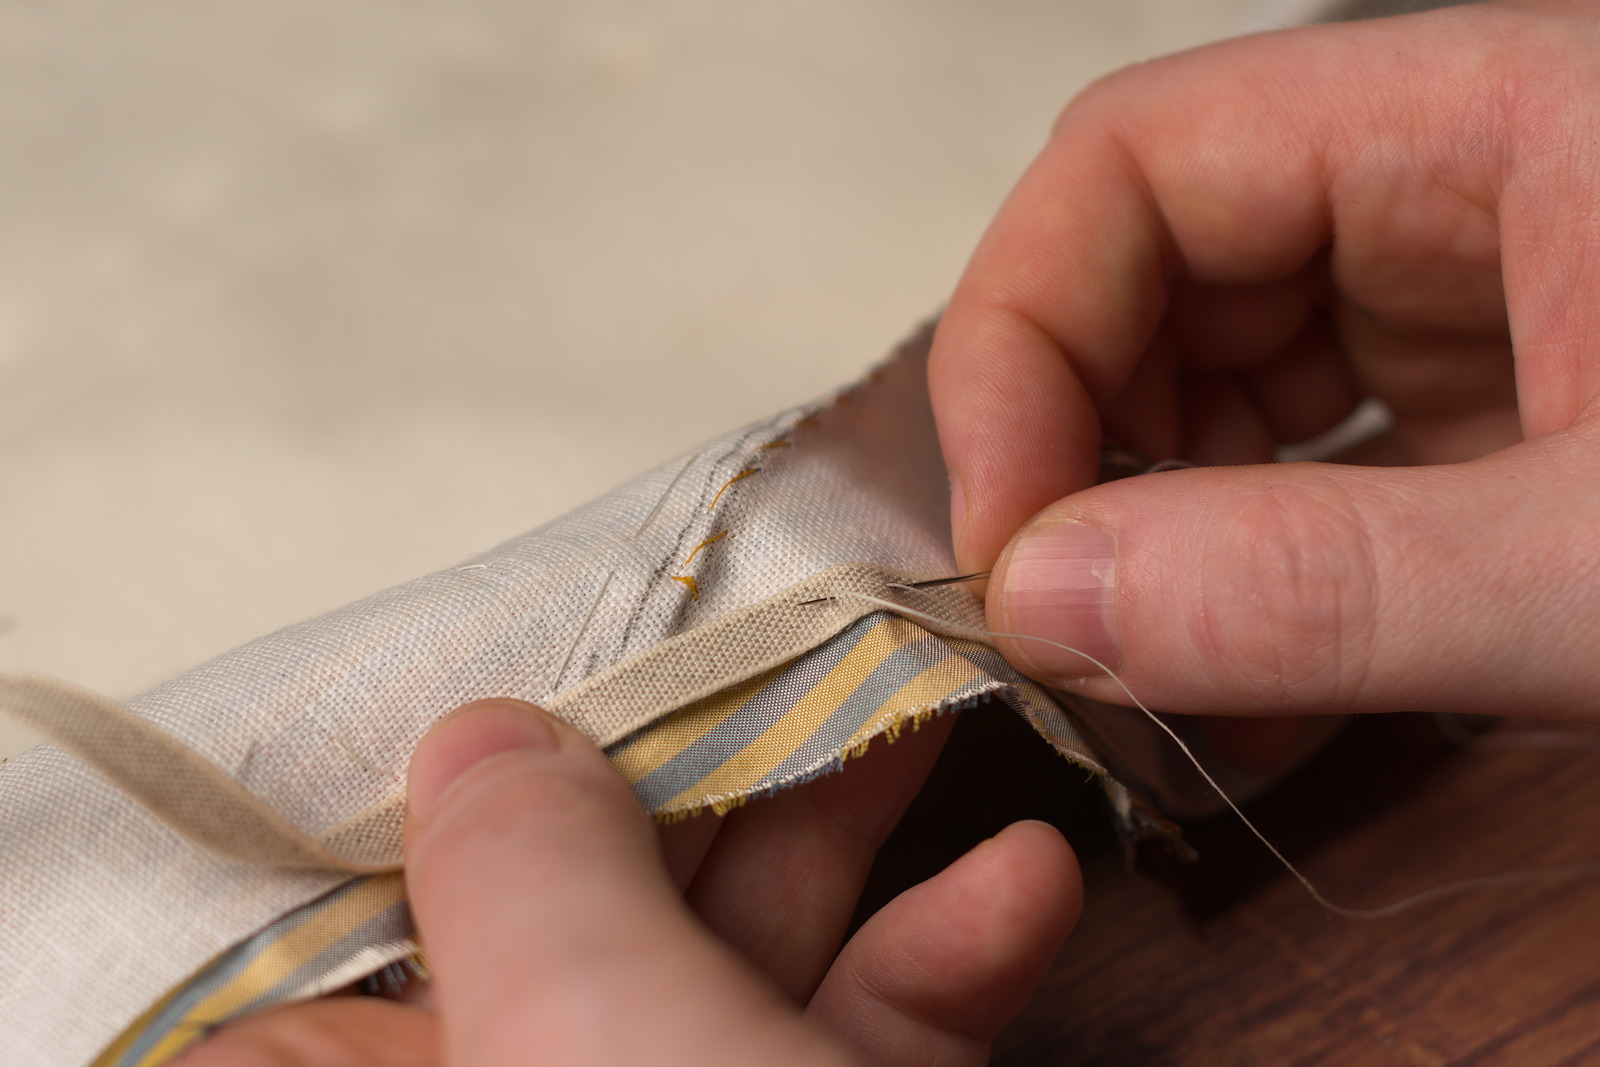
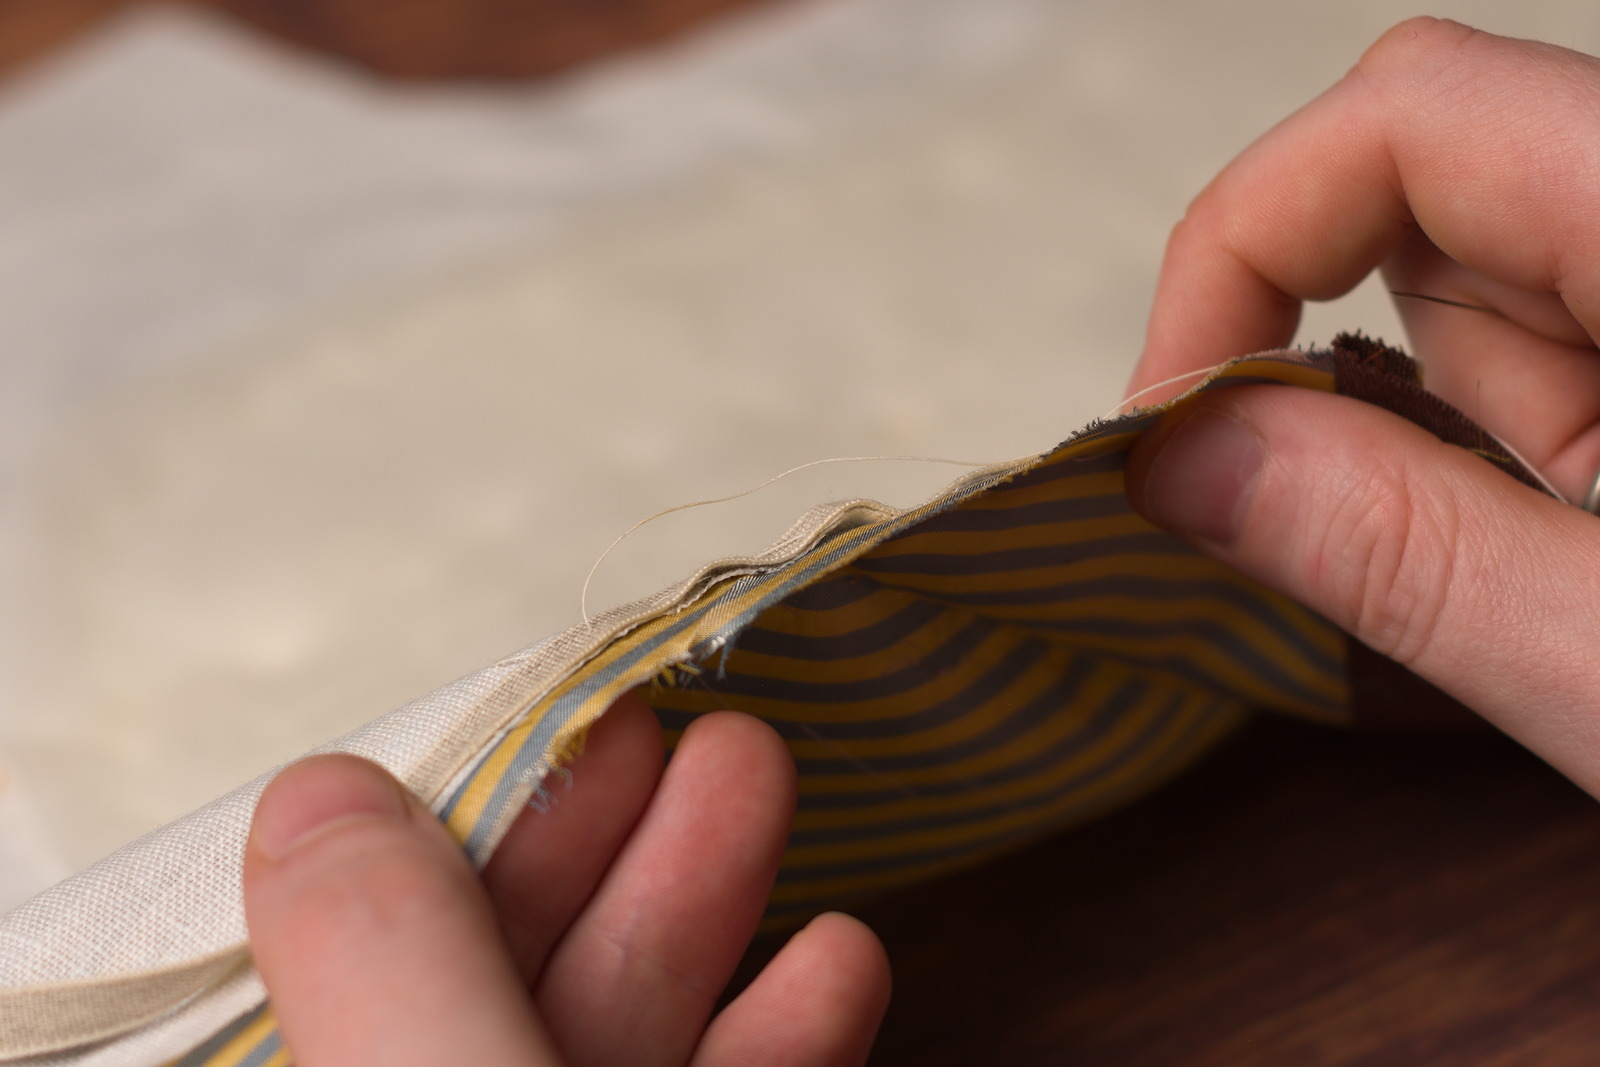
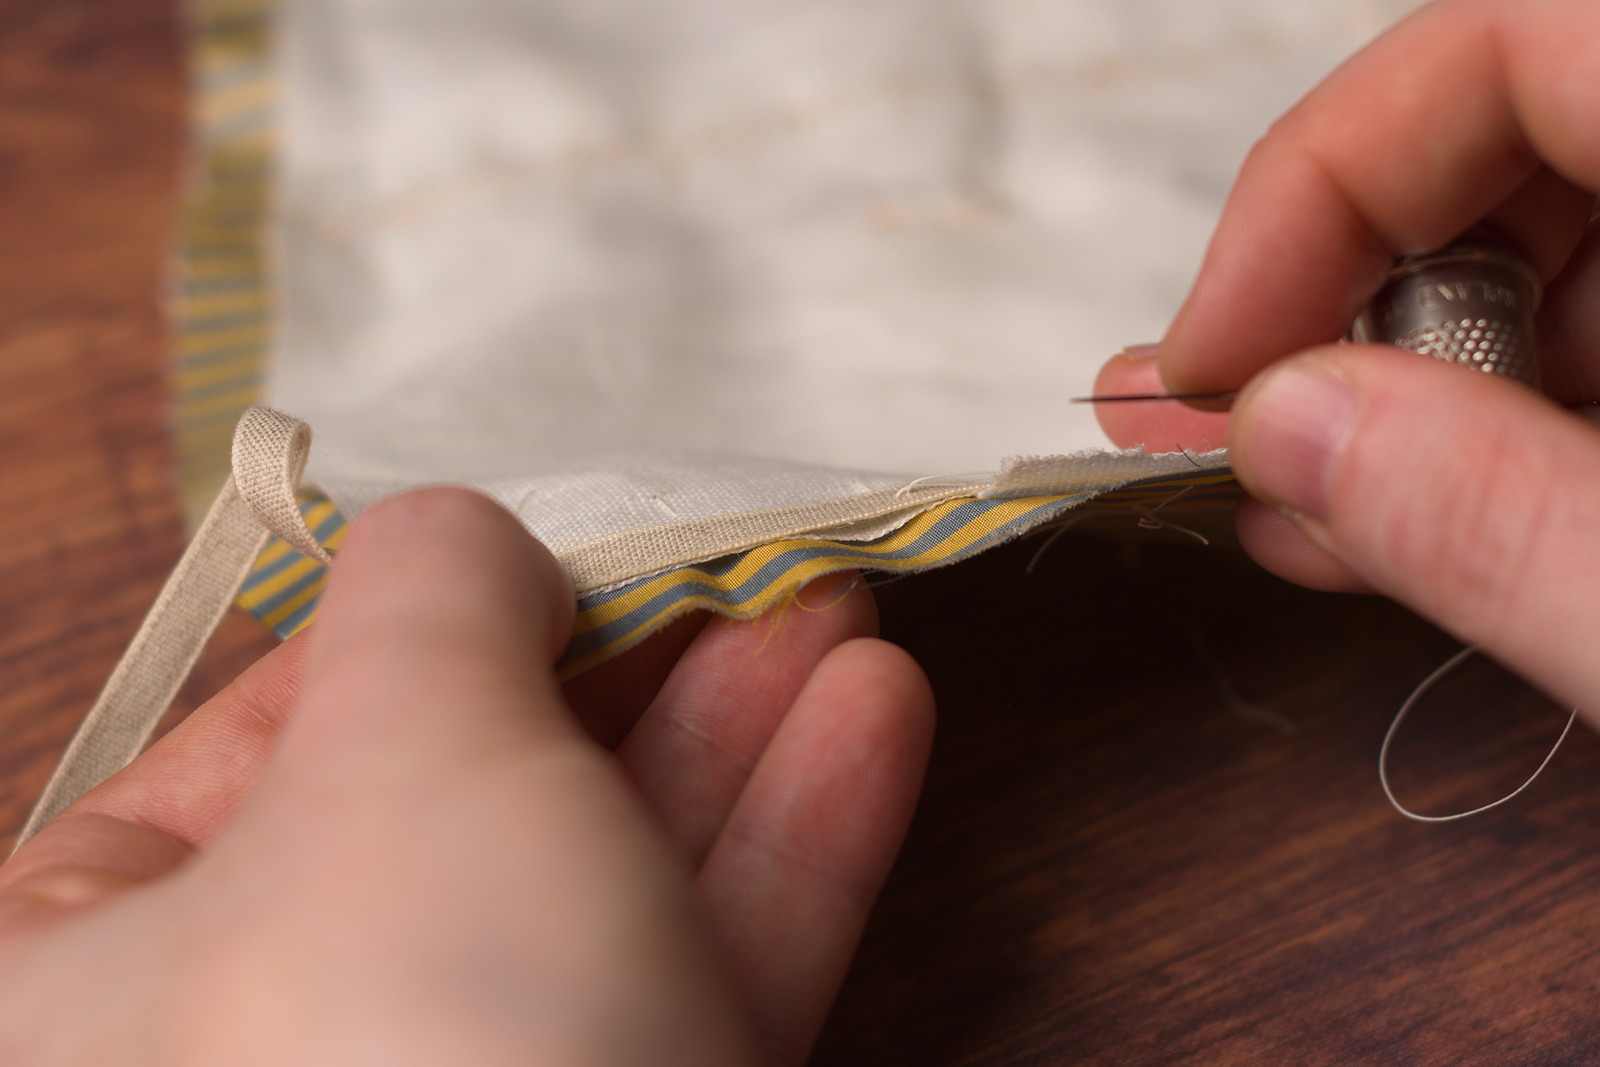
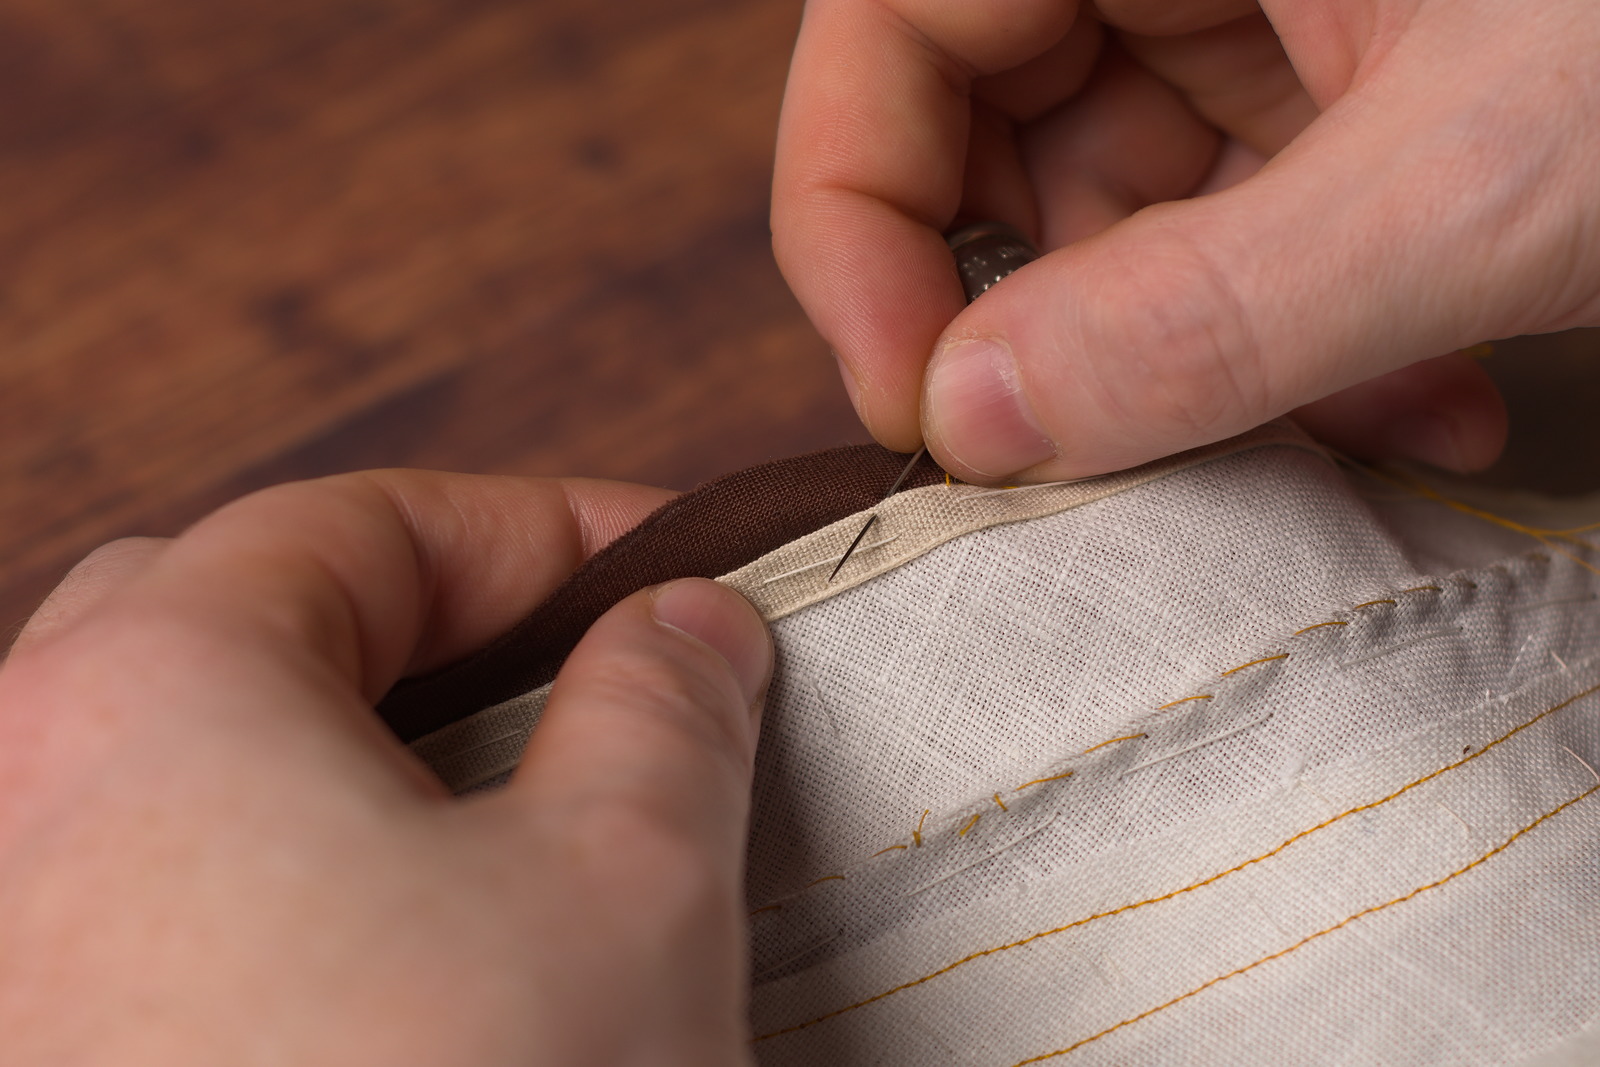
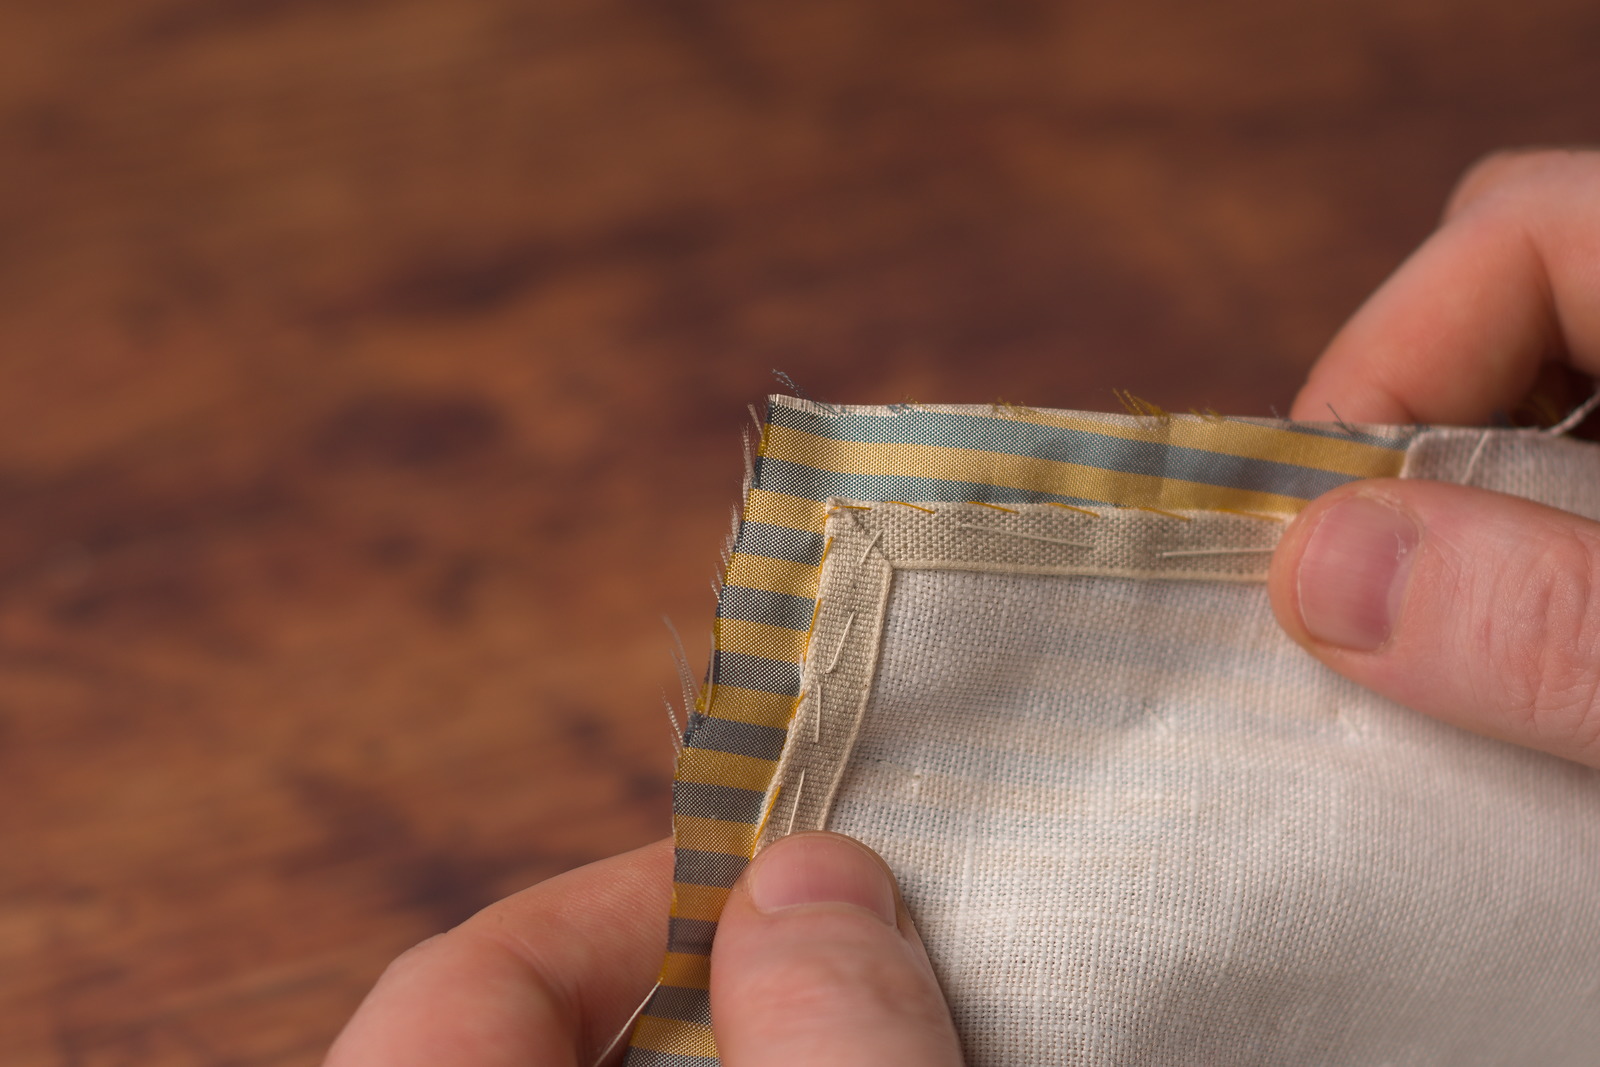
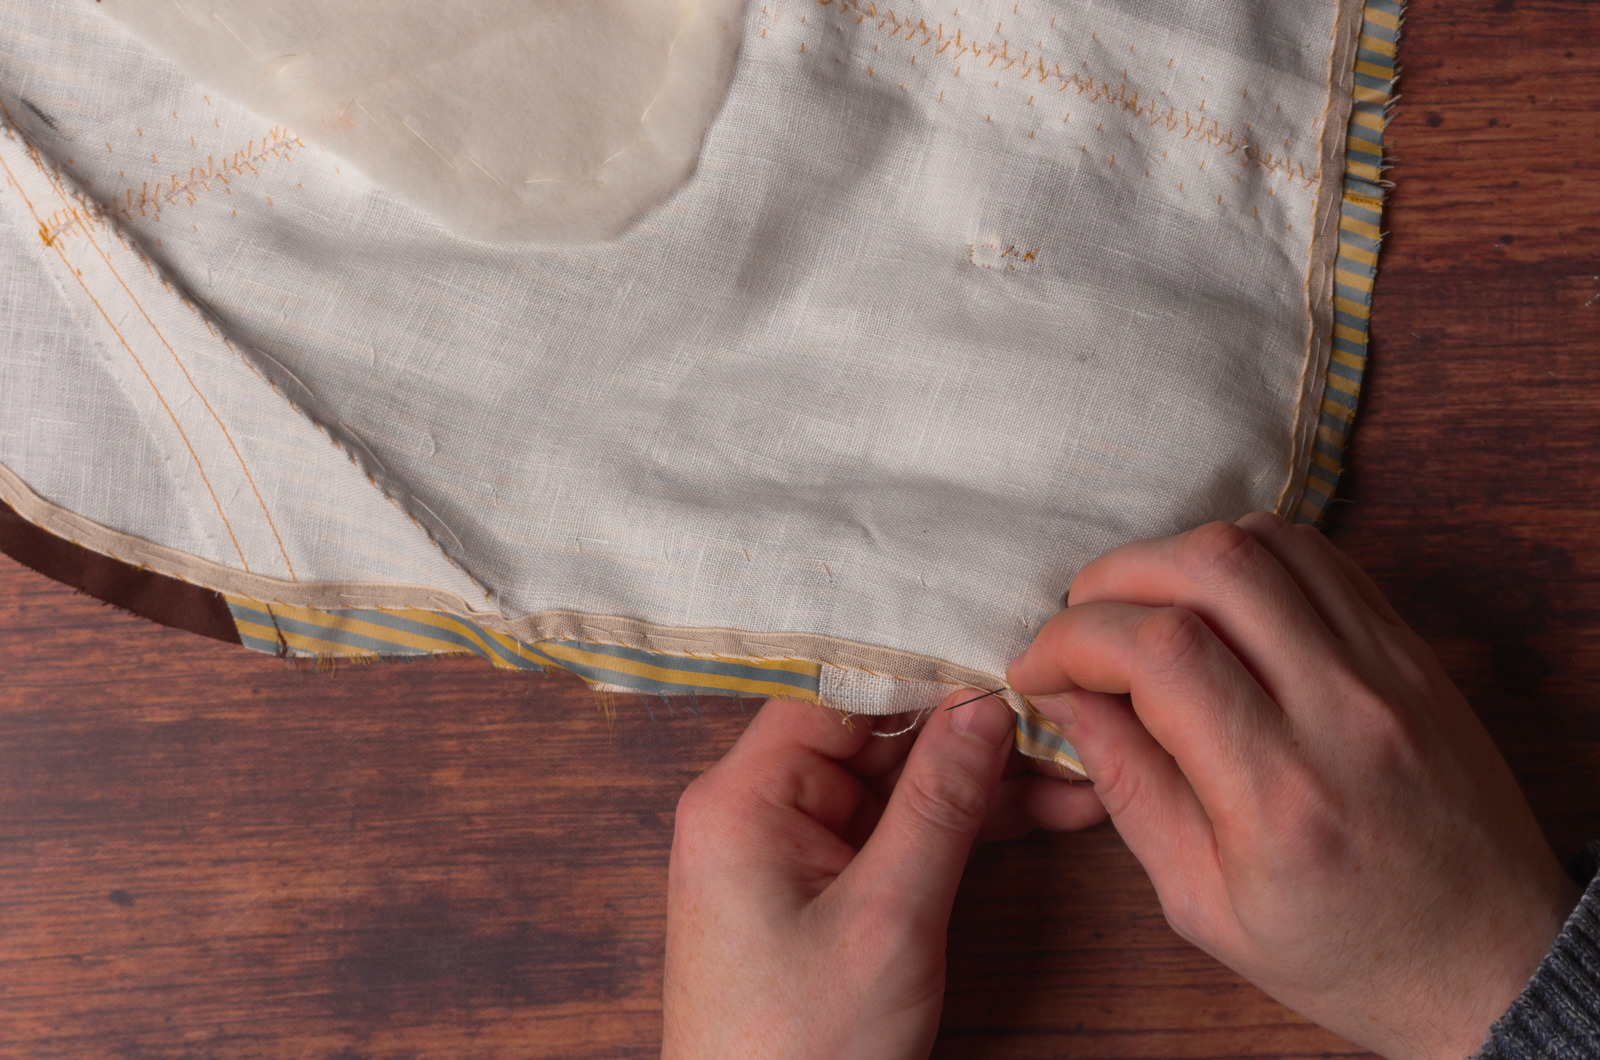
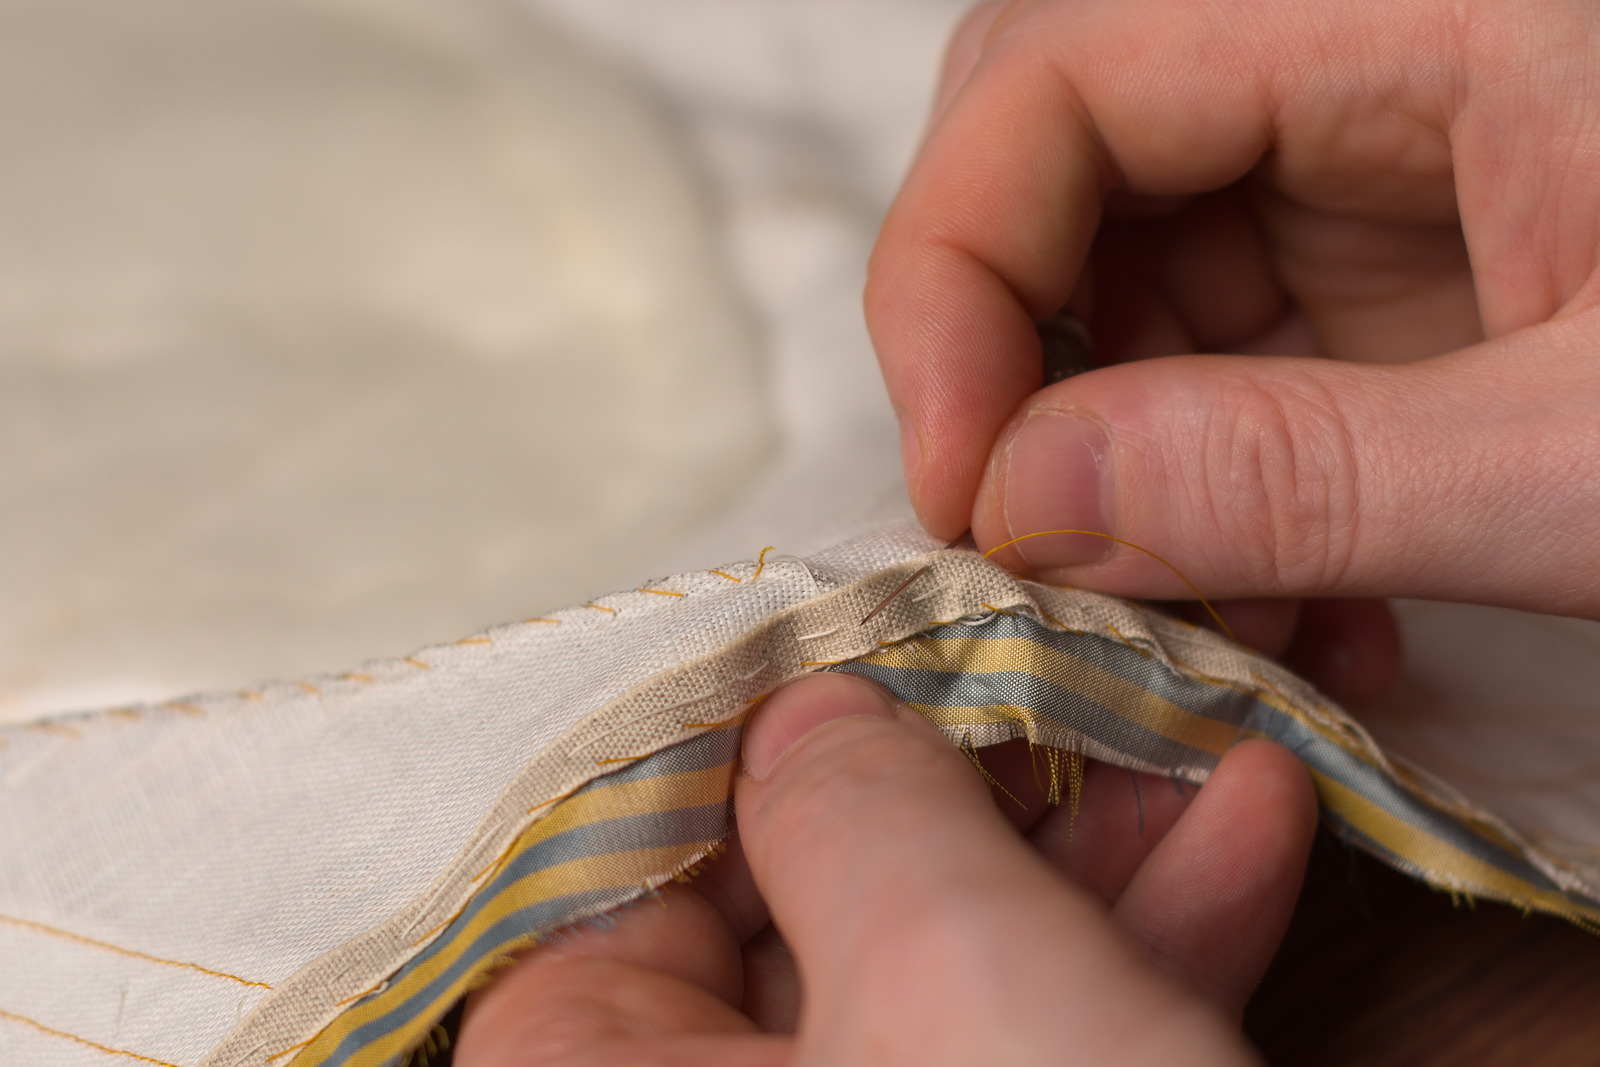
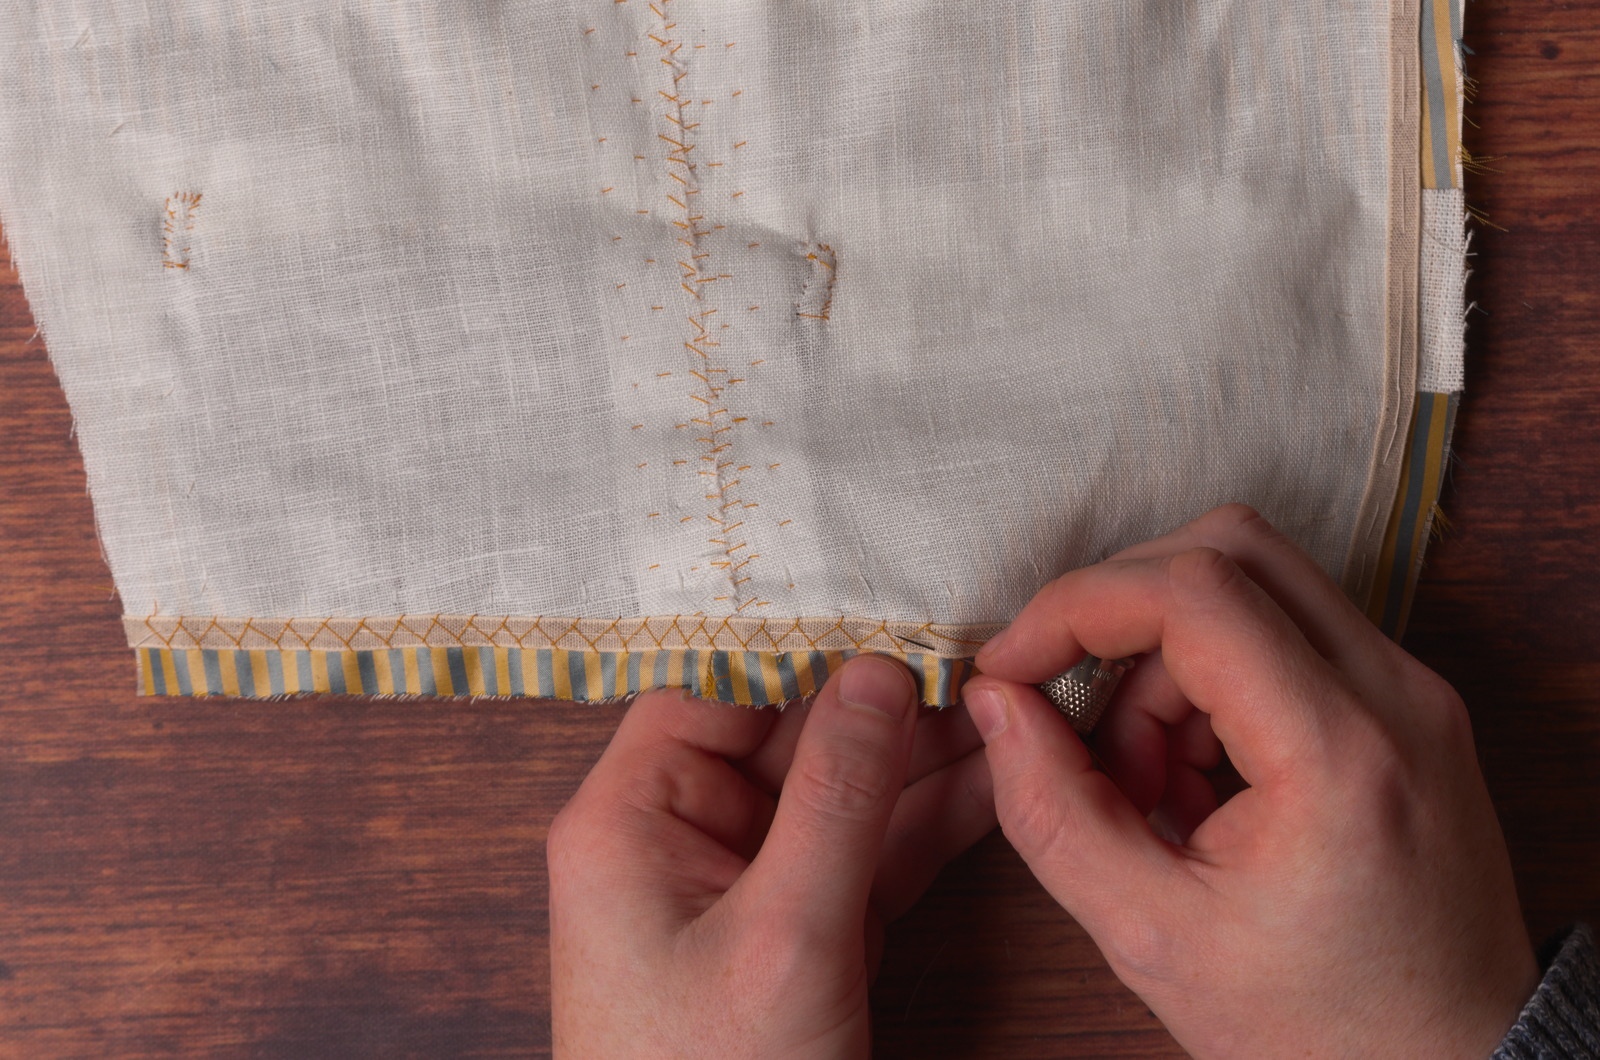
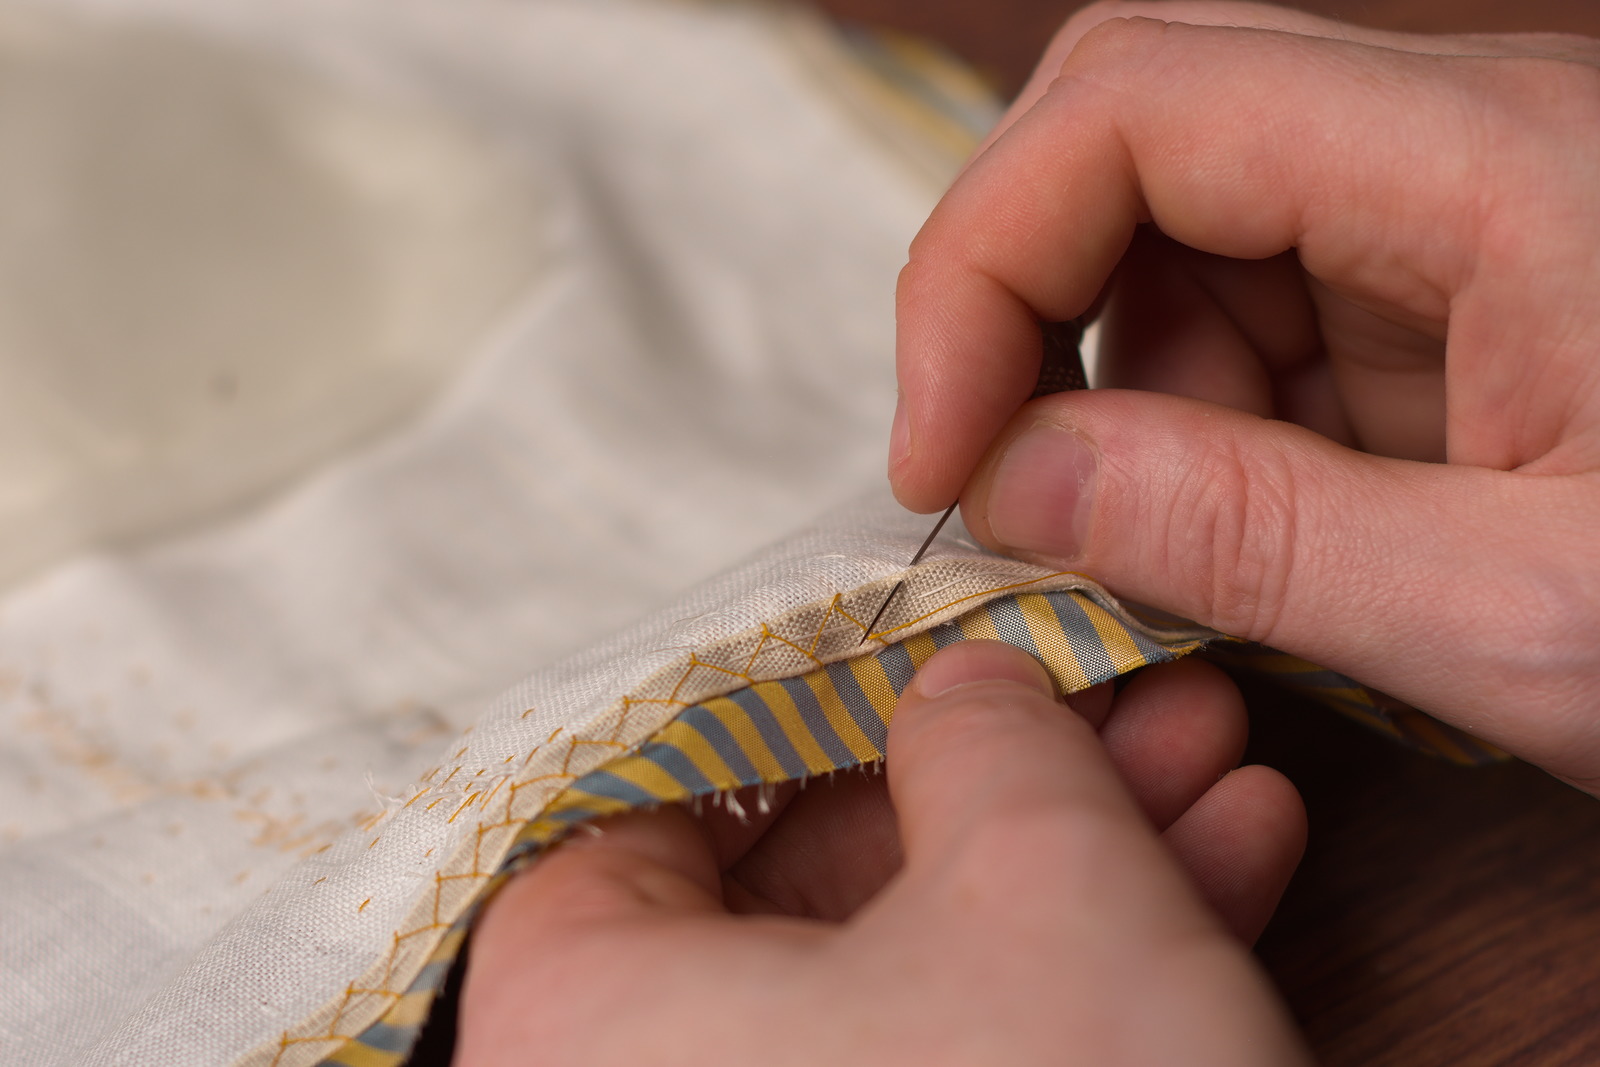
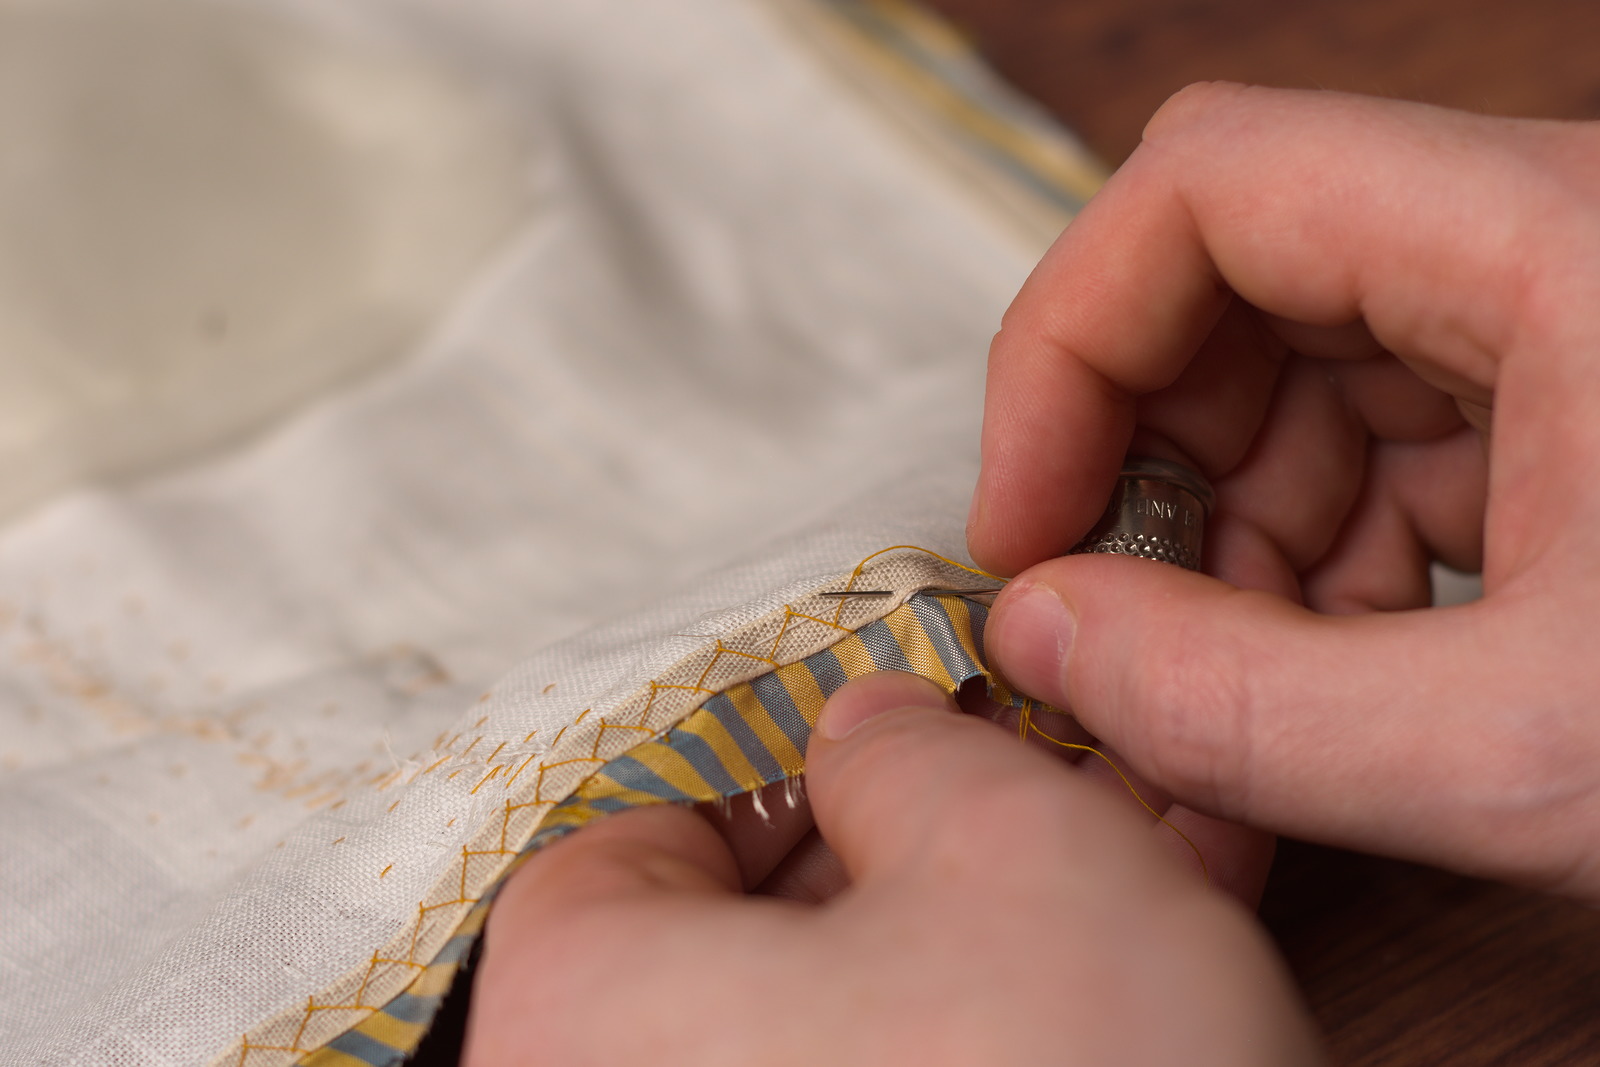
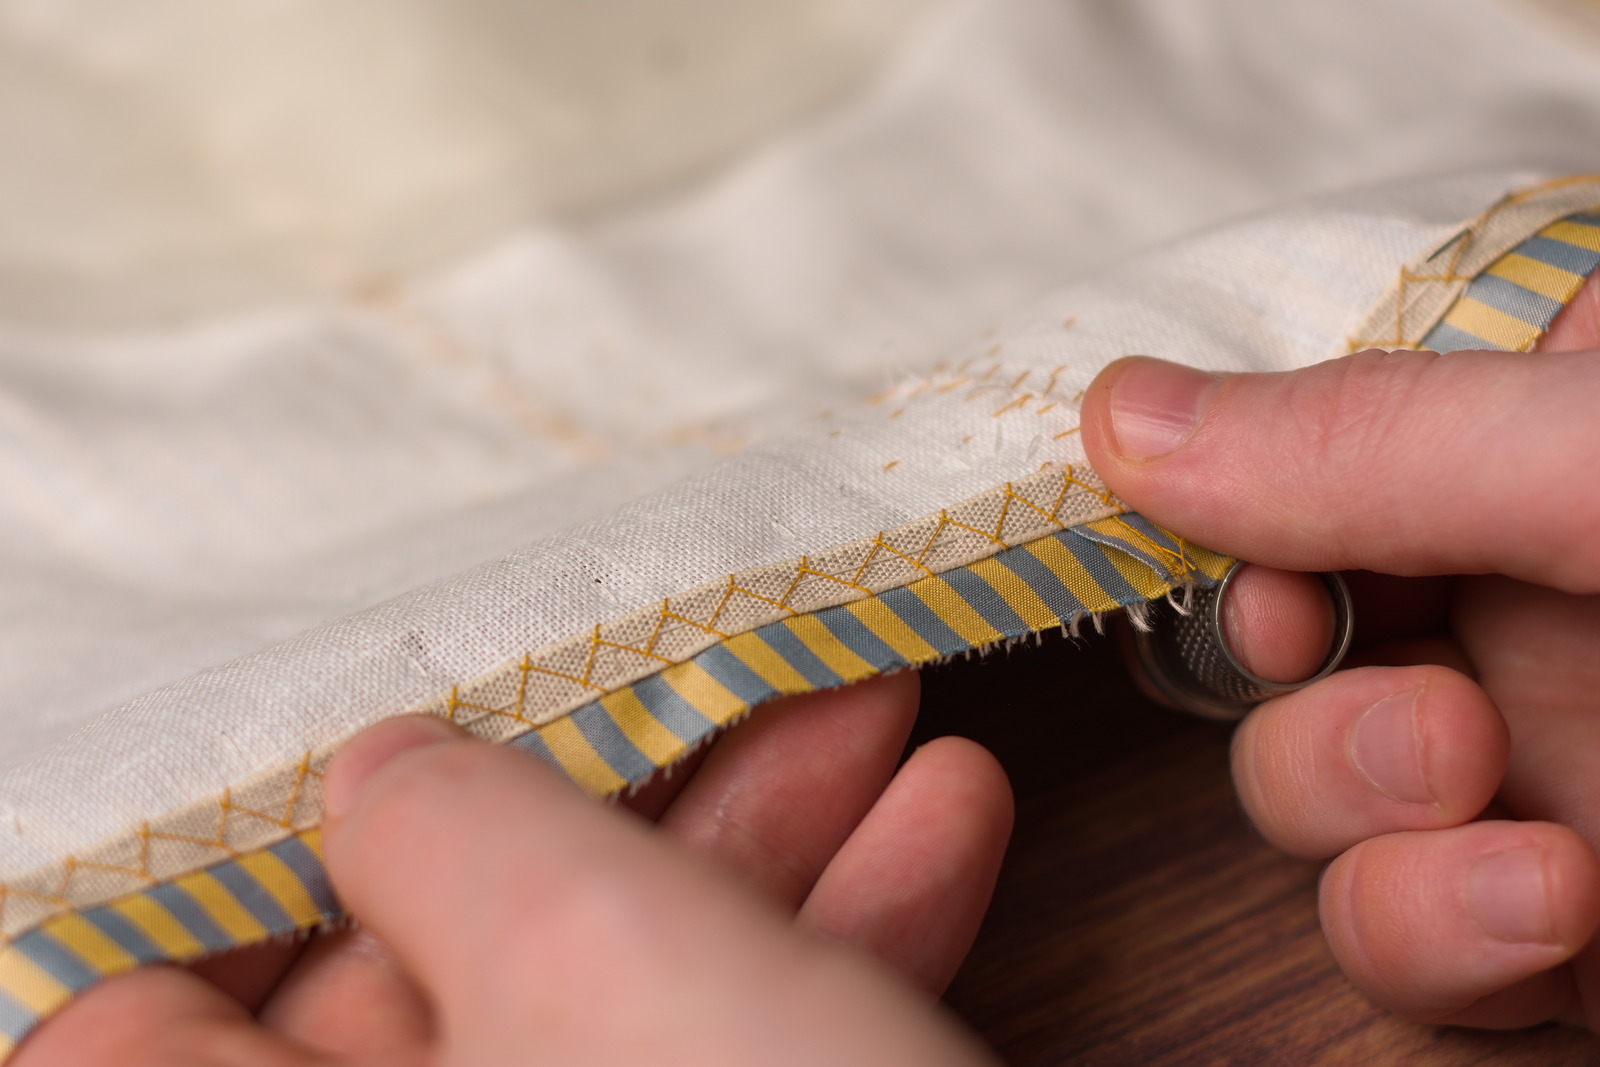
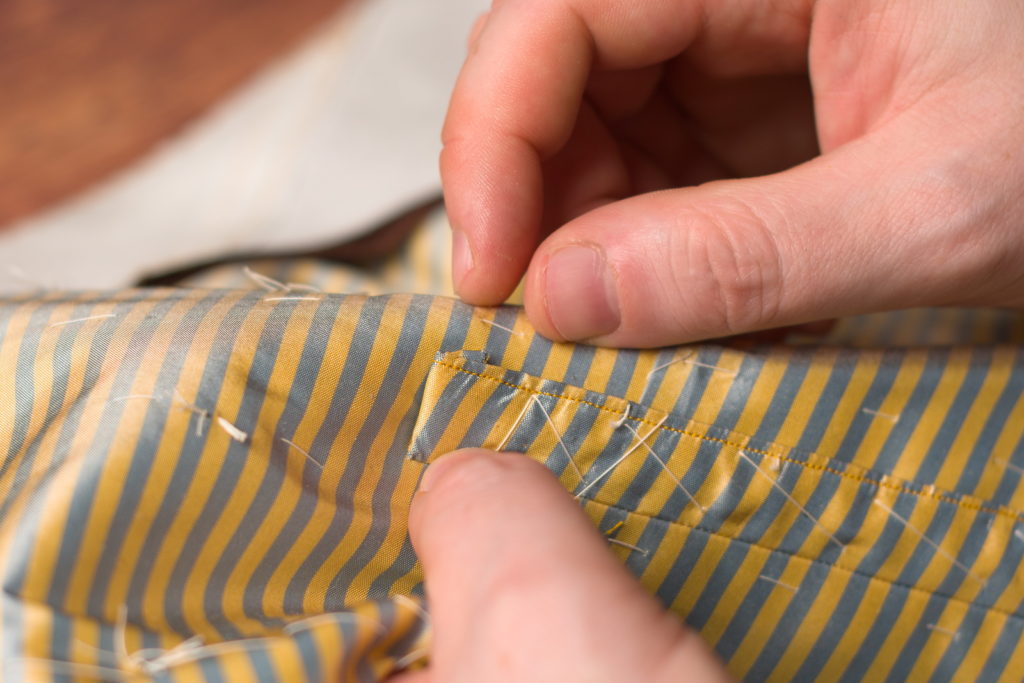
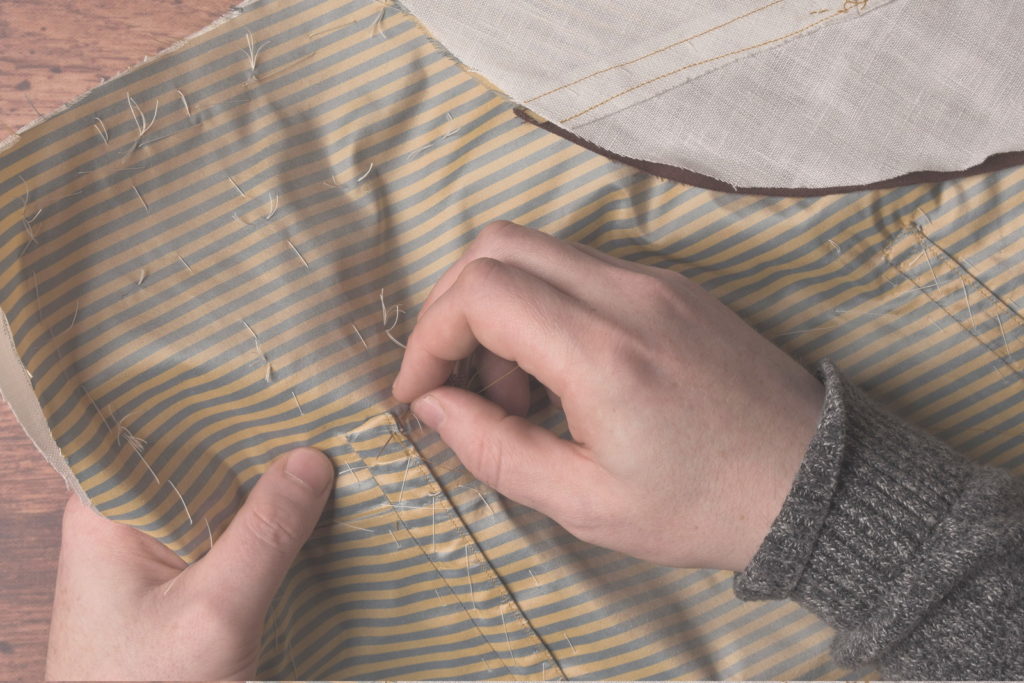
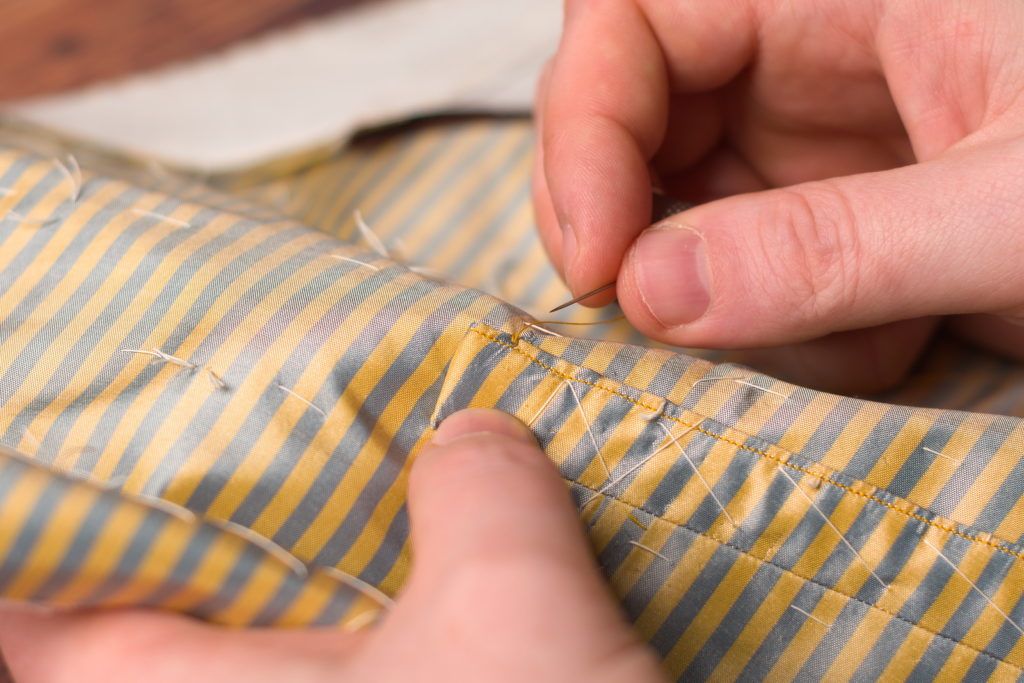
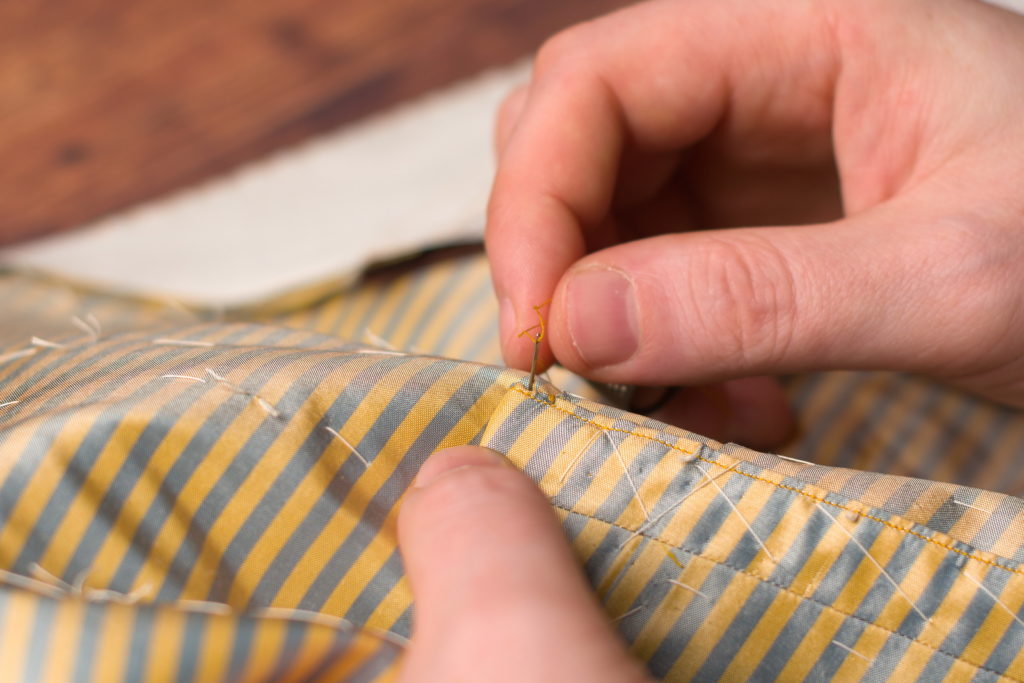
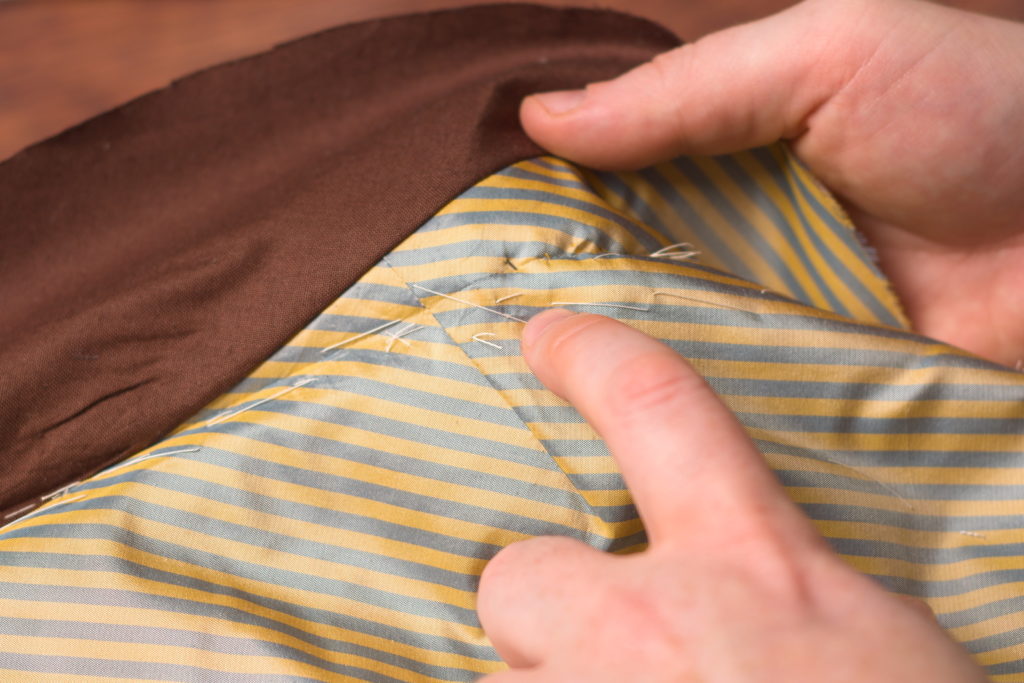
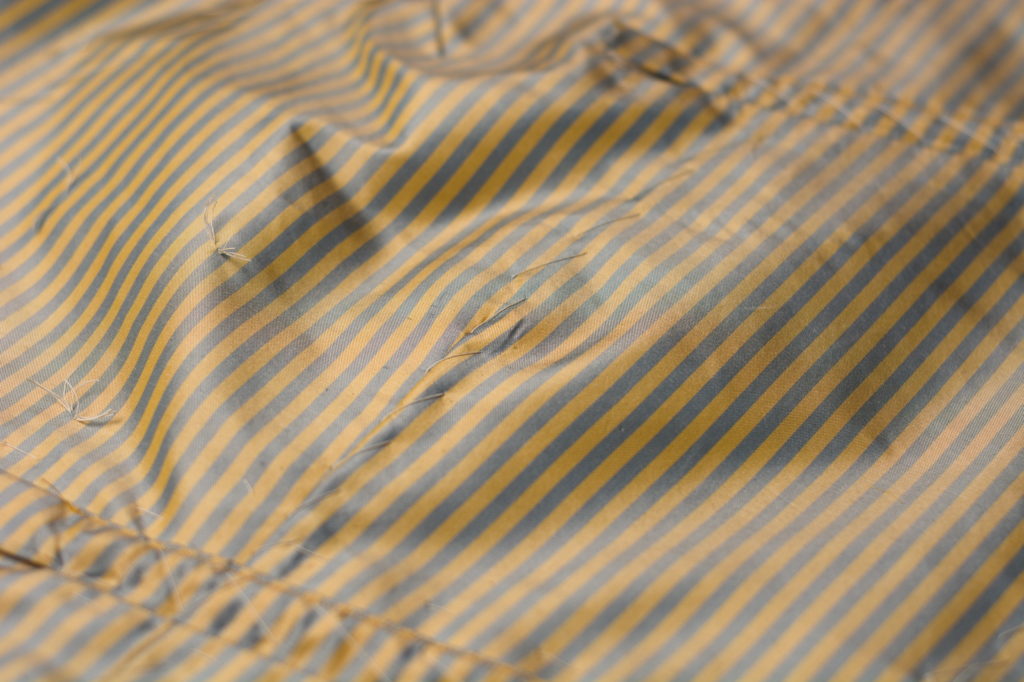
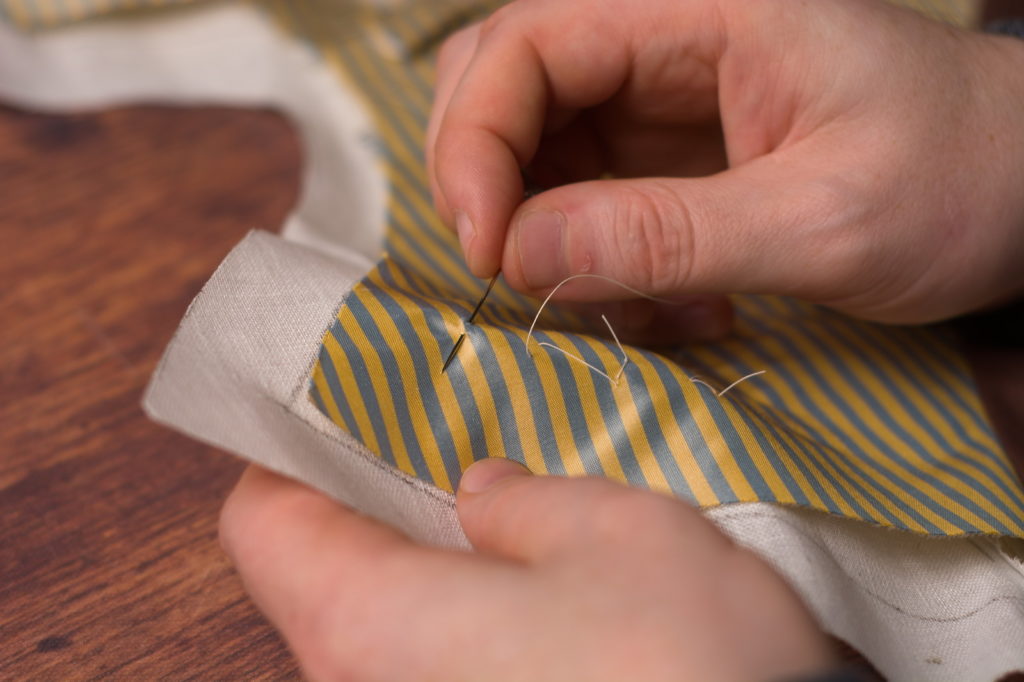
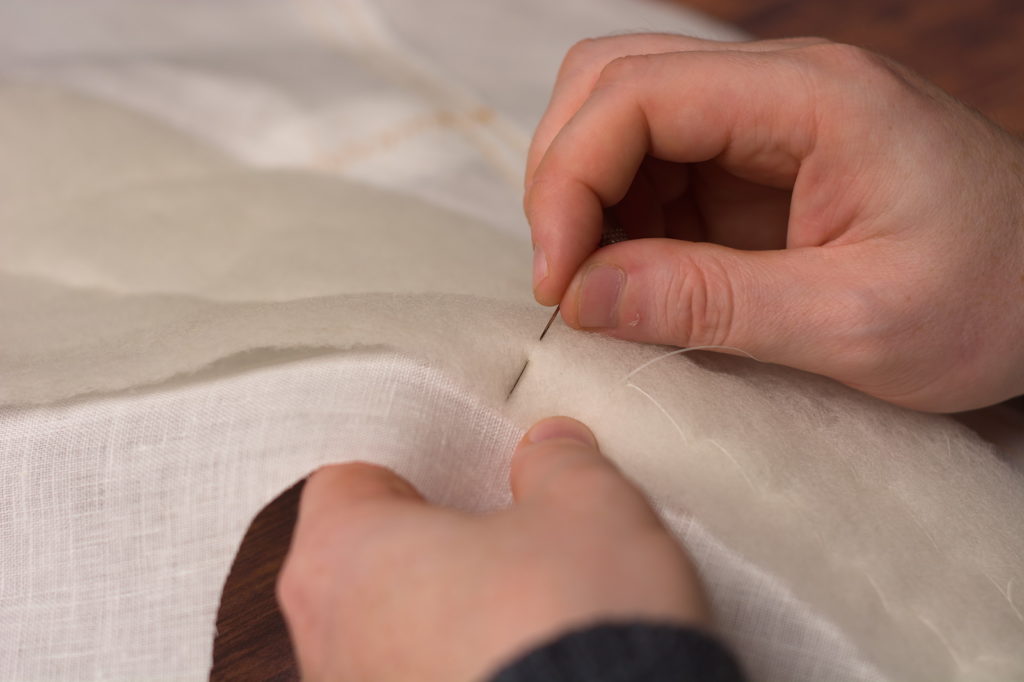
Using a small stitch, carefully fell the folded edge of the lining to the facings along the front, waist, and armscye edges.
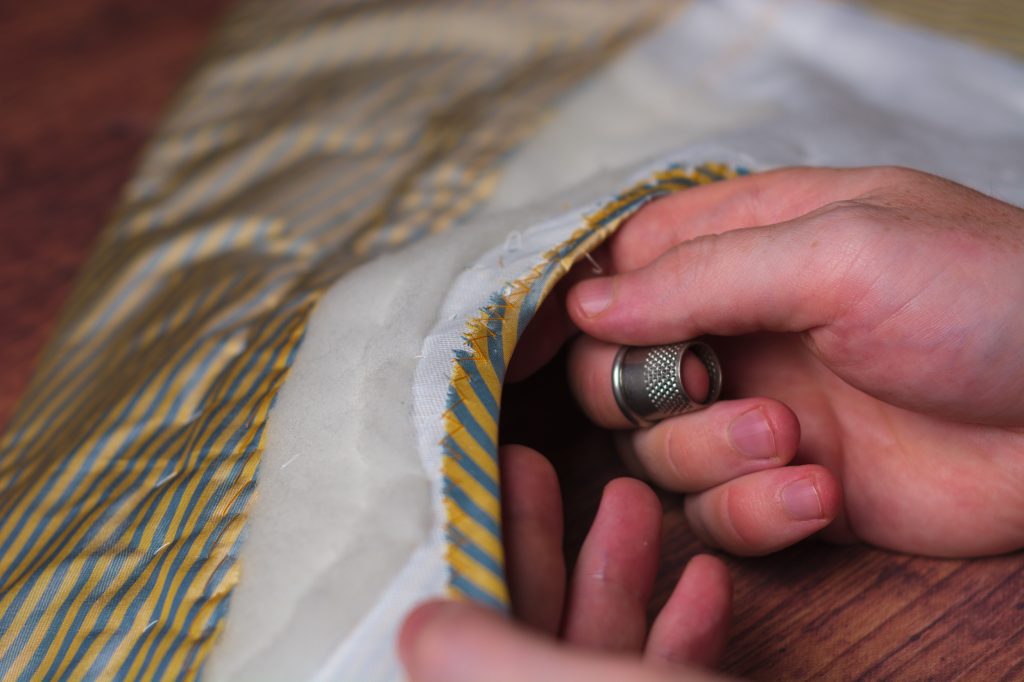
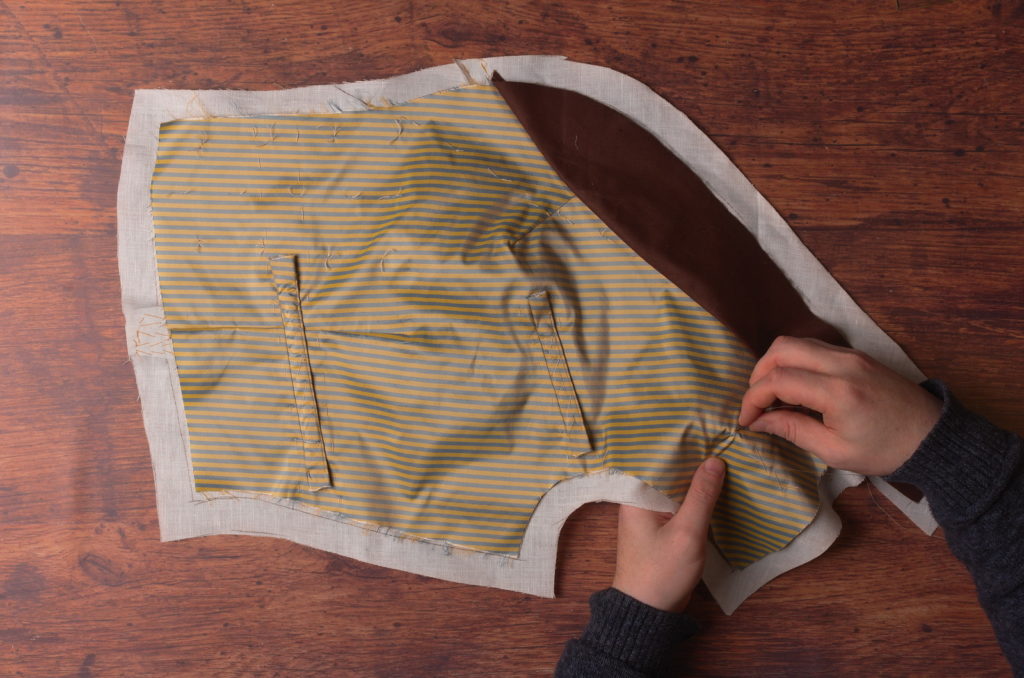
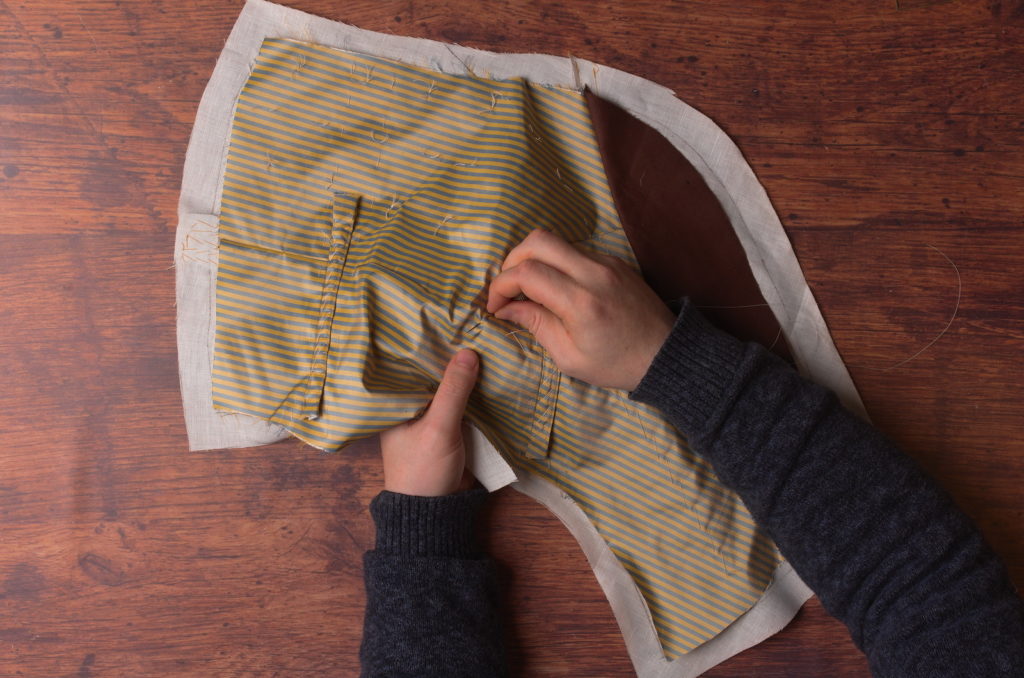
Along the waist seam of the lining, it’s very easy to sew through both pocket bags, sewing the pocket closed, so I like to insert my hand into the pocket as I’m stitching here to prevent that from happening.
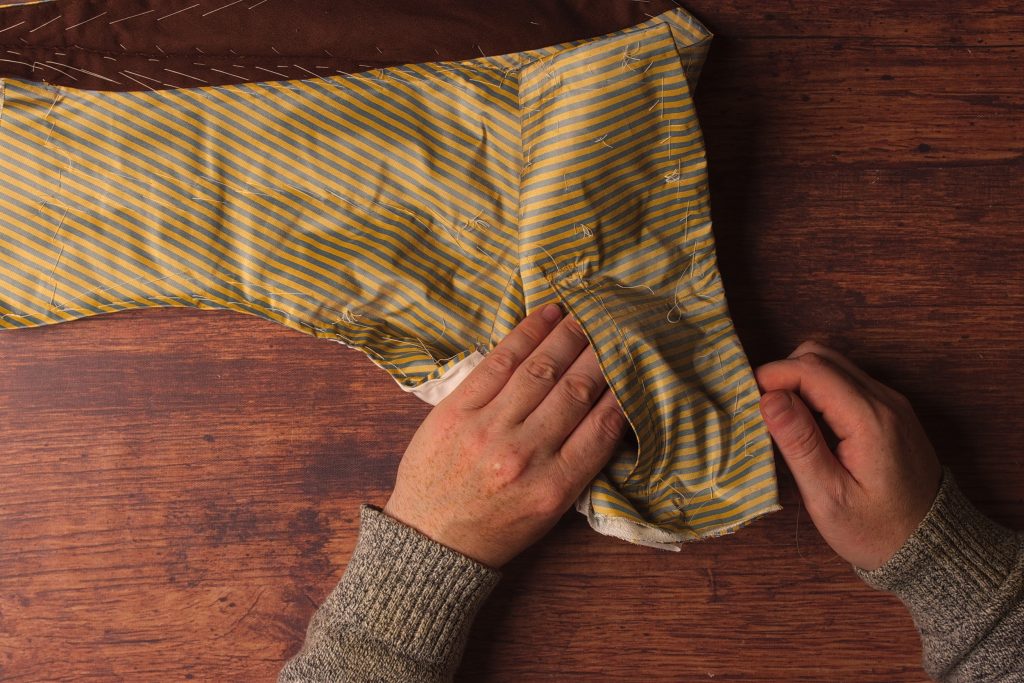
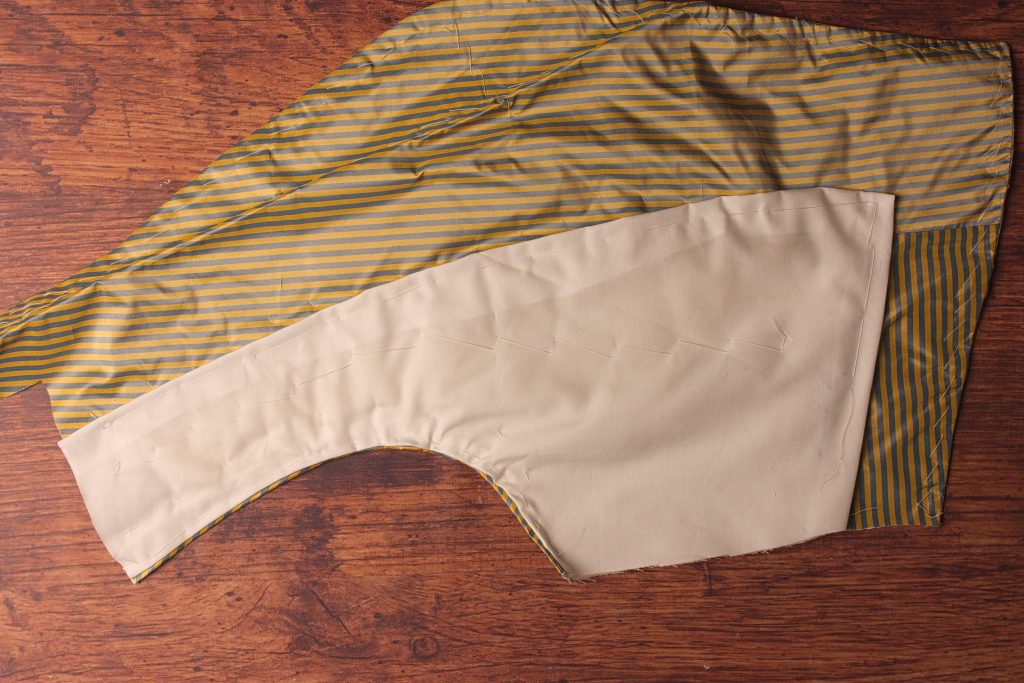
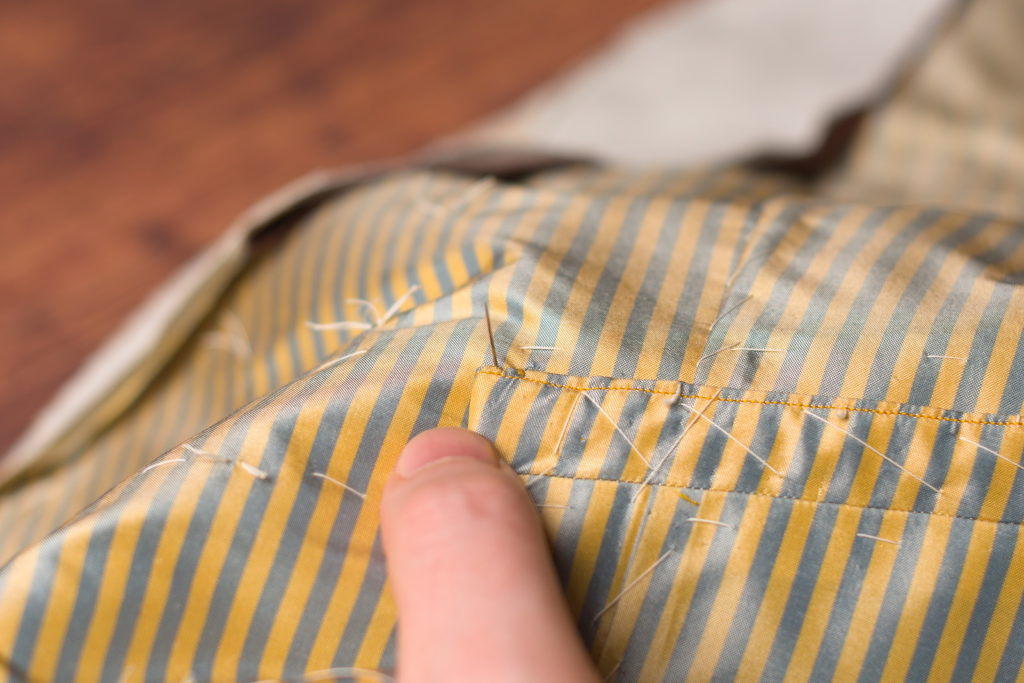
Finally, stitch along the armscye lining edge as well.

Finishing the Armscye
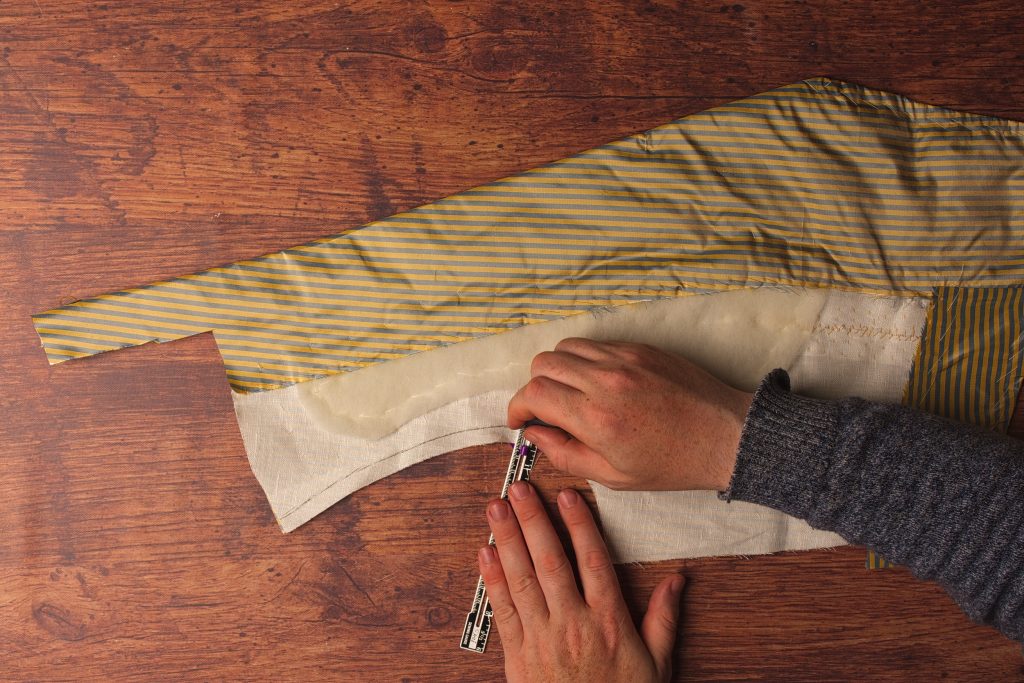
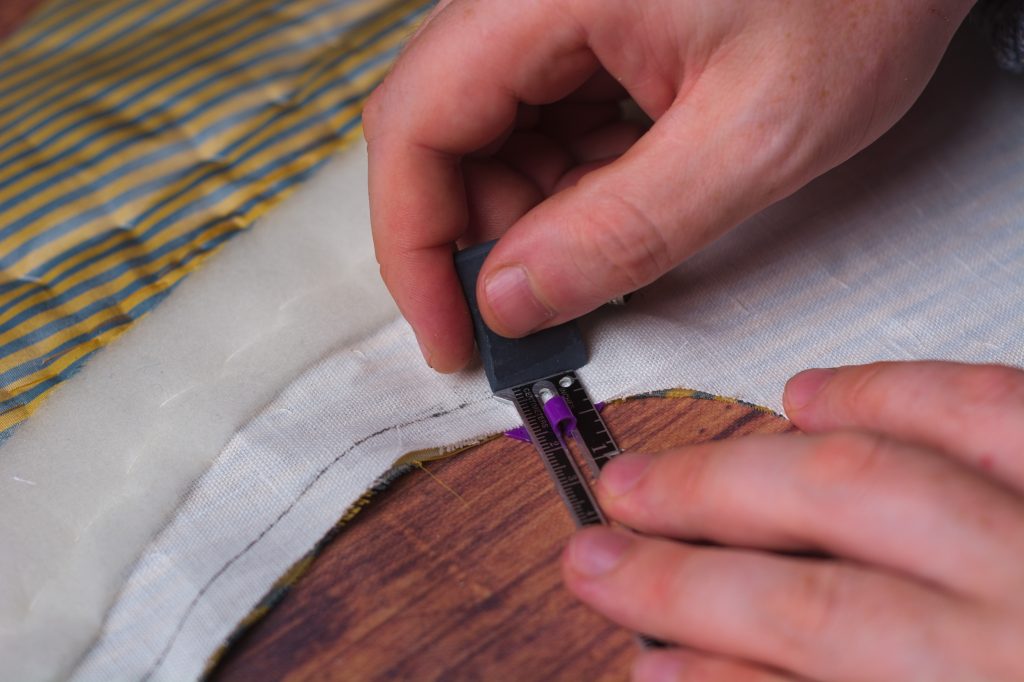
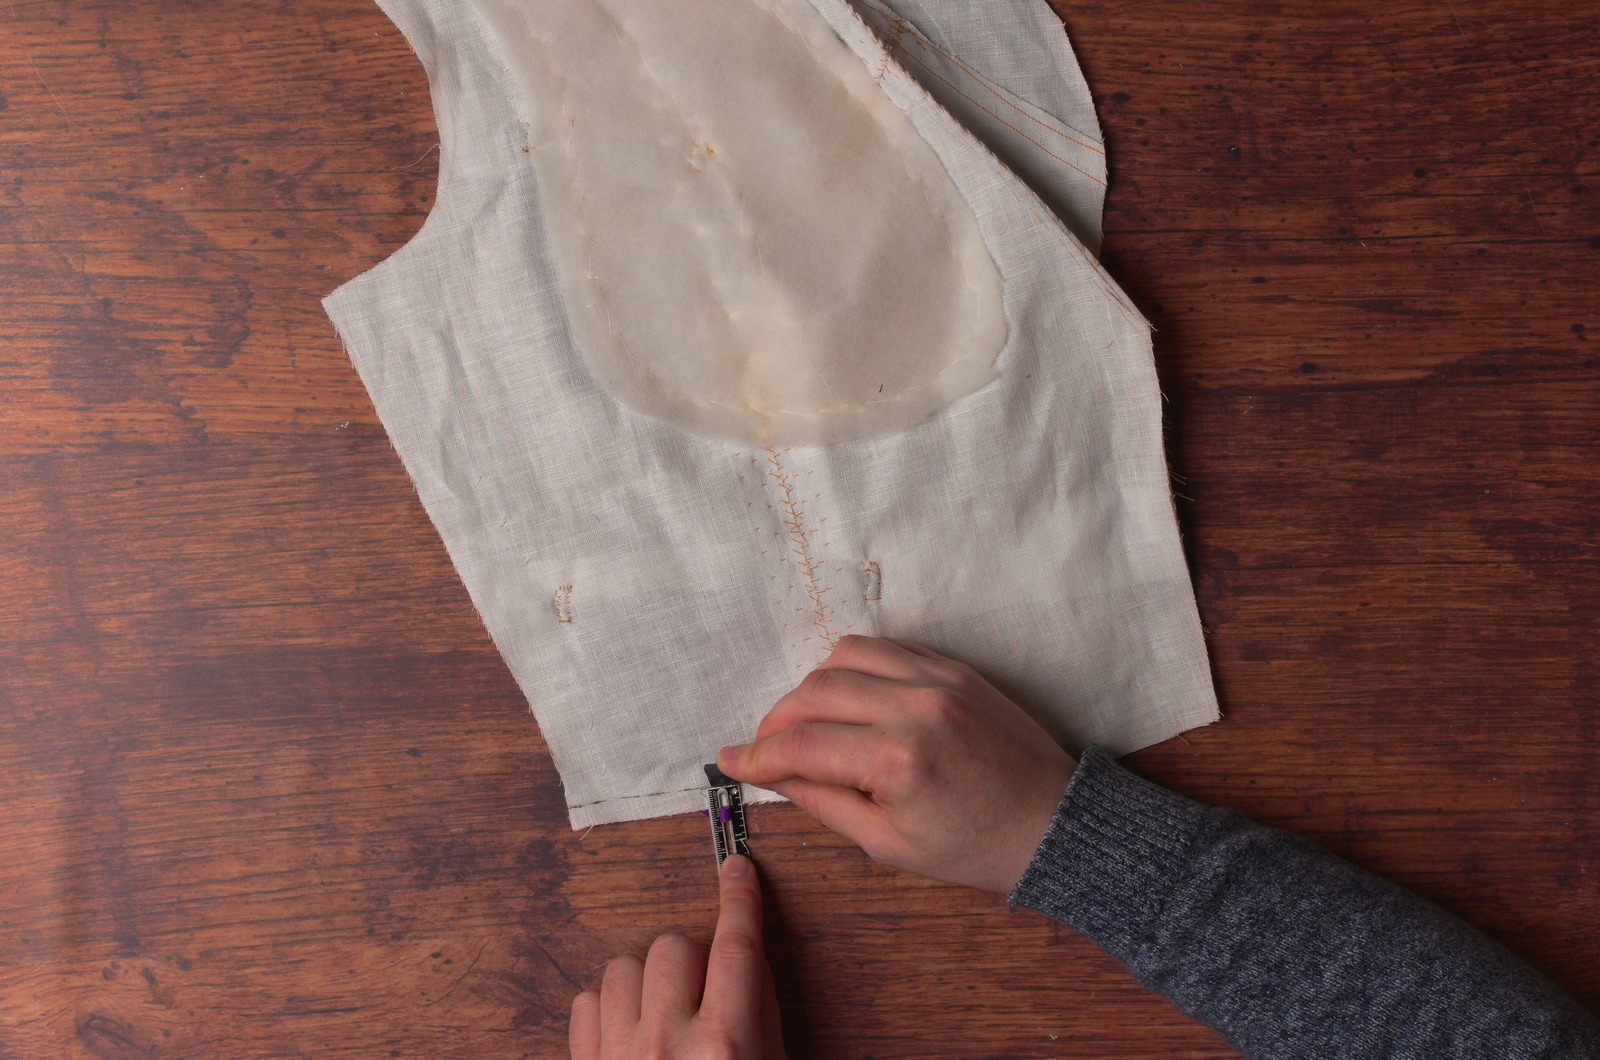
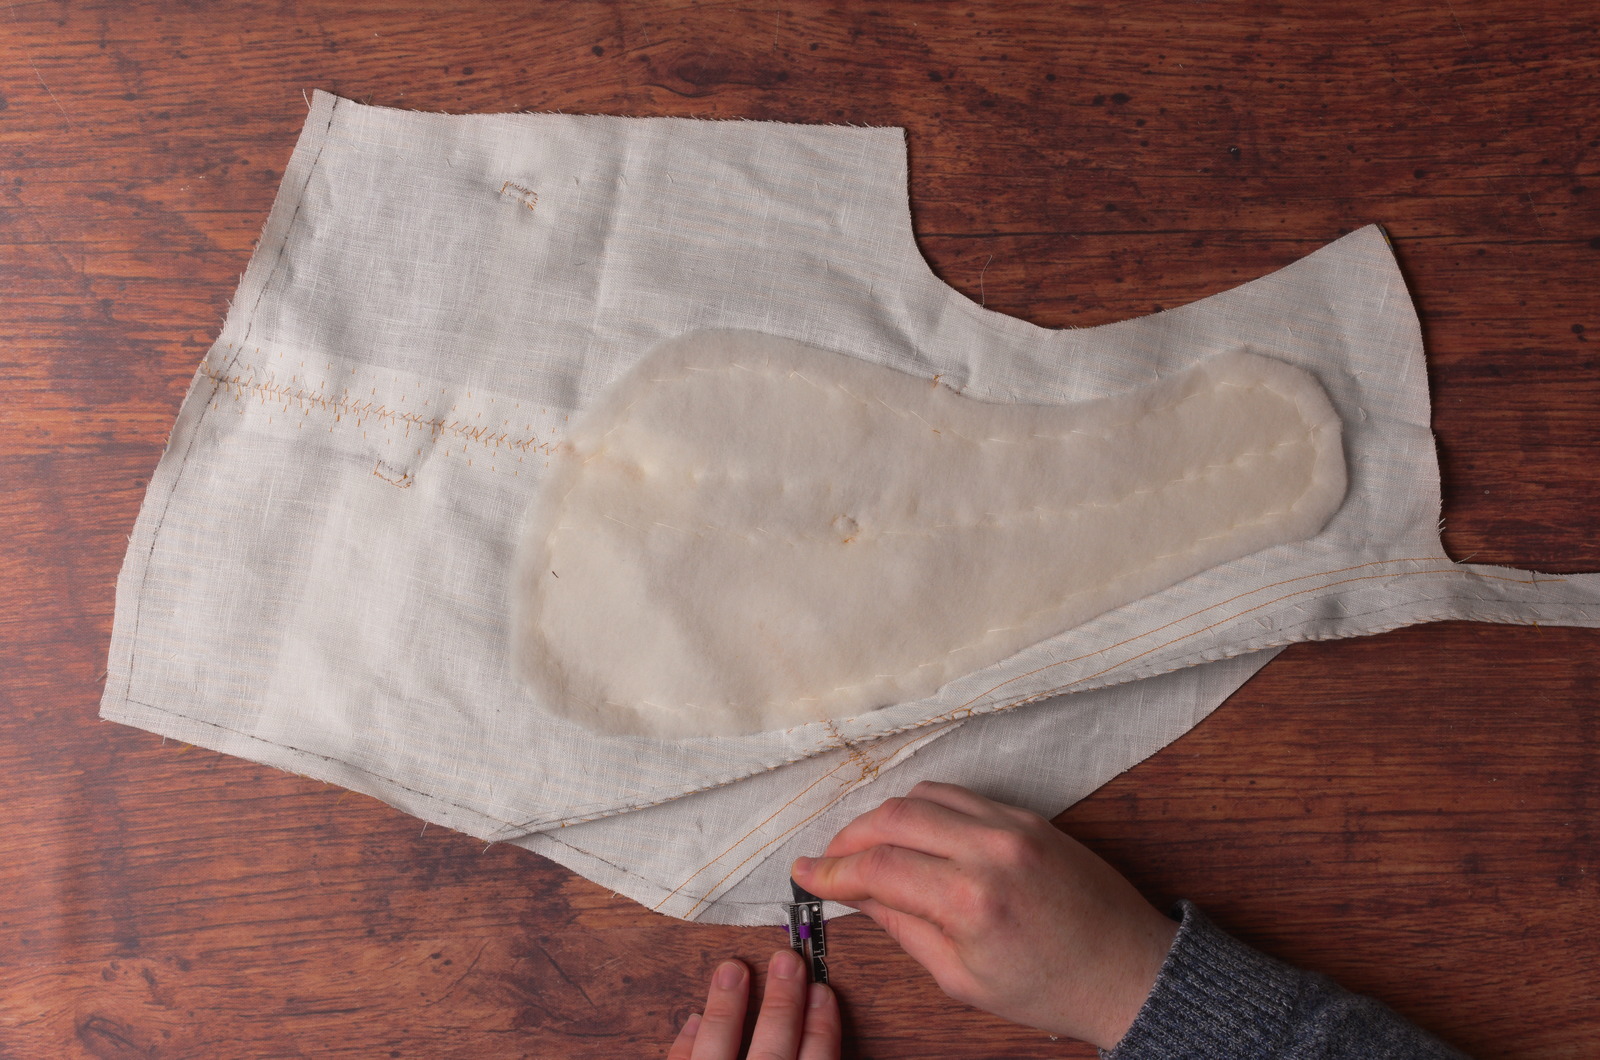
We’ve got to finish the armscye now before installing the lining. Begin by measuring and drawing out the seam line 3/8″ from the edge.
Carefully trim away the linen canvas from the seam allowance.
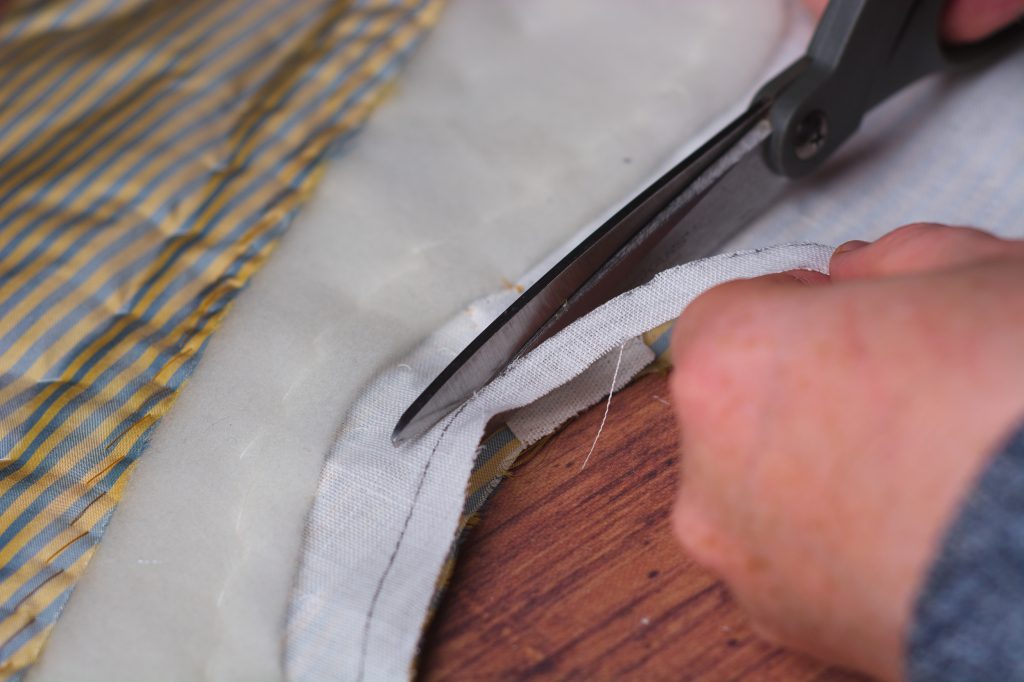
You can trim off the linen pocket stay as well if there is one.
At the deepest part of the armscye, clip into the seam allowance about halfway, every 1/2″ or so. This relieves the pressure when turning the fabric over itself.
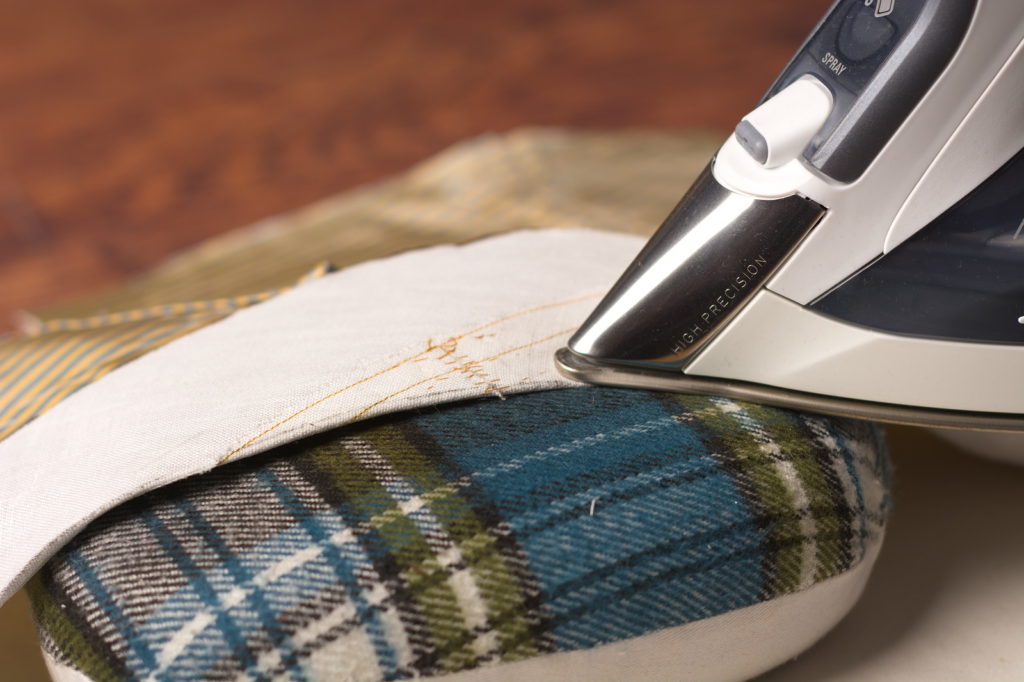
Carefully fold over the seam allowance and baste securely closed. Press with an iron over a tailor’s ham to get a nice crisp edge.
Cross stitch the seam allowance to the canvas, taking care not to catch the right side of the fabric underneath.
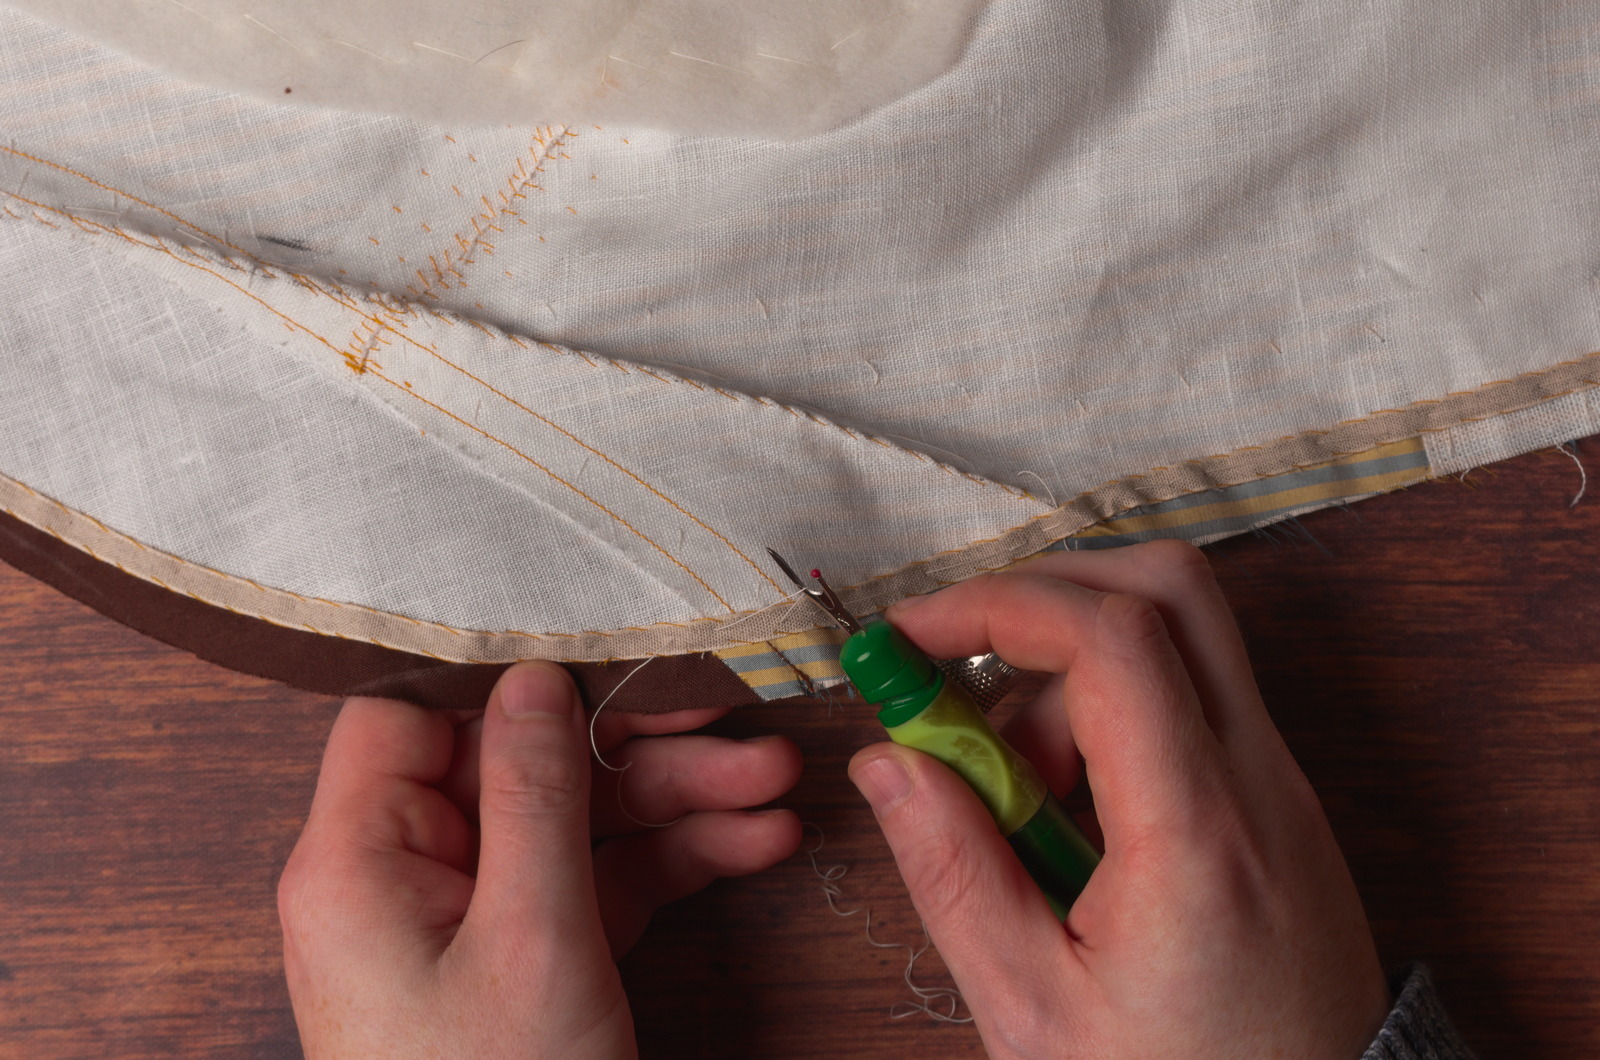
Remove the basting stitches.
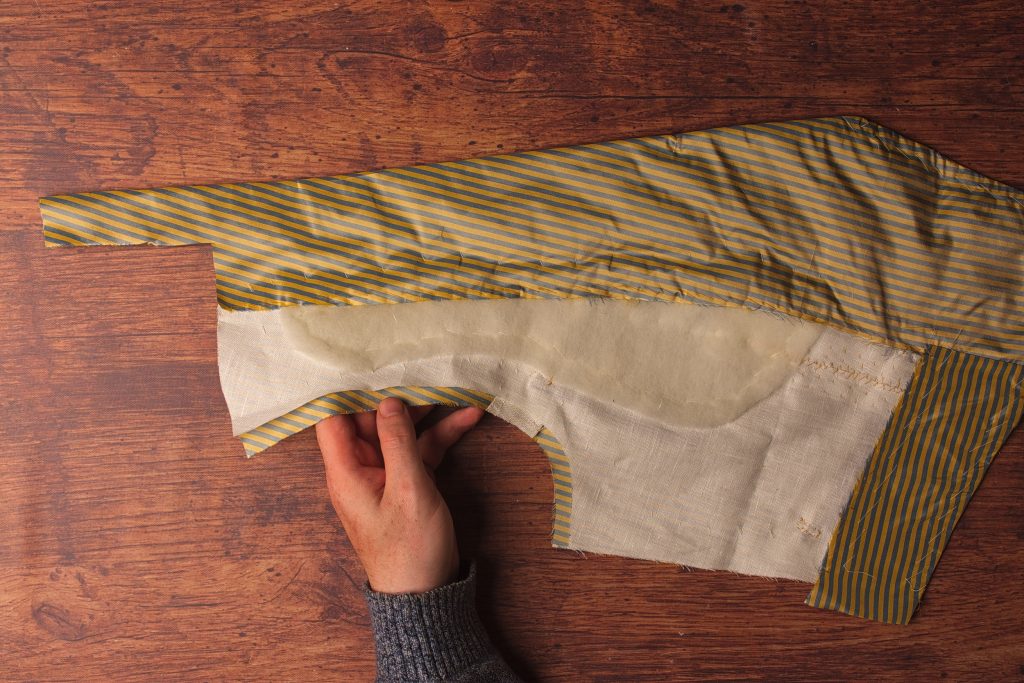
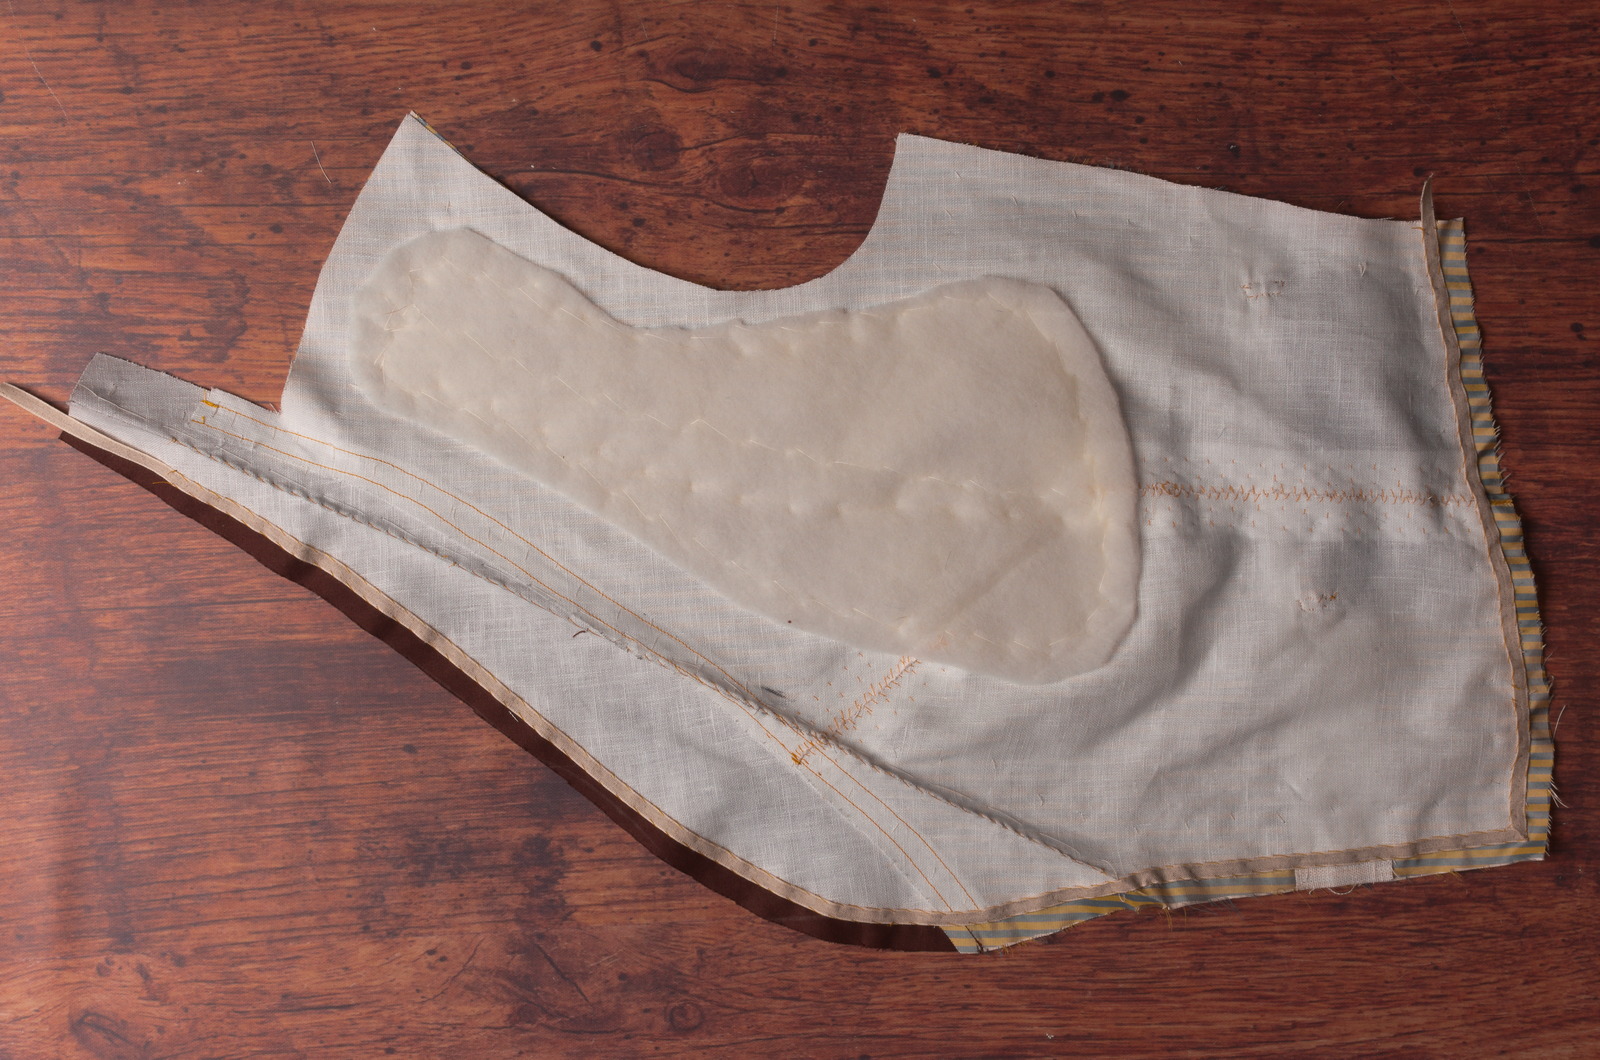
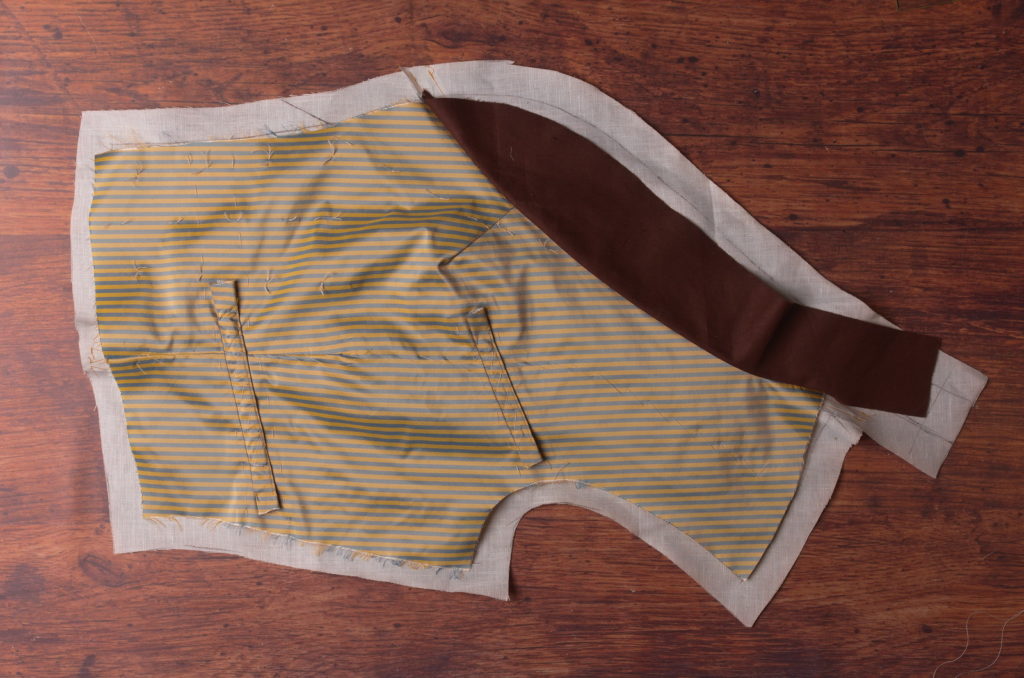
Here’s the completed armscye.
Attaching the Facings
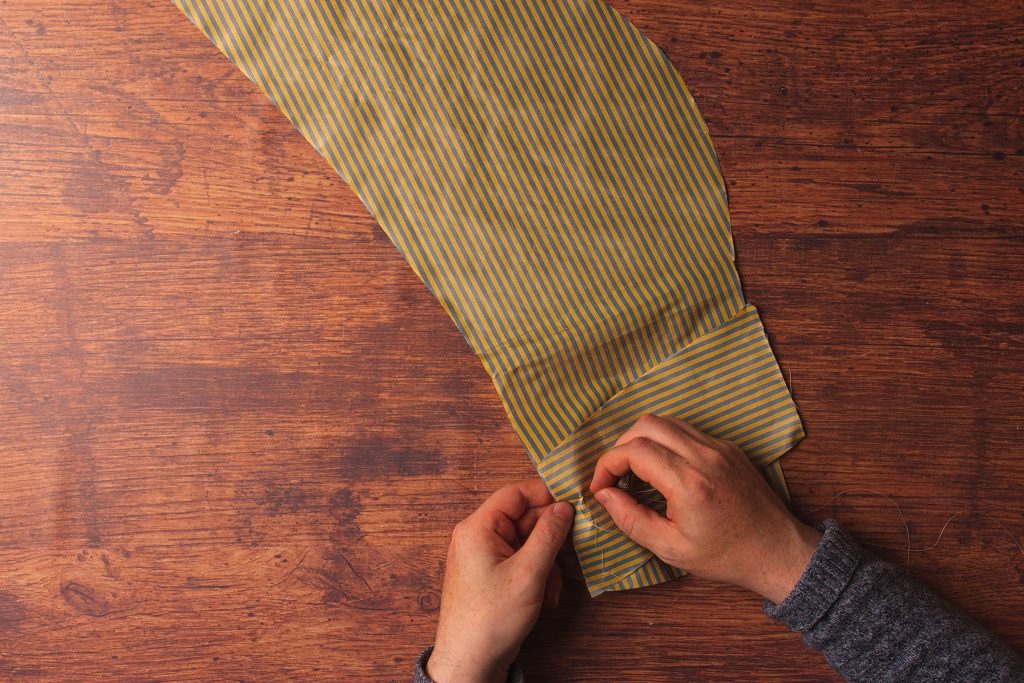
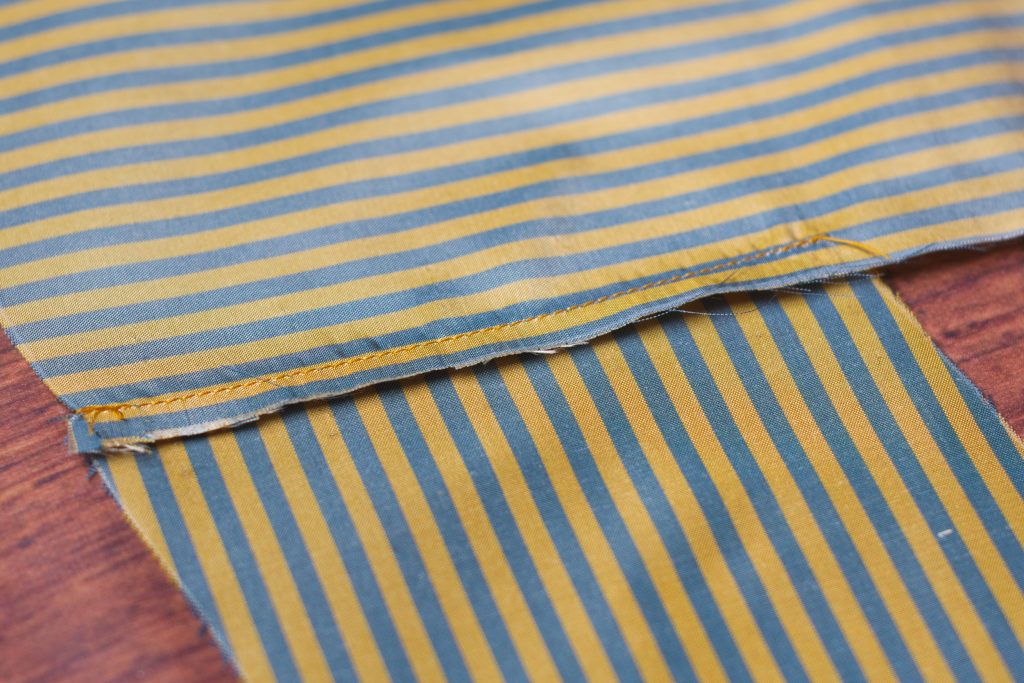
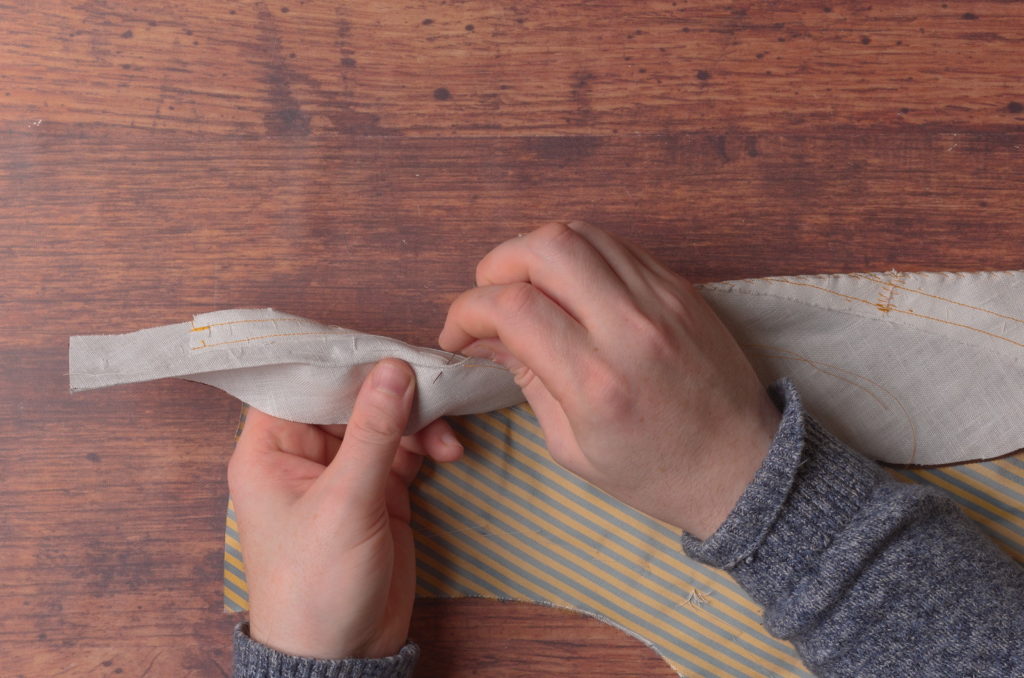
Let’s prepare the facing now in order to install it into the waistcoat. Begin by basting the two sections of the facing together at the bottom, right sides together. It’s easy to lose track of which way is which with the smaller bottom section, so compare it to your pattern to make sure it’s going the correct direction.
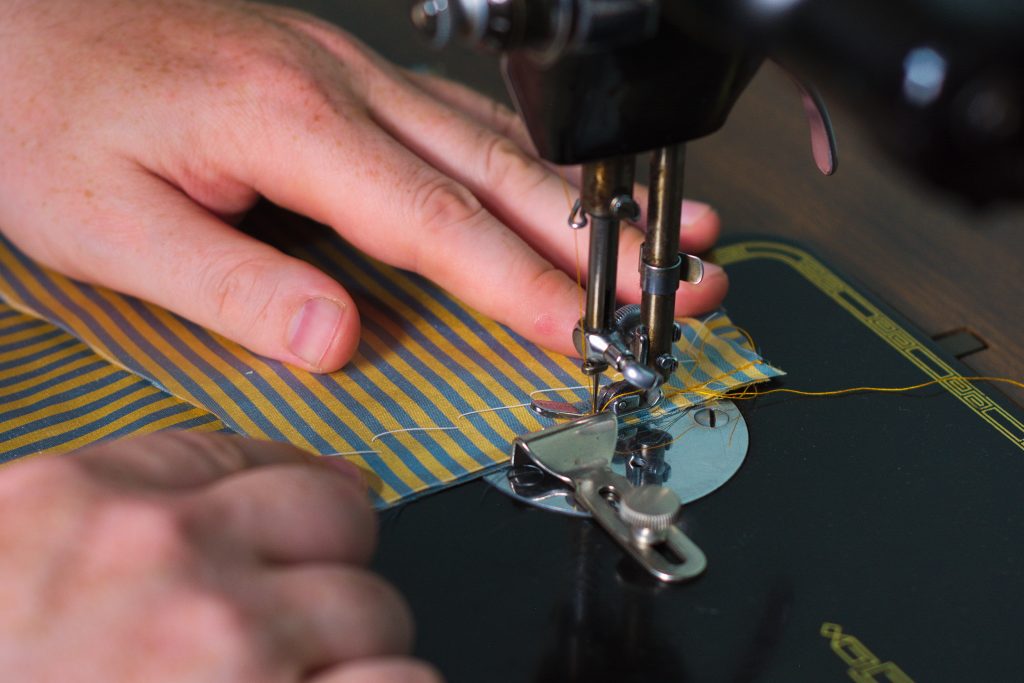
Sew using a 3/8″ seam allowance.
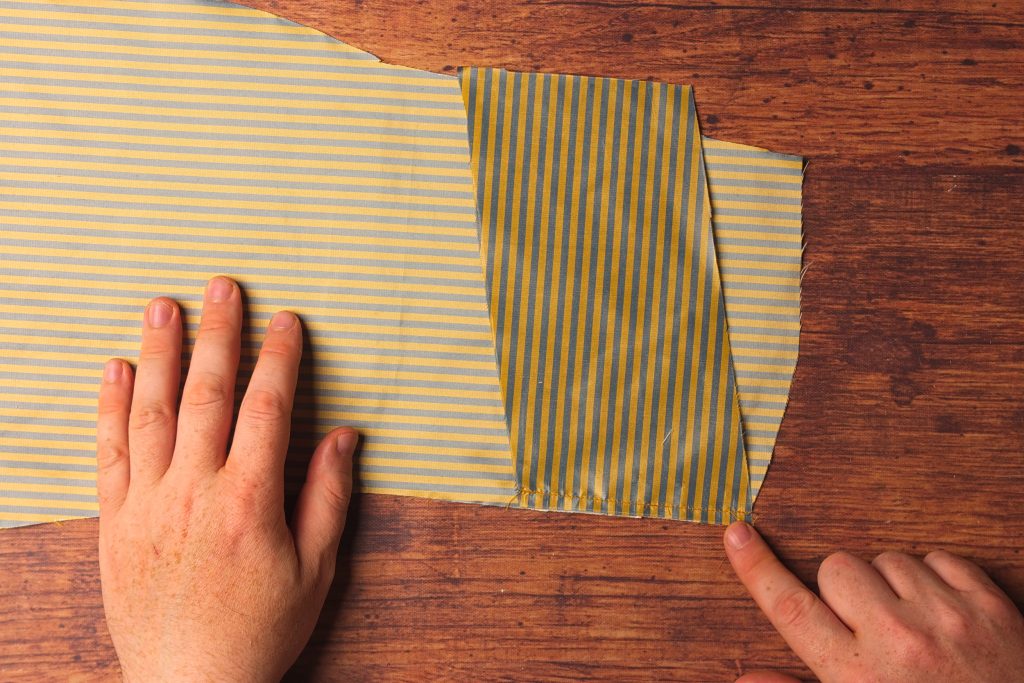
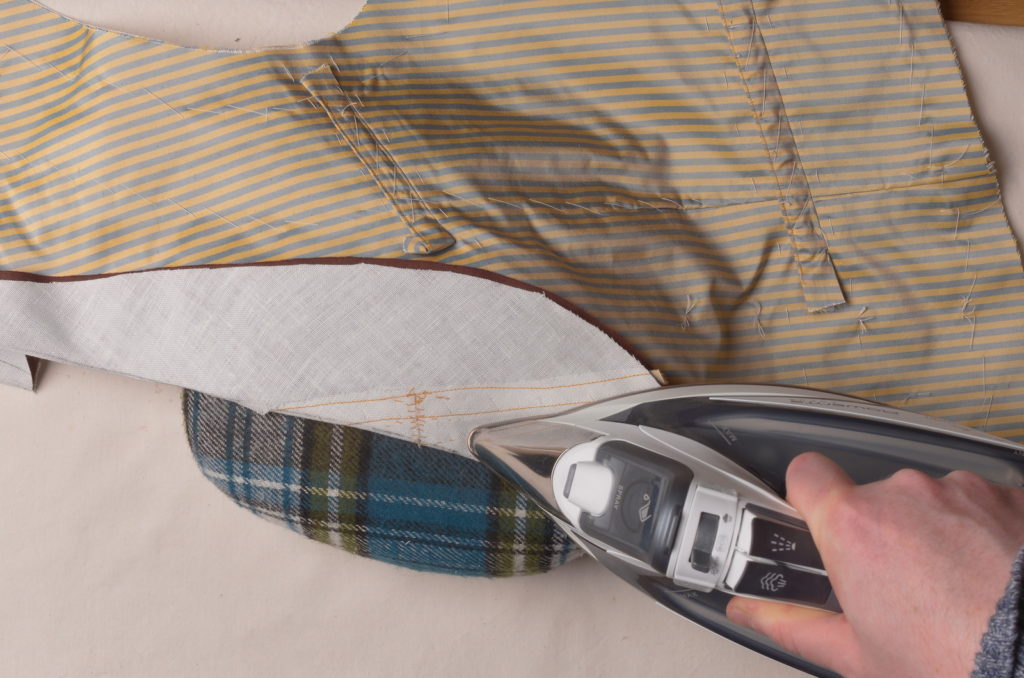
Press the seam open, keeping the seam allowances toward the back.
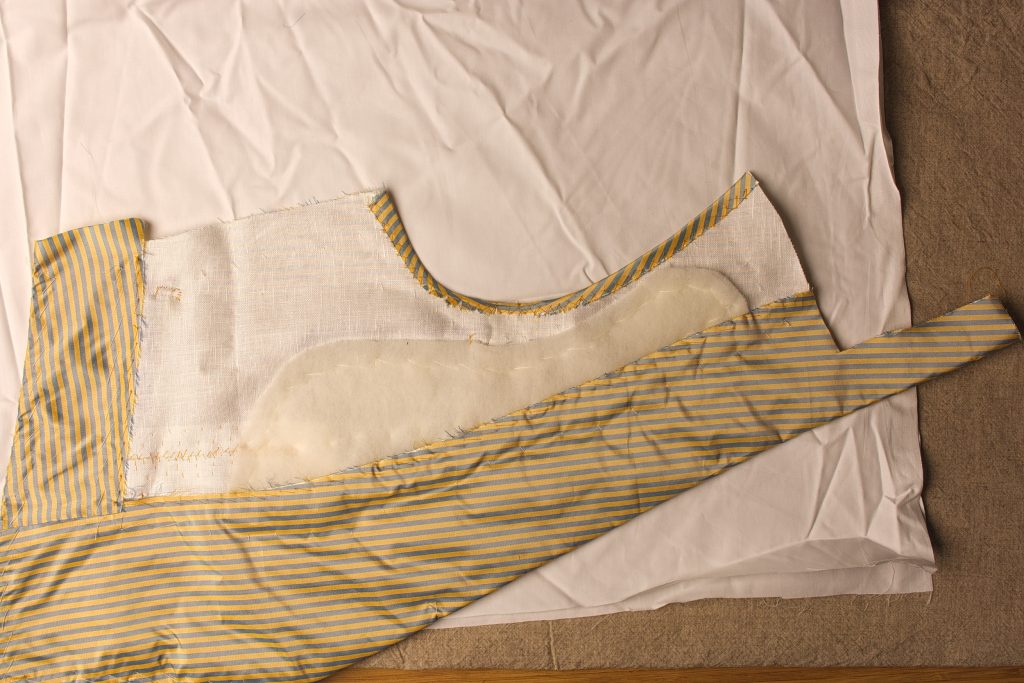
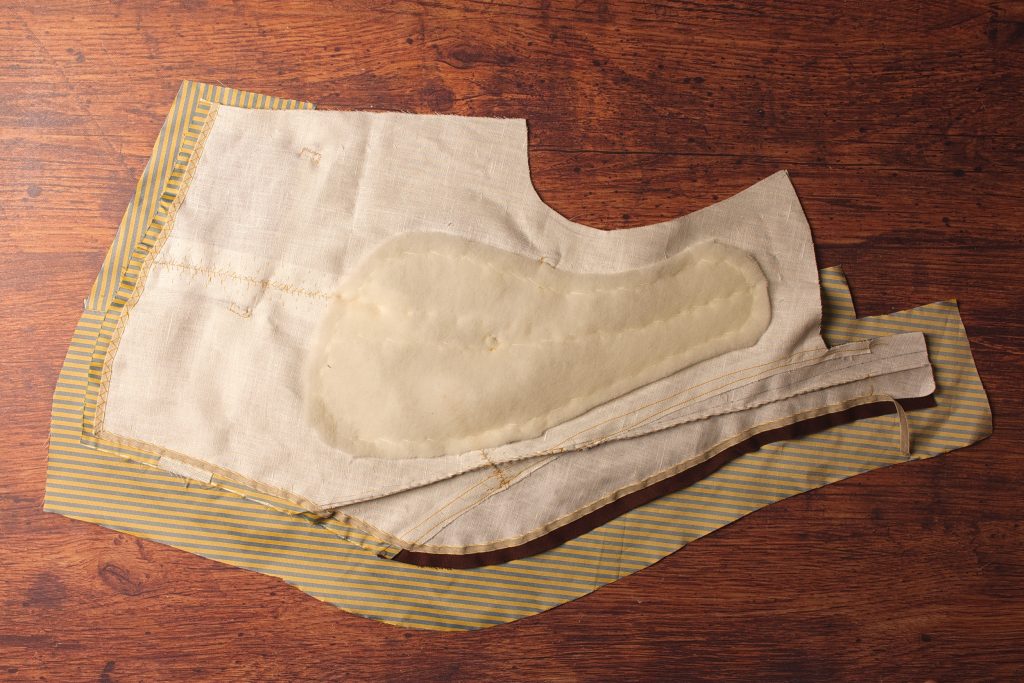
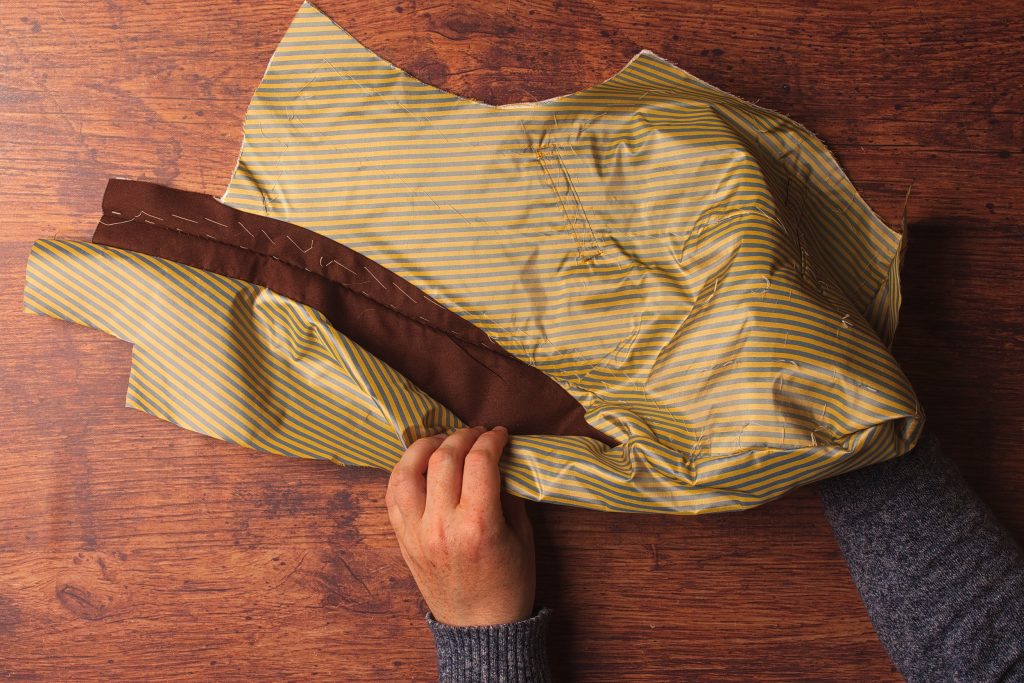
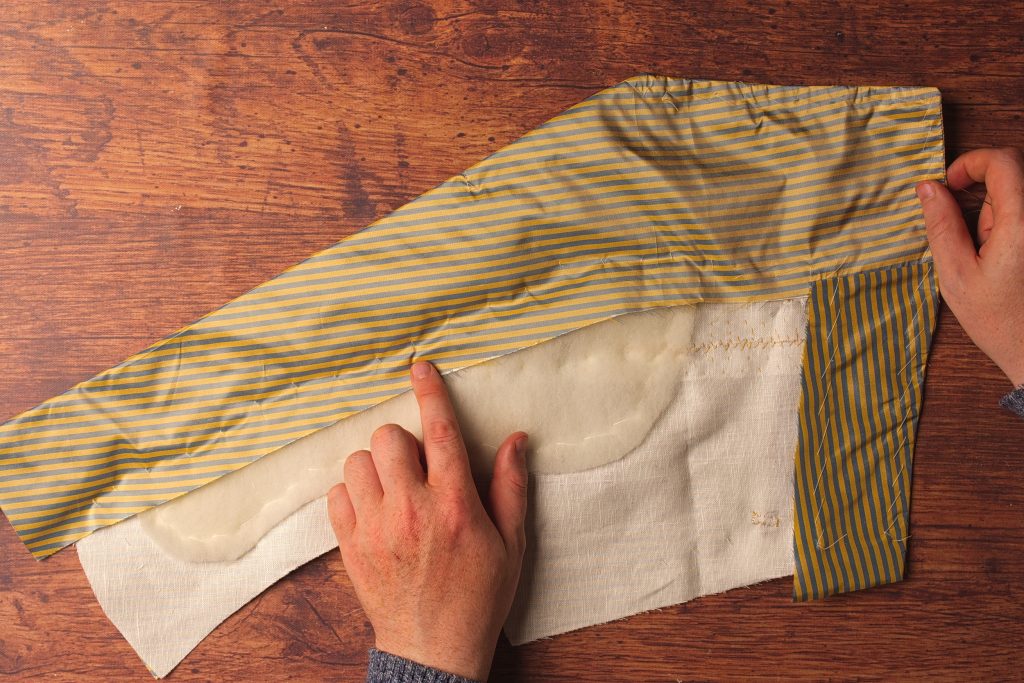
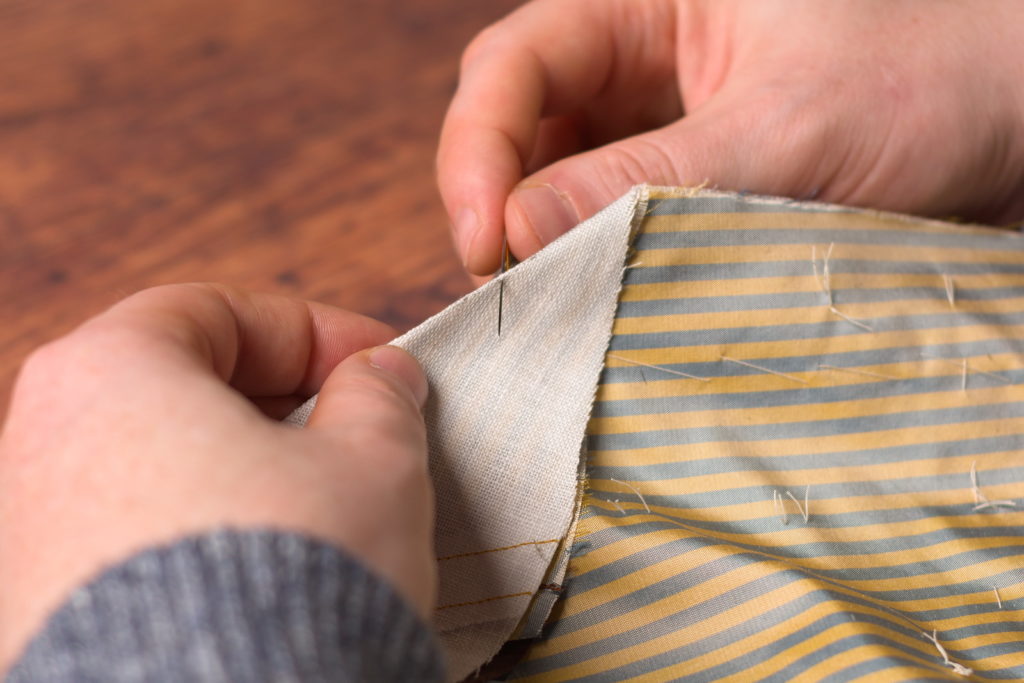
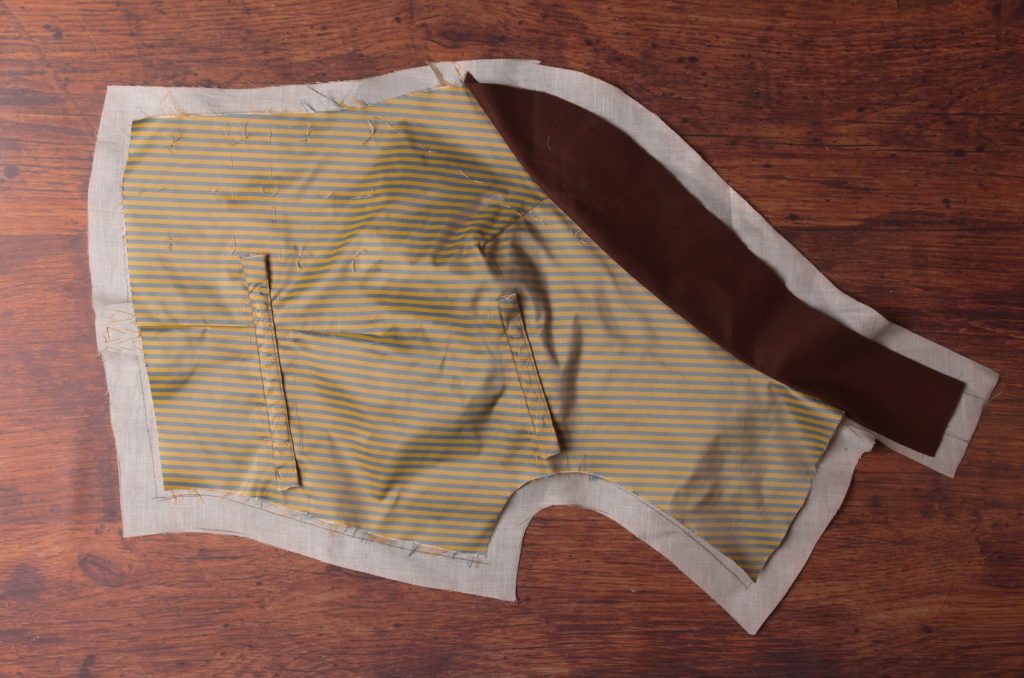
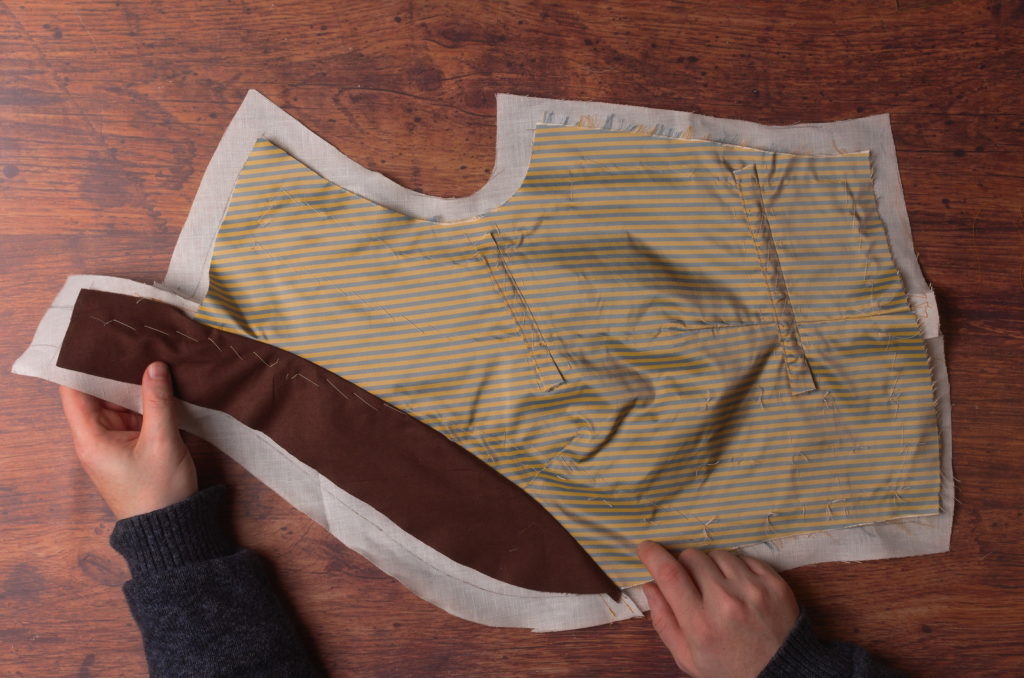
Now place the facing assembly on top of the forepart, right sides together.

You should have cut the facing a little over-sized, so allow the facing to fall naturally over the shaped forepart.
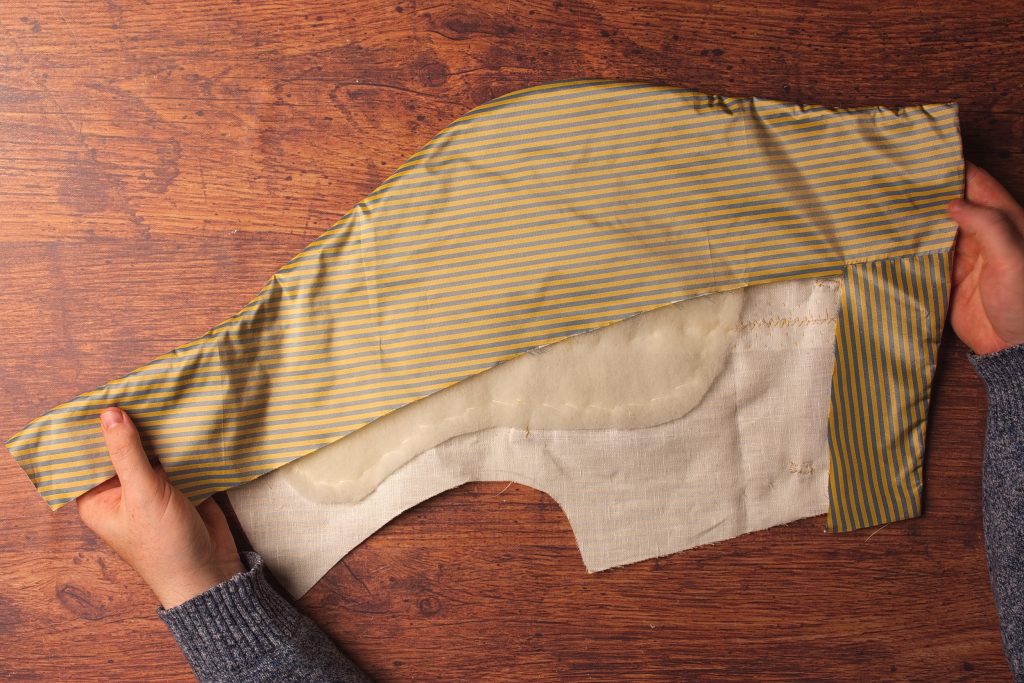
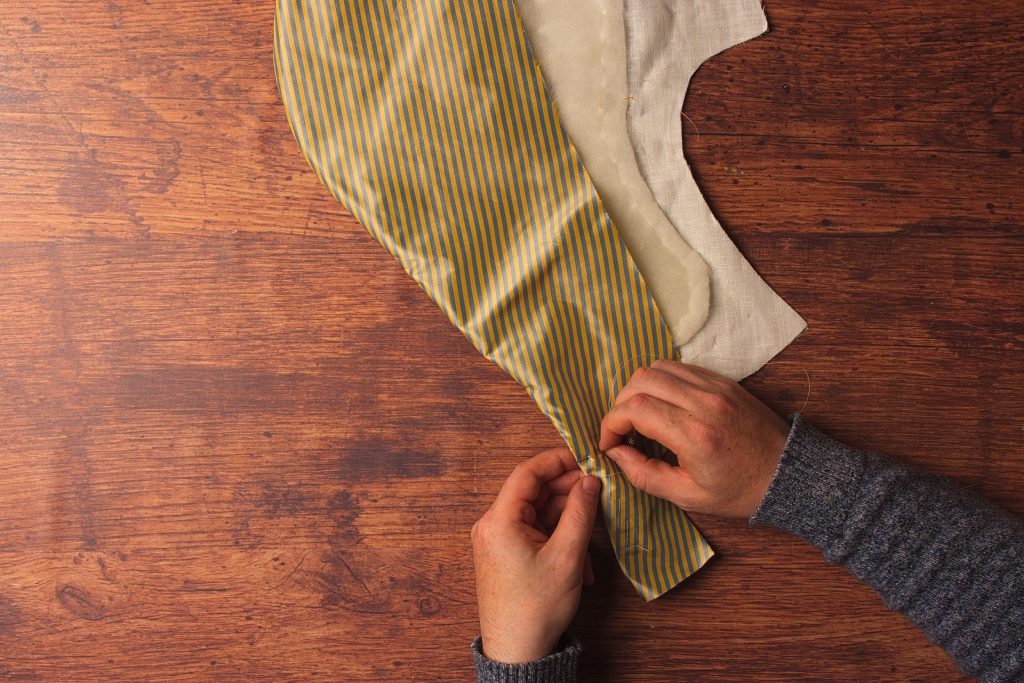
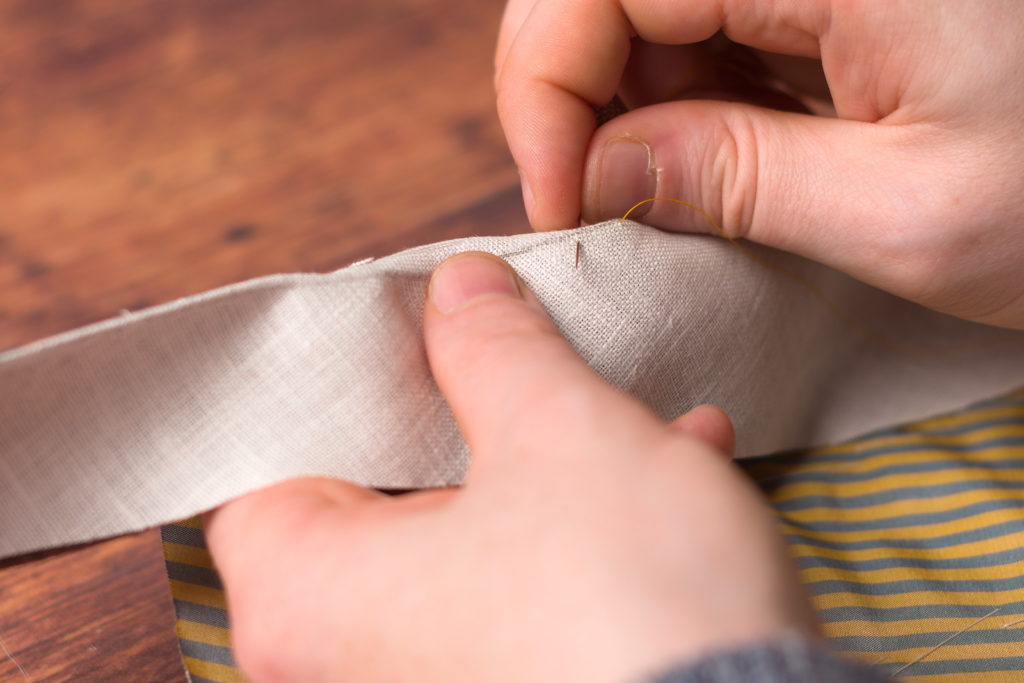
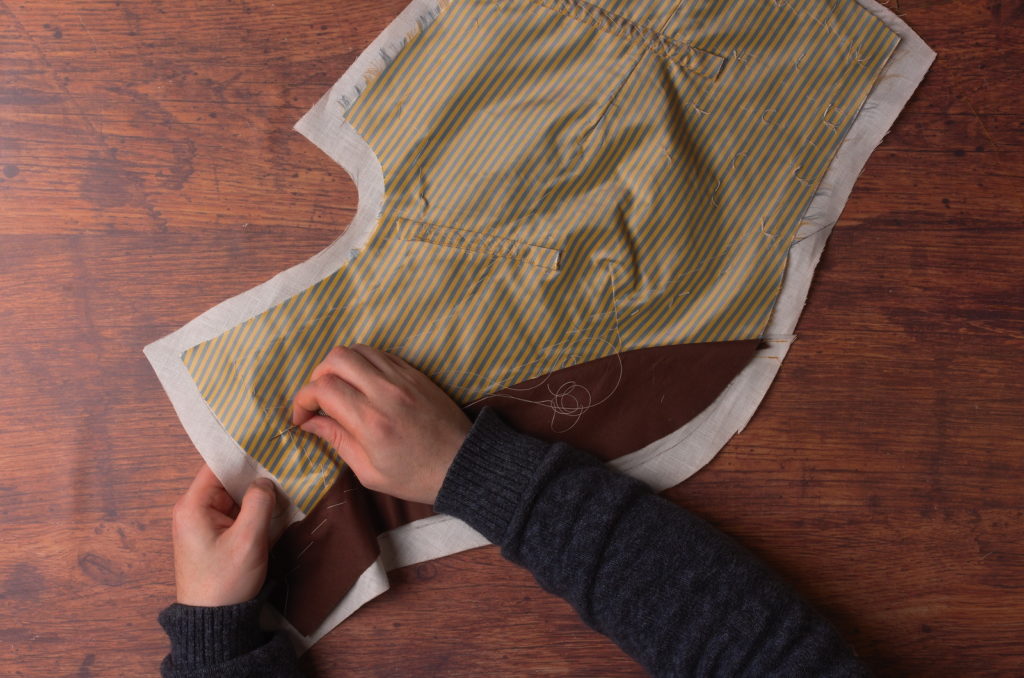
Begin basting the facing to the forepart about one inch from the forepart edge.
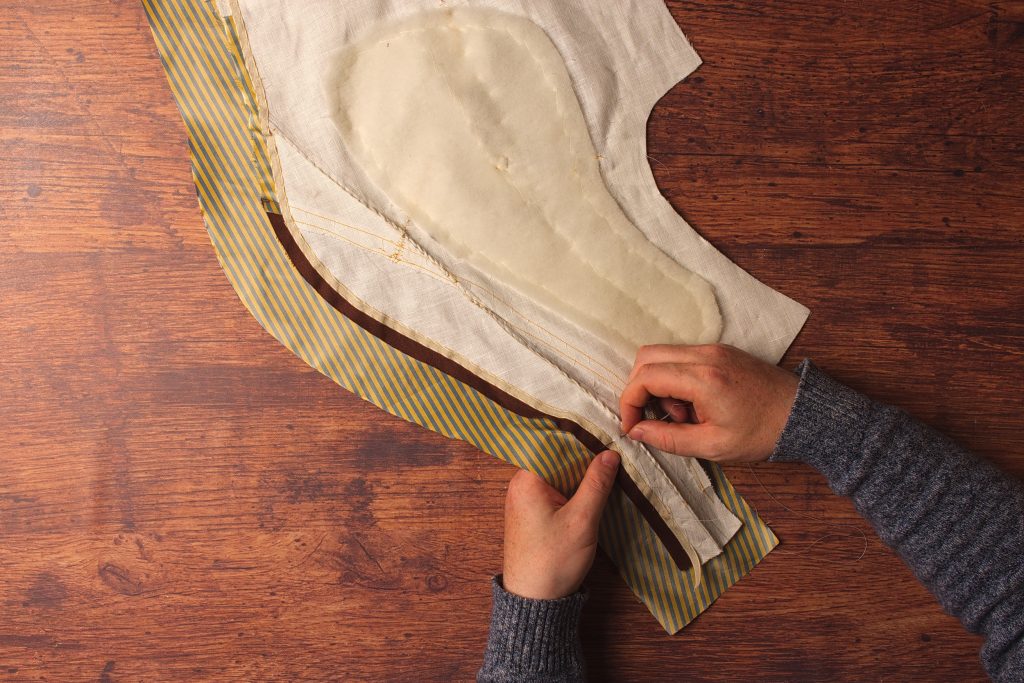
At the bottom of the roll line, try to work in a little excess fabric into the facing. This will give the extra length necessary to curve around the folded collar. Secure with a couple of extra basting stitches as necessary.
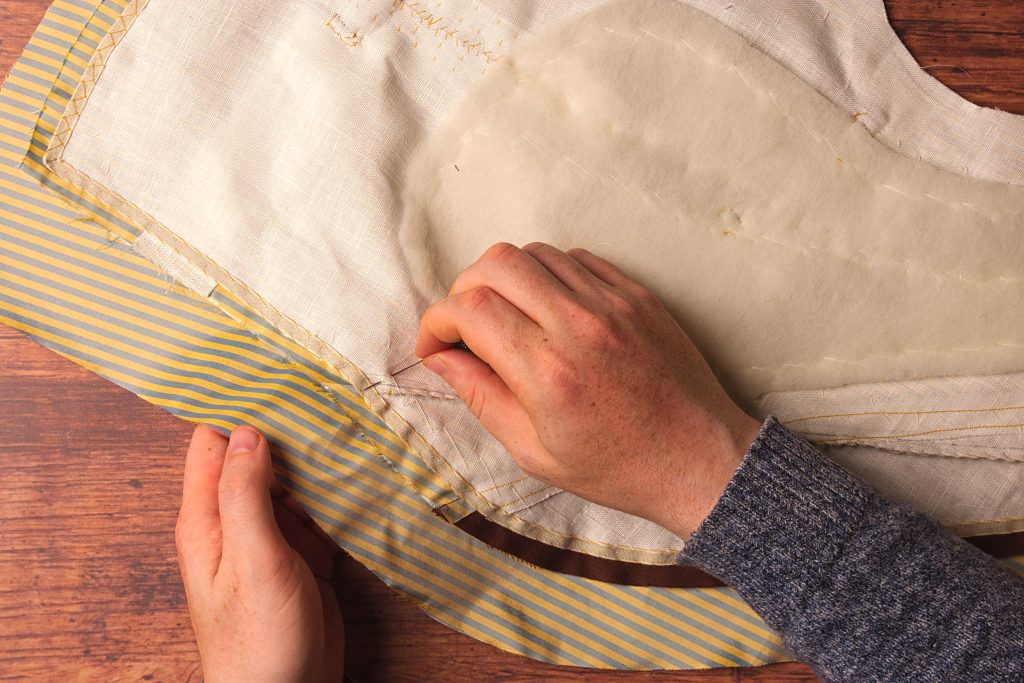
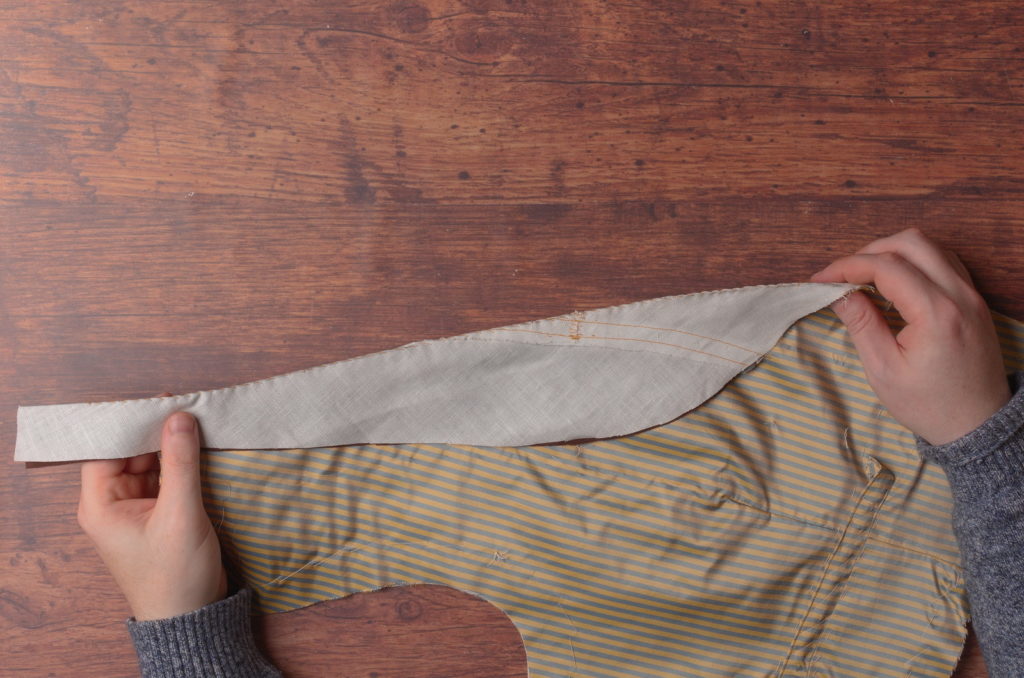
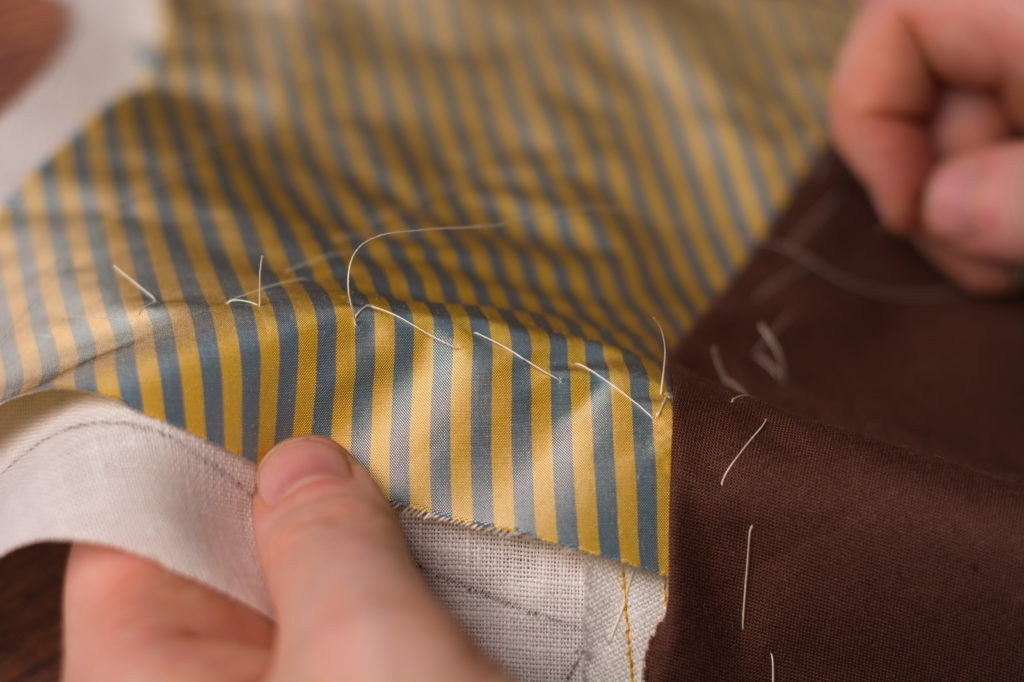
Continue basting across the bottom of the forepart.
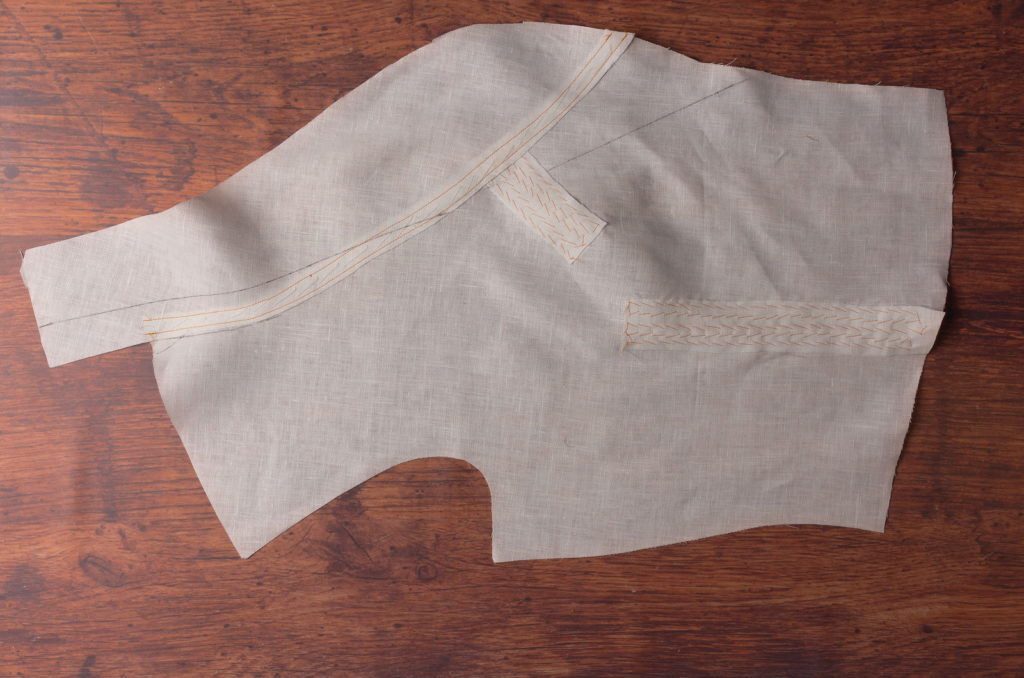
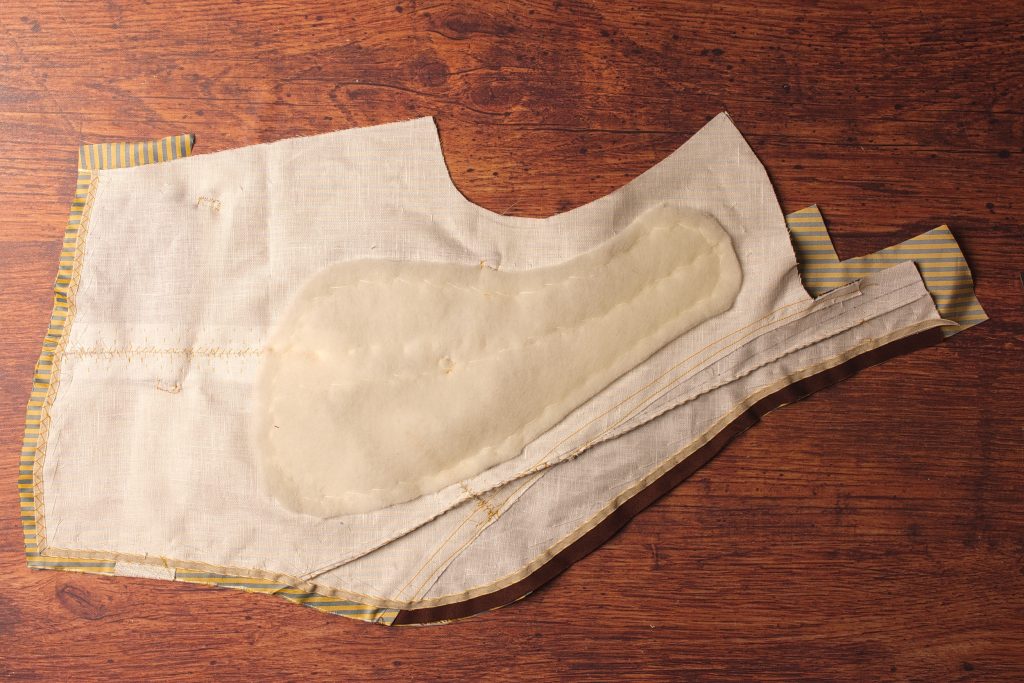
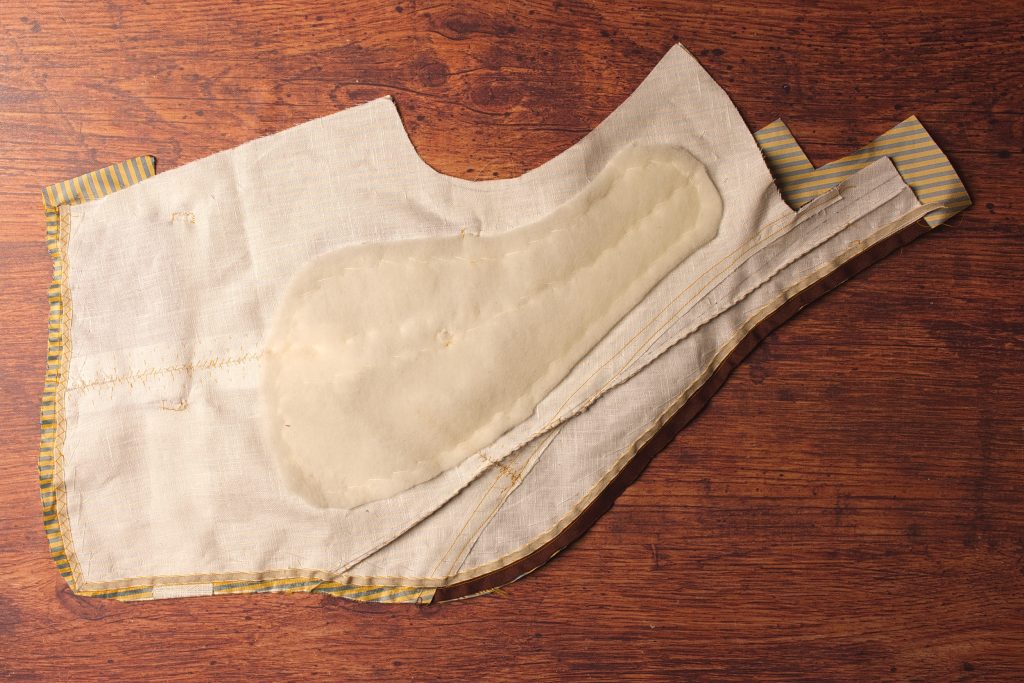
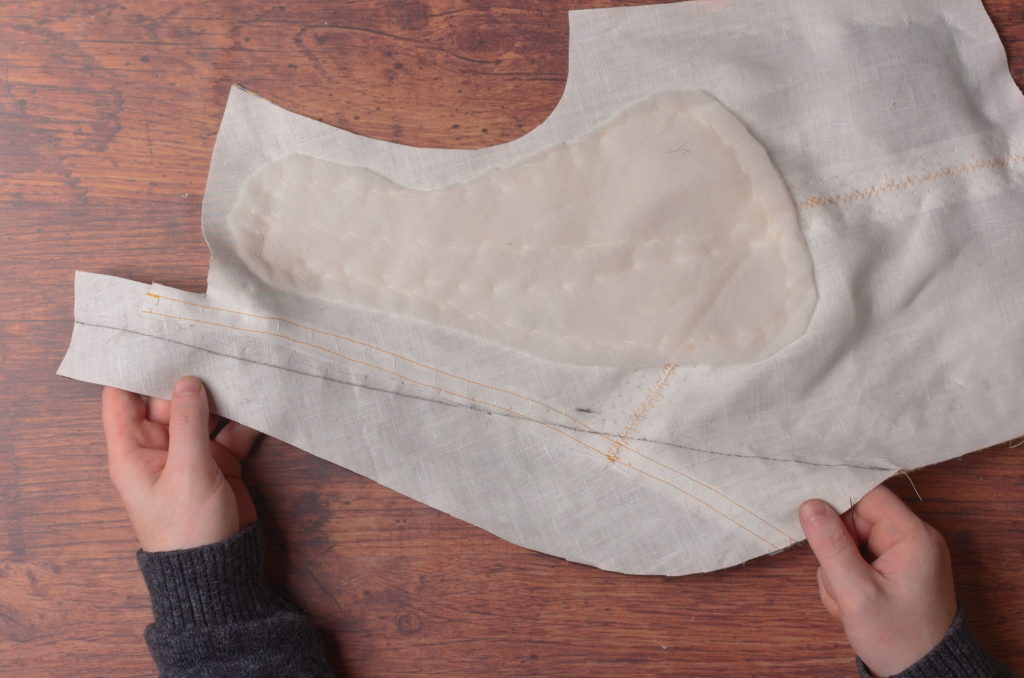
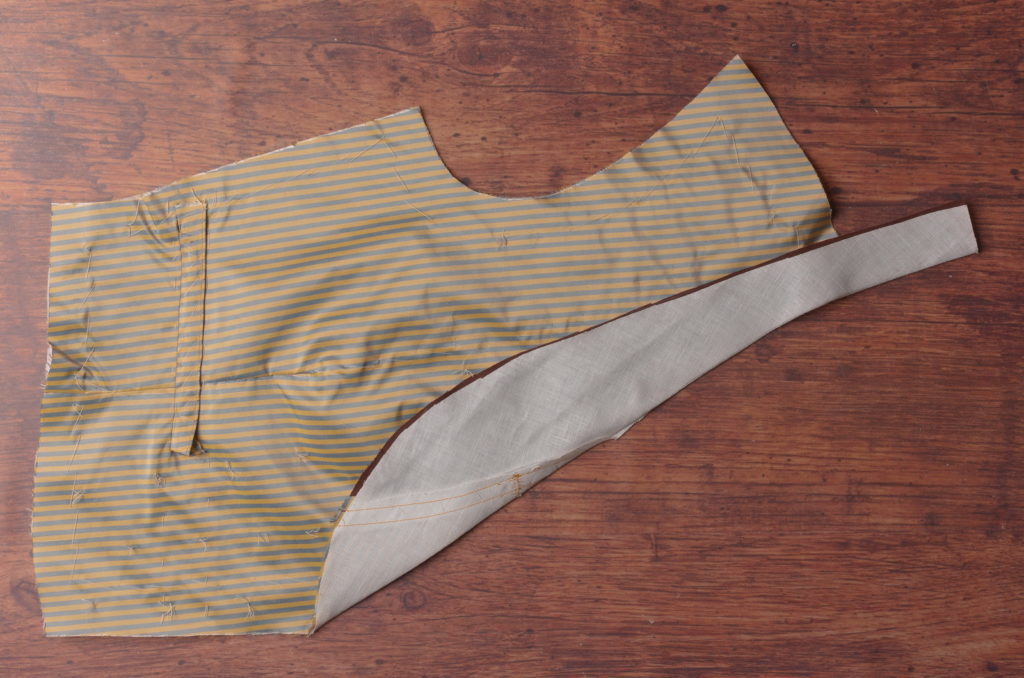
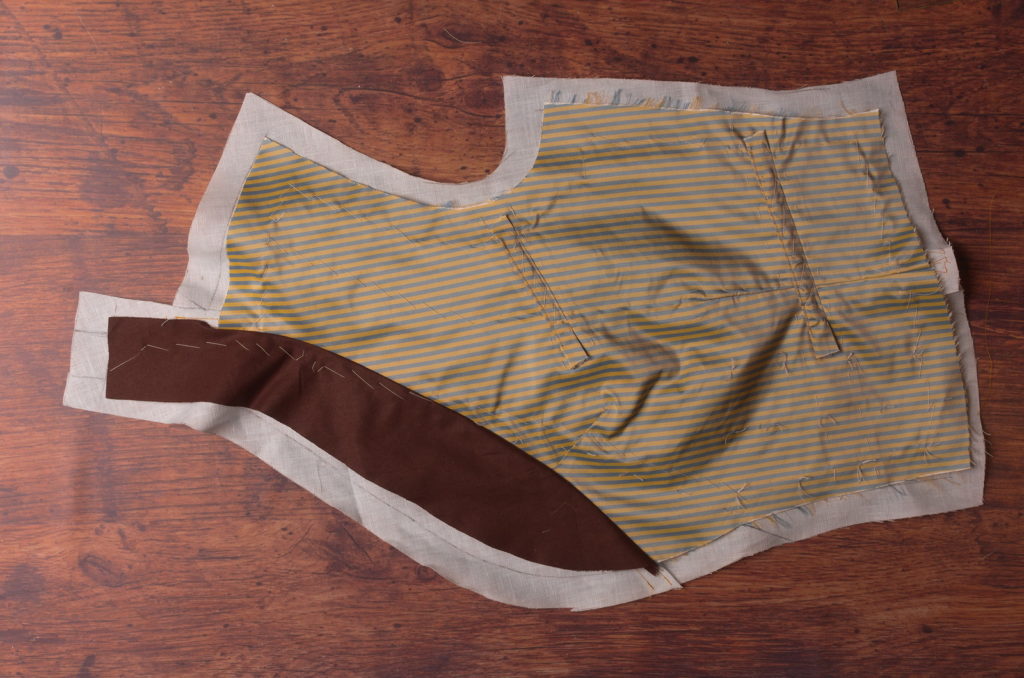
Here’s the forepart so far after basting in the facings.
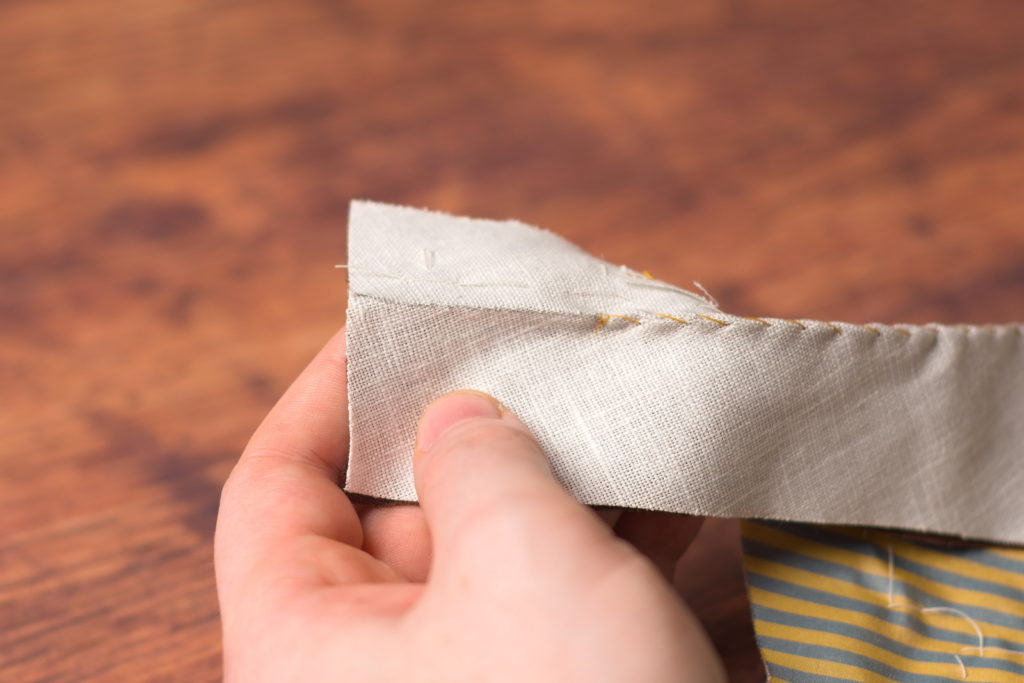
Turning to the wrong side, trim the excess from the facing along the front and bottom edges. Don’t trim the top or back of the collar or the shoulder area yet, however.
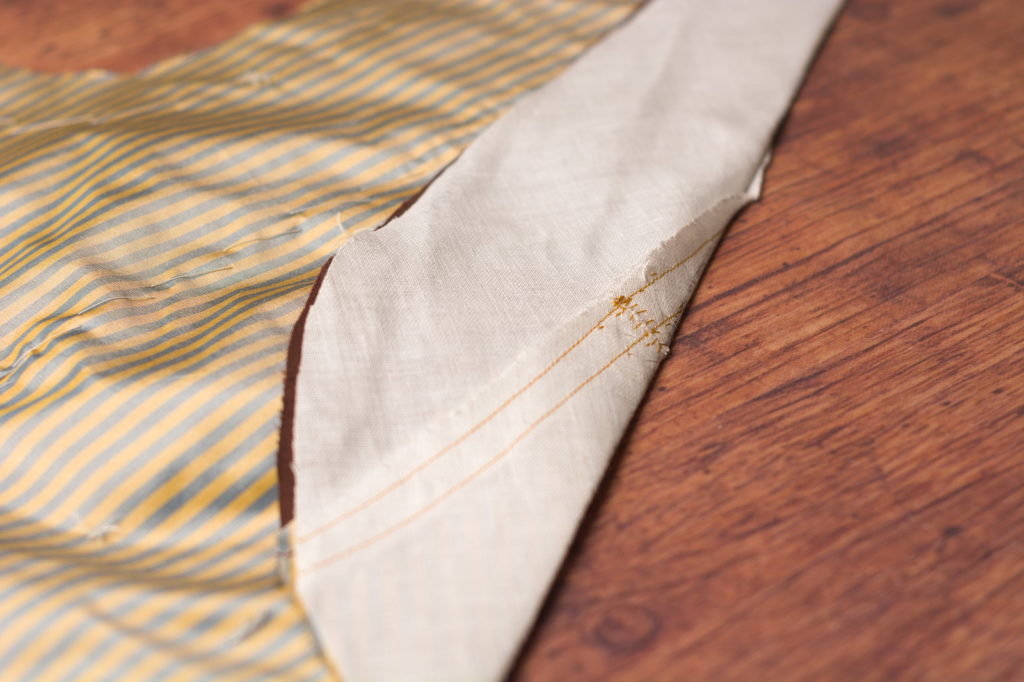
Here’s what you should have after trimming.
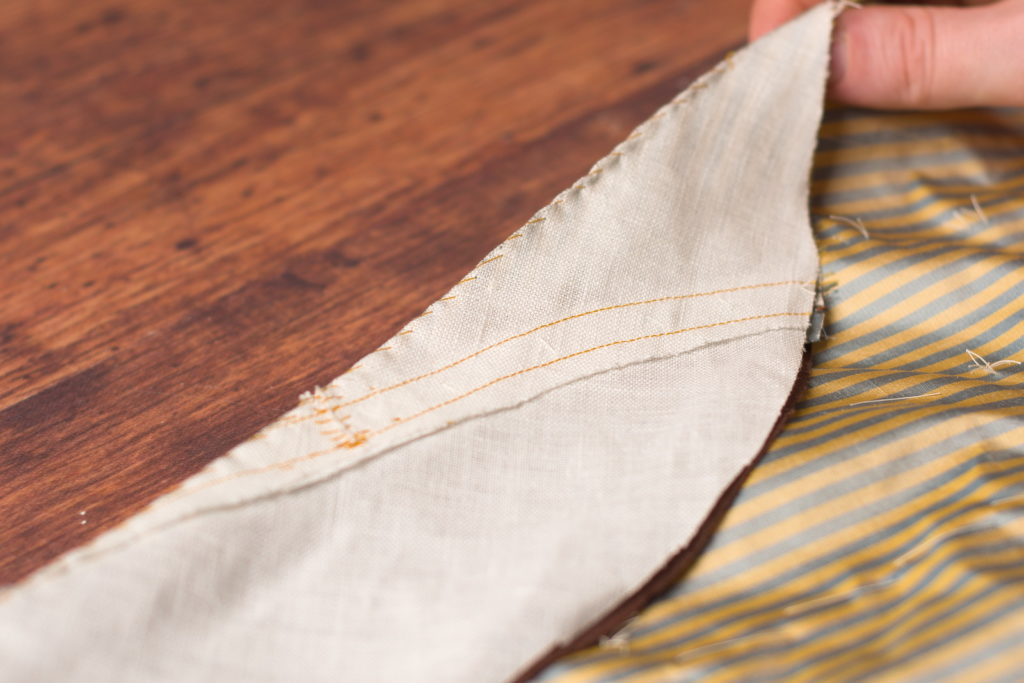
Starting at the top of the collar (or the waist depending on which side), sew the facings to the forepart using a 3/8″ seam allowance.
The feed dogs should help the excess facing be worked in evenly at the bottom of the roll line.
At the bottom of the front seam, instead of turning square across the waist, make a single stitch on the diagonal to make room for the seam allowances after turning right side out. Continue sewing across the waist seam.
Trim the corner at the center front / waist to about 1/8″.
Now remove the basting stitches and carefully turn the forepart right sides out.
Begin basting the facing in place about 1/2″ from the edge.
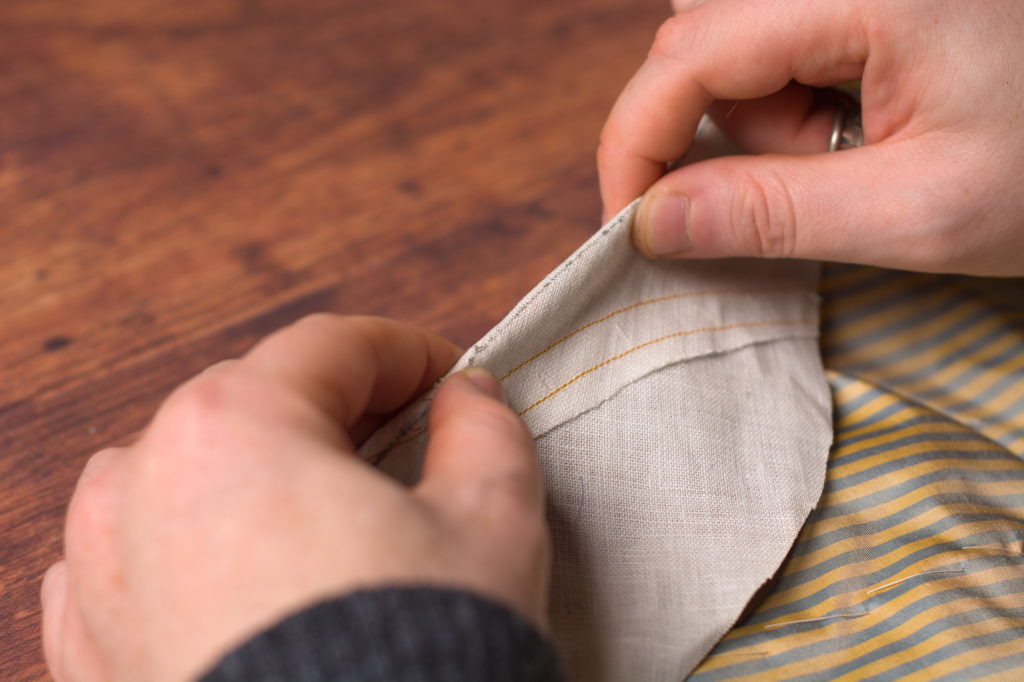
At the collar area, you want to make sure to arrange the fabric so that there is about a 1/16″ to 1/8″ reveal on the underside – so that you don’t see the underside of the collar when wearing.
Near the bottom of the roll line, about an inch on either side, keep the reveal even on both sides.
And below the roll line and across the waist, keep the reveal on the facing side so it’s hidden from the right side.
Here’s the collar after basting.
And the forepart in general so far.

Now we need to arrange the remaining fabric of the facing in a way so that the fullness is properly distributed around the fold of the collar and such. This will help the collar to lay close to the body.
First, open the collar, and with wrong side up, baste from the fullest point of the collar towards the roll line, trying to meet perpendicularly to the roll line, and continue the basting for another half inch or so beyond the roll line.
Now turn to the right side and with the collar folded into position, baste about 1/2″ away from the roll line the length of the collar.
Now I didn’t do this or photograph this step, but if you’re a beginner, I’d recommend turning over the forepart and stitching in the same manner along the other side of the roll line, from the wrong side. This will keep the fabric firmly in position and make this next step a bit easier.
Along the top of the waist piece, baste through all layers about 1/2″ from the edge. Try to keep everything in it’s proper position, no excess or pulling of fabric in any layer.

Now turn the forepart to the right side, and using your hand underneath to support the shape and structure, carefully baste the inner edge of the facing along the front. Keep the stitching about 1″ from the inside edge.
Be sure to distribute any fullness equally as much as possible. It’s a little tricky since you can’t really see it as you work, but you’ll get it within a couple of attempts.
You might have to move the collar out of the way depending on the widths of the collar and facing below it.
Flipping to the wrong side, take a look at your work and make sure the facing lays smoothly against the forepart. I got one side on the first try, the other side took two tries, so just keep working at it.
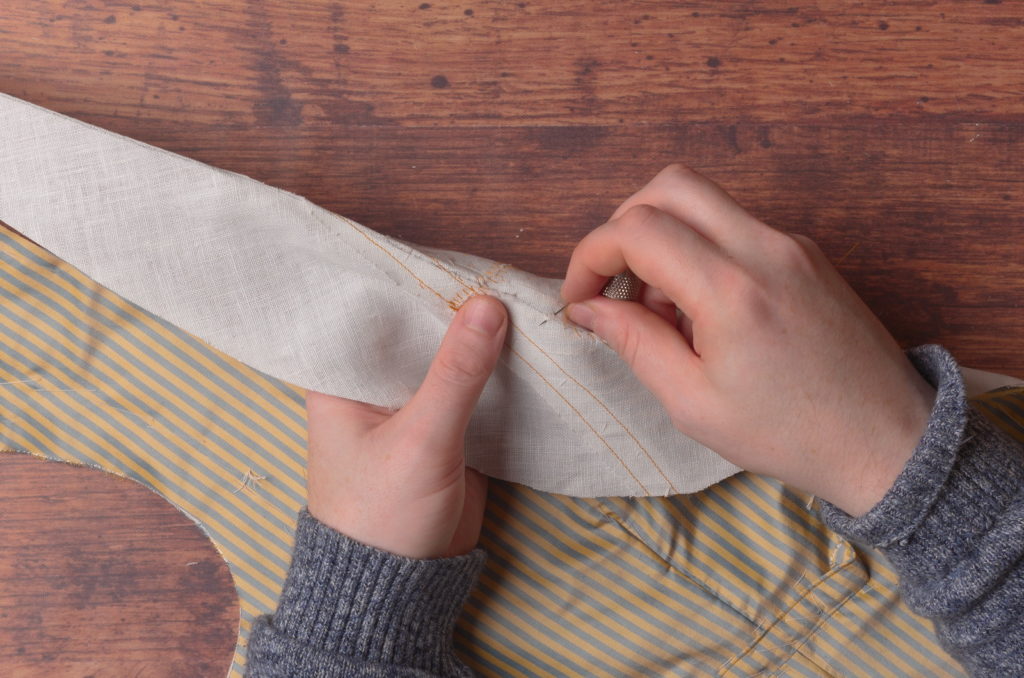
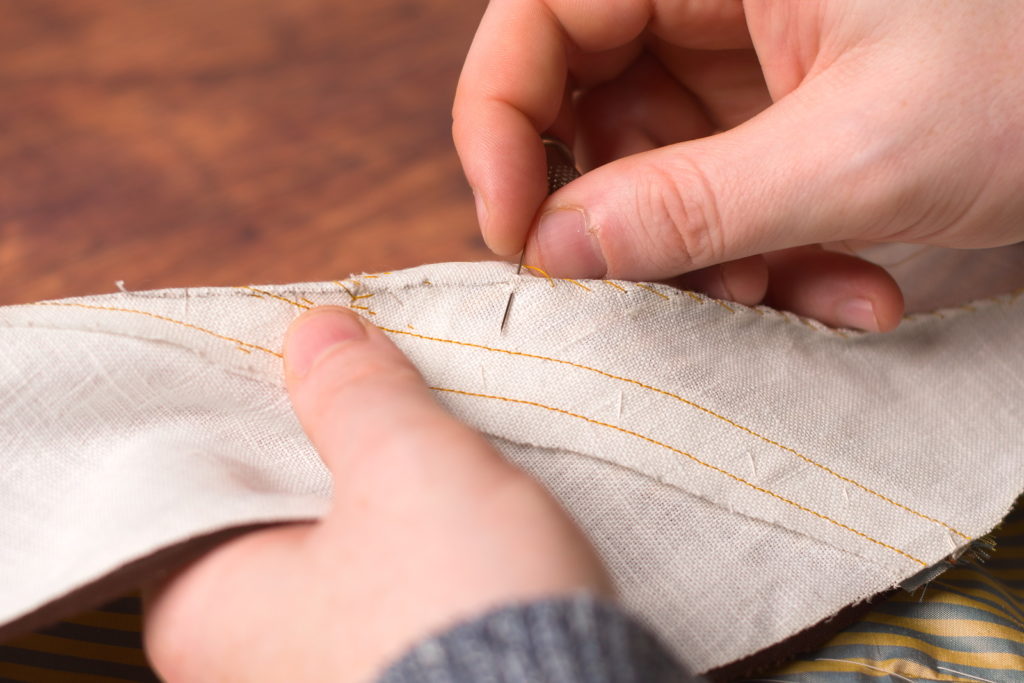
When you’re happy with how everything looks, take some regular sewing thread (not basting thread) and permanently diagonal baste the edge of the facing to the canvas below. Try not to let the stitches show through to the right side. The stitches are about 1/2″ in length and within 1/2″ of the edge.
Baste the waist section as well in the same manner.
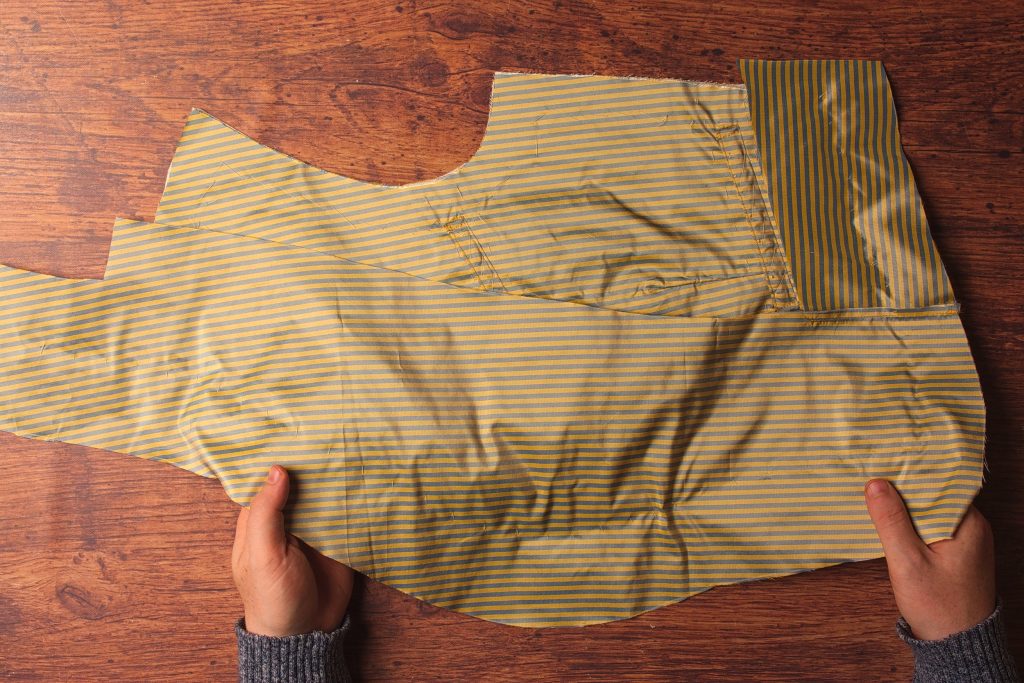
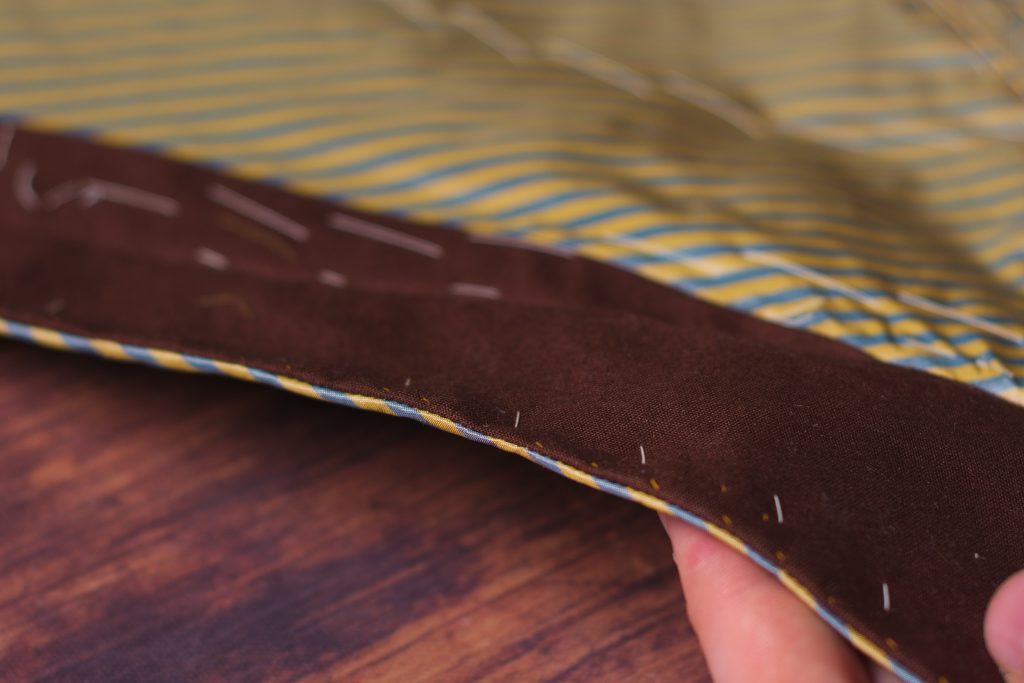
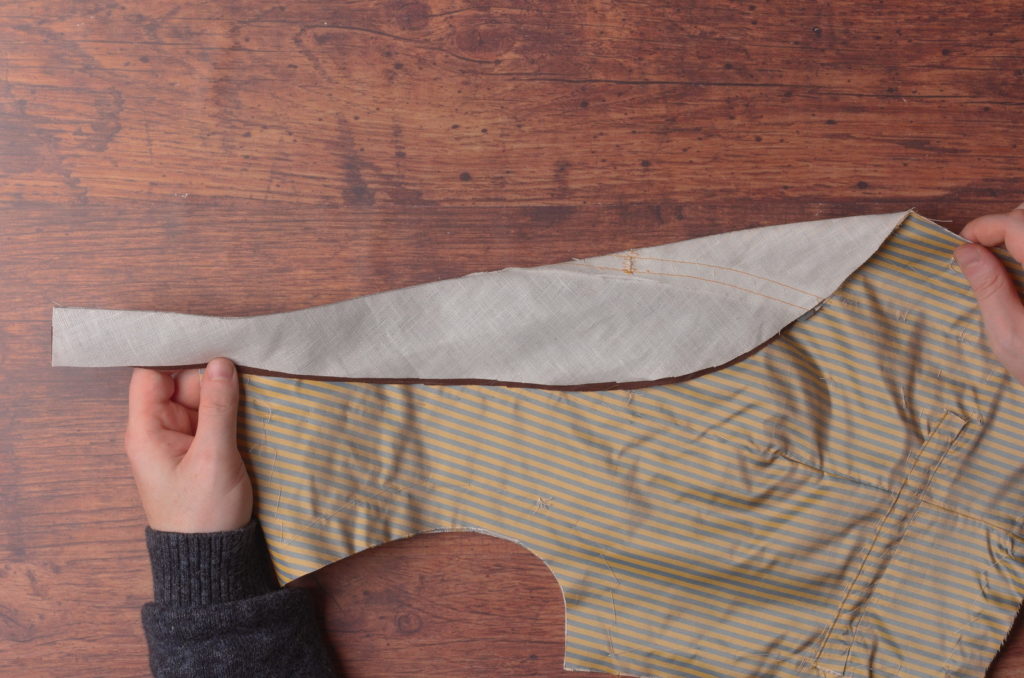
Here’s the completed facing.
Finally, trim the facings at the shoulder only (keep the excess along the collar), and at the waist area.
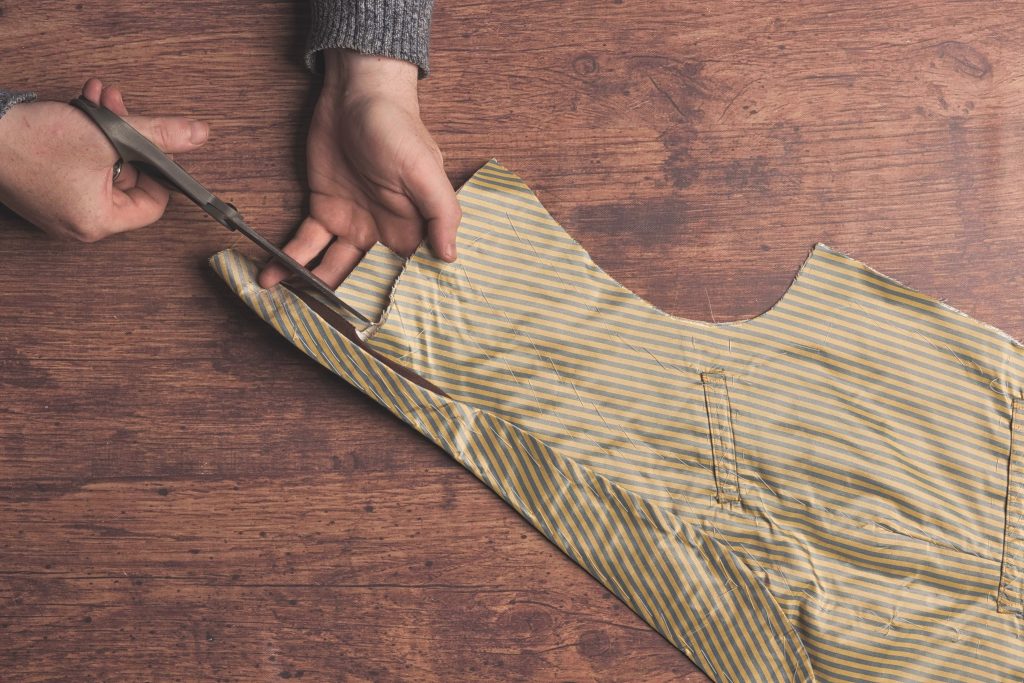
Cutting the Facings
It’s time to cut and prepare the facings for installation. Traditionally, the facings were cut with the collar in one piece to maintain a more seamless look to the finished waistcoat. To accommodate the lack of darts as well, the facings are cut with an additional allowance so that the facings can be manipulated into place. I’ll be demonstrating the ‘quick’ method for getting the pattern pieces, but if you’re using a plaid or more prominent stripe pattern that you want matched, take care in the layout of everything and use more precision as necessary.
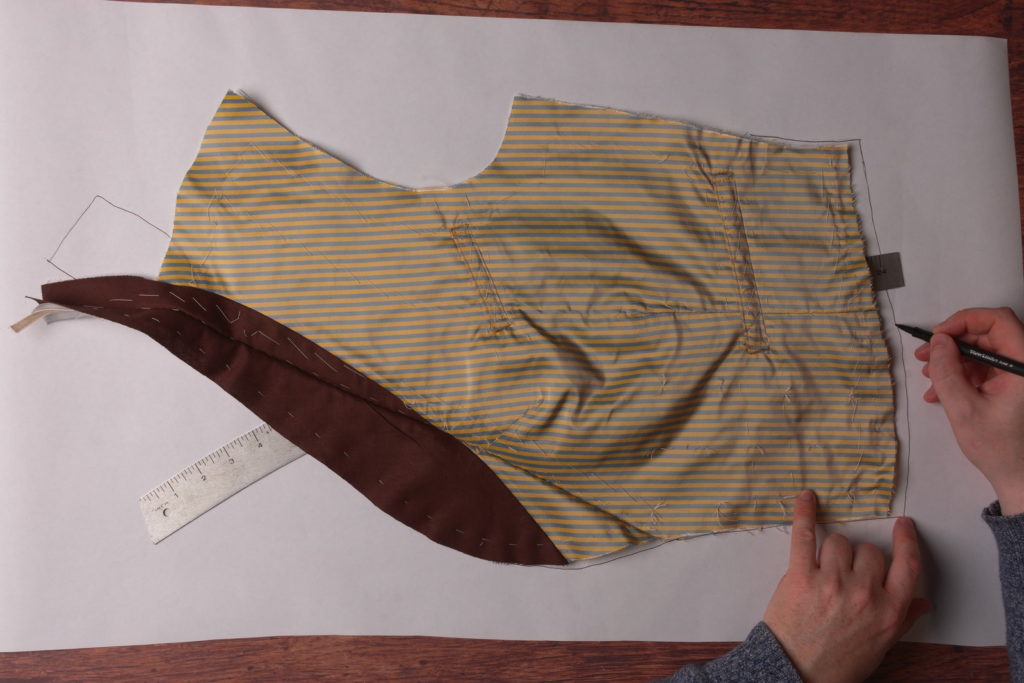
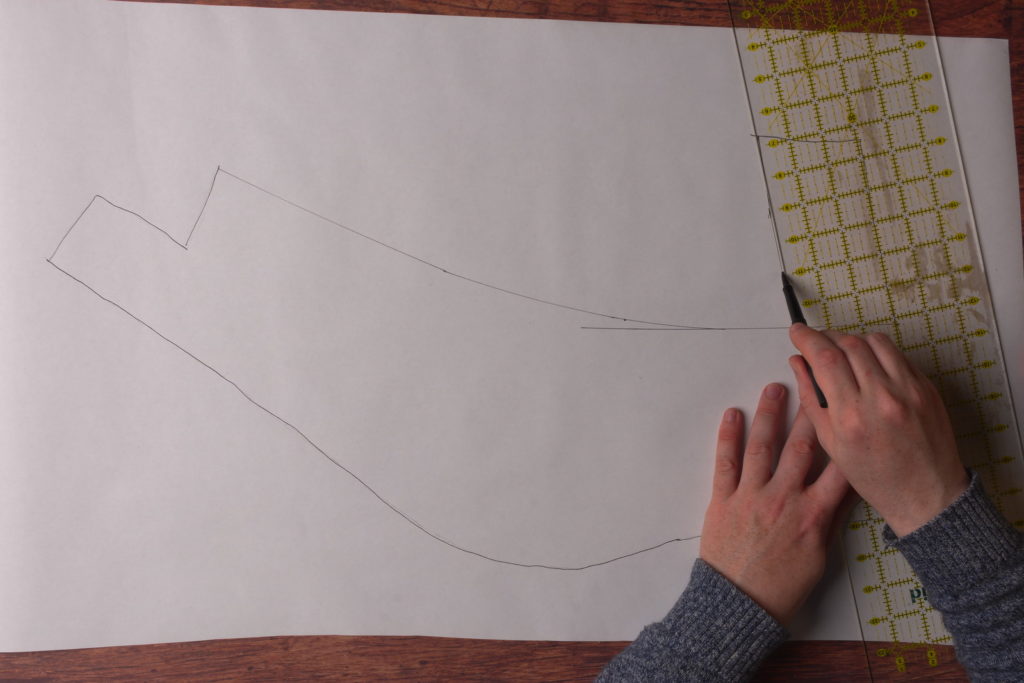
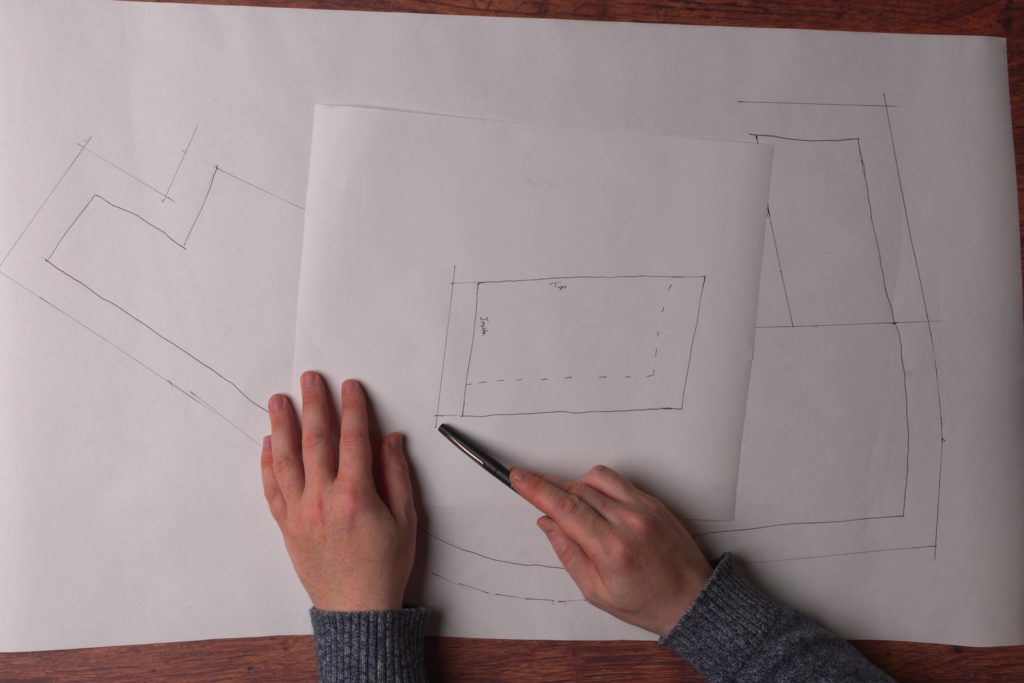
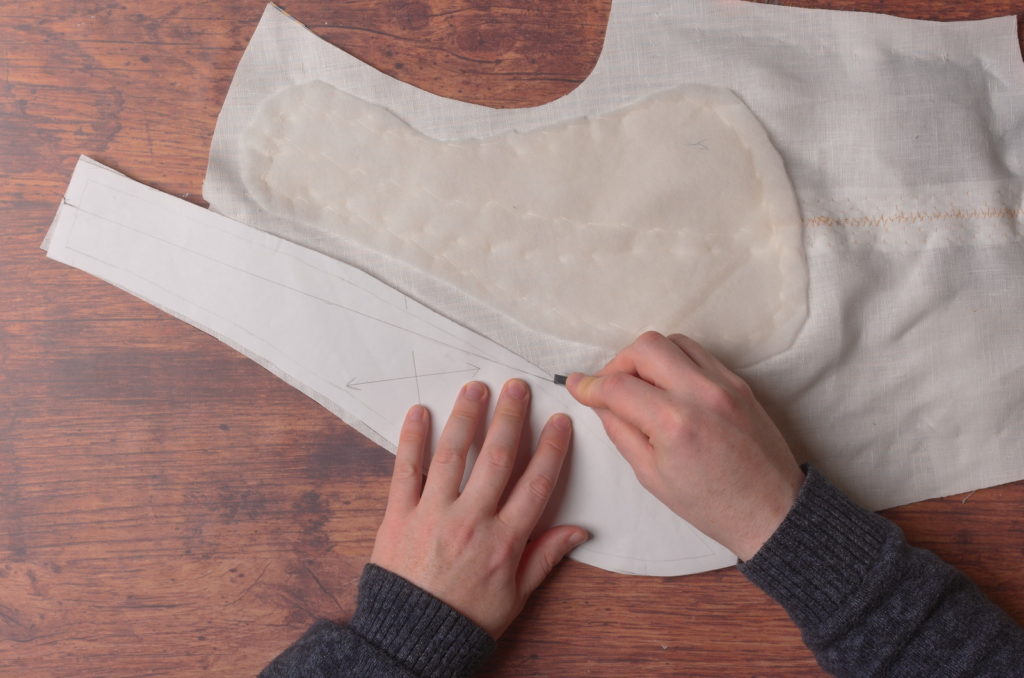
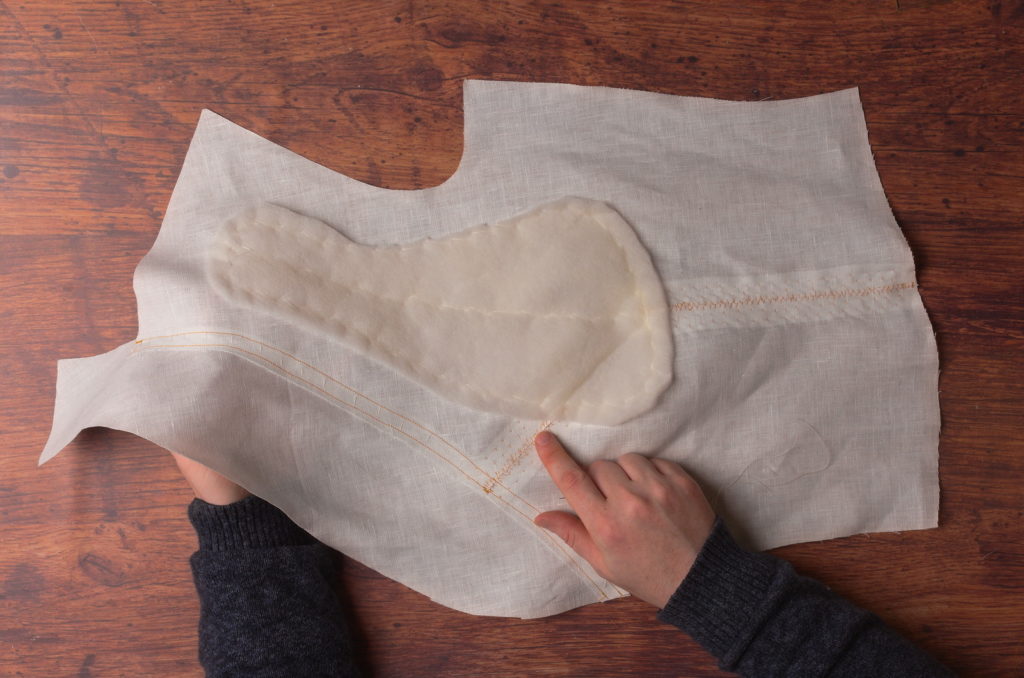
Begin by laying out the waistcoat on to a fresh sheet of paper and tracing around the lower side seam, the bottom, the front, the collar, and shoulder seams.
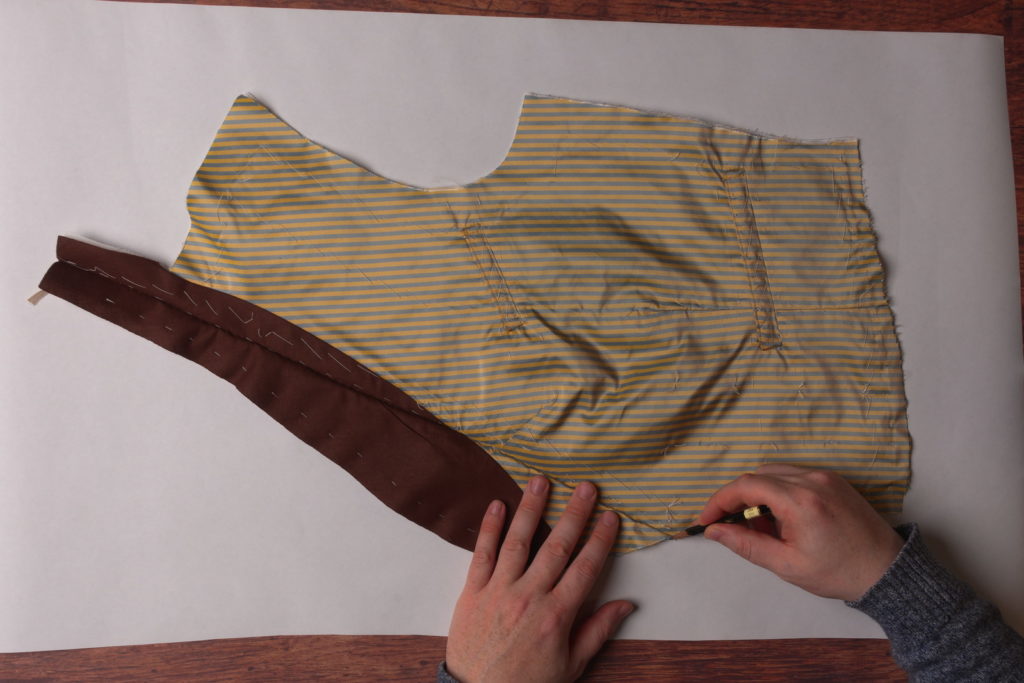
I’m using a pen here so that you can see everything more clearly, but I recommend a pencil so that you don’t accidentally get ink on your waistcoat.
As you’re tracing around the collar and shoulder area, try to hold everything in a neutral position. The pieces will want to distort due to putting the three-dimensional fabric on the flat paper.
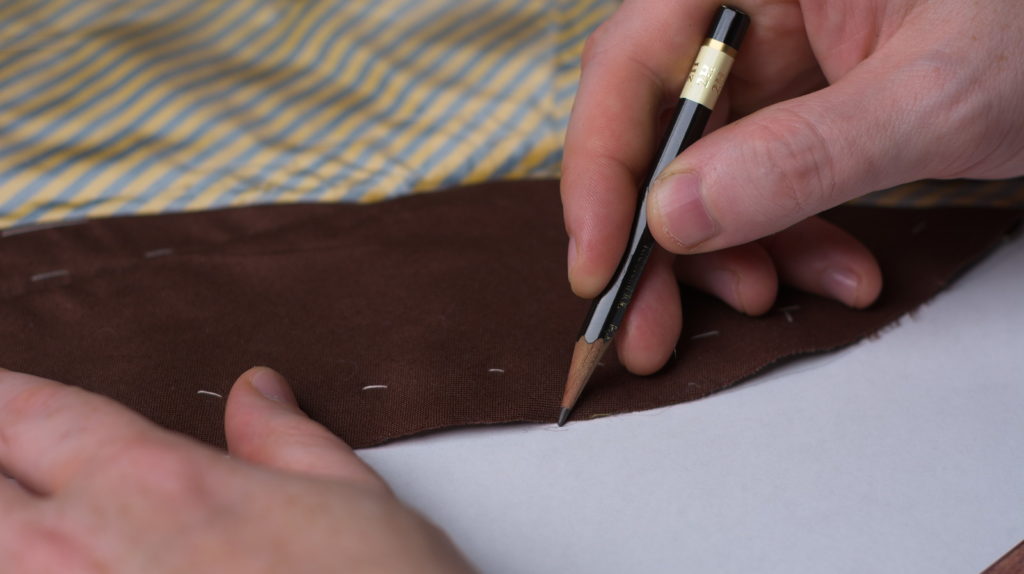
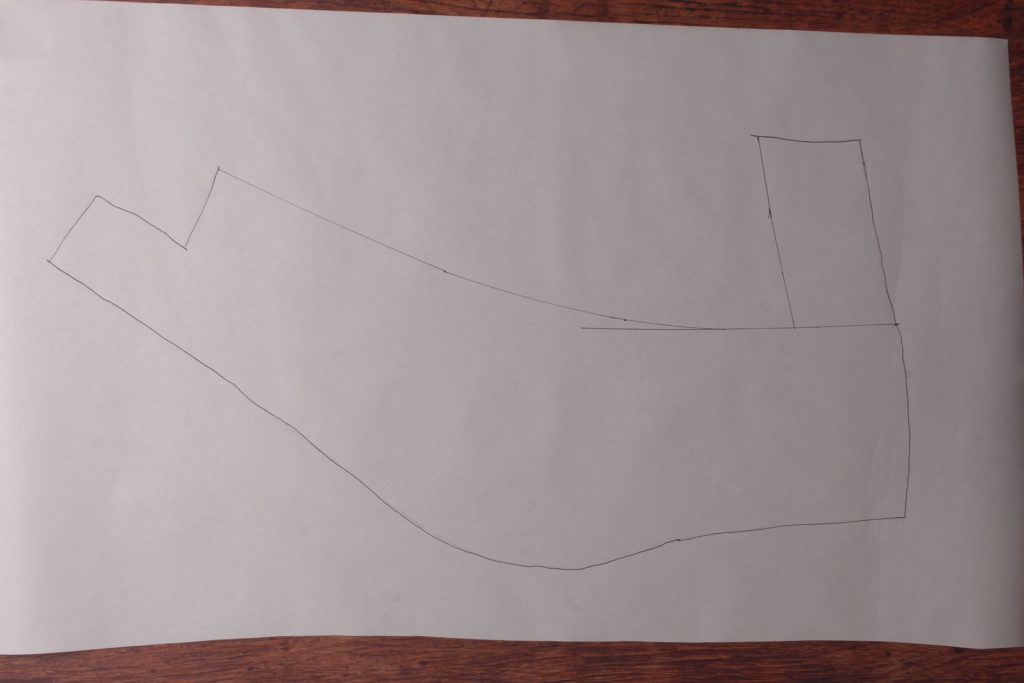
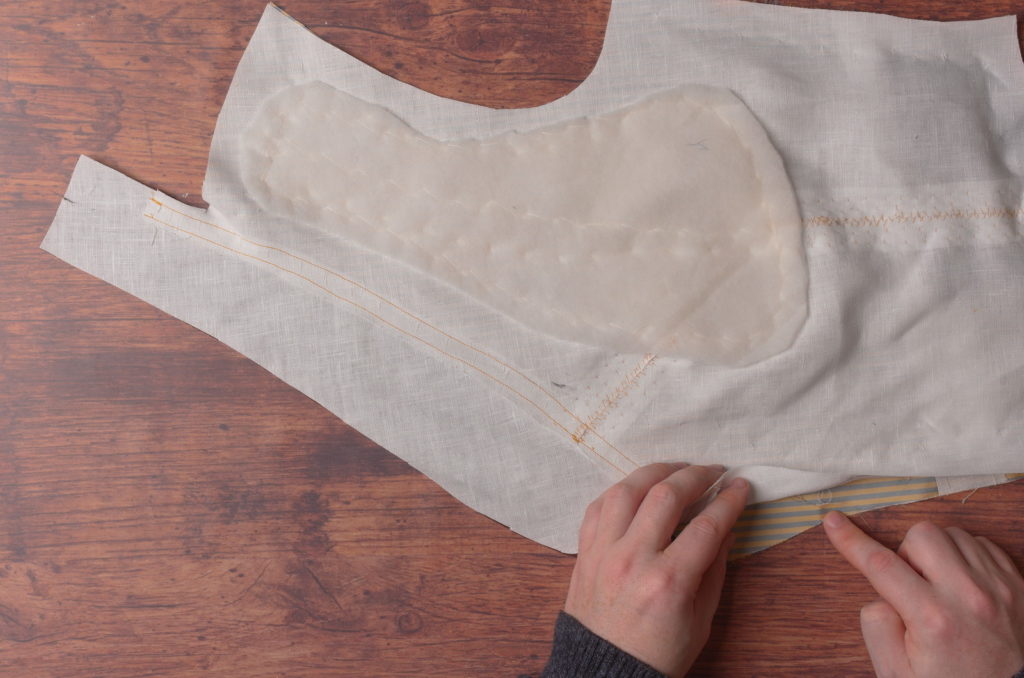
Before removing the waistcoat, slide it over slightly and determine the outer edge (including a seam allowance) of and how wide you want the facing to be. I made mine end just before the dart and about two inches from the inside buttons.
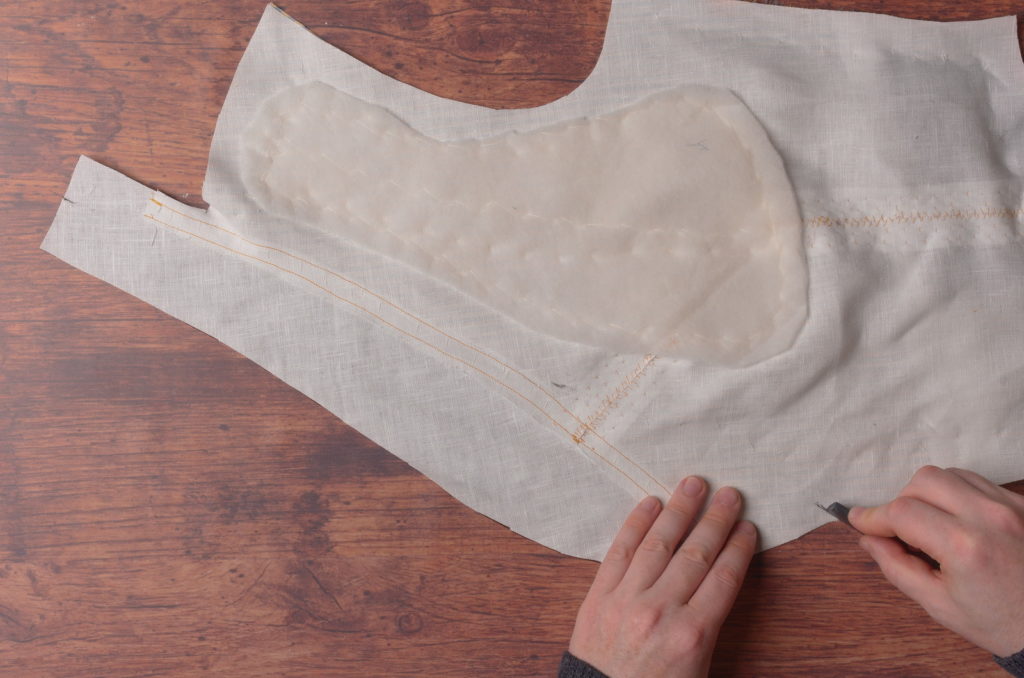
Then use a hip curve to draw in the desired shape of the facing on the inner edge. It should meet the shoulder about 1 1/2″ to 2″ from the collar (remember this includes the seam allowance).
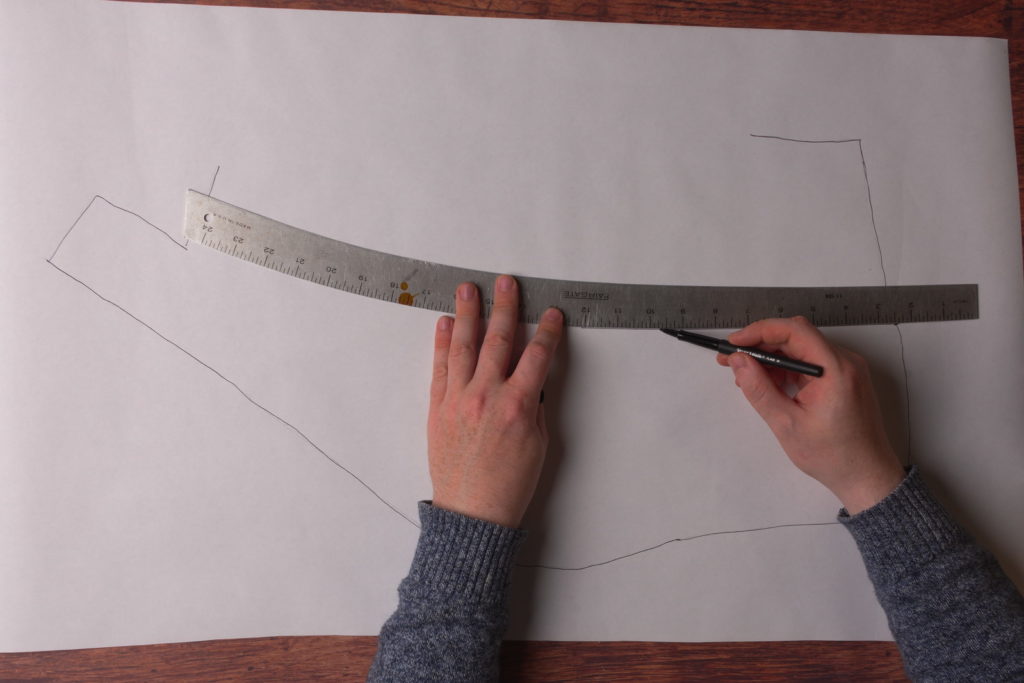
The shoulder should meet the facing in as close to a right angle as possible to make the sewing a little easier and the lines more pleasing. Finish the curve as necessary using the hip curve or French curve.
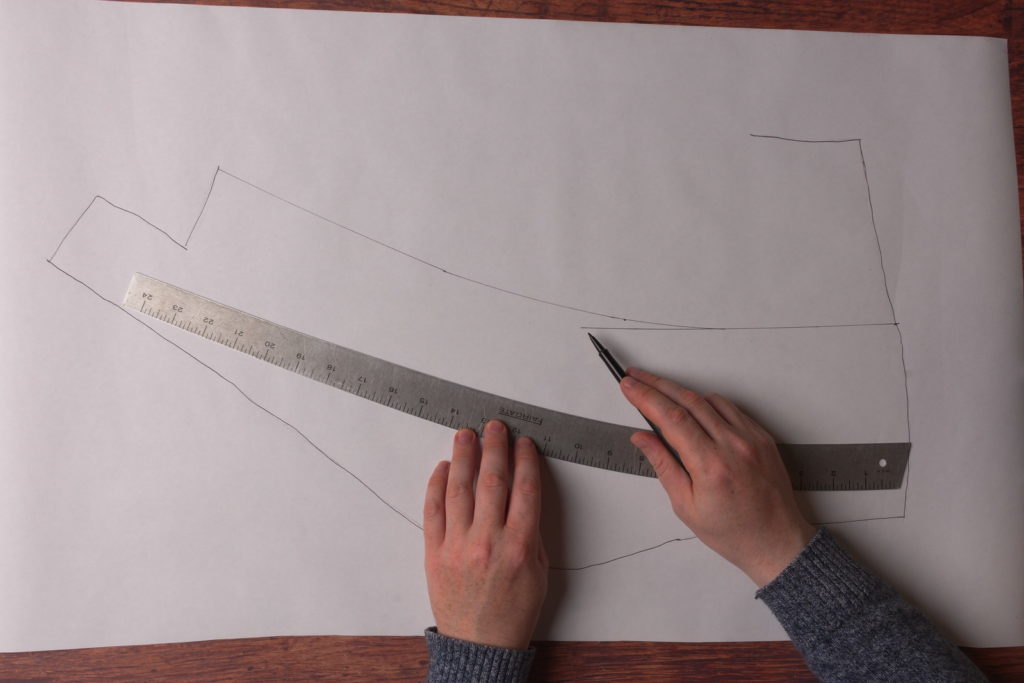
Now draw in the lower facing, about 3″ or so above the bottom of the waistcoat, following the shape of the outline. This does again include a seam allowance on the upper / inside edge, so choose your widths accordingly.
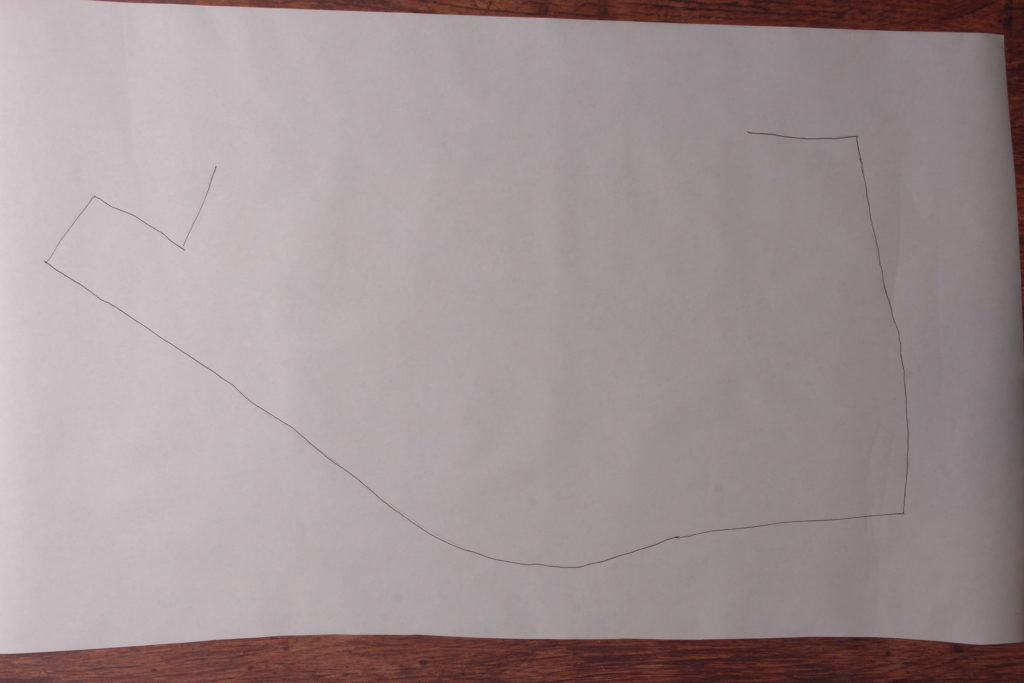
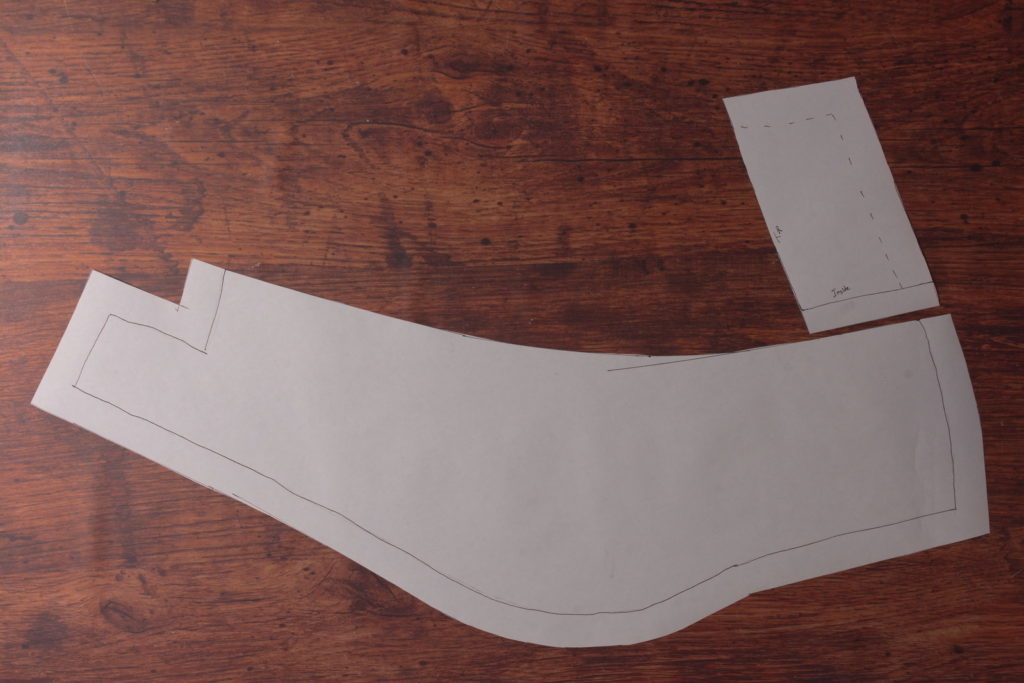
Here’s what I’ve got so far for my facing pattern. You could actually cut this out as one piece if you have enough fabric, but I’ll be constructing mine with the two separate pieces. We’ll add a seam allowance for that in a bit.
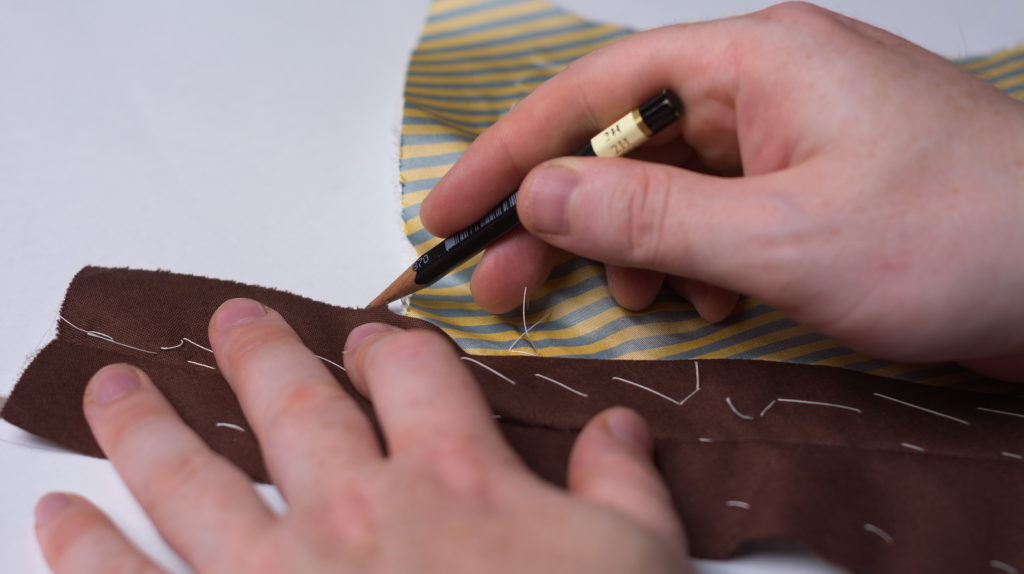
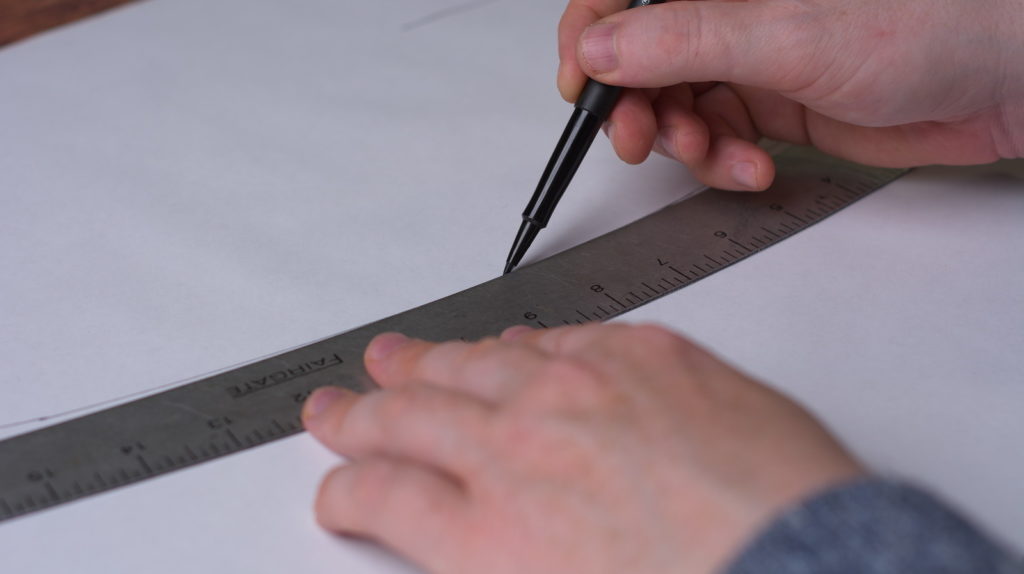
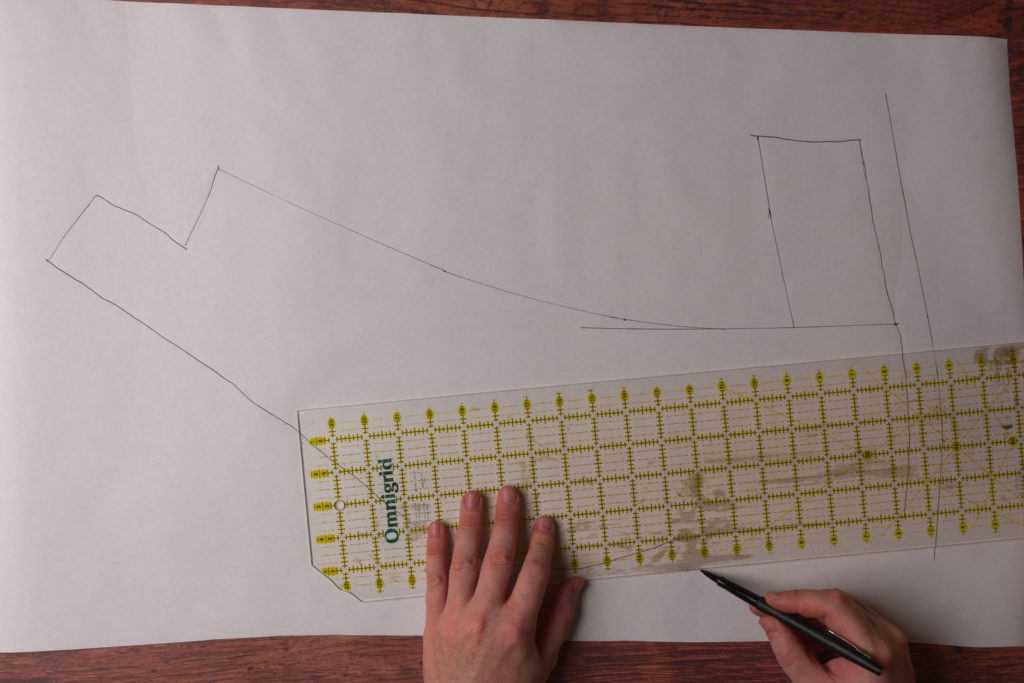
Now along the side, bottom, front, collar and shoulder seams, add an additional one inch (or more if you’re not feeling as confident) allowance to the pattern. This will allow us to manipulate the fabric around the shaped areas of the collar and darts.

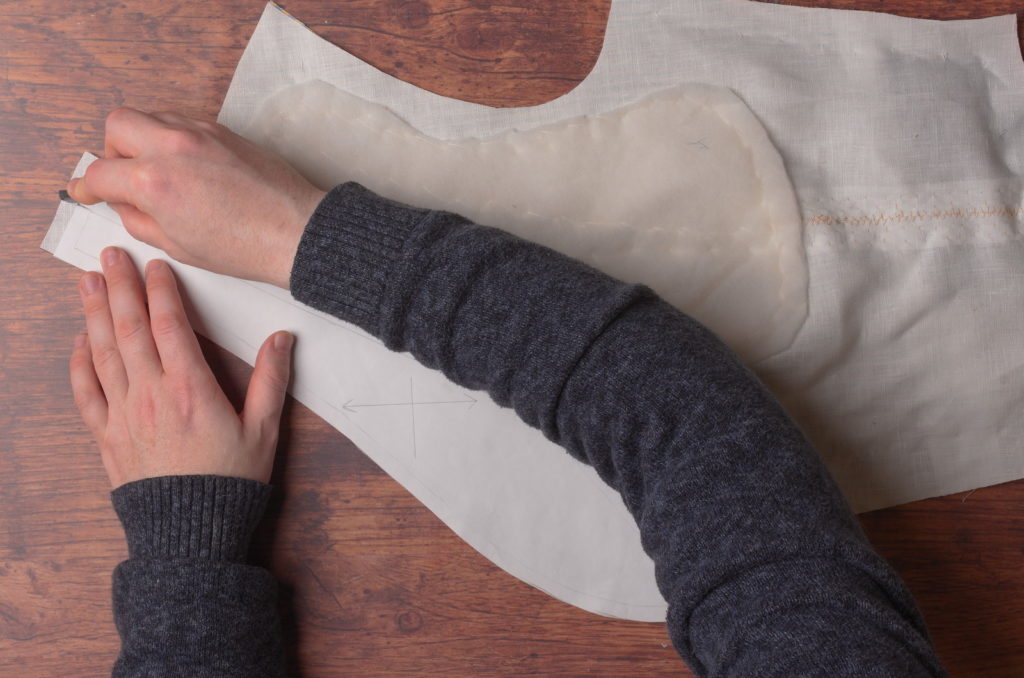
Now on a fresh piece of paper, trace out the lower facing along the outer edge (with the 1″ we just added). I drew in the original seam line with a dashed line for clarity, though no need to do that really.
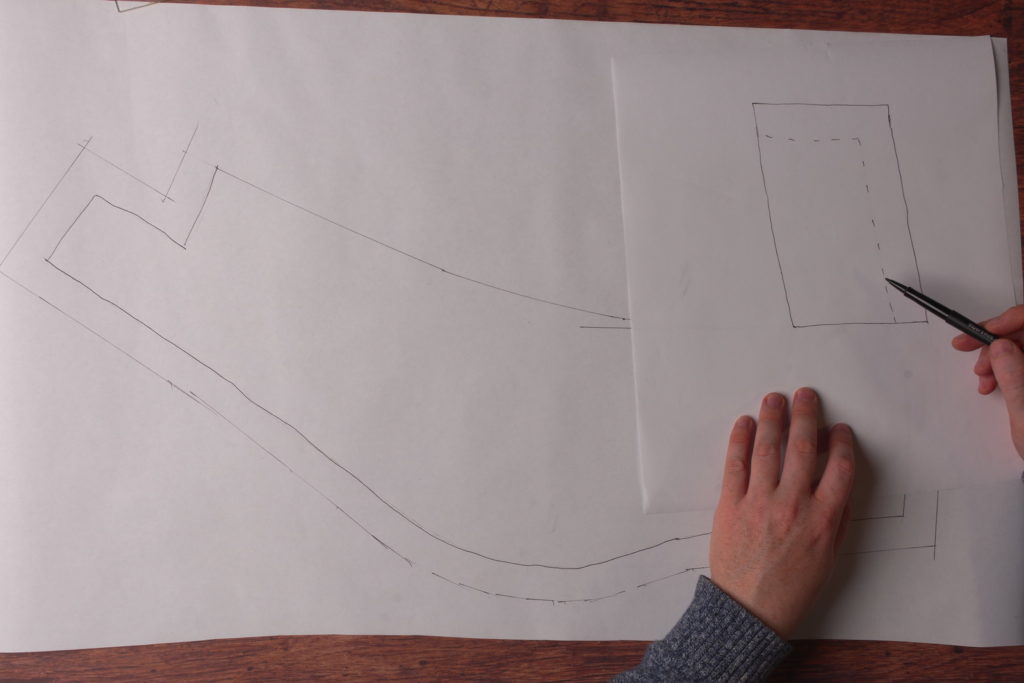
I also marked the top and front edges, since it’s easy to get this piece mixed up. Then, I added a 3/4″ seam allowance along the front edge, double the usual seam allowance. It occurred to me just now that I probably could have used a 3/8″ seam here, since we included the seam allowance on the main facing piece, but the extra allowance won’t hurt anything.
Cut out both facing pieces.
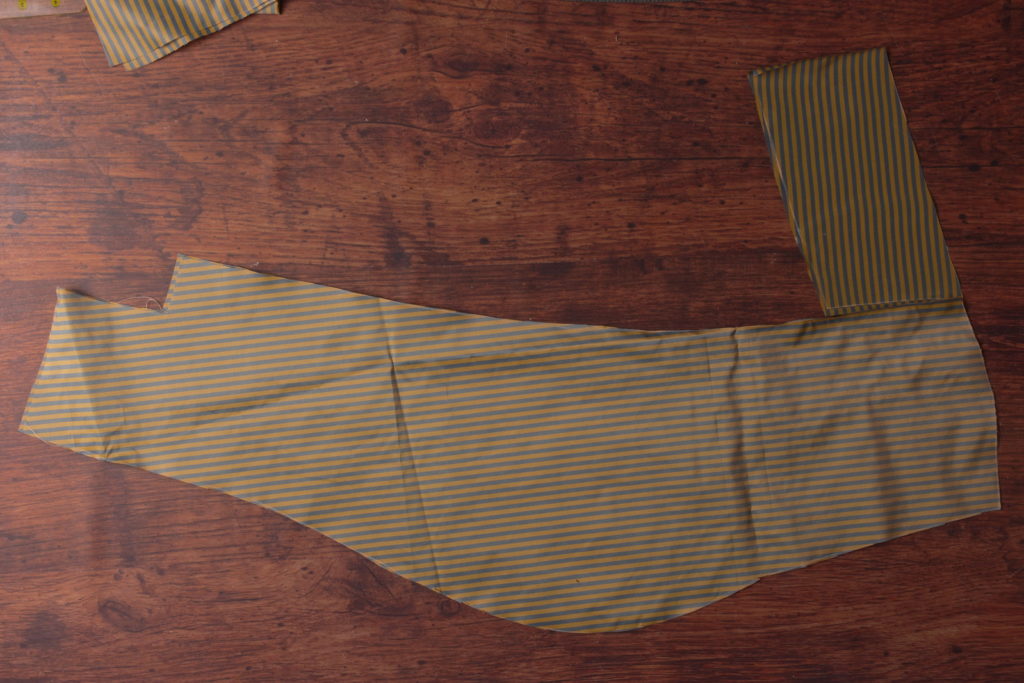
Now trace the facings on to your fabric. I kept the original grain lines for the alignment, but you could also feel free to experiment with this to get different stripe alignment on the collar area.
The lower facing could be cut on the grain as well, but I rotated it in order to save fabric, a common practice during the period.
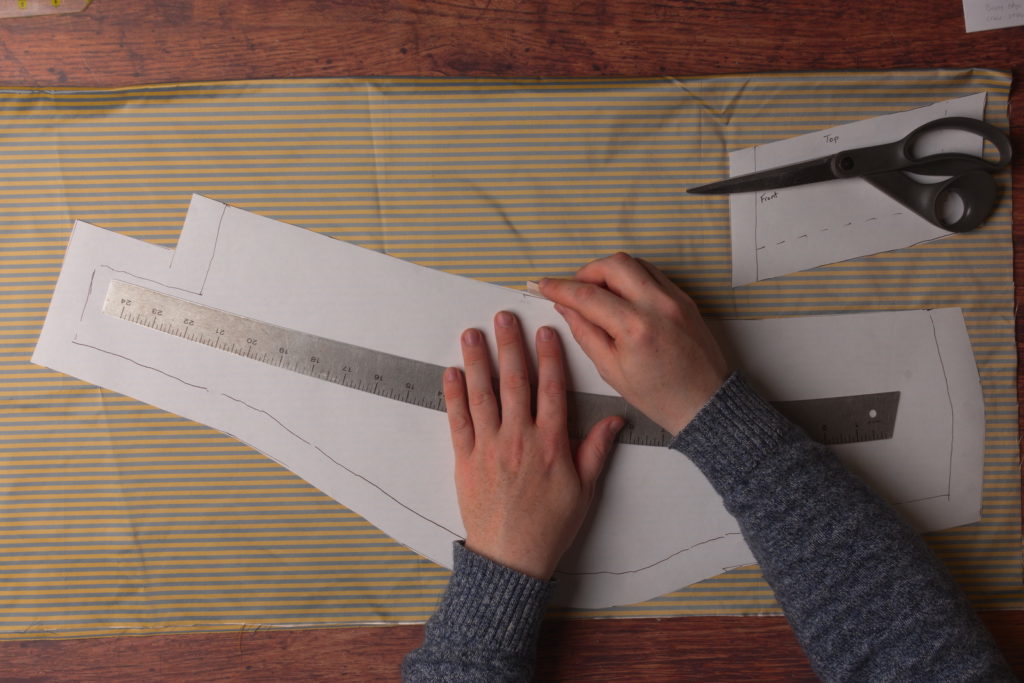
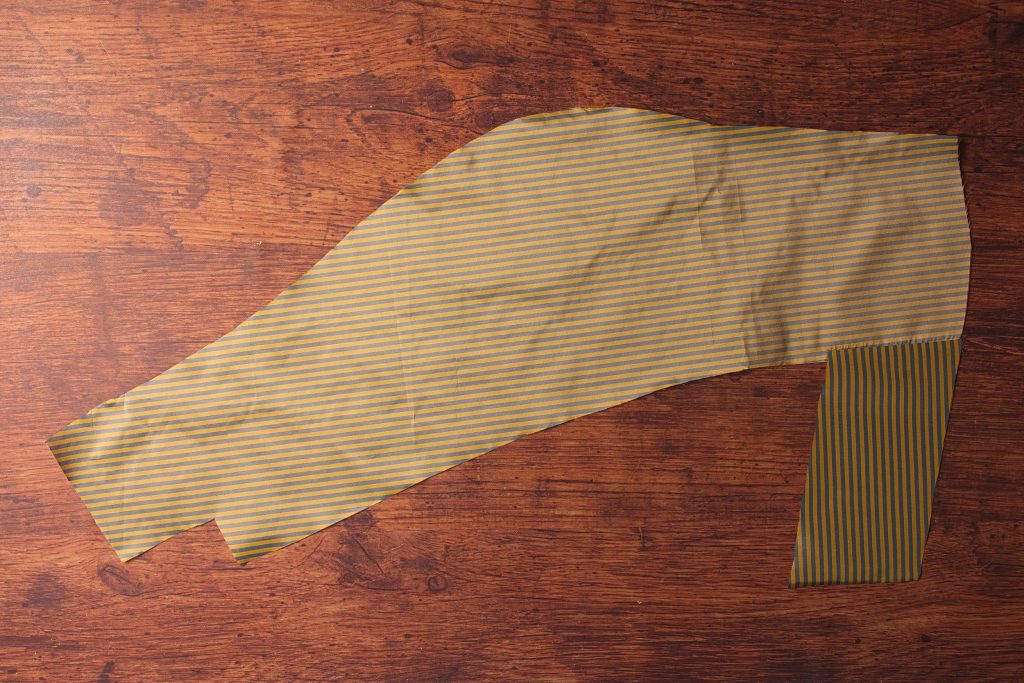
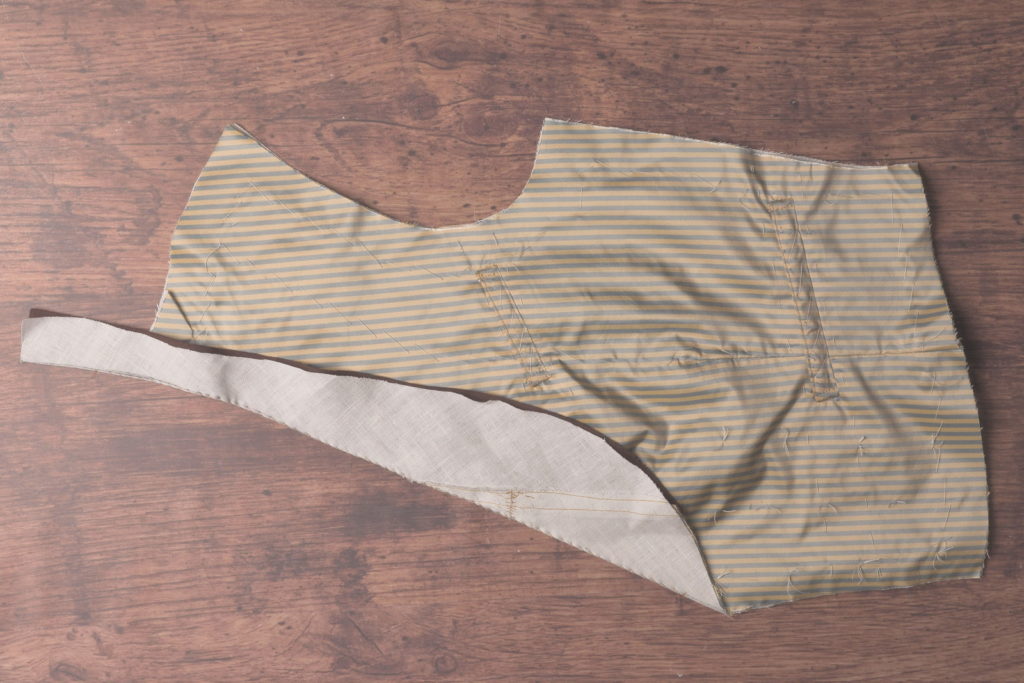
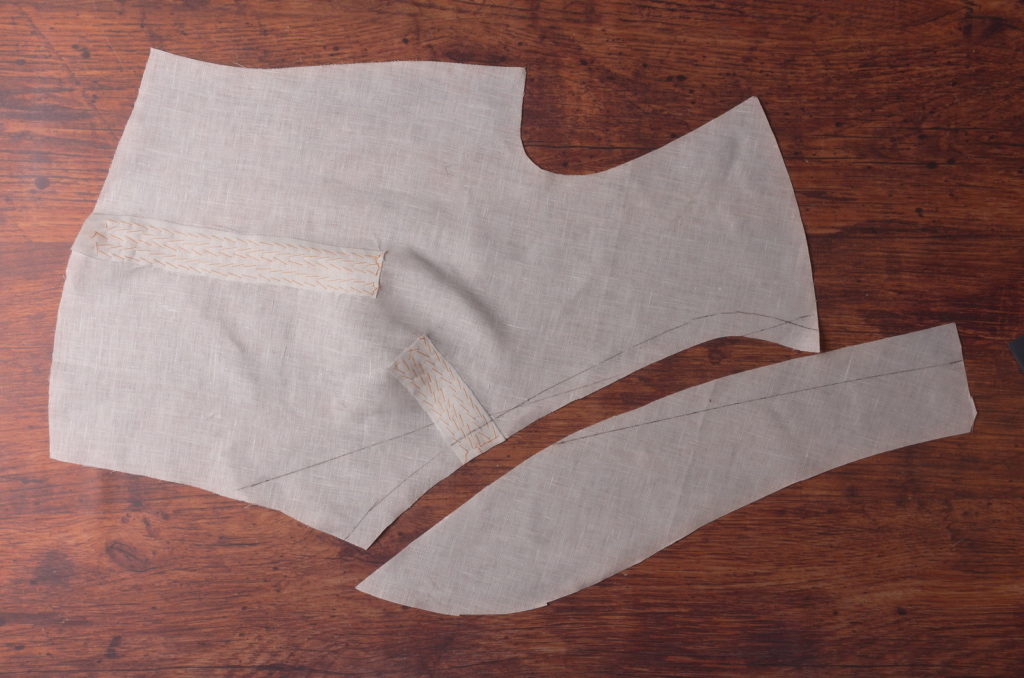
And then cut out the facings as usual. Here’s what mine looks like so far.

Stay Taping the Forepart
Before installing the facings, I like to reinforce the edges with linen stay tape. This gives a firmer and crisper edge to the waistcoat and prevents the seams from rolling out of position over time.
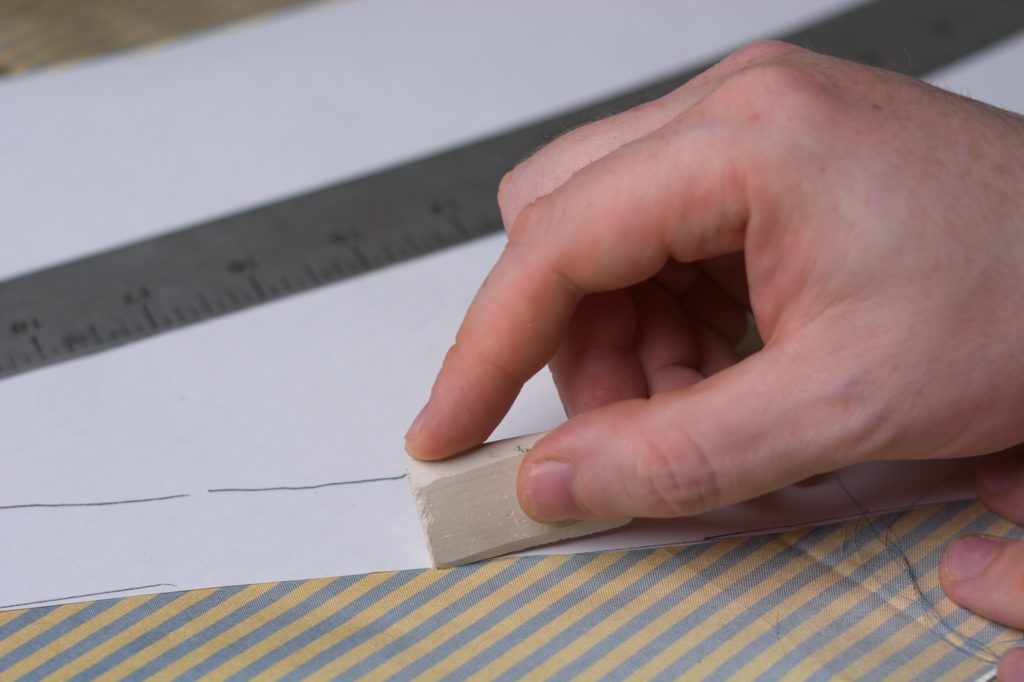
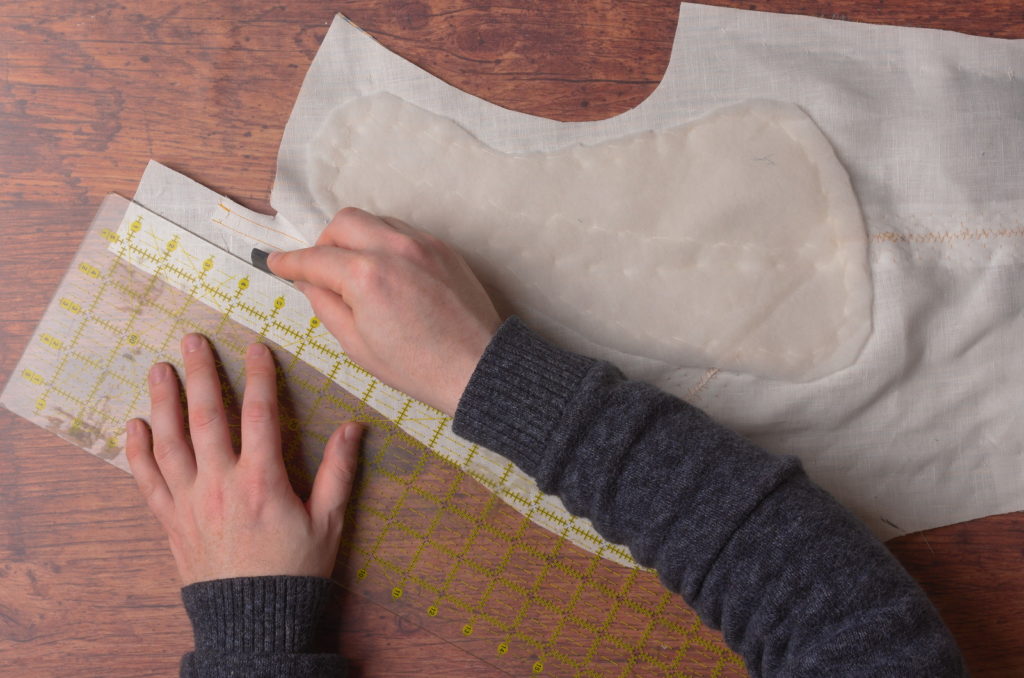
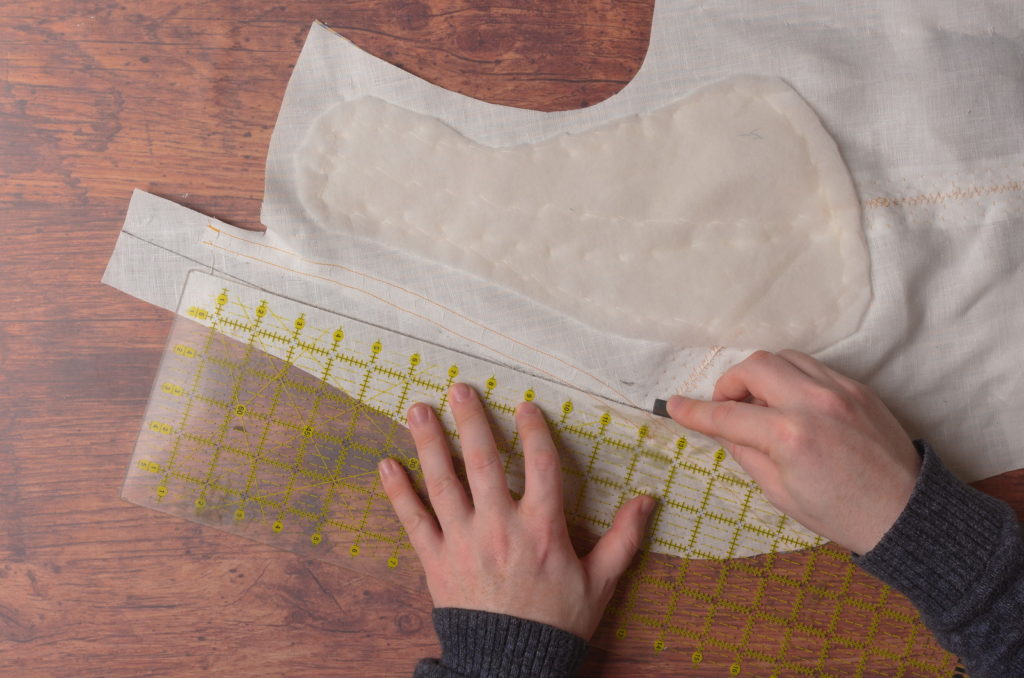
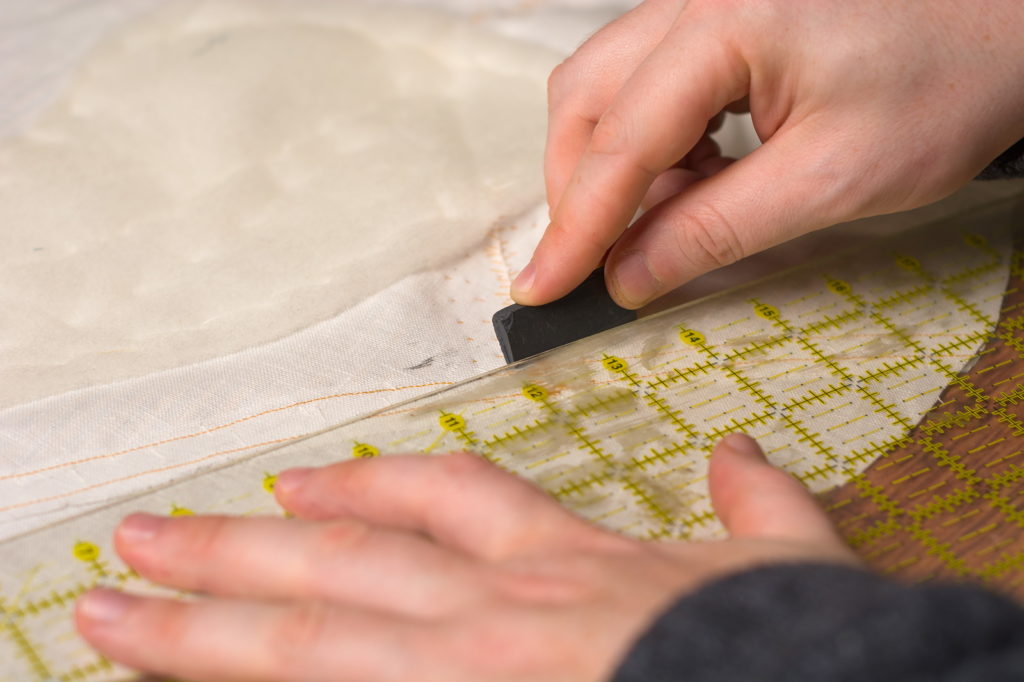
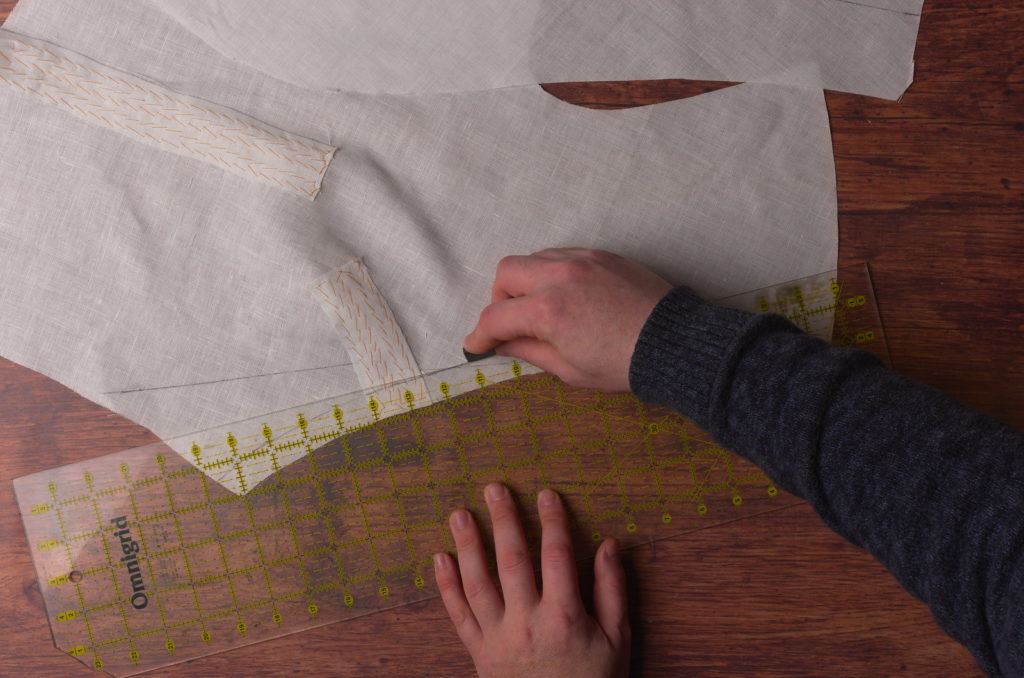
Begin by marking out the seam allowances (3/8″) along the bottom edge using a ruler and chalk or pencil.
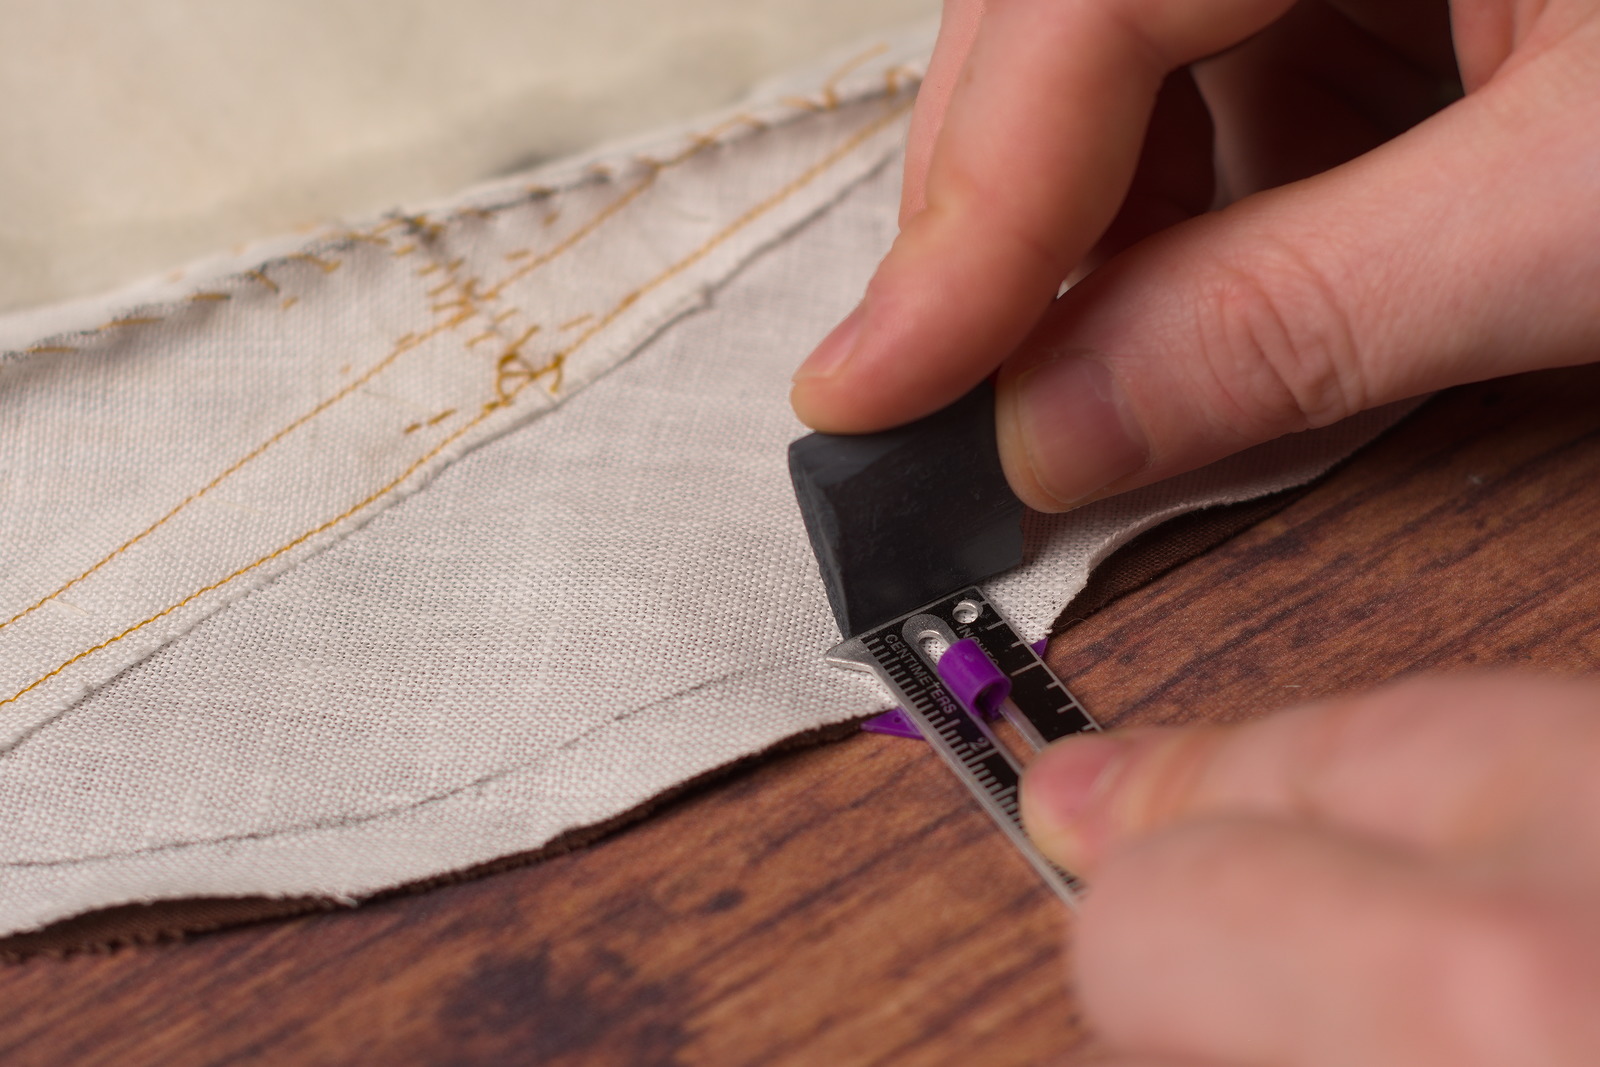
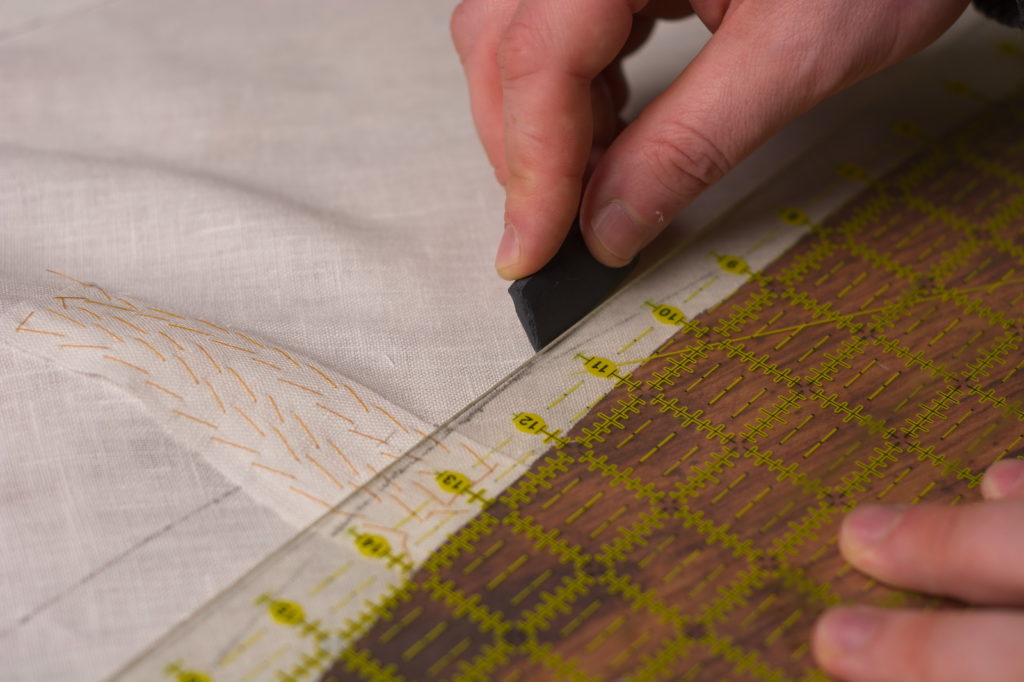
Continue marking along the front edge and around the collar.
Trace all the way to the center back of the collar.
Carefully trim away the seam allowance from the canvas only, being careful not to cut into the fabric underneath.
Be extra careful near the fold of the roll line – it’s so easy to accidentally cut through to the right side. I accidentally made a very small snip through the silk, but luckily caught it in time before too much damage was done.
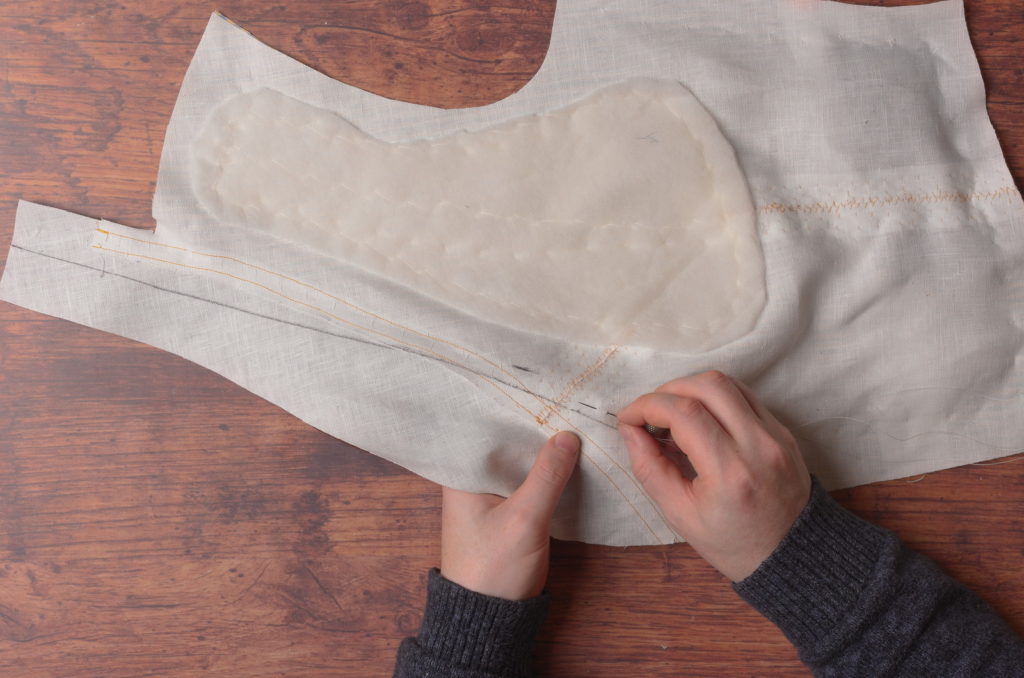
Lay the stay tape along the edge of the collar, just barely overlapping into the seam allowance. Begin basting about an inch above the shoulder, keeping the end of the tape free to finish up later.
Continue basting the stay tape to the waistcoat through all layers, along the collar.
About an inch above the roll line, take a stitch in place to lock the stay tape in place.
As you continue basting across the roll line, allow a little excess stay tape with each stitch. This excess is needed so that when the collar is folded in place, there will be enough slack in the tape to allow it to fold nicely without pulling back away from the body. Make one more stitch about one inch below the roll line to lock everything in place again.
Continue basting the stay tape to the forepart along the front edge. When you get about two inches from the bottom edge, make yet another stitch to lock everything in place. From here to the corner, hold the stay tape a little tight as compared to the forepart. This will draw the corner of the waistcoat inwards a little, helping it to stay in place when worn.
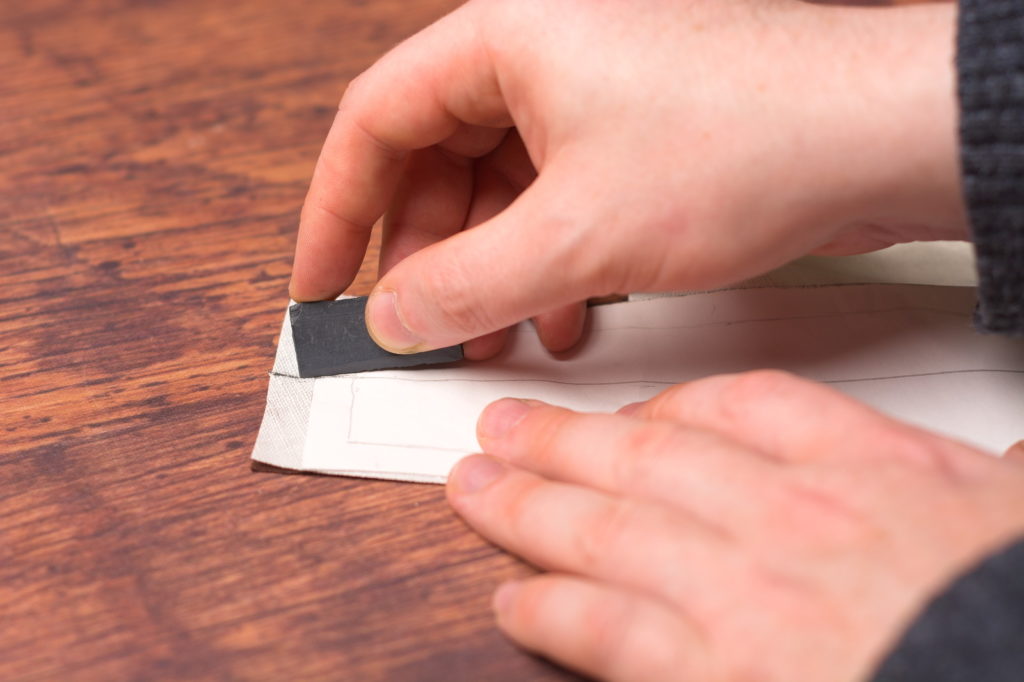
When you get to the lower front corner, take another stitch in place to lock everything, keeping about 1/2″ from the corner itself to give yourself room to work with. Then at a 45 degree angle, cut the stay tape almost but not quite all the way through. The end of the cut should ideally be right over the corner of the canvas underneath.

Now fold the stay tape in place along the lower edge.
Clip the overlapping section of stay tape at the same angle.
When done, you should have a nice crisp miter that won’t leave any extra bulk in the area. This one came out pretty nicely, but as I like to say, it ‘miter’ been better.
Make another stitch in place, and again hold the tape tight to the forepart for another inch or two along the bottom edge.
Continue basting until you get to the side seam.
Trim the excess flush with the side seam.
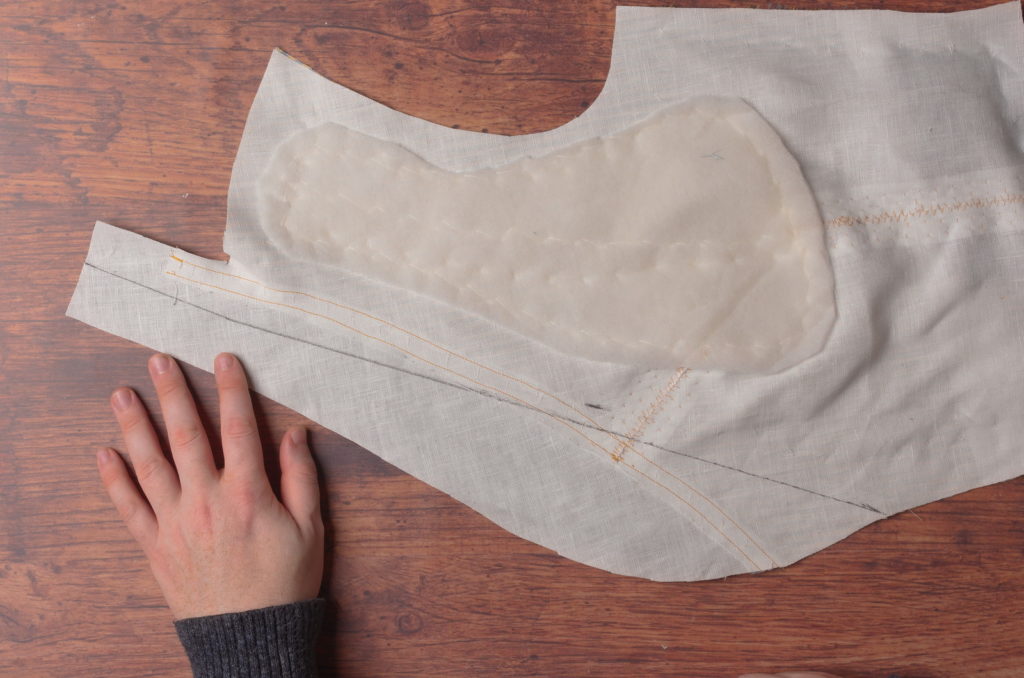
Here’s the forepart so far after basting on the stay tape.

Beginning at the top of the collar, one inch above the shoulder line, begin stitching down the stay tape along the outer edge using a bit of a felling stitch. The stitches are about 3/8″ to 1/2″ apart, and the needle enters at a slight diagonal, catching only a couple of threads on the right side. You can also use a cross stitch, shown at the end of this lesson.
Stitch along the front outside edge, past the roll line.
And continue down along the center front and waist line.
Then repeat the process, this time on the inside edge of the stay tape, and catching only the stay tape and canvas with each stitch, as these are in a more visible location looking from the right side.
Again, end the stitching about 1″ above the shoulder line. This entire area needs to be free to work with later on.
As an alternative, you could also cross stitch the stay tape to the forepart. The results are the same, but I do find this stitch is better at distributing any fullness, for example, around the roll line. It’s up to you which version you choose.
Finally, remove the basting stitches – they’re so much easier to remove now than later if you forget.
Here’s the forepart so far after installing the stay tape.
Tacking the Pockets
To complete the installation of the canvas, we’ll again turn back to the pockets, which we left unfinished at the ends. We’ll now trim the ends, turn them under, and tack them down through all layers, including the canvas, which will give them additional strength and prevent the canvas from shifting during wear.
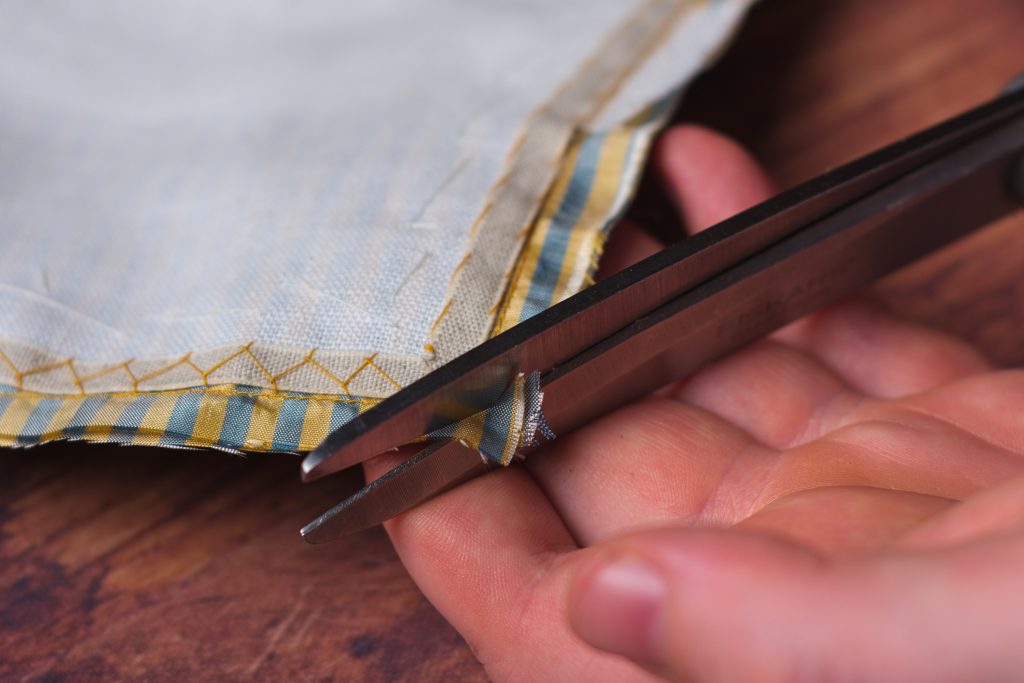
Begin by trimming the raw ends of the pocket welt down to about 1/4″ or 3/8″, either square across or more of an angle if you want more of a ‘boat’ shape to your pocket ends.
Fold the raw edge under, forming the shape you want, and pressing firmly with your fingers against the table.
Depending on the angle of your pocket, you may have a little excess fabric poking above the top of the welt. You’ll have to push this under the welt with your fingernail as you fell the top edge.
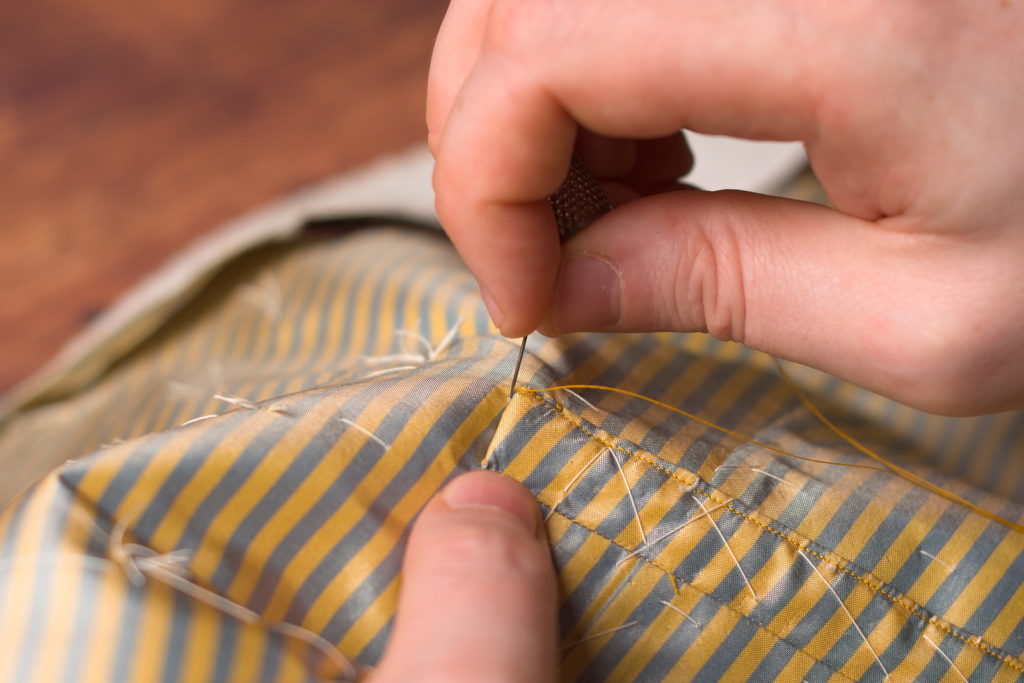
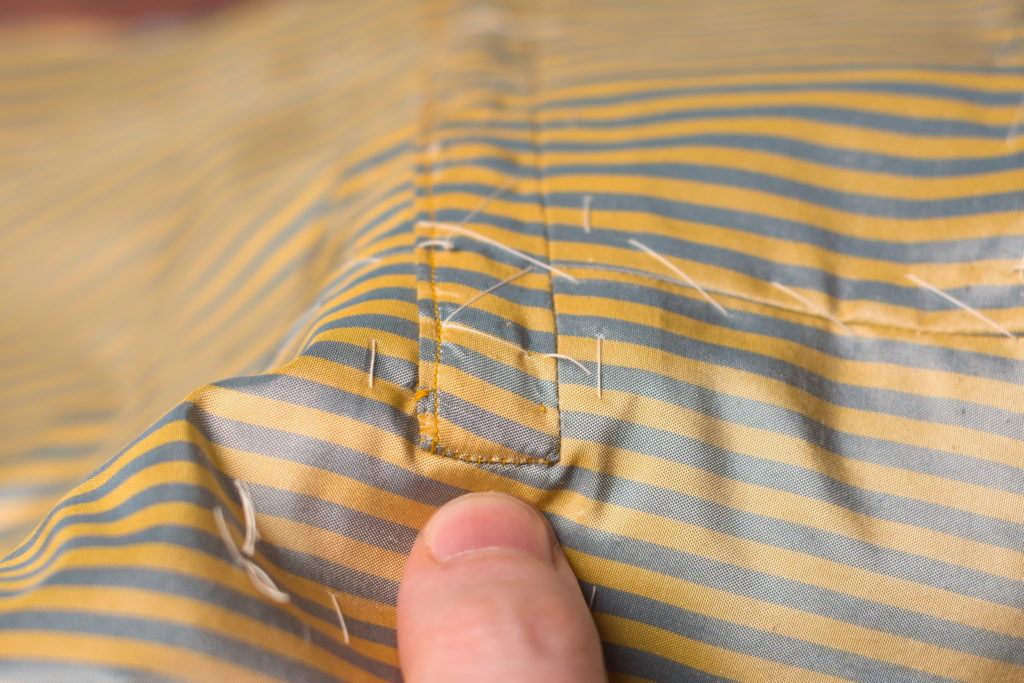
Along the top of the welt, about 1/4″ from the end, form 4 – 5 felling stitches in place, going through all layers. You may need to make this a prick stitch – that is, passing the needle all the way through to the underside, in order to get through all of the layers. This is the point of the pocket that takes the most stress, so the additional stitches in place are necessary.
Continue felling along the top edge of the pocket towards the end, through all layers.
Then continue felling down along the end of the pocket itself, taking as small a stitch as you can into the welt to minimize the stitching that’s visible. It’s a bit tricky in silk, but it can be done.
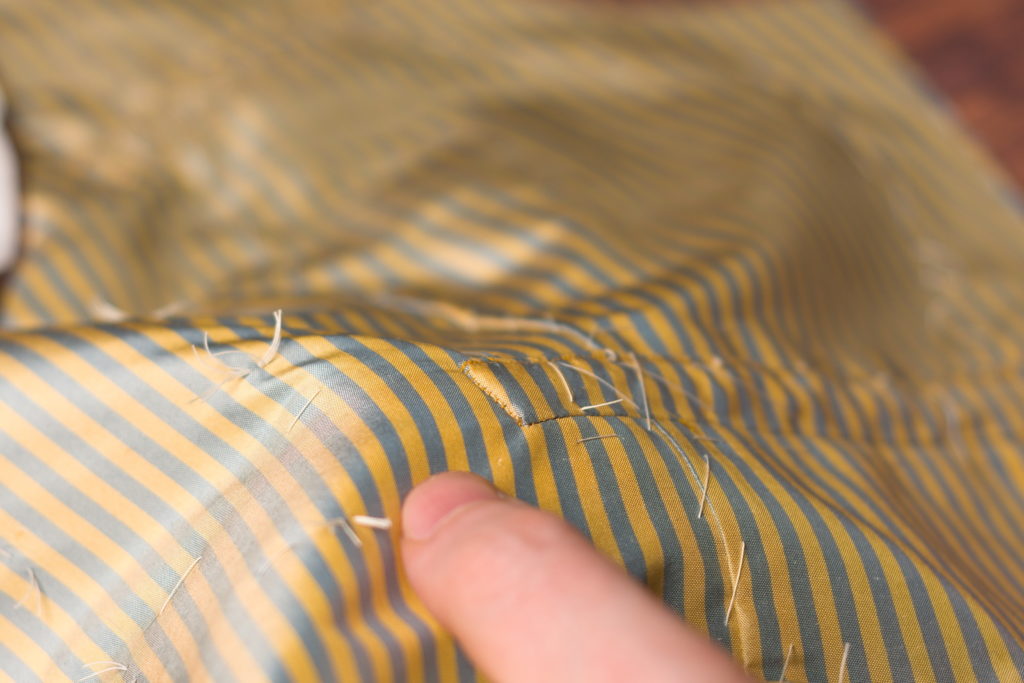
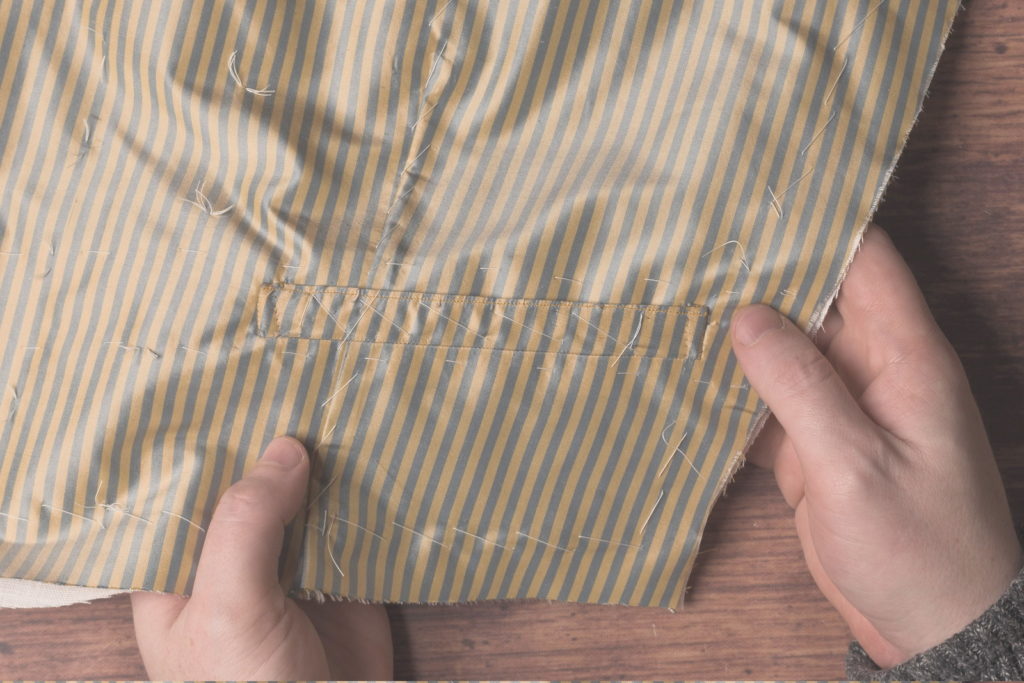
Here’s the end of my pocket after felling.
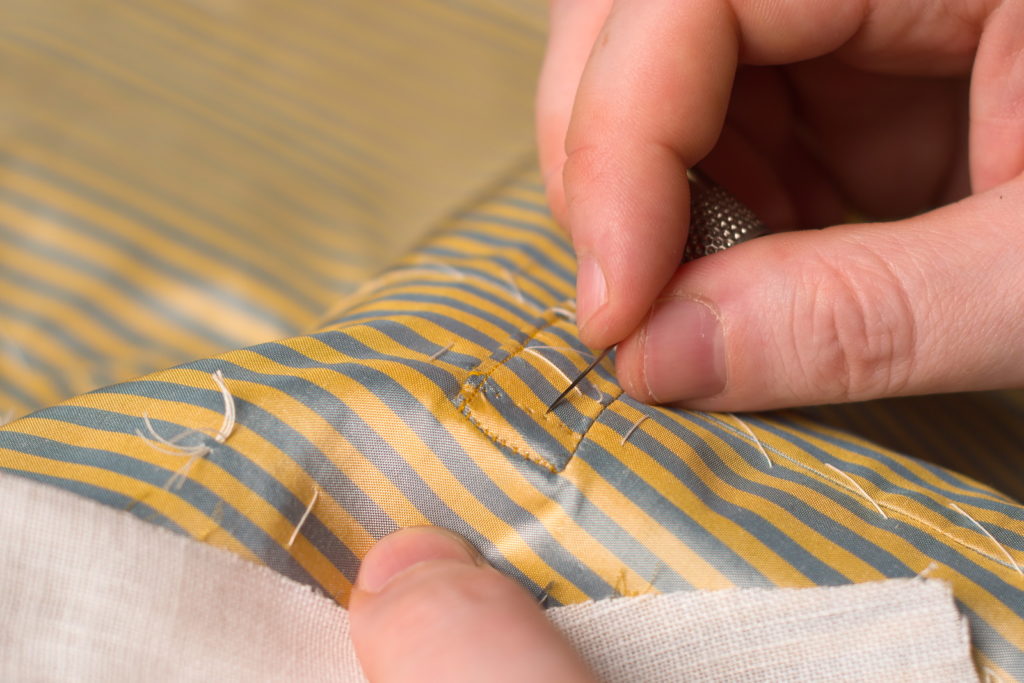
Now pass the needle and thread to a point about 1/4″ from the end of the pocket, and along the bottom edge. Make your first stitch by passing the needle to the right side of the waistcoat.
Now pass the needle back into the fabric through all layers, immediately to the side of the first half of the stitch. This is what’s called a side stitch, and due to the way the stitch is formed, is very strong, perfect for this situation.
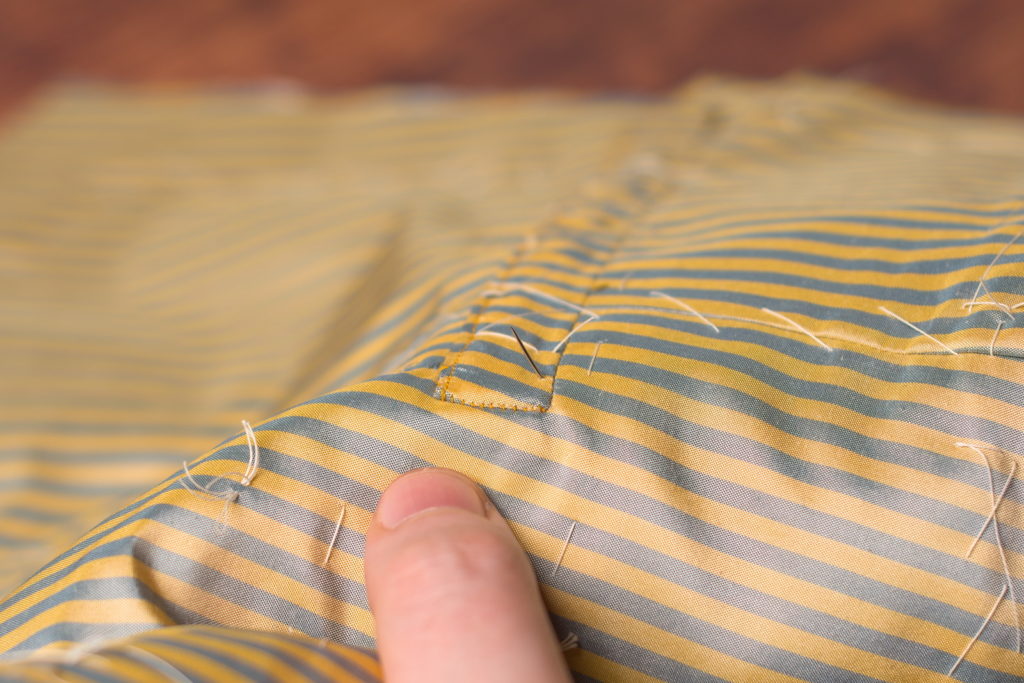
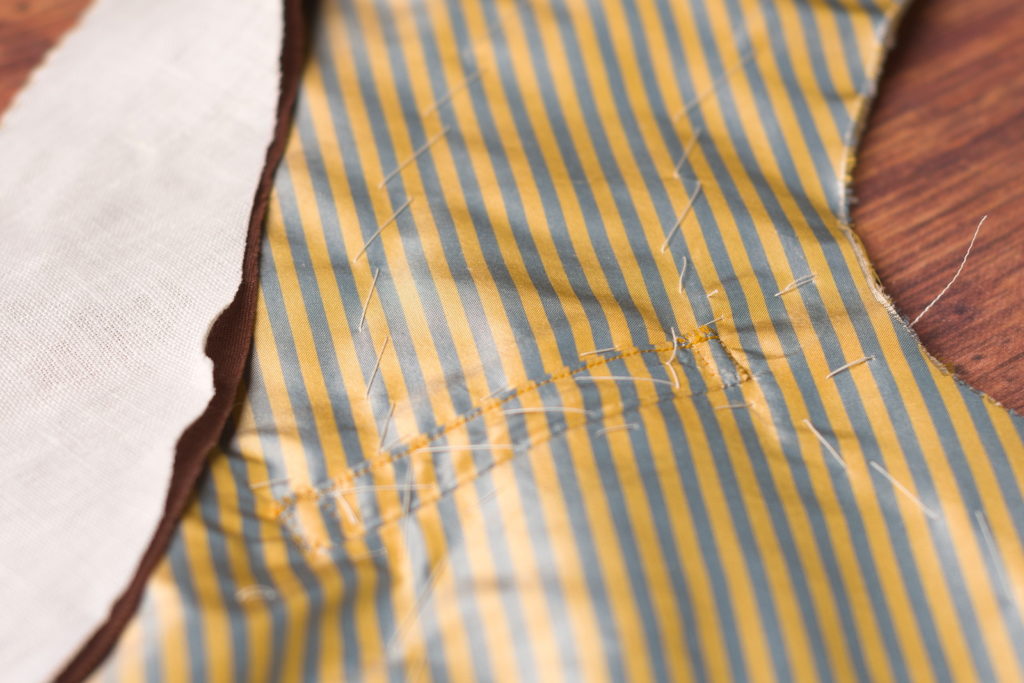
The stitch should be very small – almost invisible. The one I made here is a little large. Now, draw a line visually with your mind from that first stitch to the original group of overcasting stitches you made. Continue sewing in as straight a line as possible back towards those stitches.
I was kind of disappointed with how these came out, while they look good, I was not concentrating on aiming for those original felling stitches and shifted a little off towards the end of the pocket rather than keeping parallel to it. Alas …
Finish off the pocket from the wrong side with a few stitches in place.

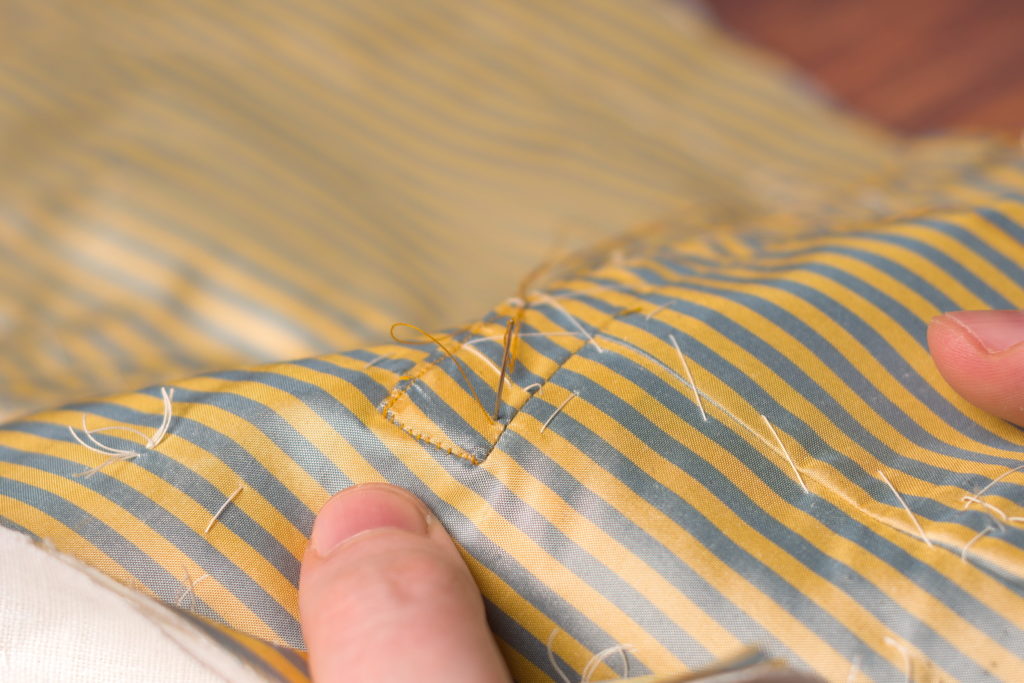
Repeat for the other end of the pocket, though you’ll probably be working in the opposite direction – just takes a little getting used to. So here I started from the bottom of the pocket on the outside edge, worked my way up, and across the top, making the felling stitches in place to tack it down, and then side stitching down the pocket.
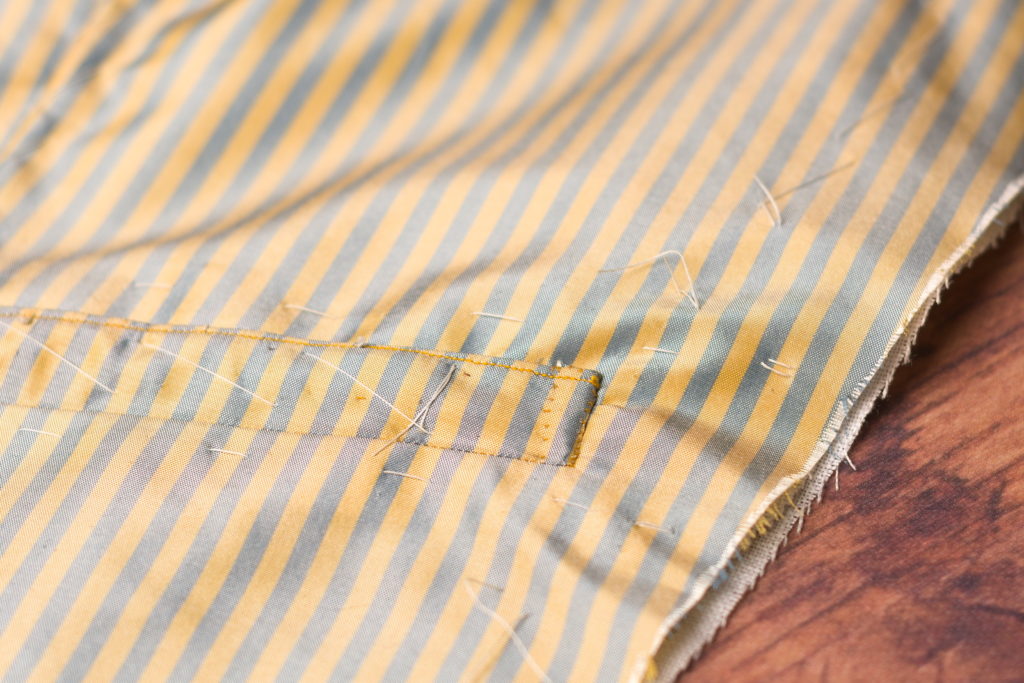
Here’s one of the completed pockets, continue with the remaining pockets.
Collar Roll Line
With the canvas installed, we can move on to finalizing the position of the roll line. Take your collar pattern and align it on the collar canvas as closely as possible. Slide it down about 1/4″ to expose the linen underneath and make a mark at the top of the collar along the roll line.
Then mark the roll line at the bottom edge of the collar pattern. This point most likely won’t align with the final roll line position due to the dart, but it’s useful to see the amount of adjustment.
Finally, pull back the canvas to find the location of the bottom of the roll line, which should have been marked on the forepart.
Mark the bottom of the roll line as closely as possible. I usually just do this by eye but you could make a tailor’s tack through all layers from the right side to find the location that way.
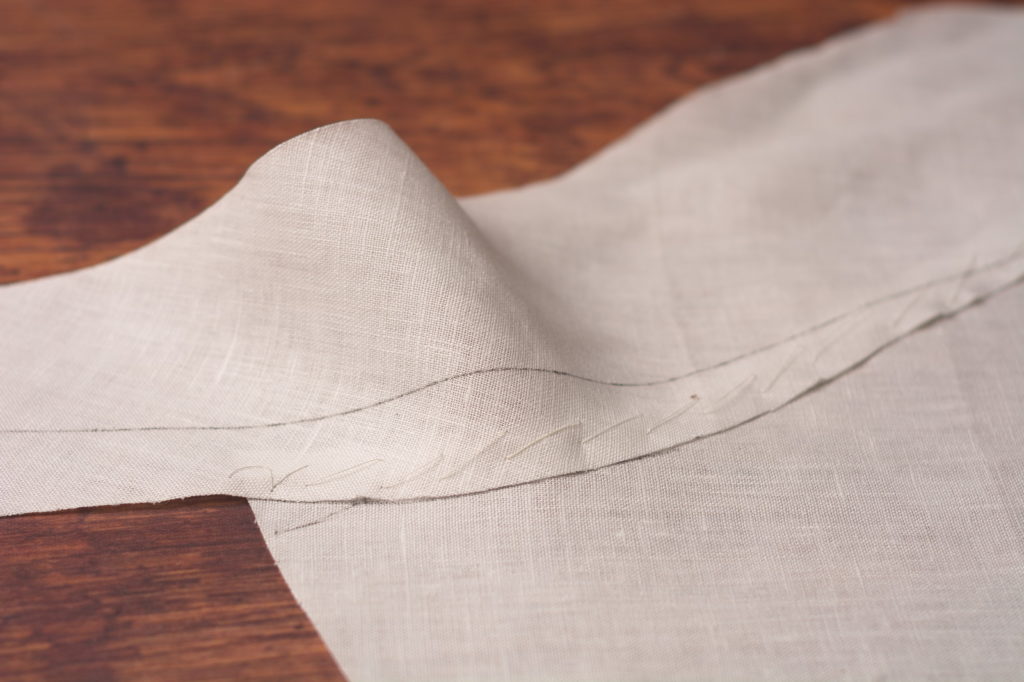
Now start marking in the final position of the roll line. In the original draft, it’s indicated as a straight line from top to bottom, but I find that doesn’t actually work so well in practice, and a bit of nuance is needed in the positioning.
At the top end of the collar, keep the roll line parallel to the lower neck edge (closest to the top of the photo) for the first 3 inches or so, to about level with the shoulder.
Then ever so slightly shift the ruler so it aligns with the bottom mark, and draw in the rest of the roll line.
Here’s the roll line all marked out, you can see the slight angle we put in. When the waistcoat is worn, this will help everything stay closer to the neck.
Keeping everything flat and aligned between the layers, baste a row of straight stitches about 1/4″ away from the inside of the roll line.
It occurred to me afterwards that it might be easier to just baste directly down the center of the roll line, that way the layers will stay together even better without much effort on your part.
The roll line after basting.
Now crease the collar along the roll line with your fingers, as closely as you can to the marked line.
Press carefully and firmly over a tailor’s ham, as the collar and roll line have a good deal of shaping built in thanks to the dart.

Here’s the entire forepart so far after pressing the roll line.
Now starting about an inch from the bottom of the roll line, begin overcasting the folded edge, being sure to catch all of the layers with each stitch. Keep the stitches between 1/8″ and 1/4″ apart.
The stitching is started an inch from the bottom so that we can open the collar back up and do a bit more work around the edges of the waistcoat.

I started with three or four stitches in place.
Since I had basted to the edge of the collar, I found my stitches were missing the silk layer underneath, so I opened up the collar and press the silk into the crease with the finger of my left hand while I made the stitch.
It’s a good idea to check every once in a while to make sure you’re catching every layer.
Continue sewing towards the center back of the collar in the same manner.
End the stitching about 1 1/2″ to 2″ from the back of the collar. We need this free so we can join the collar halves together with a seam later on.
And here’s the completed roll line and collar after stitching.
Installing the Canvas
With all the preparatory work out of the way, we can begin installing the canvas. Begin by laying the forepart on top of the canvas, right sides up, and aligning the forepart at the darts, collar, and other visual landmarks. If you’ve not done this before I’d recommend starting on the side with the 1″ allowances marked on the canvas.
Also note that the upper part of the collar, along the bottom edge, should align exactly with the edge of the canvas, since we didn’t add any allowance there.
The following process basically consists of basting the forepart to the canvas down the center, and around the edges, all the while supporting the shape with your hand underneath and smoothing out any excess in the forepart. This is the general order I use to install the canvas.
Begin in the center of and about an inch below the shoulder, basting down the front, smoothing out the excess fabric in the forepart as you work. You can use either a straight basting stitch or a diagonal stitch – I tend to vary depending on the angle I’m working at.
When you get below the chest level, aim for the center of the waist or the location of the dart, if you have one. Continue smoothing out the fabric as you work – please see the video for a demonstration of this.
Stop your stitching about 1″ above the waist. You need room to do some work there later.
Starting at the same point as the previous stitching at the shoulder, baste along the shoulder towards the armscye, again keeping 1″ from the edge.
Continue basting along the armscye, pushing any excess down and away from the center of the waistcoat and away from your stitching.
And continue basting along the side seam towards the waist. Here you can see me pulling gently on the forepart with my left hand in an effort to smooth everything out.
Keep basting to 1″ from the waist.
Also, try to keep the basting away from the ends of the pockets. We need those free to be able to turn under shortly.
Then baste across the bottom of the waist to the dart, keeping again 1″ from the edge of the forepart.
Finish up installing the canvas by basting from the bottom of the dart towards the front.
Keeping 1″ from the edge of the forepart, baste up along the center front of the waistcoat, smoothing the fabric as you work.
When you get to the roll line, turn and continue basting following about 1″ below the roll line. We still need to finalize the position of the roll line, so don’t worry too much about following it perfectly.
Continue basting below the roll line onto the collar. I neglected to draw the roll line in on my collar, so I’m just keeping the stitching near the lower edge of the collar.
Continue basting to the end of the collar, stopping 1″ from the end. It gets a little tricky near the shoulder due to the tighter curves, so just be aware of any excess, smoothing as you stitch.

Finally, baste from the edge of the collar across the shoulder to the midpoint, where you started, just to get that area secured.
After you’ve finished basting, hold up the waistcoat, on yourself or a tailor’s form, and check to see how well you did – are there any wrinkles or excess fabric still remaining in the forepart? If so, you may need to go back and re-baste. Kind of a pain but well worth the effort.
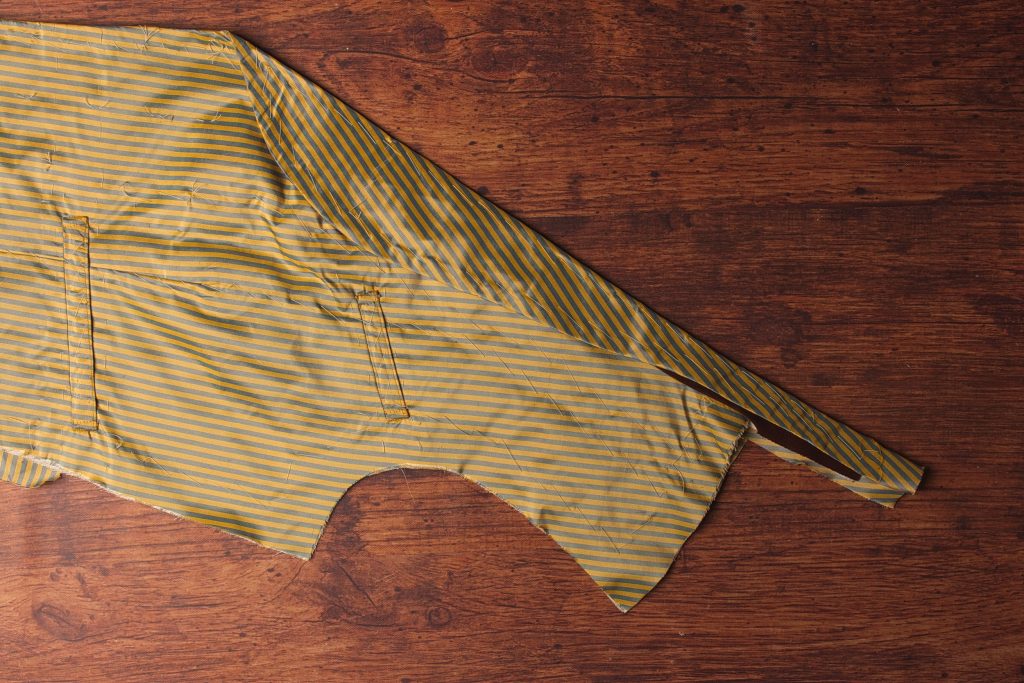
When you’re happy with everything, carefully trim the excess linen away from the forepart.
This completes the installation of the canvas.
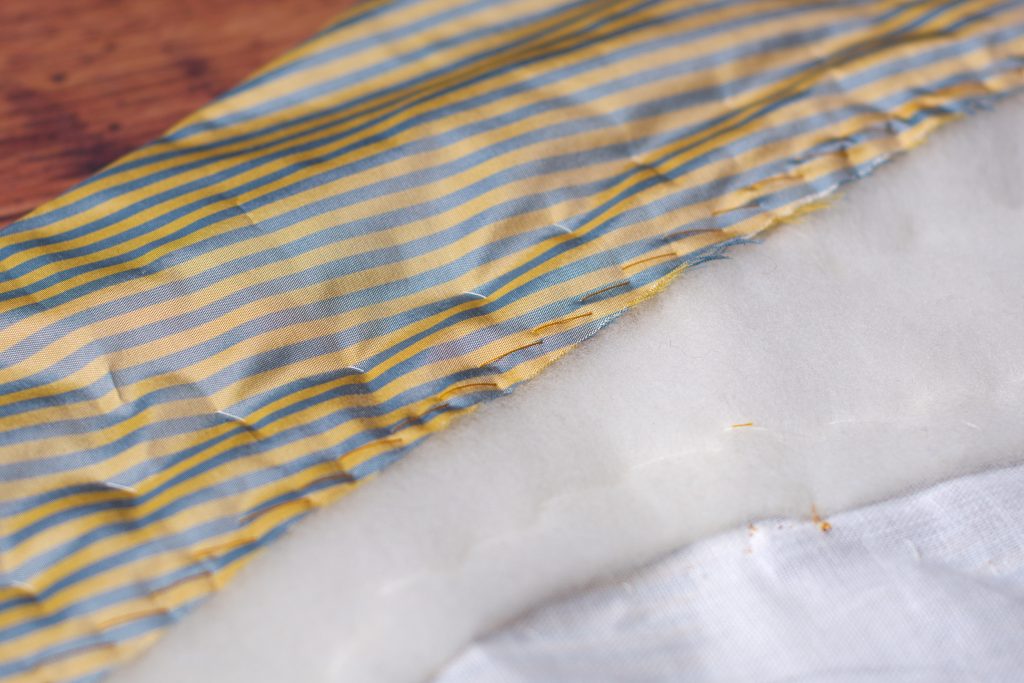
Chest Padding
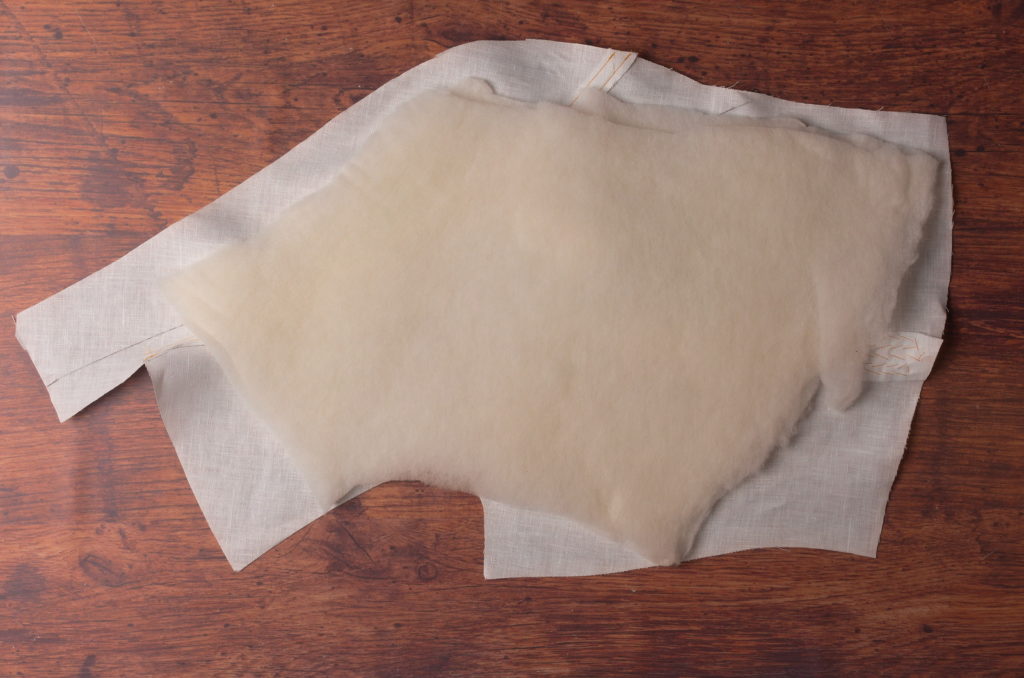
The last thing to do before installing the canvas is to add a bit of padding to the underside. I’m using a 100% wool quilt batting from Hobb’s Heirloom, which gives just the right amount of body without being overly thick.
I first cut two layers of batting to very roughly the size of the area I want to pad. The area depends on your own individual body type and shape, but generally the chest area can be padded rather reliably.
After cutting, I like to very lightly press the wool batting to smooth out any wrinkles. Just the lightest of touches with the iron will allow the fibers to relax and puff up a little bit after being in the packaging. Just don’t press too hard or you’ll flatten it beyond repair. You could use a little steam if necessary as well.
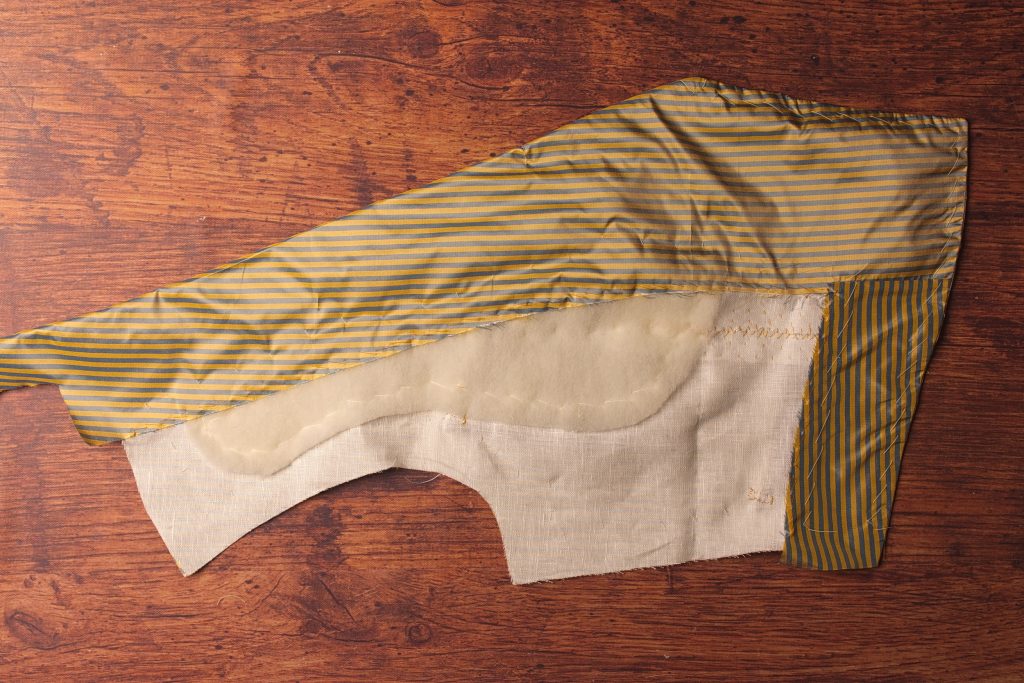
Now gradually trim away the wool batting until you’ve got the shape that looks like it will work for you.
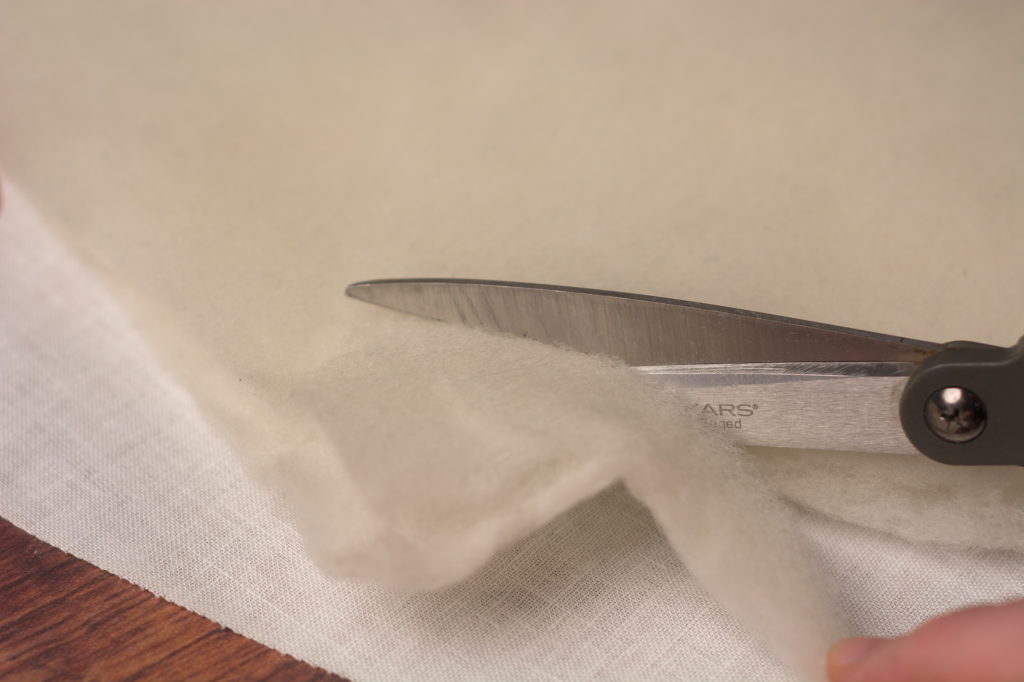
Here’s what I ended up with. I kept it out of the very top of the shoulder since mine are already full enough, and dropped the padding just to above my stomach area. At the same time, keep the padding about 1″ from the armscye as well as the roll line, as well as any edges if you decide to make your padding larger than mine.
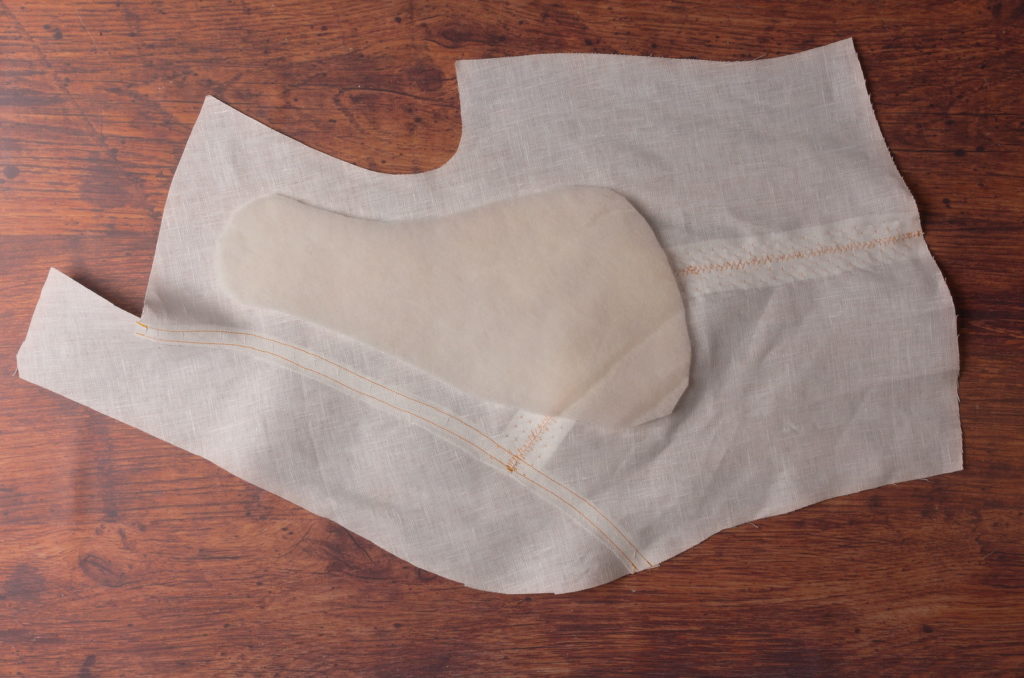
With one layer of padding in place on the wrong side of the canvas, baste down the center of the padding using fairly small diagonal basting stitches – 1/2″ or so. These stitches will permanently keep the padding in place so you don’t want them to fall out over time.
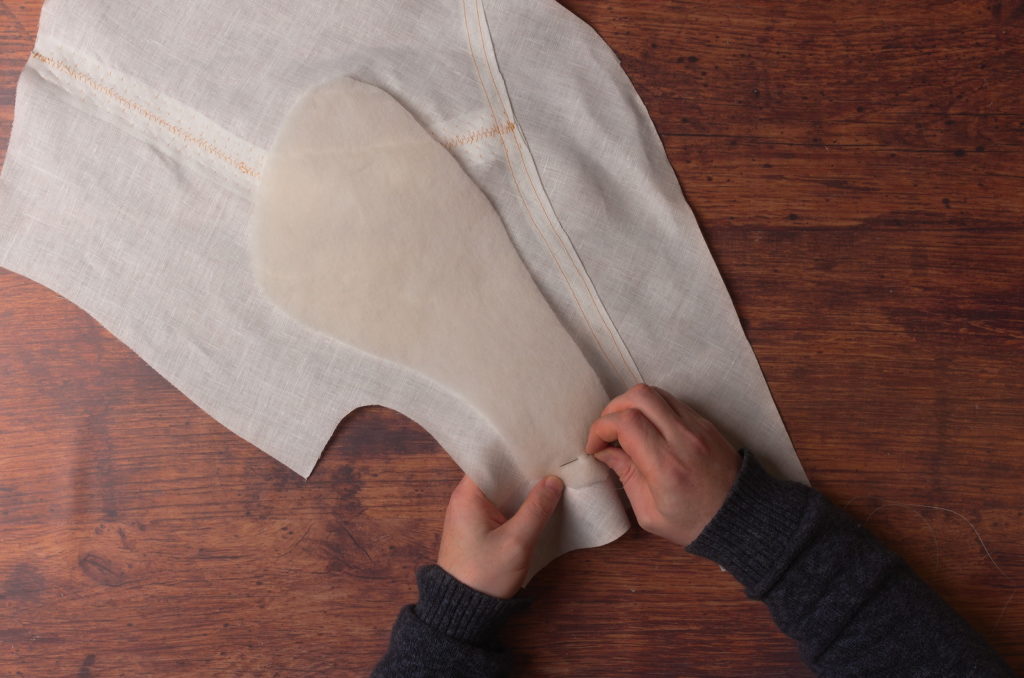
Then continue basting around the outside edge of the padding.
If you’ve got a larger padding then you may wish to do more basting along the central area, but for a smaller-sized padding, this works.
Collar Canvas
We can now turn our attention to the collar canvas, which also must be attached with as few layers as possible. Begin by drawing in a line along the neck edge, twice the seam allowance in width. So using 3/8″ seam allowances, my line is 3/4″ from the edge.
Beginning at the base of the collar, align the edge of the collar with the line you drew, and baste the collar to the forepart with a diagonal stitch, keeping a neutral tension.
Make sure the front edges are aligned as closely as possible.
Near the top of the shoulder, the curves tighten up a bit so it’s slightly trickier to get everything in place. I like to take smaller stitches in this area to ensure nothing moves out of place.
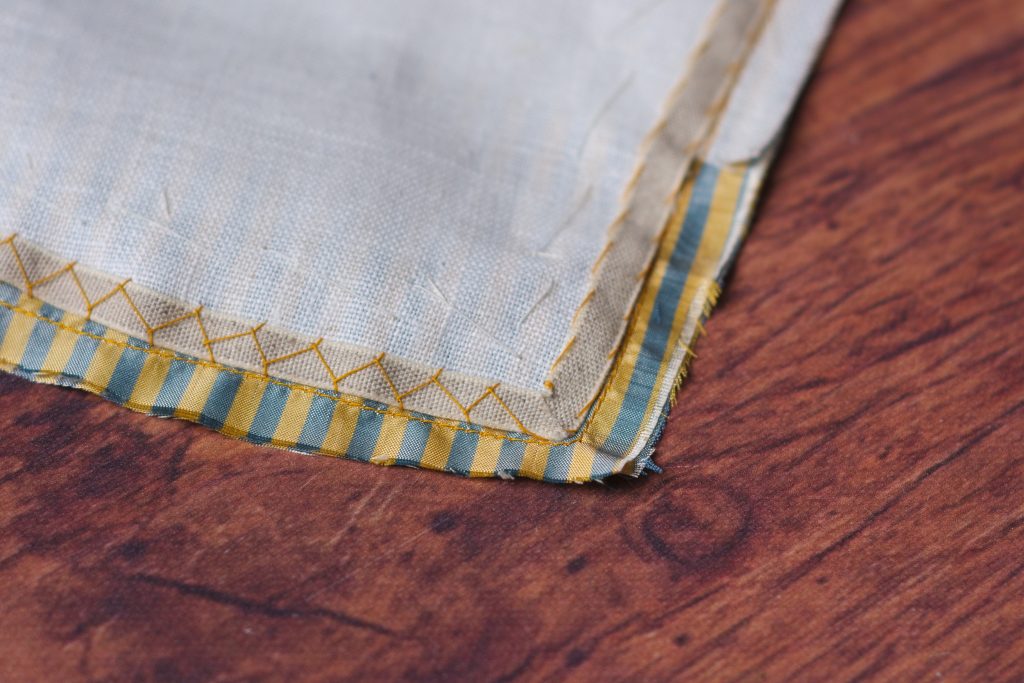
Here’s the completed collar after basting to the forepart. Don’t worry about the roll lines quite yet, we’ll straighten them out later.
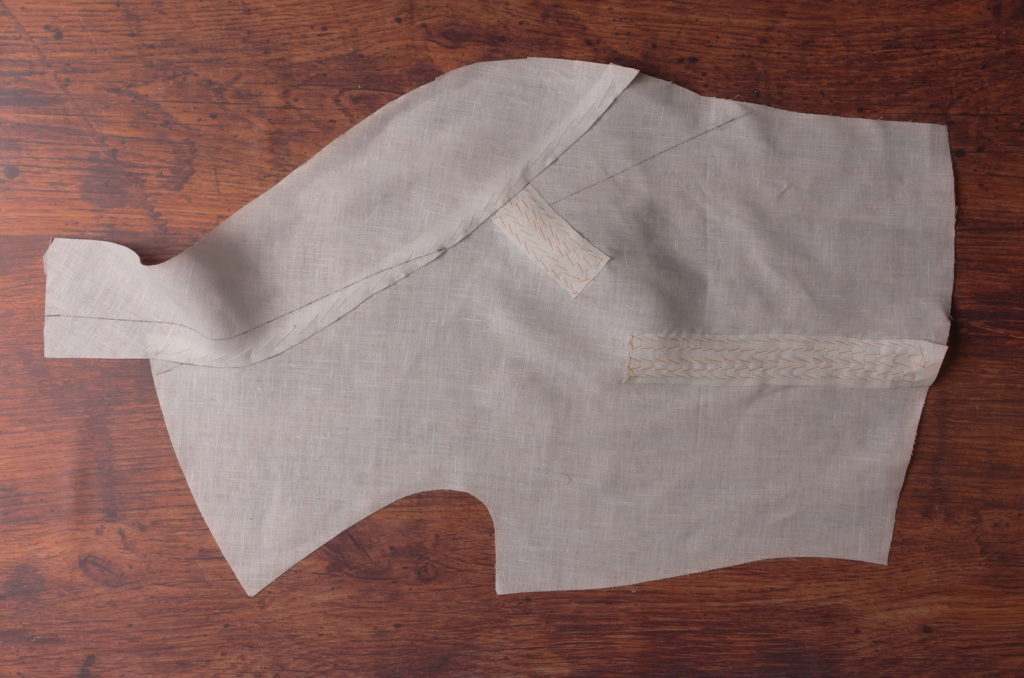
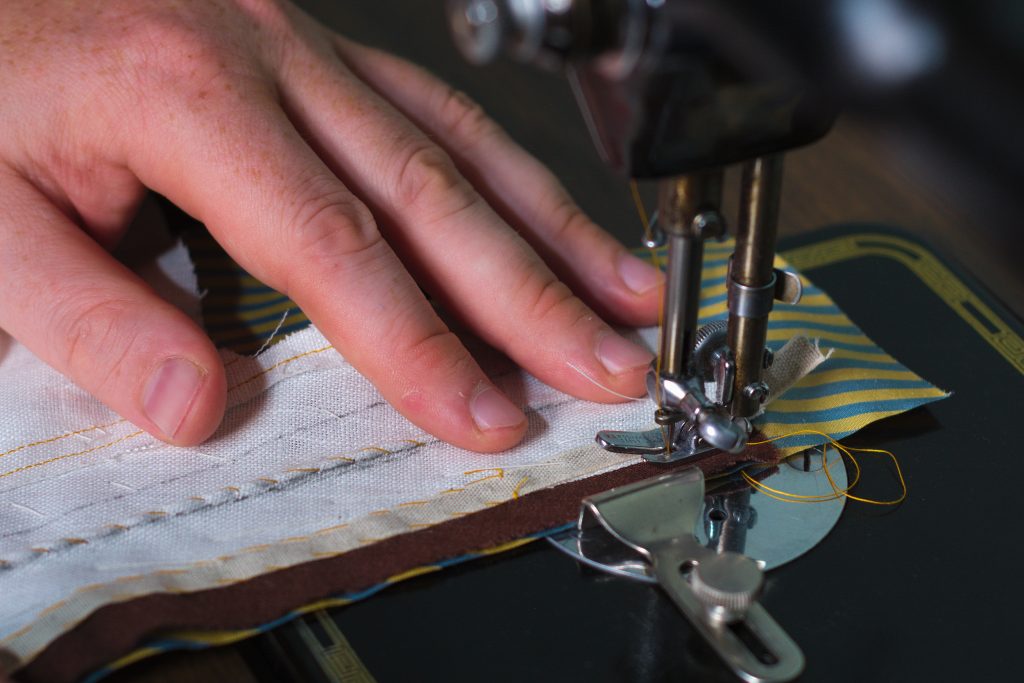
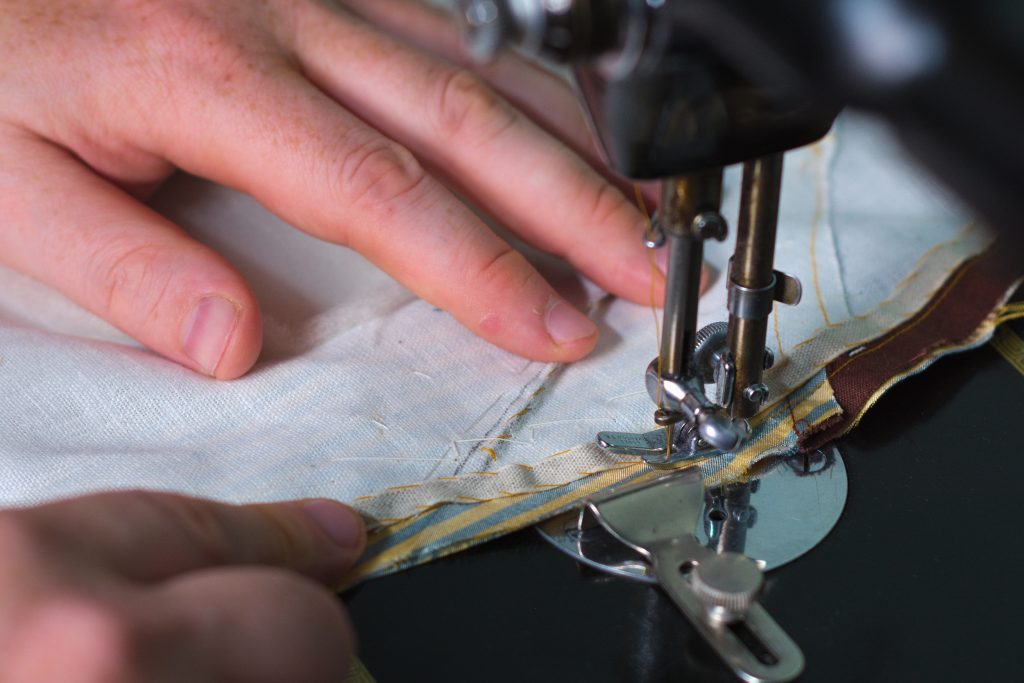
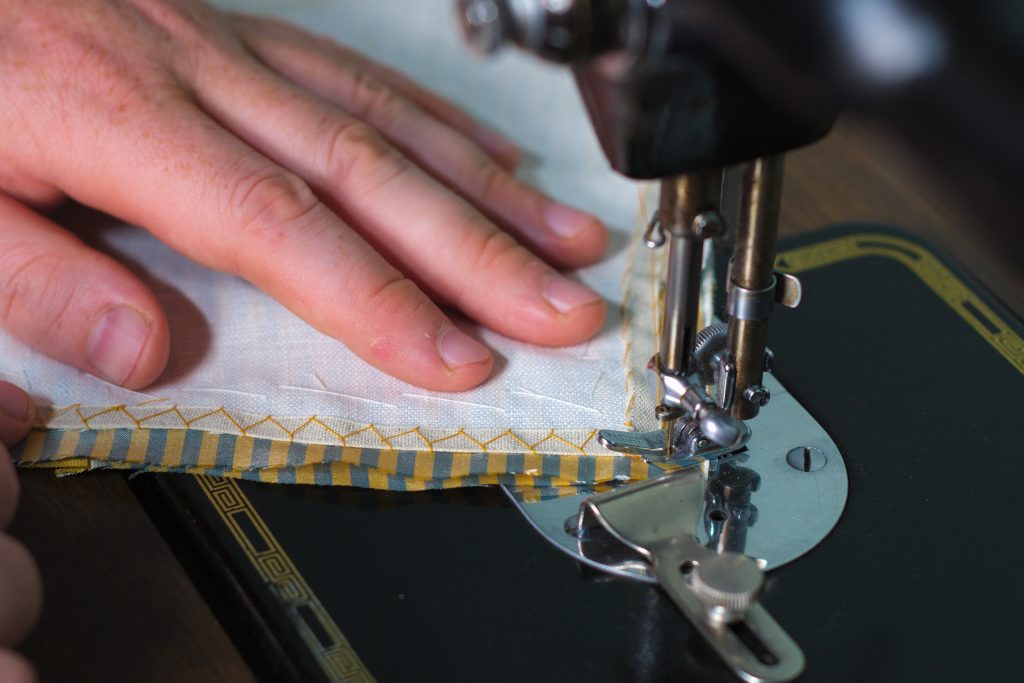
On the sewing machine, stitch two parallel rows about 1/8″ from the edge of the collar and from the forepart’s neck seam, along it’s length.
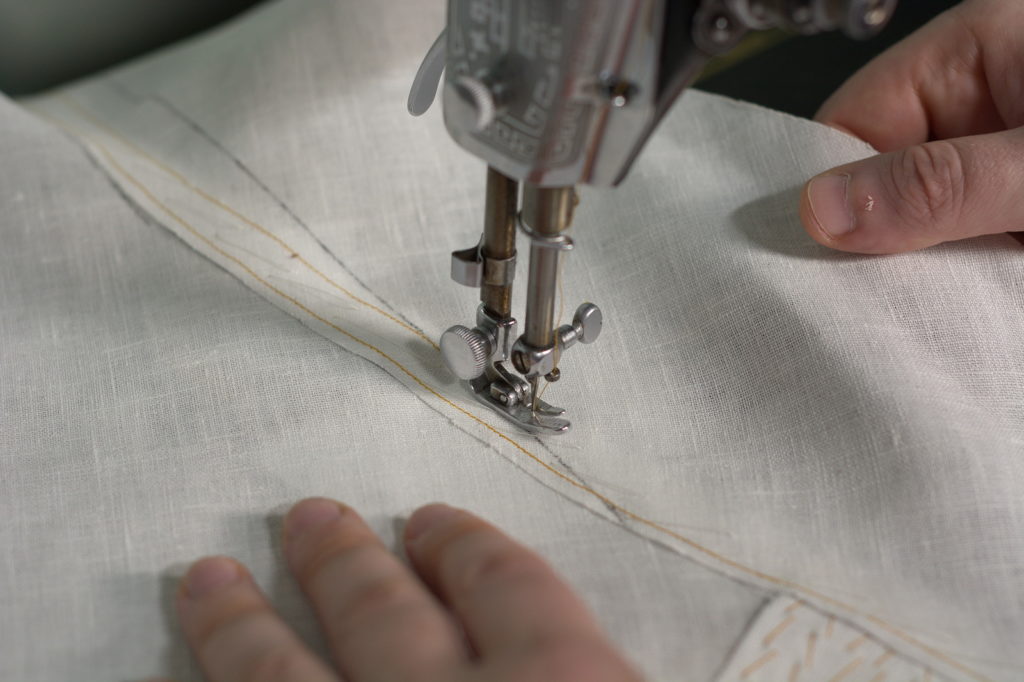
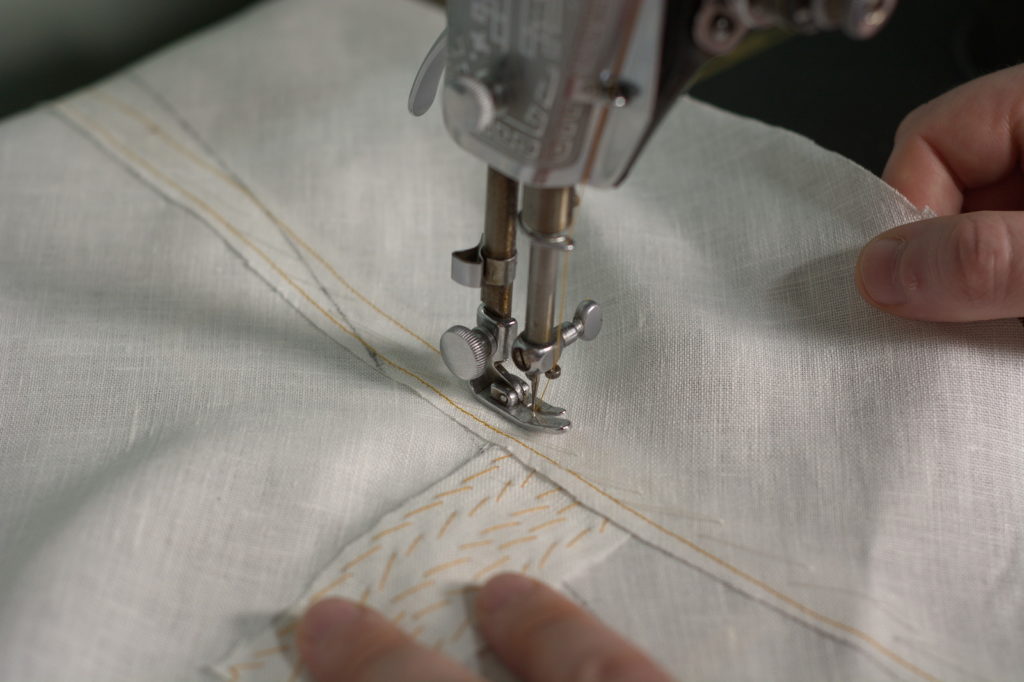
And here’s the canvas thus far, after stitching down the collar. Repeat for the other side.