Author: James Williams
Drafting the Collar
Drafting your detachable collar is fairly straightforward, and can be done on a sheet of 8 1/2″ x 11″ paper. I’m using a regular ruler here for instructional purposes, which gives a collar that should fit just about everyone. You might experiment however with using a graduated ruler [advanced tailors only] for those with larger necks or body sizes to get a more proportional look to your collar, though I have not tried that yet.
The Collar Points
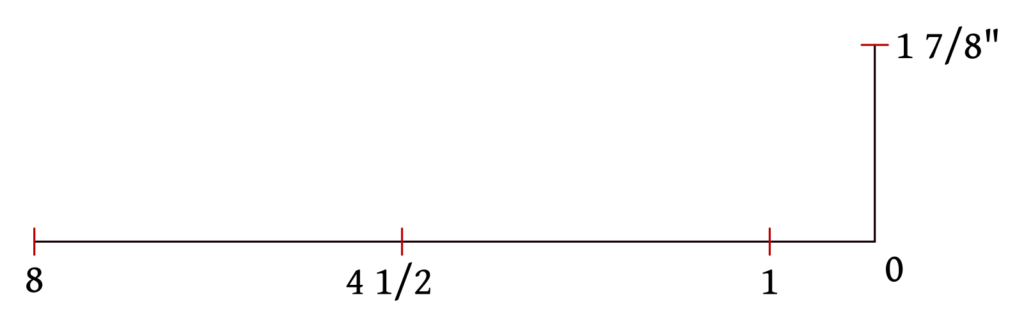
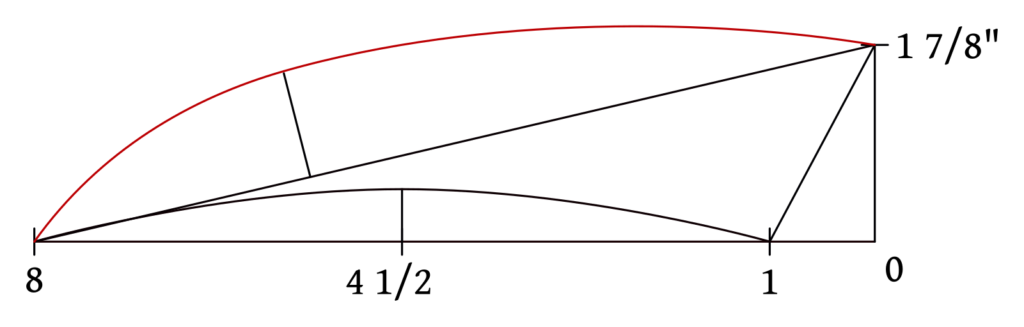
Begin by ‘squaring out’ from point 0 two lines at right angles to each other. The horizontal line is 8″ long, while the shorter vertical line is 1 7/8″.
Then mark the additional points from 0 along the horizontal line at 1″ and 4 1/2″.
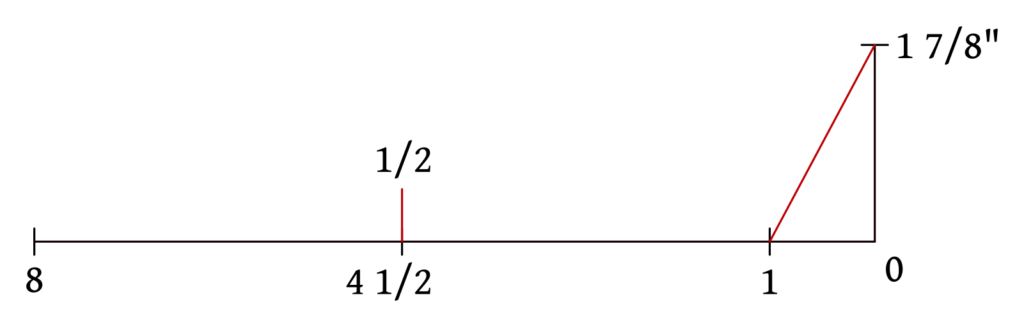
Draw a line from 1 to 1 7/8, giving the front angle of the collar. This is something that could be adjusted, both in the angle and length, to get other styles of collars after you are more familiar with the construction.
Then square up from 4 1/2 by 1/2″ to get the depth of the collar curve.
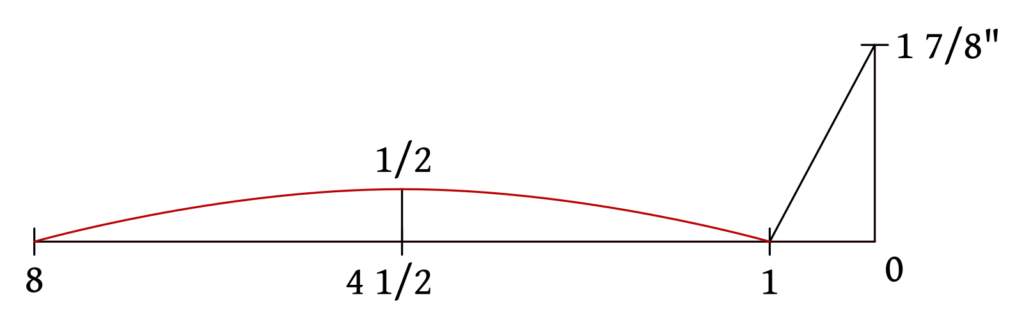
Draw a curve from 8, through 1/2 to 1, keeping everything as smooth and even as you can. I usually use a bendable drafting ruler for these types of curves, but it’s definitely possible to do freehand, using your arm as a sort of compass.
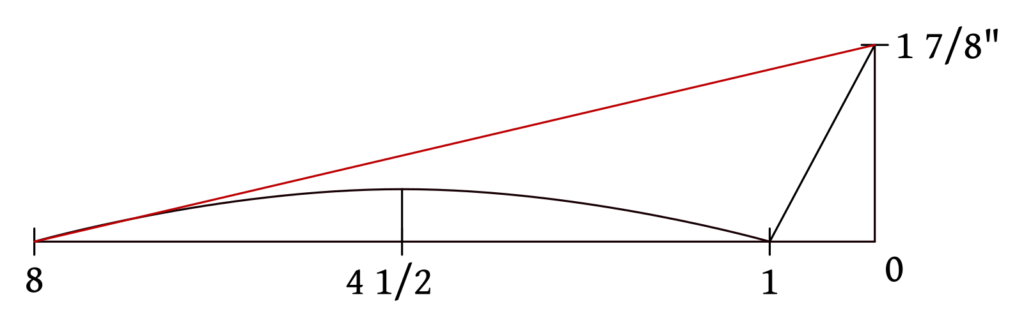
Draw a construction line from point 8 to 1 7/8 to help with the upper curve.
Measure along this construction line from point 8, 2 3/4″. Then square up from there 1″.

Finish the upper part of the collar by drawing a curve from 8, through point 1 that you just made, to the point at 1 7/8. This is more of a compound curve; from point 8 to 1 it’s fairly deep, and from 1 to 1 7/8″ the curve gets a bit shallower. Areas such as these are where the artistic part of drafting comes into play over the mathematical and ‘scientific’ steps, and you’ll get better with practice as you become more experienced.
The Collar Band
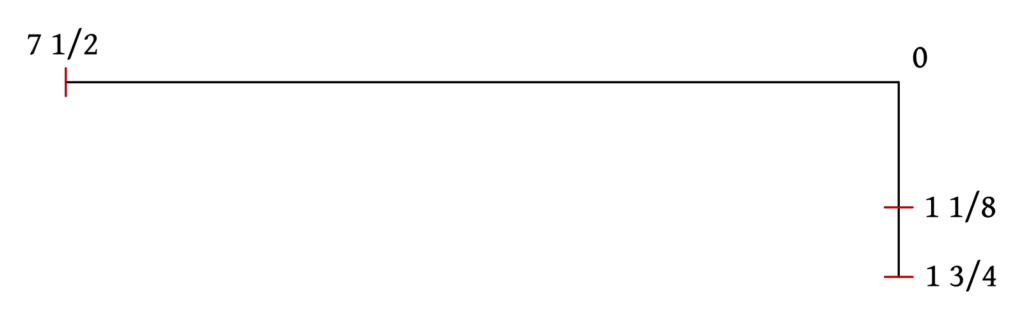
The collar band is also easy to draft. Begin by drawing a horizontal line and measuring out 7 1/2″ from point 0.
Square down from point 0 and mark points 1 1/8″ and 1 3/4″ from 0.
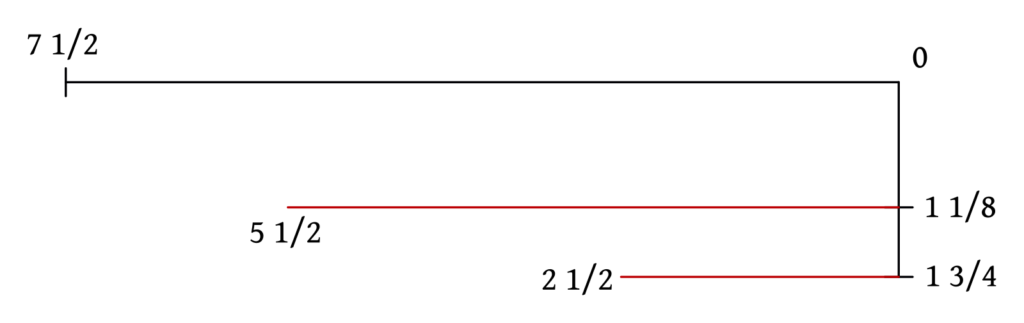
Square out lines from 1 1/8 and 1 3/4 as shown. These are merely construction lines to help draw the curves in the next step, and in practice, I don’t even measure them, though I’ve left measurements to aid you in your own drafts.
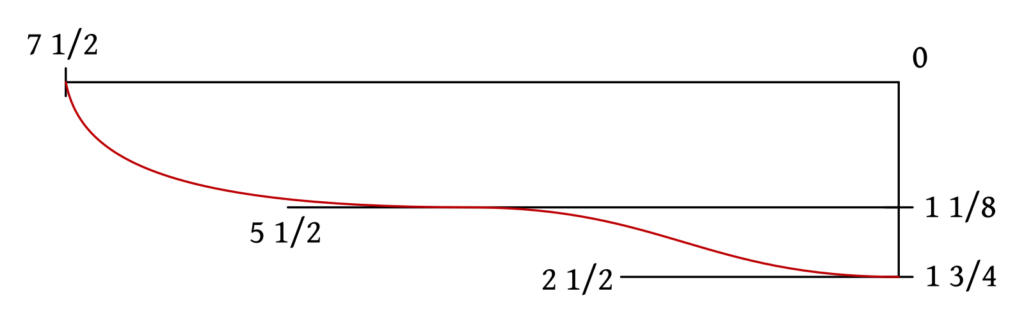
Here’s where that artistic part definitely comes into play again. Draw a curve from 1 3/4, keeping parallel to the construction line for about 1/2″ and curving into the second construction line and running parallel to that for a ‘little bit’. Finally, continue the curve, deepening it as you round up to 7 1/8.
At point 1 3/4, you want the curve to meet the opposing construction line at right angles to avoid an ugly angular transition to the other side of the collar.
And at 7 1/2, the curve comes in close to a right angle but not quite. This will help keep the ties that go around the neck in the correct position.
Seam Allowances
With both pattern pieces drafted, add a 1/4″ seam allowance all the way around the upper half of the collar, and the top and bottom edges of the collar band. The vertical construction line on the collar band forms the center of the collar, and so it is cut on the fold, no seam allowances added here.

That concludes the drafting portion of this short course! Draft your collars, add the seam allowances, and cut out both pieces before you move on to the next section where we’ll begin the construction process. If you have any questions or would just like to share your work, please feel free to make a post in the support community.
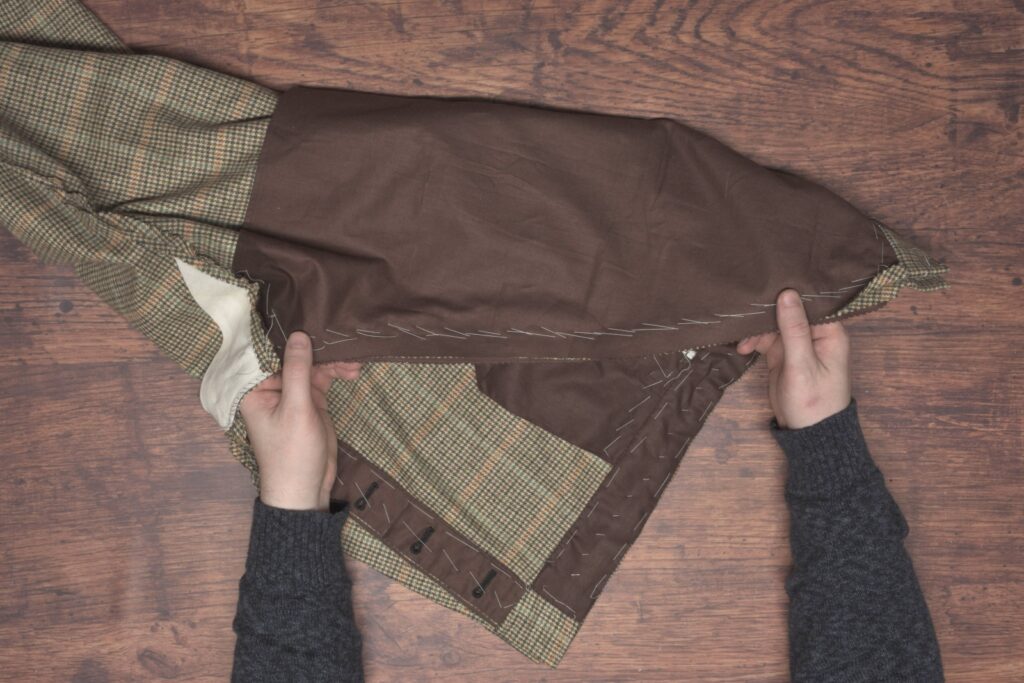
Turning and Finishing
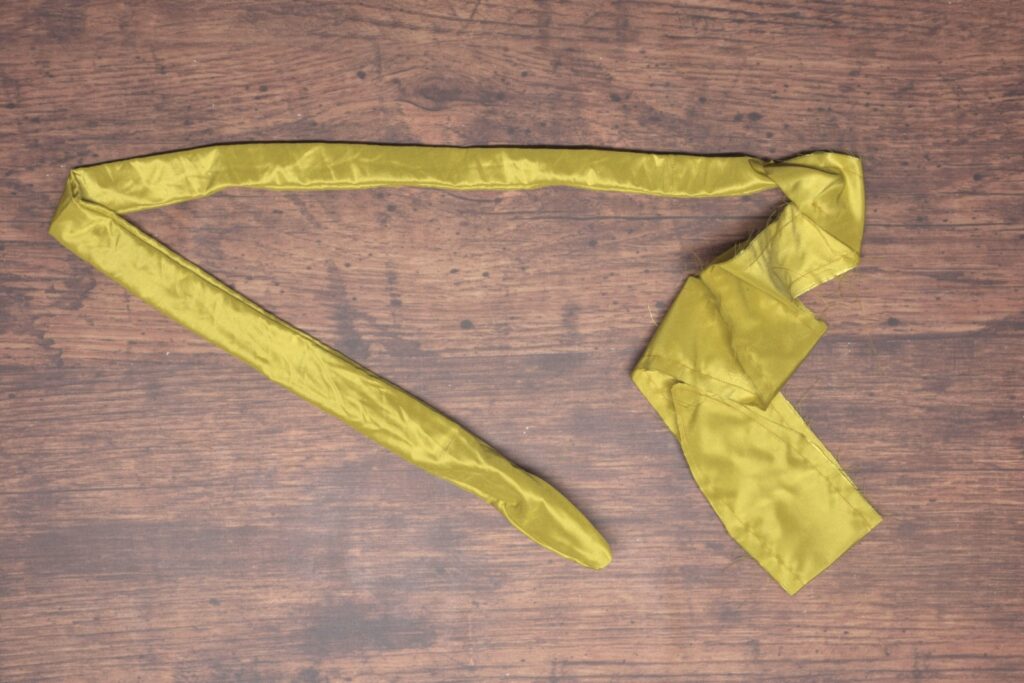
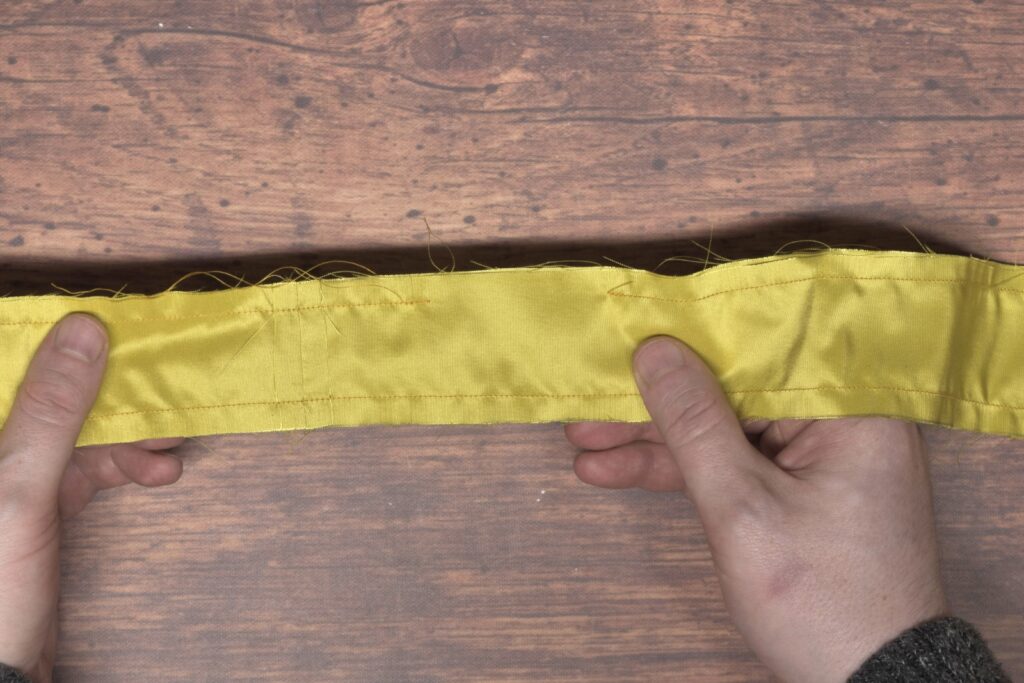
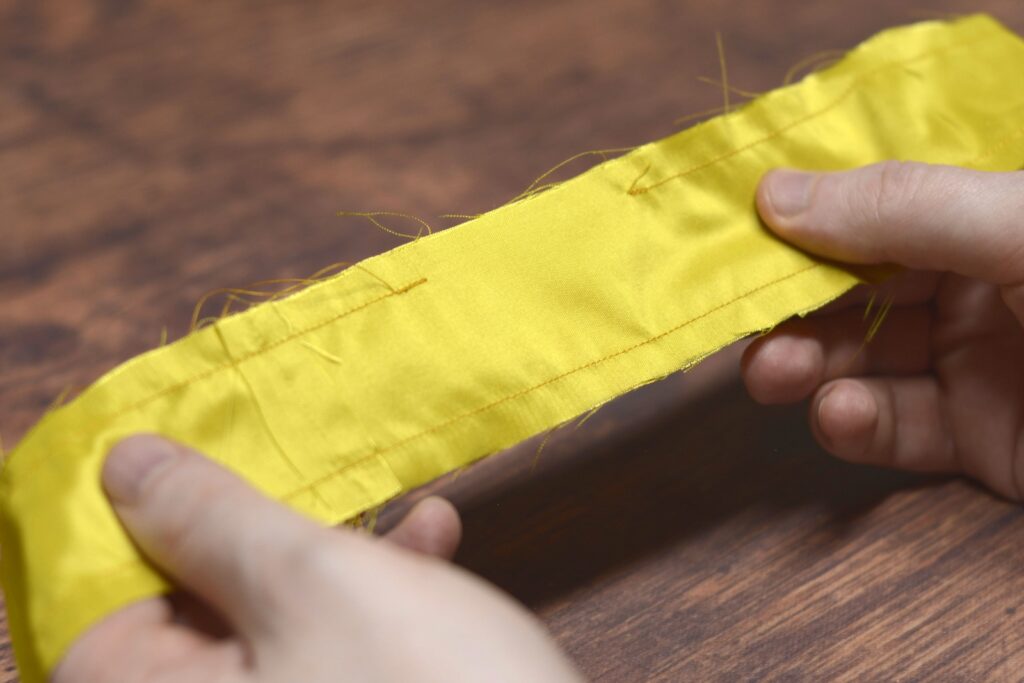
Here’s where we left off with the cravat. It’s now time to begin the process of turning and pressing them.
Begin by carefully trimming the seam allowance to just over 1/8″ at both ends. I like to taper the cut to avoid any hard transitions.
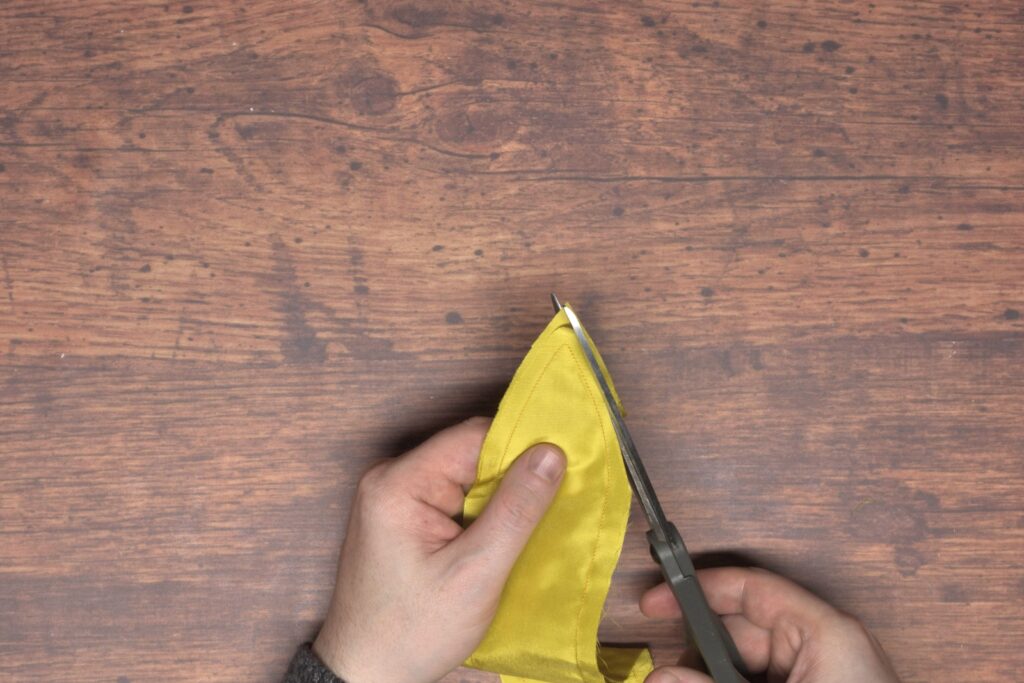
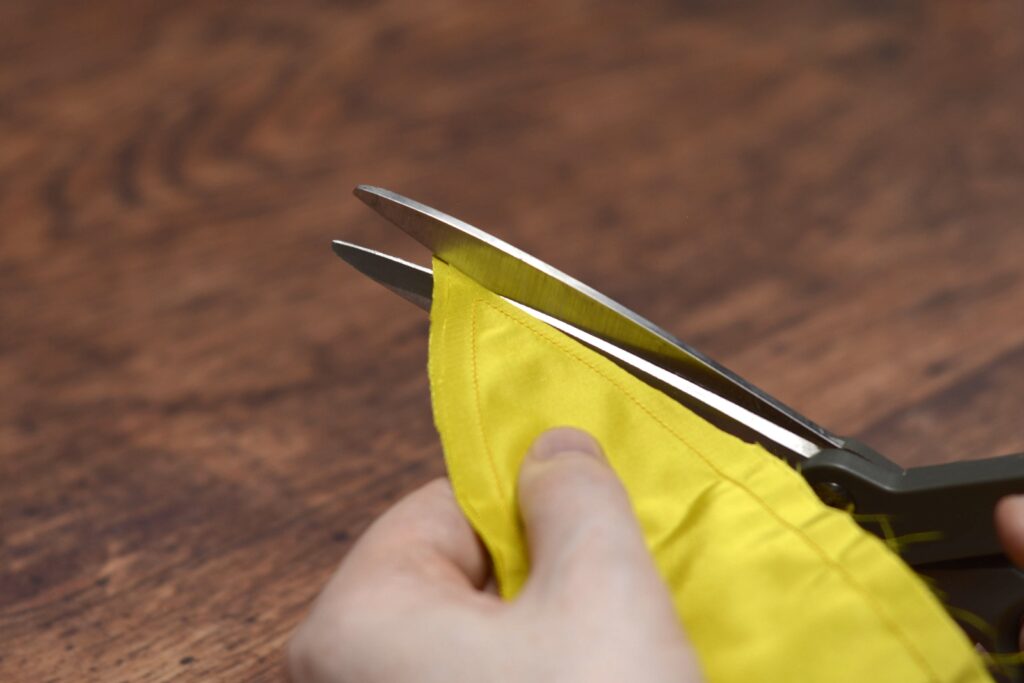
Here’s the completed end after trimming. Repeat for the other end. Be sure not to trim any closer than 1/8″, or you risk the seam coming undone and it fraying.
Turning
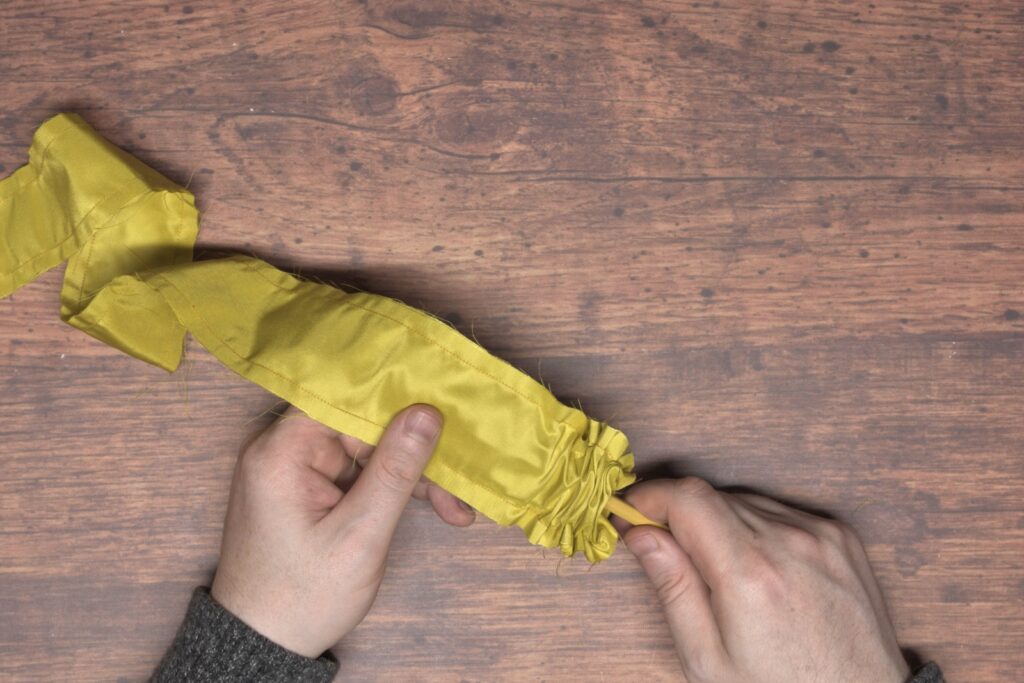
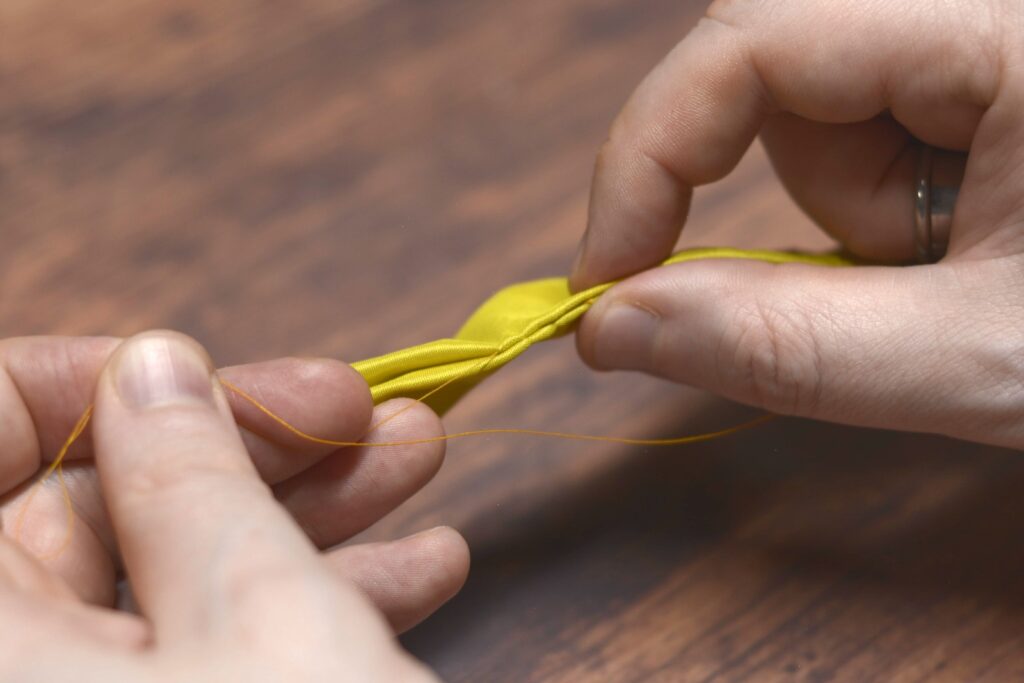
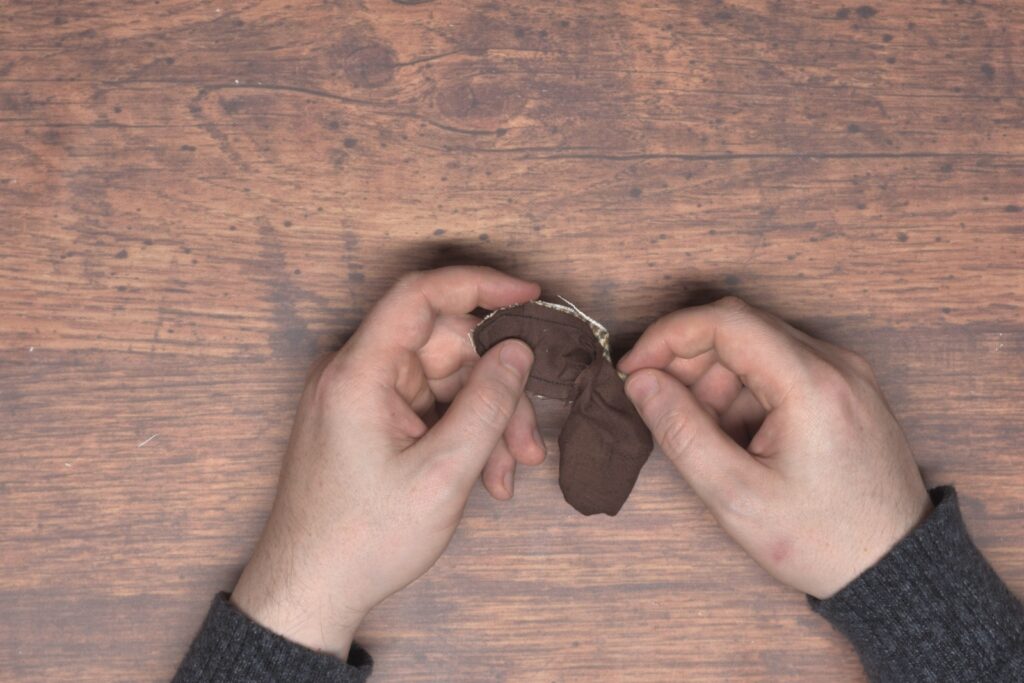
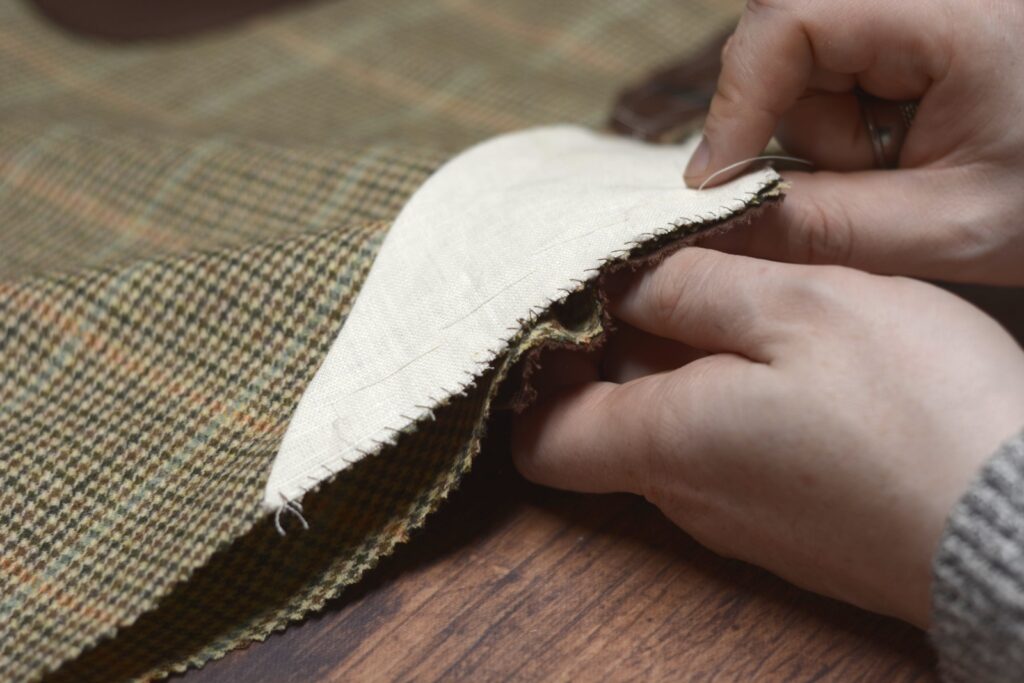
Turning the cravat is pretty straightforward, but I’ll try to give you a few tips I’ve picked up. First, separate the two layers of fabric near the tip, sort of opening it up.
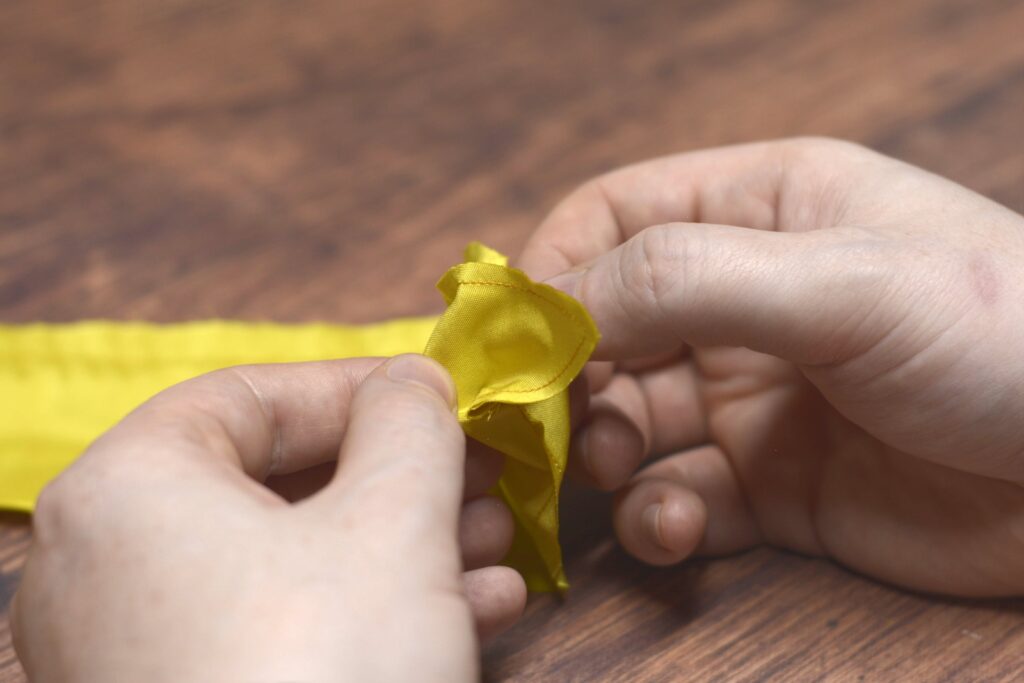
Then push it into itself, and use the eraser end of an unsharpened pencil to gradually and carefully push the end through towards the opening in the middle. Try not to put too much pressure on the very tip – keep the pencil off to one side or the other.
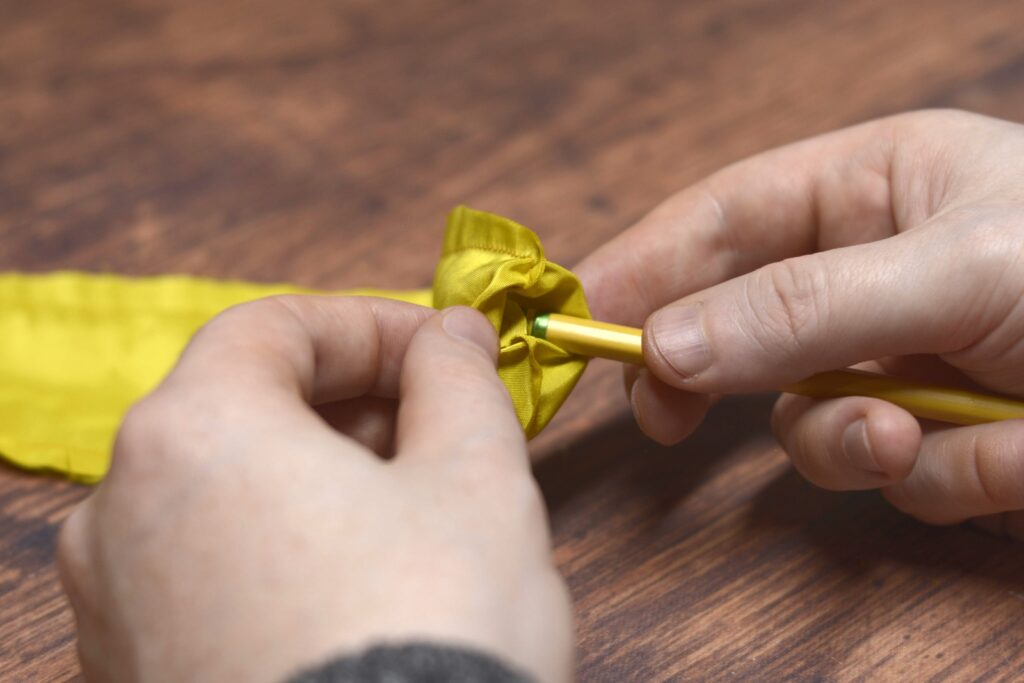
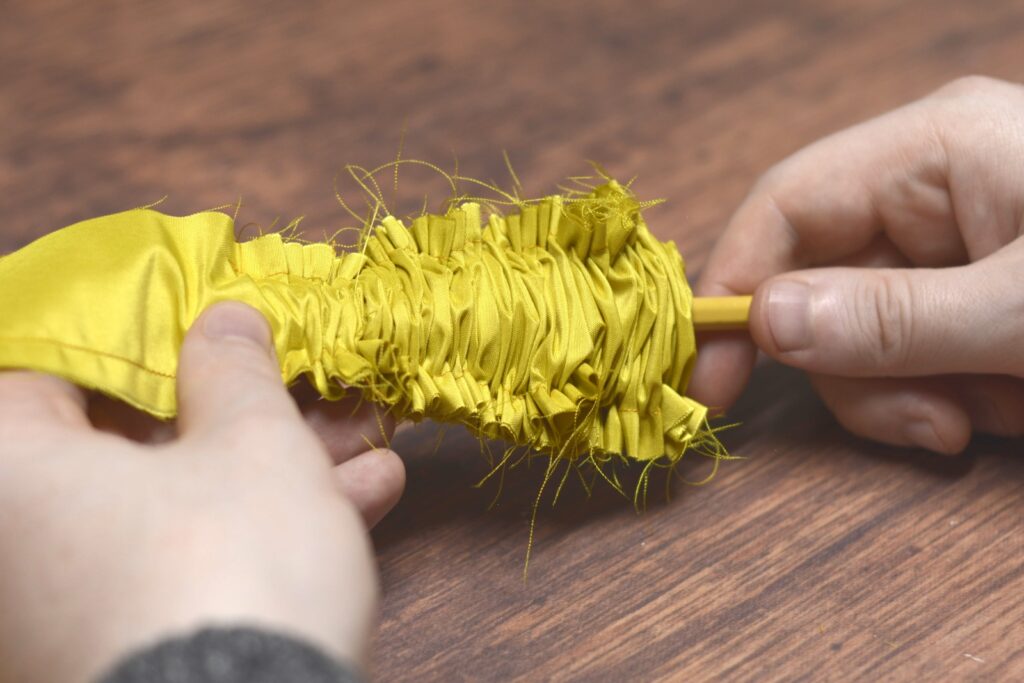
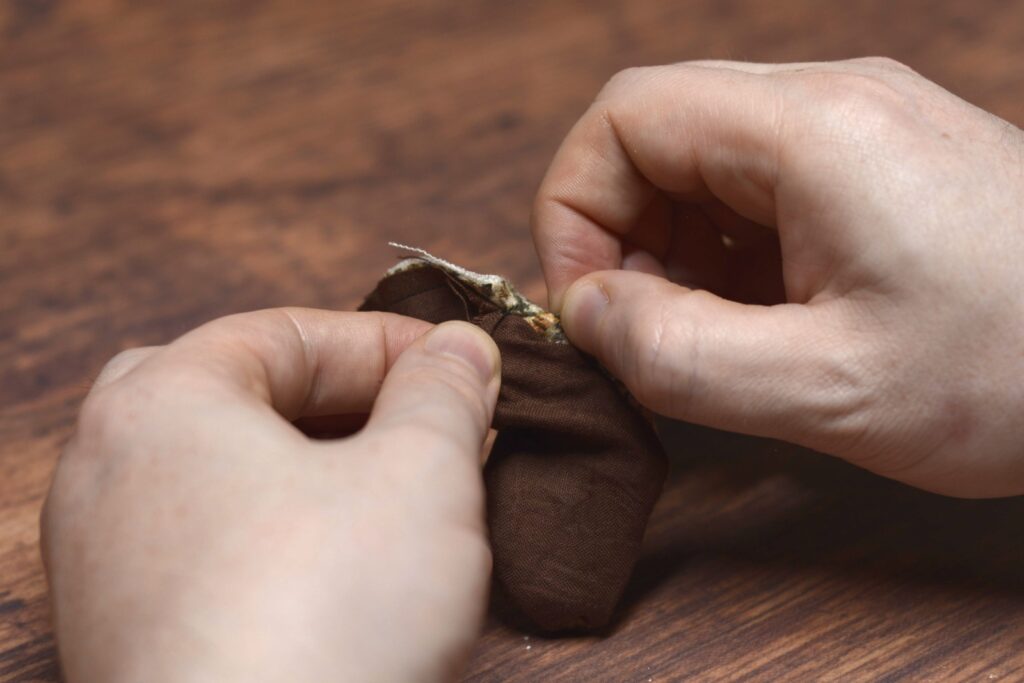
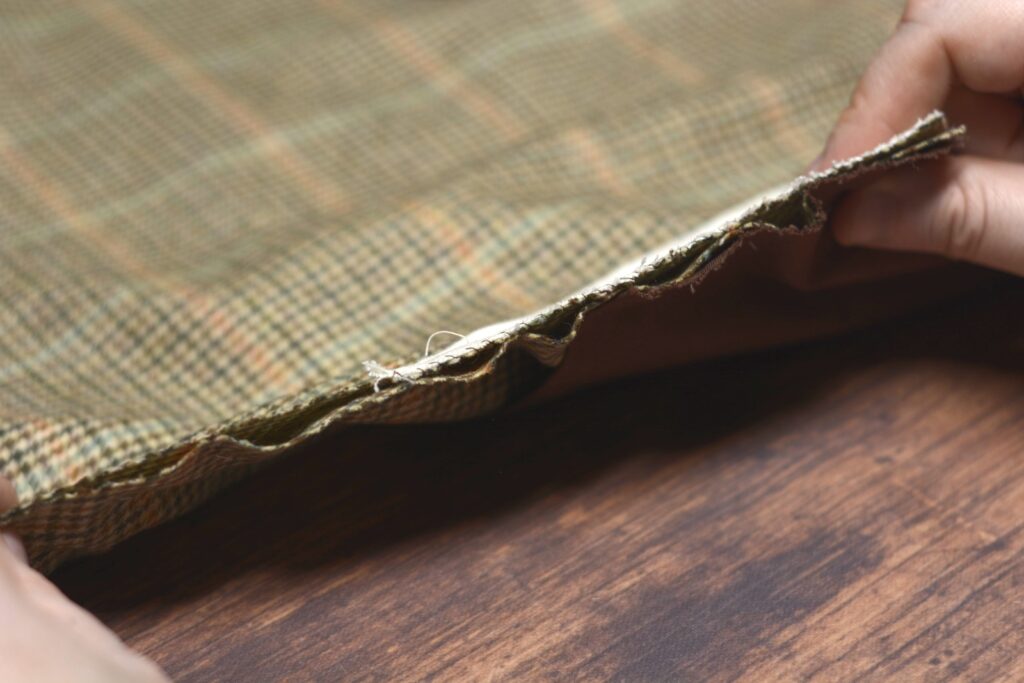
Continue pushing the pencil and cravat gently through, collecting the gathers of fabric as far down the pencil as you can.
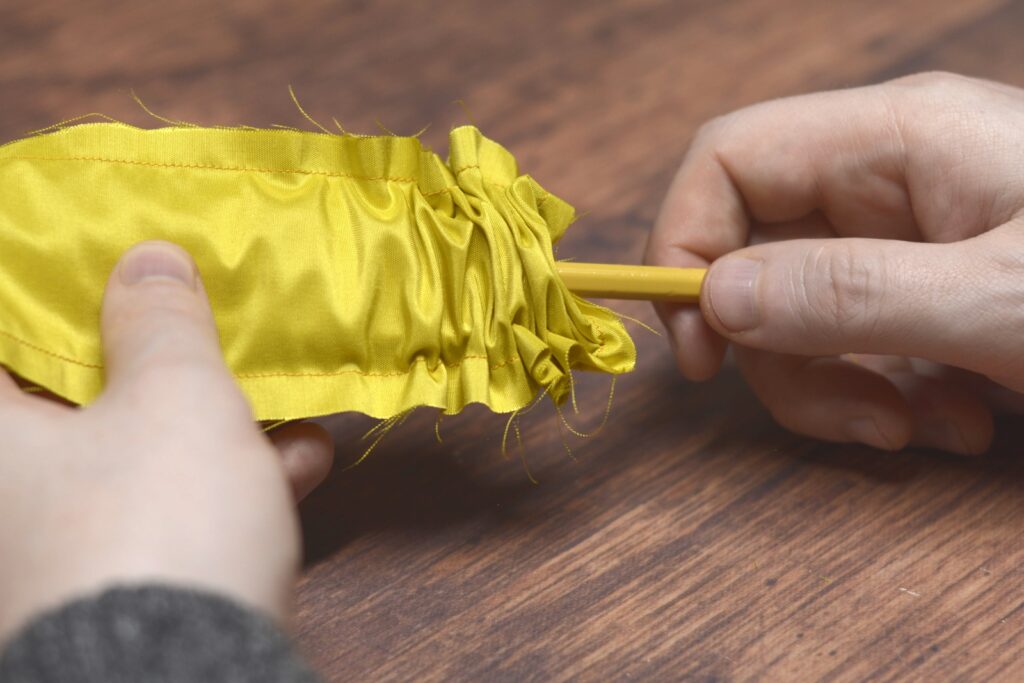
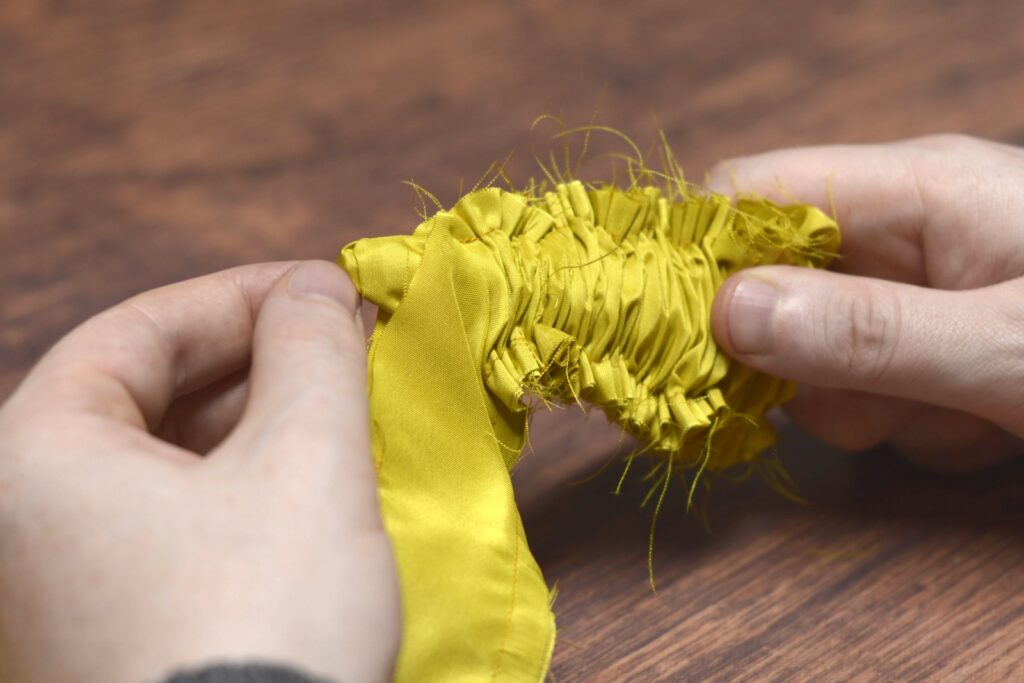
There’s a lot of fabric that gets gathered up on the pencil, and it’s easy to get the pencil lost in the gathers if you don’t push them down far enough.
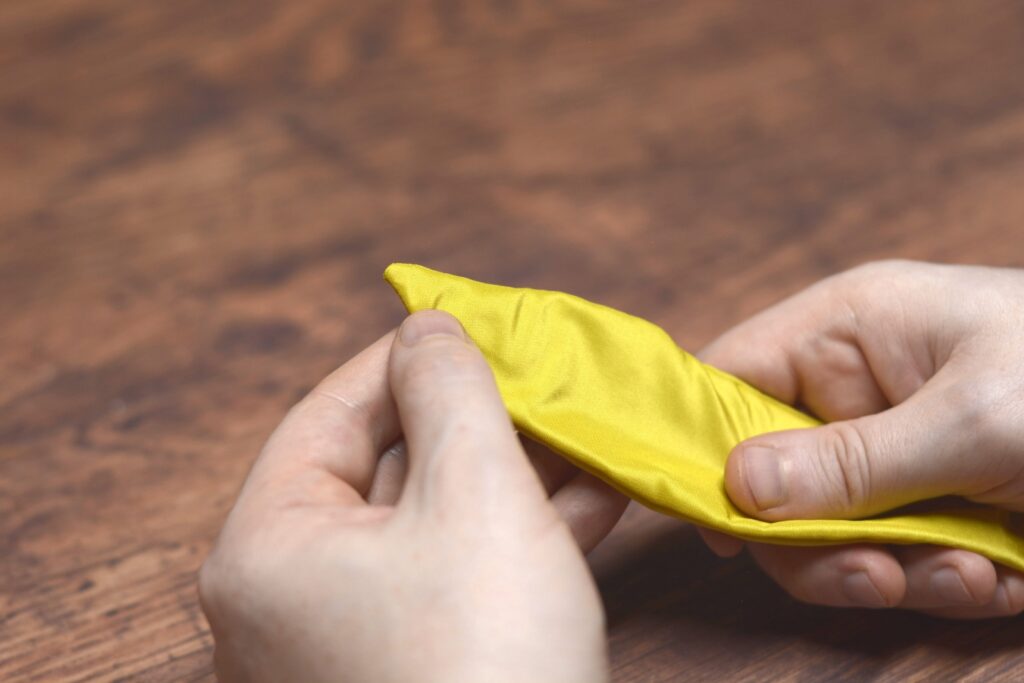
Finally, the right side of the cravat tip should emerge from the opening. Once you have a firm grasp of it, you can pull the pencil out, and pull the rest of this side of the cravat right side out.
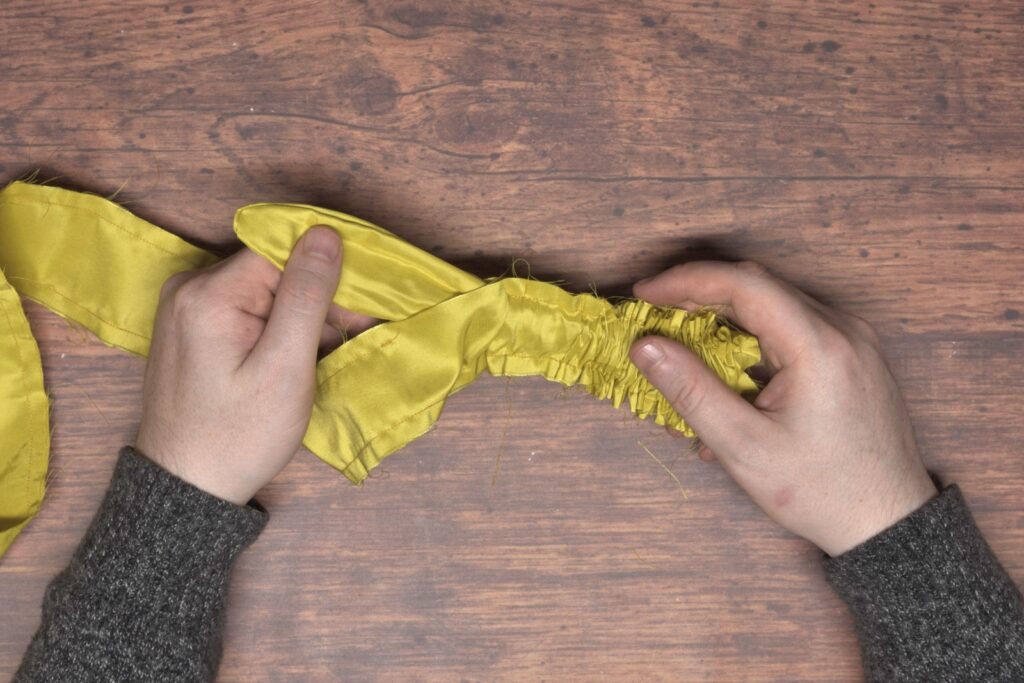

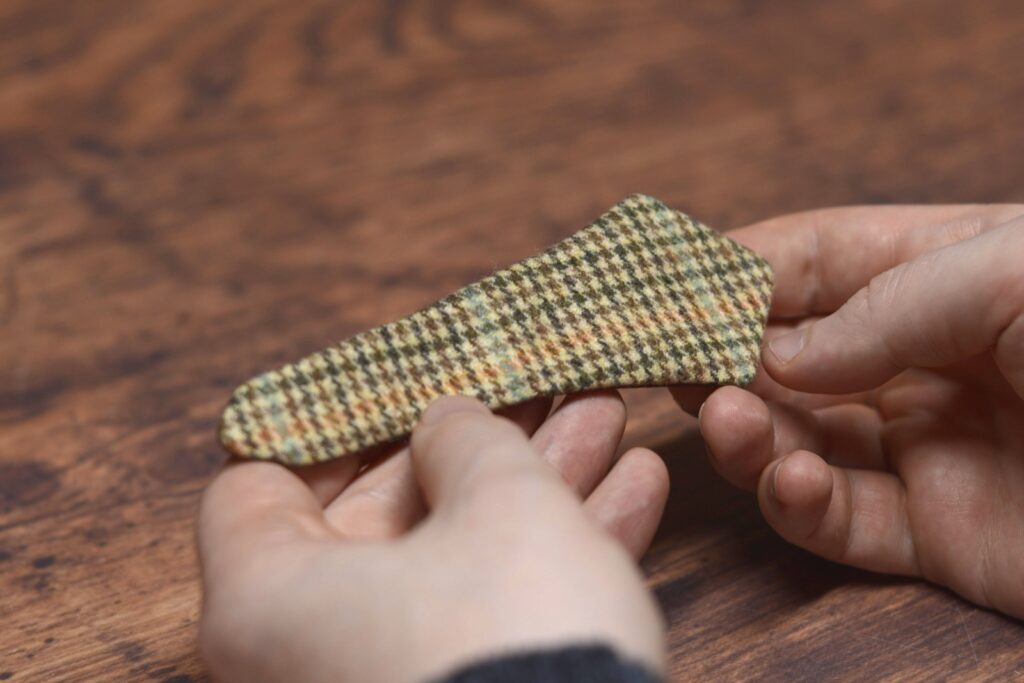
Here’s the first half of the cravat turned right side out. Repeat the same process for the remaining half.
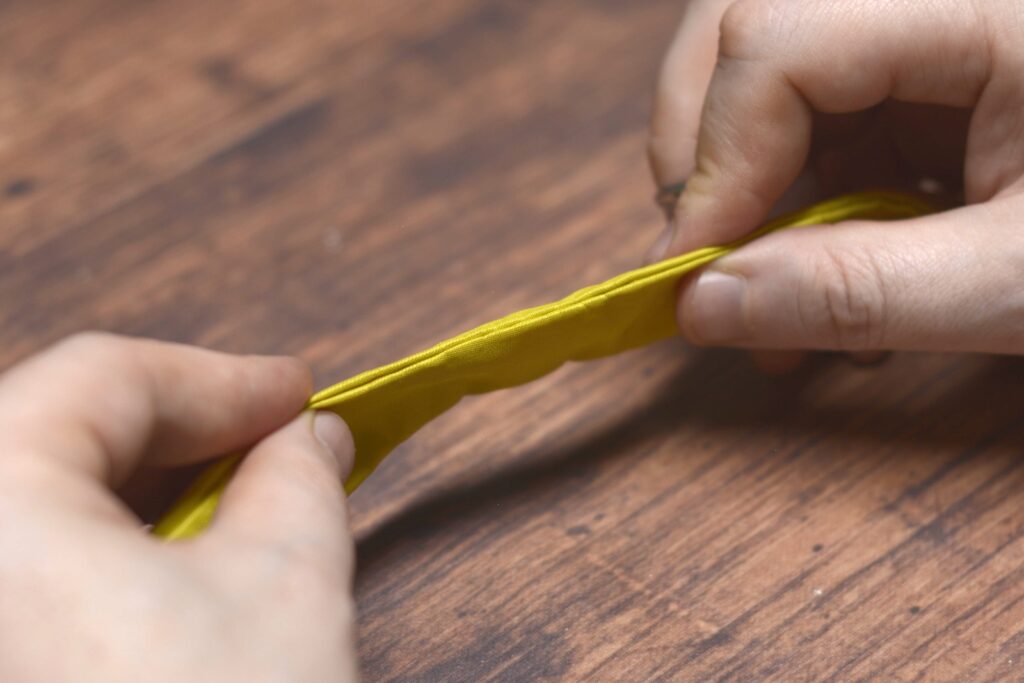
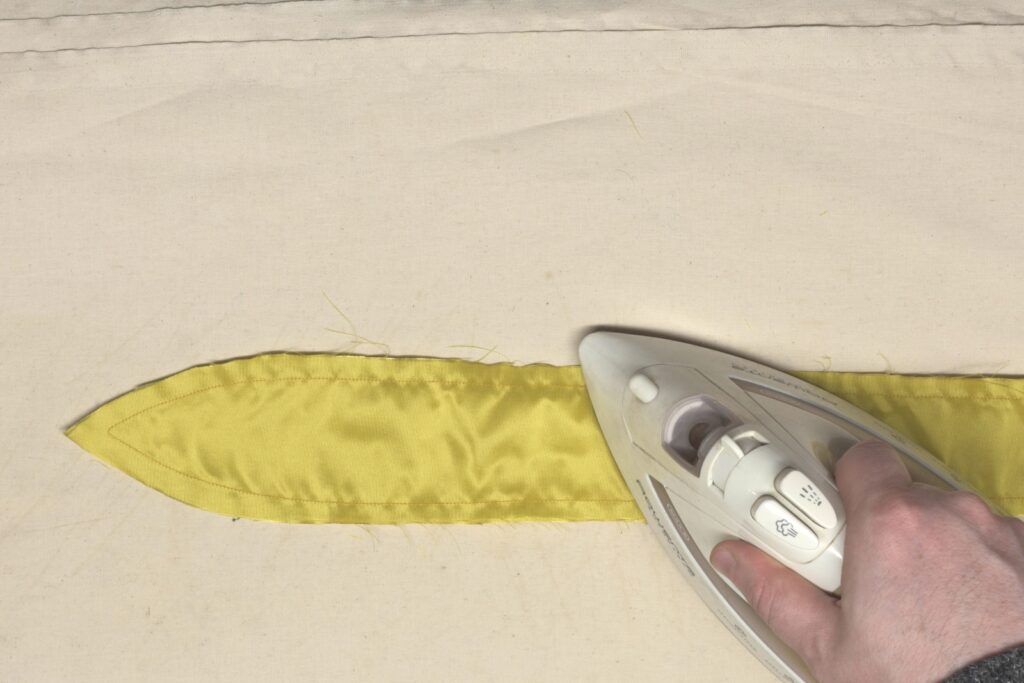
Pressing
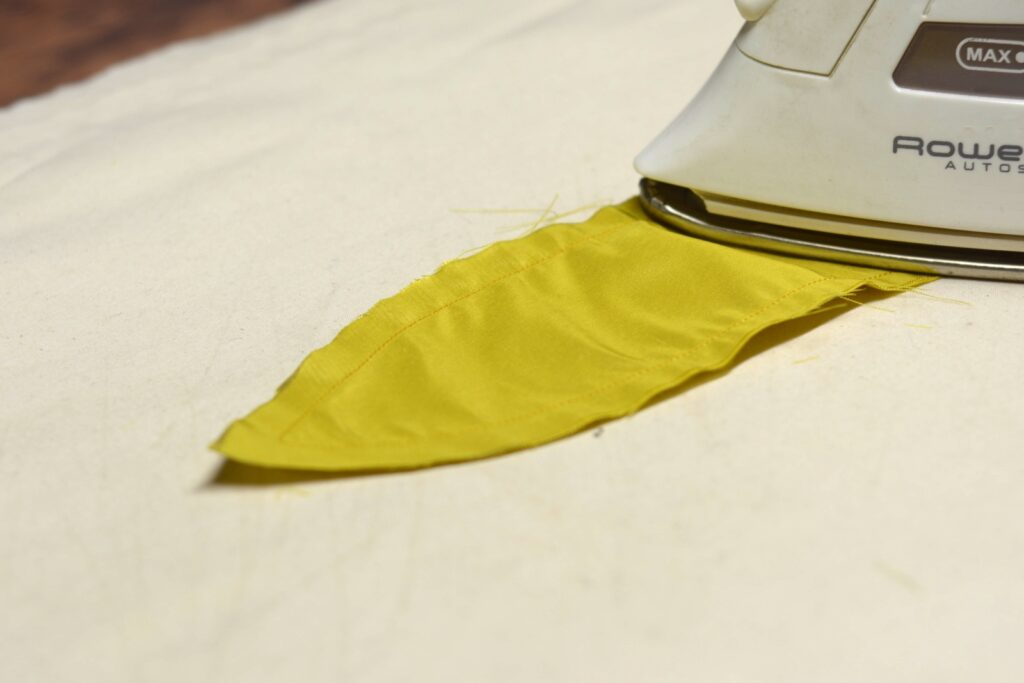
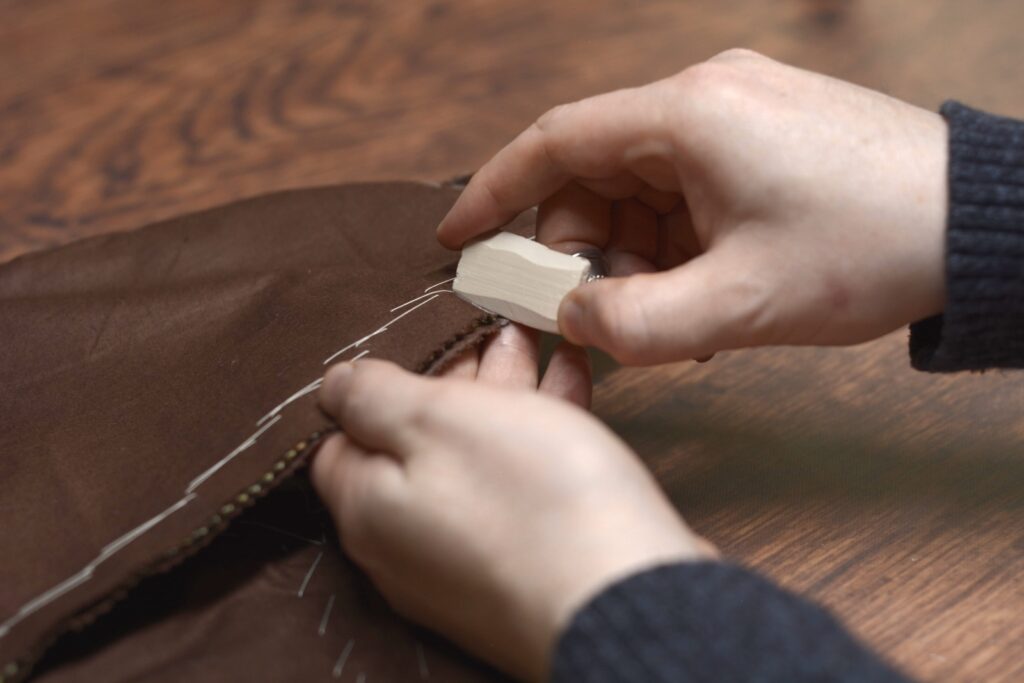
Pressing is one of the most important aspects of good tailoring, and I spend almost as much time pressing here in this simple project as I do sewing. Looking at the cravat so far, you’ll notice that a lot of the seams tend to be ‘inside’ the cravat still. I like to insert a seam turning tool into the opening at this point to crease each of the seams from the inside, and in particular straighten out the points at each end. You could also use a pencil for this process with pretty much the same results.
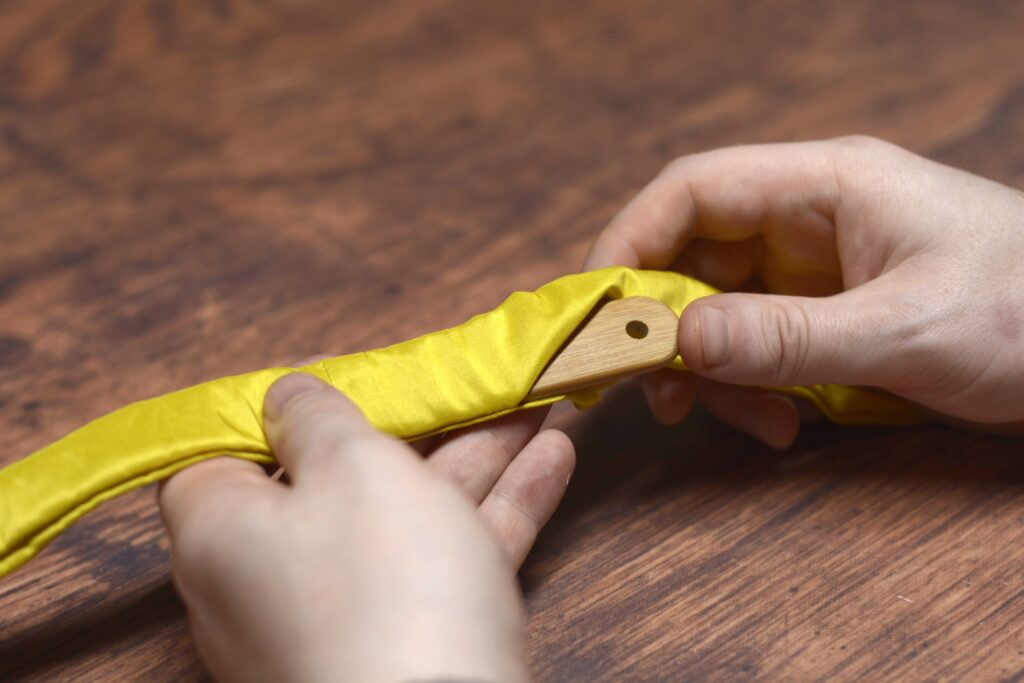
It’s hard to see, but I’m holding the point pressing tool against the seam and pulling both edges firmly, giving a nice crisp edge to the seam.
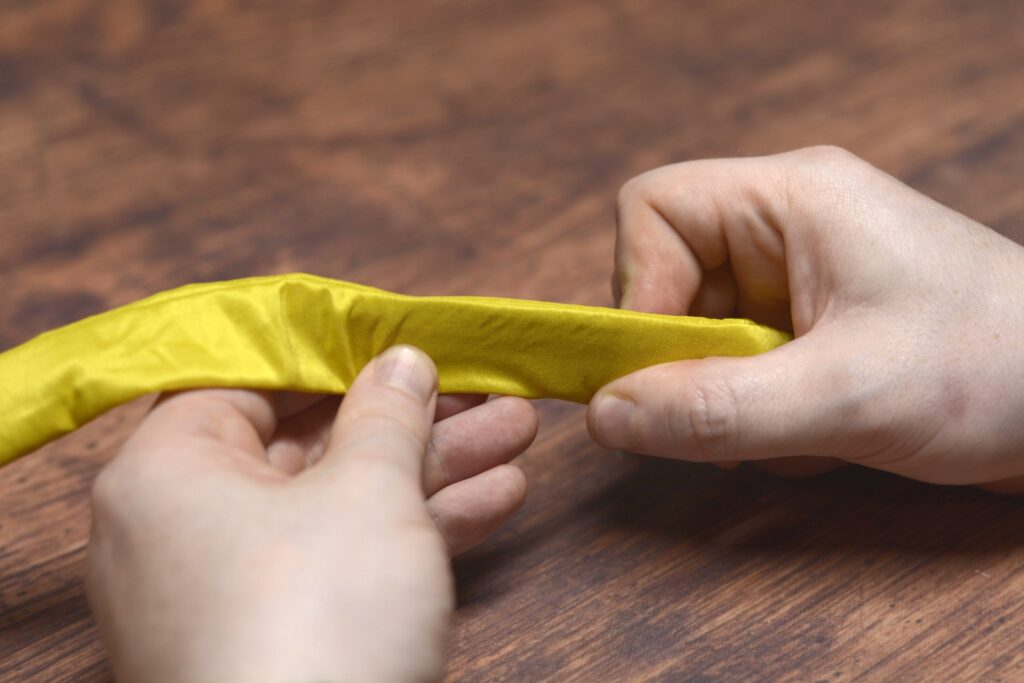
Continue the process towards the point.
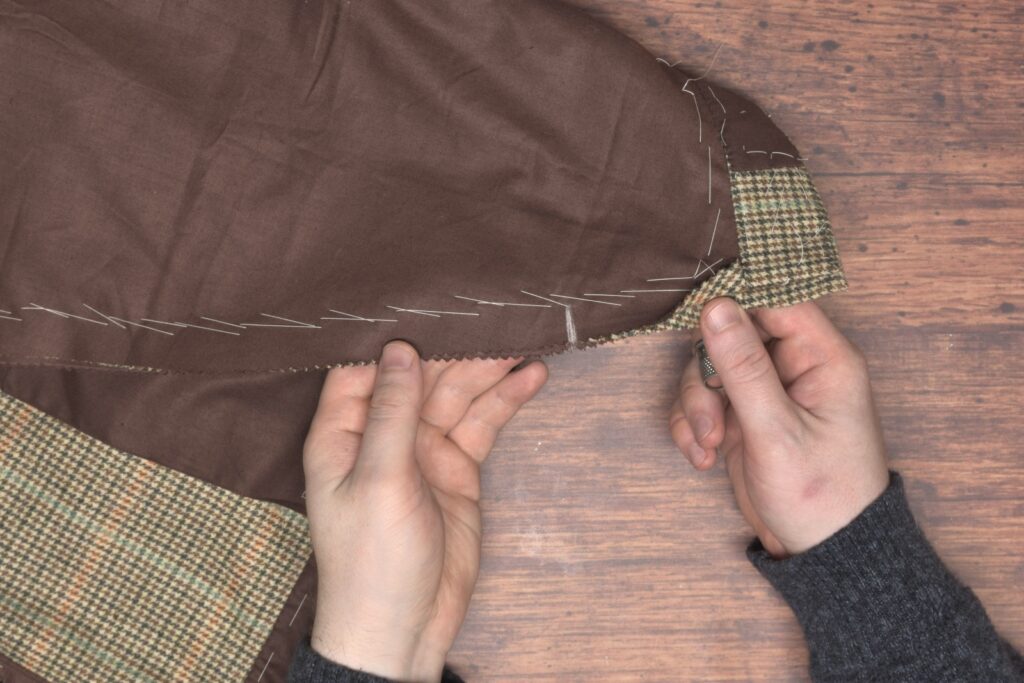
At the point carefully and gently push the point fully open from the inside. Be careful not to use too much pressure as this is the weak point and can very easily burst open. Get the point looking exactly how you want it to, as pressing will not do much if the point is not sharp now.
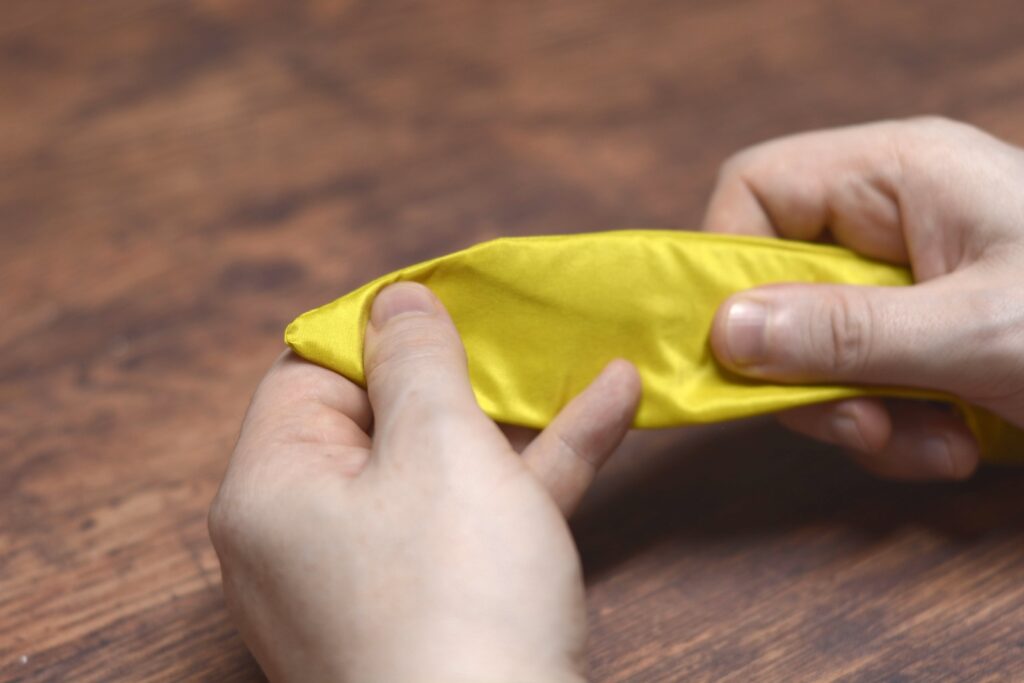
Continue around the other seam, and the other half of the cravat in the same manner.
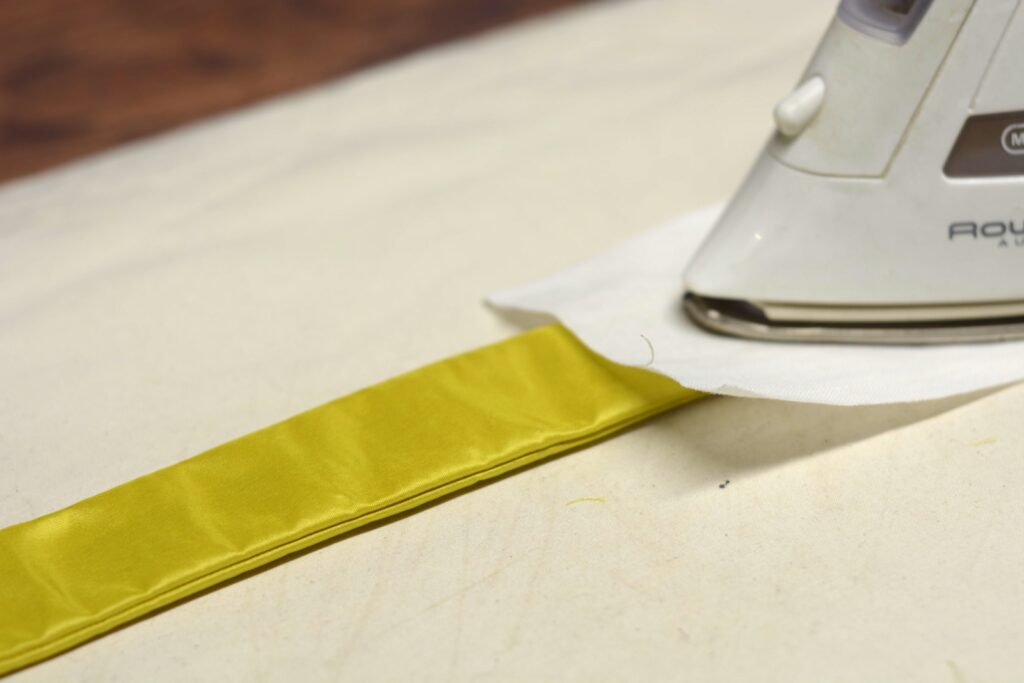
Without using steam at this point, I like to give the cravat a light pressing just to keep everything in its position. You don’t really want to crease the edges yet, as that makes finishing the opening a little more difficult. Since we’re pressing the outside of the cravat, I like to use a press cloth, in this case a scrap of linen, between the iron and the cravat to prevent any scorch or dirt marks from appearing.
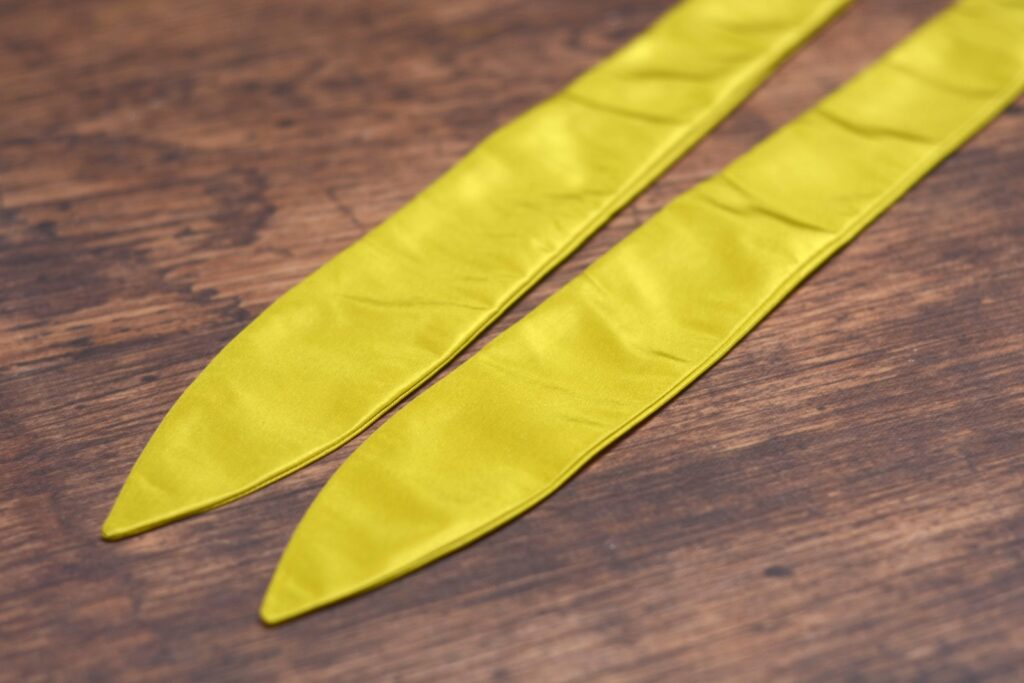
Here’s what you should have so far.
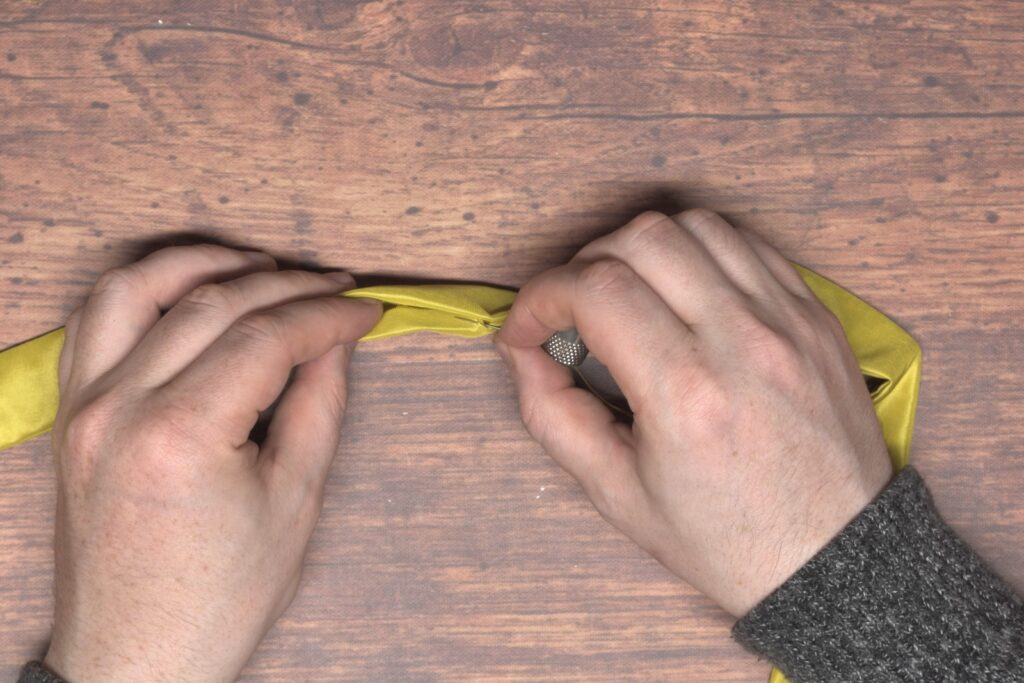
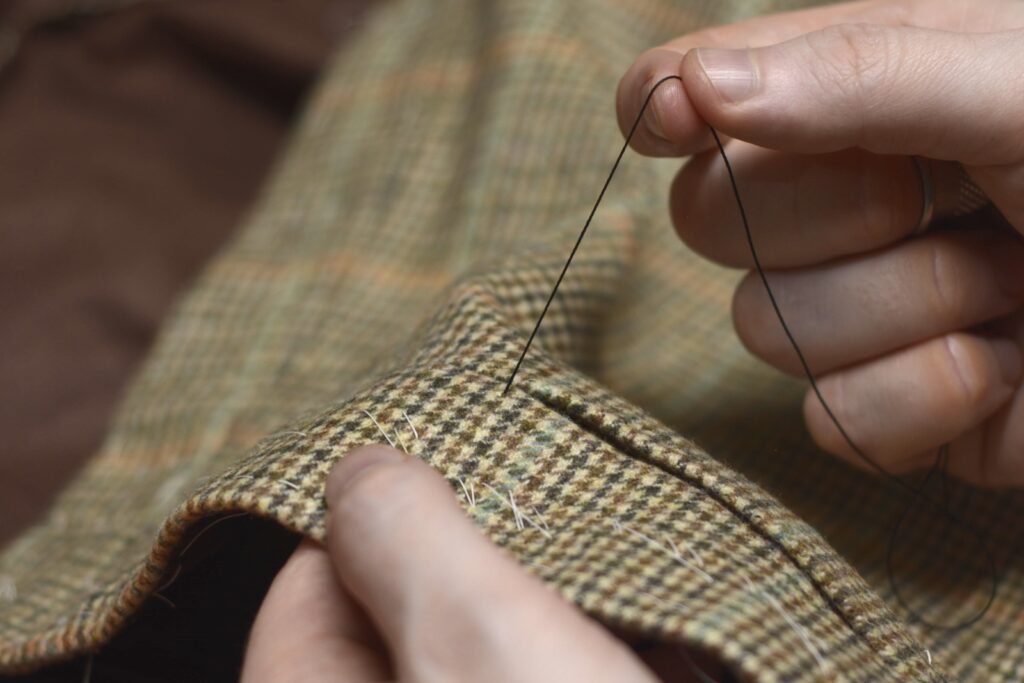
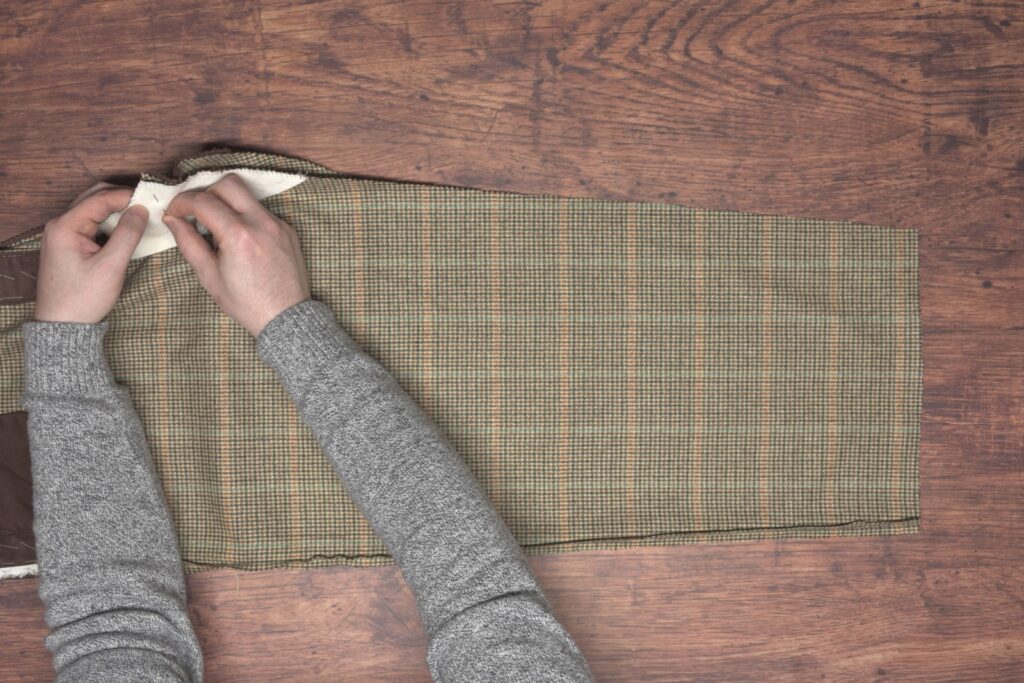
Ladder Stitching the Opening
It’s time to close up the opening now with what’s sometimes known as a ladder stitch. This is an almost invisible stitch from the outside which gives a nice clean finish to your cravat.
You’ll notice that the seam allowance at the opening is creased under from the pressing, but still not completely flat at this point.
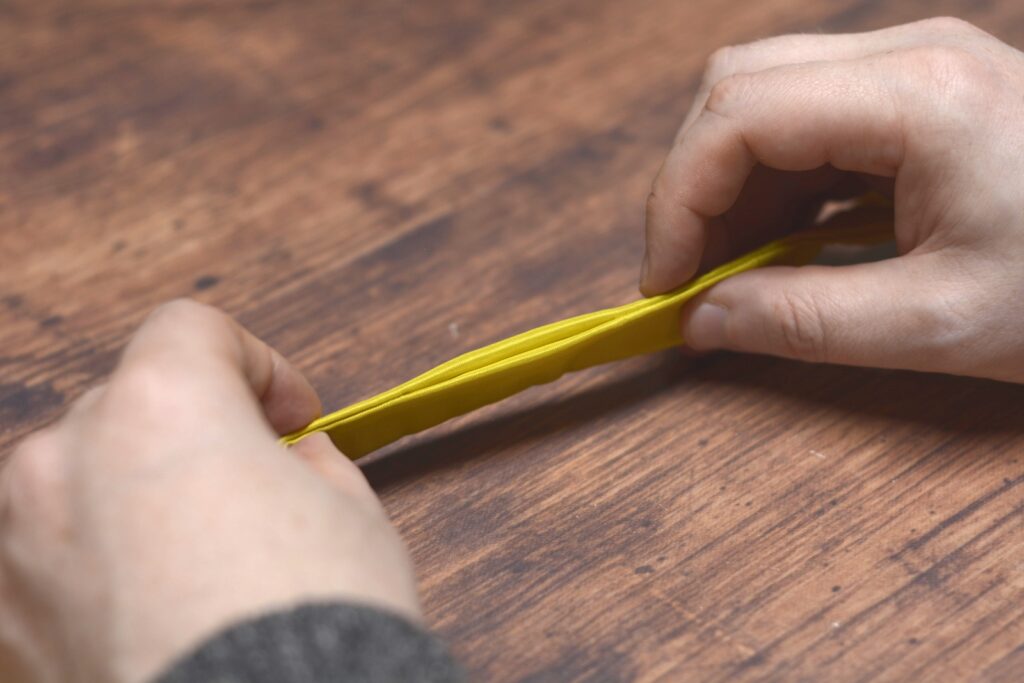
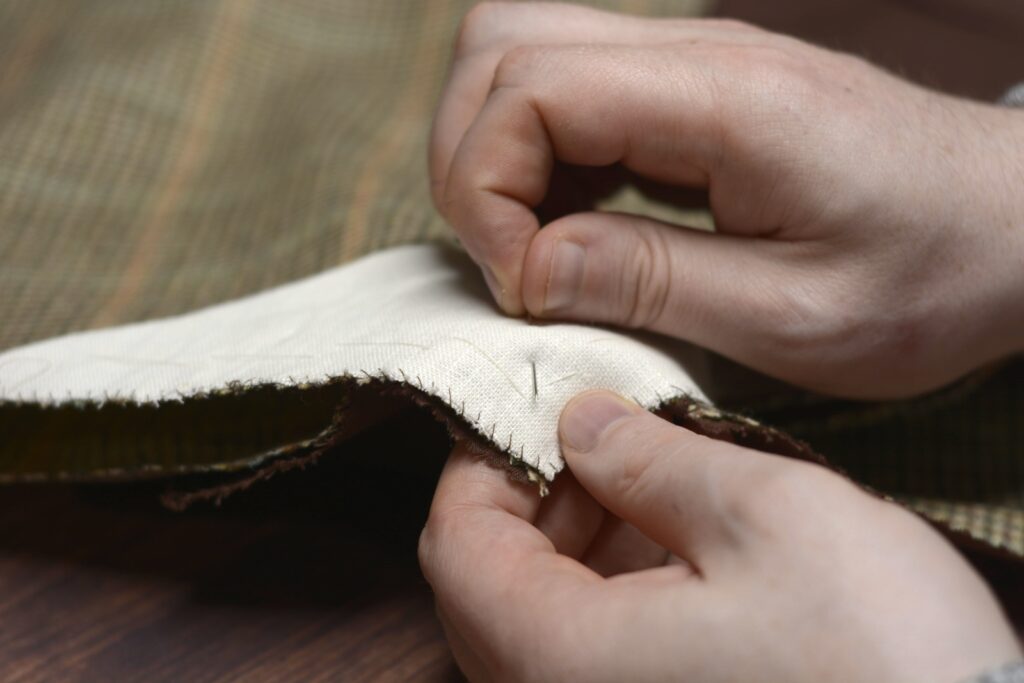
With your needle and some fine finishing thread, make two or three stitches in place near one end of the opening on one seam allowance, being sure not to let the stitch show through on the outside. The stitches should be about 1/8″ below the crease and parallel to the fold.
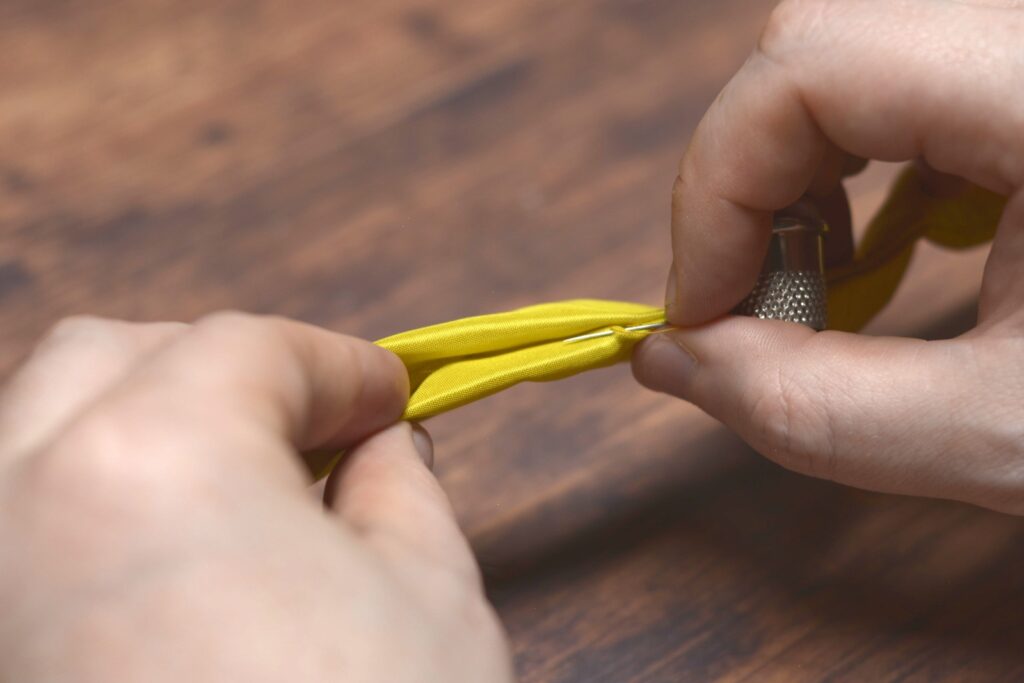
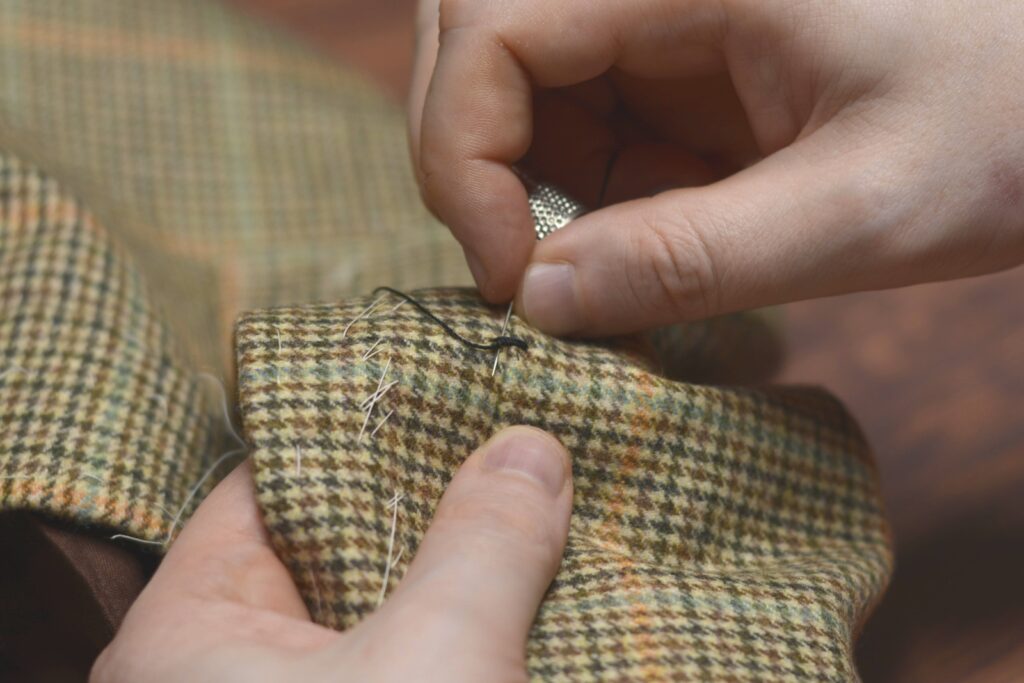
Make your next stitch beginning directly across from the end of the previous stitch in the other seam allowance.
Continue making about four or five stitches, not pulling them tight at this point. You’ll notice how they form somewhat of a ‘ladder’, hence the name.
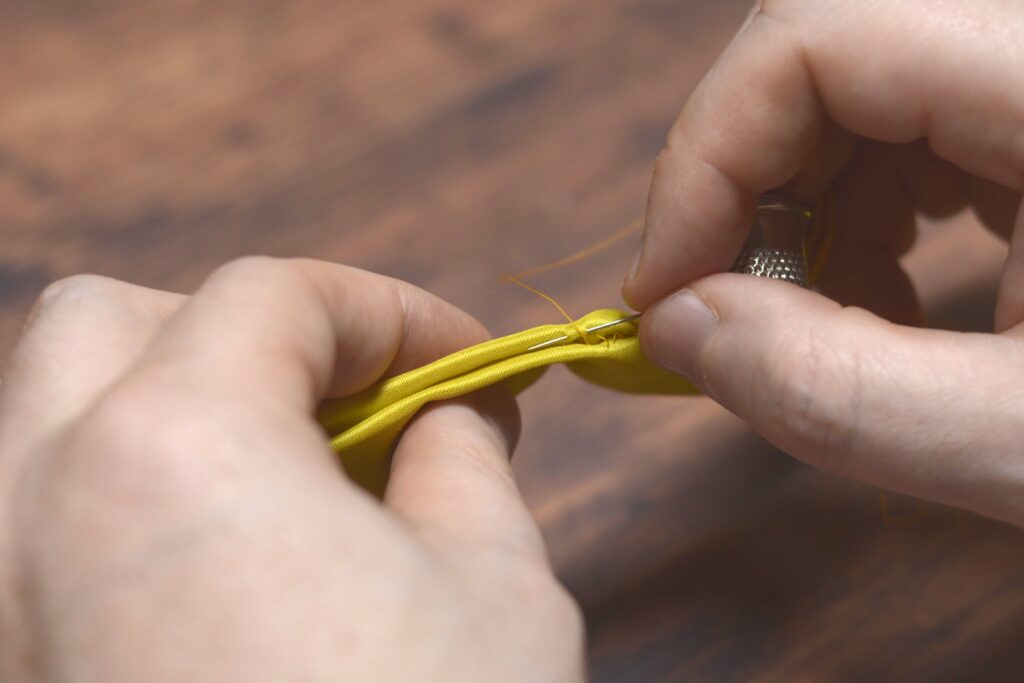
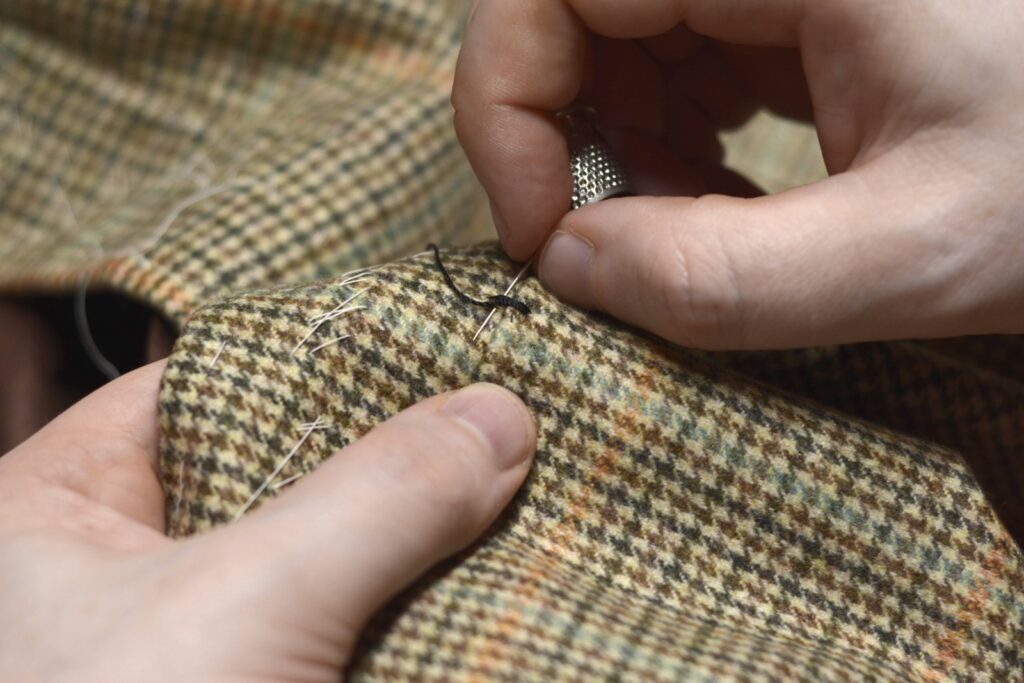
Now carefully pull the thread, pulling the stitches firmly closed. Don’t pull too tightly though, as you’ll end up with unsightly gathers.
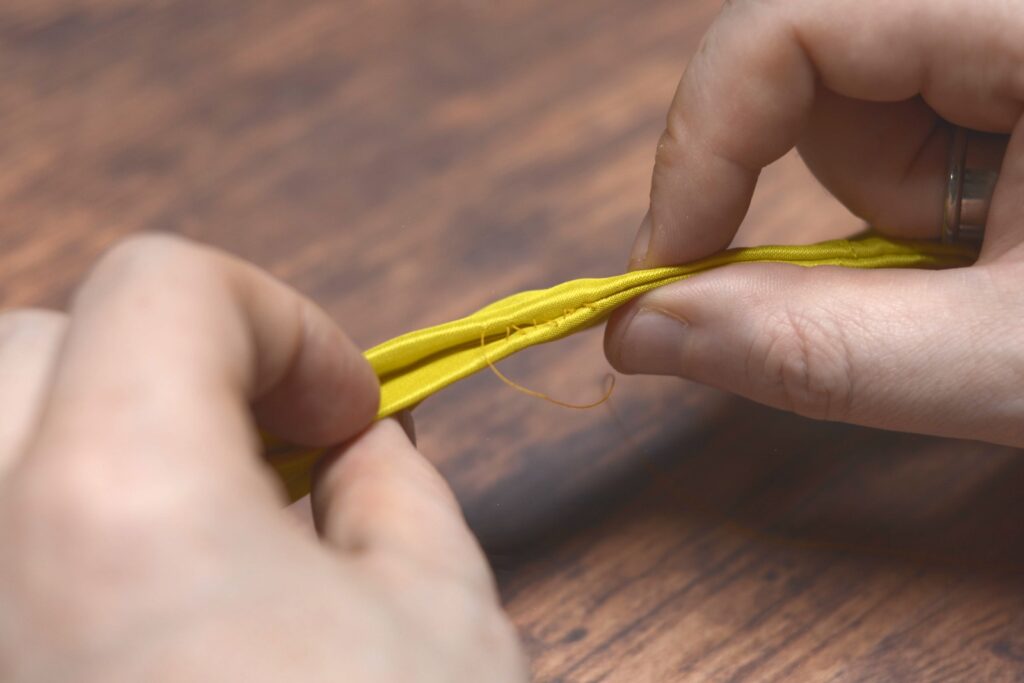
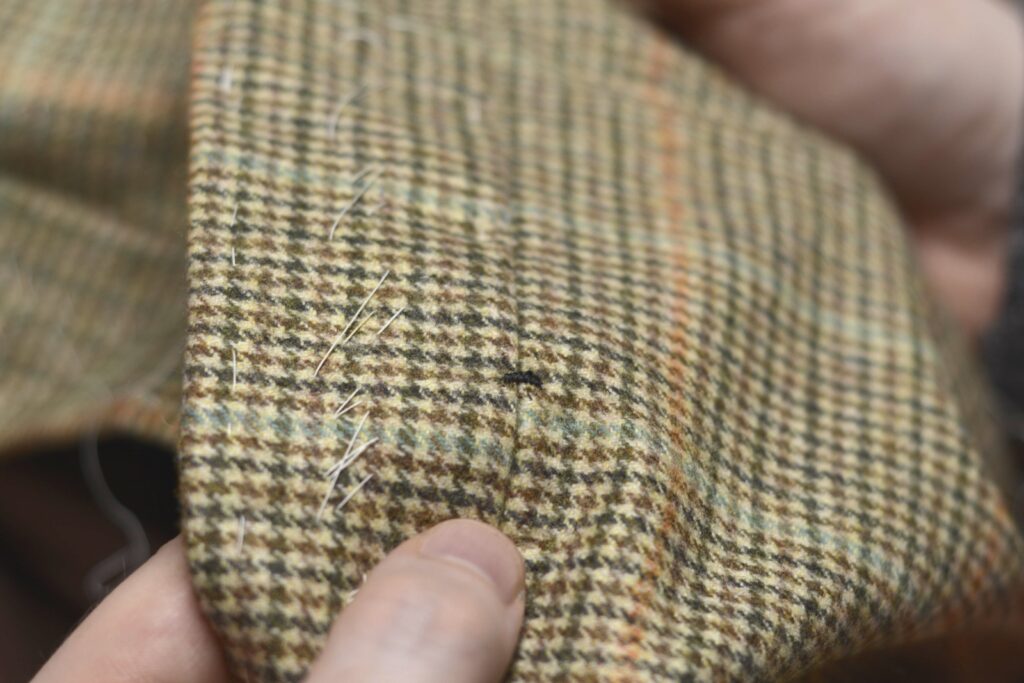
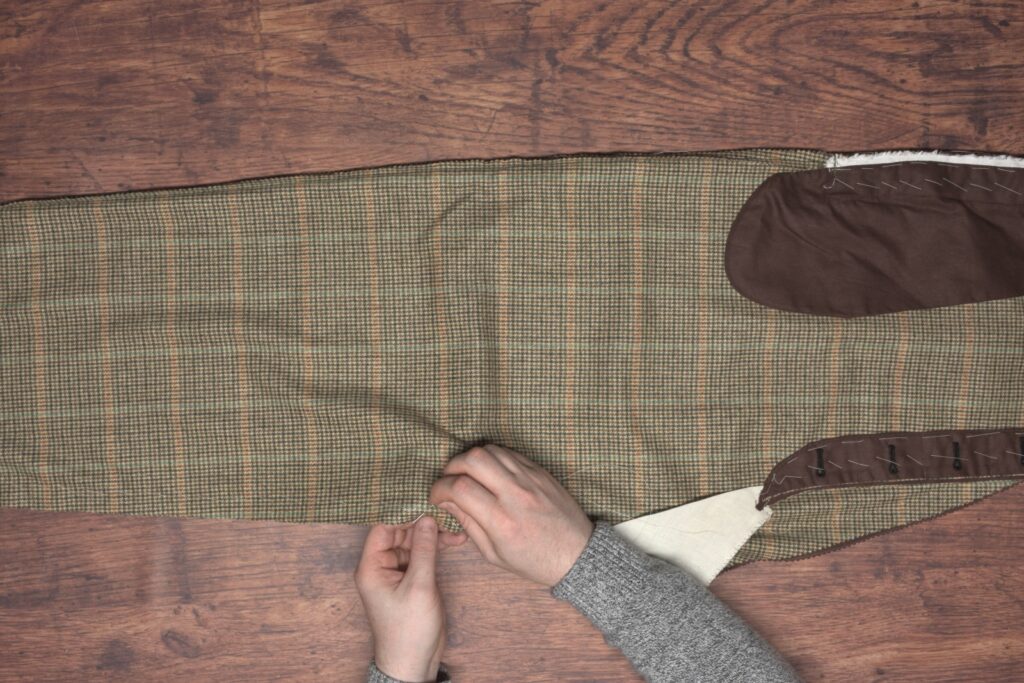
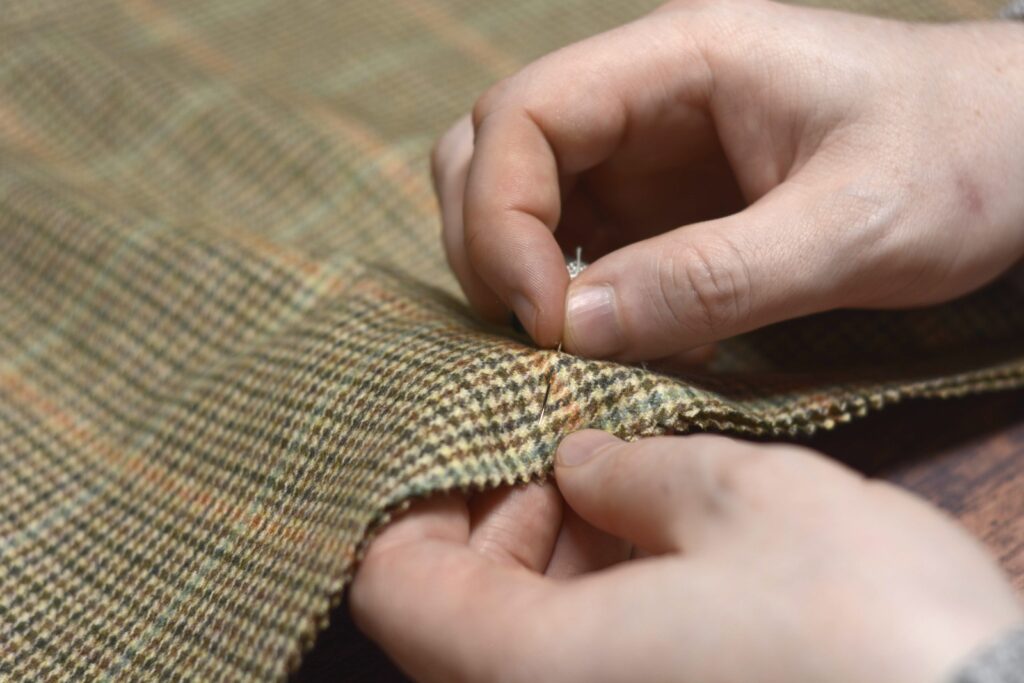
Continue with the same process across the width of the opening, closing it up nicely. At the other end, make another three or so stitches in place, hiding them as best you can in the folds of the seam.
Final Pressing
We’ll finish up the cravat with one last pressing. I’m again using the press cloth. Lightly dampen the press cloth with a spray bottle, use high heat on your iron, and you’ll end up with a very nicely pressed and crisp cravat, ready to wear.
Cravat Construction
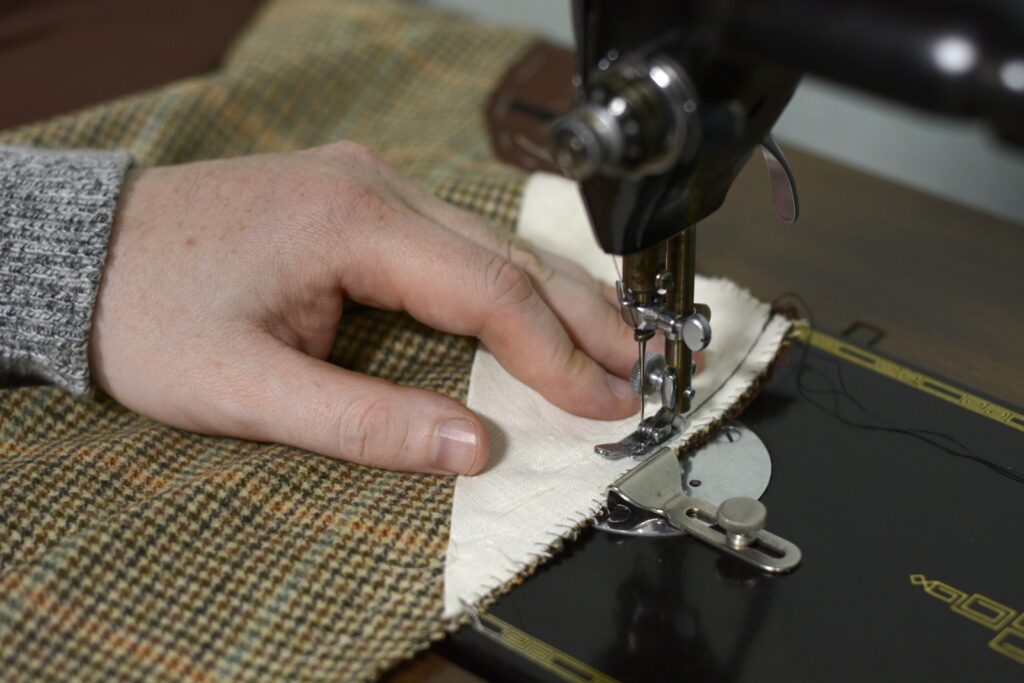
With the pattern drafted, it’s time to cut it out the fabric and start on the construction. Begin by laying your pattern on the doubled fabric with the baseline parallel to the grain in either direction. It’s probable that you’re using scraps to make your cravat so just place the pieces where they’ll best fit.
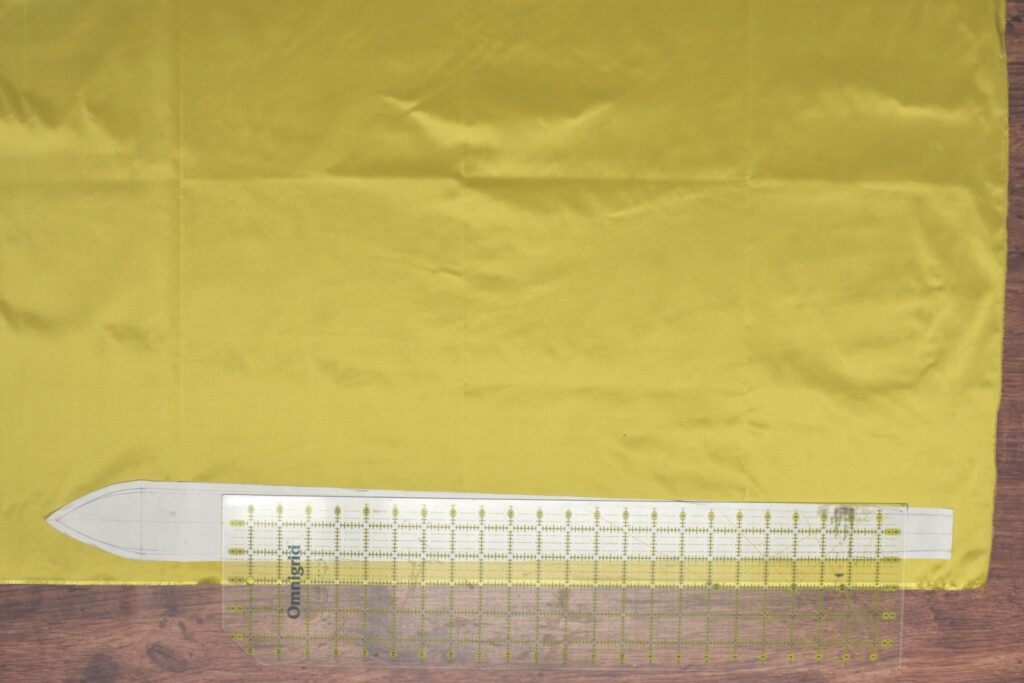
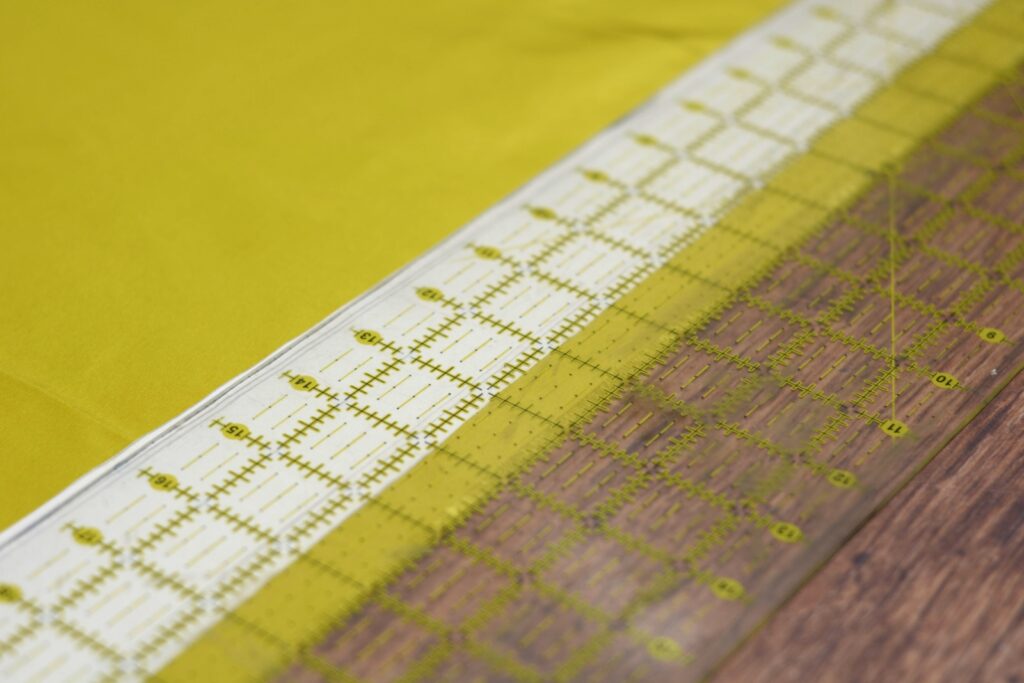
Using a quilting ruler helps with the alignment of the pattern piece.
When laying out the second piece, I like to align the long edge with the previous piece, as well as reverse the pattern, to save cutting and fabric.
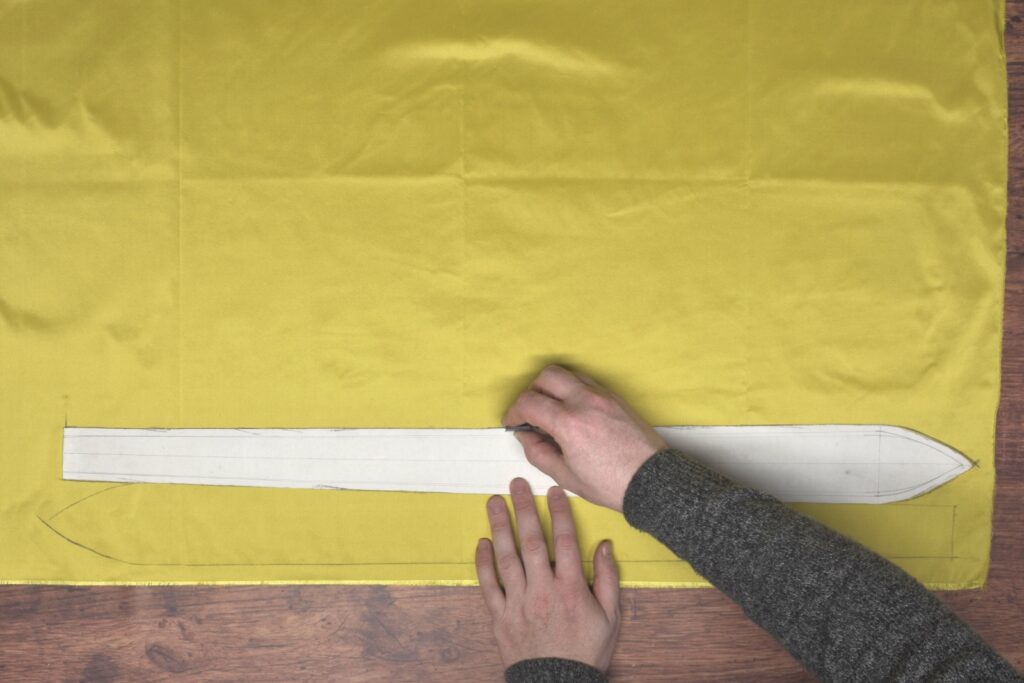
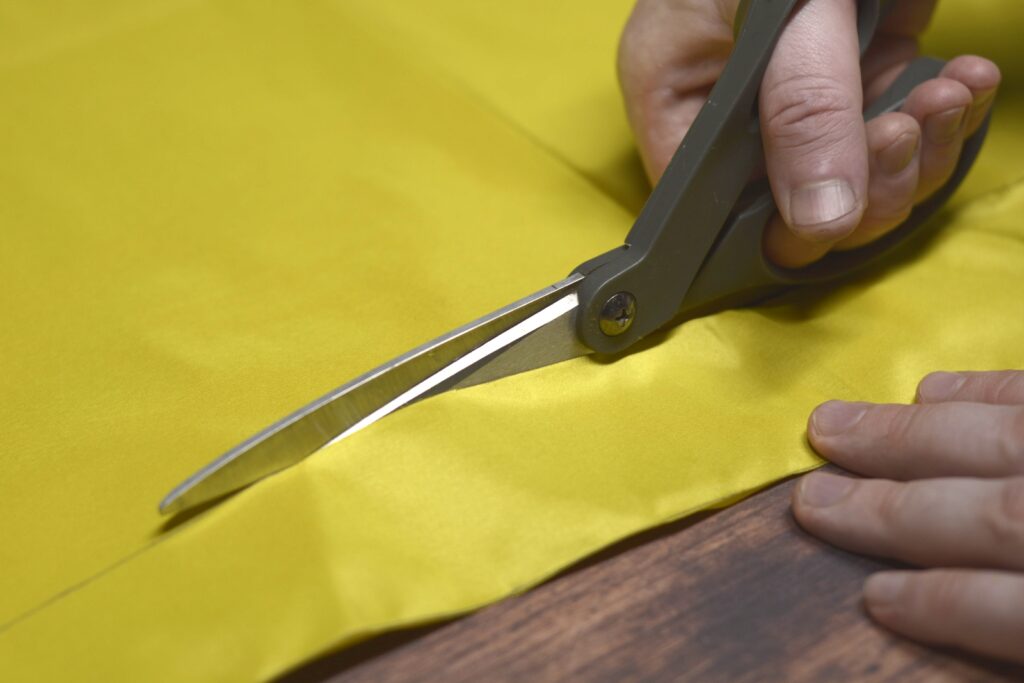
Cut out the two pieces, keeping the cut to the inside of the chalk line, as the chalk line takes up some width and would throw off your pattern otherwise. On the shared long edge, cut directly in the middle of the line.
When cutting silk be sure your scissors are very sharp!
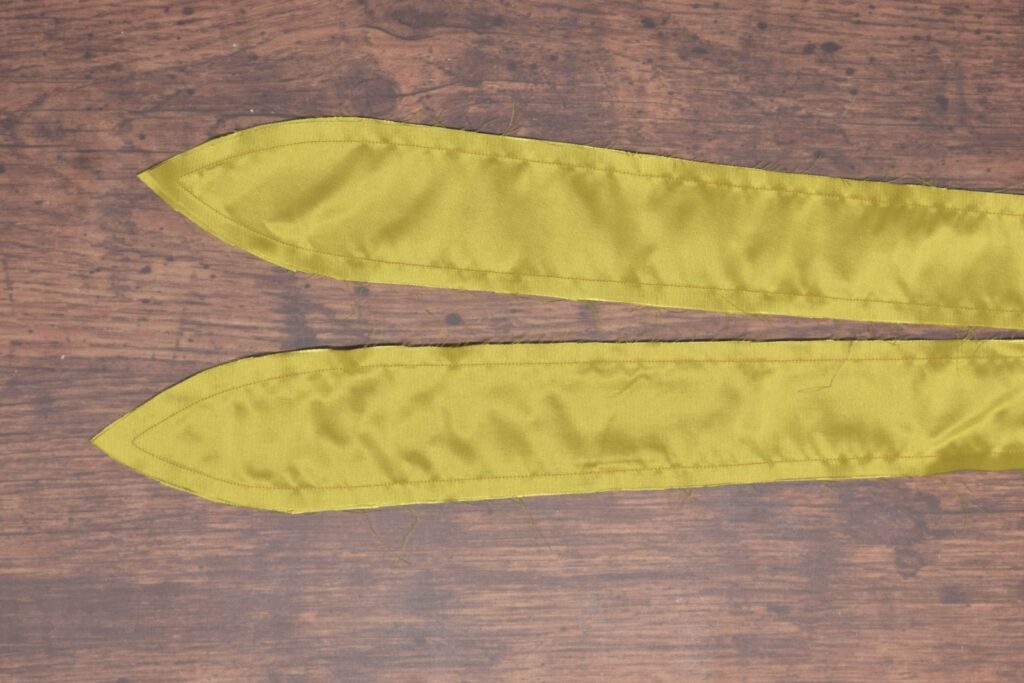
Here are all of the pieces cut out, for a total of four, two for each side.
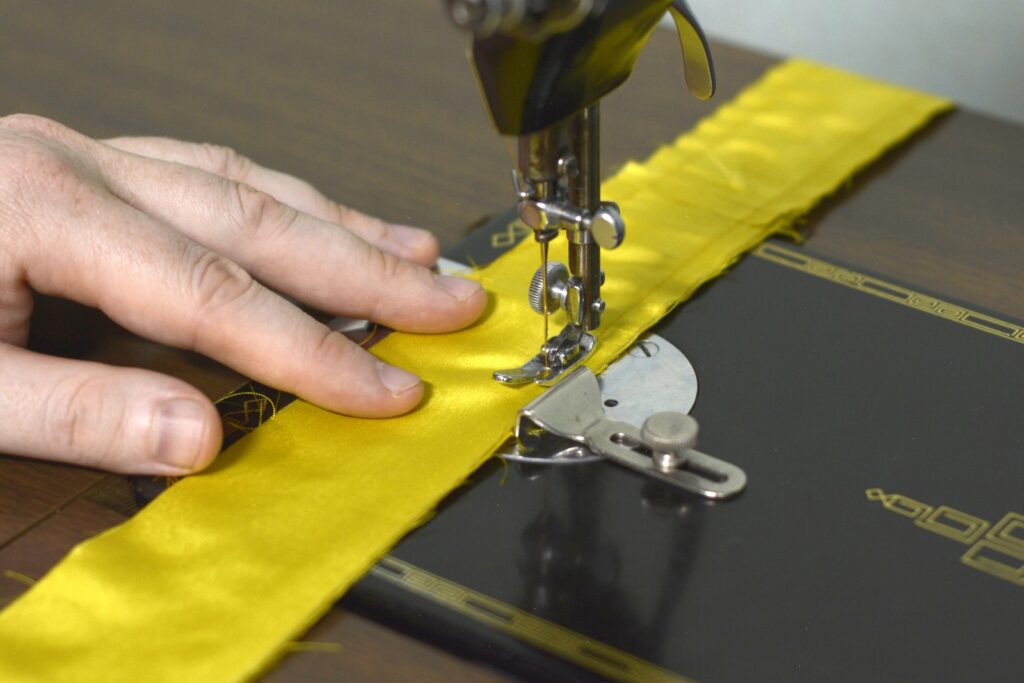
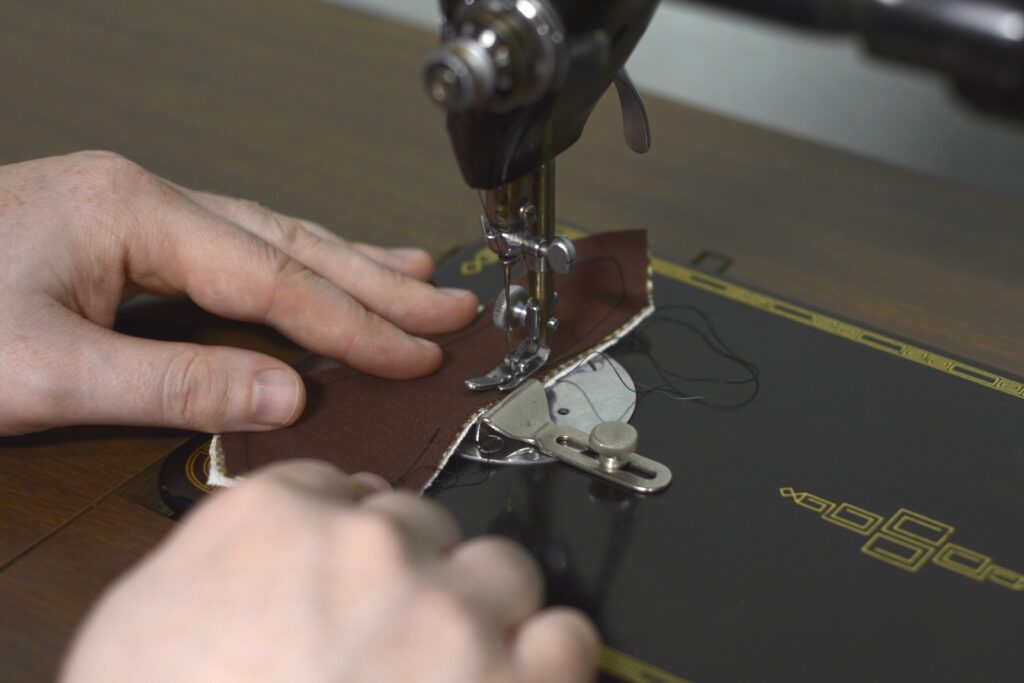
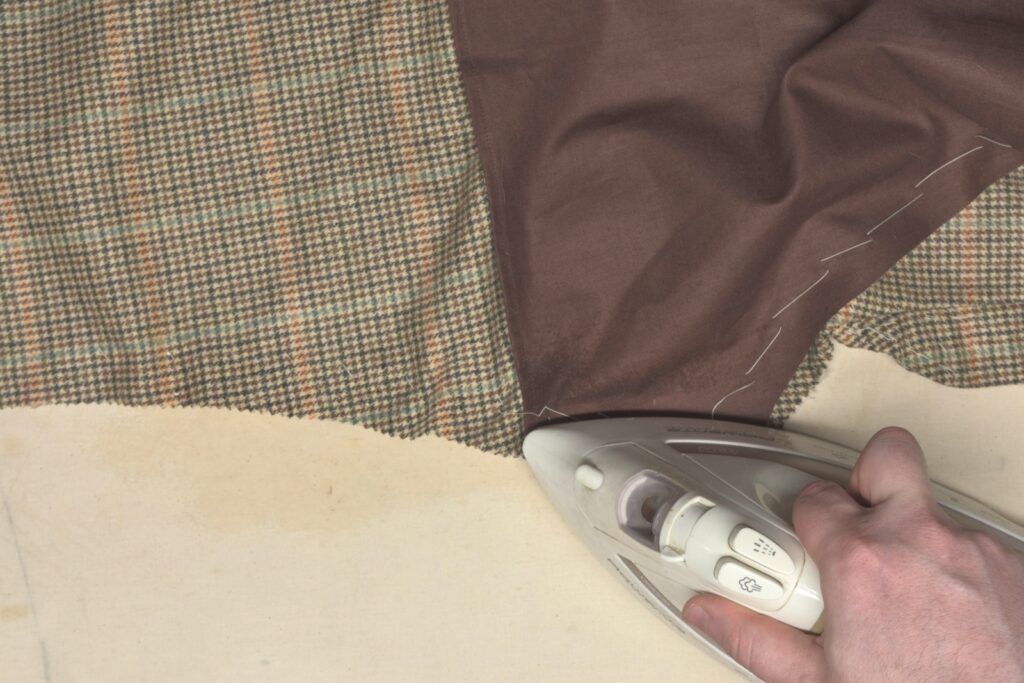
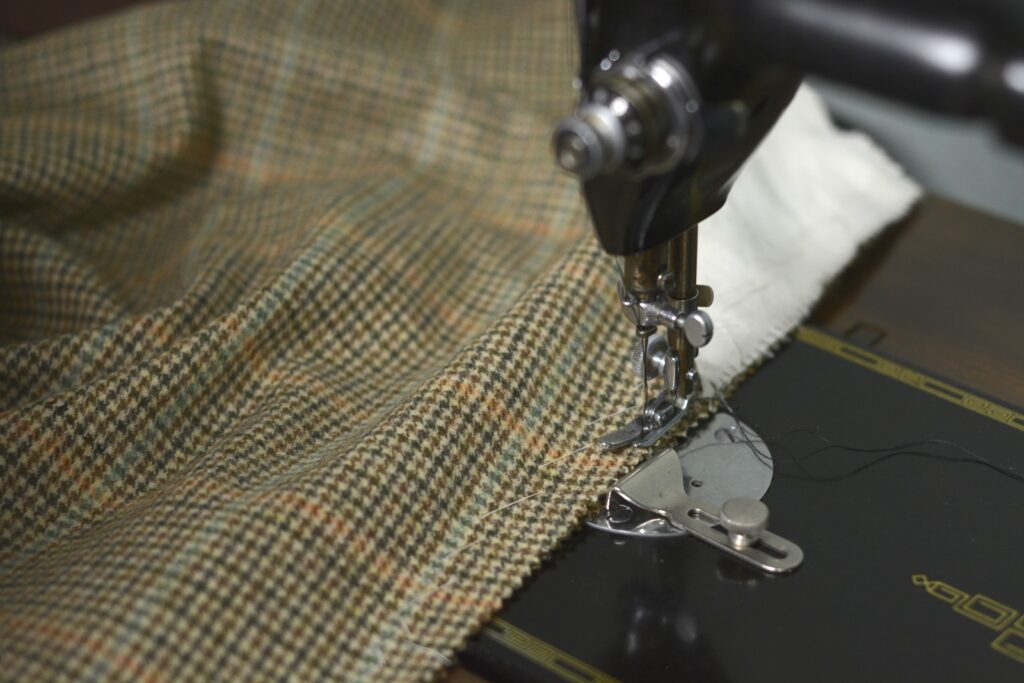
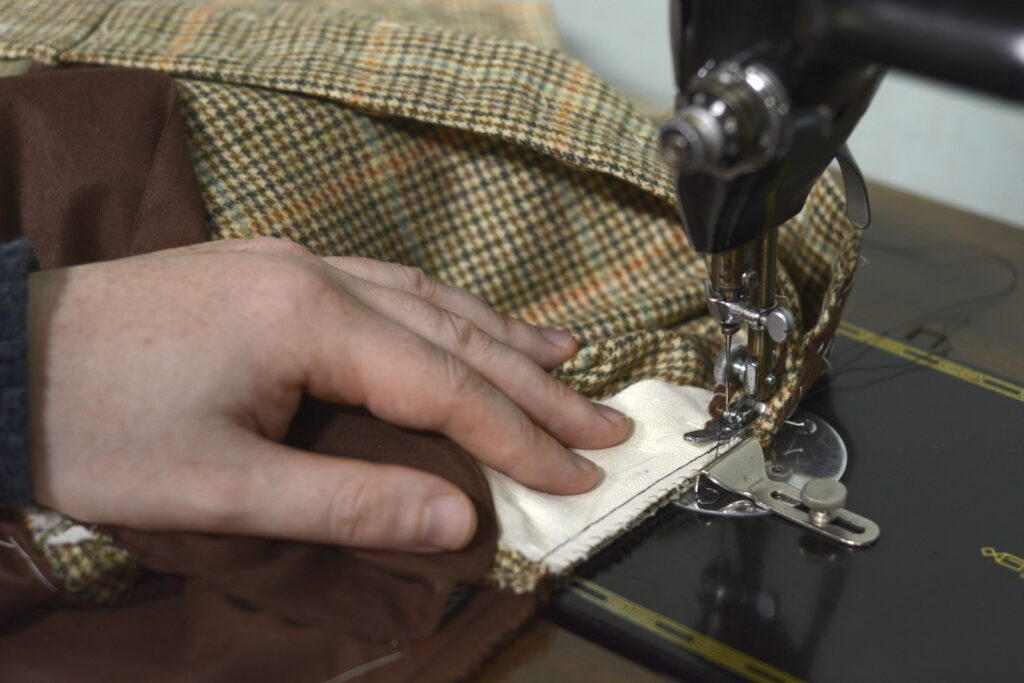
Align two of the pieces together as closely as you can, right sides together. Then along the short edge at the center, sew a seam either by machine or with a back stitch using a 3/8″ seam allowance. Repeat for the other two pieces. It’s important that the pieces be properly aligned and the seam accurately sewn, or else the cravat will skew off at odd angles rather than remain straight.
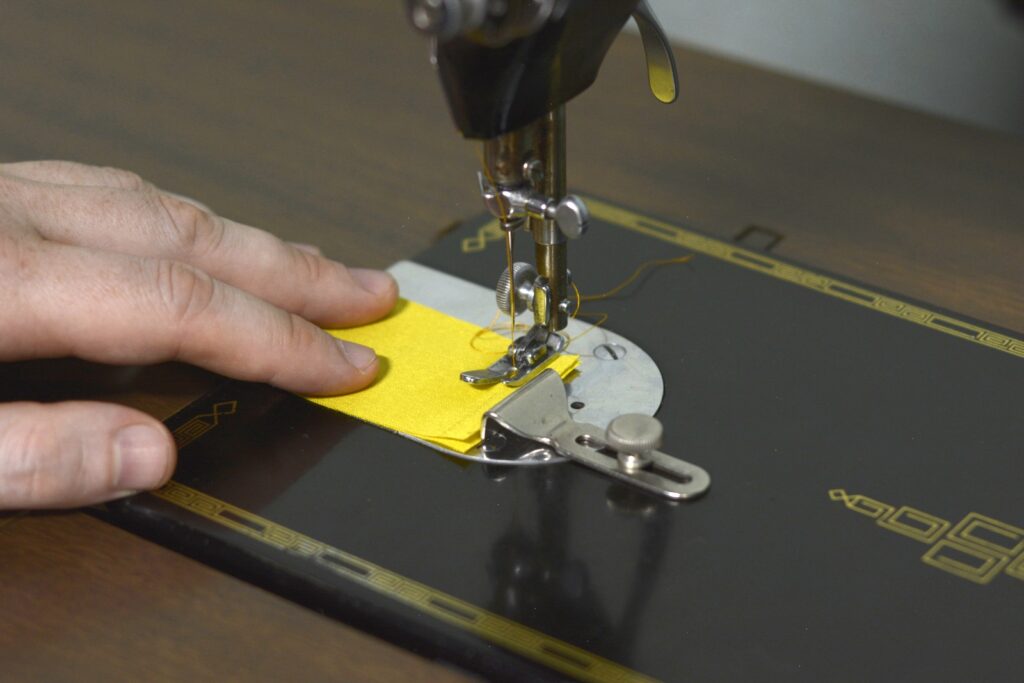
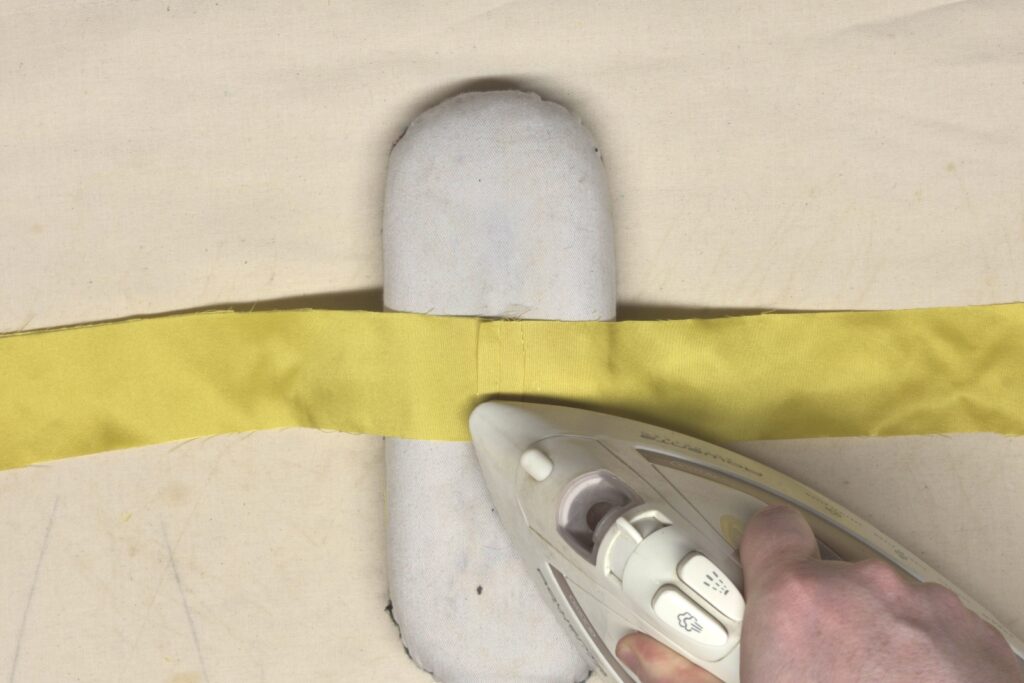
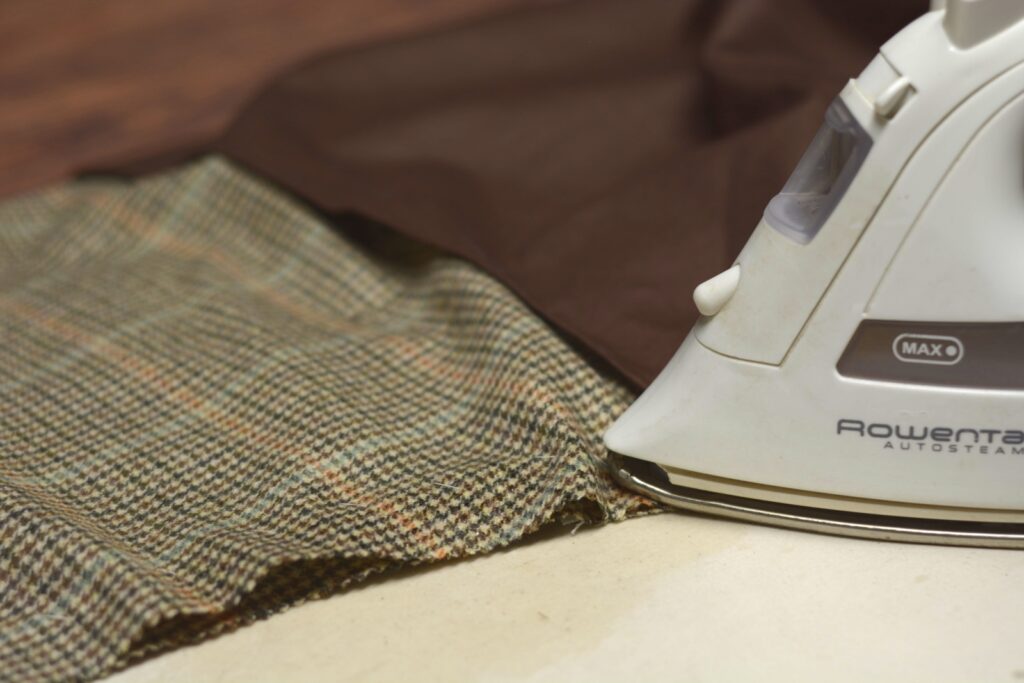
Press the seam open with your fingers just to make getting in there easier with the iron.
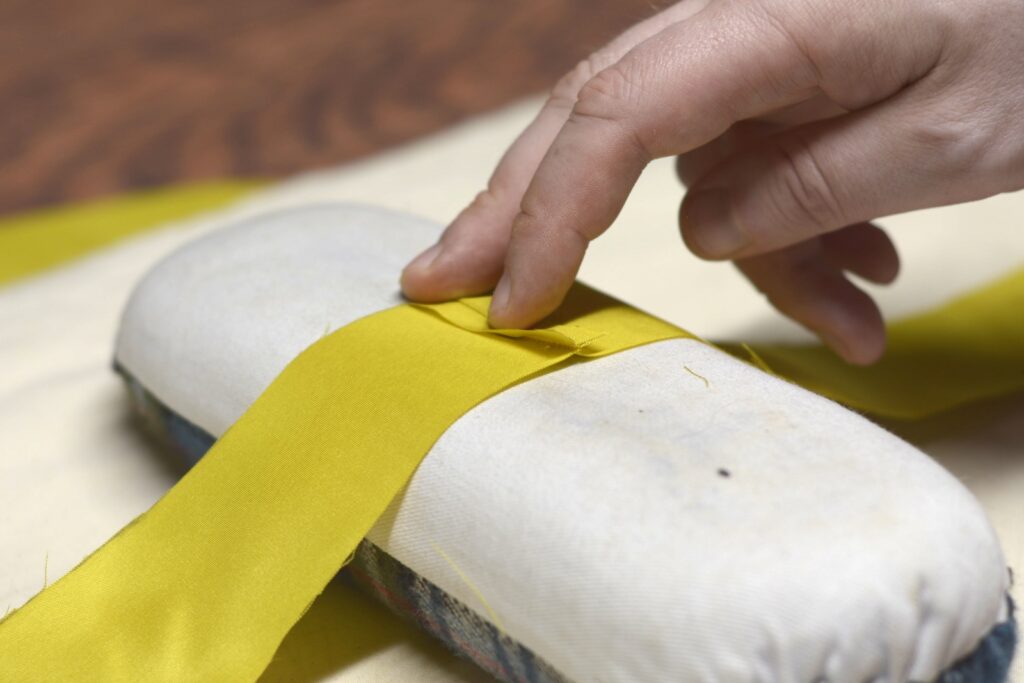
Press the seam firmly open from both sides using high heat and no steam unless necessary.
Now carefully align both sewn pieces right sides together, ensuring that the center seams are perfectly aligned. You can pin them together if you want using very small pins if you must, but I find they damage the silk and prefer to just align things as I sew.
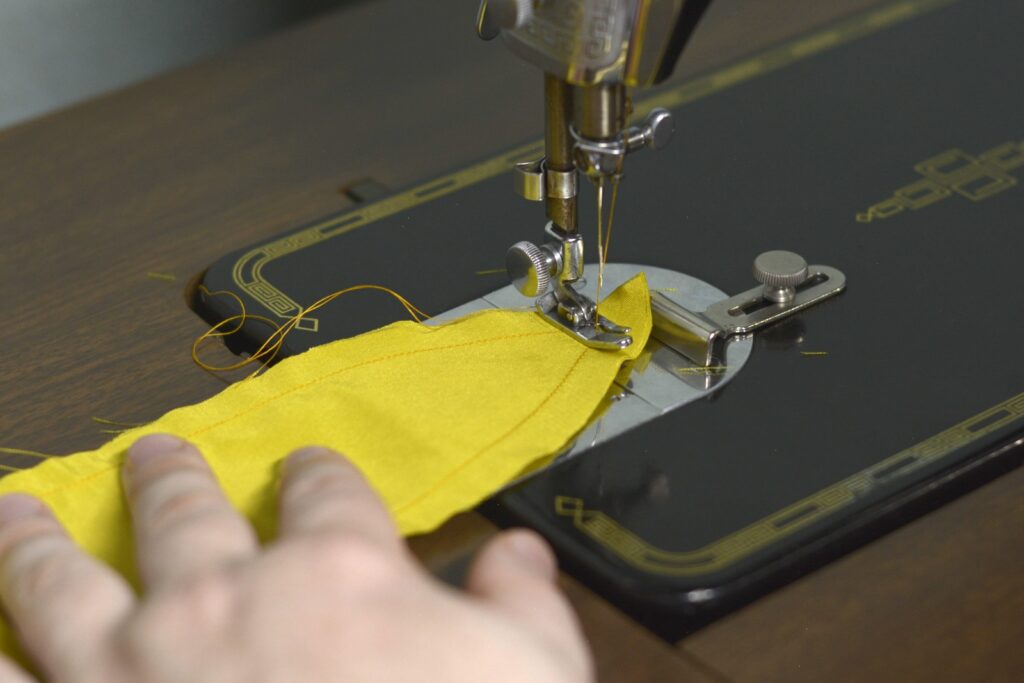
Start just on the far side of the center seam and begin sewing towards one end, using a 3/8″ seam allowance. You can use a back stitch if you want, I simply don’t have the patience for that anymore.
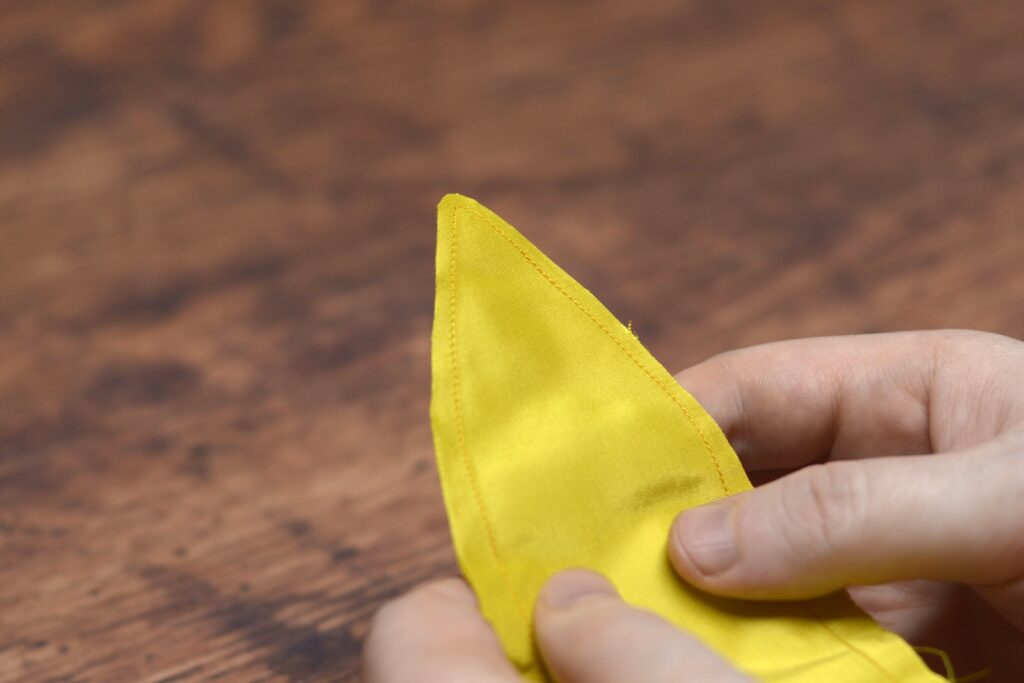
When you get to the tip of the cravat, rather than making a sharp angle with your stitching, stitch across the point with a single stitch, sort of blunting the angle. This gives more room for the fabric when you turn it right side out later on.
Continue sewing the other side down towards the opposite point and back towards the beginning.
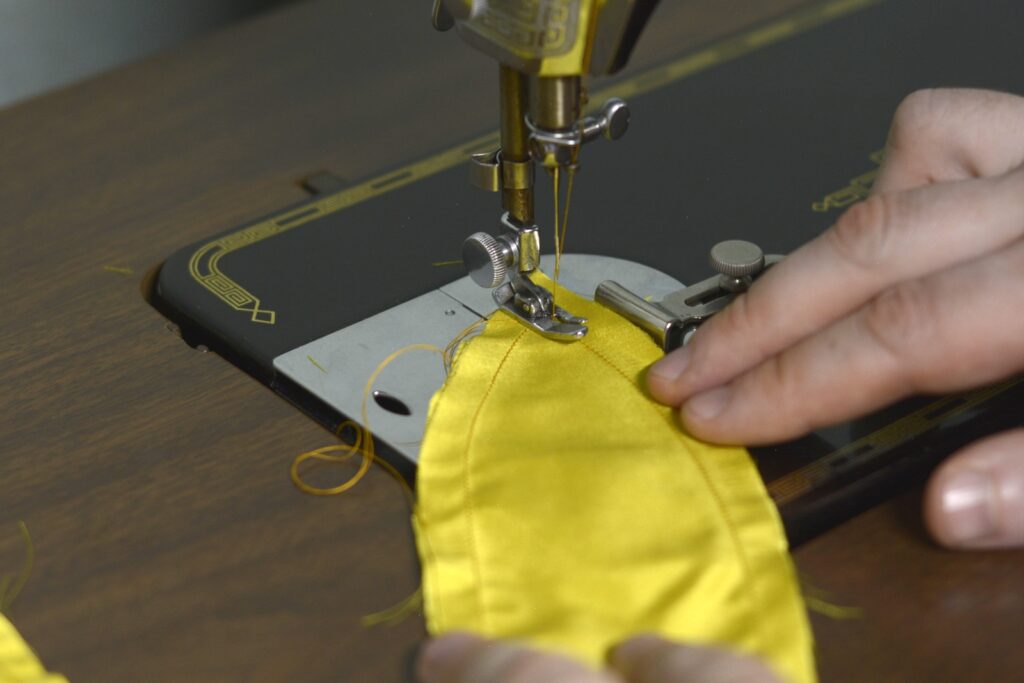
Stop your stitching 2″ to 4″ away from where you started, giving yourself room to turn the cravat right side out. The smaller the opening, the more difficult it is to turn. Note how my opening is to the side of the center seam. The preference is really yours, if you’re a beginner you might want to keep the opening centered over the center seam. I find I get a better result by offsetting the opening when I go to finish the seam by hand.
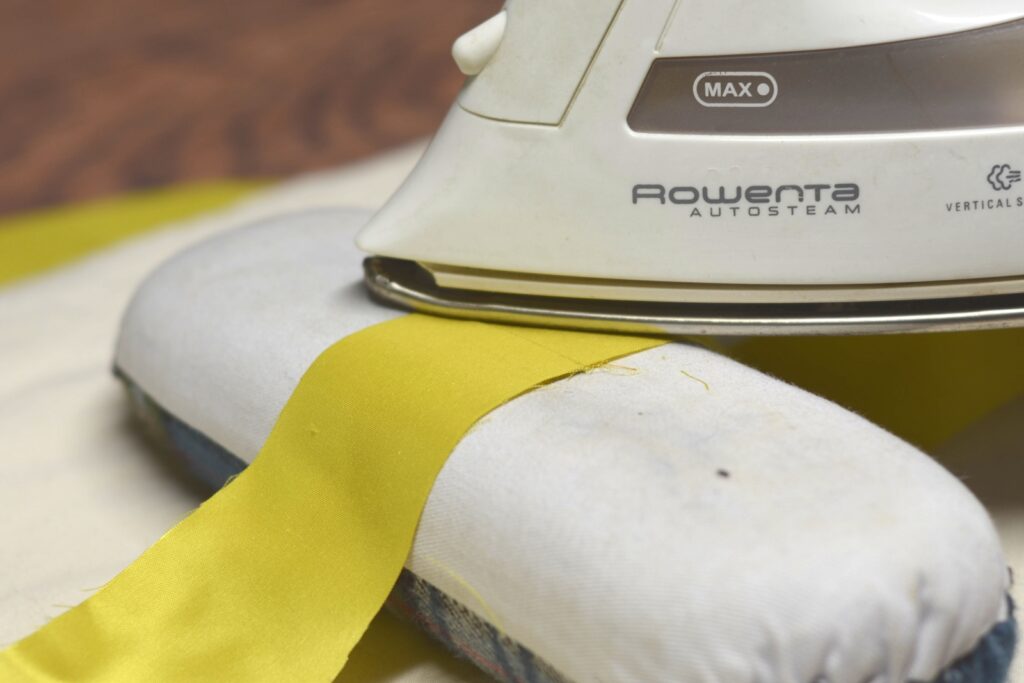
Silk is kind of fiddly to work with, and after sewing, you may notice that there are some unwanted ripples and such. You can iron them out by passing the iron across the cravat in the narrow direction, not lengthwise. Ironing lengthwise tends to introduce even more wrinkling which are very difficult to remove.
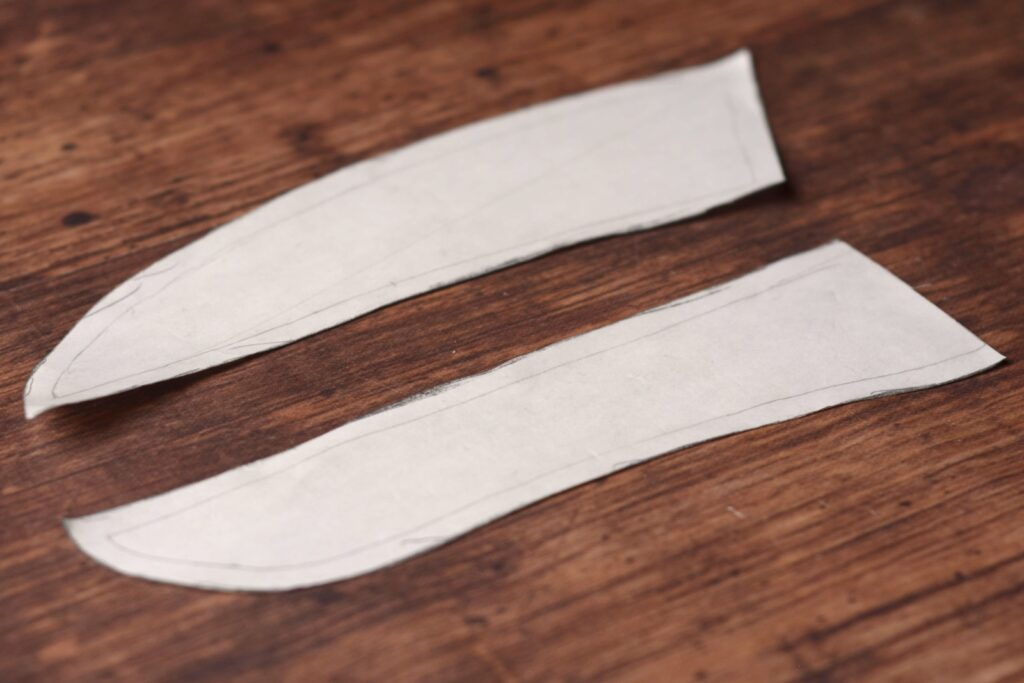
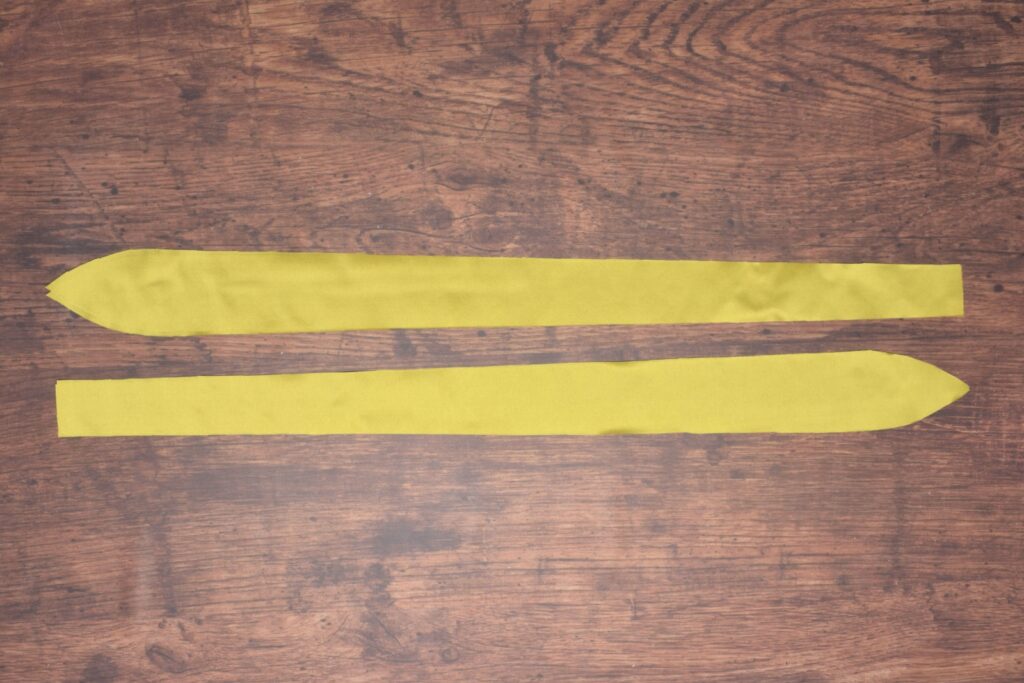
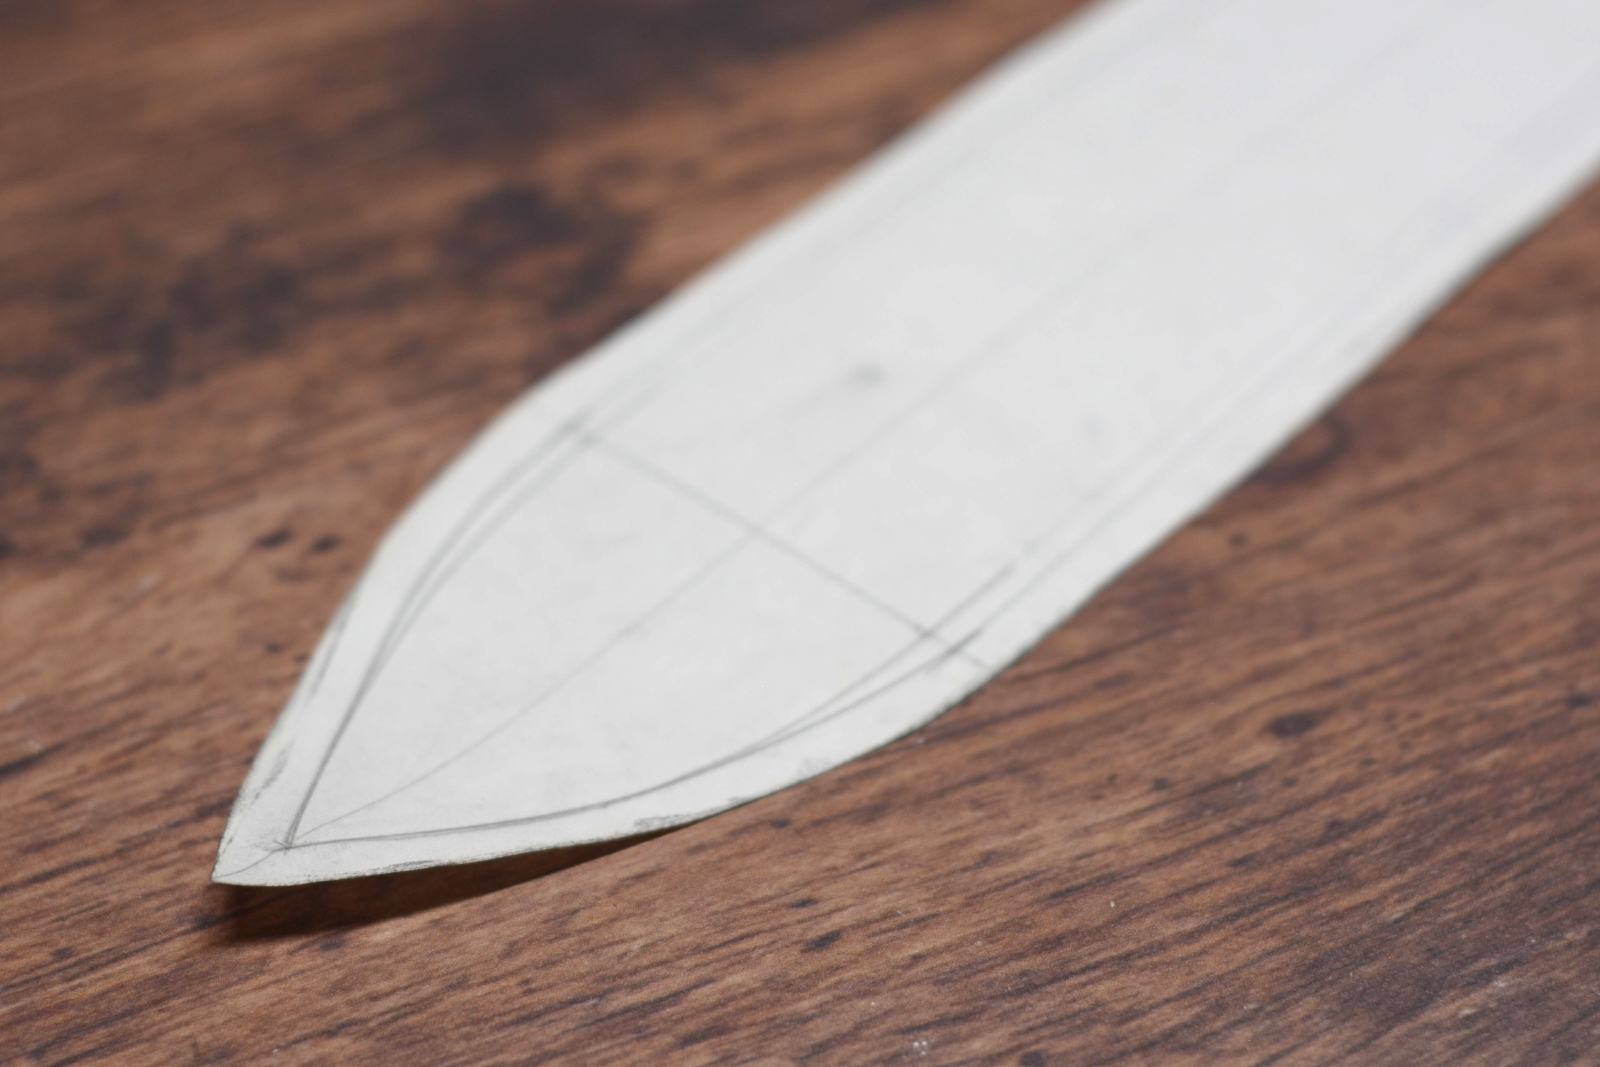
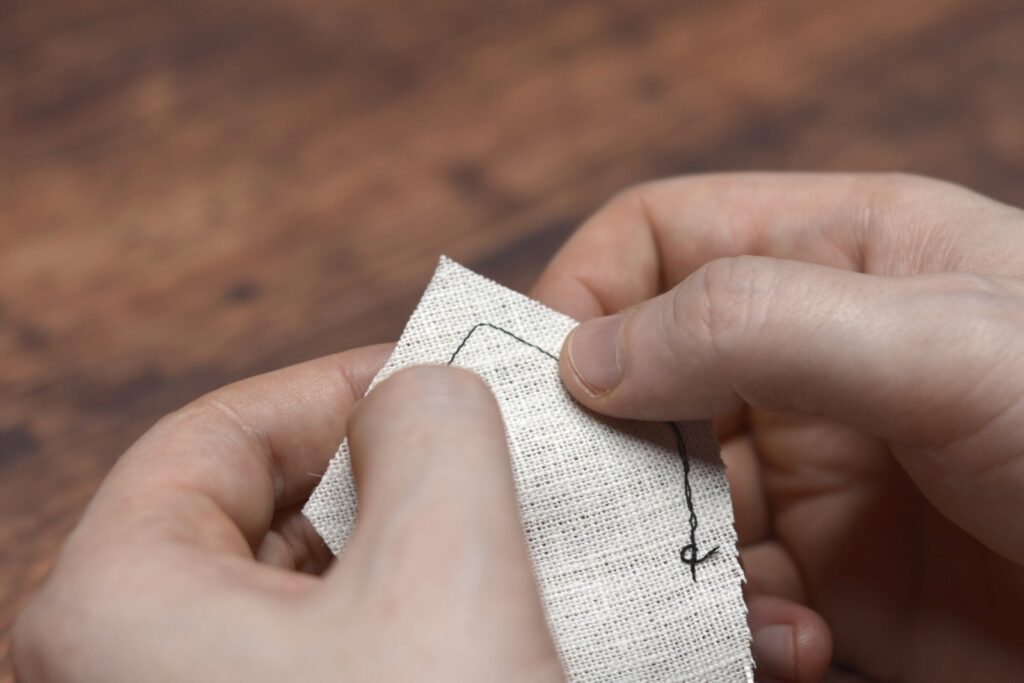
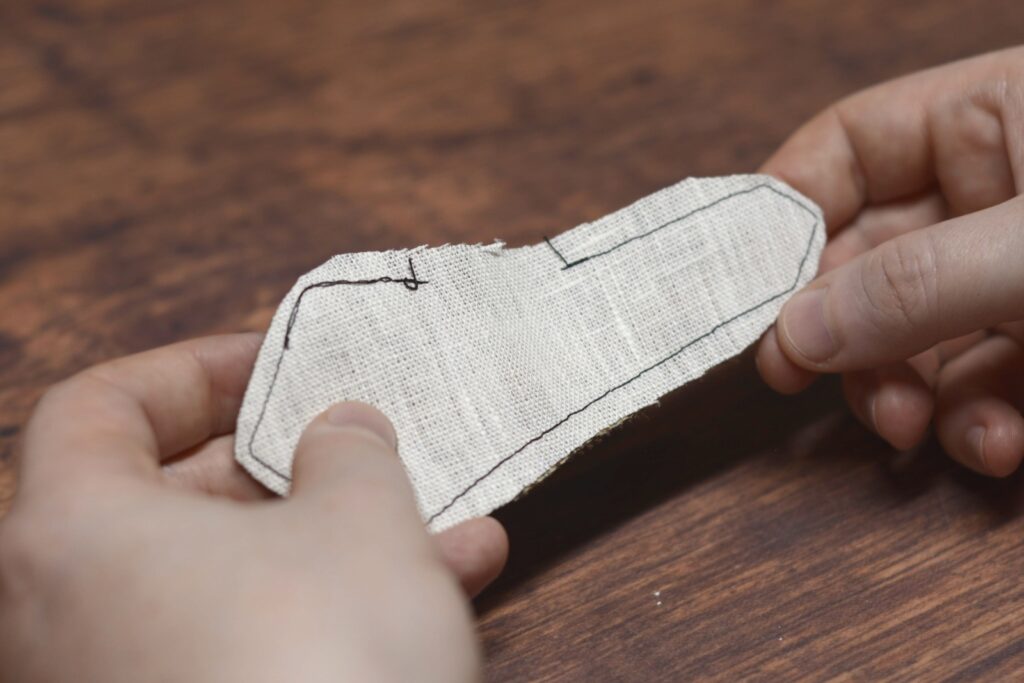
Drafting a Cravat
Drafting a cravat is very easy and a great place to start if you’ve never drafted anything before. To begin, draw a horizontal line, 25″ in length, placing a mark at 0 and 25.
Make one more mark, 3″ from 0.
The exact length is up to you, I sometimes make them slightly longer, it depends on your neck size and how large of a bow you want, really. So feel free to experiment.

At point 3, draw a 2″ line centered on the base line, so 1″ above and below. This gives us the width of the bow, and again can be altered to preference.
At point 25, draw a 1″ line centered as well, 1/2″ above and below, giving us the center back. You could make this a little wider, say 1 1/4″, to make it easier to fit your point turning tool when turning the cravat right side out.

To draw the outline, draw a straight line from 1 to 2, curving into point 0. I do end up curving the transition between the two lines at point 2 to smooth things out. Repeat for the lower edge of the cravat as well.

Finally, add a 3/8″ seam allowance all the way around the cravat. I’ve found the silk tends to fray so I prefer the slightly wider seam allowance here, as it can always be trimmed down. I’ve also marked the grain line, identical to the original construction line.

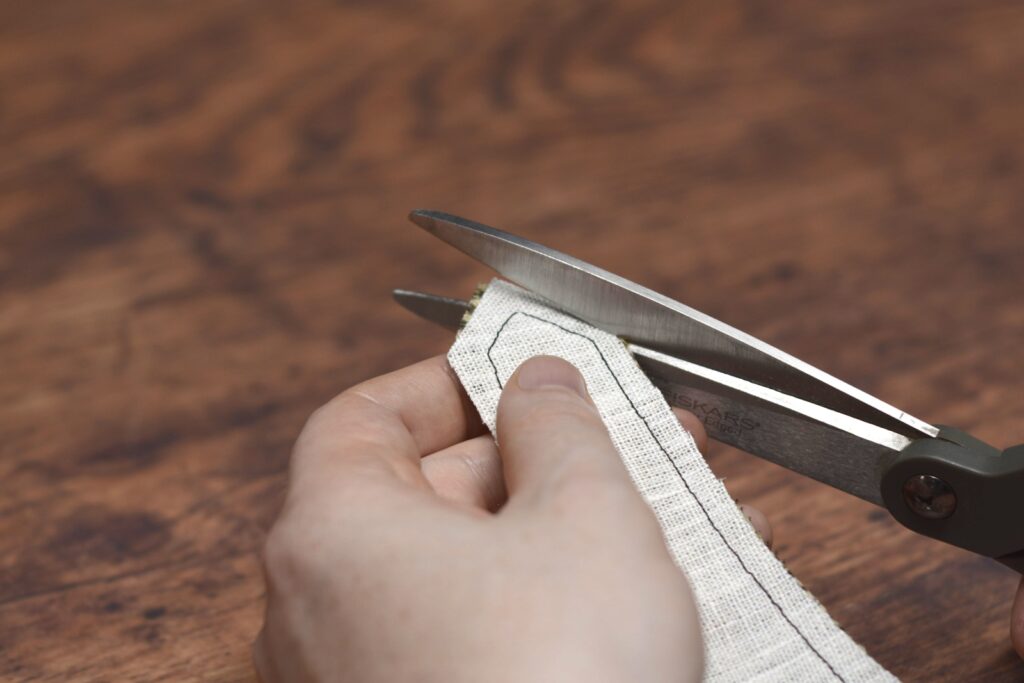
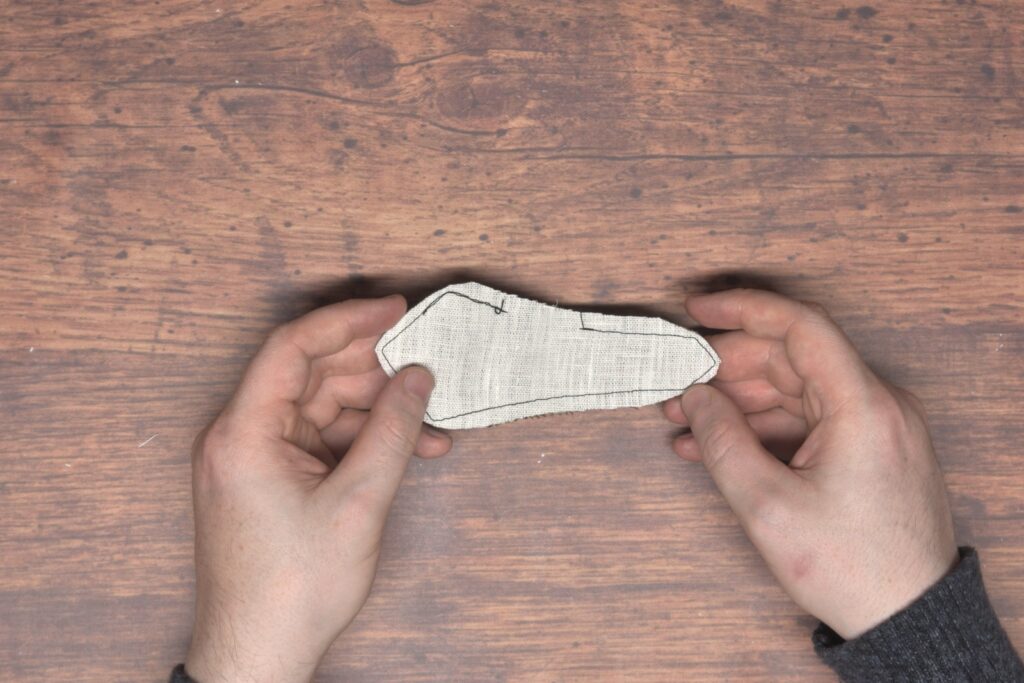
Cut out your paper pattern along the seam allowance.
Buttons
The final task prior to hemming the trousers is to attach the buttons. Begin by laying out the button placement. I transferred their position on the fly first, setting their distance from the fly seam equal to the distance of the buttonholes from the fly edge.
Next mark the position of the front suspender buttons on the waistband. I like to make the first one about 2 1/2″ from the side seam, and the second one another 2 1/2″ from the first. Both are placed about 1/2″ below the top of the waistband.
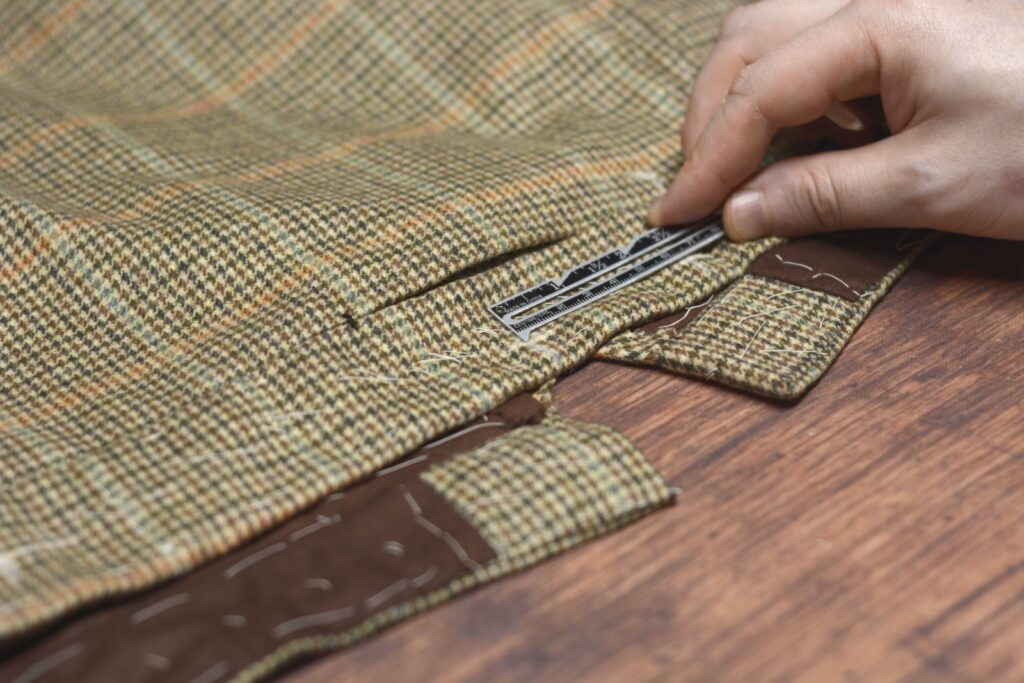
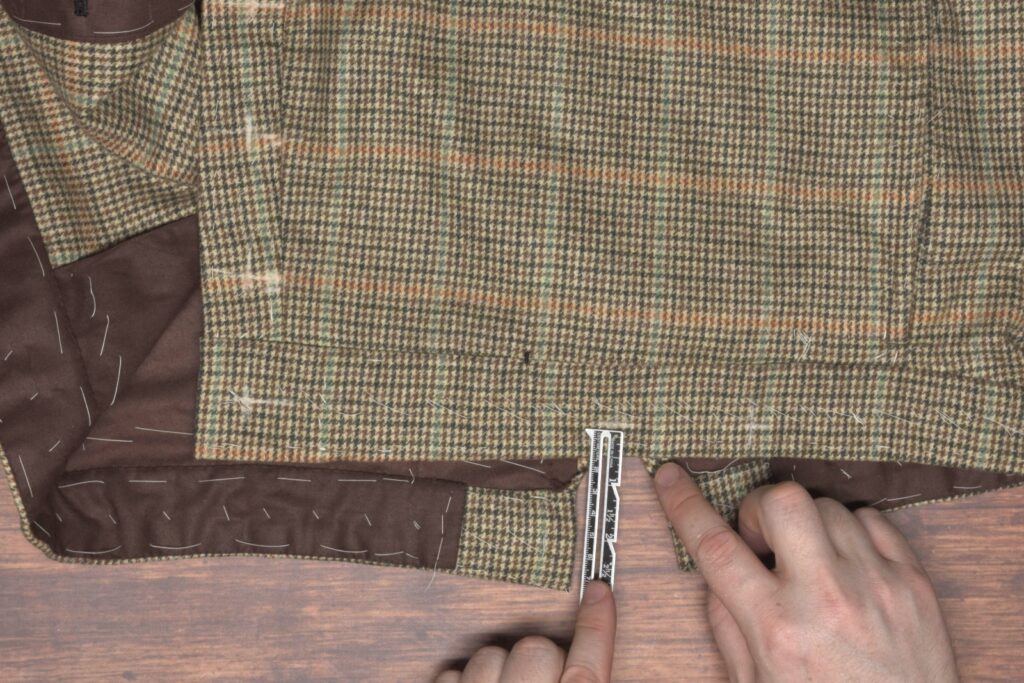
Finally, mark the back button position about 1″ from the end of the waistband and 1/2″ from the top edge.

Attaching the Buttons
To attach the buttons, begin by passing a knotted thread from the wrong side through all layers.
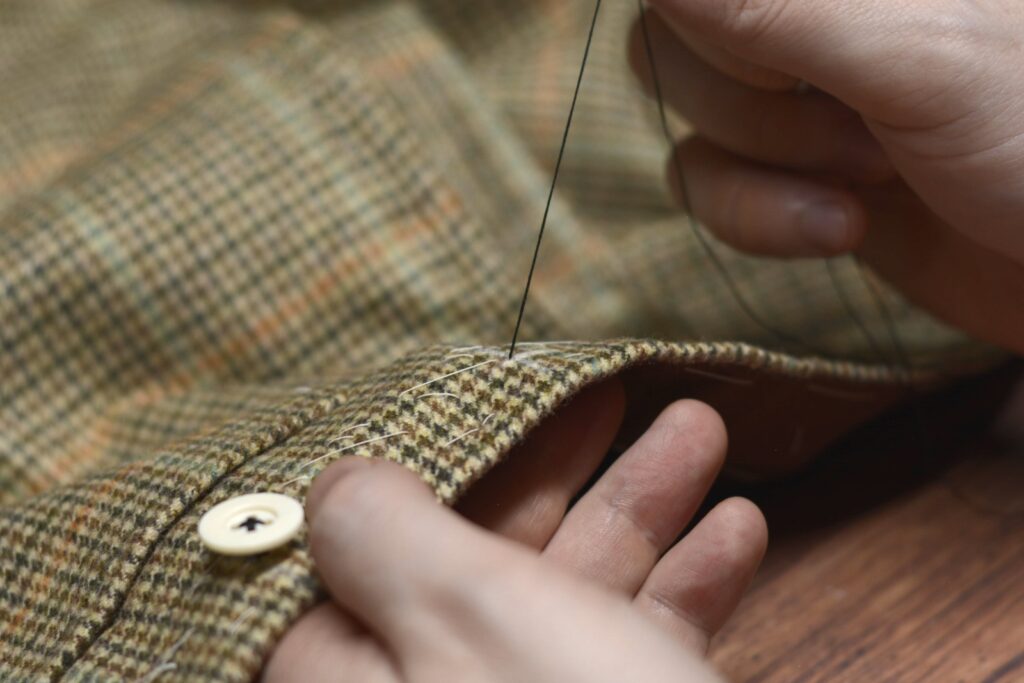
Pass the thread through opposite holes of the button.
Make two complete passes through the button, passing the needle and thread back to the underside, and keeping the stitches rather loose. After this second pass, you can adjust the final height of the button by holding the button at the desired height and gently drawing the threads to the correct height. The height should be just slightly thicker than the suspenders or the fabric that will be attached to it.
The two stitches give just enough tension that the button will not move out of position, yet at the same time not be difficult to move if you want to.
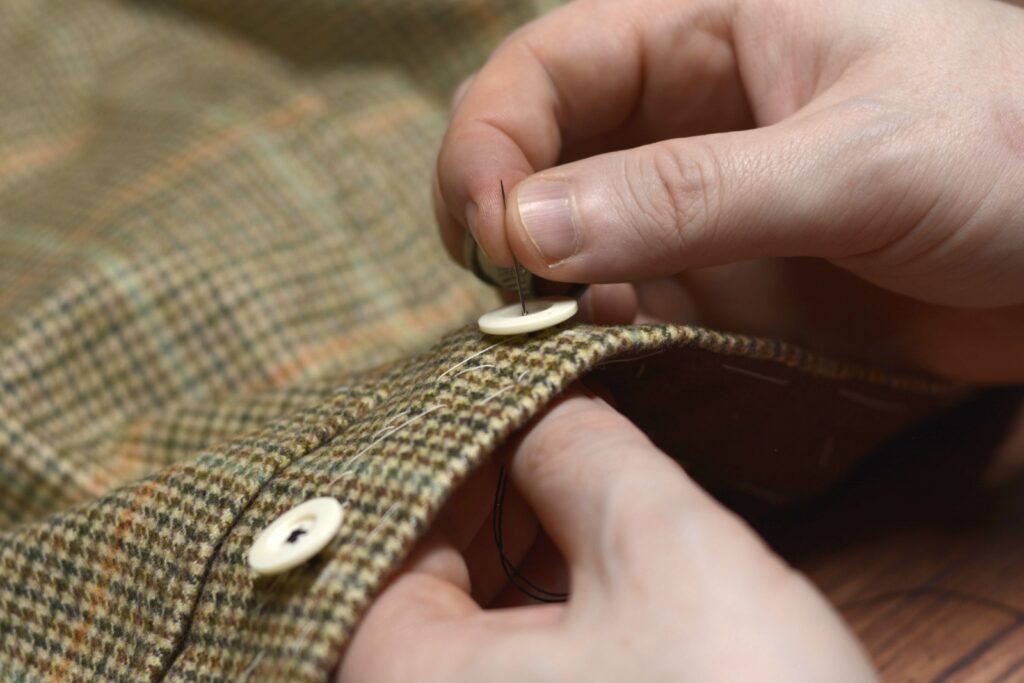
After four or so stitches, begin making stitches in the other direction, forming a cross. The number of stitches depends on the strength of your thread and the thickness of the fabric. I’ve gone as many as six stitches in each direction.
Be sure to regulate the height with each stitch – at this point it’s impossible to change the height so any individual loose or tight stitch will affect the other stitches.
Pass the thread back to the right side one last time, and wrap the thread around the previous stitches 6 – 8 times, depending on the height, and pull firmly, forming the shank. This provides a durable finish to the buttons, helping to prevent them from falling off.
Finally, pass the thread through the shank three times in alternating directions to secure it, and trim the excess thread.
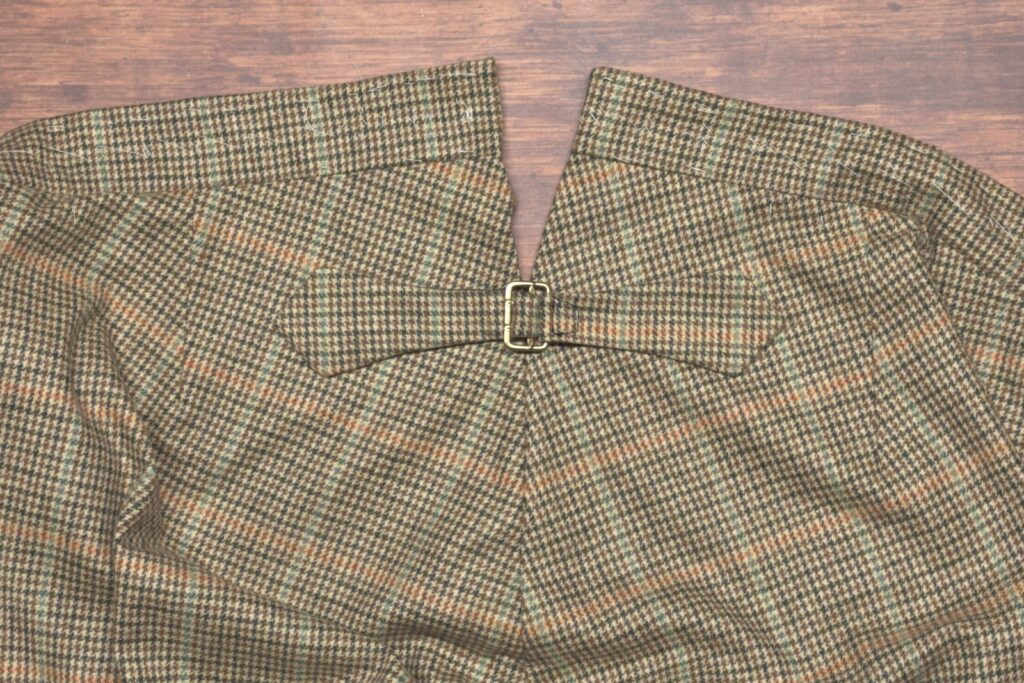
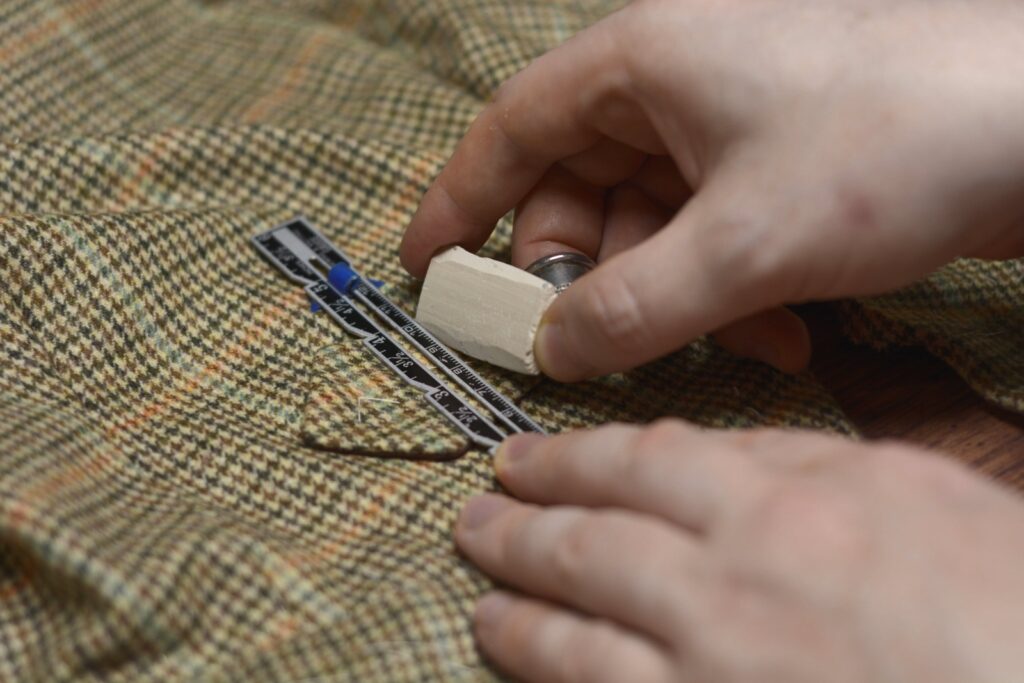
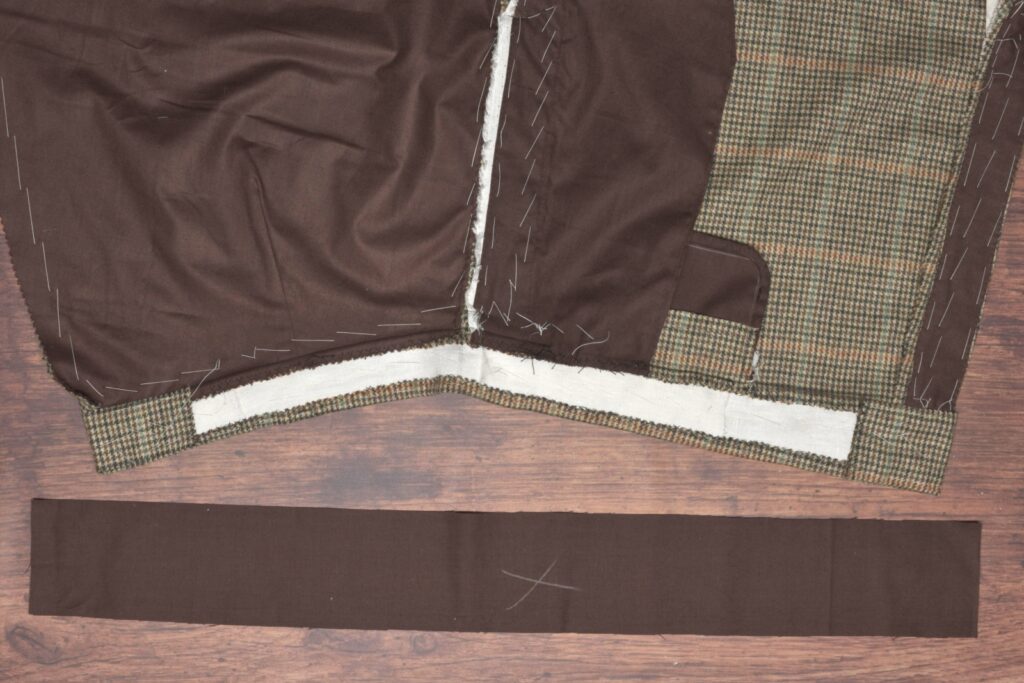
Trouser Buckle
A waistband was usually found in the back of trousers to help adjust the fit as well as take stress off of the top of the seat seam.
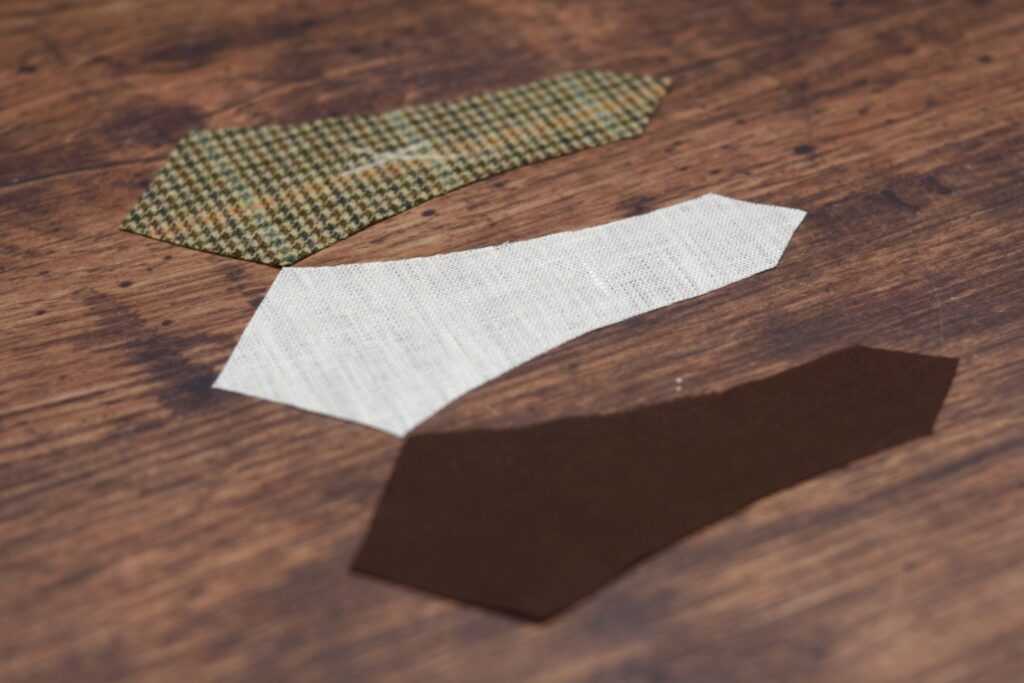
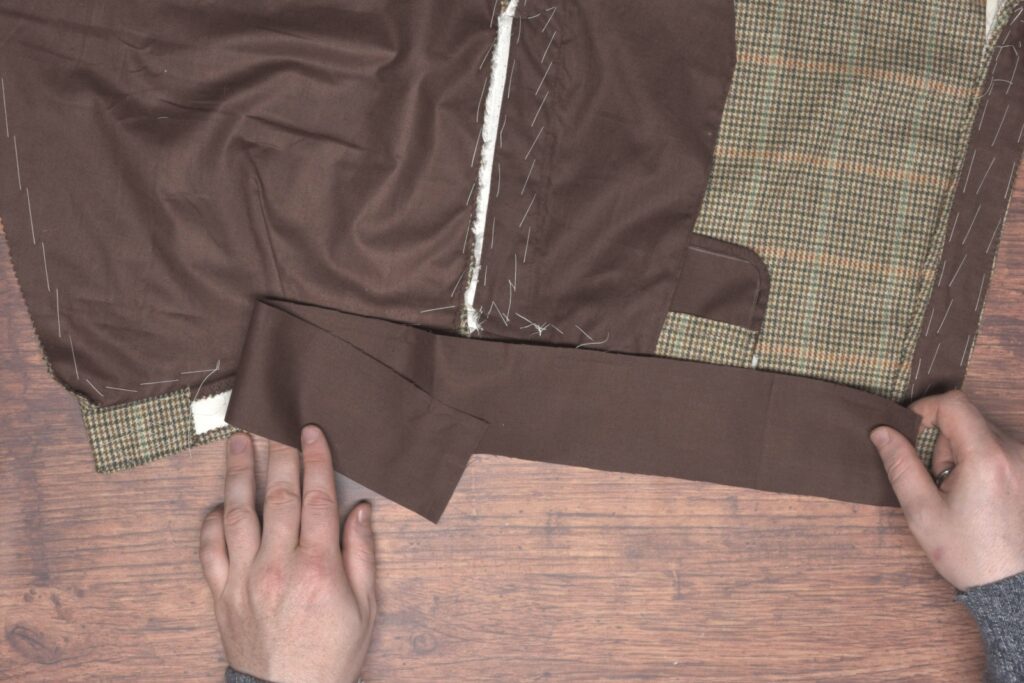
Begin by cutting out two each of fashion fabric, lining, and optionally, linen. The linen is a good way to reinforce the belt, but is completely optional, especially if you’re using heavier fabric.
Place the lining and wool pieces right sides together, and then place that assembly on top of the linen, if using it.
Stitch around the belt using a 1/4″ seam allowance, and leaving a gap in the stitching about 1 1/2″ to 2″ for turning right side out.
A smaller gap means less hand sewing later on, but also makes turning right side out a bit more difficult.
When you get to the corners at each end, instead of making a sharp 90 degree turn, make a stitch across the corner as shown, giving room for the fabric when you turn it.
Trim the corners down to about 1/8″ to help in the turning process.
Turn the belts right side out.
I used a dull pencil to help get the points turned crisply.
Press the belt carefully after turning.
Close up the belt with a small felling stitch.
Repeat for the other belt.
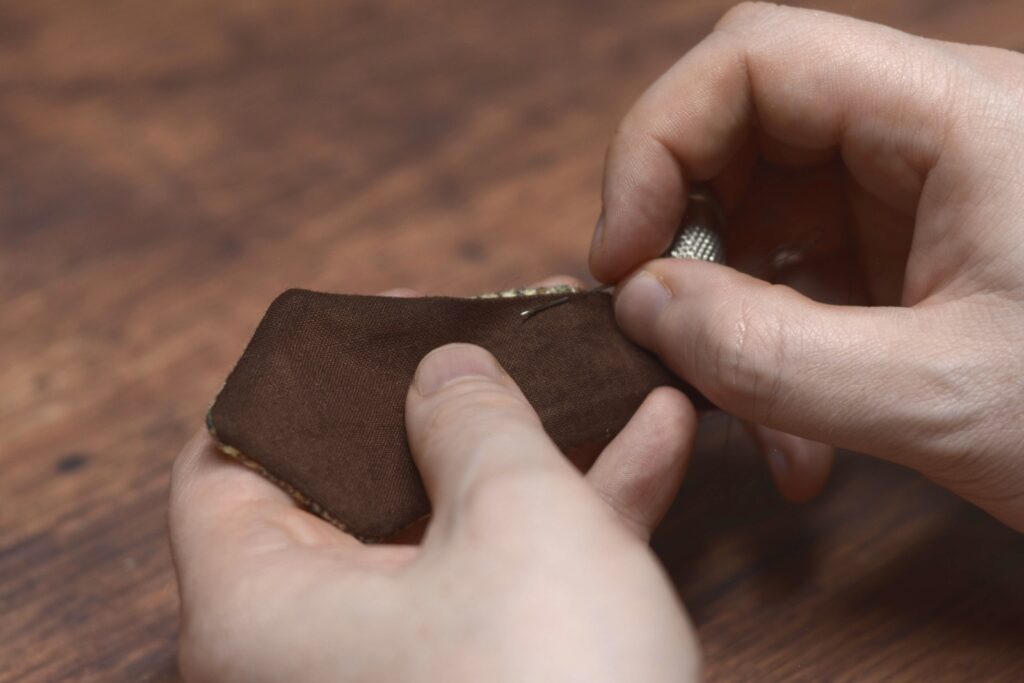
Next, choose one belt to hold the buckle, and fold it around the buckle, basting it by hand with a couple of stitches. Mine’s turned under about 3/4″. Sorry I somehow forgot to take photos here but I believe it’s all in the video.
Then, getting your presser foot as close as you can, sew along the edge of the buckle, then out and around forming somewhat of a box shape to keep everything nice and secure. It’s helpful to use a piping foot here on your sewing machine, but I simply allowed the regular foot to sit on top of the buckle and turning the machine by hand so as not to accidentally sew into the metal buckle.
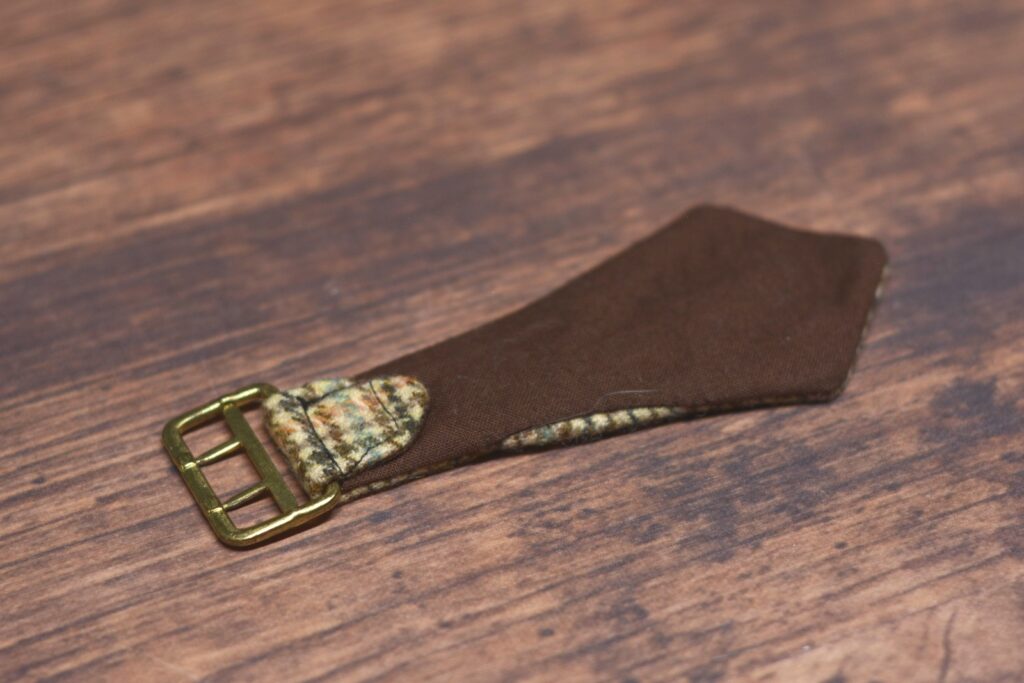
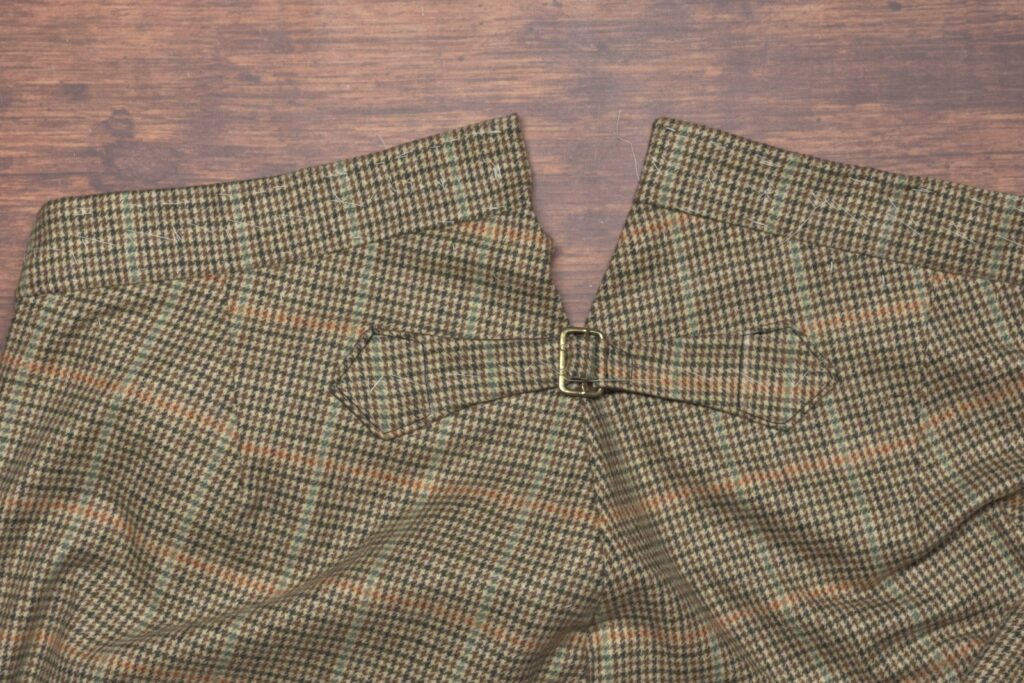
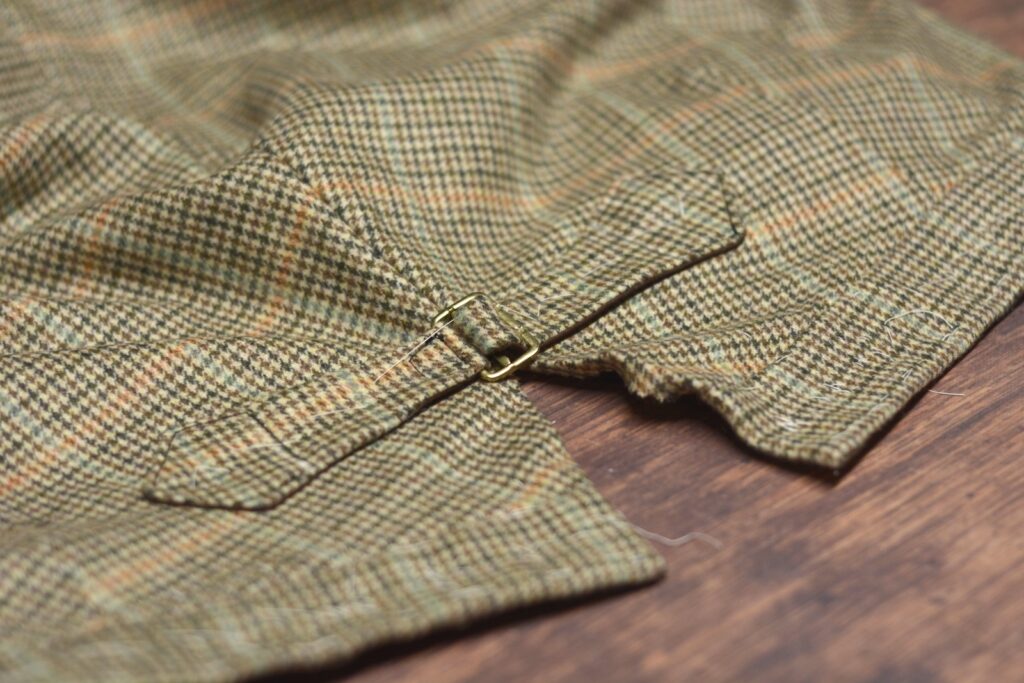
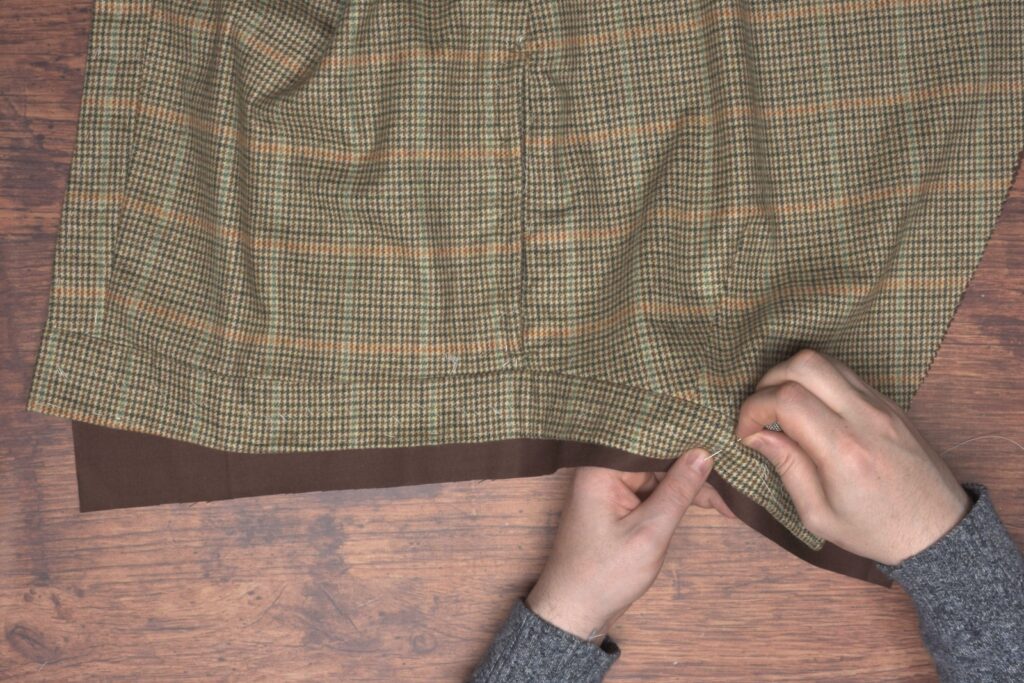
Next, buckle the belt securely, which makes laying the belt out on the trousers a little easier.
Lay the buckle on the trousers, the buckle centered over the split point in the seat seam.
Measure the distance from the top of the belt to the waistband on each side to ensure they’re at the same height.
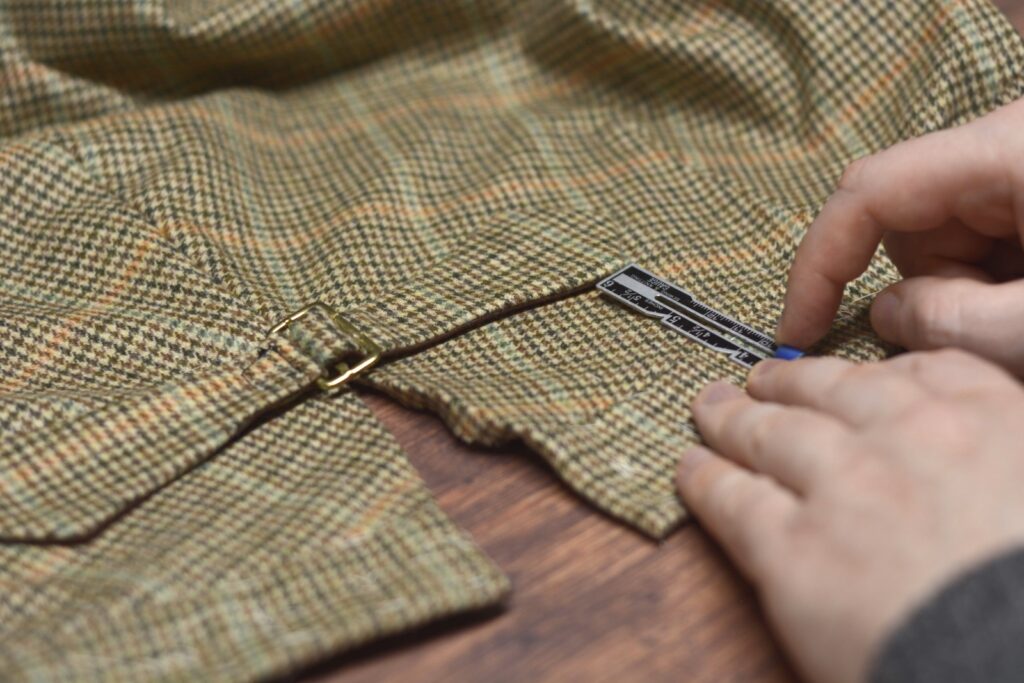
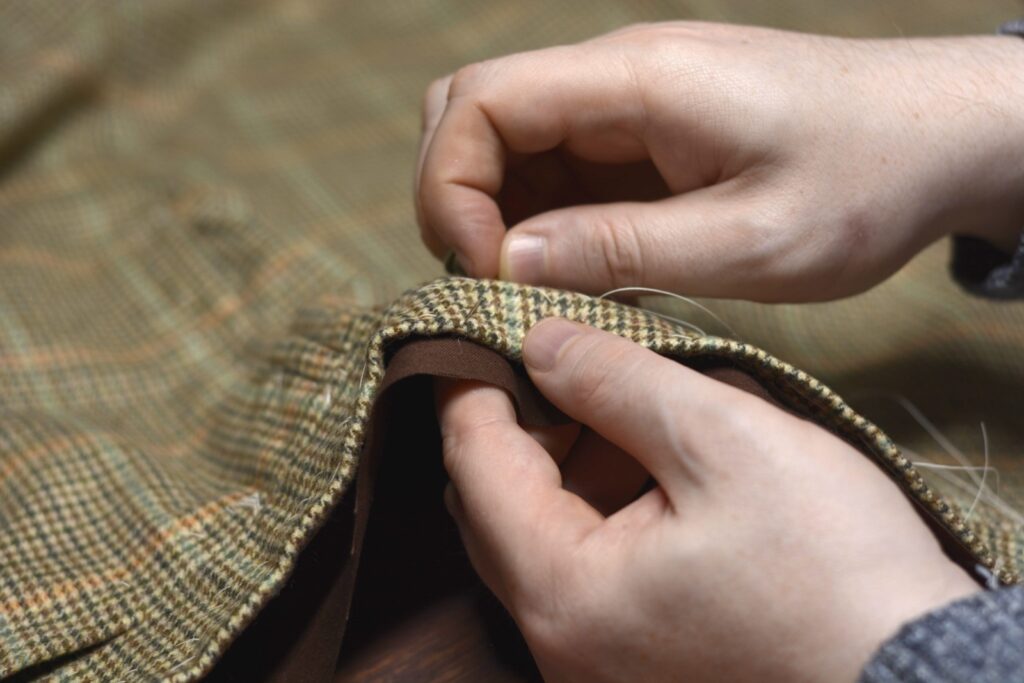
Baste across the belt from end to end, being sure it’s in the correct position after basting. It’s a good idea to double check your measurements, mine were off slightly so I ended up adjusting.
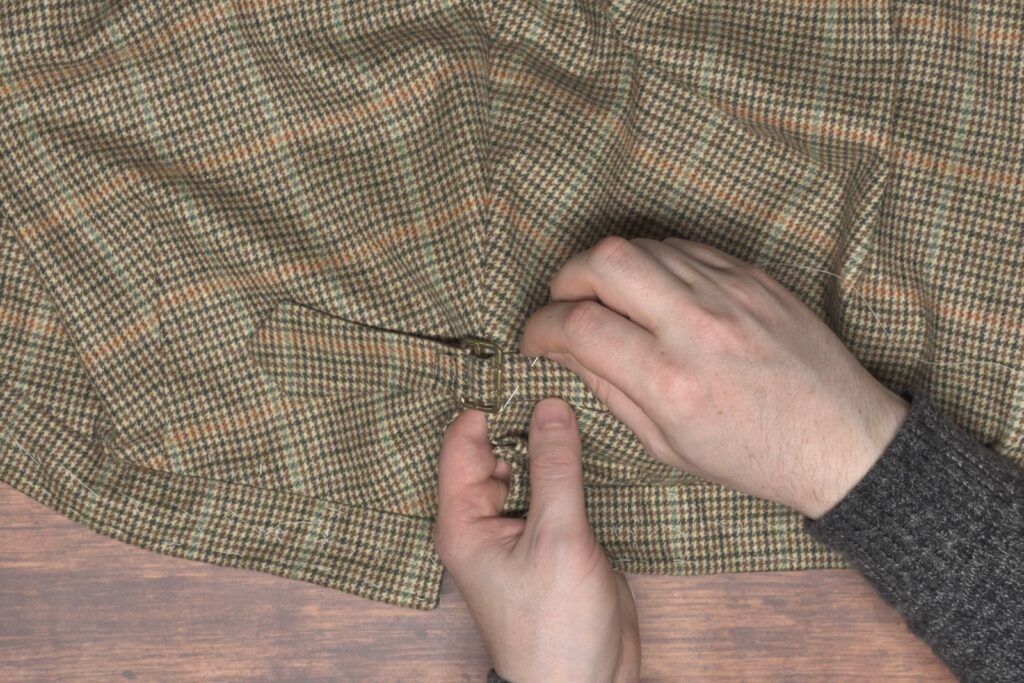
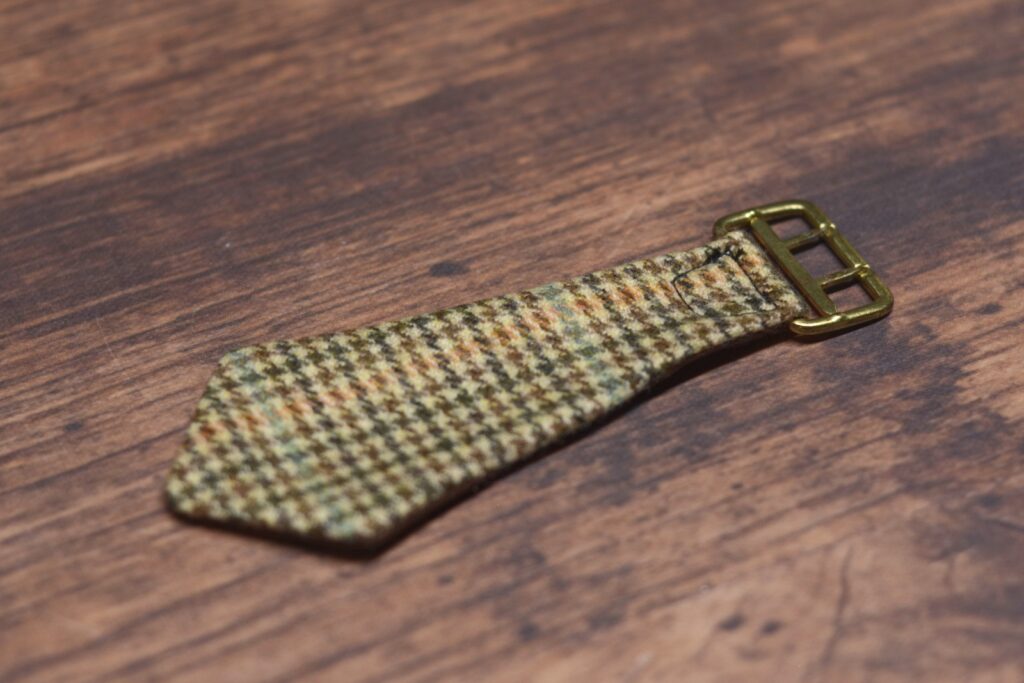
When you’re happy with the positioning, draw a vertical line across the buckle where you would like the top stitching to be.
Top stitch around the belt edge and across the belt at the mark through all layers of the seat.
Here’s my completed belt after top stitching.
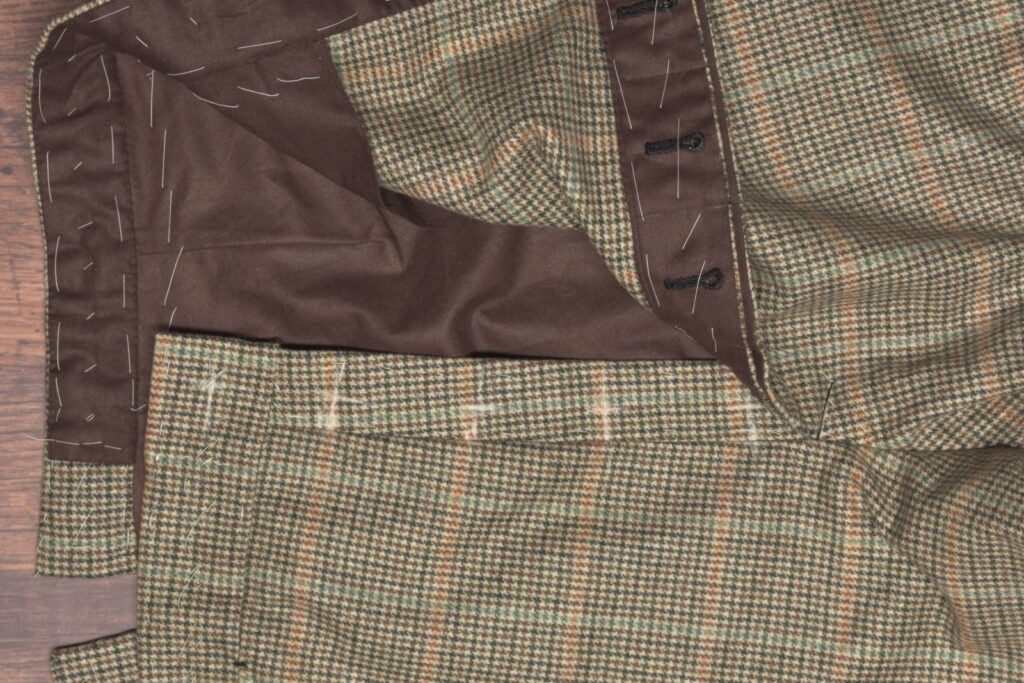
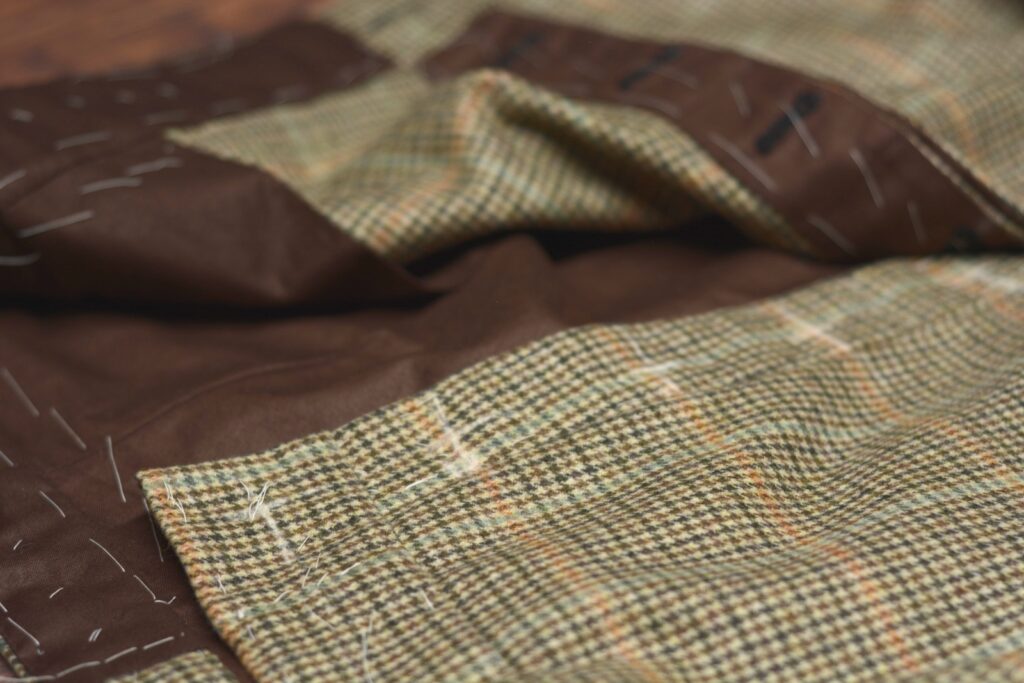
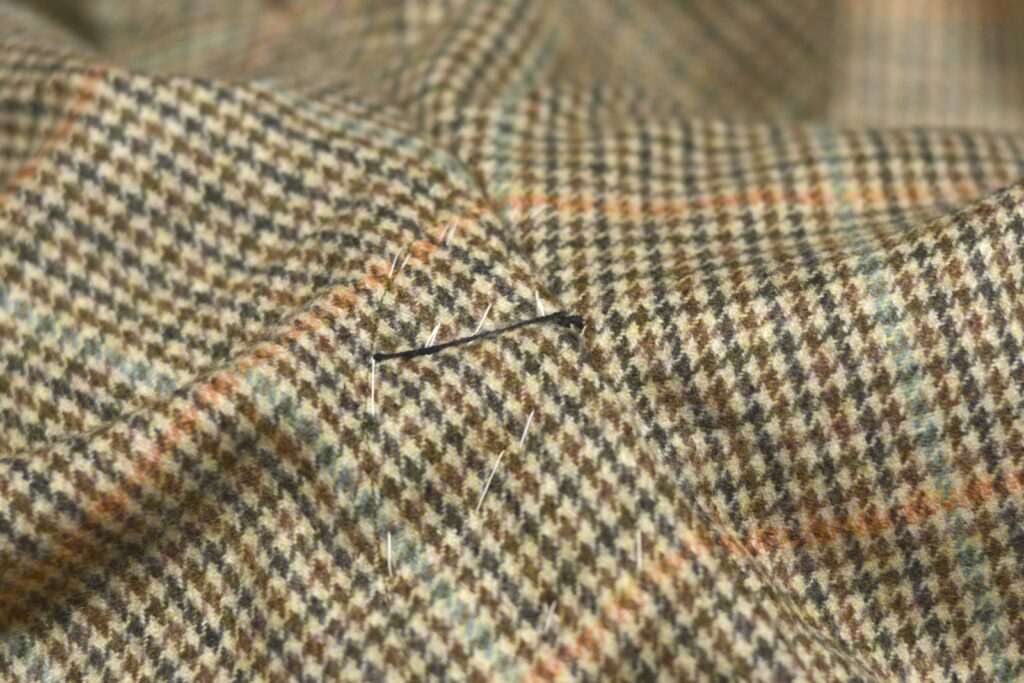
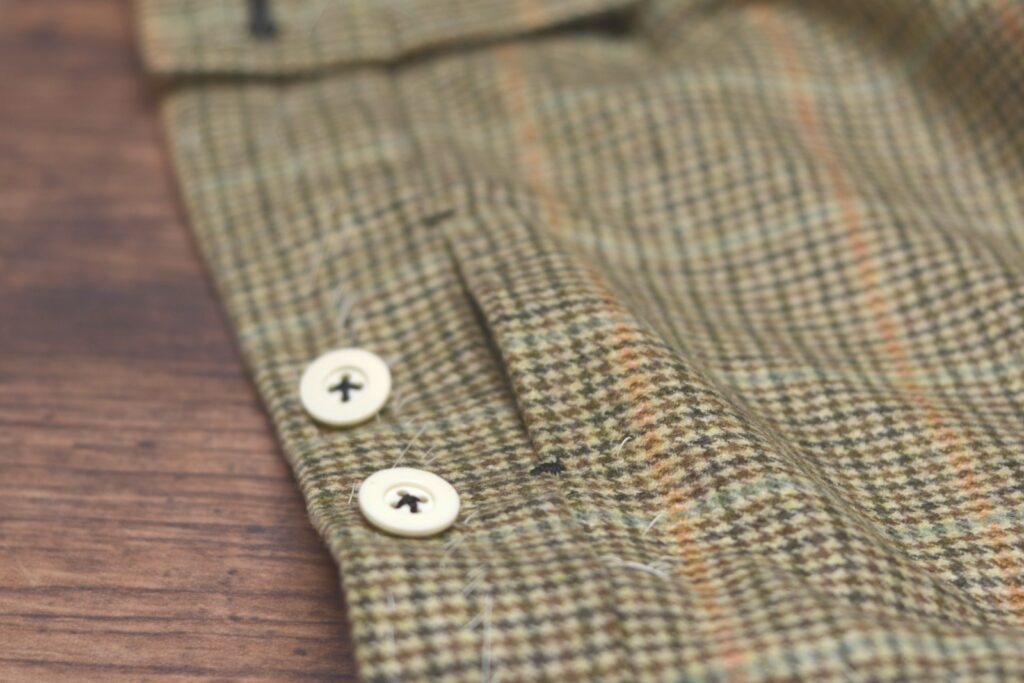
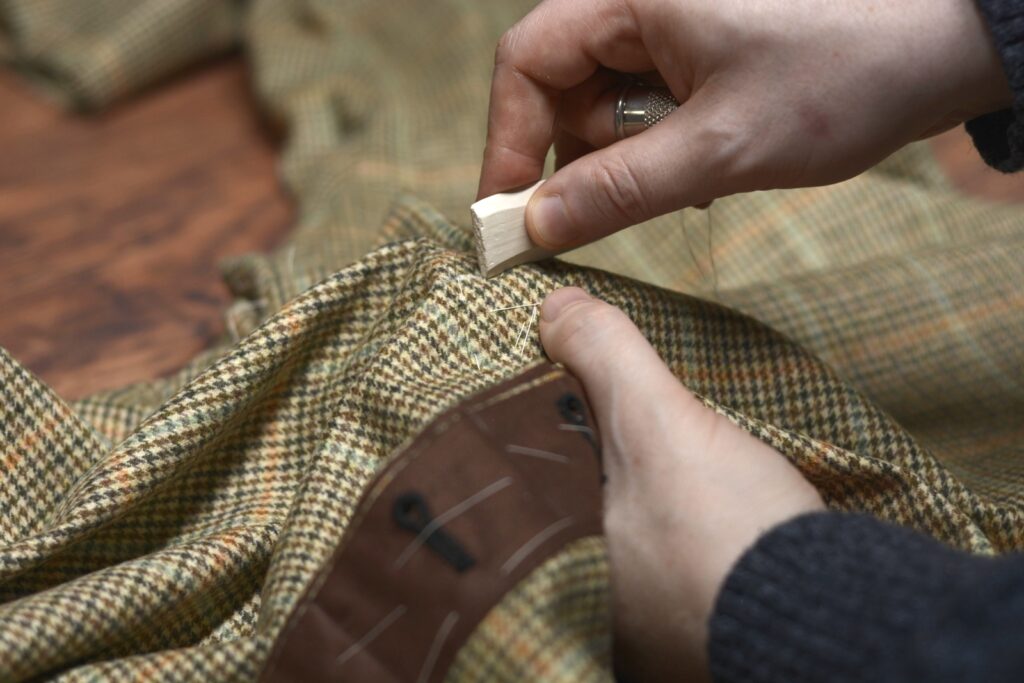
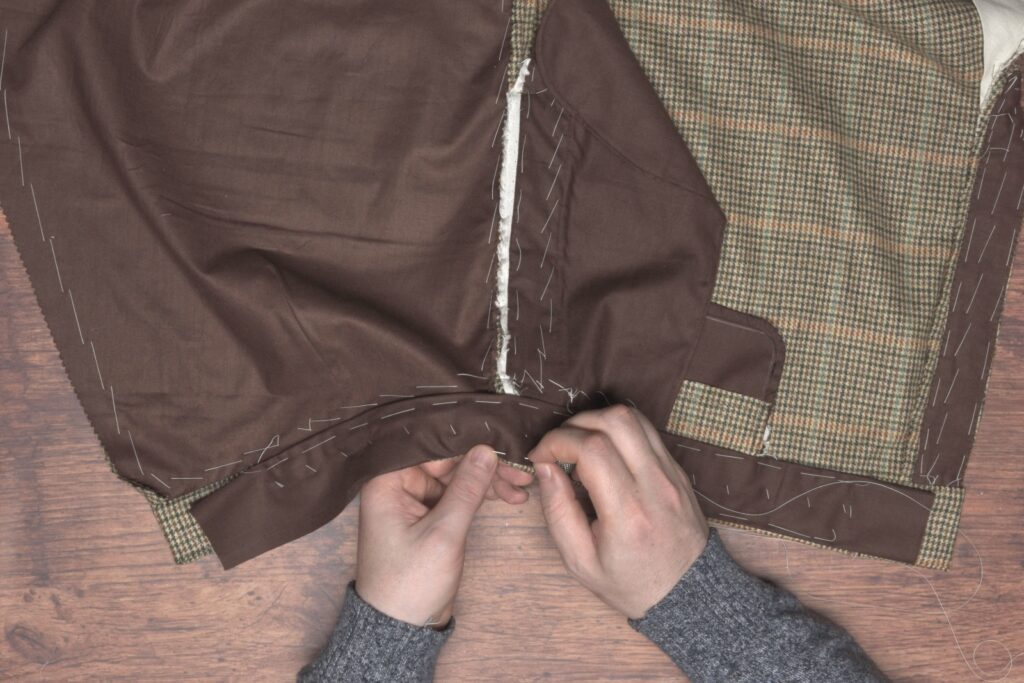
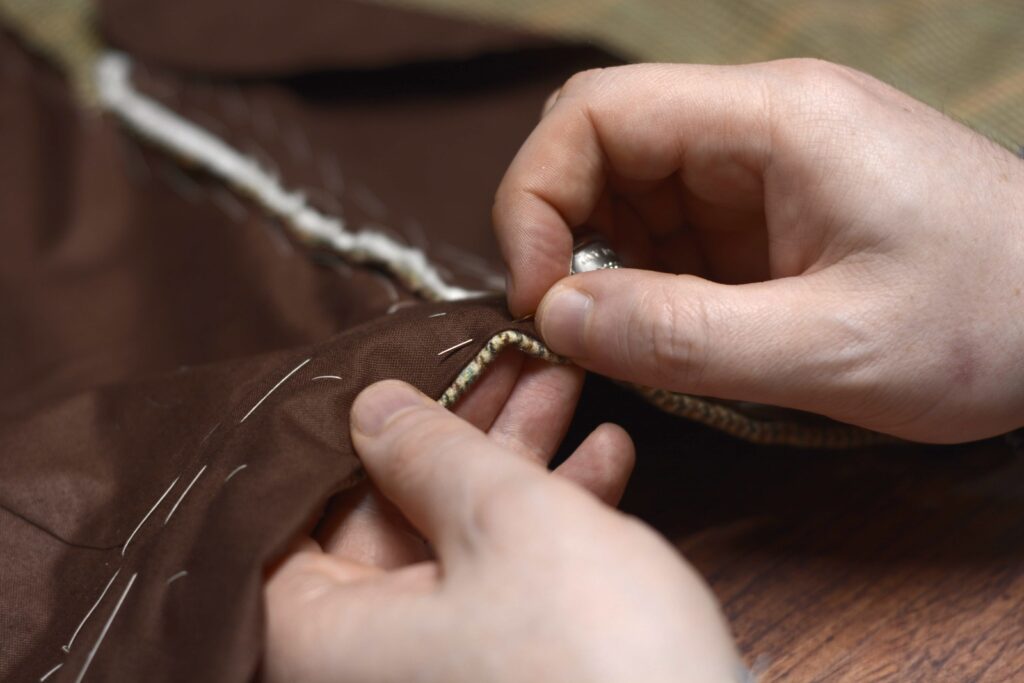
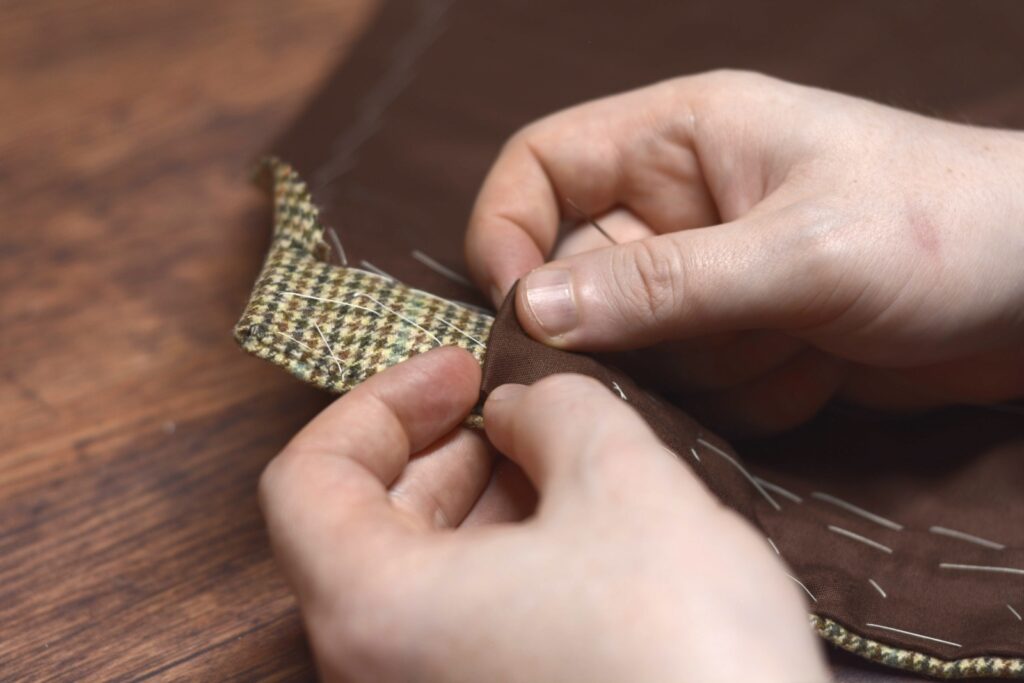
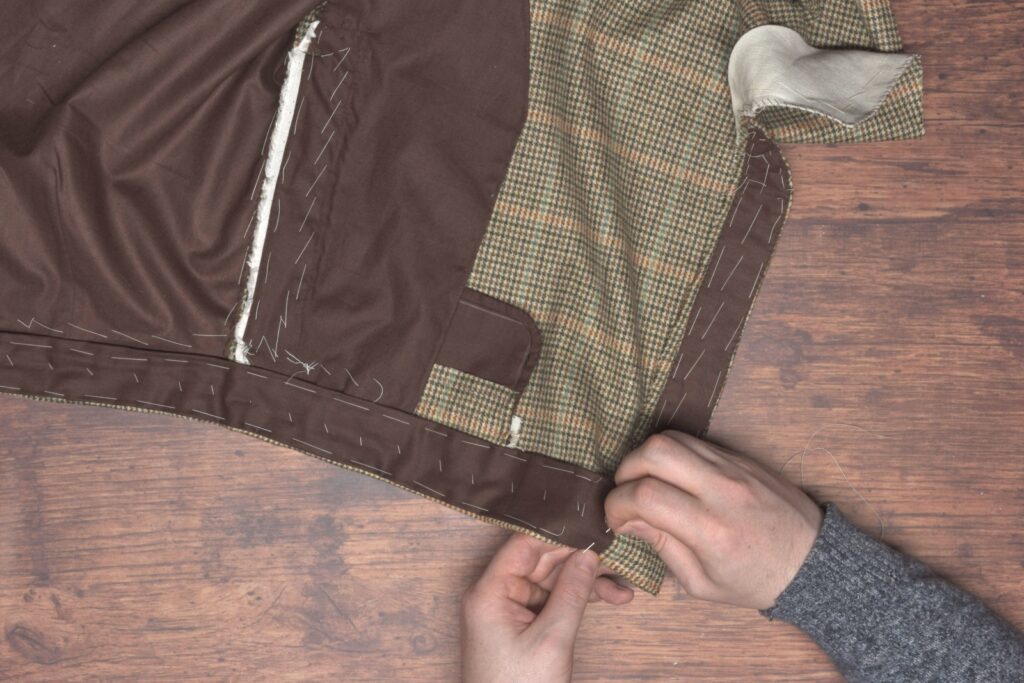
Tacking the Pockets
It’s a good idea to reinforce various stress points with bar tacks, especially if you have not done so on machine. I’ll be adding a bar tack to each side of my watch pocket, the back of the trousers at the split in the seat seam, and the bottom of the fly. You could also add one at the top and bottom of each side seam pocket.
Begin by knotting the silk buttonhole twist and passing it through from the wrong side through all layers.
Make a stitch about 1/4″ in length across the seam or area you are reinforcing, catching as many layers as you can. You could make it a prick stitch, passing the needle all the way through, in order to get through all of the layers.

I usually make a total of four stitches in place, but you could do more depending upon the thickness of your thread.

Now pass the needle crosswise between the stitches you just formed, catching some of the fabric underneath as well.
The number of these small stitches depends upon the length of your bar tack but eight seemed to work best in my case.
Pass the needle and thread to the wrong side and finish with a few back stitches in place. Here’s the completed bar tack, continue tacking the rest of the desired areas.
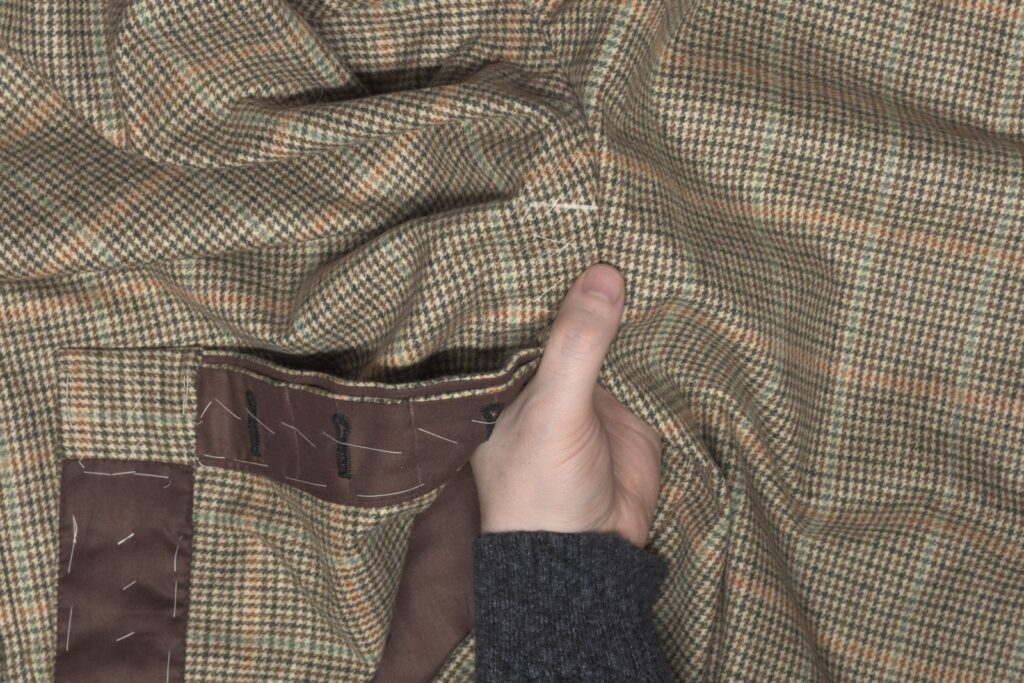
The bottom of the fly is tacked to give more strength to this very stressed area.
Here’s the watch pocket after tacking. You could do the side seam and open-top pockets in the same manner.
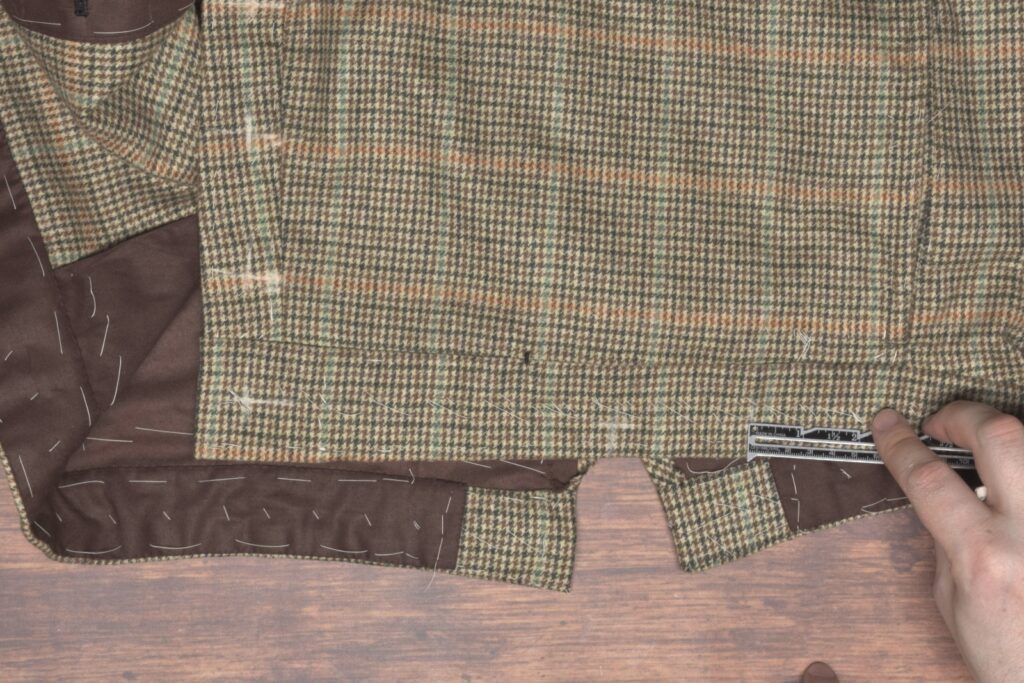
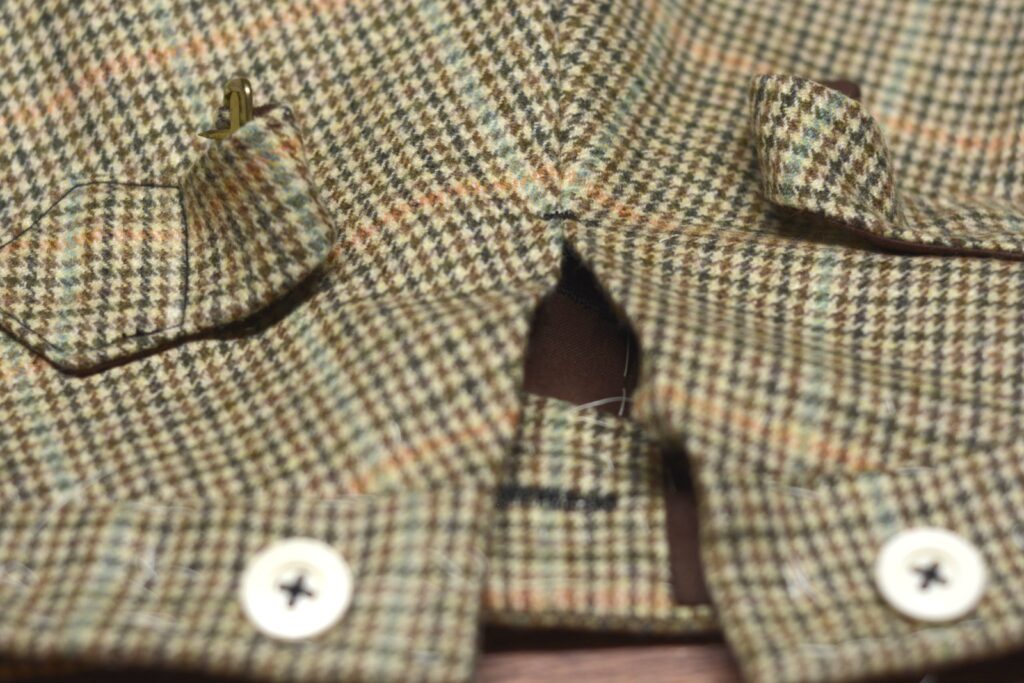
And finally but most importantly, tack the top of the seat seam just where the split begins.
Inseam and Seat Seam
At last we can begin to sew the inseams and seat seam, turning our work into something that actually looks like a pair of trousers. To begin work on the inseam, lay one leg in front of you, folded right sides together.
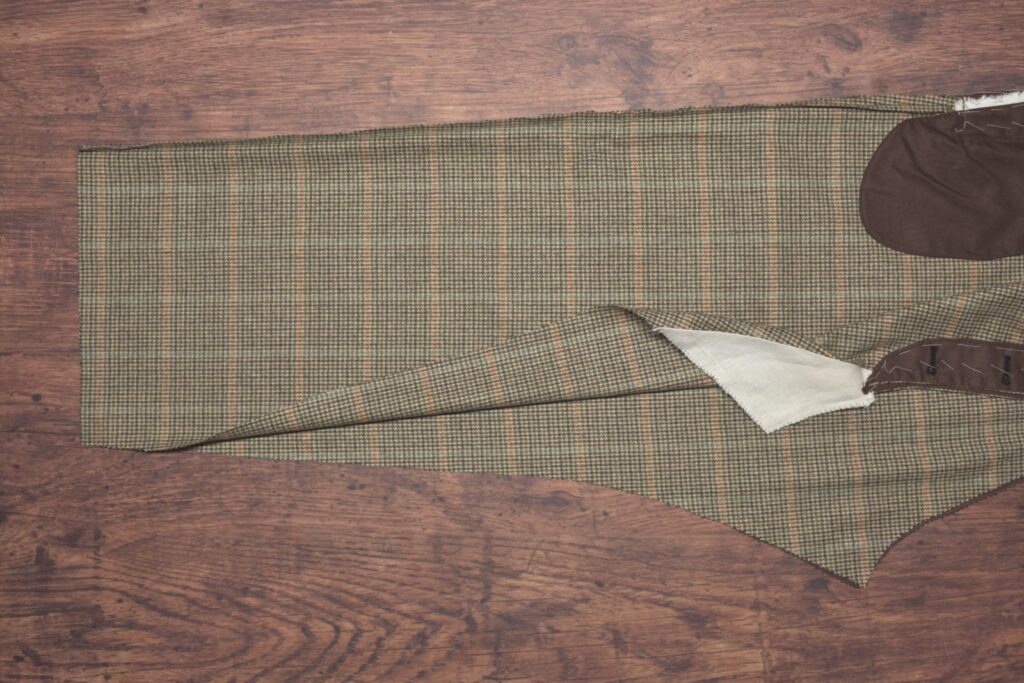
Pin the inseam together at the fork. There is a bit of excess fabric built into the pattern that needs to be fulled in here when basting.
Aligning the trousers at the hem, begin basting the inseam from the bottom towards the fork. Baste evenly until you get a couple of inches above the knees, or roughly two-thirds of the way to the fork.
You’ll notice now there is some extra fullness in the seat of the trousers that needs to be fulled in to the inseam. Continue basting towards the fork, carefully distributing the fullness as you go.
Here’s my inseam after basting. You can see the fullness that has been worked in. For that last little fold on the right side, I’d say that was a little too much fullness and to go back and baste that area again.
Place the trousers on the ironing board, back side up, and gently full or shrink out the extra fullness that was basted in using a bit of steam as necessary. As your pressing the iron in small circular or back and forth motions, the fabric will gently shrink away. Try to keep the iron within an inch or so from the edge to avoid shrinking more of the trousers than we want.
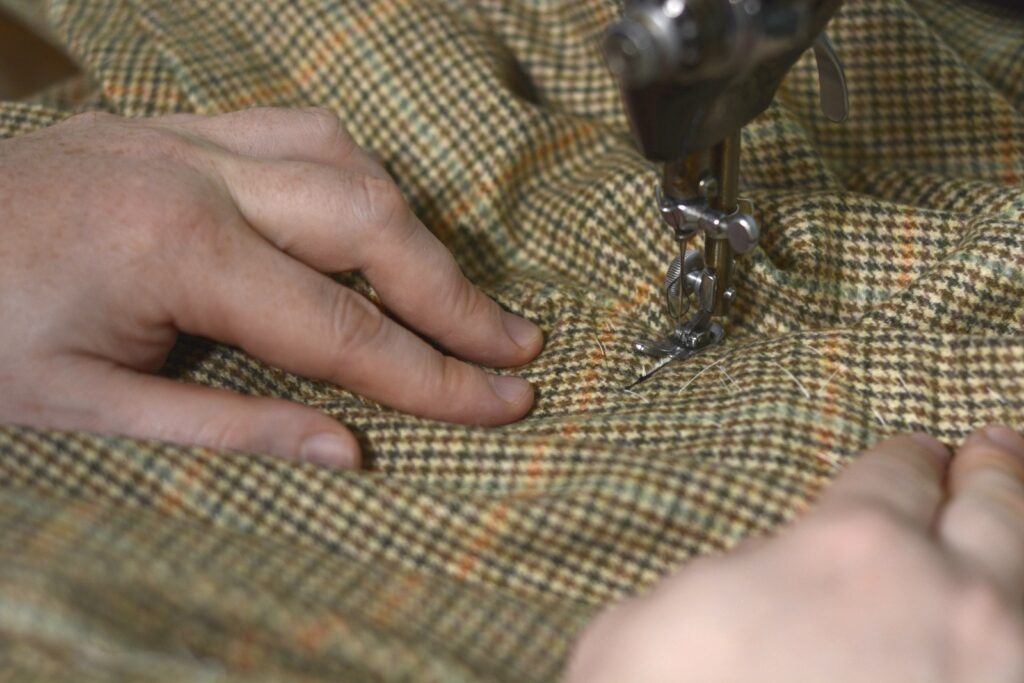
Sew the inseam by machine or using a back stitch (or back and fore stitch), keeping a 1/4″ seam allowance.
Remove the basting stitches and press open the seam from both sides, using a pressing roll as necessary.
The Seat Seam
Moving on to the seat seam, this step can be a little confusing – I almost always get it mixed up. Turn the left side of the trousers, with the buttonholes, right side out. Turn the right side of the trousers inside out.
Then insert the left leg into the right leg, so that they’re right sides together. Roughly align the seat seam at the fork / side seam as best you can. This makes sewing the seat seam a little easier than if we had done things the opposite way.
Line up the side seams at the fork for each half as closely as possible.
Now baste the seat seam together from the side seam to the bottom of the fly, or just beyond it for more stability. Be sure that the cut you made during the fly construction lines up with the bottom of the button catch. Smaller basting stitches are best to keep things from moving around.

The completed basting here stabilizes the seat seam so we can move on to basting the rest of the seam now.
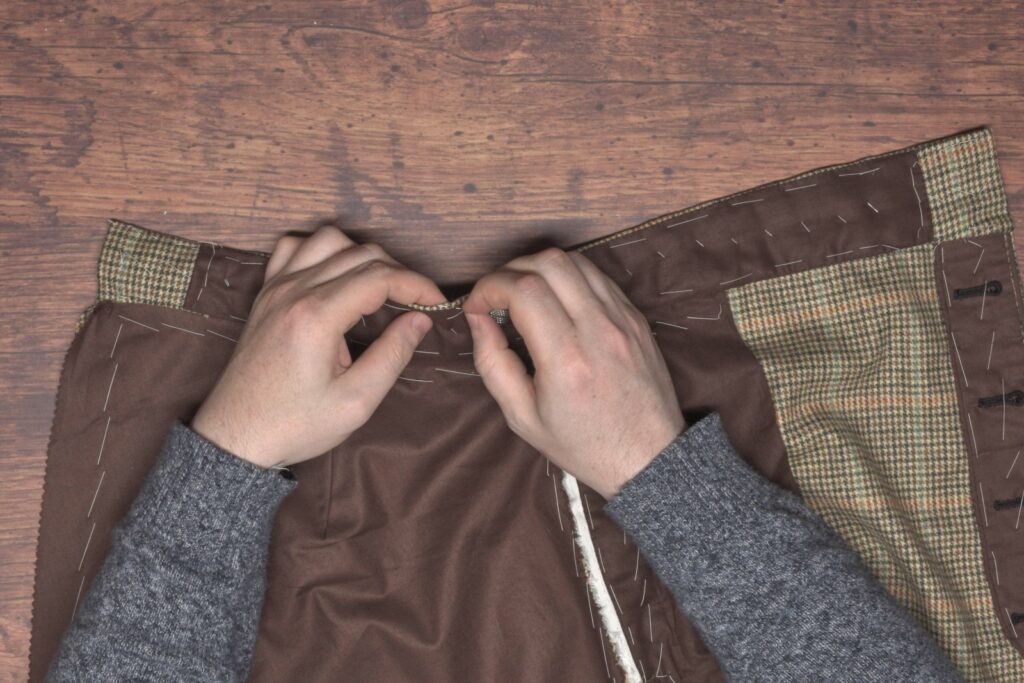
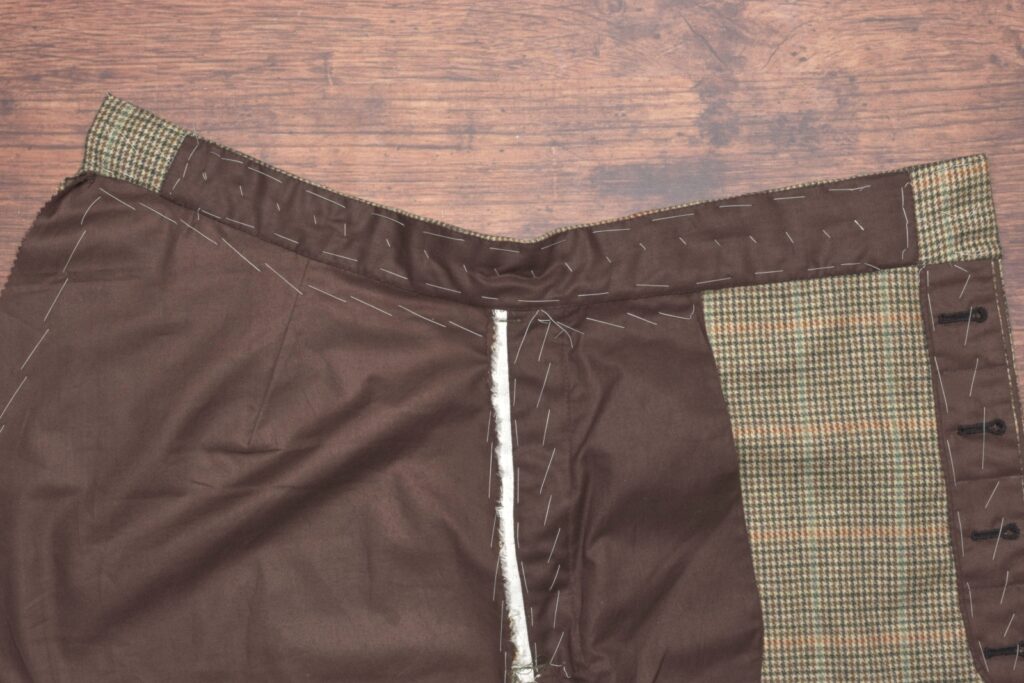
Aligning the backs of the waistband first, baste from just below the waistband to the fork at the side seams.
Make a mark on the inner side of the seat seam (I’m showing the mark on the outer side in the photo) about 2″ or 3″ below the waistband depending on your size and preferences, to denote the opening of the back.
This will indicate the upper end of the stitching.
Sew the seat seam starting at the bottom of the fly through to the mark you just made. Sewing the area near the fly can be tricky due to all of the layers. Try to carefully manipulate and fold the fly out of the way to get as close as you can with your stitching to the bottom of the fly.
Then repeat the process and sew a second line of stitching almost directly on top of the first line. This will greatly strengthen the seat seam and help keep the seam from splitting open.
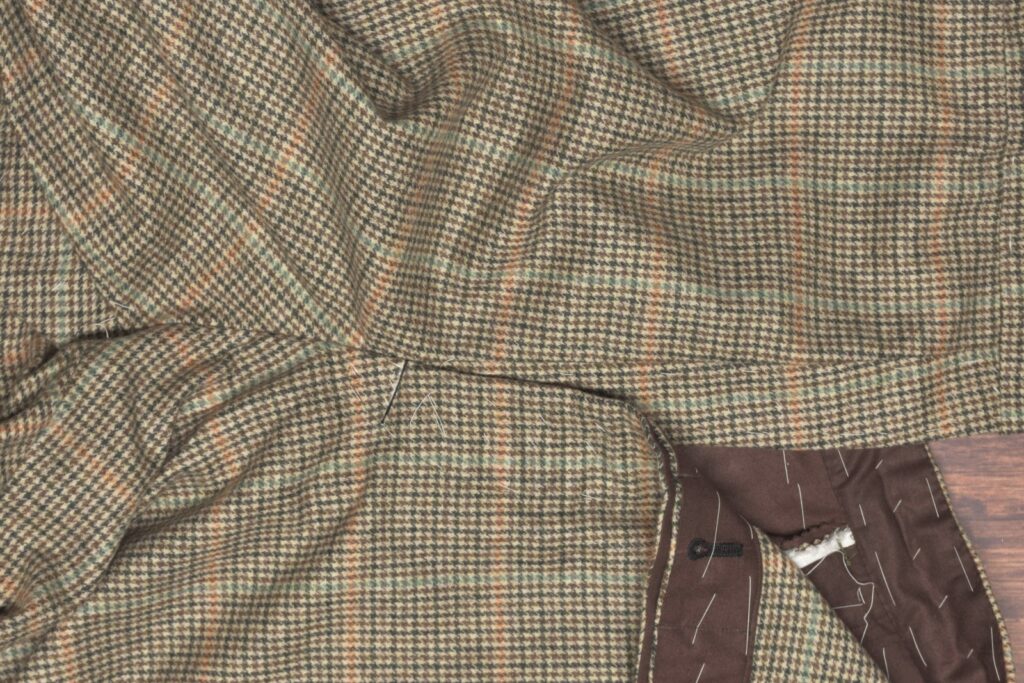
You can see how close I got to the fly seam here, it’s maybe 3/16″ off. If you can get closer that’s great but not strictly necessary as the fly will be secured further in a bit.
Here’s the same area from the other side. I realized I caught part of the seam allowance in the seam, but chose to leave it, as it’ll be pressed over in that direction anyway.
Here’s a section of the seat seam towards the back, you can just make out the two rows of stitching.
Finally, press the seat seam open from the wrong side, followed by the right side as usual. It’s somewhat difficult to get to all of the angles, so I use a tailor’s ham placed inside the seam and manipulate the fabric as necessary.
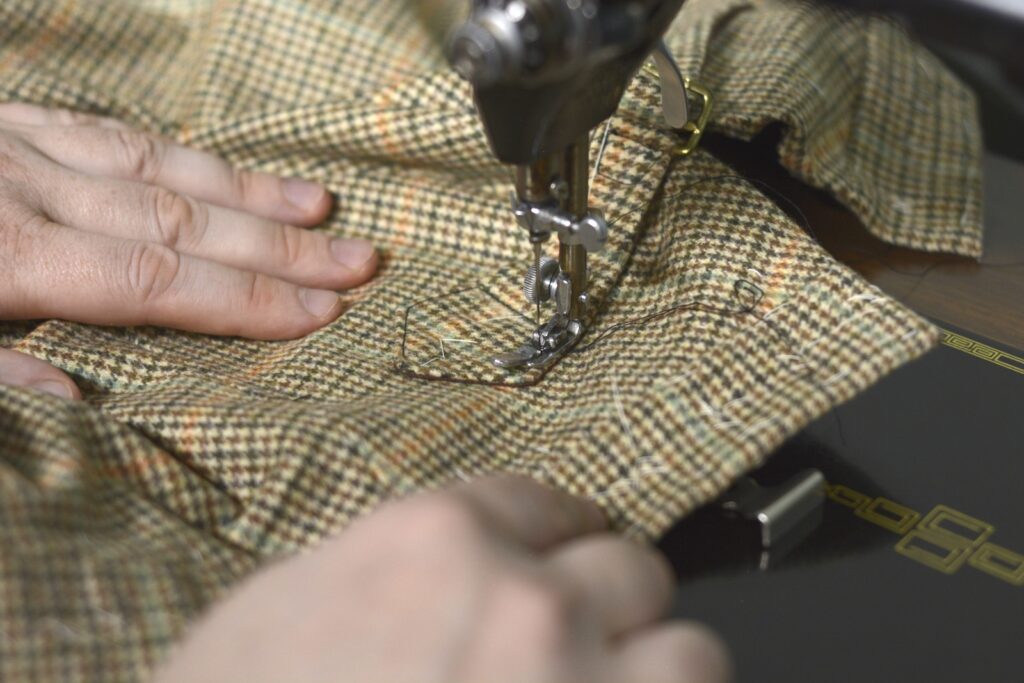
Topstitching the Fly
One last bit to do that I consider as part of the seat seam is to secure and top stitch the fly to the button catch, further strengthening the area and preventing the fork from tearing open. Lay the trousers right sides up, the fly facing you.
It’s hard to photograph, but align the fly carefully along the bottom, and baste securely through all layers. In the photo, I’ve got my left hand grasping the fly from underneath the fabric.
The fly after basting the lower area.
Now draw a small line across the fly, at least 1″ below the lowest buttonhole, to indicate the stitch line. This should be perpendicular to the edge of the fly, not necessarily parallel to the floor.
Sew across the width of the fly through all layers, being careful to not catch any other parts of the trouser underneath, such as the back side or the pockets. That’s happened to me all too often and it’s a pain to undo!
As there are many layers in this area, be sure to use a sturdy enough needle, at least a size 100. Even with that you may break a needle here depending on the fabric you’re using. Luckily this was a fairly light weight fabric and I was able to sew without incident.
I usually make two or even three passes over the seam for extra strength. You could also back stitch or side stitch this area if you feel up to it.
And the completed fly after top stitching.
Waistband Lining
It’s time to complete the waistband with a polished-cotton lining. Begin by laying your trouser half and lining out, right sides down.
Lay the lining on the waistband, right sides together, aligning one end so that it overlaps the waistband facing by about an inch.
Holding the lining in rough position with one hand, flip the entire assembly over so that the lining is underneath. Begin basting at one end towards the other, keeping about 1 inch away from either waistband facing.
As you baste, allow the fabric to curve over your hand. This mimics the waistband curving over your waist, allowing the outside of the waistband to be slightly longer than the lining, helping to avoid any excess fabric in the lining.
Here’s the facing basted in place.
Flipping back over to the inside of the trousers, trim away the excess lining from the opposite end so that it extends about 1″ beyond the facing below.

Now begin folding under the lower edge of the lining so that it’s even with the waistband stitch line, or just slightly below it.
Baste this lower edge in place from end to end, keeping about 1″ from either end.

Repeat with the upper edge of the facing as well.
The results so far. Now to finish up the raw ends.

Fold under the raw ends, aligning them as you prefer in relation to the facing underneath.
Baste securely.
Here’s the lining after completing the basting process. Now you can work on the felling without worrying about things slipping out of place.
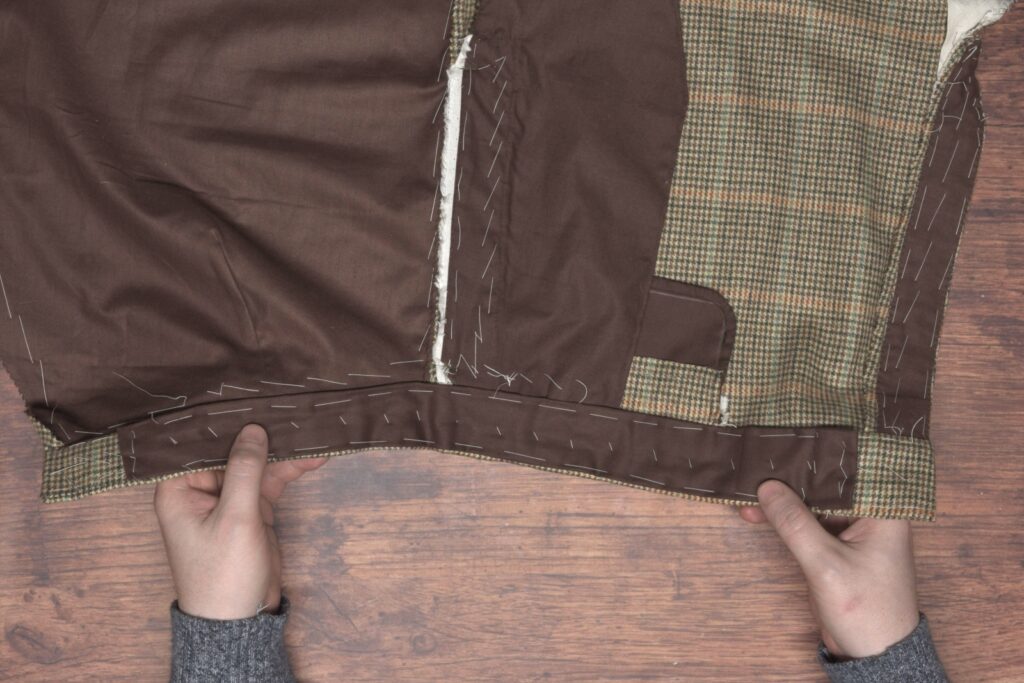
Fell along the entire lining using a small 1/8″ – 3/16″ stitch.
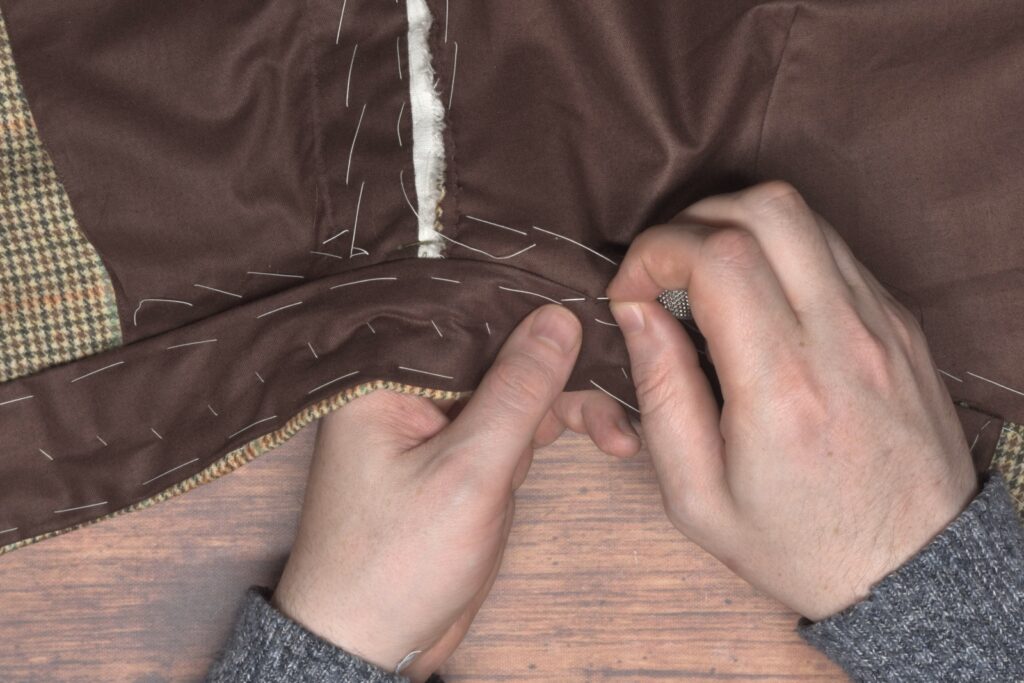
One thing to note that’s not pictured here (I think it’s in the video), is be sure to not sew closed your watch pocket while felling the lining. I like to keep a couple of fingers in the pocket as I work to ensure that this does not happen.
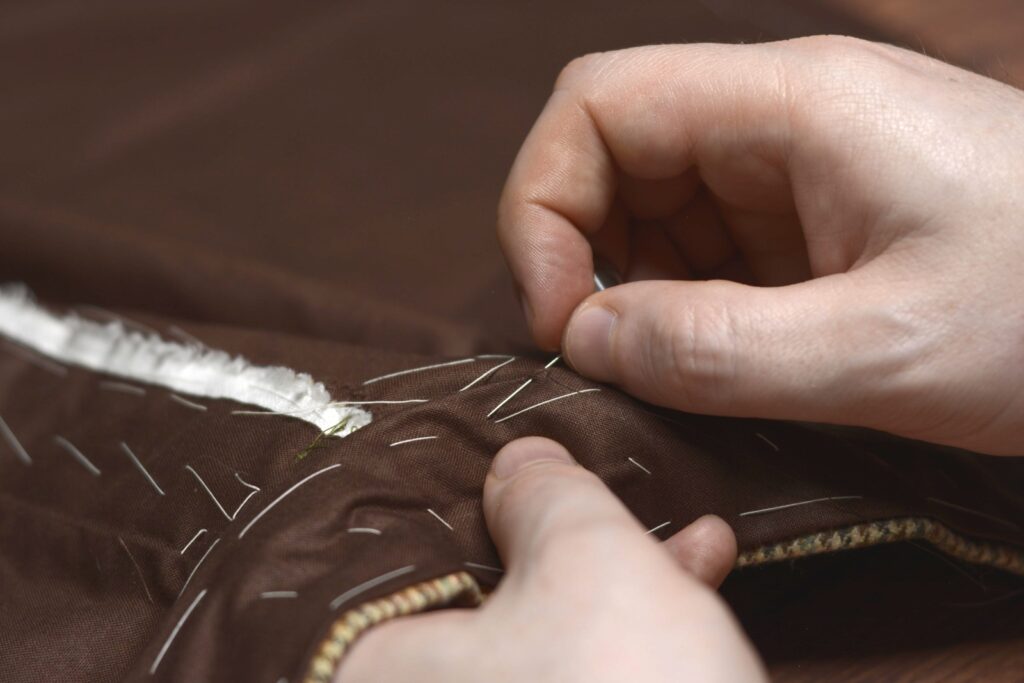
Continue around the ends.
And along the top edge as well.
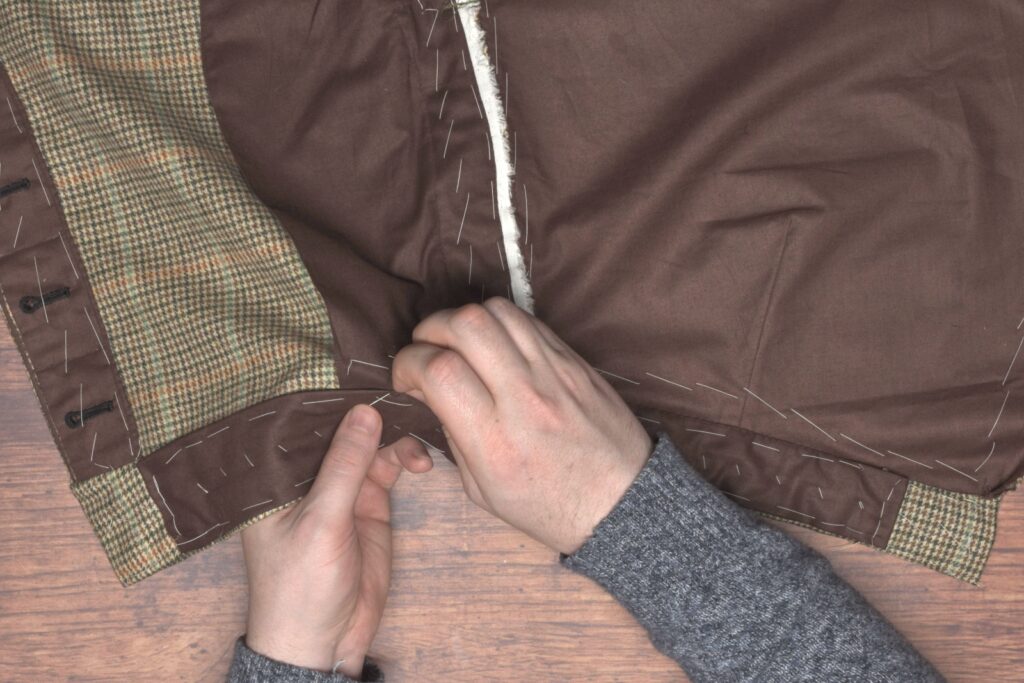
This completes the lining and waistband installation.
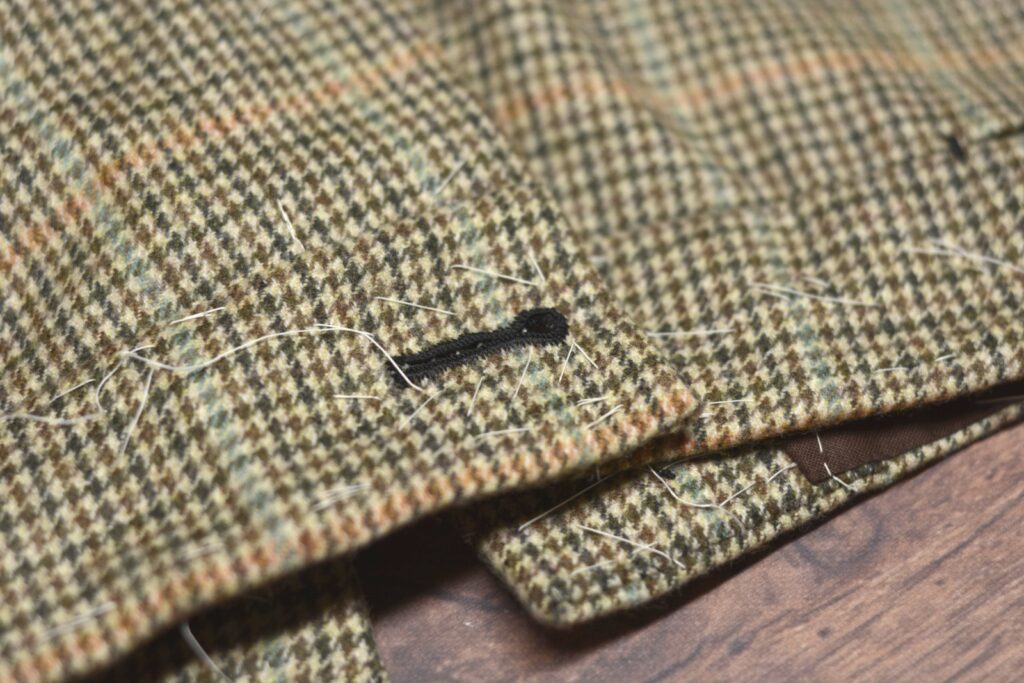
Waistband Buttonhole
One last thing to do for the waistband is to add a buttonhole similar in size and position directly above the buttonholes on the fly. Be sure to work it from the outside of the trousers, so that the nice edge of the buttonhole is what is seen from the outside.
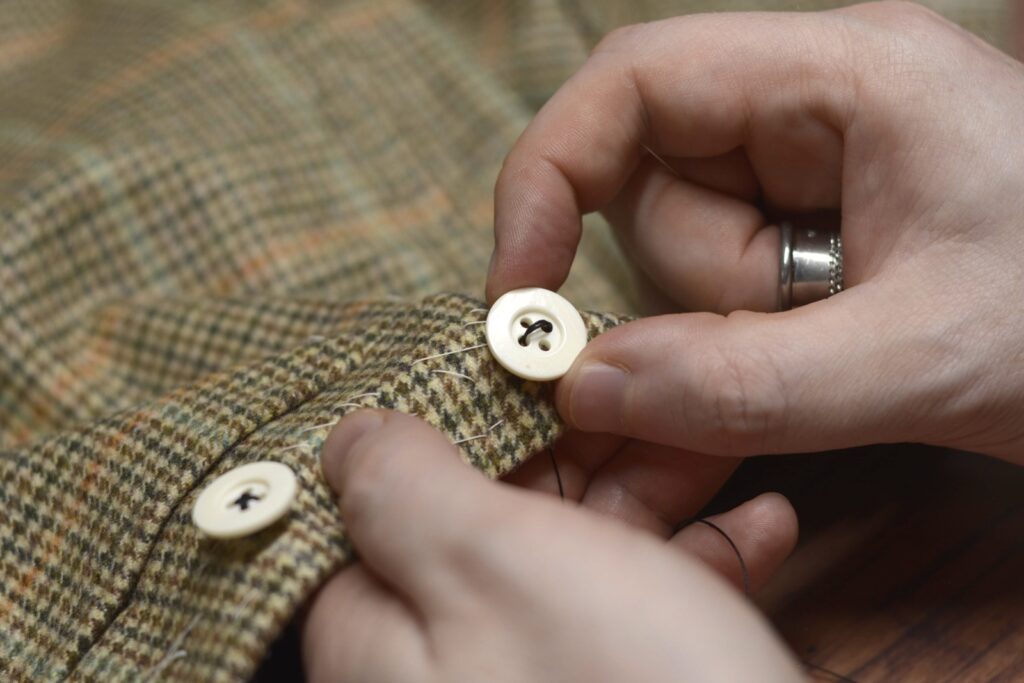
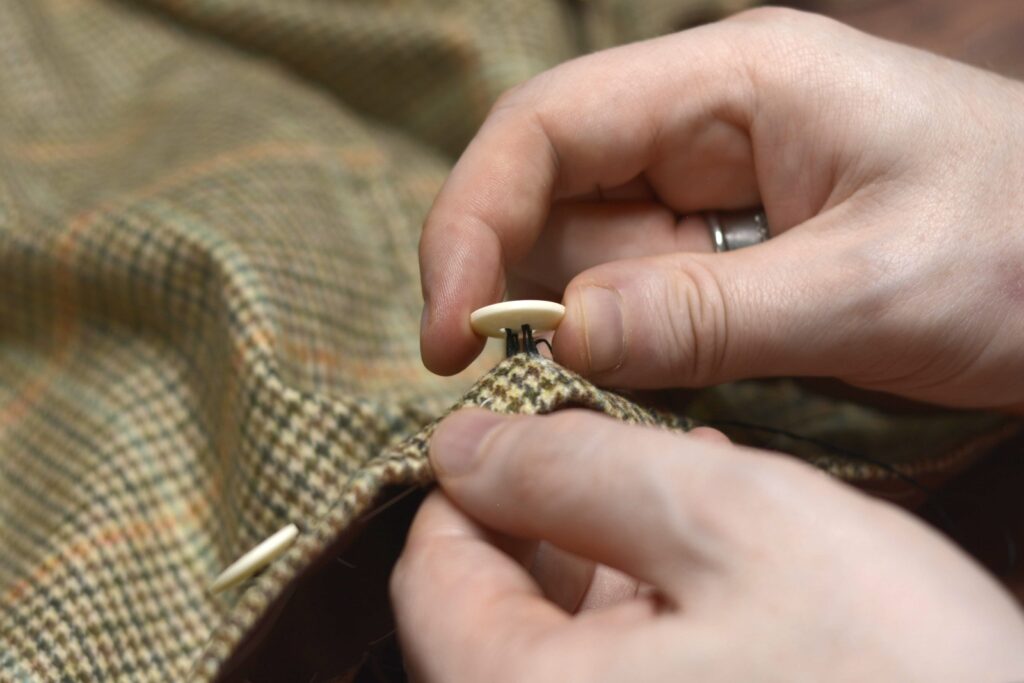
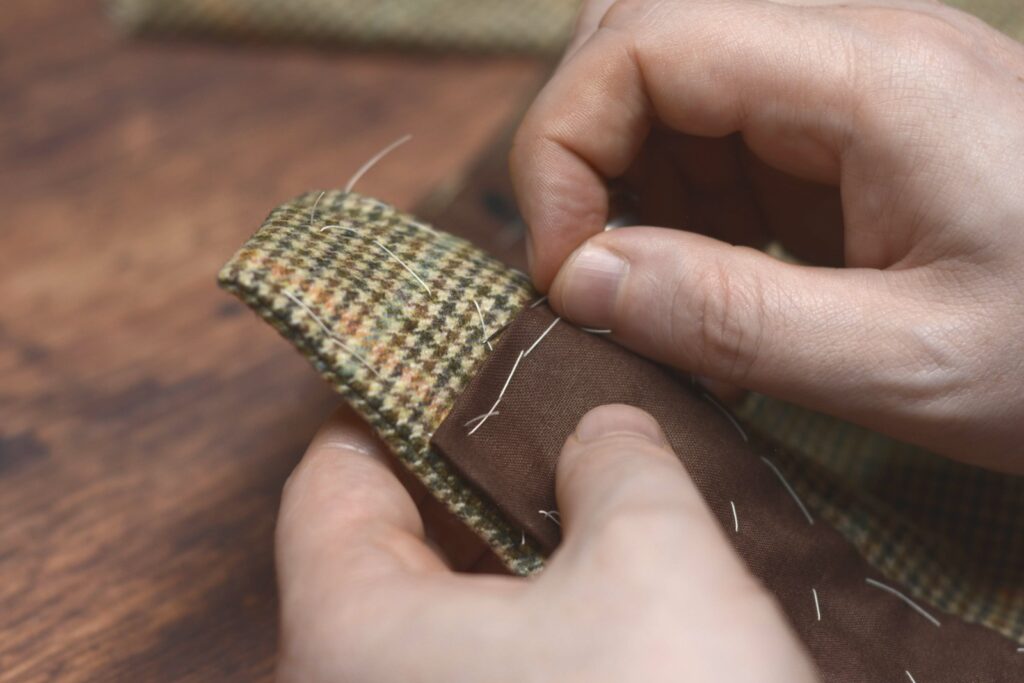
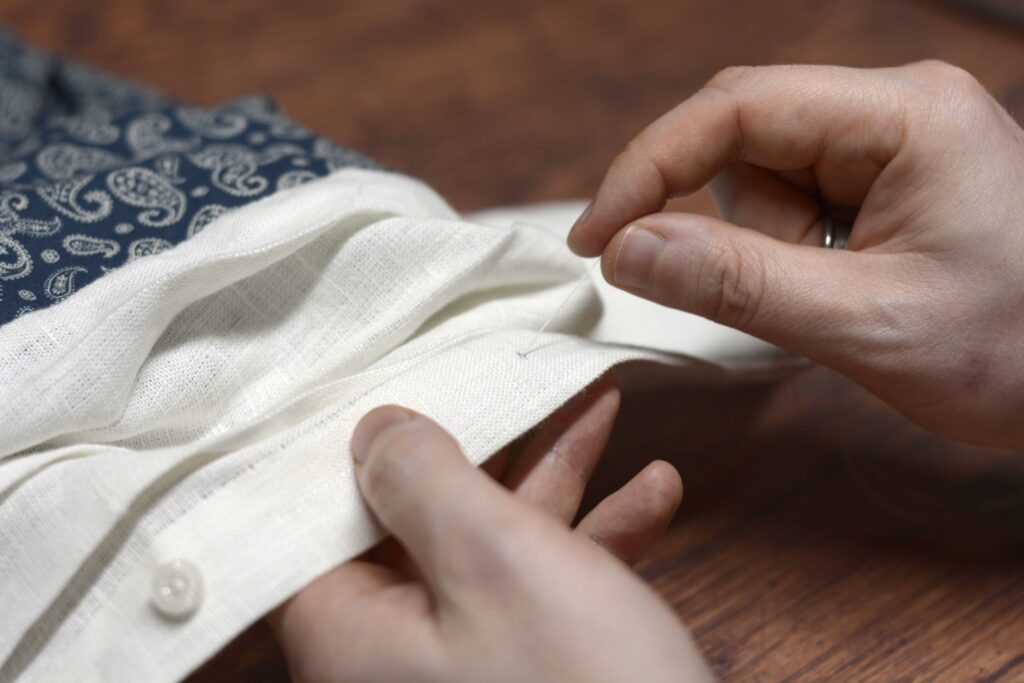
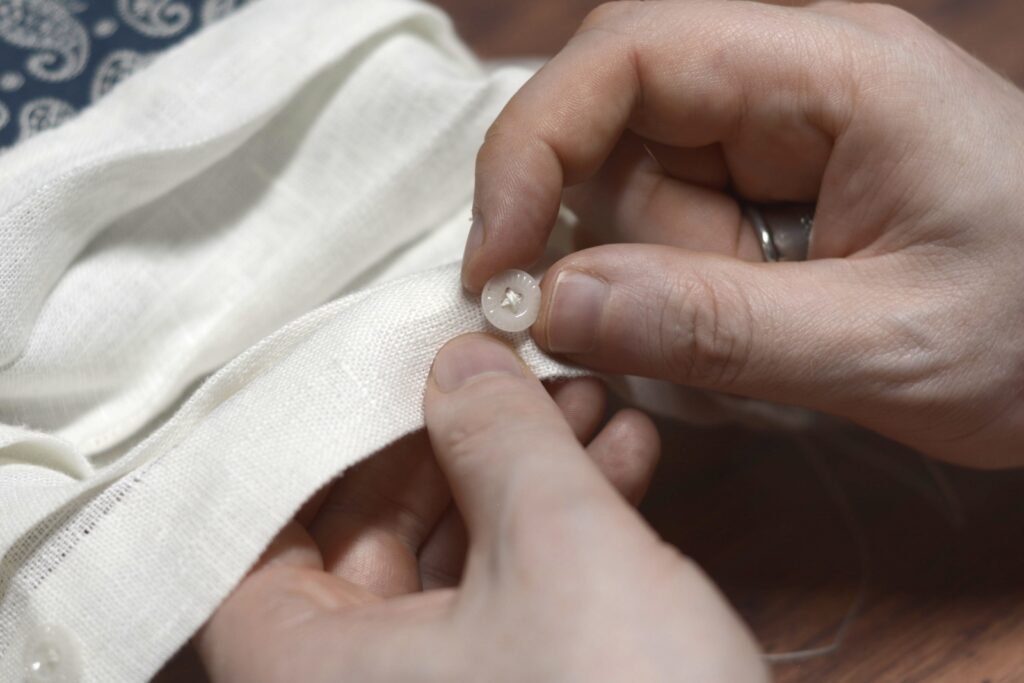
Buttons
All that’s left to do is attach the buttons. I prefer to use a silk buttonhole twist here for its durability, but you could use a linen or other such thread, perhaps taking more passes through the button. Transfer the buttonhole positions to the other sides of the placket opening and cuffs.
Begin by passing a knotted thread from the wrong side through all layers.
Pass the thread through opposite holes of the button.
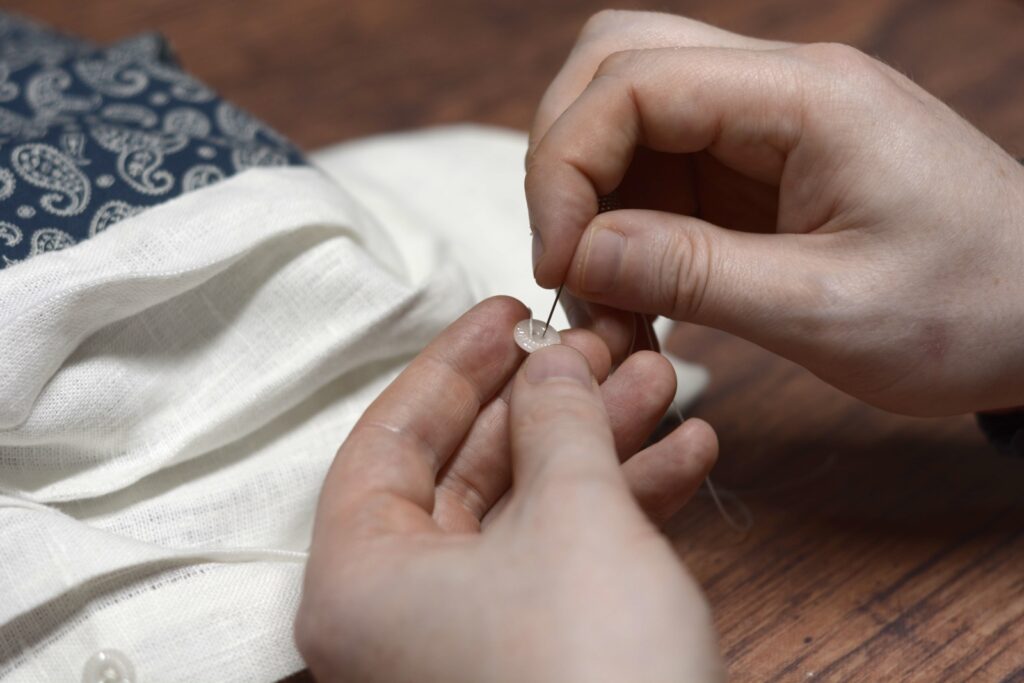
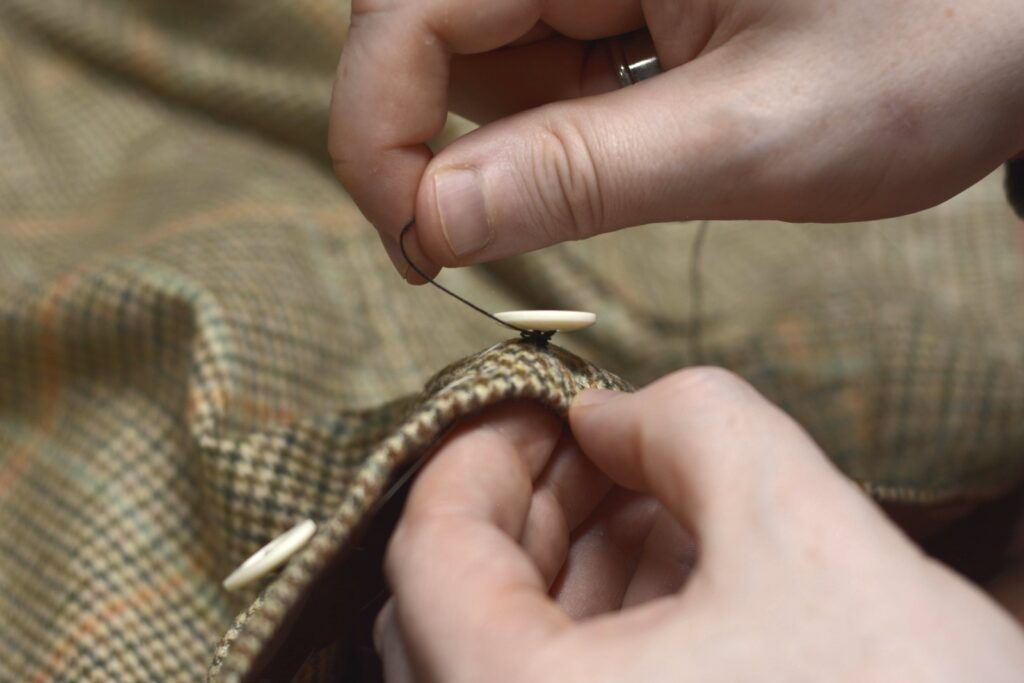
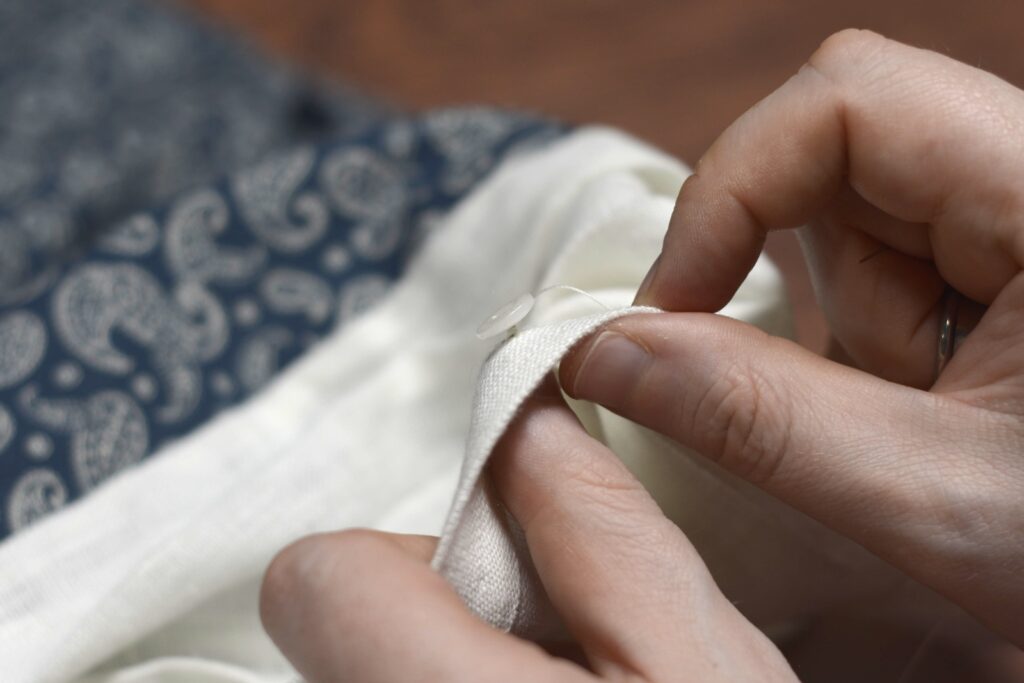
And pass the needle and thread back through the fabric for your first stitch. Keep the buttonhole rather loose at this point.
Make a second stitch through the buttonhole. At this point, you can adjust the final height of the button from the fabric. I like to make mine just a little taller than the width of the fabric the button will be passing through. The two stitches give just the right amount of tension to adjust this height.
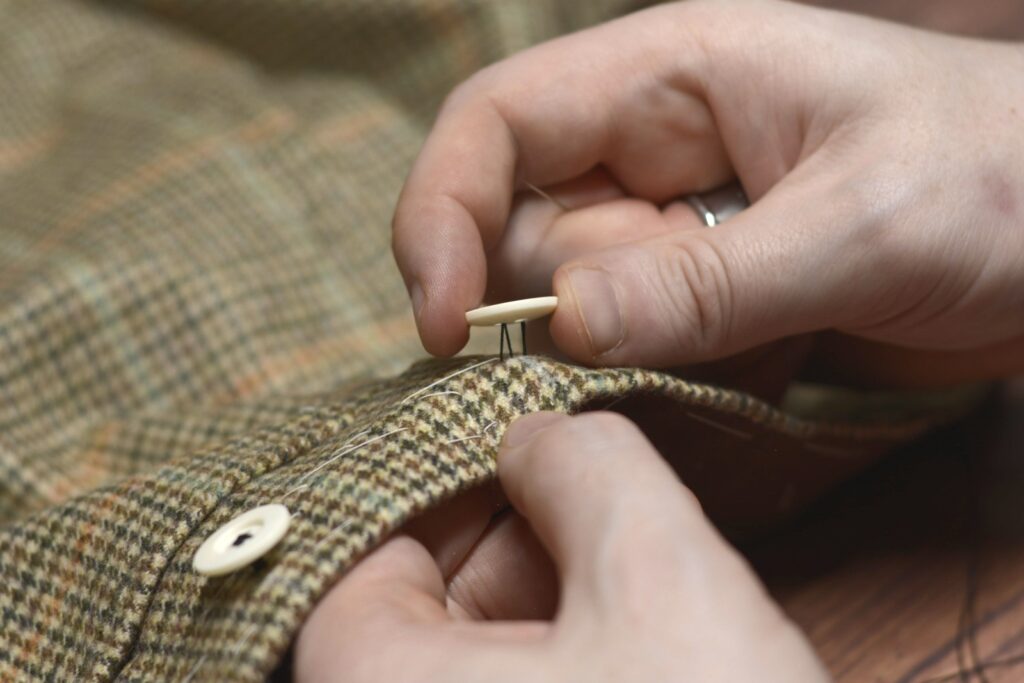
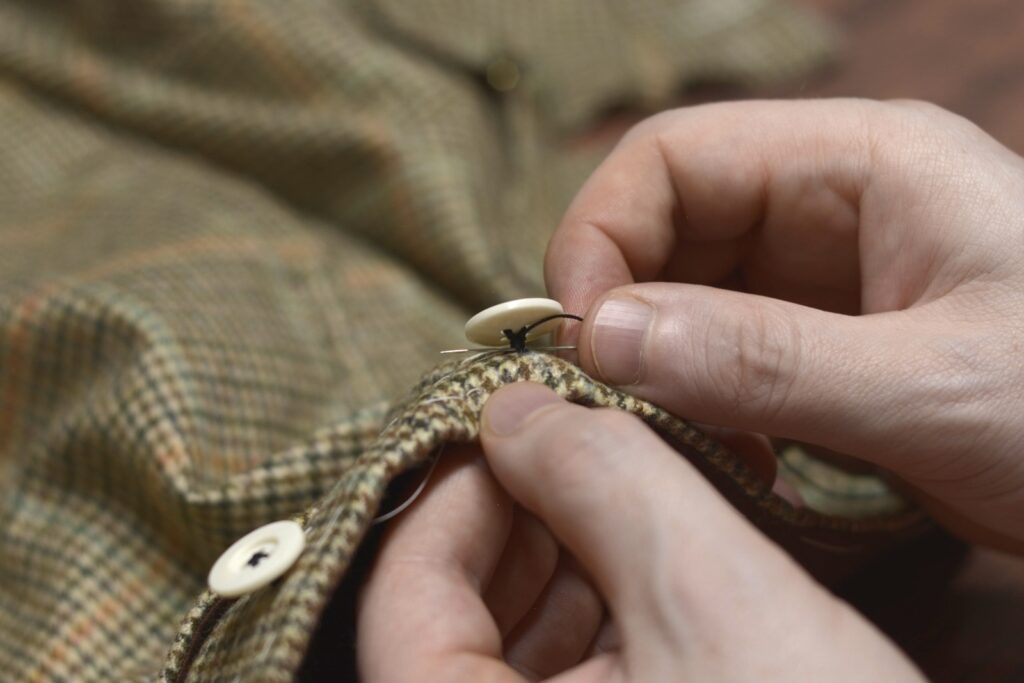
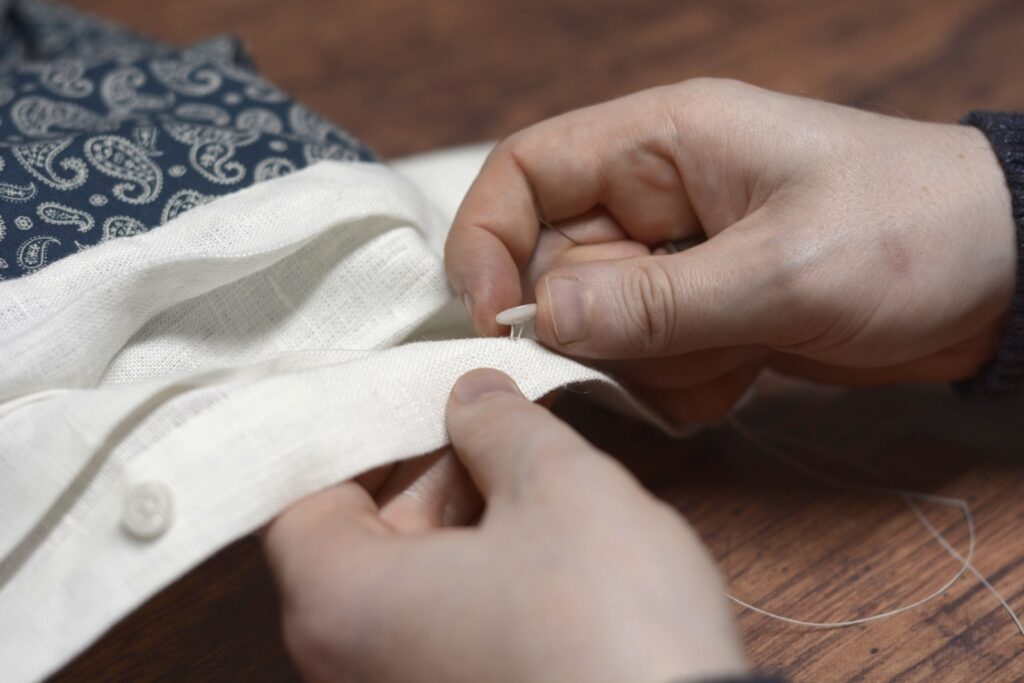
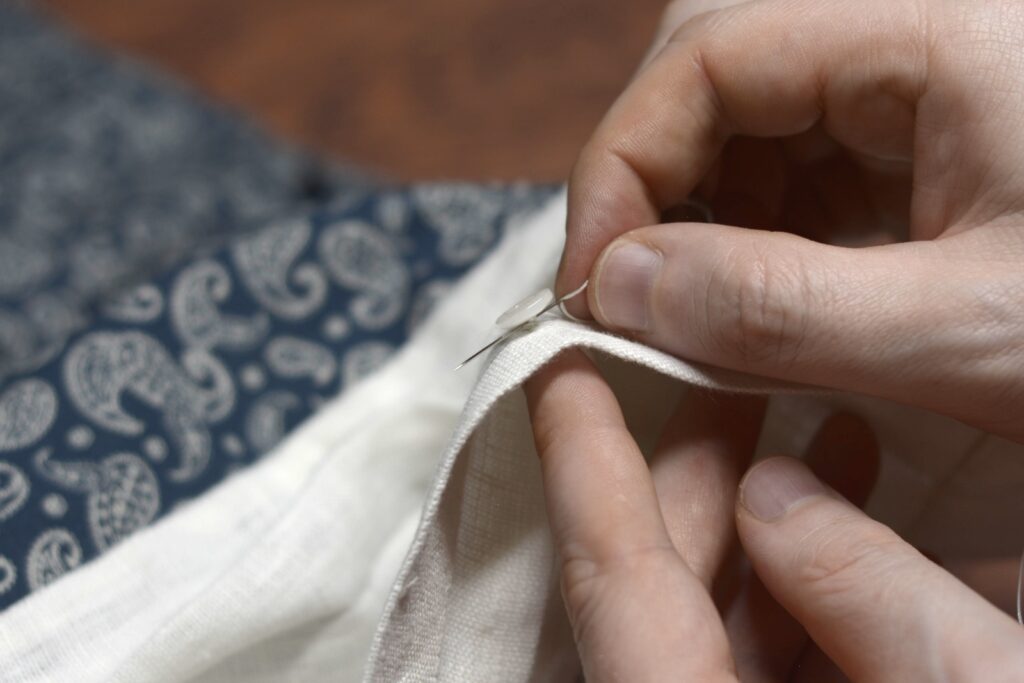
Make one (or more) stitch across, then make the same number of stitches in the alternate direction. With each stitch, gently pull the thread taut, keeping the appropriate height.
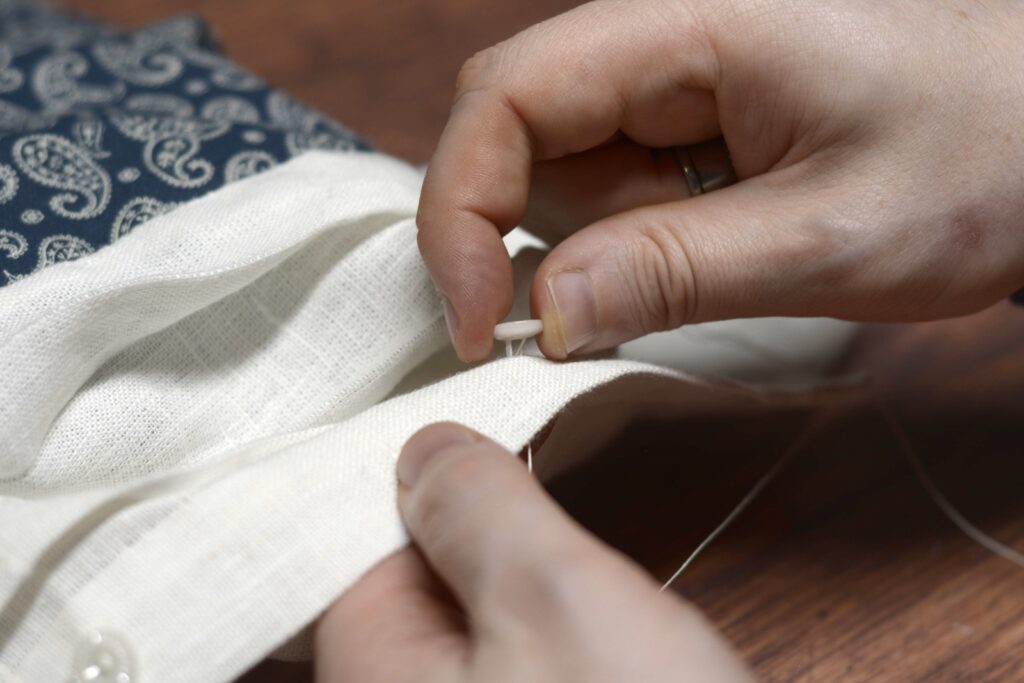
Pass the thread through to the right side, without going through the button. Instead, wrap the thread around the previous stitches about 4 – 6 times, depending on the height, pulling it tight after the final wrap and forming the button shank. This gives the button great strength and the fabric will probably wear out long before the button falls off.
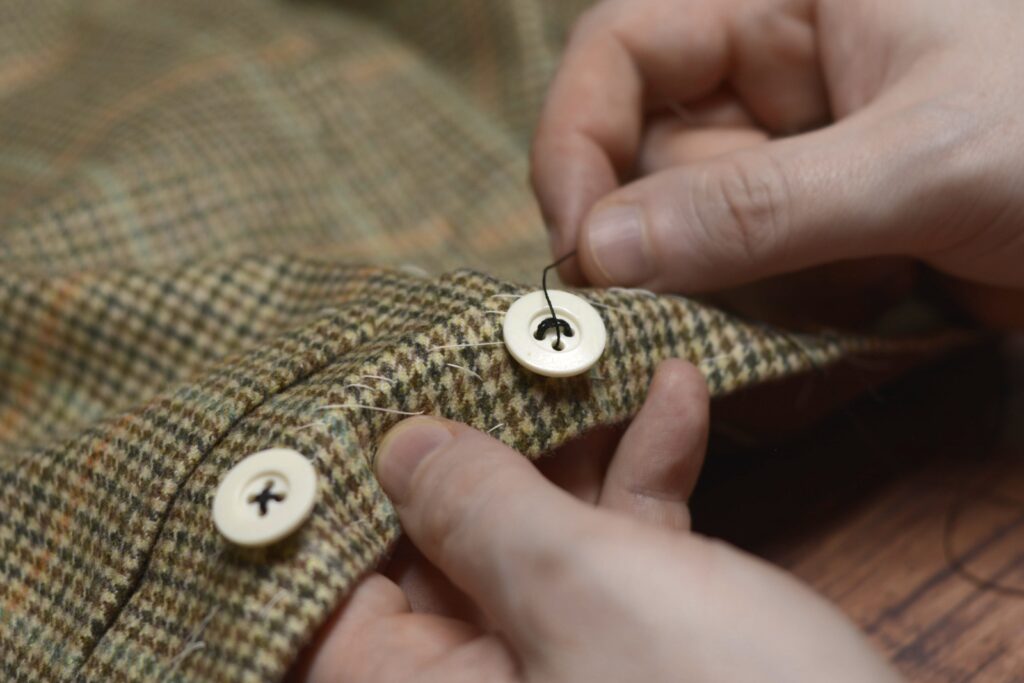
Finally, pass the thread through the shank three times in alternating directions to secure it, and trim.
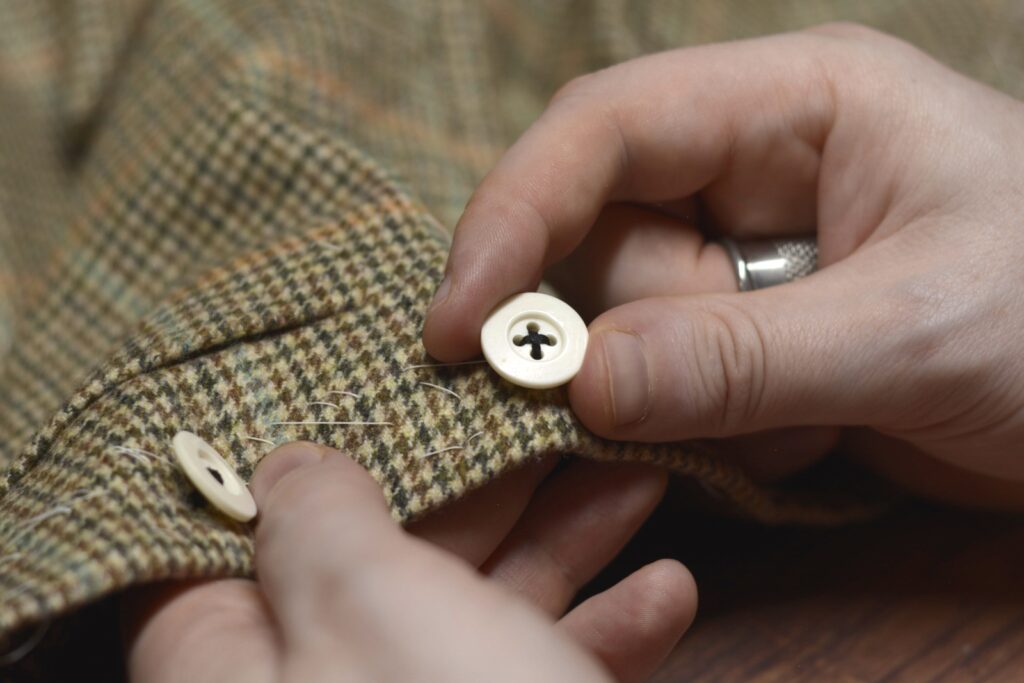
Attach the other buttons in a similar manner. Work from left to right to keep your thread from getting snagged on the previous button.
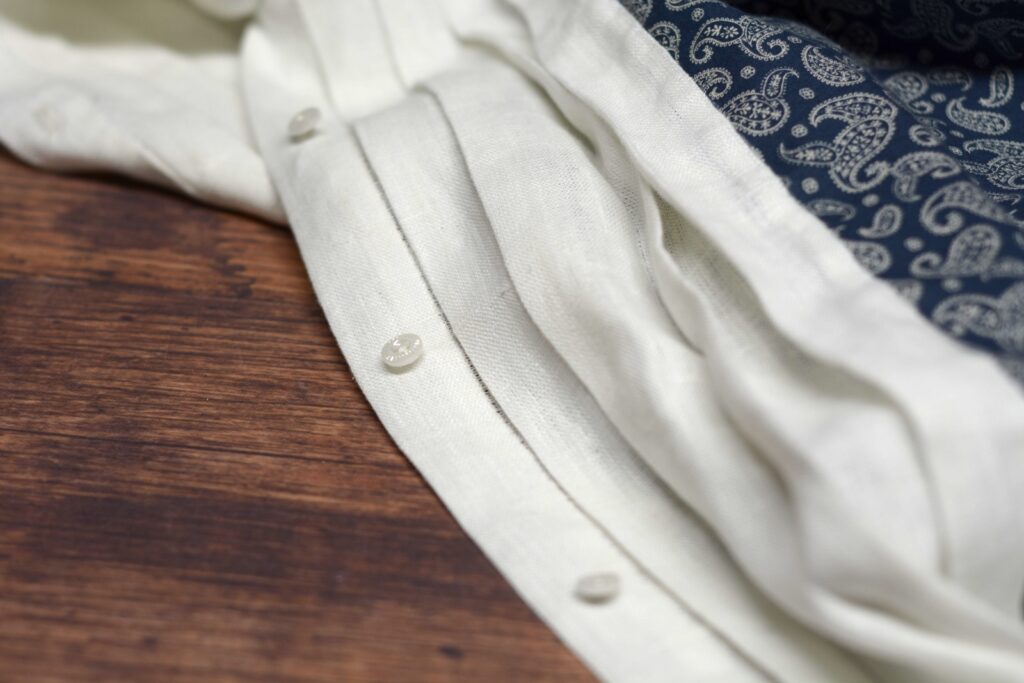
And with that, your shirt is complete! I always feel happy when a project is done, but at the same time, sort of let down, as in, “am I really done? What shall I do with my self now?” I hope you’ve enjoyed this project and able to follow along and make a nice shirt of your own! Please feel free to share your work in the community support forums!
Your Progress
[columns gutter=”0″]
[col]
1 | Attach the buttons. |
[/col]
[col align_text=”center, middle”]
[/col]
[/columns]