Author: James Williams
Measurements

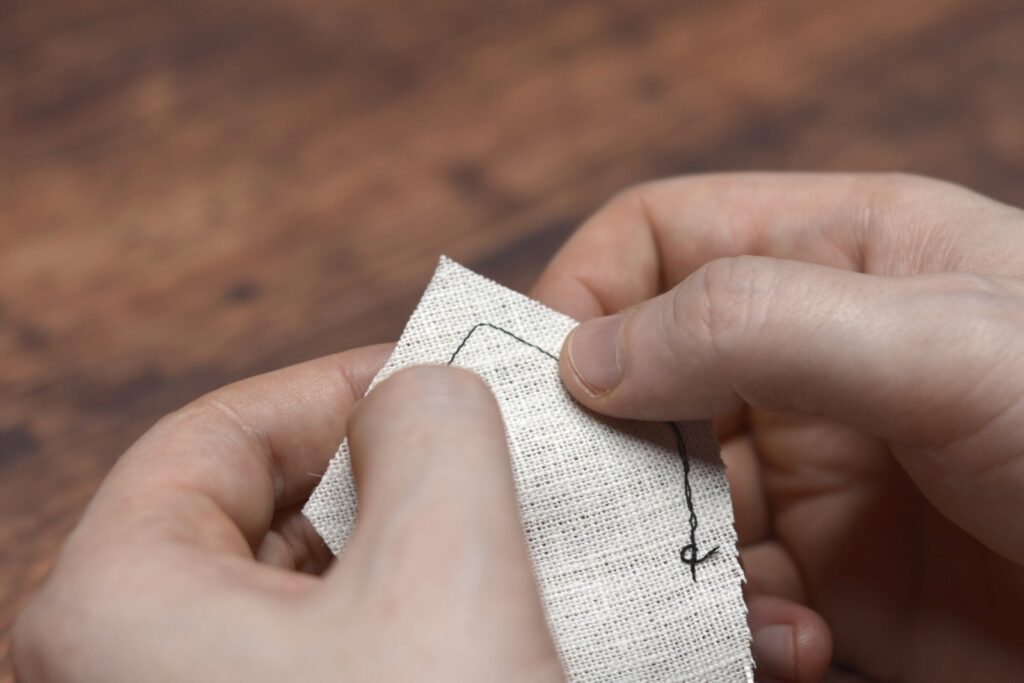
Before we can begin drafting our waistcoat pattern, it is necessary to take a few measurements to ensure a good period fit. While a few of the measurements will seem familiar to you, Devere uses some special measurements based on the ‘center point’, which forms the basis for the entire system. Just take things step by step, feel free to ask questions in the forums, and I know you will get it.
To start off, here is an overview of all of the measurements Devere suggests, although the Front Opening measurement is not illustrated. Try to get someone to measure you. While it is possible to measure yourself (I do it all the time), it takes practice and skill, and it’s very difficult if you’ve never used these measurements before.
As you go, write down each measurement in the spreadsheet provided. You’ll then draft the pattern using the graduated measure corresponding to your chest size (in inches). You can download both below.
When printing the rulers, I recommend taking them to a copy shop and having them print it on the larger paper. It’s possible though to print them out on letter sized paper but will probably take some fiddling with your printer settings. Either way, be sure that it prints at 100%, and double check they’re printed correctly by comparing a regular ruler with the 37 1/2 graduated ruler – they should be the same size.
All measurements should be taken over a well-fitted waistcoat, if possible. If you don’t have one, a period shirt will do, but I’d add maybe an inch to your breast and waist measurements. You really need only the first three measurements – Breast, waist and back length. The others are good for checking your work and being more precise with the front opening and so on, but are by no means necessary.
Breast

This measurement determines the size of the graduated measure you should use. Hold the tape around the chest as shown, as high as possible under the arms, and over the fullest part of the chest, holding the tape with the thumb and forefinger of each hand. Draw the tape very tight, and loosen it gently as the client breathes, for the best accuracy. Write this measurement down as half in the chart, i.e. if you have a 48 inch chest, write down 24 in the spreadsheet, since we only draft half of the waistcoat.Waist
This measure it goes around the body on a level with the hollow above the hips, and it should be taken rather easy. Like the breast measure, it is only written down as half the length taken; say 15 ¾ for 31 ½ inches.
This measure, by comparison with the breast, shows if the waist is thin or stout. In the proportionate man it is 15 ¾ or 3 less than the breast.
Working Scale (added September 2023)
On the spreadsheet you’ll also notice something called the working scale. Devere’s drafts tend to fall apart when you get to the larger sizes above a 45″ waist, so to combat this I’ve reverse engineered the draft and taken some formulas from a more modern system to get the correct size and shape. Rest assured that the draft comes out exactly like the originals, we’re just using different math to get there more easily. Just keep a note of that scale – it’s used a couple of times in the draft.
Working Scale: 1/3 full breast measure plus 6″
Waist
This measure is also taken under the coat: it goes round the body on a level with the hollow above the hips, see figure blank, and it should be taken rather easy. Like the breast measure, it is only written down as half the length taken; say 15 ¾ for 31 ½ inches.
This measure, by comparison with the breast, shows if the waist is thin or stout. In the proportionate man it is 15 ¾ or 3 less than the breast.
Back Length
Measure down the center of the back from the bottom of a shirt collar or the bony 7th vertebrae on the back of the neck, down to an inch or two below the natural waist. You want the vest long enough to cover the tops of the trousers.
Additional Measurements
For more advanced tailors, the following measurements are available to check your work and be more precise with the draft.
Finding the Centre Point
The center point forms the basis of finding the next two measurements, and lays out the position of the side seam. Unless you know you have a very accurate waistcoat (which you could use the side seam as the center point), it’s best to manually find the center point.
To find the centre point, we must use the formula of taking 2/5 of the Breast or 1/5 of the full chest and using that number to find the centre point. For example, a 35 inch chest measured all the way around would be 7 inches to the centre point. So find the center of the back at the waist level and measure 7 inches around to find the Centre Point. Or just fill out the spreadsheet and find the center point position that way.
Mark this center point on the client being measured using some chalk in the form of a cross hair +.

Curve
Take the Bust and Curve part of the Tape, slip the eyelet-hole at the end of it over the head of the pin, and hold it there; the eyelet-hole must be exactly at the top of the back seam: then with the other hand carry the tape perfectly straight to the Centre Point, crossing the side seam near the middle, and not letting the tape be either very tight or too slack.

Bust
Continue to hold the end of the tape at the top of back seam, and with the other hand pass the tape over the shoulder in front of the arm, close to the front of the scye, letting the clients arm hang down in its natural position; draw the tape very tight, to flatten any creases there may be at the front of arm, and carry it direct to the Centre Point.

Side
Pass a pencil or penholder through the loop at the end of tape, and hold it tight under the arm (the arm must not be raised up, but should lay close to the body). Then measure the length to the Centre Point, so as to ascertain exactly, the distance between this point and the bottom of scye.
This measure serves to rule the depth of the bottom of scye, and shows the degree in which it must be hollowed out below the side point. In proportionate men it is 8 ½, and is usuallyabout half the length of back to natural waist. It is longer for extra erect men, and for small or high shoulders; and less for stooping men, and for large or low shoulders.
Opening
This is also known as the length of neck seam, and begins at the middle of the back neck and ends at the top of the desired opening in the front, being sure not to measure too tightly or loosely. This is a good measurement to use if you are copying a known vest or style and want the opening at a certain position.
Front Length
The Front Length is measured from the center of the back neck to the bottom of the front, and gives us a reliable way of checking that the length of the vest is correct.

Buttonholes
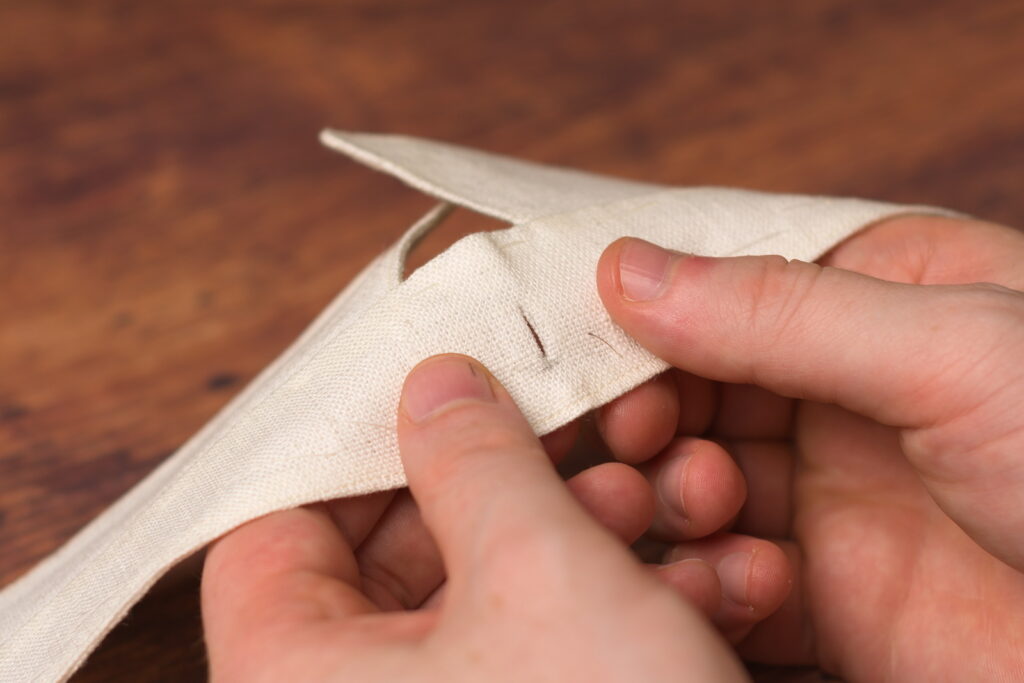
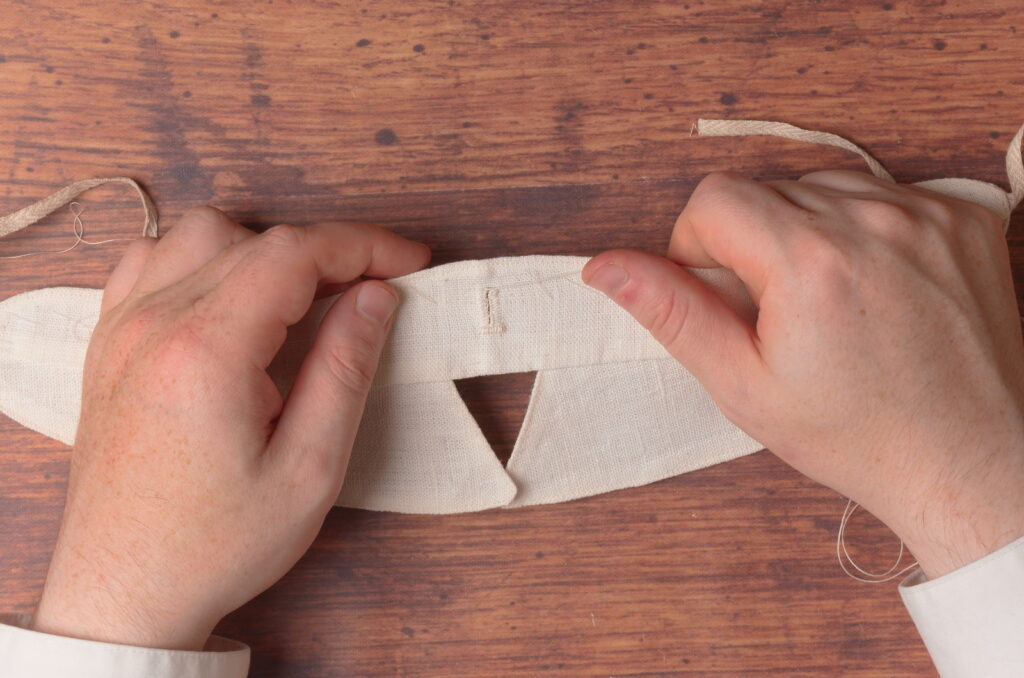
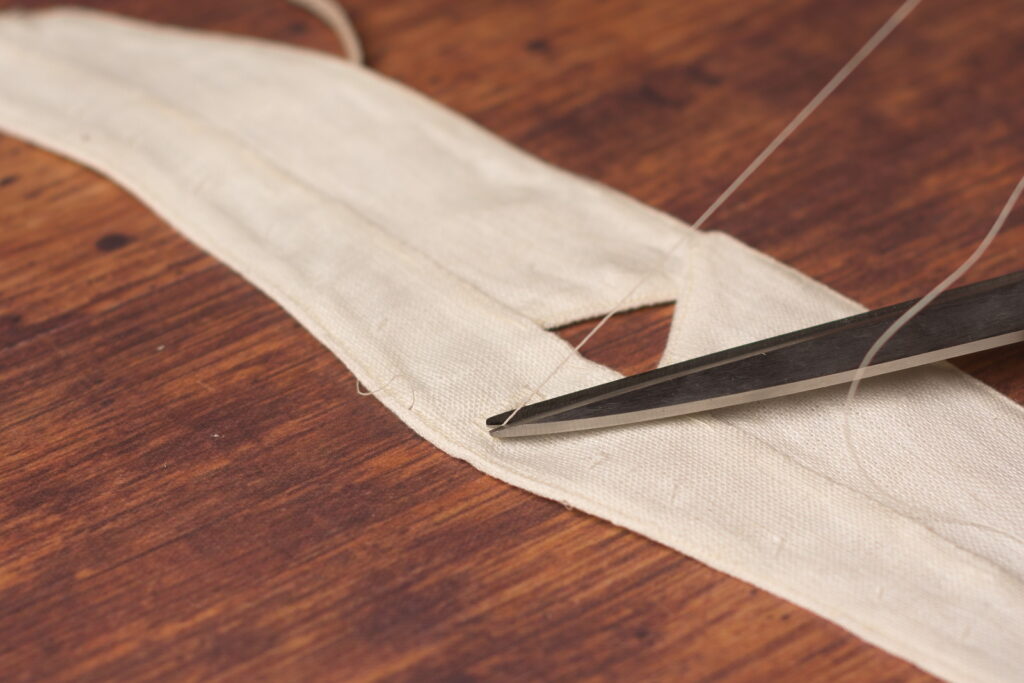
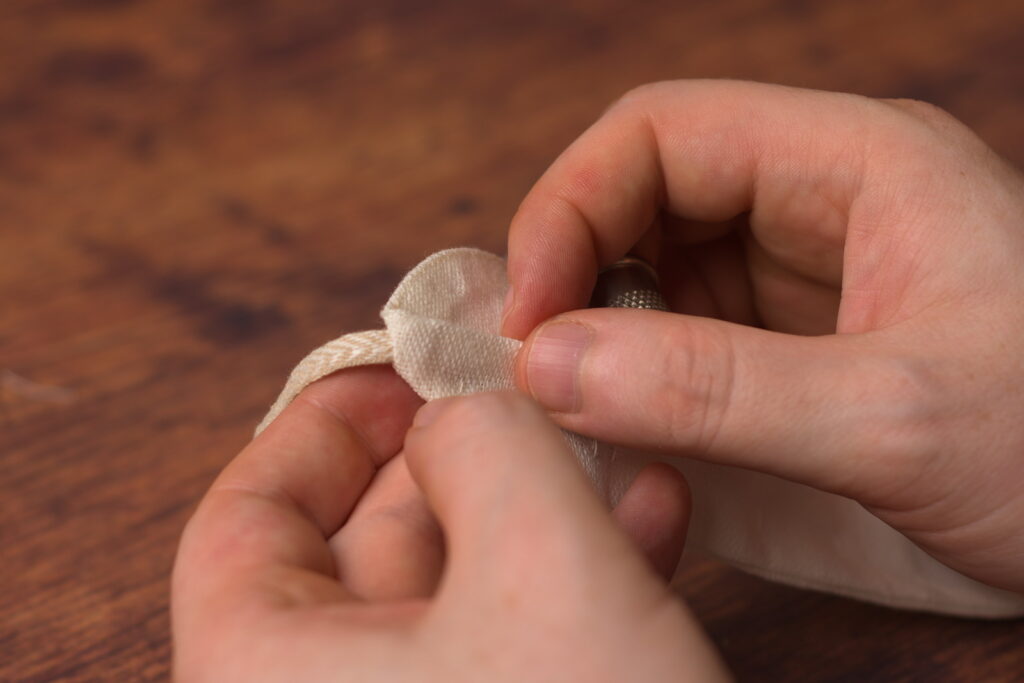
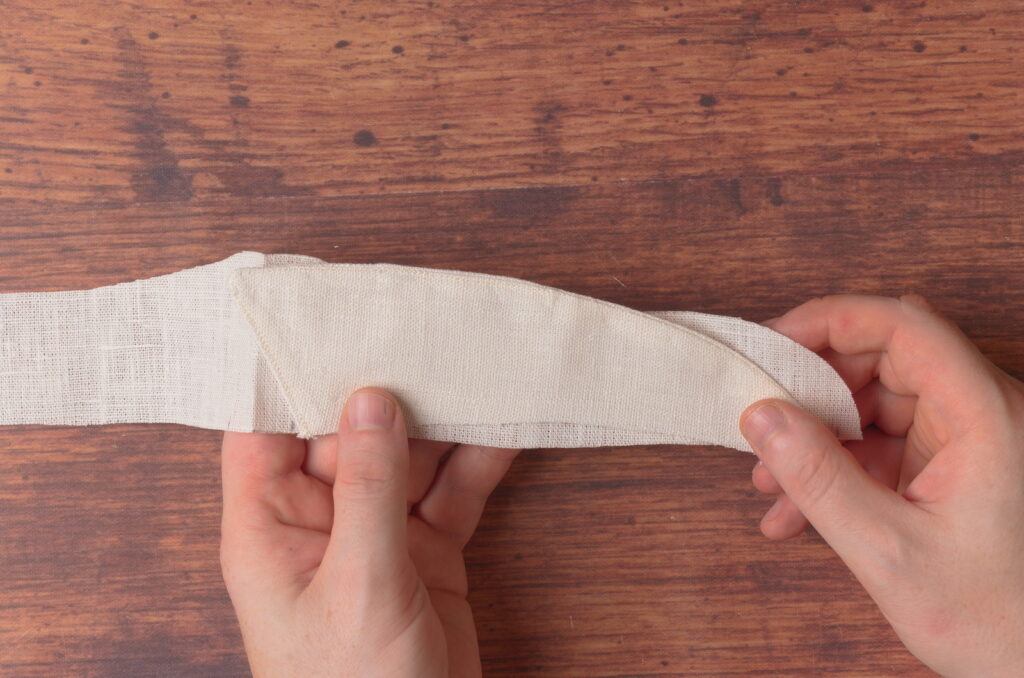
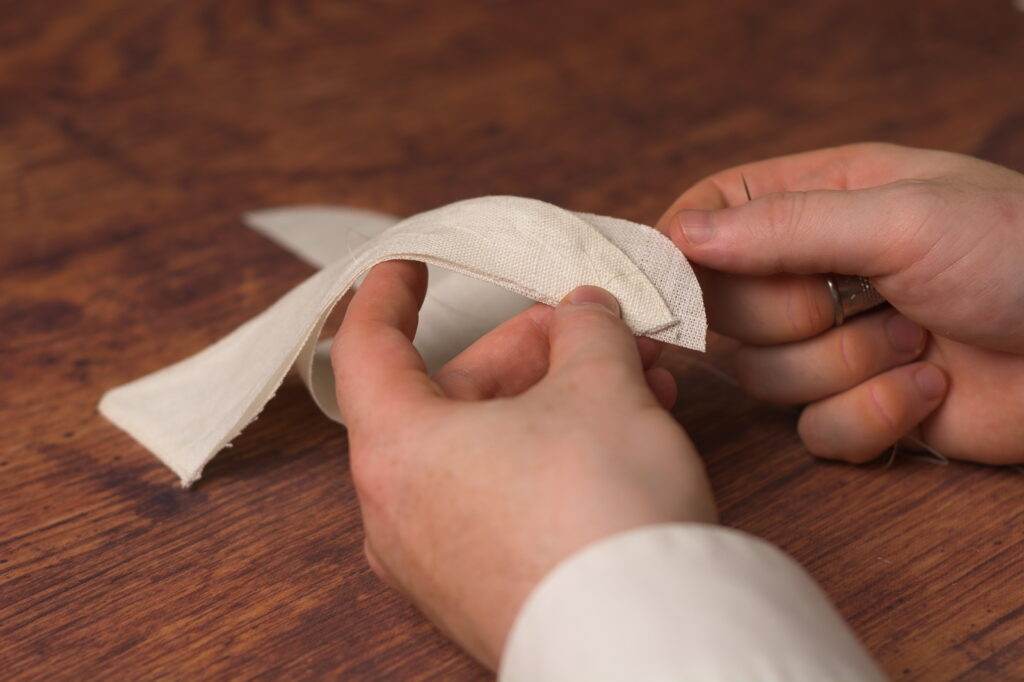
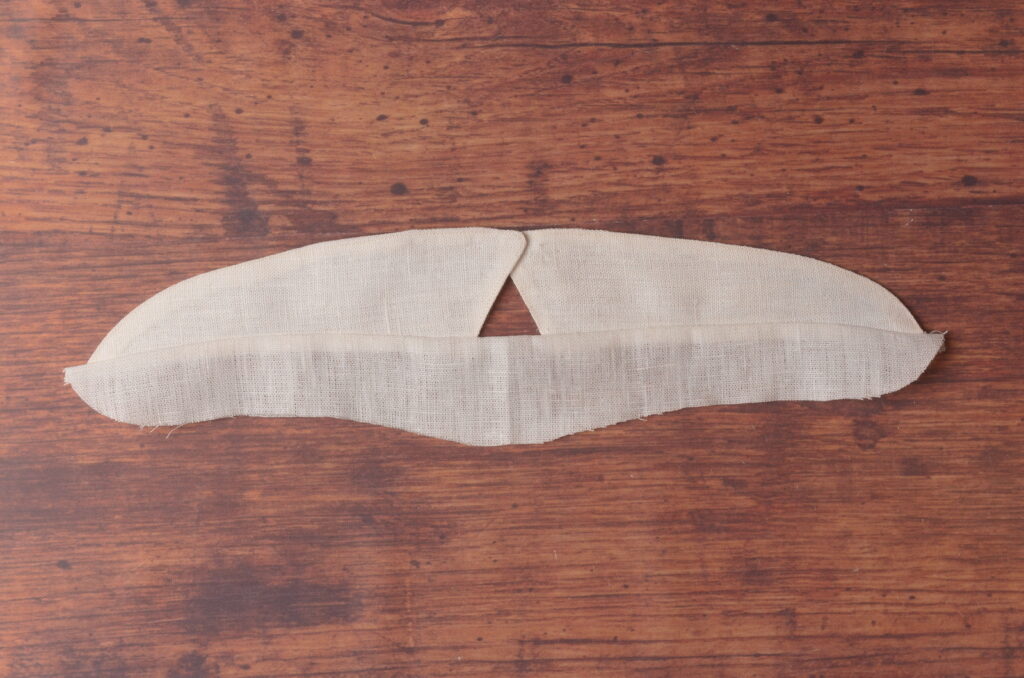
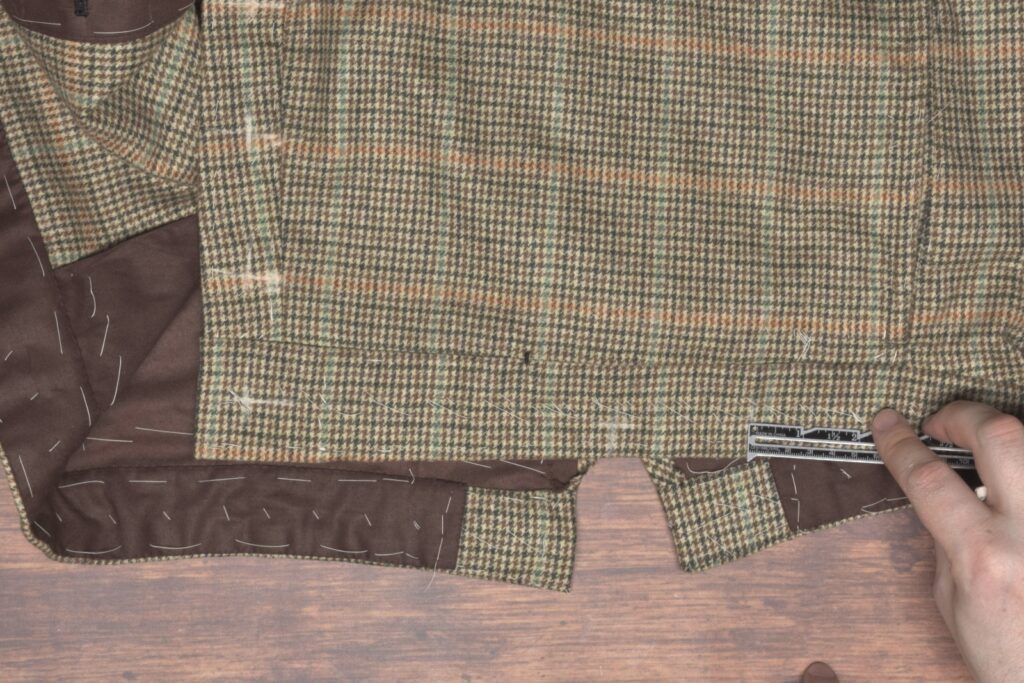
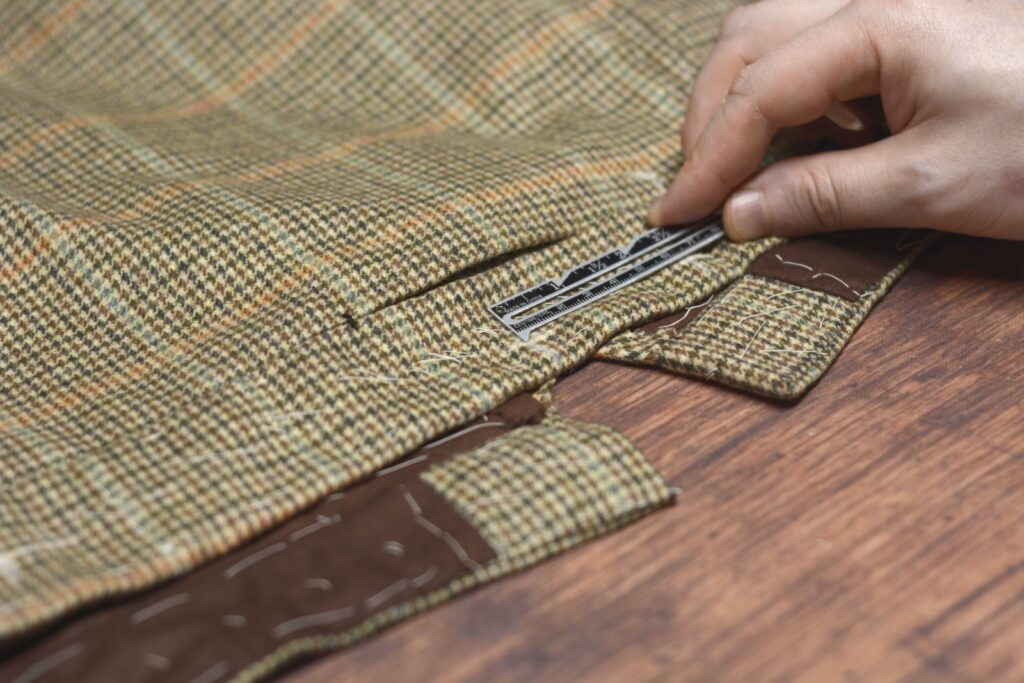
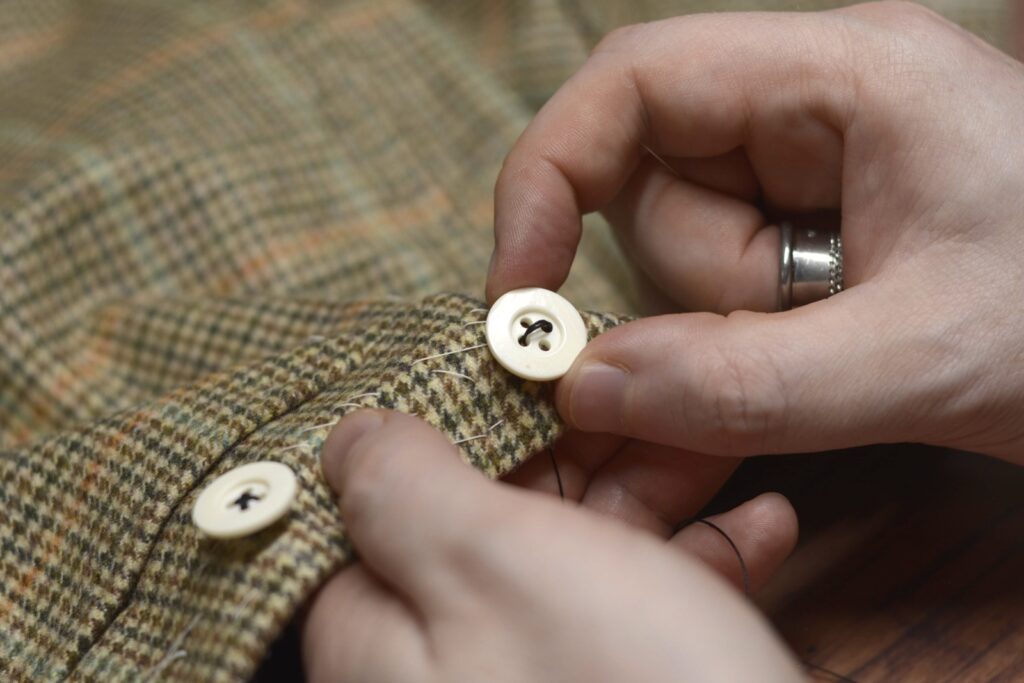
Sometimes there can be some discrepancies between the two halves of the collar. Yikes, like mine – easy to get distracted when filming.
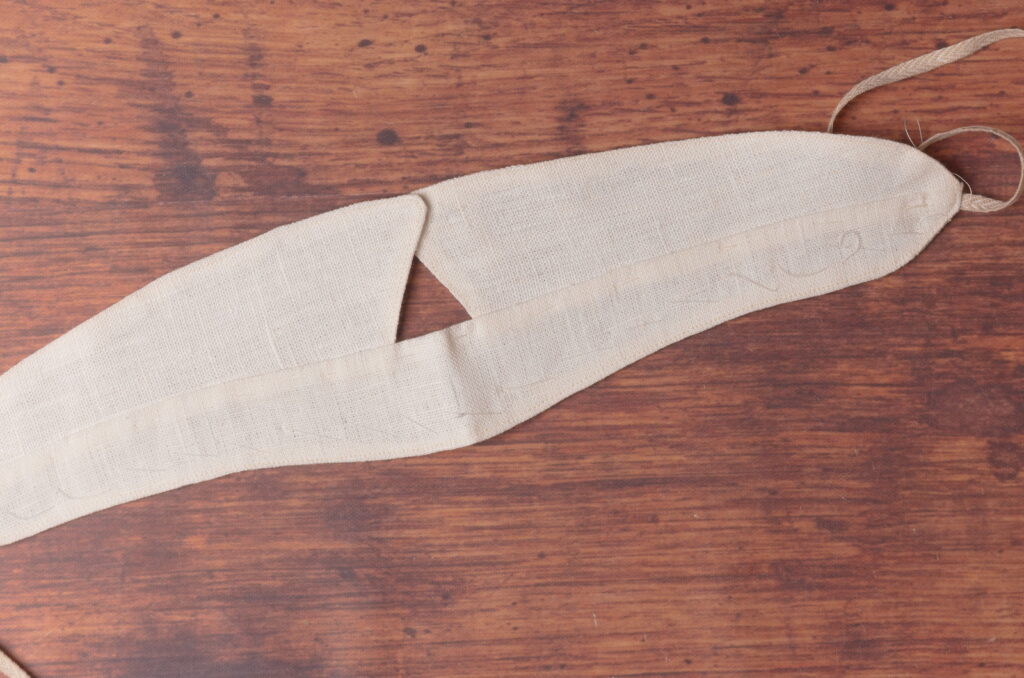
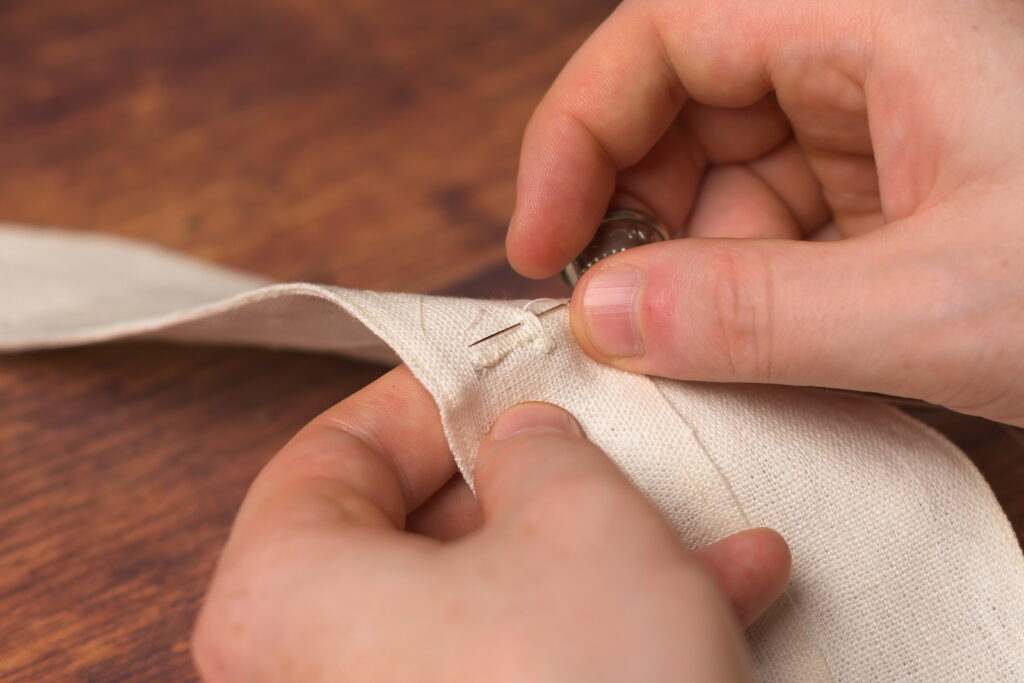
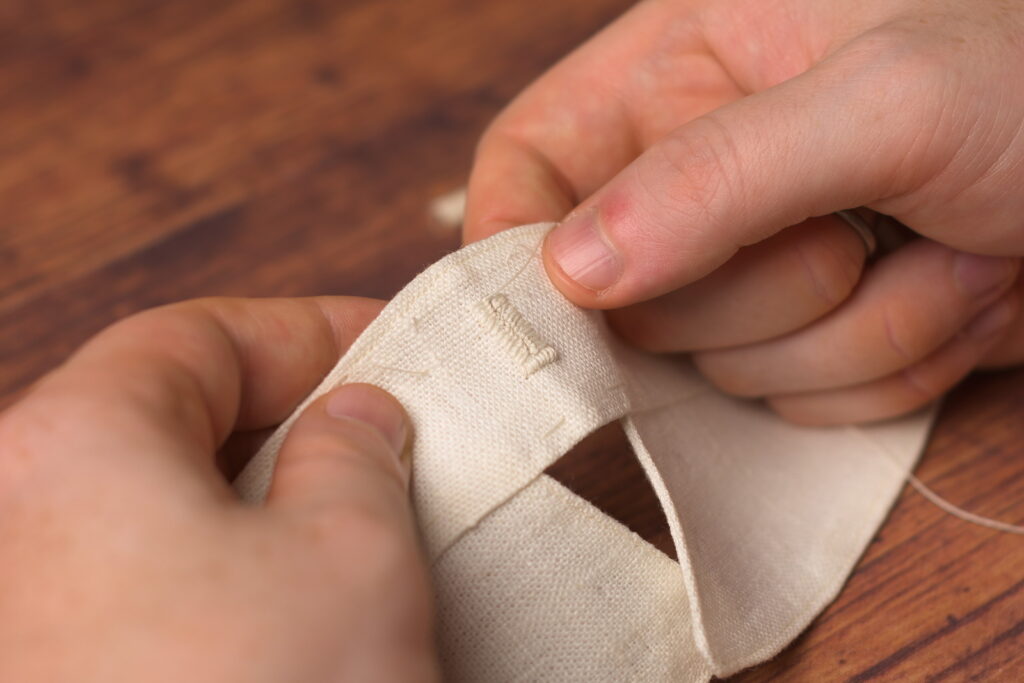
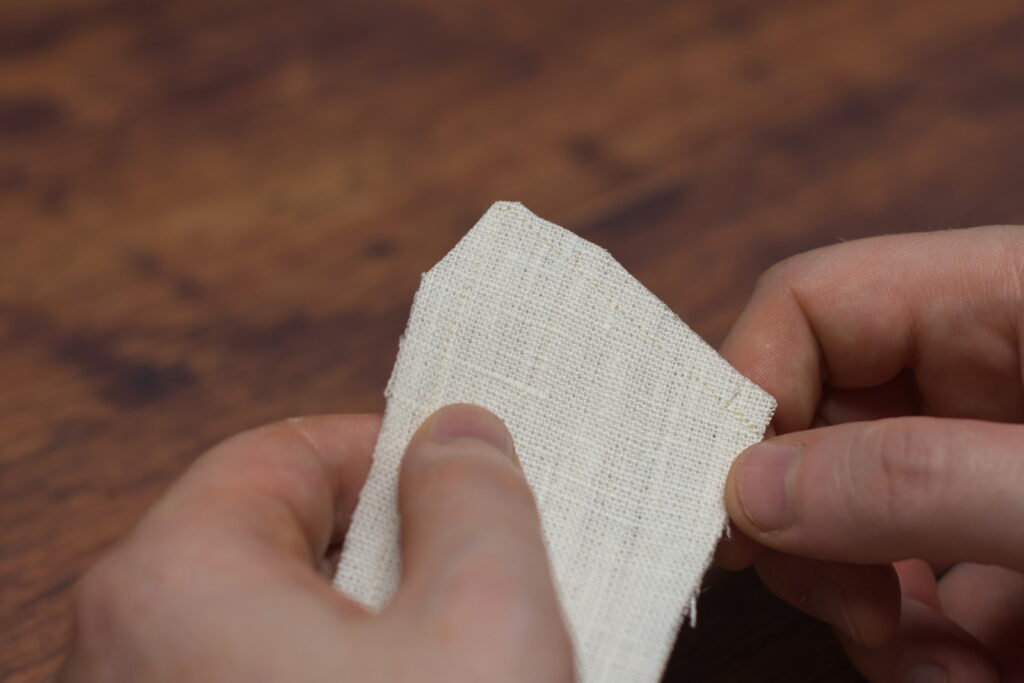
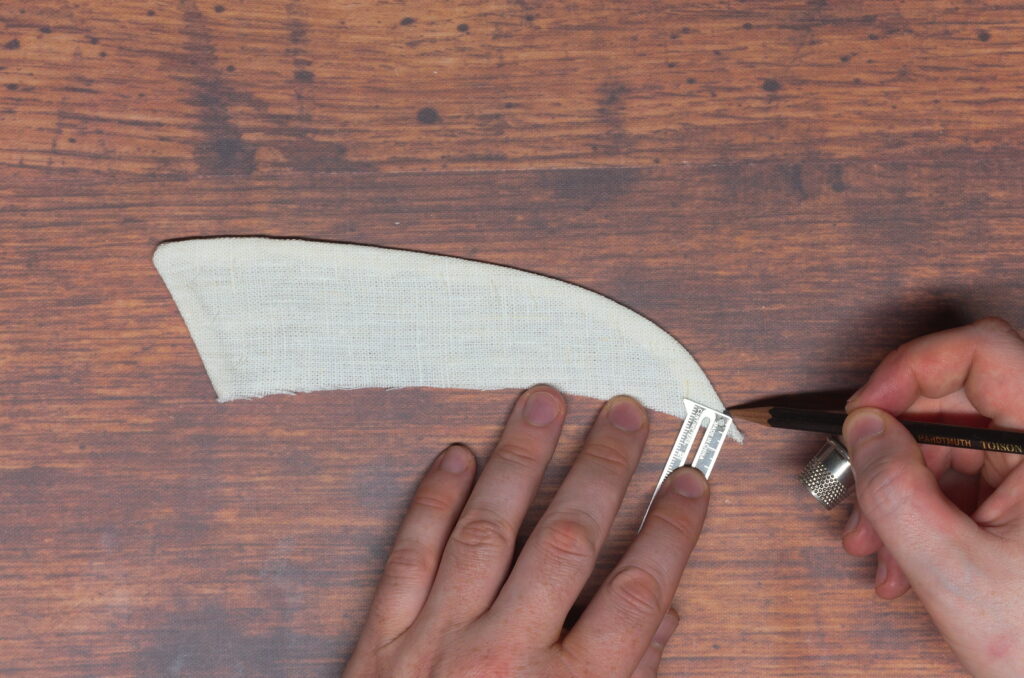
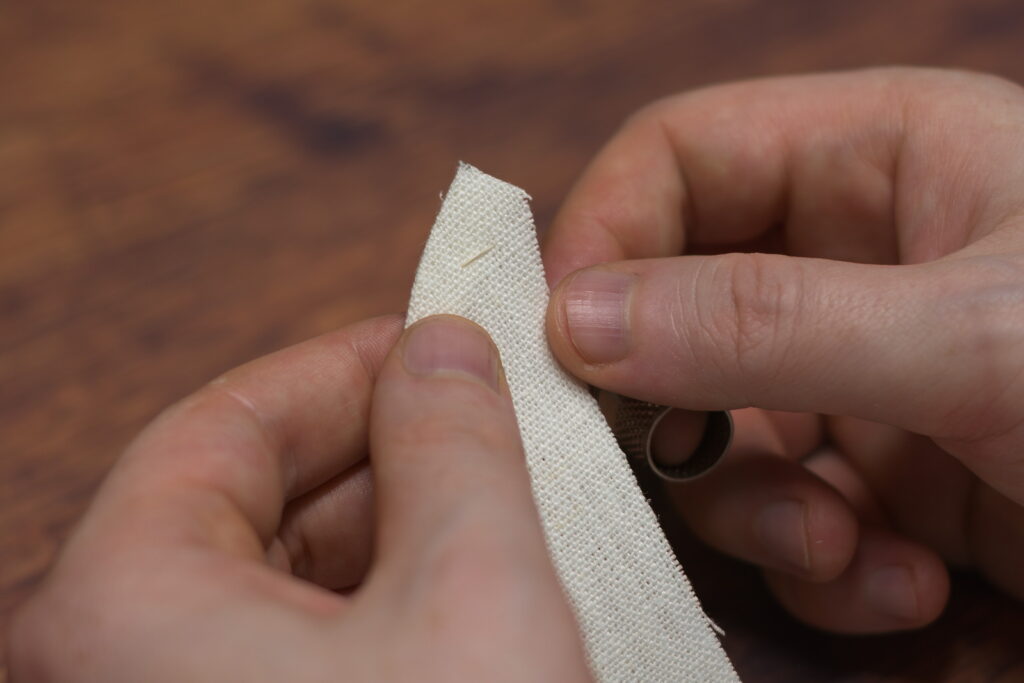
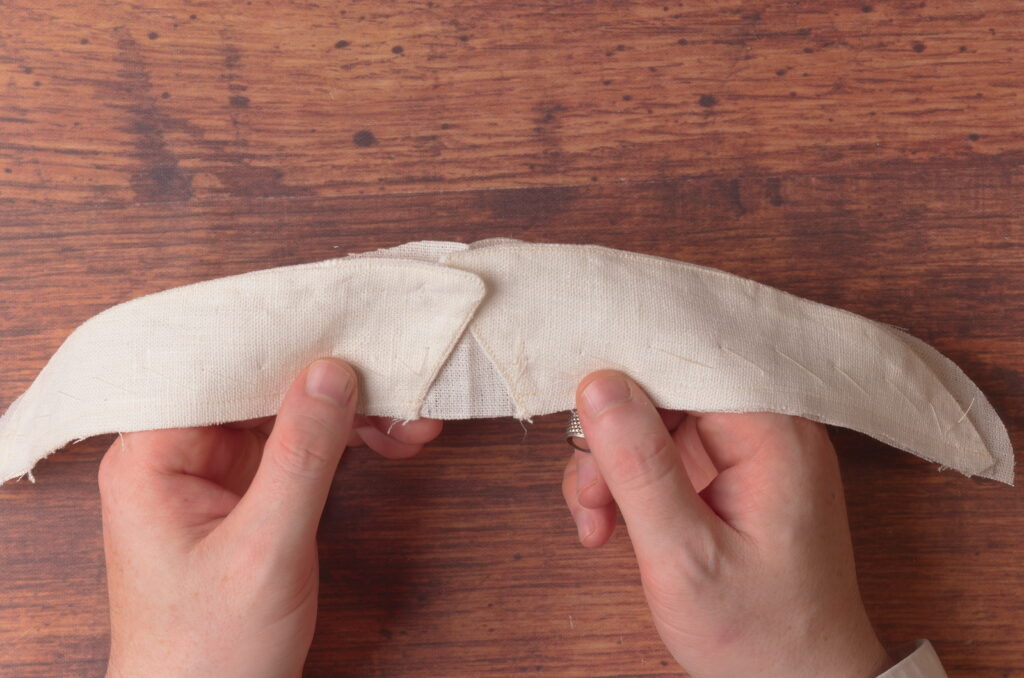
So the best way to find the center of the collar for the buttonhole position is to fold it in half, aligning the front edges as closely as possible. Then press firmly to give it a good crease.
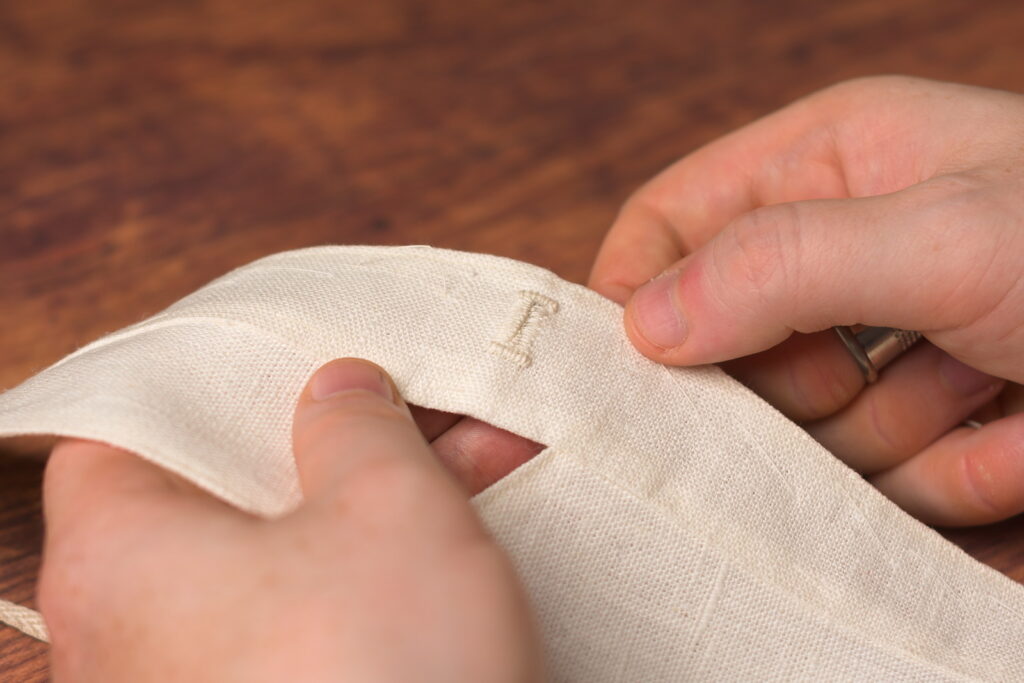
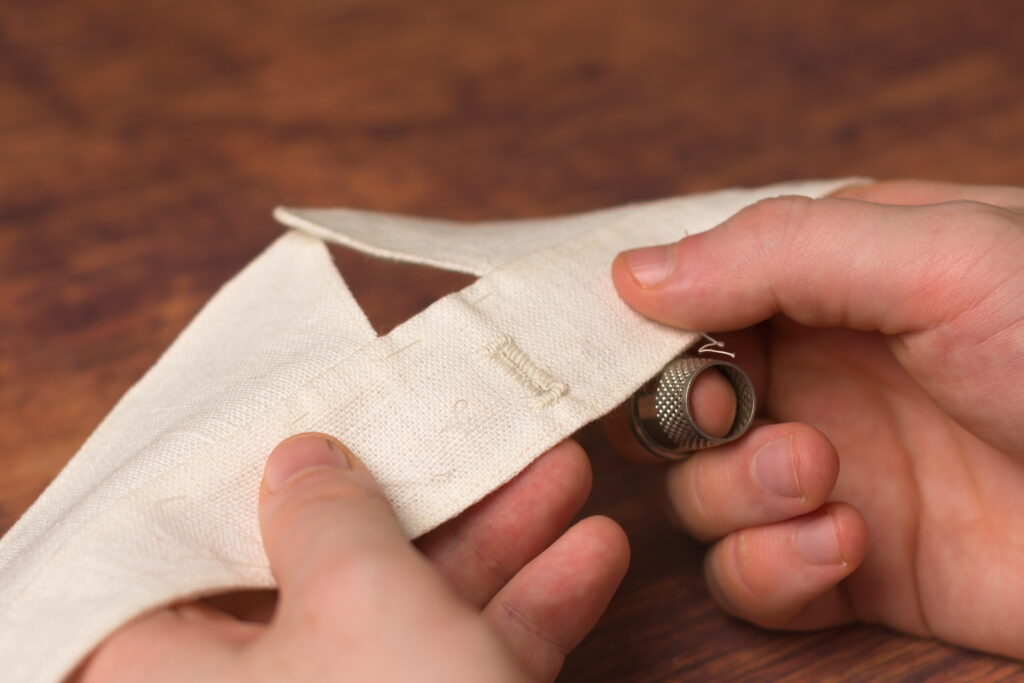
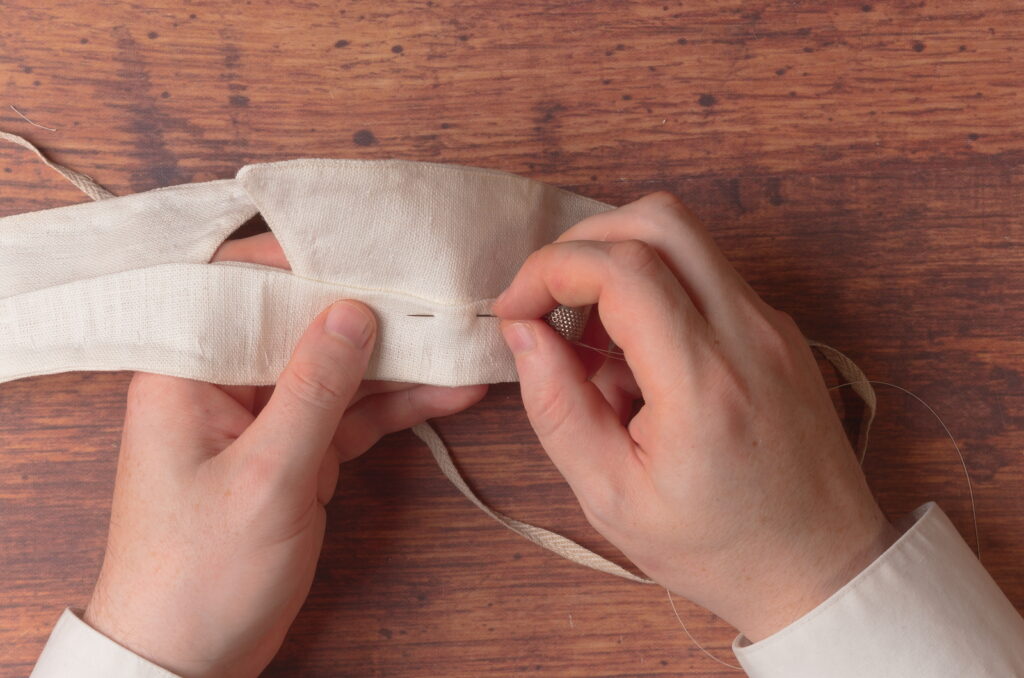
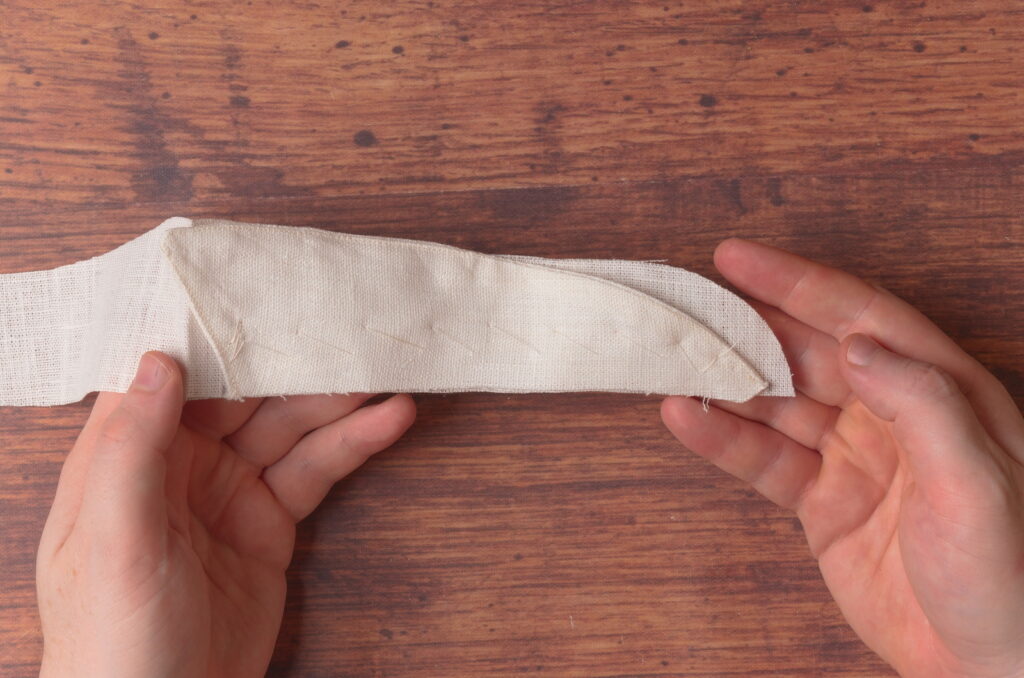
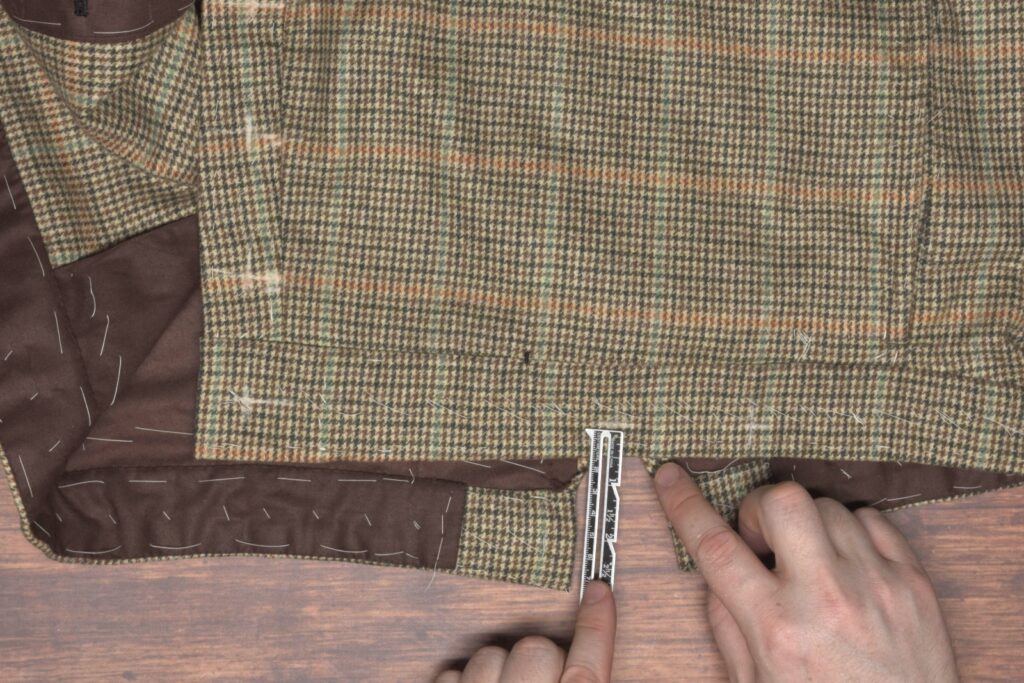
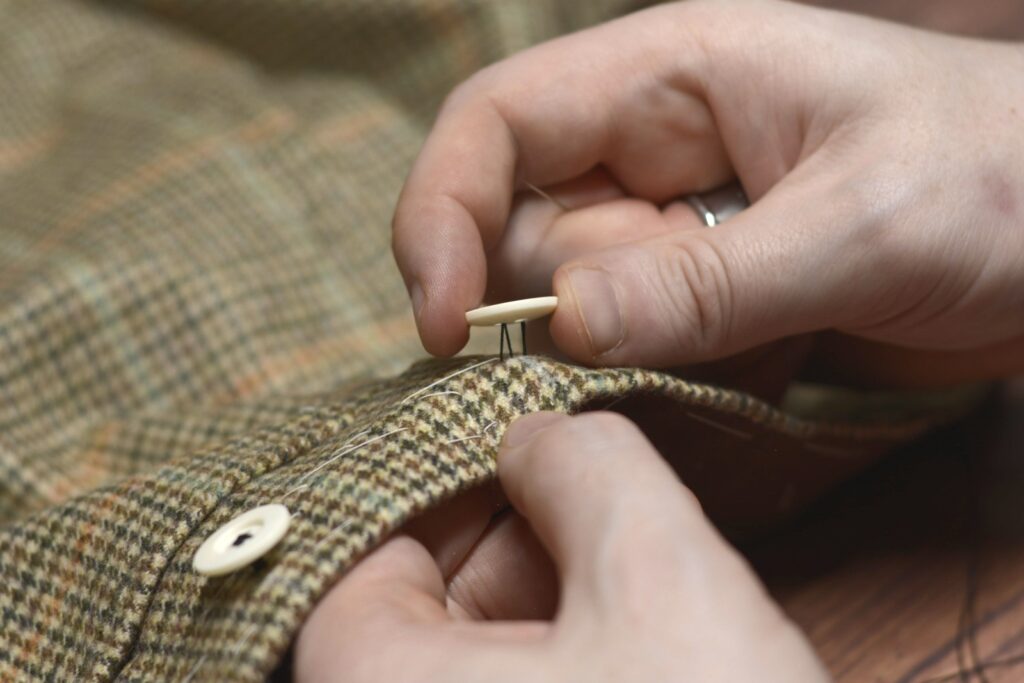
Mark the center line of the collar for the rough position of the buttonhole.
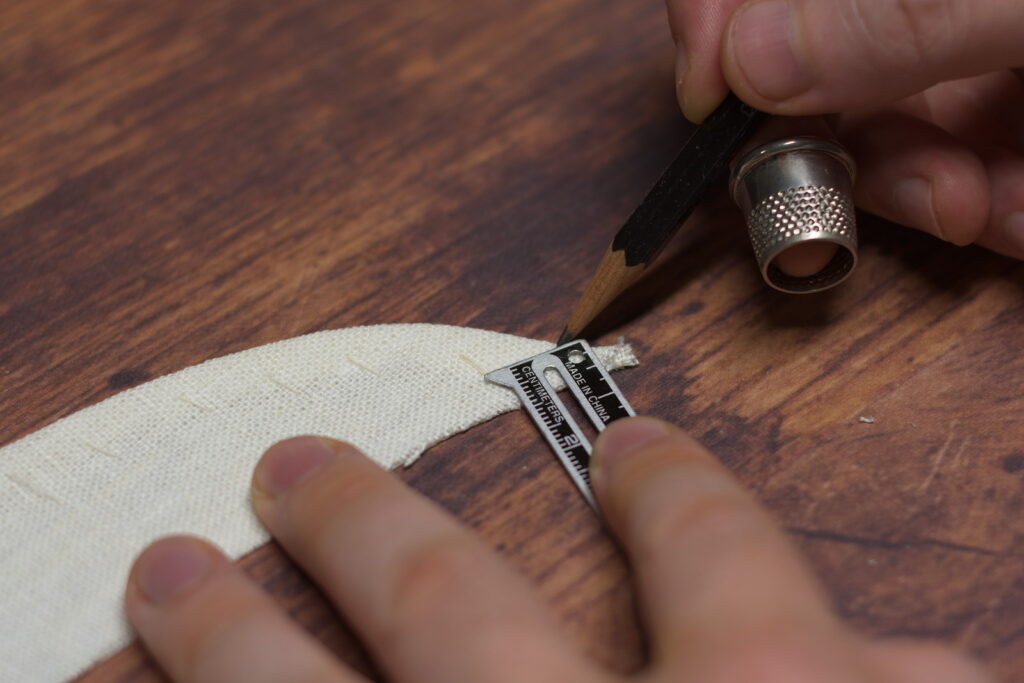
Then mark along the line 3/8″ above the bottom of the collar. The buttonhole itself will be 1/2″, or 1/8″ larger than the button you are using on your shirt.
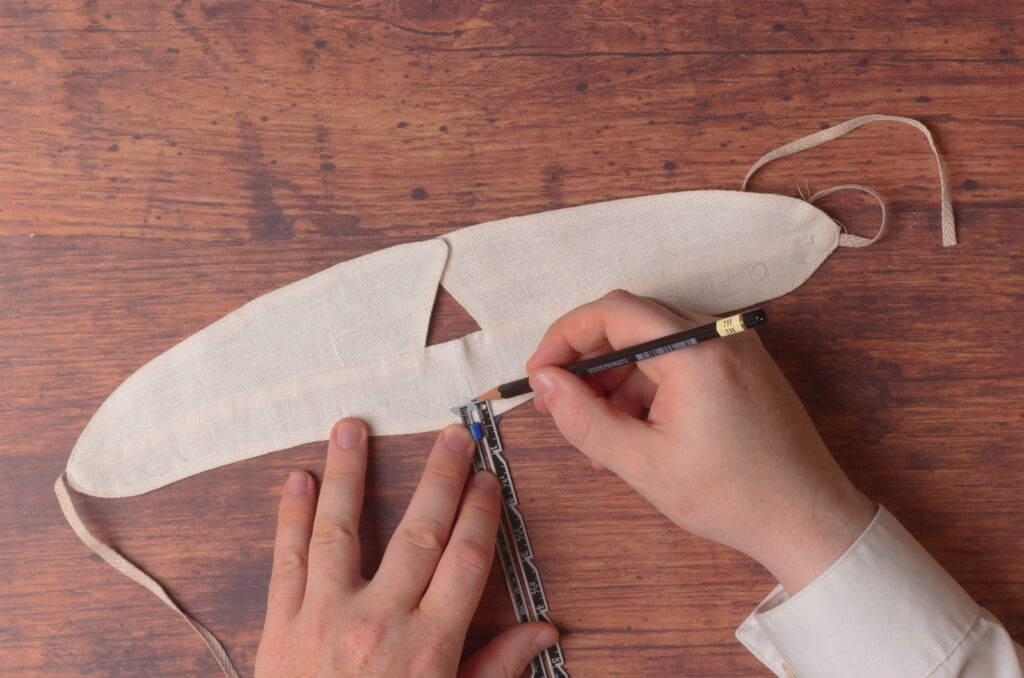
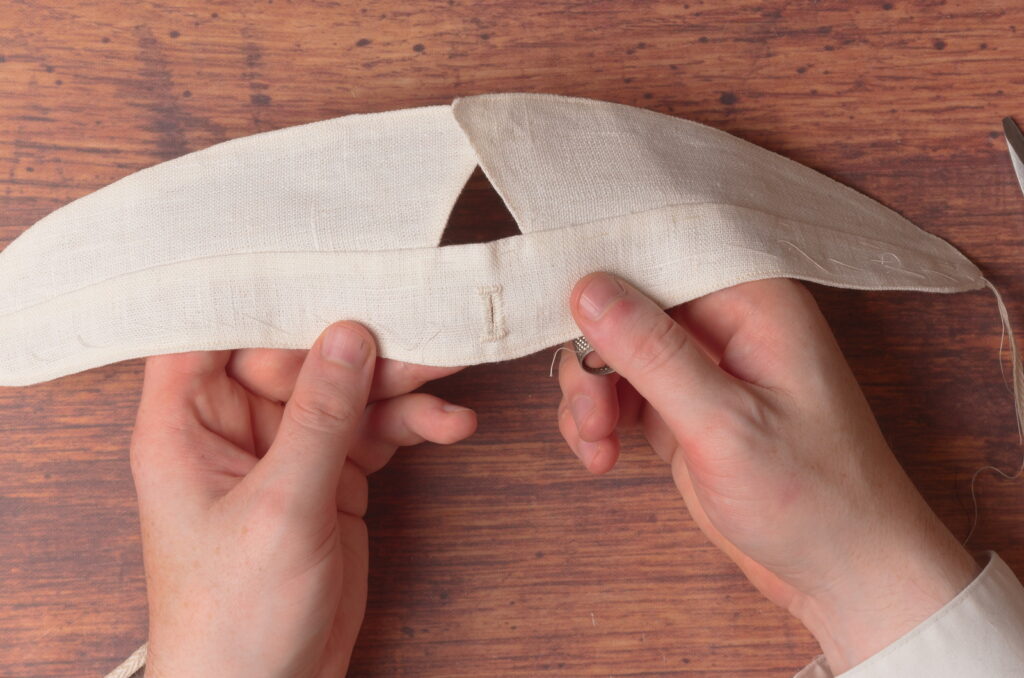
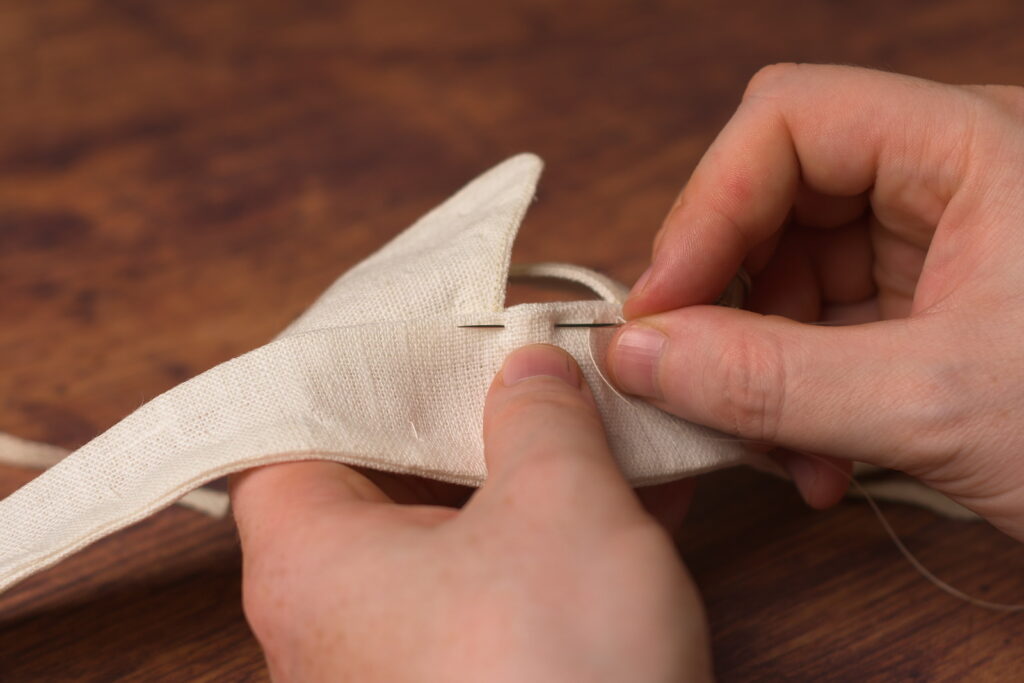
Here’s the buttonhole laid out. Try to keep the markings as light as possible.
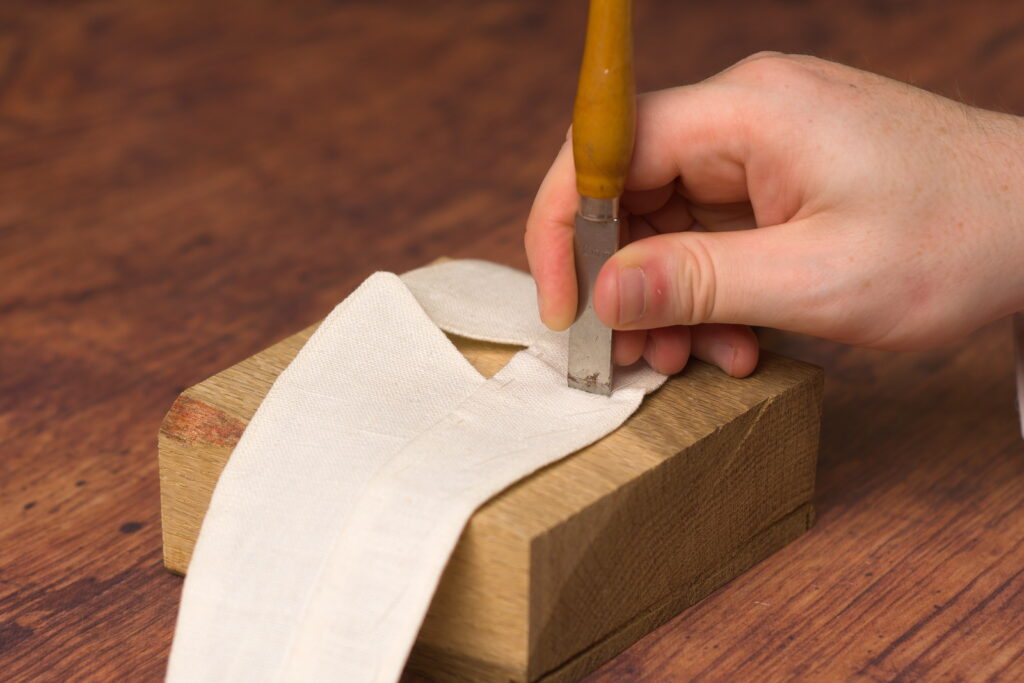
Place a 1/2″ chisel carefully in position and cut open the buttonhole with a couple of firm but controlled taps of a hammer.
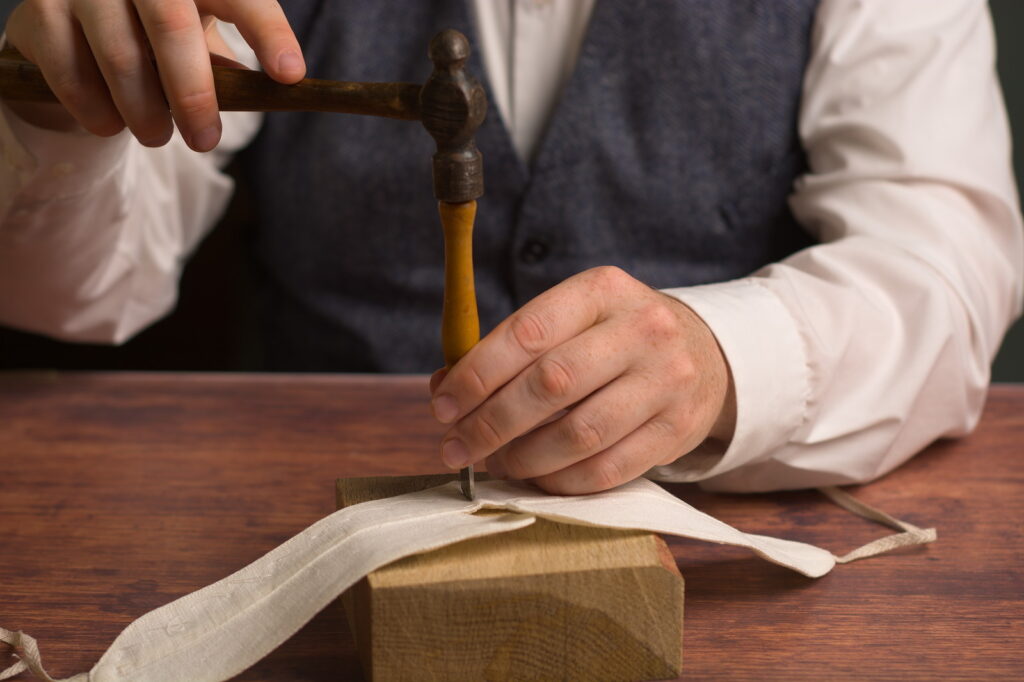
Showing with my right hand holding the chisel only to get a good photograph. I did switch back right after.
I don’t do anything additional to strengthen the buttonhole edges as I typically would on say a coat, only because the buttonhole is so small and easy to work with that I find it unnecessary.
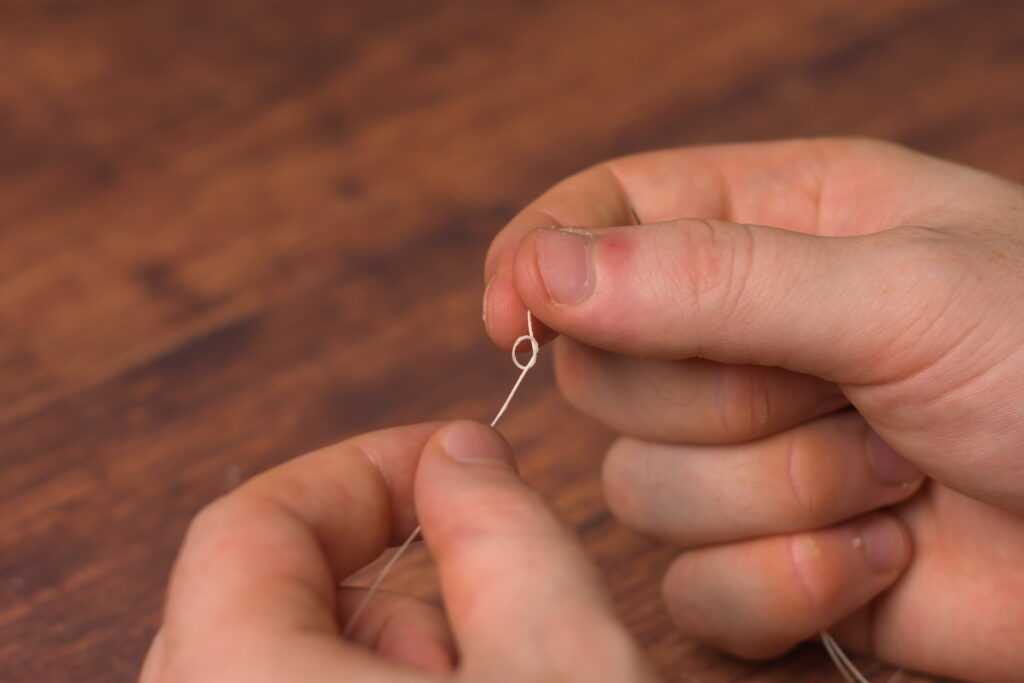
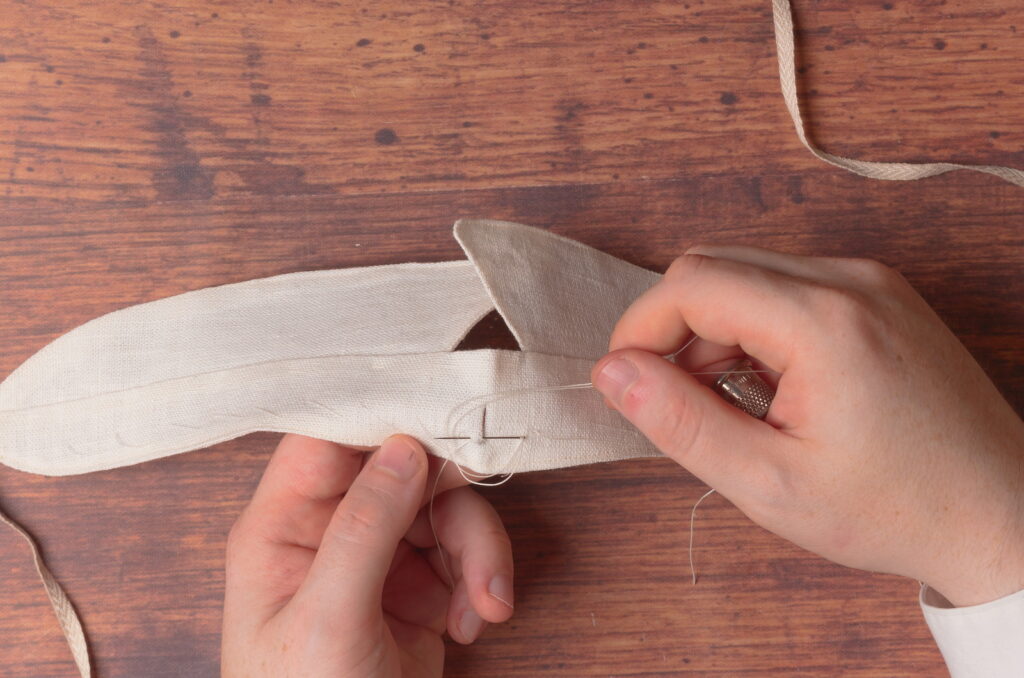
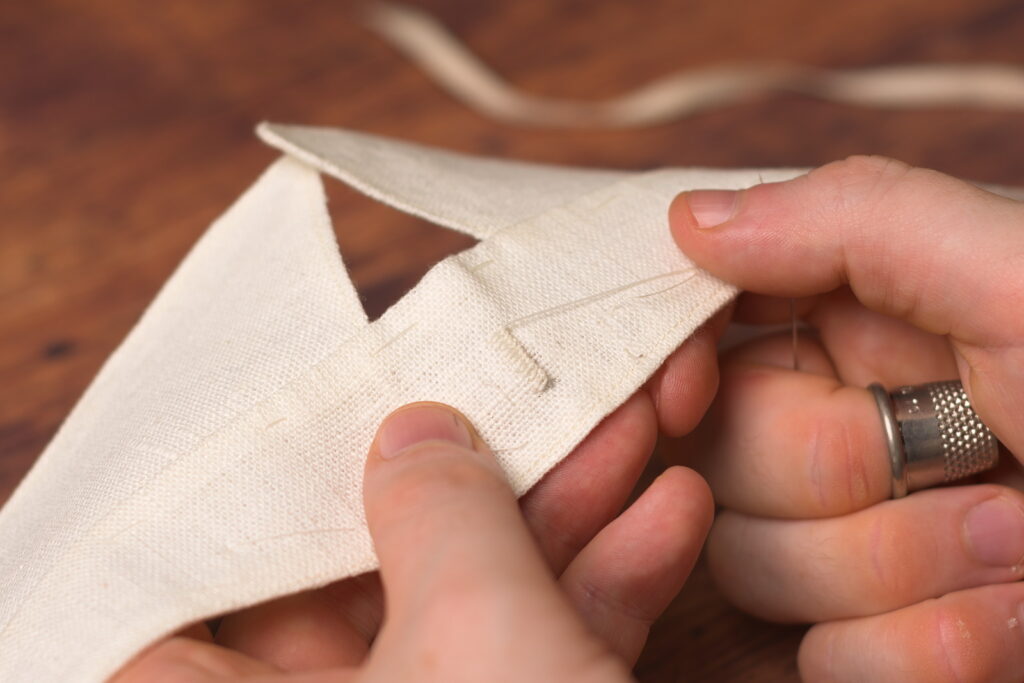
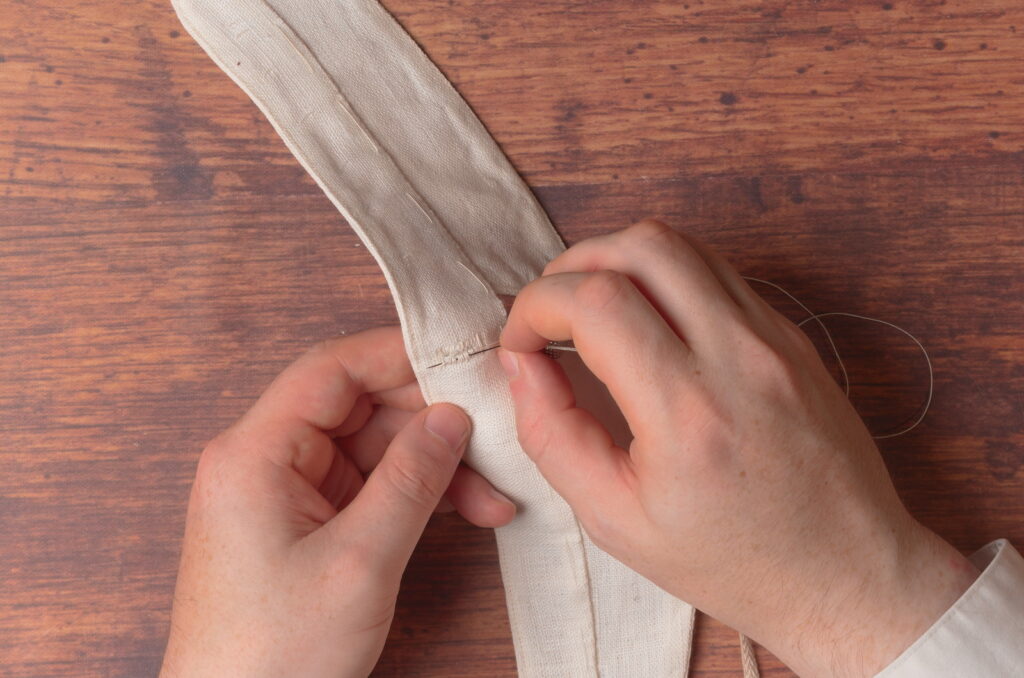
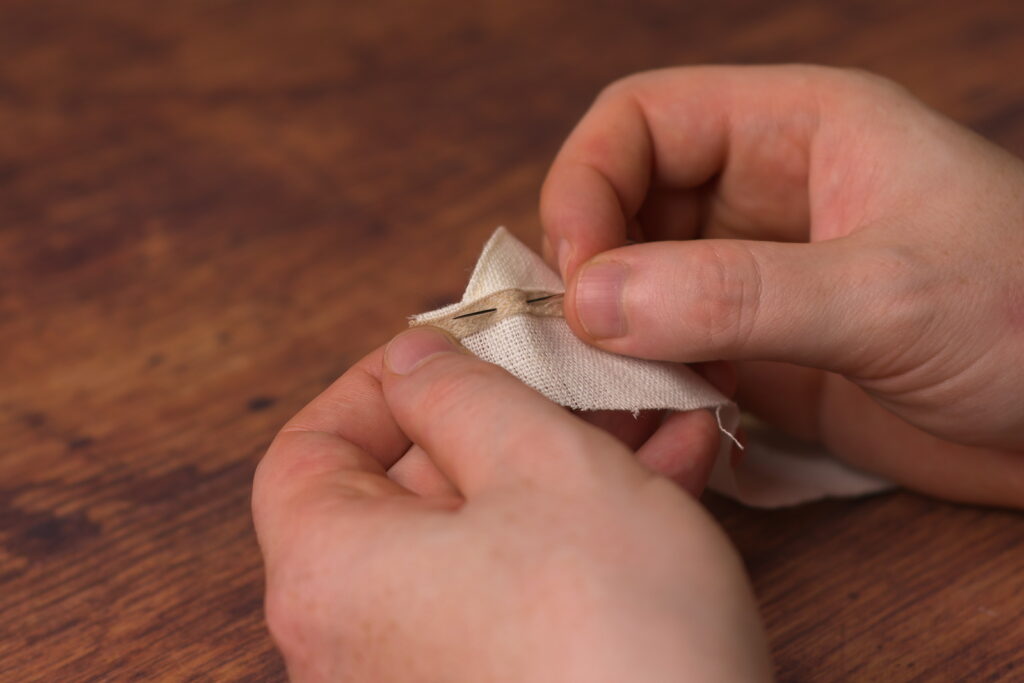
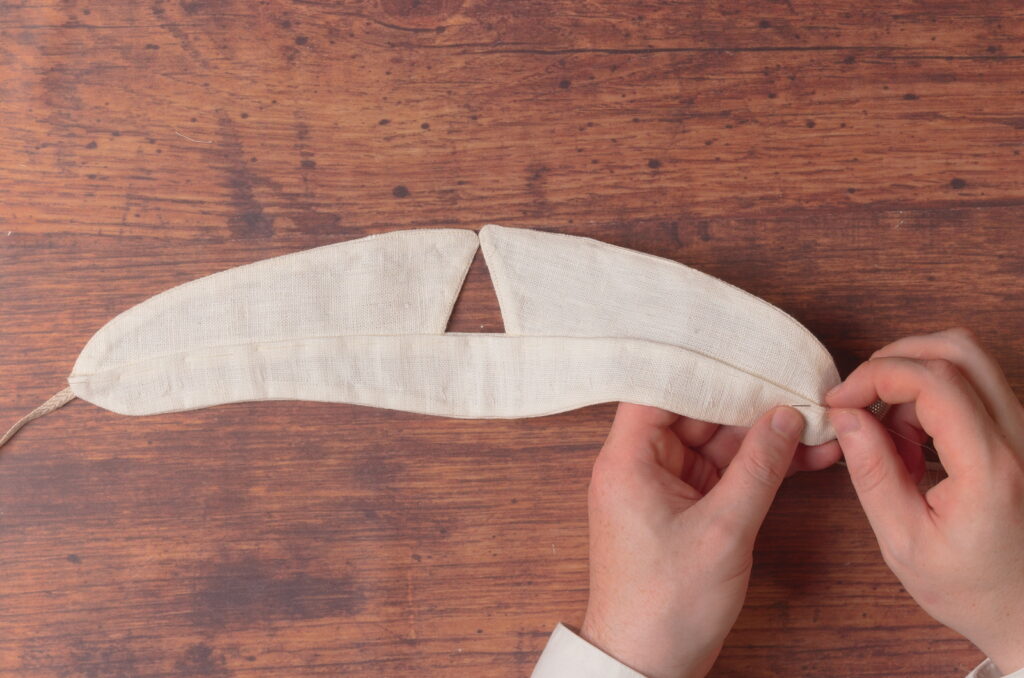
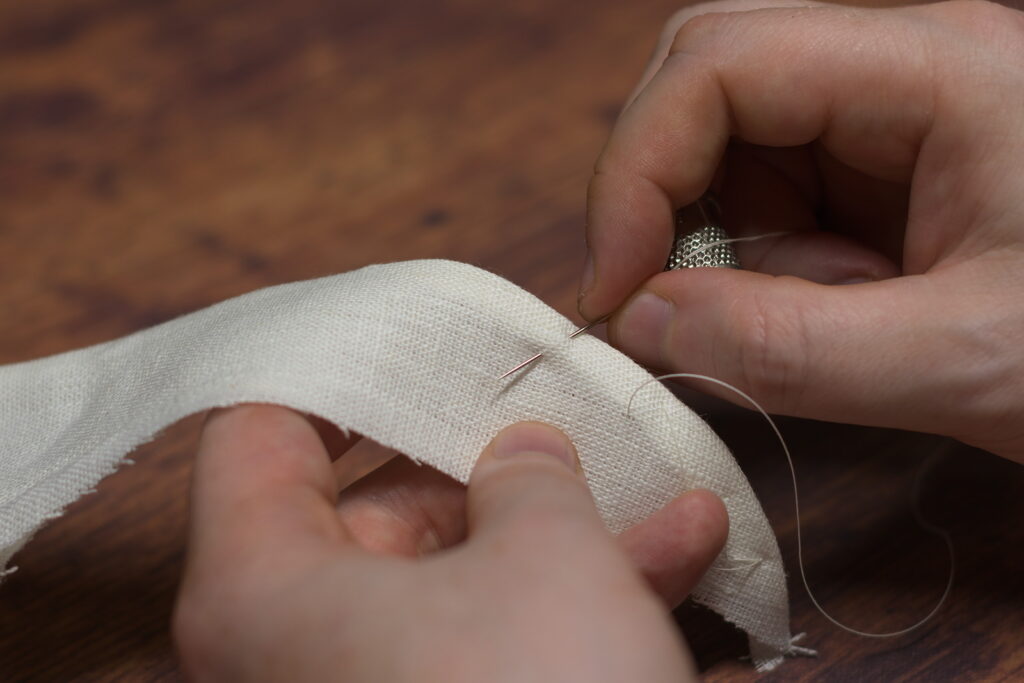
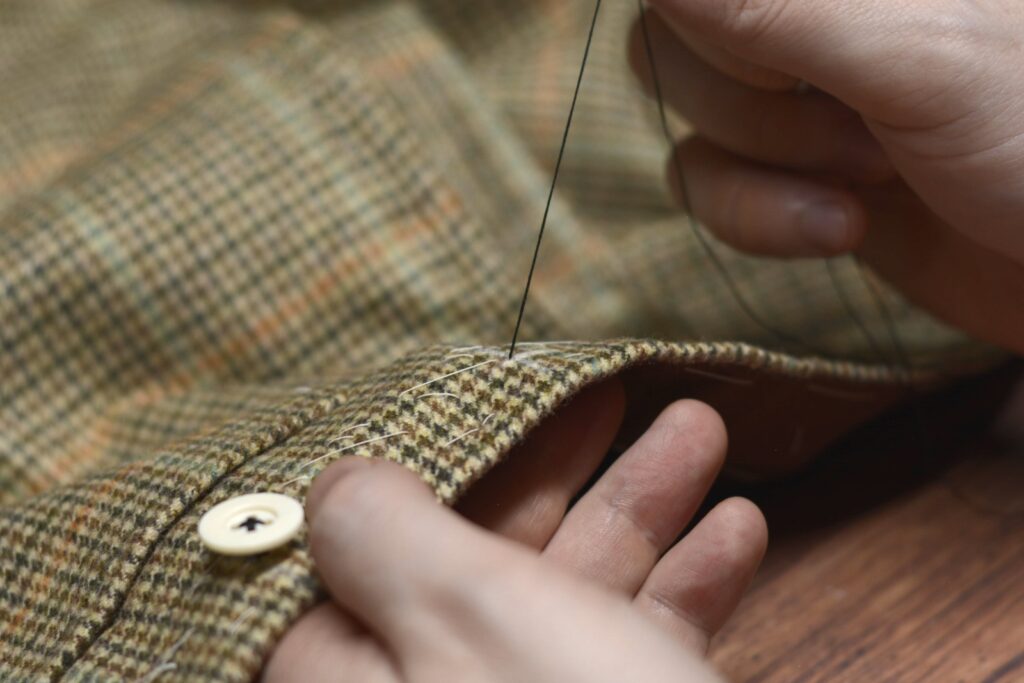
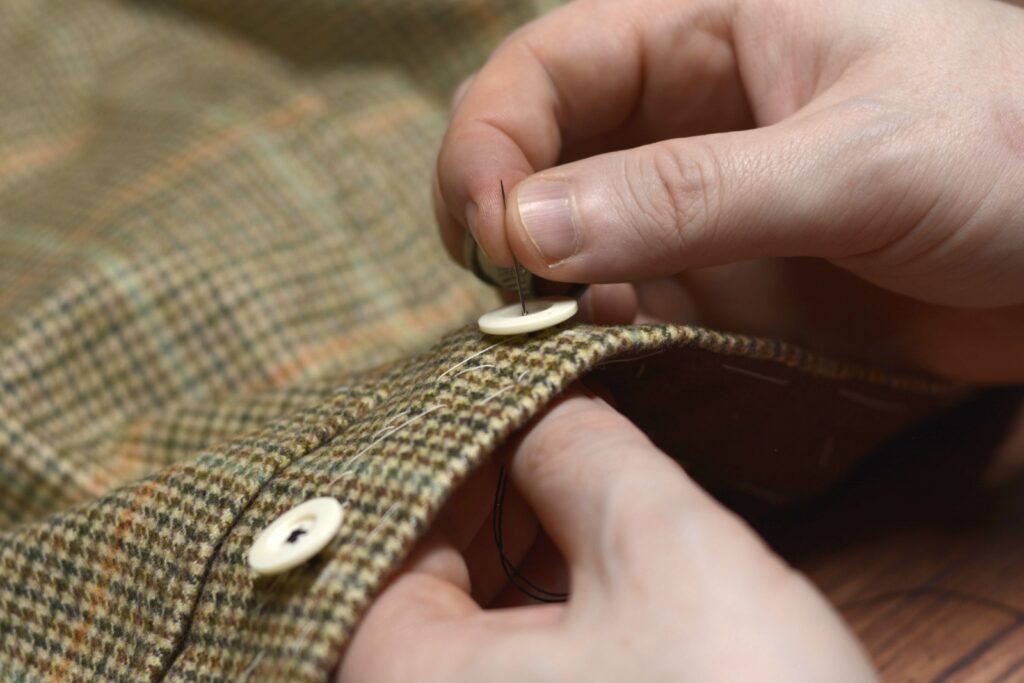
Take a waxed piece of silk buttonhole twist or other thread and knot one end.
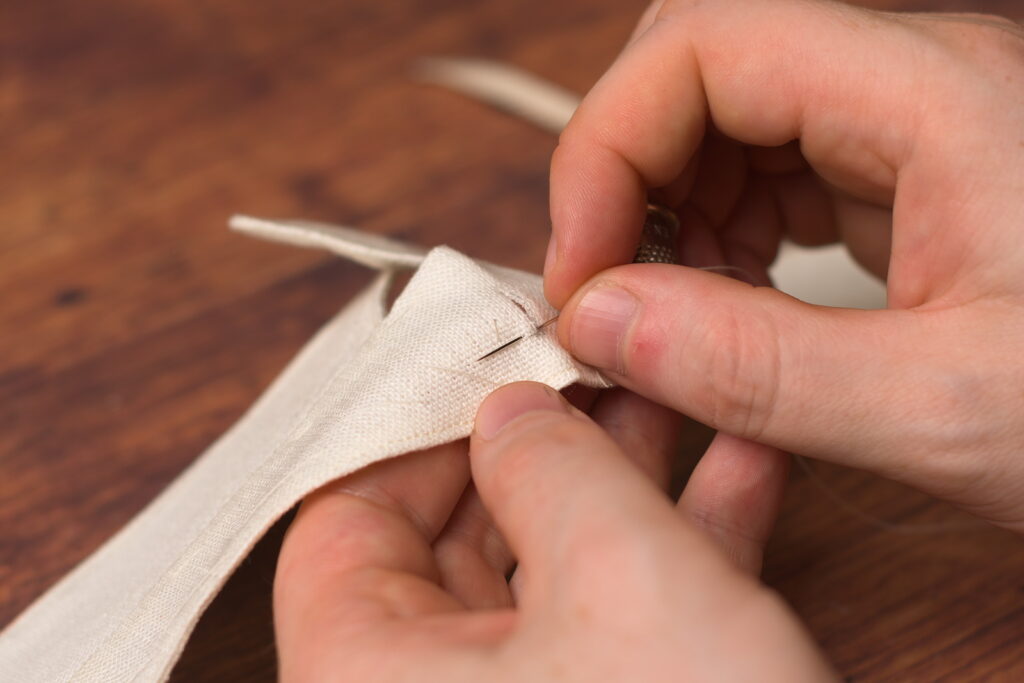
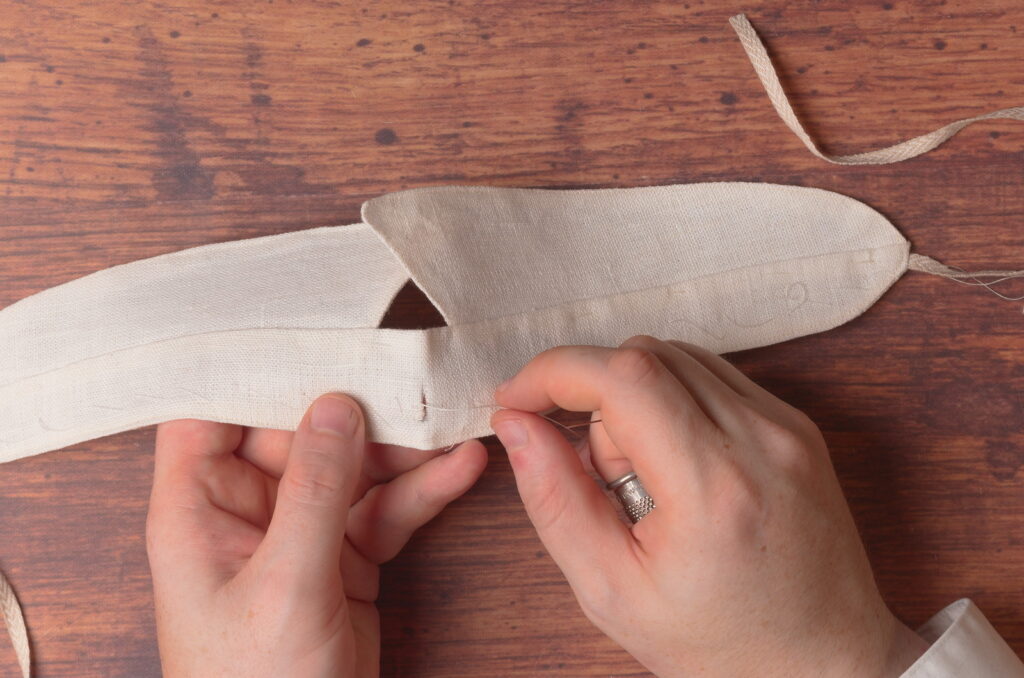
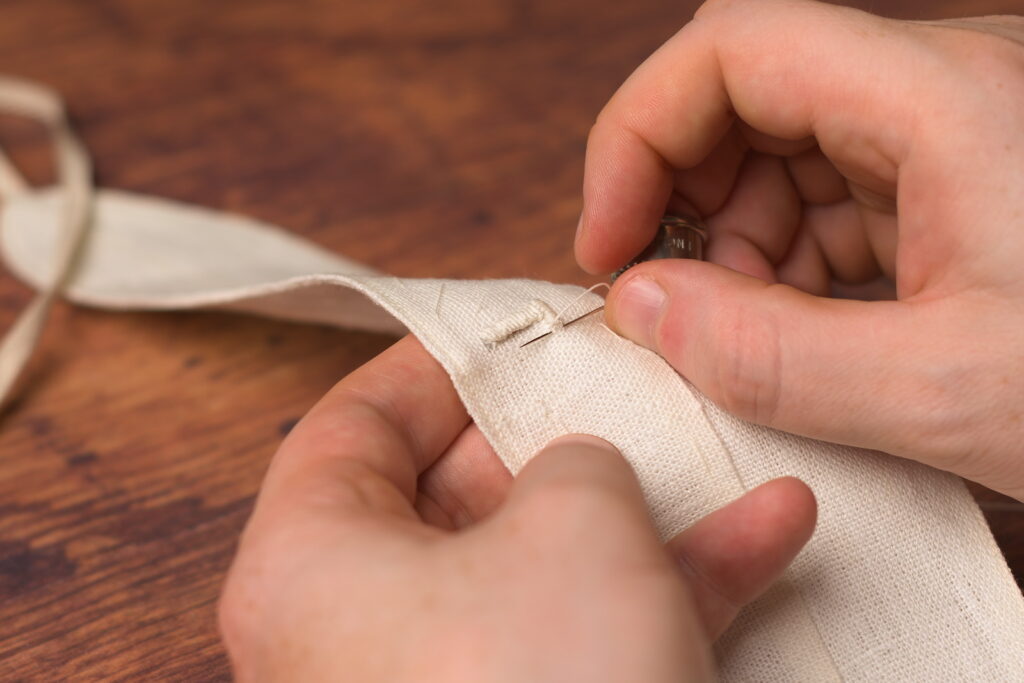
Insert the needle into one end of the buttonhole between the two layers. The idea is to hide the knot in between the layers, out of sight.
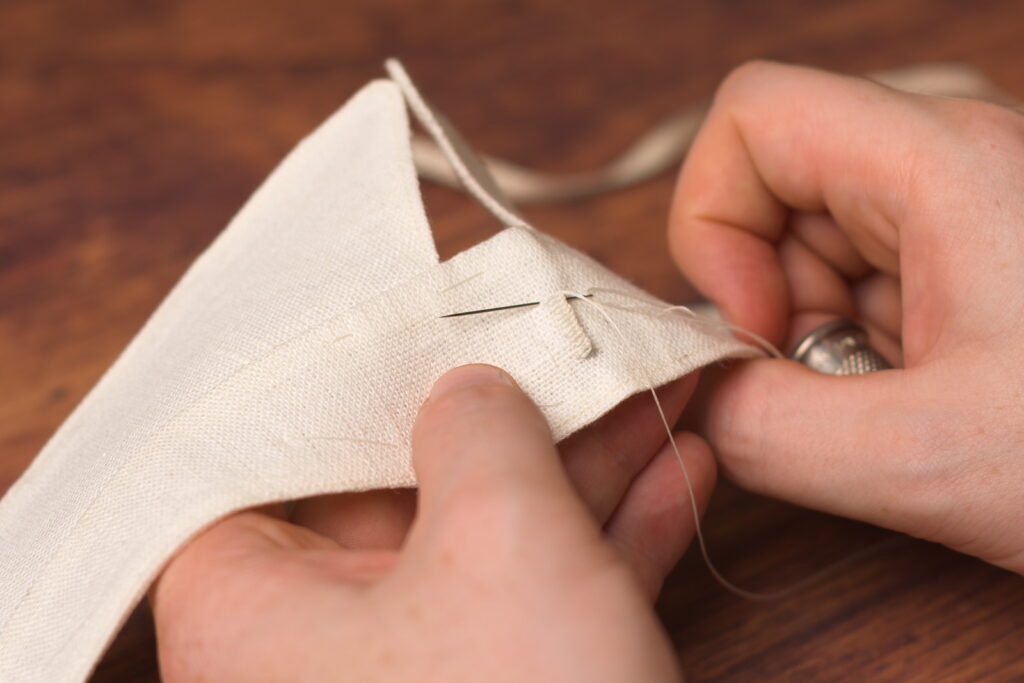
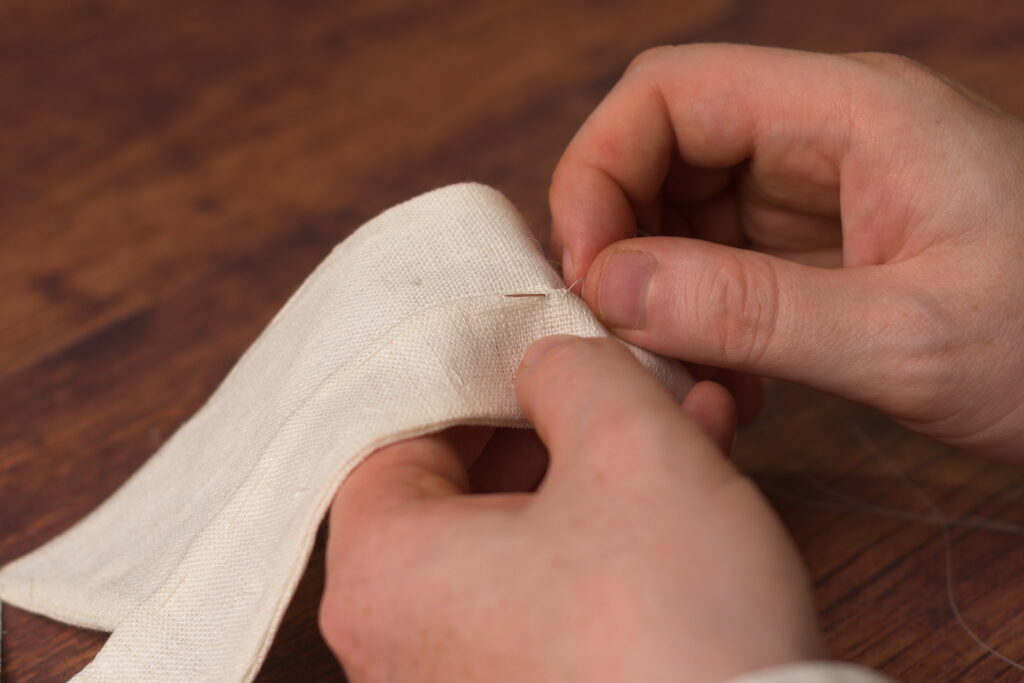
The stitches should be about 1/8″ from the edge of the hole, and fairly close together but not too close that the purls start to get out of place. It’s really a developed skill that will take some practice if you’re new to this.
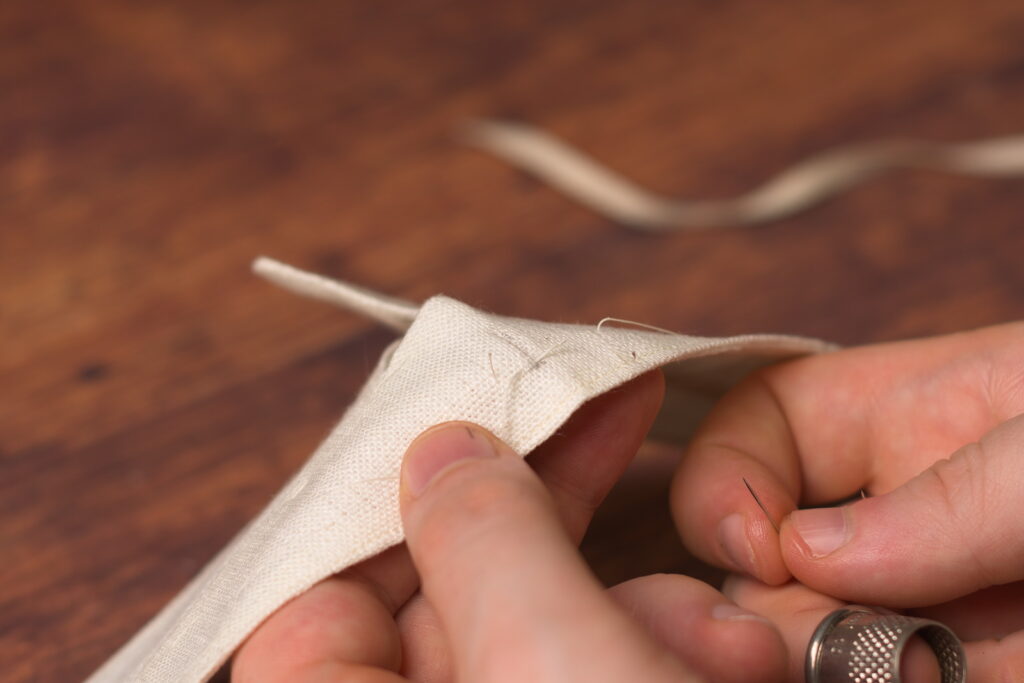
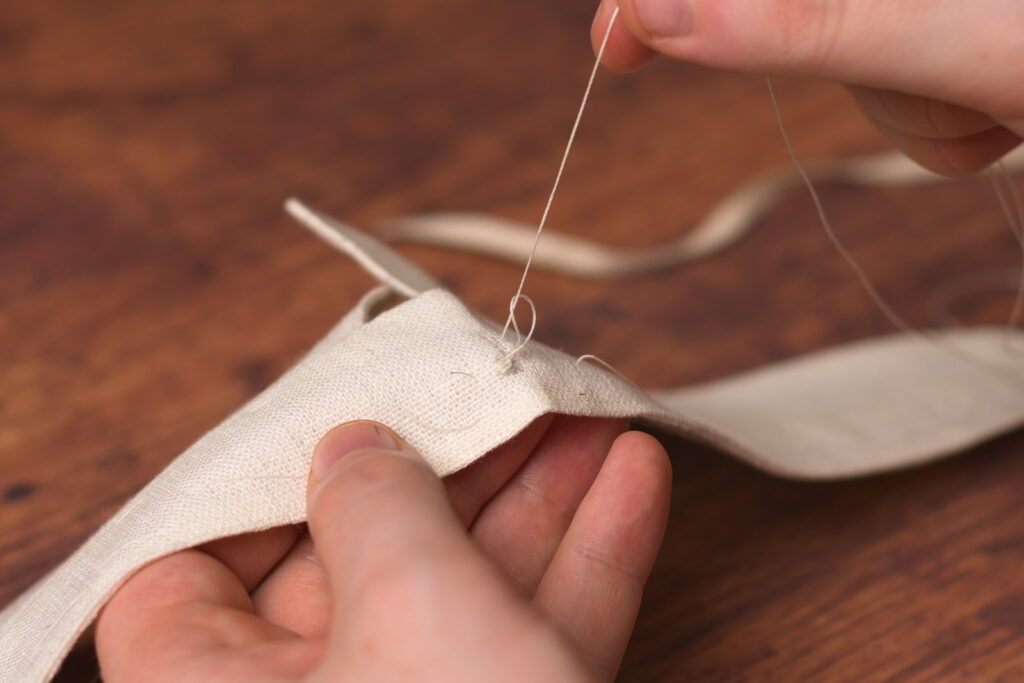
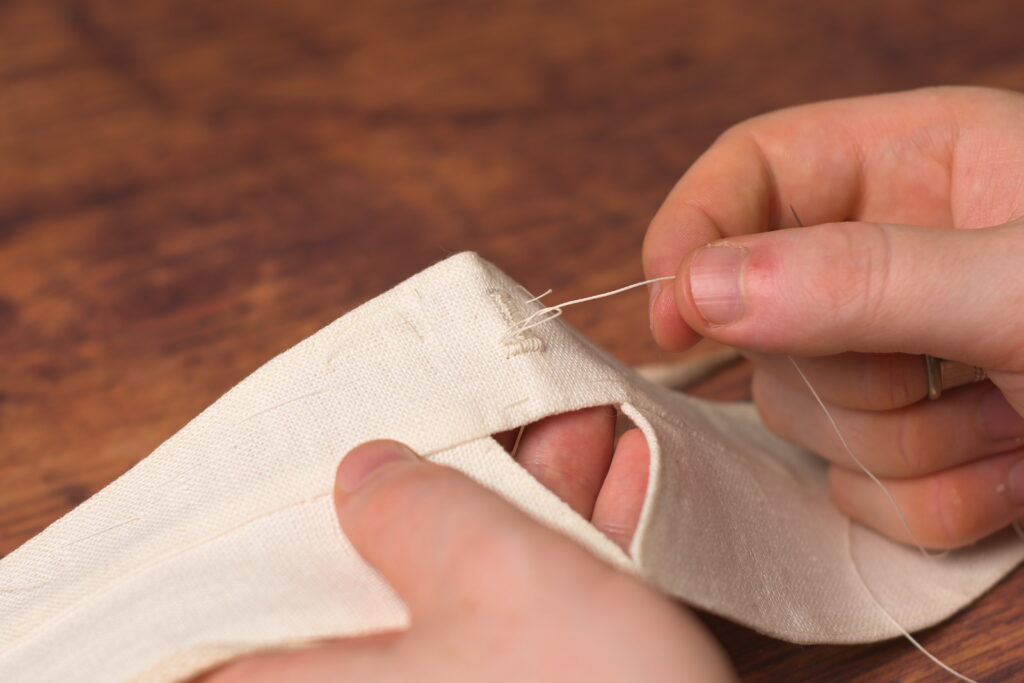
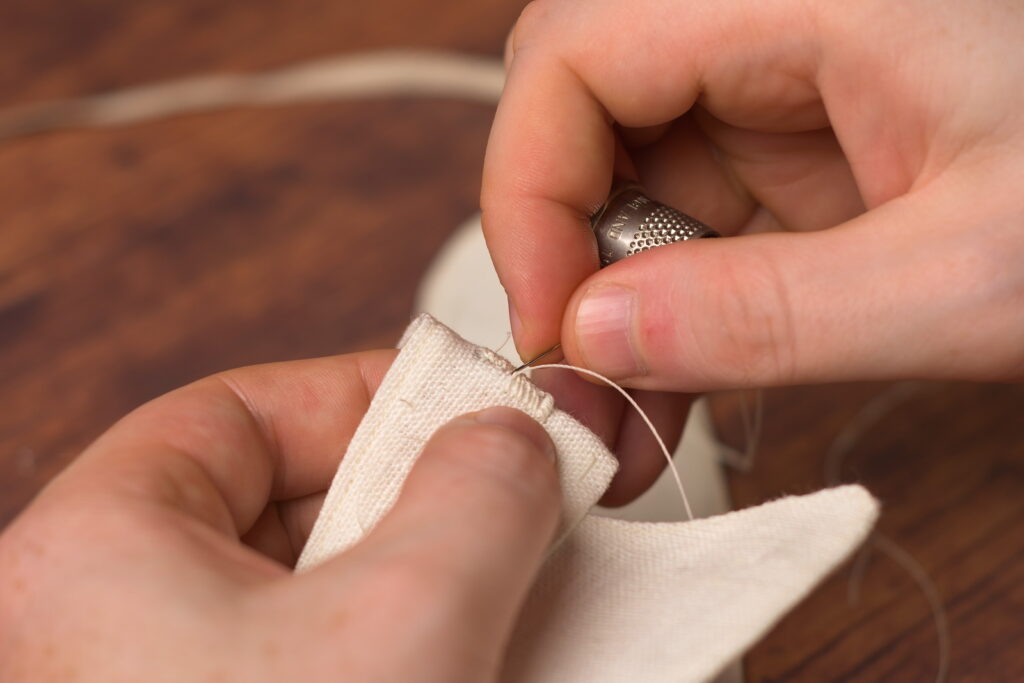
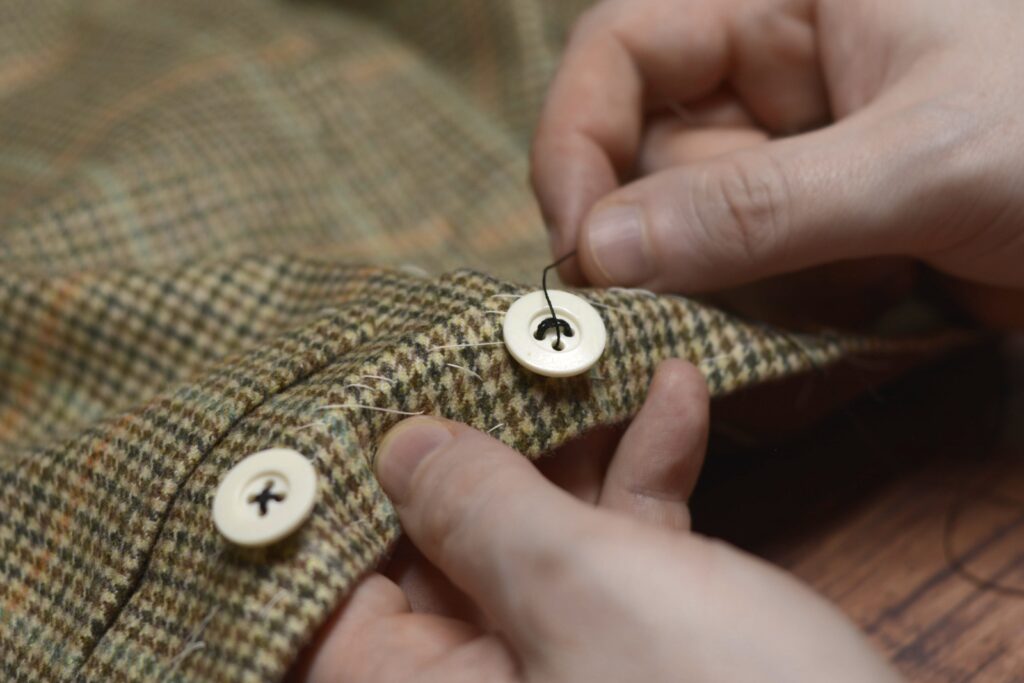
Insert the needle through all layers of the buttonhole this time, coming out right next to your first stitch. Grasp the two threads coming from the end of the needle with your right hand, and wrap them clockwise under the tip of the needle.
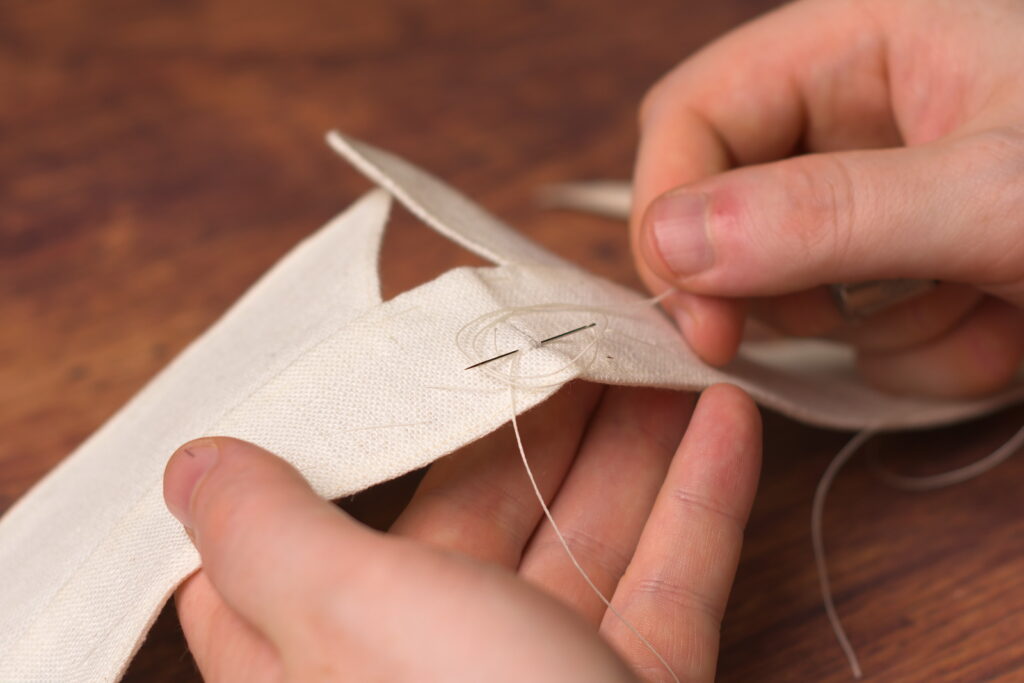
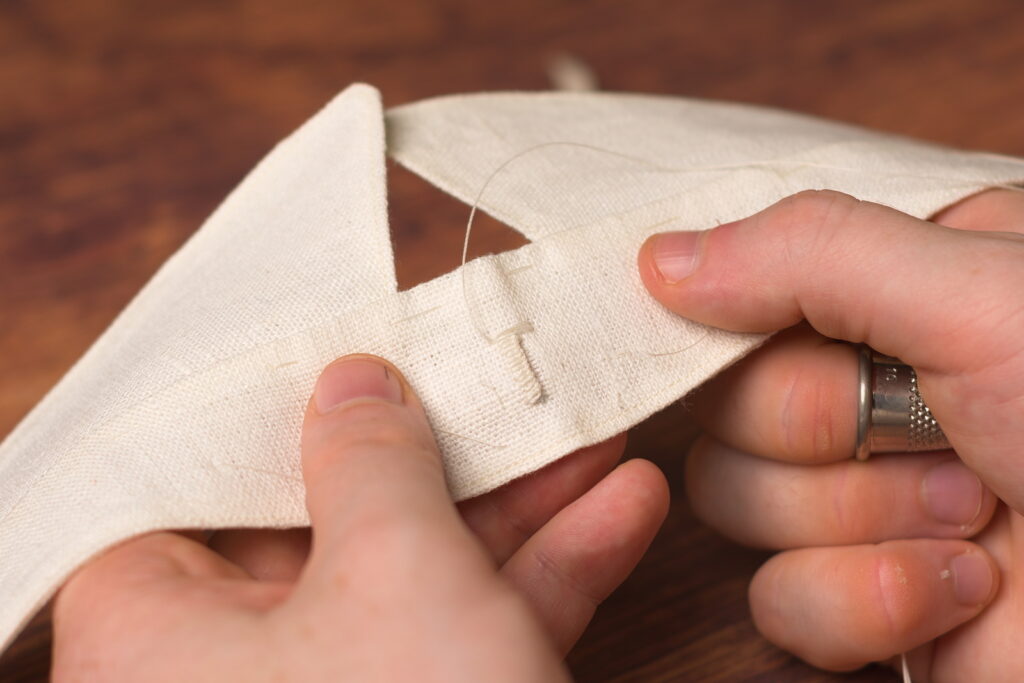
Gently pull the thread tight, forming the purl.
Continue working buttonhole stitches along the first half of the buttonhole.
When you get to the top, make one last stitch, but don’t form the buttonhole stitch.
Instead form a bartack by passing the thread through all layers about three or four times. You’ll have to estimate the exact width as the buttonhole stitches on the other side are not done yet.

Then make small stitches around these threads, catching the collar underneath with each stitch. I typically make 6 – 8 of these stitches.
Then continue making buttonhole stitches along the remaining side of the buttonhole.
Make another bartack in the same manner at the remaining end of the buttonhole.
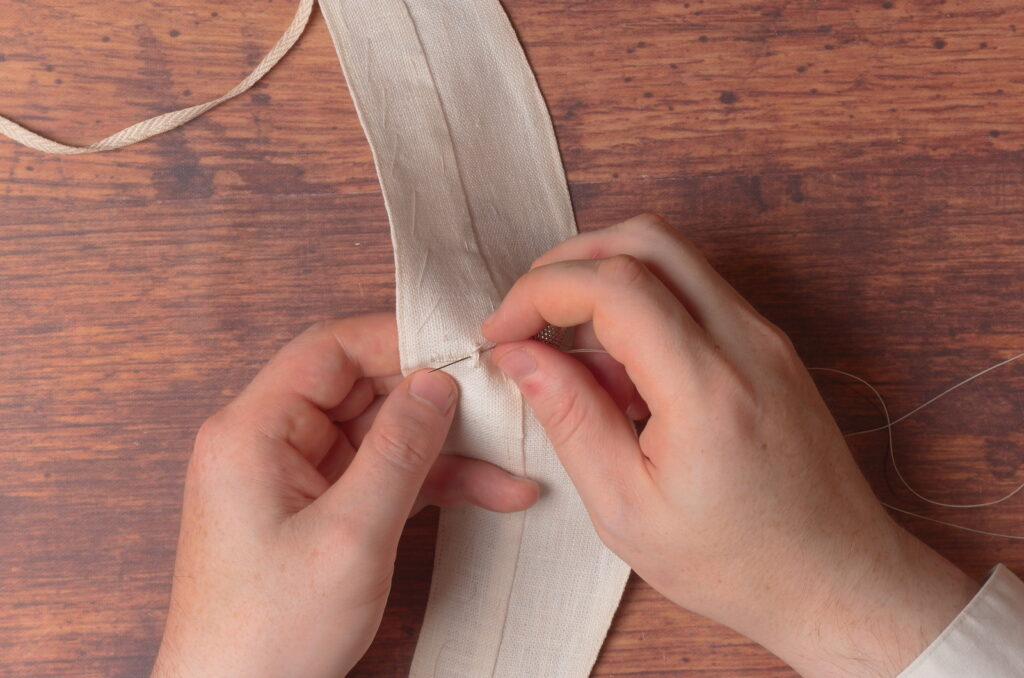
Pass the thread to the underside and run the thread along the buttonhole underneath the stitches, three times in alternating directions to secure the buttonhole.

Trim the thread!
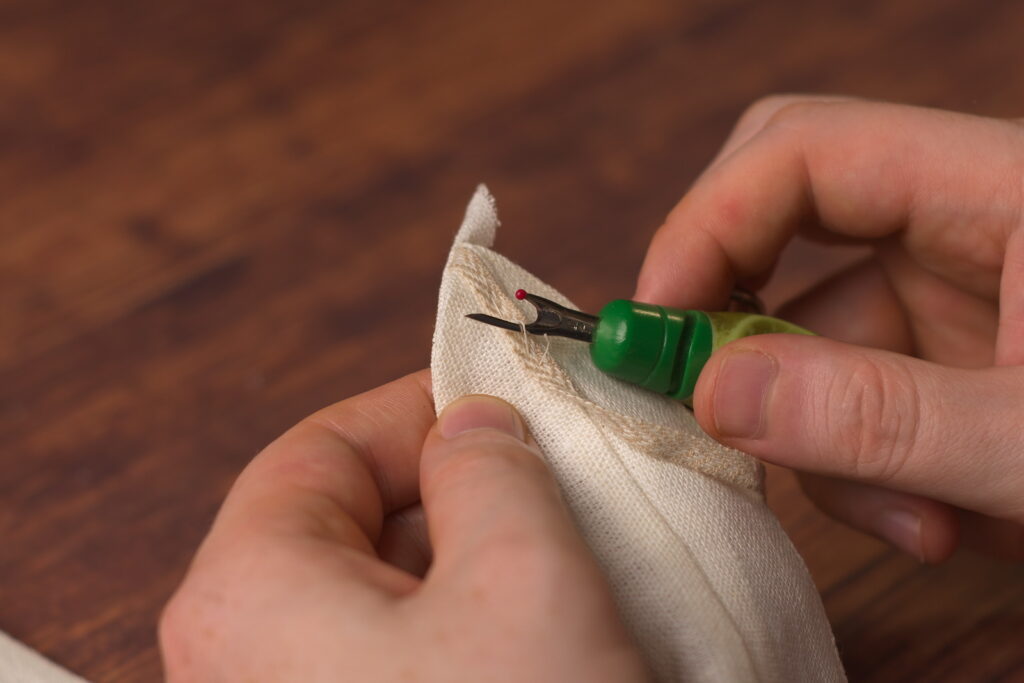
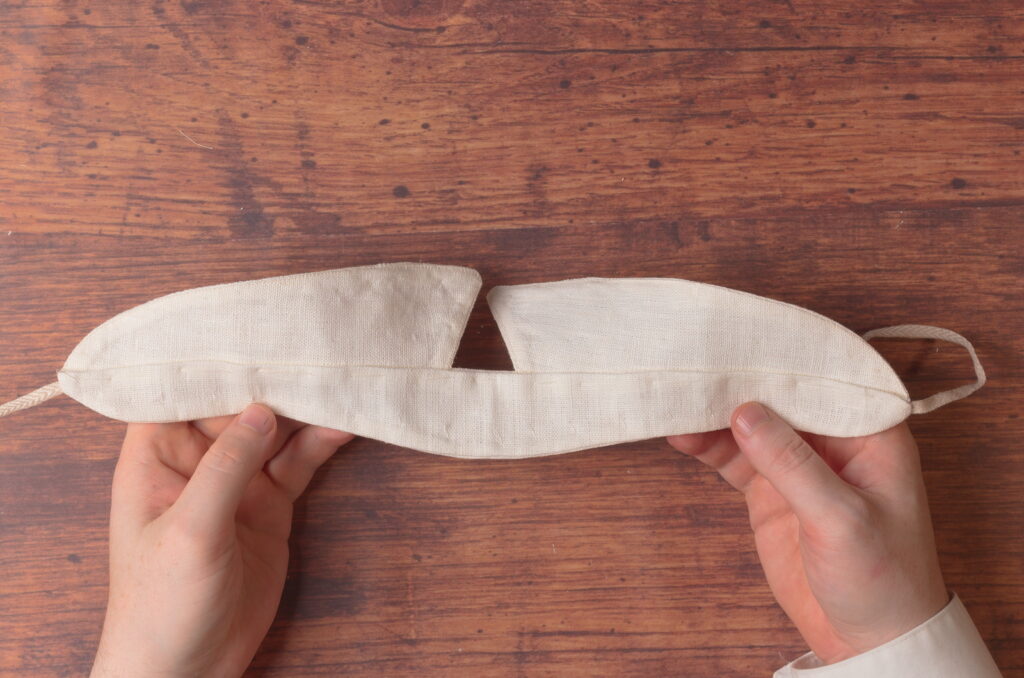
That completes the buttonhole, and with that, your detachable collar. Be sure to remove all the basting stitches!
Collar Construction Part II
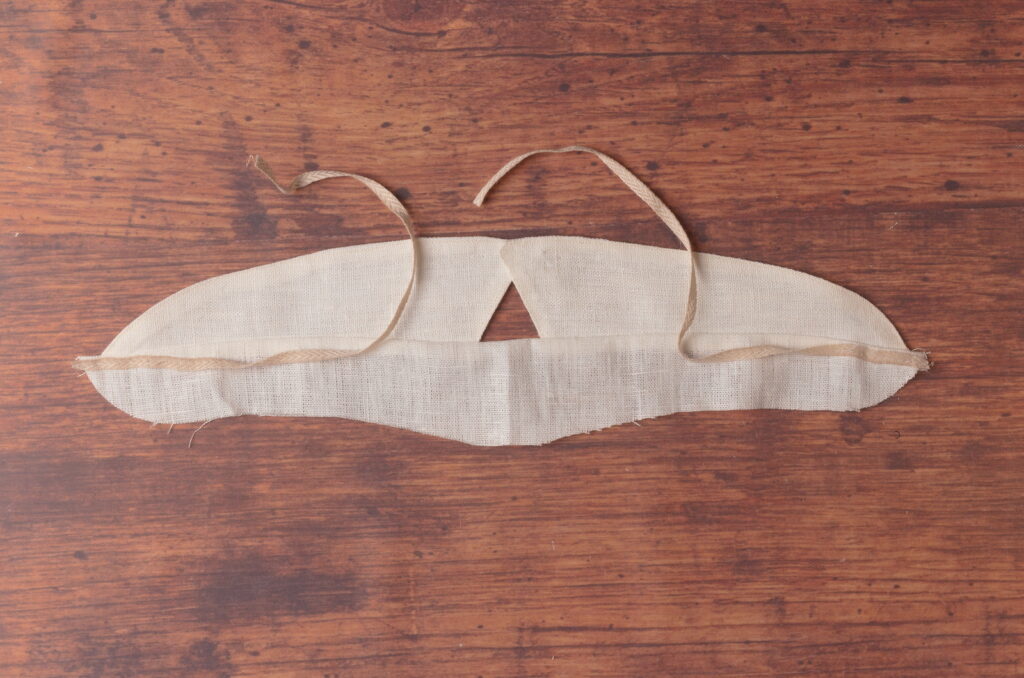
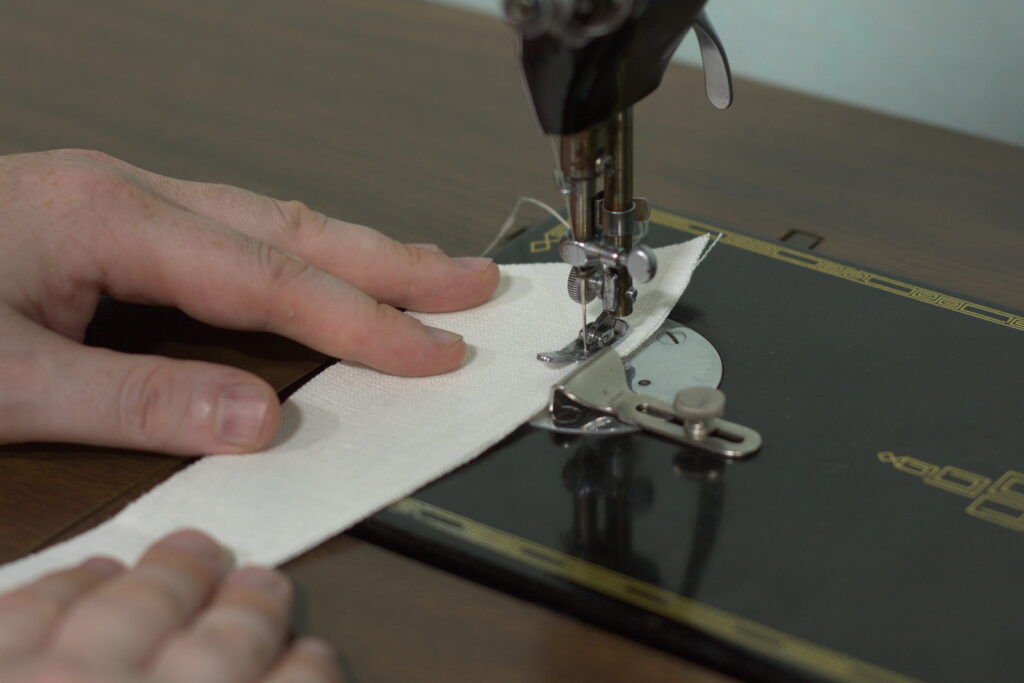
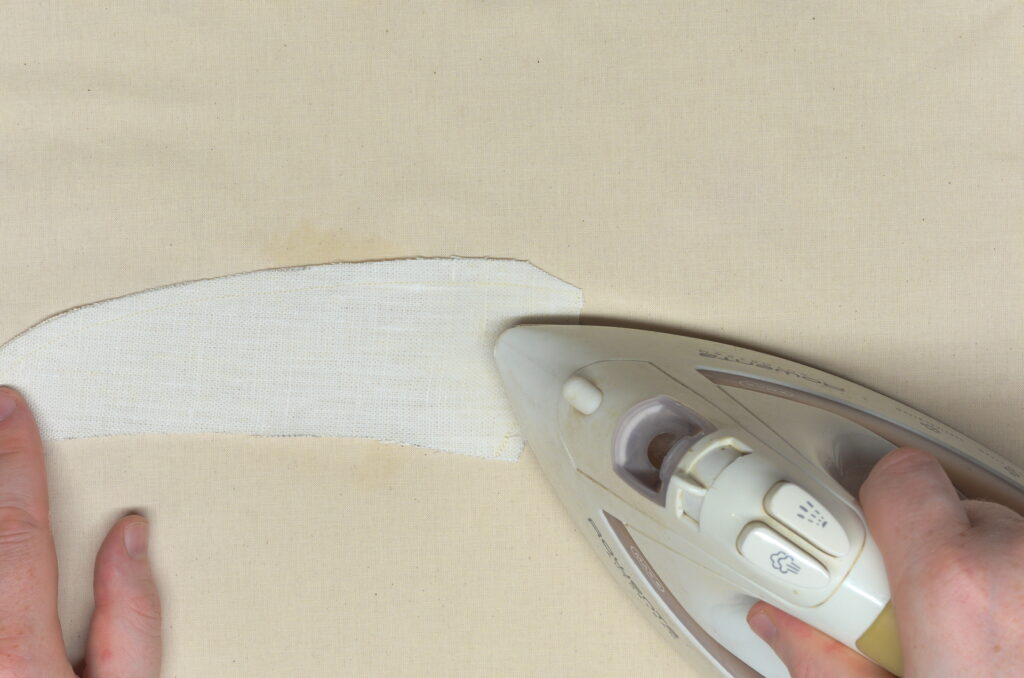
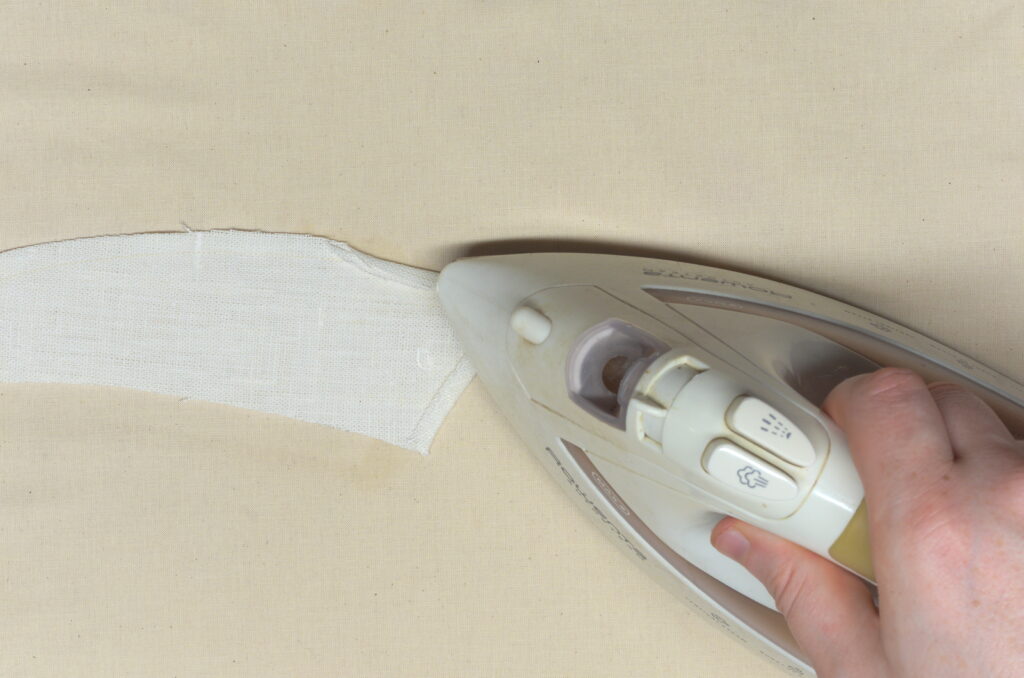
Cut two 12″ lengths of stay tape, and lay them on the right side of the collar band, about 1/16″ below the seam line you just pressed. The stay tape should extend beyond the ends of the collar by about 1/8″. Baste the tape in place at each end for about an inch or two, just enough to keep them in place.
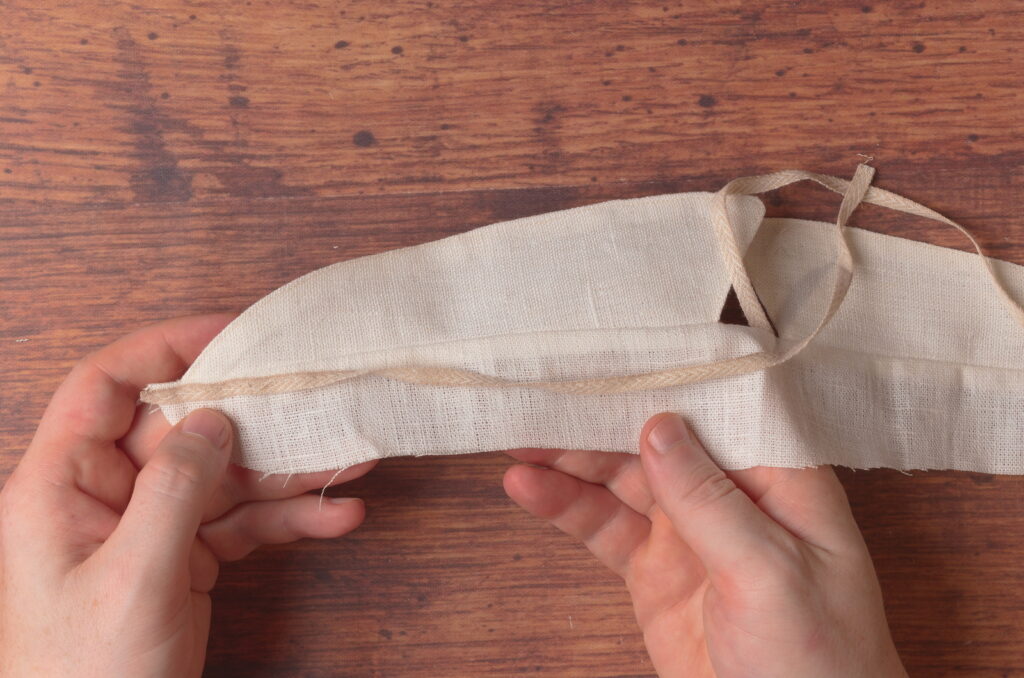
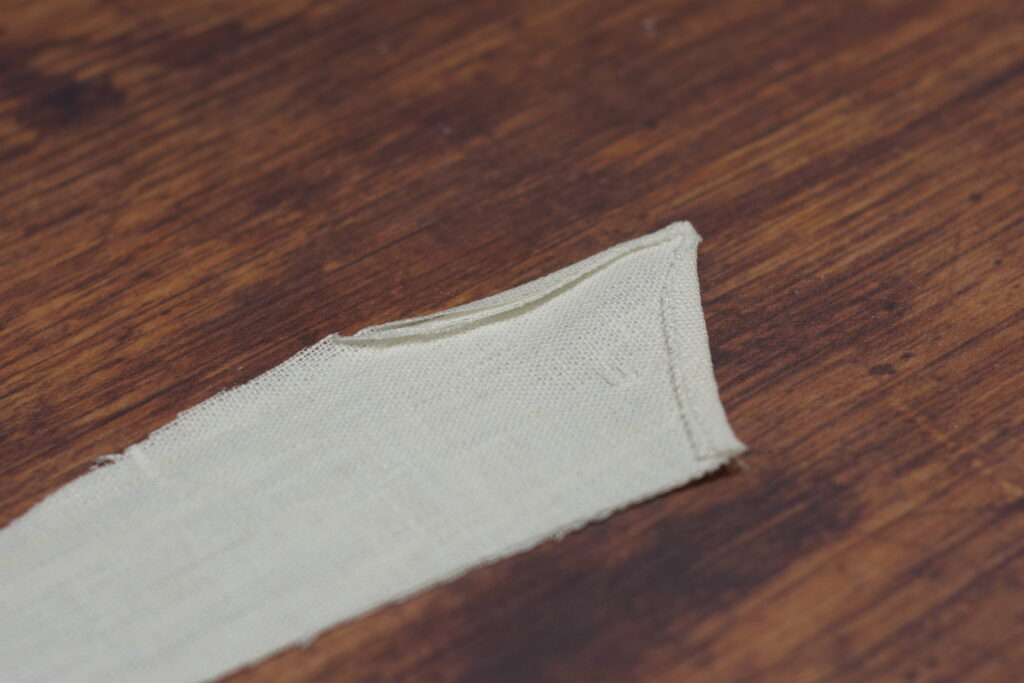
Here’s what you should have so far.
Place the remaining collar band right side up on the table. Flip the collar assembly over and lay it on the collar band so that right sides together, and align the lower and outer edges.
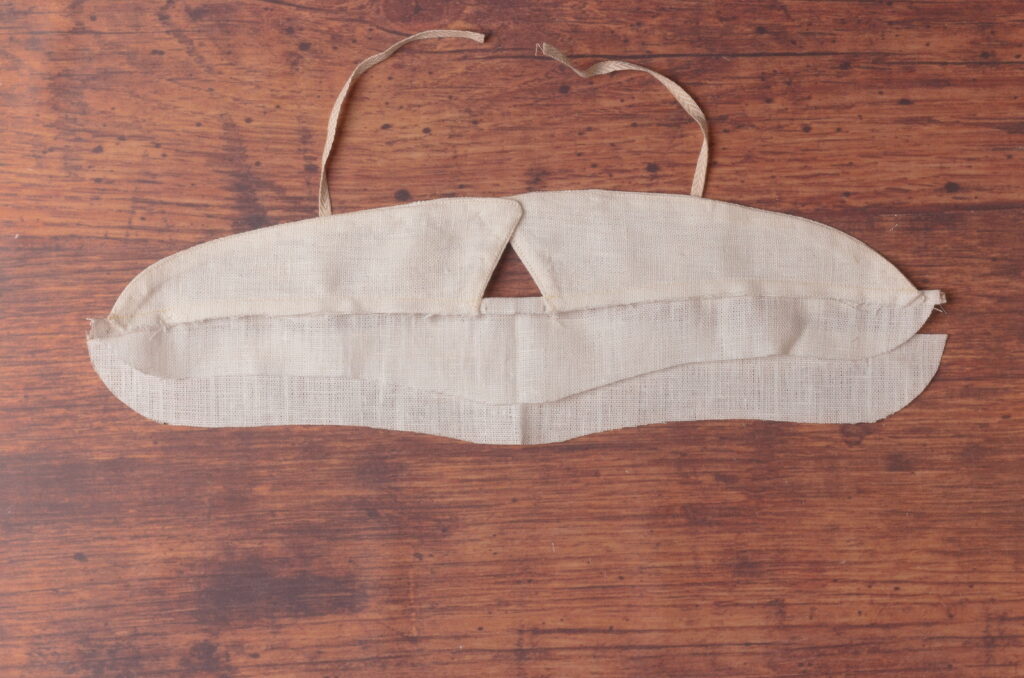
Beginning at the center of the collar band, baste the two bands together towards one end of the collar.
As you’re basting, allow the fabric to drape over your hand. This shortens the lower piece and naturally lengthens the upper band, so that when it’s worn around the neck, there will be no excess fabric bunching up on the inner collar. This also encourages the collar to roll around the neck a little.
Baste the other half of the collar as well.
Make sure you keep the stay tape out of the way as you baste. These should be coming from the inside (really the ride sides) of the collar towards the top to keep out of the way of the stitching.
You can see when the collar is layed flat, that there is some slight bunching up due to the lower collar band being shortened.
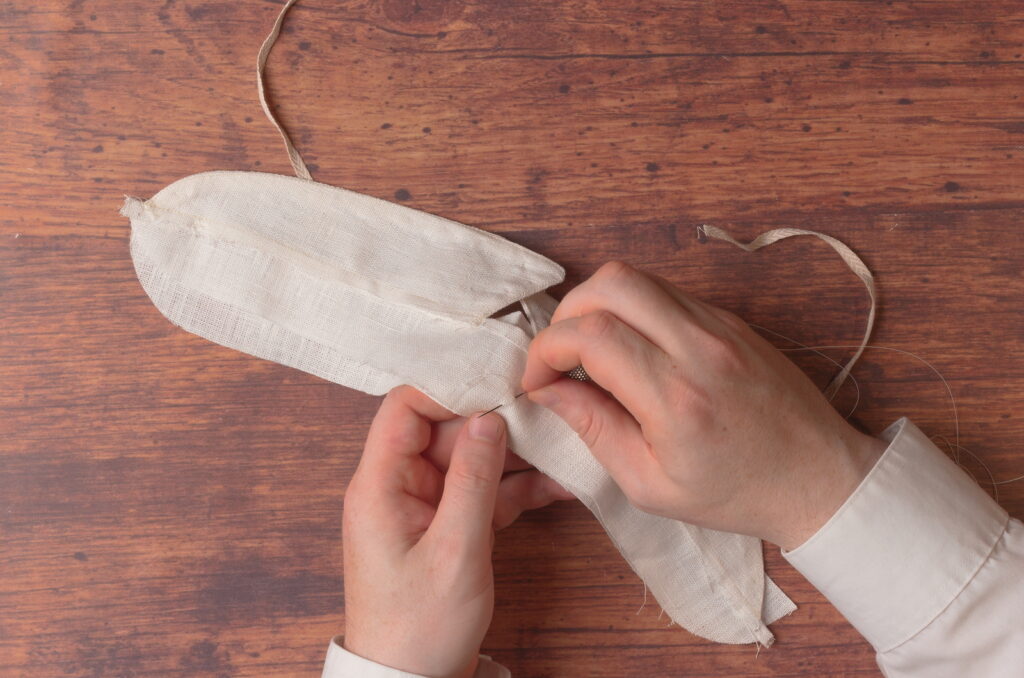
Sew the collar band along the lower edges using a 1/4″ seam allowance, starting from the top of the folded seam at the end of the collar, precisely where it meets the relief cut of the collar point. The closer you can get this the better, and feel free to go back after and restitch closer if necessary. You don’t need to remove any stitching unless you’ve sewn too far inwards.
Continue sewing through to the other end.
It’s hard to see, I know, but I can’t stress enough how important it is that the seam end exactly where the relief cut ends, or just ever so slightly to the inside of that. Otherwise, you’ll end up with a sort of extension to the back of the collar which doesn’t look nearly as good.
I didn’t photograph it for some reason, but you may notice that the collar band edges don’t line up at one or both ends, due to the way we held the collar during basting. Trim the ends flush as necessary.
Here’s the stitch line near the center of the collar, following the curves nicely.
And what you should have so far.
Trim the curves down to about 1/8″ at each end.
As well as near the center of the collar.
Remove the basting stitches.
Turn the collar band right side out.
Use a point pressing tool in the curved areas as necessary.
Don’t forget to remove the basting stitches from the linen tape as well! You can also pull on the tape gently to help pull the curved areas of the collar band into position.
Again roll the seam to the wrong side of the collar by about 1/16″, as you did for the collar points.

Baste along the collar band, finalizing the position of the seams. Keep at least 1/2″ away from the mid-seam on the collar to allow room to turn under the raw edge.
I’m still allowing the fabric to drape over my hand here as I baste, though it’s not important at this point, as all the fullness has already been worked out for the most part.
Here’s the collar after basting.
Turning to the inside of the collar, turn under the raw edge so that it’s even with the stitching underneath, just covering it. The ends are a little fussy due to all of the various layers coming together.
Baste the folded edge closed.
When you get to the center of the collar, make sure the fold is set back 1/16″ or so, in a similar manner to the rest of the collar.
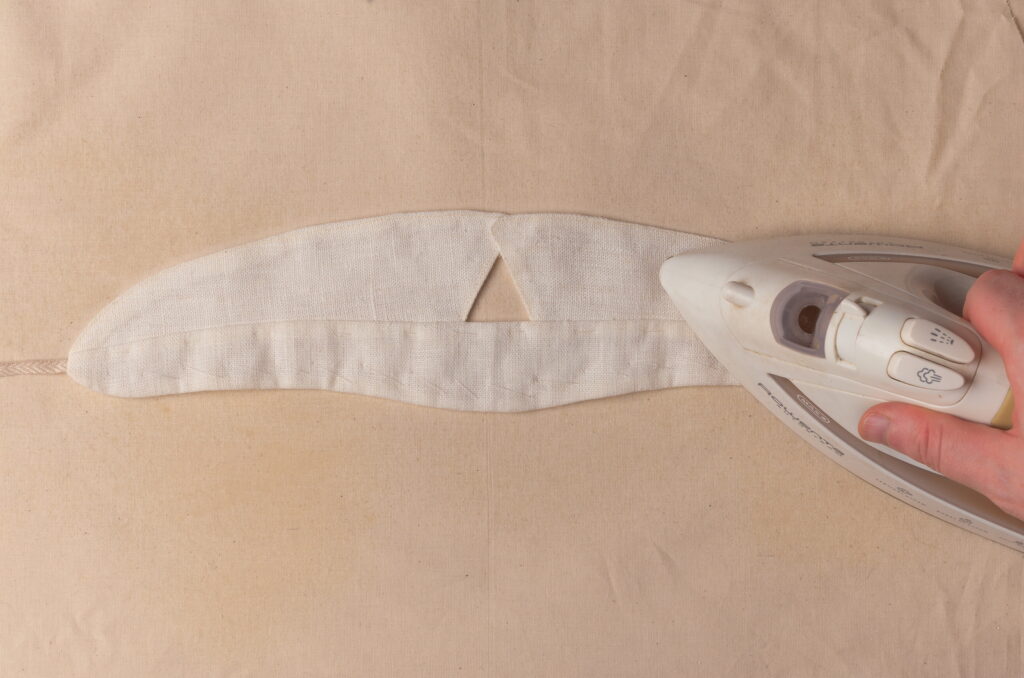
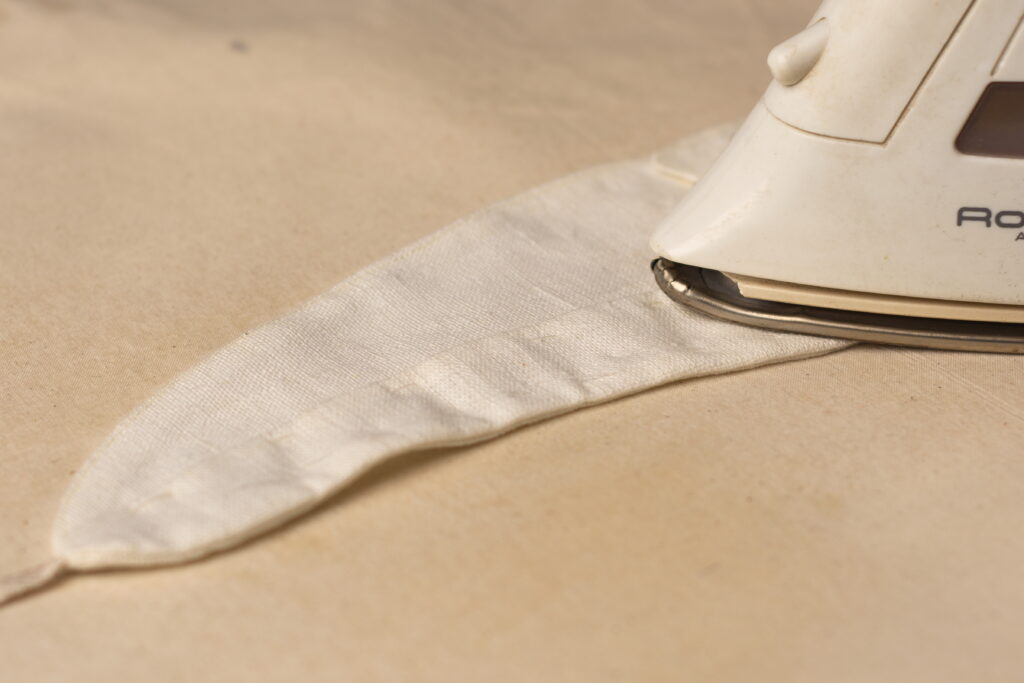
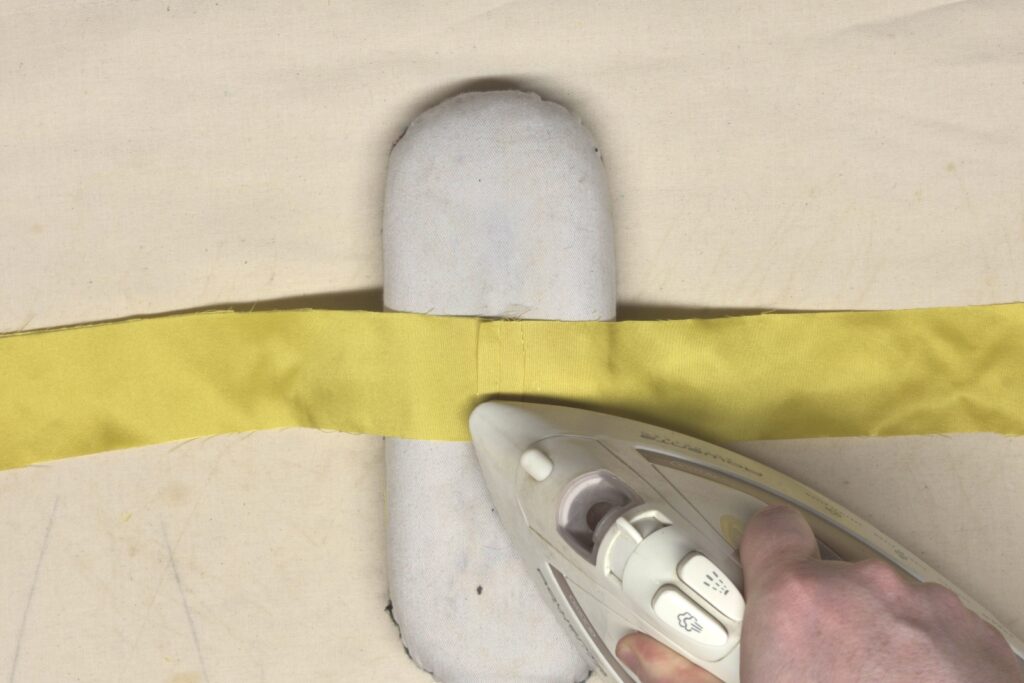
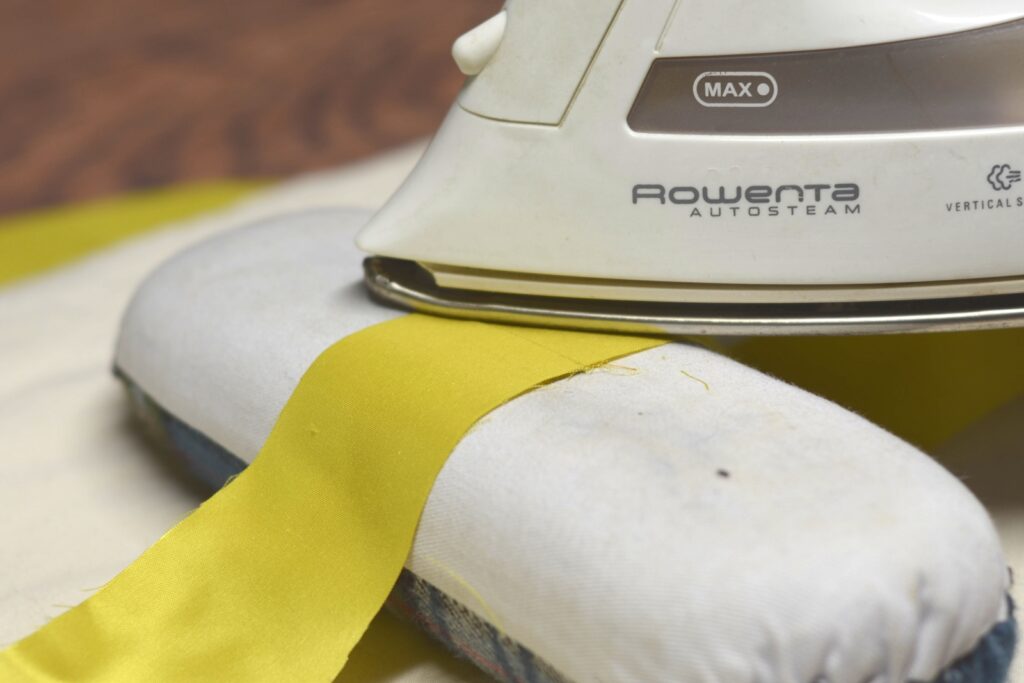
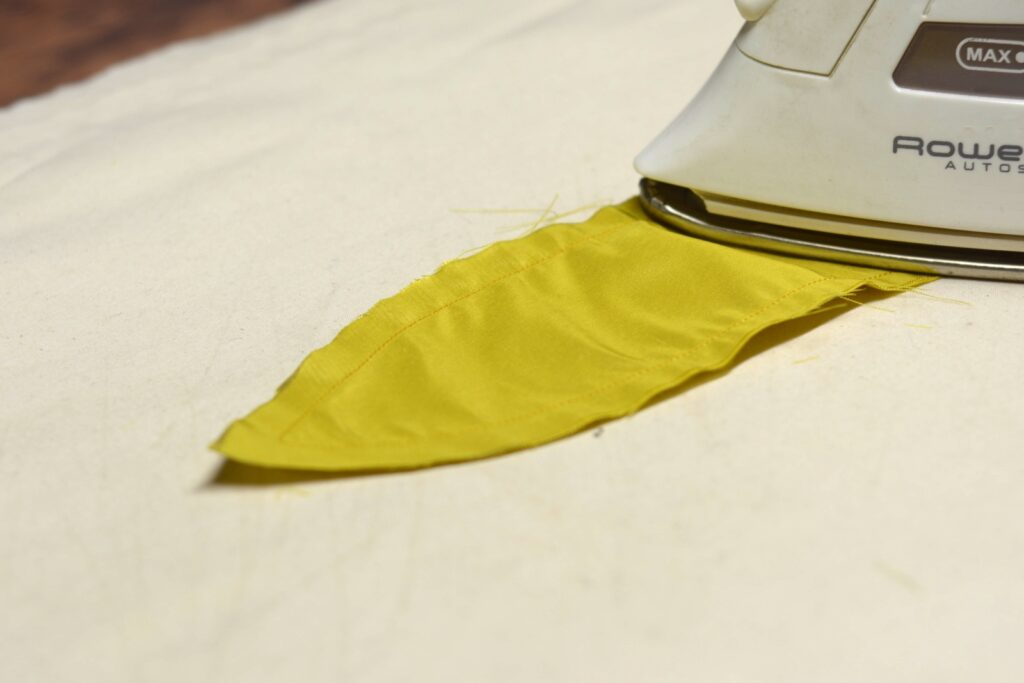
I like to give everything a good press here with some steam. Be careful that the iron doesn’t get caught up on the collar points like mind did in the video, very annoying!
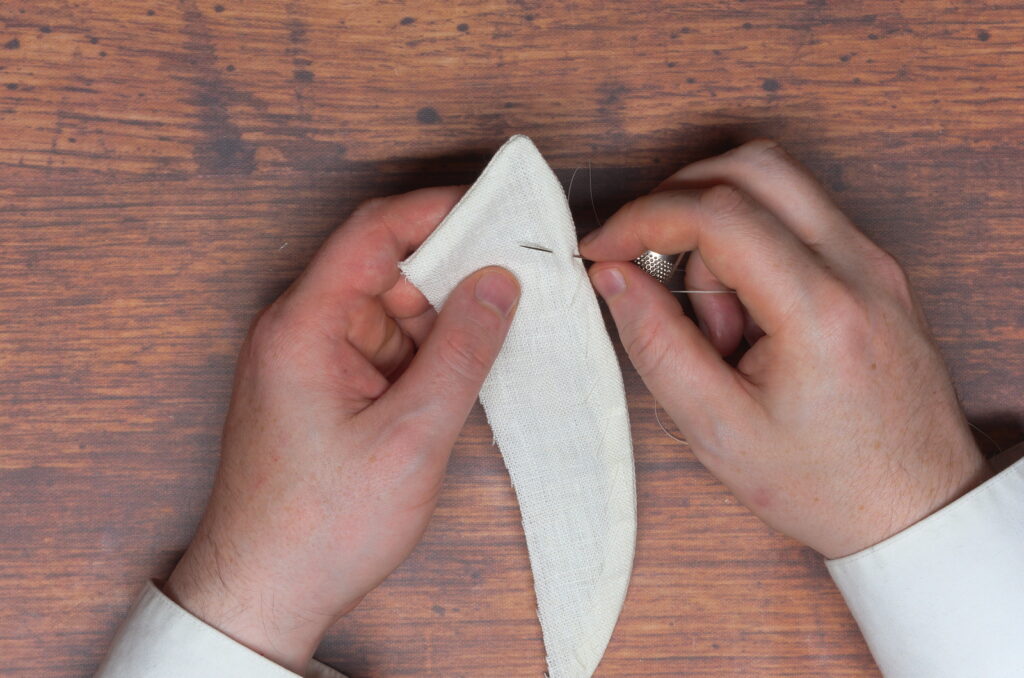
Finally, fell the seam closed from end to end using a small 1/8″ stitch. Be careful not to let the stitches show through on the right side.
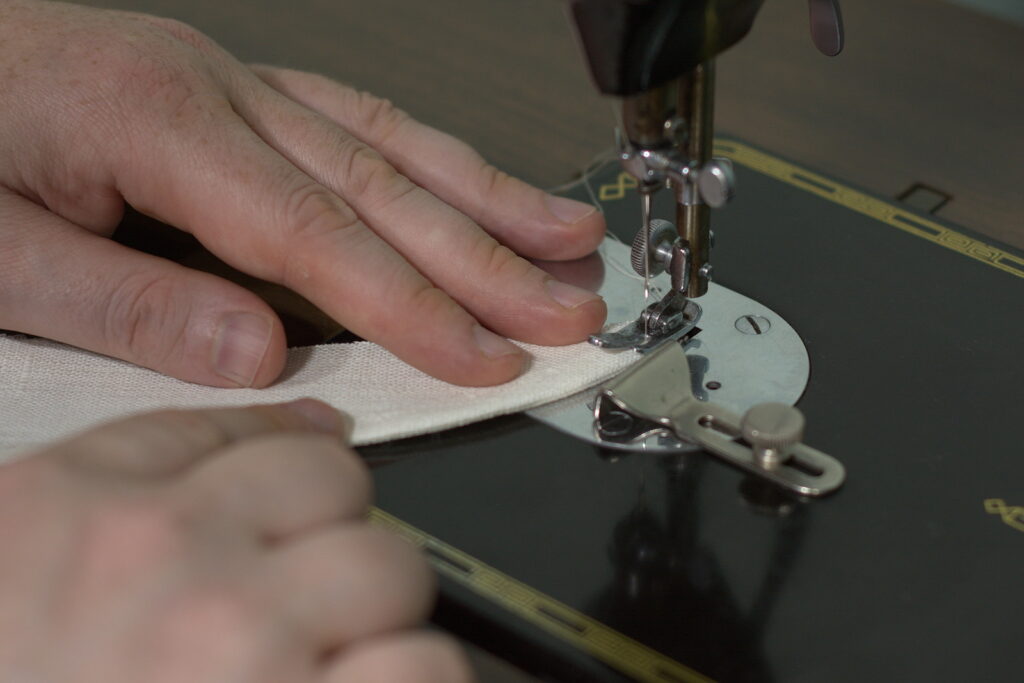
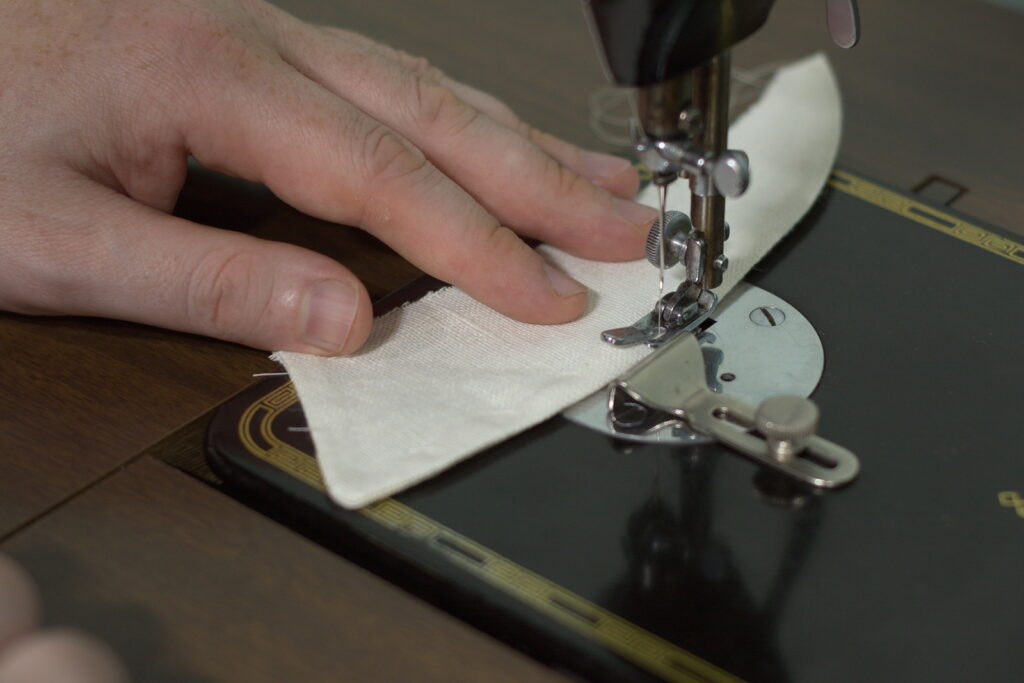
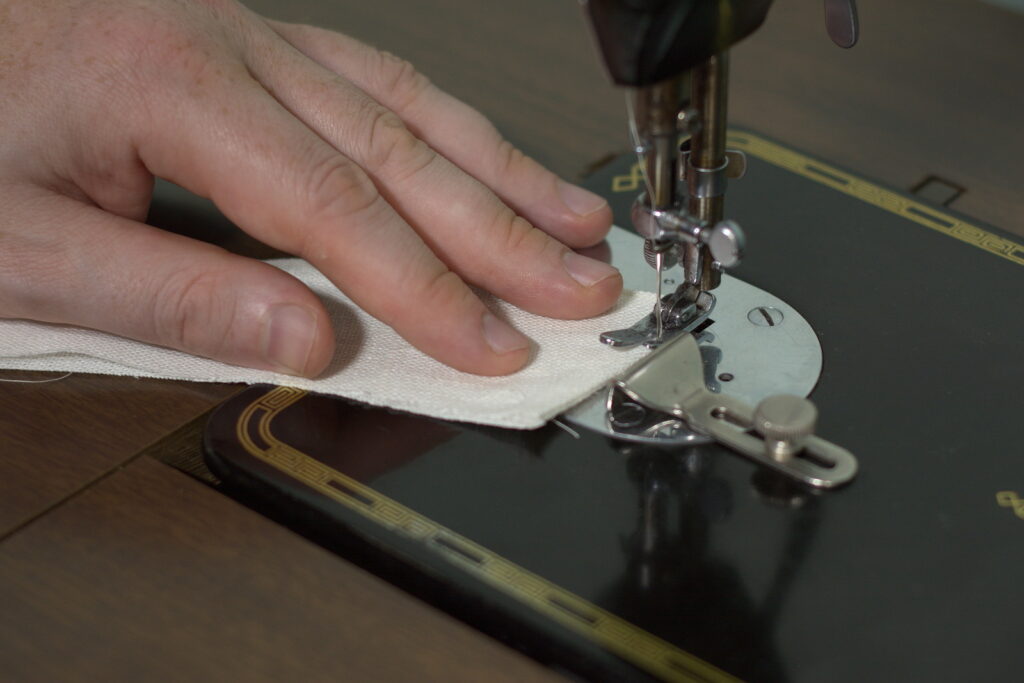
To complete the collar, top stitch the outside edge of the collar band from end to end, about 1/8″ from the edge (or whatever you did for the upper half of the collar). Take care around both ends and use a fresh, sharp needle, as the layers are pretty thick here.
Collar Construction Part I
Construction of the detachable collar begins with the upper part which forms the collar points. Take each pair and place them right sides together, carefully aligning the edges. I don’t baste these, but rather just sew them as is, as the pieces seem to be small enough that the friction of the fabric holds them together.
Beginning at the front edge where it meets the bottom, sew the two halves together using a 1/4″ seam allowance.

When you get to the collar point, instead of making a sharp turn with your stitching, take a single stitch across the point at a diagonal. This gives a bit of room for the fabric when you turn the collar.
And continue sewing along the top edge of the collar until you meet the bottom edge.
Here are the results so far after repeating for the other half.
Here’s a closer shot of the collar point showing that diagonal stitch. It does take a bit of practice to get the exact positioning of the point correct as you stitch, so that the seam allowances line up properly.
Now carefully trim the corner at the point, keeping about 1/8″ from the stitching to keep the seam from coming undone.
Then further trim the seam allowances at the point, tapering the original miter into the seam allowances.
Turning the Collar Points
Now press the collar flat, especially near the front edge, with a bit of steam just to soften the fibers and make them more pliable.
While the fabric is still warm, carefully turn over the seam allowances to one side, directly on the seam line, and press with your fingers. I’m only turning under the front edge and an inch or two of the top edge, not the entire seam.
Press the seams with the iron and a little more steam until it is completely dry. This process helps with the turning of the collar by keeping the seam allowances in some sort of order, giving a crisper finish to the collar.
Here’s the collar point so far. I did go back and adjust the point again after this photo, as it wasn’t quite right.
Repeat for the other half.
Now turn both halves of the collar point, using a point pressing tool as necessary to get into the narrow pointed areas.
This is really where you develop the point on the collar. If it doesn’t look good here, then it won’t look good after the collar is completed, so take your time here! Also make sure the two points are as identical as possible to each other.
As you’re turning the seams and getting closer to the final position, keep one side of the seam back from the other, kind of rolling it away from the edge with your fingers. The setback should be about 1/16″, maybe 1/8″, depending on the thickness of your particular fabric.
Baste along the seam about 1/4″ from the edge, and finalizing the position of the setback as you go.

Repeat for the other half, being sure to make it a mirror image with regards to the setback.
Top Stitching
Due to setting back the seam at the upper edges of the collar, there will be a slight discrepancy with the raw edges at the bottom raw edge. Trim any excess fabric flush, which will make it easier to sew to the collar band.
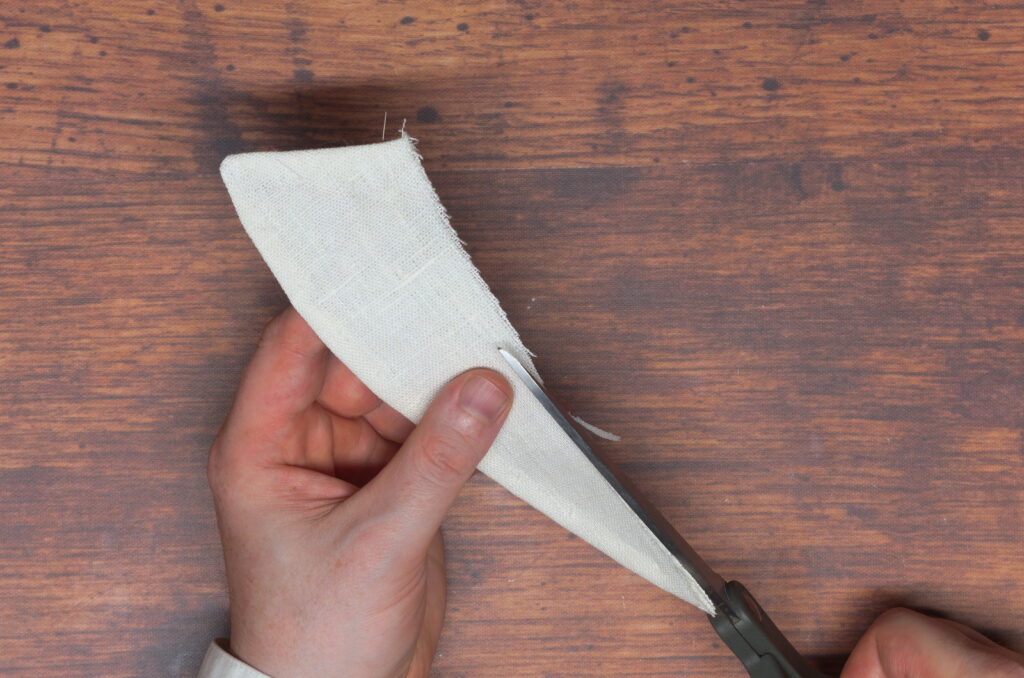
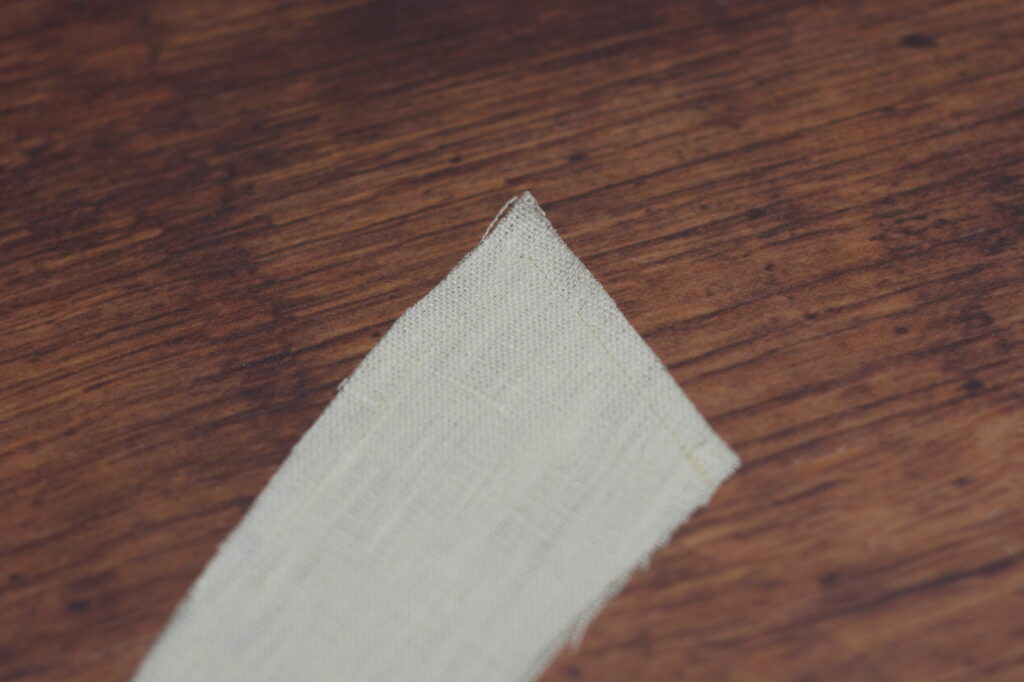
At the back edge, the pointed section needs to be trimmed to make it fit into the collar band. Measuring from the bottom edge, mark a point along the folded seam exactly 1/4″ from the bottom.

Carefully trim the across the point of the collar, just to the lower edge of the mark you made. The exact angle doesn’t matter too much, but I find keeping it at a right angle to the outer seam gives good results.
Finally, top stitch around the upper and front edges of the collar, keeping 1/8″ from the edge.
Try to be as consistent as you can, especially around the front point, though this does take some practice and experience.
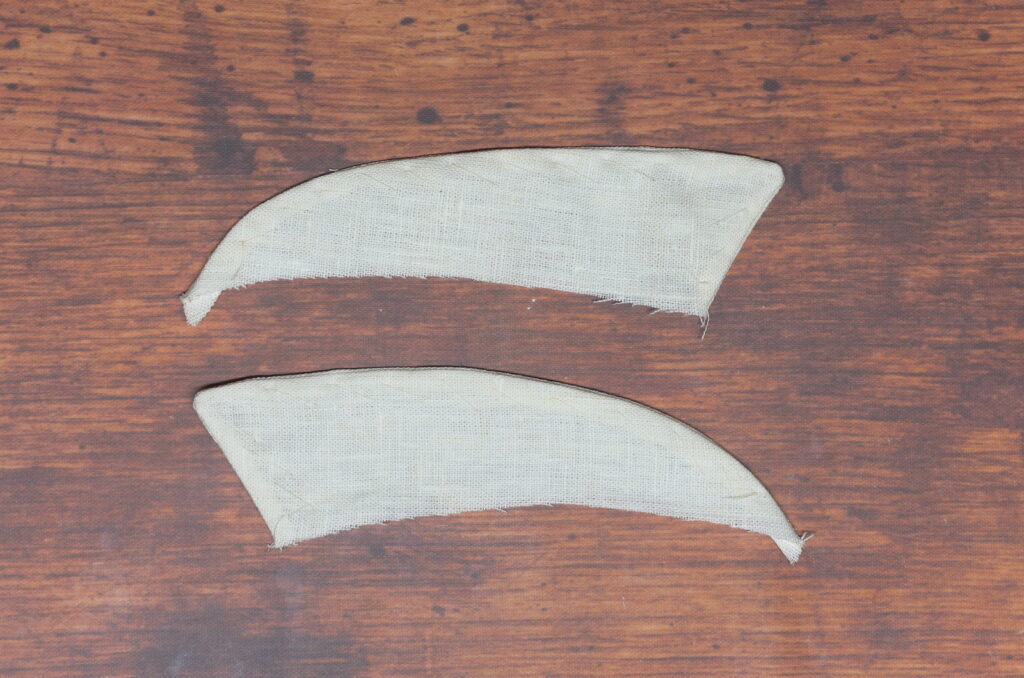
Here are the two collar points after topstitching and completion.
Remove the basting stitches.

Attaching to the Collar Band
Lay one of the collar bands on the table, right side up. The center front of the collar should be evident by the crease in the fabric, if not, find the center.
Mark a point 1/2″ from the center front to both sides.

Mark also a point 1/4″ from both ends.
Lay one of the collar points onto the collar band, right sides together. Keep in mind the side with the set back edge is the wrong side.
Align the front and back edges of the collar points with the marks you made, as best you can.
Starting from the center of the collar, align the front edge of the collar point so that the seam line is even with the mark, and begin basting the collar point to the band.
I should have started from the center, not sure why I started from the other end here. But as long as you’re consistent everything should work out.

Here’s the back end of the collar point and how it’s aligned in relation to the rear mark.
And one half basted together.
Baste the other half of the collar point on as well, trying to keep the same distances at each of the points. Keep in mind that since this is such a small project, even a 1/16″ can make a big difference!

And since I try to show my mistakes so you don’t have to make them, here you can see there’s a slight difference in the positioning at the center of the collar between the two sides. It’s so small you almost don’t see it, especially while you’re working, but it does make a difference. I will be showing how to account for any differences later on during the positioning of the buttonhole, so don’t worry too much if yours is similar. Just something to be aware of.
With the collar pieces basted together, sew from one end using a 1/4″ seam allowance, towards the center. At the ends, make sure the stitching starts as closely as possible to the top of the diagonal cut you made.
Try to ensure the center area remains aligned properly as well. I did stop the stitching at the edge of the first collar point, rather than sewing all the way through, as it’s possible the stitches would be seen in the middle.
Finally, press the collar band down away from the collar points. We’re not opening up the seam here, just pressing everything downward.

Here’s the collar so far. Hopefully you’ve got something similar at this point!
Drafting the Collar
Drafting your detachable collar is fairly straightforward, and can be done on a sheet of 8 1/2″ x 11″ paper. I’m using a regular ruler here for instructional purposes, which gives a collar that should fit just about everyone. You might experiment however with using a graduated ruler [advanced tailors only] for those with larger necks or body sizes to get a more proportional look to your collar, though I have not tried that yet.
The Collar Points
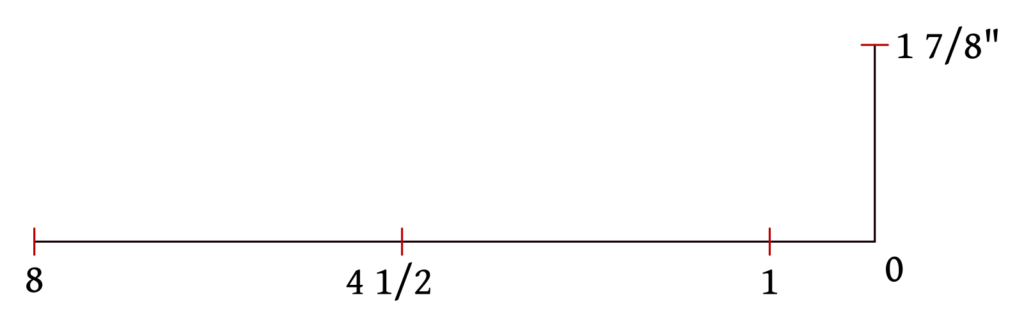
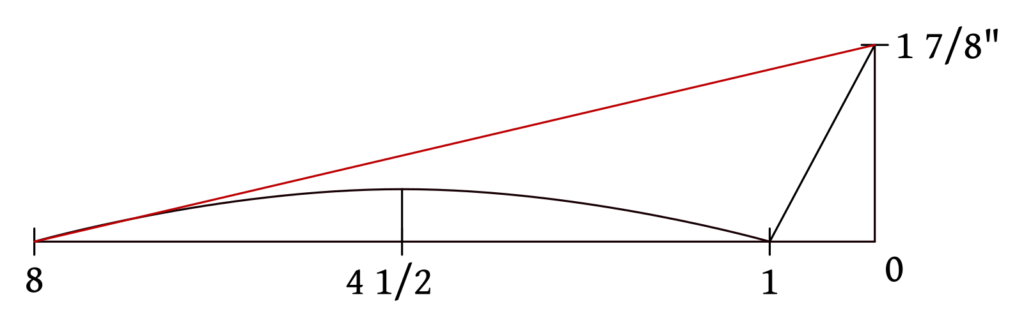
Begin by ‘squaring out’ from point 0 two lines at right angles to each other. The horizontal line is 8″ long, while the shorter vertical line is 1 7/8″.
Then mark the additional points from 0 along the horizontal line at 1″ and 4 1/2″.
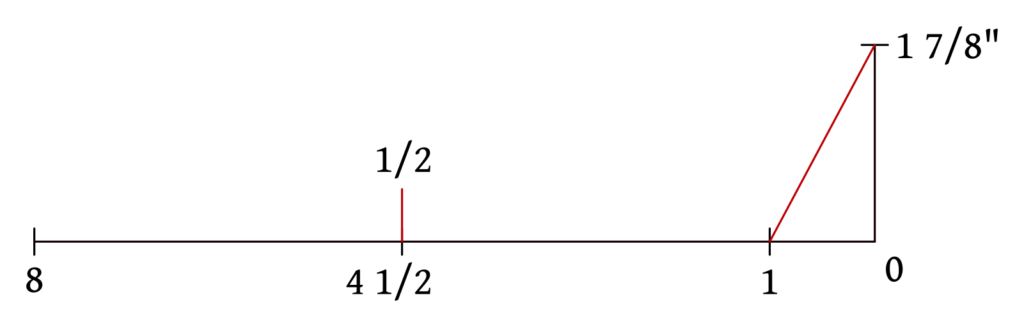
Draw a line from 1 to 1 7/8, giving the front angle of the collar. This is something that could be adjusted, both in the angle and length, to get other styles of collars after you are more familiar with the construction.
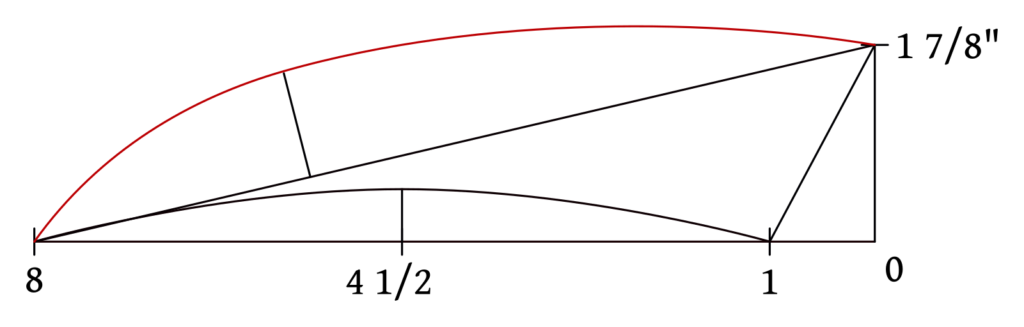
Then square up from 4 1/2 by 1/2″ to get the depth of the collar curve.
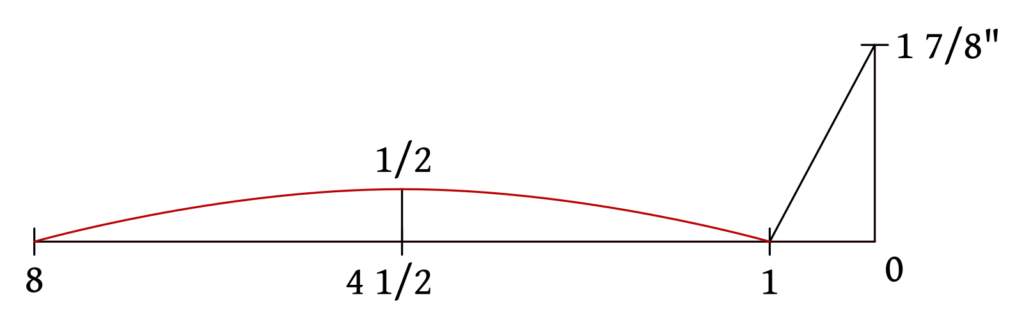
Draw a curve from 8, through 1/2 to 1, keeping everything as smooth and even as you can. I usually use a bendable drafting ruler for these types of curves, but it’s definitely possible to do freehand, using your arm as a sort of compass.
Draw a construction line from point 8 to 1 7/8 to help with the upper curve.
Measure along this construction line from point 8, 2 3/4″. Then square up from there 1″.

Finish the upper part of the collar by drawing a curve from 8, through point 1 that you just made, to the point at 1 7/8. This is more of a compound curve; from point 8 to 1 it’s fairly deep, and from 1 to 1 7/8″ the curve gets a bit shallower. Areas such as these are where the artistic part of drafting comes into play over the mathematical and ‘scientific’ steps, and you’ll get better with practice as you become more experienced.
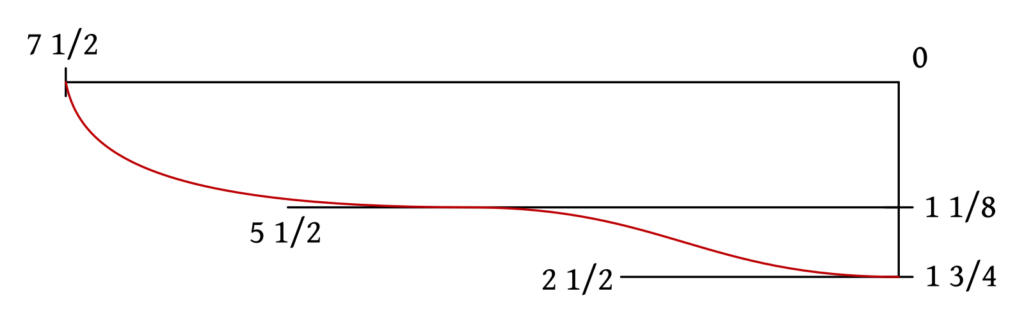
The Collar Band
The collar band is also easy to draft. Begin by drawing a horizontal line and measuring out 7 1/2″ from point 0.
Square down from point 0 and mark points 1 1/8″ and 1 3/4″ from 0.
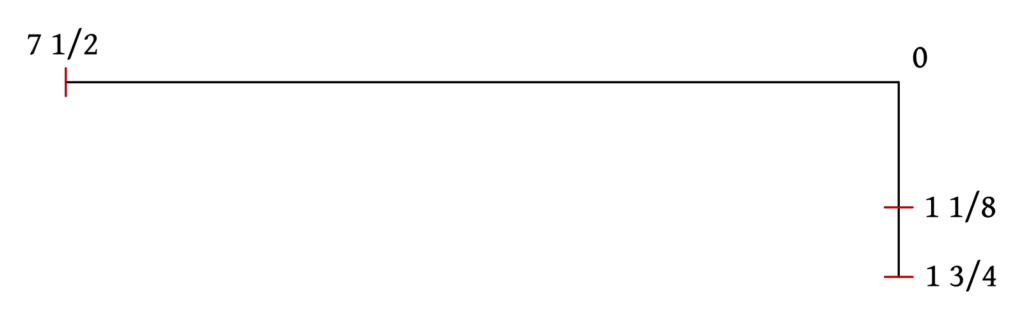
Square out lines from 1 1/8 and 1 3/4 as shown. These are merely construction lines to help draw the curves in the next step, and in practice, I don’t even measure them, though I’ve left measurements to aid you in your own drafts.
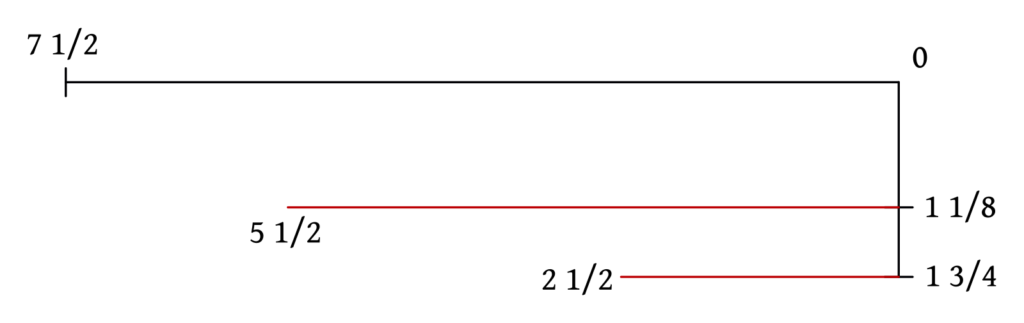
Here’s where that artistic part definitely comes into play again. Draw a curve from 1 3/4, keeping parallel to the construction line for about 1/2″ and curving into the second construction line and running parallel to that for a ‘little bit’. Finally, continue the curve, deepening it as you round up to 7 1/8.
At point 1 3/4, you want the curve to meet the opposing construction line at right angles to avoid an ugly angular transition to the other side of the collar.
And at 7 1/2, the curve comes in close to a right angle but not quite. This will help keep the ties that go around the neck in the correct position.
Seam Allowances
With both pattern pieces drafted, add a 1/4″ seam allowance all the way around the upper half of the collar, and the top and bottom edges of the collar band. The vertical construction line on the collar band forms the center of the collar, and so it is cut on the fold, no seam allowances added here.

That concludes the drafting portion of this short course! Draft your collars, add the seam allowances, and cut out both pieces before you move on to the next section where we’ll begin the construction process. If you have any questions or would just like to share your work, please feel free to make a post in the support community.
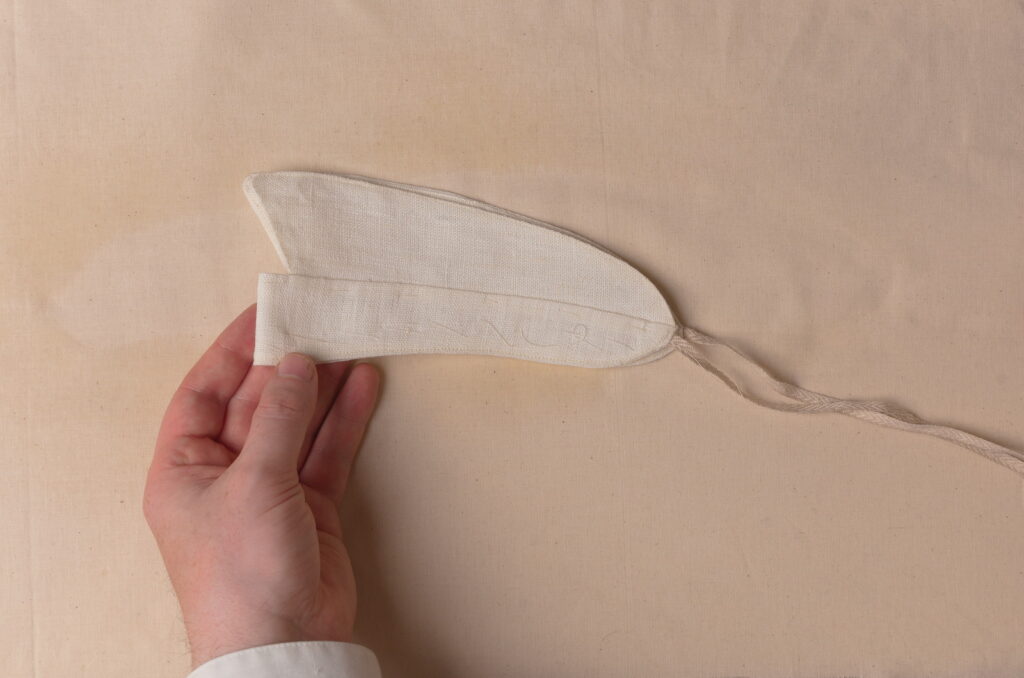
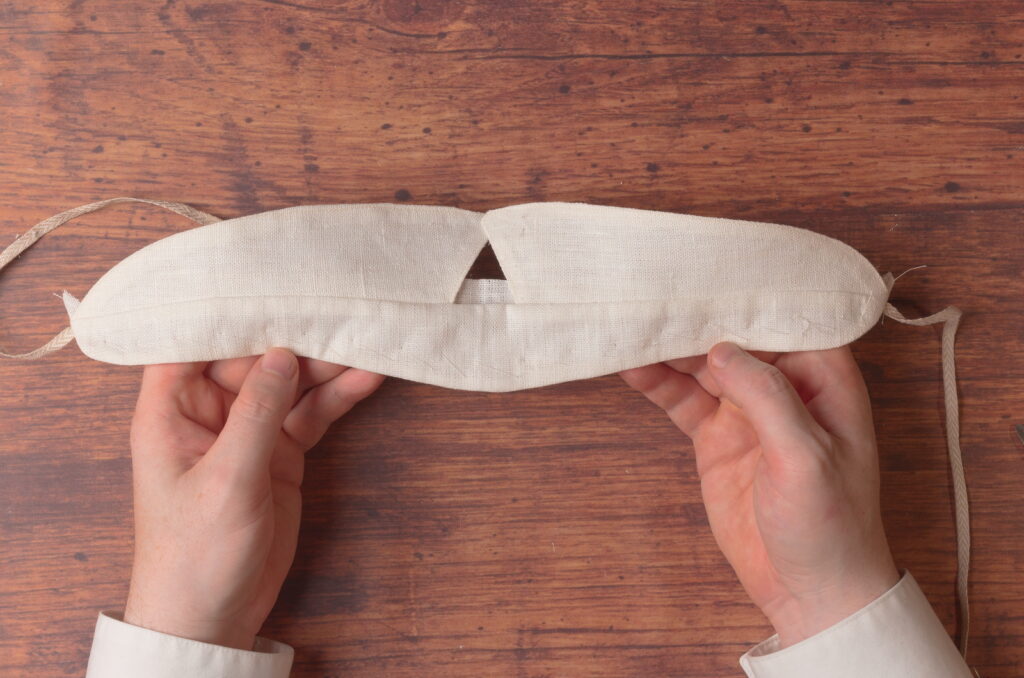
Turning and Finishing
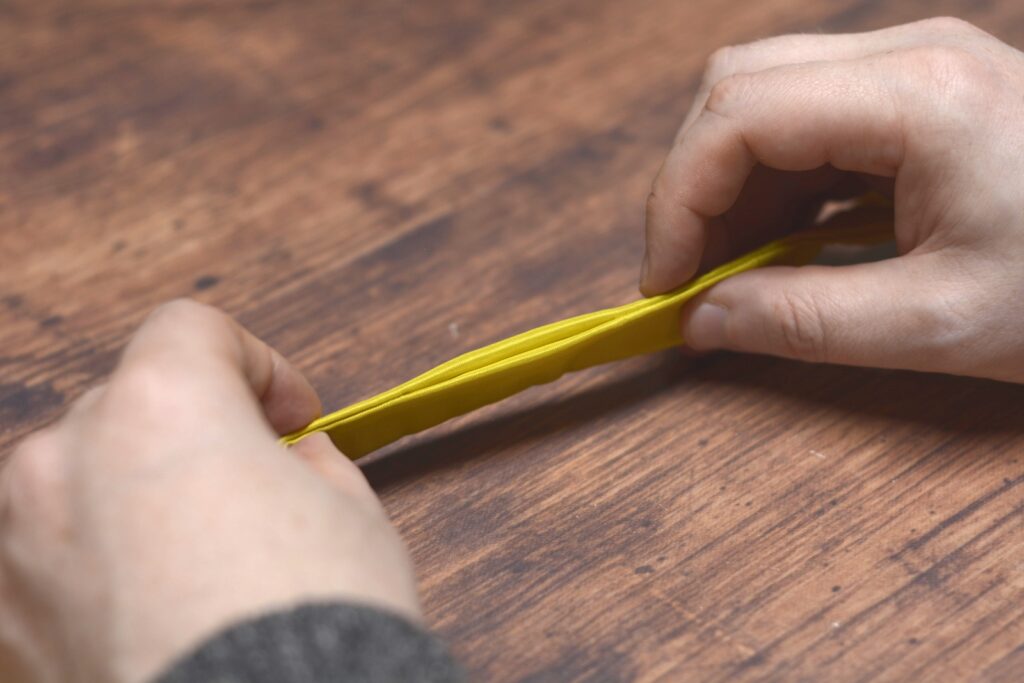
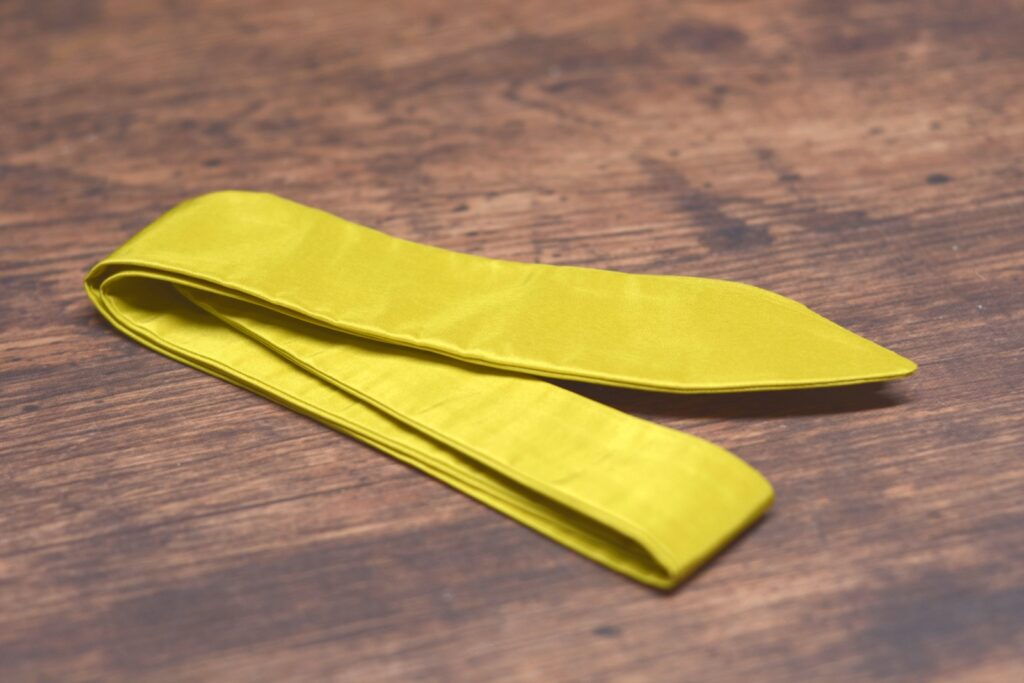
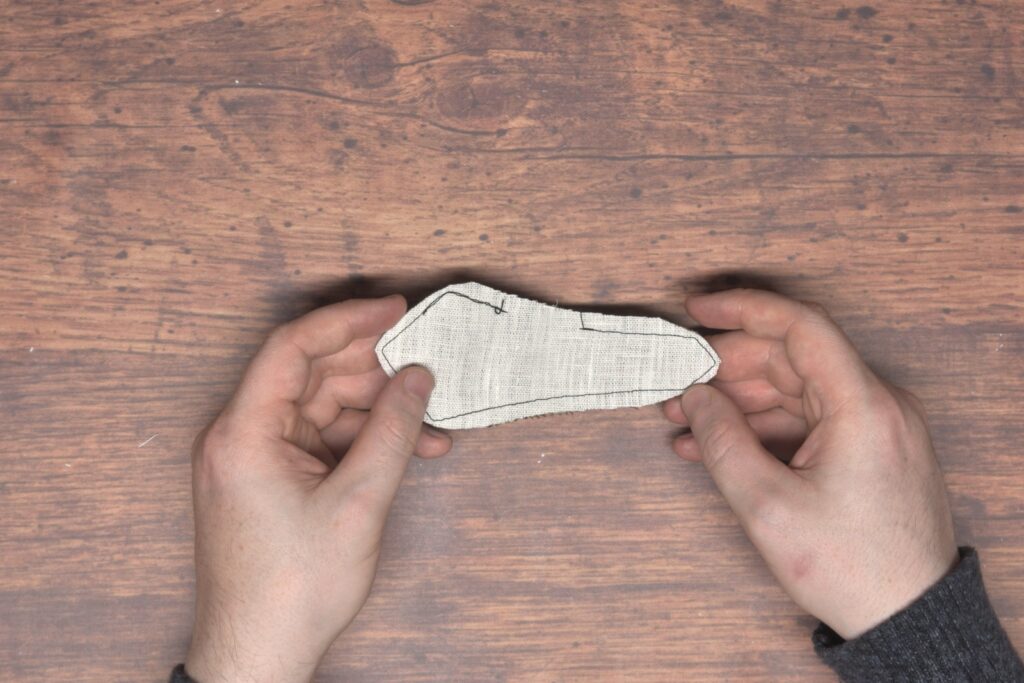
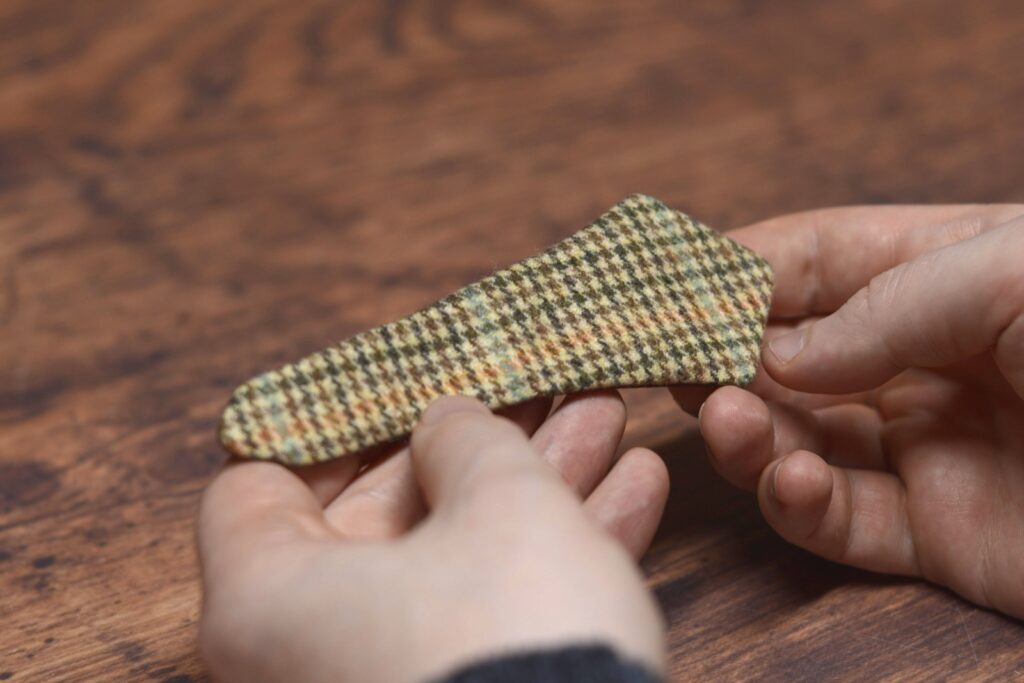
Here’s where we left off with the cravat. It’s now time to begin the process of turning and pressing them.
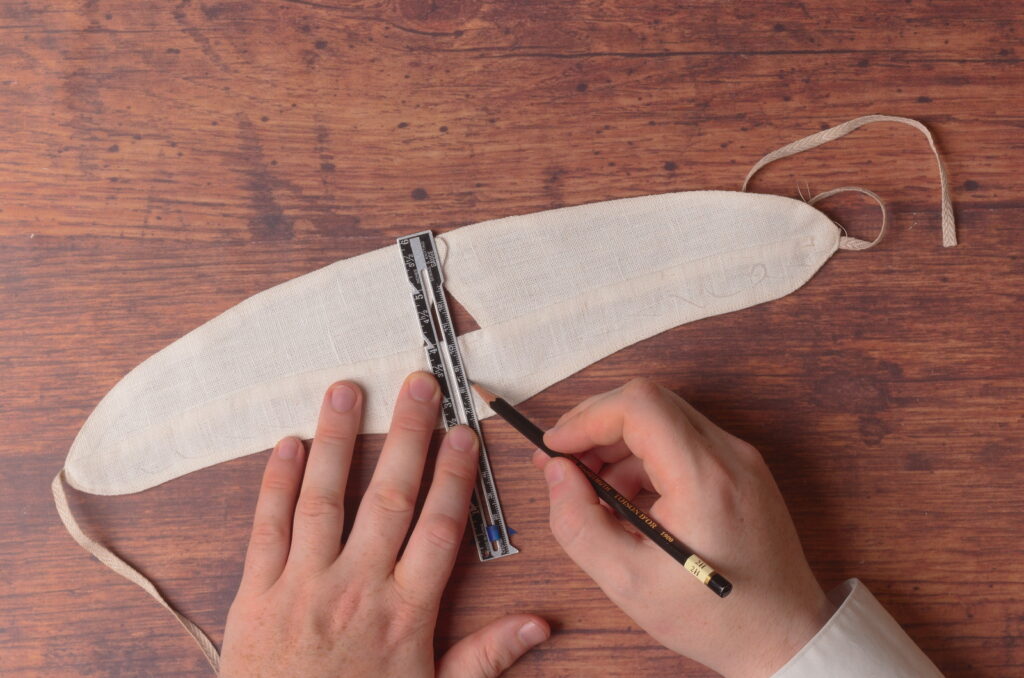
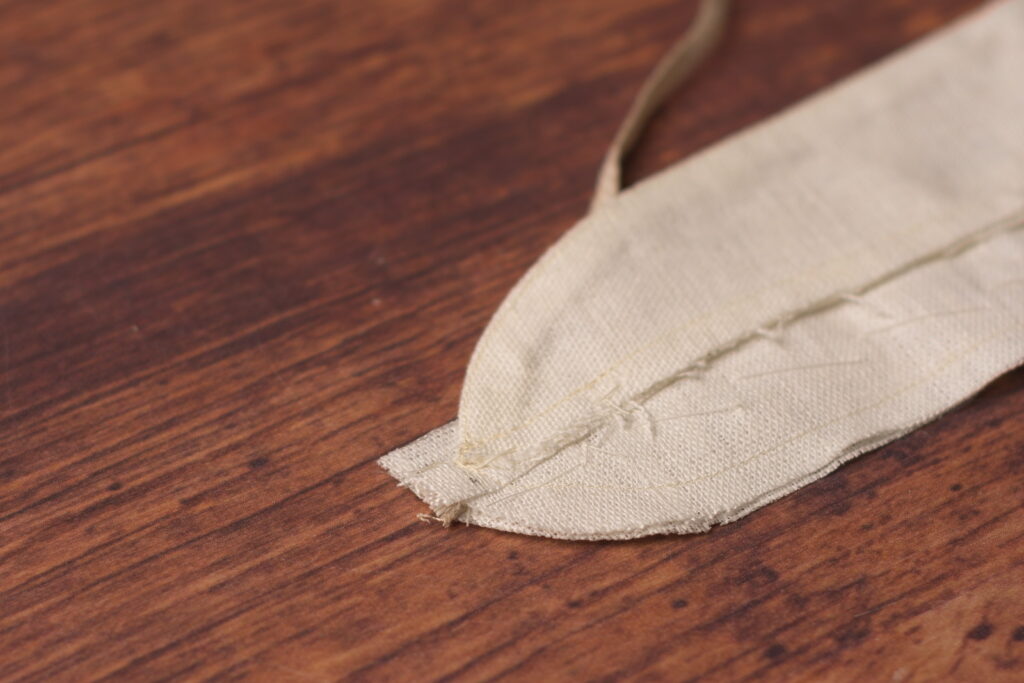
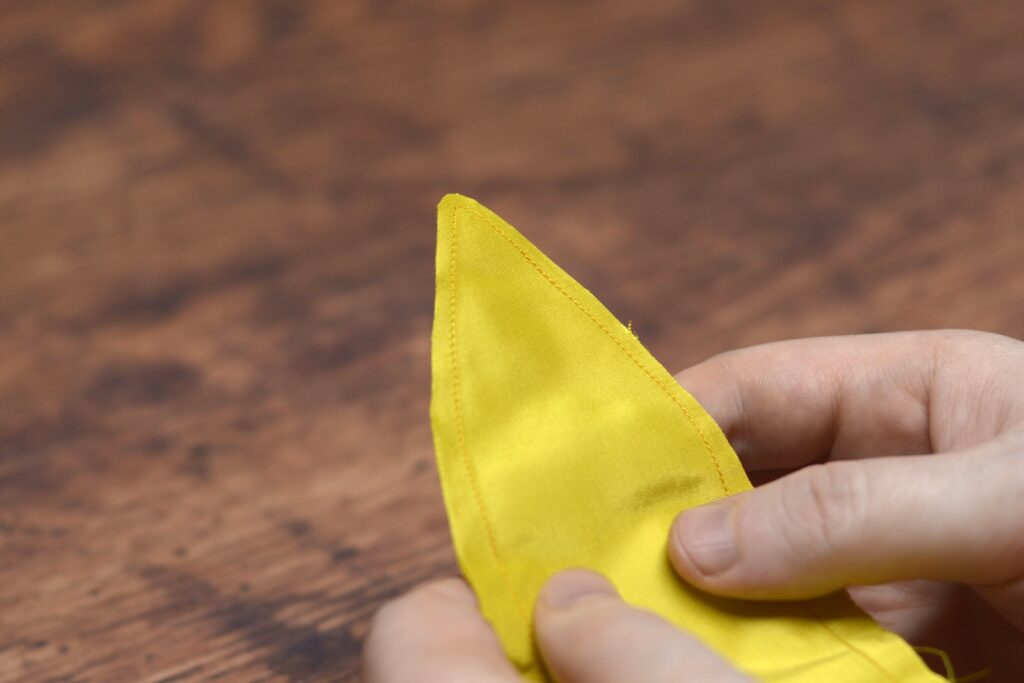
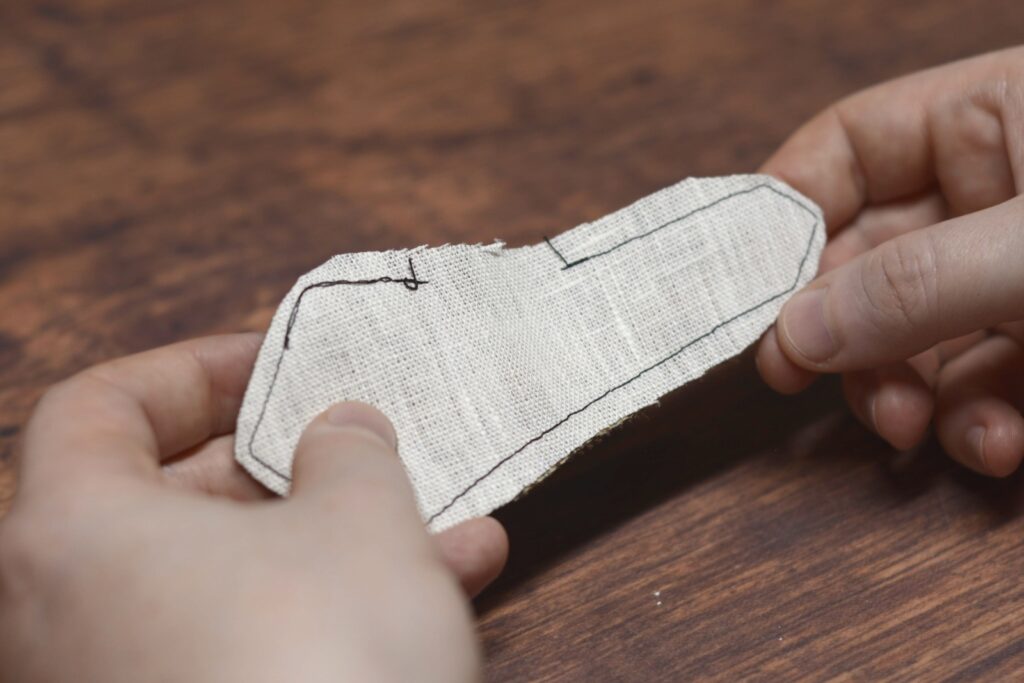
Begin by carefully trimming the seam allowance to just over 1/8″ at both ends. I like to taper the cut to avoid any hard transitions.
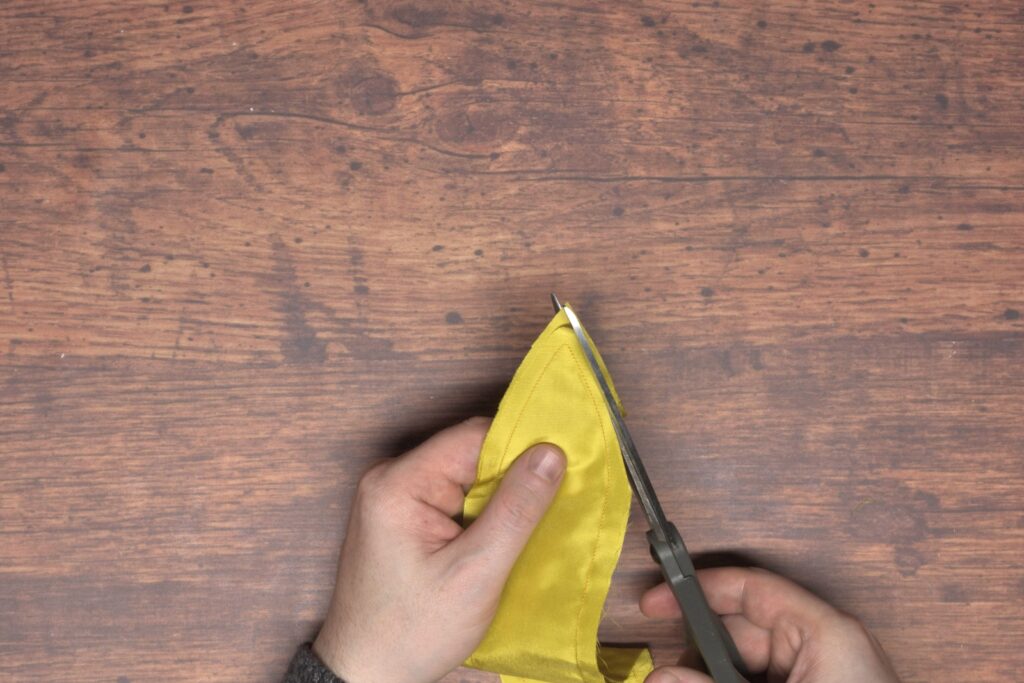
Here’s the completed end after trimming. Repeat for the other end. Be sure not to trim any closer than 1/8″, or you risk the seam coming undone and it fraying.
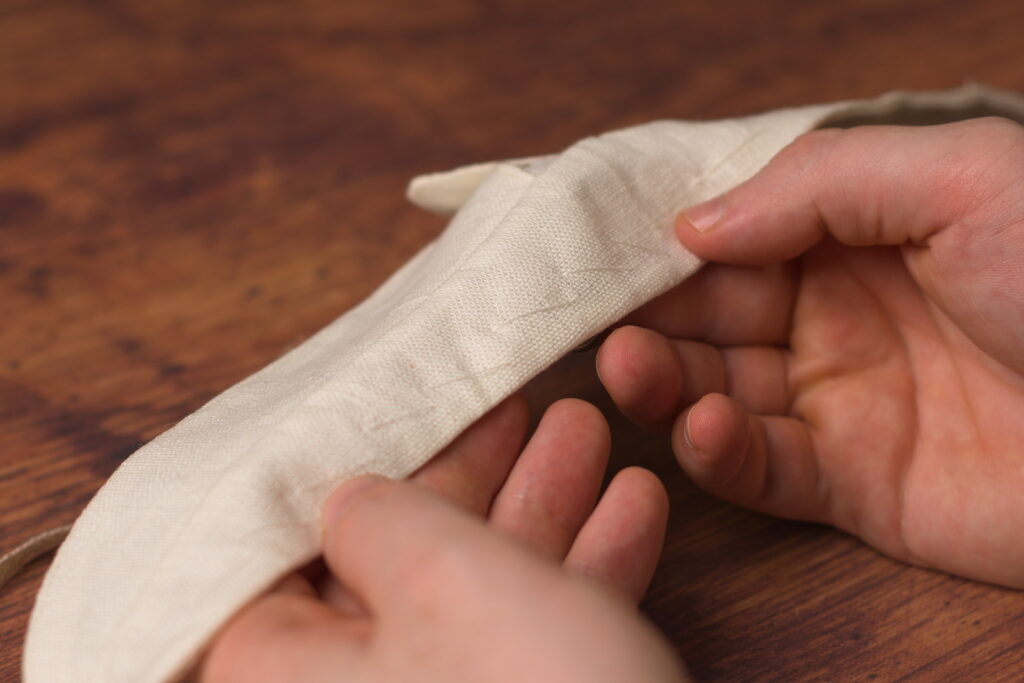
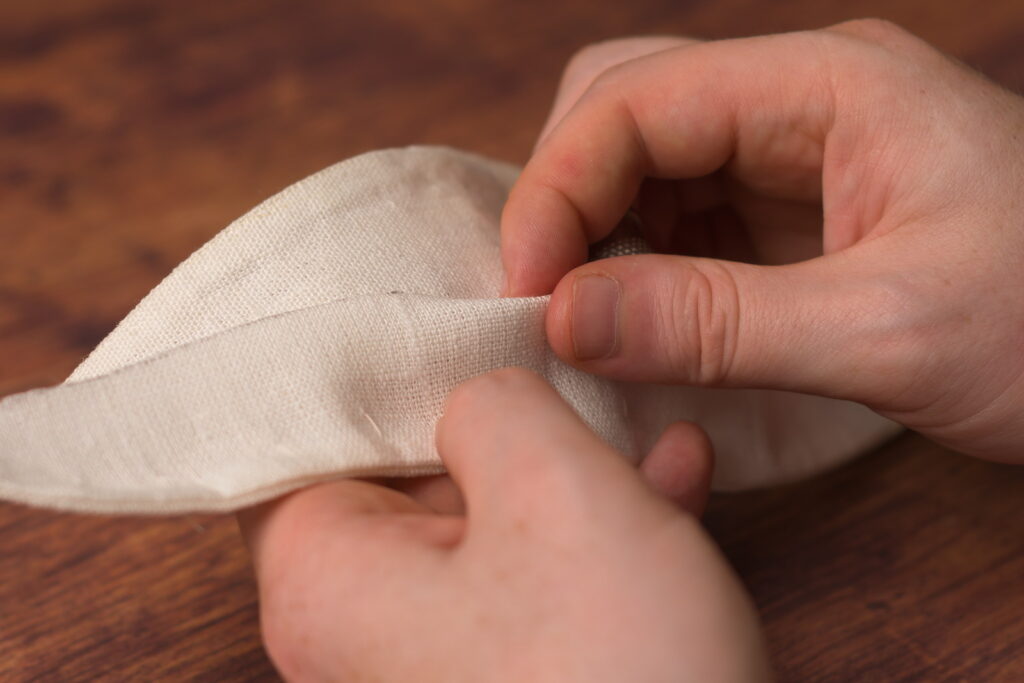
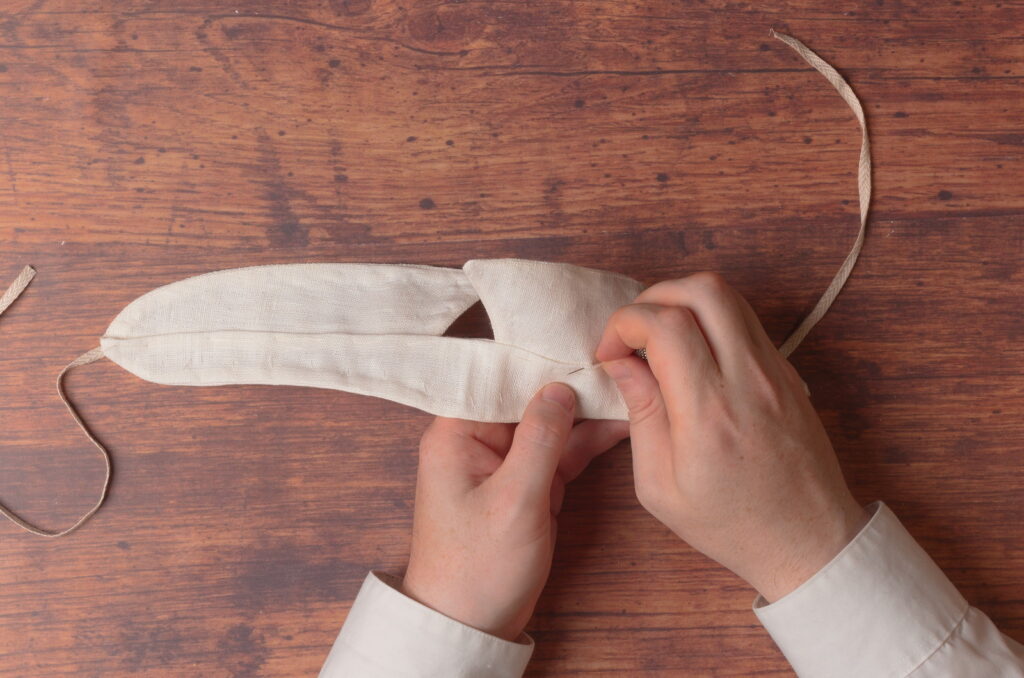
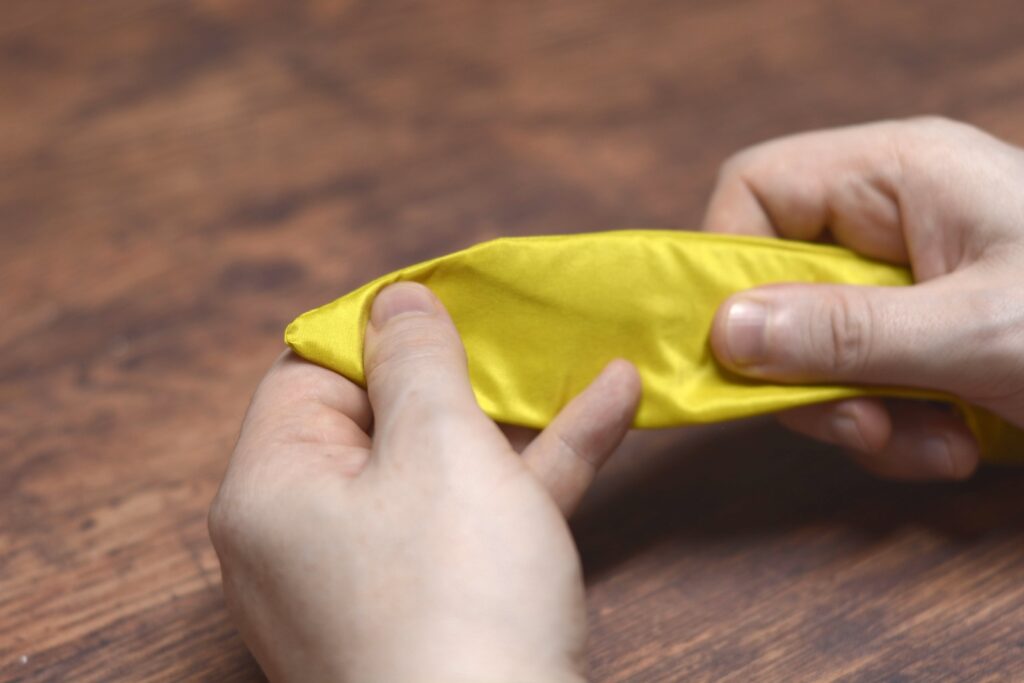
Turning
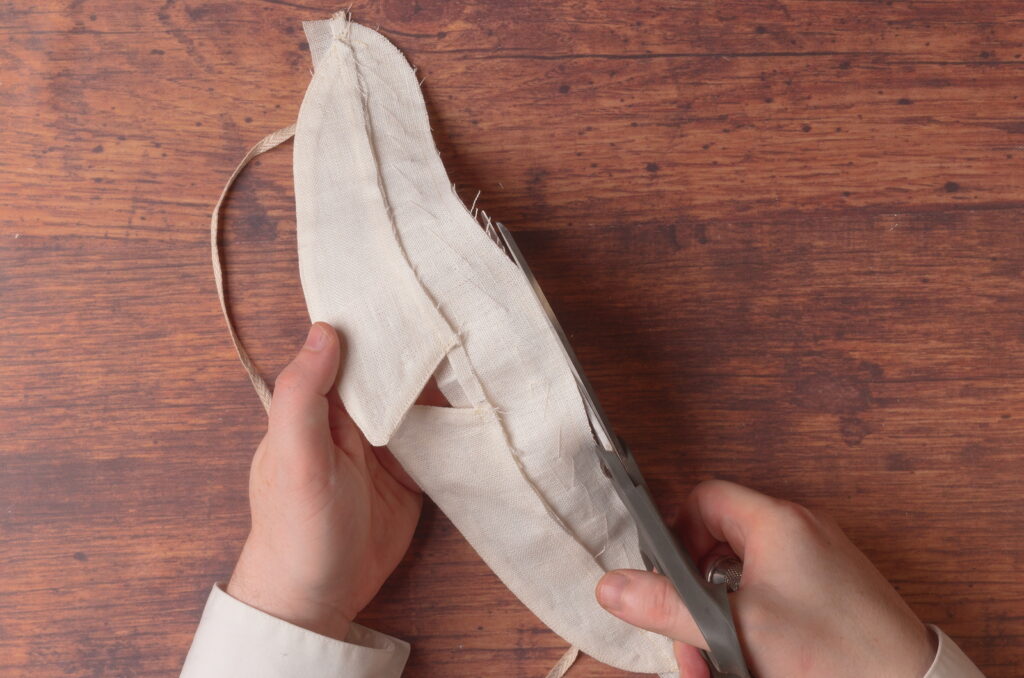
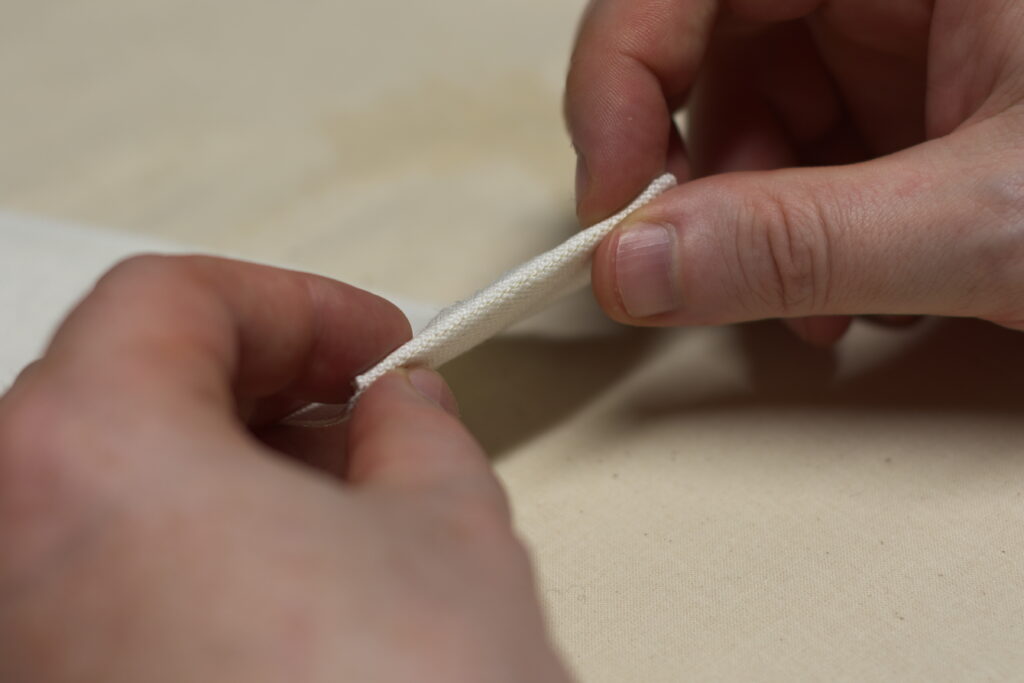
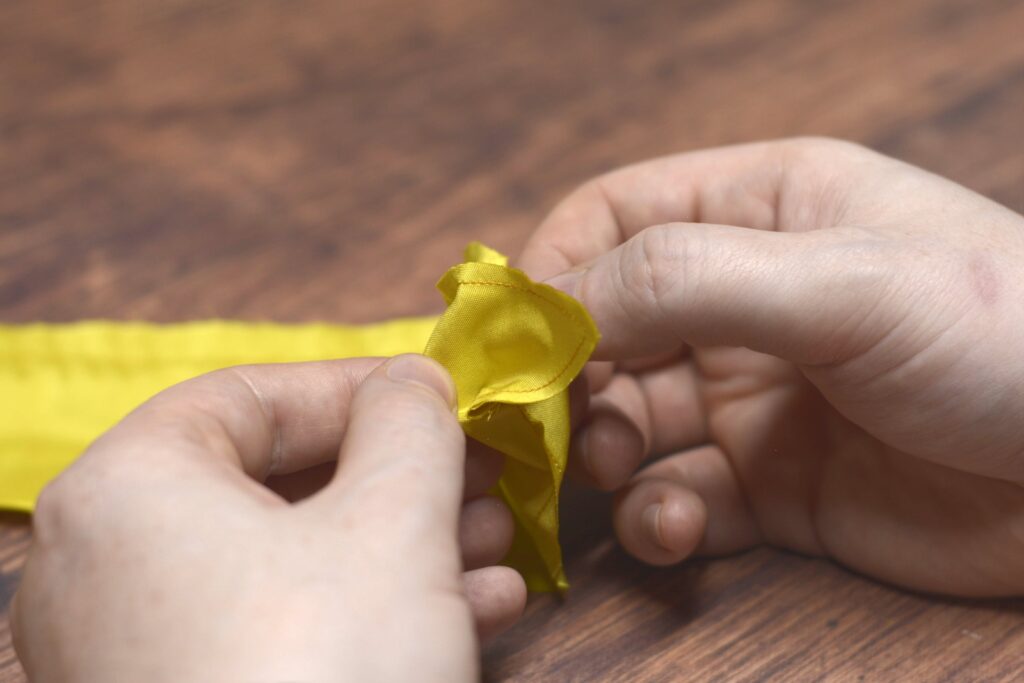
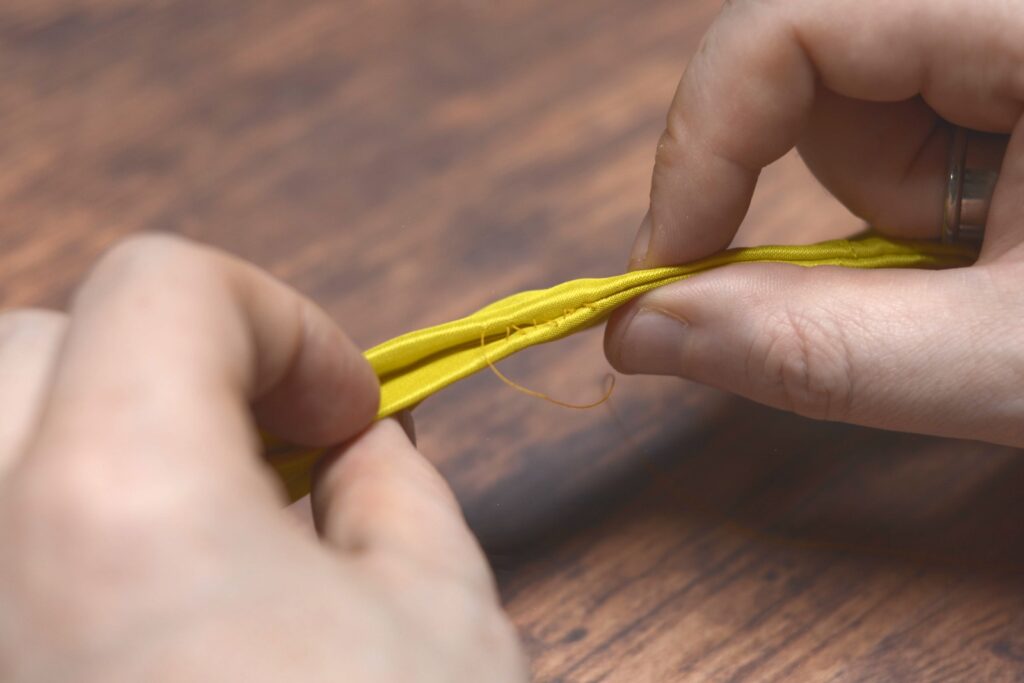
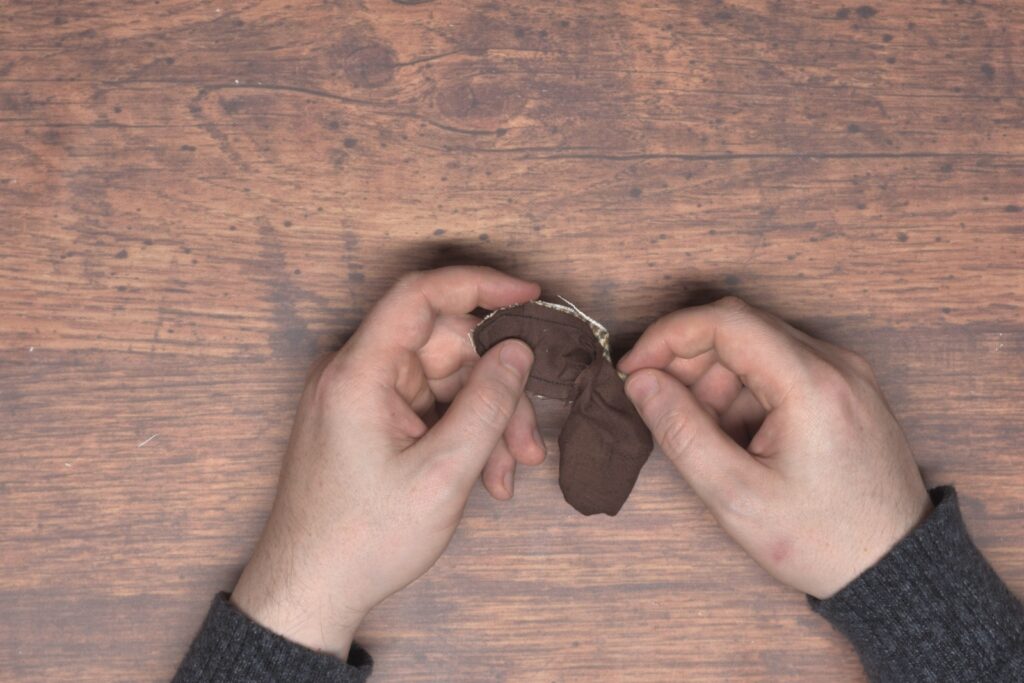
Turning the cravat is pretty straightforward, but I’ll try to give you a few tips I’ve picked up. First, separate the two layers of fabric near the tip, sort of opening it up.
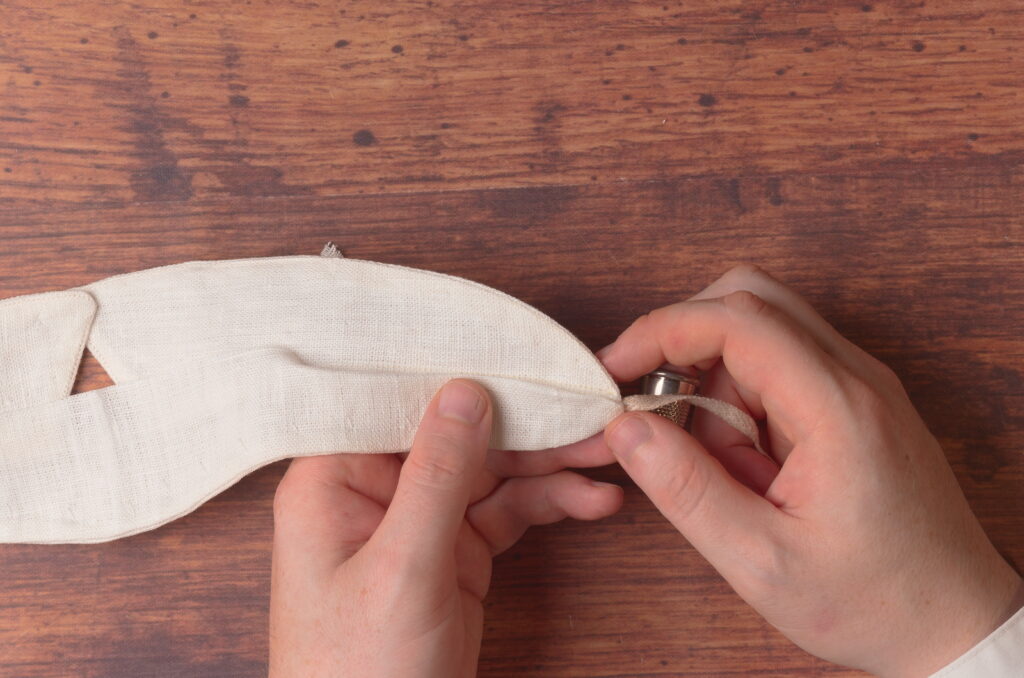
Then push it into itself, and use the eraser end of an unsharpened pencil to gradually and carefully push the end through towards the opening in the middle. Try not to put too much pressure on the very tip – keep the pencil off to one side or the other.
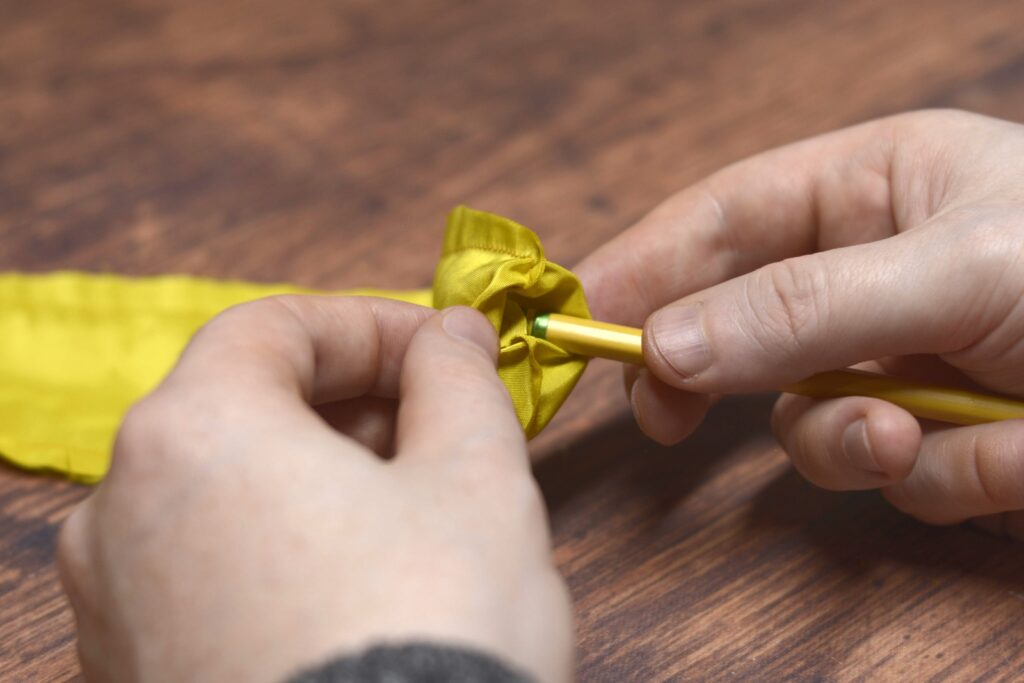
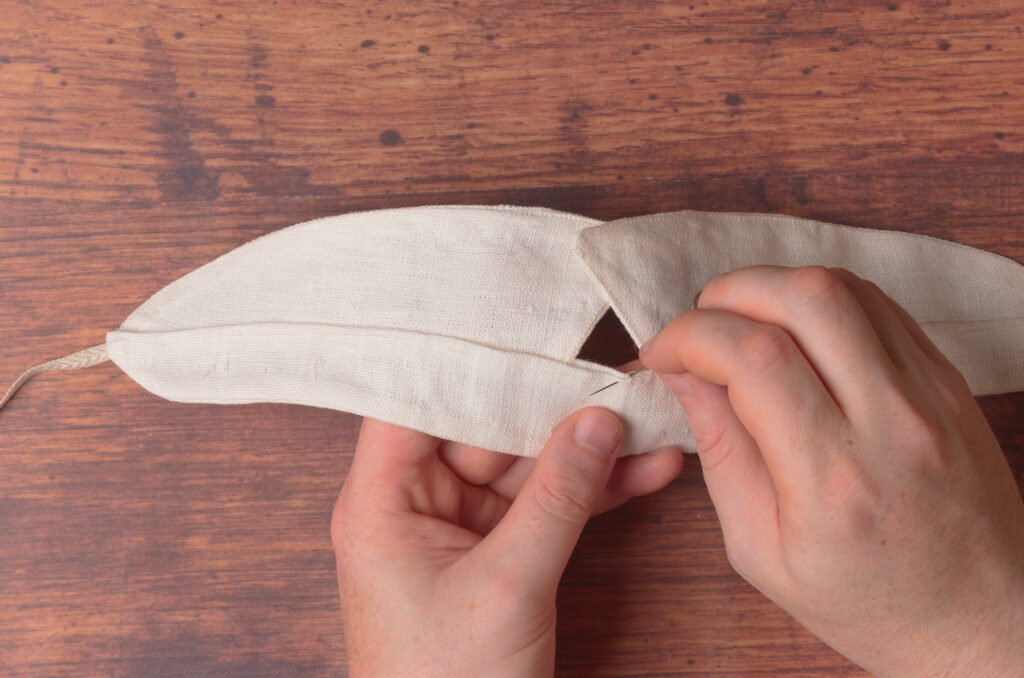
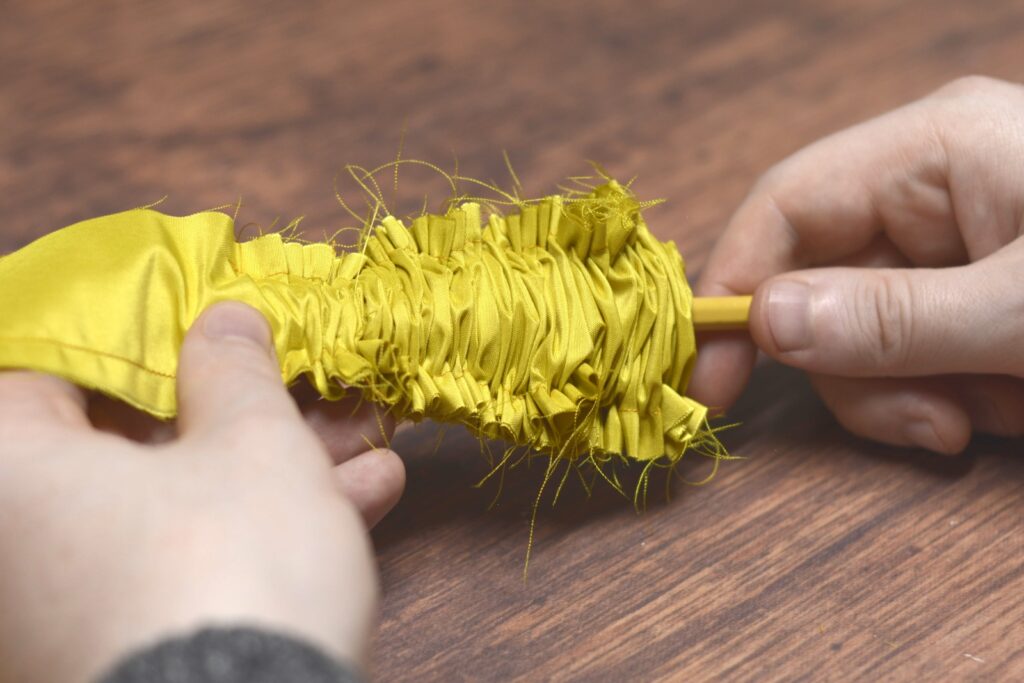
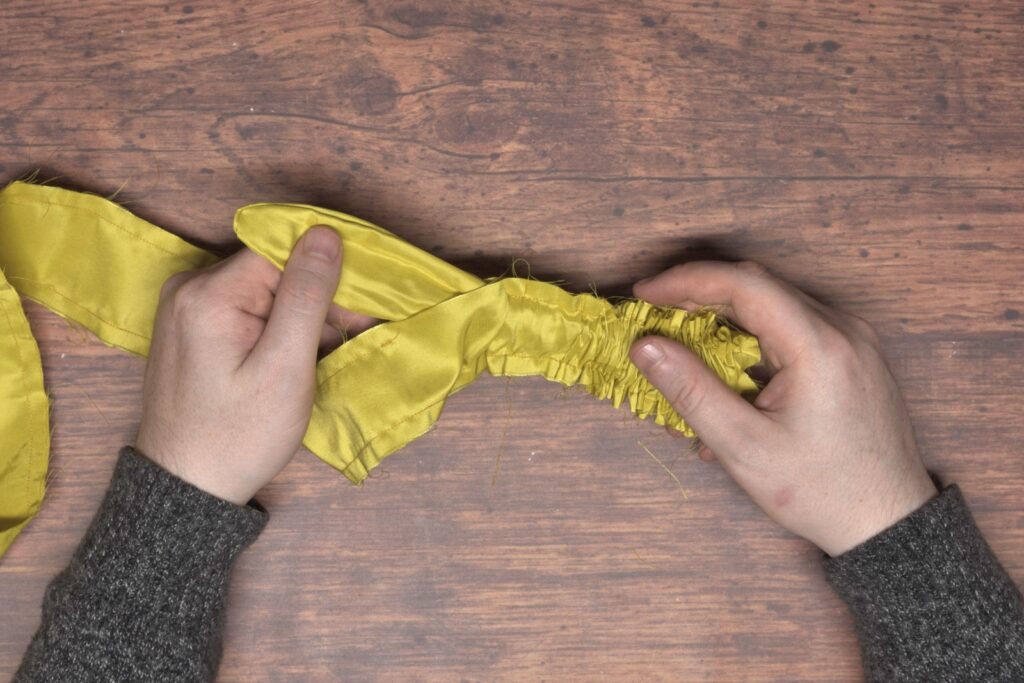
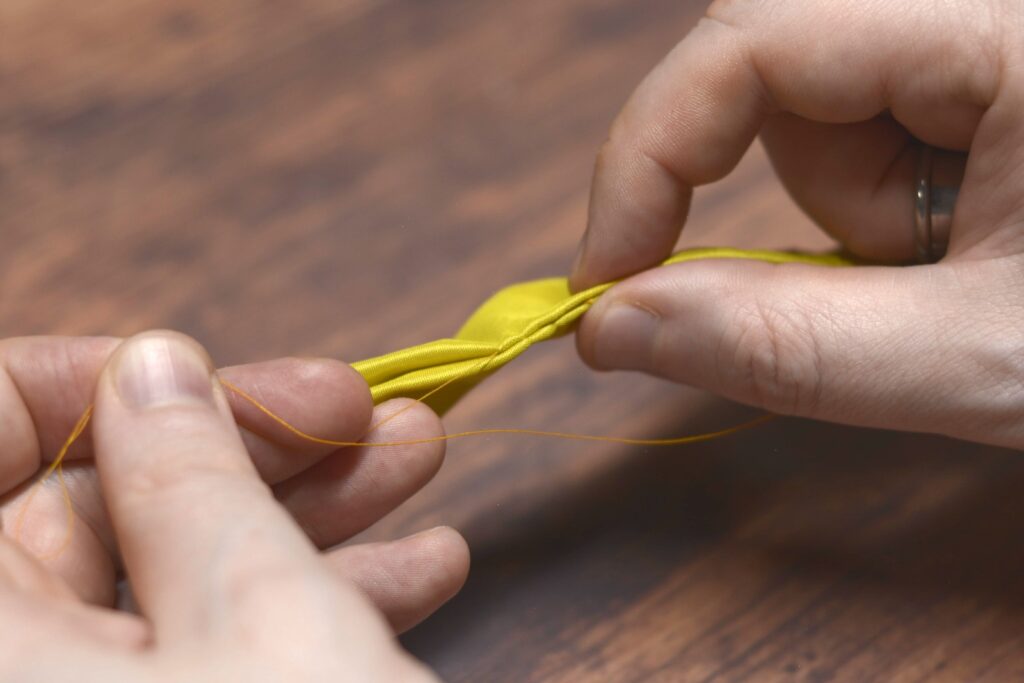
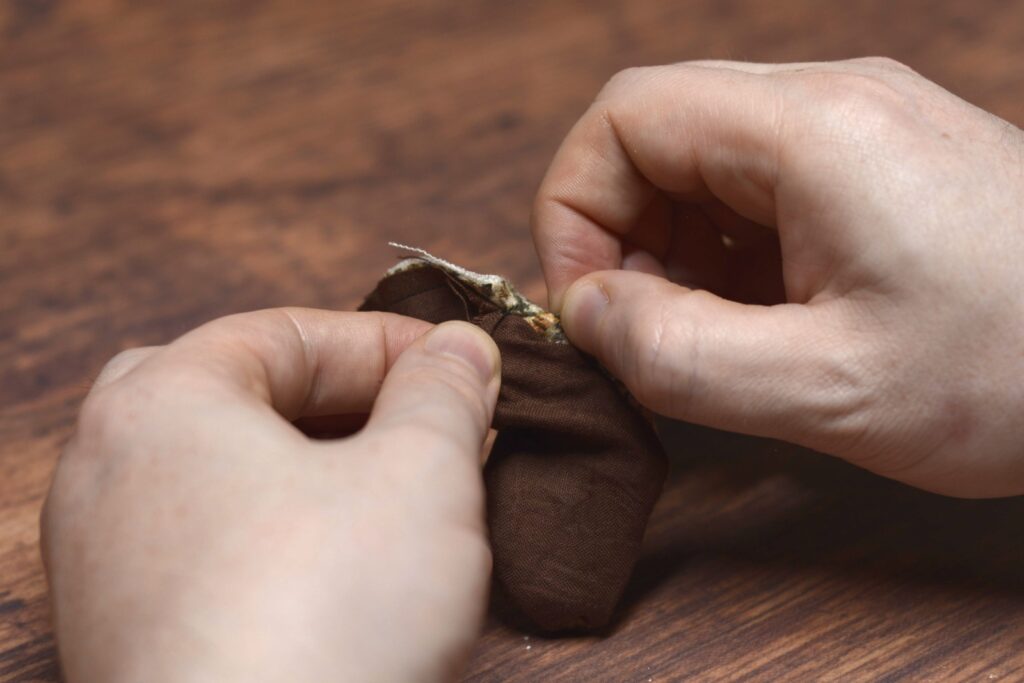
Continue pushing the pencil and cravat gently through, collecting the gathers of fabric as far down the pencil as you can.
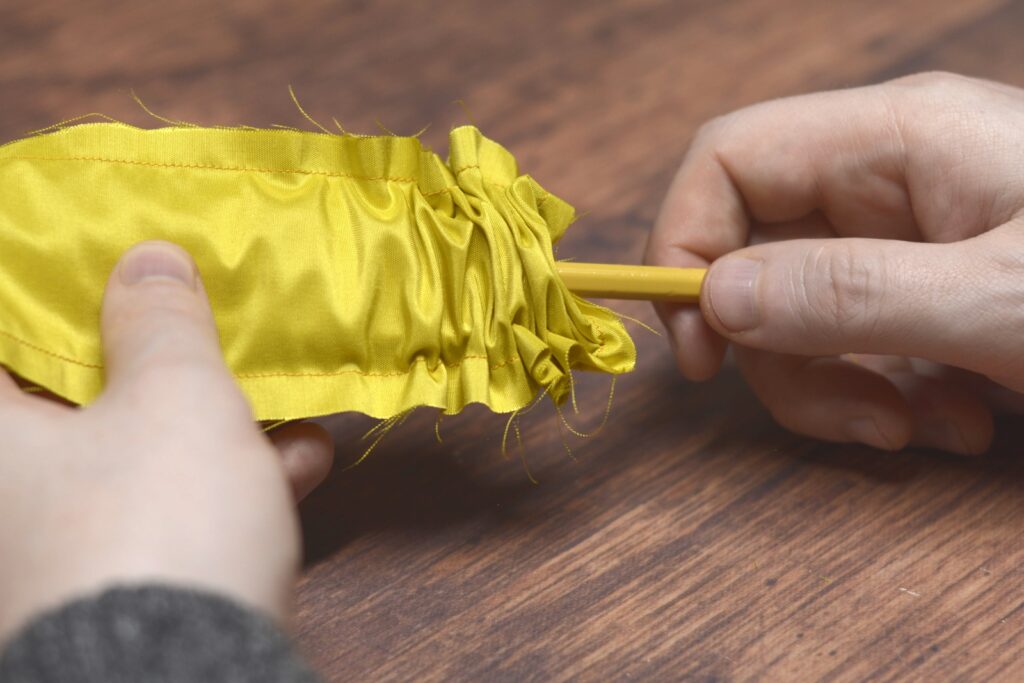
There’s a lot of fabric that gets gathered up on the pencil, and it’s easy to get the pencil lost in the gathers if you don’t push them down far enough.
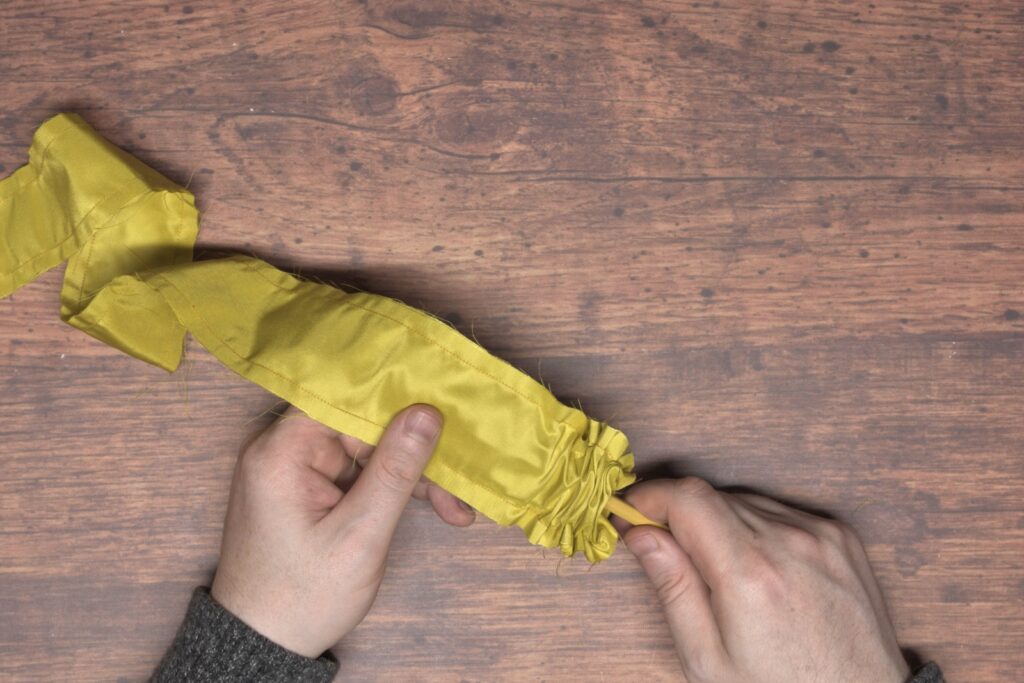
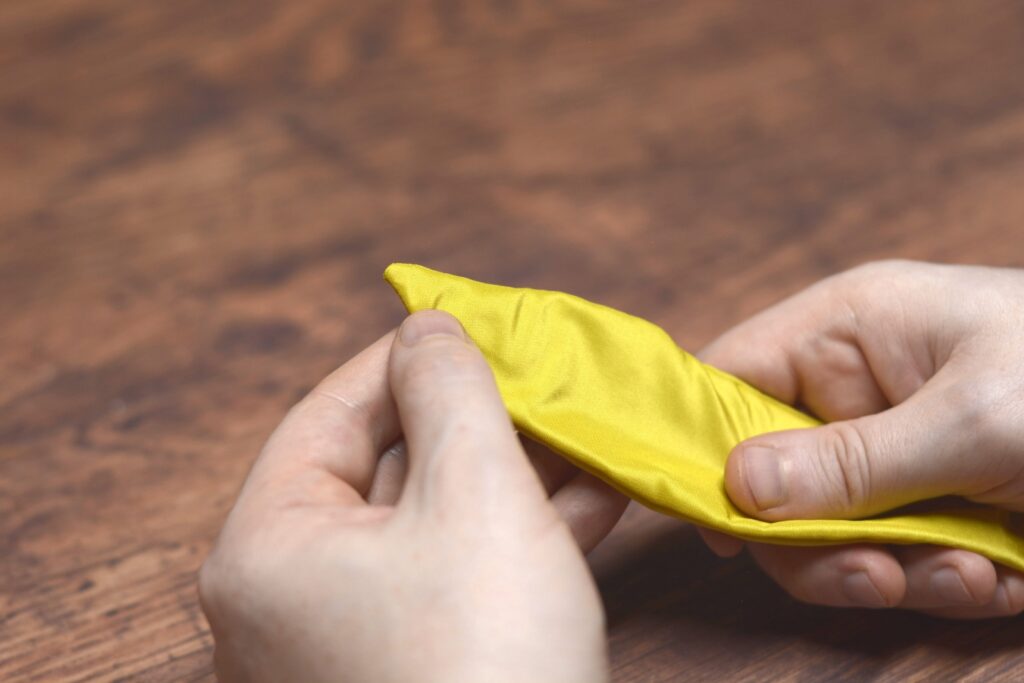
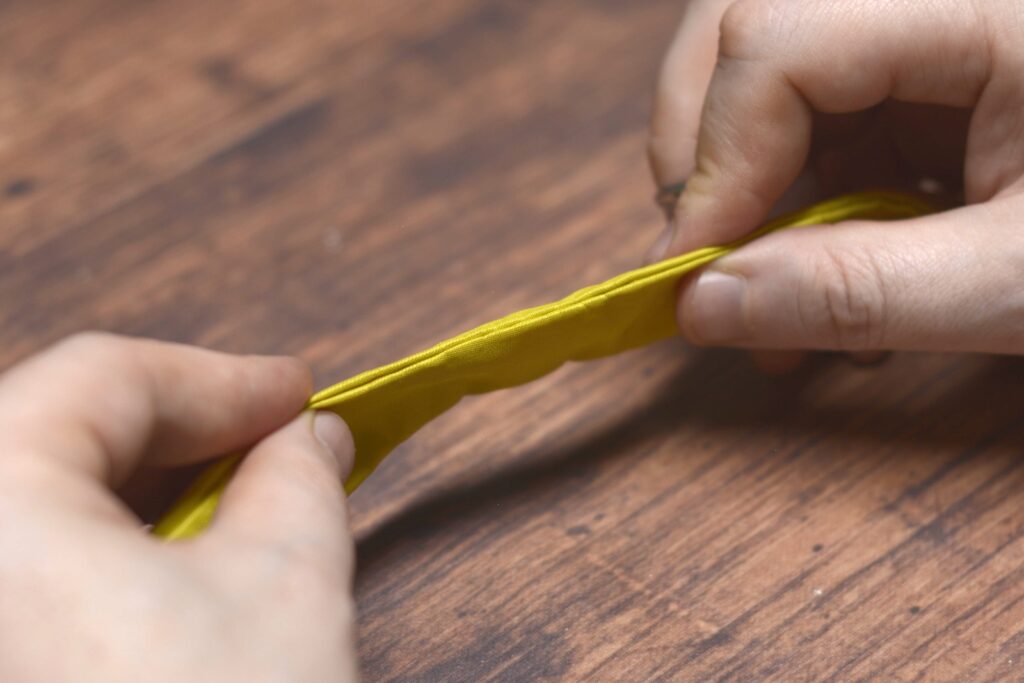
Finally, the right side of the cravat tip should emerge from the opening. Once you have a firm grasp of it, you can pull the pencil out, and pull the rest of this side of the cravat right side out.
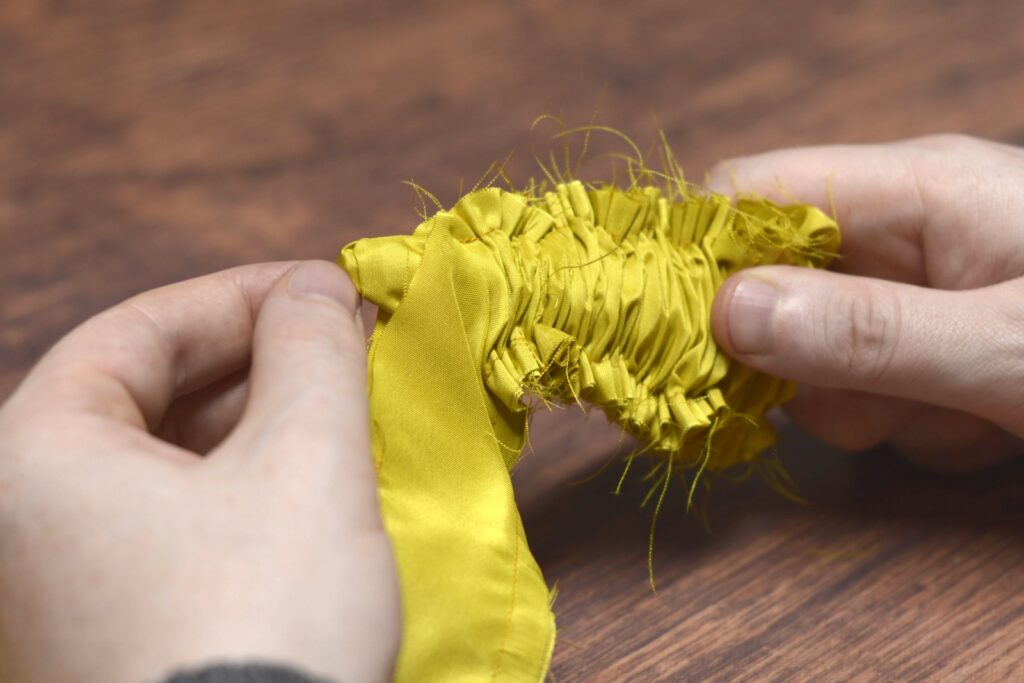

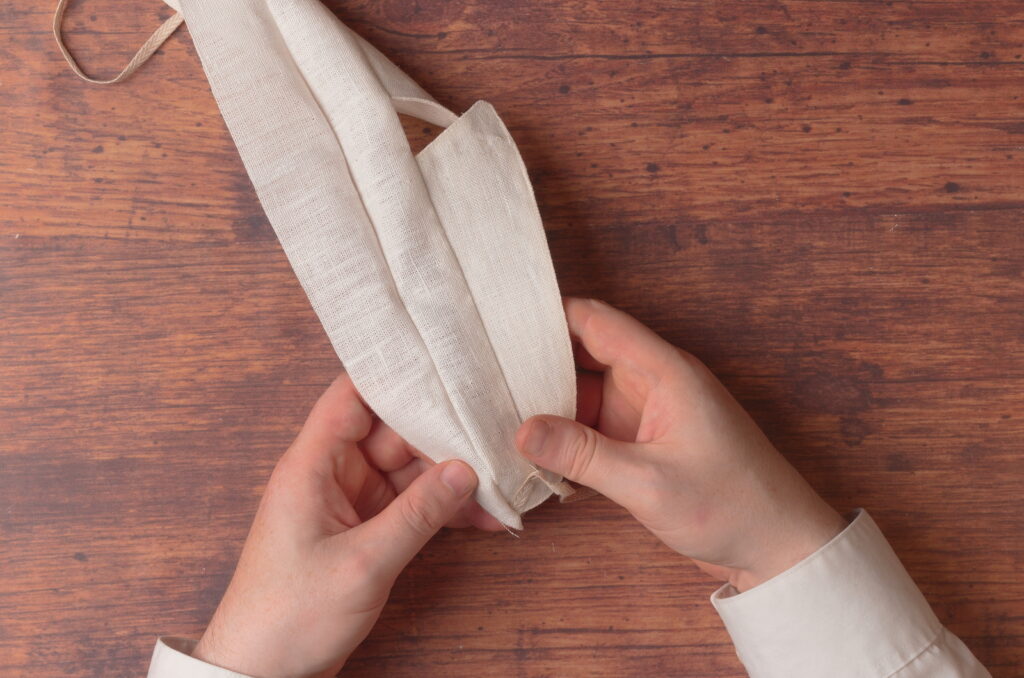
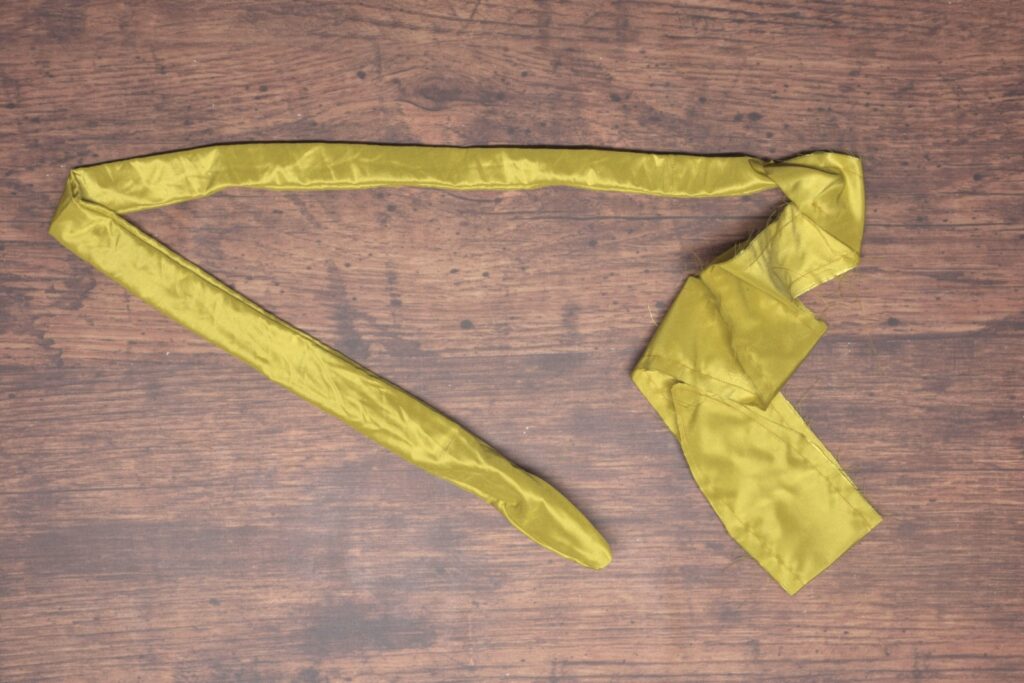
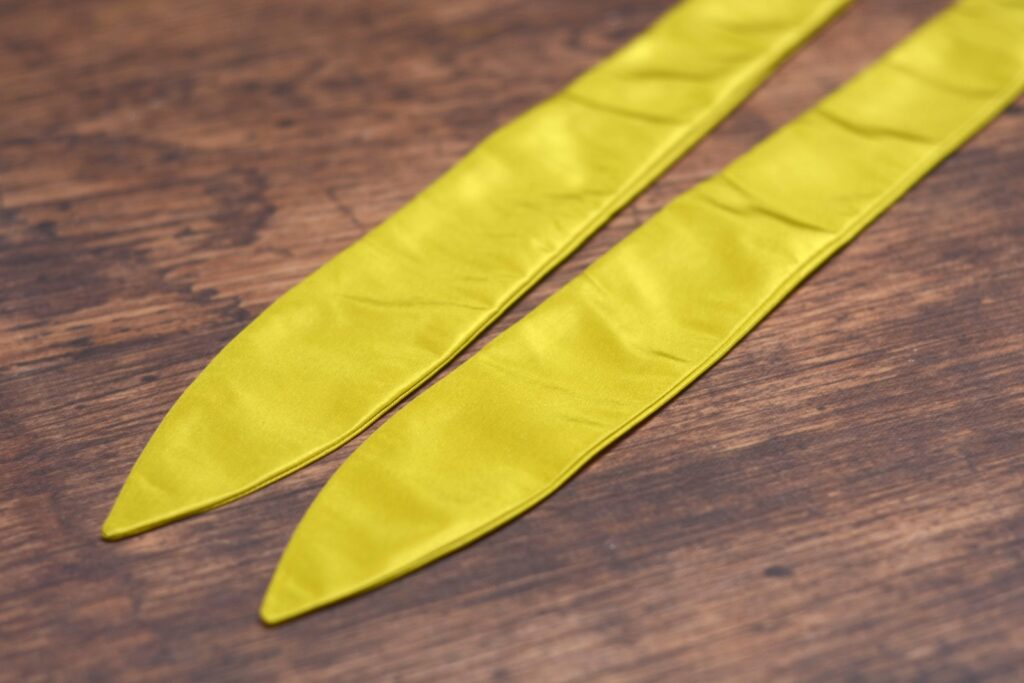
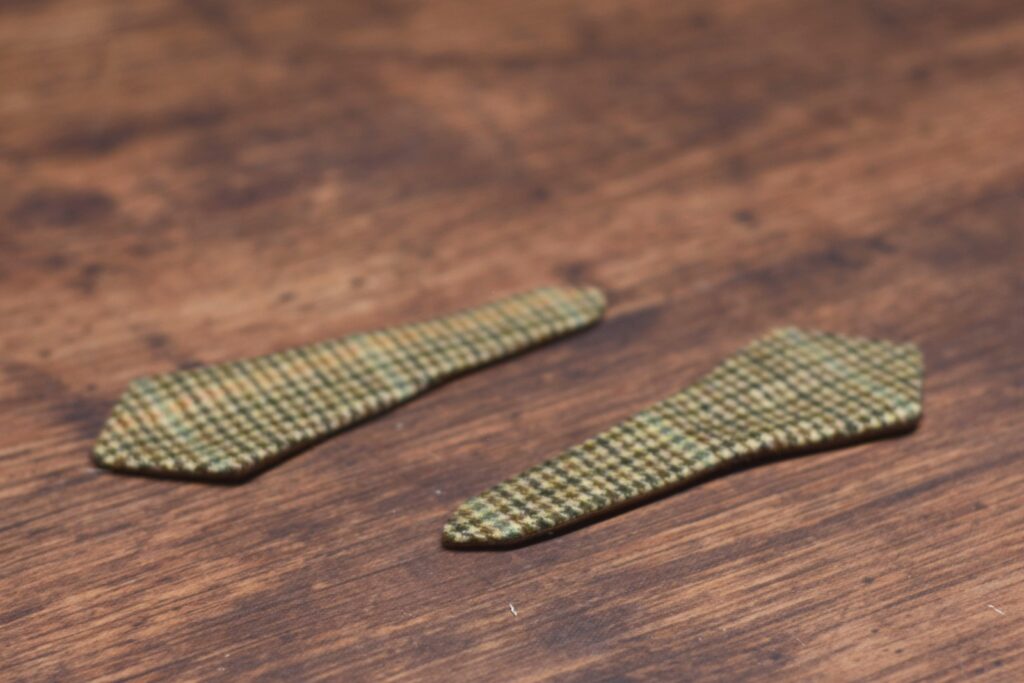
Here’s the first half of the cravat turned right side out. Repeat the same process for the remaining half.
Pressing
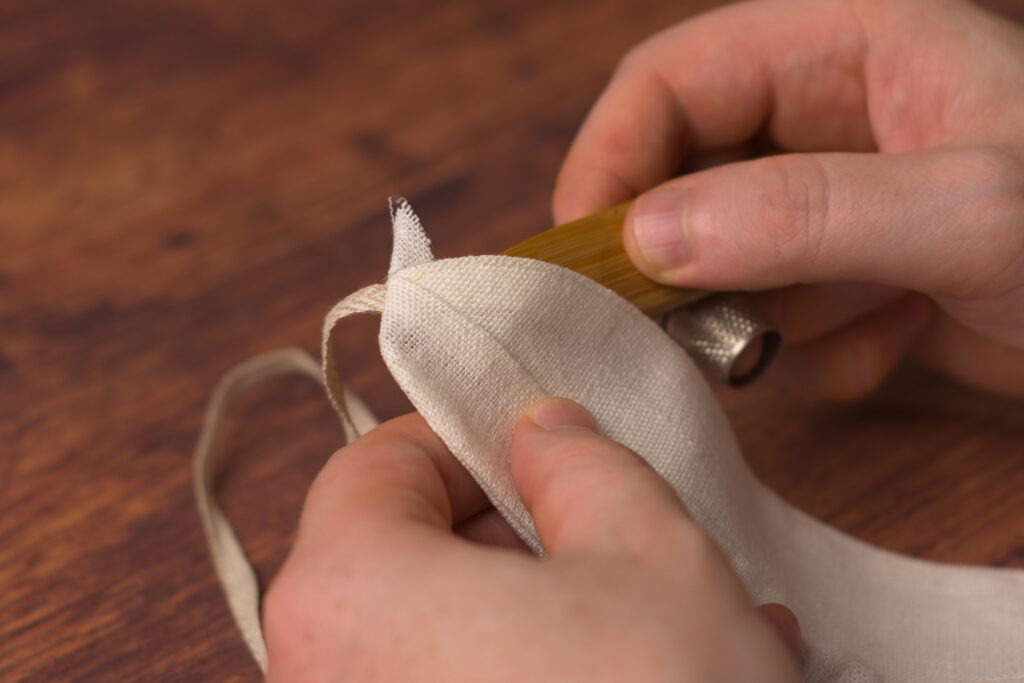
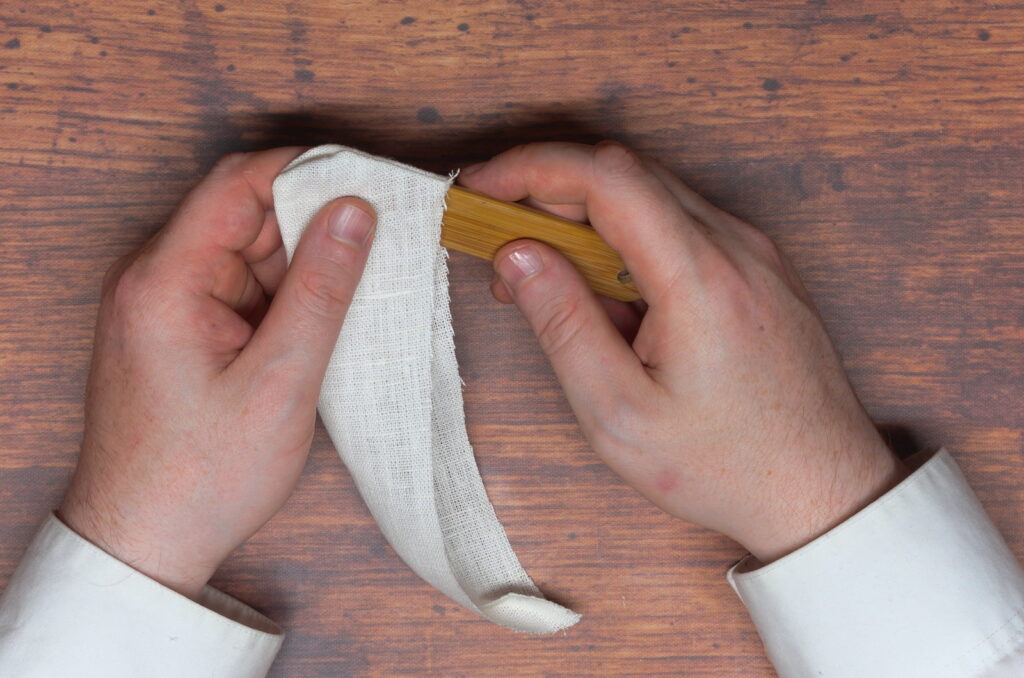
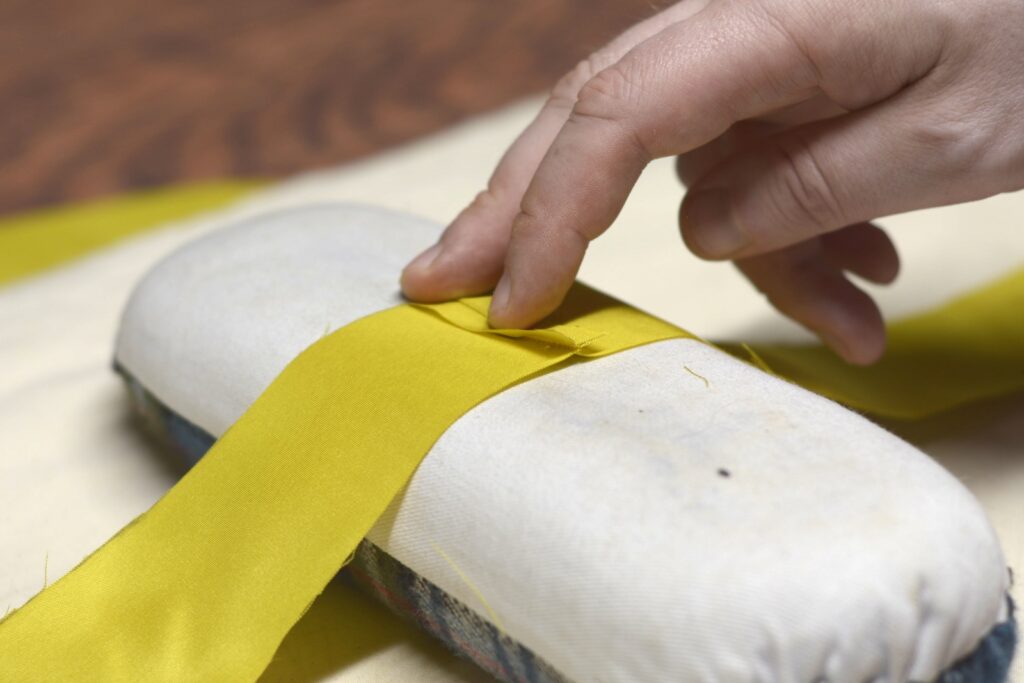
Pressing is one of the most important aspects of good tailoring, and I spend almost as much time pressing here in this simple project as I do sewing. Looking at the cravat so far, you’ll notice that a lot of the seams tend to be ‘inside’ the cravat still. I like to insert a seam turning tool into the opening at this point to crease each of the seams from the inside, and in particular straighten out the points at each end. You could also use a pencil for this process with pretty much the same results.
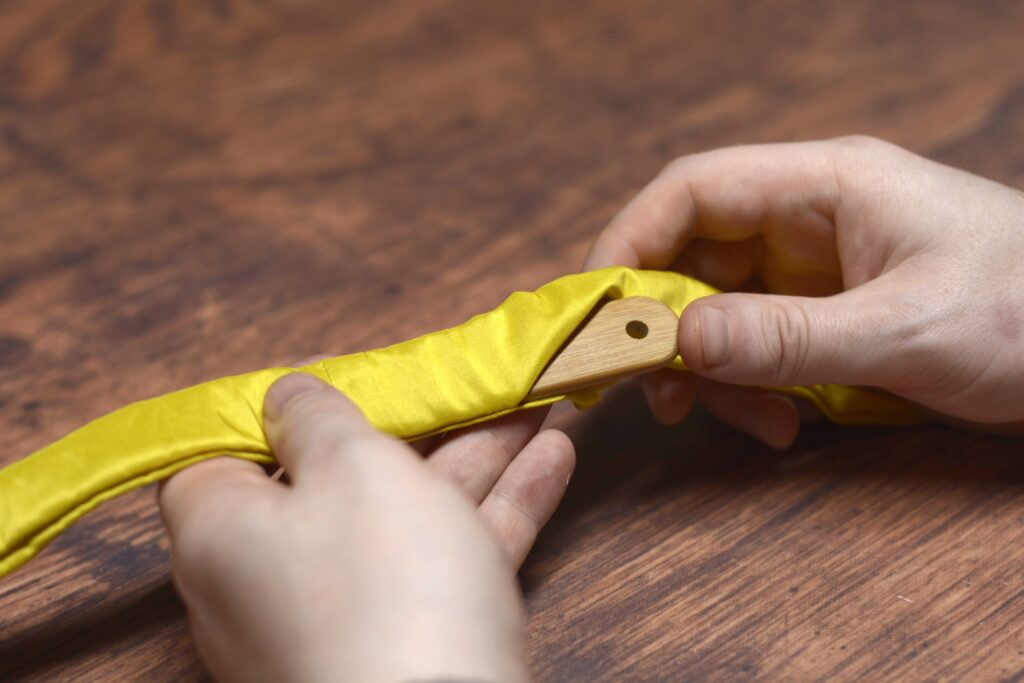
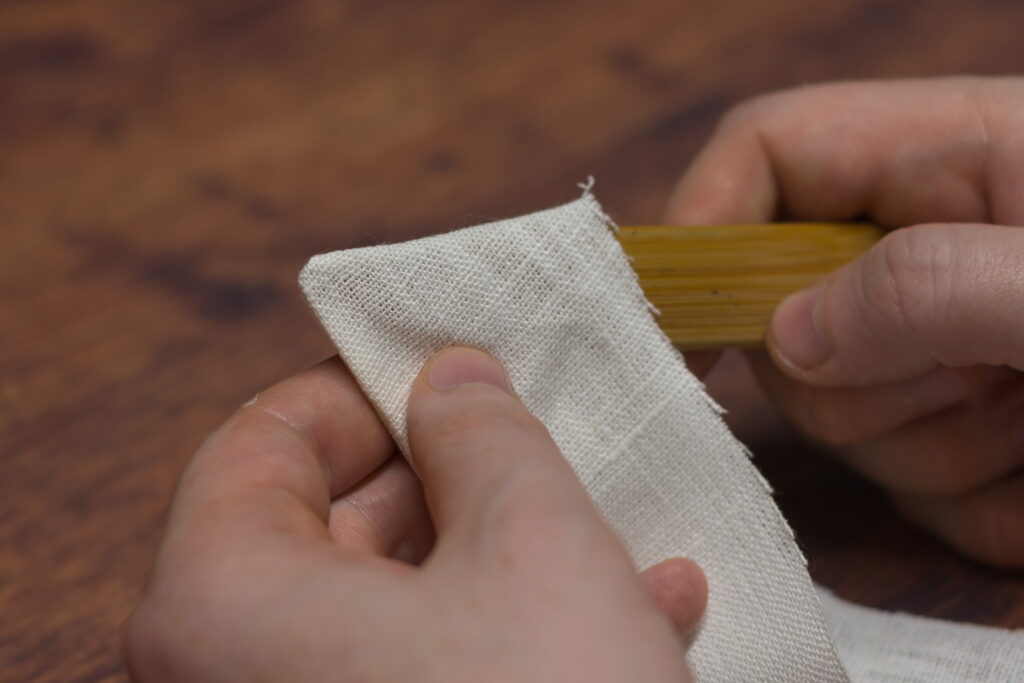
It’s hard to see, but I’m holding the point pressing tool against the seam and pulling both edges firmly, giving a nice crisp edge to the seam.
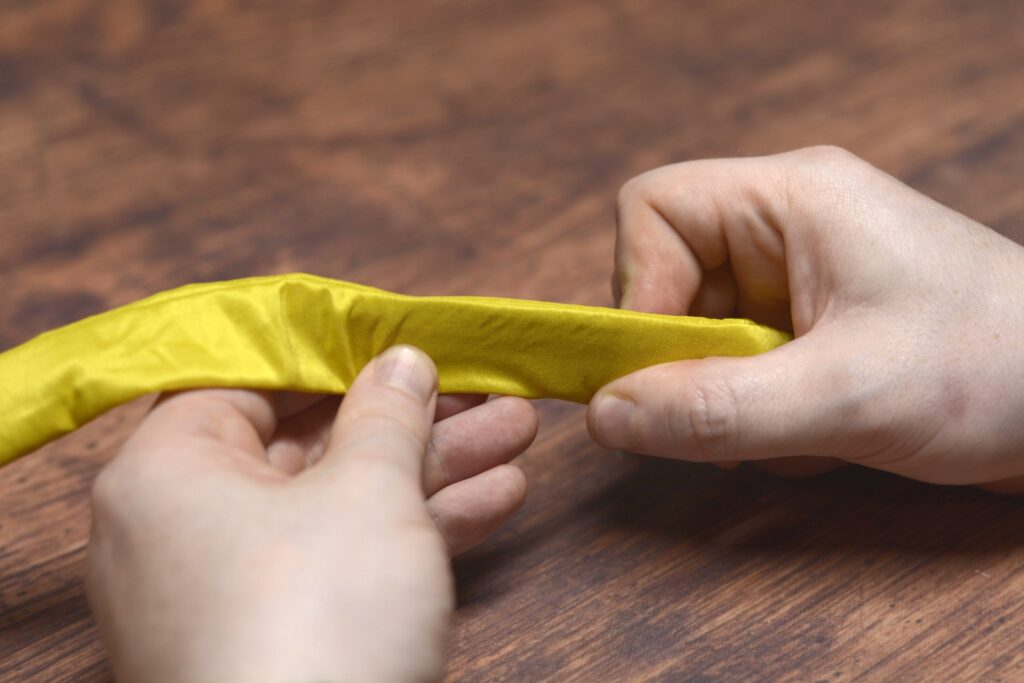
Continue the process towards the point.
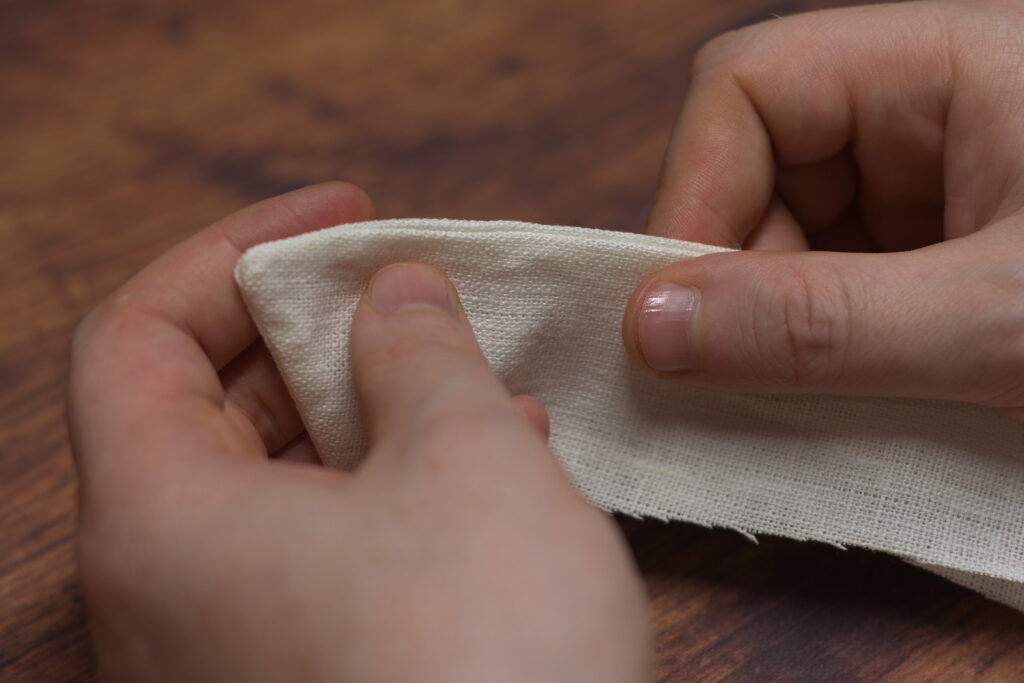
At the point carefully and gently push the point fully open from the inside. Be careful not to use too much pressure as this is the weak point and can very easily burst open. Get the point looking exactly how you want it to, as pressing will not do much if the point is not sharp now.
Continue around the other seam, and the other half of the cravat in the same manner.
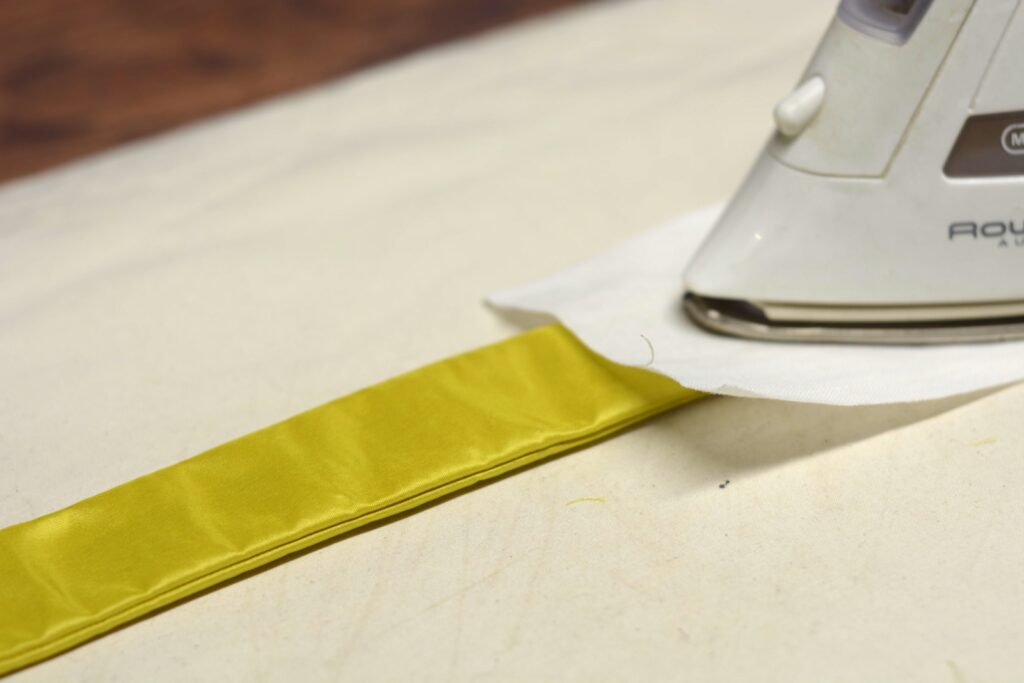
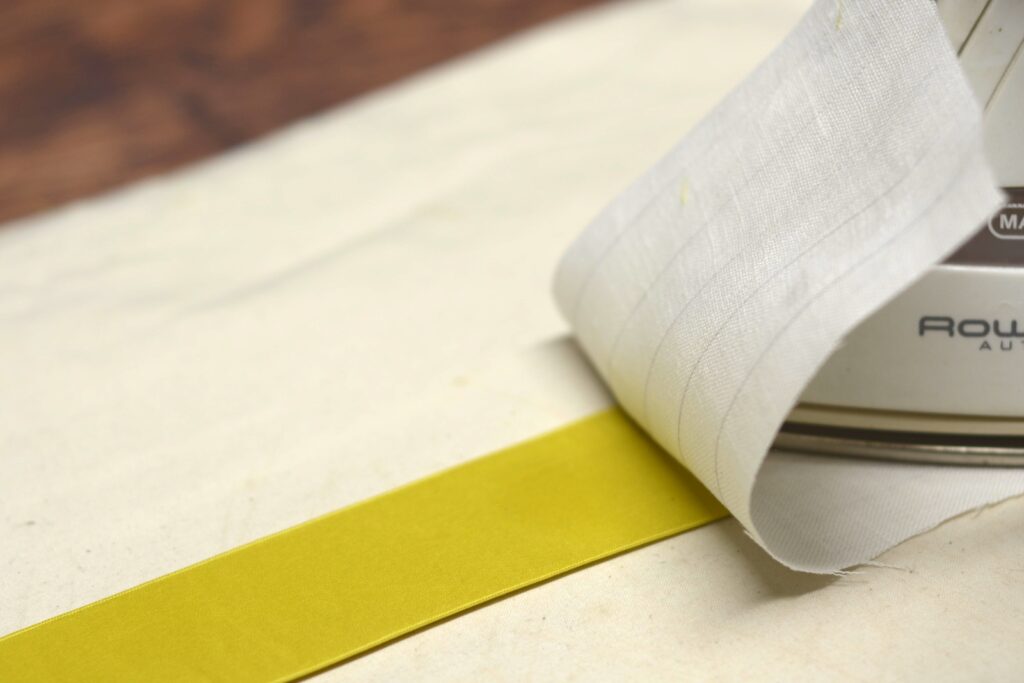
Without using steam at this point, I like to give the cravat a light pressing just to keep everything in its position. You don’t really want to crease the edges yet, as that makes finishing the opening a little more difficult. Since we’re pressing the outside of the cravat, I like to use a press cloth, in this case a scrap of linen, between the iron and the cravat to prevent any scorch or dirt marks from appearing.
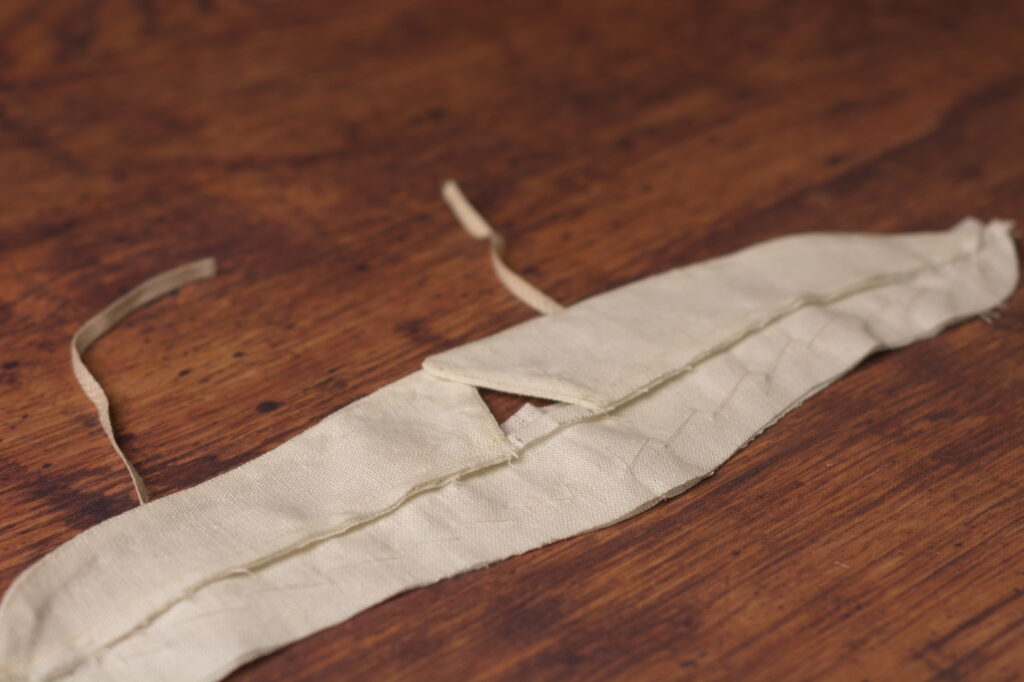
Here’s what you should have so far.
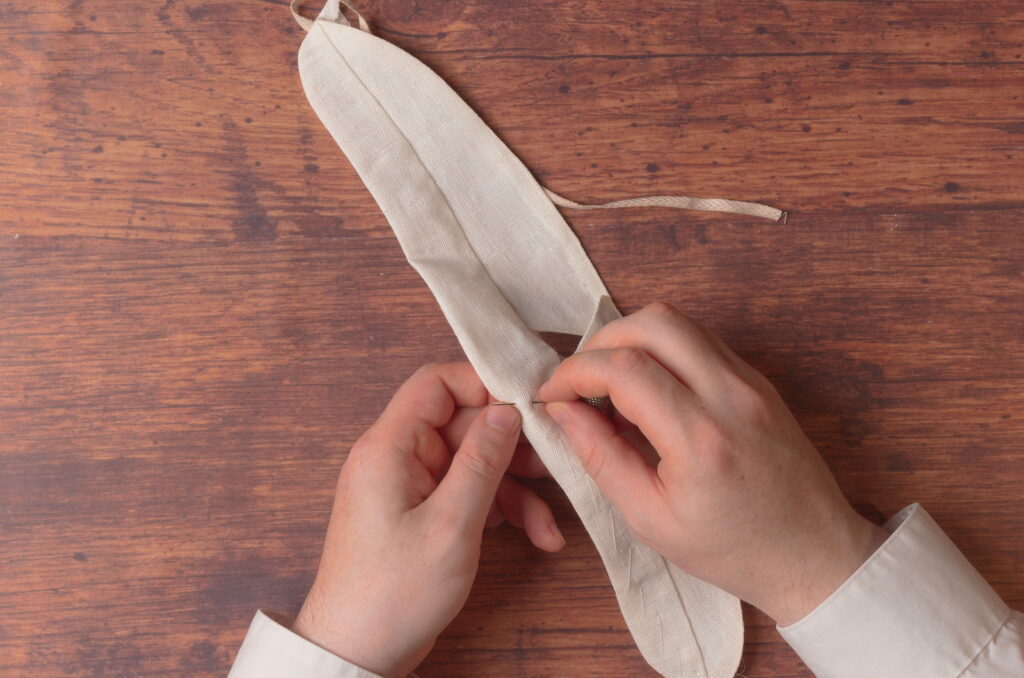
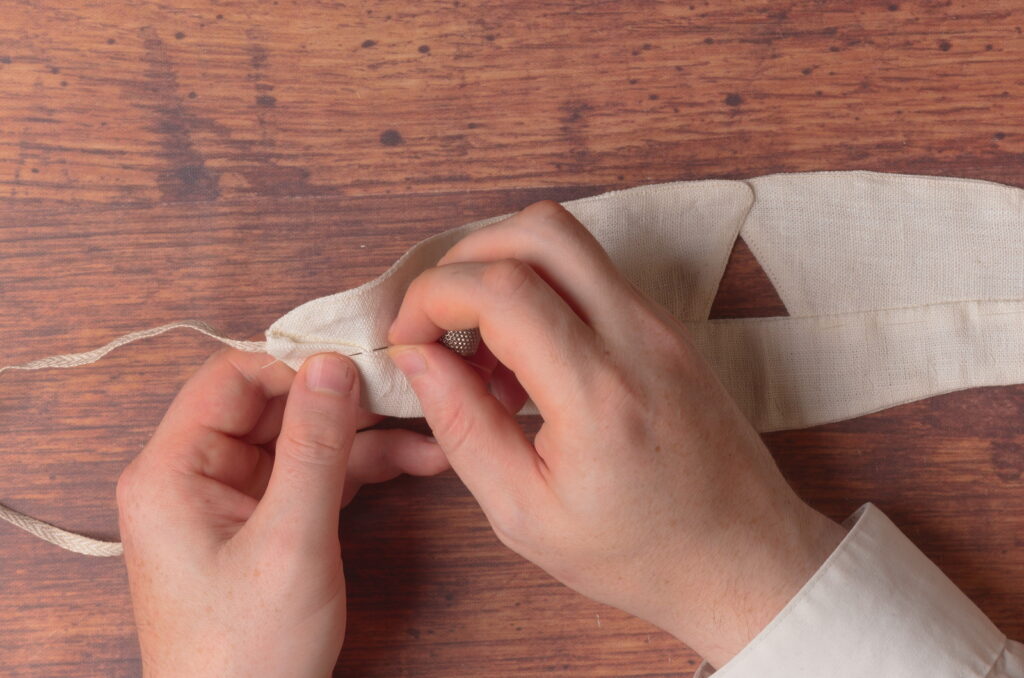
Ladder Stitching the Opening
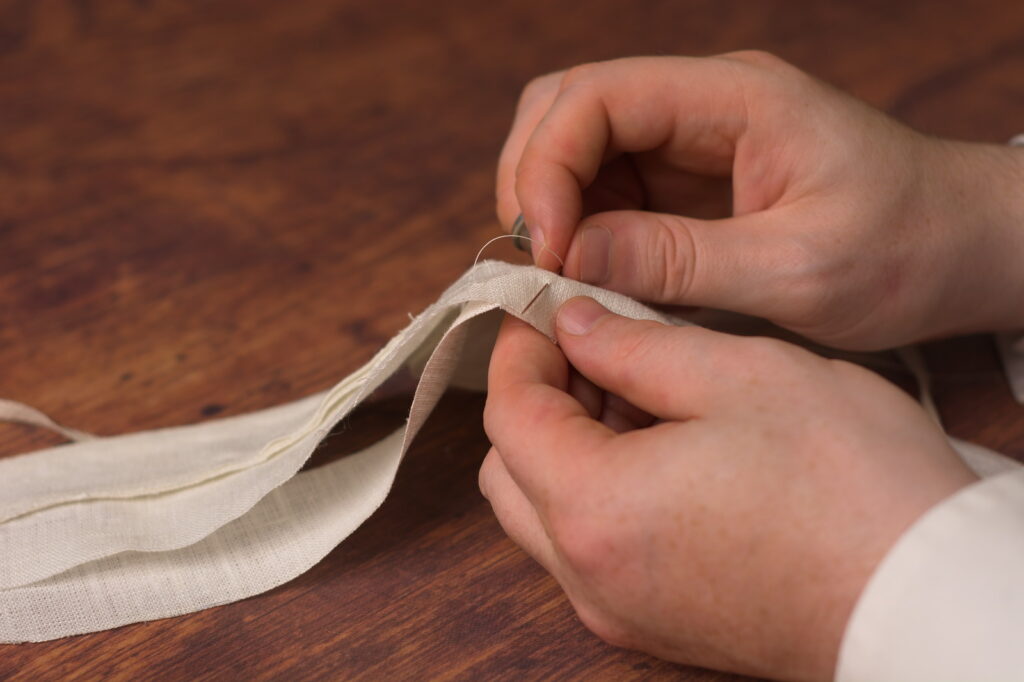
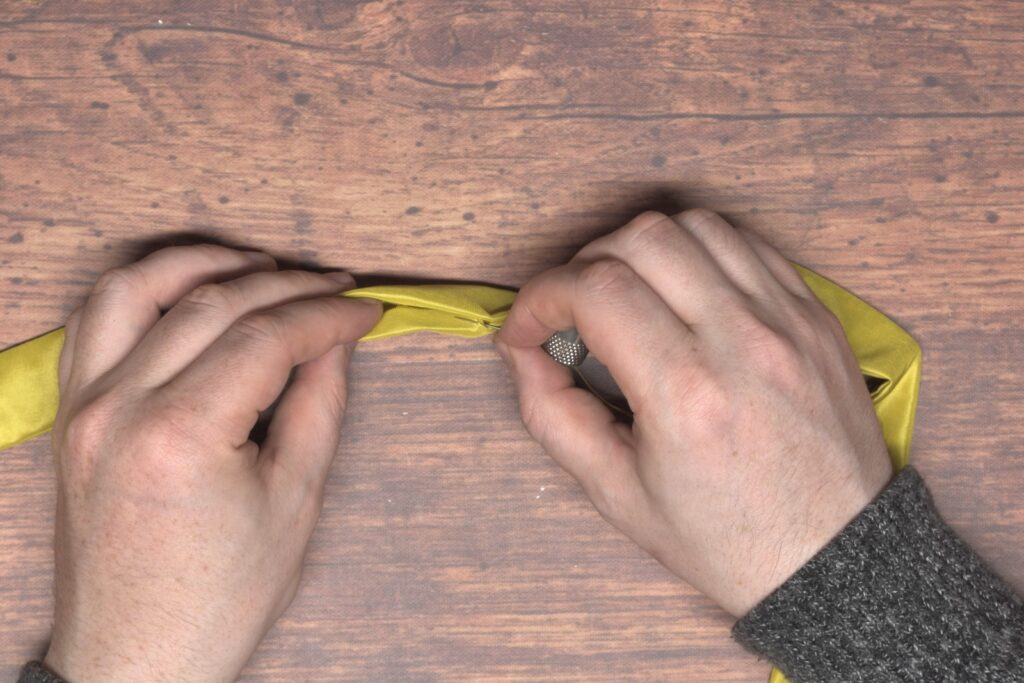
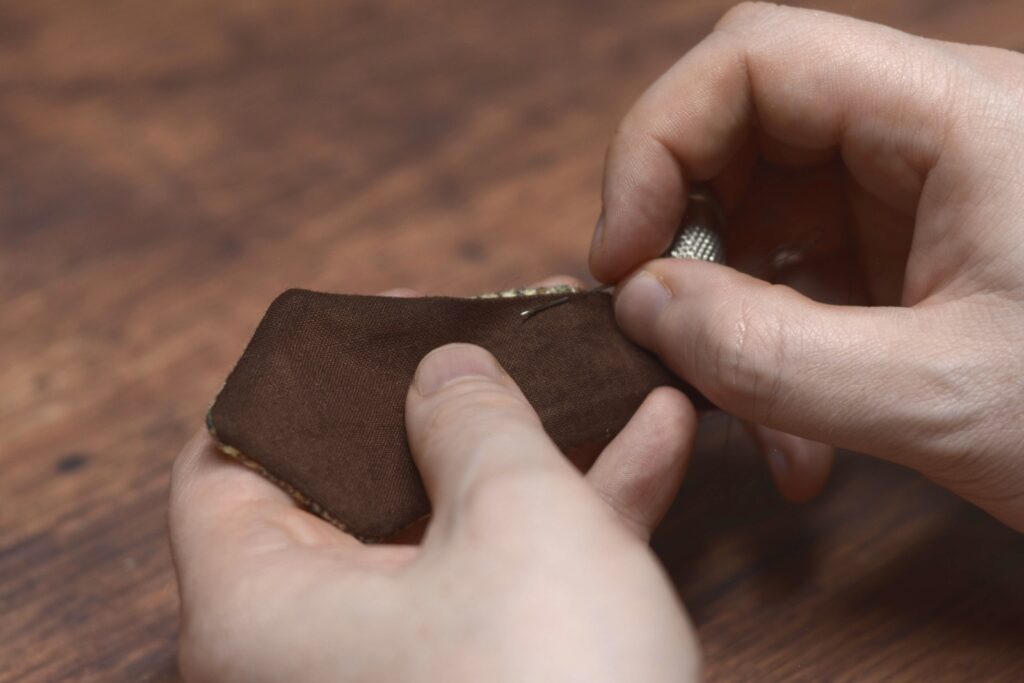
It’s time to close up the opening now with what’s sometimes known as a ladder stitch. This is an almost invisible stitch from the outside which gives a nice clean finish to your cravat.
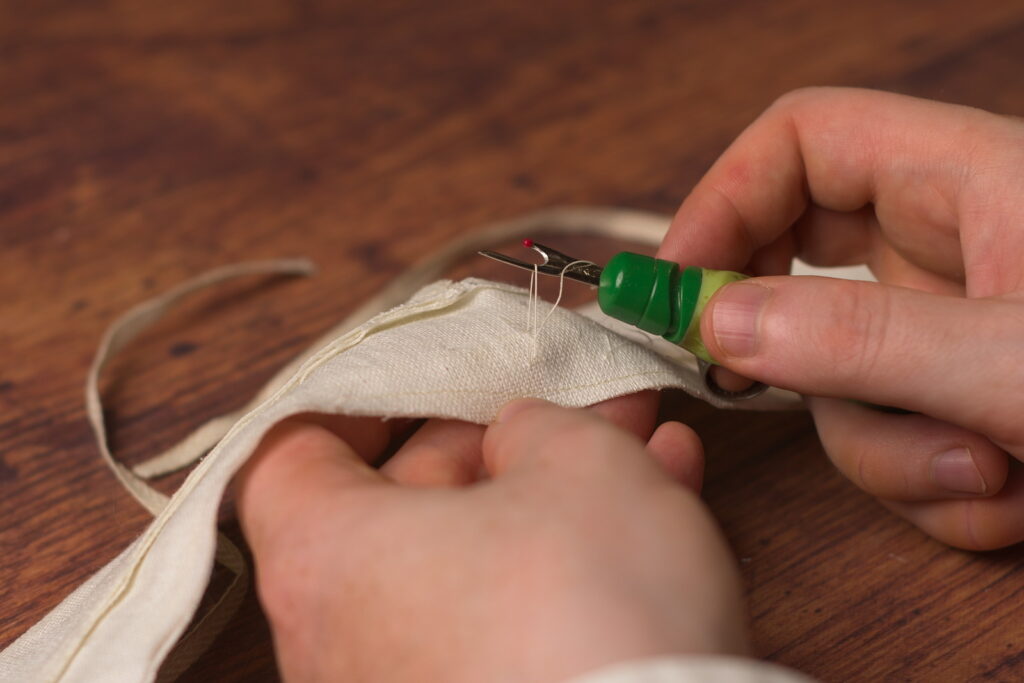
You’ll notice that the seam allowance at the opening is creased under from the pressing, but still not completely flat at this point.
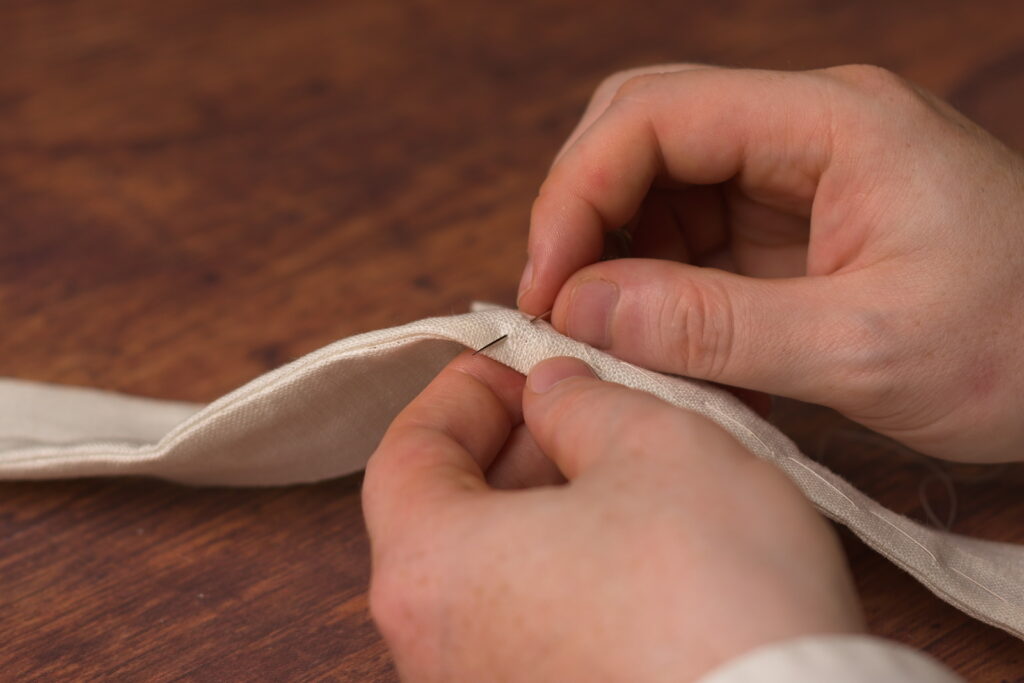
With your needle and some fine finishing thread, make two or three stitches in place near one end of the opening on one seam allowance, being sure not to let the stitch show through on the outside. The stitches should be about 1/8″ below the crease and parallel to the fold.
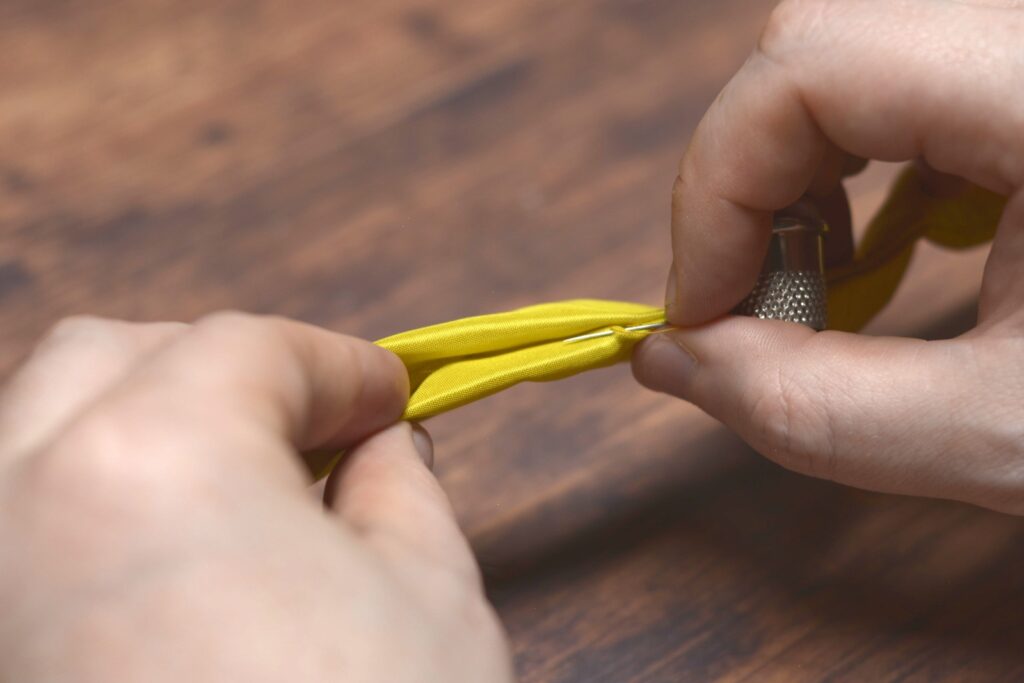
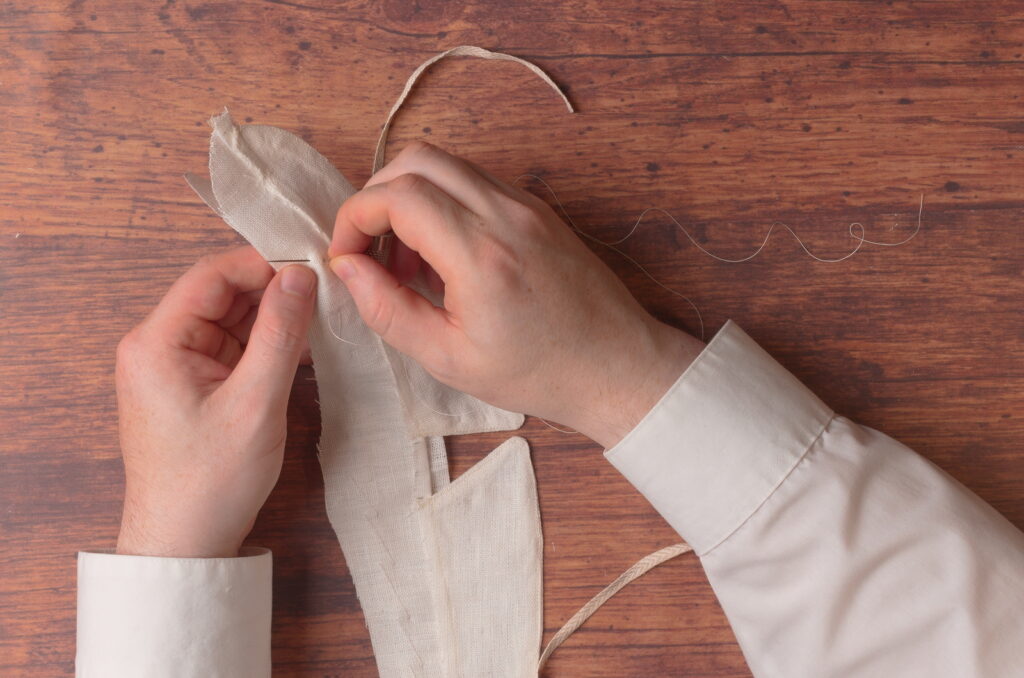
Make your next stitch beginning directly across from the end of the previous stitch in the other seam allowance.
Continue making about four or five stitches, not pulling them tight at this point. You’ll notice how they form somewhat of a ‘ladder’, hence the name.
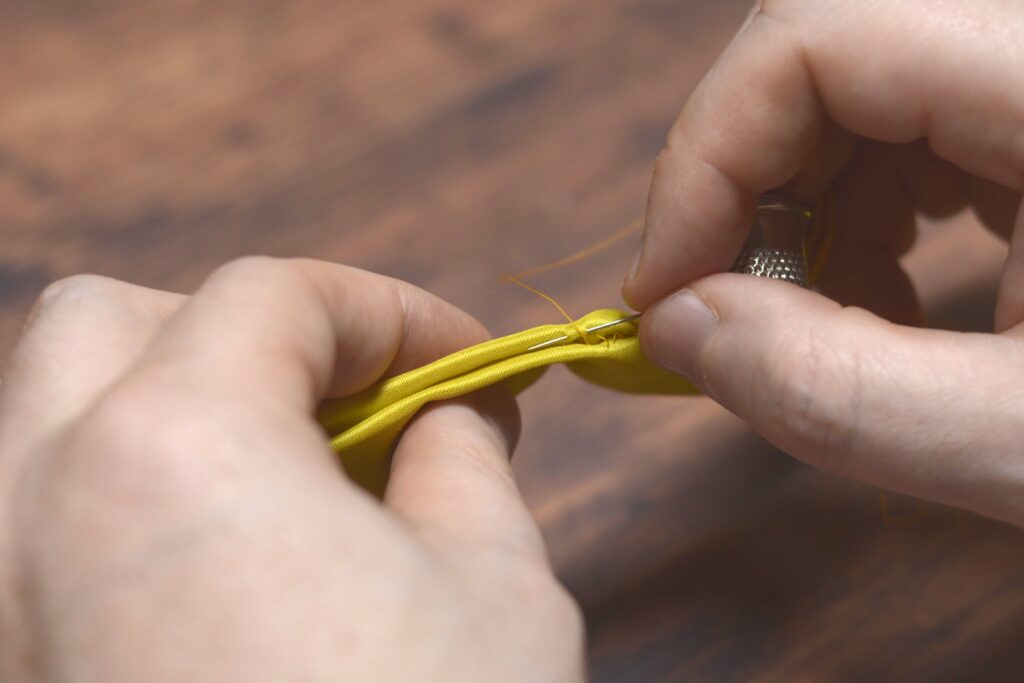
Now carefully pull the thread, pulling the stitches firmly closed. Don’t pull too tightly though, as you’ll end up with unsightly gathers.
Continue with the same process across the width of the opening, closing it up nicely. At the other end, make another three or so stitches in place, hiding them as best you can in the folds of the seam.
Final Pressing
We’ll finish up the cravat with one last pressing. I’m again using the press cloth. Lightly dampen the press cloth with a spray bottle, use high heat on your iron, and you’ll end up with a very nicely pressed and crisp cravat, ready to wear.
Cravat Construction
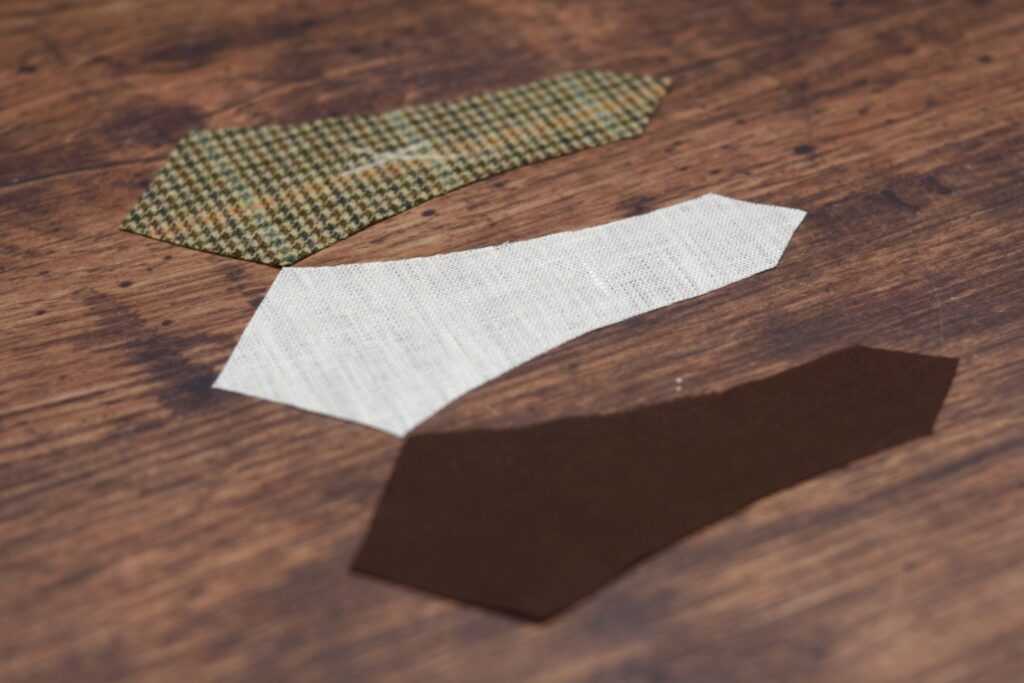
With the pattern drafted, it’s time to cut it out the fabric and start on the construction. Begin by laying your pattern on the doubled fabric with the baseline parallel to the grain in either direction. It’s probable that you’re using scraps to make your cravat so just place the pieces where they’ll best fit.
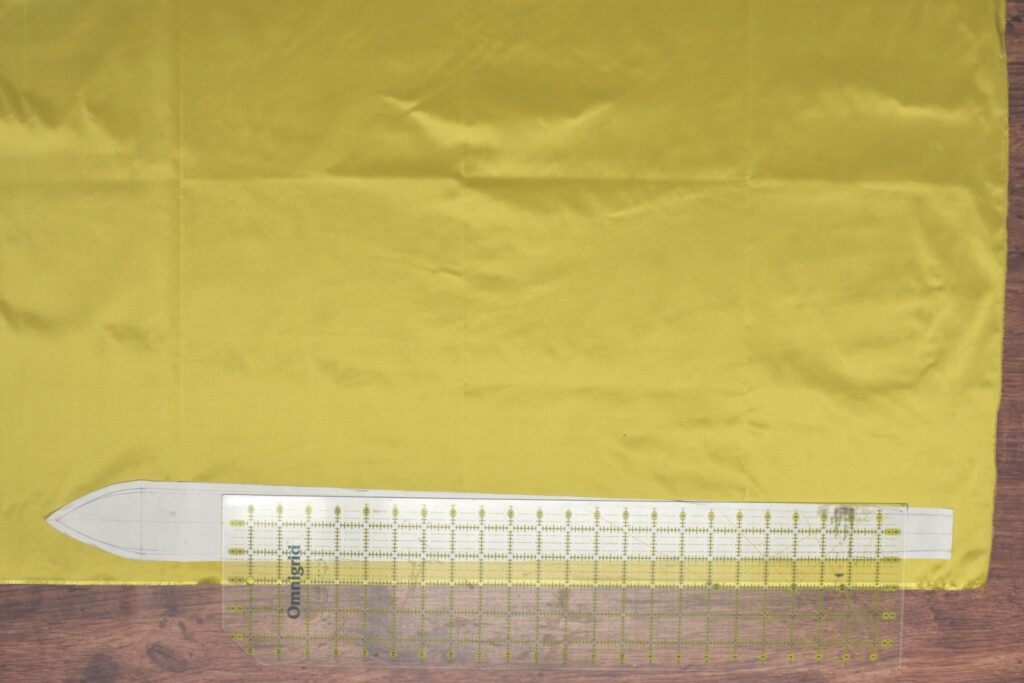
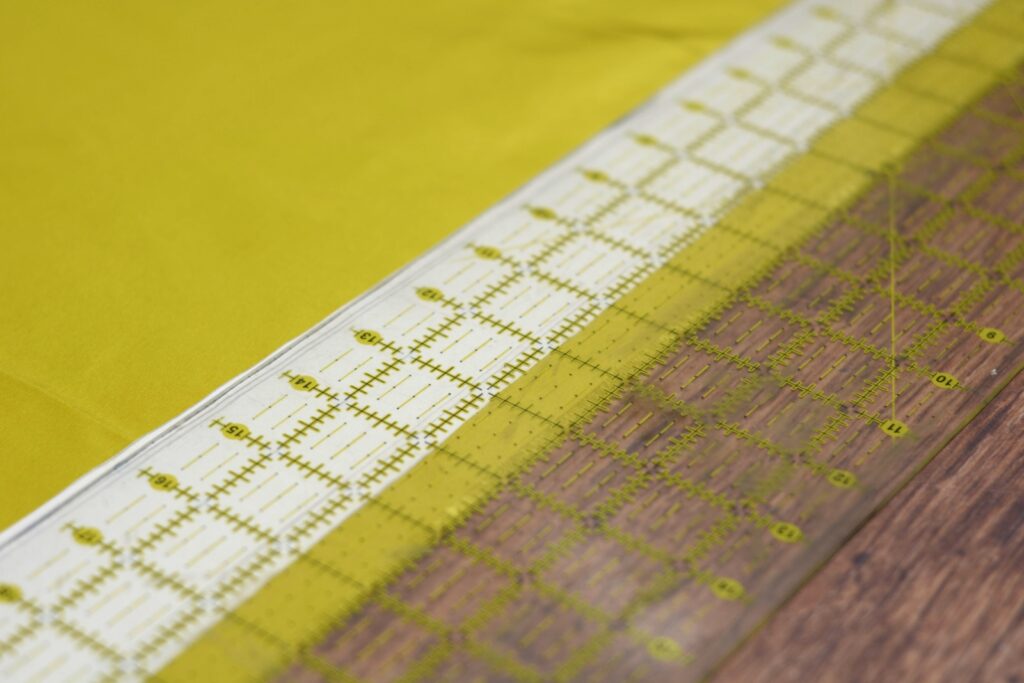
Using a quilting ruler helps with the alignment of the pattern piece.
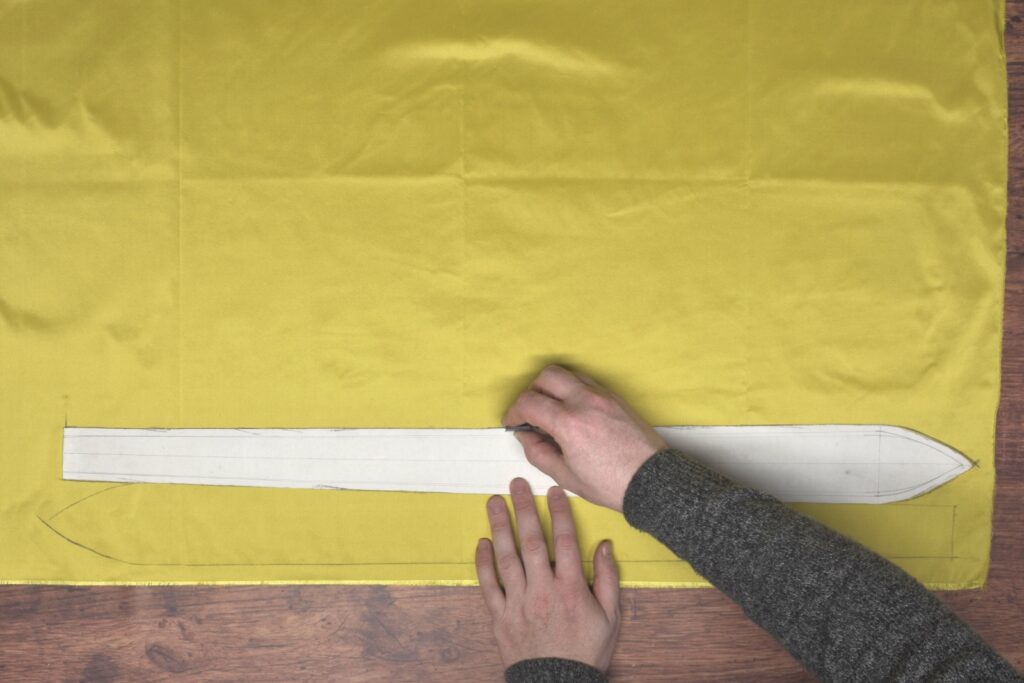
When laying out the second piece, I like to align the long edge with the previous piece, as well as reverse the pattern, to save cutting and fabric.
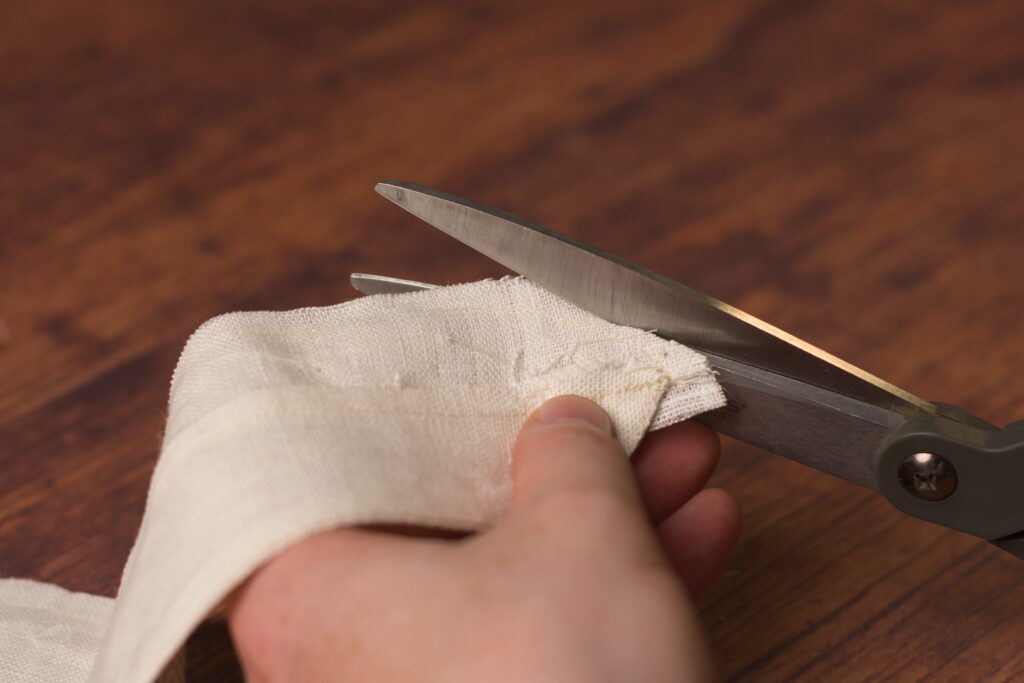
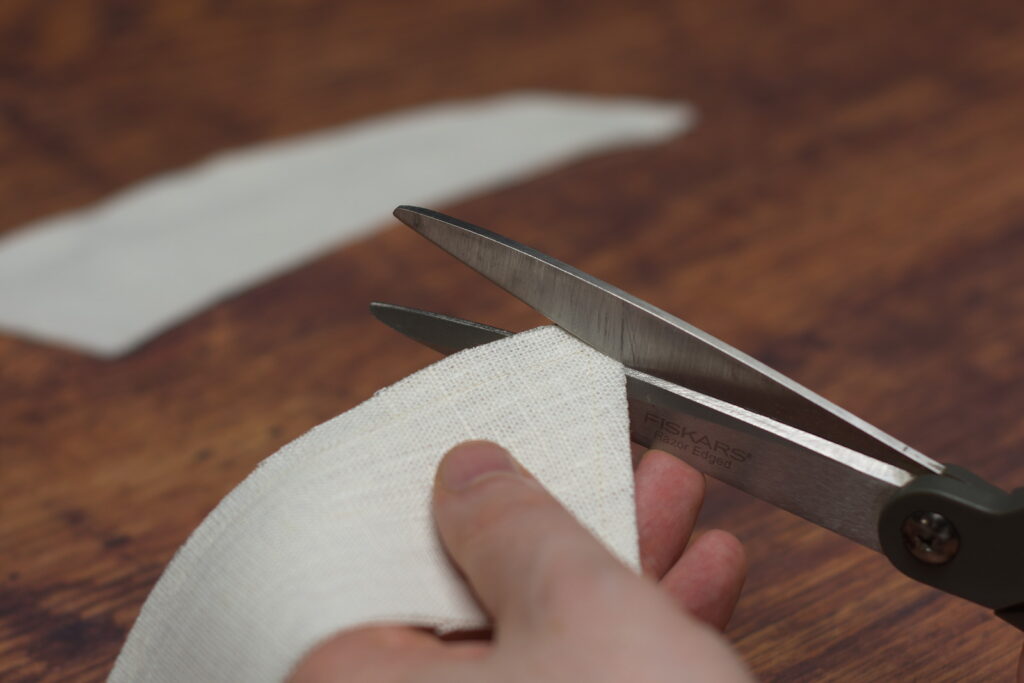
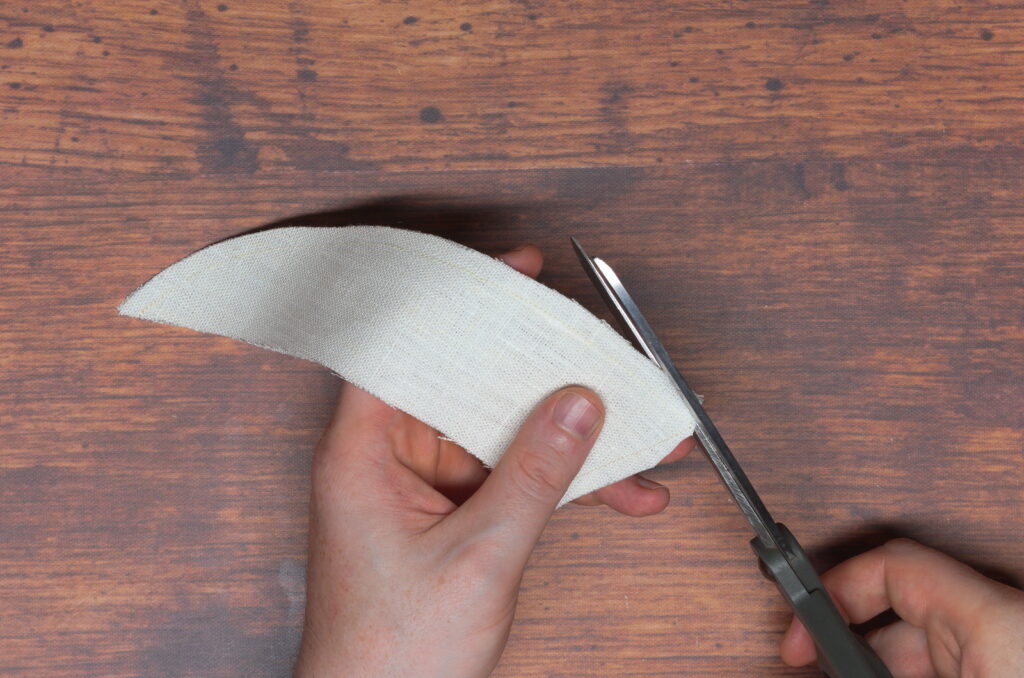
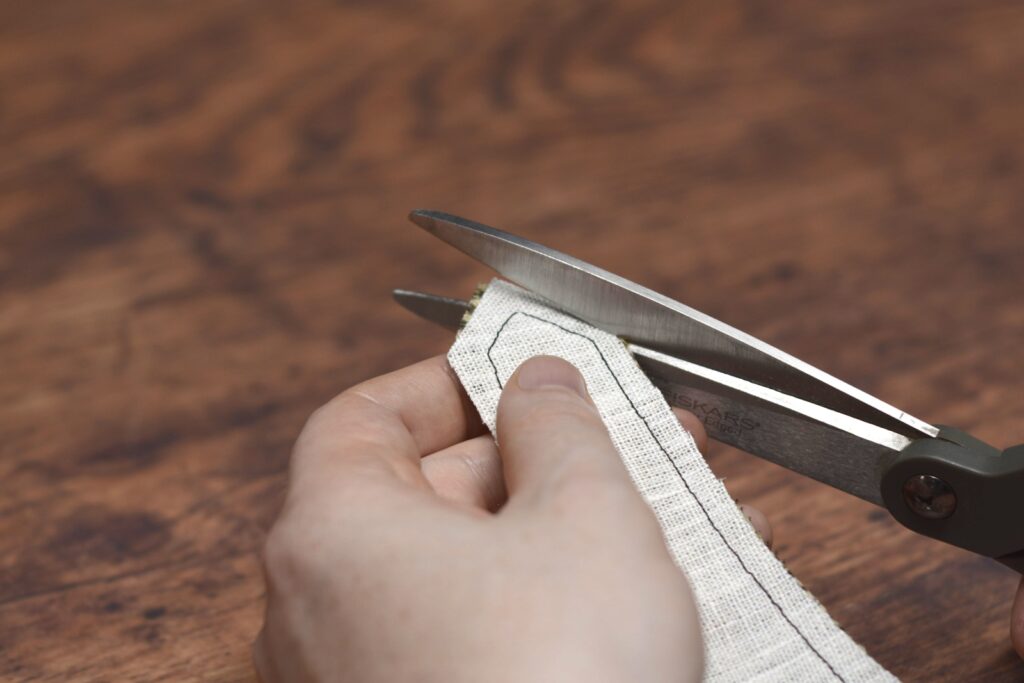
Cut out the two pieces, keeping the cut to the inside of the chalk line, as the chalk line takes up some width and would throw off your pattern otherwise. On the shared long edge, cut directly in the middle of the line.
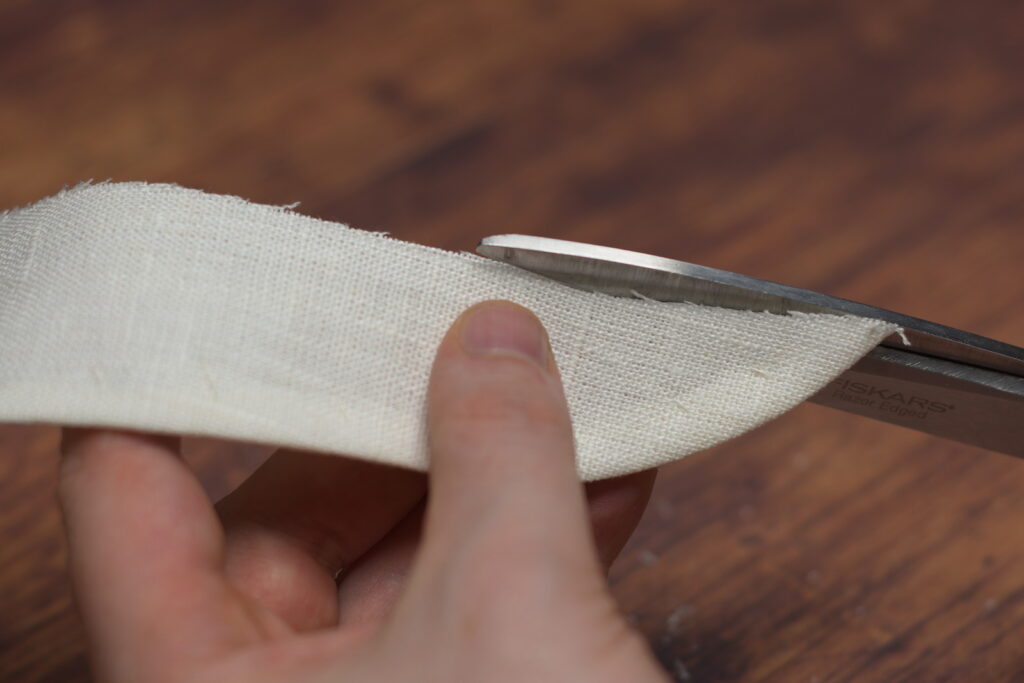
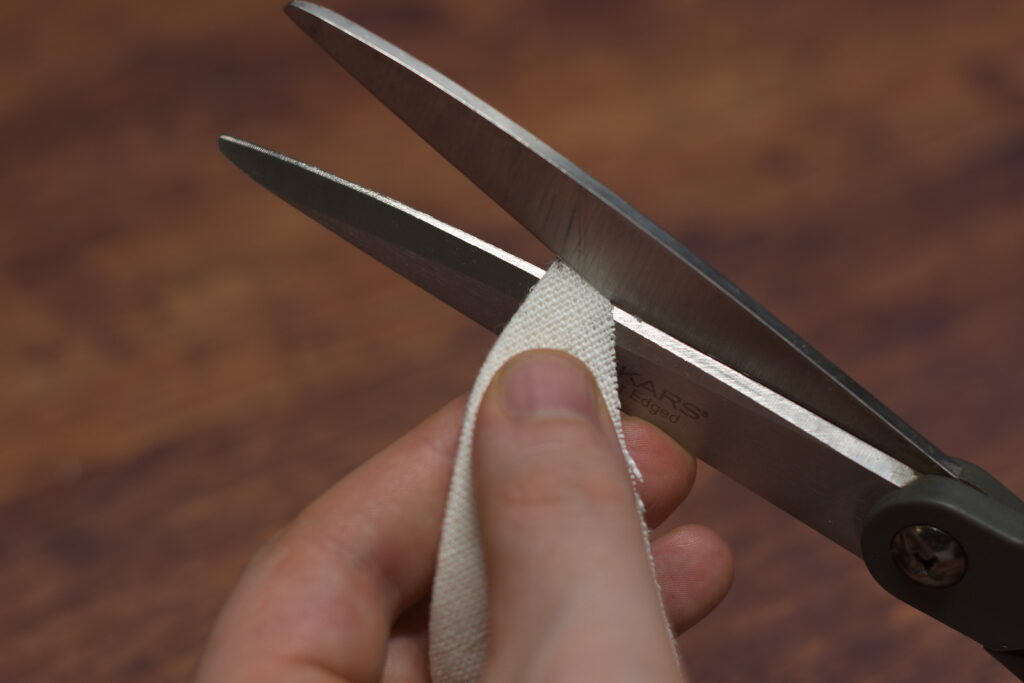
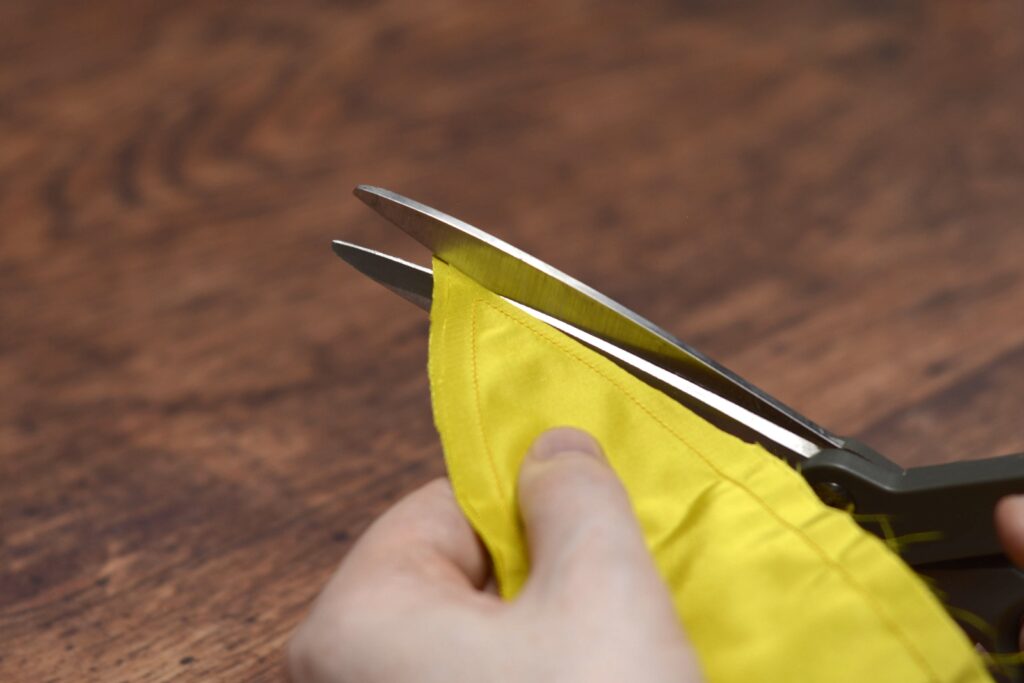
When cutting silk be sure your scissors are very sharp!
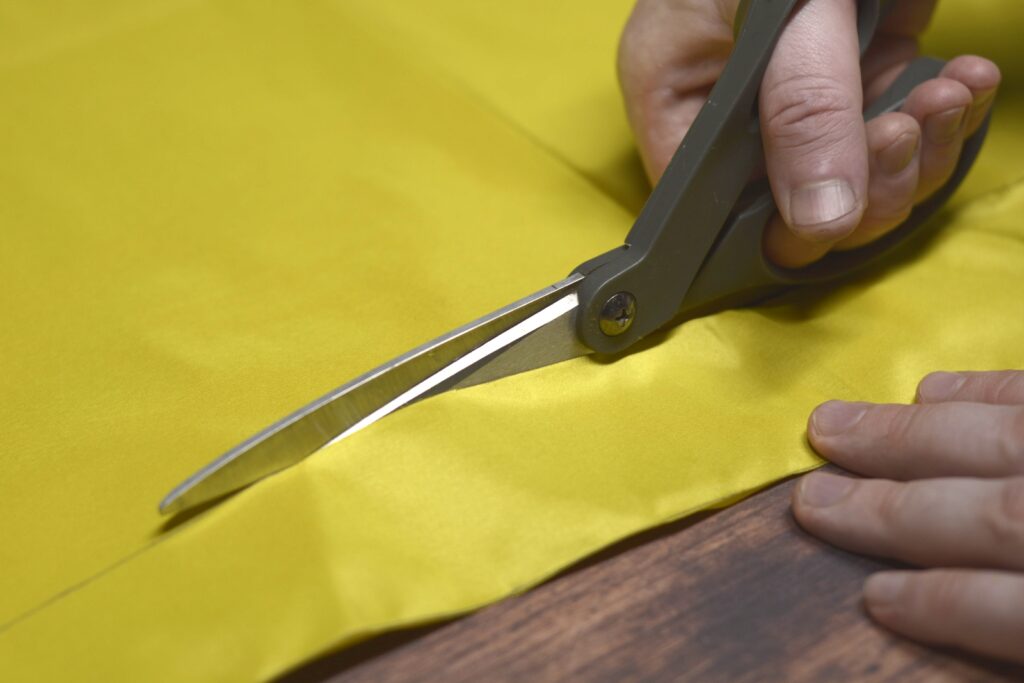
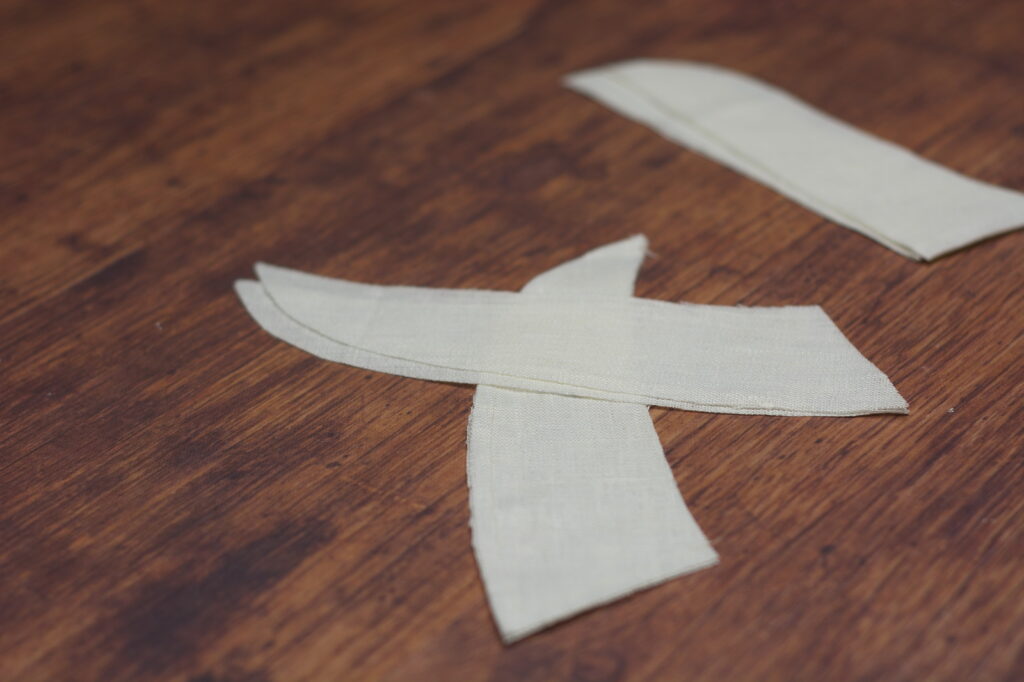
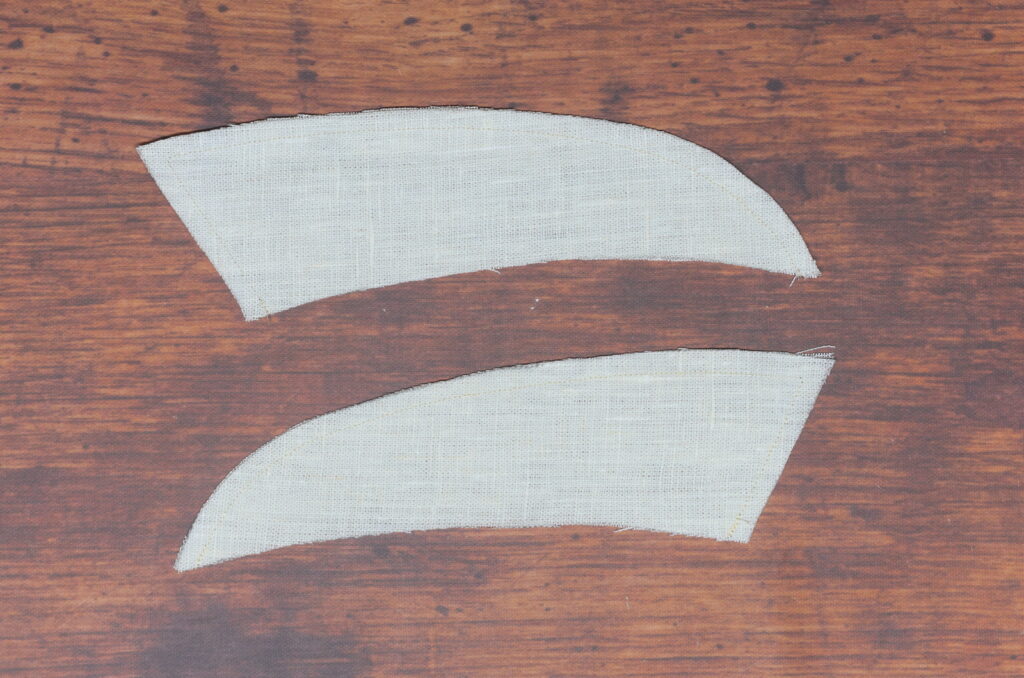
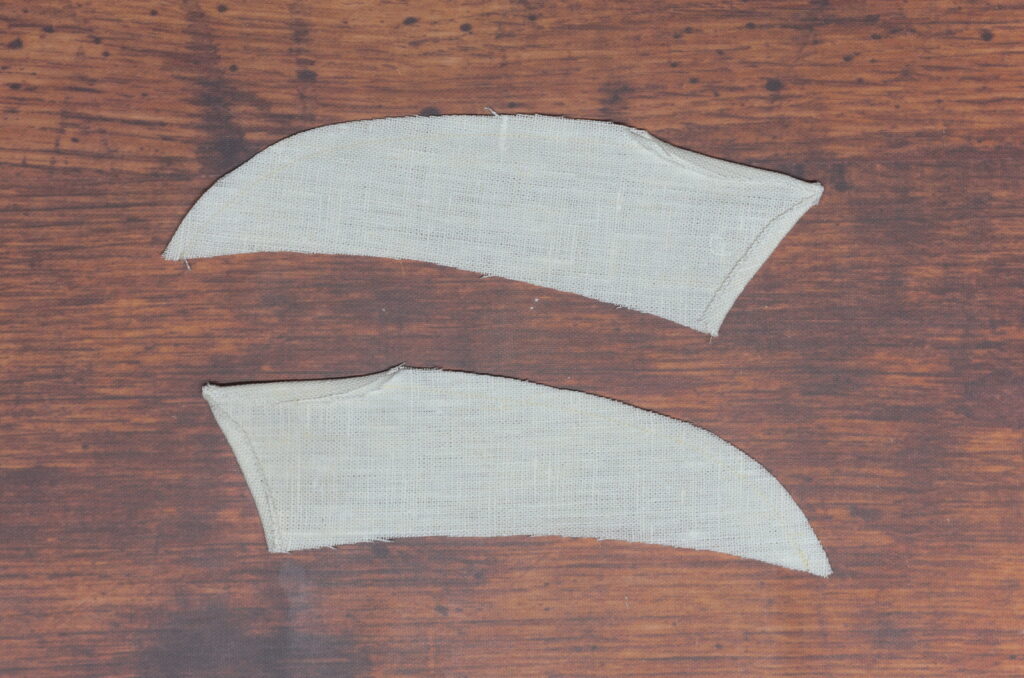
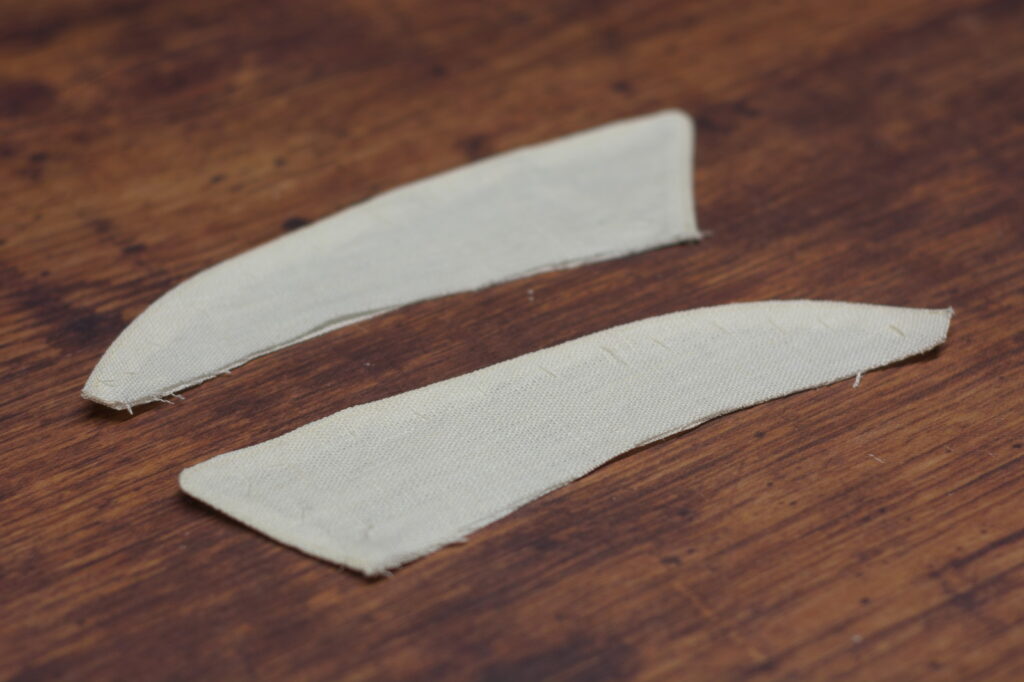
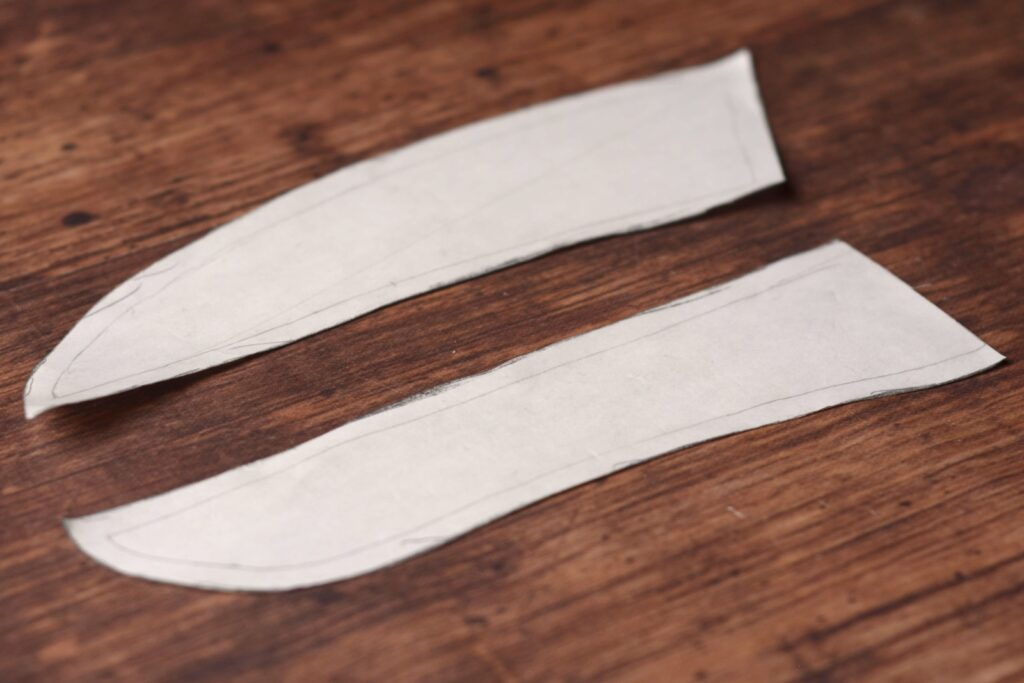
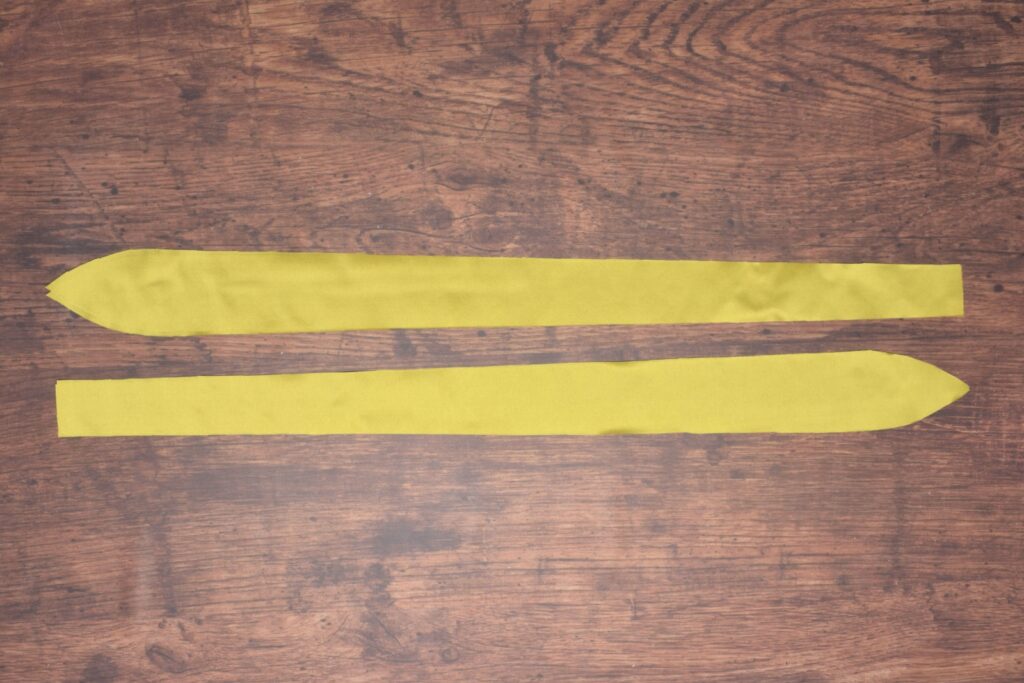
Here are all of the pieces cut out, for a total of four, two for each side.
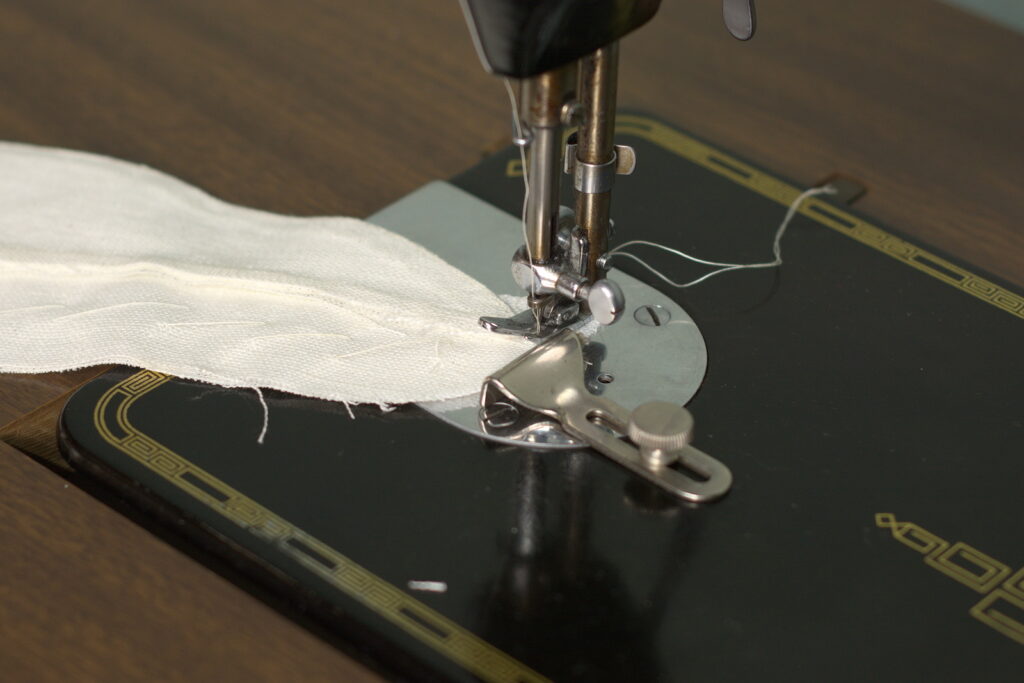
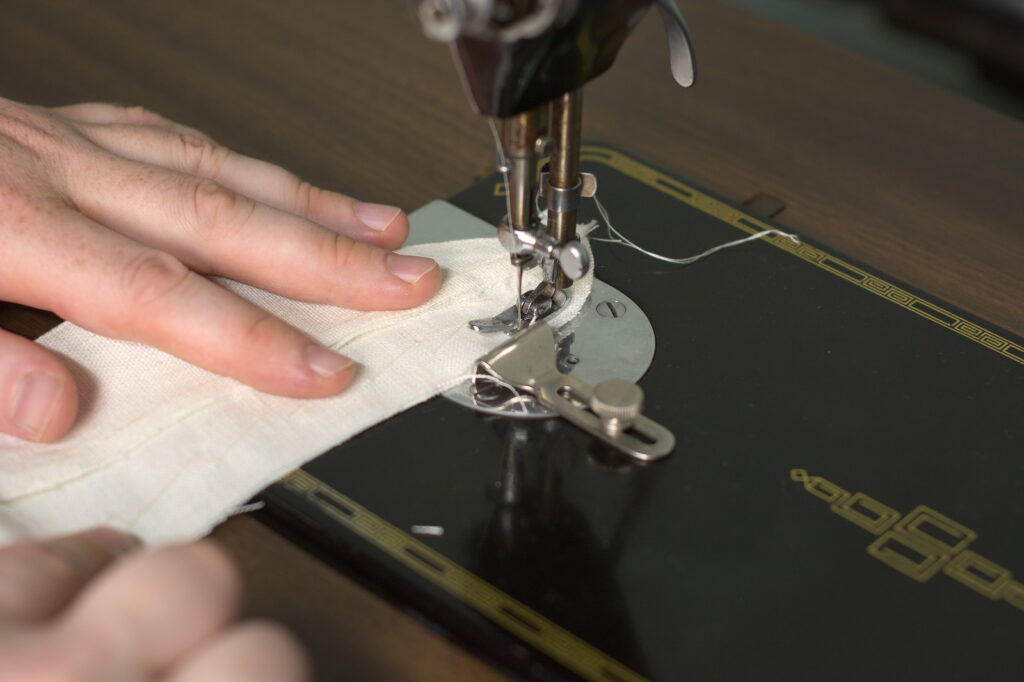
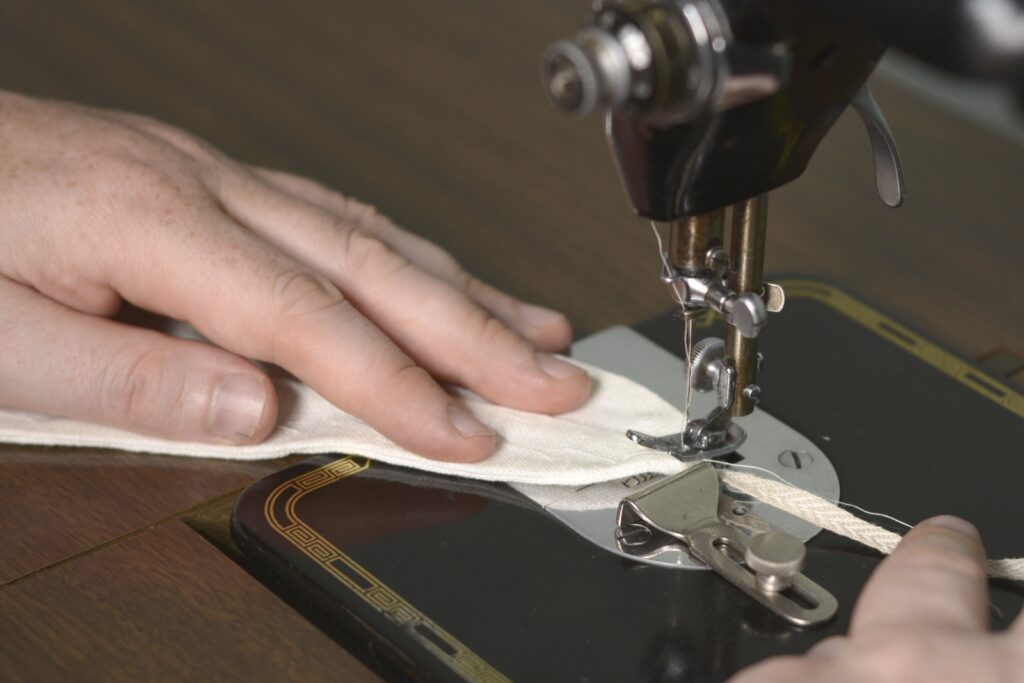
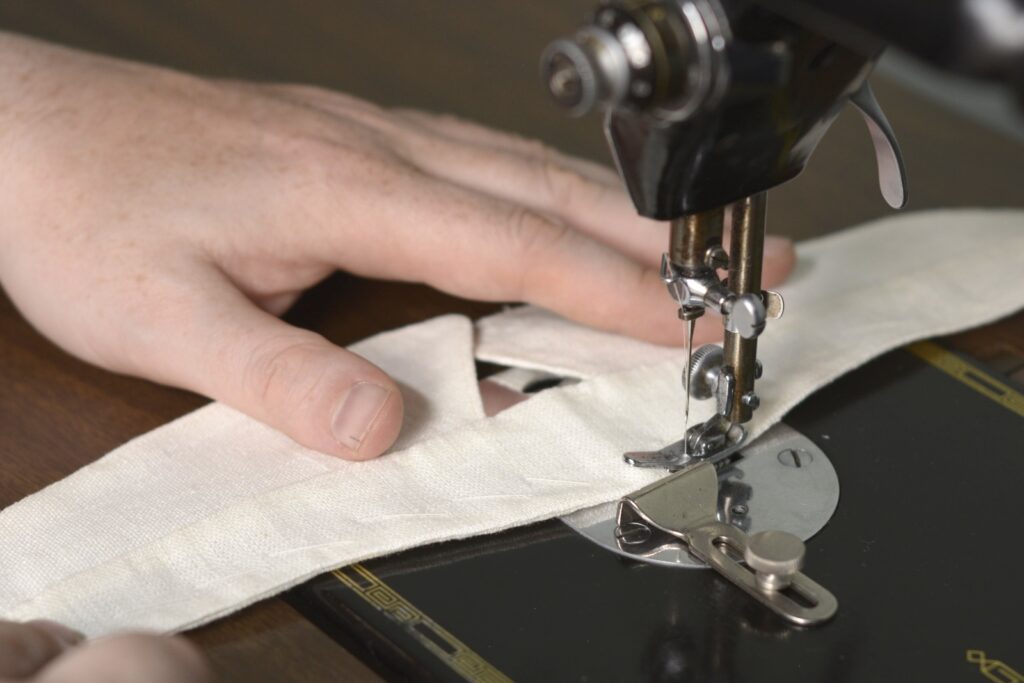
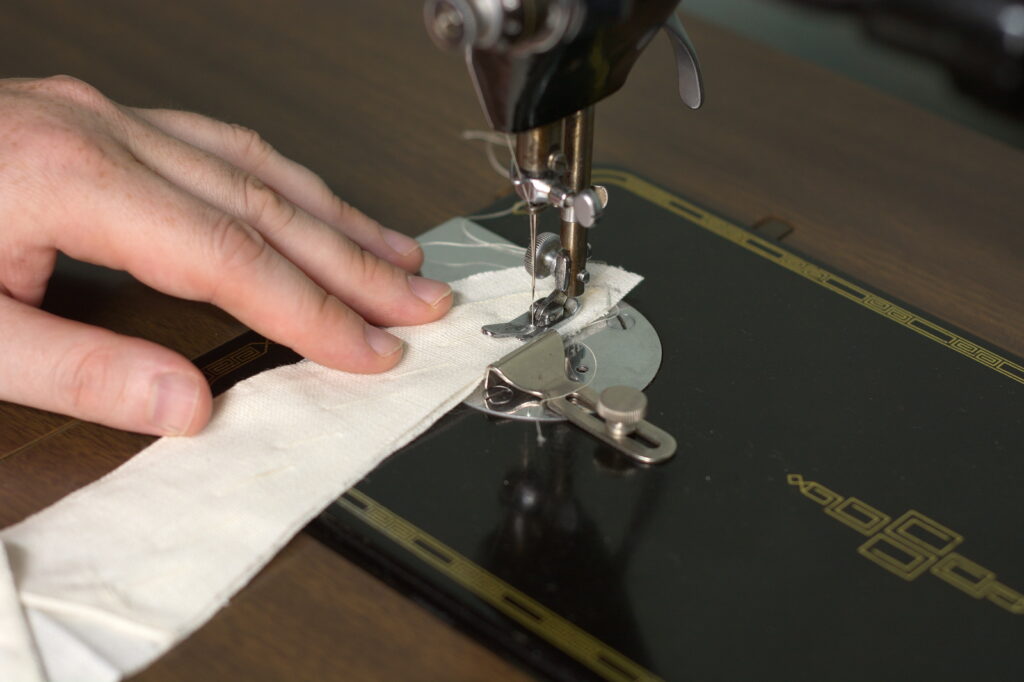
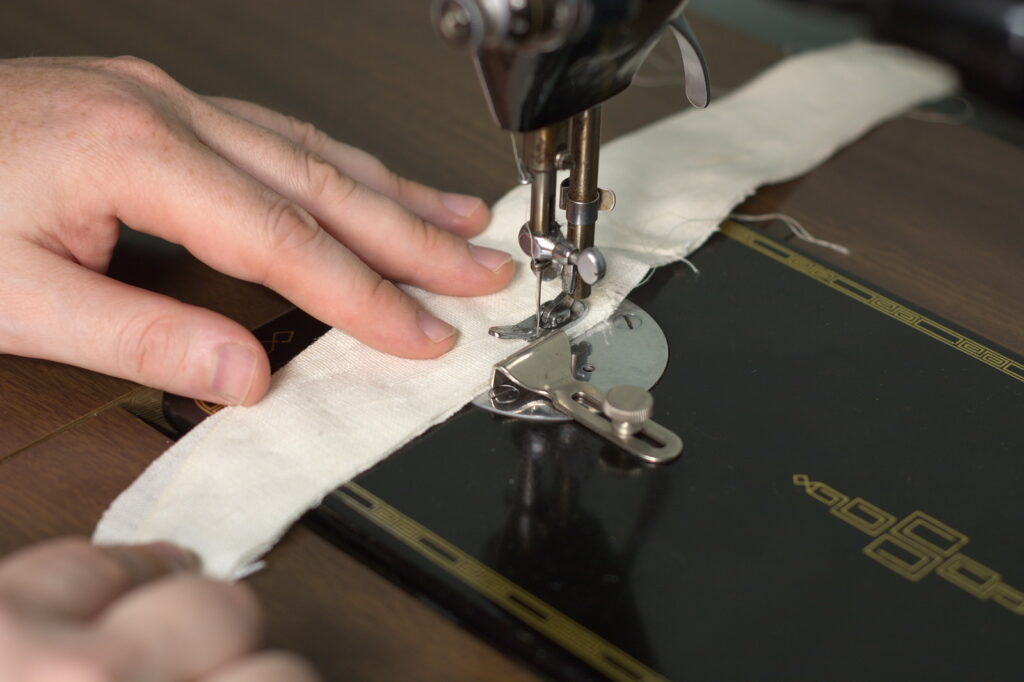
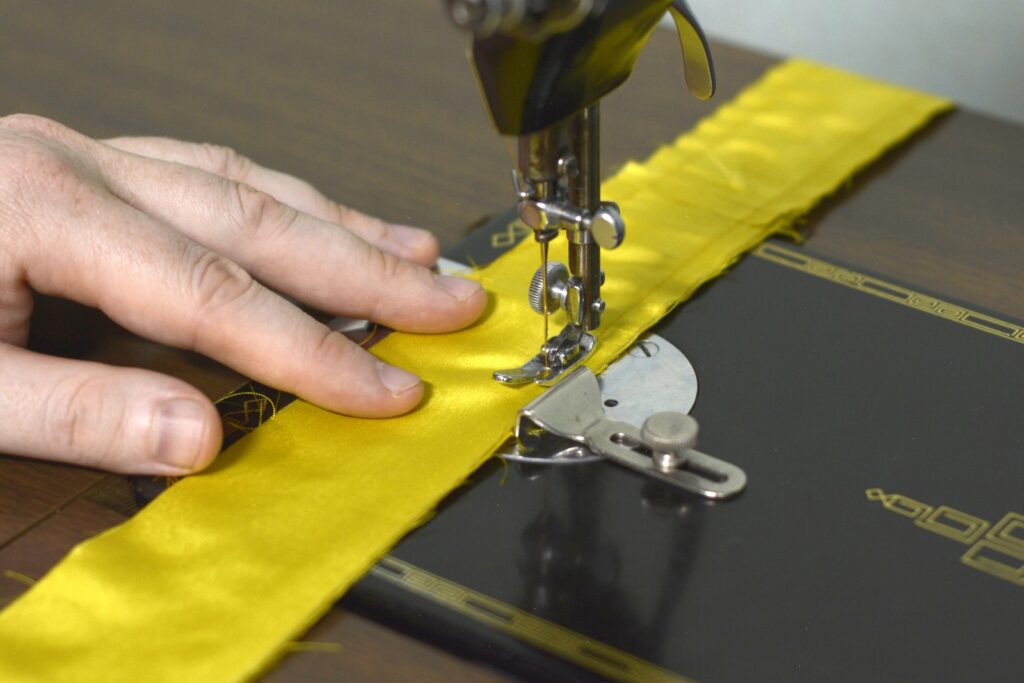
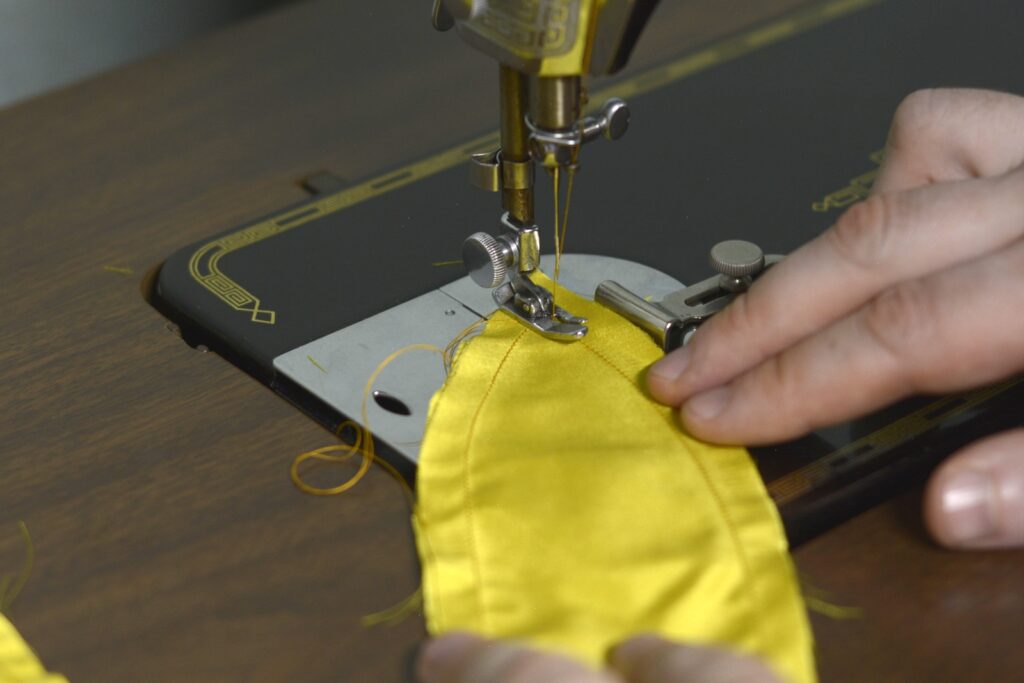
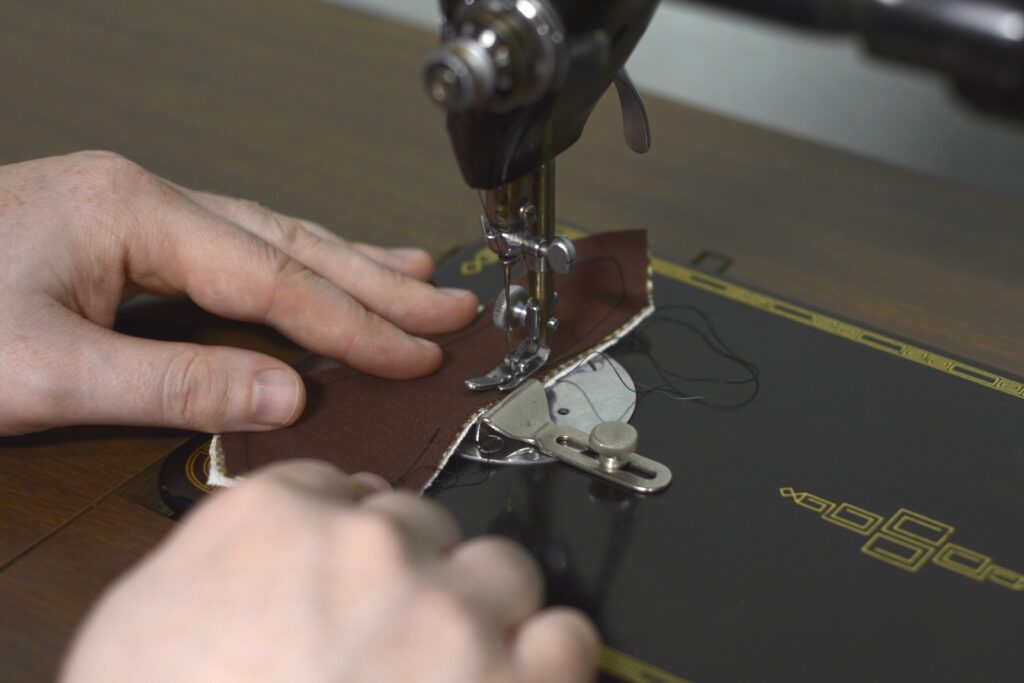
Align two of the pieces together as closely as you can, right sides together. Then along the short edge at the center, sew a seam either by machine or with a back stitch using a 3/8″ seam allowance. Repeat for the other two pieces. It’s important that the pieces be properly aligned and the seam accurately sewn, or else the cravat will skew off at odd angles rather than remain straight.
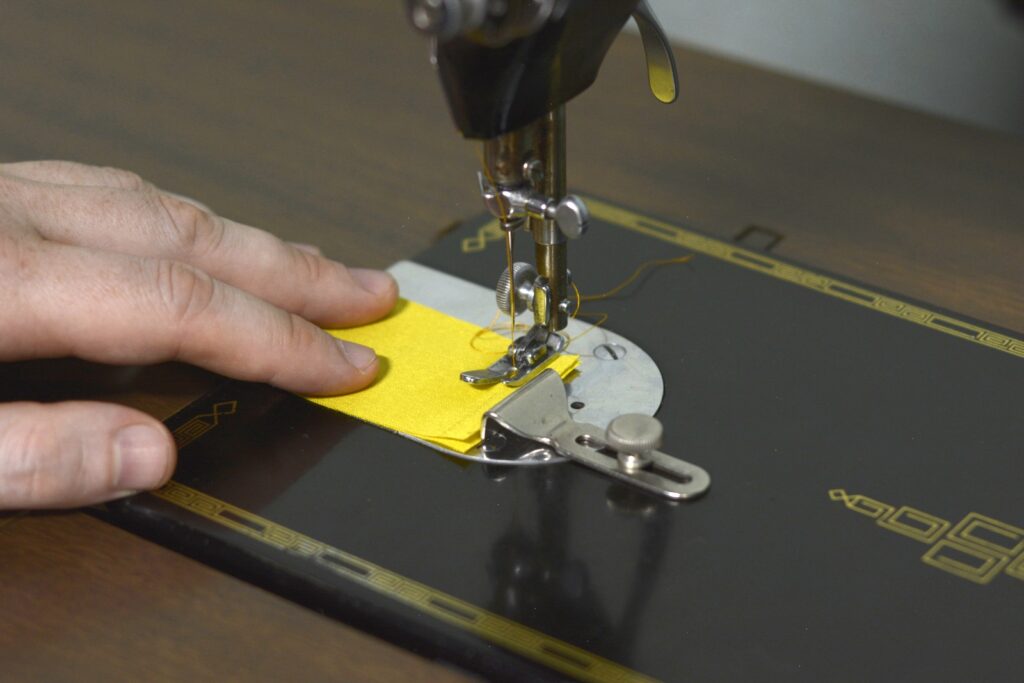
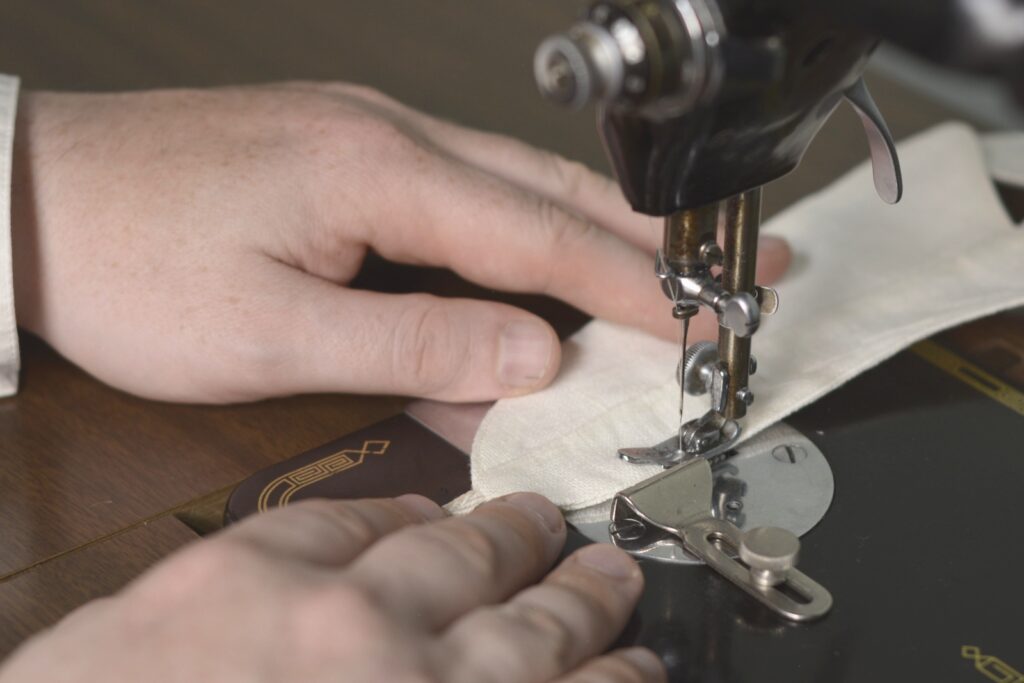
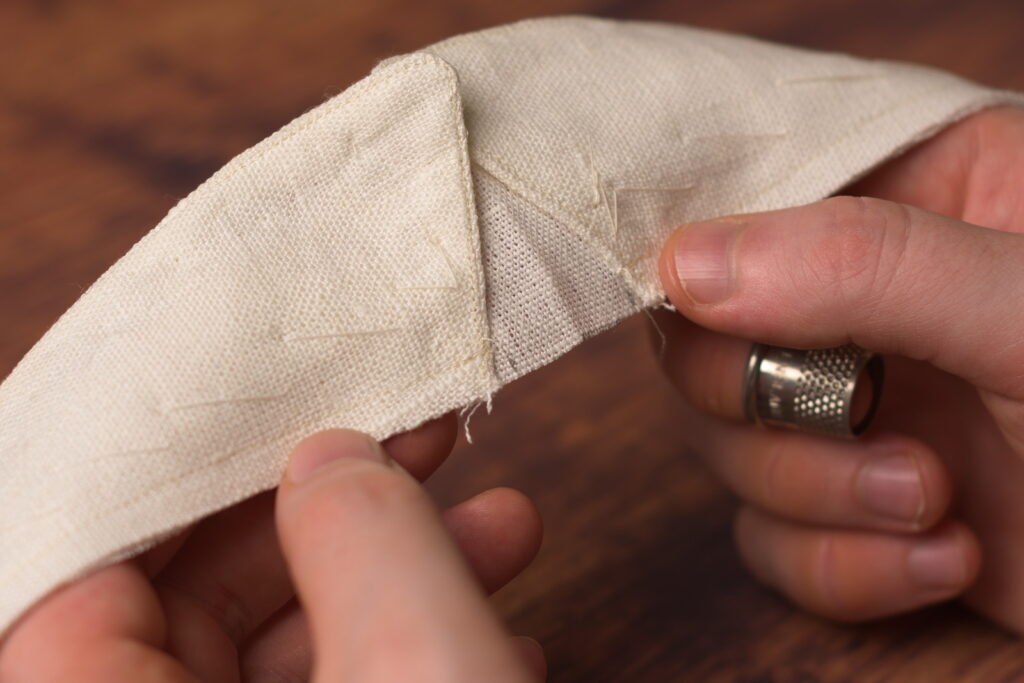
Press the seam open with your fingers just to make getting in there easier with the iron.
Press the seam firmly open from both sides using high heat and no steam unless necessary.
Now carefully align both sewn pieces right sides together, ensuring that the center seams are perfectly aligned. You can pin them together if you want using very small pins if you must, but I find they damage the silk and prefer to just align things as I sew.
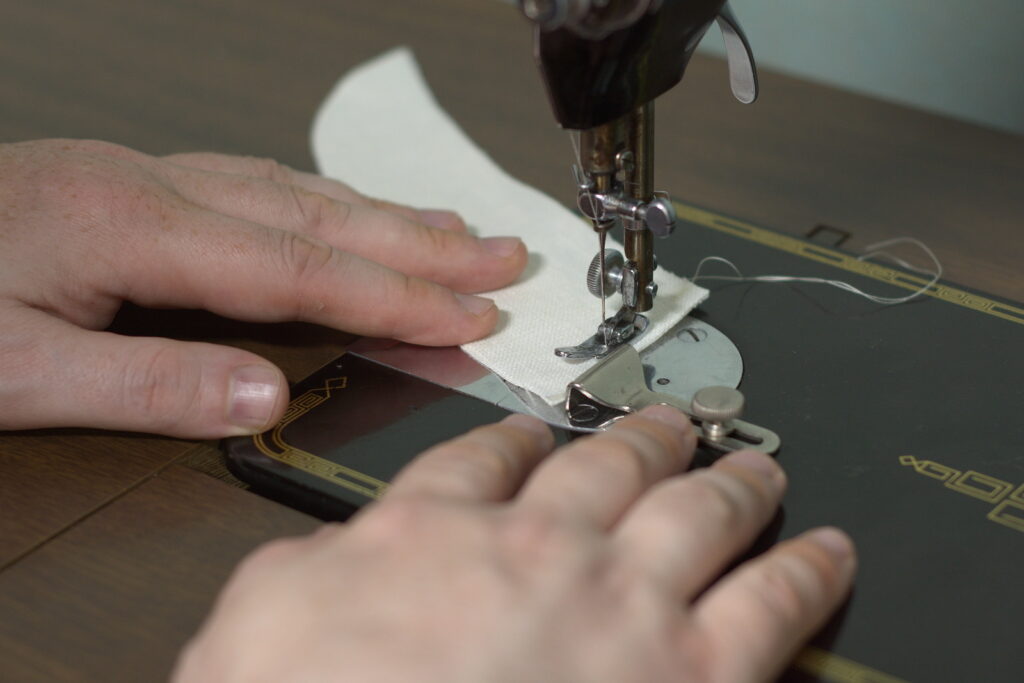
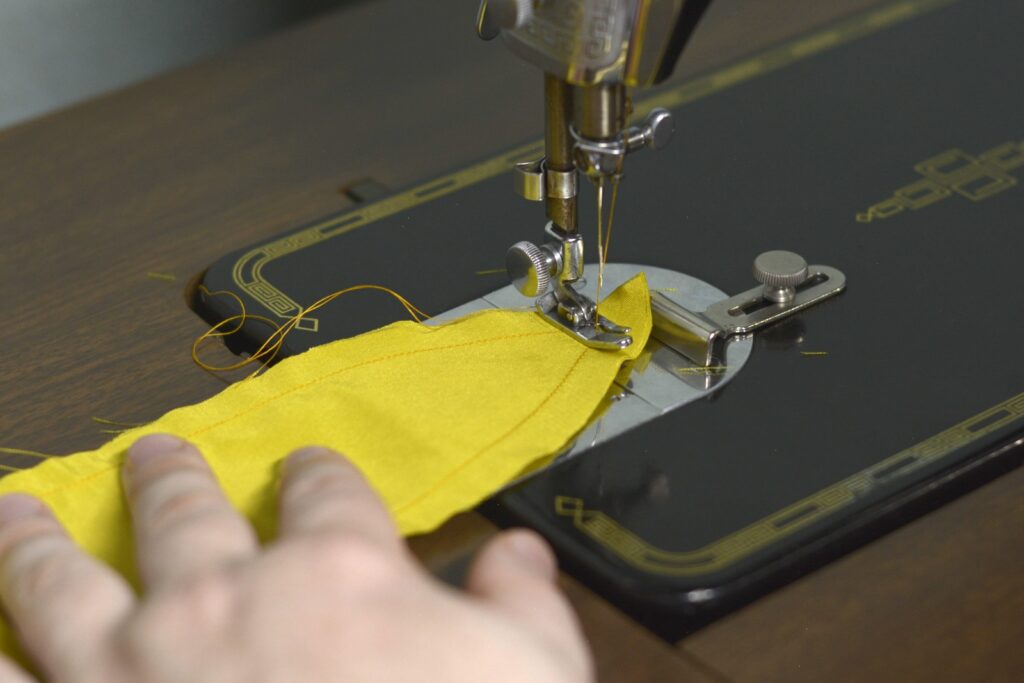
Start just on the far side of the center seam and begin sewing towards one end, using a 3/8″ seam allowance. You can use a back stitch if you want, I simply don’t have the patience for that anymore.
When you get to the tip of the cravat, rather than making a sharp angle with your stitching, stitch across the point with a single stitch, sort of blunting the angle. This gives more room for the fabric when you turn it right side out later on.
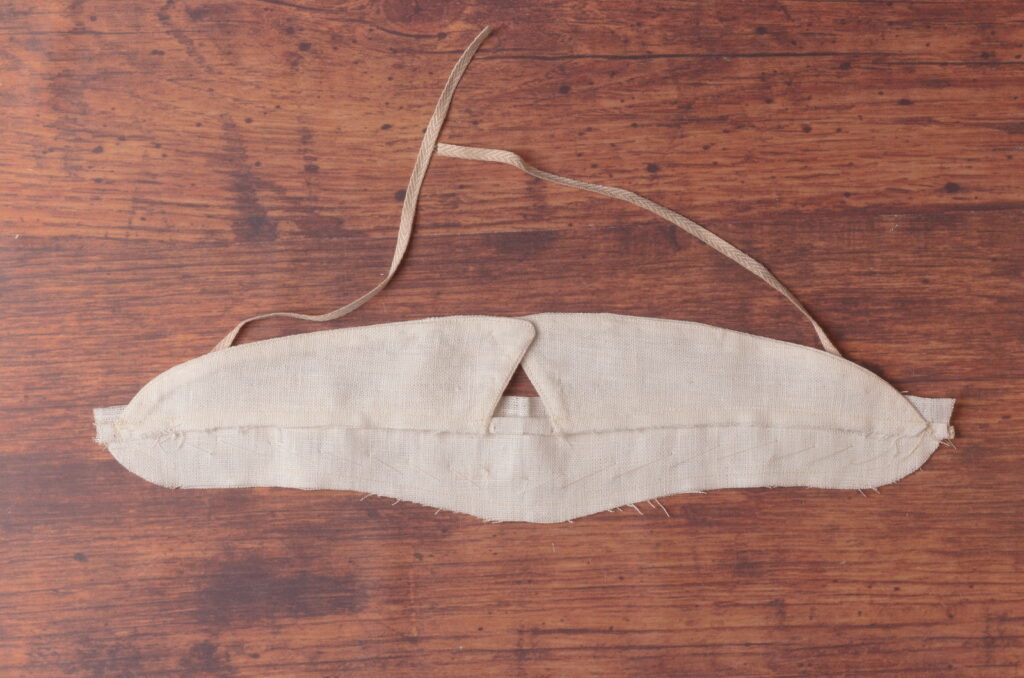
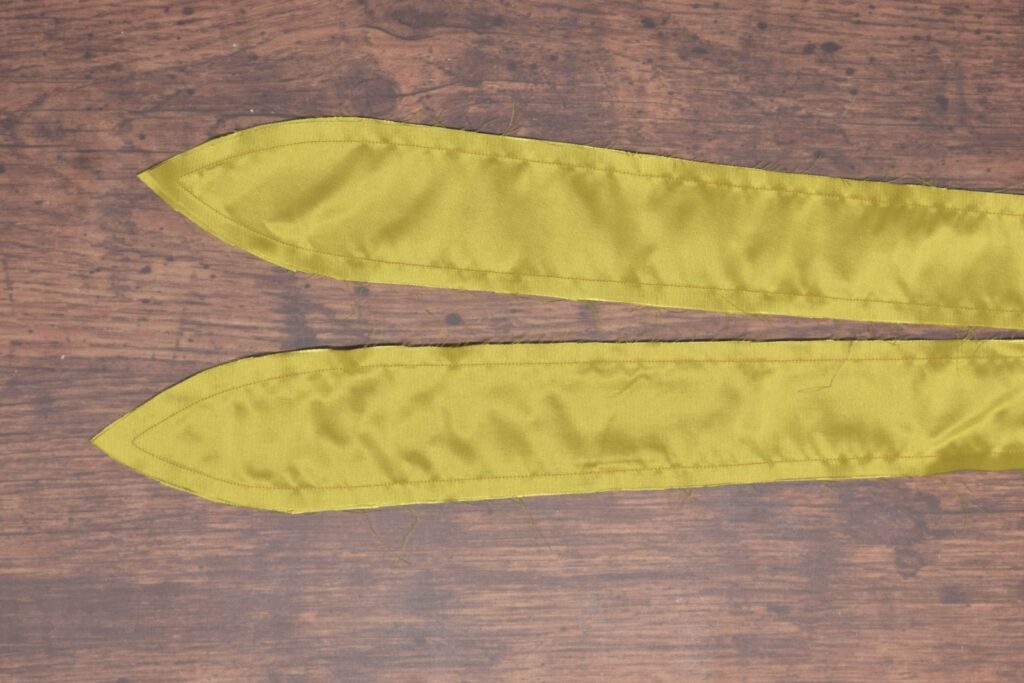
Continue sewing the other side down towards the opposite point and back towards the beginning.
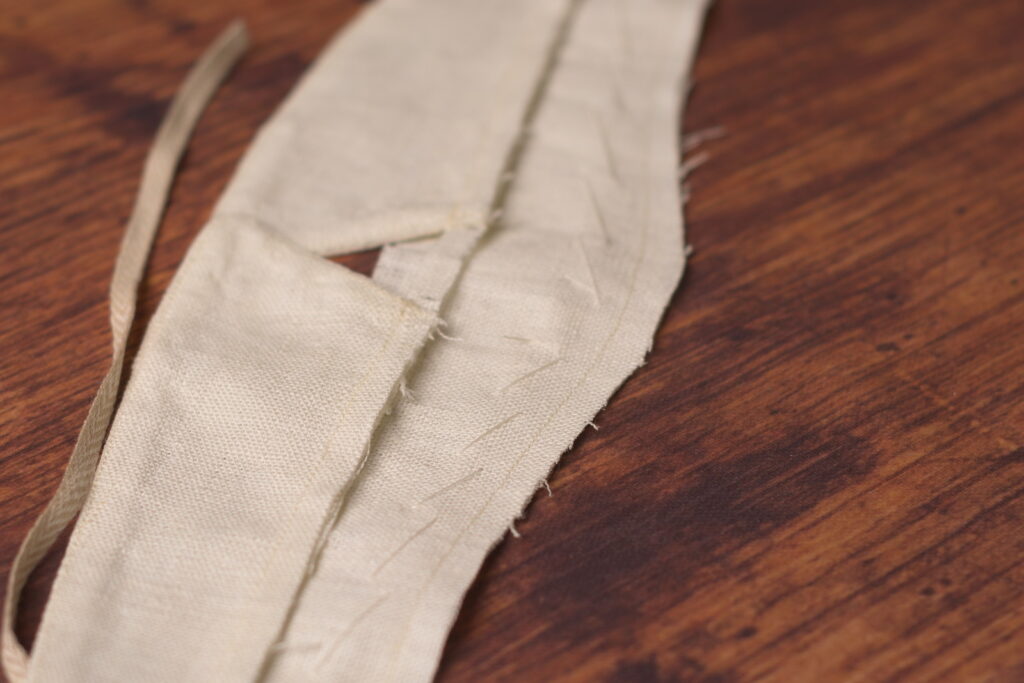
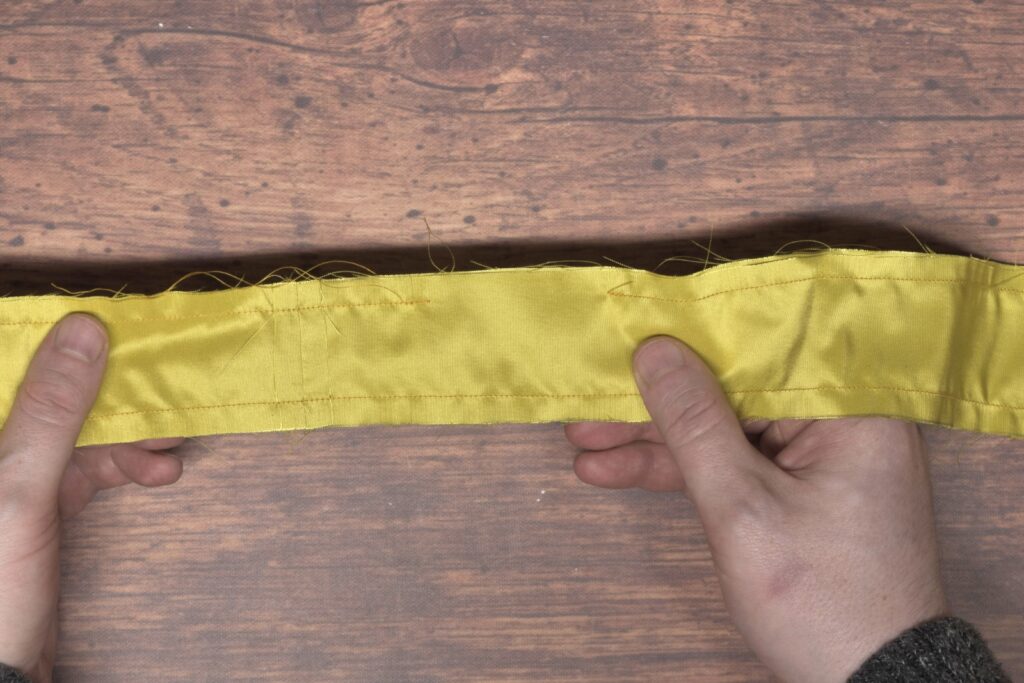
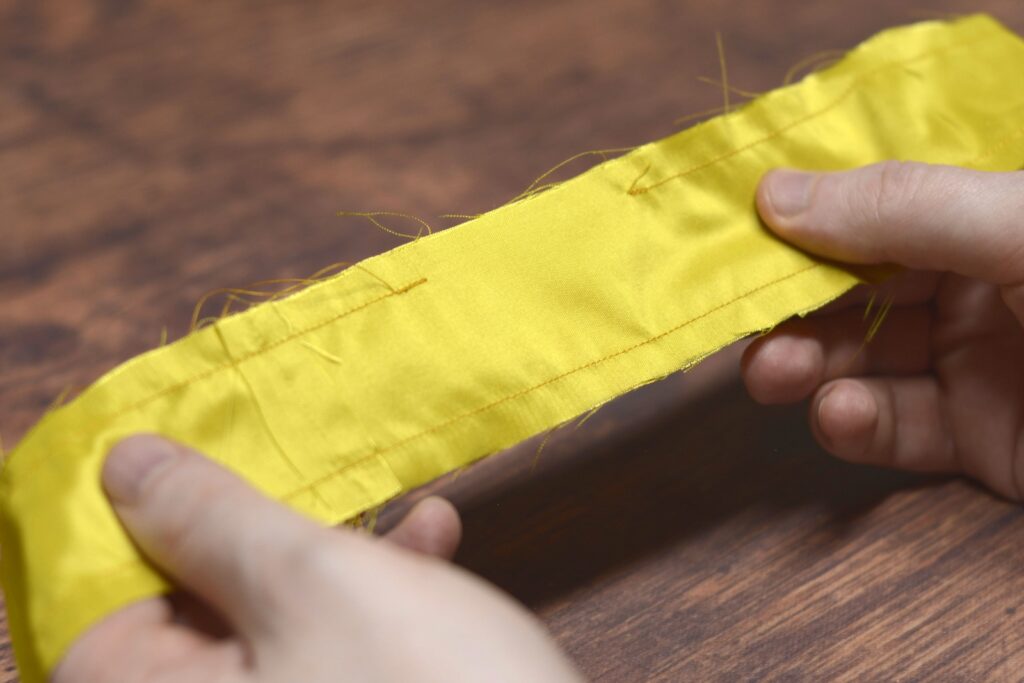
Stop your stitching 2″ to 4″ away from where you started, giving yourself room to turn the cravat right side out. The smaller the opening, the more difficult it is to turn. Note how my opening is to the side of the center seam. The preference is really yours, if you’re a beginner you might want to keep the opening centered over the center seam. I find I get a better result by offsetting the opening when I go to finish the seam by hand.
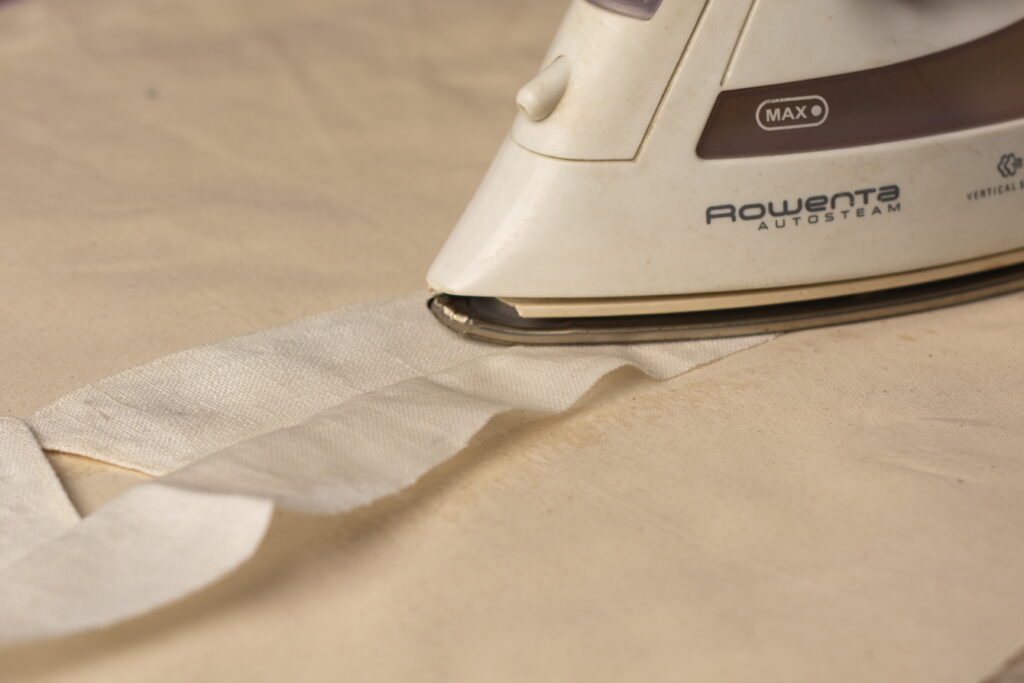
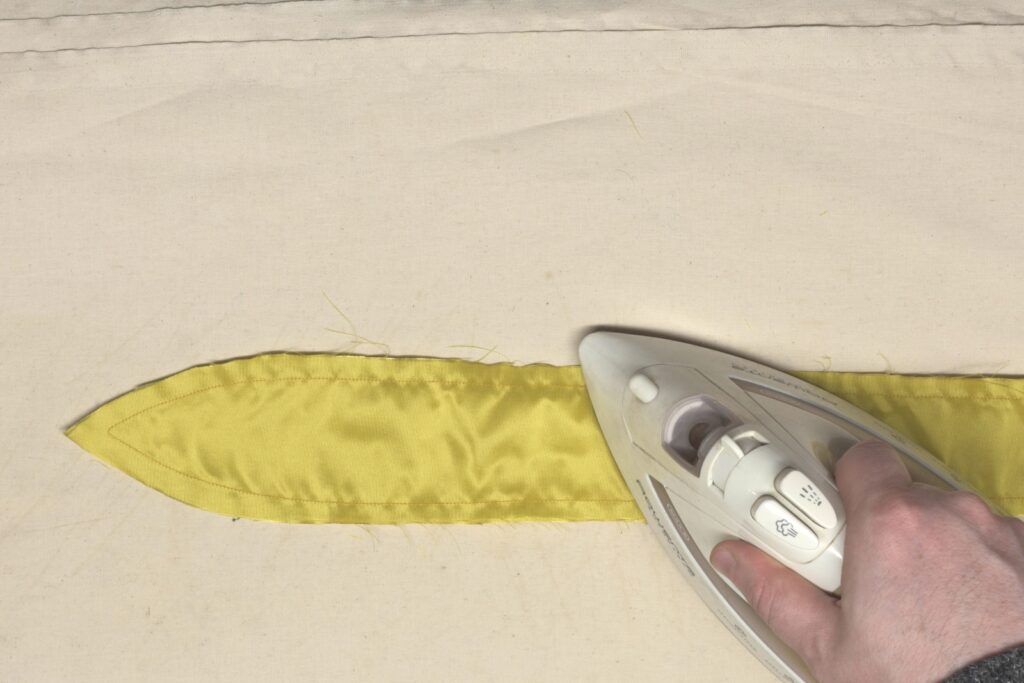
Silk is kind of fiddly to work with, and after sewing, you may notice that there are some unwanted ripples and such. You can iron them out by passing the iron across the cravat in the narrow direction, not lengthwise. Ironing lengthwise tends to introduce even more wrinkling which are very difficult to remove.
Drafting a Cravat
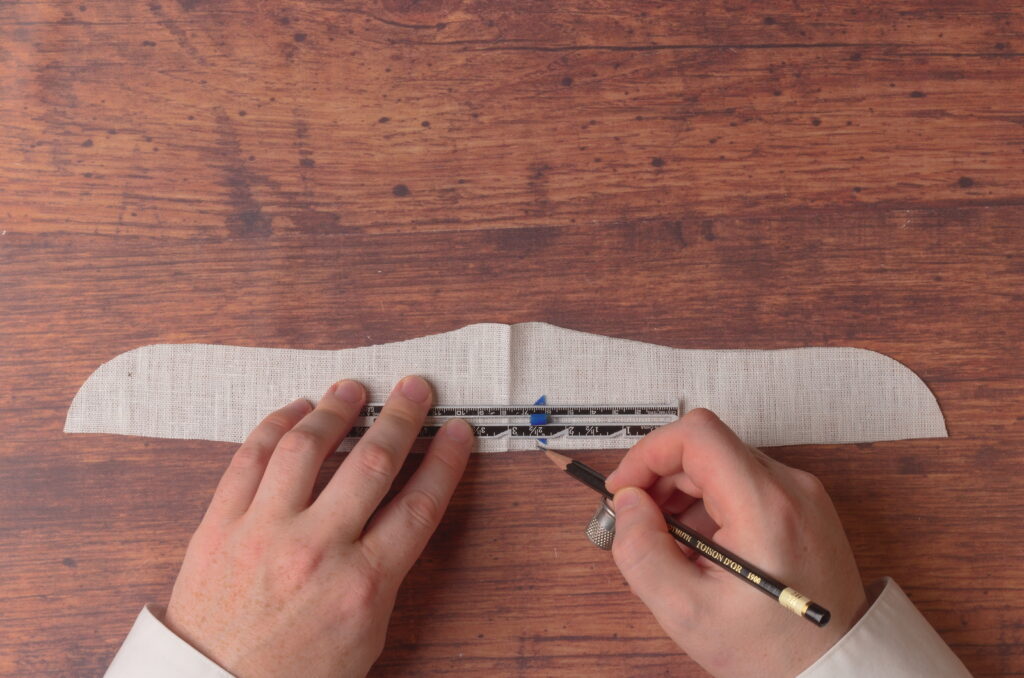
Drafting a cravat is very easy and a great place to start if you’ve never drafted anything before. To begin, draw a horizontal line, 25″ in length, placing a mark at 0 and 25.
Make one more mark, 3″ from 0.
The exact length is up to you, I sometimes make them slightly longer, it depends on your neck size and how large of a bow you want, really. So feel free to experiment.

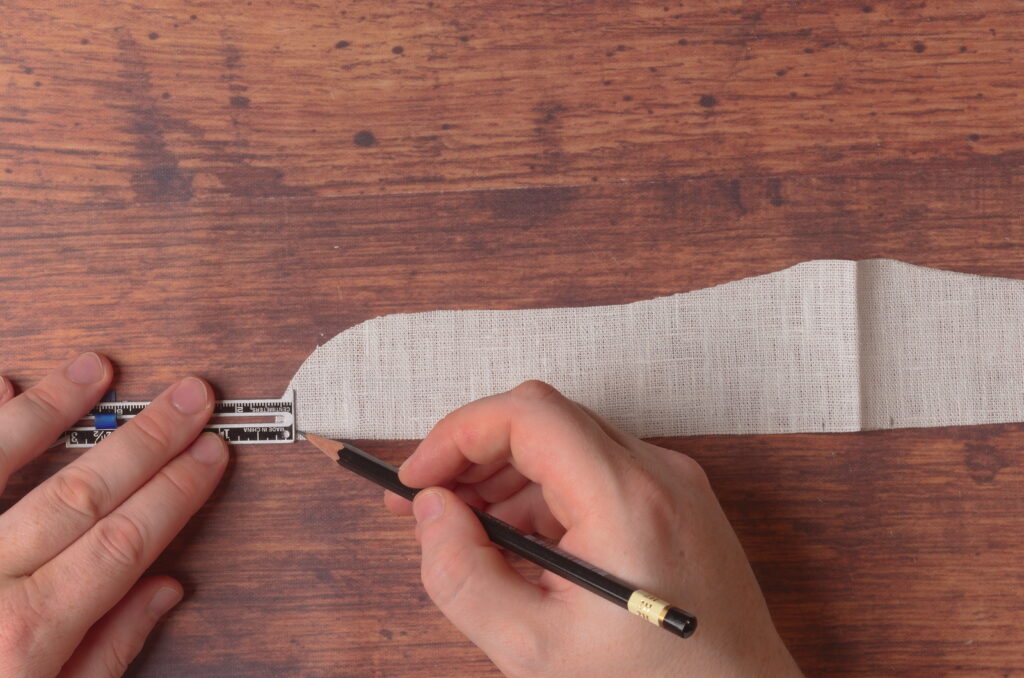
At point 3, draw a 2″ line centered on the base line, so 1″ above and below. This gives us the width of the bow, and again can be altered to preference.
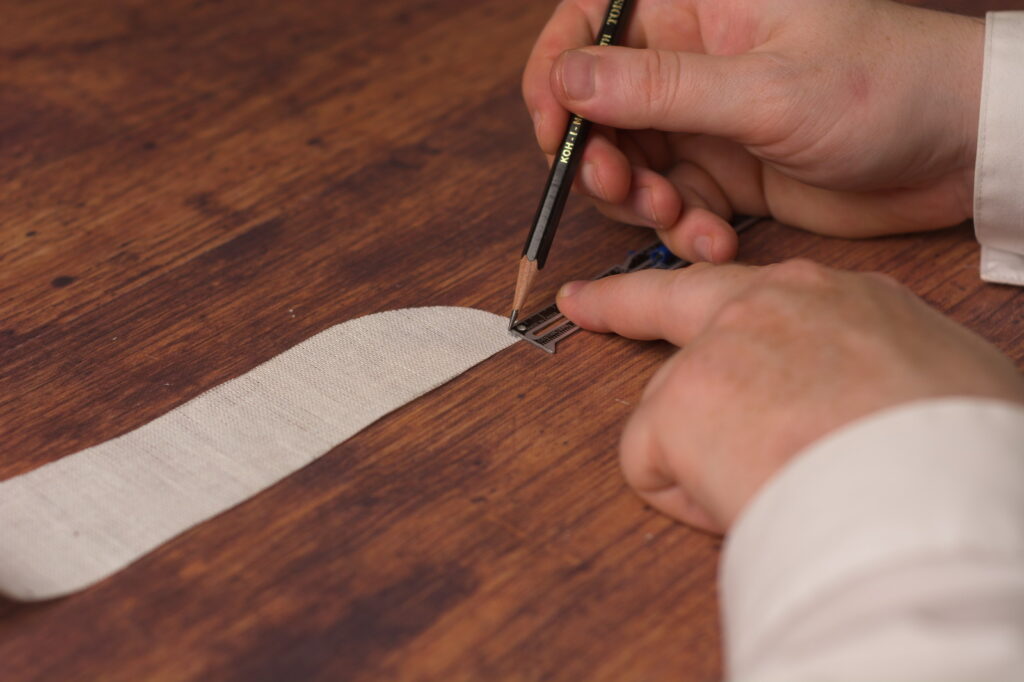
At point 25, draw a 1″ line centered as well, 1/2″ above and below, giving us the center back. You could make this a little wider, say 1 1/4″, to make it easier to fit your point turning tool when turning the cravat right side out.

To draw the outline, draw a straight line from 1 to 2, curving into point 0. I do end up curving the transition between the two lines at point 2 to smooth things out. Repeat for the lower edge of the cravat as well.

Finally, add a 3/8″ seam allowance all the way around the cravat. I’ve found the silk tends to fray so I prefer the slightly wider seam allowance here, as it can always be trimmed down. I’ve also marked the grain line, identical to the original construction line.

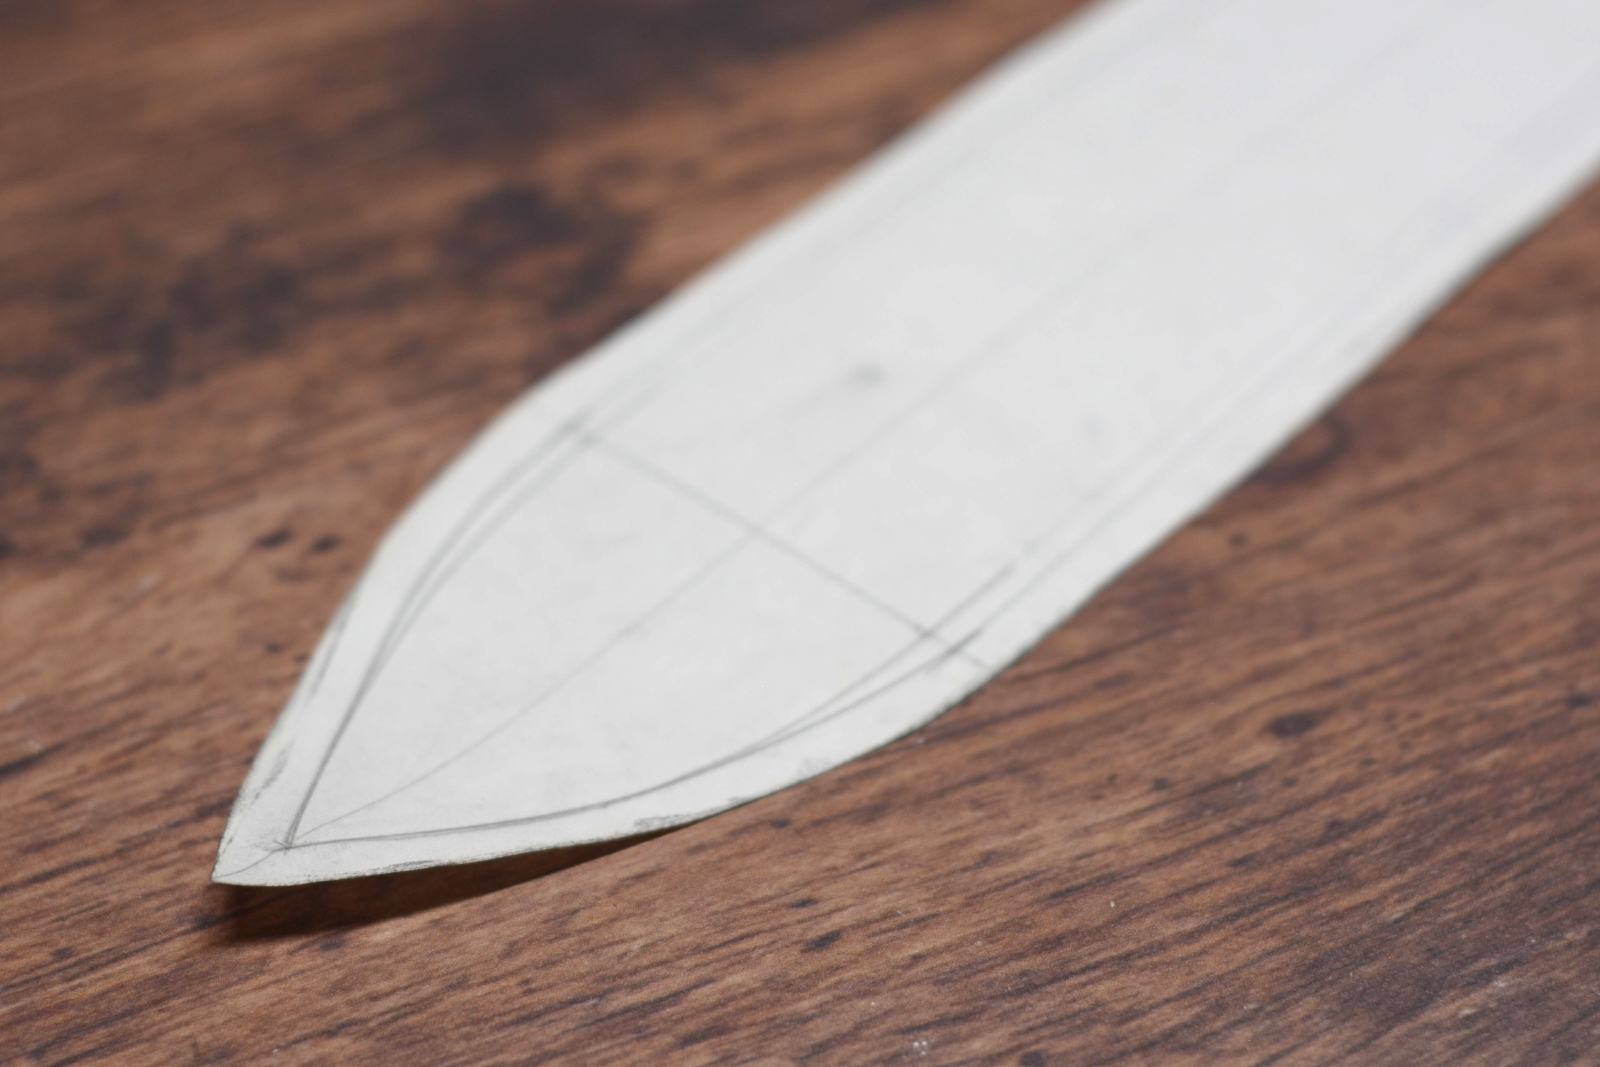
Cut out your paper pattern along the seam allowance.
Buttons
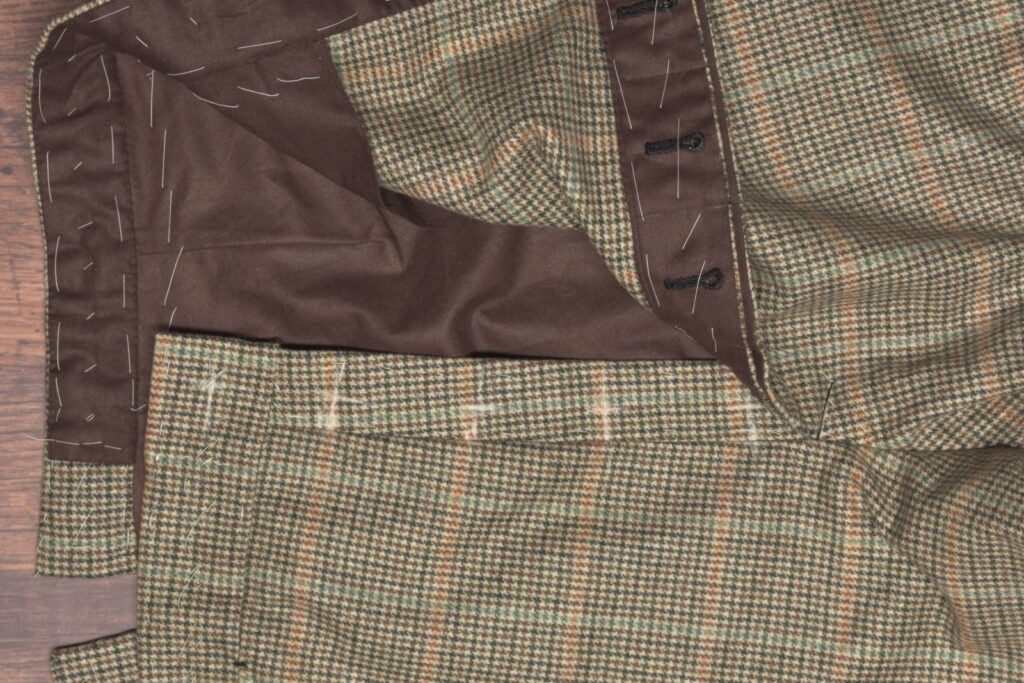
The final task prior to hemming the trousers is to attach the buttons. Begin by laying out the button placement. I transferred their position on the fly first, setting their distance from the fly seam equal to the distance of the buttonholes from the fly edge.
Next mark the position of the front suspender buttons on the waistband. I like to make the first one about 2 1/2″ from the side seam, and the second one another 2 1/2″ from the first. Both are placed about 1/2″ below the top of the waistband.
Finally, mark the back button position about 1″ from the end of the waistband and 1/2″ from the top edge.

Attaching the Buttons
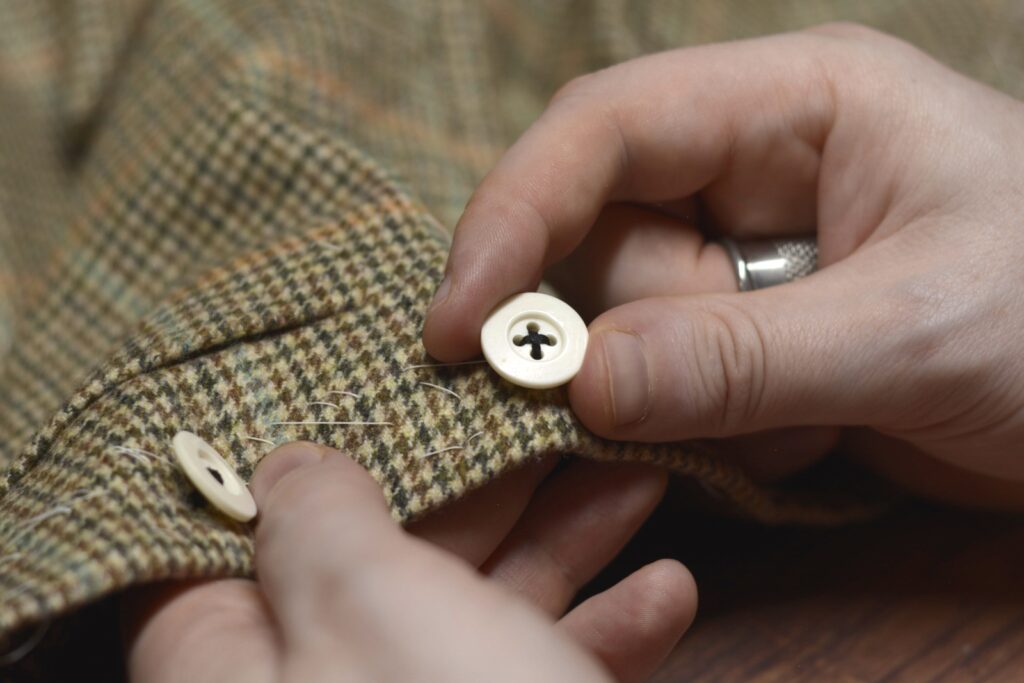
To attach the buttons, begin by passing a knotted thread from the wrong side through all layers.
Pass the thread through opposite holes of the button.
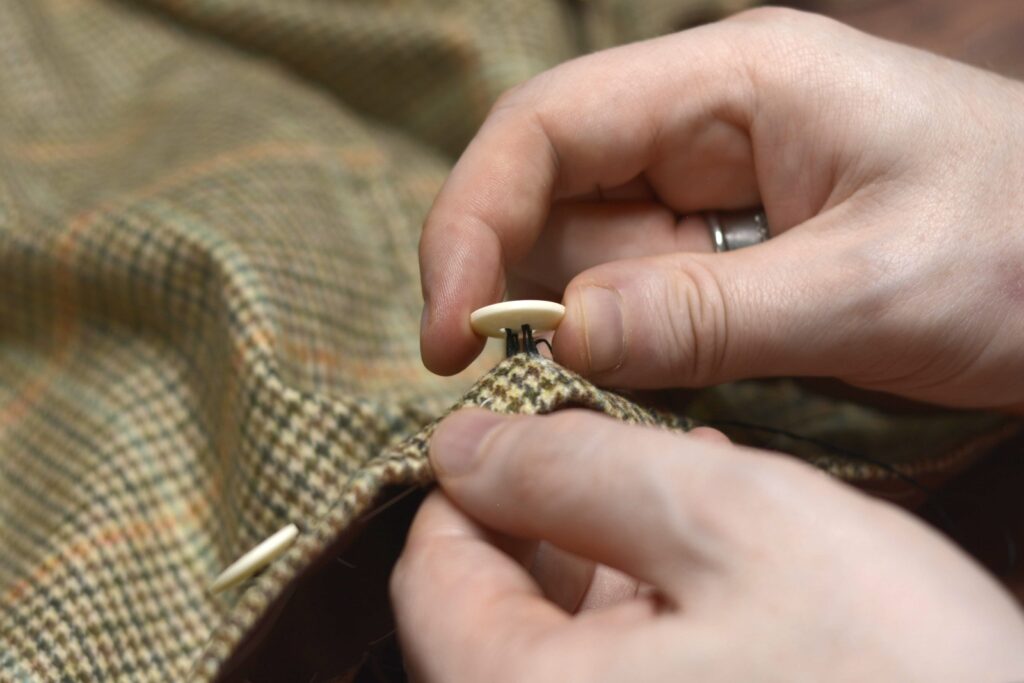
Make two complete passes through the button, passing the needle and thread back to the underside, and keeping the stitches rather loose. After this second pass, you can adjust the final height of the button by holding the button at the desired height and gently drawing the threads to the correct height. The height should be just slightly thicker than the suspenders or the fabric that will be attached to it.
The two stitches give just enough tension that the button will not move out of position, yet at the same time not be difficult to move if you want to.
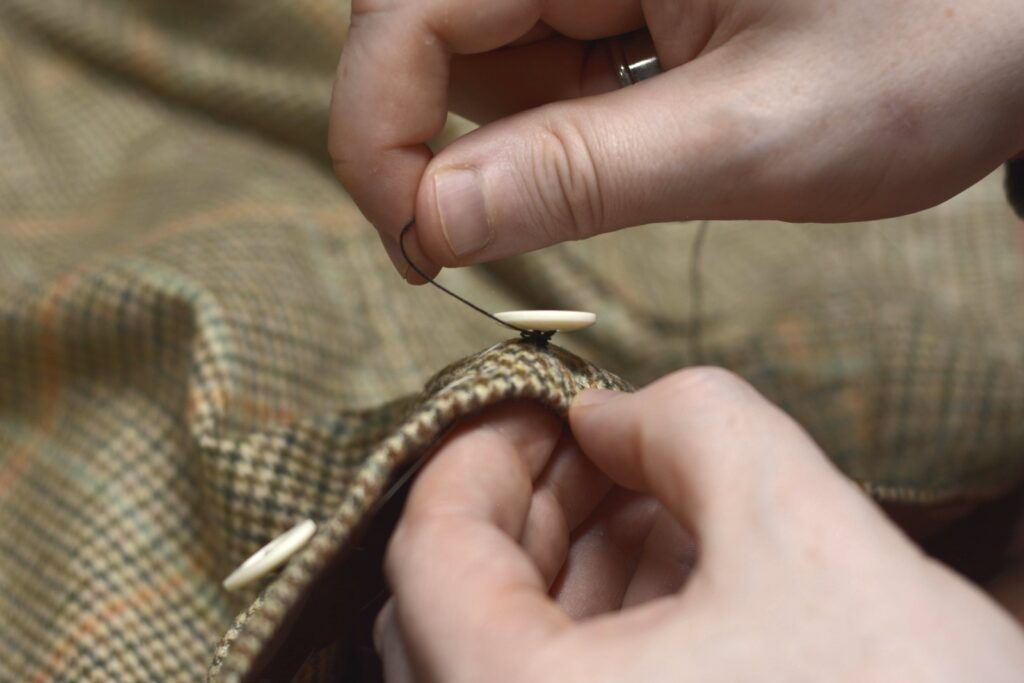
After four or so stitches, begin making stitches in the other direction, forming a cross. The number of stitches depends on the strength of your thread and the thickness of the fabric. I’ve gone as many as six stitches in each direction.
Be sure to regulate the height with each stitch – at this point it’s impossible to change the height so any individual loose or tight stitch will affect the other stitches.
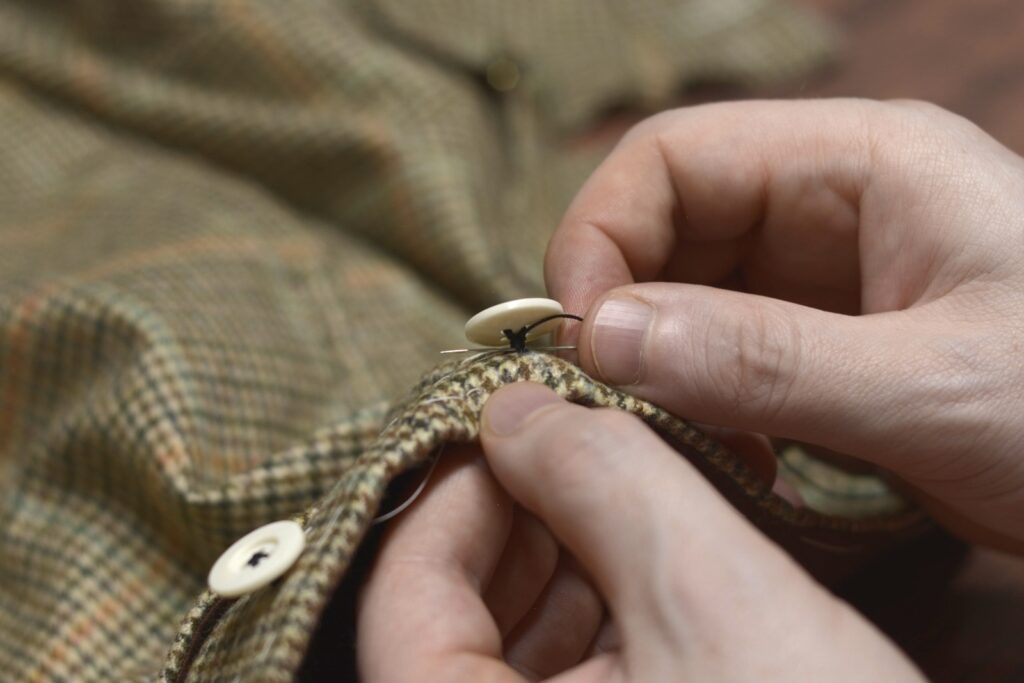
Pass the thread back to the right side one last time, and wrap the thread around the previous stitches 6 – 8 times, depending on the height, and pull firmly, forming the shank. This provides a durable finish to the buttons, helping to prevent them from falling off.
Finally, pass the thread through the shank three times in alternating directions to secure it, and trim the excess thread.
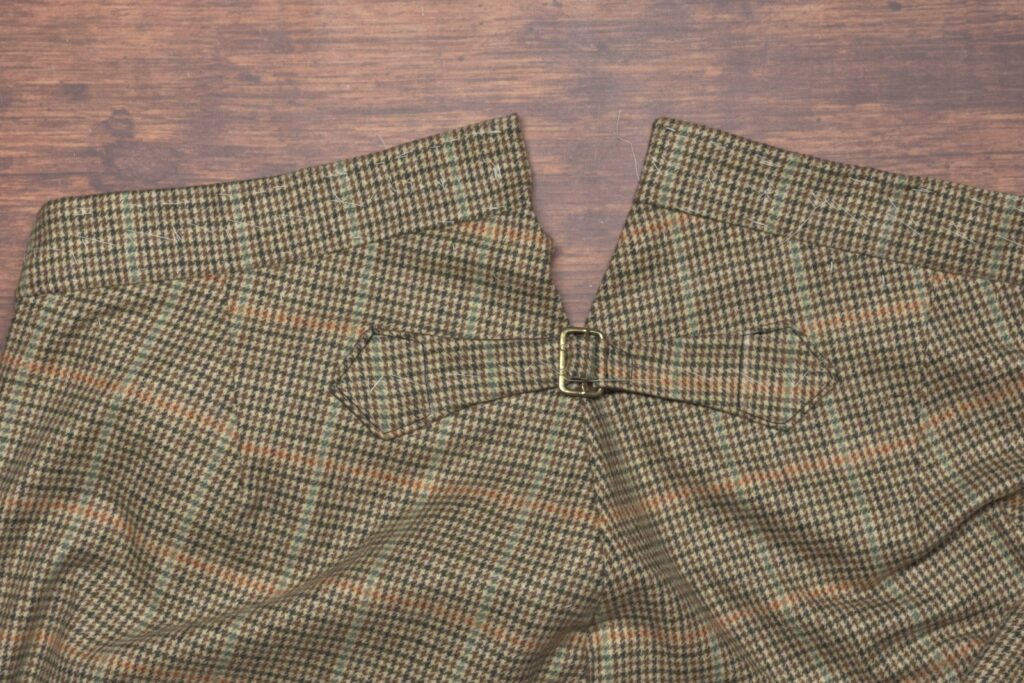
Trouser Buckle
A waistband was usually found in the back of trousers to help adjust the fit as well as take stress off of the top of the seat seam.
Begin by cutting out two each of fashion fabric, lining, and optionally, linen. The linen is a good way to reinforce the belt, but is completely optional, especially if you’re using heavier fabric.
Place the lining and wool pieces right sides together, and then place that assembly on top of the linen, if using it.
Stitch around the belt using a 1/4″ seam allowance, and leaving a gap in the stitching about 1 1/2″ to 2″ for turning right side out.
A smaller gap means less hand sewing later on, but also makes turning right side out a bit more difficult.
When you get to the corners at each end, instead of making a sharp 90 degree turn, make a stitch across the corner as shown, giving room for the fabric when you turn it.
Trim the corners down to about 1/8″ to help in the turning process.
Turn the belts right side out.
I used a dull pencil to help get the points turned crisply.
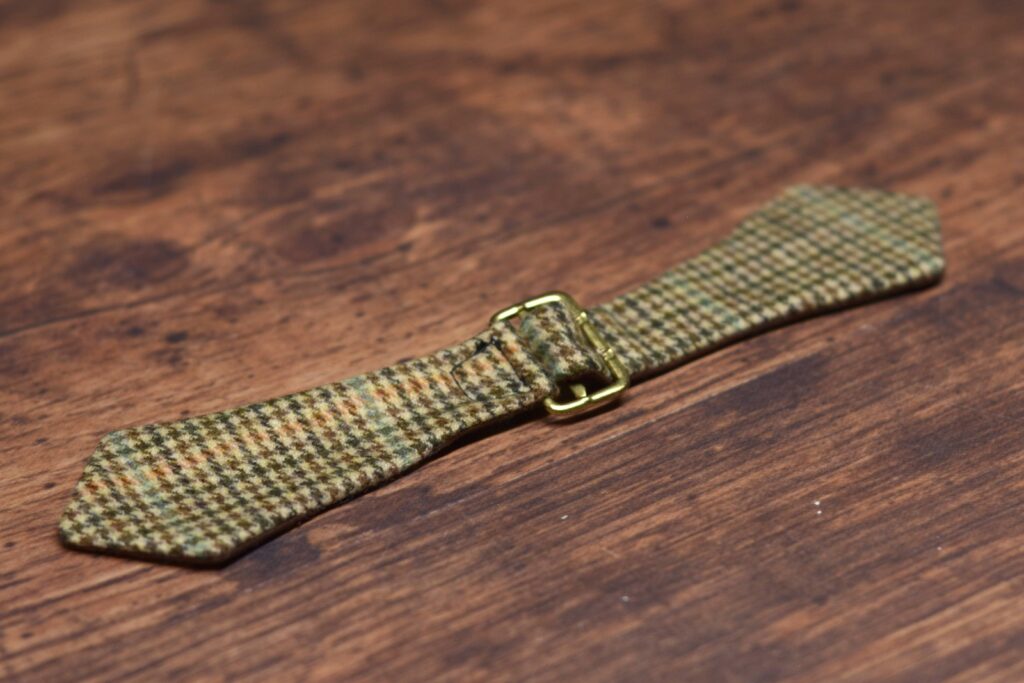
Press the belt carefully after turning.
Close up the belt with a small felling stitch.
Repeat for the other belt.
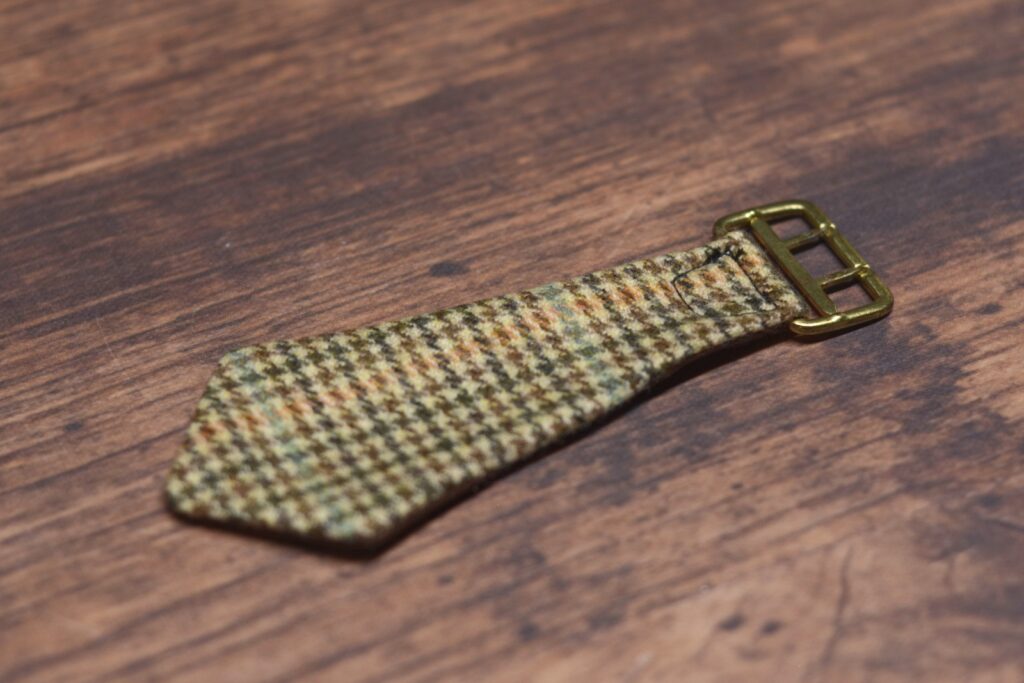
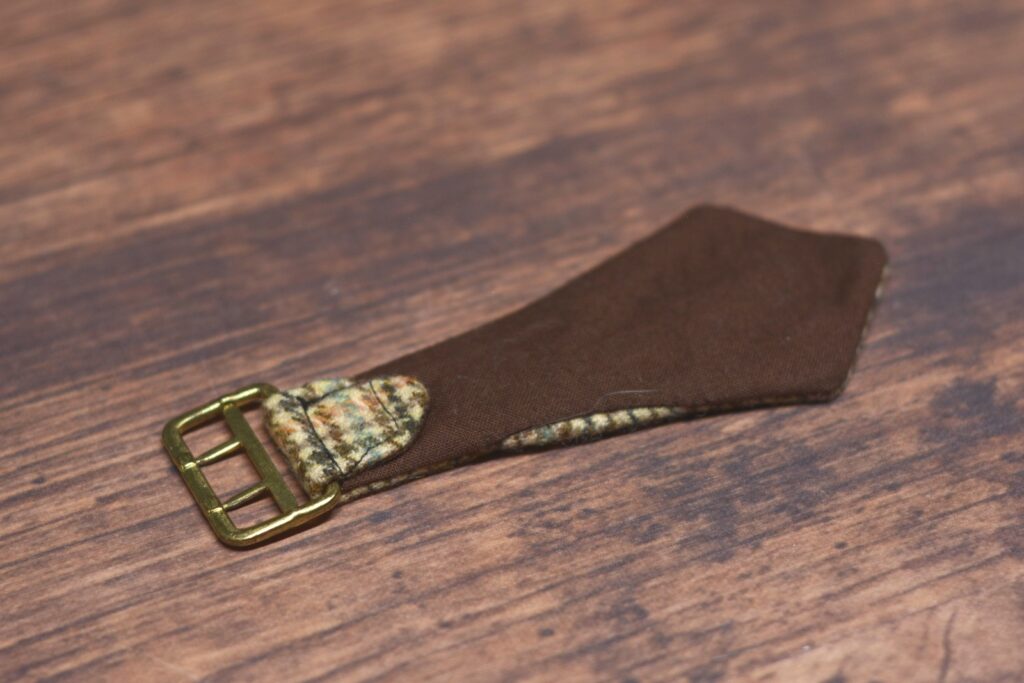
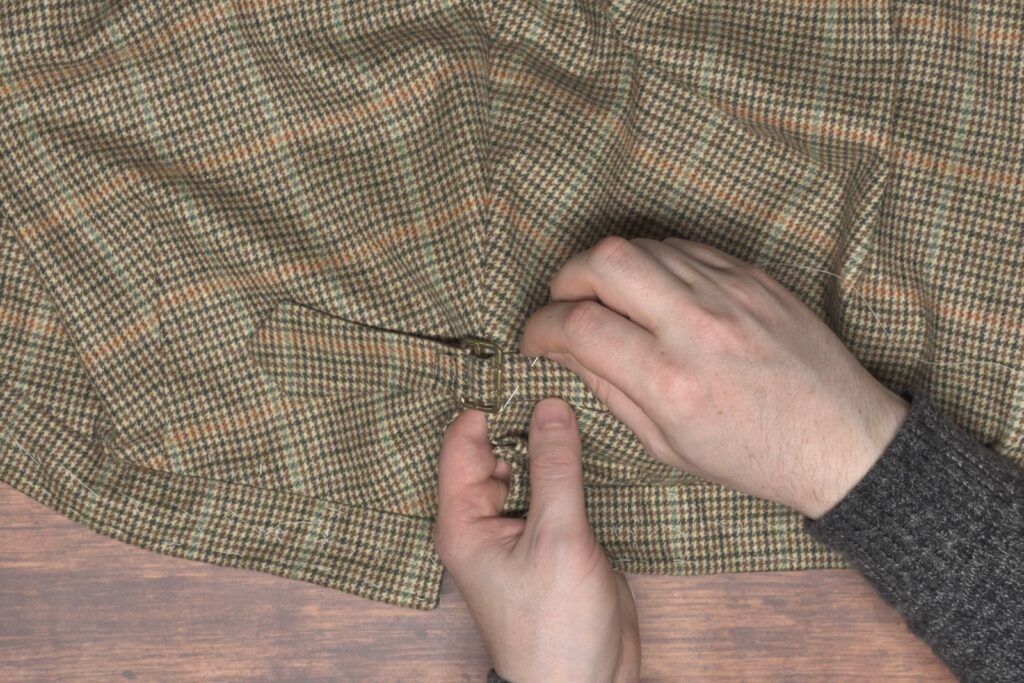
Next, choose one belt to hold the buckle, and fold it around the buckle, basting it by hand with a couple of stitches. Mine’s turned under about 3/4″. Sorry I somehow forgot to take photos here but I believe it’s all in the video.
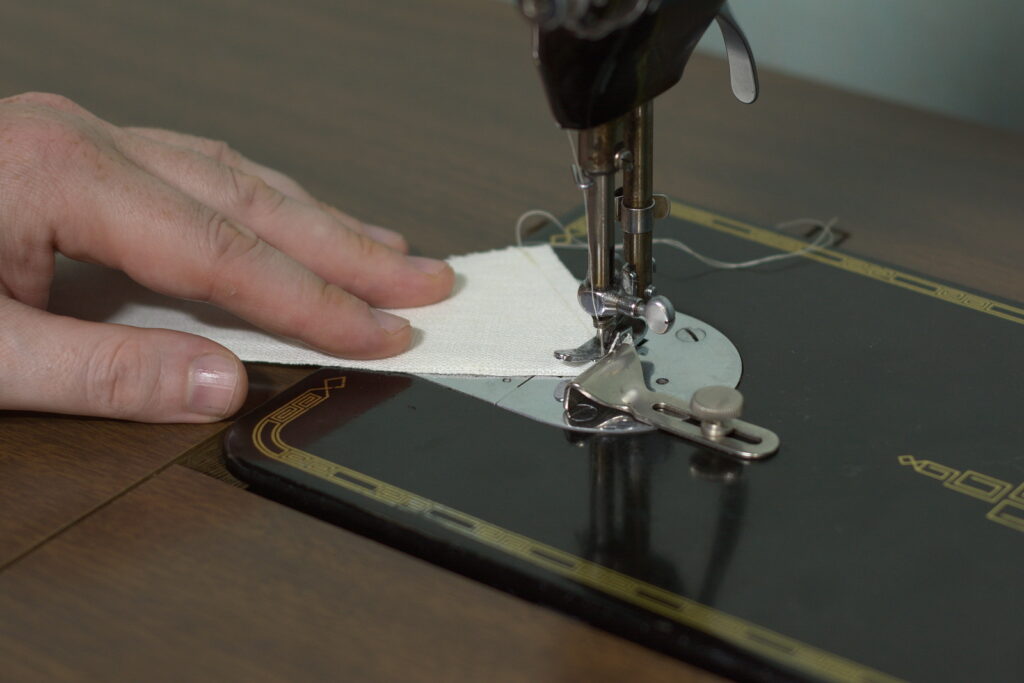
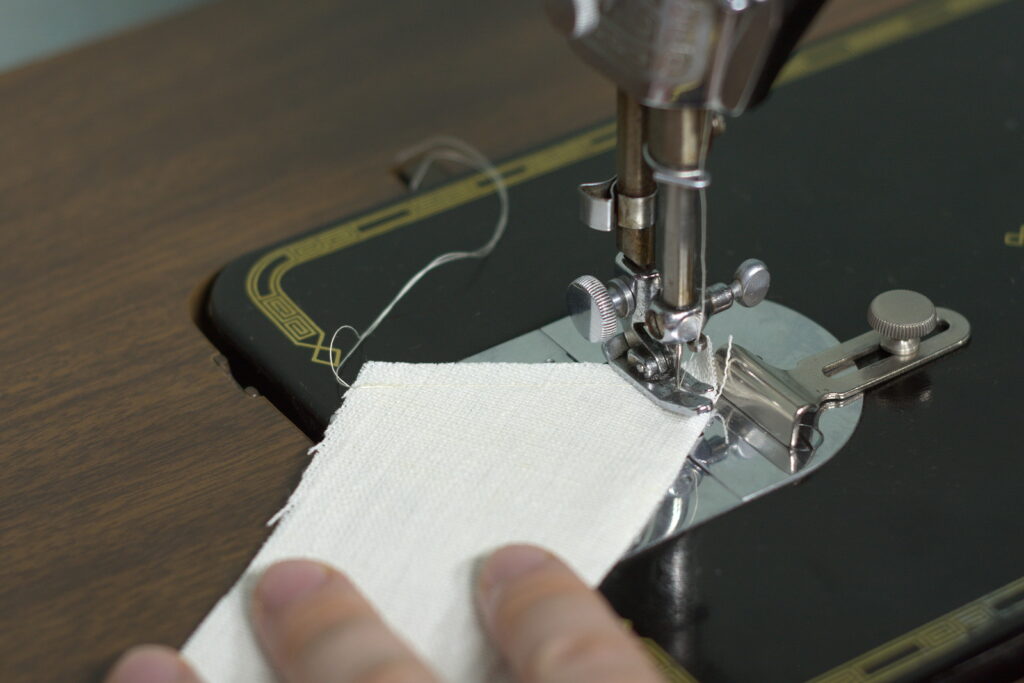
Then, getting your presser foot as close as you can, sew along the edge of the buckle, then out and around forming somewhat of a box shape to keep everything nice and secure. It’s helpful to use a piping foot here on your sewing machine, but I simply allowed the regular foot to sit on top of the buckle and turning the machine by hand so as not to accidentally sew into the metal buckle.
Next, buckle the belt securely, which makes laying the belt out on the trousers a little easier.
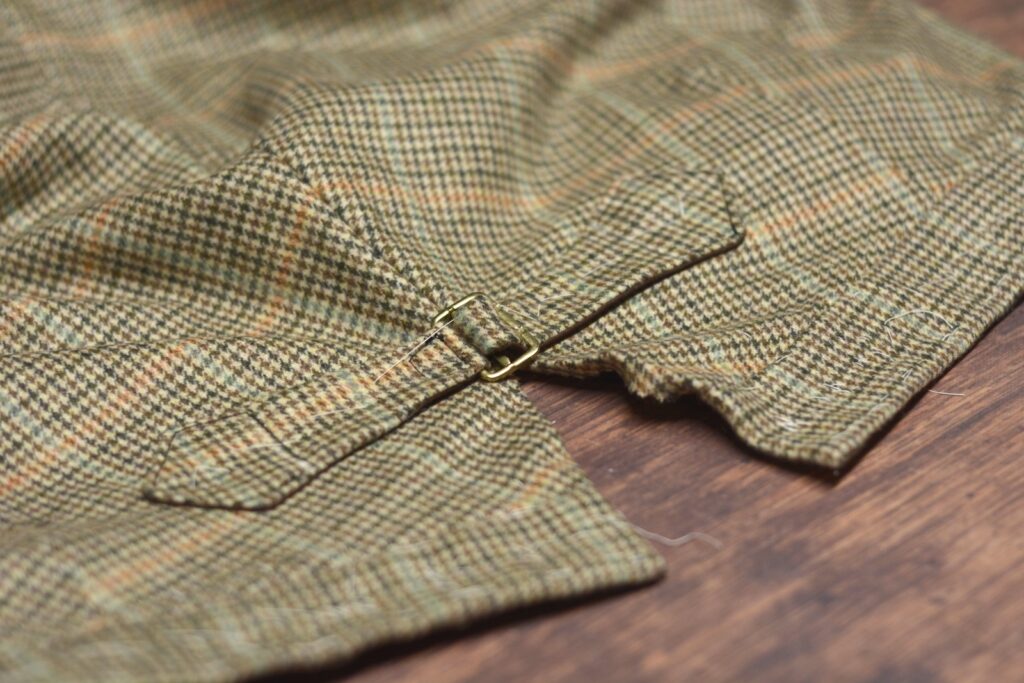
Lay the buckle on the trousers, the buckle centered over the split point in the seat seam.
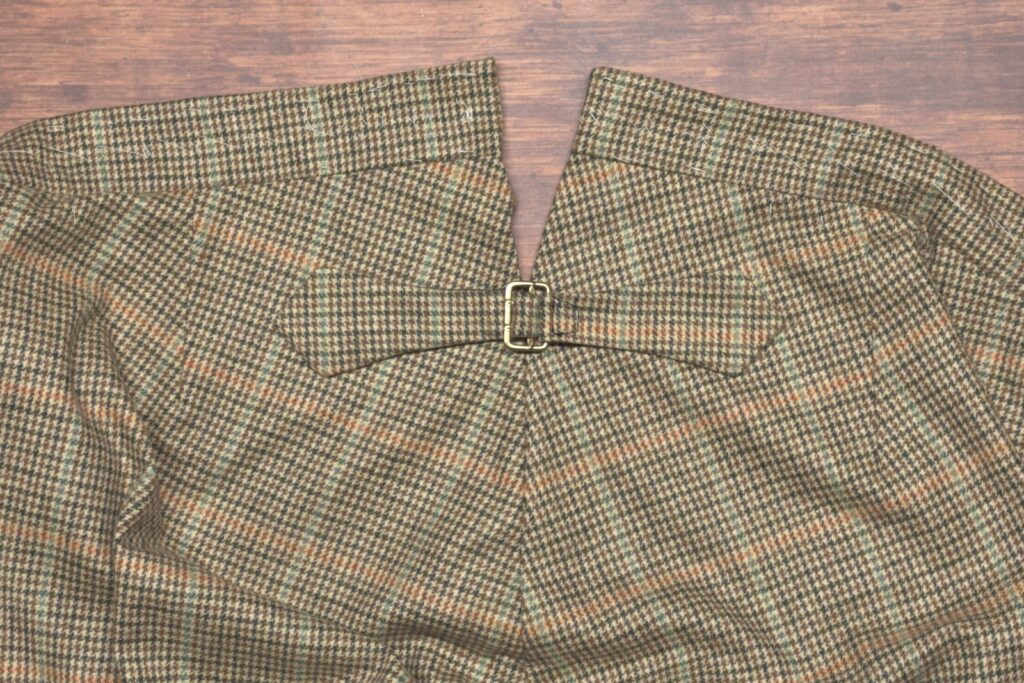
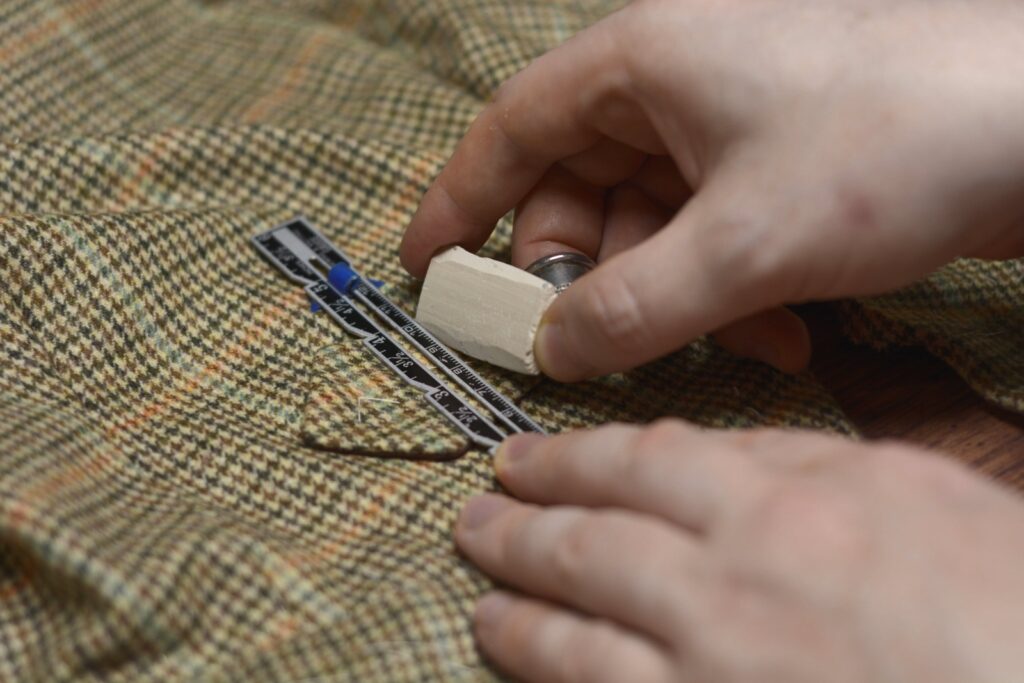
Measure the distance from the top of the belt to the waistband on each side to ensure they’re at the same height.
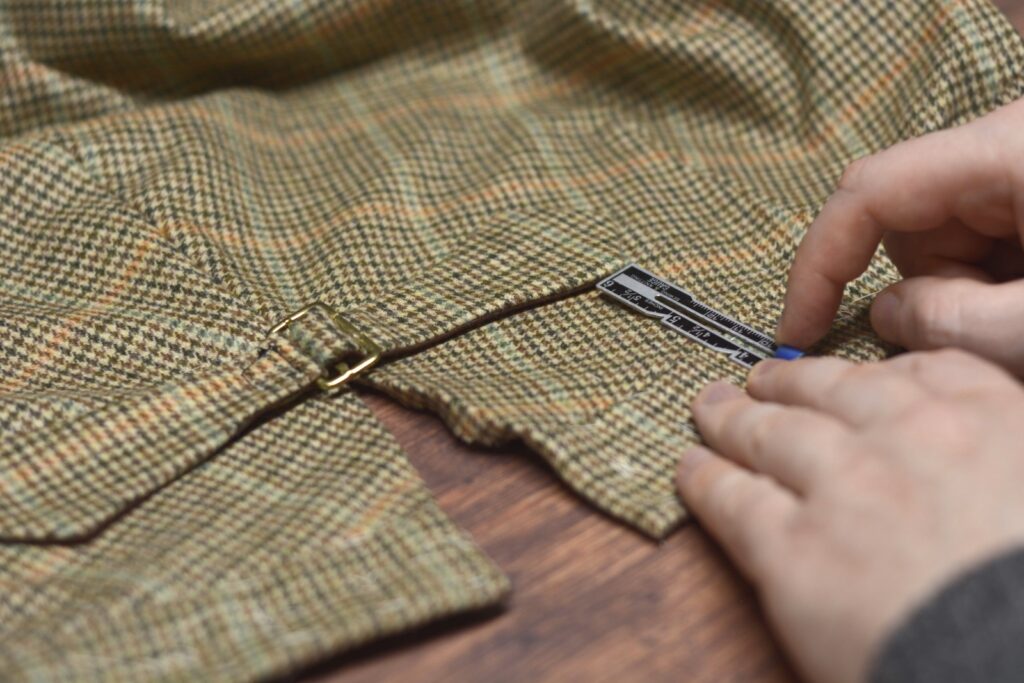
Baste across the belt from end to end, being sure it’s in the correct position after basting. It’s a good idea to double check your measurements, mine were off slightly so I ended up adjusting.
When you’re happy with the positioning, draw a vertical line across the buckle where you would like the top stitching to be.
Top stitch around the belt edge and across the belt at the mark through all layers of the seat.
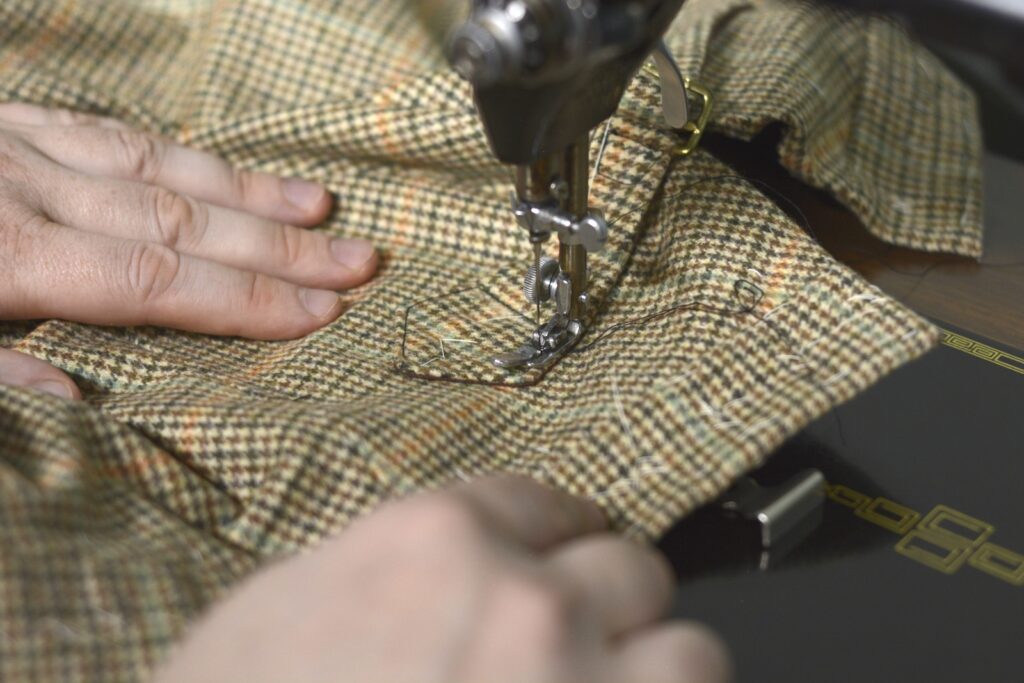
Here’s my completed belt after top stitching.