Author: James Williams
Fabric Selection
For this introductory class, I recommend practicing your stitches on as wide a variety of fabrics as you can. At many sewing stores, they usually have a ‘remnants’ bin where you can get smaller pieces of fabric from the end of bolts at a reduced price. For most of the exercises, I’ll be using a 5″ x 12″ piece of fabric, doubled, though you could vary the size to fit what you have.

Here are some fabric types to look for that are appropriate for the 19th century.
Wool
Wool was used in coats, waistcoats, and trousers and comes in a variety of weights, colors, patterns and weaves.
Linen
Linen comes in a variety of colors, from natural, white, red, green, blue, etc to black, and also in different patterns, such as stripes and plaids. I like to use a lightweight to medium weight linen for most of my projects, something about 4 – 6 ounces. Linen is great for summer wear, and was used in coats, trousers, and waistcoats.
Cotton
Cotton was used for linings, shirts, pocketing, and similar projects. Avoid solid colors, as the dyes back then would run in cottons. Small, repetitive prints are good, as well as woven designs such as seersucker and gingham.
Silk
For silk, look for either silk taffeta or brocade, especially those without slubs. Both are great for waistcoats, the taffeta could be used as a lining in a frock coat, though it’s a bit on the weaker side.
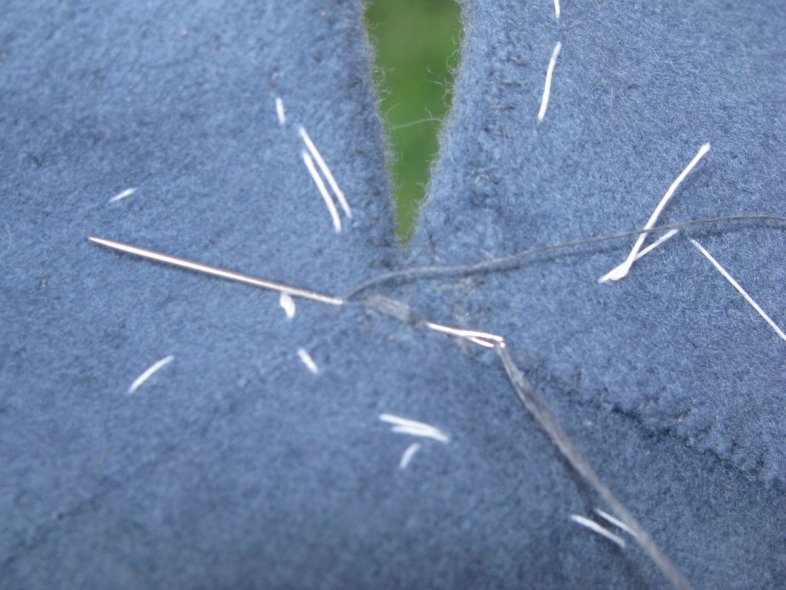
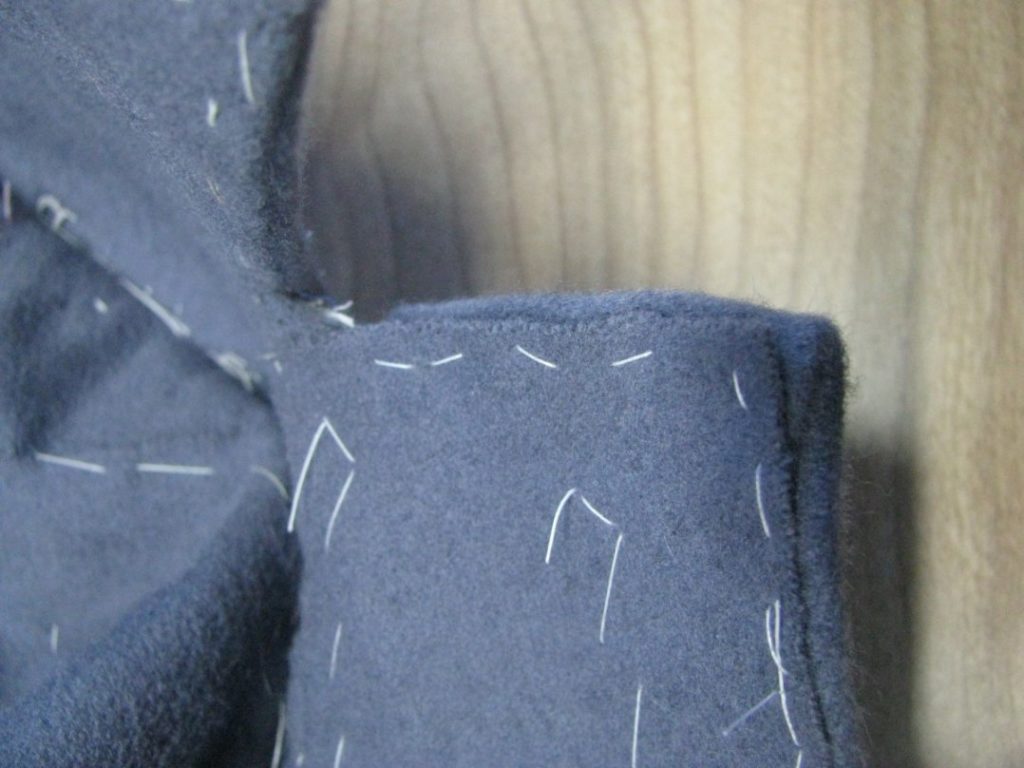
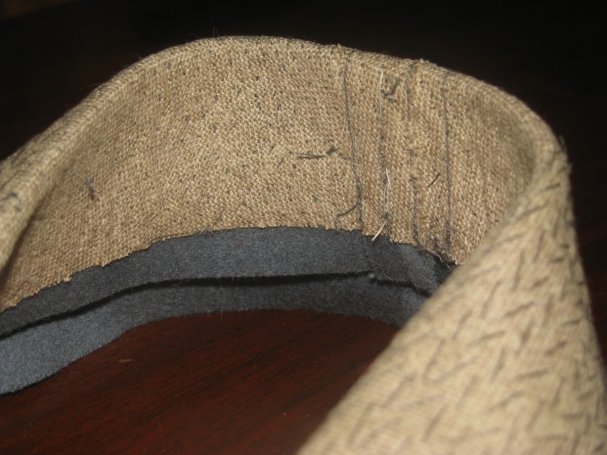
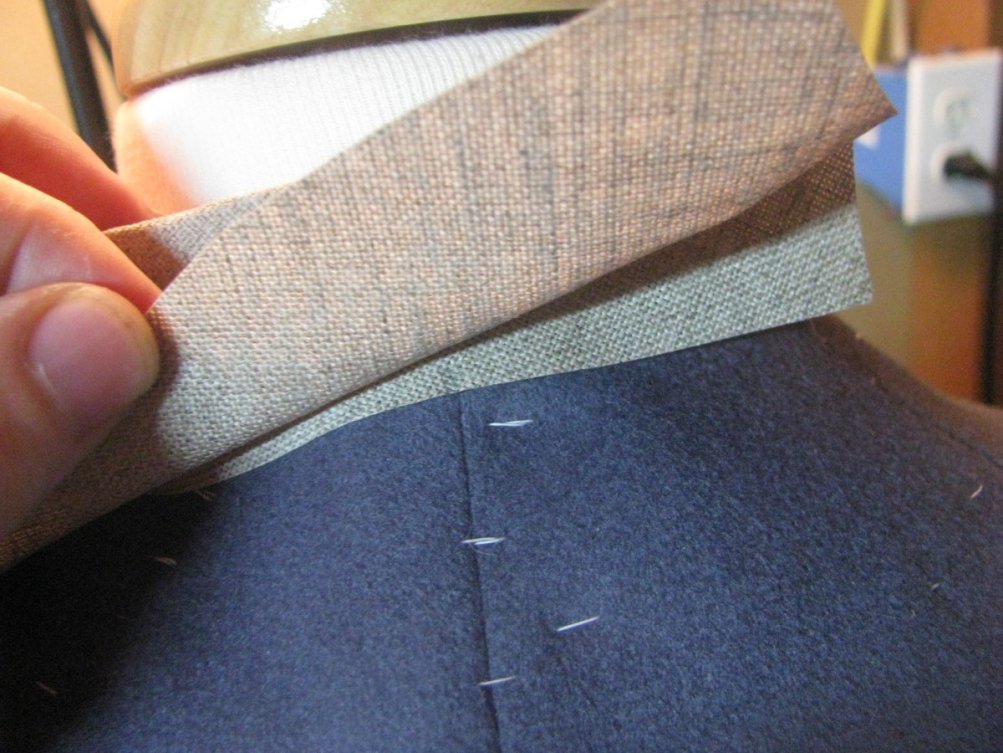
Completing the Collar
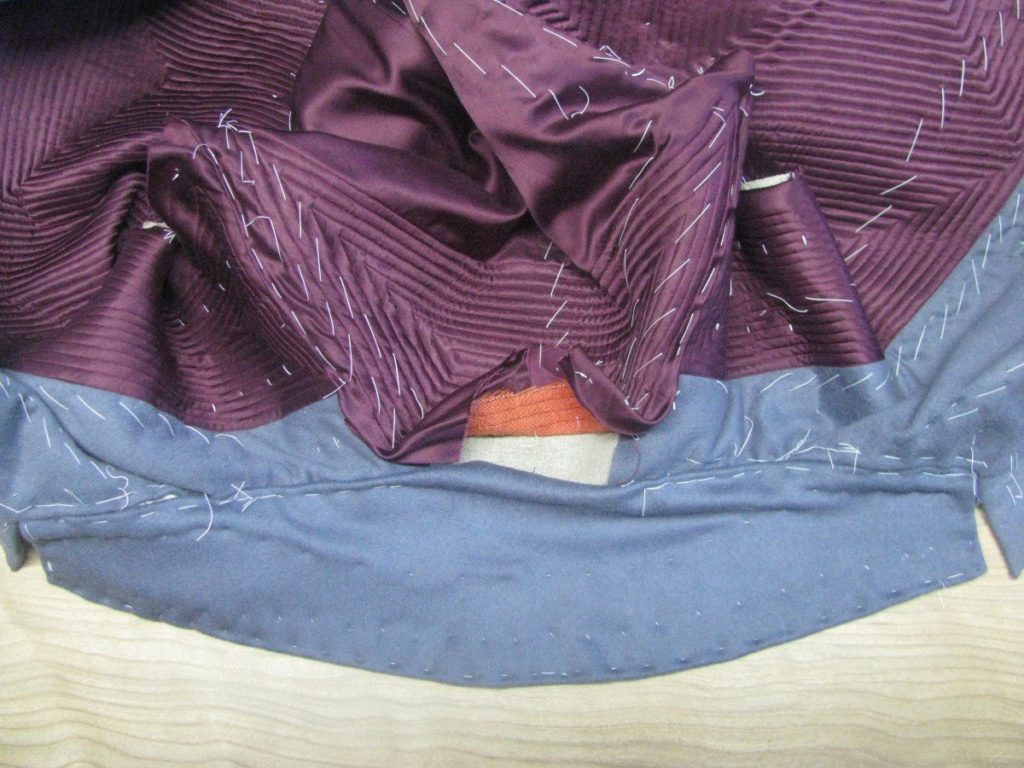
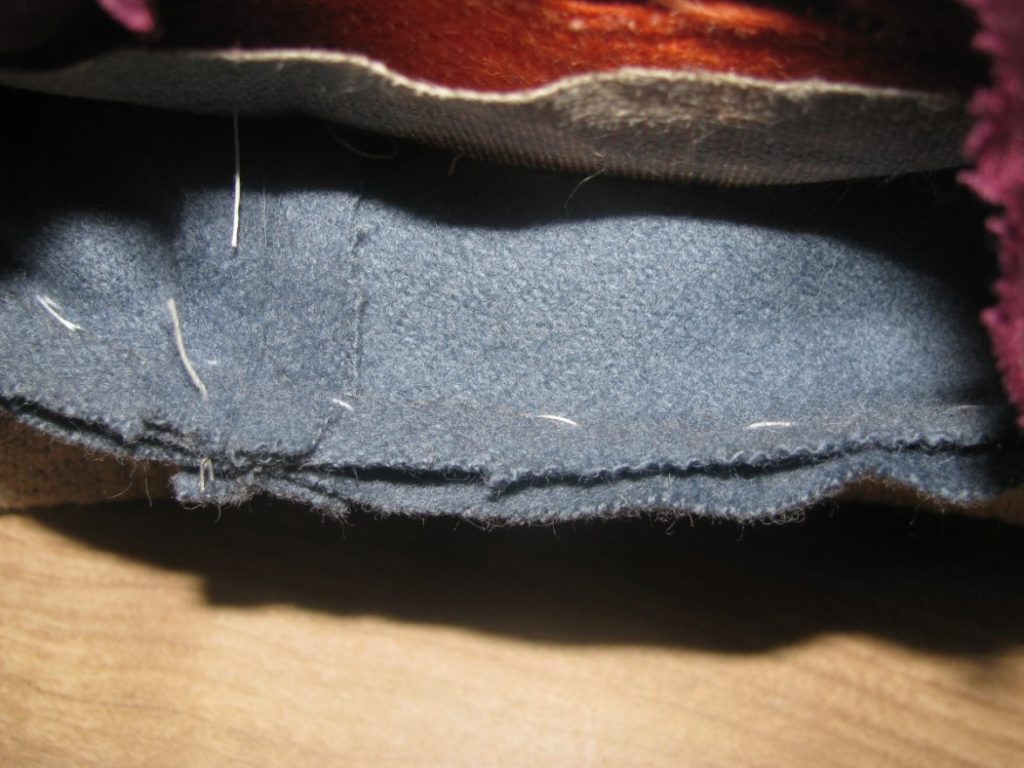
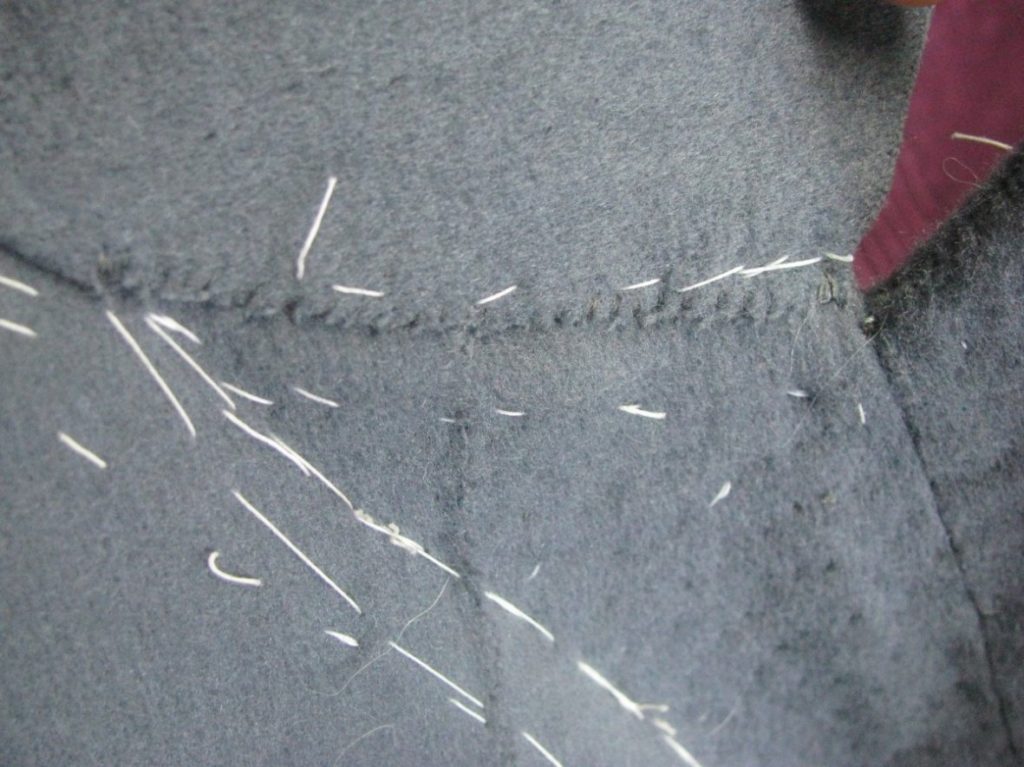
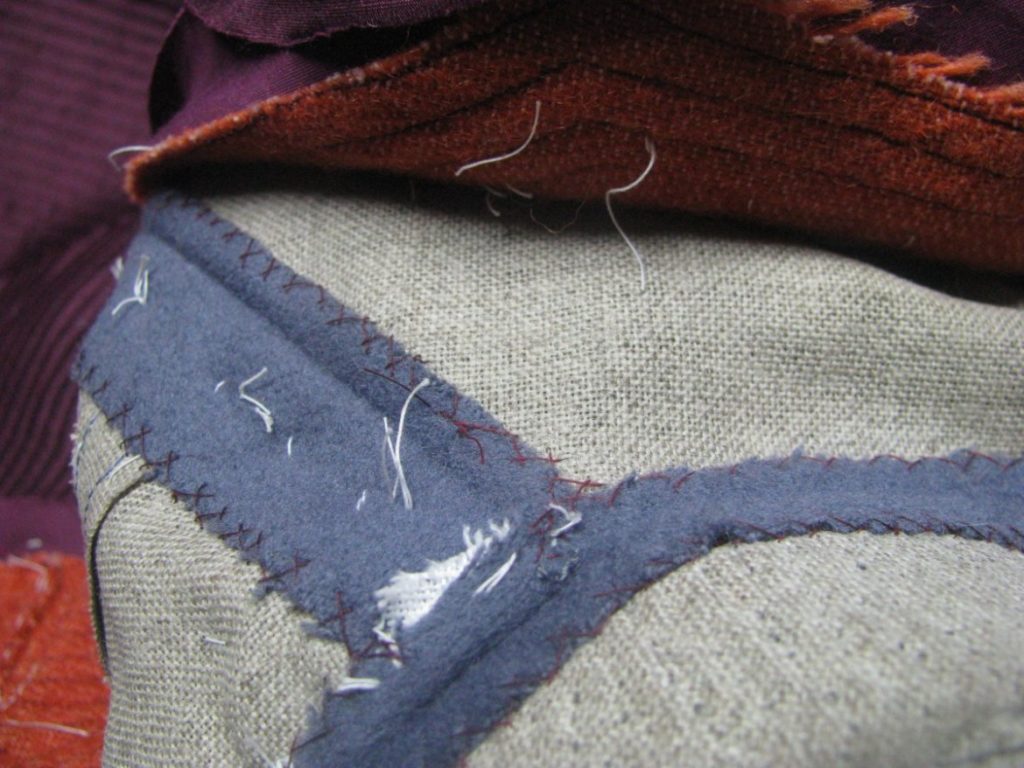
The first step in completing the collar is to sew down the gorge line. If you look, you’ll notice a junction of three separate seams, from the lapel, collar, and gorge line. Begin by knotting your thread and securing it at this point, in between the layers.
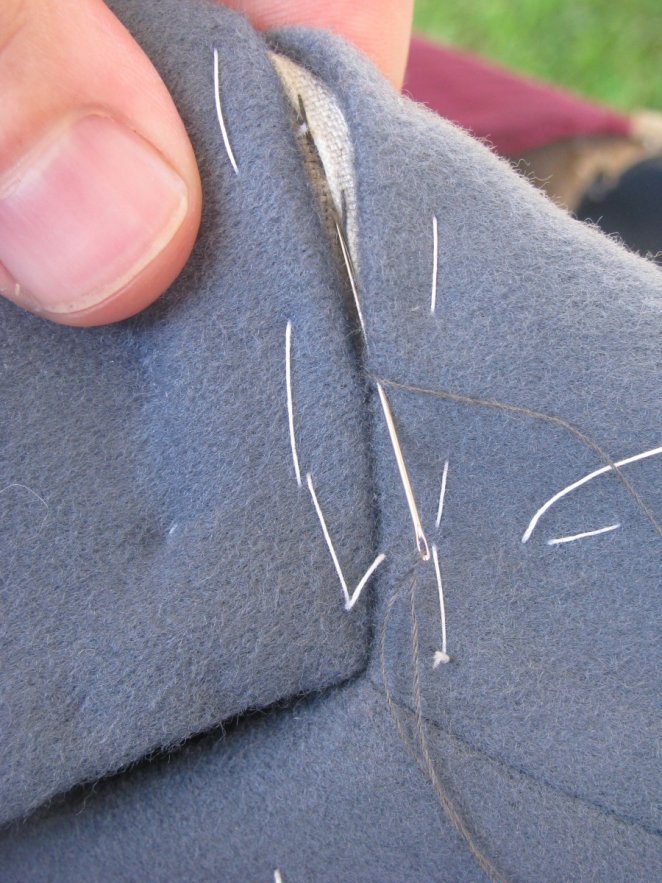
Note how there are two folded edges facing each other. The object is to sew these together without any thread showing. To do this, take a small stitch through one side of the gorge line, then another on the opposite side, forming a ladder-like stitch. Every 4 or 5 stitches, take a stitch directly into the canvas below, to further hold things in place. Continue in this manner until you reach the point where you trimmed the coat forepart at the roll line area.
From this point, begin felling the rest of the collar down until you get to the edge of the facing. Repeat the process for the other side of the collar and gorge line.
Now flip the collar over so that you can see the underside. Fell from the intersection at the gorge line and lapel all the way around the edge of the collar, in the same manner that you felled down the facing.
At that intersection, the area can sometimes be weaker than the rest of the coat. It’s a good idea to put in a bar tack for some extra strength. Take about 5 stitches in places, being careful not to let them show on the right side. Then wrap the thread around these stitches, forming a bar tack.
Completing the Lining
Fold and baste the lining across the top of the back neck and facing areas. Make sure they cover the slashes and permanent basting stitches. When satisfied with the appearance, carefully fell the lining down across the shoulder seam, neck line, and shoulder seam.
The Top Collar
Begin the top collar by placing the collar pattern on the grain, and chalking the outline. Add a two inch inlay to the top and bottom, and three inches to the sides. You have the option of placing the collar on the fold, or seaming the pieces together. In the case of seaming, you should add a 1⁄4 inch seam allowance, and stitch the pieces right sides together. In my case, I chose to cut the collar in one piece.
Stretch the top and bottom of the top collar with the iron. This will help the collar lay more smoothly on the finished coat.
Lay the top collar right side down on the table, and place the coat in position on top. Use the chalk marks as a rough guide in getting the proper alignment.
Baste from one edge of the collar, about one inch from the edge until you meet the roll line. Continue basting along the roll line until you reach the far edge of the collar.
At the top edge of the collar, about one inch from the edge, baste the top collar to the under collar, making sure there are no ripples in the fabric underneath. Use your fingers to determine this.
Carefully trim the collar ends to one inch, and the top edge to 3/8 of an inch.
Fold the edge of the top collar beneath the under collar, and baste. There should be 1/16” of fabric showing beyond the raw edge of the under collar, so that it will not be visible when completed.
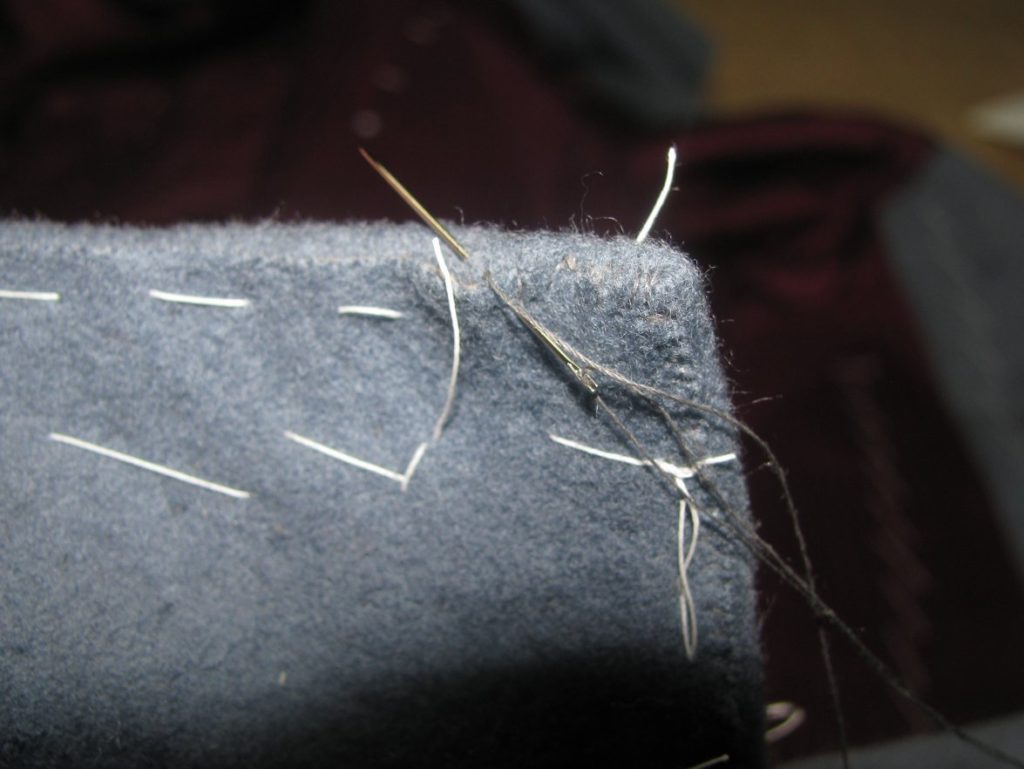
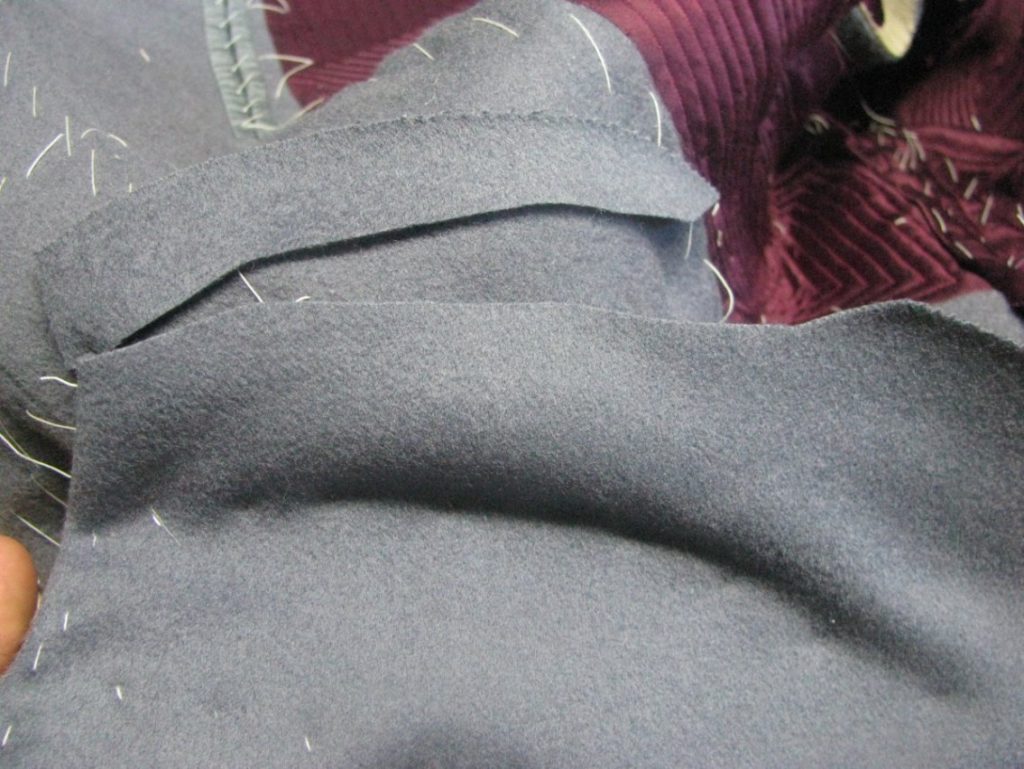
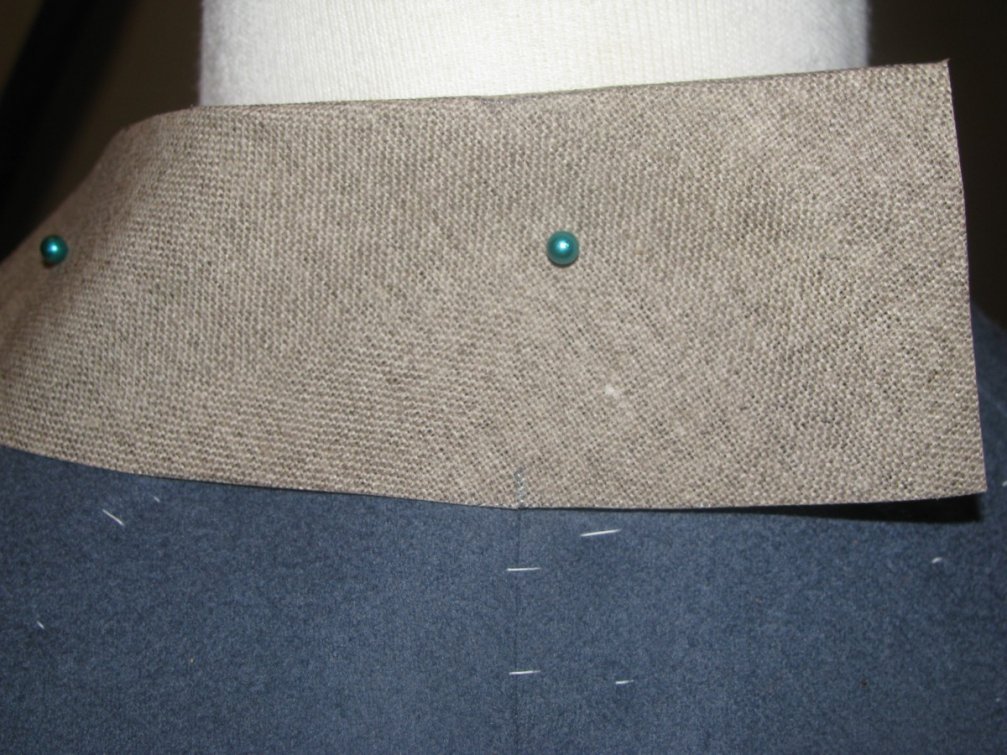
This photo shows the collar so far. Next we’ll secure the stand side of the collar.
Trim both ends of the collar to 3/8 of an inch.
Baste the ends under in the same manner as the top of the collar, making a nice fold at the corner.
On the bottom edge of the top collar, near the gorge line, measure a half an inch seam allowance from the edge of the collar. Trim carefully.
Fold under the fabric and baste along the gorge line. Ideally there will be no pulling or ripples. I ended up going back and redoing this section.
From the gorge line to the point of the collar just before it meets the end of the facing, fold and baste under the fabric.
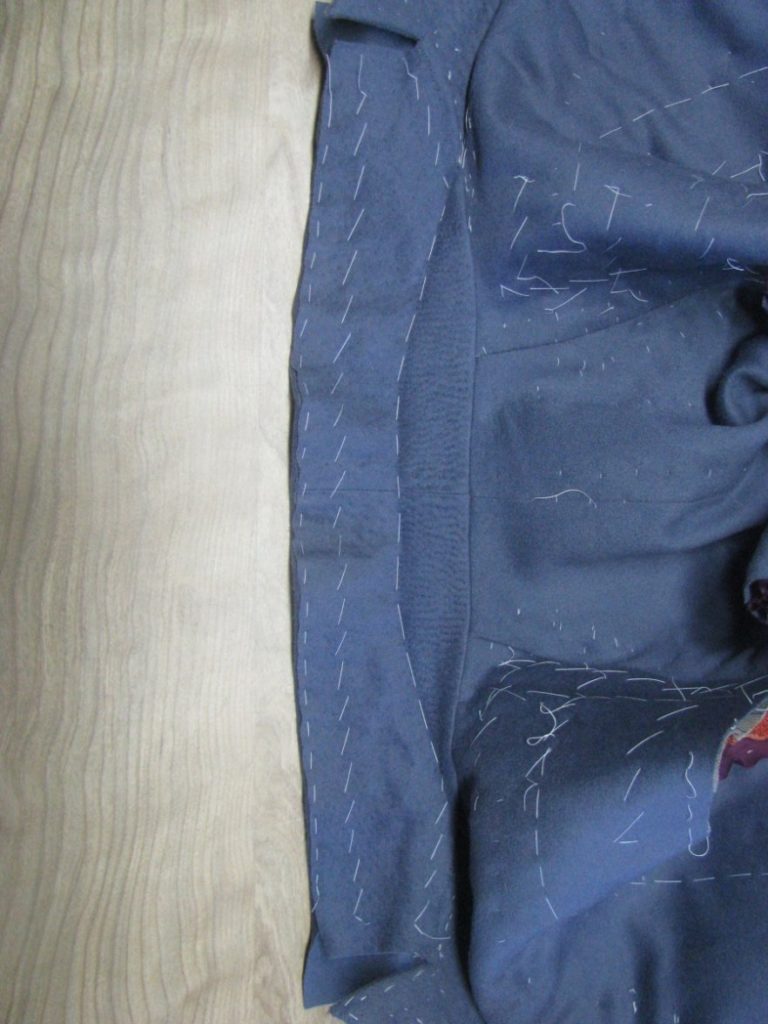
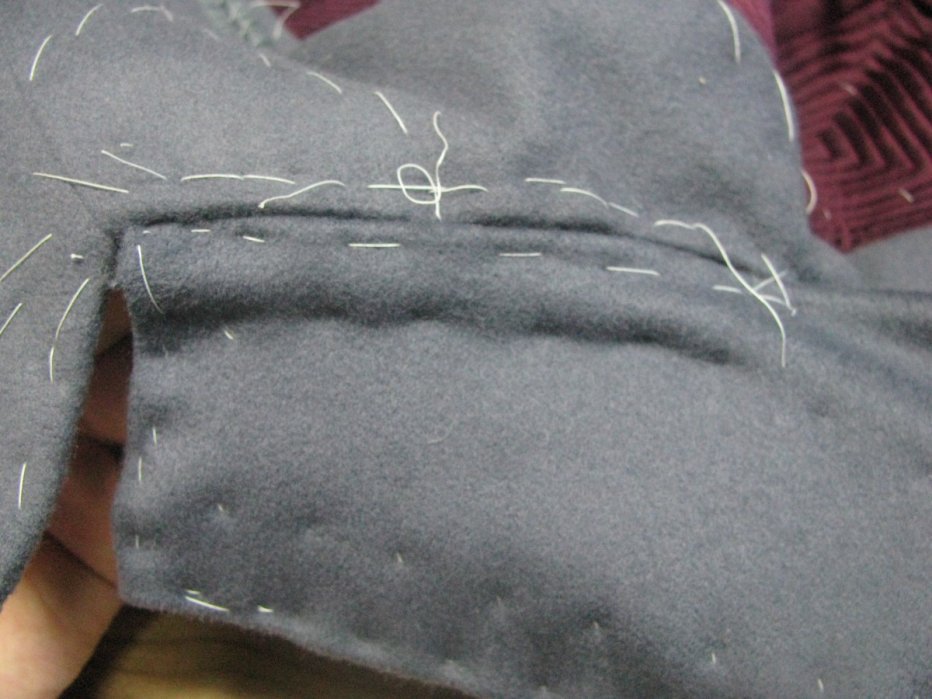
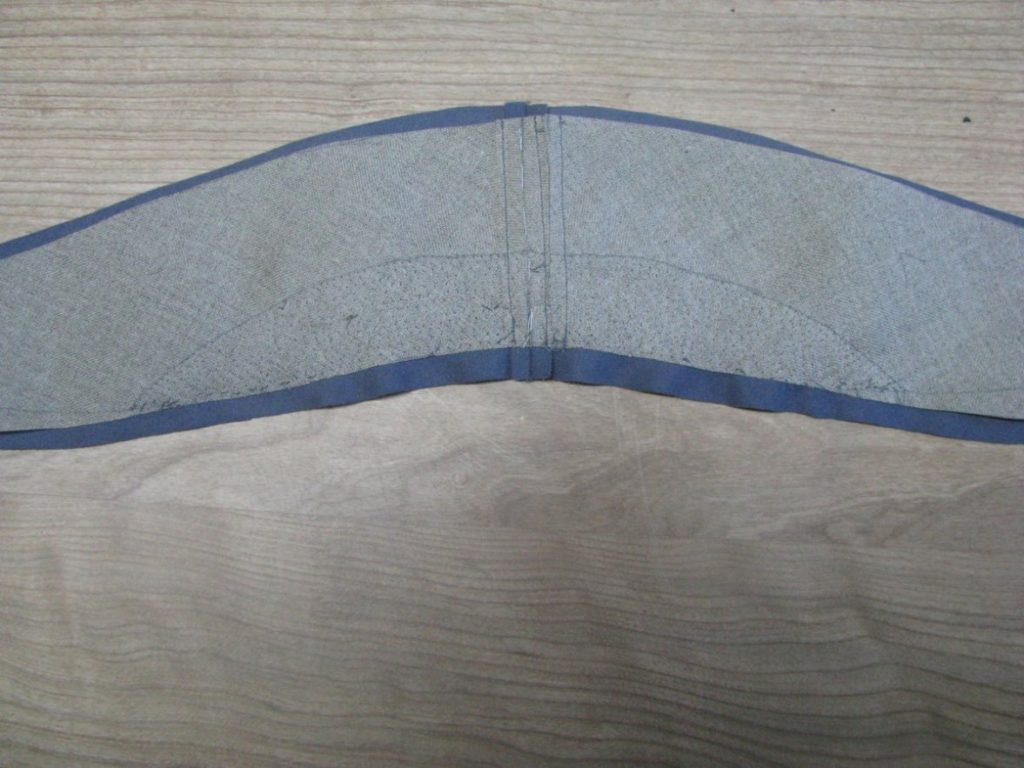
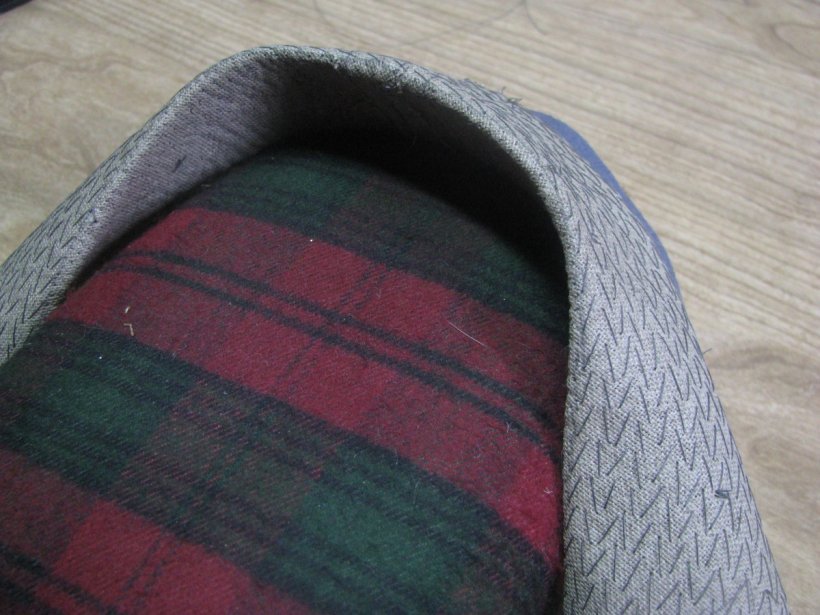
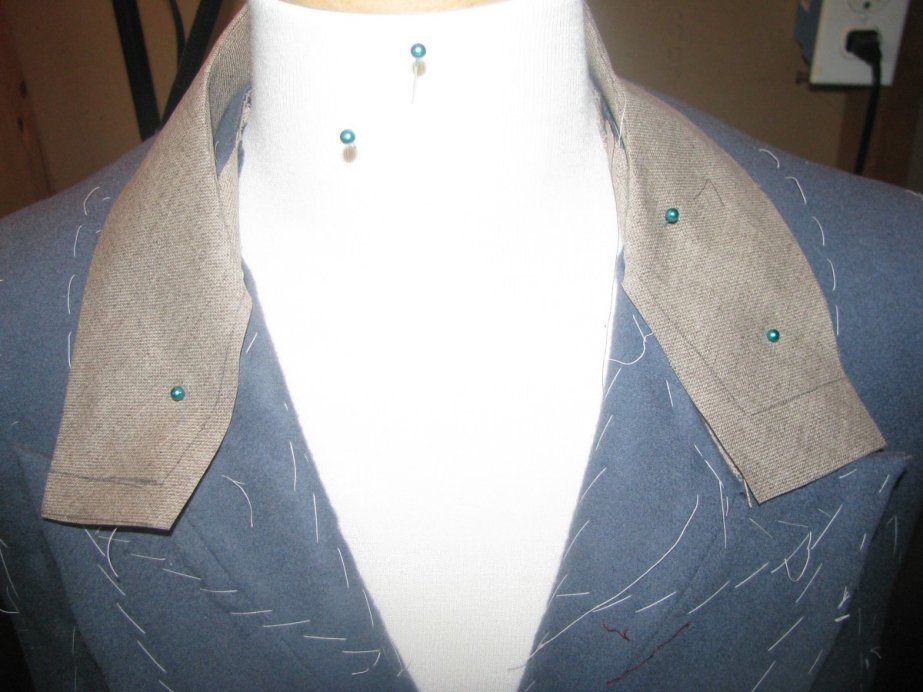
Here’s what the collar should look like. Note the back section has not been basted down yet.
Turn the coat lining side down again, and baste the stand of the collar from one end to the other.

At the back, carefully slash the top collar so that it may smoothly fit around the curvature of the neck. Don’t slash too far, however. Next, using a pad-type basting stitch and silk thread, baste the top collar to the collar seam below it. These stitches are permanent, so don’t let them show through to the right side.
Securing the Lining
It’s now time to further baste down the lining, in preparation for the final stitching. Like the canvas, the lining has likely loosened from work on the collar.
Along the neck edge, baste the lining in place, smoothing with your fingers underneath.

Do the same along the center of the shoulder.
Complete the initial basting by basting along the armscye up to the shoulder.
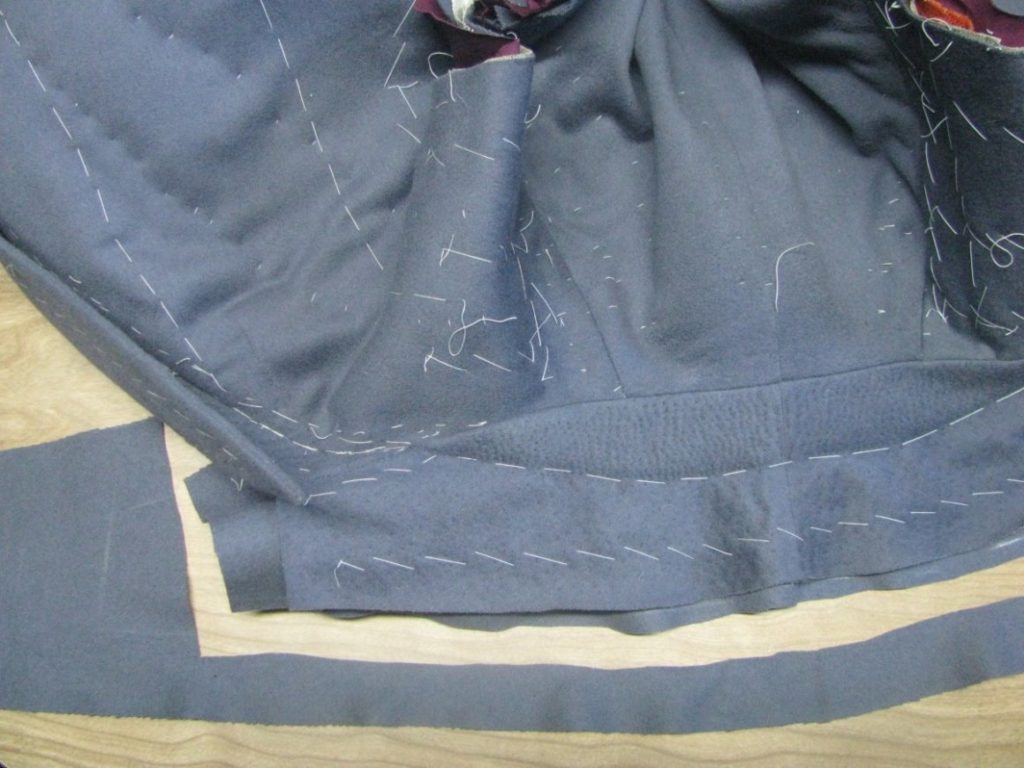
Turn to the inside. Baste the back lining along the shoulder seam, about one inch from the edge. The back lining should overlap the front lining and facing.
Carefully fold over the raw edge of the back lining, and baste it in place. Begin the basting at the edge of the facing. The facing area needs to remain free until after we put in the top collar.
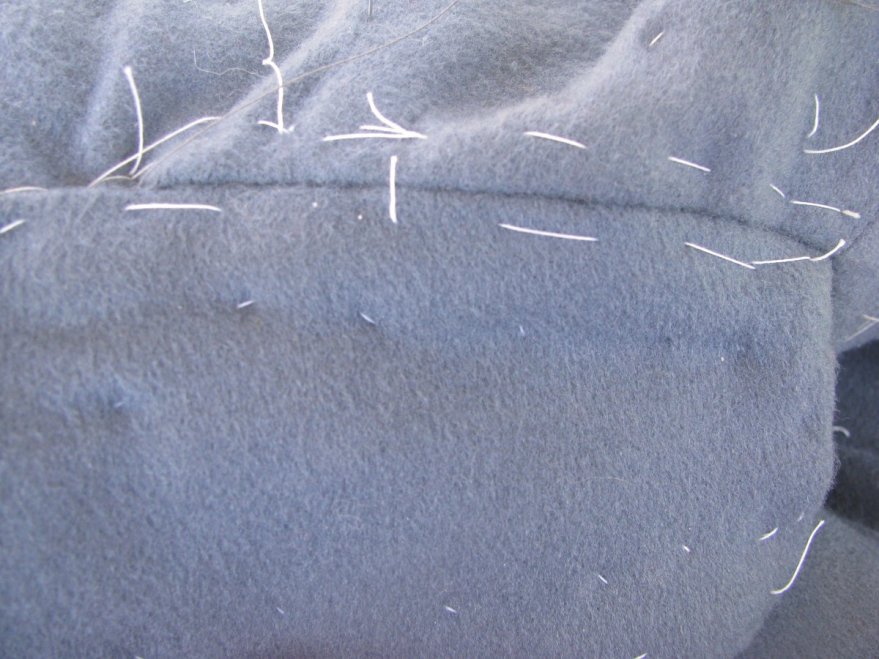
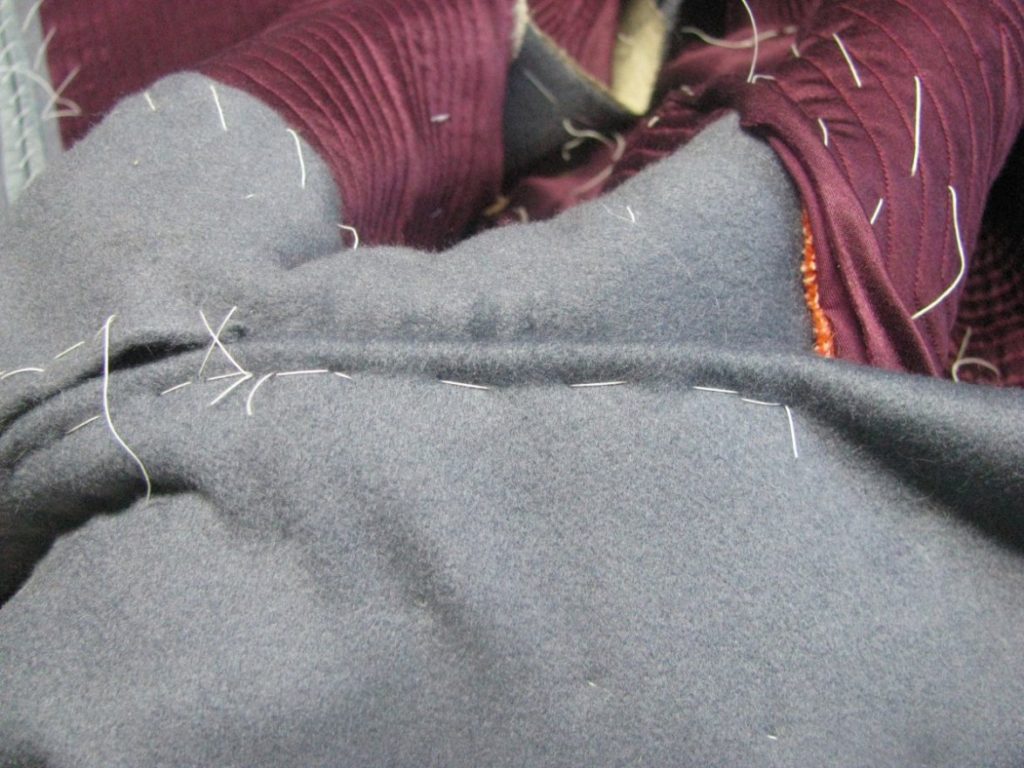
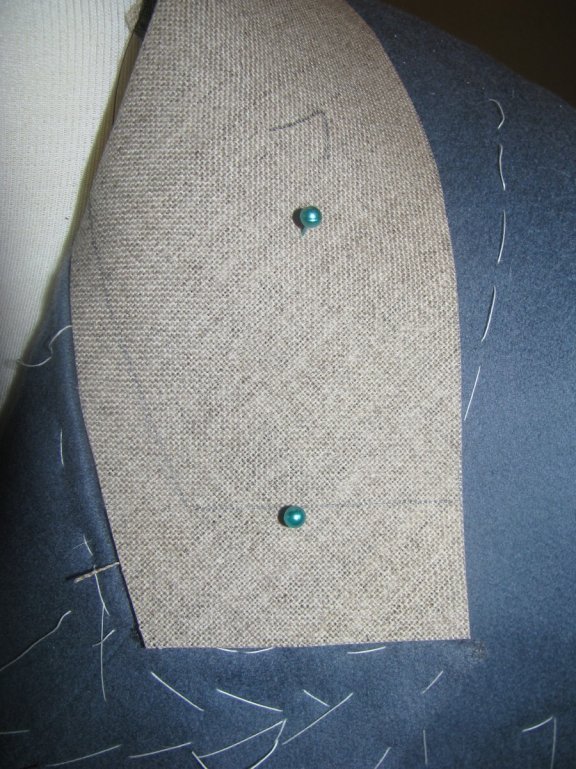
Here is how the coat should look after the work so far.
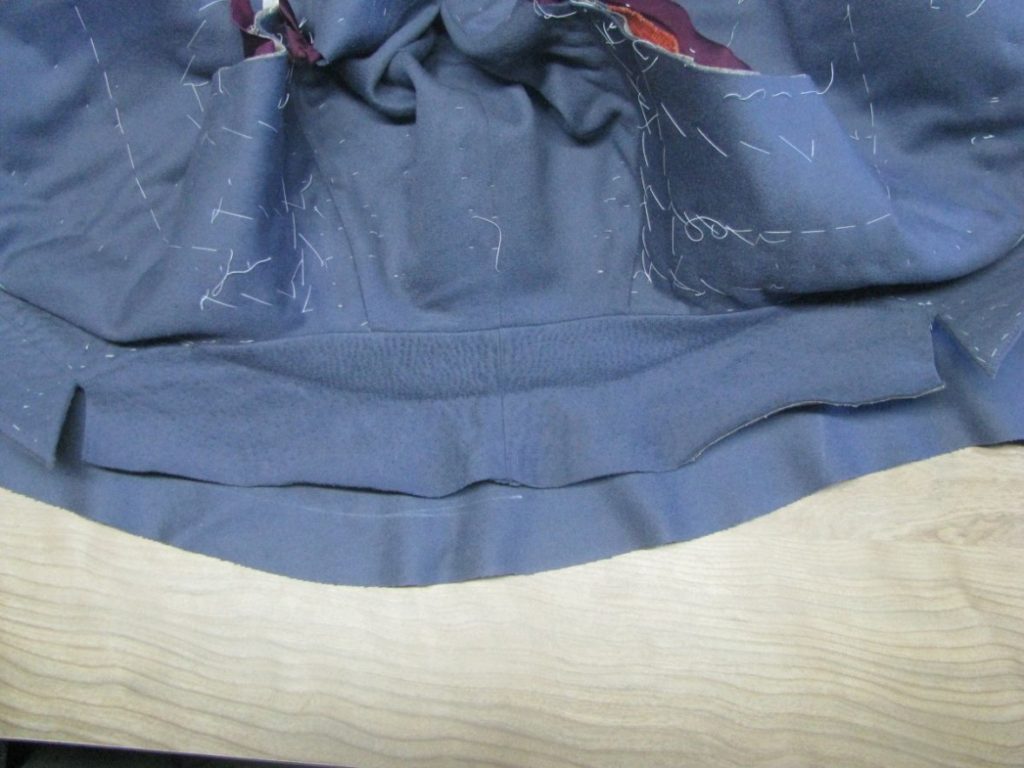
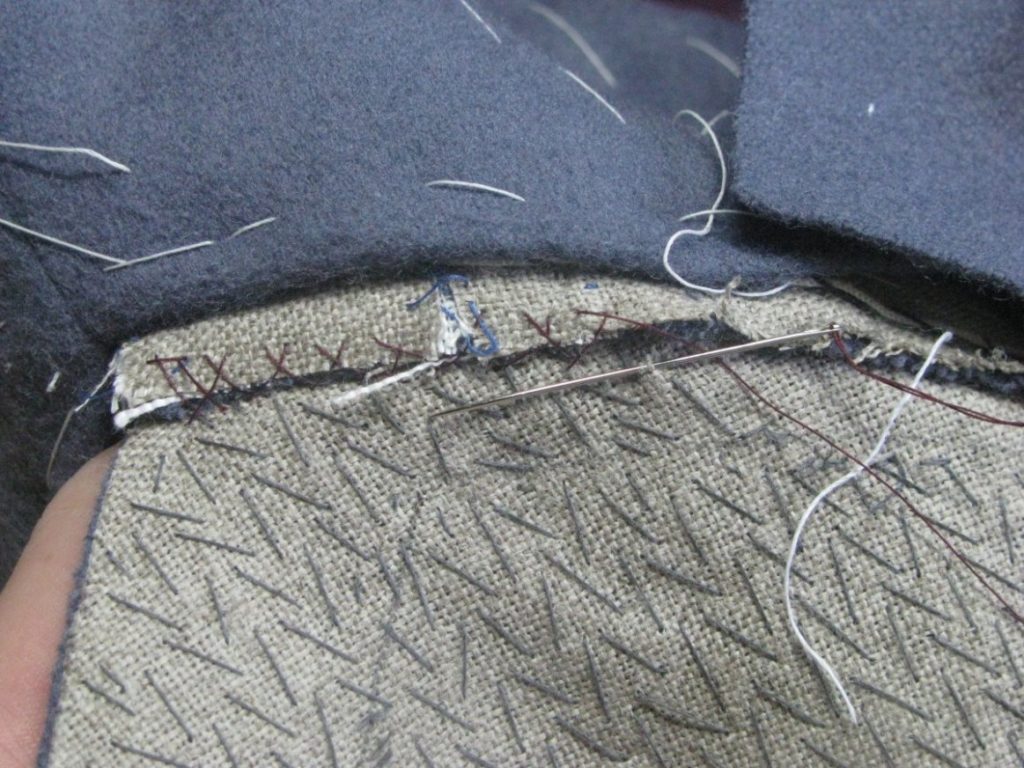
Attaching the Undercollar
At this point in time, the undercollars were still mainly attached right sides together with a backstitch to the body of the coat. During the later 1860s and 1870s, collars began to be attached with the method still used today, by felling the raw edge of the collar to the coat. We’ll be doing the older method in this workshop, but it’s good to be aware of both methods.
Begin by trimming any unused inlays from the neck edge.
Line up the center back of the collar with the center back seam, right sides together. Baste from the center back to the roll line. At the deepest part of the neck, full on a little extra bit of collar to allow it to roll more easily. The roll line of the collar should line up with the roll line of the lapel if you’ve measured everything correctly. Repeat for the other half.
When you get to the area covered by canvas, you’ll want to pull the canvas back slightly so that you can baste just the wool together.
Backstitch from roll line, to roll line. I highly recommend doing this step by hand, because it is very difficult to get a machine in the right place due to the bulk and curves of the coat.
At either end, from the roll line, to the end of the collar, baste the raw edge of the collar to the back of the lapel. This gives a thinner finish to the area, allowing the lapel to roll more freely. Finish by felling the raw edge to the coat. The raw edge should just cover the seam line, 1⁄4 inch from the edge of the neck.
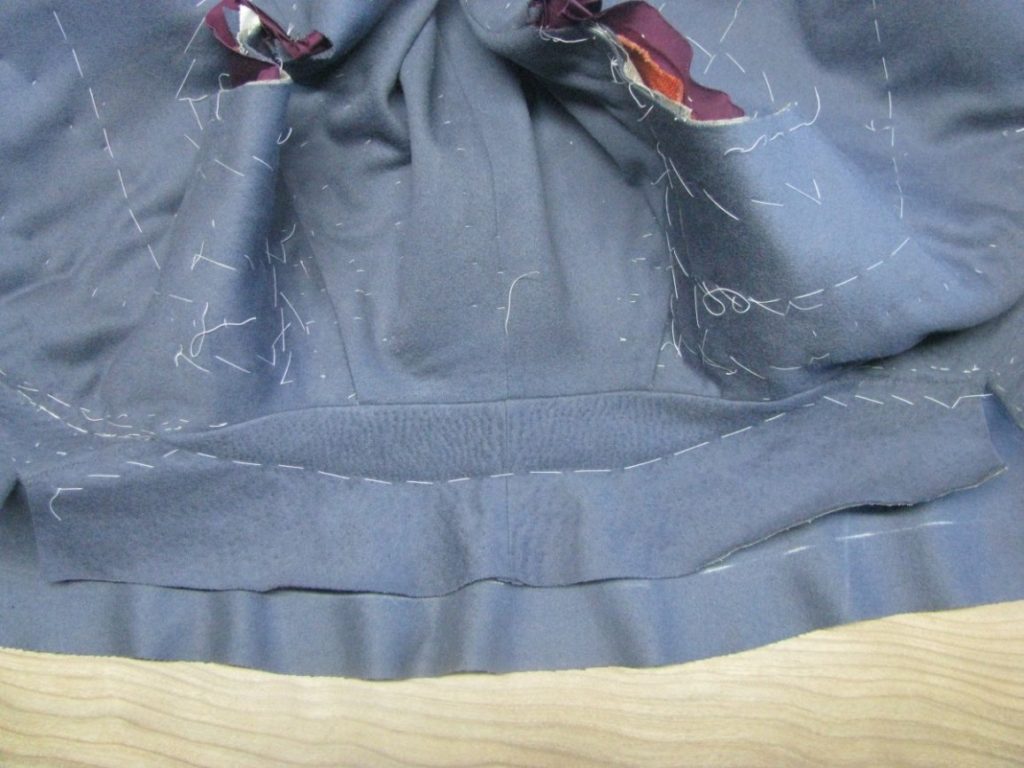
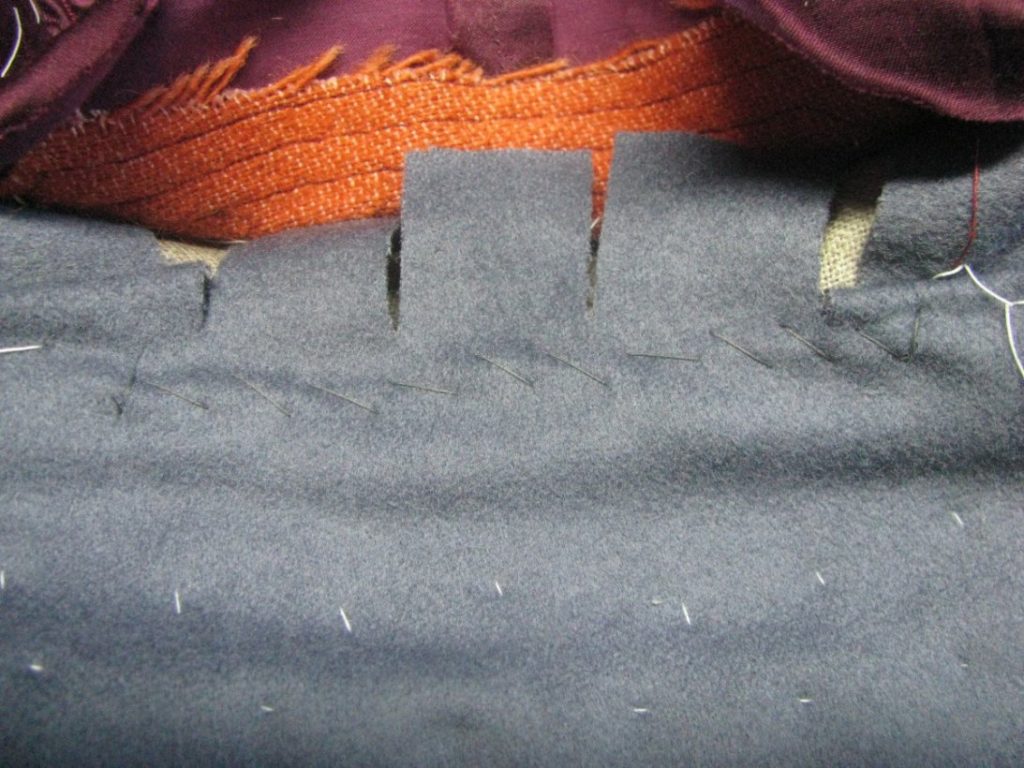
On the inside of the coat, snip the canvas and top layer of wool (the neck edge), just to the seam line. This will allow you to press the collar seam open.
From both sides, and using a tailors ham and press cloth, press open the collar seam from roll line to roll line.
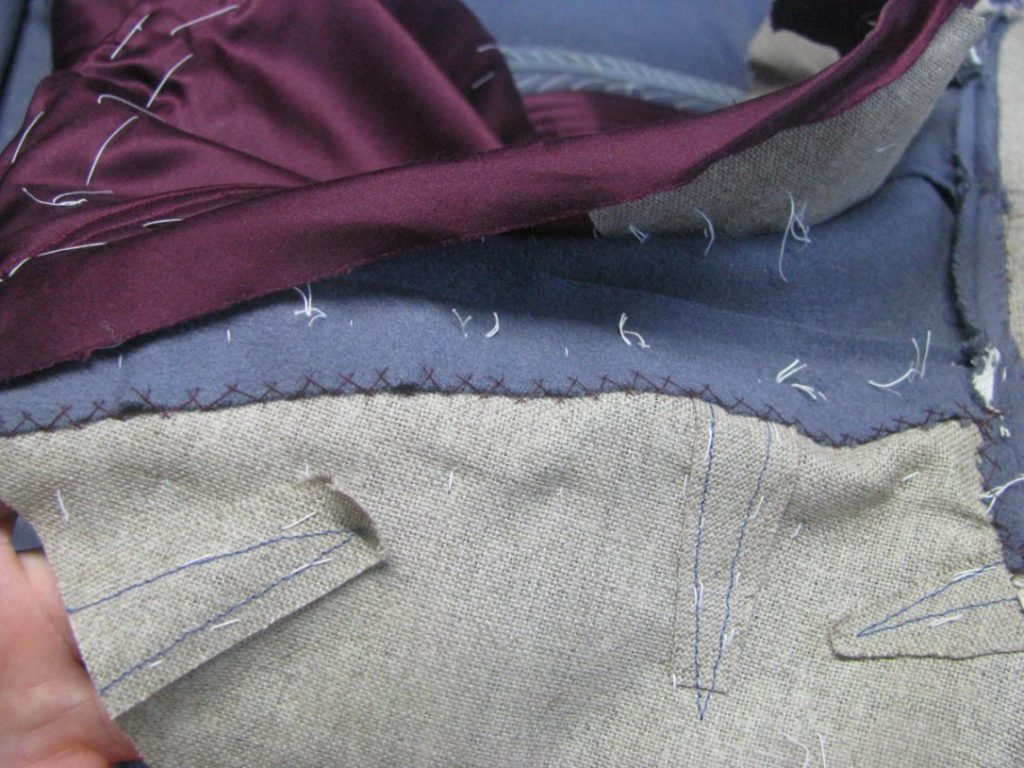
Securing the Canvas
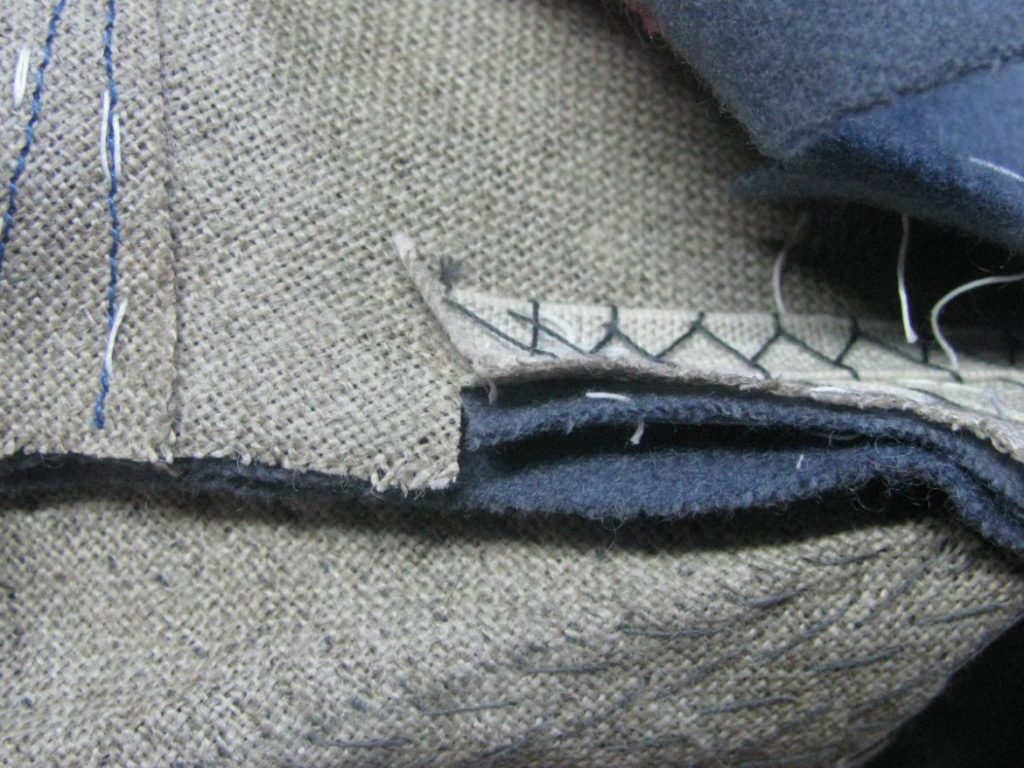
It is now time to completely secure the canvas into the coat. Beginning at the ends of the collar, at the collar notch, cross stitch the body canvas to the collar canvas.
When you get to the section that has been snipped, fold the top layer of wool and canvas out of the way, and catch only the seam allowance of the undercollar, cross stitching it to the canvas. Continue this process until the entire collar is secured.
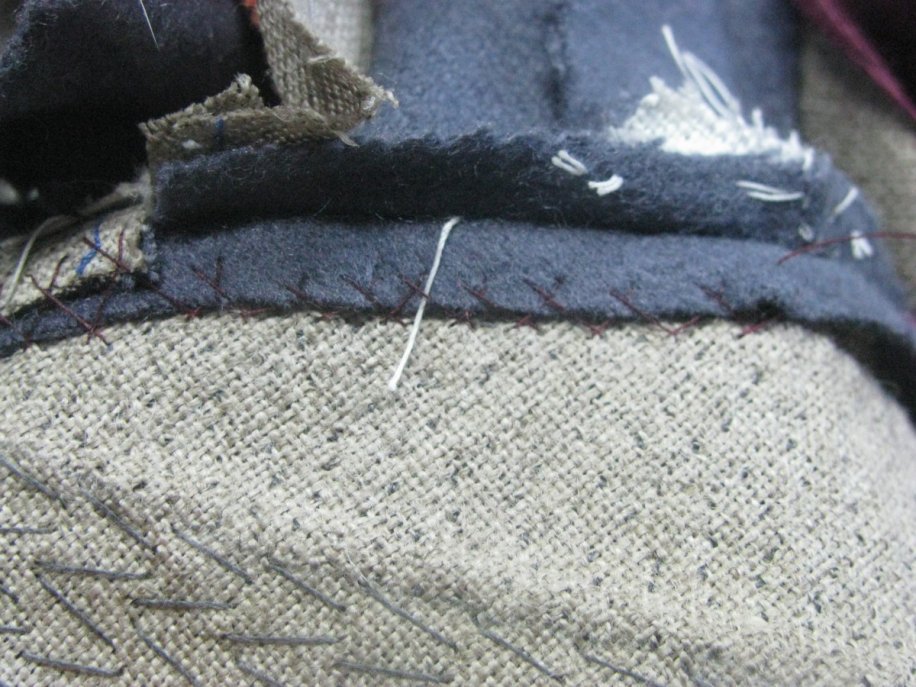
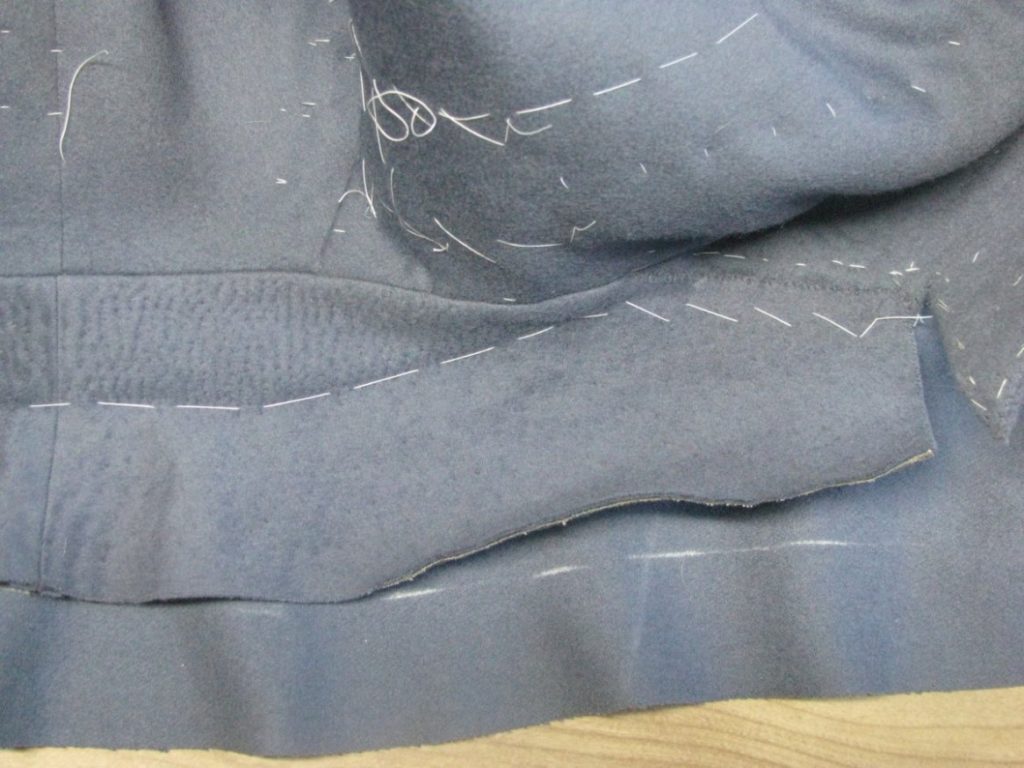
From the outside of the coat, baste the canvas back in place across thetop of the shoulder. While doing various constructing steps, the canvas has likely been loosened in this area. It needs to be secured in order to do the following steps more accurately.
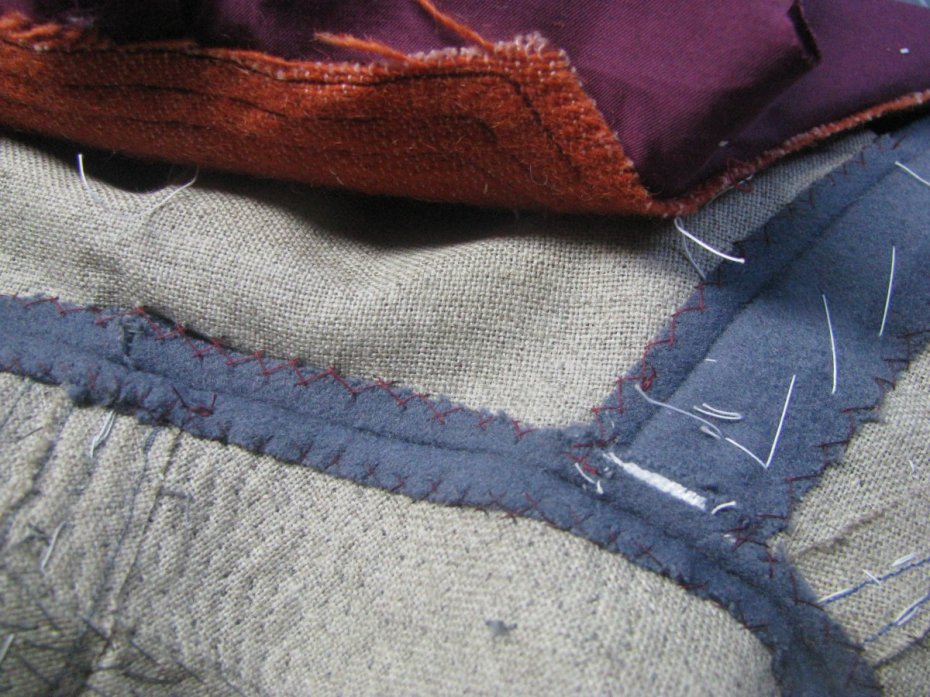
From the inside, mark a seam allowance plus 1/16” inch along the neck edge of the body canvas. It needs to be slightly larger to allow the wool seam allowance to fold over without interference. Trim carefully along this neck edge, from the top of the shoulder, to the cut you made earlier in the canvas.

Along the very top of the shoulder, mark the position of the seam and trim the excess canvas. I find it’s easiest to use the groove of the shoulder seam as a guide for my scissors, but that does take some getting used to. Be careful!
From the outside of the coat, baste the shoulder inlay, forepart and canvas together, binding all three layers. This simply makes the next step easier.
Along the top of the shoulder, and down the neck edge, cross stitch the canvas to the inlay and seam allowances. The stitching will end at the cut in the canvas, just next to where the stay tape begins.
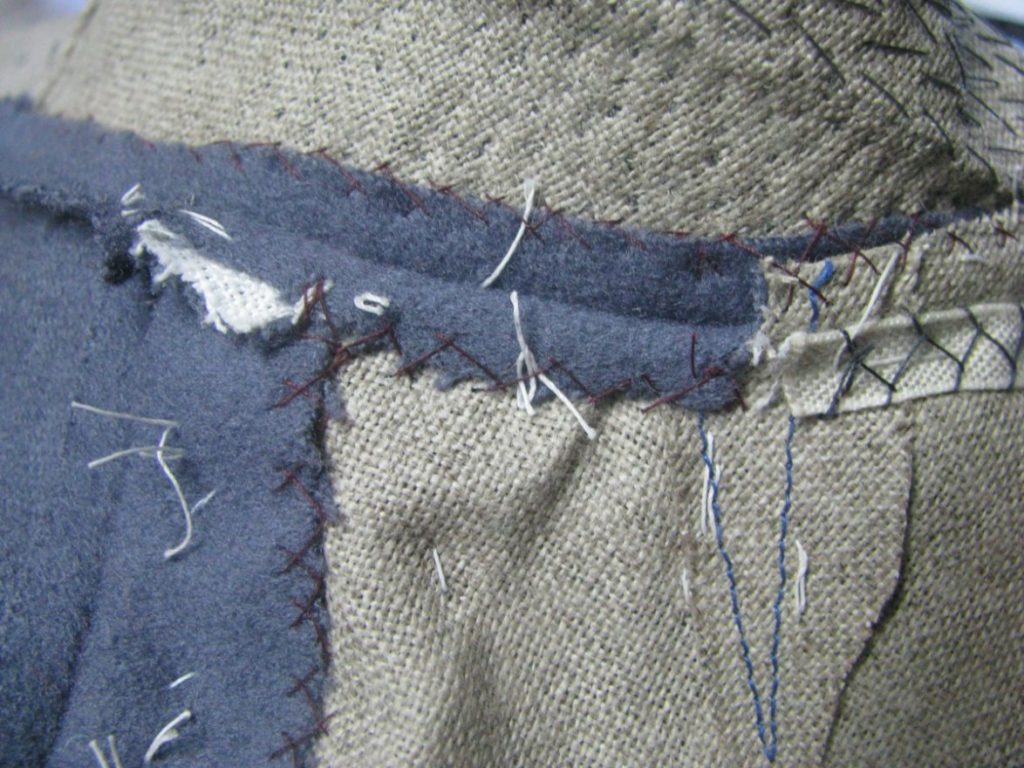
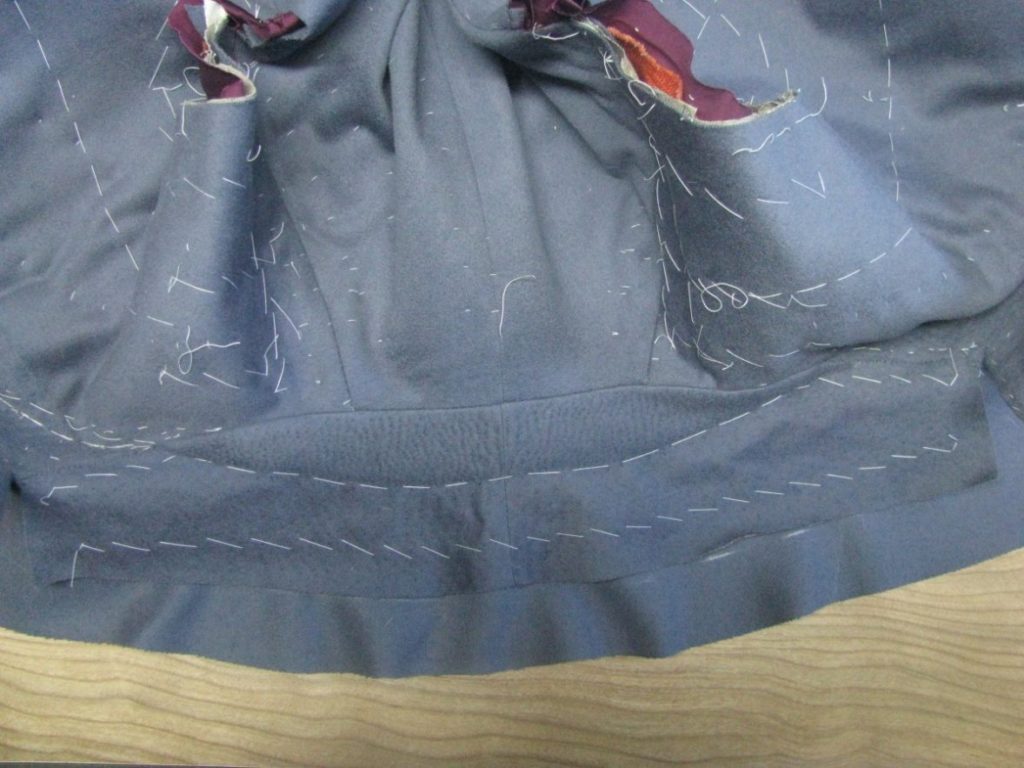
Securing the Back Canvas
That little piece of canvas in the back needs to be secured as well. Add any basting stitches necessary, if it has become loose, and cross stitch the canvas to the shoulder seam, top of the back neck, and opposite shoulder seam.
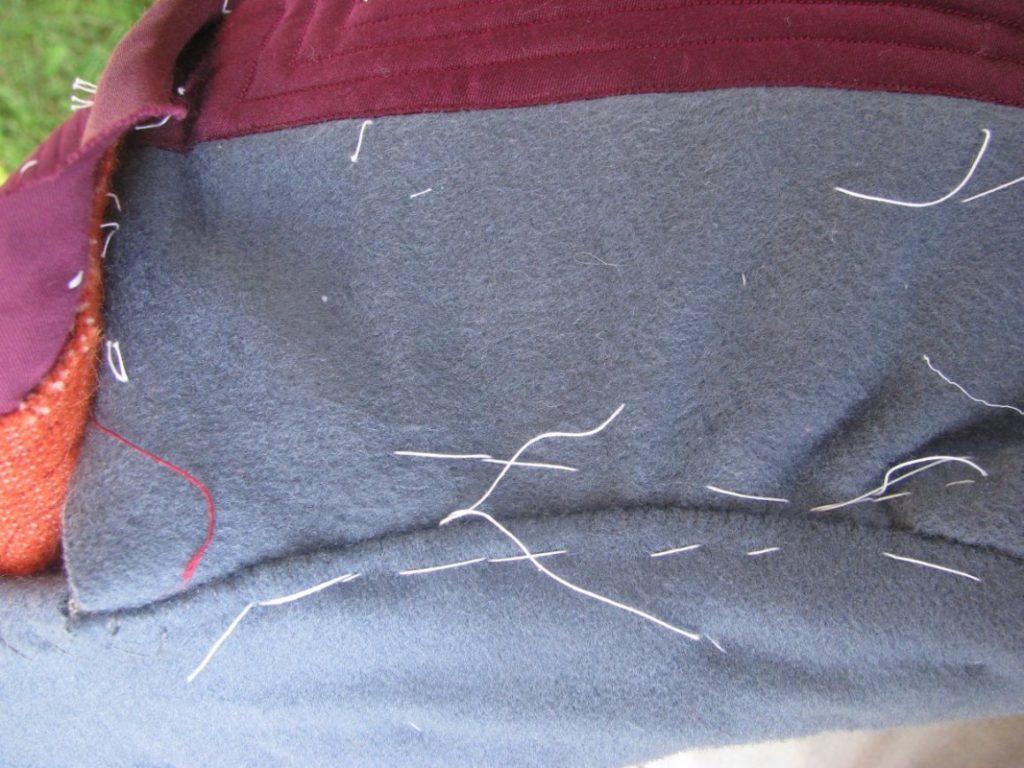
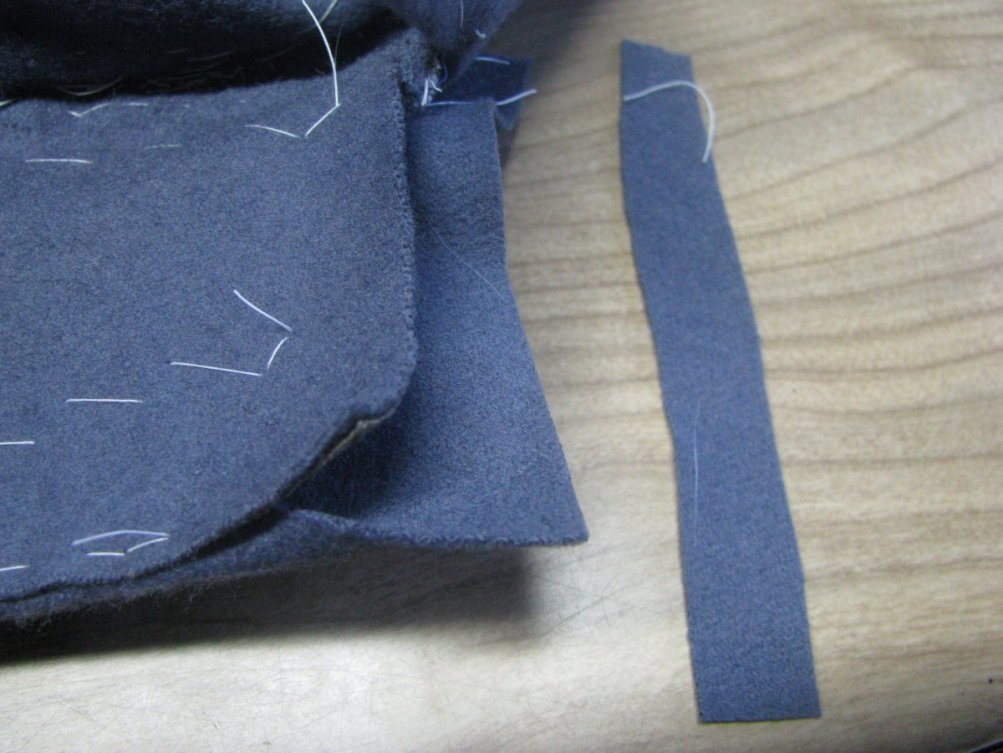
This photo shows the body canvas to the left, the back canvas at the top, and the collar canvas closest to the camera.
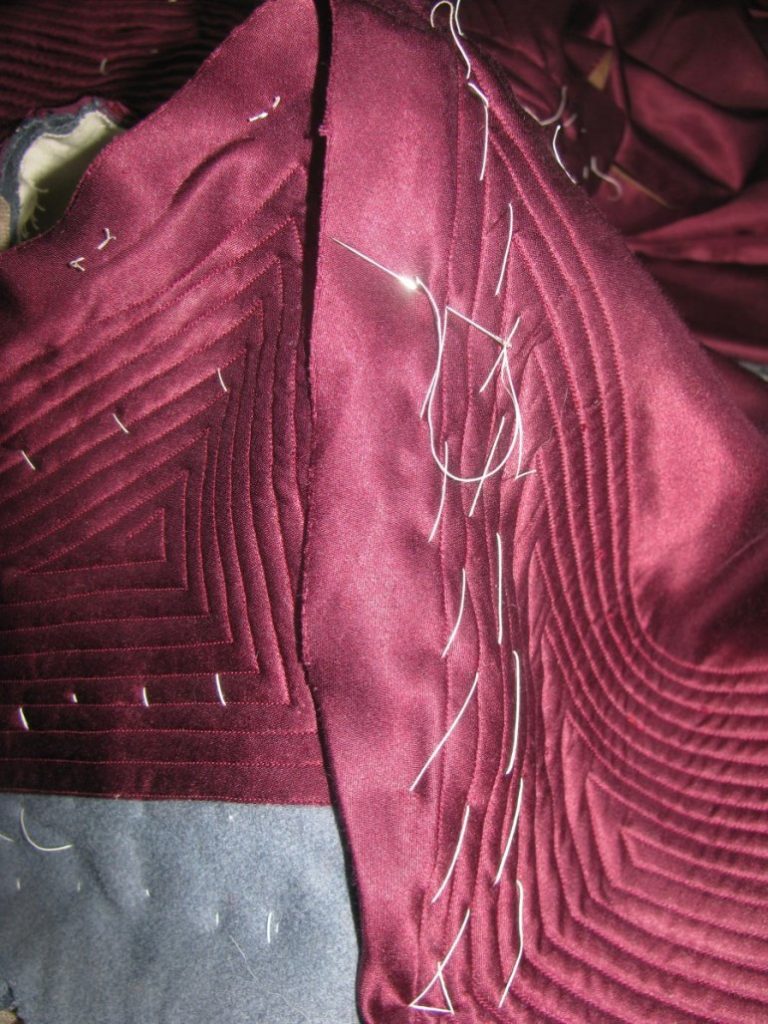
Padding the Collar
Now for the fun part! I find this next step incredibly relaxing, because after you figure out the technique, you can put yourself on autopilot and think about other things.
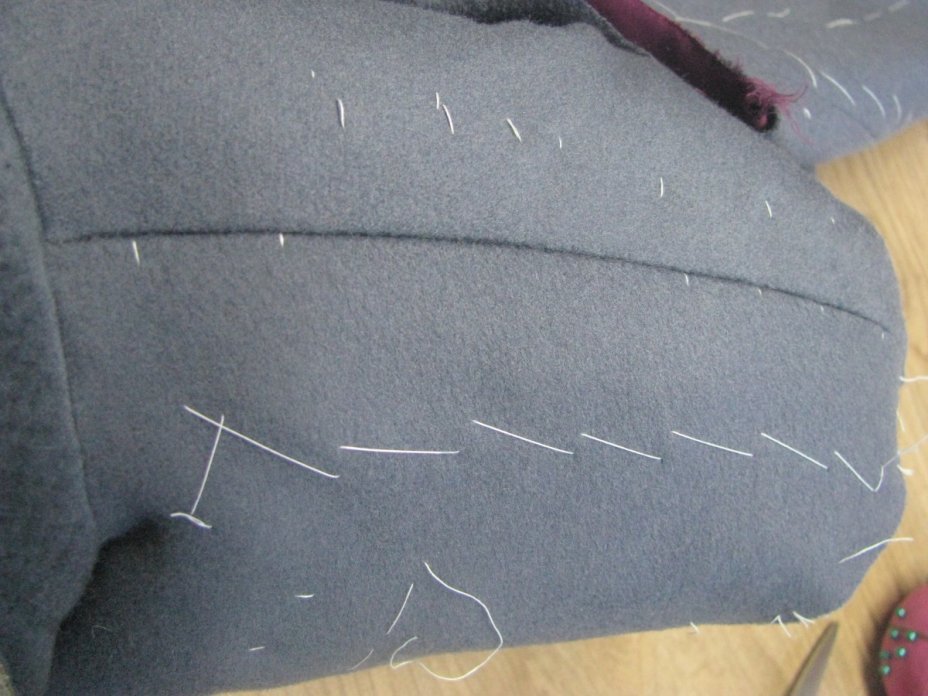
The Collar Stand
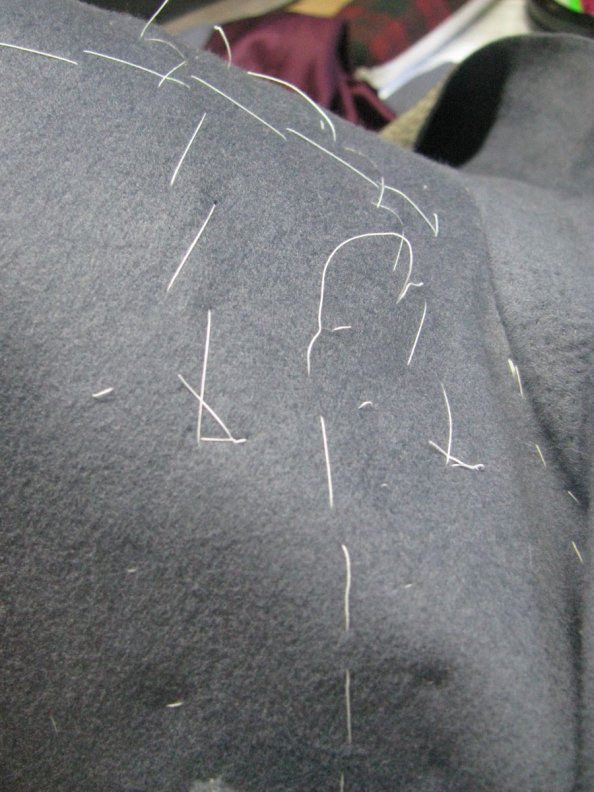
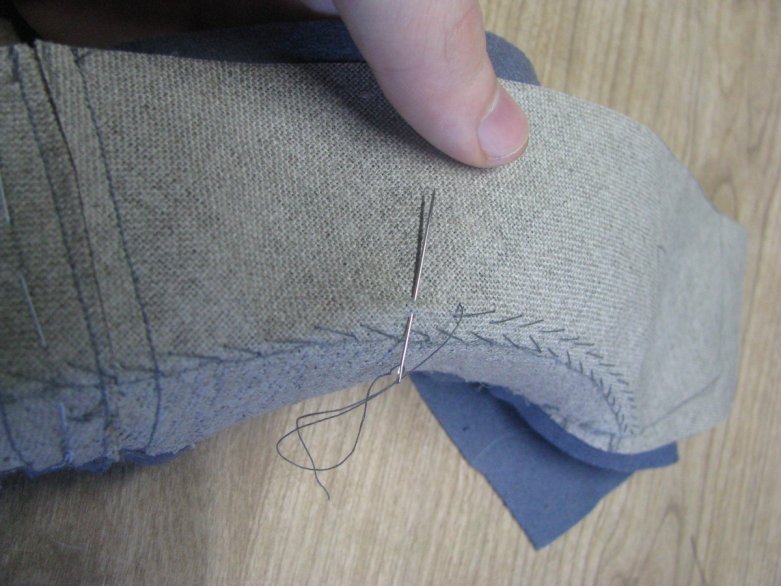
Just to the inside of the roll line, make a row of fine side stitches. The stitches should be between 1/8 and 1⁄4 apart, and just about invisible on the right side. As you are going, use your thumb and fingers to shape the collar as it will be around your neck. At the same time, pull each stitch just a tiny bit tighter than normal tension. These two techniques combined will help form the collar to your neck in a more stable way.
When you get to the other end of the collar, end your thread, and start again on the same side that you began stitching on. This is easier than going back and forth, because you don’t have to train your hands to go in both directions. The next row of side stitching should be about the same distance away as the stitches themselves – 1/8 to 1⁄4 inches. Try to line the stitches up in a honeycomb fashion, to avoid puckering in the finished collar, and give more stability. Continue to subtly shape the collar and give a tighter tension to the stitches as you go.
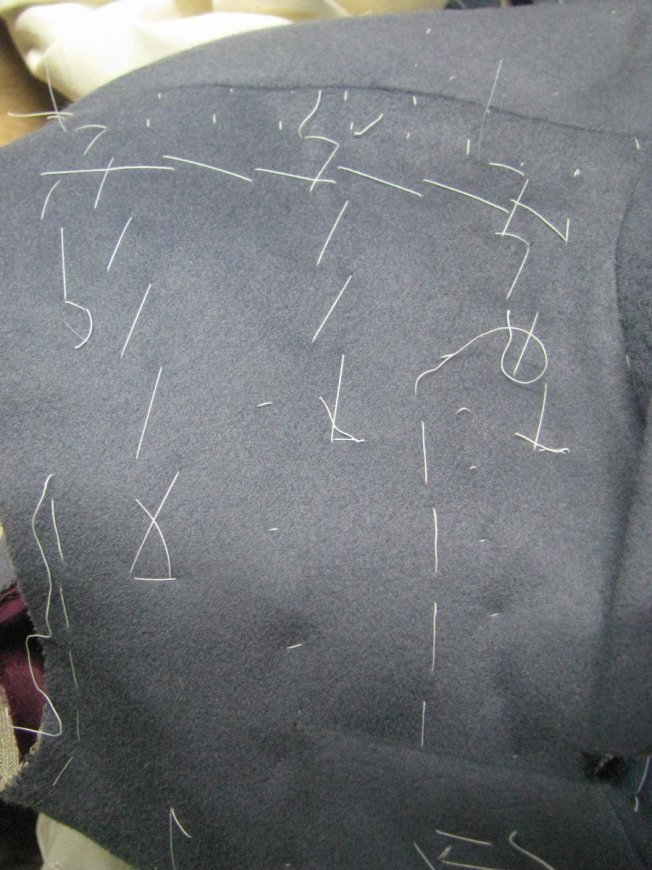
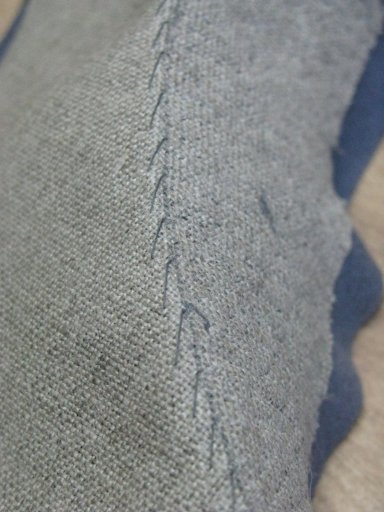
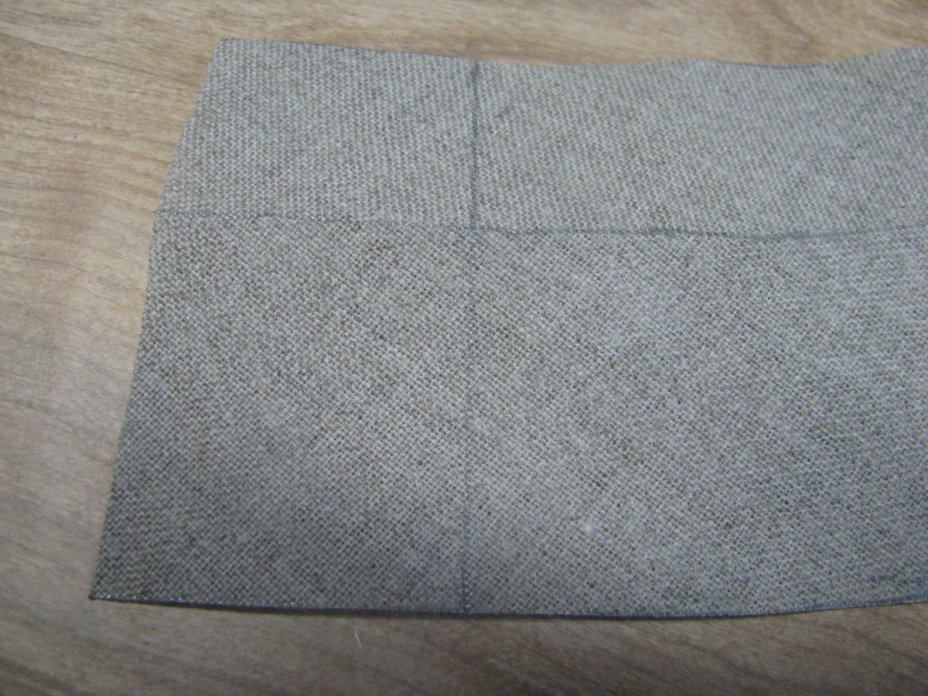
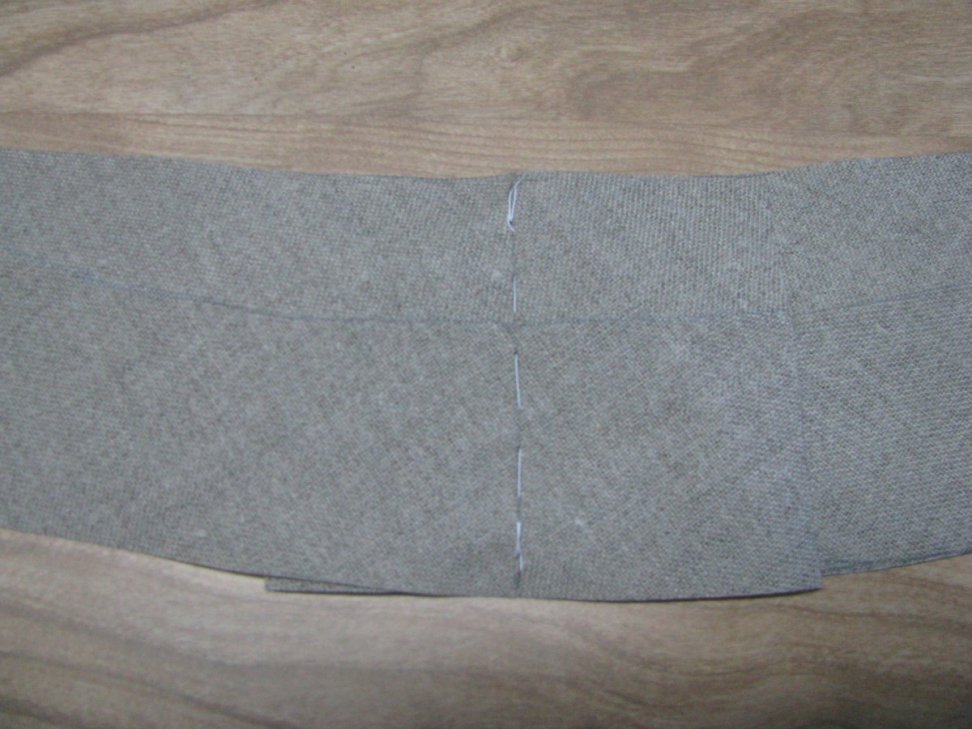
After completing the side-stitching of the collar stand, this is what the collar should look like. Though laid flat on the table, you can see some puckers along the bottom edge, due to the tensioning you put into the collar. As long as these puckers are at the bottom, and not in the collar area itself, you are in good shape.
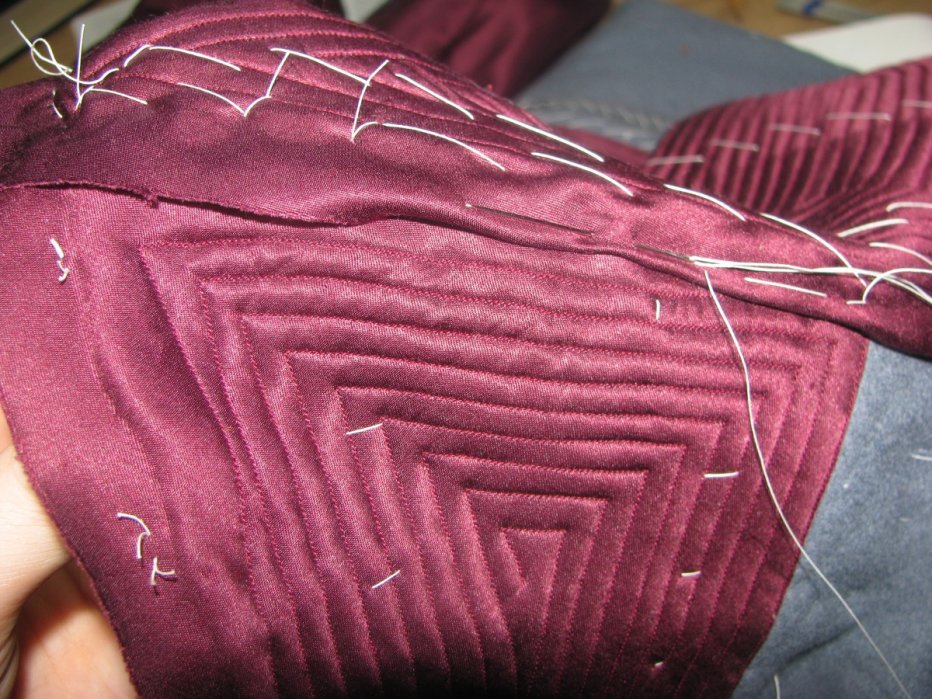
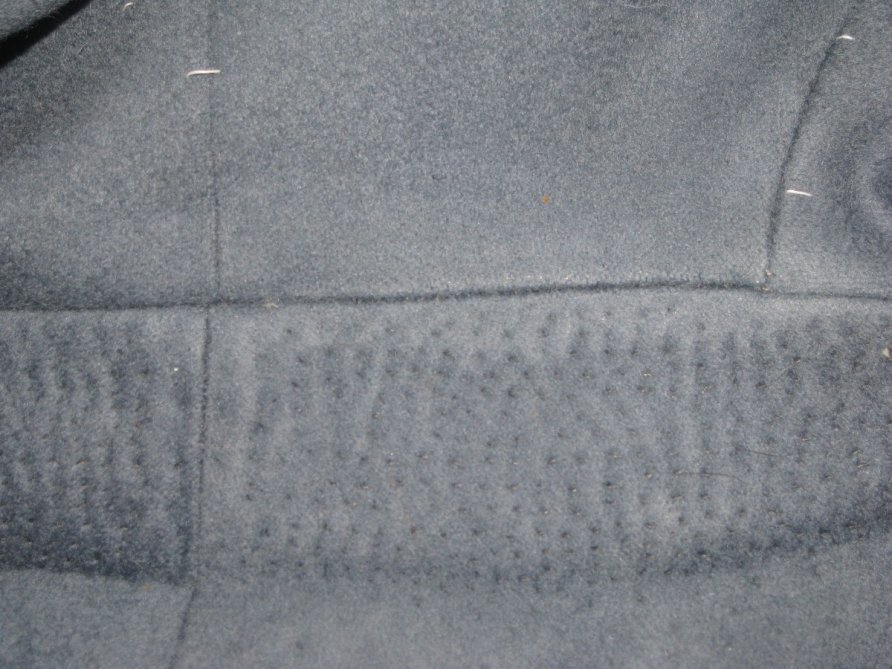
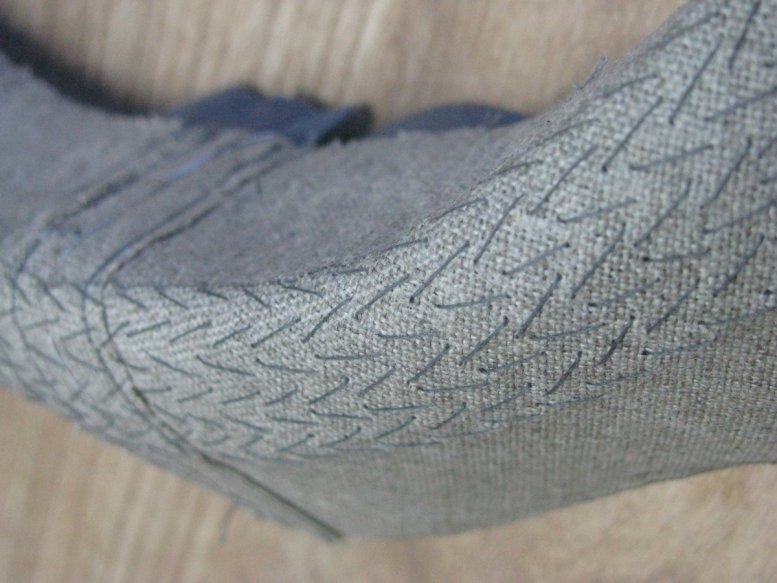
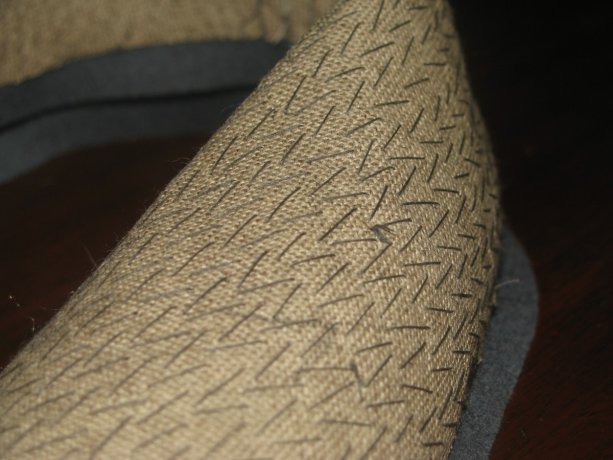
Pad-stitching the Collar
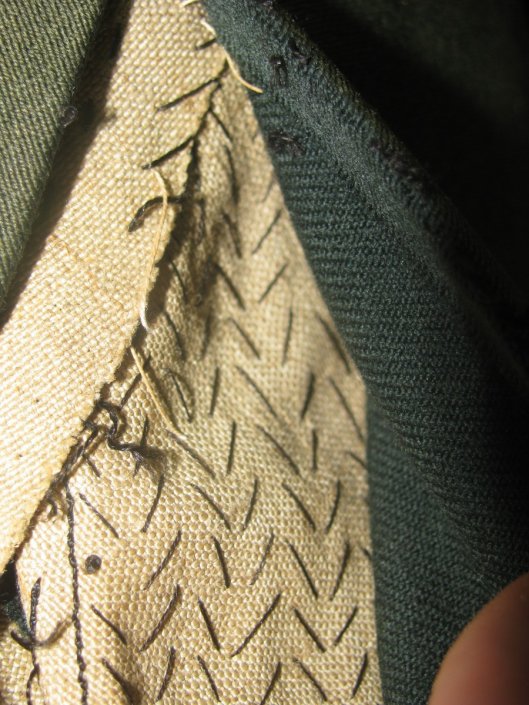
Most reproductions made today sadly lack the pad stitching in the collar, and the affect is very noticeable. The collar will blow around in the wind, lay in a different place every time the coat is put on, and more. Here is a photo of an original coat collar, pad stitched carefully and neatly. While some tailors will do some huge pad stitches, you’ll find that the collar will not be supported well enough, except on the very lightest of modern fabrics. It is much better to keep the stitching to about 3/8 of an inch at the most.
Starting on the other side of the roll line, make a single roll of pad-stitches, shaping the fabric gently with your thumb and fingers. This is the same technique used on the lapels earlier. You can see the collar really start to take shape at this point.
Continue the rows of pad-stitching until the entire collar is completed. At about the midway point, you may wish to check the fit again and adjust, before sewing the rest of the pad-stitches. Stop sewing until the inlays if you are not using them, or continue sewing all the way to the edge of the canvas if necessary. I ended up doing both on each end of the collar.

Pressing the Undercollar
Fold the collar along the roll line by hand, to have more control while initially pressing it. Then laying the collar over a tailors ham, carefully press the undercollar as shown. If you’ve made any adjustments for a long or short roll, the collar will not lay flat. This makes it very difficult to press, but just take your time and you’ll get it.

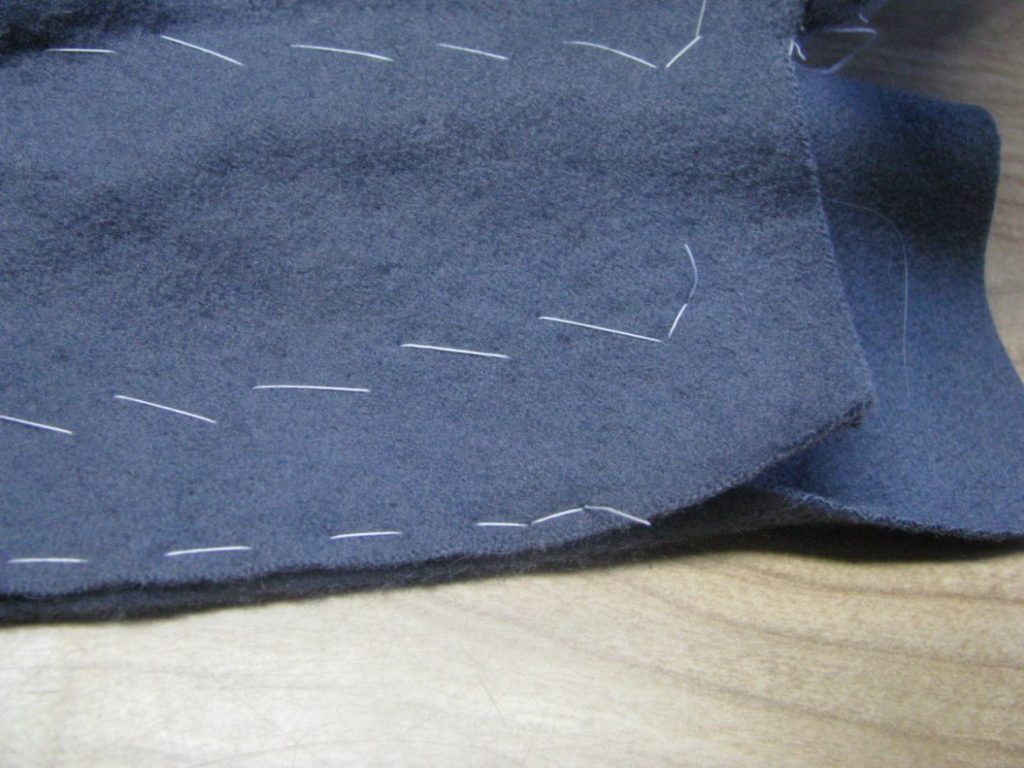
Trimming the Undercollar
The undercollar canvas must now be trimmed to the exact size of the finished collar. Carefully trim away any unused inlays at this point.
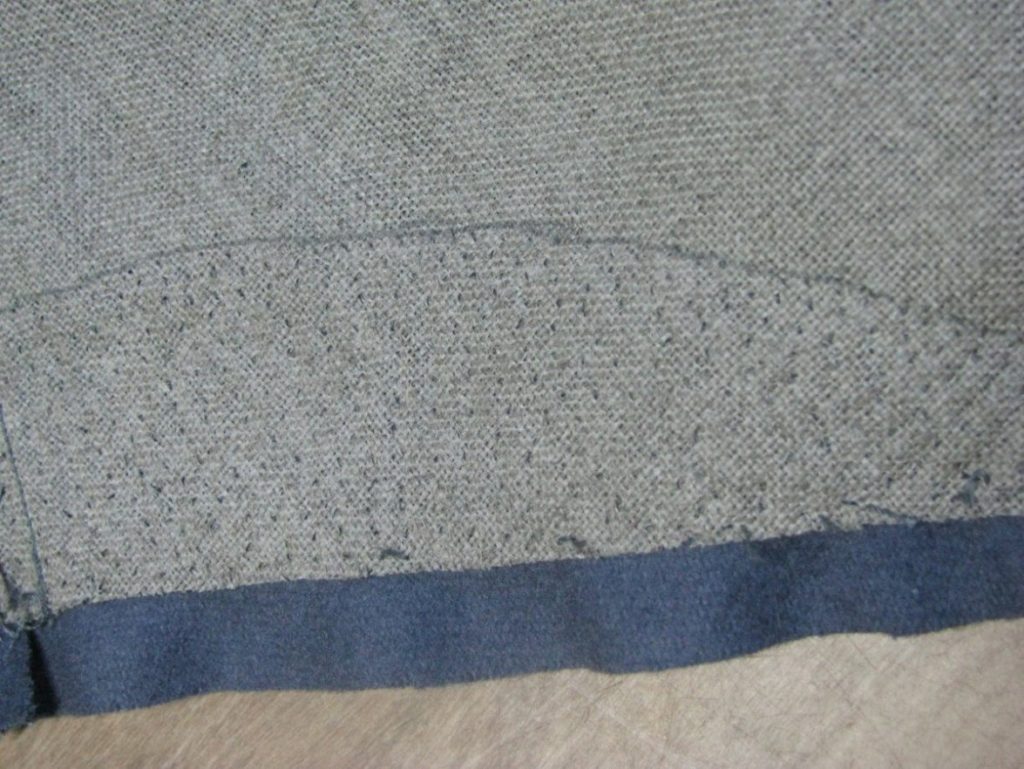
Since the collar is on a bias, it may have stretched out of shape slightly while padding. Measure various points as necessary to make sure they concur with each other, and make any adjustments if necessary. You may end up cutting out a few stitches if things are way off.
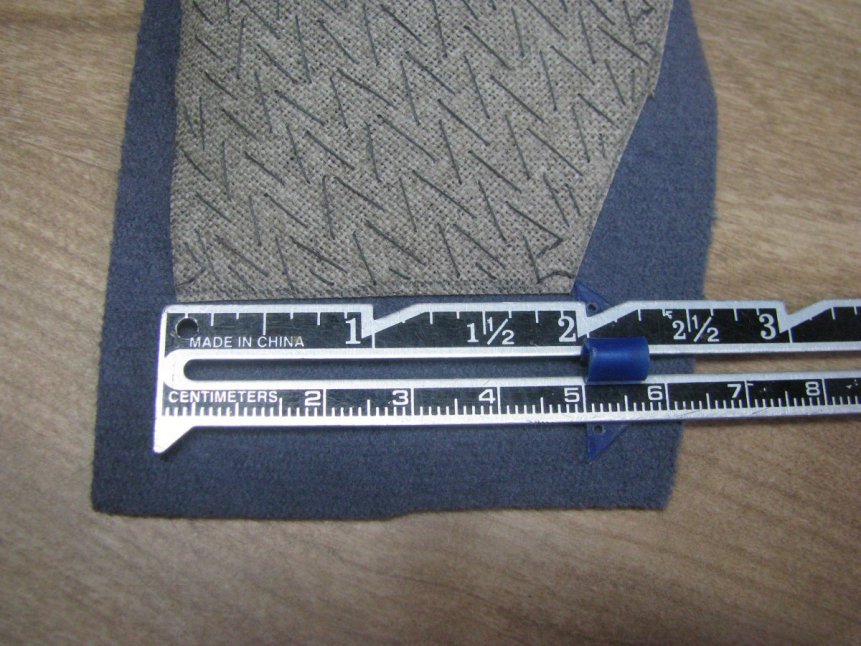
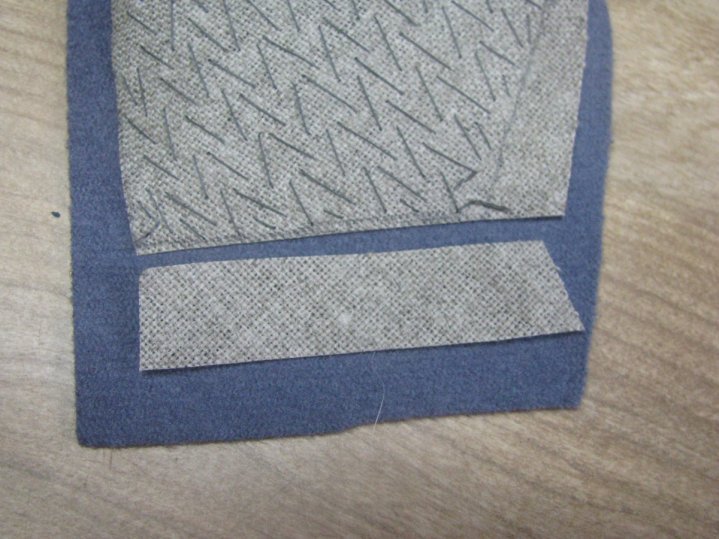
Along the bottom neck edge of the collar, mark out a precise 1⁄4” seam allowance on the wool, measuring from the edge of the canvas. Trim off any excess.
On the wool, extend the roll line from the canvas and mark with chalk, on both ends of the collar.
Trim along this line, stopping just before you get to the canvas.
For the rest of the undercollar – the top, ends, and bottom until the roll line, trim away the wool so that there is about 1/16” showing beyond the canvas.
Constructing the Undercollar
Collars of the period, and even to this day, were constructed in two steps. The undercollar was first attached, and then covered by the overcollar, giving a nice thinness that is lacking when the collar is constructed using other methods.
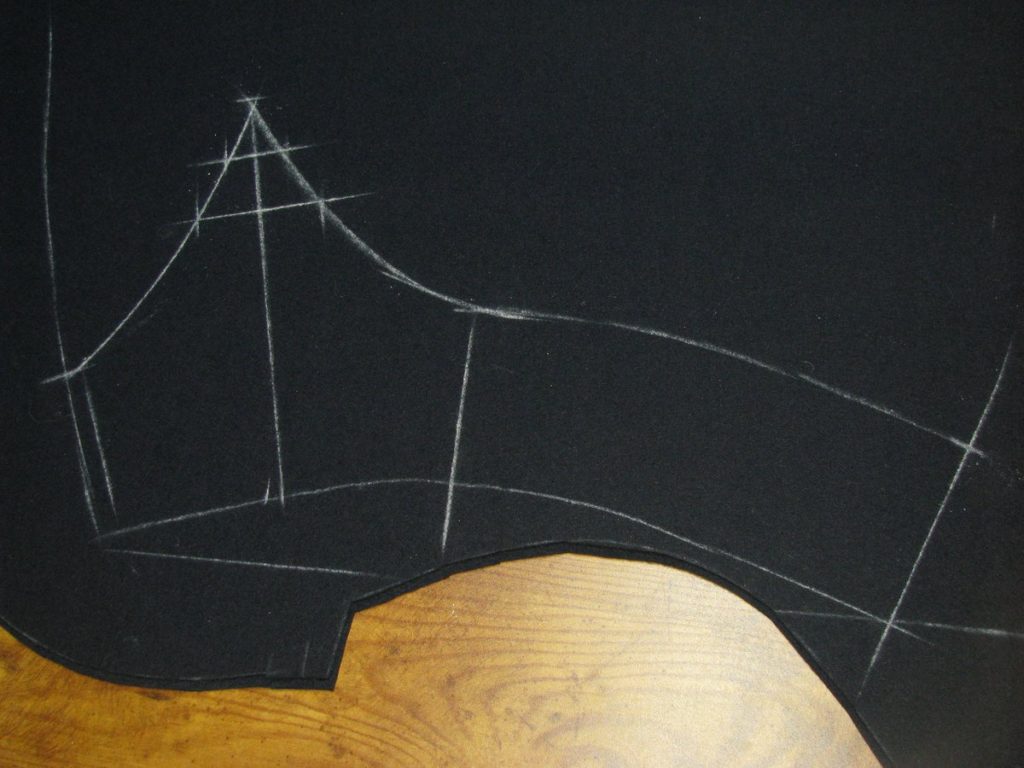
Begin by drawing a bias 45 degree line on your french collar canvas. Place the collar along the line, and carefully trace. The reason for the bias cut is to allow the collar to roll more gracefully and retain its shape.
I highly recommend leaving room for a small inlay at both ends of the collar, so that you may adjust the fit more precisely.
The roll line must be marked on the collar. I find the easiest way is to cut the collar pattern along the roll line, and use one of those pieces to trace the line.
Place one half of the collar onto the coat. You may have to baste it if you do not have a tailor’s form, but either method works just as well. It’s hard to see, but I marked the location where the bottom edge of the collar intersects the center back seam of the coat body.
You can see in this case I ended up using all of the inlay that I added to my collar. Due to the age of Devere’s system of drafting, things sometimes do not line up as they would with a more modern system, so it’s best to be prepared for all occasions!
Lift up the collar in the back, and mark again where it intersects the back seam.
Draw a line connecting the two points you have marked on the center back of the collar. Repeat with the other half of the collar, marking in the same location.
Baste the canvas pieces together, ensuring both lines are sitting exactly on top of each other.
Place the entire canvas back on the coat, either pinning or basting in place. It’s simply one more chance to correct any small errors you may have. At this point you will also want to ensure that the roll line on the collar lines up with the lapel roll line.
Machine or hand backstitch two rows of stitching on either side of the basting line. Trim off any extra allowance from the center back. Try to avoid what I did – cutting off the collar instead!
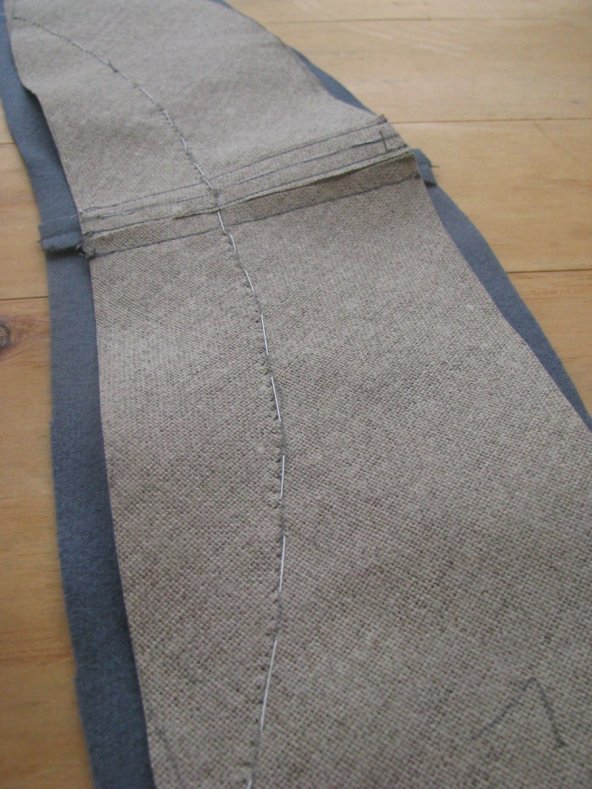
Cut the undercollar fabric in the same manner as the canvas, on the bias. Make sure to add about 1⁄2 an inch all the way around the pattern, as a seam allowance. This will be trimmed to 1⁄4 inch later, but it’s easier if you have some room to play with.
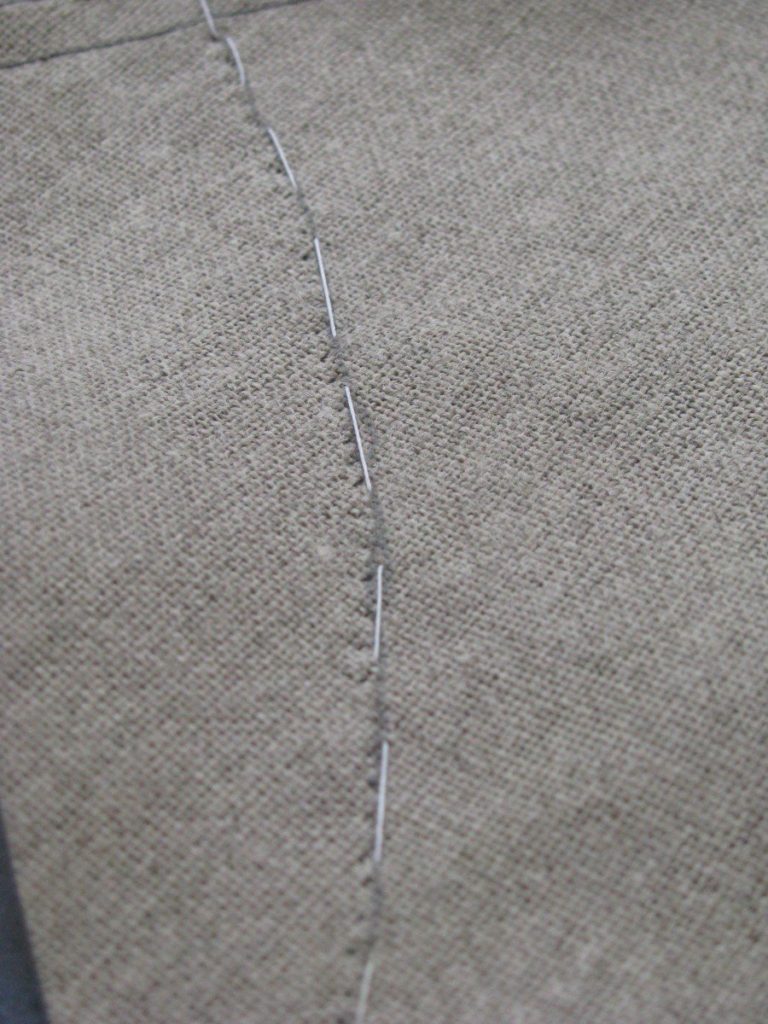
Sew the undercollar wool right sides together, at the center back. Fitting isn’t important, since that’s taken care of with the canvas.
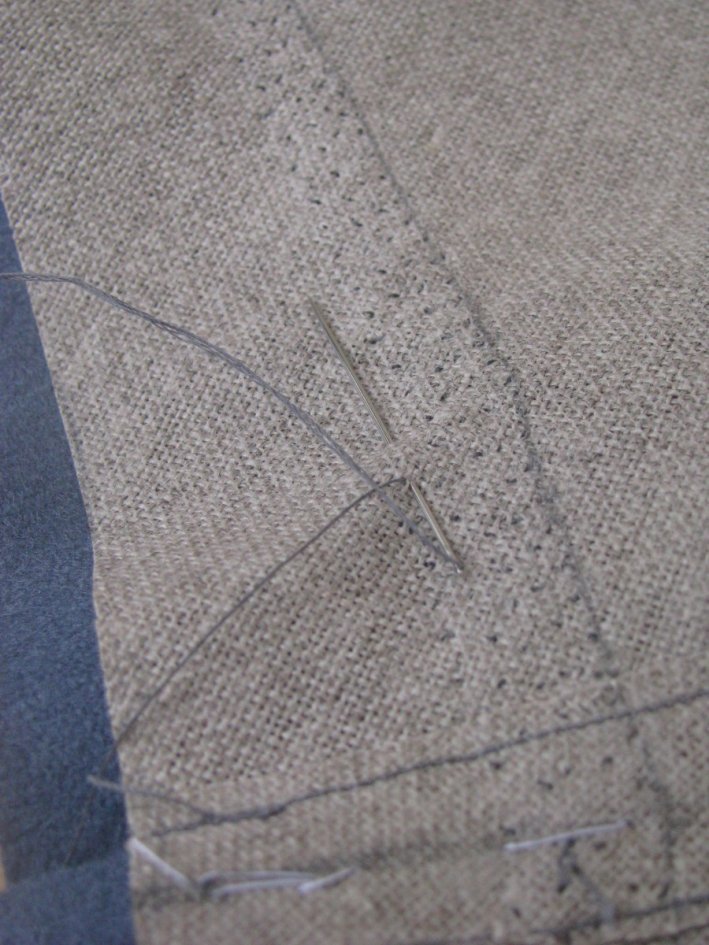
Place the canvas on the wrong side of the wool undercollar, and baste together along the roll line.
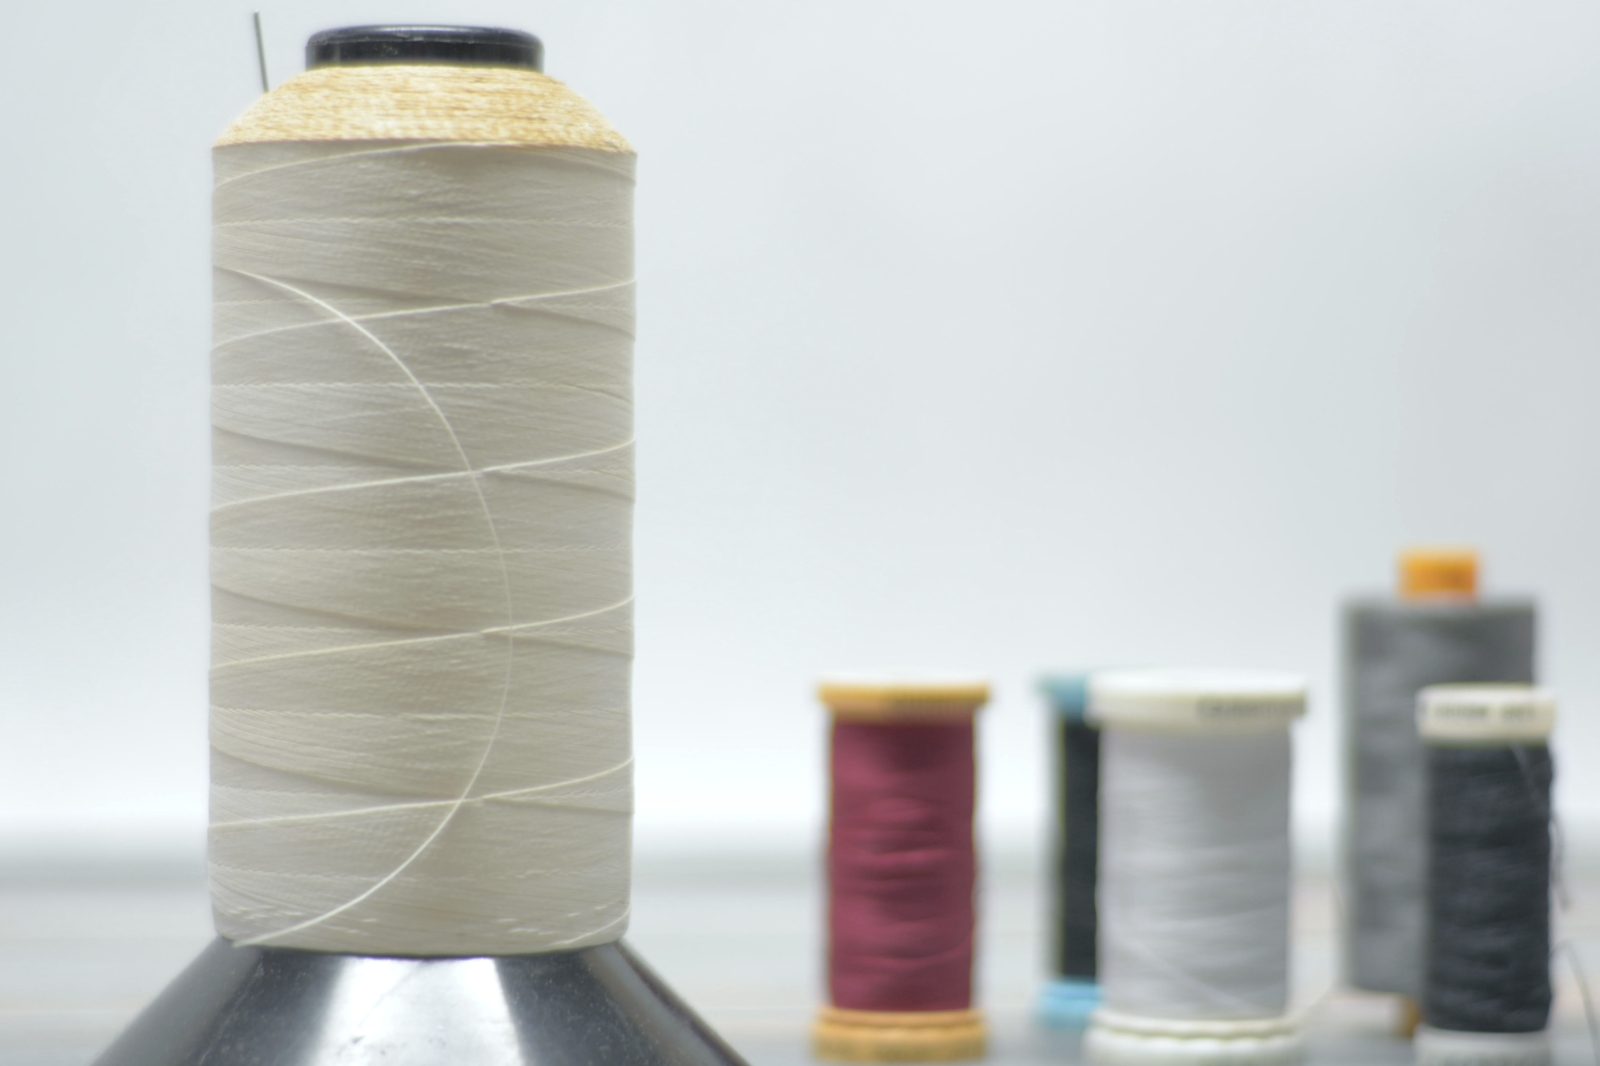
Thread Selection
Choosing appropriate thread for your hand-sewn historical projects can feel very intimidating at first. In this brief guide, I’ll recommend some thread to get started with, as well as the various types of thread I use on a day-to-day basis.
If you’re completely new to hand-sewing and intend to follow the lessons in this introductory course, I recommend starting with a cotton thread by Gutermann. It has the benefits of being on the more affordable side, while being easy to work with, especially if you wax and press it before using.
You’ll also want some cotton basting thread, which I’ll discuss more below.
It’s really a good idea to get experience with each of these threads as you can, so you can develop a feel for how each of them works and what you can use it for.
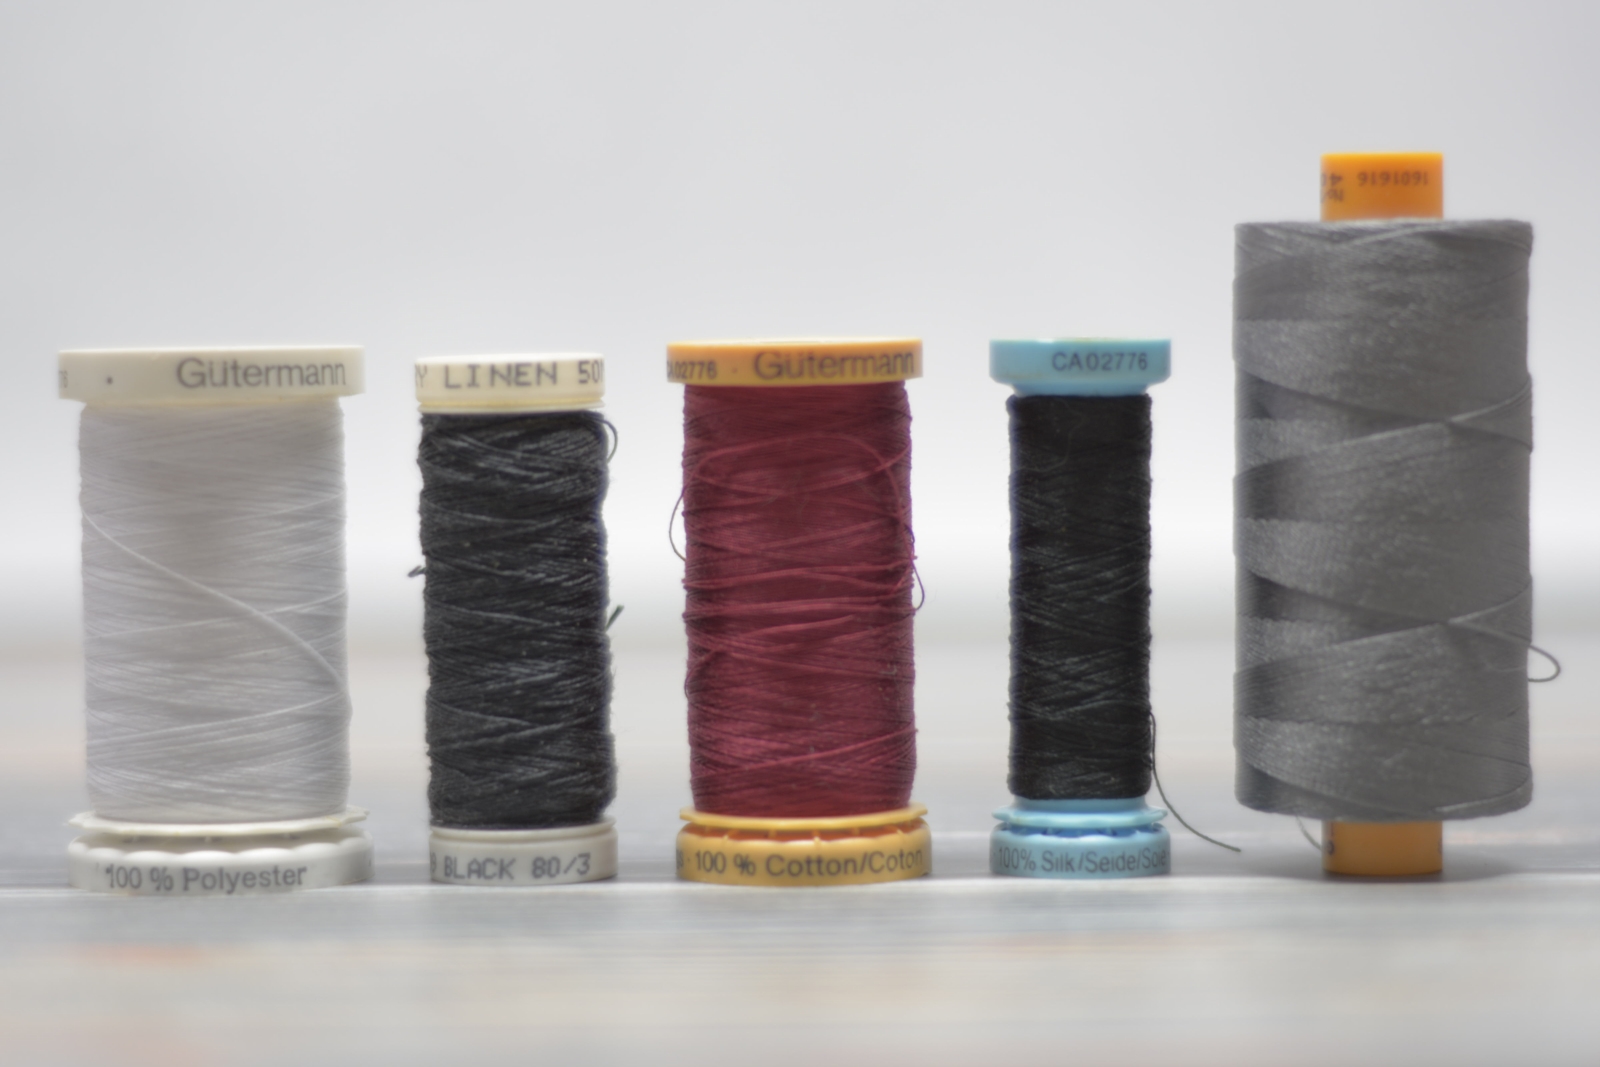
Polyester thread
Polyester thread is not used in historical tailoring, being a modern invention of the 20th century. But I definitely make use of it when sewing up muslin toiles and mock ups, as it is the most affordable of the various threads for the most part.
Linen Thread
Linen thread is among the oldest of the threads, with threads and fabric of linen being used since the time of ancient Egypt. It was used extensively at least in the 17th through 19th centuries, until cotton thread became more widely available. I tend to dislike linen thread due to past experiences with breaking and knots, so it’s very important to get a good quality thread and of course wax and press it before use. It could work well with linen coats and other clothing.
Cotton Thread
Cotton thread was first developed at the beginning of the 19th century and became more popular as the century went on. Most cotton thread today is mercerized, a process developed by John Mercer in 1844 and that didn’t come into common availability until the 1890s, which makes the cotton thread smoother, stronger, and better able to take dyes.
So the problem with cotton thread is that it’s very difficult to find unmercerized cotton thread as would have been common during the 1860s. There are pages upon pages of debates in various reenactment forums on whether or not to use cotton thread, and so these days I just stay out of the argument altogether. Use it if you wish, recognizing there is a slight difference from the originals.
I tend to use cotton thread on silks and linen garments for the main construction, as well as for the various cotton pieces such as pocketing, canvas construction, and so on, as the slightly weaker thread will break before the garment’s fabric will wear out, making for a relatively easy repair.
Silk Thread
Silk thread comes to us from China, with recorded usage of at least 5000 years. During the late Middle Ages and onwards it was brought to Europe via the silk road. I love using silk thread on my woolen garments, as the elasticity of the thread compliments the pliable hand of the wool, helping the various pieces to move more as one unit. I’ll also use it for top stitching on silk garments, but avoid it for main construction as it is strong enough to cut itself out of the seams.
Silk Buttonhole Twist
Buttonhole twist, although it can be found in polyester versions these days, was made from silk during the 19th century, and this is what I prefer for all of my buttonholes. It’s also great for attaching buttons and will hold easily for a decade or more of rough usage. The thread is produced in such a way that the thread will naturally want to form itself into a purl when working a buttonhole stitch. Cotton was also used for buttonholes but I’m not sure if it was made in the same twist pattern.
Cotton Basting Thread
Probably the most important thread on this page is the lowly cotton basting thread. This thread is slightly thicker and has a finish such that the cotton fibers help to grab onto the material to hold it into place while sewing. This is definitely something you’ll use everyday. Pictured is the five-mile-long spool I bought in April, 2009. It definitely lasts a while.
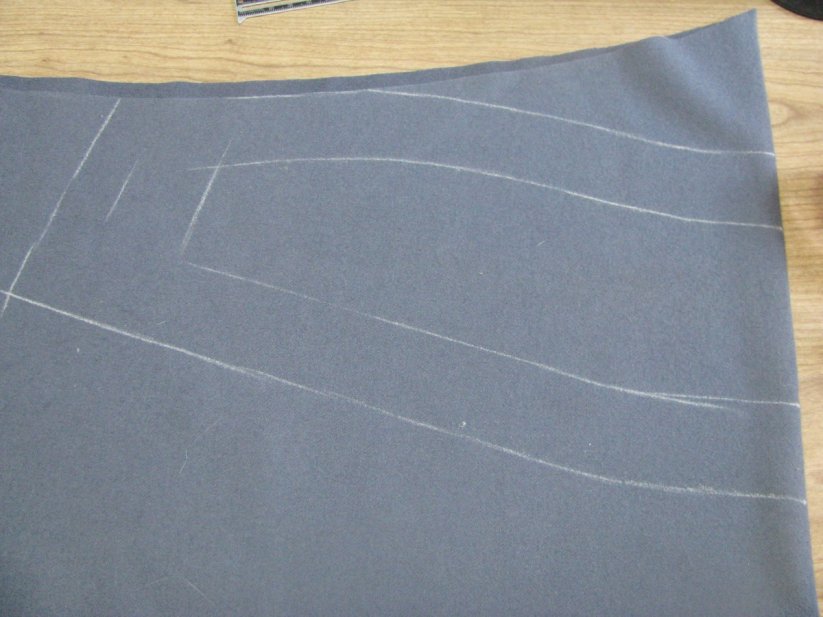
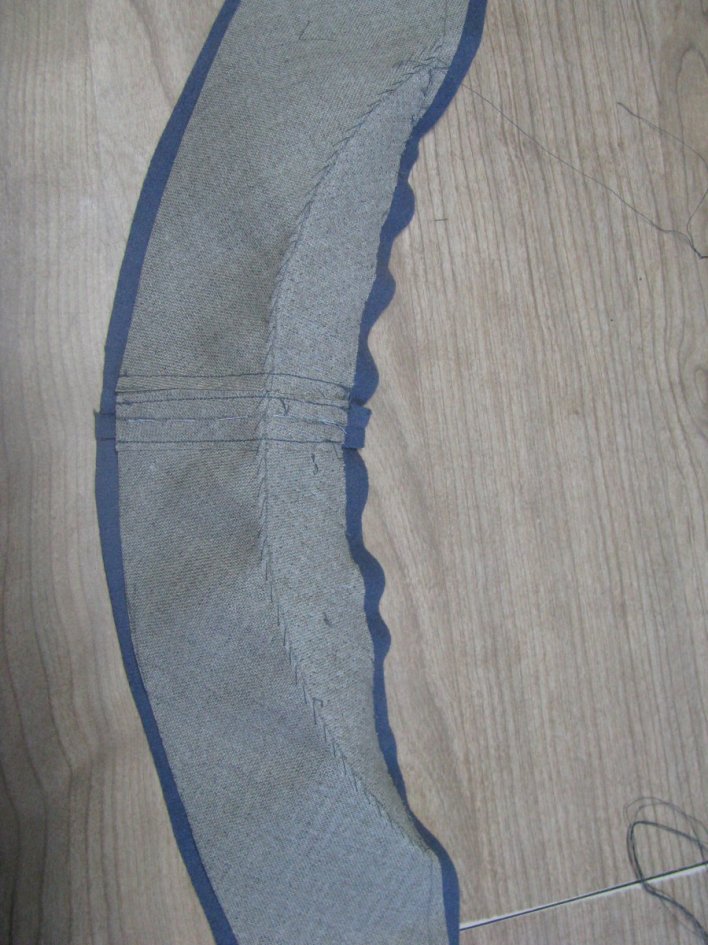
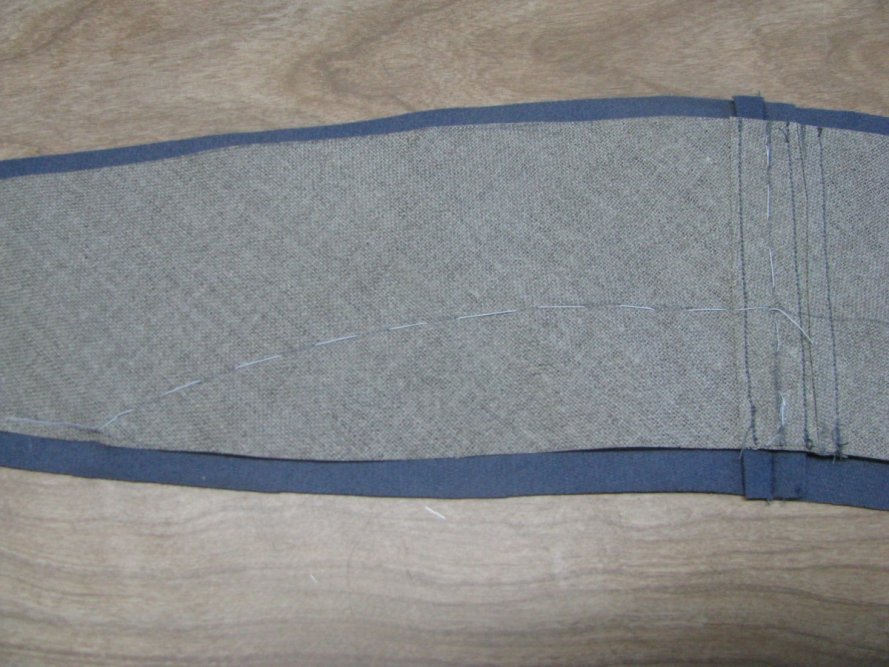
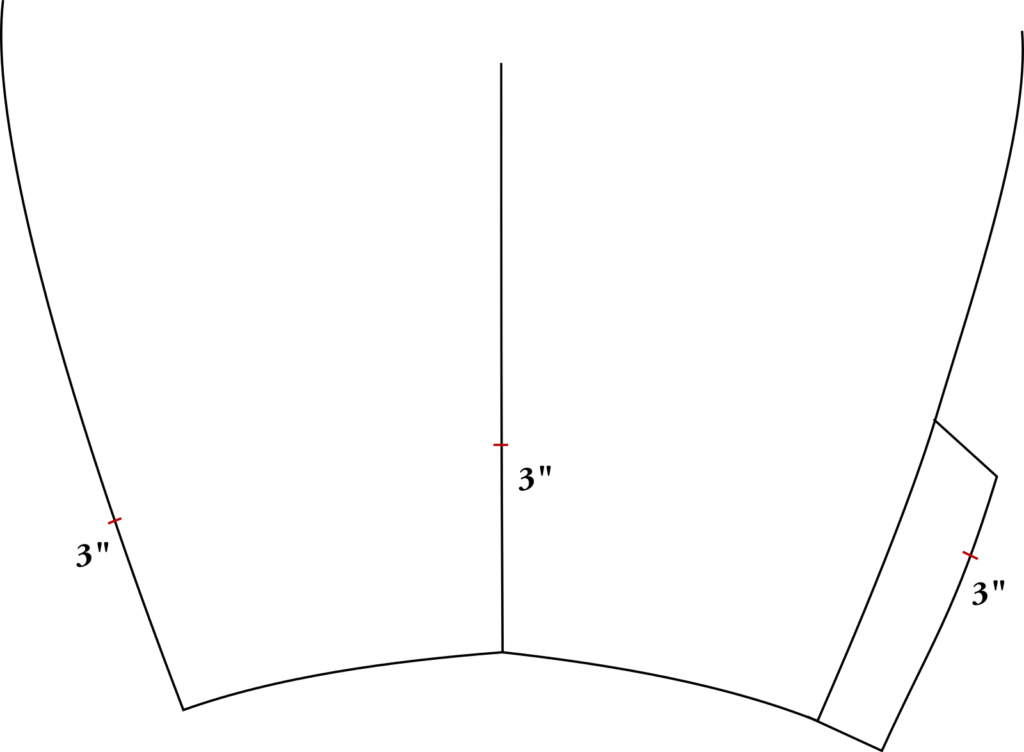
Drafting the Cuff
We’ll use the sleeve itself as a template for drafting the cuff, as using the paper gets complicated when dealing with the seam allowances that are present there. I like to draft the cuff directly on the cloth, simply because it’s less time consuming to do, and there is less room for error.
Note that all of these measurements are based on the original coats and photographs I’ve been able to look at. They can be altered as necessary to match the particular coats you are reproducing.
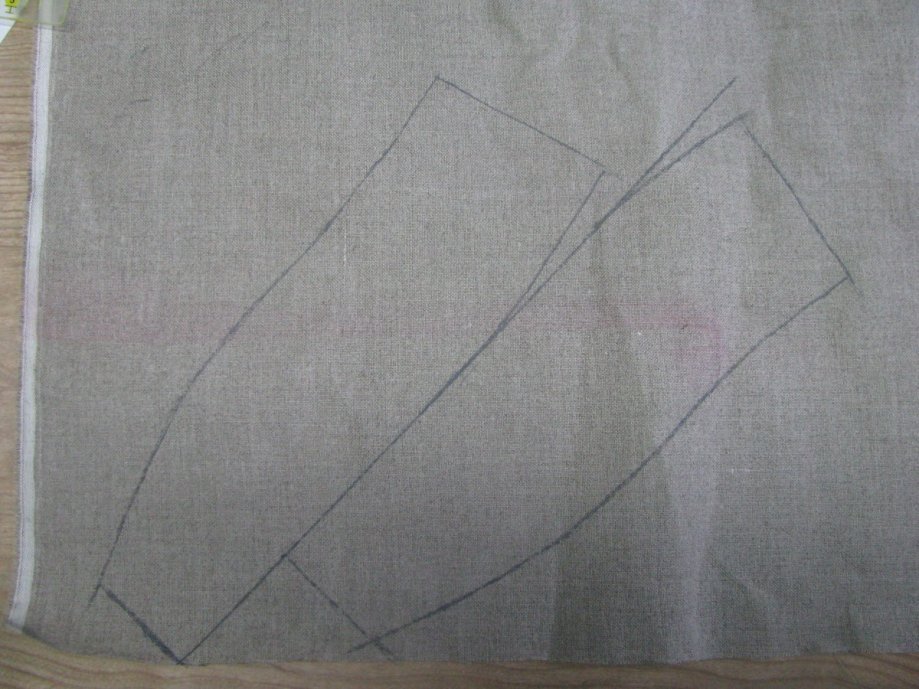
First draw a line crosswise on your fabric so that you have a base to work from. Place the sleeve down so that the ends are touching this line, and the vent inlay is to the right.
Trace around the bottom of the sleeve, and about 5 graduated inches up either side. You can draw further up if you wish to better see how the sleeve looks when drawing the cuff design.
Extend the center seam line down to the baseline, and lift up the sleeve. After removing the sleeve, you can continue this line straight up for another five inches or so to give more visual aid (This is that line in the middle for more clarity).

Measure 3 inches up on either side, as well as the center line. This will mark the top of the piping line, seam allowances included.
On the cuff line, between the left seam and the center seam, mark the midpoint of the line.
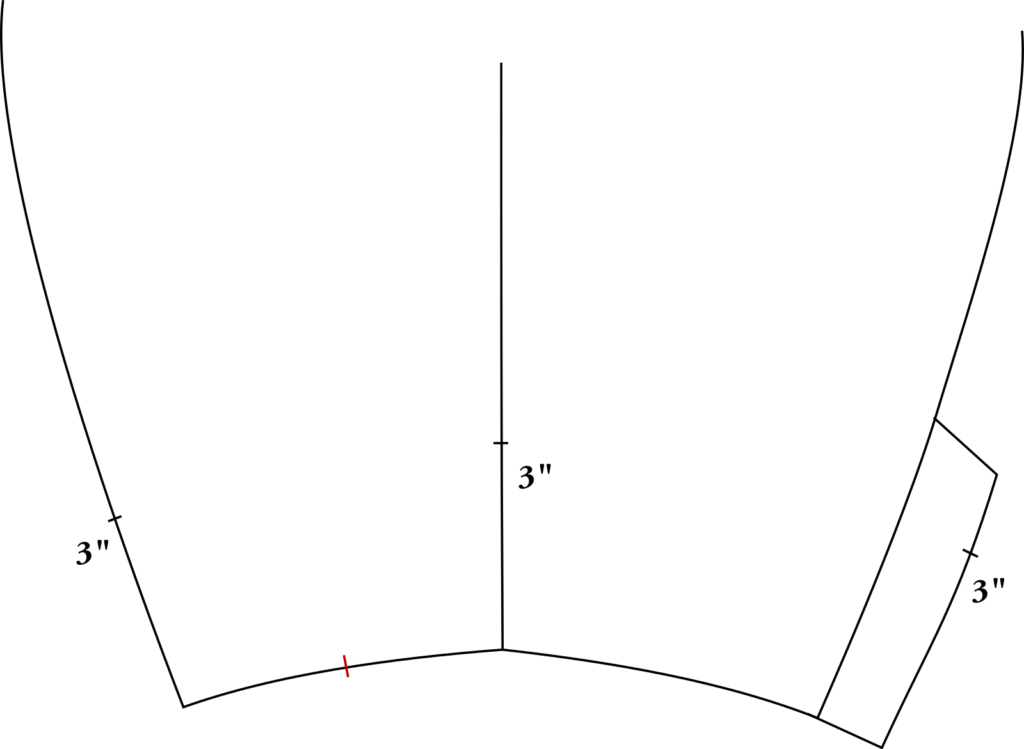
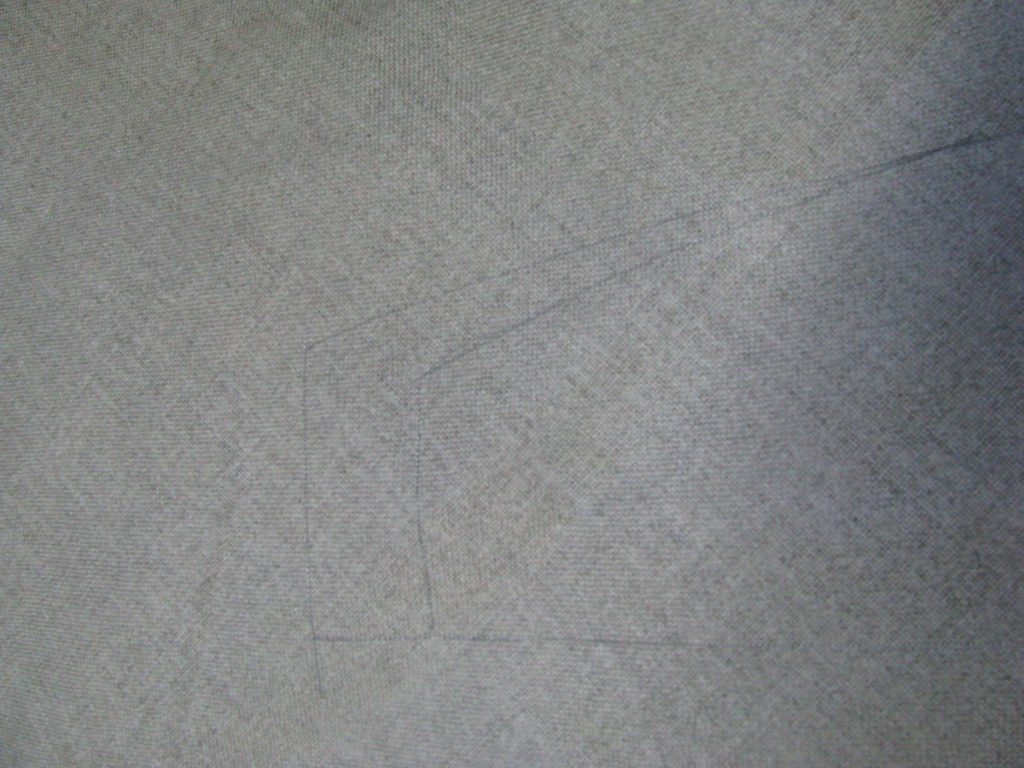
Note: it’s not pictured here, but in drawing this next line, move the starting point (that you just marked) 1/4″ towards the center, to account for the seam allowance, so that the chevron doesn’t appear off center. I photographed it below but somehow forgot to include it in the drafting instructions.
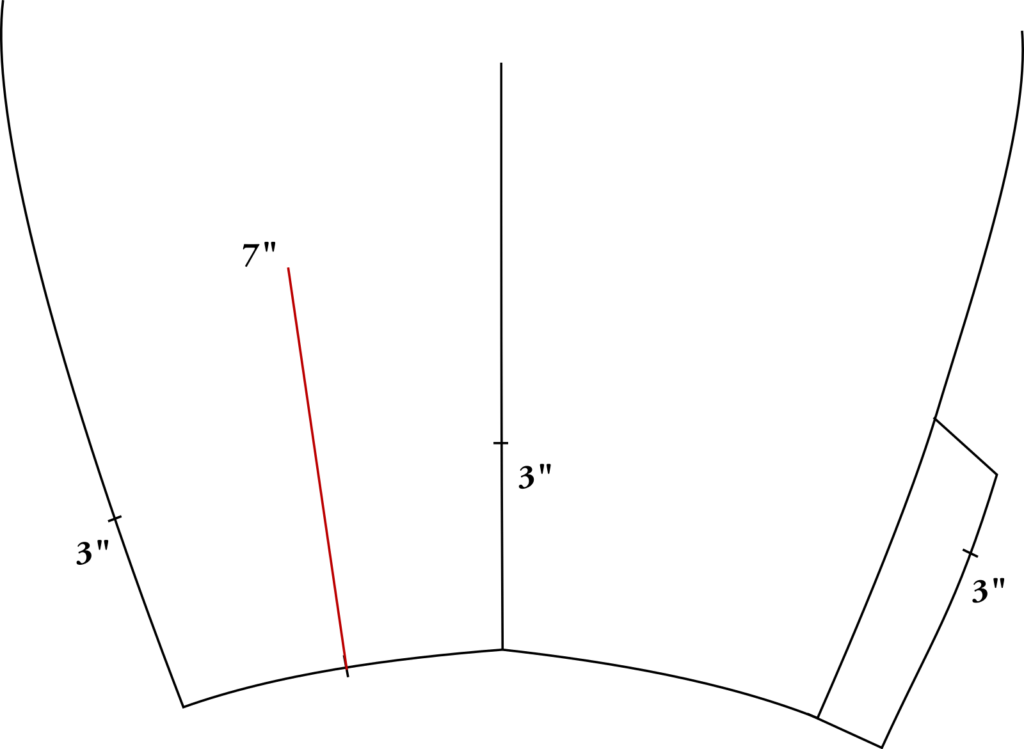
Draw a line at about 90 degrees from the midpoint. It’s actually slightly closer to the center seam line, so it’s not exactly 90 degrees. If you do leave it at exactly 90 degrees, you’ll find the point of the chevron falls too close to the vent opening. The line should be about 7 graduated inches long.
On the left side, lightly chalk the seam allowance, as a visual aid. This is not a cutting line.
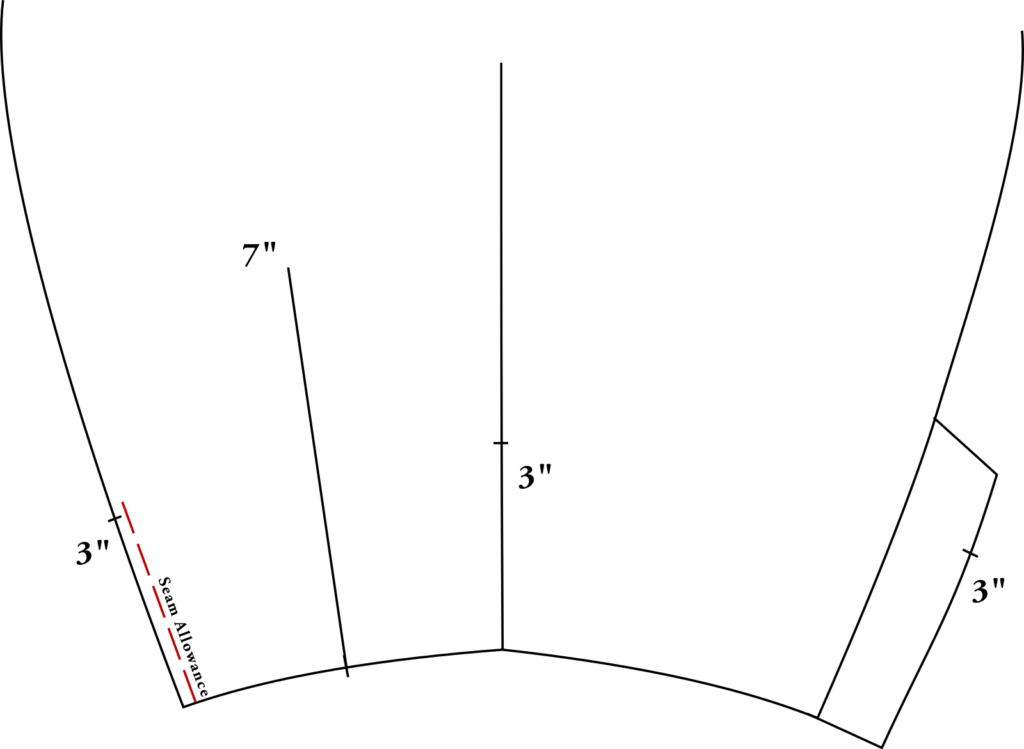
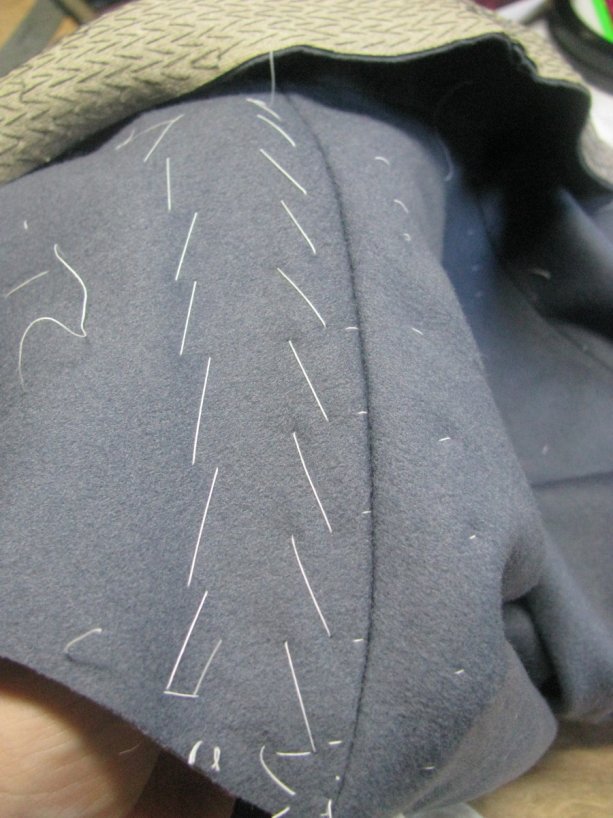
On the midpoint line, mark a line, at 6 inches, that is 1 inch wide, centered on the line. Do the same at 5”, but make it 2 inches, centered. This gives us a guide to help make both halves of the chevron identical.
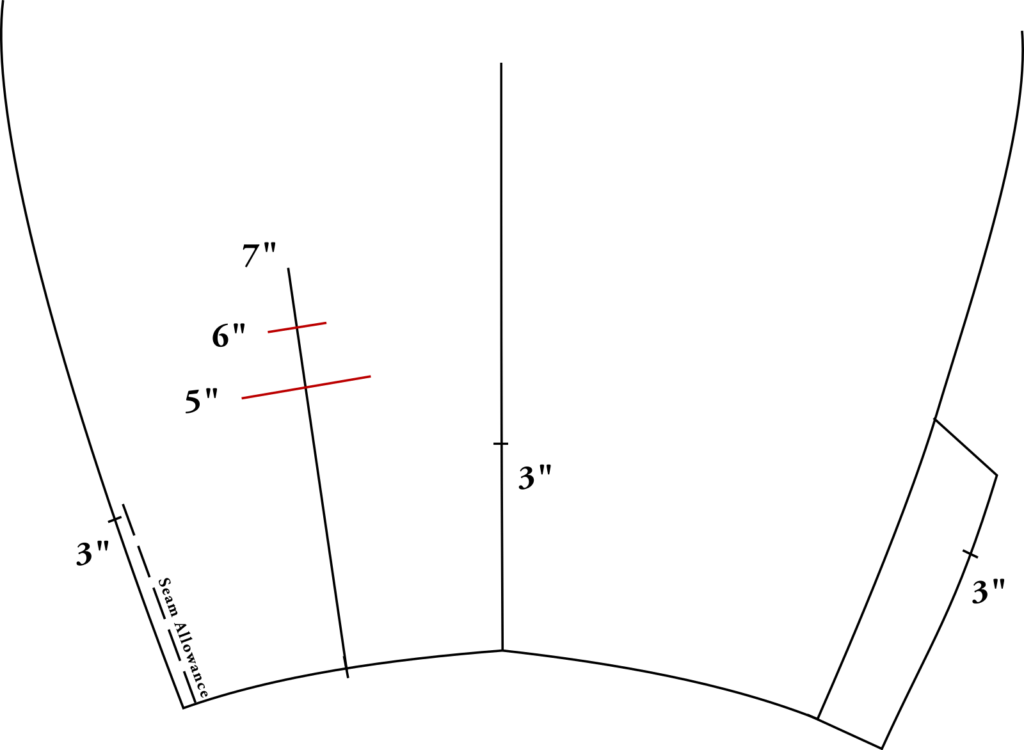
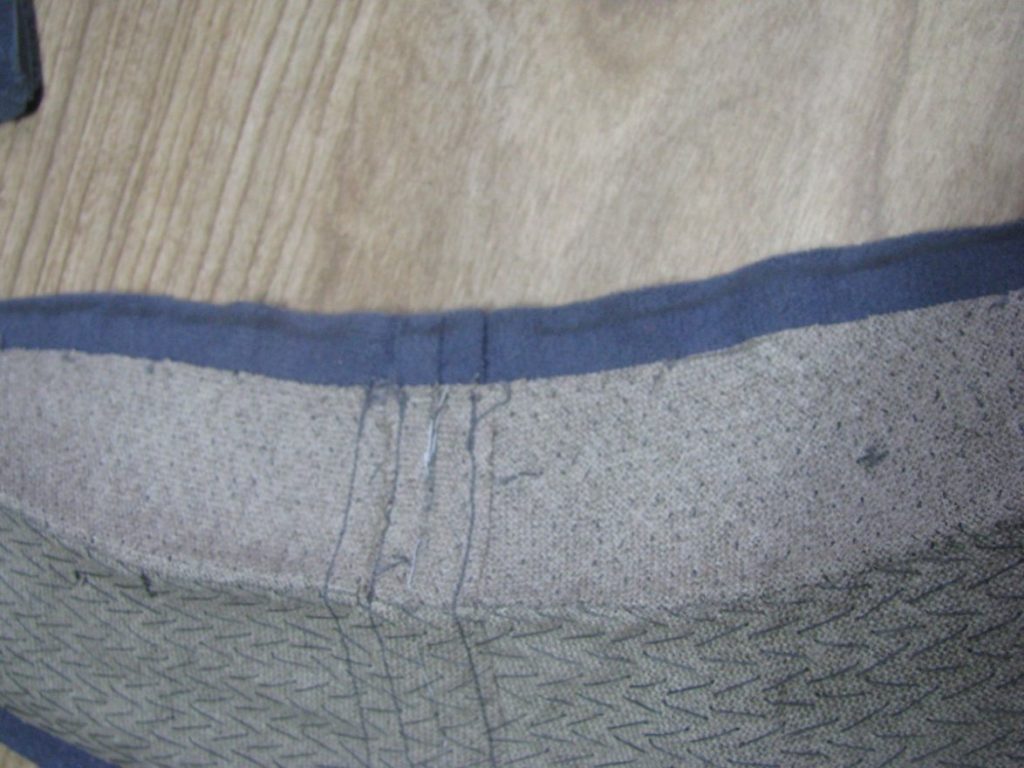
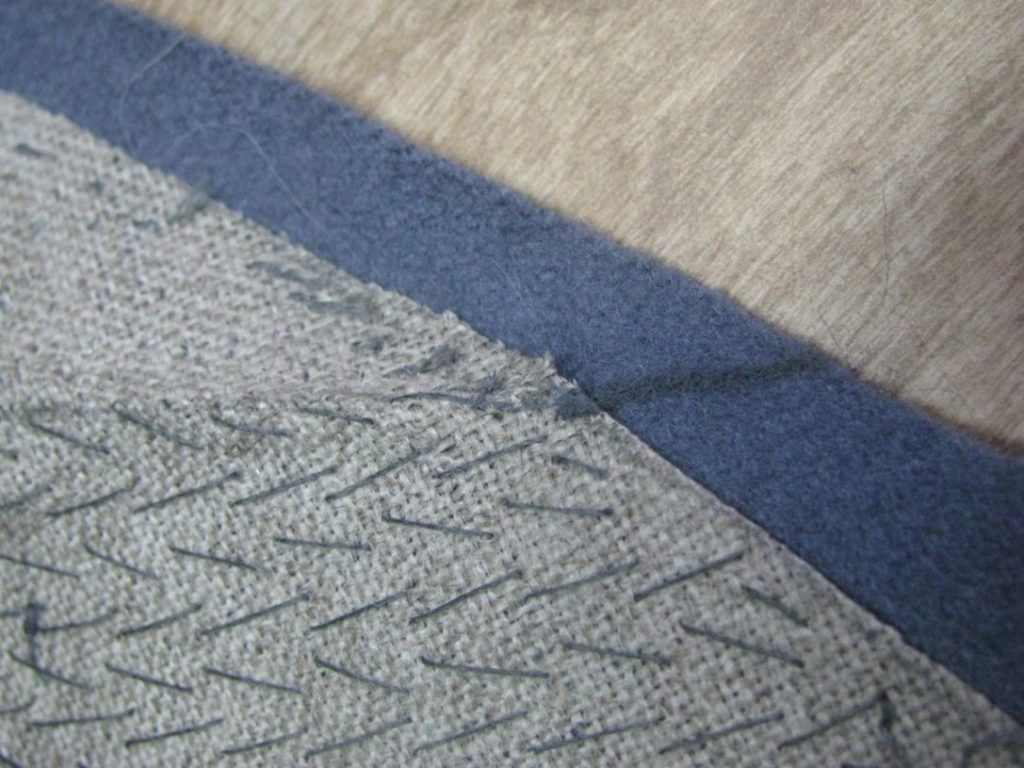
Draw the actual chevron and cuff shape, starting from the left. The curve does not actually start until just after the seam allowance marker. Try to make the curve meet both of the horizontal construction lines, but if it’s not exact, that’s okay. Just try to make it look nice. After hitting the point, come down on the other side, matching the first half of the chevron. The line continues through the middle seam, and arcs upward slightly to match the curve of the cuff. The line ends at the right side at the edge of the inlay.
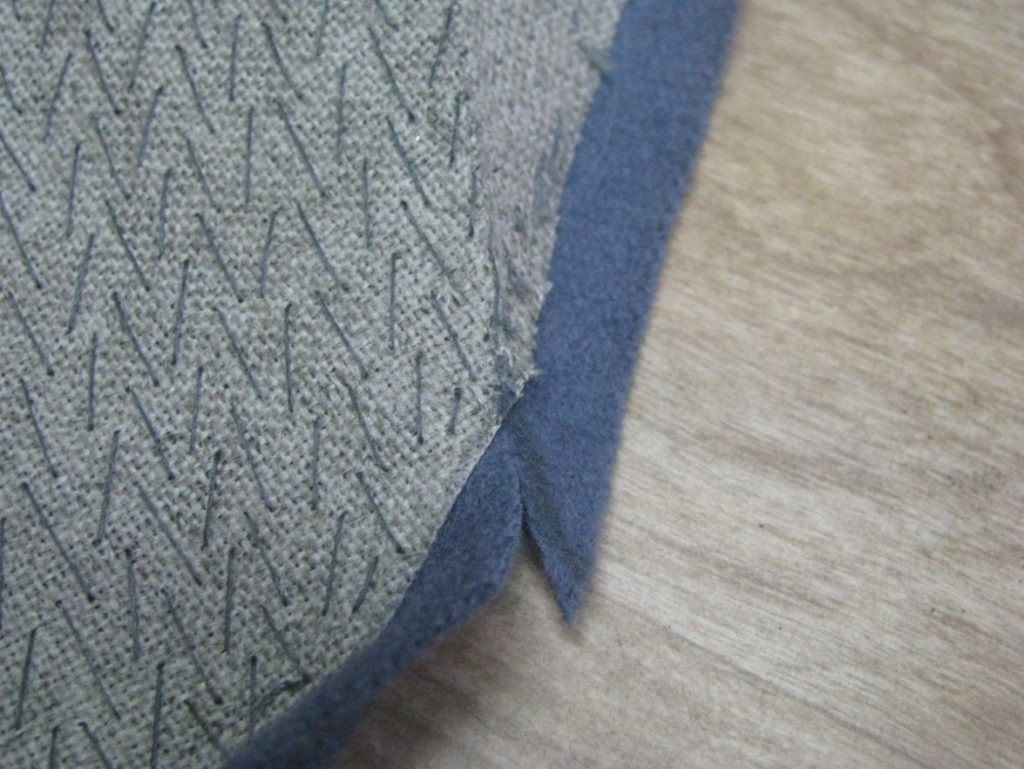
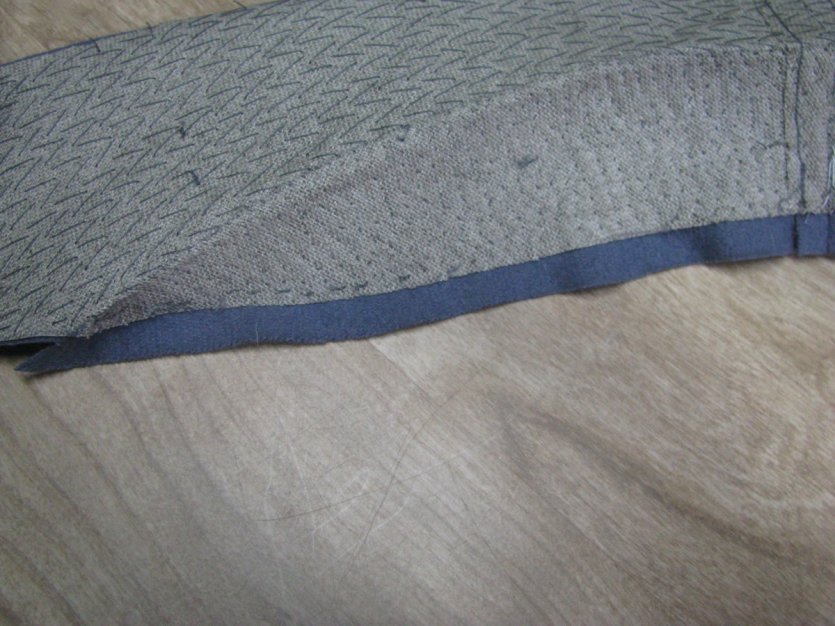
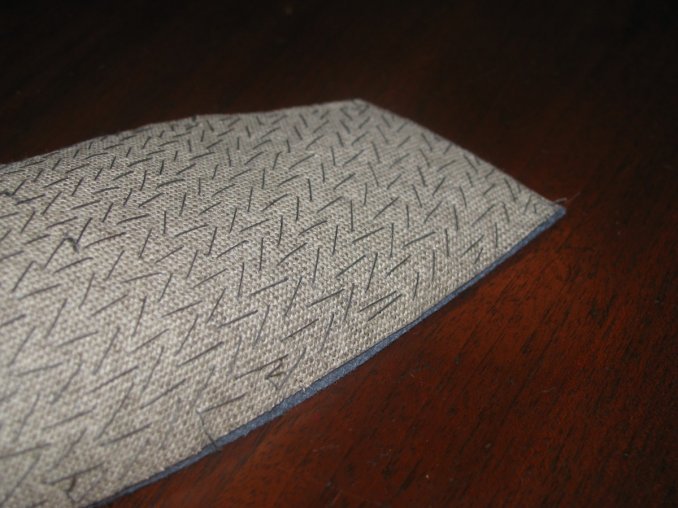
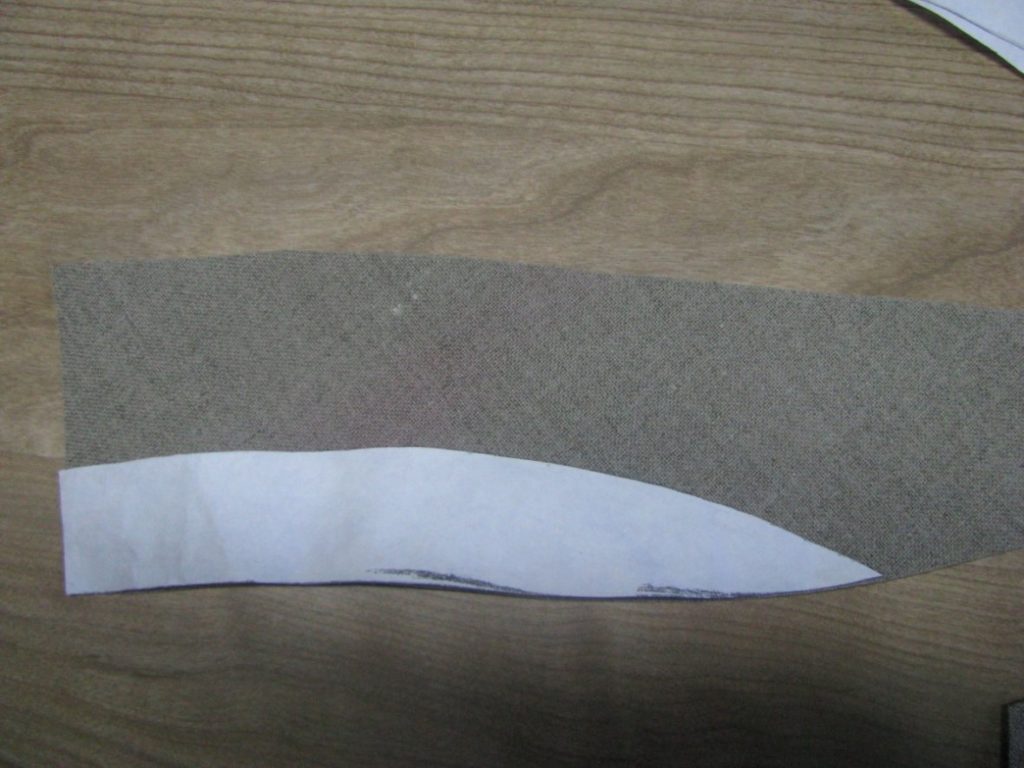
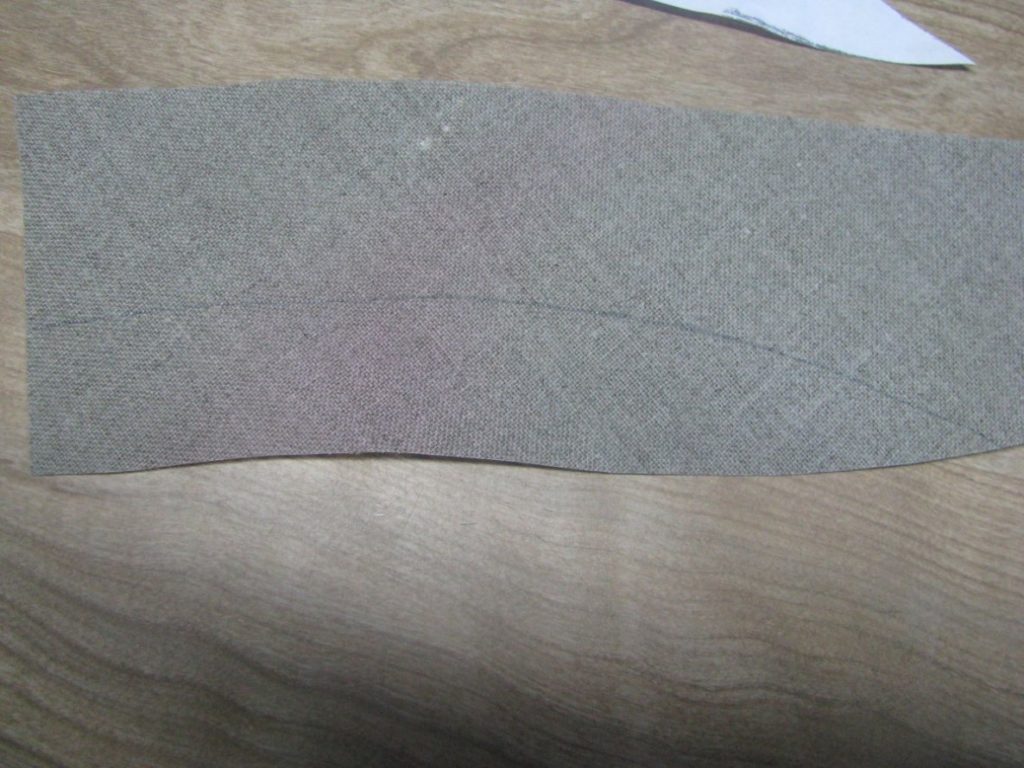
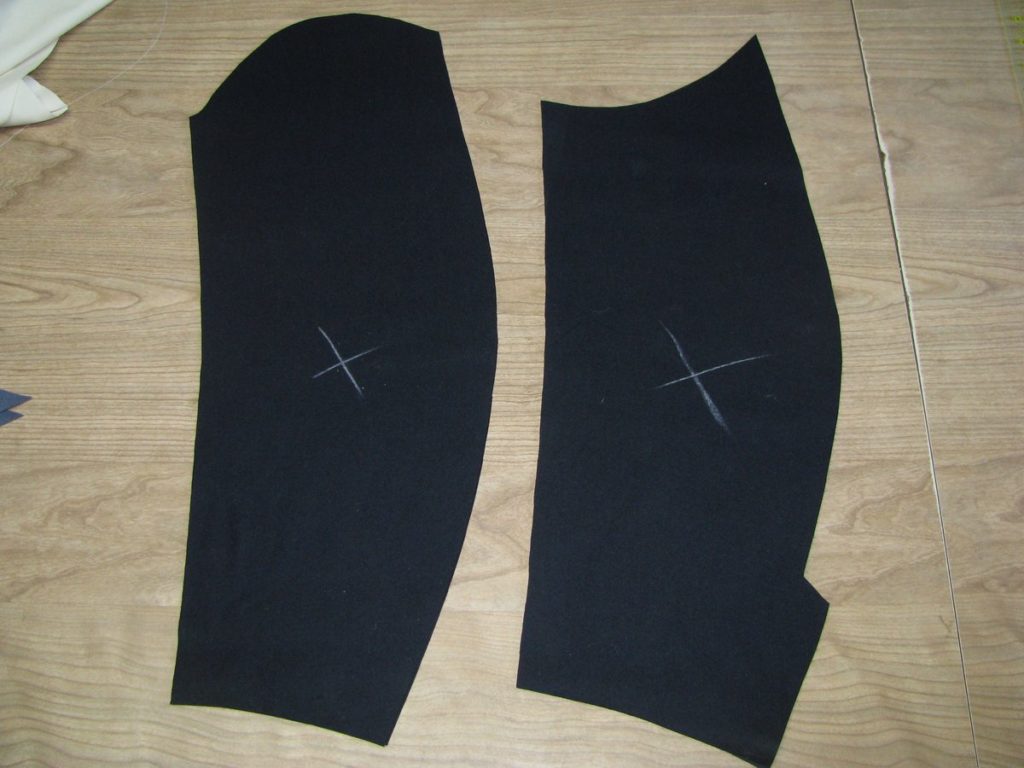
Cut out this whole piece on the doubled cloth, which should be the same size as the sleeve on the sides and bottom.
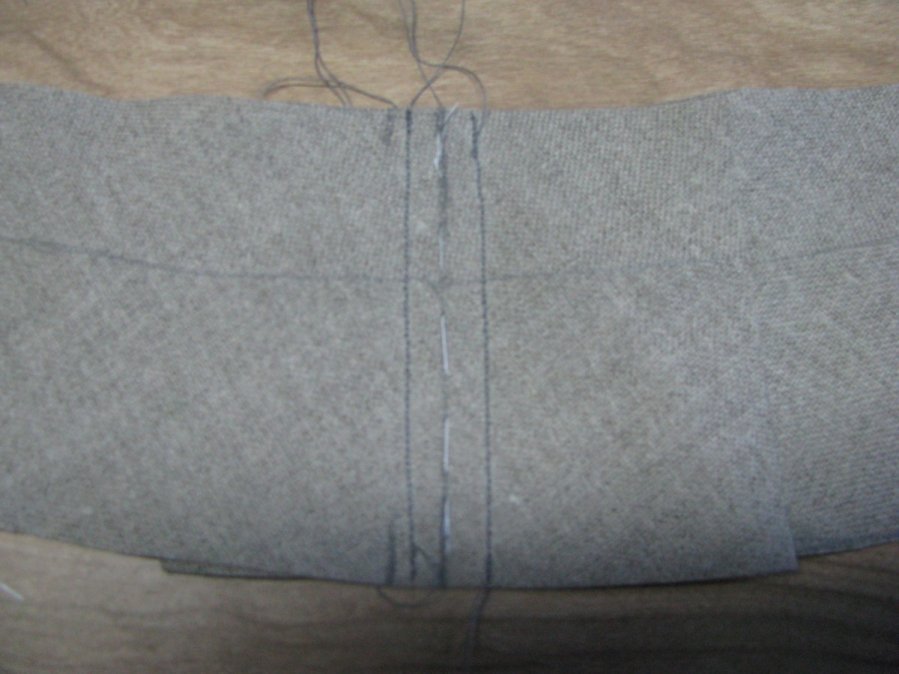
Front Seam
After you are happy with the fit of your sleeves, you can cut them out of the wool. Make sure the grain lines are aligned properly, as well as the direction of the nap.
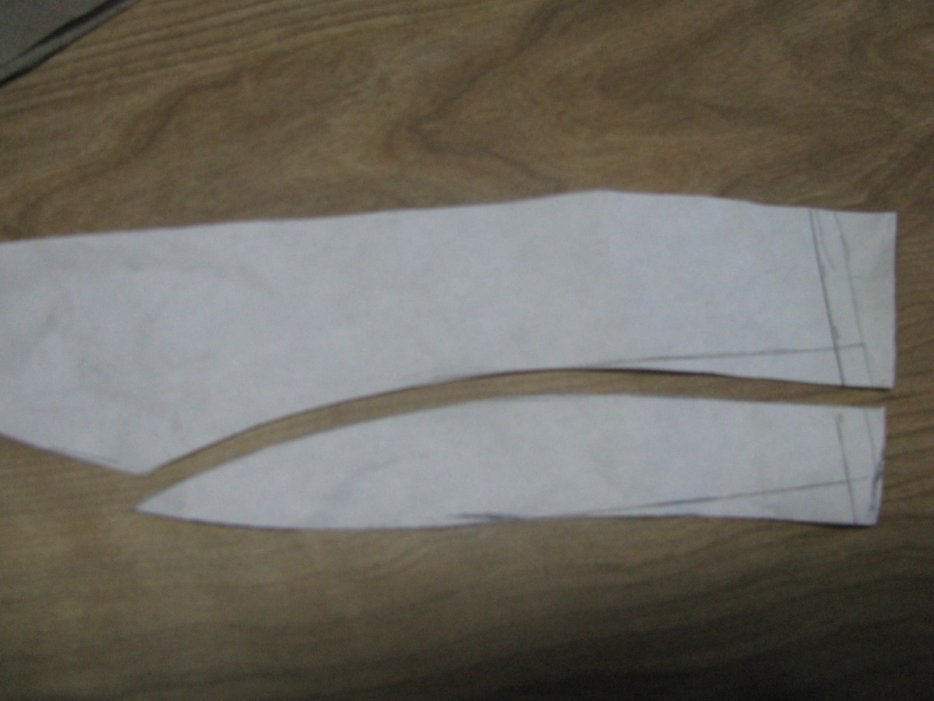
The first step is to baste together the front seam, with right sides
together.
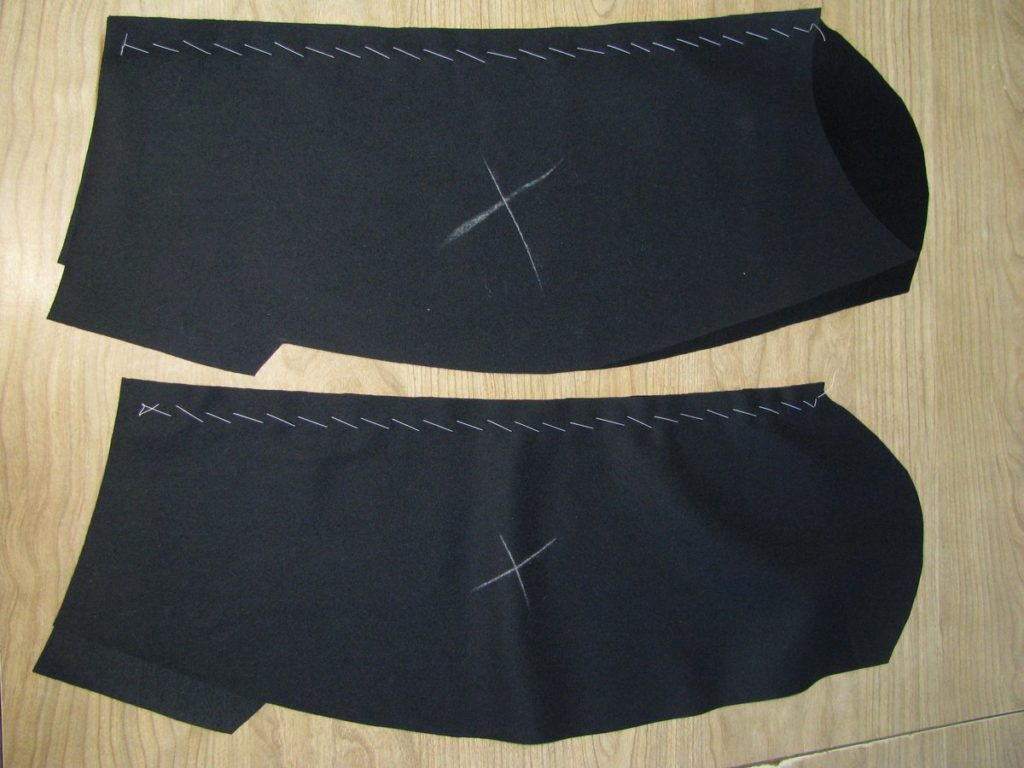
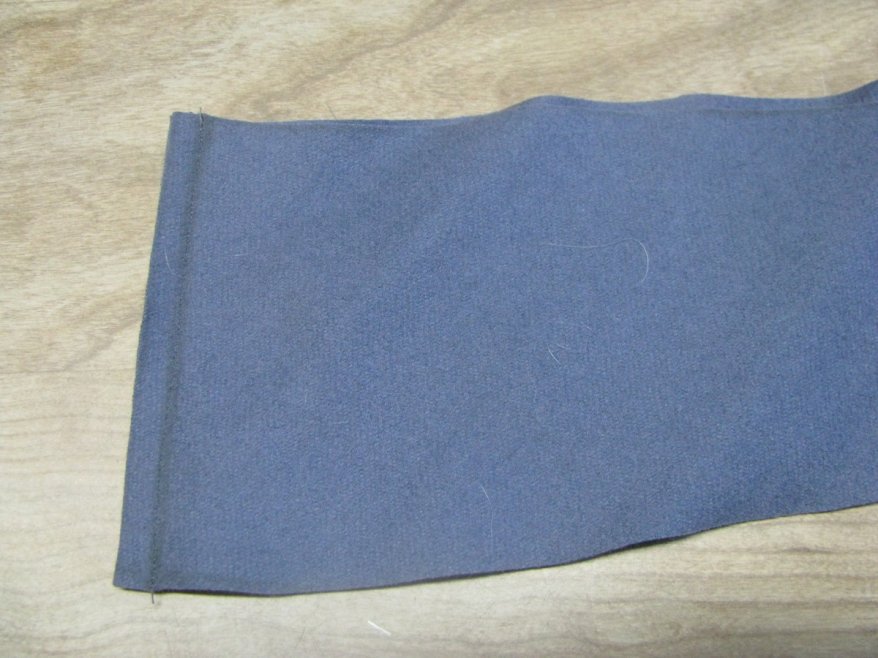
Sew the seam, and press open well, using a seam roll.