Month: February 2021
Drafting the Pleated Front
Drafting the pleated front can seem a little tricky at first, but after you get the first pleat or two down it all starts to make sense.
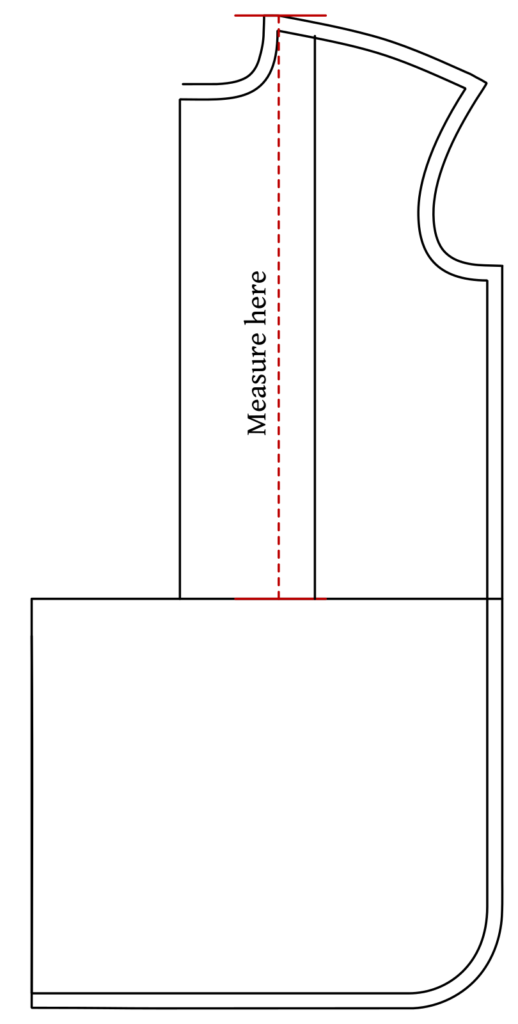
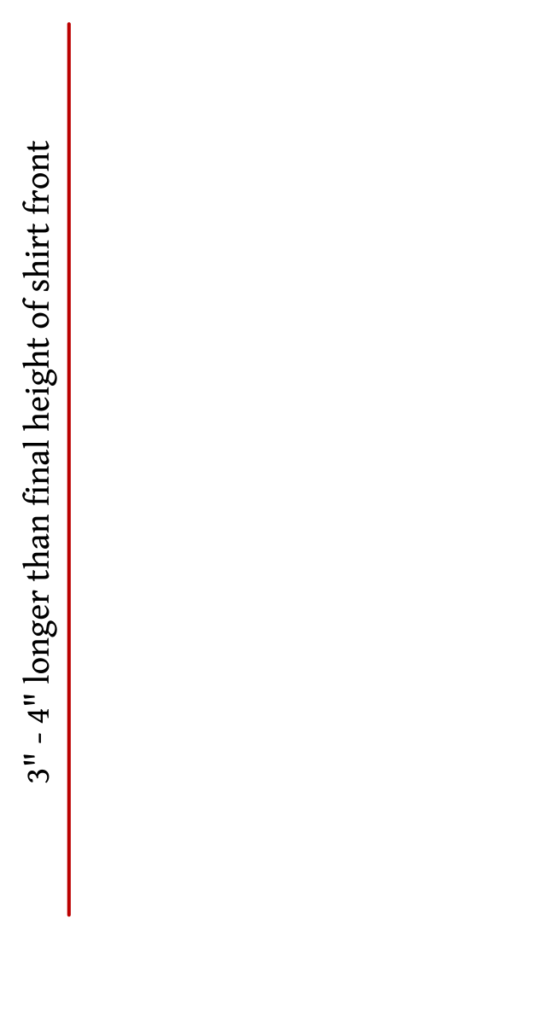
First, you need to measure the distance between the top of the pleats at the shoulder, including the seam allowance and the bottom of the pleats. Add 3″ or 4″ to this measurement, giving us the height of the pleats we will draft. When constructing the pleats, it’s easy for things to get out of alignment, so the extra inches give room for error.
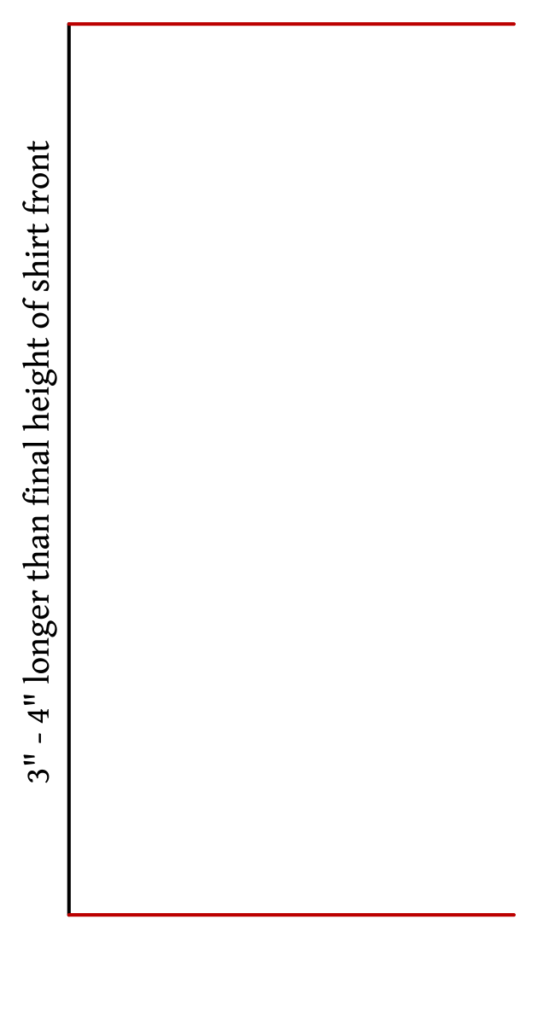
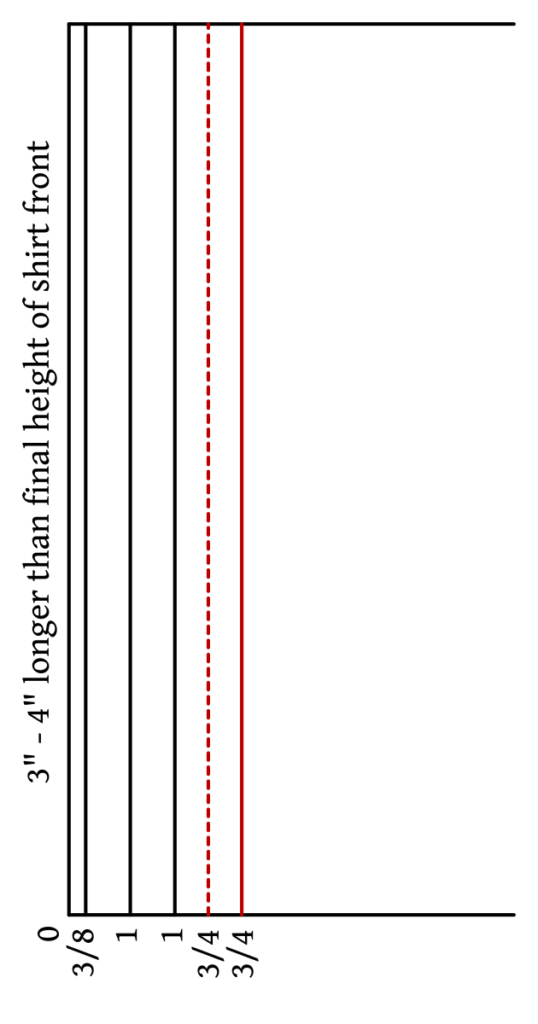
On a fresh sheet of paper, draw a vertical construction line 3″ to 4″ longer than the total height of the pleat length.
Square out at the top and bottom of the line. These horizontal lines should be around 20″ or so in length so that you don’t need to redraw them later.
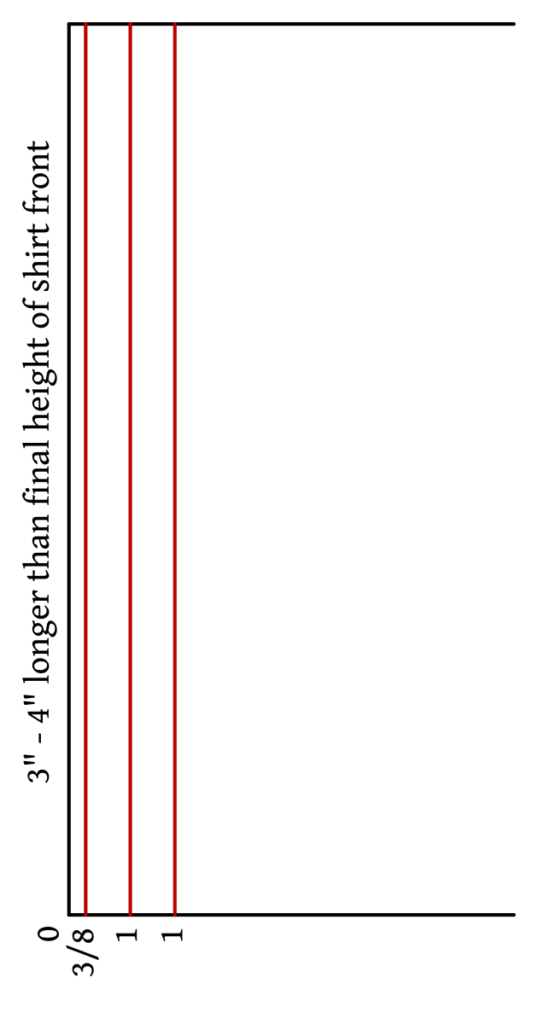
Draw a vertical line parallel to the construction line at 3/8″ from O for the seam allowance of the center placket. I use 3/8″ to give some room for error and at the same time keep the seam allowance out of the buttonhole area.
Next, draw another two lines at 1″ from the previous to mark the outside and inside of the placket at the center front of the shirt. The one inch width can vary according to the style you’re going for or the specific shirt you are reproducing.
You should have determined your pleat width when drafting the front. I’ve decided to demonstrate here with 3/4″ pleats, but again, that can vary from less than 1/2″ to 1″.
Draw a dashed line 3/4″ from the previous line. This indicates the fabric is folded in the opposite direction as the other lines. Then draw an additional line 3/4″ from the dashed line.
This gives us our first pleat.
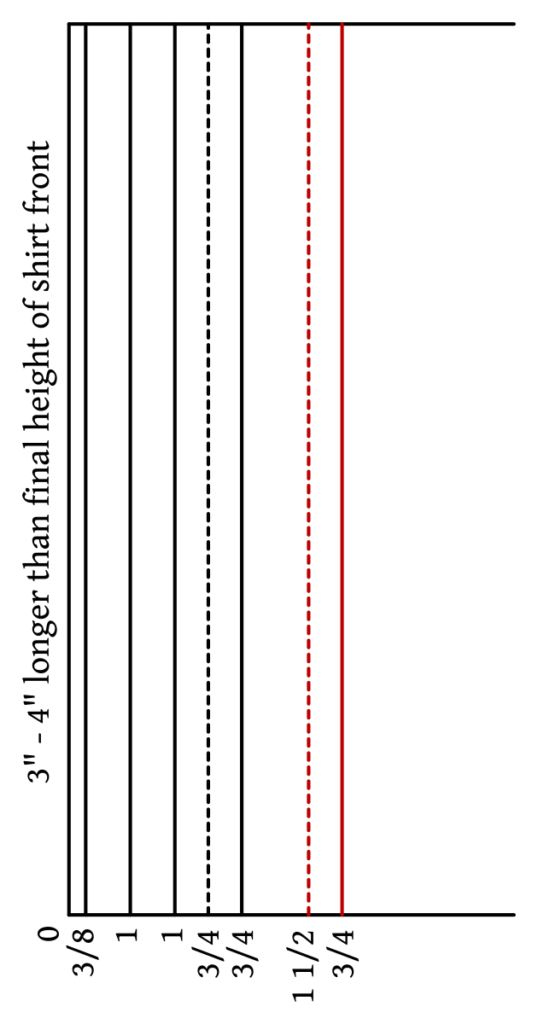
The next dashed line is double the width of the pleat in distance from the previous line. So in my case with a 3/4″ pleat, this dashed line is 1 1/2″ away.
Follow that with another solid line 3/4″ from the dashed line. This is our second pleat.
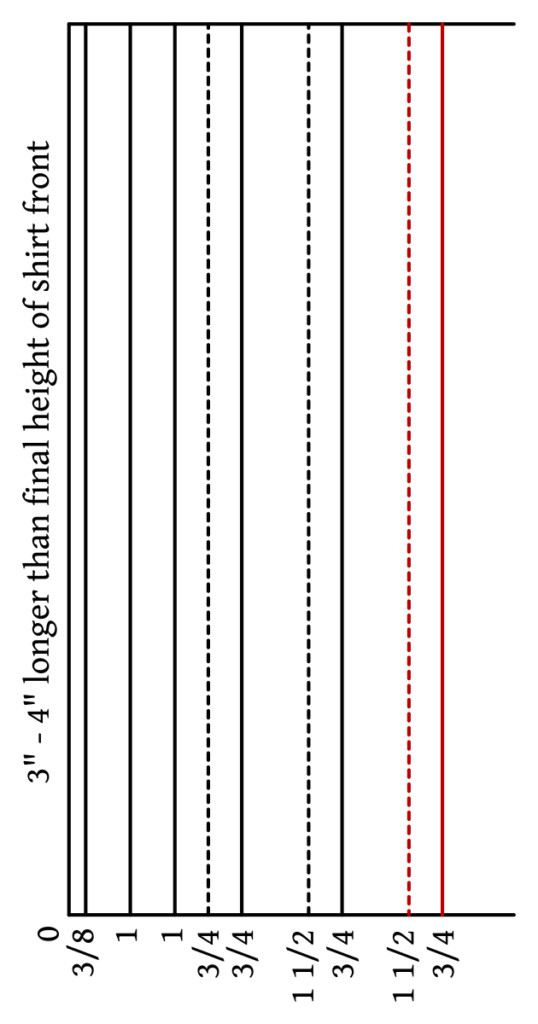
Continue adding pleats as shown until you have the correct number as determined in the draft of your shirt front.
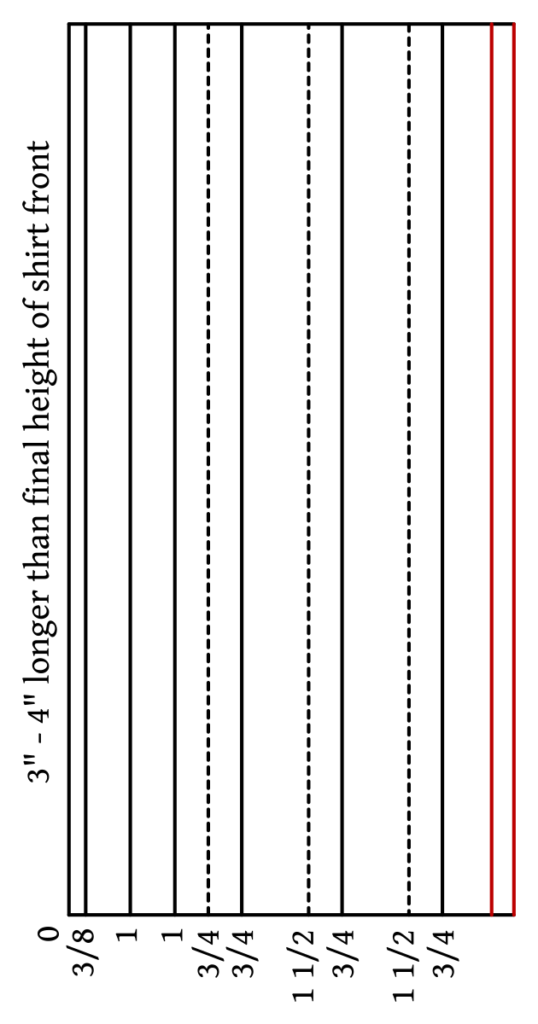
To complete the draft at the inside edge of the placket, add one final line the width of the pleat plus any additional remainder you added. You may want to experiment with exactly the look you are going for at this point on a sheet of paper, so you can see exactly how the folds look.
Finally, add a 1/2″ seam allowance.
I do highly recommend copying the pleats to an 8 1/2 x 11 sheet of paper and folding it into position so you can wrap your mind around how it works, as well as compare the pleats to your pattern to ensure they fit properly. It also makes a great reference as you’re ironing and basting the pleats themselves.
Your Progress
[columns gutter=”0″]
[col]
[progressally_objectives]
[/col]
[col align_text=”center, middle”]
[progressally_progress_pie_chart size=”100″]
[/col]
[/columns]