Month: February 2020
Setting the Sleeves
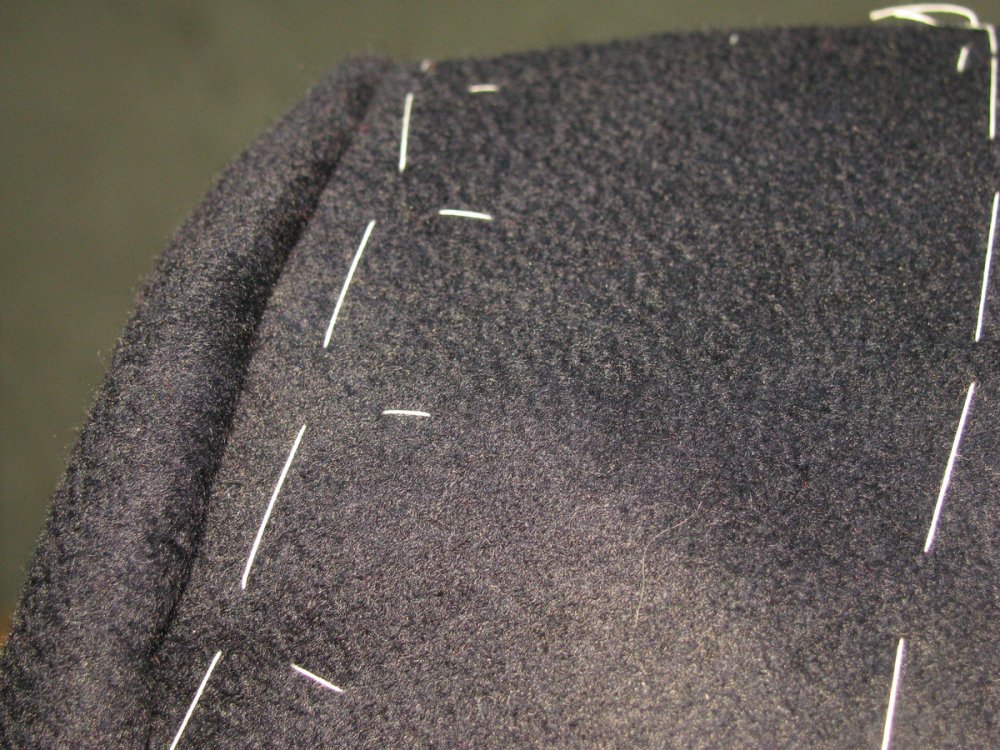
Setting the sleeves can be tricky at first, but there are a couple of steps we can take to make things easier. Due to the amount of ease put in Devere’s sleeves, and the weight of the fabric used, it is difficult to ease in the fabric nicely without some help.
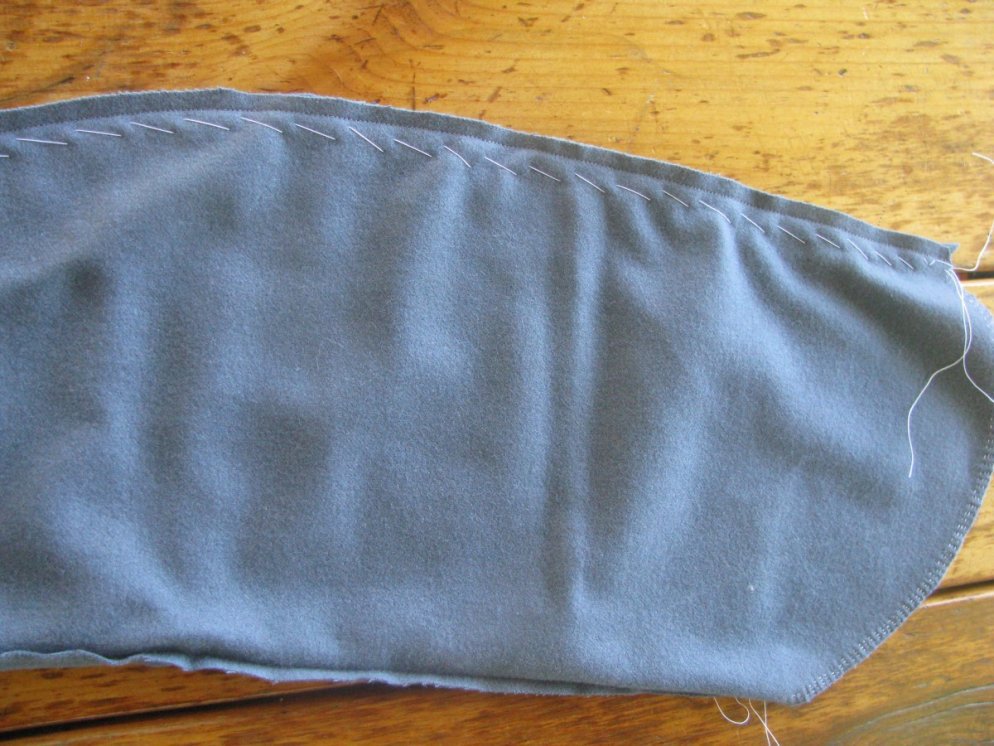
Begin by making three rows of shirring stitches across the inner edge of the sleeve head. These stitches are 1/8 in length, and the rows are 1/8 inch apart. You must keep the stitches aligned between each row for proper gathering. Three rows may seem excessive, but the third row helps lock the gathering in place, making things easier for you. The ends of the stitching should be left free with about 5 inches of extra thread on each end, to ensure it doesn’t slip through at the ends.
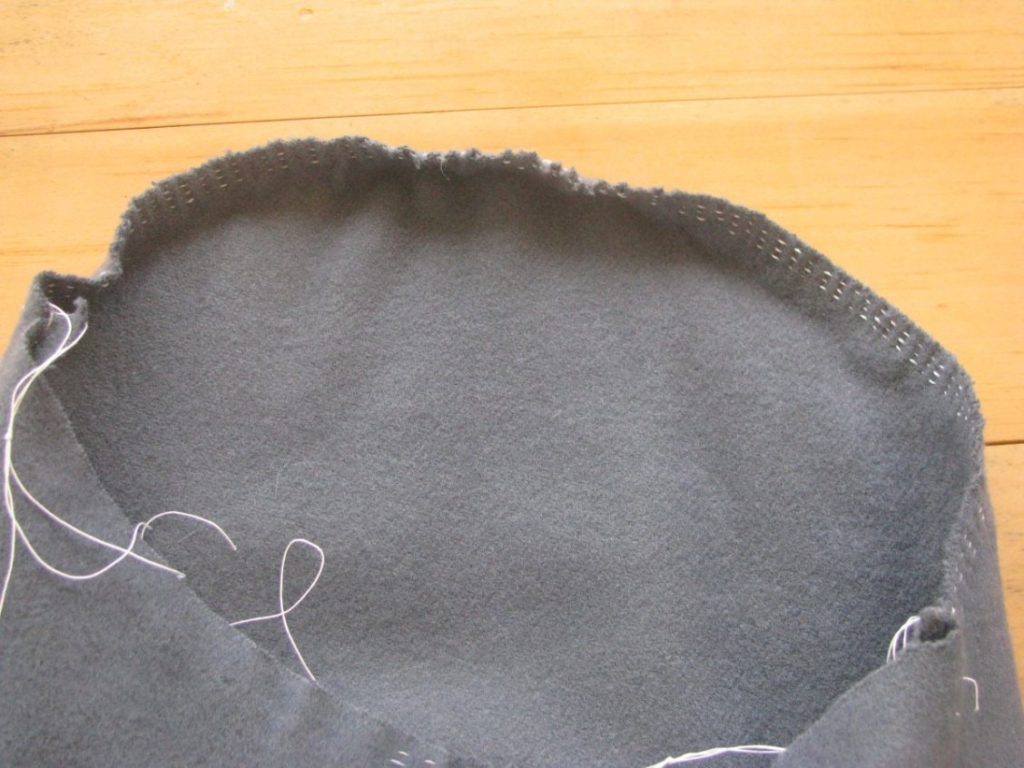
At the edge of the center back, mark an ‘X’ in the middle of the small strip near the armscye. Do the same to the back seam of the sleeve. Place these two together and hold them in place with your fingers.
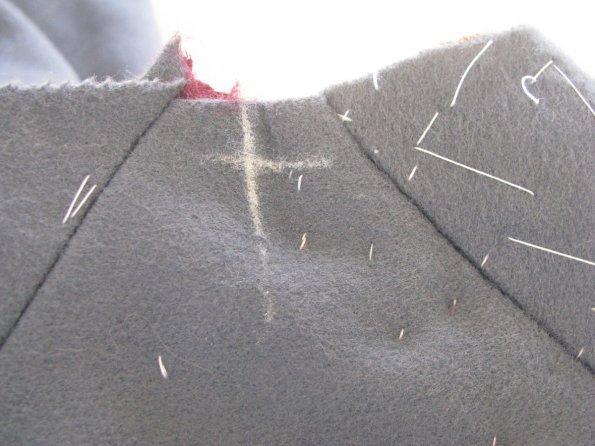
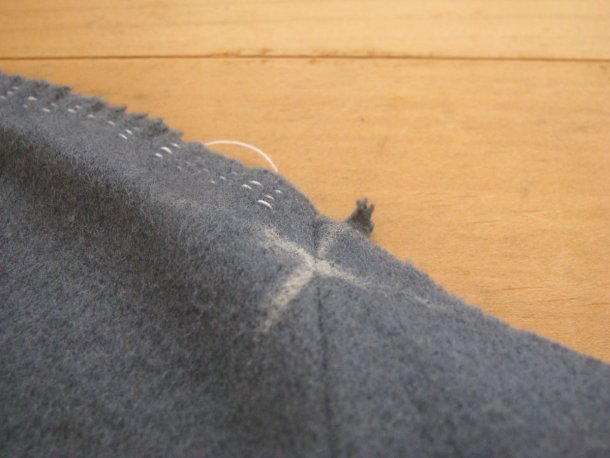
Turn the coat to the inside, still holding these layers together. Make sure the edges of the armscye and sleeve head are even, and then baste the ‘X’s together with a couple of basting stitches.
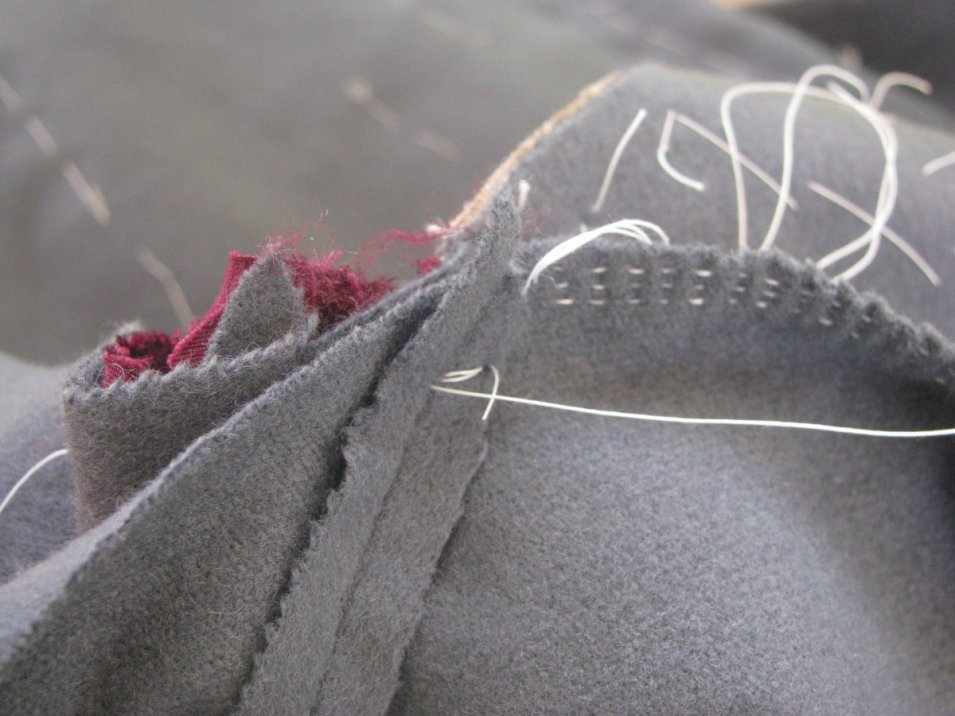
Holding the layers together with your left hand, ensure that the edges are lined up, and baste down the bottom edge of the sleeve, using a 1⁄4 inch running stitch. You want to baste the bottom half of the sleeve first, so that you know how much to gather for the top sleeve.
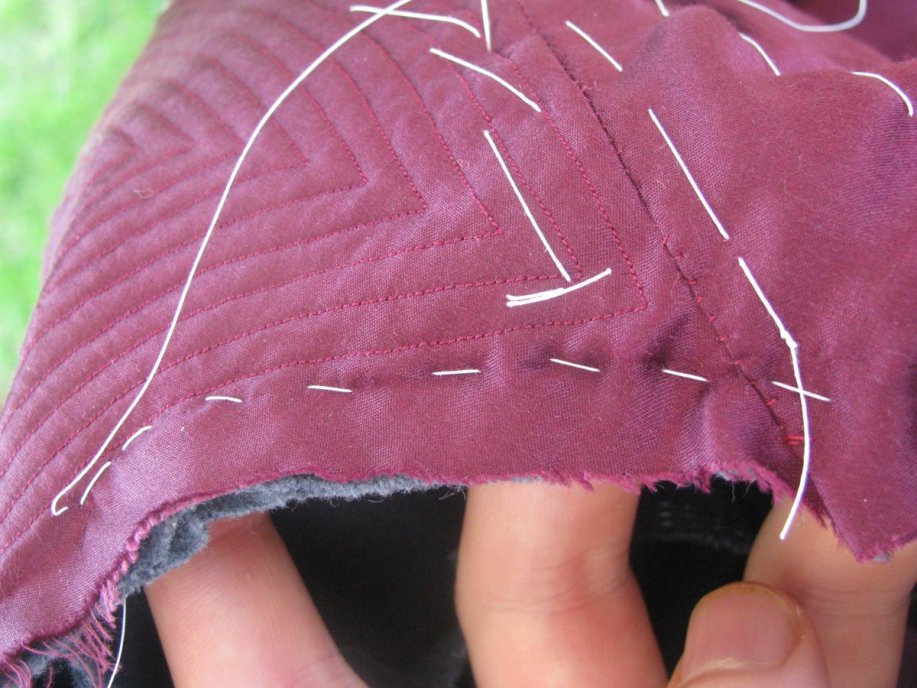
Directly at the bottom of the armscye, gather in a very slight amount of sleeve as you baste, about 1⁄4 inch total.
Continue basting until you get to the other seam, where the shirring stitches begin.
Now pull each end of the shirring stitches, grasping all three threads at the same time, gathering the sleeve until it fits nicely into the coat. Distribute the fullness so that there are no large folds in the fabric. This step can be fiddly and take a while, but have patience and you will get it. It’s worth the extra time.
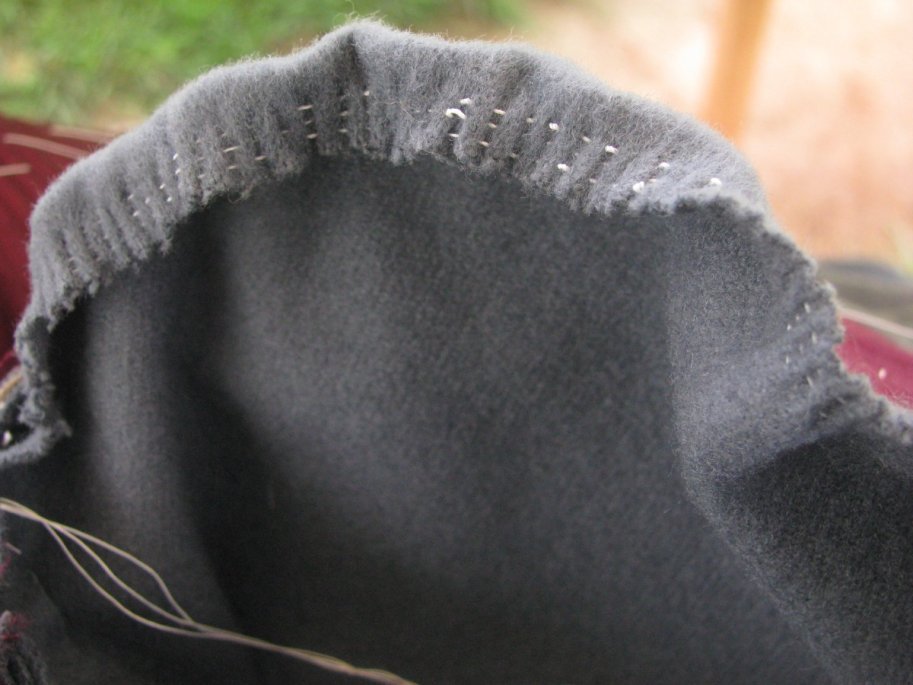
When you are happy with the distribution, baste across the top of the sleevehead, fine tuning the fullness as you go. When you reach the other side, where you began basting, stop for a moment, but don’t cut the thread. Turn the coat to the right side, and check the hang of the sleeve, and that the fullness is distributed nicely. Also check that the rear sleeve seam is centered on the little section of the back piece. This is the time to make any changes necessary.
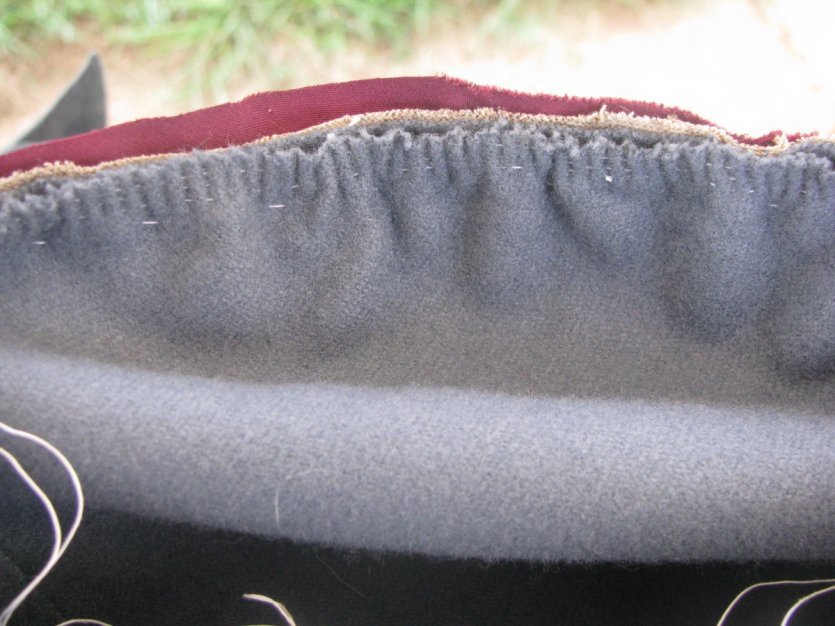
When satisfied, go back to the inside, and baste around the armscye again, this time alternating your stitches with the previous stitches. This will lock the sleeve in place, while at the same time making the basting stitches easier to remove later
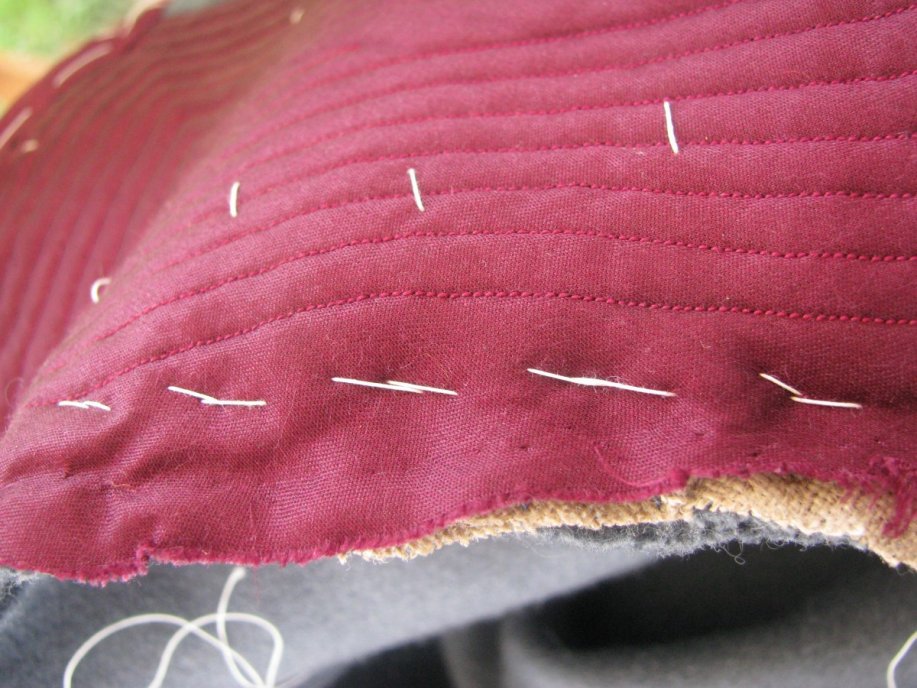
.
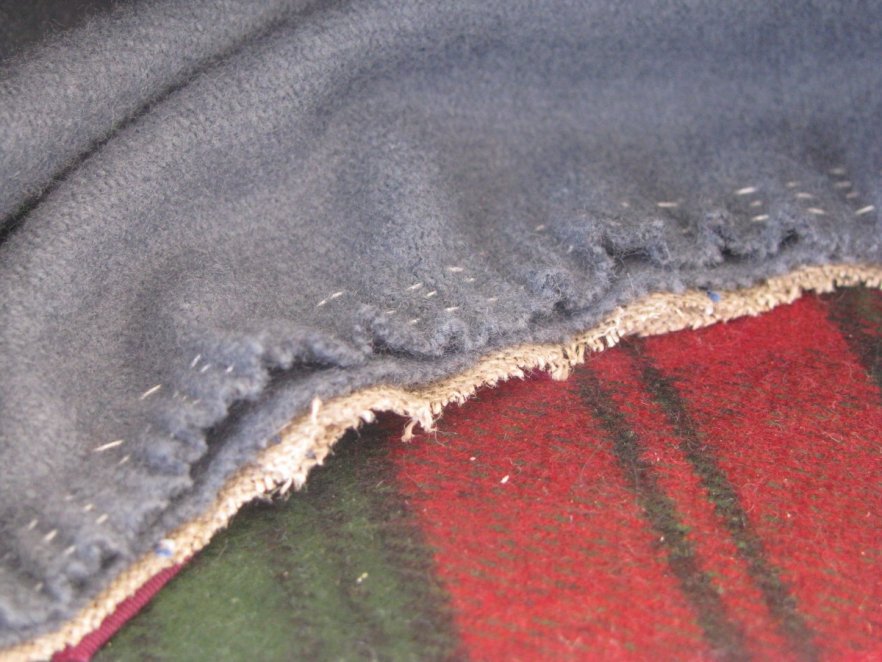
Place the top of the sleeve head onto a pressing surface so that the gathered section is visible, and gently shrink away the fullness from the gathering stitches. Press no more than 3⁄4 inch into the sleeve, or you’ll end up shrinking all of the fullness away, and your work will be for nothing.
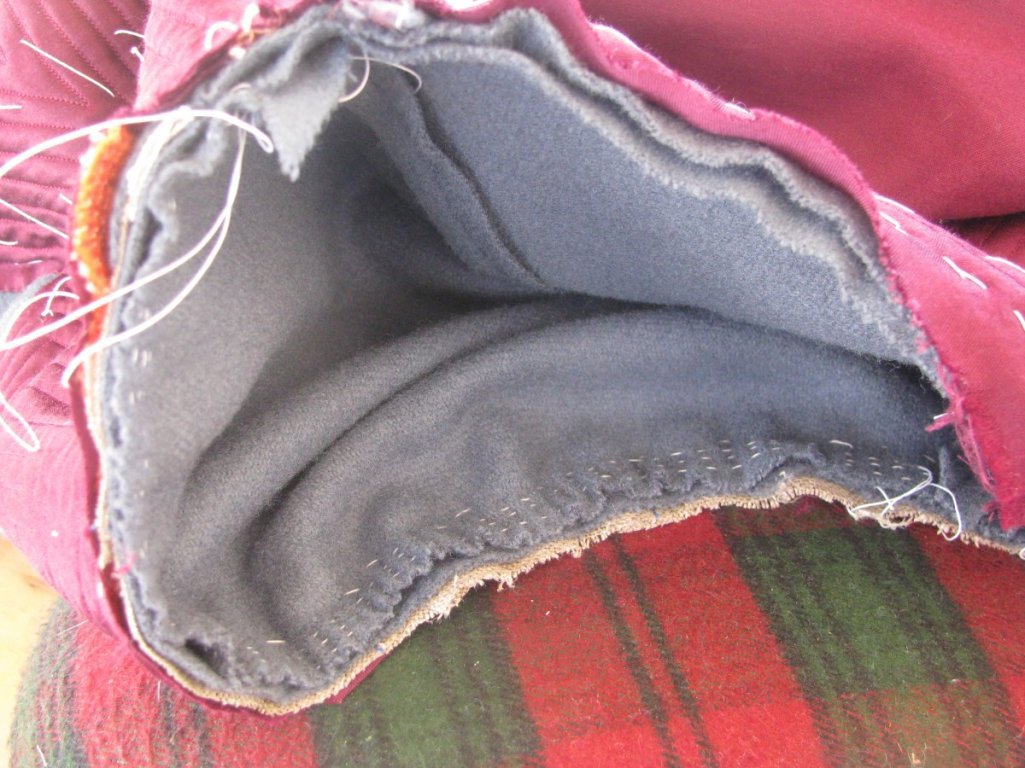
After pressing you should have a fairly smooth sleevehead, with some fullness visible below the top edge.
Place the sleeve onto the sewing machine, with the coat inside out, and sew the sleeve on with a quarter inch seam allowance. This can be done with a backstitch if preferred, of course.
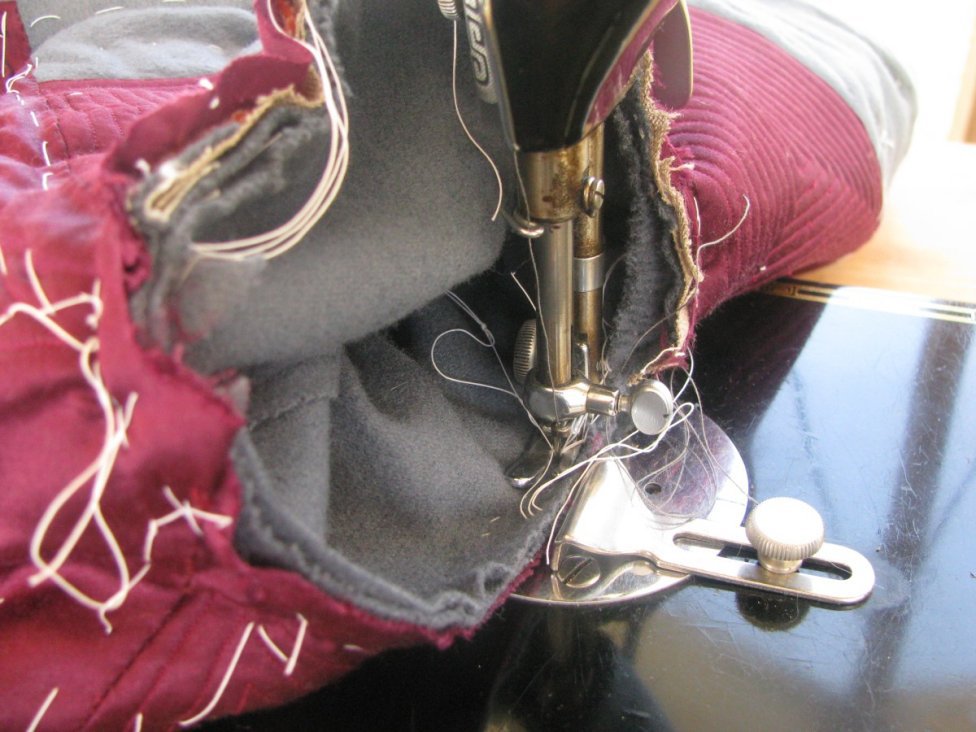
After sewing, remove all basting stitches from the sleeve area. Some of them may get caught in the stitching, but by picking at them carefully, they’ll all come out eventually. Turn the coat to the right side and check your work. The sleeve should be smooth on top, and slightly raised above the level of the shoulder.
Sleeve Lining
We’ll now begin constructing and inserting the sleeve linings. These are cut from the same pattern as the sleeve, however some additional allowances need to be made on the seams. On the front and rear seams, add 1/8 of an inch to the seam allowance. At the very top at the sleevehead on both pieces, add 1 inch extra allowance. This is so the sleeve has room for movement, preventing the lining from tearing. It also prevents the lining from pulling on the outer sleeves, producing unsightly folds.
Construct the sleeve just as you did for the muslin sleeve. Make sure you add the inlay at the bottom cuff of the under sleeve as as you did for the wool sleeves. Press well. At the cuff end, trim off a half inch from the bottom, then turn under another half inch seam allowance. This will line the bottom of the lining up with the upper edge of the cuff facing, just covering the cross stitches.
Turn the wool sleeve inside out, and the sleeve lining right side out. Insert the sleeve lining onto the wool sleeve, wrong sides together, and baste the two together at the bottom of the center seam, just above the inlay area. This will help you align the rest of the sleeve sections together.
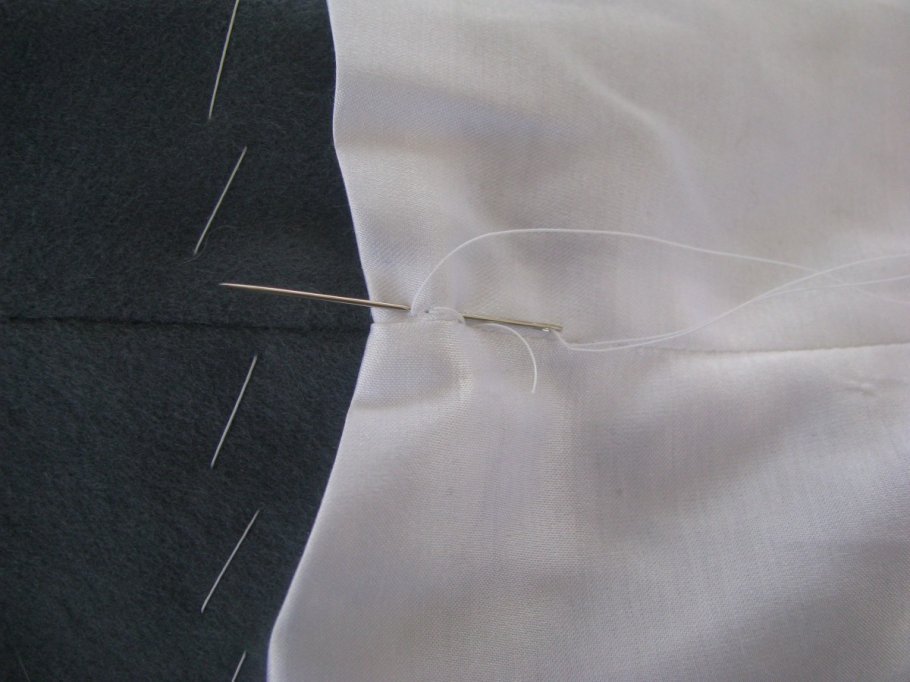
Make sure the lining is falling smoothly over the entire sleeve. You may pick up the sleeve and lining by the cuff and shake slightly to help distribute the fabric properly.
Starting at the center that you just basted, baste toward the side with the button catch. Baste from the bottom of the sleeve lining, up along the edge of the inlay, and along the top edge of the inlay, folding the fabric under neatly as you go. The lining should just cover the cross stitching by about 1⁄4 inch.
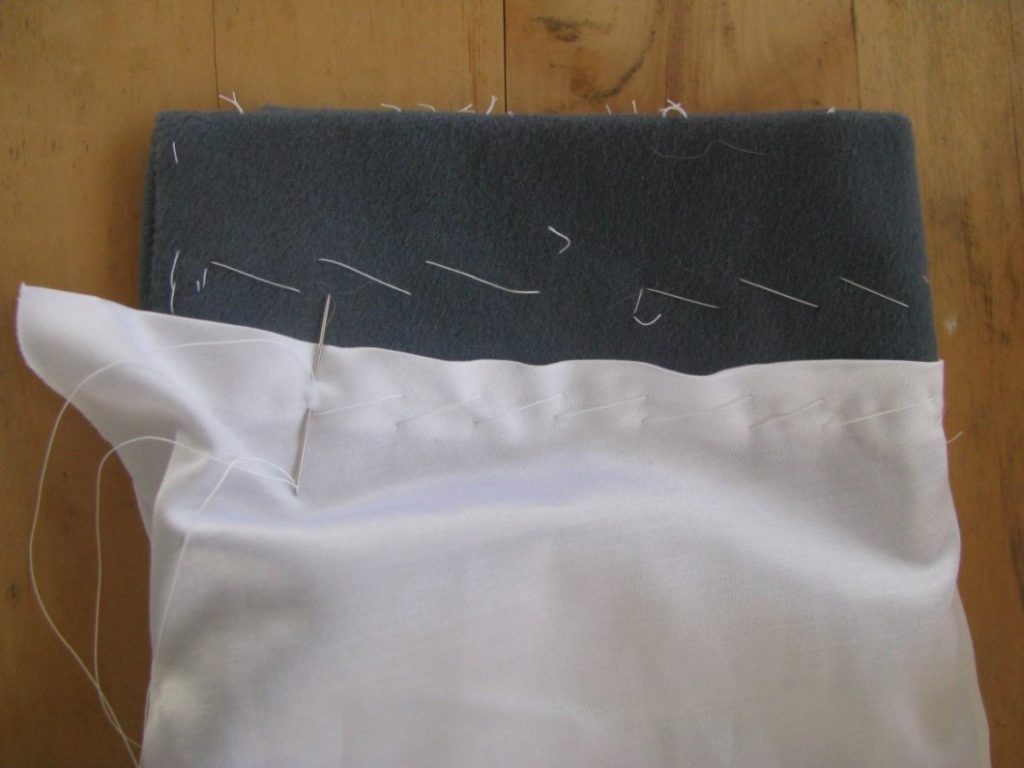
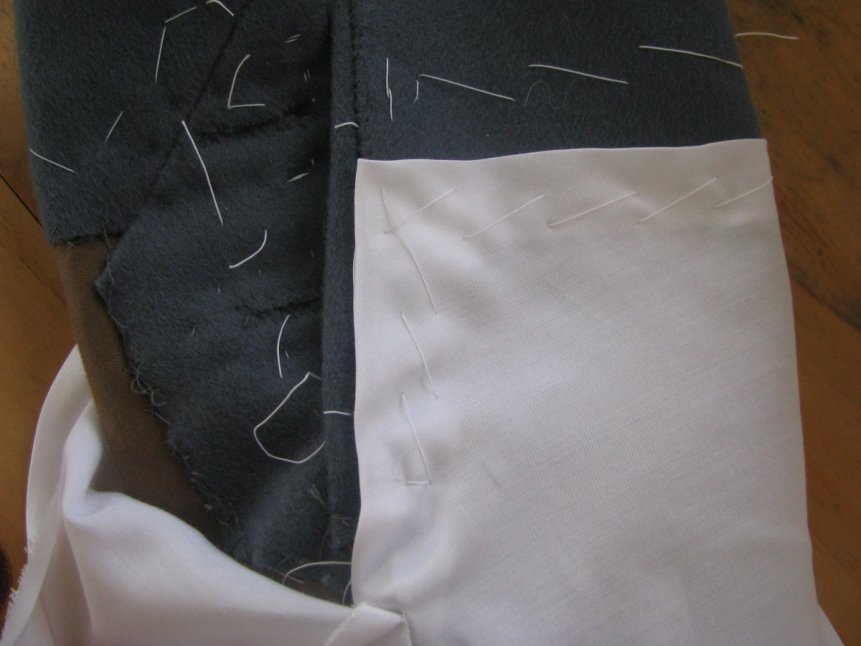
Now baste across the bottom edge, starting from the center again, toward the buttonhole side of the cuff.
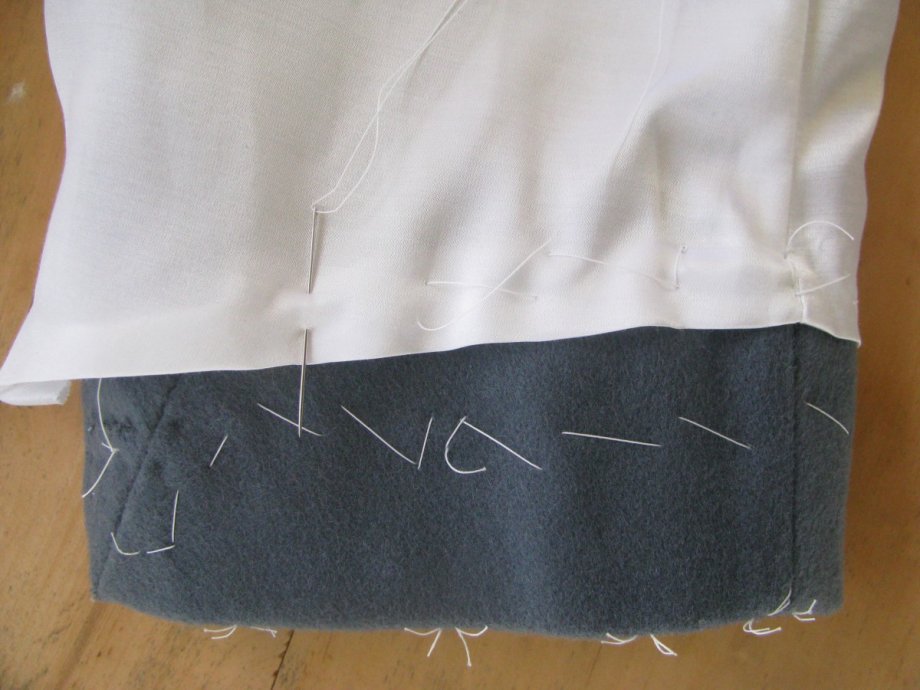
Continue basting across the bottom until you get to the area where the buttonhole facing is. Trim the lining down if necessary, so that it is 1” away from the edge of the buttonhole inlay along the top and side.
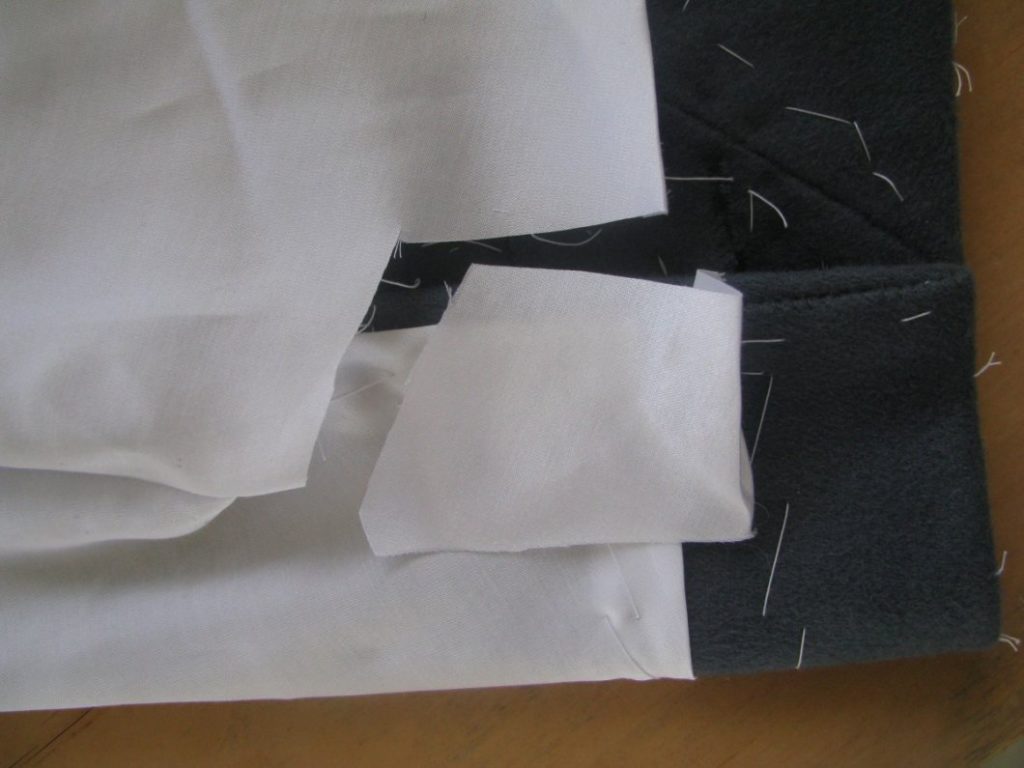
Make a diagonal cut, about 1/2” wide, from the intersection of the cuts you just made. Make sure this diagonal cut does not extend too close to the edge of the facing underneath!
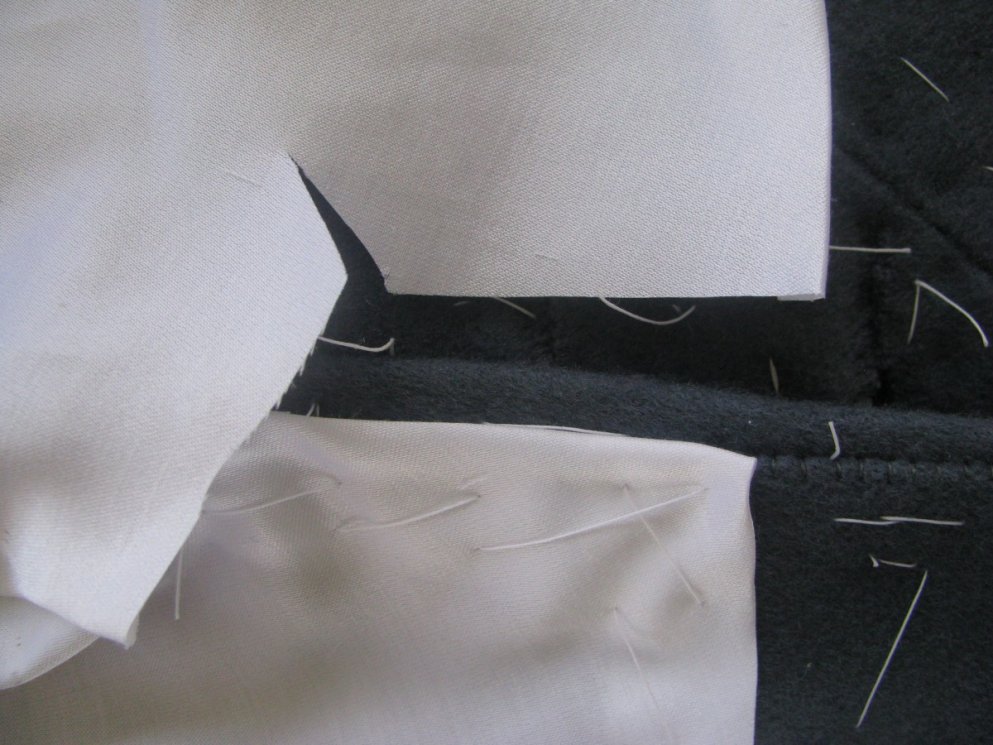
Now fold under this section of lining, exposing the buttonholes underneath, and baste down, stopping at the end of the cut you made.
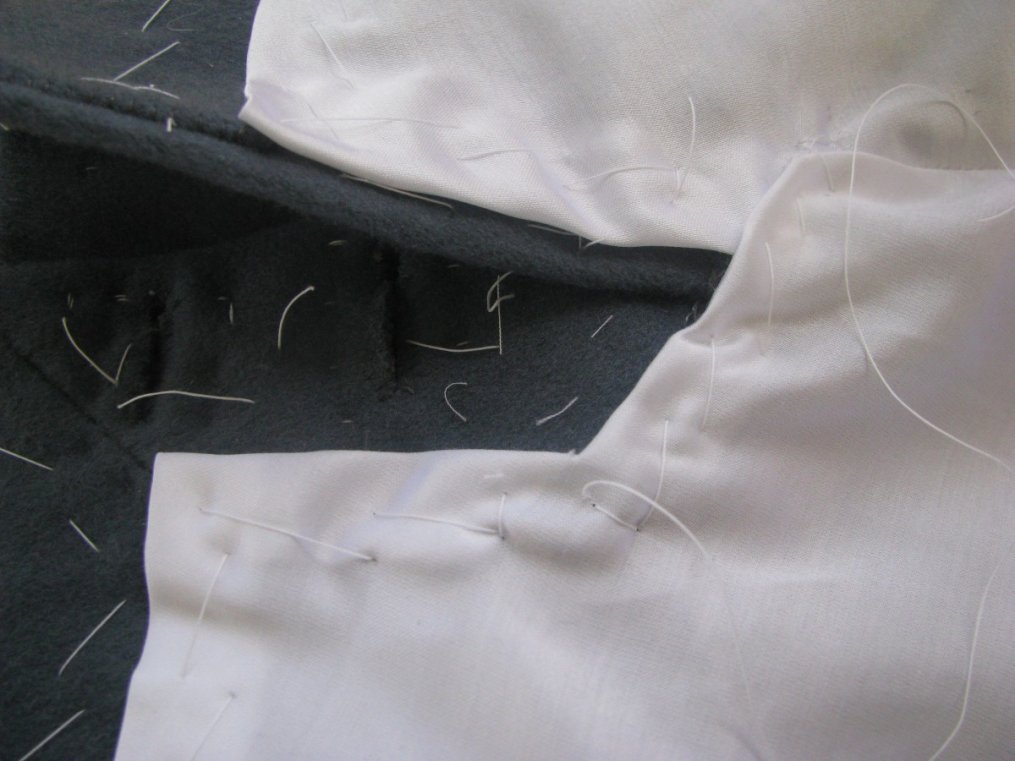
The lining is now felled down with white cotton thread at this point, using 10 to 12 stitches per inch. Using the white thread will help hide the stitches, making them almost invisible. Begin sewing at the end of the cut lining, down to the bottom of the cuff, across the bottom, and up the sides and top of the inlay area. When sewing the section near the inlay, be careful not to let the stitches show through to the right side, as it is only one layer.
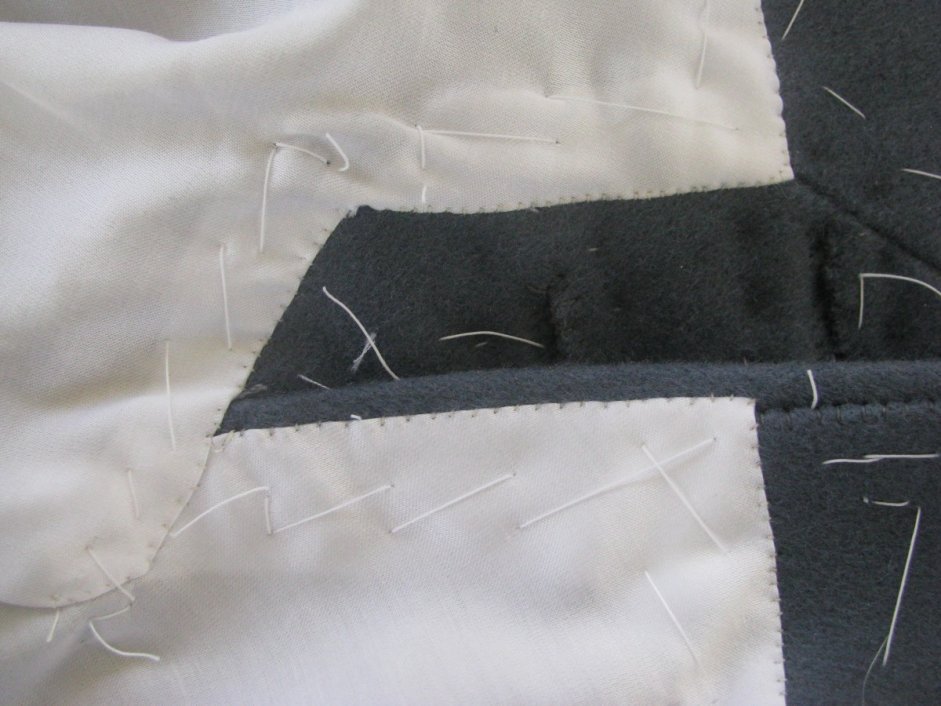
At this point, the sleeve vents are completely done, save attaching the buttons. Remove all basting stitches and turn the sleeve to the right side. Buttons can be added now, or after the sleeve has been set into the coat body.
Again, shake the sleeve gently to make sure the lining is laying correctly on the inside. Baste through the outer sleeve, catching the lining underneath to hold it in place.
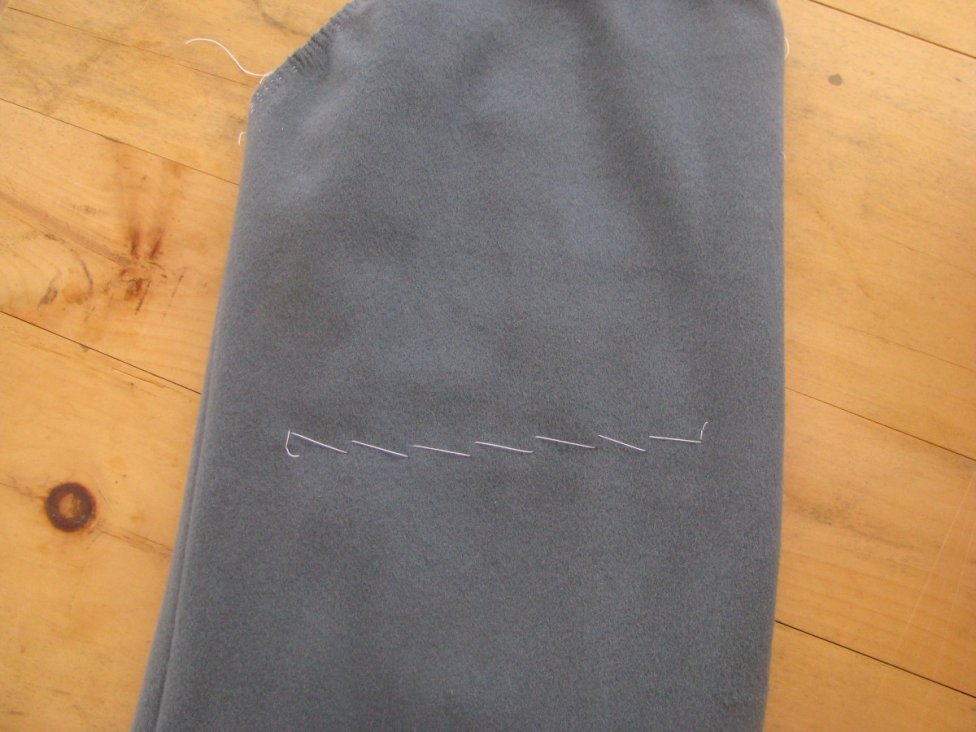
Forming the Cuffs
On the under sleeve inlay, fold over 3/8” of fabric and baste in place. Press.
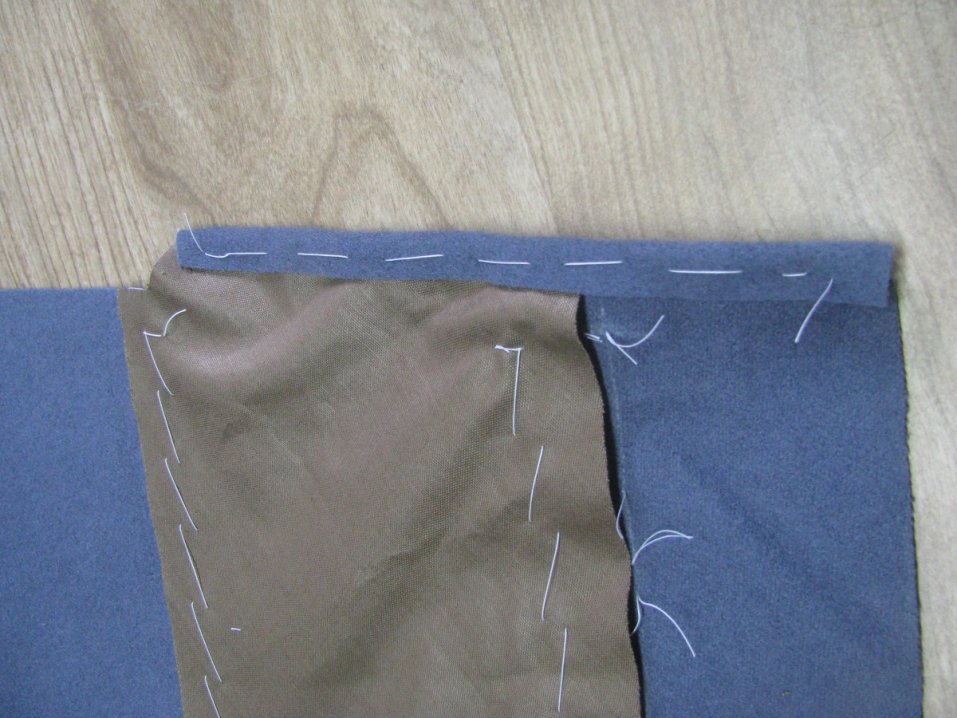
On the top sleeve, draw a chalk line continuing the seam line – not the inlay line – of the sleeve down to the bottom of the cuff inlay. Draw another line horizontally, continuing the angle of the bottom of the sleeve inlay.
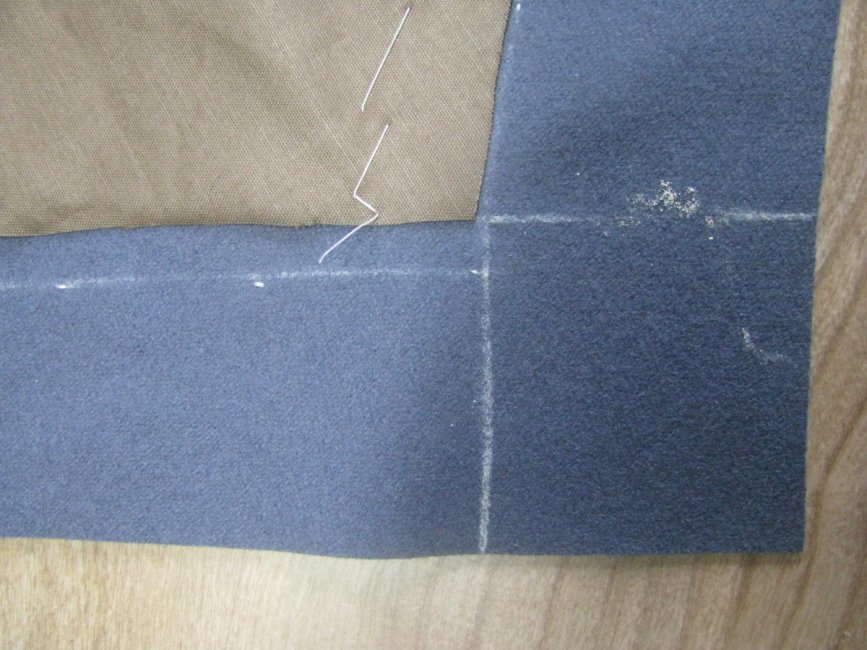
Optionally, cut out this square of fabric, about 1/8” from the lines you just drew. If using heavy, dense fabric, this will make the sleeve miter a little easier. The downside is, you will not be able to lengthen the sleeve ever again. If you wish for this possibility to remain, leave the fabric uncut. Another benefit of not cutting this fabric out is that it lends a bit of weight to the cuff, allowing it to flair out stylishly. My fabric was dense enough that cutting the piece out did not affect this.
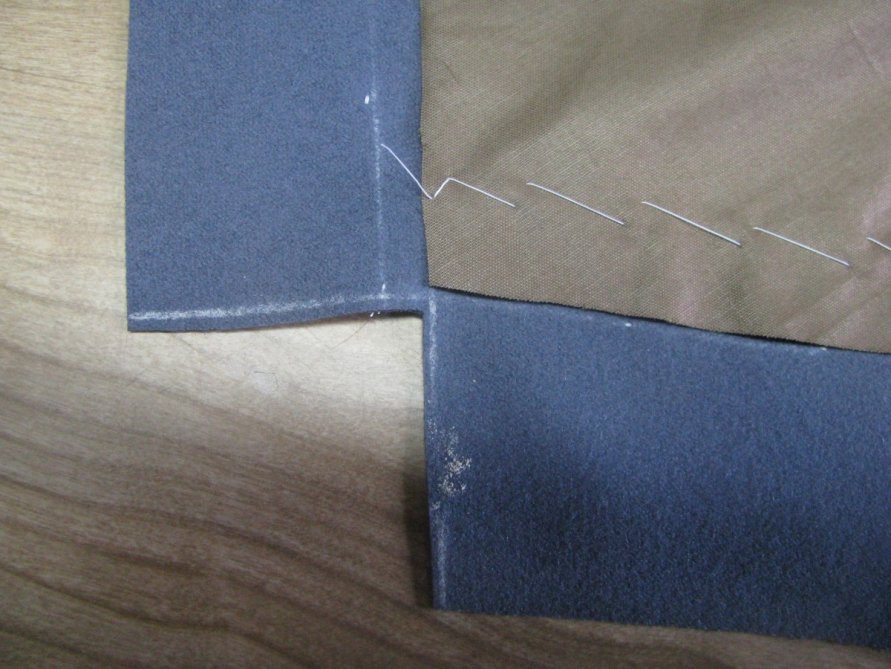
Fold the fabric corners up, forming two small triangles, and baste in place. This should form a straight line along the folded edge. Baste and press.
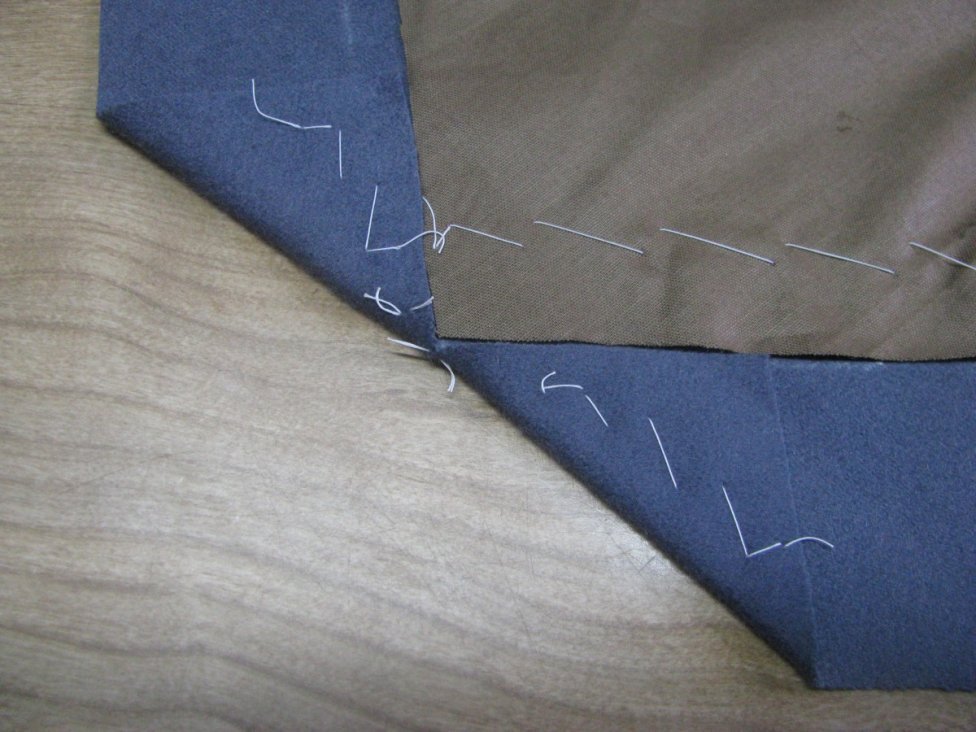
Now turn up the bottom of the cuff along the inlay line, and the remaining inlay for the buttonholes, baste in place, and press. Cross stitch the raw edges of the inlays to the pocketing underneath, being sure not to catch the wool underneath. You may have to fiddle with the mitered corner a bit to get it looking just right.
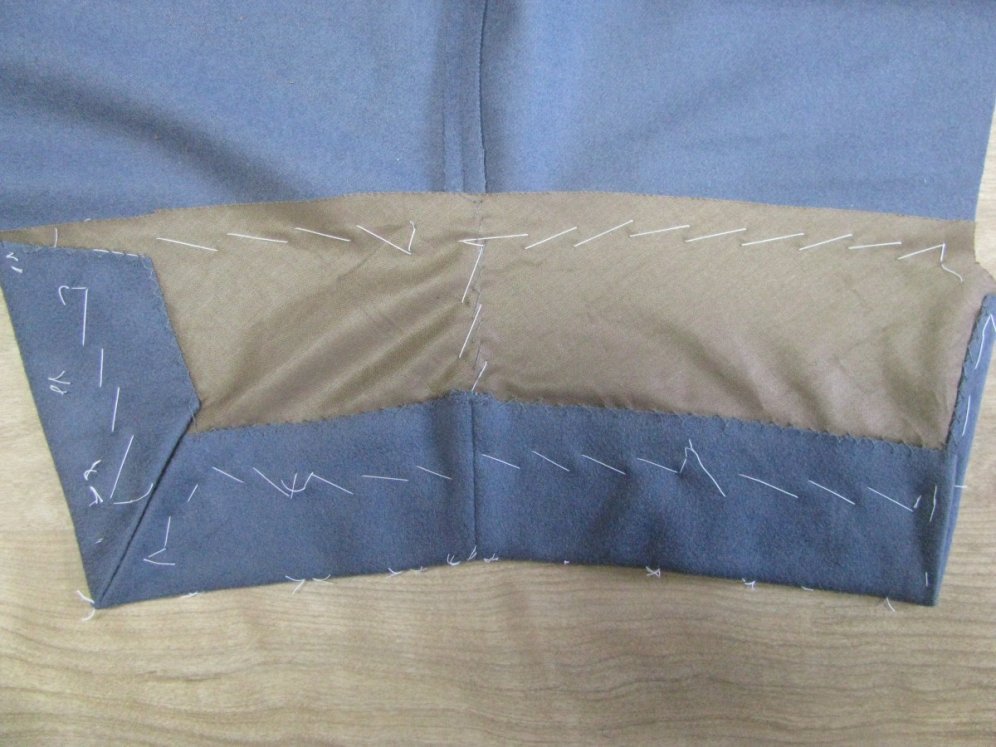
Along the button catch side, on the under sleeve, fell the folded edge of the cuff to itself, closing up the opening.
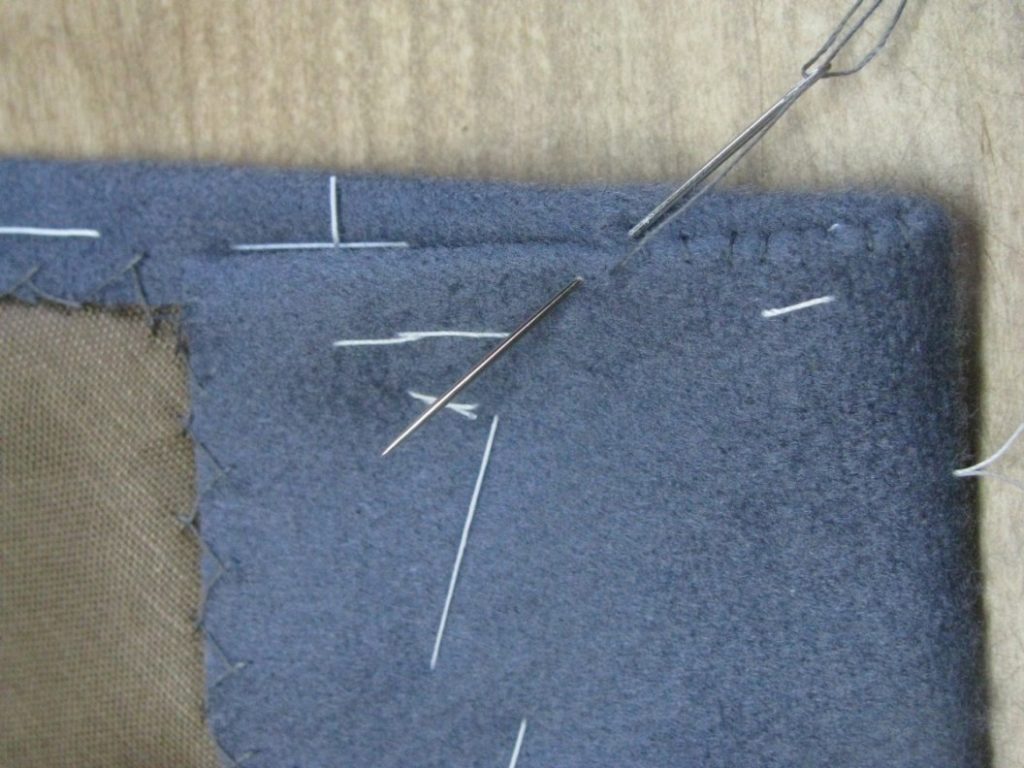
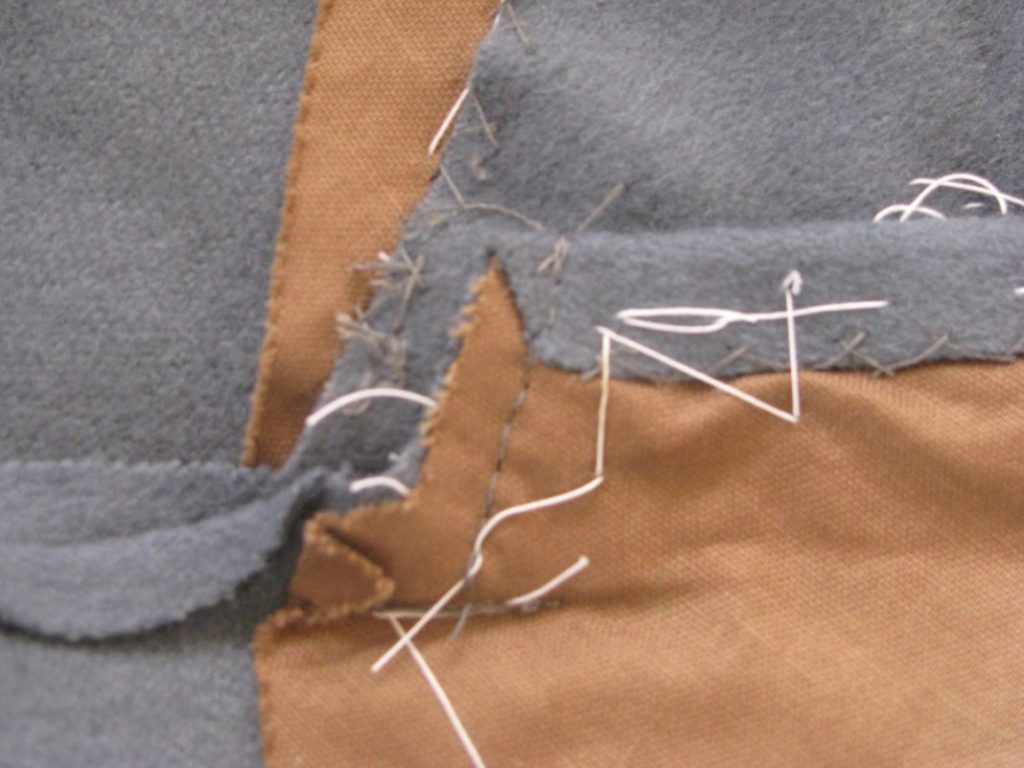
At the mitered corner, ladder stitch the seam to the pocketing, in the same manner that you closed the gorge line on the collar.
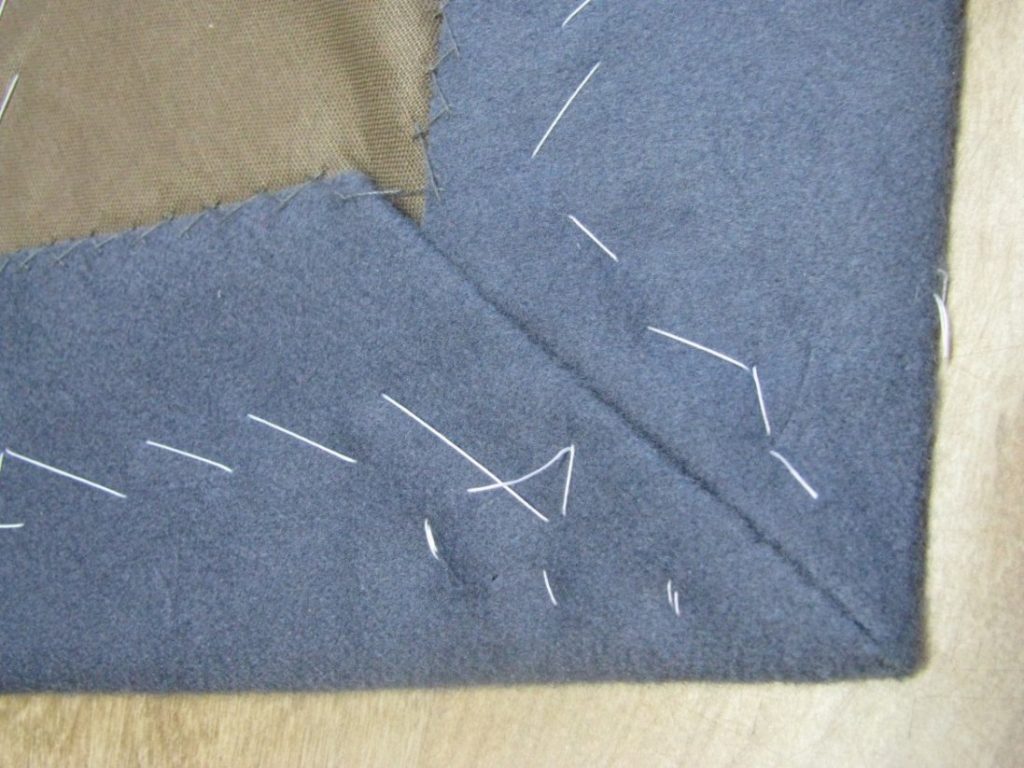
Here is the result of the completed cuff.
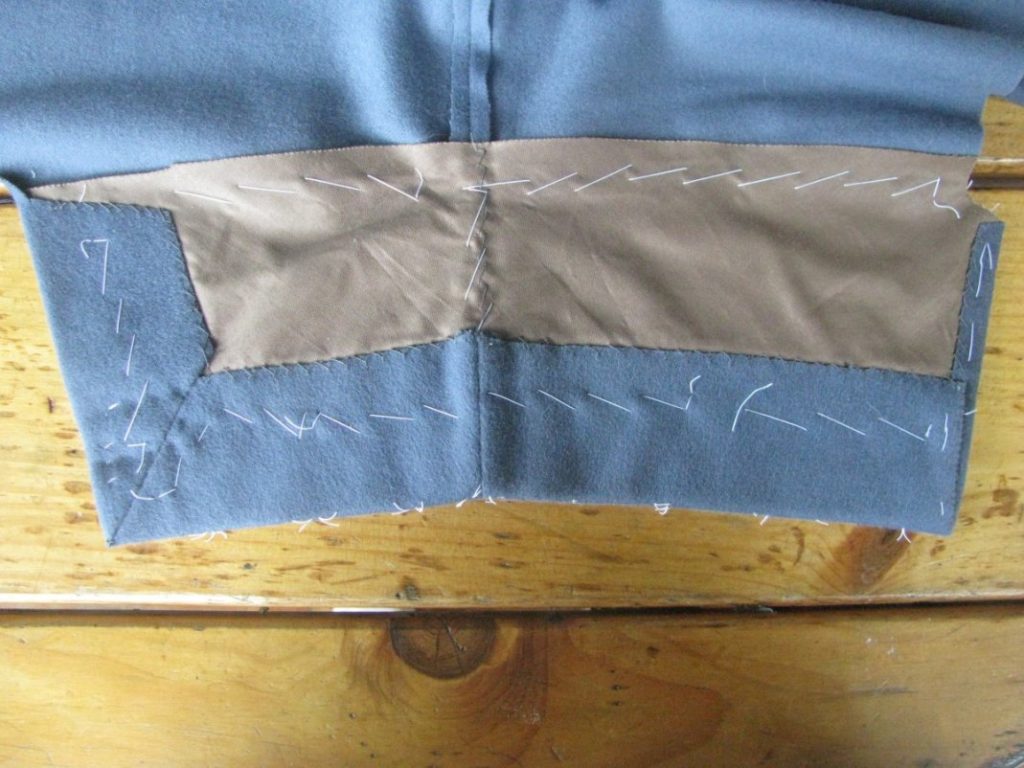
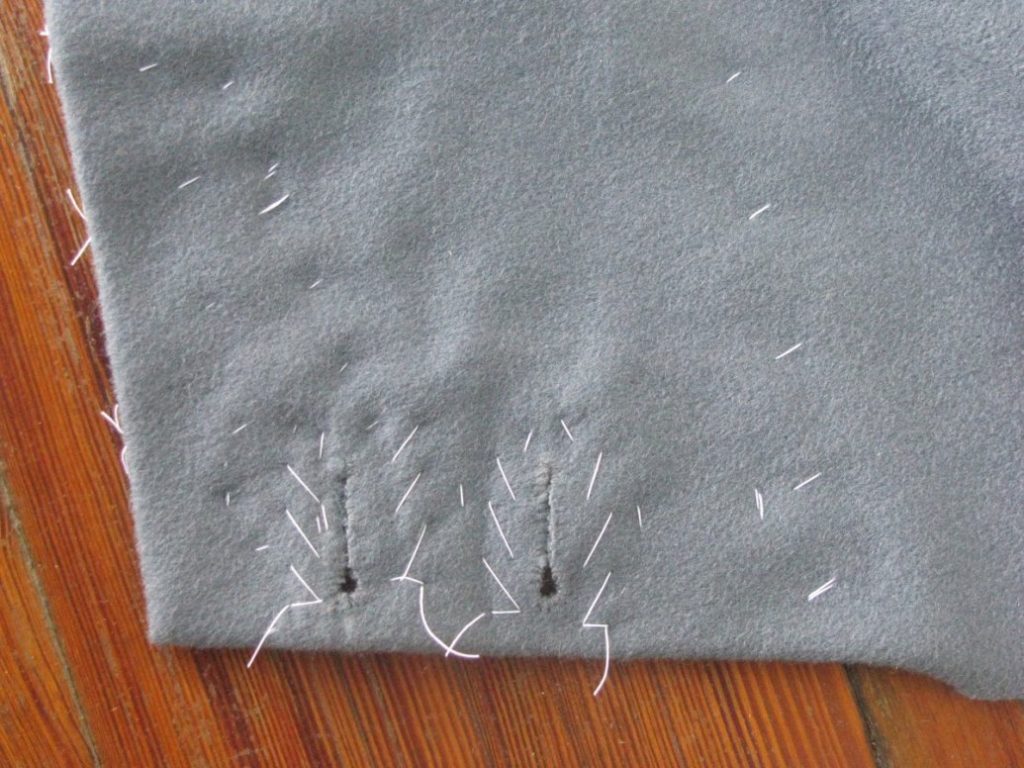
Work two buttonholes on the top sleeve, just above the mitered corner. These are usually smaller than the front buttonholes, and spaced about 3/8” away from the edge. The number and exact position will depend on the coat you are copying. Completing the buttonholes now makes the job much easier than if you wait until the sleeve has been closed.
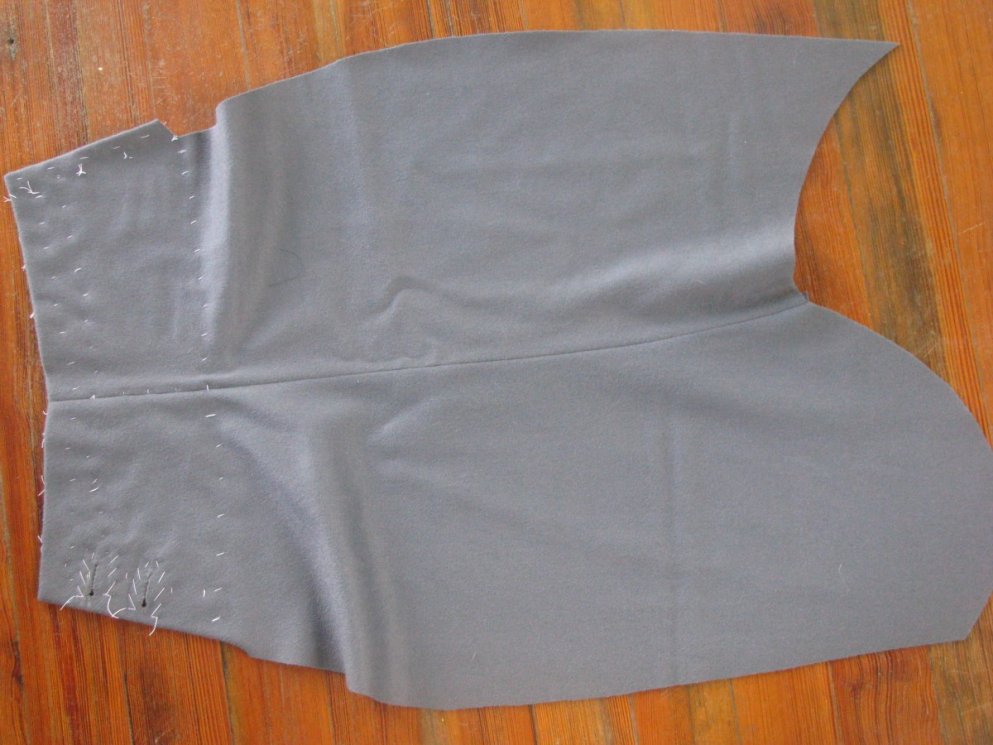
Line up the rear seams of each sleeve, right sides together. Because we did not add seam allowances, the top sleeve will be a little longer than necessary. This excess is eased in along the top of the seam, from the sleeve head, to about 5 inches below that. Shrink away the fullness with the iron, being careful not to extend the iron more than an inch onto the fabric. Sew from the top of the seam, to just 1⁄4 inch beyond the edge of the sleeve inlay, as shown. You may have to remove a couple of cross stitches to gain access to the area. Press well, using a sleeve roll or tailors ham inserted into the sleeve. This is sometimes tricky to press correctly due to the nature of the curved sleeves. At the bottom of the seam, press the button catch and seam allowance over to one side.
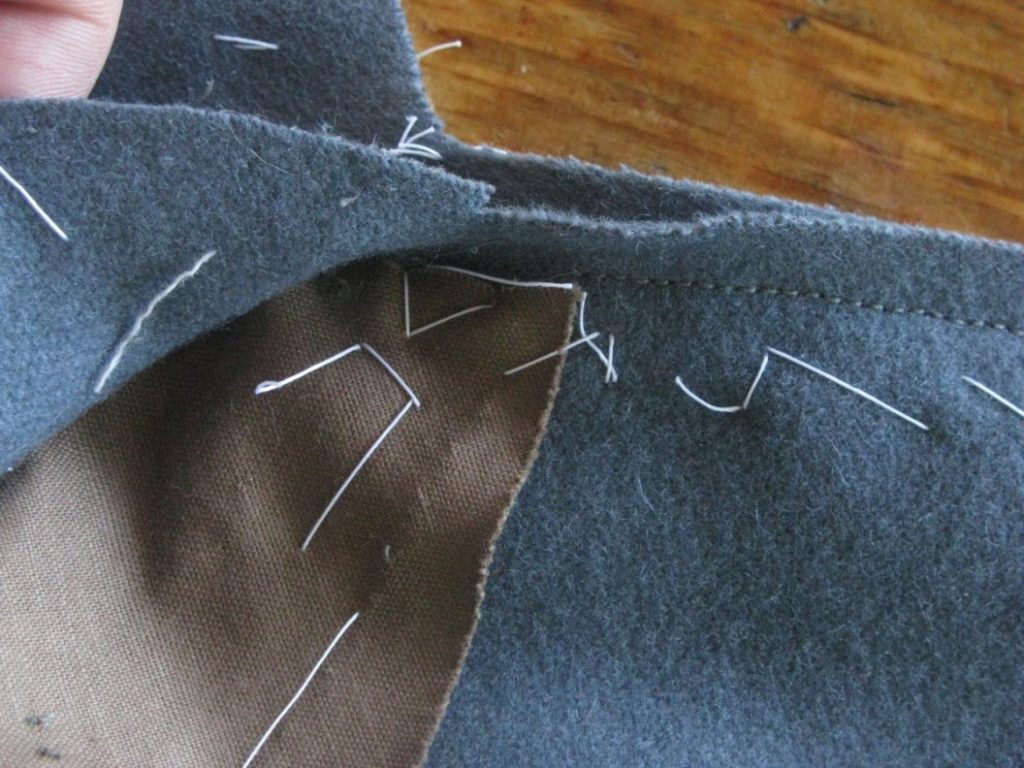
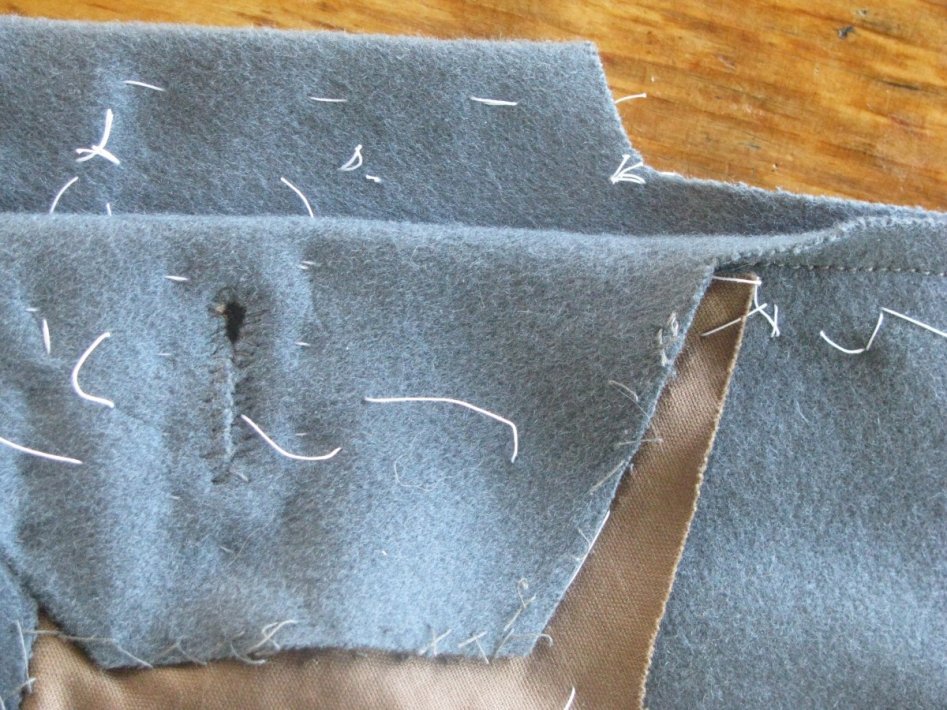
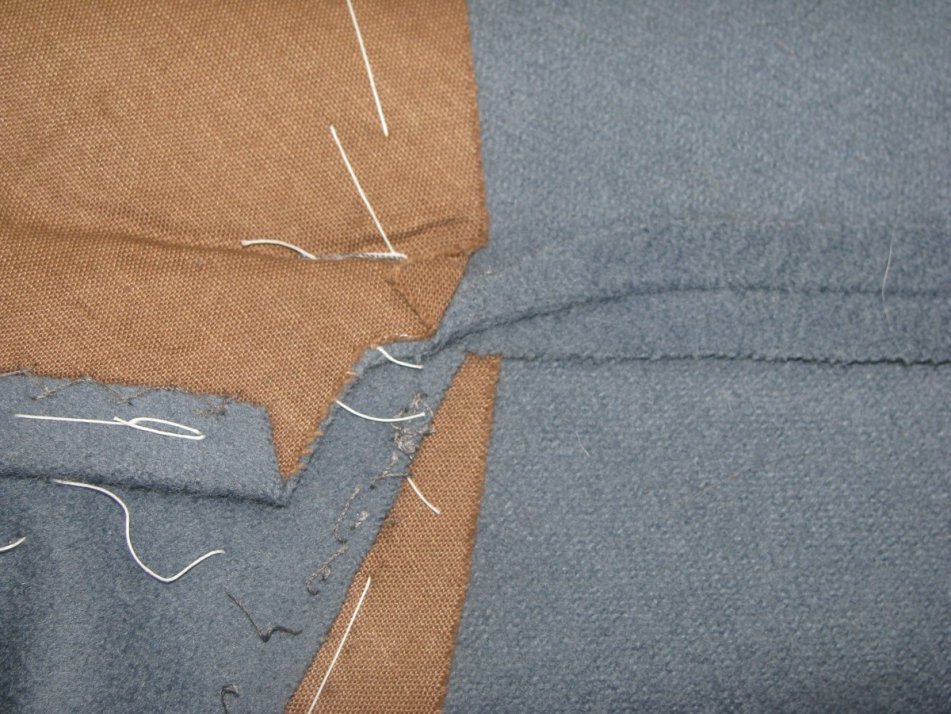
With the sleeve inside out, baste the button catch to the button hole catch, making sure everything lines up properly. Along the top of the inlay, back stitch with silk thread, catching every layer but the outer layer of fabric. This secures the top of the sleeve vent to prevent tearing, and the fact that we did not clip any seam allowances adds strength as well.
Construction
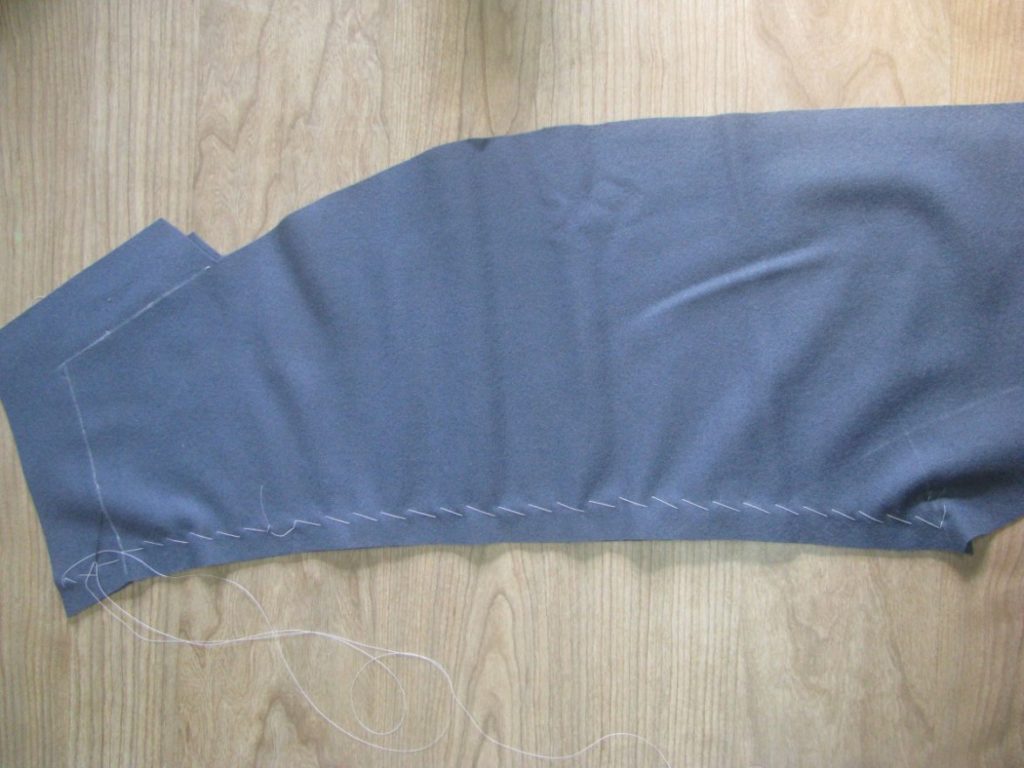
Begin by basting the under sleeve to the top sleeve along the shallower front seam. Sew the seam with a 1⁄4 inch seam allowance, remove basting stitches, and press.
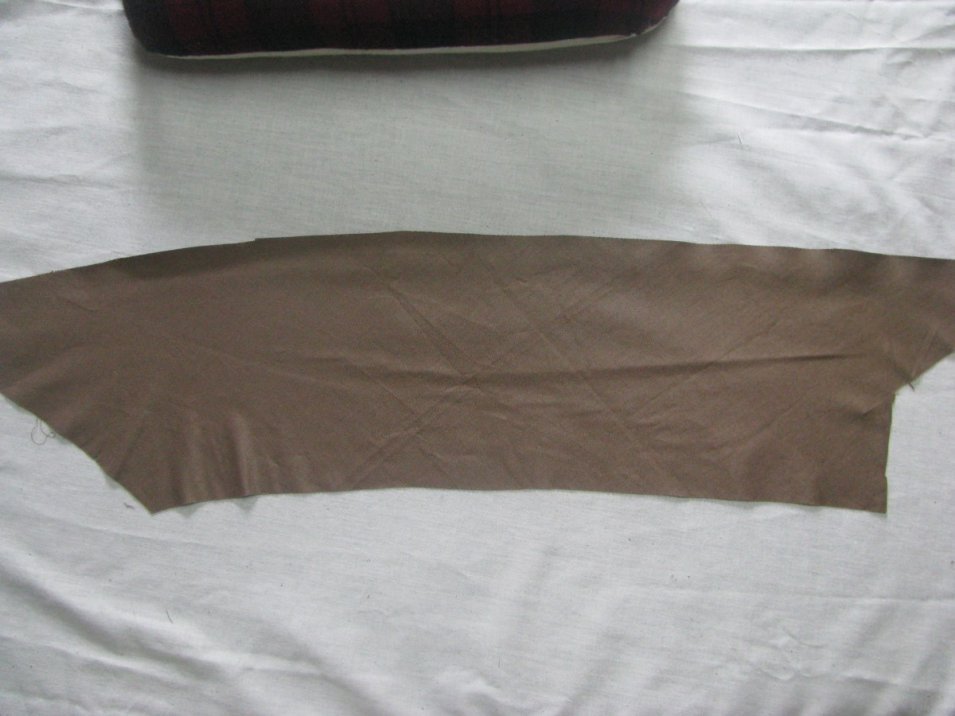
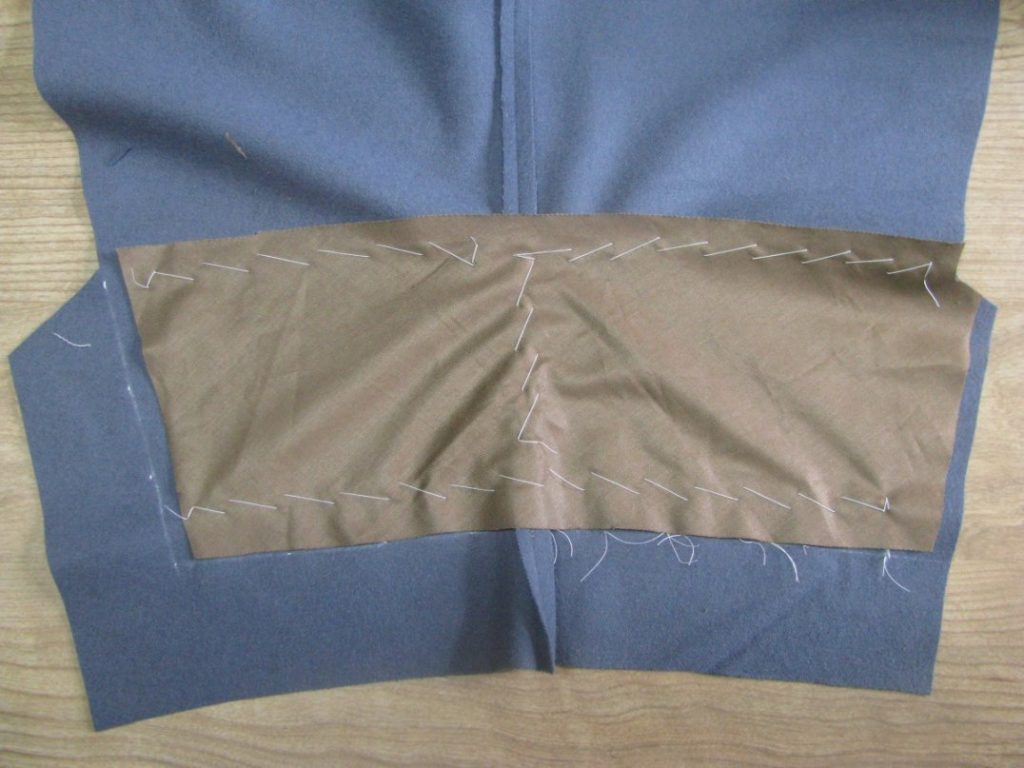
Cut a strip of pocketing or polished cotton on the bias, about 5 inches wide, and long enough to cover the bottom of the sleeve. Stretch this into a curve along one edge in order to approximately copy the curve of the cuffs.
Place the pocketing along the wrong side of the sleeves, just above the cuff inlay. Baste along the bottom edge.
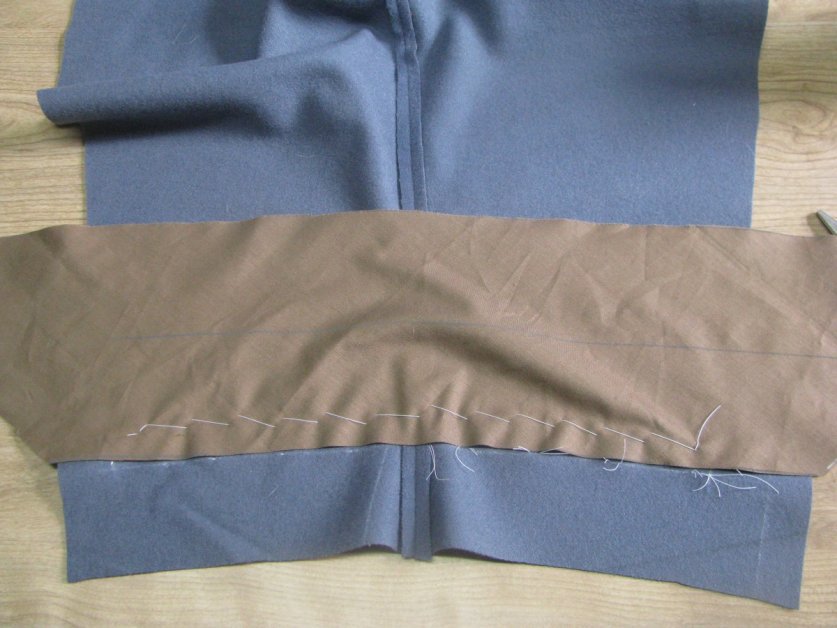
Baste the pocketing upwards from the cuff, catching the seam underneath.
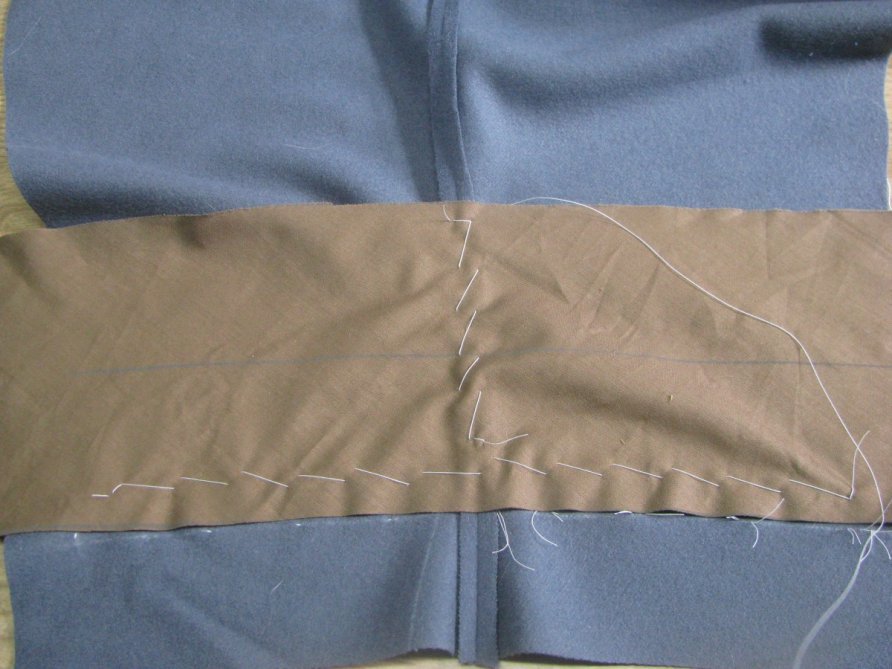
Baste along the top edge, starting at the center seam and working your way out. Smooth any excess that may appear as you go.
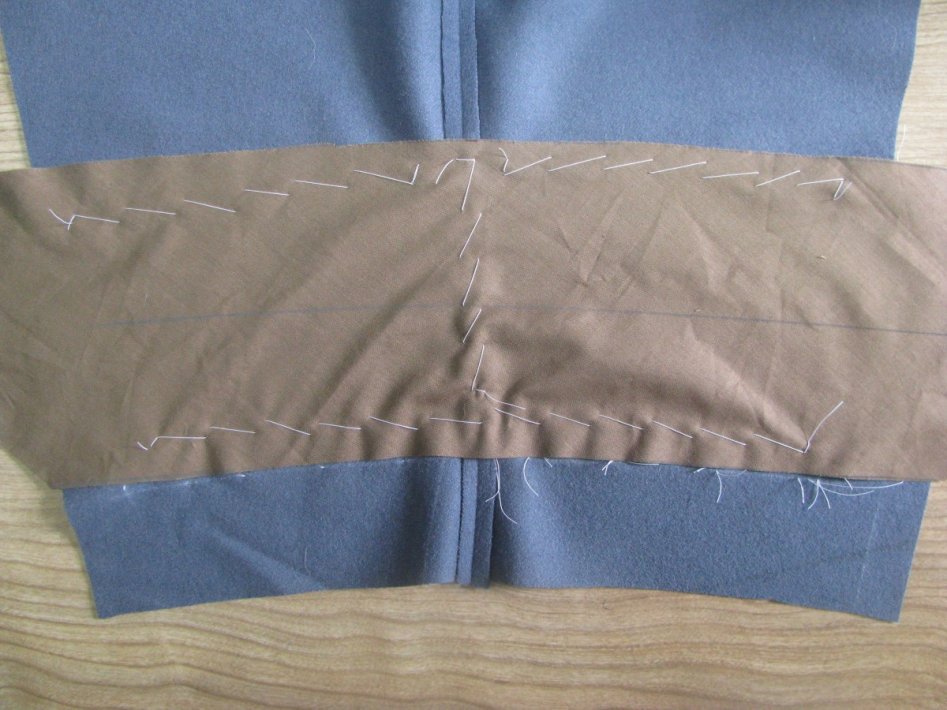
Along the center seam, using silk thread, carefully baste the pocketing to the seam permanently.
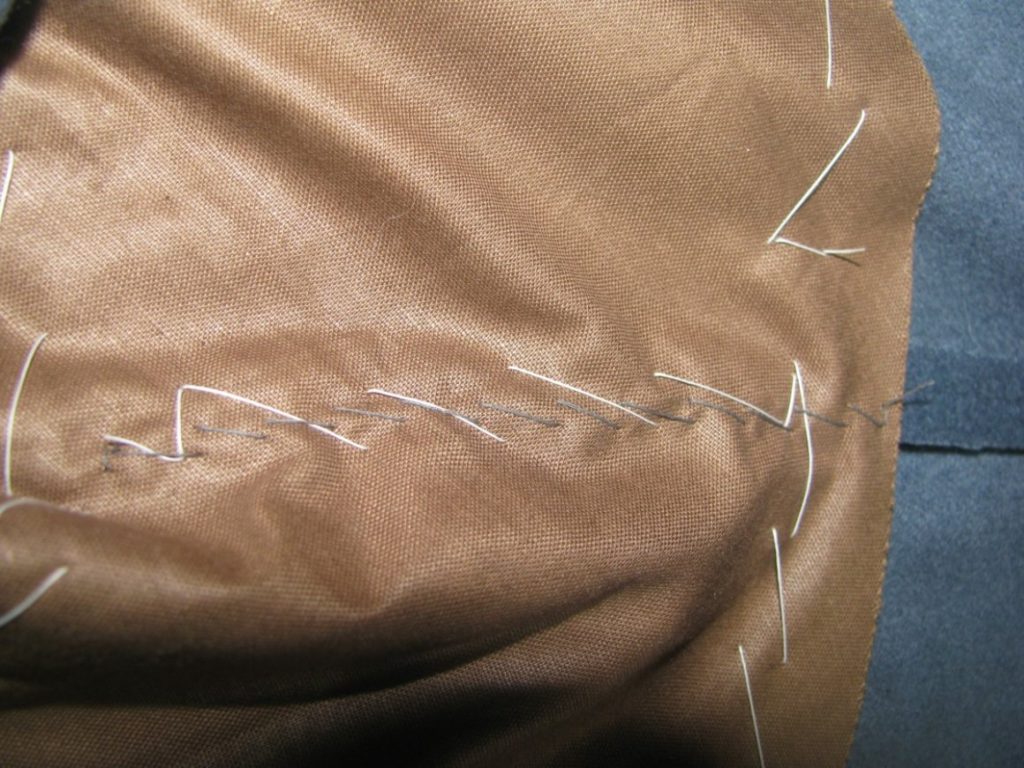
On the top sleeve side, fold back the pocketing, creasing just over 1/4” away from the inlay. Trim off the excess along this crease line.
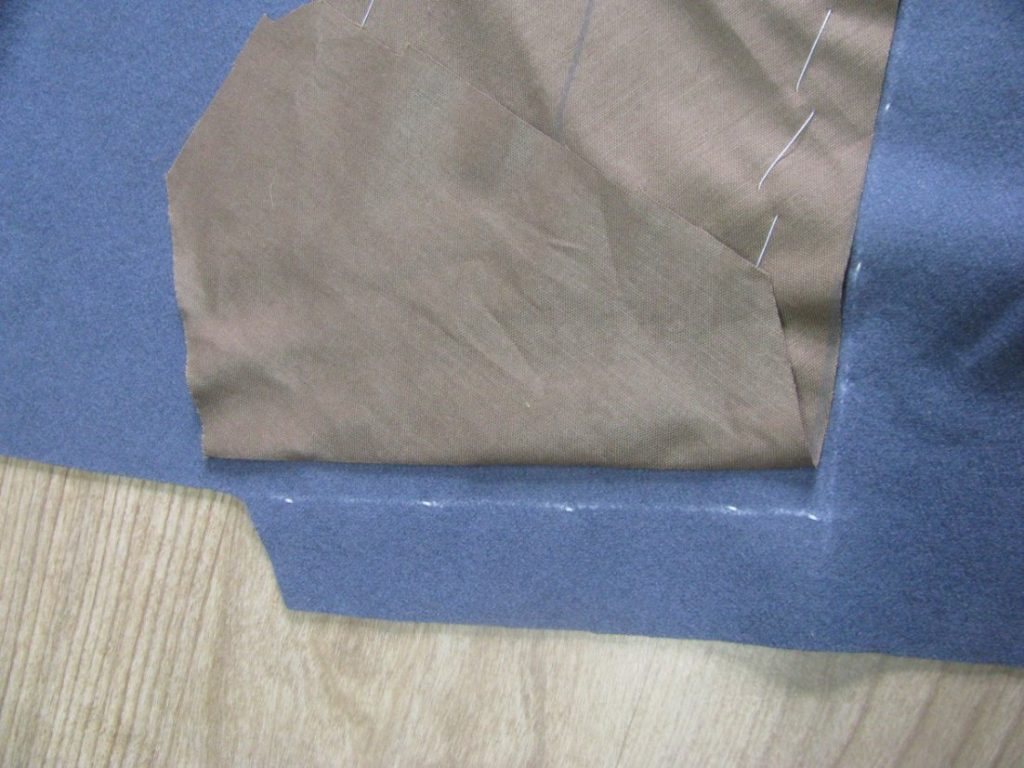
On the under sleeve side, trim off 3/8” of pocketing along the button catch inlay.
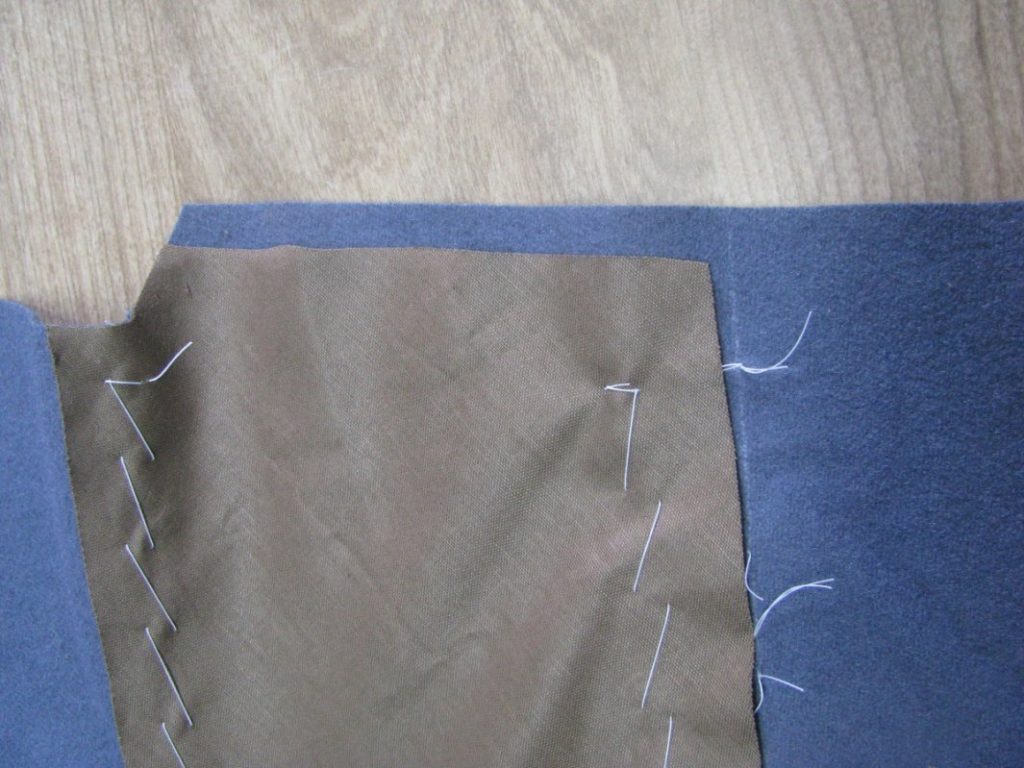
Here are the results so far. This pocketing will provide stability for the buttons, buttonholes, and also the sleeve as a whole.
Constructing the Cuffs
You’ll need two pieces of bias piping, made in exactly the same way as the collar. Again, these are 1 1⁄4 inch wide by about 20 inches long. The length depends on the size of your individual chevron shape. You’ll also need two smaller pieces of piping 5 inches long, but these can usually be obtained from the scraps after you’ve piped the chevron area. Press the piping in half lengthwise, and proceed.
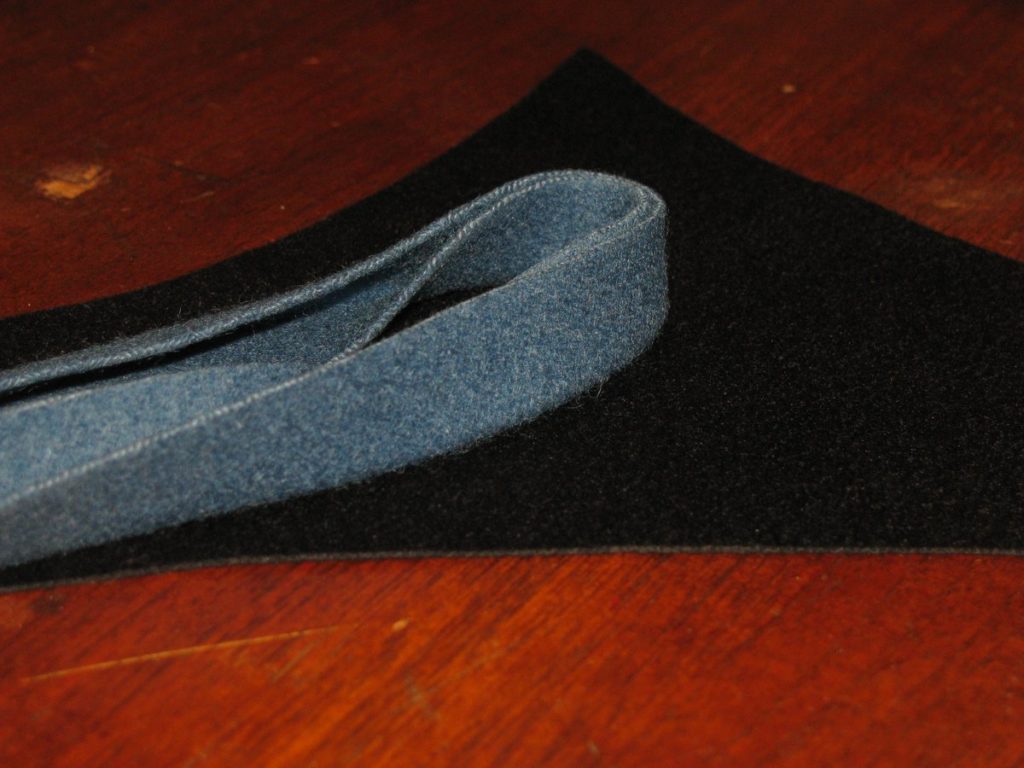
Baste the piping to the chevron, with the folded edge of the piping facing inward. When you get to the point, measure exactly 1⁄2 an inch from the edge of the other side of the chevron, and mark that point in chalk.
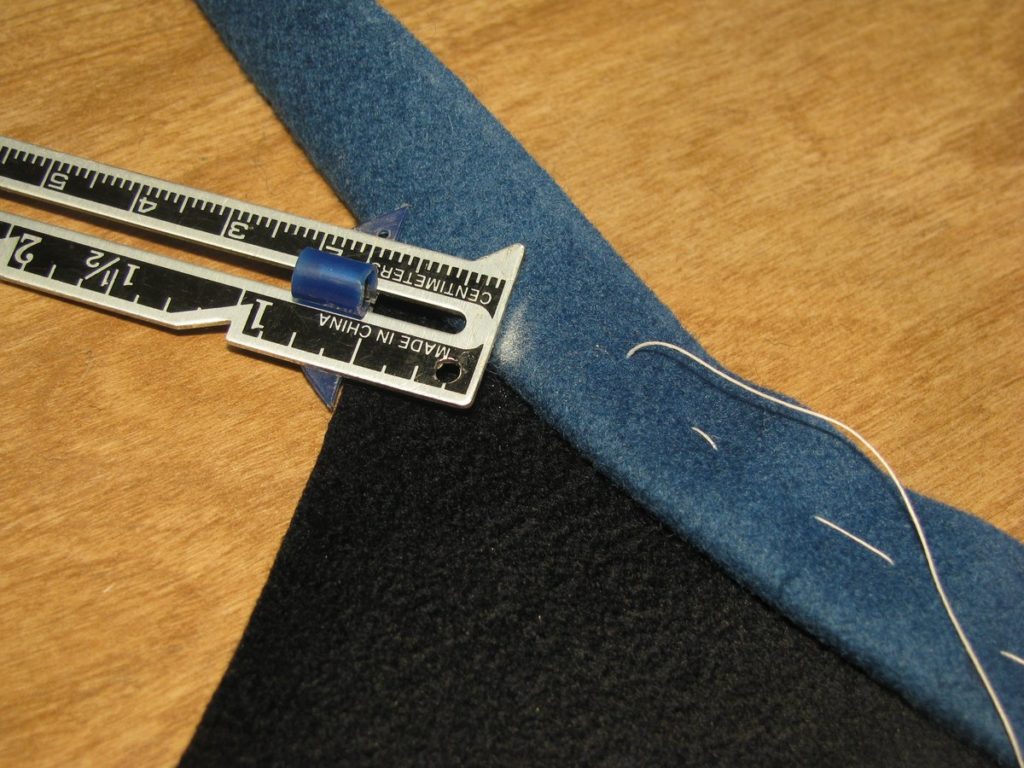
Draw a chalk line square across the piping corresponding with that mark. Note how it’s cutting right across the piping, not at all aligned with the other half of the chevron.
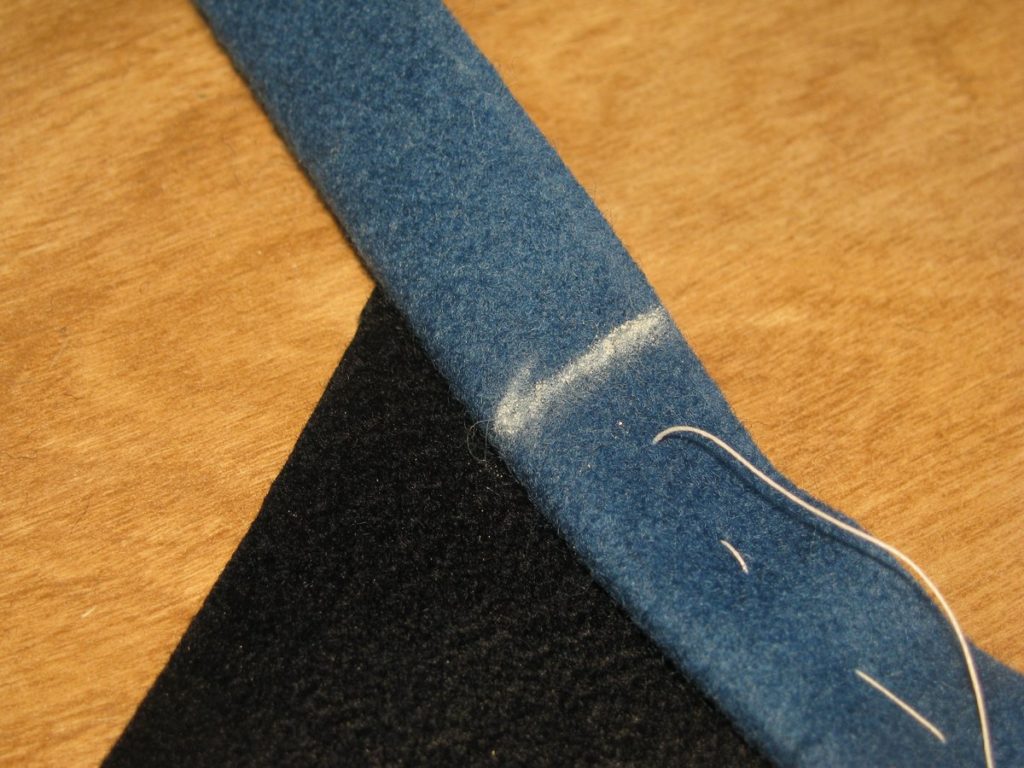
Trim along this line carefully, to within 3/16″ of the folded edge. Don’t go any closer or you’ll have a gap or cut edge showing in your finished piping. Any wider and it will be hard to get the piping around the tight corner.
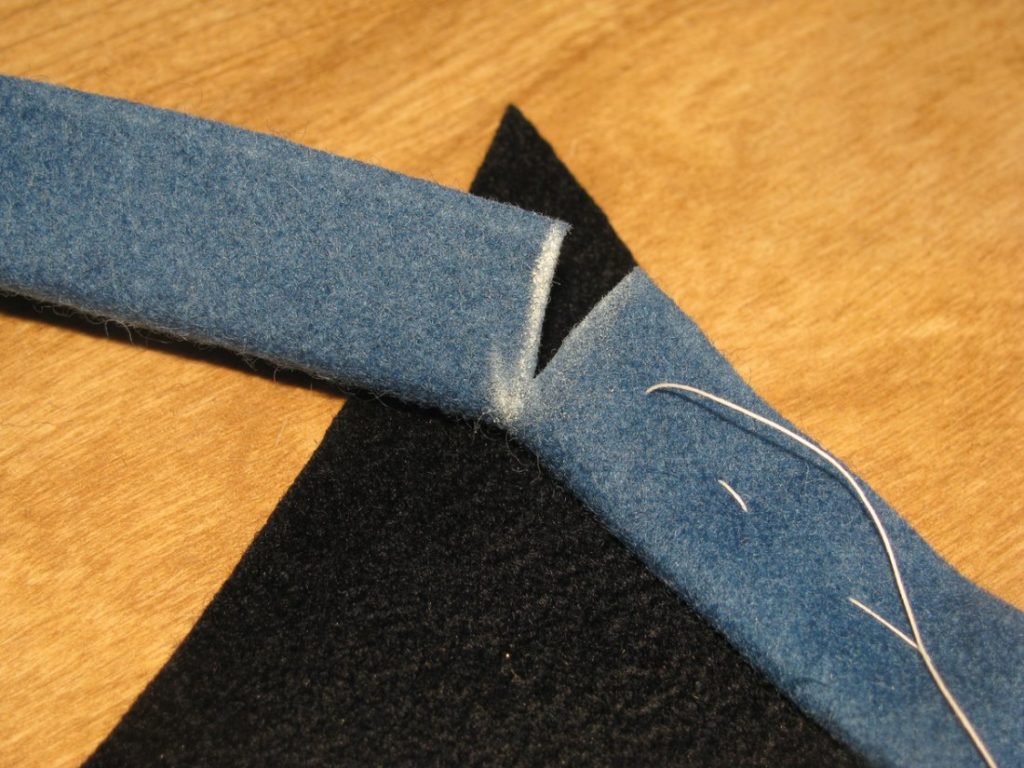
Continue basting the piping down until you get to the other edge. Leave about a one inch tail on either end.
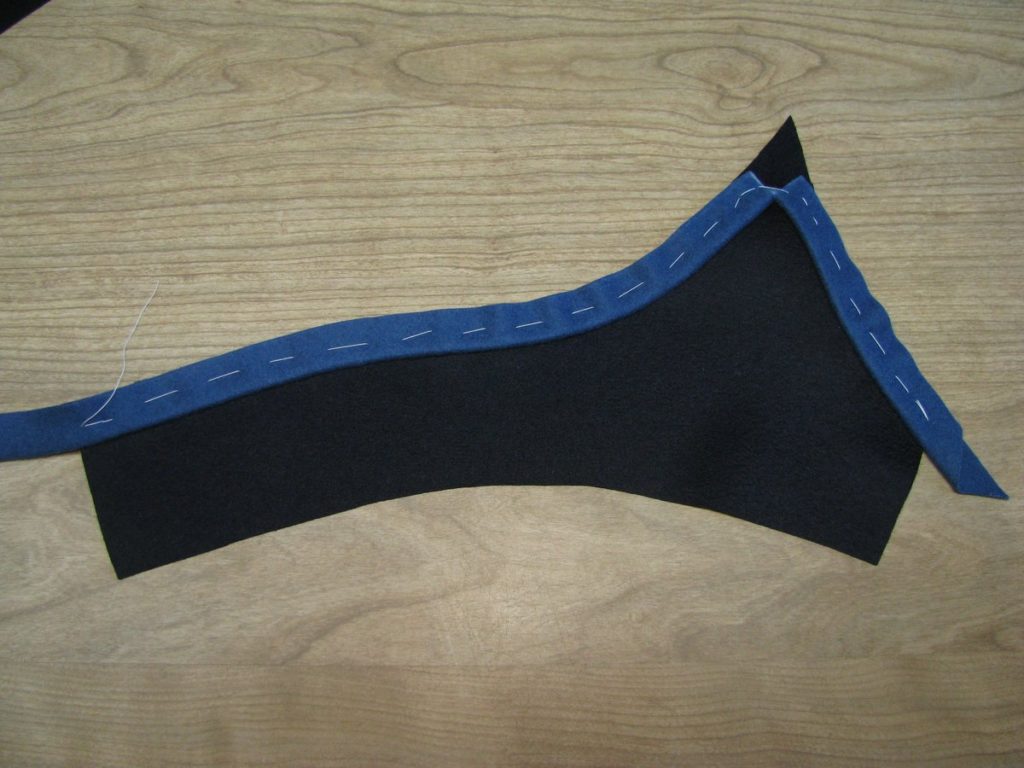
Machine stitch or backstitch the piping to the cuffs with a half inch seam allowance, letting 1/8″ of piping show on the other side of the stitching.
At the point, try to make the stitch line turn with a small radius. It’s not perfectly square, but it’s not a huge arc, either. If you mess this up, unpick the stitches and try again.
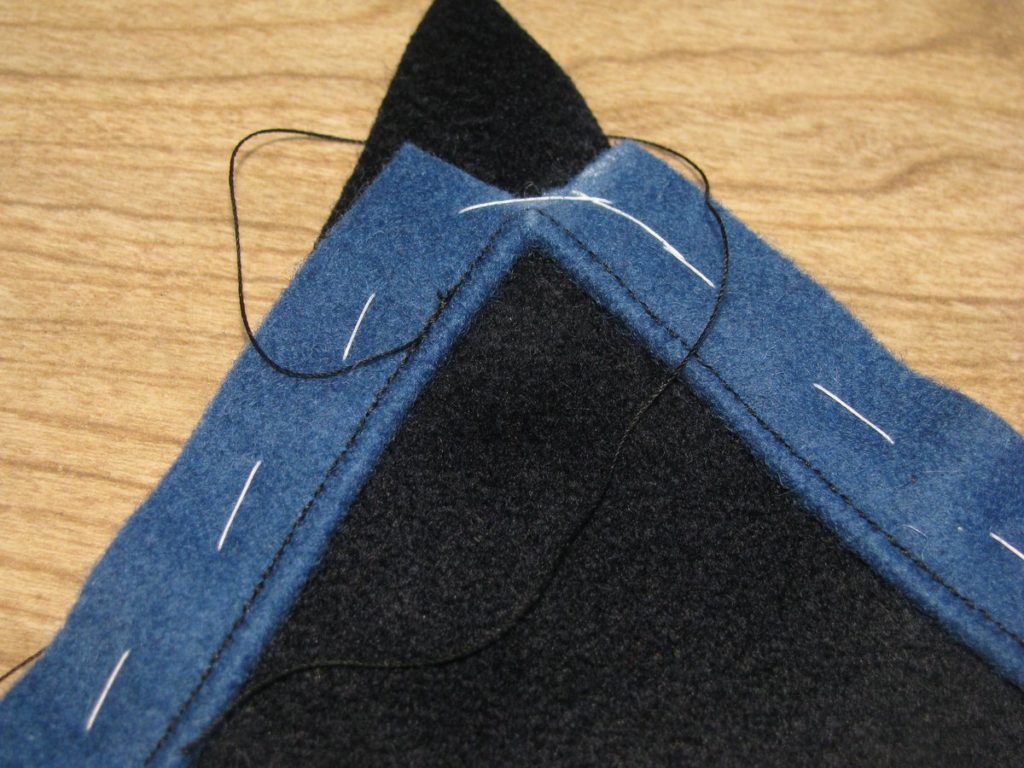
Remove the basting stitches and trim away the coat fabric as you did for the collar. Try to get as close to the stitches as possible – 1/8″ is good.
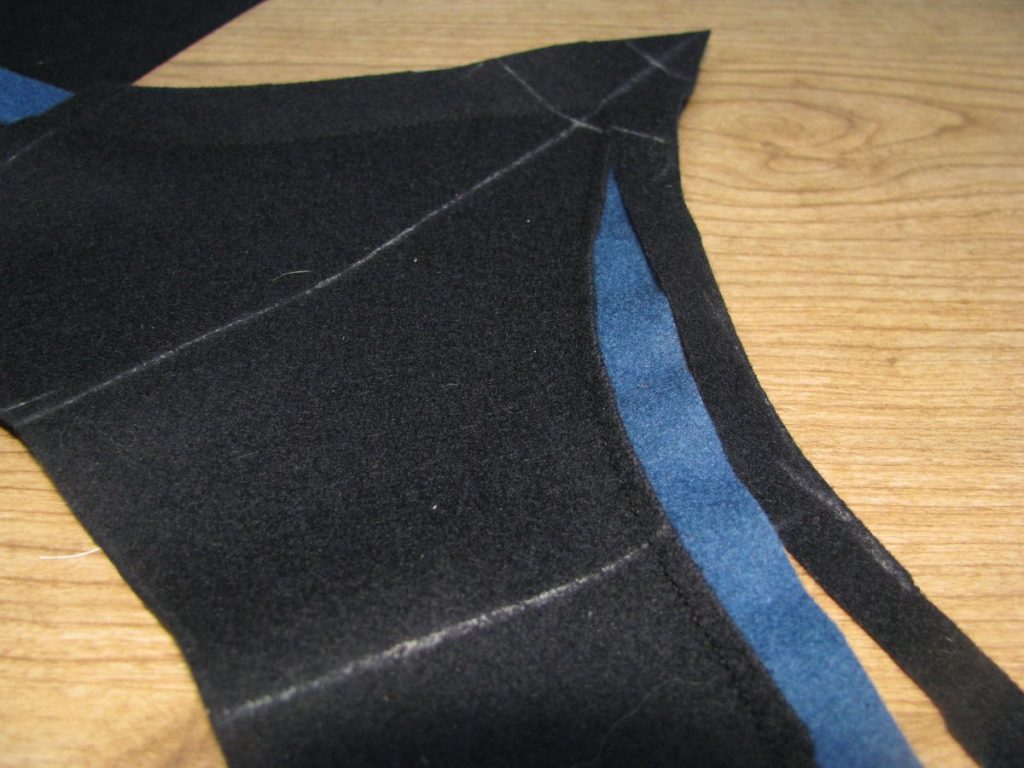
Trim the middle layer of piping as well, staggering the layers.
