Month: December 2019
Toile Construction
It is now time to construct the full body muslin. The purpose of this fitting is to ensure the seam lines are in the correct place, and that all of the pieces fit together properly. It’s also one last chance to catch any errors you missed during the close fitting wrapper stage.
Before you begin, you should have constructed at least one close-fitting wrapper, and corrected that on the original paper pattern.
Construction is slightly different because of the added pieces, and make sure to press each seam before continuing on.
Before commencing construction, draw the lapel line on the forepart fabric in chalk.
Forepart Darts
Begin by sewing the darts closed on the forepart – the lapel, gorge, and armscye or waist if necessary. Remember that the seam lines are directly on the construction lines of the dart. The fabric should not be cut out from the dart area until after it is sewn. Also sew on the lapel if constructing a double-breasted coat.

Side Body to Forepart
Sew the side bodies to the forepart. Press open the seams.

Front to Skirt
With right sides together, pin the skirt to the forepart and sew. The back seam of the side piece should overlap the inlay we added in the skirt by 1/4 inch – the seam allowance. Sew the seam all the way across. There should be about 5 inches extra fabric in the front of skirt.

You can measure off the extra 5 inches and mark with chalk, and then trim off the extra amount in the front. This extra amount is only needed when sewing the actual coat.


Front to Back
The front in then carefully pinned to the back, making sure the tension is neither too tight or two loose in either piece. At the top, the side body should extend out 1/4″. At the waist seam, the two pieces should line up with the little spring we gave to both the skirt and back pieces. And the bottoms should match as well, although this is commonly off by 1/4″ either way.

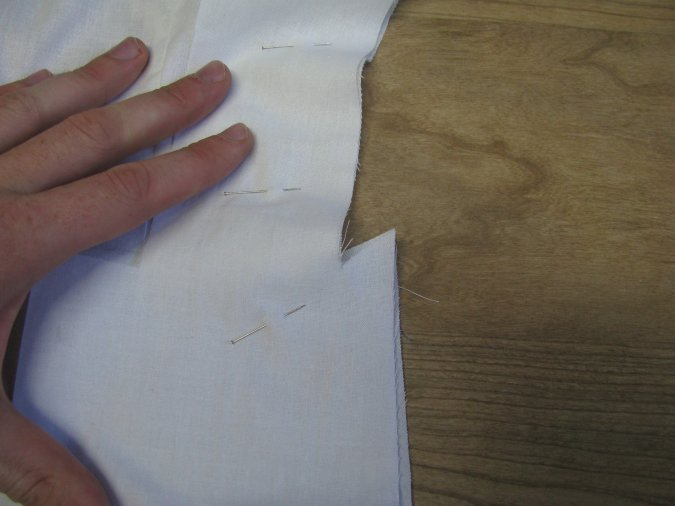
On the underside, the skirt seam allowance should be clipped just 3/8 of an inch past where the seam will be sewn. This allows the inlay area to remain flat, and reduce bulk.


You can see the back side of the seam and the shape it should take. Note how it follows the edge by 1/4 throughout, and the ‘step’ that the seam takes.

When pressing open the curved side seam, clip the seam allowance of the back piece to allow it to lay flat.

Here is the view from the right side of the pieces sewn together. The next step is to sew the shoulder seam together using the same method discussed for the close fitting wrapper.

Notice that it does not want to lay flat on the table. That’s a sign of good tailoring and that you are moulding the shape to the human body.
Back Seam
Finally, pin and sew the two sides together at the back seam, sewing 1/4″ past the ‘step’ at the waistline. Clip the corner to the stitching, and press open.

The muslin is now complete. When trying on, check that the waist seam is at the appropriate place. Check also for any fitting errors as discussed in the last section and correct if necessary on the original draft, and recopy the pieces in question.

When fitting the draft, the seam connecting the forepart to the lapel should meet at the waist, while having a little bit of ease at the chest line, where it’s fullest.
I love the back view. The skirt, which I cut a little fuller than usual, drapes almost perfectly.

Notice how the armscye comes right up to the bottom of the arm. This was the practice back then, and is still used on higher end coats today.

I need to shorten the back about 1/2 an inch.
Front view with arms raised to show how there is almost no movement of the coat. Try that with yours and see if the results are the same. A close fitting armscye gives much more mobility, contrary to what most people think.

Seam Allowances
At the end of this drafting process, you should have the following pattern pieces. Note the seam allowances that have been added to the sides and bottom of the forepart and side piece, the sides of the back piece, and the top of the skirt seam. These are the basic seam allowances used for any frock coat. We will be adding inlays later on to account for fitting issues.
The dart lines in the forepart indicate sewing lines, not seam allowances.
All seams are .25 inches.
