Category: Uncategorized
Jean Alterations
Alterations for jeans in the fitting stages are at once easier than traditional trousers, and more difficult, due to the fewer places for adjustment. You can’t really do anything with the side seams, being on the selvedge, so all alterations take place at the waist, seat and crotch seams, and inseam.
If you’d like personal help with your fitting, please consider posting a new message in the support community with photos of your draft from the top down, along with photos of you wearing the muslin toile from the front, sides, and back. That way others benefit from your own work and corrections. Or if you prefer, you can email me the photos to james@historical-tailoring.com. Either way, I’ll get back to you with specific corrections to help your jeans fit as nicely as possible.
In the future I’ll be adding more diagrams and hopefully photos and video of fitting issues and their solutions.
When making the alterations, I like to make them on my original pattern and then trace them to new sheets of paper. You could also tape a fresh piece of paper to your pattern pieces and then add the alterations, redo the seam allowances, and trim the excess.
Supplies
Here’s the list of supplies you’ll need for this project.
- Pattern / Poster Paper (available in craft stores or some office supply stores).
- Quilting Ruler
- Tape Measure
- Pencil
- French Curves or bendable Drafting Ruler (both are optional)
- 1 – 2 yards Cotton Muslin and Thread for sewing
Graduated Rulers
To make your pattern the appropriate size, you’ll need to print out the ruler corresponding to your chest size. The rulers can be found on the main page of this course.
Cutting and Tacking
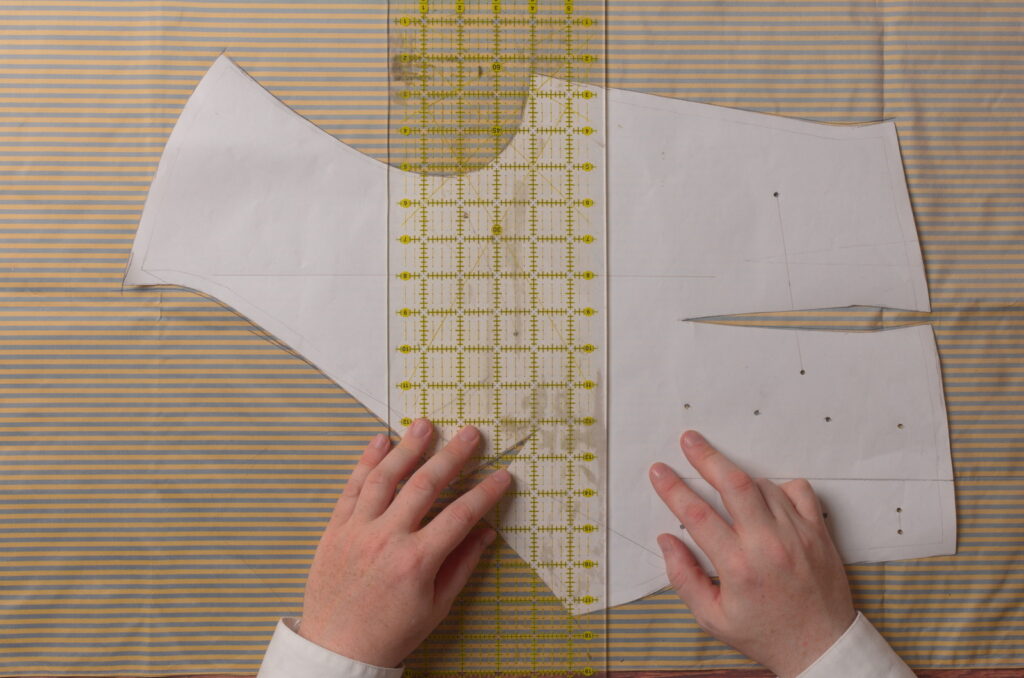
It’s time to final begin cutting and constructing the waistcoat! Lay your forepart pattern piece on the doubled fabric, aligning the grain lines with the edge of the fabric. I use a quilting ruler to aid in this. Ideally you’d have your pattern laid out closer to the edge to save fabric – I was concentrating on taking photographs and it completely slipped my mind.
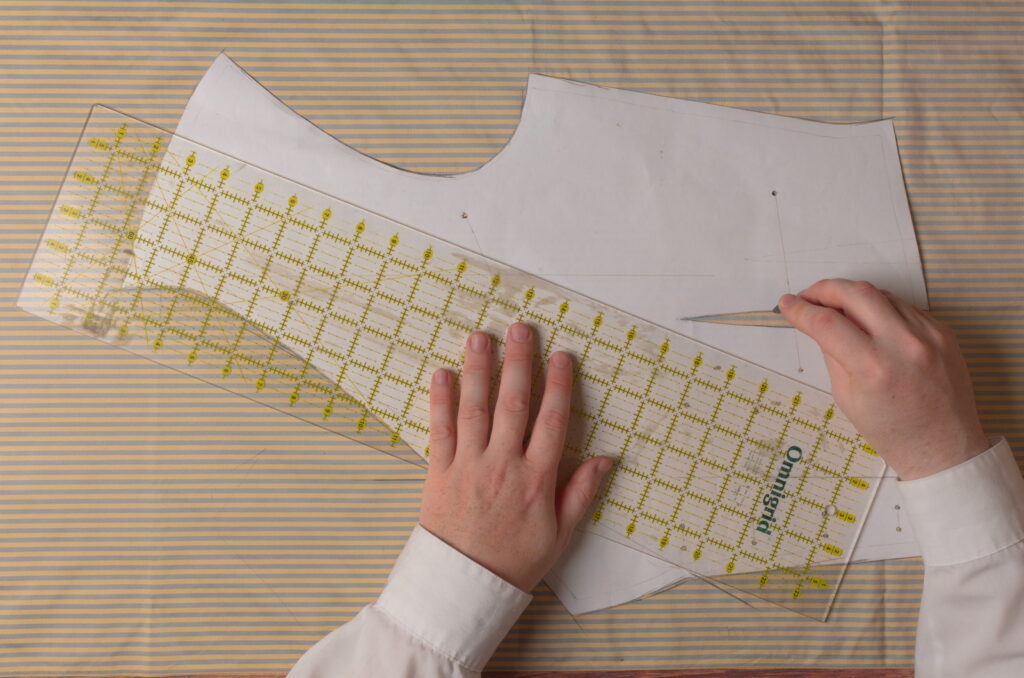
Trace around the entirety of the pattern with a sharp piece of tailor’s chalk, as well as the darts. I weigh down the pattern with whatever I have handy, in this case my quilting ruler, but scissors and other objects work well too.
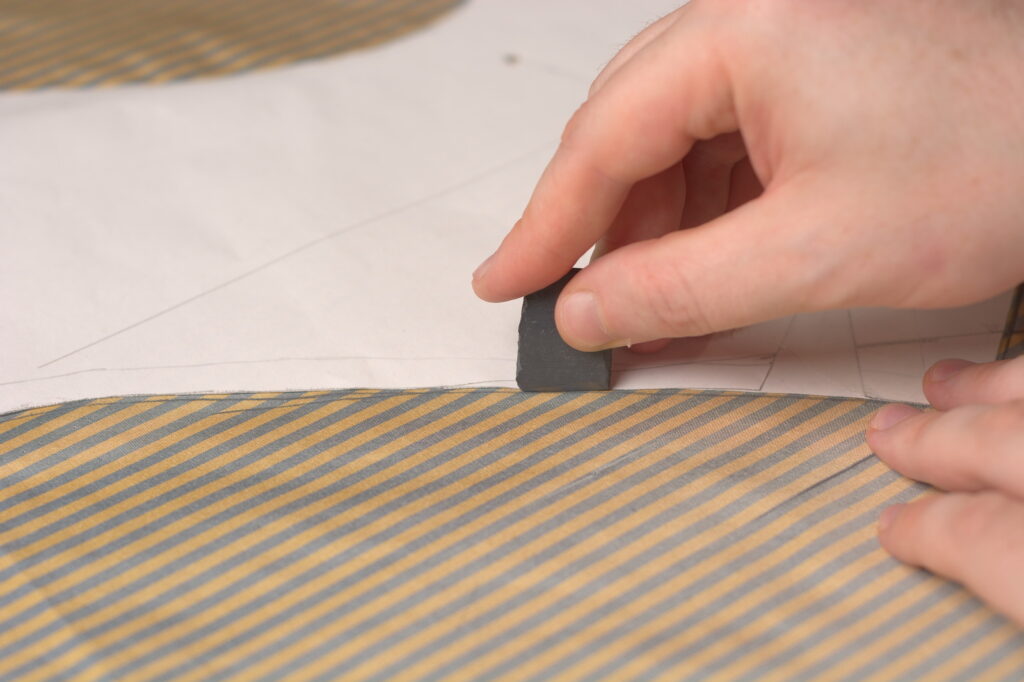
It’s a good idea to transfer the roll line and center front line to the fabric. I did so by aligning the ruler with the lines, and marking each end, just off the edge of the pattern.
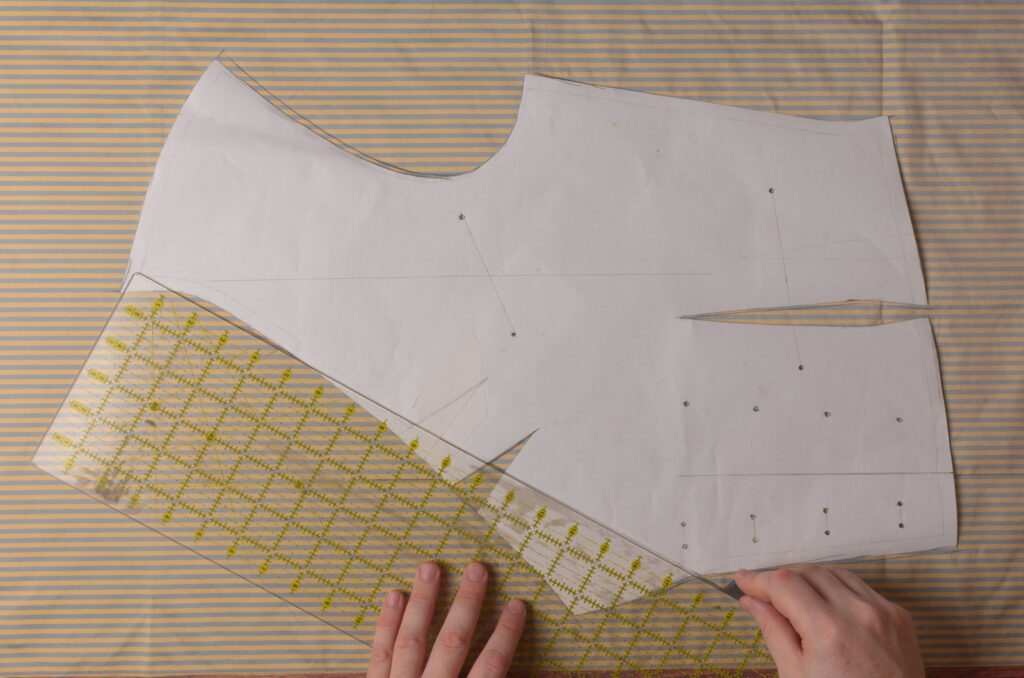
Marking the top end of the center front.
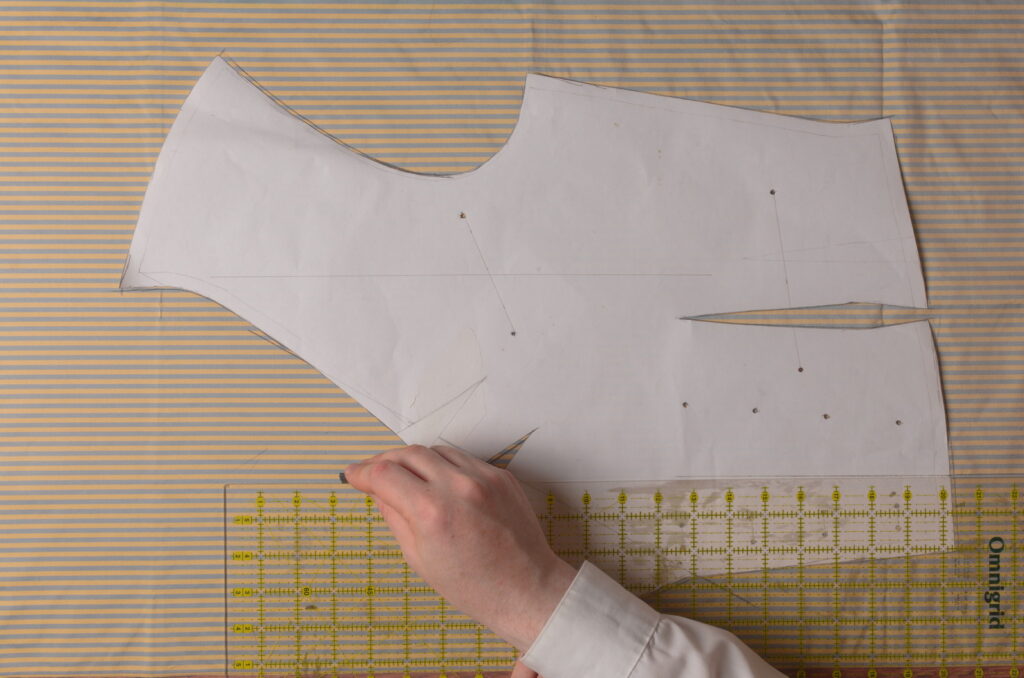
Then it’s a simple matter of connecting the two marks after you remove the pattern to get the line in place.
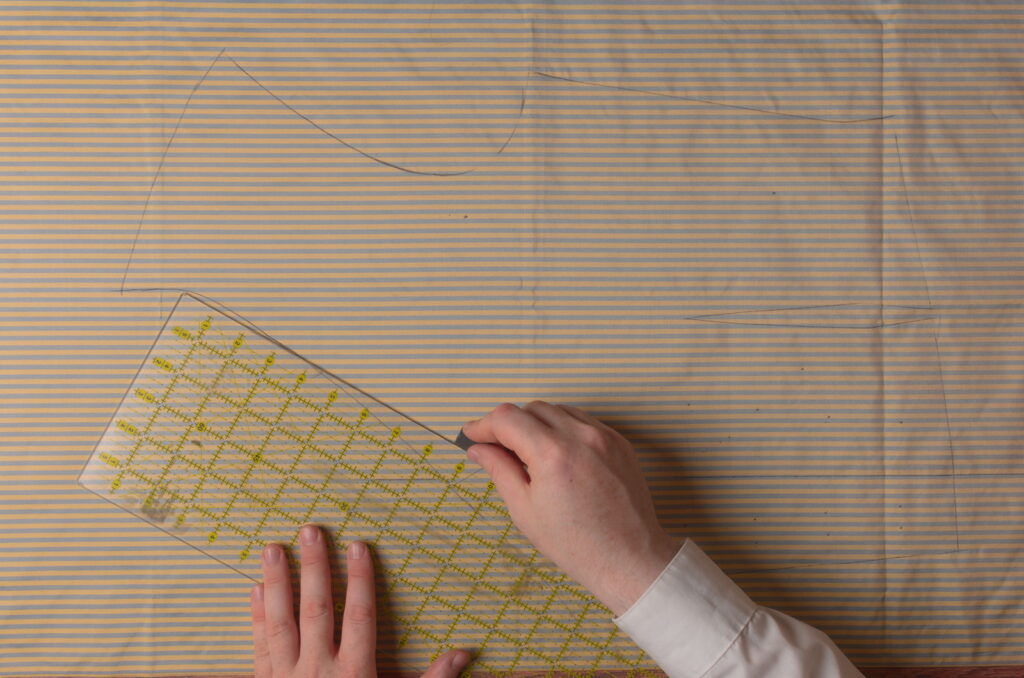
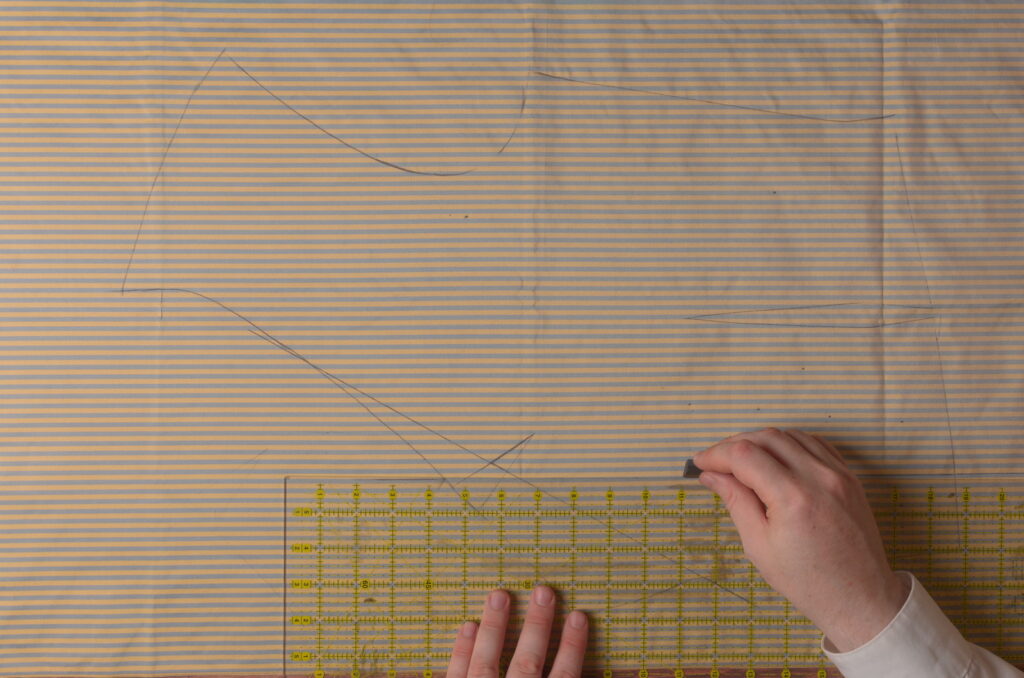
Also be sure to mark the positions of the buttons, buttonholes, and ends of each pocket before you remove the pattern.
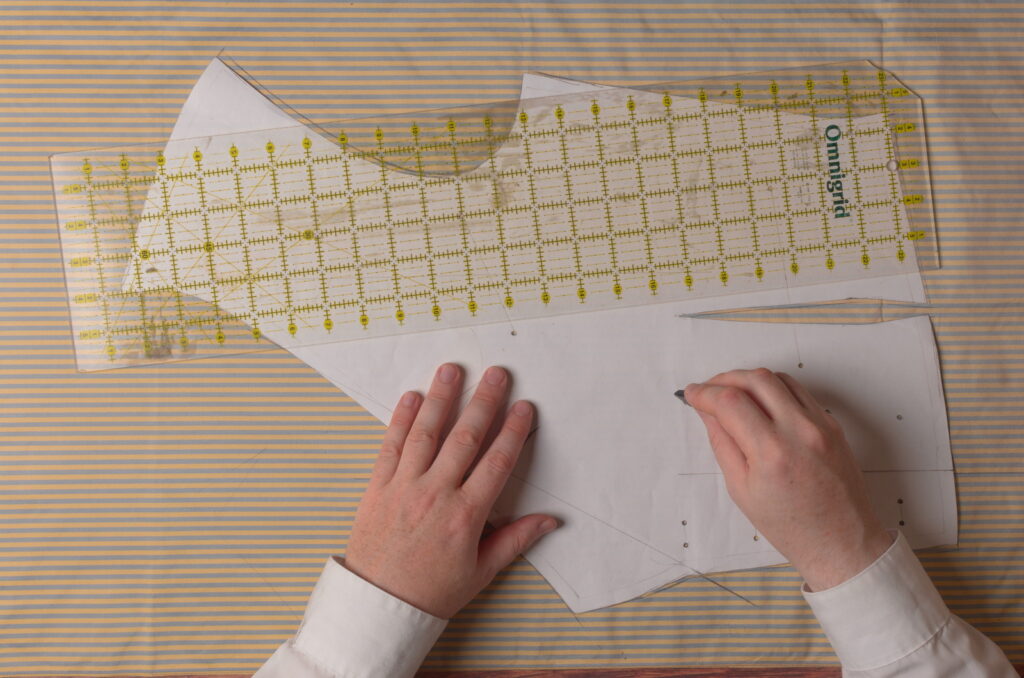
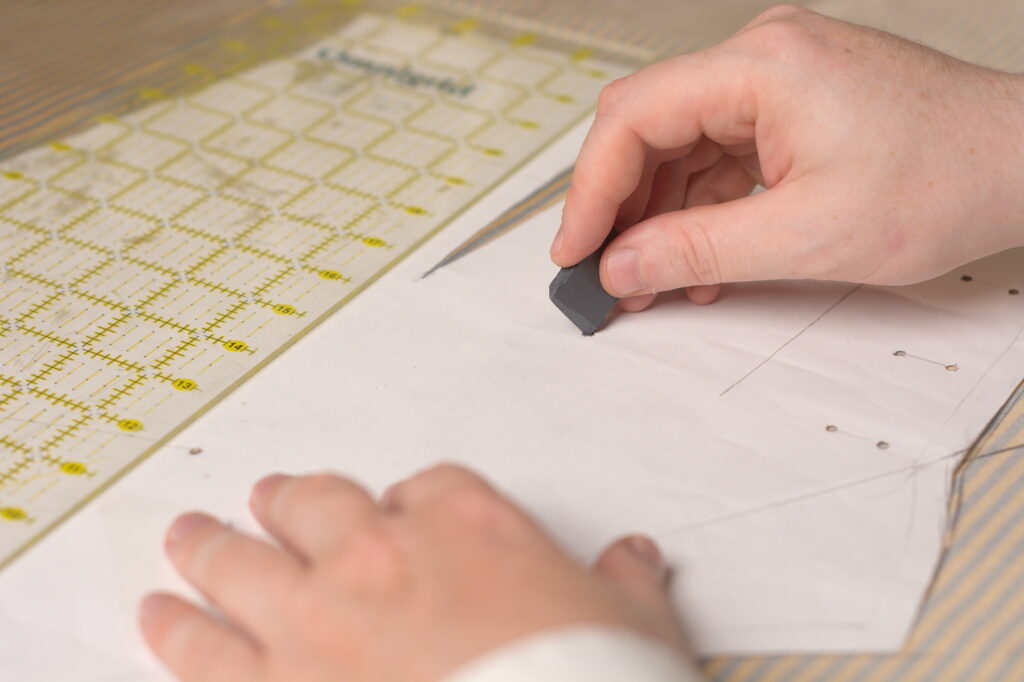
It’s a little hard to see, but here’s my pattern all marked out on the fabric, with the darts, roll line, center front, buttons, buttonholes, and pocket ends all marked out.
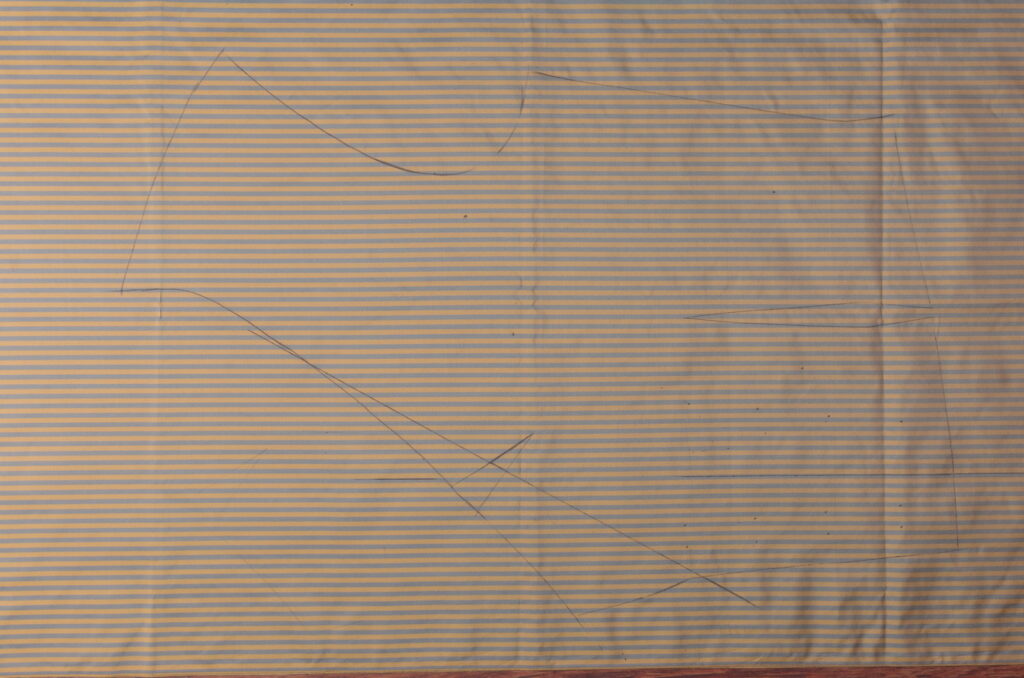
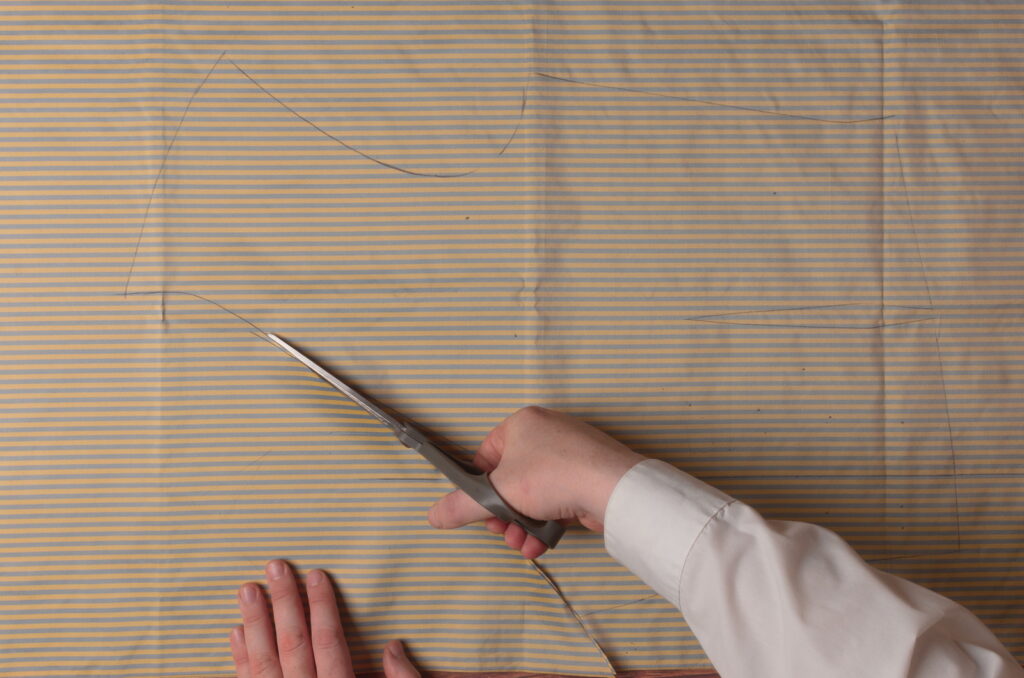
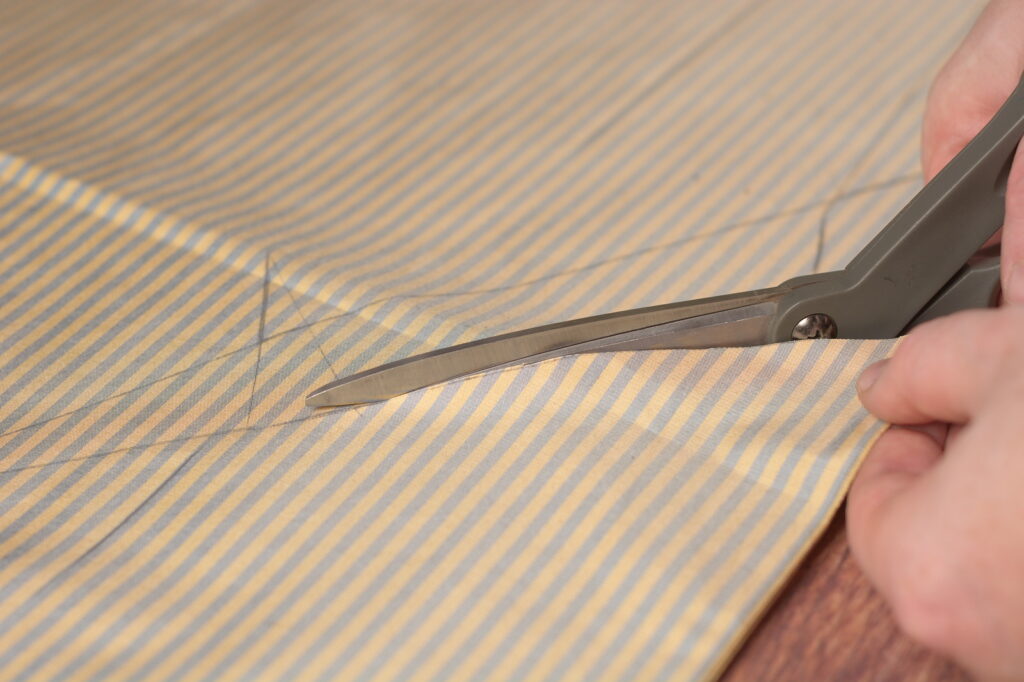
Begin cutting out the forepart. For best accuracy, keep your scissors on the table as you cut, perpendicular to the table, and cut to the inside of the chalk lines. Since the chalk line has a small width to it, cutting on the outside would give you a slightly-too-large waistcoat.
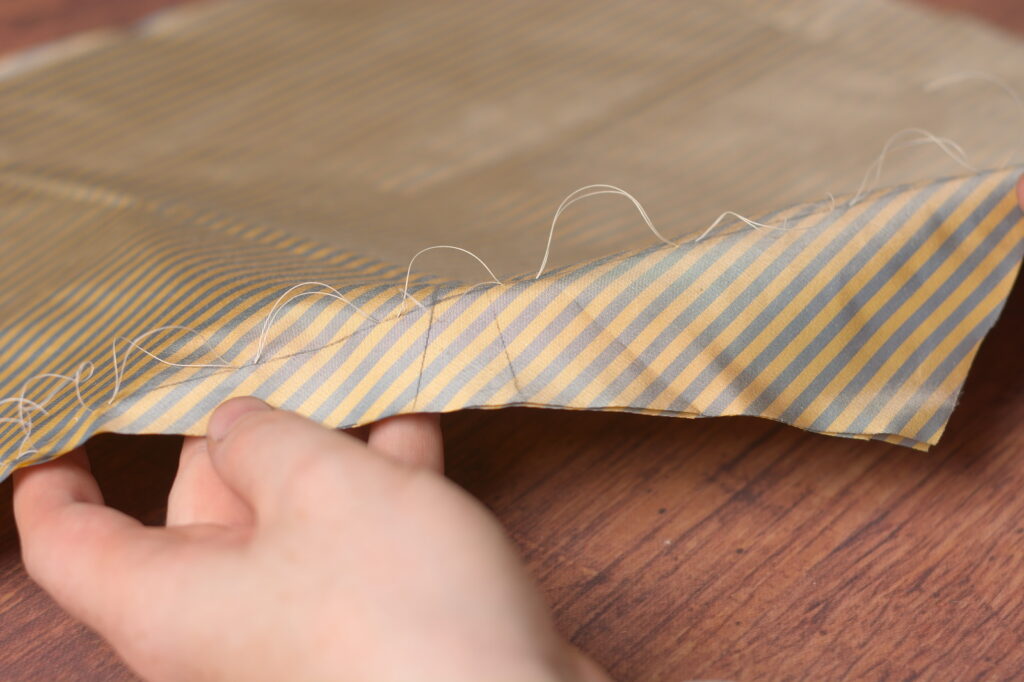
To transfer the markings to the lower piece, it’s a good idea to use tailor’s tacks, which also make the marks more durable for construction. For the roll line, center front line and pockets use the following method. Take a doubled over piece of basting thread and make about 1/4″ running stitches, two or three inches apart, along the straight lines. If you make the stitches closer together, keep a little slack in the thread.
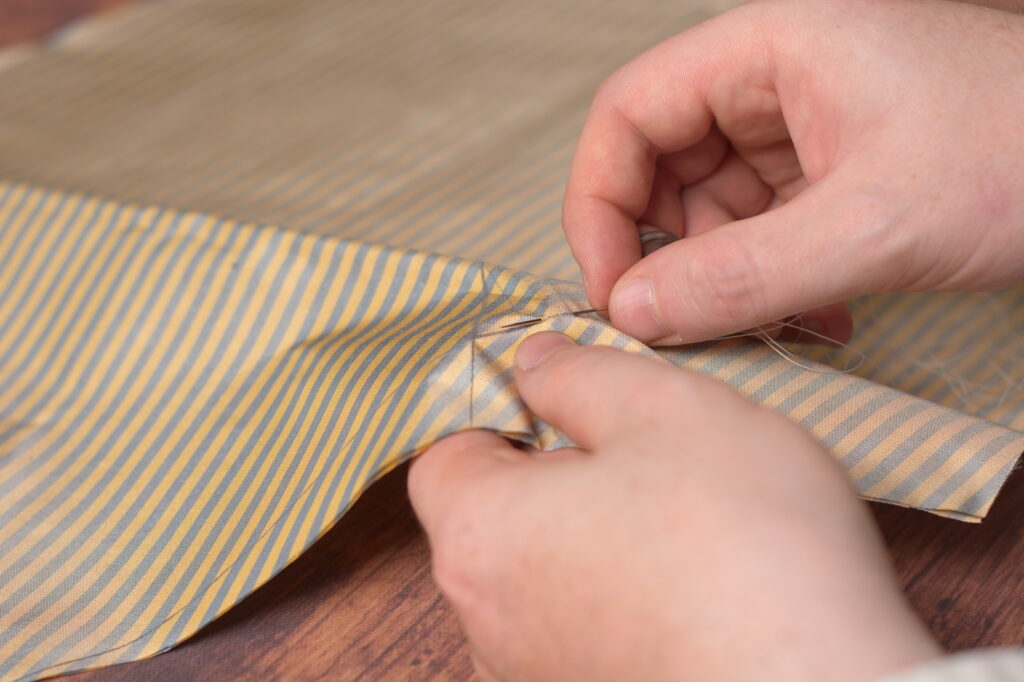
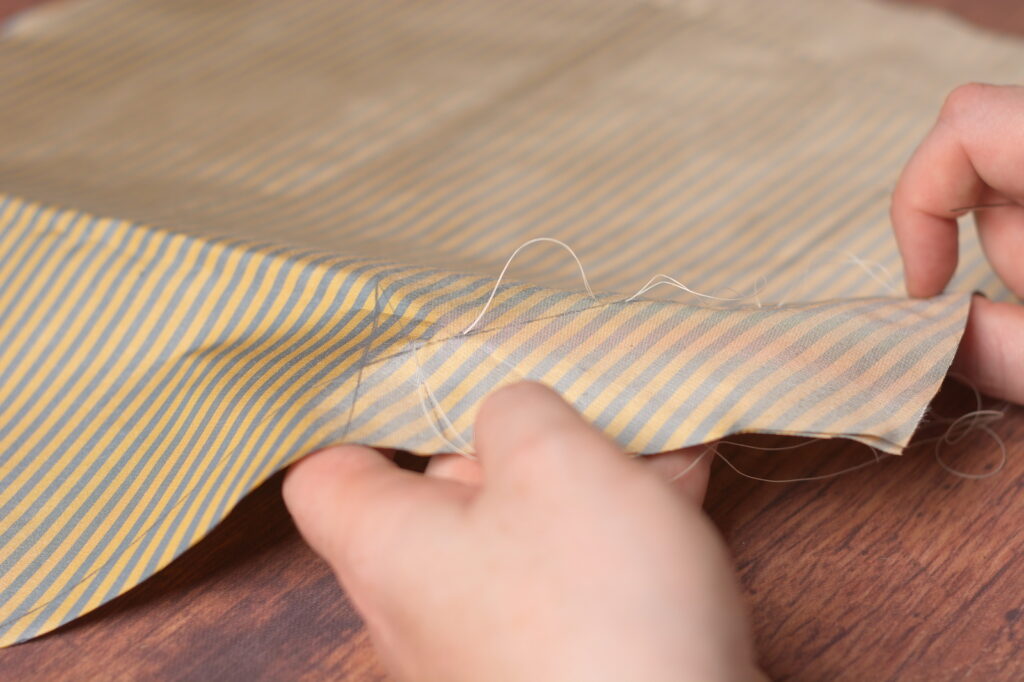
For the buttons, buttonholes, ends of the pockets, and any other points, mark them by taking two stitches in place with the doubled basting thread, forming a loop. Be sure to keep the loop open about an inch, and the ends slightly longer than that.
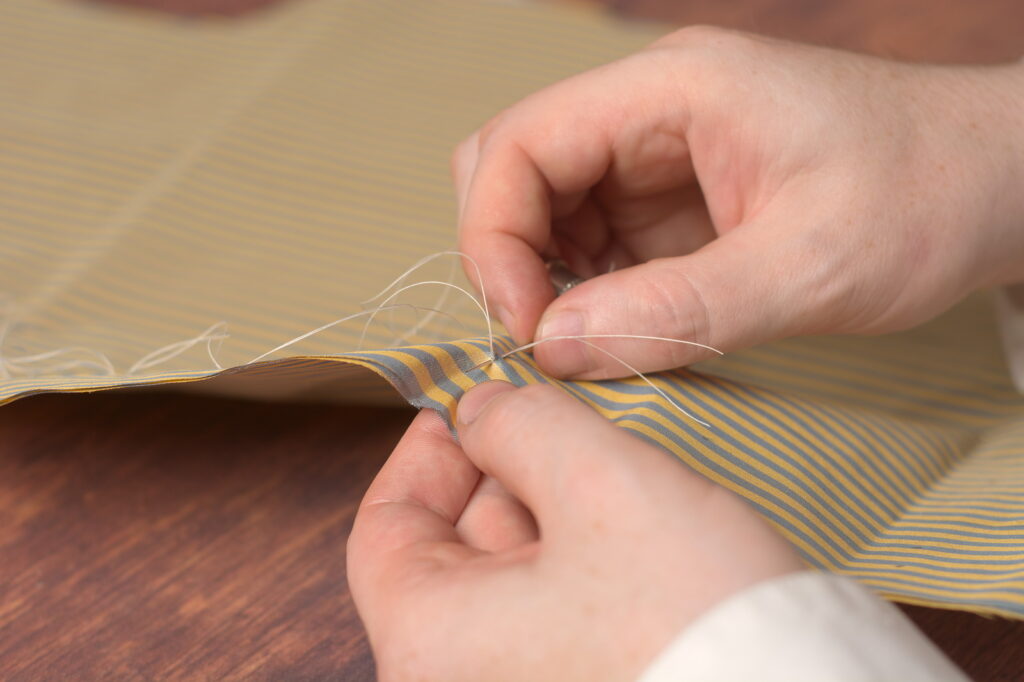
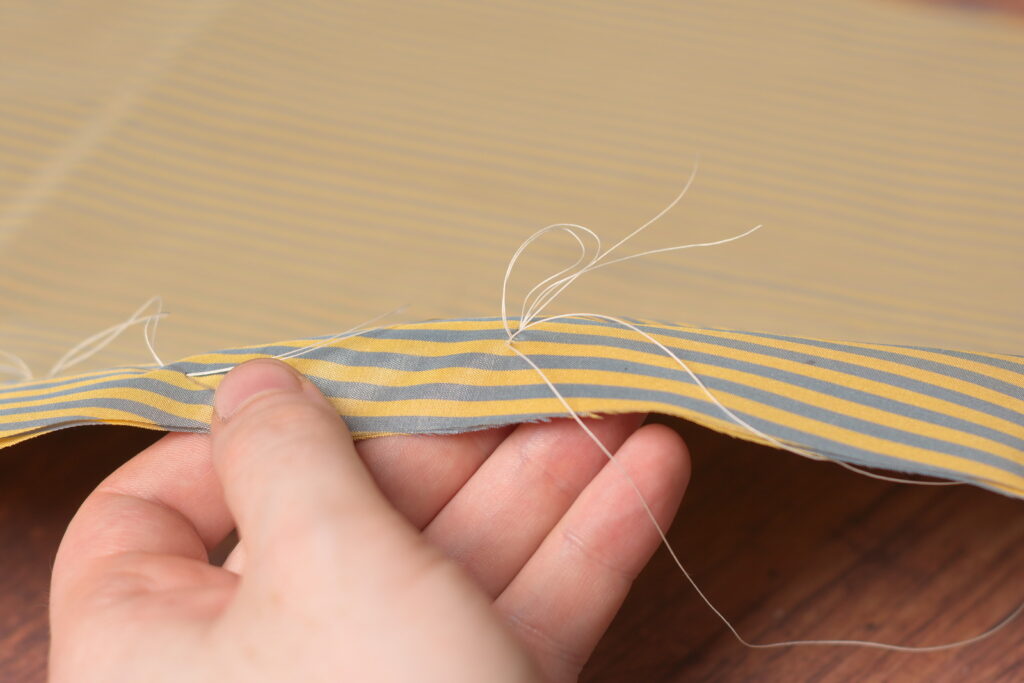
On the tailor’s tacks formed by the running stitch only, clip the threads between each stitch. The looped tacks are not cut open.
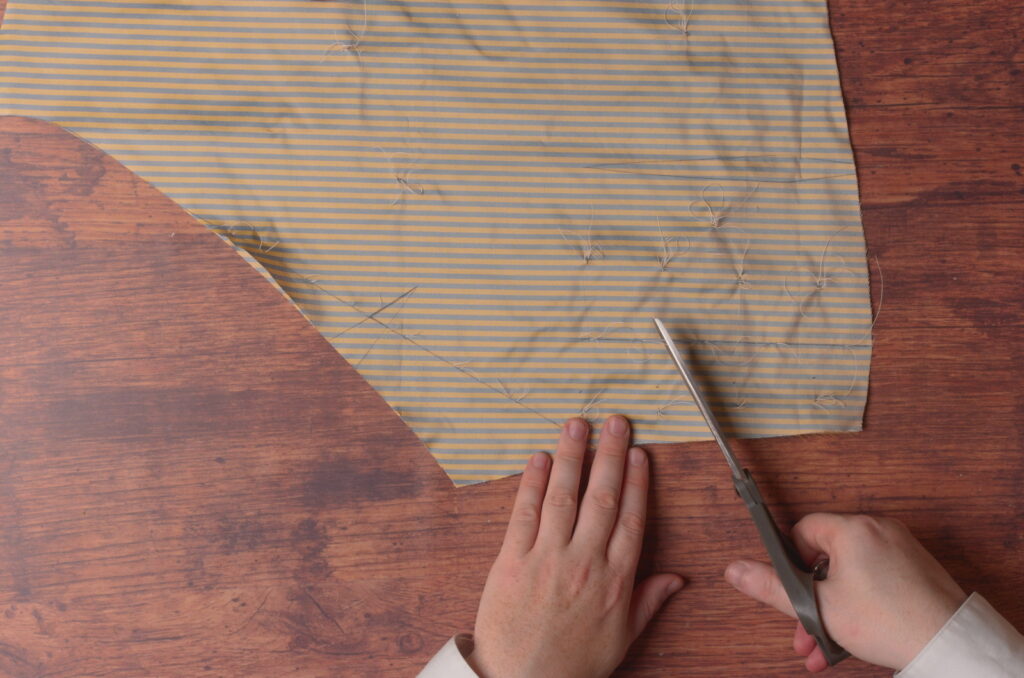
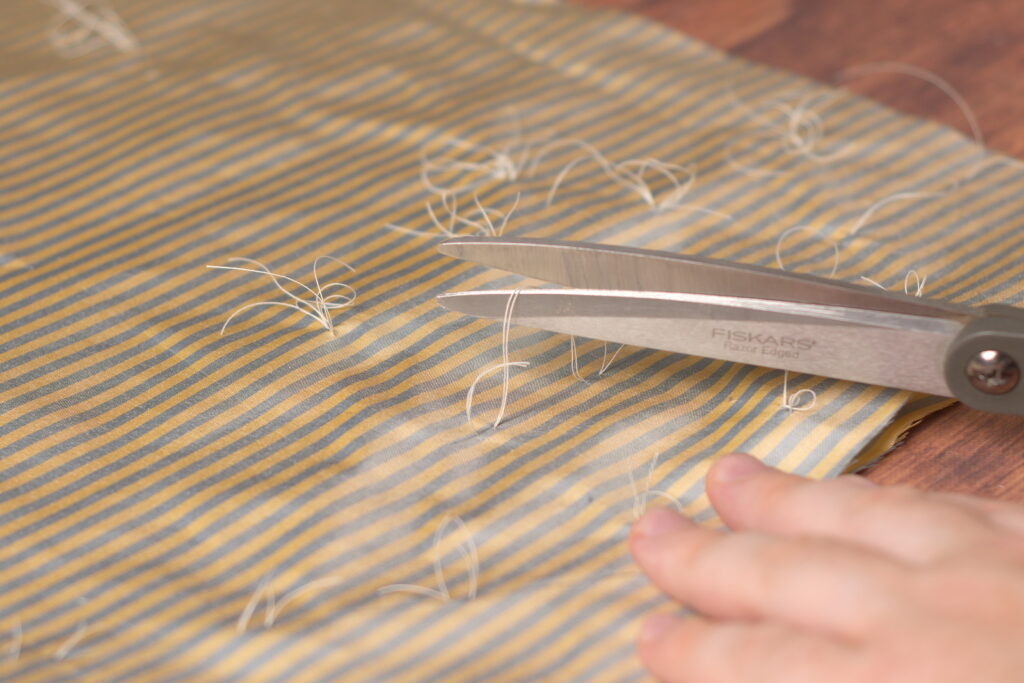
Carefully open the two layers of fabric, revealing the stitches on the inside. Don’t pull them too open or the threads may come out. Snip the threads at each tailor’s tack as you get to them, working your way across the entire forepart.
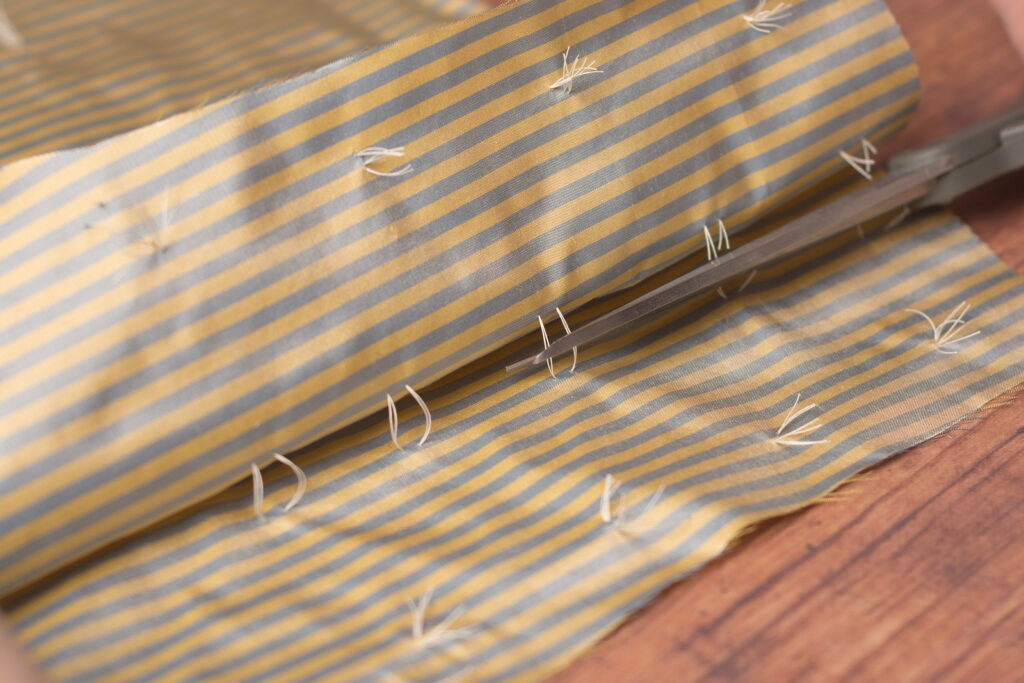
This leaves you with semi-permanent markings that will be of great use during construction.
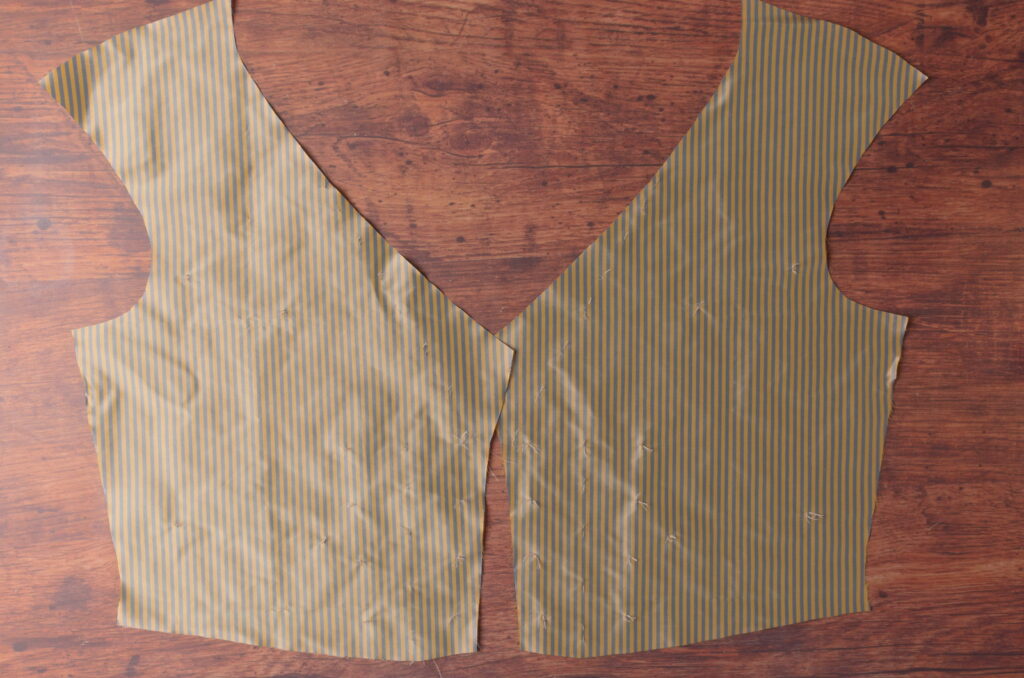
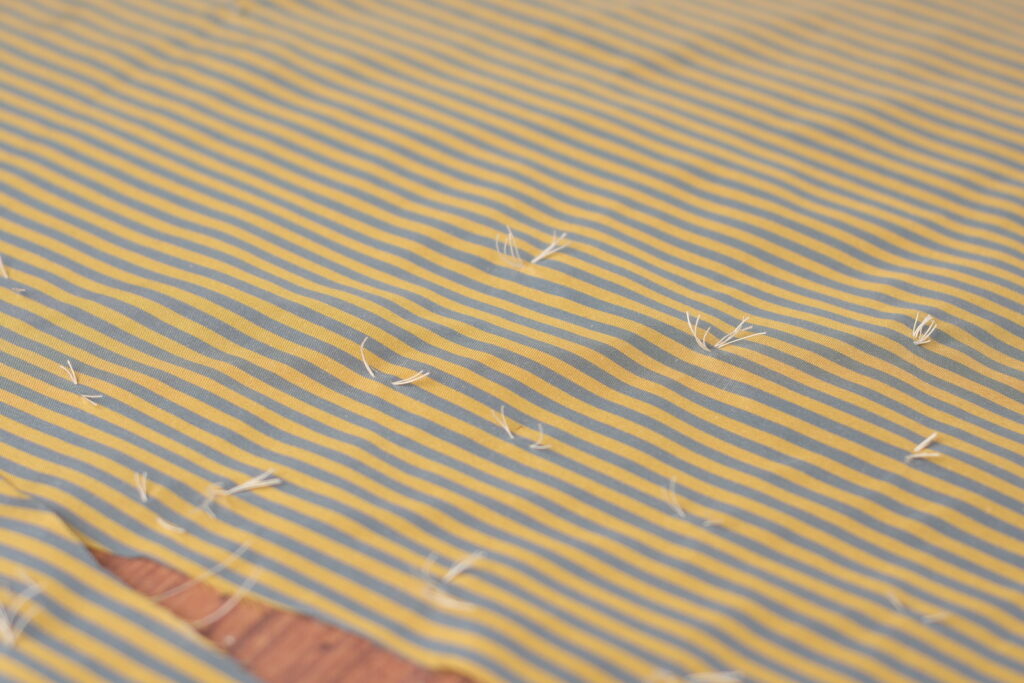
Trimming the Front Waist
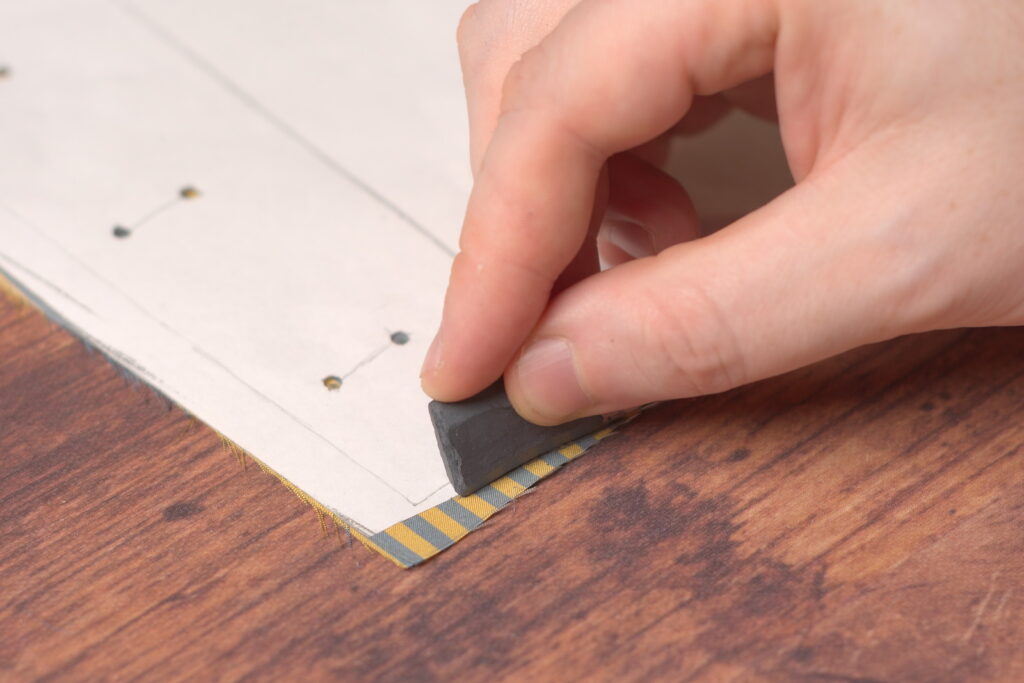
There’s one last little detail to take care of on the pattern before moving on to the toile. The way the pattern is designed, you’ll be left with two little points at the bottom front of the waistcoat if you don’t trim them. The easiest way is to make a quick copy of your waistcoat front pattern, with the center front line drawn on the copy. Then overlap the two, trace the overlapped area, and trim off the excess, giving you a nice clean front.
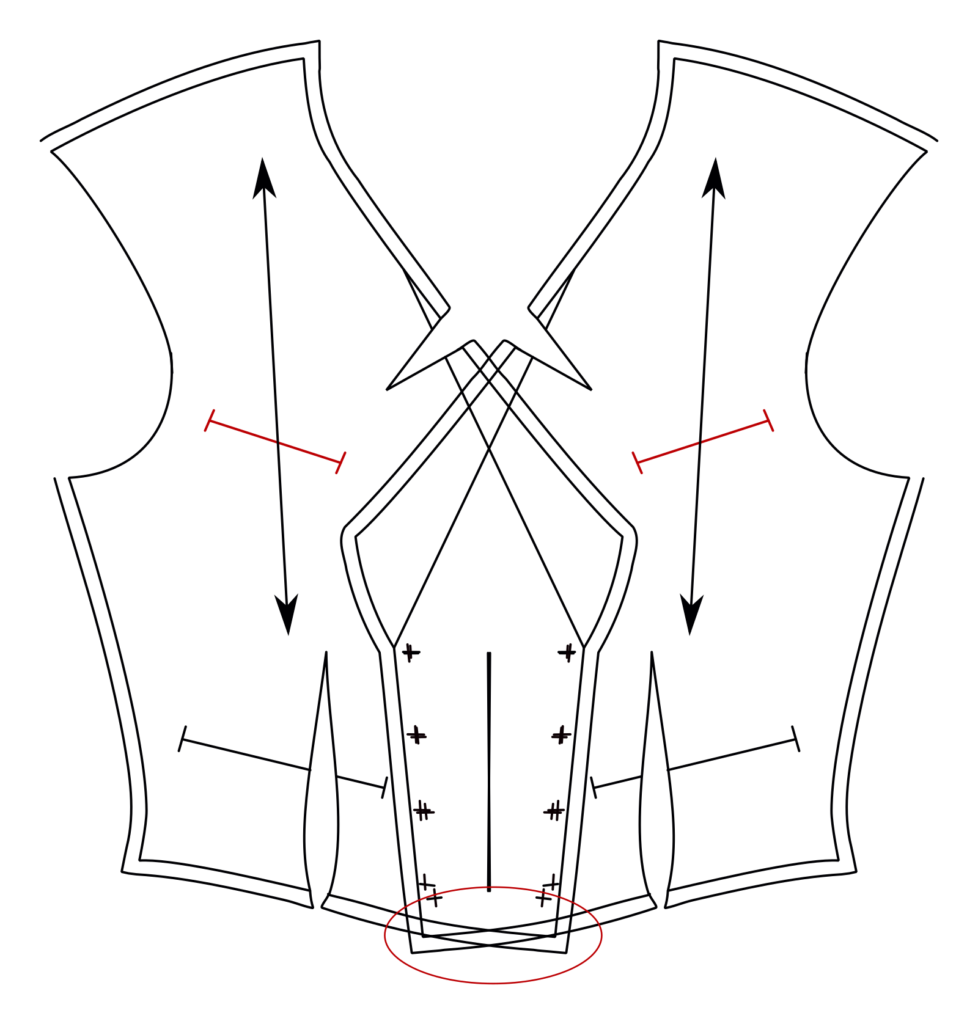
Here’s what I did in practice. First I copied a small part of the front pattern, basically from dart to dart, to a fresh sheet of paper, and copied the center line as well. You really only need a small section of the front copied, not the entire pattern.
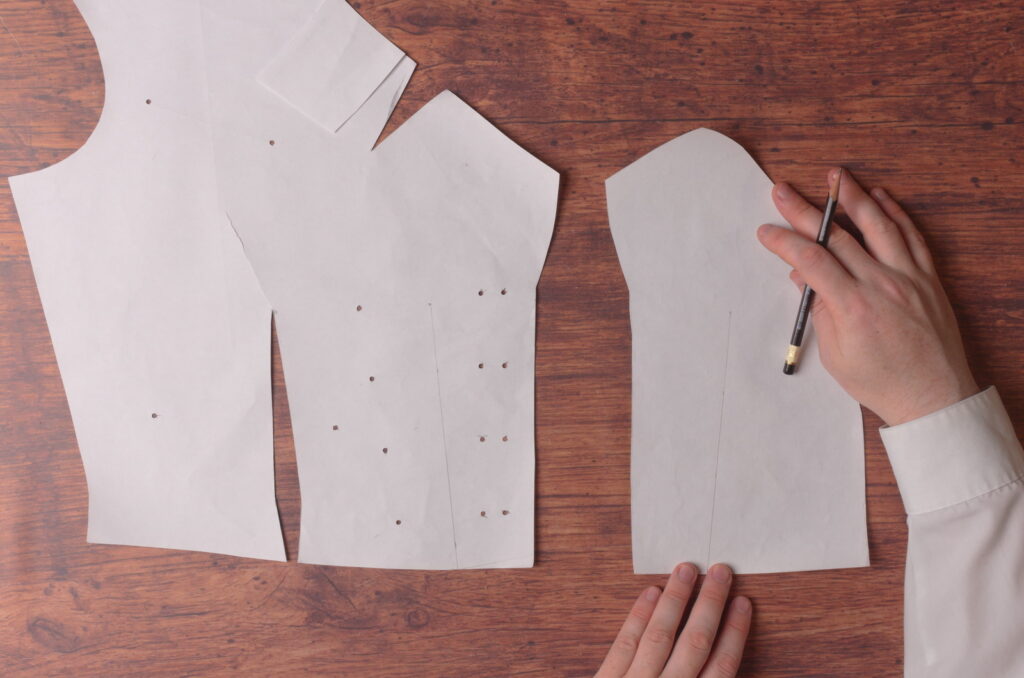
Then I placed the copy on top of the original, carefully aligning the center line, and making sure the edges of the pattern met at the bottom of the center line.
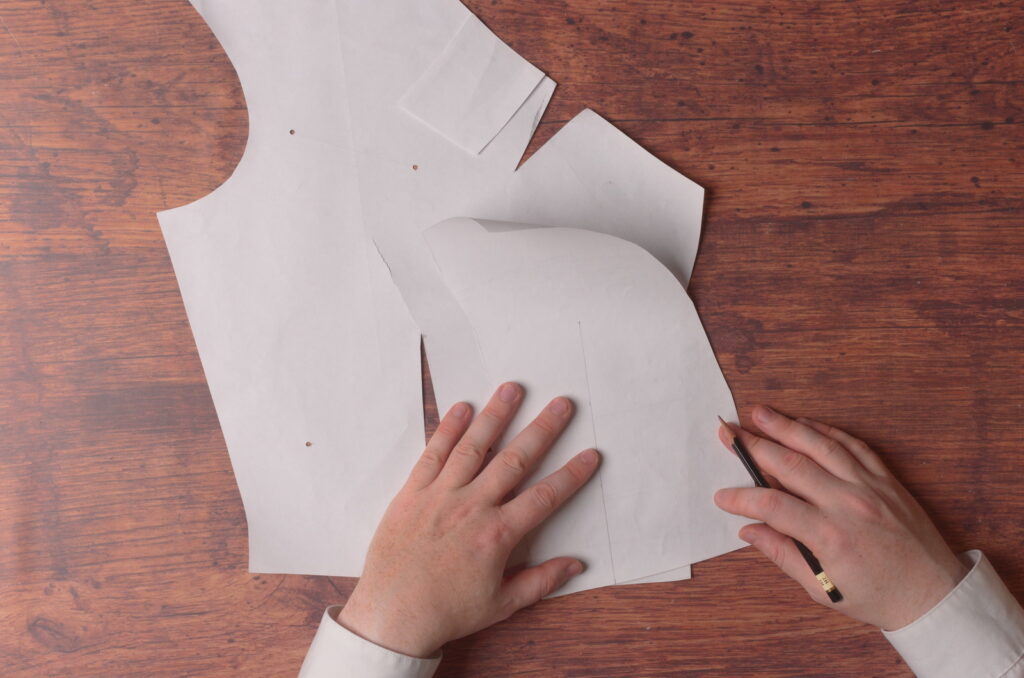
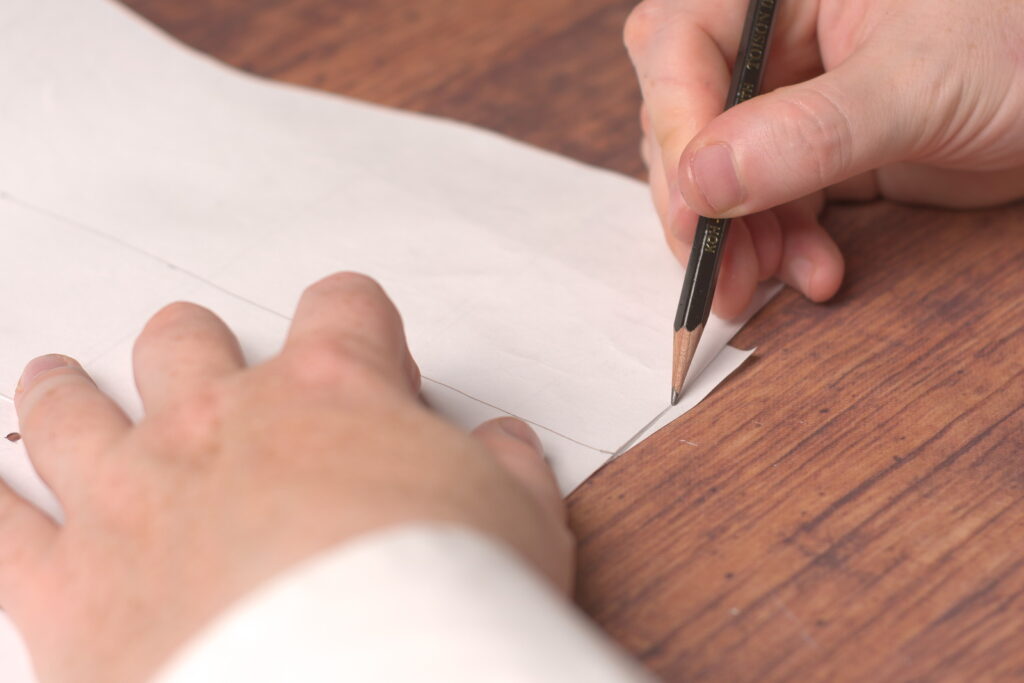
Then trace the new line onto the original pattern.
And trim off the excess section.
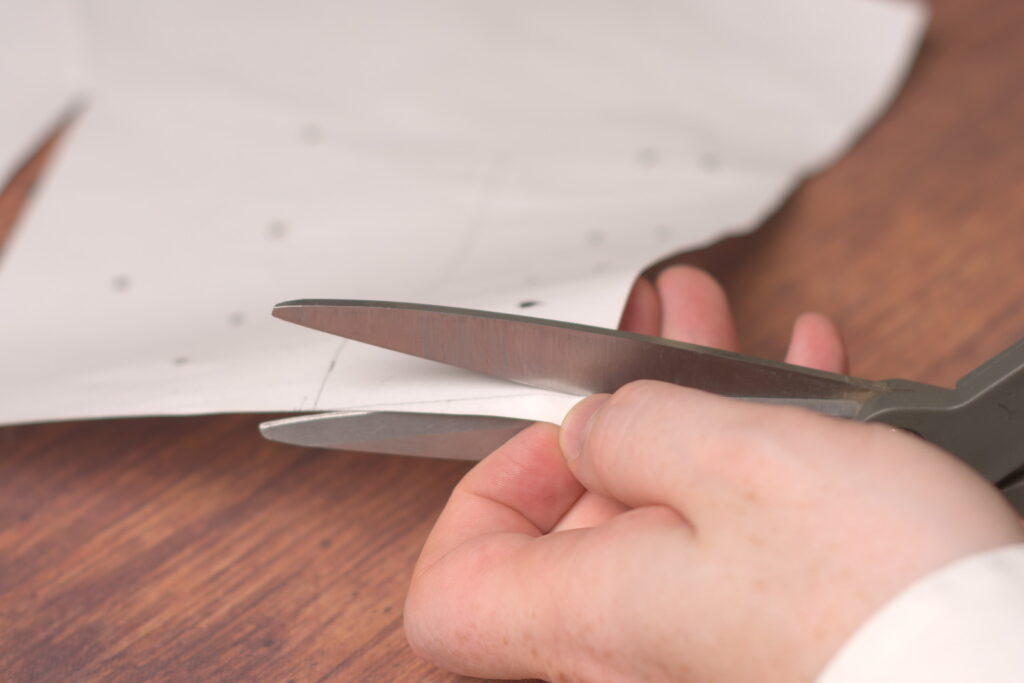
Then simply use your altered pattern as usual. I forgot this step and so had to do it after cutting out my waistcoat front.
Interfacing
With the waistband attached and any watch pocket installed, we can go ahead and install the interfacing. There are a couple of ways you could do this. The first would be to take your waistband pattern and cut out the interfacing as one piece from a linen collar canvas, or two (or more) layers of linen. This method (using the collar canvas) gives a firm finish to the waistband. The second way, which I’ll be showing here, involves cutting shorter strips of linen and applying them where you deem necessary, which gives a slightly softer finish to the waistband, depending upon how many layers you add. I’ve used both methods but prefer the second now due to ease of installing and the softer finish.
Begin by cutting about 10 – 12 strips of linen, about 3″ wide (or slightly wider than the waistband) and a little longer than half the length of the waistband.
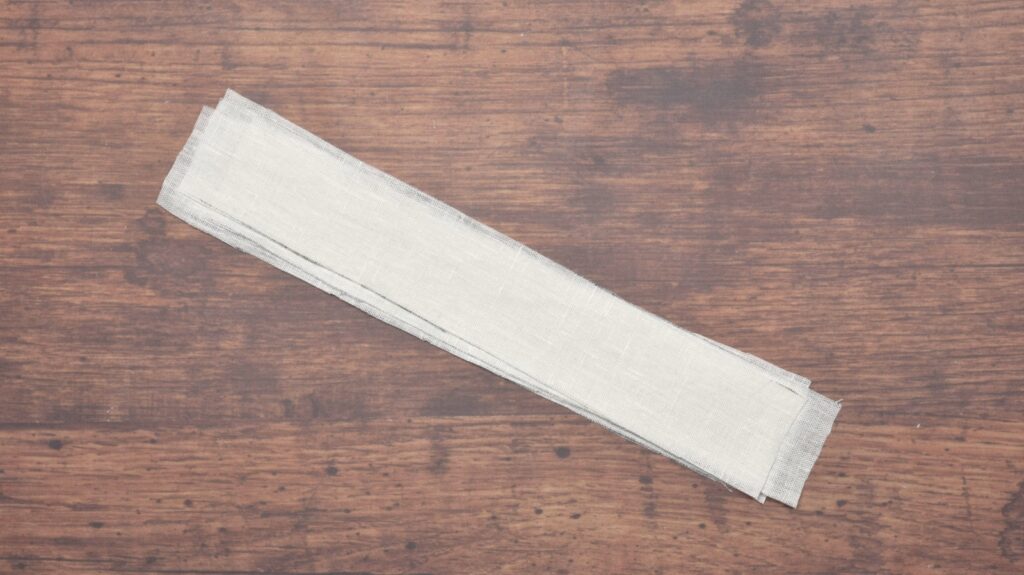
Lay the trousers on your sewing table wrong side up and begin to position the linen strips in place.
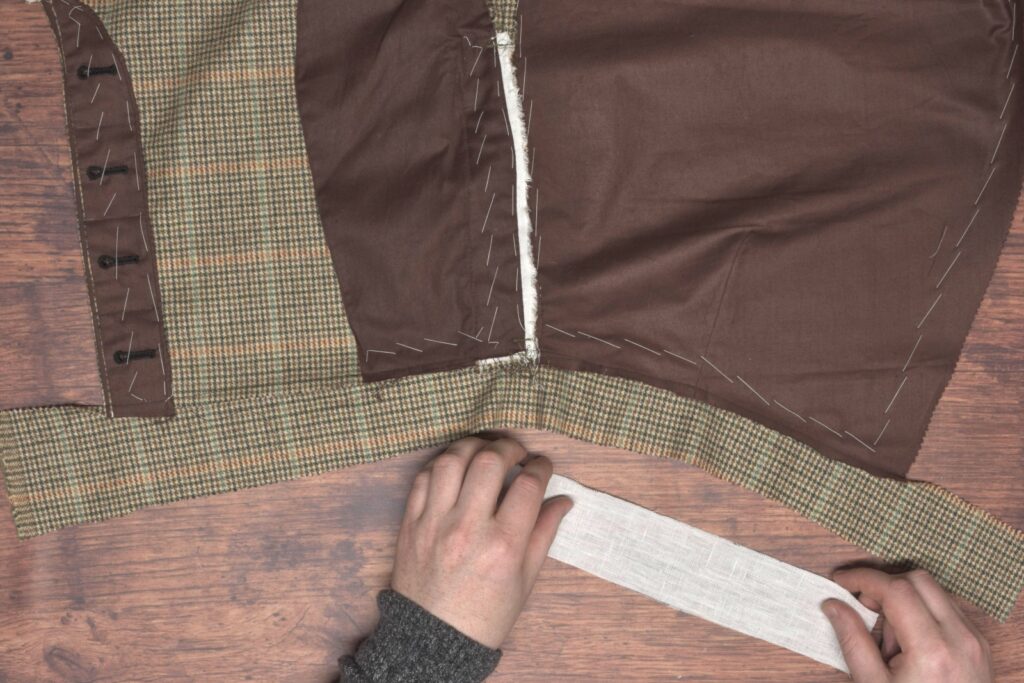
Lay the linen on the waistband, lining the bottom edge up with the fold of the waistband seam. Begin basting the linen in place. I set the end of the linen back about 1/4″ from the center back of the trousers since that’s where the seat seam will end up, but you could trim this later as well.
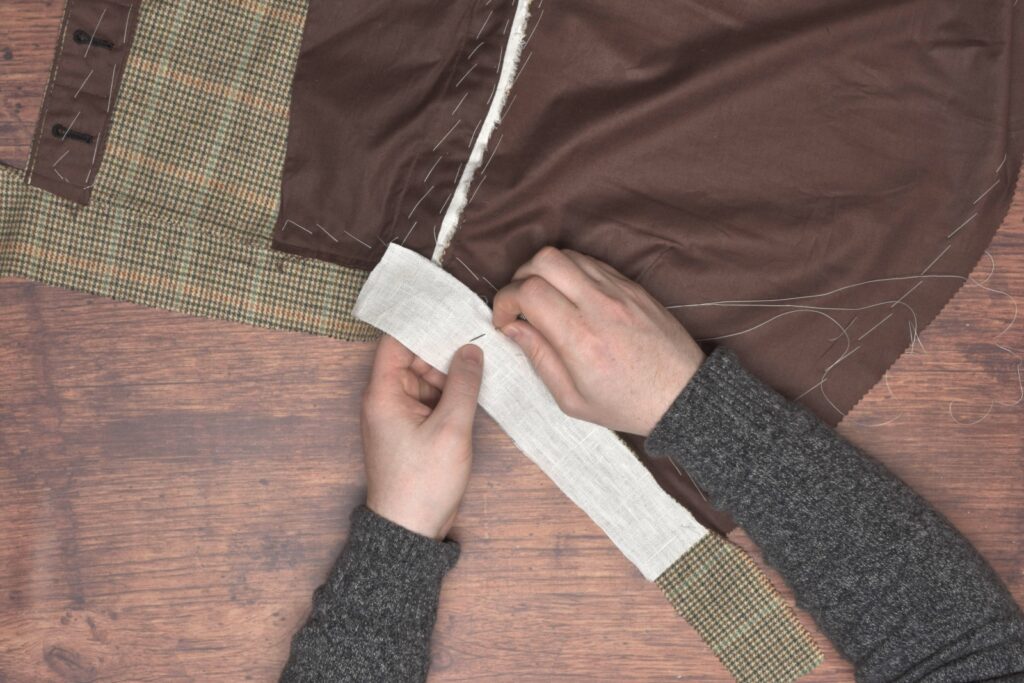
The basting stitches should be roughly centered, but closer to the waistband seam. As you’re working, don’t tuck the linen too tightly into the waistband seam, as you’ll end up with puckers and excess fabric later on.
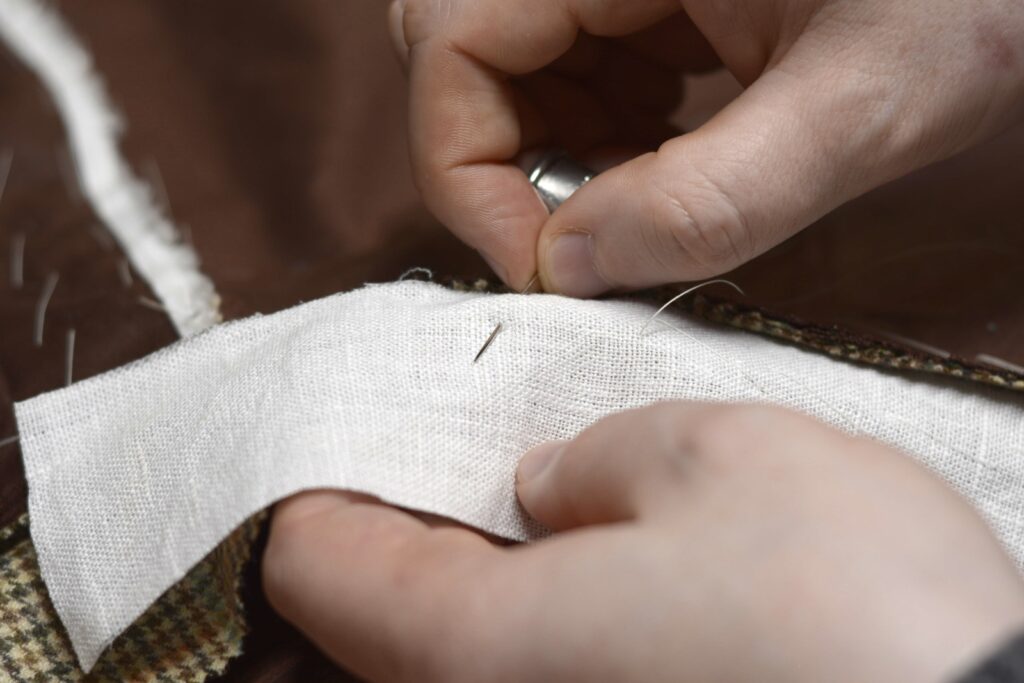
Place and baste the second piece of linen in place as well, butting the ends of each piece together.
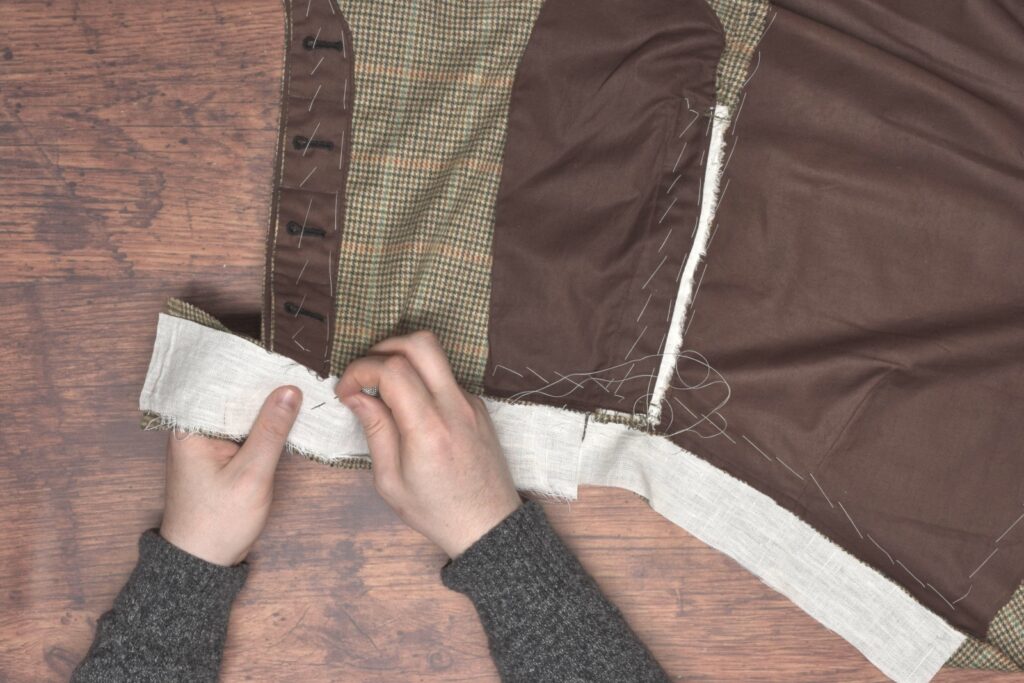
I probably could have gotten these a little closer but the gap will not be noticeable.
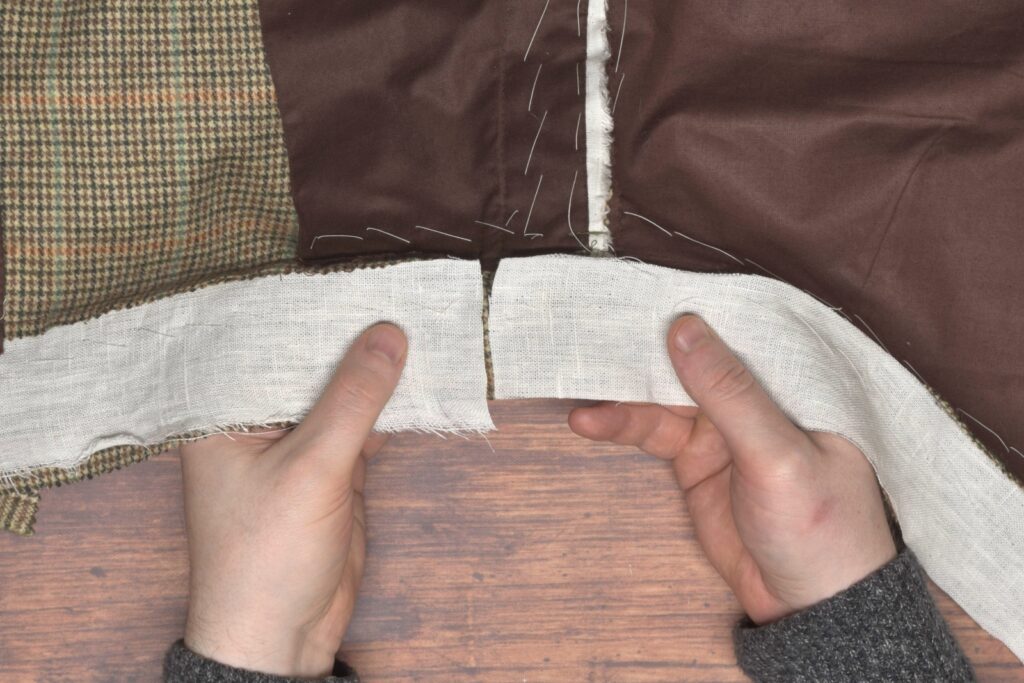
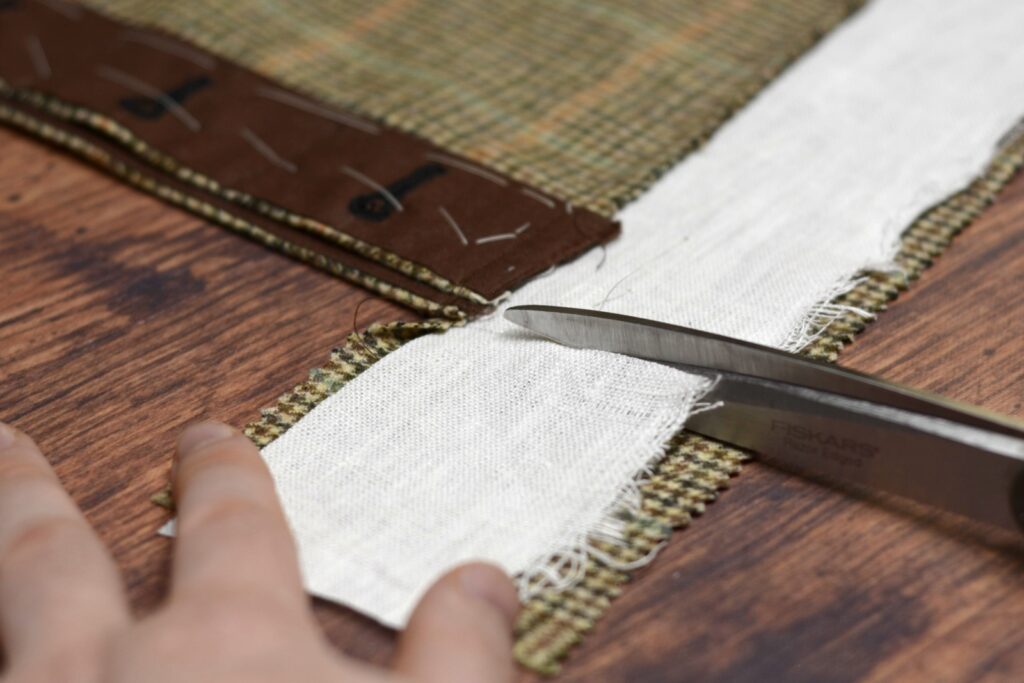
At the front edge of the trousers, draw a line parallel to the button catch.
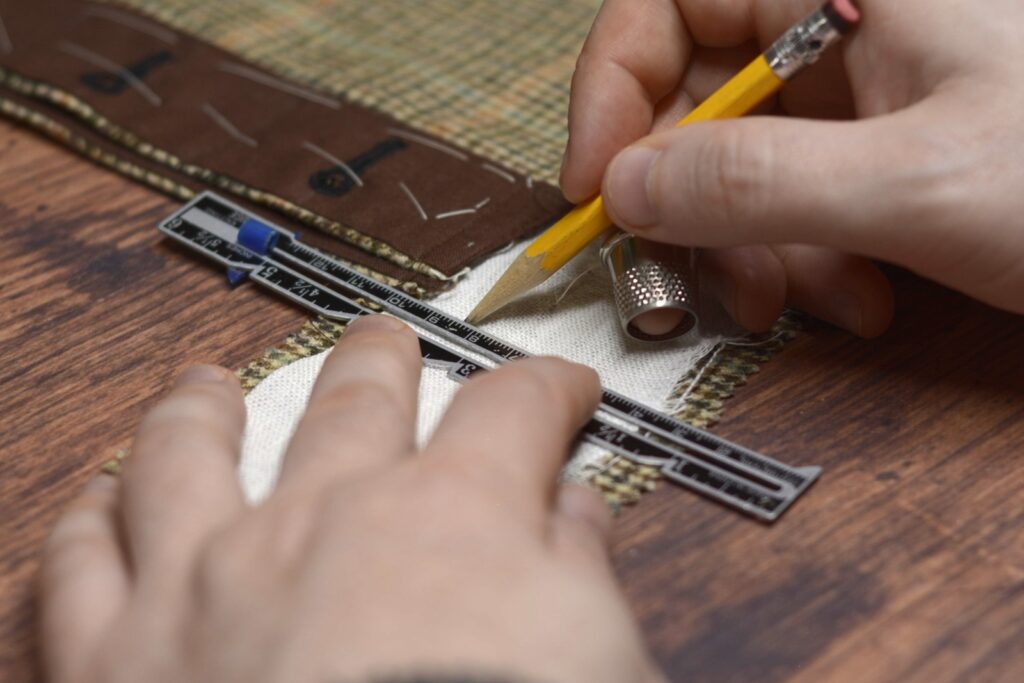
And cut the linen even with the front of the trousers. You could also wait to do this step until all of the linen layers are in place.
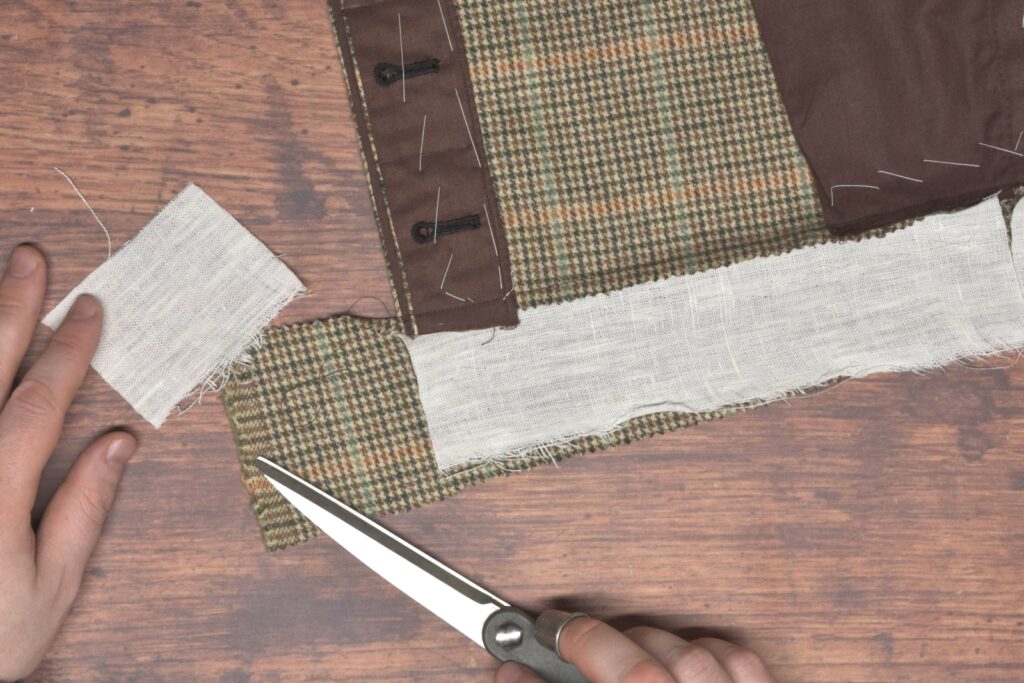
Now I like to cut one of the next linen pieces in half for the second layer so that I can keep the joints staggered like bricks for added strength.
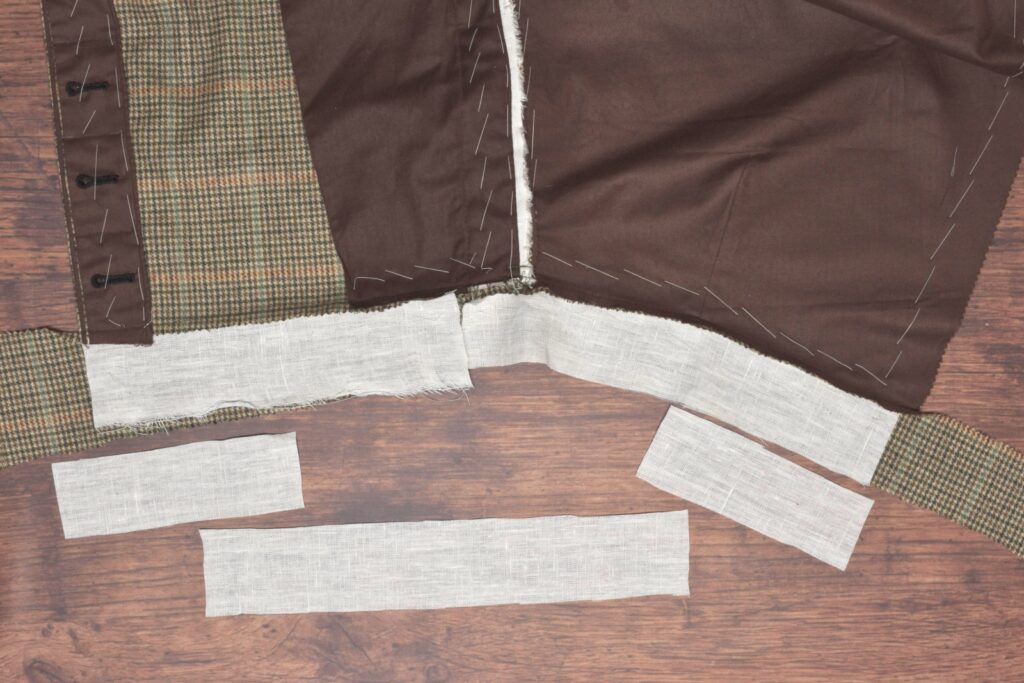
You’ll notice how the center of the trousers is somewhat curved. You could take that center piece of linen and stretch it along one edge to form in into a curved shape that will better conform to the shape of the trousers.
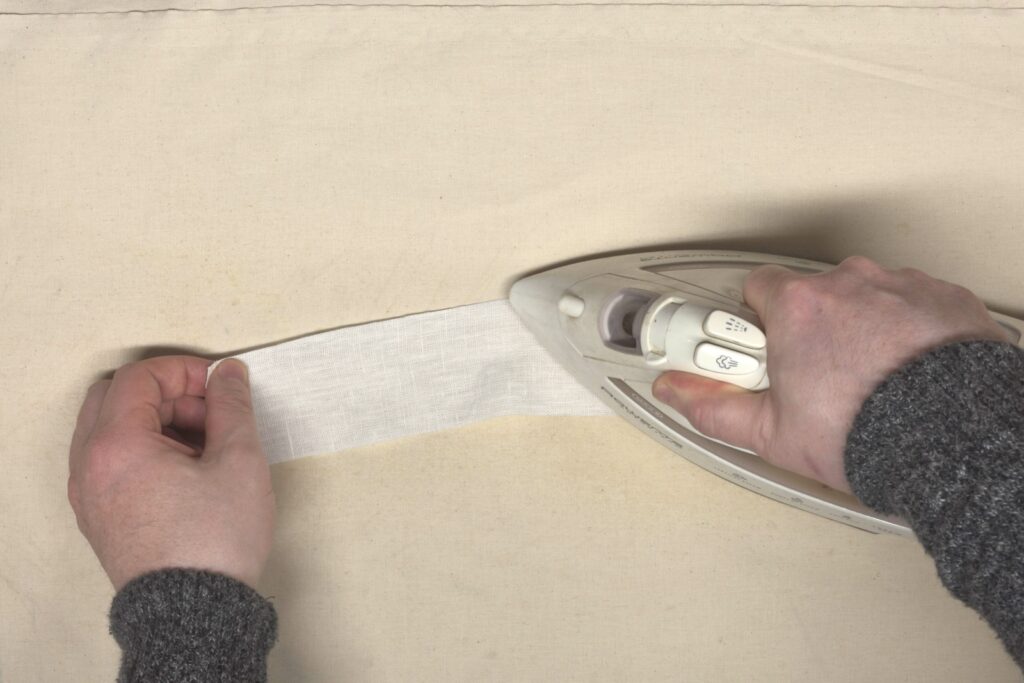
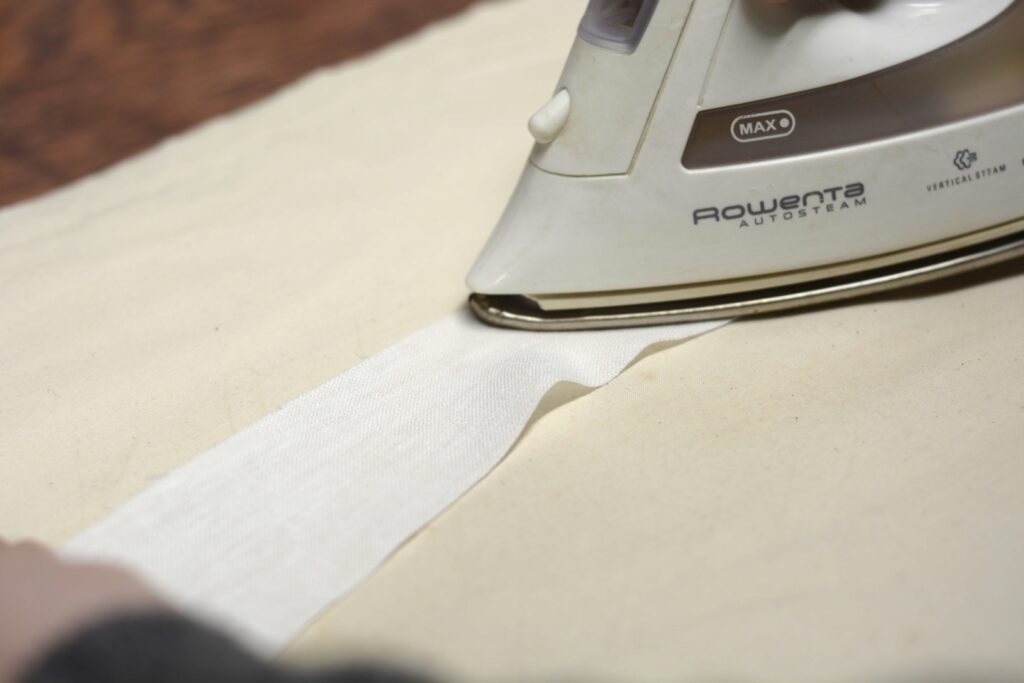
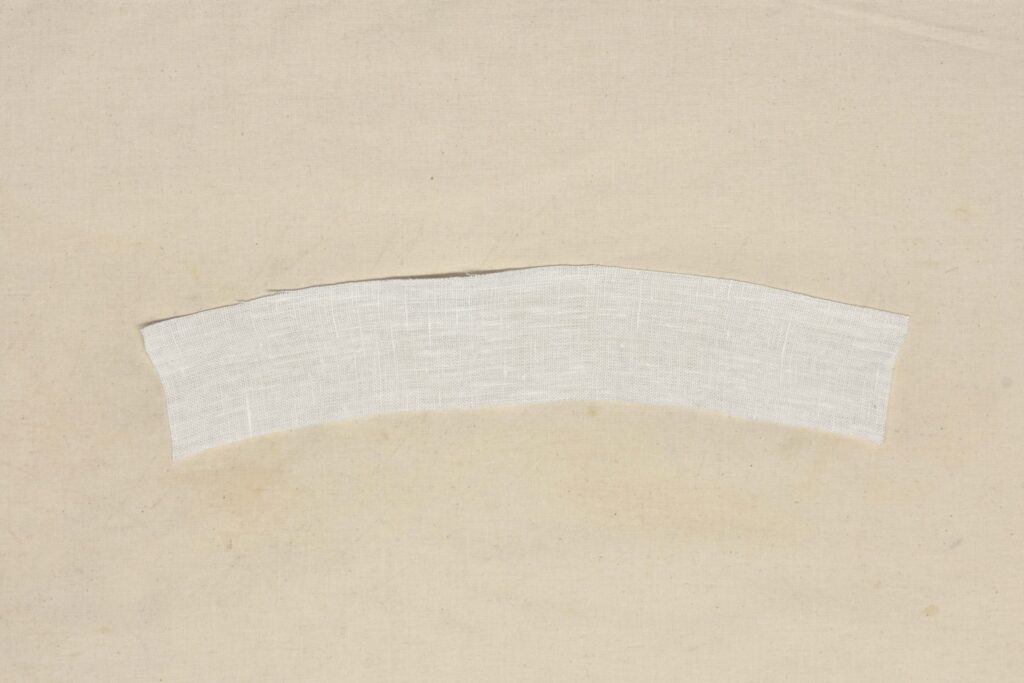
Baste one of the smaller linen pieces in place followed by the curved piece. Keep these slightly further back from the waistband seam if you can to reduce the tension and prevent and rippling.
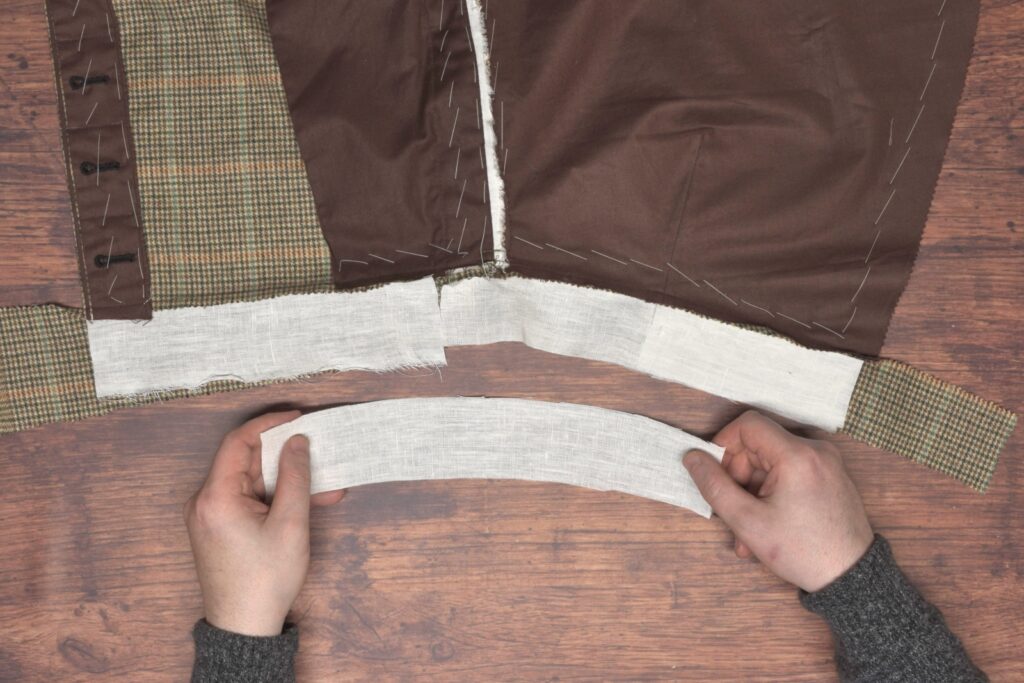
Here’s the second layer of linen in place after trimming both ends.
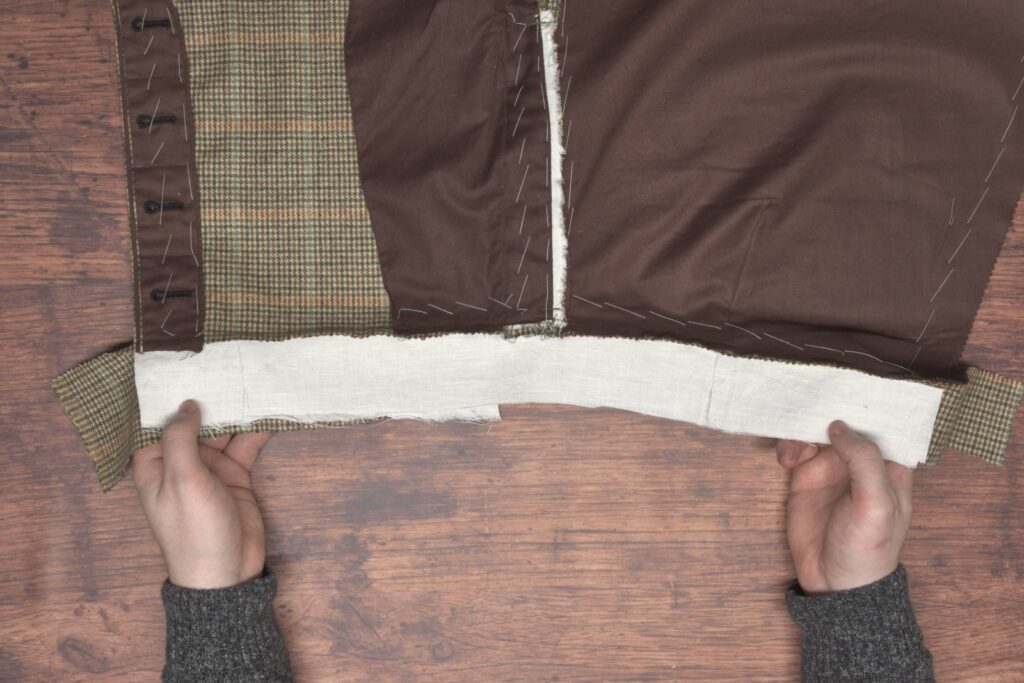
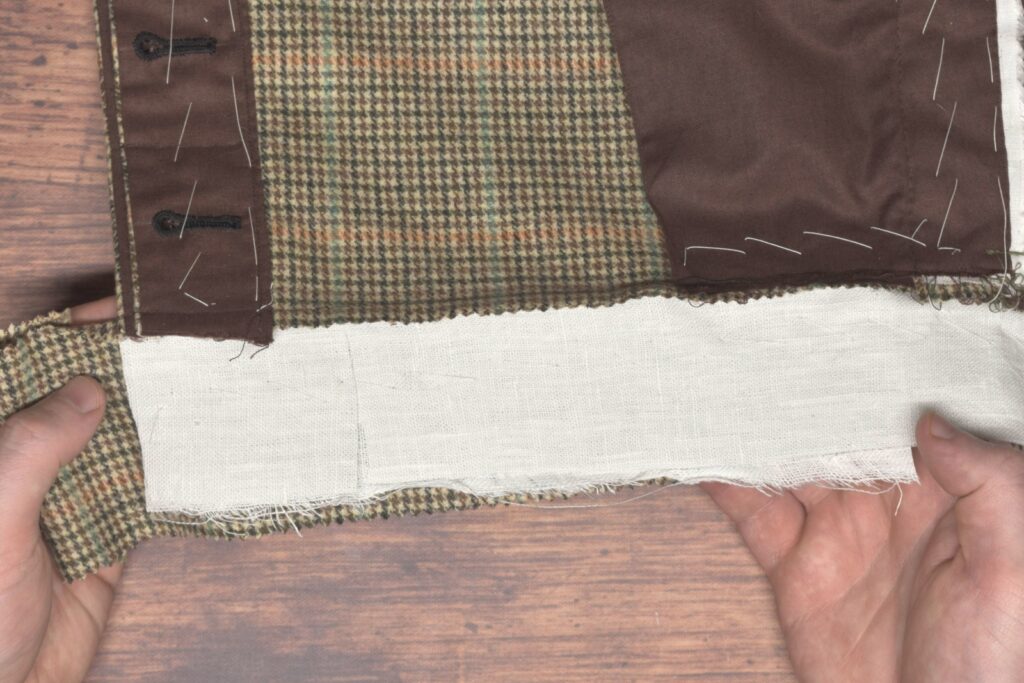
You could add another full layer as above if you like, but for my third layer, I chose just to reinforce the areas that will have buttons. Over the years, one of the biggest issues I’ve seen is buttons being ripped out of the fabric over time, this will greatly help to prevent that. I added a small piece near the back of the trousers.
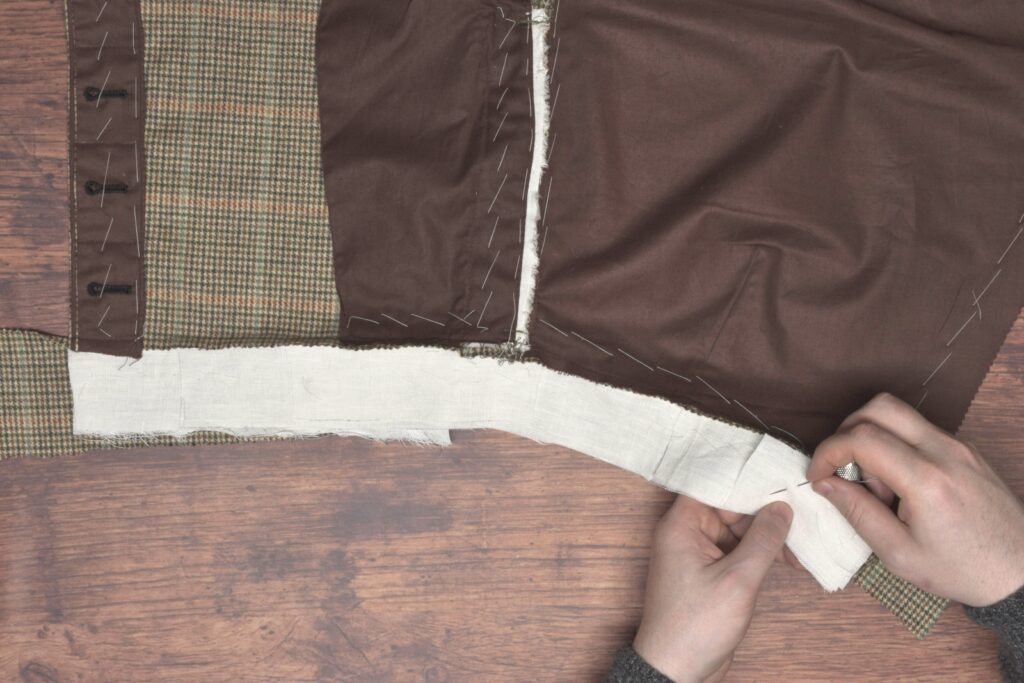
And another strip to the front of the side seam over the pocket. Both pieces should be placed even more loosely against the waistband seam, kind of staggering the long edges of each layer of linen.
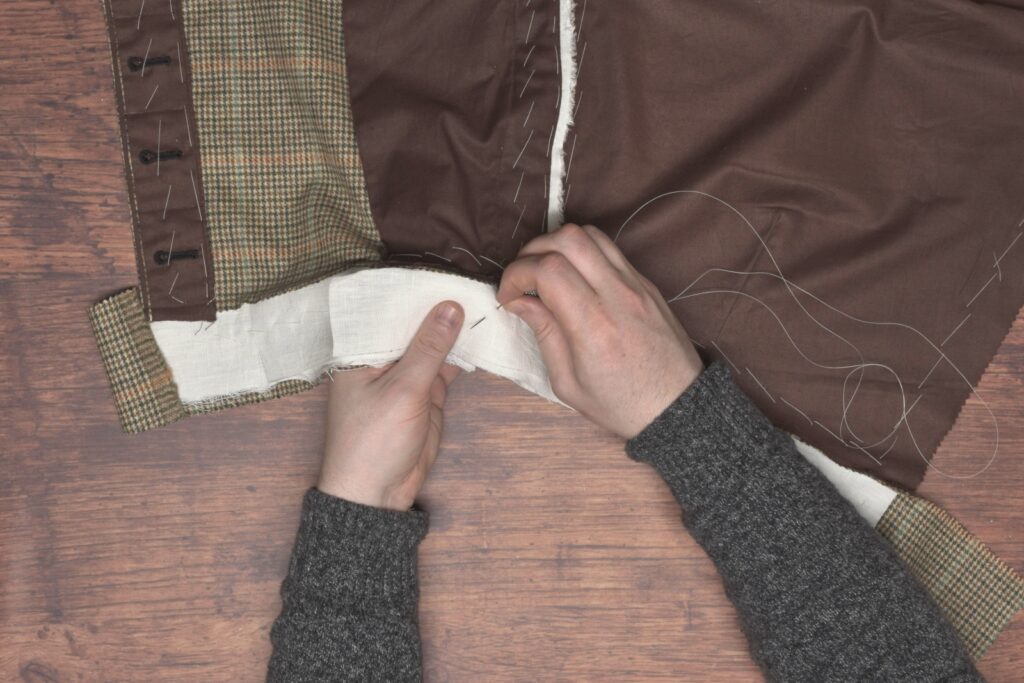
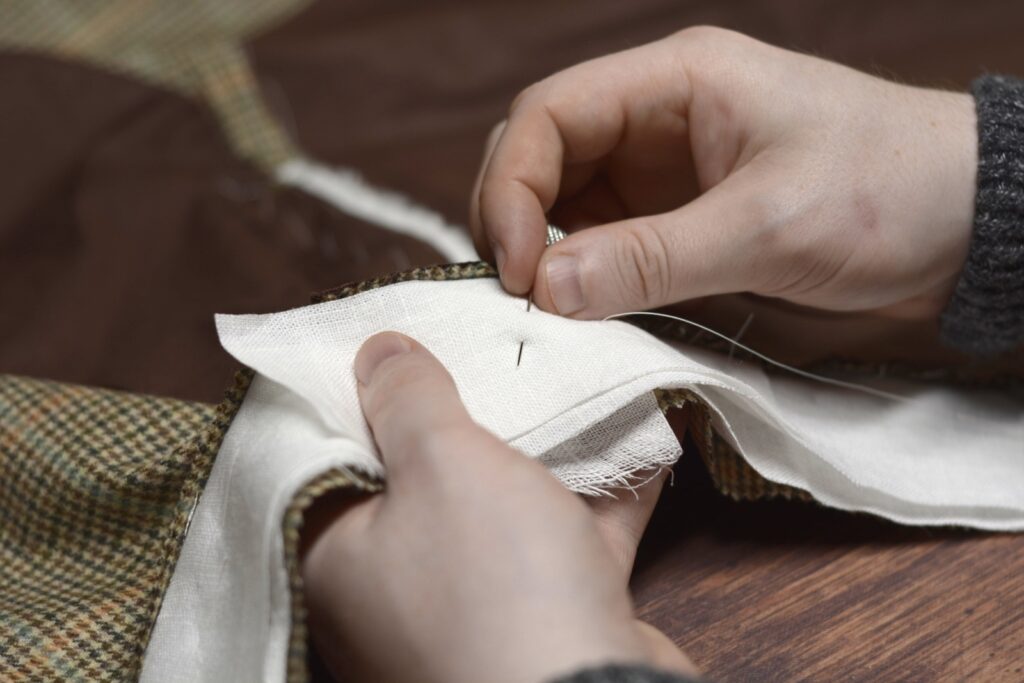
And here’s one last look at the waistband with all three layers of interfacing installed.
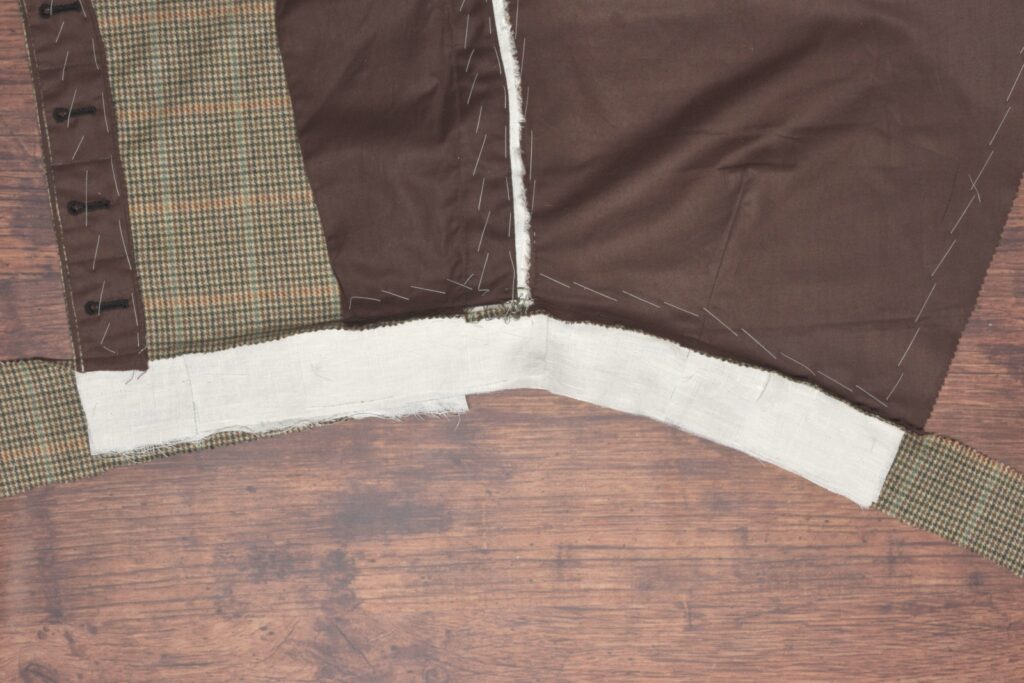
Turn the trousers over and trim the linen flush with the edge of the waistband.
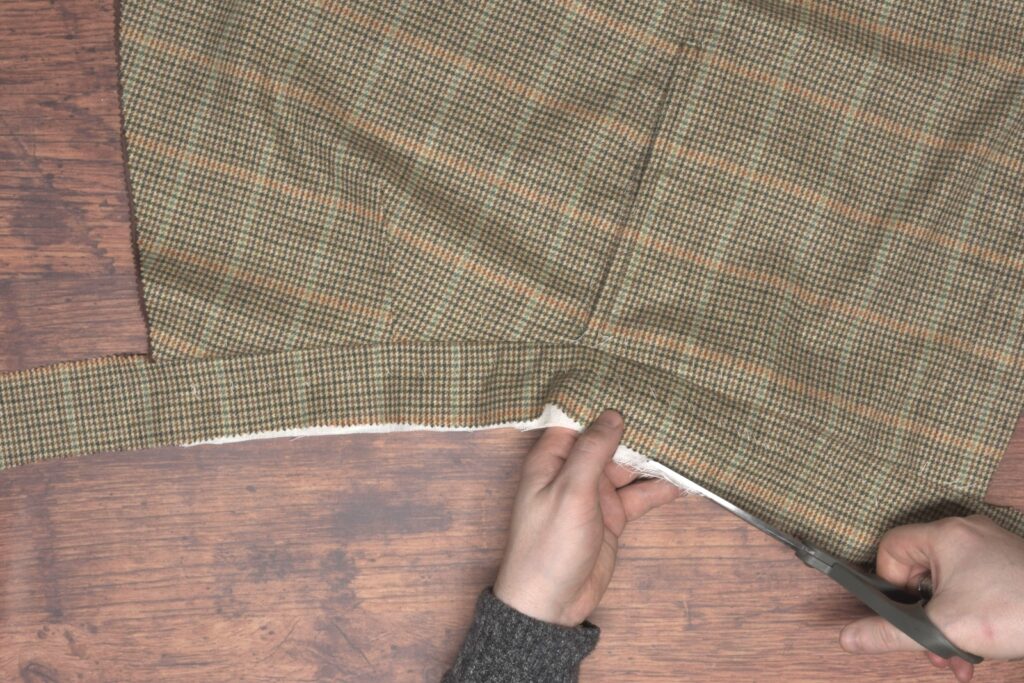
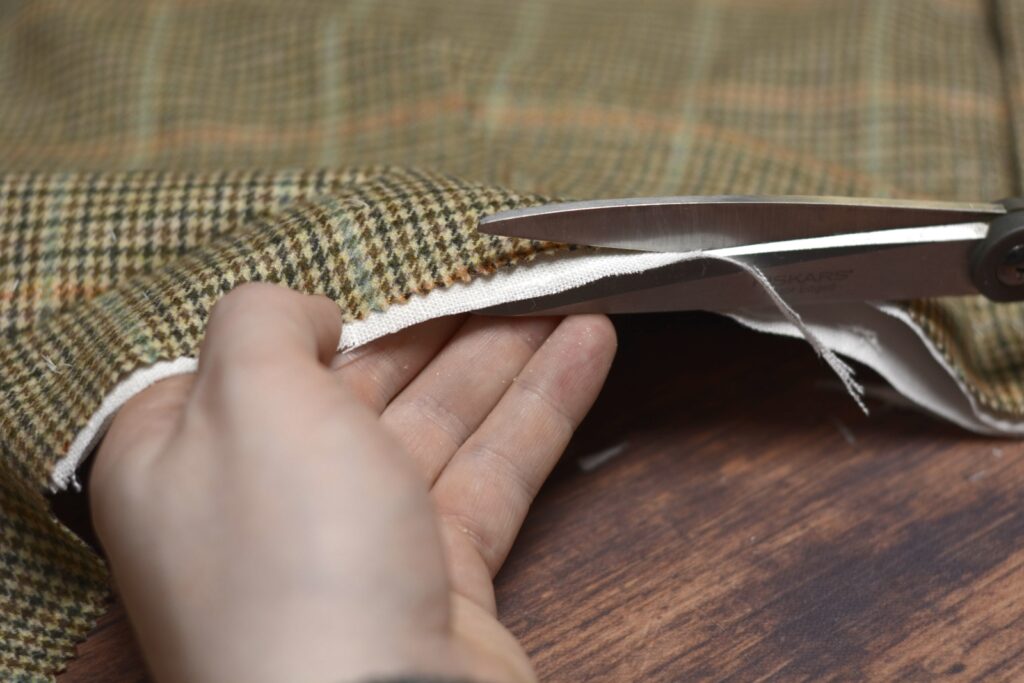
Turn the trousers back over and mark a cut line about 3/8″ from the top edge of the waistband. You could even go a ‘smidge’ further if your fabric or interfacing layers are particularly thick. The 3/8″ accounts for the turn of the fabric, helping us to end up with a 1/4″ finished seam allowance.
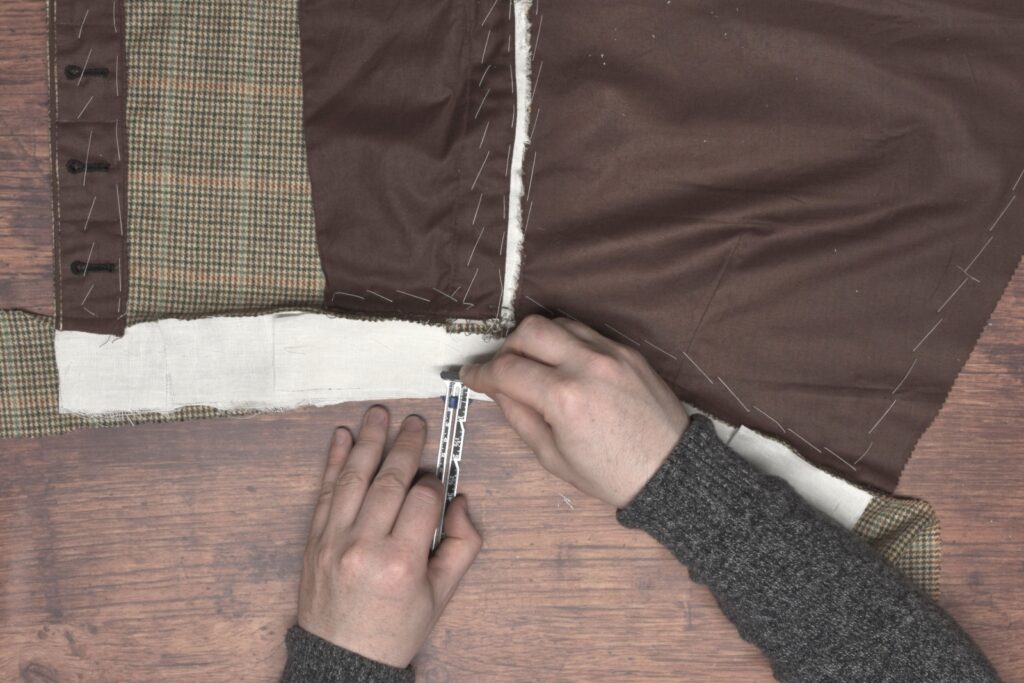
Here’s mine after drawing the cut line. As you can see my linen pieces were a bit narrower than they should have been, but it all worked out.
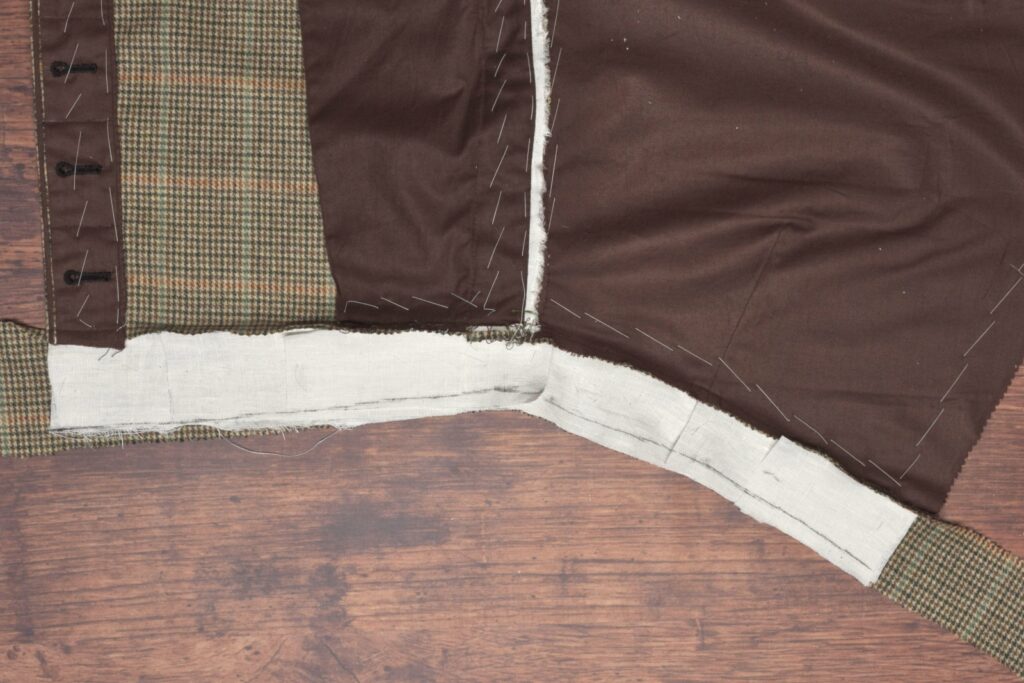
Trim the interfacing to just past the line, cutting through all layers except the waistband itself, of course.
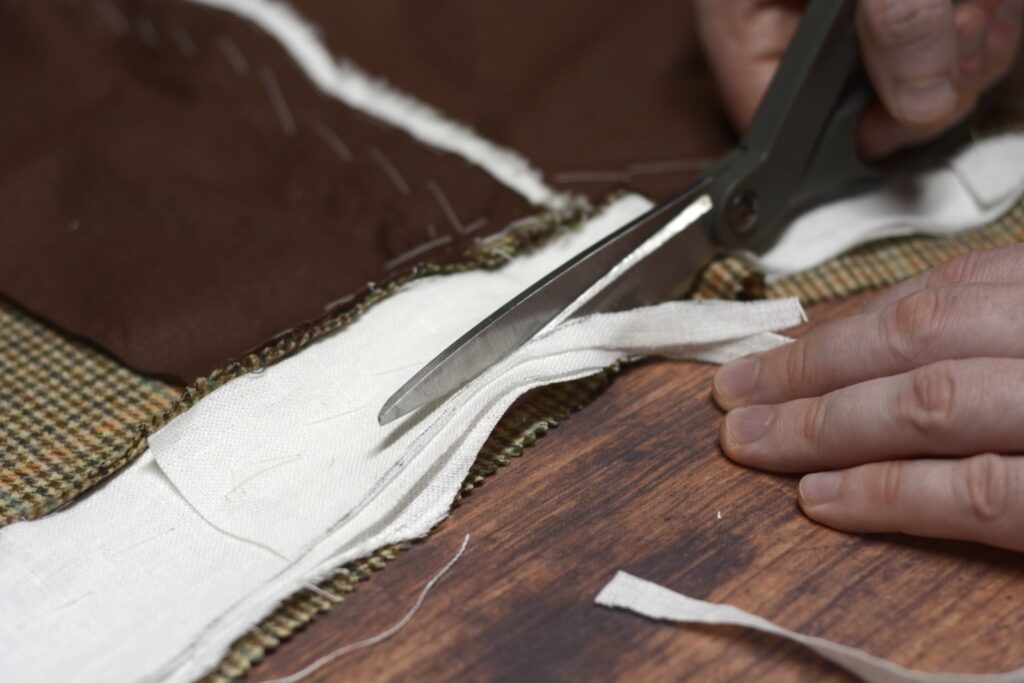
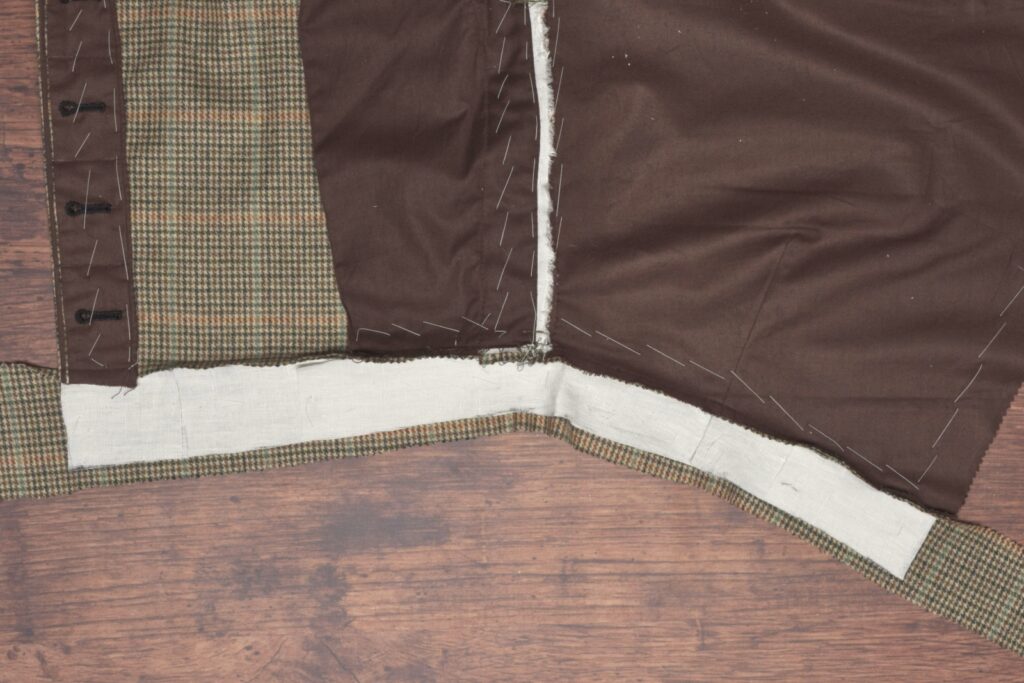
If you haven’t already done so, trim the back end of the interfacing to about 1/4″ to 3/8″ away from the trouser edge, making room for the seam allowance and pressing the seam over later on.
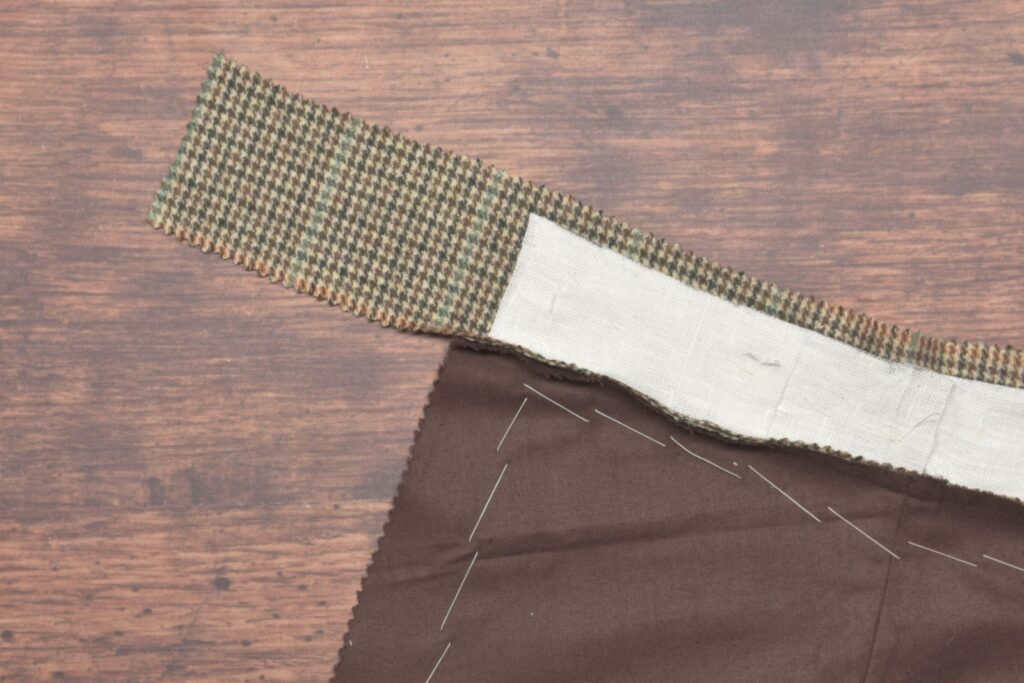
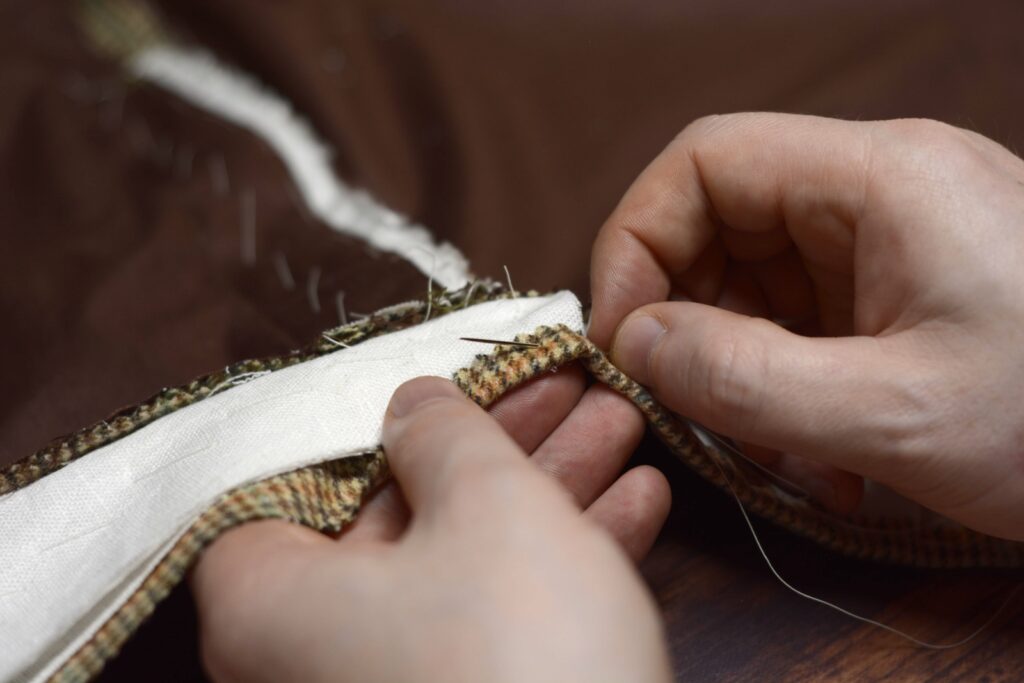
Gently fold the top edge of the waistband over the interfacing and baste securely in place.
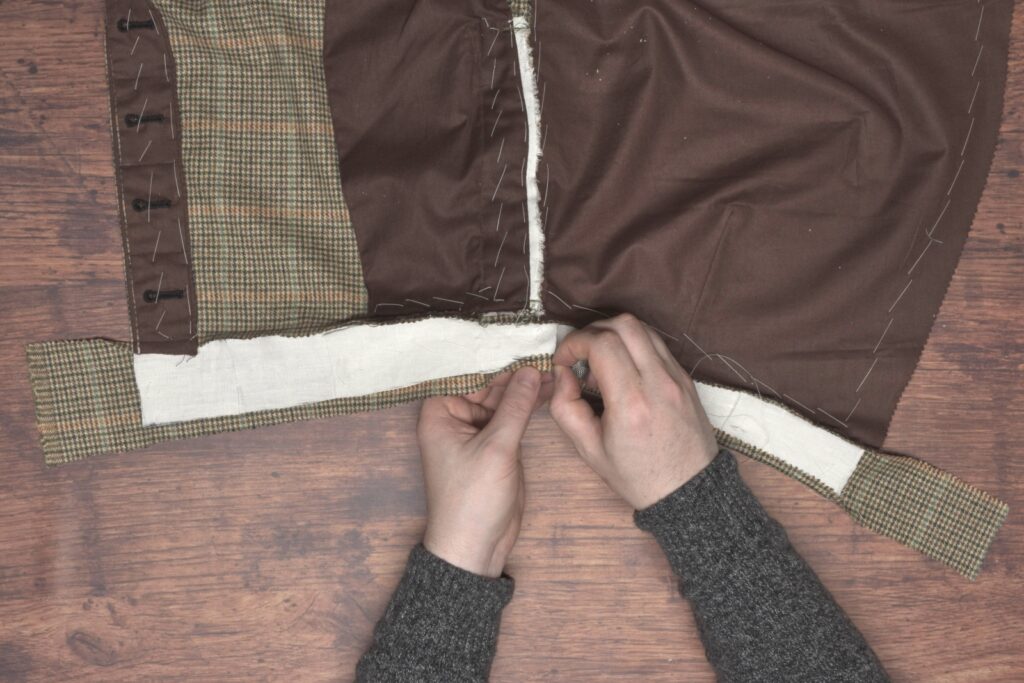
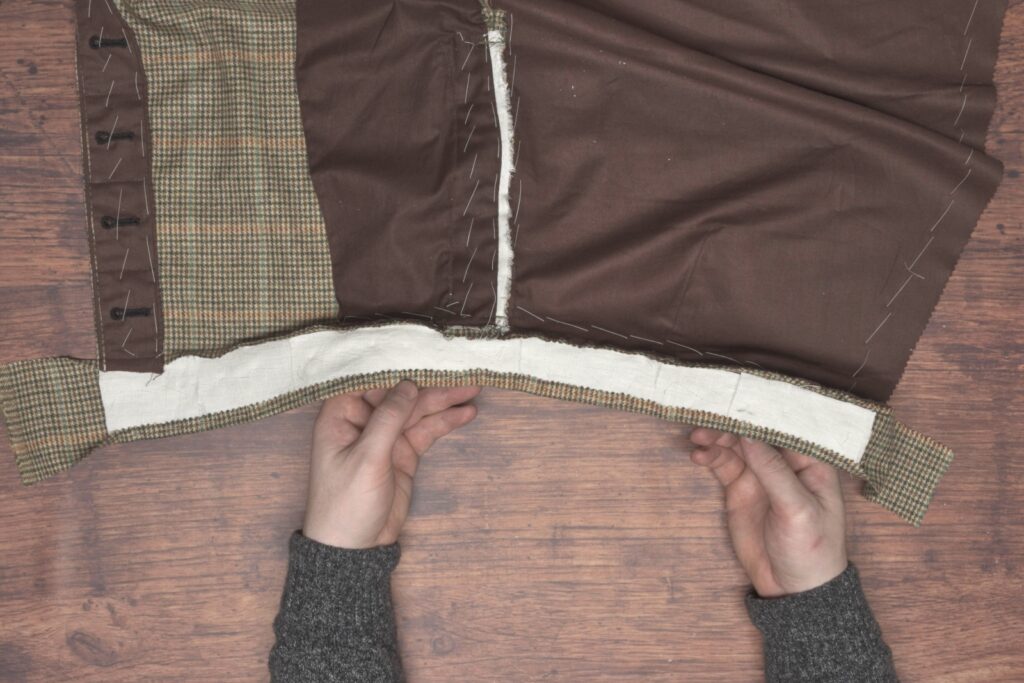
If you added the watch pocket, make sure that the side seam pocket bag is in the correct position, and permanently baste it to the waistband seam using small diagonal stitches. This gives a little extra strength to the pocket.
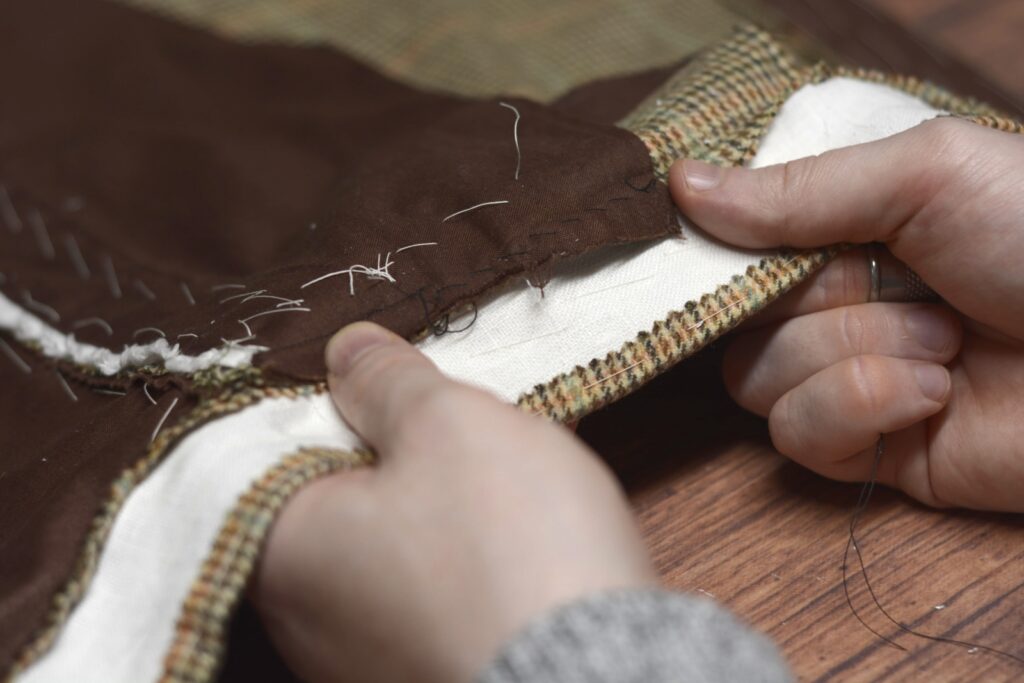
Trim the top edge of the pocket if necessary, even with the waistband seam below it.
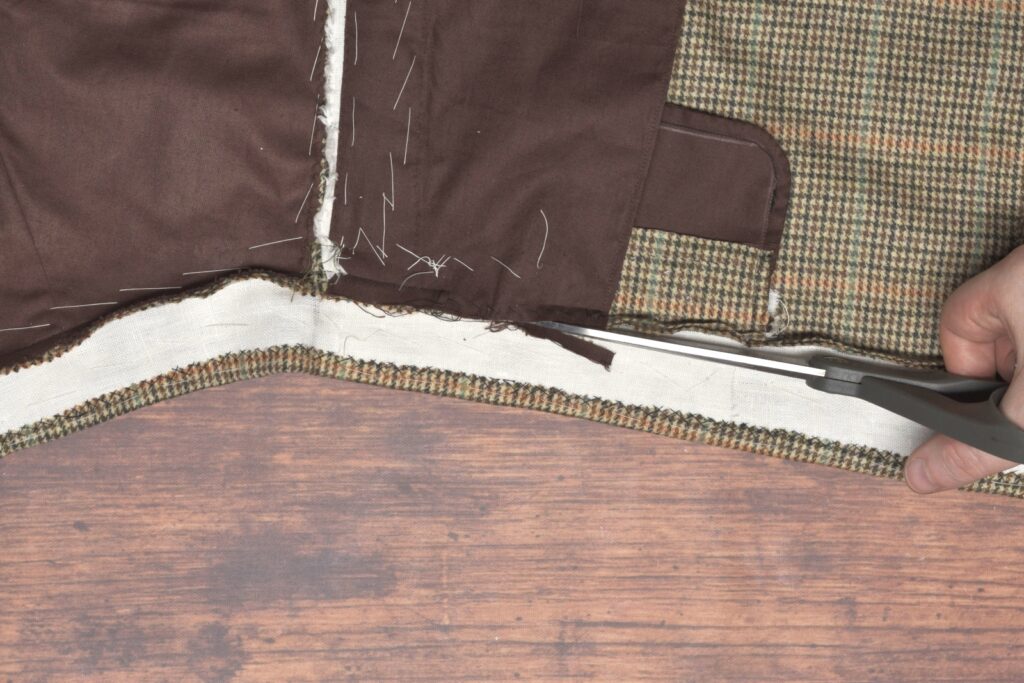
Working from left to right, cross stitch the folded waistband edge to the interfacing underneath. Try to catch all of the interfacing layers without letting the needle pass through to the right side.
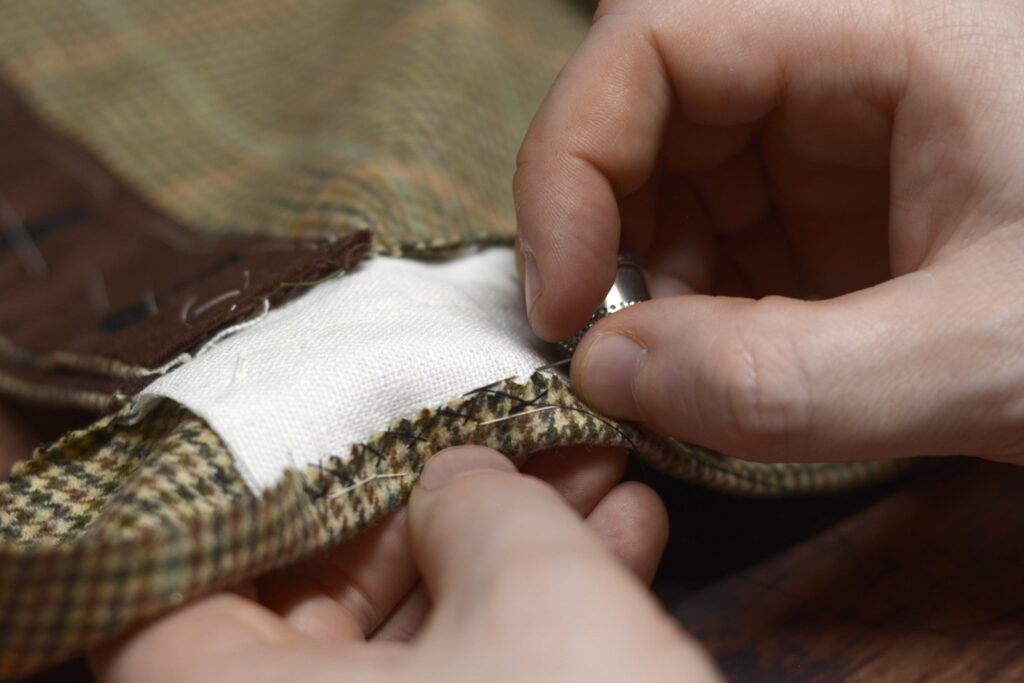
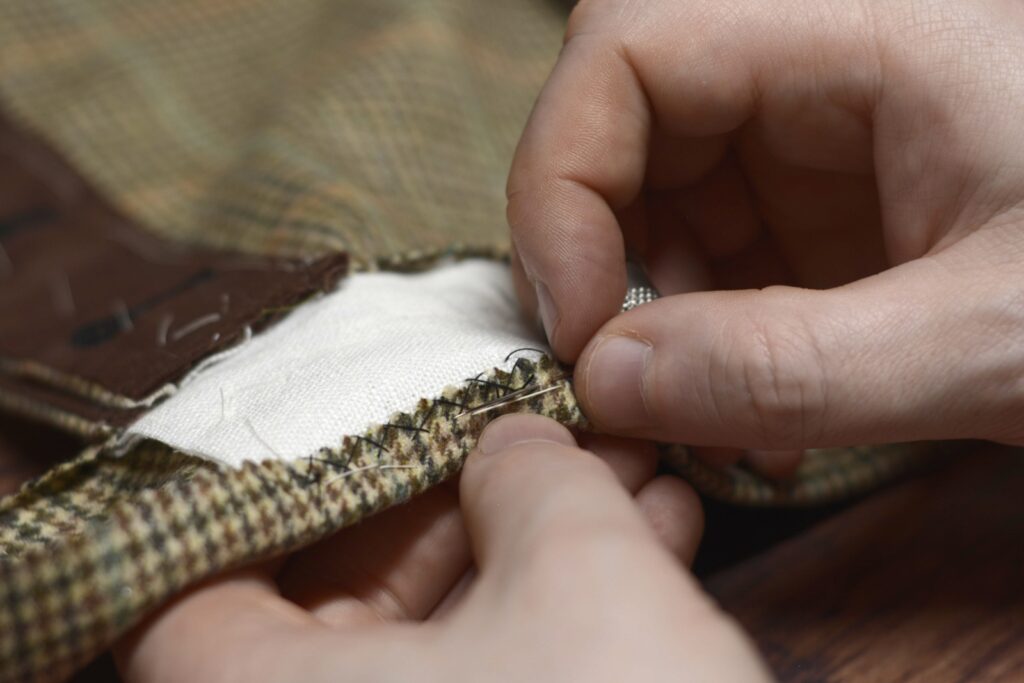
Before cross stitching the lower half of the interfacing, make sure that the tension between waistband and interfacing is neutral, without any excess fabric showing up in bubbles or ripples. If you have to (I did), carefully trim about 1/16″ from the lower edge of the interfacing to ease the tension.
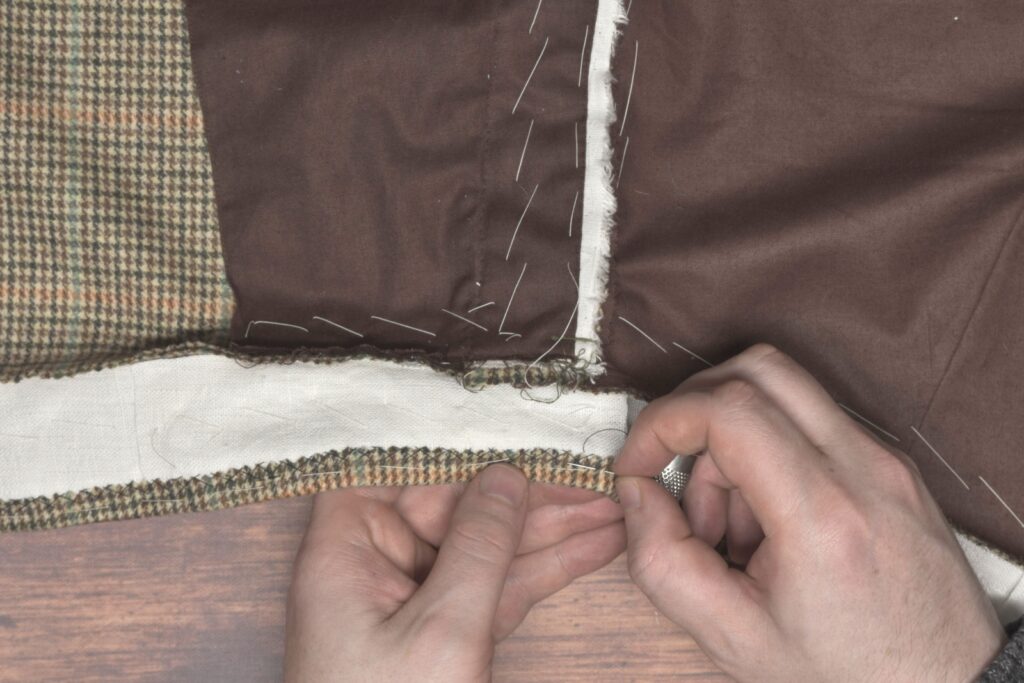
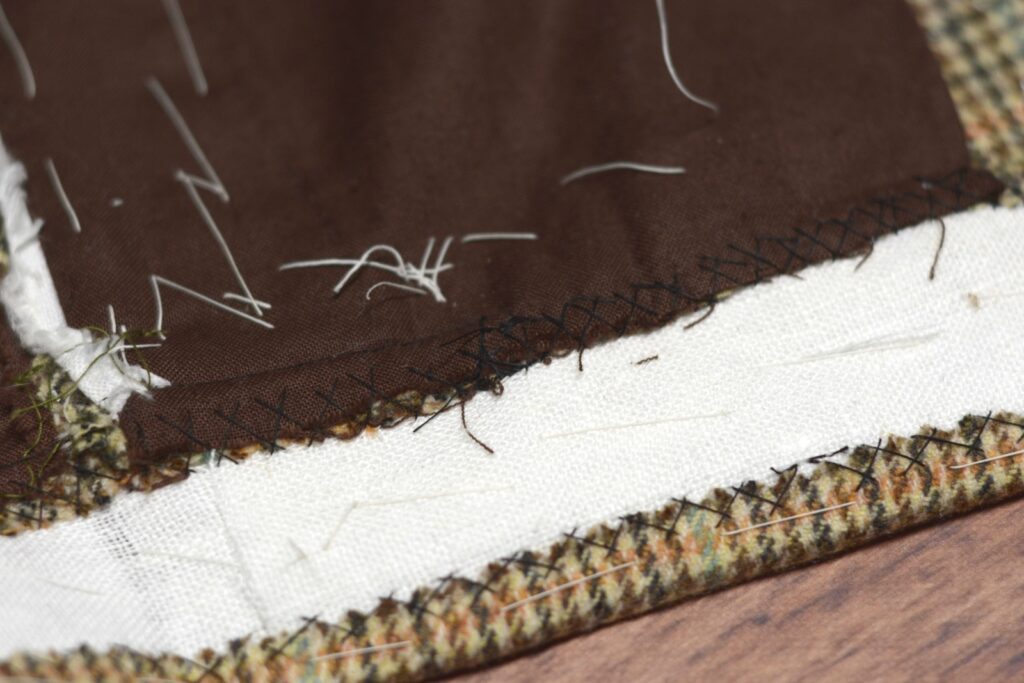
Then cross stitch the interfacing to the waistband seam.
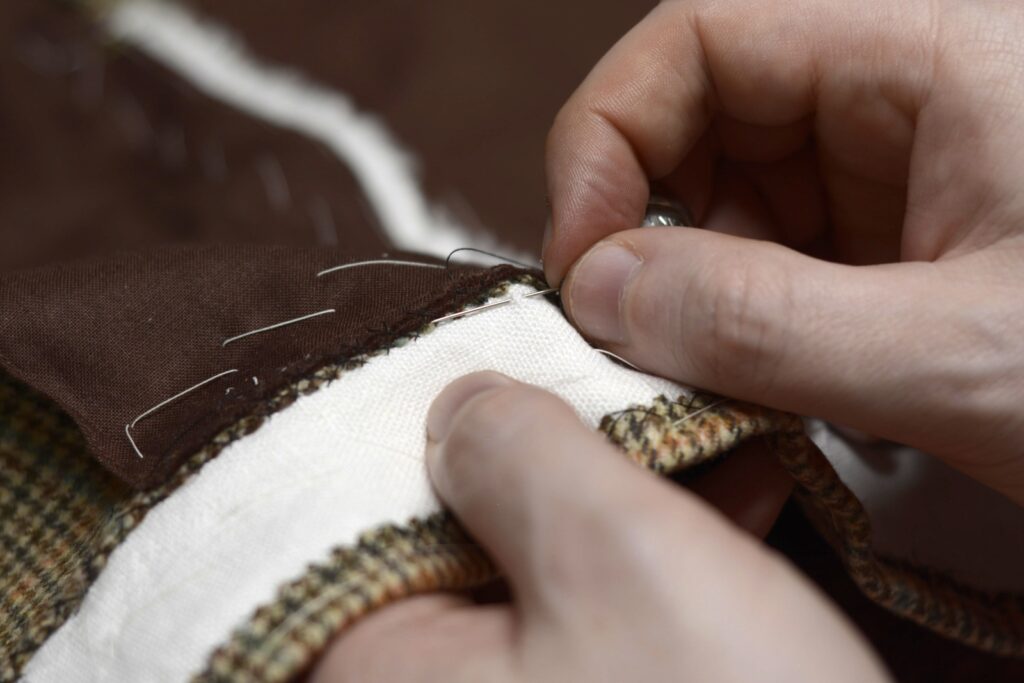
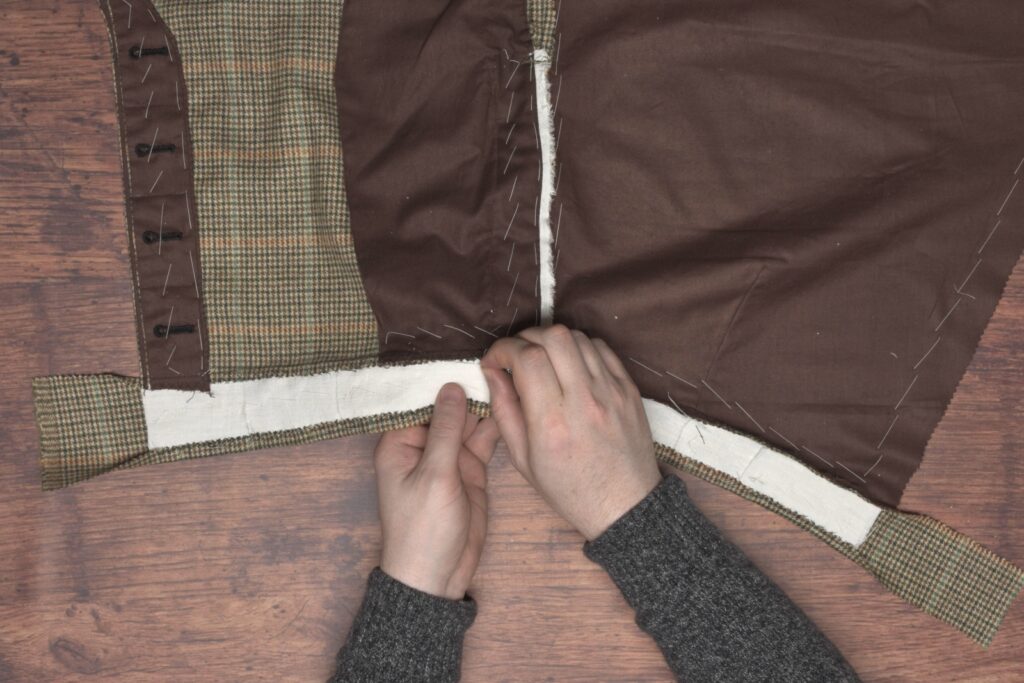
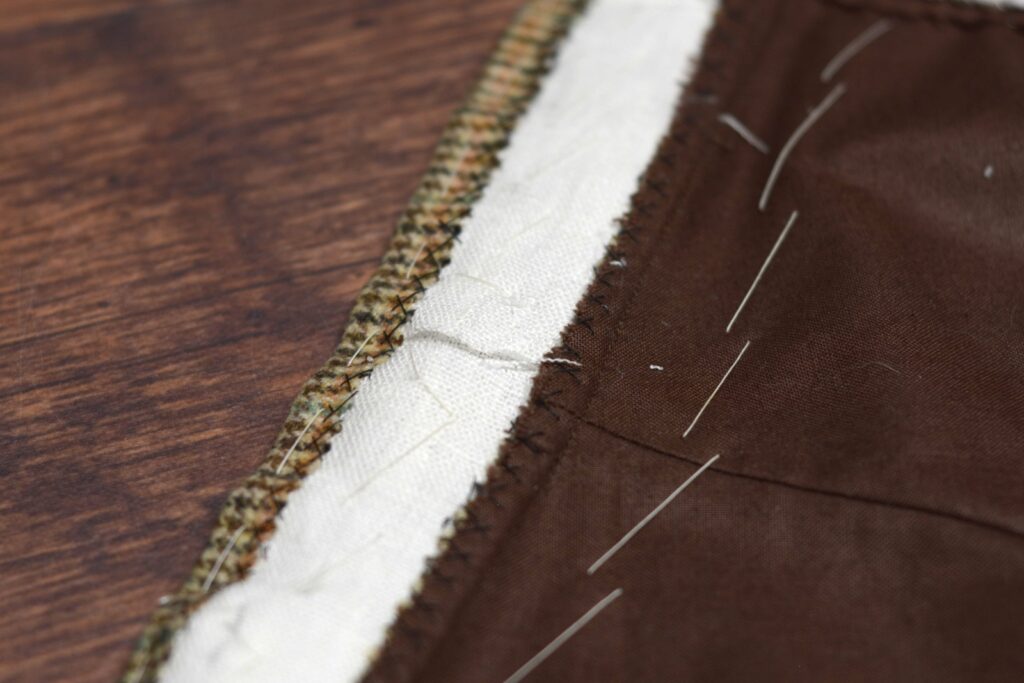
And here’s the top of the pocket with watch pocket after cross stitching in the same manner.
Securing the Waistband Ends
With the interfacing cross stitched in place, fold over each end of the waistband over the interfacing, keeping a straight edge as appropriate. Baste in place with a diagonal stitch.
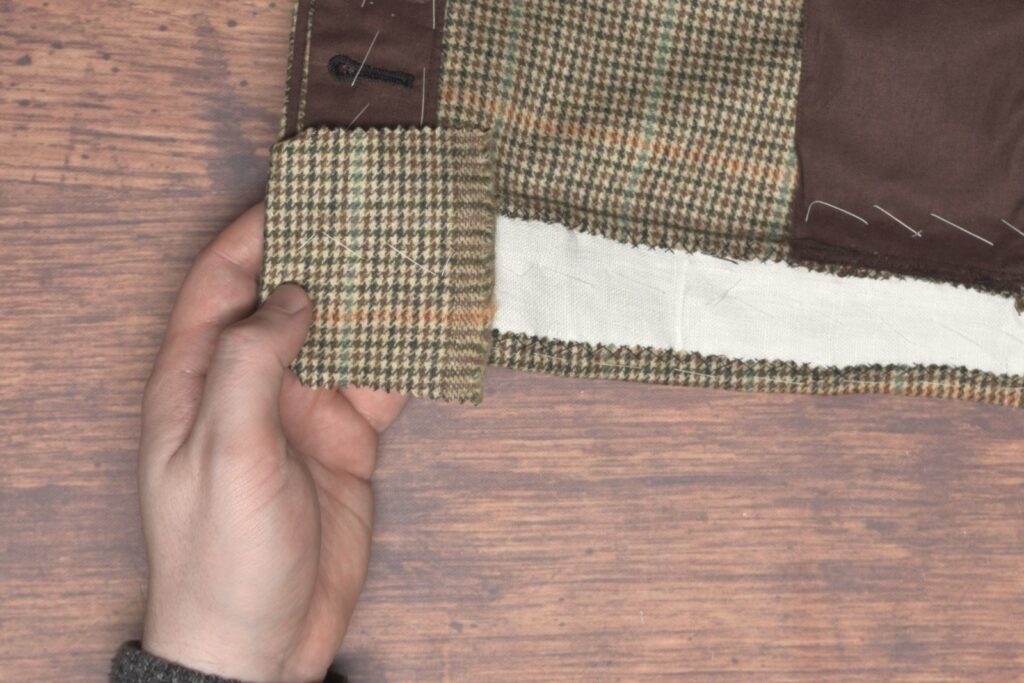
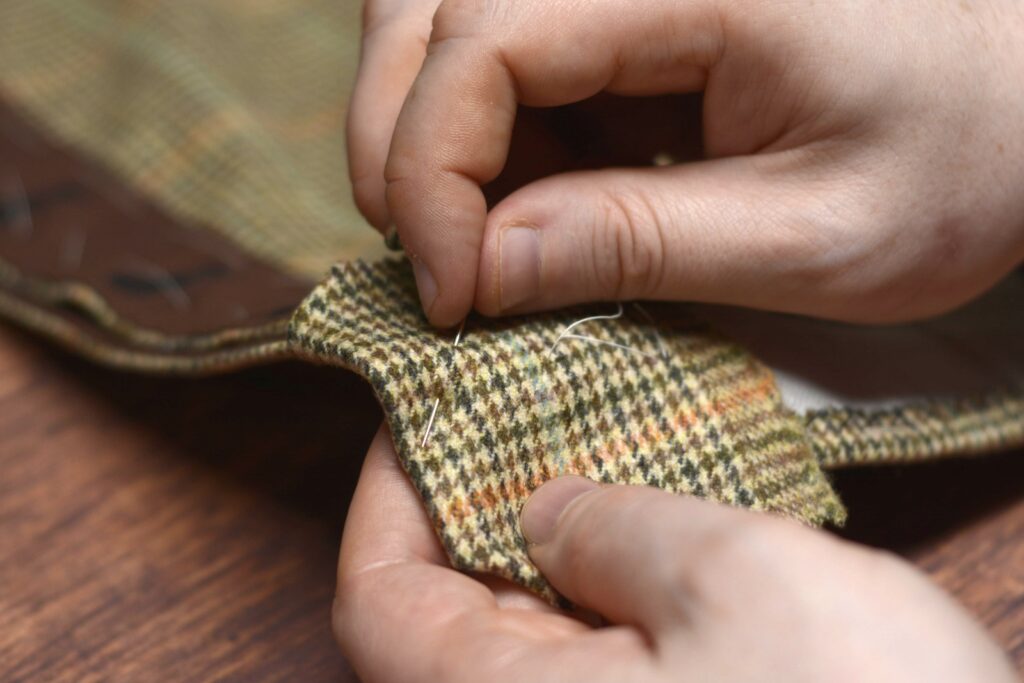
Fold under the raw edges on top and lower edges, setting the top edge back about 1/16″ and allowing the lower edge to just cover the waistband stitch line underneath. Baste in place.
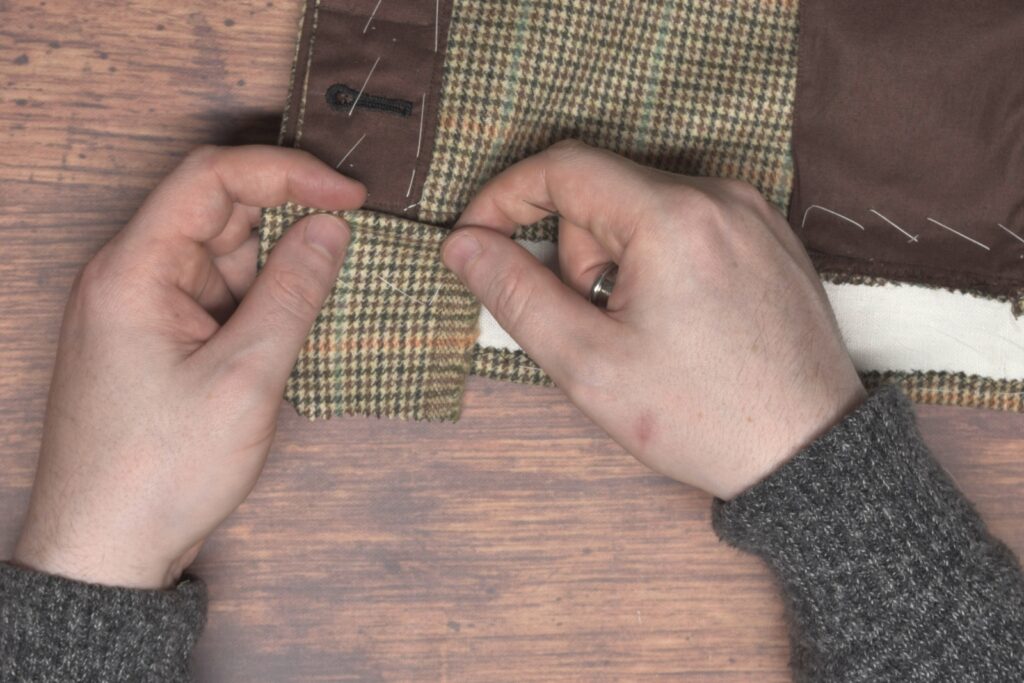
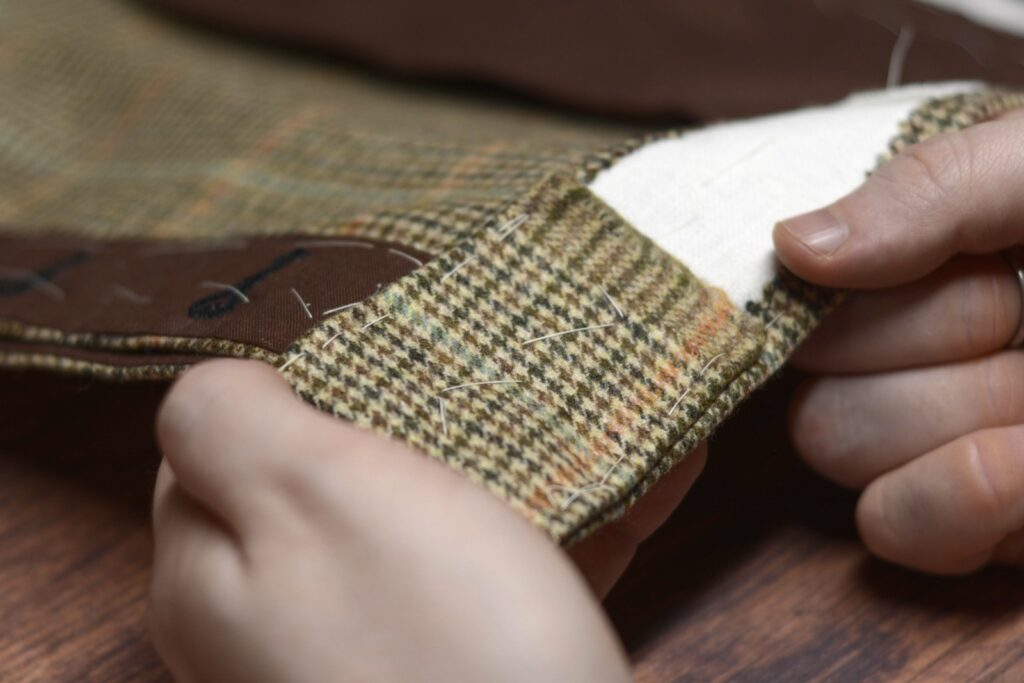
Fell the folded edges of the waistband using a small stitch, keeping the diagonal part of the stitch hidden between the layers.
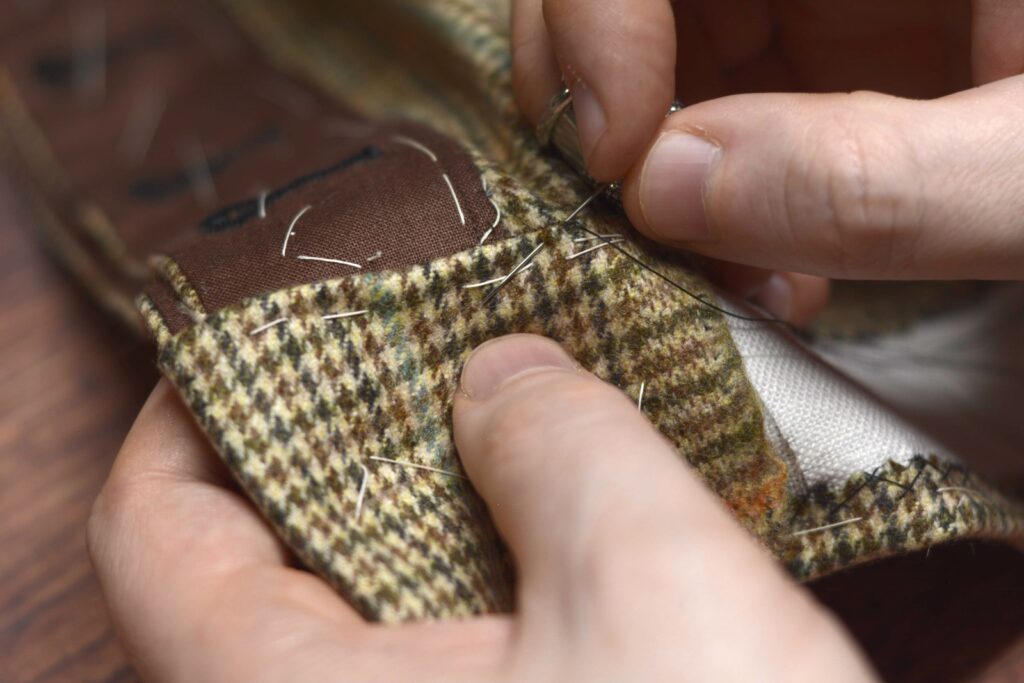
Cross stitch the remaining waistband edge to the interfacing.
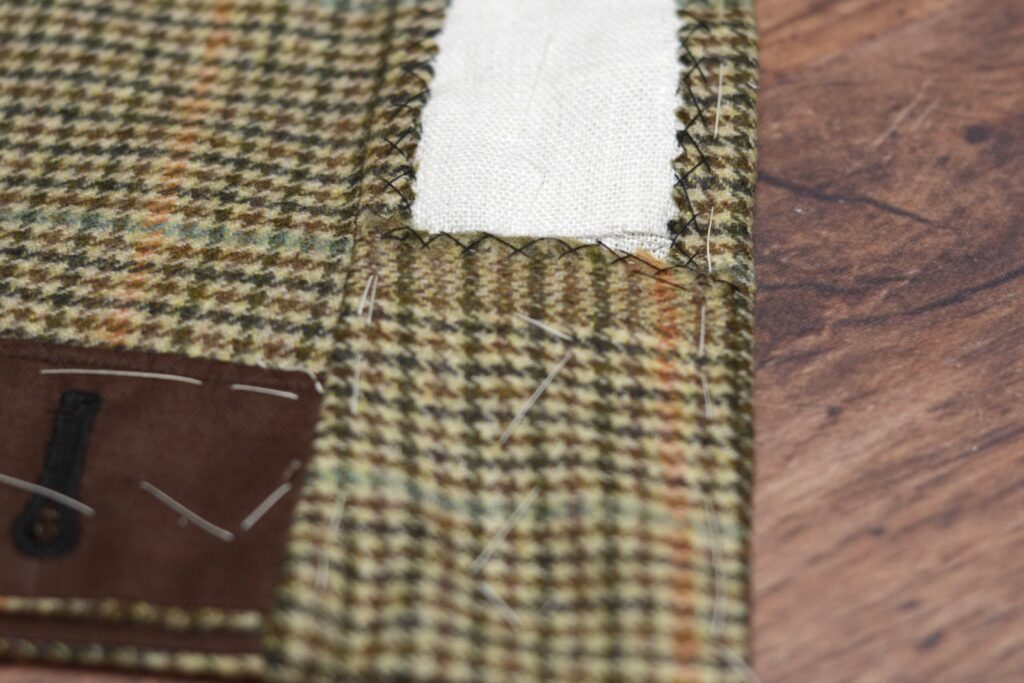
Repeat for the back of the waistband and the other half of the trousers. This completes the installation of the interfacing.
The Top Collar
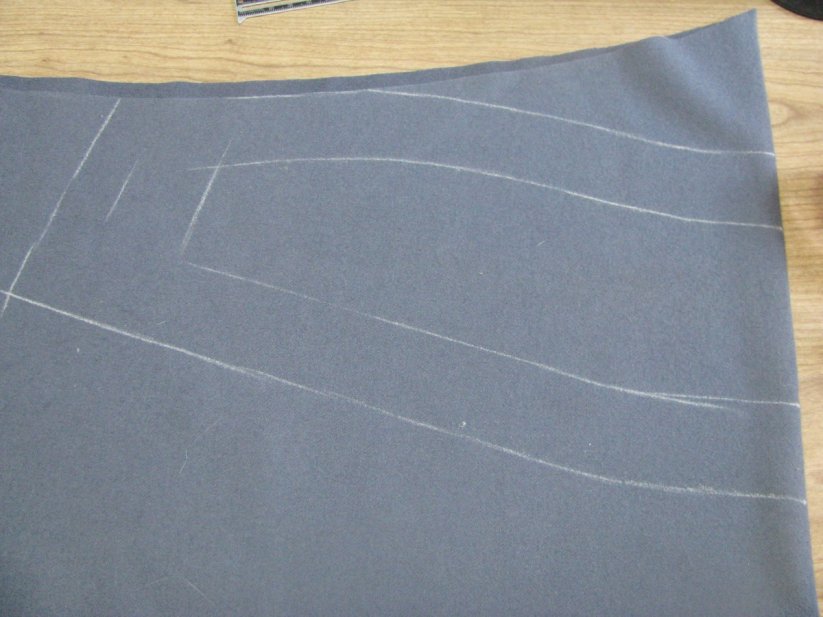
Begin the top collar by placing the collar pattern on the grain, and chalking the outline. Add a two inch inlay to the top and bottom, and three inches to the sides. You have the option of placing the collar on the fold, or seaming the pieces together. In the case of seaming, you should add a 1⁄4 inch seam allowance, and stitch the pieces right sides together. In my case, I chose to cut the collar in one piece.
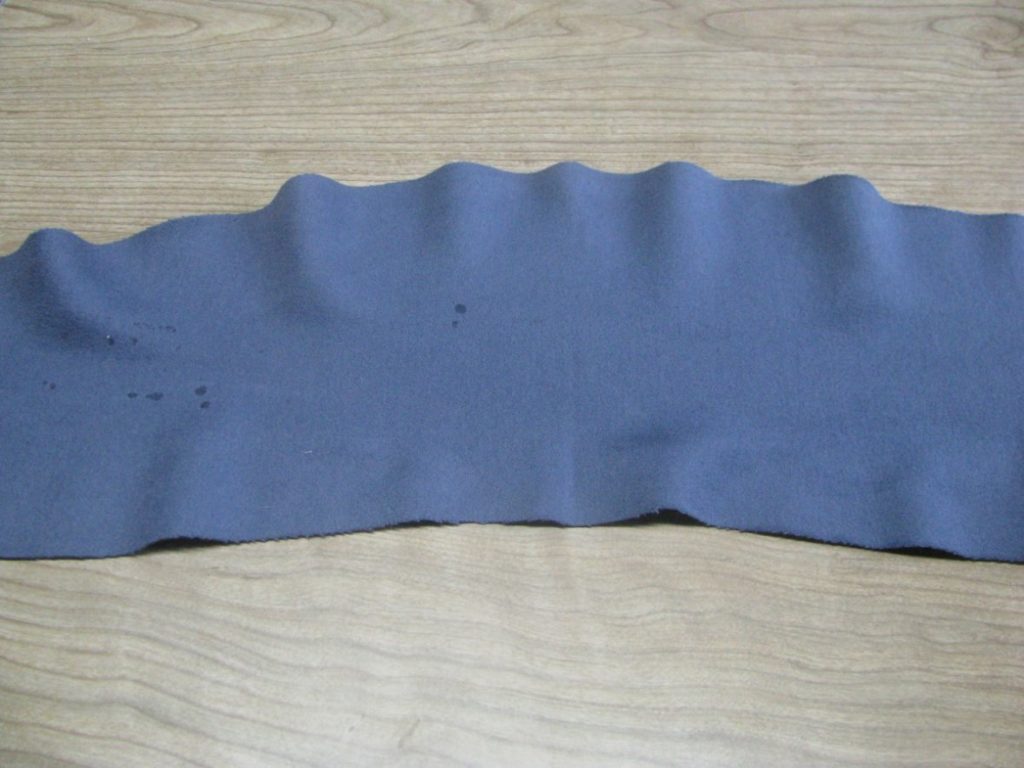
Stretch the top and bottom of the top collar with the iron. This will help the collar lay more smoothly on the finished coat.
Lay the top collar right side down on the table, and place the coat in position on top. Use the chalk marks as a rough guide in getting the proper alignment.
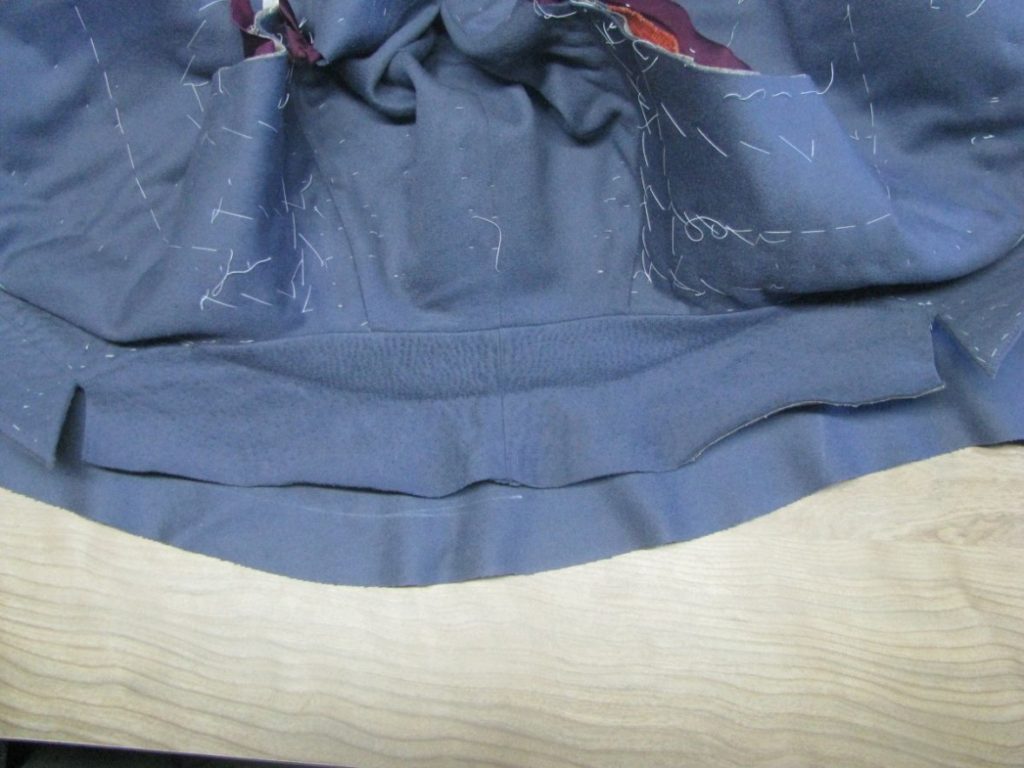
Baste from one edge of the collar, about one inch from the edge until you meet the roll line. Continue basting along the roll line until you reach the far edge of the collar.
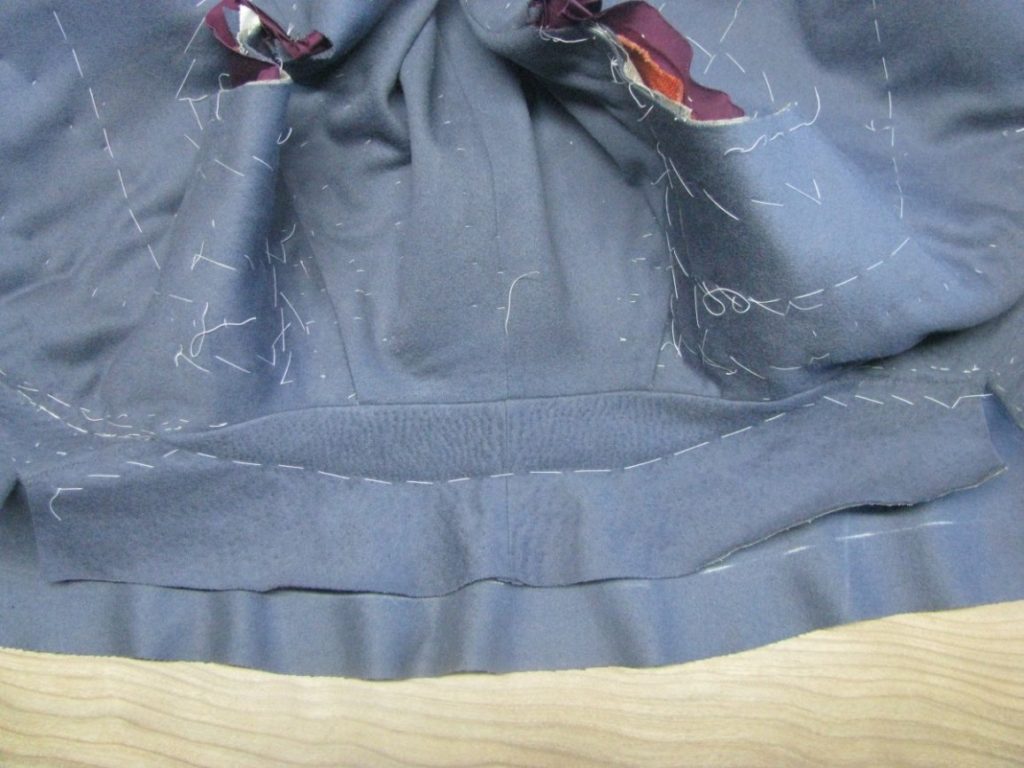
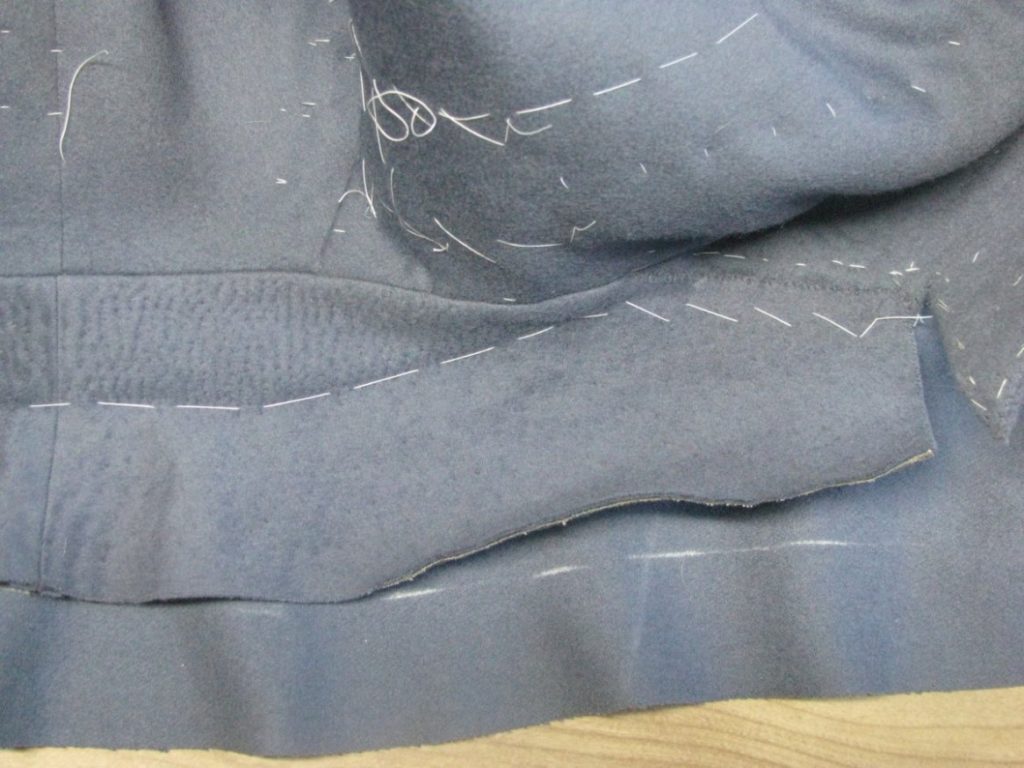
At the top edge of the collar, about one inch from the edge, baste the top collar to the under collar, making sure there are no ripples in the fabric underneath. Use your fingers to determine this.
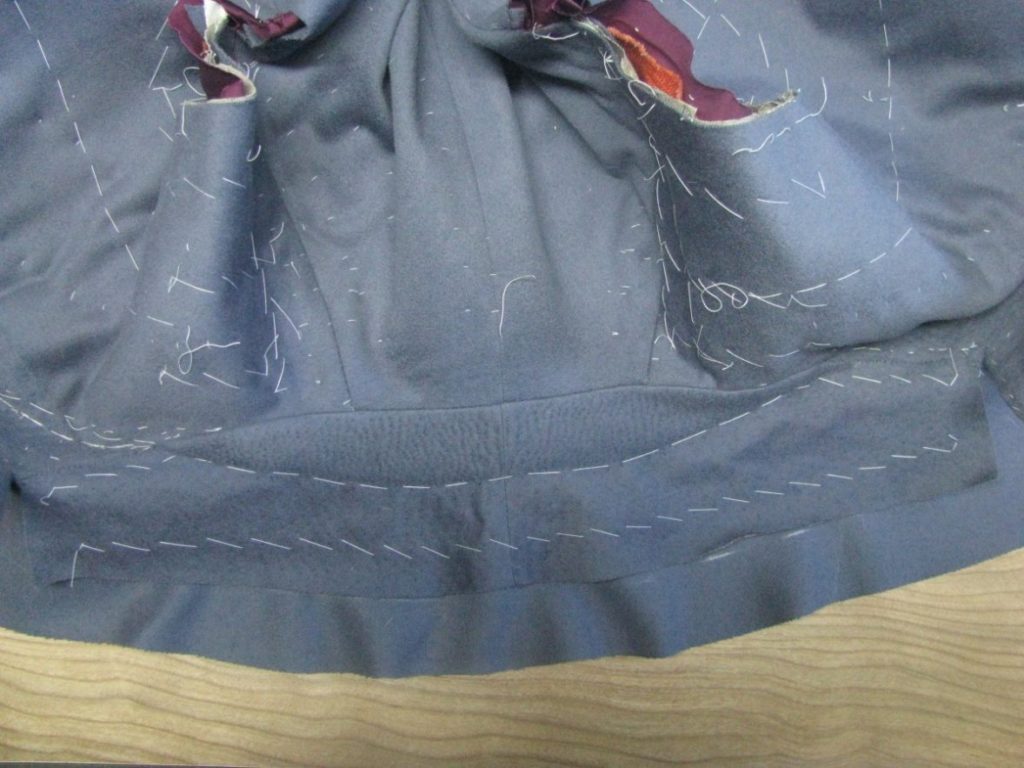
Carefully trim the collar ends to one inch, and the top edge to 3/8 of an inch.
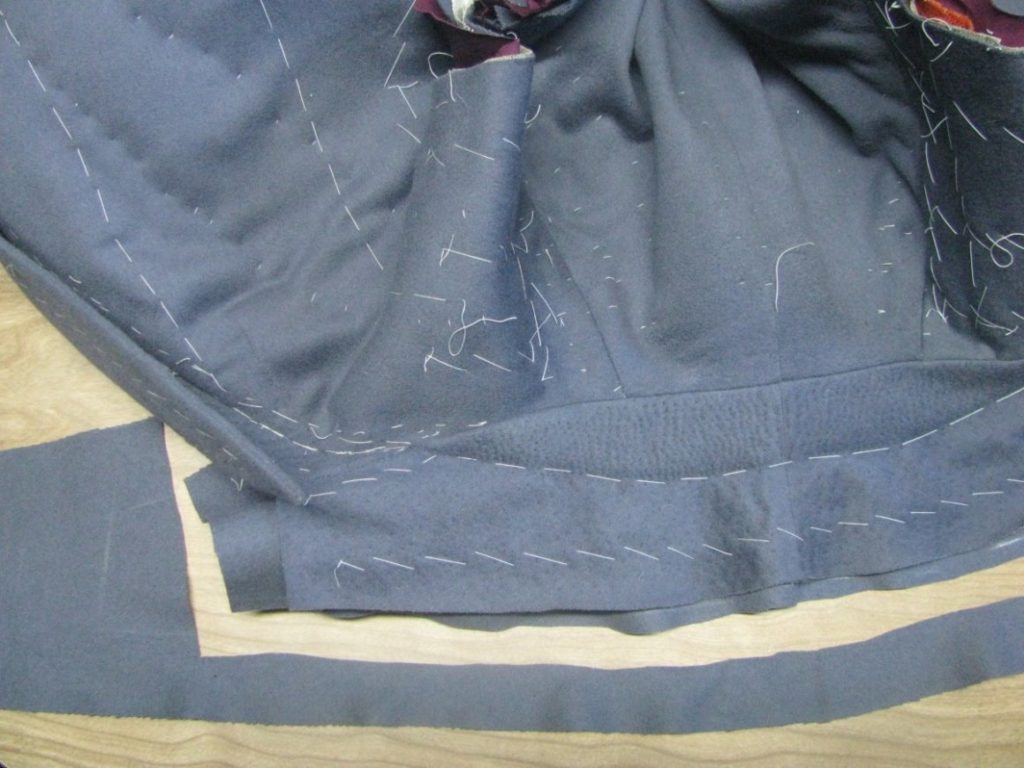
Fold the edge of the top collar beneath the under collar, and baste. There should be 1/16” of fabric showing beyond the raw edge of the under collar, so that it will not be visible when completed.
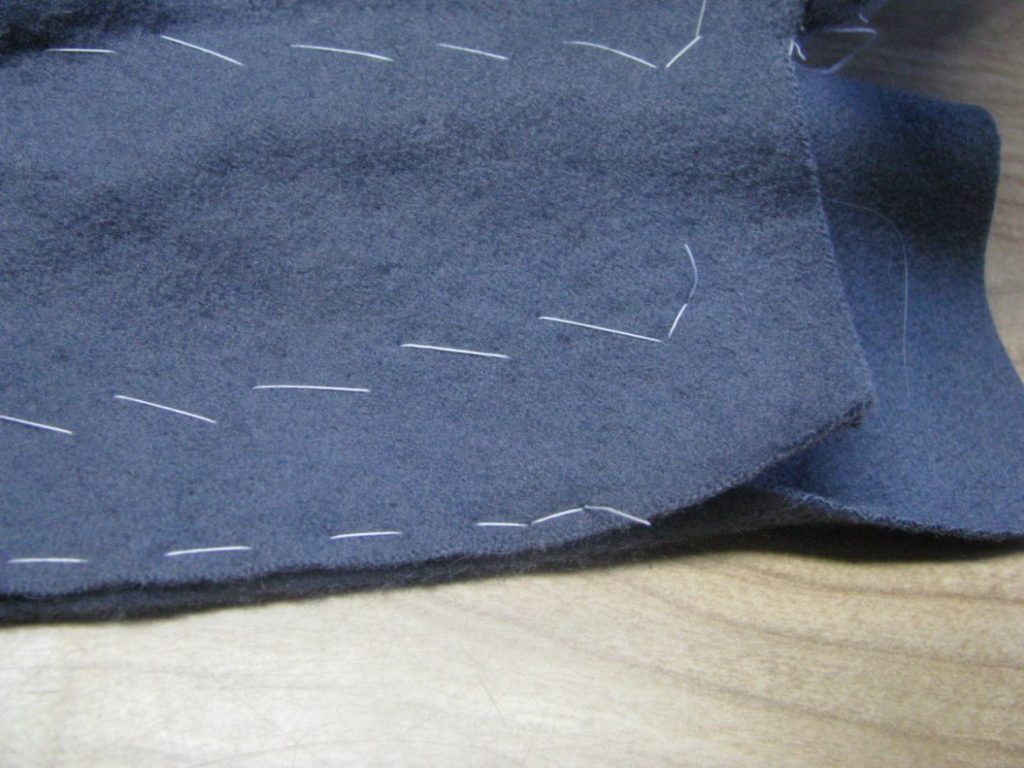
This photo shows the collar so far. Next we’ll secure the stand side of the collar.
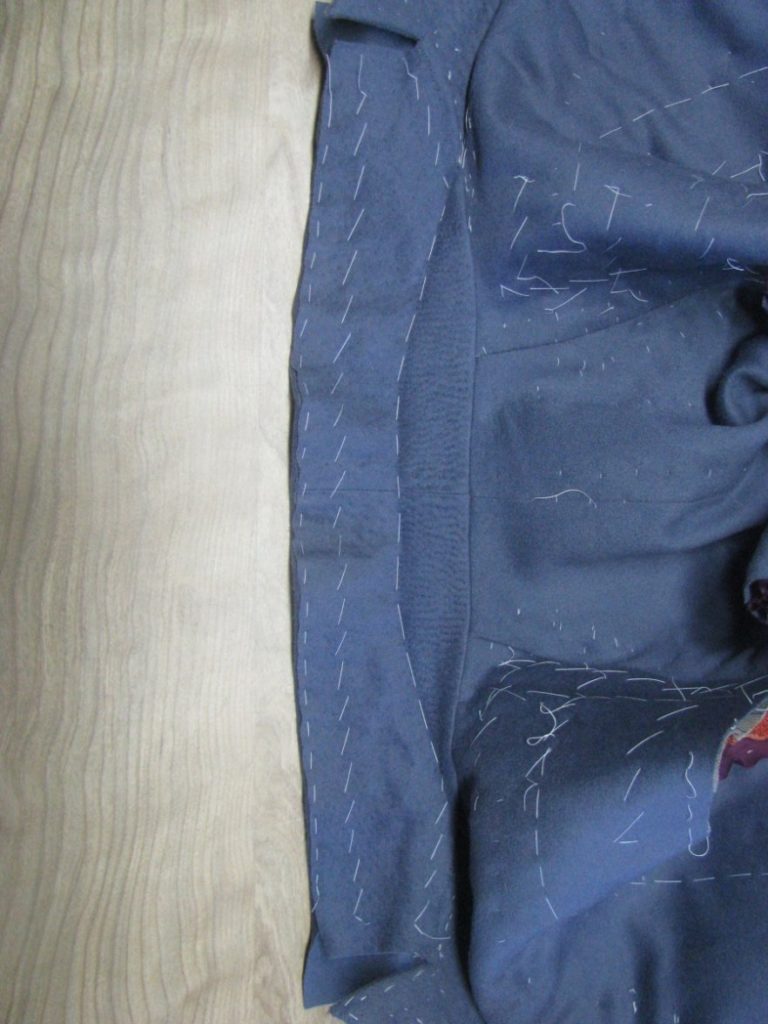
Trim both ends of the collar to 3/8 of an inch.
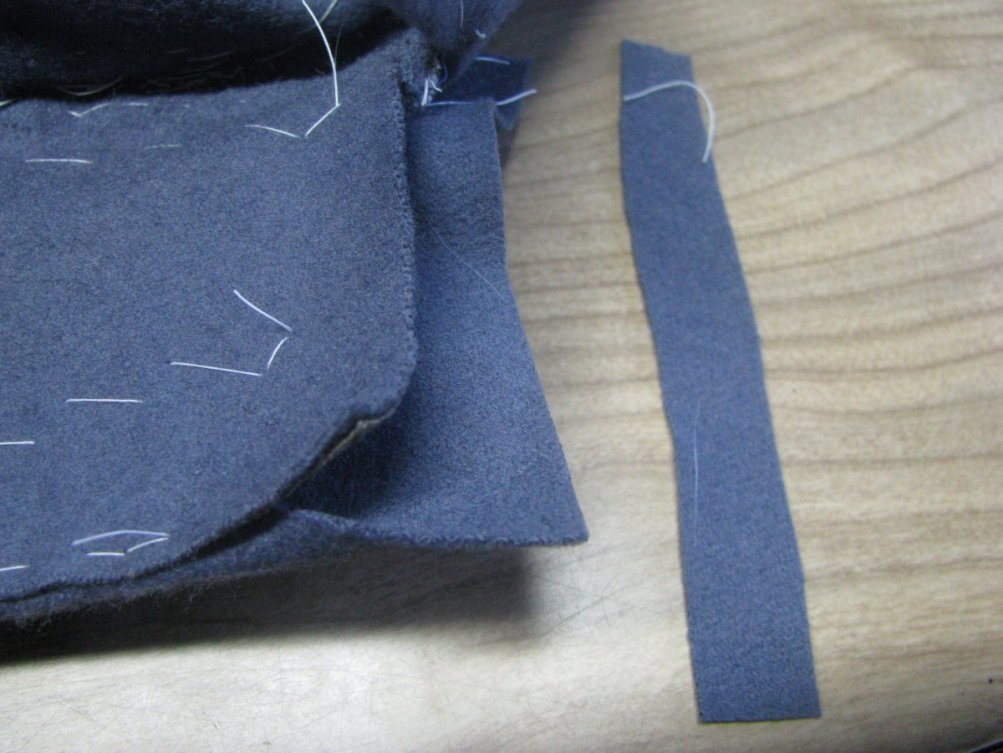
Baste the ends under in the same manner as the top of the collar, making a nice fold at the corner.
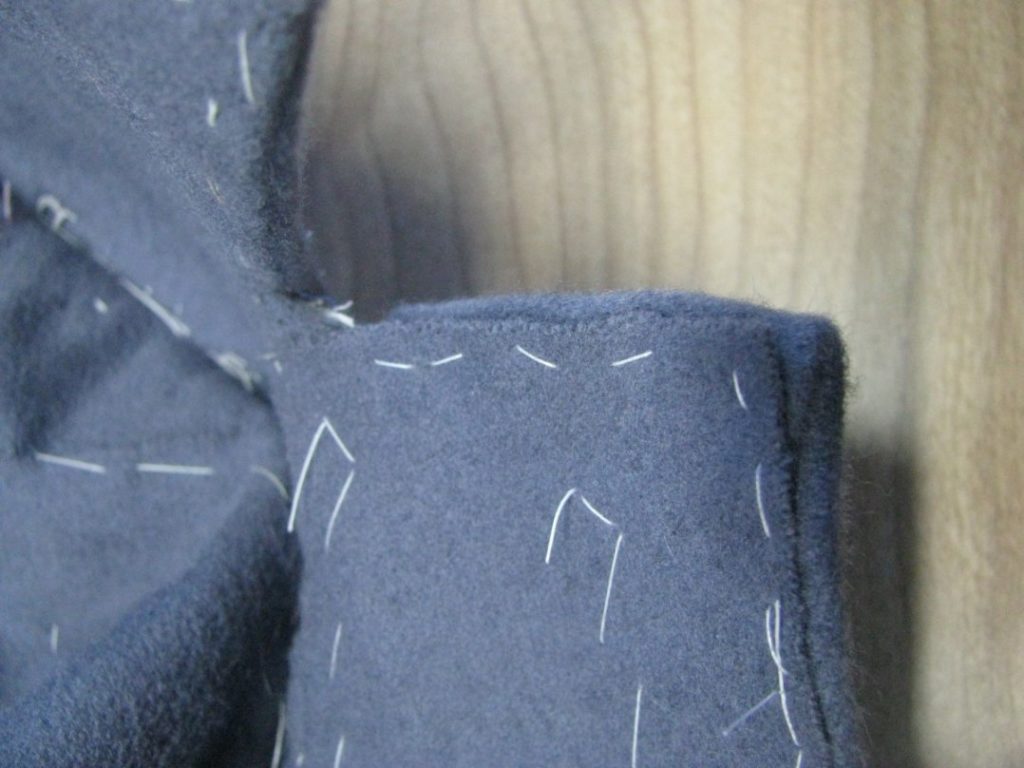
On the bottom edge of the top collar, near the gorge line, measure a half an inch seam allowance from the edge of the collar. Trim carefully.
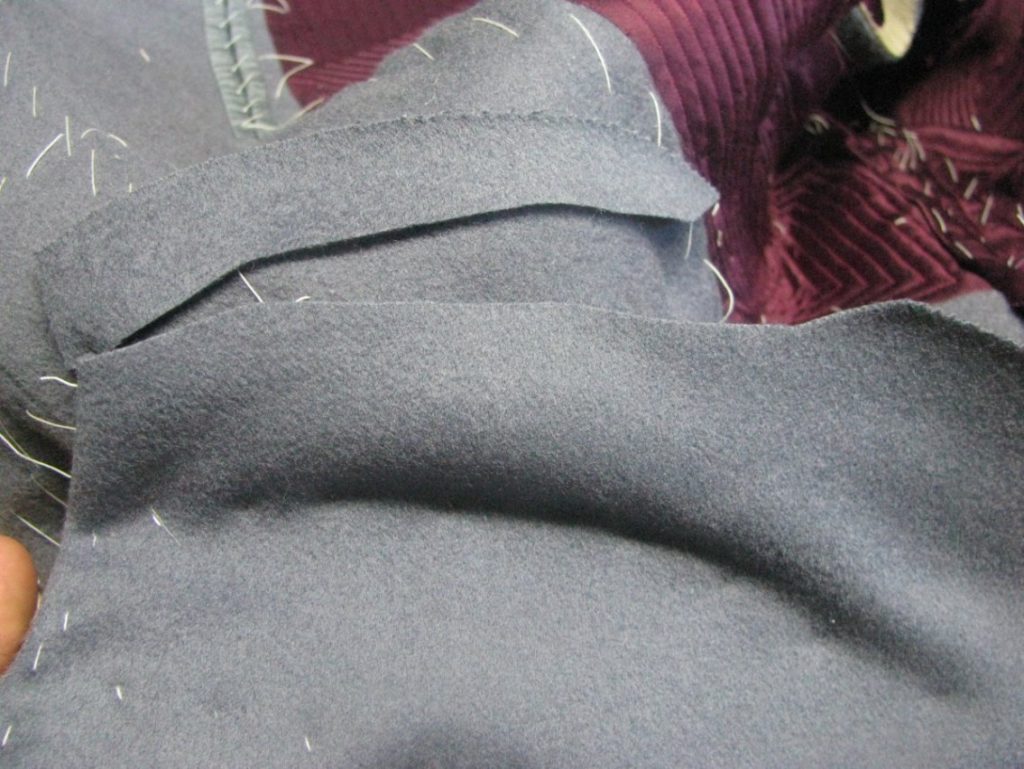
Fold under the fabric and baste along the gorge line. Ideally there will be no pulling or ripples. I ended up going back and redoing this section.
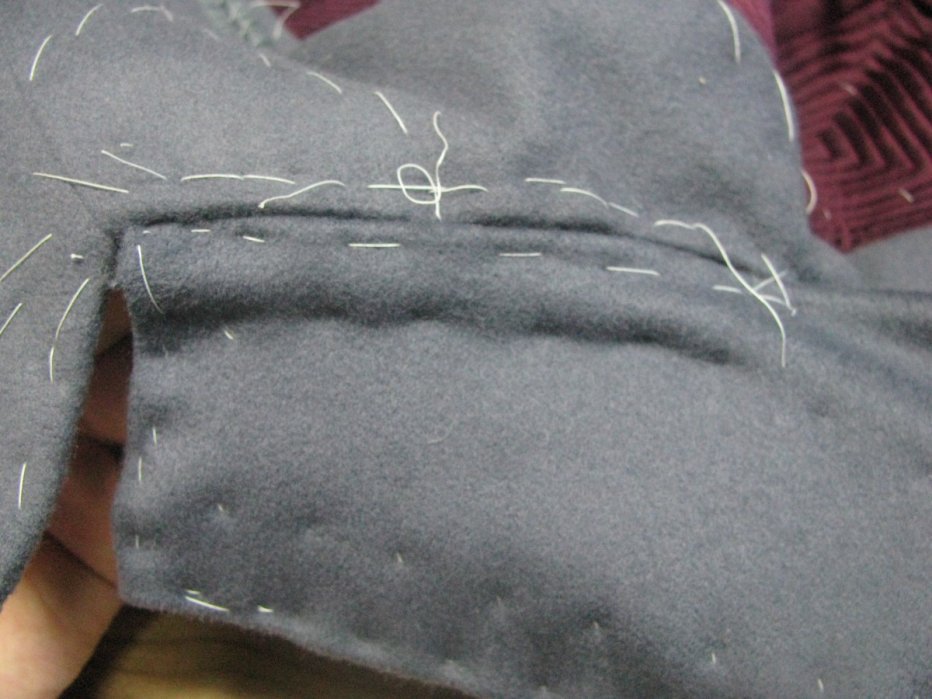
From the gorge line to the point of the collar just before it meets the end of the facing, fold and baste under the fabric.
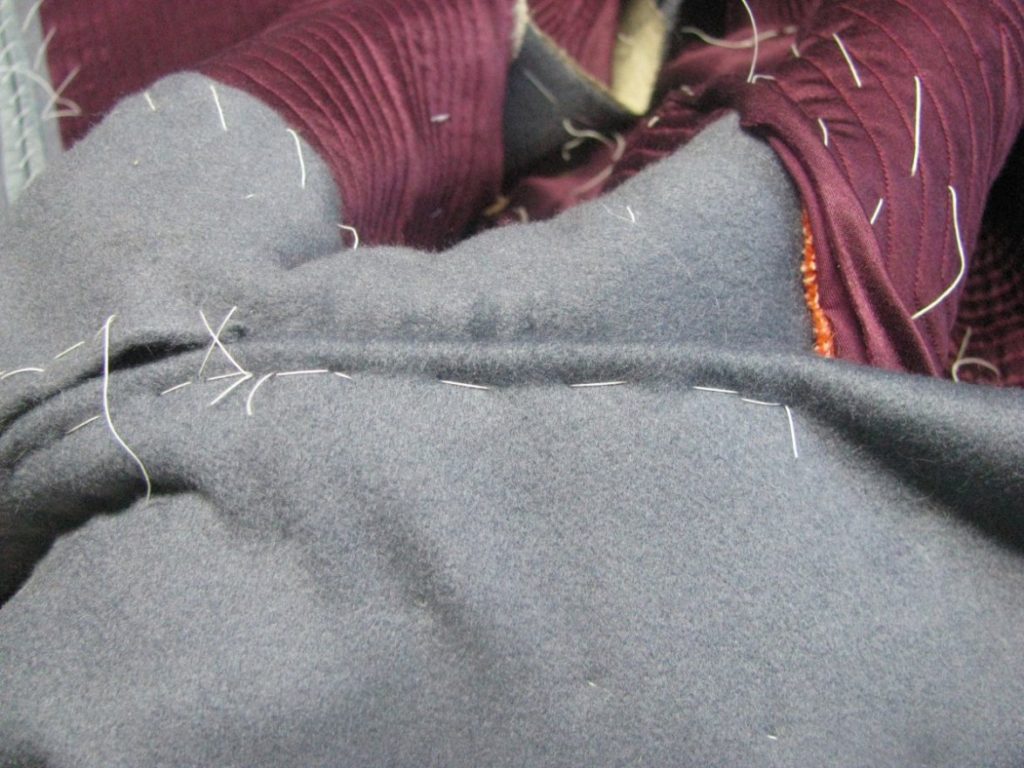
Here’s what the collar should look like. Note the back section has not been basted down yet.
Turn the coat lining side down again, and baste the stand of the collar from one end to the other.
At the back, carefully slash the top collar so that it may smoothly fit around the curvature of the neck. Don’t slash too far, however. Next, using a pad-type basting stitch and silk thread, baste the top collar to the collar seam below it. These stitches are permanent, so don’t let them show through to the right side.
Lapels and Side Body
It’s now time to begin piecing the coat body together. I prefer to baste everything together before sewing for maximum control. It helps to ensure all the seams line up properly.
Begin by basting the lapels to the forepart, wrong sides together. The lapel should line up with the tailor’s tacks, unless you needed to make some alterations for a protruding stomach, which would then need to be marked.

Before sewing, you should trim off the inlay, cutting directly on the tailor tacks you put in earlier.

Sew the seams with a 1⁄4 inch seam allowance. Press the seam well on each side to set the stitches, then press from the wrong side, and finally from the right side. Using a tailor’s ham in extremely necessary for this seam, or you will lose all of the fullness that forms between the two pieces. All seams should be sewn in this manner.


Note how flat the seam looks. There is no ‘roll’ to the seam. When pressed well, the layers of fabric are almost unnoticeable to the touch.

Note in this photo how the lapel extends a 1⁄4 inch below the forepart. This is due to adding the seam allowance there, which, after experimenting, I recommend not adding.

Side Body
Now baste the side body to the forepart, right sides together. The seams should be the equal in length, but if you’ve stretched the two pieces in unequal amounts, you may have to stretch one of the seams again. Press open, using a tailor’s ham for the lower half.

Note that this is the only inlay that remains in the finished coat, as it is the easiest one to let out if necessary, and does not affect the pressing of the seam.

Fitting Issues
If you wish to do a fitting at this point, you may do so. I wanted to see the affects of some more ironwork I did, and also to check how the back looked after raising it a half inch. Note how the back falls smoothly to the waist now, and how the folds are almost completely gone from the side pieces. What remaining fullness there is will be taken up by the padding later on.

In this photo, you’ll notice that the waist seam is uneven in the front. This is something that occurs on all double breasted coats, even modern coats. To fix, you will need to raise the front waist on the right side of the coat 3/8 of an inch, tapering into the regular seam about 7 inches from the center front, as shown.


At the back, you can see the alteration I did to raise the side body and back waist.

After you are satisfied with the alterations, trim off the inlays following the remarked lines.
Creating a Muslin Toile
Before moving on to stylizing your pattern, it’s a good idea to get most of the fitting out of the way while the pattern is less complicated. To do that, we’ll construct a muslin vest, using inexpensive fabric to check for fitting errors.
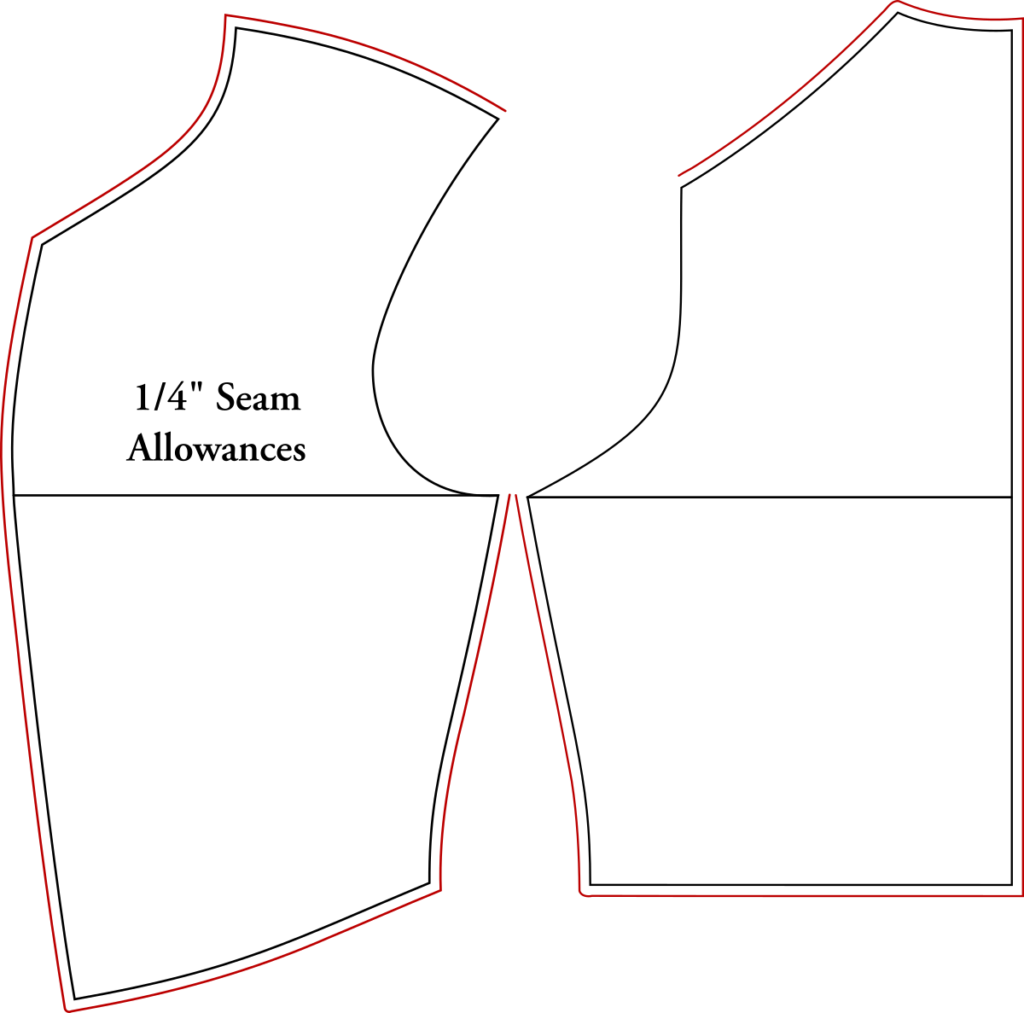
To begin, copy the front and back of your draft onto a fresh piece of paper, so that the original draft can be preserved. After you’ve copied them, seam allowances need to be added. Through a lot of research and experimentation, I’ve come to the conclusion that Devere’s draft needs 1/4″ seam allowances needed along every edge, except the armscye and shoulder seam. And while I personally do not add seam allowances to the shoulder seam, for this beginner course, we will add the 1/4″ there as well, in order to make the construction a little easier. Feel free to leave it off if you wish, though.
Here is a diagram of the pattern pieces after the seam allowances have been added. I use a small ruler to mark out the 1/4″ all the way around. Also be sure to mark out the chest line, to help you align the patterns on the fabric.
Here is my pattern after tracing to a fresh sheet of paper and adding the seam allowances.
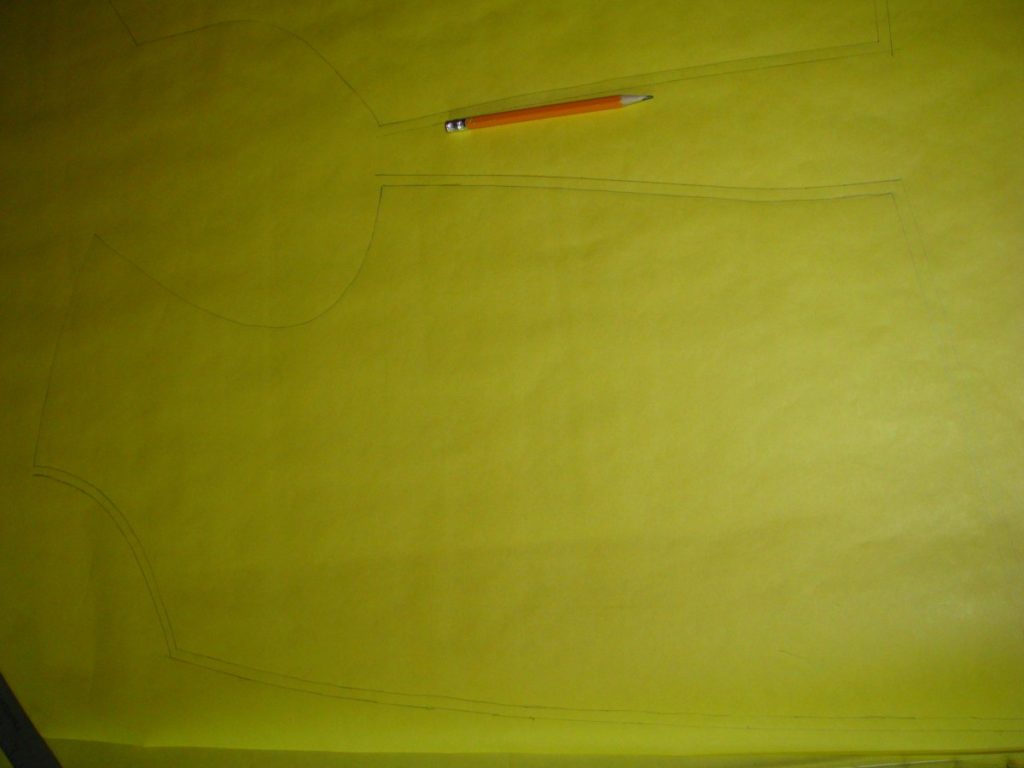
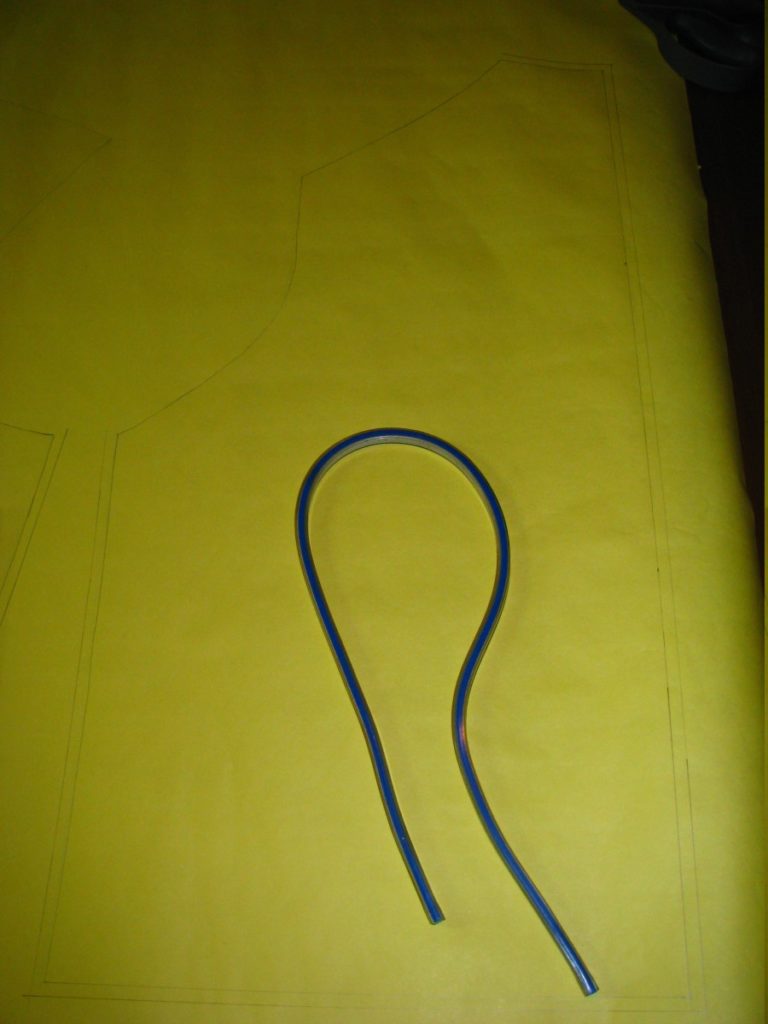
Cut out both pattern pieces along the seam lines you just drew, being as neat as possible. Lay the pieces on your doubled layers of muslin fabric, and carefully trace around each piece using sharp chalk or a pencil. Place something on the pattern to hold it in place while you trace. Make sure that the horizontal construction chest line on the pattern is perpendicular to the edge of the fabric to get a good grain alignment.
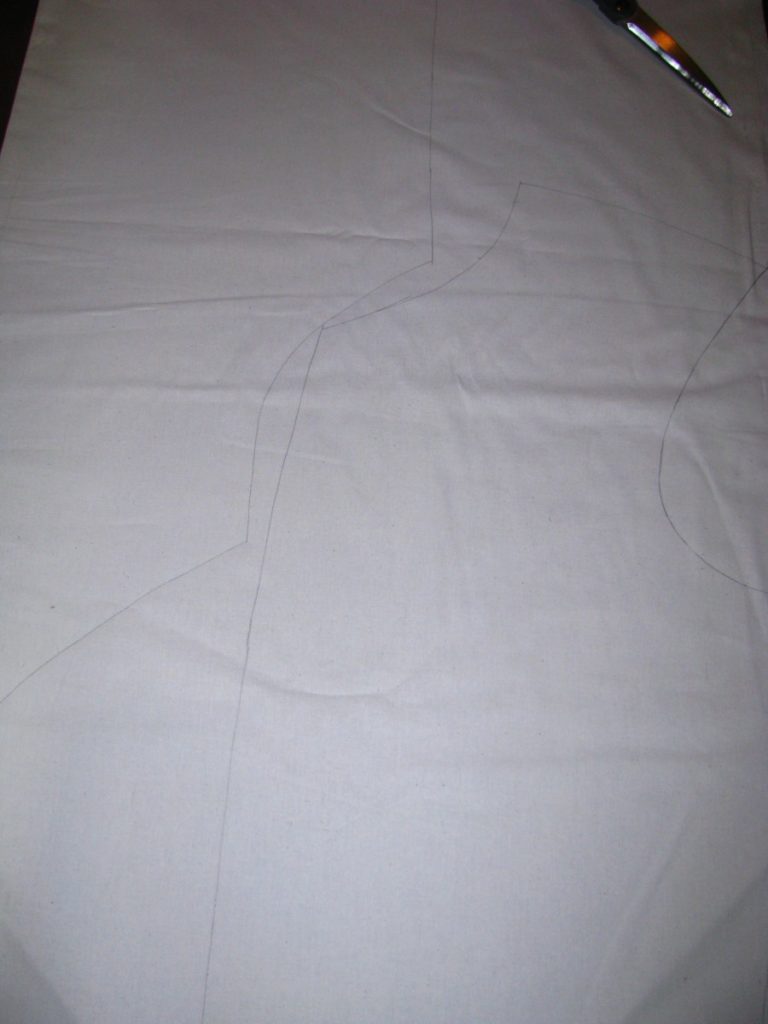
Cut out the pieces, cutting on the inside of the line to ensure a more accurate fit.
Ironwork
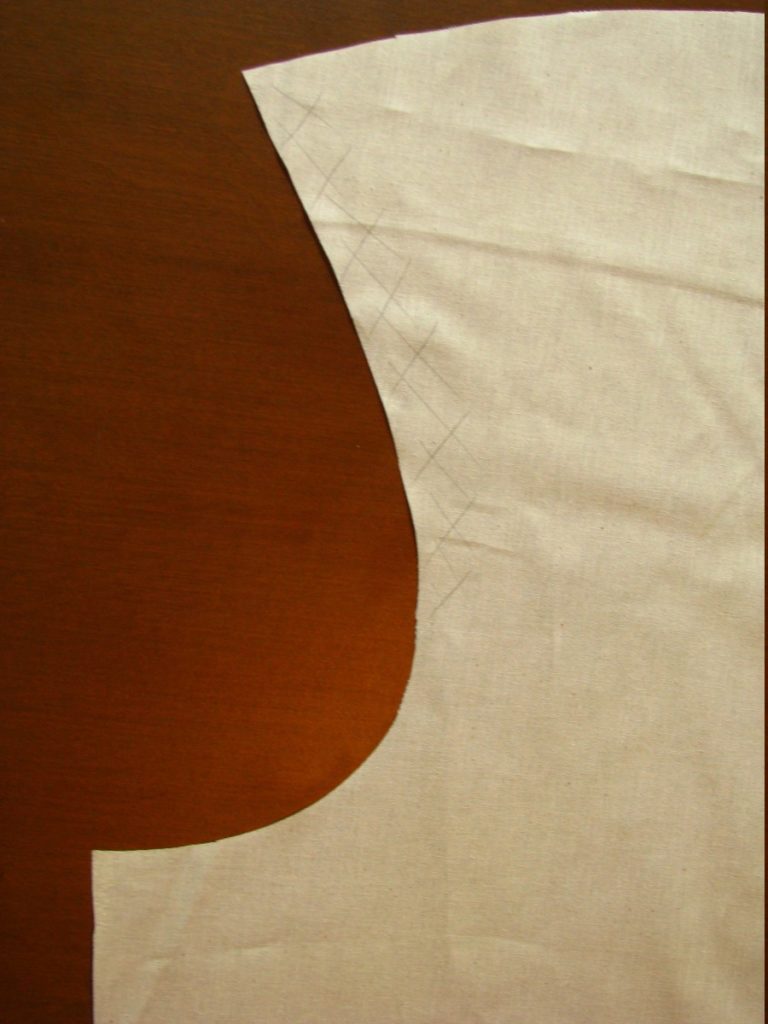
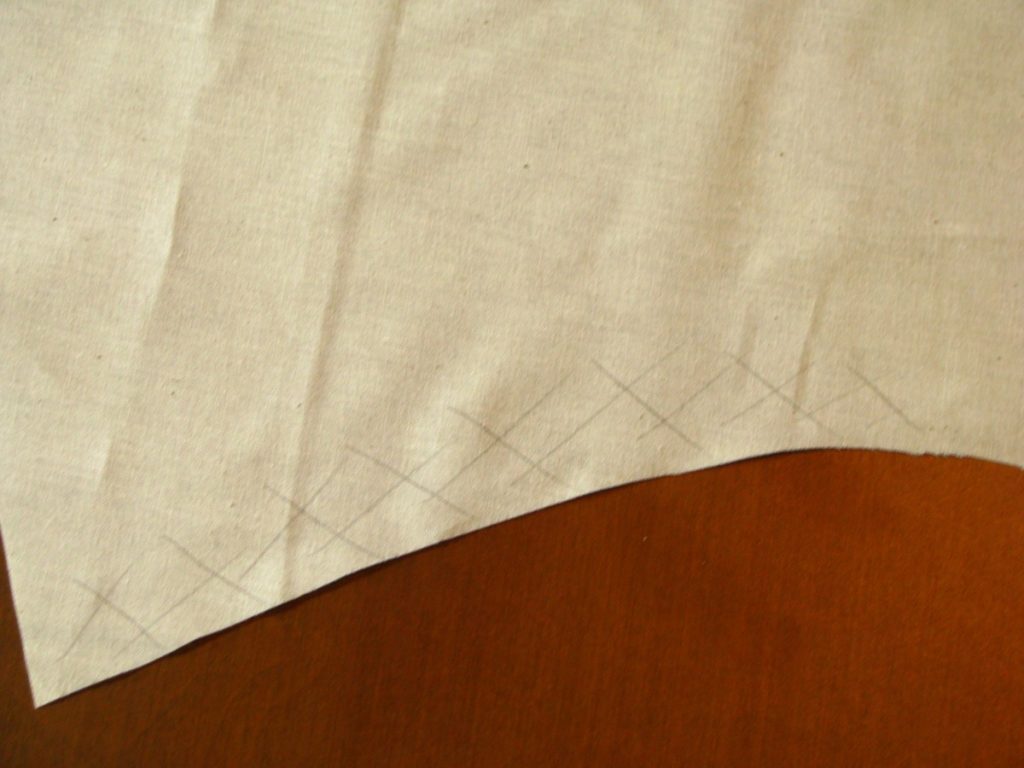
As this pattern is for a generic vest, and we have not yet decided on which fabric to use, we will assume it will be a wool vest for now. To get a good period fit, the shoulder area of the vest fronts were shaped with the iron. As this is a very lightweight muslin fabric, it’s possible to just do this using your hands. Holding the armscye in one hand at the fullest part, at the bottom of the X’s, use your other hand to stretch the material. It’s better to have a lighter touch and make more passes over the length of the armscye.
If you did not add seam allowances to the shoulder area, stretch across the top of the shoulder as well.
With right sides together, lay the forepart and back together, aligning the side seam, and pin at the ends. It’s likely that the forepart will be slightly longer, so place a pin in the middle, dividing the fullness in half, and repeat with another pin between, for a total of 5 pins. Sew the seam using a 1/4″ seam allowance.
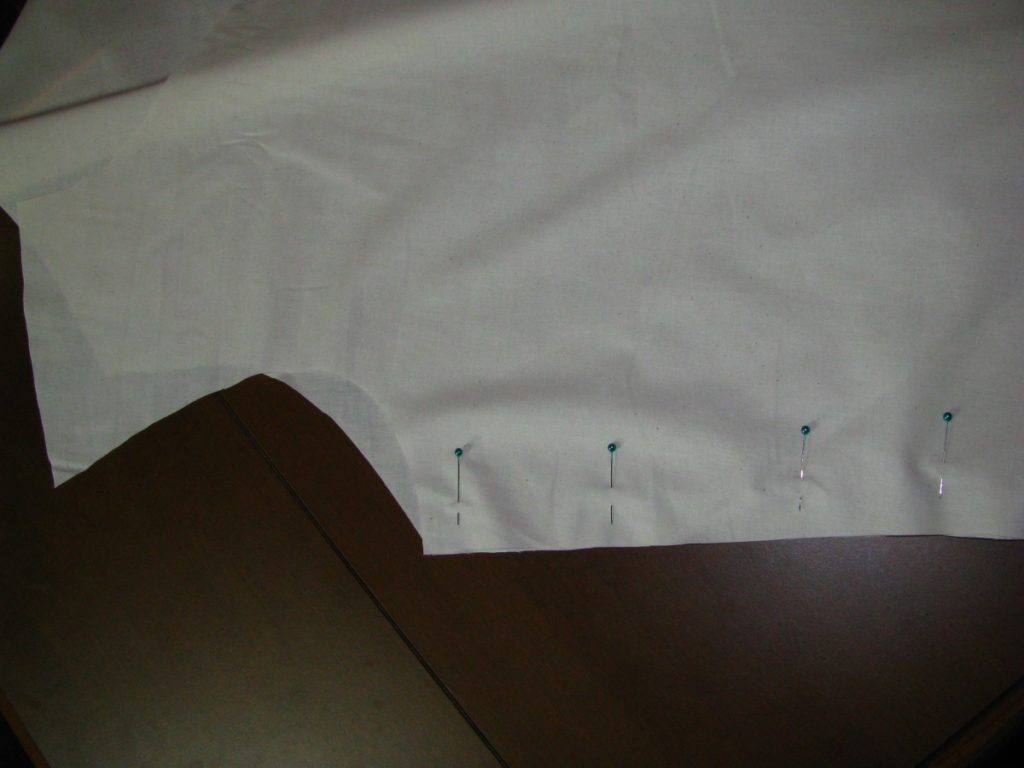
Pin the ends of the shoulder seams, right sides together, and subdivide further with more pins. If you left the seam allowance in, there will be a fair amount of fullness to work in on the back. If not, the two seams will match pretty closely in length.
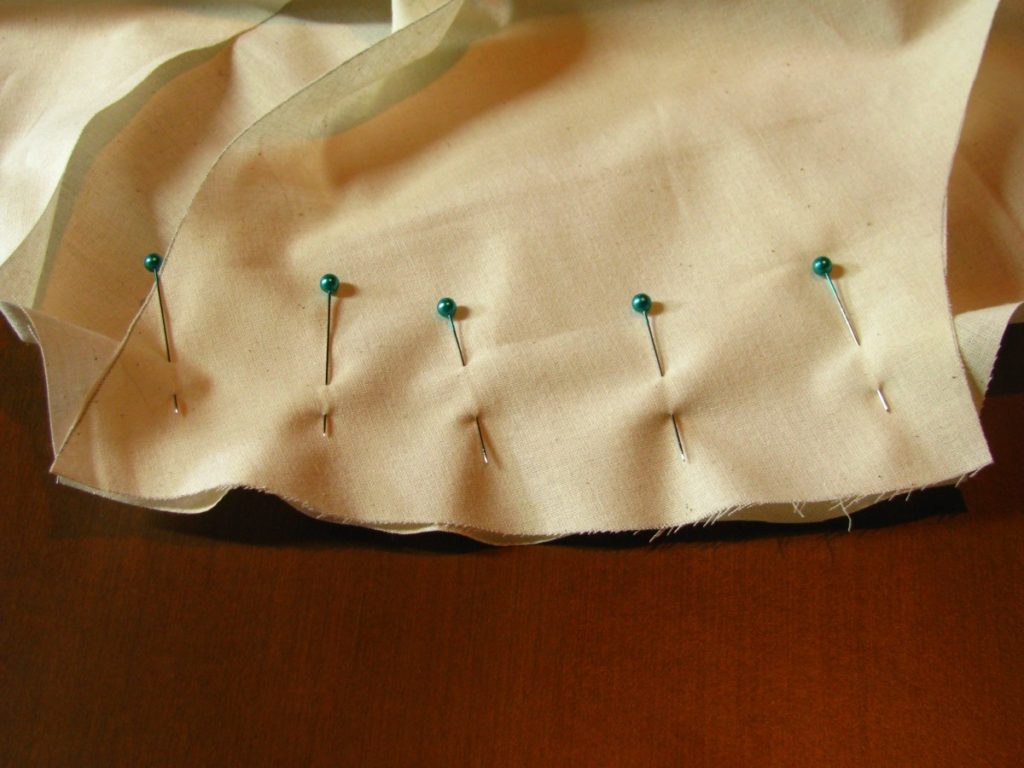
Sew, using a 1/4″ seam allowance. Press open all of the seams with your thumbnail.
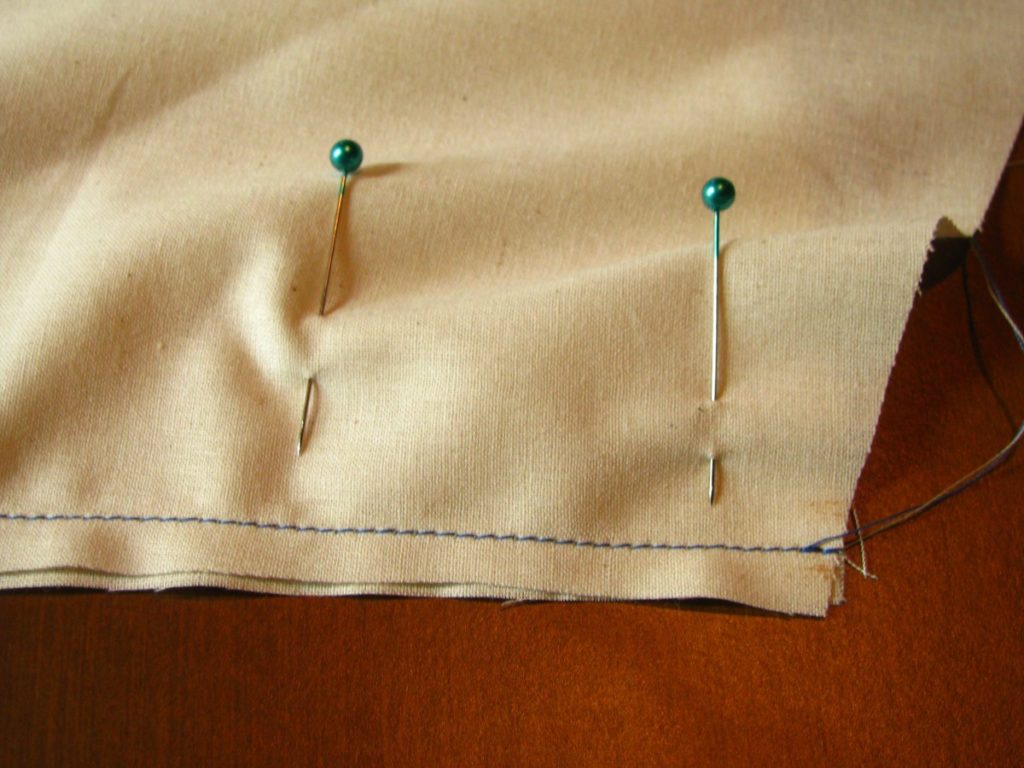
Sew the two halves together along the back, right sides together. This completes your vest muslin, which you can go try on and begin to work on any fitting issues you may have. Please post in the forums with photos of your draft, and wearing the muslin, and I’ll help you as best I can through the fitting process.
Drafting the Back
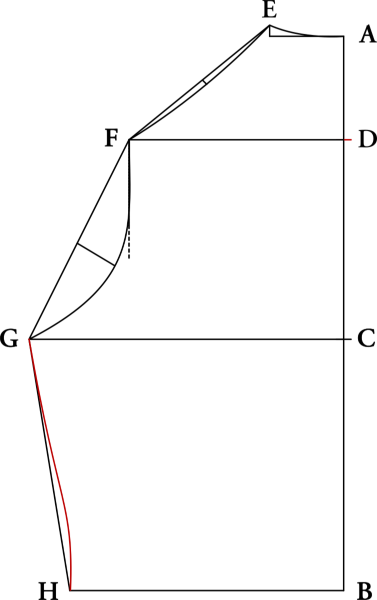
Let us now proceed with drafting the back of the waistcoat. I’d recommend doing this on the same sheet of paper as the front, and align the point A on both front and back, so you can be sure that things are properly lined up while drafting.
A – B
Draw a long straight line, and mark on it the length of Curve to measure.

B – C
Length of Side to measure.

A – D
3 1/2 graduated inches

A – E
Draw a line square across from A to E, which is 2 1/2 graduated inches.
At E, square up 3/8 graduated inches for the rise of the neck.

D – F
Square across from D to F, at 7 1/4 graduated inches.

C – G
Square across from C to G, at 10 5/8 graduated inches.
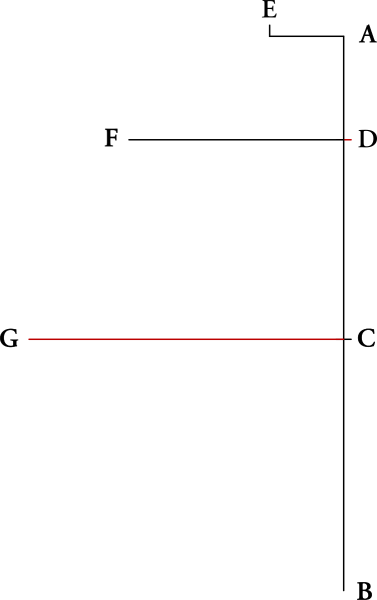
B – H
Square across from B to H, making this length equal to half the waist plus 1 1/2 graduated inches. This extra is added to give extra movement in the back, and is taken up by the strap and buckle during use.

Back Neck Curve
Using a French curve or free hand, draw a curve for the back neck from A to E as shown.

Shoulder Seam Hollowing
Draw a straight line from E to F. Find the center of this line, and draw a 1/4″ line square towards the back at this point. Then draw a curve connecting all three points as shown.

Armscye
Draw a line square down from point F. This is just a construction line to aid in drawing the armscye.
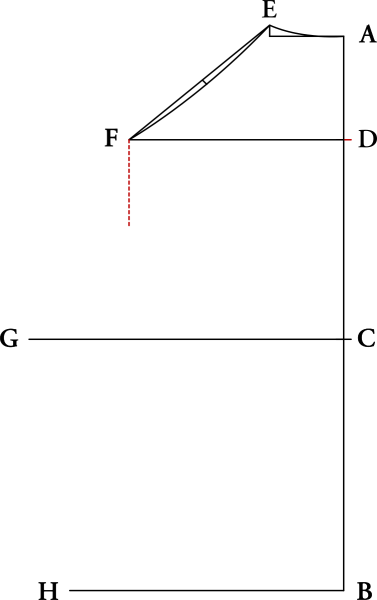
Draw a line from point G to F. Find the middle, and draw a line square at 1 1/2 graduated inches in length. Draw a curve connecting the three points. This curve should align with the construction line you drew previously down from F.
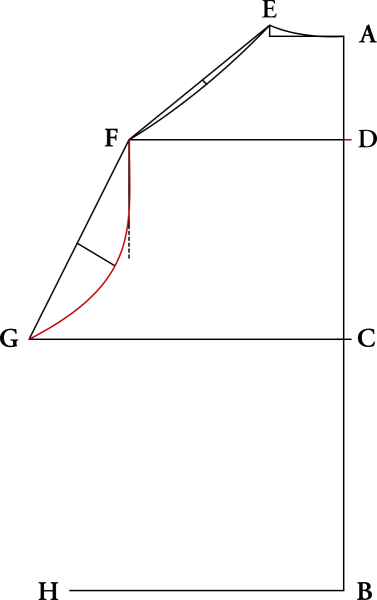
Waist Hollowing
About 2 inches above the waist line, hollow in 1/4″ for the hollow of the waist, and draw a line connecting G, H, and that point. This completes the draft of the waistcoat back.
Your Progress
[columns gutter=”0″]
[col]
1 |
Draft the waistcoat back. |
[/col]
[col align_text=”center, middle”]
[/col]
[/columns]
Drafting the Front
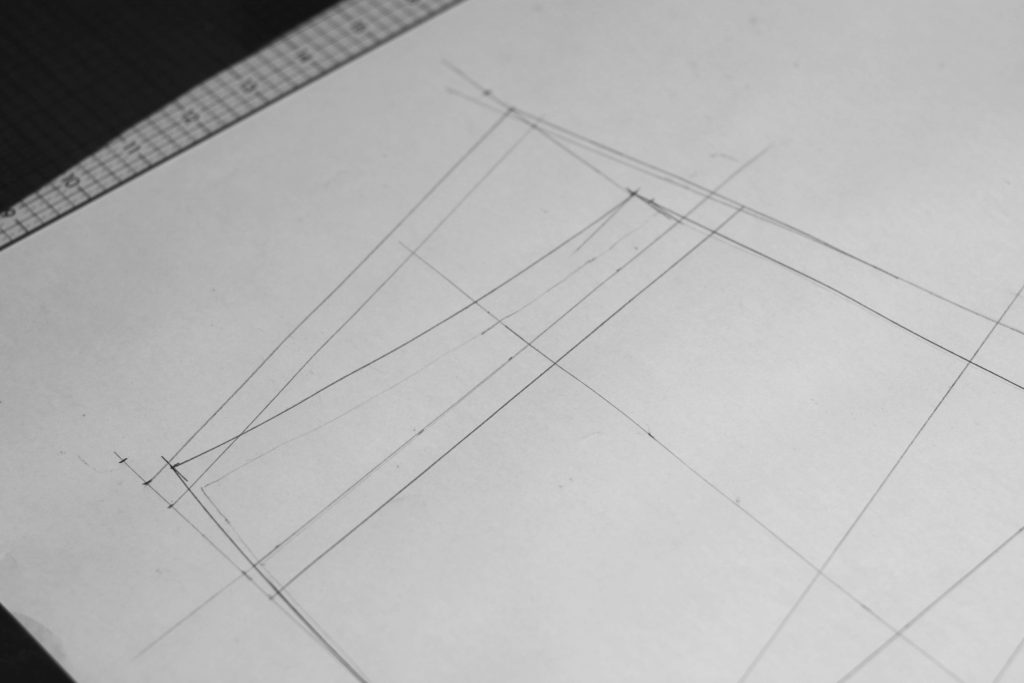
Now we’ll begin the drafting process. I like to draft on ‘project paper’, found at most office supply stores. A quilters’ ruler, french curve, and a sharp pencil will help get you started.
If following the instructions below, use a normal ruler or your actual measure when the instructions say ‘to measure’. If graduated inches are specified, use the graduated ruler corresponding to your Breast measurement.
If you prefer to use the spreadsheet, just use the numbers that are calculated for you, and use the drawings here as a guide.
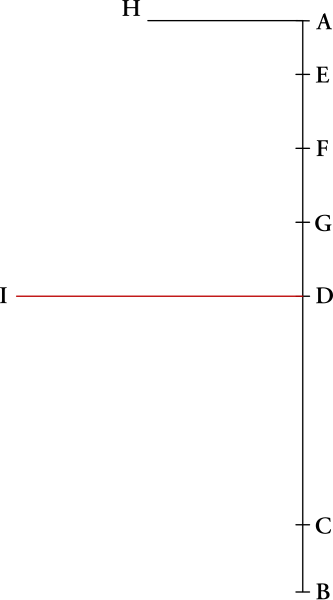
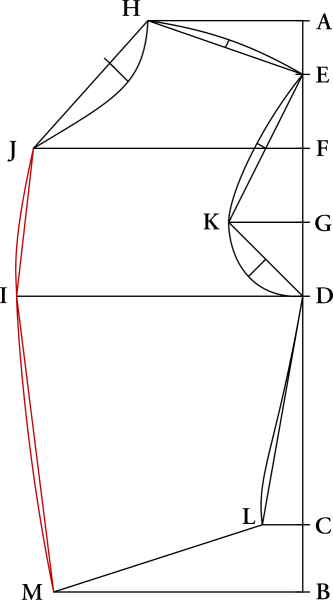
A – B

Draw a long straight line, and mark on it the length of Bust to measure.
B – C
Measure up from B to point C, 2 1/2 graduated inches. This marks the bottom of the side seam.

C – D
Length of Side to measure.

A – E
Mark point E at 2 graduated inches from point A.

A – F
A to F is 4 3/4 graduated inches.

F – G
F to G is halfway between F and D, or 7 1/2 graduated inches from point A.

A – H
Square across from point A to point H, which is a total of 5 3/4 graduated inches. This gives us the shoulder point.

D – I
Square across D – I, at 10 5/8 graduated inches. This gives the width of the chest.
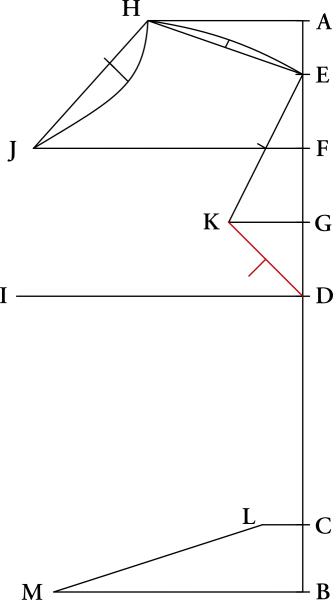
F – J
Square out from F to J at 10 graduated inches. This gives us the position of the neck point.

G – K
Square out from G to K, at 2 3/4 graduated inches. This gives us the width of the armscye.

C – L
Square from C to L at 1 1/2 graduated inches.

L – M
Now we must find the center front of the waist. To do this, first draw an unmeasured line squared out from point B. The line just needs to be long enough for the next step.

Then measuring from point L, using 1/4″ of your full waist measurement, locate point M where the measurement intersects with the previous construction line.

The Curves
The Neck
Draw a line connecting points H and L. At one third of the way from point H, make a mark.

Square out from that mark 1 graduated inch. Connect the three points in a graceful curve as shown, giving us the line for the neck.

The Shoulder
Make a construction line from point H to E. At the midpoint, square out a line 1/4 graduated inches, and draw the curve as shown.

The Armscye
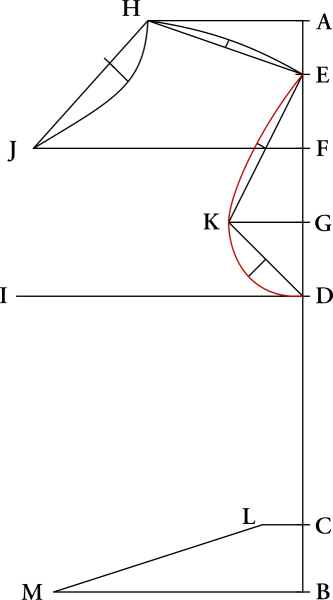
Draw a line from point E to K, and find the midpoint. Square in 3/8 graduated inches.

Do the same for the bottom of the scye, connecting point K to D. Square out from the midpoint 7/8 graduated inches.
Connect points E, K, and D in a graceful curve.
Side Seam
For the side seam, draw a straight construction line from point D to L. Then draw a slightly curved line as shown, hollowing 1/4 graduated inches a little above point L.

The Center Front
Draw to construction lines from point J to I to M. Then add a slight curve to the center front, using the construction lines as a guide.
The Waist
This is optional, but you can give additional shape to the waist as shown. If you can make the bottom front at point M be closer to a right angle, it’ll look a lot better in front rather than having a pointed look.

Your Progress
[columns gutter=”0″]
[col]
1 |
Draft the front. |
[/col]
[col align_text=”center, middle”]
[/col]
[/columns]