Category: Shawl-Collared Waistcoat
The Undercollar
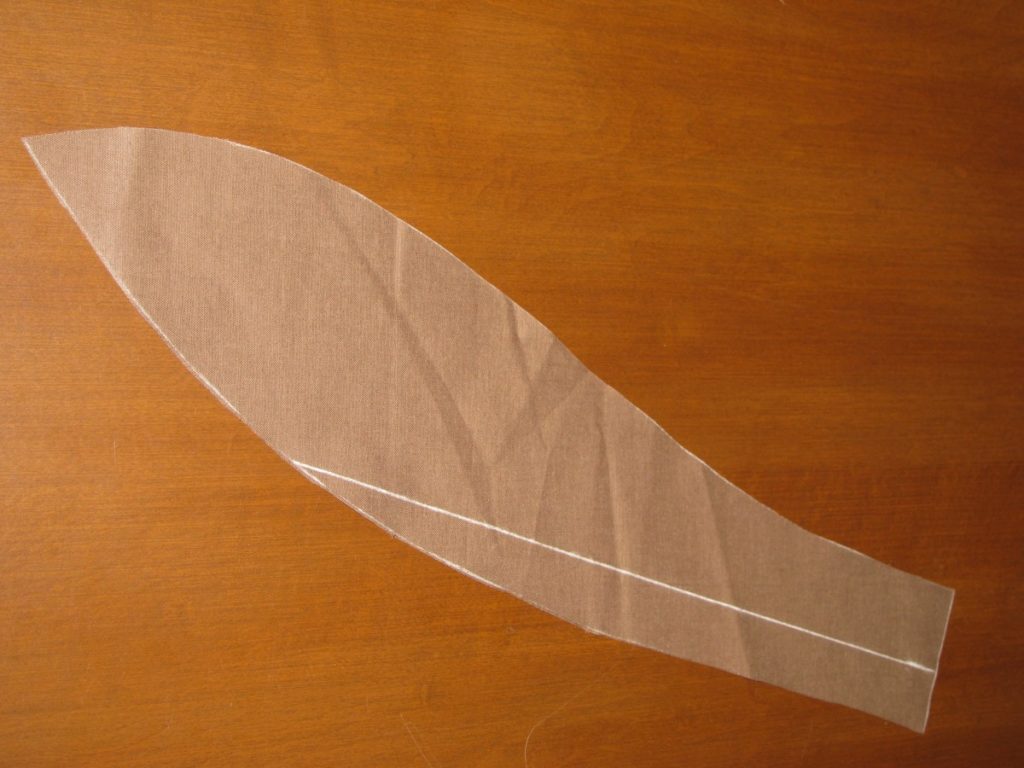
I like to attach the undercollar next, even before the pockets, to help prevent stretching of the neck during construction. Cut out the collar from brown polished cotton, and mark the roll line.
Lay the collar right sides together on the forepart. It’s sometimes very confusing, but if you’ve drawn the roll line in, make sure it touches the neck line, and you’ll be sure that it is aligned the proper way!
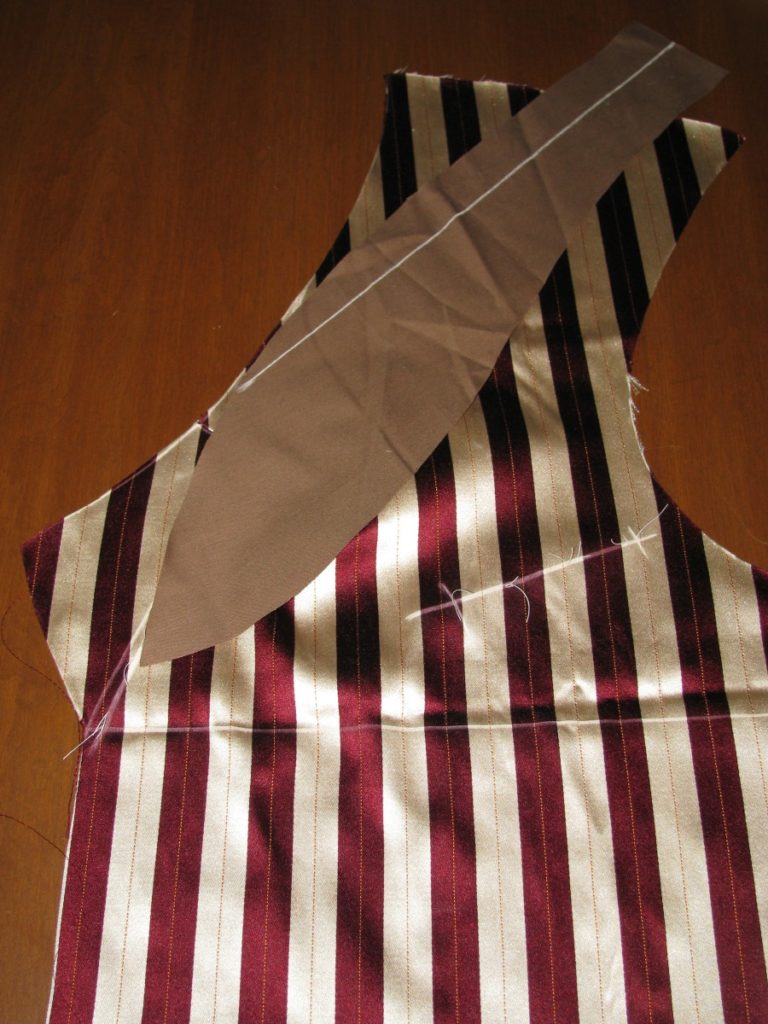
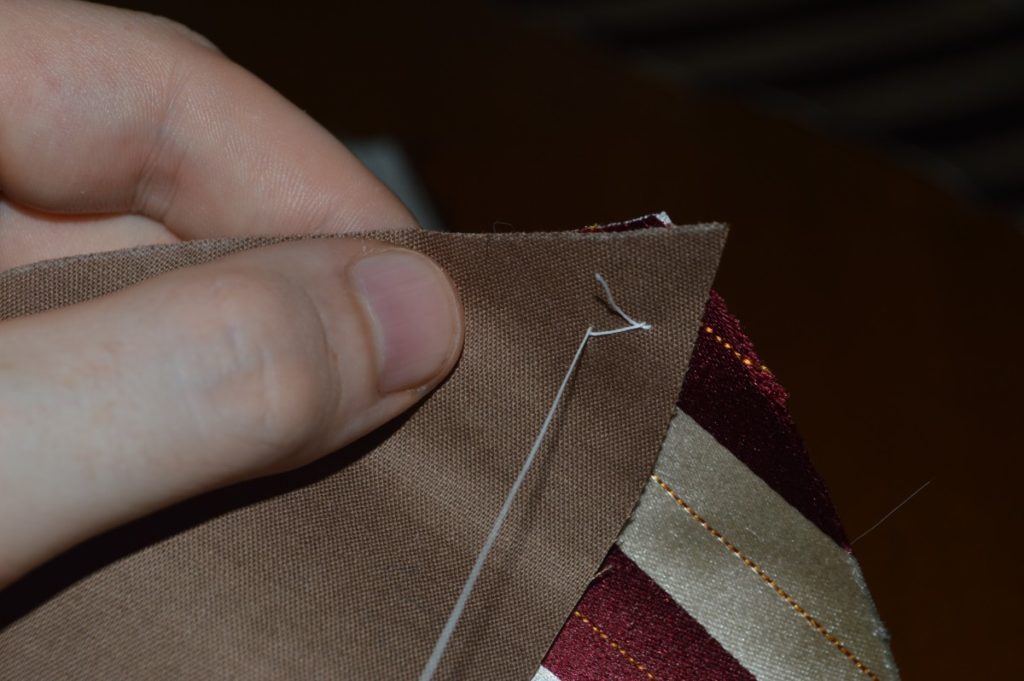
With right sides together, align the tip of the collar so that it extends off the edge of the forepart just a little, aligning the seams exactly.
Place a basting stitch here to hold it securely.
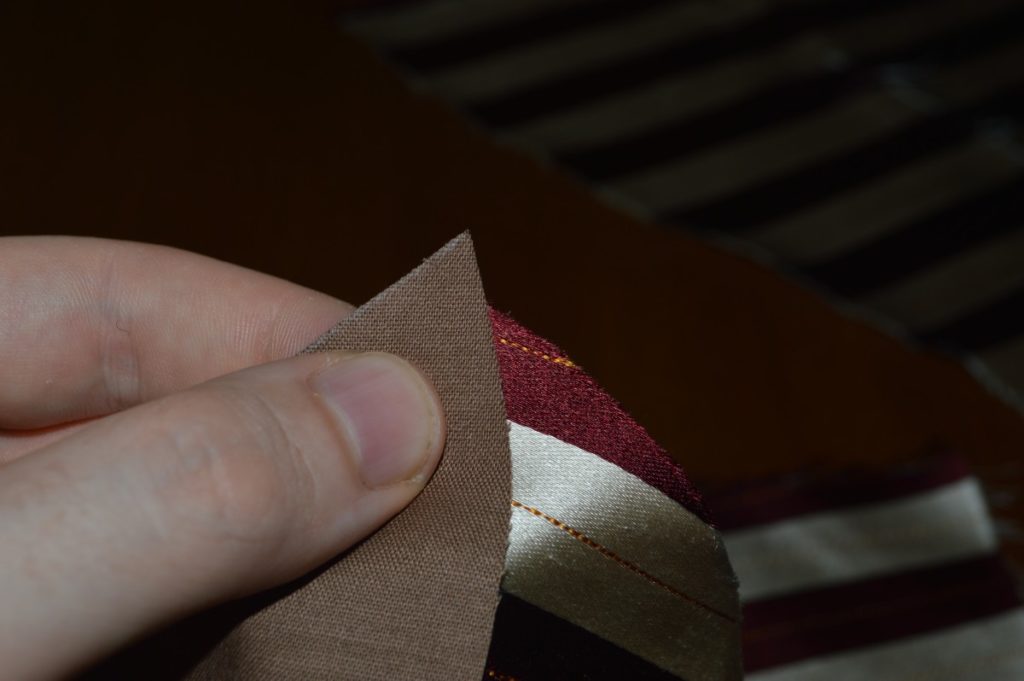
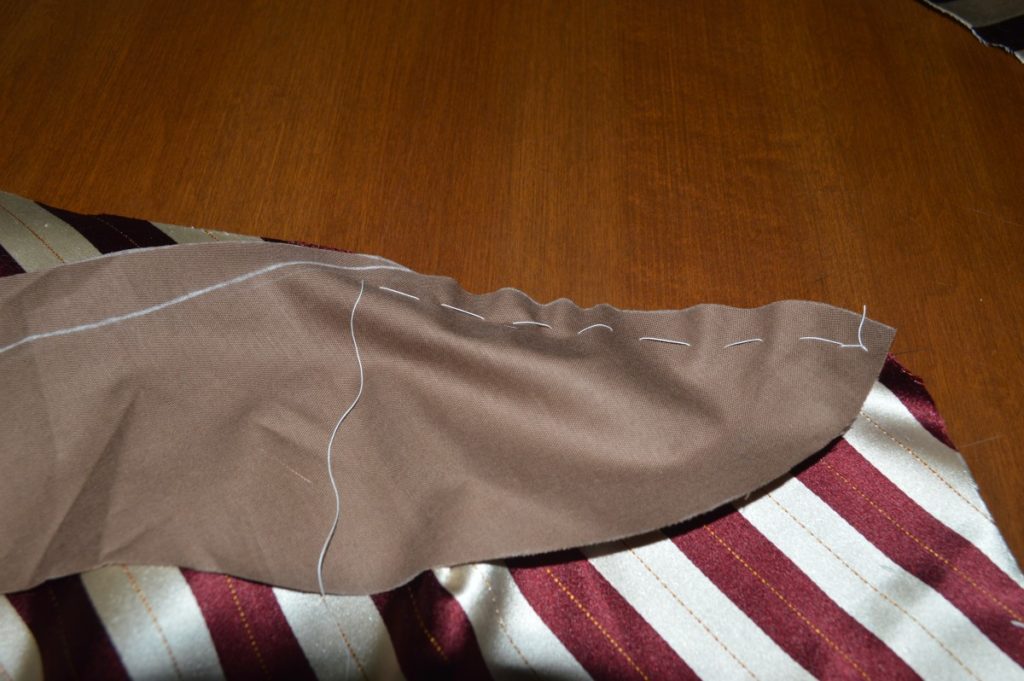
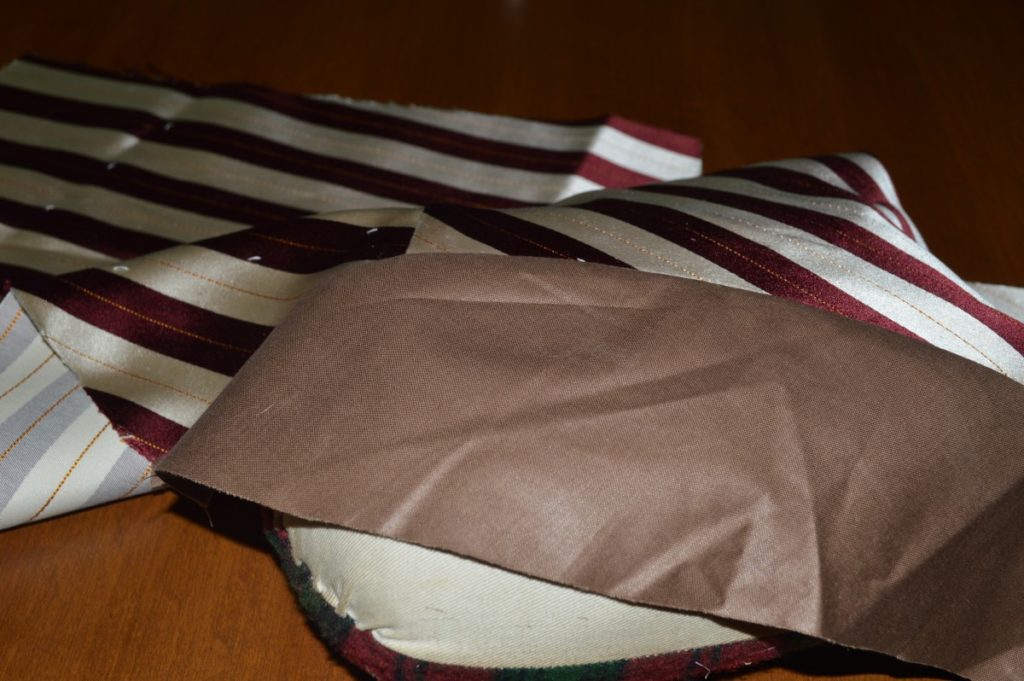
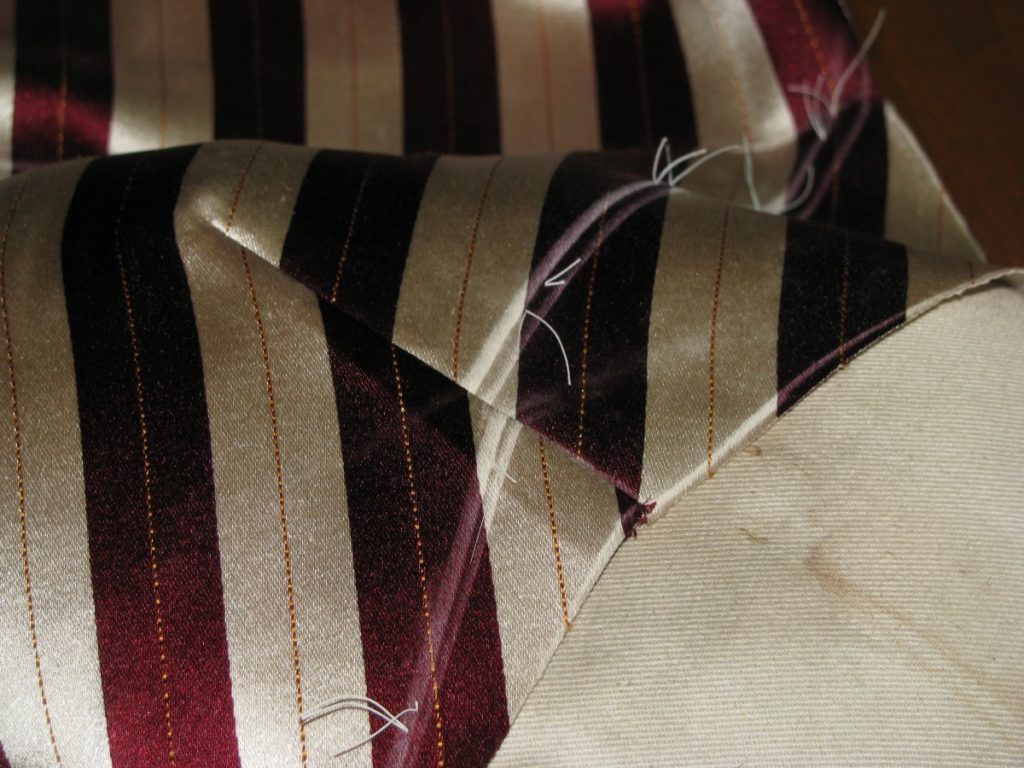
Continue basting the collar to the forepart, allowing the fabric from the collar to naturally gather, as shown. Use your fingers to help the process.
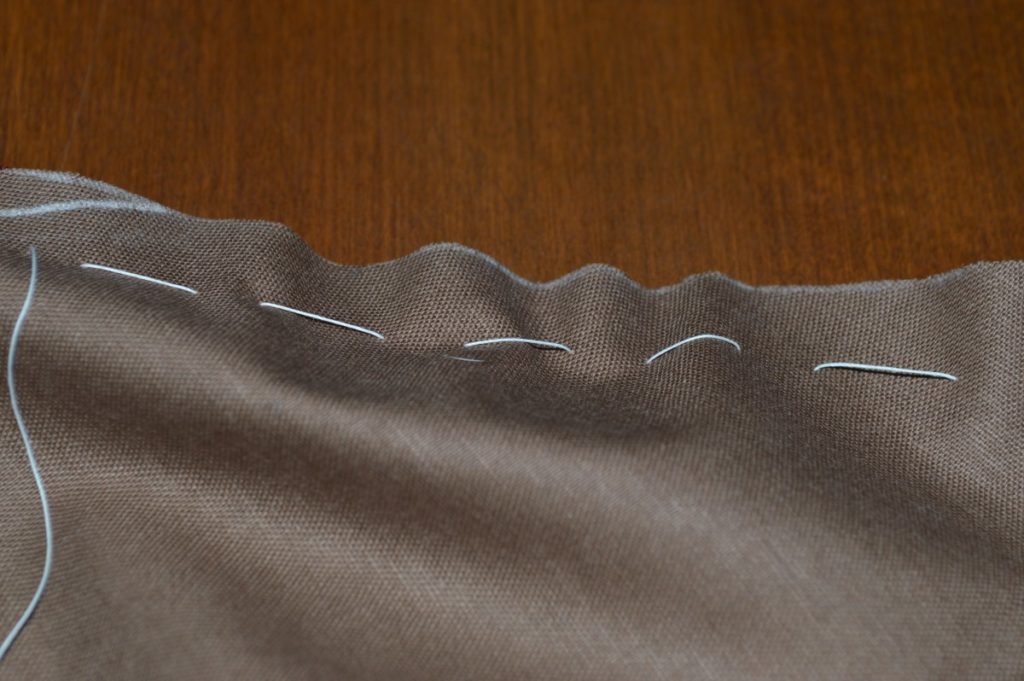
A closer view of the fulled collar, giving you an idea of the amount of excess.
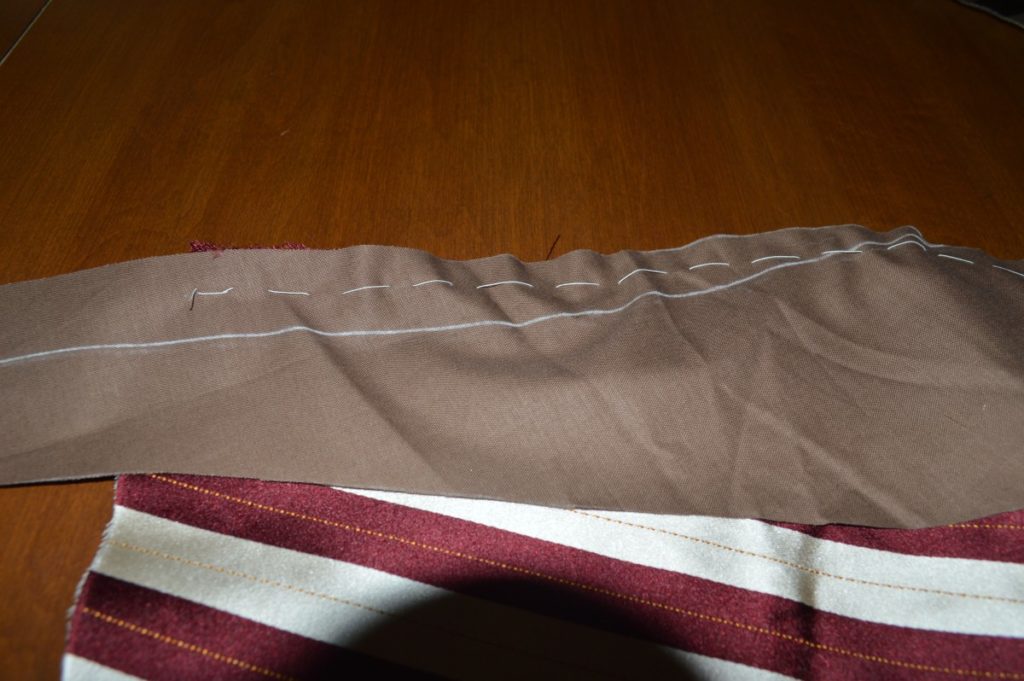
Continue basting to the end of the forepart. The fulling lessens as you get towards the end of the collar, as both pieces are straightening out.
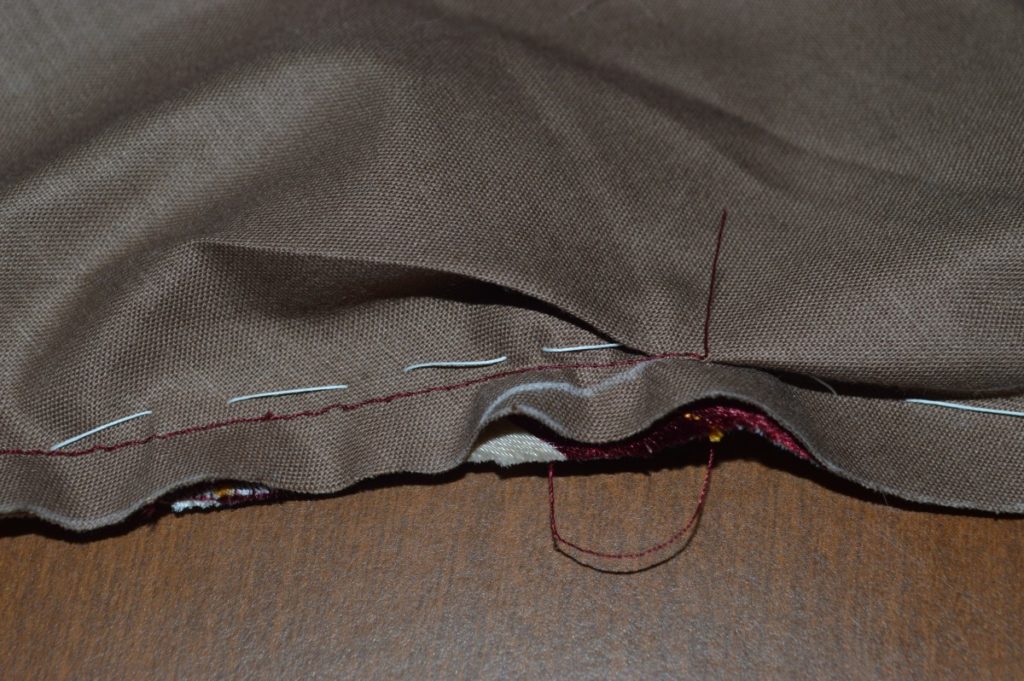
Sew the collar to the forepart using a 1/4″ seam allowance. The collar side should be down if you use a machine, so that the feed dogs will help distribute the excess fabric equally. One thing to be careful of, is getting folds of the collar stuck in the stitching, as I did here. Since it’s such a curved seam, the collar will want to get in the way of the stitching, so just be aware of that. Luckily I caught this in time, before having sewn the entire collar.
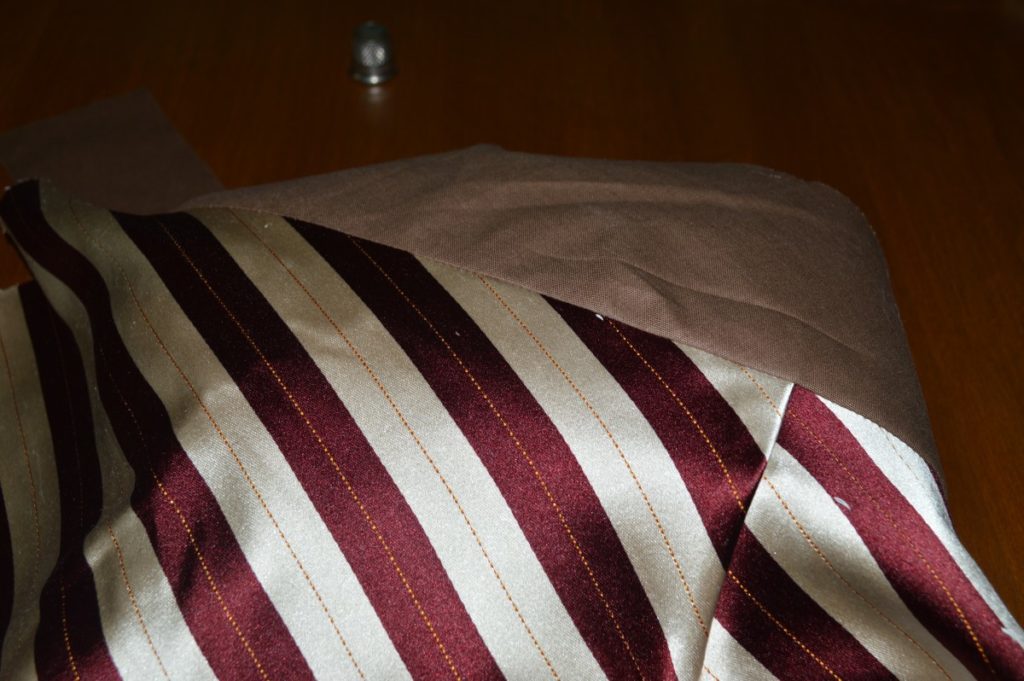
From the right side, using a pressing ham, press the collar over as shown. It’s probably a good idea to get the wrinkles in the collar out as well, but I just figured I’d get them later . . .
It’s hard to see here, but if you attached the collar correctly, the roll line will meet up with the roll line on the forepart. If it’s off by a little, don’t worry too much, as we’ll be redrawing the roll line anyway, due to the dart.
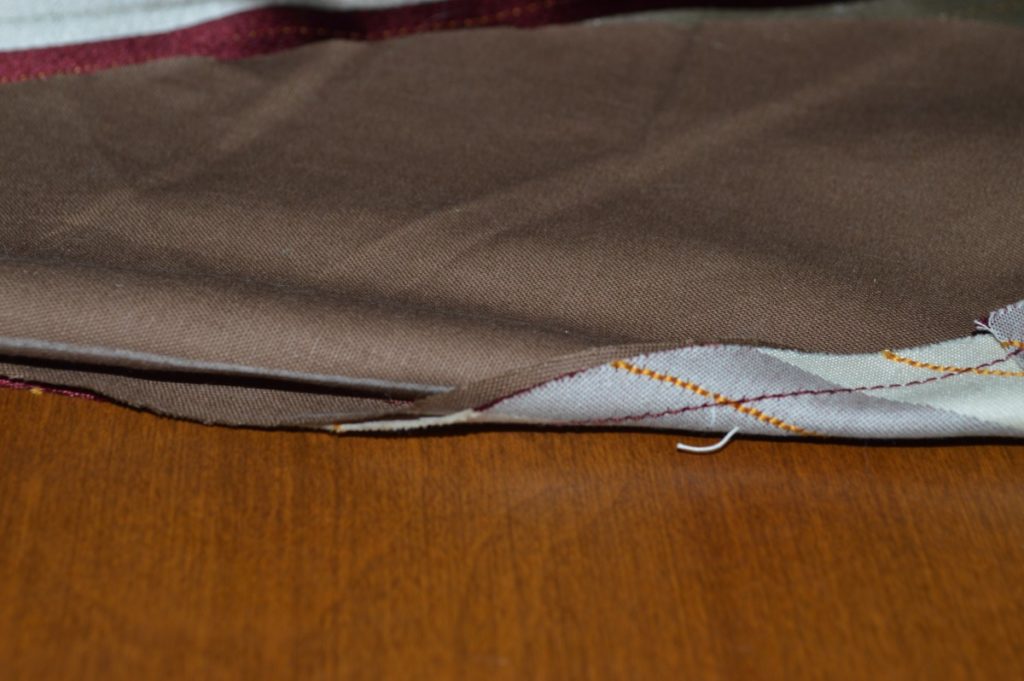
Here is the completed undercollar.
Darts or Fishes
The first step in the construction process is to close up the darts on the forepart. If you haven’t already, draw the lines for the dart on the side of the forepart that did not receive chalk marks, using the tailor tacks as a guide.
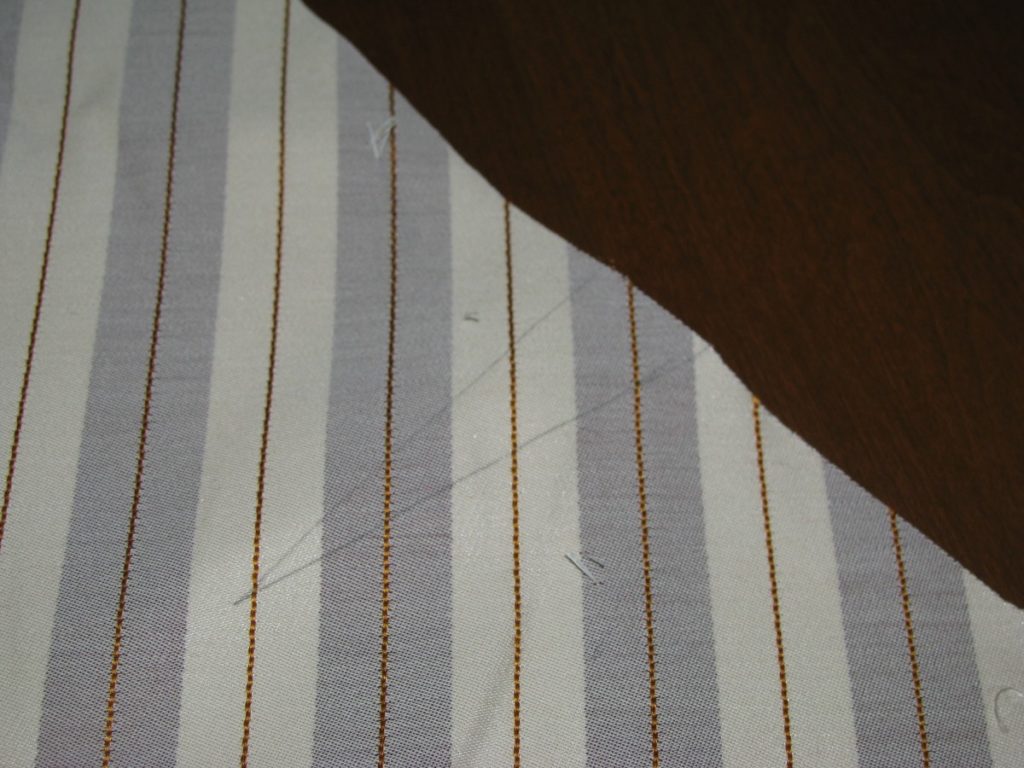
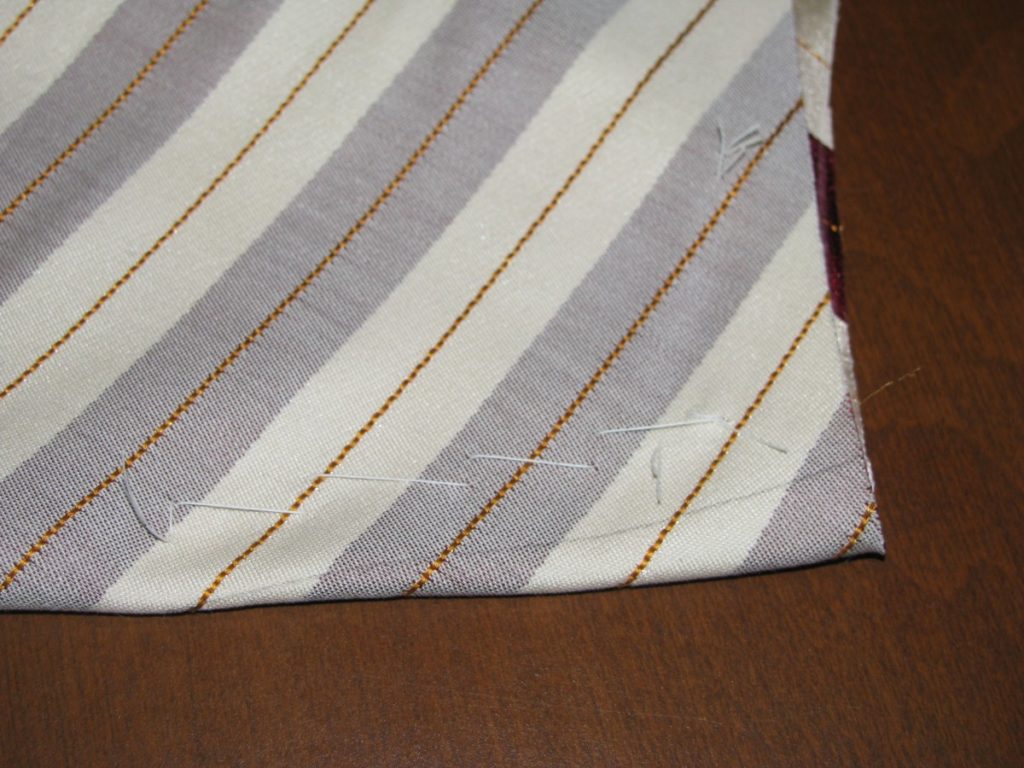
Fold the dart in half along the middle, right sides together, ensuring that the construction lines of the dart line up with each other. I sometimes stick a pin through both layers to help see if things are properly aligned. Baste securely.
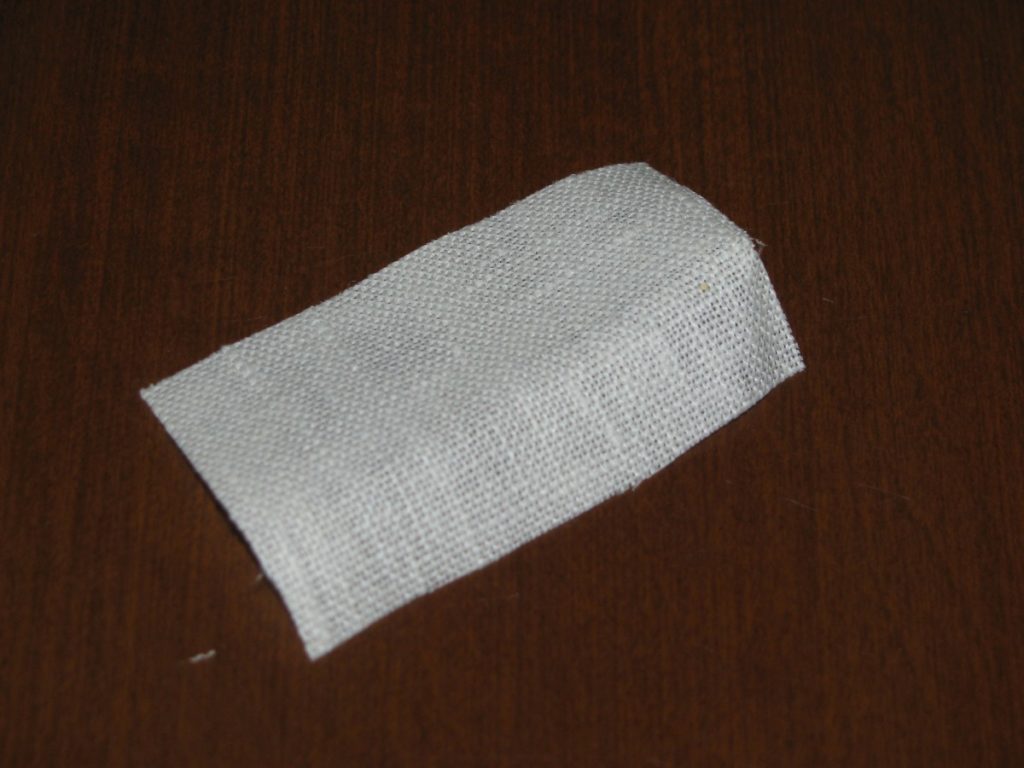
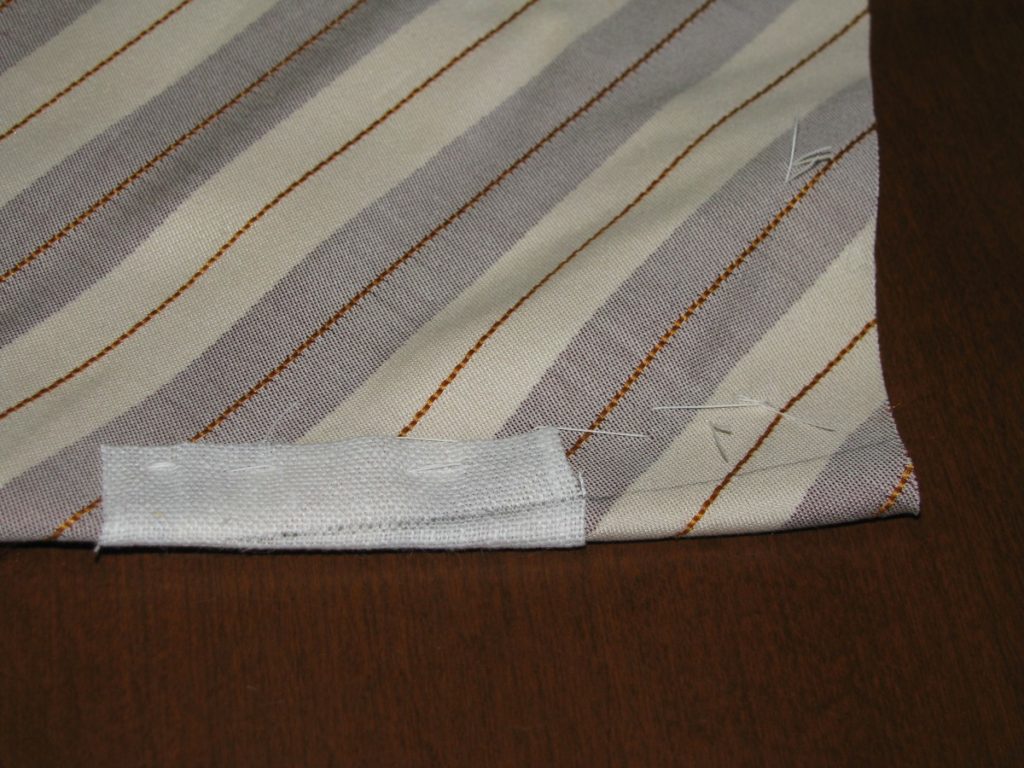
Cut a small piece of linen, mine was about 2″ by 1″. As silk can be fairly fragile, it’s a good idea to add some reinforcement to the dart, particularly at the tip, to prevent tearing over time.
Fold the linen in half and place it over the end of the dart. You should have about 1/2″ of linen extending beyond the point of the dart. Baste closed through all four layers.
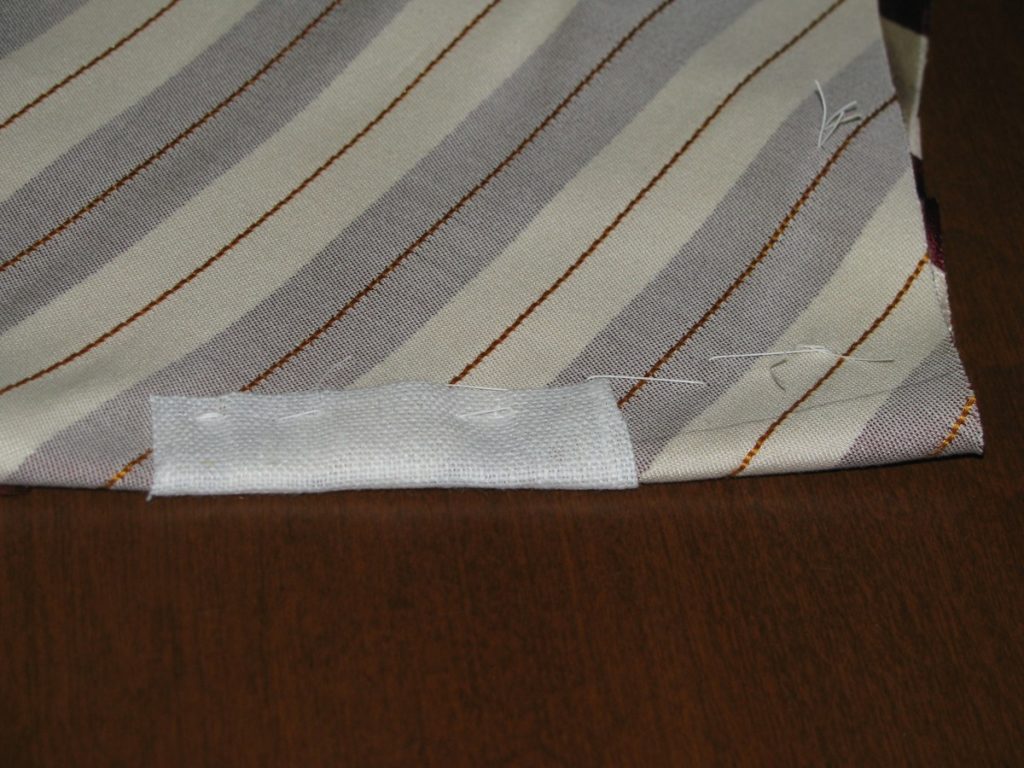
Redraw the dart lines over the linen.
Sew the dart along the line, using either a back stitch by hand, or a machine stitch. In the interests of time, I’ll be doing mostly machine work.
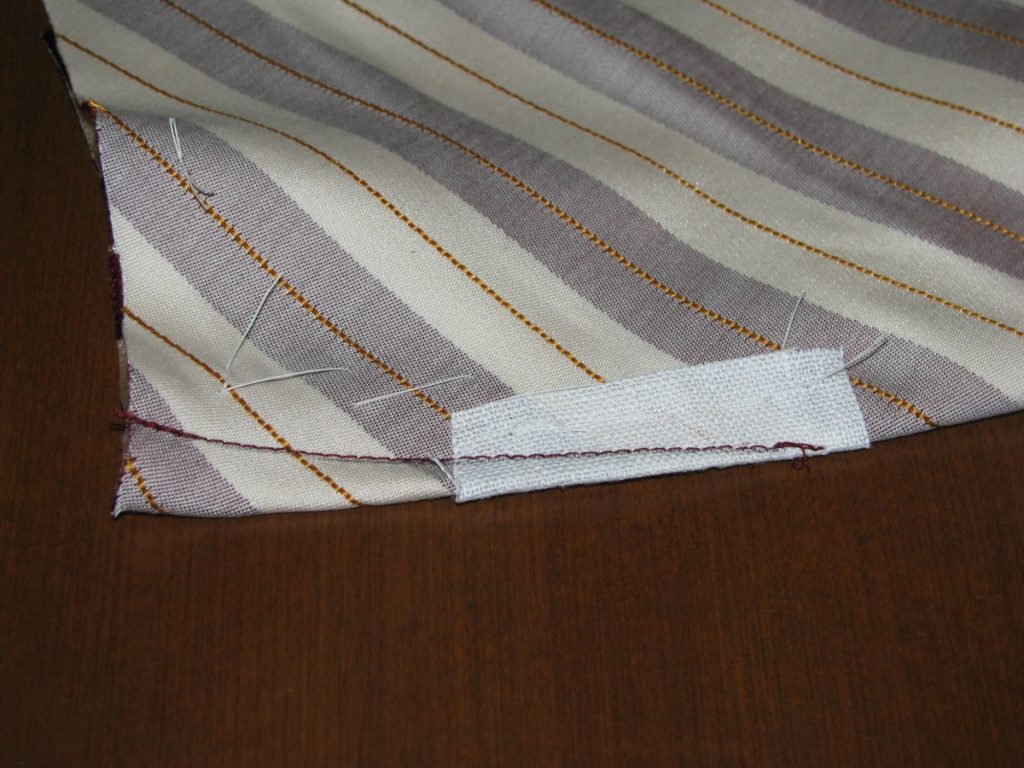
Trim the excess linen down to about 1/4″ from the stitching.
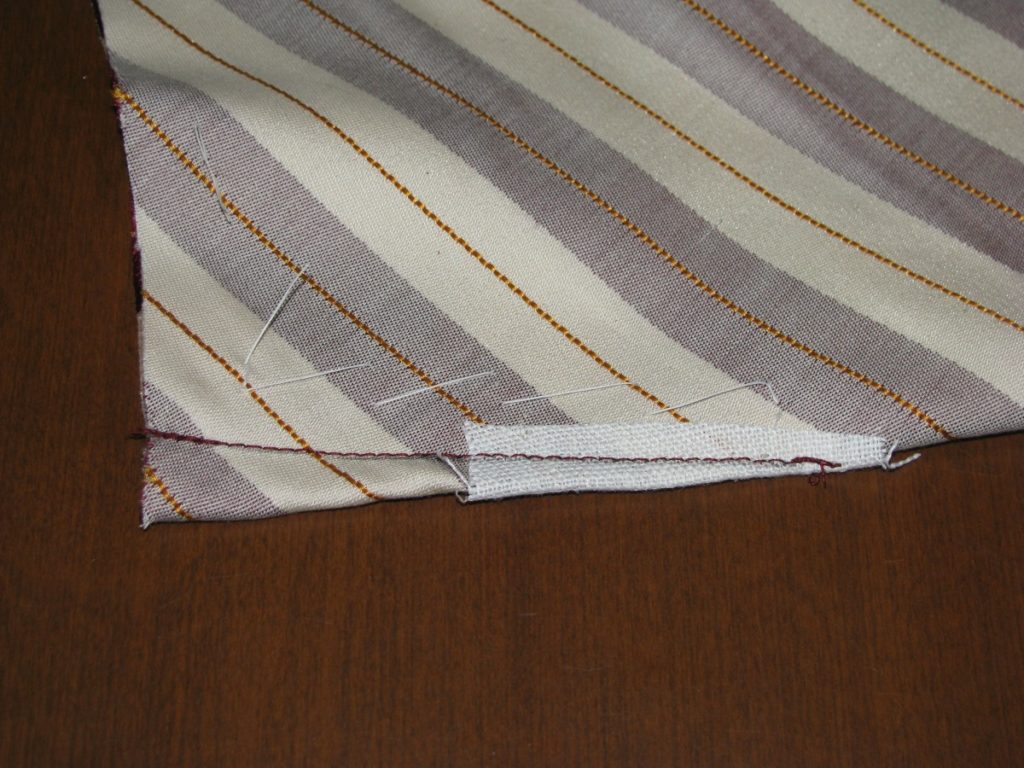
Press the entire dart to one side. It doesn’t matter which direction, really, but just try to be consistent between both halves of the forepart.
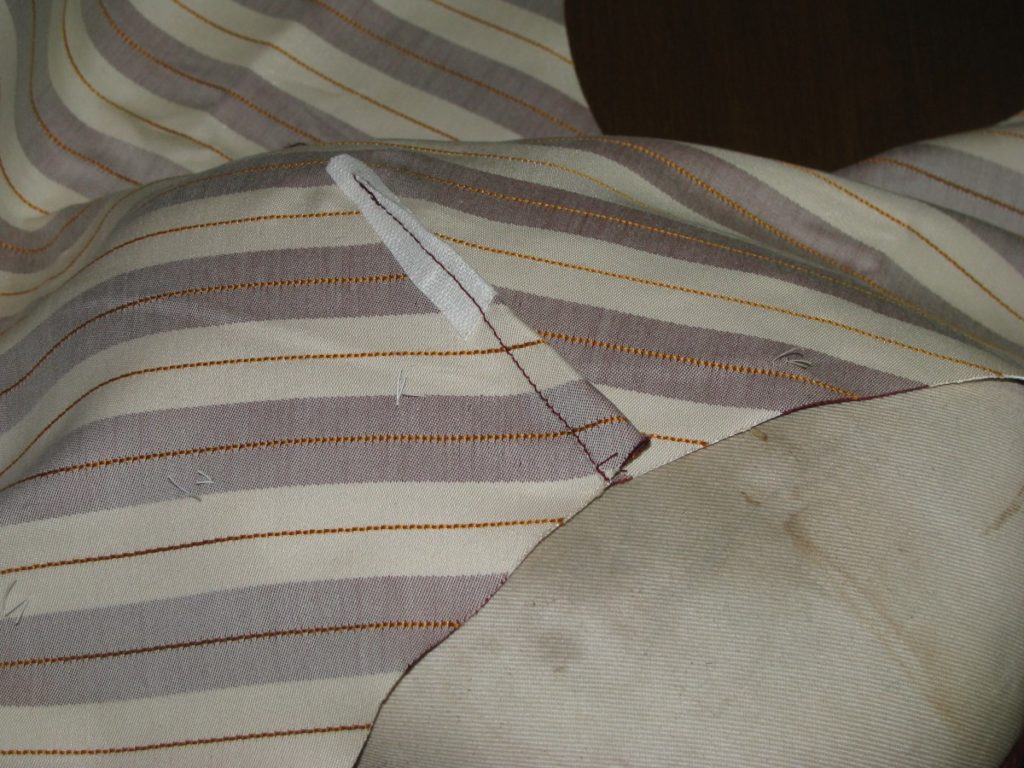
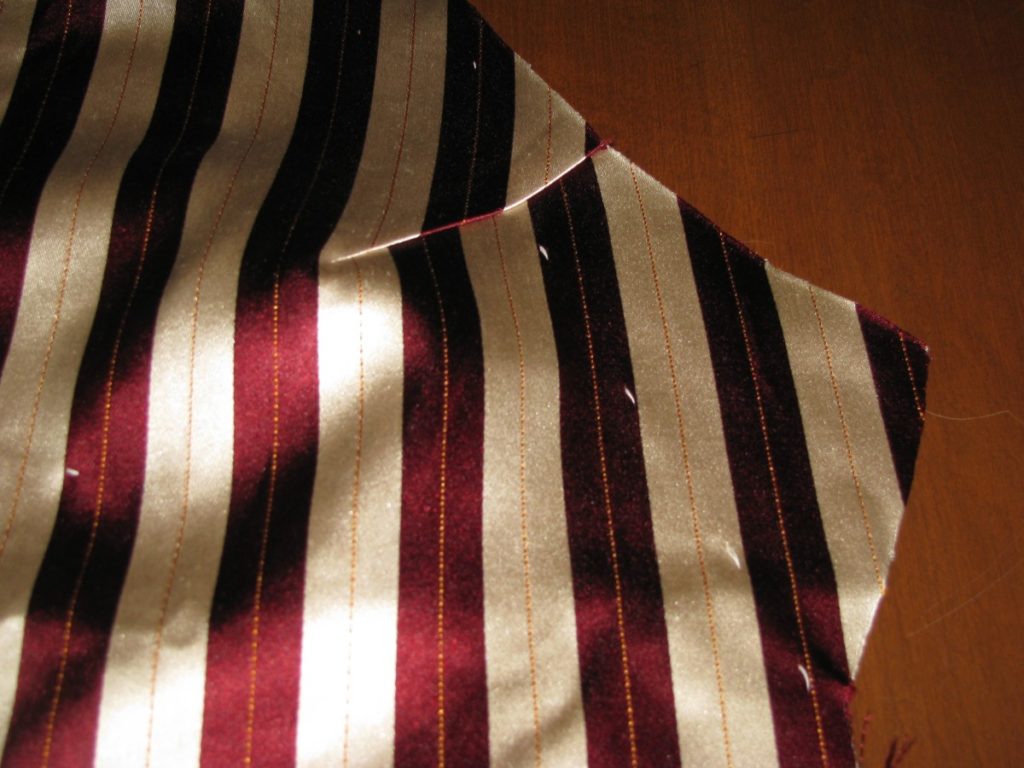
Here’s the result from the right side, after pressing. Ideally you will not have the chalk marks on this side, but oh well. Note how the roll line is misaligned now.
A view of the other half. You can see that the dart messes up the nice look of the stripes, which is why it’s important to have it hidden underneath the collar.
Shawl Waistcoat Toile
Now that we have the pattern updated with the styling details, it’s a good idea to make another muslin to check the fit and proportion of the collar and other details. This will also be good practice in assembling the various pieces of the waistcoat.
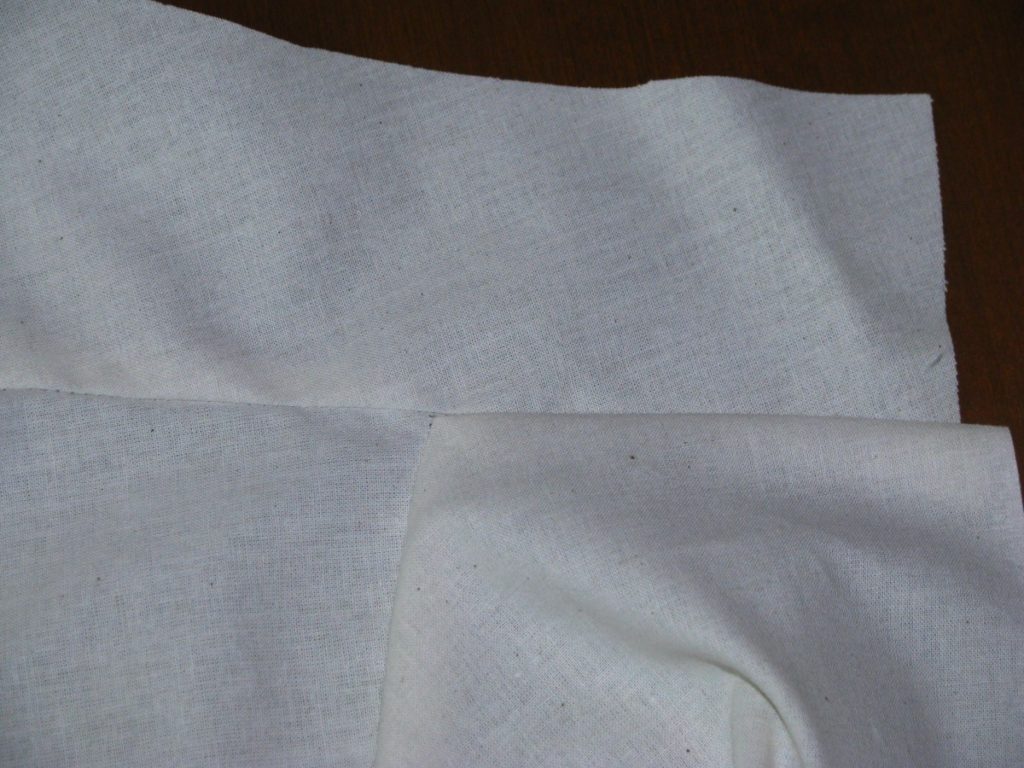
The first step is to transfer the pattern to the cloth, making sure to include all of the darts and collar roll line markings. Note here how I cut the dart out of the paper pattern, but not in the fabric itself.
The first thing to do is construct the darts. With right sides together, pin the darts closed so that both sides align with each other. Stitch closed.
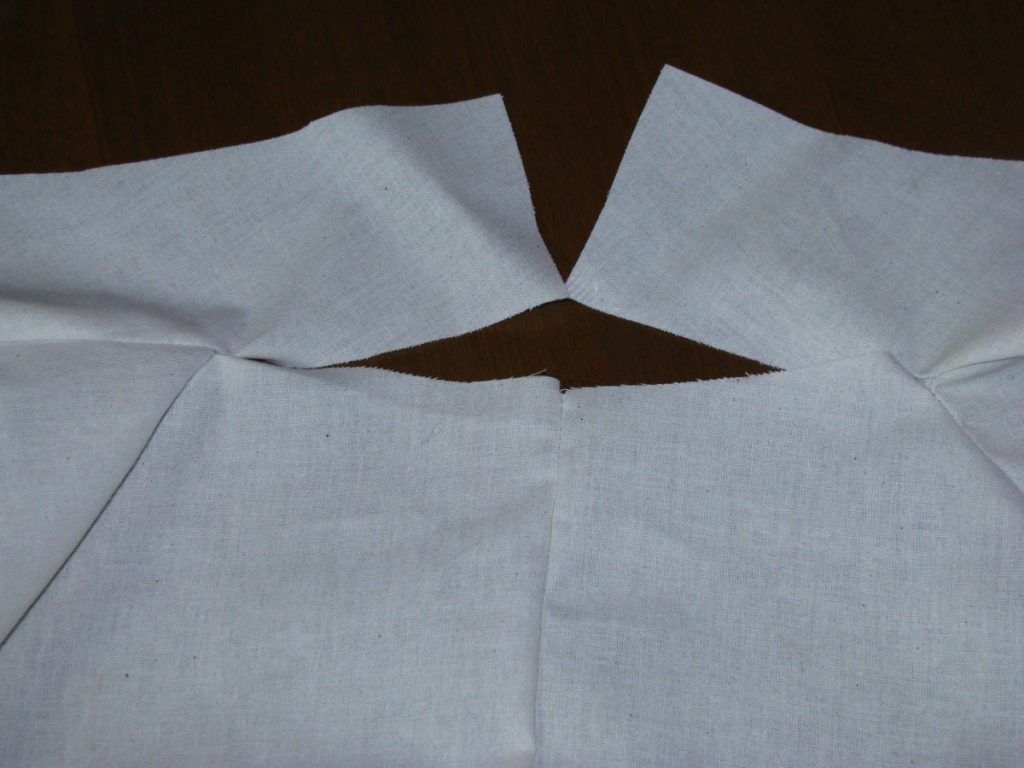
Press the darts open using a tailor’s ham. Note the shape this dart just imparted to the forepart.
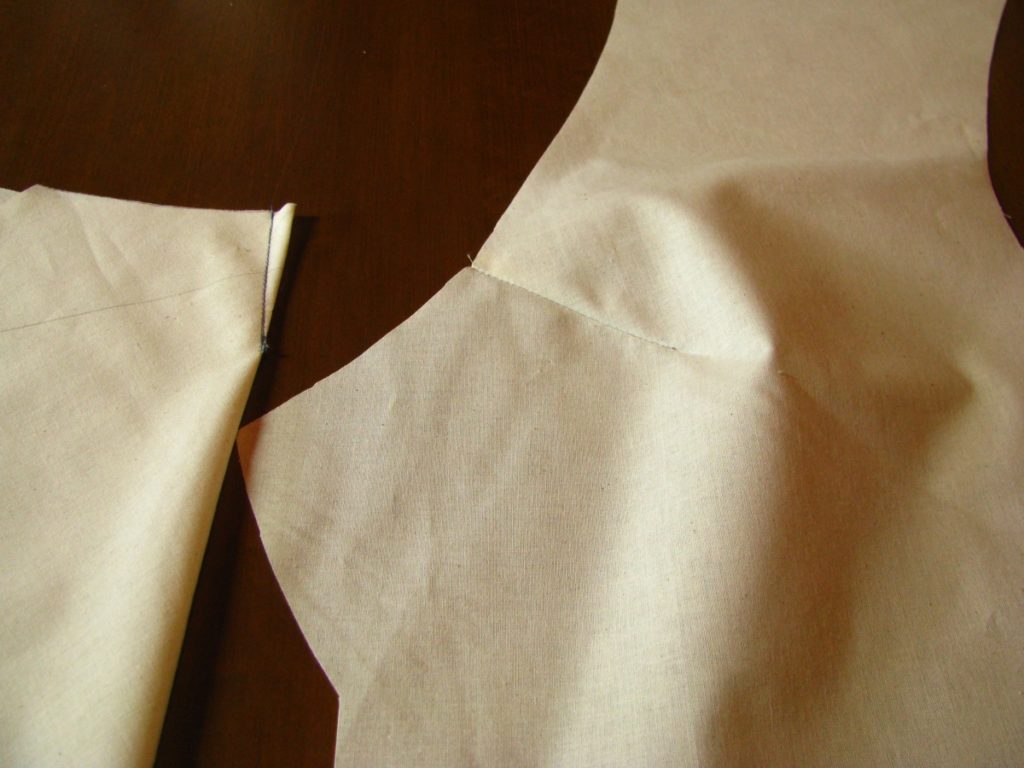
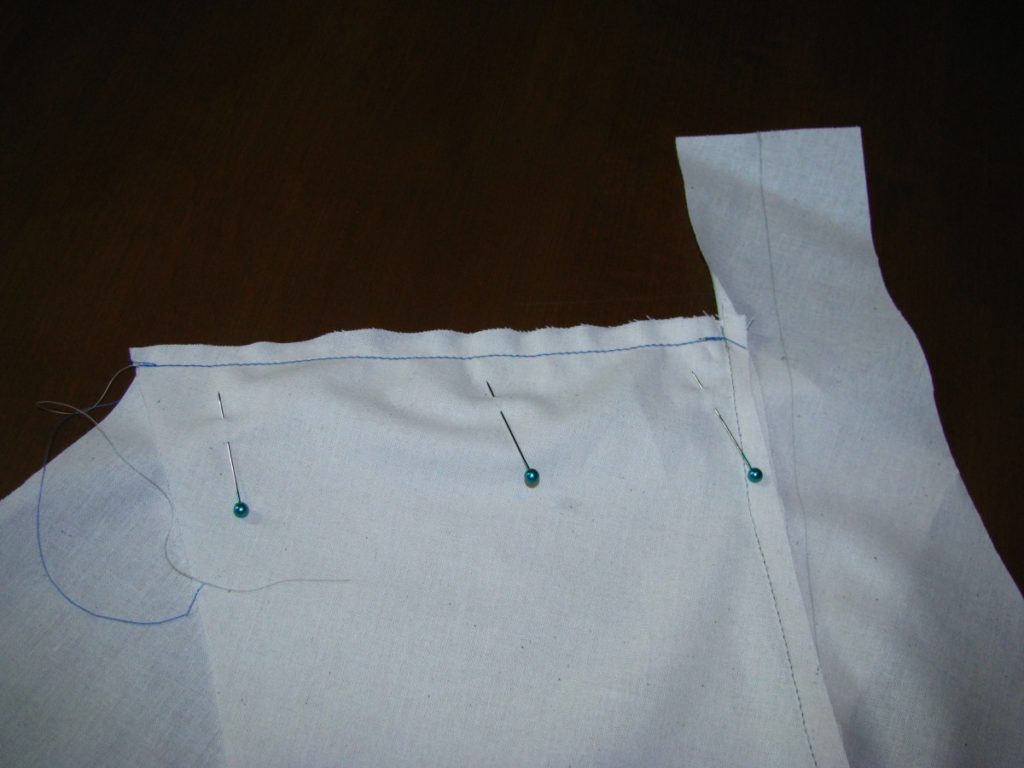
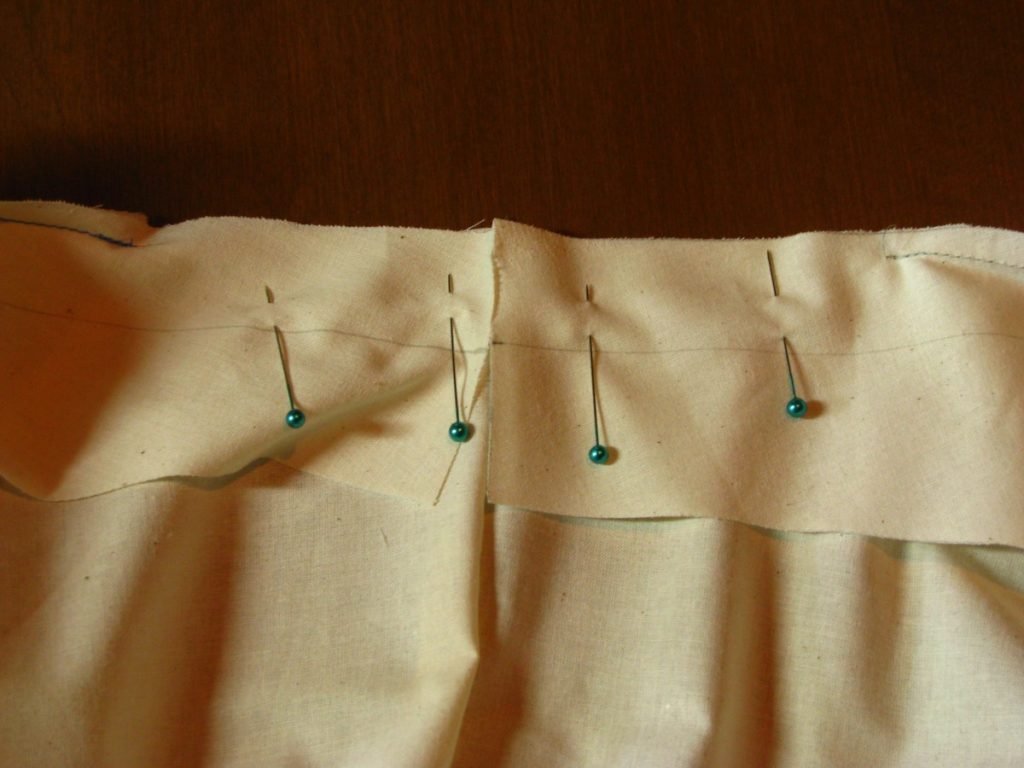
With the right sides together, pin the collar to the neckline of the forepart. It’s very easy to put the collar on upside down, so try to remember to have the roll line toward the edge that will be sewn.
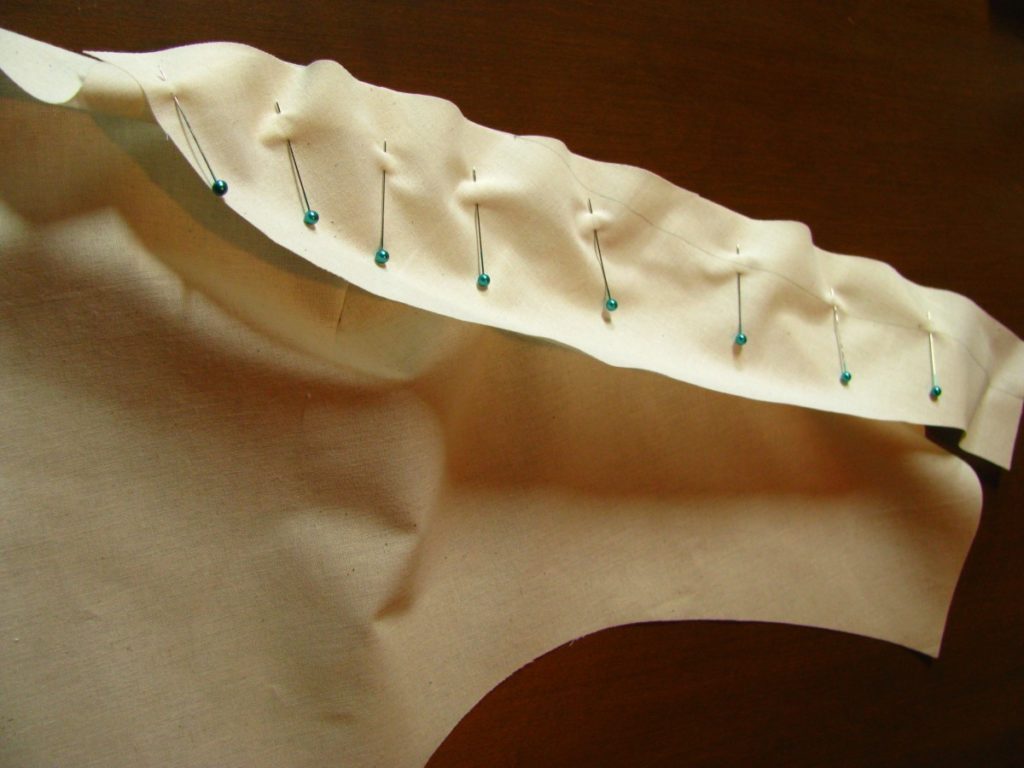
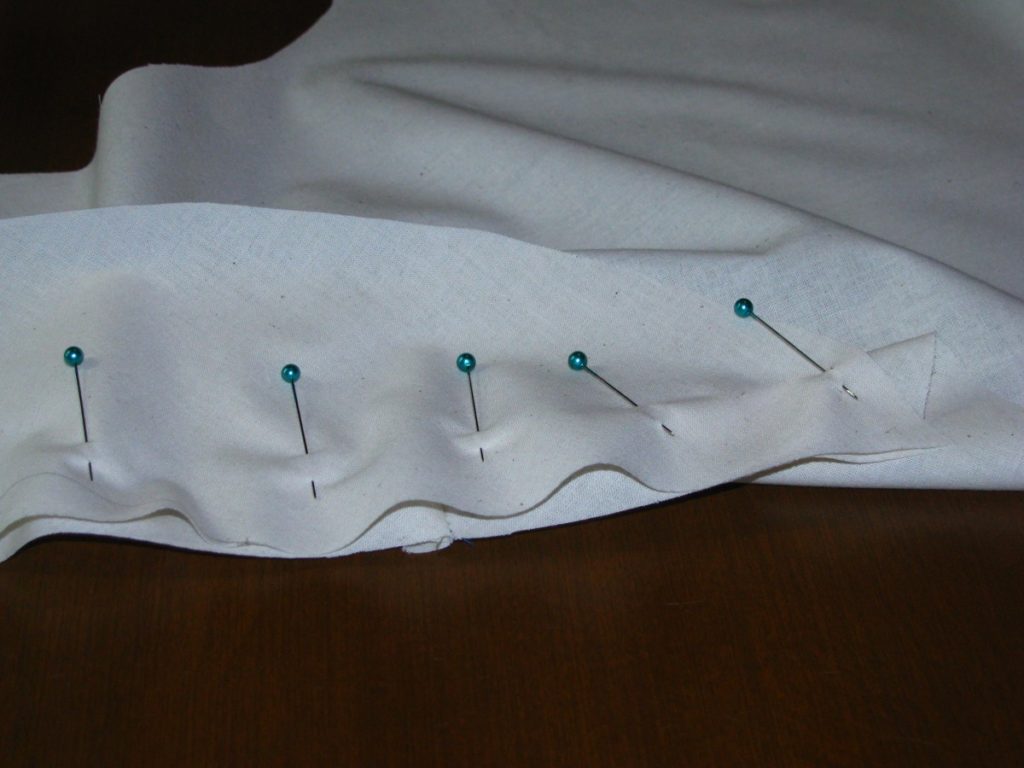
It’s hard to see, but at the bottom of the collar, the collar will extend off the edge of the forepart by 1/4″, to ensure that the seam allowances line up. Also, as you are pinning, there will be some fullness worked into the collar, especially in the curved areas. This should happen naturally and isn’t something to be forced, but just be aware of it.
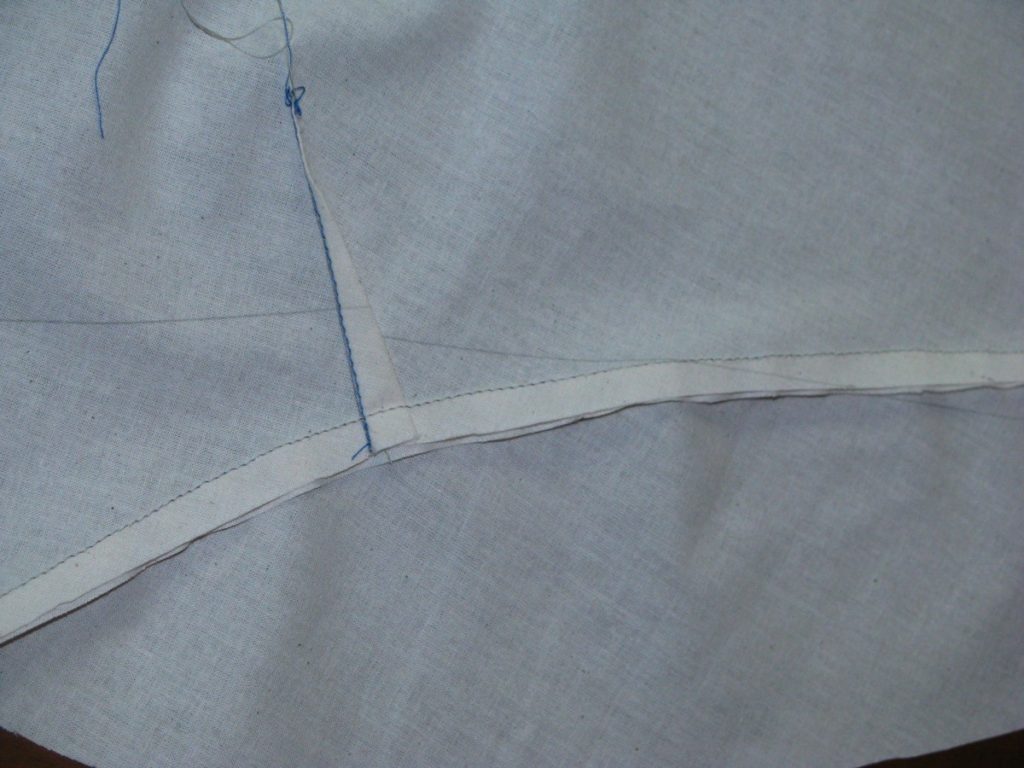
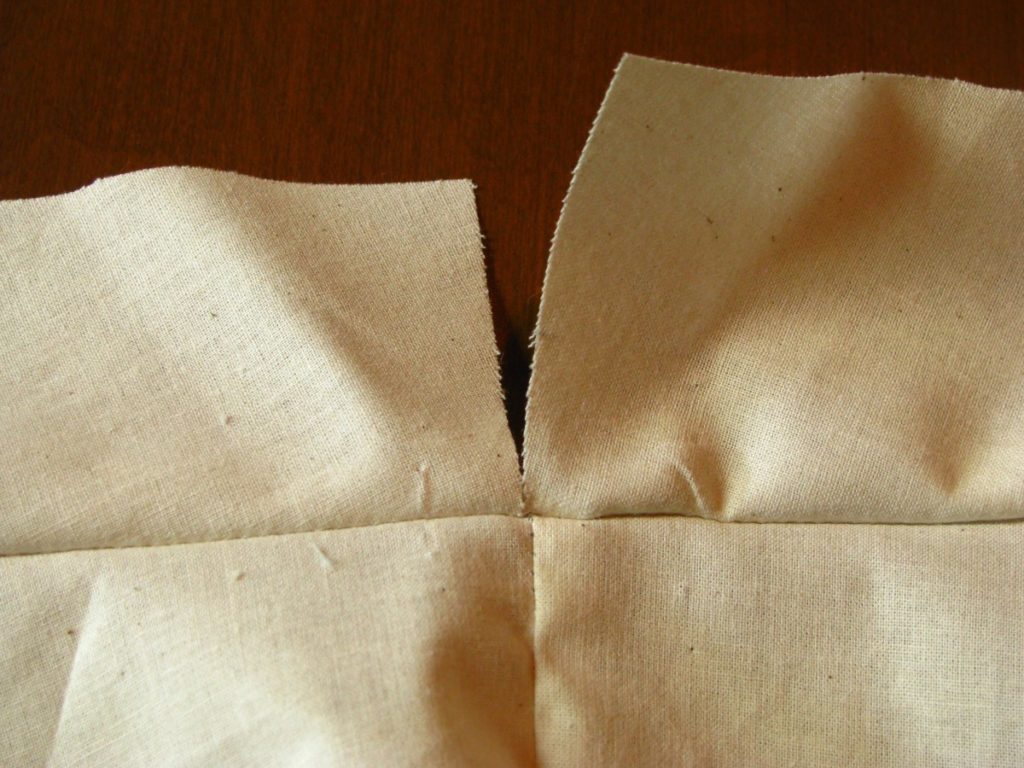
Sew the collar on with a 1/4″ seam, and press open on tailor’s ham, since it’s a shaped seam.
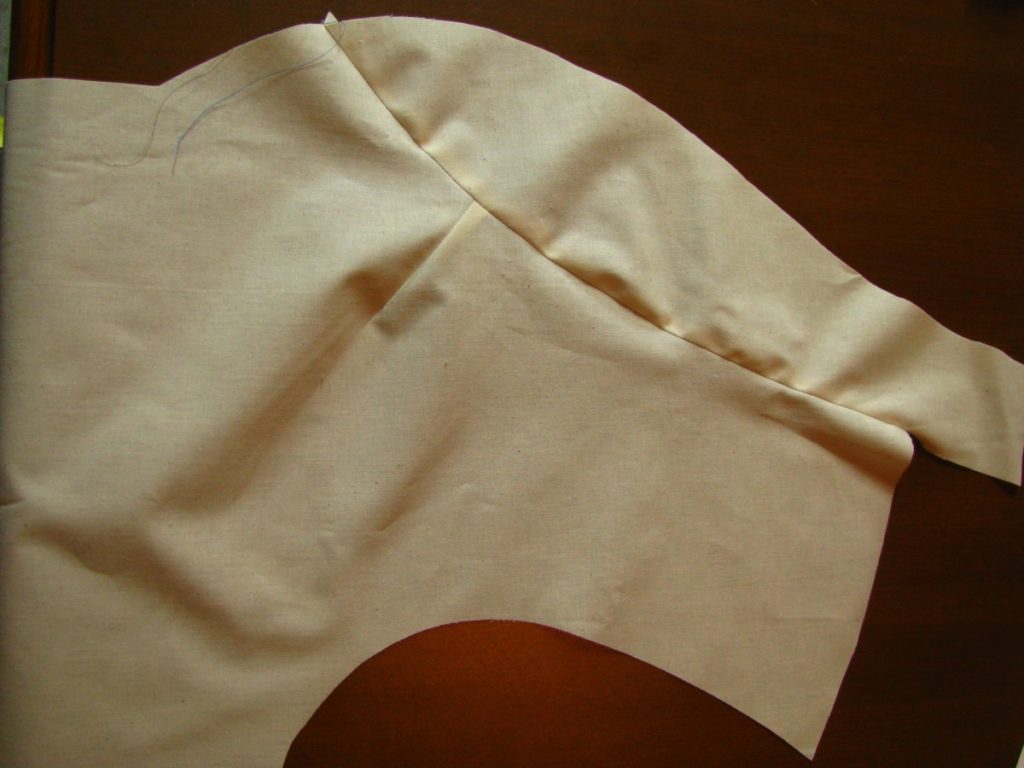
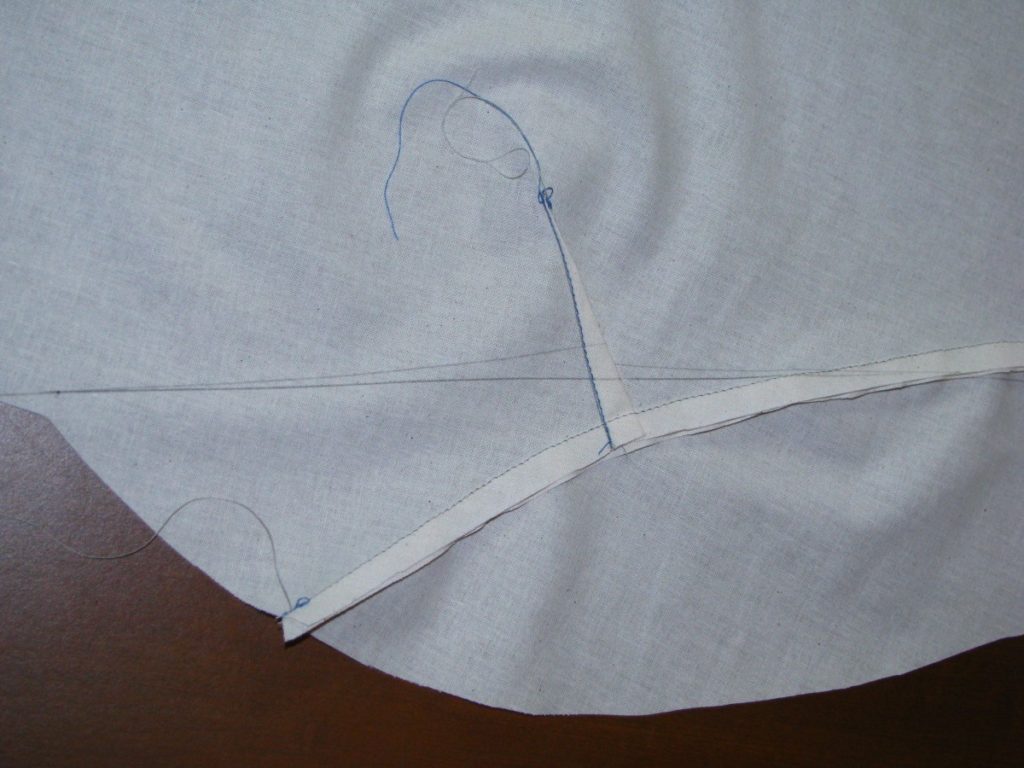
Note here how the roll line flows from the collar on the bottom to the forepart in one harmonious line. That tells you the collar was put on correctly. However, the dart messes up the roll line, which must be corrected.
Using a ruler, redraw the roll line. There’s some room for error here, the important thing is that it’s straight from the shoulder point to the bottom of the collar, and that both sides are done the same way.
Sew the side seams of the front and back together, as done with the original muslin.
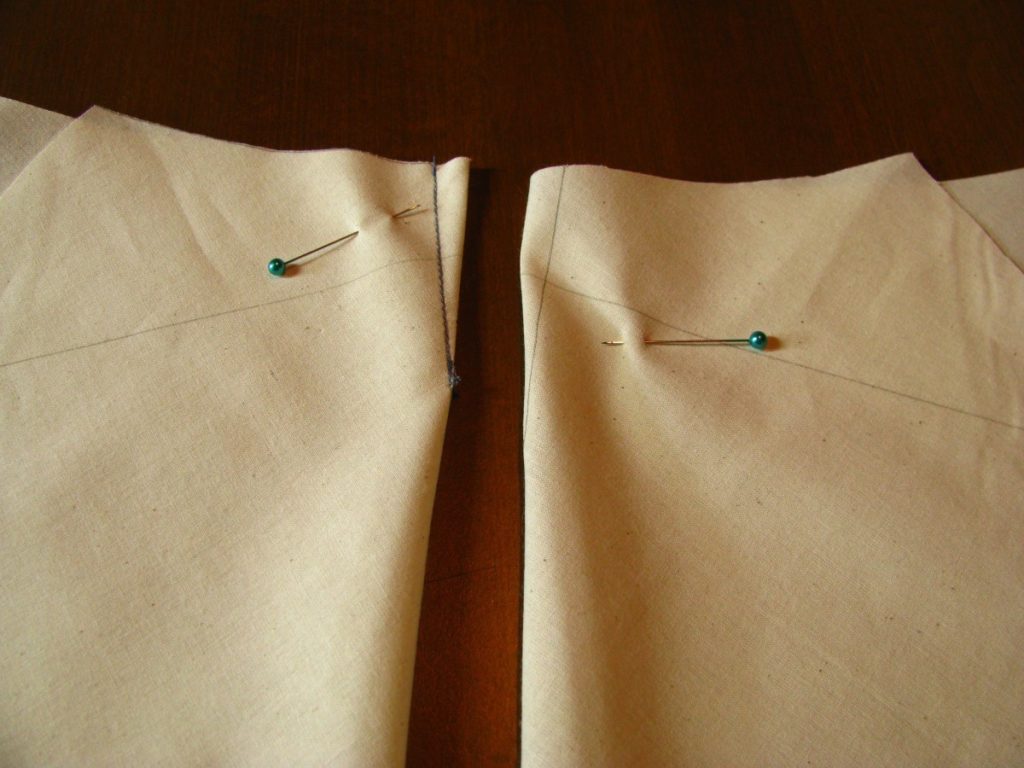
Now it’s time to sew the shoulder seams together, which are slightly different due to the added collar. Line up the seams, right sides together, and sew from the armscye to the point where the seam allowance meets the stitching for the collar. Don’t sew any farther than that or it will be visible on the finished collar.
Closer view of the shoulder seam meeting the collar, for clarity.
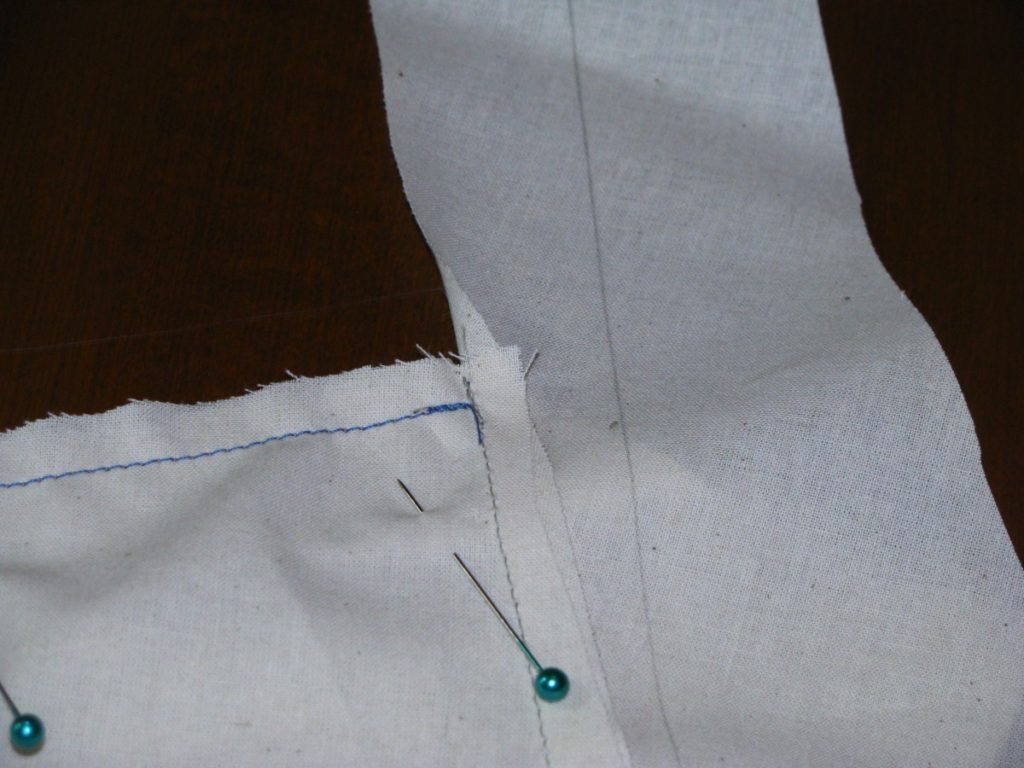
Press open the shoulder seam, and you should have a nice clean join of the three pieces. All that remains is to sew the rest of the collar to the back, right sides together.
If you have a center back seam, sew that first.
Pin the back of the collar to the back itself, and sew from the stitching to the center of the collar. You can join the collar halves together first, if you are able, but in my case, I was about 1/2″ short (hence the reason for the toile).
Press open the back of the waistcoat and collar, and this is approximately what you will be left with. If you need to add more to the back of the collar, like I did, make sure to do that to the pattern now, before you forget.
Now that your toile is done, try it on for a fitting, and if you’d like, take some photos and send to me either in the Facebook group or through email.
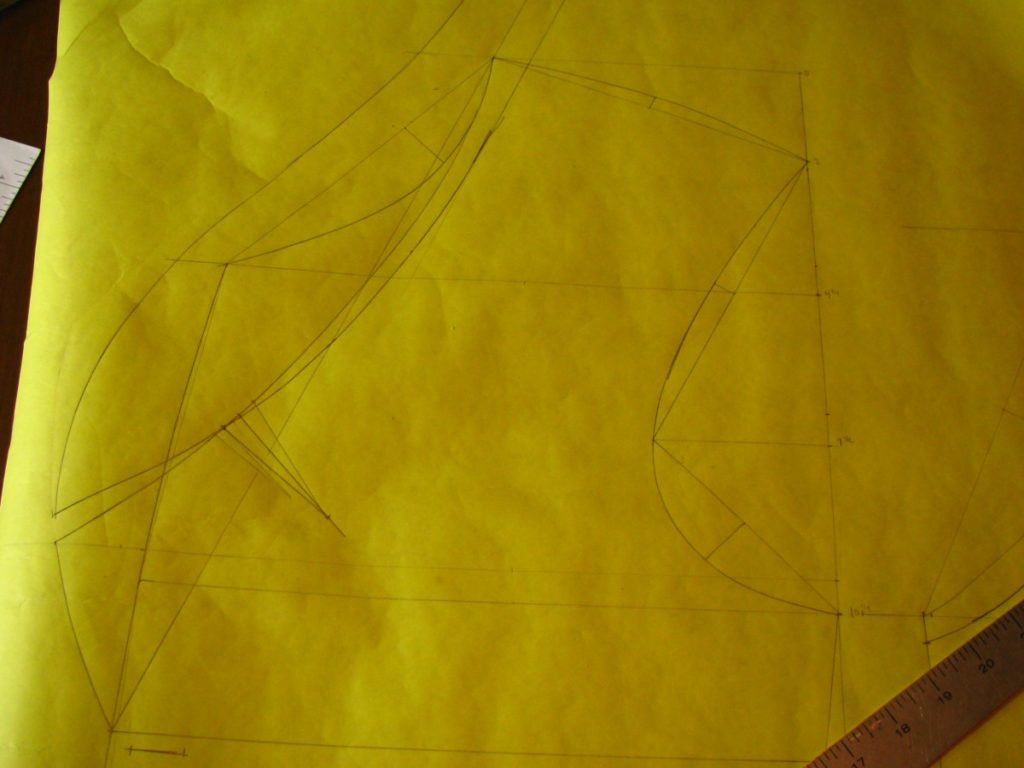
Pattern Adjustments
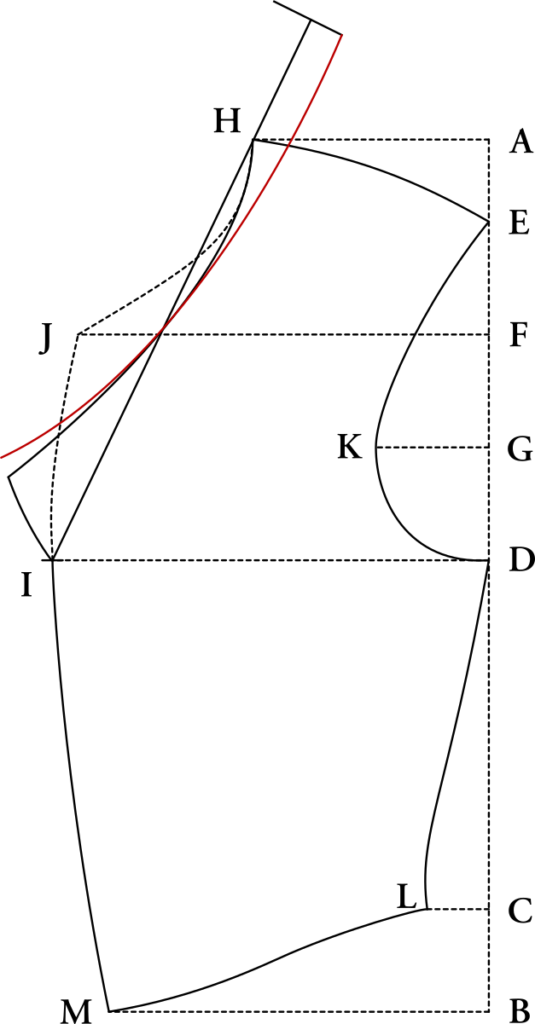
Before starting work on the waistcoat, we must make some style adjustments to the basic pattern, which you should have already drafted and fitted. Note that in the following I used dotted lines for the construction lines just to make things easier to see.
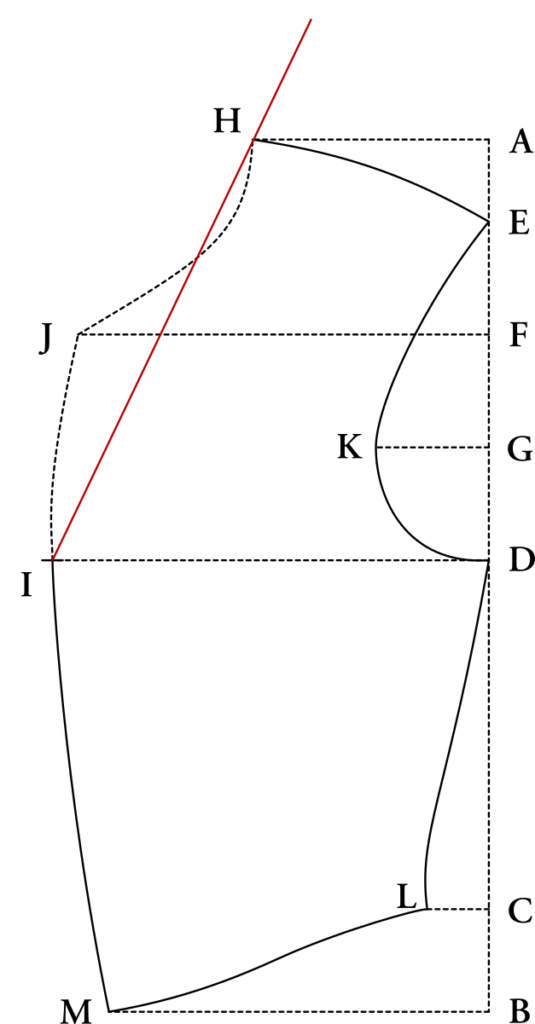
First, begin by marking the position of the front opening, using the Opening measurement if you took one. The proportional placement of this point is along the Line from D, though you can move it up or down as necessary. In my case, I have a long torso so moved this point down in order to account for that – otherwise the collars look too small on me.

Draw the roll line, from the opening point you just marked, through the shoulder point, and extending outwards a distance equal to that of the back neck.
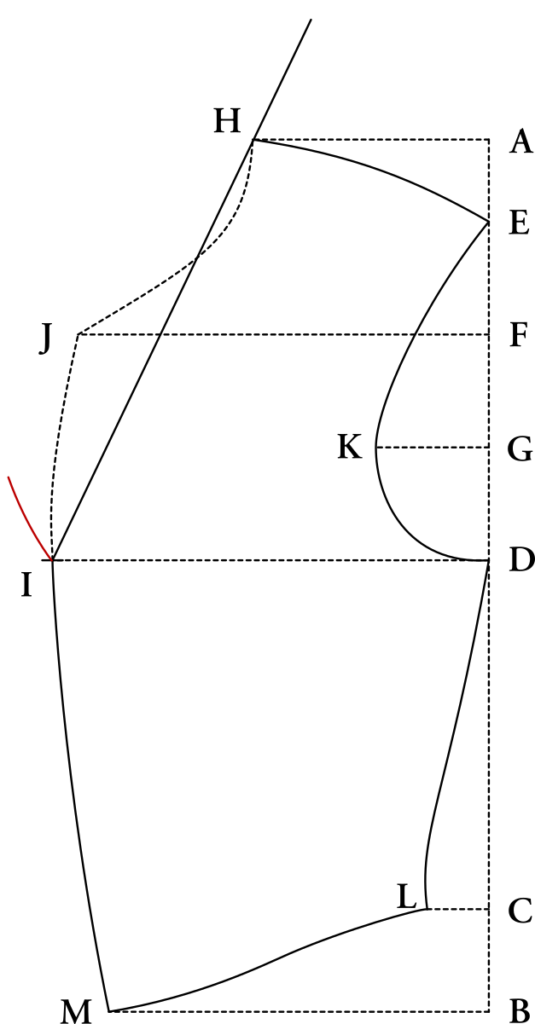
Spring out from the opening point, any distance required, to give the width of the shawl collar. Devere springs out 7/8 graduated inches, and upwards 2 3/4 graduated inches. You could also take the measurements directly from an original vest and apply them here, or use your artistic skills and copy a fashion plate or photograph of the period.
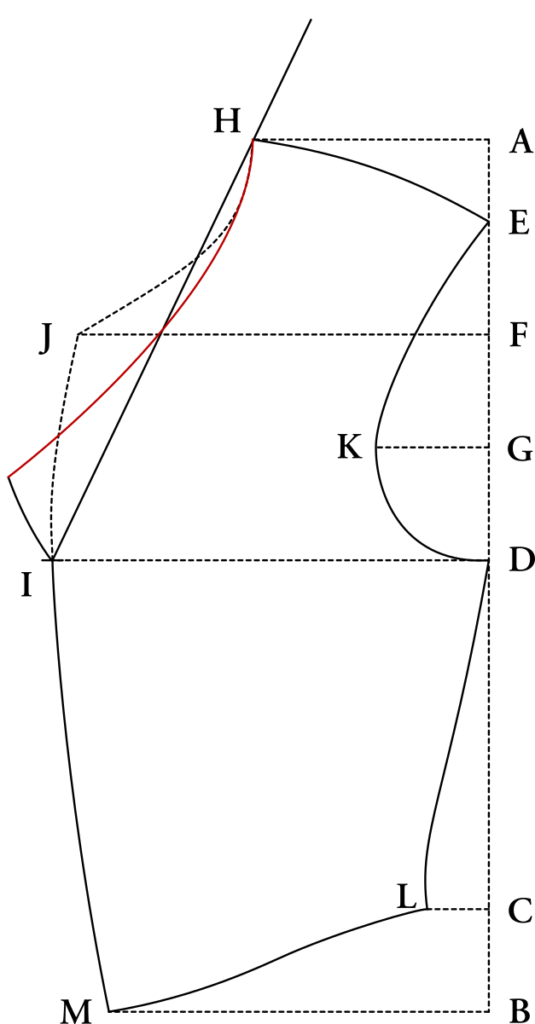
Draw the neck line, beginning at the neckpoint H, and following the original neckline to begin with. Connect with the point of the shawl that you drew in the last step.
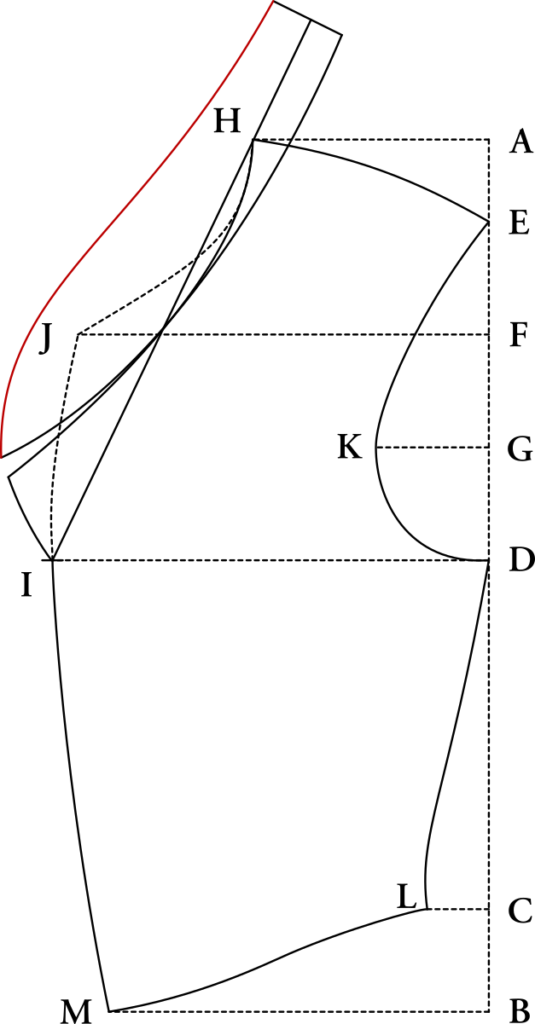
Now at the end of the collar, draw a line perpendicular to the roll line, indicating the height of the collar. I used 7/8″ for the bottom, or stand of the collar, and 1″ for the top, or fall of the collar. The extra 1/8″ ensures that the collar will cover the neck seam properly. This line should be at a distance from the neckpoint H equal to that of the back neck.
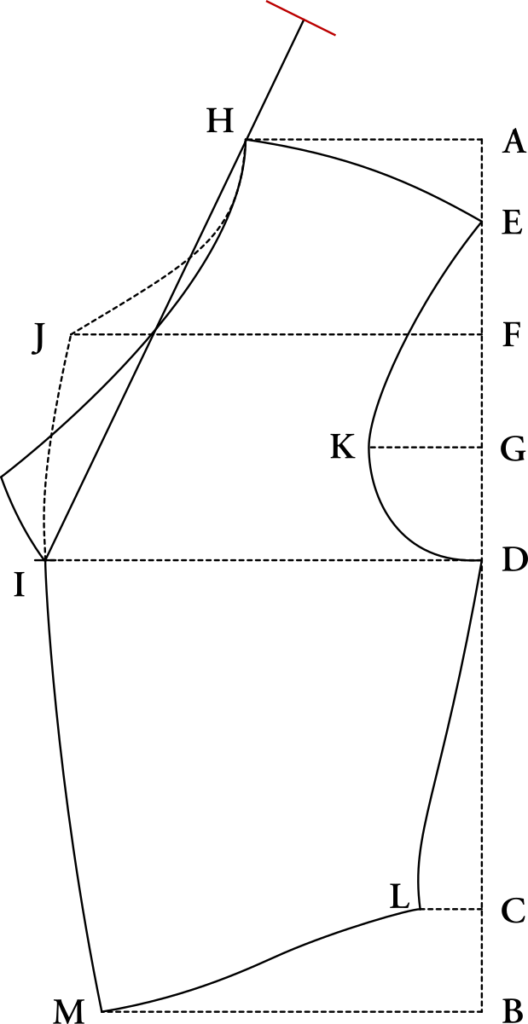
Draw the bottom of the collar. At the top, it begins parallel to the roll line, gradually meets the neck line of the forepart, and ends at height about 3/8 to 1/2 an inch above the sprung out point of the shawl. This gives us a nice dart built into the draft, which will help the collar roll smoothly and give some tension and shape.
Draw the top of the collar. Again it begins parallel to the roll line at the top. The rest is up to you and your artistic judgement – it’s a good idea to study some original photographs to get a better idea of the shape.
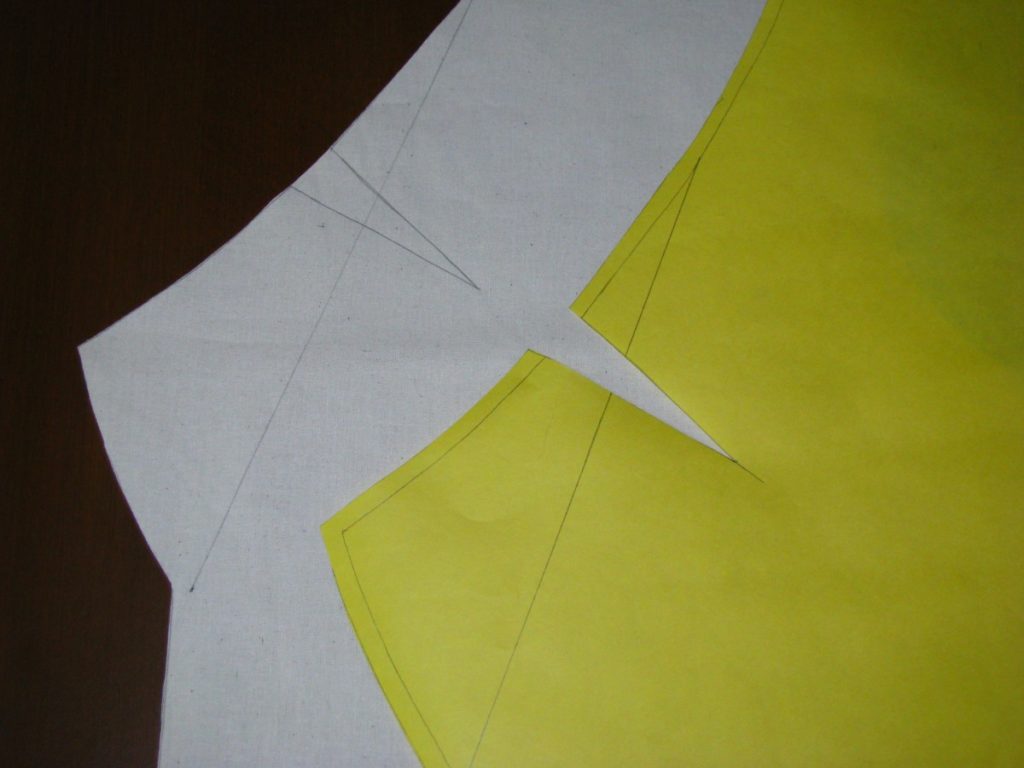
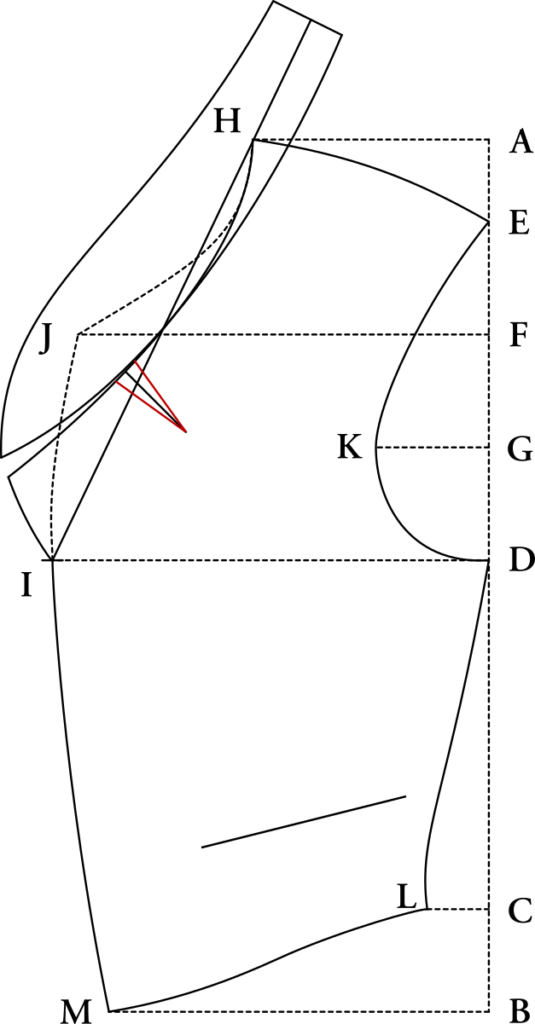
We will now add another dart, which will aid in rolling the lapel and potentially move the armscye forward, if you are using silk fabric. At the area where the collar meets the forepart, draw a construction line perpendicular to the neckline, about 2 – 3 inches in length. Ideally it should be hidden from view when the collar is folded over it.

Now, measure from each side of this line 1/4″ or 3/8″. If using wool, you want the total width to be no more than half an inch. If using silk, however, this dart needs to be a total of 3/4 in width, so as to help move the shoulder forward (since we can’t do the typical ironwork). Complete the lines of the dart as shown.
During the time of the 1860s, it was fashionable to have a longer waist. Lower each point of the waist by 1 1/4 graduated inches, springing out at the front and side seams. Don’t forget to do this to the back as well! Redraw the curved seam lines. Typically, I’ll just account for this lengthening as I do the original draft, using the Length of Front measurement, but this is how Devere explains it.
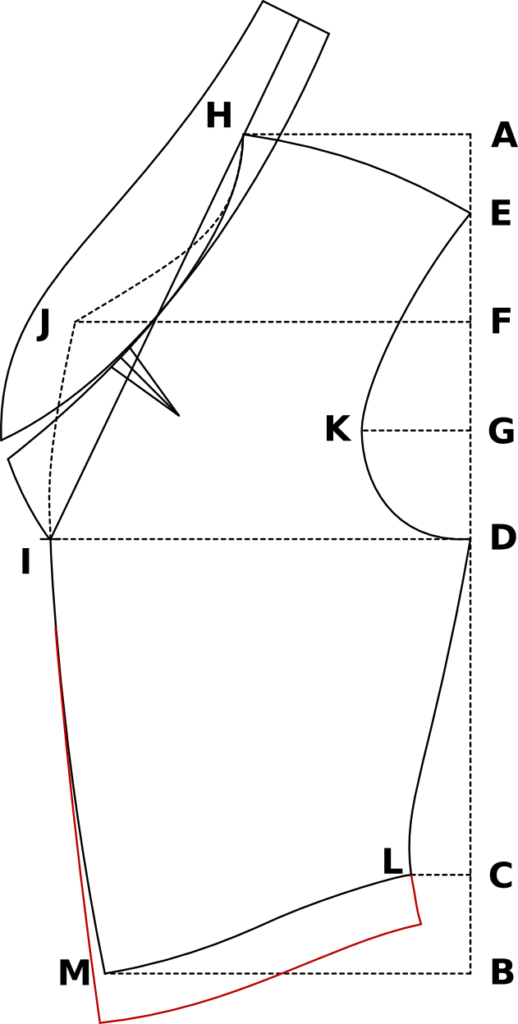
Finally, draw in the pockets using a single line (you can mark the endpoints, though). I usually make the lower pockets about 5 graduated inches in length. They’re about 3 inches from the bottom of the vest, and 1 inch from the side seam, and angled in a similar way as the bottom of the vest.
The upper pocket (made only on the left side of the waistcoat) I tend to make 3 or 3 1/2 graduated inches in length, and about one inch from the armscye. The angle should be steeper than the lower pockets, as shown. Again, exact placement will depend on your body type and the originals you are using for inspiration.
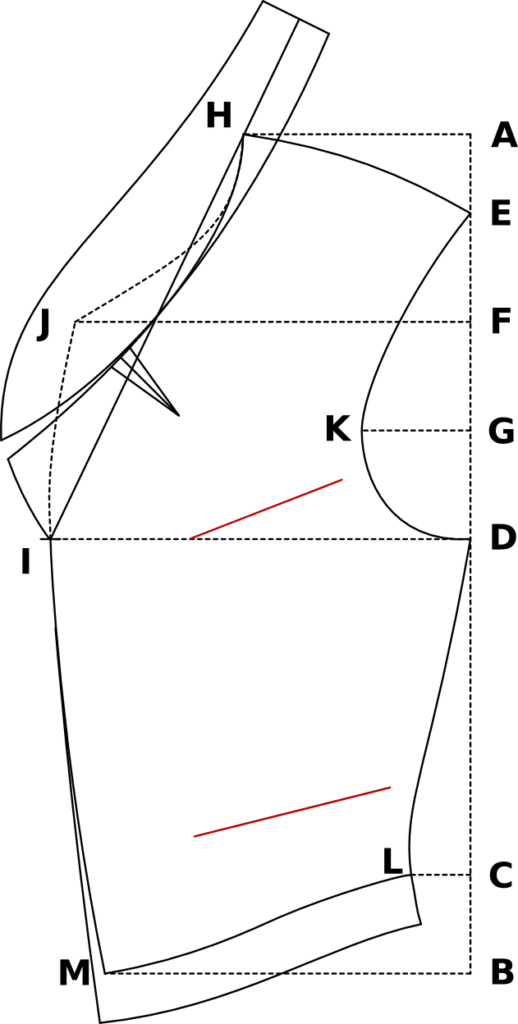
Here’s my completed pattern, showing the collar area. Note how I lowered my collar below the chest line to account for my long torso. You’ll have to do what looks best for your body type as well.