Category: Shawl-Collared Waistcoat
Staying the Edges
Now that the canvas is securely in place, it is time to work on the edges, in preparation for attaching the linings and facings. By adding stay tape to the edges, we gain a crisper, firmer edge, that will hold up to more abuse and keep the vest in shape longer.
Though not pictured, begin by trimming any canvas that extends beyond the edge of the forepart flush. I had two small areas that I had to trim.
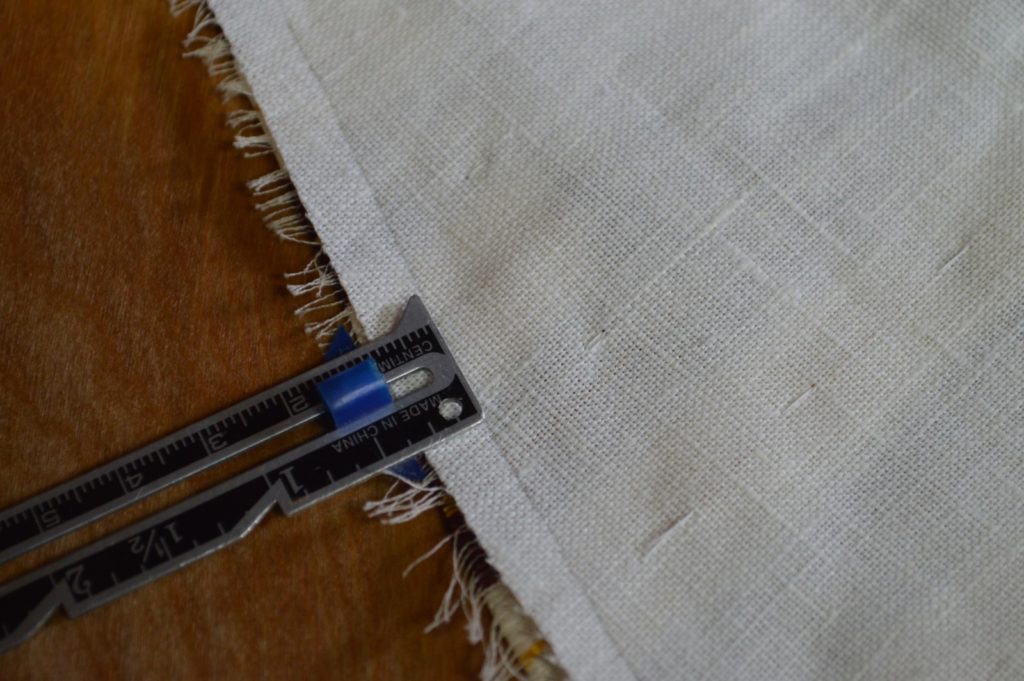
Next, using a ruler or seam gauge, mark around the bottom, front, and collar a distance just over the width of the seam allowance. I did 3/16″ here. Start along the bottom.

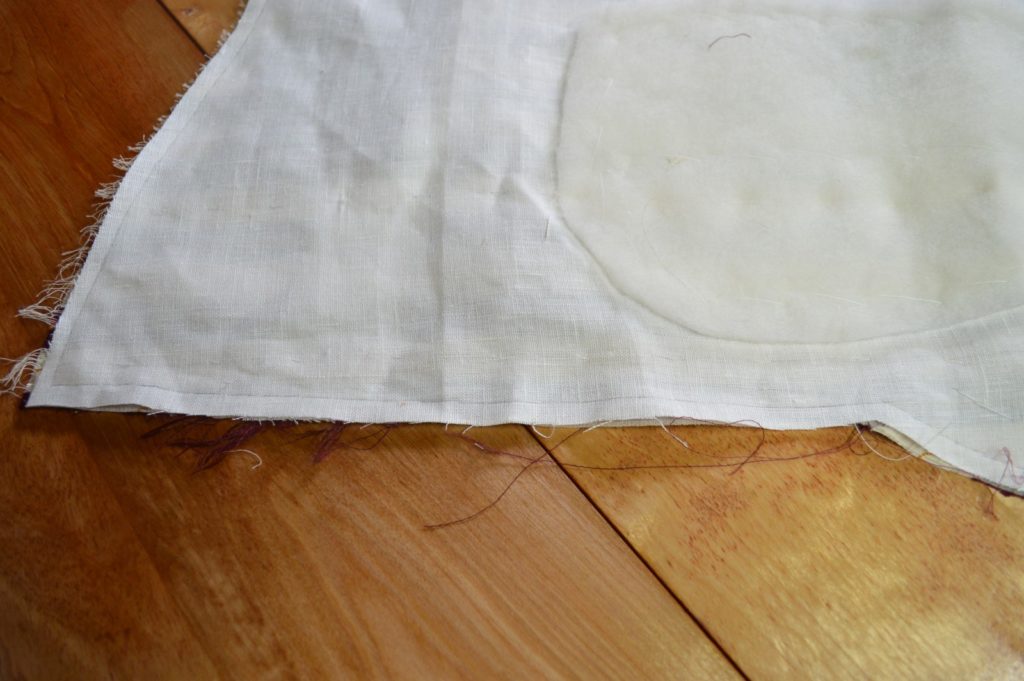
Along the front edge.
Along the front of the collar. I ended up taking too much off here because I measured from the edge of the canvas, rather than the edge of the main fabric.
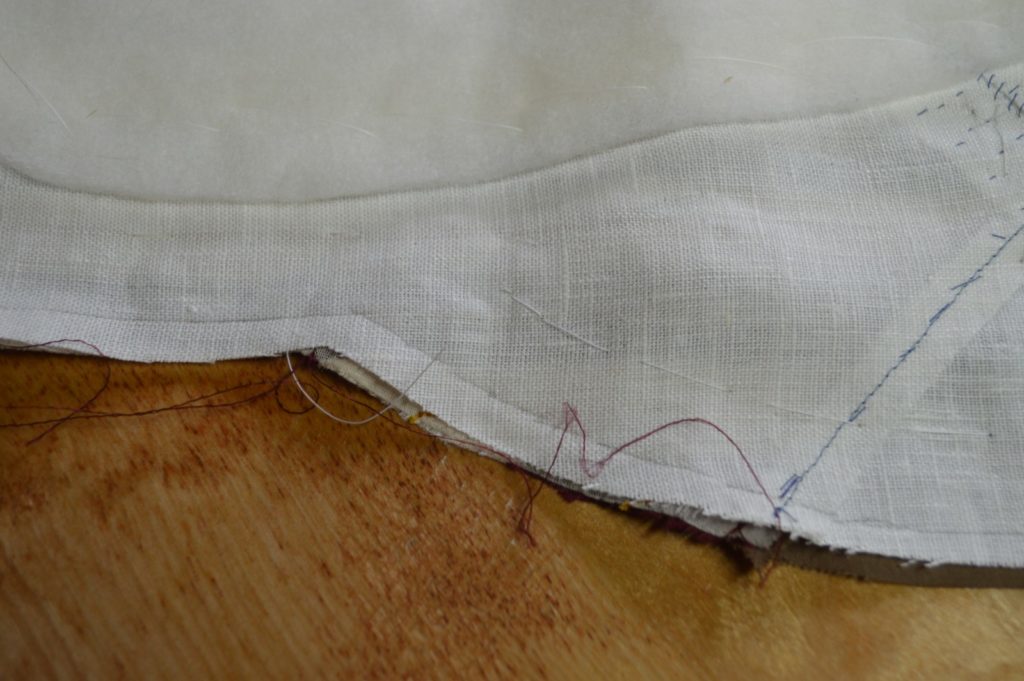
And continue along the entirety of the collar.
Next, trim off that allowance, being careful to cut only the canvas.
Here’s that area where I cut off too much. Luckily, it is fixable when I add the stay tape on in a minute.
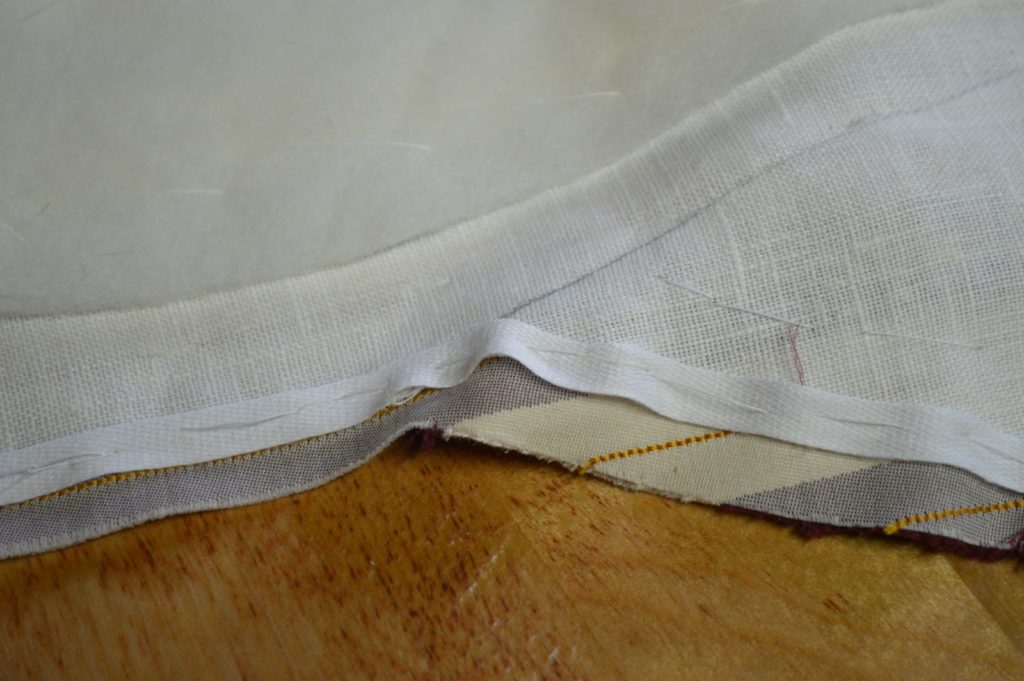
Add a length of stay tape and baste it to the canvas and forepart, through all layers. The stay tape should extend off of the edge of the canvas by about 1/16″, which is why we trimmed off 3/16″ earlier. Start at the collar, just beyond the shoulder line, and basted down along the collar.
When you get to the roll line area, allow a little excess in the stay tape. This will allow the collar to fold along the roll line without any tightness.
Continue basting down the center front. When you get near the waist, you can hold the tape slightly taut, which will then force the bottom to stay near the body, rather than its usual tendency to pull away.
When you reach the corner, you’ll need to make a miter in order to allow the tape to turn cleanly without building up additional layers. Start by making a 45 degree cut through the tape, just to the point where you want to turn. Don’t cut all the way through the threads, try to leave the edge uncut.
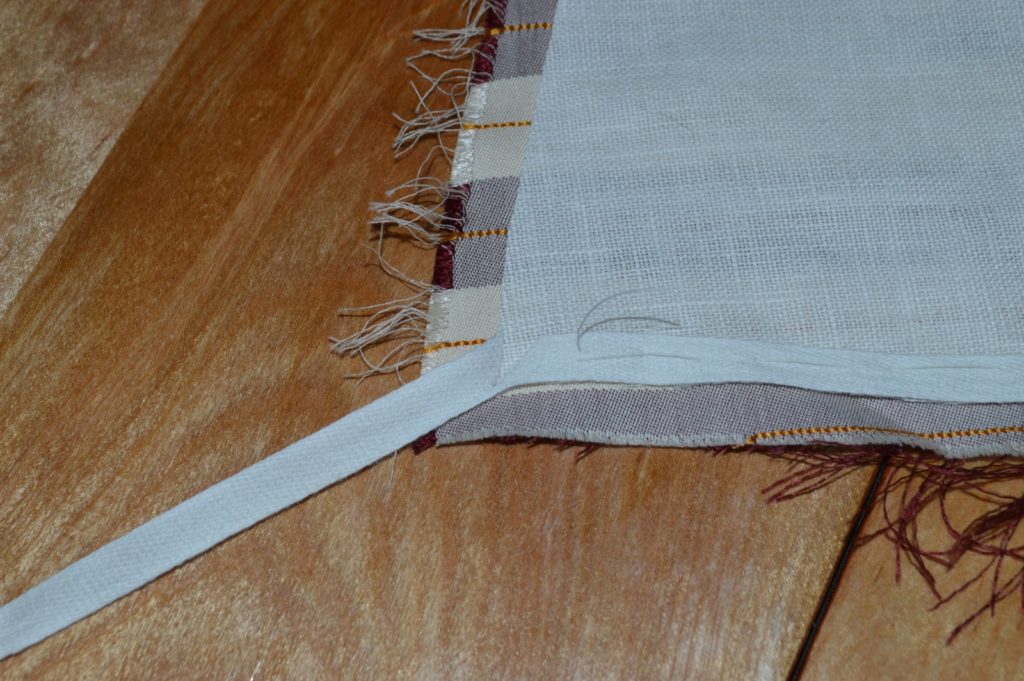
Turn the tape into place along the waist line and note the overlap created.
Trim from the outside corner, 45 degrees towards the inside, cutting off the excess. You should be left with a clean miter.
Continue basting along the waist. The stay tape stops where the waist line meets the side seam.
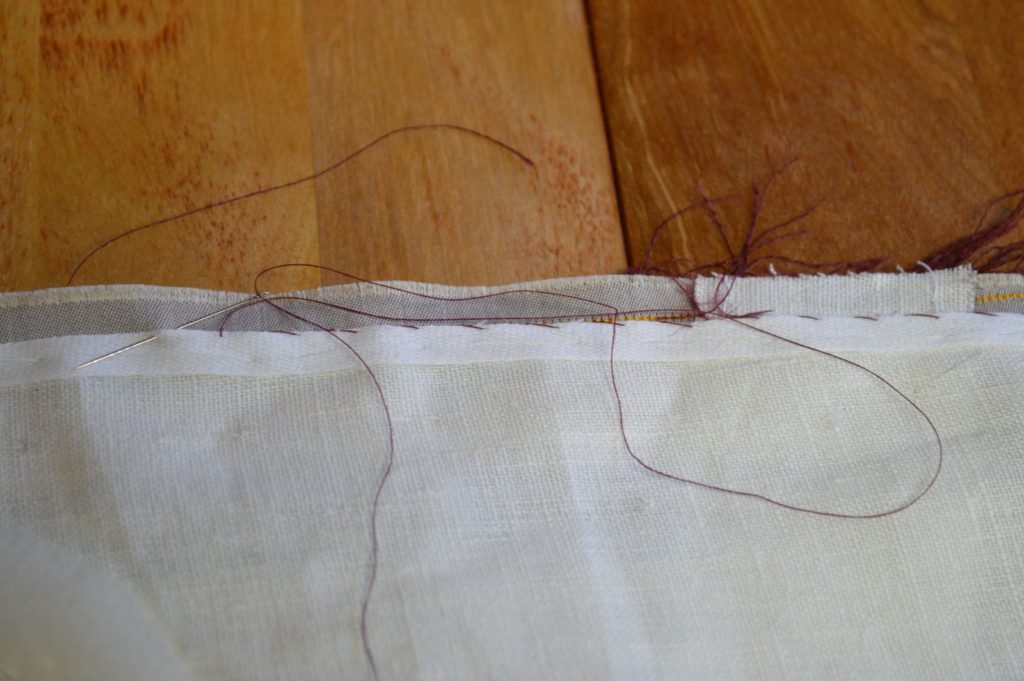
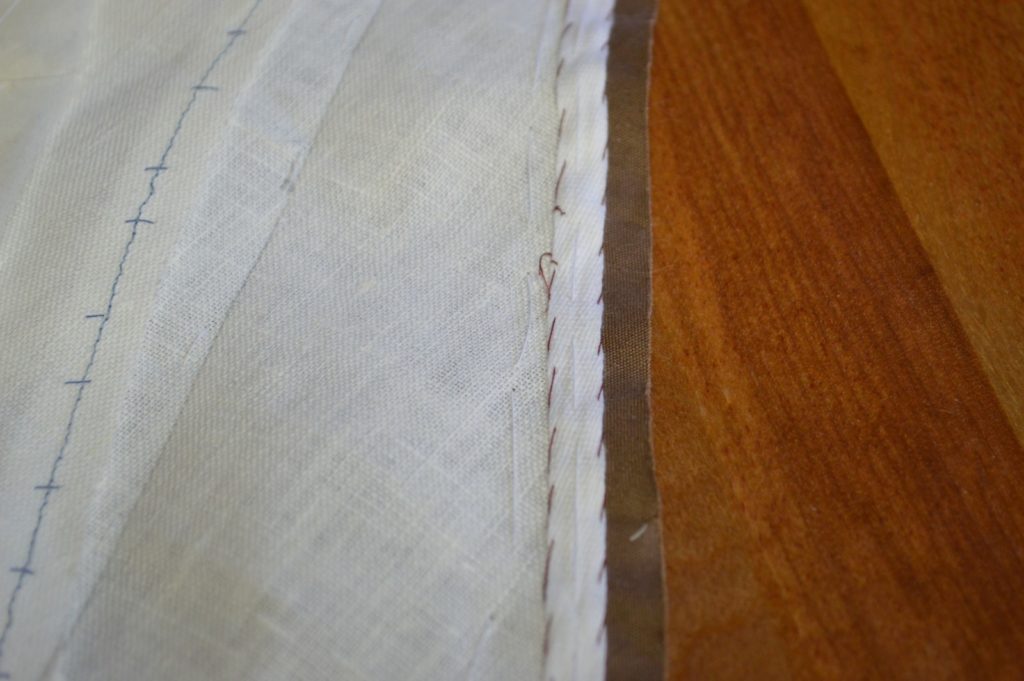
Now it’s time to secure the stay tape to the forepart. Using a row of slip / felling stitches, about 3/8″ to 1/2″ apart, sew the stay tape down along the outside edge. These stitches should show as a small pinprick on the right side.
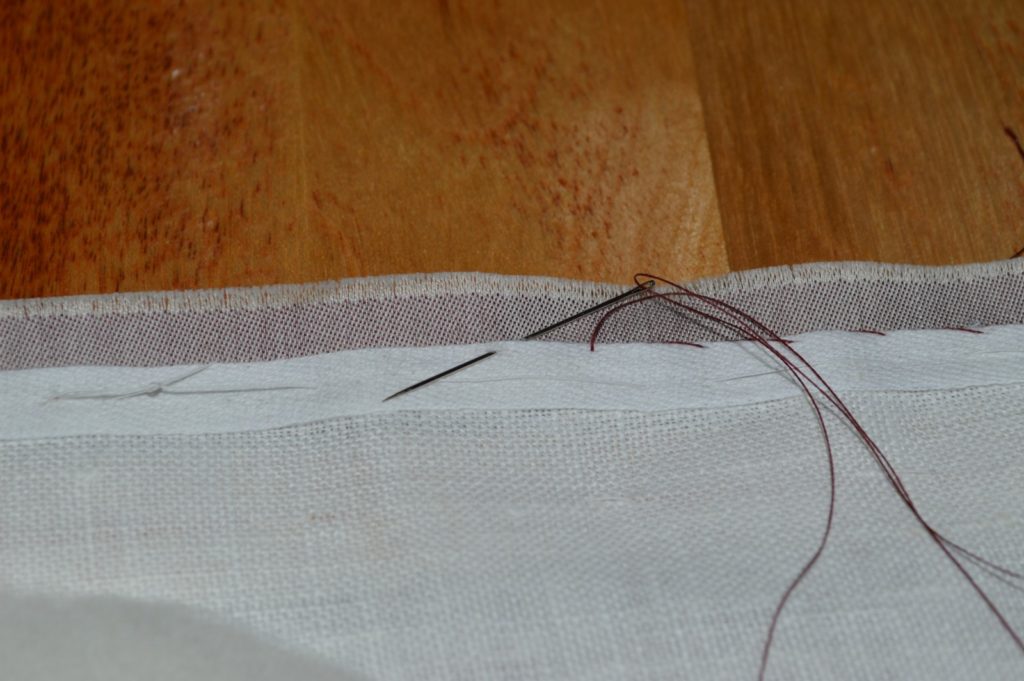
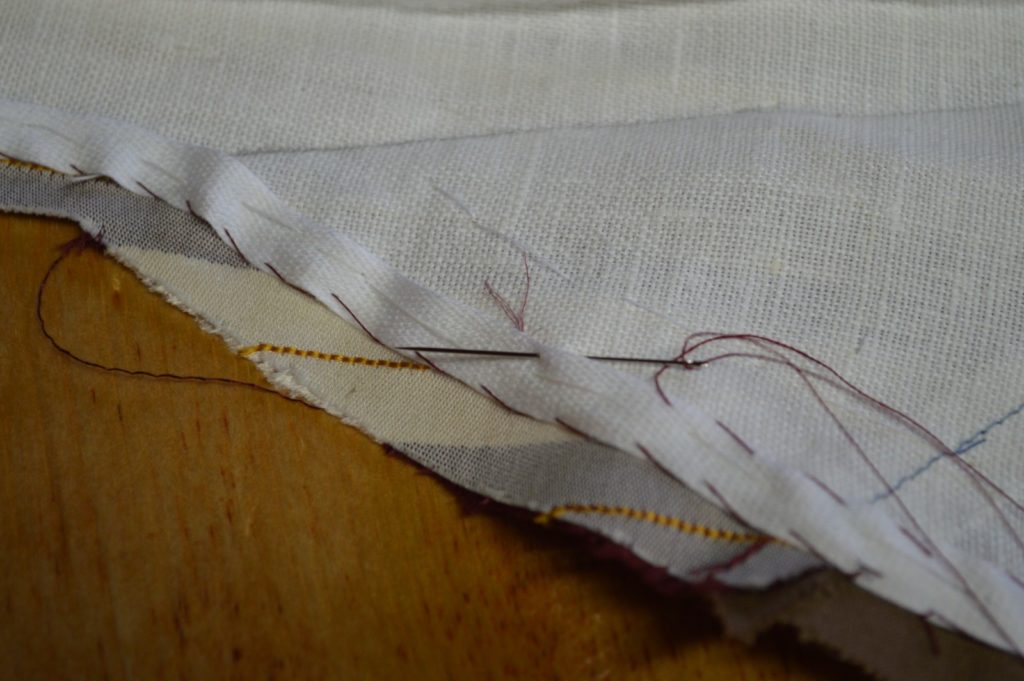
Then continue along the inside edge of the tape. This time, the stitches catch only the canvas layer, and do not go all the way through to the right side.
Tacking the Pockets
With the canvas in place, it is time to tack down the pockets permanently. By tacking the pocket ends through the canvas, it helps tie the two together, and provides additional strength for the pockets, which are under a lot of stress.
Begin by trimming the end of the pocket to 1/4″ seam allowance.
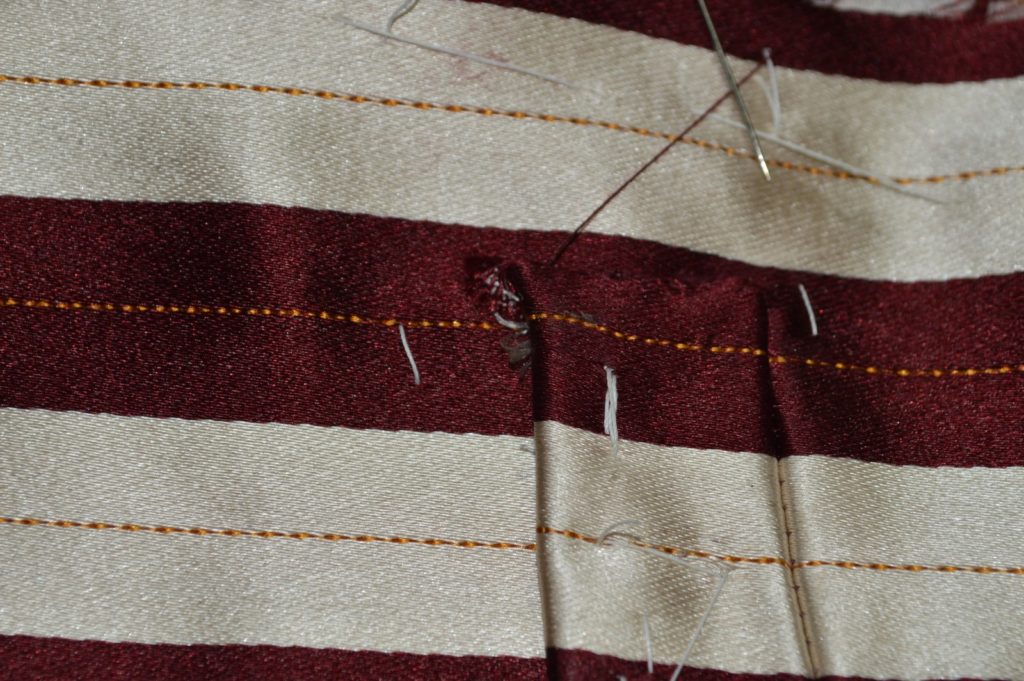
Starting from the bottom, fold the end of the pocket in, and fell, trying to make the stitches as small and invisible as possible. Work the stitches with about a 1/16″ spacing between them, through all layers. You may need to make it a ‘prick’ stitch, when the needle passes all the way through to the bottom, due to the thickness of the materials.
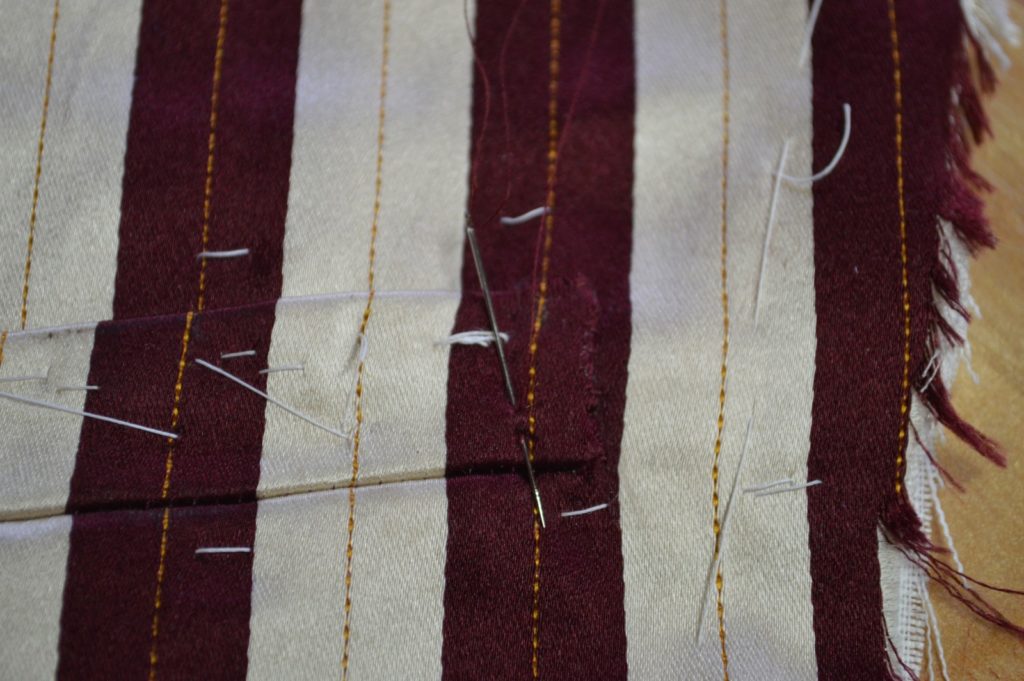
When you get to the top of the pocket, gradually fold under the remaining material that will have a tendency to want to stick out. Fell across the top of the pocket, for about 1/4 of an inch, hiding the fabric as you go.
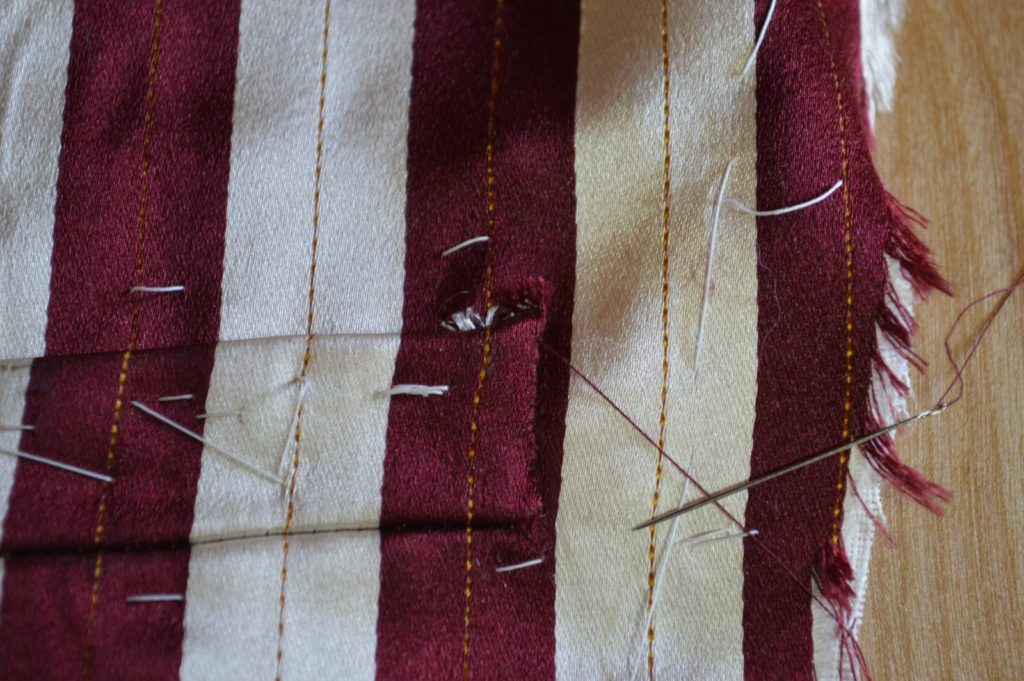
At 1/4″ from the ends, at the location of the needle in the following photo, work 4 or 5 stitches in place through all layers, to firmly tack the pocket, as this exact point is where the most stress will be.
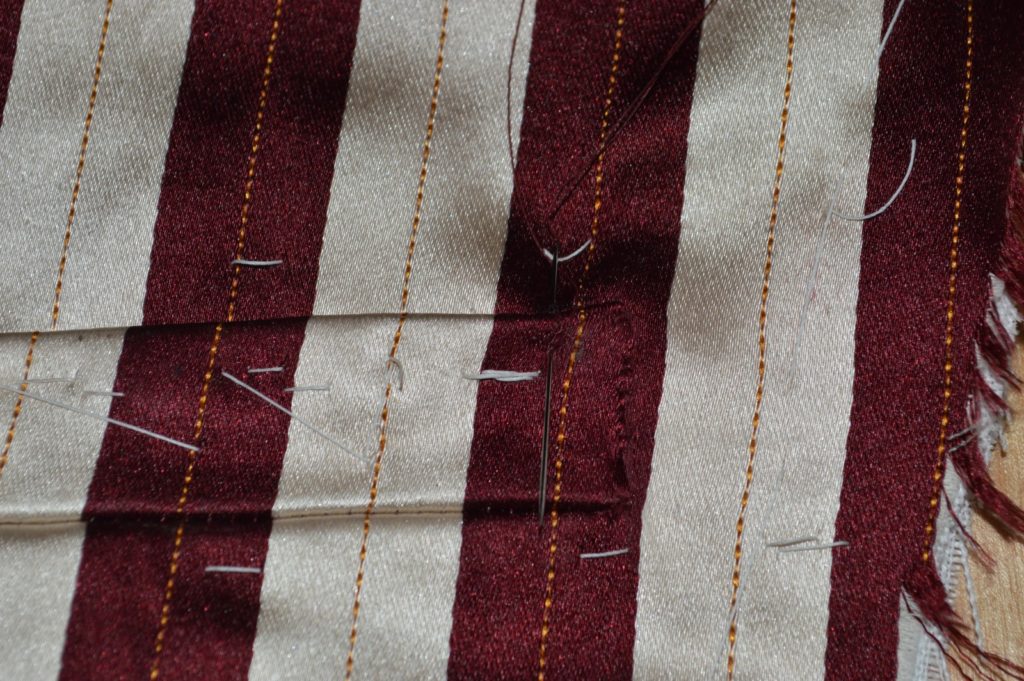
Working in a line parallel and 1/4″ from the end of the pocket, work a row of side stitches through all layers, towards the bottom of the pocket.
Here is the completed pocket end. Repeat the process for the rest of the pockets.
Installing the Canvas
Now that the canvas is complete, it is time to install it onto the waistcoat forepart. This is an important step, and while it may seem tedious, the results are well worth the effort, and will help make the canvas and forepart act as one, enhancing the shape and figure of your waistcoat.
Begin by clearly marking the roll line, in a straight line, on the wrong side of the forepart. Remember, it starts 1/4″ away from the edge of the forepart, to leave room for the seam allowance.
Taper the collar end of the roll line into the original roll line. The angle is shallow enough that it won’t affect the roll of the collar.
The final re-marked roll line.
Run a row of basting stitches along the newly-marked roll line, so that it is transferred to the right side.
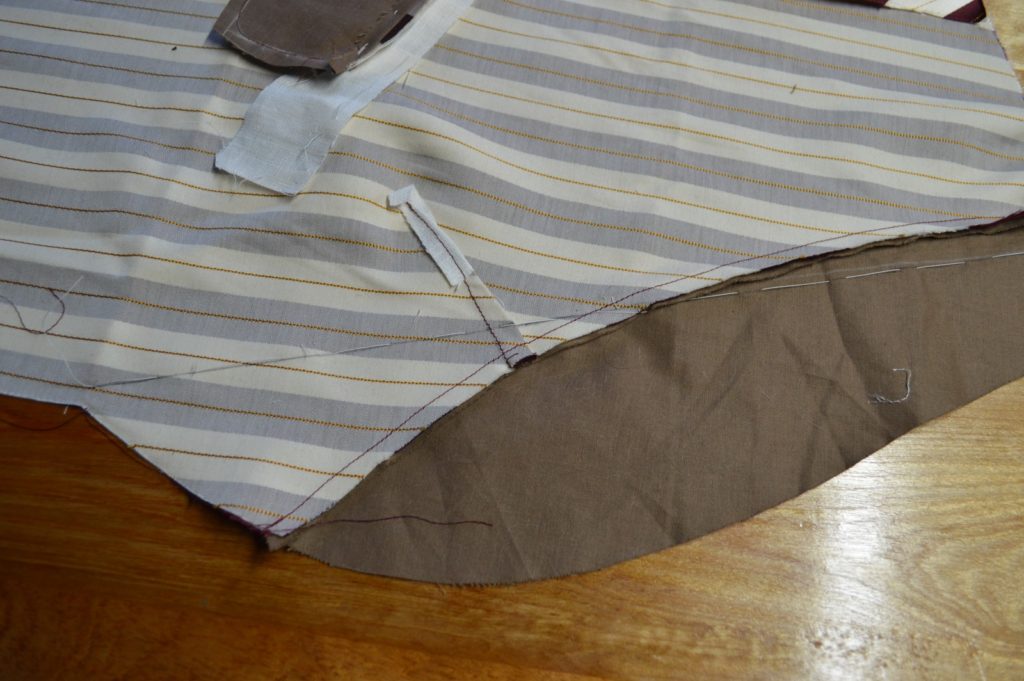
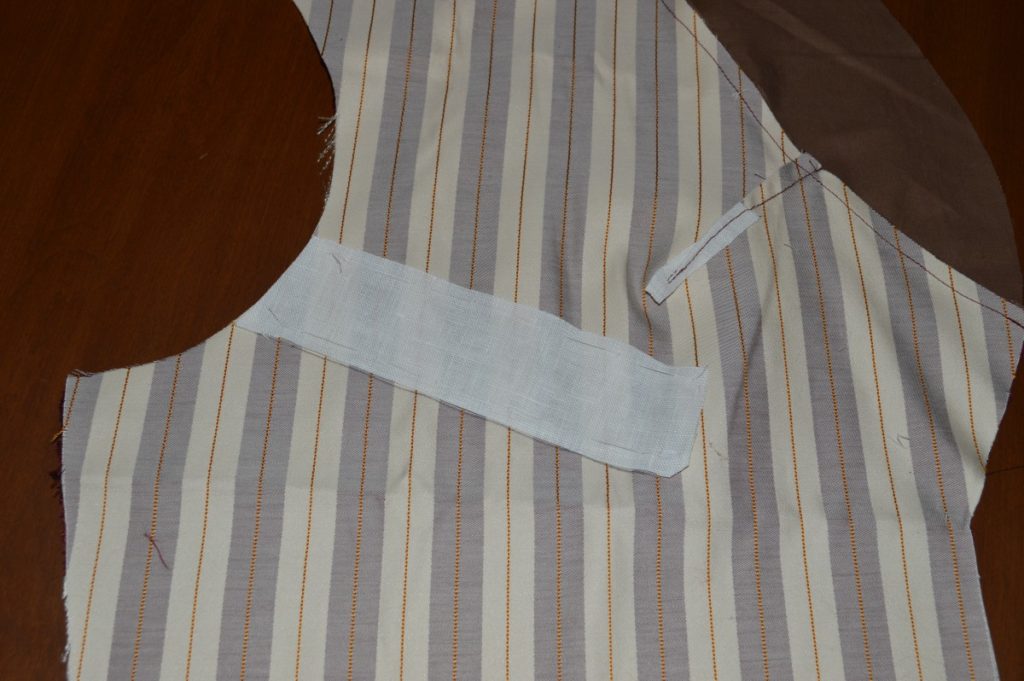
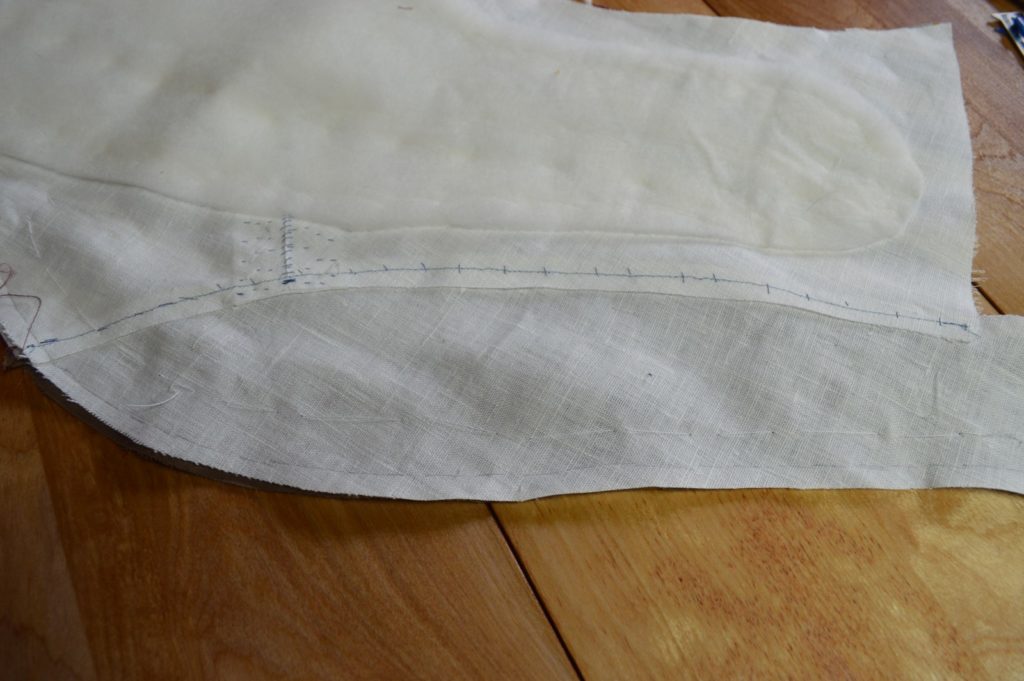
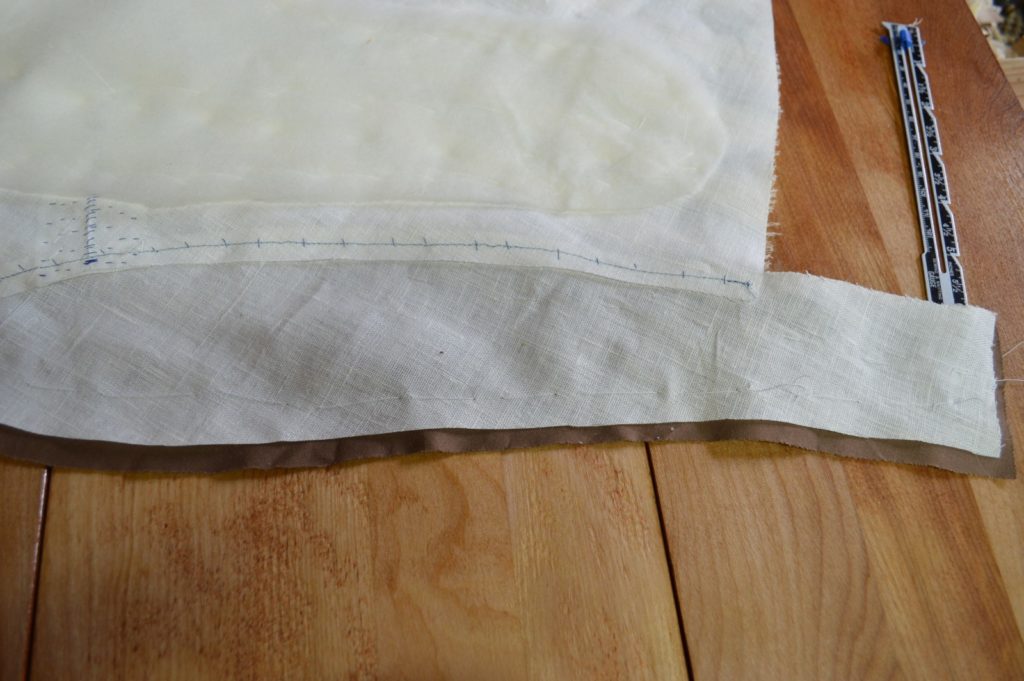
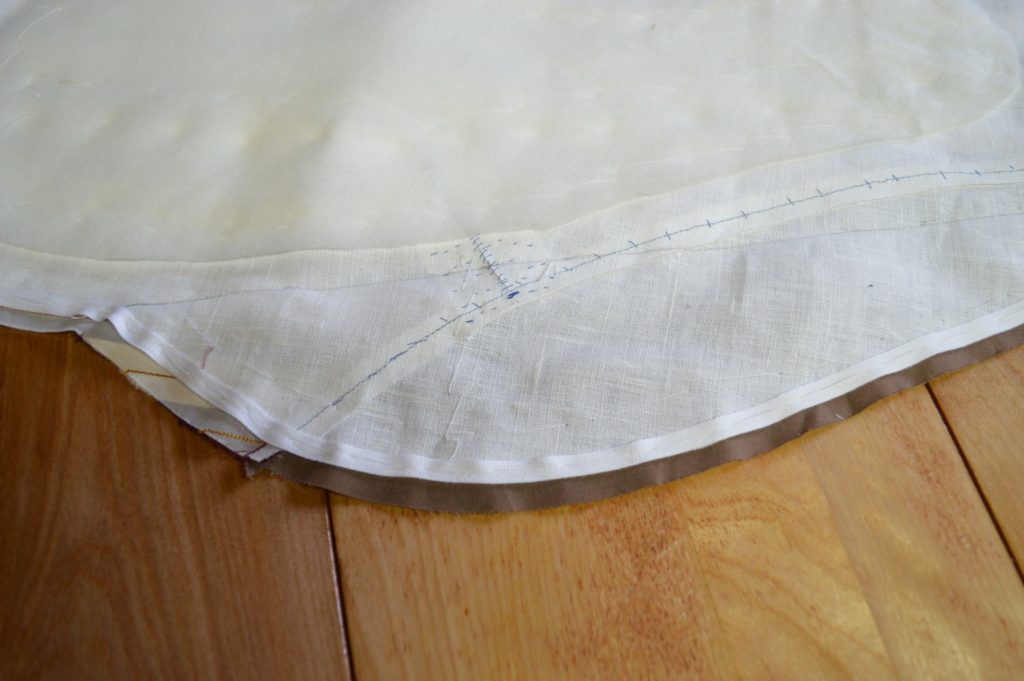
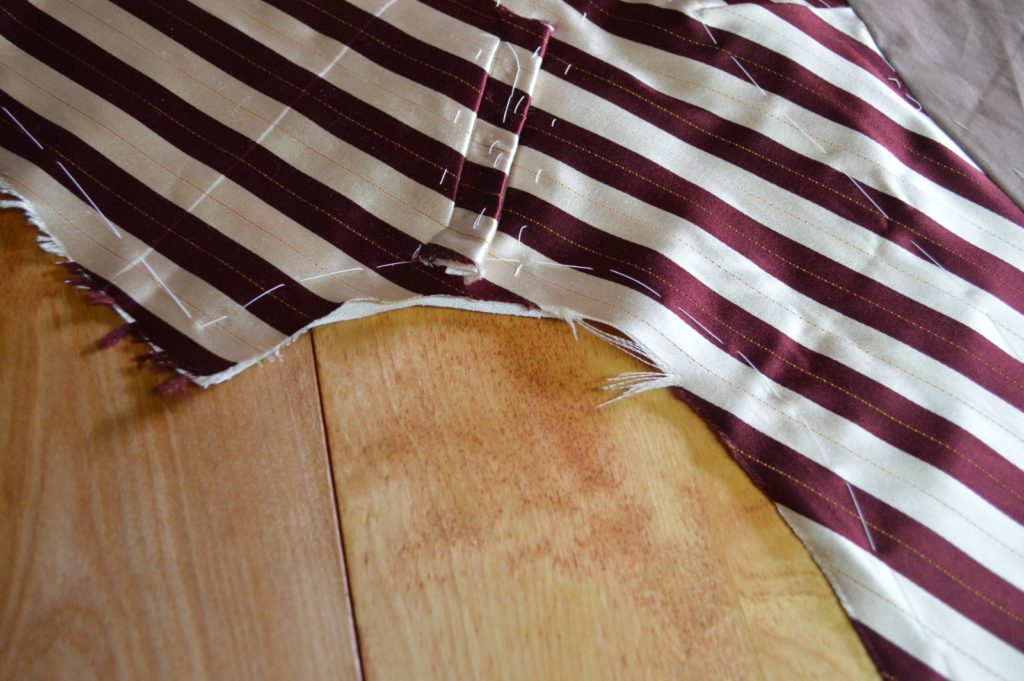
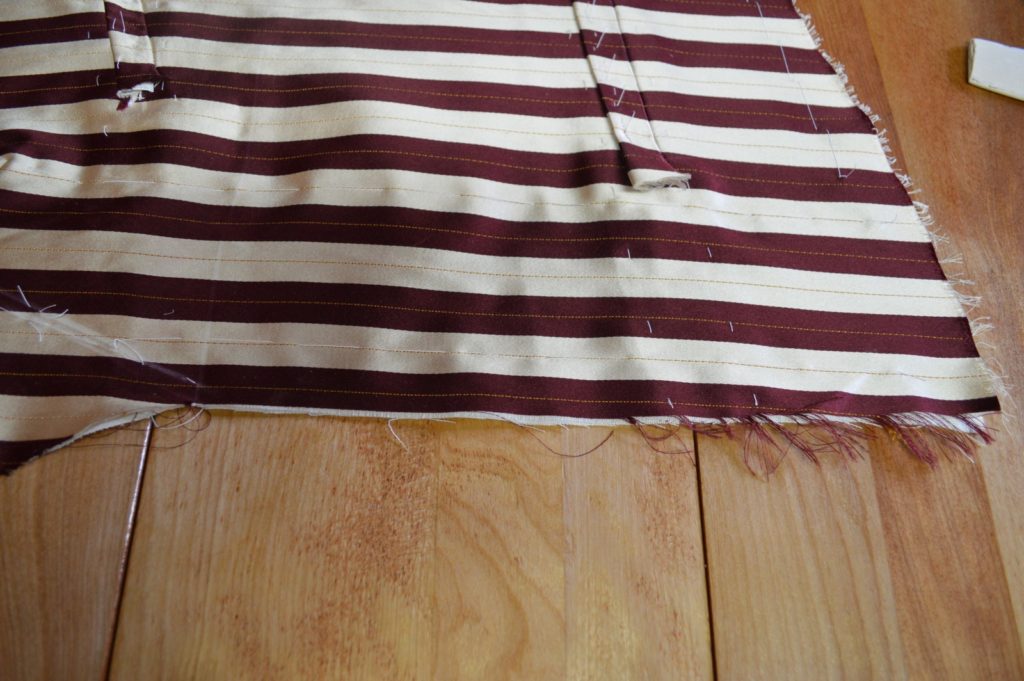
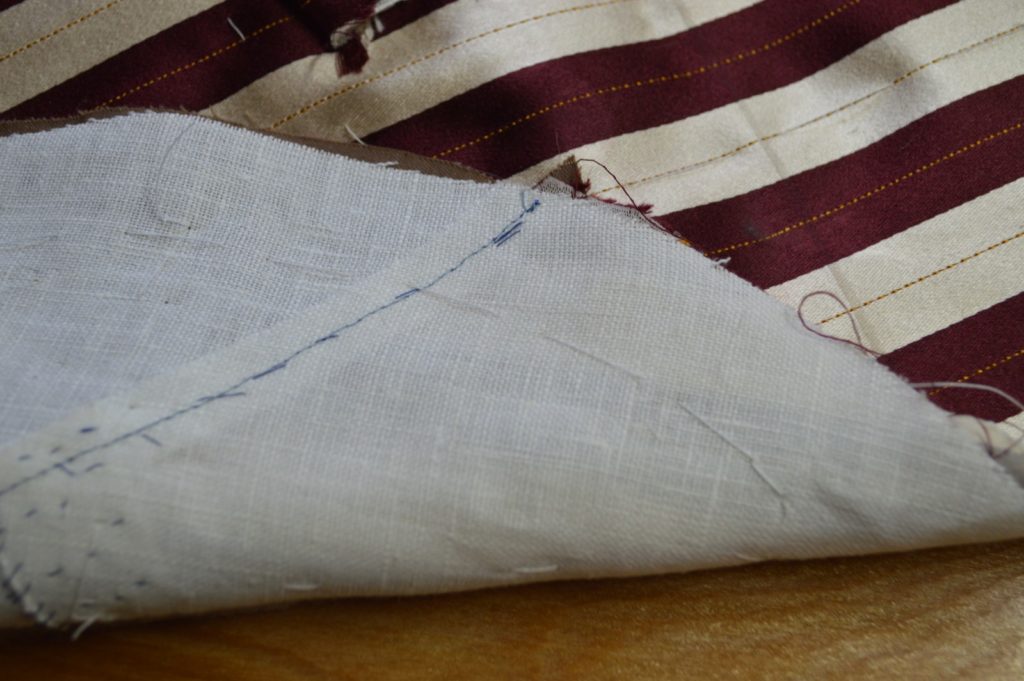
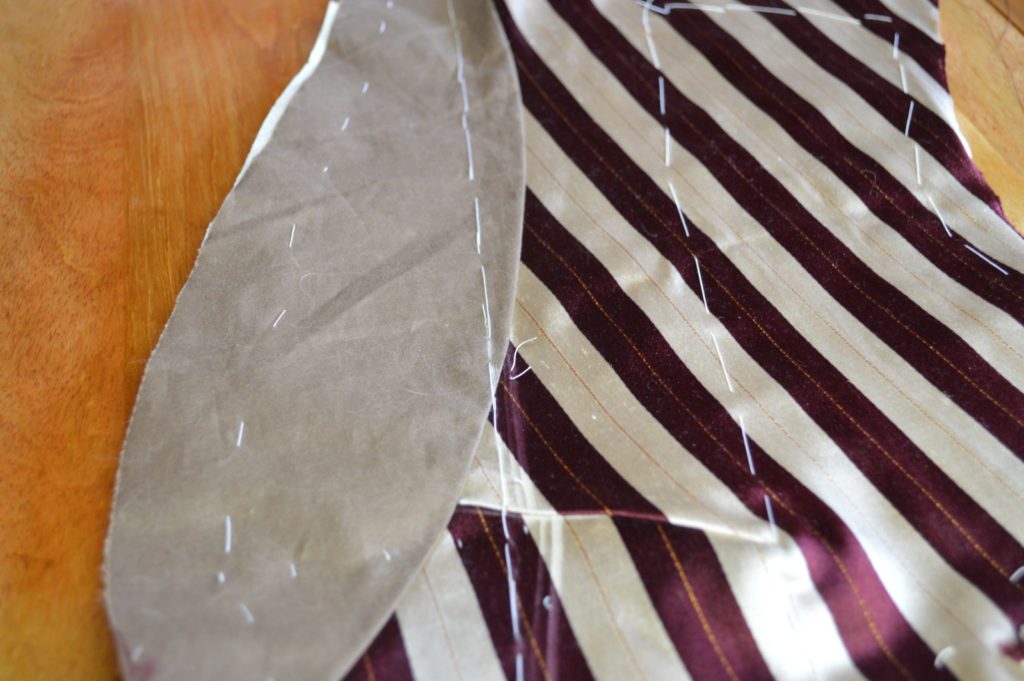
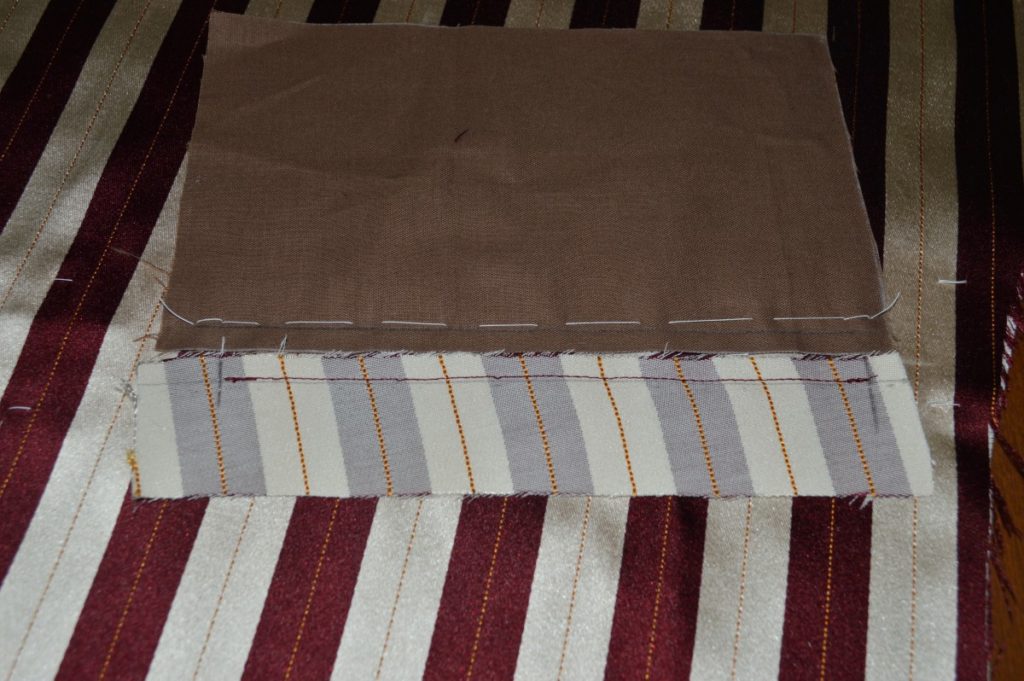
Place the canvas, with the wool batting facing down on the table, and place the forepart on top, as shown.
Line up the edges as closely as possible.
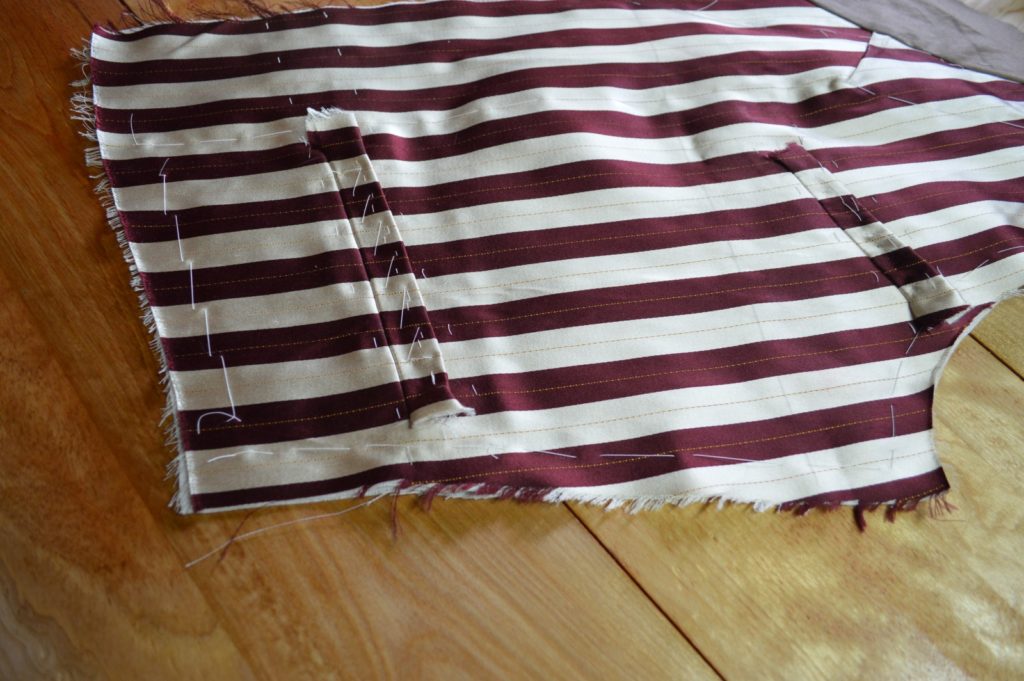
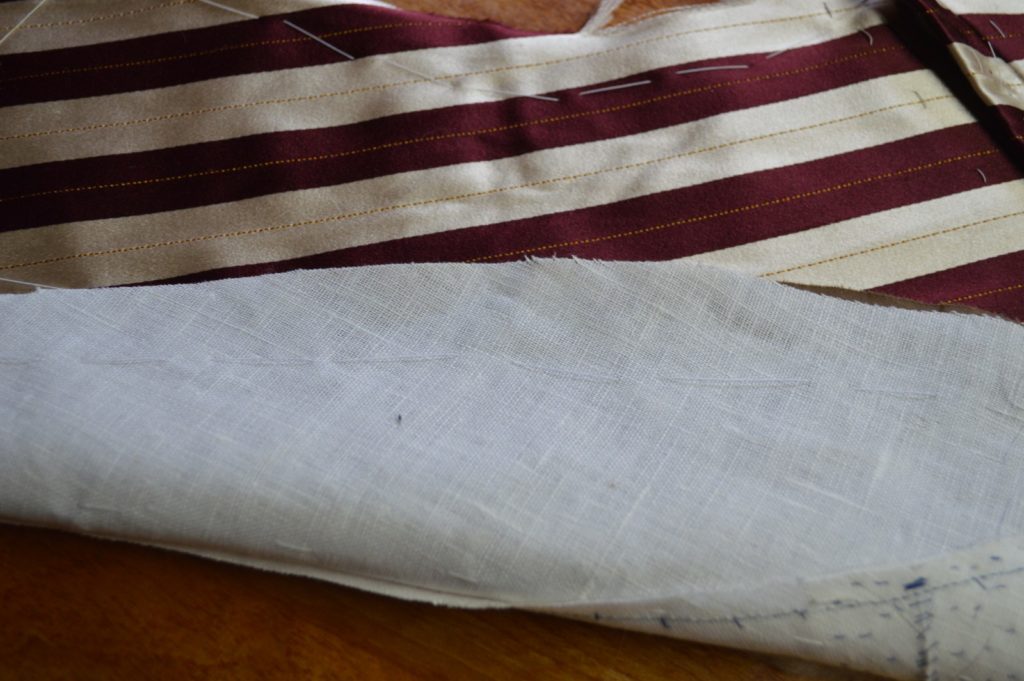
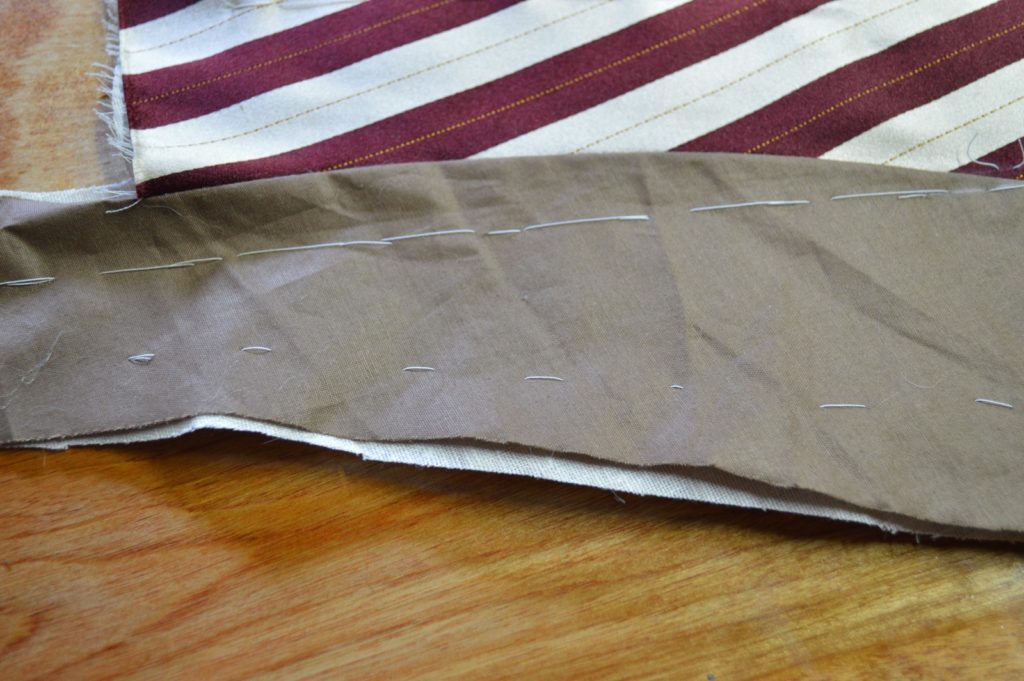
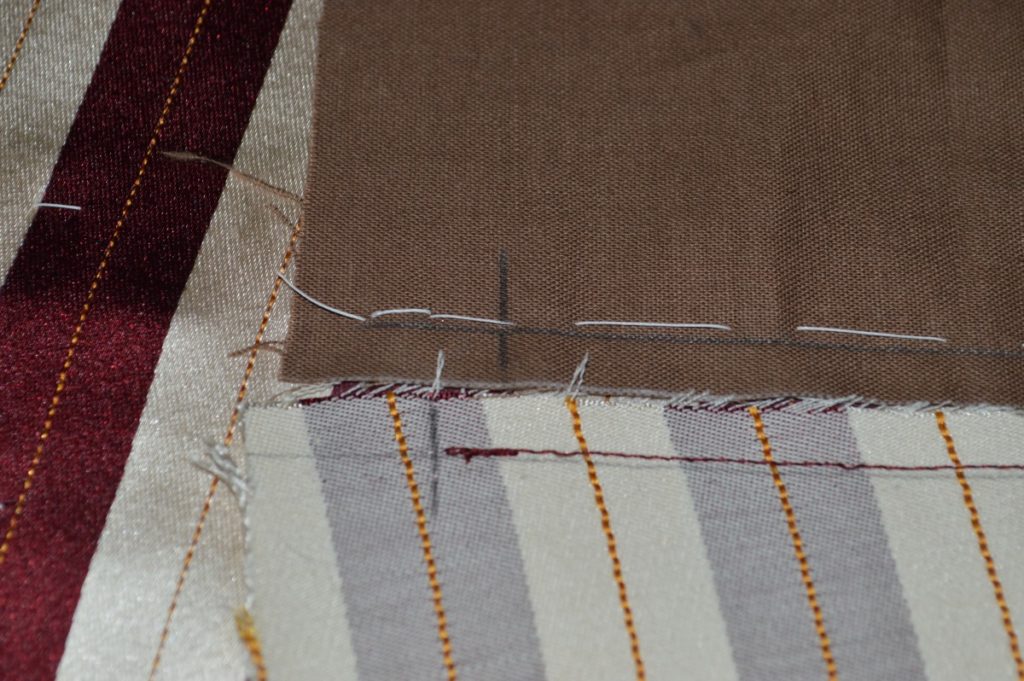
Starting at the top of the shoulder, baste all layers together in a single row of stitching, down towards the chest, and then straight down to the waist. Smooth the fabric gently towards the waist as you go, to ensure there are no folds or excess in either the canvas or the forepart.
Stop this first line of stitching about 1 inch from the bottom of the forepart, to leave room for working with the edges.
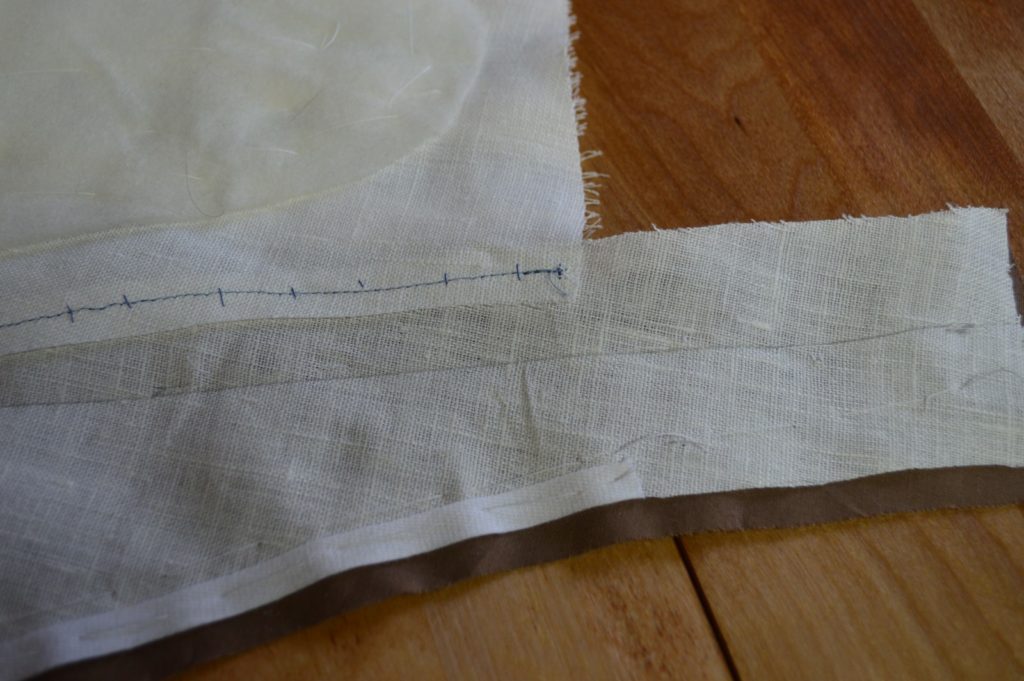
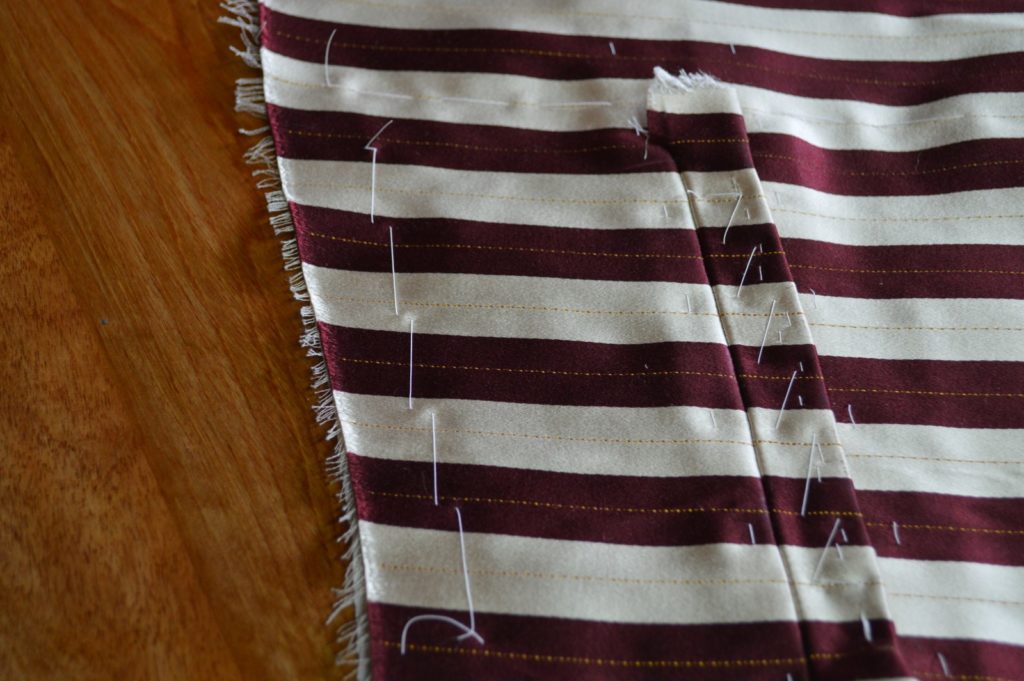
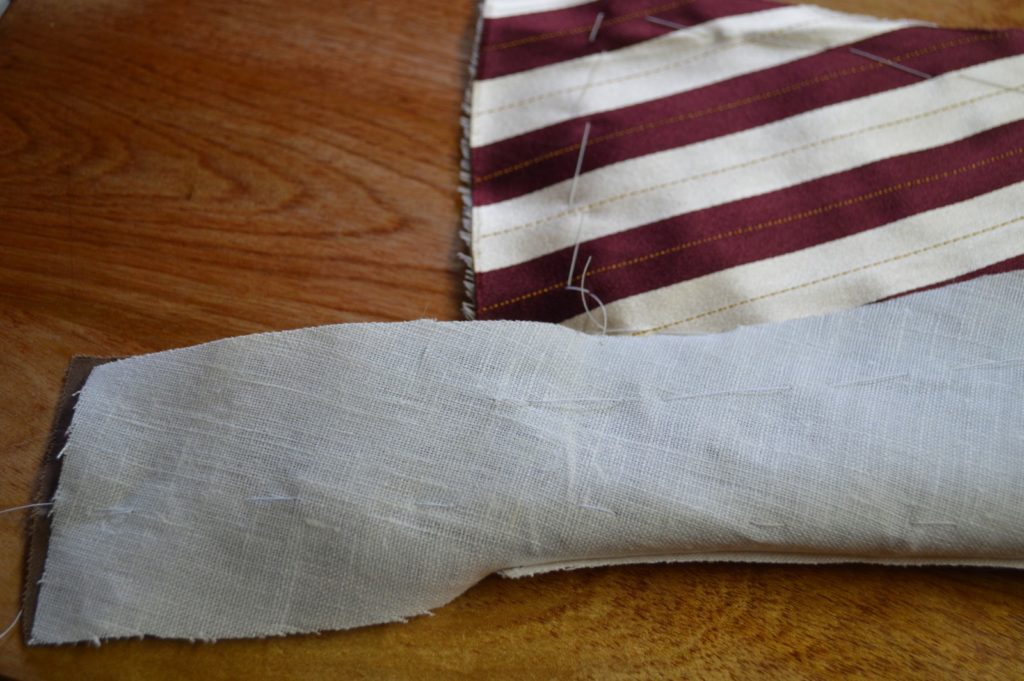
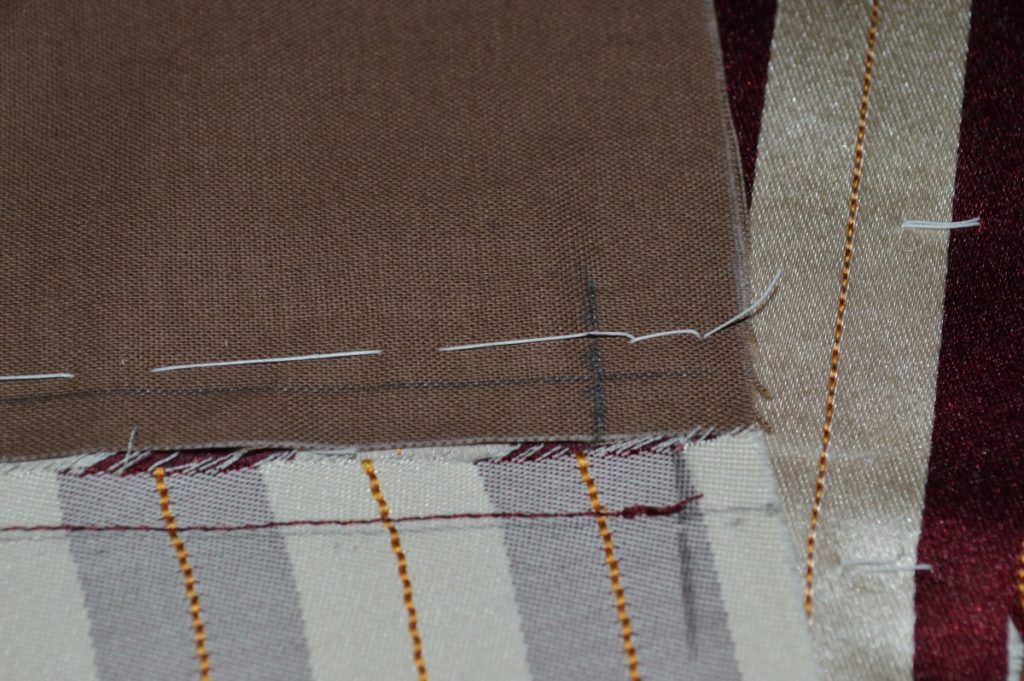
I like to have this first row of basting stitches pass the inside edge of the bottom pocket.
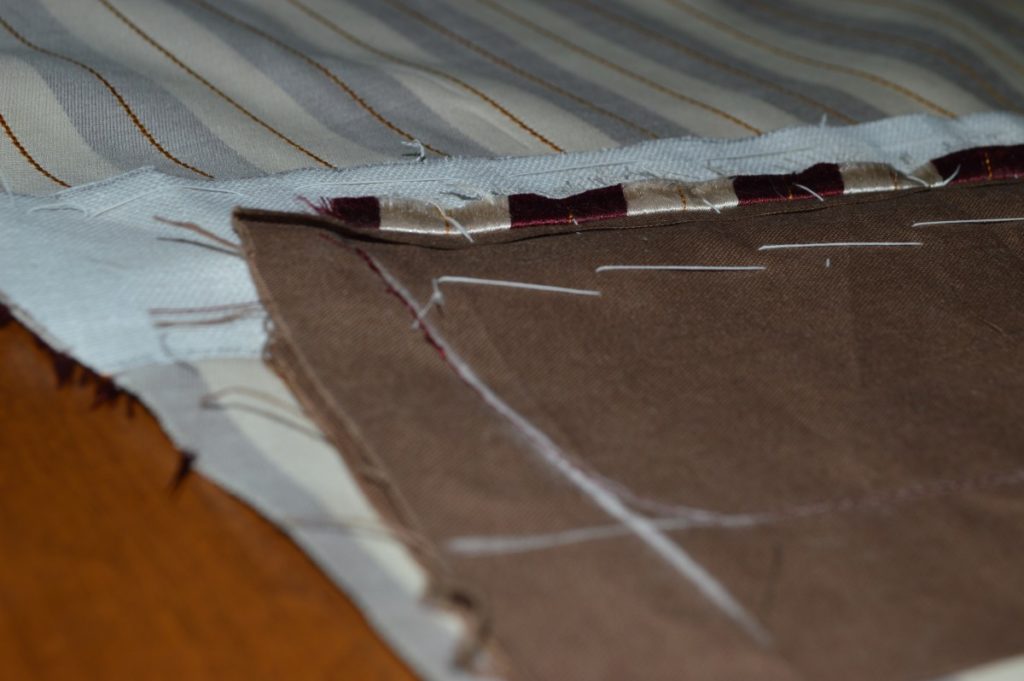
Another view of the basting to give you a better idea of what’s going on.
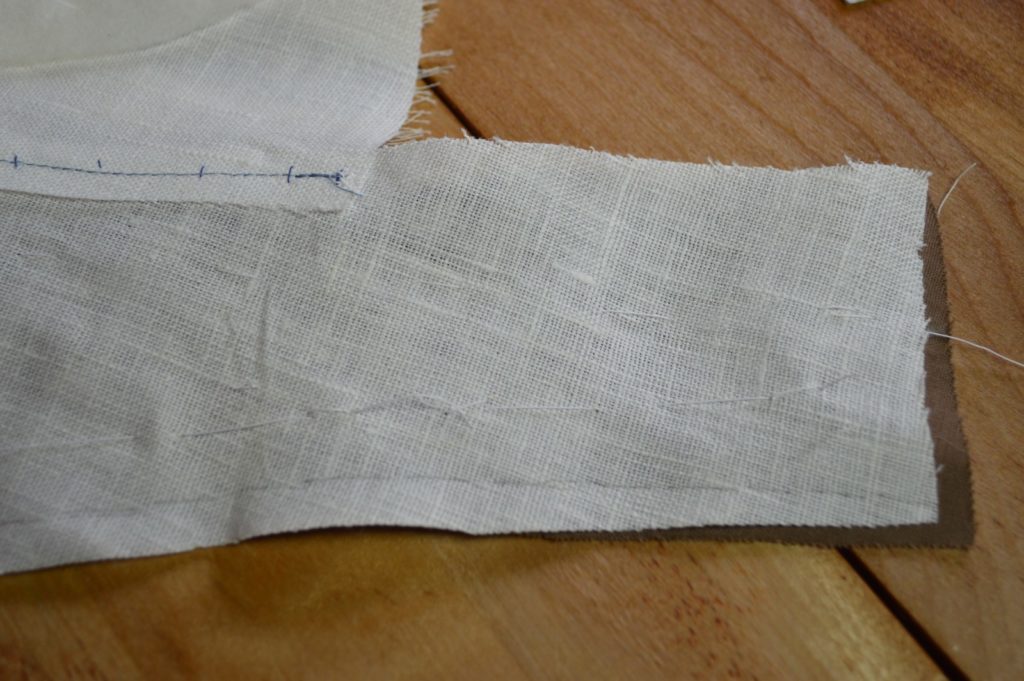
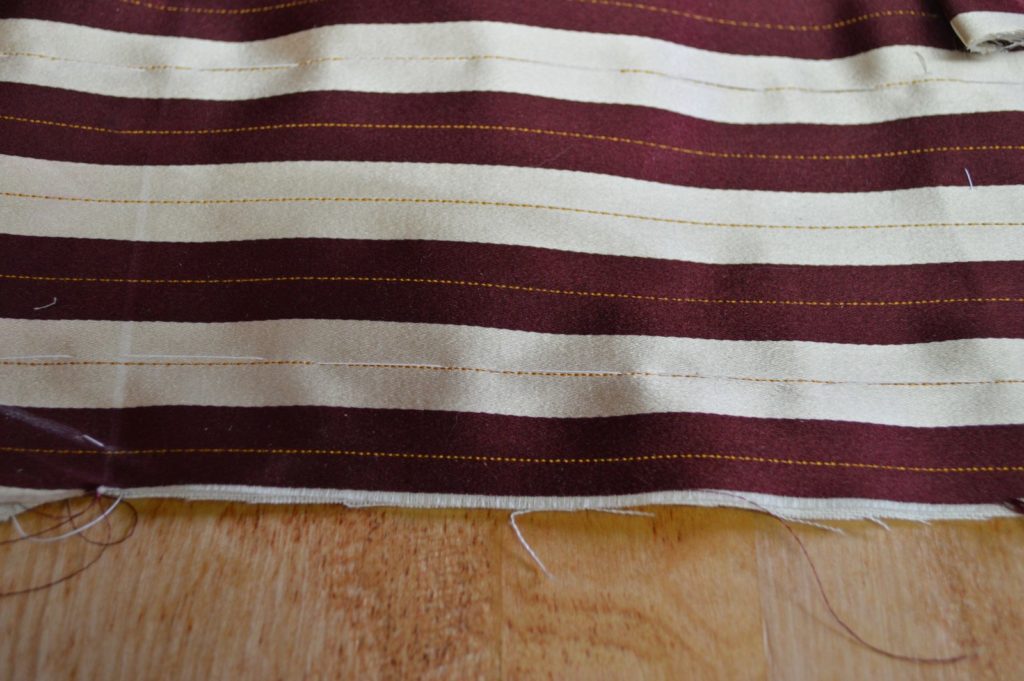
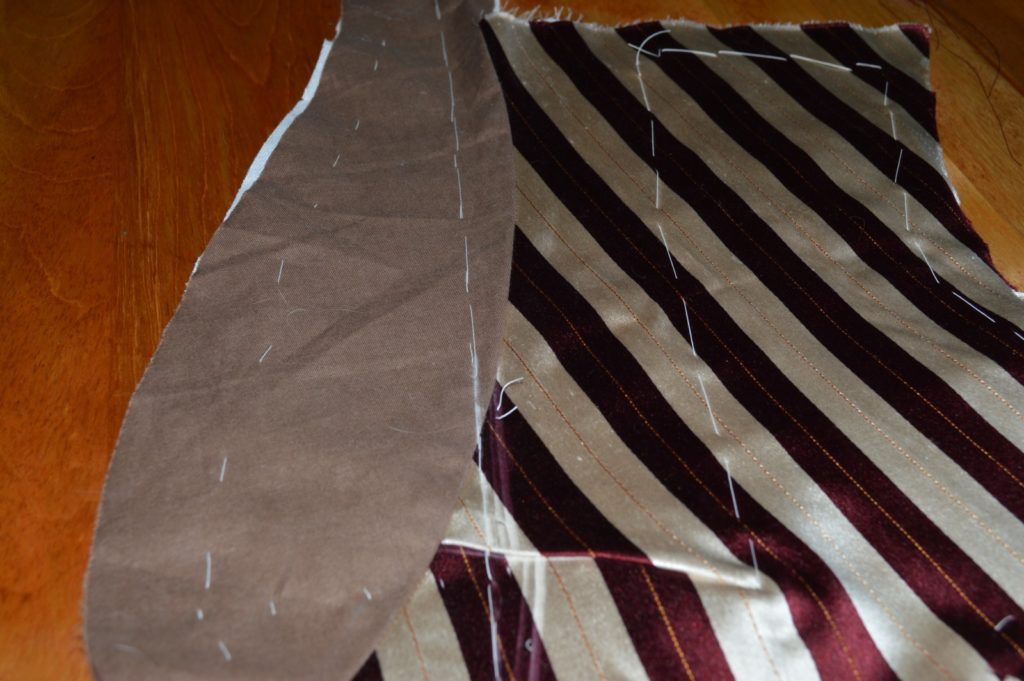
Next, start a new row of basting stitches at the same location you started the first, at the center top of the shoulder, and move across the shoulder seam towards the armscye, always staying 1 inch from the edge.
Continue basting along the armscye. Be sure not to catch the pocket ends that are still loose. Smooth the fabric with your hands in the direction of the armscye.
Baste along the side seam, again smoothing the fabric towards the side and downwards as you go.
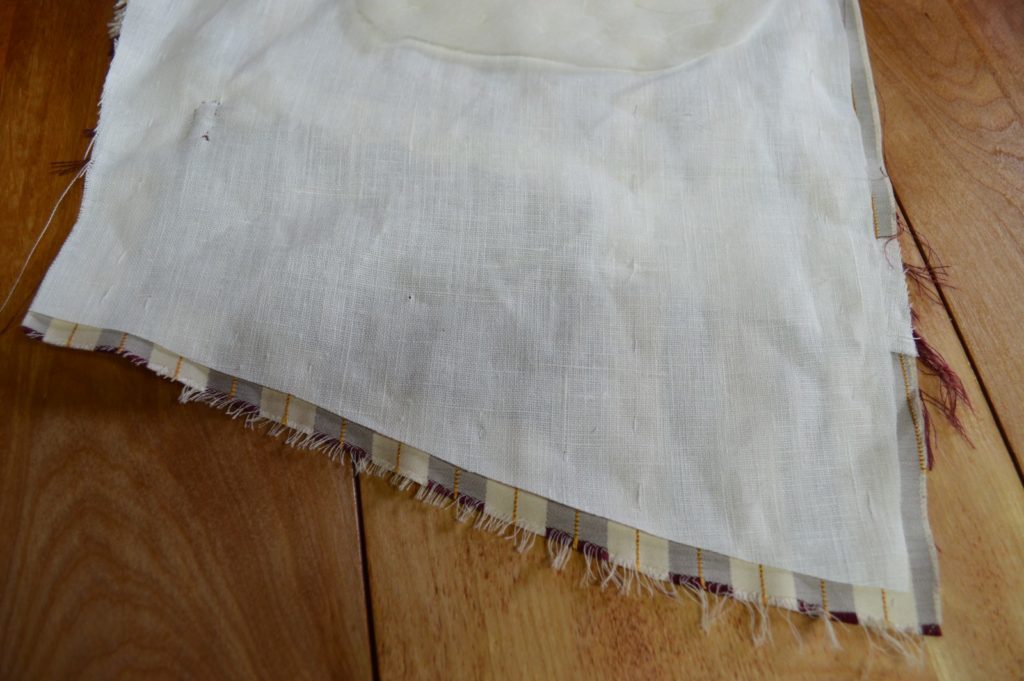
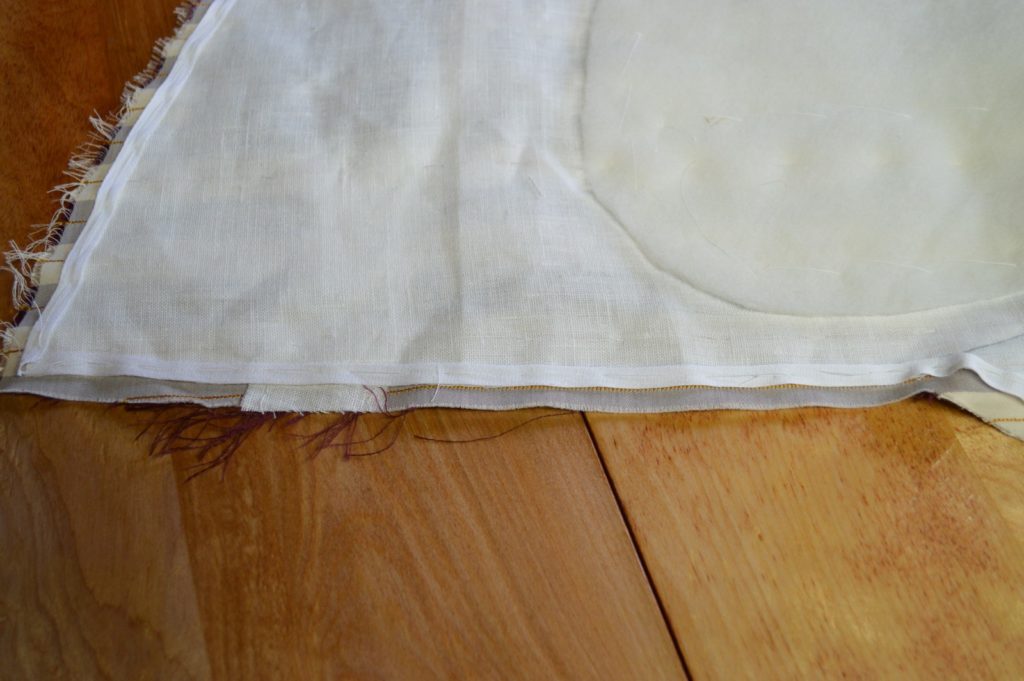
Baste along the bottom edge, stopping where the first row of basting stitches ended. Smooth the fabric towards the bottom.
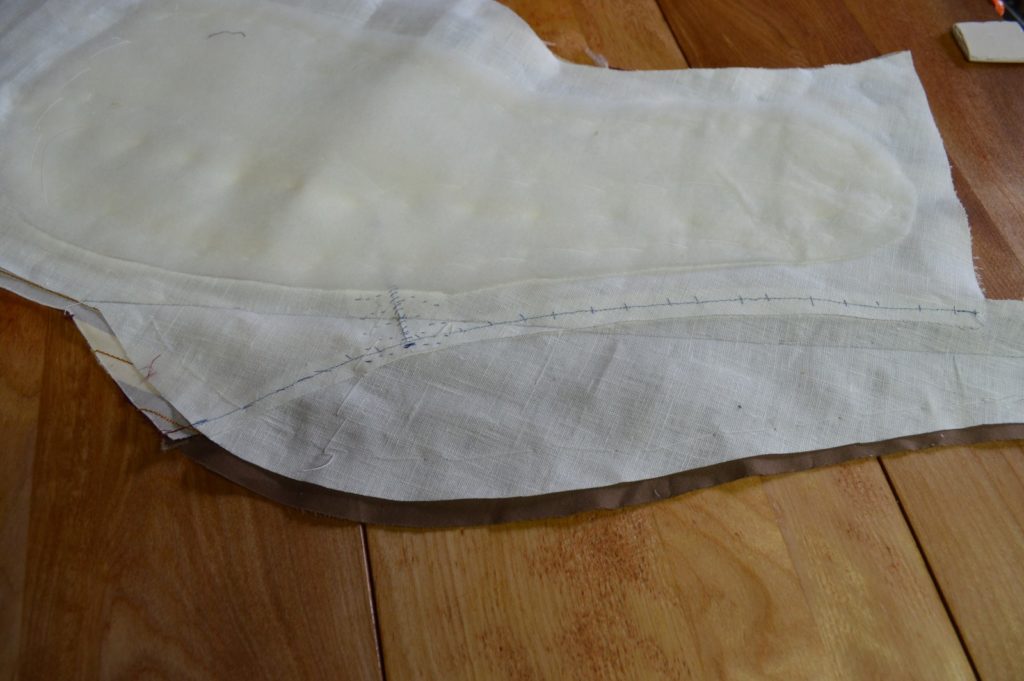
Start the third row of basting stitches at the waist, 1 inch from the waist, and 1 inch from the center front, working your way upwards. Sorry it’s so hard to see here.
When you get to the roll line, continue basting directly on the roll line. The more accurate you are here the better.

Continue basting along the roll line all the way to the end of the collar.
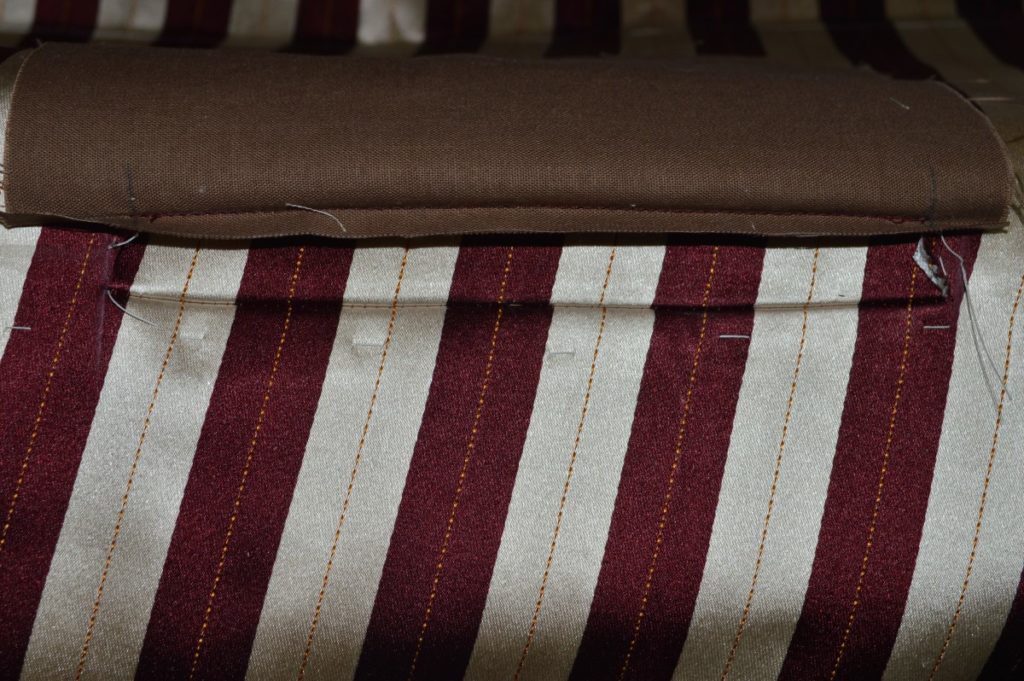
Now roll the collar over into its final position, using the basting stitches as a guide. Work another line of basting stitches from just behind the roll line, near the area where the dart is, out to within 1 inch of the collar edge. This ensure the right amount of fabric is distributed where it is needed, when the collar is rolled over.
Working from the roll line to the other end of the collar, and with the collar rolled into its final position, baste along the collar 1 inch from the edge.
In the photo, I stopped at the end of the shoulder, but keep basting all the way to the end of the collar.
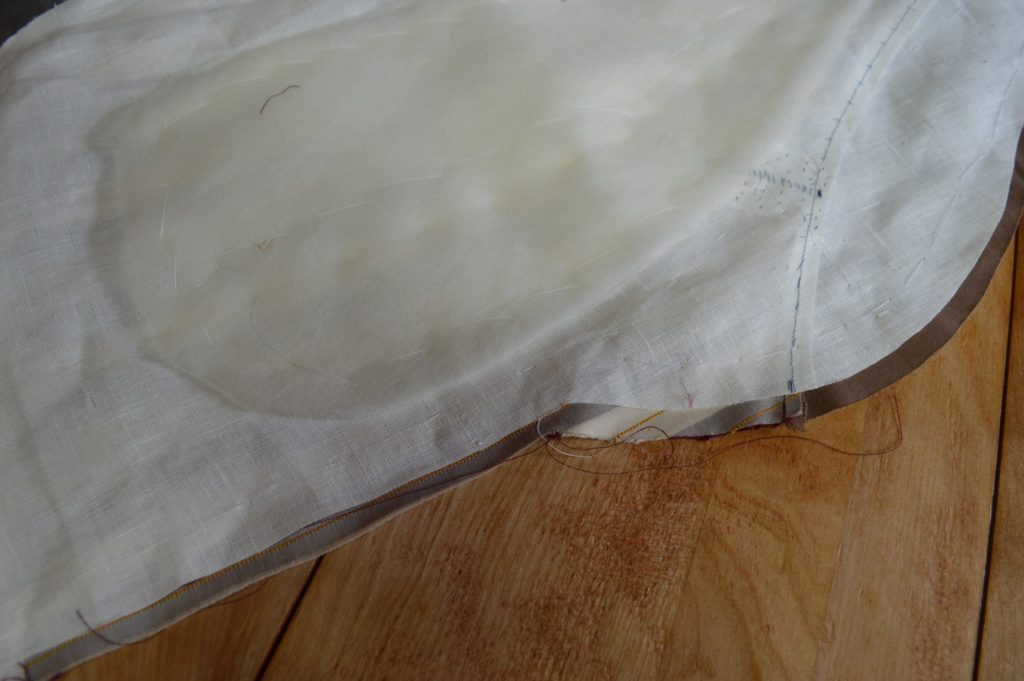
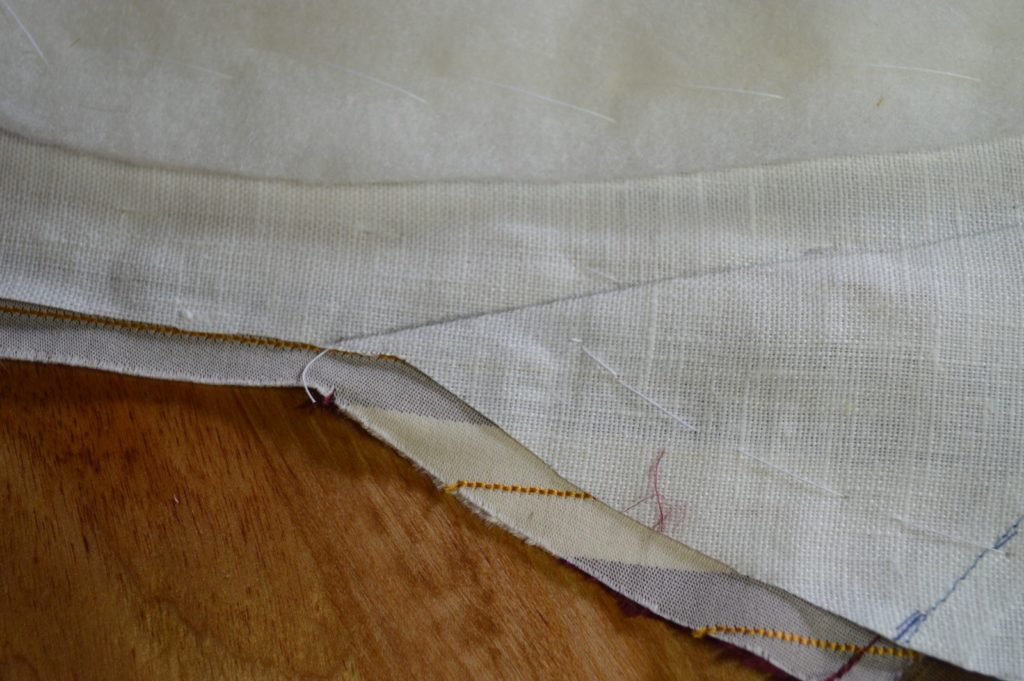
It’s hard to see here, but when you open up the collar again, you will see that it has a tendency to pull upwards, which is a very good sign that you have basted correctly. When the waistcoat is being worn, the collar will then hug the body.
Here you can see more clearly the collar being pulled up from the table. This completes the basting portion of installing the canvas.
Padding
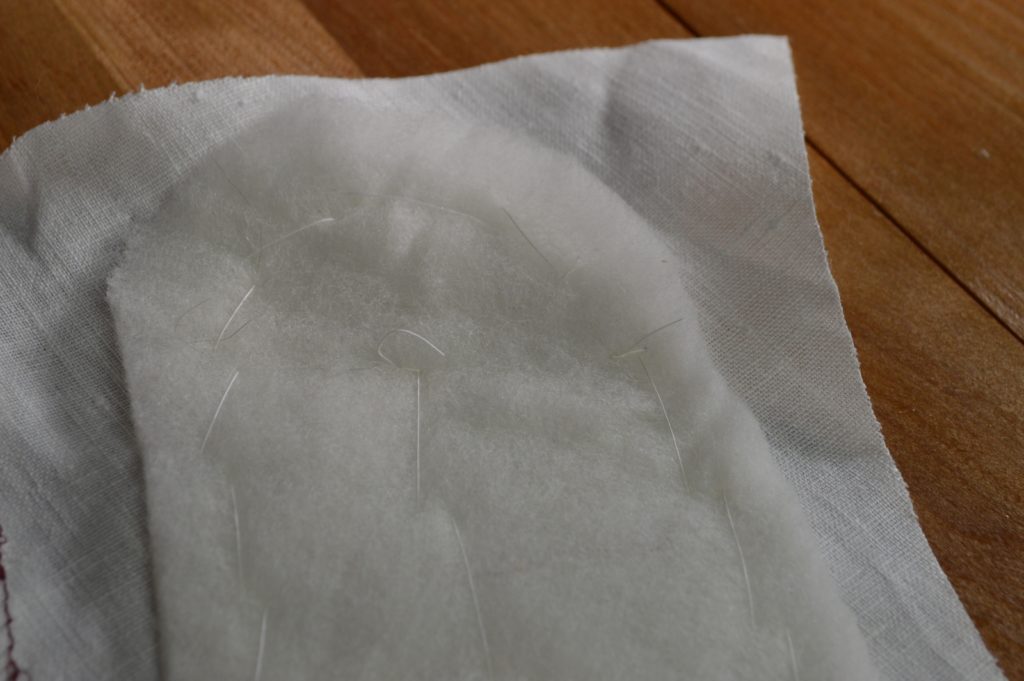
Padding the waist is important in order to give shape to the chest area. I like to start with a rectangular piece of wool batting that is roughly the size of the canvas area that I want to pad. Gradually cut away the excess until you are happy with the fit. I like to keep my padding one inch away from the armscye and shoulder seams, and about the same distance from the roll line. Other than that, the padding may differ widely between body shapes and sizes. You’ll have to determine where the padding will look best in your case.
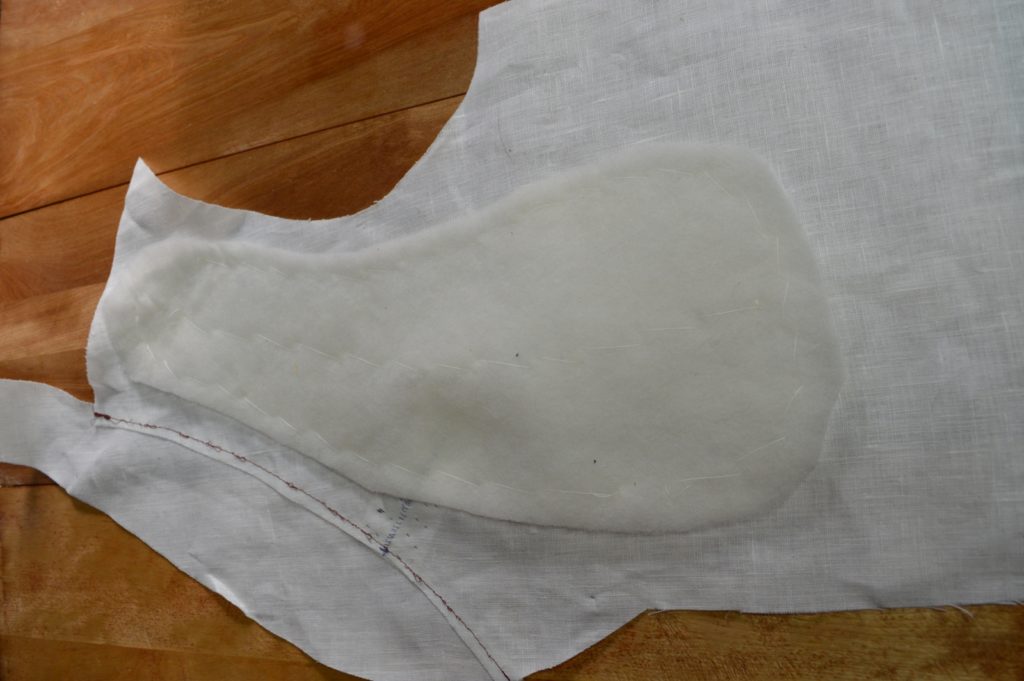
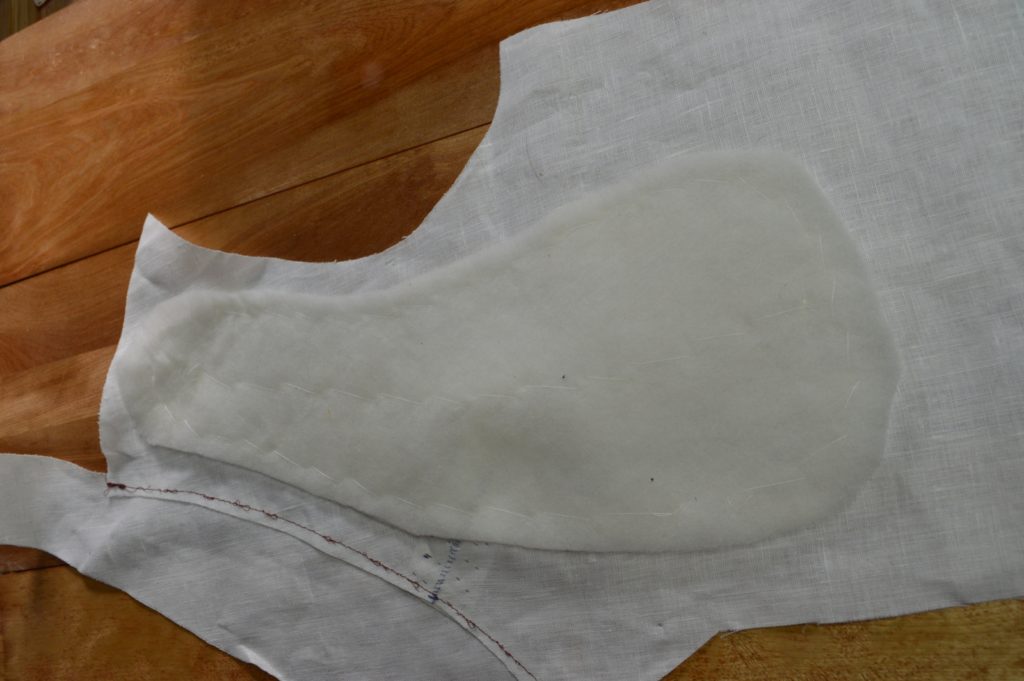
Lay the padding on the wrong / inside edge of the canvas. Then baste down the middle to secure it in place.
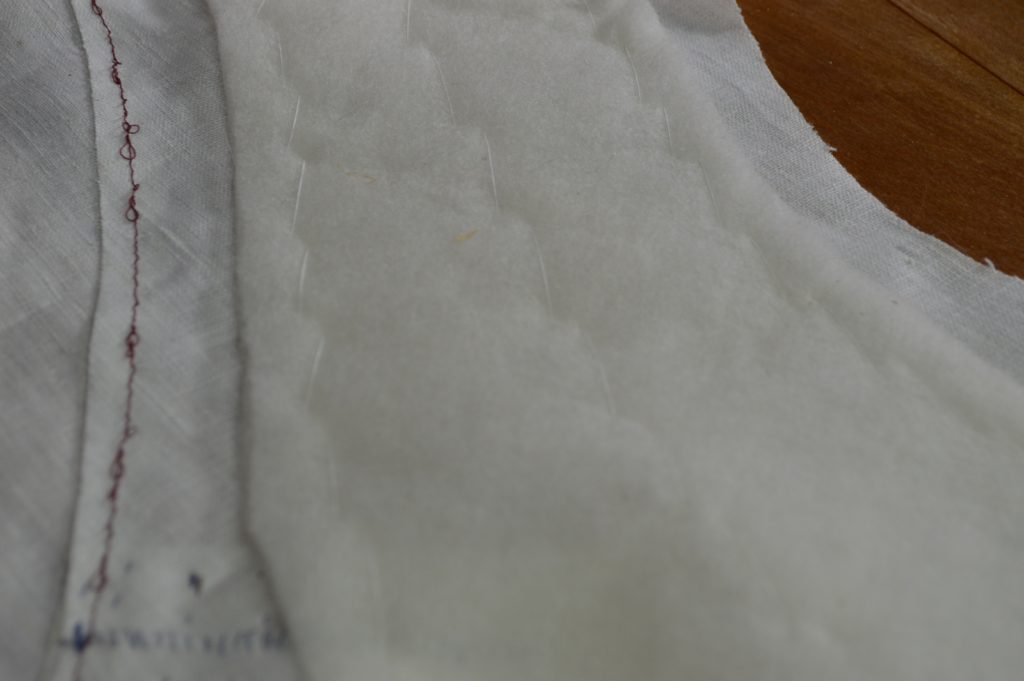
Then continue basting around the outer edge of the padding.
Use a diagonal basting stitch for the greatest strength.
Constructing the Canvas
Now that the pockets are complete, it is time to work on the canvas. I like to use a firm linen, about 5 or 6 ounces in weight, which compliments the weight of the silk perfectly. The pattern used is exactly the same, with no changes except for the darts, which should be made one inch longer – the width of the opening remains the same, however.
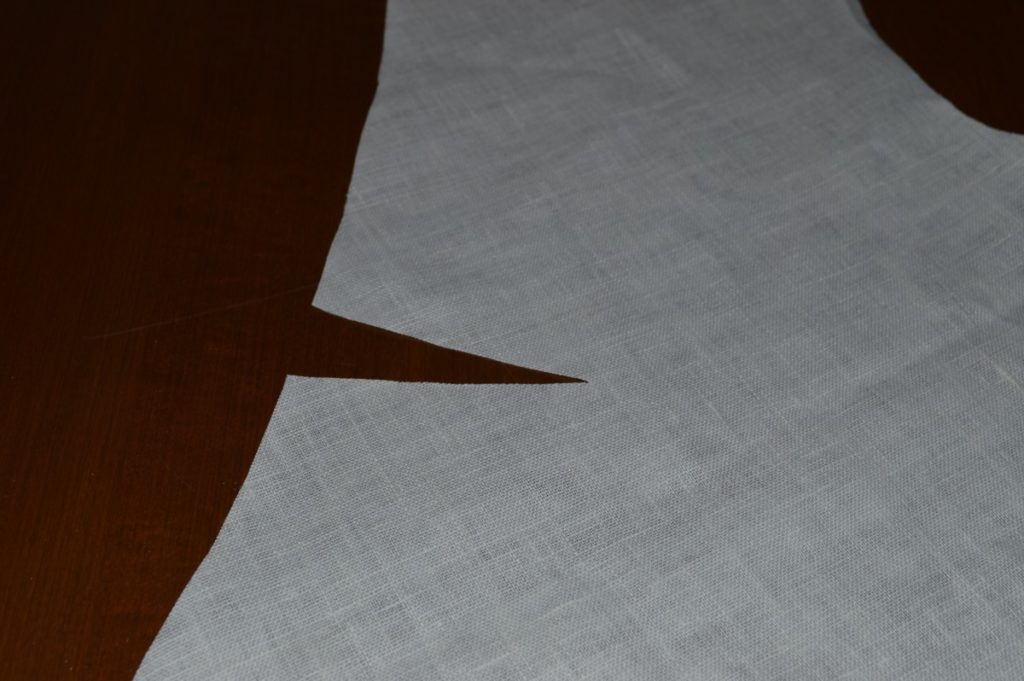
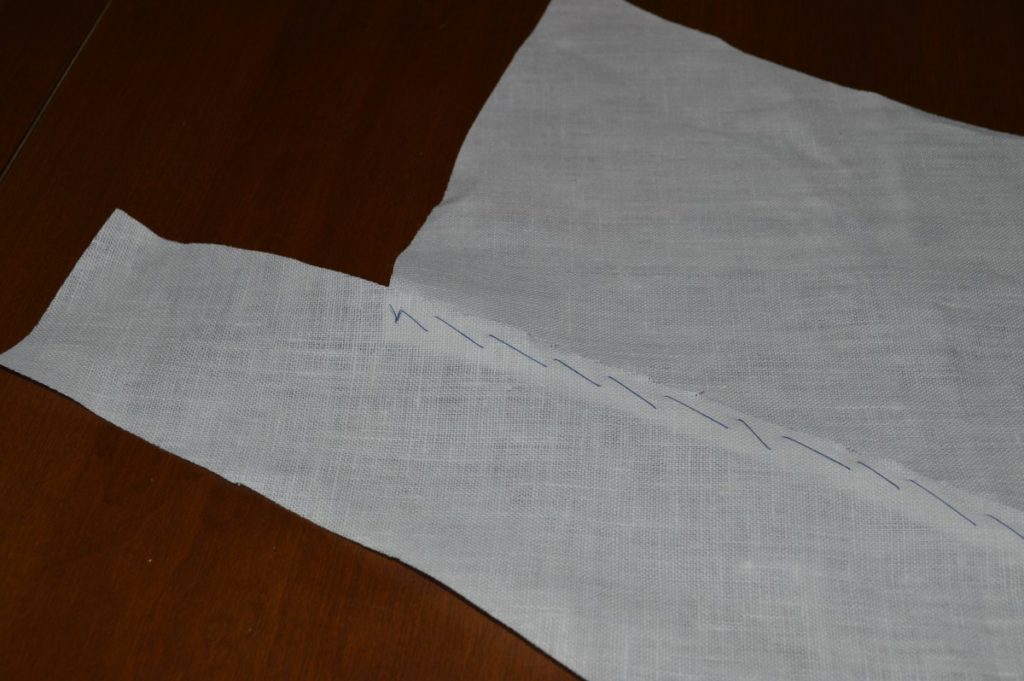
Here is my dart, cut out on the seam line. If you compared this to the forepart, the dart here is one inch longer. This smooths out the transition between the two darts, avoiding a pointed look which can sometimes happen, especially in silks and linens.
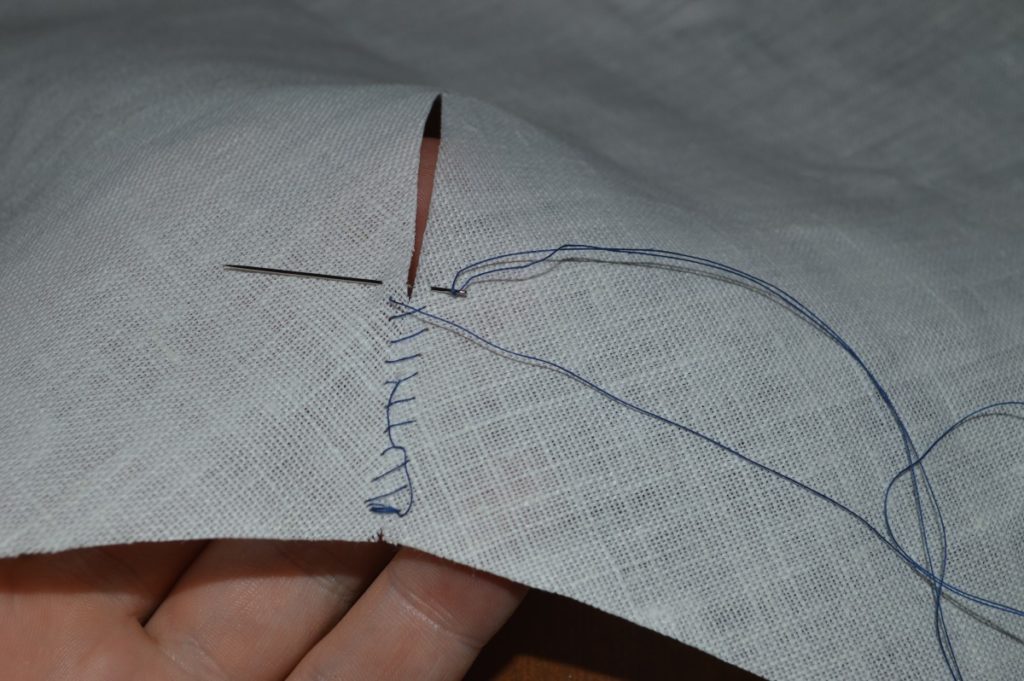
Now we will use a technique called stoting to secure the raw edges of the dart together. Begin at the edge of the dart, to ensure the ends are lined up, and make three or four stitches in place to secure, catching a couple of threads on each side of the dart.
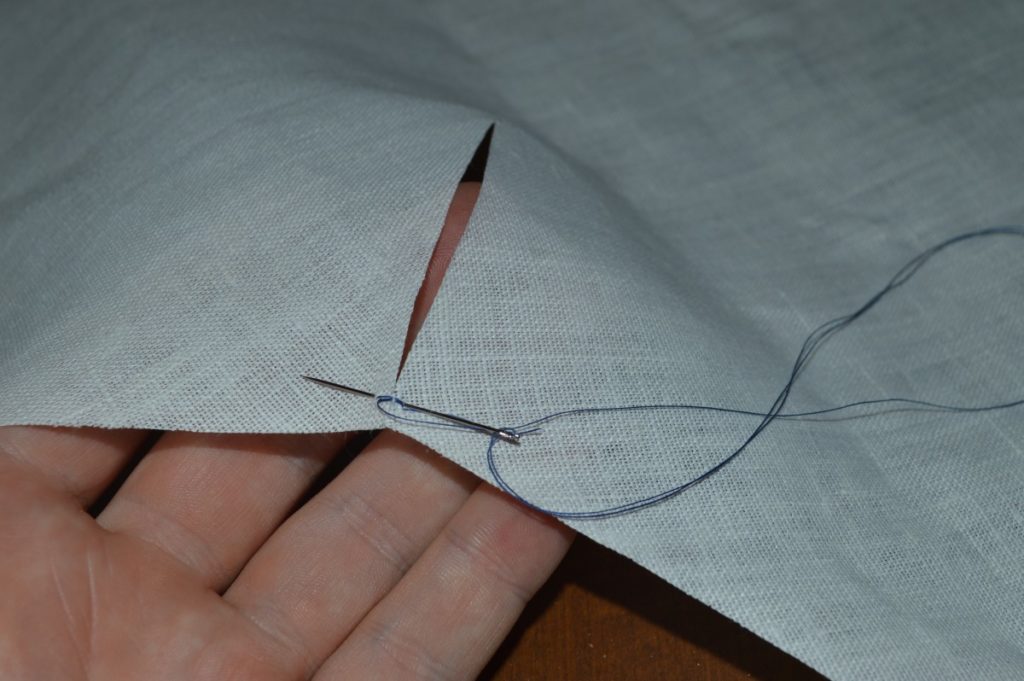
Continue making a horizontal stitch across the dart, closing it up as you go, as shown.
When you get to the point of the dart, fasten off the thread with a few stitches in place.
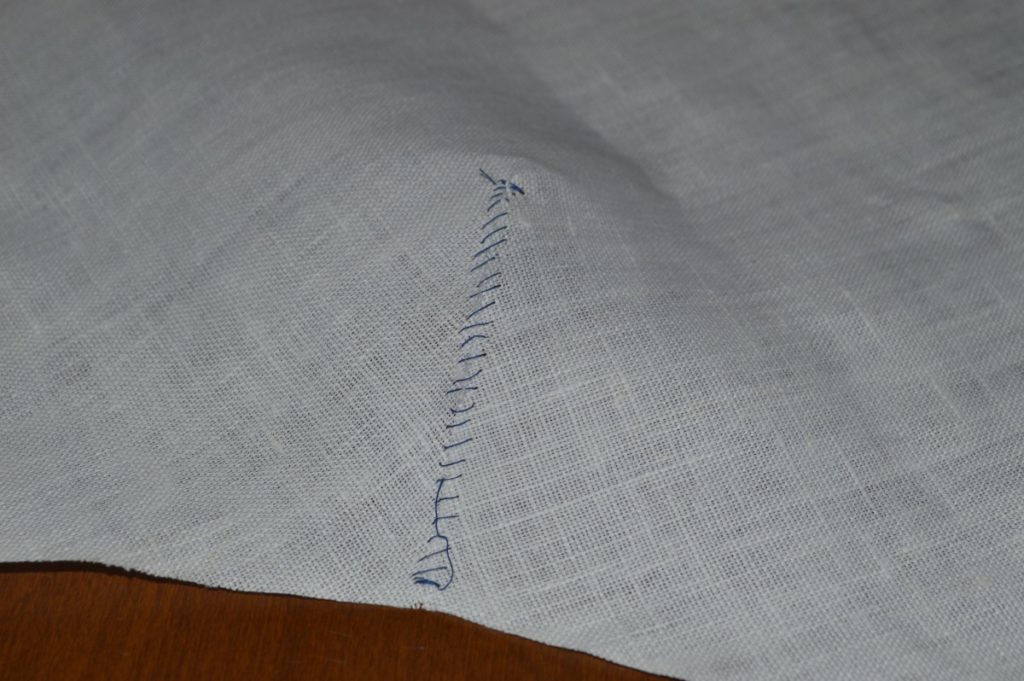
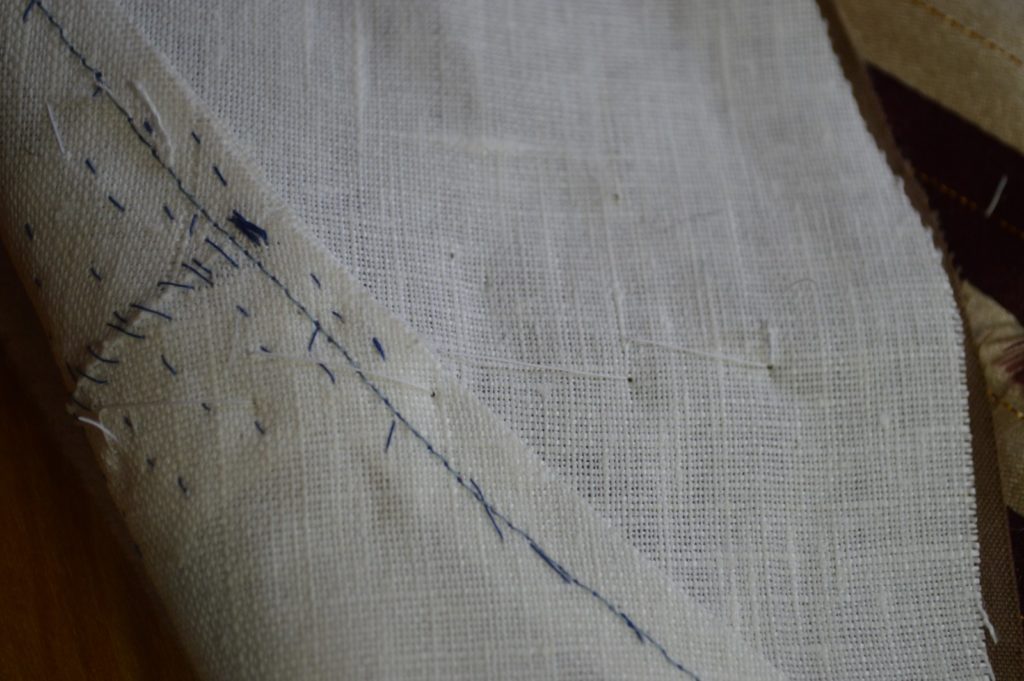
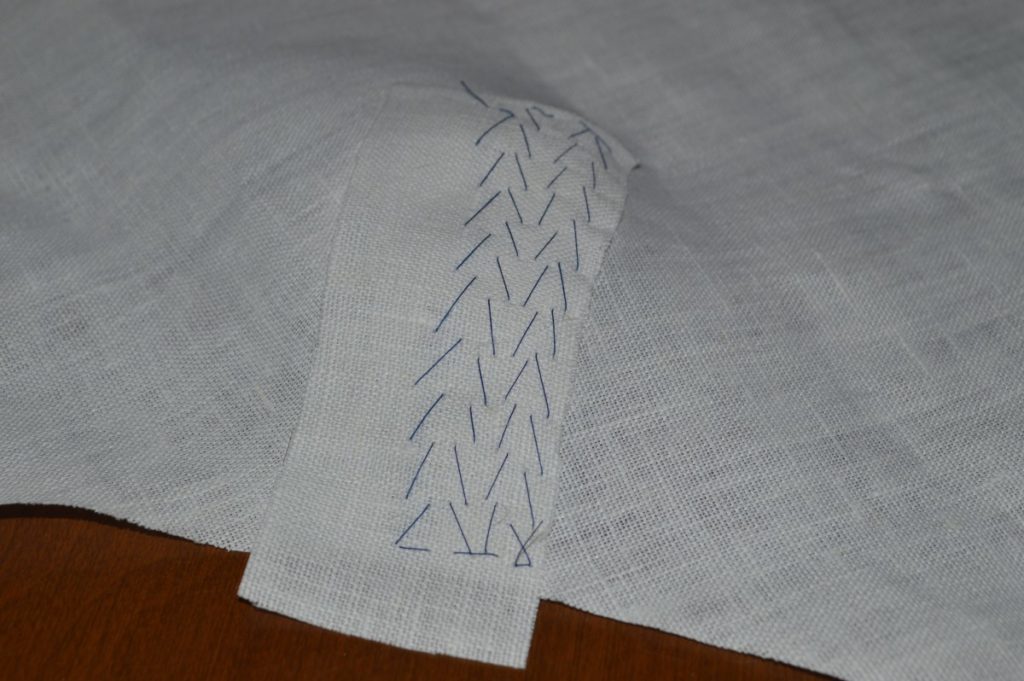
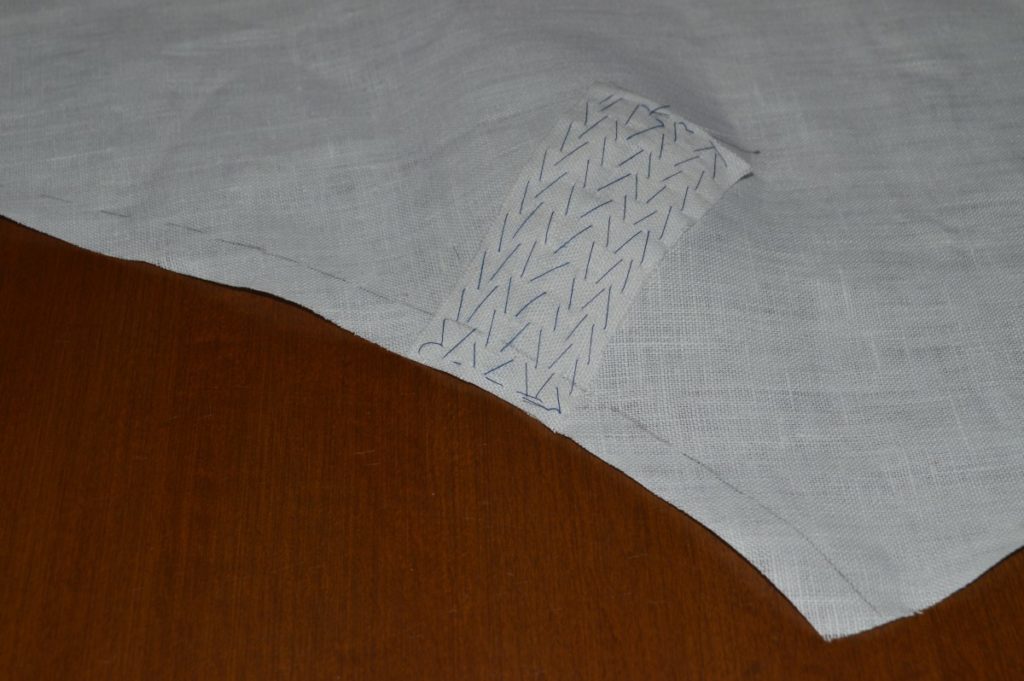
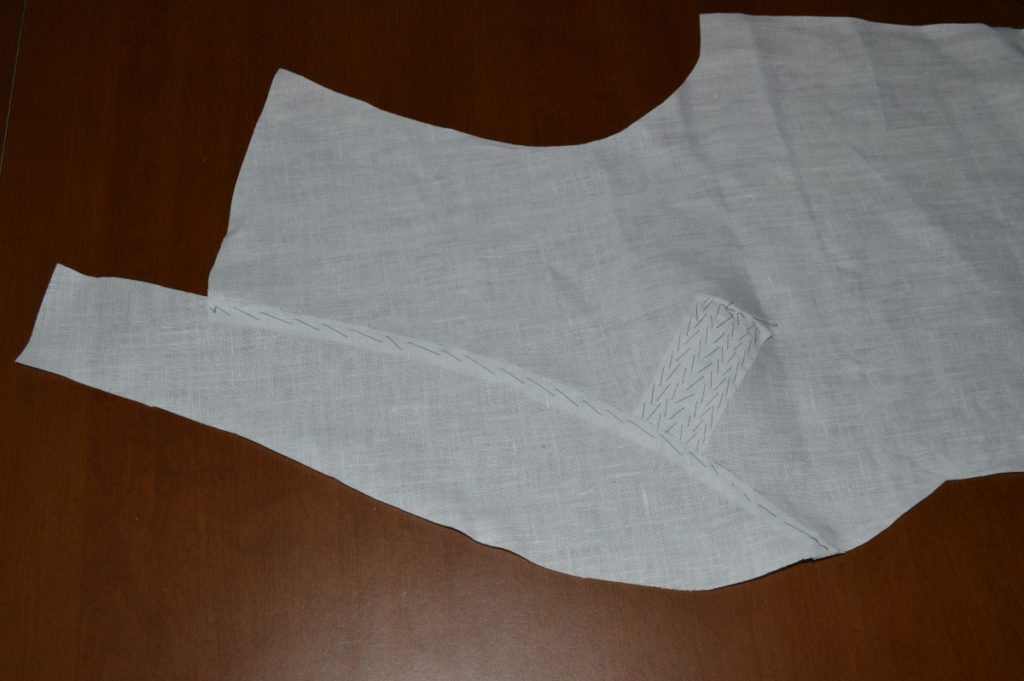
Now if you thought this looked weak, you would be correct. We must strengthen the dart with a piece of linen, about 1 1/2 inches wide by about an inch longer than the dart.
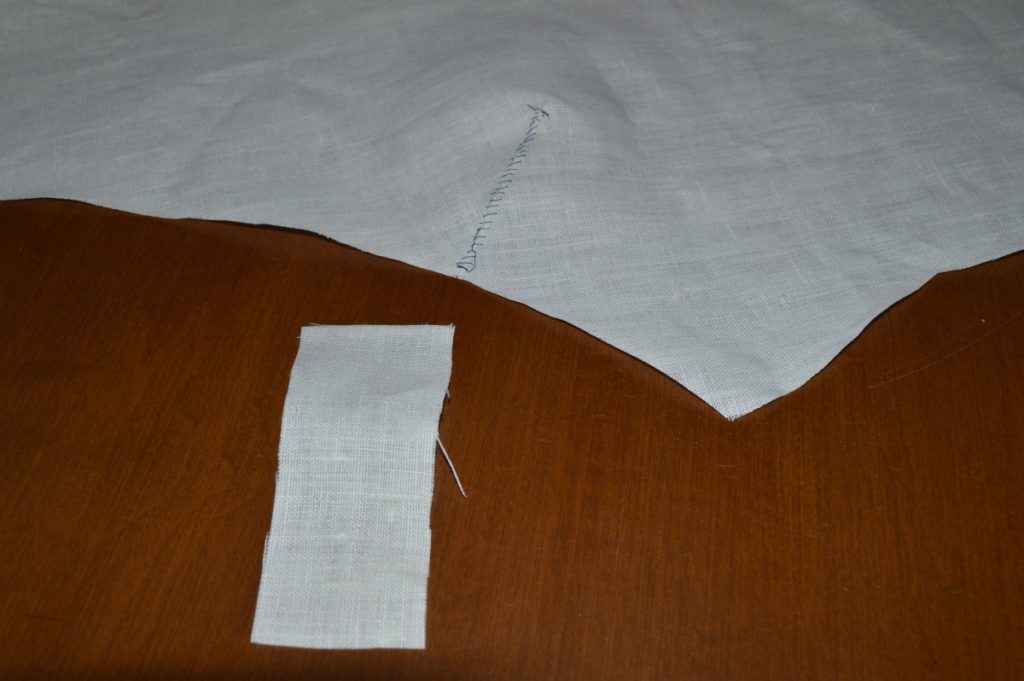
Place the linen piece on the canvas, centered over the dart, extending a little bit off of the edge of the neck seam as shown. Work a row of padding stitches directly over the dart, catching both sides of the dart if you can.
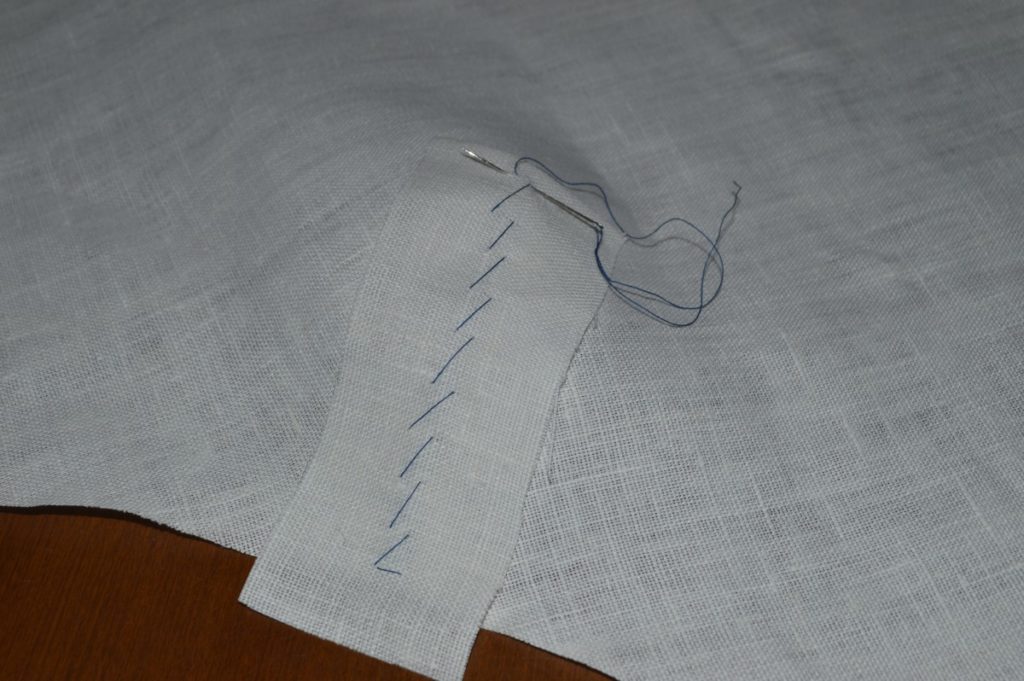
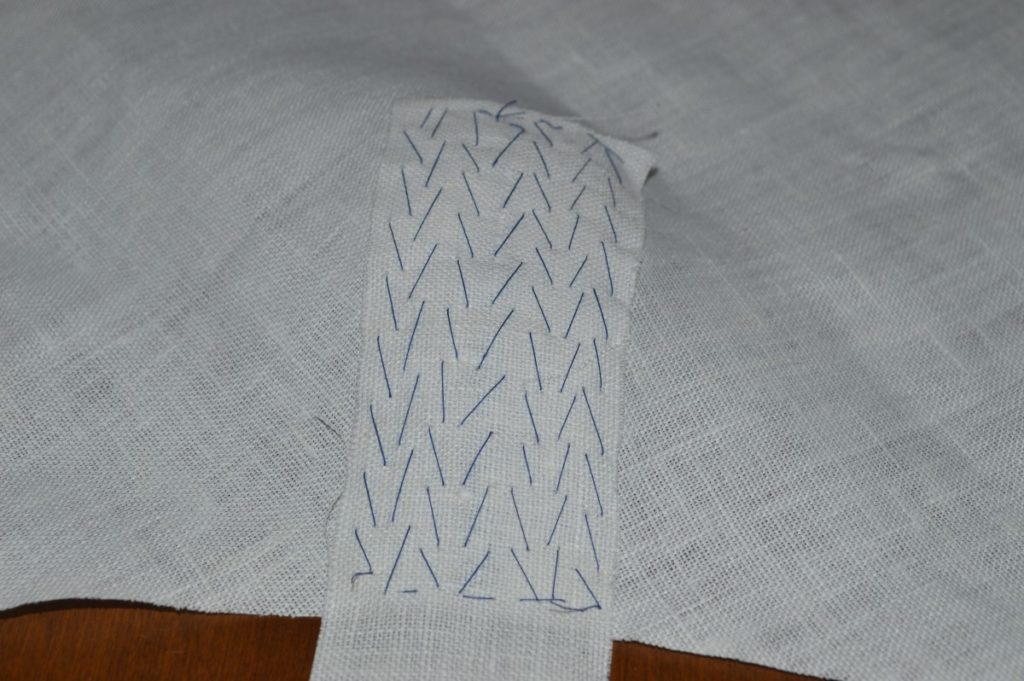
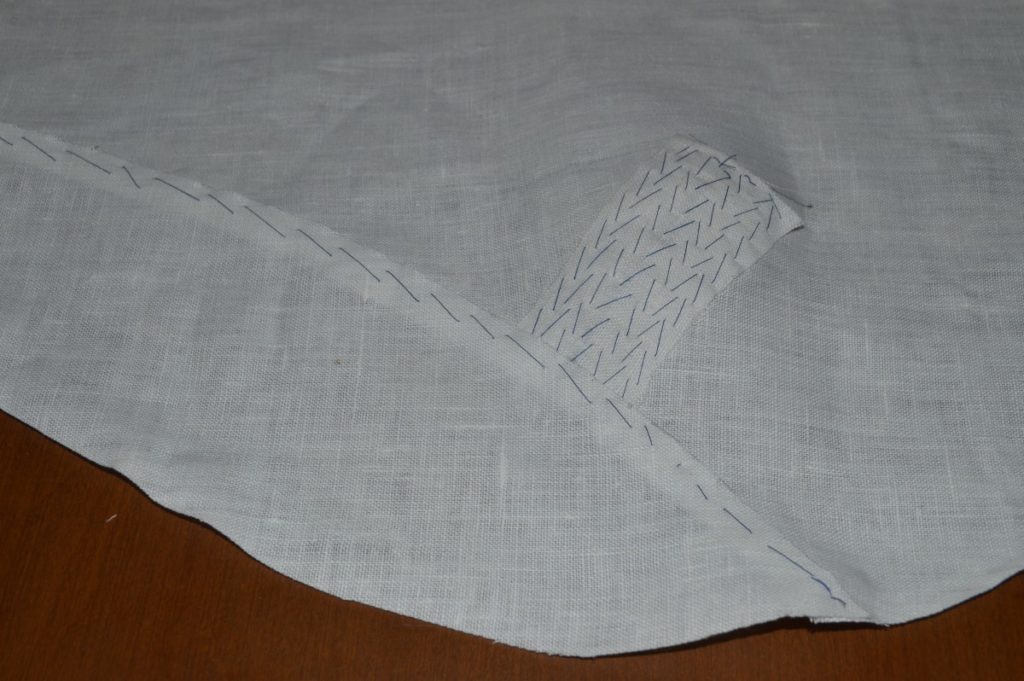
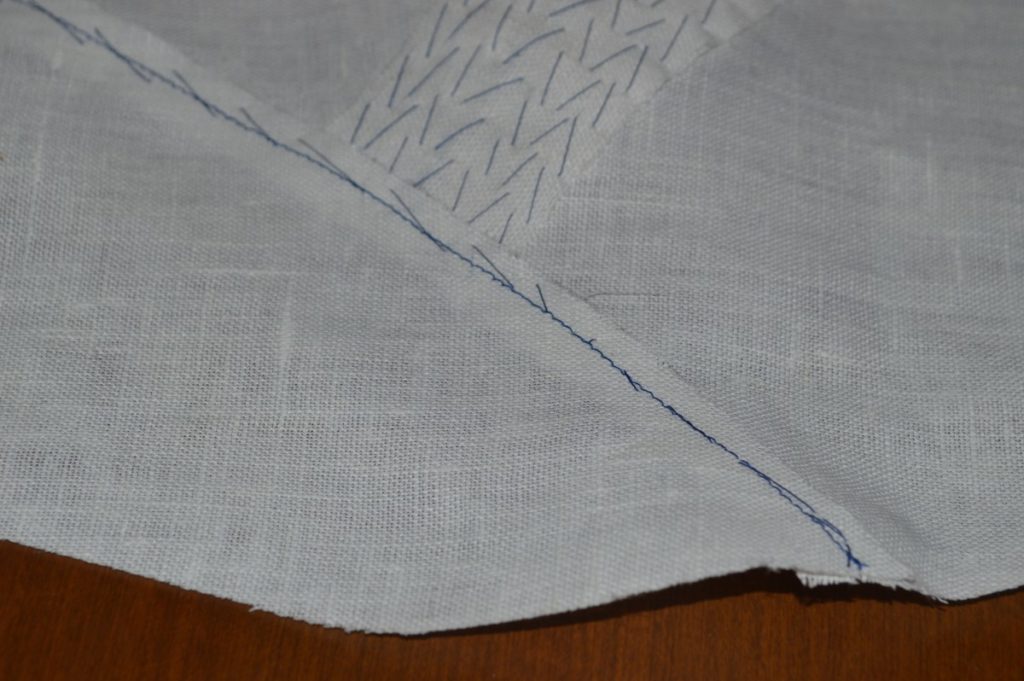
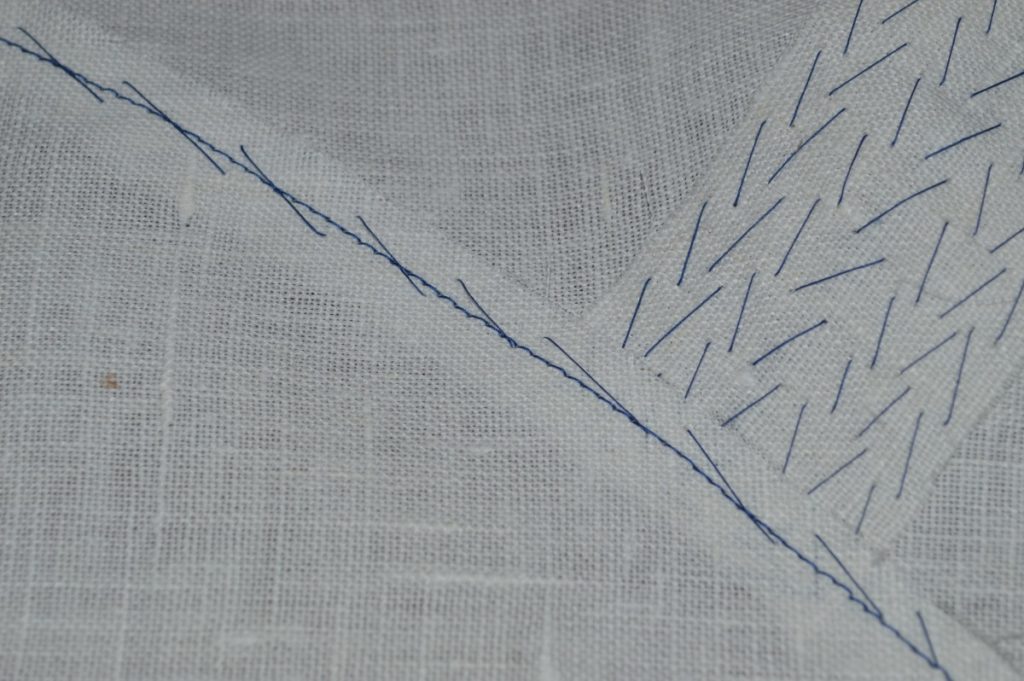
Continue the padding stitches along one side of the dart, securing the linen in place. You can subtly shape the fabric into a gentle curve with your fingers as you go, but this should be done naturally, not forced or exaggerated.
Pad stitch the other side of the linen in the same manner.
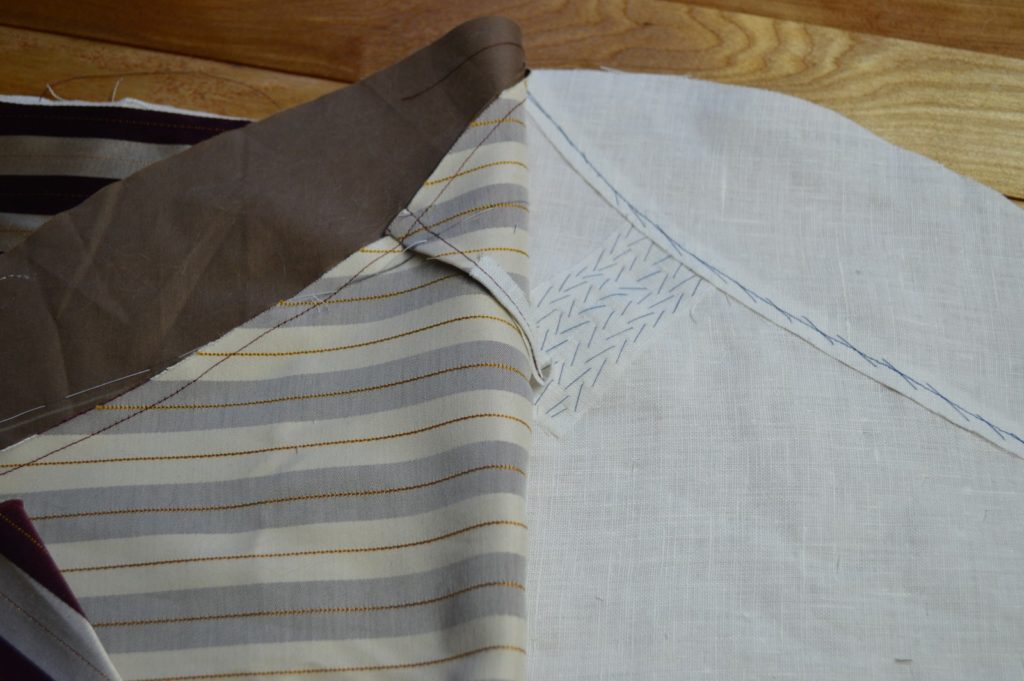
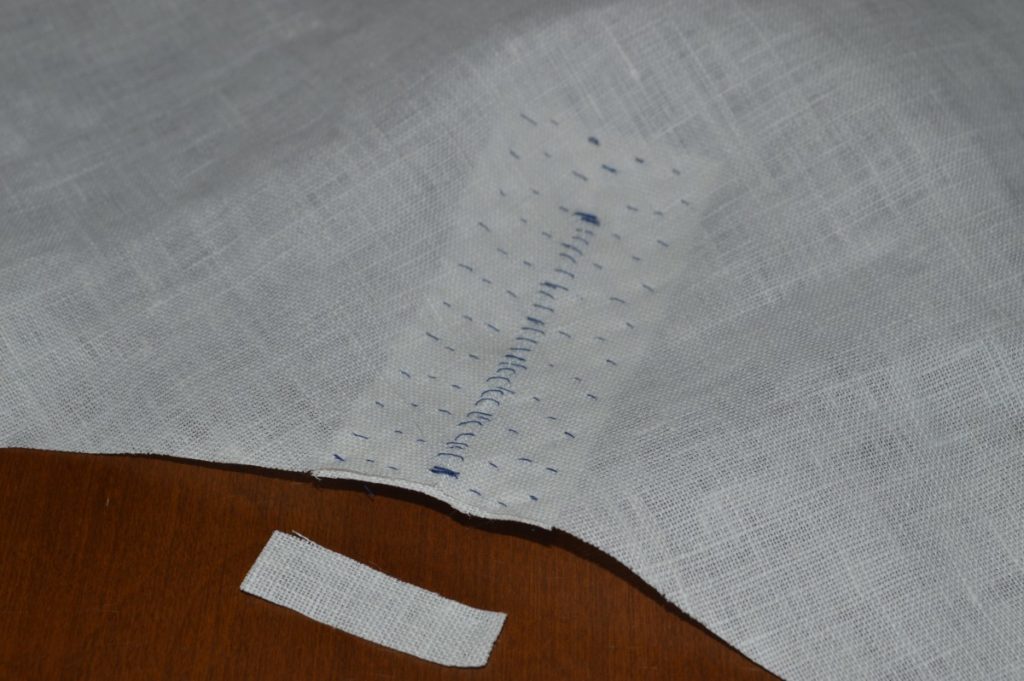
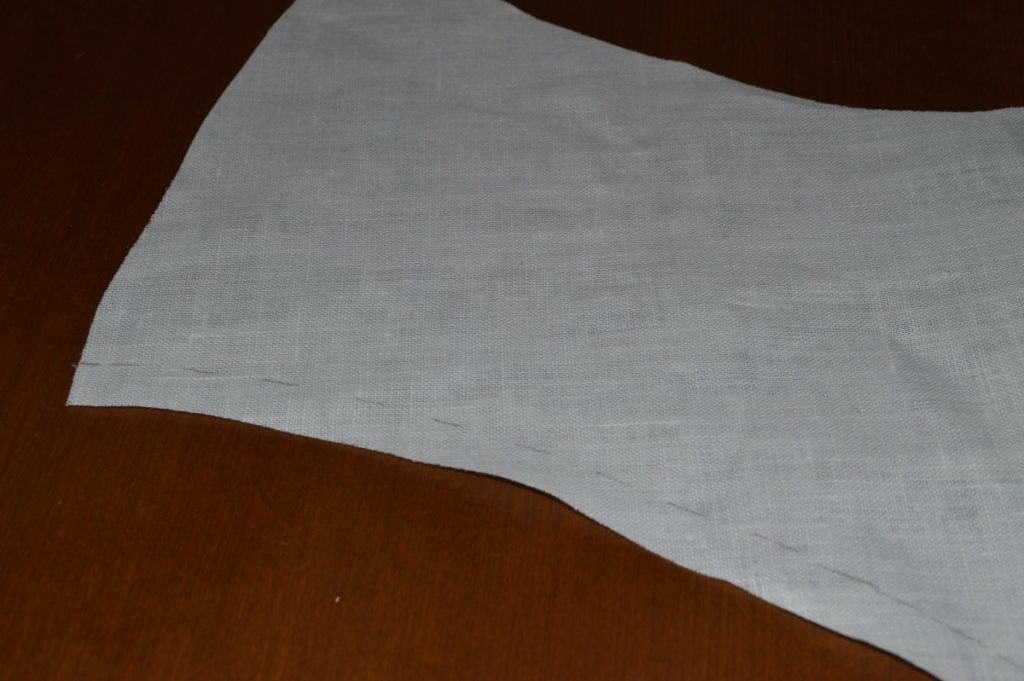
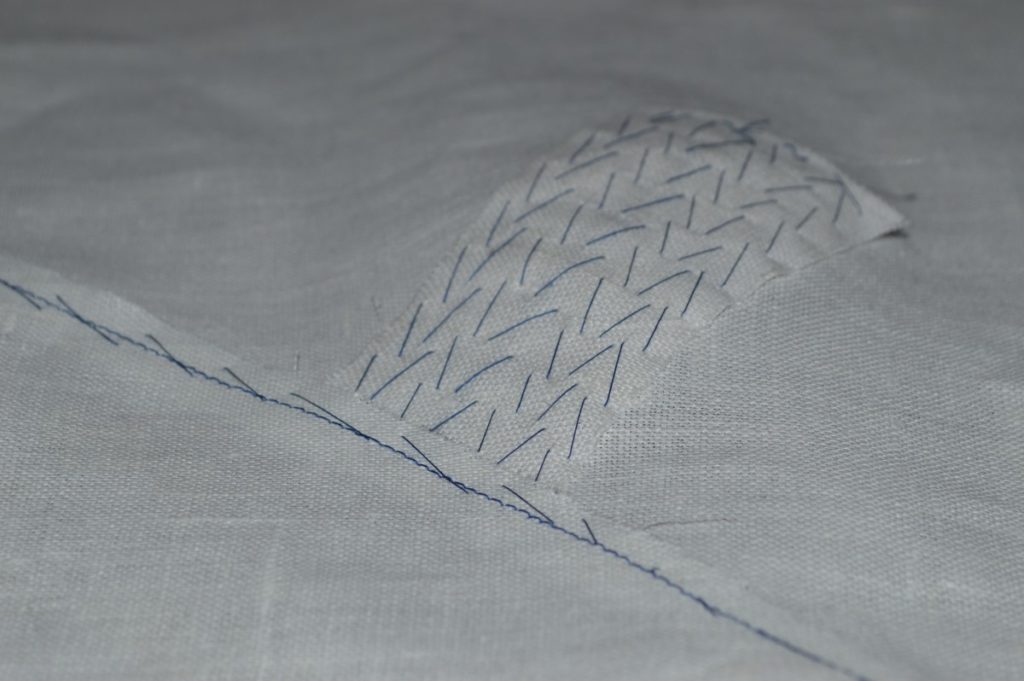
Turn over the canvas and trim the excess linen from the edge. You can see in this photo the hollow that has been created from the combination of the dart and pad stitching.
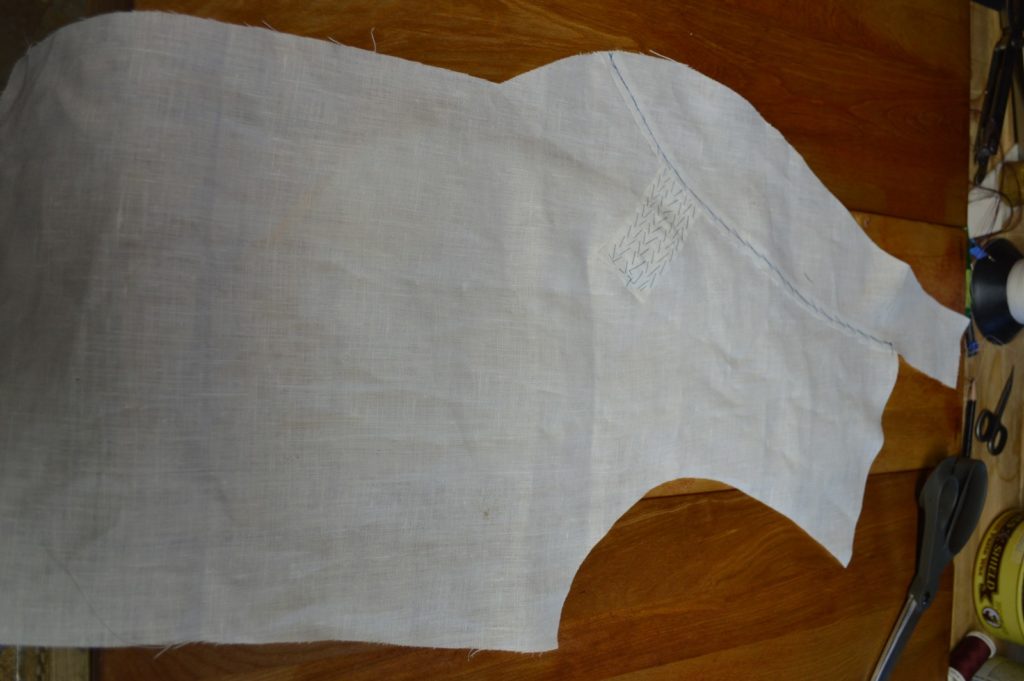
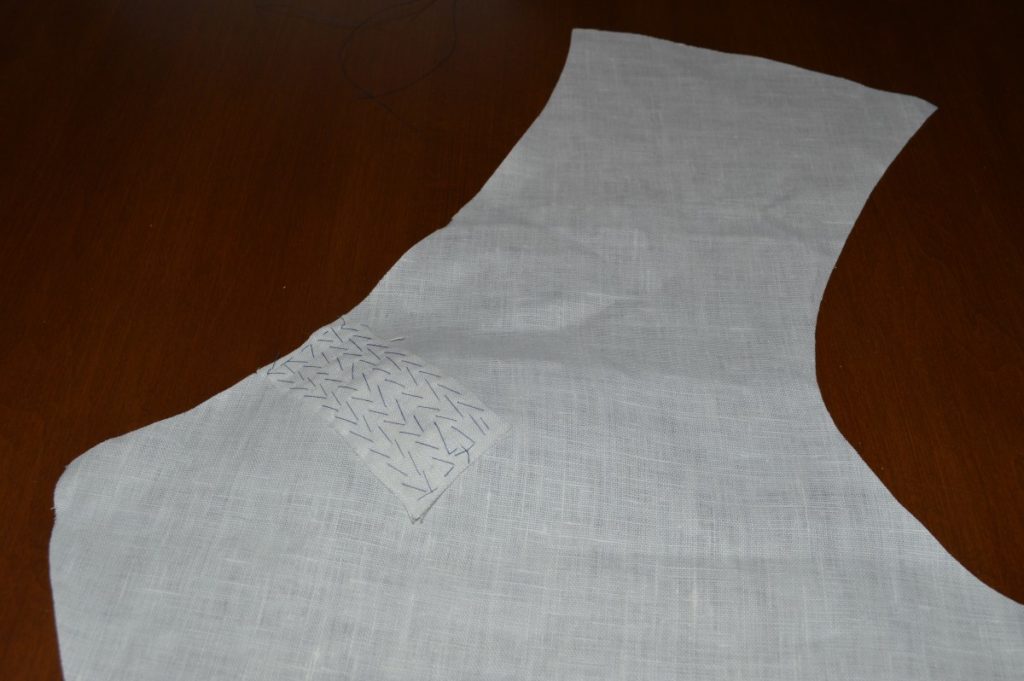
And here is the completed dart from the right side of the canvas.
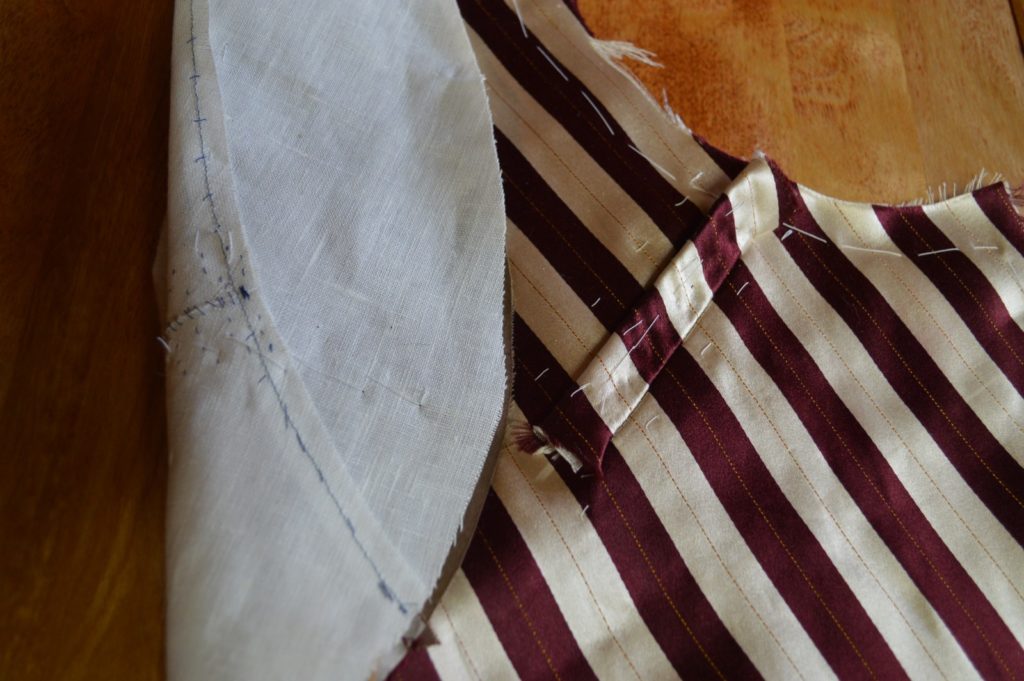
To attach the collar canvas to the chest canvas accurately, it’s helpful to draw a guideline on the canvas along the neck seam. This should be two seam widths from the edge, or 1/2 inch in my case.
Baste the collar onto the forepart canvas, aligning the raw edge of the collar with the guideline you just drew. I started off using a straight basting stitch but that was not holding well enough, so I switched to a padding style of stitch which worked much better. Remember that the pieces are shaped differently so they will need some manipulation with your fingers to get everything in place.
Machine or backstitch along the center, 1/4 inch from each edge, as shown. Notice the shape that appears in the front of the collar, this is from a dart that is formed thanks to the way we drafted the pattern.
This completes the canvas construction. Next up, padding and installing the canvas!
Completing the Welt Pocket
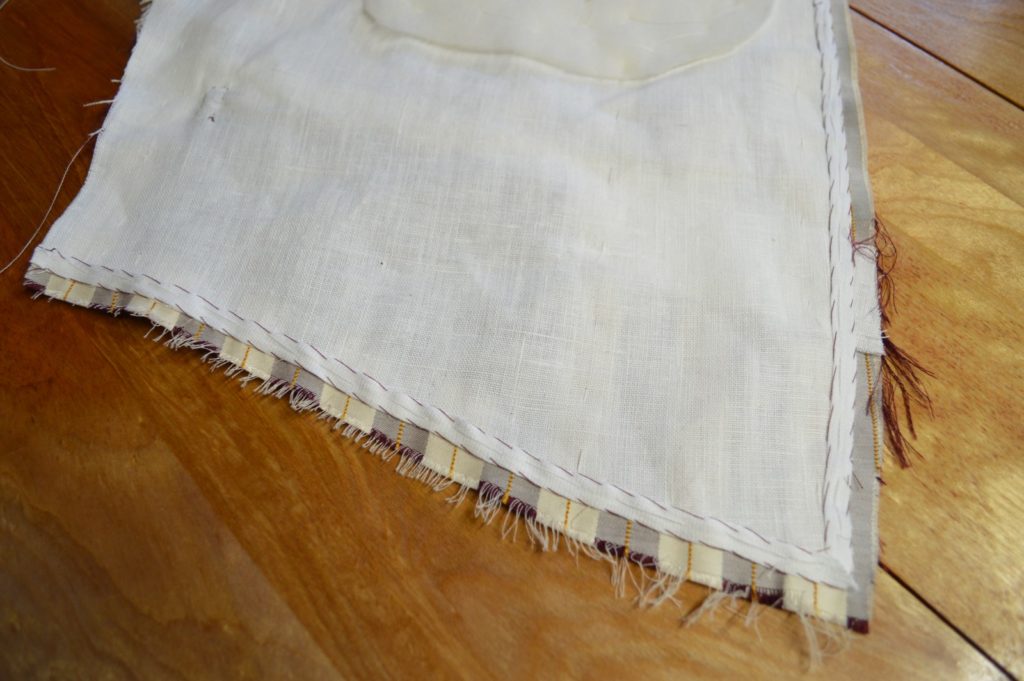
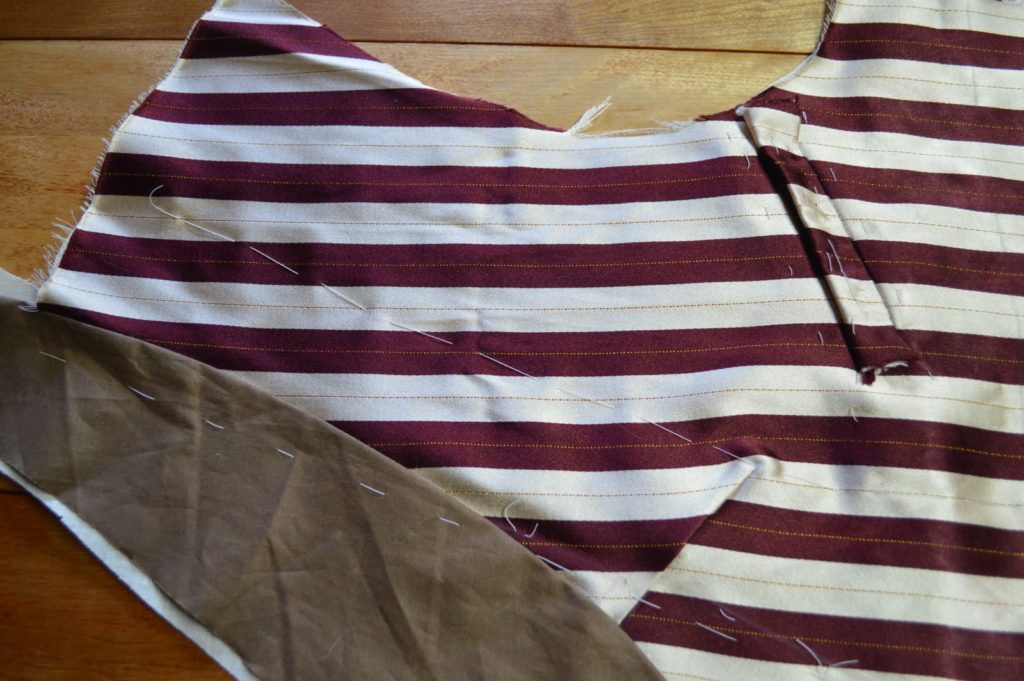
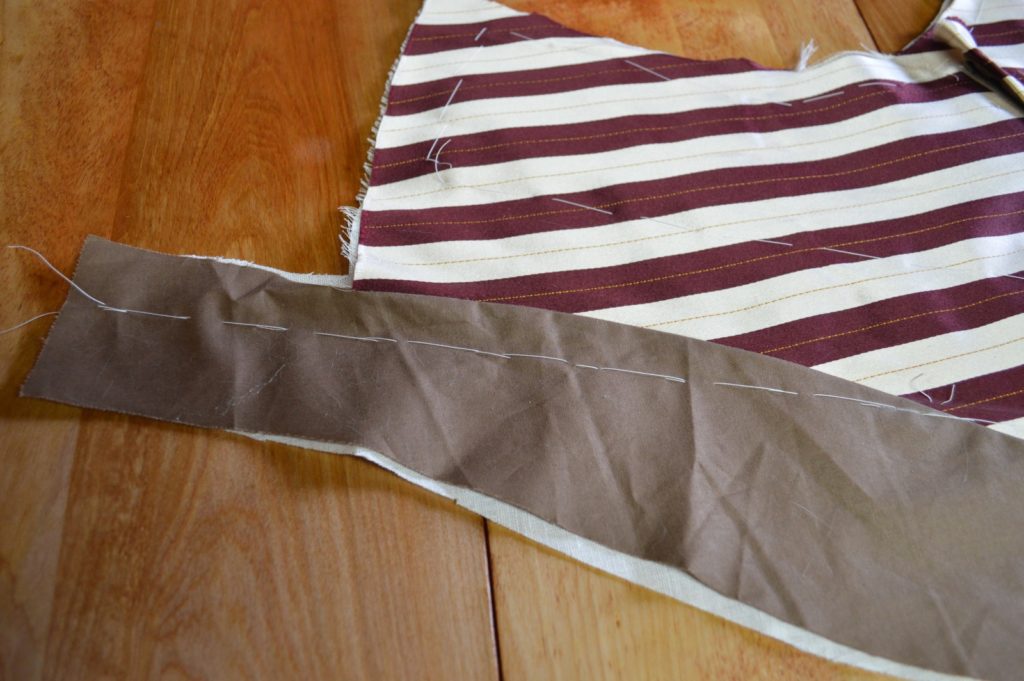
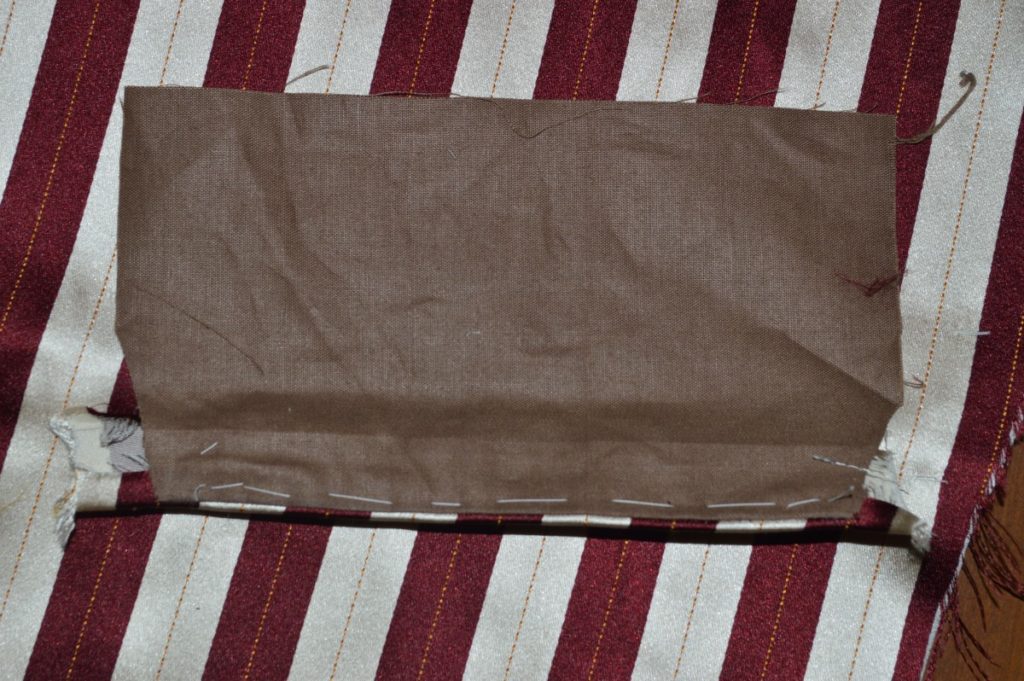
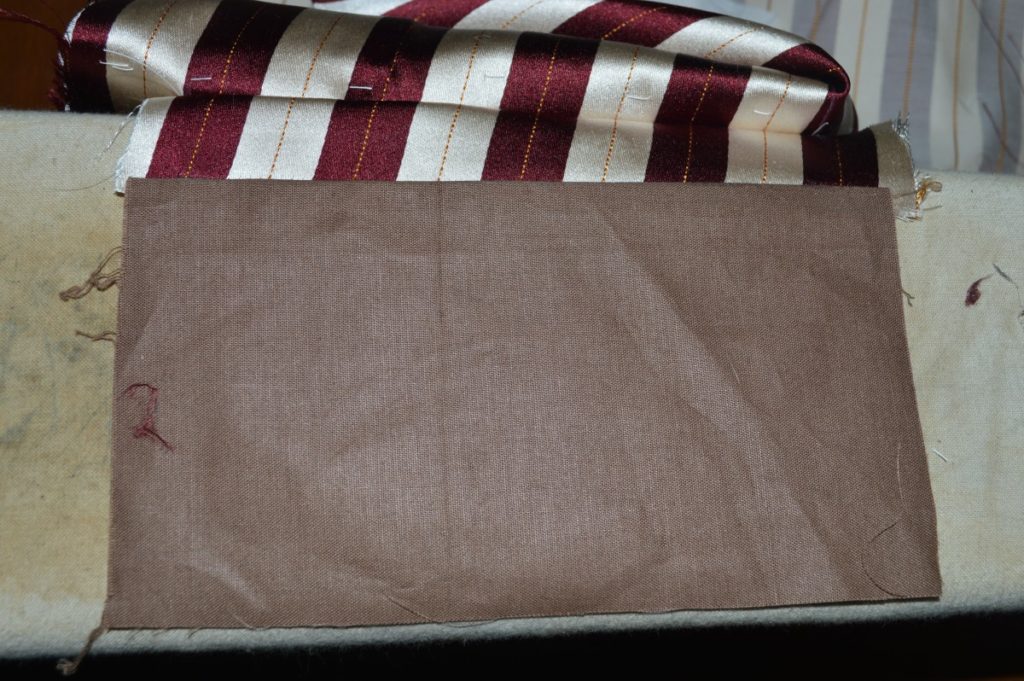
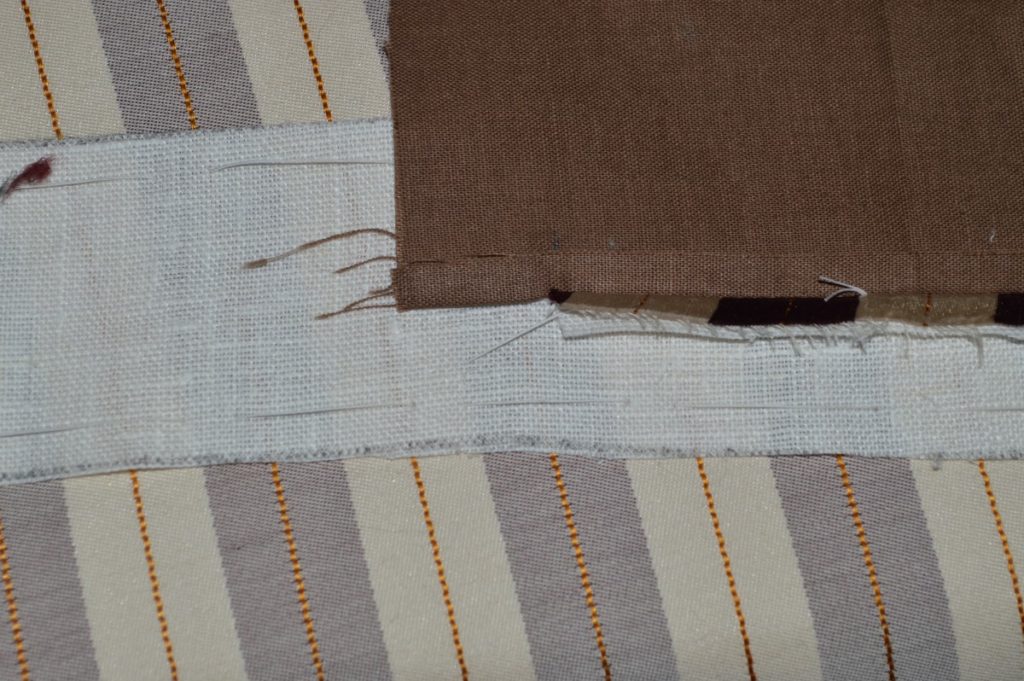
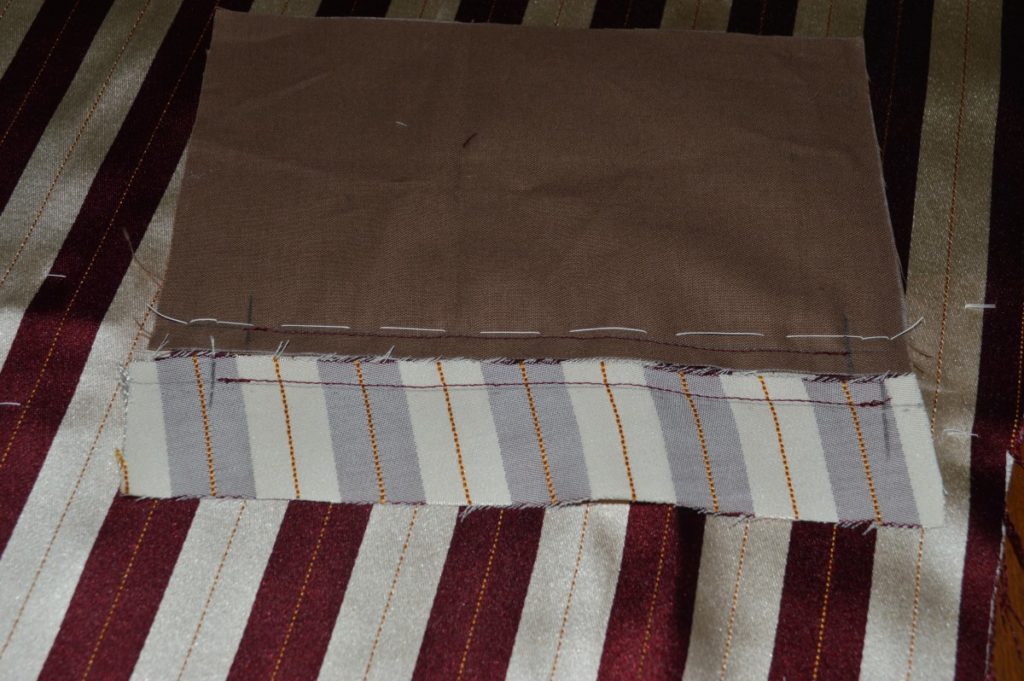
With the pocket pressed, lay the forepart on the table with the upper pocket bag on the wrong side, and the welt and lower pocket bag on the outside.
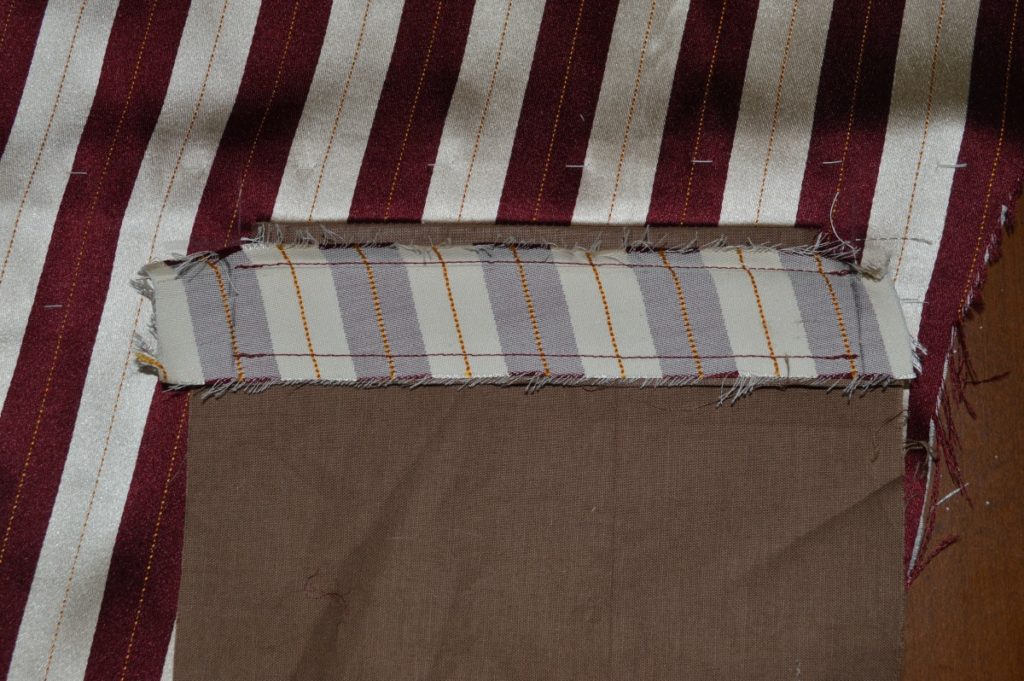
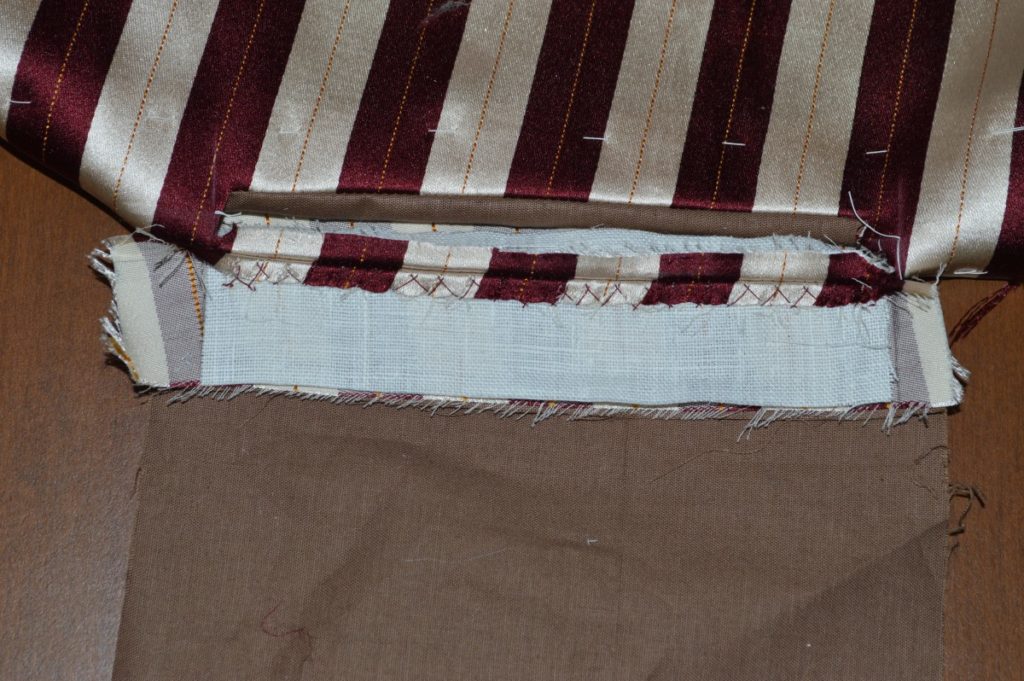
Cut a piece of linen the width of the finished pocket (5 inches in my case), and the same height as the welt, subtracting one seam allowance. Lay this piece of linen on the welt as shown, just touching the stitch line that holds the welt to the forepart. This will give strength and support to the finished welt.
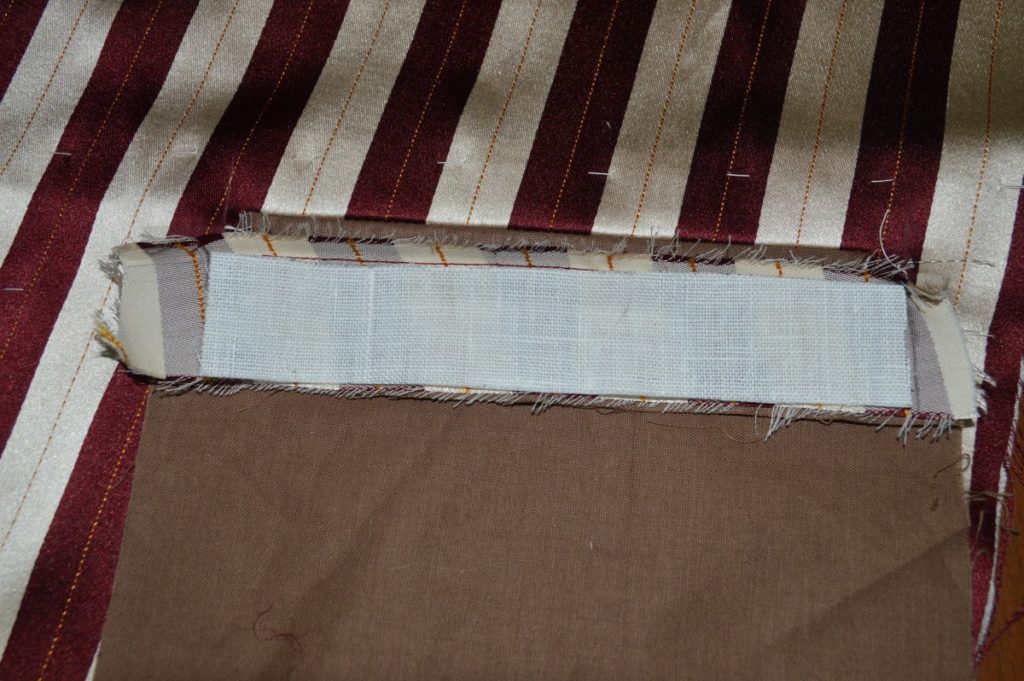
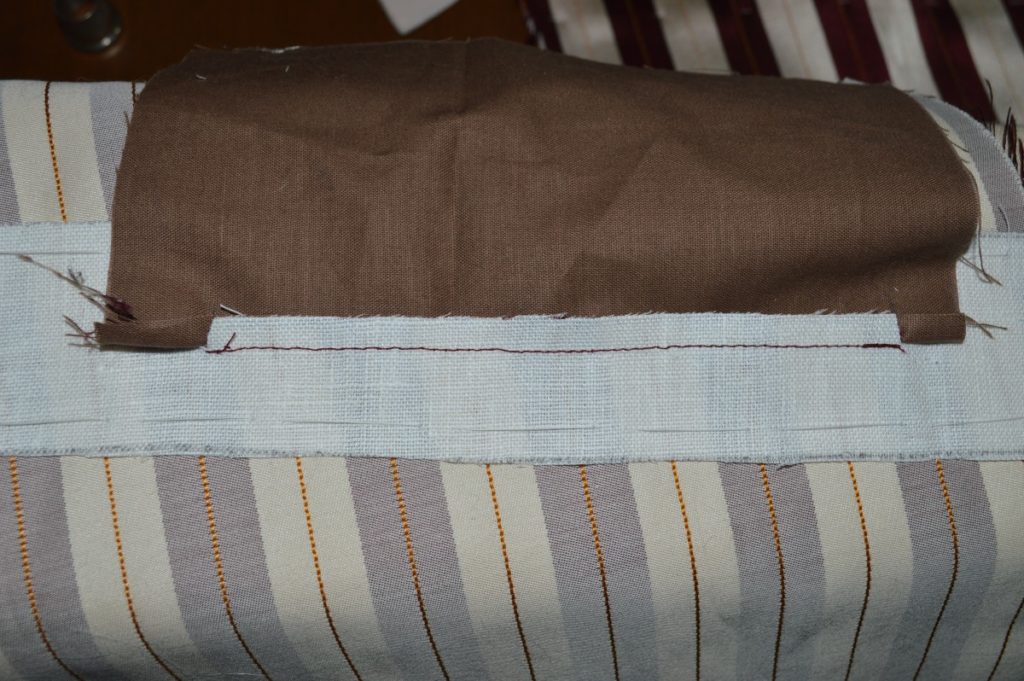
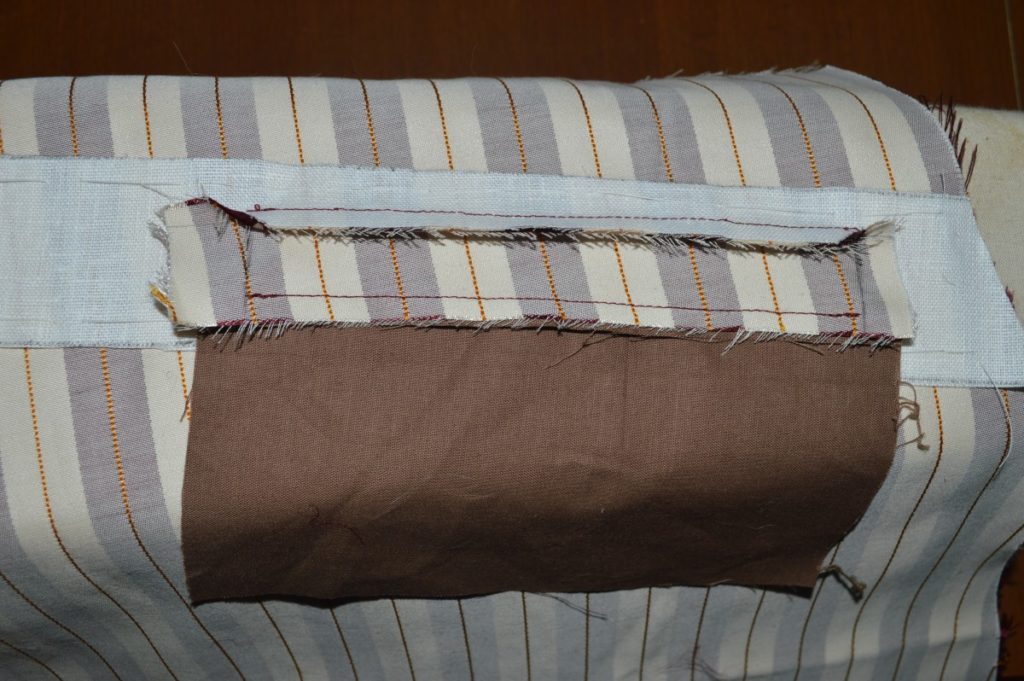
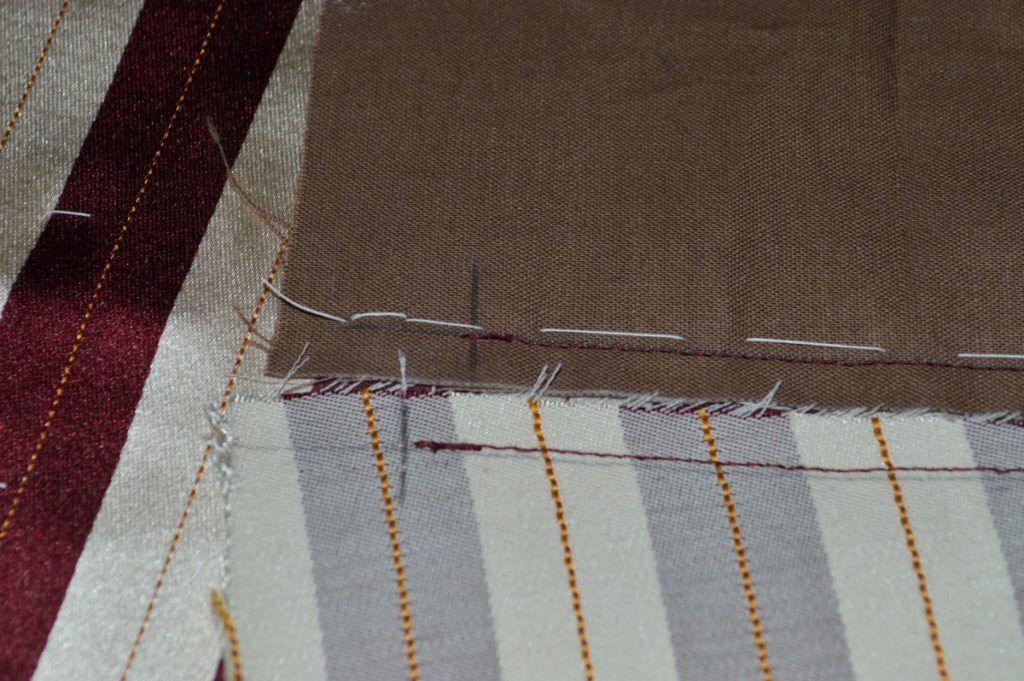
Baste the linen to the welt layer underneath, making sure not to catch the forepart.
Here’s what everything will look like from the right side of the welt.
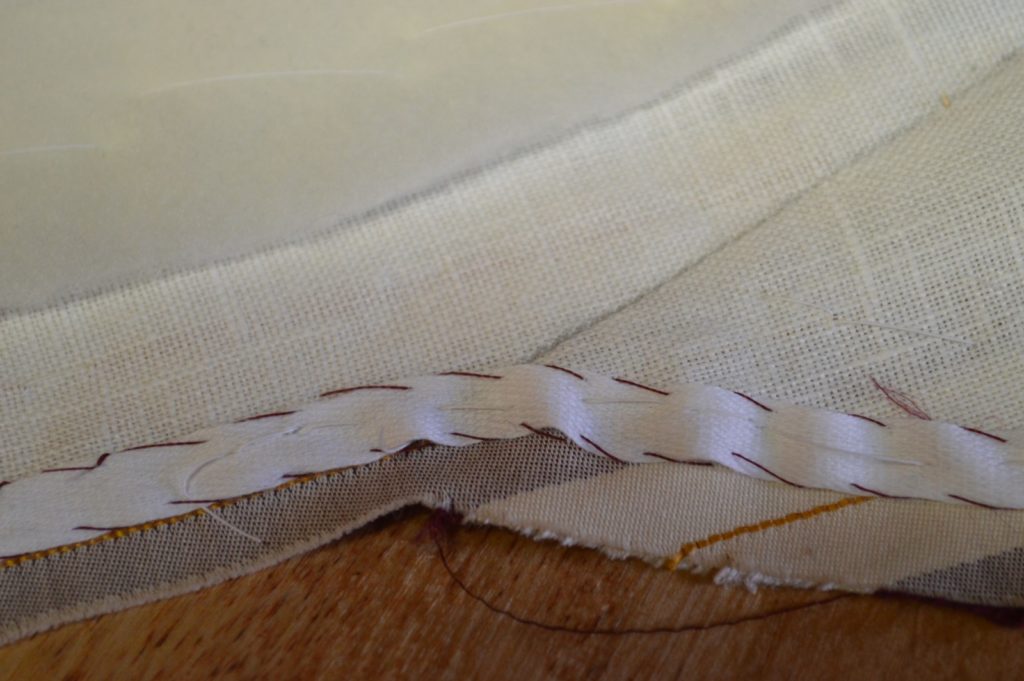
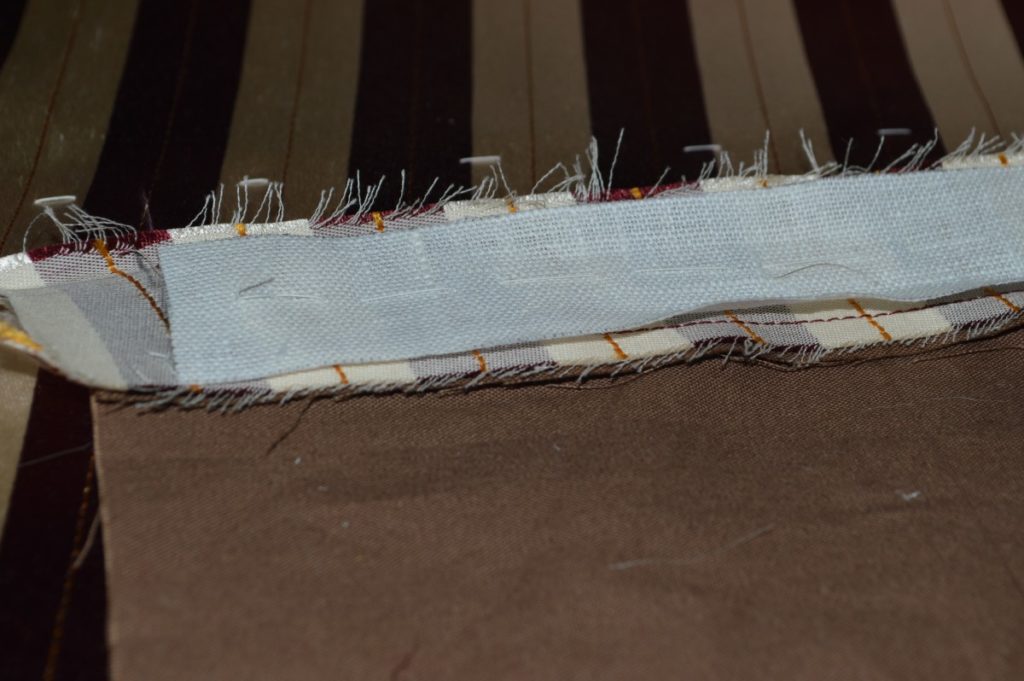
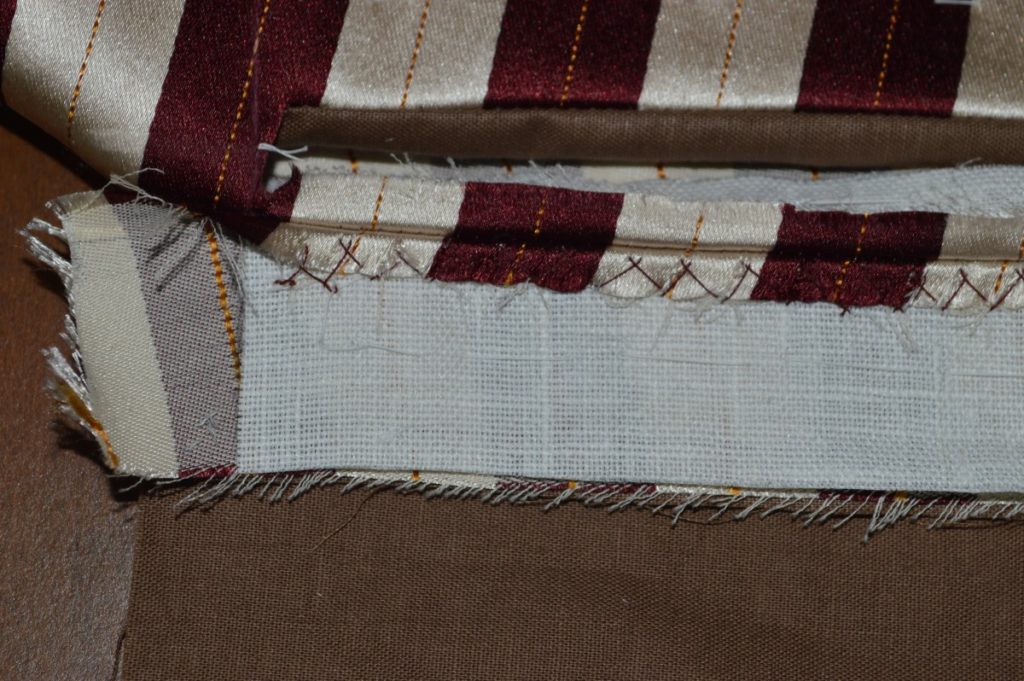
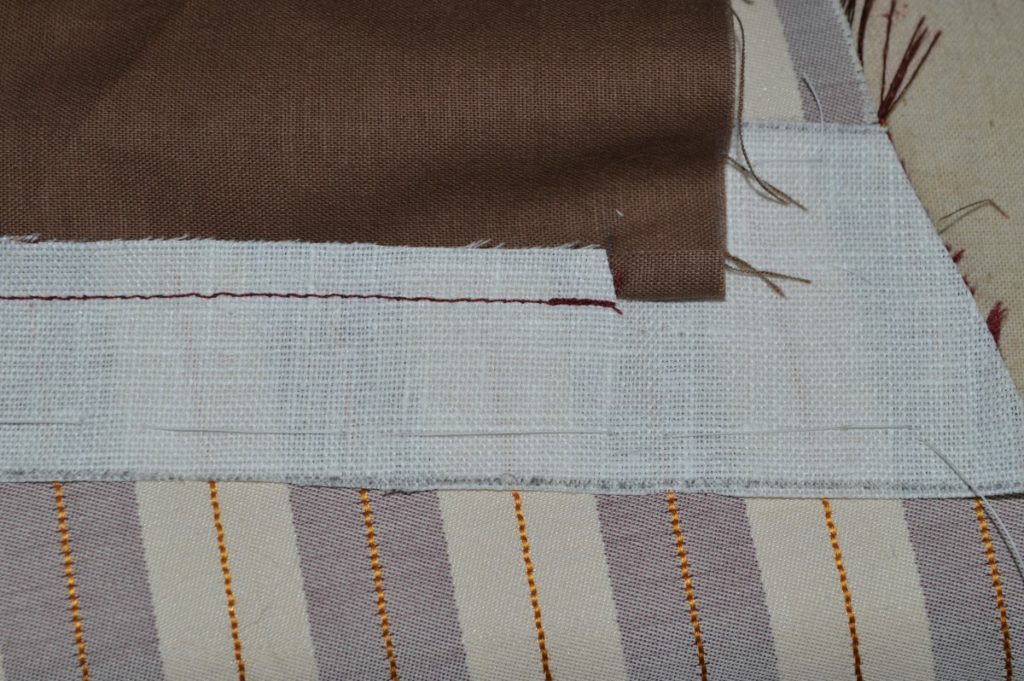
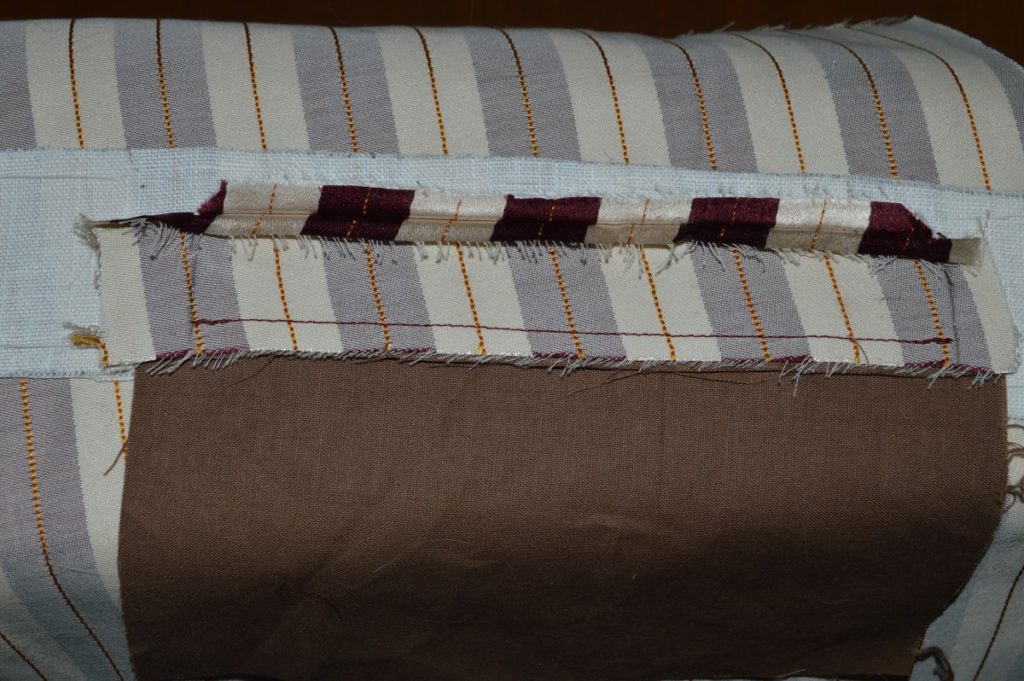
Holding the pressed seam allowance over the linen, cross stitch the linen securely in place. You may have to make the stitches fairly deep to avoid fraying the fabric.
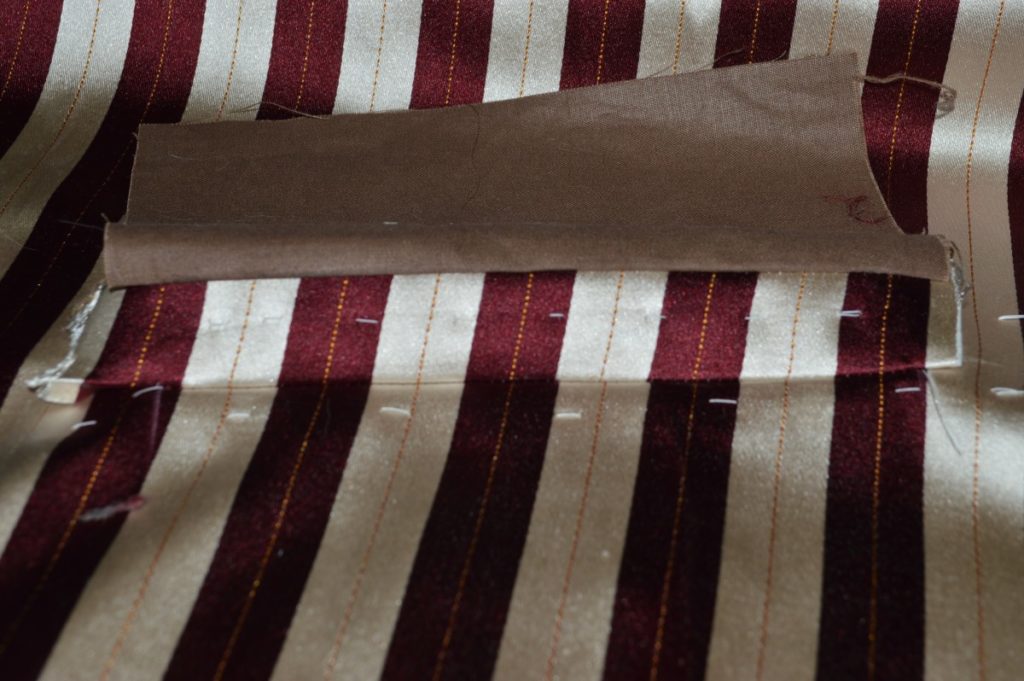
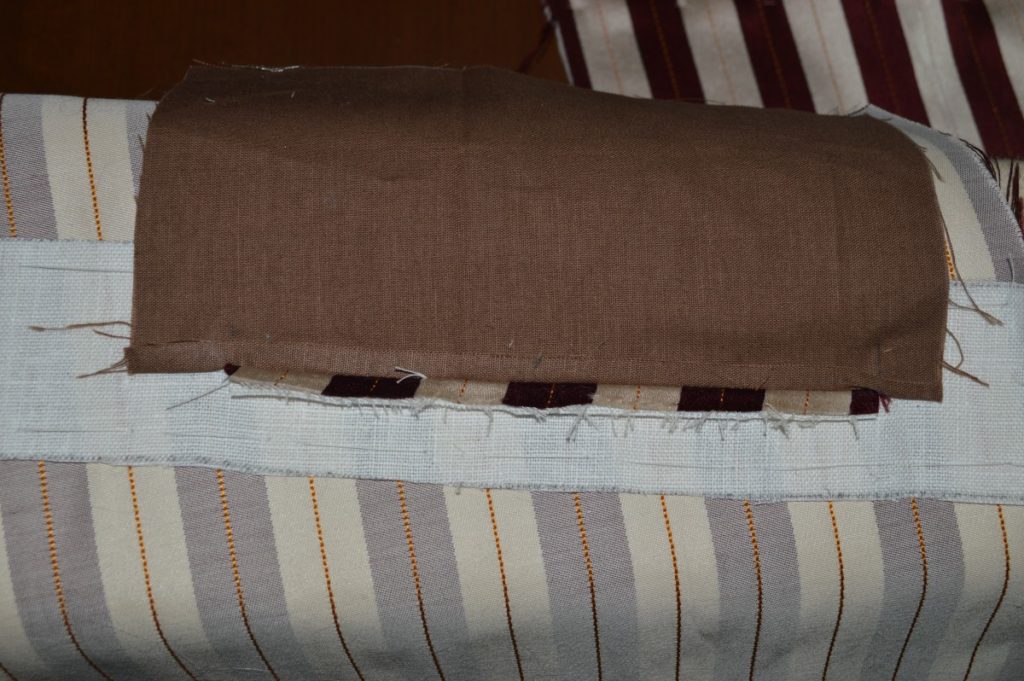
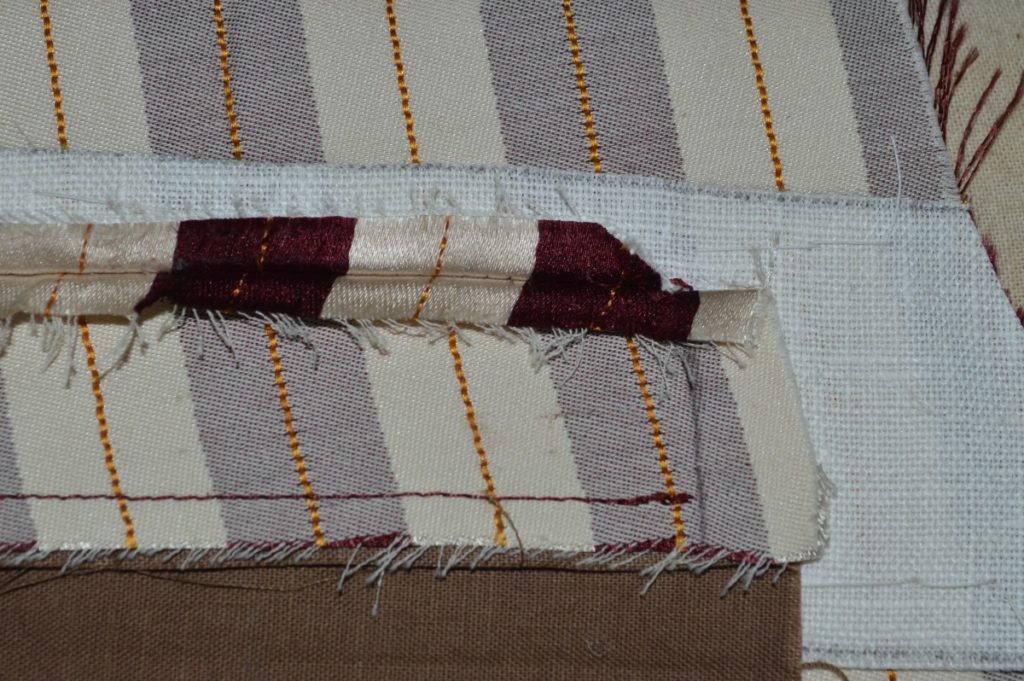
Fold the pocket bag over the welt, leaving about 1/8 inch of the welt showing on the bag side, as shown. Baste securely in place about 1/4 inch from the edge and press.
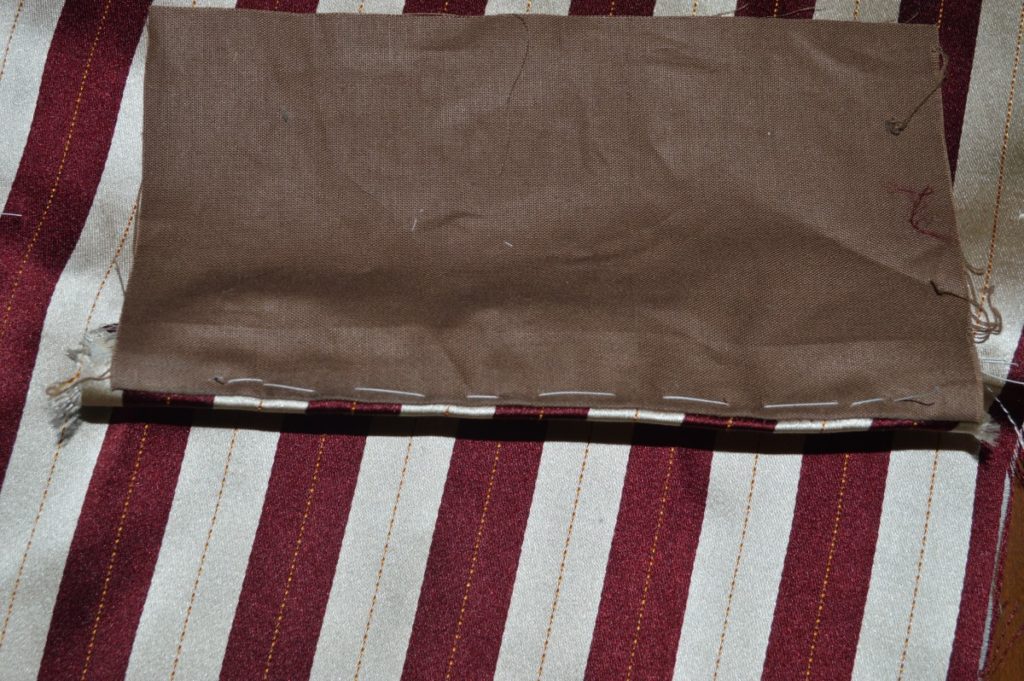
View from the outside. The pocket welt should be the same height all the way along. If not, you’ll want to go back and rebaste the pocket bag.
[callout]If you’d like to top stitch across the top of the welt, feel free to do so now, using a machine stitch or a side stitch by hand. I chose not to, as the tacking at each end of the completed pocket should hold the linen in place.[/callout]

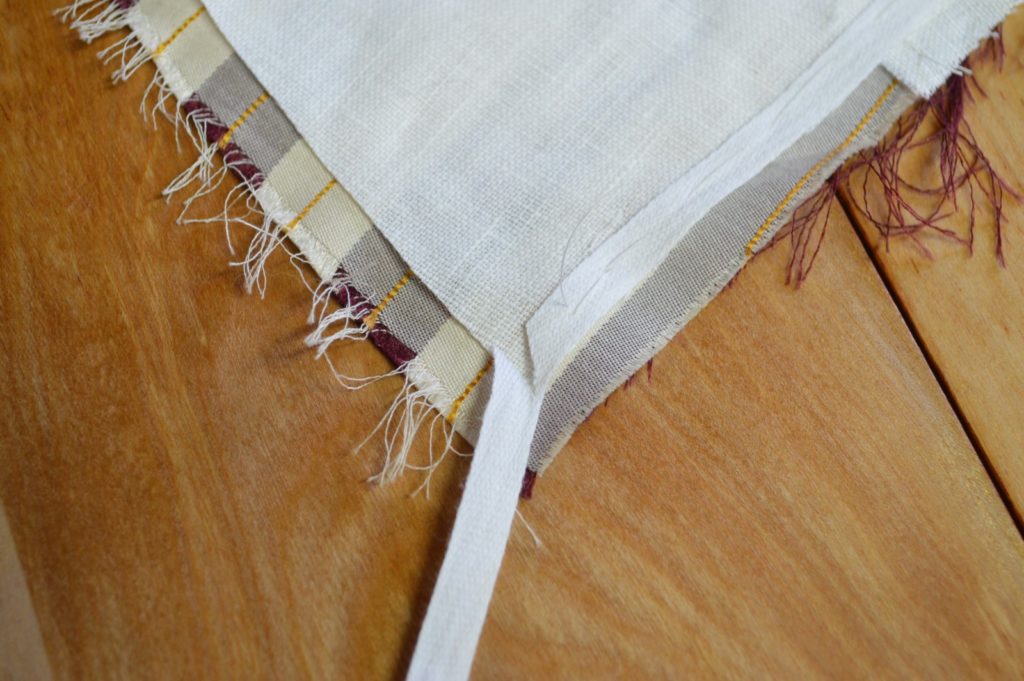
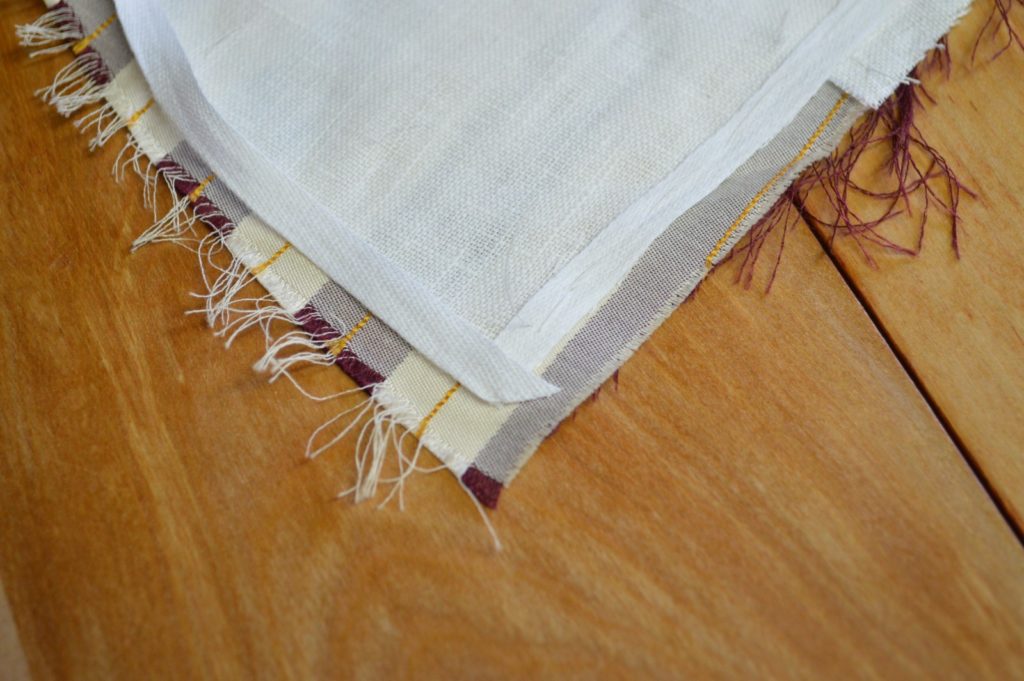
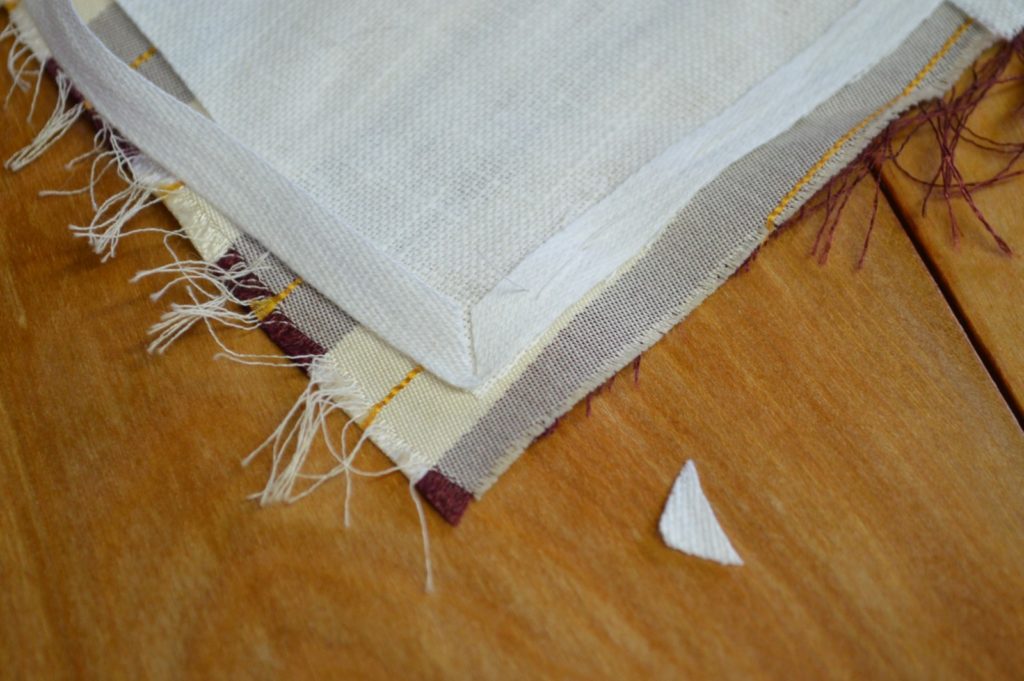
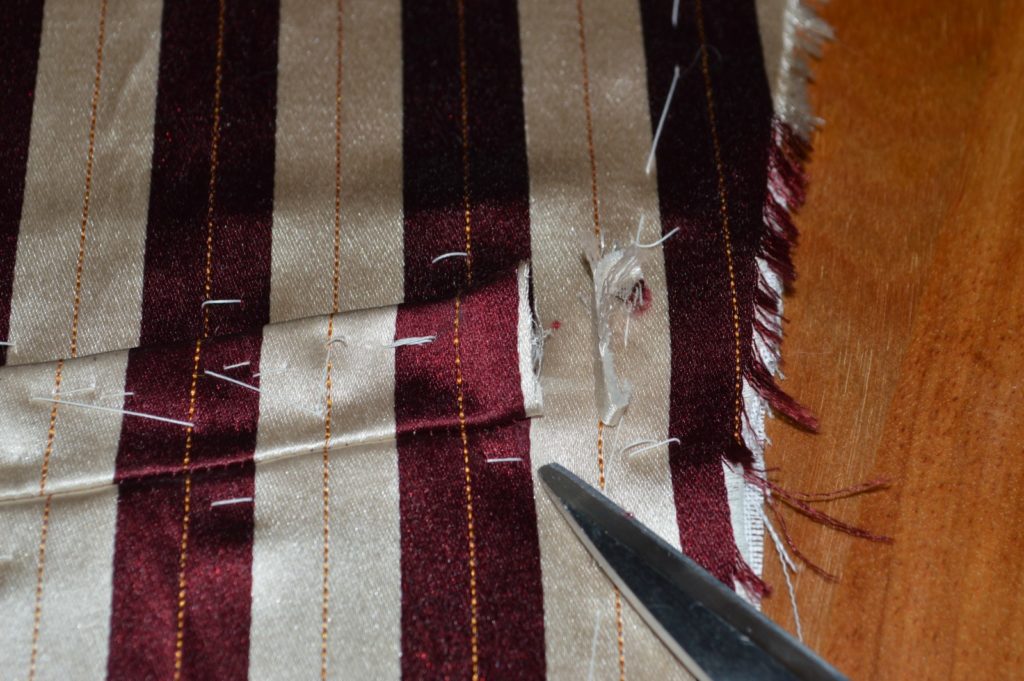
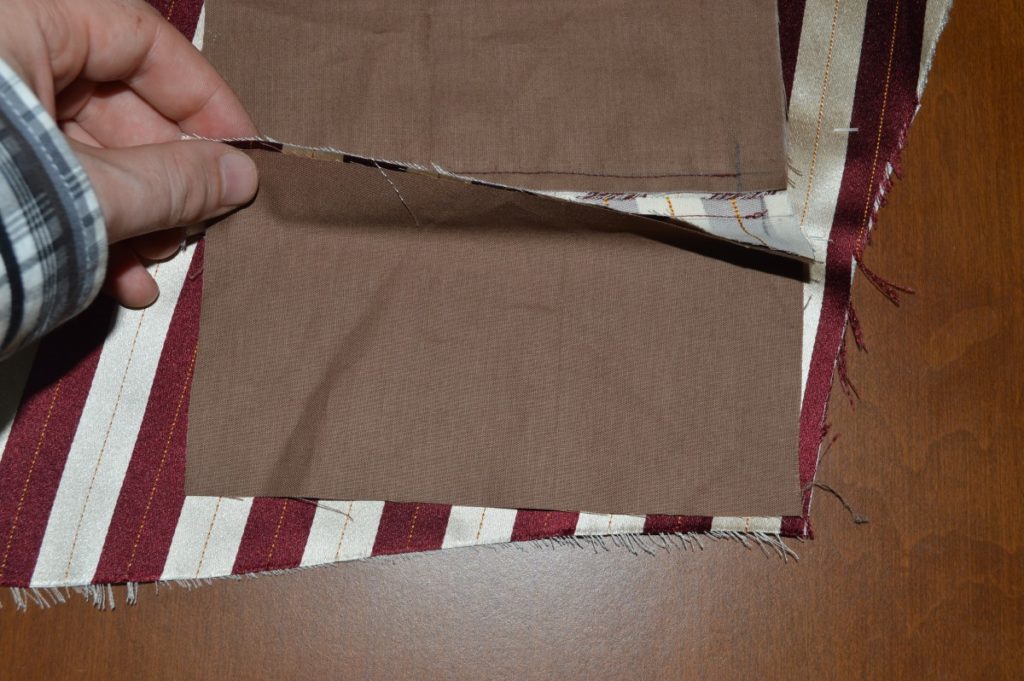
With the pocket bag on top, cut a triangle from the end of the stitching to a point along the edge about an inch from the basted edge.
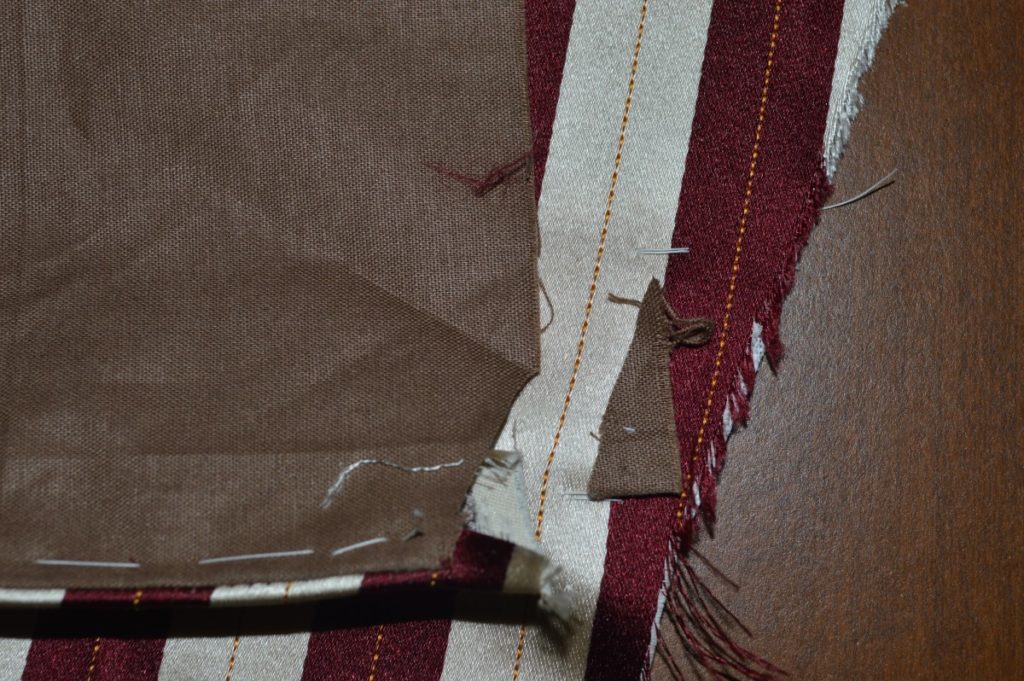
This will allow the pocket bag to be tucked inside the pocket without puckering.
Tuck the pocket bag inside, ensuring there are no puckers. If necessary, go back and trim the pocket bag further.
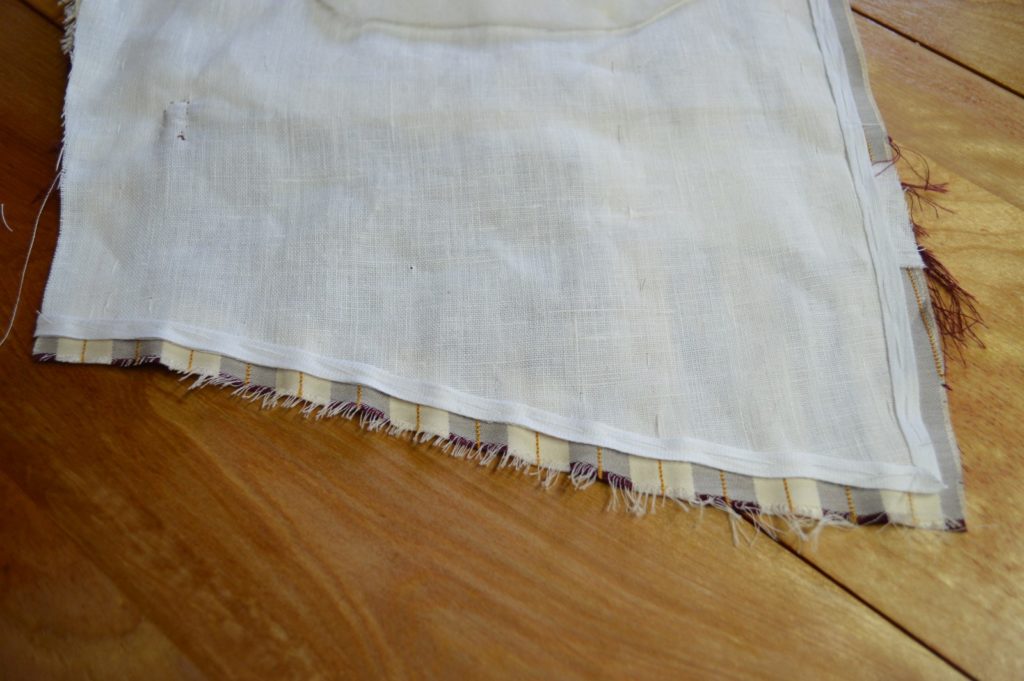
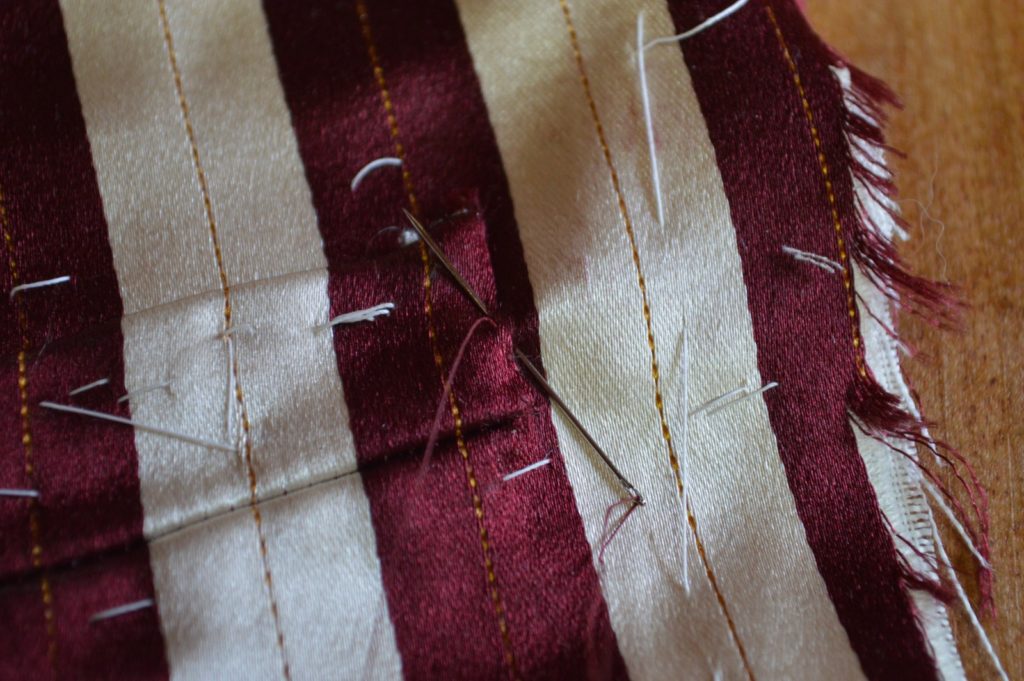
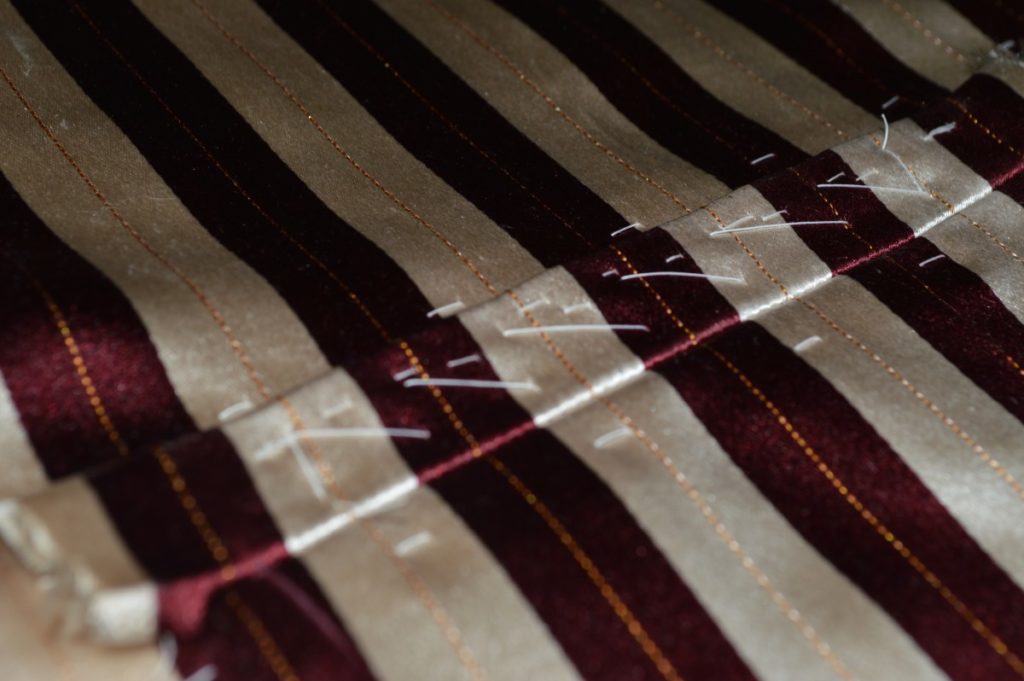
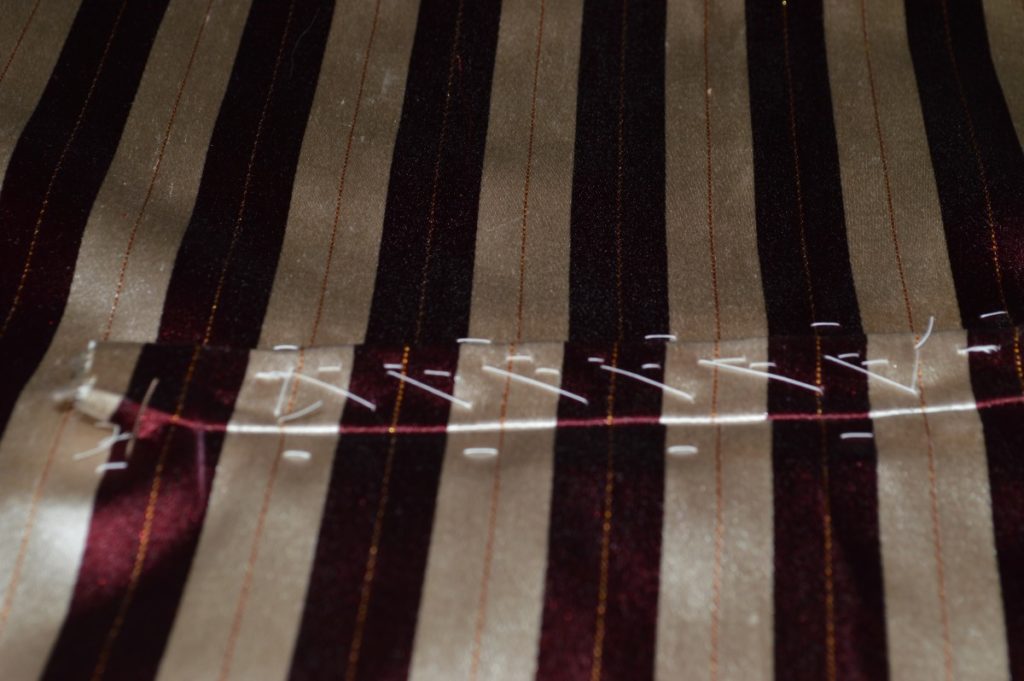
Baste across the top of the welt, staying about 1 inch from either end, through all layers. This will hold the pocket securely closed until the vest is completed.
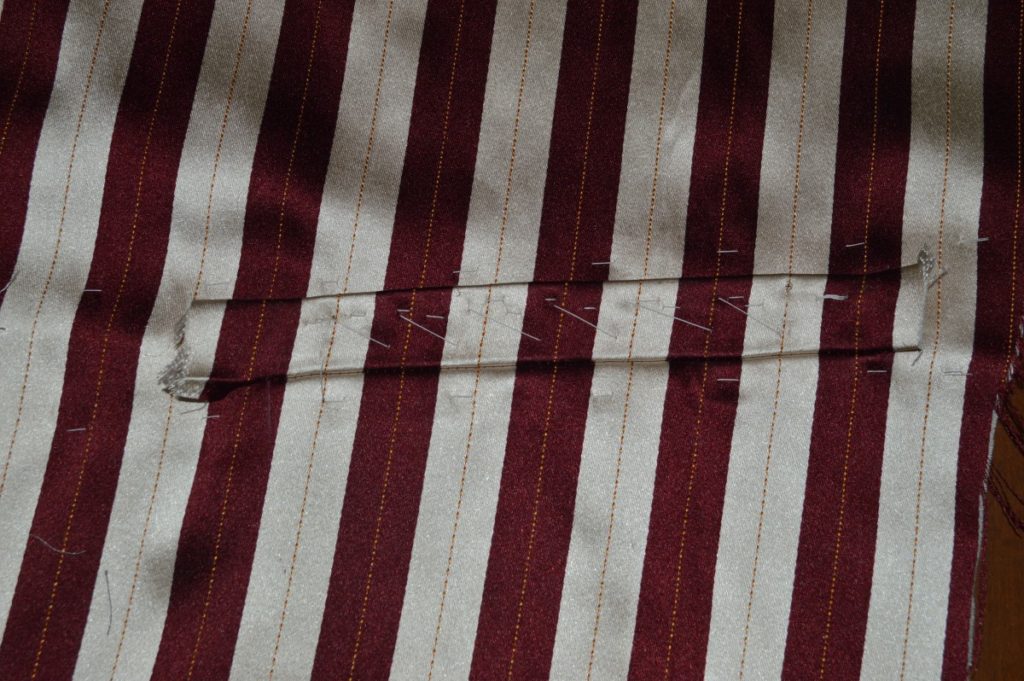
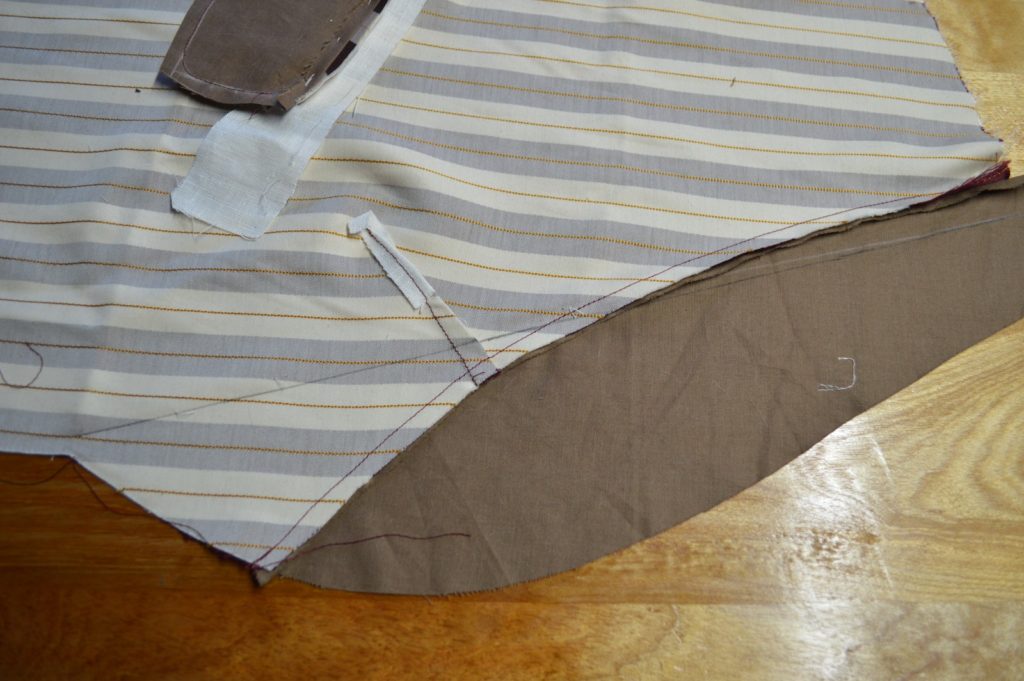
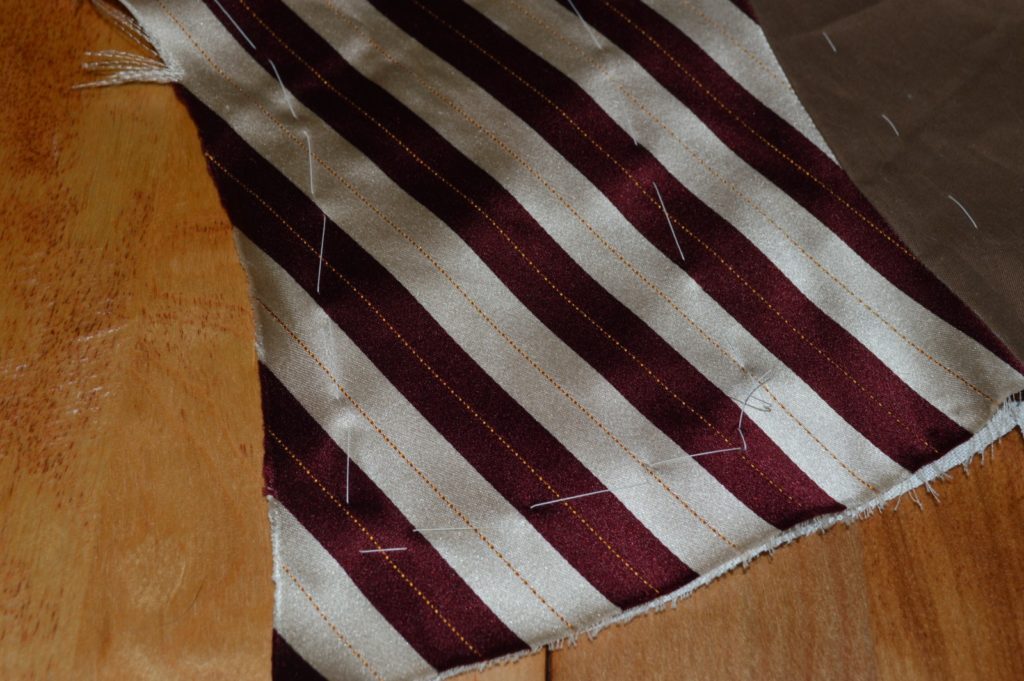
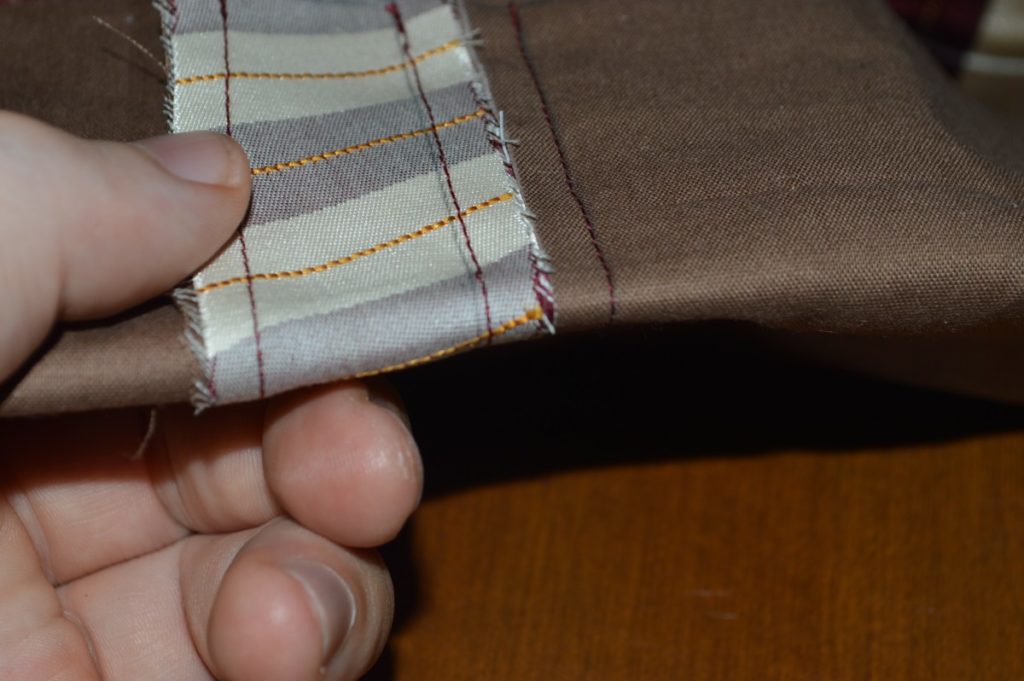
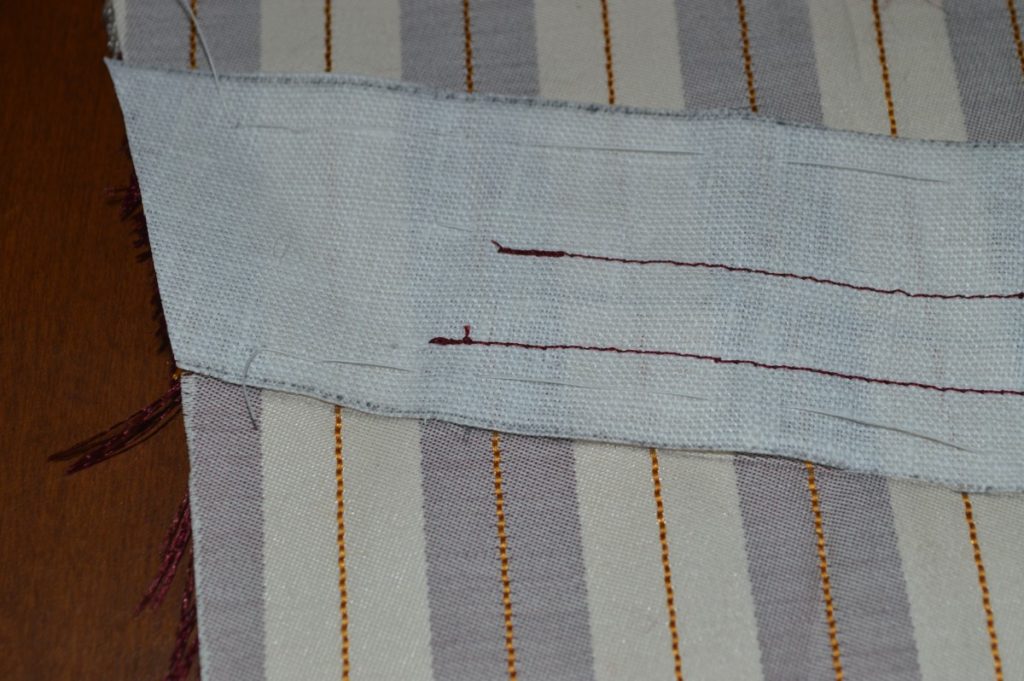
Turn to the inside of the forepart, and baste the two pocket bag halves together just below the pocket opening.
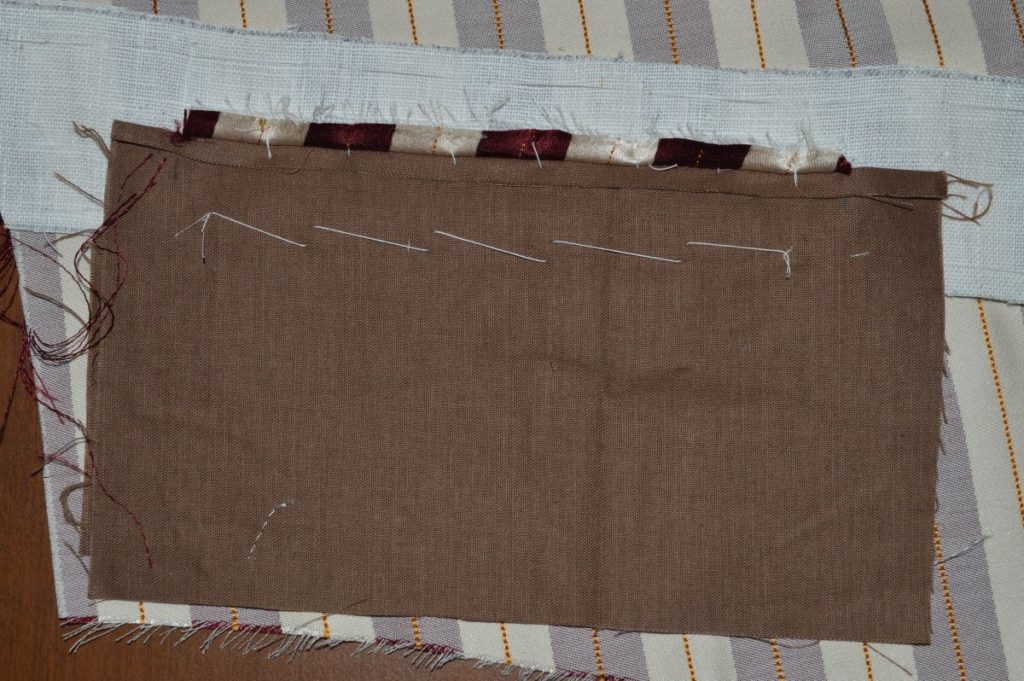
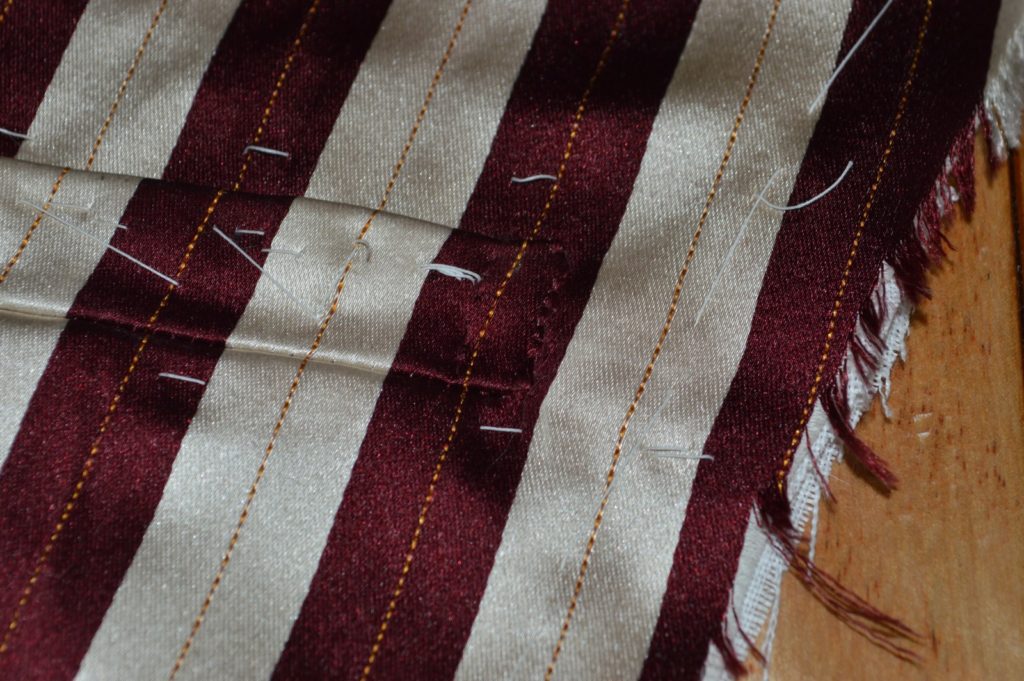
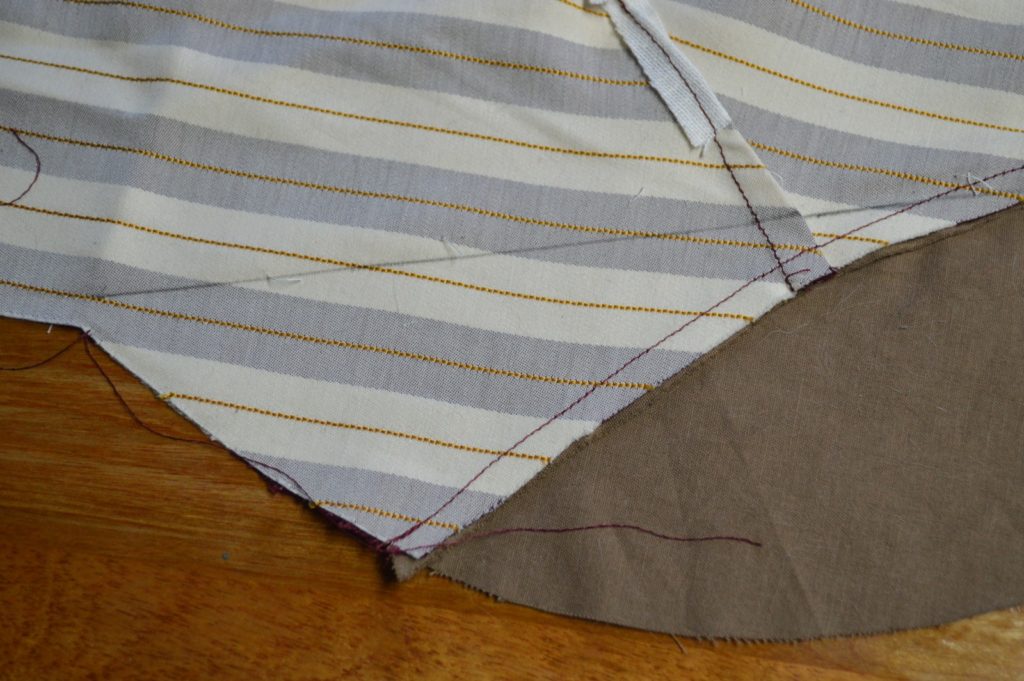
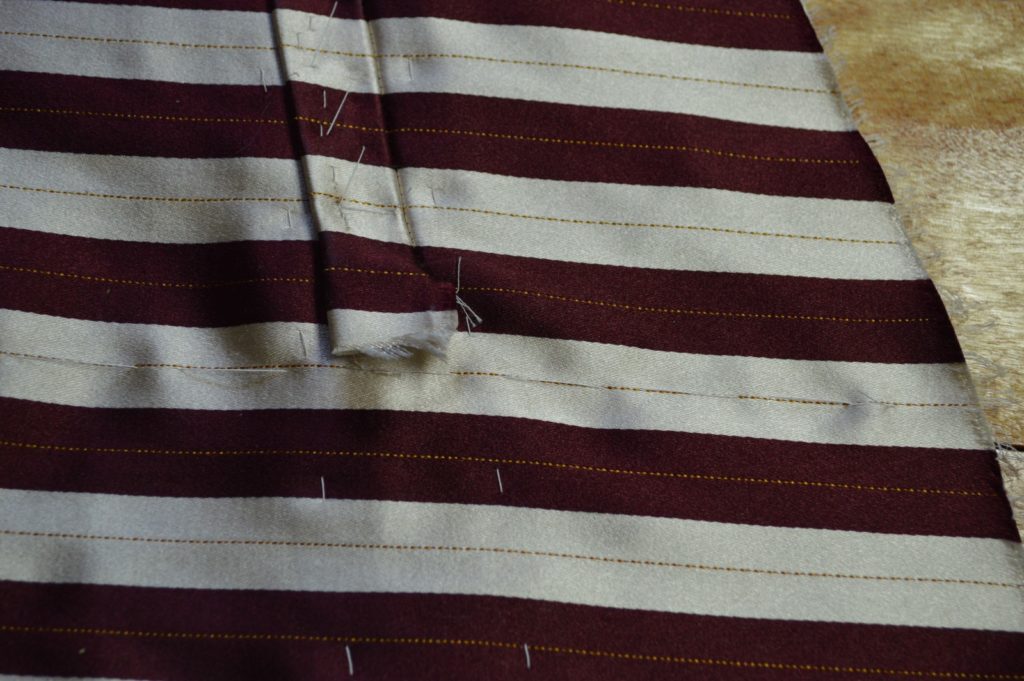
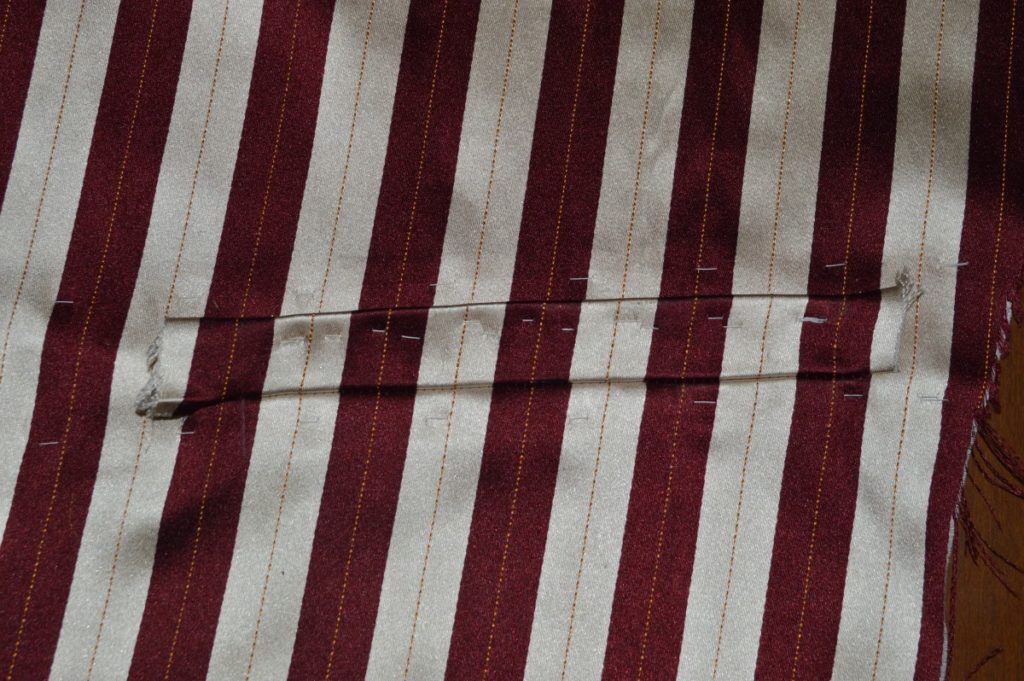
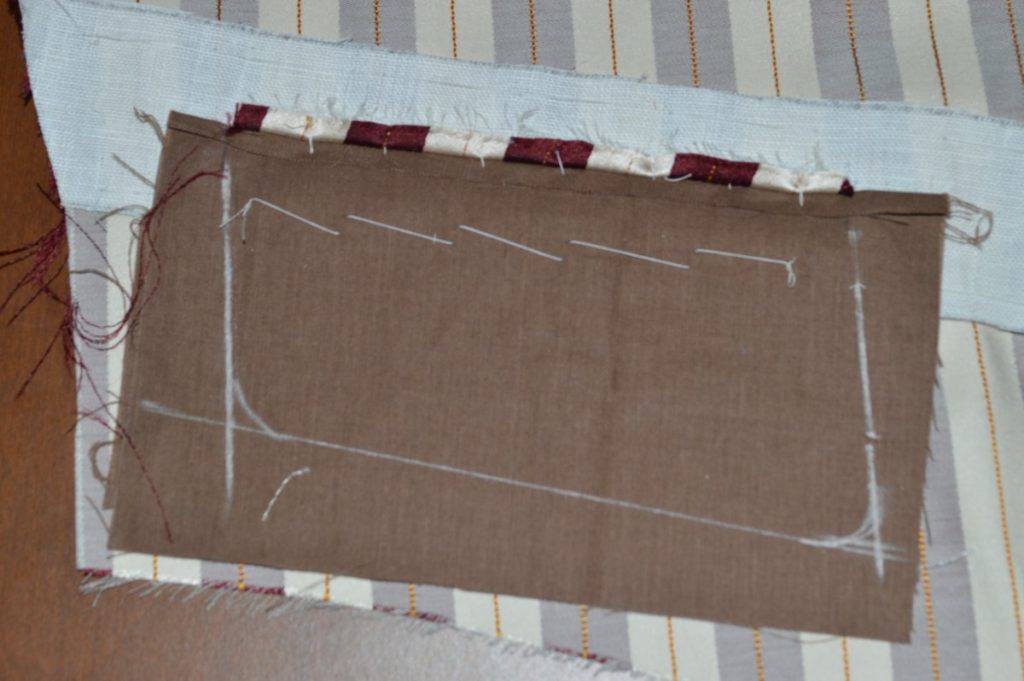
Draw in the stitching lines for closing the pocket bag. The two sides should be parallel with the grain on the forepart, or the stripes. The stitching starts just where the stitching holding the welt on begins. The bottom should be about 2 or maybe 3 inches below the top of the pocket, and away from the seam allowance at the bottom of the vest. It should also be angled, following the general angle of the bottom of the waistcoat, which will allow items to fall towards the front of the pocket, keeping them secure.
Stitch along the chalk line. Try to get as close as you can to the top of the pocket, but be sure not to pull anything as you’re doing so, or you may catch the welt and ruin the appearance.
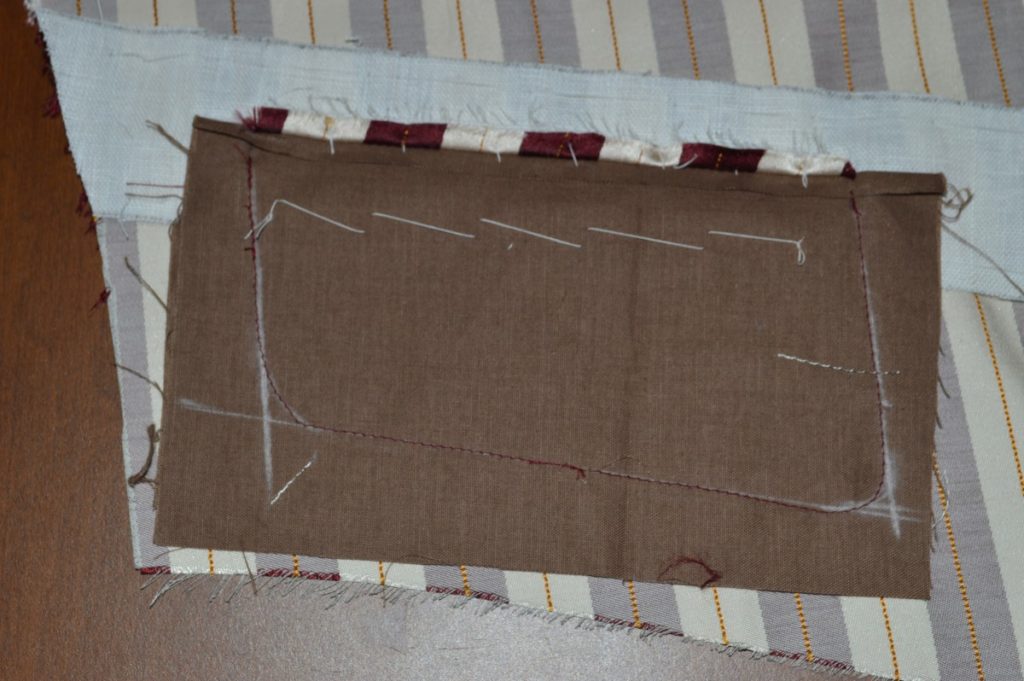
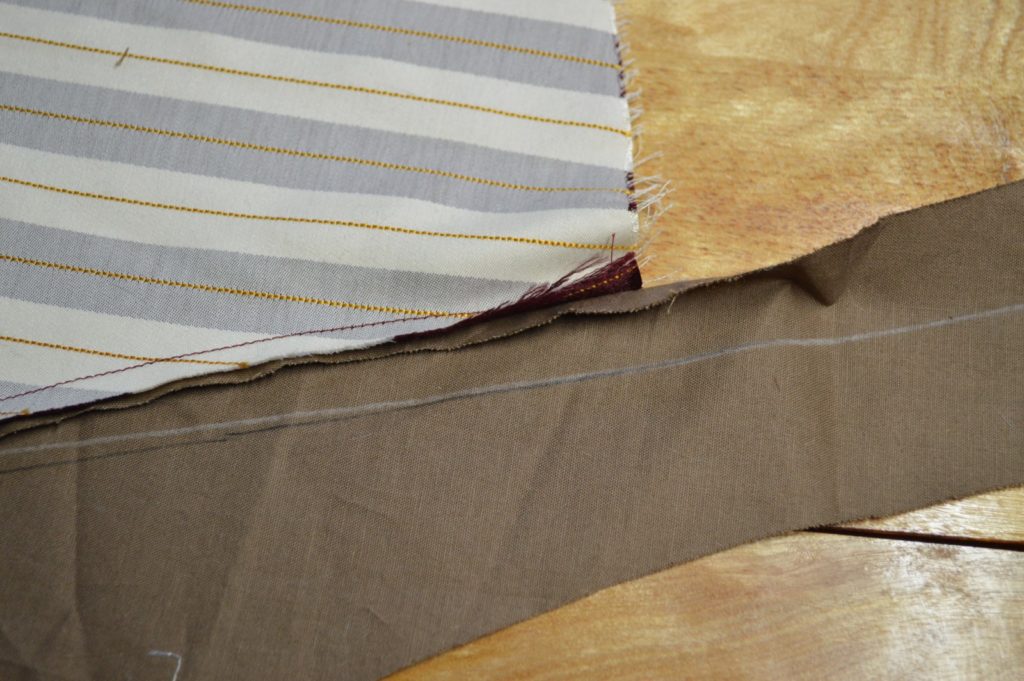
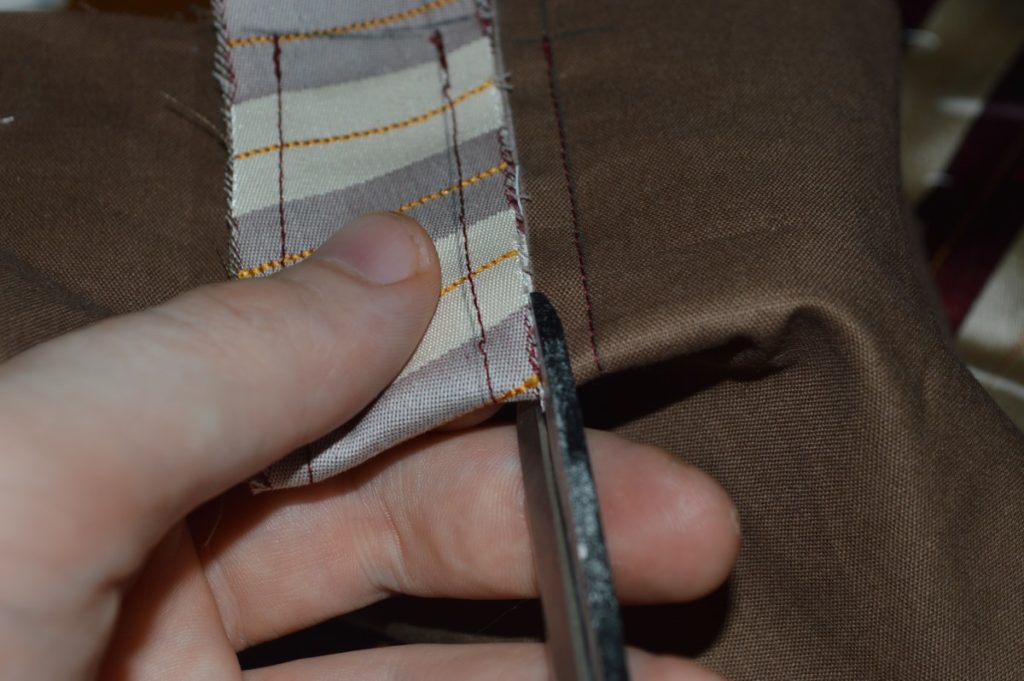
Trim the excess material from the seam allowances, down to 1/4 inch.

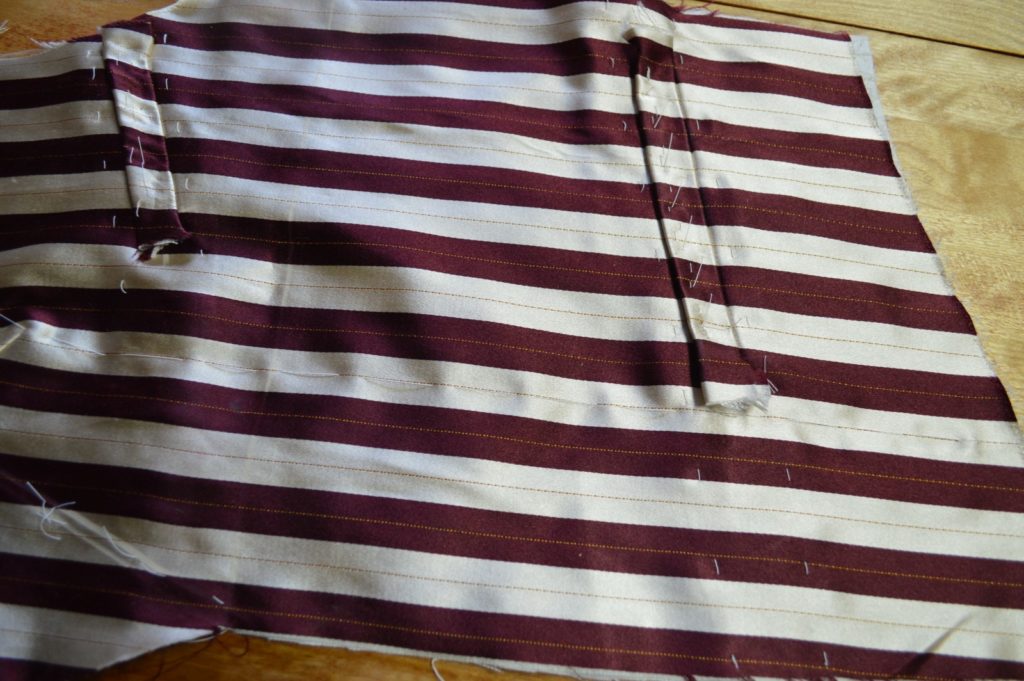
Here is the completed pocket from the inside, showing the linen stay as well.
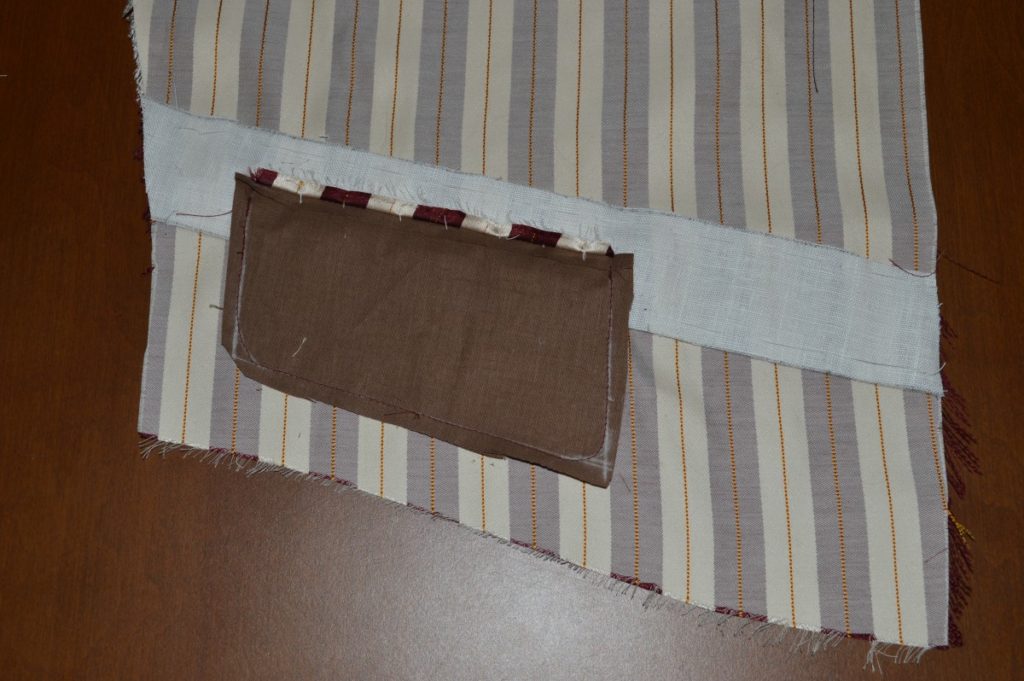
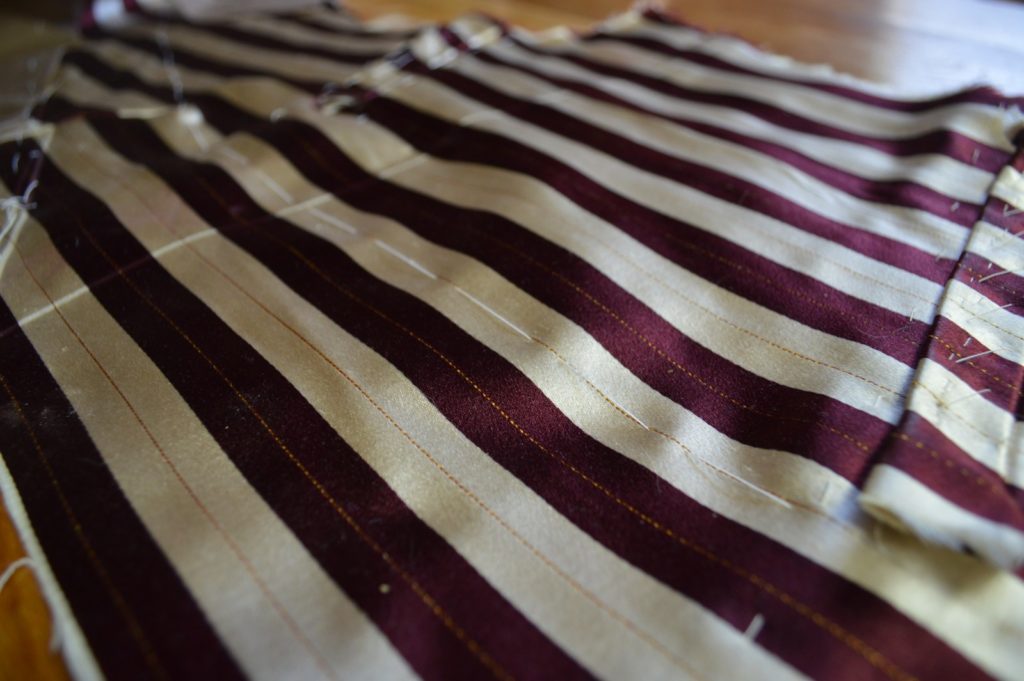
And here is the completed pocket from the outside. The ends of the welt will be tacked down after the canvas has been installed.
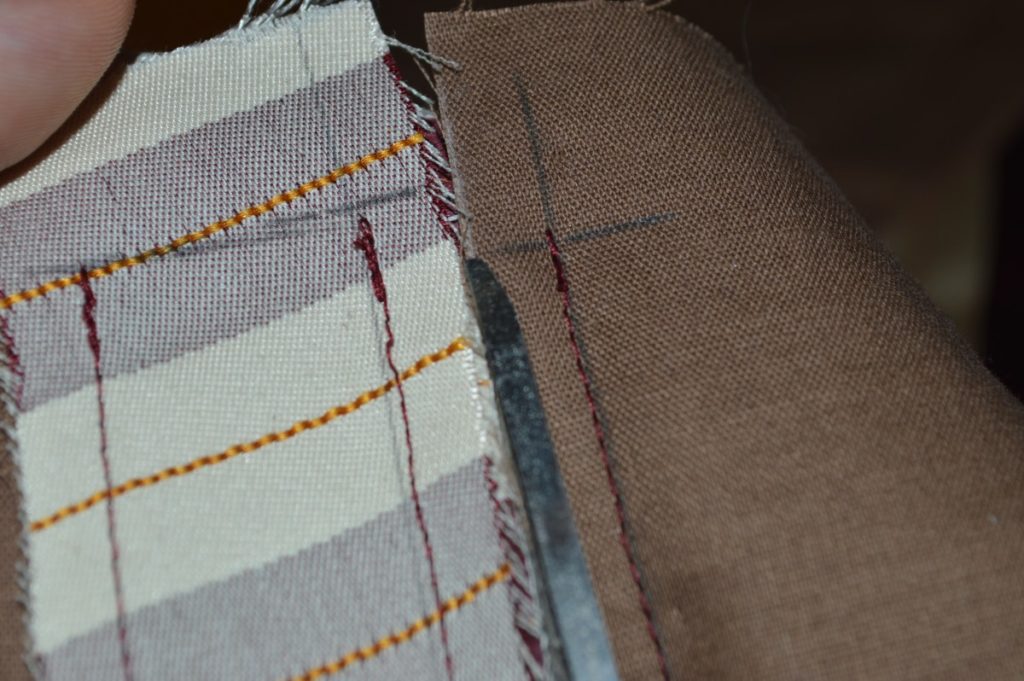
Cutting and Pressing the Pocket
Now it is time to carefully cut open the pocket. Use extra care here because a mistake can ruin all of your work thus far. Fold the pocket in half, lengthwise, making sure that the pocket line, in between the welt and pocket bag, is aligned underneath.
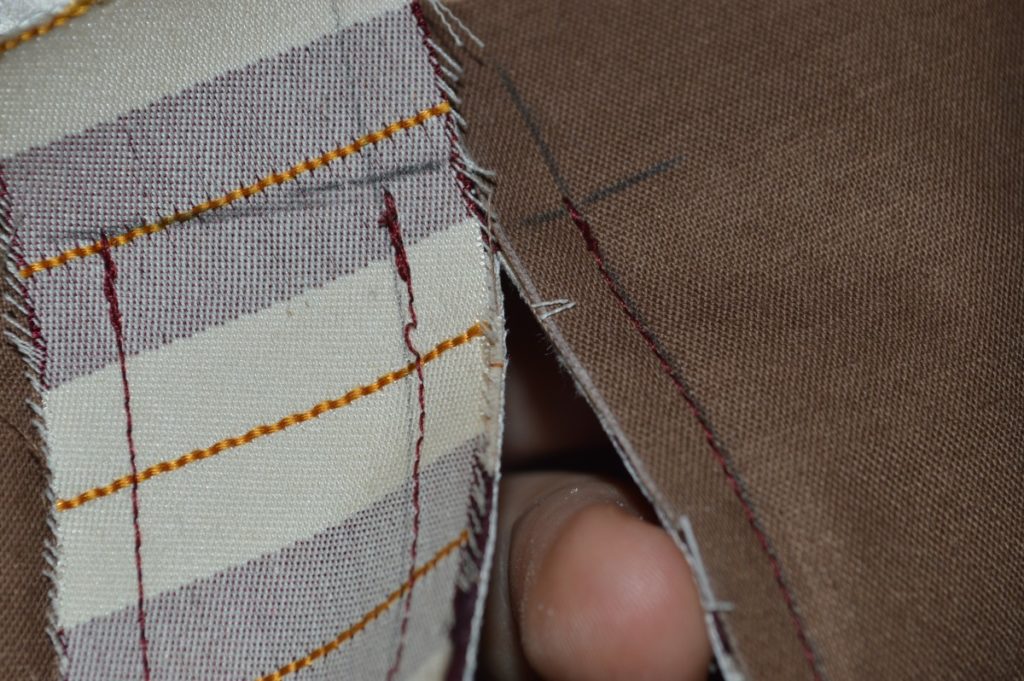
Make a small cut through the folded section, just big enough to get your scissors through the resulting hole.
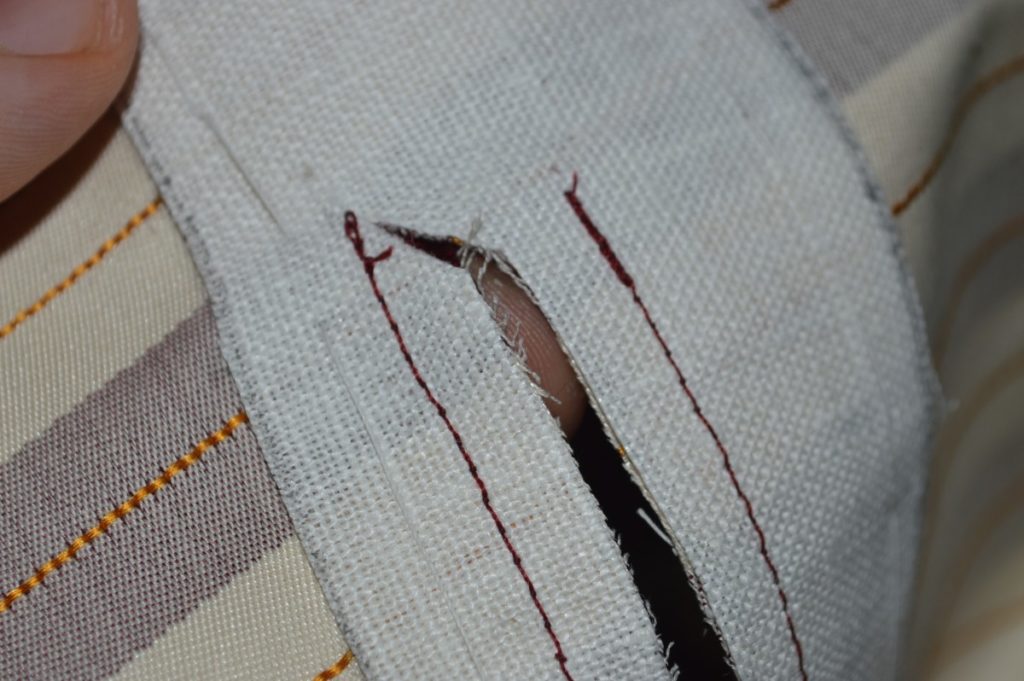
Open up the pocket, insert your scissors into the hole, and carefully cut through all layers to the end of the pocket, stopping at the shorter mark you made on the pocket bag, on either end.
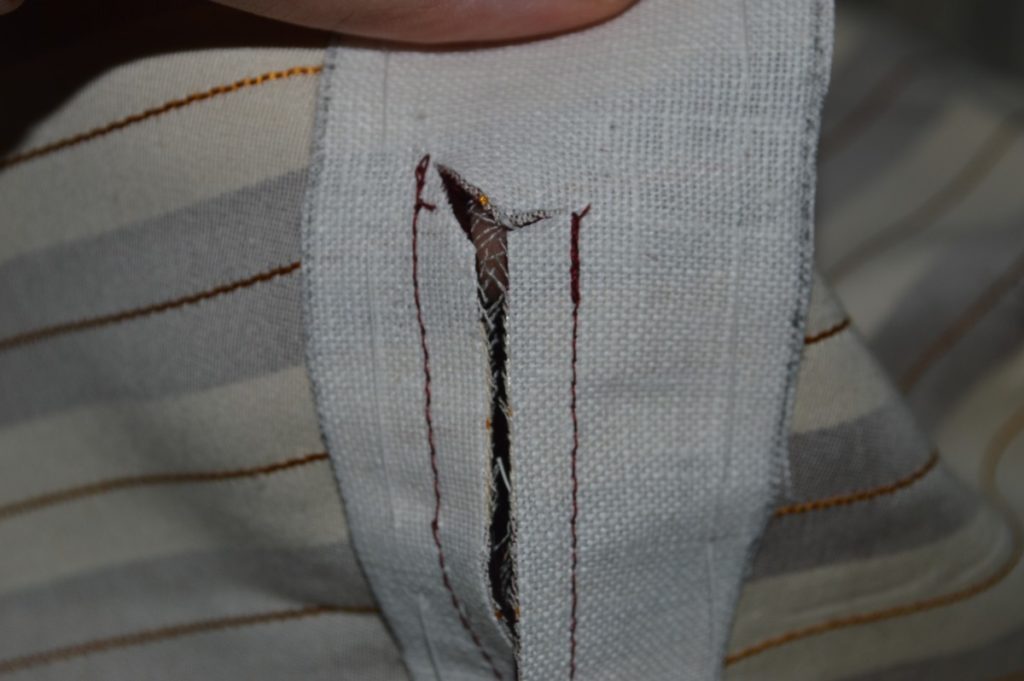
From the wrong side, as it’s easier to see what you’re doing, cut on a diagonal from the end of the cut you just made, to precisely the end of the welt stitch line. Cut through only the linen and the forepart itself, not the welt or the pocket bag seam allowances. You want the cut to end just at the end of the stitches, to prevent gaps or puckers from showing in the finished pocket.
From the end of the original cut line, cut at a right angle to the end of the stitching for the pocket bag. Repeat for the other end.
Place the pocket welt on the ironing board and press the pocket bag over as shown.
Turn to the wrong side, and pull the pocket bag through. Arrange the layers neatly as shown.
The ends of the pocket bag should fold nicely along the seam line.
Press open this seam as shown.
Pull the pocket bag out to the right side again to get it out of the way, and pull the pocket welt and bag to the wrong side as shown.
Press open the welt seam.
It’s a little more tricky due to the slippery silk fabric, but try to get the ends as neat as possible.
Press the seams from the right side to get a crisper edge.
Welt Pocket Construction
Now that the stripes are aligned on the welt as we like, it’s time to move on to the main construction of the pocket.
Cut out the pocket bags for each of the pockets. The pockets should be the same width as the welts, and about 3 or 4 inches in depth. You want the bottom of the pocket to be free of the seam allowance, in the case of the waist pockets, but these can be trimmed later, so don’t worry if they’re too long.
Draw in the seam line on one of the pocket bag halves, and baste it to the top of the pocket, right sides together.
Mark each end of the pocket bag, 1/4 inch less than the width that you made the pocket welt. This is so there is room to turn in the ends of the welt later on.
Stitch the pocket bag from one mark to the other along the seam line you drew, 1/4 inch from the edge.
I went slightly past the line here, though it should be okay as long as you have close to 1/4″.
Here’s the view from the wrong side of the forepart, more clearly showing the lengths of the two stitch lines.

Take the other half of the pocket bag, and with right sides together, place it against the non-sewn edge of the welt.
Baste the two pieces together, just out of the seam allowance.
Mark the ends of the stitch line, aligning them with the ends of the welt stitching.
Sew the pocket half to the welt. Note how the stitching ends at the same distance from the edge of the pocket.
Aligning Pocket Welts
Now we are ready to proceed with the pocket construction. In my case, I am using a striped fabric, and so will show you how to match the stripes of the pocket to those on the forepart. In period examples of waistcoats, one finds a whole range of diligence in pocket matching. Some are perfectly aligned, while others are totally random. Since I’m more of the perfectionist sort, and the fact that there is no skill in randomly aligning the stripes, I’ll try to show you how to precisely line up the pocket stripes.
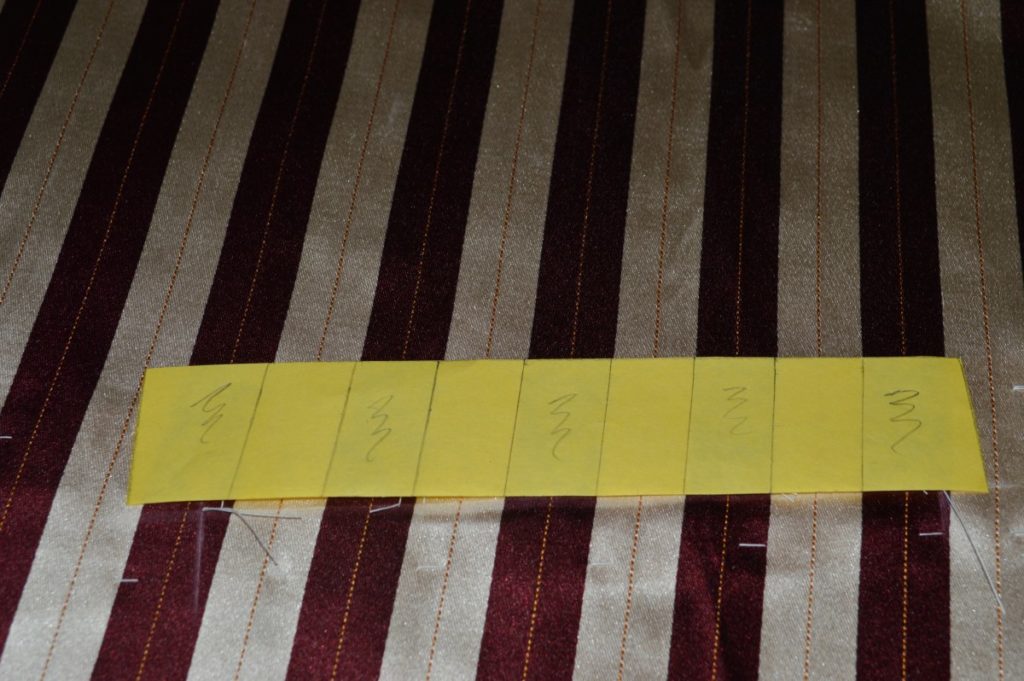
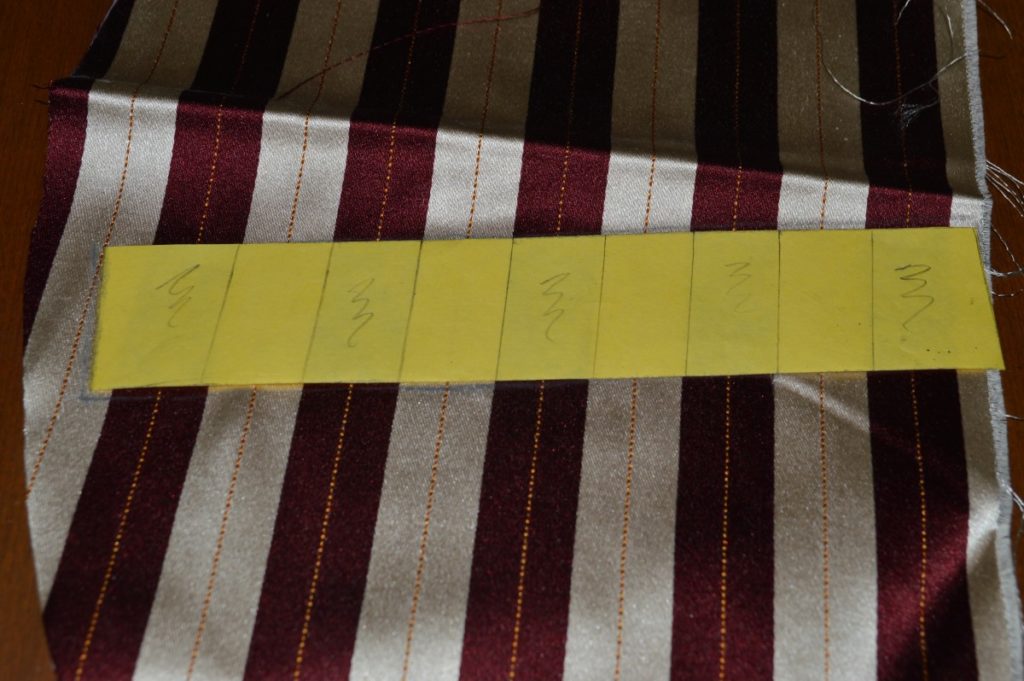
First, you’ll need a pocket welt pattern. You’ll need to do this individually for each pocket. Draw a rectangular pattern piece that is 1 inch wider than the finished pocket (1/2 inch on each side), and the height of the finished pocket welt plus two 1/4 inch seam allowances. A good average pocket welt height is 3/4″, which you could scale up to as much as 1 inch on larger vests.
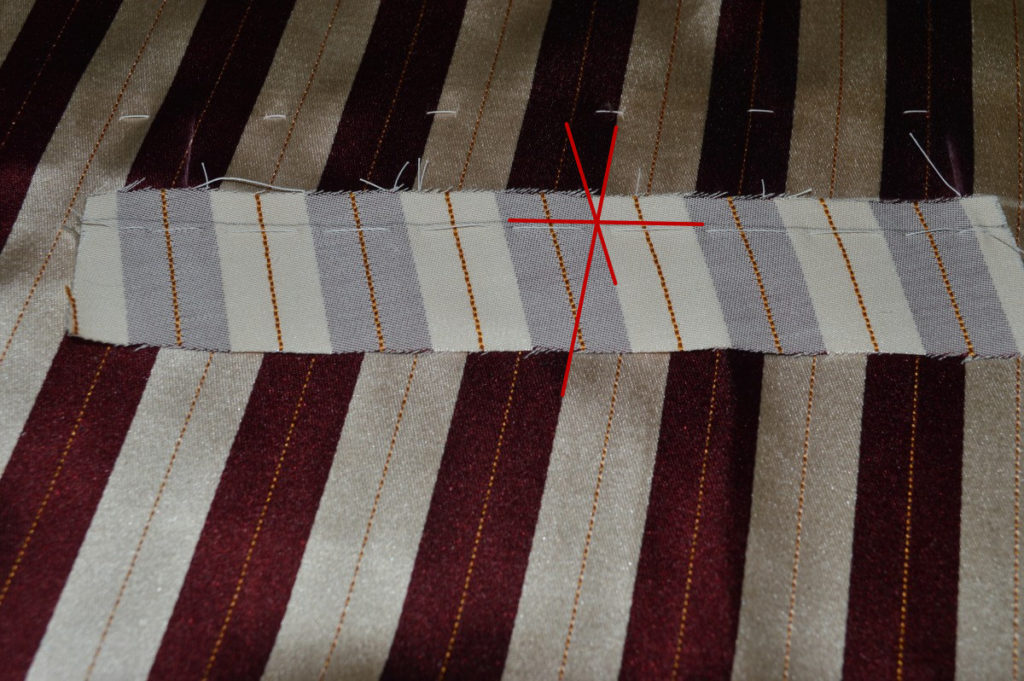
Place the pattern piece into position above the pocket line (the bottom of the pattern should touch the line), and then using a ruler, draw in the stripes as shown. If the stripes are smaller you could mark fewer of them, the important thing is to have a good reference point. I marked the red stripes with a little pencil mark to make things more clear.
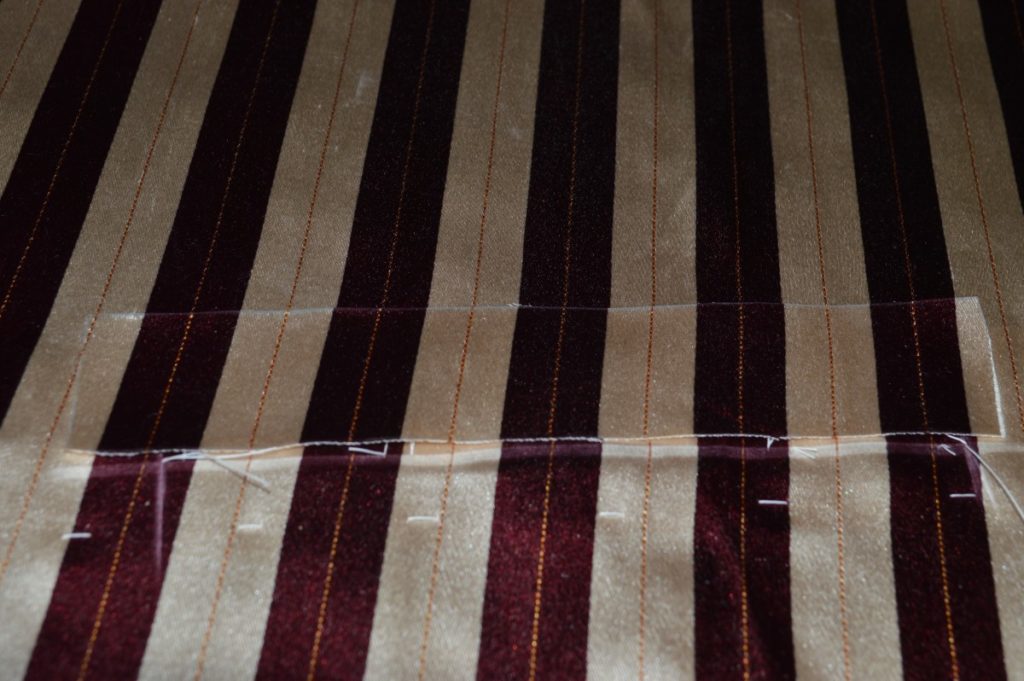
Now place the pattern on your uncut fabric, lining everything up just as it was on the forepart. Mark with chalk, and cut out the welt piece. Repeat for each of the other pockets.
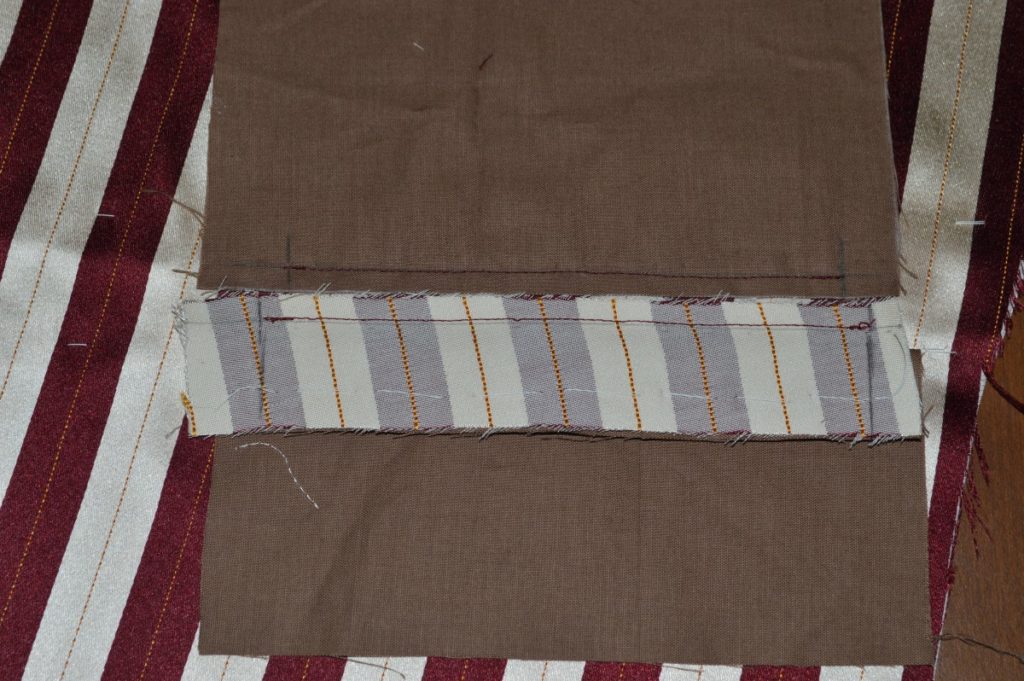
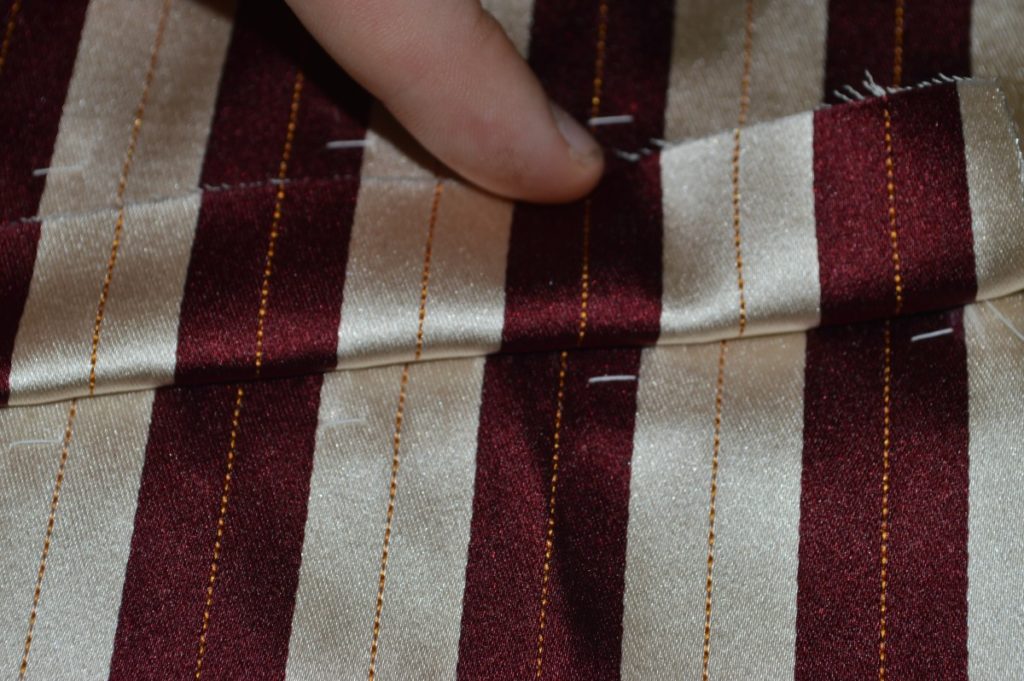
Place the pocket welt on the forepart to test the alignment. Assuming you worked accurately, and did not stretch anything out of shape, you should be fairly close at this point.
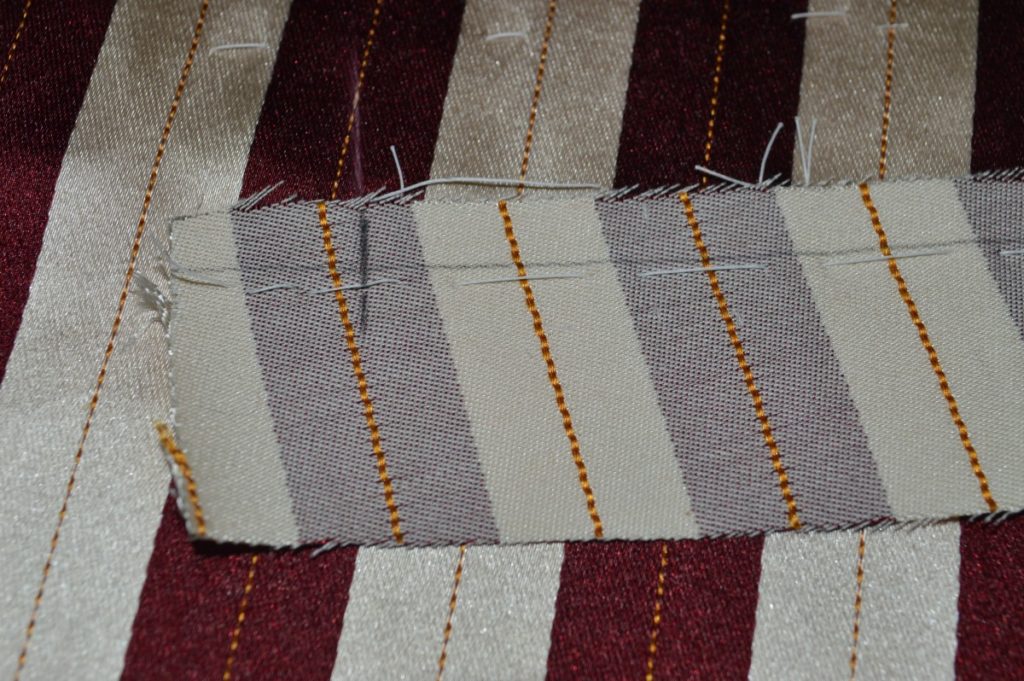
Turn to the wrong side of the pocket welt, and draw in the 1/4 seam allowance.
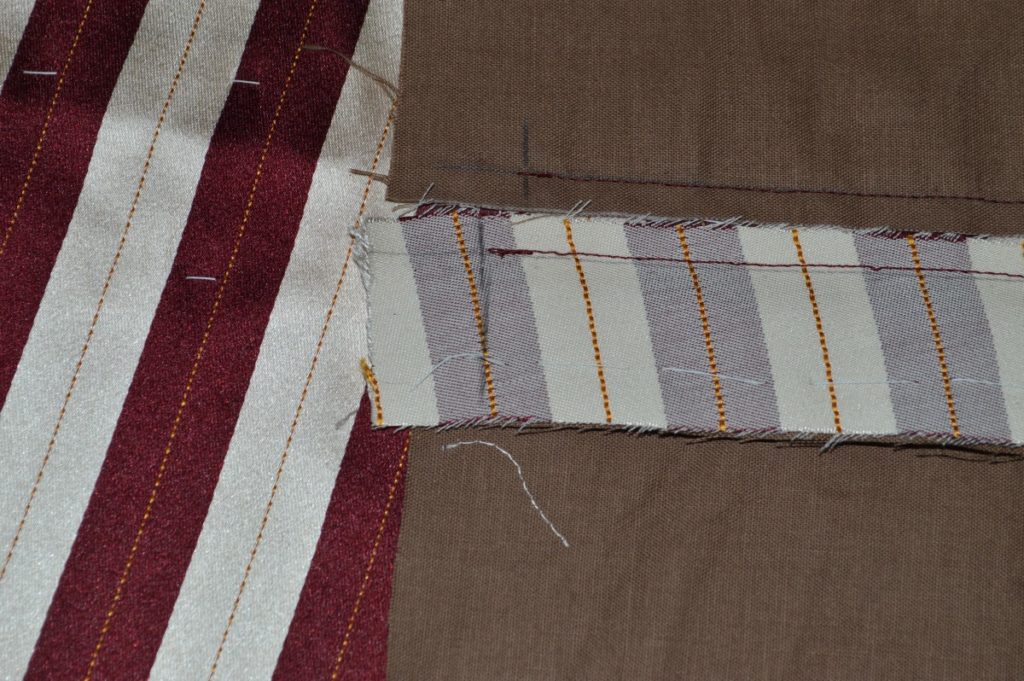
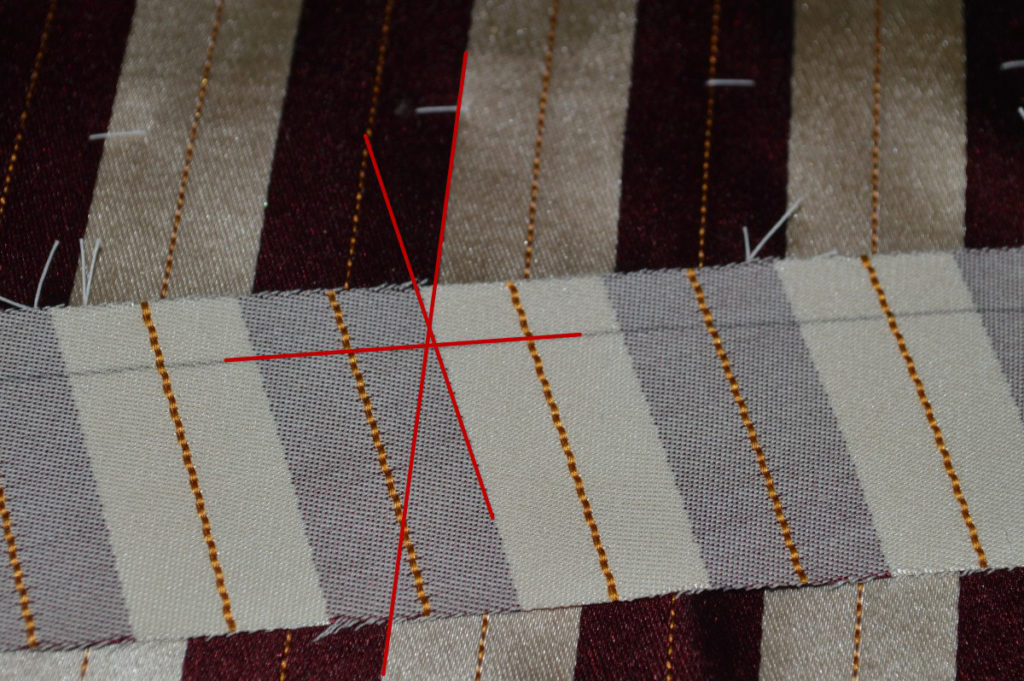
This next step is the trickiest and the appearance of the finished pocket relies almost entirely on this one step. You need to get the three lines shown, the edge of a stripe on the forepart, the seam allowance on the welt, and the corresponding edge of the stripe on the welt, all aligned precisely at the same point. As you can see in this picture, I’m slightly off, though I think that’s because I was just arranging the pieces for a photograph. You need to do this all by eye, and the more you practice, the more precise you will become.
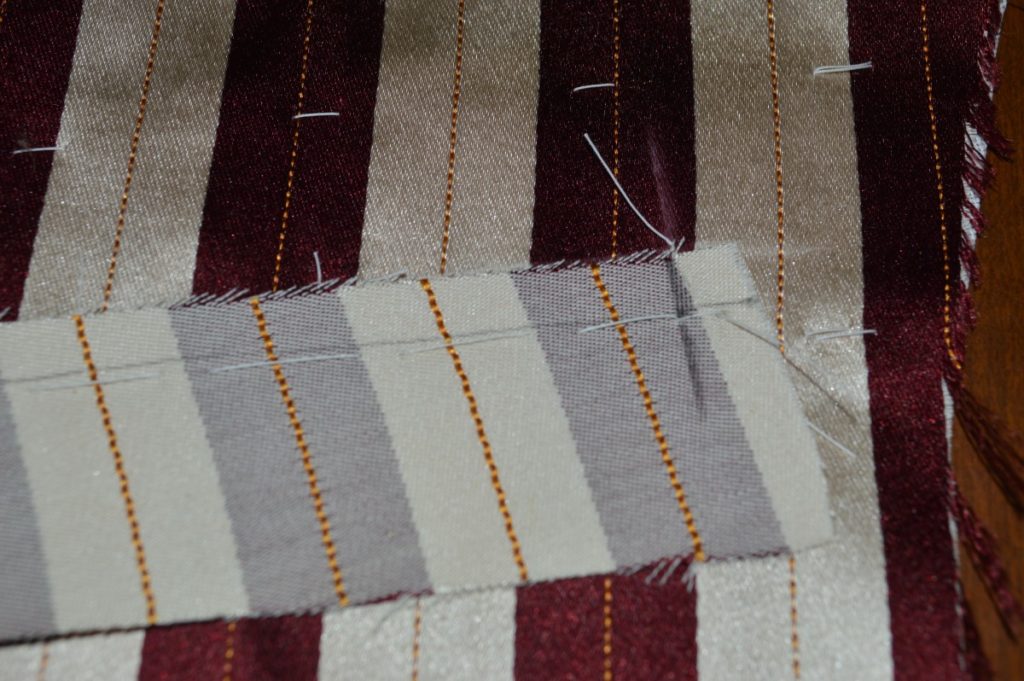
Baste the welt to the forepart, just below the seam line. I’m relieved to know that I indeed aligned the stripes correctly here! As you are basting, be aware of stretching one piece or the other — since both are on a slight bias, this is extremely easy to do. As you baste, make sure each intersection is properly aligned.
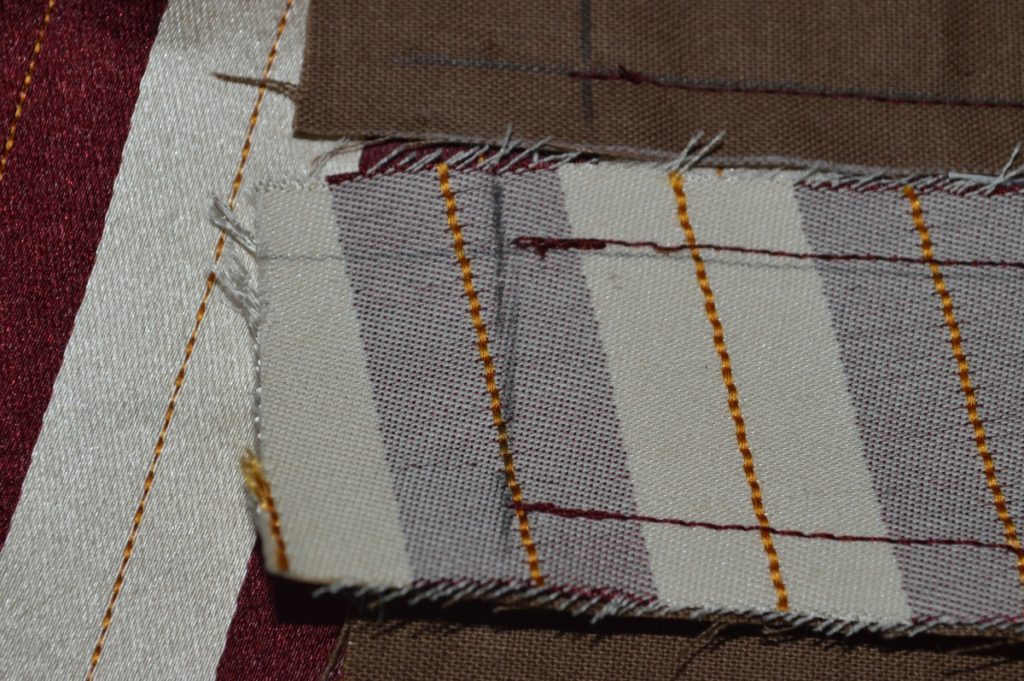
You can turn the welt up after basting to get an idea of what the alignment will look like after, though it will be slightly off due to the misplaced basting stitches. The only way to know for sure is after sewing it for good.
With the welt accurately basted, mark both ends of the pocket, in pencil, 1/2 inch from either end.
Carefully sew the welt from end to end, stopping precisely at the marks you just made. I used a machine stitch but this could also be done with a backstitch by hand. Seems my tension was off a little, hmm. Stick as precisely to the seam line as you can, it looks like mine was off slightly.

Remove the basting stitches, and check your alignment for the final time. Success! If yours is off, it’s possible to undo the stitches and try again, but you may need to cut a new welt piece if the fabric frays too much.
Pocket Stays
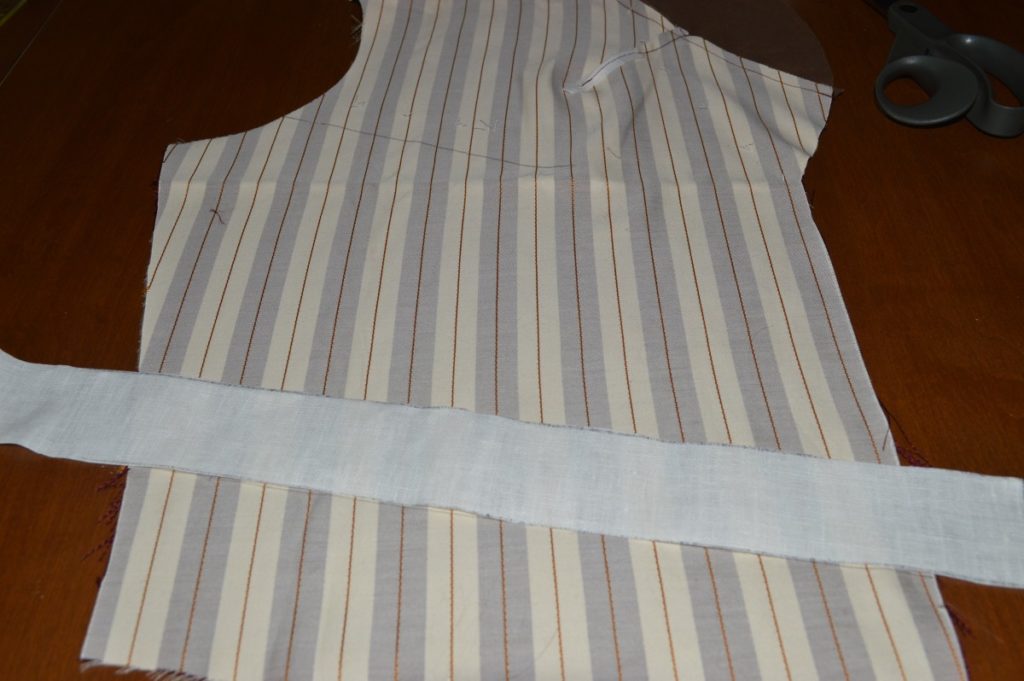
Now that we’ve completed the darts and collar lining, it’s time to move on to the waist and watch pockets on the vest before moving on to the inner workings. First off, we need to reinforce the pocket area with strips of linen. While on some thicker fabrics you might be able to get away without adding these stays, it’s a good idea, especially on thinner fabrics, in that it helps to prevent tearing, and also stretching, since the pockets are slightly on the bias.
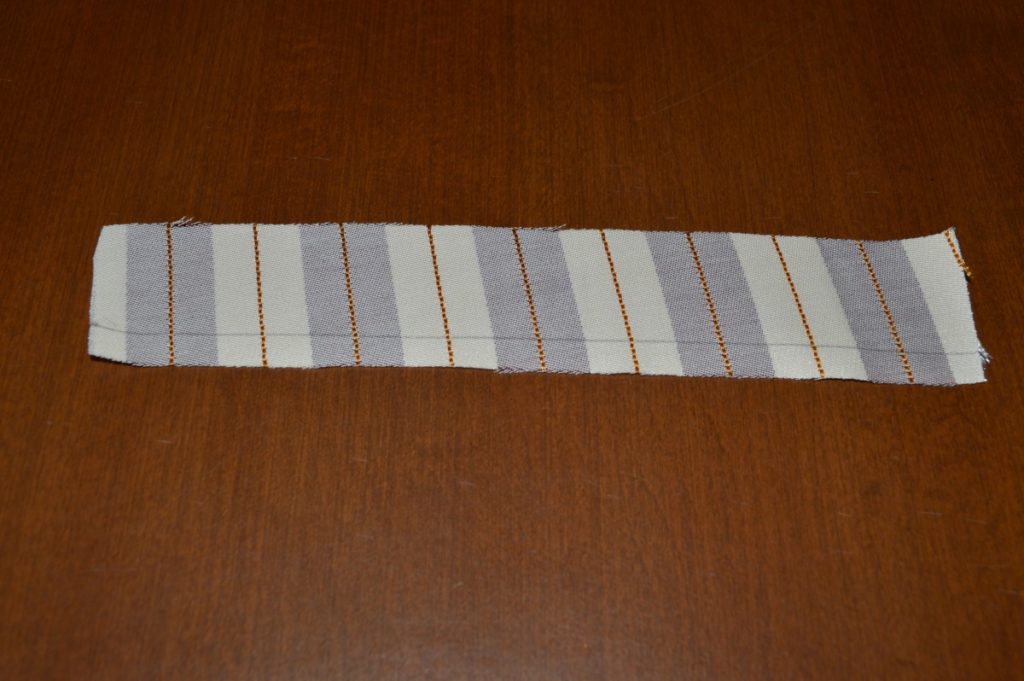
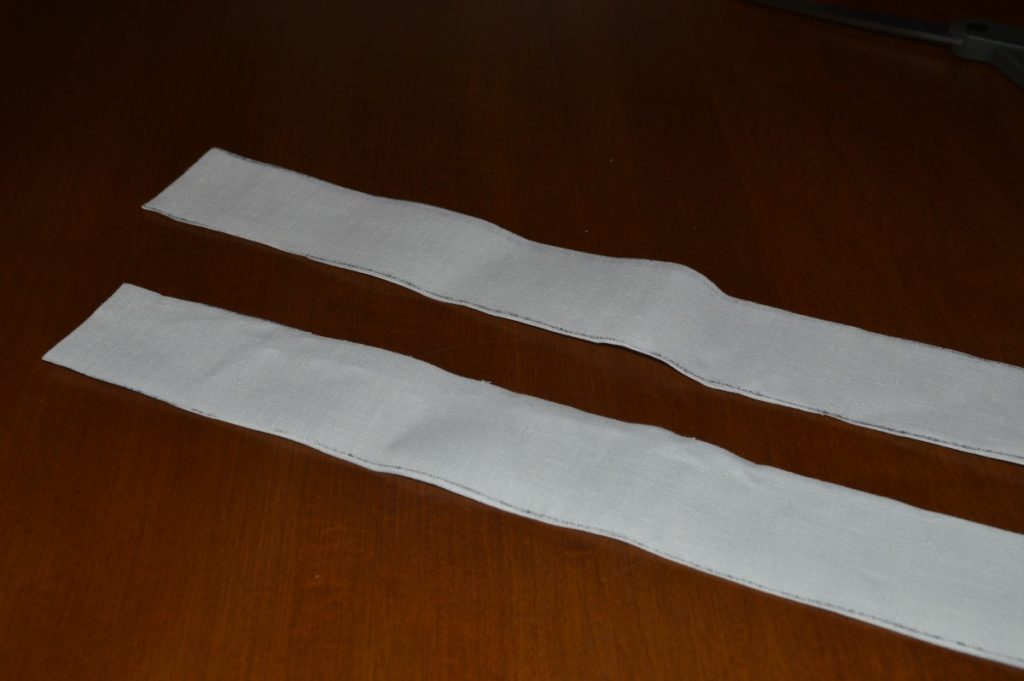
To begin, cut two strips of linen 1 1/2 inches wide by slightly longer than the width of the forepart. Cut a third strip, shorter in length, for the watch pocket.
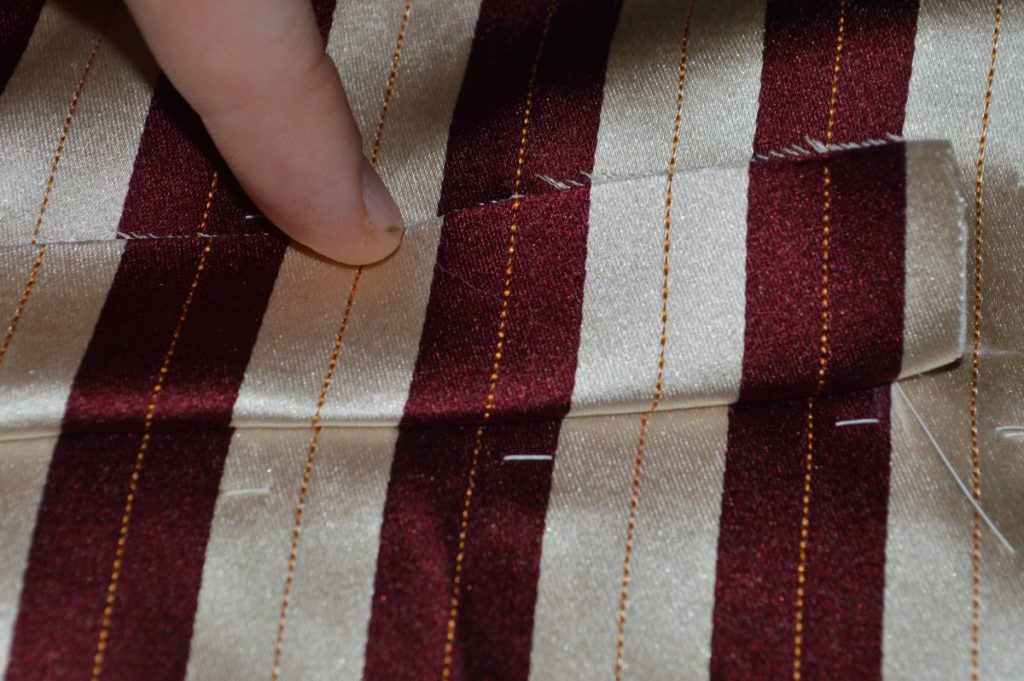
Turn to the inside of the forepart, and if you like, draw in the pocket line in chalk, using the tailors tacks as a guide. Or, just use the tacks as a guide, and draw a parallel line 5/8″ below the bottom of the pocket, extending all the way across the forepart.
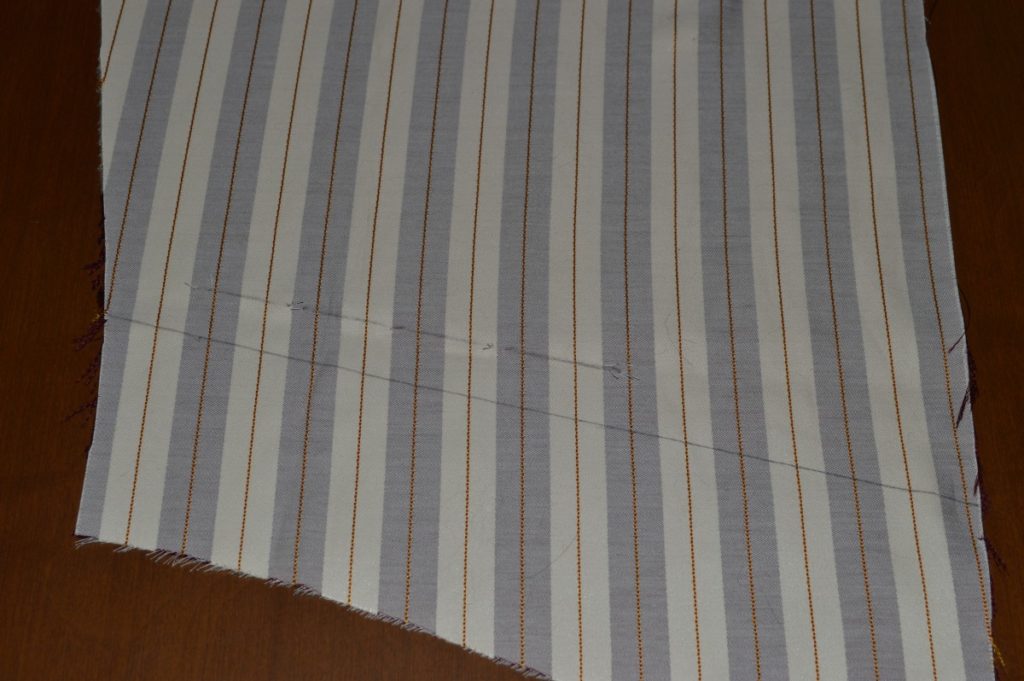
Do the same for the breast pocket, only the line should extend from the armscye, stopping about an inch beyond the end of the pocket.
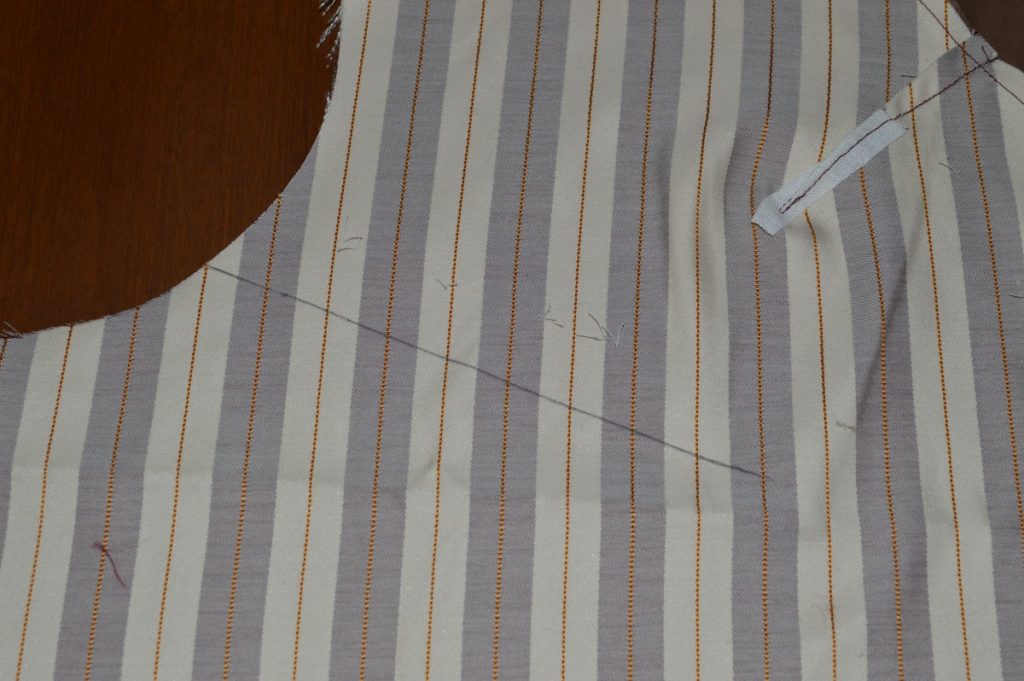
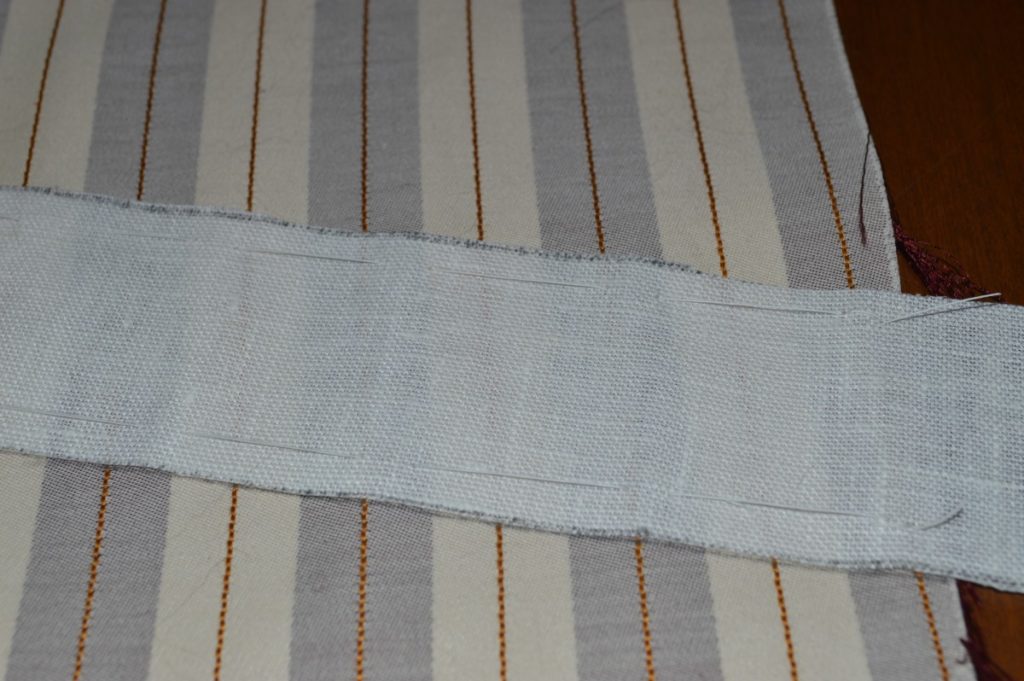
Lay the strips of linen on the wrong side of the forepart, lined up with the line you just drew. The ends should extend off either end of the forepart.
Baste along the top and bottom edge, as shown. These stitches will stay in until completion of the waistcoat.
Turn to the right side, and trim off both ends of the linen.
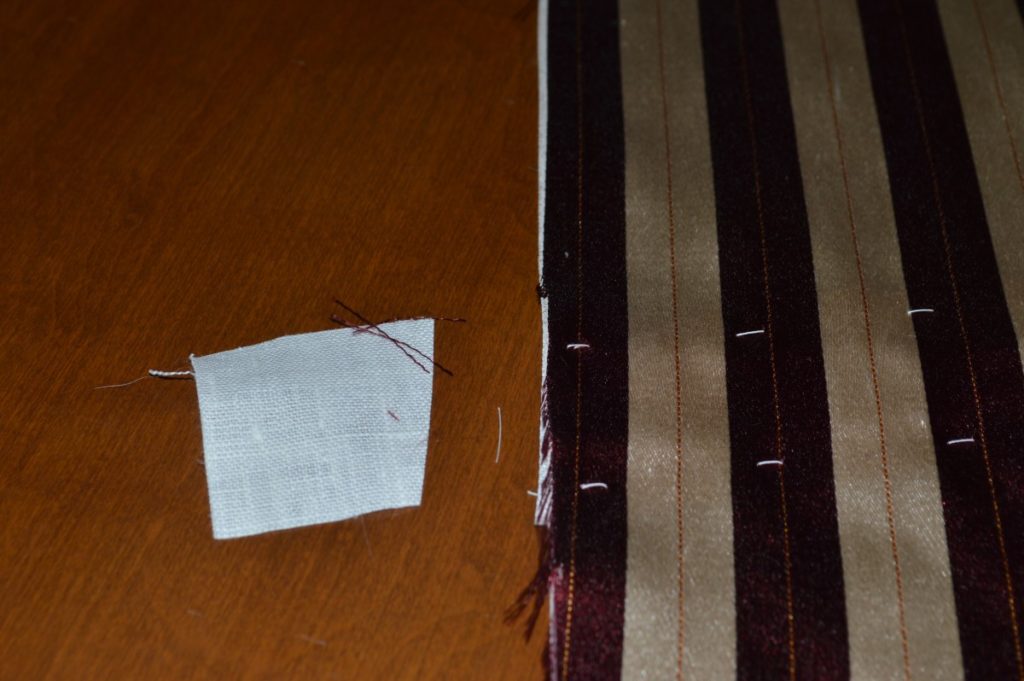
Now repeat this process with the watch pocket, only the linen will stop 1 inch from the end of the pocket, rather than continuing all the way across the forepart.