Category: Selvedge Jeans
Preparing the 1873 Button Fly
This section covers the preparation of the three types of flies, the 1873 two-piece fly (also typically used even nowadays), the one-piece fly (my favorite and the strongest type), and the zipper fly. The one piece and zipper flies instructions will appear here later on after I film them.
1873 Two-Piece Button Fly
If you haven’t already cut out the 1873 fly, you can find the pattern on the fly and waistband drafting page.
Begin by overcasting the long edges, and along the curves to the bottom point. If you’re using a selvedge along one edge you’ll save yourself a bit of work here.
Press the fly in half, wrong sides together, keeping the top edge set back from the selvedge by about 1/16″. Baste together along the open edge.
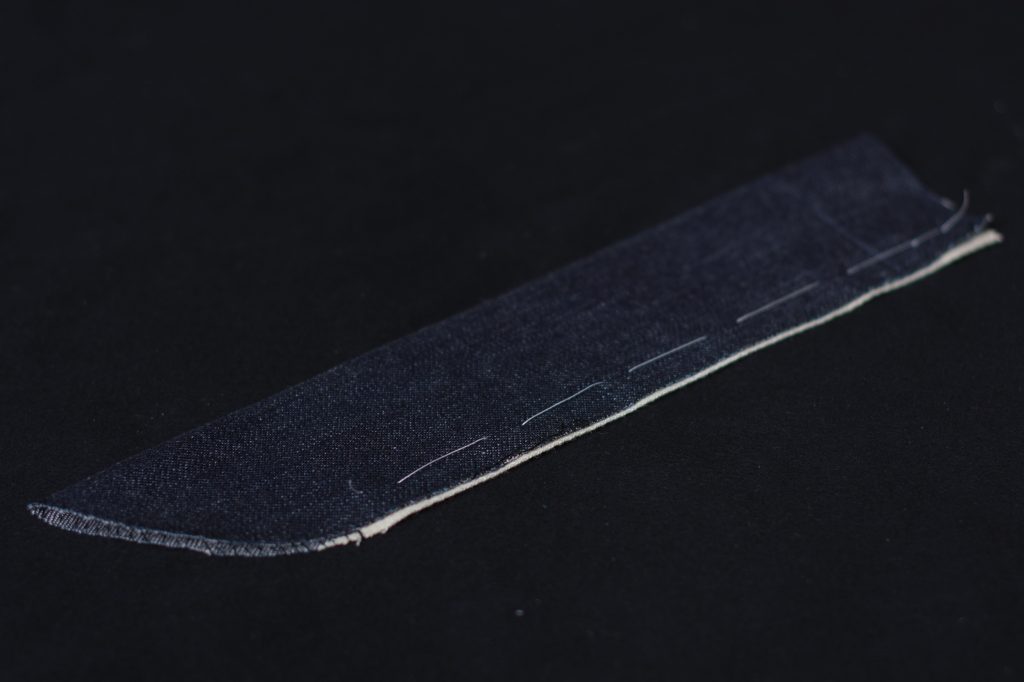
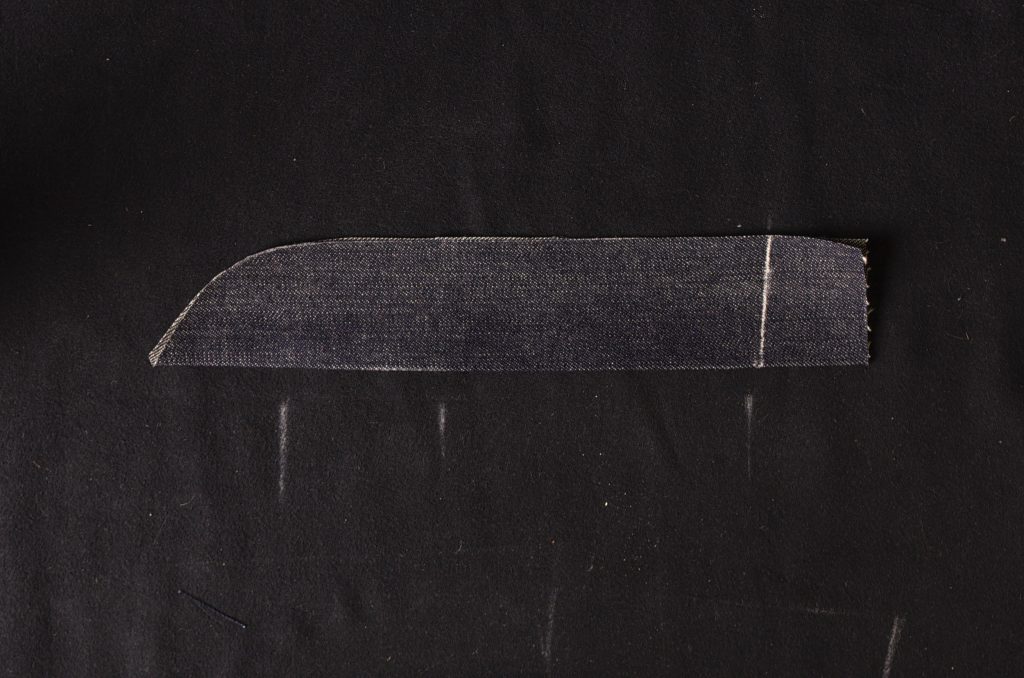
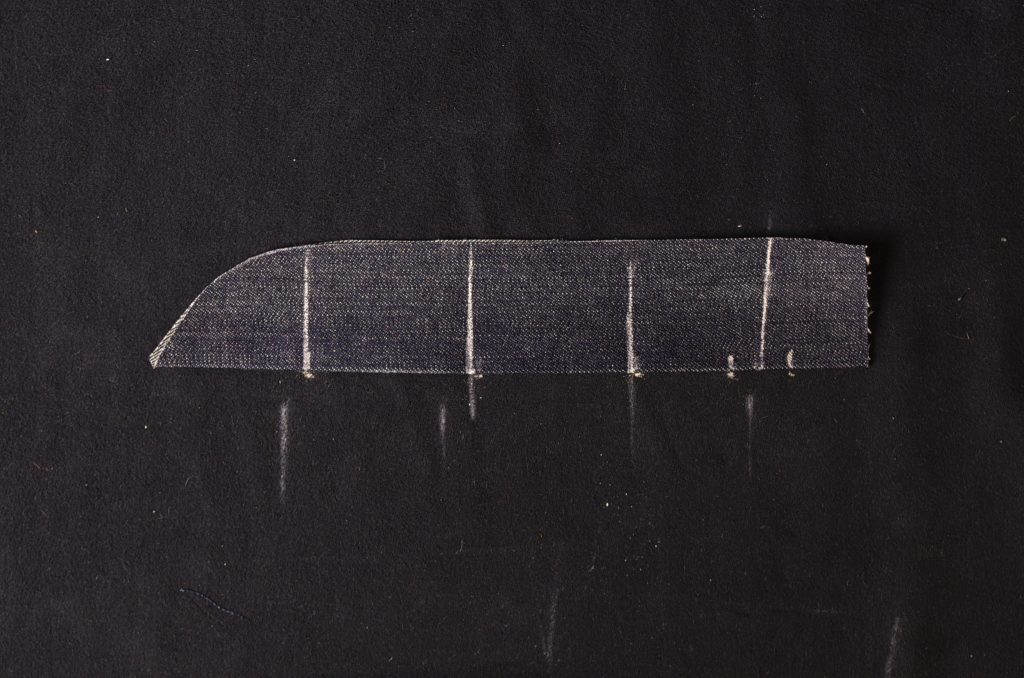
The top edge of the fly should be clearly marked at this point, showing the inlay area.
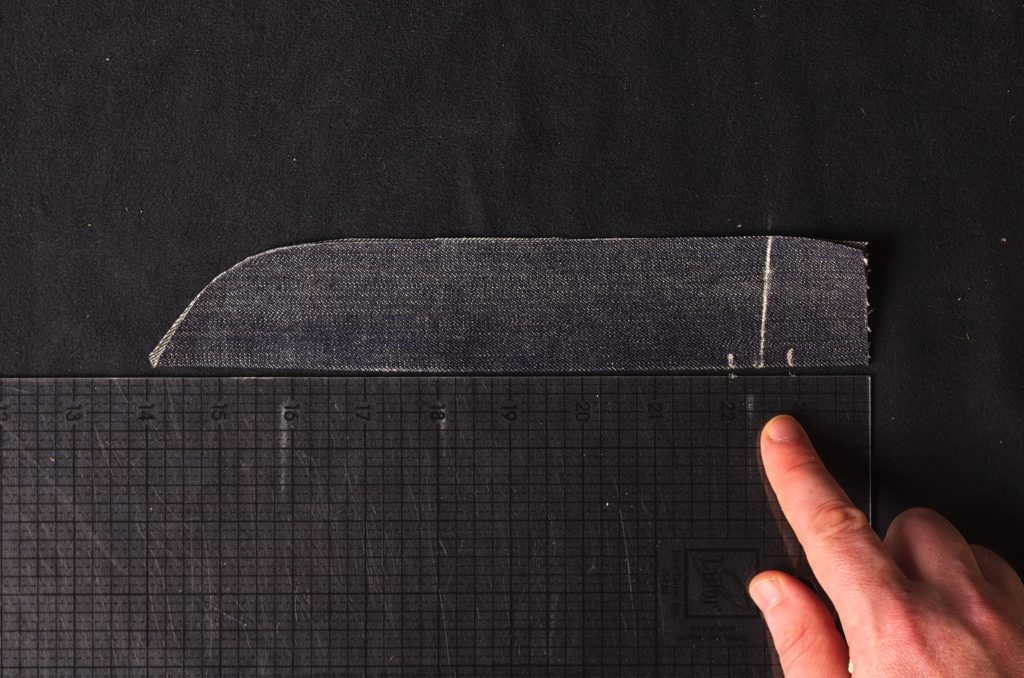
Mark two little points for visual aids, 3/8″ to the right and left of the inlay mark. The left mark is the seam line, indicating the position of the waistband in the finished garment. The right mark is 3/4″ from that, indicating the position of the buttonhole that will be added to the waistband later on.
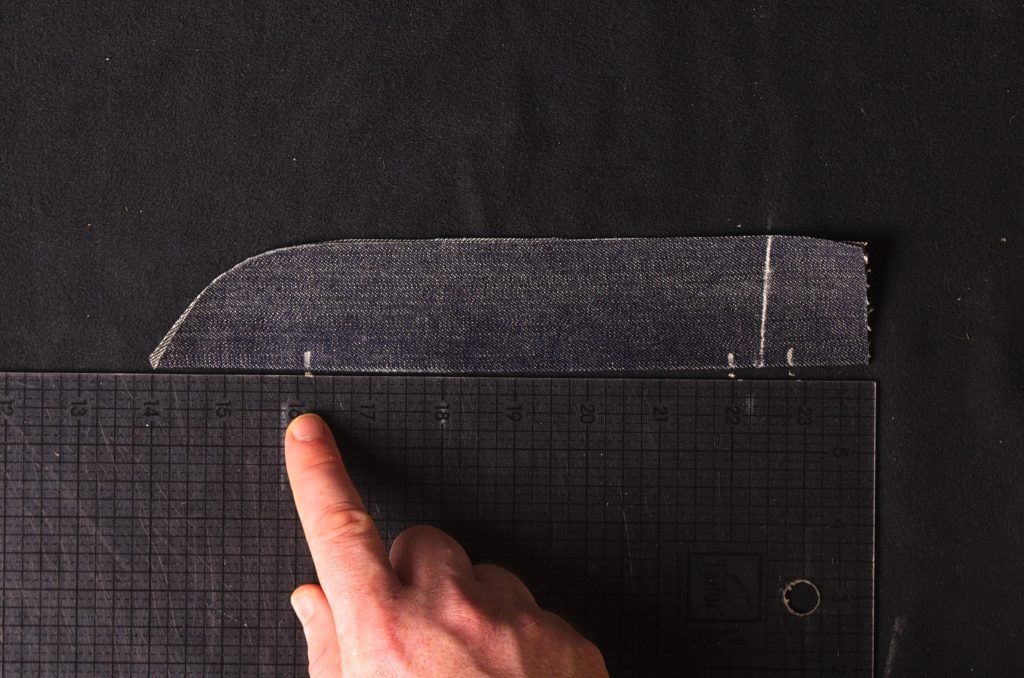
Mark the position of the lower buttonhole, about 2″ to 2 1/2″ from the bottom edge. You want to make sure there’s room for the top stitching below the buttonhole and around the curve.
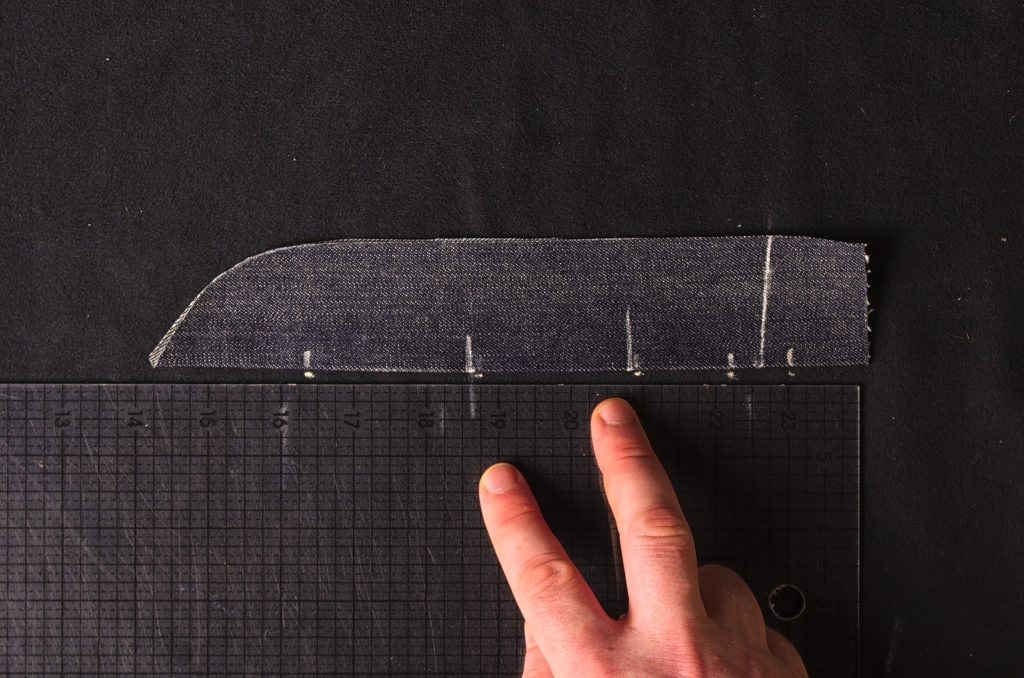
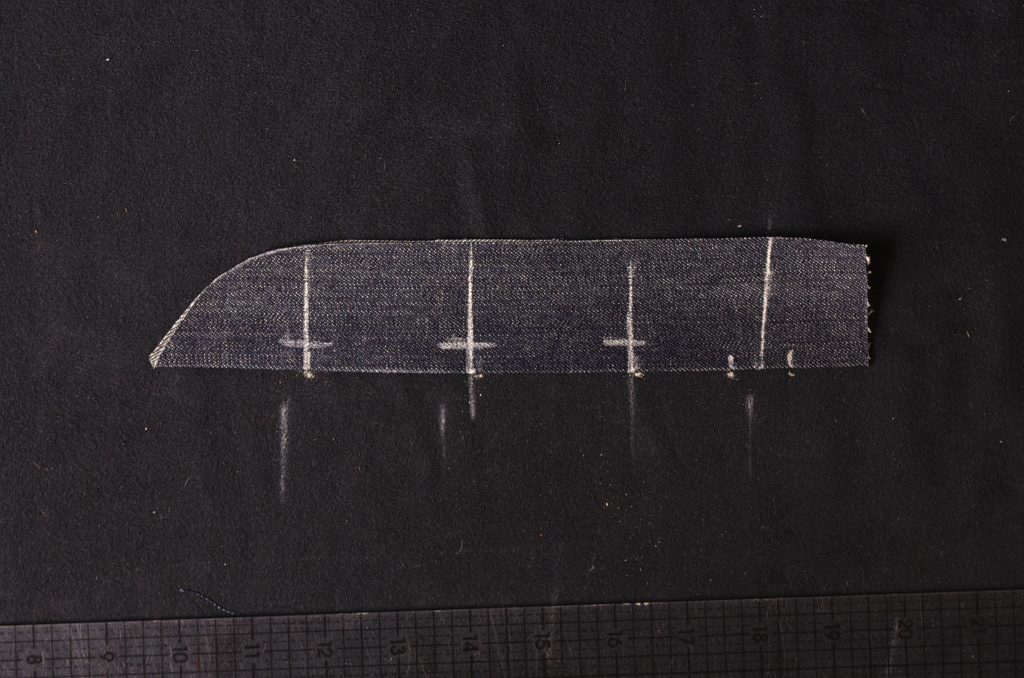
With the lower and top buttonhole positions marked, add the additional buttonholes spaced evenly between them. You might have more than I do depending on your size. Generally, I like to keep them spaced between 1 1/2″ at the narrowest to 2 1/2″ apart at the widest spacing, so use your best judgement here and see what works for you.
Square across the buttonholes (don’t worry about the top one that will be in the waistband).
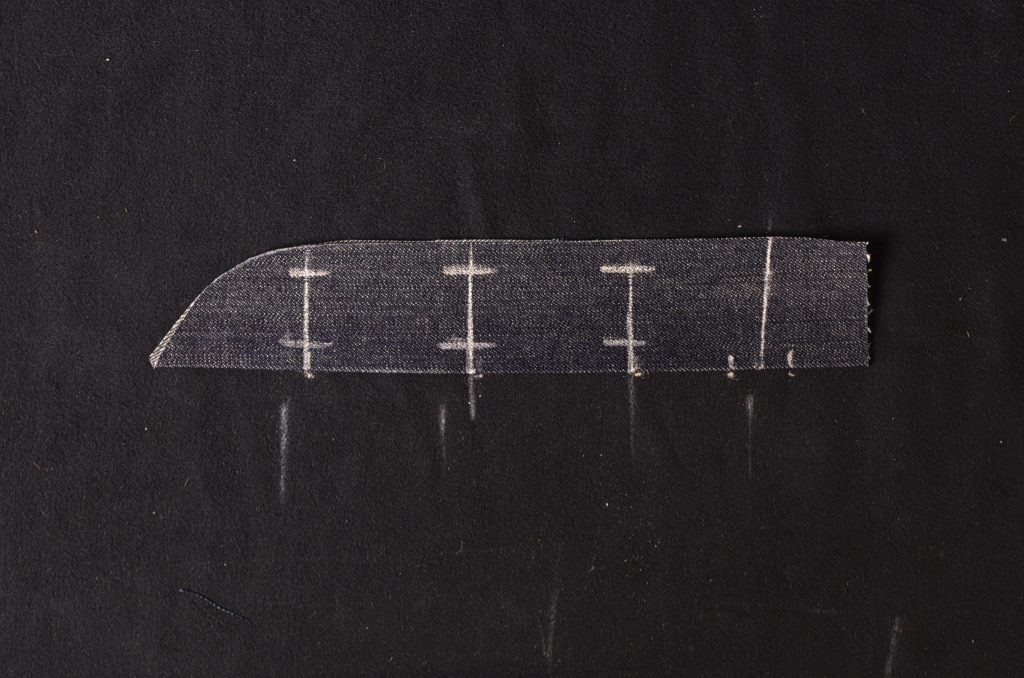
Mark the outside edge of the buttonholes, about 3/8″ from the folded edge.
And finally, mark the inner edge of the buttonholes. These should be about 1/8″ to 1/4″ wider than the buttons you are using.
One Piece Fly
Coming soon.
Zipper Fly
Coming soon.
Installing the Pockets – Part II
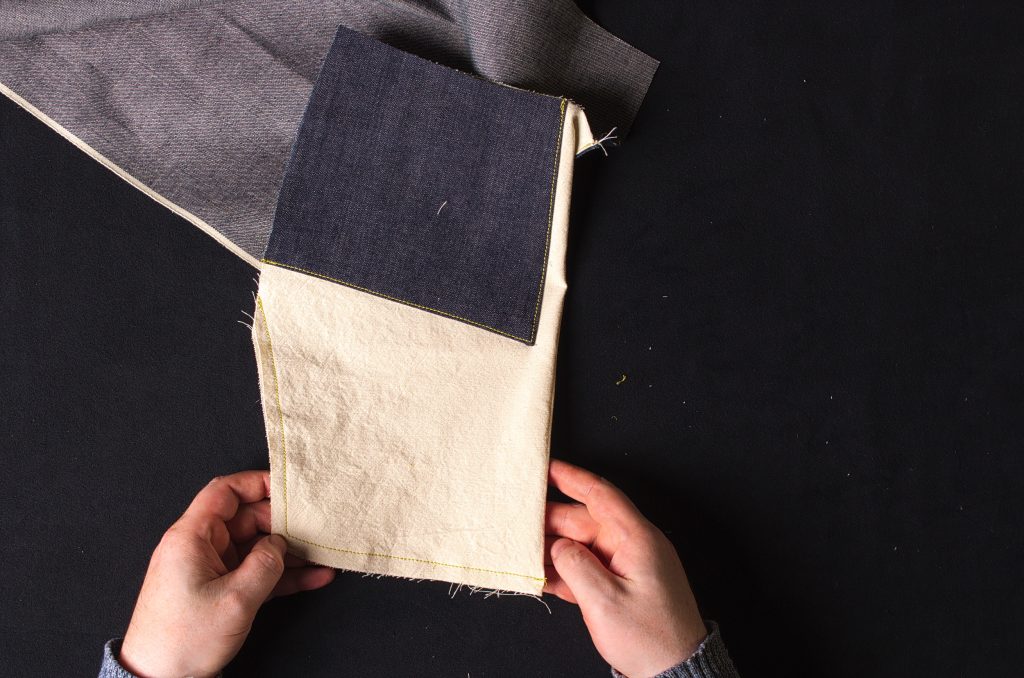
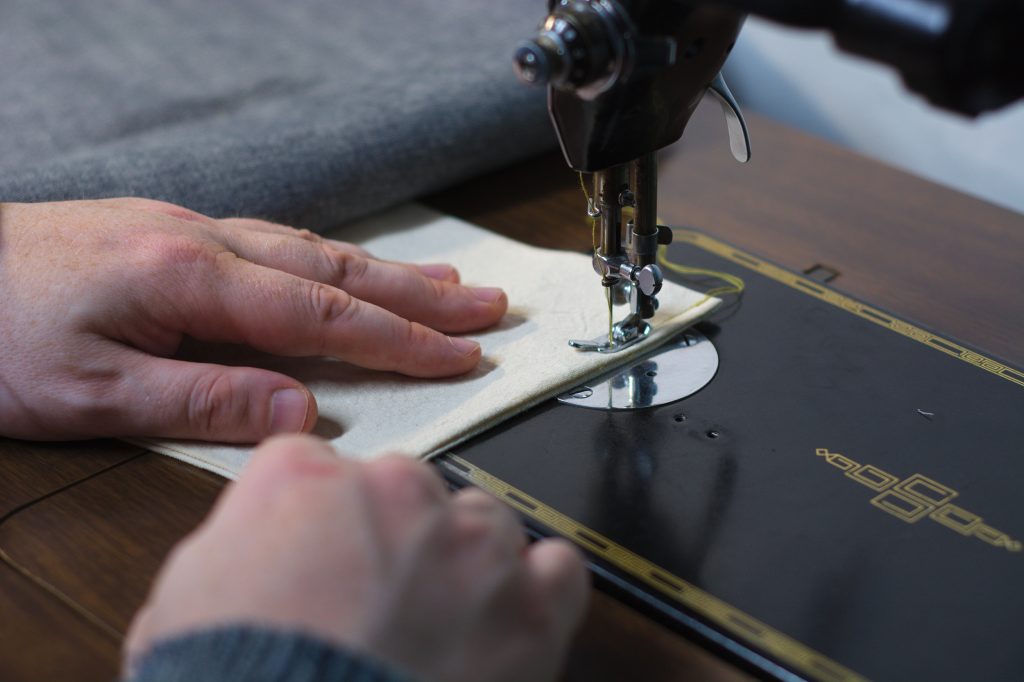
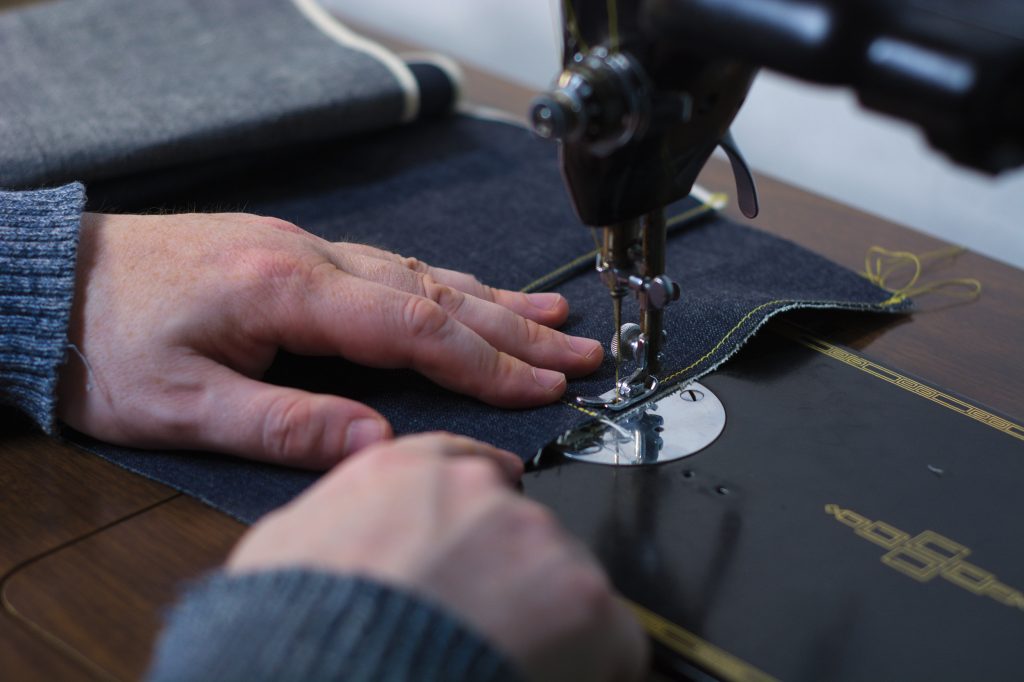
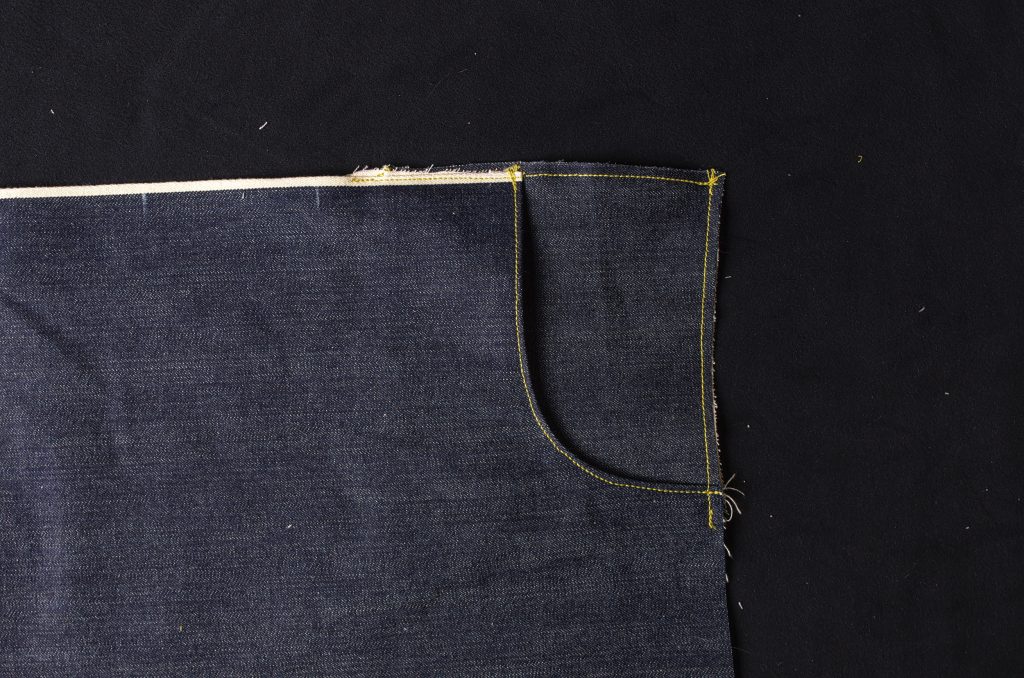
Lay the pocket bag facing side down on the table as shown, moving the leg out of the way.
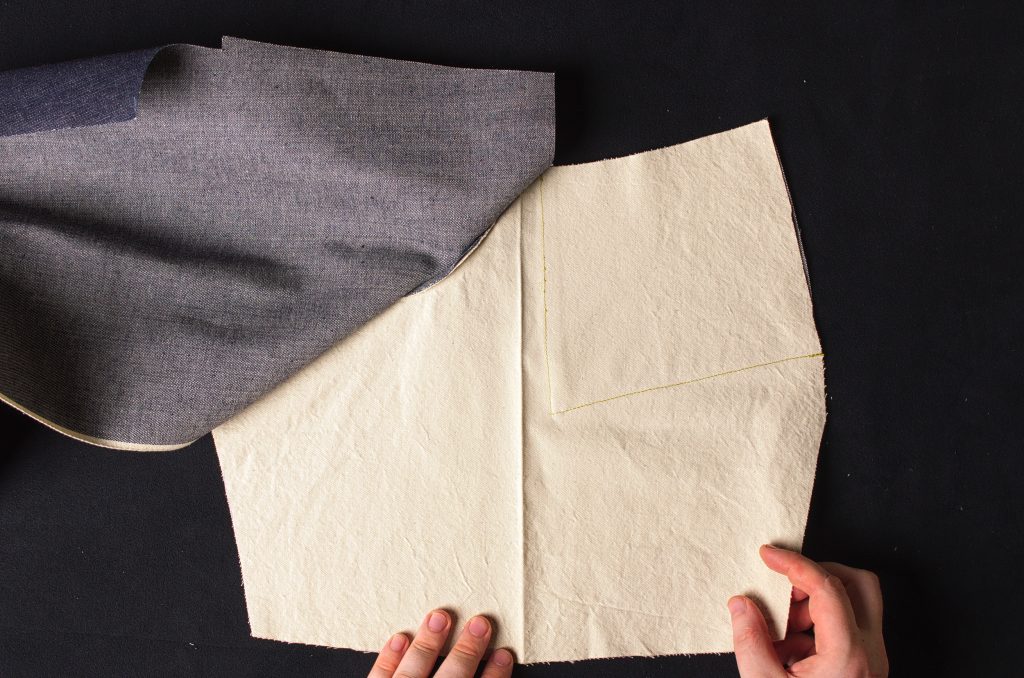
Fold the pocket in half so that it’s inside out, with the facing side on the outside. Align the bottom and remaining edge.
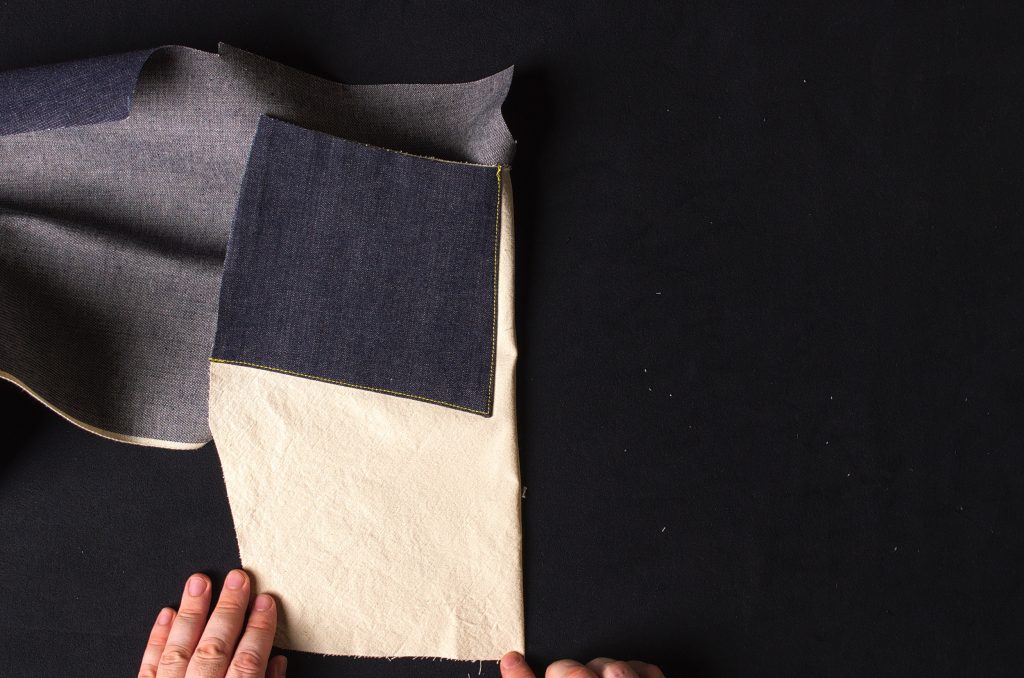
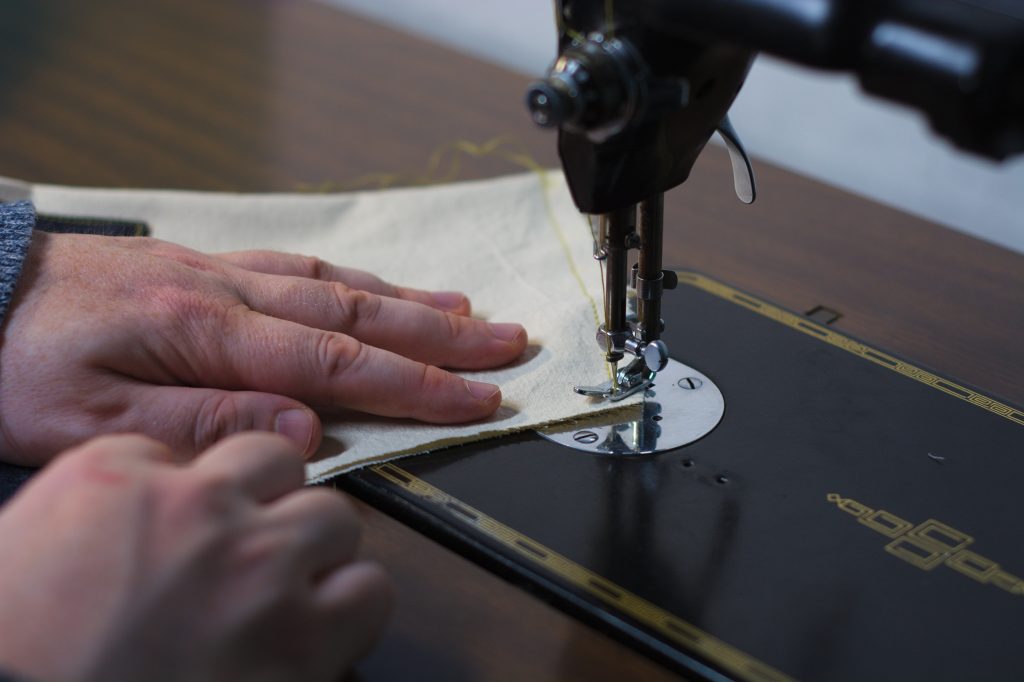
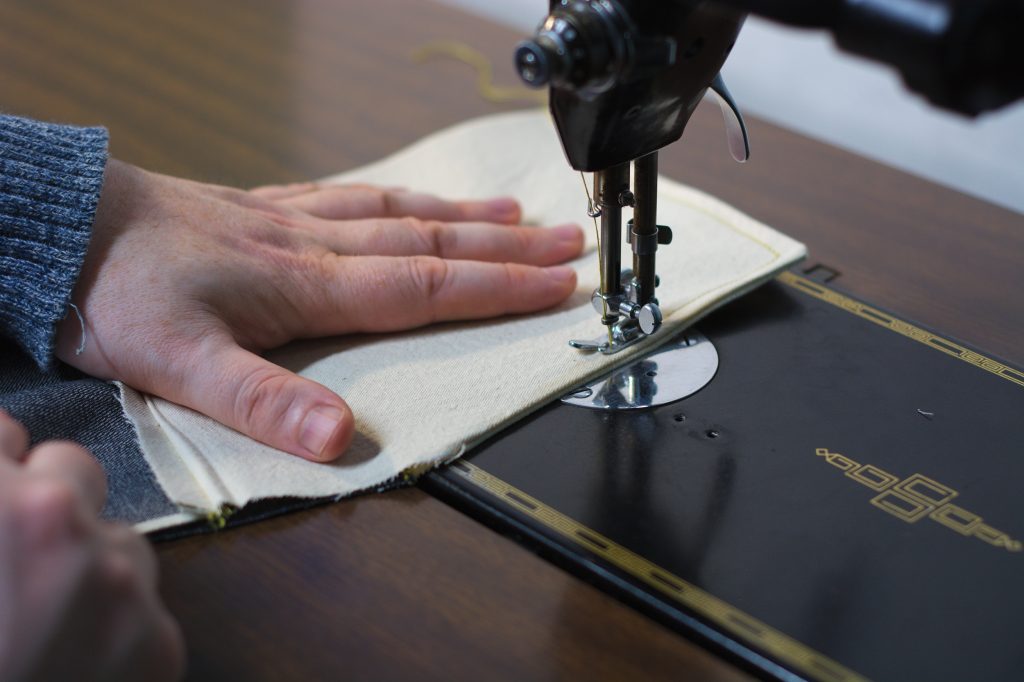
Sew along the bottom edge (if you have a curved bottom edge taper the stitching around the curve into the folded edge), as well as up along the curved seam, ending at the side seam.

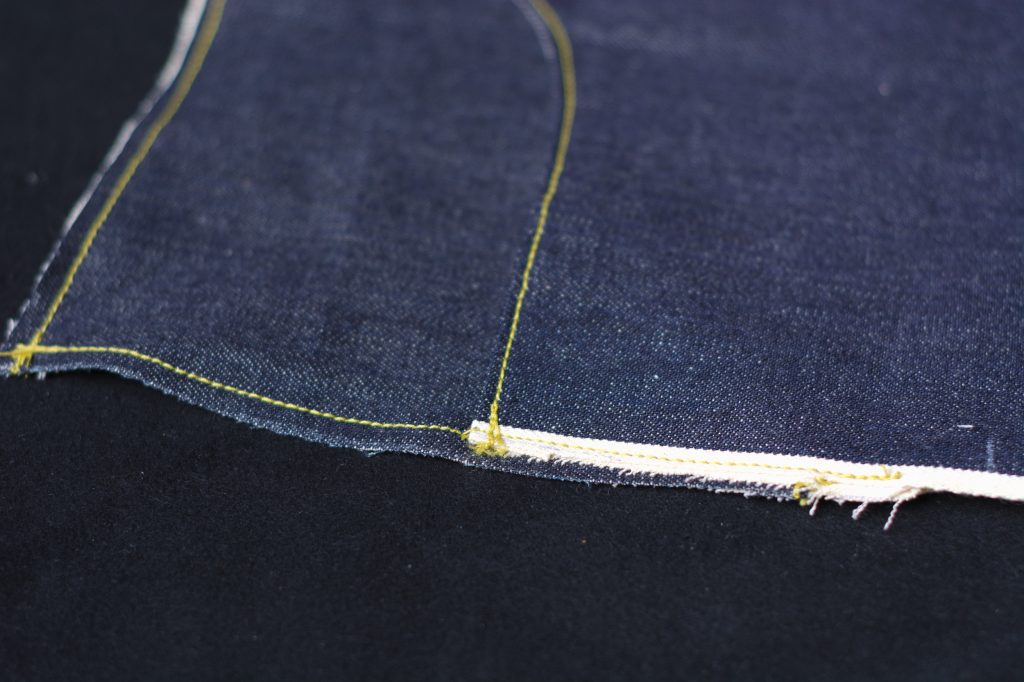
At the corner take a single diagonal stitch across at a 45 degree angle, rather than making a sharp corner, to make turning the pocket a lot smoother.
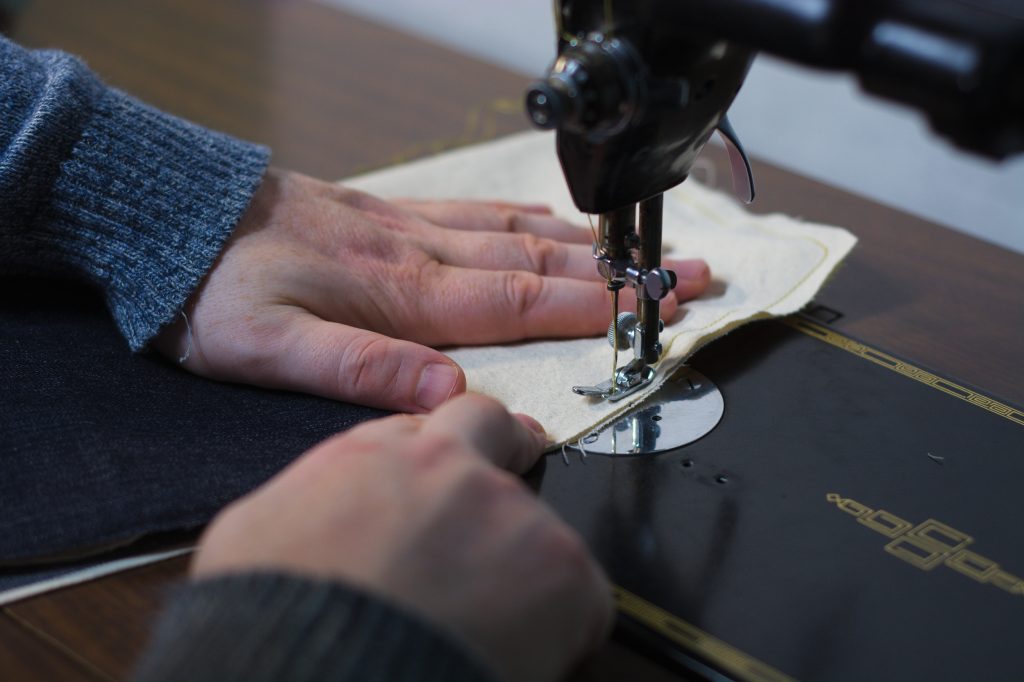
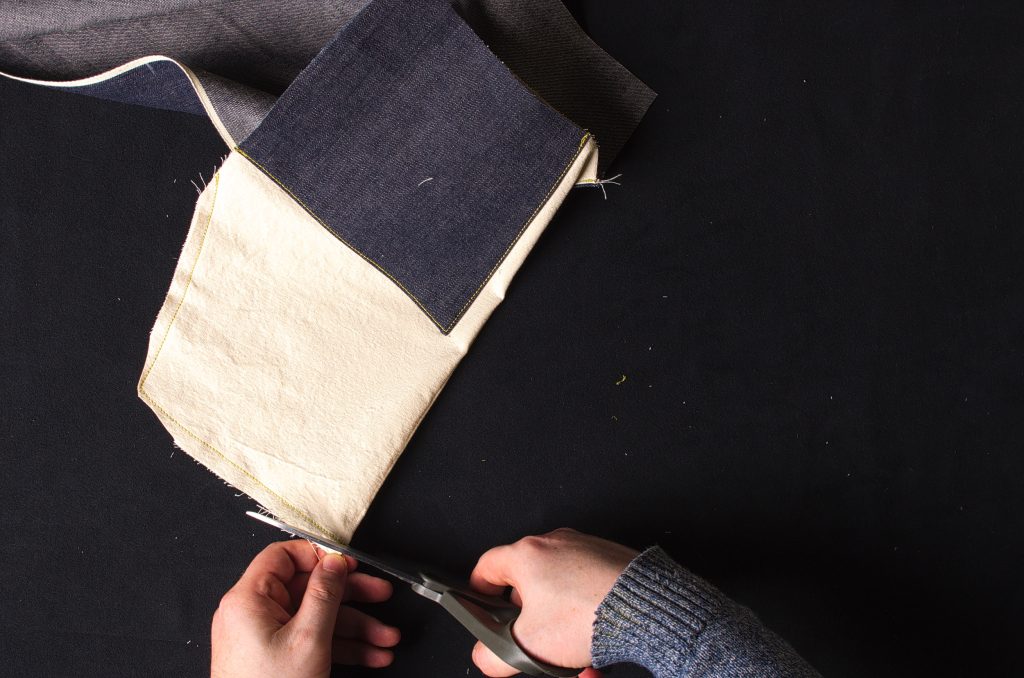
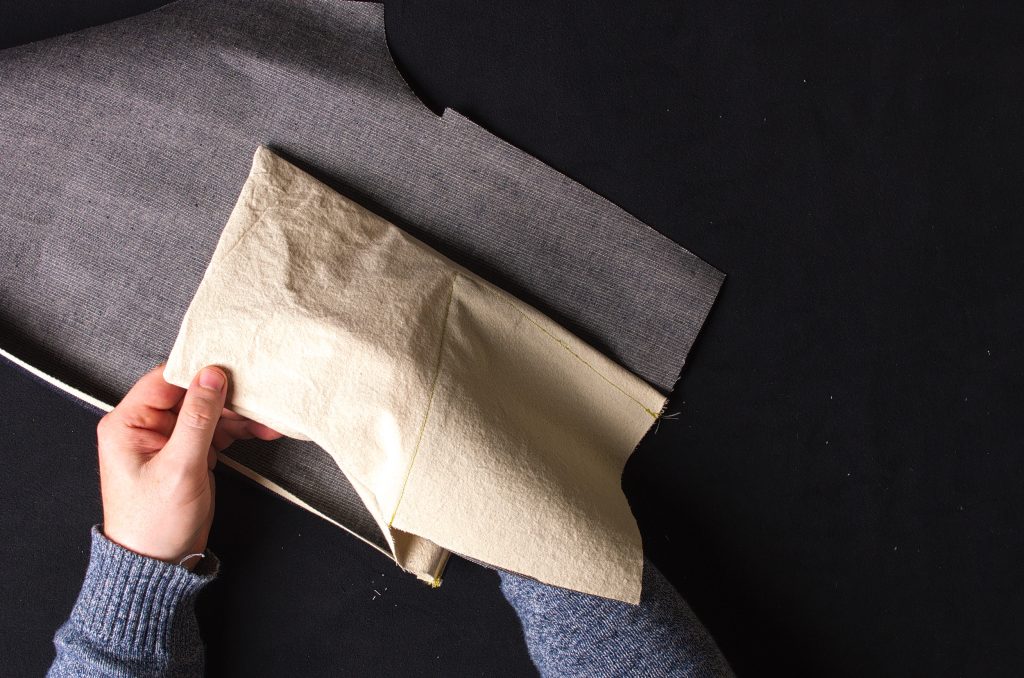
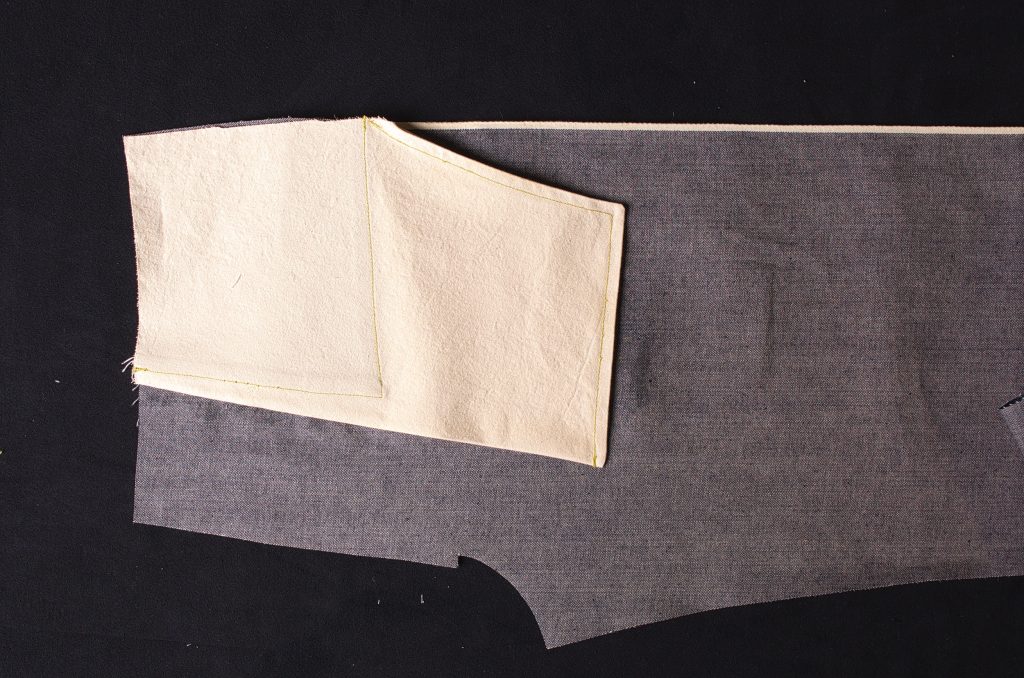
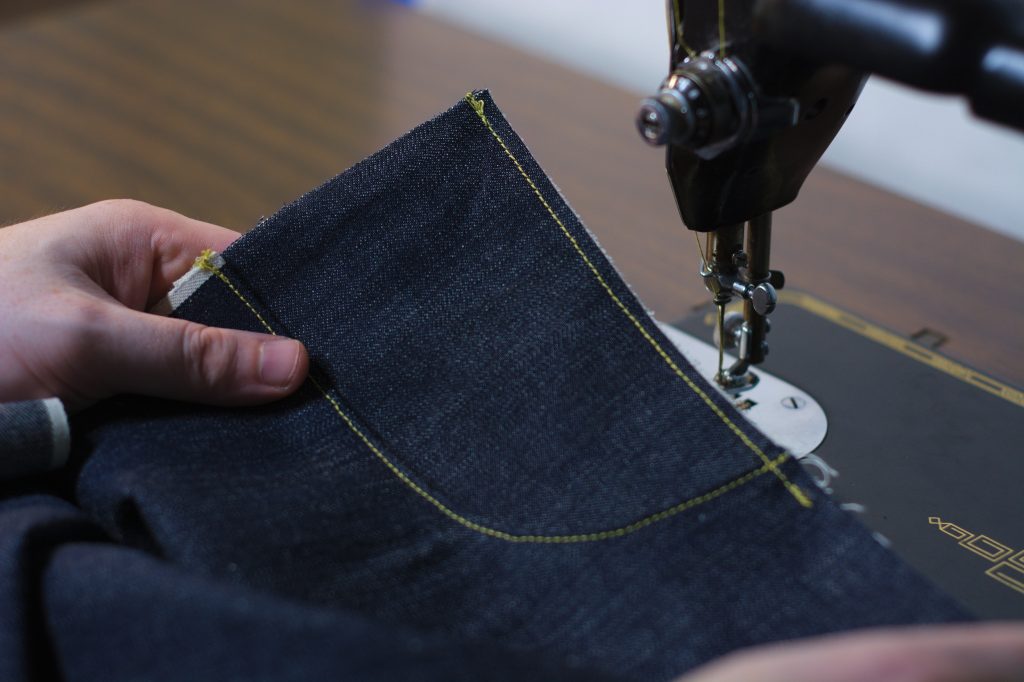
The pocket bag after sewing.
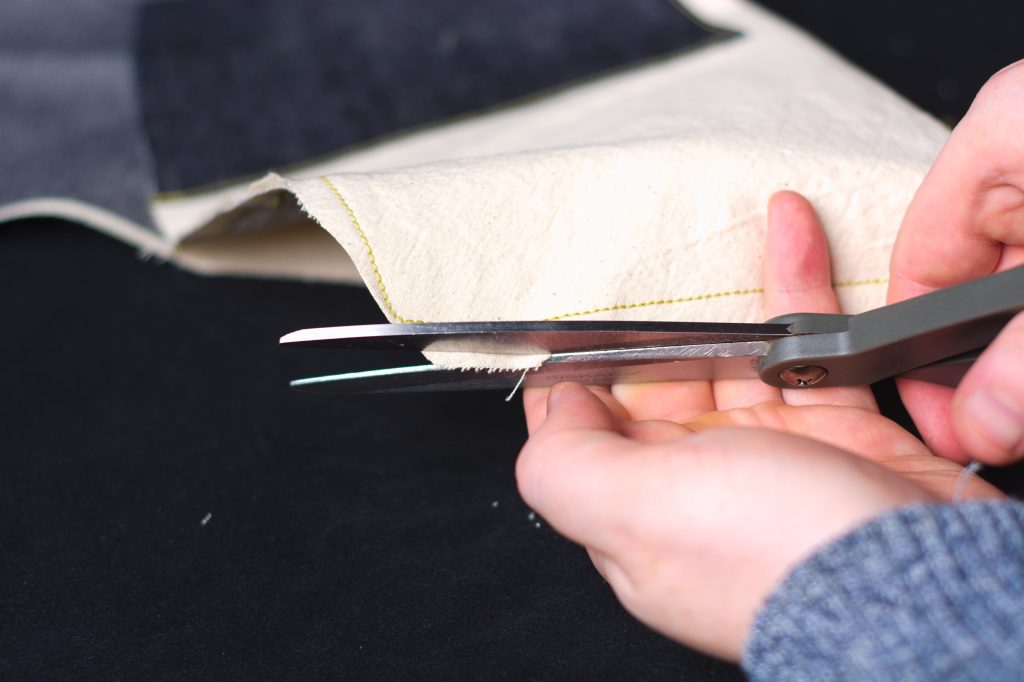
Now clip the corners to make turning easier.
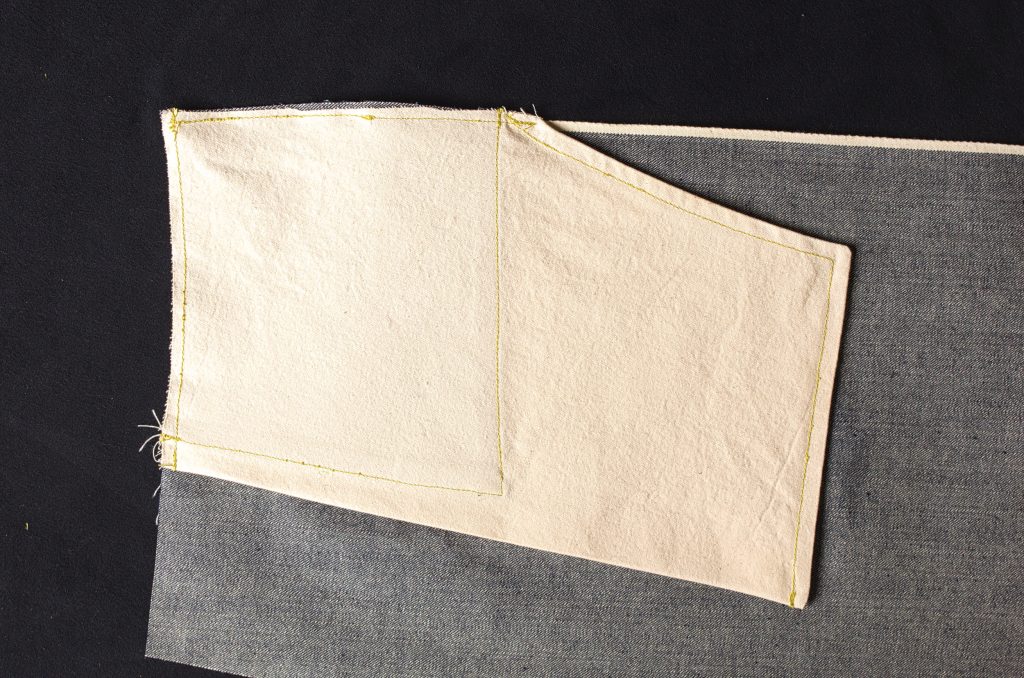
Turn the pocket right side out.
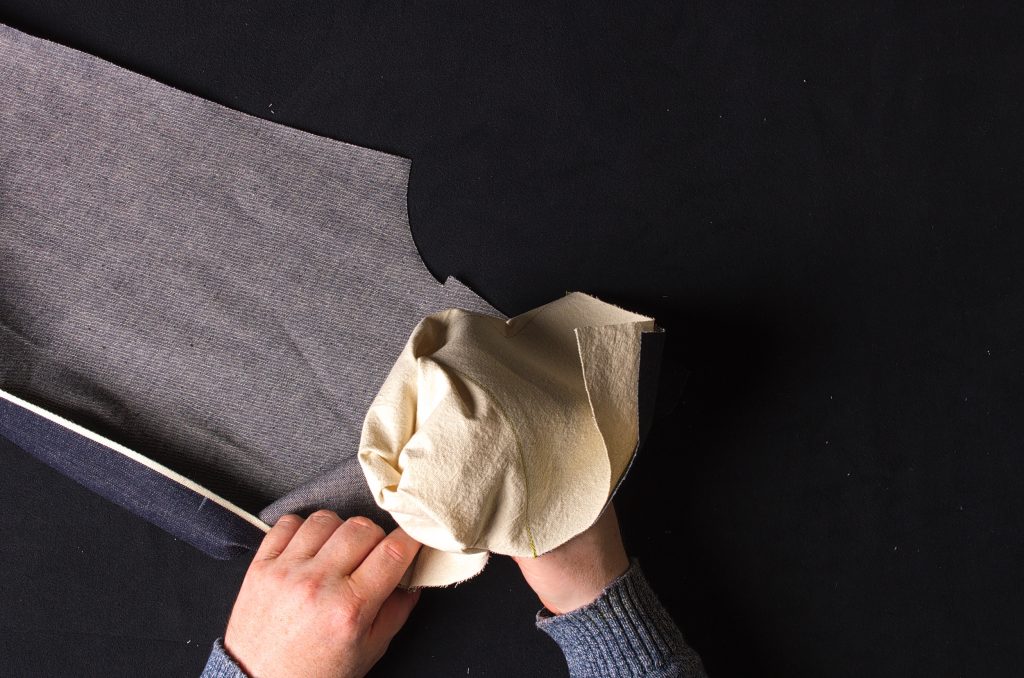
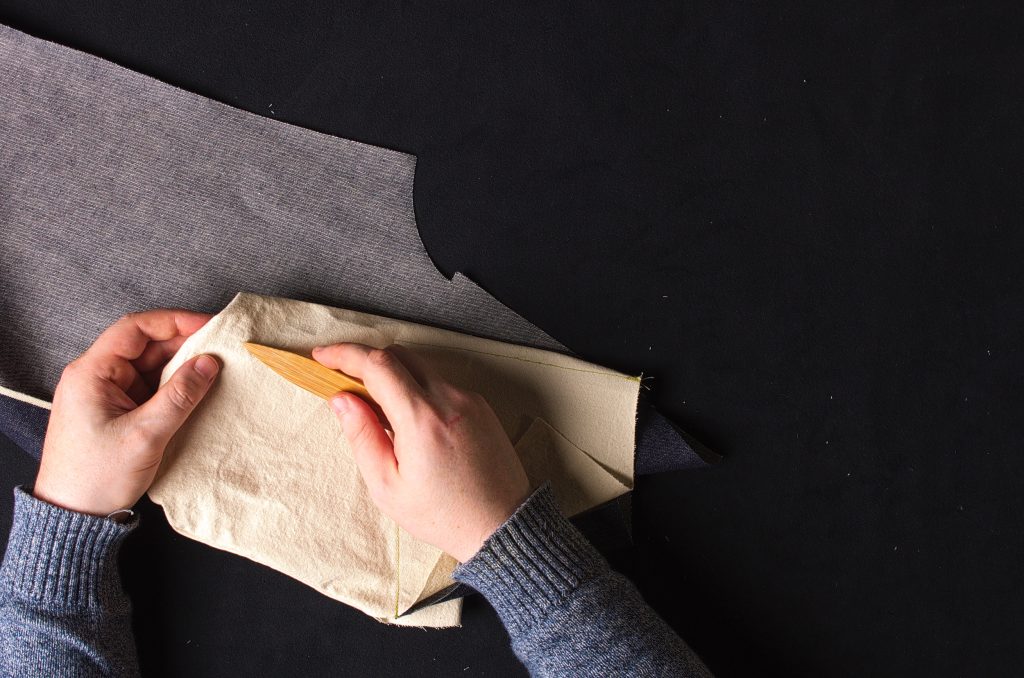
Use a point pressing tool to help get the corners nice and crisp.
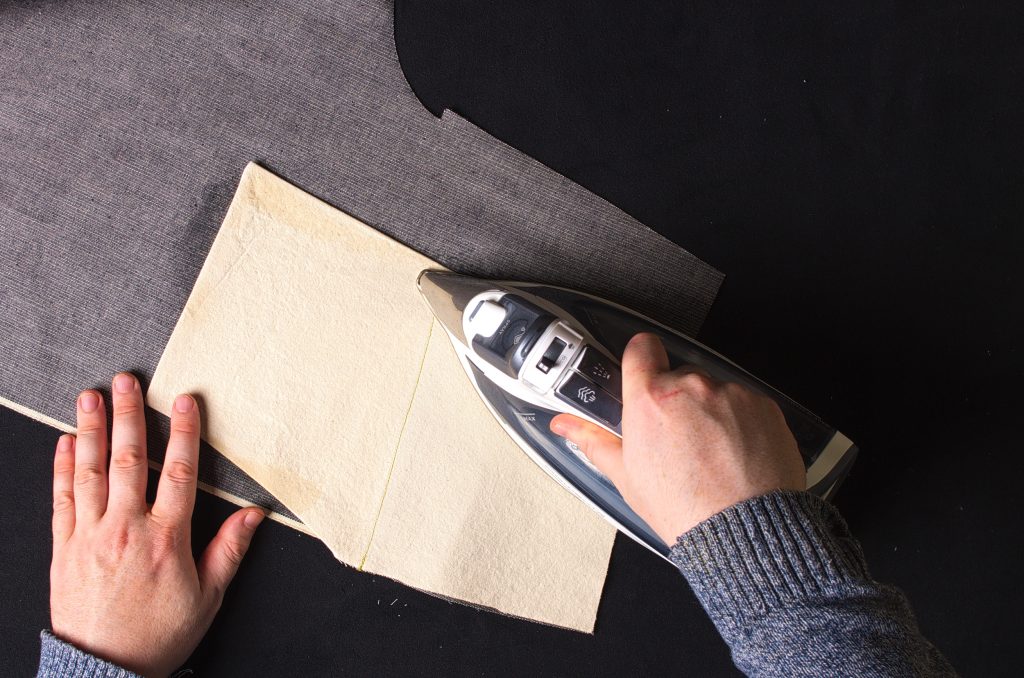
Give the pocket bag a good pressing to finalize the position of everything.
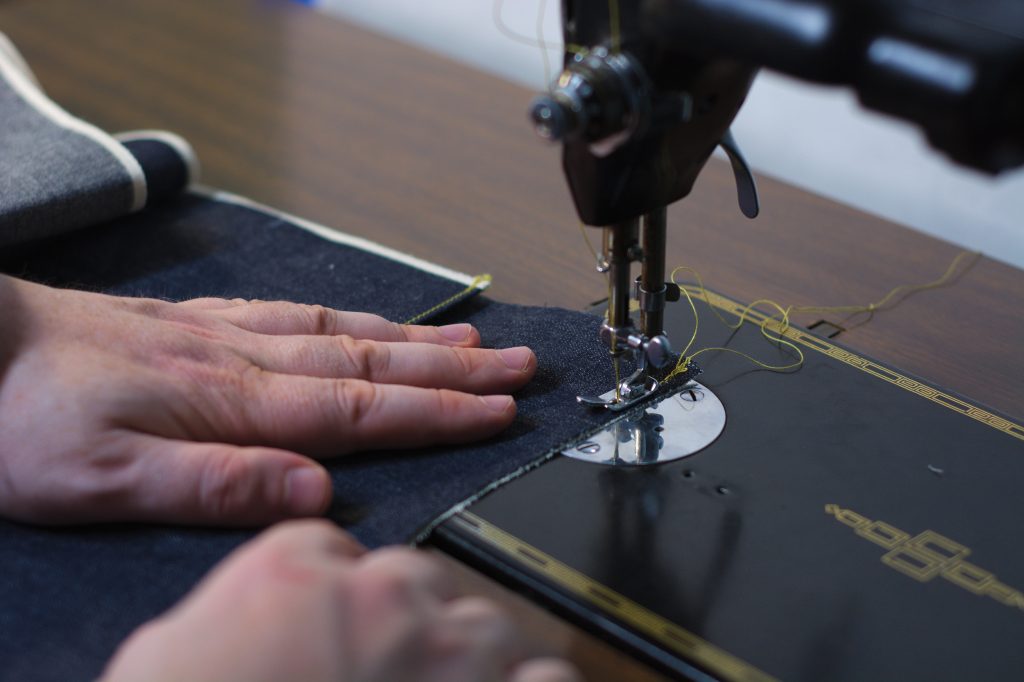
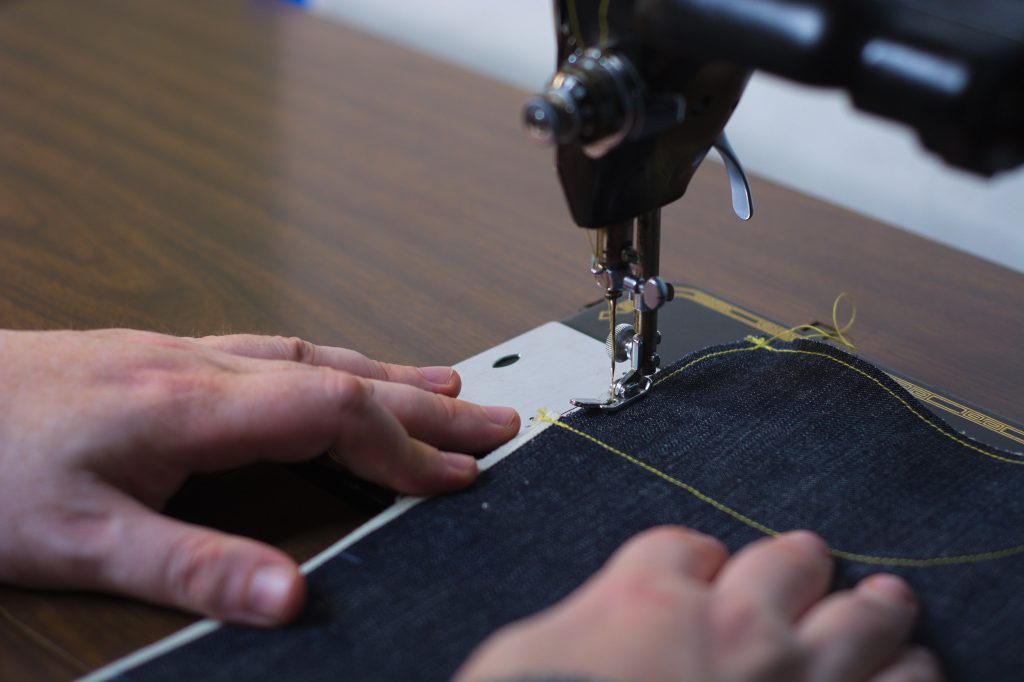
Top stitch along the curved and bottom edges, about 1/8″ to 1/4″ from the edge.
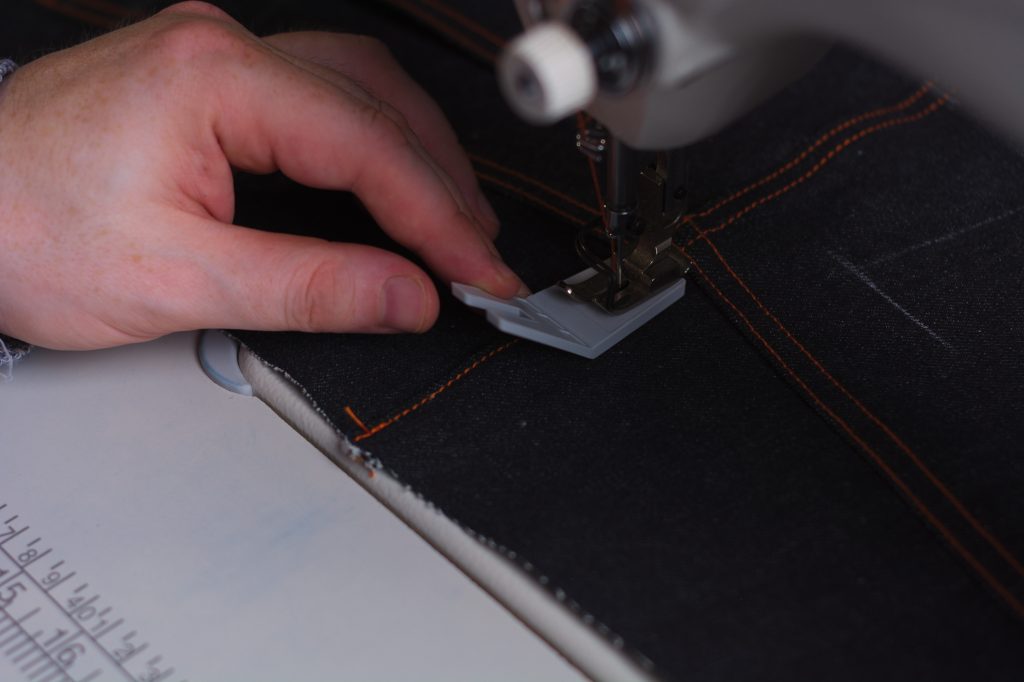
Now sew across the top of the pocket / leg along the waist seam, about 1/4″ from the edge through all layers.
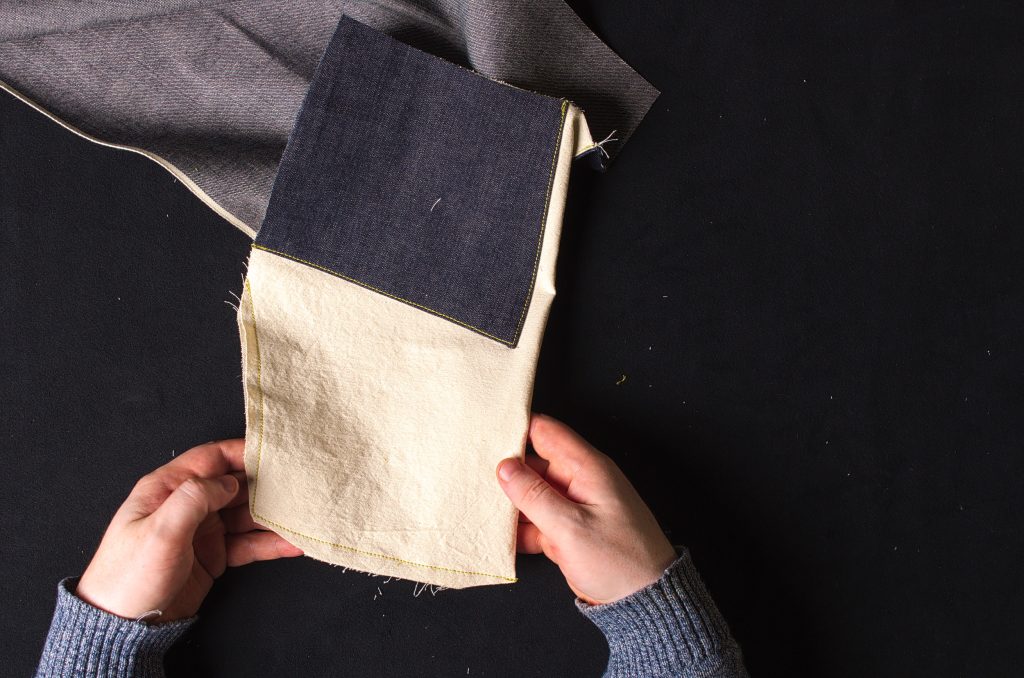
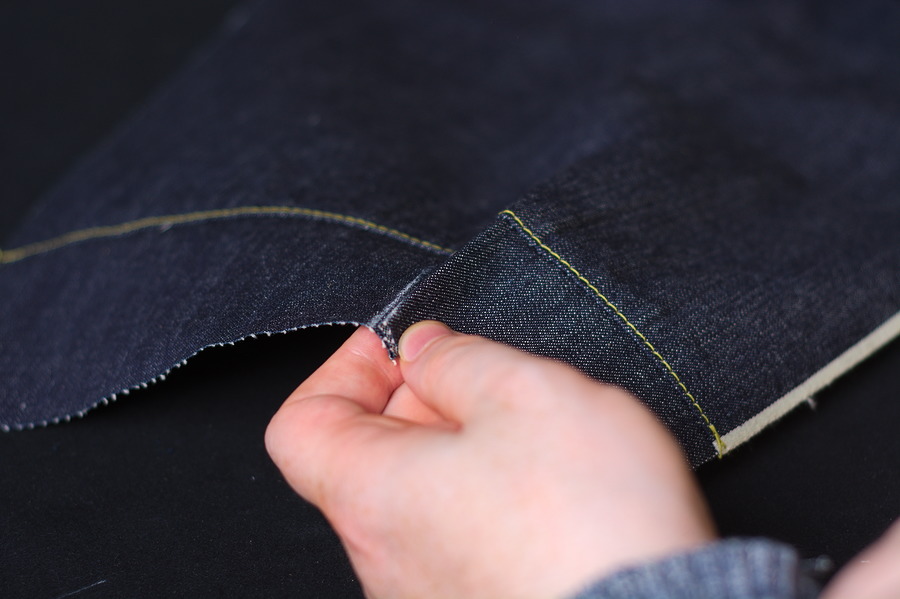
Be sure to fold the top of the pocket into it’s final position before sewing it closed.
The stitching ends just at the end of the pocket underneath.
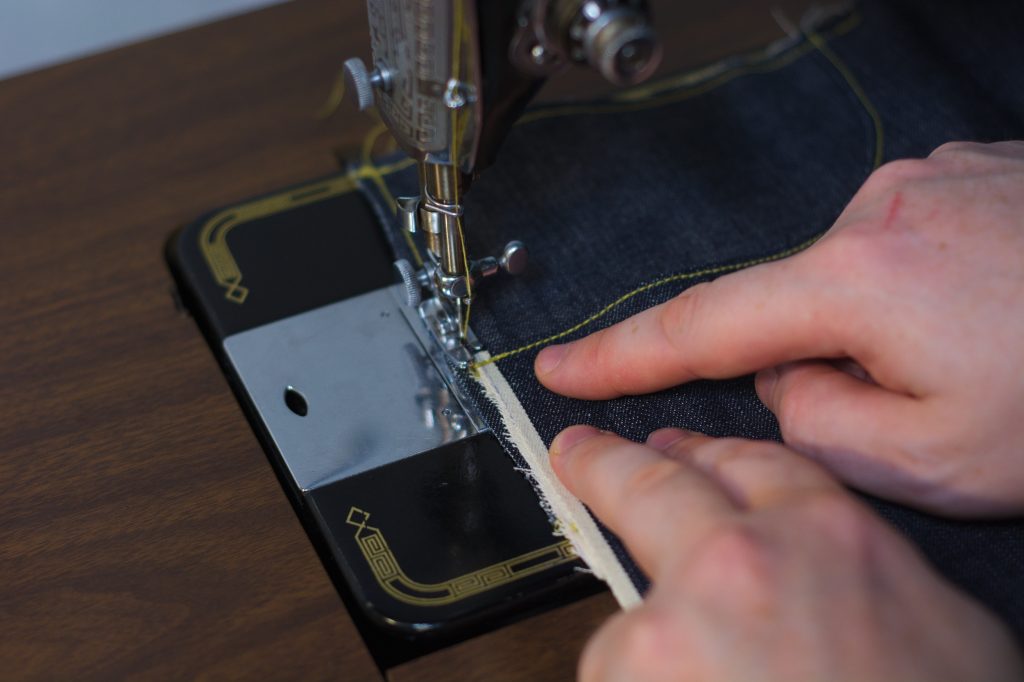
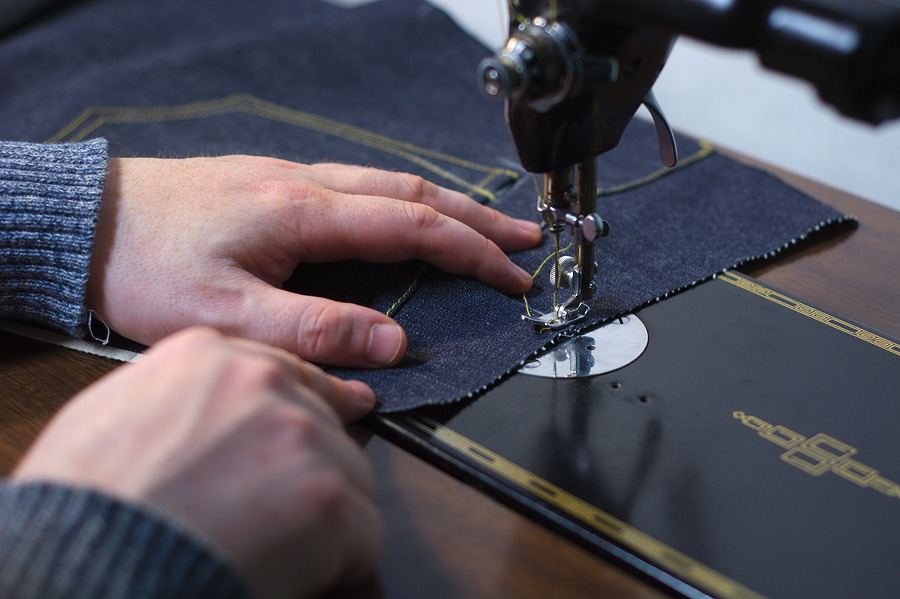
Now starting at the waist seam again, sew down along the side seam through all layers.
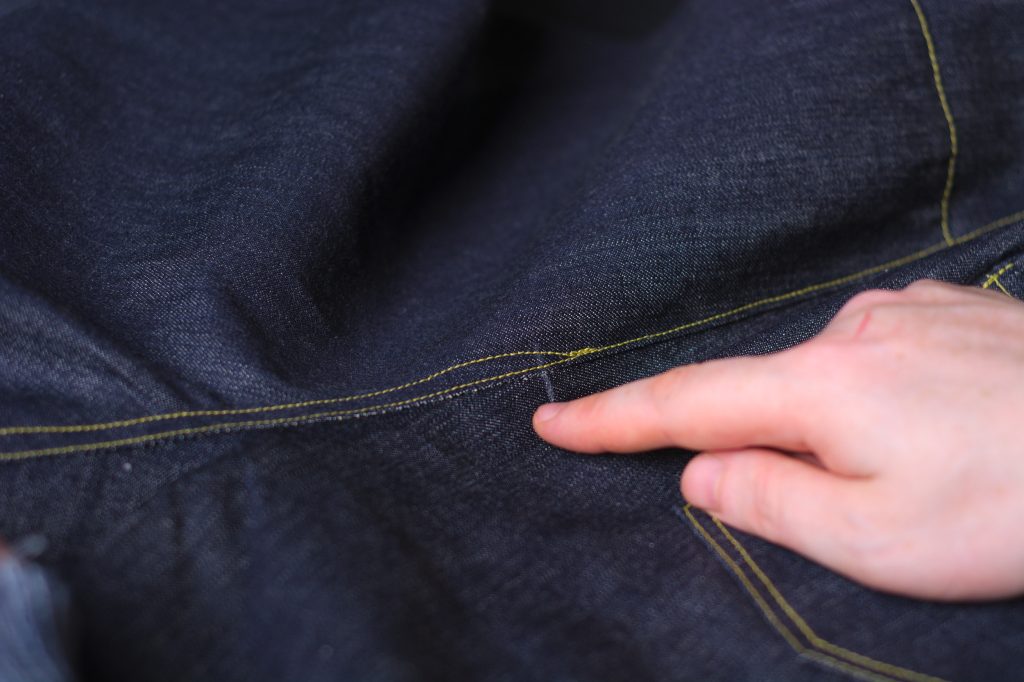
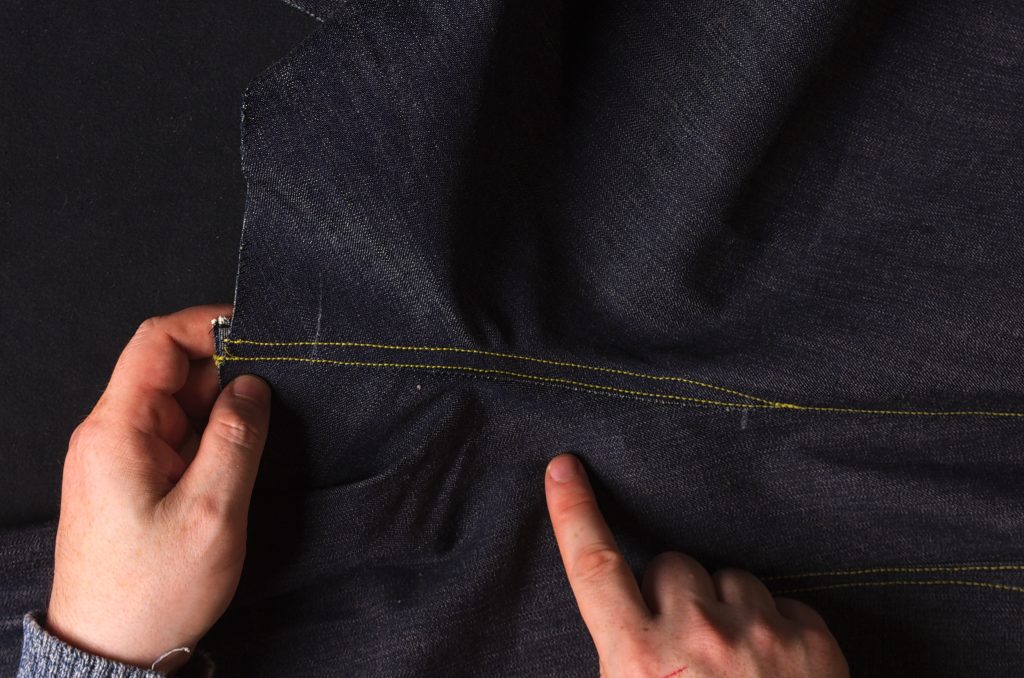
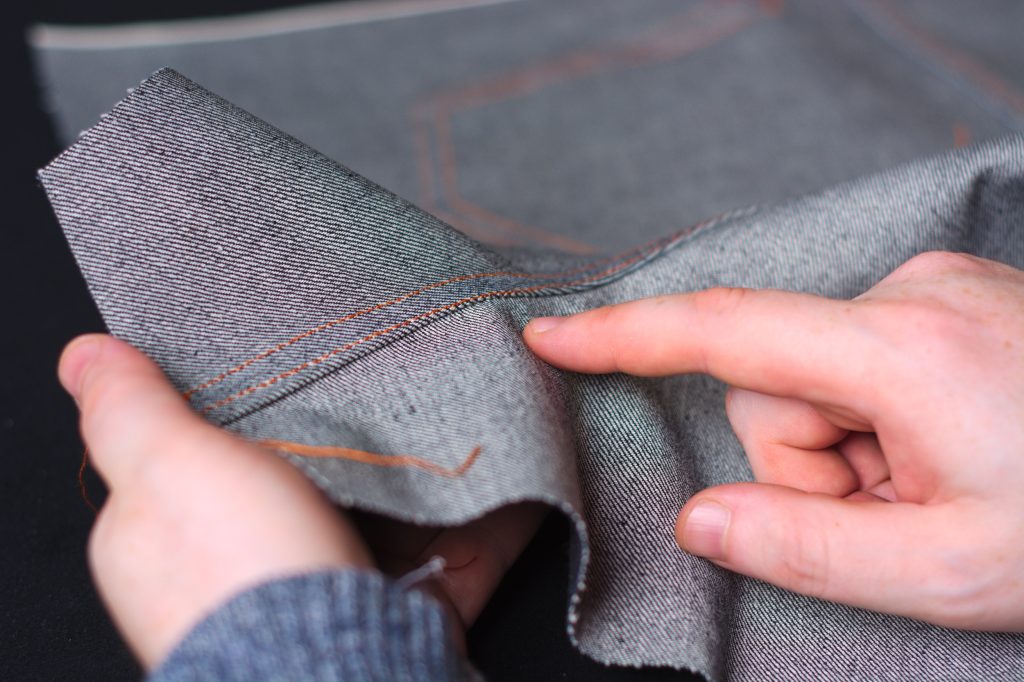
When you get to just above the pocket, pause for a moment, and slide the front leg at the side seam forward, away from the side seam of the facing underneath. This gives the pocket just enough room to get around the curve of the body, as well as makes it a lot easier to get your hand into the pocket.

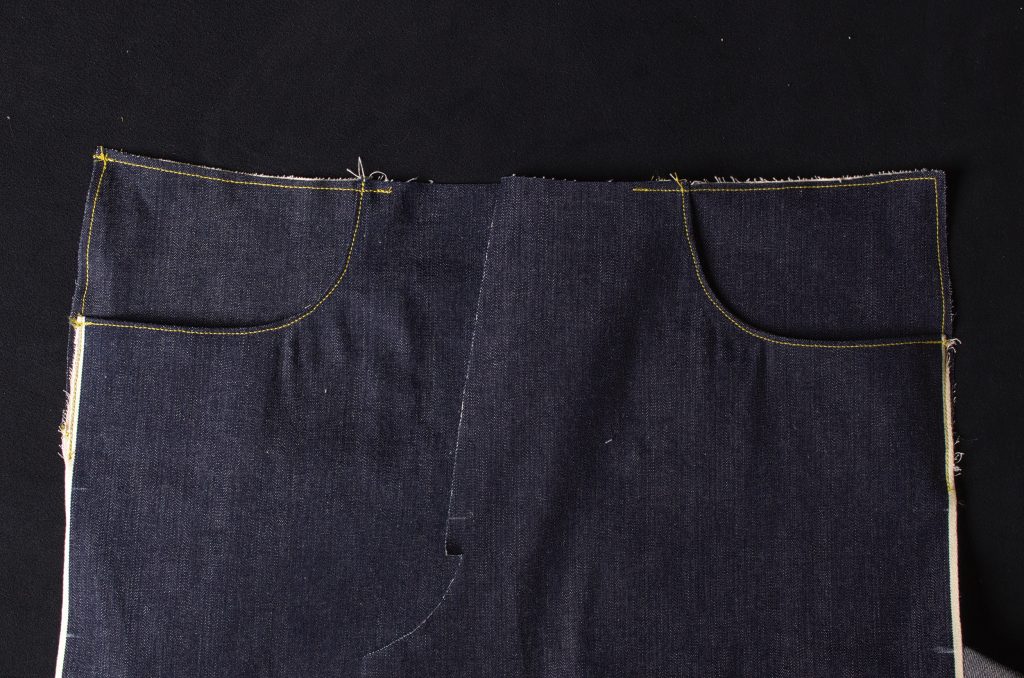
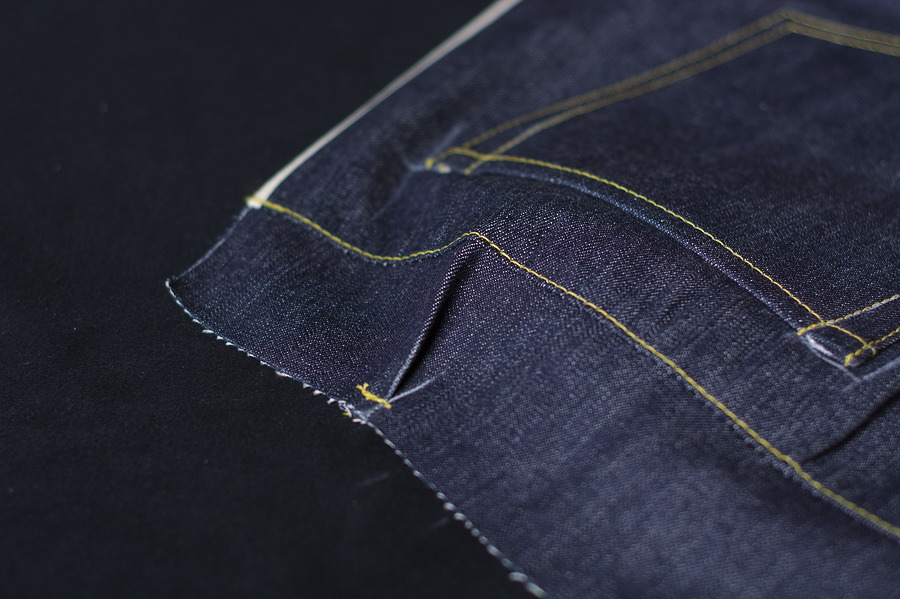
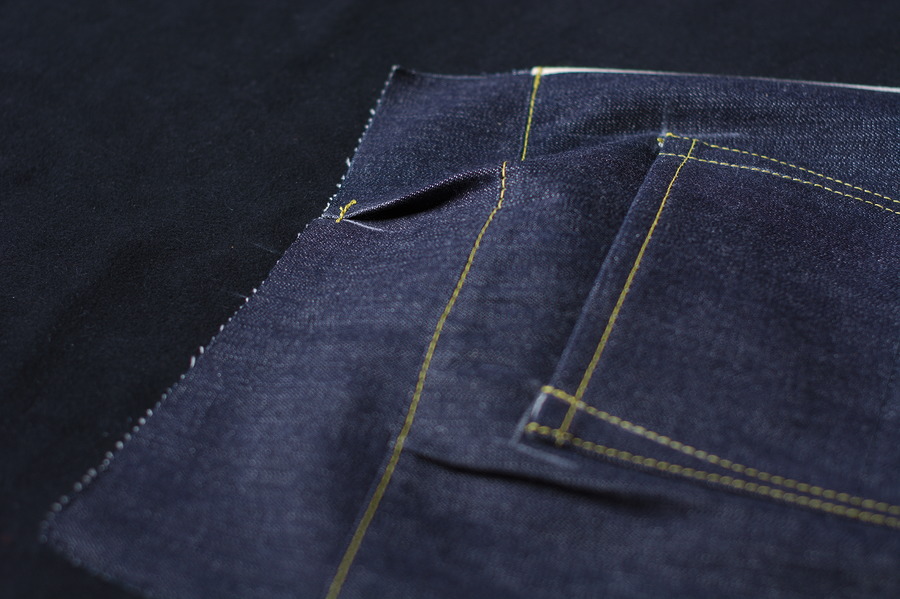
Here you can see how I slid the side seam over just about 1/8″. Continue sewing until you reach the bottom of the pocket underneath.
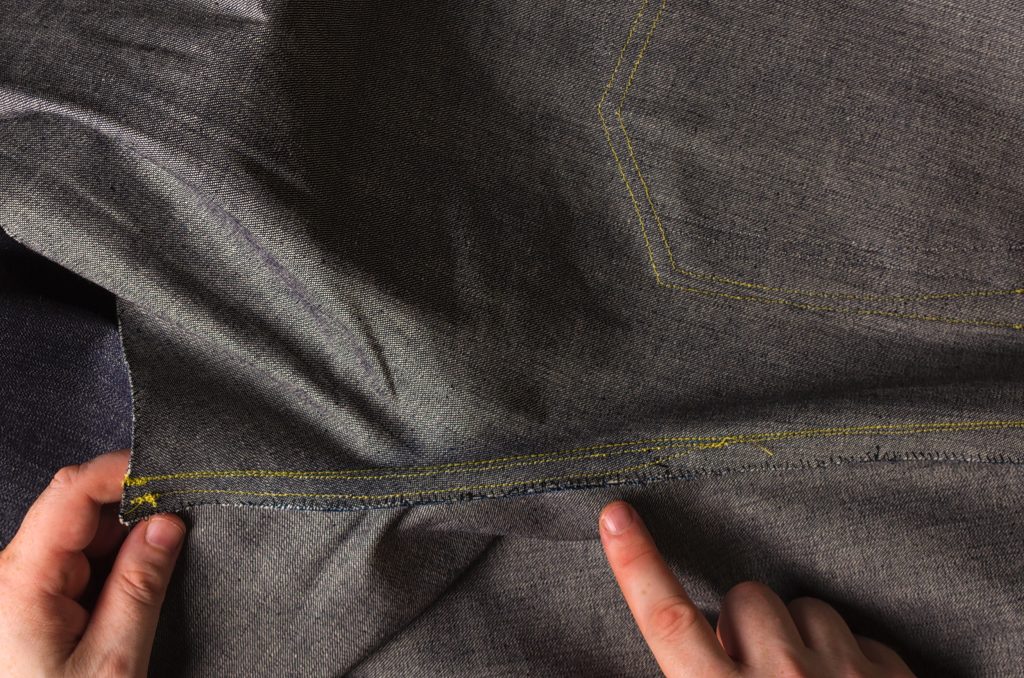
Here’s what my stitching looks like. This will all be hidden after the side seam is complete and waistband is attached.
Repeat the entire process for the other pocket.
Installing the Pockets – Part I
This tutorial covers the pocket construction for both the 1873 and modern pair of jeans.
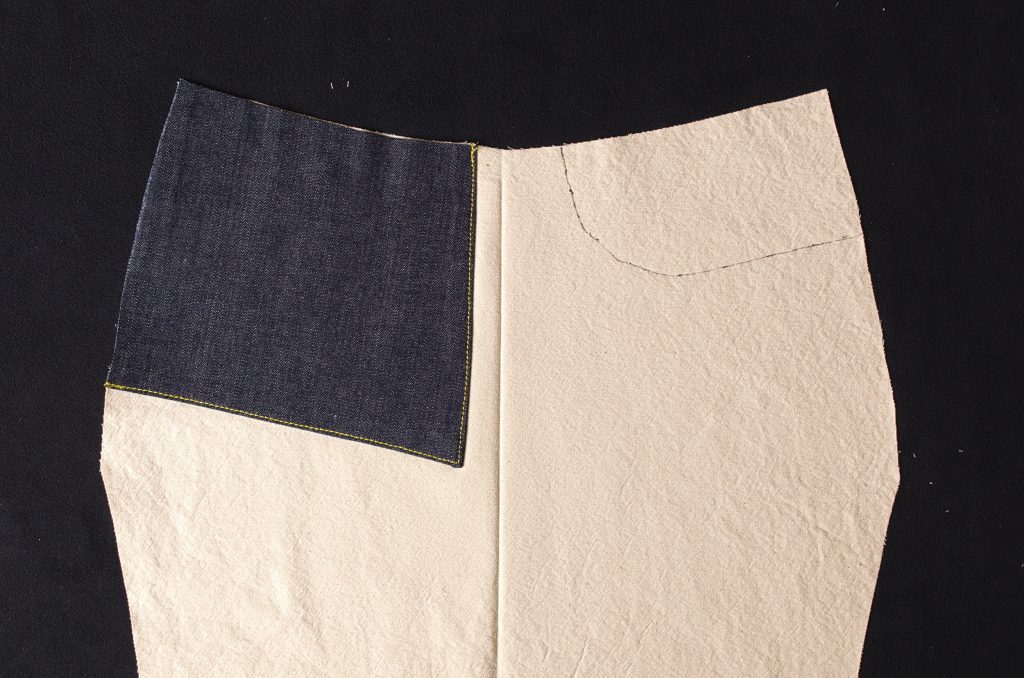
To begin, lay your pocket bag right side (inside) up, and place the appropriate front leg right side down as shown. The pocket opening on the leg should be on the side of the pocket bag without the facing.
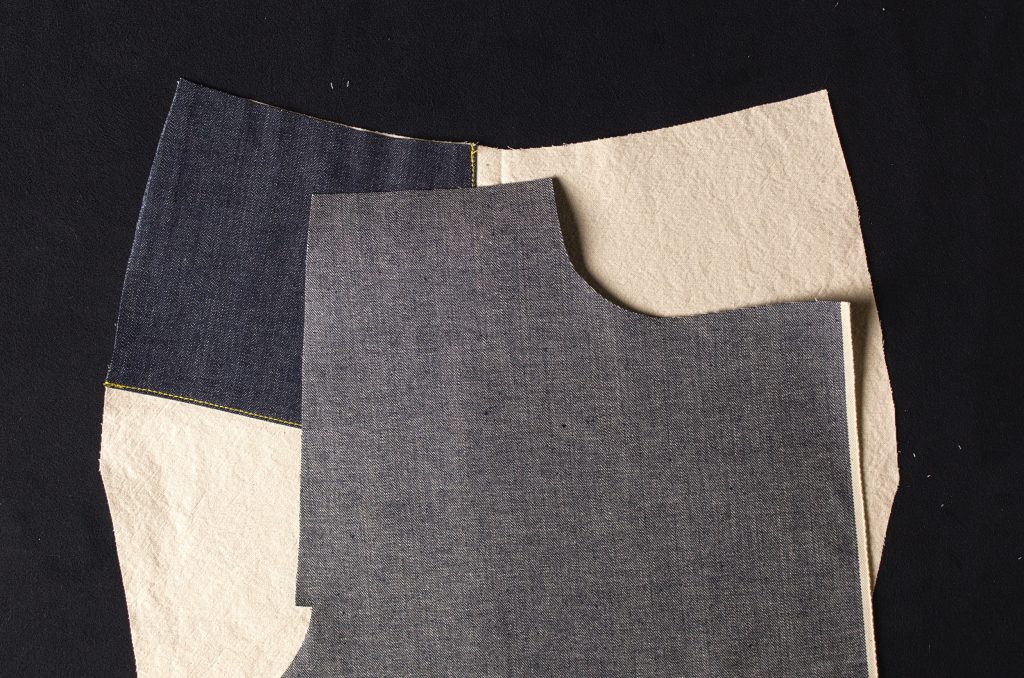
Carefully align the edges of the pocket bag and the leg.
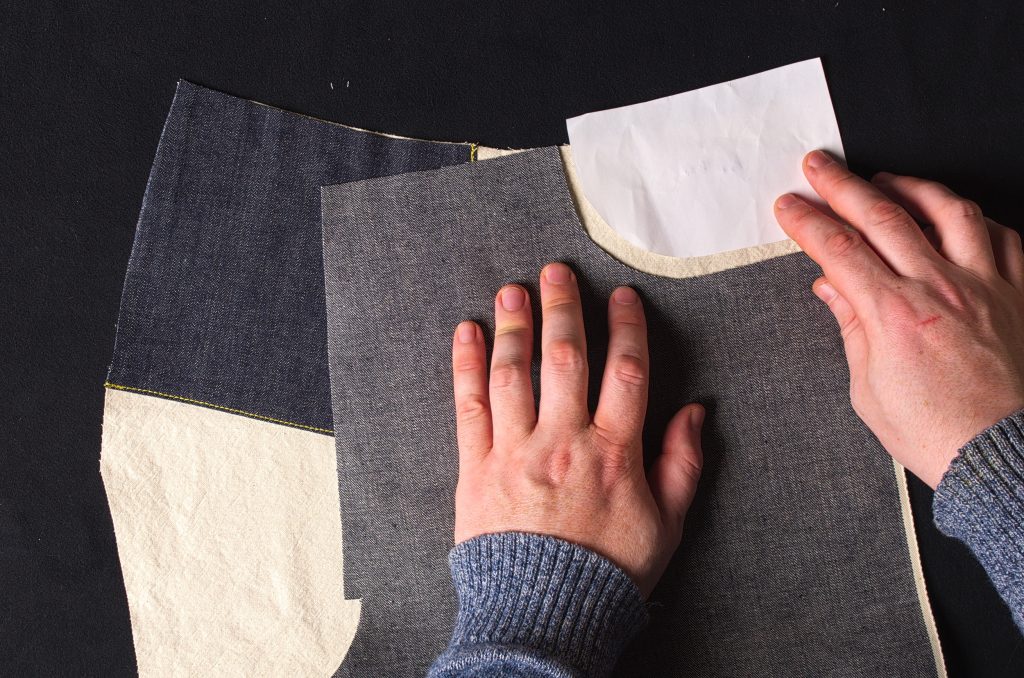
It can be helpful to use the little pattern piece you cut away from the front leg pattern to help with the alignment.
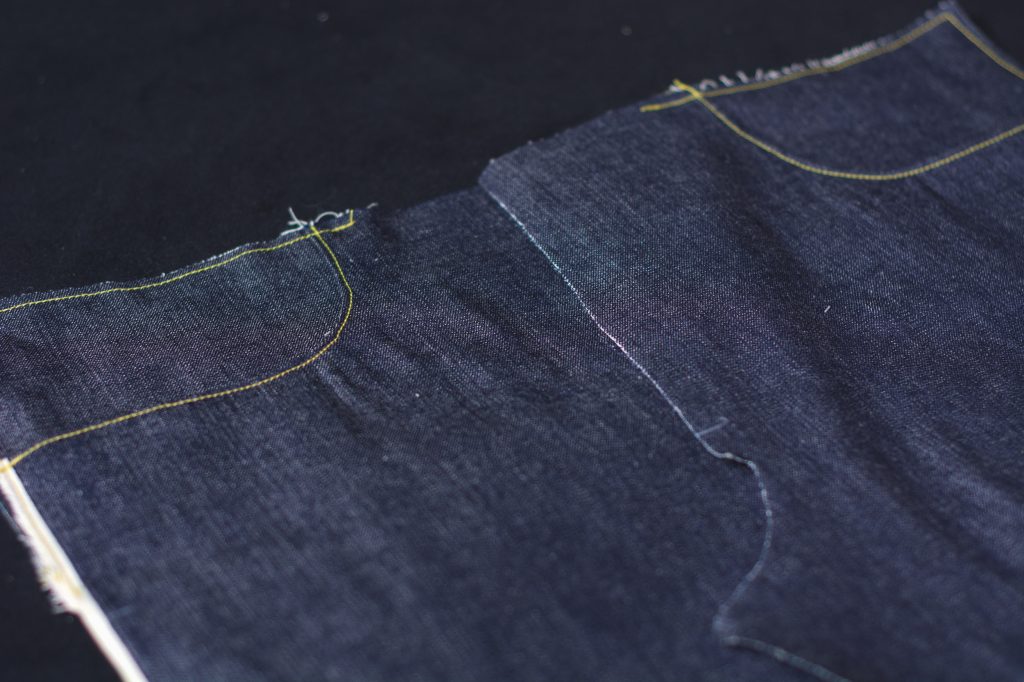
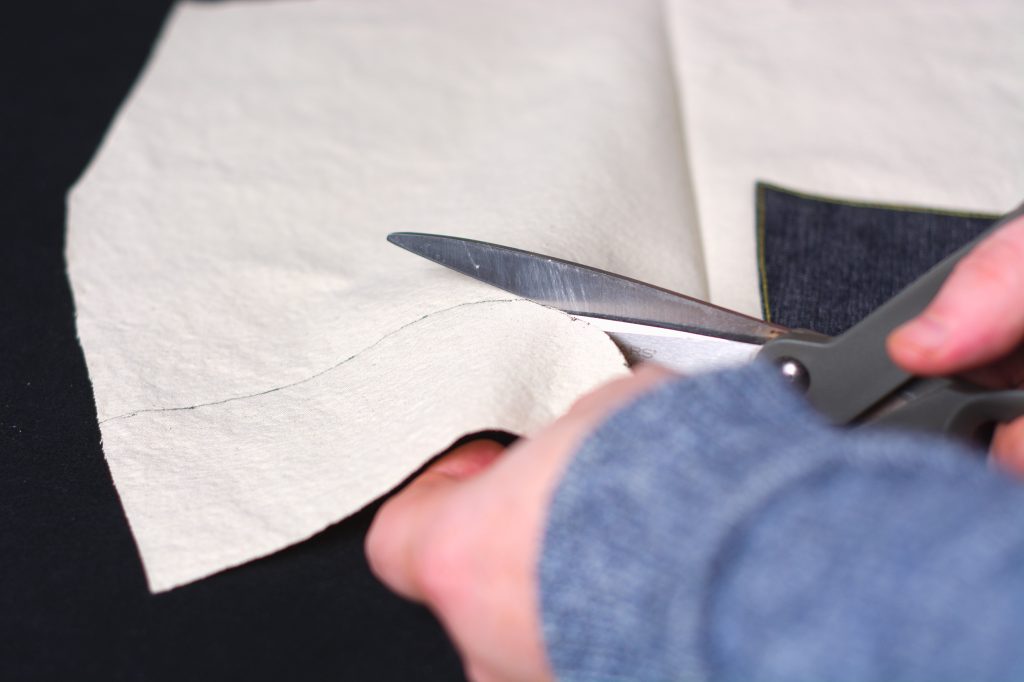
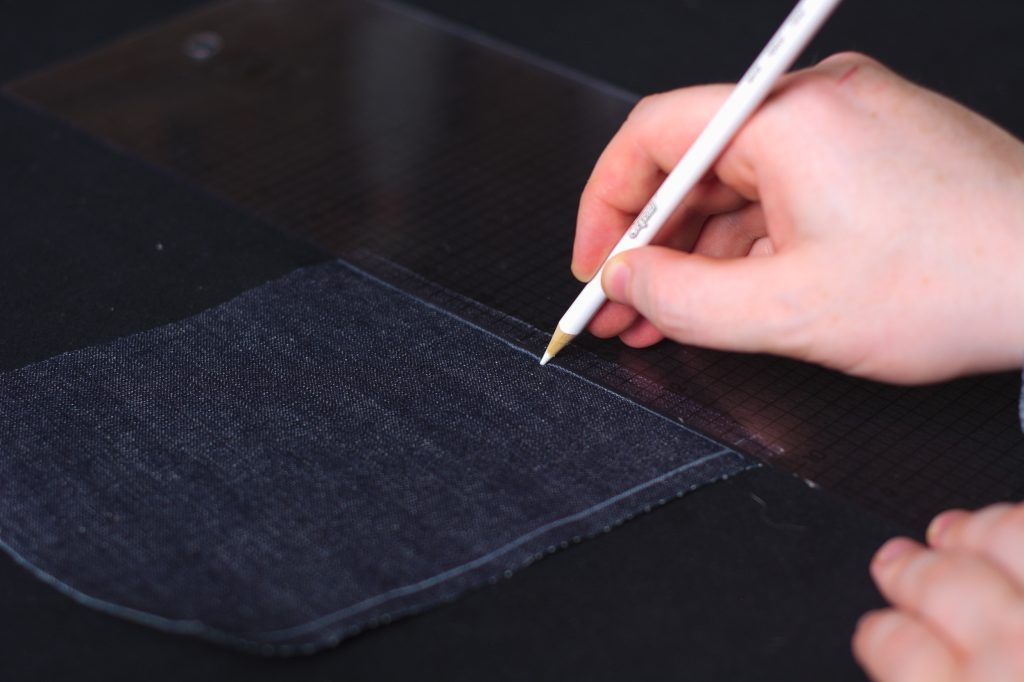
Trace the pocket opening onto the pocket bag.

And cut out the opening as shown.
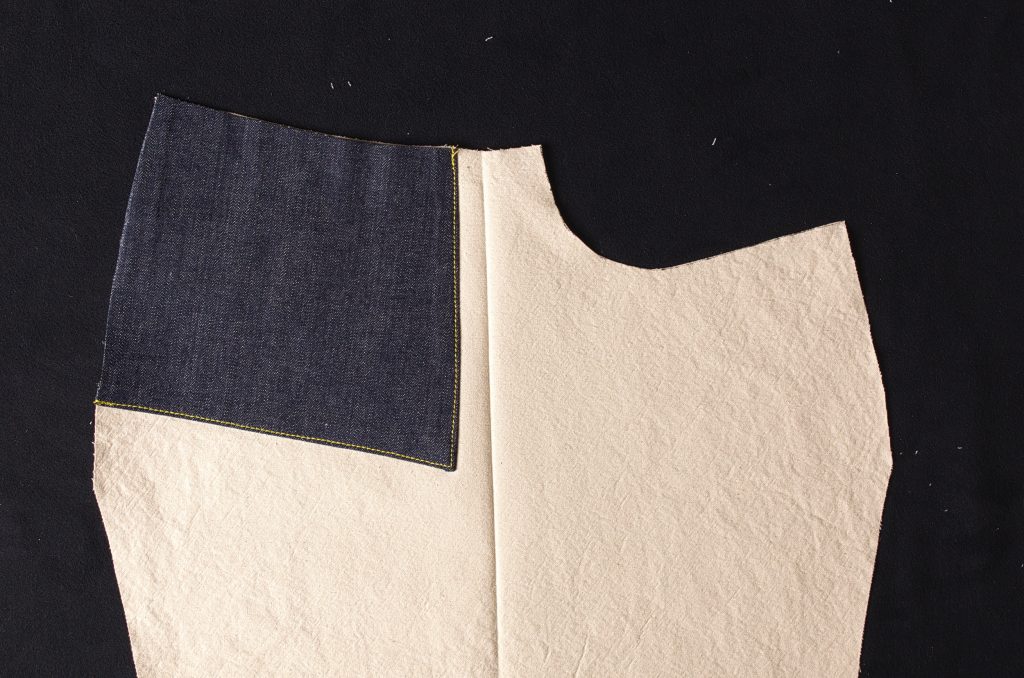
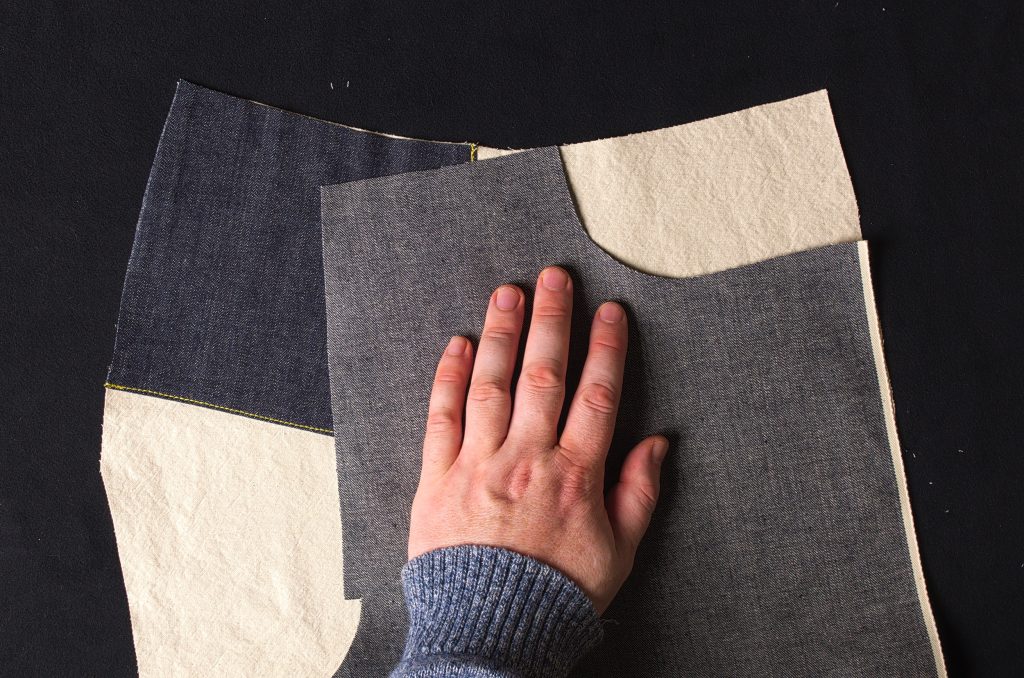
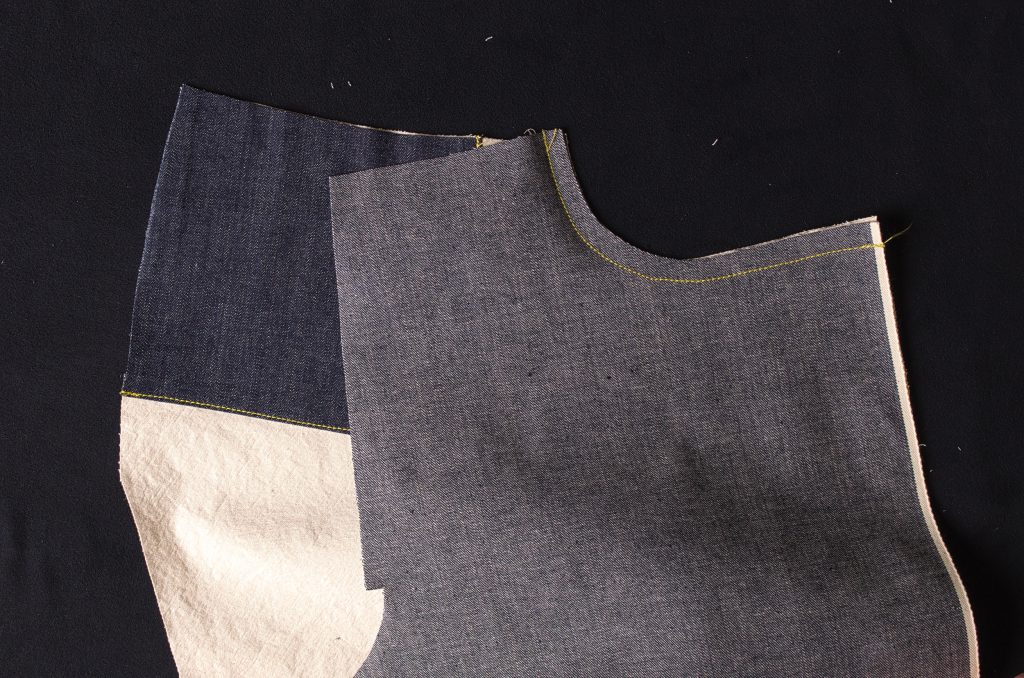
Align the pocket bag and leg openings again.
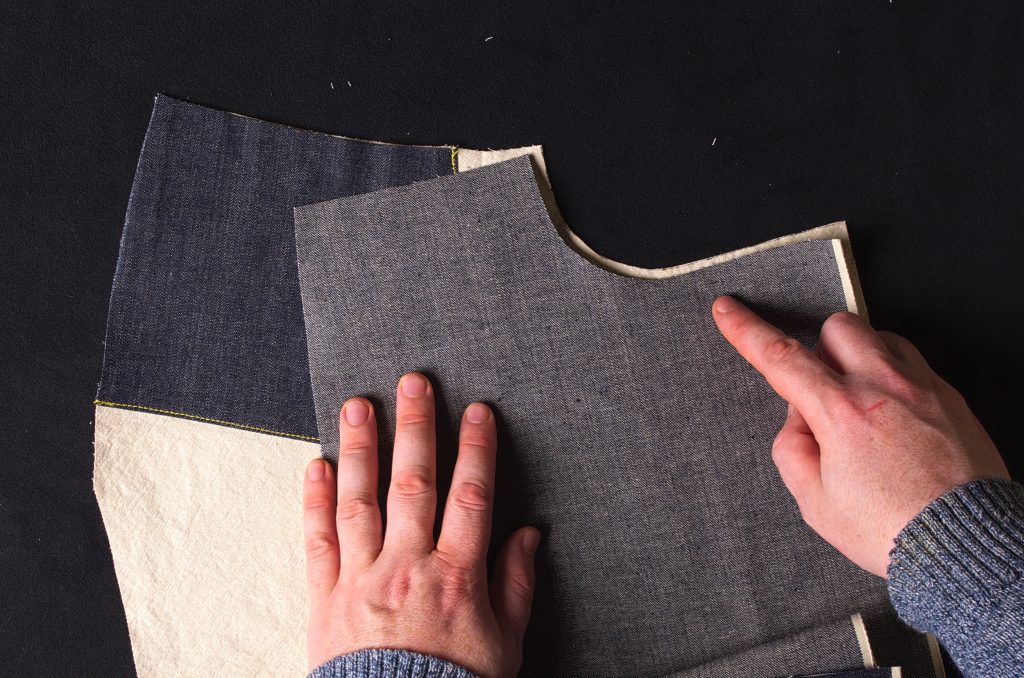
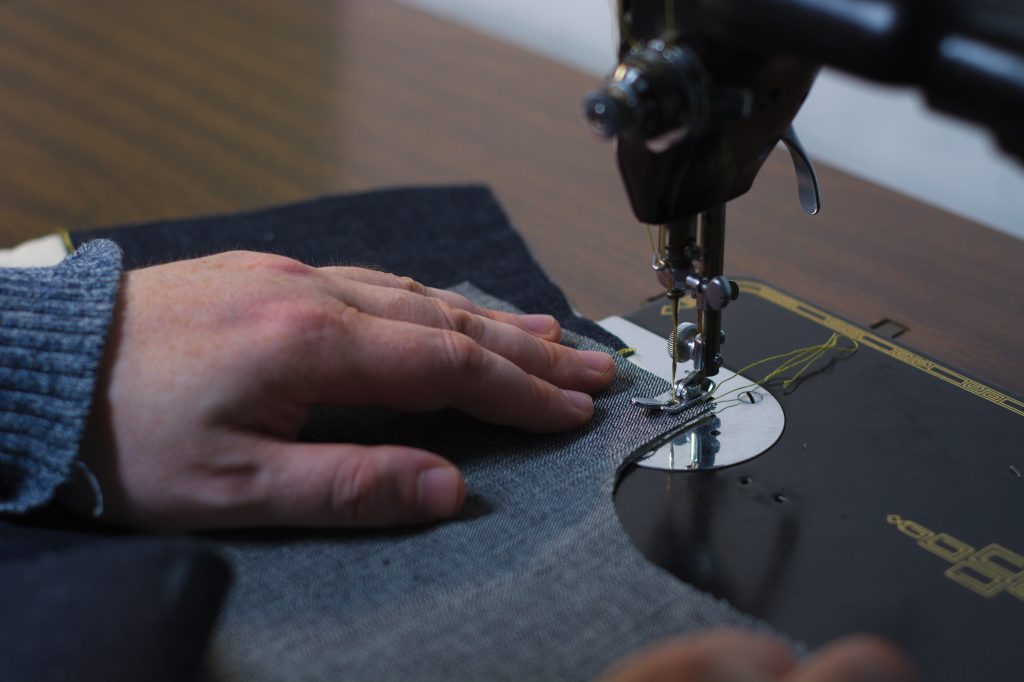
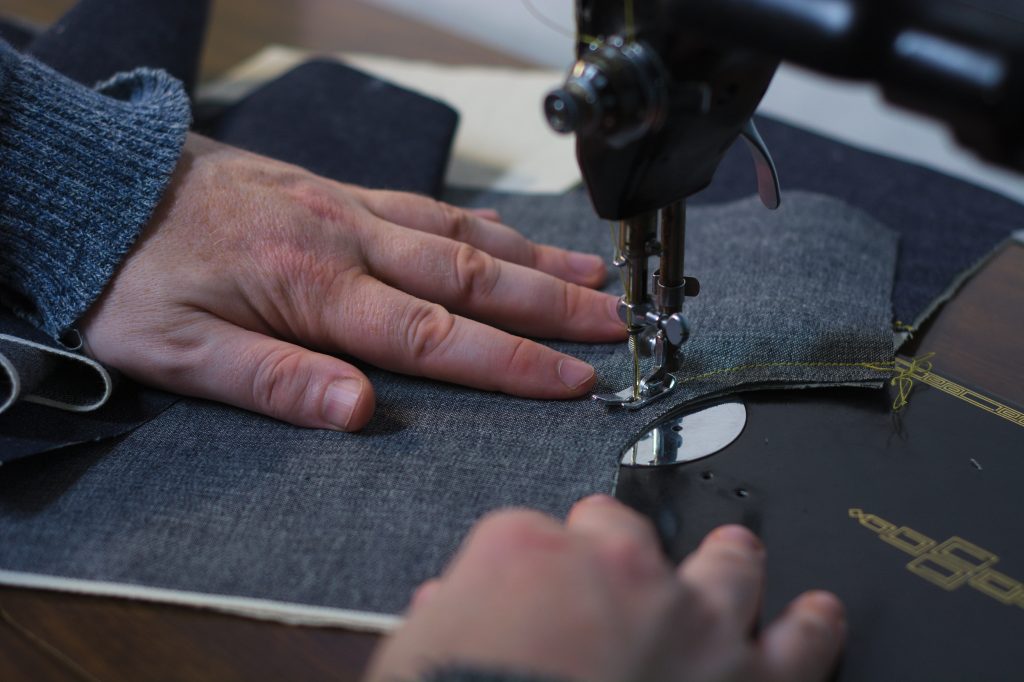
And stitch along the entire pocket opening using a 3/8″ seam allowance.
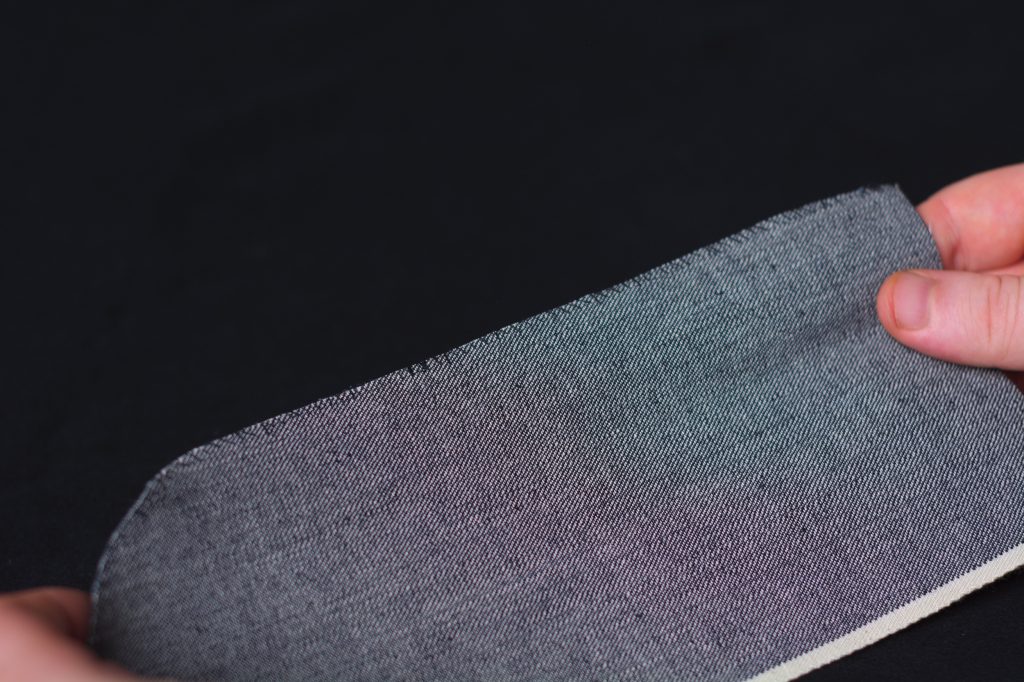
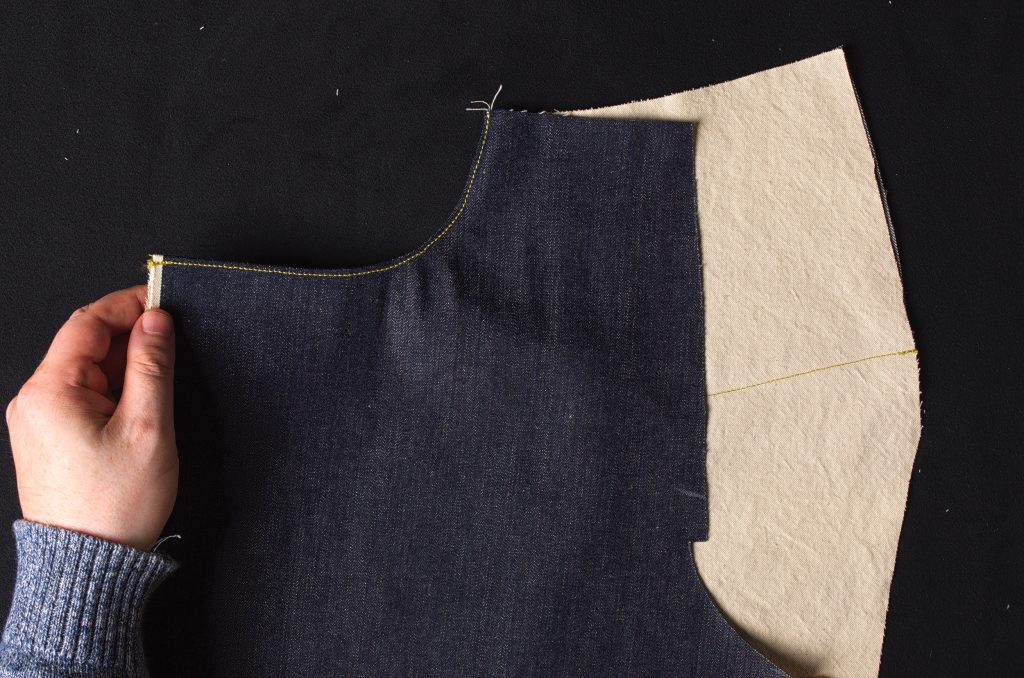
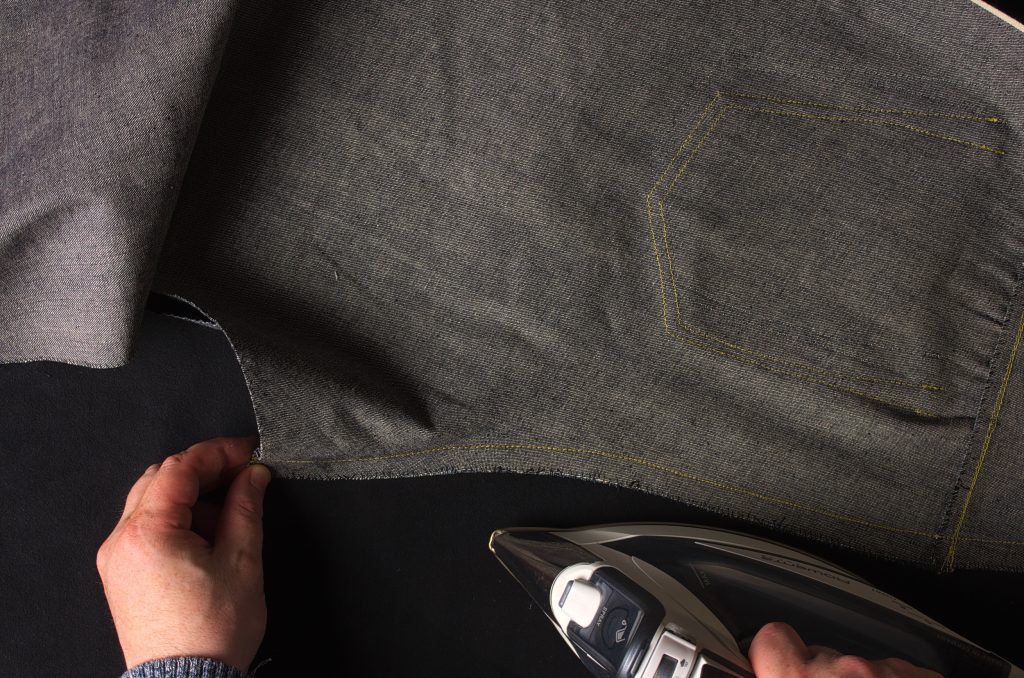
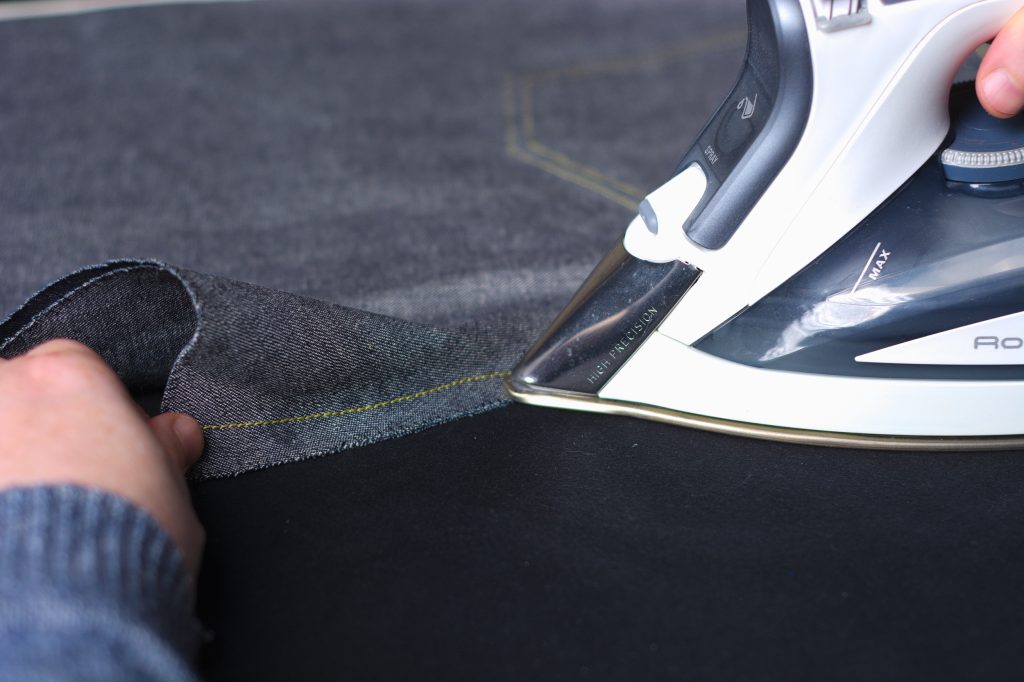
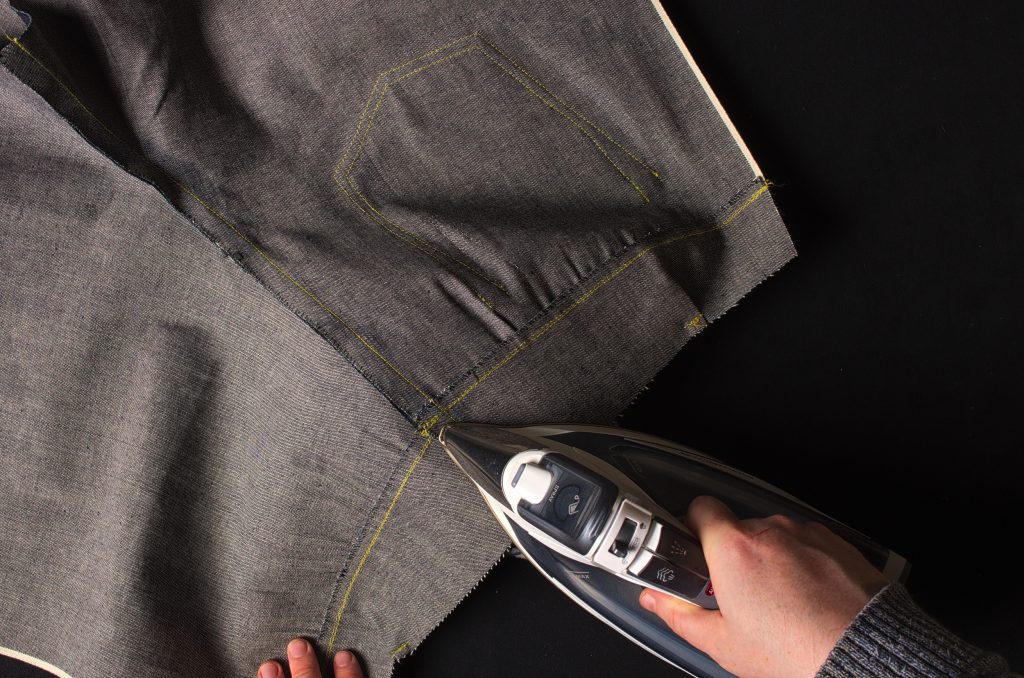
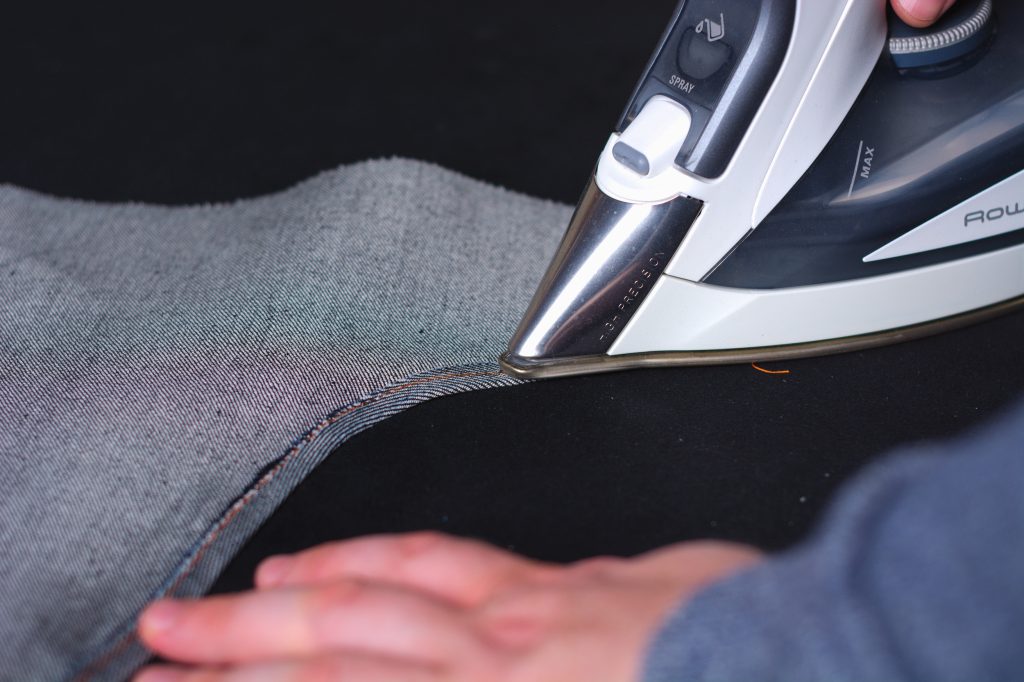
Now take your iron and with a bit of steam, gently stretch the pocket opening in the seam allowance only at the curved area.
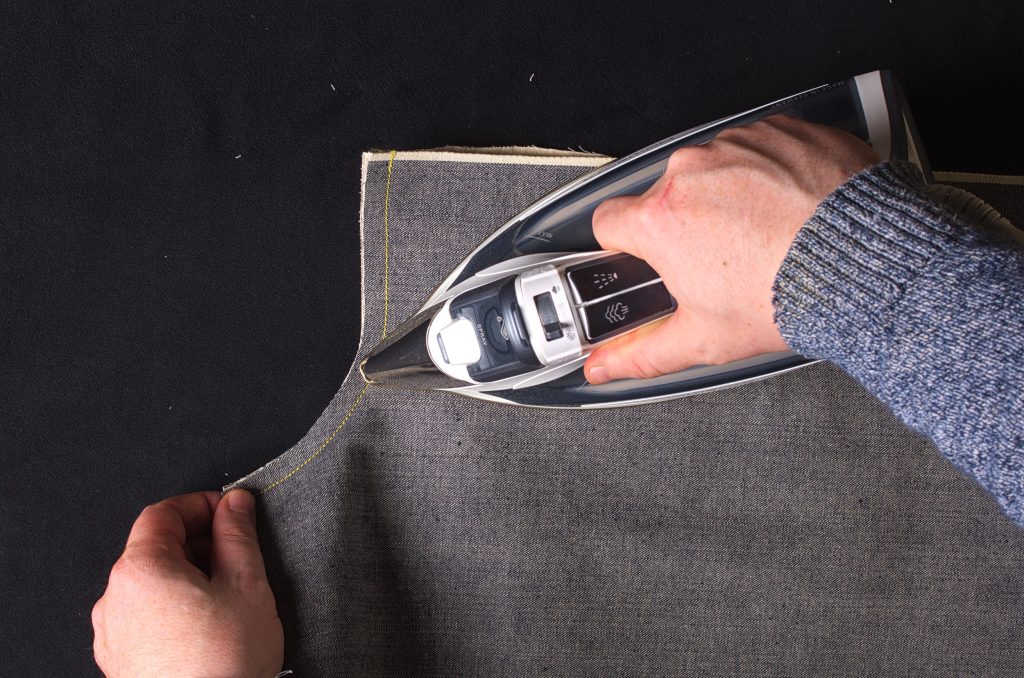
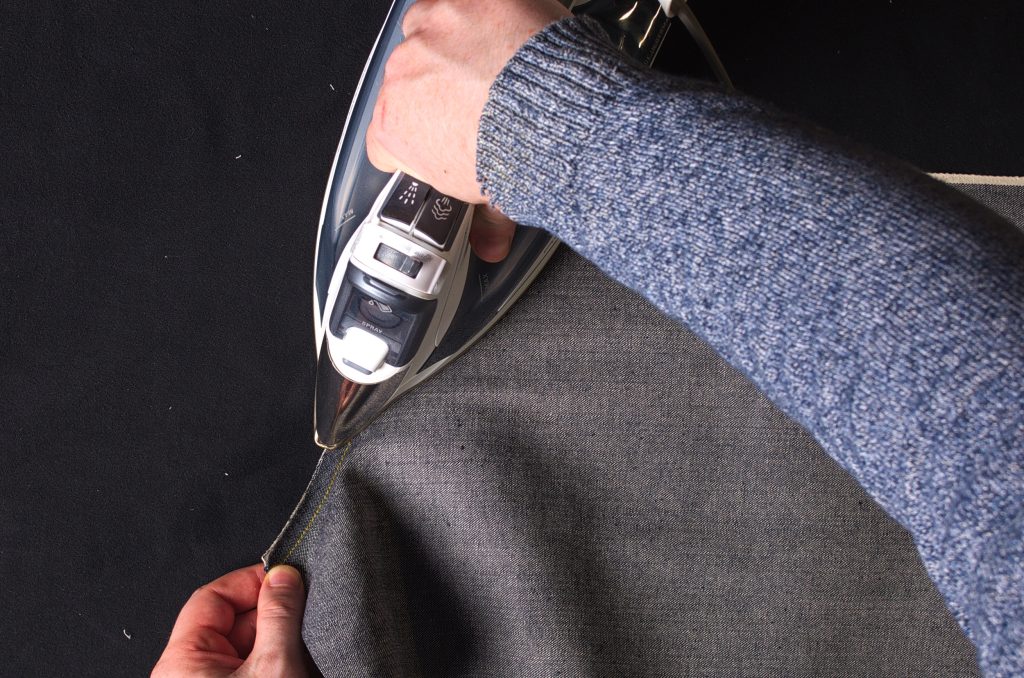
Continue stretching until you pretty much have a straight line formed with the pocket opening.
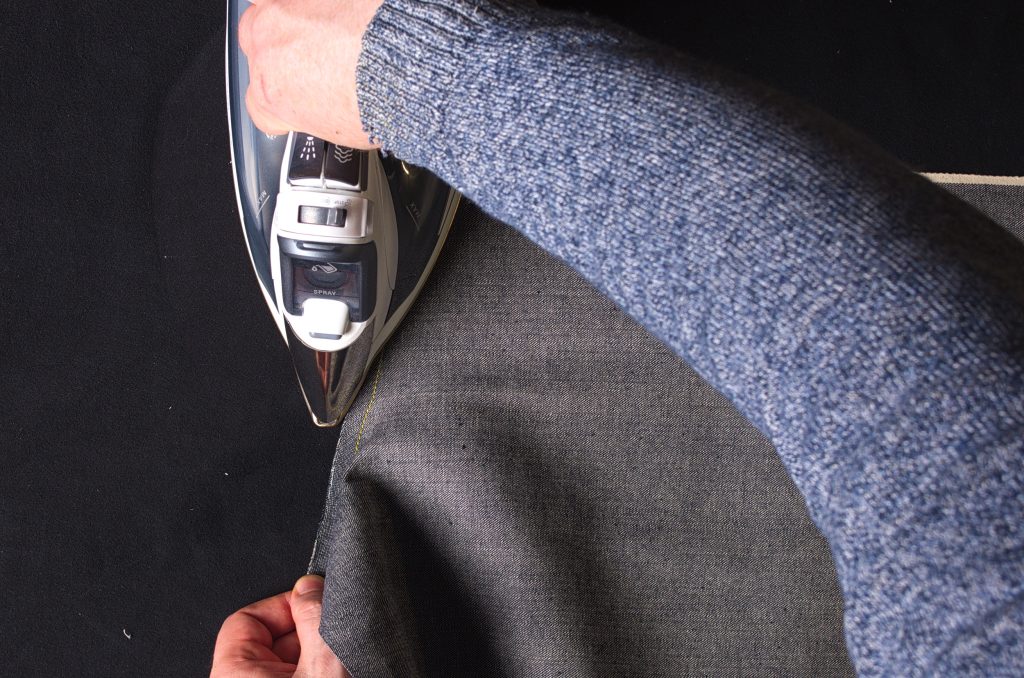
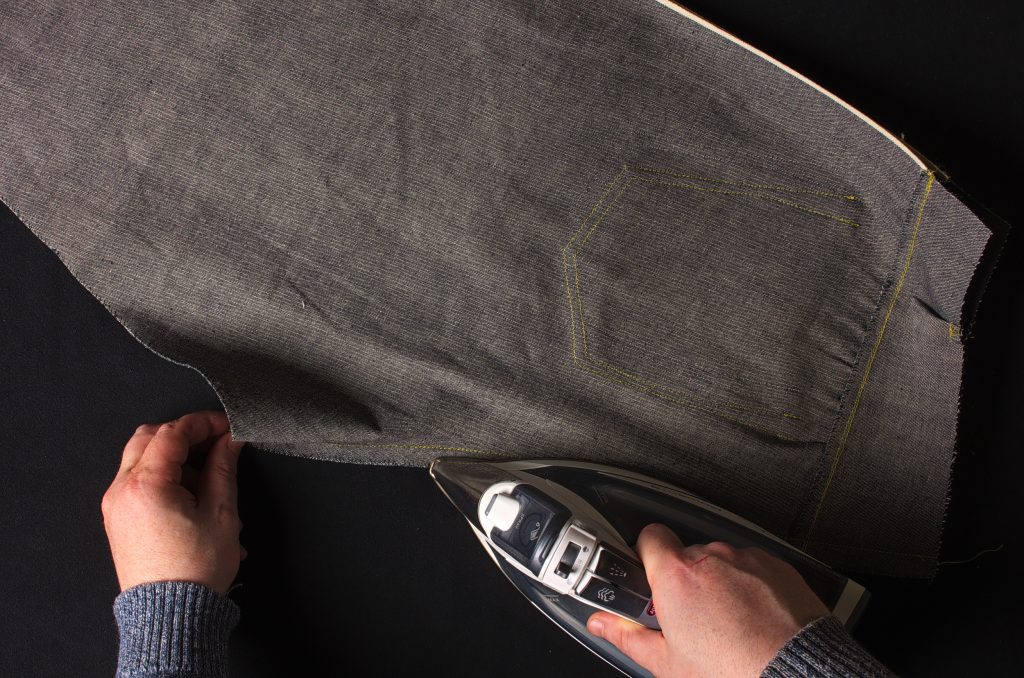
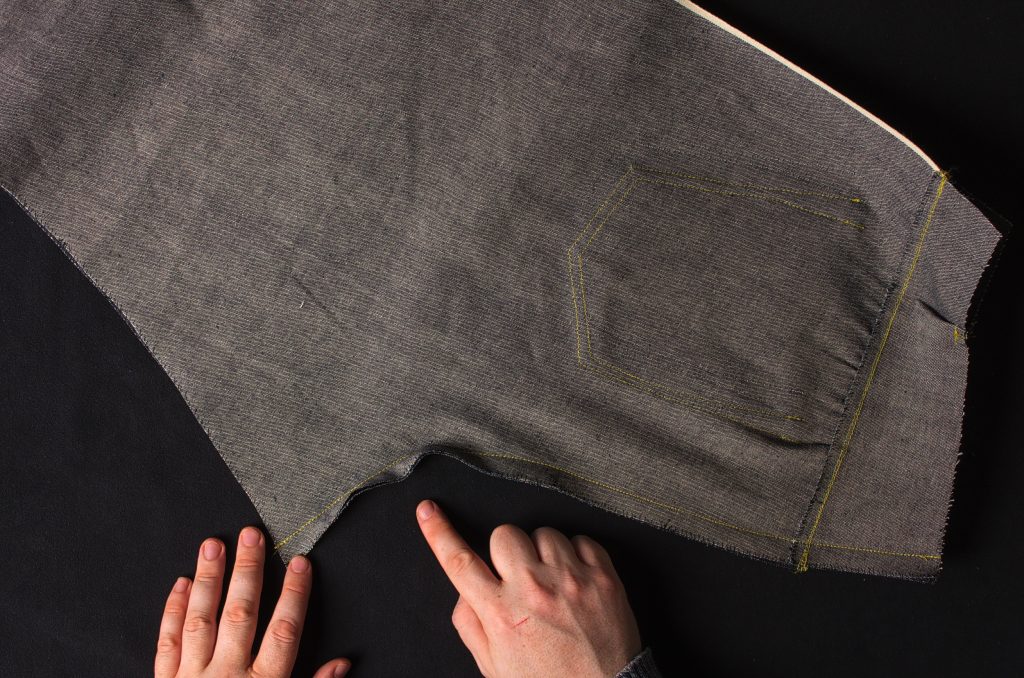
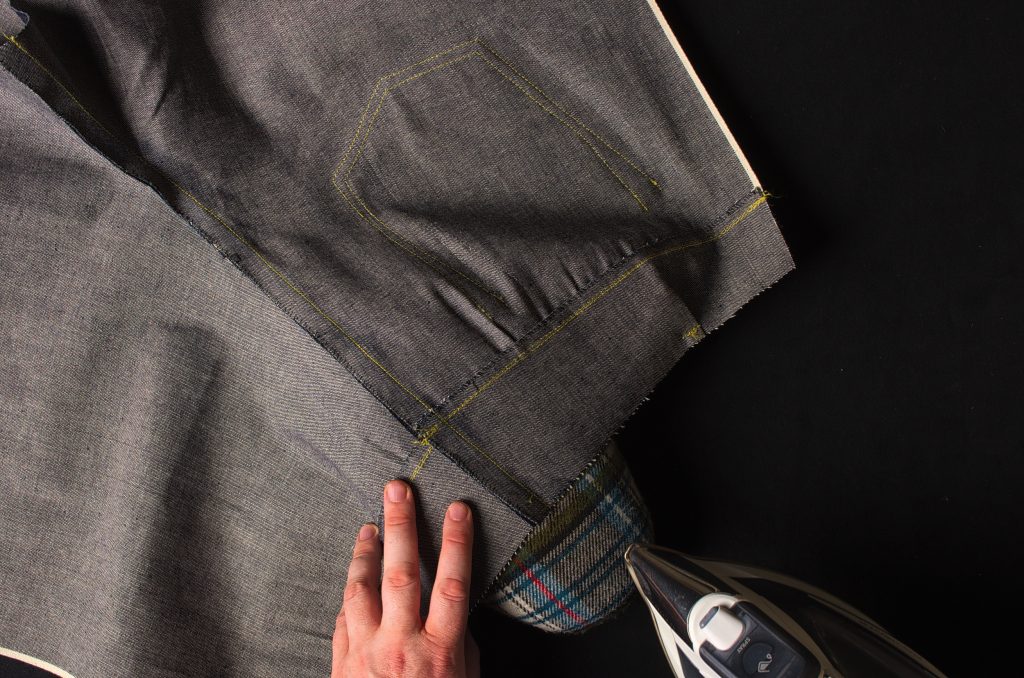
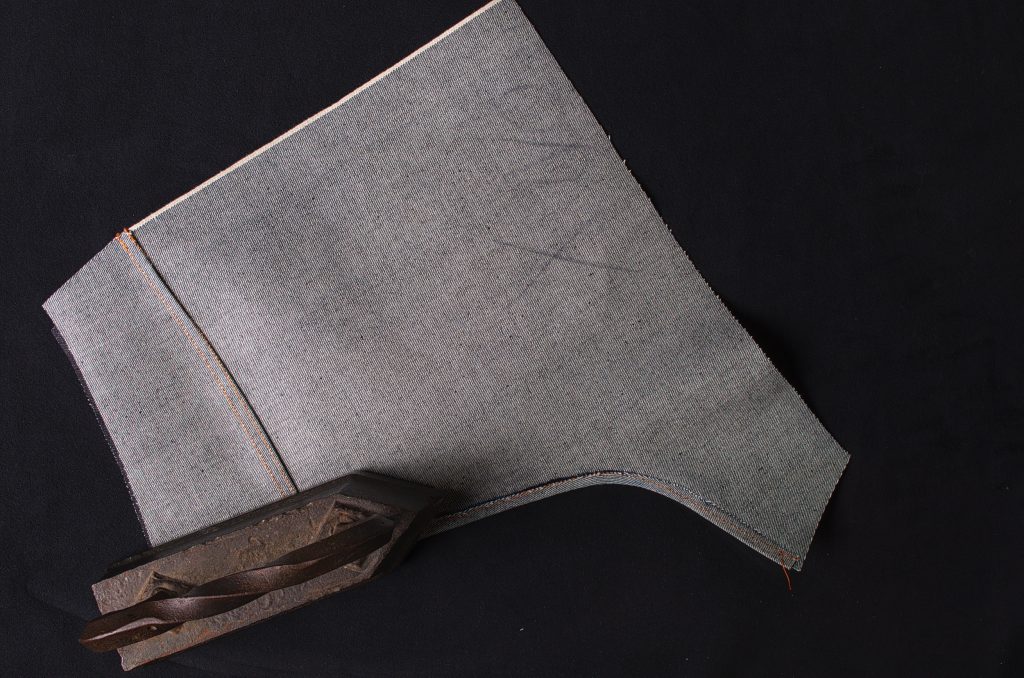
Here’s what mine looked like afterwards. I could have gone a little farther but decided this was enough.
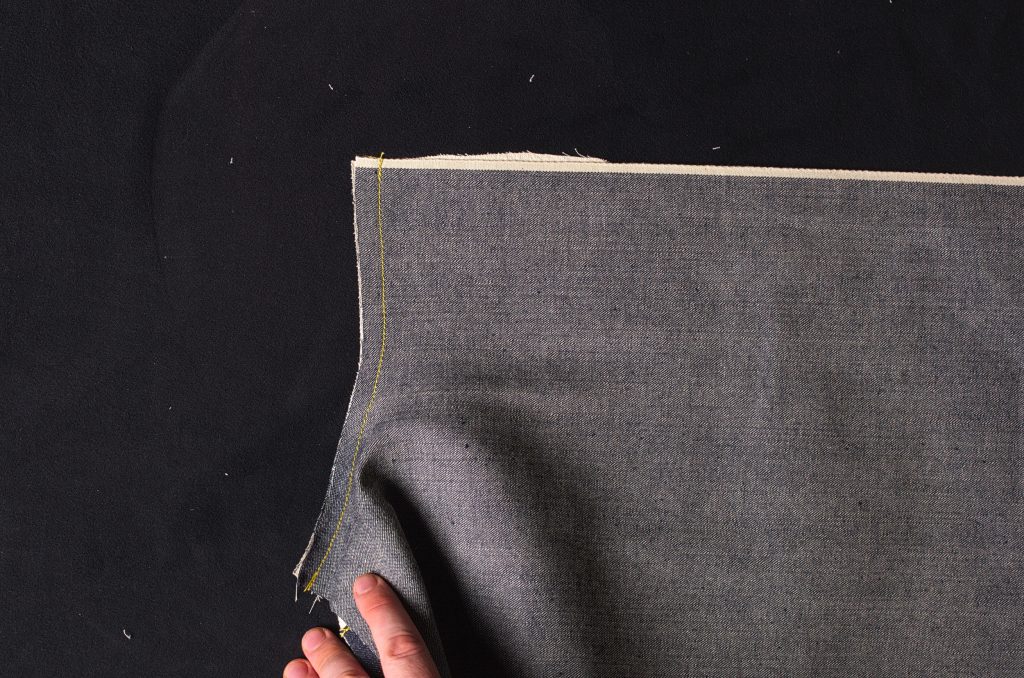
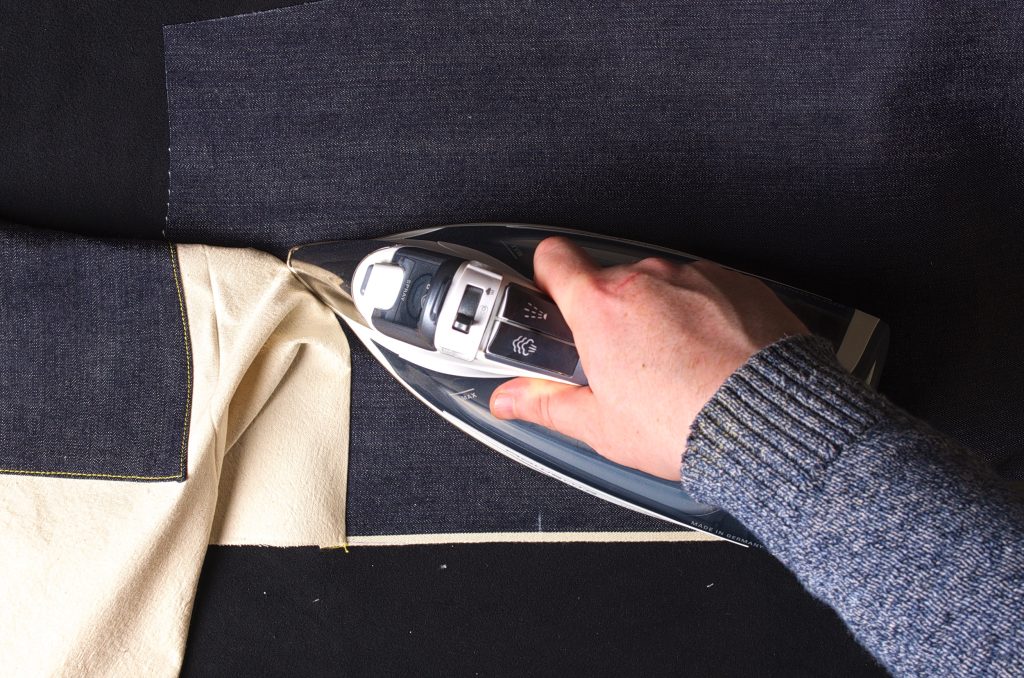
Turning to the right side, press the pocket back up and away from the leg.
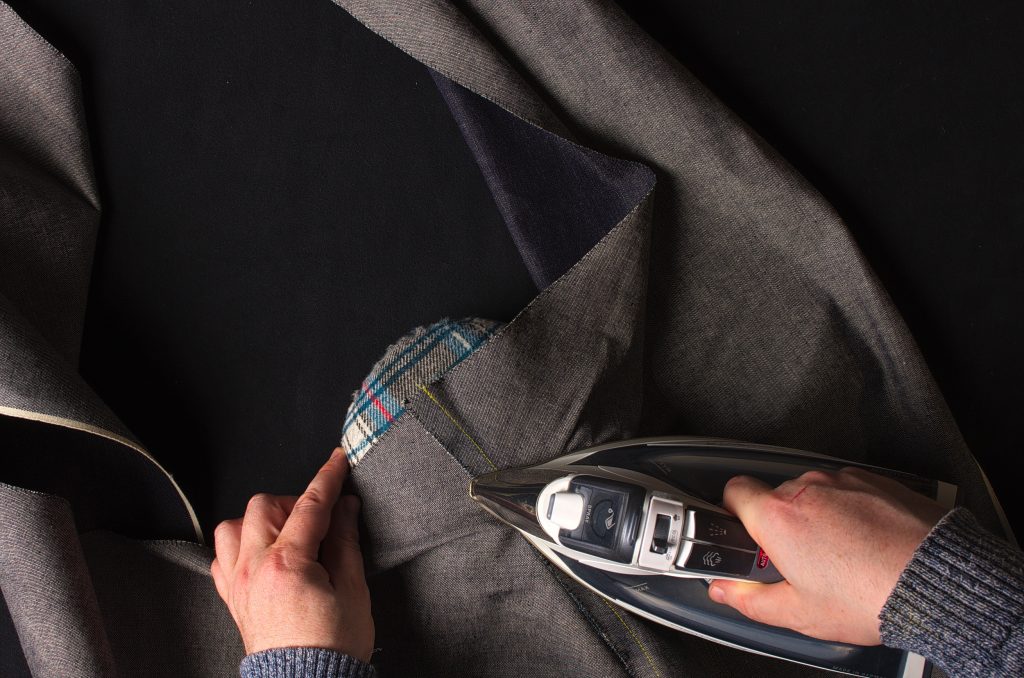
Manipulate the pocket bag as necessary as you get to the curved area, moving it out of the way.
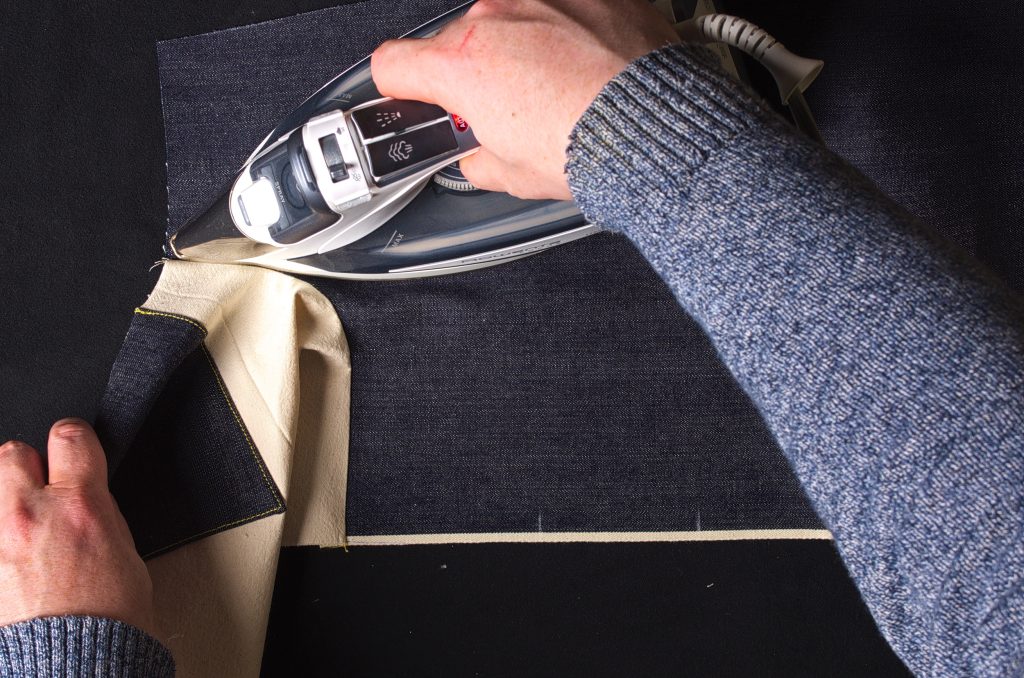
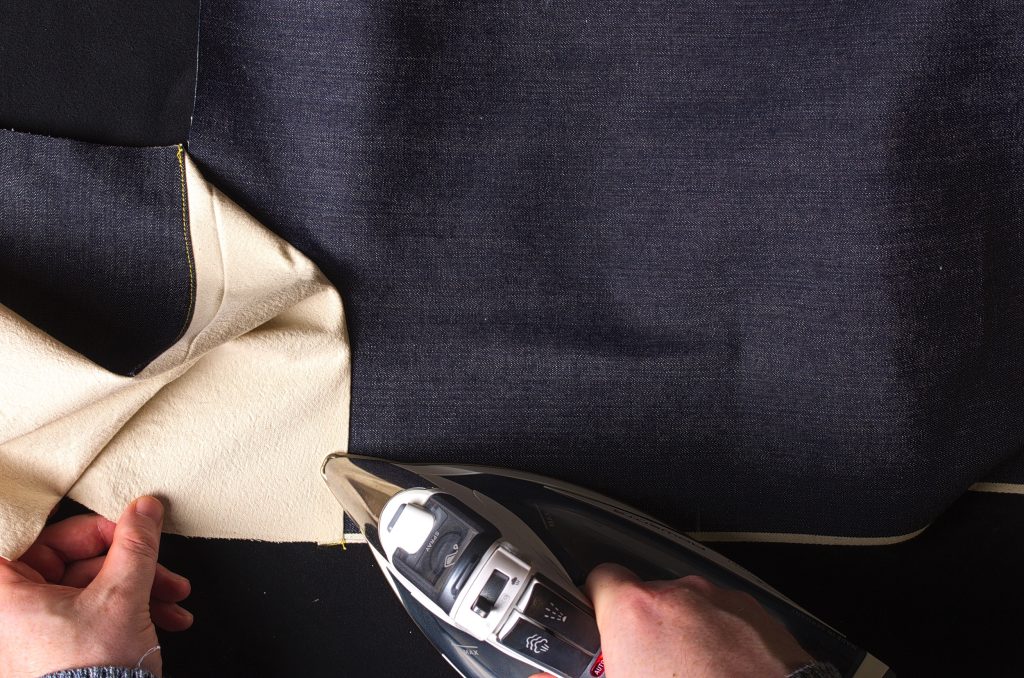
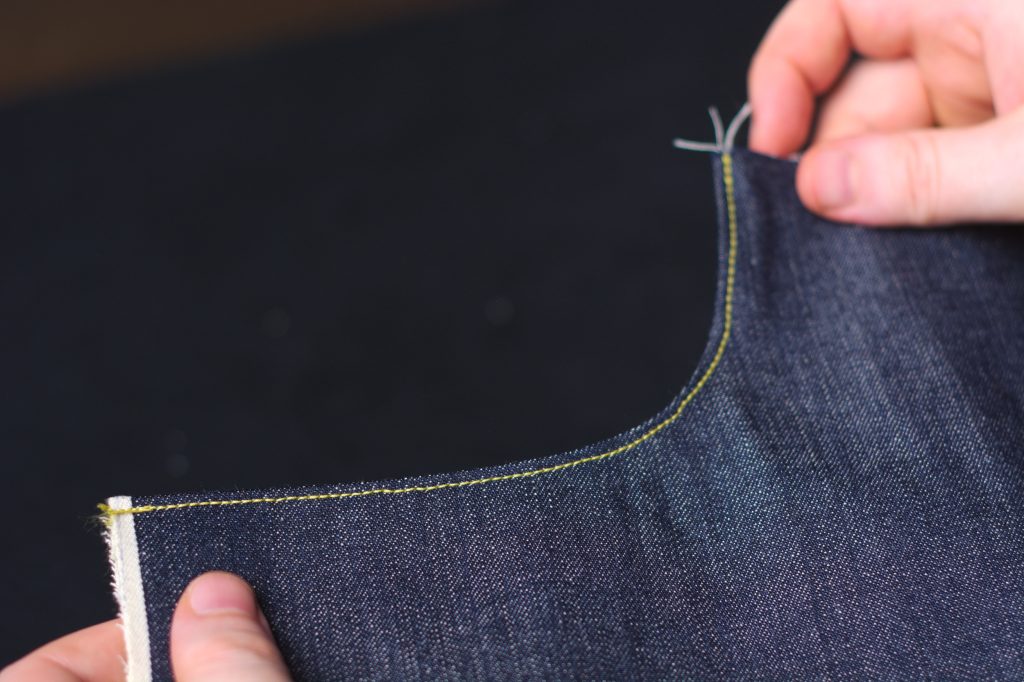
Now turn the pocket bag to the wrong side of the leg as shown, and press the edge of the pocket opening. Set back the pocket back about 1/8″ so that it cannot be seen from the right side.

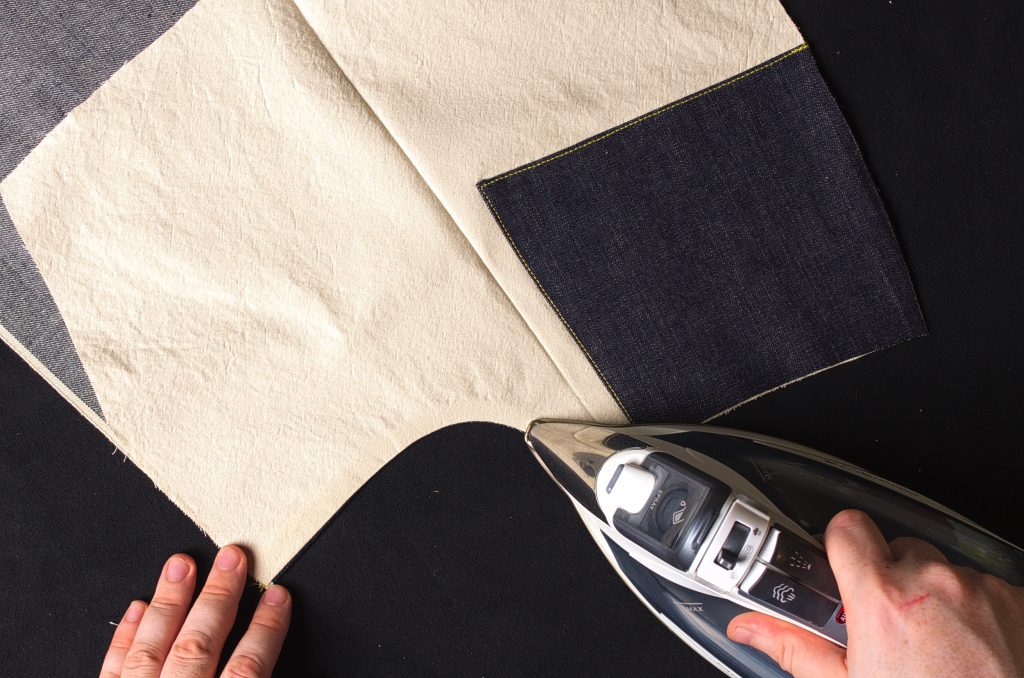
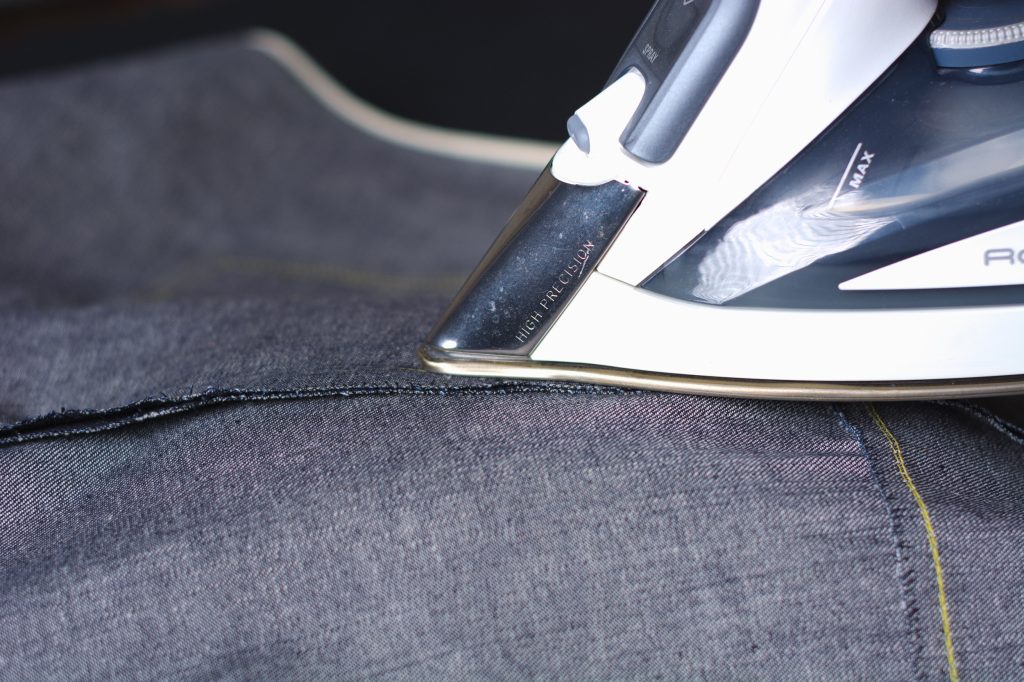
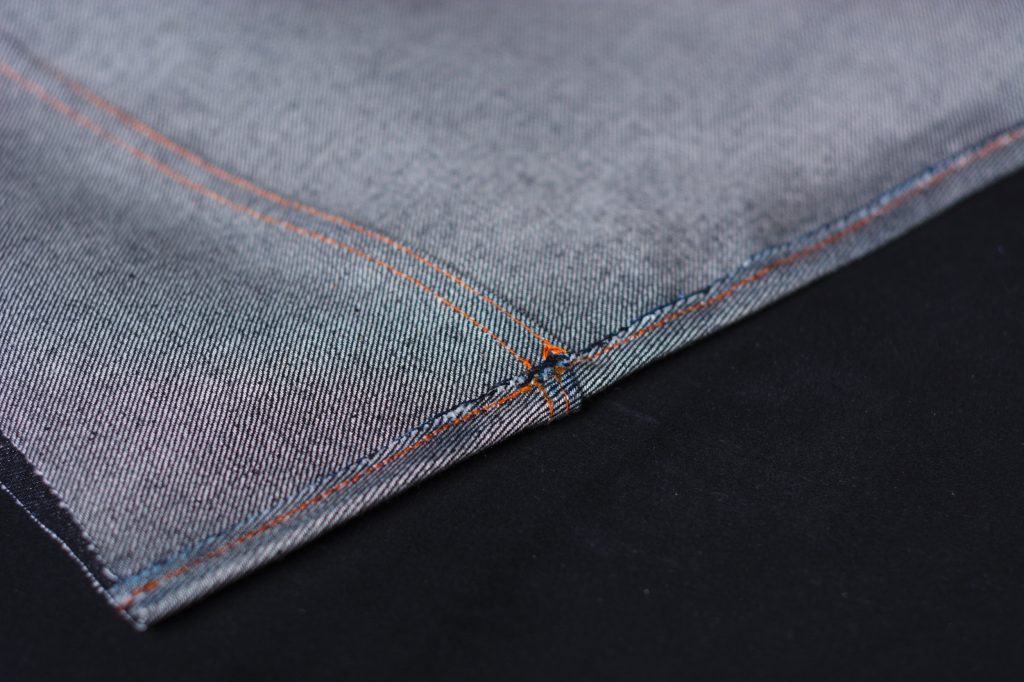
Press from the right side, and then top stitch about 1/8″ away from the edge. Just this one row is used for the 1873 jeans.
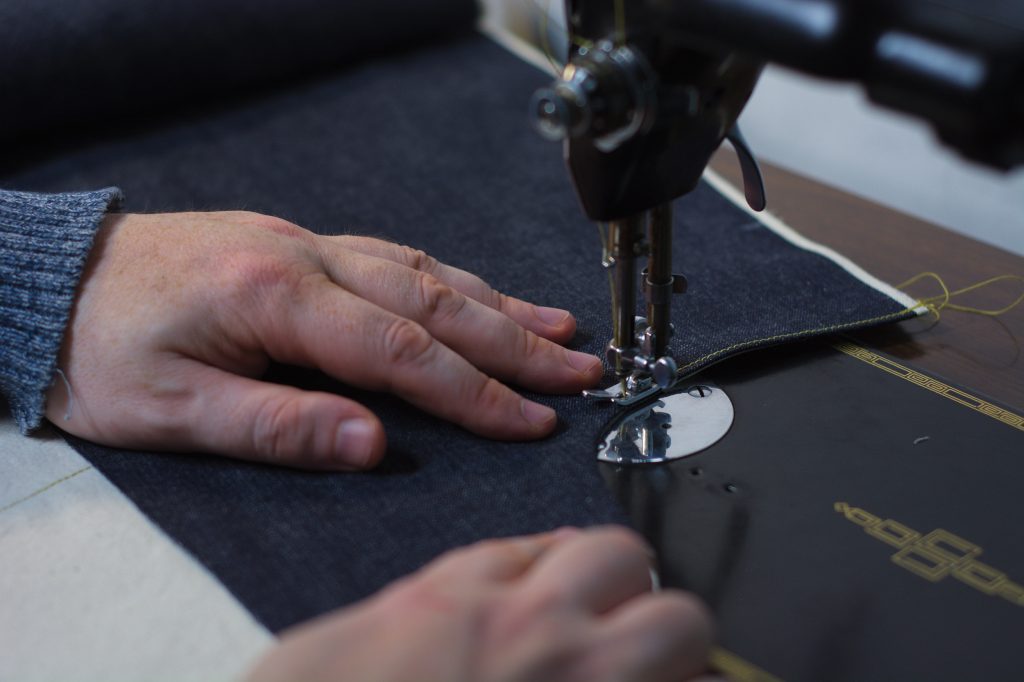
A second row of stitching is added to the modern jeans, about 3/8″ from the edge, maintaining the spacing from the back yoke.
Modern Watch Pocket
For those doing the more modern jeans, the watch pocket is installed at this point. For the 1873 jeans, the watch pocket is installed after the waistband is complete.
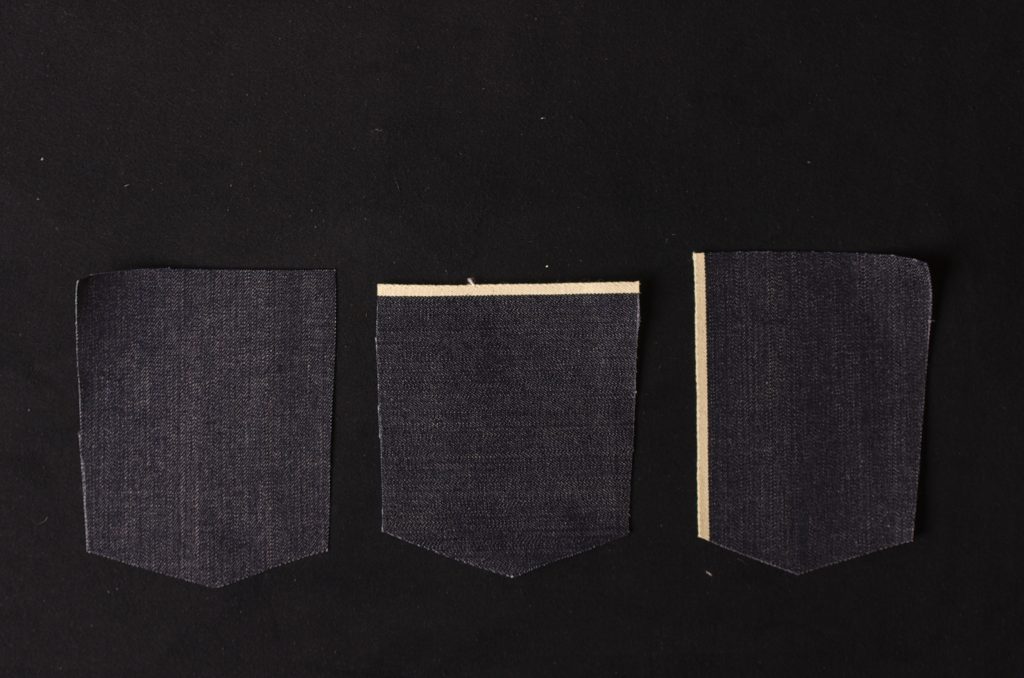
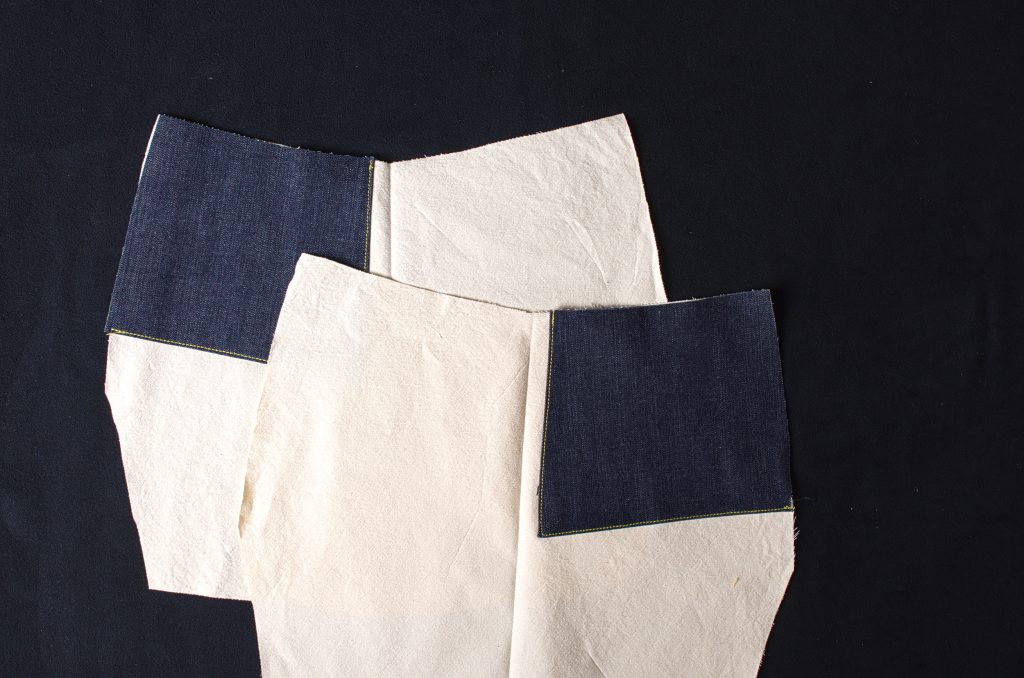
First, here’s a variety of ways you could get the watch pocket. On the left, no selvedge is visible. The center, the selvedge is folded under, giving a thinner top edge to the pocket. And on the right, the seam allowance is cut off entirely on the left edge and replaced with a selvedge to help subtly show it off in the finished jeans. It’s up to you which way you’d like to do this.
Mark off 1/2″ seam allowances along the sides and bottom edge, and 7/8″ on the top edge of the watch pocket lining.
Trim the lining, and then mark out 3/8″ seam allowances on the bottom and sides of the watch pocket, and again 7/8″ along the top edge.
Press the top seam allowance towards the wrong side along the line, and then tuck the raw edge under and press firmly.
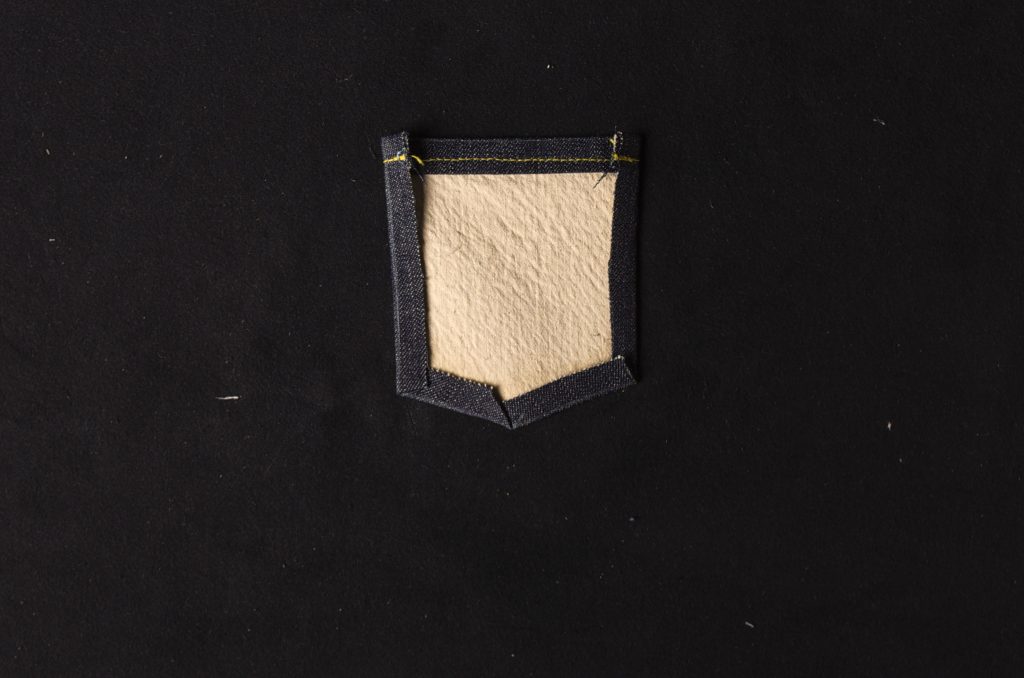
Place the watch pocket lining into position.
Top stitch the top of the watch pocket bag, first about 1/16″ from the top edge, and then a second row 3/8″ from the top. Maintain the same spacing as the stitching on the back yoke.
Sorry I’m only showing the second row here as per the 1873 version – planning to reshoot this section in the future.
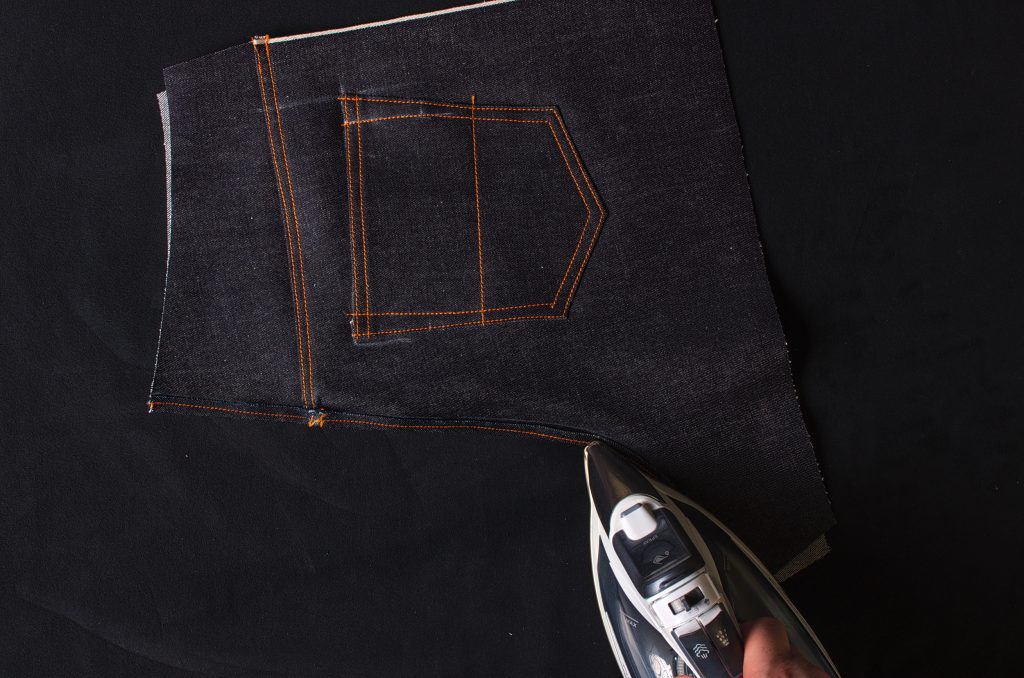
Press the remaining seam allowances to the wrong side along the chalk lines.

Finally, position the watch pocket on the right pocket facing as shown. Make sure it’s about 1″ – 1 1/2″ below the top edge, as well as about 1 1/2″ from the side seam, and following the angle of the waist seam as closely as possible. You can pin this if you’d like to but I usually do not.
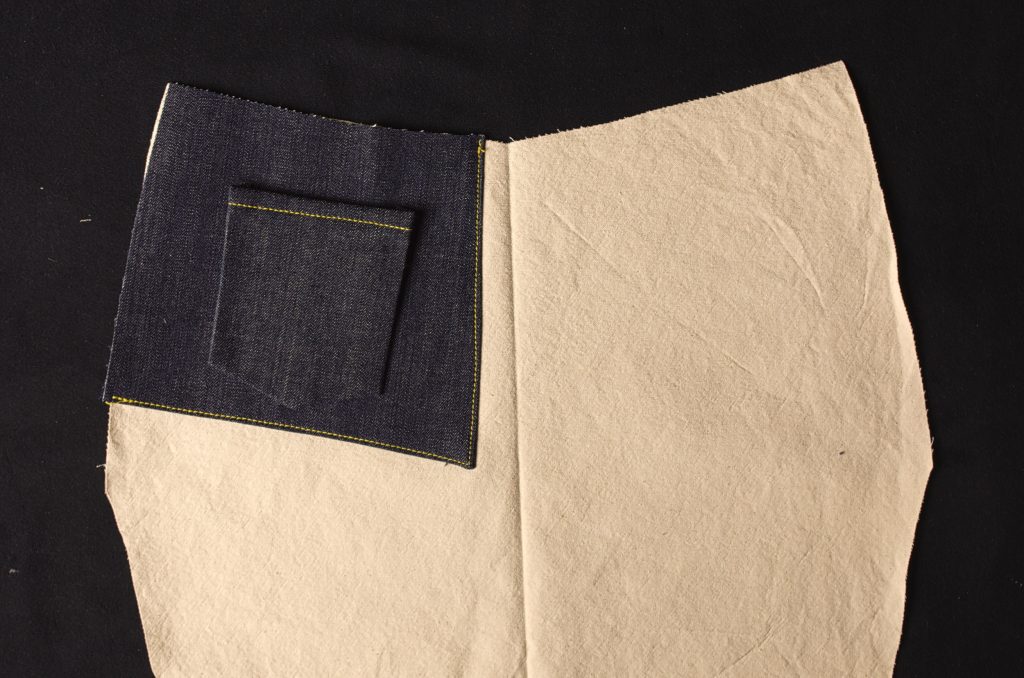
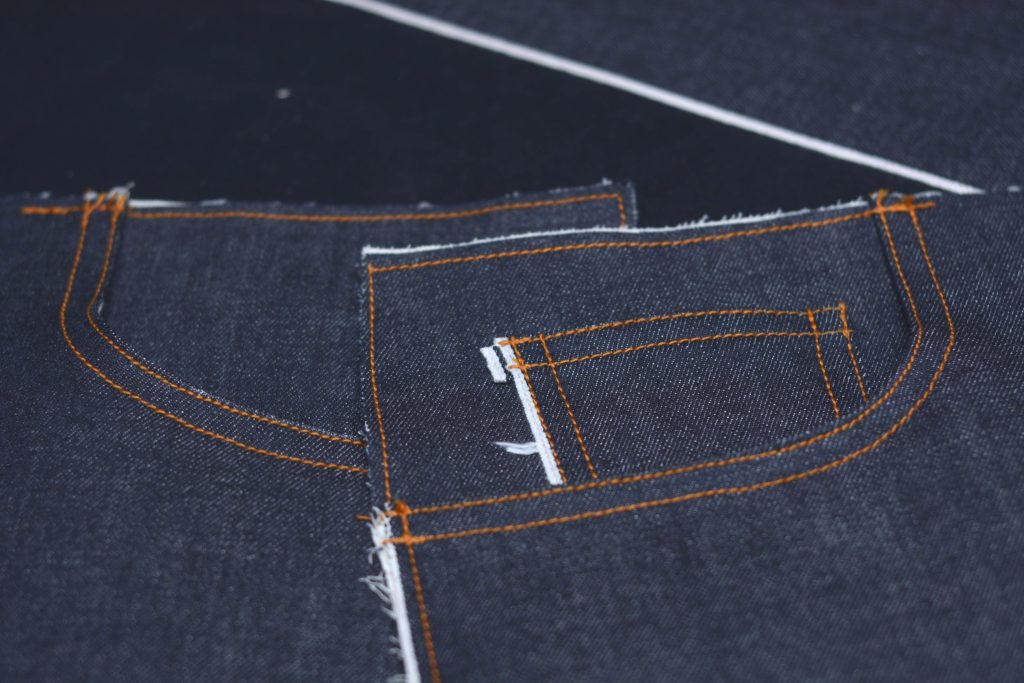
Top stitch around the outer edges about 1/16″ to 1/8″ from the edge. Then make a second row of top stitching about 3/8″ from that, tapering to about 1/2″ at the top as shown.
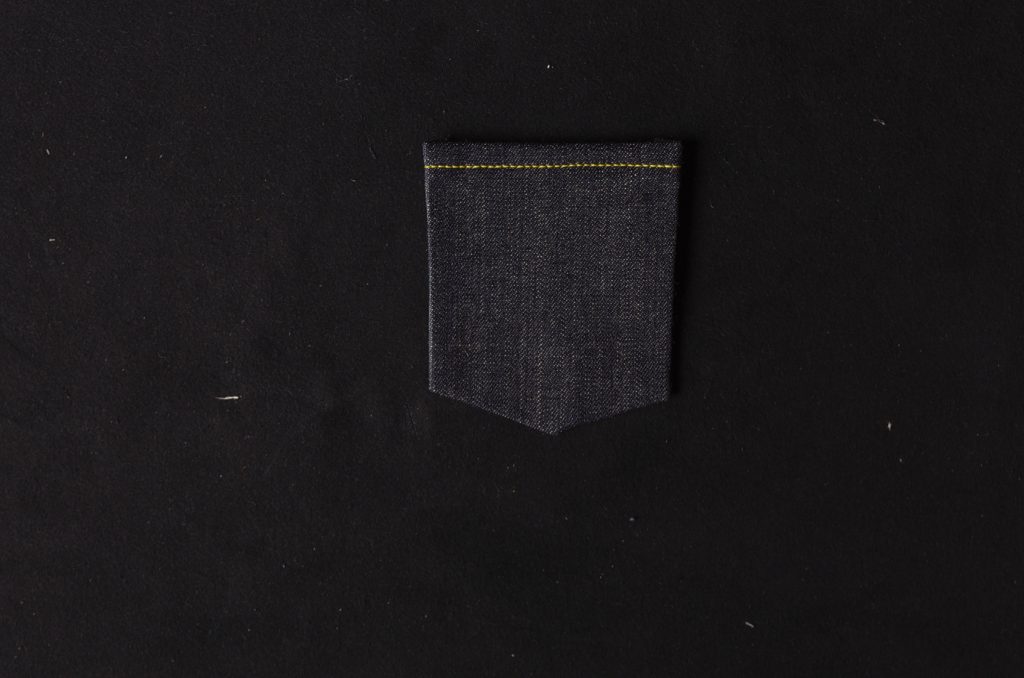
Here’s the modern watch pocket with the two rows of top stitching at the top, and making use of the selvedge on the left side.
Preparing the Pocket Bags
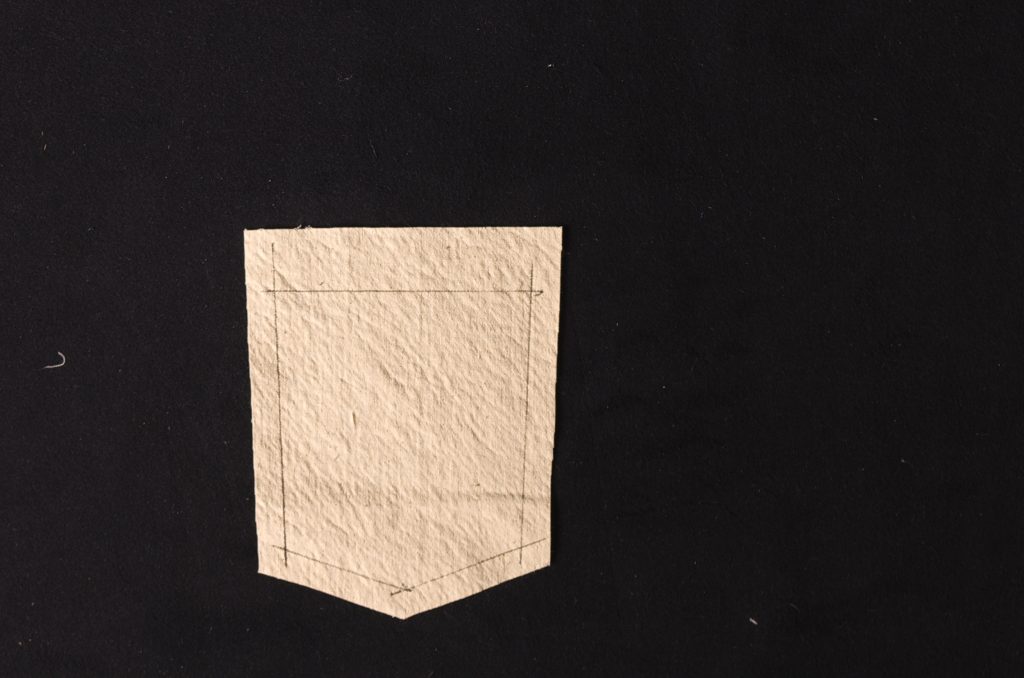
Moving on to preparing the pocket bags, begin by marking the 3/8″ seam allowances for the pocket facings on the bottom and inner edges. The curved waist and side seams do not need to be marked. The other facing should be opposite if you’ve cut it correctly.
Press the bottom and inner seams to the wrong side. At the overlapping area in the corner, you’ll want to manipulate the fabric so there’s no excess poking out like the example on the left.
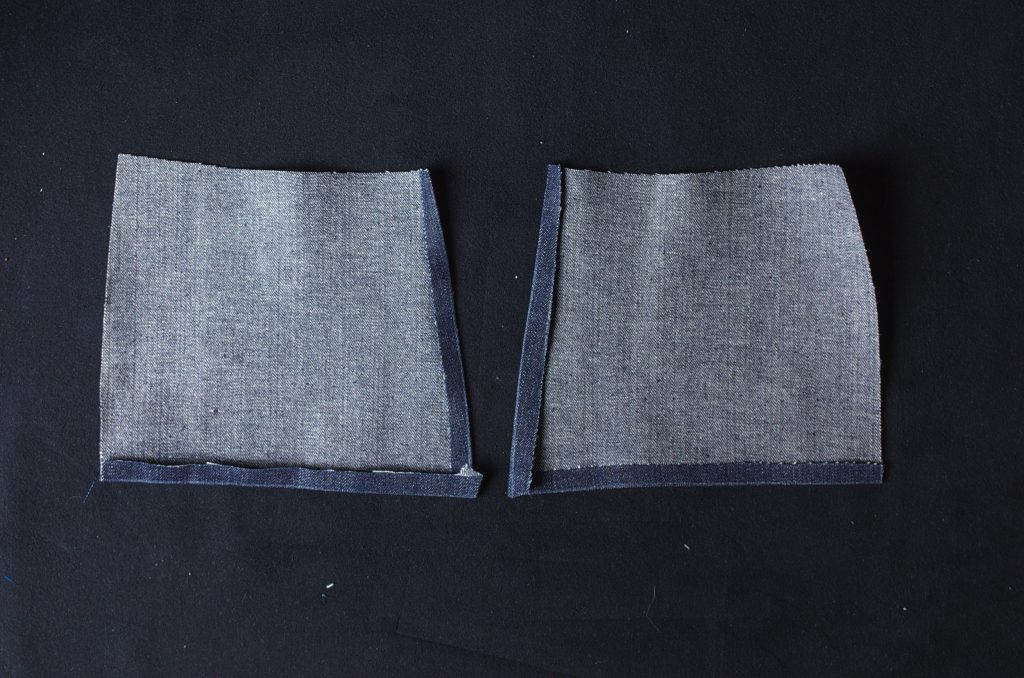
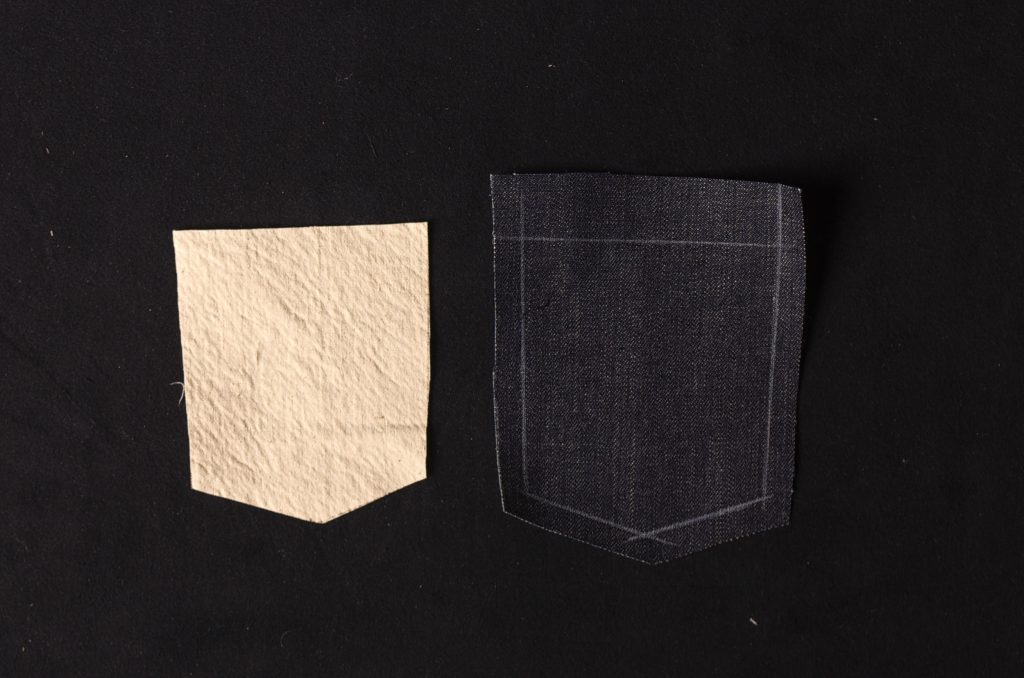
You should now have two facing pieces and two pocket bags cut on the fold.
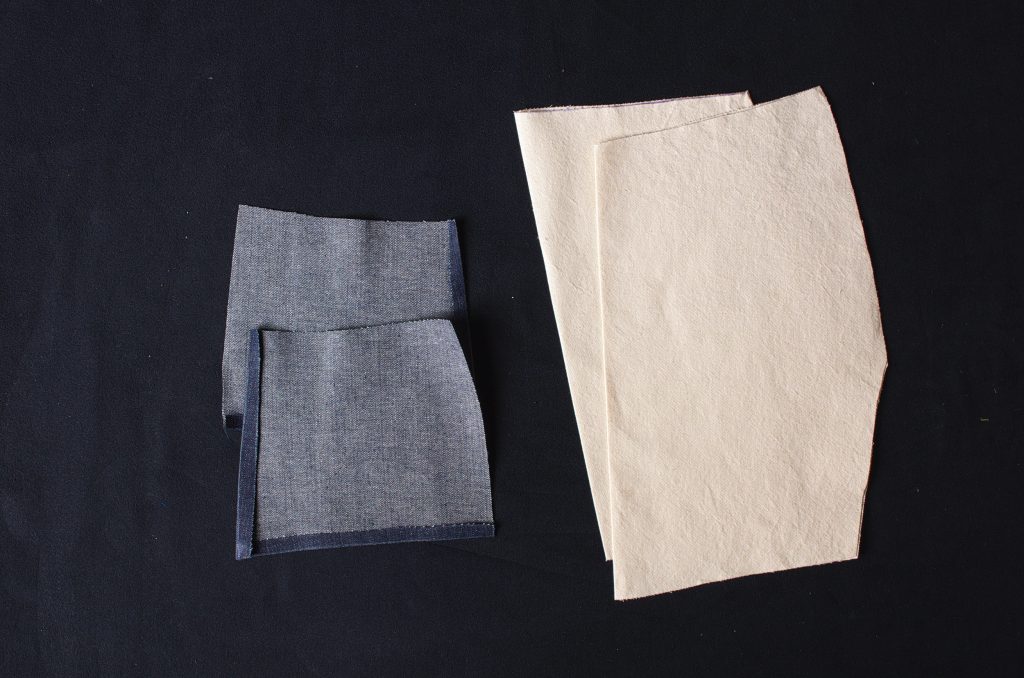
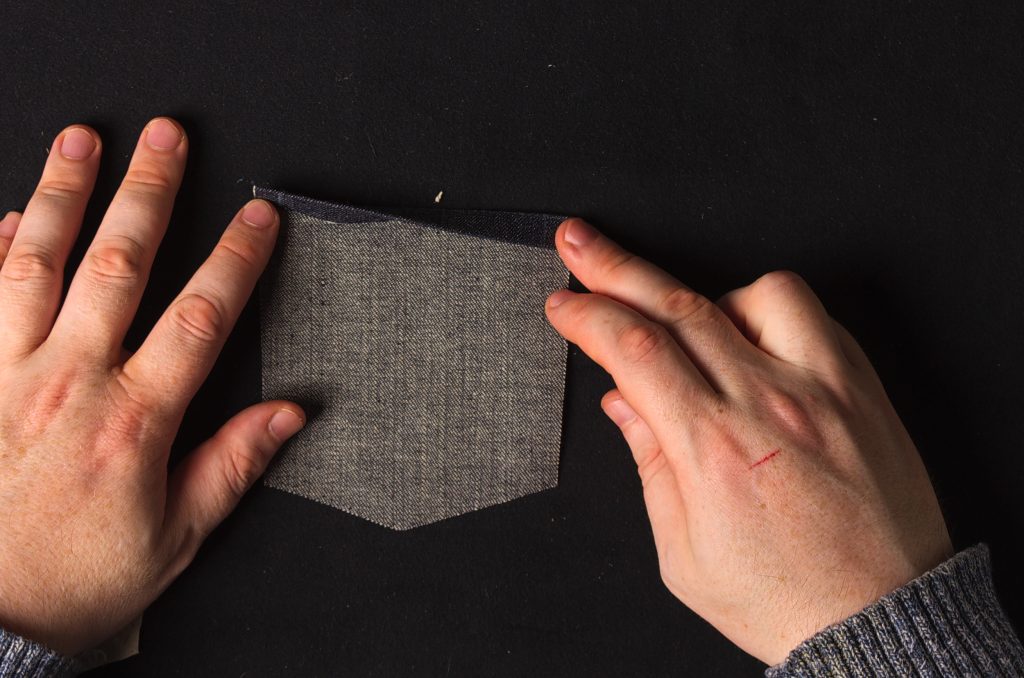
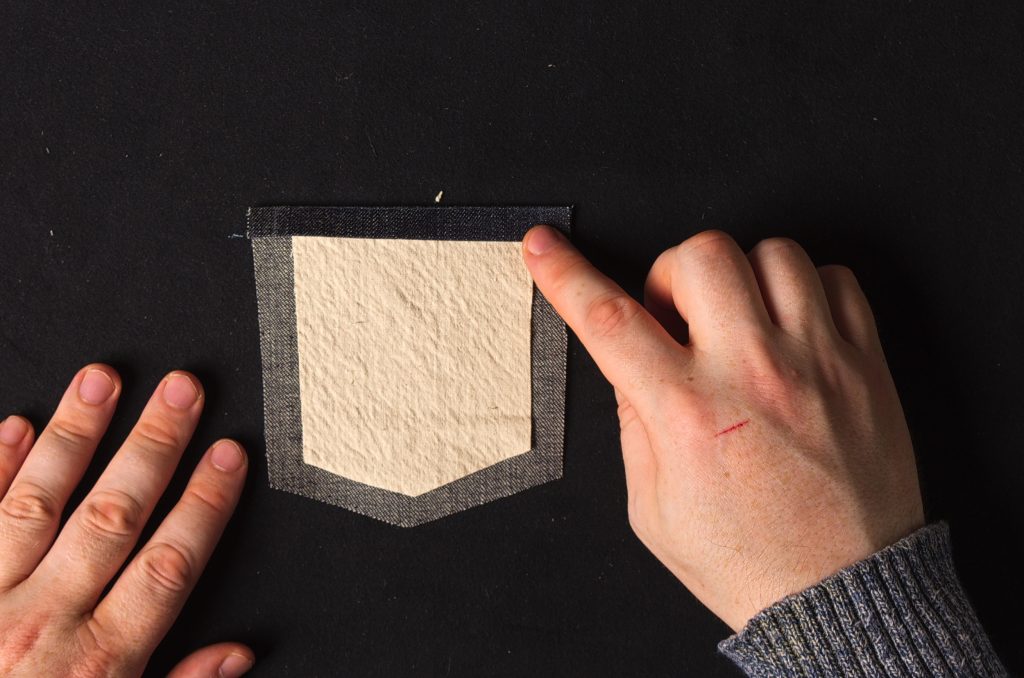
Open up the pocket bags and place the facings into position on opposite sides.

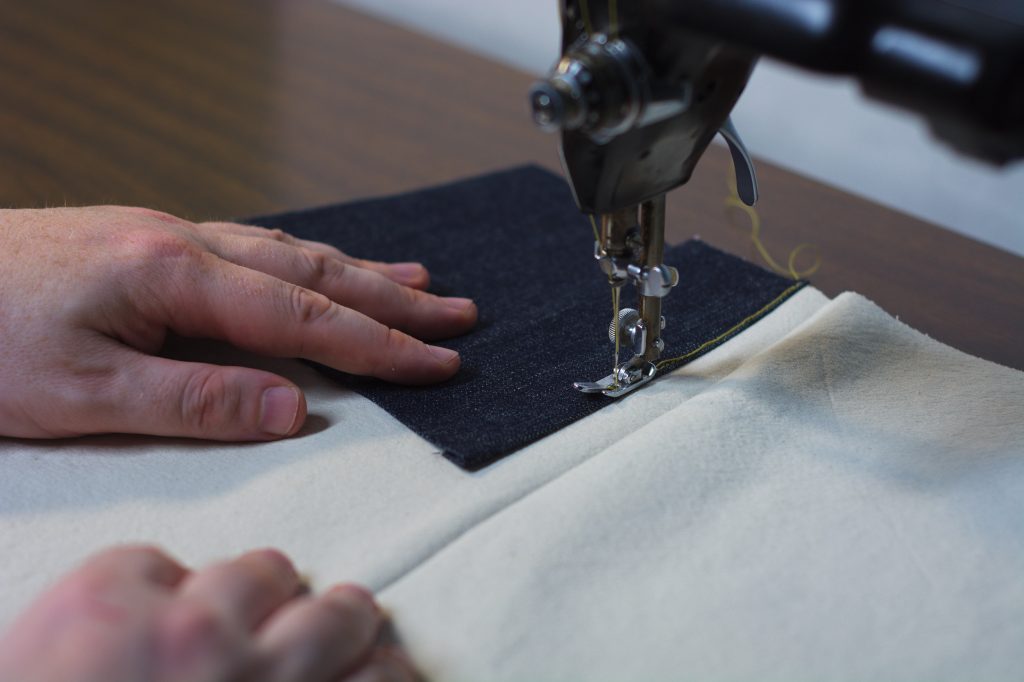
Top stitch through all layers along the inner and bottom edges of the pocket facings, keeping about 1/16″ – 1/8″ from the edge.

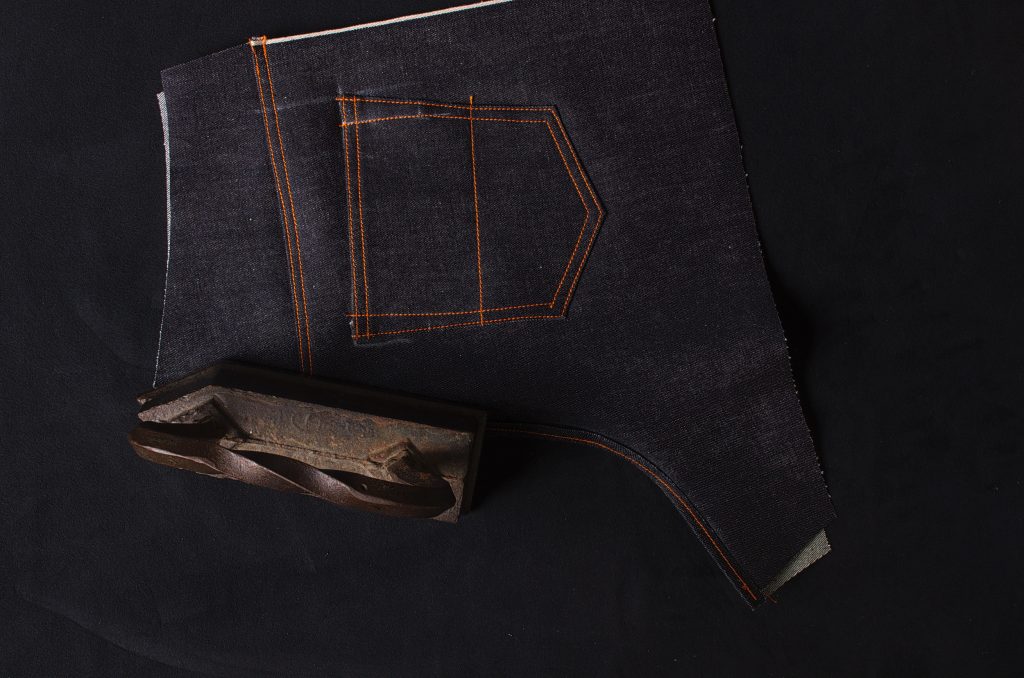
The Seat Seam – 1873
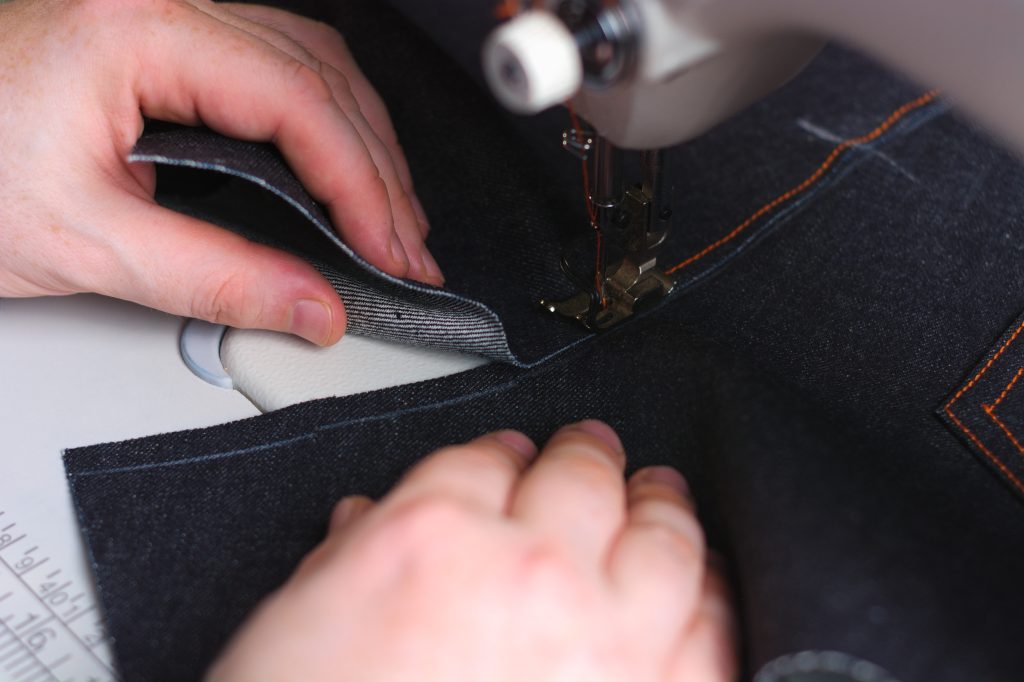
We’re now ready to sew the seat seam for the 1873 jeans – this method is also great if your sewing machine can’t handle the thick layers of the flat felled modern seams.
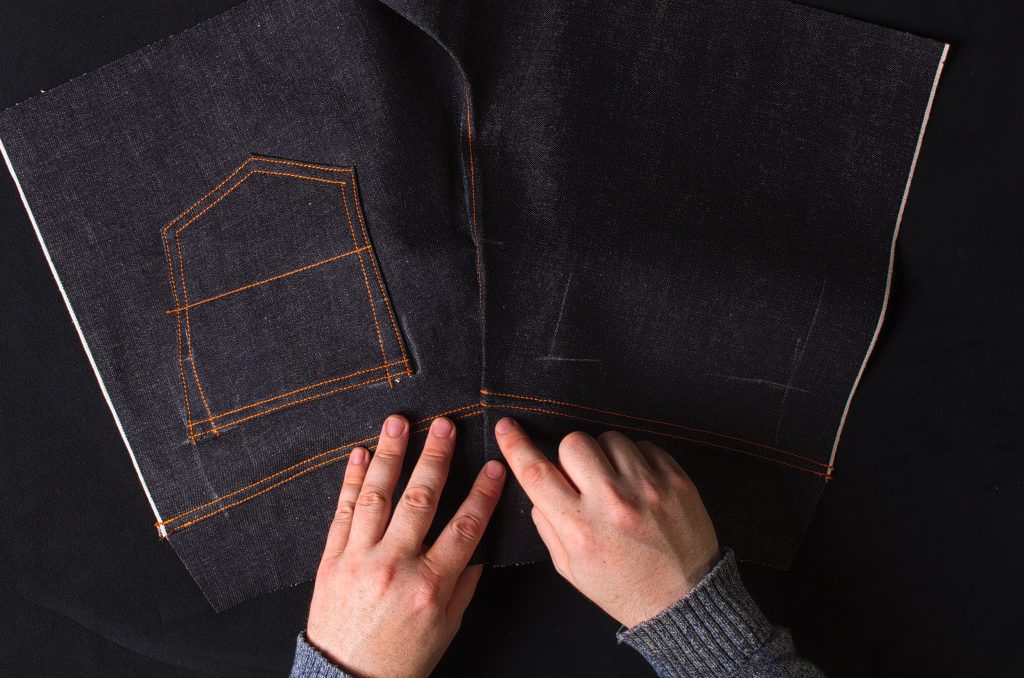
Lay the back legs right sides together, aligning the seat seam.
Remark the hip line at the seat seam if necessary on both pieces for clarity.
Pin and sew a 5/8″ seam along the seat seam through all layers.
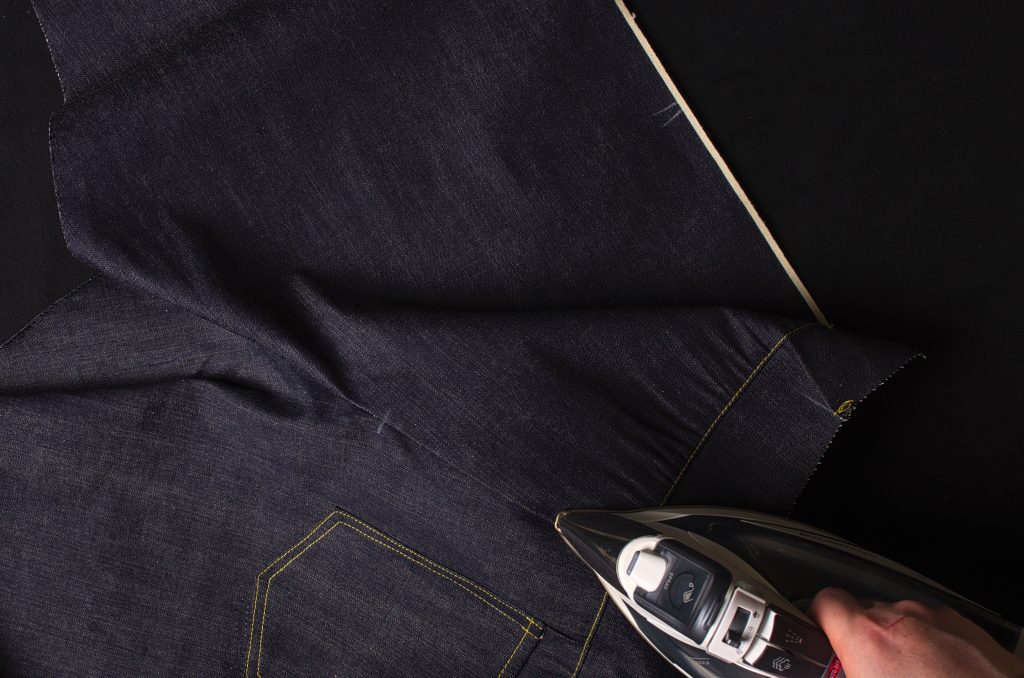
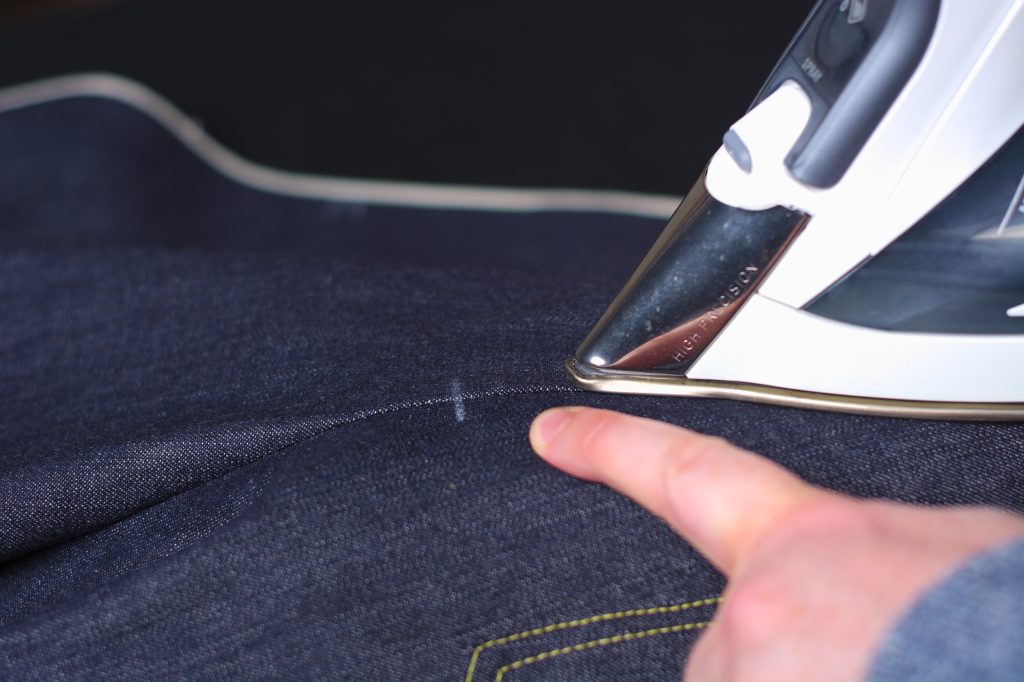
I’m not sure they would have done this in exactly this way back in 1873, but it helps a lot with the sewing. Gently stretch the crotch curve in the seam allowance only, basically straightening it, as shown. This will help the seam roll properly without tension.
By keeping the iron in the seam allowance, you won’t affect the fit of the jeans even with the stretching.
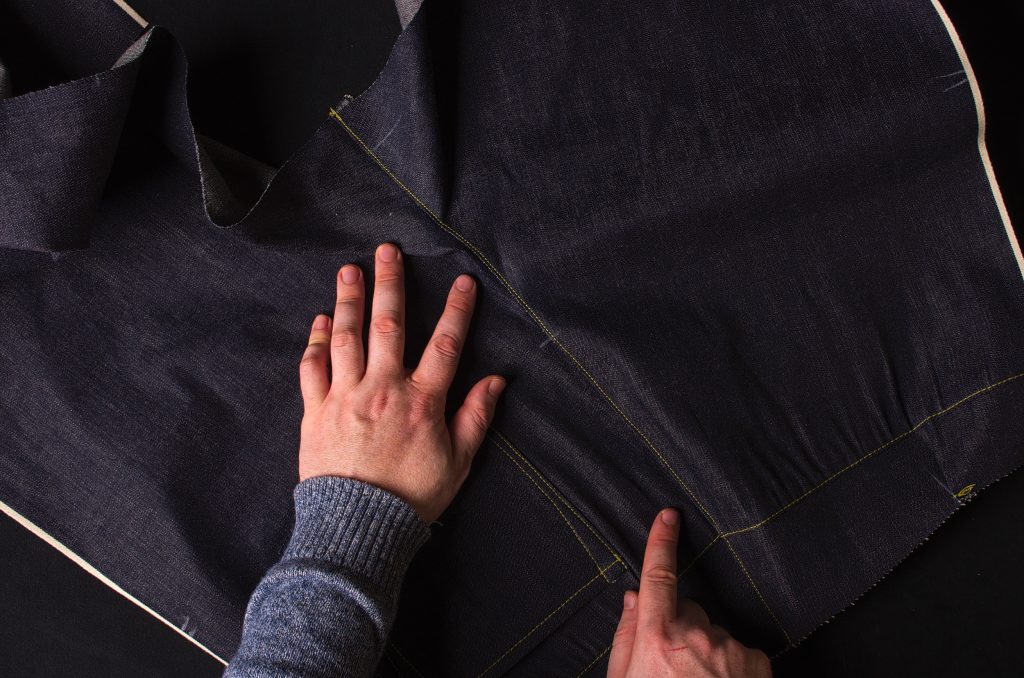
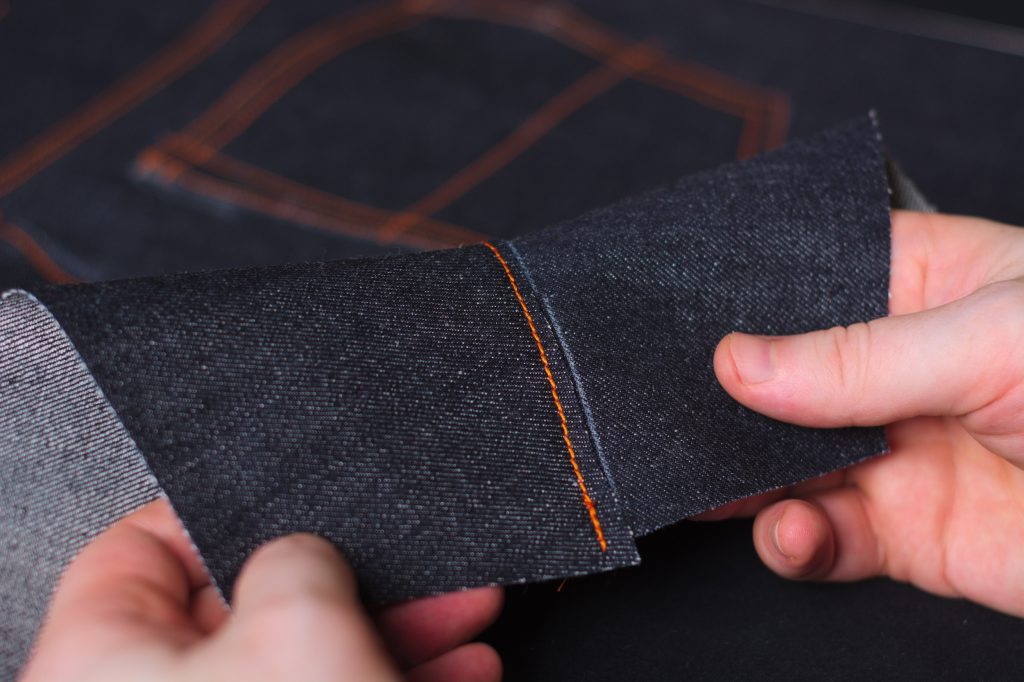
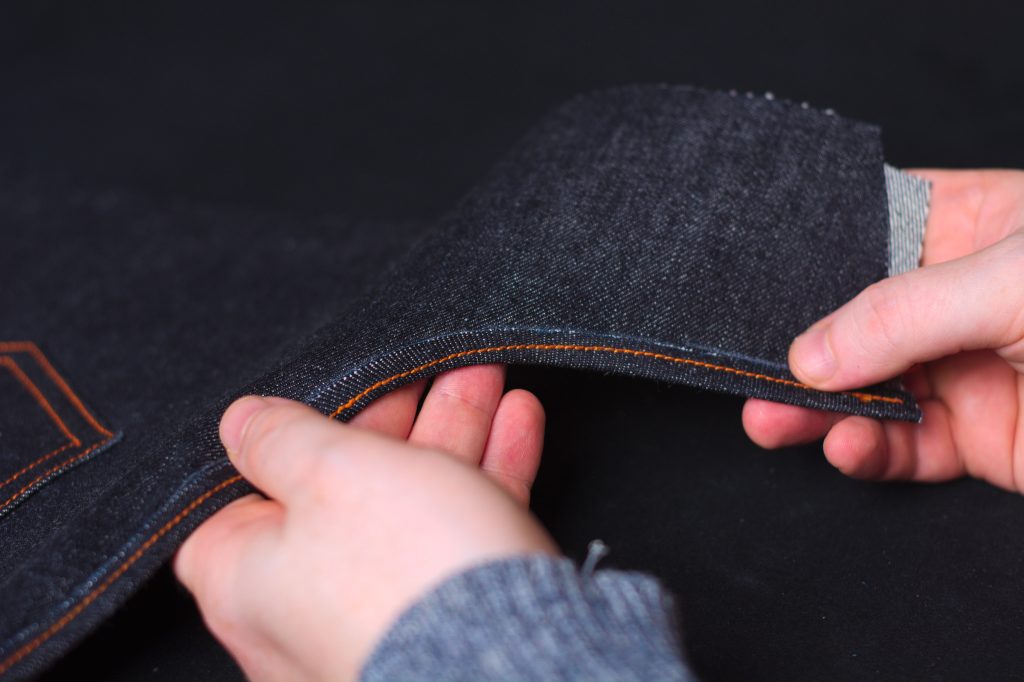
After stretching, you can put the seat area back into it’s original shape and see the extra length now built into the seam allowance.

Turn to the wrong side and open up the back legs. Press the seat seam towards the left side.
Use a tailor’s ham as necessary under the curved or shaped areas of the seat seam.
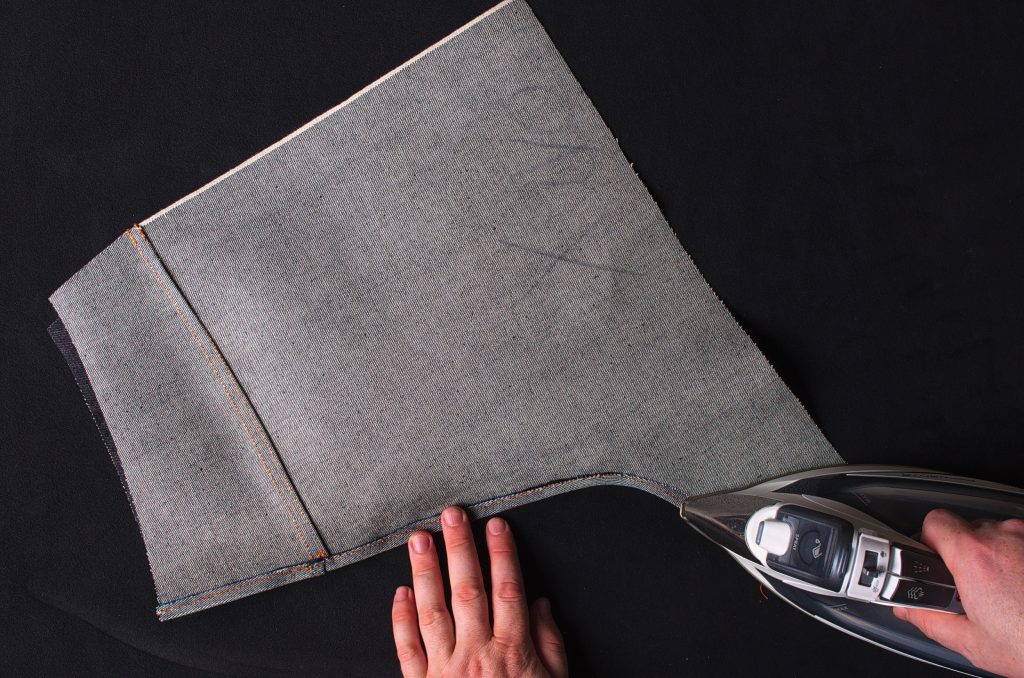
Flip to the right side and press to make sure everything is nice and crisp.
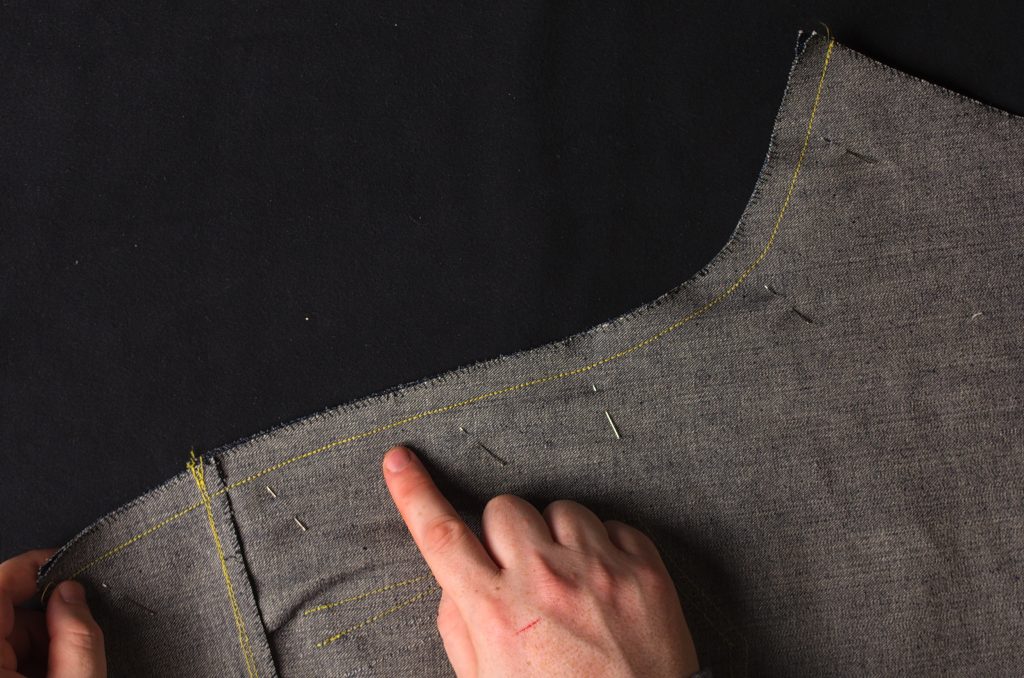
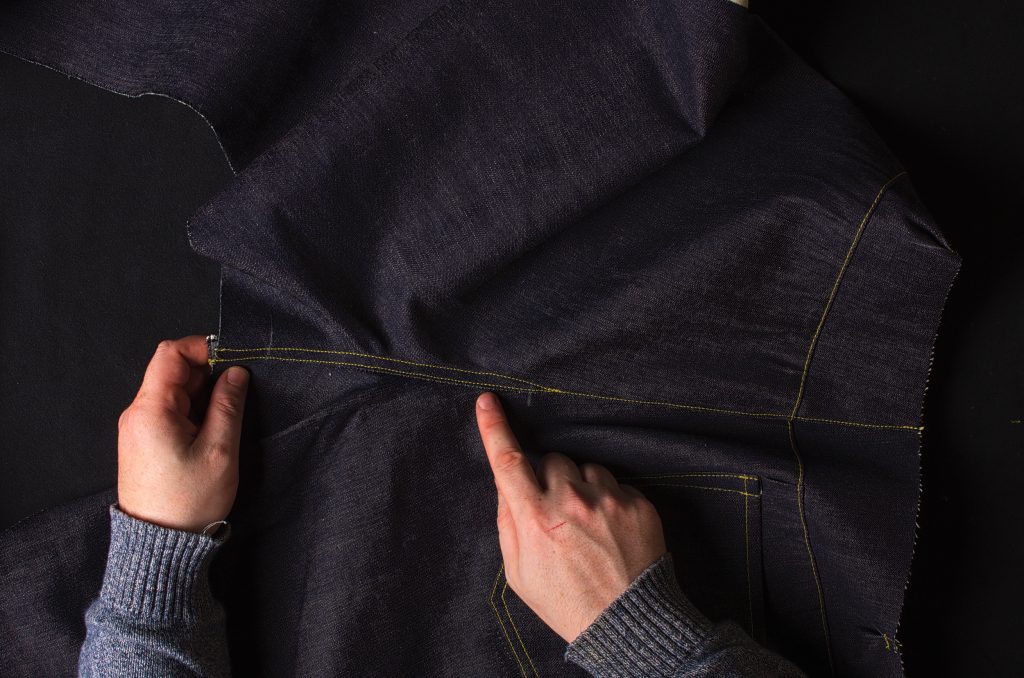
Now top stitch along the entire seat seam about 1/16″ – 1/8″ away from the creased edge (just use the same spacing you used for the yoke).
Now here’s a step that threw me for a loop when trying to figure all of these steps out. Starting from the crotch, top stitch about 3/8″ or just under from the original top stitching. As you get to the hip point, taper back into the original top stitching and back tack.
I’m still not entirely sure why they did the double top stitching here and not the rest of the seat seam and yoke. It does add some strength to the area at least.
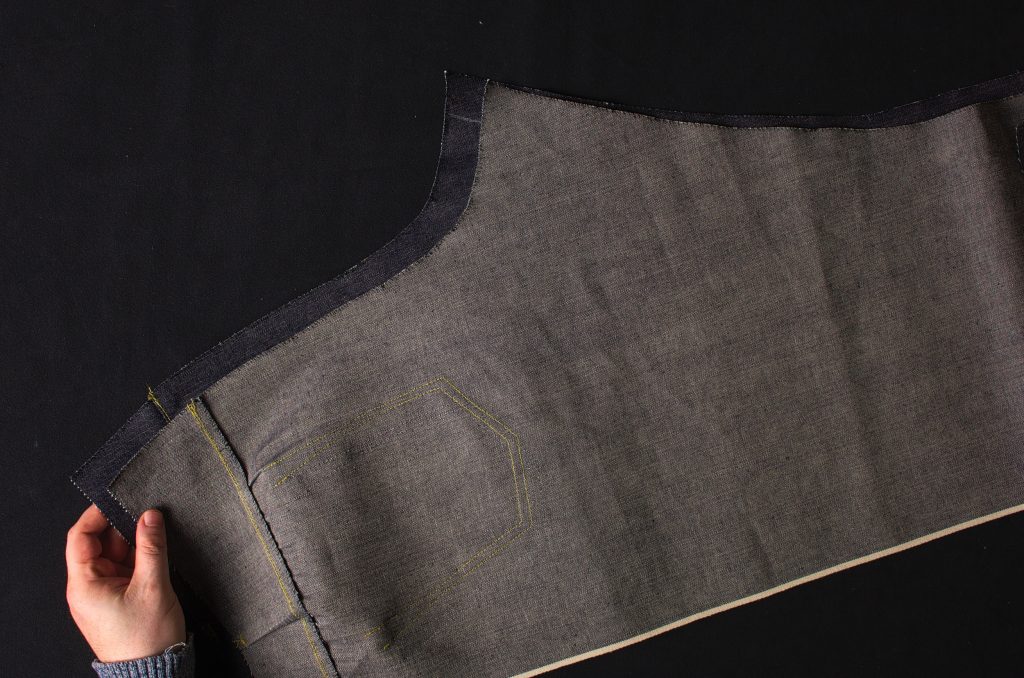
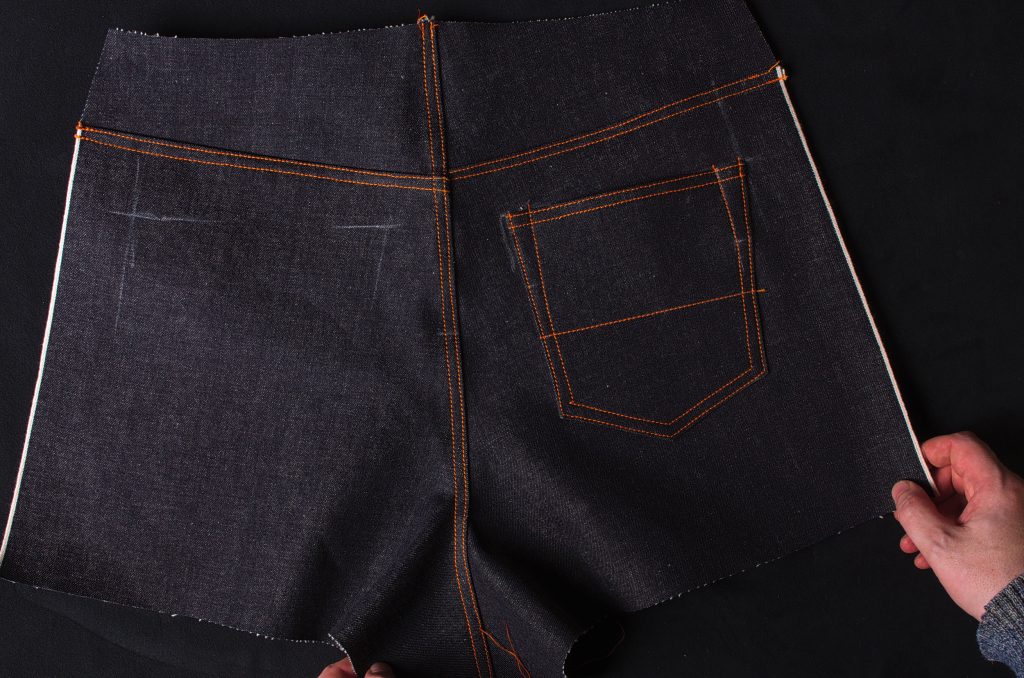
From the wrong side you can see the three rows of stitching making this a strong seam.
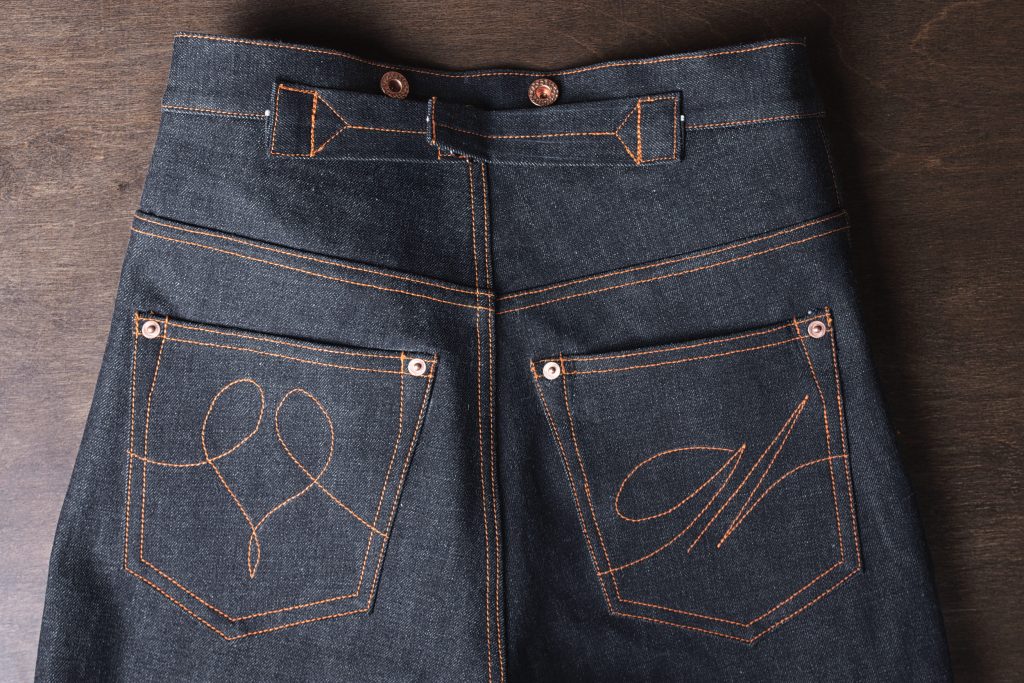
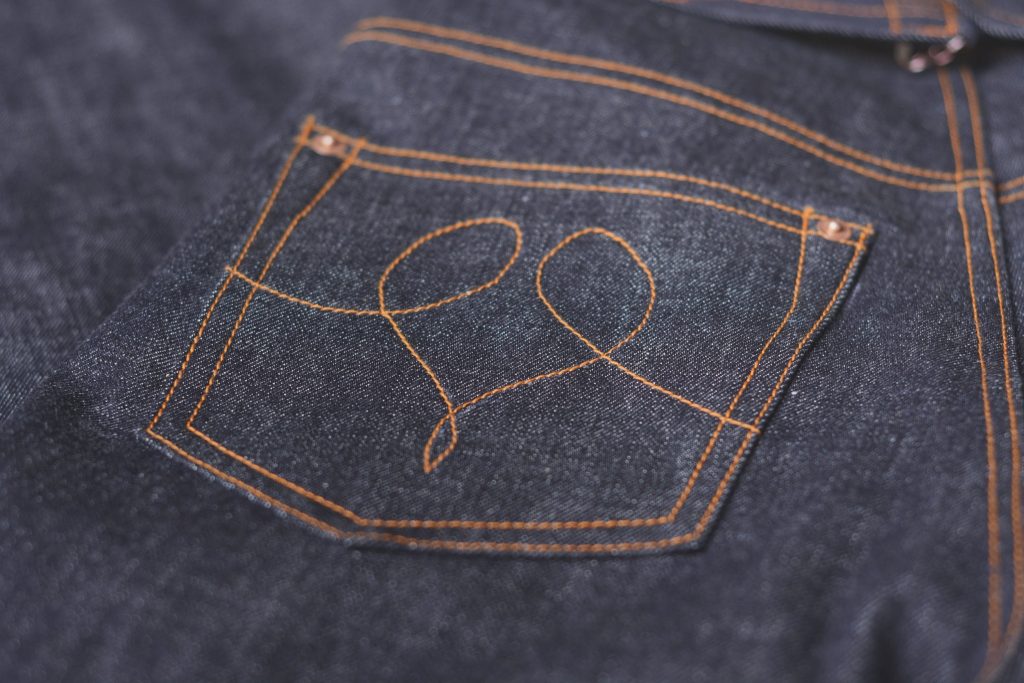
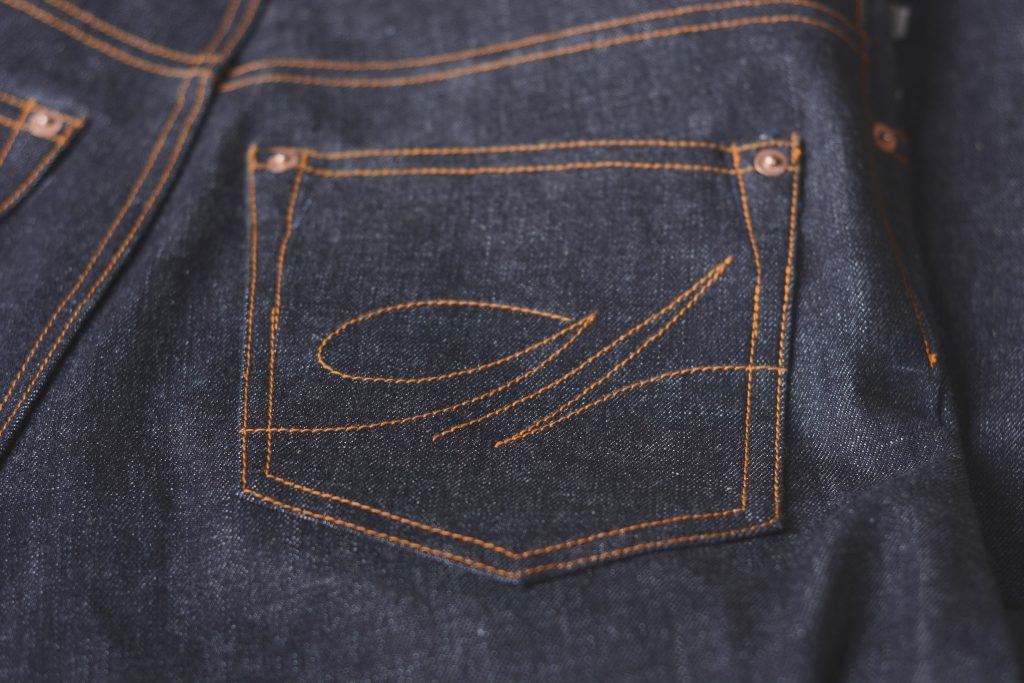
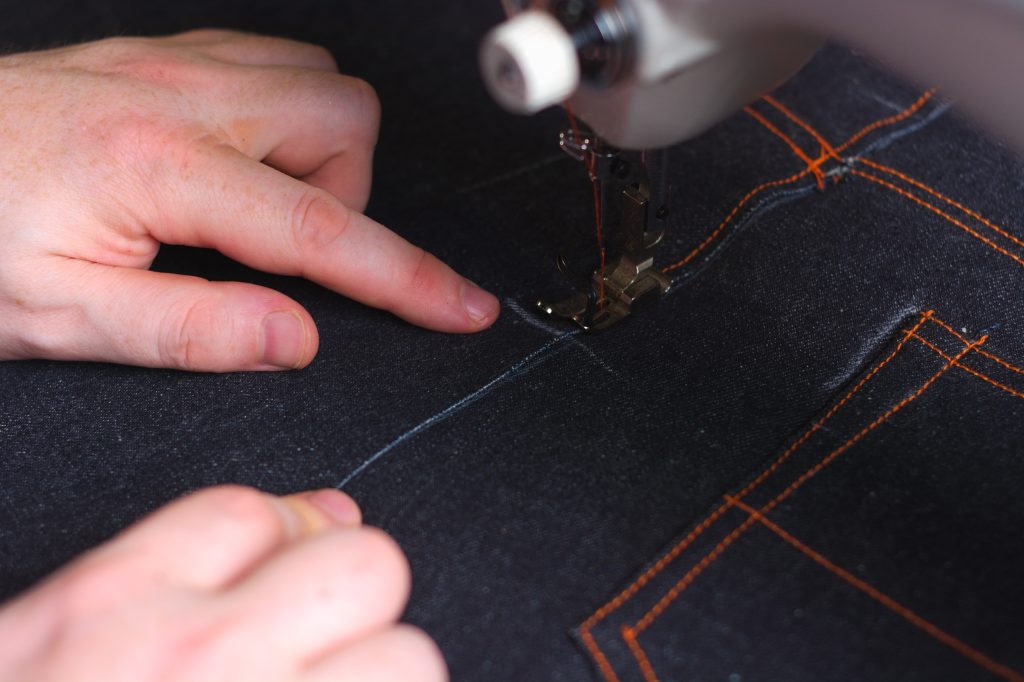
Arcuates
After I’m done with the rest of the tutorials, I’ll come back and add instructions for doing some simple and more complicated arcuate designs. It’s similar to the straight line I used in the previous section, just more complex designs. I’ll leave these as inspiration for now!
1873 Yoke Pleat
The 1873 yoke is cut straight as opposed to the curved shape built into the more modern versions. Therefore, we need to introduce a little shape with a small pleat put into each yoke. You should have this laid out in your pattern already.
Begin by aligning the yoke pattern onto the yoke.
Make two small marks at the top of the dart.
Extend the marks straight down a half inch or so for clarity.
Pinch and crease the fabric at the mark closest to the selvedge edge / side seam.
And then fold this into position so that the creased edge touches the second mark. This is position in which the pleat will be sewn.
At the machine, make sure everything is correctly aligned.

Sew across the top of the dart, 1/4″ from the waist seam. This will ensure the stitches are hidden after the waistband is attached with a 3/8″ seam allowance.
Here’s the stitching done. You can see the shape that’s been introduced into the jeans now. When they’re being worn, the pleat will naturally begin to crease more to the wearer’s actual shape over time.

Repeat for the other side.
The Seat Seam – Modern
This is the construction method for the modern jeans with the flat felled seams. If your machine has trouble getting through the 16 layers, I’d recommend using the 1873 construction method instead.
To begin, check the upper part of your seat seam near the yoke to make sure everything is aligned correctly. I noticed the seam was protruding a little here so I trimmed it down flush to make sewing easier.
That looks better. Of course your pattern may be curved here, so just even things out if necessary.
On the right back leg, mark a 3/8″ seam allowance along the seat seam.
Try to be as precise as you can, especially in the curved areas.

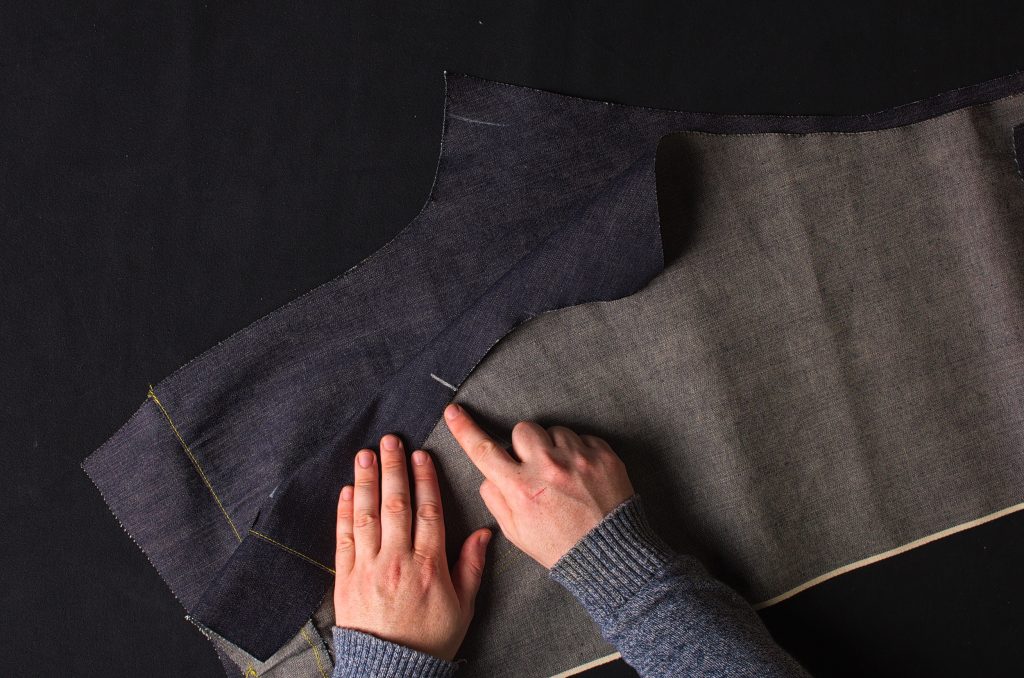
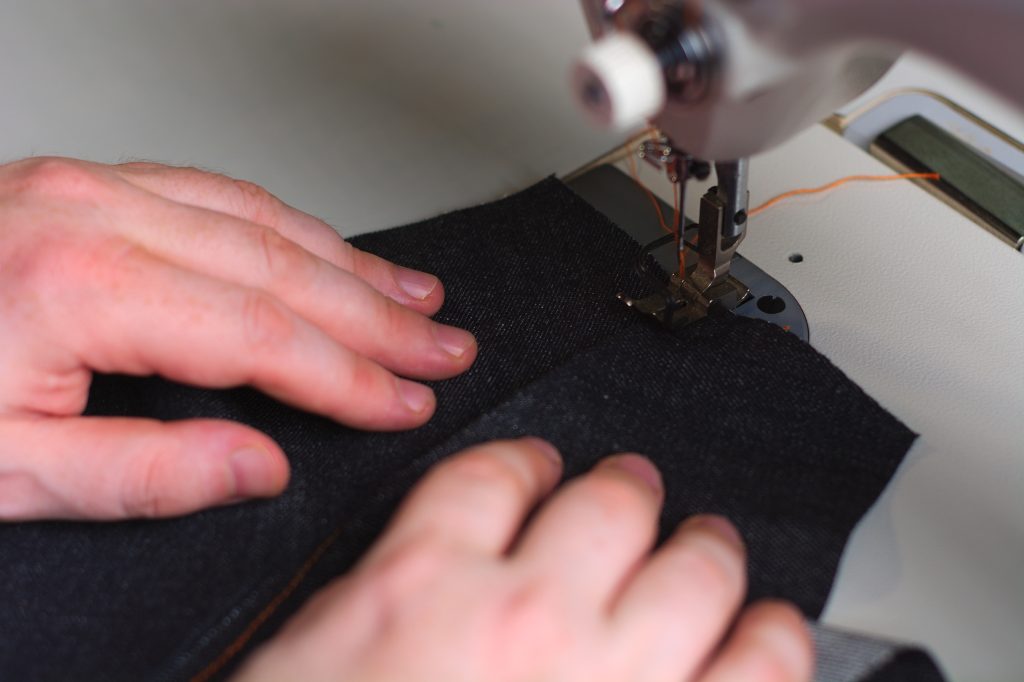
Starting at the waist seam, align the left leg over the right, butting the raw edge just to the outside of the line you just marked.
Begin sewing down the center of the overlapped area, aligning the yoke area as closely as possible.
Continue aligning the seam as you sew. Here’s the hip mark lining up between both sides.
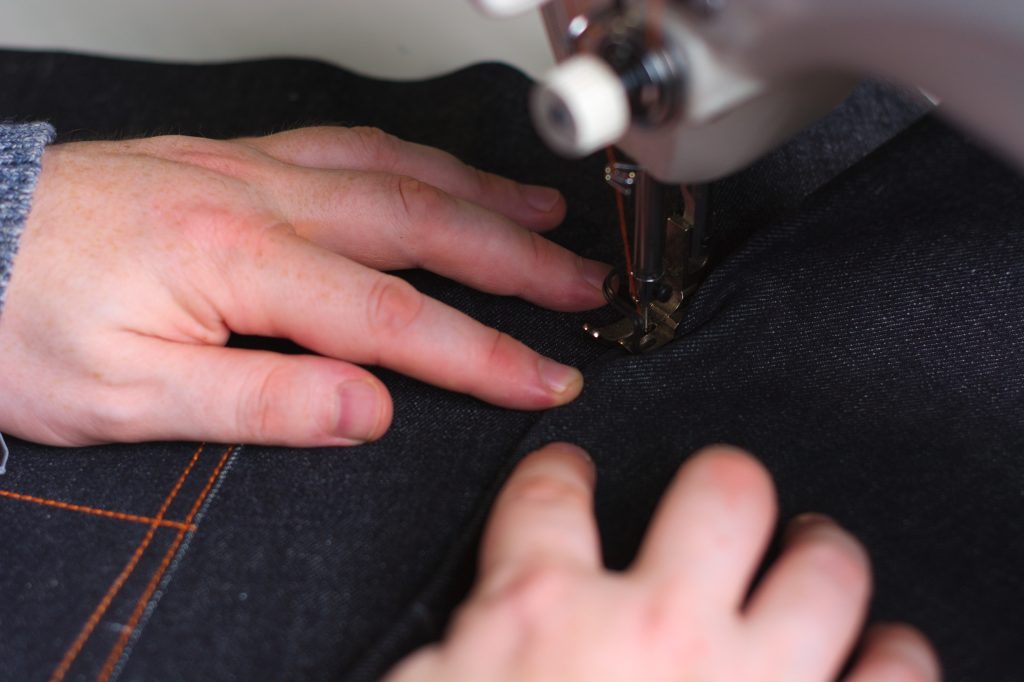
As you get to the curved area, you’ll have to fight with and manipulate the fabric to get everything lined up properly. Just be as accurate as possible.
Eventually you’ll get through the worst of the curved section.

Continue until you reach the crotch area. Ideally the seams should line up here at the end, but if you’re a little off like I am, maybe 3/16″ at most, don’t worry about it, we’ll trim it flush later.
Here’s the seat seam so far (though you’ll have two pockets if you’re making the modern trousers).

Now with right sides together, align the seat seam as shown so that the hidden raw edge that’s in between the layers lines up with the folded edge of the seat seam. Use your fingers to manipulate and crease the denim, following up with a hot iron with steam.
As you’re pressing the curved area, be sure you have a good 3/8″ overlap here. It’s easy for the fabric to want to unroll here giving you a seam that is too narrow.
You’ll notice that my stitches here are very close to the raw edge. If they’d gone off the edge I’d have had to redo the seam, but luckily they caught just enough fabric. Still, try to ensure those stitches are in the middle of the seam when sewing.
At the yoke junction, I highly recommend using a heavy goose iron or other object to really press that area down.
The yoke area after pressing.
Now flip the assembly so that the wrong sides are together, and again press the seam in a similar manner. Try not to let the iron go too far from the edge or you’ll begin to flatten the seam you just pressed that’s now underneath, as well as risk marking your denim with the iron.
Again use a heavy weight on the yoke junction for best results.
Open up the legs, right sides up, and manipulate the seat seam into its final position.
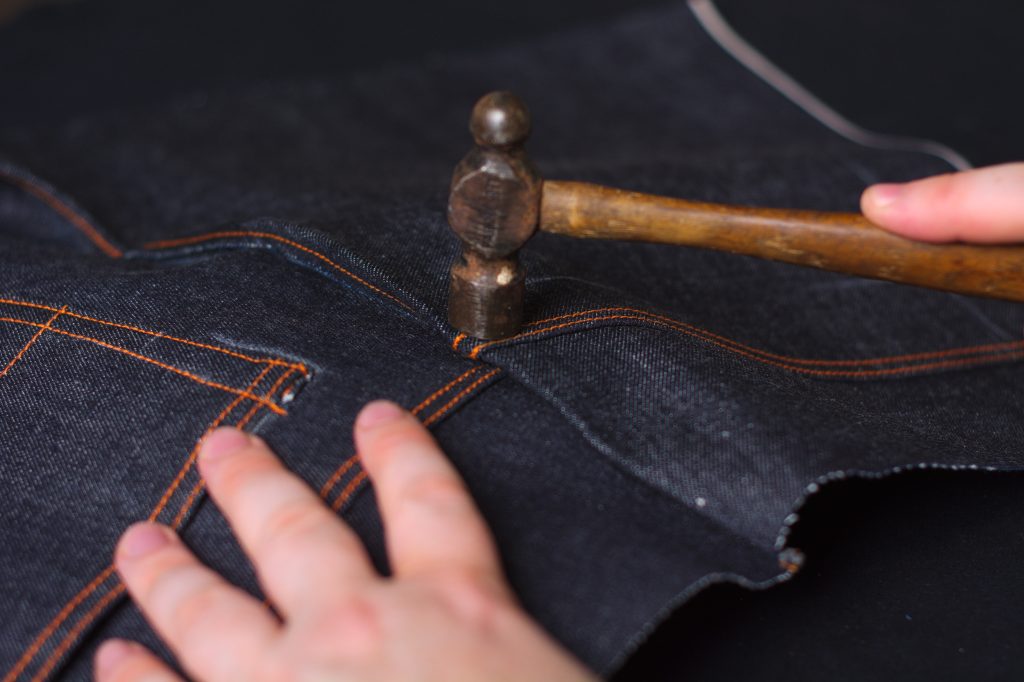
Over a block of wood, hammer the yoke area firmly to further crease the area. We really need all the help we can get here!
Also, if you’ve done things correctly, the yoke seams won’t align perfectly. This is just the nature of this seam and somewhat a sign of good construction actually.
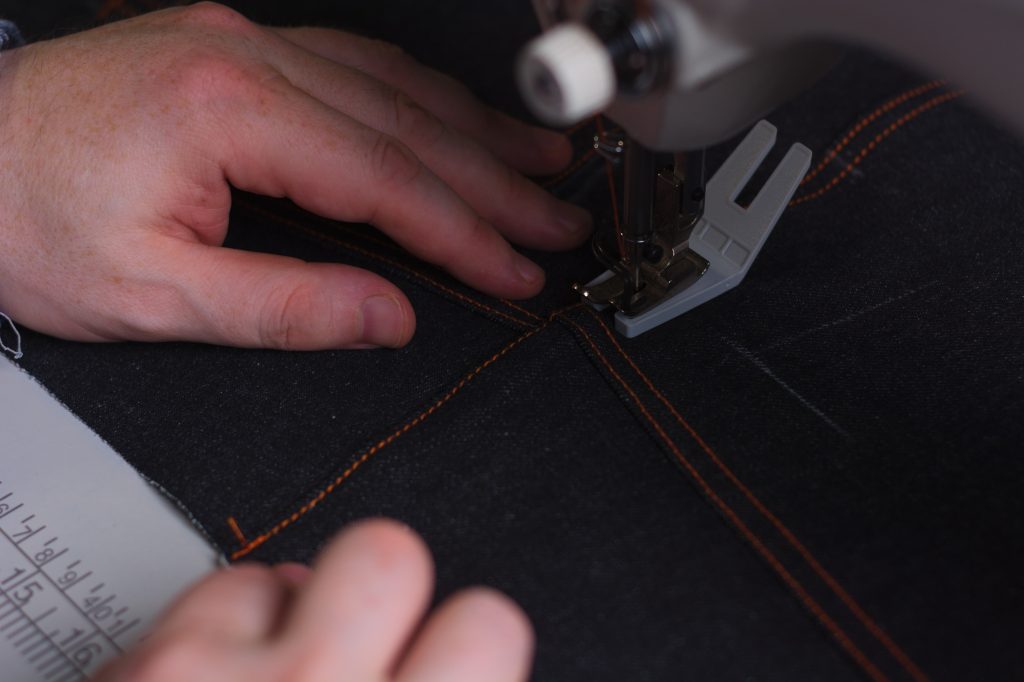
Starting at the crotch, begin top stitching the seat seam, about 1/8″ from the creased edge (match the distances in the yoke seam). As you sew, manipulate the seam into its pressed position, being especially careful around the curved area.
Be especially careful near the yoke junction! And definitely use the seam jumper here. Best of luck.
Sew a second row of top stitching about 1/4″ 3/8″ from the first row, being sure that your stitches are catching the seam below and not running off. When you get to the yoke area, use that seam jumper again for best results.
After sewing the seat seam, examine your work to be sure you didn’t run off the seam in any areas. I was super close here but I’d call that acceptable. Definitely takes some practice.
If you do run off the seam, it’s best to undo the stitching and try again, despite how painful it may be mentally.
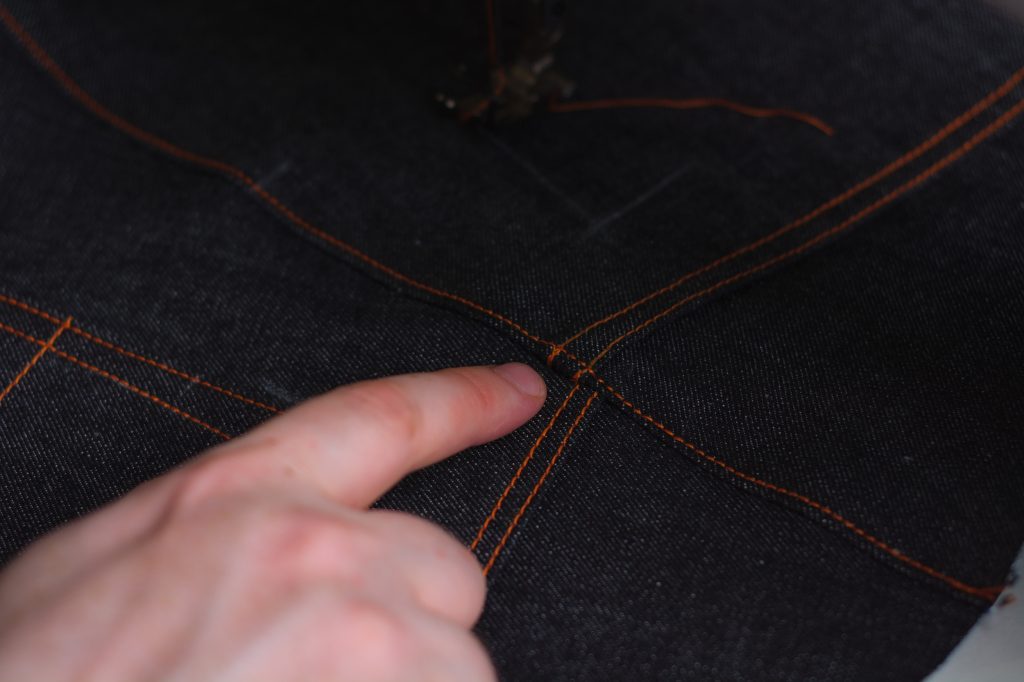
Here’s the finished seat seam from the right side. You can see how the yoke seams are slightly off from each other. If I’d have mad the yoke stitching a little more evenly spaced on the right side it would look a lot better here.
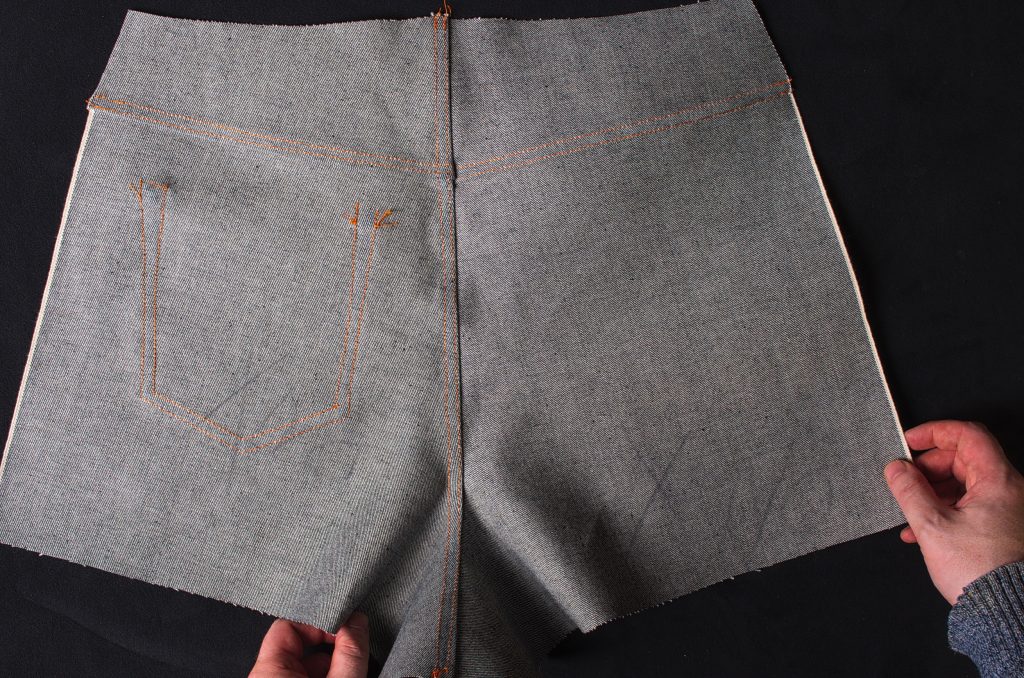
And the seat seam from the wrong side.
Attaching the Back Pockets
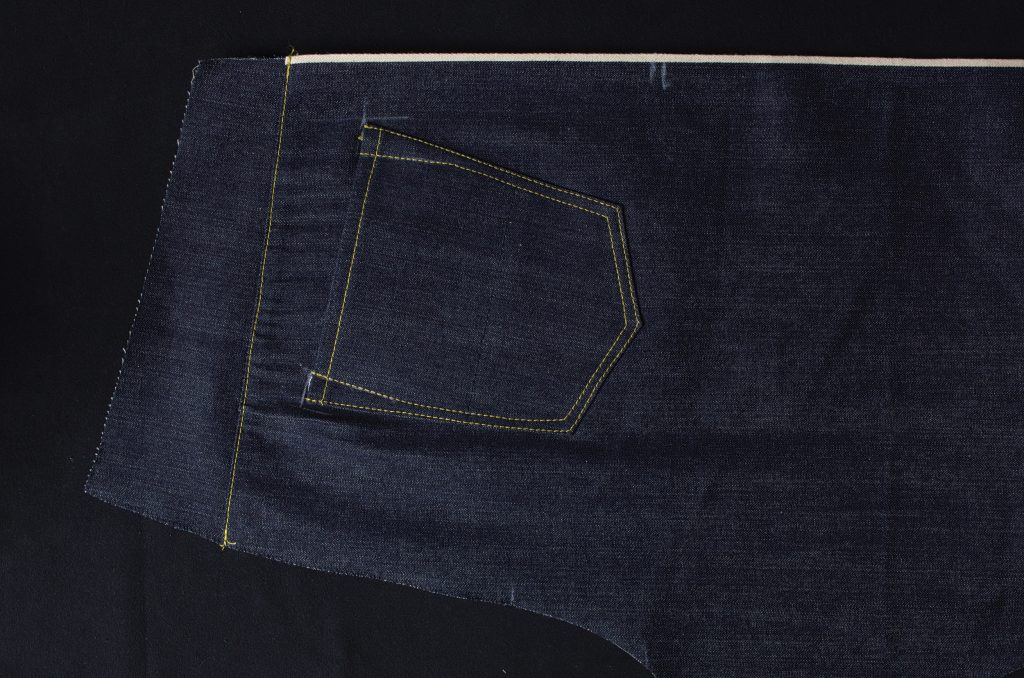
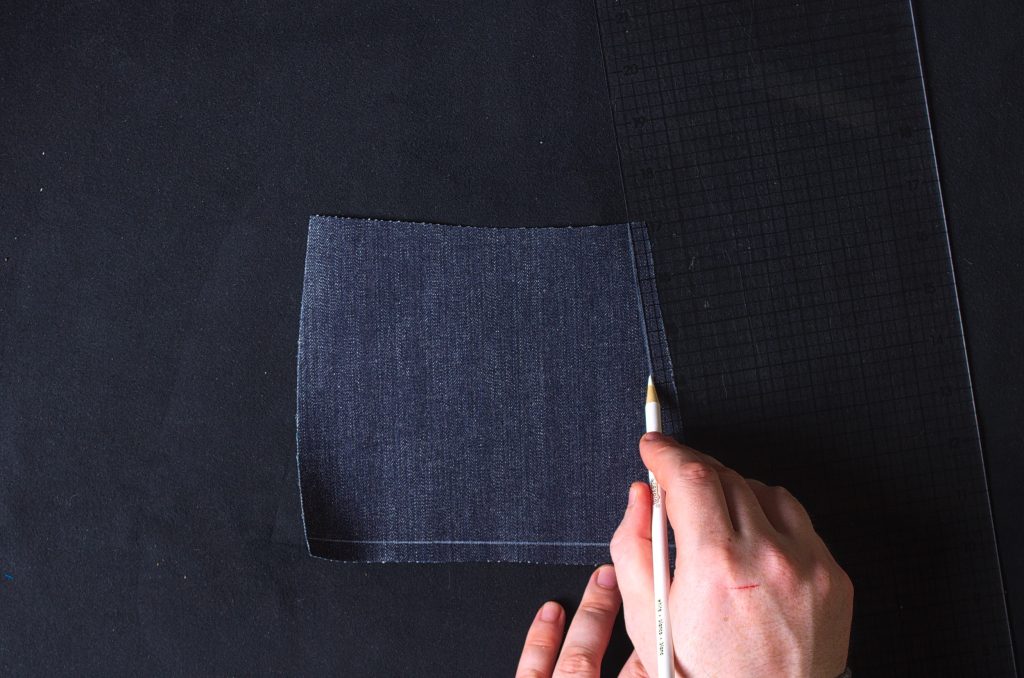
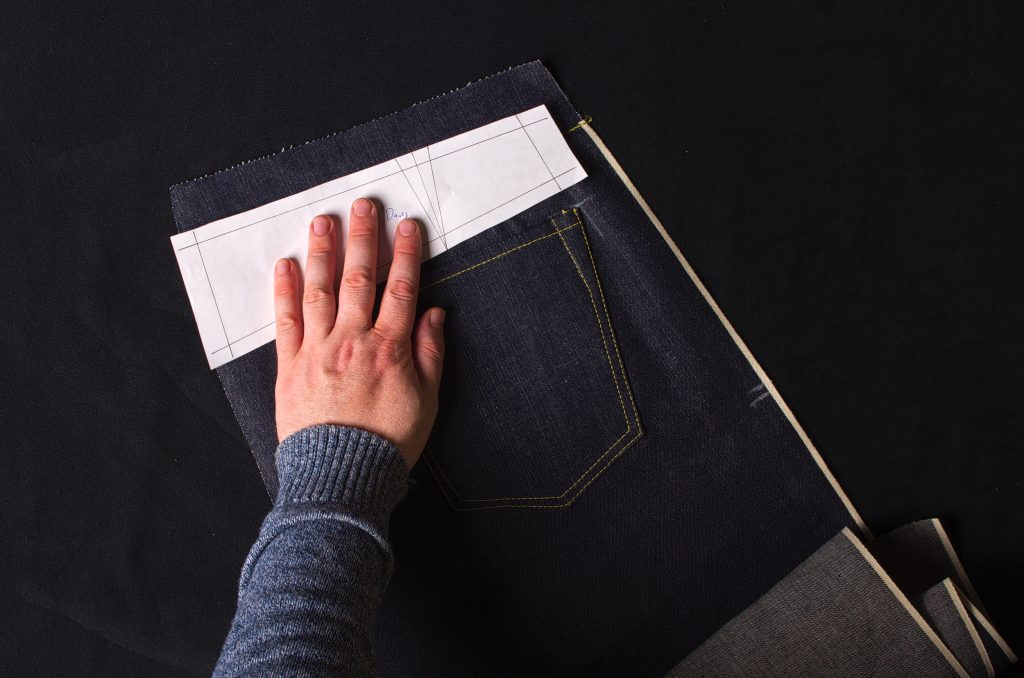
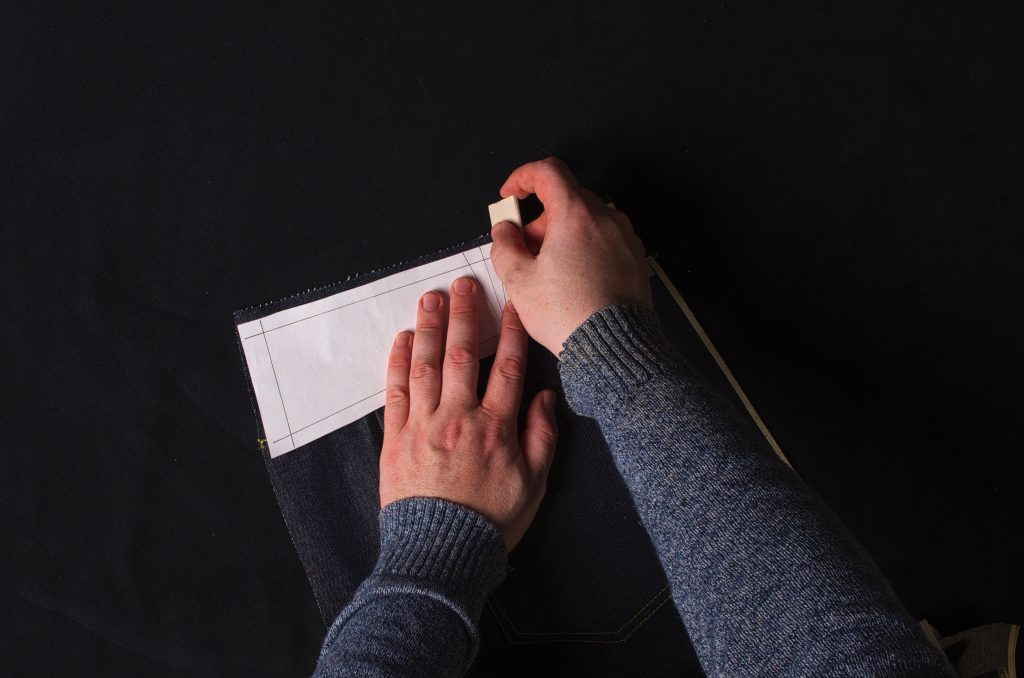
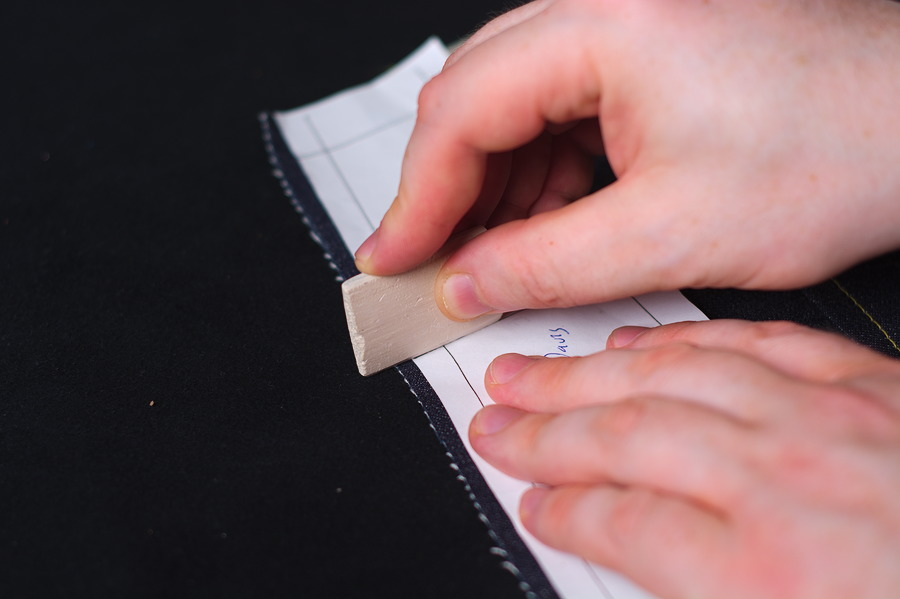
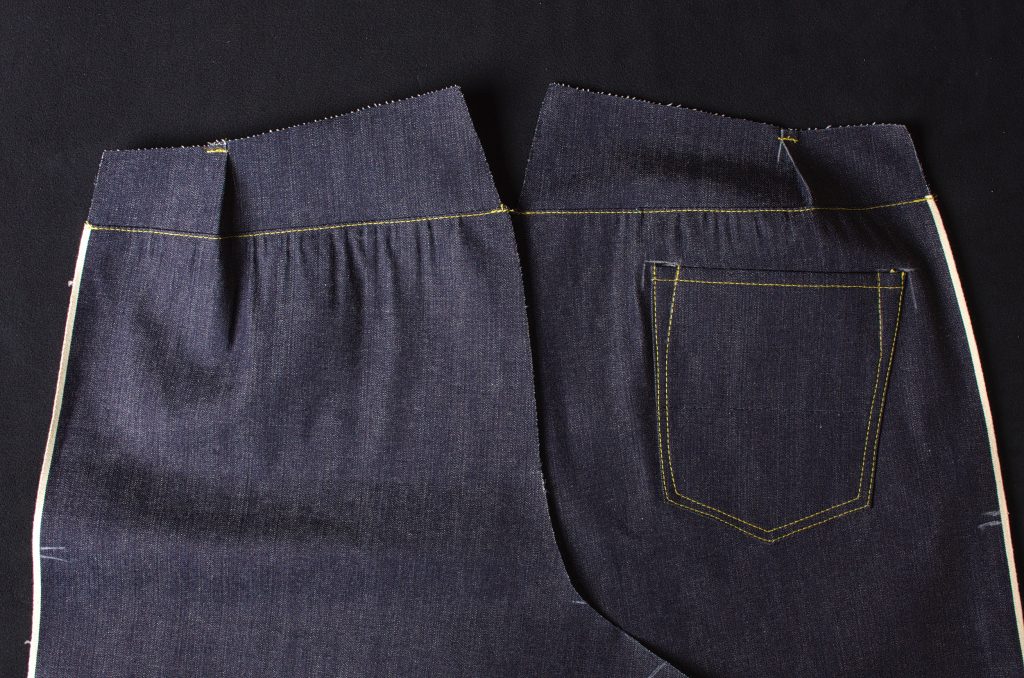
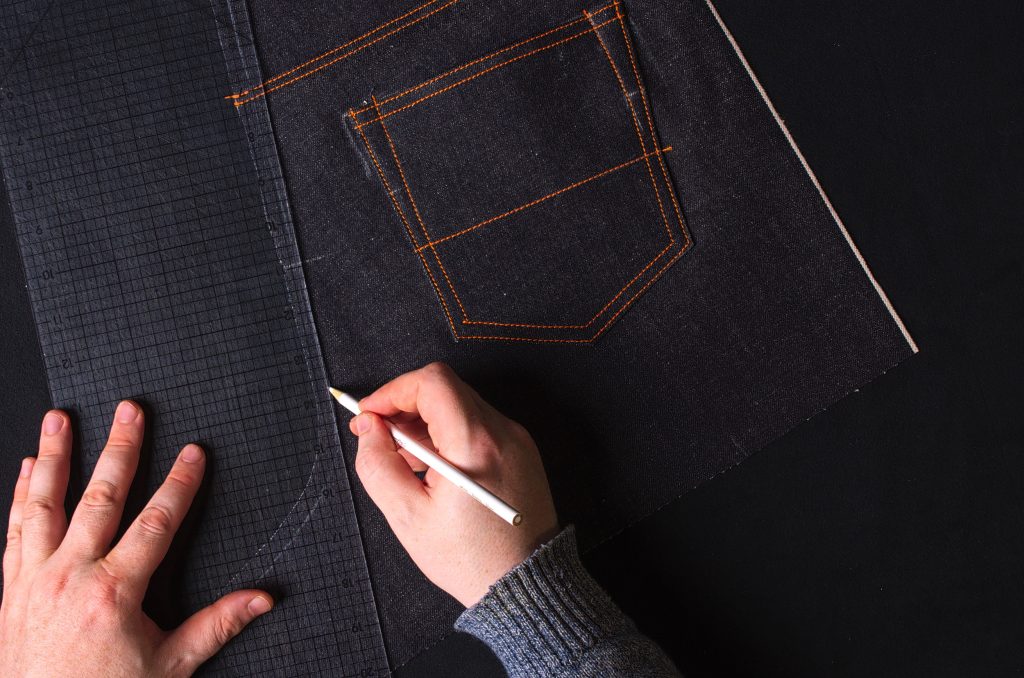
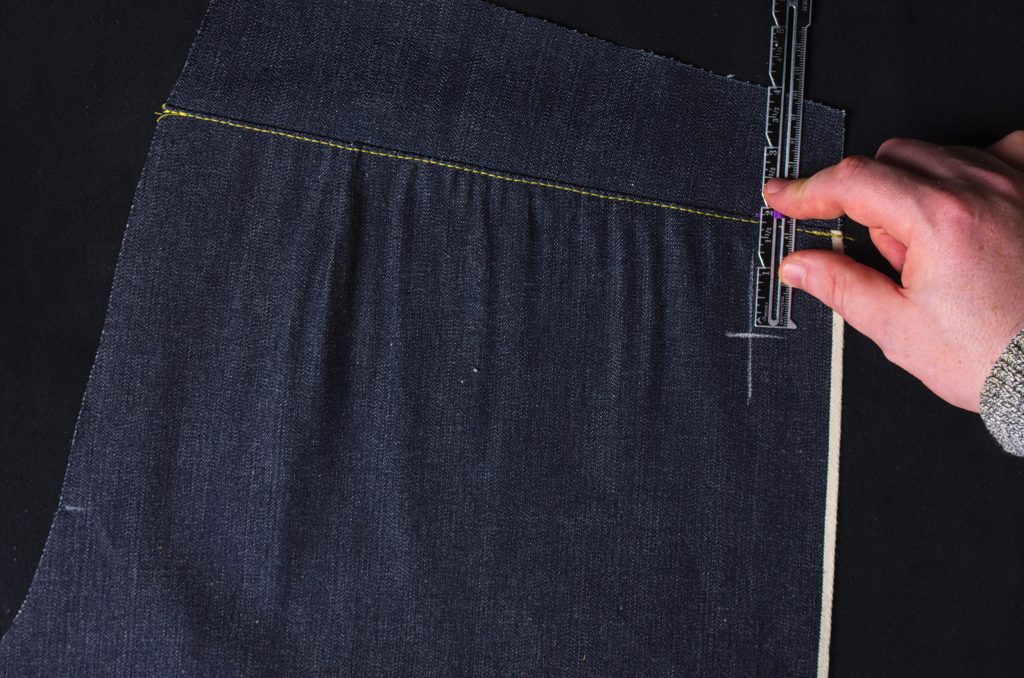
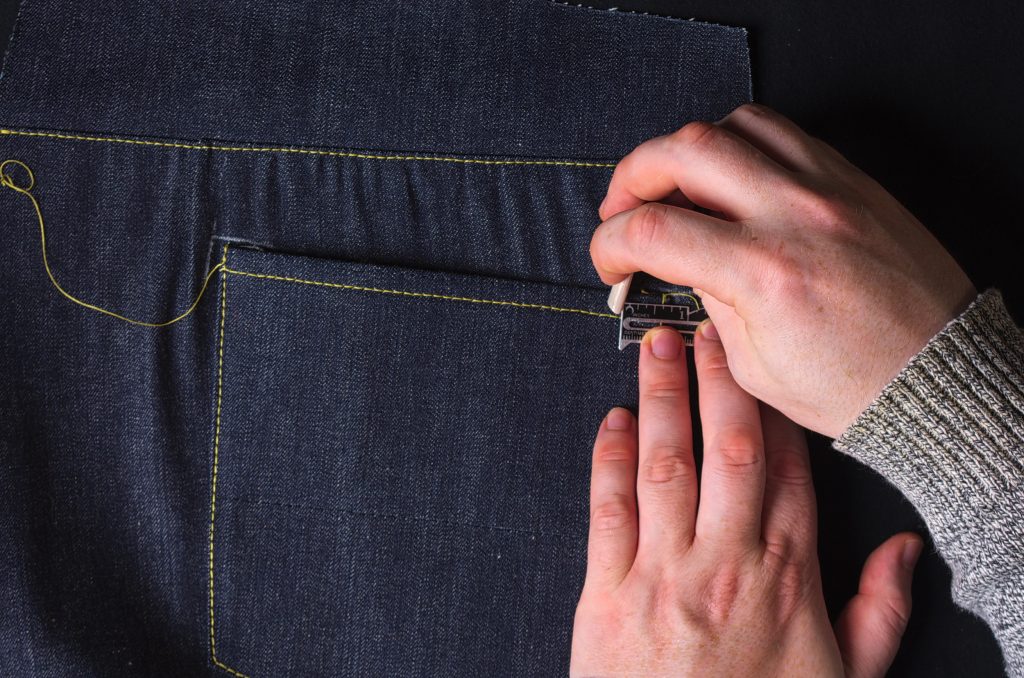
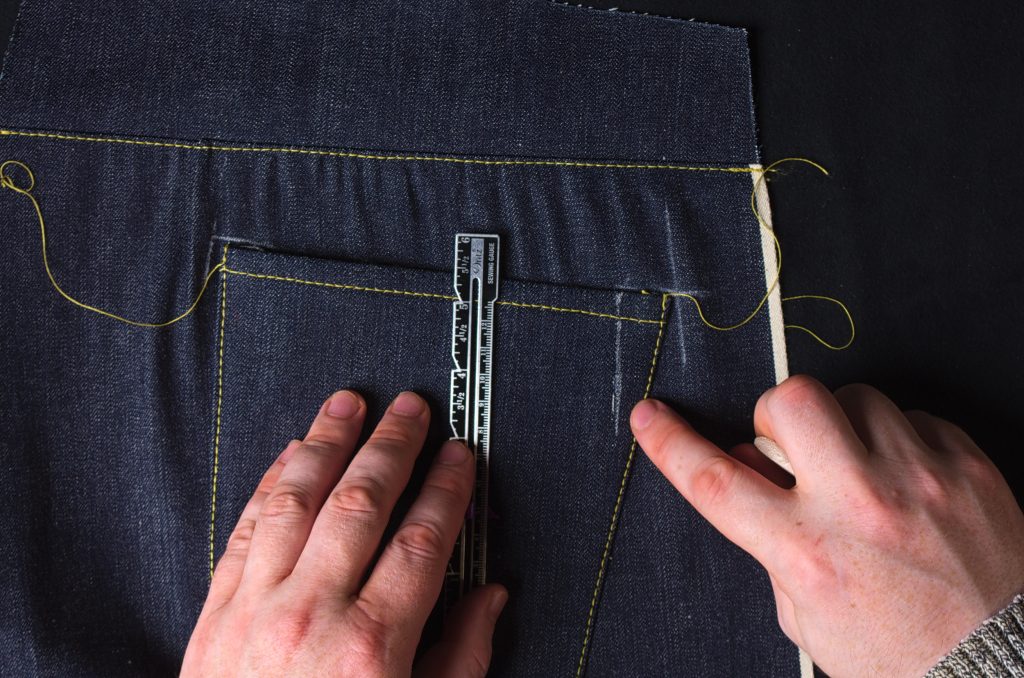
Finding the position of the back pockets (only one on the 1873 version) is fairly straight forward. For larger sizes you may want to use the graduated rulers to find these points – you’ll have to use your judgement there.
- Along the side seam, mark a line just below the yoke, 2 1/2″ from the selvedge edge, measuring from the selvedge edge.
- Measure down from the yoke seam 2″.
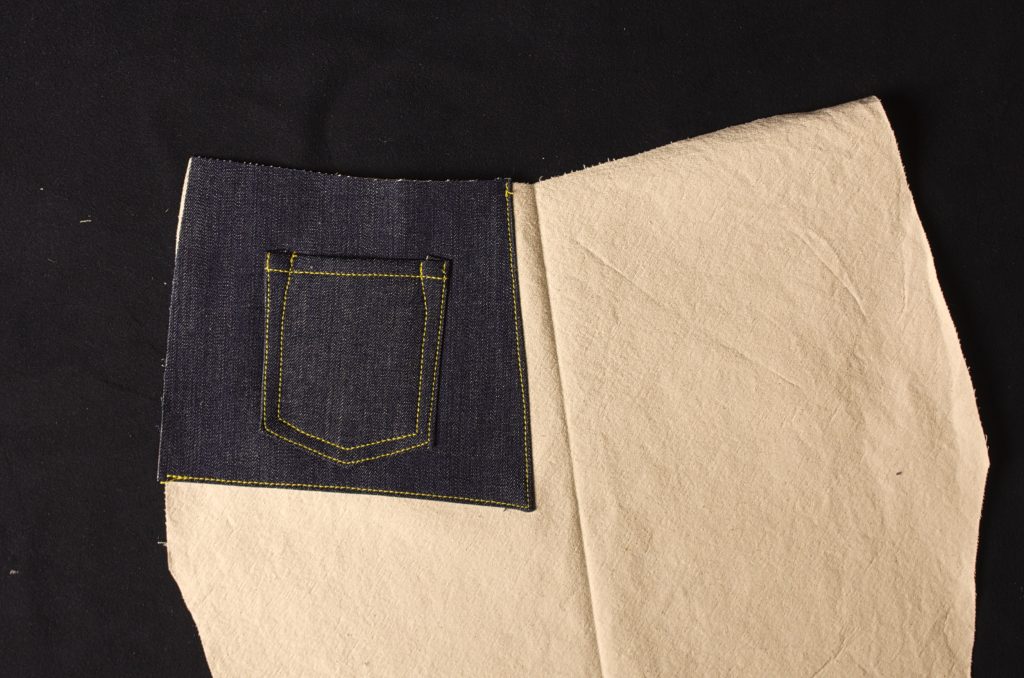
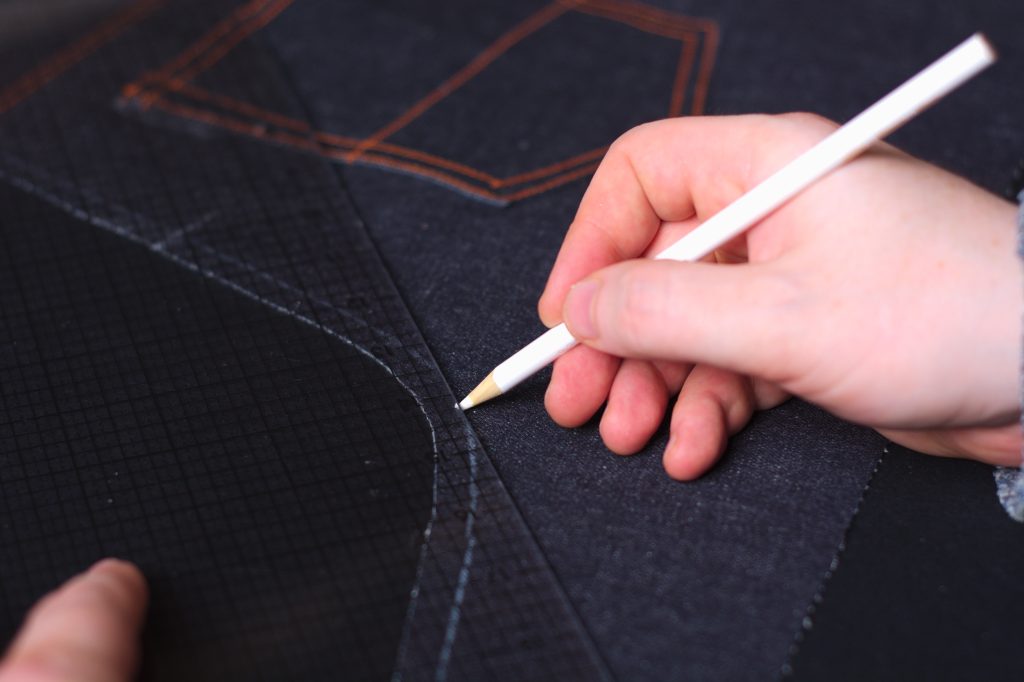
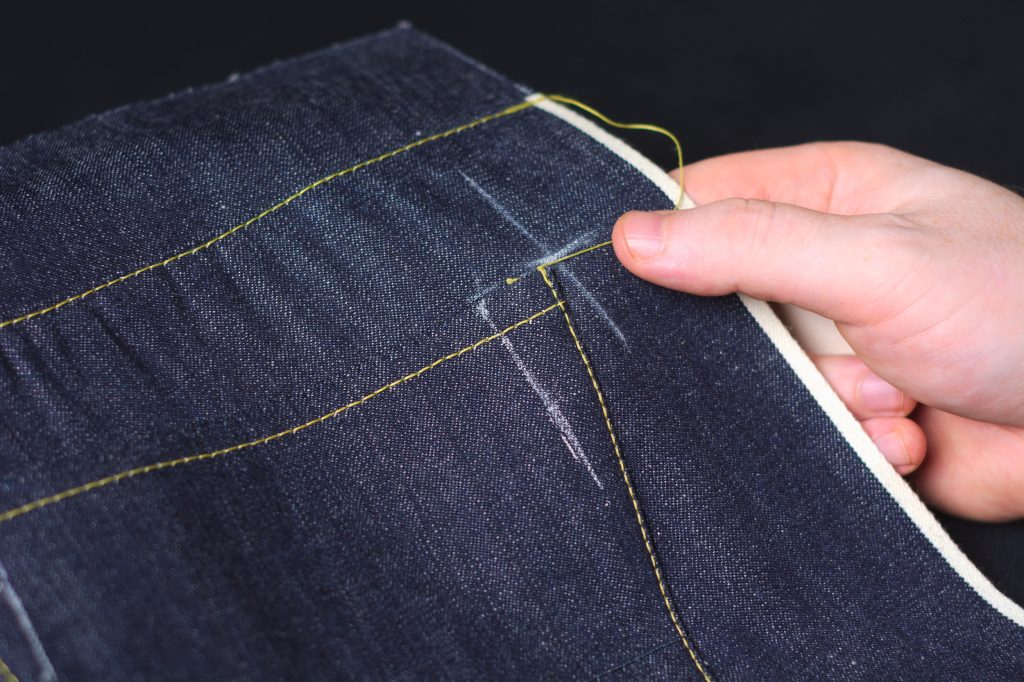
Then aligning the right side of the pocket at that intersection you just made, rotate the left side so that it’s about 1 1/2″ below the yoke seam.
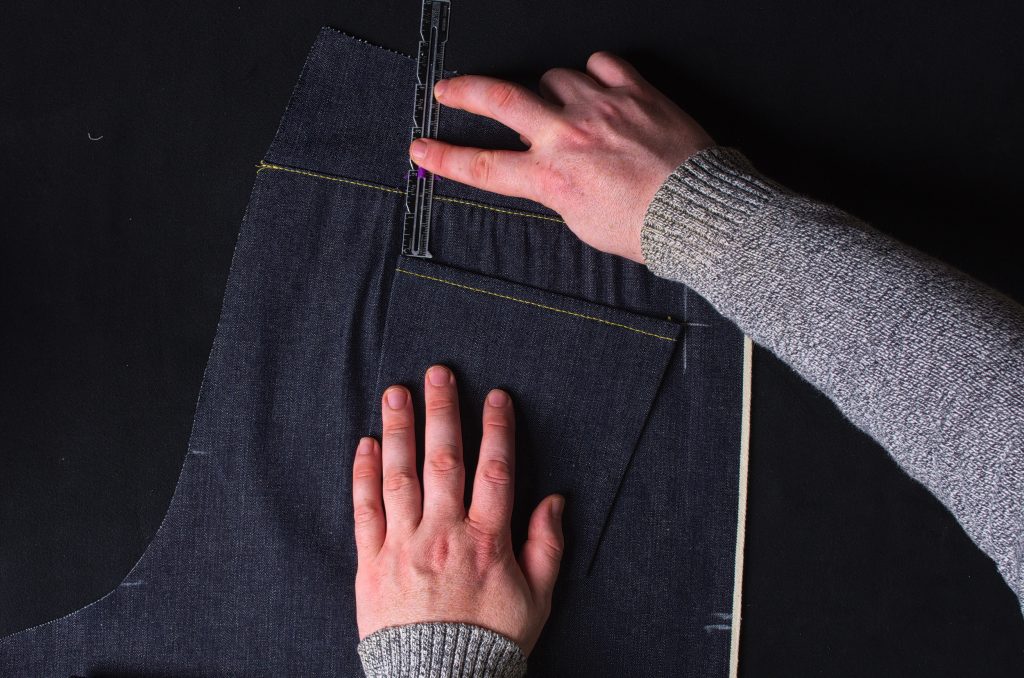
I like to then trace the outline of the pocket at the upper corners to make aligning the pocket again easy.

If you’re doing the more modern versions, there are usually pockets on both back legs, so repeat the measurements above for the remaining side, double checking to make sure everything is symmetrical.
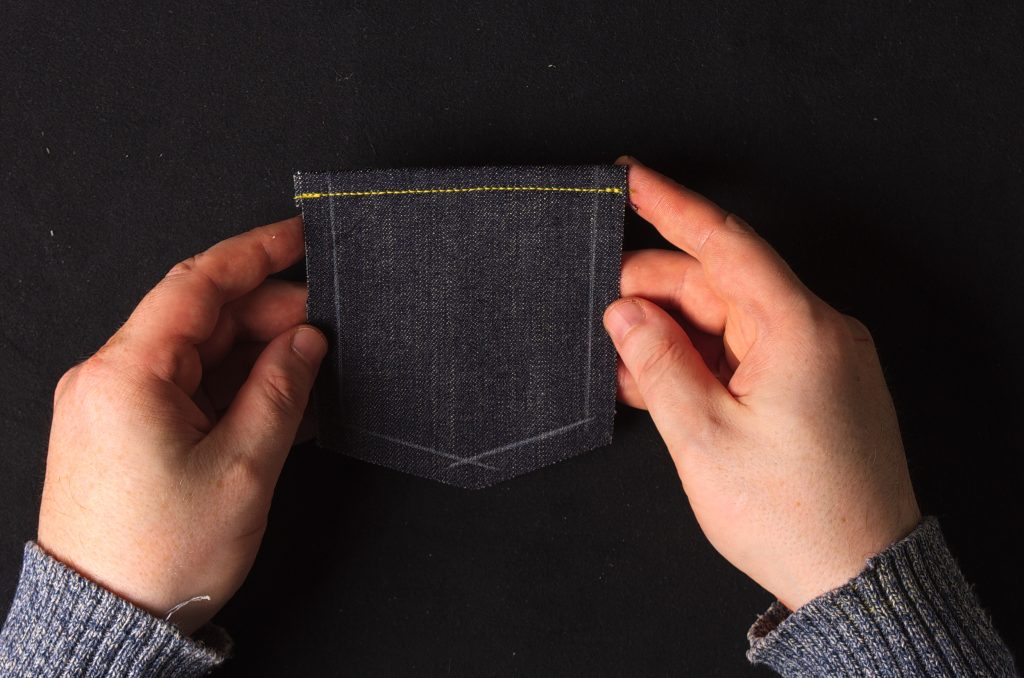
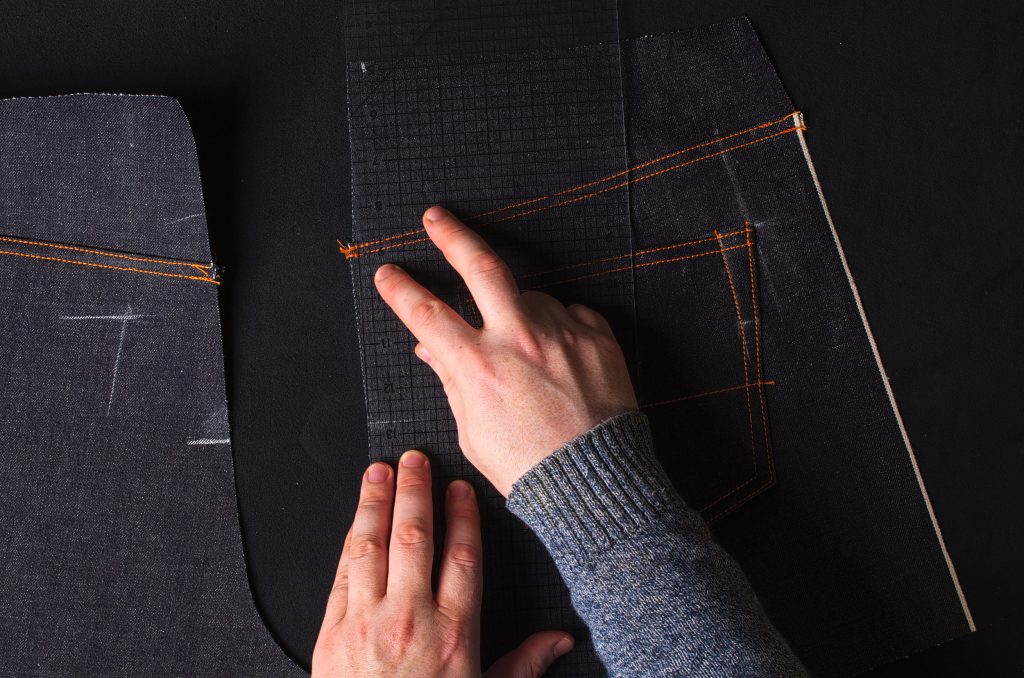
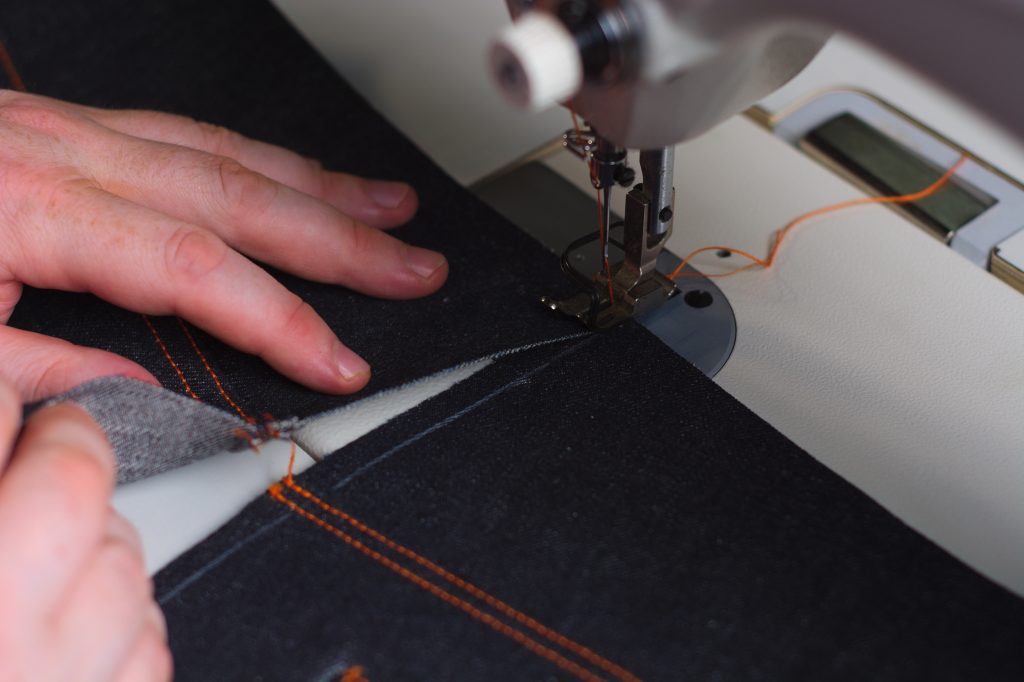
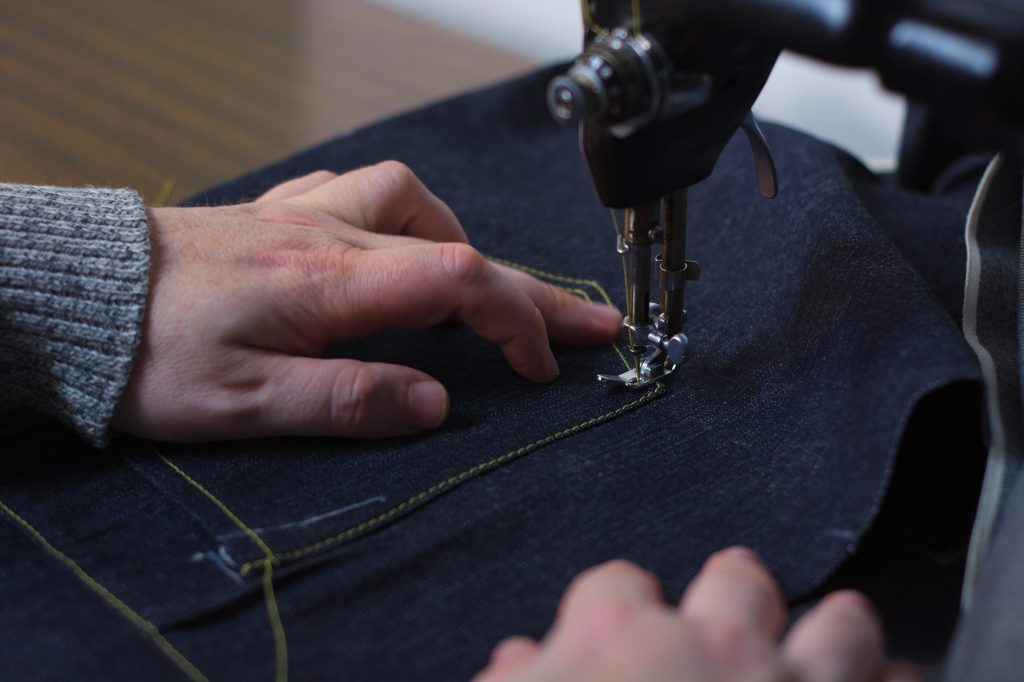
Take the pocket and back leg over to the sewing machine, and beginning from the side nearest the selvedge, top stitch through all layers about 1/8″ (or just under) from the edge along the side and bottom edges. I like to start with a back tack just for some extra strength. You can pin the pocket in position first if you like but I think it’s a good skill to learn to sew without the pins or basting, if possible.
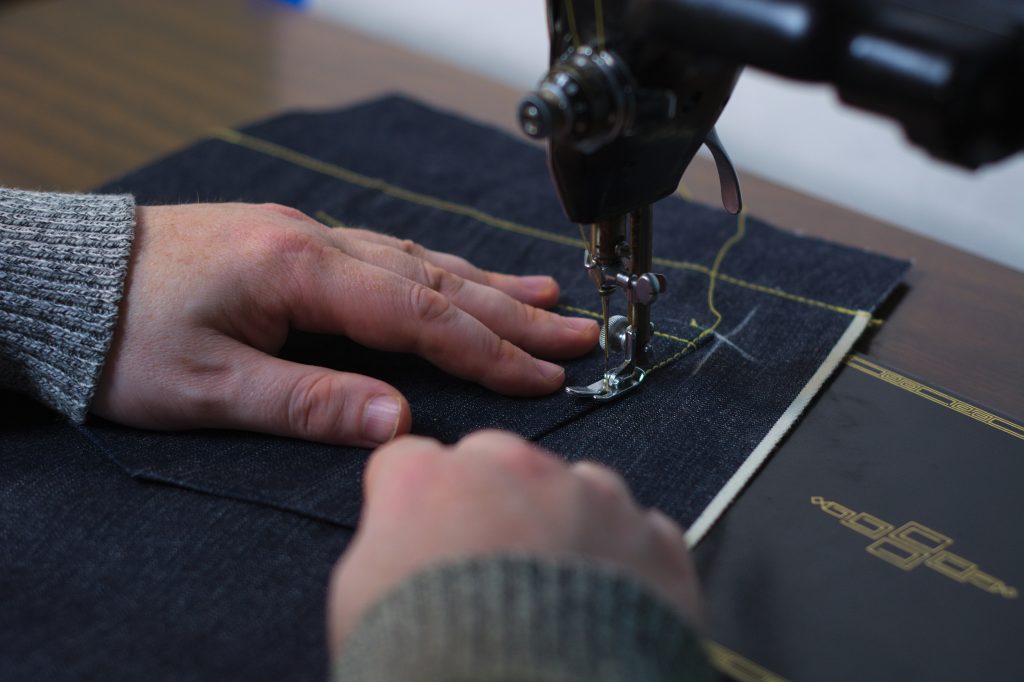
When you get to the corners, try to turn the stitching precisely at the corners for the best look.
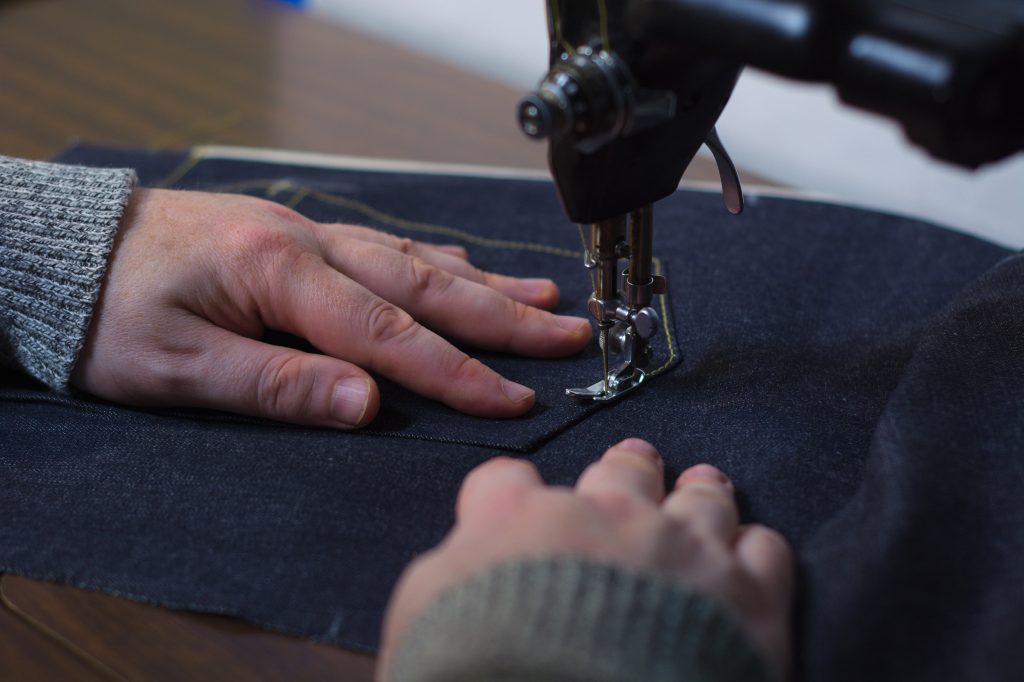
Along the remaining pocket side, before stitching, slide the top corner of the pocket towards the selvedge by about 1/8″ or slightly more in some cases. What this does is create a little extra room in the pocket back opening, so as it curves around the seat, being the outer layer, it’ll have just the extra length needed to give a perfectly smooth appearance.
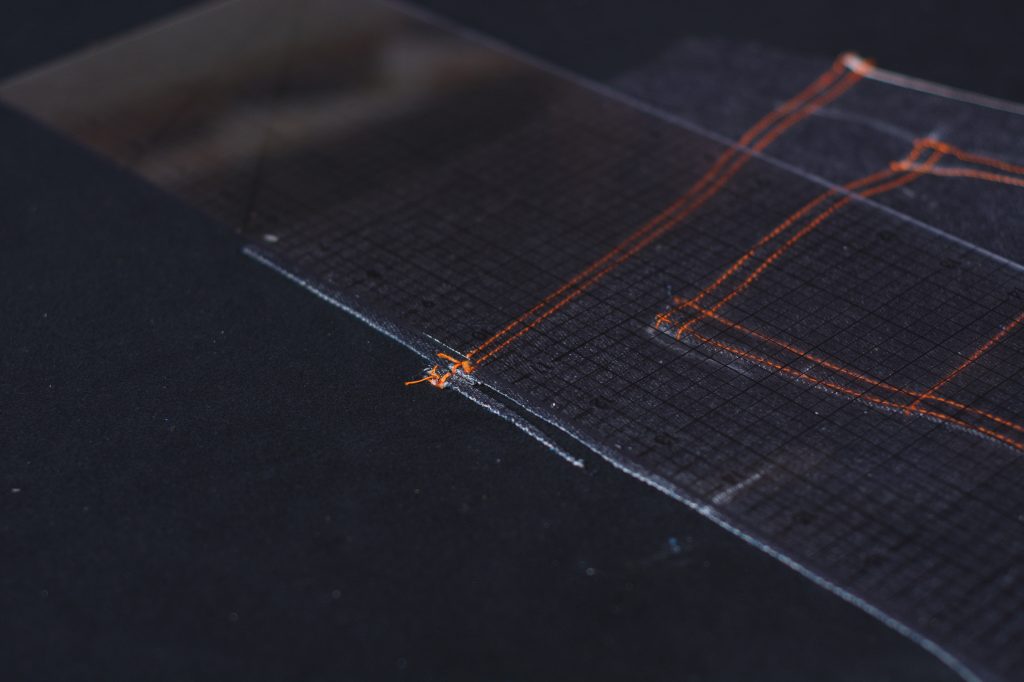
Continue stitching along the remaining side of the pocket, keeping it in that new position as you sew. End with another backtack.
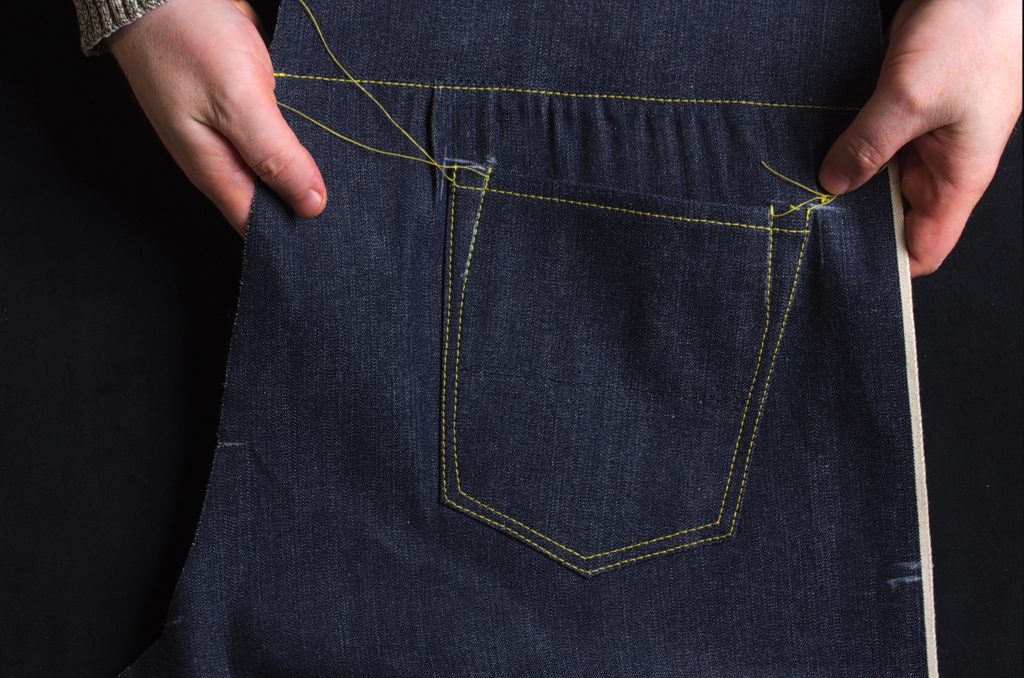
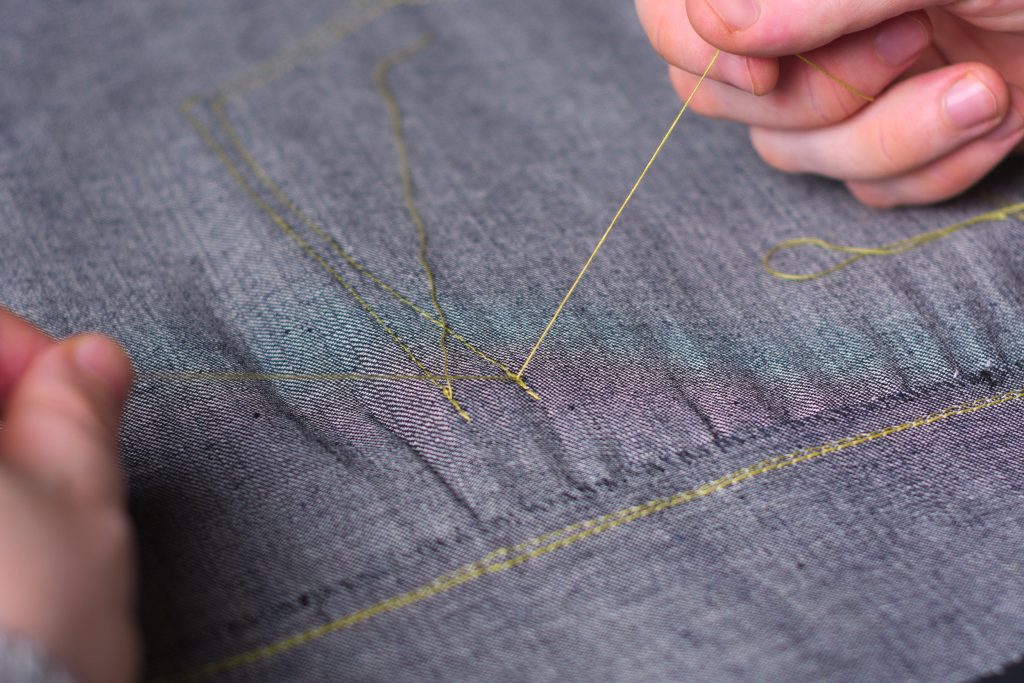
Be sure to keep the threads longer when you cut them from the sewing machine. We’ll be tying the ends for a more secure finish in a moment.
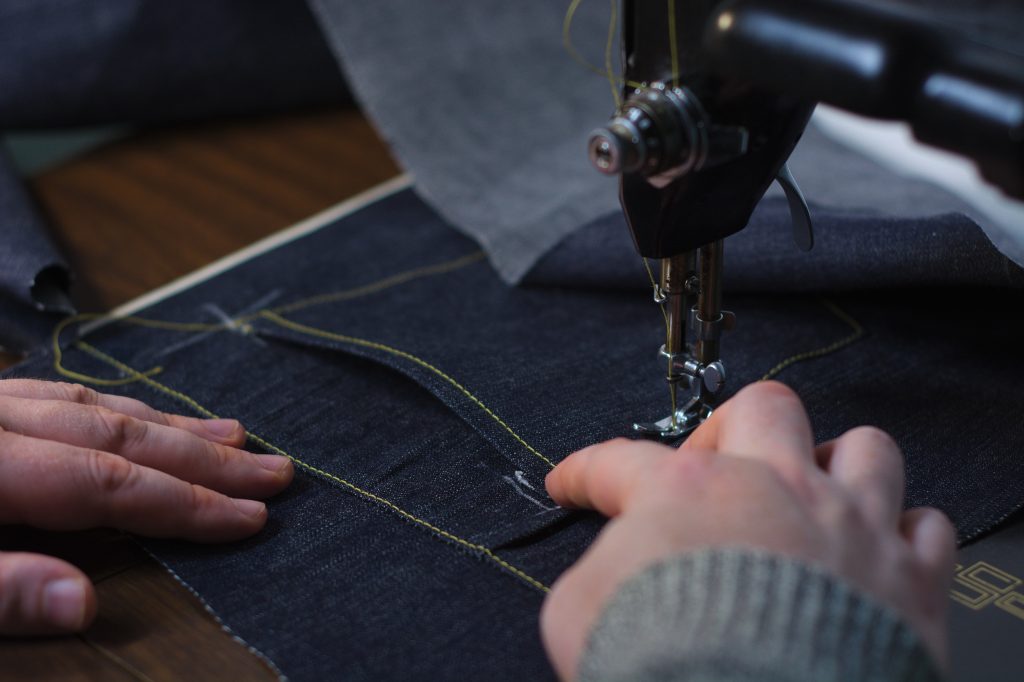
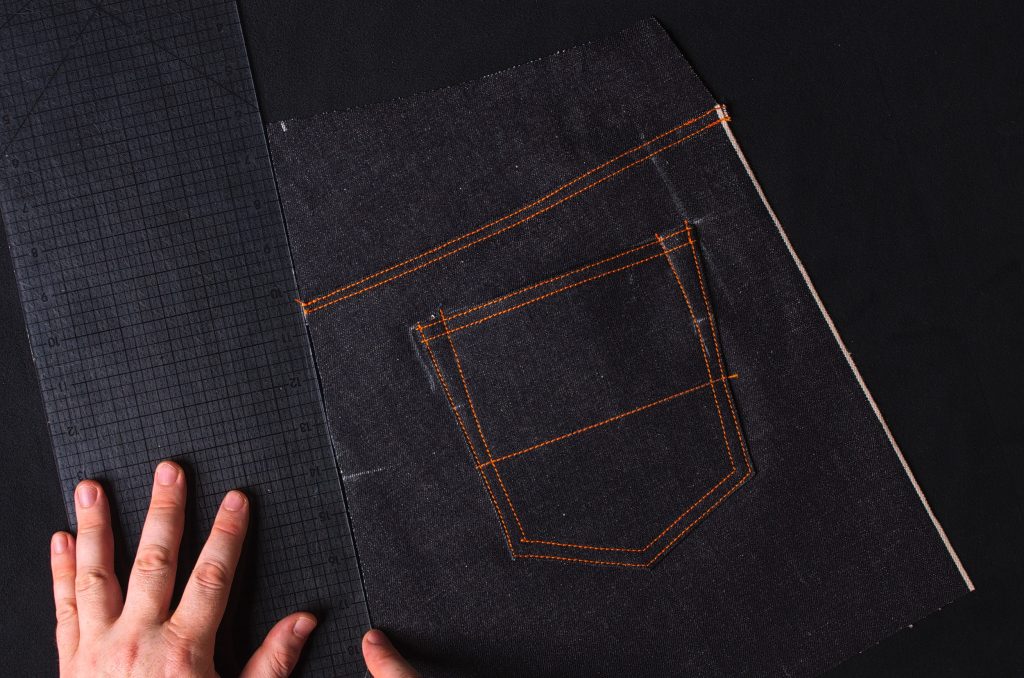
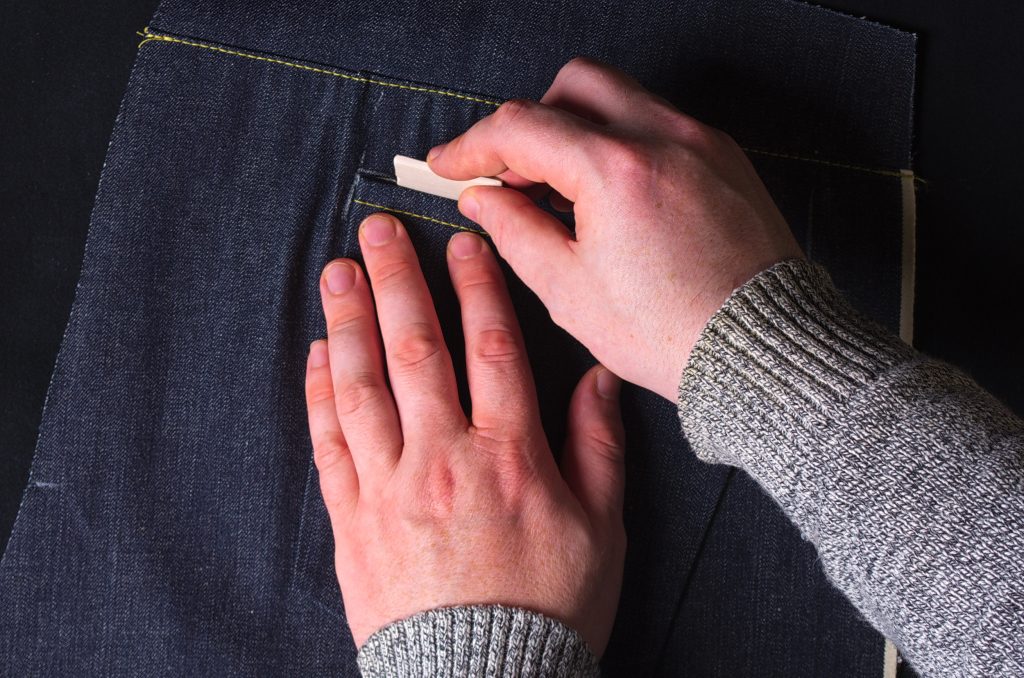
With the pocket stitched down, mark along the top of the pocket about 5/8″ from each upper corner.
Draw a line tapering down to about 1/4″ from the stitching, about 2″ below the pocket opening. This is just a rough guideline for the second row of pocket stitching.
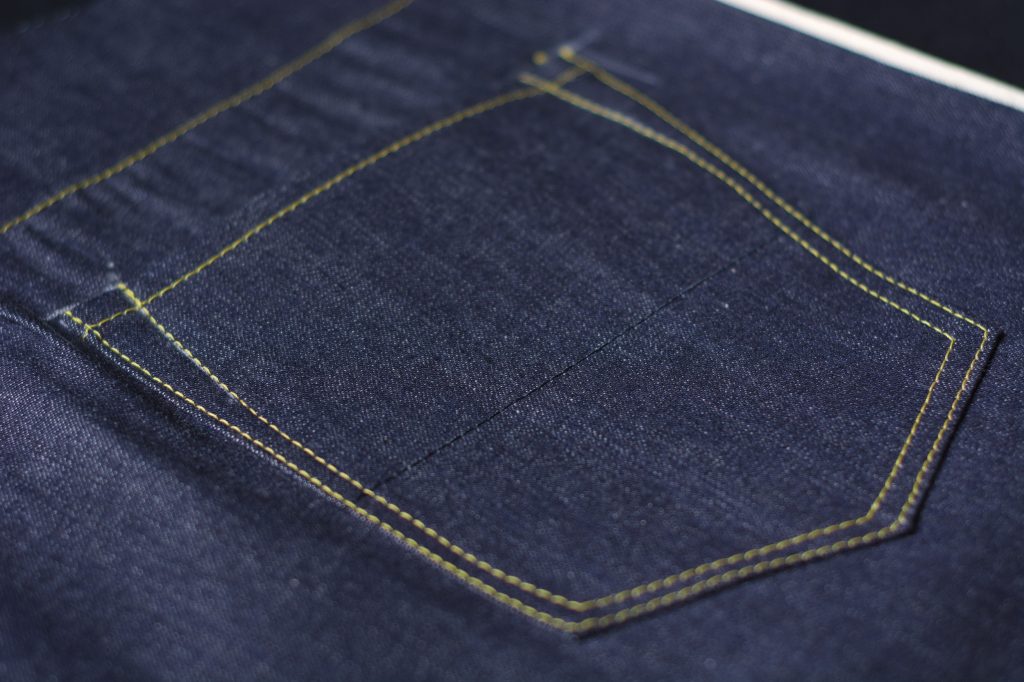
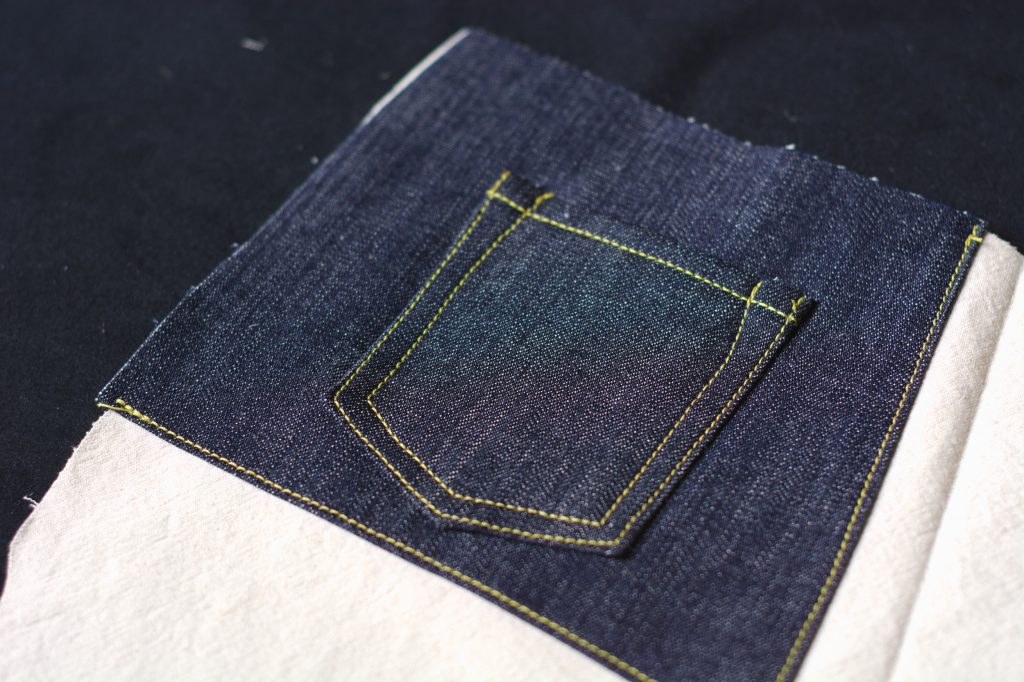
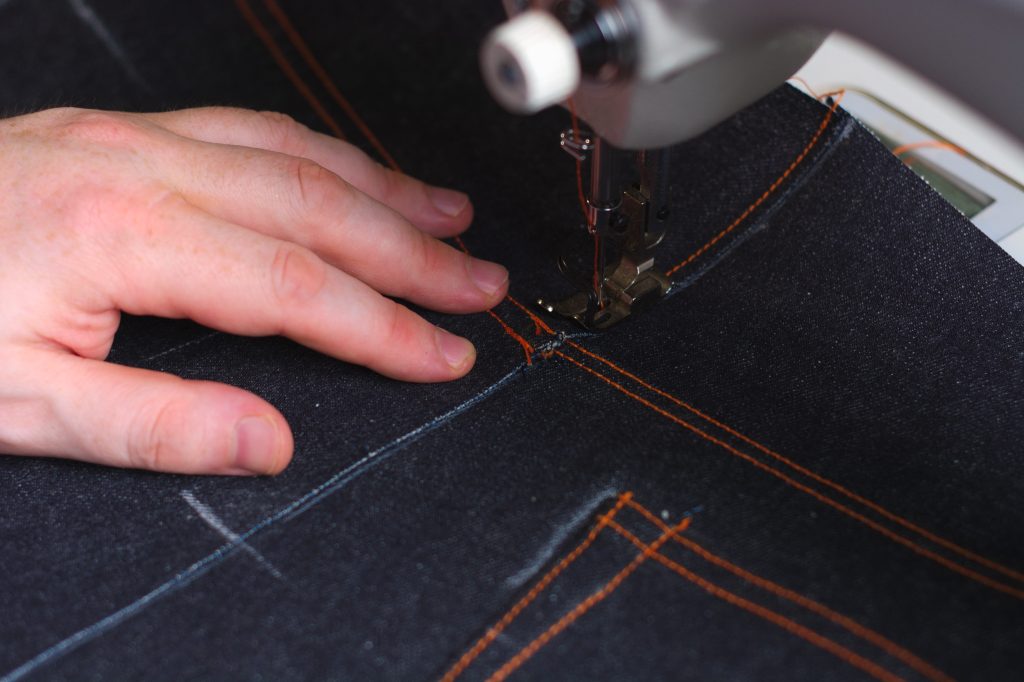
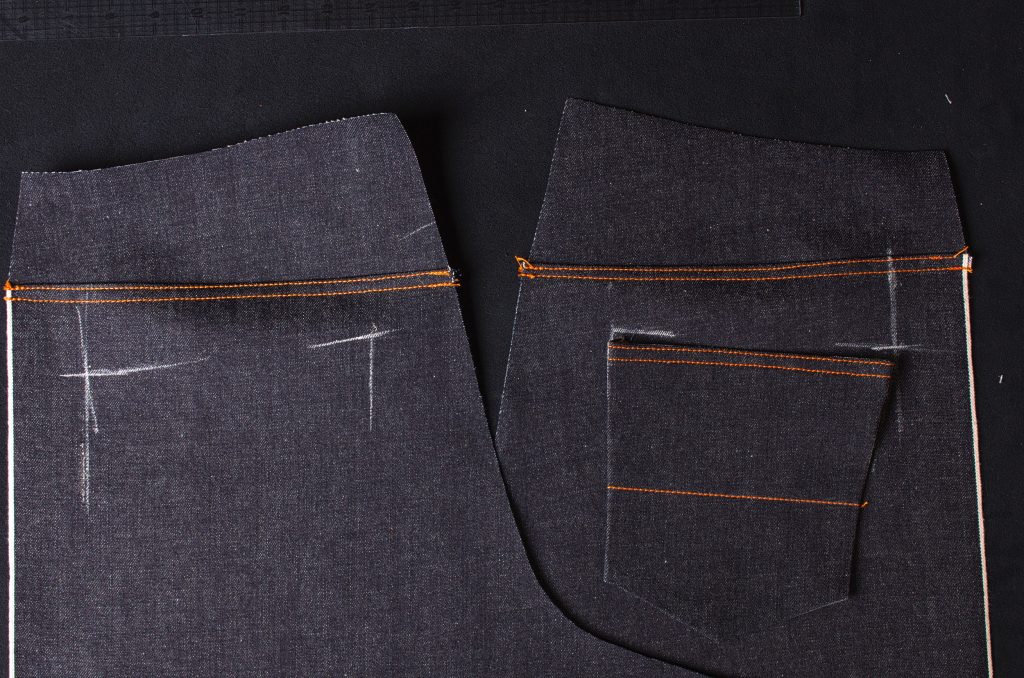
Top stitch again, following the guideline at the top, and tapering to a distance about 1/4″ to 3/8″ from the original stitching lines. The 1873 version appears to be narrower, about 1/4″, while for the modern jeans I’d keep the spacing consistent with your yoke seam.

Be careful around the corner areas, try to get the distances to match as closely as possible.
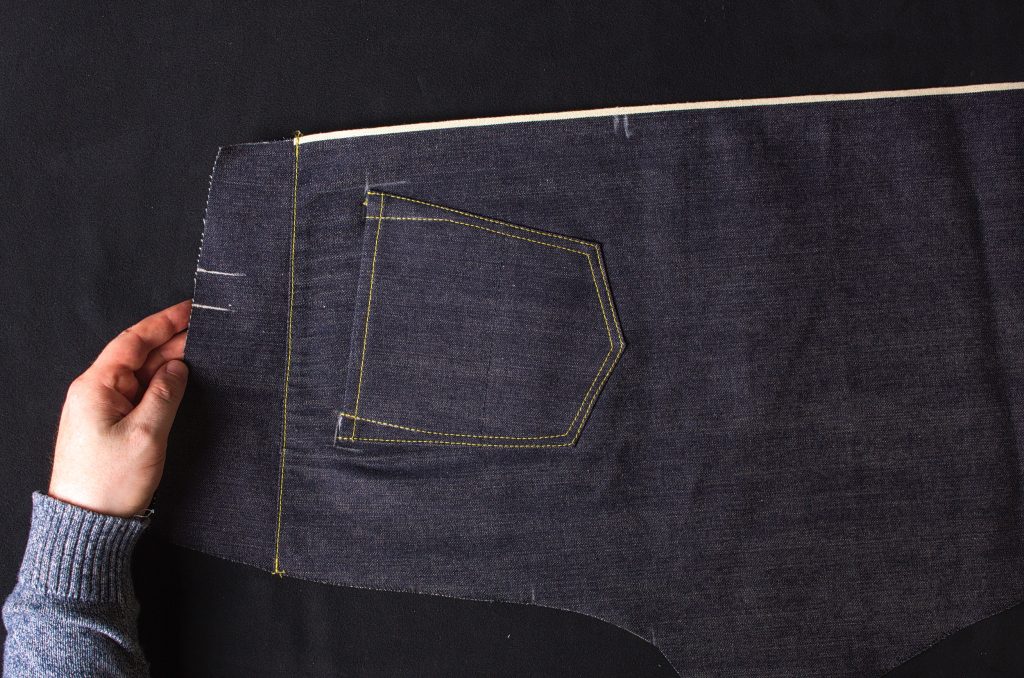
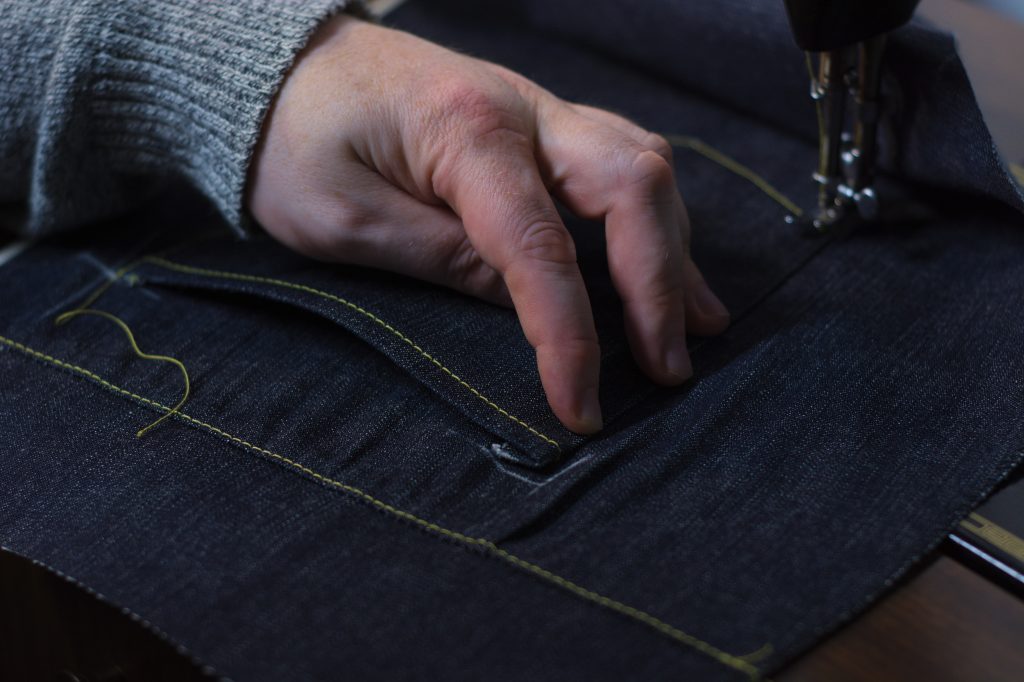
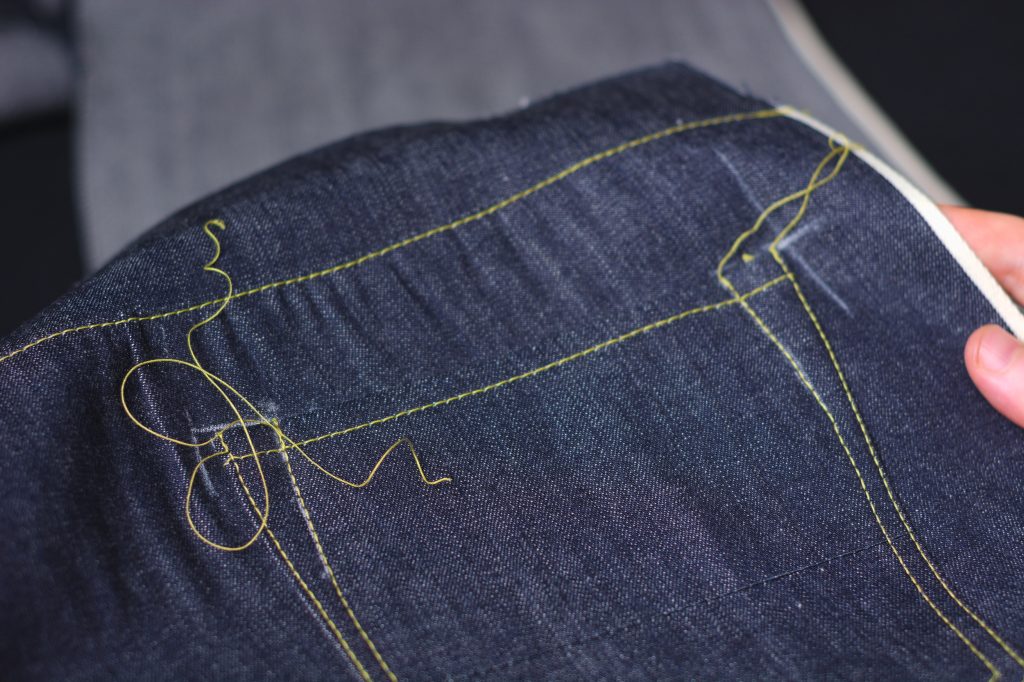
Here’s the pocket after the second row of top stitching. Again, try to keep the threads long when you cut them from the machine.
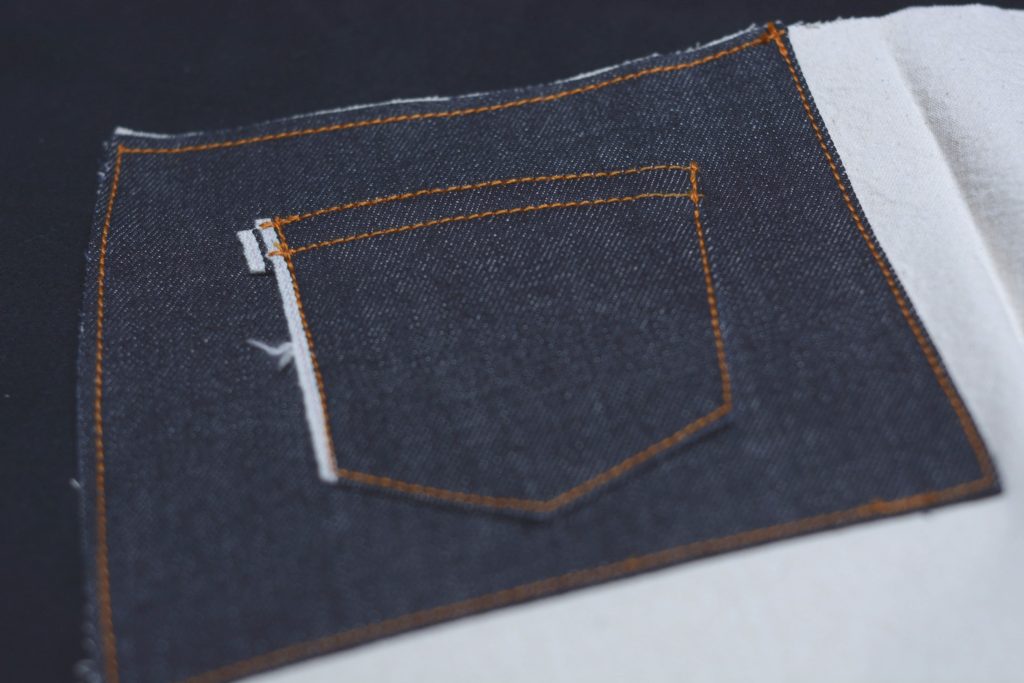
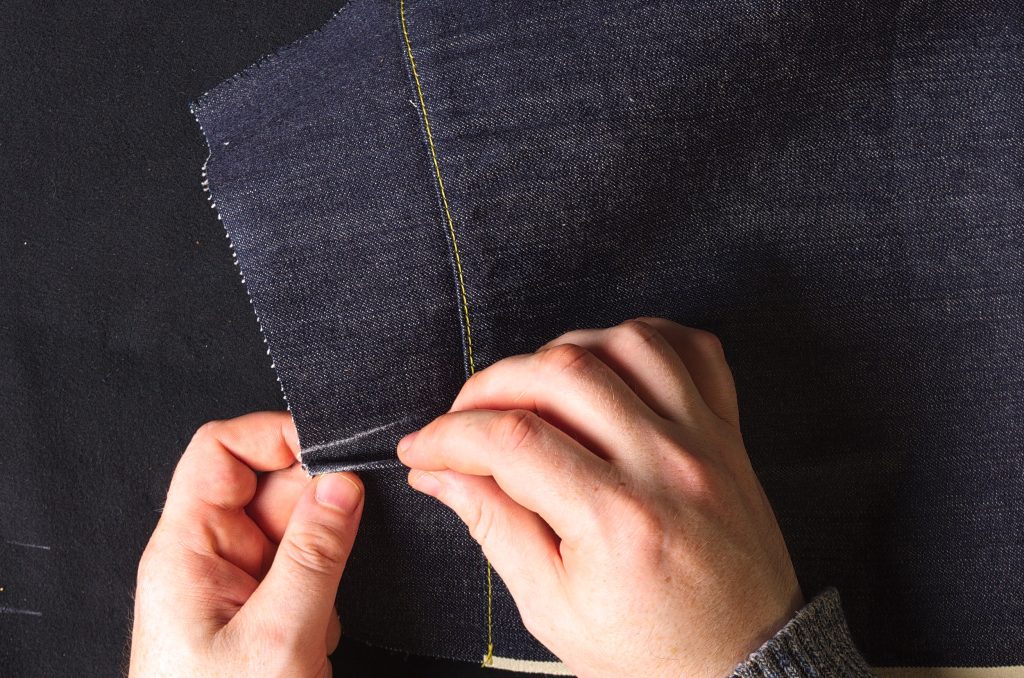
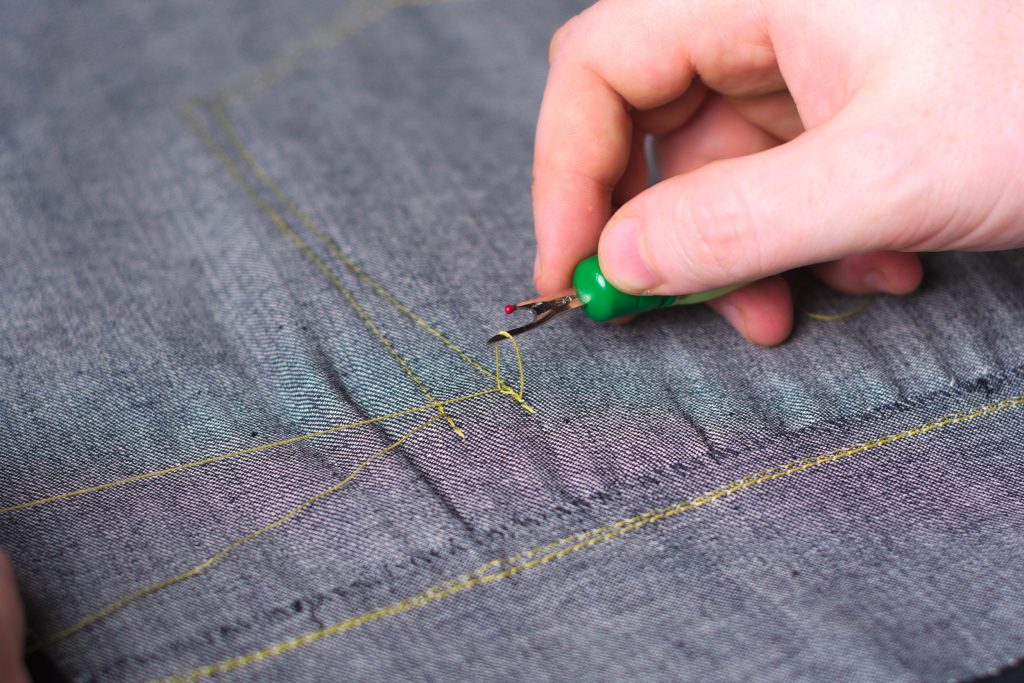
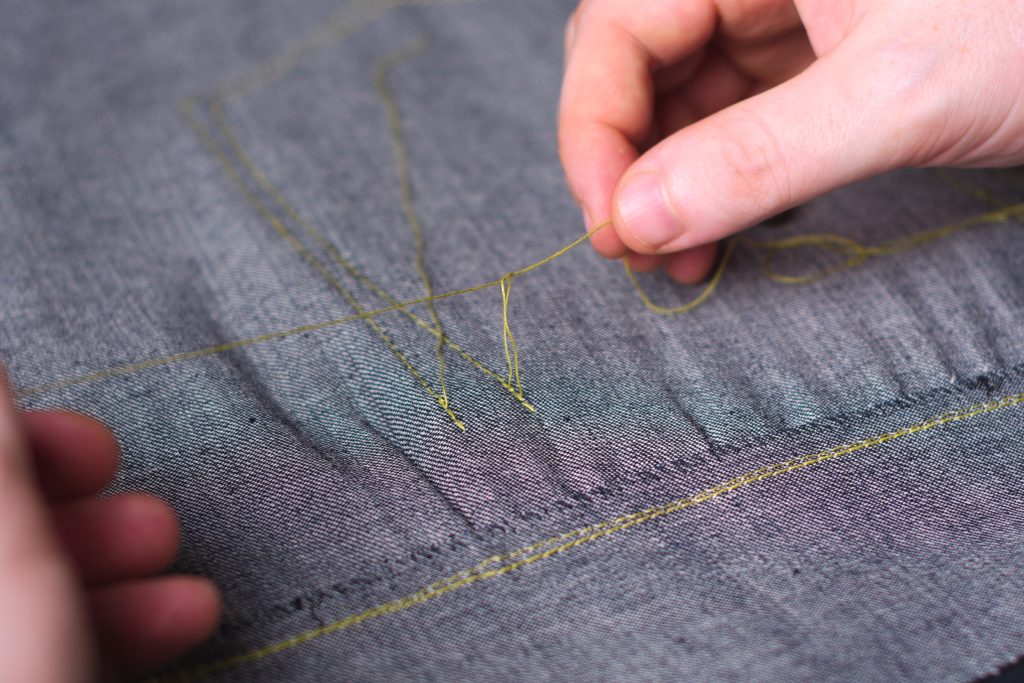
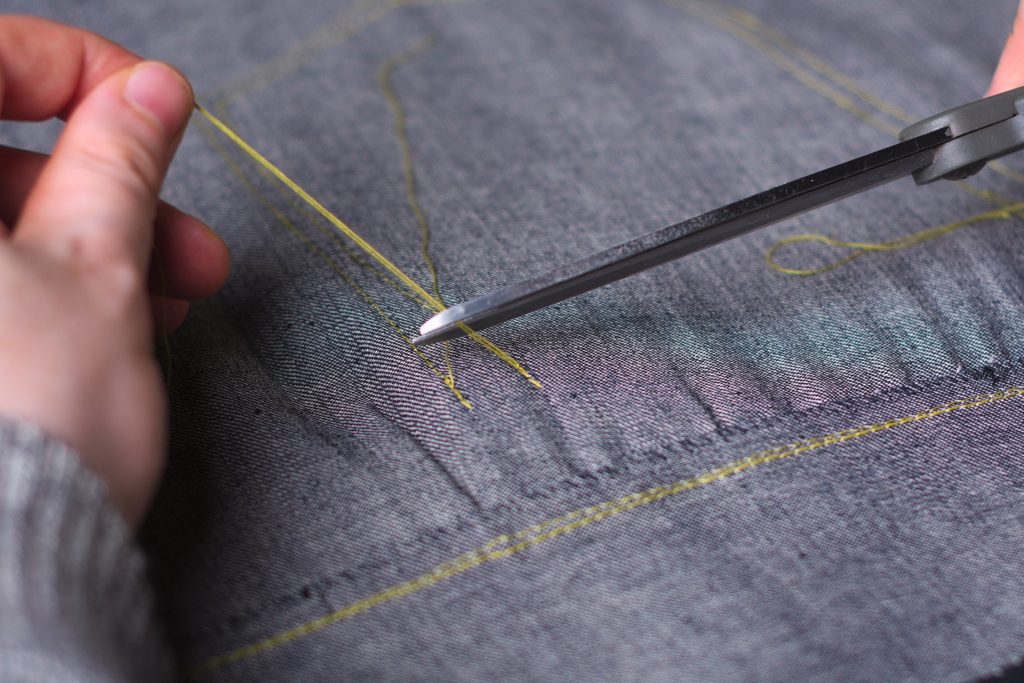
On the wrong side, pull the end of the thread through using a seam ripper or something similar. You could also thread it onto a needle to push it through.
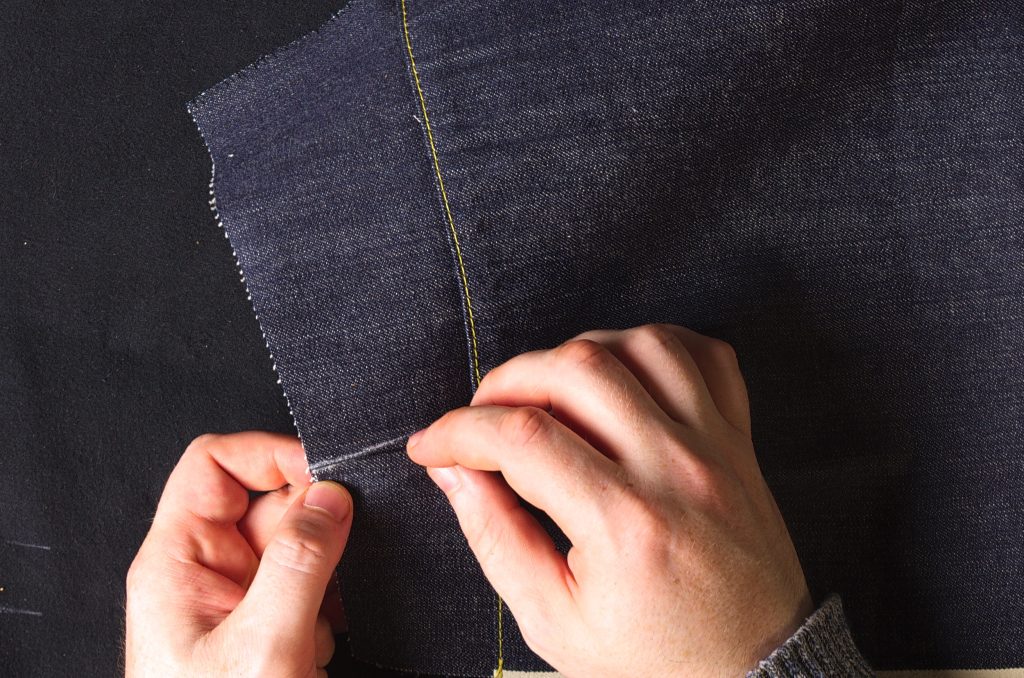
Tie a knot to secure the loose ends.
And trim the ends to about 1/2″ for extra security.
Repeat for the remaining threads.
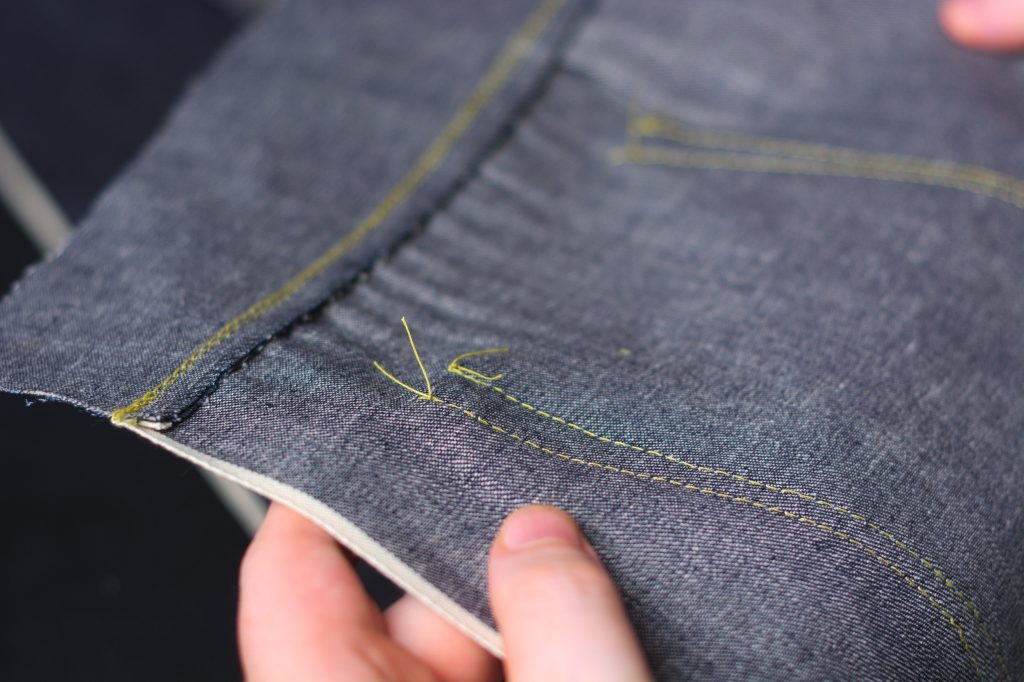
And that completes the back pocket. Repeat for the other side if you’re doing a more modern pair of jeans.