Author: James Williams
Using Graduated Rulers
To draft your Inverness Cape pattern, you’ll need to print out the graduated ruler corresponding to your chest size, available below. So if you’re a size 40 chest, you’ll want to print out the size 40 ruler, and so on. More instructions in the video below.
There are three versions of the ruler to print out, choose which option works best for you. For home printing, there is a letter sized version (US) and an A4 version (EU) for printing on a home printer – you’ll have some of the larger rulers cut off but they still work just fine. There’s also a larger 11×17 version for printing at a print shop.
Either way, you need to make sure the 37 1/2 size ruler is printed at 37 1/2″ by comparing it to a regular ruler after printing. This will ensure that the rulers are all printed at the correct size.
Letter Size for printing at home
A4 Size for printing at home in Europe
11 x 17 Graduated Rulers for Print Shop
Cape Measurements
Measuring for the Inverness Cape is extremely easy. As the cape is so full, I’d recommend just measuring over a modern clothing. It’s possible to measure yourself but I recommend having someone measure you for best results.
Chest
The first measurement is the chest. Simply measure over a shirt around the fullest part of your chest, keeping the tape horizontal.

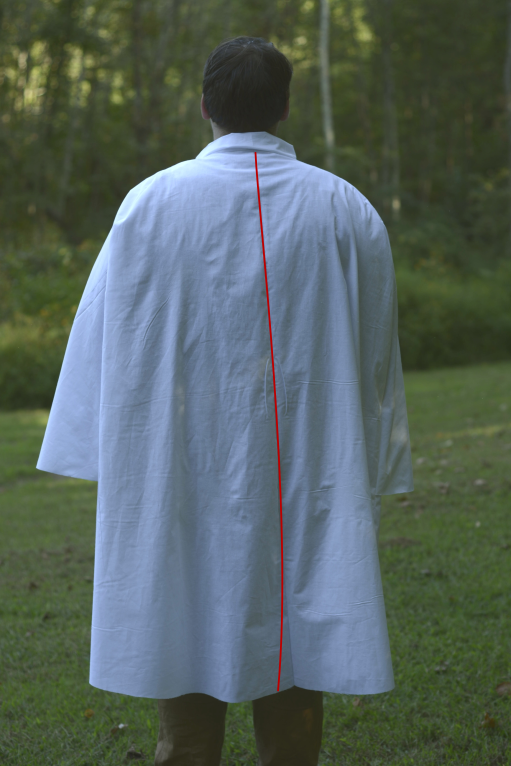
Back Length
This measurement determines the overall length of the garment. Measure from the nape of the neck / bottom of a shirt collar, down the center of the back to the desired length, usually just below the knees or mid calf.
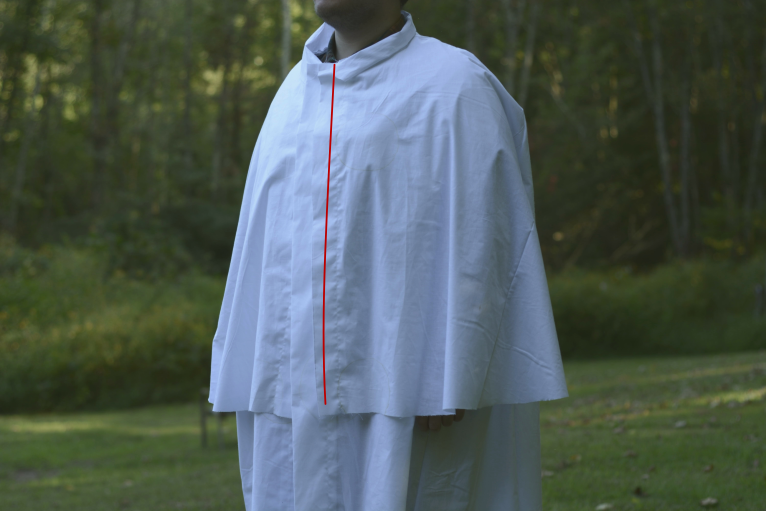
Length of Cape
Finally, you’ll need to measure the desired length of the cape in the front. Measure from the neck bone down the center to a point level with your knuckles.
Materials
Here’s a brief list and discussion about all of the materials you’ll need for your Inverness Cape project. You’ll need the drafting supplies and muslin first, and the rest of the materials about a month into the class.
For Drafting
Pattern Paper
I like to use 36″ wide poster paper, usually available at office supply stores, hobby stores, and the like. It’s not too thick so you can see through it to trace patterns if necessary.
Quilting Ruler
A quilting ruler is necessary for squaring out the various construction lines in the pattern. It’s also indispensable for adding seam allowances. Available from craft and sewing stores.
Pencil
While I’ll be demonstrating the drafting process with a pen for clarity, I recommend drafting all of your patterns with a good sharp pencil. I like the #2H drawing pencils as they’re a little harder and maintain their sharpness longer.
Fabric and Materials
4 – 6 yards cotton muslin
The cotton muslin is used for fitting the Inverness Cape and helping to determine fabric amounts. While the cape is not really a fitted garment, it’s still a good idea to go through and make a toile in cheaper fabric just to avoid any major errors and get a feel for how the pieces go together. I recommend 4 – 6 yards depending on your size of about 60″ wide muslin to mimic the width of the wool.
4 -6 yards wool fabric or overcoating (draft your pattern before buying to determine how much!)
There’s a wide range of woolen fabrics you could use for this project. Devere recommends in his drafting manual “dark colored meltons or waterproof cloths” for the theatre or evening wear. For traveling, he recommends “stout Pilots, Witneys, or fancy diagonals, the edges bound with braid, and the collars covered with velvet to match”. And finally he recommends tweeds in varying weights for traveling. So there are a whole lot of options.
When doing your shopping, look for heavier weight overcoatings and broadcloths, in addition to the options mentioned above. I’d say 16oz and above would work best. Here is a list of sources for wool of varying prices and quality. Wool tends to start at about $30 per yard and quickly works itself up in cost.
- Burnley and Trowbridge
- B. Black & Sons
- Hainsworth
- Renaissance Fabrics
- Etsy and ebay
2 yards silk or cotton sateen for cape lining
I recommend lining the cape at least to make moving your arms a lot easier. Unlined, the wool tends to catch on your sleeves and get in the way a bit. You want something smooth like silk taffeta or cotton sateen. The sources under wool above should have something suitable.
Body Lining
Devere recommends an Alpaca lining which is basically impossible to find these days. If you’re going to line your cape’s body I recommend a lighter weight wool from the above sources. Or you can simply not line it at all. Another option is to line it with the same cotton sateen as the cape, or with a cotton homespun for a more rustic look.
1 yard brown polished cotton
This material is used for the pocket bags and is very close to what was used in the original garments of the period. As far as I know it’s only available from Needle and Thread in Gettysburg, Pennsylvania. You’ll have to call them at (717) 334-4011 to order. Another option is to look for cotton pocketing or silesia, available from Bias Bespoke and probably other sources online.
1 yard linen collar canvas
Collar canvas is used to stiffen the collar and help keep its shape over time. You’ll need about 1/4 yard, though it’s only available in one yard increments. I highly recommend the canvas from Bias Bespoke.
Thread
I like to use Gutermann silk thread when working with wool as it has a bit of a give to it that compliments the wool nicely. I’d say 200 – 300 yards for the Inverness Cape. Available online and local sewing stores.
Silk Buttonhole Twist
You’ll need a special silk buttonhole twist thread for the buttonholes. I’ve used and recommend the Gutermann silk twist, but also found this Trebizond silk twist from France that looks promising. If you can find the small spools, you’ll need 20 yards / meters, otherwise you’ll be stuck with a bigger spool.
Buttons
You’ll need 4 buttons of about 1″ inch” in diameter, and 3 smaller buttons for the cape at about 5/8″ to 3/4″ in size. I recommend these horn buttons from Bias Bespoke but you can also find original buttons from antique stores and such that might be worth looking for.
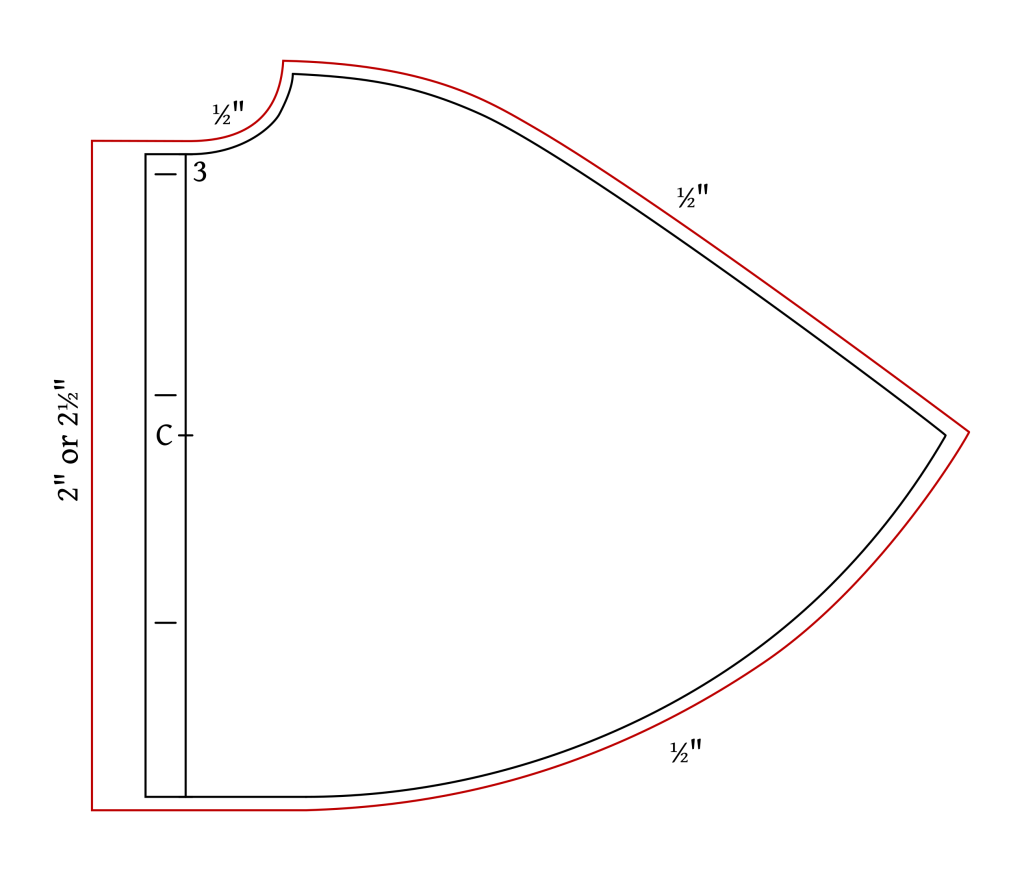
Drafting the Cape
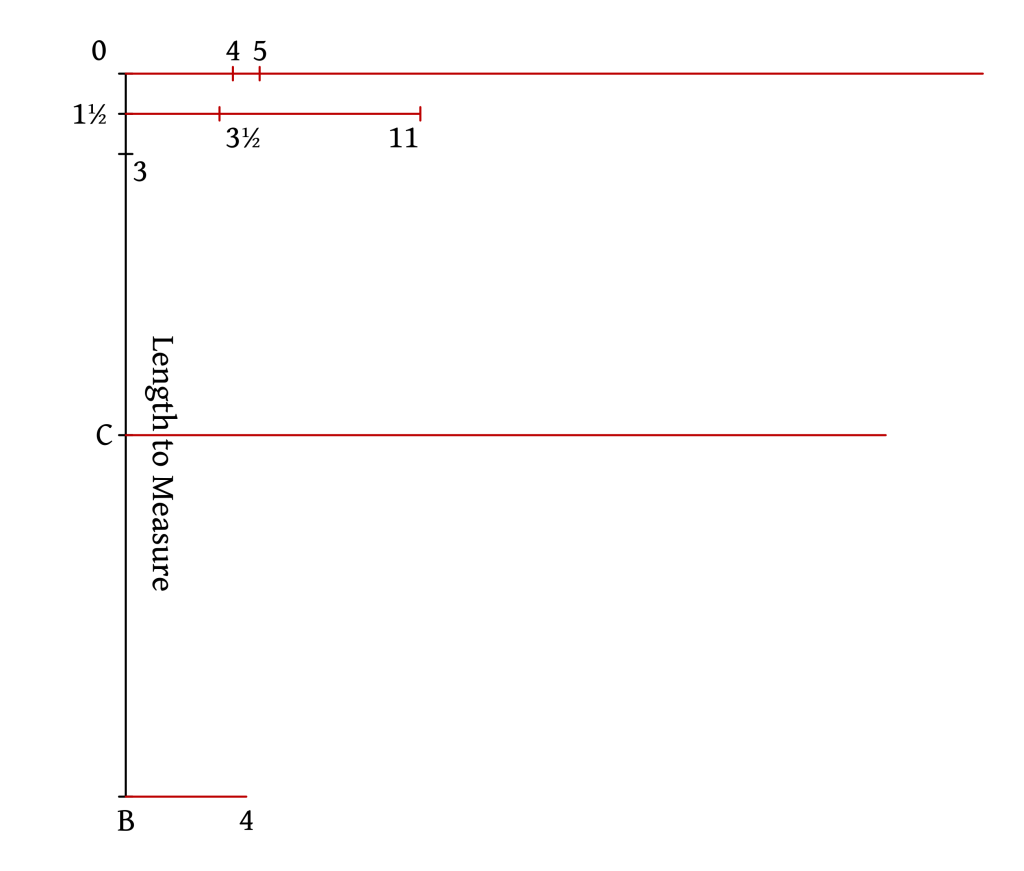
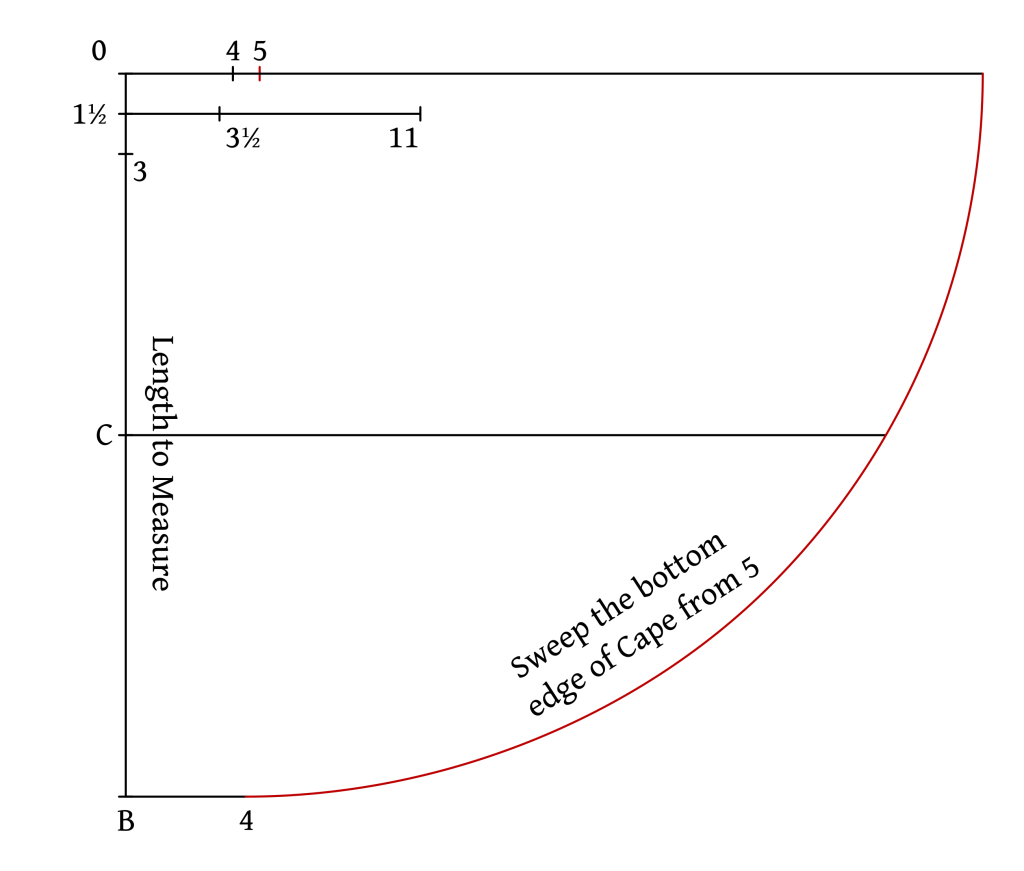
Drafting the cape is relatively straight forward. Begin with a vertical baseline and mark the following points using your graduated ruler.
- 0 to 1 1/2 graduated inches.
- 0 to 3 graduated inches.
- 3 to B is your cape length to measure.
- Measure from 0 to B and divide in half to find point C.

Square Out
Square out the following points. A few of the lines we don’t know the length for yet, so just extend them a little longer than you’ll need (or extend them as necessary later on).
- From 0 mark 4 and 5 graduated inches. Extend the line farther.
- From 1 1/2 mark 3 1/2 and 11 graduated inches.
- Square out from C.
- Square out from B about 4 graduated inches.
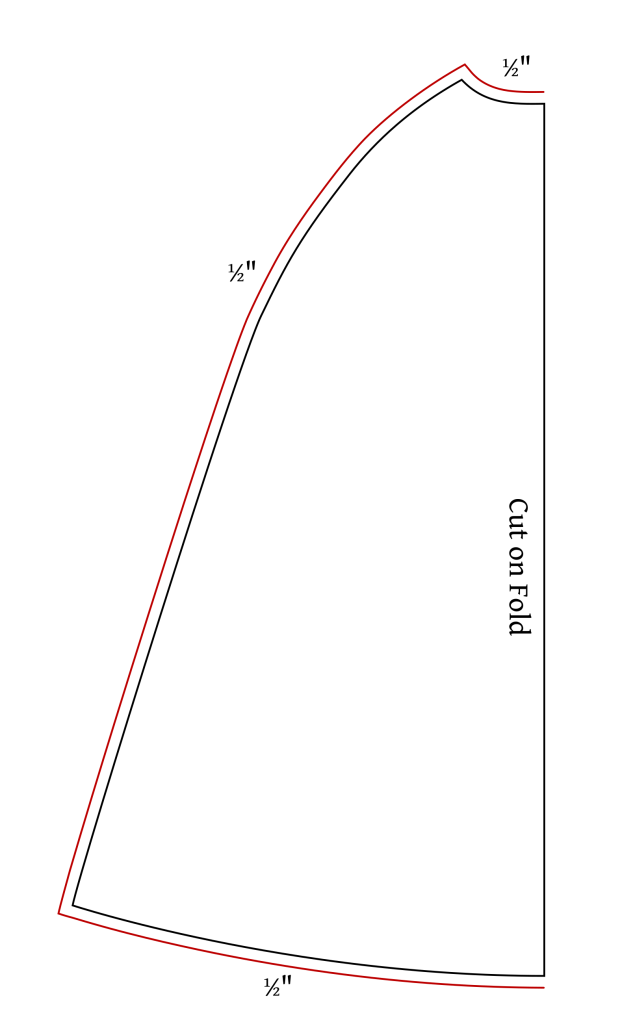
Sweeping the Bottom Curve
Sweeping the bottom curve is probably the trickiest part of the draft. You basically need a large compass to make that quarter circle. The easiest way to do this is to tie a length of string or thread around a pencil. Hold the string in place with your finger at point 5. Then place the pencil at point 4 at the bottom, ensuring the string is taught. Then just use the string like a compass and draw in the quarter circle as shown.
I’ll try to put up a video of this as soon as possible.
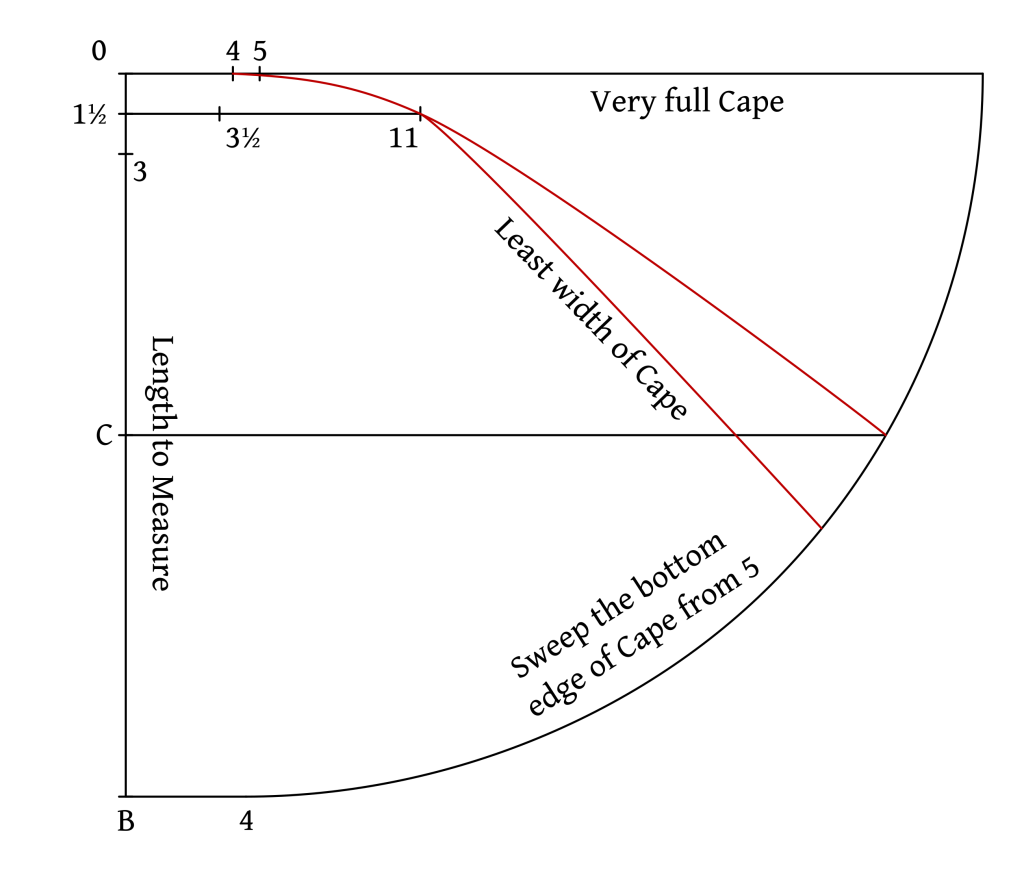
Cape Width
Draw a gentle curve from point 4 through 11, to where the line from point C intersects the quarter circle. This gives you the recommended with of the cape. You could make this a few inches narrower but I find it begins to restrict arm movement, or you could make a very full quarter circle cape if you’d like (and have extra fabric just laying around!).
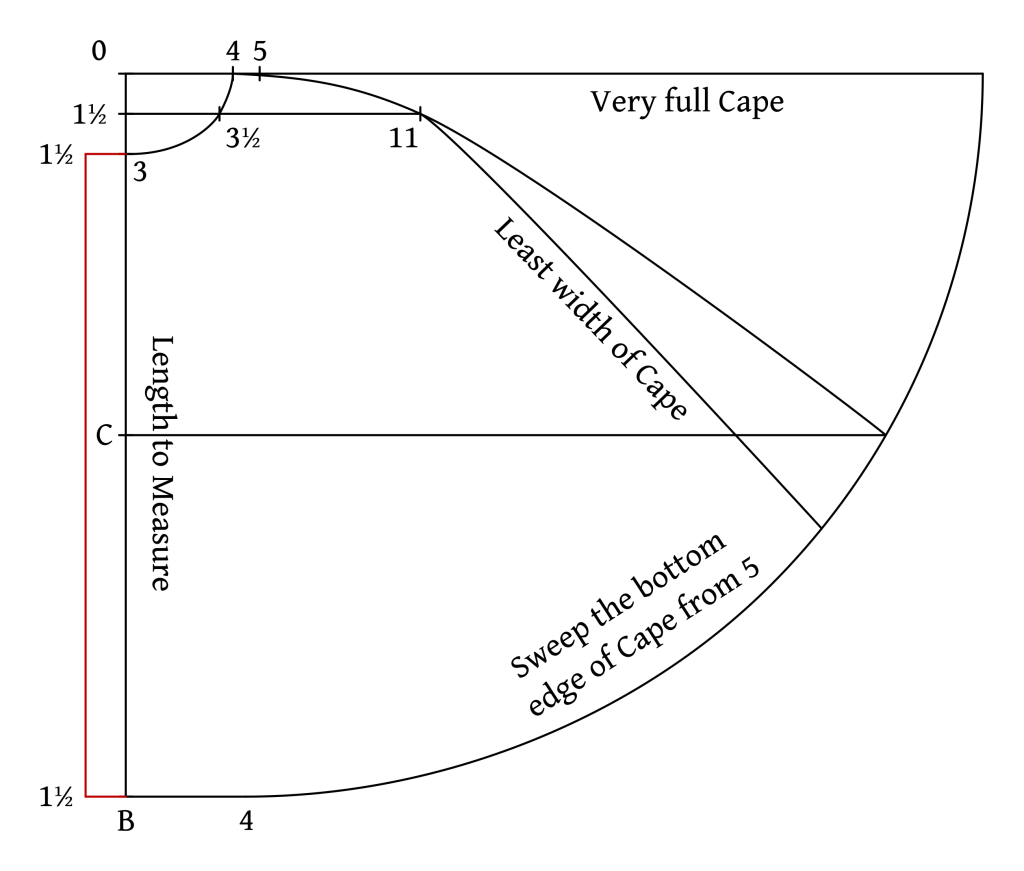
Draw in the curve for the neck from 3 through 3 1/2 to 4.

Button Fly
Measure out 1 1/2 graduated inches from 3 and from B. Connect the two new points with a vertical line, forming the button fly area.
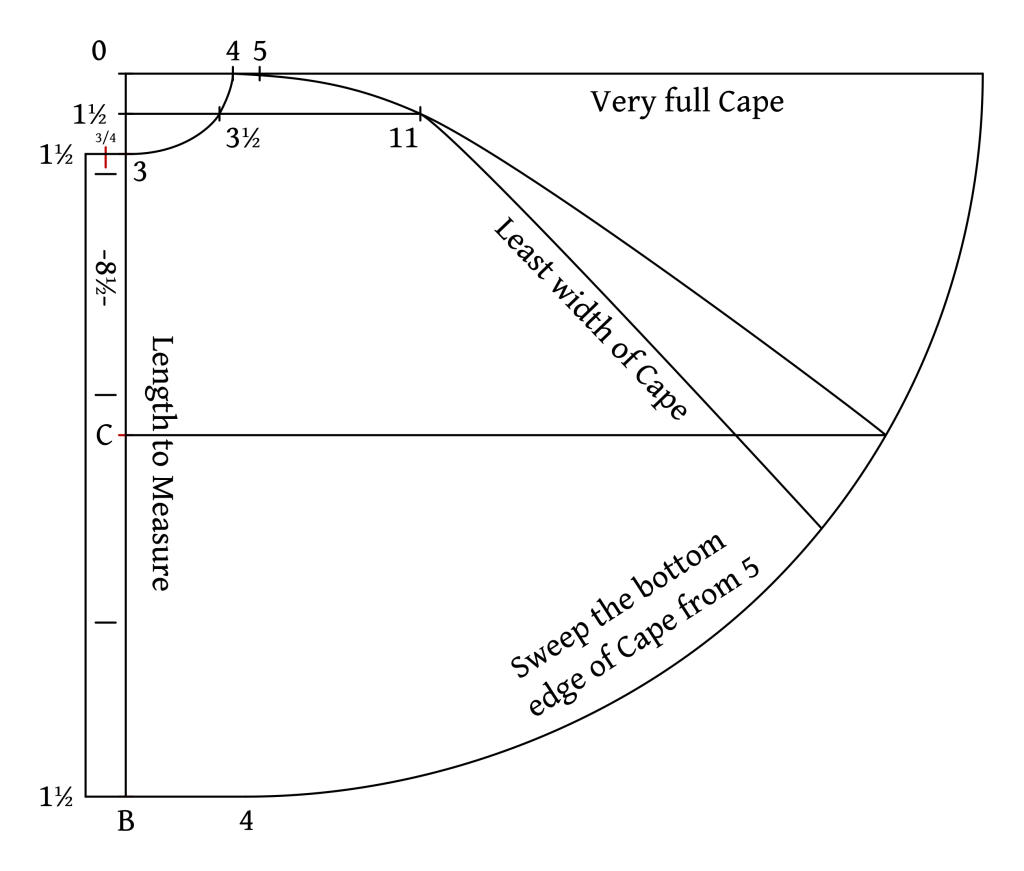
About 3/4″ from the top of the button fly, mark the position of the top buttonhole. The width depends on the size of your buttonhole but 3/4″ is a good starting point.
Mark two buttonholes below the top one, about 8 1/2 graduated inches apart. You may need to adjust these positions depending on your size, just get it roughly looking like the diagram.

Finally, make a mark on the neck line 3/4 graduated inches to the left of the construction line, denoting the center front. The collar will end here and this should line up with the corresponding point on the front piece during construction.
Seam Allowances
The front edge of the cape will be folded back on itself to form a fly front, so you’ll need to add allowance of 1 1/2 graduated inches plus 1/2″ seam allowance there. Add an additional 1/2″ if your fabric frays a lot so you can turn it under.
Add a 1/2″ seam allowance along the neck, side, and bottom edges of the cape.
Cut out the cape pattern.
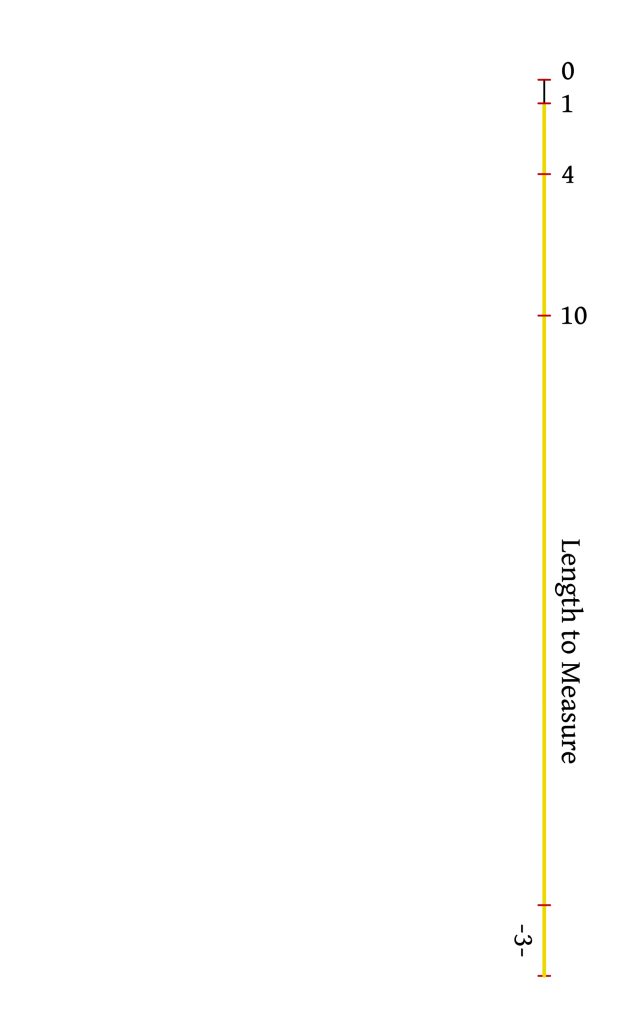
Drafting the Back
We’ll begin the drafting process by drafting the back, which gives us a foundation on which to draft the front and cape pieces as well. While I’ve got the draft oriented vertically here, you’ll probably have to draft horizontally due to the width of your paper.
Baseline
Begin by drafting a vertical baseline from point 0, a little longer than you think you’ll need it. Then mark the following points using the graduated measure corresponding to your chest size as appropriate:
- 0 – 1 graduated inches.
- 0 – 4 graduated inches.
- 0 – 10 graduated inches.
- Now measure from point 1 the length of back measurement and mark the bottom edge.
- Mark 3 graduated inches up from the bottom.
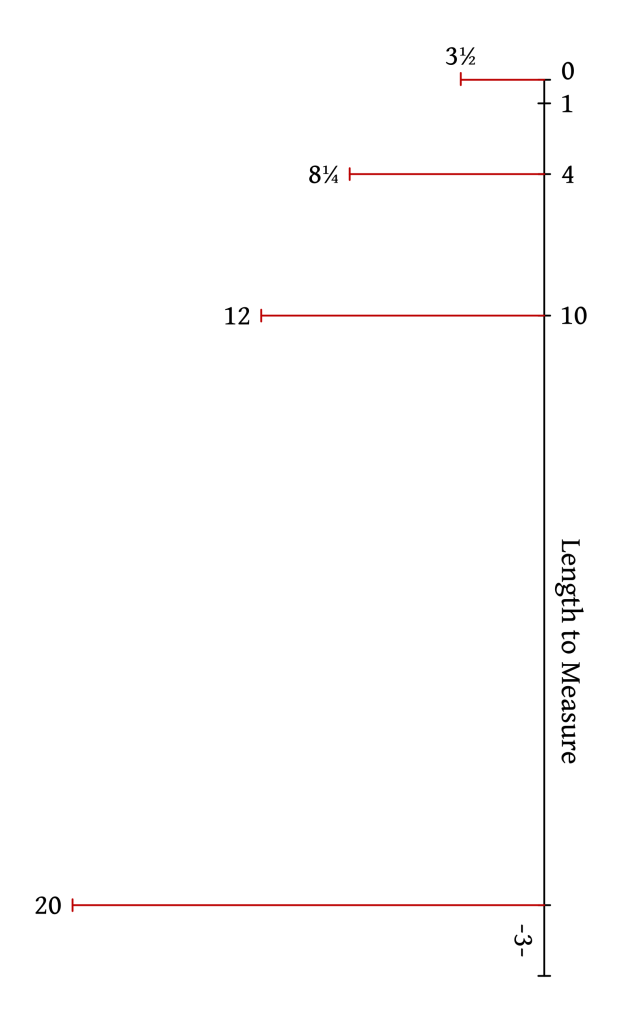
Square Out
Square out the following points using your graduated ruler. Note that this gives a somewhat semi fitted back near the shoulder but quickly tapers into a very flowing and unfitted back. The original draft had 24 for the bottom measurement, which I’ve found to be almost ridiculously large, especially on larger drafts. So I’ve changed that to 20, which also more closely matches what the original draft looks like (it wasn’t completely to scale in the original).
- 3 1/2 graduated inches from point 0.
- 8 1/4 graduated inches from point 4.
- 12 graduated inches from point 10.
- 20 graduated inches from the point 3 from the bottom.
The Curves
Draw in the following curves.
- The neck from 3 1/2 to 1. Try to straighten the curve out as you approach 1 and the curve should meet the shoulder curve at close to right angles if possible.
- The side seam curve from 3 1/2 to 20. The curve should be somewhat shallow coming into 12 and then straighten as you approach 20.
- The hem from 20 to the bottom of the baseline. The curve should be at right angles to the side seam, and straighten out as you get to the baseline.
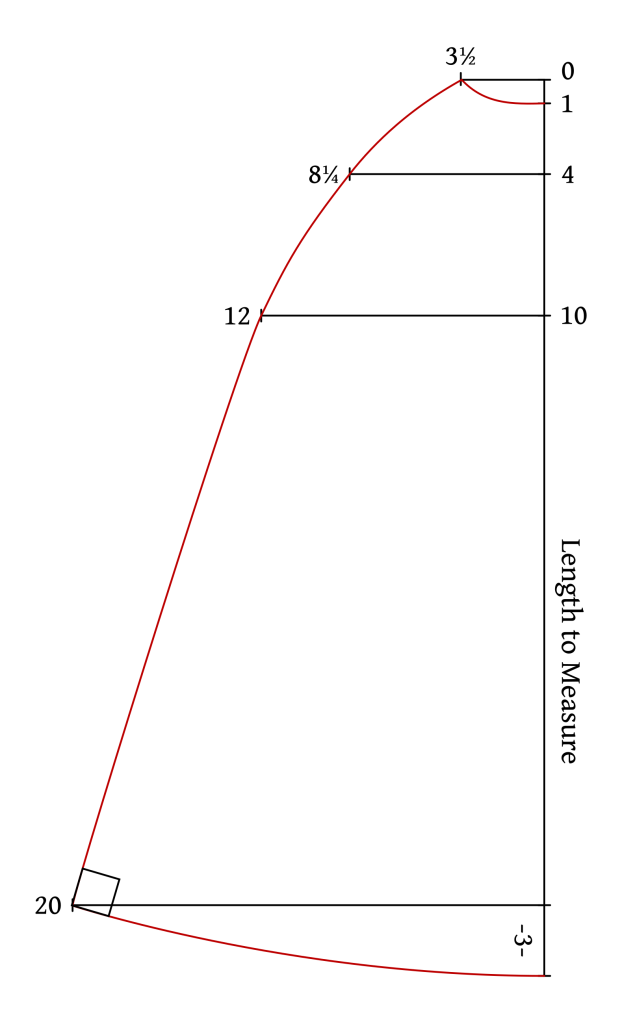
Seam Allowances
I usually add the seam allowances after I’ve drafted all the pieces, but since these pieces are so large and drafted one at a time, it’s easier to just add them as you go.
Use a quilting ruler to mark out a 1/2″ seam allowance along the neck, side seam, and hem.
The center back is cut on the fold to avoid a seam there, so no seam allowance is necessary there.
Finally, cut out your pattern piece.
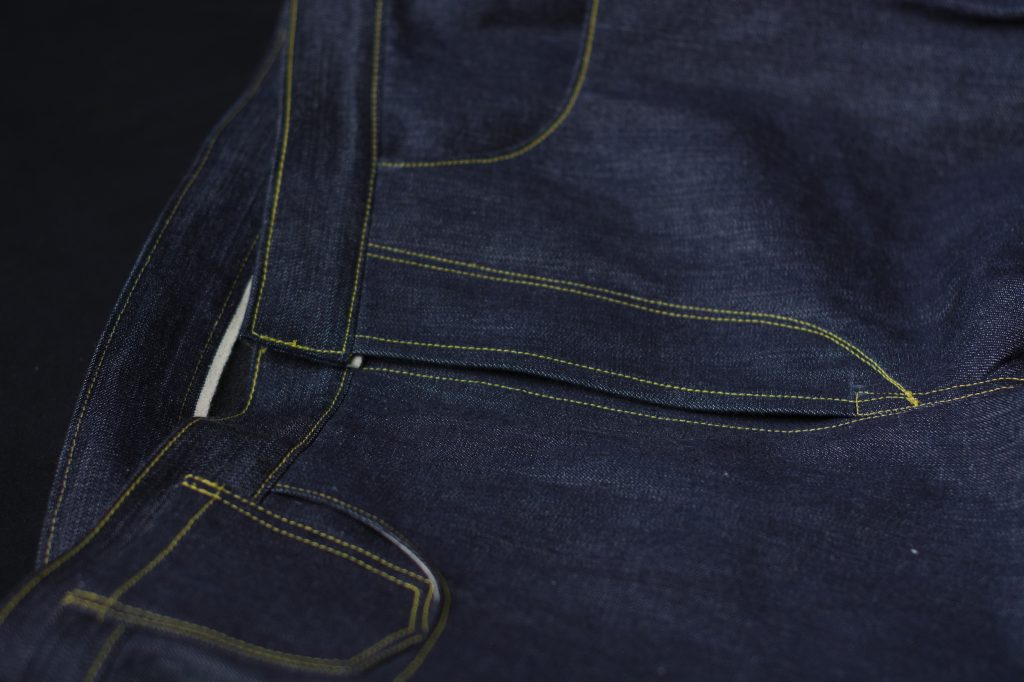
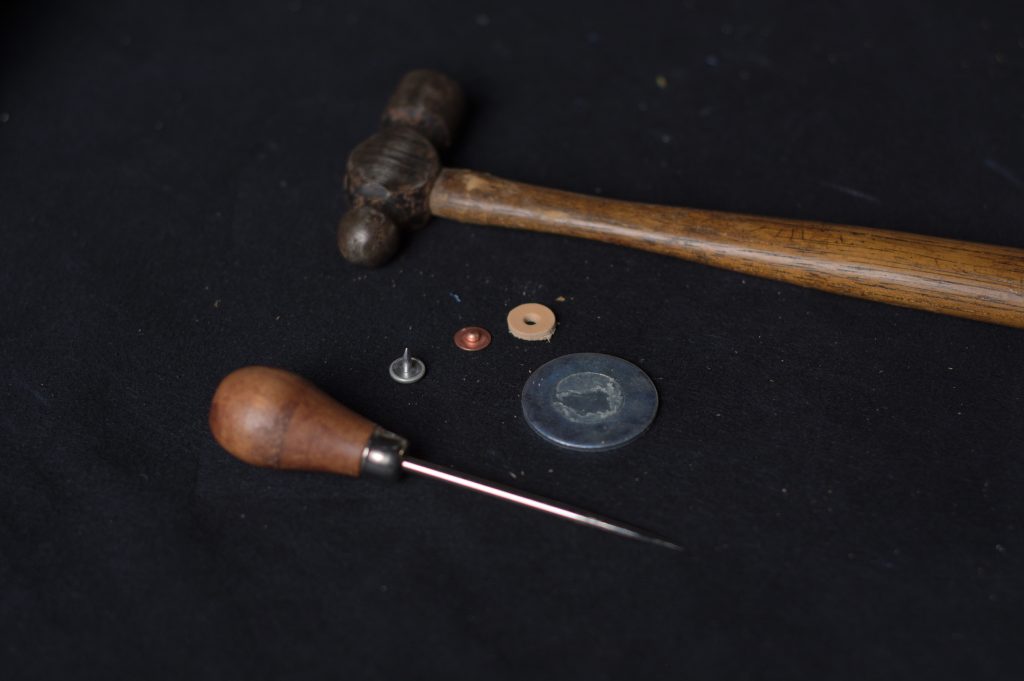
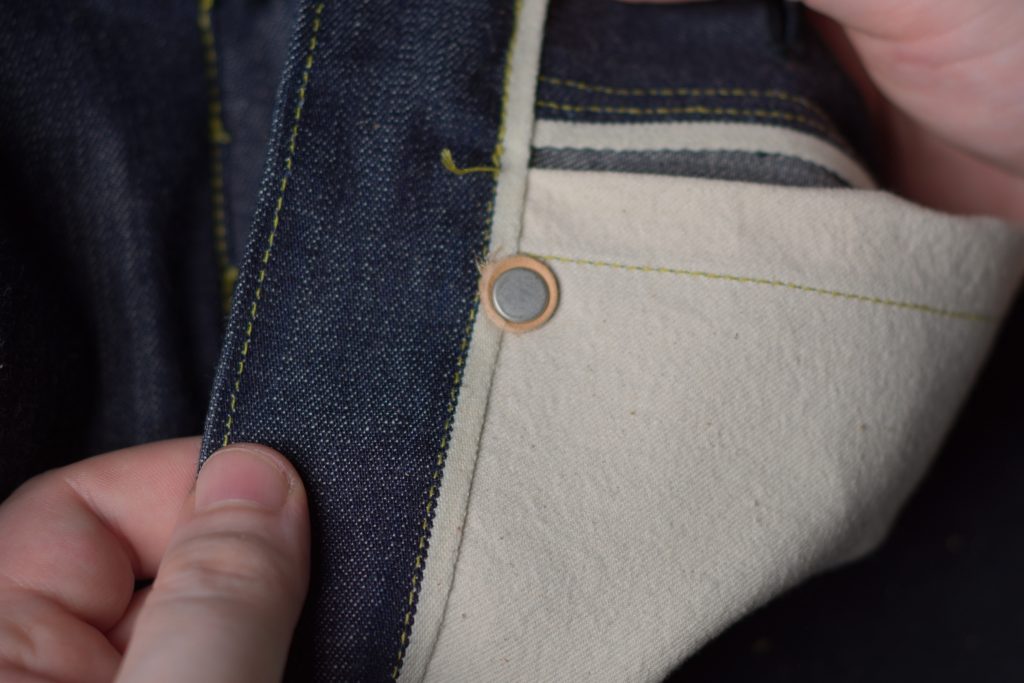
Rivets
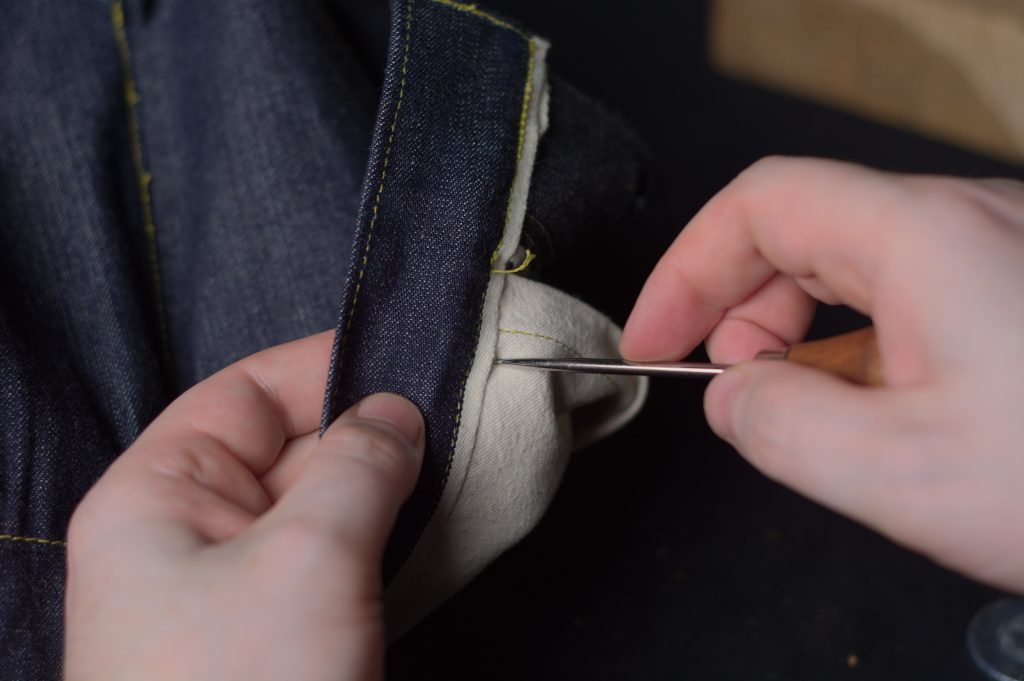
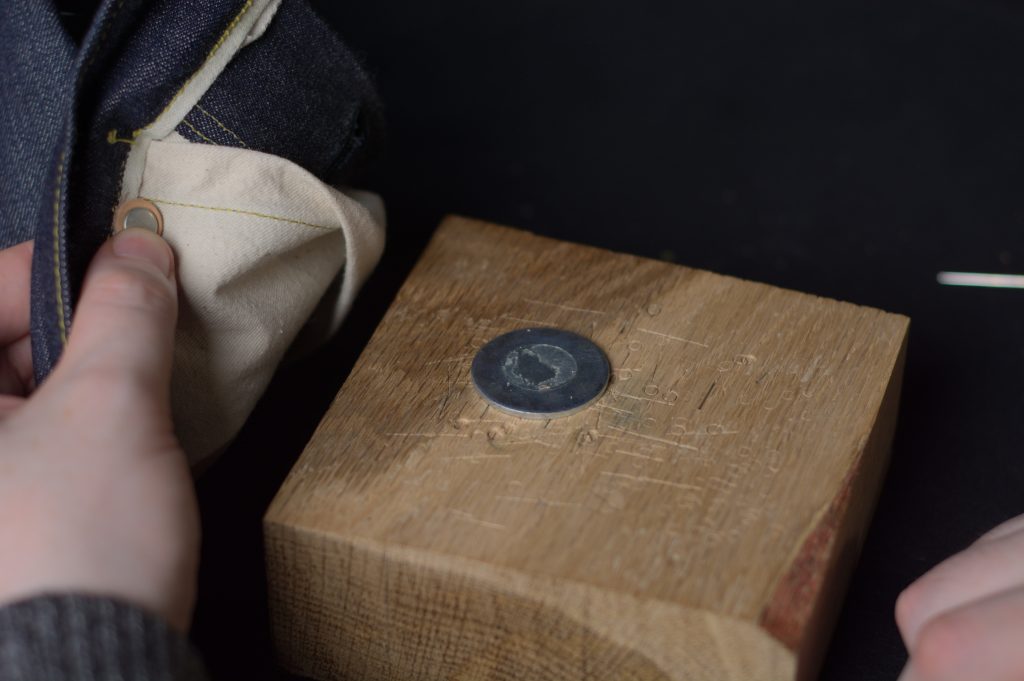
With the sewing out of the way, we can finally move on to attaching the rivets. You’ll need an awl, small metal anvil, rivet and backing, optional leather washer, a hammer, and the rivet setting too (not pictured).
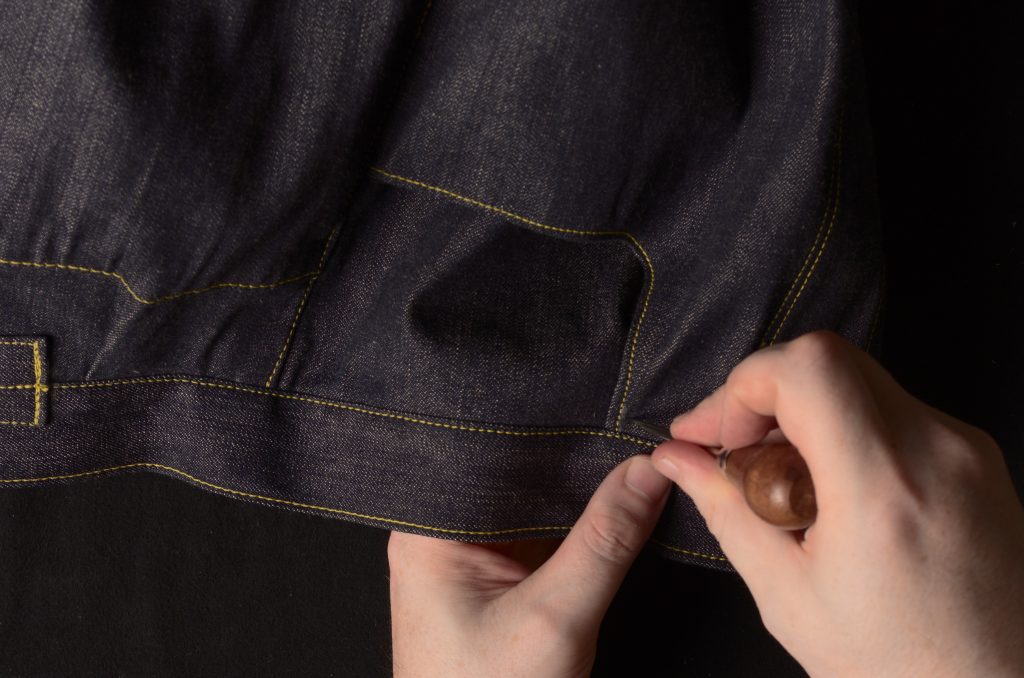
The best way to go about finding the position of the rivets is to use the awl to poke through the fabric from the right side. The first rivet is at the top edge of the front pocket opening, about 1/4″ from the waistband.
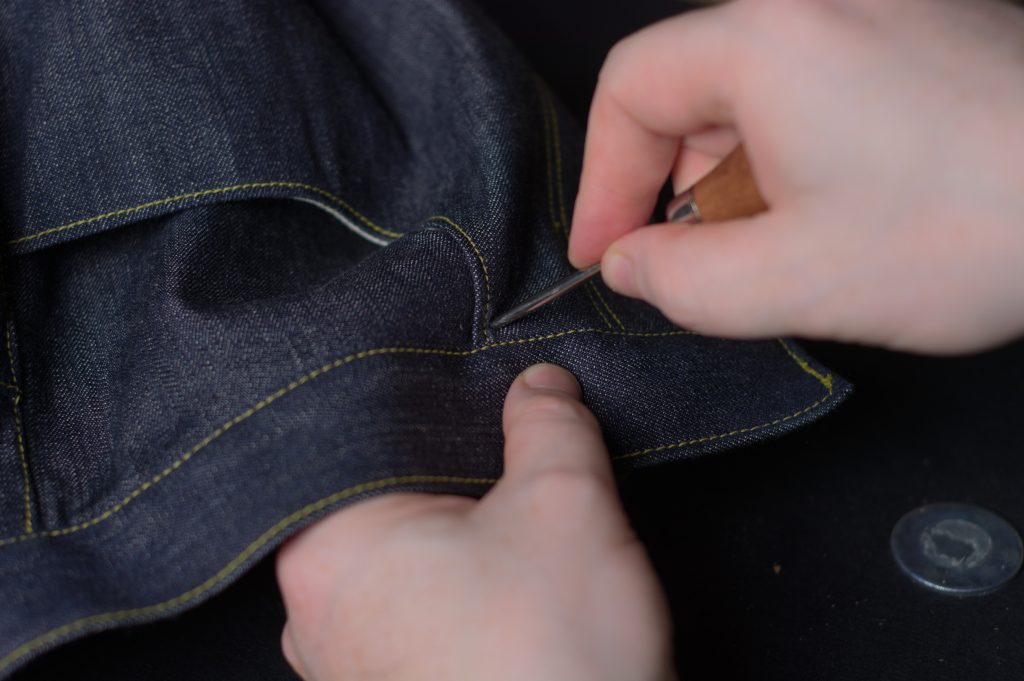
I then like to open the hole from the back as well.
Insert the rivet backing into the leather washer (optional).
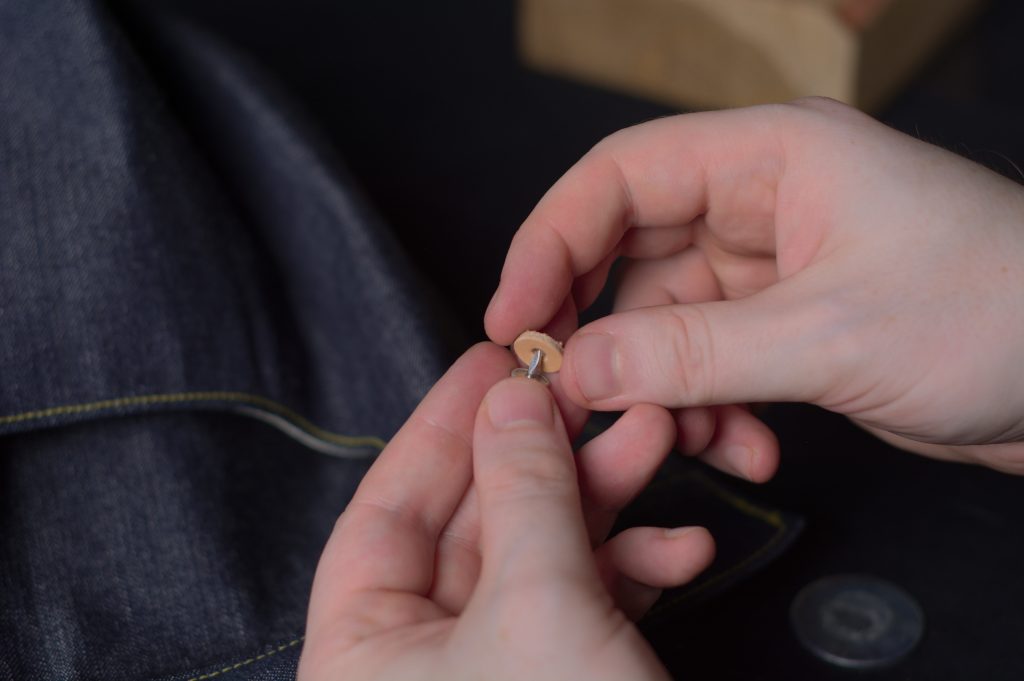
And insert the backer into the hole from the wrong side.
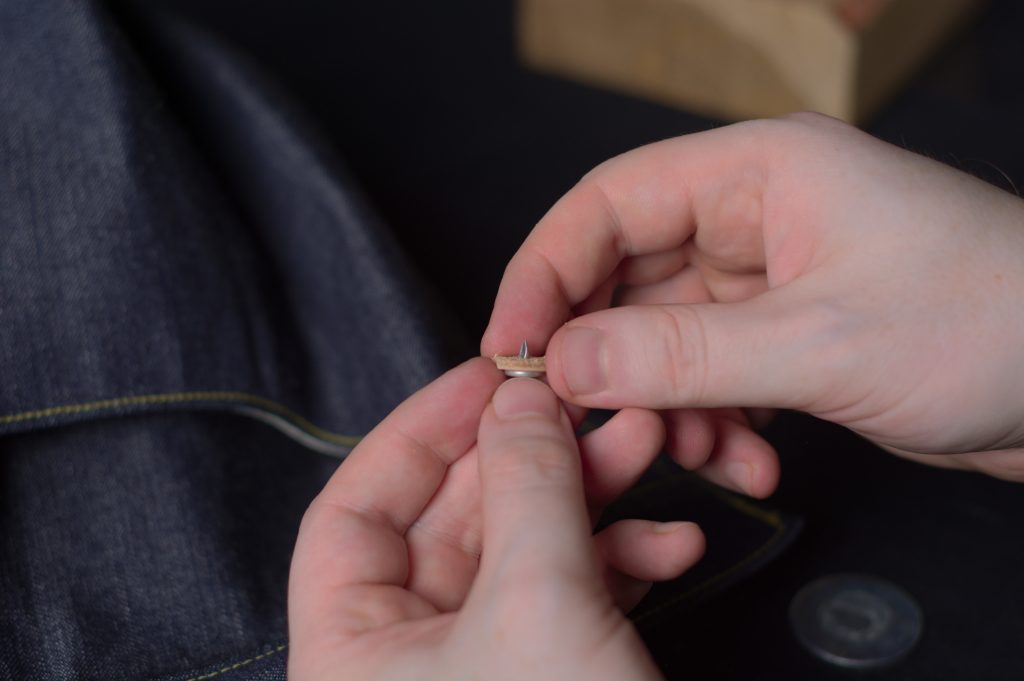
Place the assembly onto the anvil. Using a block of wood is helpful to get a good set to the rivet and avoid damaging the table.
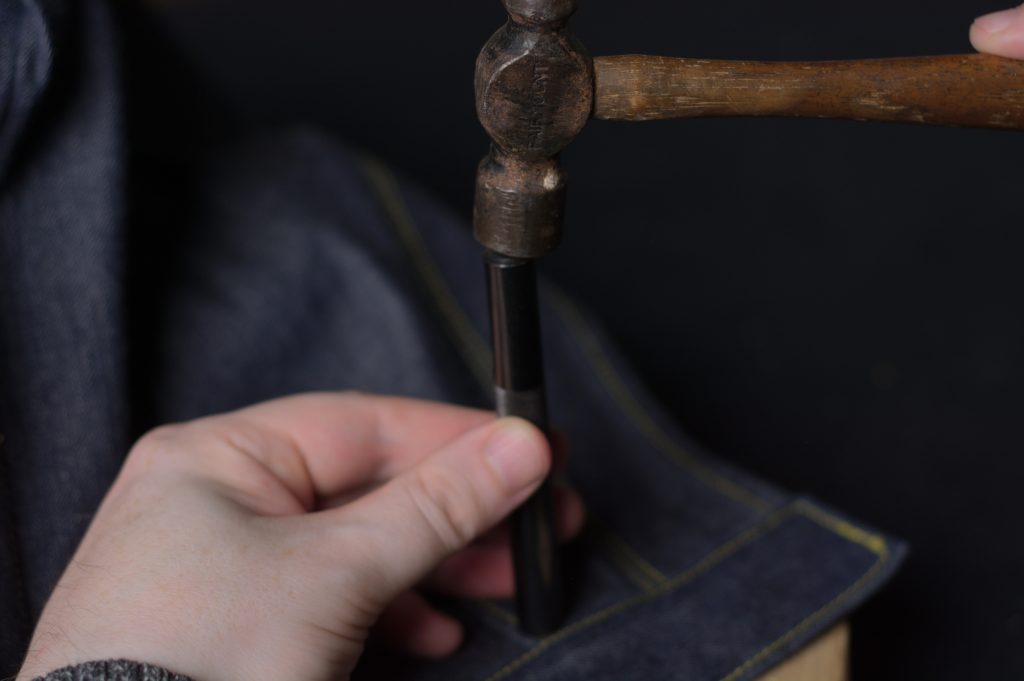
Place the rivet on top of the assembly, and then place the tool over the rivet.
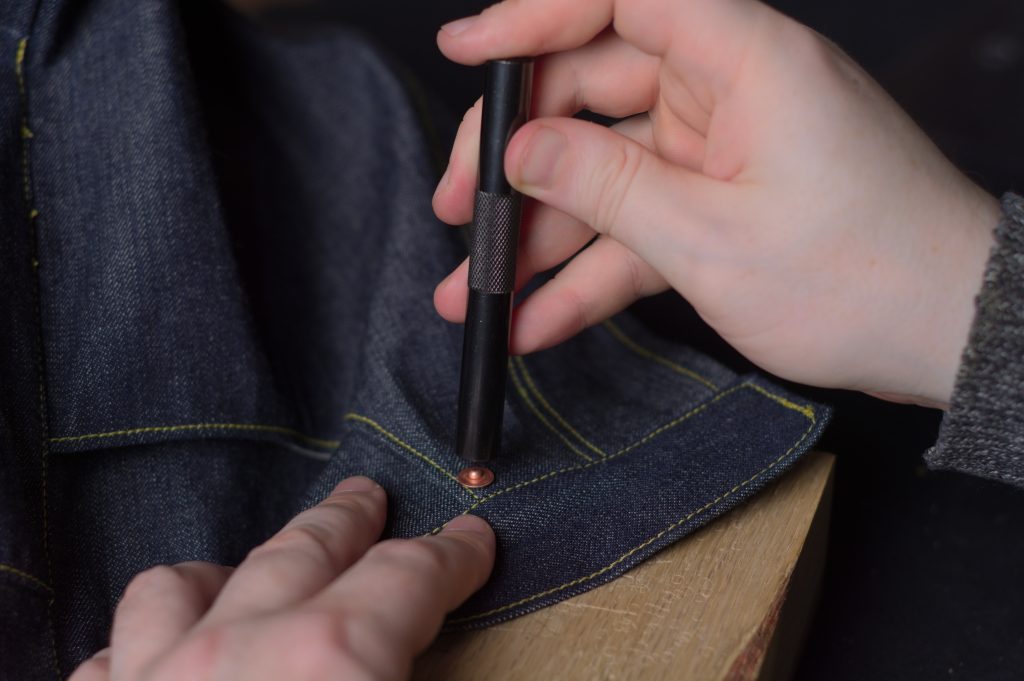
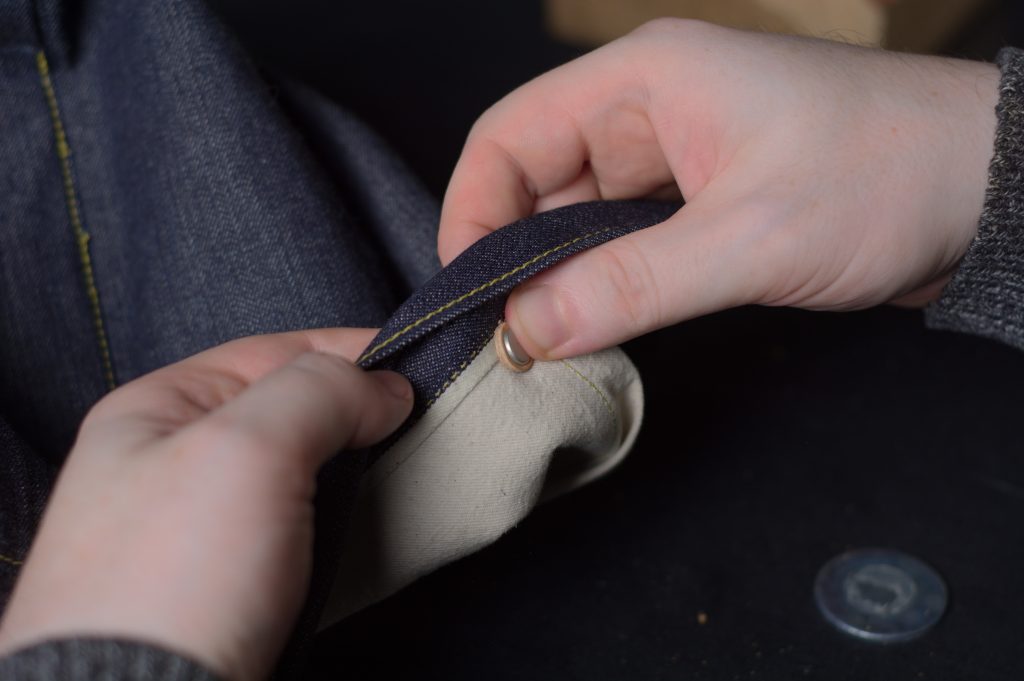
Give the tool a few light taps to start and then firmly secure the rivet. It will compress the fibers underneath, and the backing will spread out under the rivet, hopefully permanently securing it. But if you don’t hit it strongly enough, it is possible for it to come undone.
And here’s the set rivet.
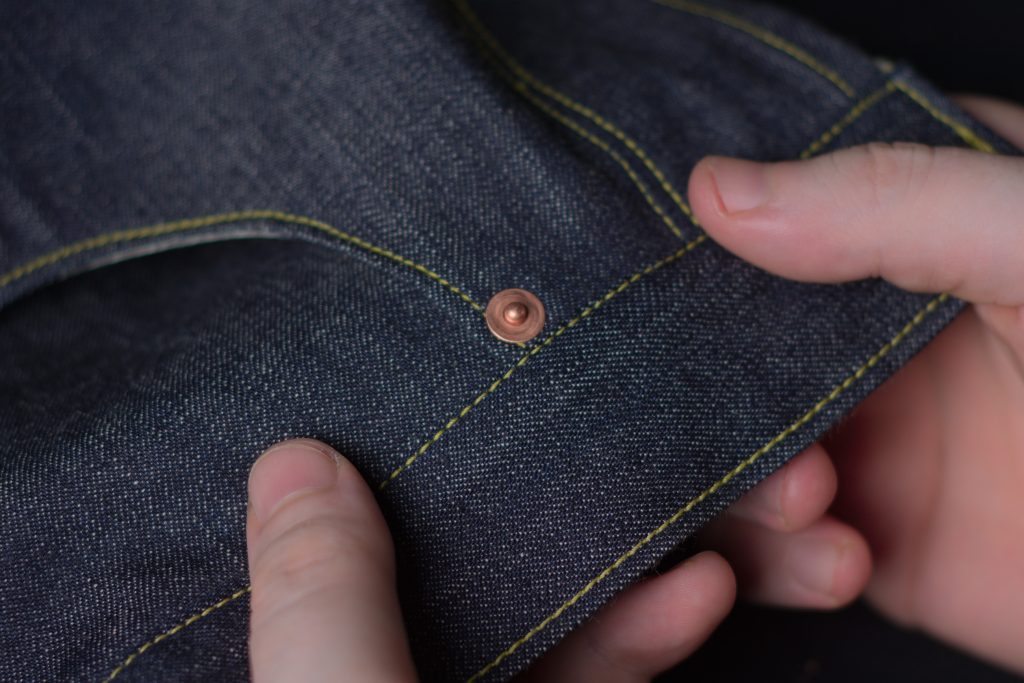
Repeat for the lower half of the front pocket opening, the top of the watch pocket (though not on the 1873, let me check on that . . .), the tops of the back pockets, and optionally the bottom of the fly (for the 1873 version).
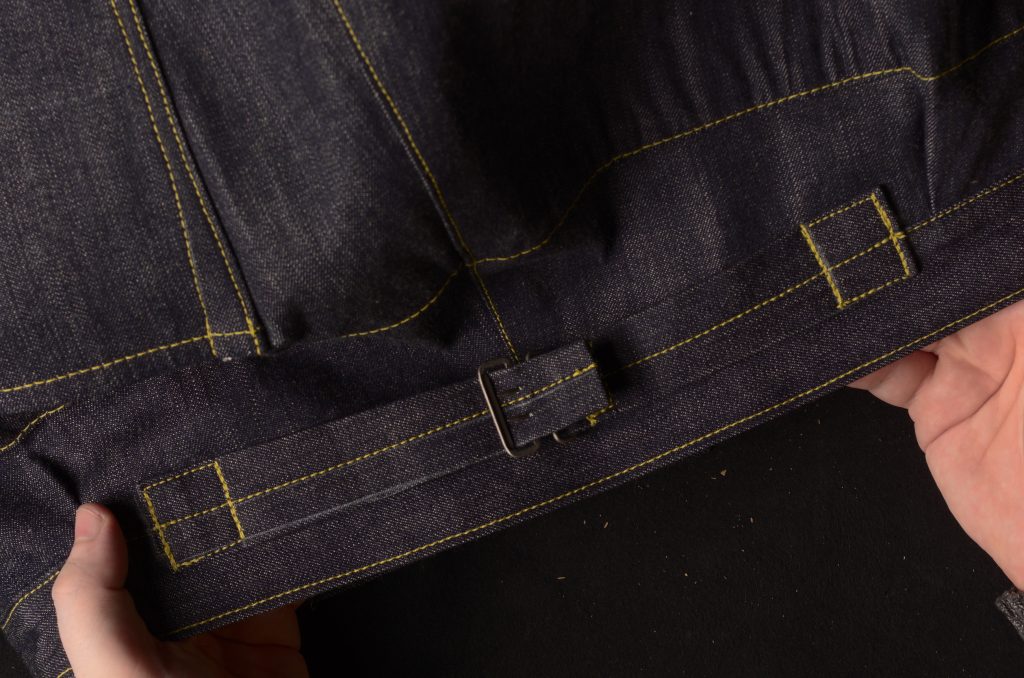
The Back Cinch Belt
To put together the back cinch belt, you’ll need your pattern, a length of selvedge denim, and a jeans belt buckle.
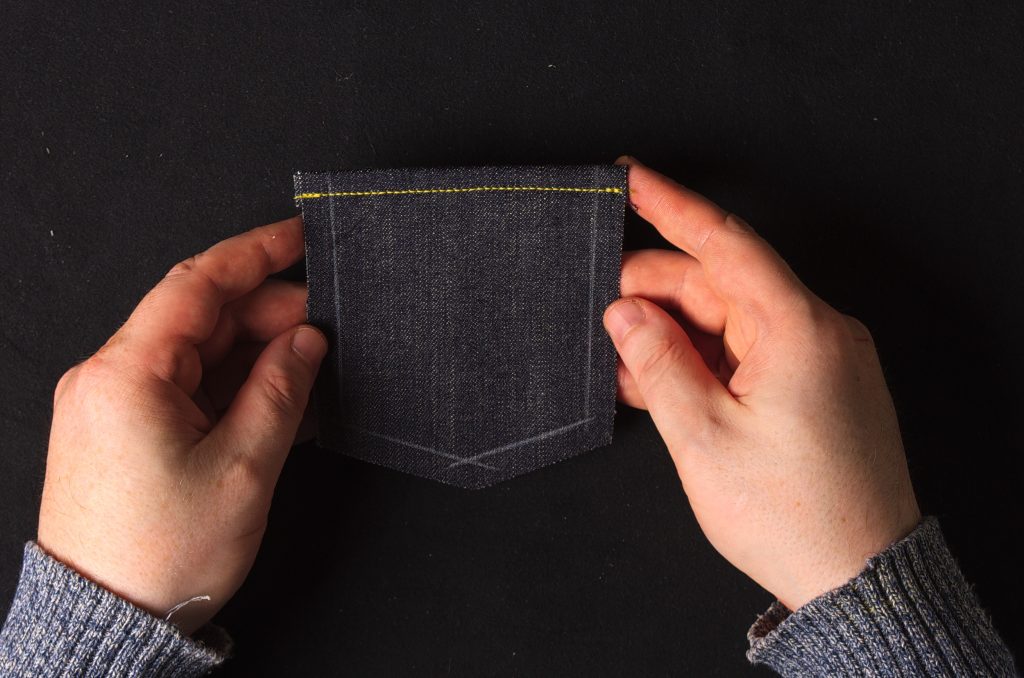
Trace out the pattern onto your denim, being sure to mirror it for the other side, and keeping one edge on the selvedge. You could also add an additional seam allowance for turning under instead of using the selvedge, if you prefer.
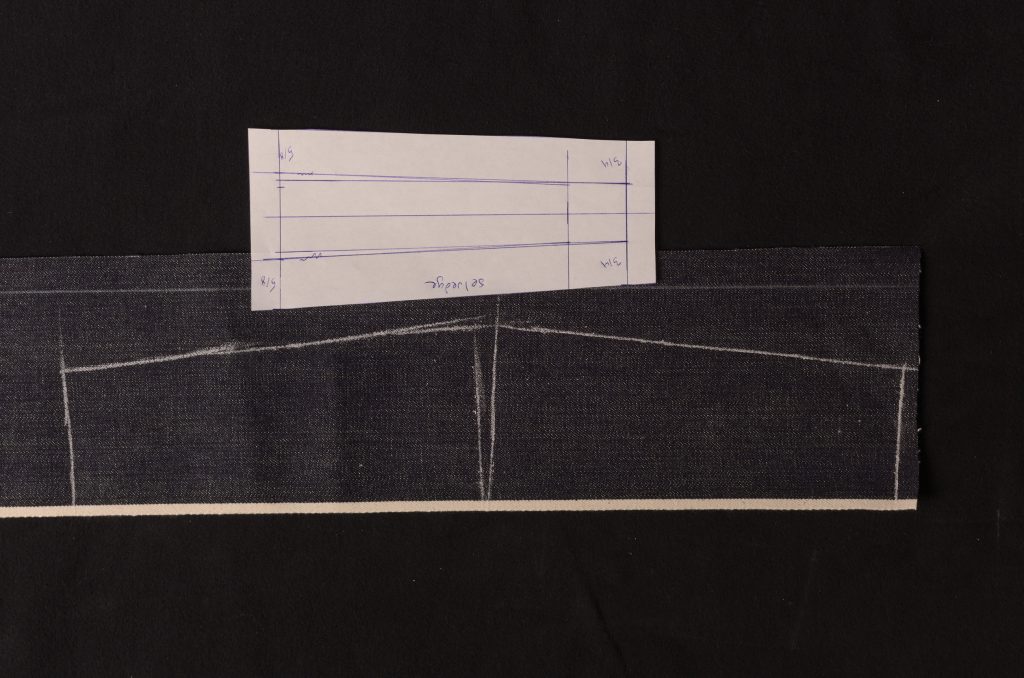
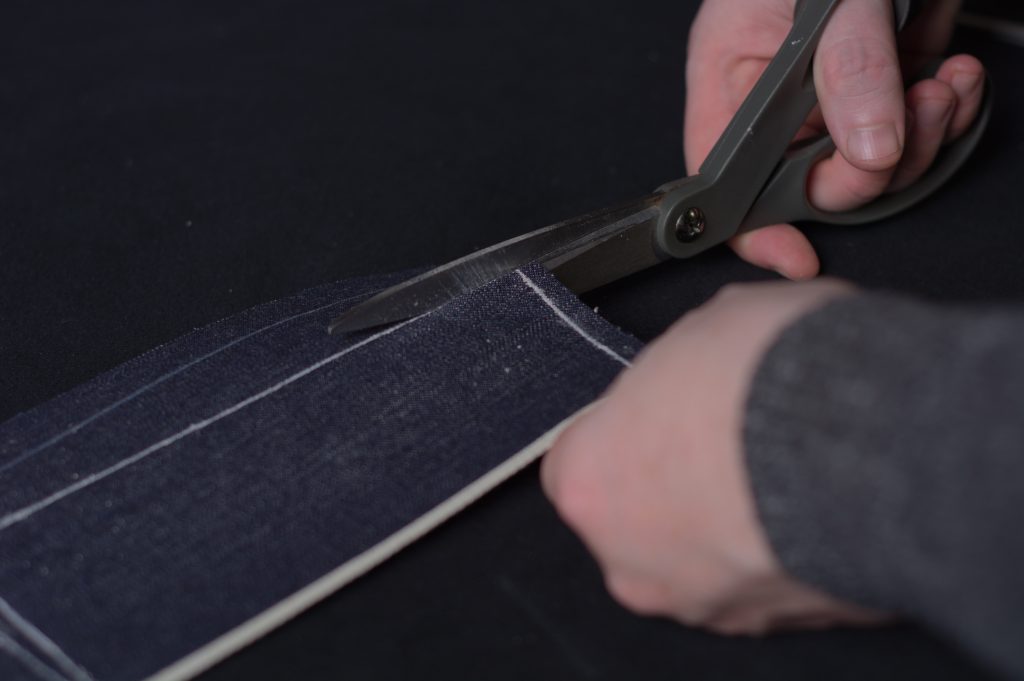
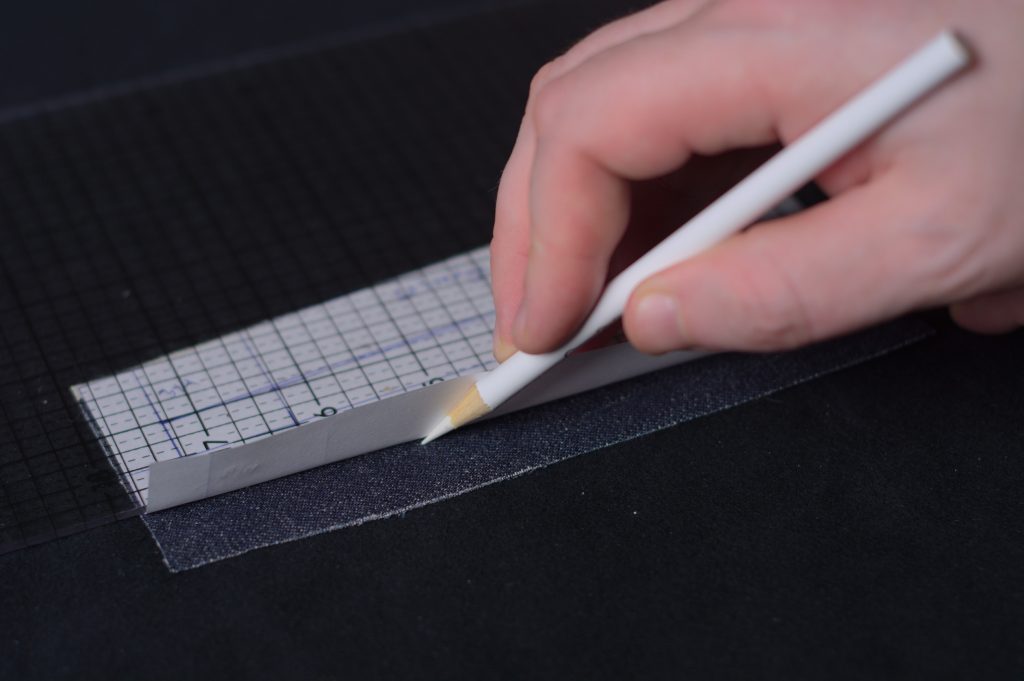
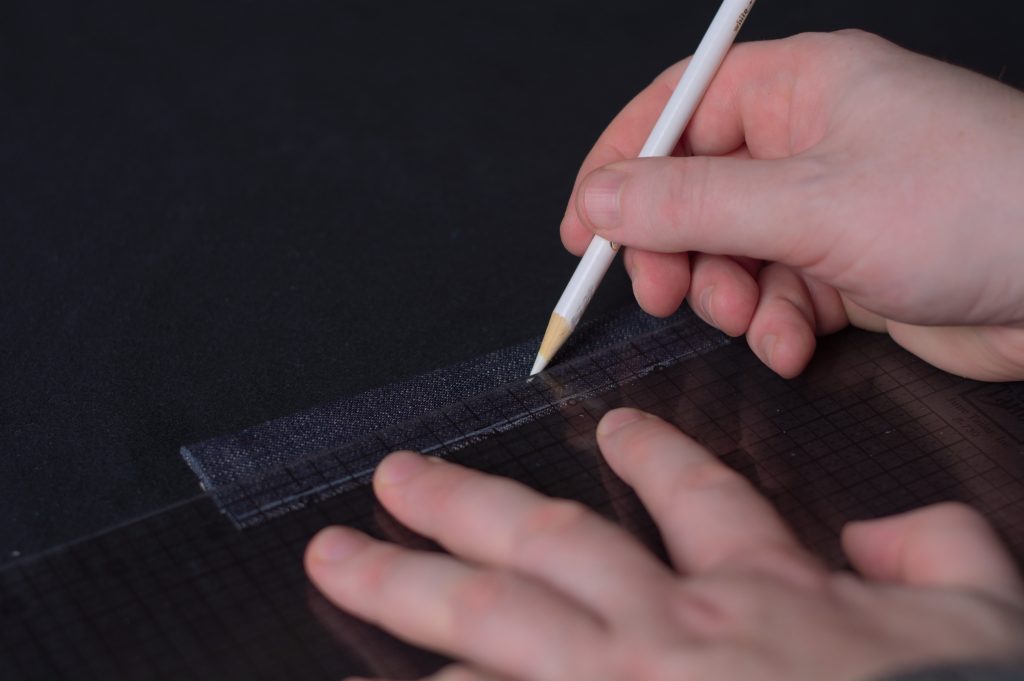
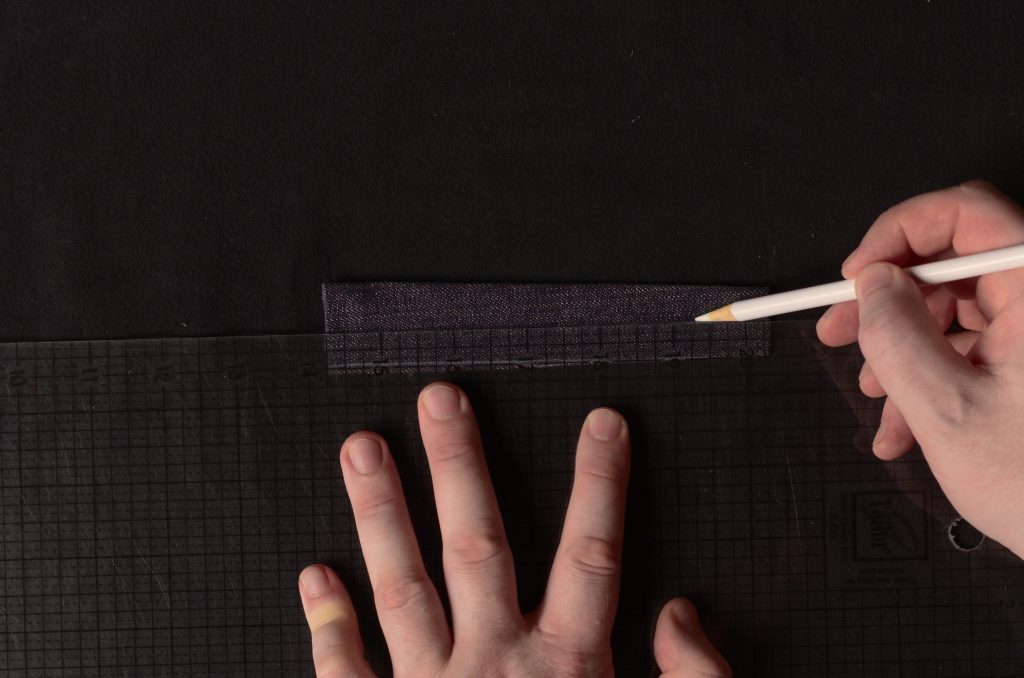
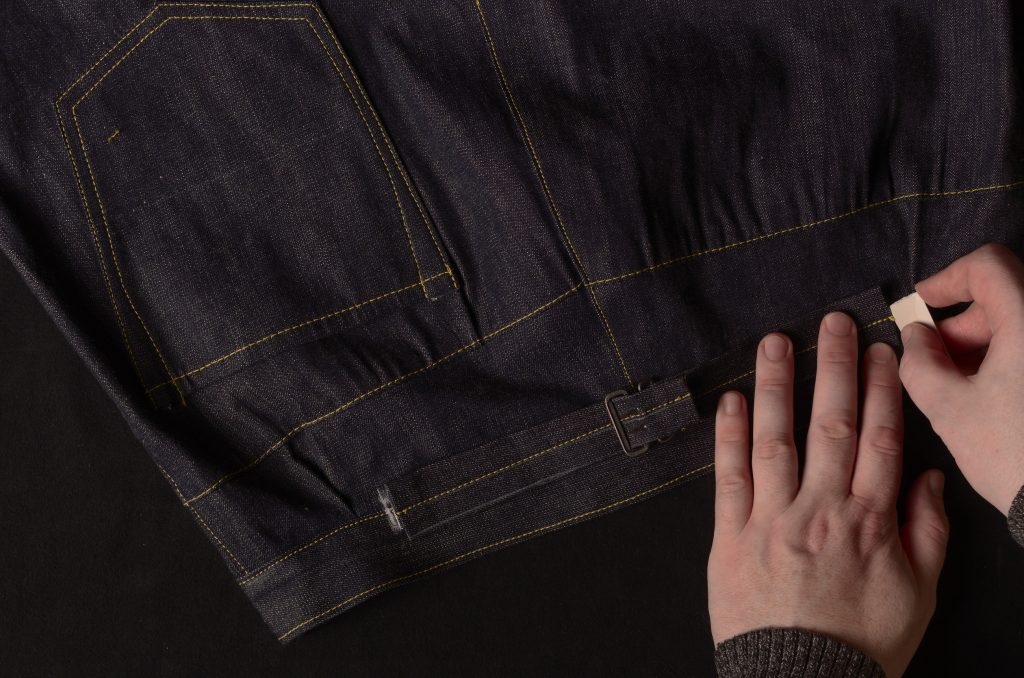
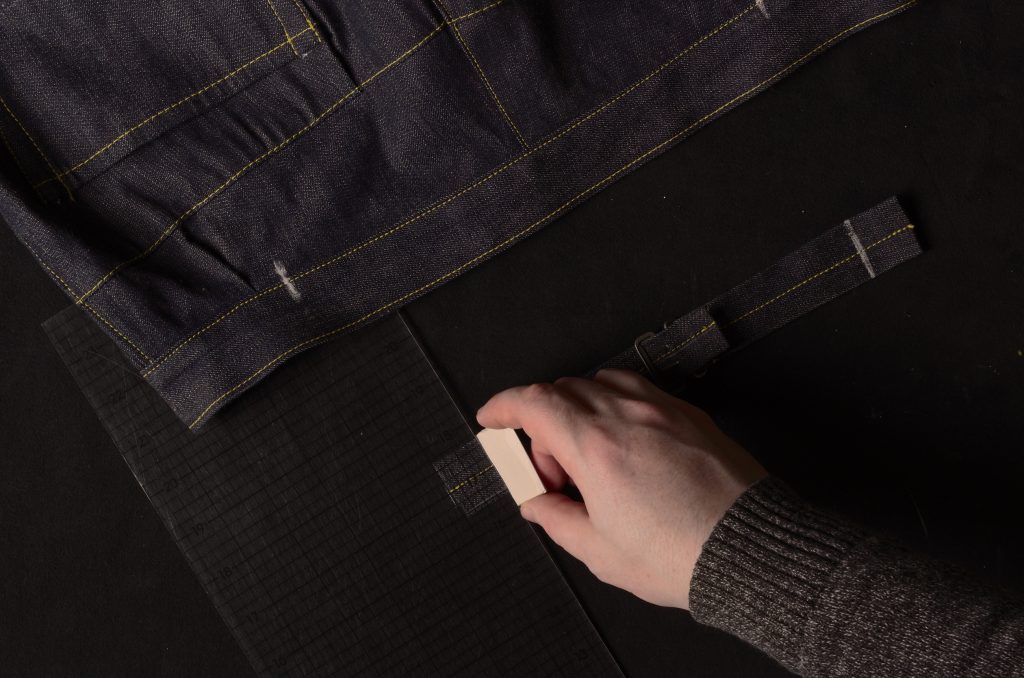
Cut out the pieces, and then place the pattern on top. Align the ruler with a long edge, flip the paper back, and trace the finished seam line onto the denim. Repeat for the other long edge and the two short ends, on both pieces.

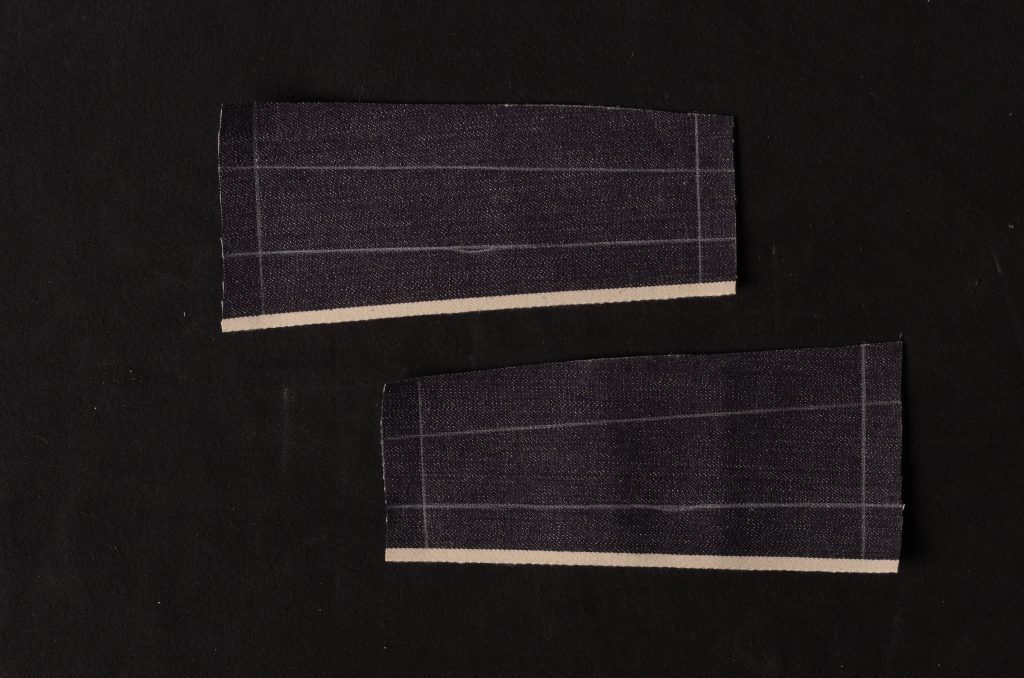
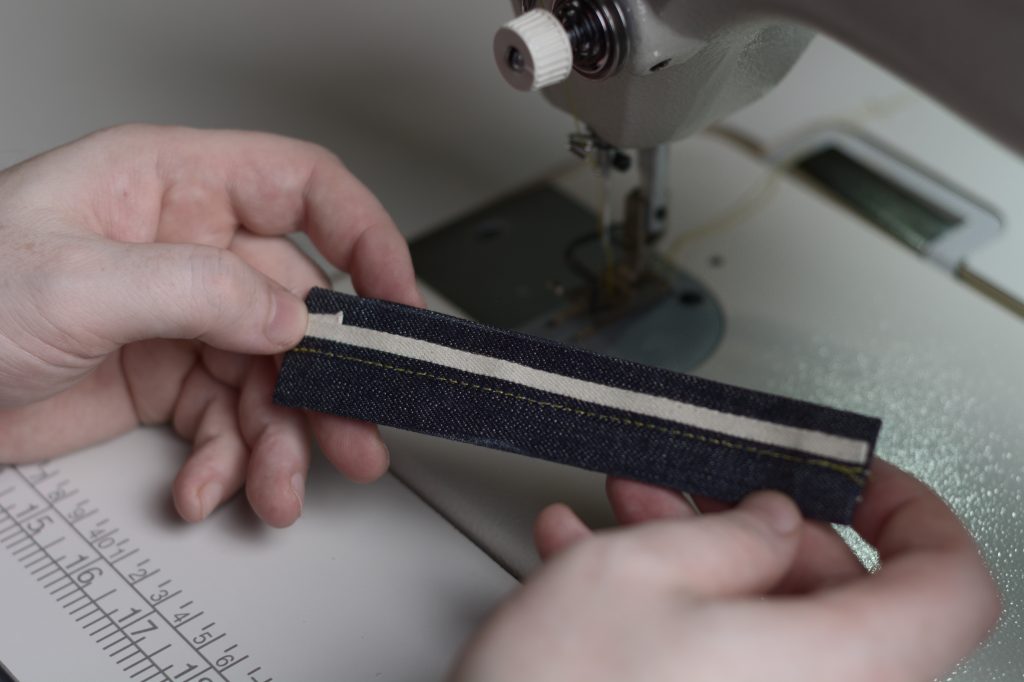
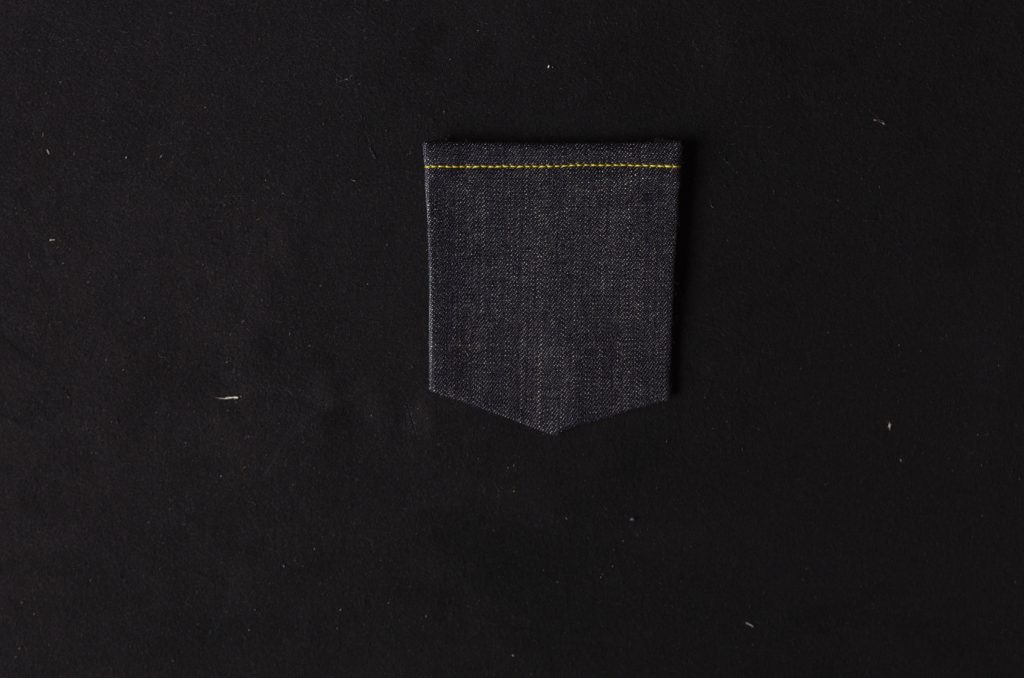
Here’s what you should be left with.

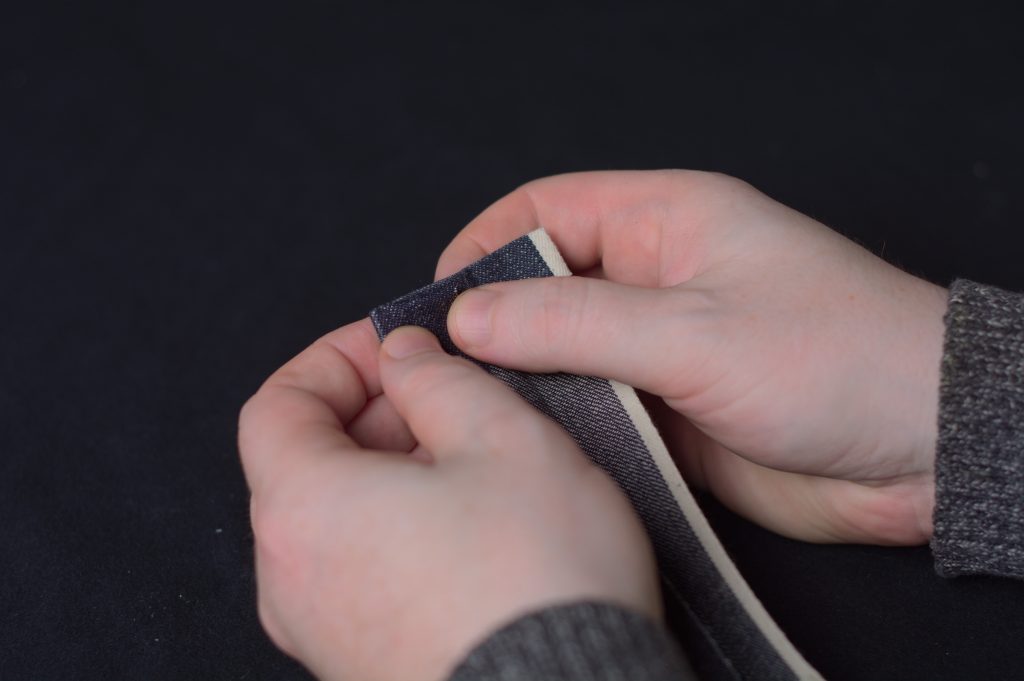
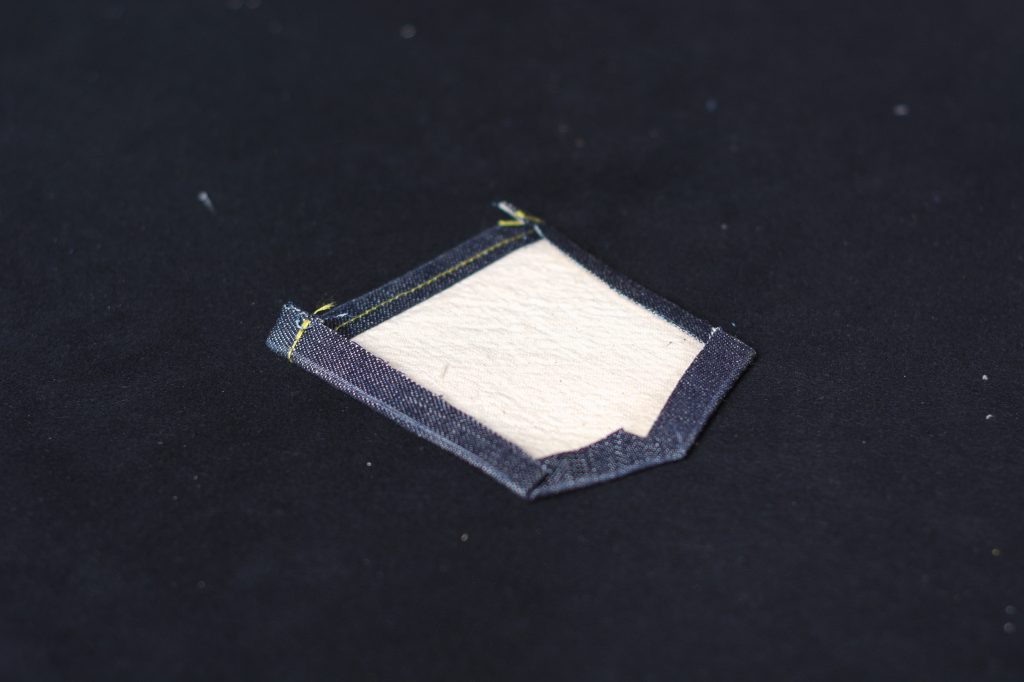
Press over the seam allowances on both ends, just barely bringing the chalk lines to the wrong side.
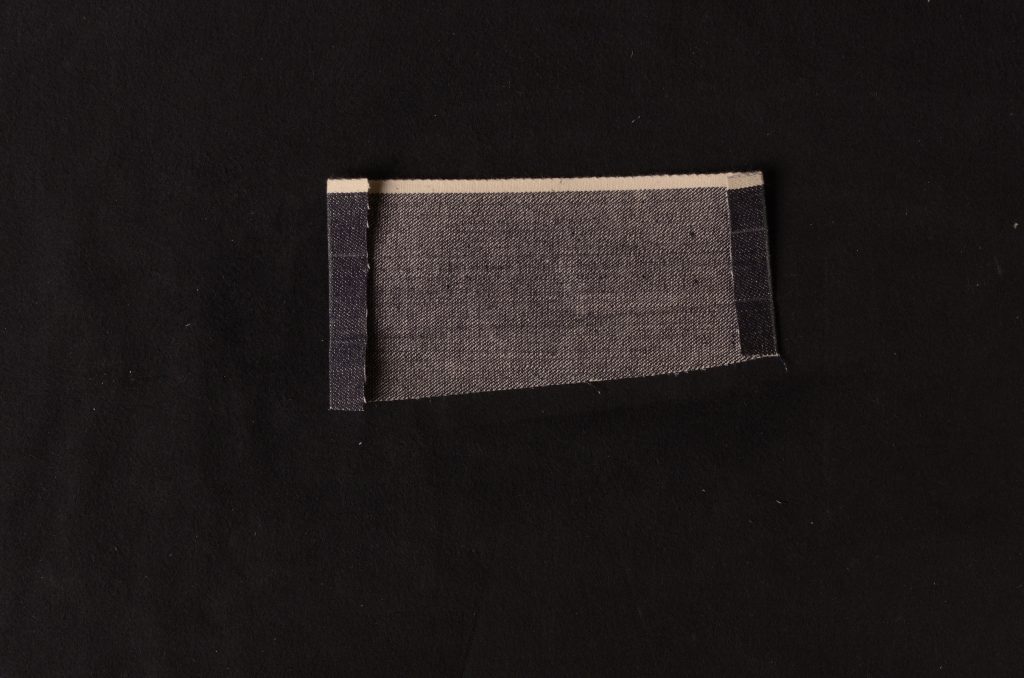
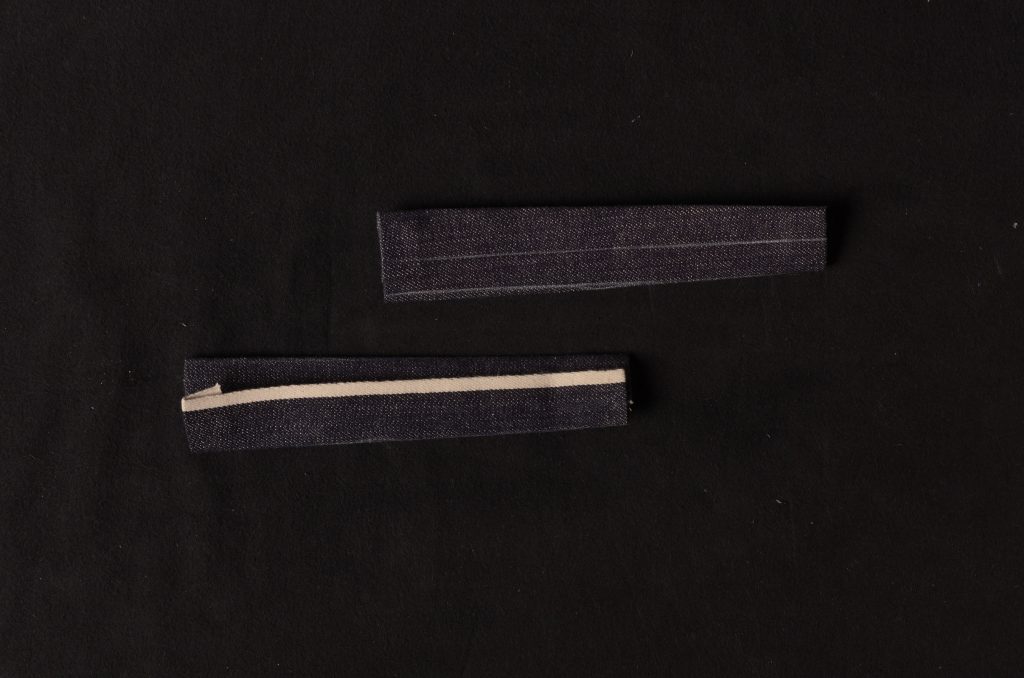
Press over the raw non-selvedge edge.
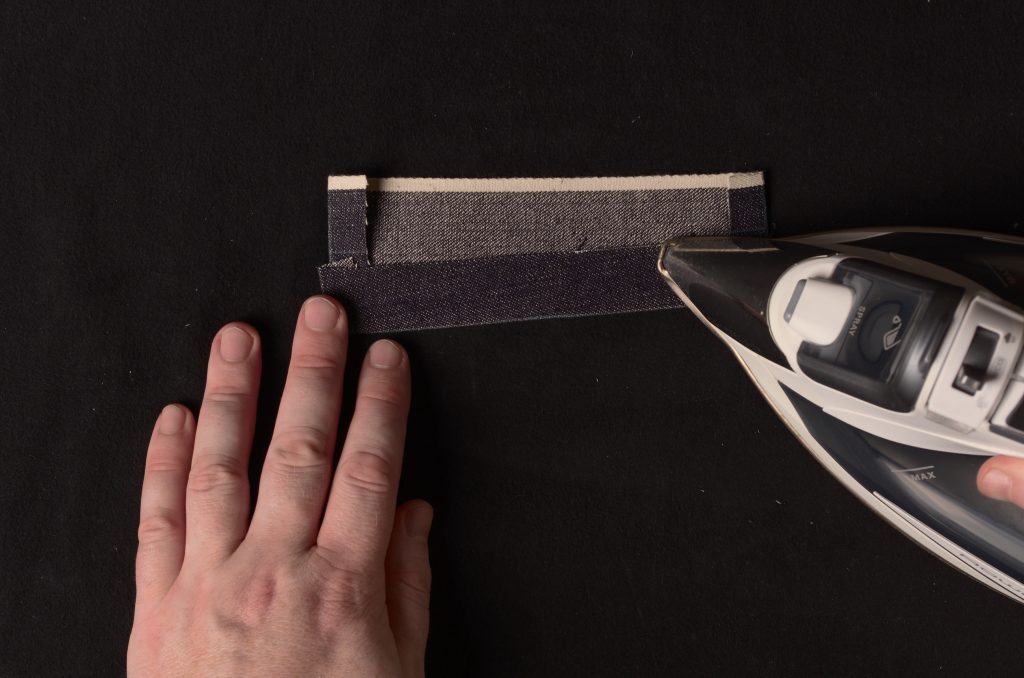
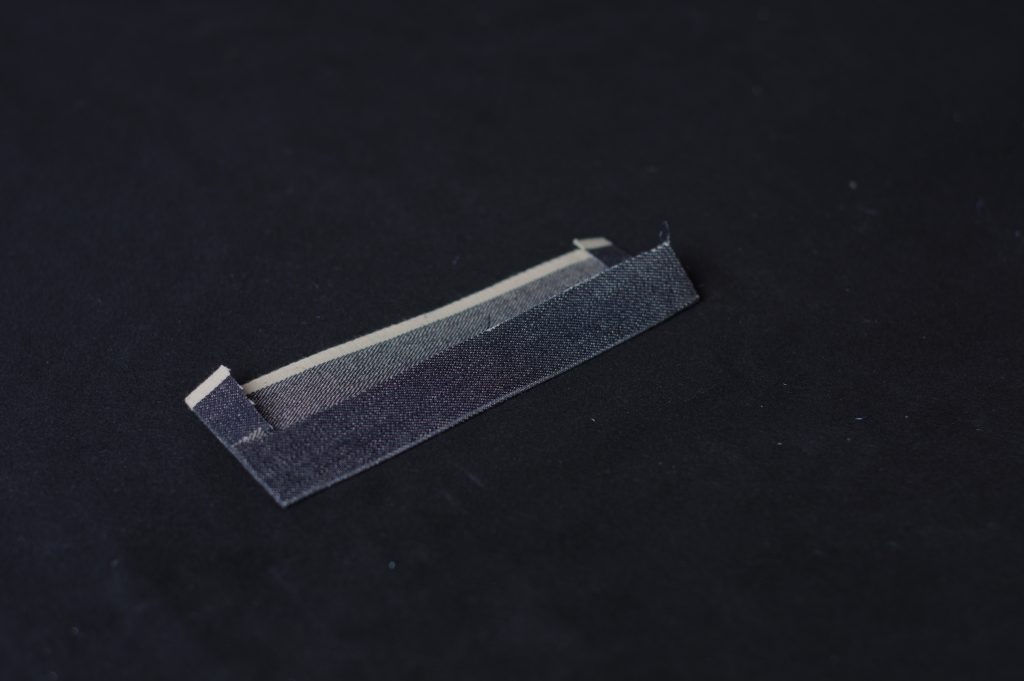
And then fold and press the selvedge seam allowance over everything. Tidy up the ends as necessary.
Just tidying up the end here, making sure the seam allowances are all falling into place properly.
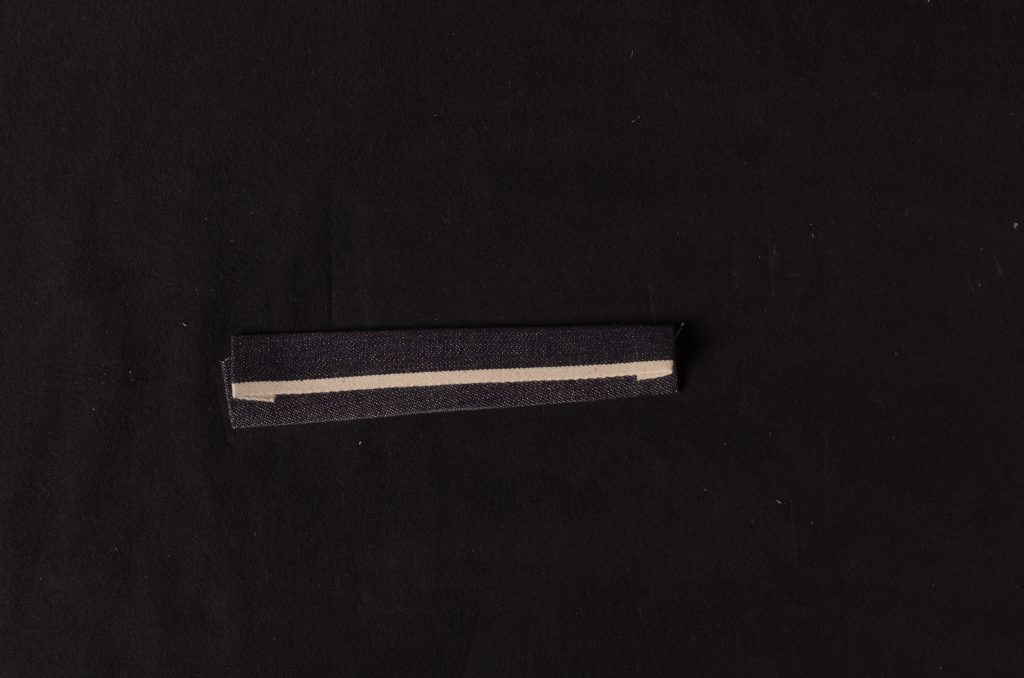
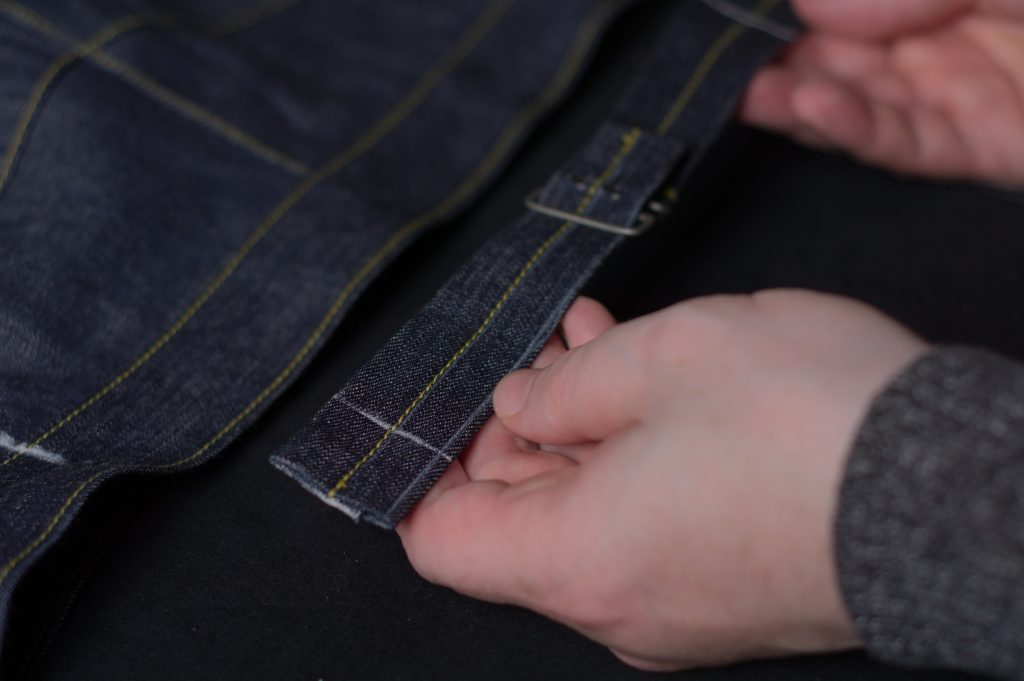
Draw in the center line across the length of the cinch.
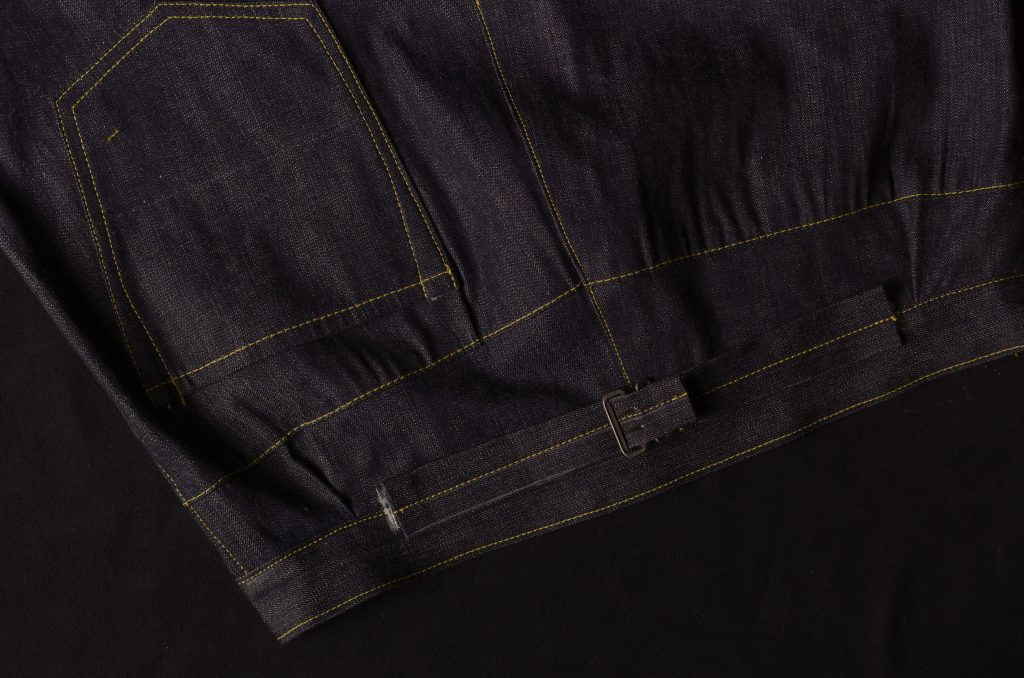
Here are the results so far. You’ll want to make sure both pieces are identical in size, and that the back buckle actually fits, and adjust as necessary. I usually have issues with one or the other.
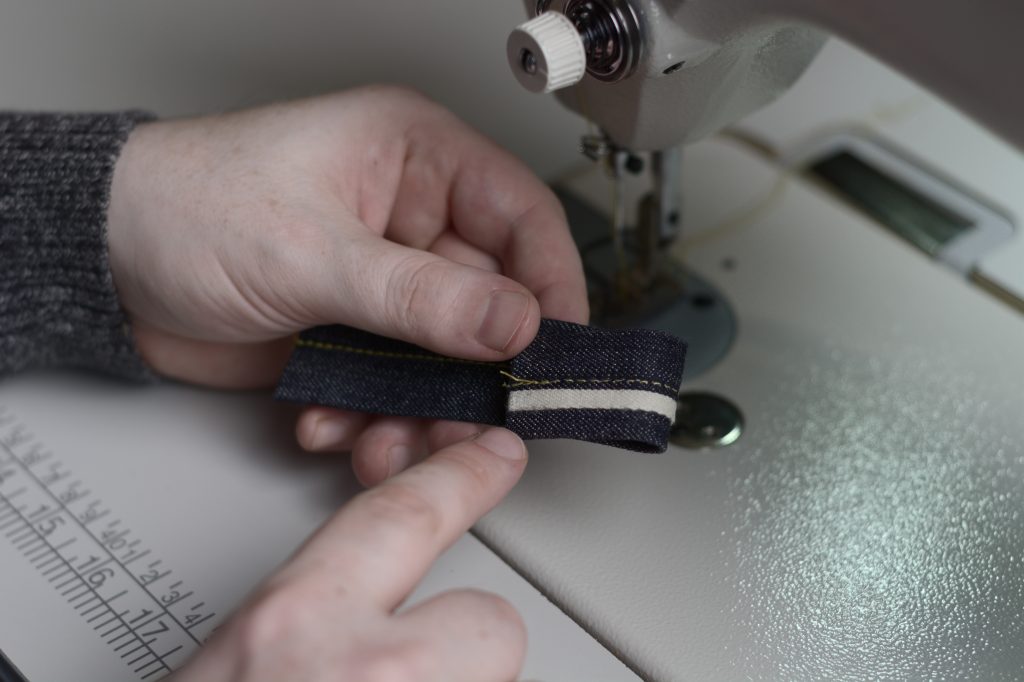
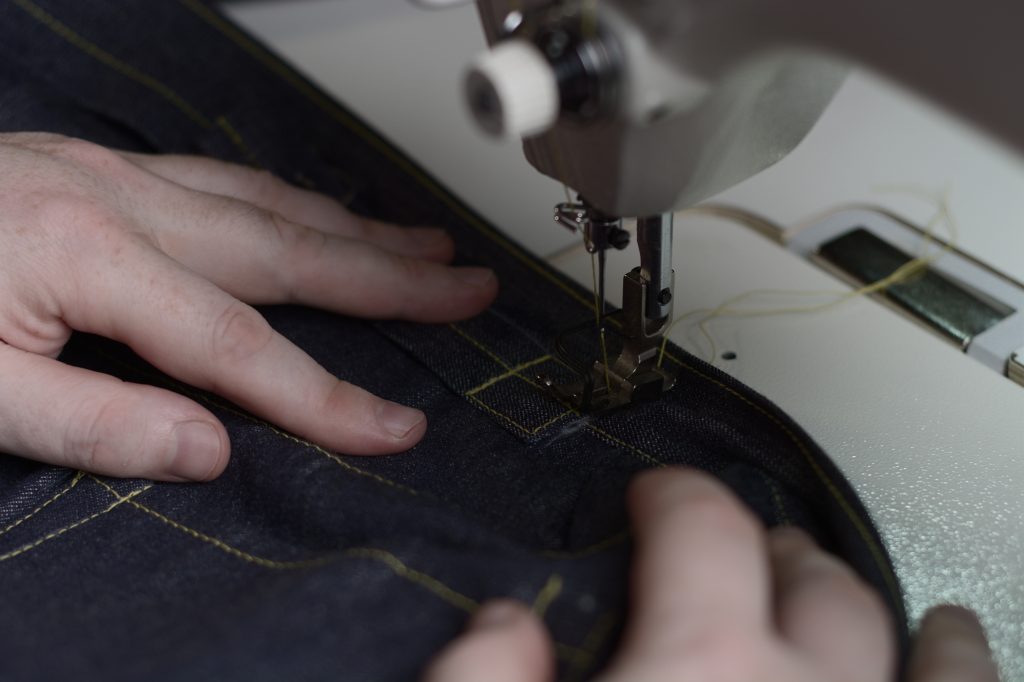
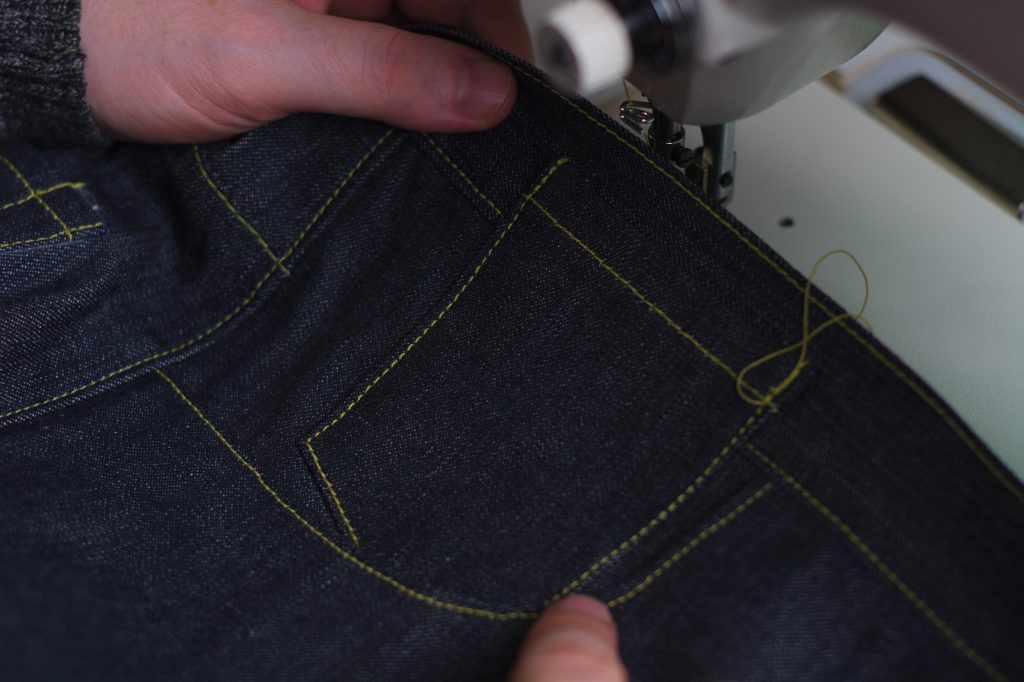
Keeping everything in place firmly using your fingers, sew across the length of the cinch belt from end to end.
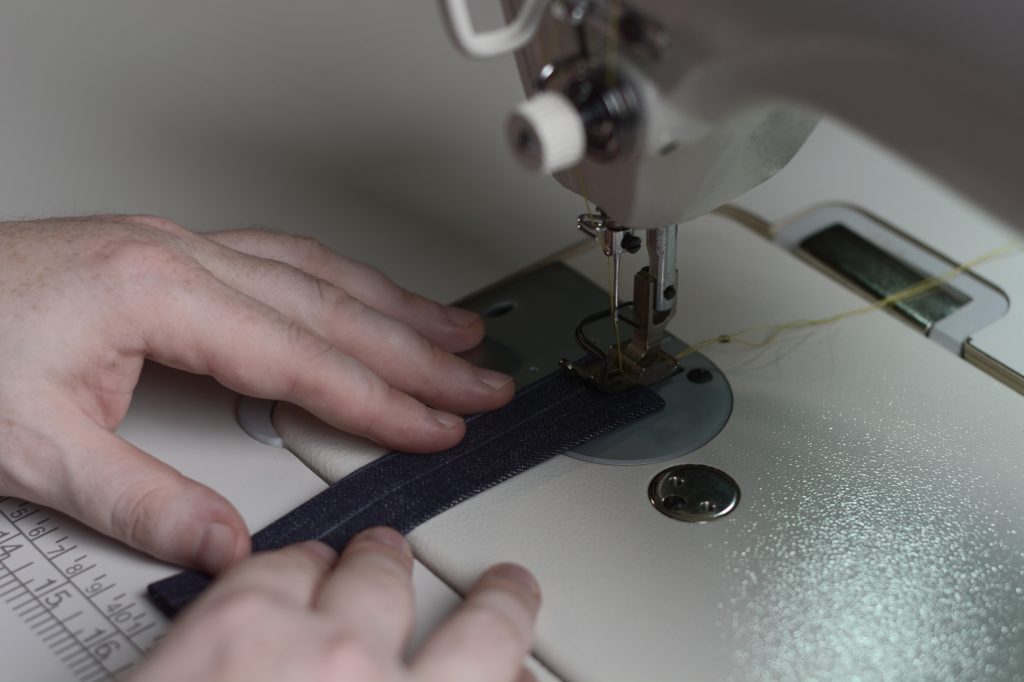
If everything has been drafted correctly, you should have the stitches aligned with the selvedge underneath (yours may have more or less selvedge beyond the stitching than I do).
Now take up the left cinch belt (the selvedge should be pointing down when you look at it from the right side).
Slide the buckle on, ensuring it’s facing the correct direction, and overlap the back on itself by about 1″.
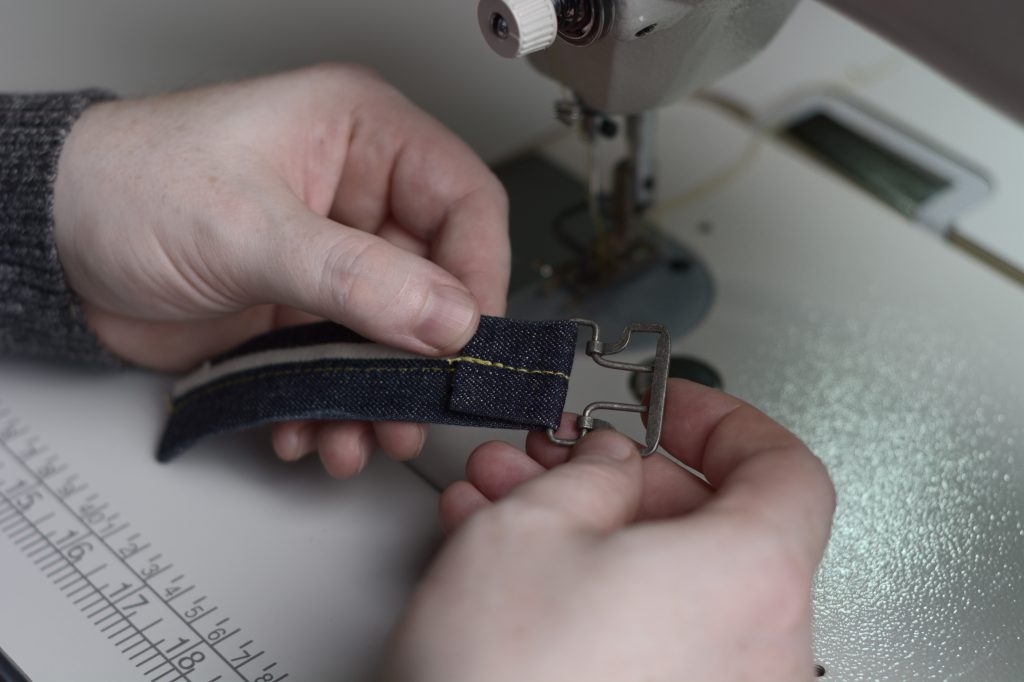
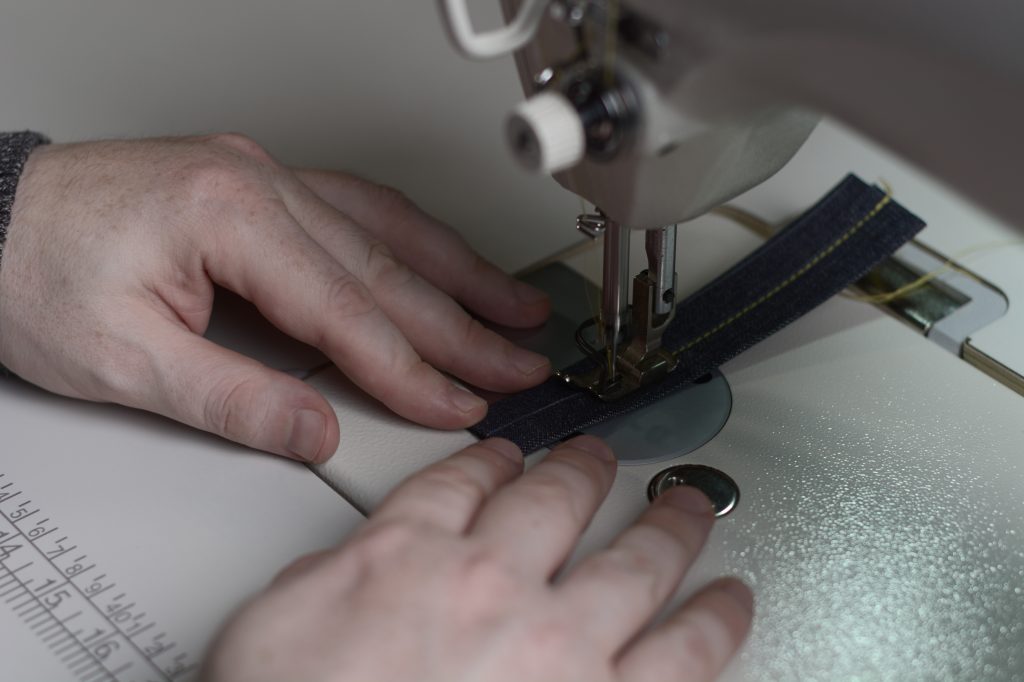
Secure the buckle by top stitching through all layers. If you have a zipper foot, this is a good time to use it, though I tend to use a regular foot and just be super careful about not running into the metal with my machine needle.
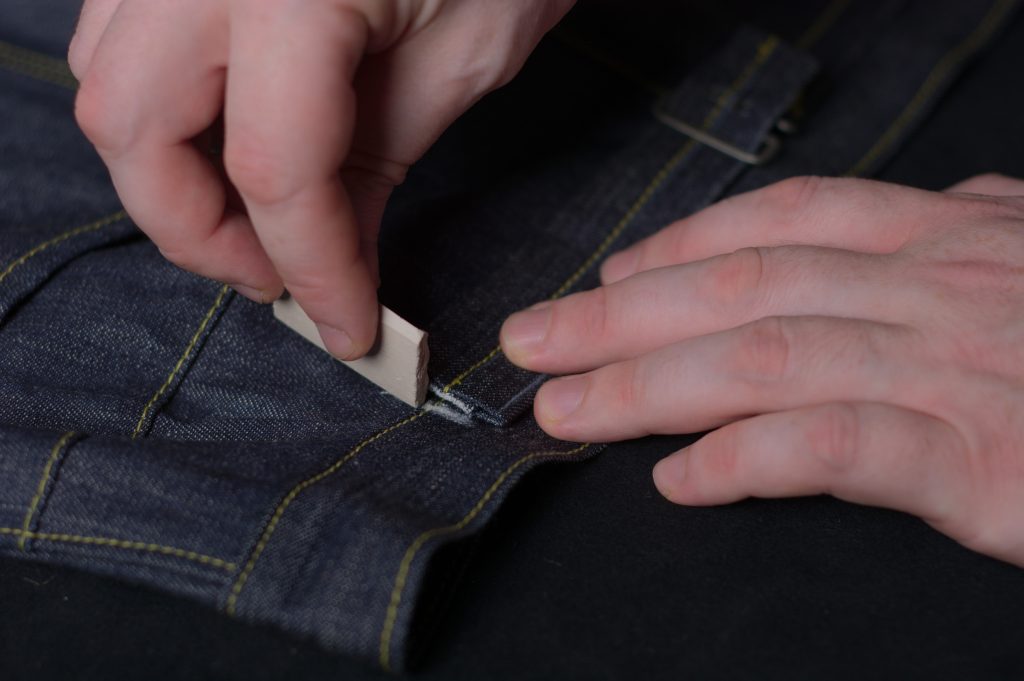
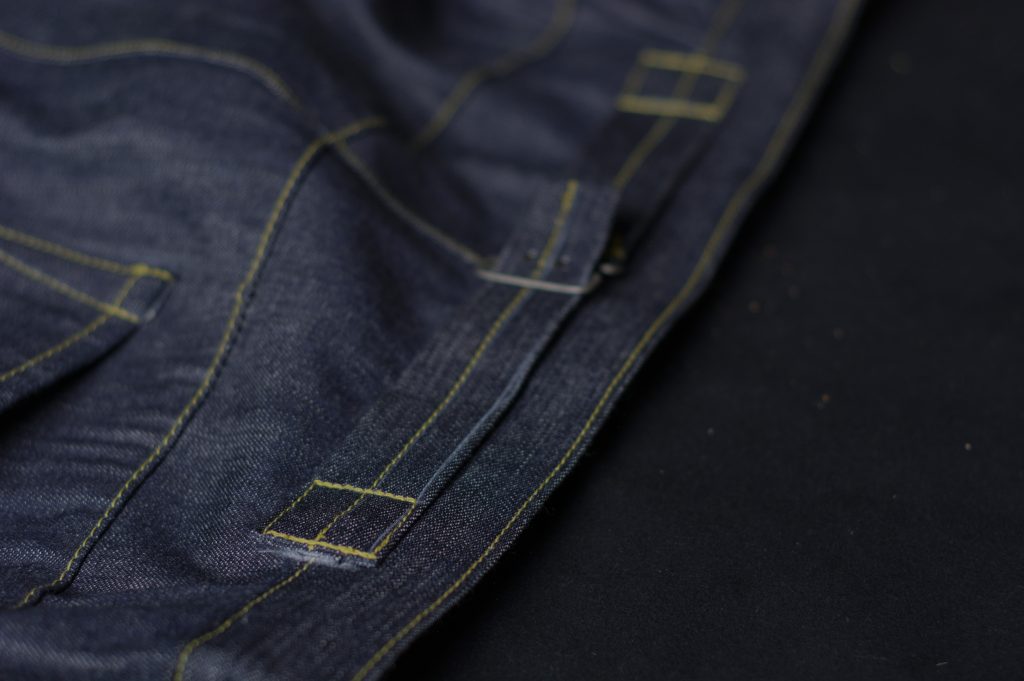
For the 1873 jeans, they used a simple box stay here as shown. I like to double back on the stitching to make it extra secure.

Here’s what it looks like from the wrong side.

Now with the right cinch belt oriented correctly, secure it in the buckle with about an inch extending past it.
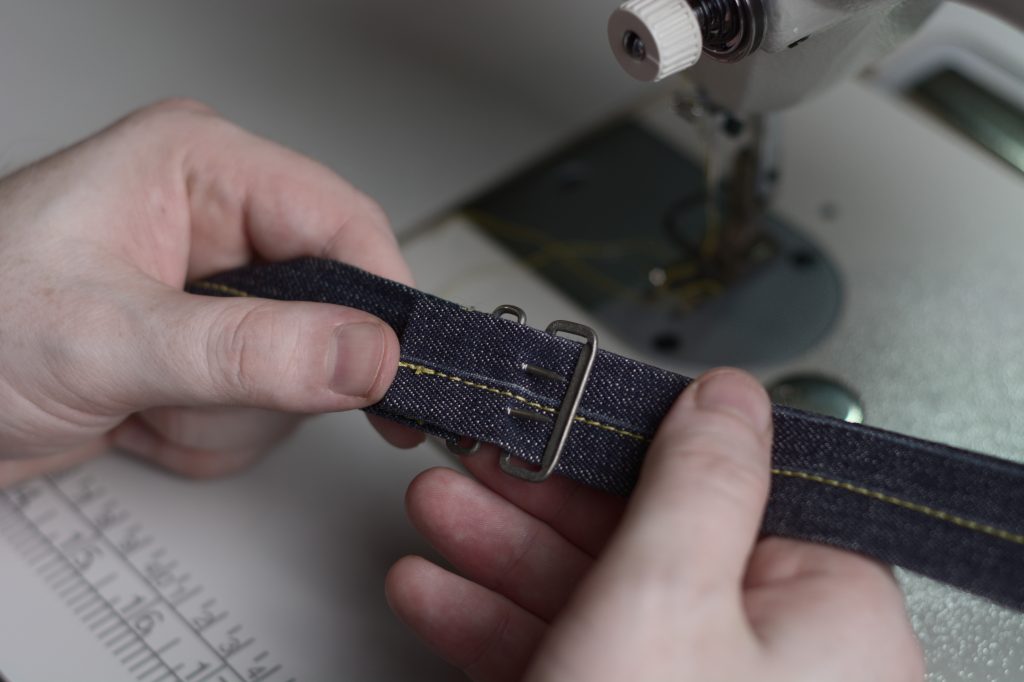
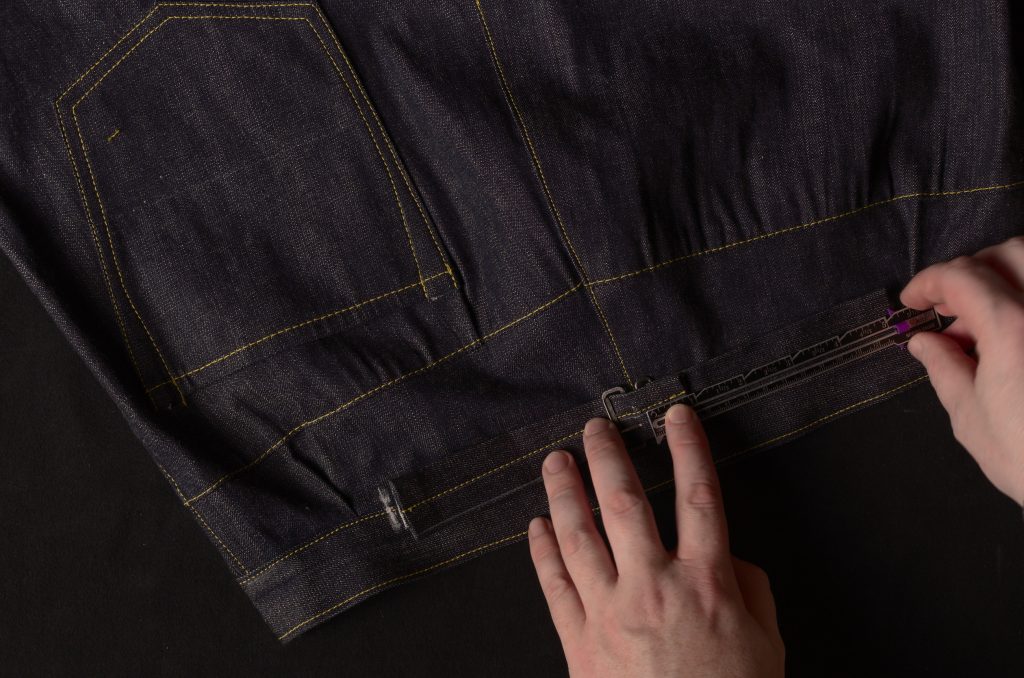
Place the entire back cinch assembly and place it on the jeans, centering it vertically on the waistband seam, and horizontally centering it as well. Take measurements from the center back to each end to ensure they’re the same. When you’re happy with the look, mark the end positions in chalk on the waistband.
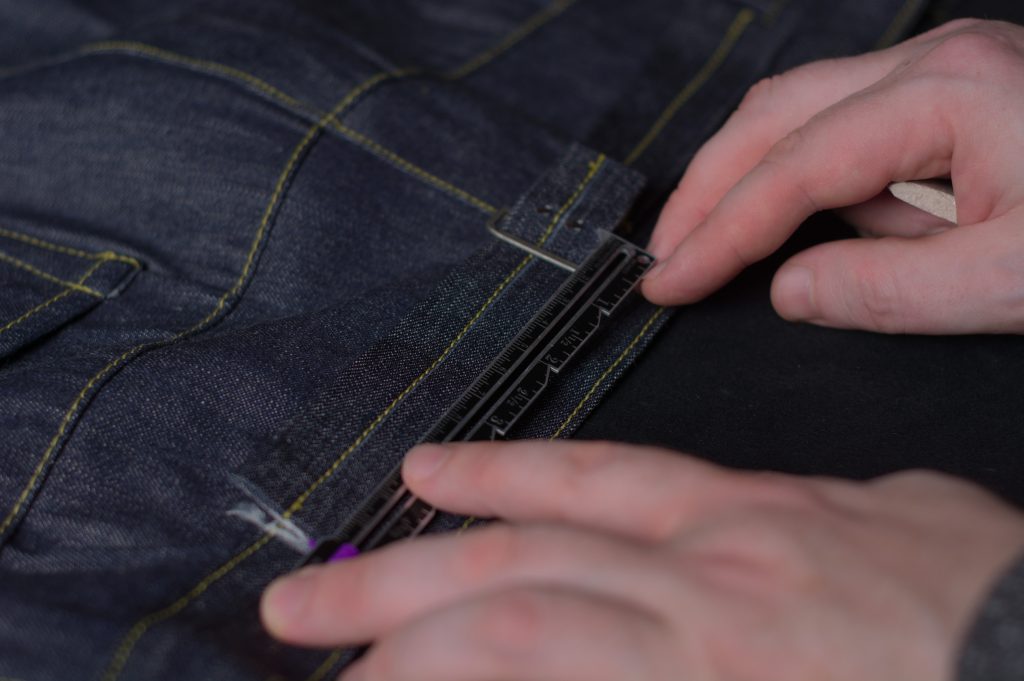
On the back cinch itself, make vertical lines 1″ from each end.

Moving everything over to the sewing machine, make sure your back cinch belts are aligned still, and then sew box stays at each end, about 1/8″ from the edge of the belts, and across the lines you just made.
And that completes the back cinch belts, as well as the sewing portion of the jeans construction.
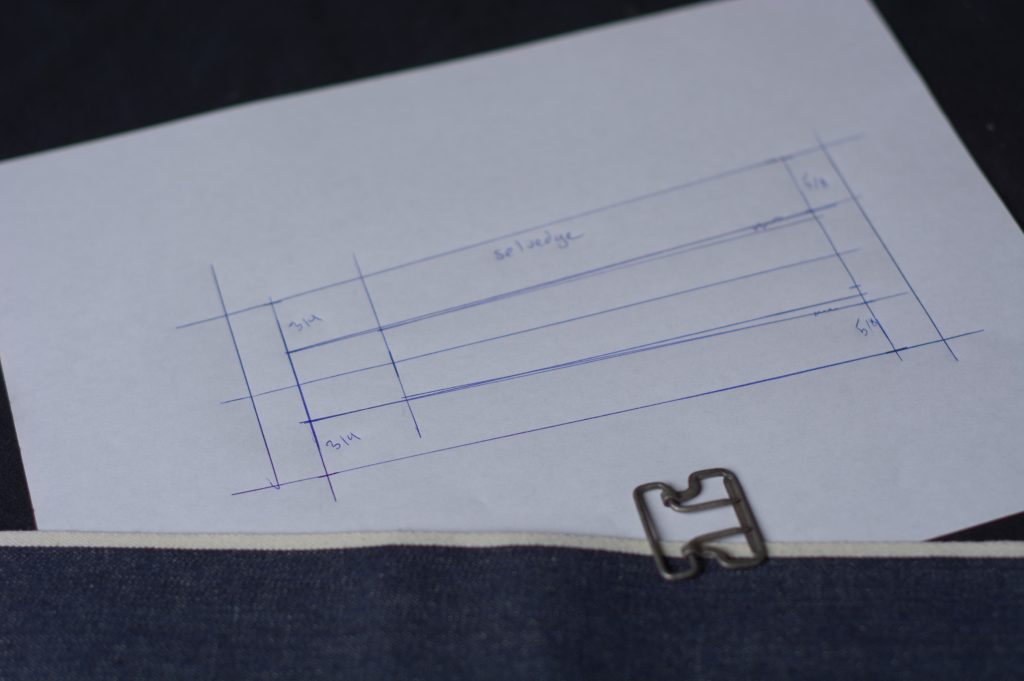
Drafting the Back Cinch Belt
Drafting the back cinch, used on the 1873 model and other more recent models, is pretty simple, with a slightly complex method of adding the seam allowances.
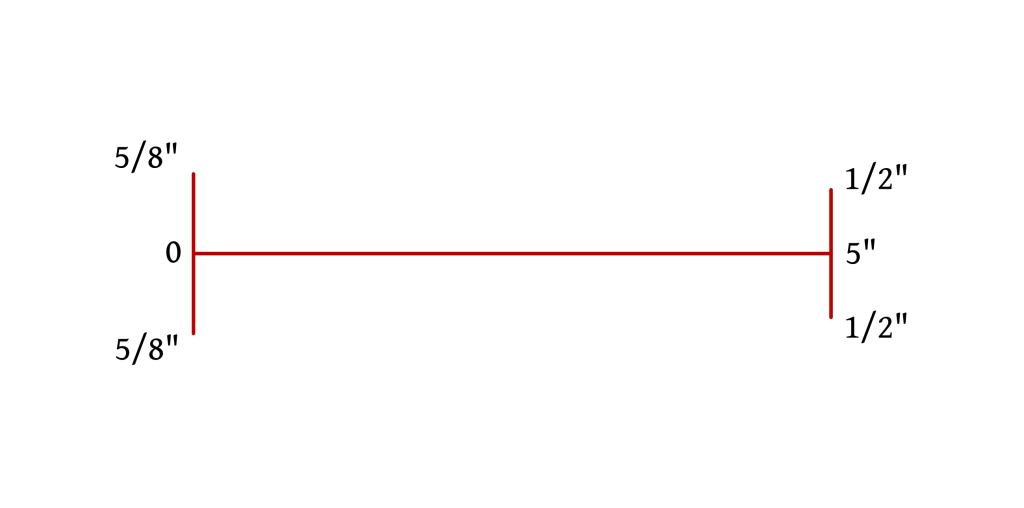
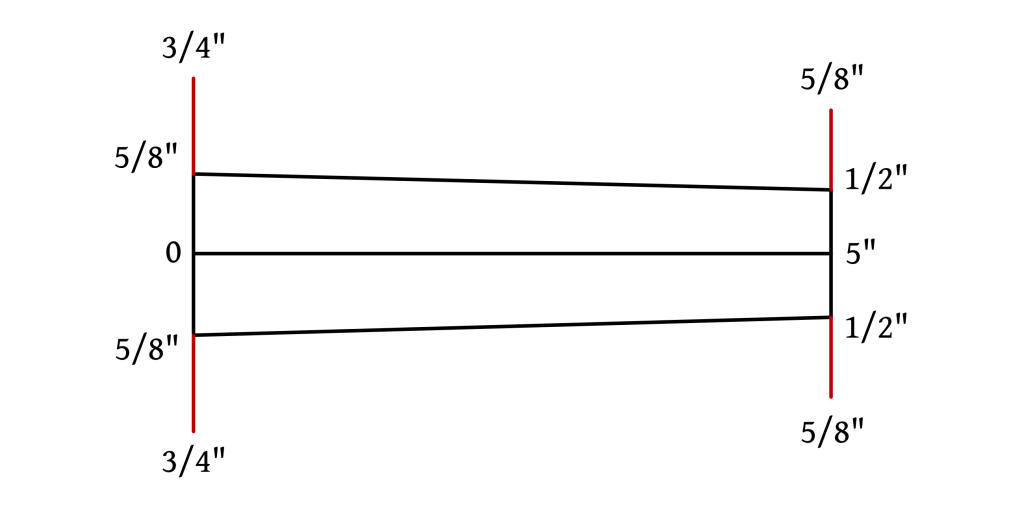
First, draw a horizontal line from 0 to 5″. Five inches is a good length for the back cinch, though for larger sizes you may wish to make this a little longer (or use the graduated rulers to determine the length.
Then mark lines square at each end. From 0 measure 5/8″ up and down, and from 5 measure 1/2″ in either direction. The 1/2″ end is pretty standard, giving you a final 1″ width that fits most buckles, but you can play around with the widths at 0 if you wish.
Draw in the outlines as shown. So far you’ve got the entire finished size of the back cinch.
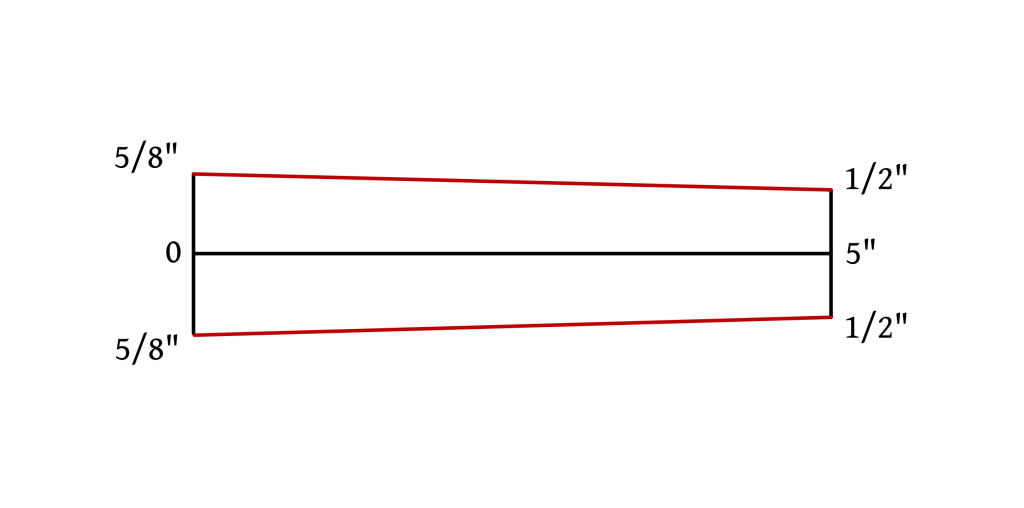
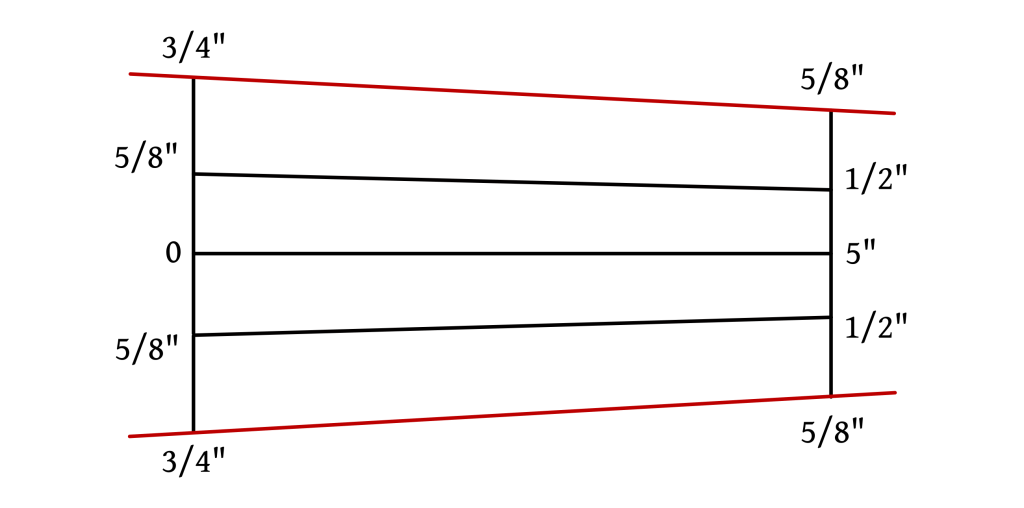
We want the selvedge edge to fall just below the horizontal center line, so that makes for some interesting seam allowances.
- Extend the vertical line from 0, 3/4″ on each side.
- Extend the line from 5 a further 5/8″ on each side.
Draw in the top and bottom seam allowances, extending them a bit in both directions.
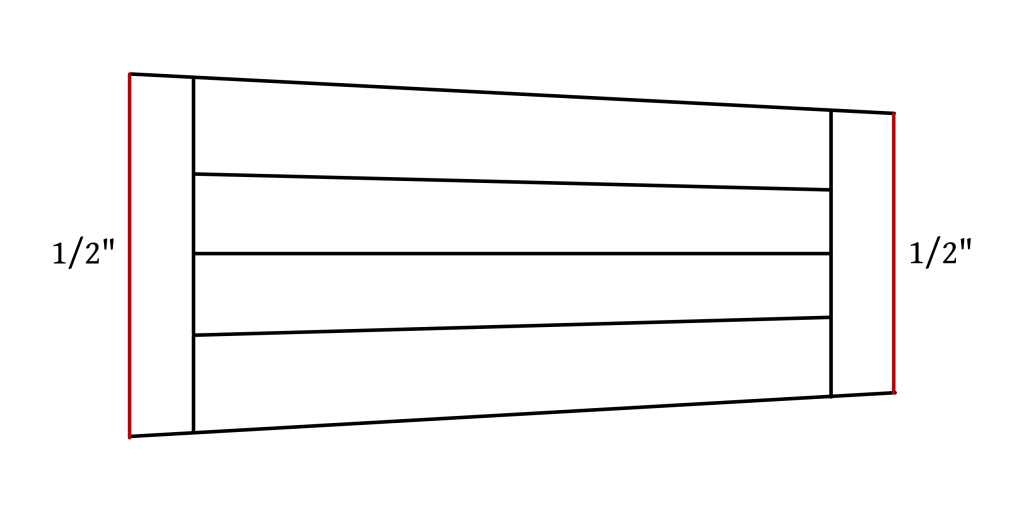
Finally, add a 1/2″ seam allowance on both ends. This completes the draft for the back cinch. You’ll want to cut one of the long edges on the selvedge.
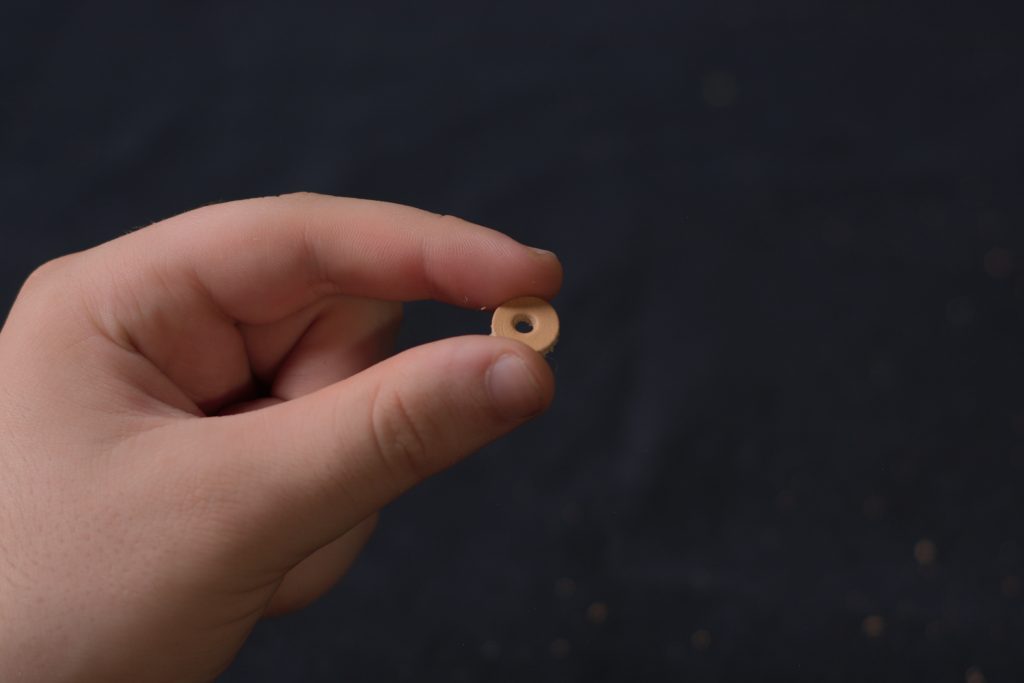
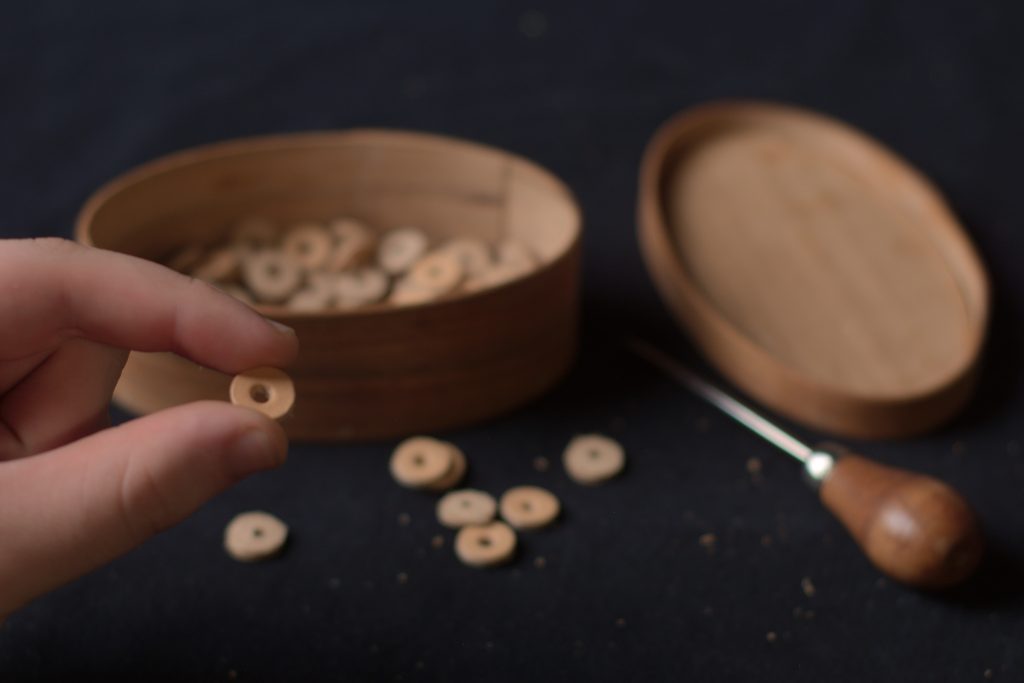
Leather Washers
I like to add some leather washers to the inside of my rivets and buttons to take some of the stress off of the denim and prolong the life of the garment. These are definitely optional, and while not found on the original 1873 jeans, I decided to add them for the benefits given above.
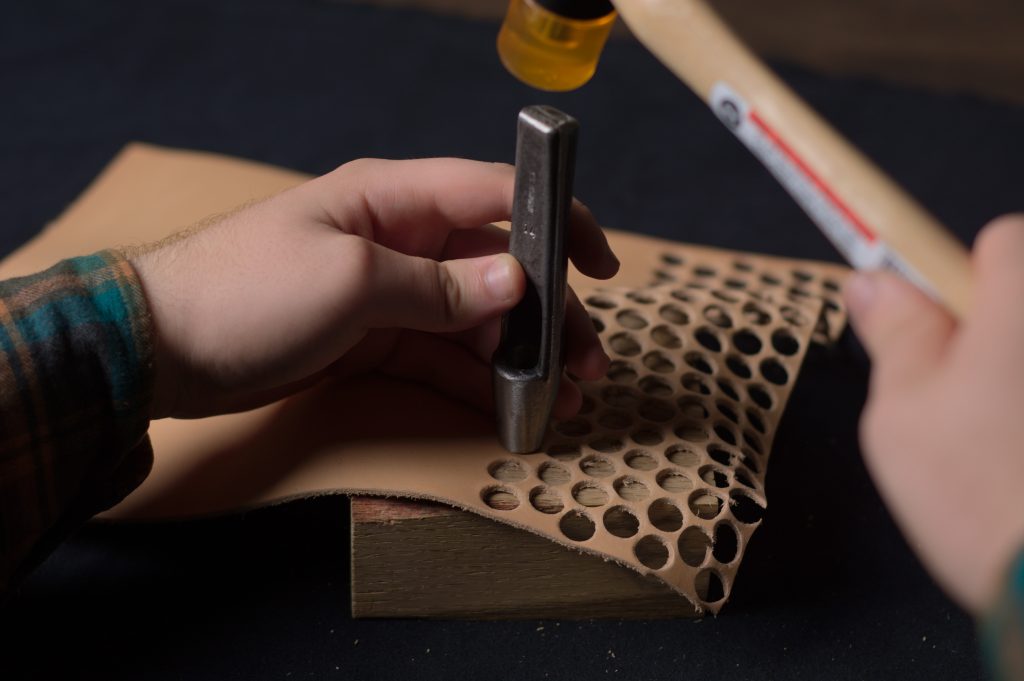
You’ll need some fairly lightweight leather, maybe 2 to 4 ounces in weight, an awl, a 1/8″ hole punch, a large 1/2″ leather punch, and a small hammer or mallet.
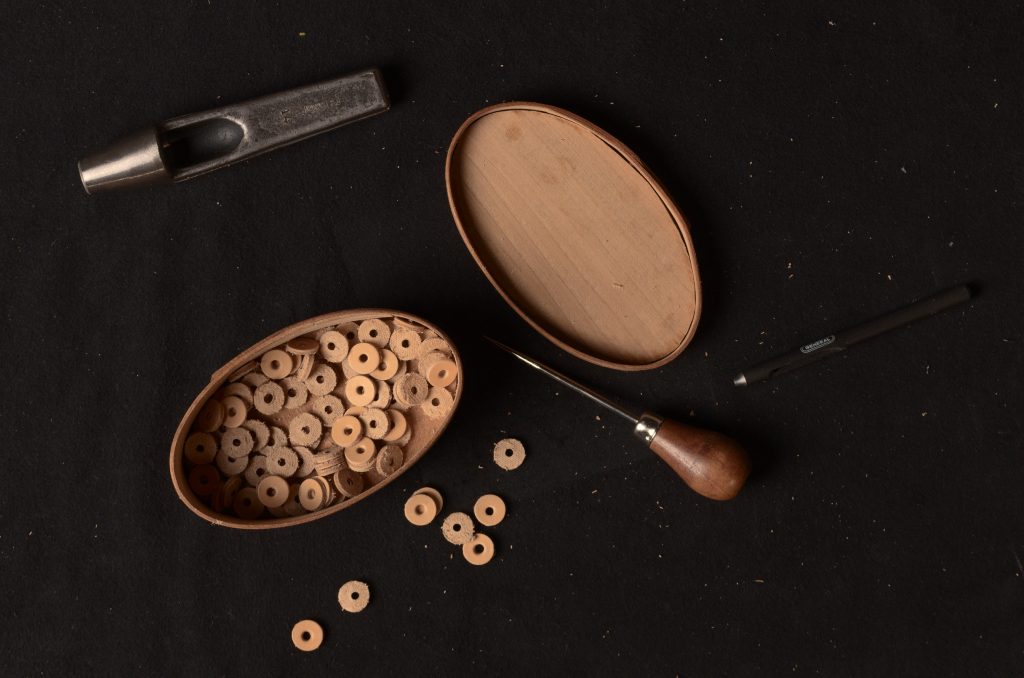
Begin by cutting out the washers using the 1/2″ hole punch.
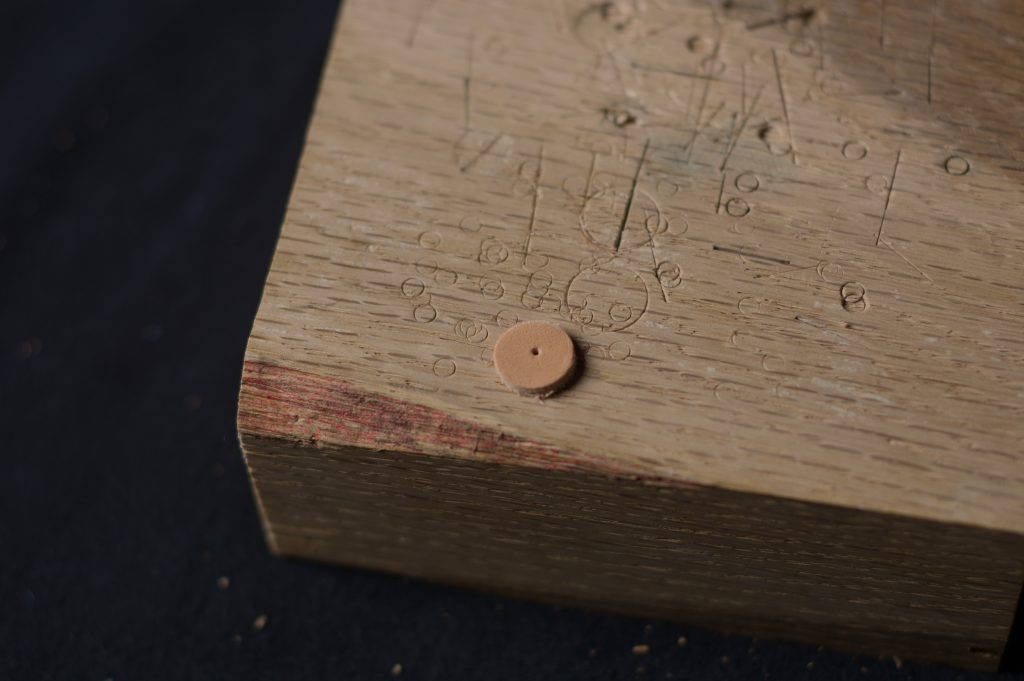
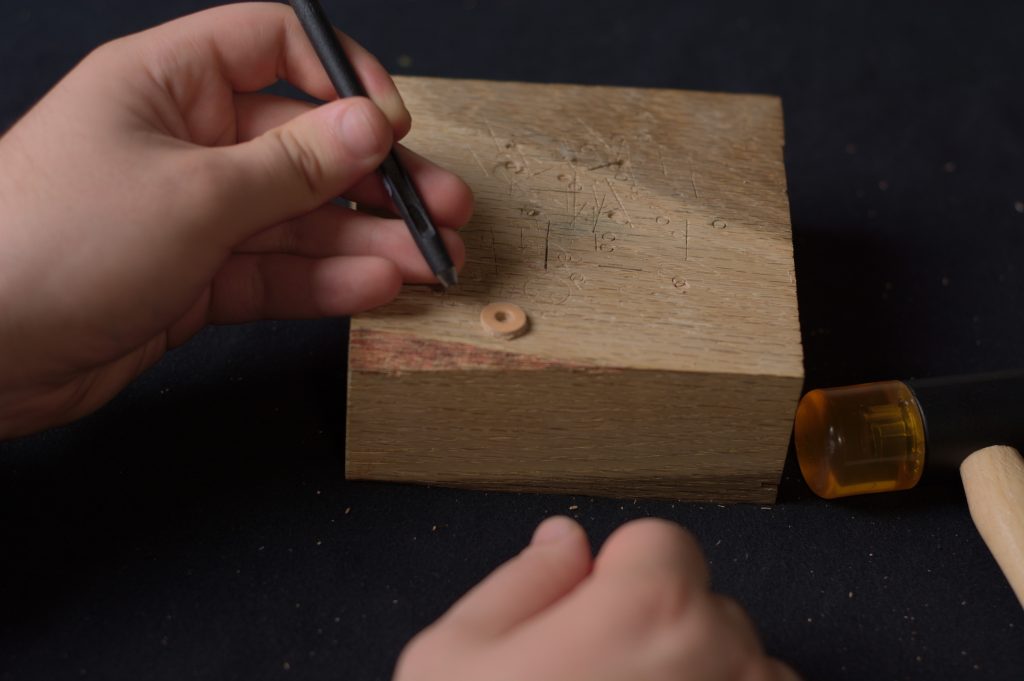
I found finding the exact center with the 1/8″ hole punch to be a little challenging, so I use an awl to find the center instead. It doesn’t have to be perfect but should be as close as possible.

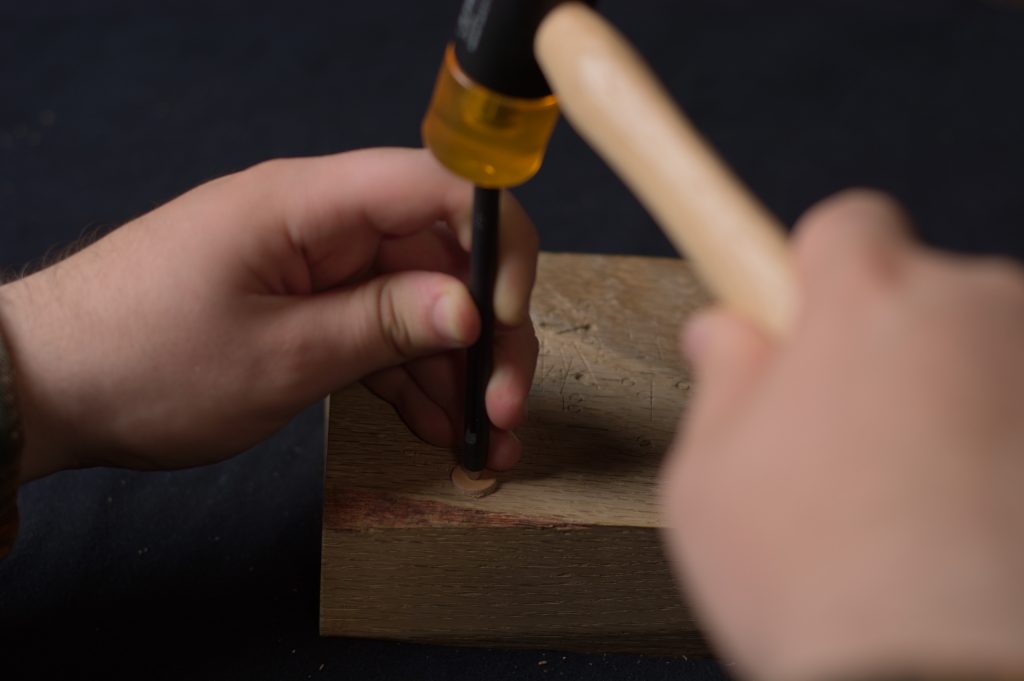
Then center the 1/8″ over the washer, using the hole from the awl as a guide, and chop out the center hole.
And that’s all there is to it. Cut out as many as you’ll need for all of your rivets and buttons.
1873 Watch Pocket
These are the instructions for installing the 1873 watch pocket, which while similar to the modern version, extends about halfway up the waistband.
Mark off 1/2″ seam allowances along the sides and bottom edge, and 7/8″ on the top edge of the watch pocket lining.
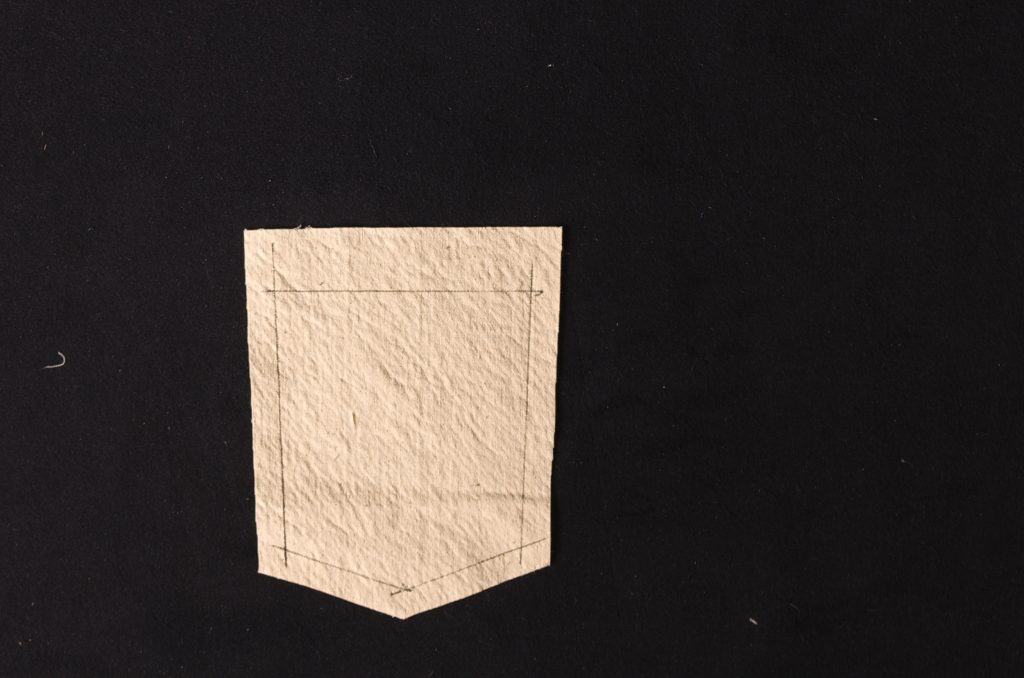
Trim the lining, and then mark out 3/8″ seam allowances on the bottom and sides of the watch pocket, and again 7/8″ along the top edge.
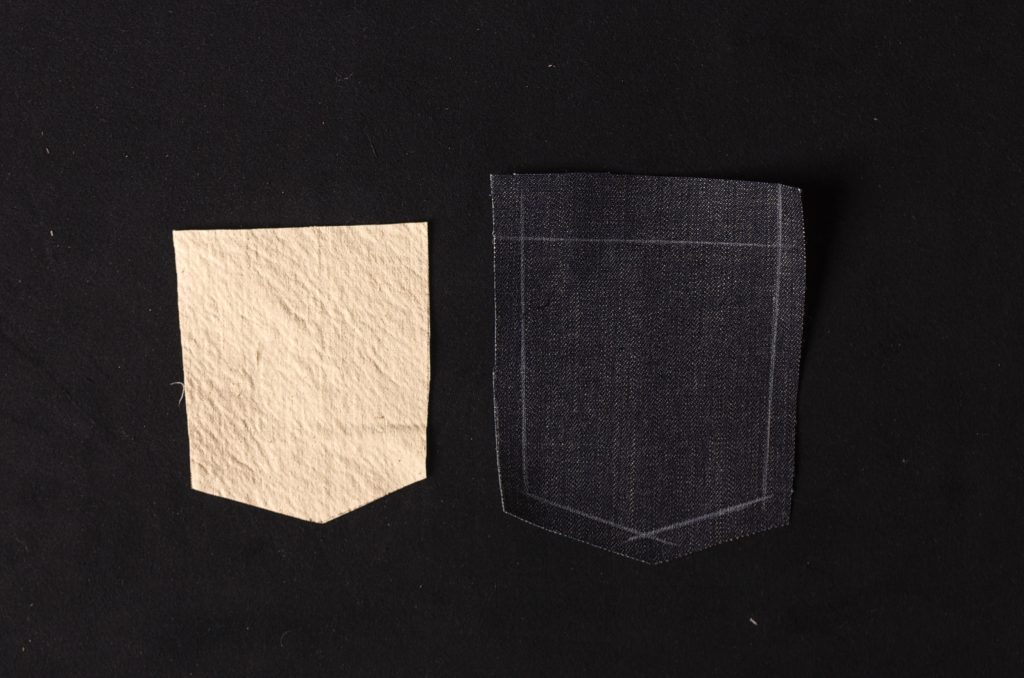
Press the top seam allowance towards the wrong side along the line, and then tuck the raw edge under and press firmly.

Place the watch pocket lining into position. you may need to trim the lining a little further to get a good fit.

Top stitch a single row of stitching about 3/8″ from the top, catching all layers.
Press the remaining seam allowances to the wrong side along the chalk lines.

Attaching the Watch Pocket
Place the watch pocket into position on top of the right front pocket. The top of the watch pocket should extend about midway up the waistband, while the bottom edge should be just below the front pocket opening.
You can pin the pocket in place or just hold it while you sew.
Starting from the left side of the pocket (I accidentally start on the right in the video and run into trouble!), top stitch the watch pocket around the sides and bottom edge, about 1/8″ from the edge.
Then make another row of top stitching about 1/4″ from the first, keeping the stitches parallel throughout.
Here’s the waistband area after top stitching the watch pocket in place.