Author: James Williams
Tailor’s Tacks II
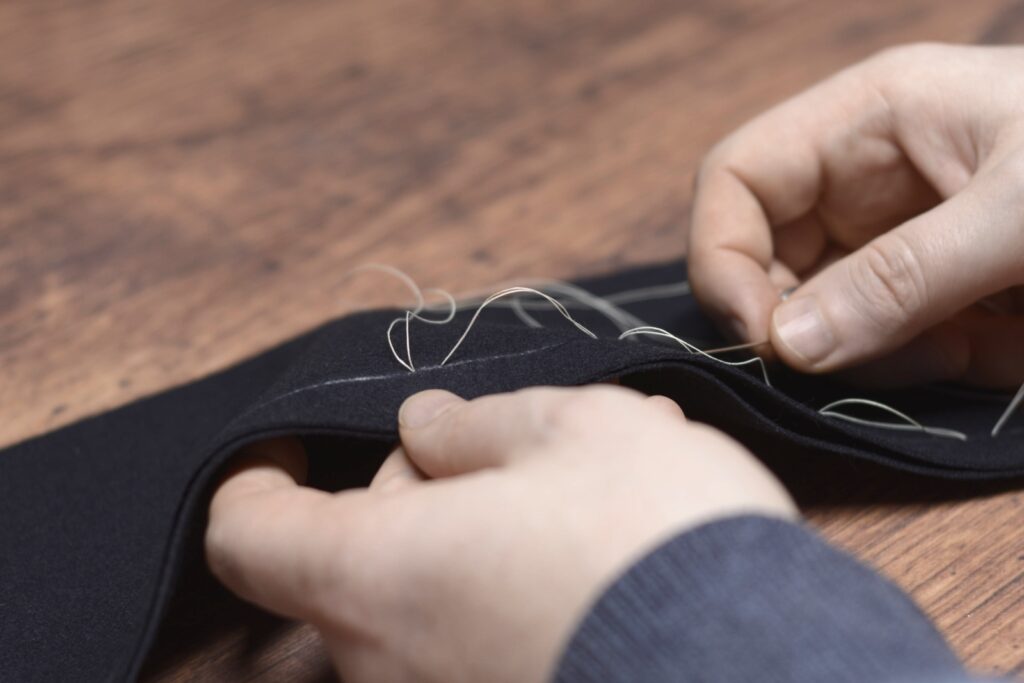
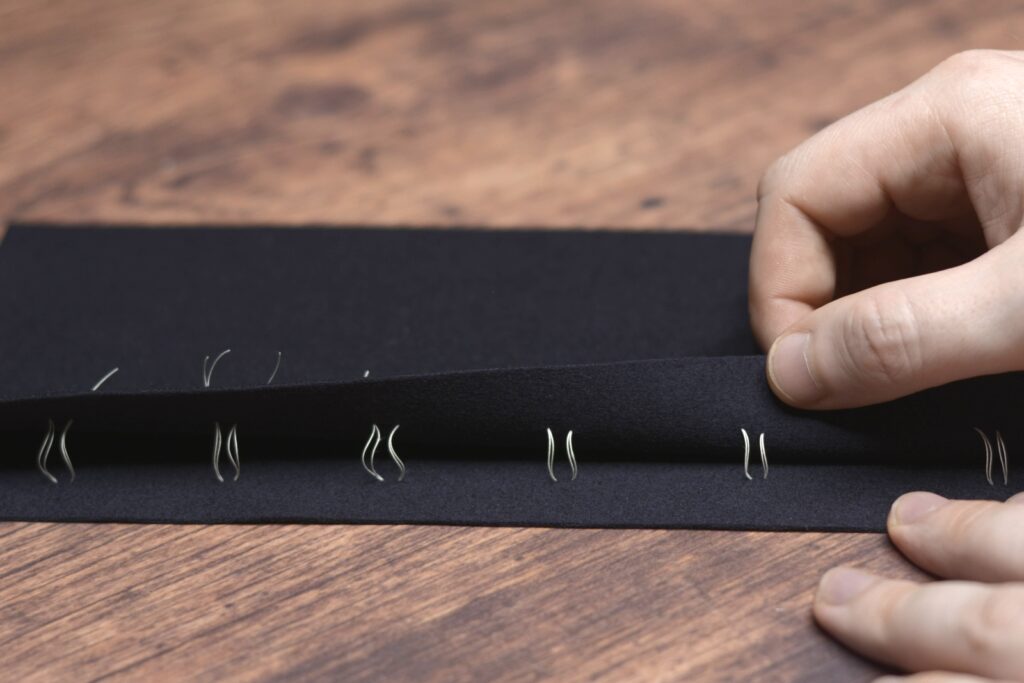
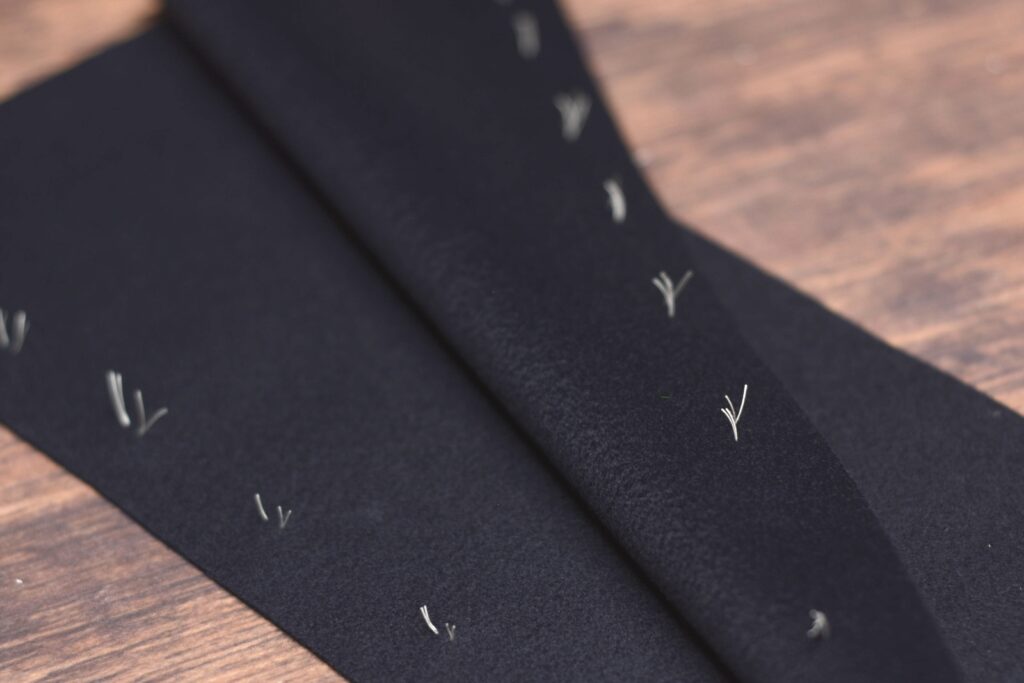
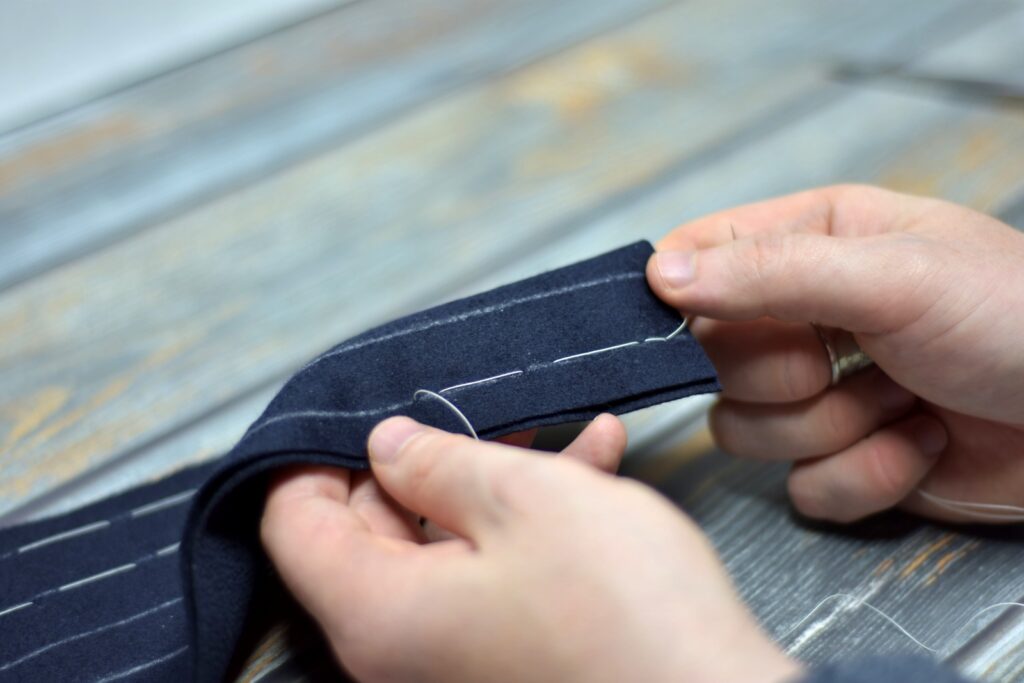
This second version of tacking is similar to the first, except it is meant to mark a single point on your cloth, such as a pocket position or a balance mark.
Begin by making a single stitch with a doubled piece of basting thread.
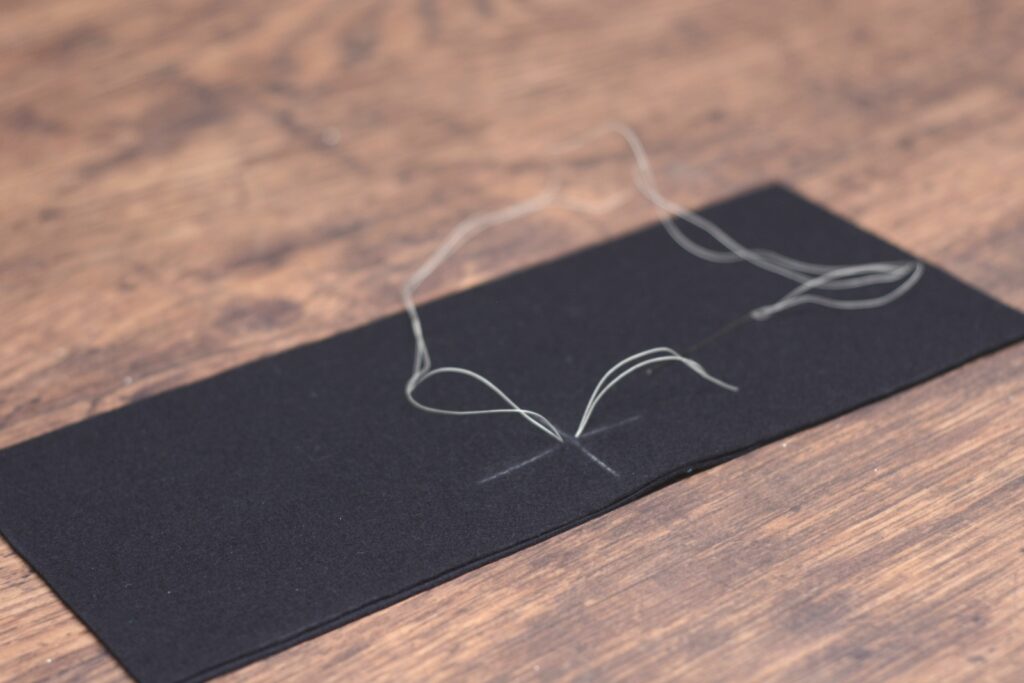
Make another stitch in place, forming a loop about an inch or so tall. Keep the ends of the thread slightly longer than the loop to avoid them pulling out later.
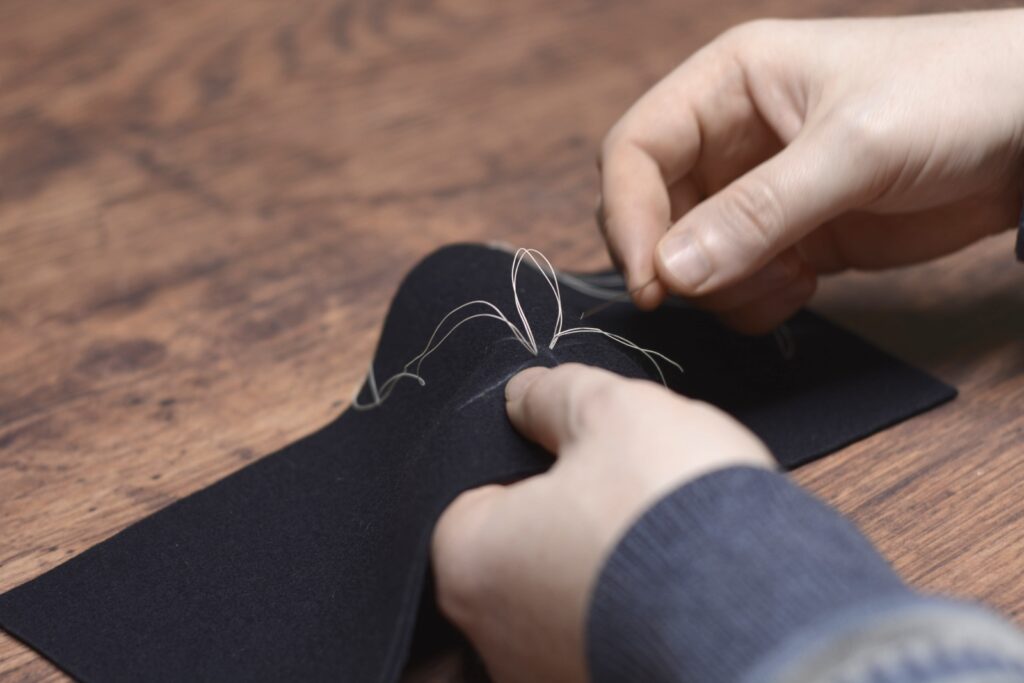
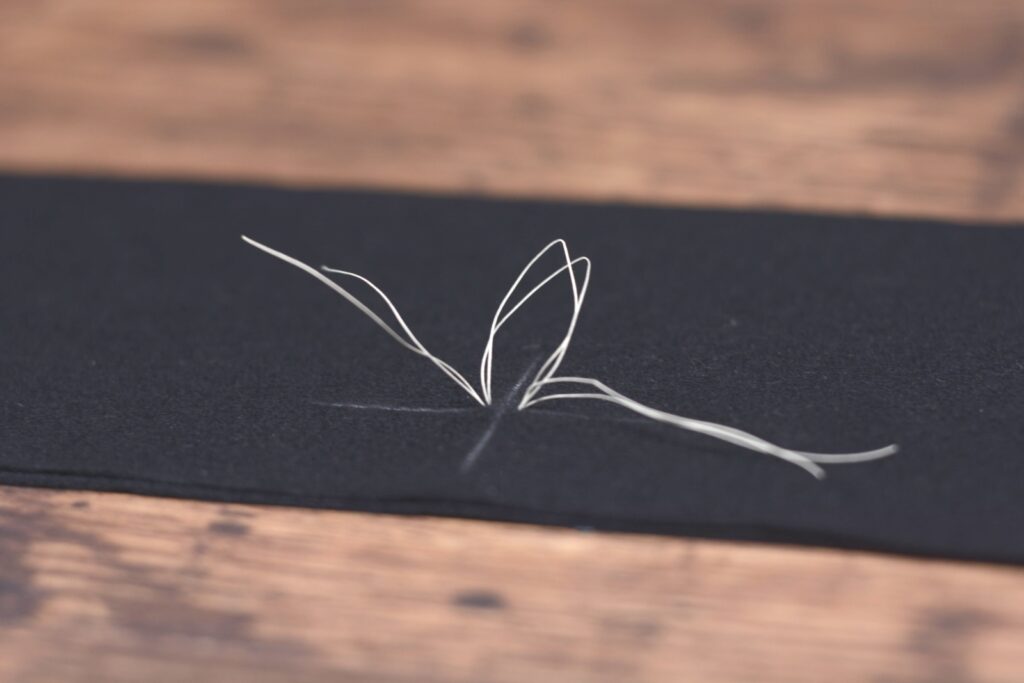
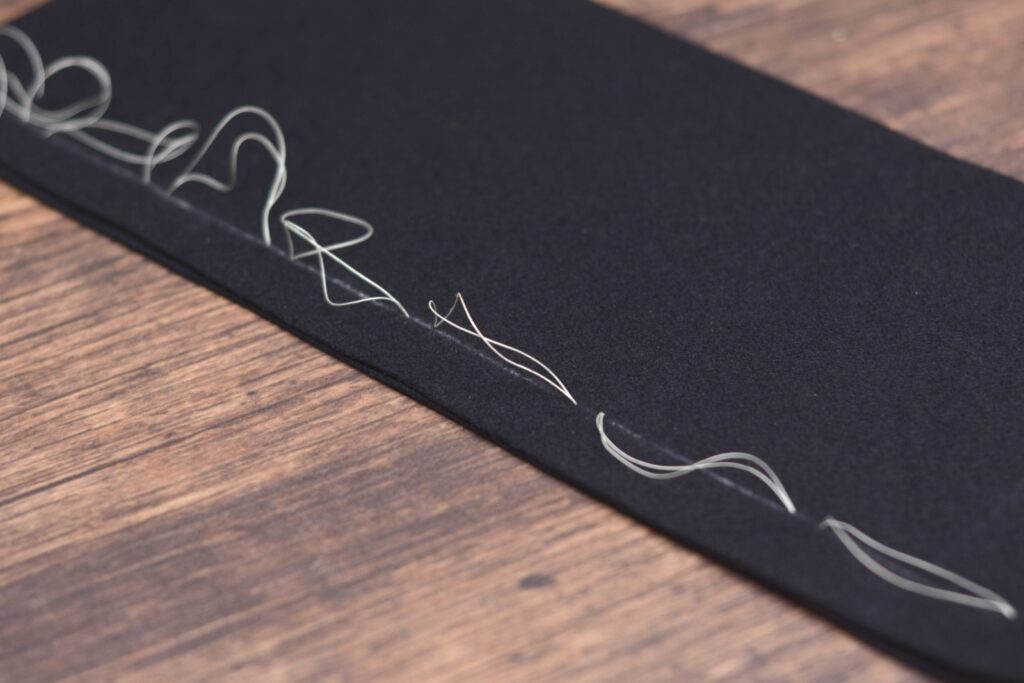
Pull the layers of fabric apart until the threads are taut.

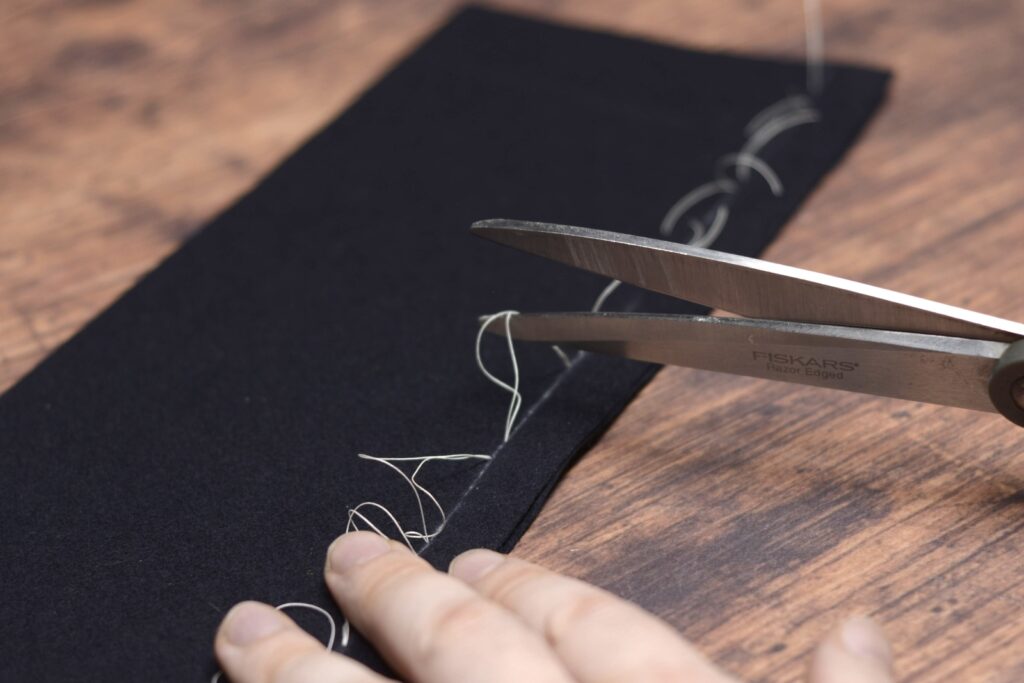
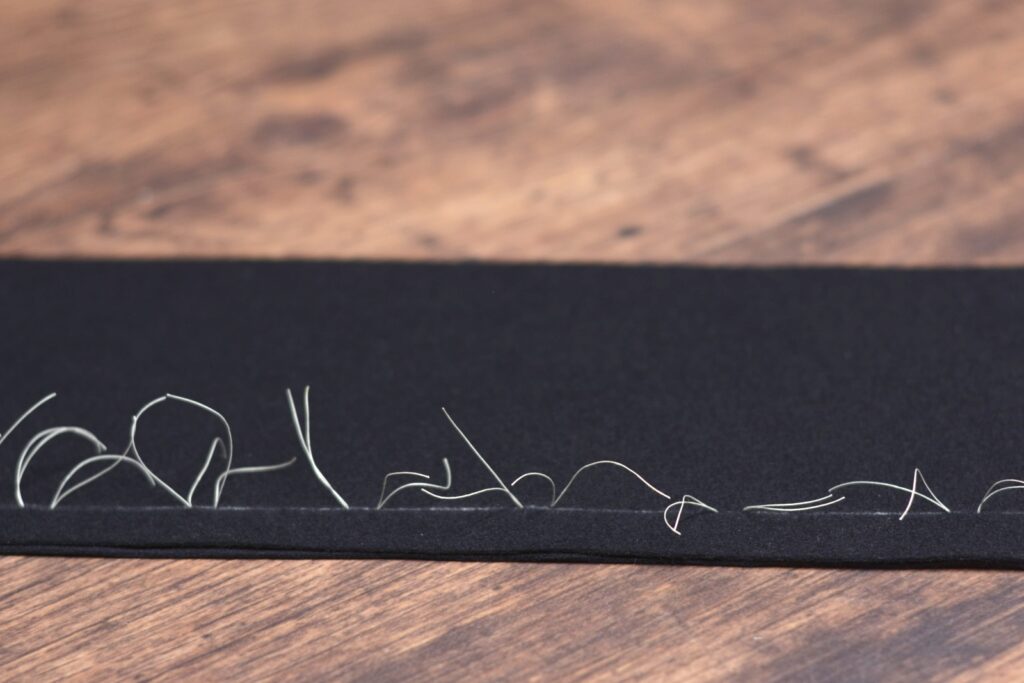
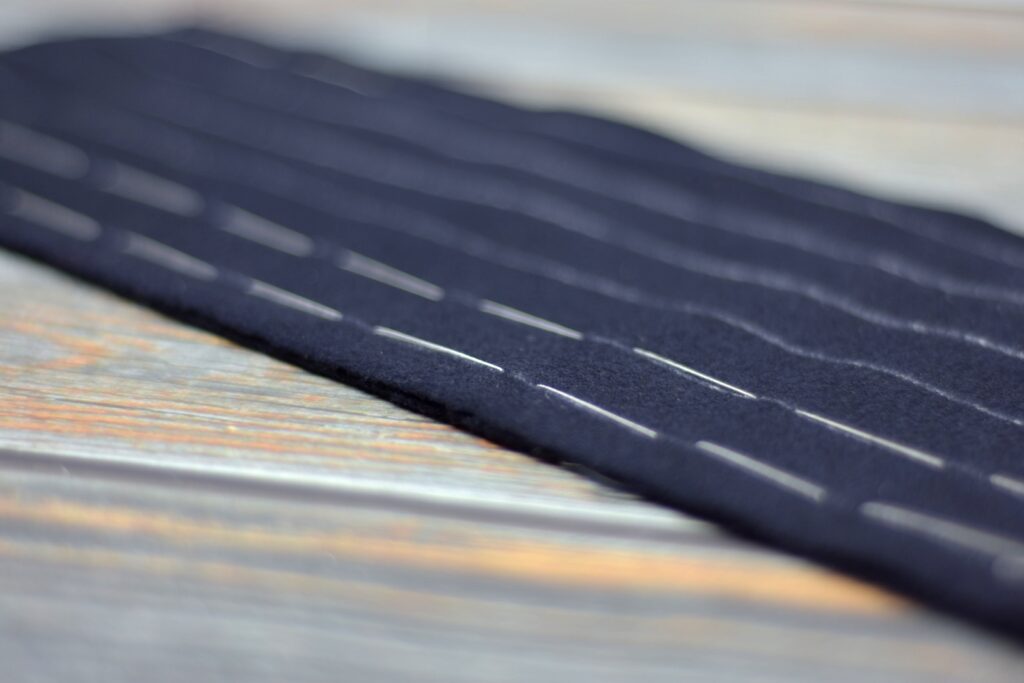
Finally, trim the threads between the layers, completing the tailor’s tacks. These are very durable and should hold throughout the construction process.

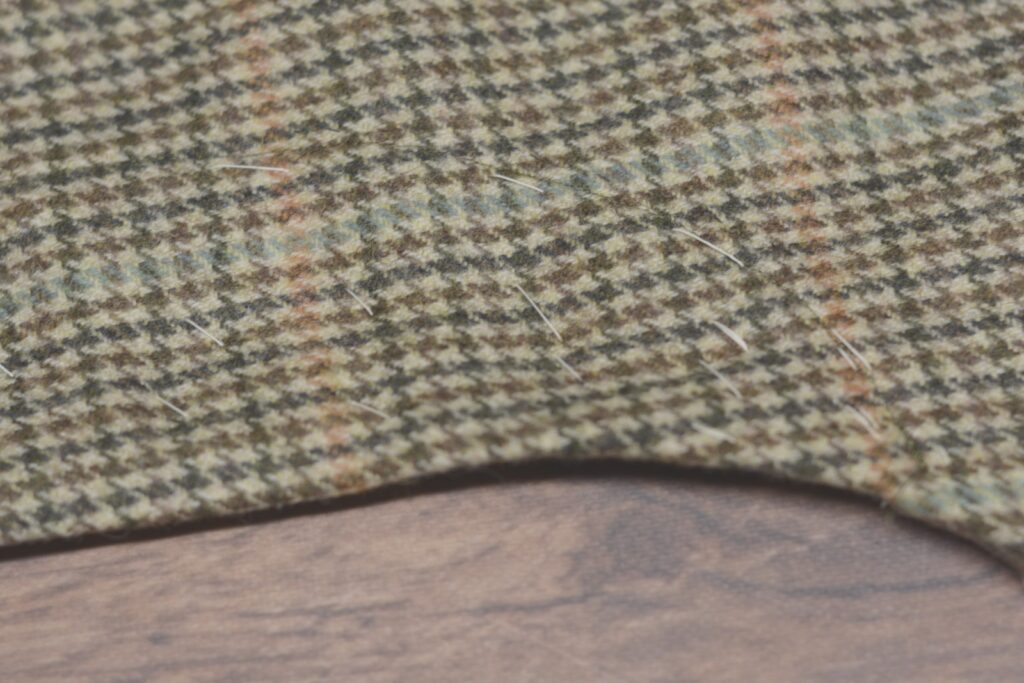
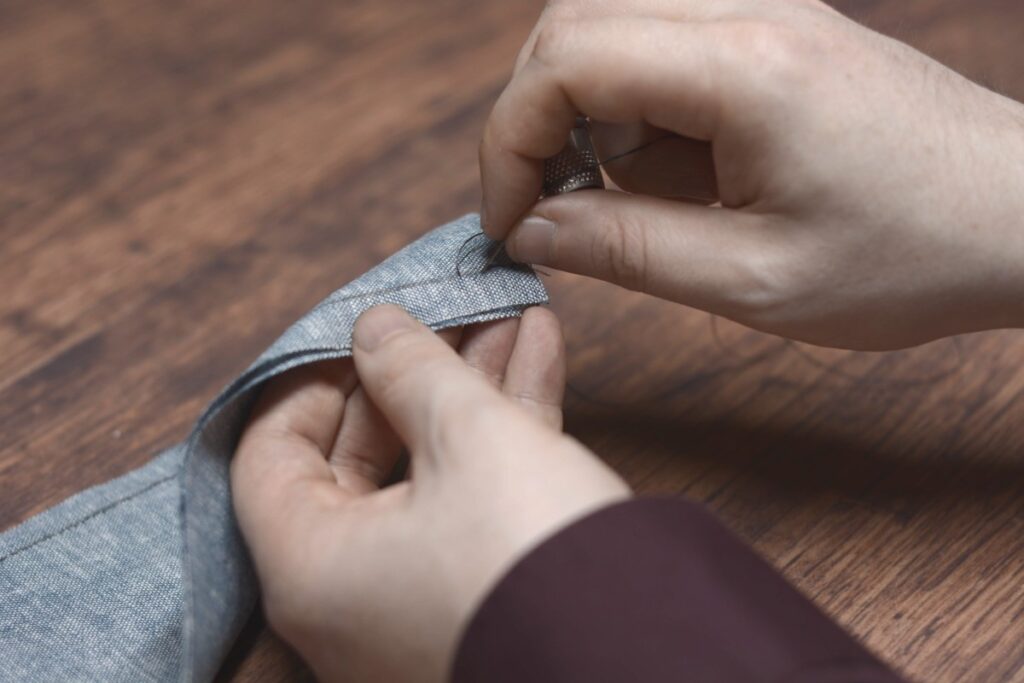
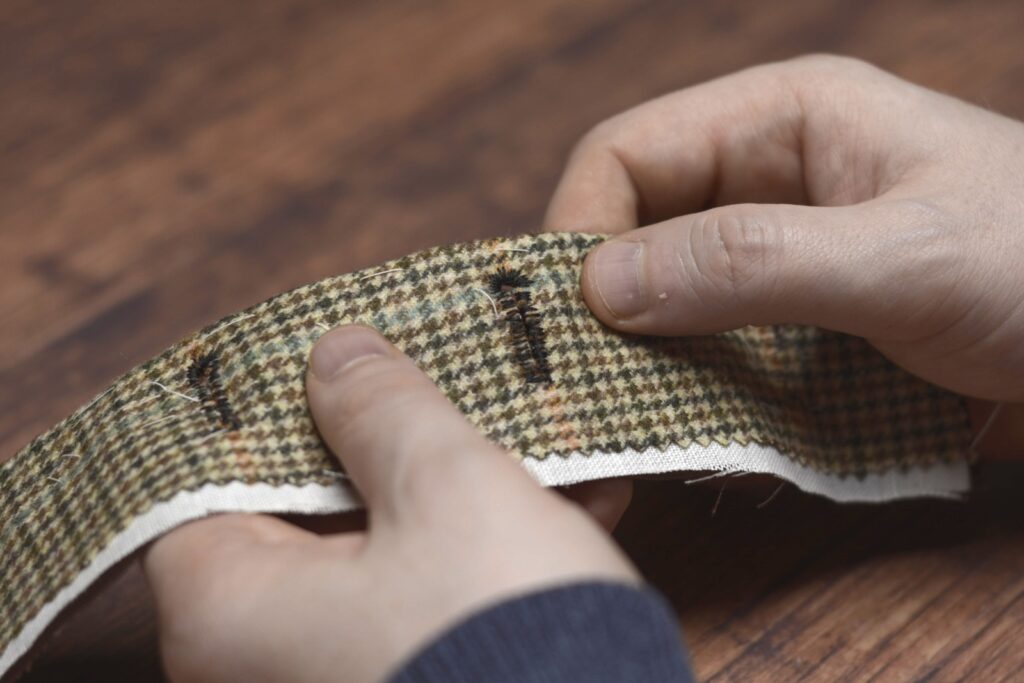
Tailor’s Tacks I
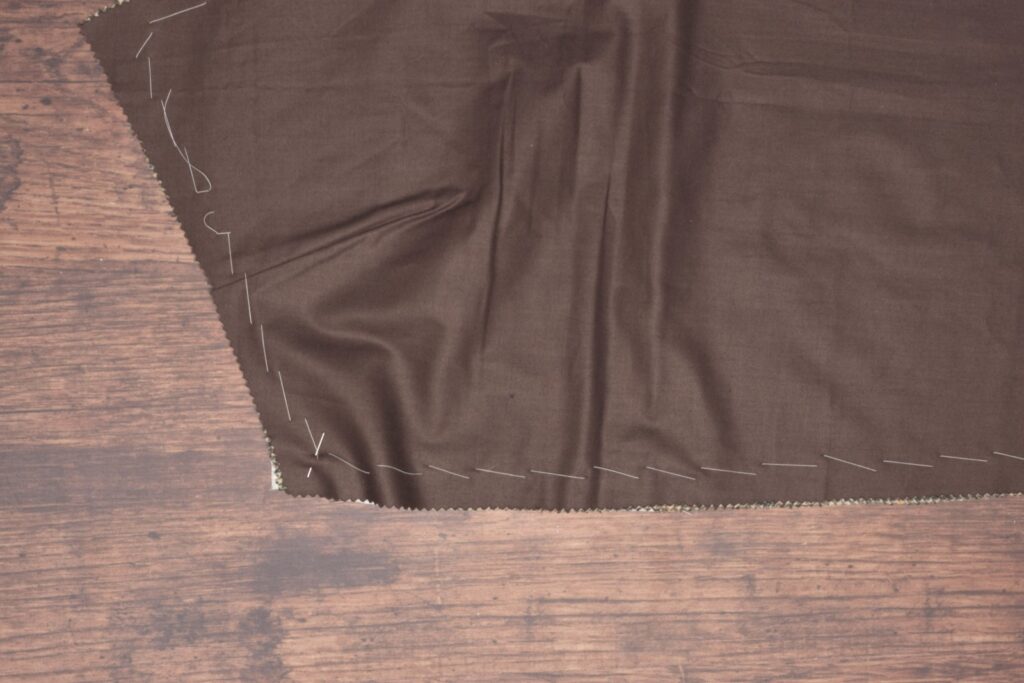
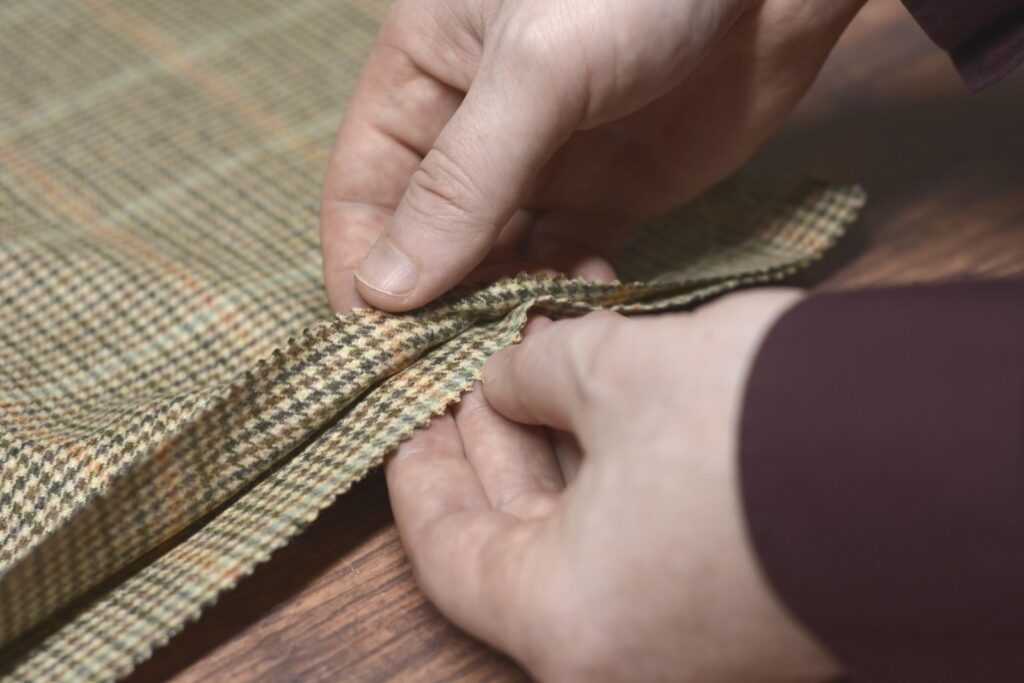
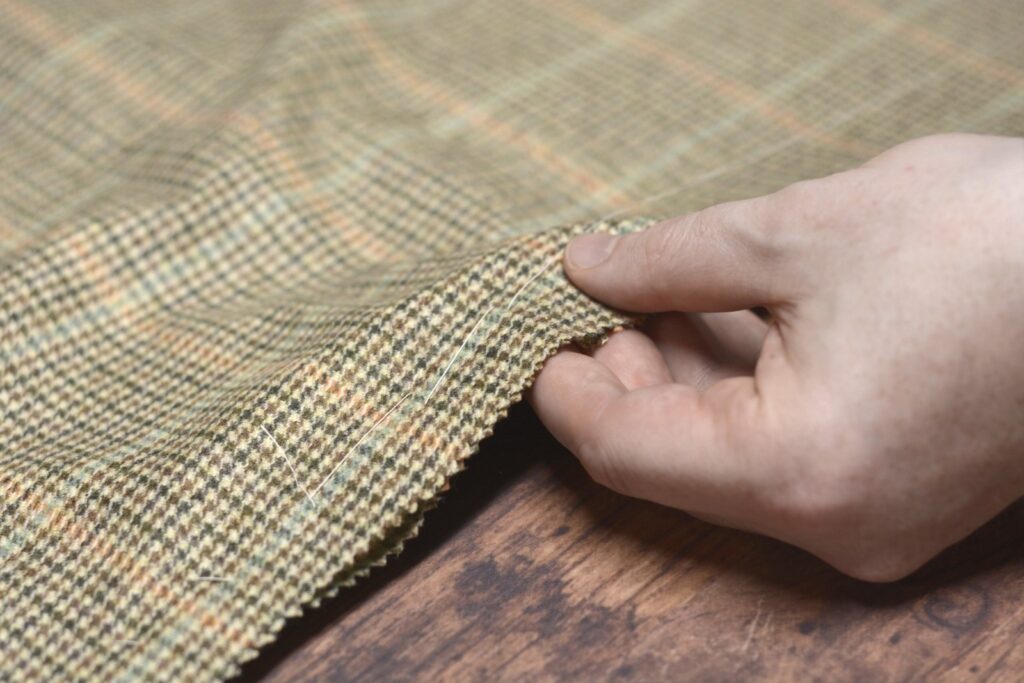
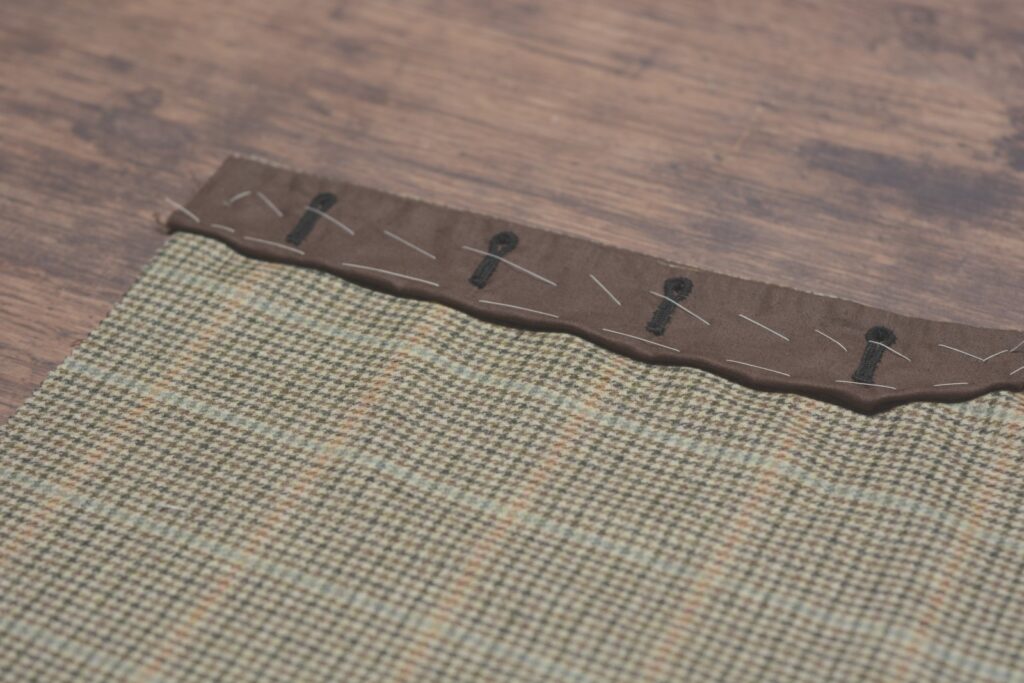
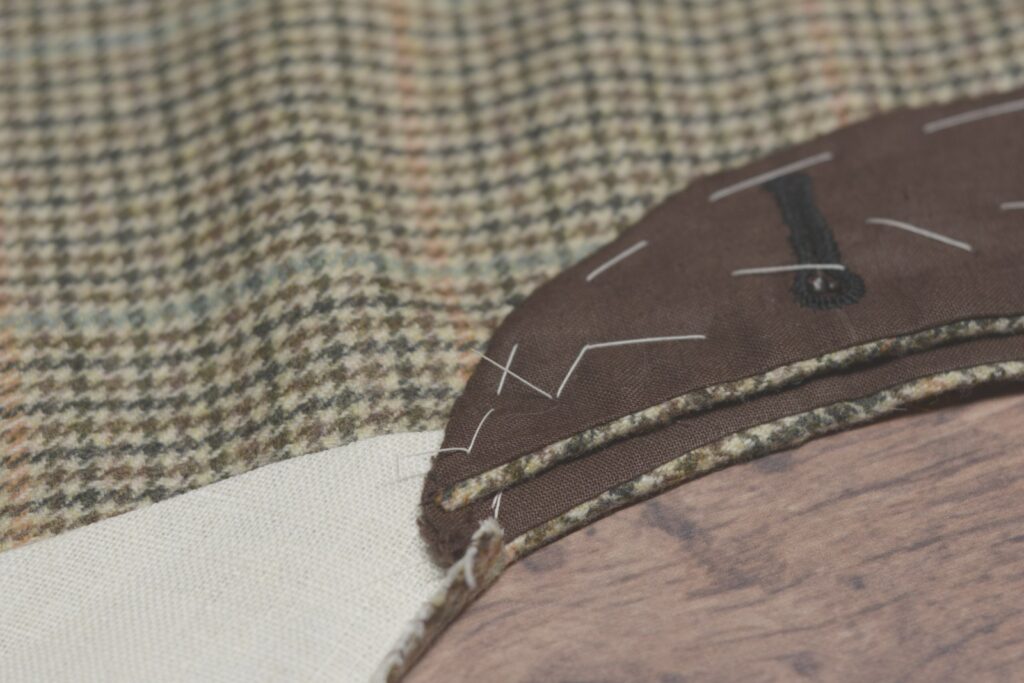
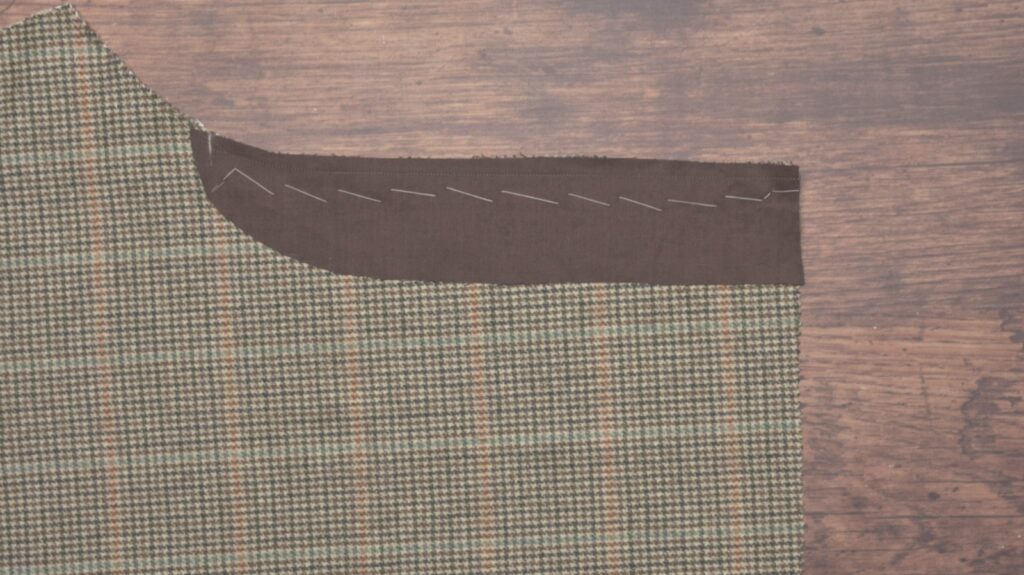
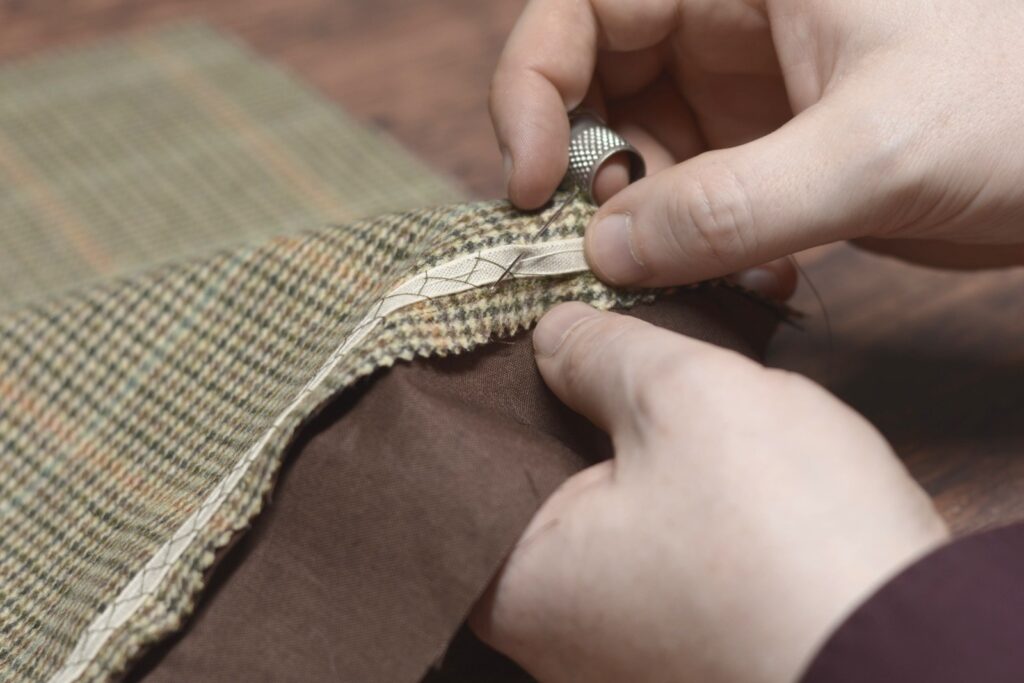
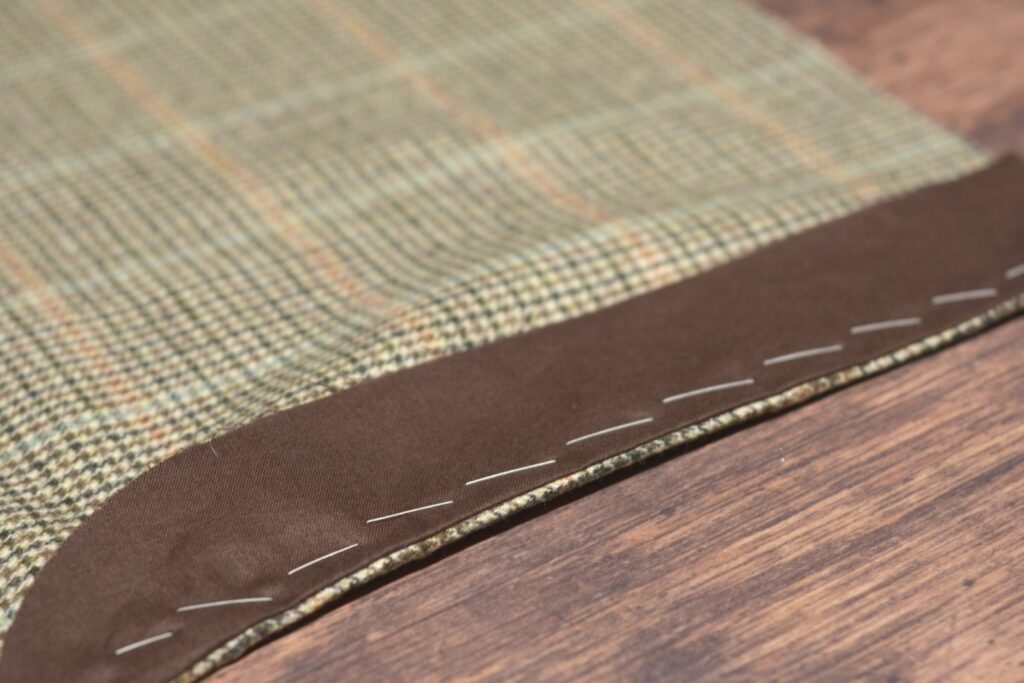
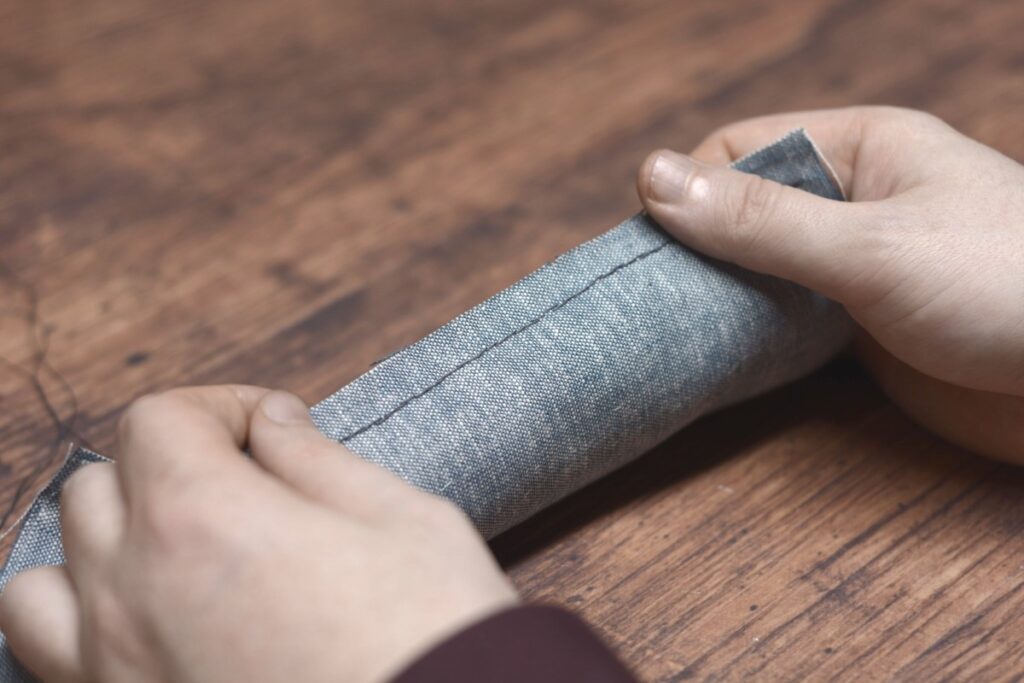
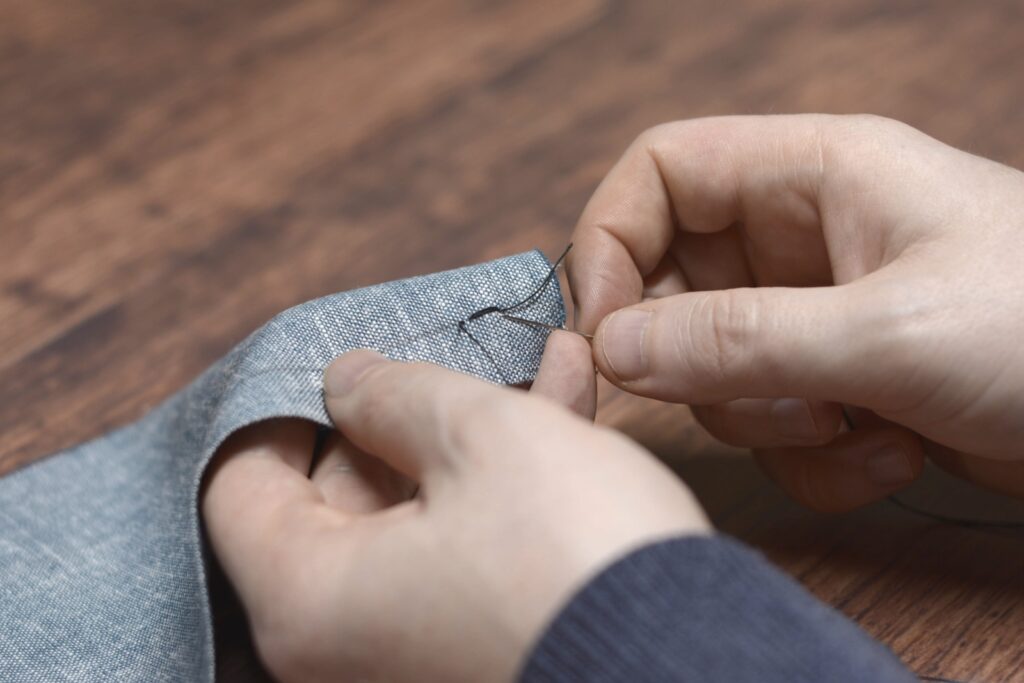
This first type of tailor’s tack is very useful for marking seams along inlays, darts, and other areas where a chalk mark may wear away too quickly, and for transferring these areas to the other half of the cloth when laying out your pattern. You typically need two layers of fabric to make this stitch useful.
Take a doubled strand of basting thread on your needle and make a stitch similar to a straight basting stitch along the seam – only keep the stitches further apart depending upon what you are basting.
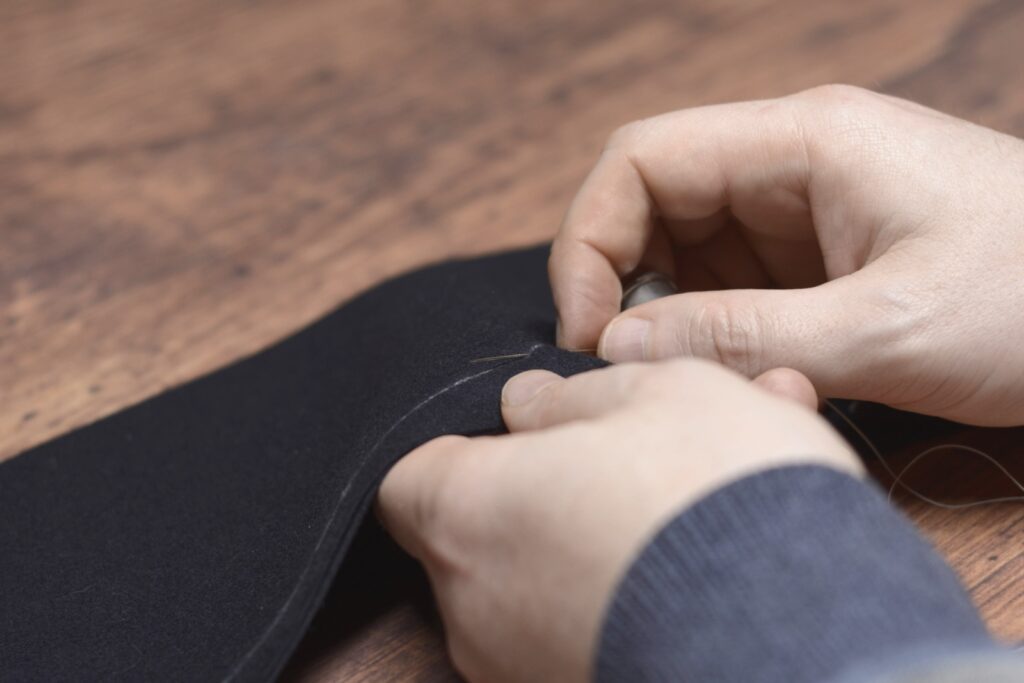
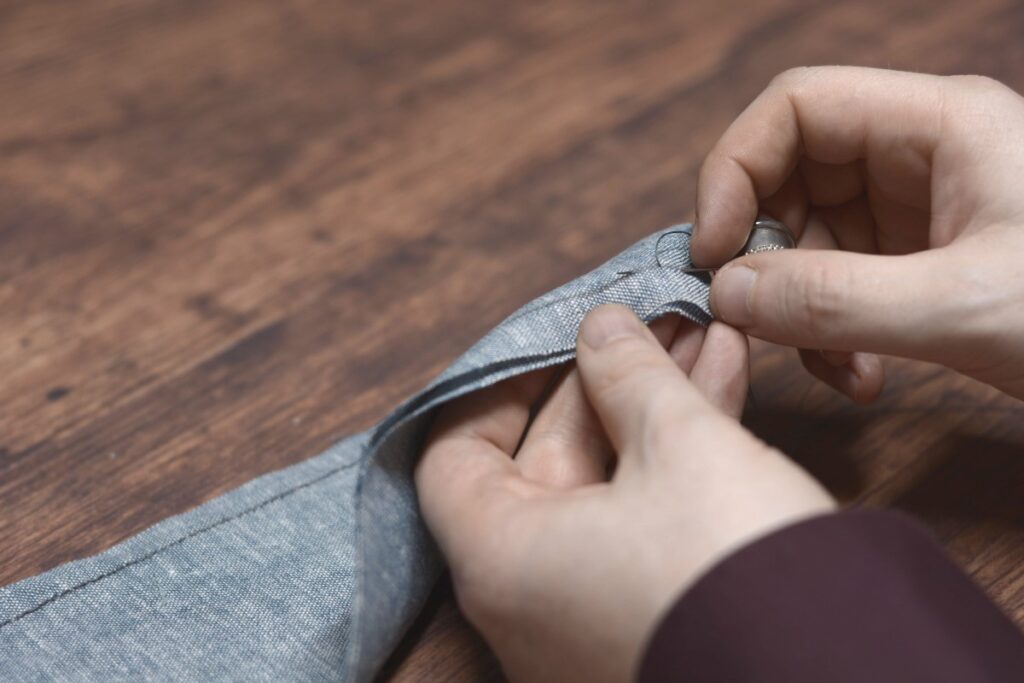
For straight seams, you can make the stitches up to 3″ or so apart from each other, pulling the thread snug between each stitch.
For curved seams, you’ll want to keep the stitches closer together, an inch or so apart or even closer, leaving a good bit of slack between each of the stitches.
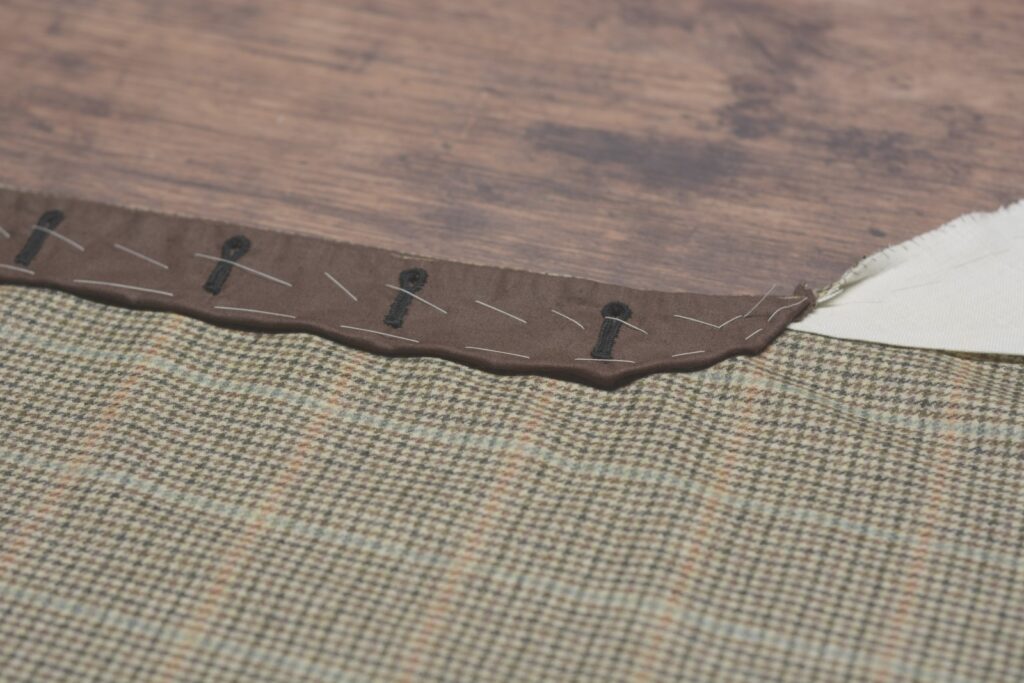
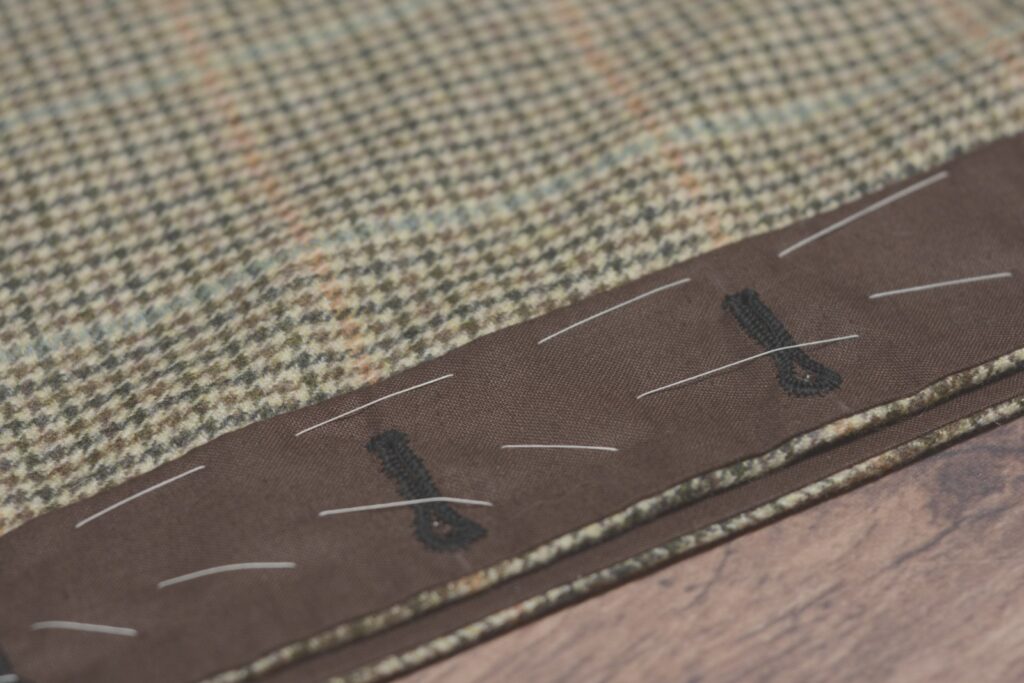
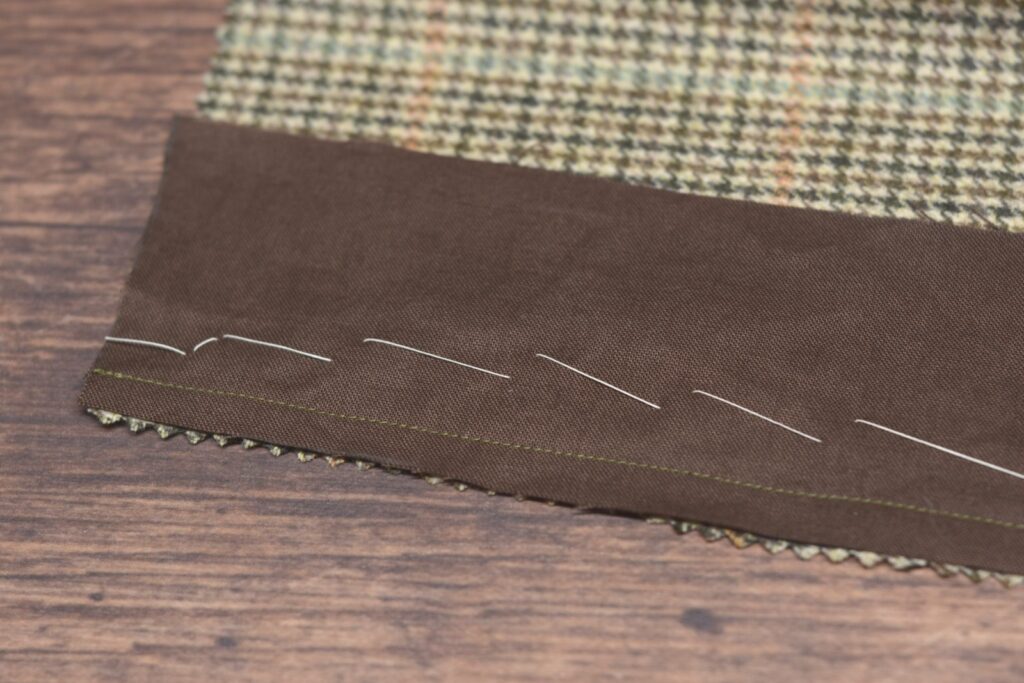
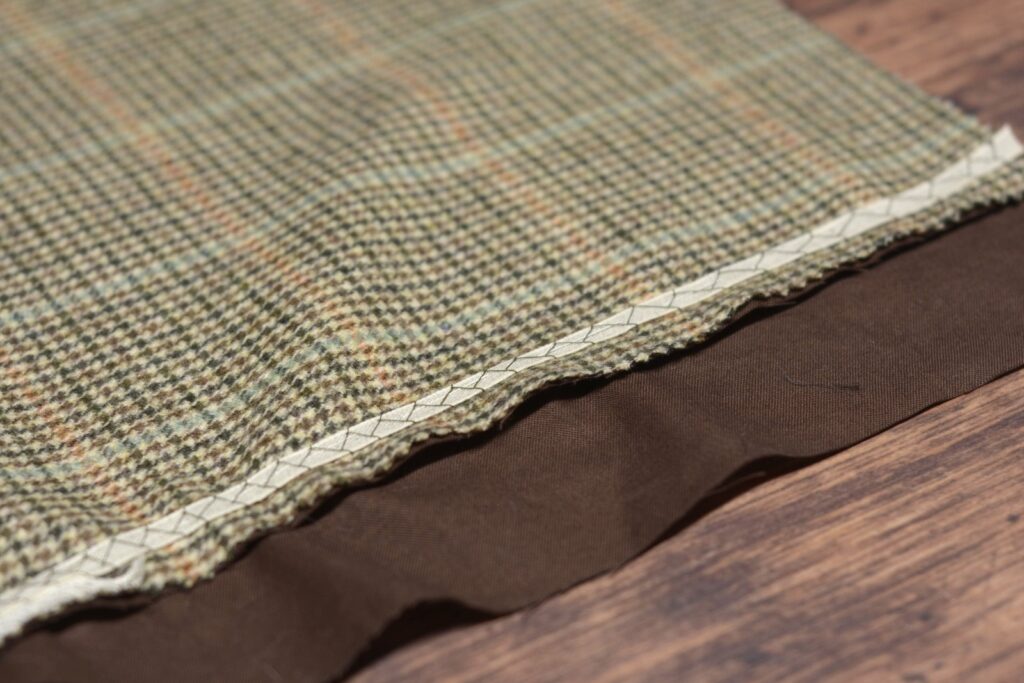
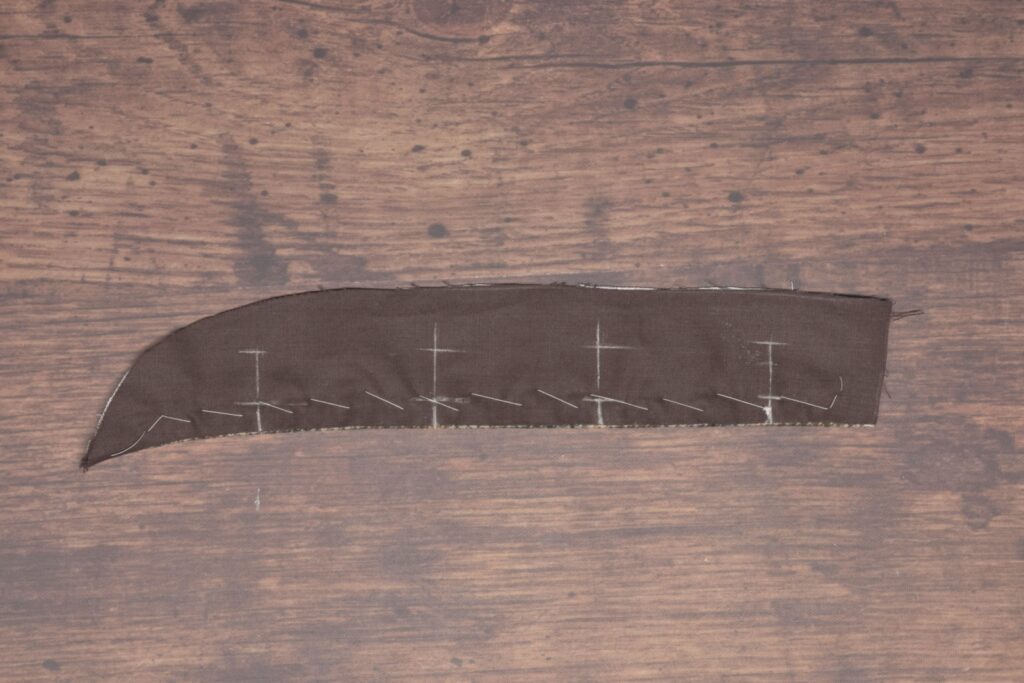
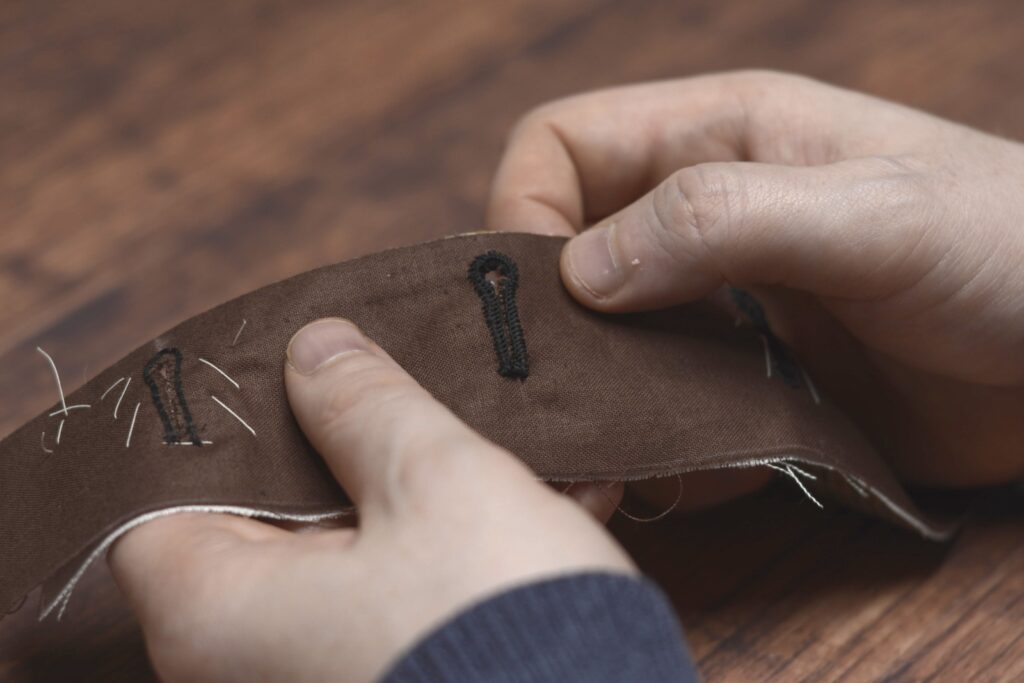
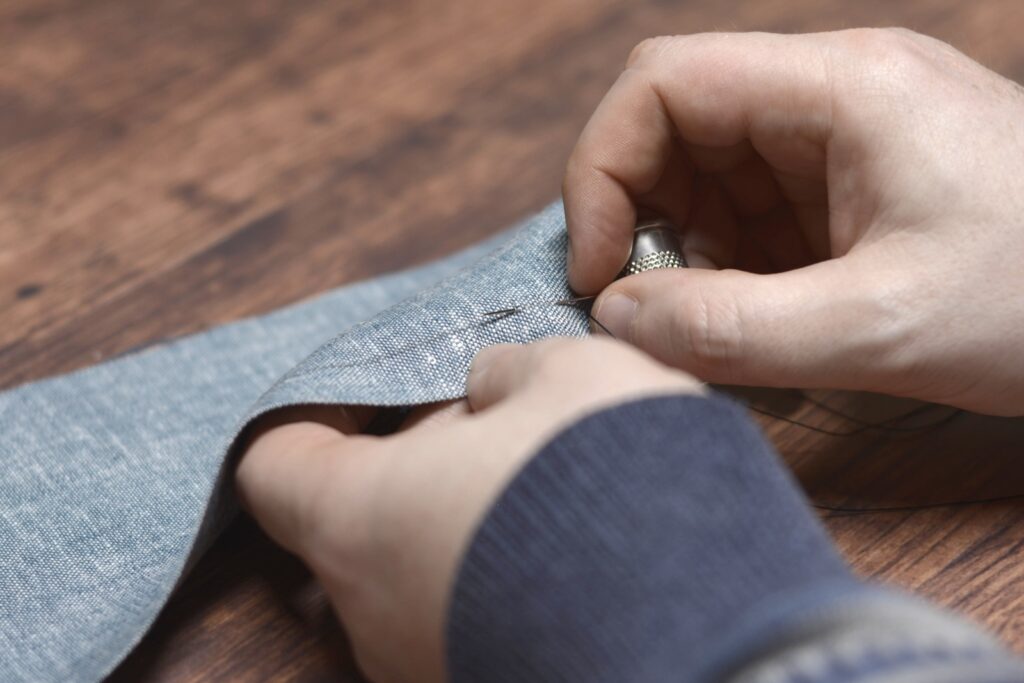
Here’s my seam marked with the stitches kept loose for demonstration purposes.
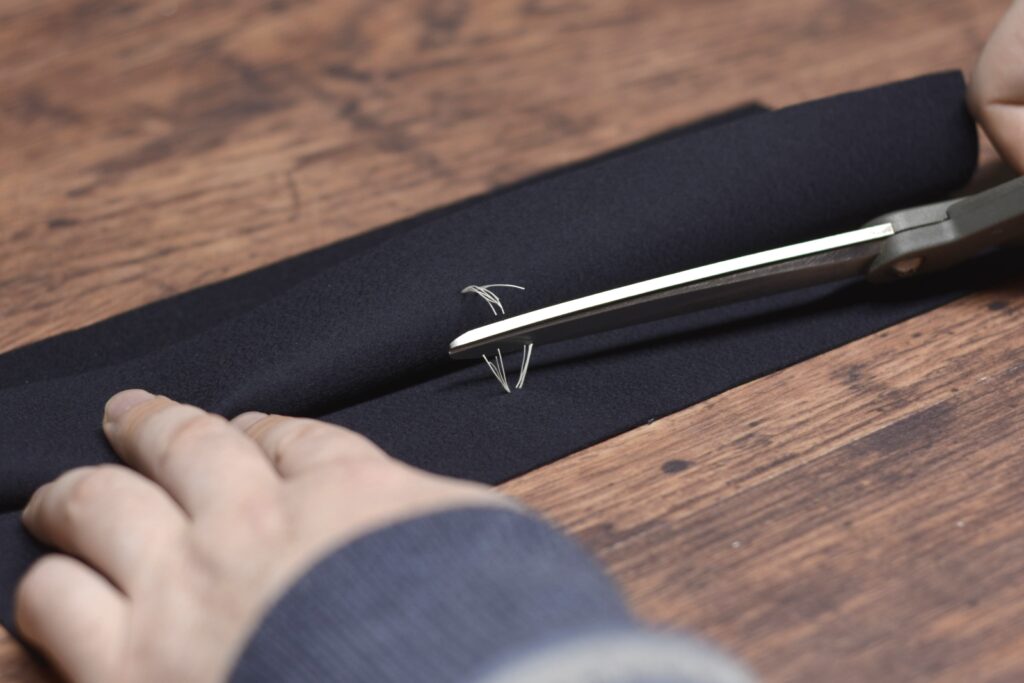
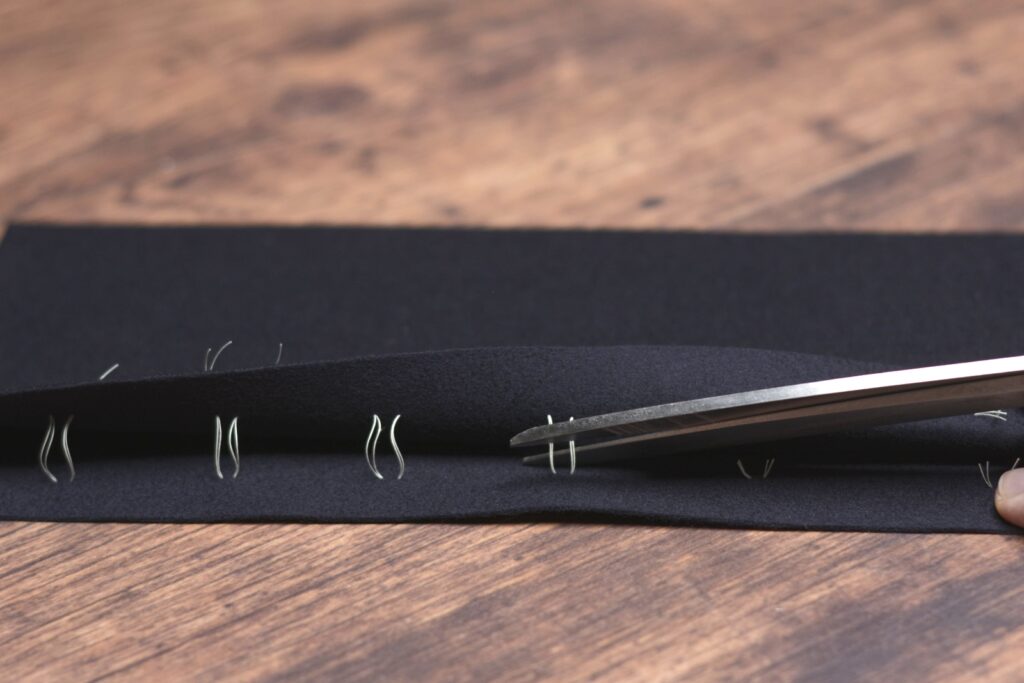
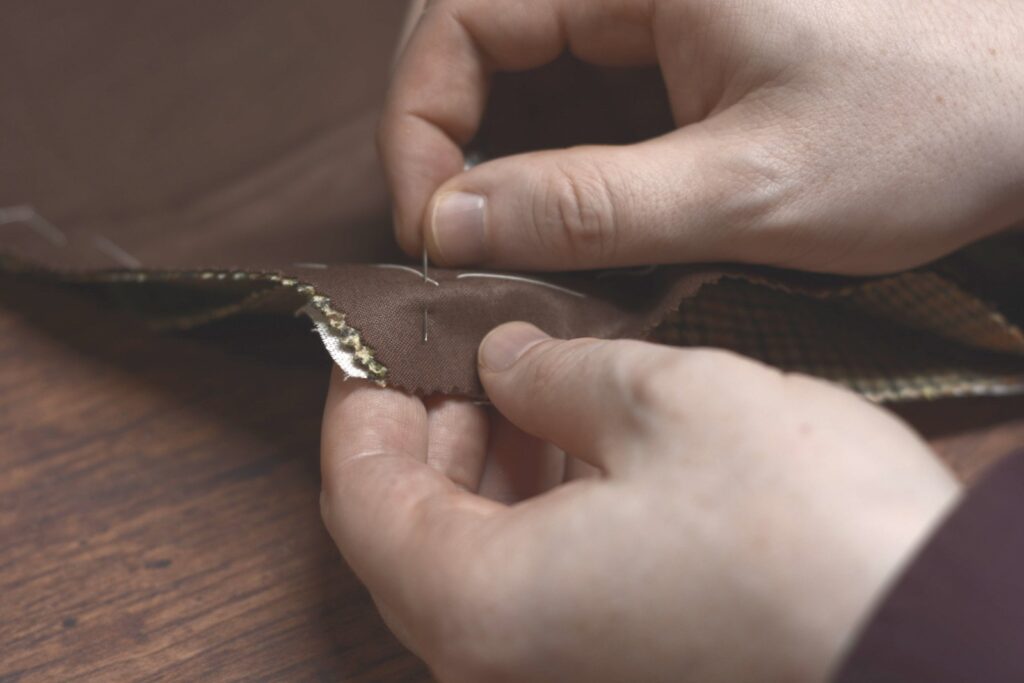
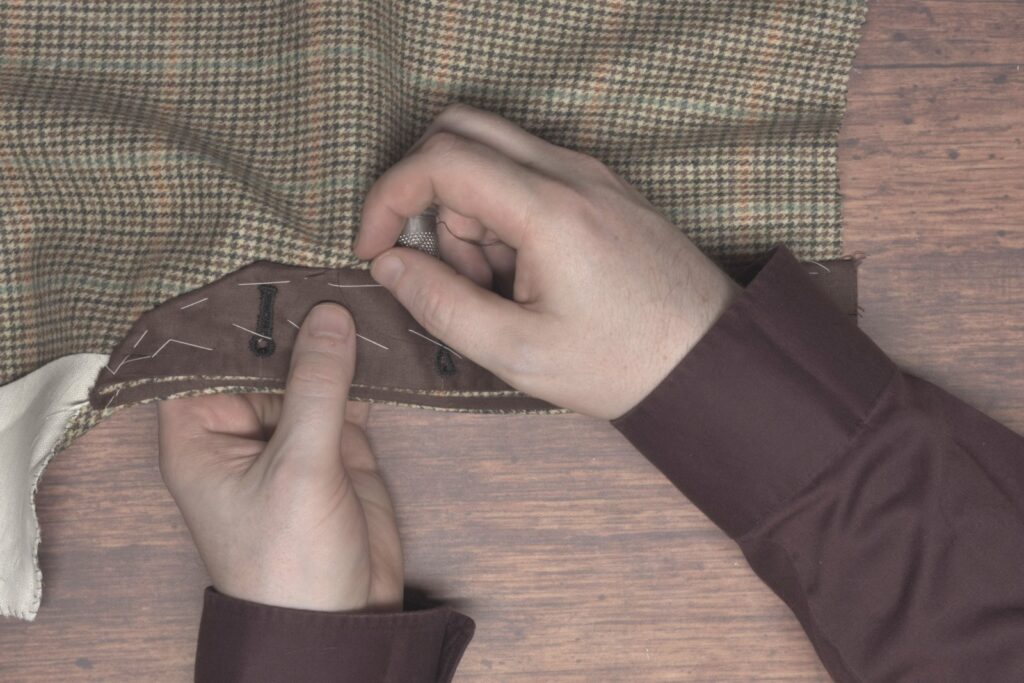
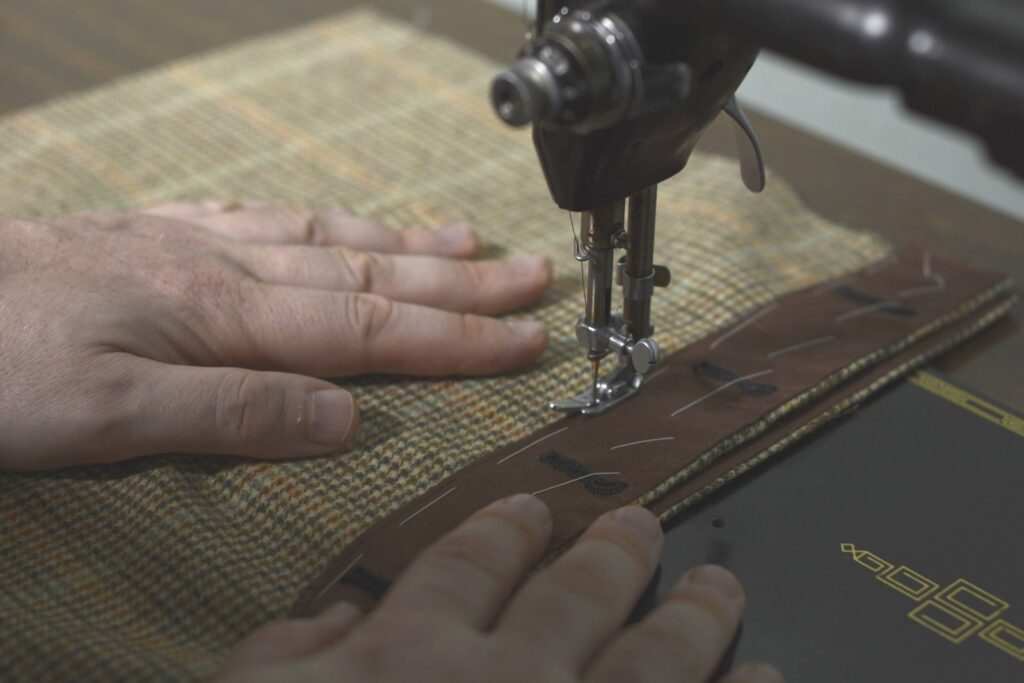
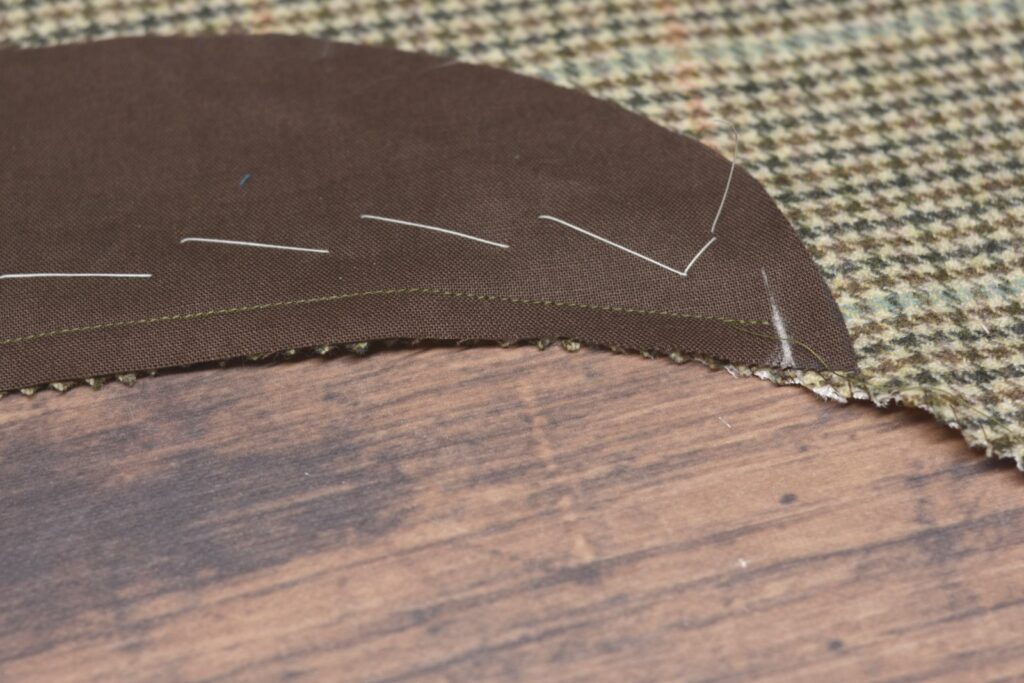
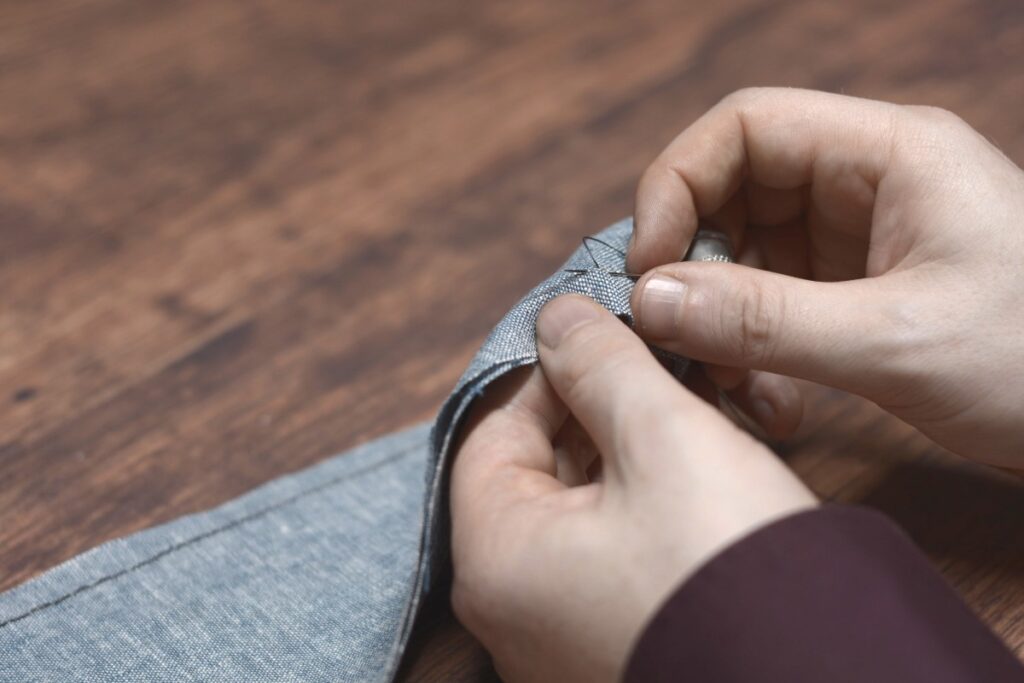
Next, you’ll want to trim the threads in between each stitch. You can see now why we left the slack in the stitches that were spaced closer together.
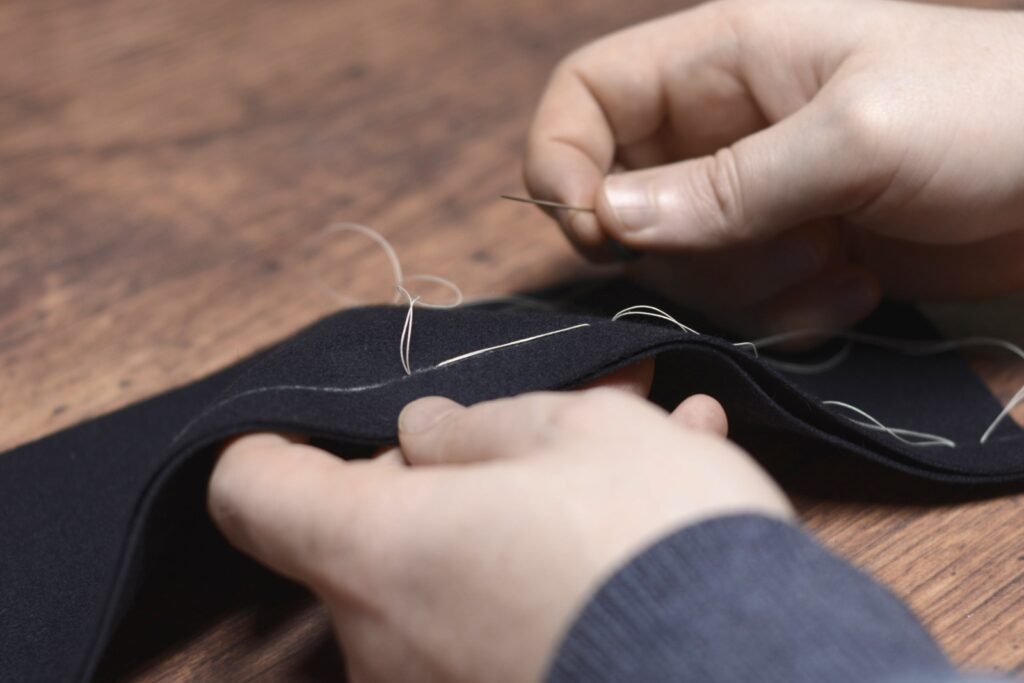
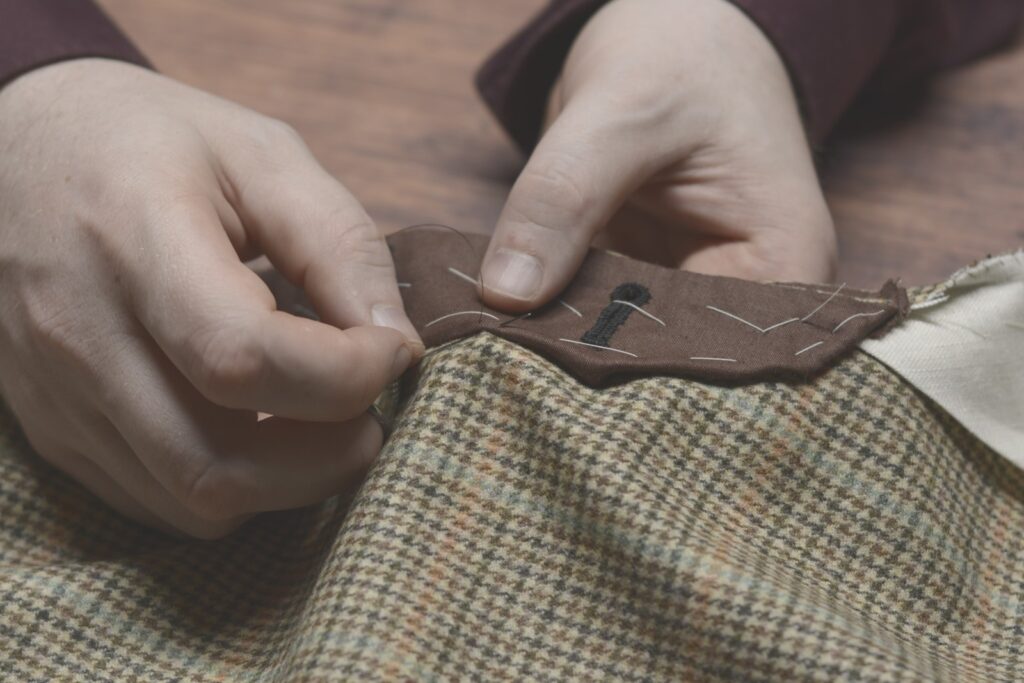
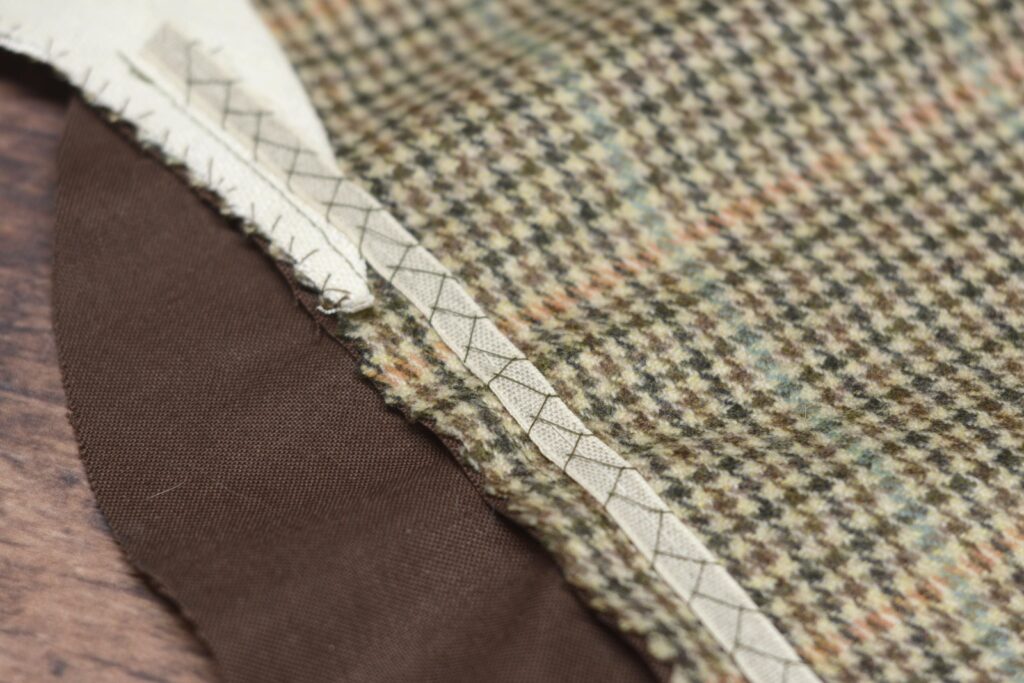
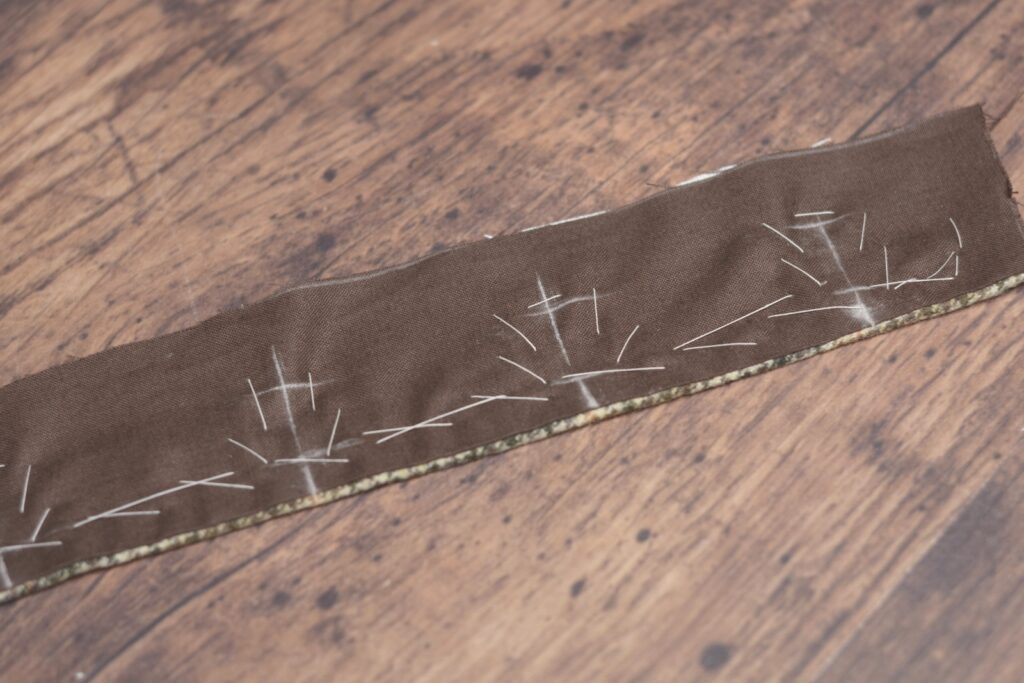
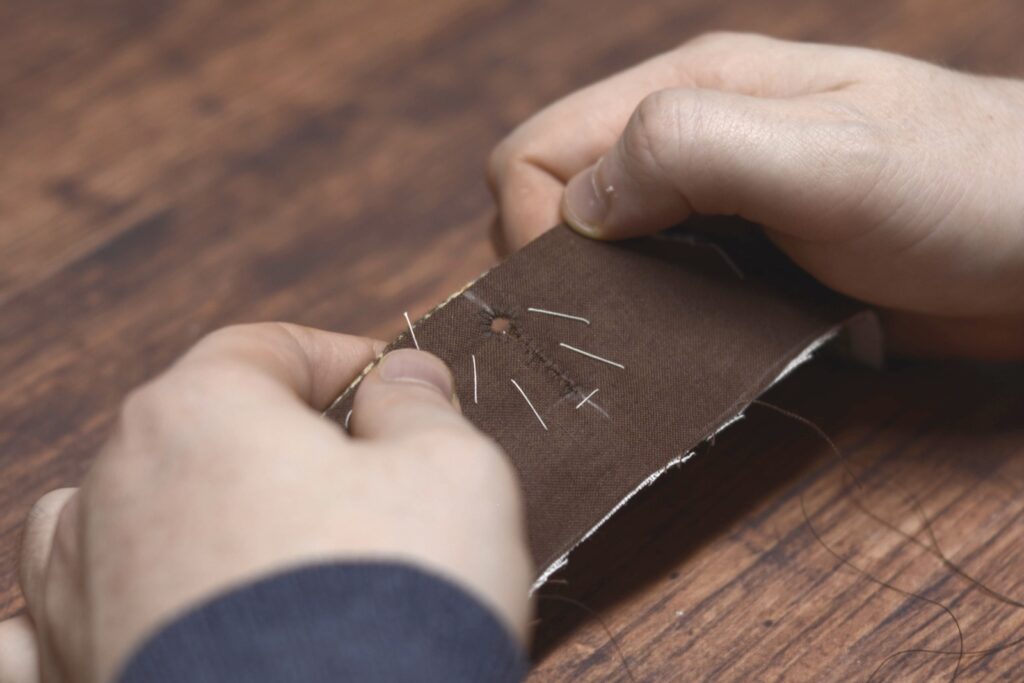
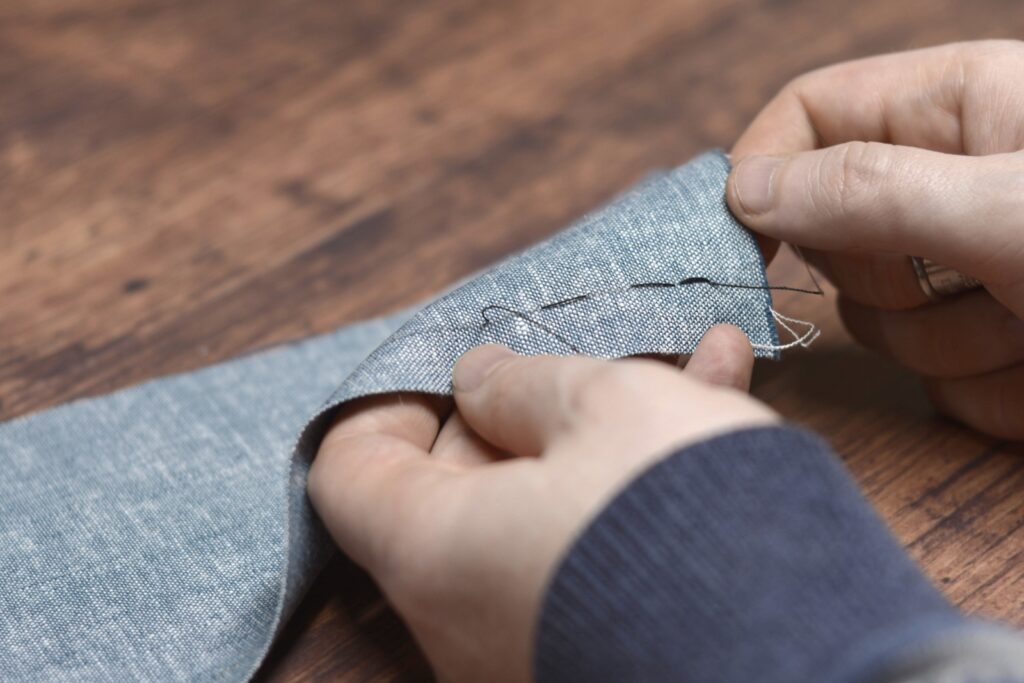
Now, carefully open up the two layers of fabric, being sure not to open it so wide that the stitches pull out of the top layer.
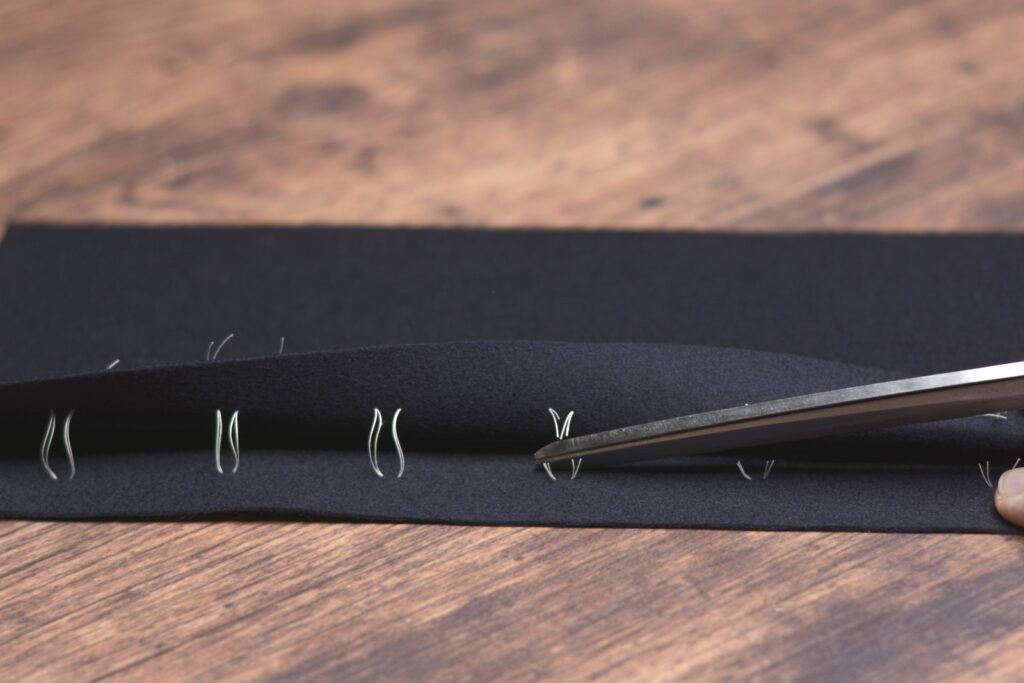
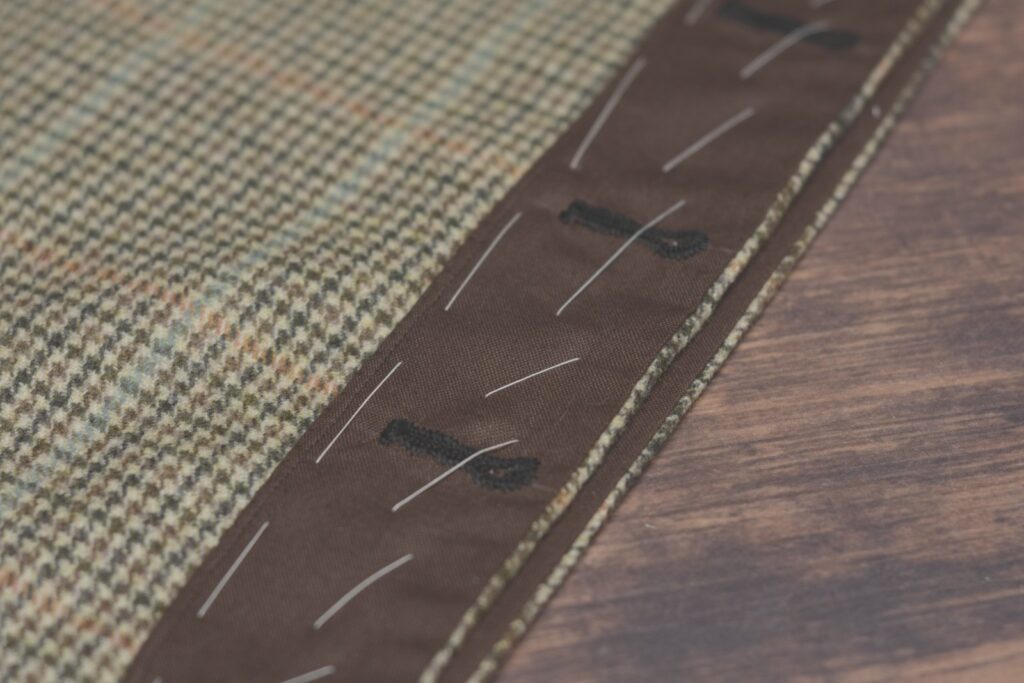
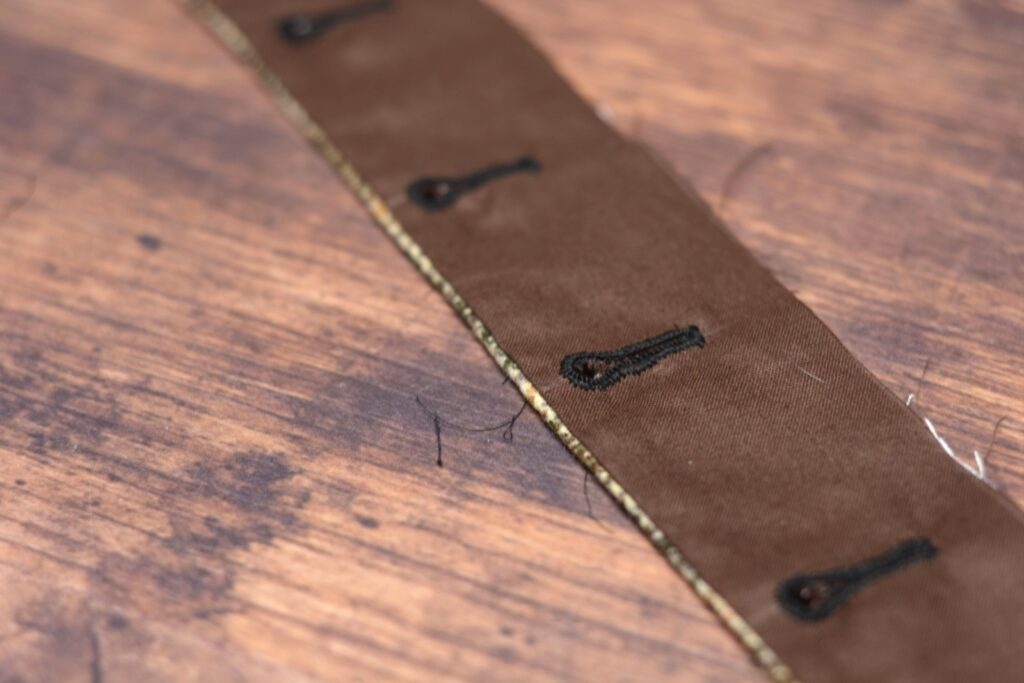
Finally, snip the threads between the layers.
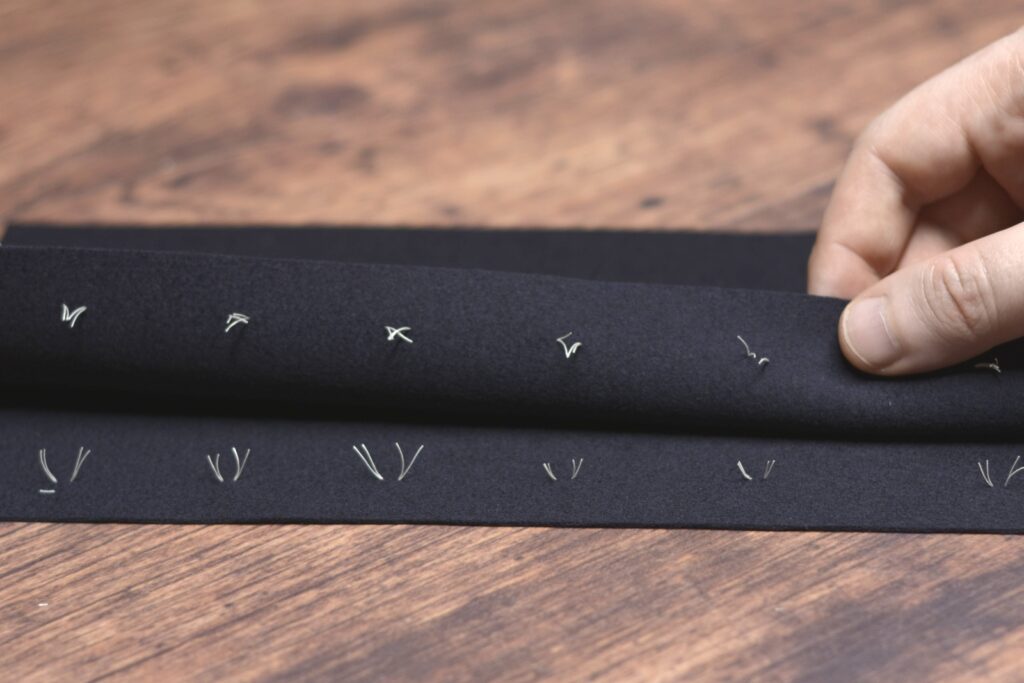
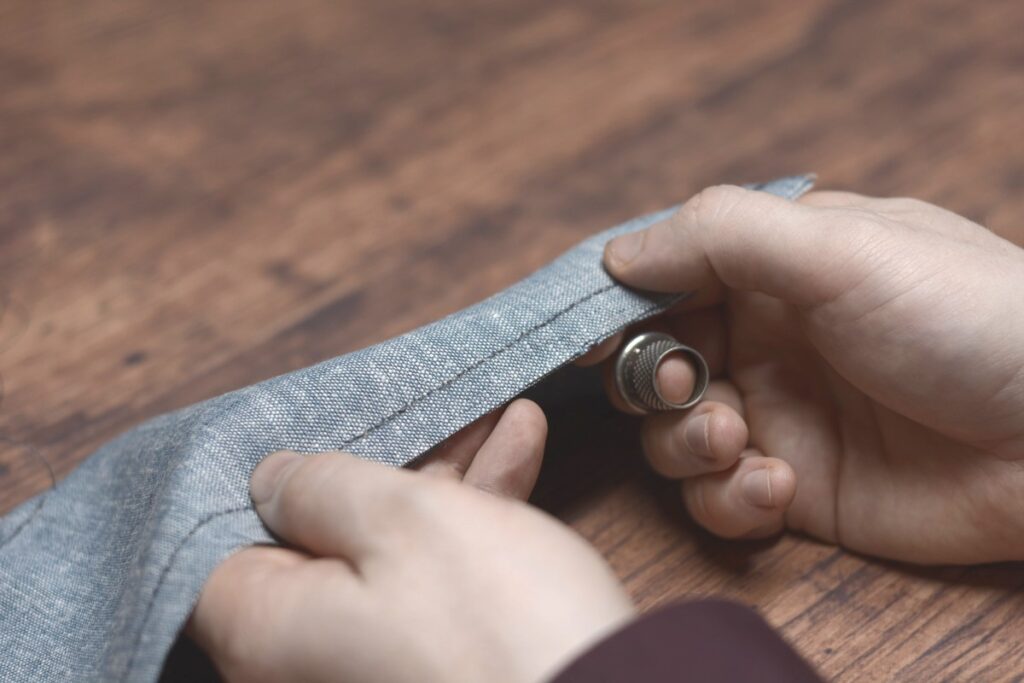
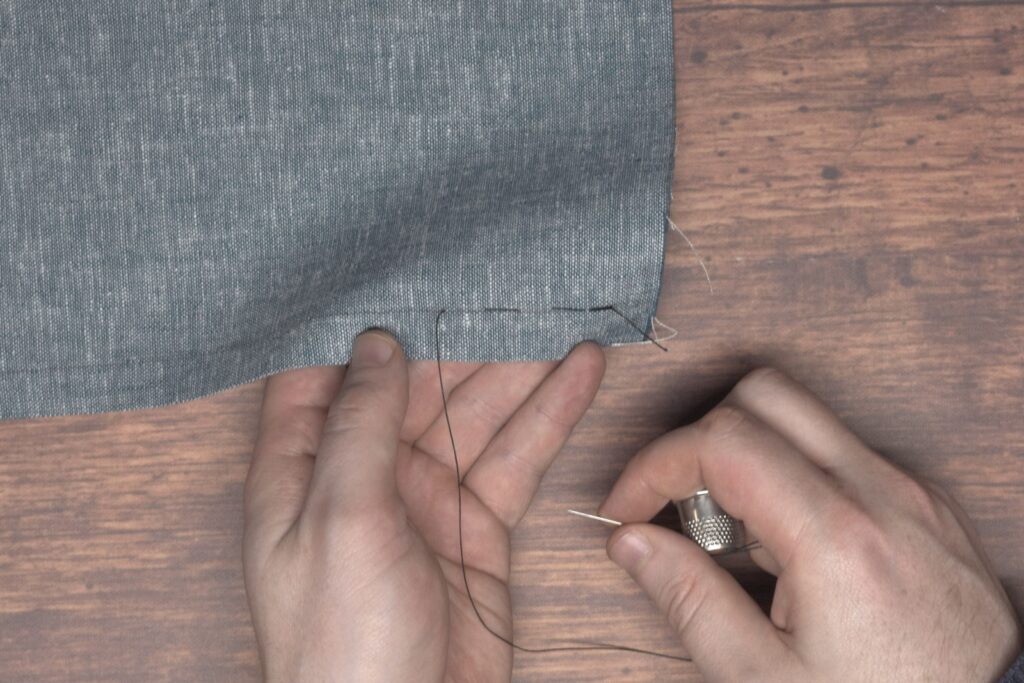
And here are the resulting tailor’s tacks. You’ll find that the top layer will come out a bit more easily than the lower, but they still last a lot longer than the chalk marks do.
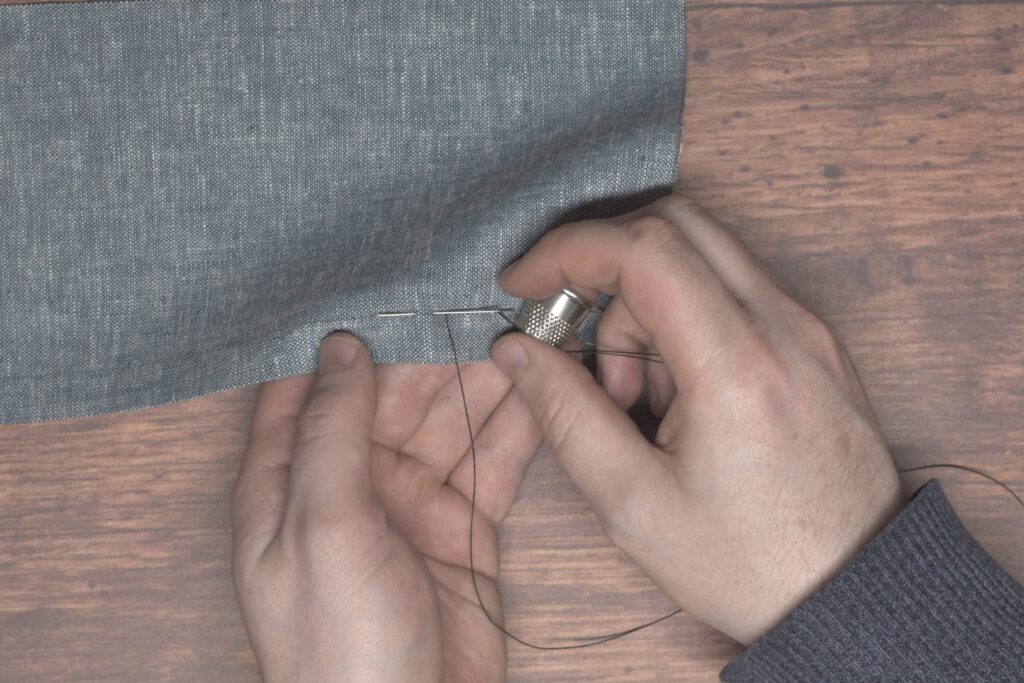
Straight Basting
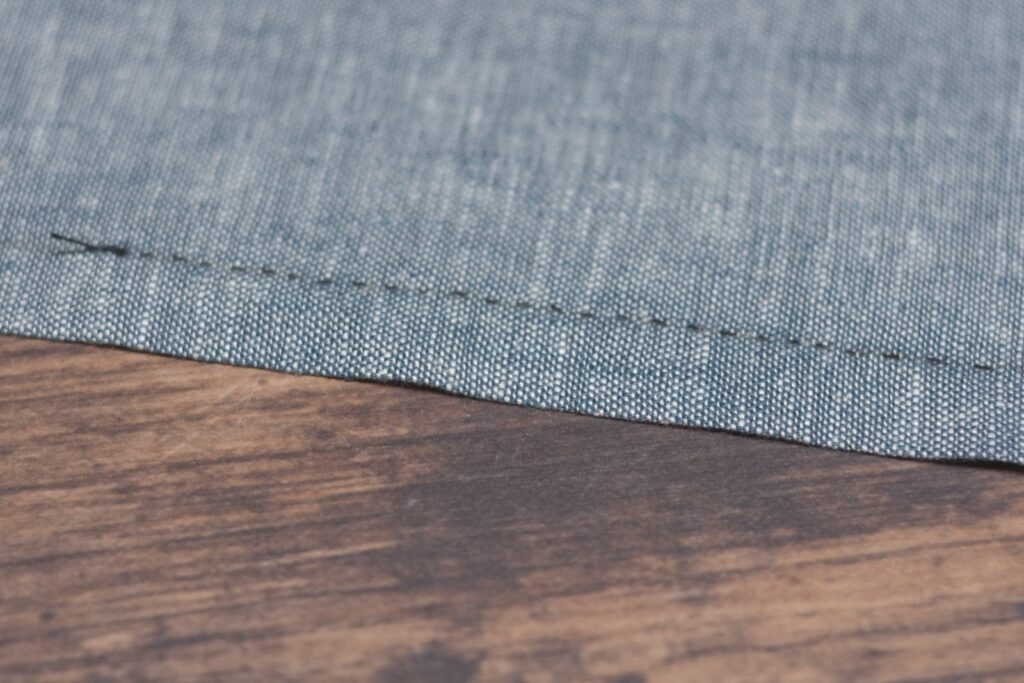
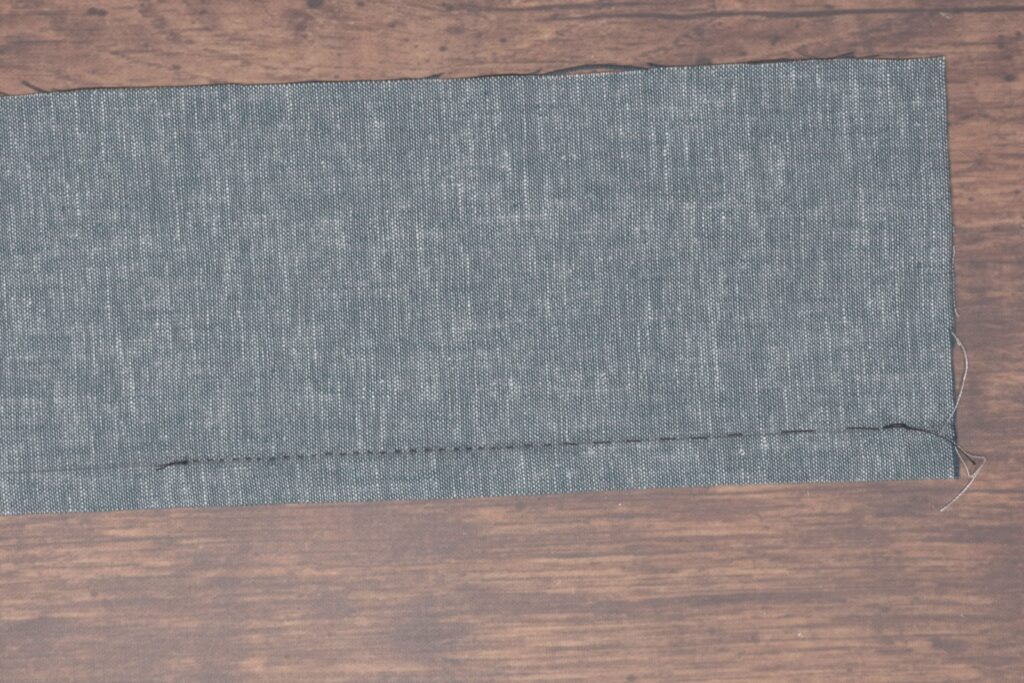
Straight basting is one of the most basic of stitches yet one of the most useful. It’s used when basting two or more layers of fabric together that you want to be able to remove easily later on. The straight basting stitch is quite similar to a running stitch, only the spacing is different. Each stitch is made rather small with a larger space between the stitches.
When doing any basting, it’s very helpful to use a specialized basting thread. This is usually made of cotton, and in such a way that the fibers help grip the fabric. You can get very large rolls that will last for years and years.
Begin by making a stitch in place.
Skip about 3/4″ to 1″ down the seam to make your first stitch. Depending on the fabric thickness, this can be between roughly 1/8″ to 3/8″ in length.
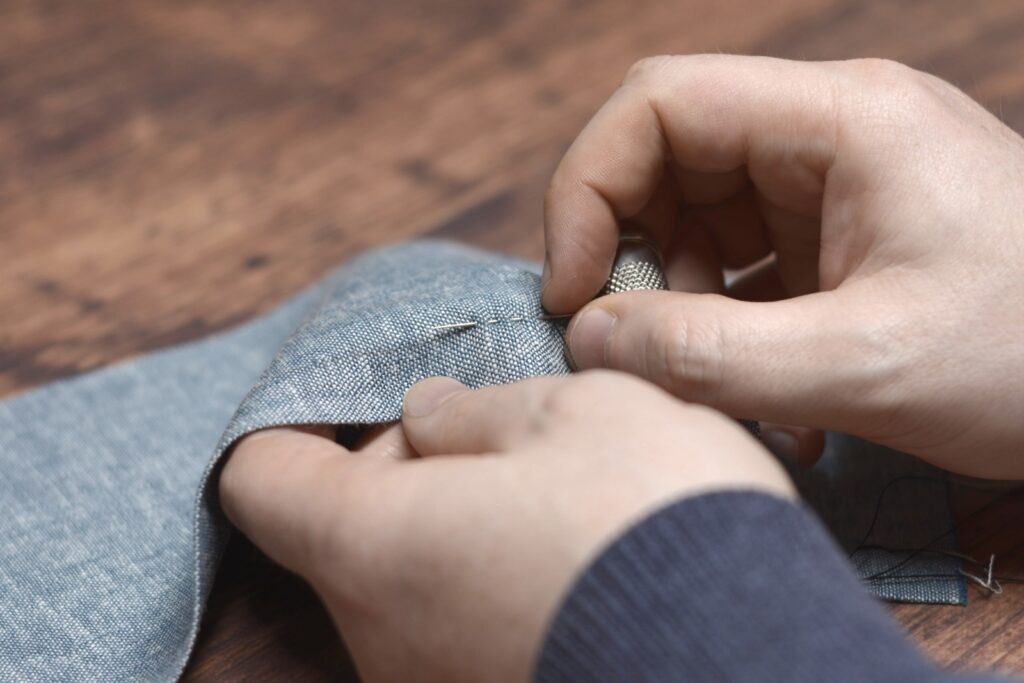
Continue making stitches in such a manner down the seam or area to be basted. The length between stitches will also vary depending on what you are sewing and how securely you need the stitches to hold, something that mainly comes with practice and experience.
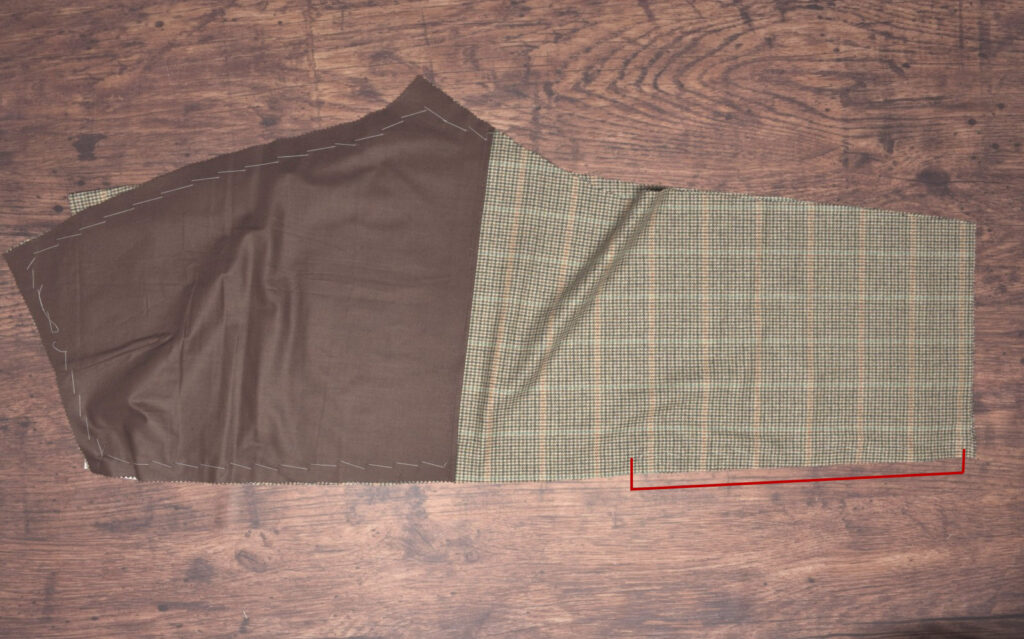
Side Seam
Side Seam vs Open-Top Pockets
This module contains instructions for a basic side seam trouser pocket. If you’d like to add an open-top pocket style to your own trousers, please skip this entire module.
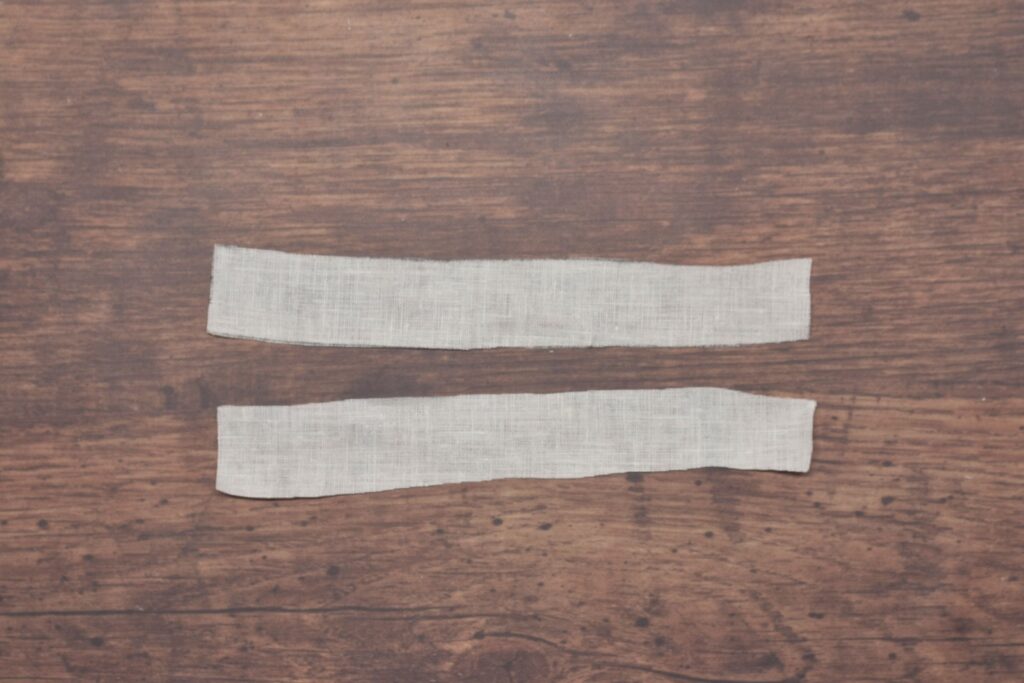
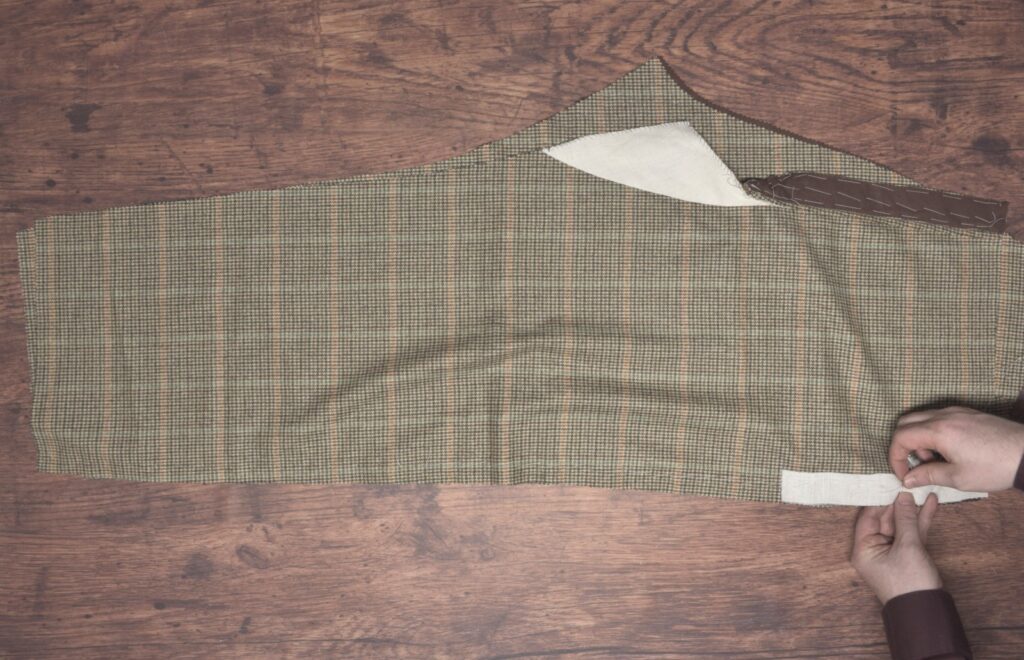
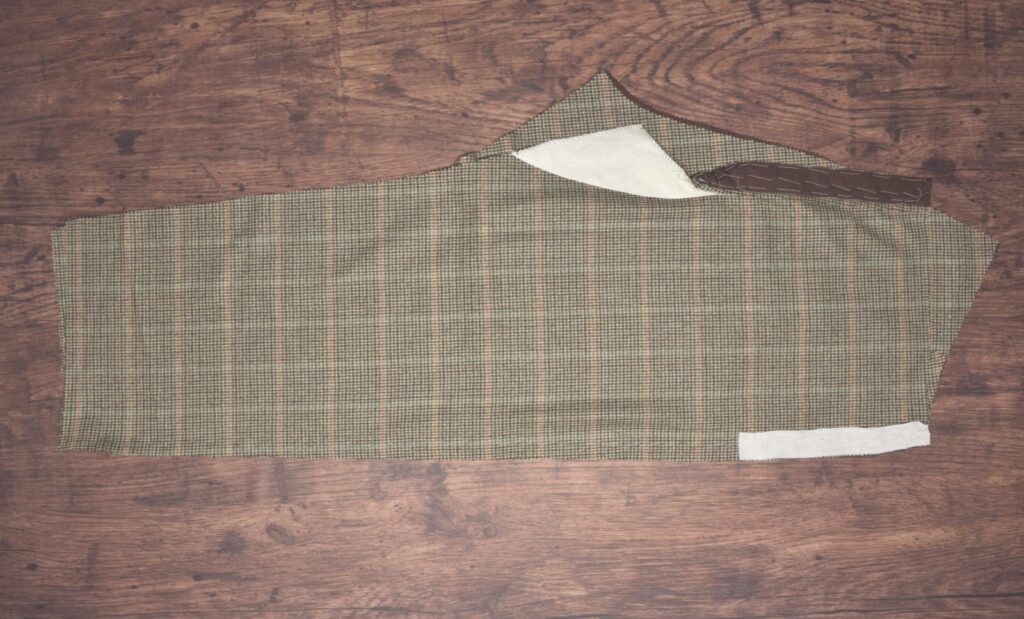
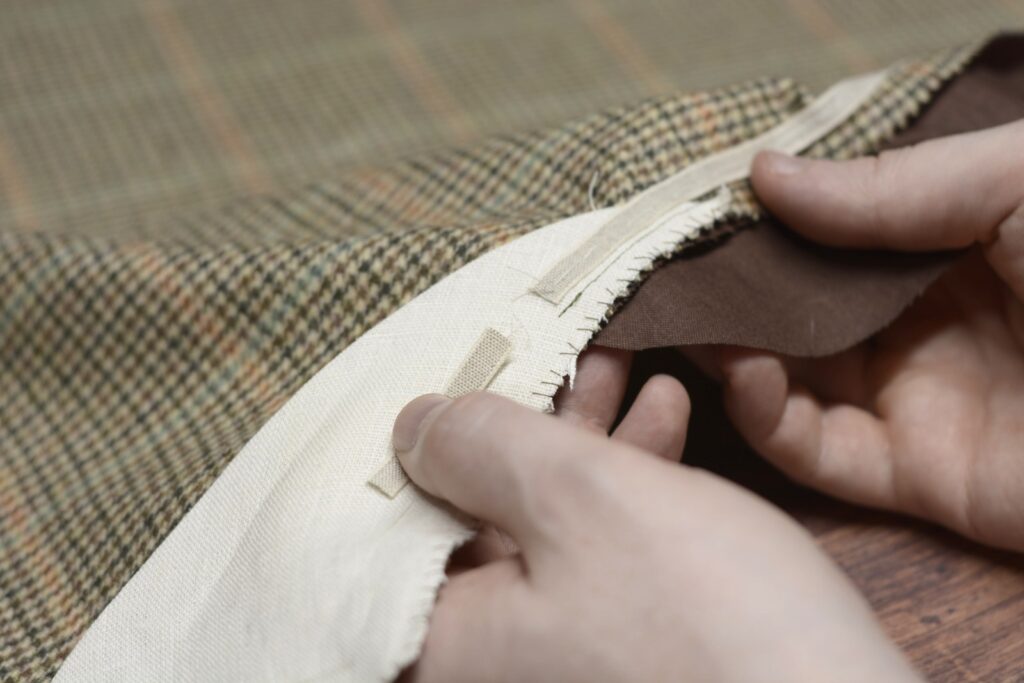
The side seam has to be stabilized and sewn together before we can install the pocket, and it involves a few steps. I choose to add linen interfacing and stay tape in certain areas, but realize they were not used in all trousers during the period, especially of the military variety. I find the trade off worth it though in prolonging the life of the trousers.
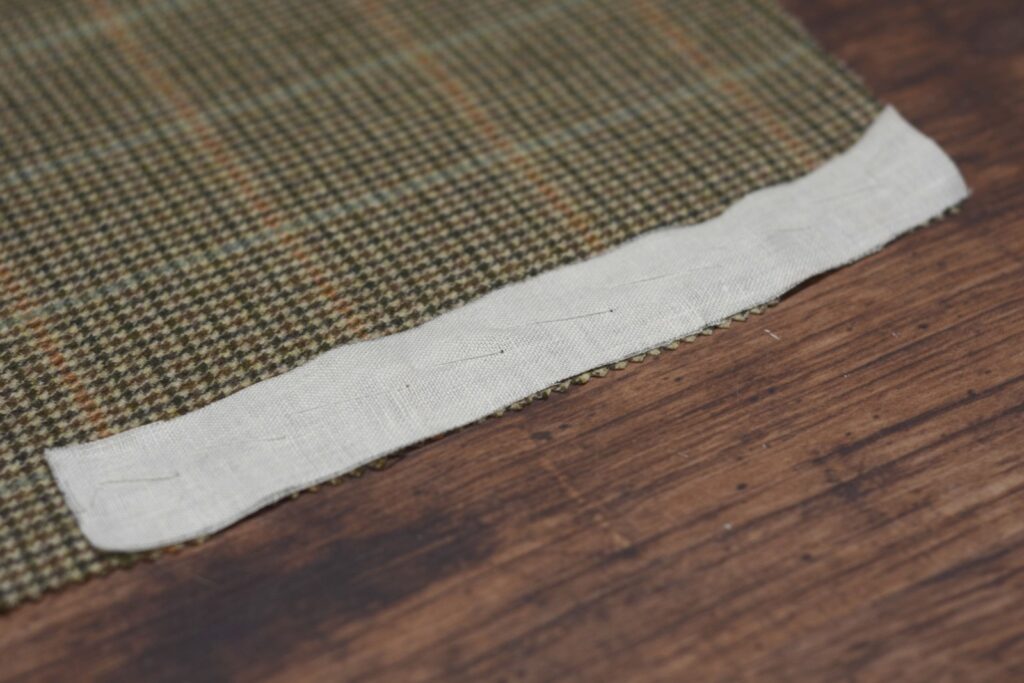
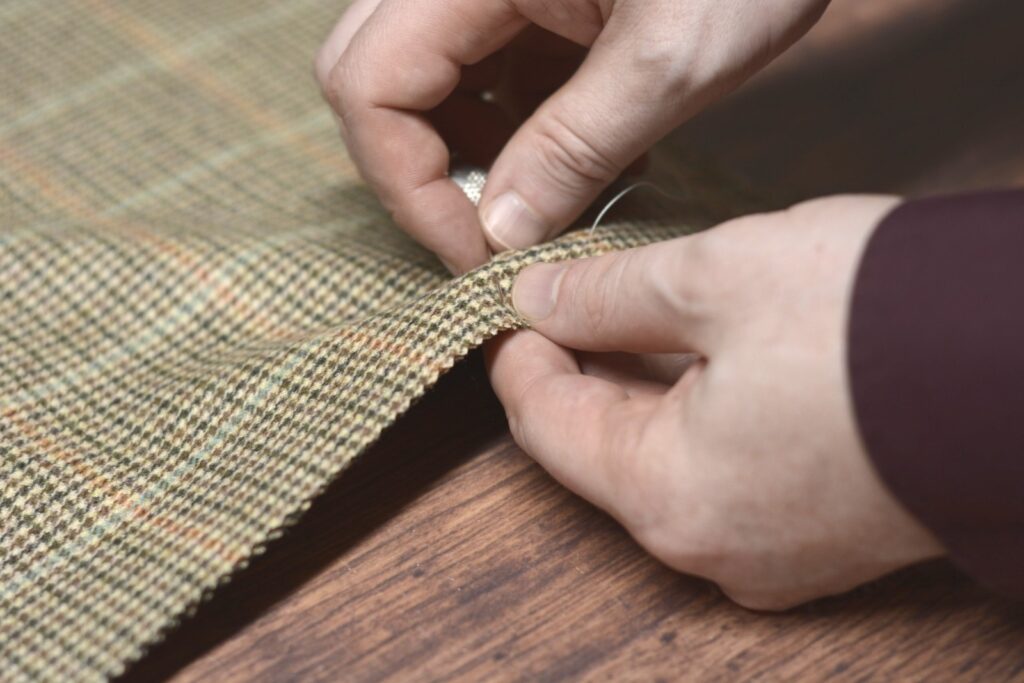
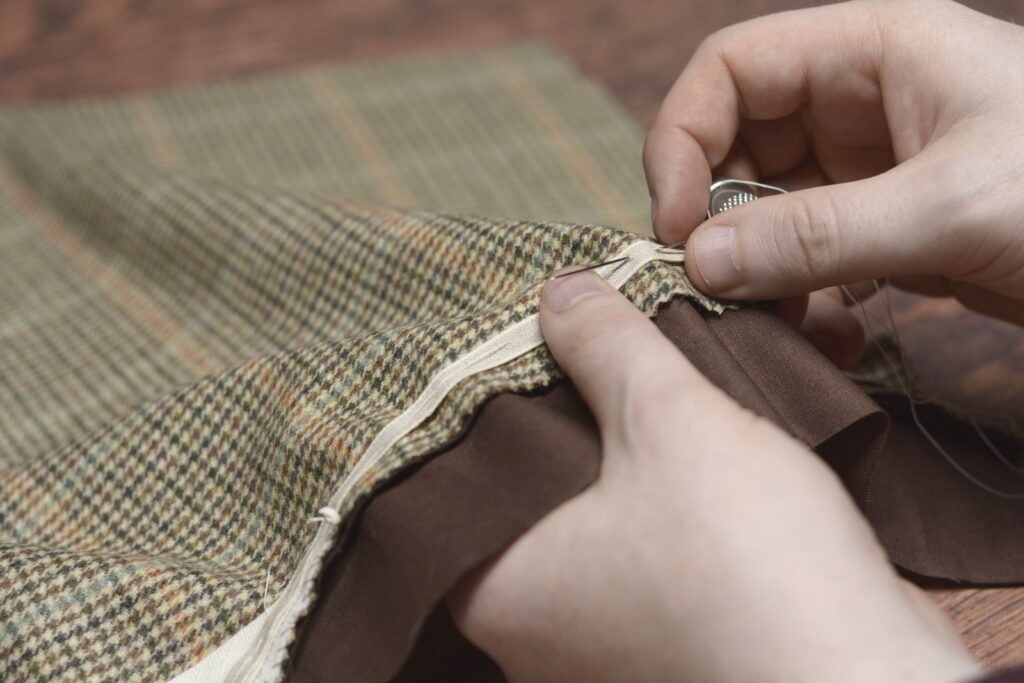
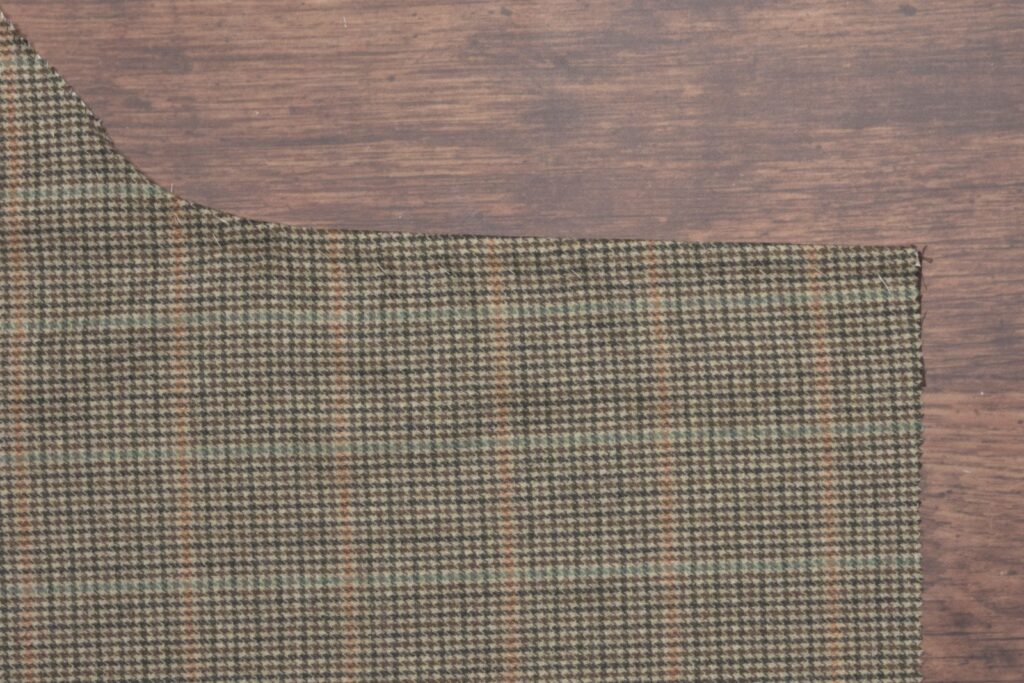
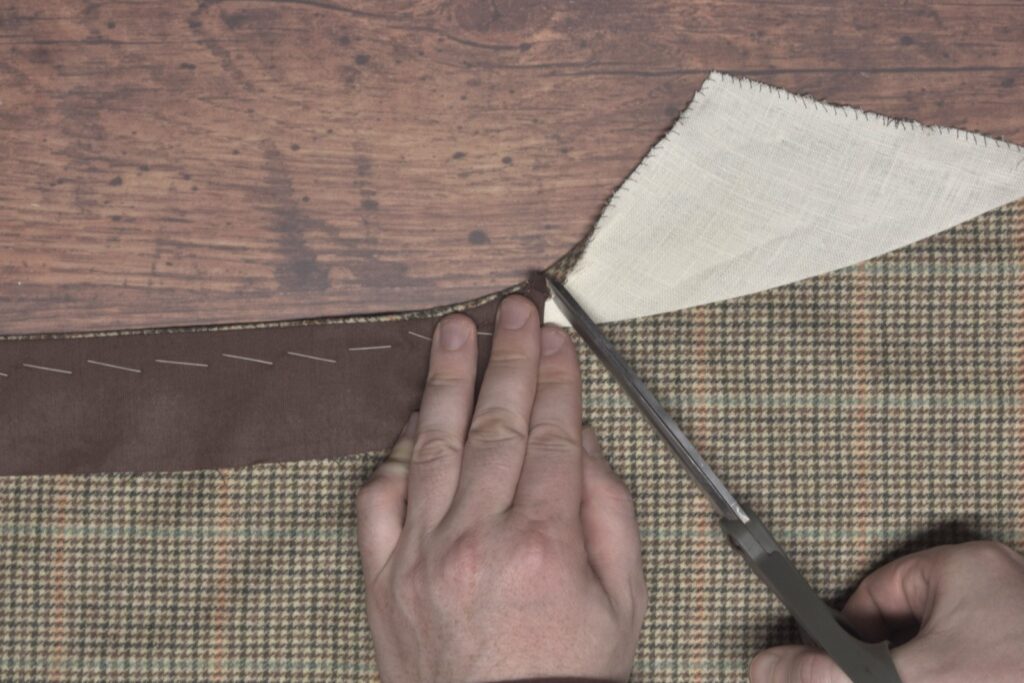
To begin, cut two strips of linen, about 1″ wide by 1″ longer than you want the pocket opening to be. I prefer a larger opening so I made my strips 9″ long, for an 8″ wide pocket mouth.
It’s great if you can cut them square but as you can see, I had a bit of trouble this time.
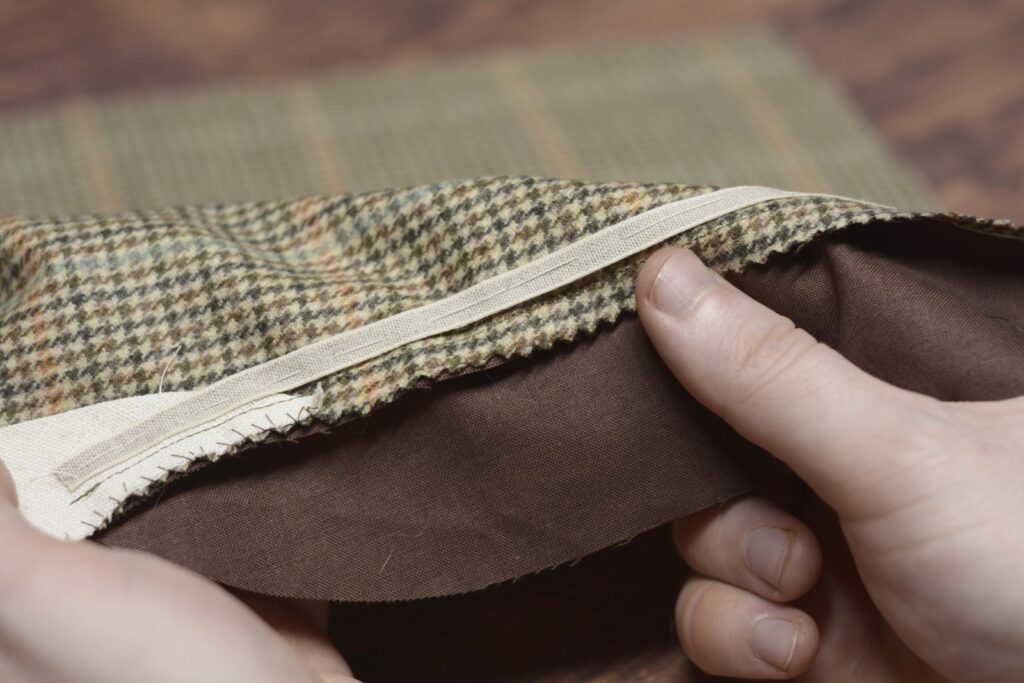
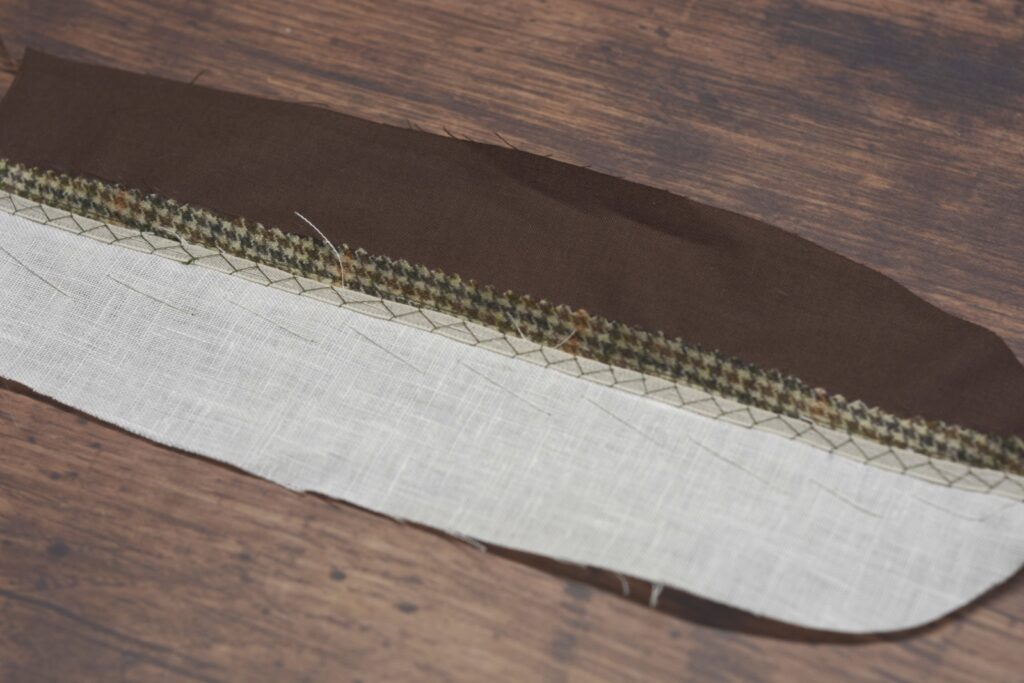
Baste the linen strips to the wrong sides of each trouser front.

Adding this strip of linen alone greatly strengthens the area around the pocket.
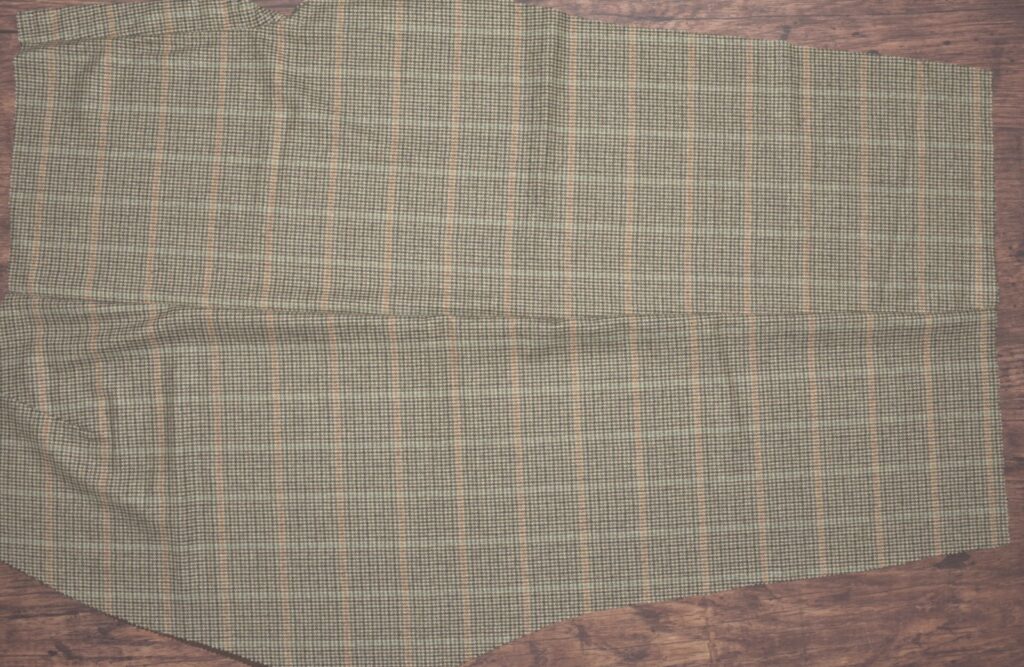
It’s now time to attach the trouser fronts to the backs. Lay out the front on the table, and lay the back over the top, right sides together.
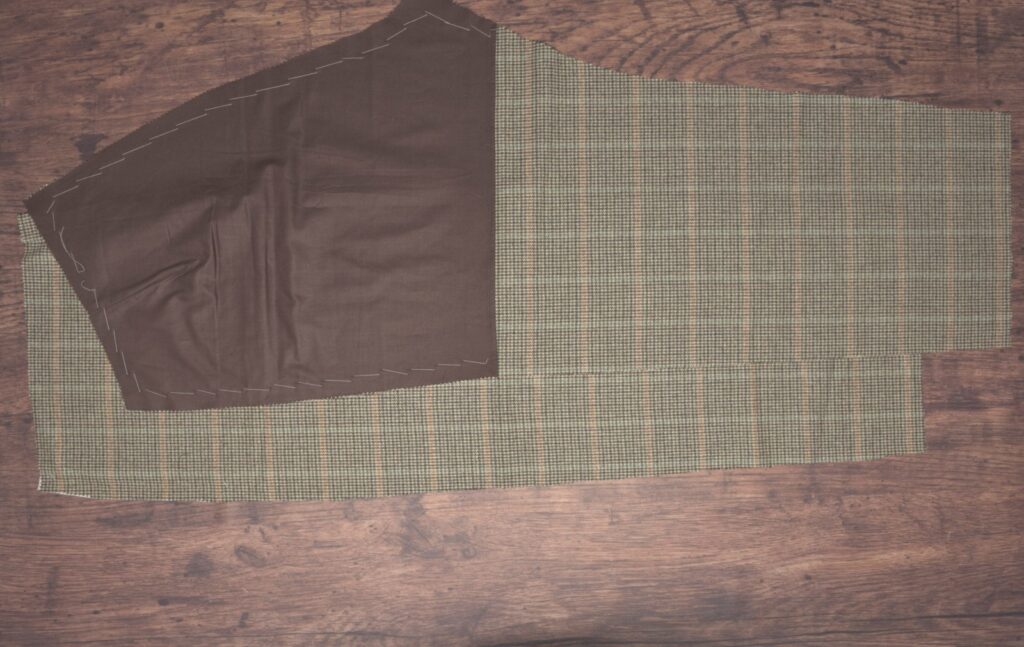
Now pin the very top of the side seam at the waist, ensuring that when we baste the side seam, the tops will be aligned properly.
Now, starting from the bottom hem, baste to the position of the knee (you can be precise about this and lay it out on the pattern, or just estimate).
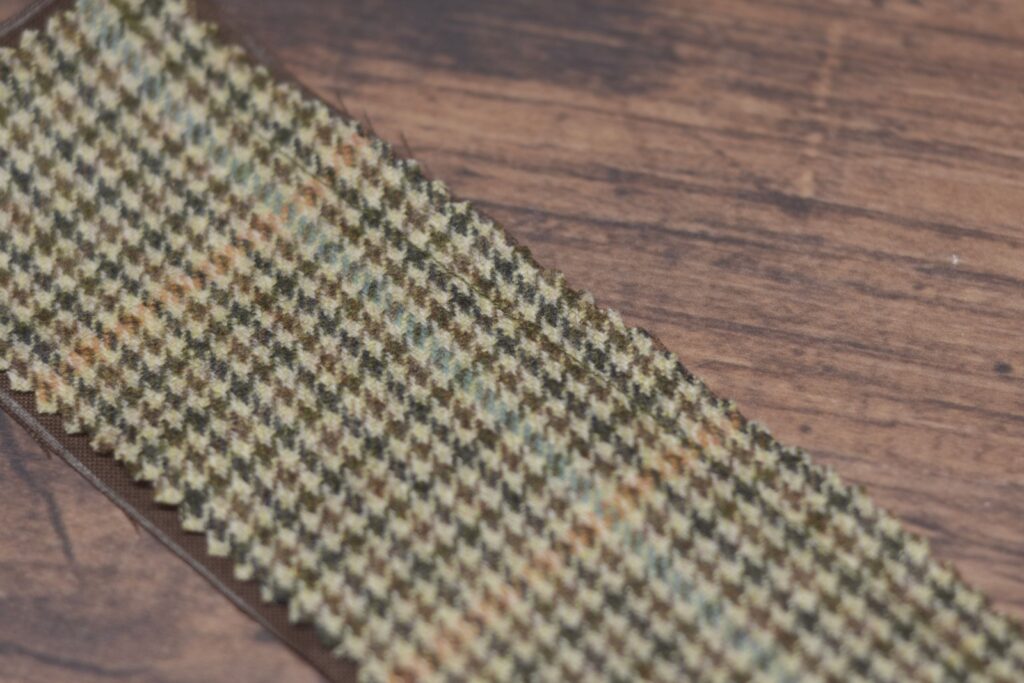
Be sure to match the plaids as you’re going, if necessary.
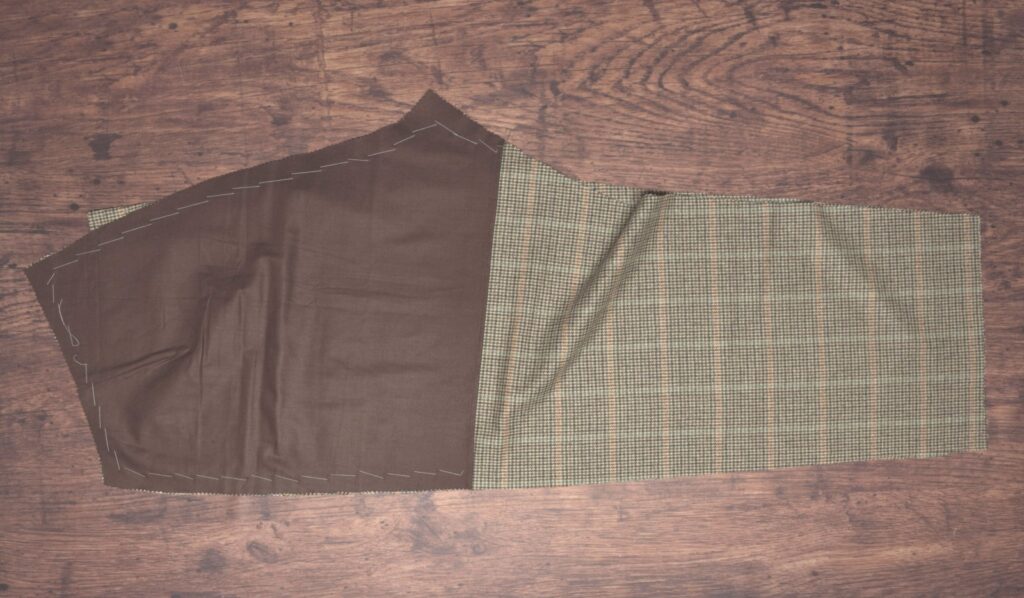
Now baste from the knee to the waist, positioning the trousers so that the back piece is underneath and in an orientation that is most comfortable for your you.
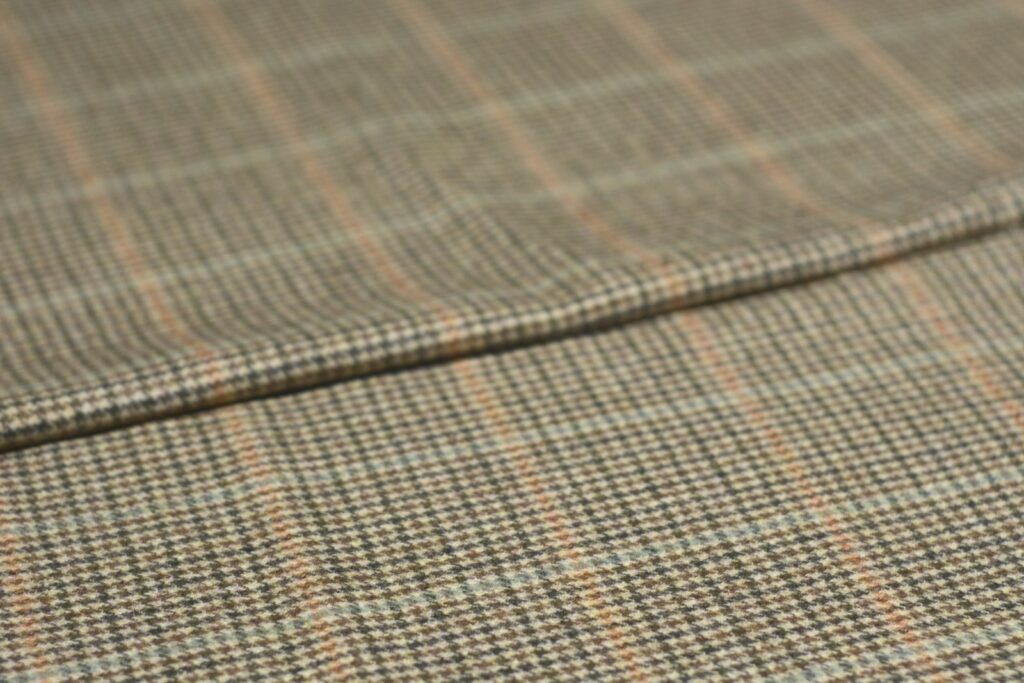
As you’re basting, you’ll notice that the underside has a bit more fabric than the top side. This needs to be distributed evenly, moreso around the pocket opening, with the remaining excess distributed just below the pocket and tapering off to an even tension by the time you get to the knee.
The idea is to have the back piece have a bit of excess for the seat and hips, as well as the pocket opening to be slightly under tension in the front piece, ensuring it stays closed while wearing.
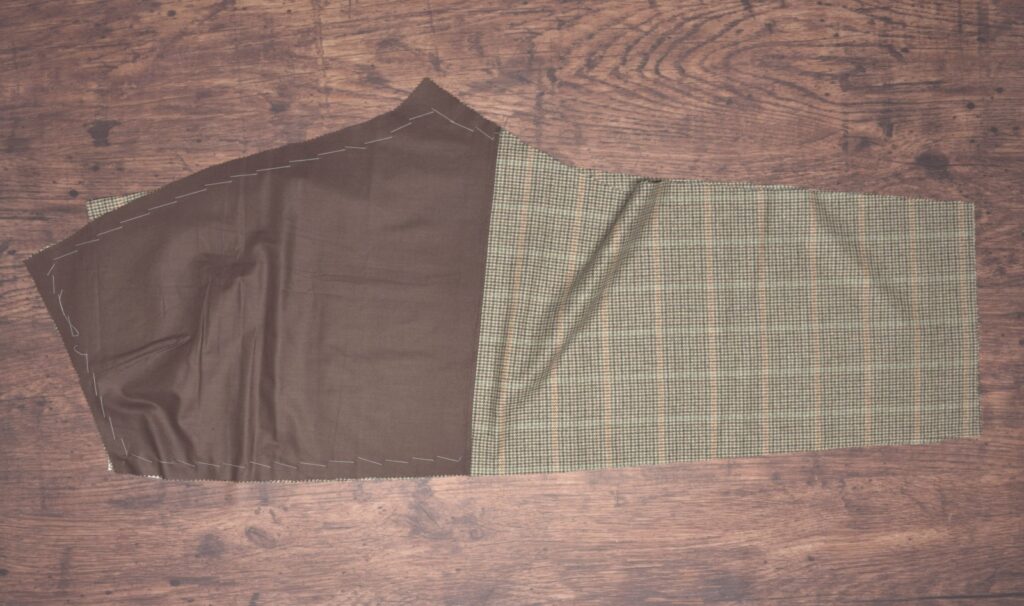
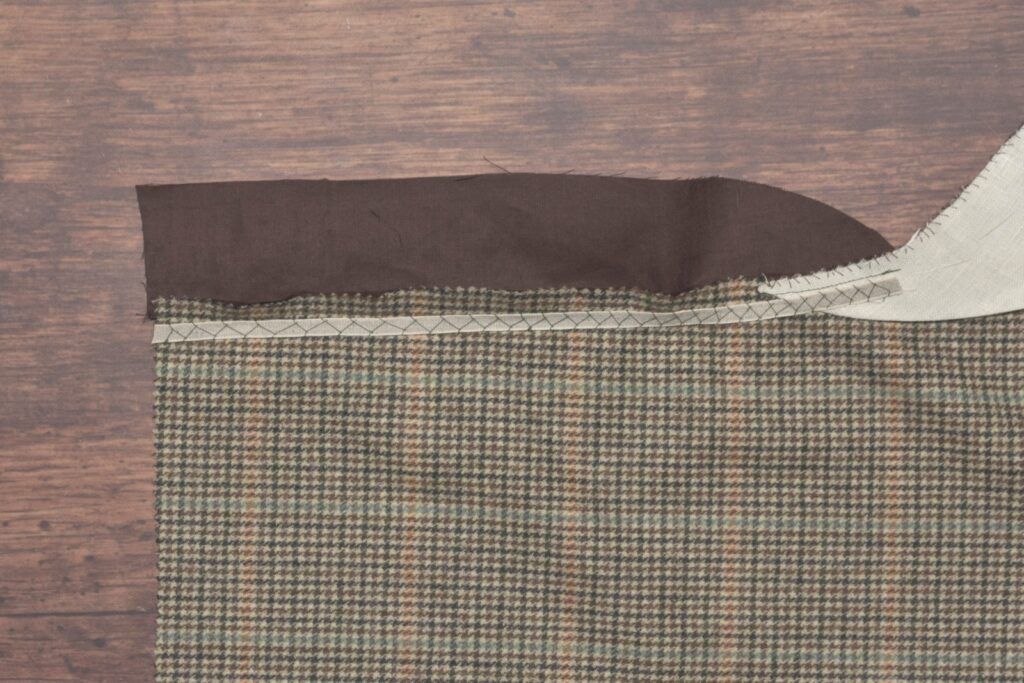
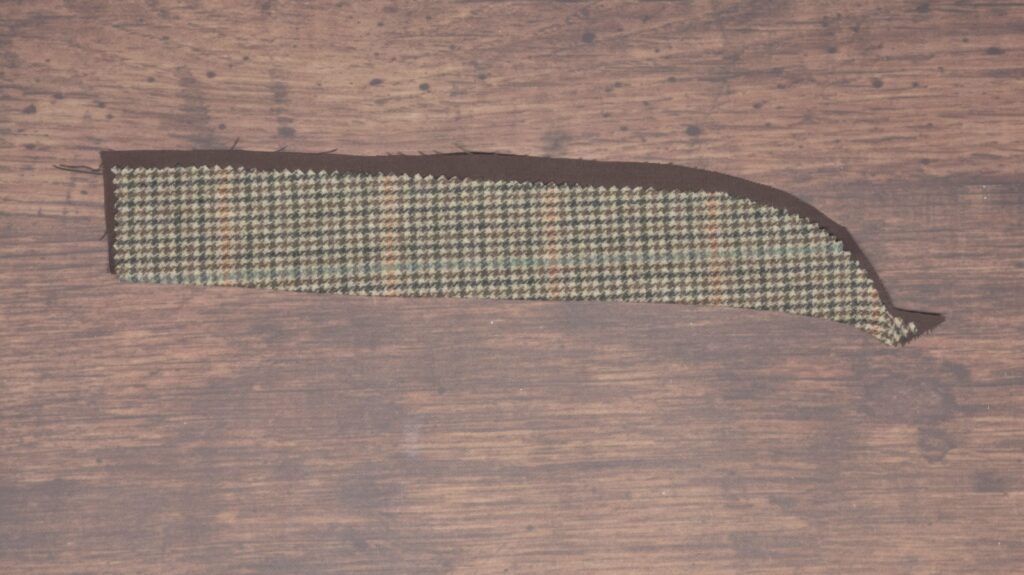
Sorry it’s not more photogenic! But here’s the basted side seam.
It’s a good time to check how the plaids are aligned, and if necessary, redo them. Really depends upon how fussy you want to get.
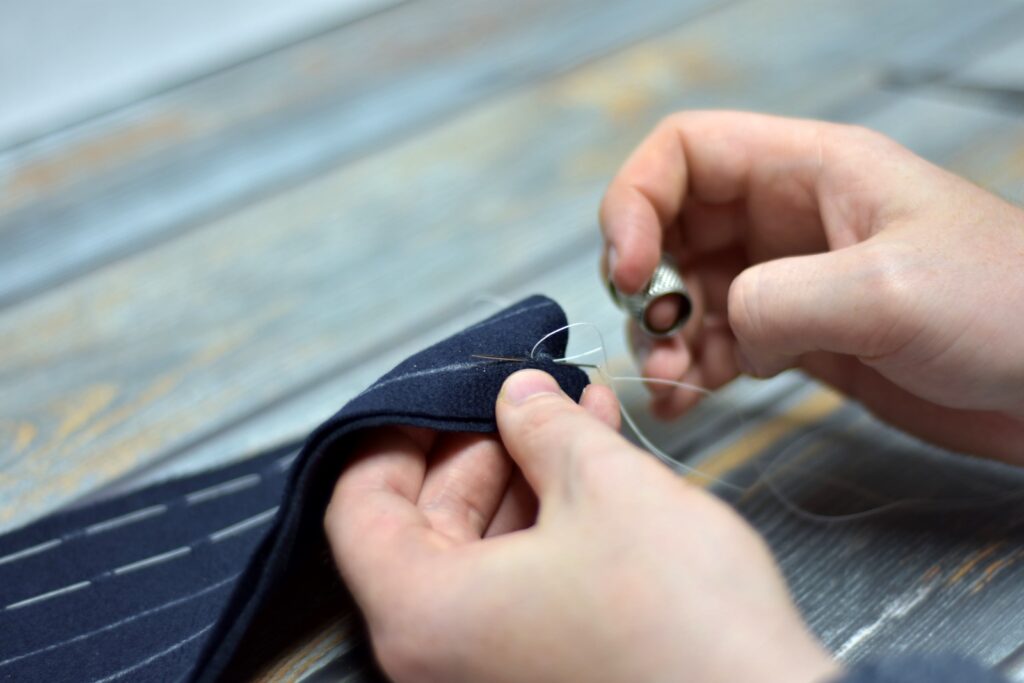
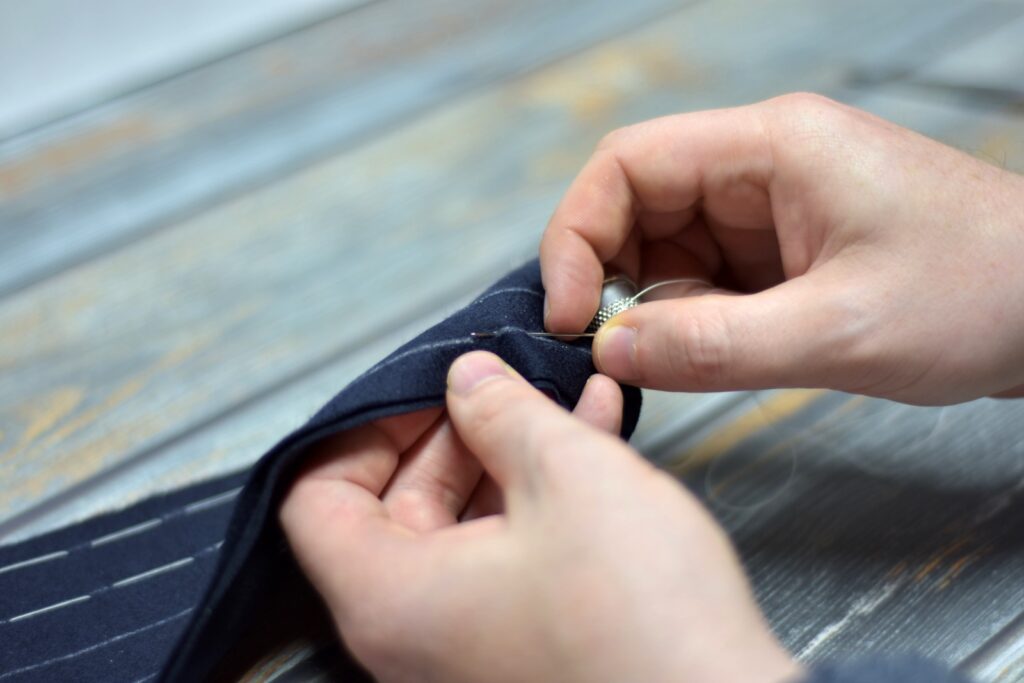
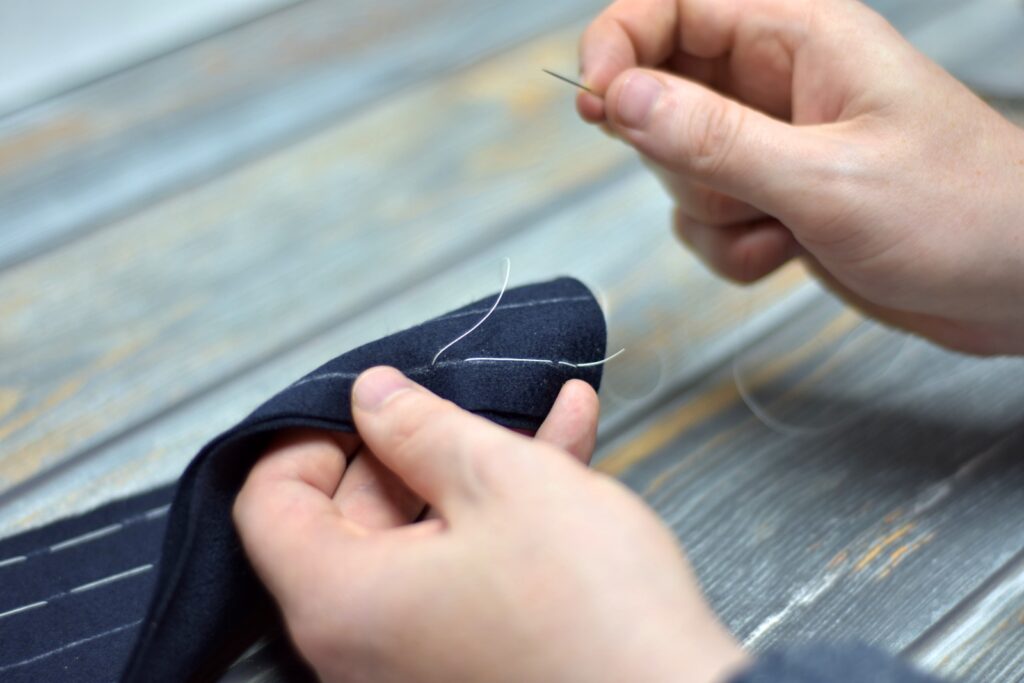
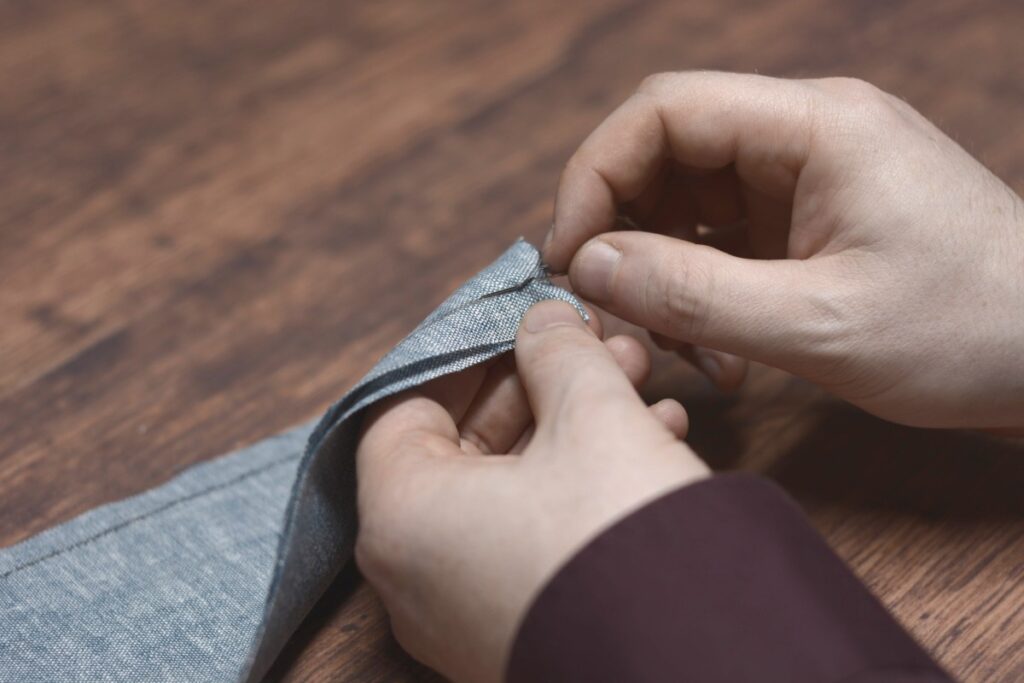
Attaching the Fly
Finally, it’s time to attach the fly itself to the trouser front. Begin by trimming away about 1/4″ to 3/8″ of the fashion fabric and the linen interlining from the fly, being sure not to cut into the lining underneath.
Lay the fly in place on the wrong side of the trousers. I like to set the fly back a little to reduce bulk, so that the eyes of the buttonholes are about 1/2″ from the edge of the trouser. Baste securely down the center of the fly.
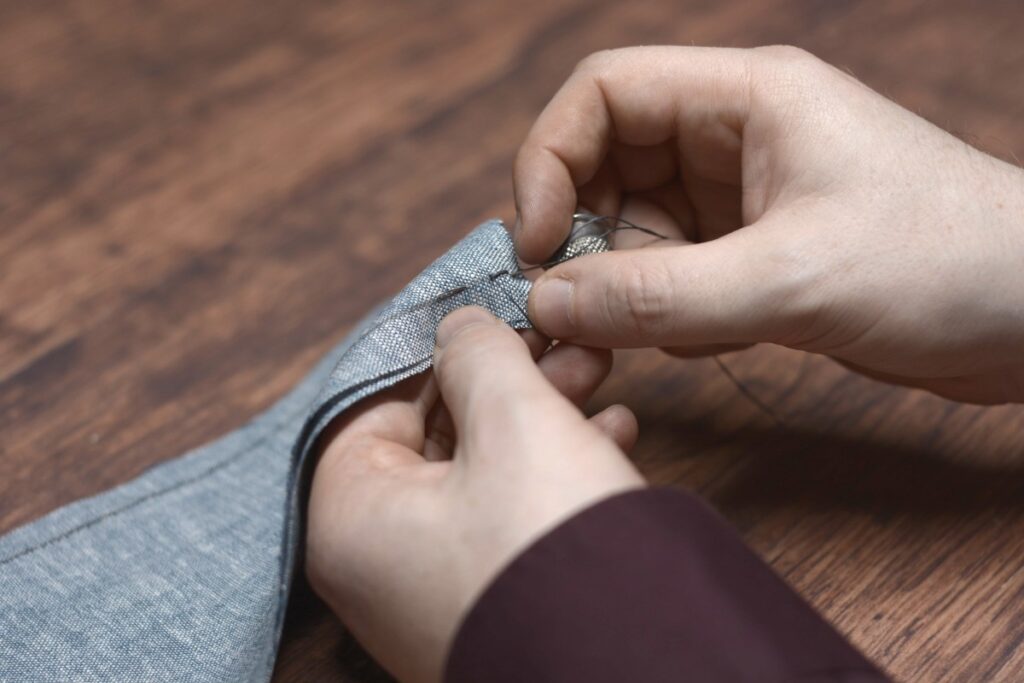
Turn the fly lining under itself – ideally it will encompass all of the layers that make up the fly and fly facing. Baste closed along the folded edge.
Fell along the folded edge of the fly from the waist to the bottom of the fly.
The very bottom can be a little unwieldy depending on just how you’ve trimmed and aligned things. Just get everything looking as nice as you can without making too big a deal out of it, as this area will be mostly hidden when the trousers are finished.
Using a machine stitch or back or side stitch by hand, top stitch through all of the layers about 1/8″ away from the folded edge of the fly. I like to use two different threads here for the machine, the bobbin matching the fashion fabric and the top thread matching the lining.
Use the edge of the fly and your presser foot as a guide while sewing.
The finished result should be a nice line of stitching on the inside.

As well as a smooth line of stitching on the right side which follows the shape of the fly perfectly.
Finally, we need to finish up the fly by making several rows of stitching across the fly, between the buttonholes, to keep the fly from opening up too widely while wearing the trousers.
Start by drawing some guidelines midway between the buttonholes and perpendicular to the edge of the fly.
Start by taking a knotted thread and passing the needle between the layers of the fly, catching the knot inside where it won’t be seen.
Tack the edge of the fly down with about 6 to 8 stitches in place through all layers except the outer layer.
Then begin back stitching across the fly, following the chalked guideline.
Be sure not to let the stitches show through to the right side! Finish off the back stitching with a few stitches in place. Repeat as necessary. This concludes the trouser fly construction.
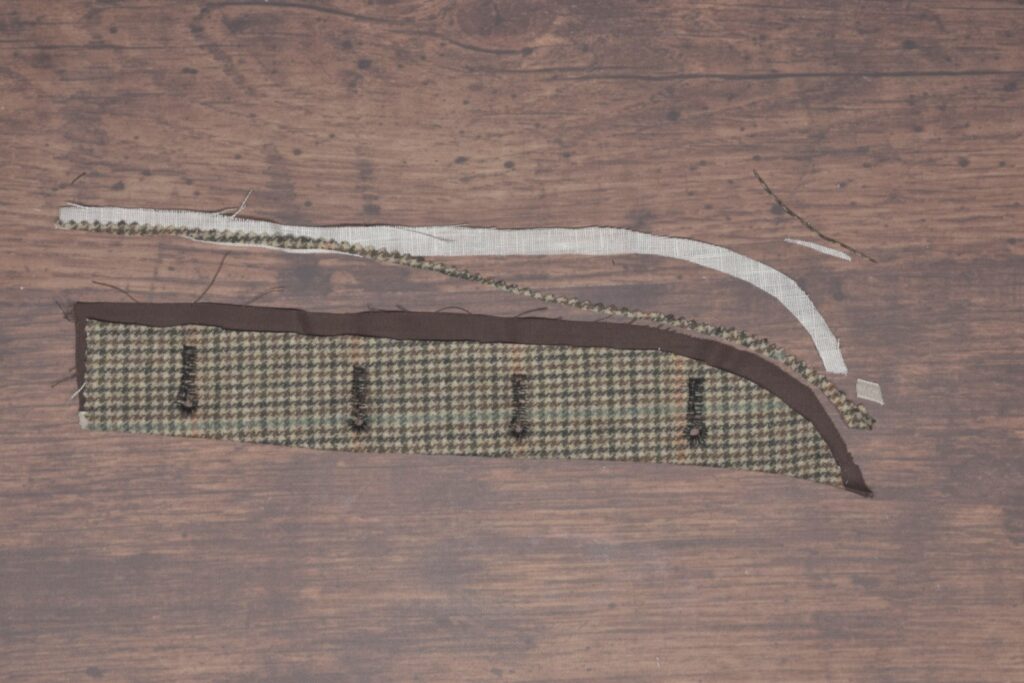
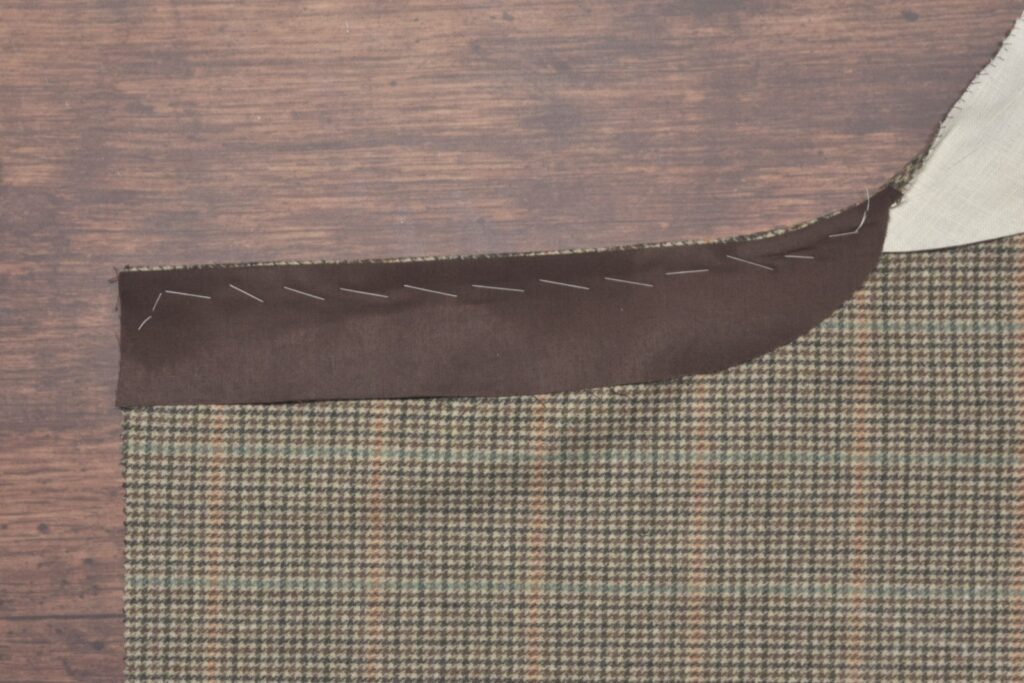
Fly Facing
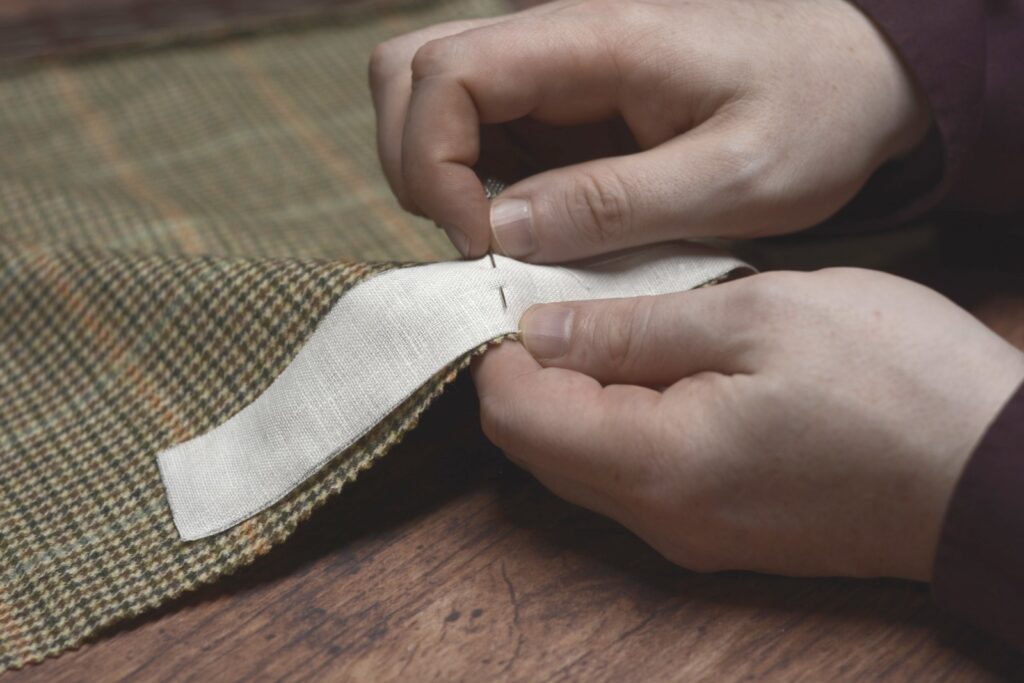
Before attaching the fly to the trouser front, we need to add the fly facing, which will prevent the buttons from wearing through the front of the trousers. You’ll need one fly lining piece as well as an optional length of stay tape.
Baste the lining fabric to the front of the trouser, right sides together.
Mark the seam allowance at the bottom of the fly facing, 1/4″ from the bottom.
Machine or back stitch the fly facing to the trouser front, from the mark to the top of the fly.
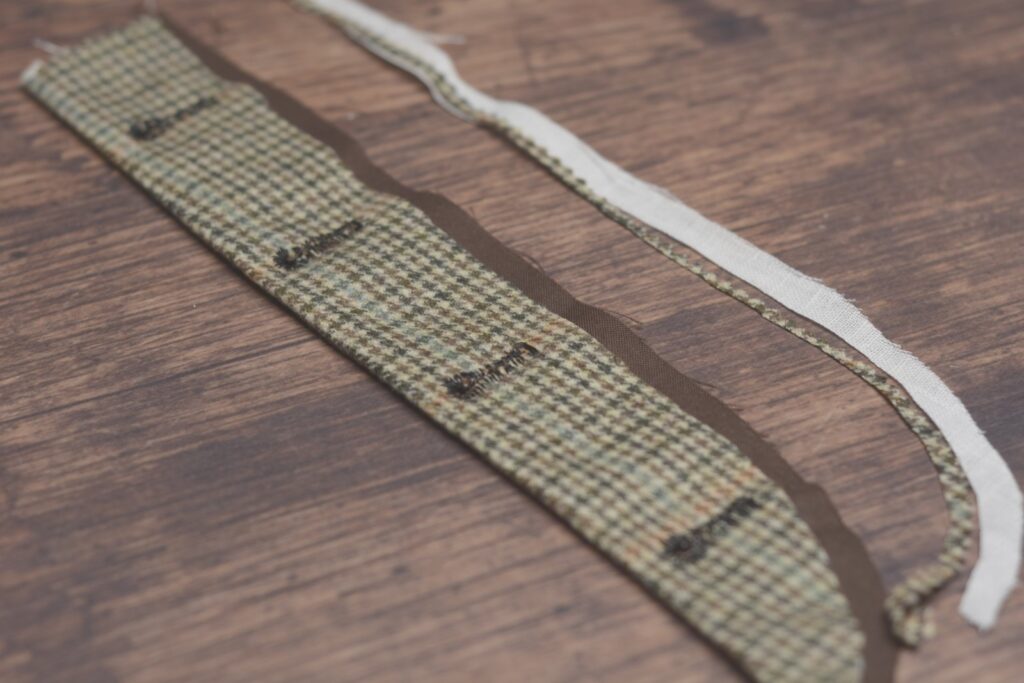
Remove the basting stitches, and open up the seam with your fingers. On the wrong side, baste in the optional stay tape about 1/16th from the stitch line.
As you get towards the bottom of the fly, hold the stay tape with more tension than the fabric underneath, continuing to baste as you go. This will serve to pull the fly area in towards the body.
Trim off the excess stay tape along the bottom and top as necessary, even with the stitching.
Now cross stitch the stay tape to the trouser front, being careful not to let the stitches show through to the right side.
With the tape stitched in, fold the fly facing back into place, allowing the facing to be rolled back 1/16th or so away from the front edge. Baste securely in place.
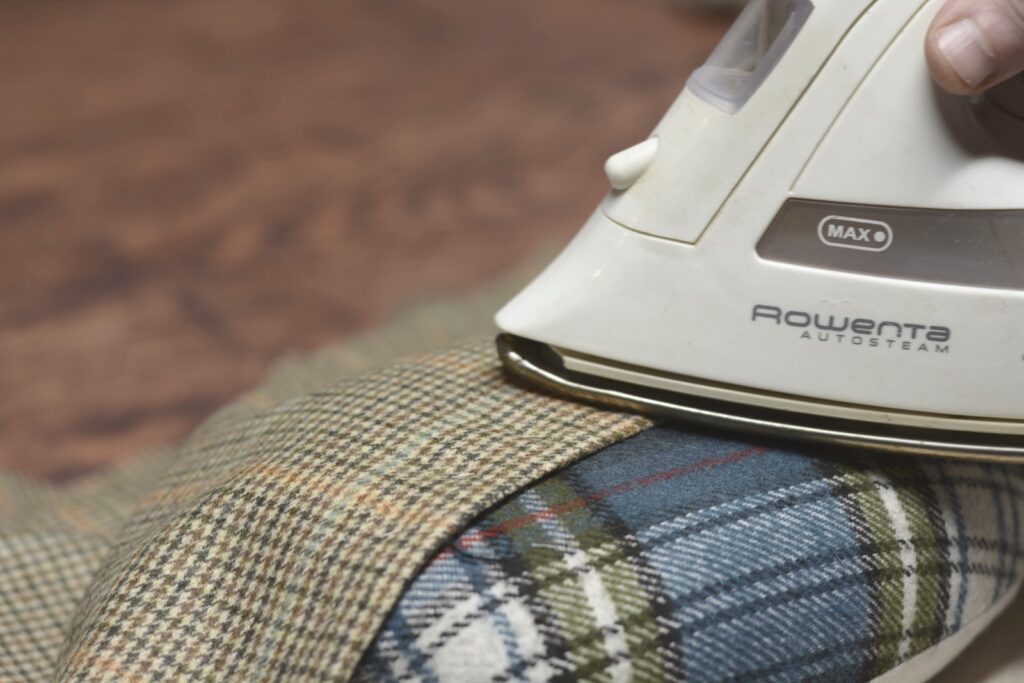
Now press using a tailor’s ham so as not to disturb the fulled in section. You’ll want to smooth out any wrinkles that formed when you held the stay tape tightly to the fabric.
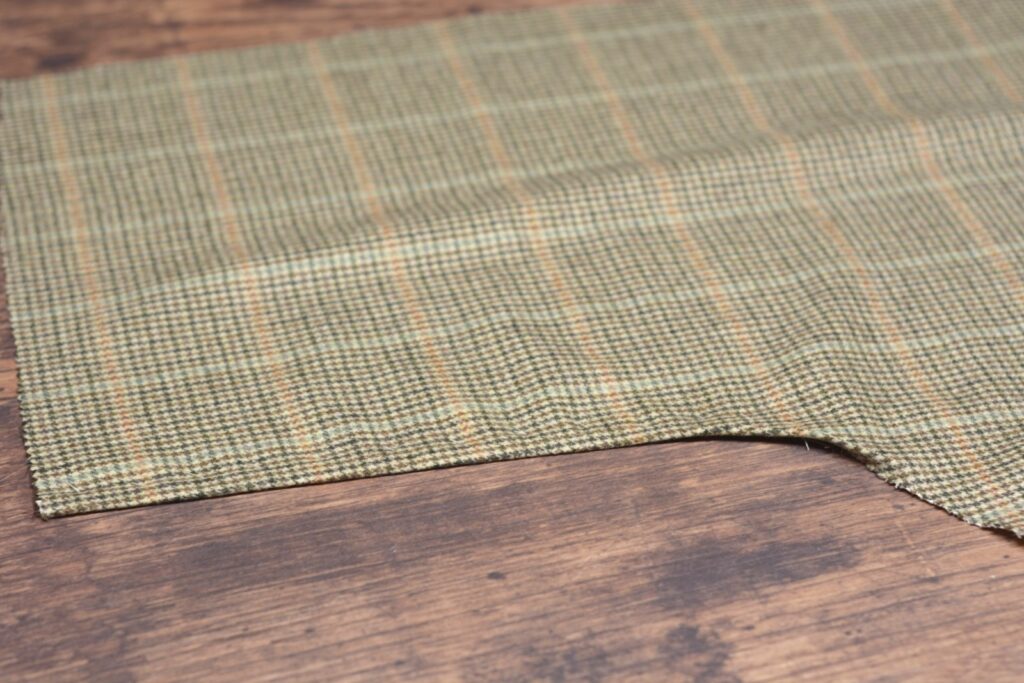
Here’s the completed fly facing. Notice how it naturally pulls in towards itself near the bottom of the fly.
Finally, you need to trim the very bottom of the fly area directly to the bottom of the fly facing stitching.
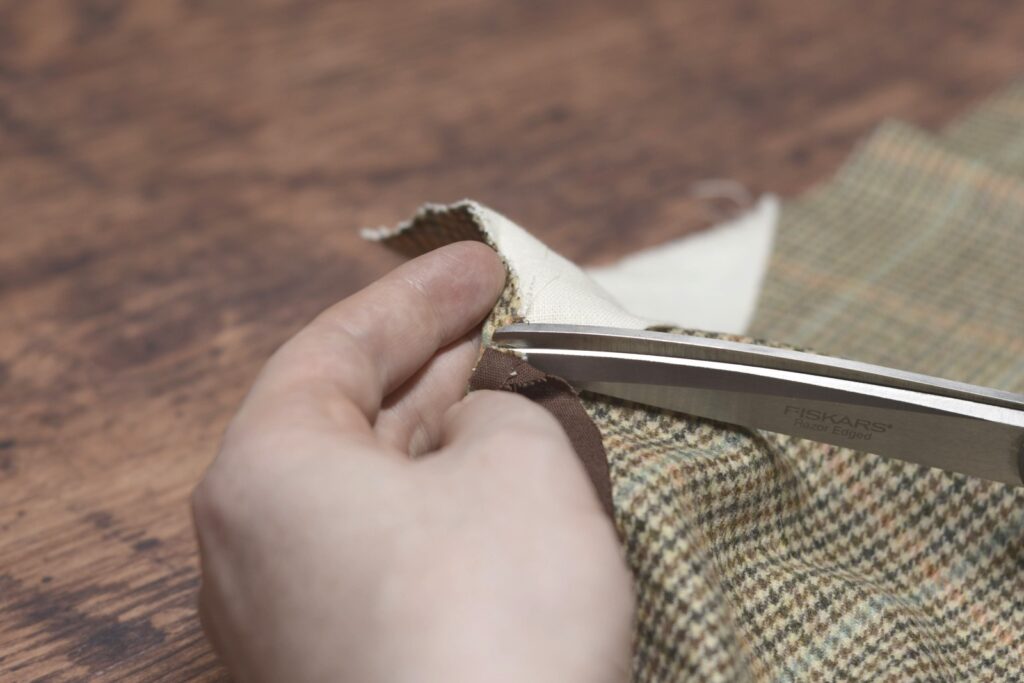
This allows the fork area to open up and lay flat for stitching later on. I try to trim to within about 1/32″ of the bottom of the stitching, to prevent any potential fraying. Press the fork area back open.

Back Stitch
The back stitch is the strongest stitch you can use for a seam, and is great for those areas of a project that take a lot of stress. The downside is that it does take a little longer to stitch the seam, but it’s usually worth the effort if you need that strength.
Begin with a few stitches in place.
To form the first stitch, insert the needle into the original hole, passing it underneath, and bring the needle back to the top of the seam at an equal distance away from the end of the original stitches in place. This completes your first back stitch.

Form the next stitch by bringing the needle back to the end of the prior stitch and continuing as before.
As usual, keep the stitches as evenly spaced as possible. Gradually allow the stitches to become smaller as you become more used to the process. But remember that the fabric will ultimately dictate the size of the stitches and how small you can make them.
Here’s the row of back stitches after completing the seam. They look very nice and tidy from the right side.
While the wrong side looks a little less tidy due to the overlap of the stitches.
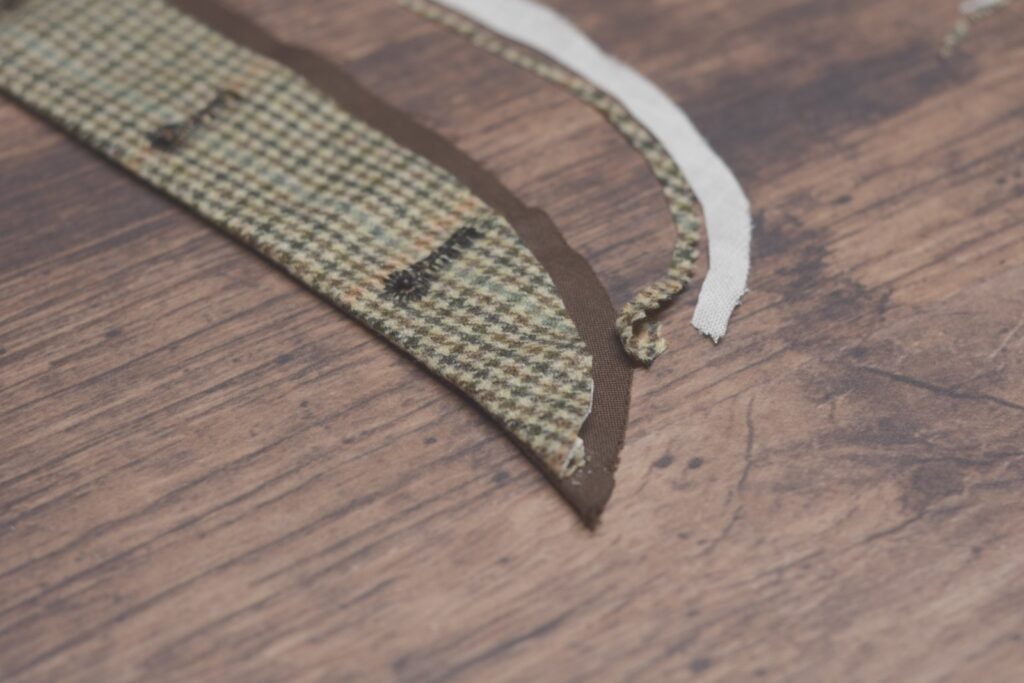
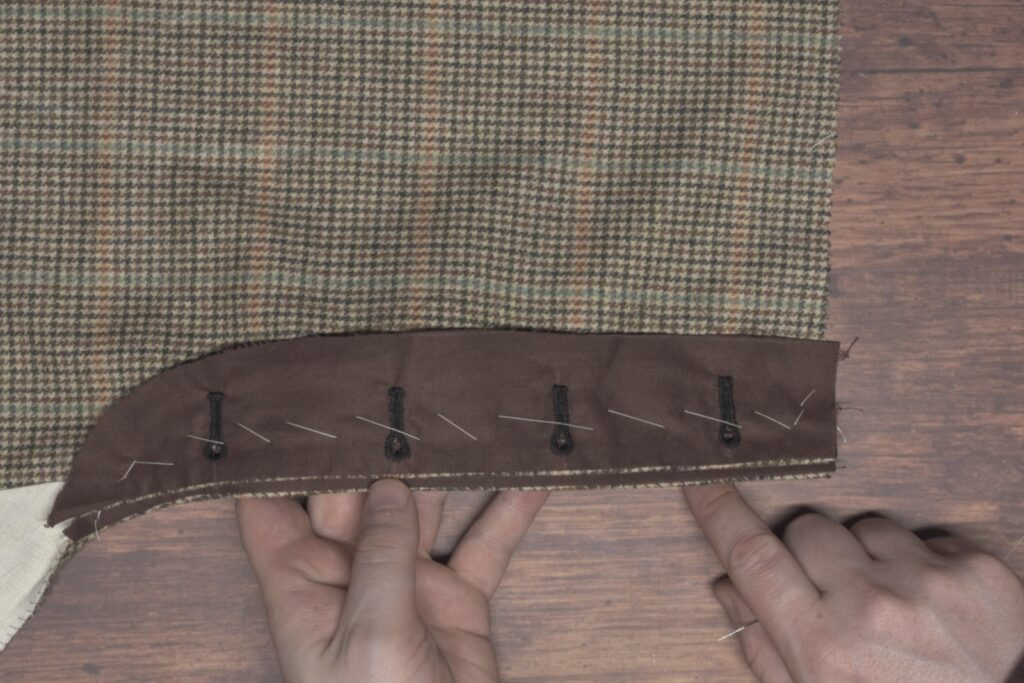
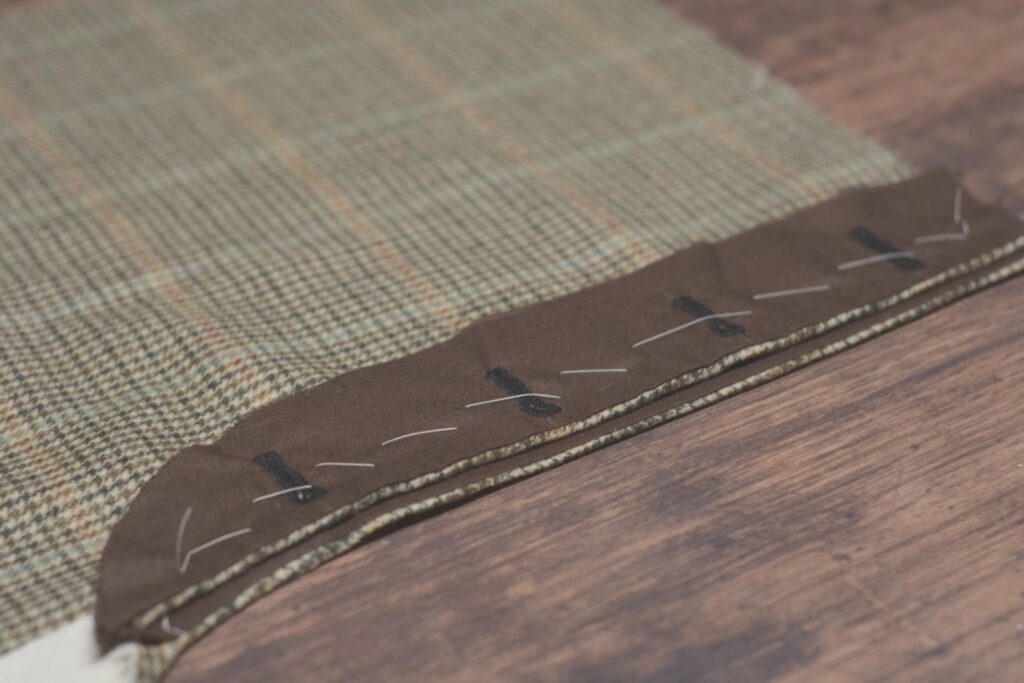
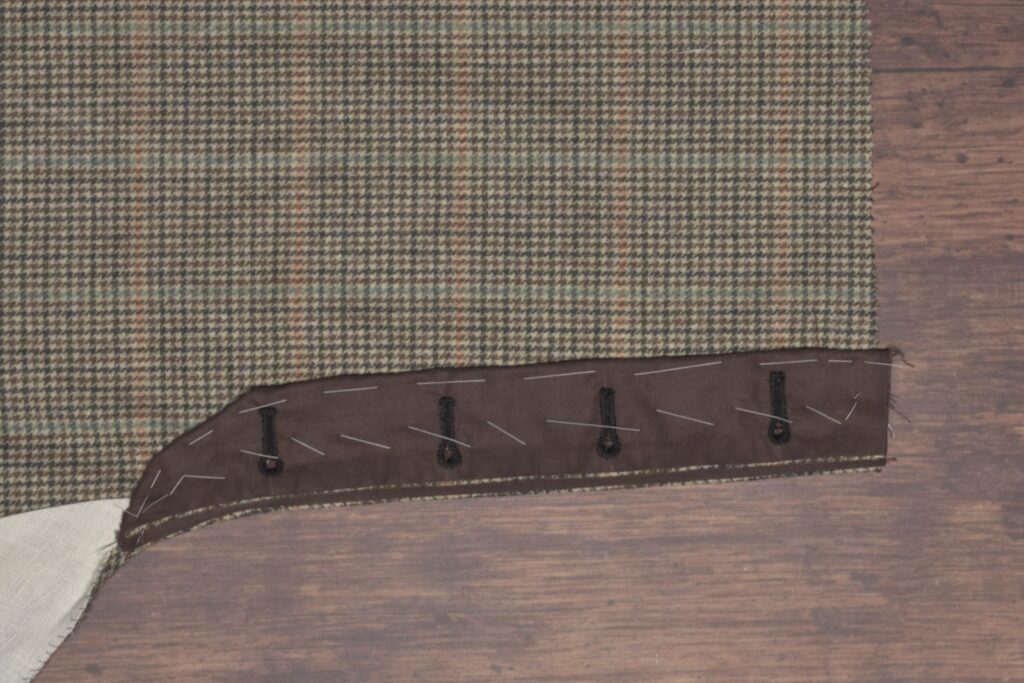
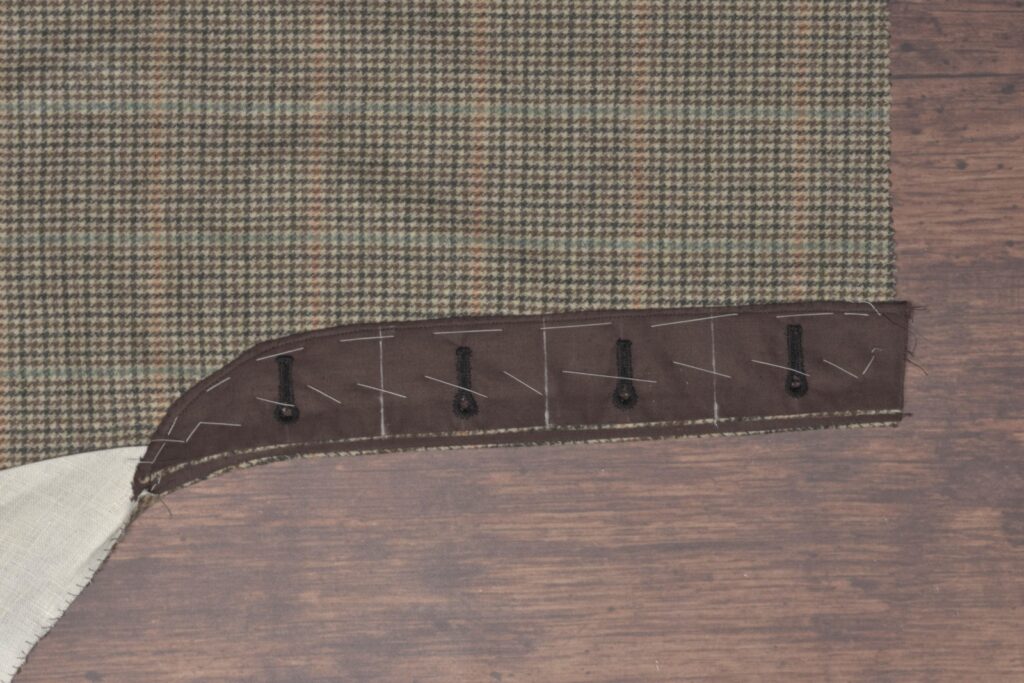
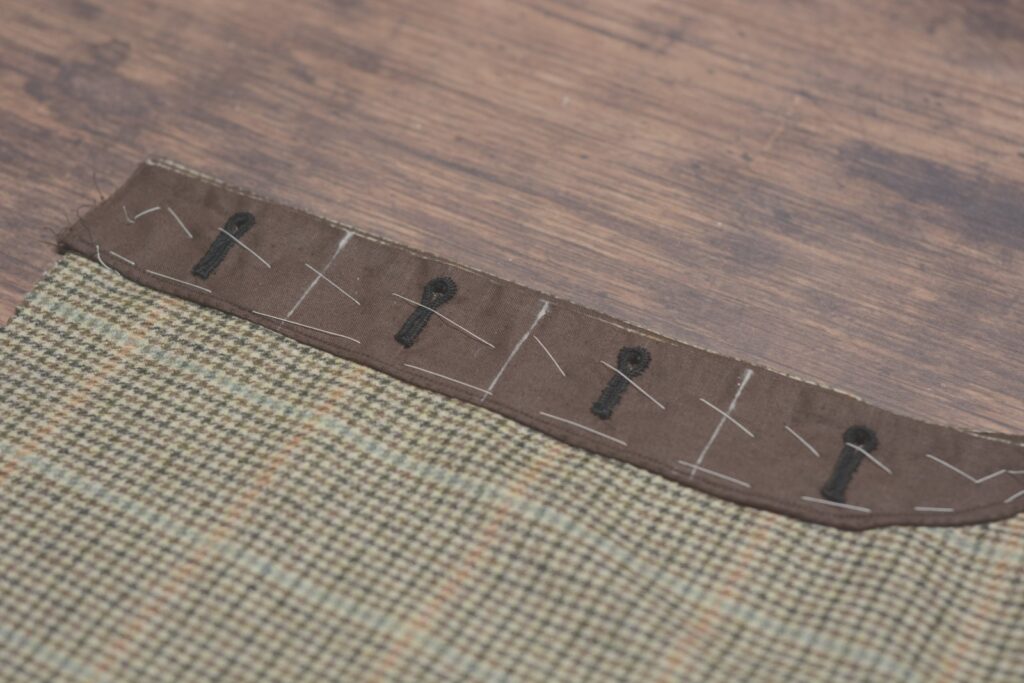
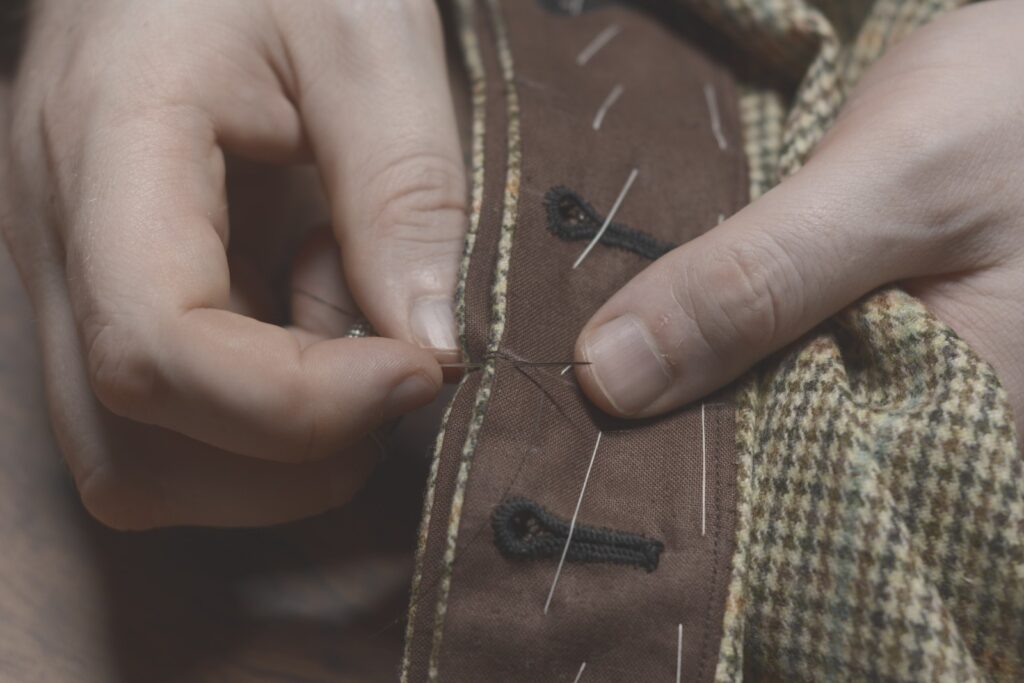
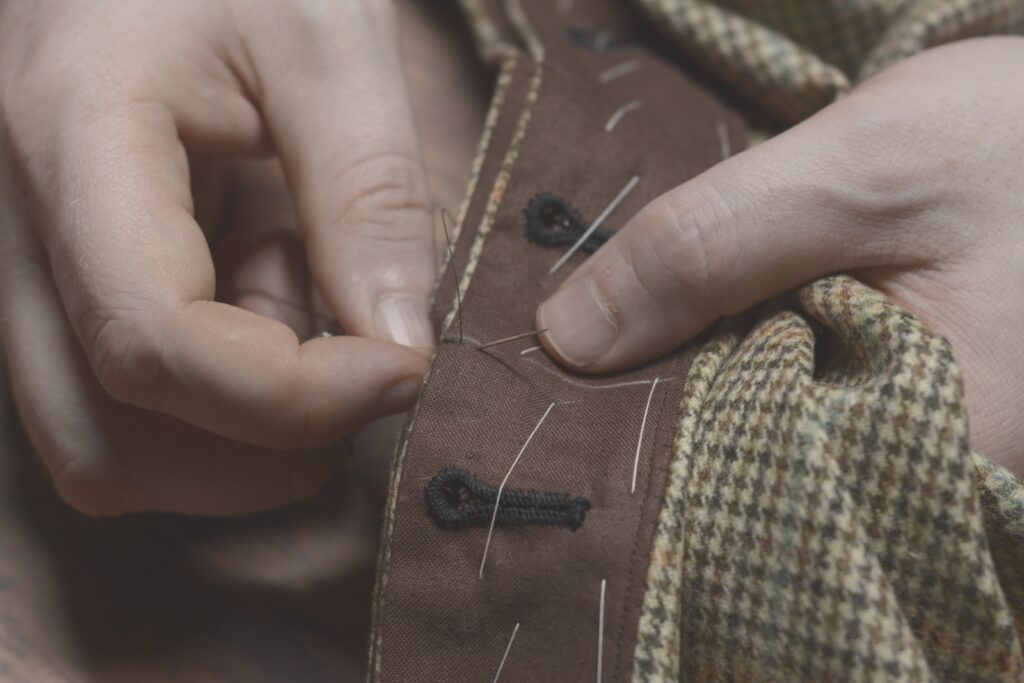
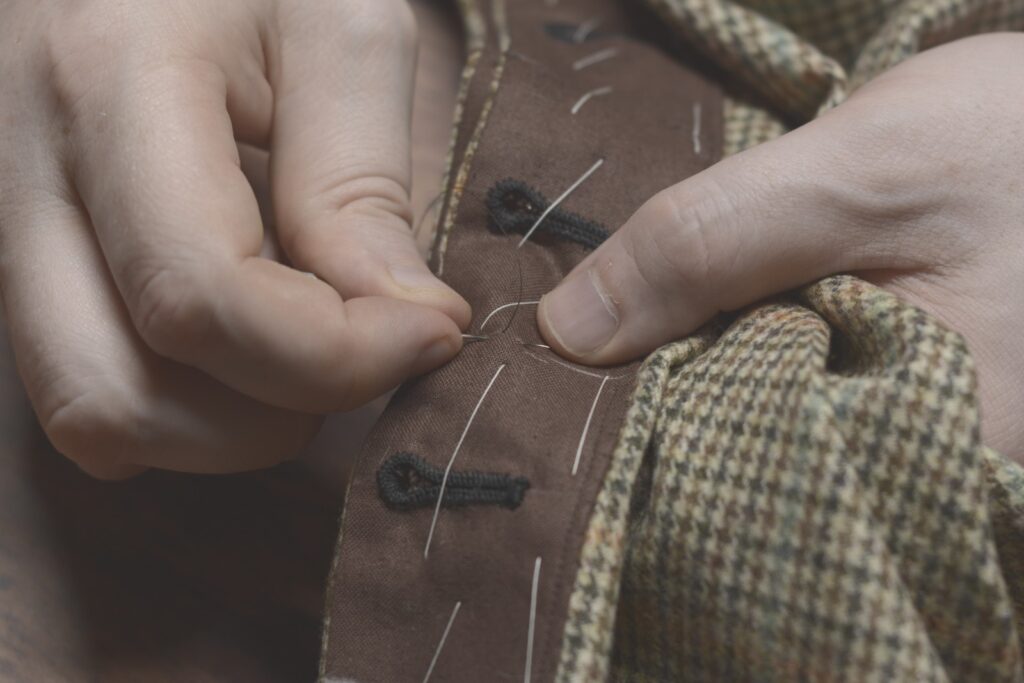
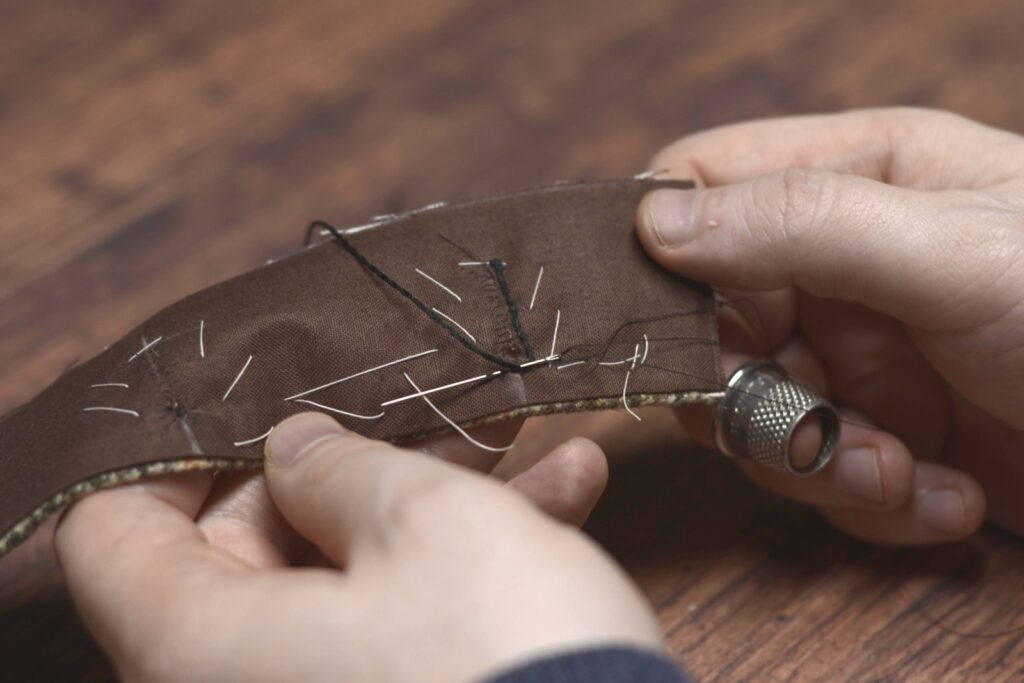
Fly Buttonholes
It’s time to work the buttonholes on the trouser fly. If you’ve never made a buttonhole before, please see my course The Art of the Buttonhole and practice on some scraps first, as this will just be a general overview.
Begin by laying out the buttonholes on the fly. The top buttonhole I usually place about 1 1/2″ below the top edge, and the bottom buttonhole about two inches from the bottom. Then fill in the remaining buttonholes equally (you may have more or less than I do, according to your size). Mark the width as 1/4″ to 3/8″ from the edge, and 1/8″ to 1/4″ wider than your buttons.
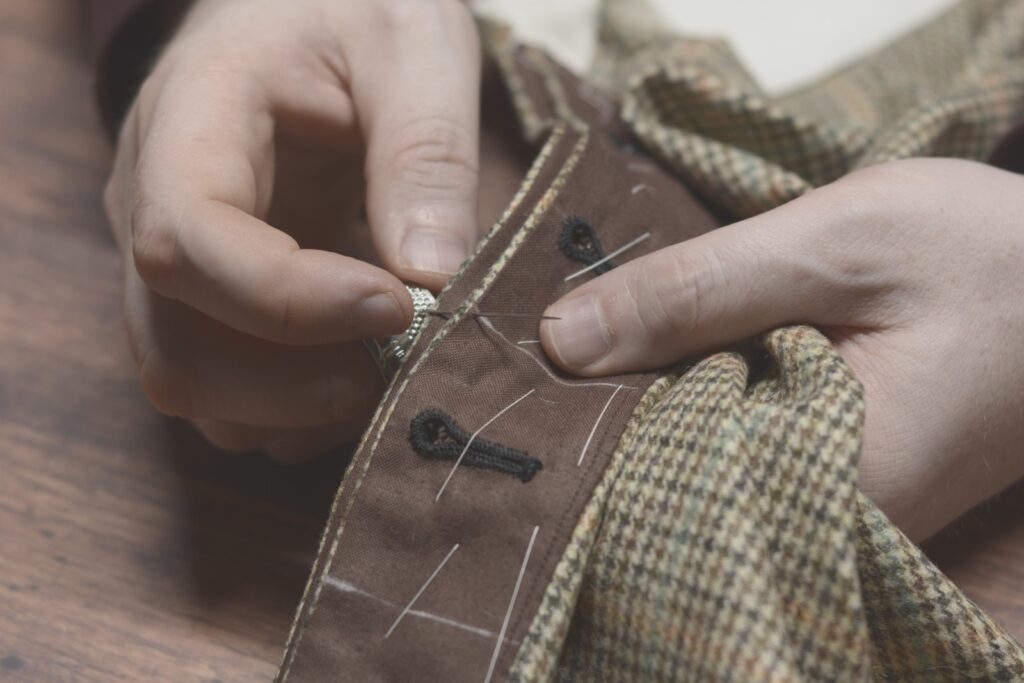
Baste around each buttonhole with a diagonal basting stitch to secure the layers.
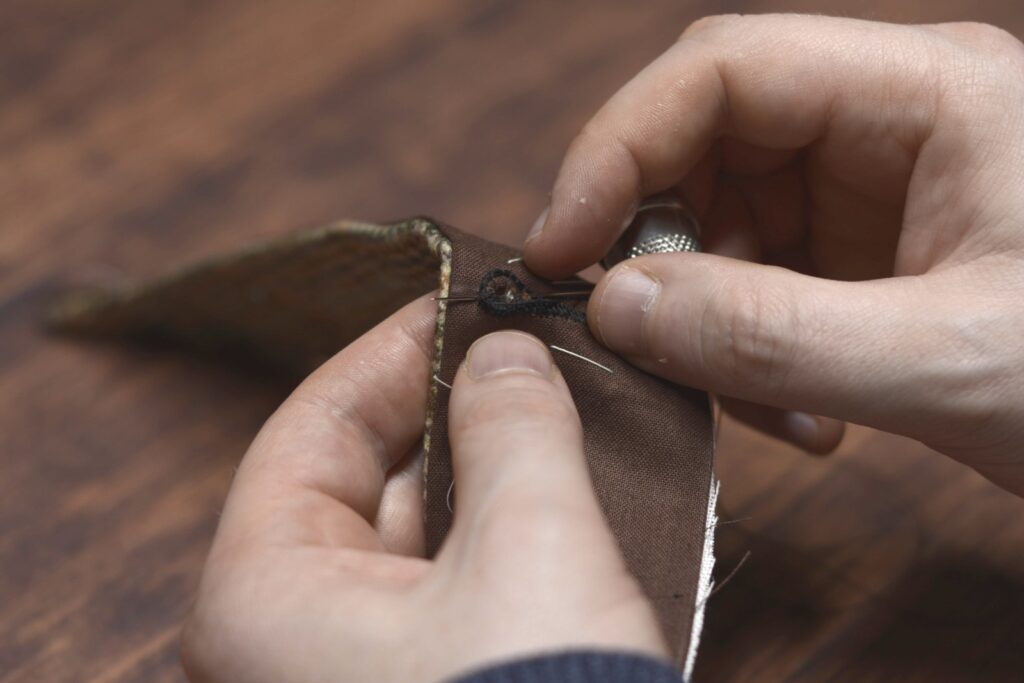
Fell along the edges of the buttonholes to secure the edges permanently.
Attach the four-cord or gimp along the edge of the buttonhole using a couching stitch.
Now work the buttonhole stitch evenly around the edge.
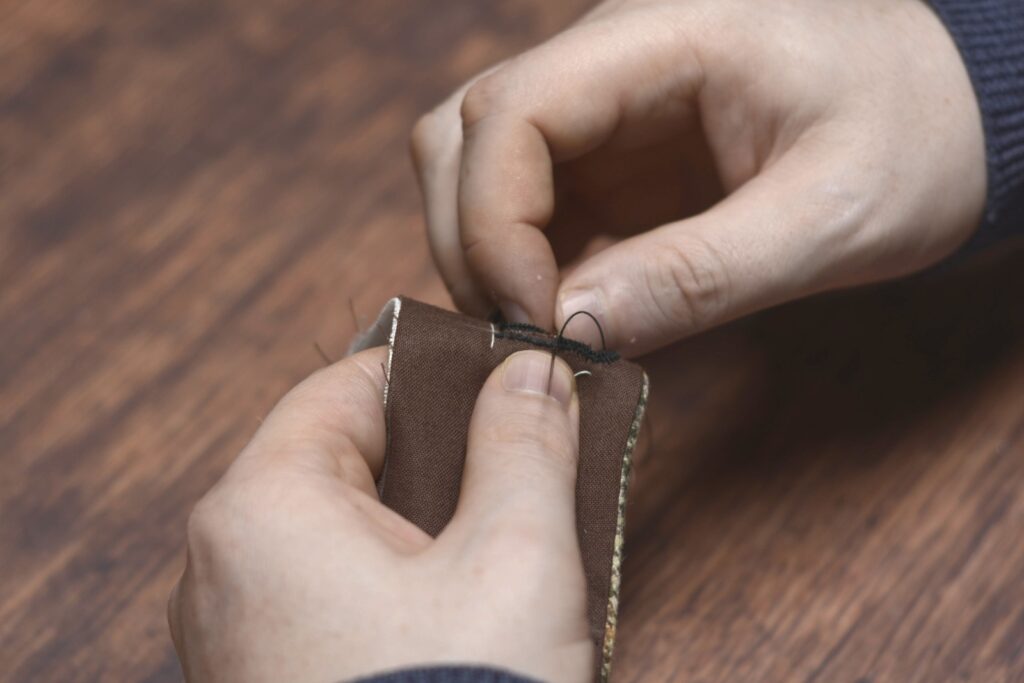
Finish up the buttonhole by working a bar tack across the end.
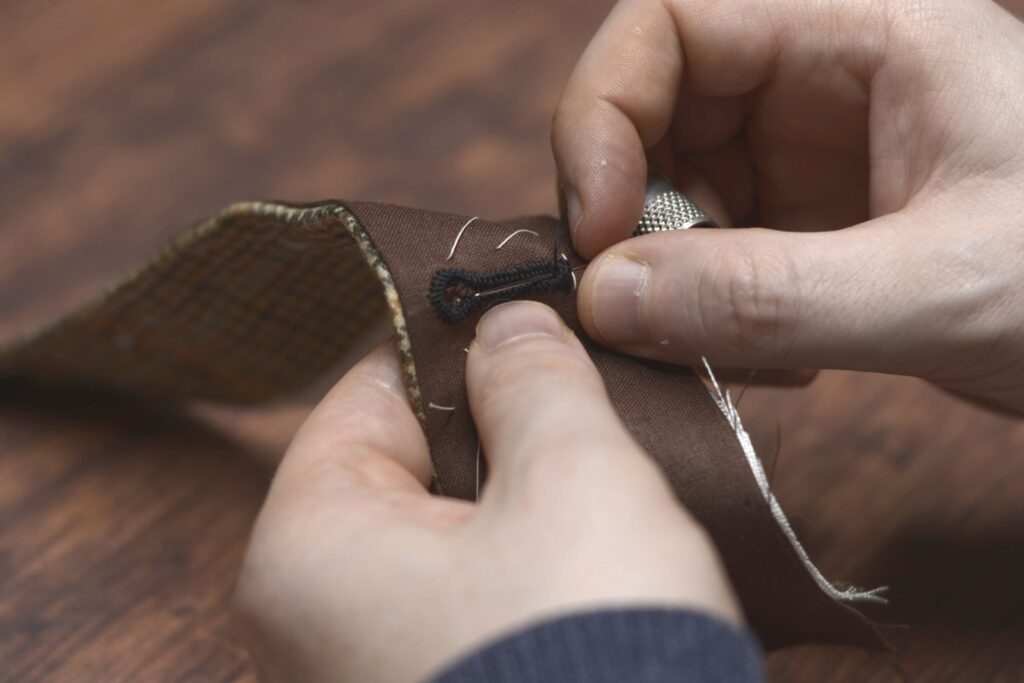
And finally secure the thread by passing it beneath the stitches in multiple directions on the wrong side.
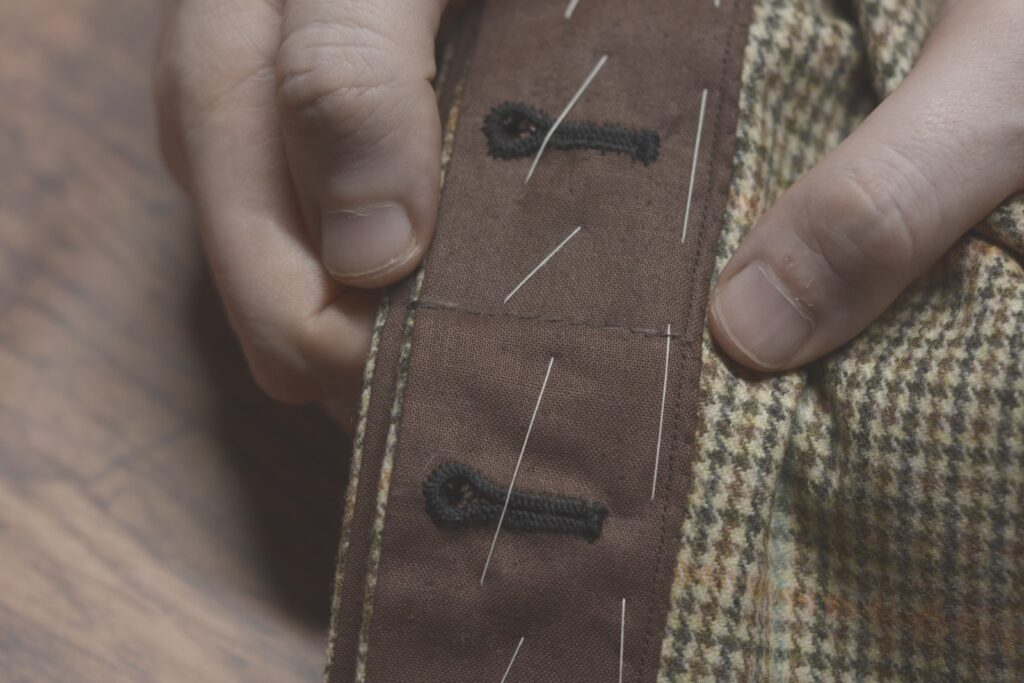
Here are the completed buttonholes. I find these go a lot faster than usual because the layers are (usually) thinner than on a coat and they’re typically smaller as well.
Running Stitch
The running stitch is the most basic of stitches and forms the basis for a number of other stitches. Surprisingly, it’s not actually used all that much in tailoring, as it is a very weak stitch that will easily break under a little tension. The main uses within the tailoring world are for basting (covered later on), as well as in decorative top stitching.
Nevertheless, it’s an important stitch to master so that one may progress to the other stitches. When you’re starting, the most important thing is to keep an even and straight stitch, with the length being whatever you’re most comfortable with. The smaller stitches will come with time and practice.
Since we’re on the subject of stitch length, it’s easy to become a ‘stitch counter’ and try to replicate the exact number of stitches per inch used on an original garment, for example. However, we don’t have access to the same fabrics as they did, and I prefer to differ the length according to what the fabric I’m actually using can handle. So for this linen blend I’m using for these demonstrations, I can get quite a small stitch thanks to the thinness of the layers. If I’m sewing through layers of thick wool broadcloth, the stitches will a bit bigger and may take some effort to get through all the layers. Experience will help you make these decisions almost second nature, especially if you can practice diligently and with different fabrics.
I suggest marking out your seam lines in chalk or pencil at first to aid you in accuracy. In the example I’ve just marked out the one seam line but you should mark multiple seams across the fabric for extra practice, as shown previously.
To begin the running stitch, make a couple of stitches ‘in place’, or right on top of each other. The needle should enter and exit at pretty much the same place each time. These stitches serve to lock the end of the seam in place. You could also use a knot here, or a combination of the two, whichever you prefer.
After making the two stitches in place. I could go in for a third stitch if I wanted extra security but two is generally sufficient.
To make your first stitch, pass the needle into the fabric about 1/8″ to 1/4″ away from the end of the stitches in place, and pass the needle back to the top of the fabric keeping the distance the same. The entire stitch should be made in one smooth motion coming from the wrist rocking back and forth; the wrist giving the strength behind the stitch while the fingers giving the accuracy and fine control.
Here’s what my stitches look like after two have been made. I’m keeping them on the large side so you can see more clearly what I’m doing, but just keep a spacing that works for you.
Another little detail that’s easy to miss is how I’m keeping tension on the fabric with the pinkie and ring finger of my left hand. I’ve got the fabric locked between them while simultaneously grasping the fabric near my current stitch between my thumb and index / middle finger. By keeping the fabric under tension, it makes it a lot easier to sew and pull the stitches themselves to the right tension – tight enough to be fully engaged without pulling on the fabric. After I’ve sewn enough of a particular seam, I’ll sometimes use my right hand to hold the fabric down on the table to create tension. I’ve also heard of some who prefer to pin the fabric to their leg or weigh it down on the table. You’ll have to figure out which method you prefer!
As you practice, you’ll naturally begin to make smaller stitches as shown here. Don’t try to force the size, just try to keep the stitches as even as possible as you work out your preferred stitch size.
You can see how in a sense, you are actually weaving the two layers of fabric together, and why with a stronger stitch than a running stitch, hand stitching can easily be stronger than a machine sewn seam.

One of the main advantages of the running stitch is its speed. As you get more comfortable, you can begin to take multiple stitches as once. Two or three at once is good to start, more than that and the needle can get bogged down from the tension. Just rock the needle back and forth with the wrist, pulling the thread taught after all of the stitches have been made.
Finally, end the seam with another two or three stitches in place. Here you can see my finished seam line with smaller-sized stitches. Continue on with sewing more seams if you wish, or open up this seam and see how it looks!
Here’s a video demonstrating the running stitch for you.
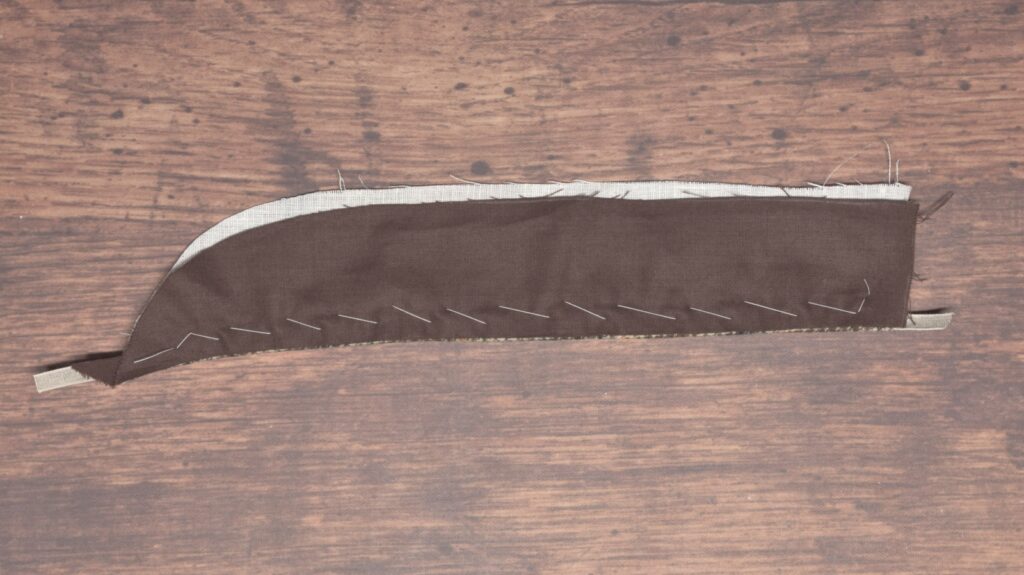
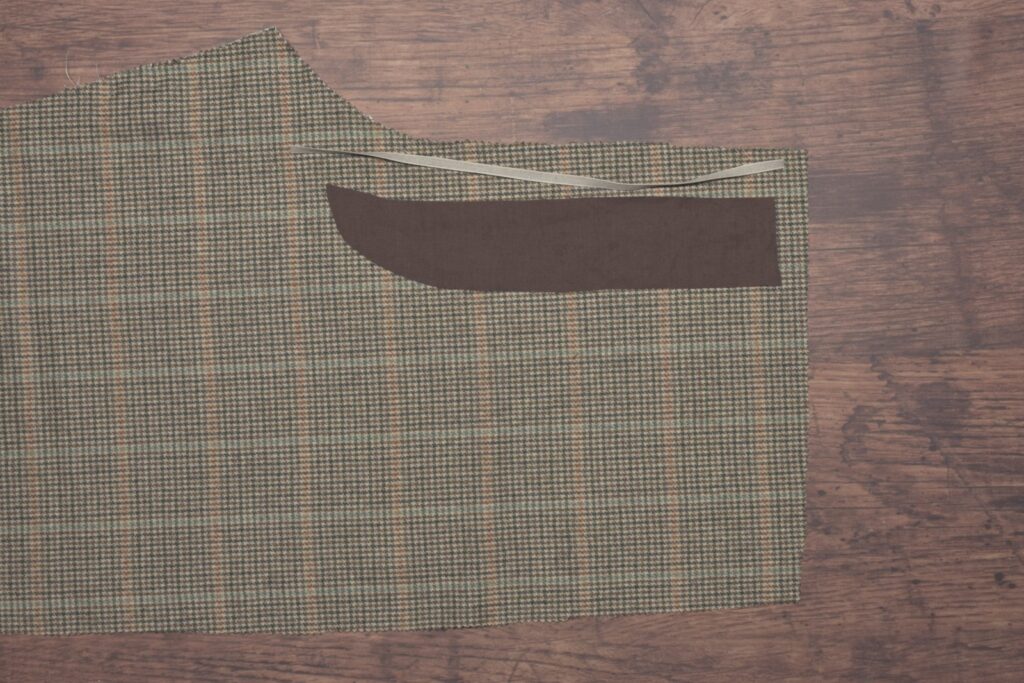
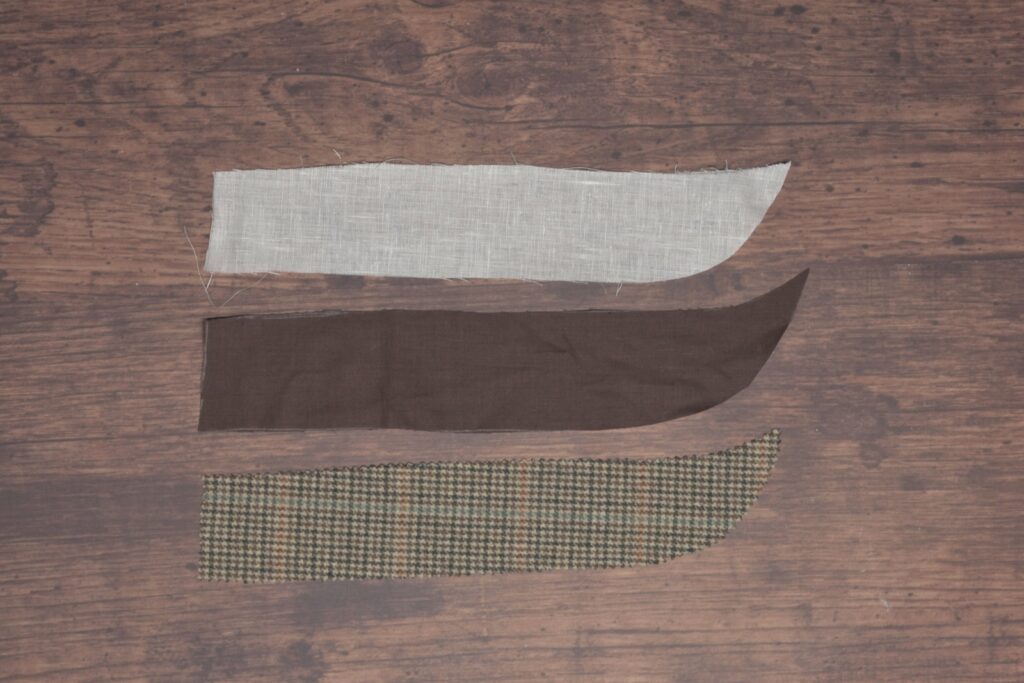
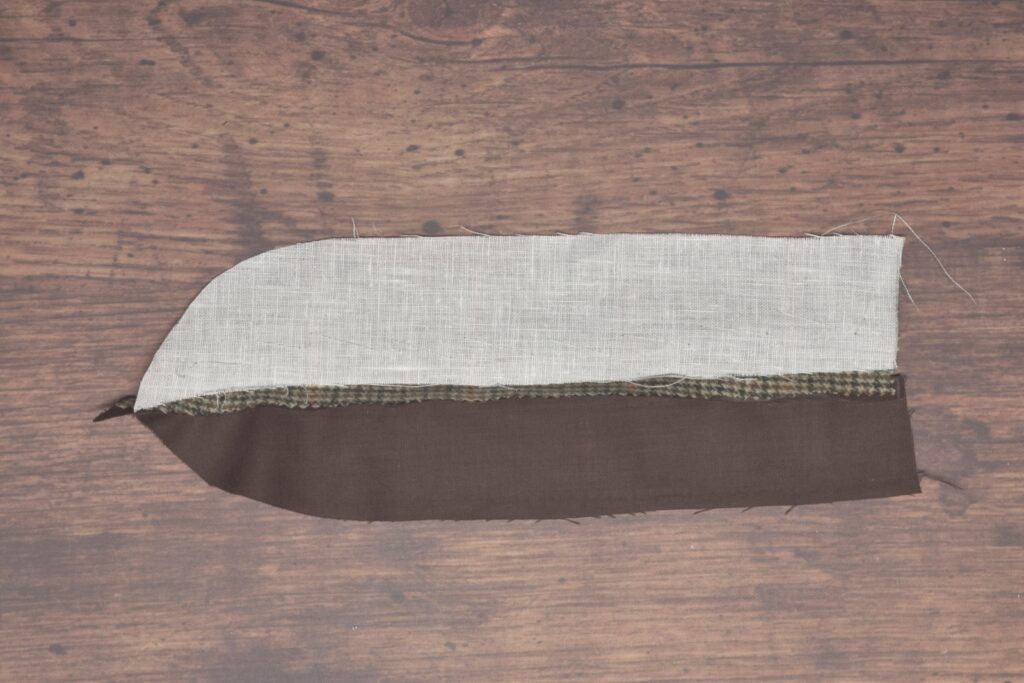
Fly Construction
Now that the button catch is complete, we can start on the fly itself. You’ll need three pieces as shown: the fabric itself, the lining, and a linen interfacing. These are all right sides up in the photo, the lining should be closest to the body when this is complete so you need to make sure they’re cut the correct way.
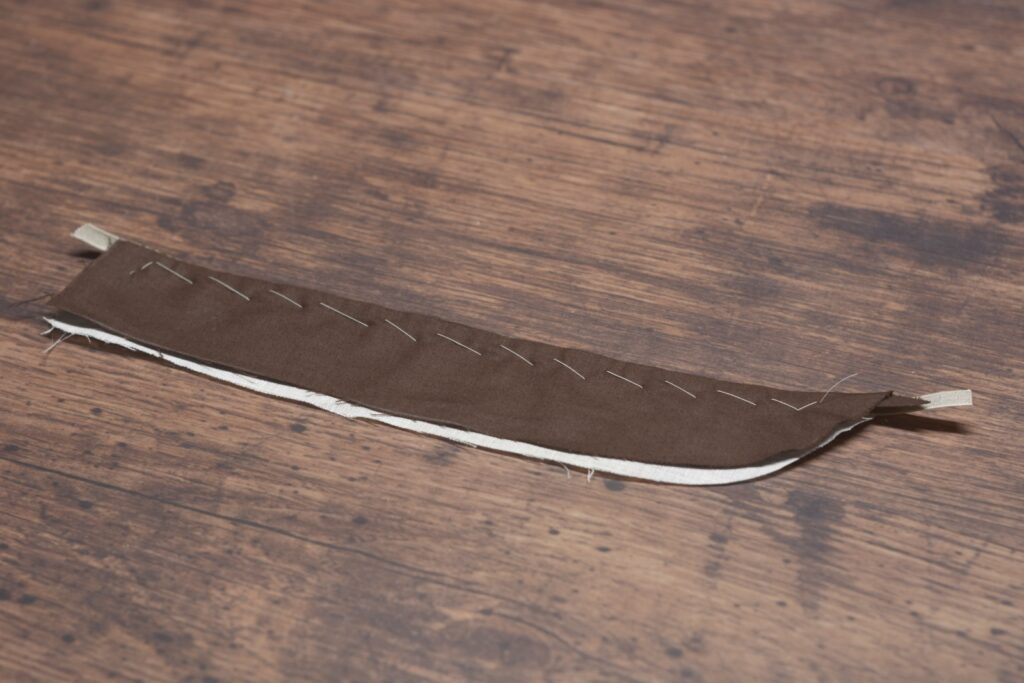
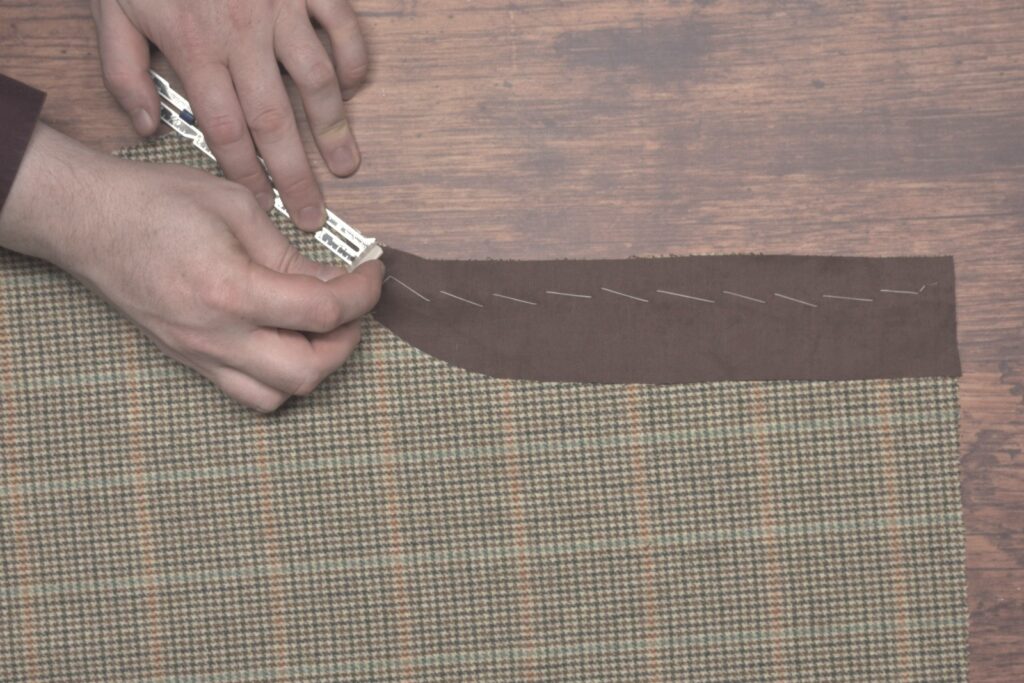
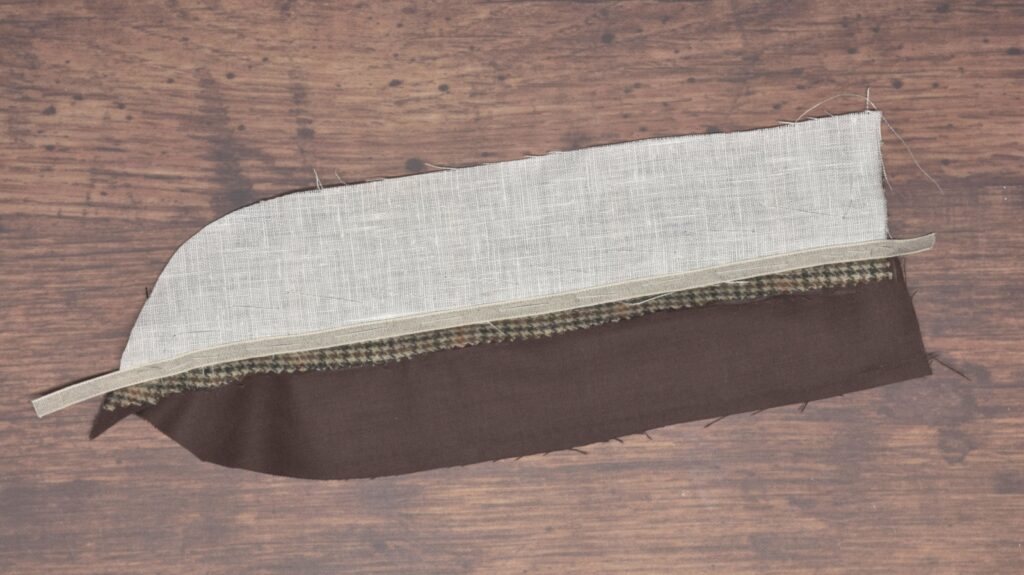
Lay the trouser fly and lining pieces right sides together, and baste along the outer (straighter) edge.
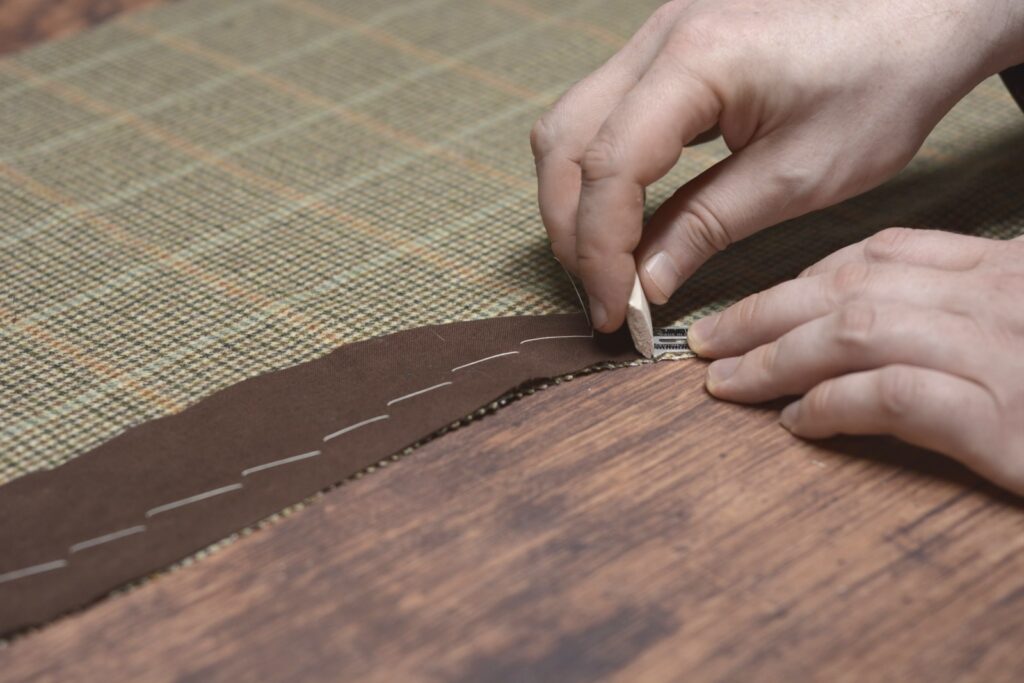
At the bottom end of the fly, mark the seam allowances at 1/4″ from the edge to get the position of the end of the stitching.
Stitch from the top of the fly to that mark along the straighter edge. Remove the basting stitches.
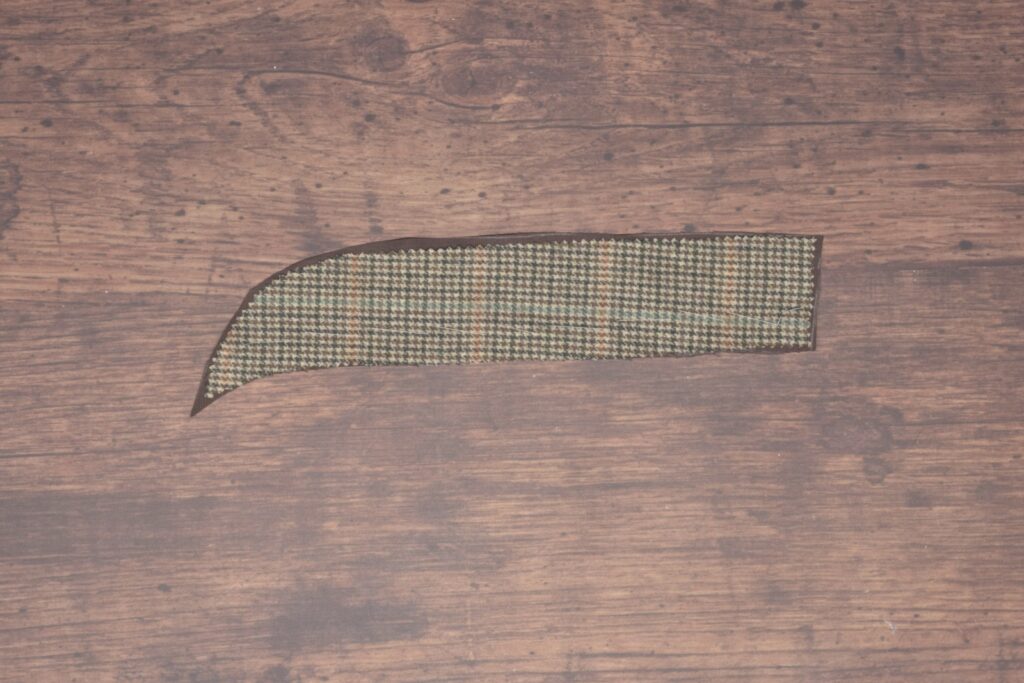
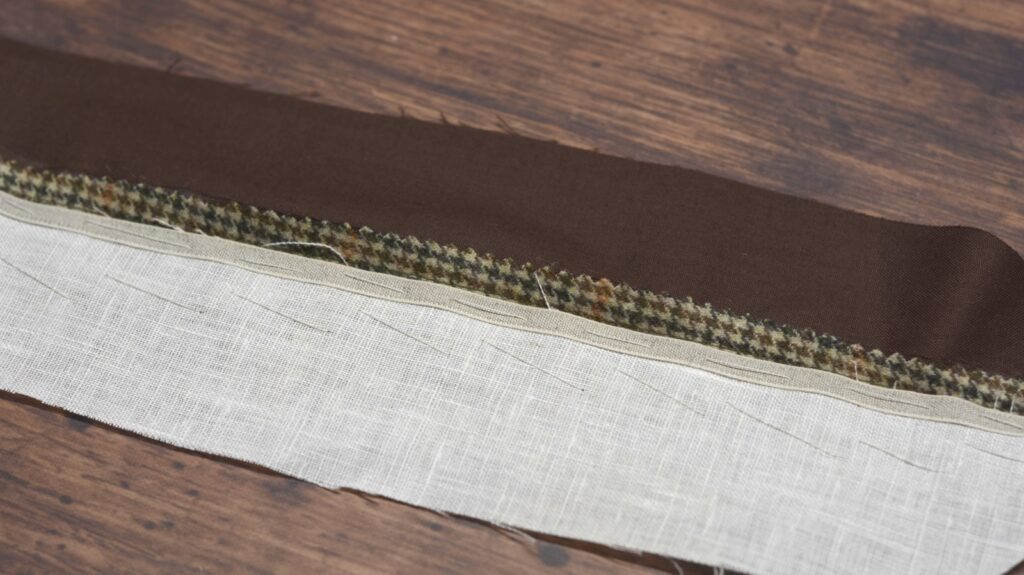
Now press the fly into its final position, wrong sides together. The lining should be pressed back about 1/16″ to 1/8″ as shown below.
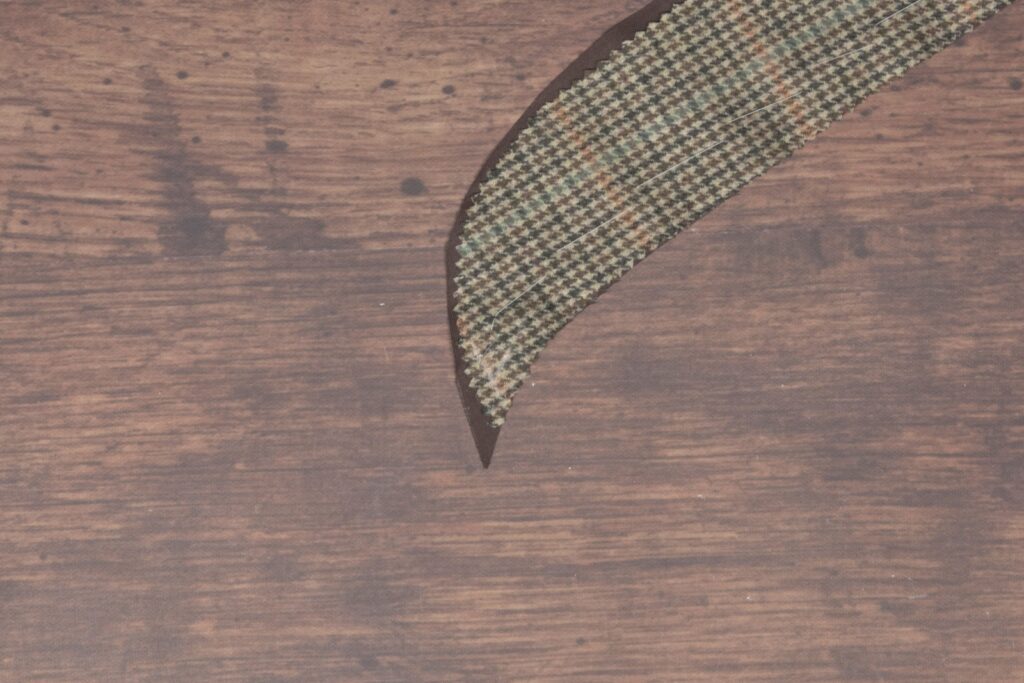
The bottom can be a little fiddly because of the curve, so I had to go back and straighten things out with my fingers before pressing again.
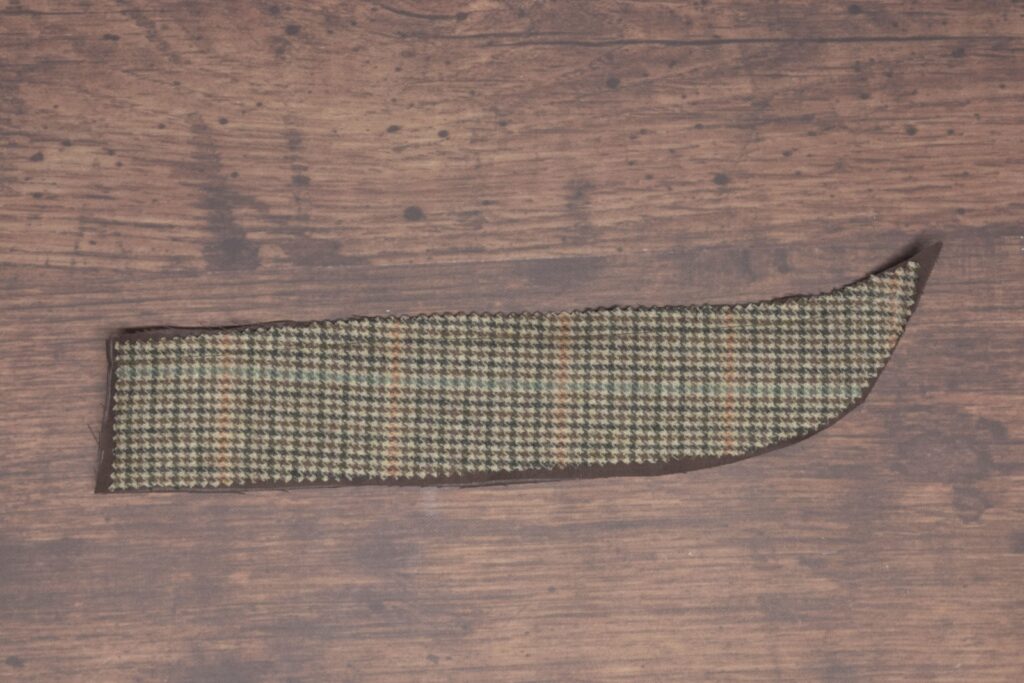
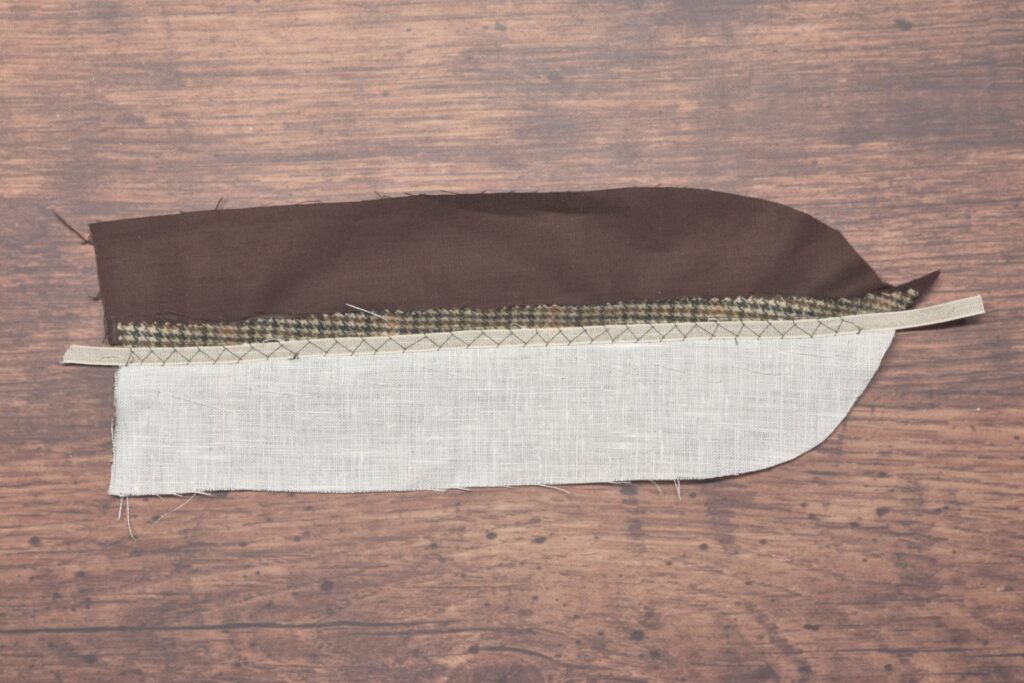
Now open up the fly again and baste the linen piece to the wrong side of the fabric.
Next, baste in a piece of linen stay tape along the length of the seam. This is optional, and I’m not sure if all trousers would have had this added during the 1860s period, but it adds a nice firmness to the edge and more durability. If your fabric is on the thicker side you could leave it out as well.
Stitch the stay tape in place using a cross stitch.
Finally, fold the lining back over the fly and baste it securely closed along the edge. We are now ready to move on to the buttonholes.