Author: James Williams
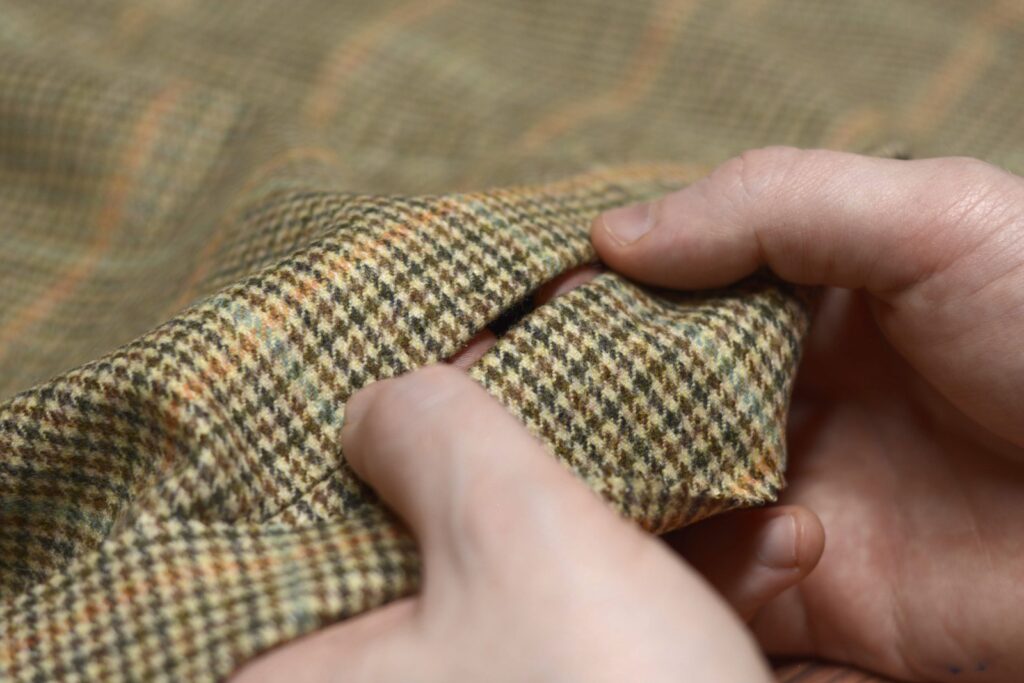
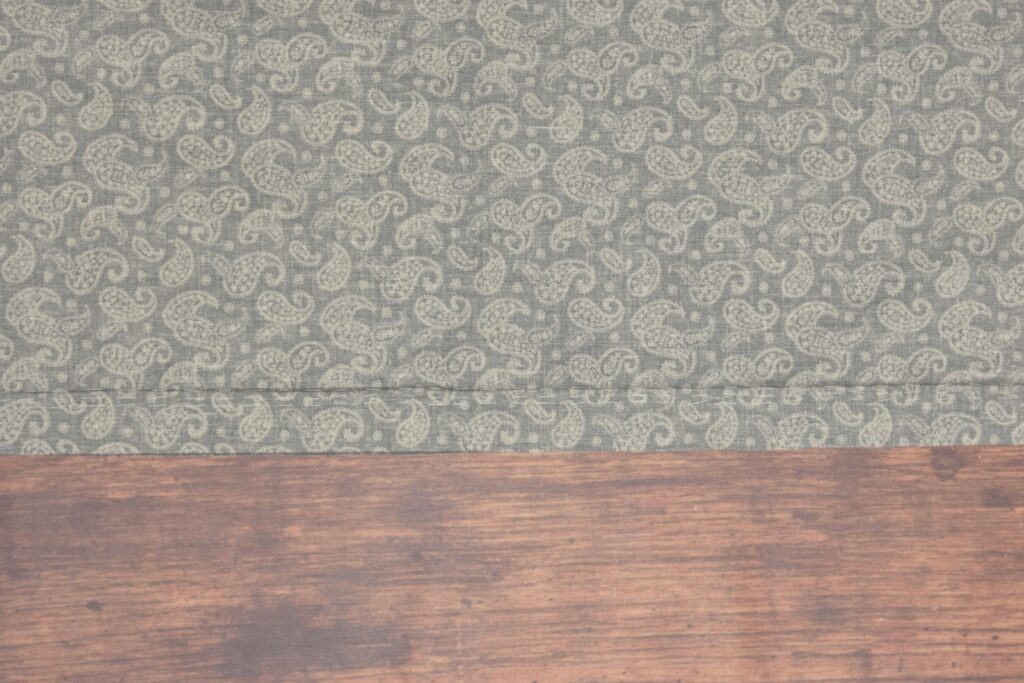
Watch Pocket
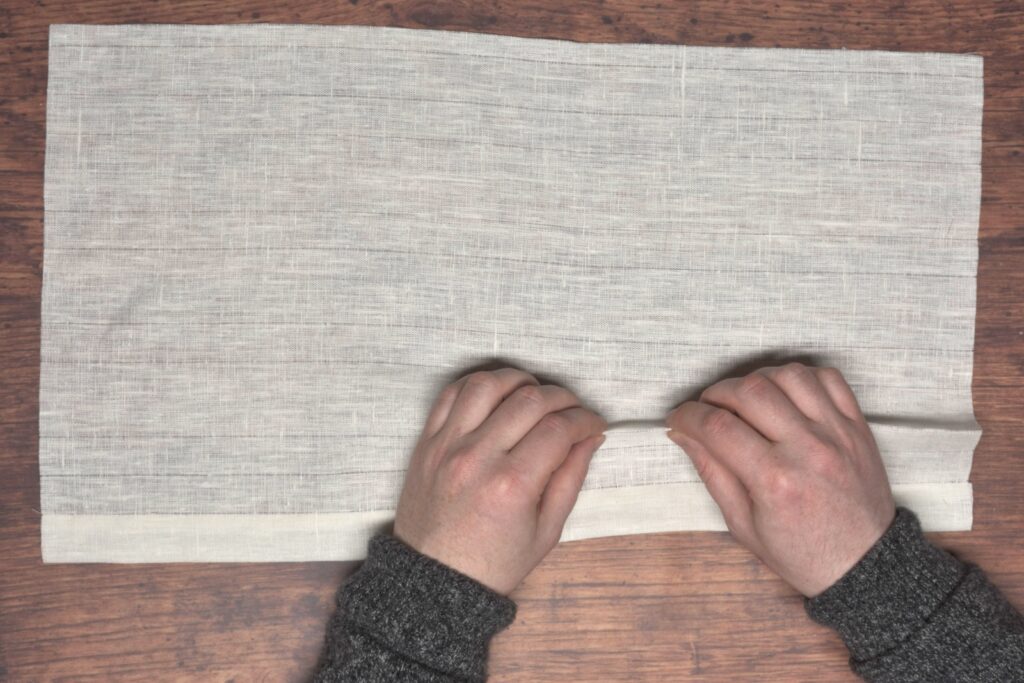
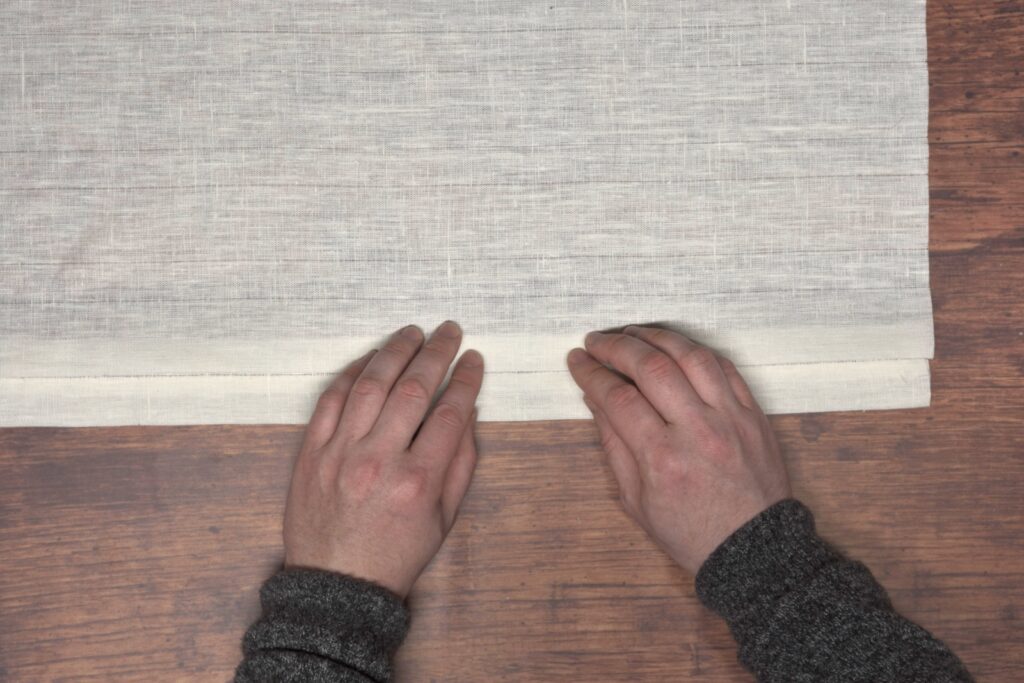
The rest of the watch pocket goes fairly quickly now that you’ve got the waistband and facings attached and pressed.
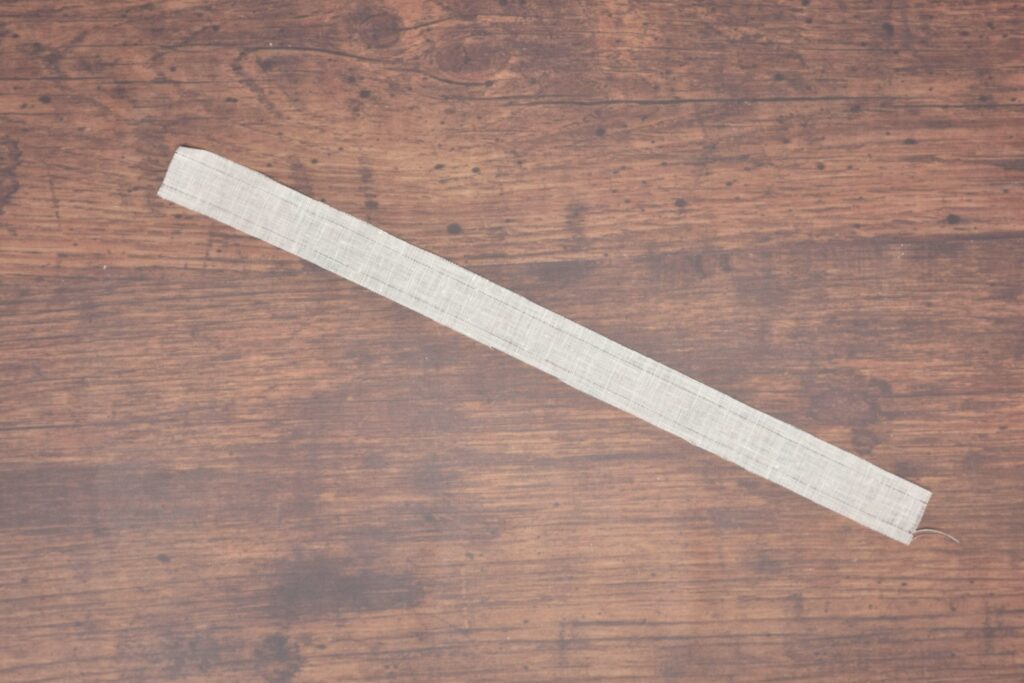
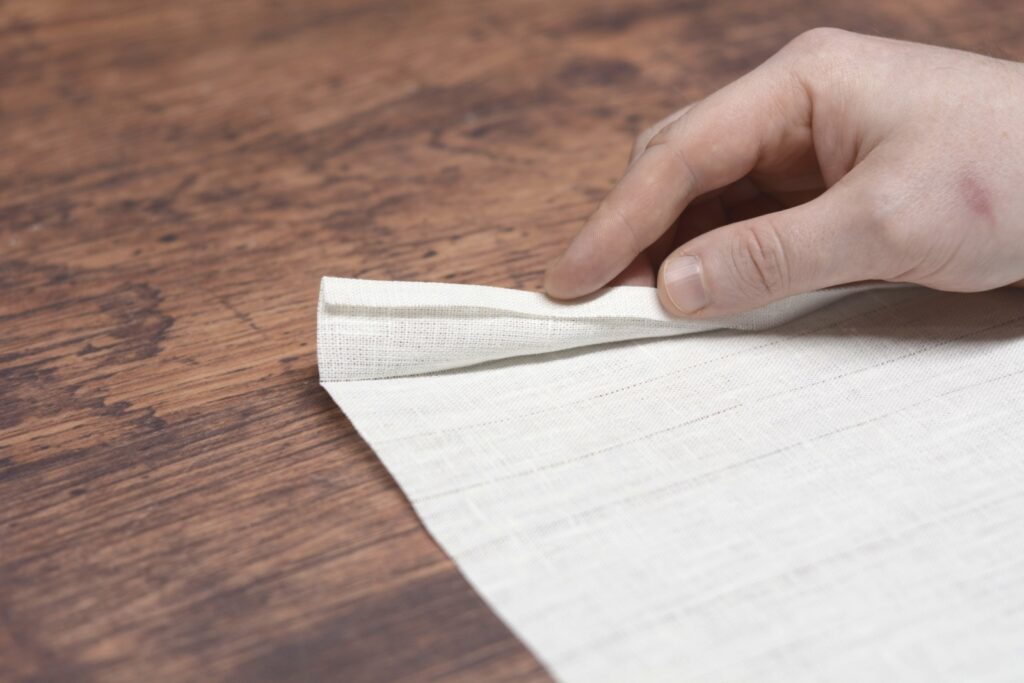
Cut a length of linen stay tape 4 1/2″ long and lay it on the linen stay about 1/16″ below the stitch line for the pocket bag.
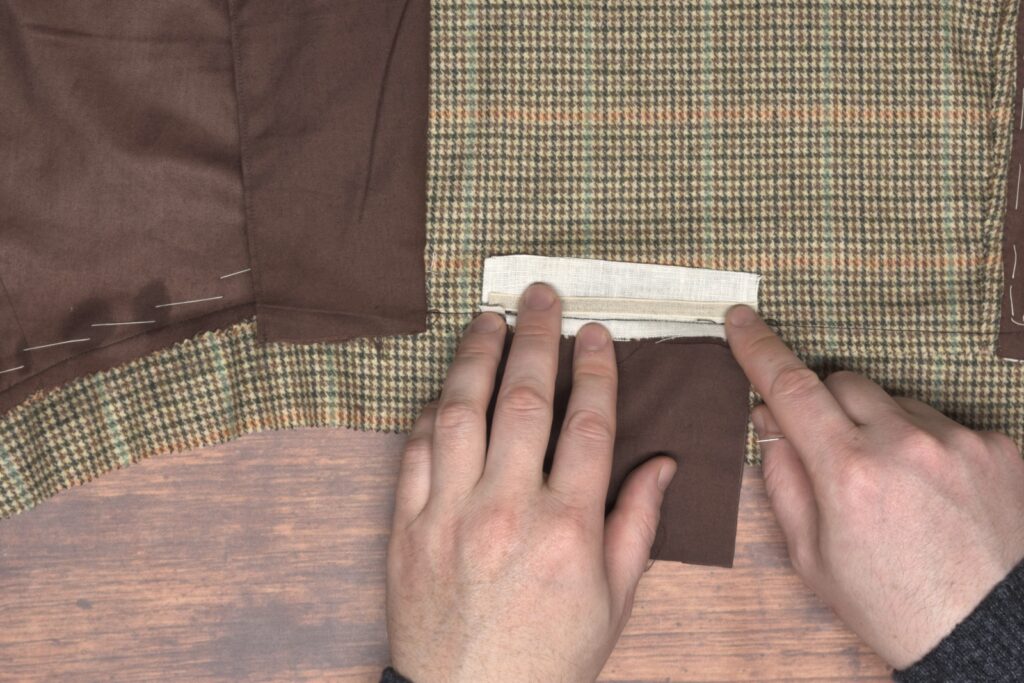
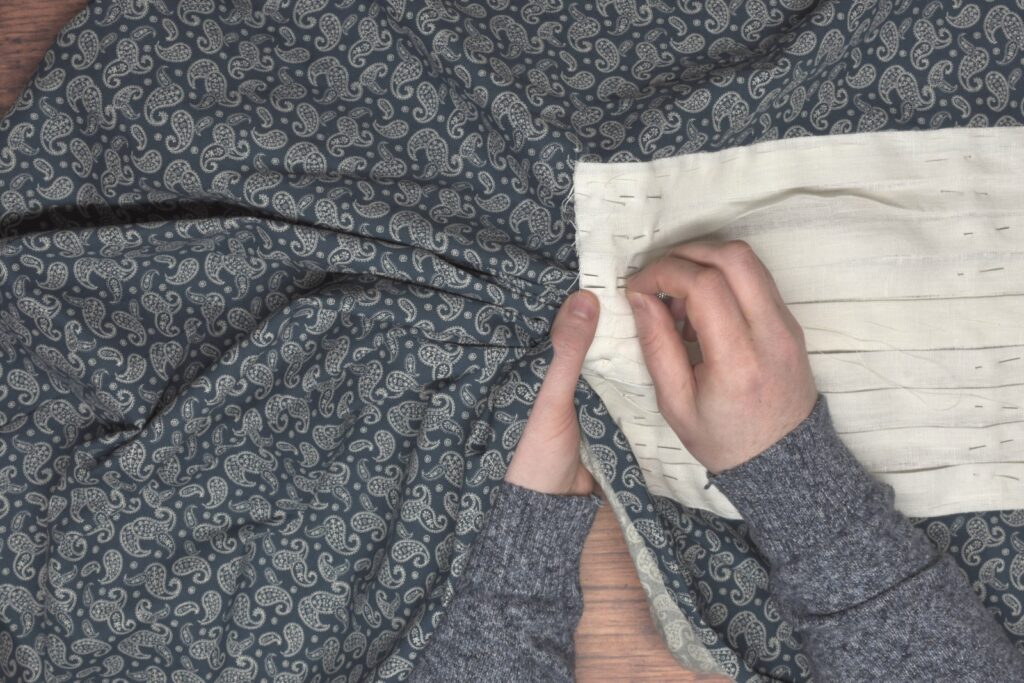
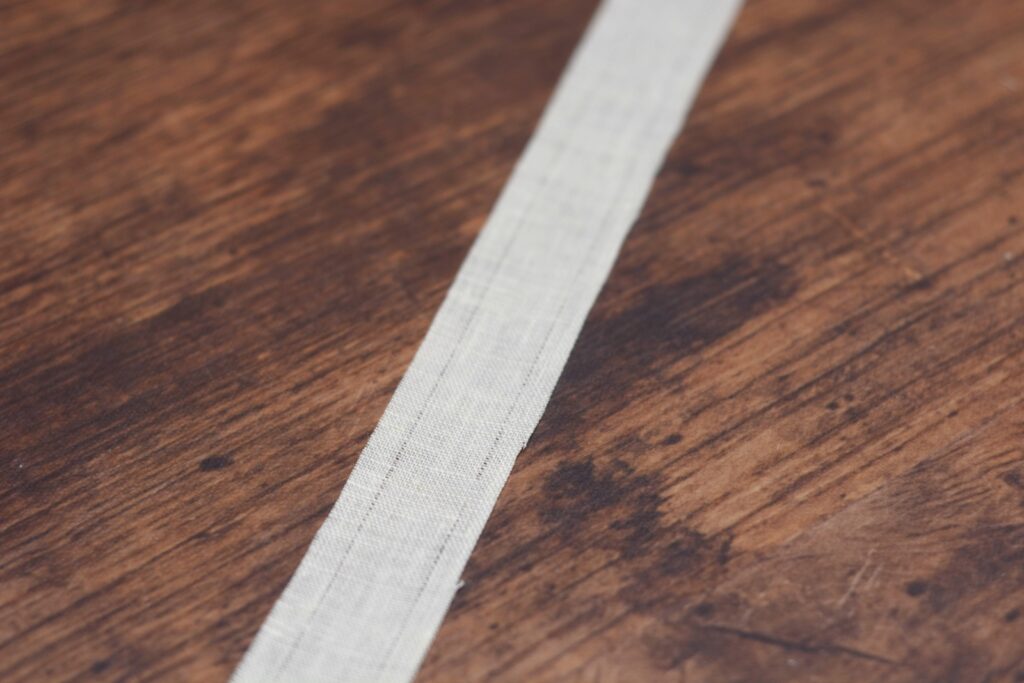
Baste the linen tape to the trouser front.
Cross stitch the linen stay tape to the trouser front, being sure not to let the stitches show through to the right side.
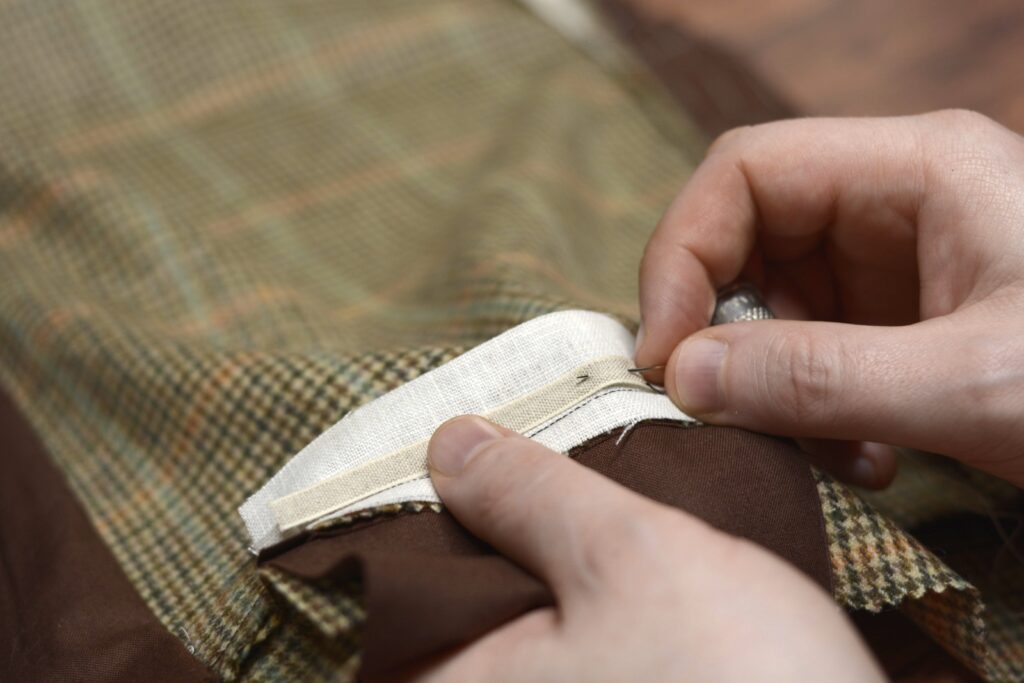
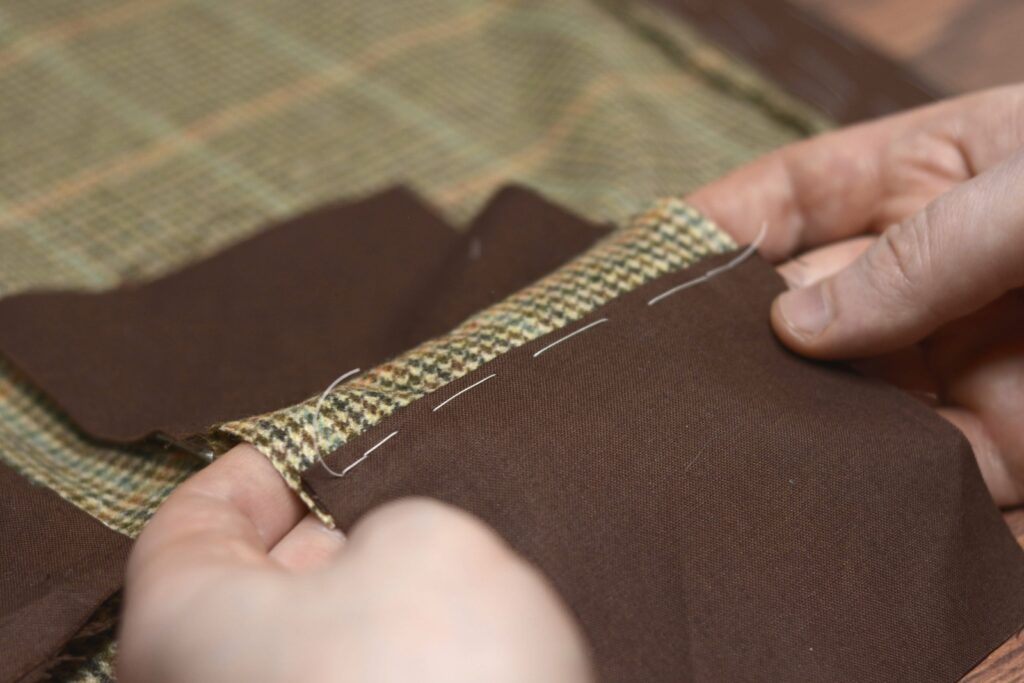
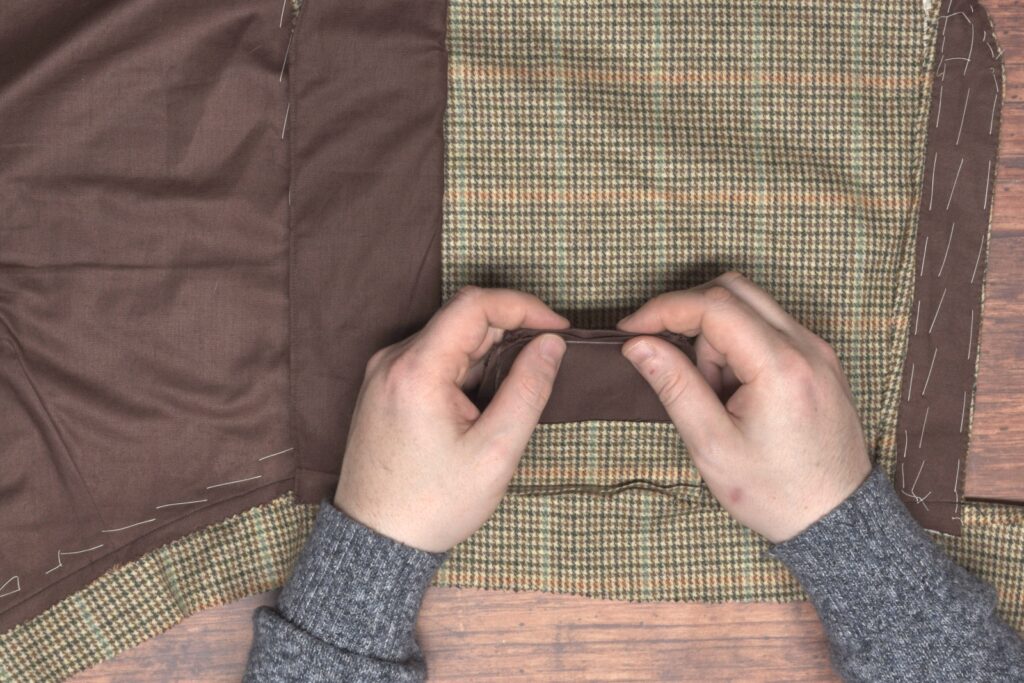
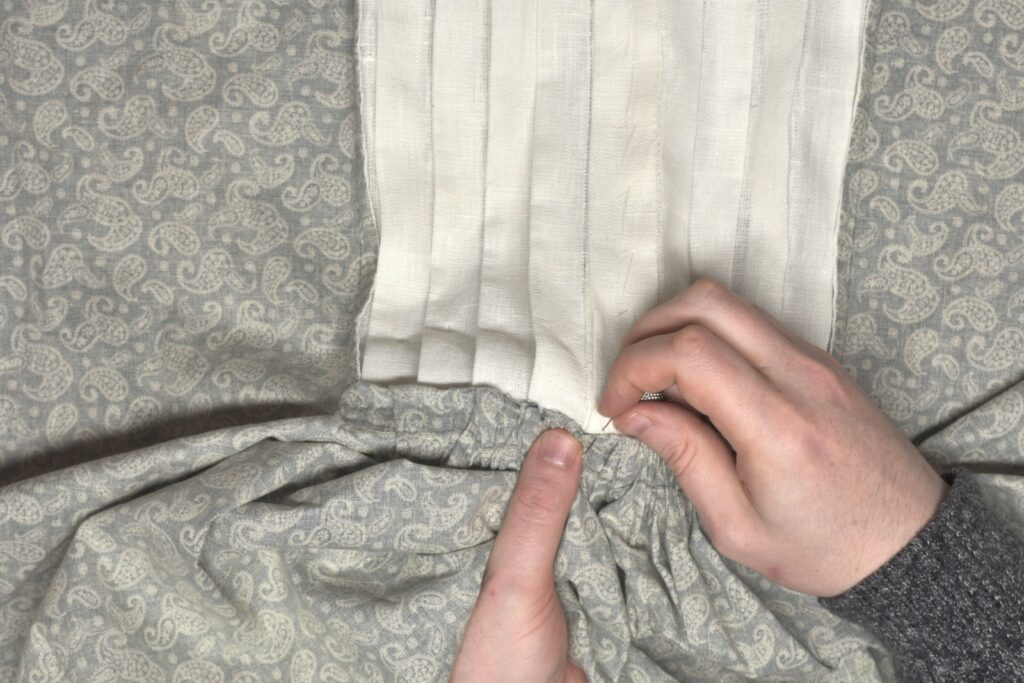
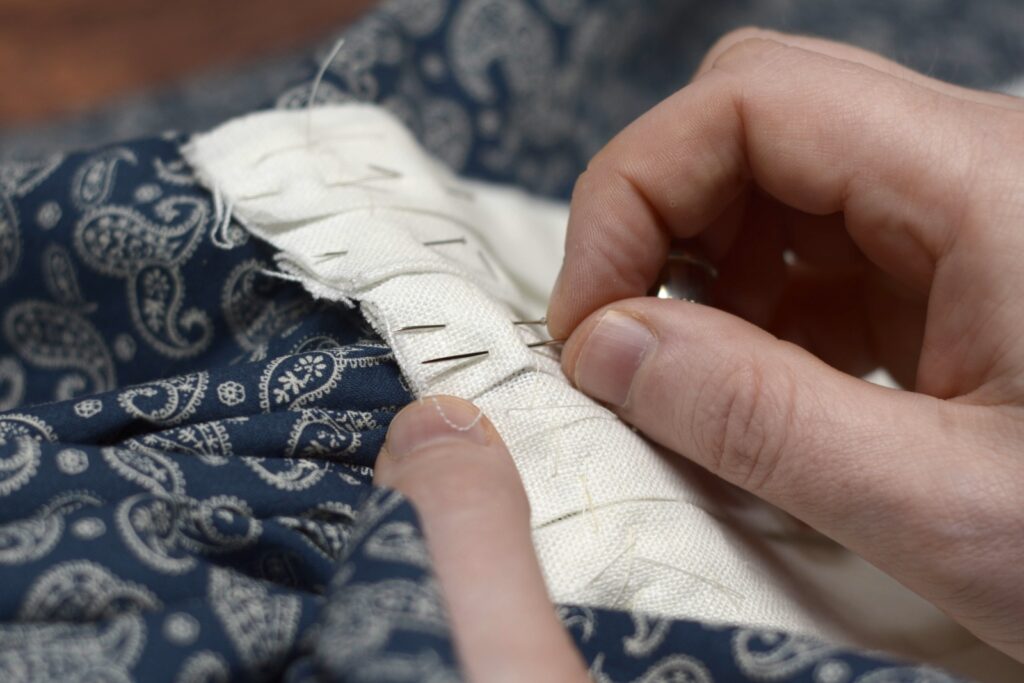
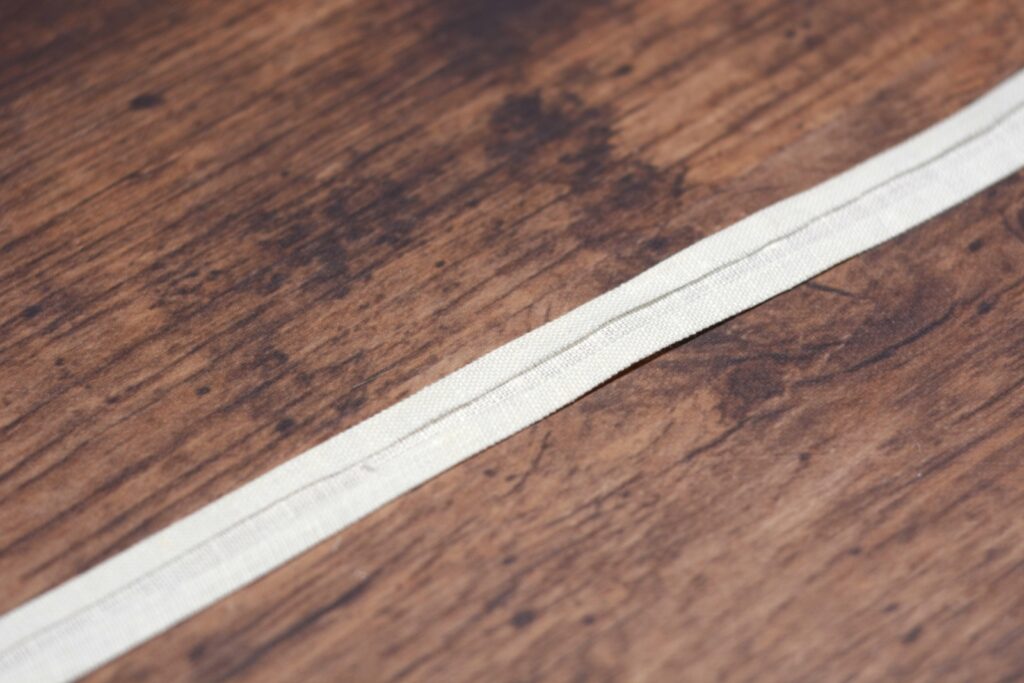
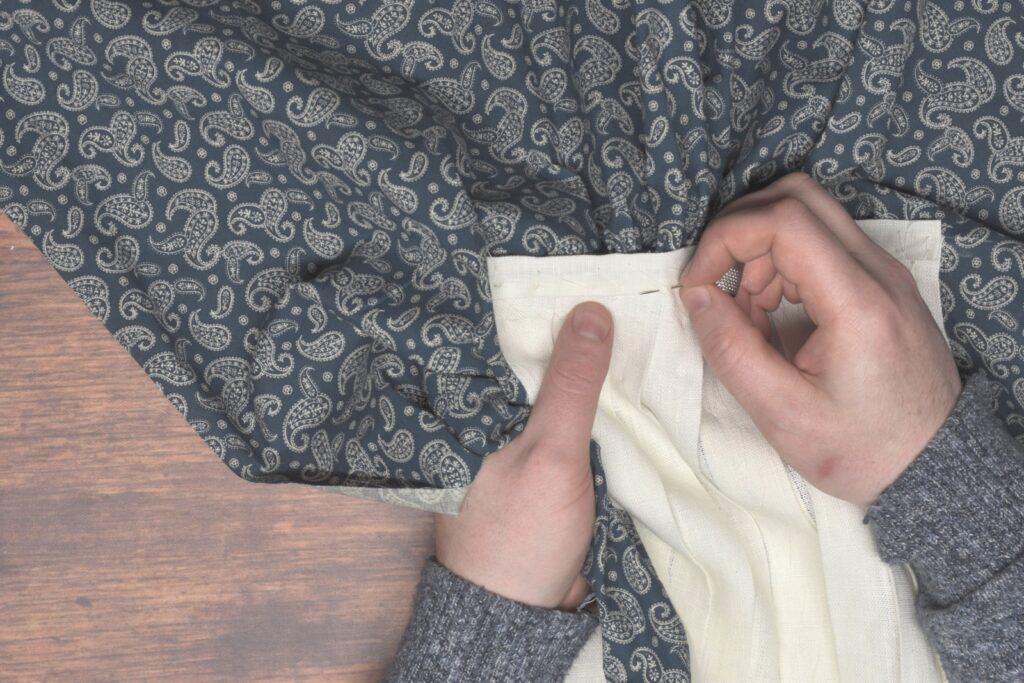
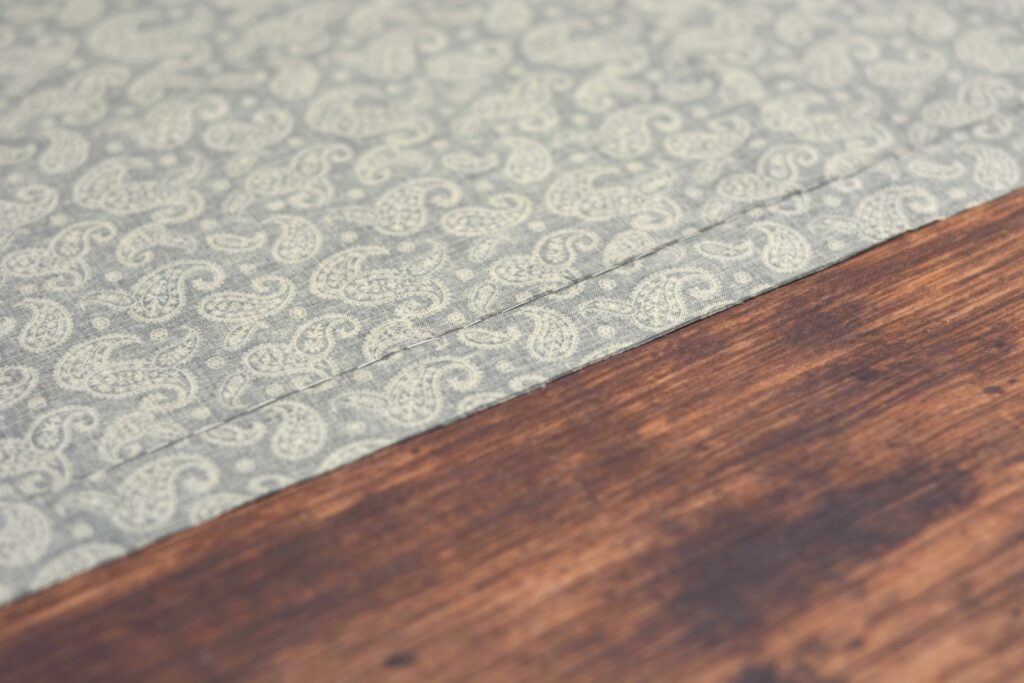
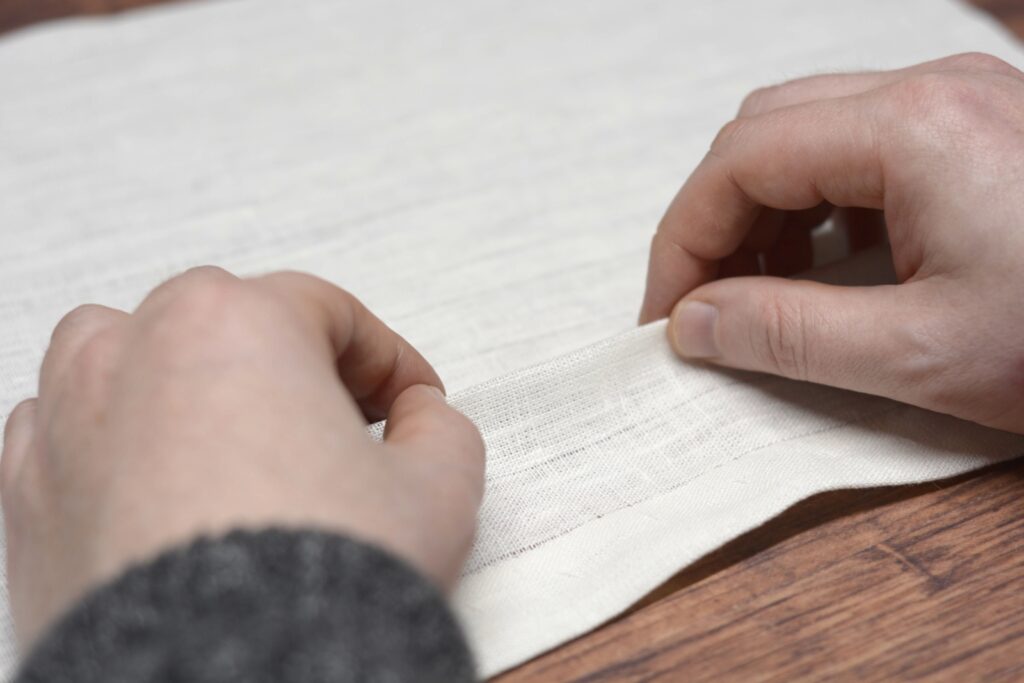
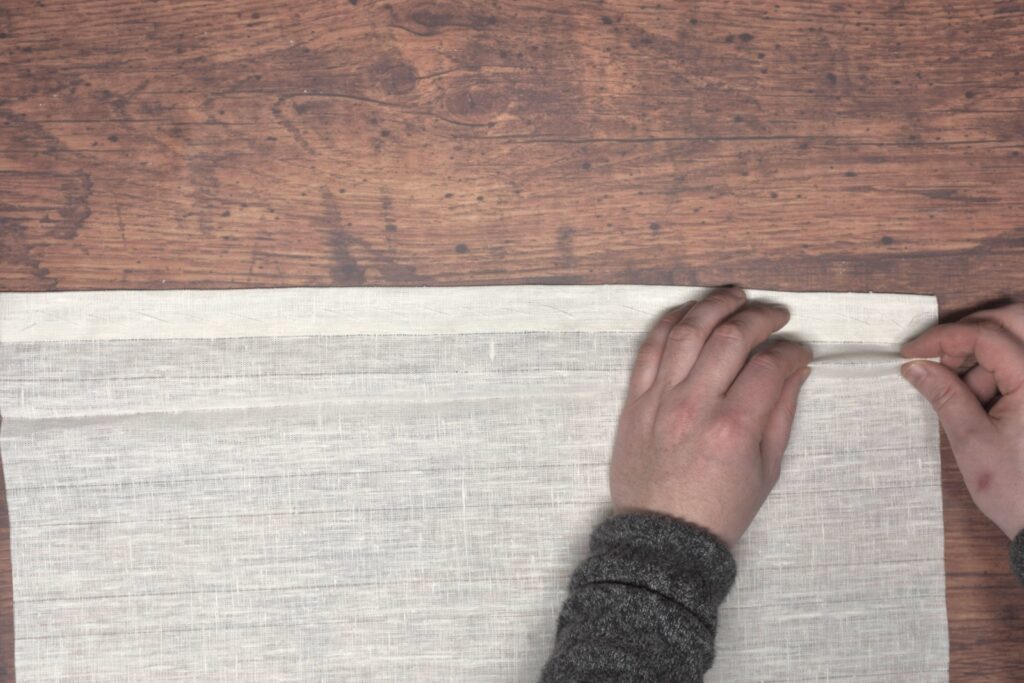
Now fold the pocket bag over the linen tape, off-setting the seam by 1/16″ to 1/8″ behind the fold, hiding the pocket bag from outside view. Baste securely in place.
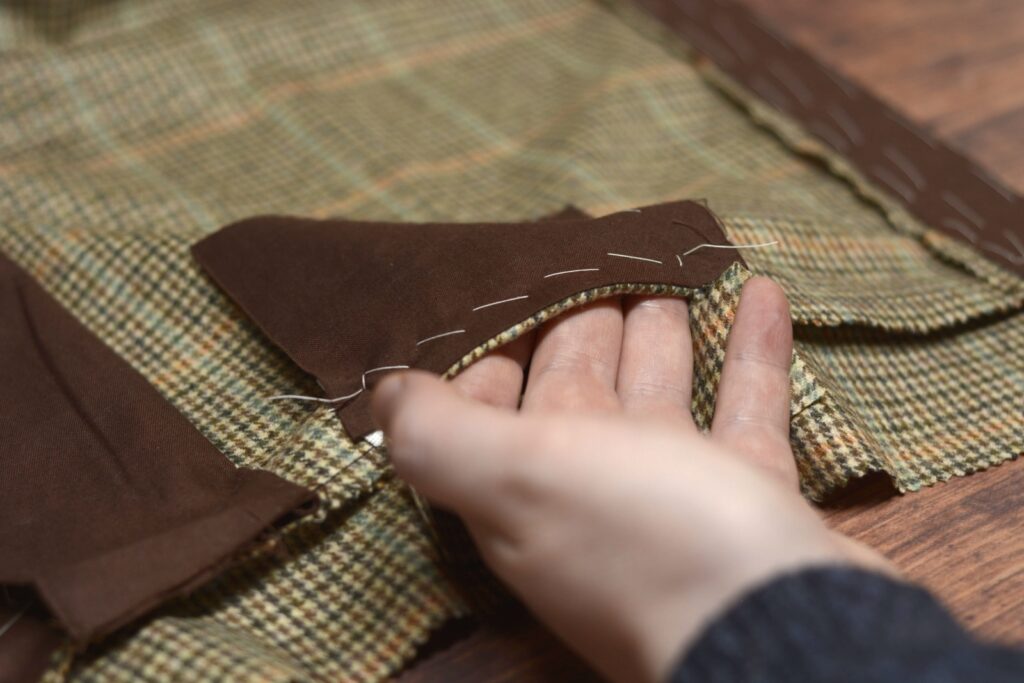
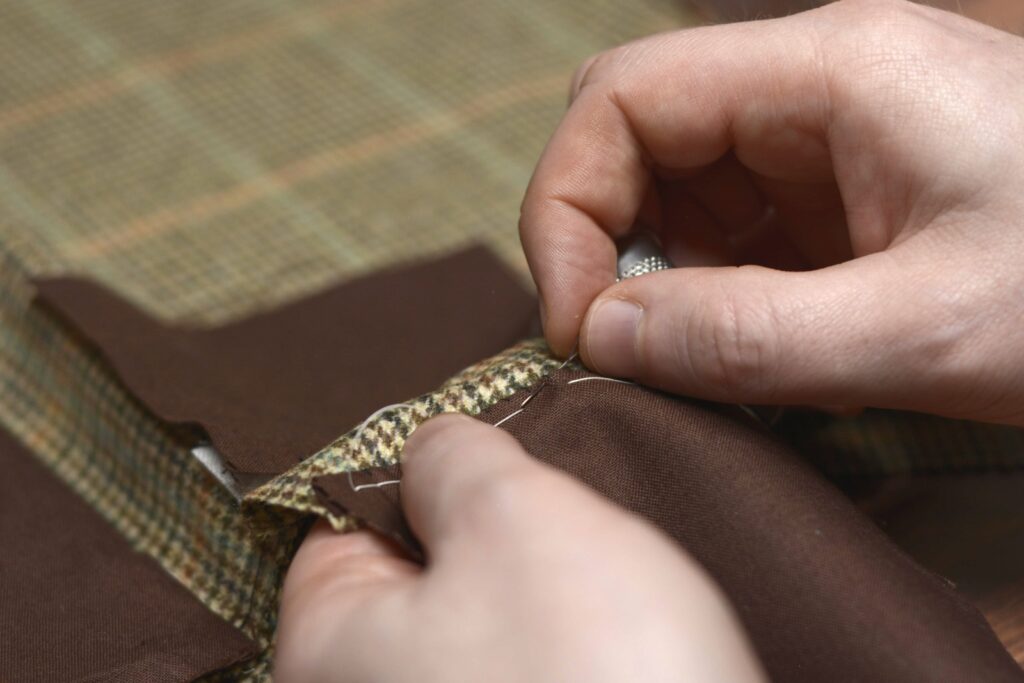
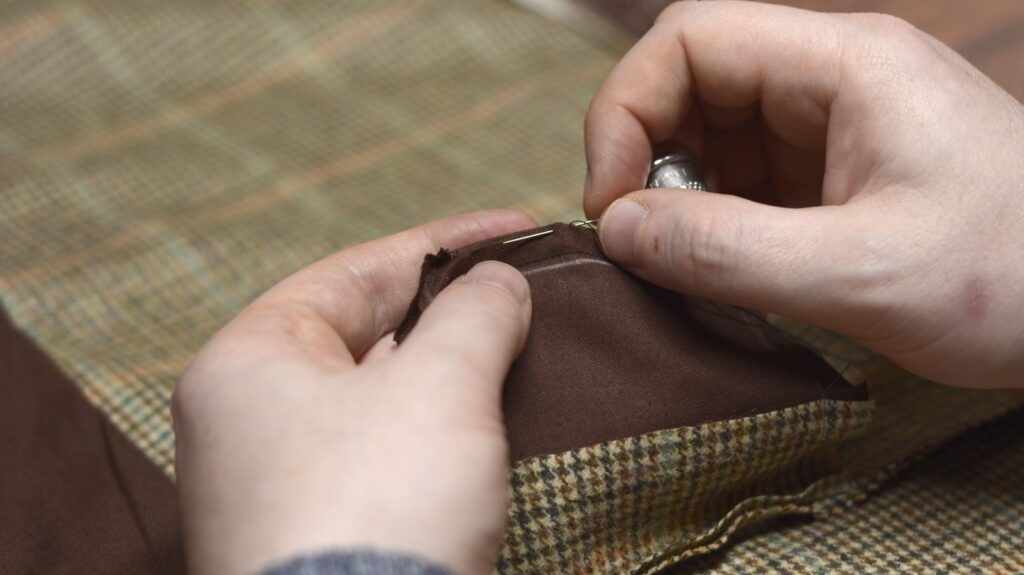
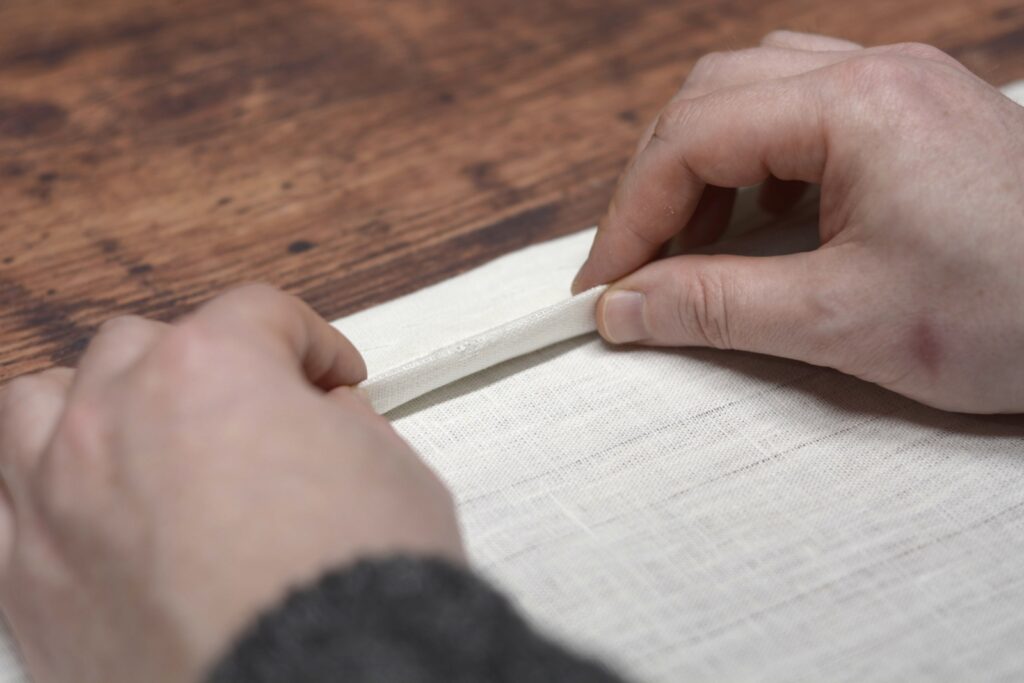
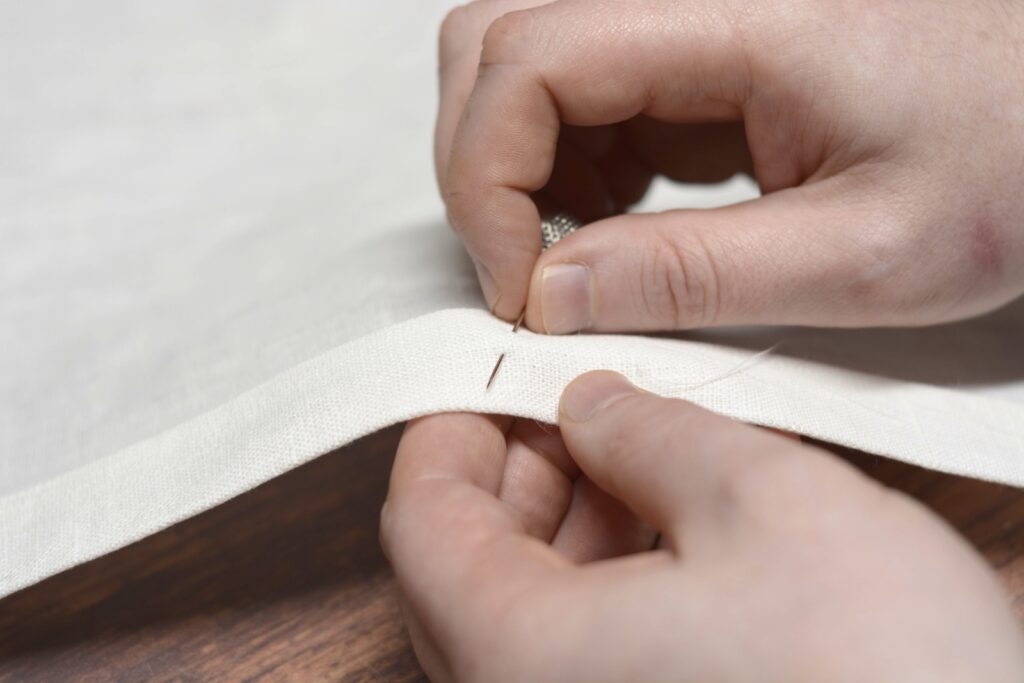
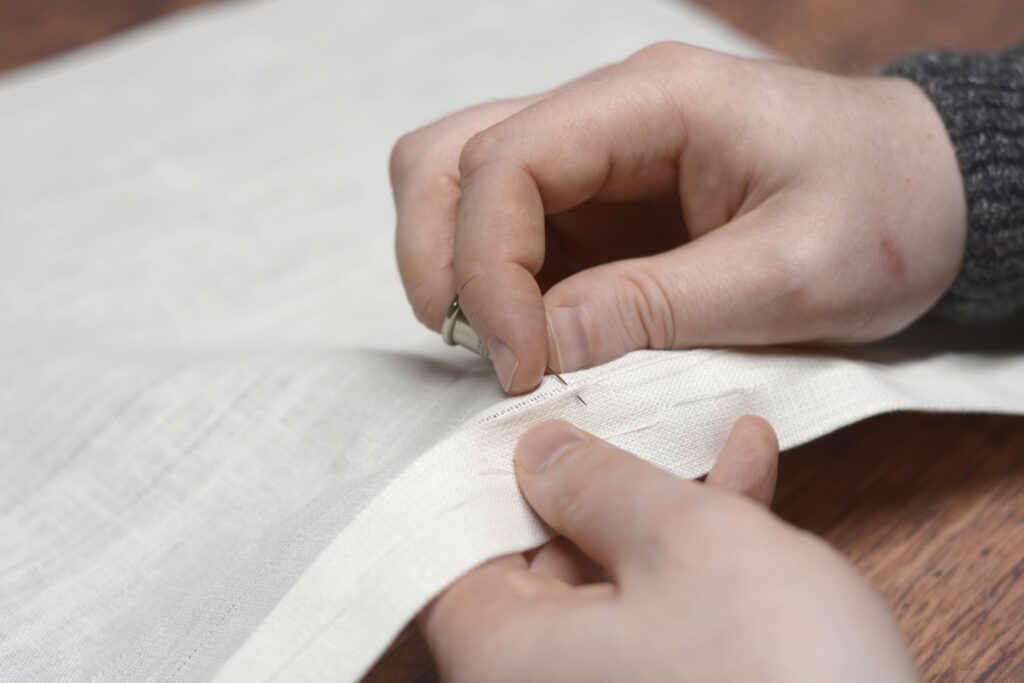
Top stitch across the pocket opening, catching the pocket bag underneath, using a machine stitch or a side stitch by hand. Keep the stitches about 1/8″ – 3/16″ away from the edge, so that they land in the middle of the stay tape that is sandwiched between the layers.
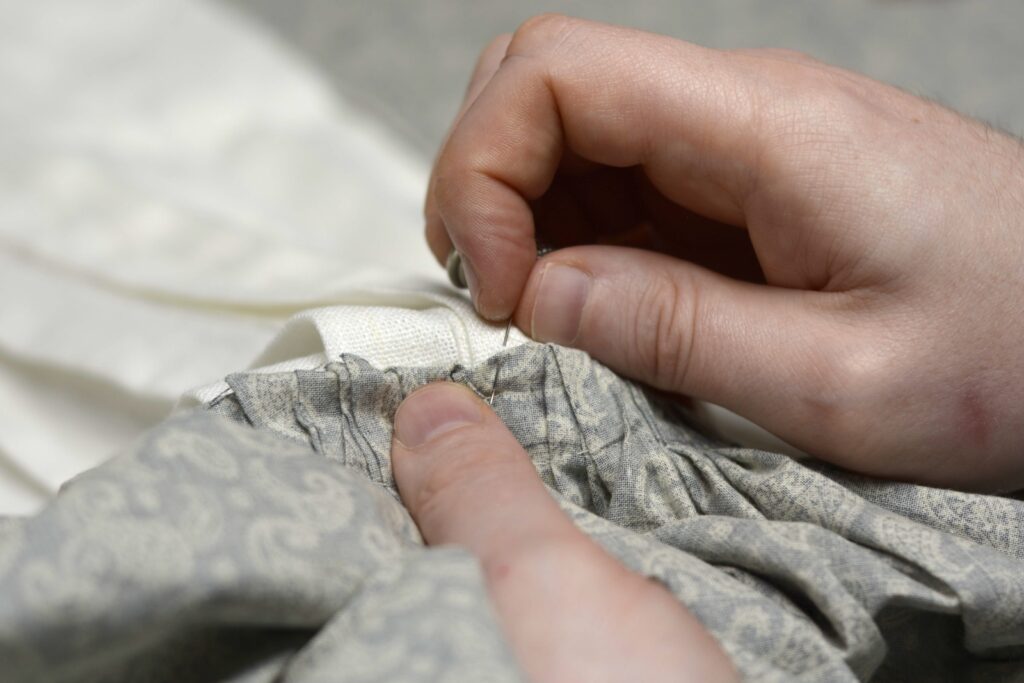
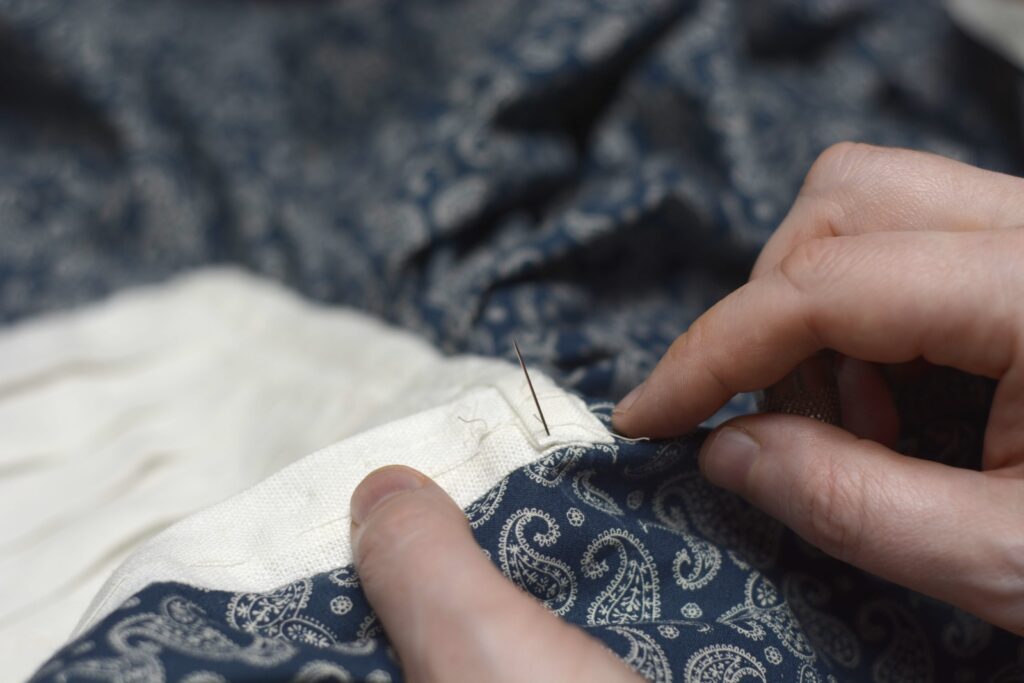
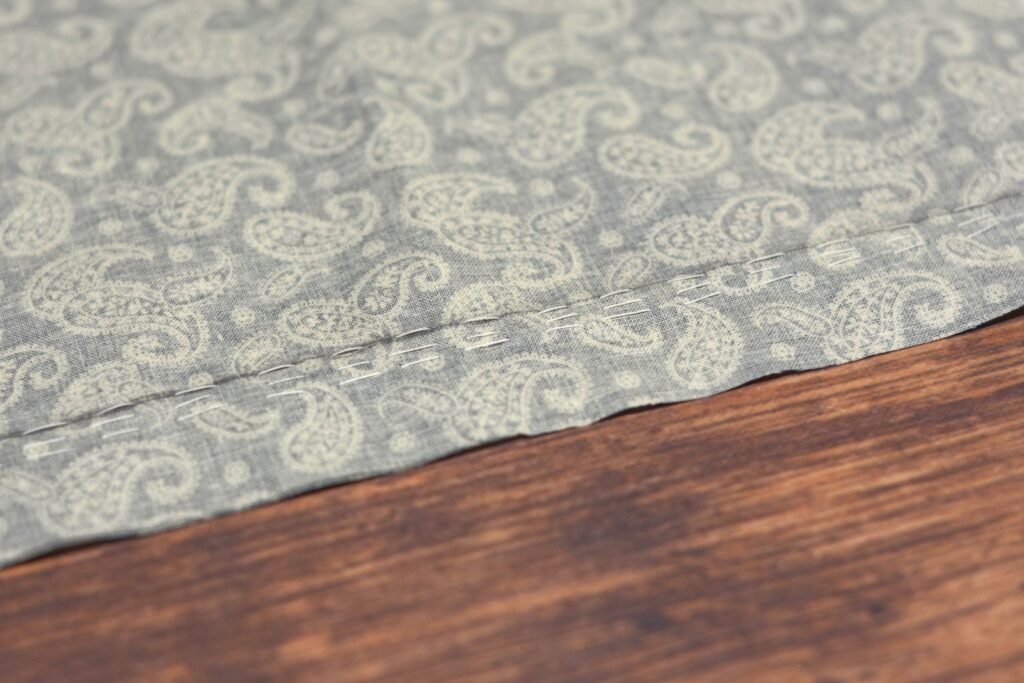
If using the side stitch, the needle enters the fabric just to the side of the previous stitch. On the underside, it is formed similar to a normal running stitch. The stitches should be 1/8″ to 1/4″ apart.
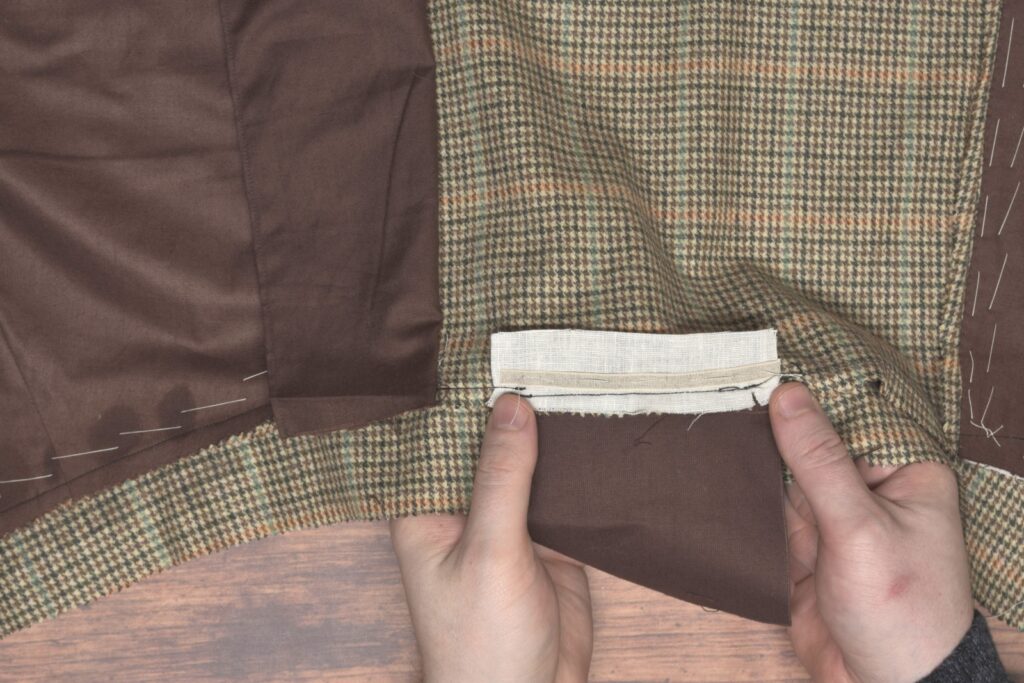
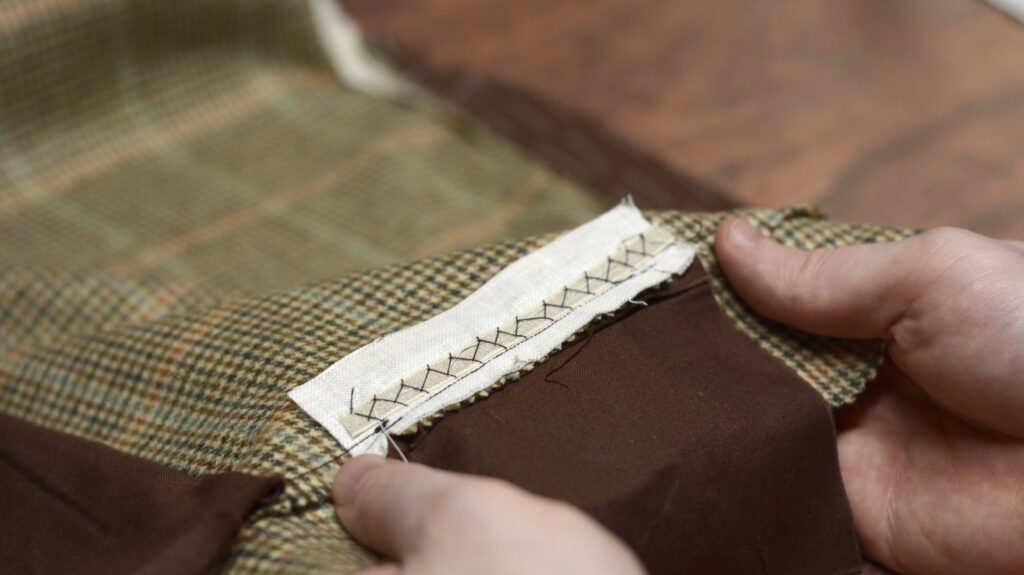
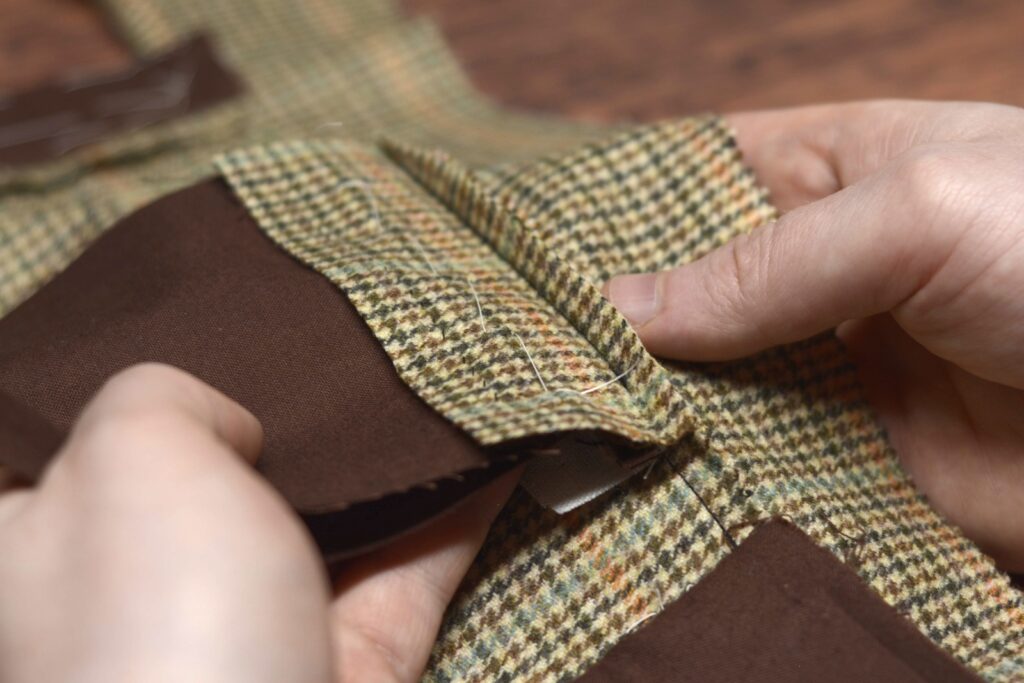
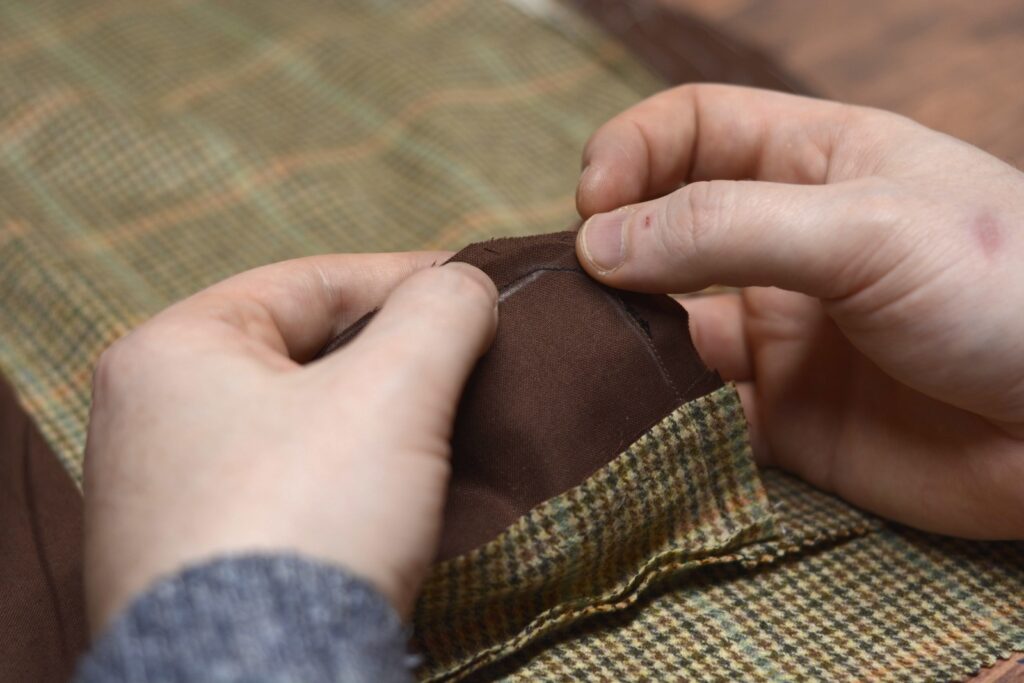
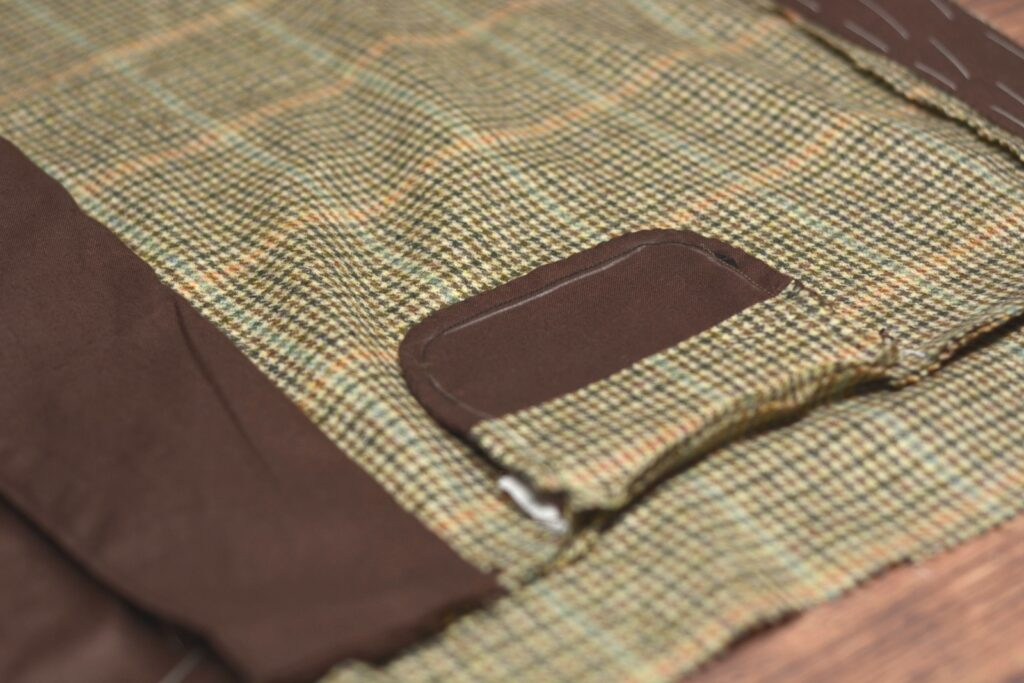
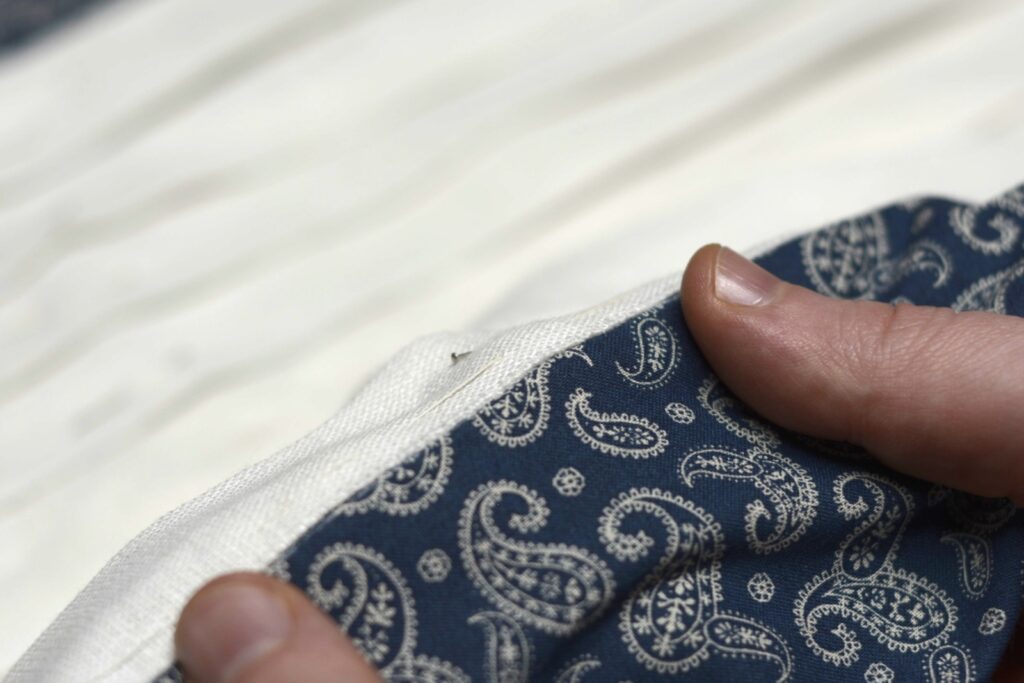
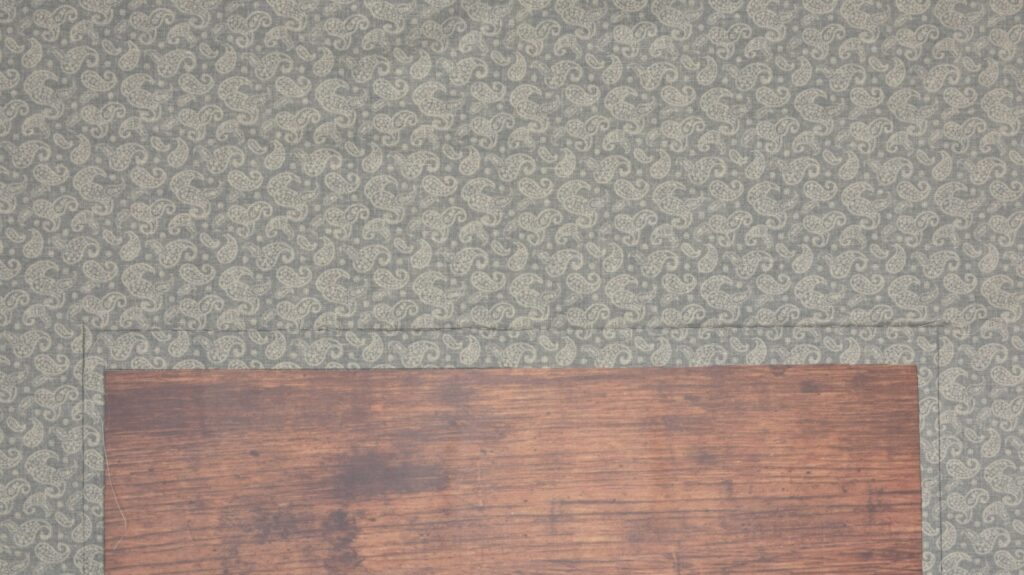
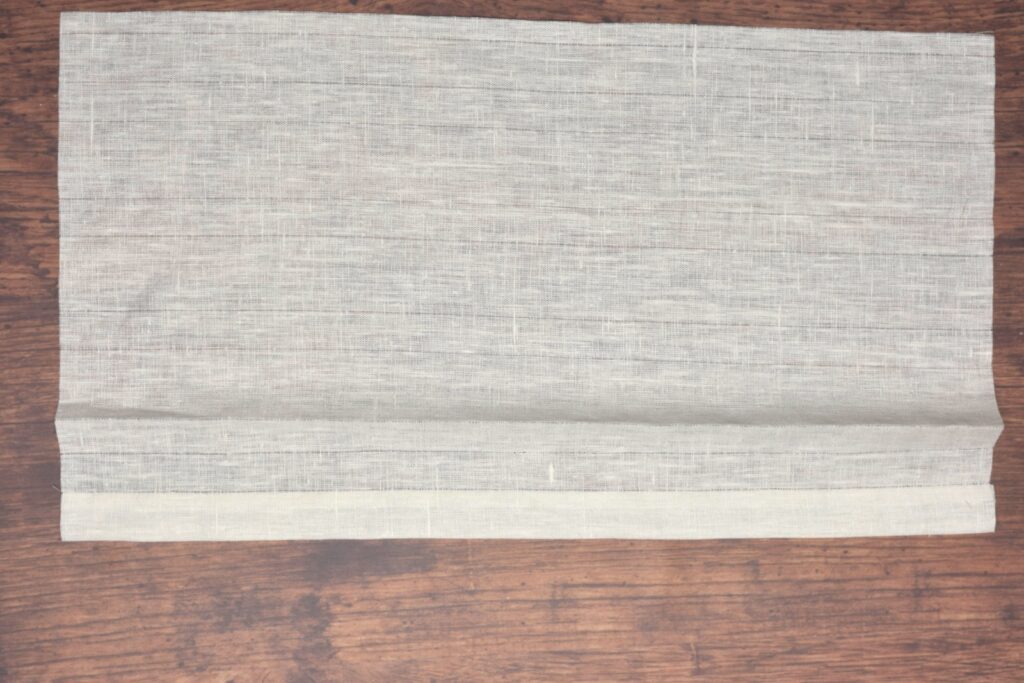
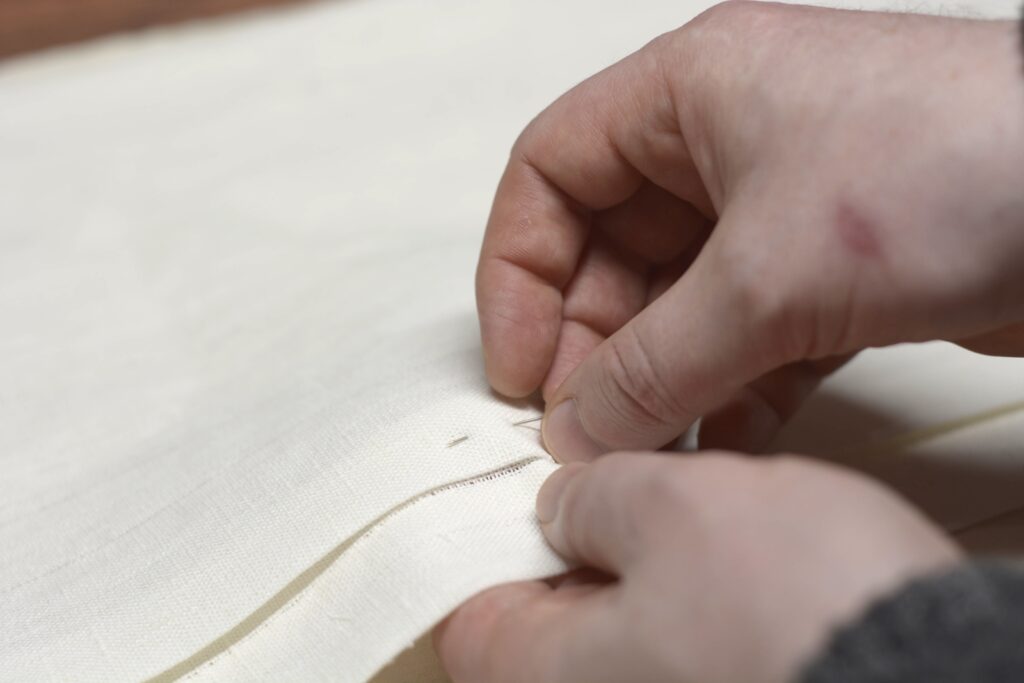
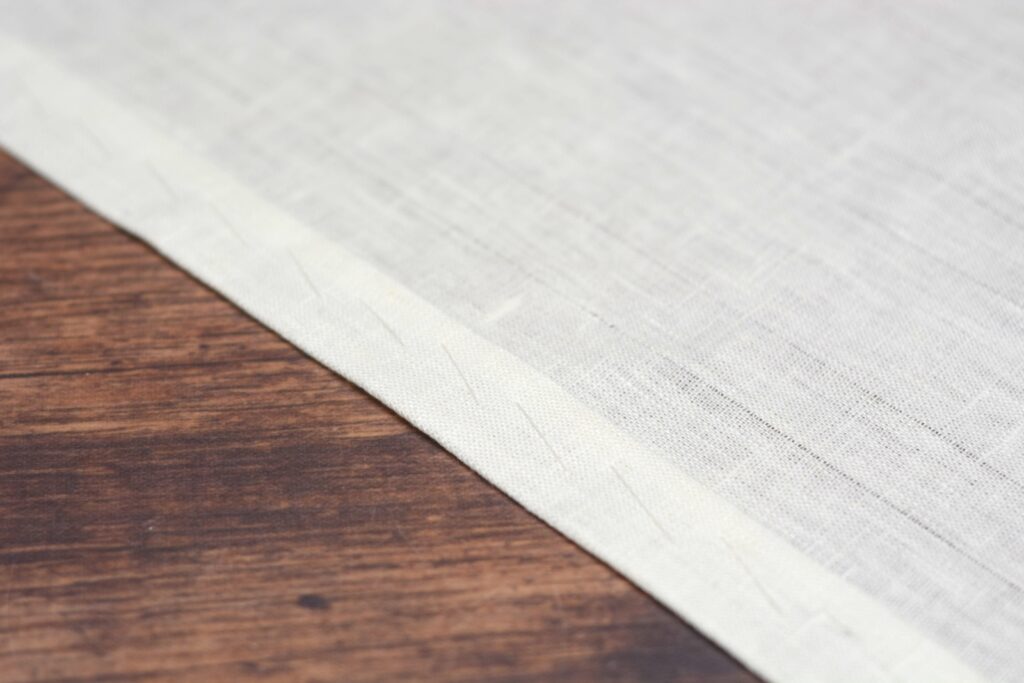
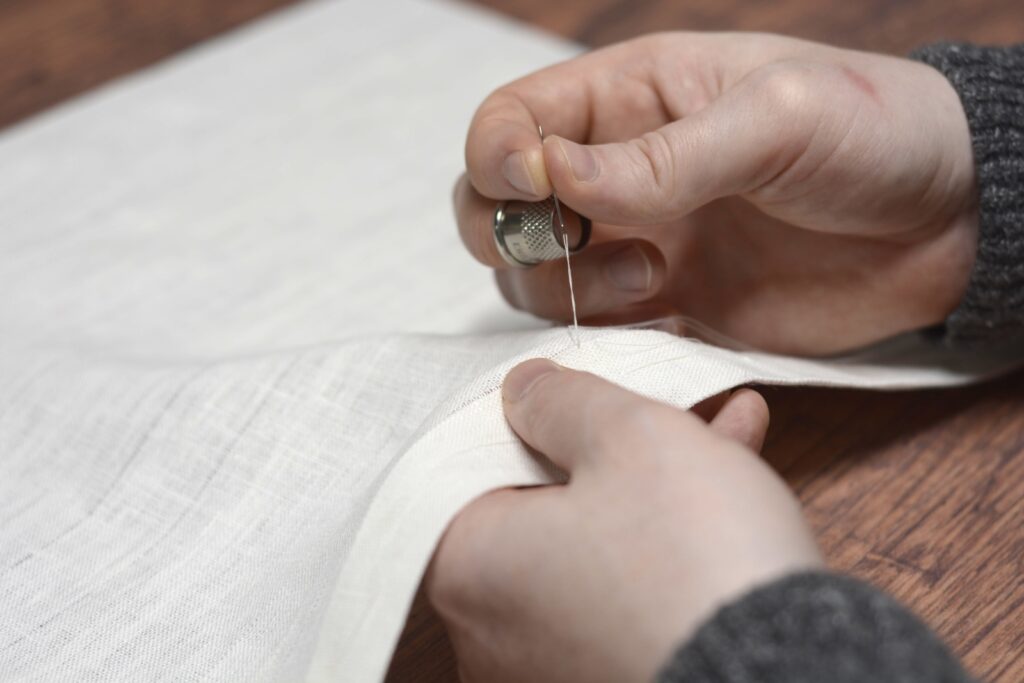
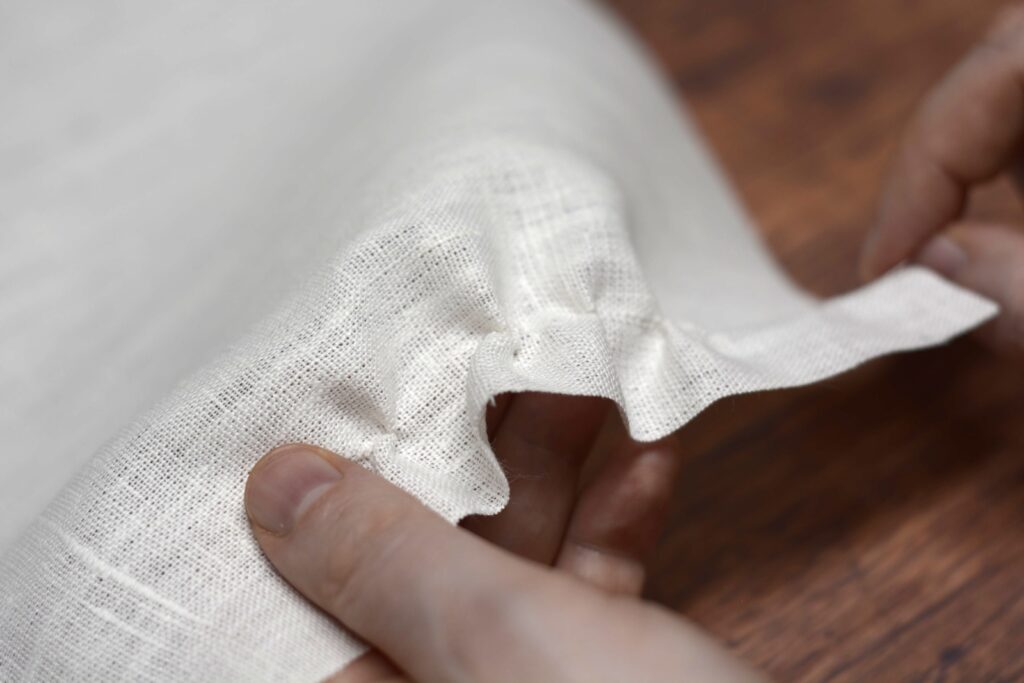
Here you can see the wrong side of the side stitches, catching the pocket bag and forming a firm opening for the watch pocket.
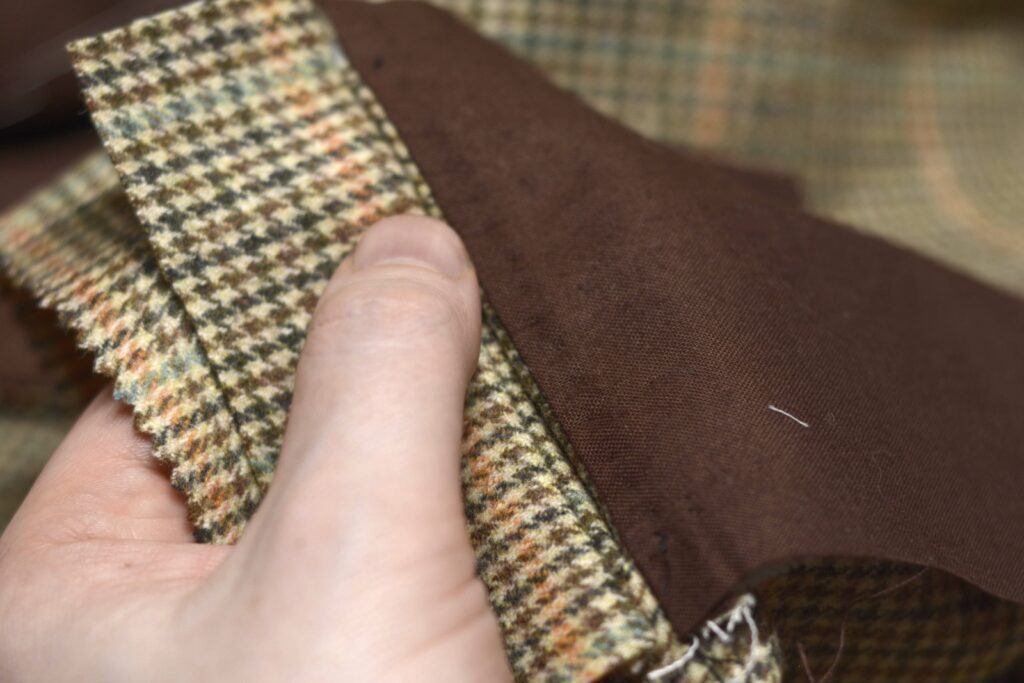
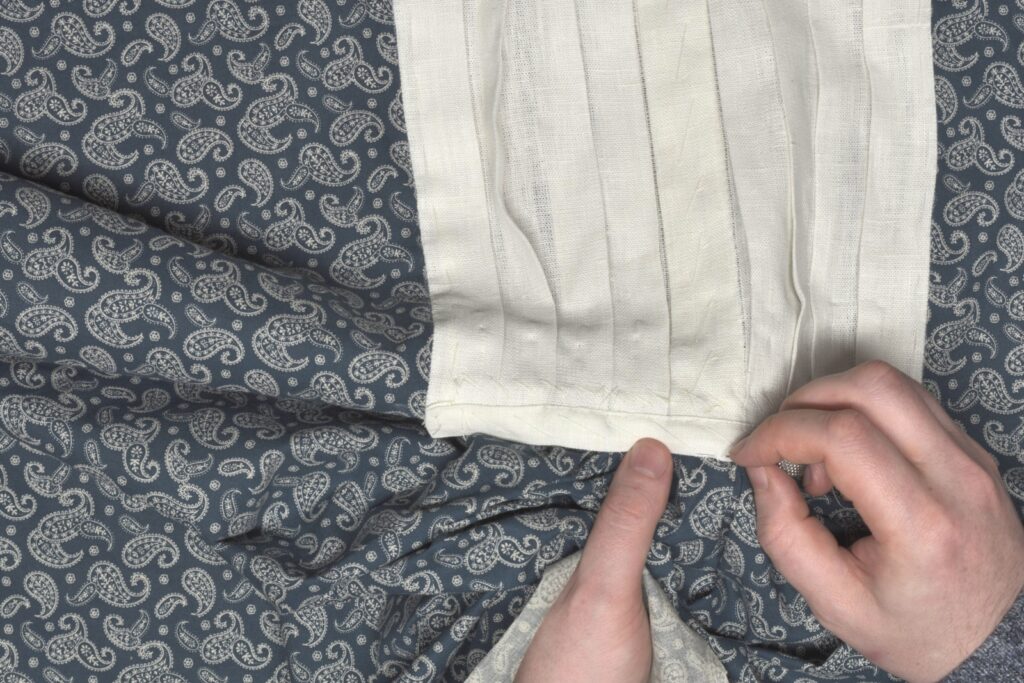
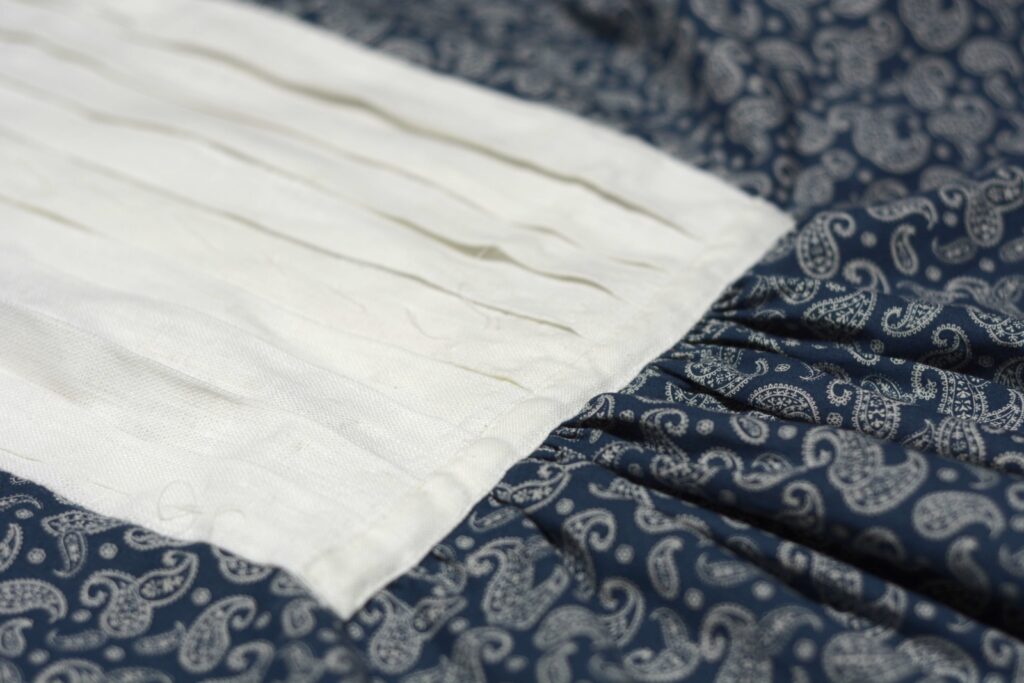
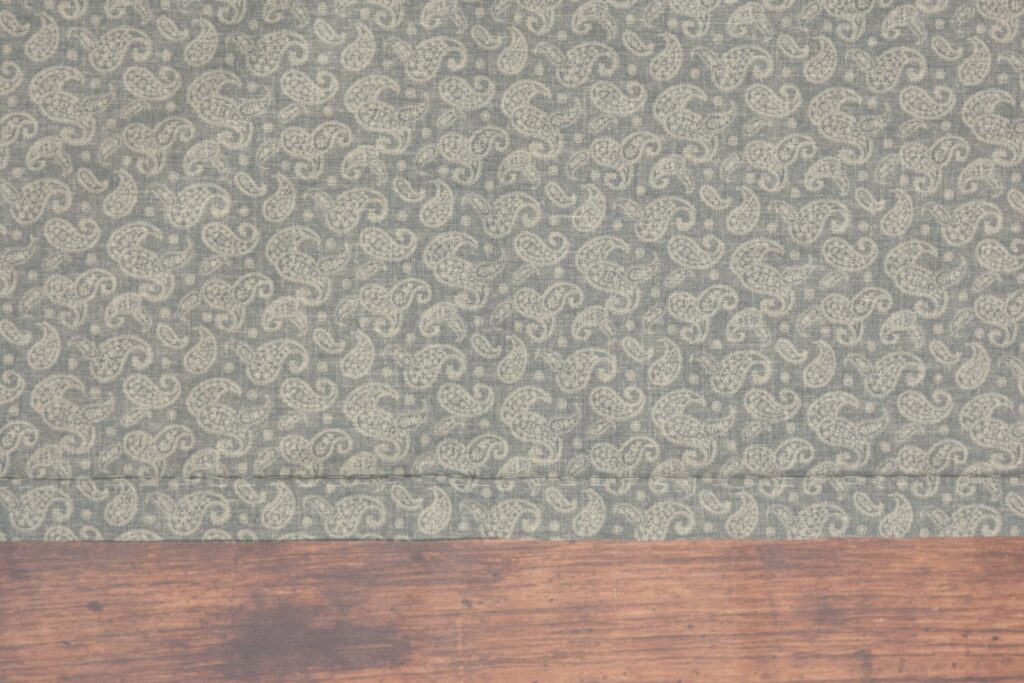
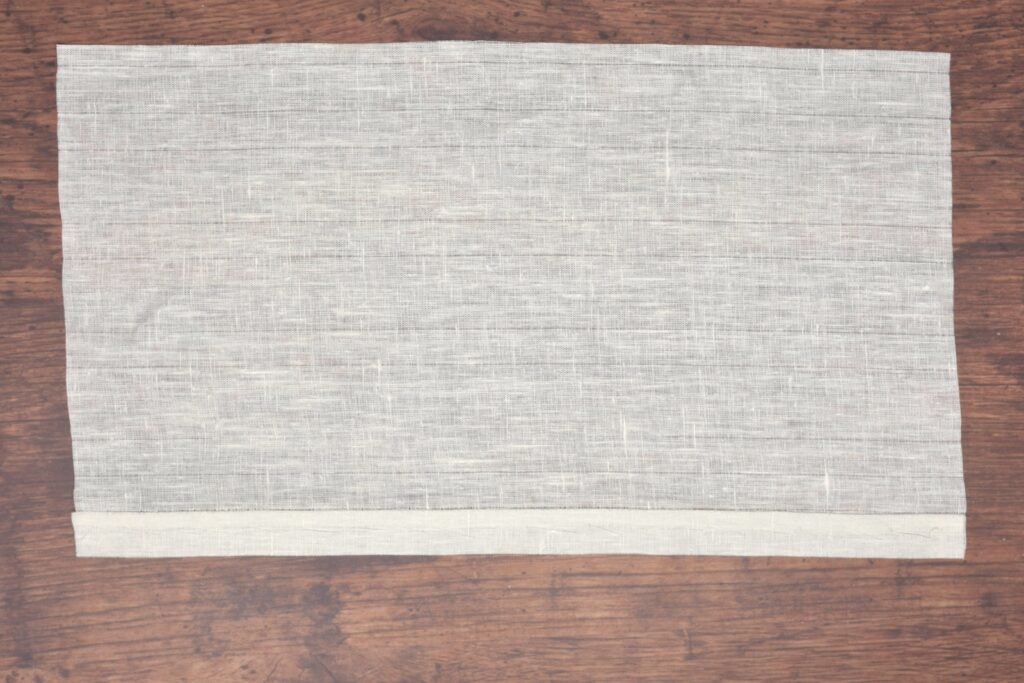
The outside of the watch pocket so far. I wish you could see the side stitches but they pretty much disappear into the fabric.
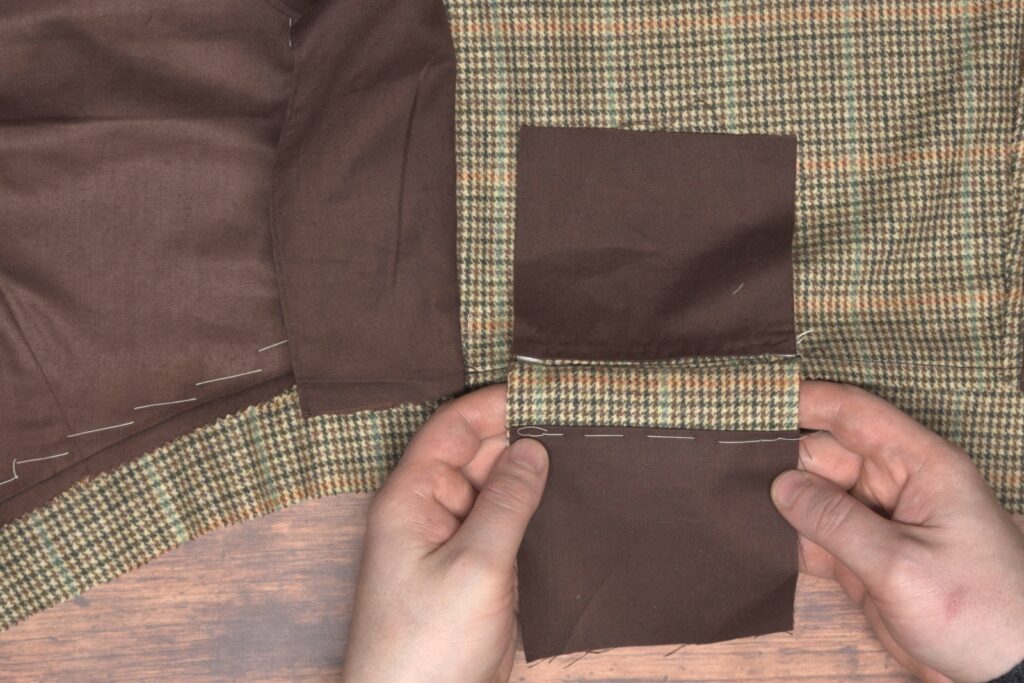
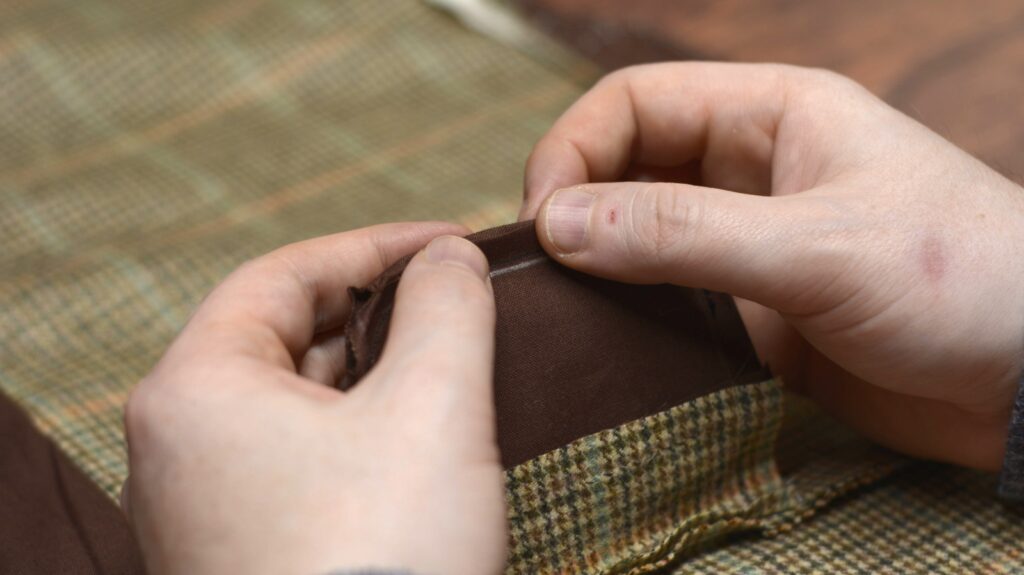
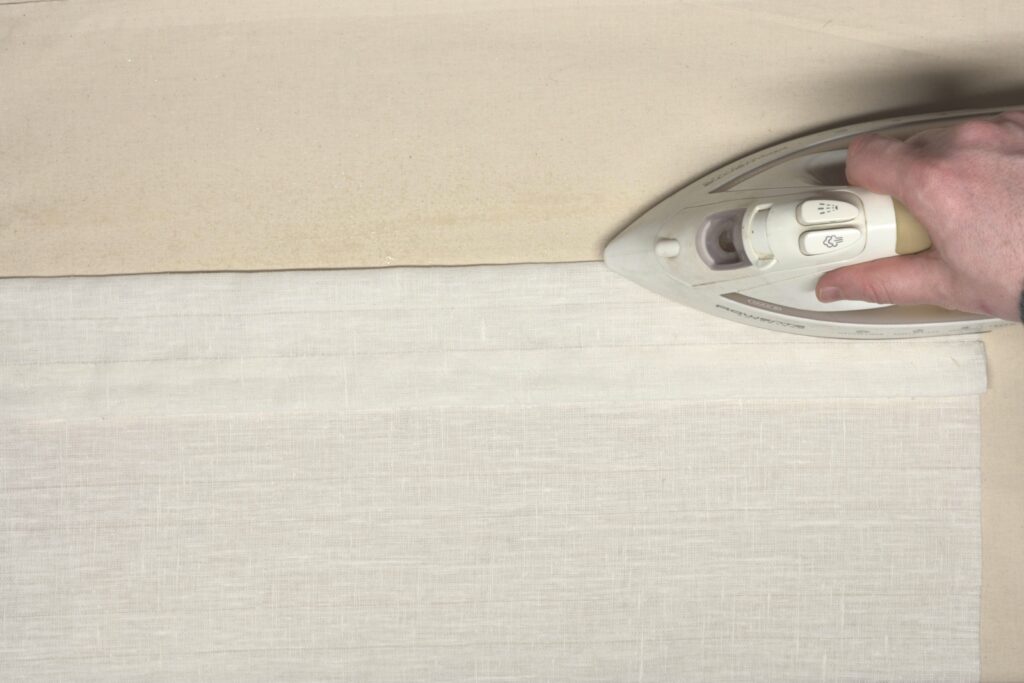
Take the remaining pocket bag half and press over the top edge 1/4″.
Open up the pocket and baste the pocket bag to the right side of the remaining pocket facing, 1/4″ from the edge.
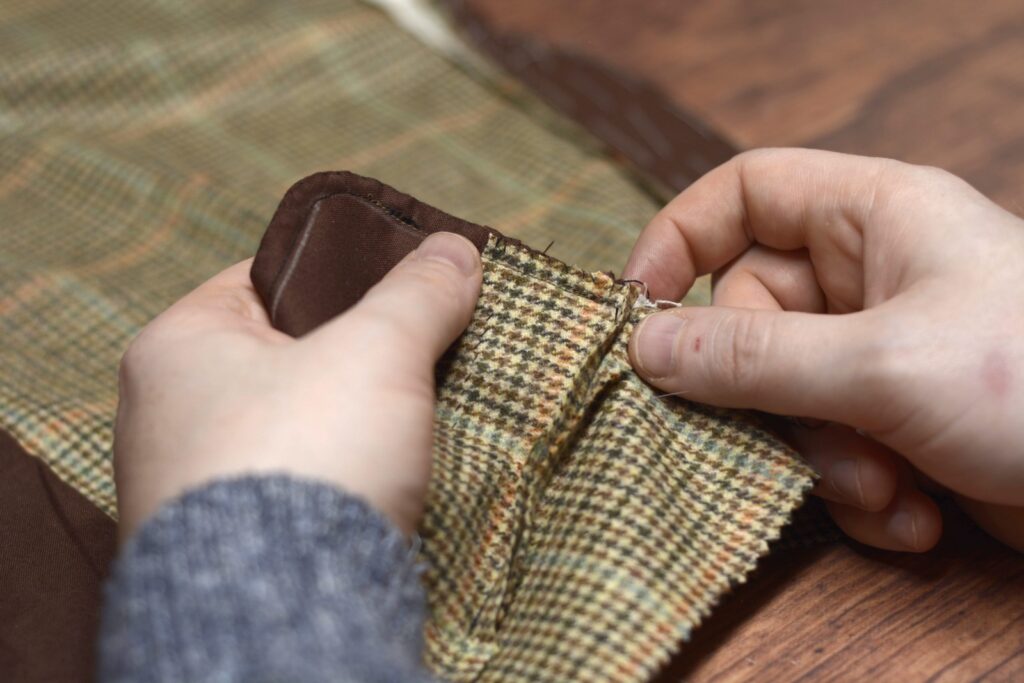
Fell the pocket bag to the pocket facing. Remove the basting stitches.
With both pocket bag halves now attached, grasp both of them, being sure they are aligned properly, particularly at the pocket opening area. Baste across the top of the pocket facing through both pocket bag halves. This holds all the layers in place while we sew the pocket bag closed.
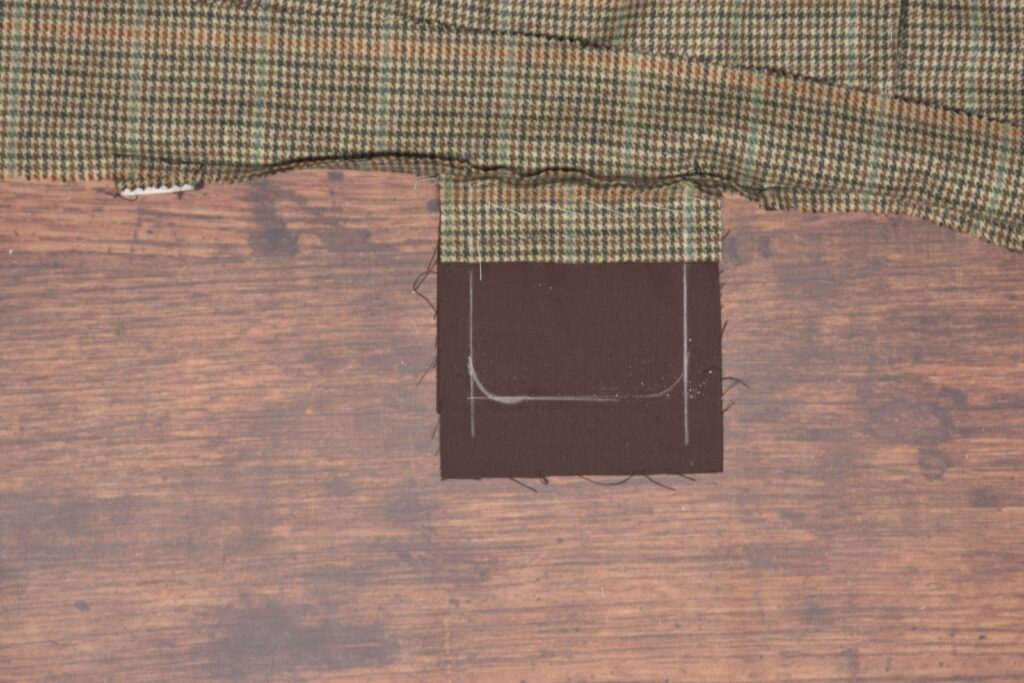
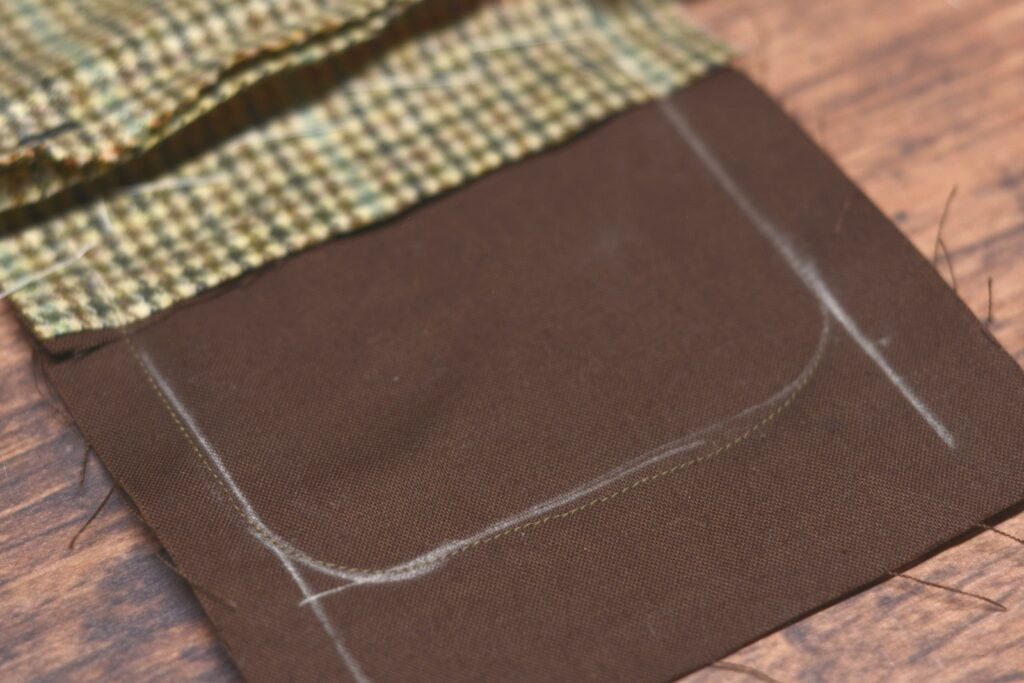
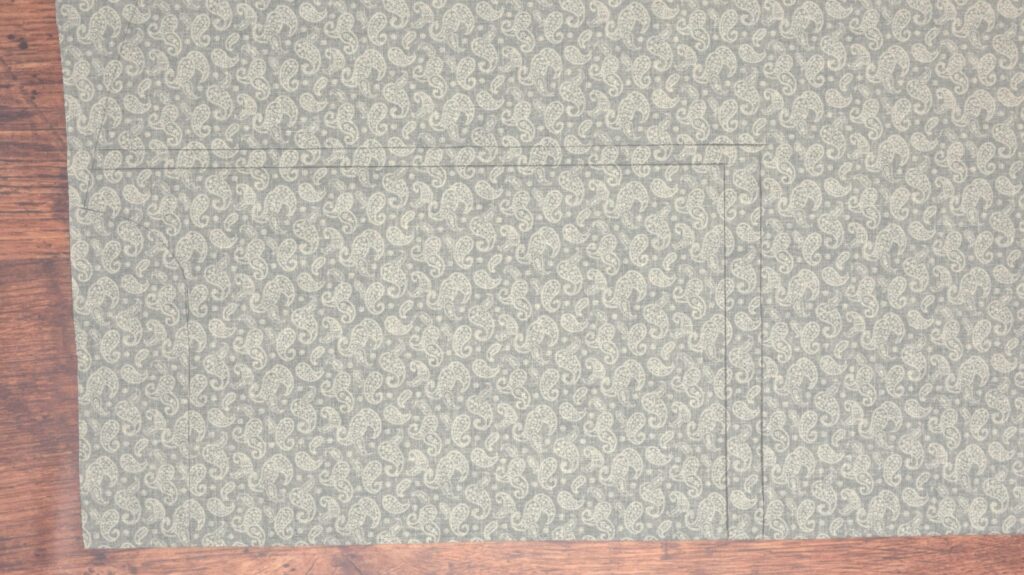
Draw out the seam lines on your pocket, 1/2″ from the edge. Be sure there is at least 1/2″ available on the underside, or you’ll end up like me with no room to turn under the raw edges. Add a couple of curves at each corner as well.
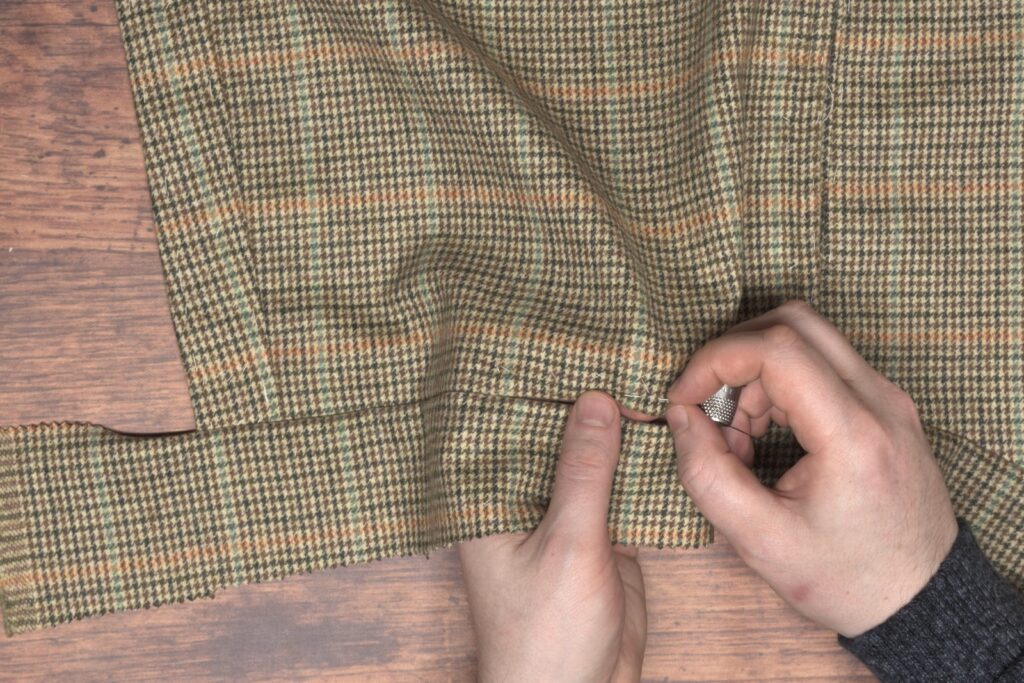
Sew the pocket bag closed, getting as close as you can to the waistband seam at the top without actually hitting it.
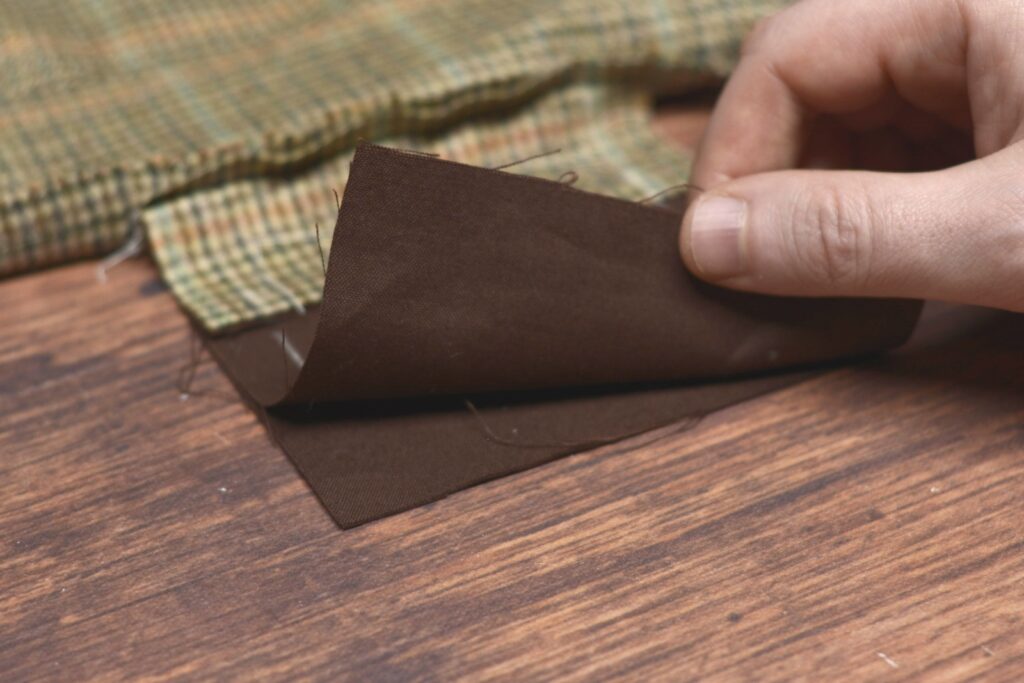
Trim the excess fabric from the pocket bag, leaving a 1/2″ seam allowance.
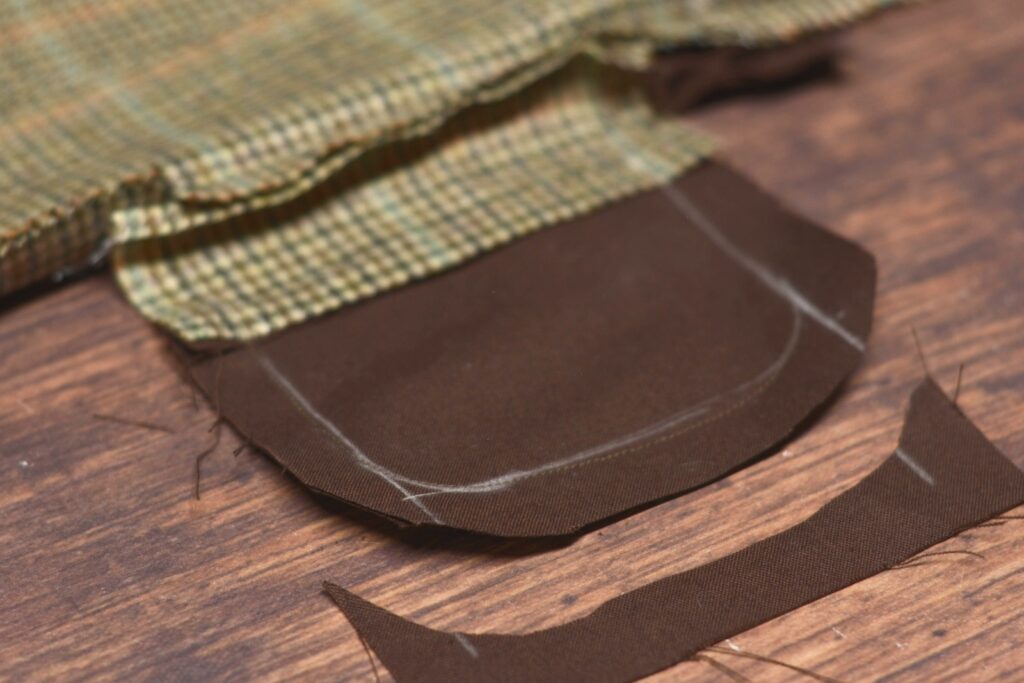
Carefully trim the pocket facing’s seam allowance to 1/4″ on each side, being sure not to cut the pocket bag below.
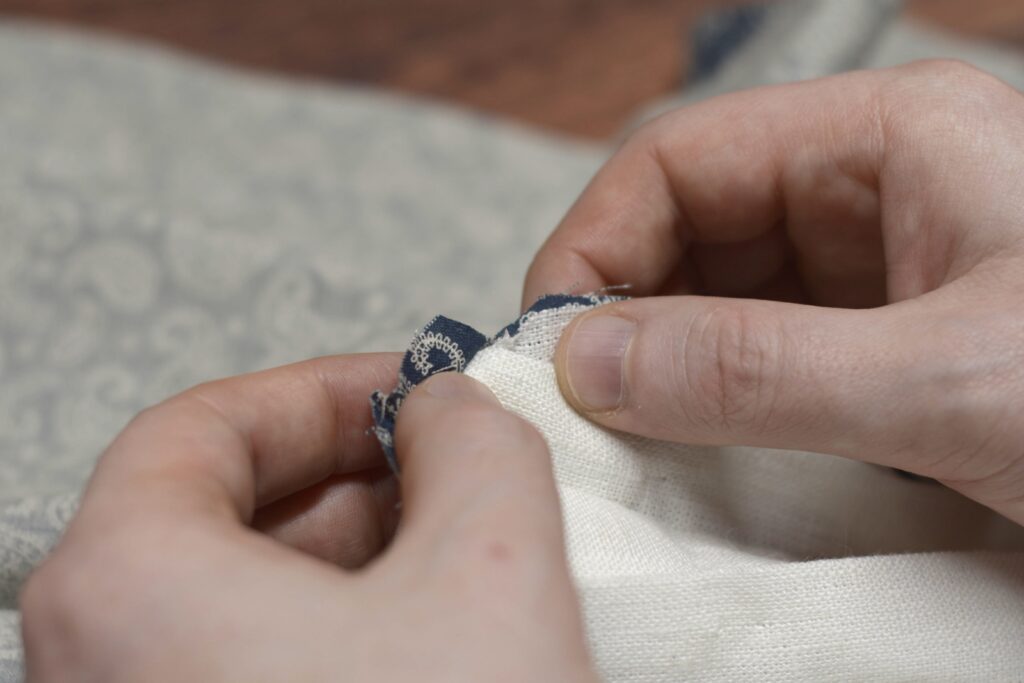
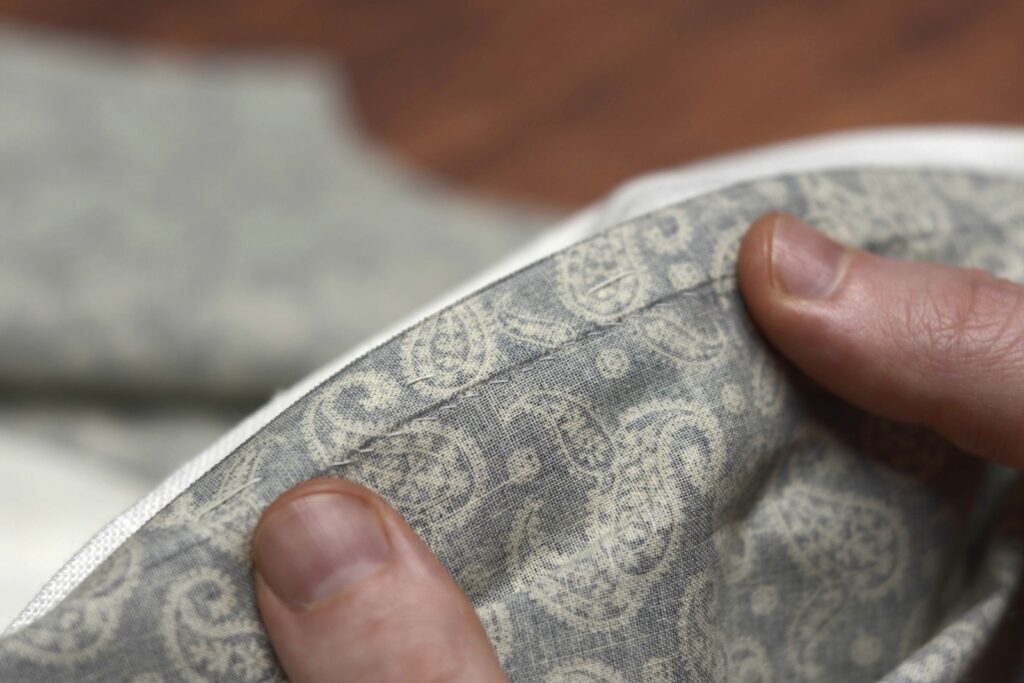
Fold the raw edges of the pocket bags inwards and press with your fingers as you go. The curved corners can be a little trick but you can perfect them as you overcast / fell the edges in the next step.
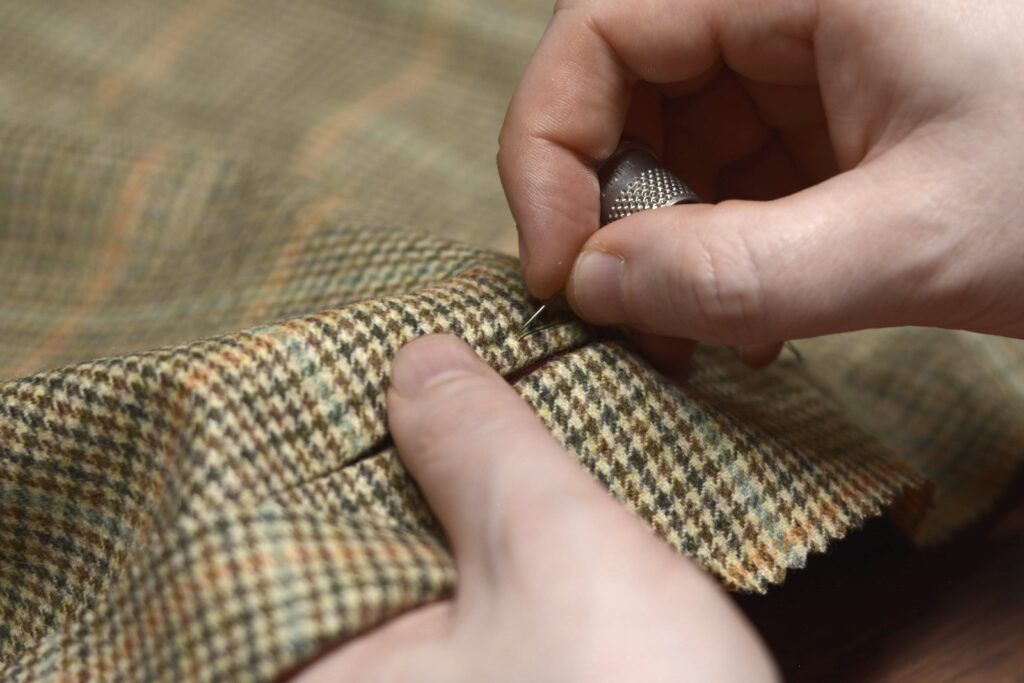
Fell or overcast the seam to the facings and along the pocket bag.
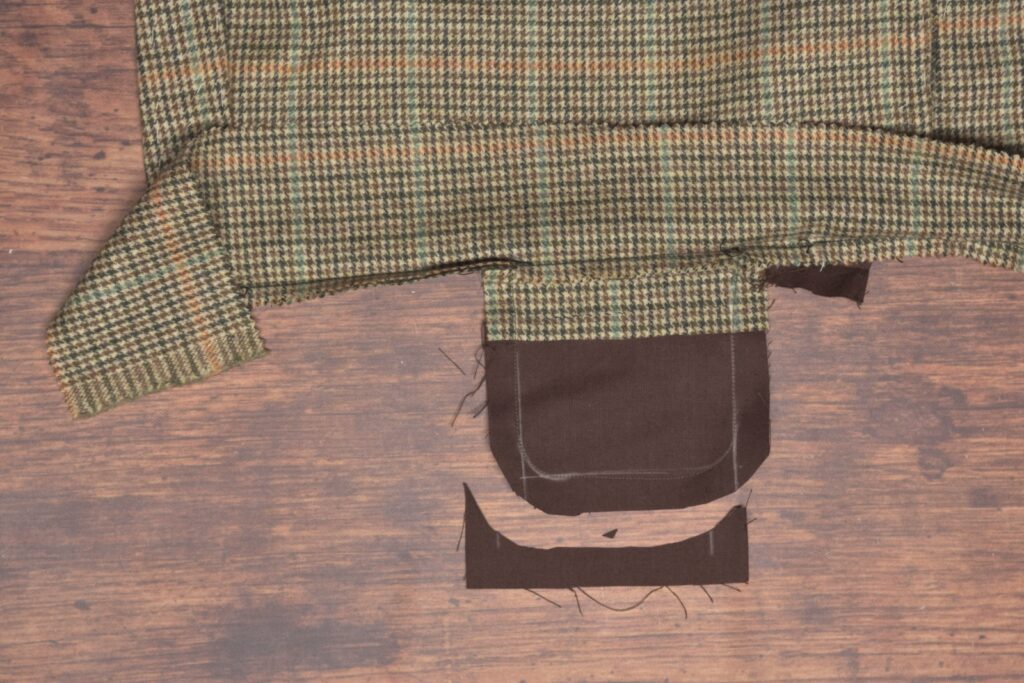
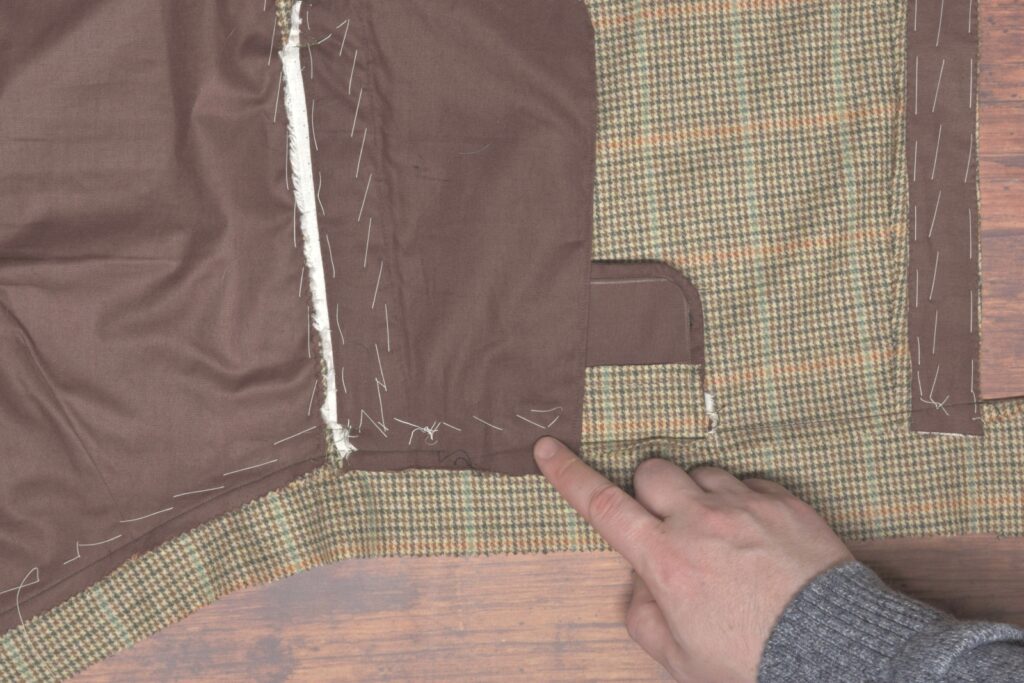
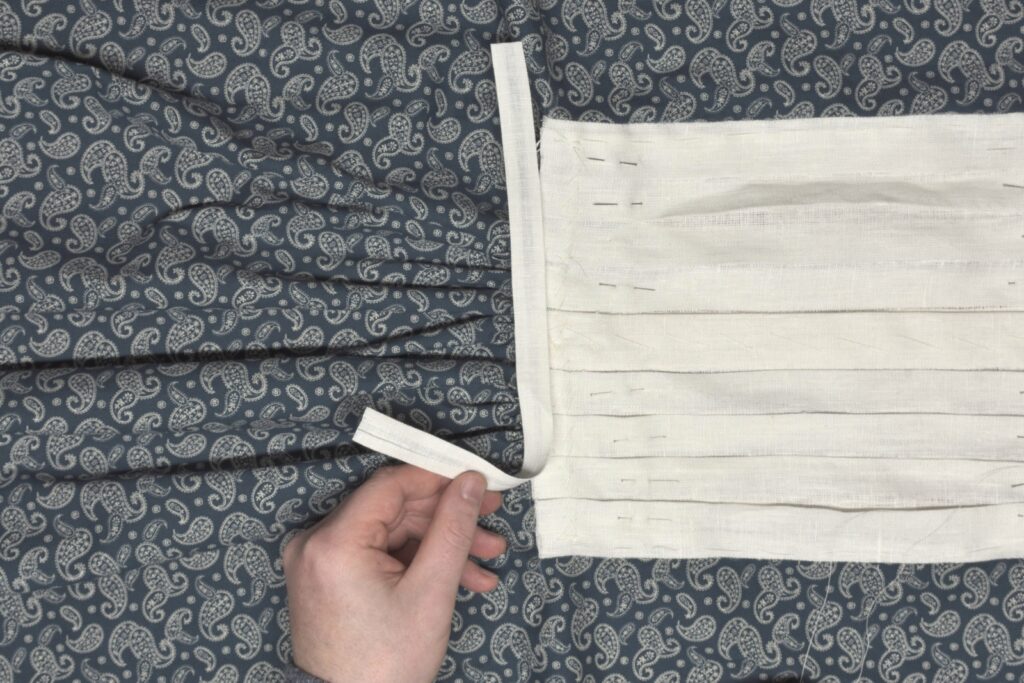
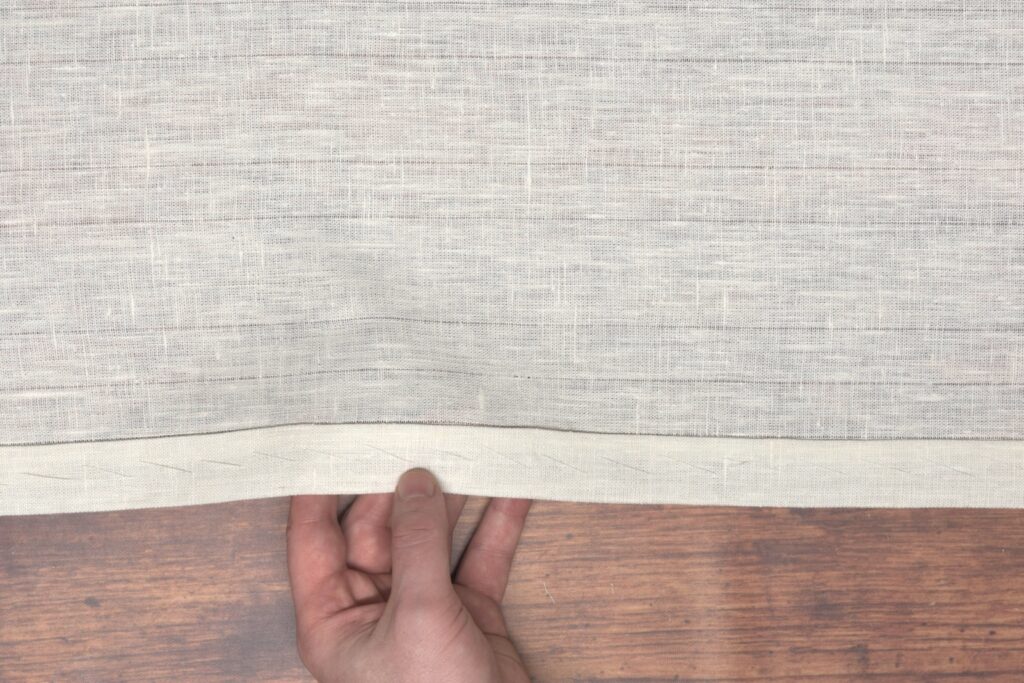
And with that the pocket is completed! We’ll tack down the ends of the pocket opening after the interfacing has been installed into the waistband.
One last detail, fold the side seam pocket bag back into place and baste across the top edge, just below the waistband. We’ll finish attaching this after putting in the interfacing as well.
Trimming the Neck Line
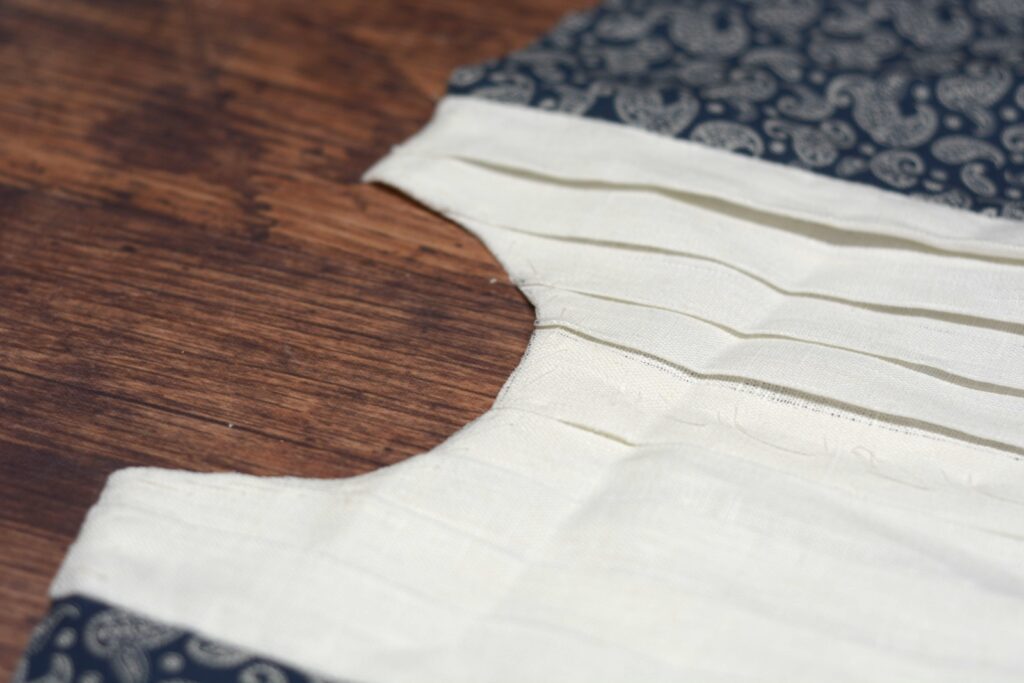
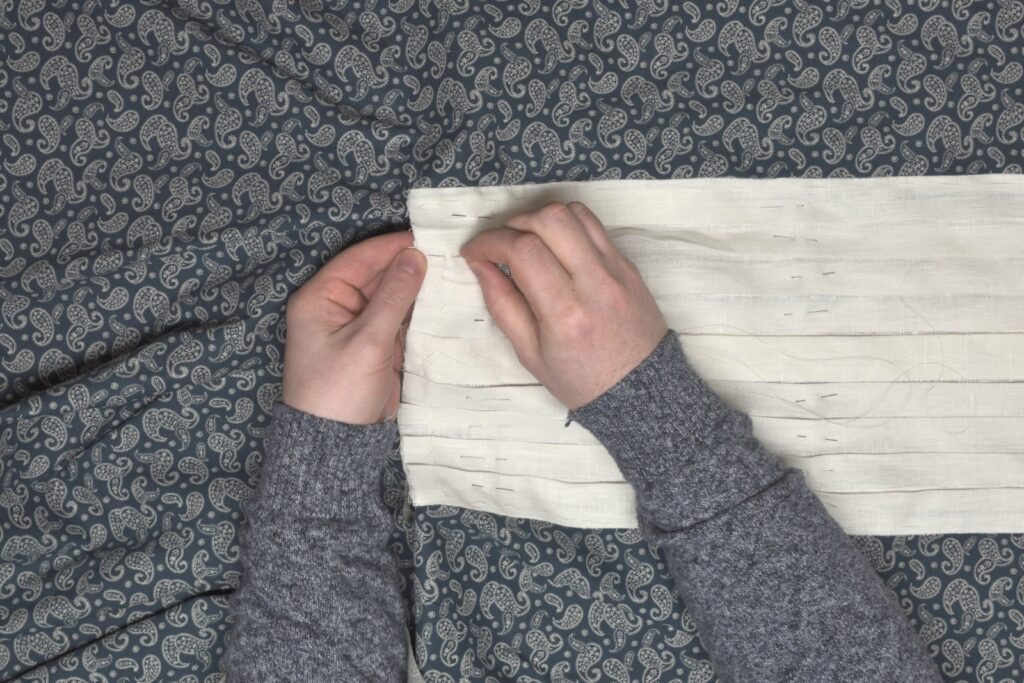
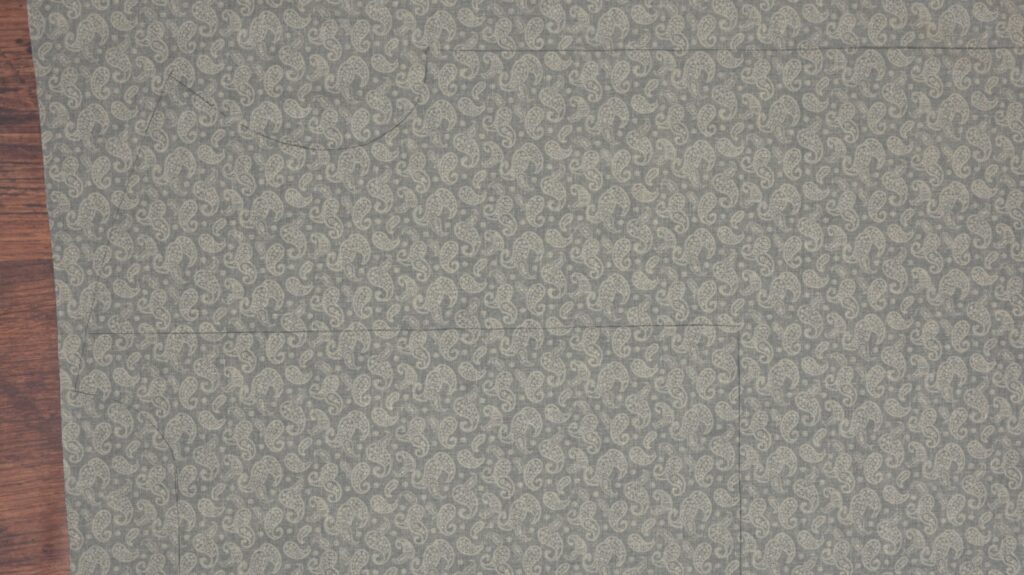
The last thing to do on the shirt front is to trim the neck and shoulder line to its final shape. Lay the pleated front pattern on top of your linen, carefully aligning the shoulders, sides, and bottom edges. Then trace the neck and shoulder line in chalk. Flip the pattern over and repeat for the other half.
If necessary, baste the two halves of the pleated front together again (mine had come undone) before doing this step.
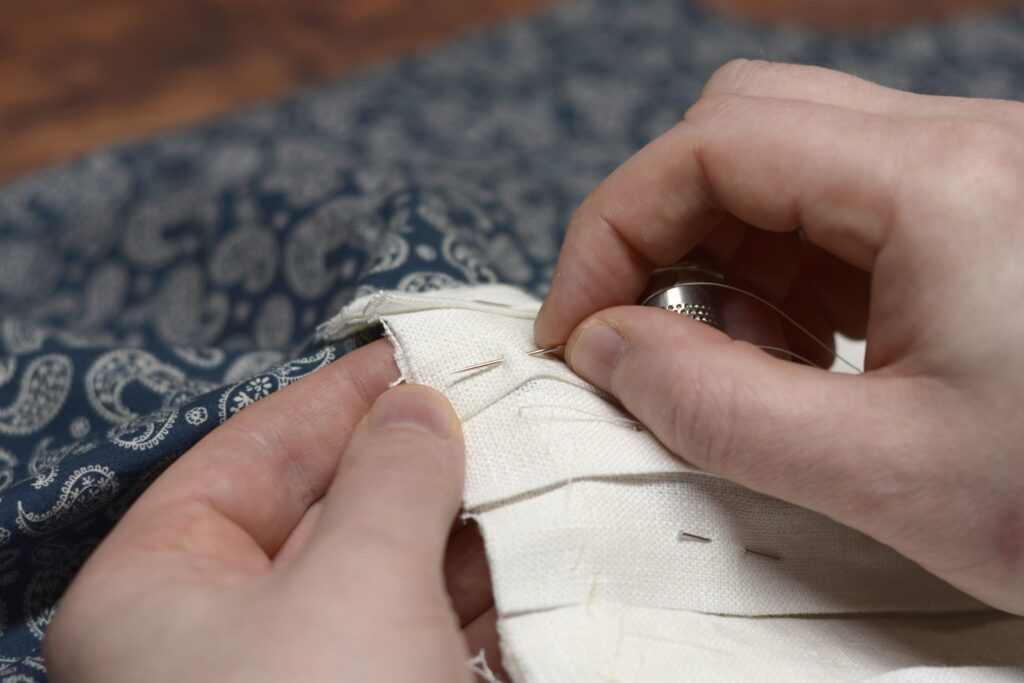
Now very carefully baste the pleats closed along the inside of the neck and shoulder line, keeping within 1/2″ of the line – this way you won’t have to remove the stitches after attaching the collar.
I used three or even four small diagonal basting stitches here, arranging the pleats in place as I worked, to ensure there is no movement during the rest of the construction.
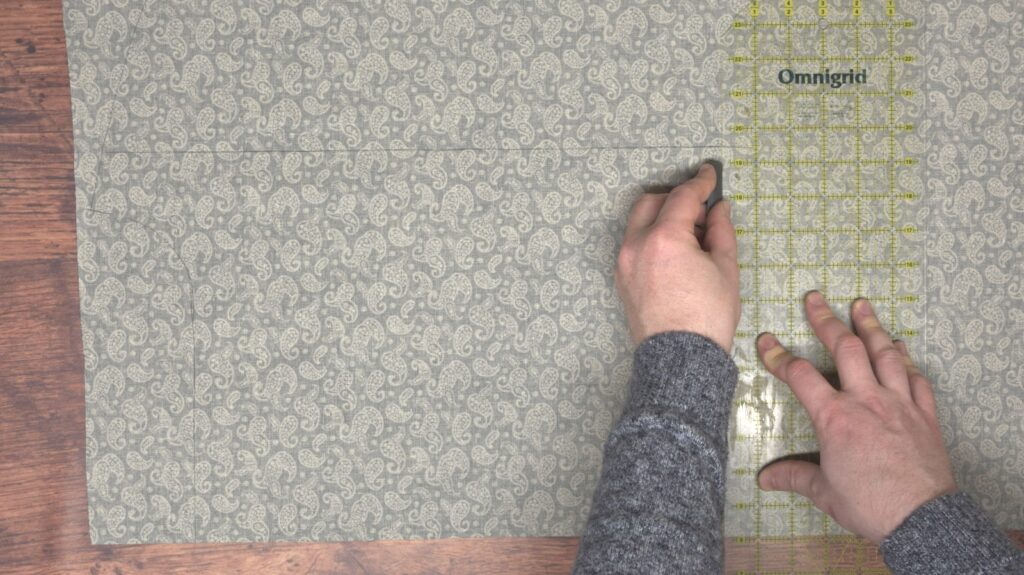
Finally, trim just to the inside of the lines, creating the curve of the neck and the final shoulder seams.
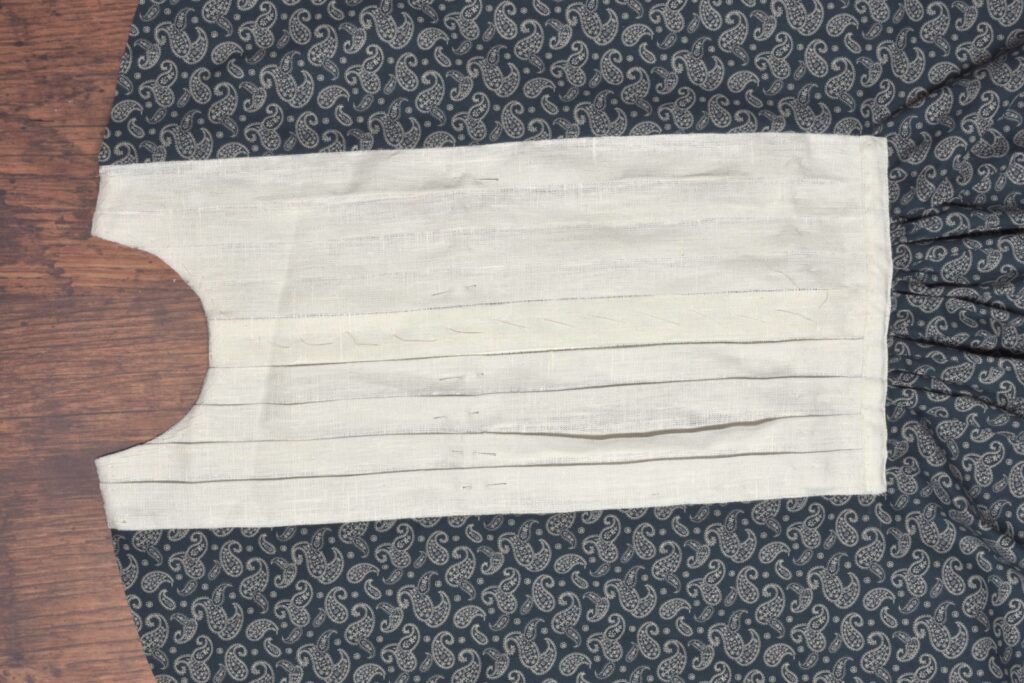
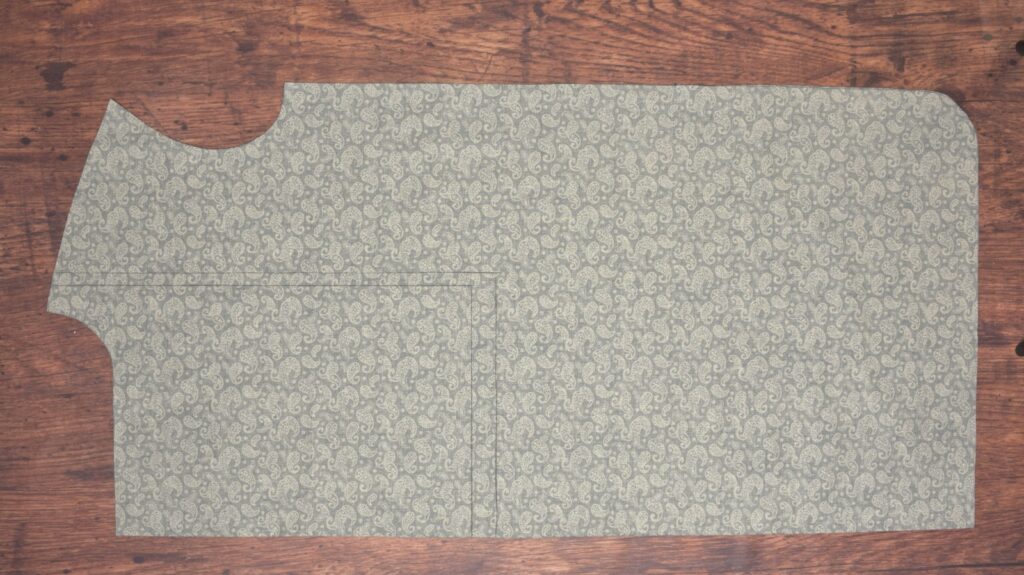
This completes the construction of the pleated front.
Your Progress
[columns gutter=”0″]
[col]
[progressally_objectives]
[/col]
[col align_text=”center, middle”]
[progressally_progress_pie_chart size=”100″]
[/col]
[/columns]
Finishing the Raw Edges
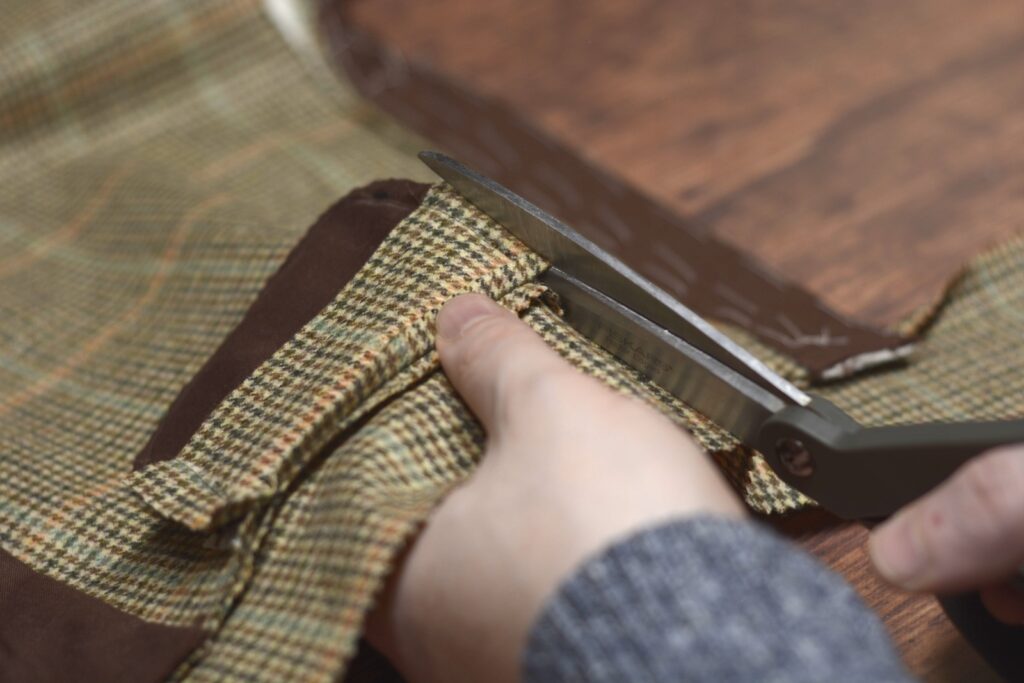
Turning to the inside of the shirt, you can see there are a few raw edges left along the sides and bottom of the placket that must be finished off to prevent fraying. Begin by clipping the corners at the bottom at a diagonal, about 1/4″ in length. Cut through the seam allowance of both the shirt and the pleated front section.
Working on the sides of the pleat, turn in the shirt’s seam allowance as shown. Give it a press with your fingernails.
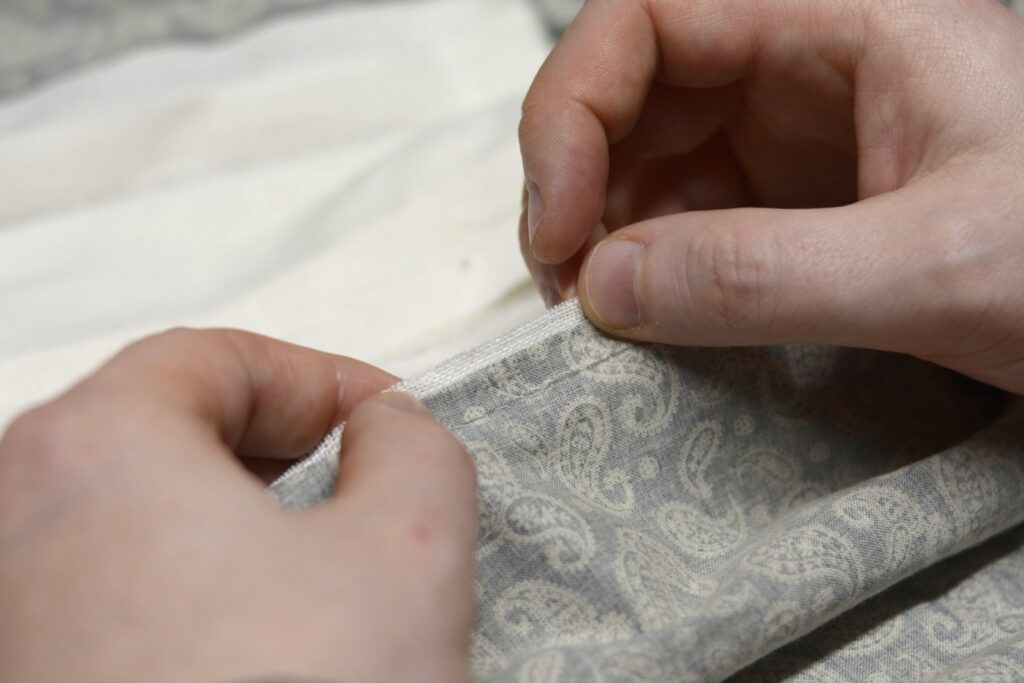
Then fold the seam allowance in as well.
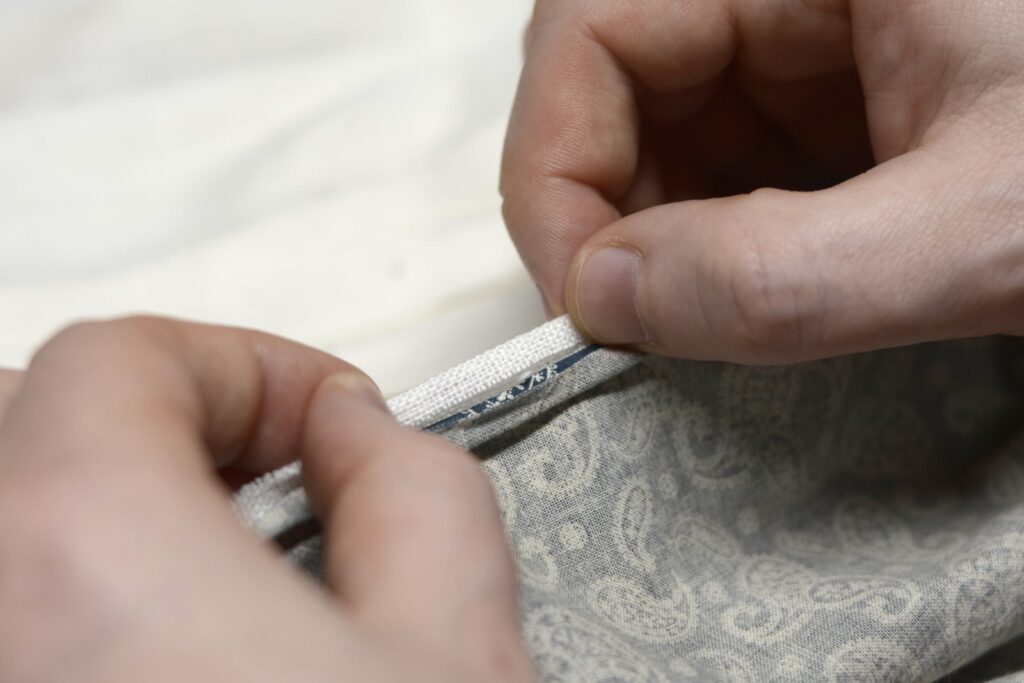
Overcast the edges by hand using a 1/4″ to 3/8″ stitch.
Turning to the bottom edge, turn under the raw edges of the shirt in the gathered / pleated area.

Carefully fell to the bottom of the pleated front, trying to catch only the first layer of pleats, keeping the stitches invisible from the right side. My stitch was about 1/4″ in length, though I made smaller stitches in areas where the pleats were a bit denser.
Your Progress
[columns gutter=”0″]
[col]
[progressally_objectives]
[/col]
[col align_text=”center, middle”]
[progressally_progress_pie_chart size=”100″]
[/col]
[/columns]
Bottom of Pleats
This probably would have been a little easier to do before attaching the pleats to the shirt front, but baste the pleats firmly together using a side basting stitch, keeping the stitches about 1/2″ from the bottom of the pleats. Arrange the pleats into position as you go in case they’ve moved out of place at all.
I like to put at least two stitches into each pleat to hold them in place better.
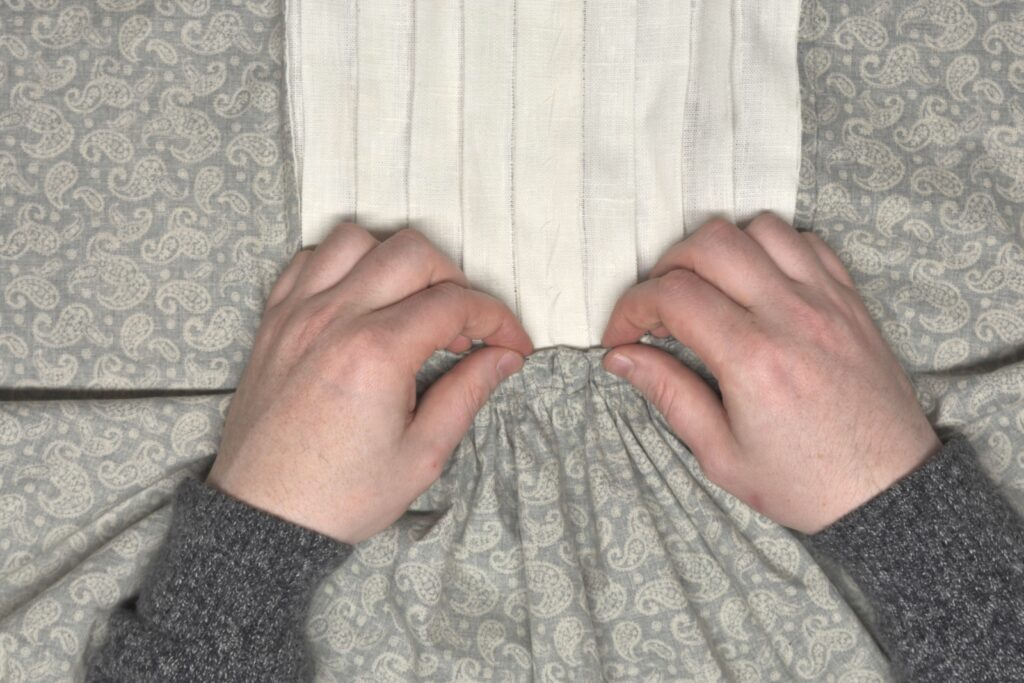
Now turn to the center, and mark the center of the shirt front at the bottom of the pleat area.
Pin the center of the shirt to the center of the pleated front at the placket, ensuring that the bottom of the pleats fall exactly on the seam line you drew.

Still on the wrong side, grasp the three gathering threads you tied together previously, and gently pull on the threads, distributing the shirt front fabric into neat gathers or small pleats as desired. Work on one half of the shirt front at a time.
You can distribute the gathers along the entire front edge of the pleats, or as I did, keep them towards the center of the shirt.
When you’re happy with their appearance, pin the gathered area to the pleated front. The gathering stitches should hold everything mostly in place as you work.
Repeat for the other half of the shirt front, pinning everything securely in place.
Now, diagonal baste everything even more securely through all layers, fine tuning the look and distribution of your pleats or gathers as you work. Keep the stitching 1/2″ from the bottom edge. Remove the pins as you go.
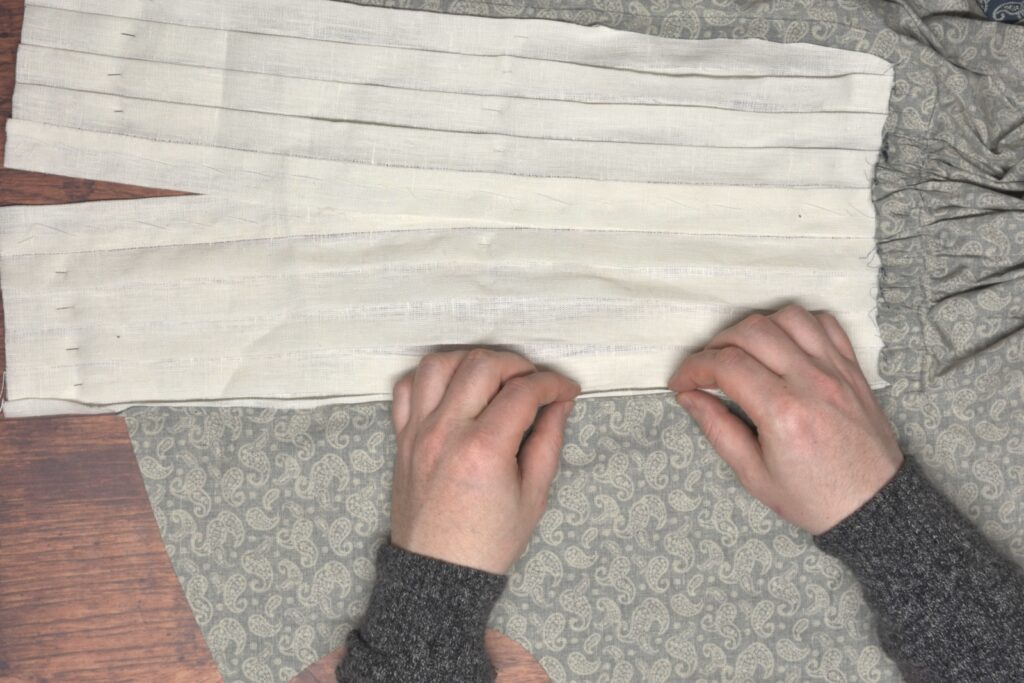
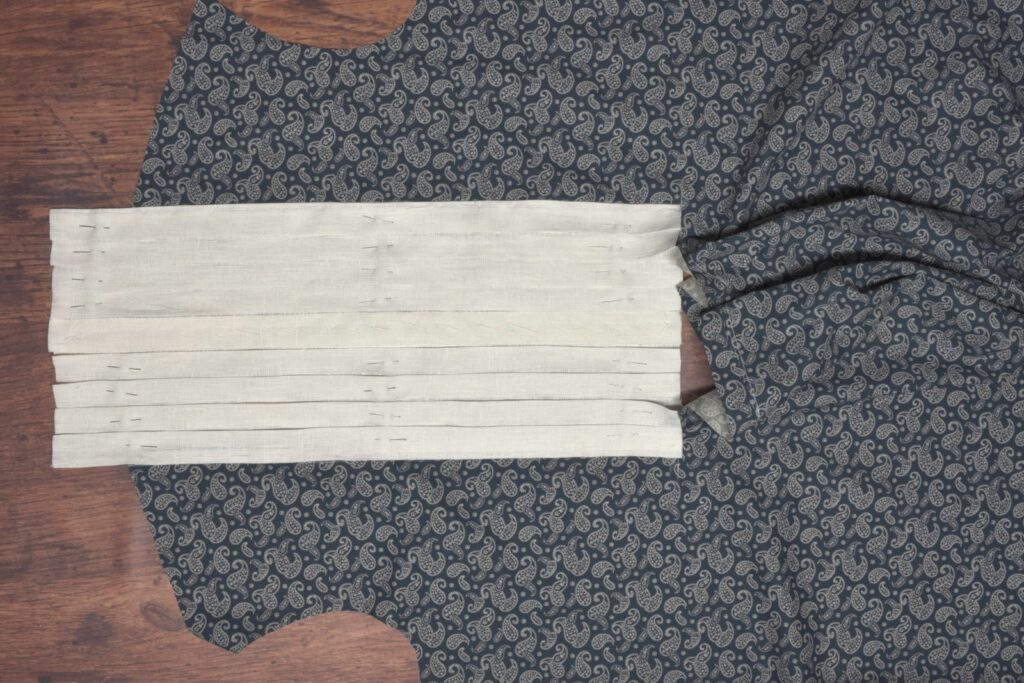
Here’s the pleated front basted to the shirt so far.
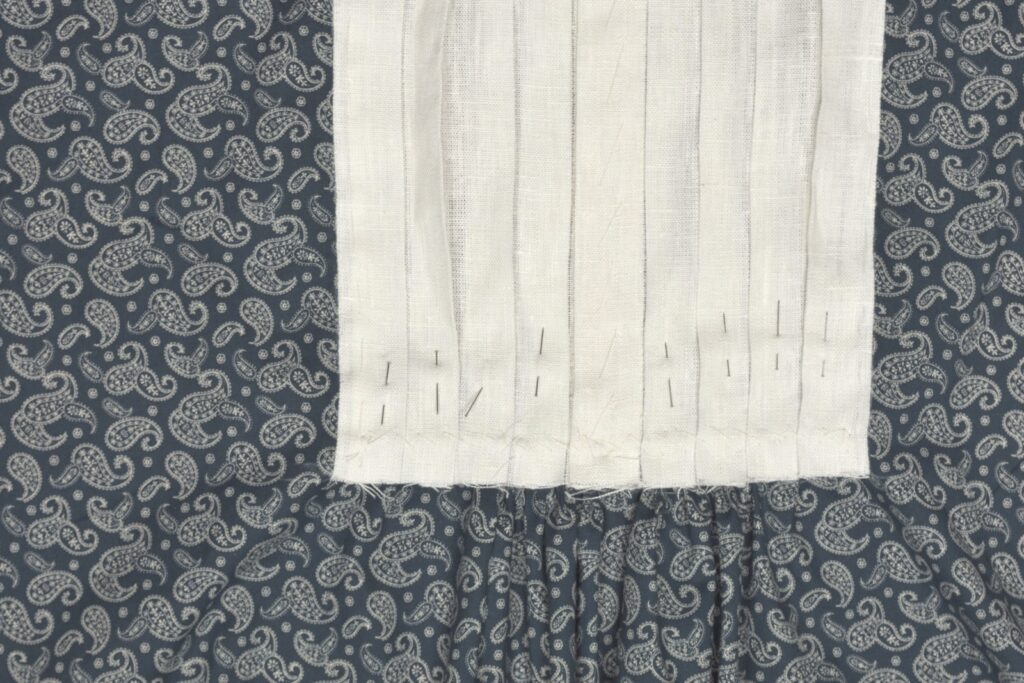
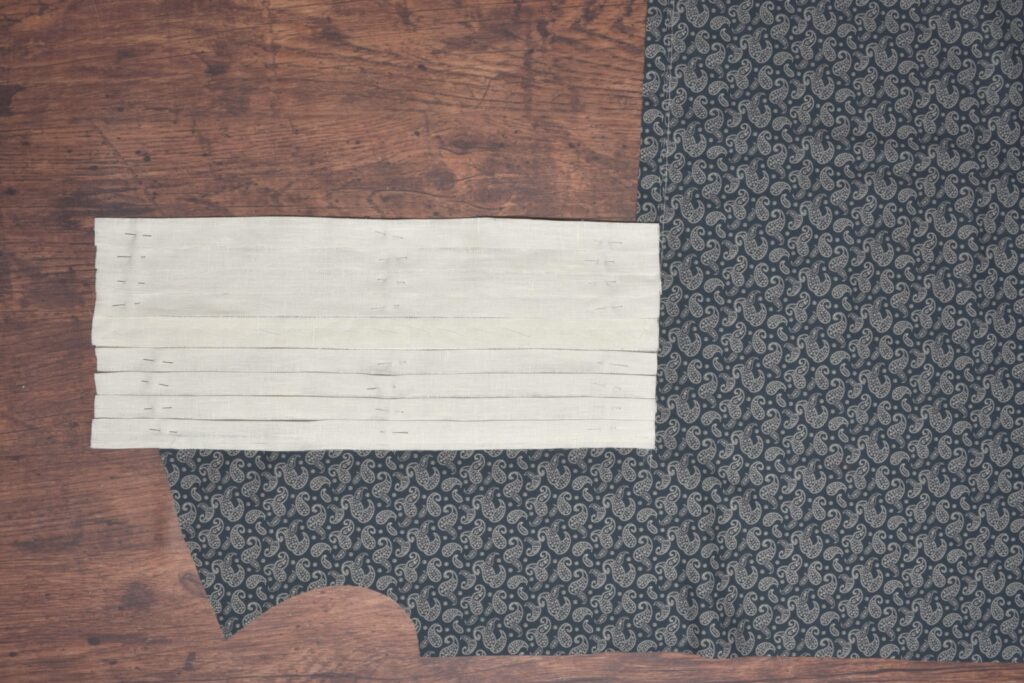
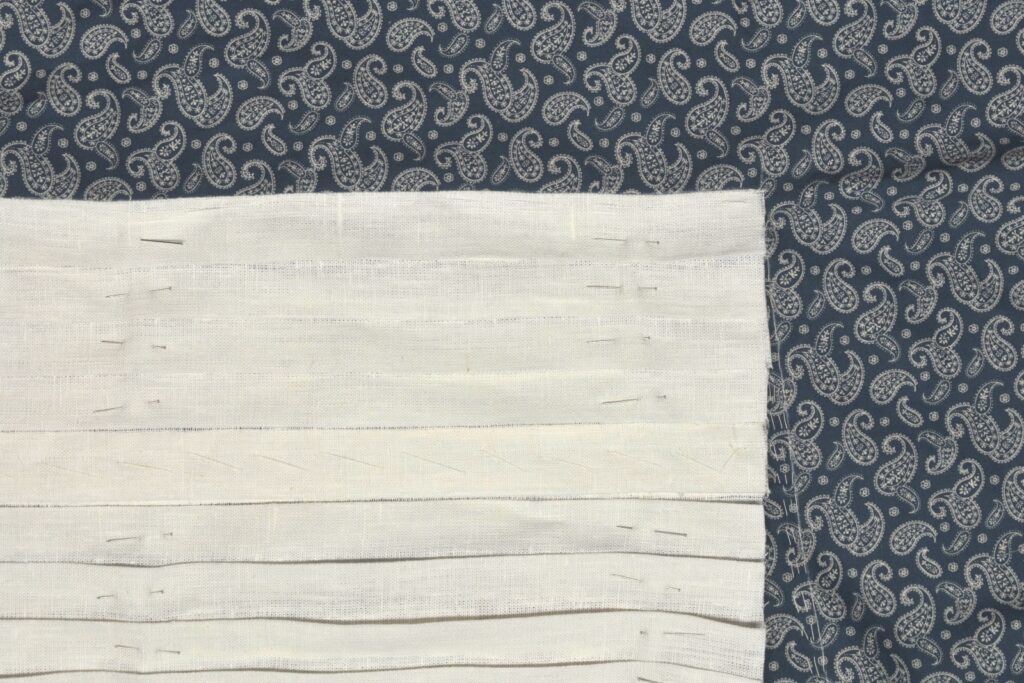
Cut a piece of linen 1 1/8″ wide by a couple of inches longer than the width of the pleated front bottom. Then mark the seam allowances (1/4″) by pulling the threads again. I pulled the threads marking the cut lines as well on the longer edges.
Crease and press the 1/4″ seam allowances to one side.
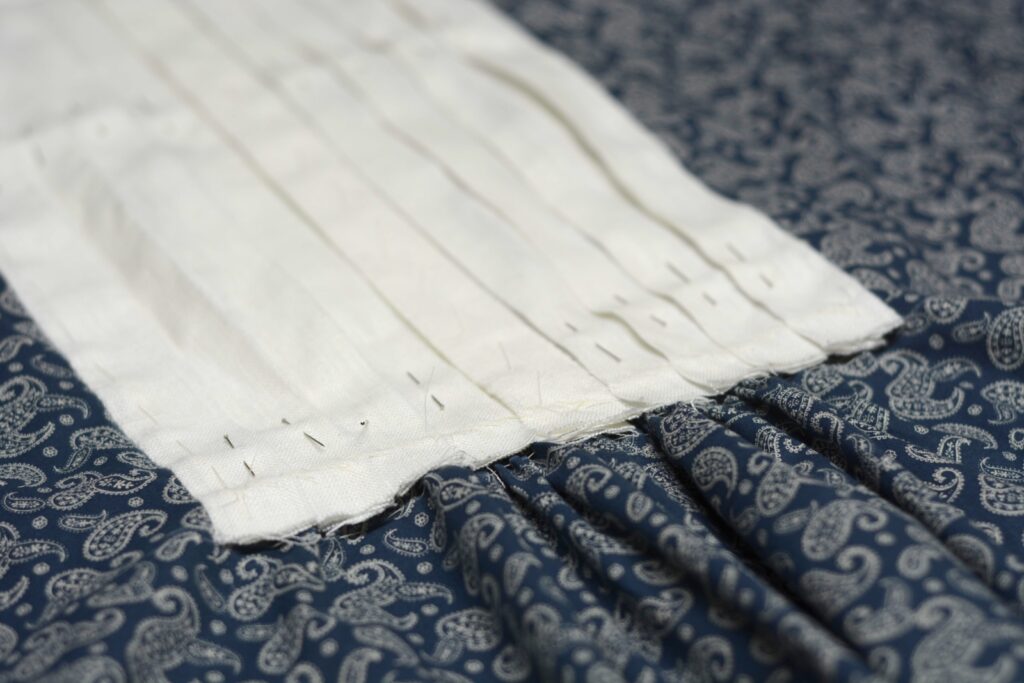
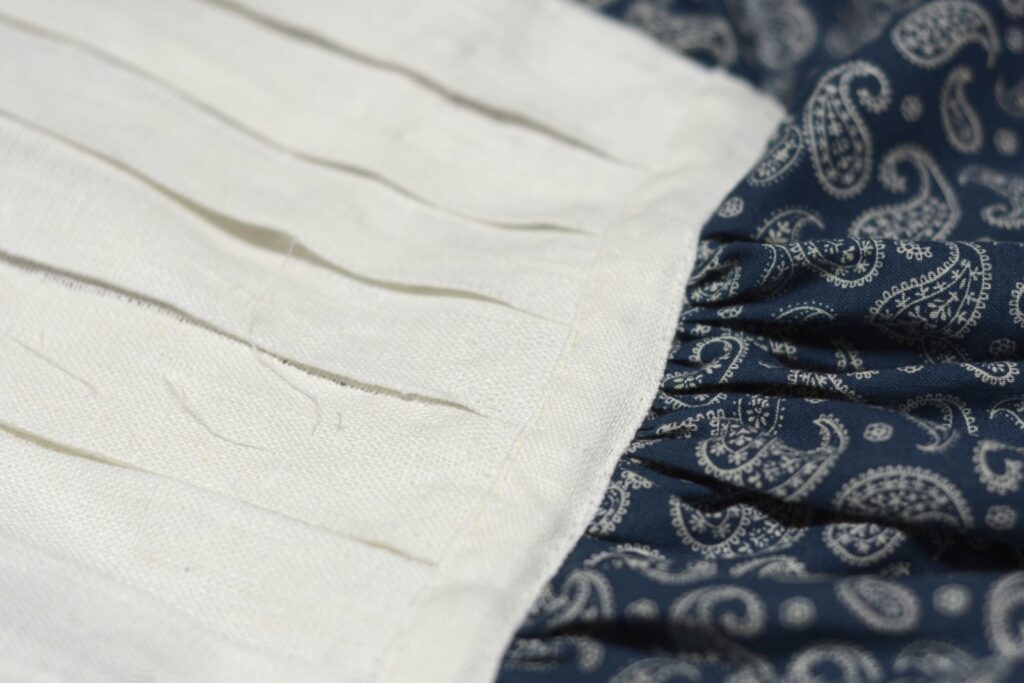
Lay the linen strip on the bottom of the pleated front, right sides up.
I like to align the linen strip so that the lower 1/4″ overlaps the main fabric of the shirt.
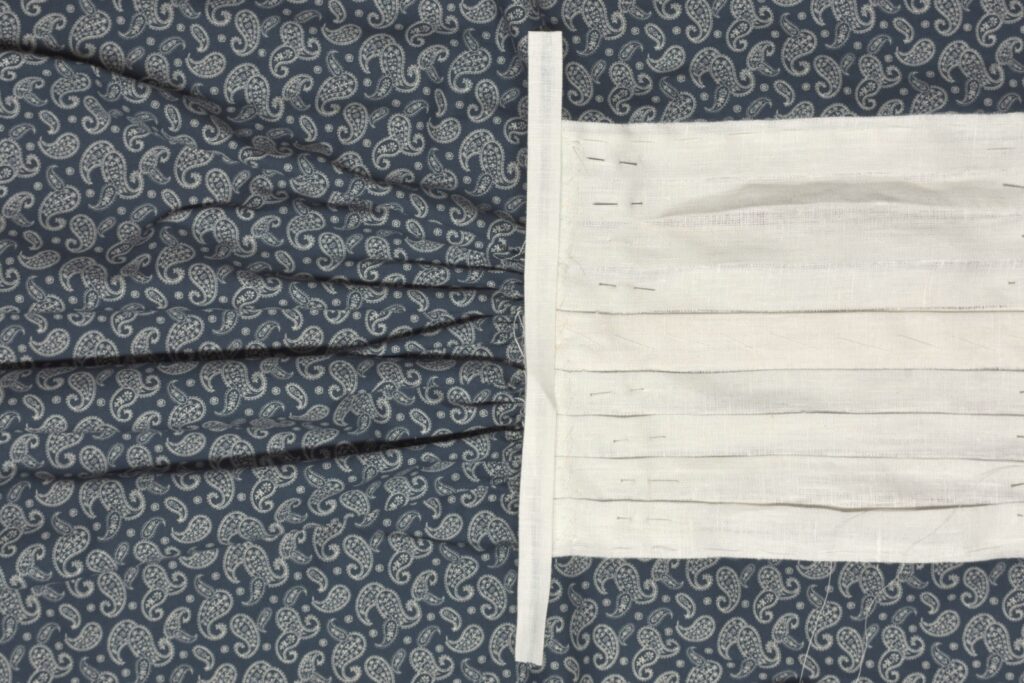
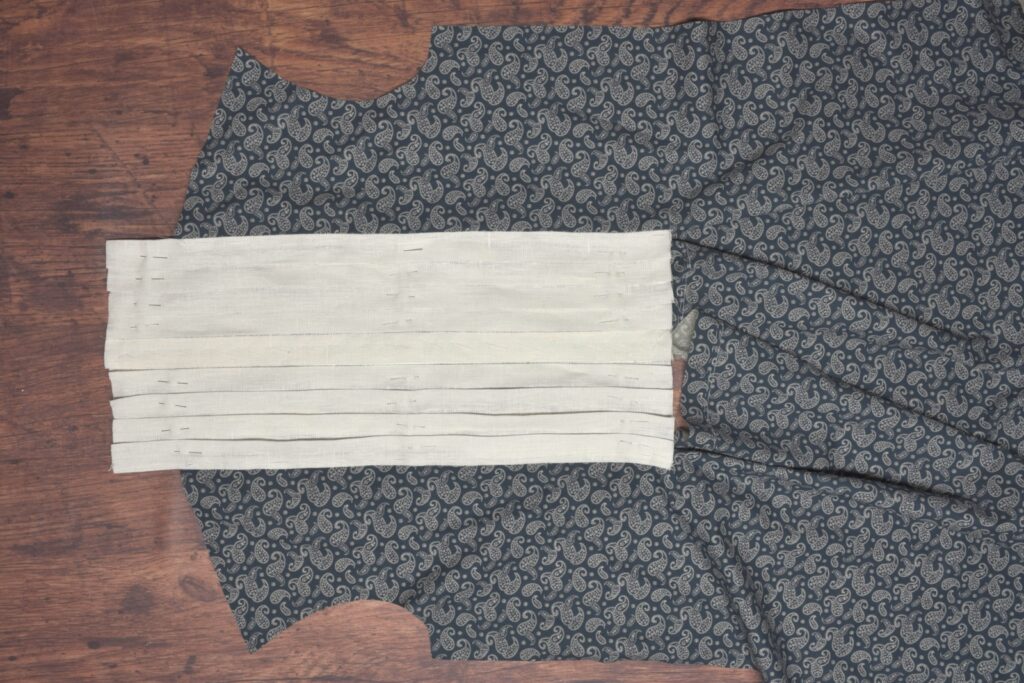
Baste the linen strip to the bottom of the pleats through all layers, keeping about 1/2″ from either end of the pleated front (so we can turn under the ends).

Trim both ends of the linen strip to about 1/2″ from either end.
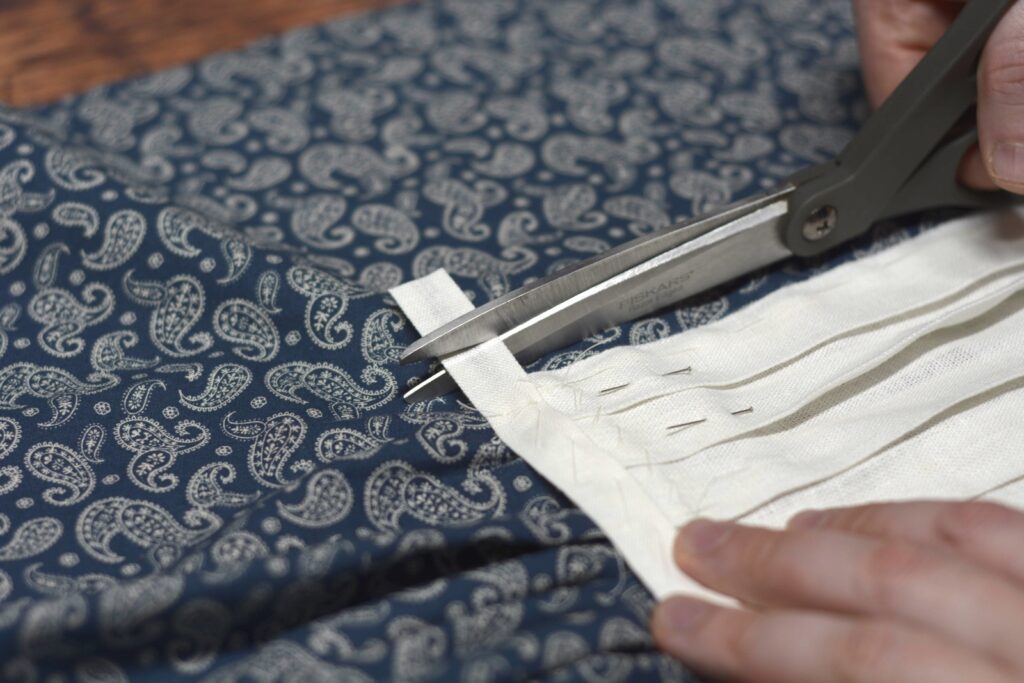
Turn under the raw edges on both ends and secure with a couple of basting stitches in place.

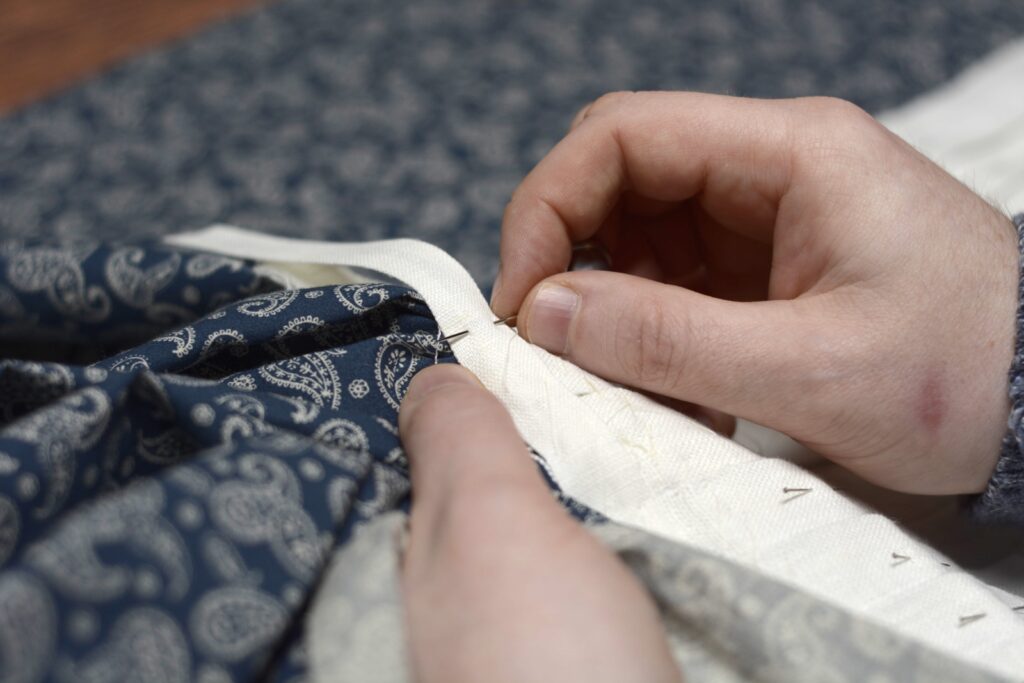
Finally, back stitch or half back stitch the linen strip to the bottom of the pleats through all layers around the four edges. I used a half back stitch here since it made the visible stitch slightly smaller. You could also machine stitch this if you prefer.
I like to begin on the upper edge of the strip, about a quarter of the way from either end, to avoid starting the stitches near the ends, which could see more stress over time.

When you get to the ends and pleats that are layered more thickly, you may need to make a prick stitch – passing the needle all the way through to the underside – in order to get through all the layers. It takes a little longer but it’s worth the effort.
Continue back stitching across the bottom edge as well. I’ve found this section to be very easy after getting through all of the layers on the other edge!
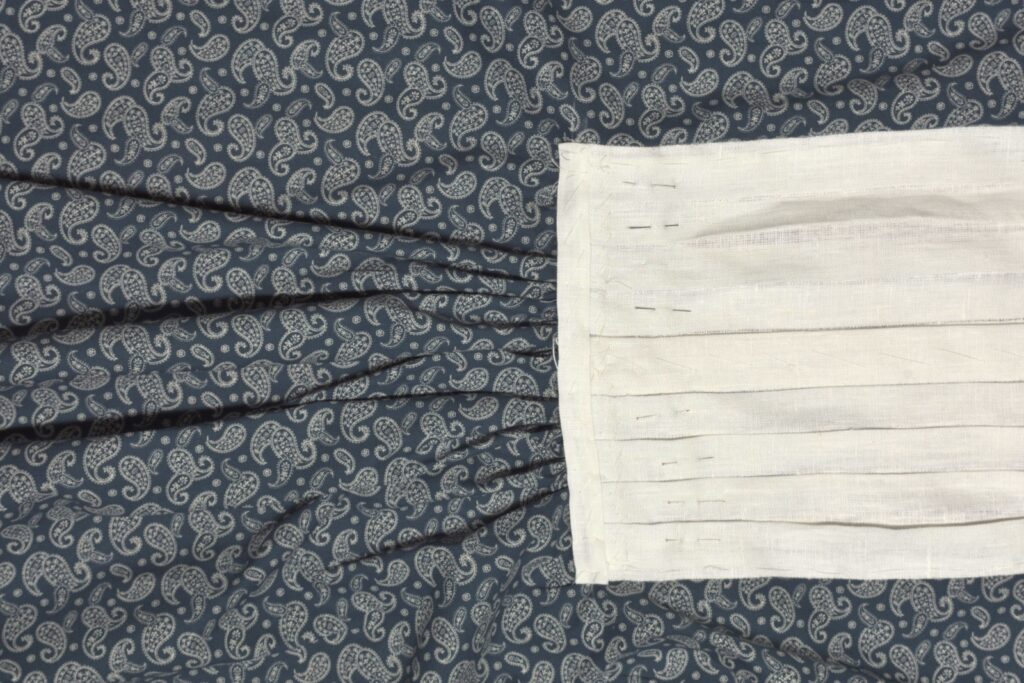
Here’s the completed bottom edge of the pleated front. Remove all basting stitches from this area as necessary (though keep the center basted together at the placket).

Your Progress
[columns gutter=”0″]
[col]
[progressally_objectives]
[/col]
[col align_text=”center, middle”]
[progressally_progress_pie_chart size=”100″]
[/col]
[/columns]
Attaching the Pleated Front
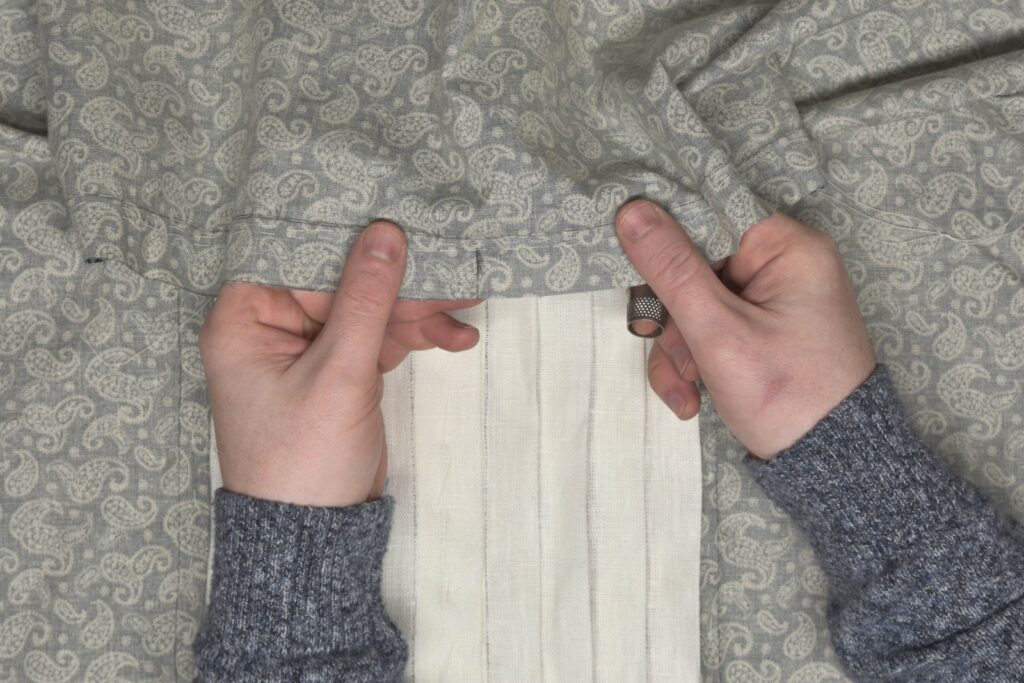
With all of that preparatory work out of the way, we can begin attaching the pleats to the front of the shirt. Begin by laying out the shirt front and pleats, right side up, ensuring that the placket is opening in the correct direction (left over right).
Align the bottom and outer edge of the pleats carefully with the seam lines you chalked earlier. The linen should just cover the chalk lines.
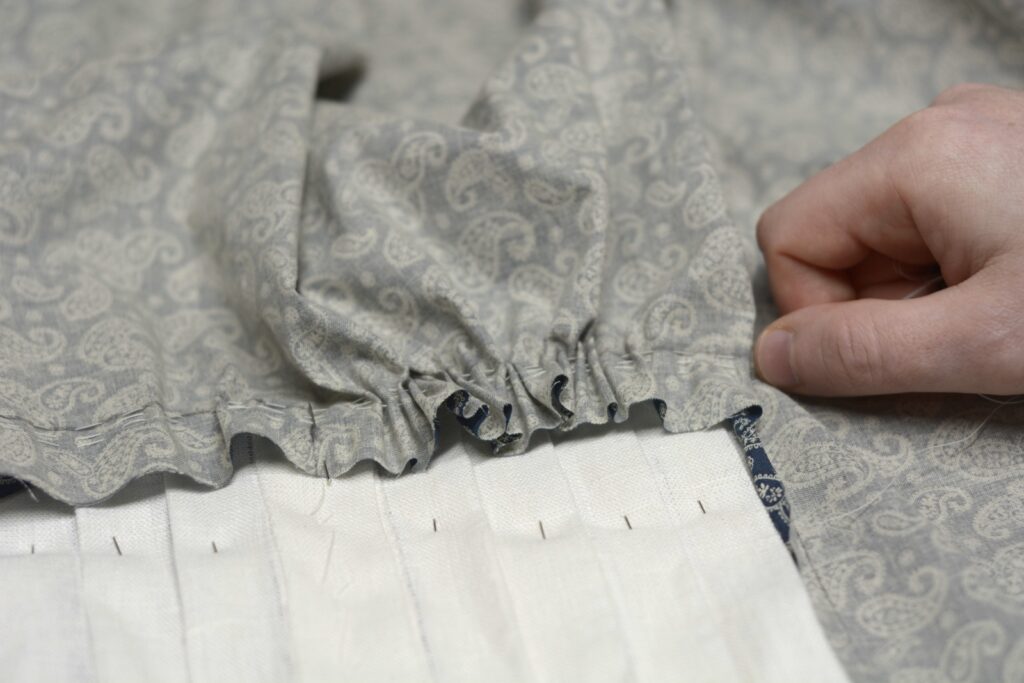
Baste, from the bottom up, one side of the pleated front in place, ensuring that everything is lined up properly as you go, maintaining a neutral tension on both the pleats and the shirt underneath.
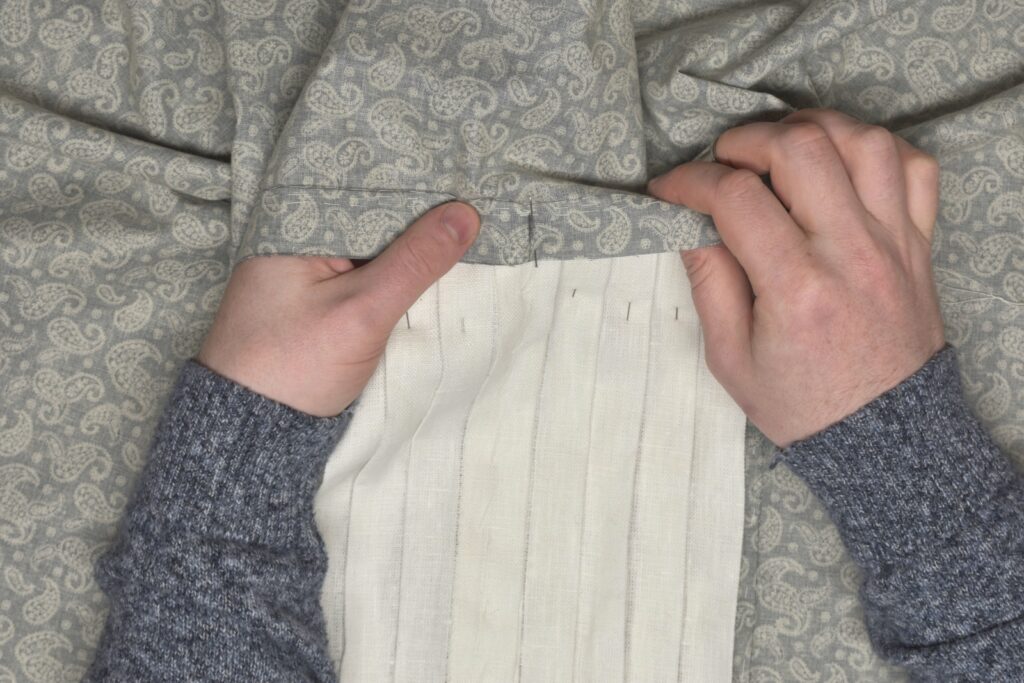
The second side of the pleated front is more awkward to reach, so I like to pin this in place before basting.
Baste the second edge of the pleats in place.
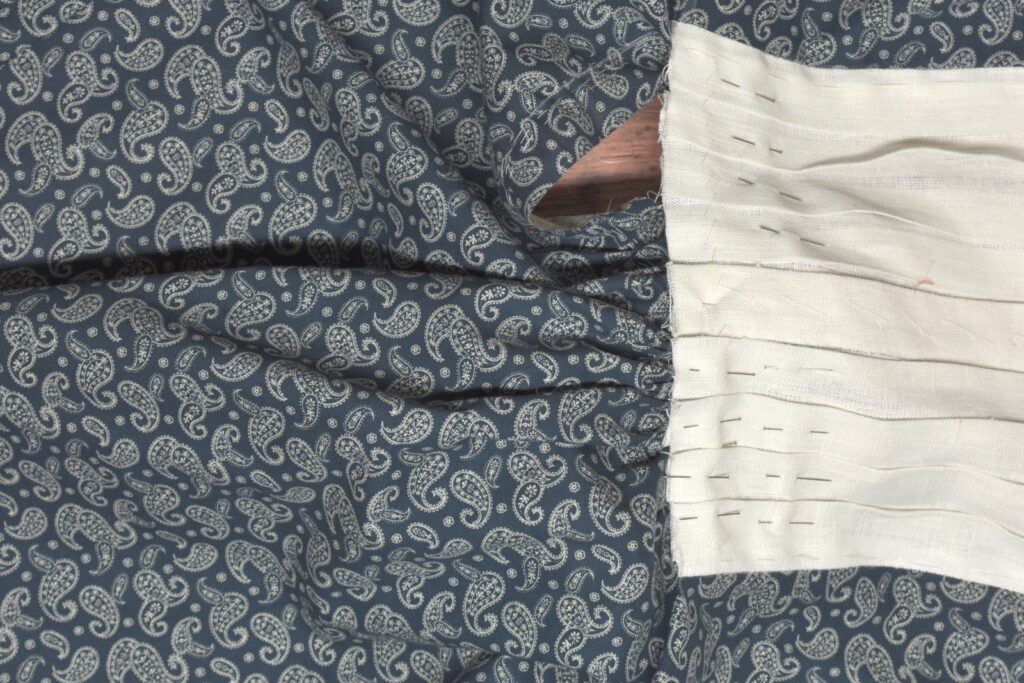
The bottom will still be left open at this point.
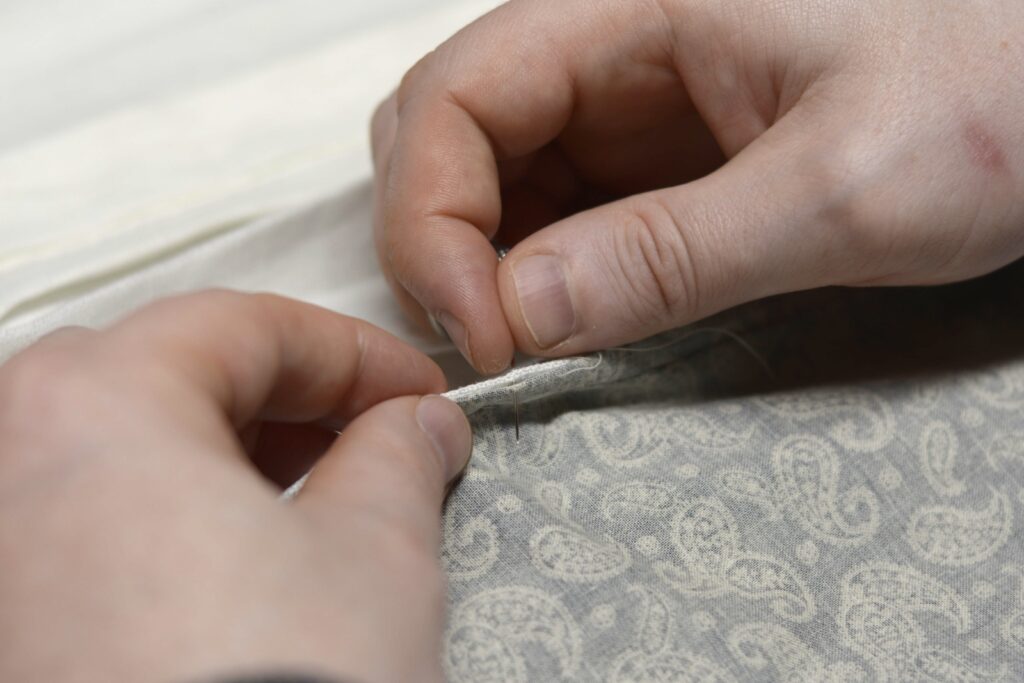
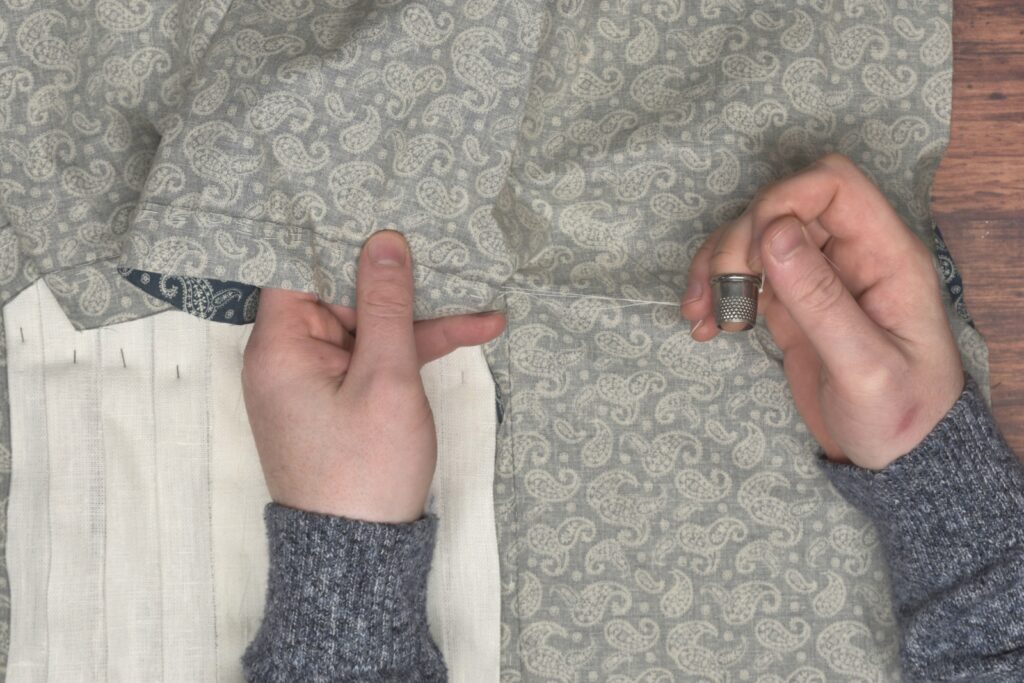
Carefully fell the pleated front to the shirt front along the long outside edges using 1/8″ – 1/16″ stitches. It’s a bit awkward to hold again — I found the best approach was to grasp the fabric from the outer edge of the shirt.
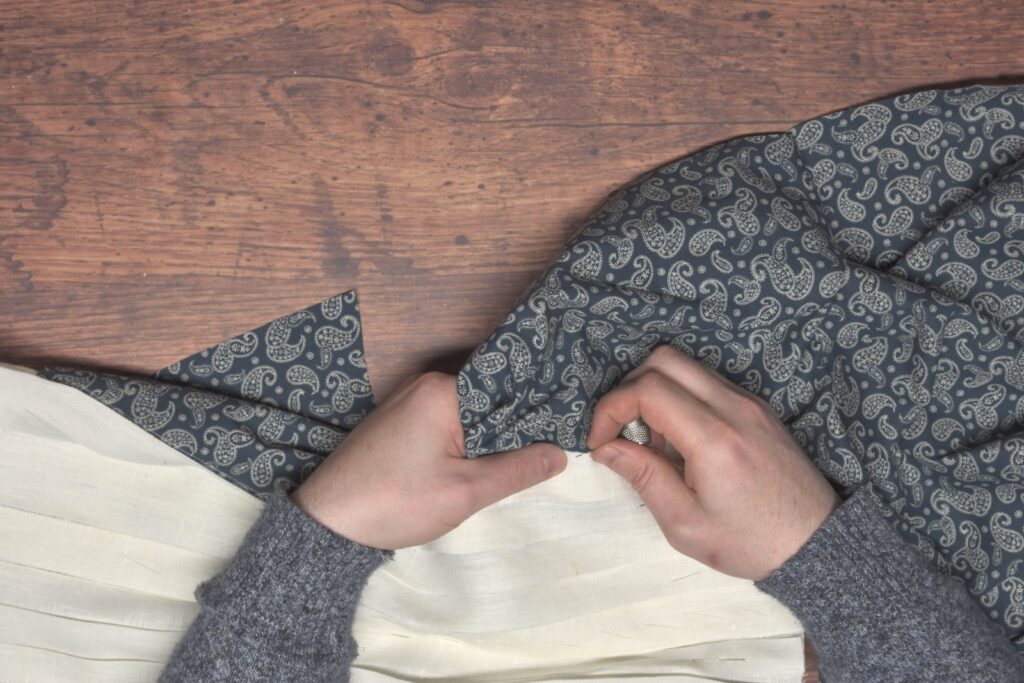
Each stitch is made by inserting the needle into the lower shirt fabric at a diagonal, coming out a stitch or two away from the edge of the linen. This hides most of the stitch on the inside.
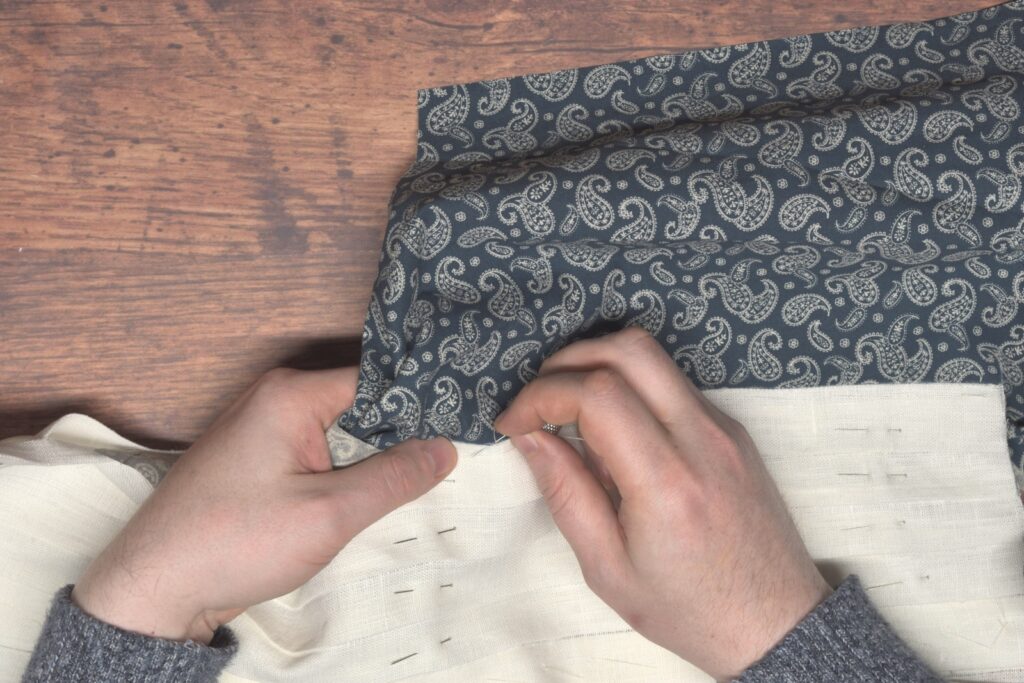
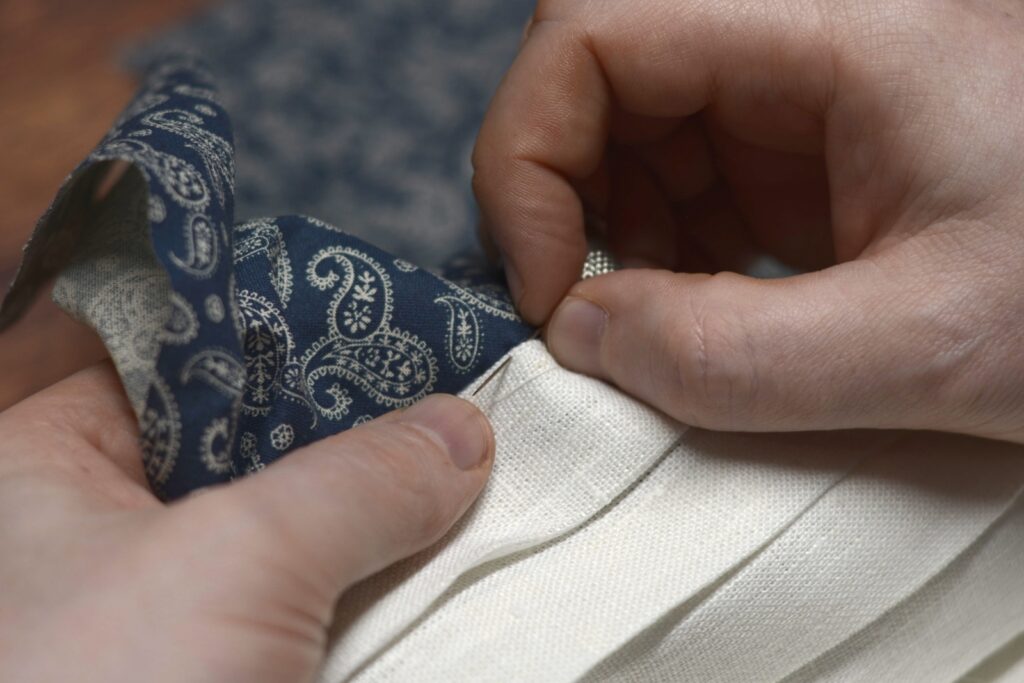
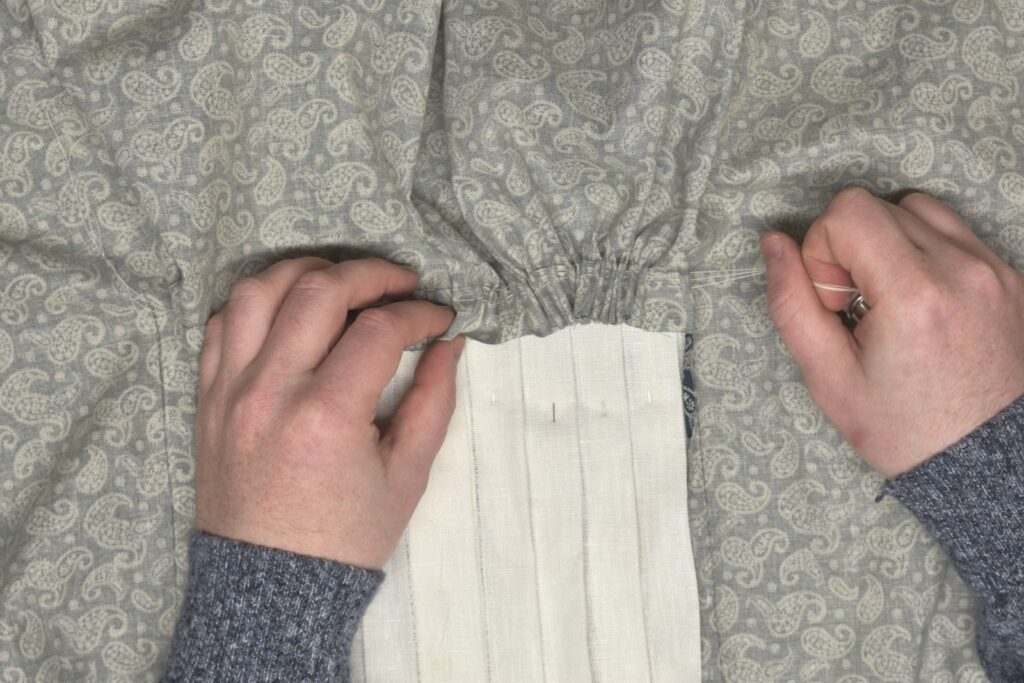
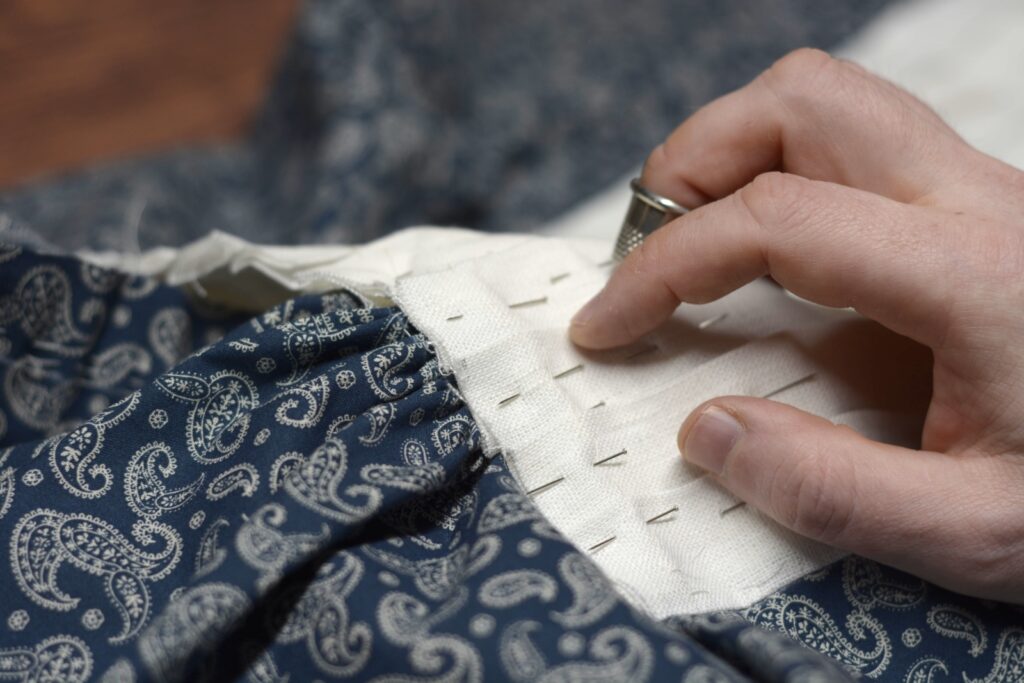
The finished seam from the outside – you can barely see the stitches.
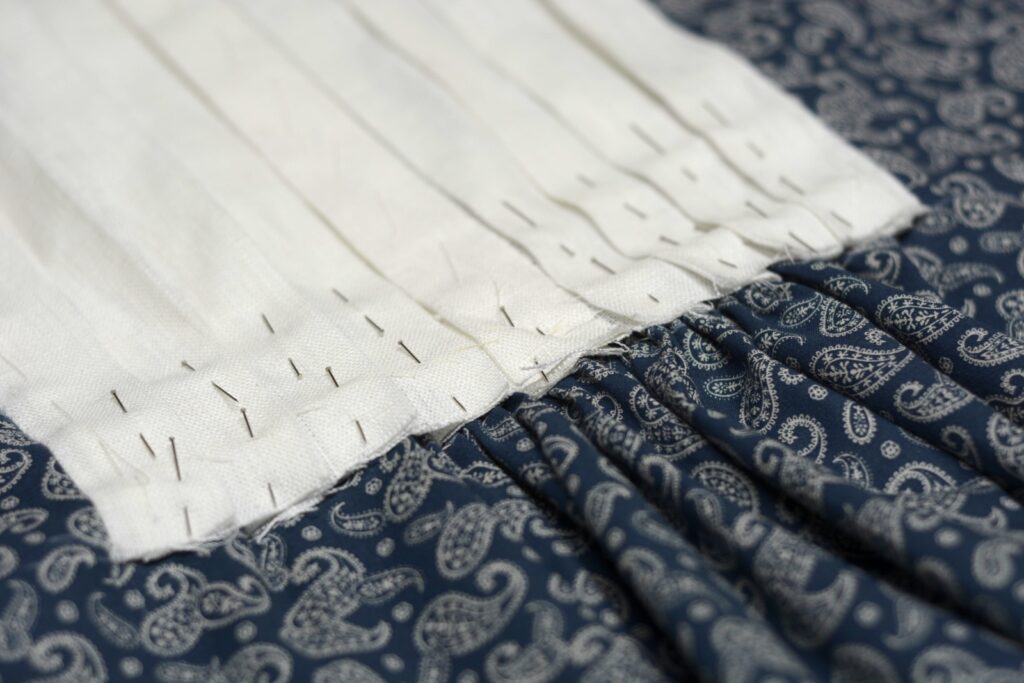
Here’s the stitch from the wrong side, showing the diagonal threads.
And here’s the progress so far with attaching the pleated front to the shirt. Next we’ll be finishing up that bottom edge.
Your Progress
[columns gutter=”0″]
[col]
[progressally_objectives]
[/col]
[col align_text=”center, middle”]
[progressally_progress_pie_chart size=”100″]
[/col]
[/columns]
Gathering Stitches
While we’re working with the shirt front, it’s easiest to add some gathering stitches to the bottom of the pleat area now rather than later. These will later be gathered up into small pleats or gathers.
Place the shirt front on the table wrong side up. Using some basting thread or other stronger thread, baste a row of running stitches along the bottom seam line (1″ from the edge), from end to end, keeping about 1/2″ from each end so the thread will not be caught up in the seams later on.
These stitches can be anywhere from 1/8″ or even less if you’re feeling ambitious, to 1/4″ or more, depending on how fine you want your gathers after attaching the pleated front. I decided to go with a 1/4″ (roughly) for sanity’s sake.
Leave about 6″ of thread free at each end.
You can usually get at least 2 or 3 or even more stitches done in one pass of the needle, depending on the stitch length.
Here’s my first row of stitches complete. If you look closely you can see how I stopped 1/2″ from each end, as well as left about 6″ of thread at each end.
Repeat this process with a second row of stitching, about 1/8″ away from the first (towards the top of the shirt), following the same stitch pattern as the first row.

And finally, complete a third row following the same pattern of stitching. It doesn’t have to be exact but the closer the better.
If you’re skilled with this type of work you could probably leave out the third row, but if you are new to it, or just prefer to have more control and no slipping of threads and pleats, then three rows is the way to go.
Finally, tie the threads together at each end to keep the from pulling out during the next couple of steps.
Your Progress
[columns gutter=”0″]
[col]
[progressally_objectives]
[/col]
[col align_text=”center, middle”]
[progressally_progress_pie_chart size=”100″]
[/col]
[/columns]
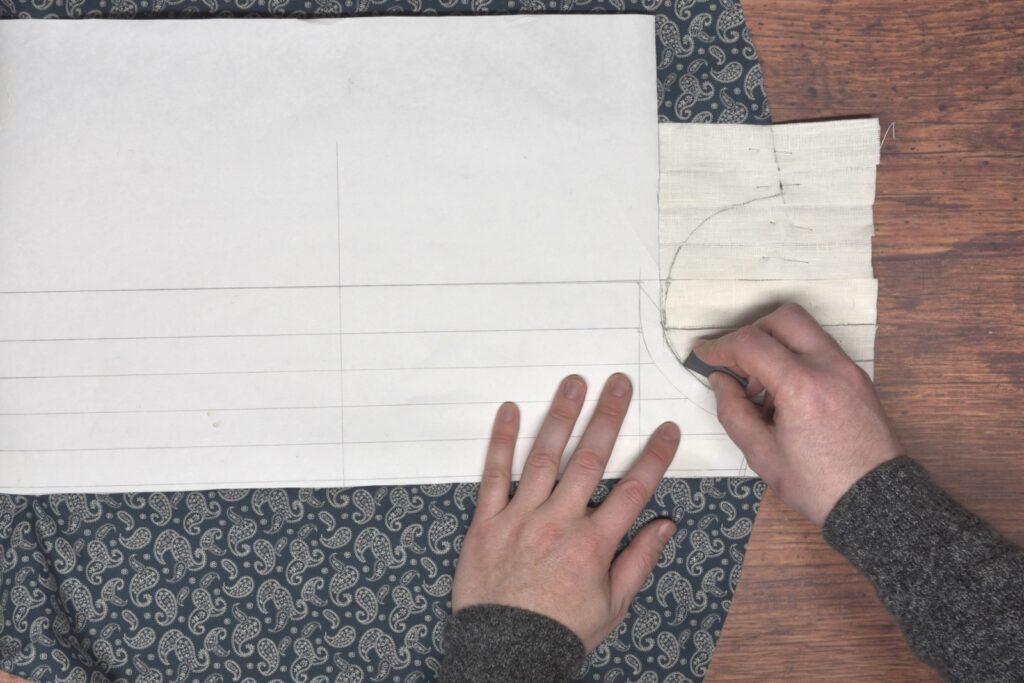
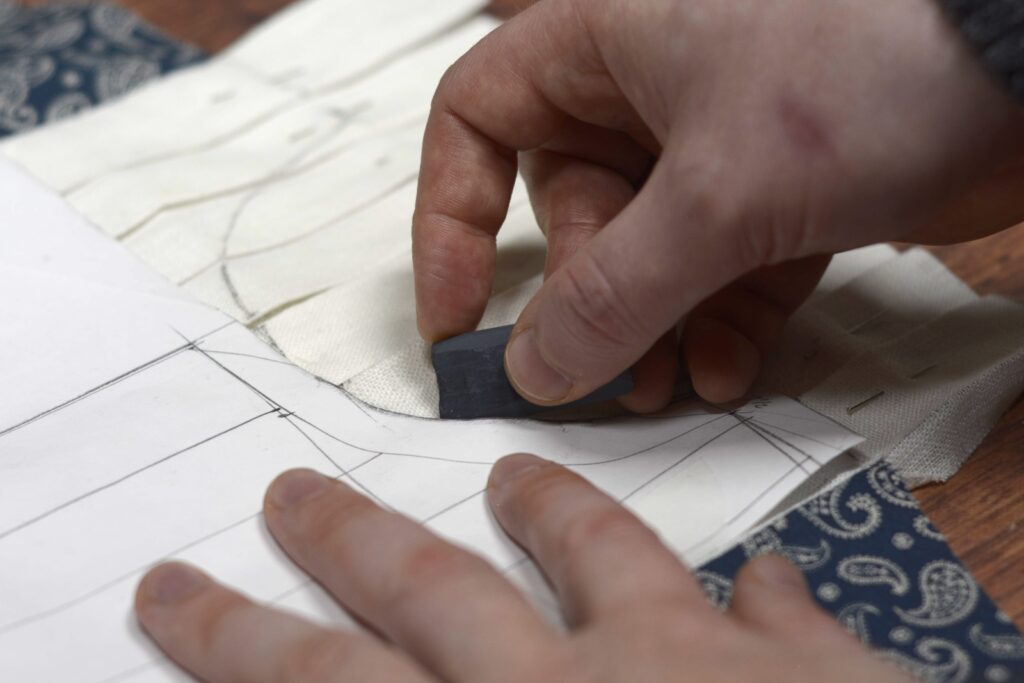
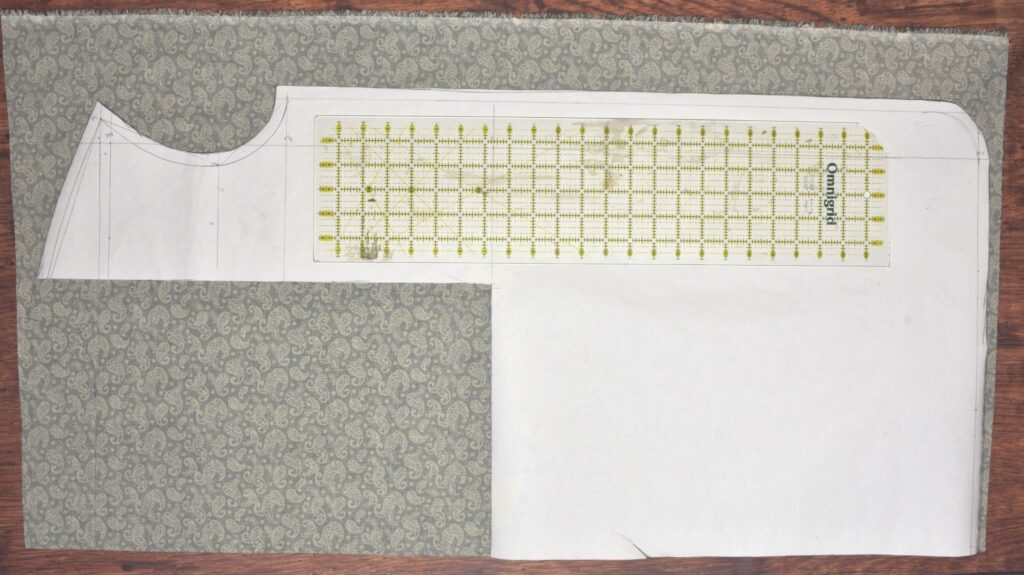
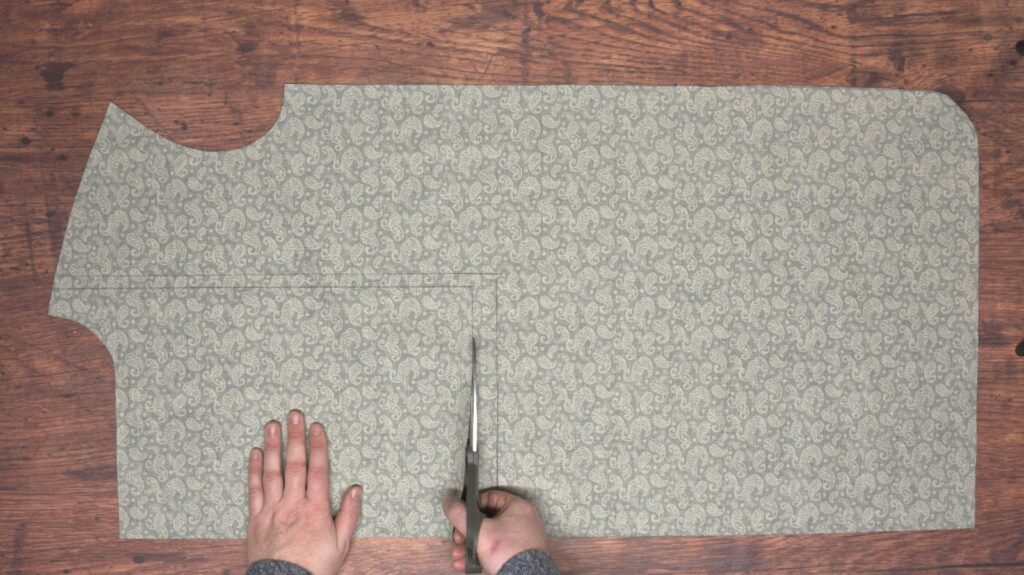
Cutting the Front
Before moving on to attaching the pleated front to the front of the shirt, we have a little work to do on the front pattern. Trace around the entire outline of the shirt. I had previously cut the pattern to make the toile, so I taped it back together for this step.
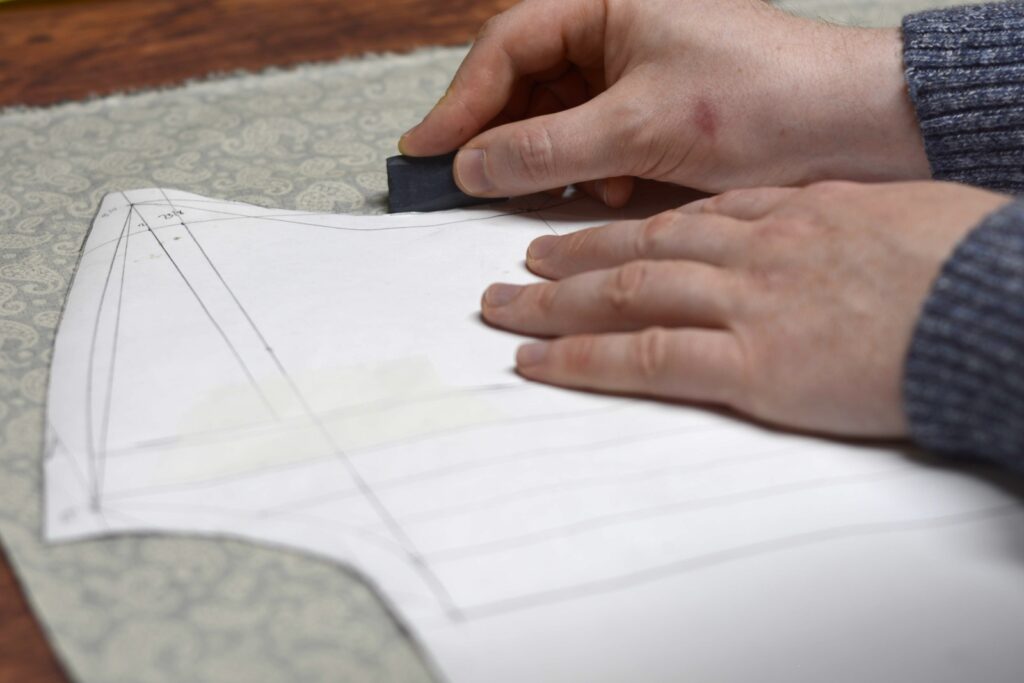
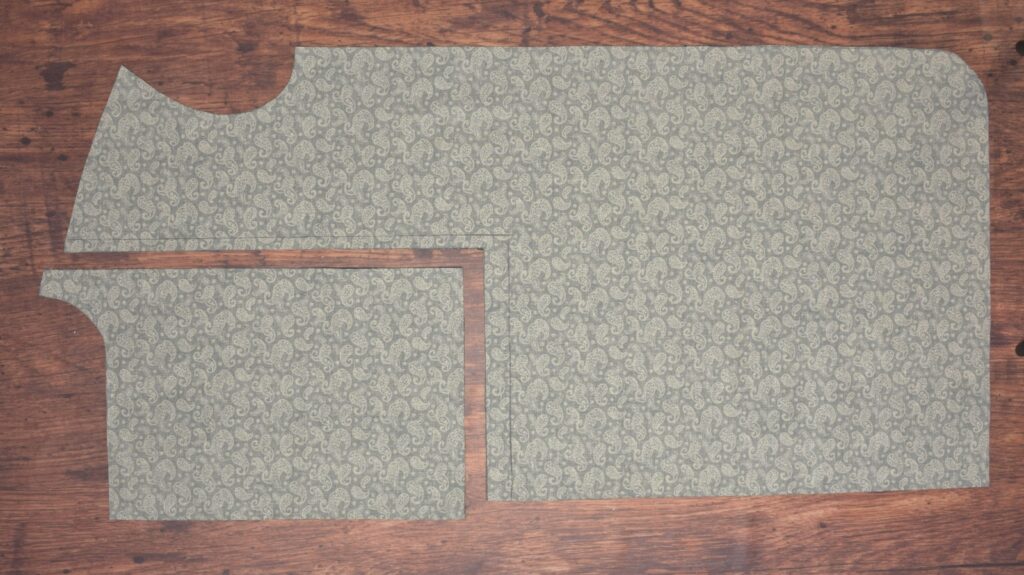
Then, cut your pattern at the bottom and inner edge of the pleats, as shown.
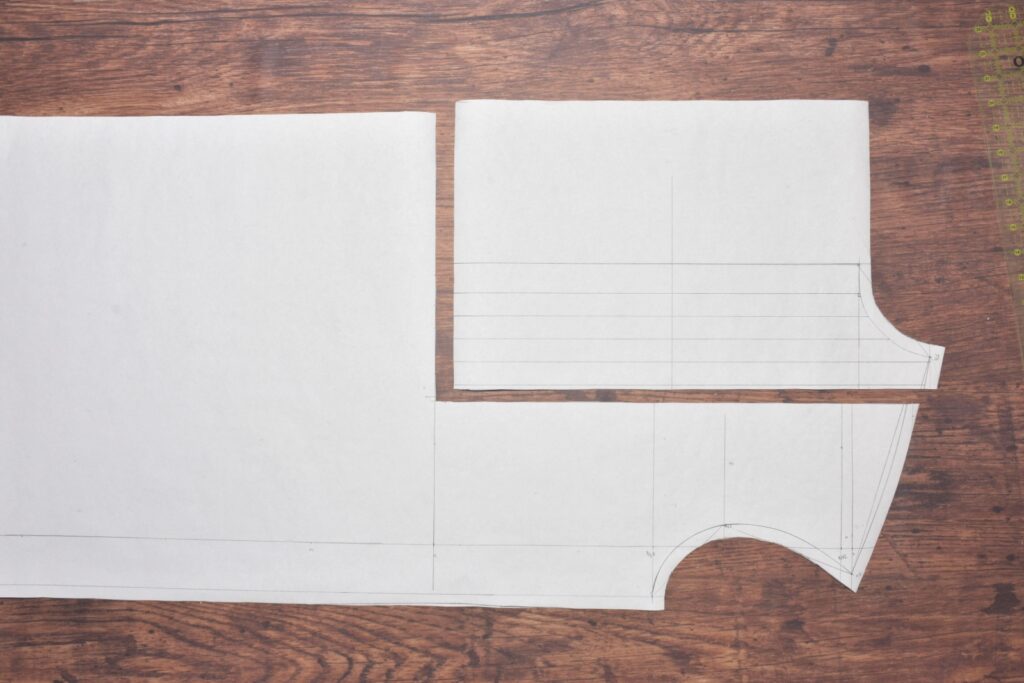
Place the pattern back on your fabric and mark the new lines indicating the edge of the pleat area.
Here’s what mine looks like so far. I hope you can see the lines clearly enough!
At the bottom of the pleat area, add a 1″ seam allowance on the inner, neck side. This gives us plenty of room to work with when finishing the raw edges later on – something I’ve wished for on prior shirt projects.
Then add a 1/2″ seam allowance along the long edge.
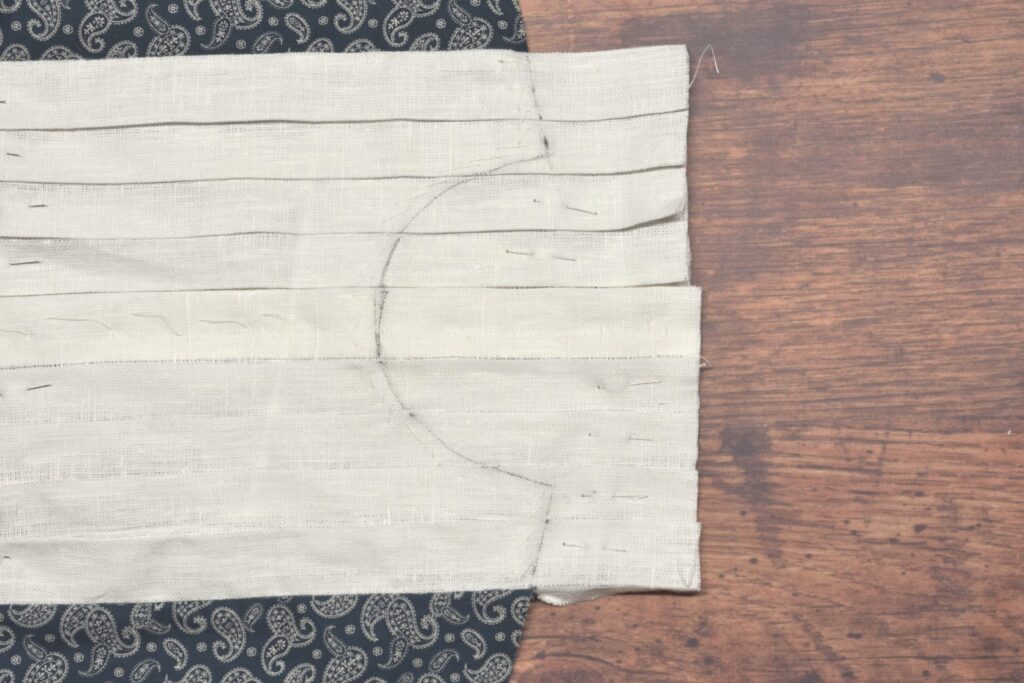
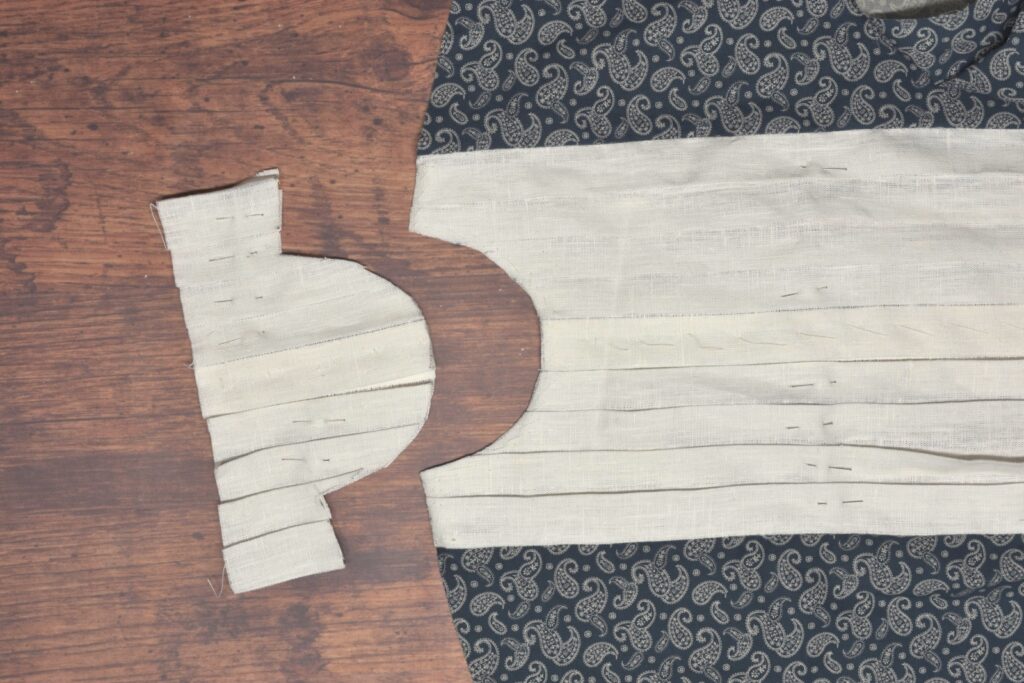
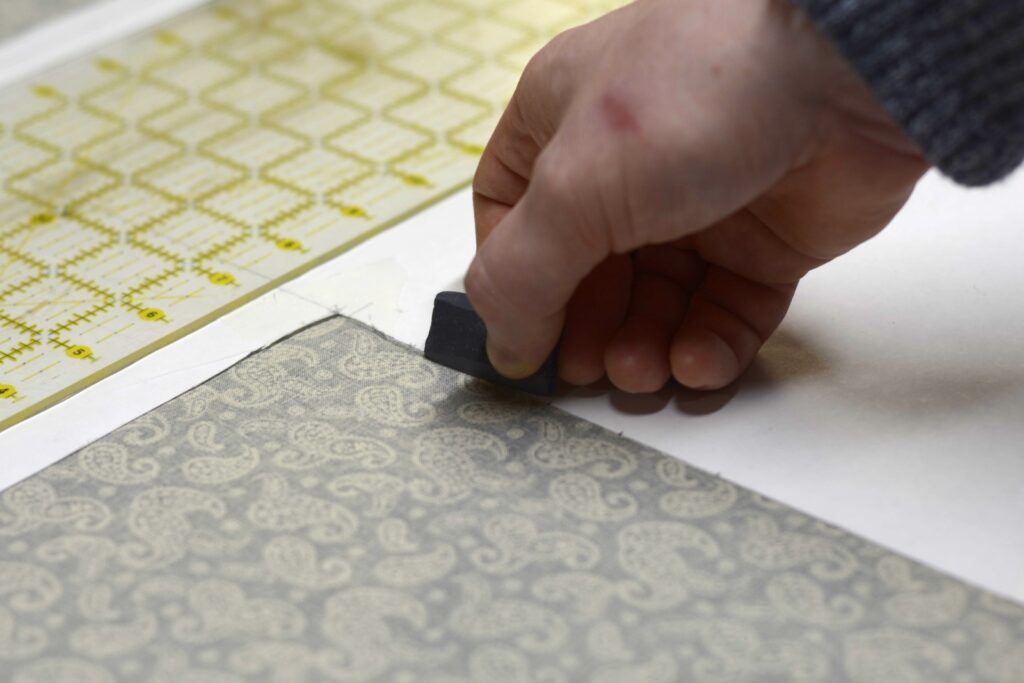
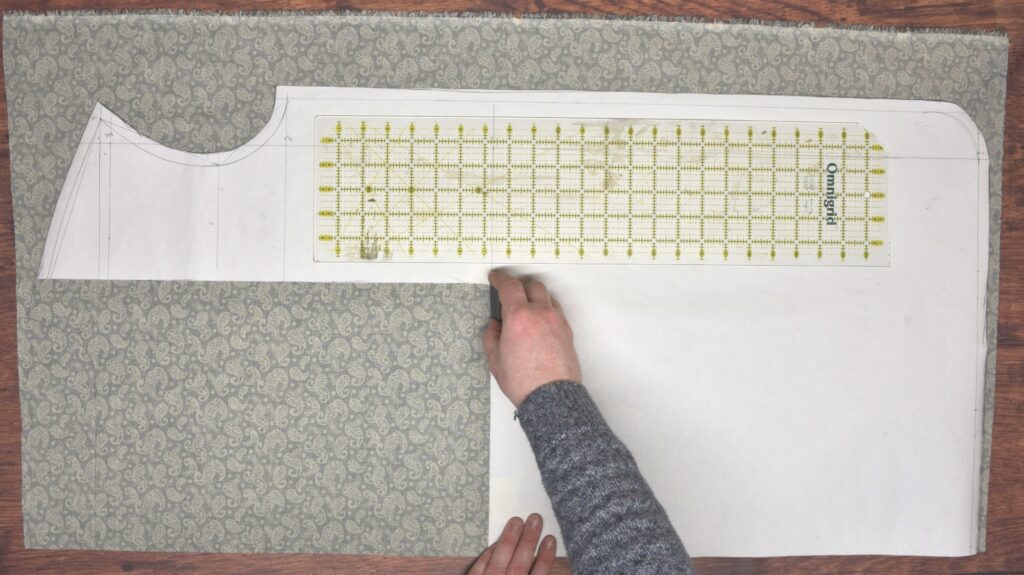
Carefully cut out the pleated area on those inner lines.
Finally, if you’re like me and did all of your layout on the wrong side, open up the fabric and lay out the 1/2″ and 1″ seam allowances as shown. Sorry the photo skips ahead slightly!
I didn’t photograph this, but transfer the seam lines from the wrong sides to the right sides as well using the same measurements.

Your Progress
[columns gutter=”0″]
[col]
[progressally_objectives]
[/col]
[col align_text=”center, middle”]
[progressally_progress_pie_chart size=”100″]
[/col]
[/columns]
The Pleats
Folding the linen into pleats is fairly easy once you get used to the process, but hopefully you’ve had some practice already with your muslin toile or by folding a sheet of paper into pleats.
Begin by laying out your linen right side up and taking the second line from the placket.
Crease the fabric into a fold along this line using your fingers.
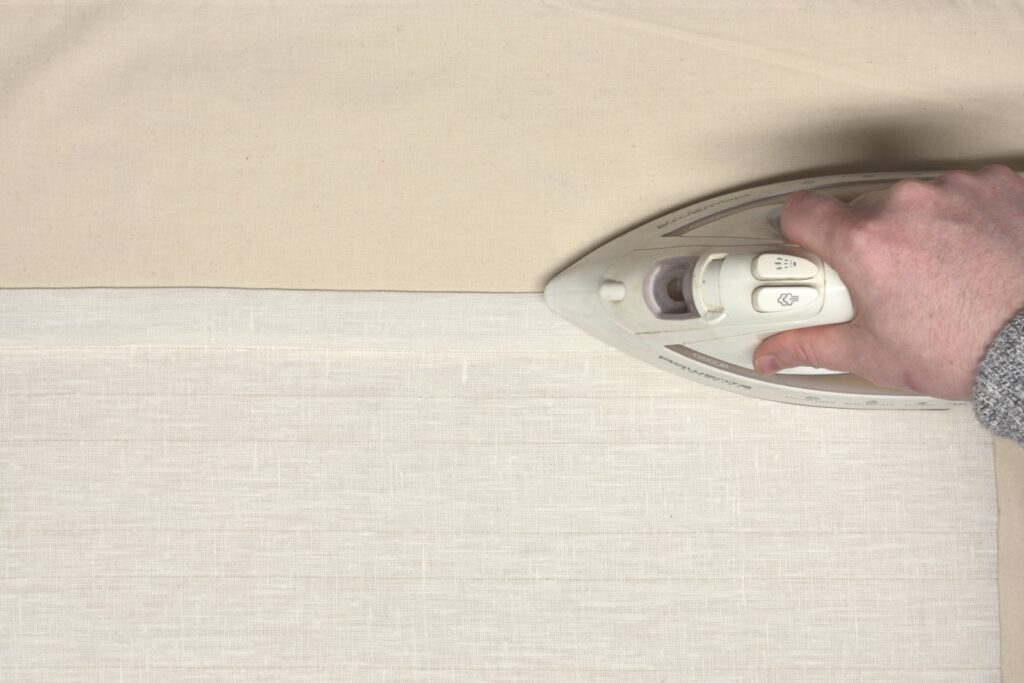
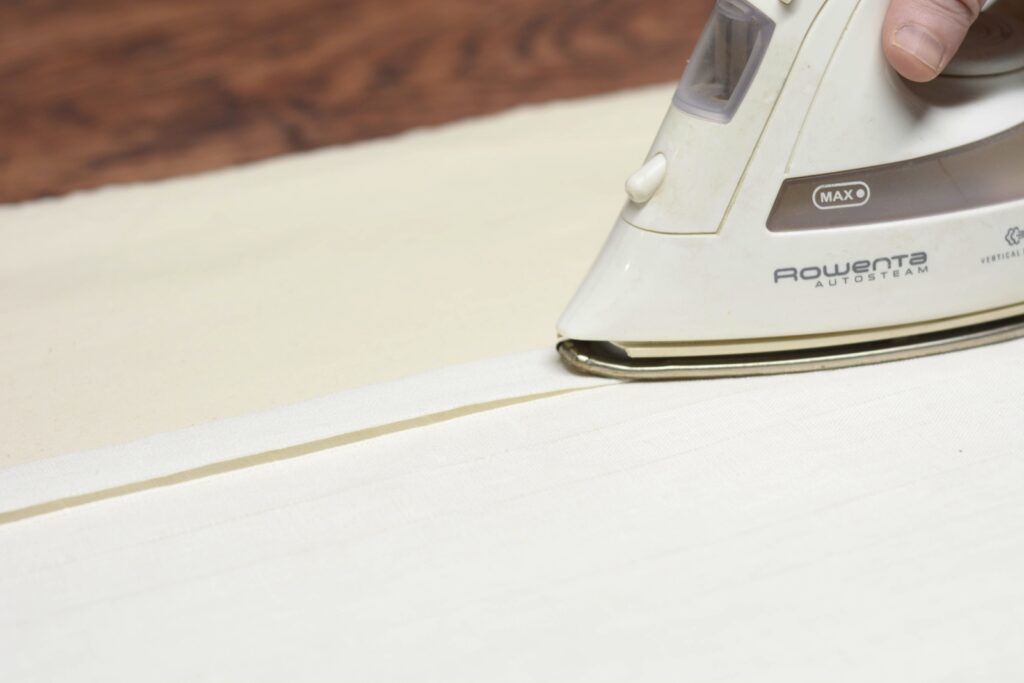
Press the fold firmly with a hot iron and a bit of steam.
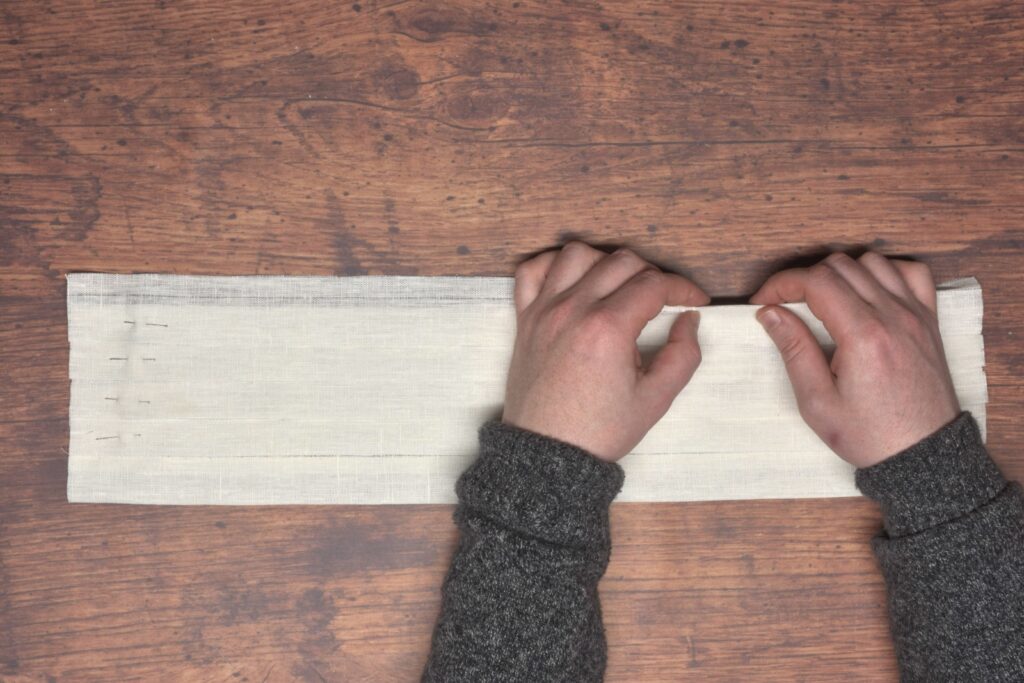
Take this folded edge and drag it into position next to the edge of the placket, forming the first pleat. I tend to gently put some pressure on the inside fold (underneath at this point) to give it the beginnings of a crease, but not yet definitive.
Here I’ve flipped the entire front over so as to crease the inside fold firmly on the line. It’s also a good chance to see how accurate you were. I was surprised that mine came out very accurate – in past shirts this hasn’t been the case.
Turn the entire assembly over to the right side again and firmly press this first pleat, holding things in position with your other hand as you go.

Finally, pin the pleat at the top, center, and bottom to hold it in place during further construction.

For the additional pleats it’s the same process. Take the second line, fold and press into a pleat.
One little tip, as you’re pressing the first fold for each pleat, make sure that the fabric underneath is square to the upper layers. This way the pleated front assembly is as square as possible and hopefully you can avoid trimming at the bottom edge later on.
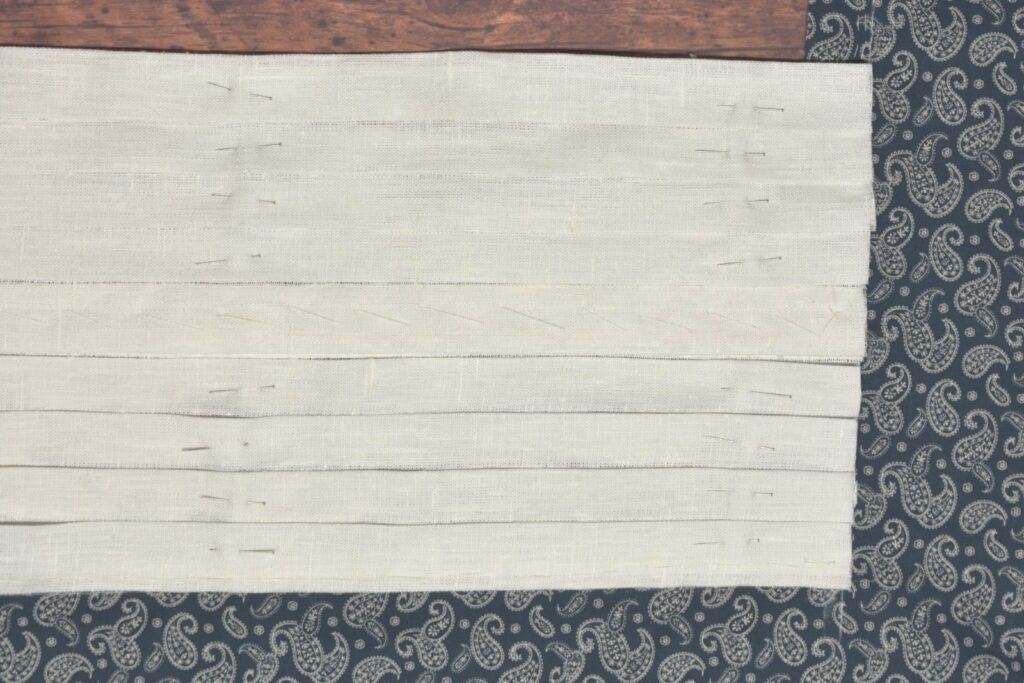
Here’s the first half completed, all of the pleats pinned in place.
The final thing to do is turn under the outside seam allowance, and press.
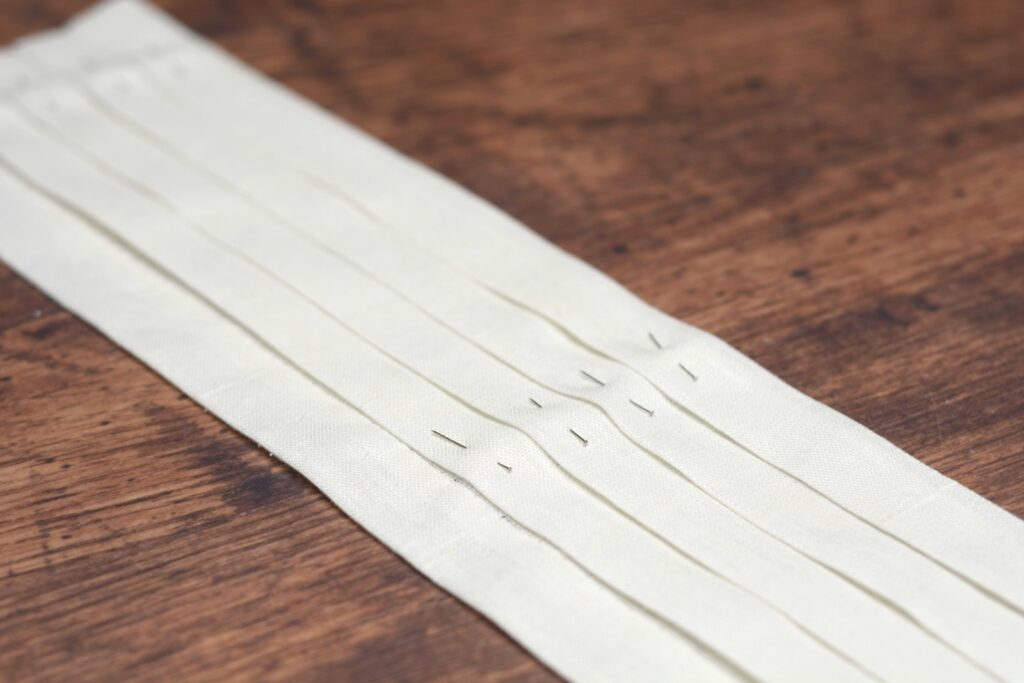

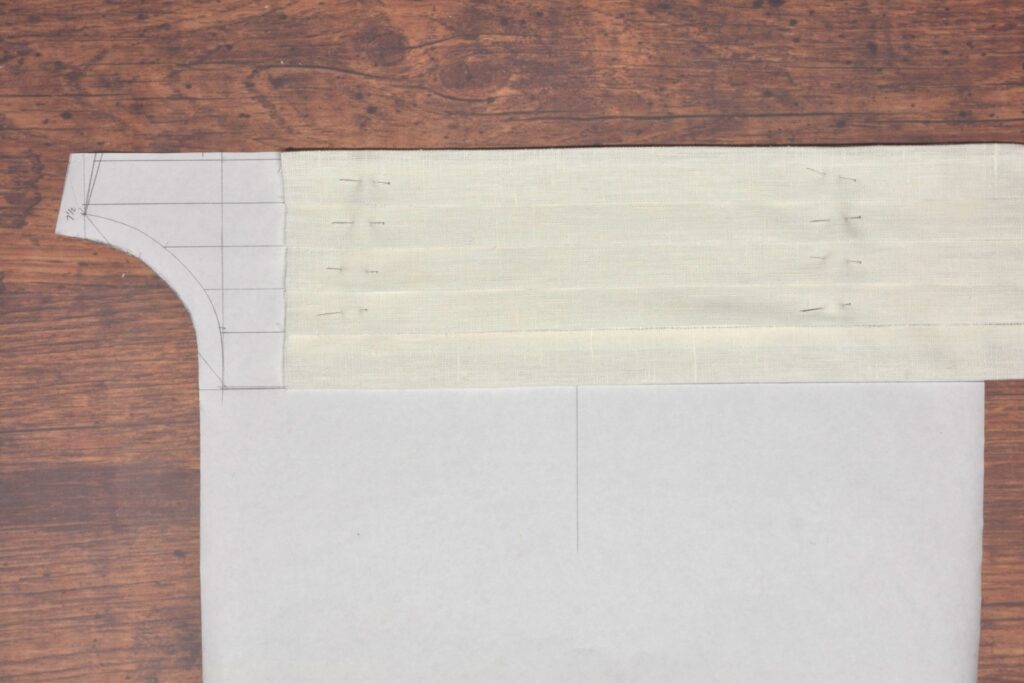
Now’s a great time to check how accurate your work has been by laying the pleated front on top of the pattern. Ideally, the pleats and edges should all line up. I wouldn’t worry too much if it’s 1/8″ to even 1/4″ off, though it will start to have an affect on your shirt’s size.
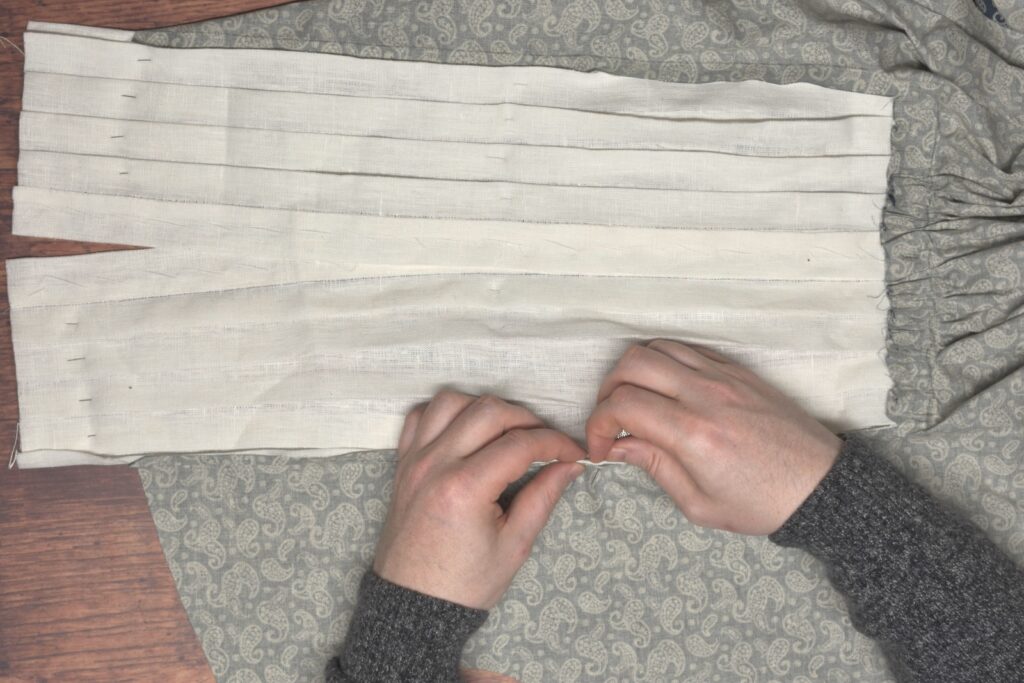
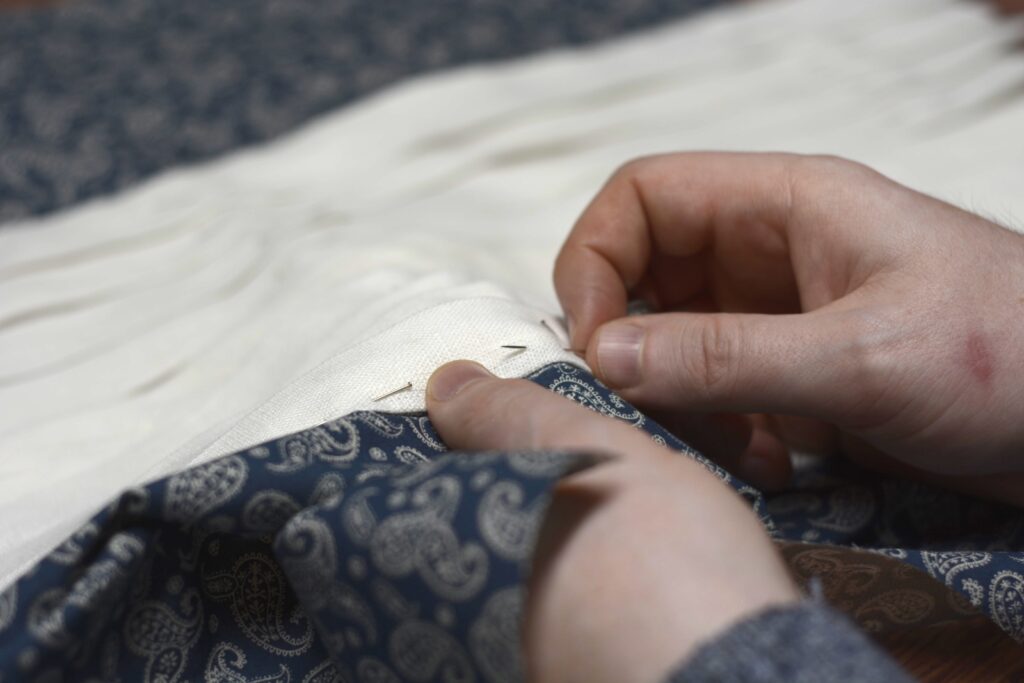
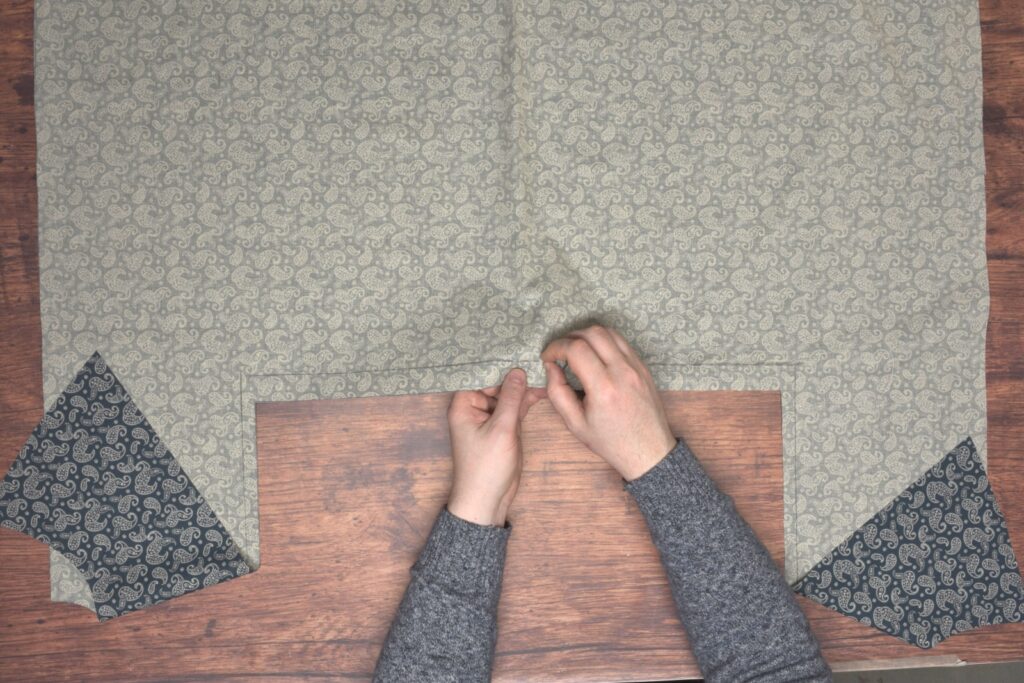
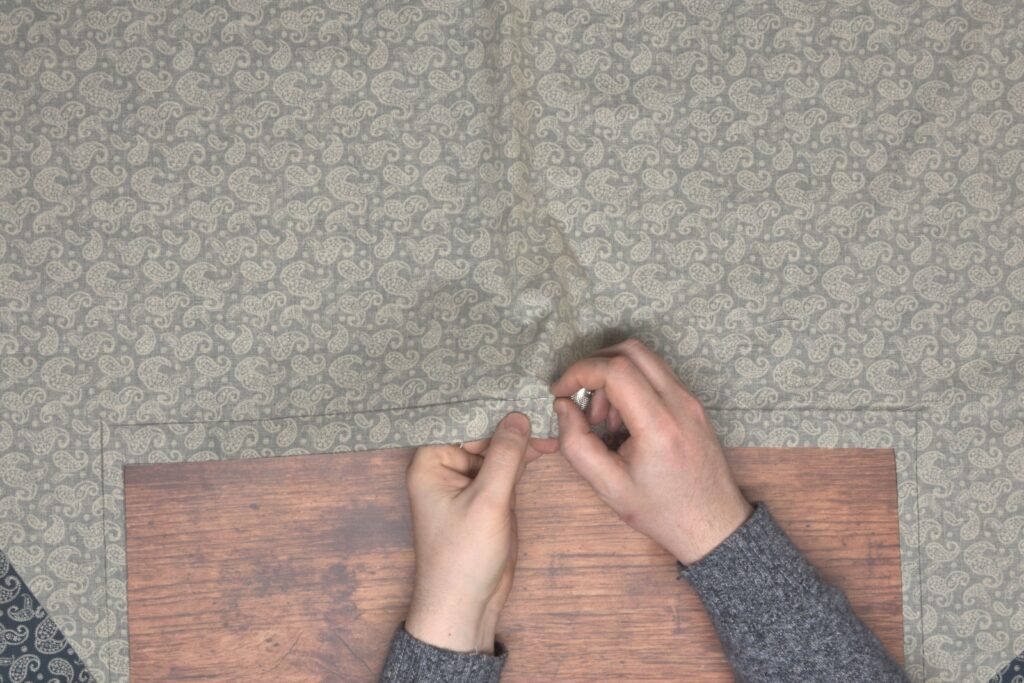
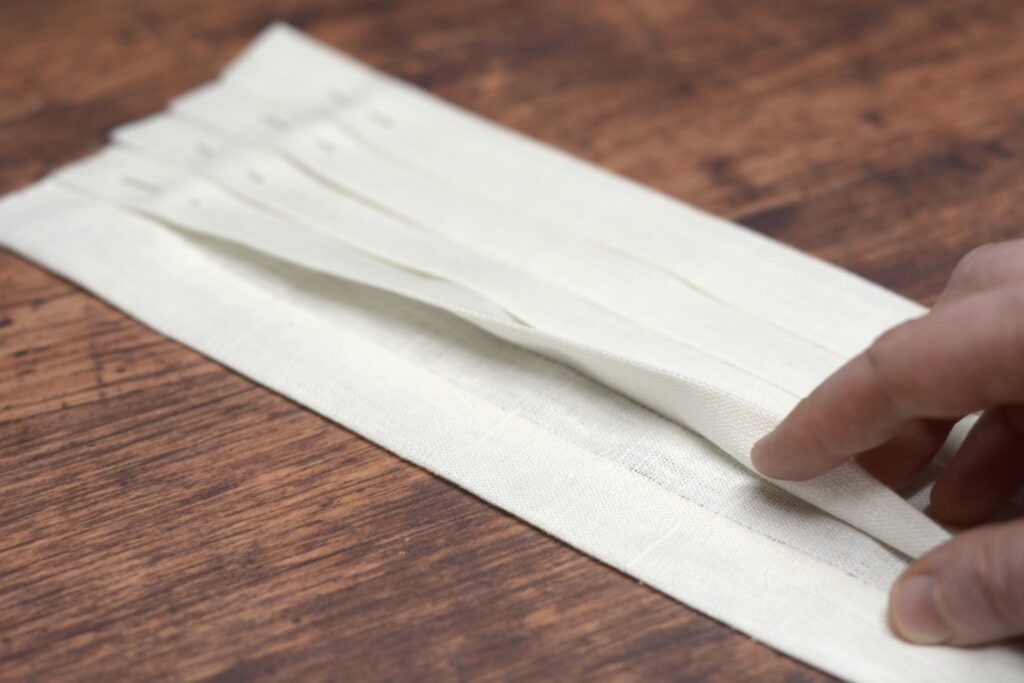
Repeat the entire process for the other half of the pleated front. Then lay both halves right sides up, with the plackets next to each other.
Determine which end you want to be the bottom edge, and then overlap the left side onto the right. This will form the opening of the shirt, so be sure to get it right!
Baste the two halves together along the center placket using a diagonal basting stitch for strength.
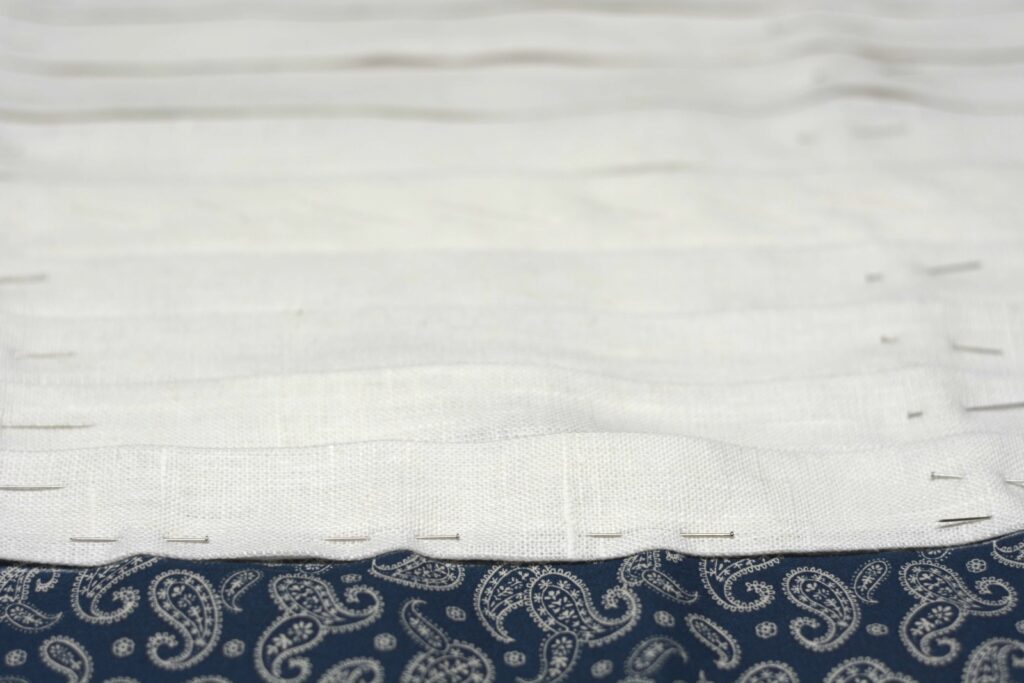
And here’s the completed pleated front assembly, ready to attach to the shirt front.
Now’s a great time to starch your pleated front, if you wish, while the pleats are flat and not attached to the shirt. You could baste three rows across to replace all of the pins to make pressing easier.
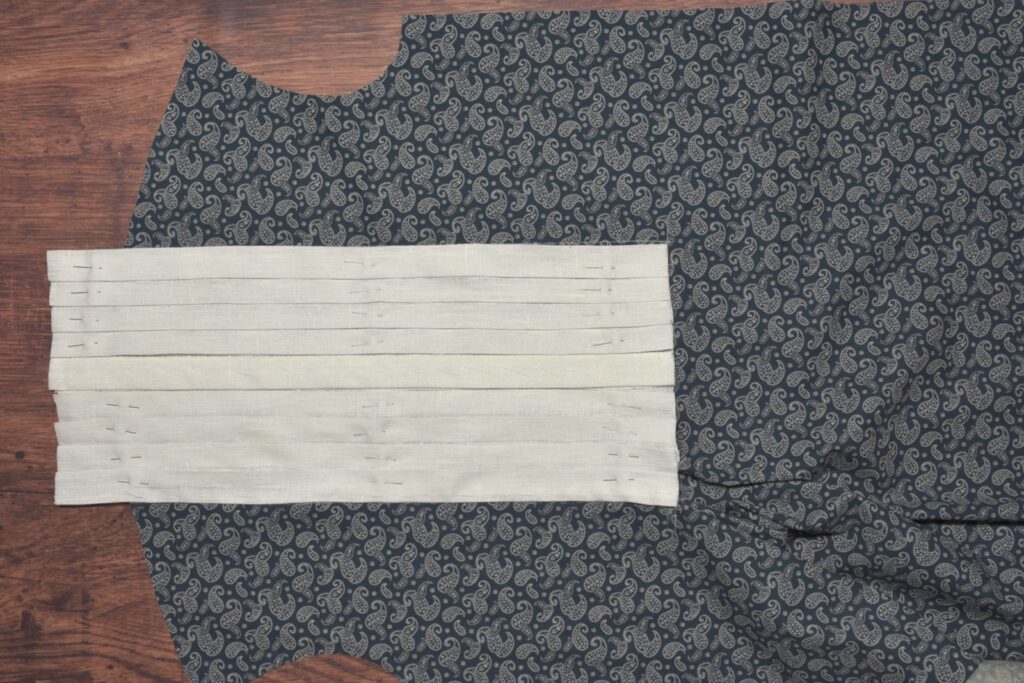
One last step, I’d recommend checking how square the bottom end of your pleats are. While we formed that nice bottom line by pulling a thread originally, it’s likely that the pleats are a little out of alignment.
Square and draw a line across the bottom edge.
I wasn’t very far off, maybe 3/16″ at most, but I decided to trim the bottom anyway.
Trim the bottom edge square.
Your Progress
[columns gutter=”0″]
[col]
[progressally_objectives]
[/col]
[col align_text=”center, middle”]
[progressally_progress_pie_chart size=”100″]
[/col]
[/columns]
The Placket
The placket forms the center front of the shirt and is where the buttons and buttonholes will be placed. Make sure you are working on the correct end (it’s got the 3/8″ and two 1″ [or graduated inch] wide pleats), and begin by folding over the first 3/8″ pleat to the wrong side, pressing with your fingernails as you go.
Give it a firm press with the iron and a bit of steam.
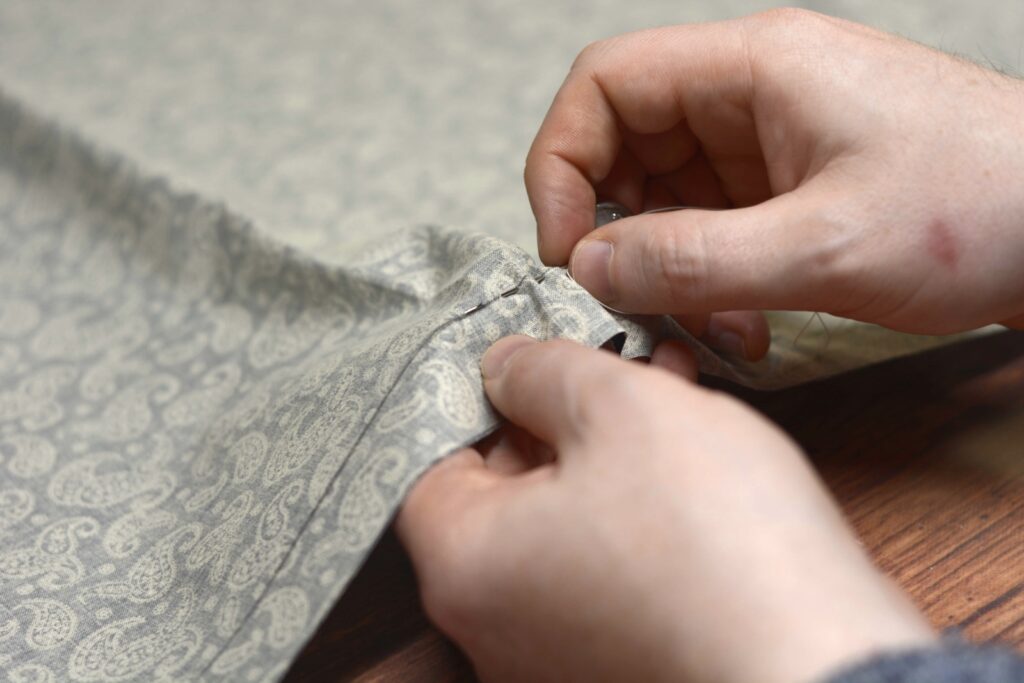
Now turn under (or over, whichever is more comfortable while you’re working) to the wrong side and press the first 1″ section, forming the placket.
Baste the placket closed with a diagonal basting stitch.
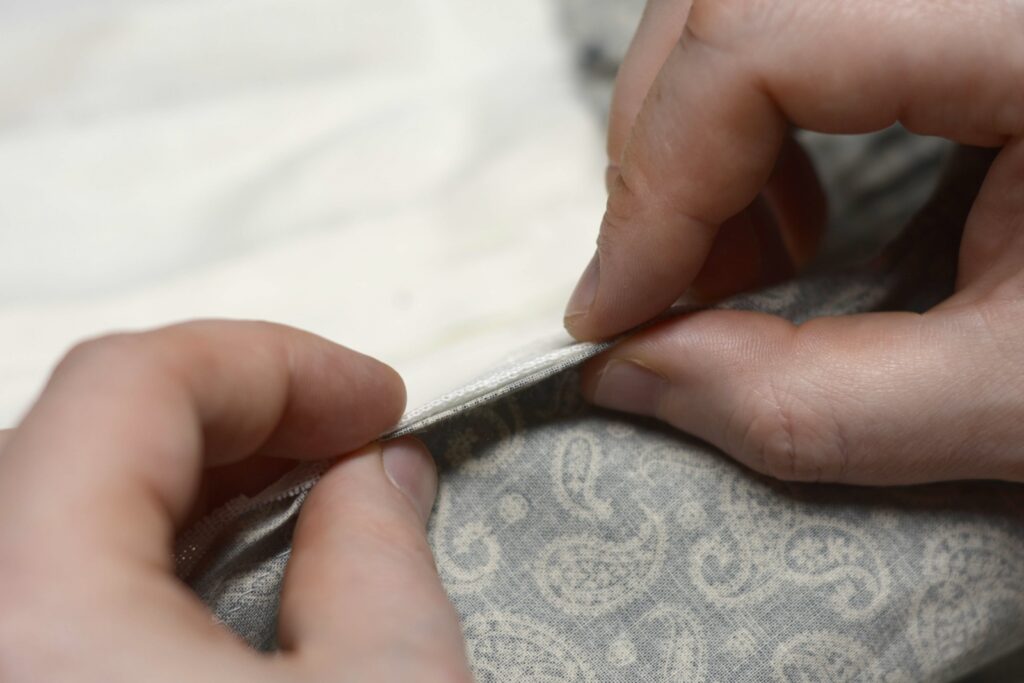
Finally, fell the placket permanently in place. Since we’re working from the wrong side, put the needle into the fabric at right angles to the seam, leaving the diagonal part of the stitch showing on the wrong side only. This way, only a small stitch appears on the front. My stitches around about 1/8″ or so apart.

Here’s the view from the right side. I’m not sure if you can see it, but the needle has caught exactly one thread, leaving the stitch itself pretty much invisible.

And the completed placket. Repeat for the other half.
I wish you could see the stitches more clearly, but they’re almost impossible to photograph.

Your Progress
[columns gutter=”0″]
[col]
[progressally_objectives]
[/col]
[col align_text=”center, middle”]
[progressally_progress_pie_chart size=”100″]
[/col]
[/columns]
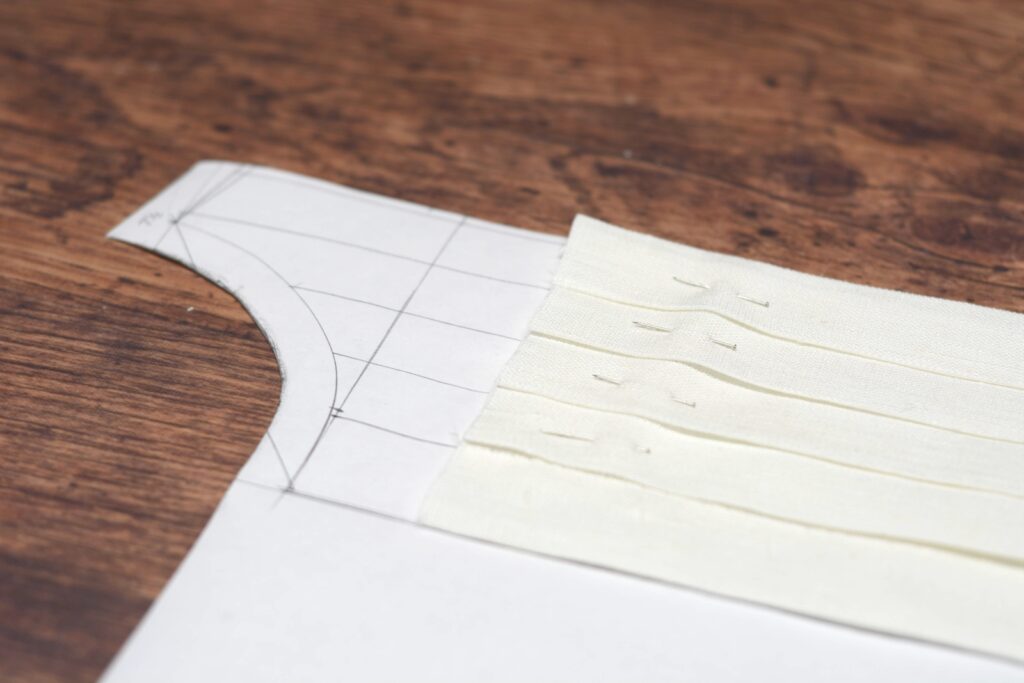
Laying Out the Pleated Front
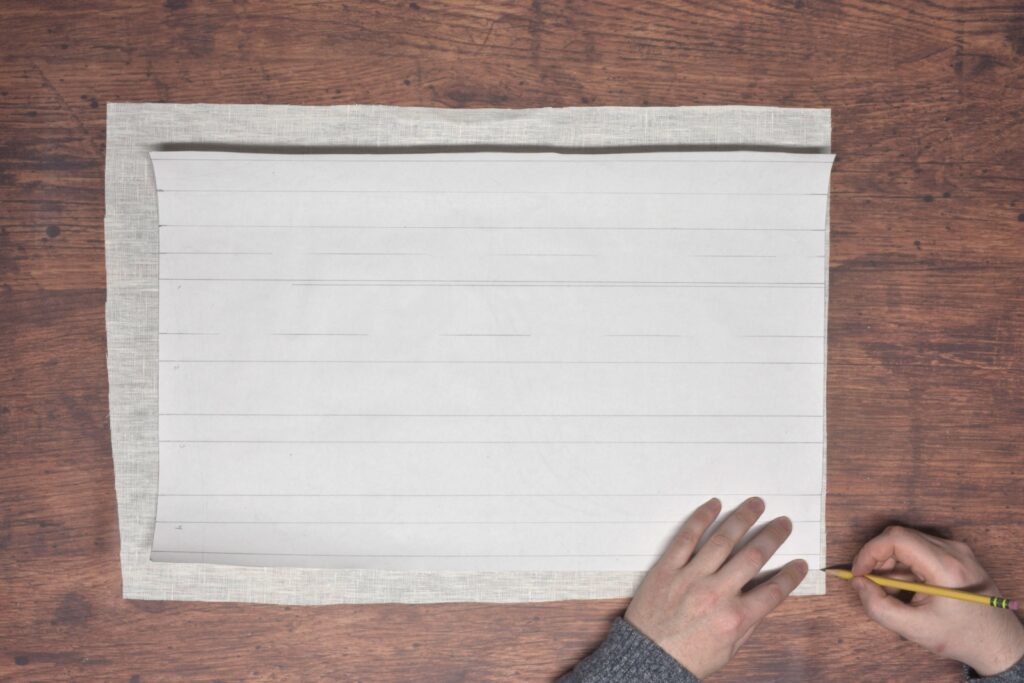
Let’s begin this shirt project by laying out the pleated front. I’ll be using this exacting method to ensure the linen pleats are parallel to each other, however, if you are using a cotton for your pleats or don’t feel the need to be this precise, you can use some white chalk to lay out your lines.
First, cut two pieces of linen about 1″ larger in all directions than your pleated front pattern. This gives us room to work with.
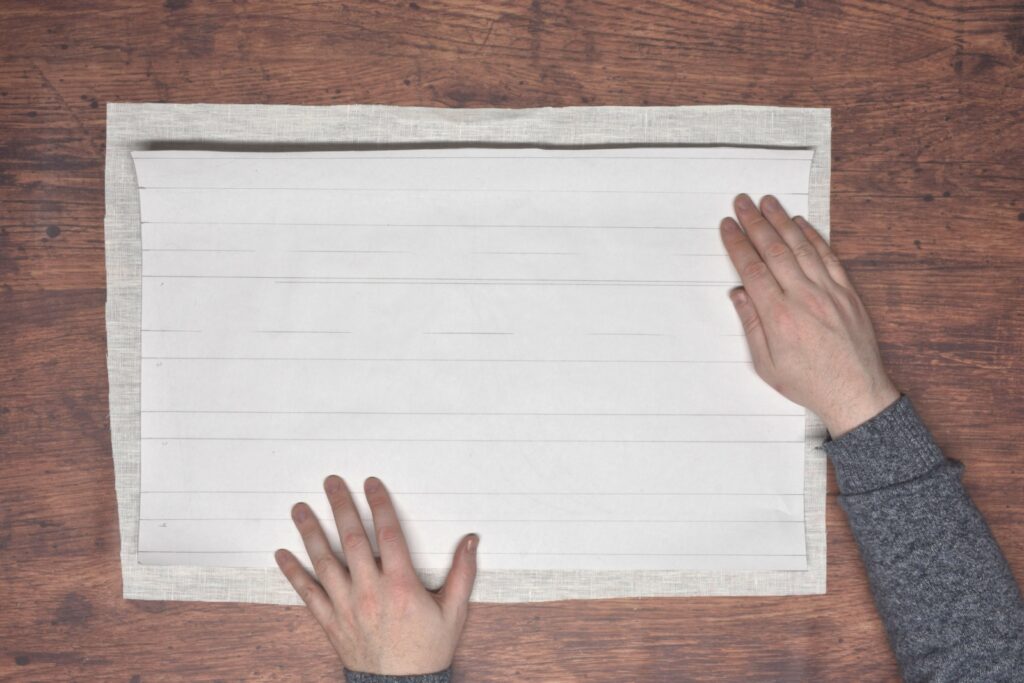
Slide the bottom of the pattern down to about 1/4″ away from the fabric, centering the long sides.

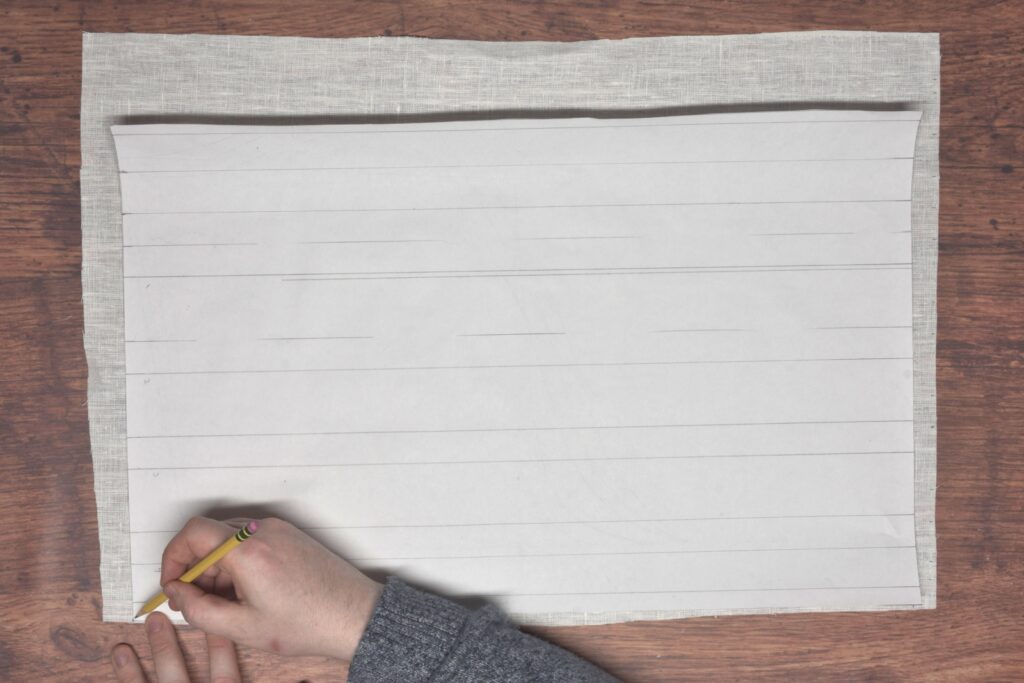
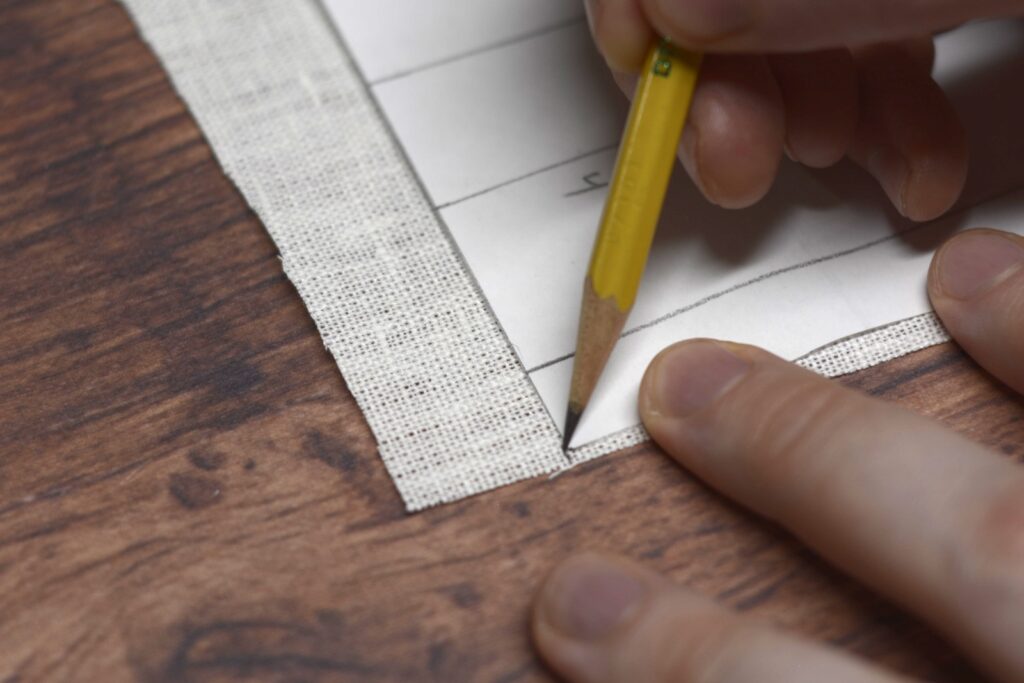
Carefully mark the bottom of the pleats, including the edges of the pattern. I’m using a pencil here for greater accuracy, as these marks will be trimmed away later.
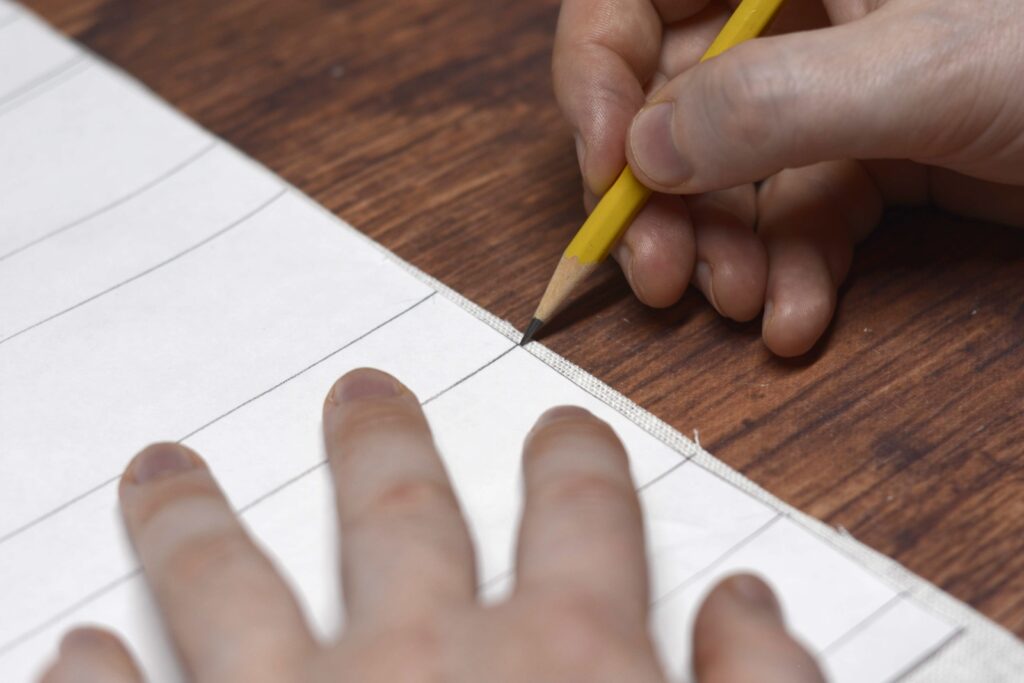
Don’t forget to mark the edges of the pattern as well!
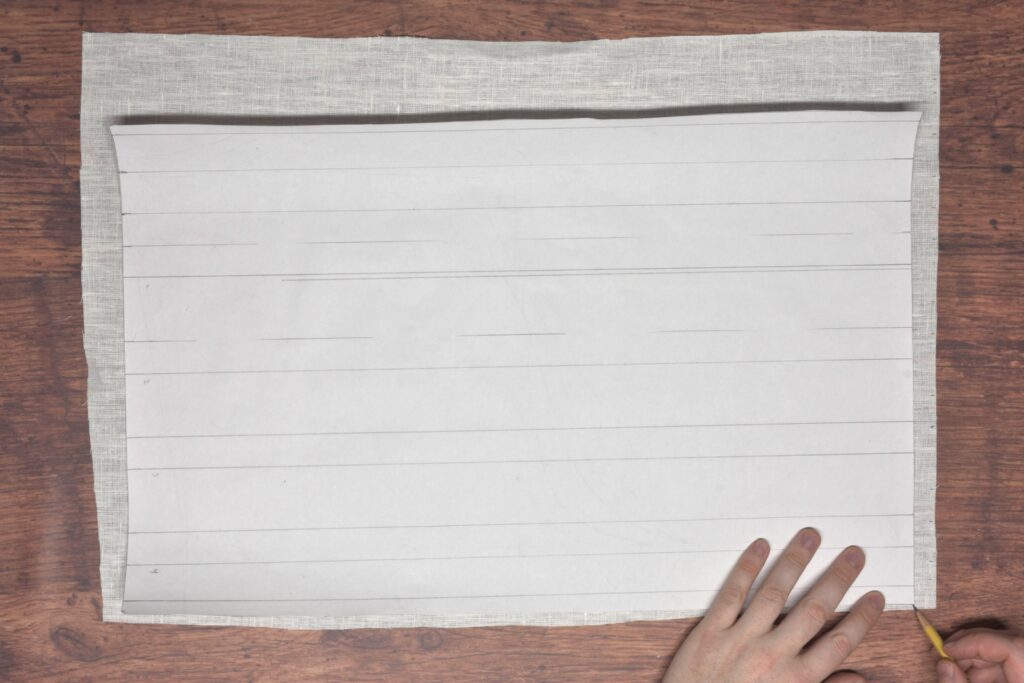
With the bottom edge marked, slide one long edge of the pattern to 1/4″ away from the edge, centering the short ends on the fabric.
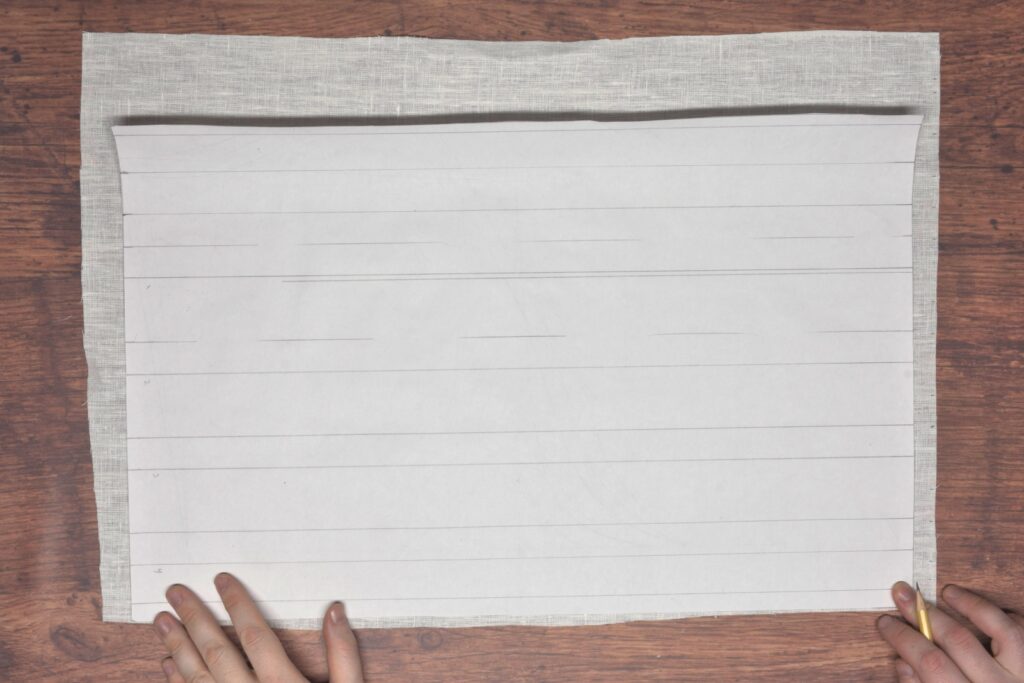
Mark the long ends of the pattern indicating the final height.
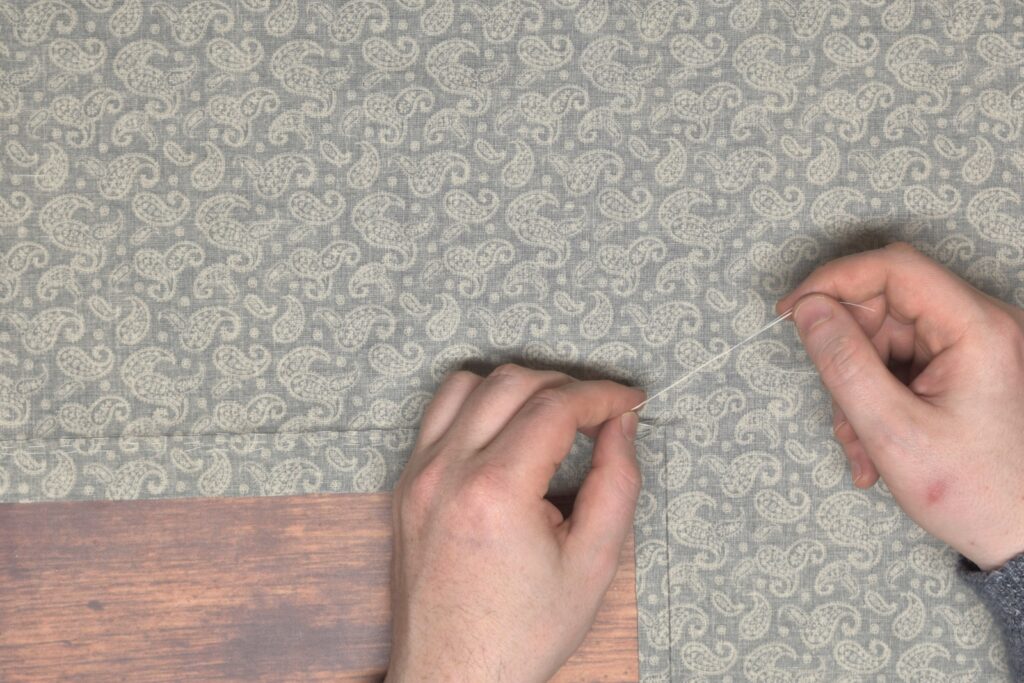
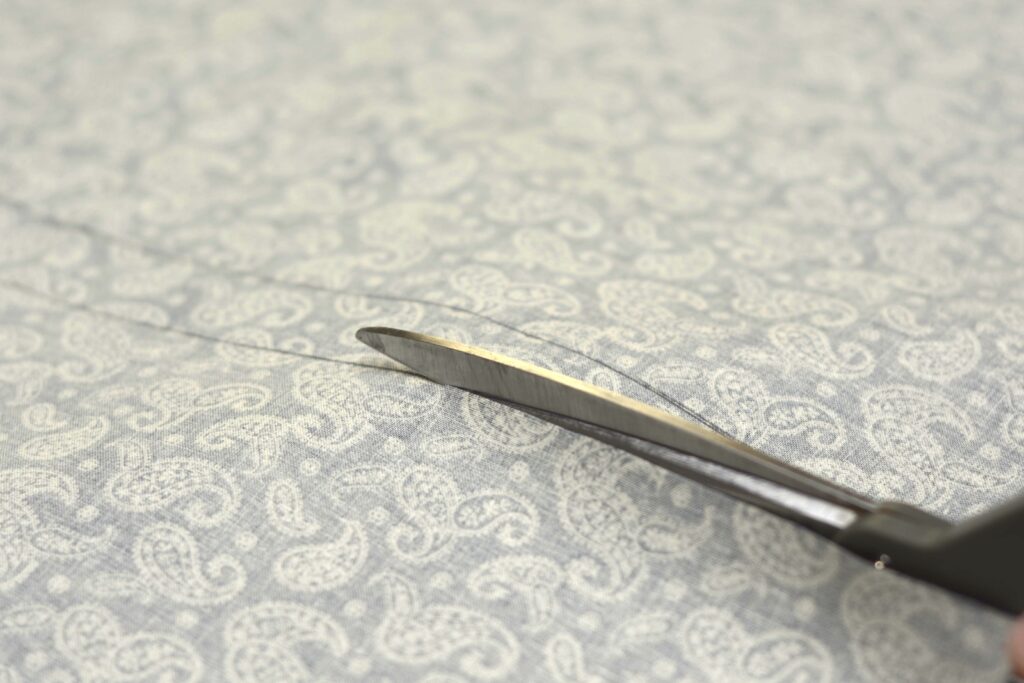
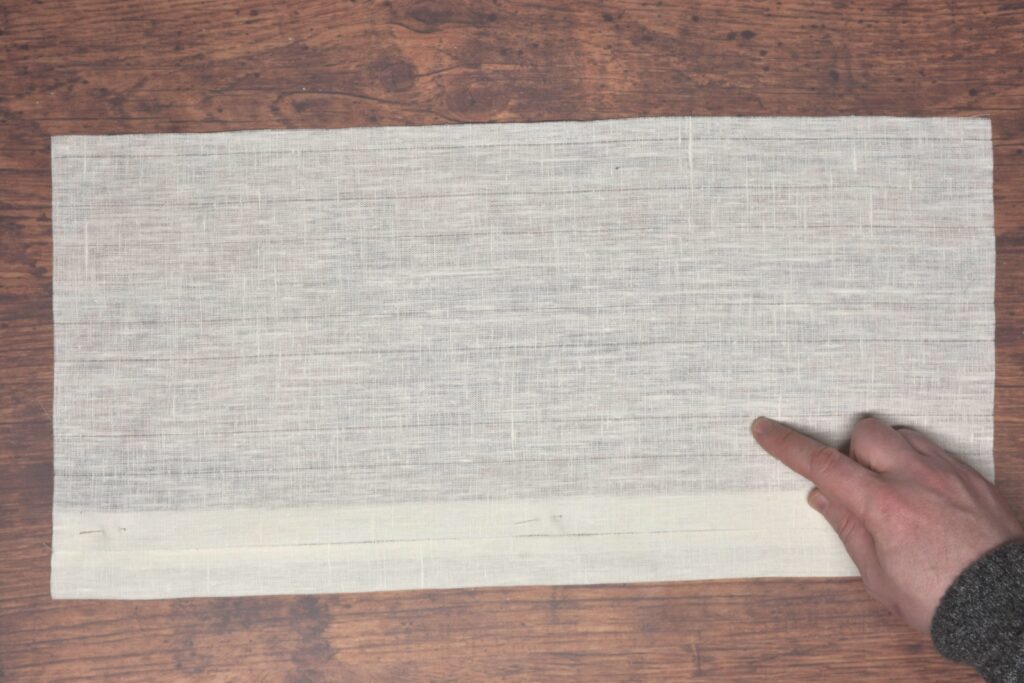
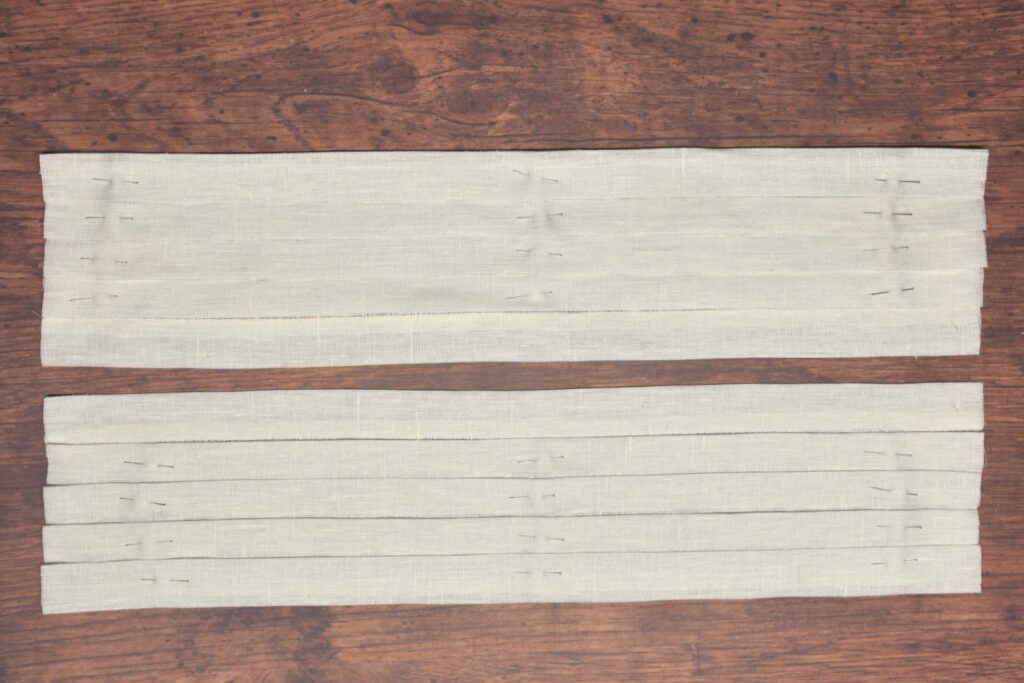
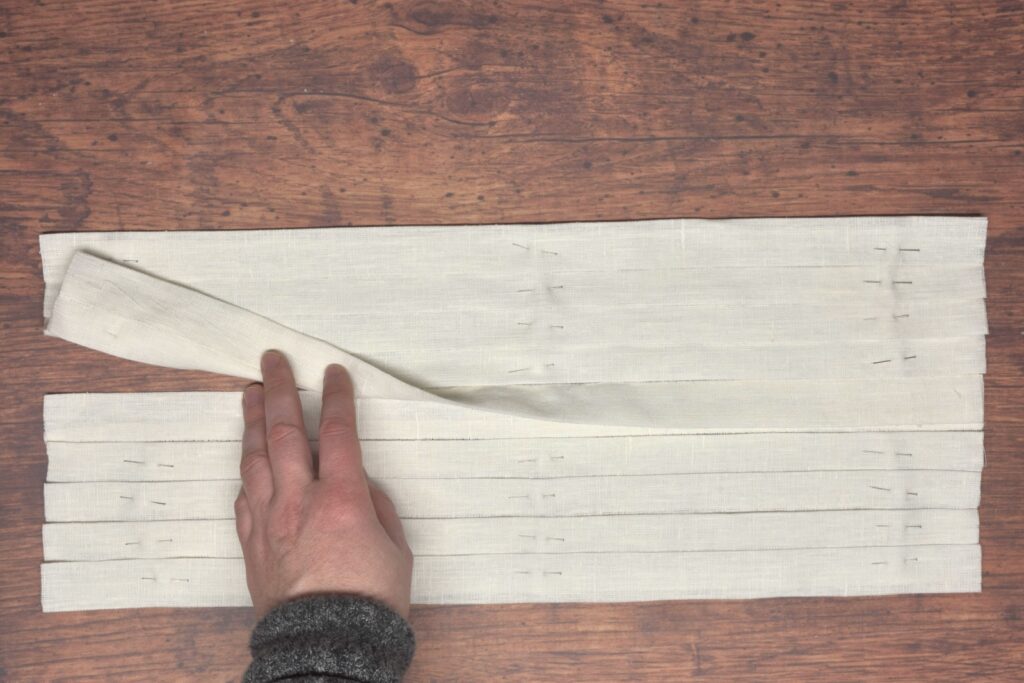
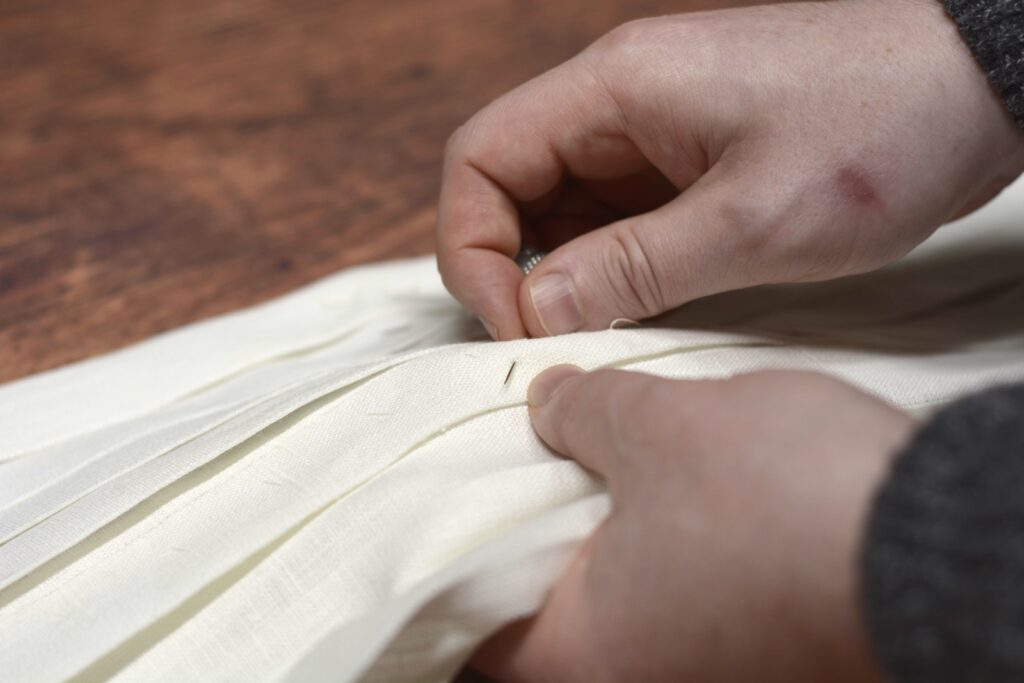
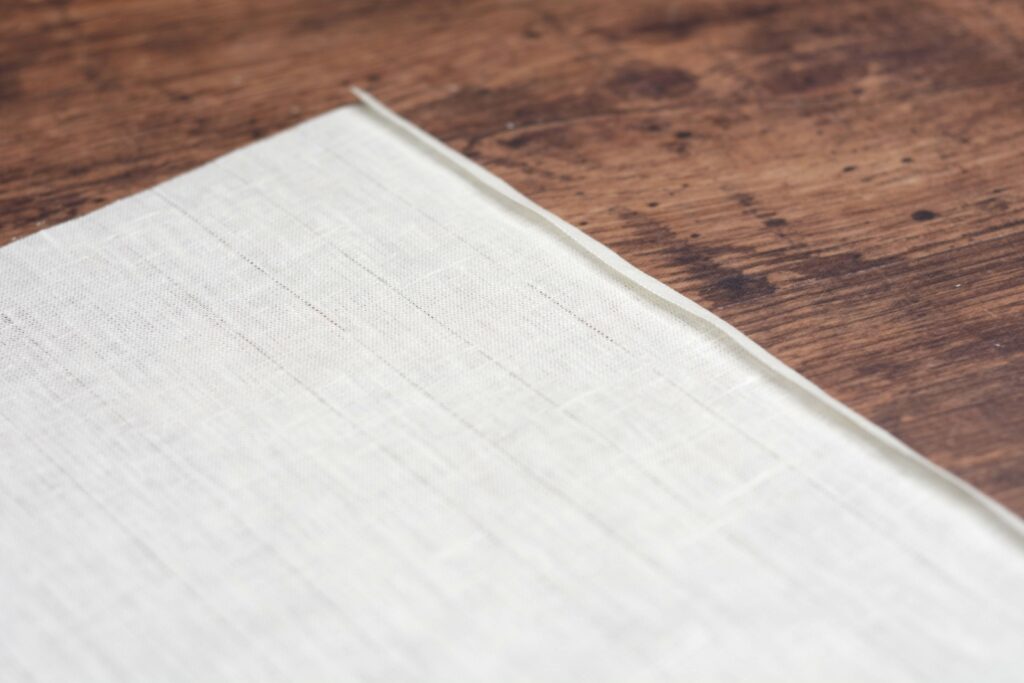
Pulling the Threads
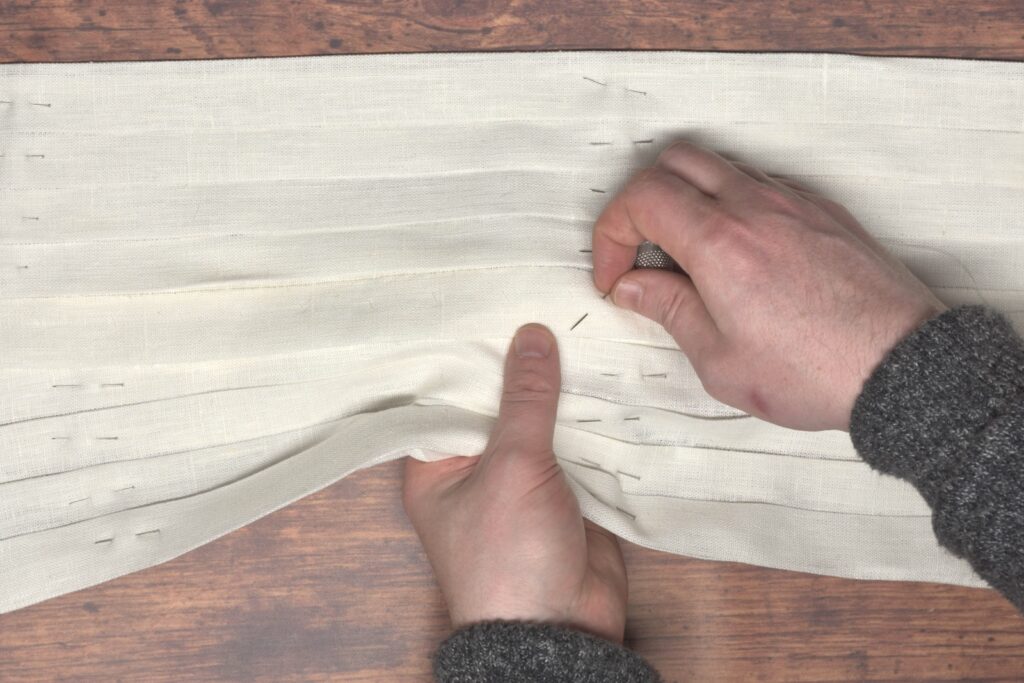
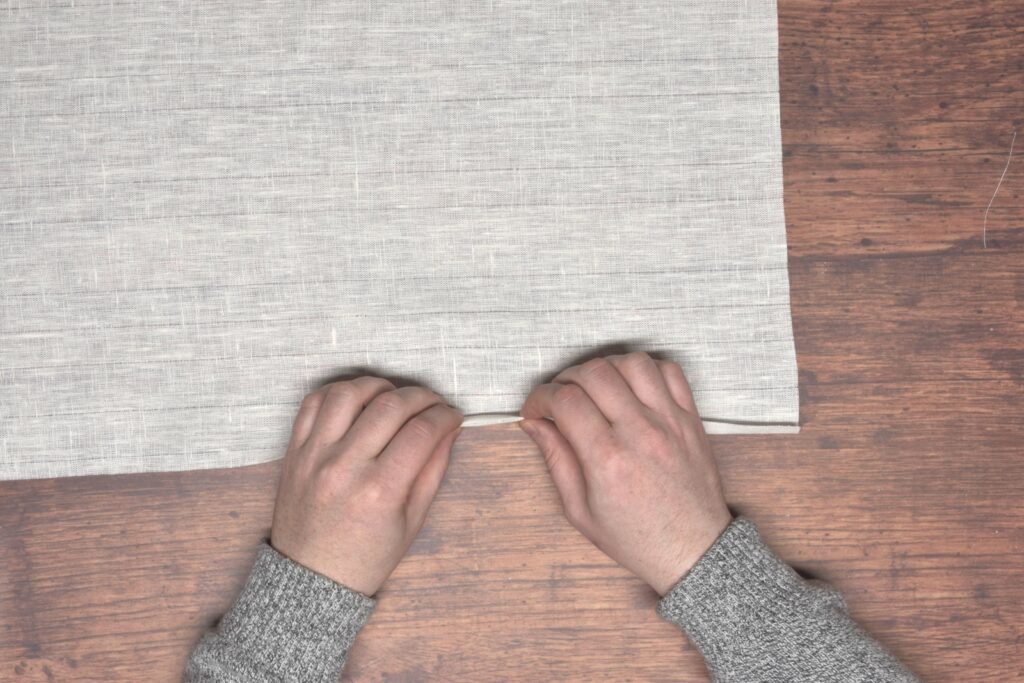
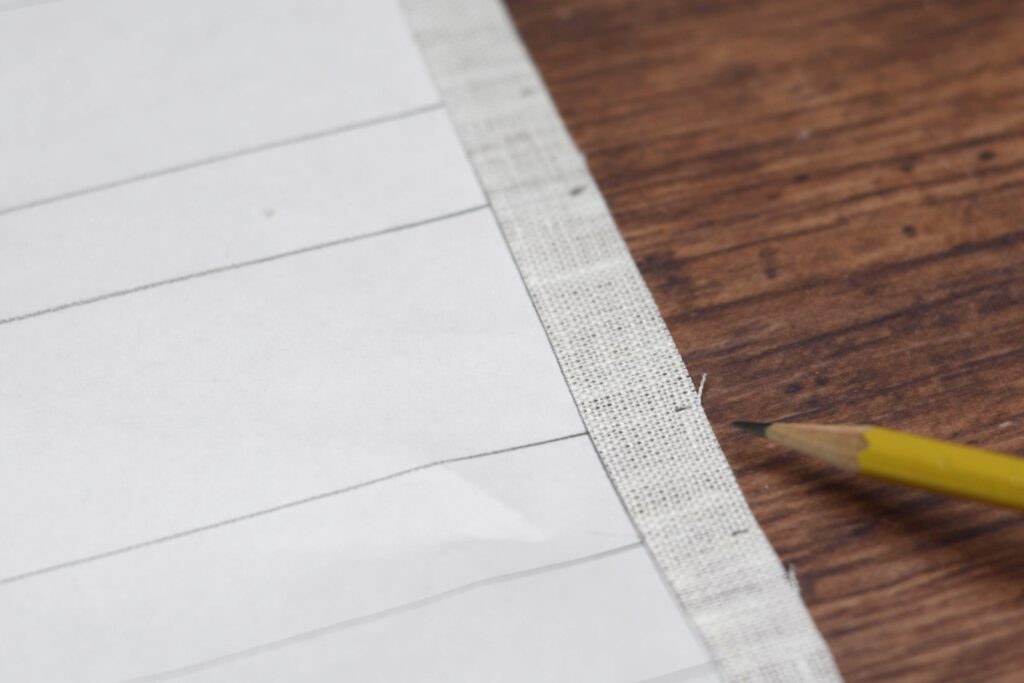
Find one of the marks you made, and using a pin, carefully begin to pull out the end of one of the threads nearest to this mark.
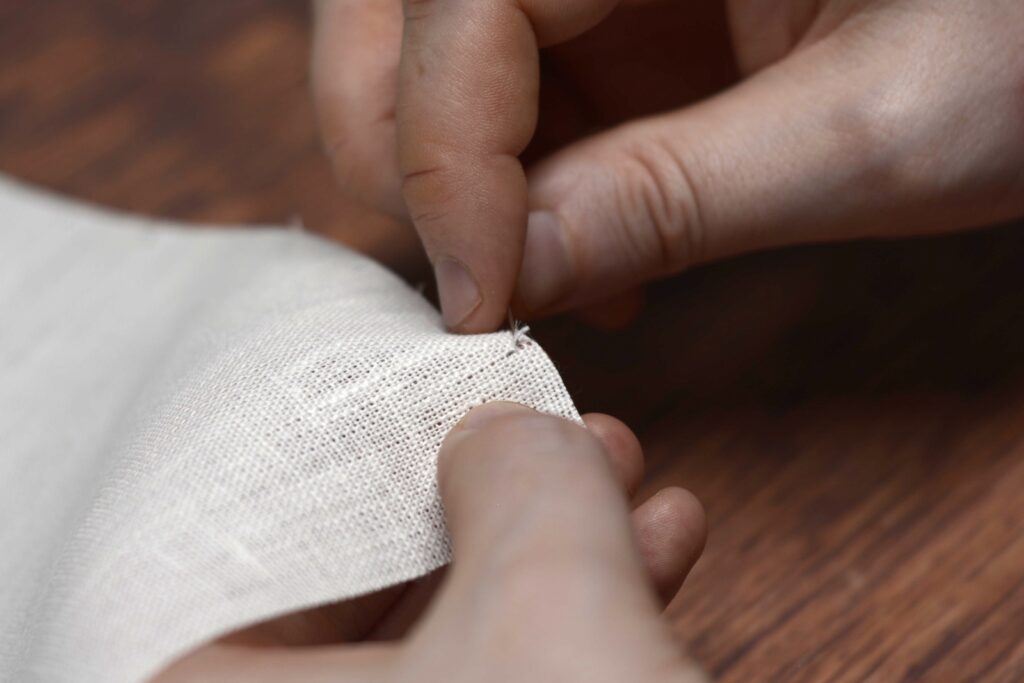
Free about 1/4″ to 1/2″ – just enough so you can get a firm grip on the thread.
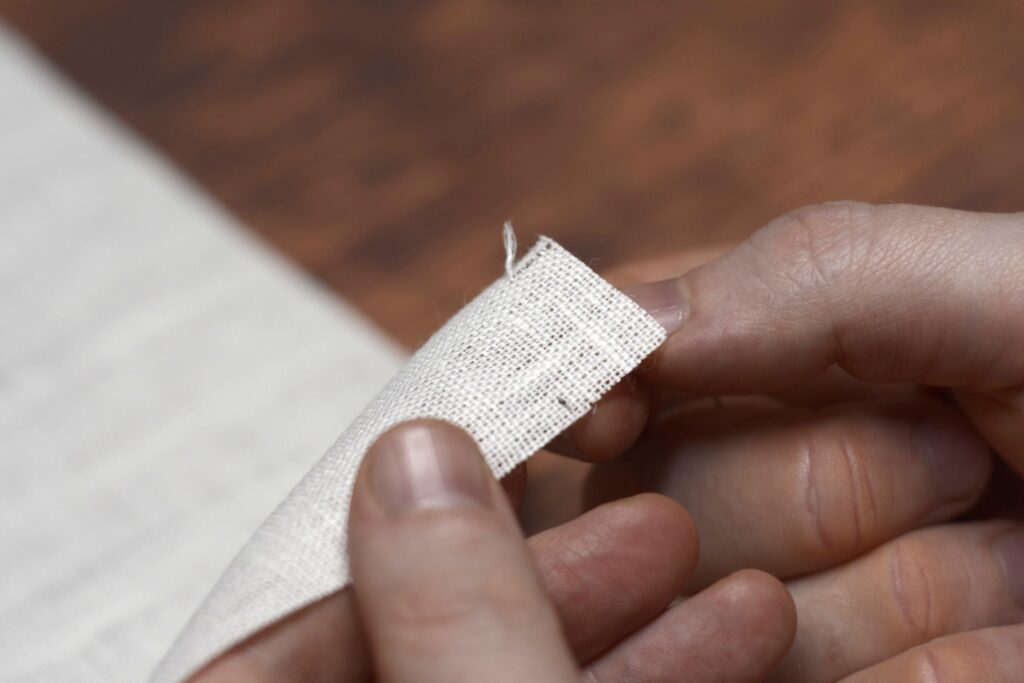
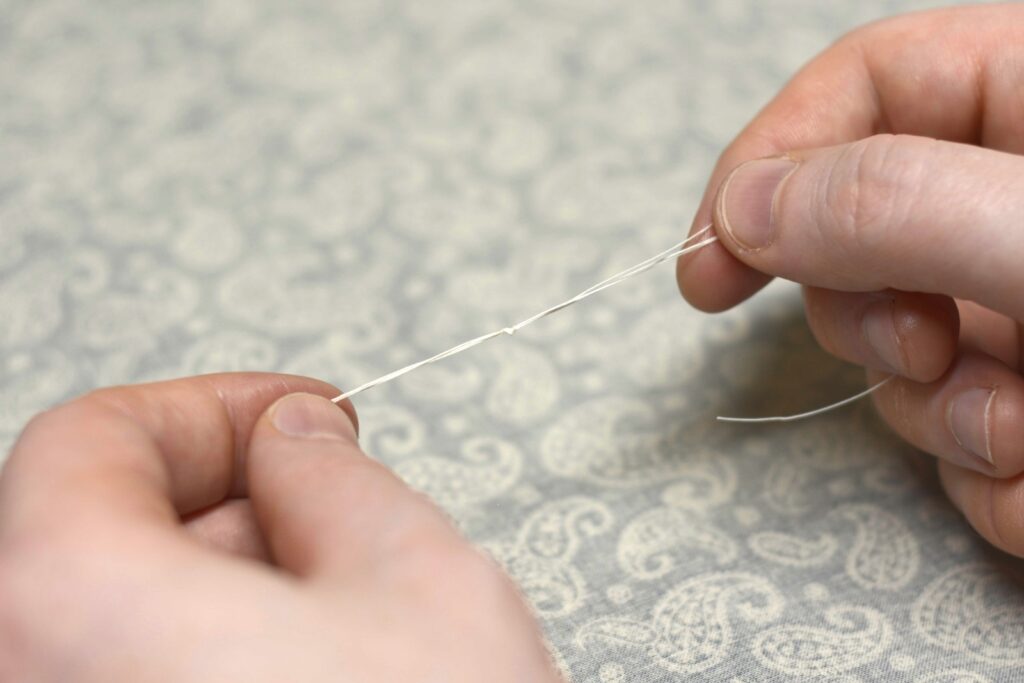
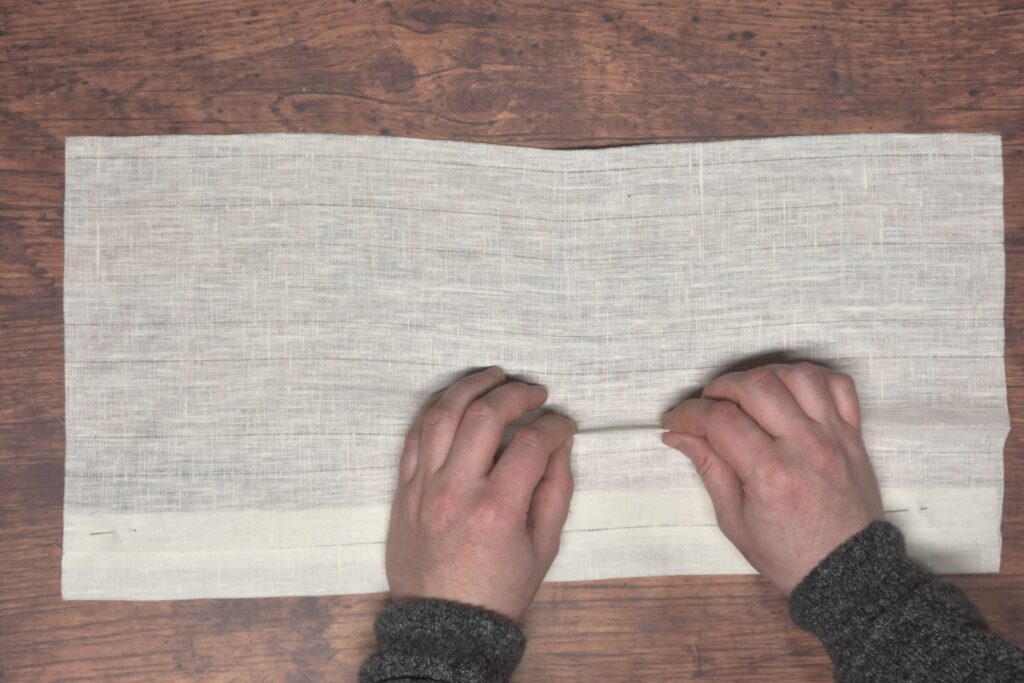
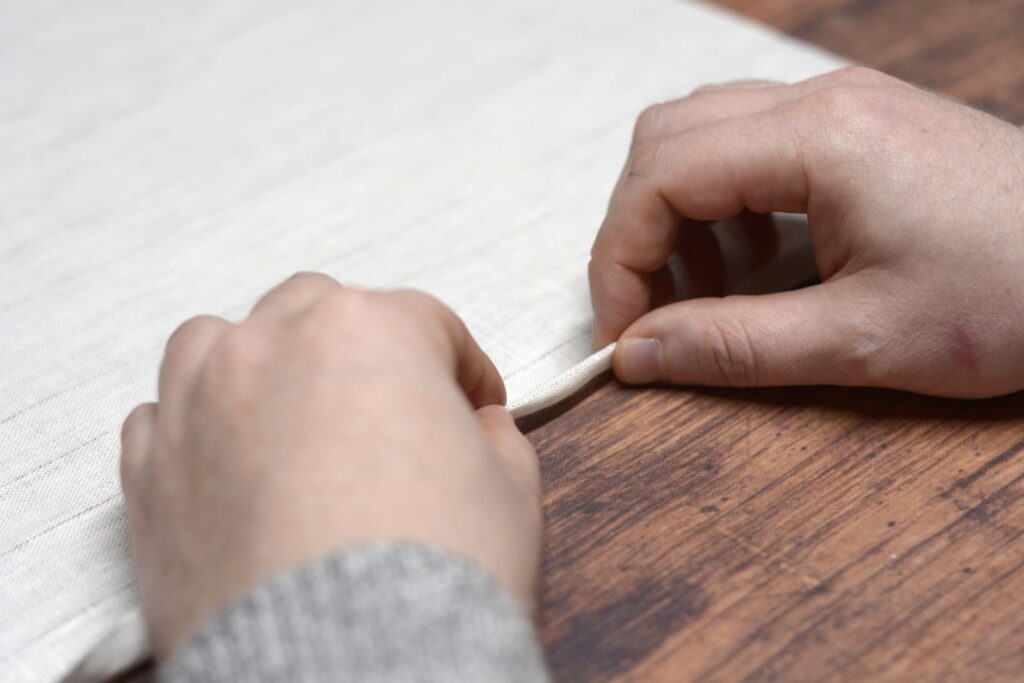
Grasp the thread and pull firmly but carefully, sliding the surrounding fabric down the thread.
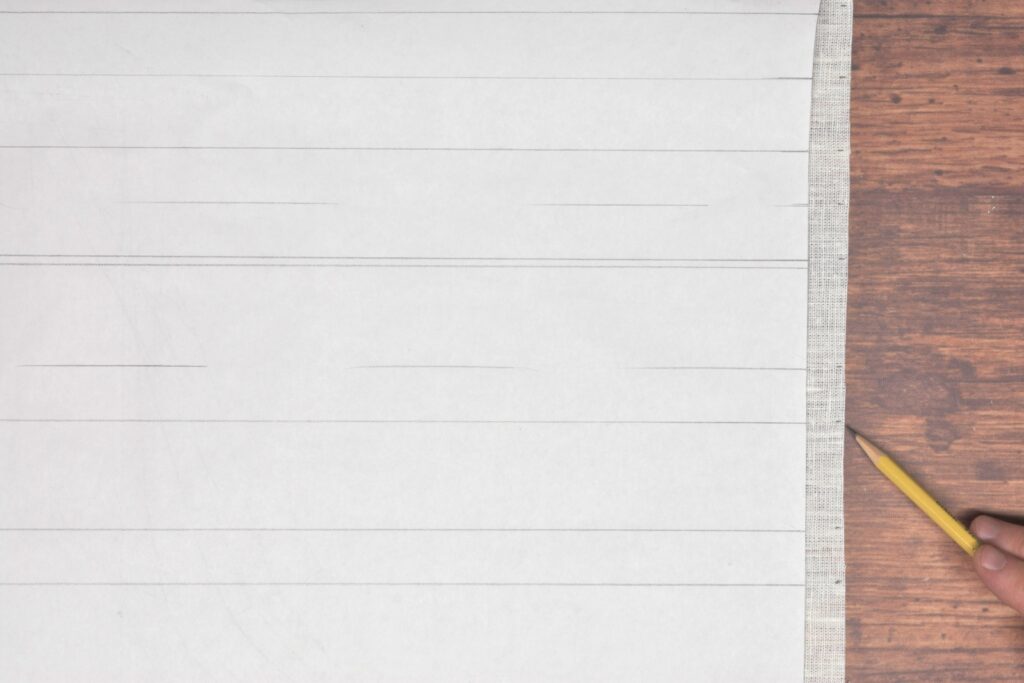
Technically, we’re pulling out the thread, but I like to think of it more as sliding the fabric off of the thread. You can see how it forms these small gathers – slowly move them further down the thread, distributing them as you go.
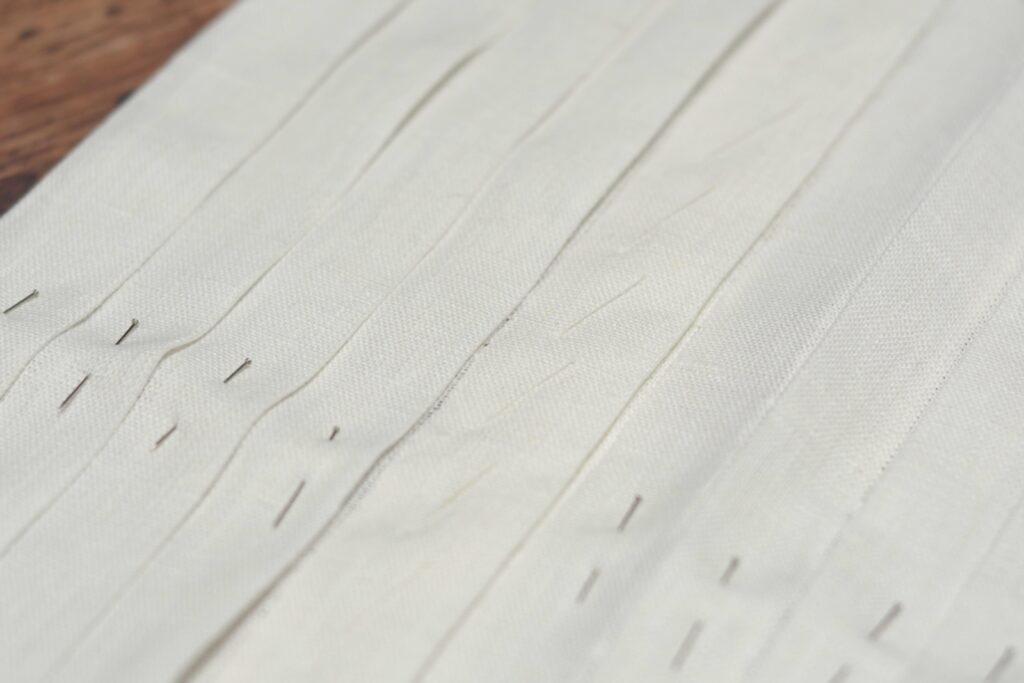
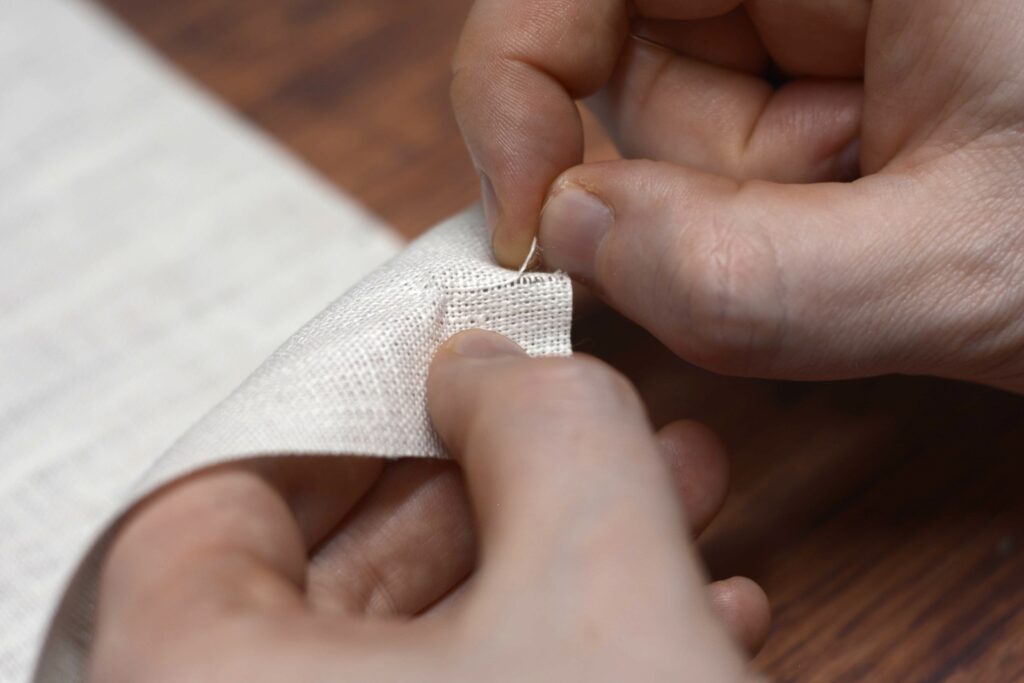
Eventually, the gathers will free up the entire thread, after which it should to slide a lot more easily. You may end up with a broken thread at some point – if this happens, just carefully unpick the broken end and continue where you left off.
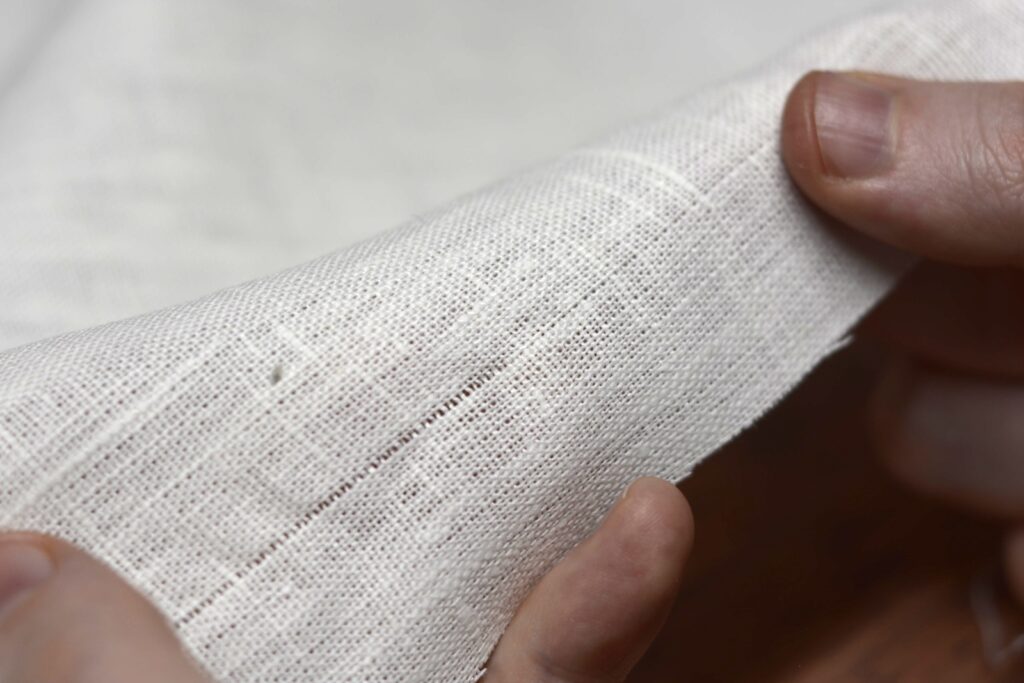
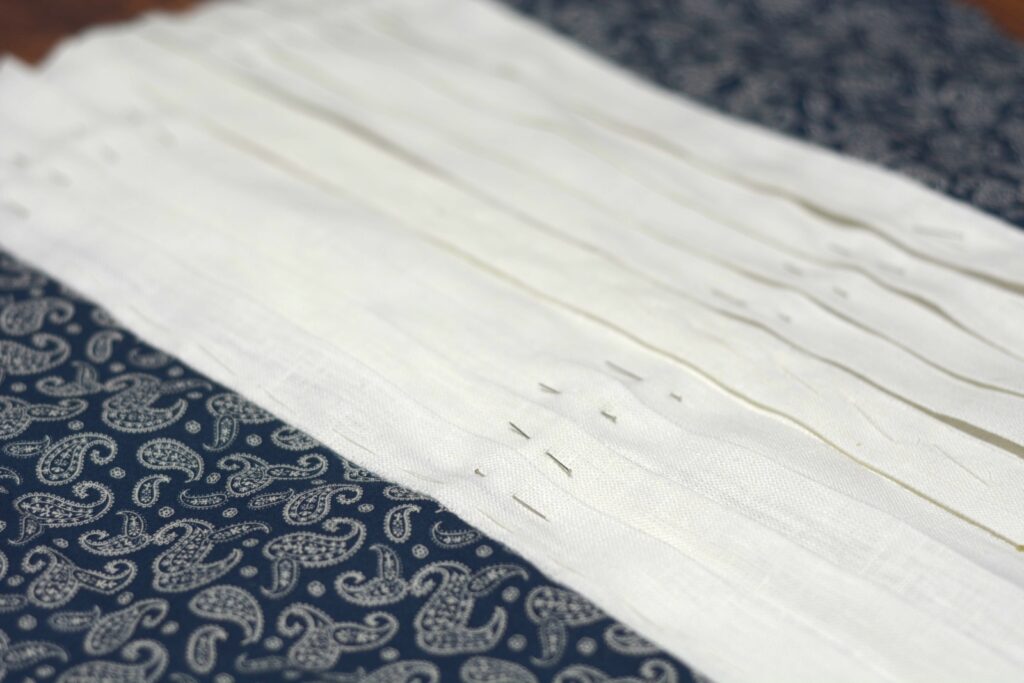
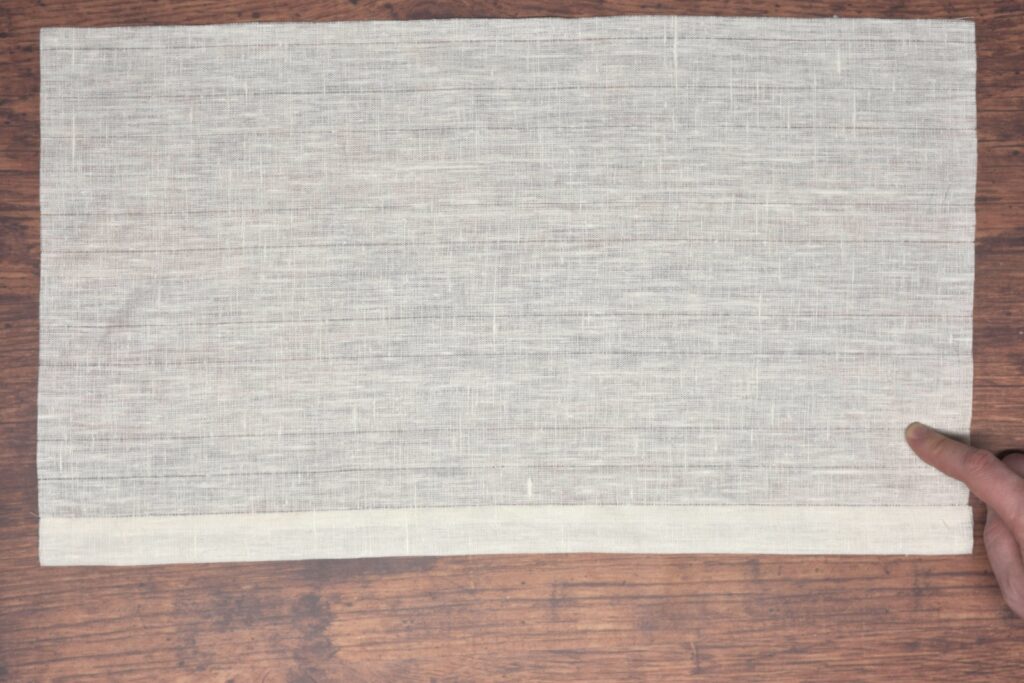
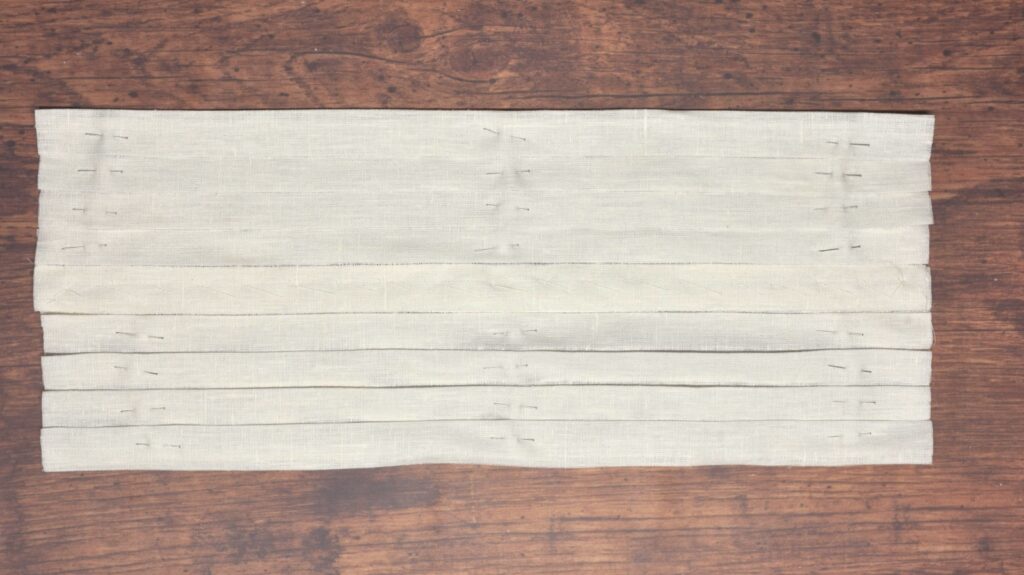
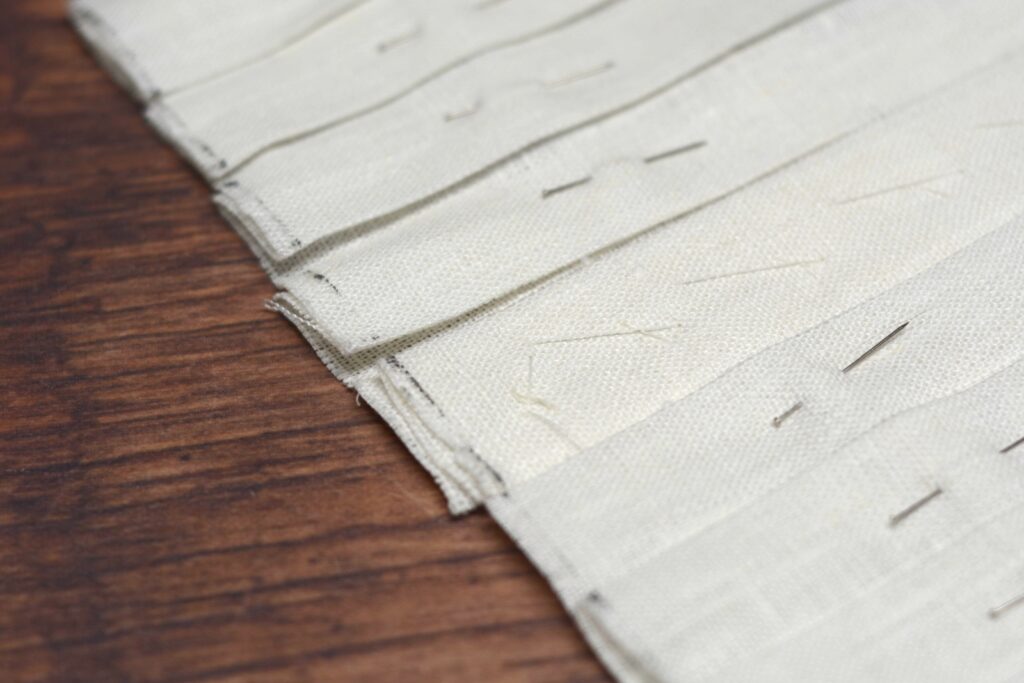
Here’s the first thread pulled out, giving us an accurate line to work out that is perfectly parallel to the grain of the fabric.
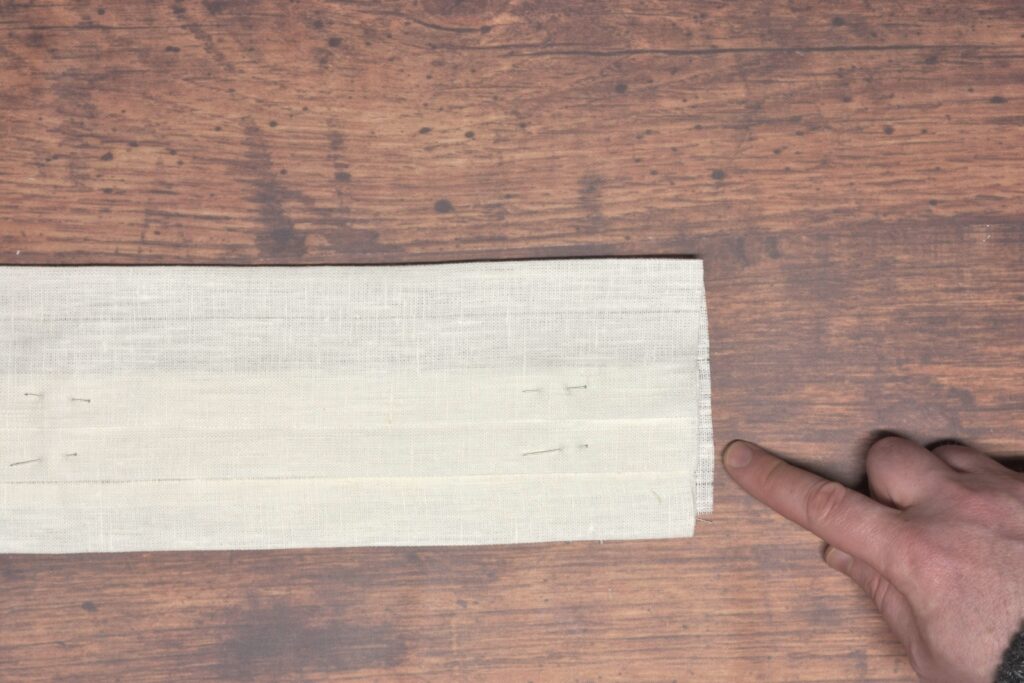
Continue working until all of the vertical and horizontal threads have been removed.
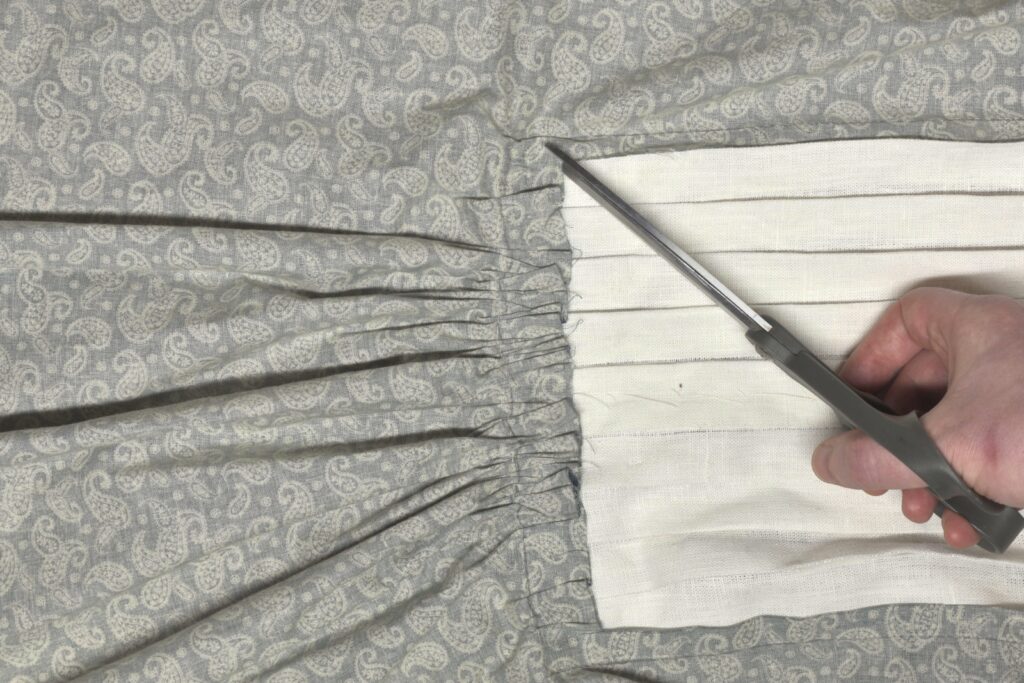
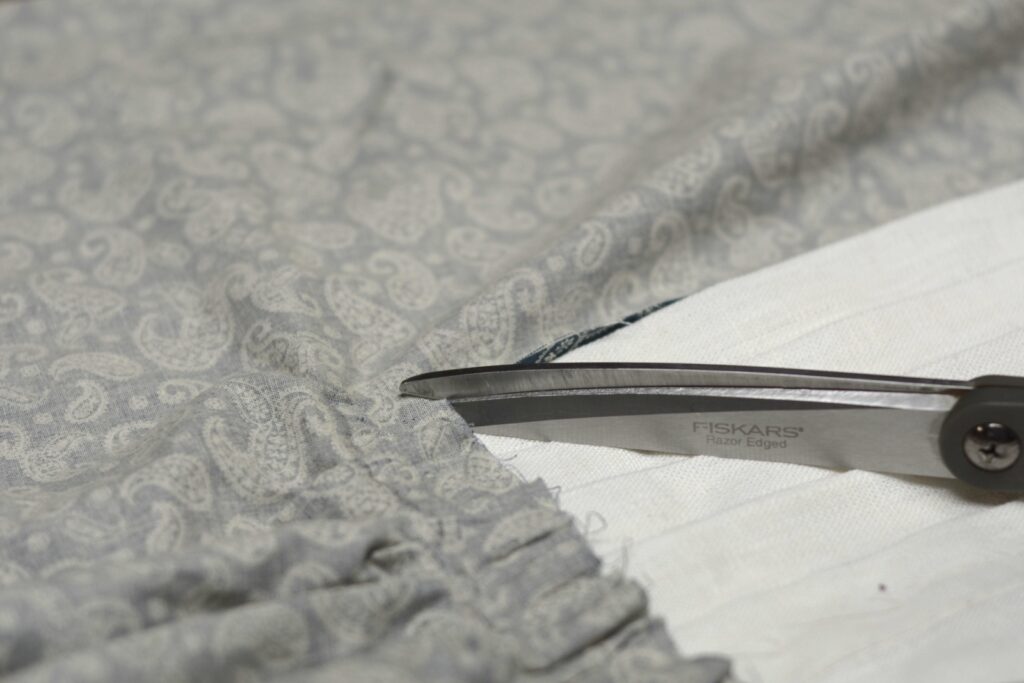
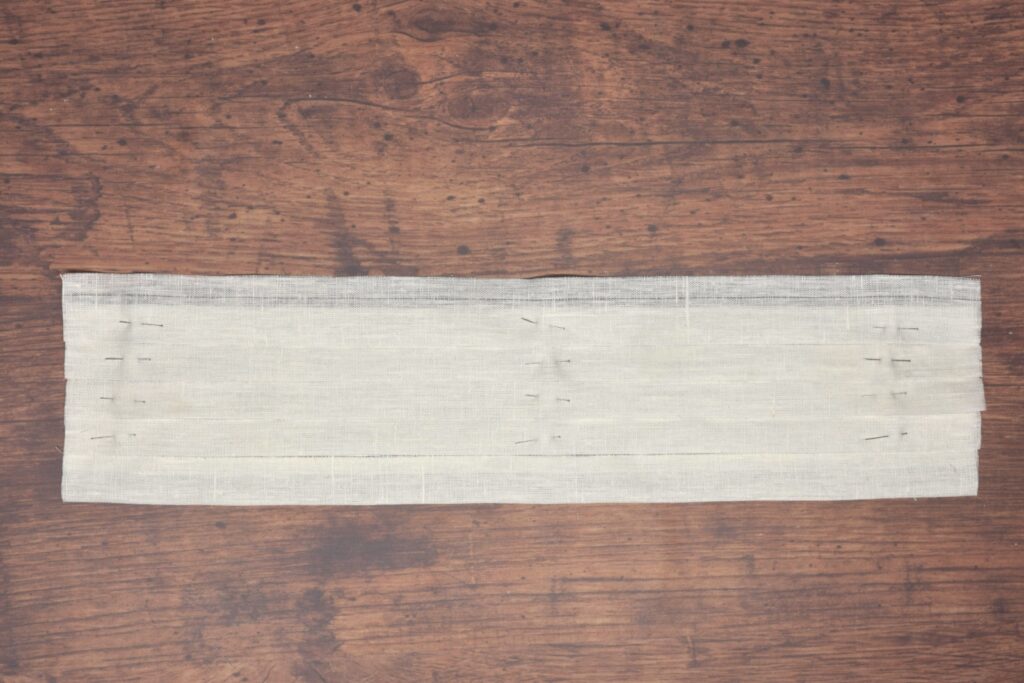
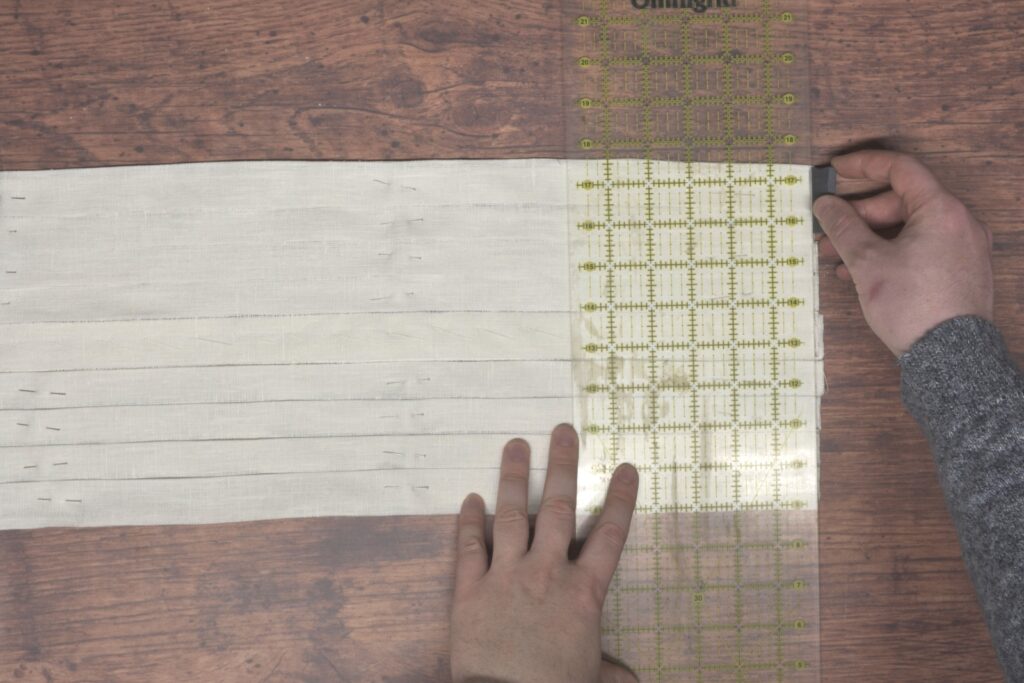
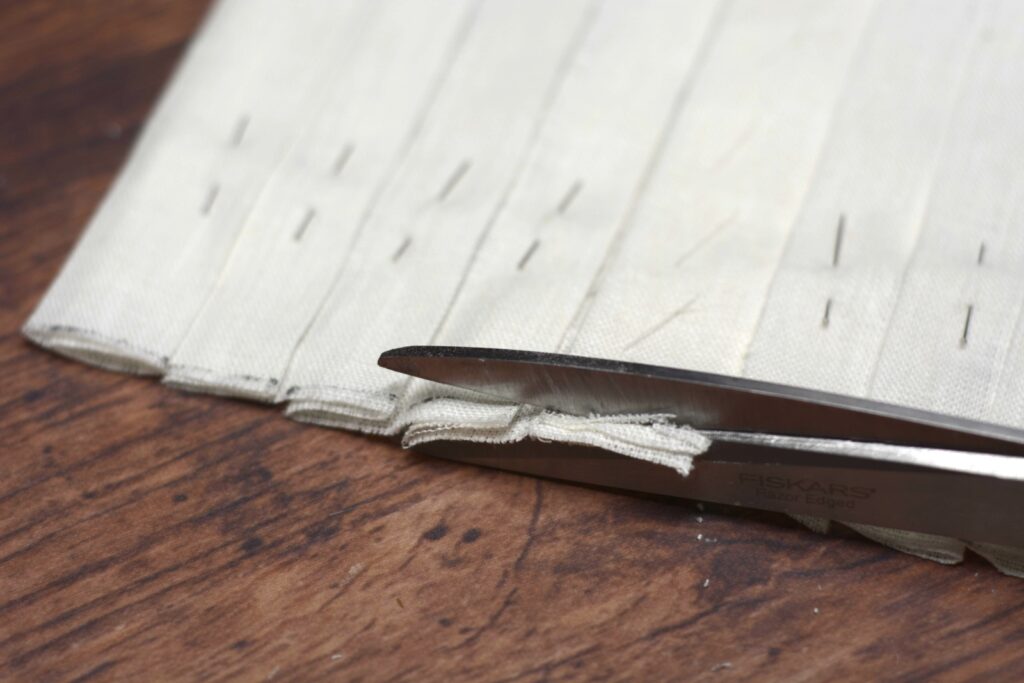
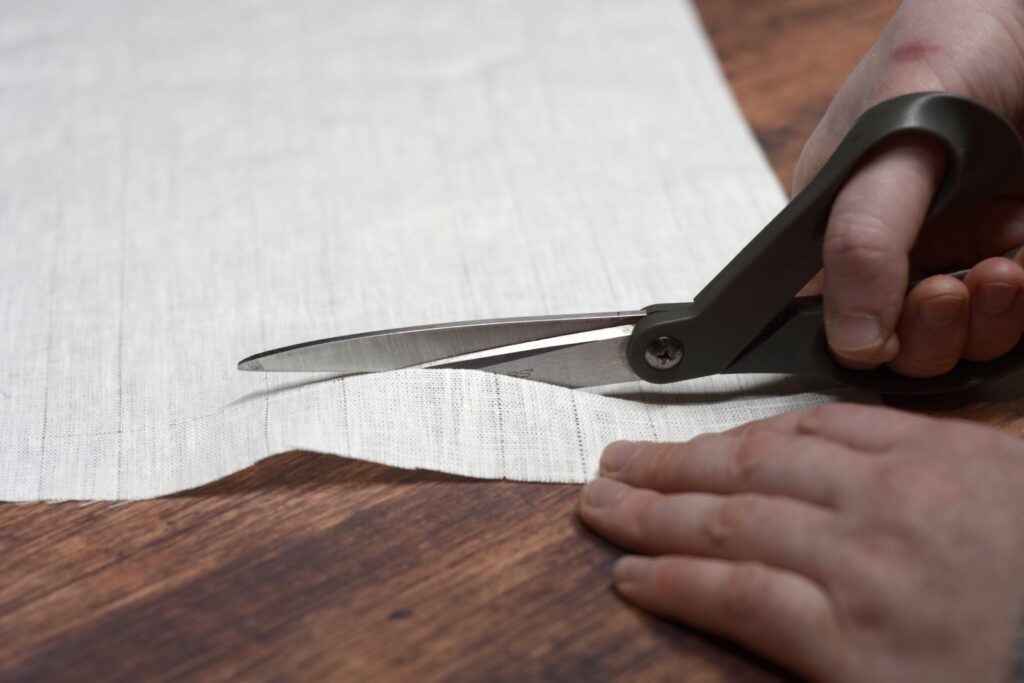
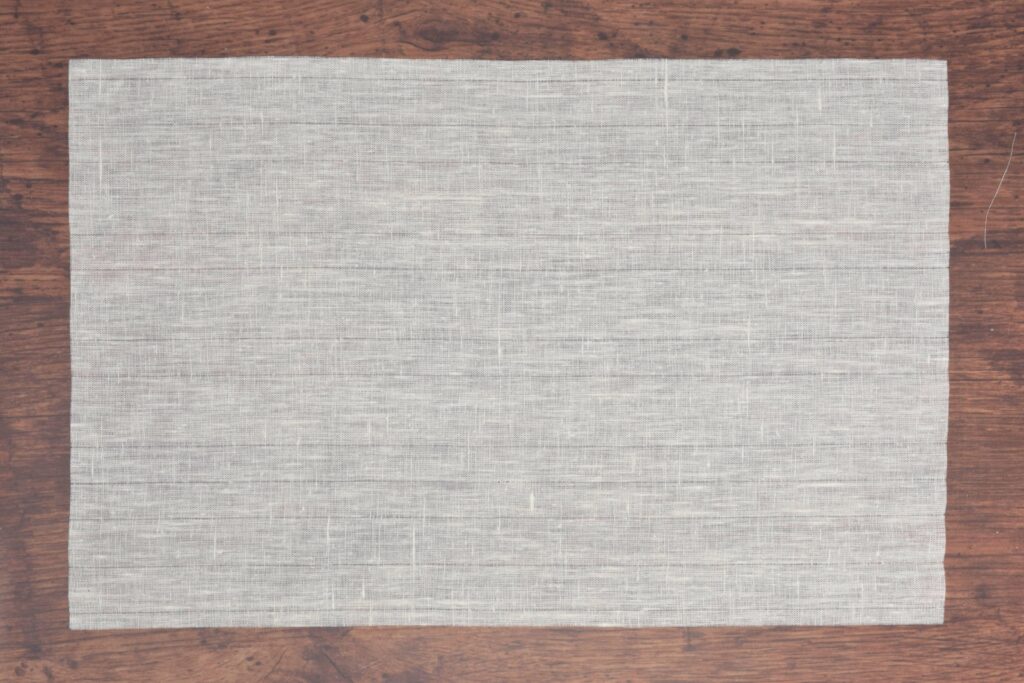
Finally, carefully trim around the pattern outline, squaring up your piece of linen.
Your Progress
[columns gutter=”0″]
[col]
[progressally_objectives]
[/col]
[col align_text=”center, middle”]
[progressally_progress_pie_chart size=”100″]
[/col]
[/columns]