Author: James Williams
Attaching the Pocket Welt
With the pocket areas reinforced, we can begin working on the pockets themselves. Although the waist pockets and breast pockets are constructed identically, there are a few slight changes in the breast pocket due to the steeper angle, so we’ll begin with the waist pockets. If you’ve never made a pocket like this before, I highly suggest practicing once or twice on some scraps just to get the process worked out in your mind.
First, draw out the pattern for the pocket welts, you’ll need one for each pocket. The pattern should be rectangular, 1 1/2″ longer than the pocket opening (3/4″ on each end), and twice the width of the finished welt. I like my welts to be 5/8″ wide, slightly more substantial than 1/2″, yet not looking too blocky or bulky like those above 3/4″ do.
Cut out the welt patterns, again, one for each pocket.
Now, to decide how you want to align the stripes, if you have any. Originals could be anything from perfectly matched, to completely mismatched and even sewn on the bias. So it’s up to you how you want to go about doing things.
If you’ve installed a dart into the waist, you’ll only be able to match the stripes along one side or the other most likely, unless your dart happens to perfectly maintain the distance between the stripes.
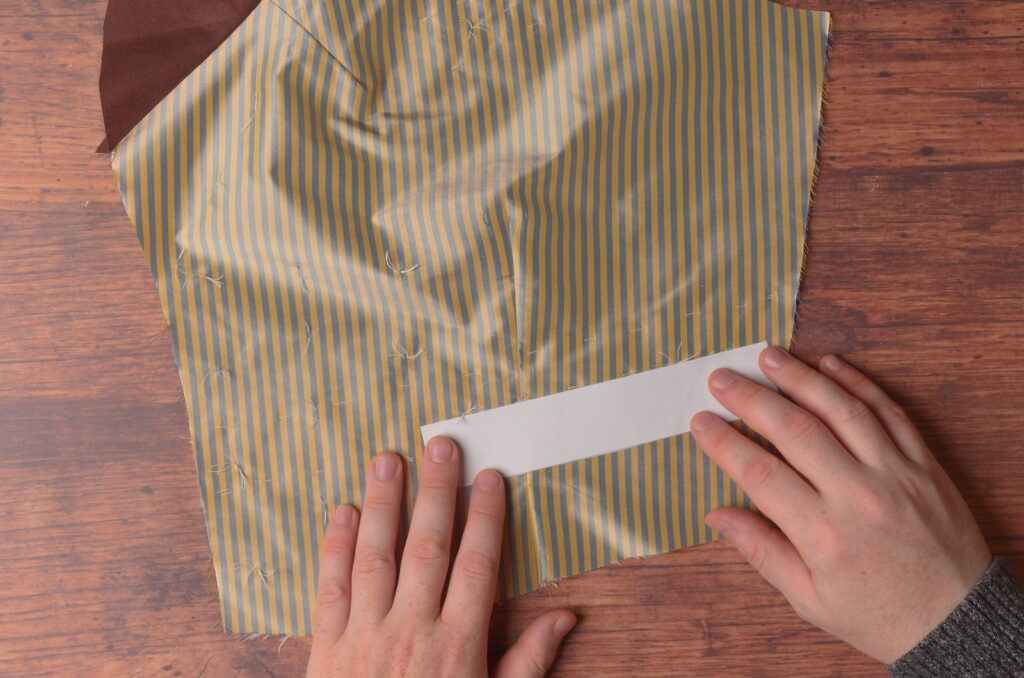
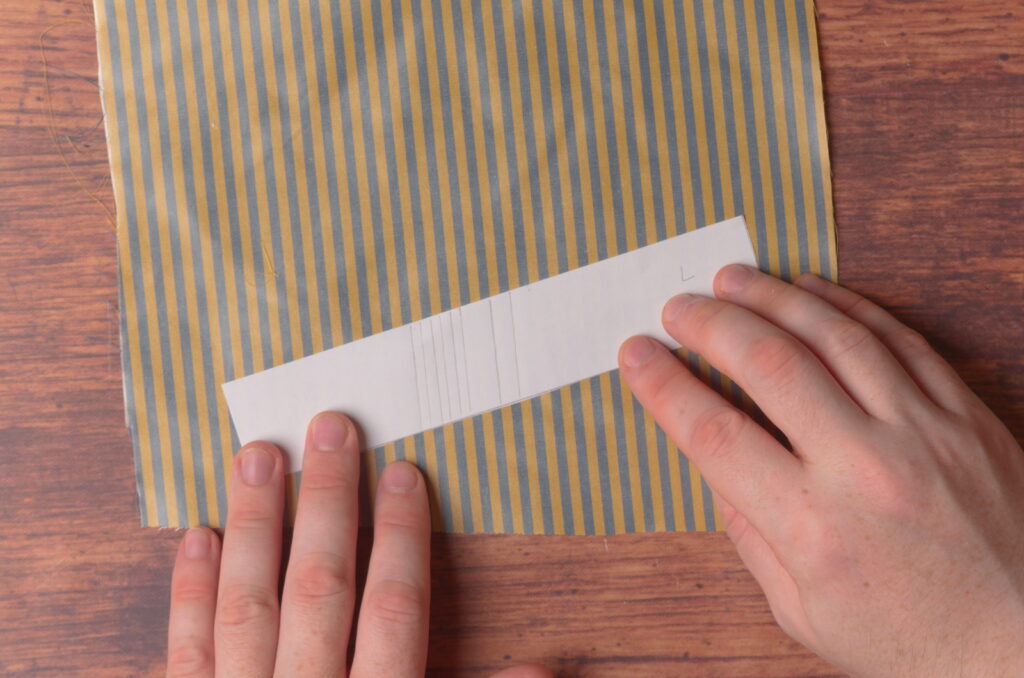
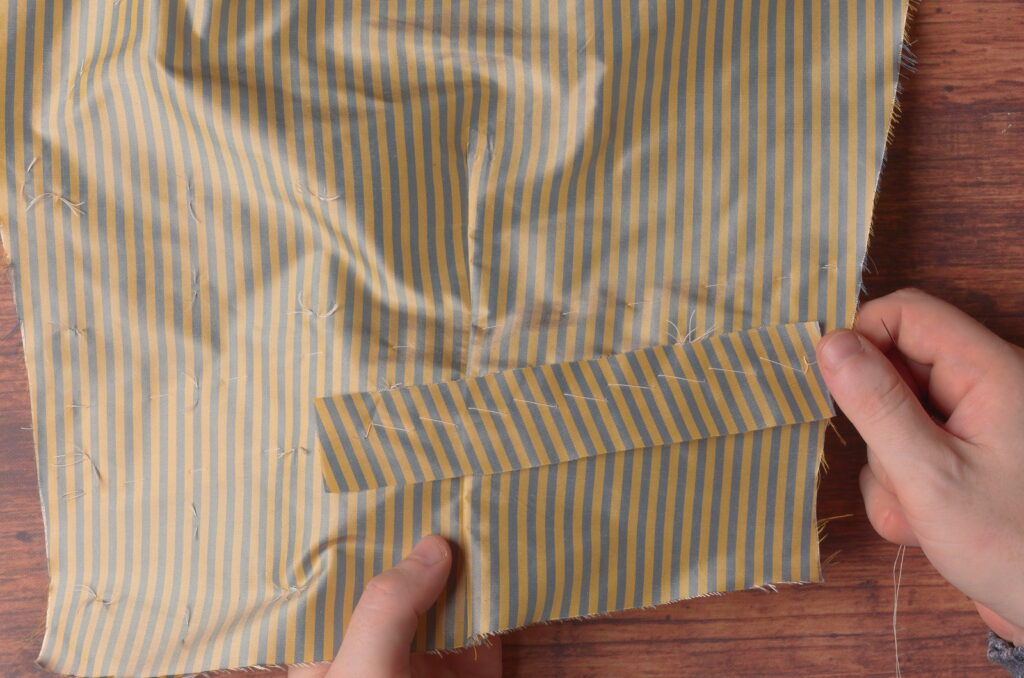
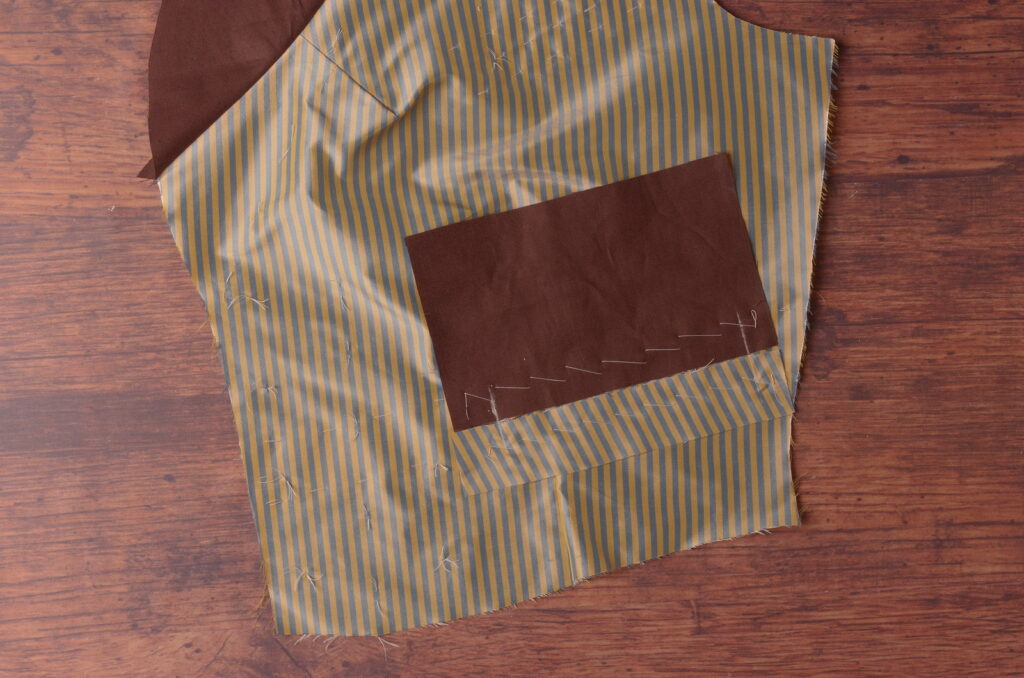
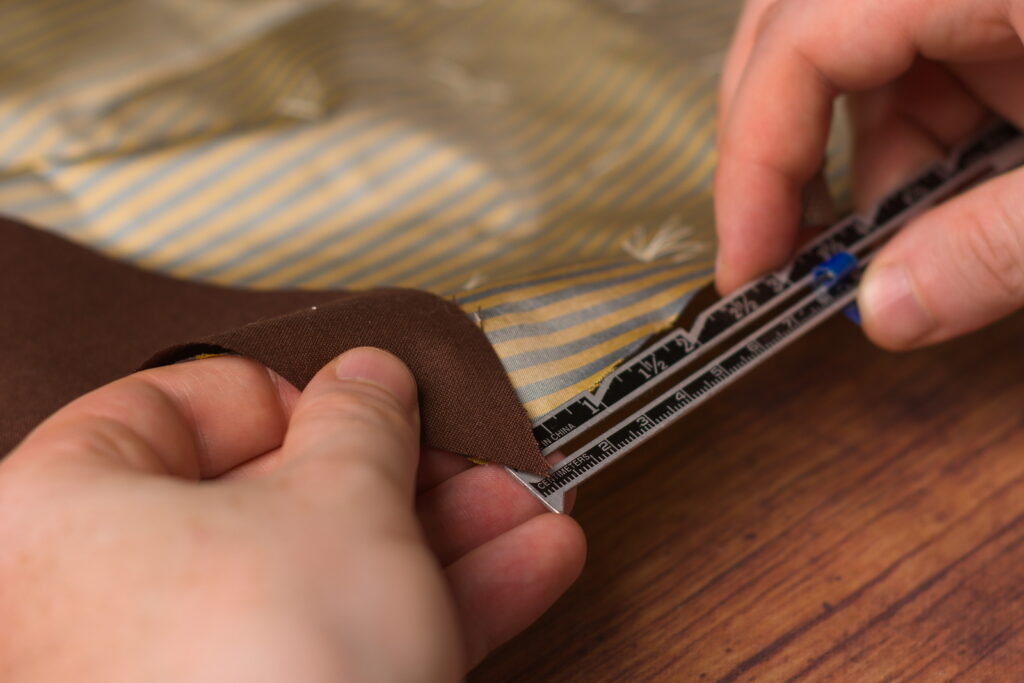
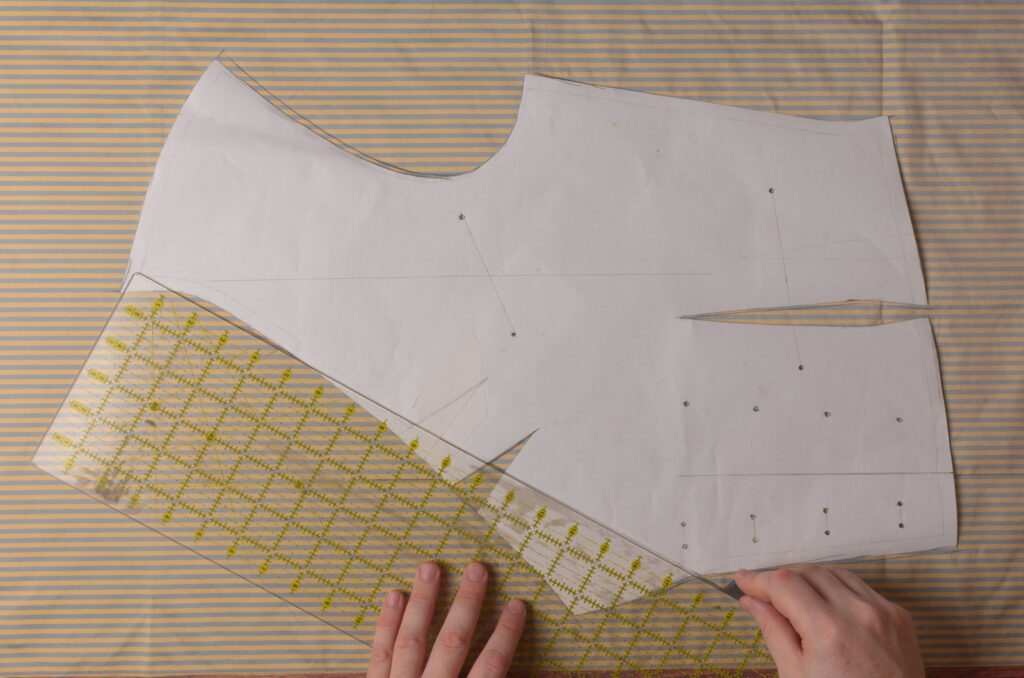
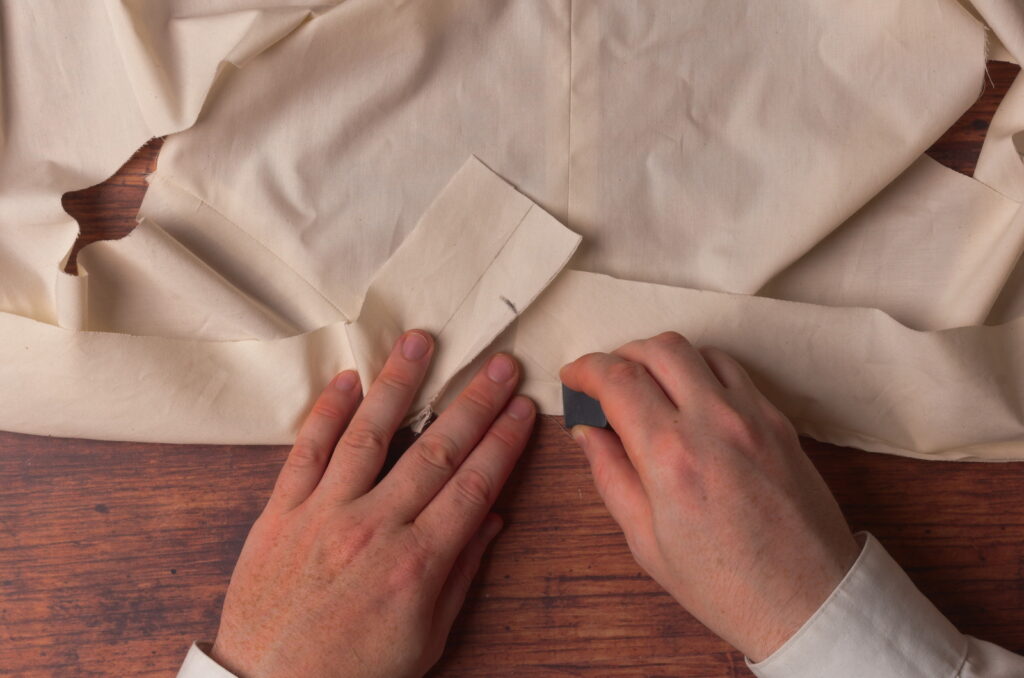
Lay the pattern onto the pocket, aligning it with the basting stitches indicating the pocket opening, and centering it so 3/4″ extends beyond the opening on each side.
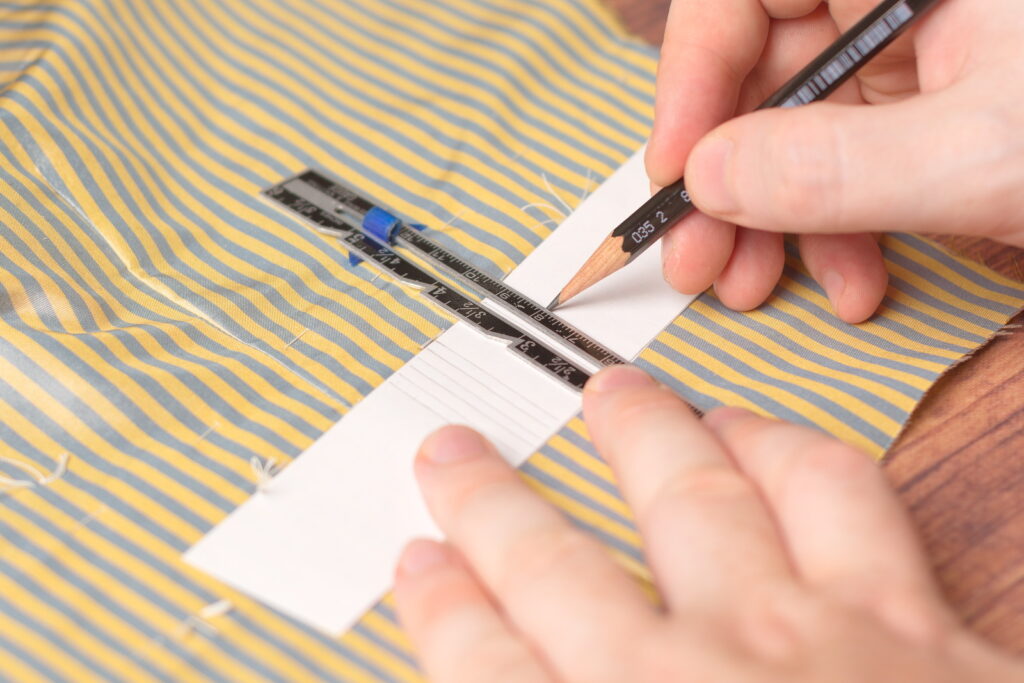
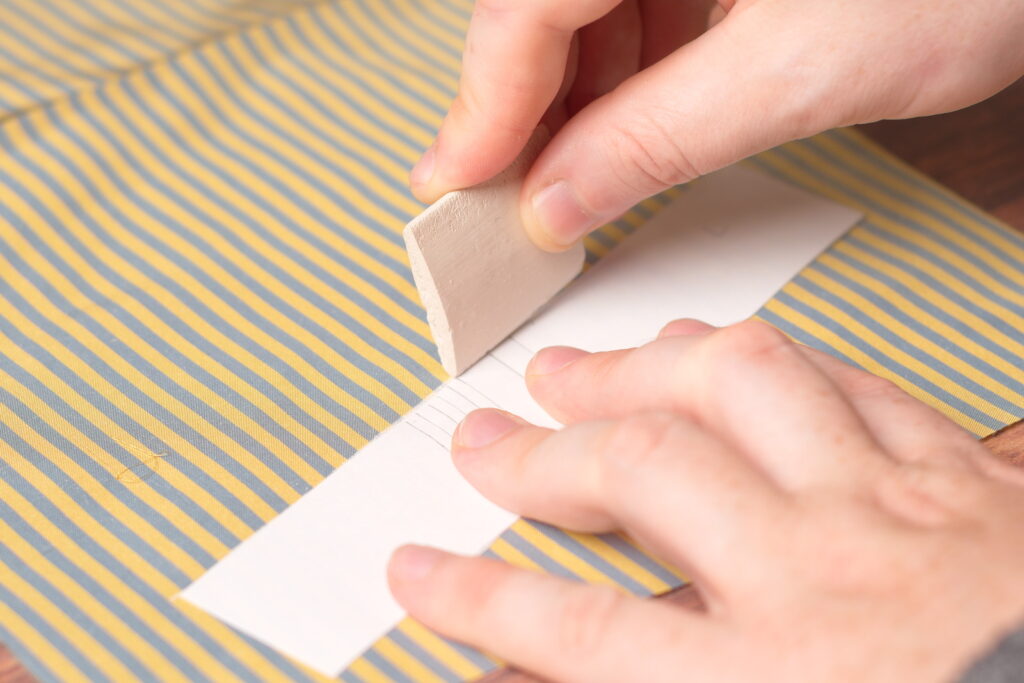
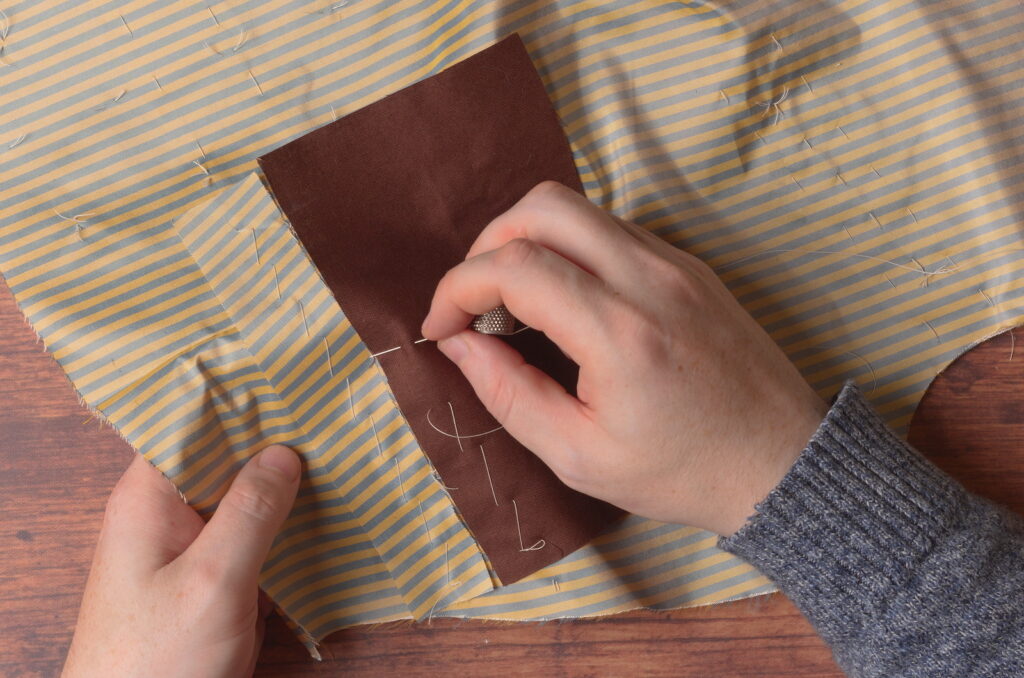
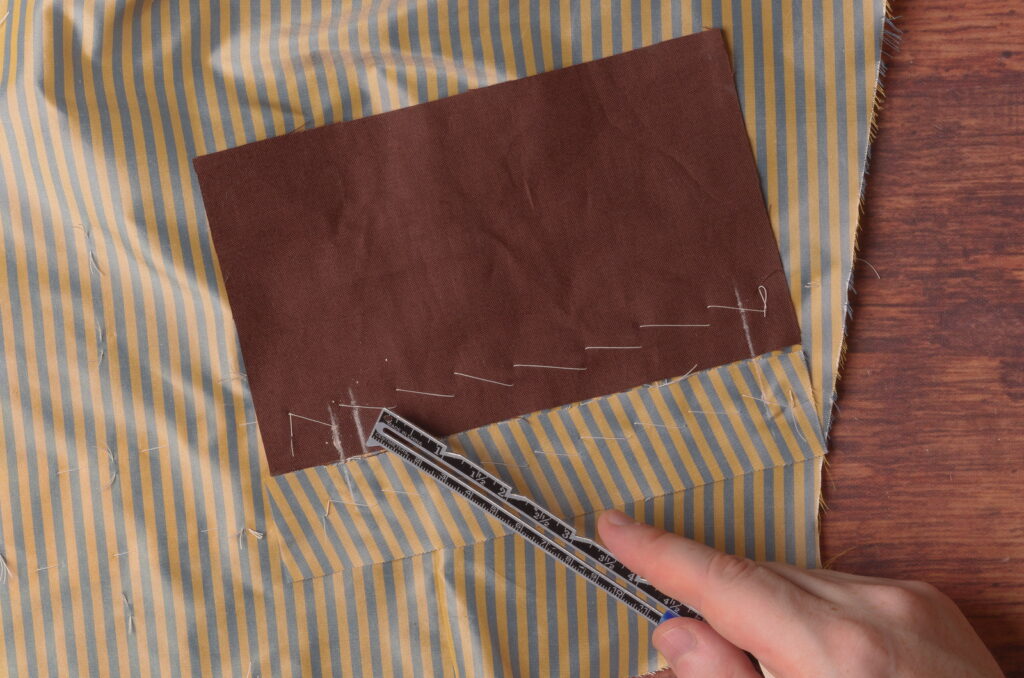
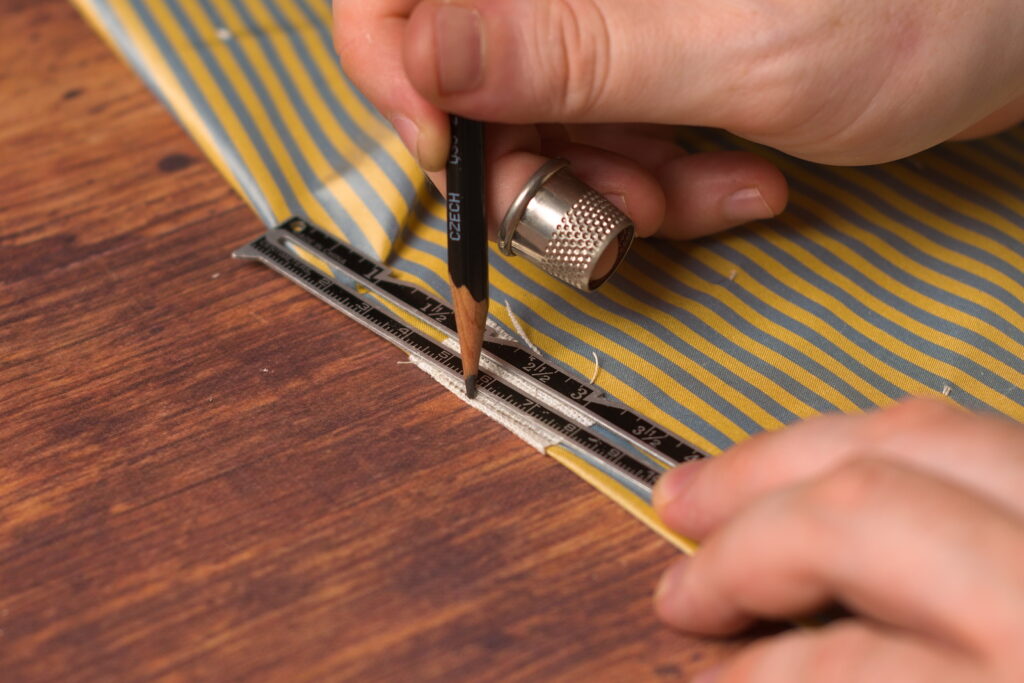
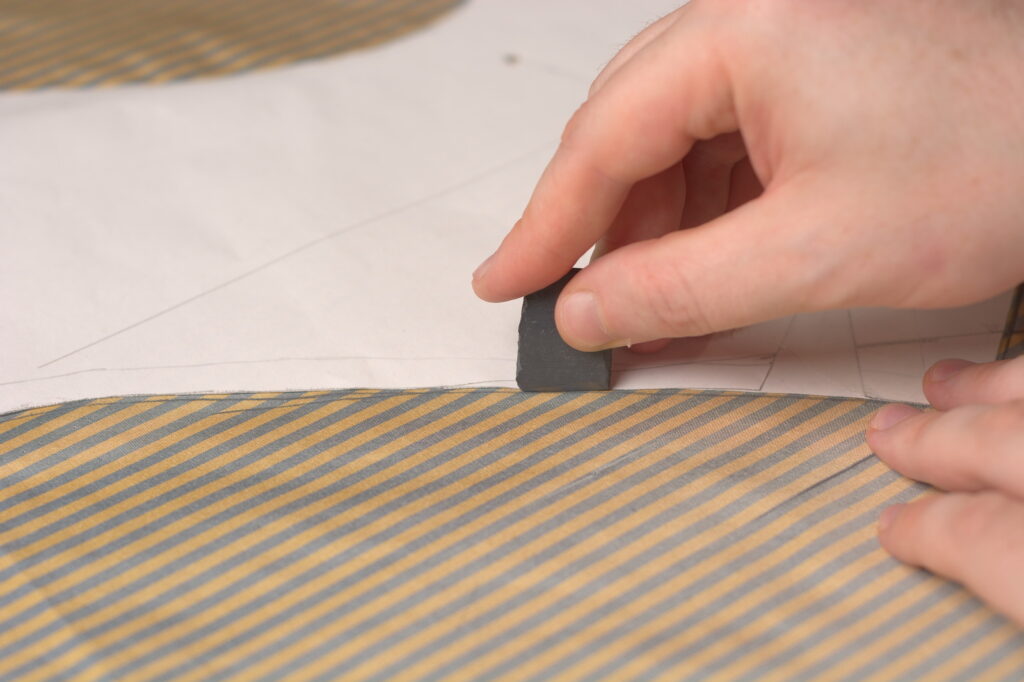
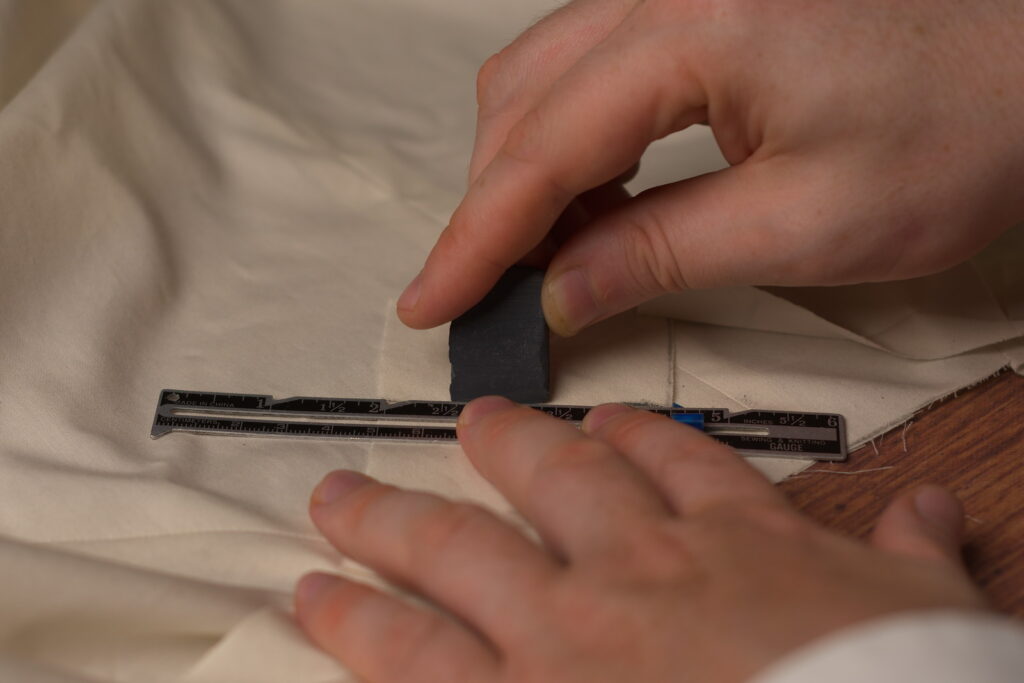
I chose to align the stripes on the pocket near the side seam, as the area is bigger and slightly more noticeable. Lay a ruler along one of the stripes, and draw a line indicating that stripe on the pattern.
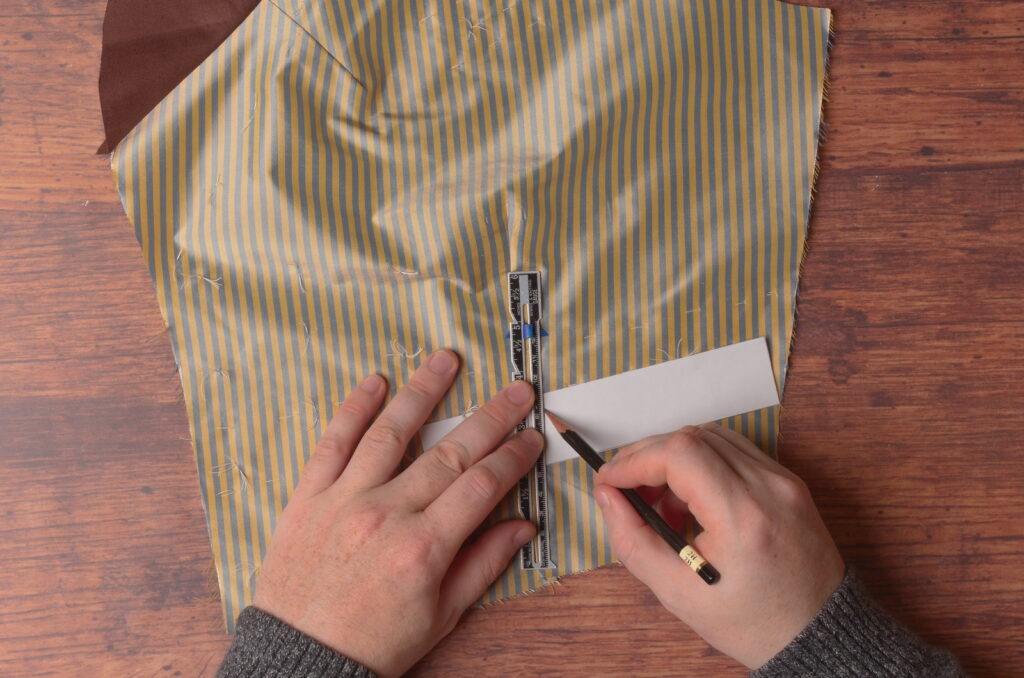
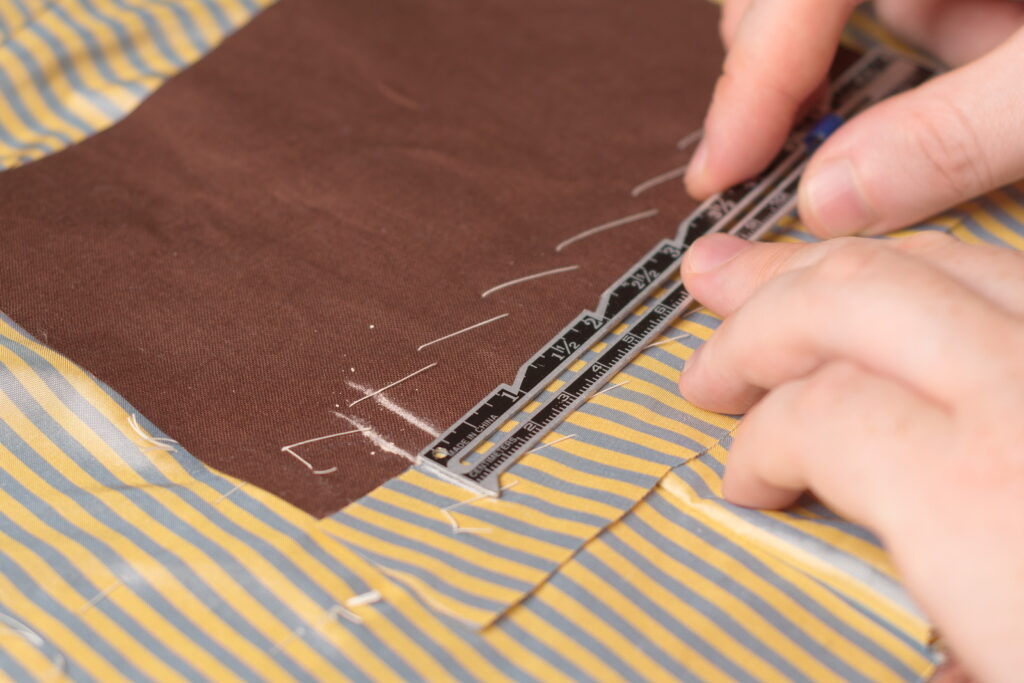
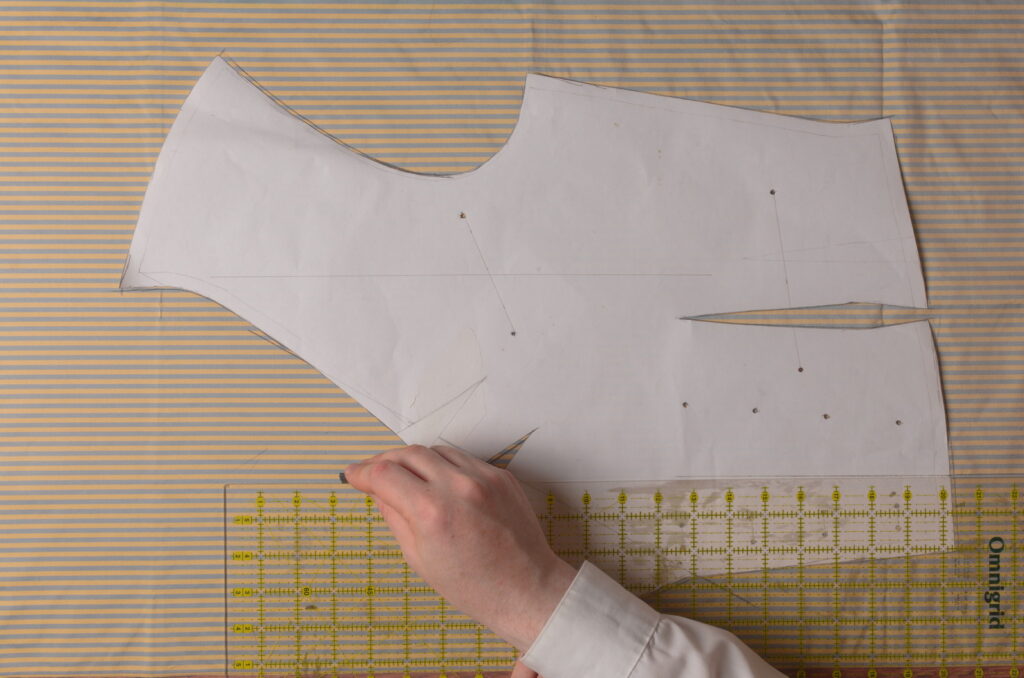
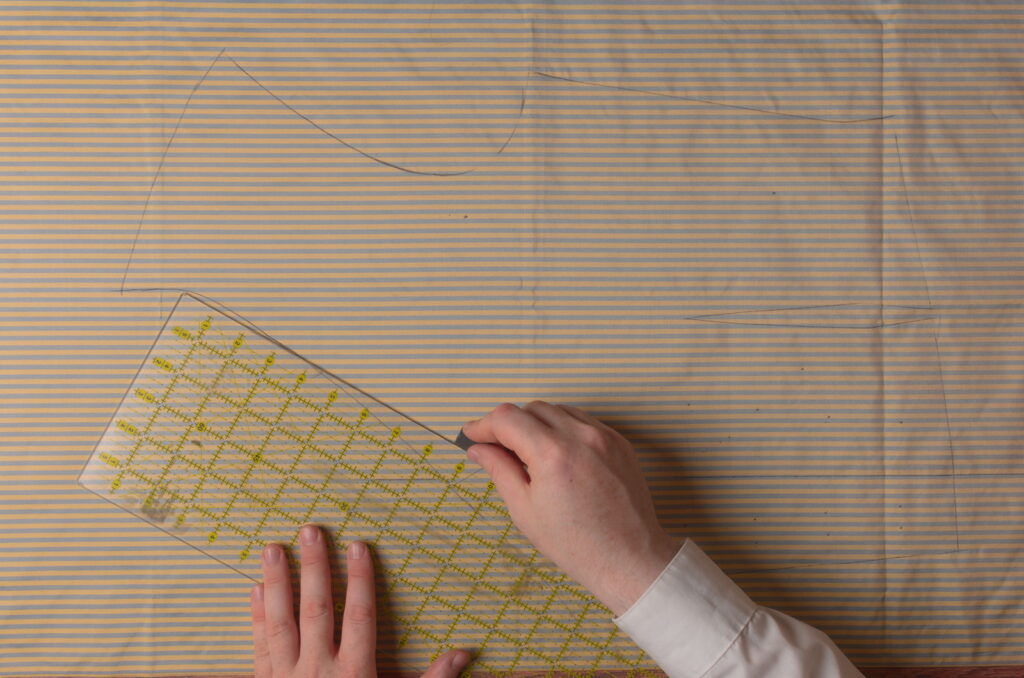
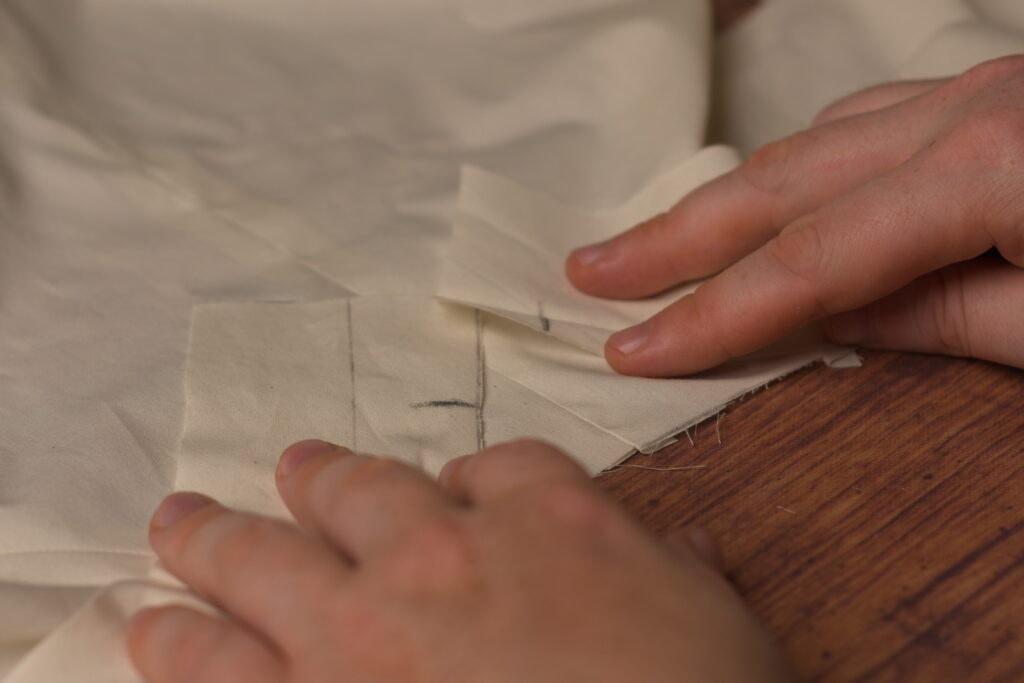
Draw as many of the stripes in as you feel you’ll need. I like to draw them across the width of the pocket to try to get the positioning more accurately. Just be consistent though and keep your lines on the same side of each stripe.
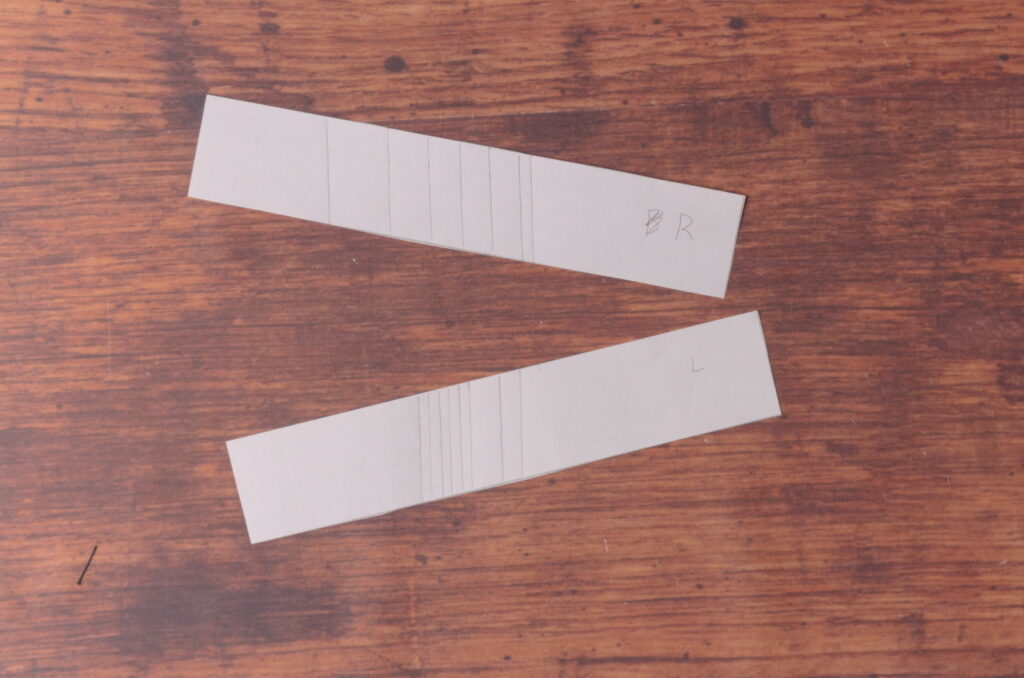
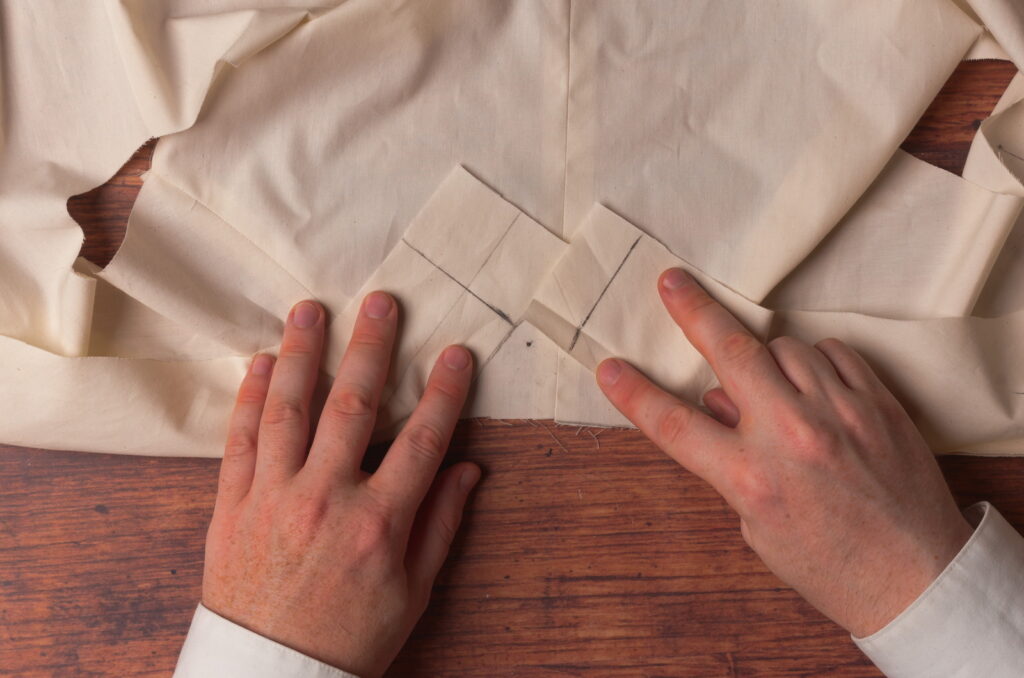
Here are my two patterns for the left and right sides. Note how they’re mirror images of each other.
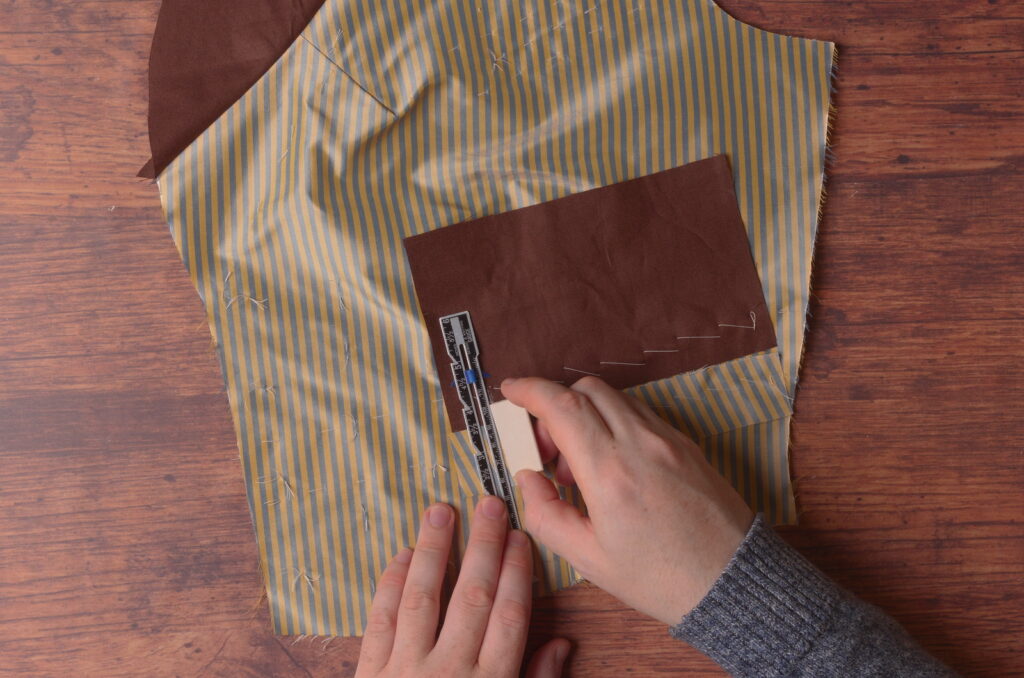
Now you can use the patterns to lay out and cut your welt pieces. Just align the lines on your pattern with the stripes on the fabric and you should be good to go.

Now lay your welt piece into position on the forepart and see how you did with your alignments. Everything looks good so far here. The angle distortion from the dart even helps to align the stripes a little on the left side, so we’ll see how that turns out.
Now actually sewing the dart is where it gets tricky. It takes a bit of practice and developed skill to be able to get the alignment just right.
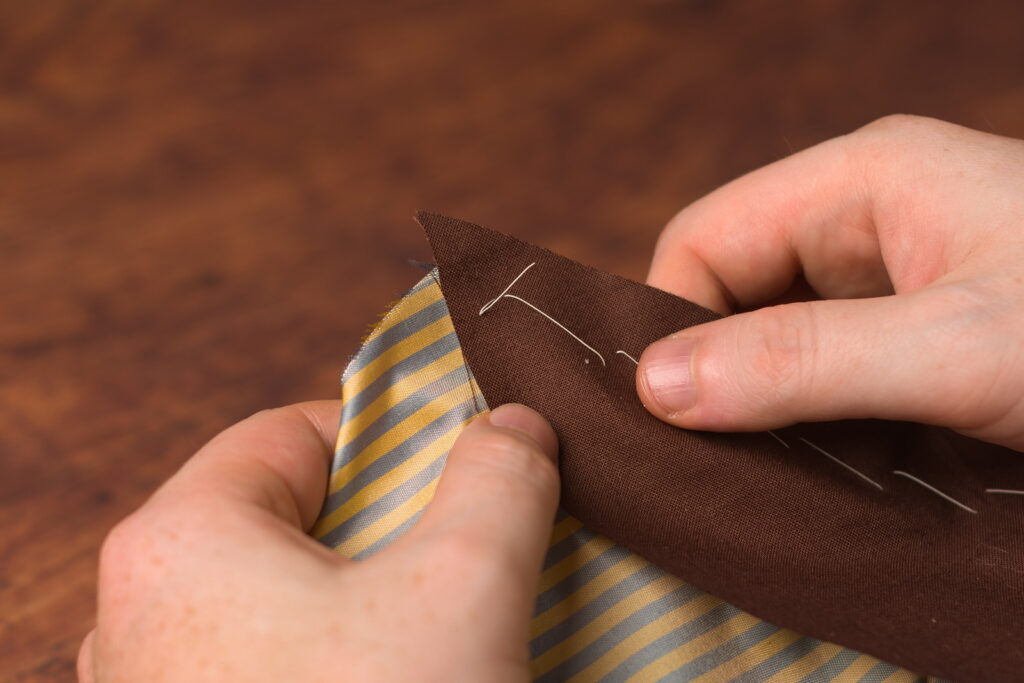
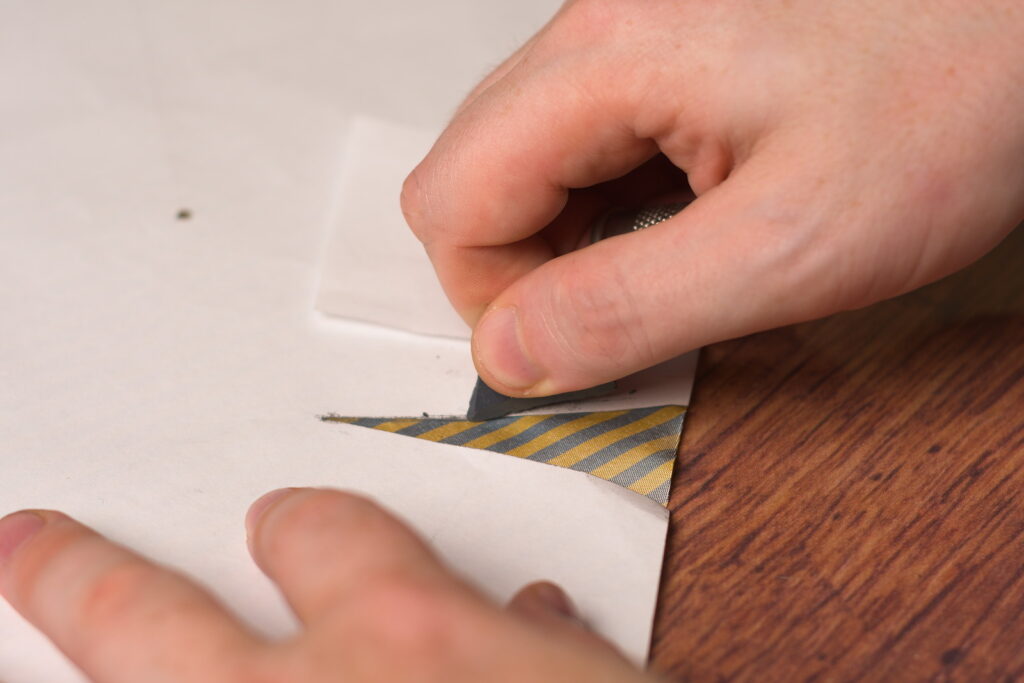
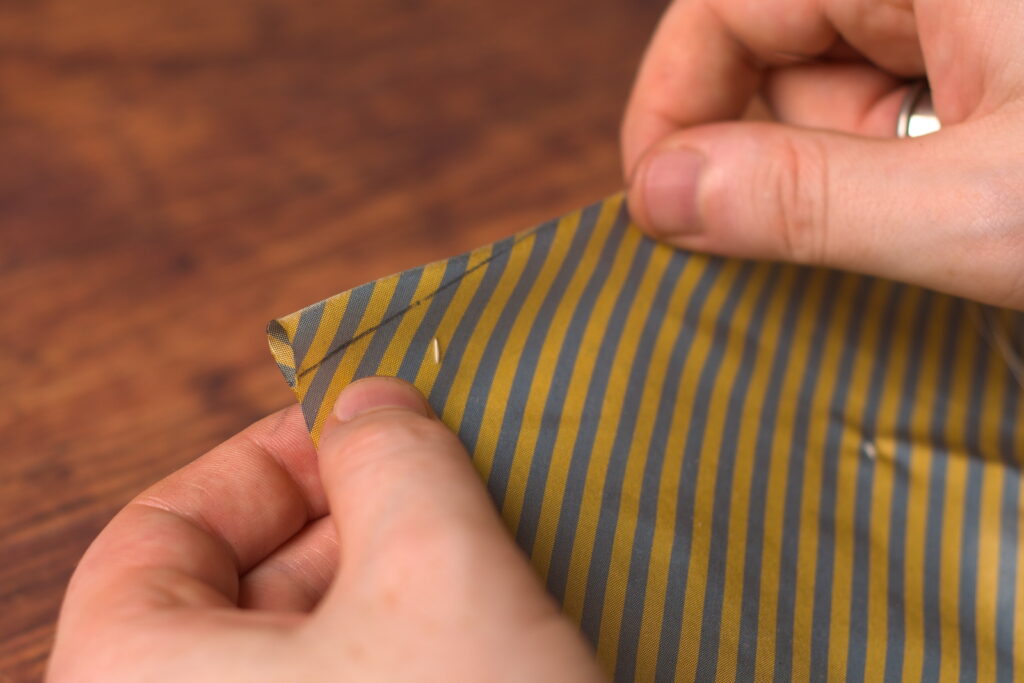
Flip the pocket welt over the marked opening so that right sides are together, realigning it as necessary so that the edge of the welt is just touching the marked pocket opening. Now shift the welt over ever so slightly so that the stripes align not at the edge of the cloth, but 1/4″ inch from the edge, were the seam will be sewn. I’ll add a closeup in the next photo.
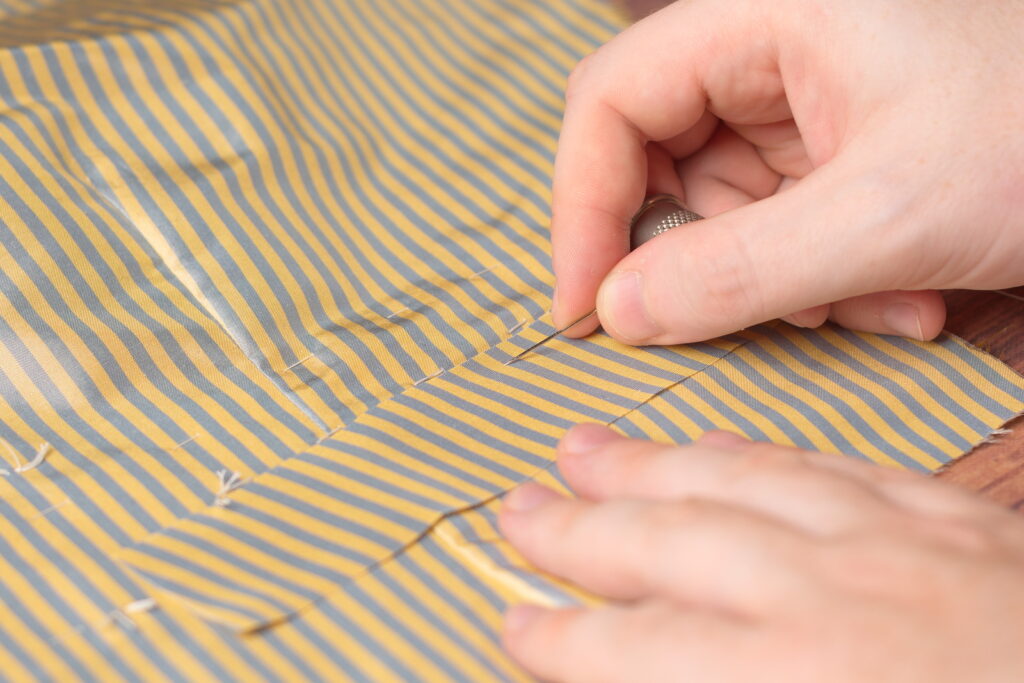
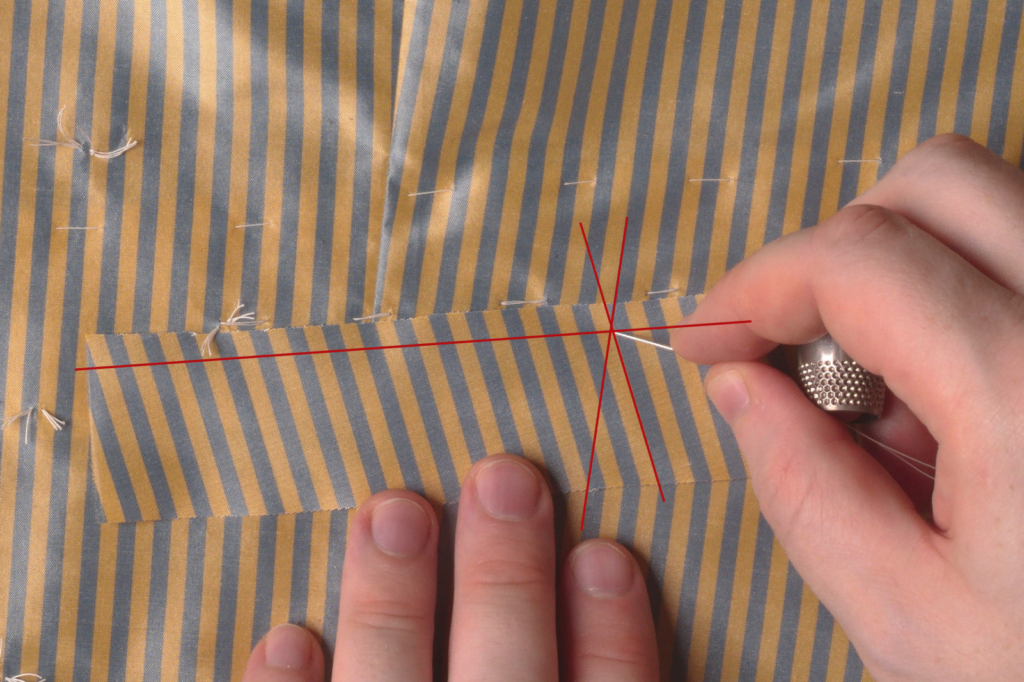
As you can see here in the closeup, I’ve matched as closely as possible the 1/4″ seam allowance, the diagonal stripe on the welt itself, and the vertical stripe on the forepart, all converging on that one intersection. And this must be done for each stripe, though after you get one the rest generally fall into place.
And if you look closely enough in the photo, you’ll see that mine isn’t even perfectly aligned. I’ve ever so slightly offset it to account for the turning of the fabric, which takes up a very slight amount in addition to the seam allowance. This is the part that takes a lot of practice, but I know you can get it with a little effort on your part.
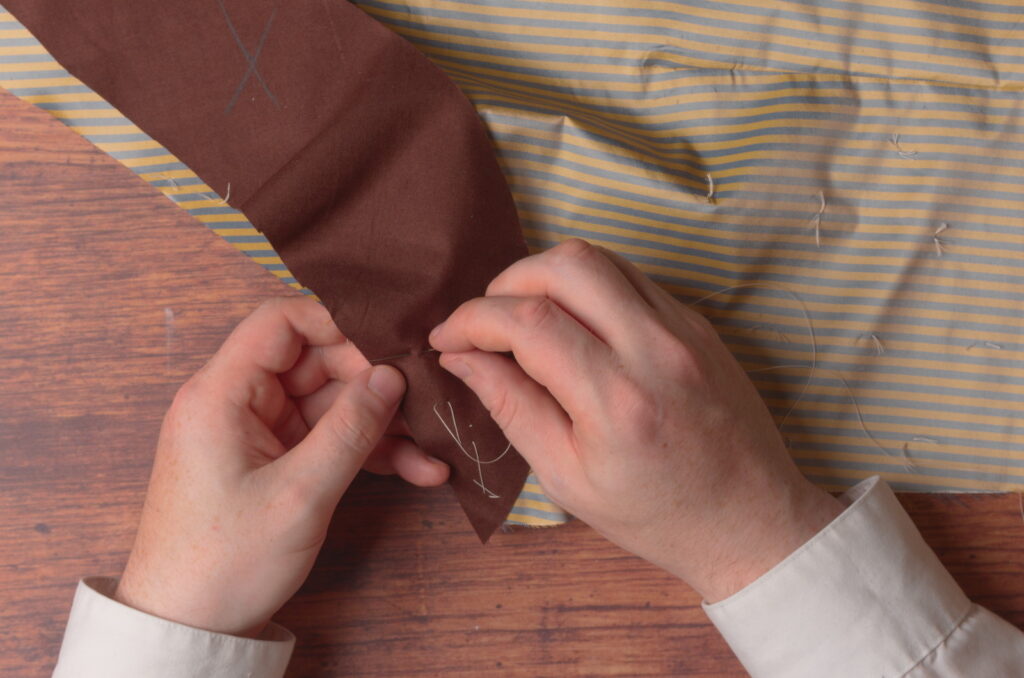
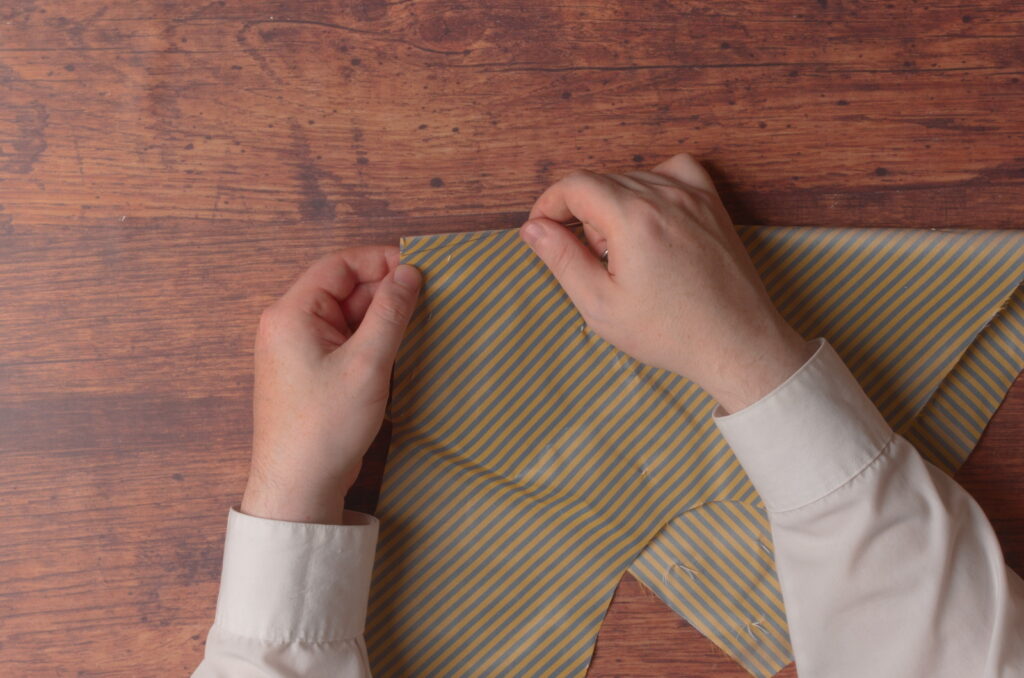
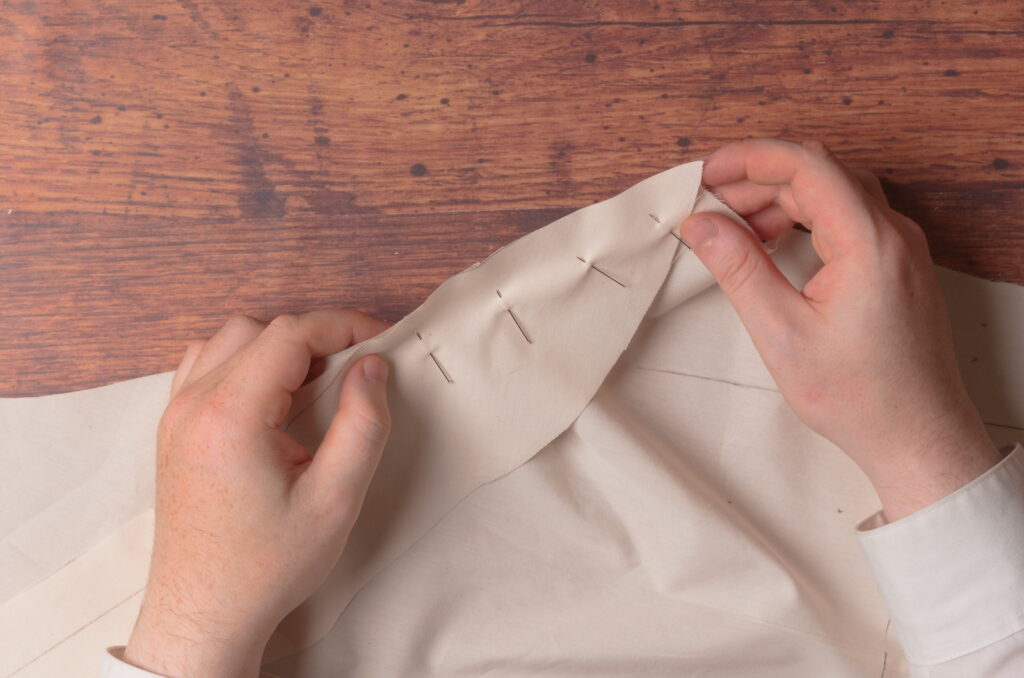
Now baste the pocket welt into position, fine tuning the alignment of the stripes as you go. This can be a little tricky, depending on the angle of your pocket, because the slight bias cut has a tendency to encourage stretching of the welt in comparison to the forepart underneath.
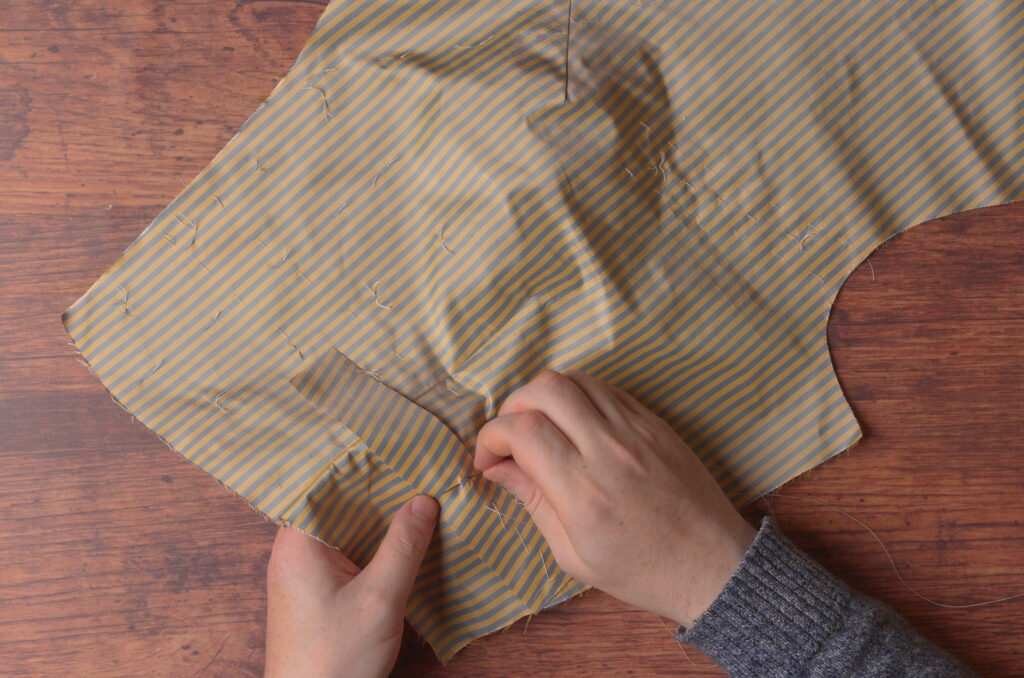
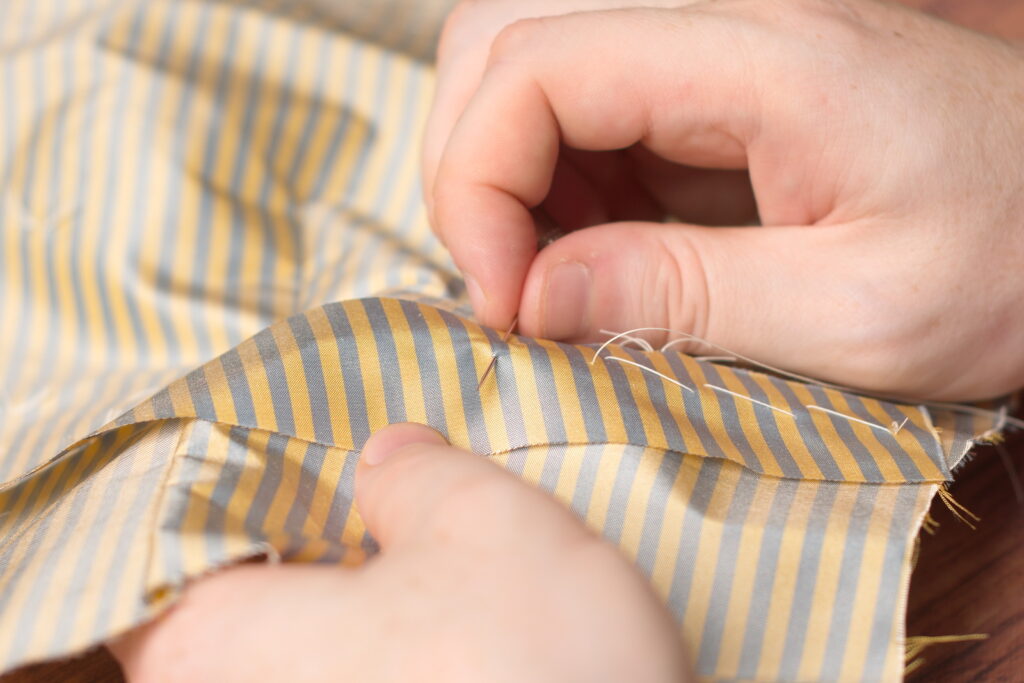
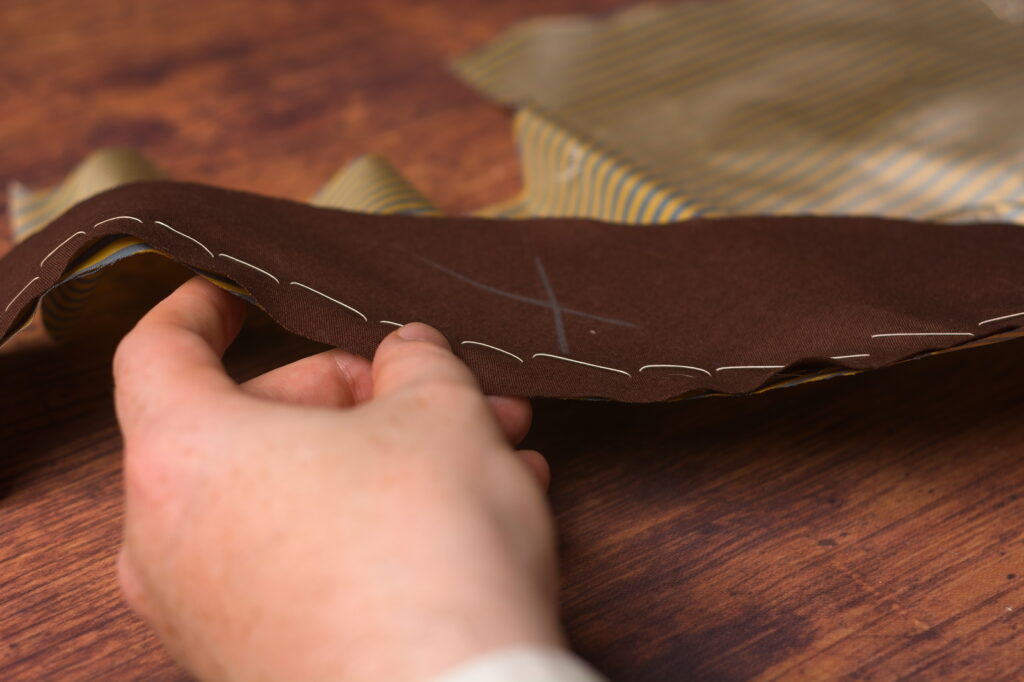
Here’s the welt after being basted on. You can see how the stripes got out of alignment to the left side of the dart.
Turning to the pocket bags for a moment, cut a four rectangular pieces (two for each pocket) 1 1/2″ longer than the pocket opening by about 4 inches in depth. I like to cut them a little over sized, as they’re so much easier to trim to the exact size later on.
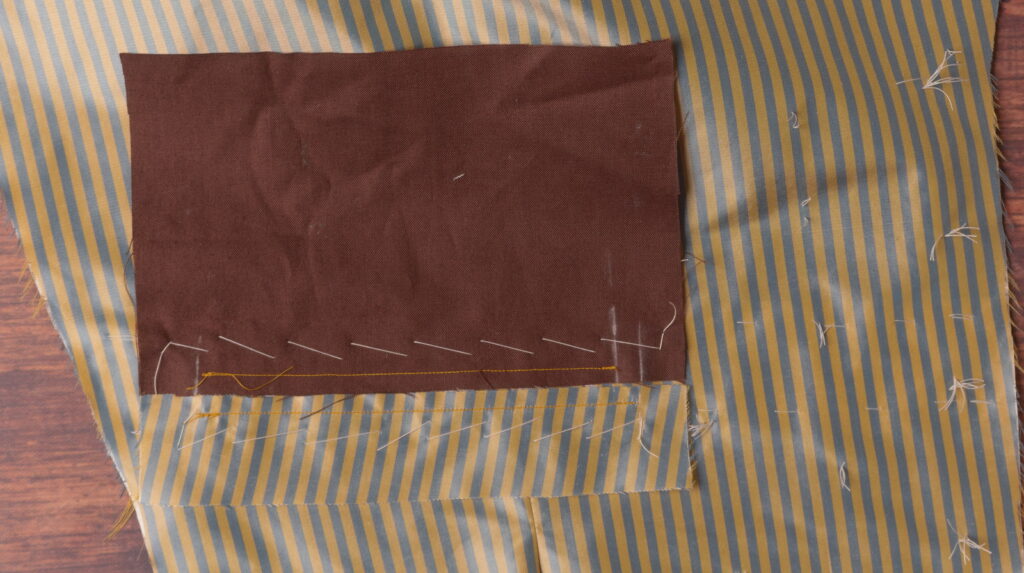
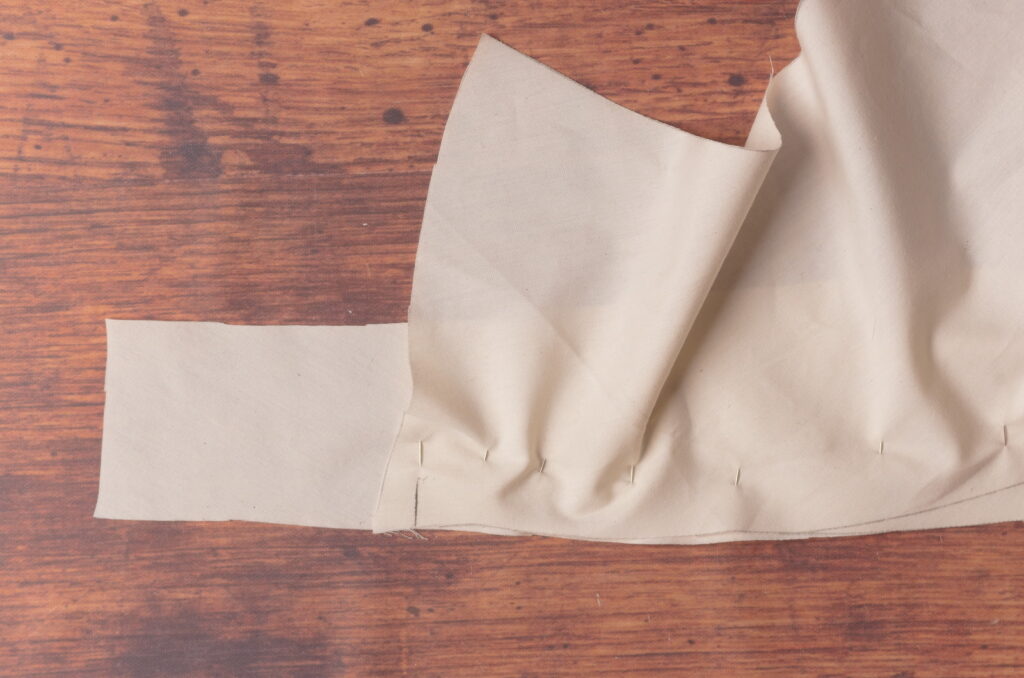
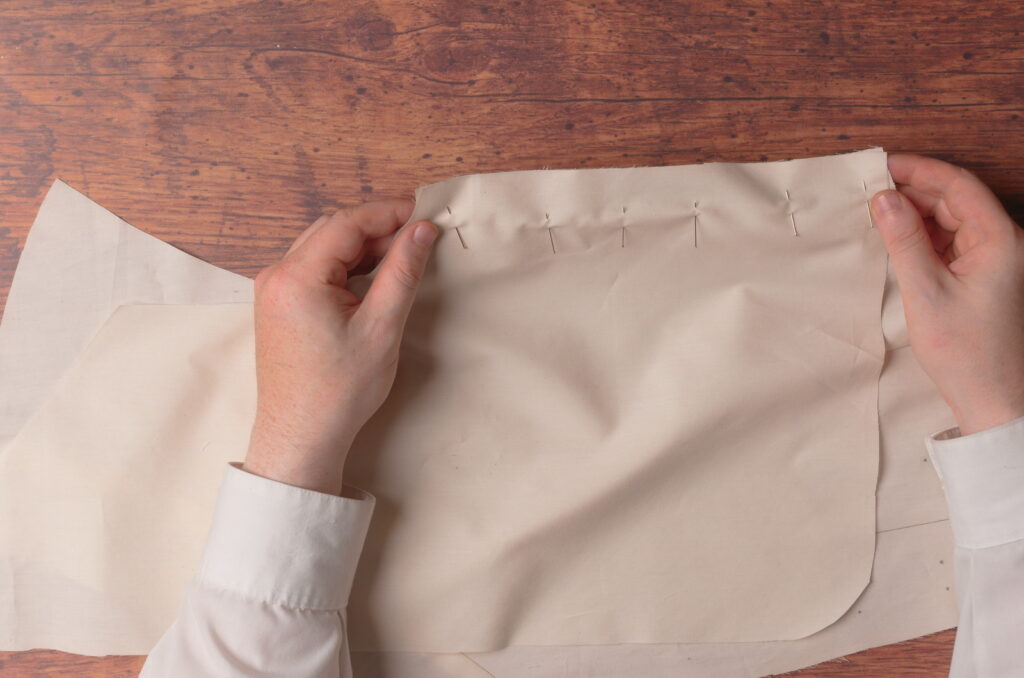
Lay one pocket bag, right sides together, on the forepart, just above the pocket opening, aligning it evenly with the pocket welt below it.
And baste the pocket bag to the forepart in the same manner as the welt. Much easier this time since there aren’t any stripes to match!
Here’s the pocket so far.

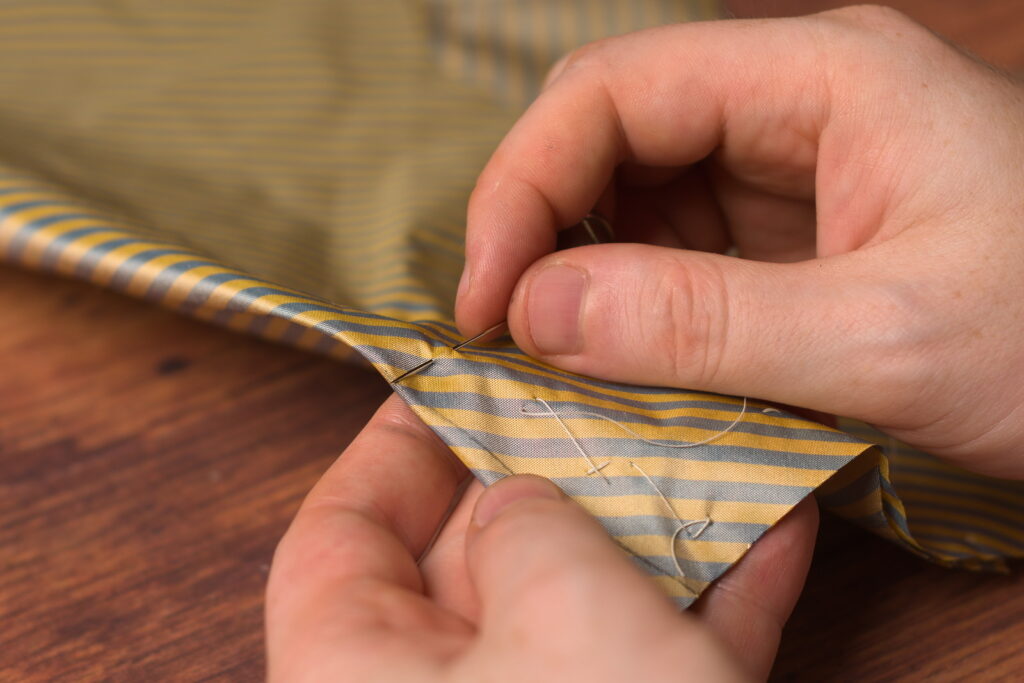
Now mark the ends of the pocket opening as precisely as possible on the pocket bag and welt at both ends.
And on the lower end of the pocket bag, mark another line 1/4″ away from the original. Since the pocket is on an angle, we need to end the stitching a little early to make room for the turning in of the pocket ends. This extra quarter inch gives the relief needed.
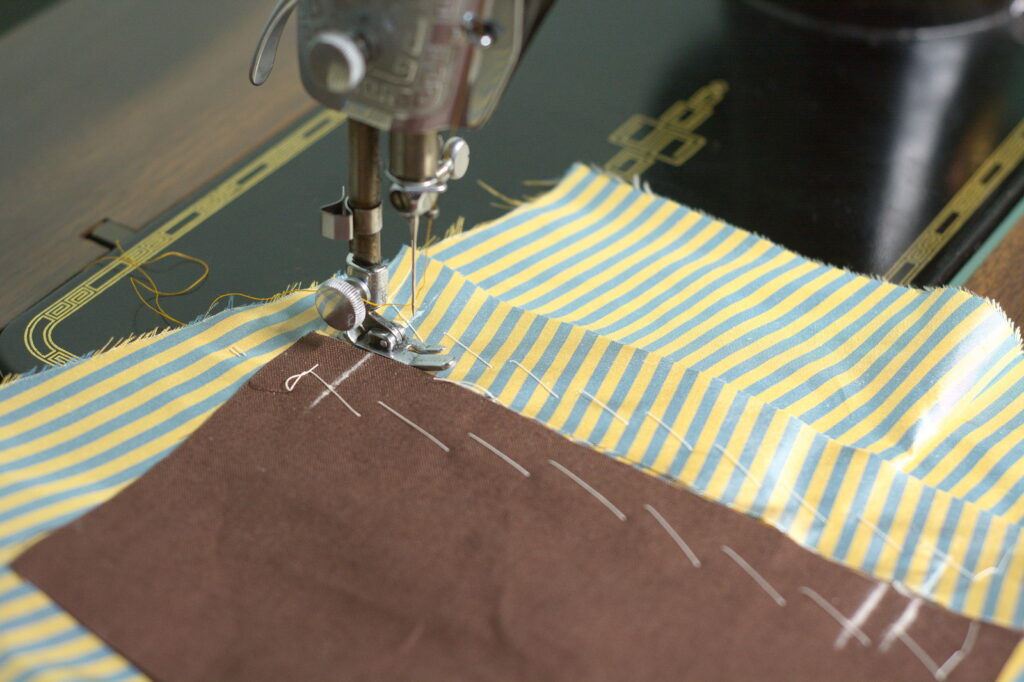
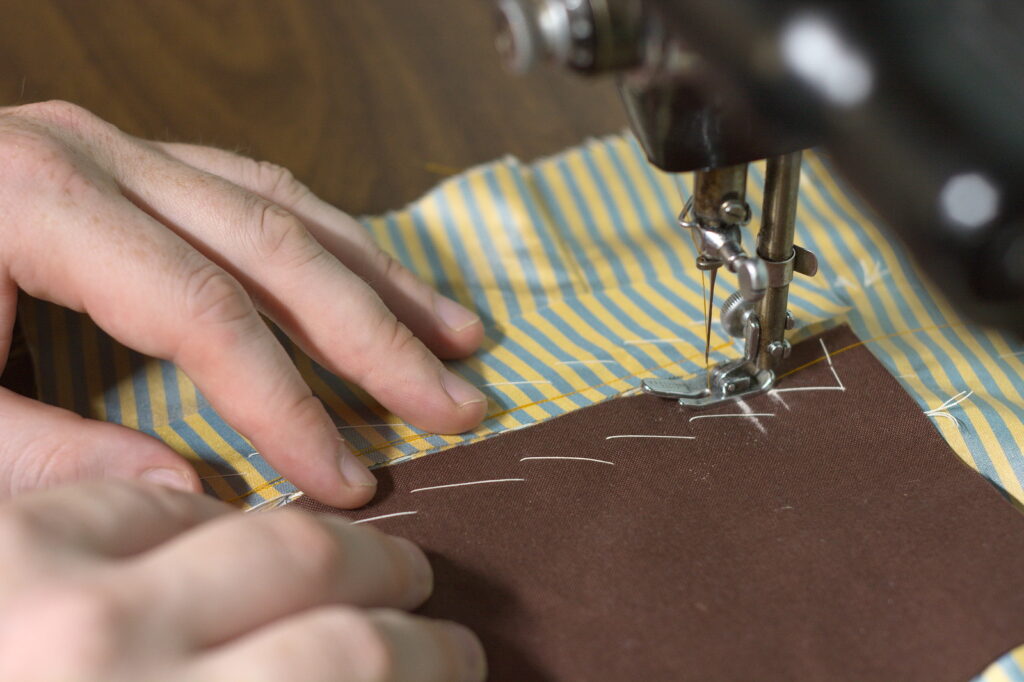
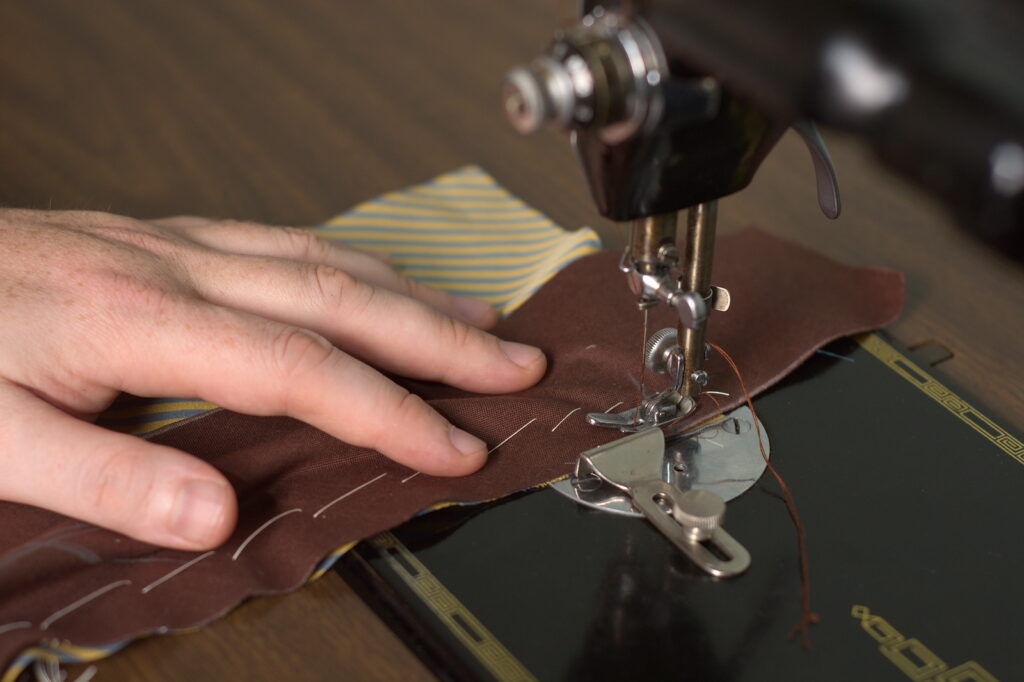
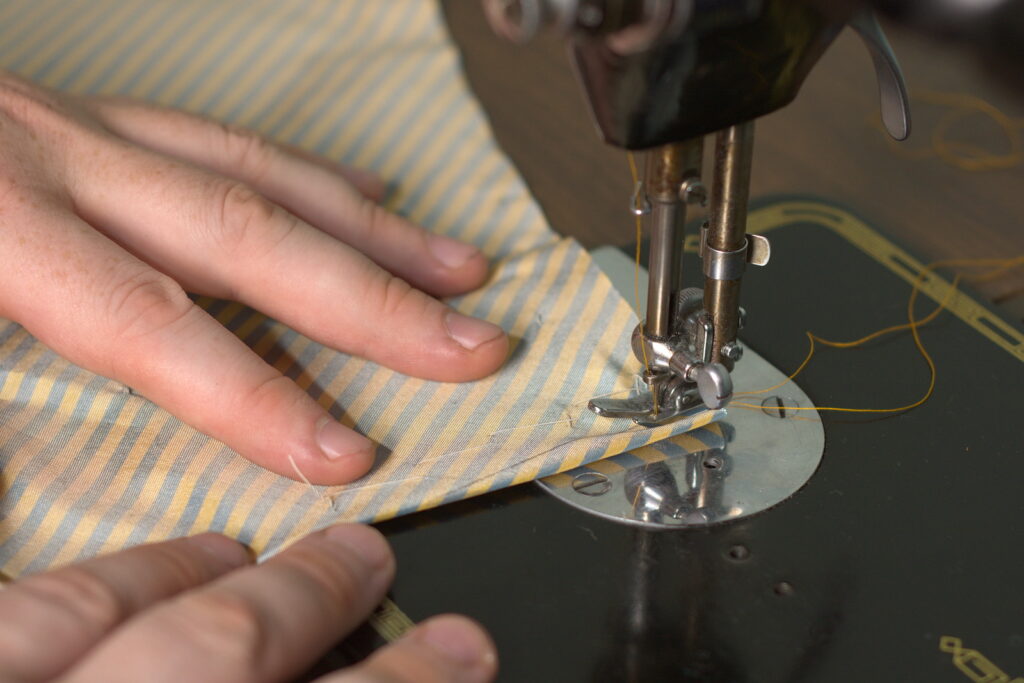
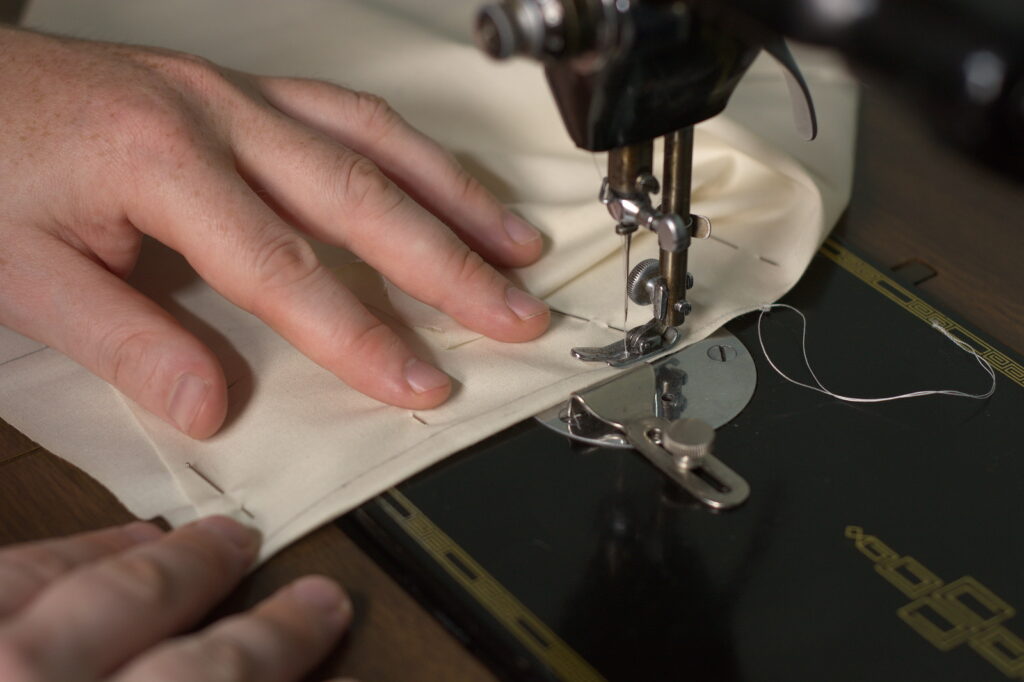
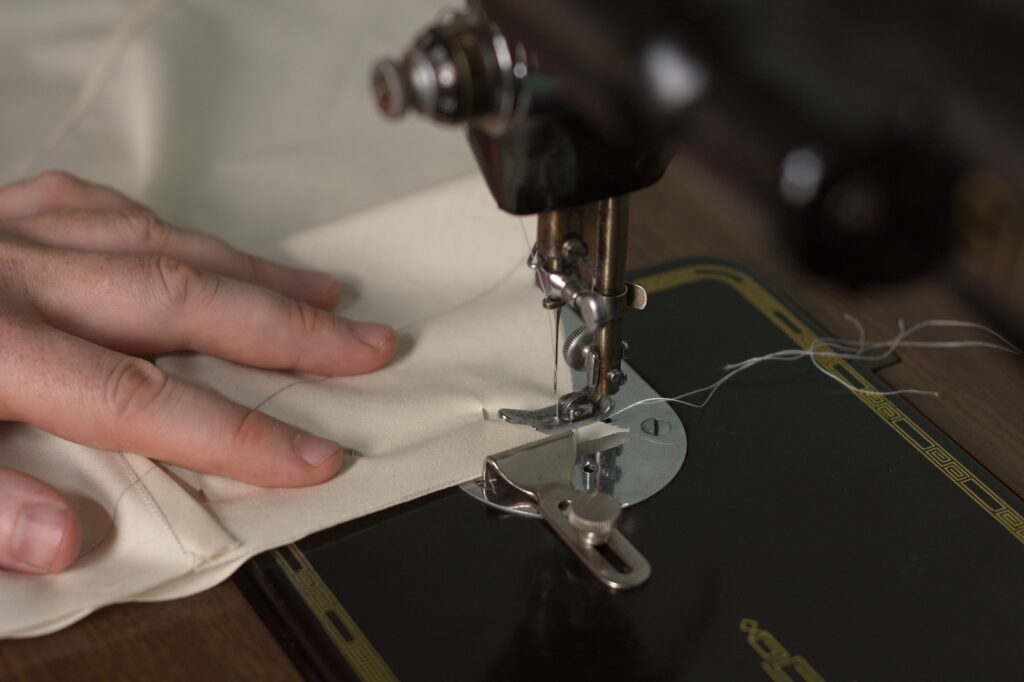
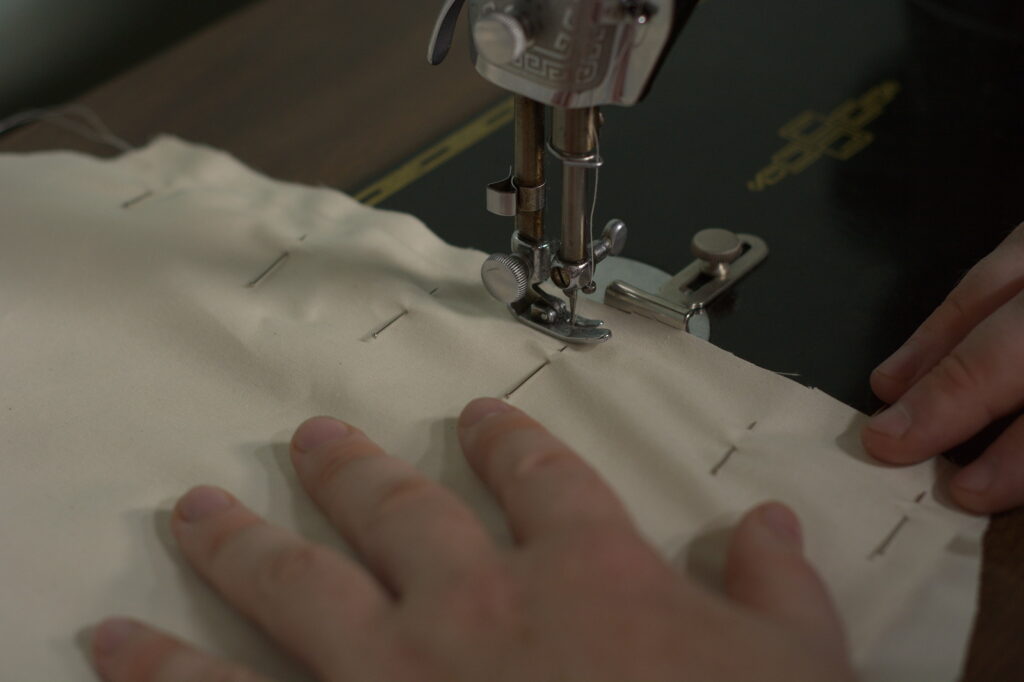
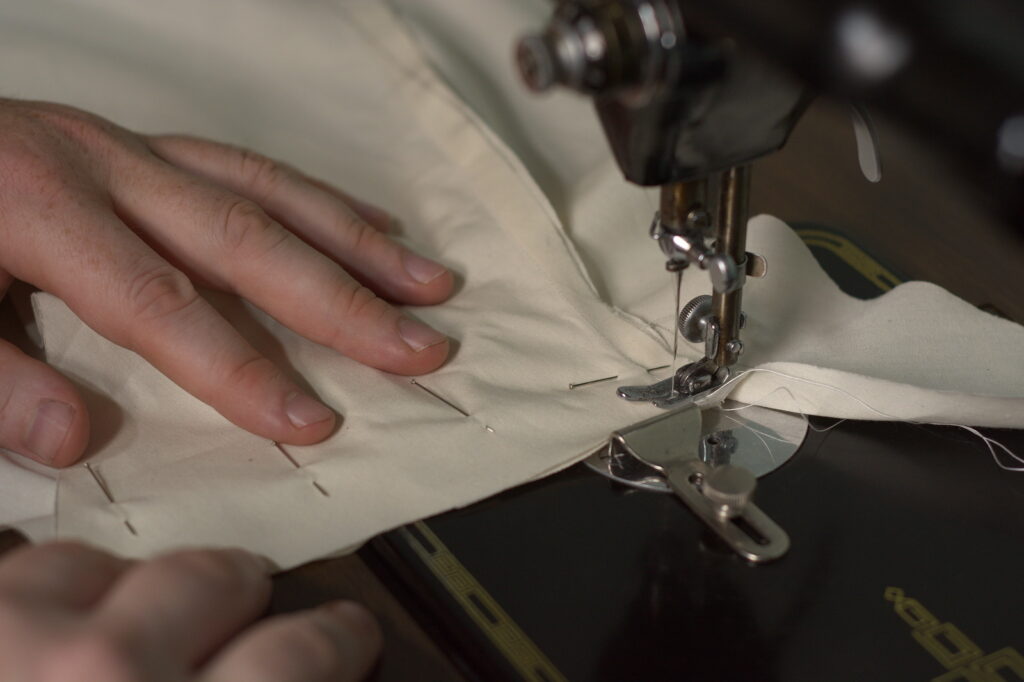
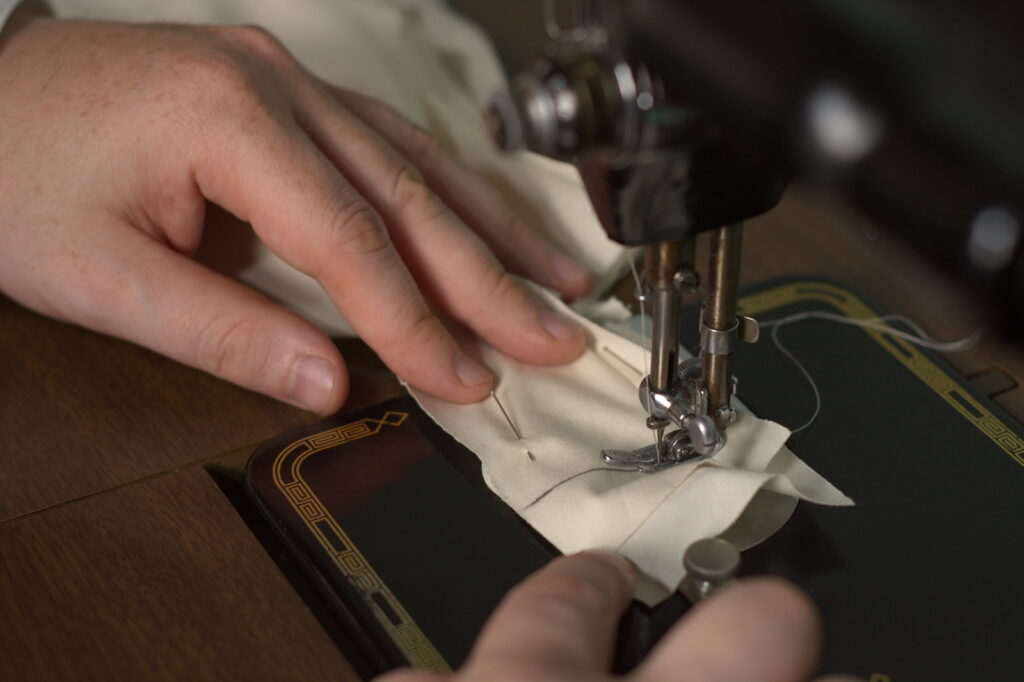
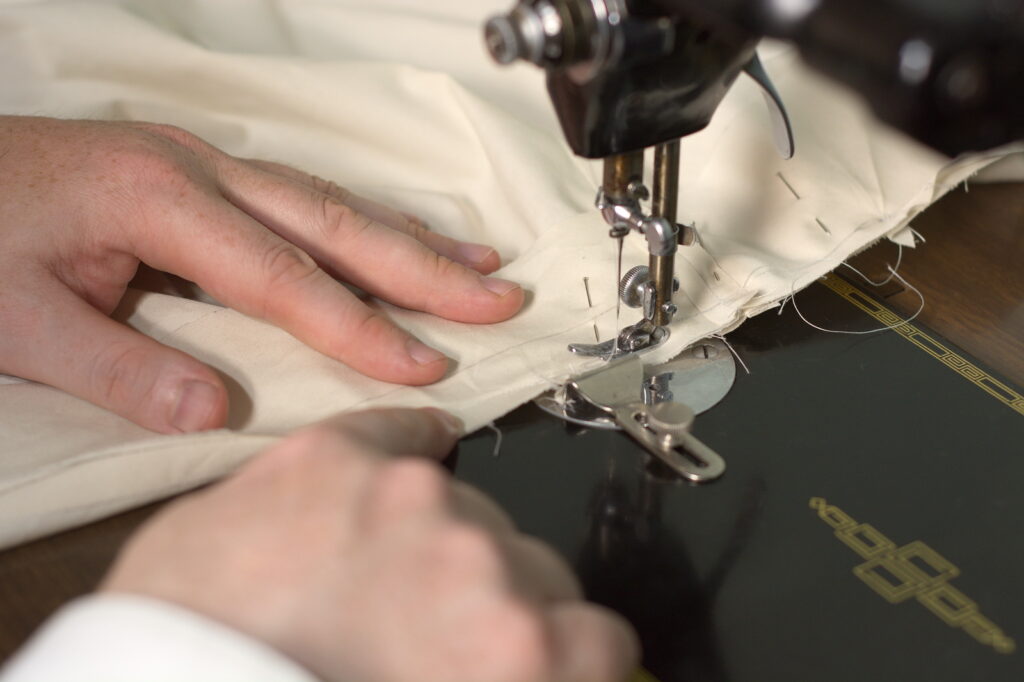
Now carefully sew the pocket welt to the forepart using a 1/4″ seam, from chalk mark to chalk mark. My presser foot happens to be 1/4″ in width so I use that as a guide. Take care, as the slight bias cut has a tendency to stretch the welt out of alignment.

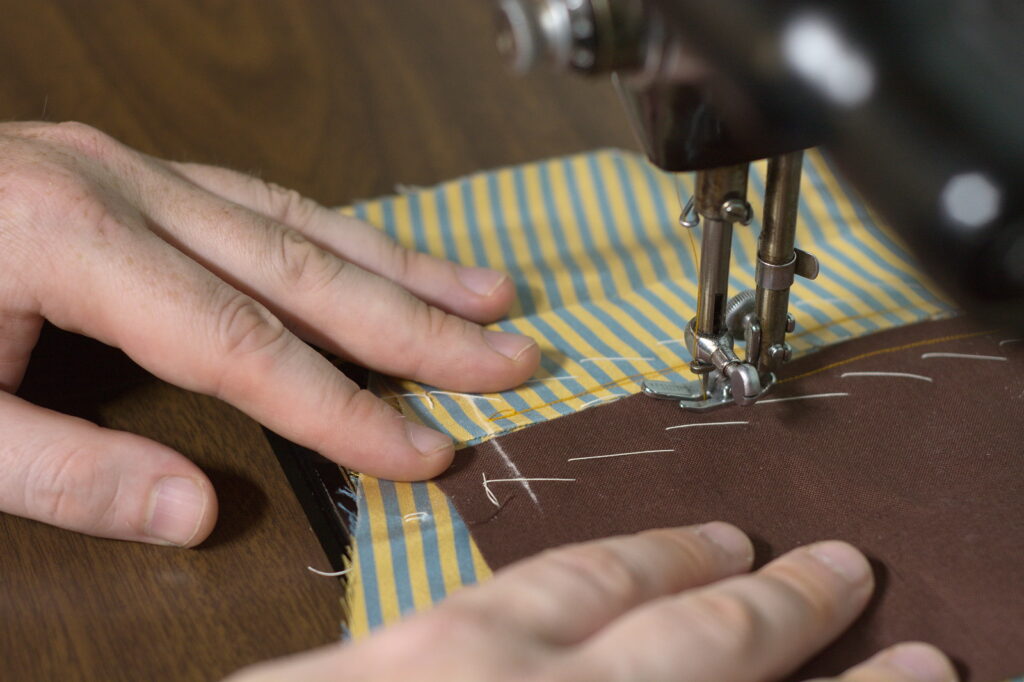
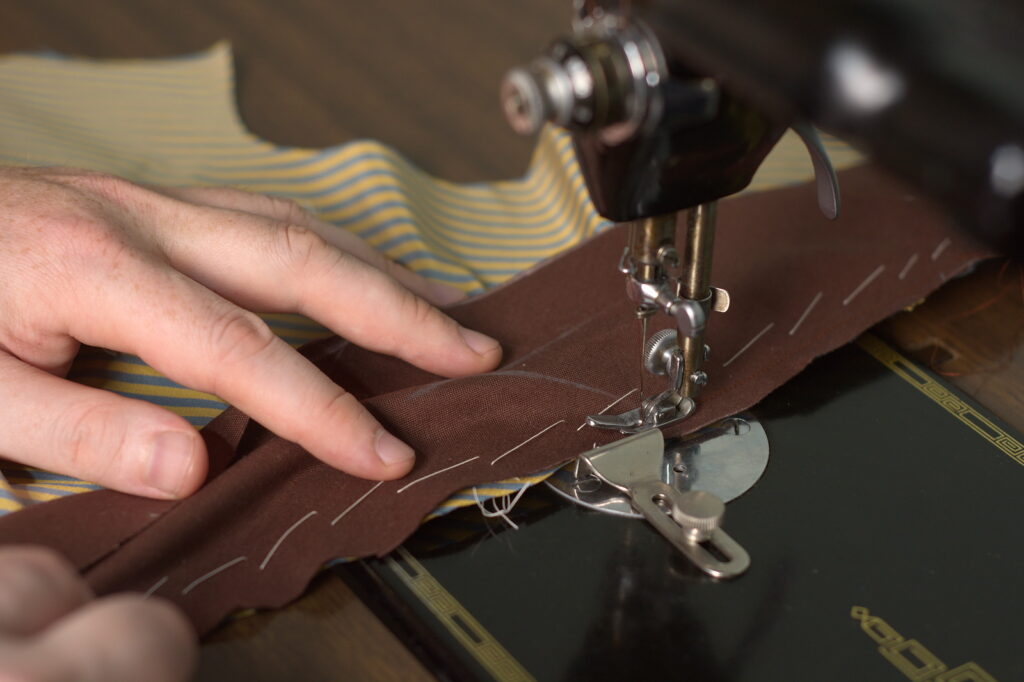
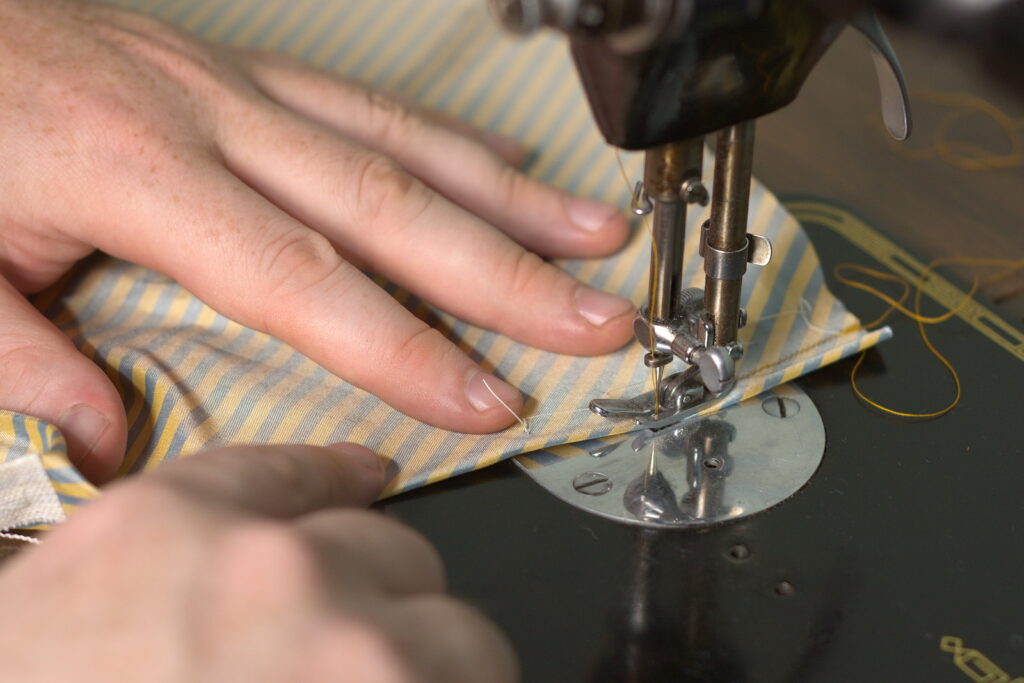
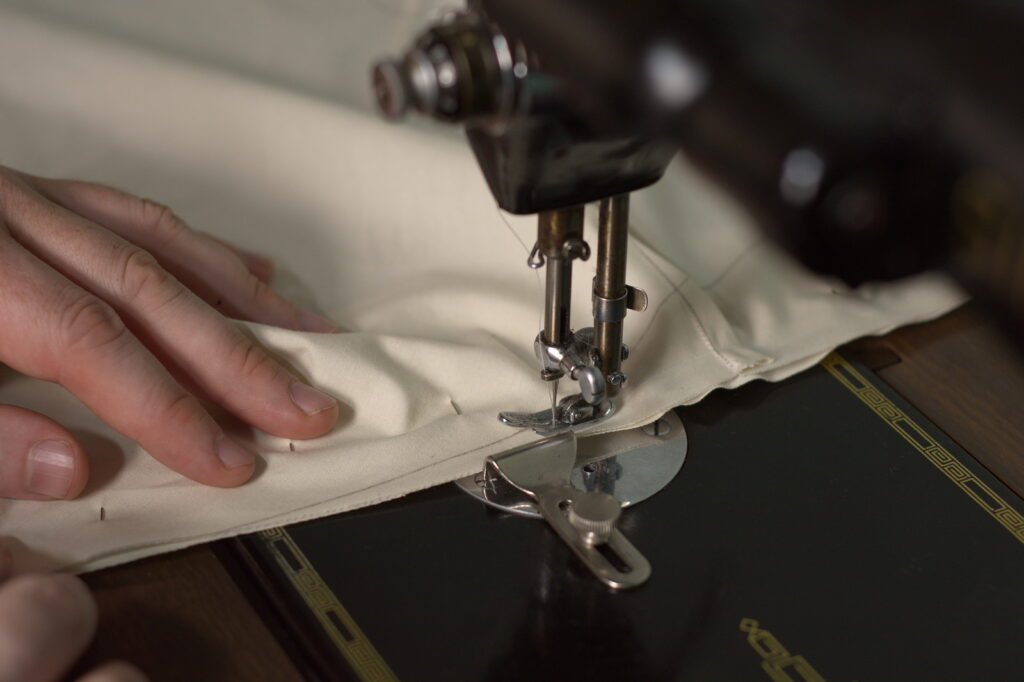
Repeat for the pocket bag, remembering that the stitching is offset at the lower end by that 1/4″.
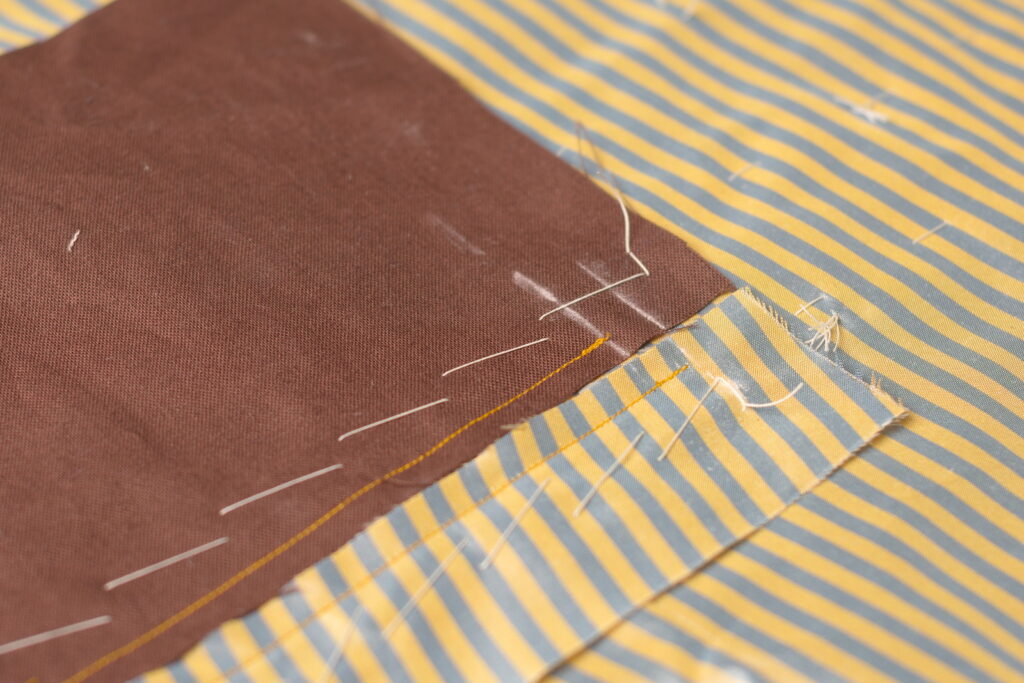
Here’s the lower end of the pocket after sewing with the offset stitching on the pocket bag.
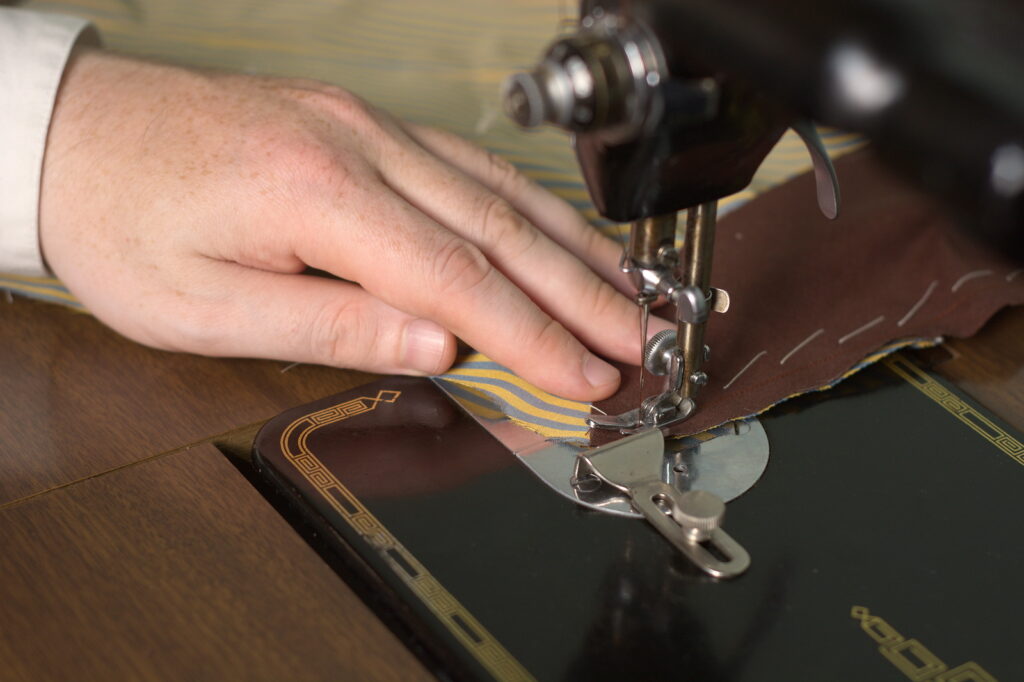
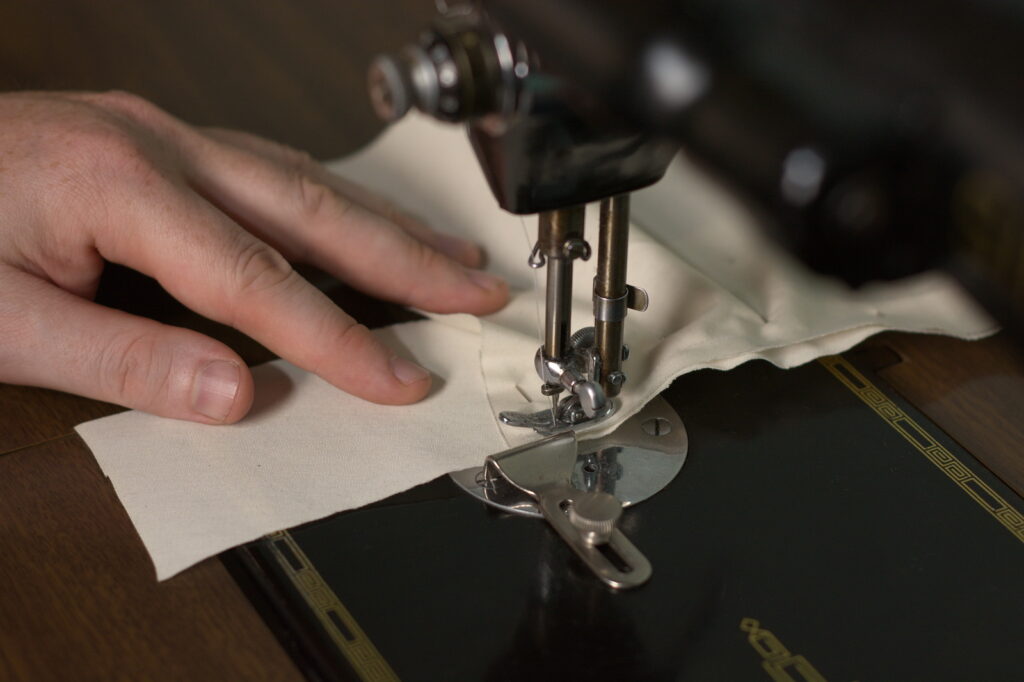
And on the other end of the pockets, the stitching should align as closely as possible.
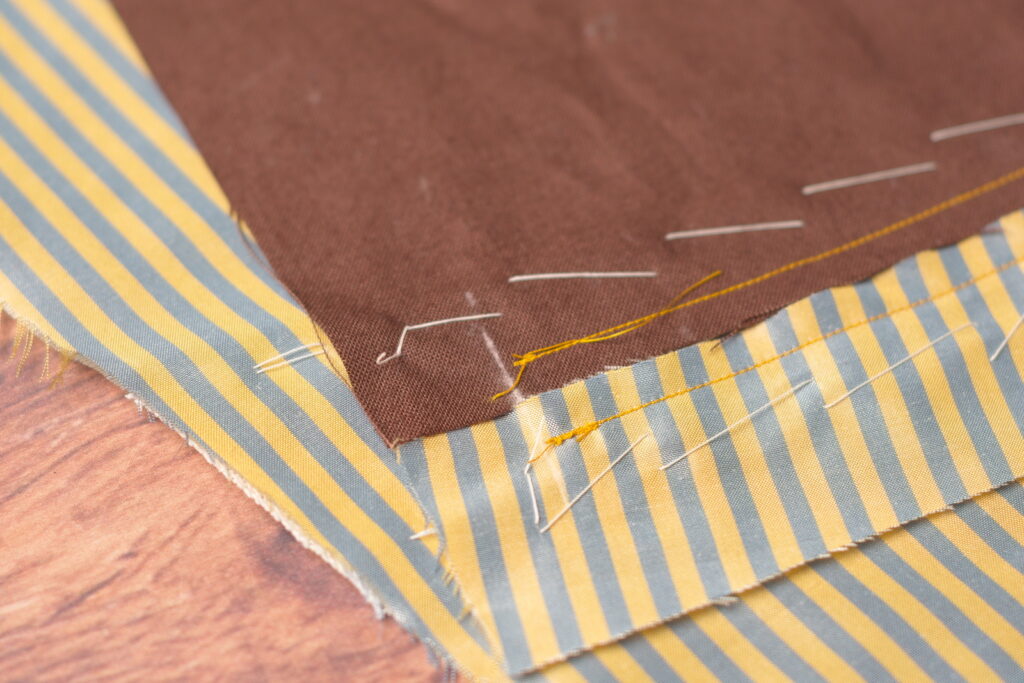
Here’s the stitching from the wrong side. On the left, lower side of the pocket you see the offset stitching, while on the right, upper end, the stitching should align as closely as possible. This one happened to be a little bit off but I wanted to show my errors so you can learn from them. In this case, I wasn’t too worried as the very slight offset won’t affect much.
Not sure what happened with all that thread at the lower left corner. Hmm.

And here’s the final view from the right side, of the opposite pocket.
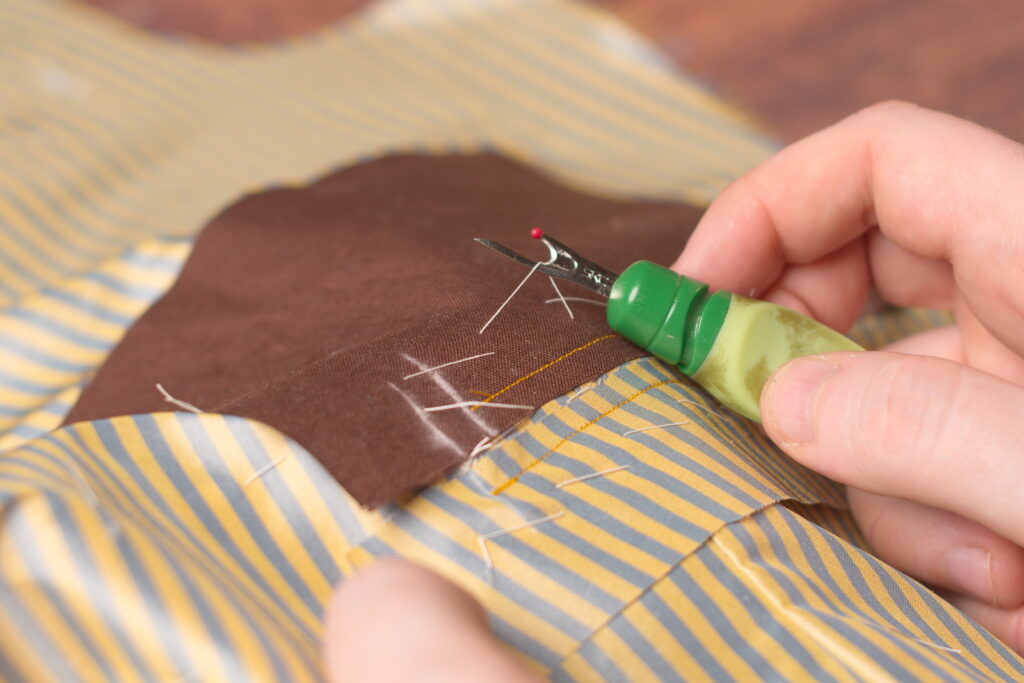
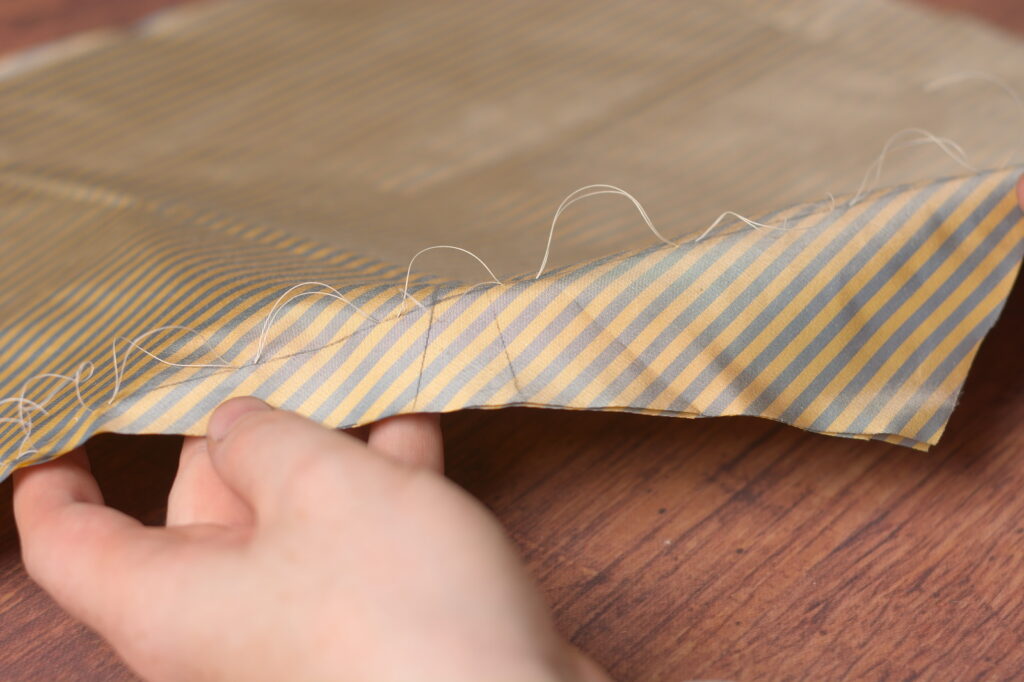
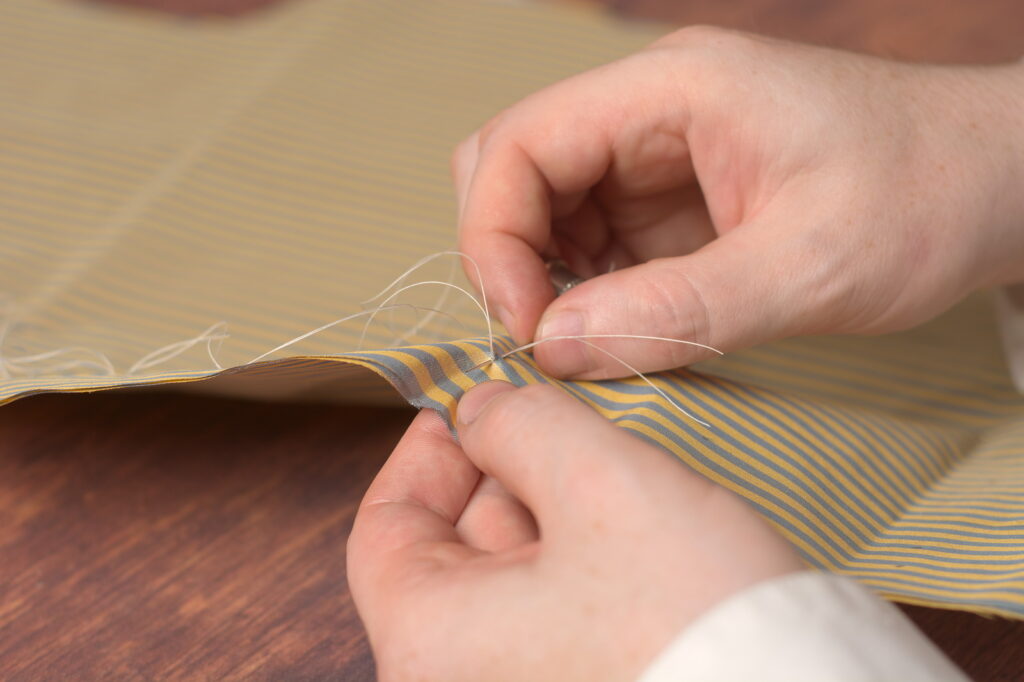
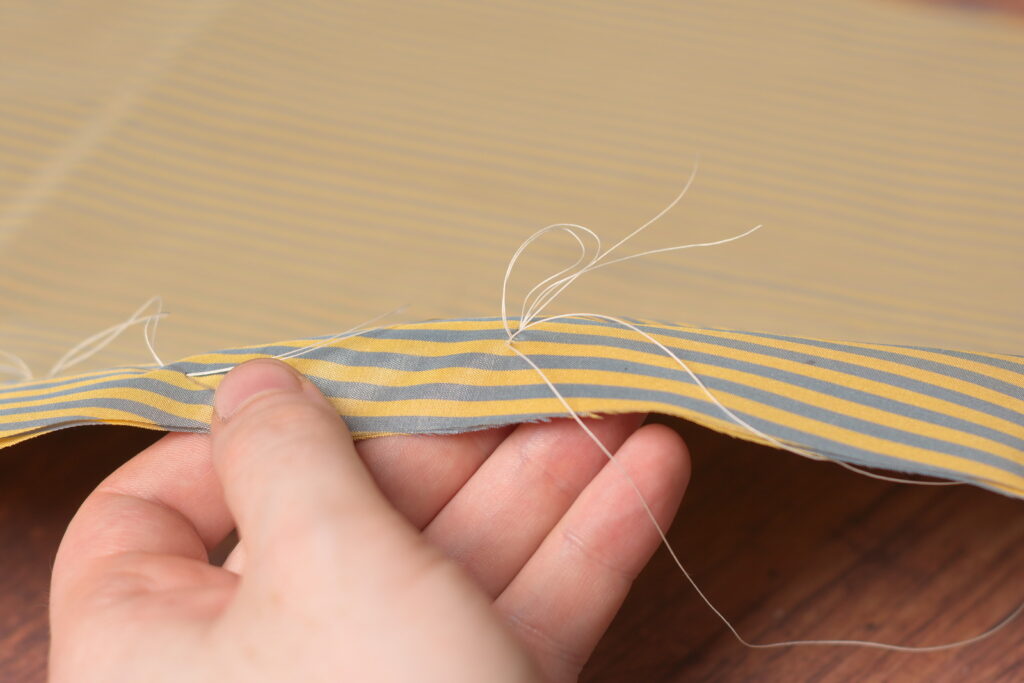
Finally, remove the basting stitches from the pocket welt and bag. It’s best to do this before cutting open the pocket when there’s more strength in the area.
Reinforcing the Pockets
Before installing the pockets, it’s a good idea to reinforce the area around them with linen stays, particular in more delicate fabrics like silk. In addition, since the pockets are on a slight bias, these stays prevent any unwanted stretching.
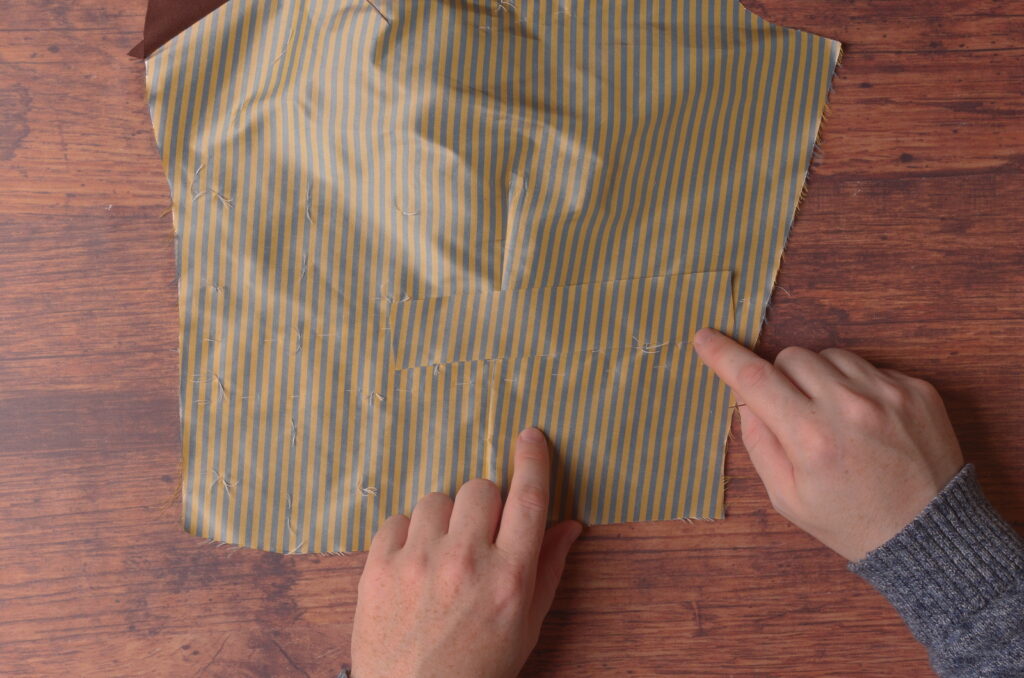
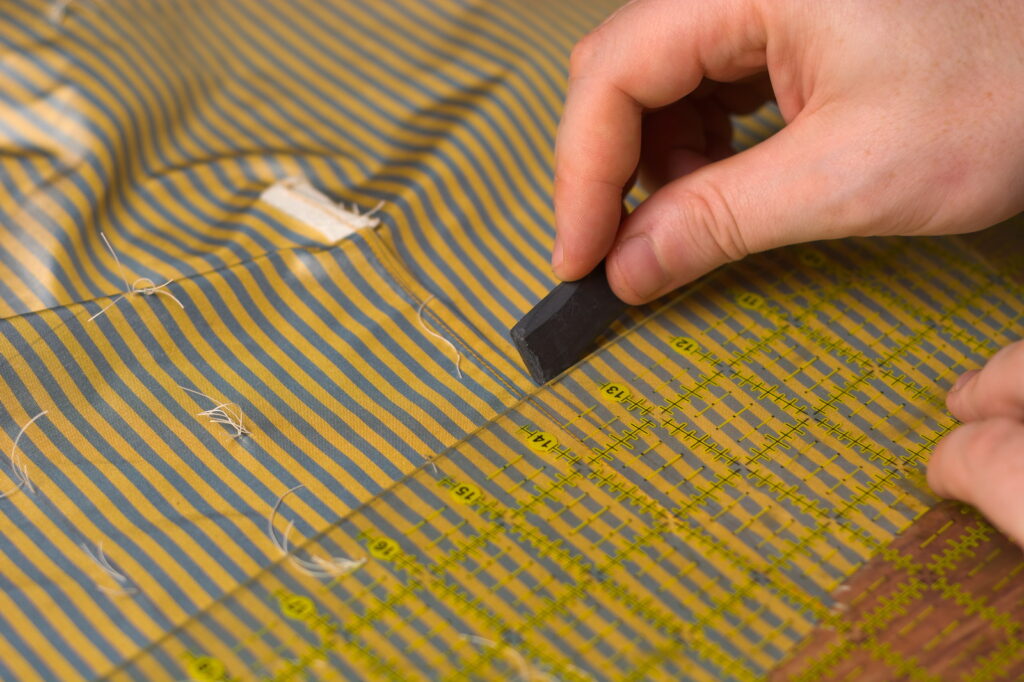
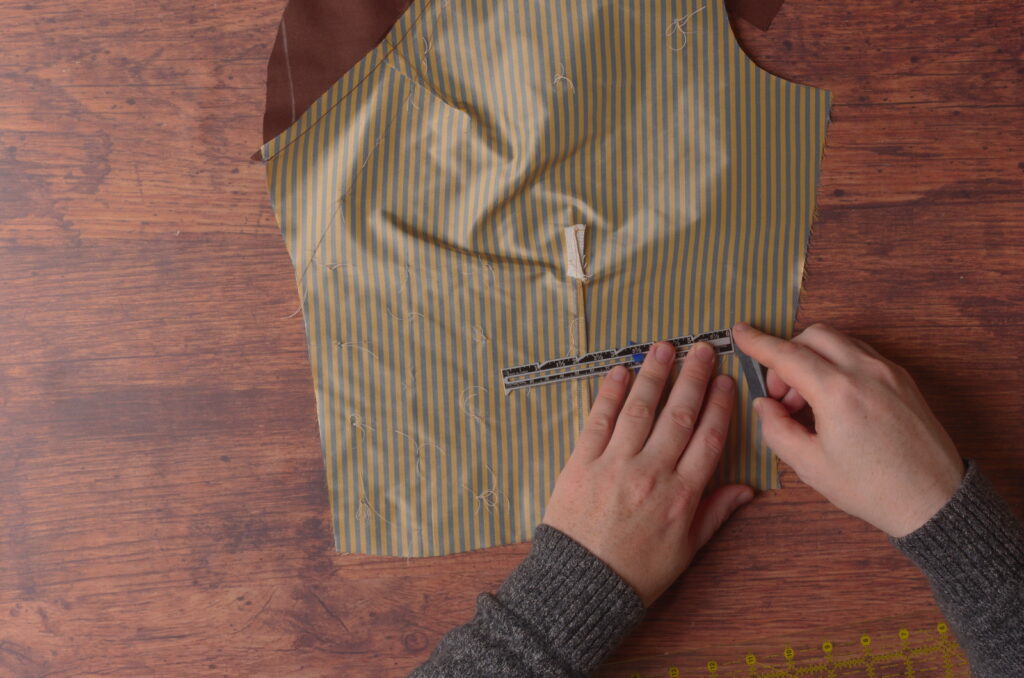
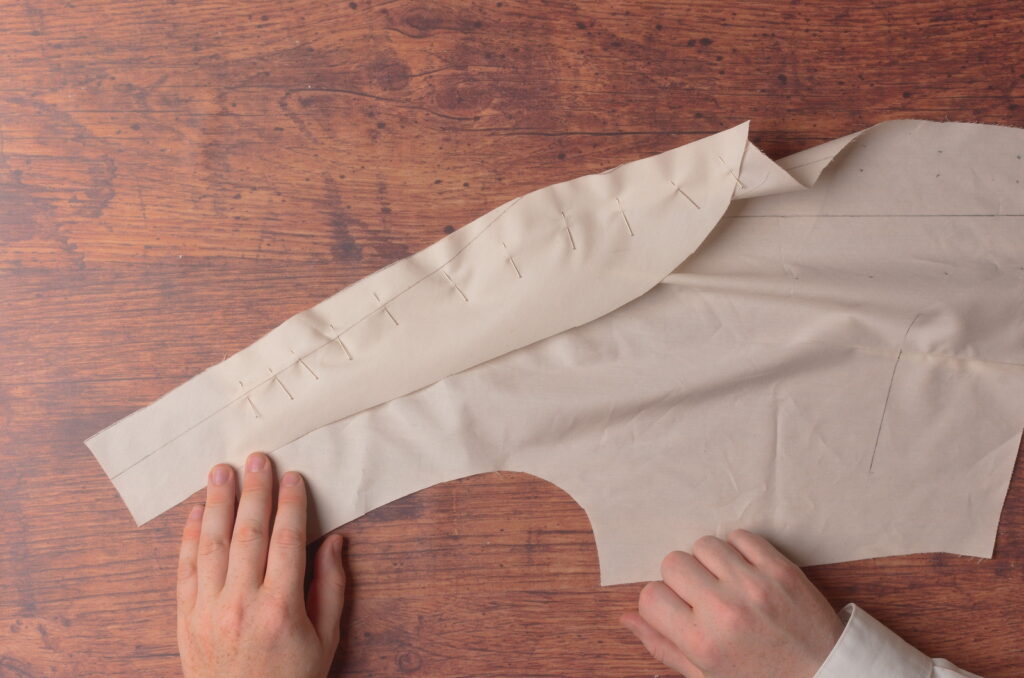
First, begin by finalizing the position of the pockets on the wrong side of each forepart. If you’ve installed a waist dart, it will have thrown the position and size of the pocket off. Hopefully you marked the ends of the pockets with tailor tacks earlier. Simply connect the two points with a chalk line, extending the line if necessary due to the loss of width from the dart.

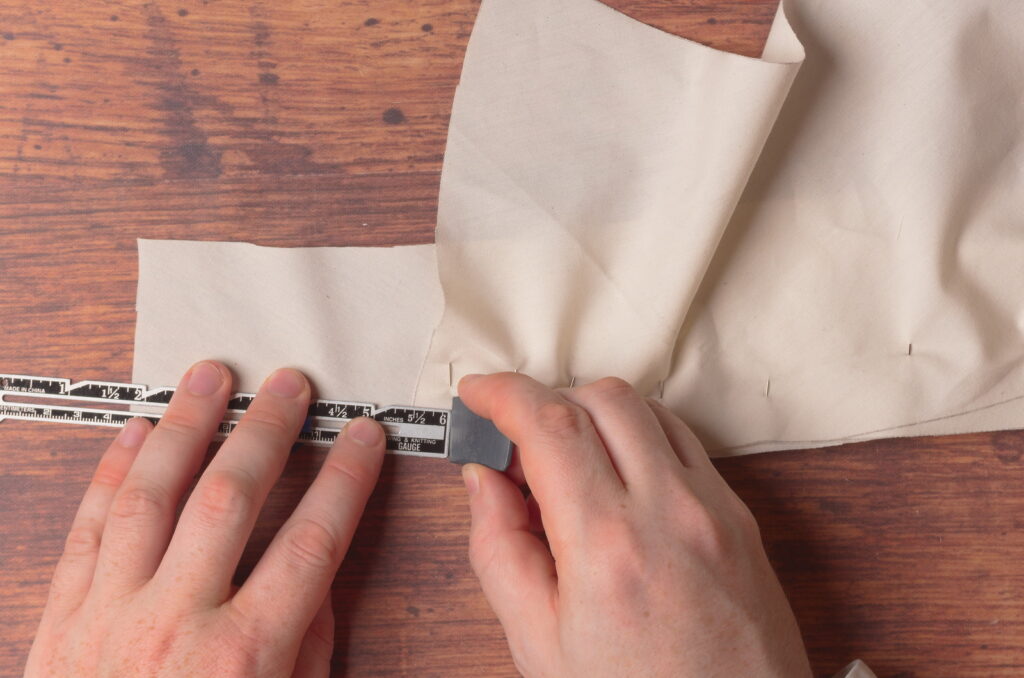
Then measure out the exact width you’d like the pocket. Anywhere from 5″ – 6″ works well, depending on your size. I made mine 5 3/8″. Repeat this immediately for the other pocket to be sure you mirror it correctly.
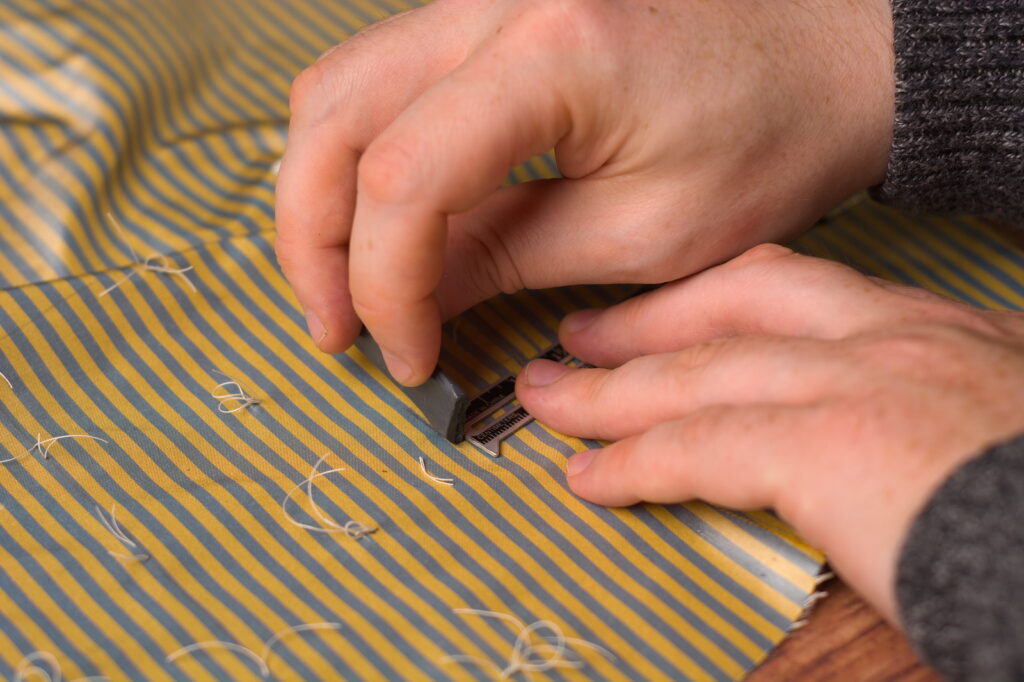
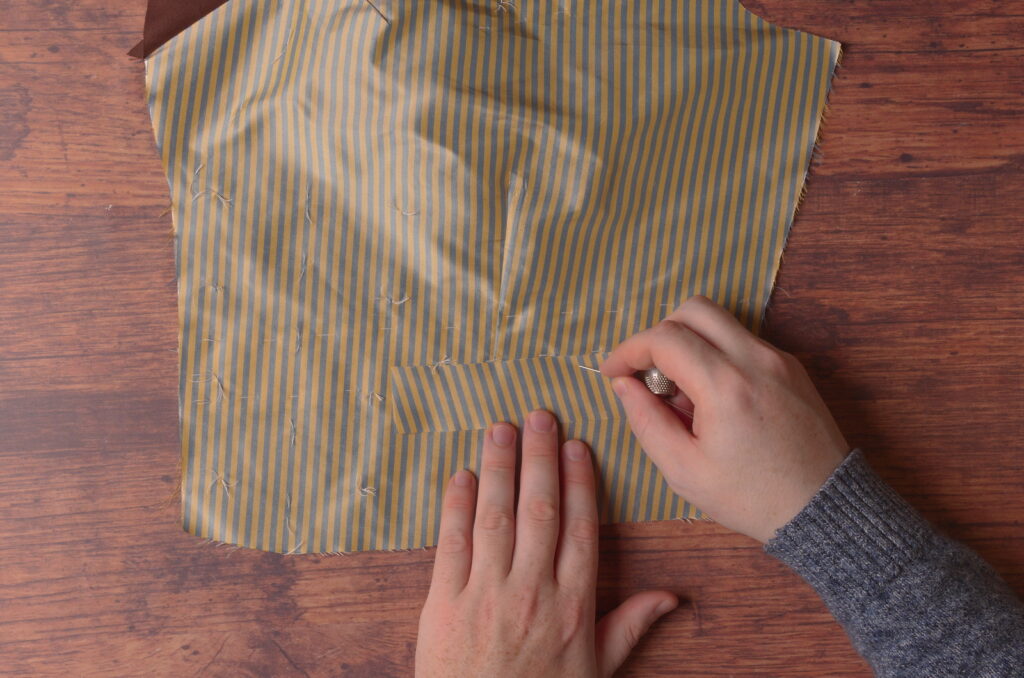
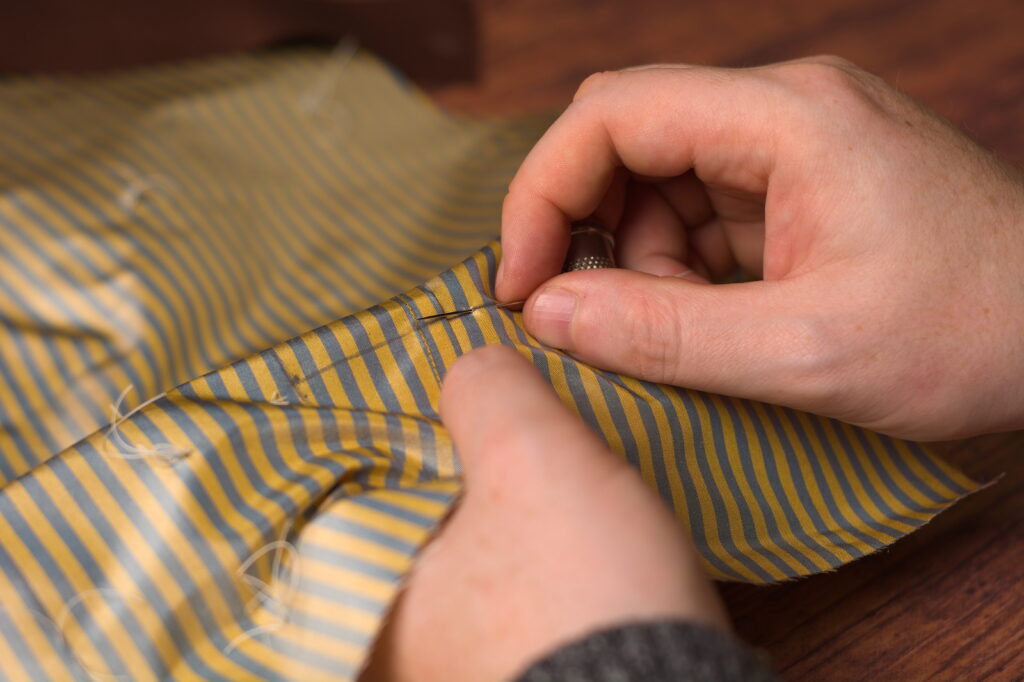
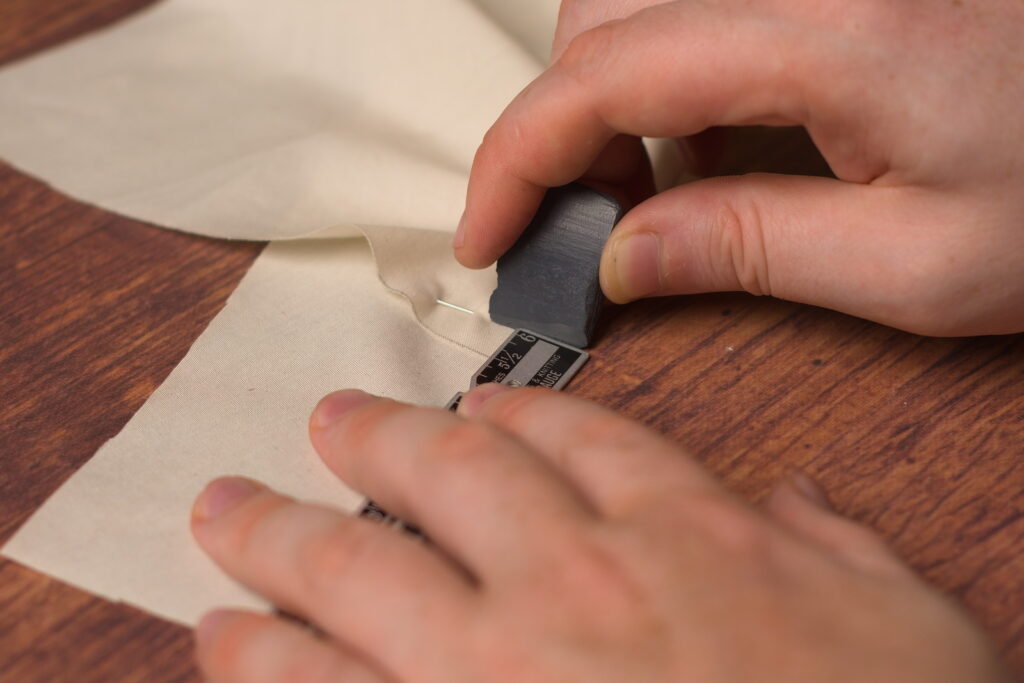
With a double over basting thread, run a row of running stitches along each of the refined pocket lines. There’s no need to cut these open as they’re only going through a single layer, not both halves of the waistcoat at once as before.
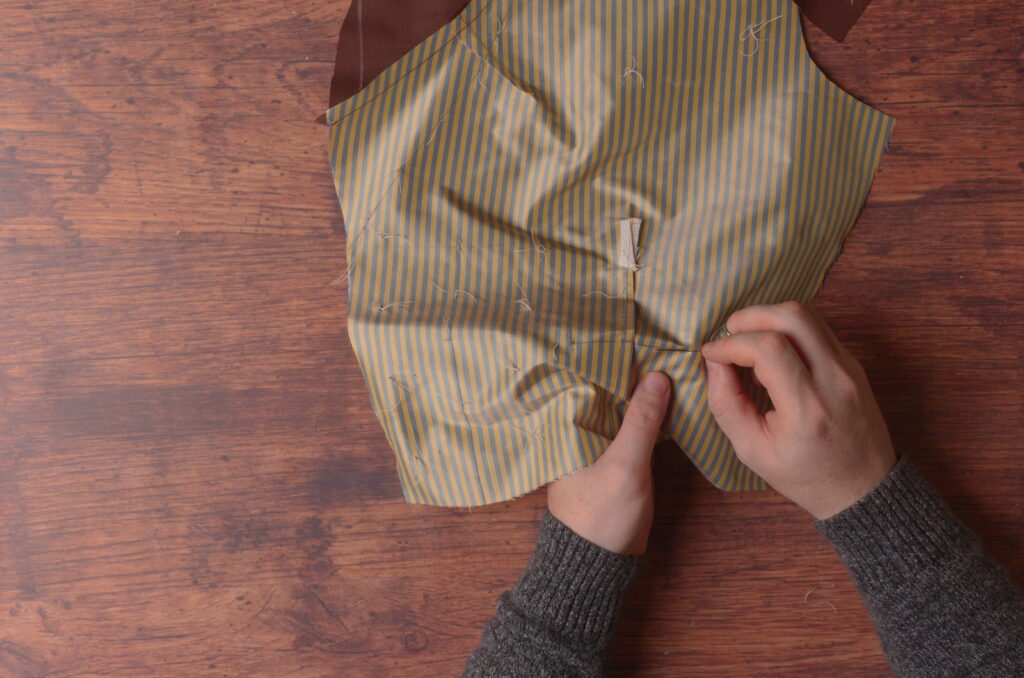
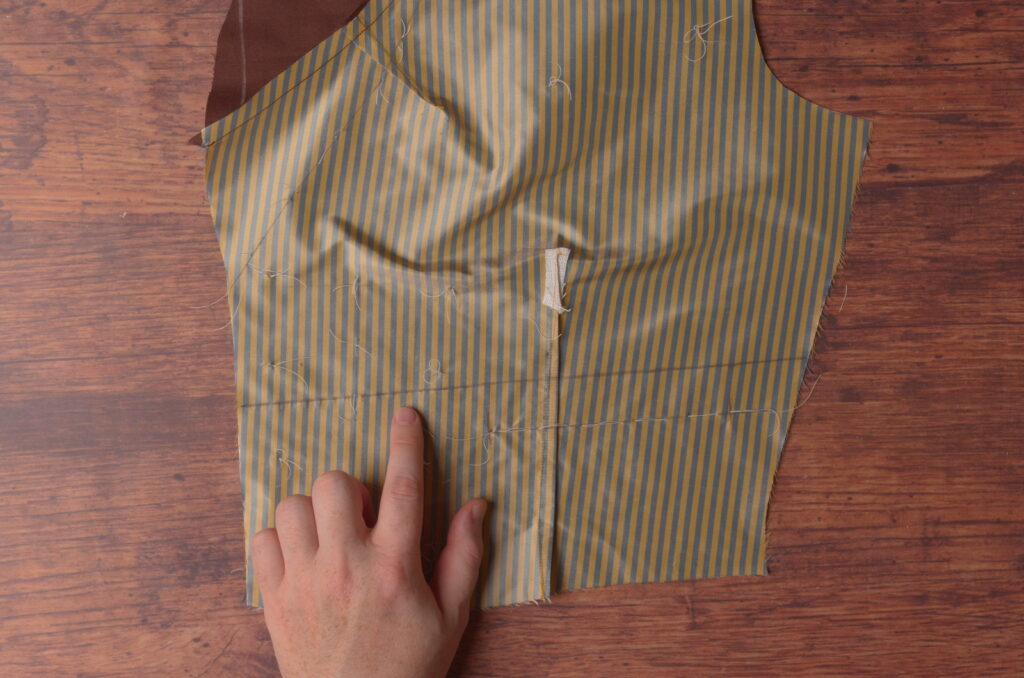
Here’s my pocket after redrawing and marking the lines.
Now draw a line across the entire forepart, parallel to and 1″ above the pockets.

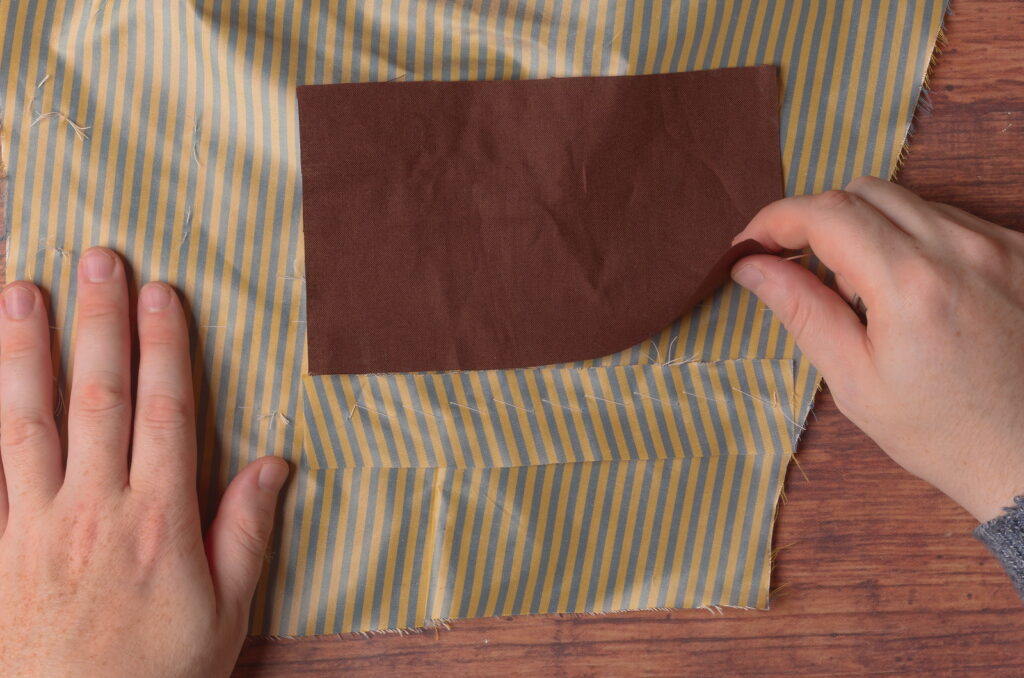
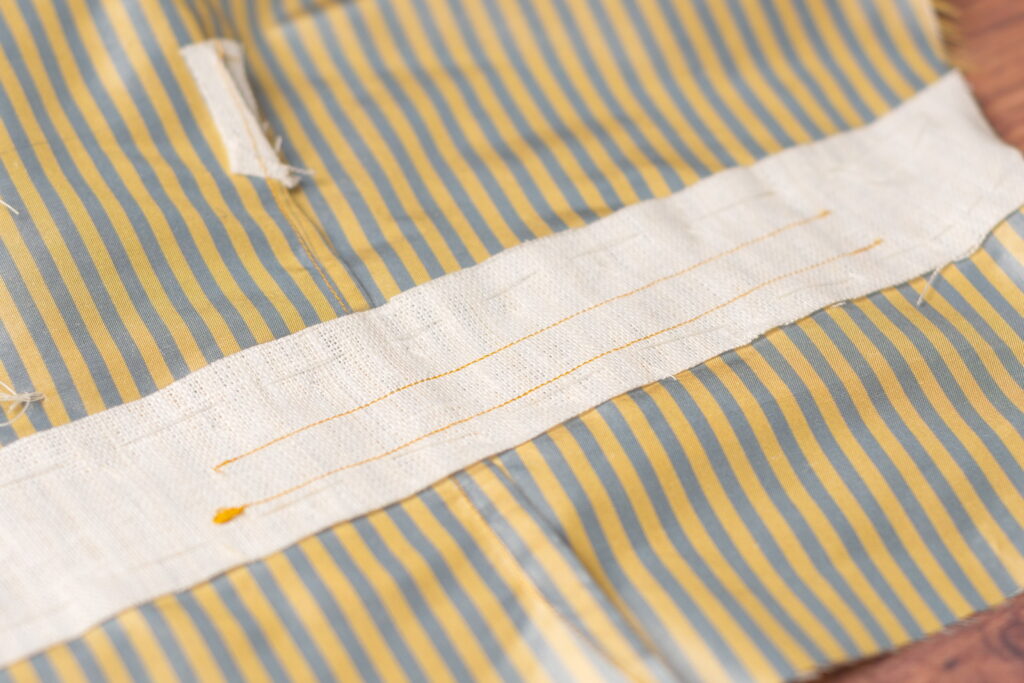
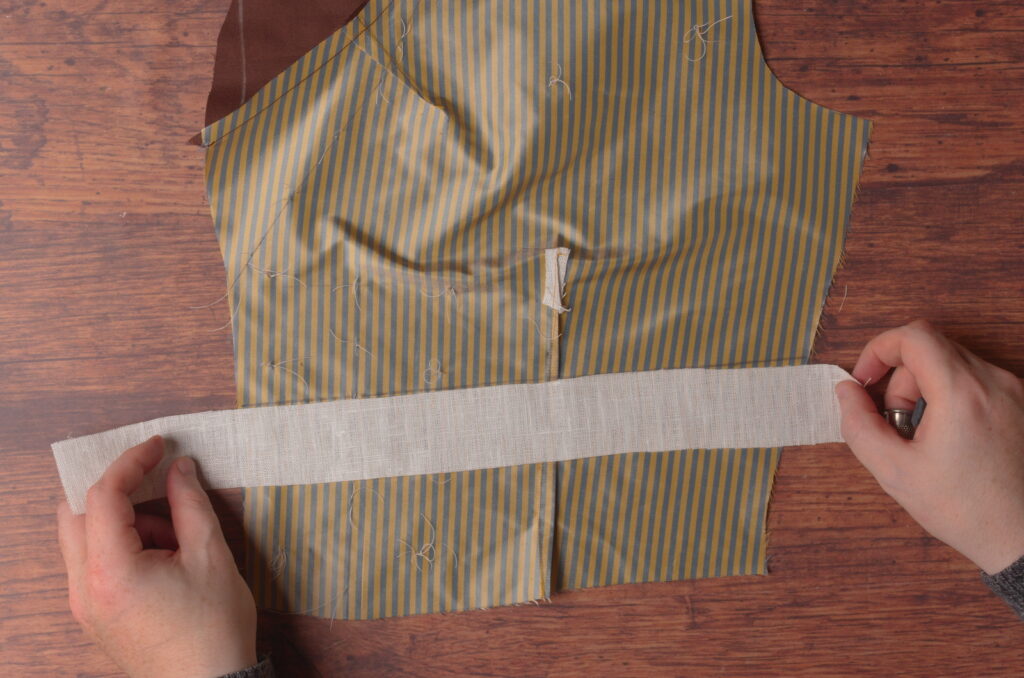
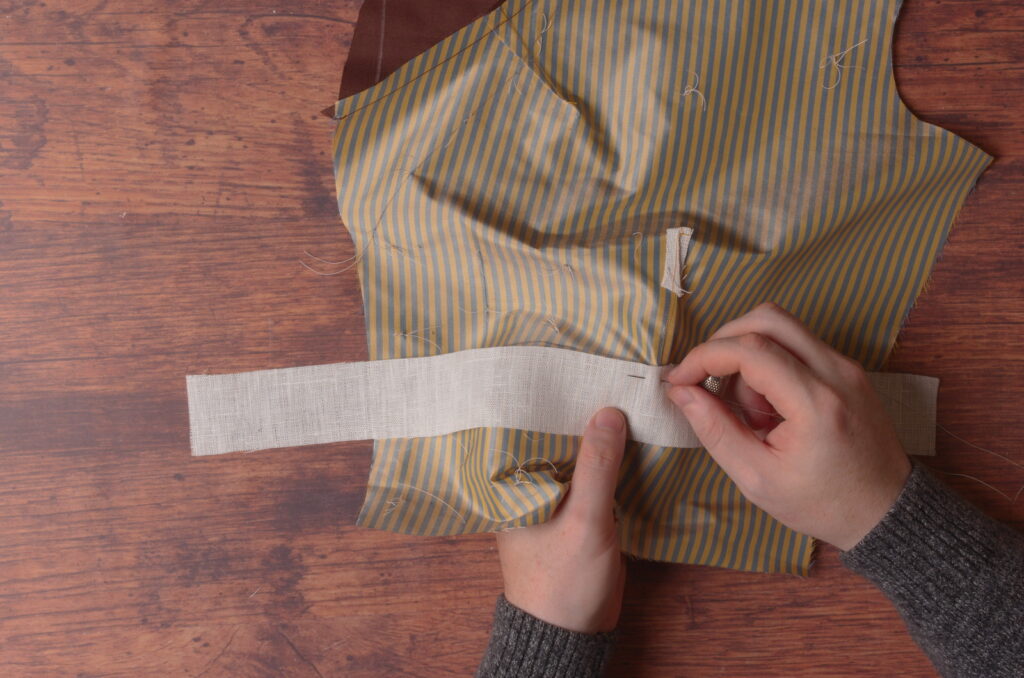
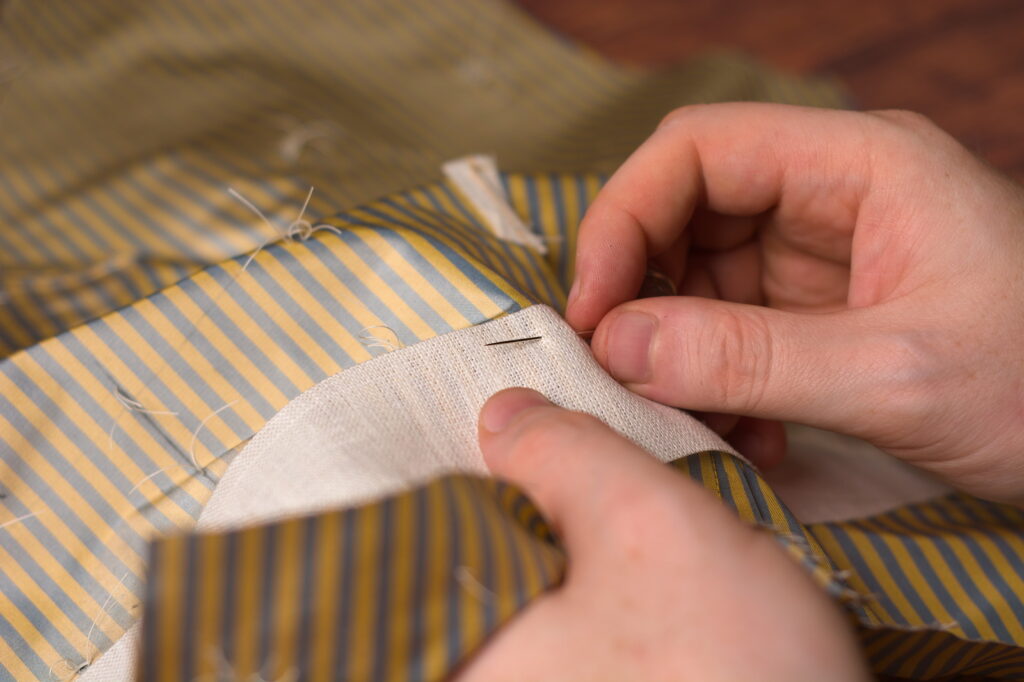
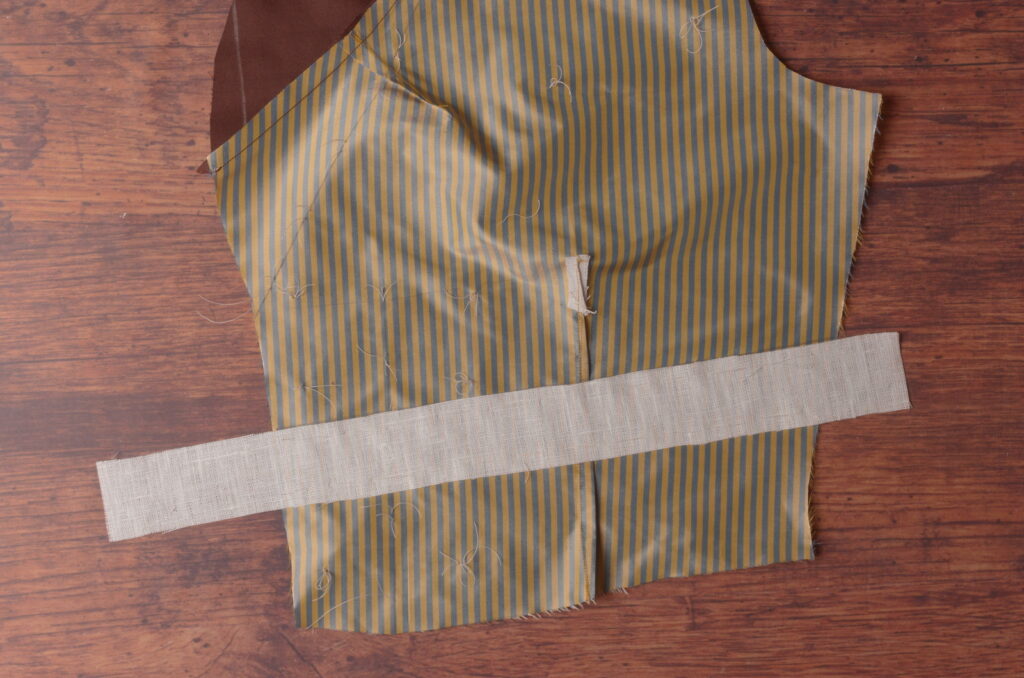
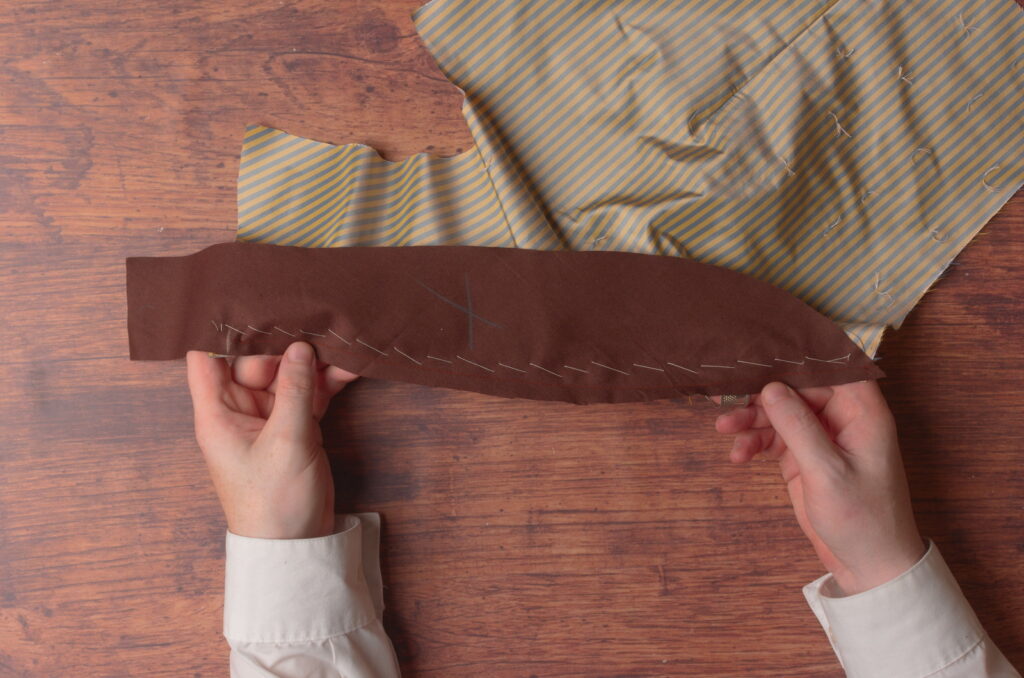
Now cut a strip of linen 1 3/4″ wide and a little longer than the width of the forepart. Place it on the wrong side of the forepart over the pocket, aligned with the line you just drew. Ideally there will be about 1″ of linen above the pocket, and 3/4″ below, to provide an area for the pocket to be attached to.
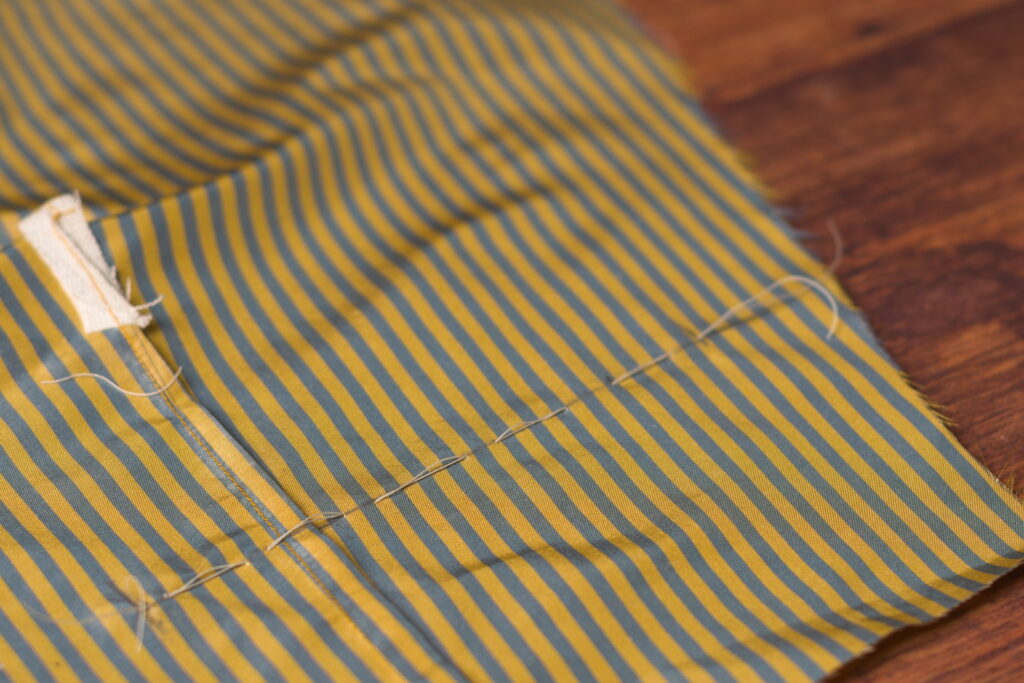
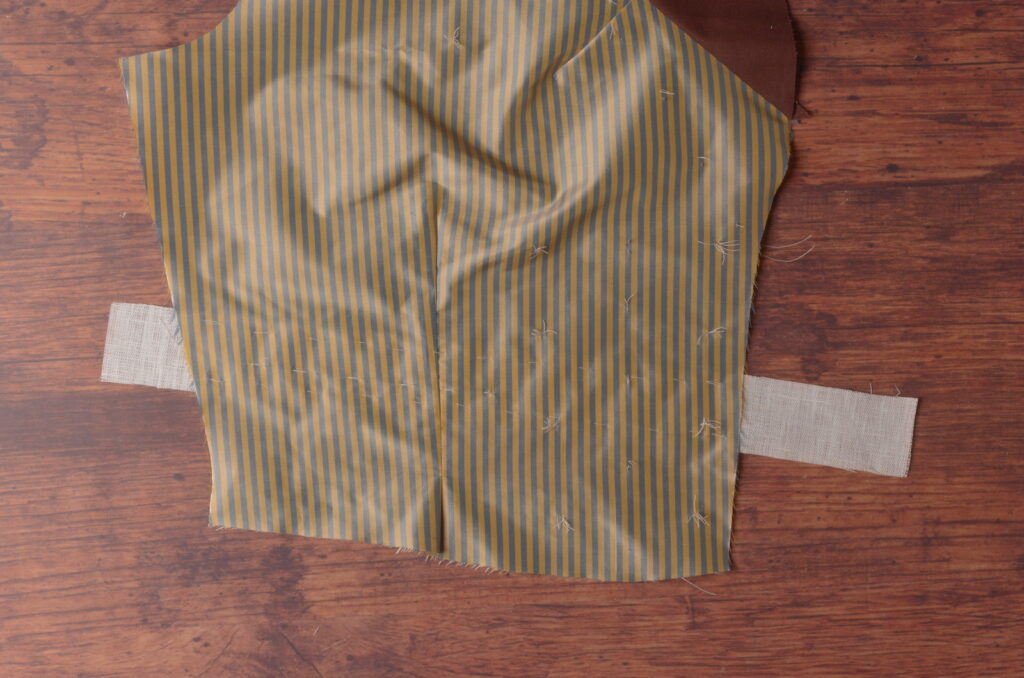
Baste across the top and bottom of the linen strip, about 1/4″ from the edge, using a straight basting stitch. Try to keep a neutral tension between the linen and the forepart.
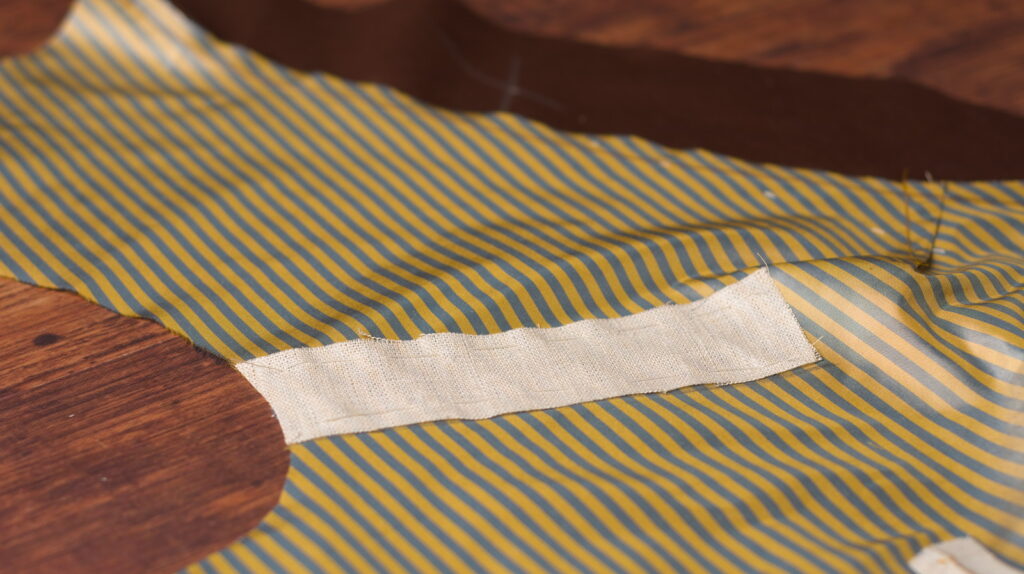
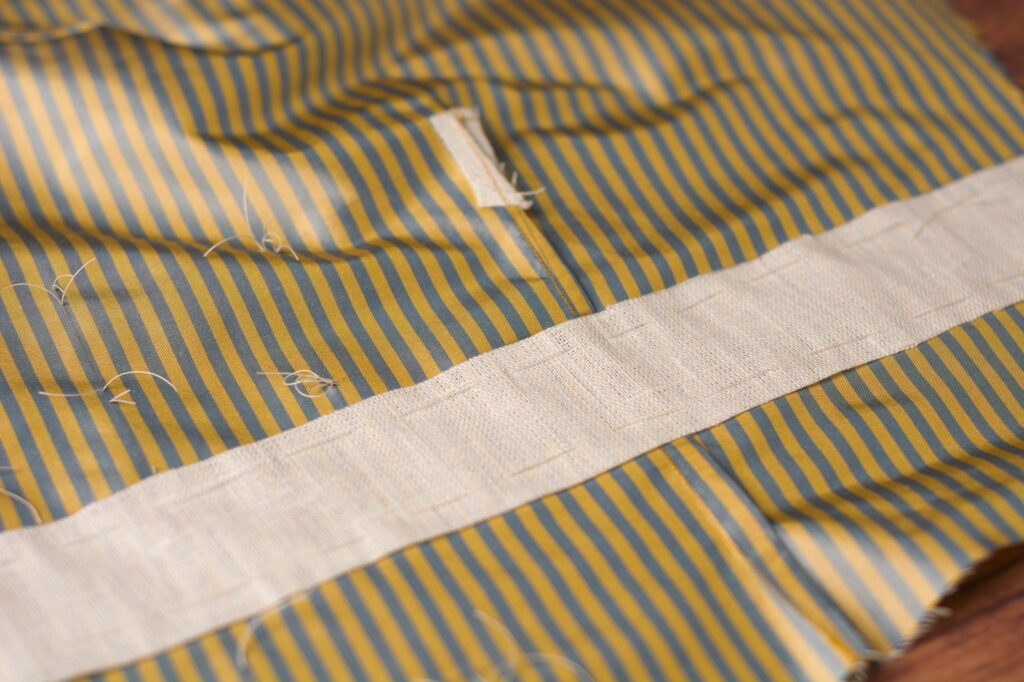
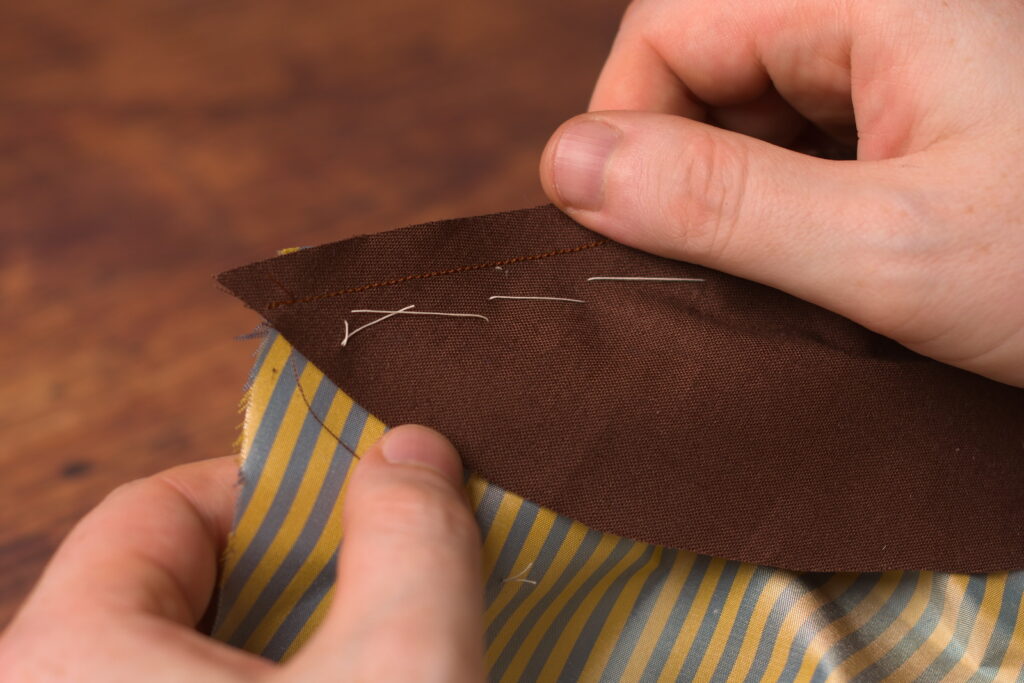
The linen stay after basting.
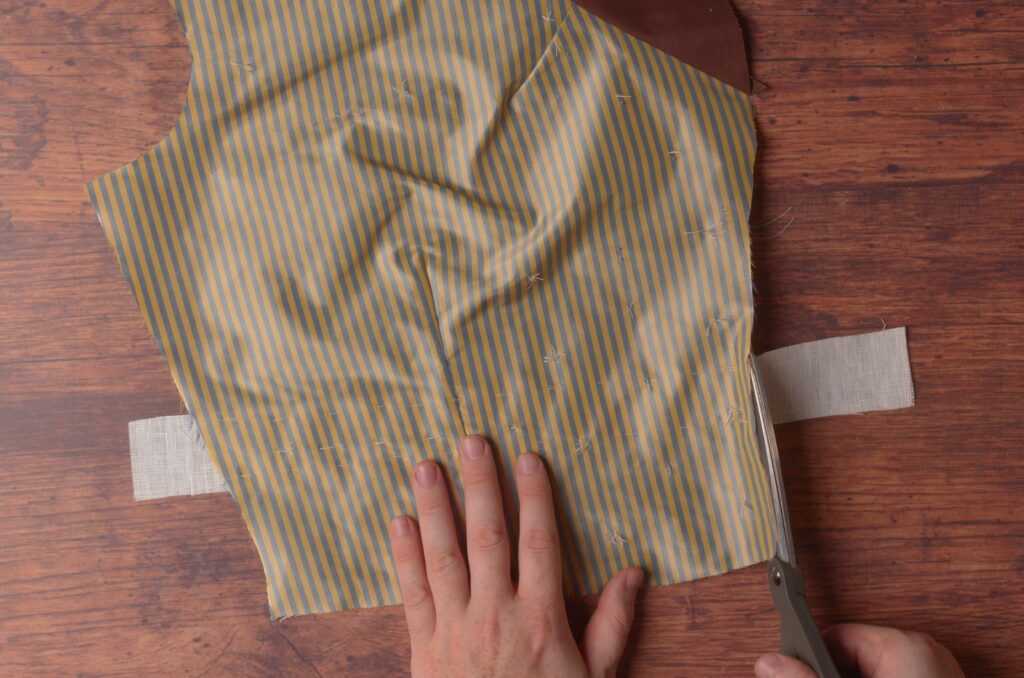
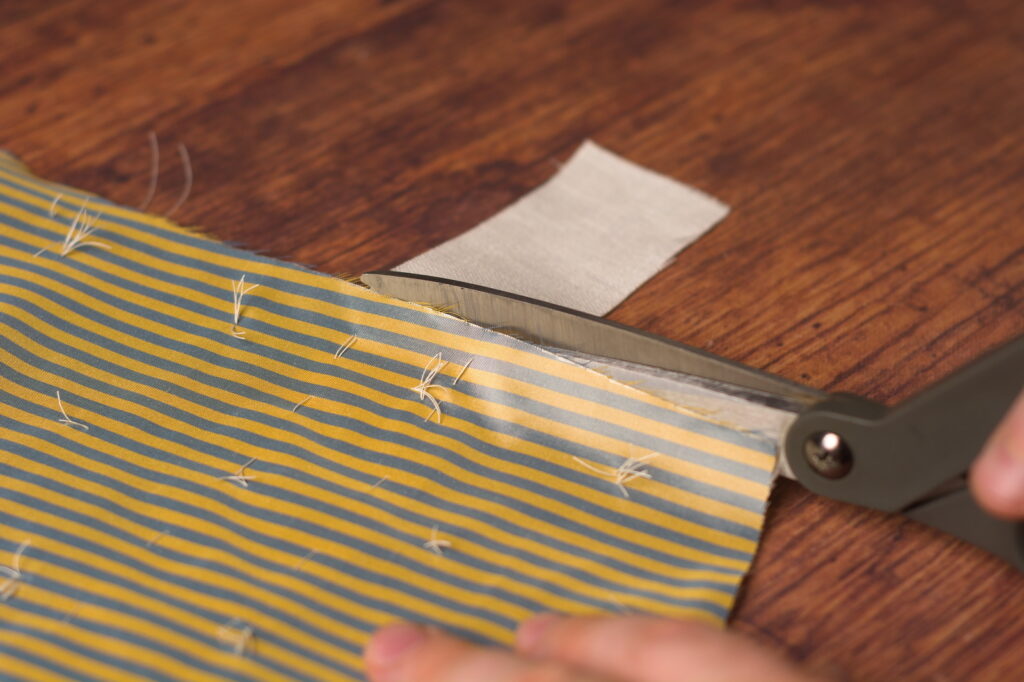
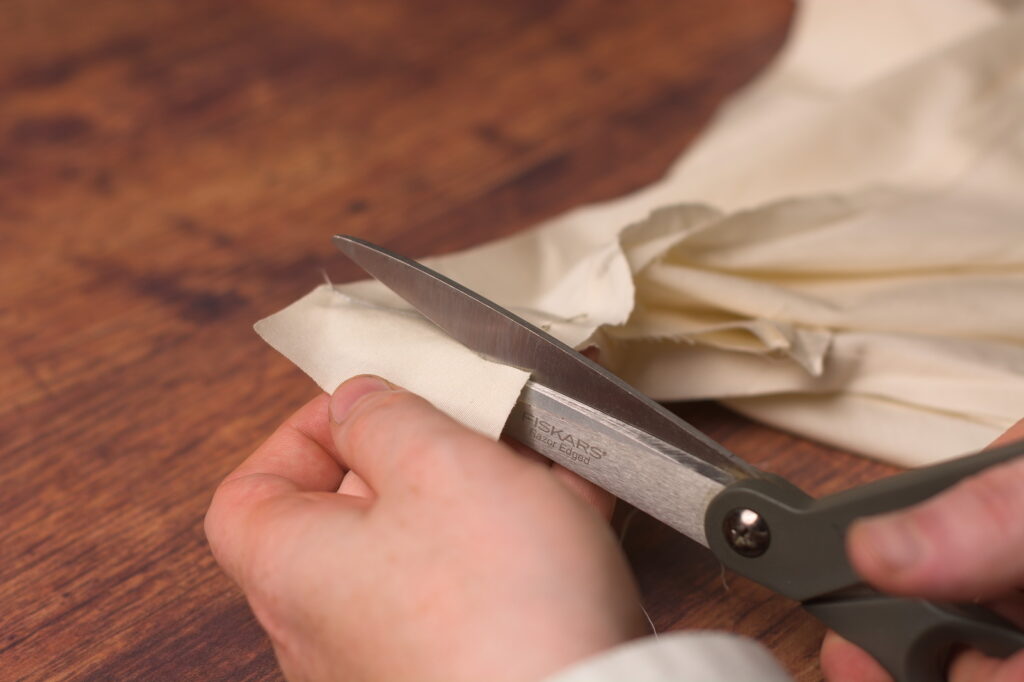
Now trim the linen stay flush with the edges of the forepart.
The breast pocket(s) is stayed in the same manner, but rather than extending the linen across the entire forepart, I go only about an inch beyond the inner edge of the pocket, to avoid the linen from interfering with the roll of the collar.
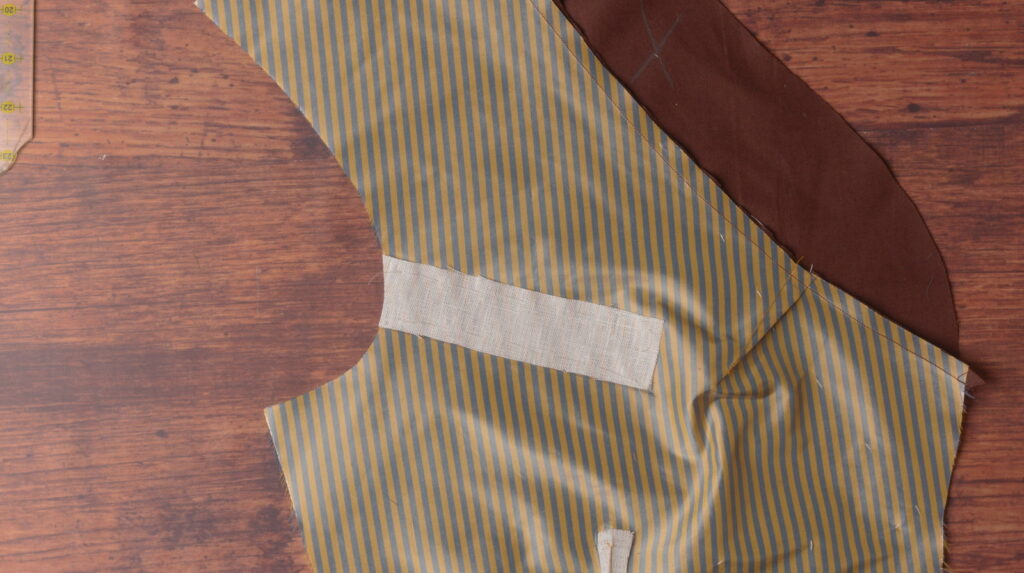
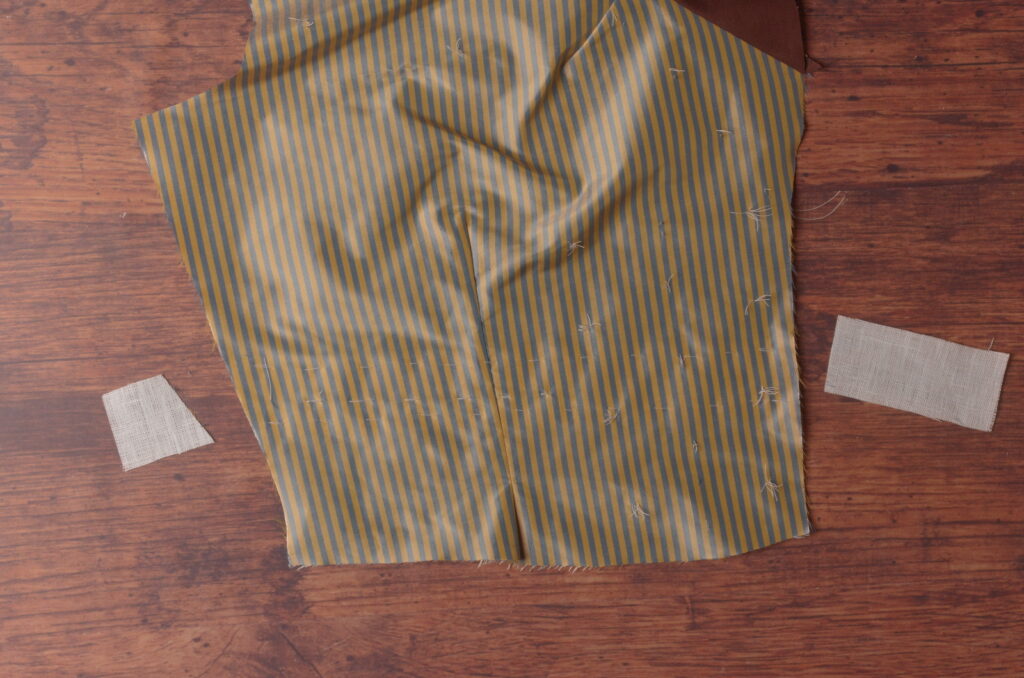
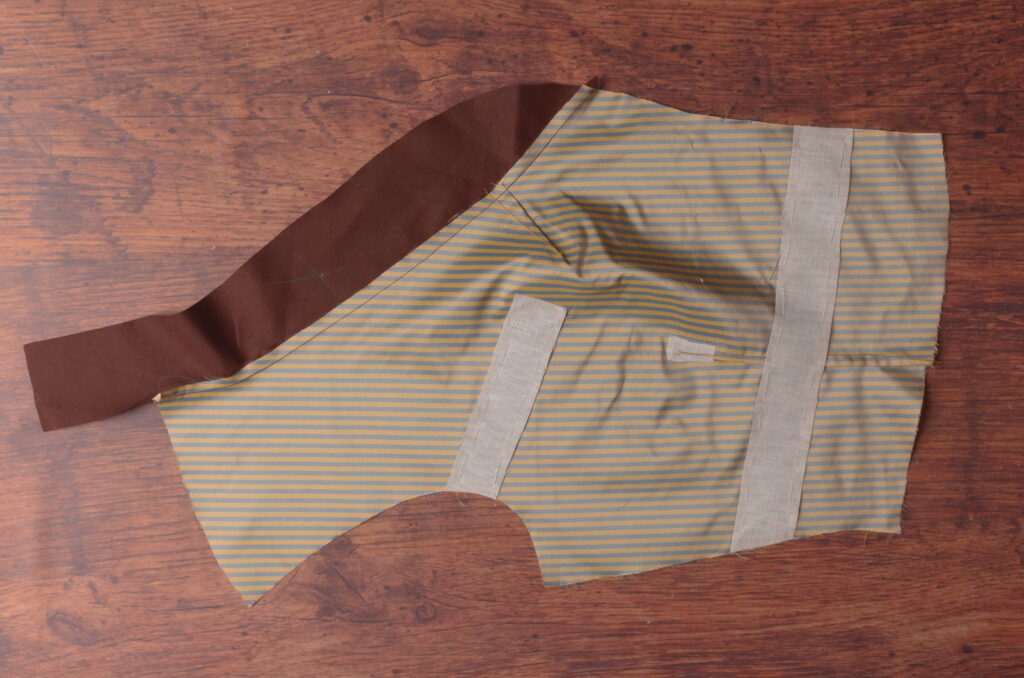
Here’s the left forepart after staying the breast and waist pockets (I’m not installing a breast pocket on the right side).
The Under Collar
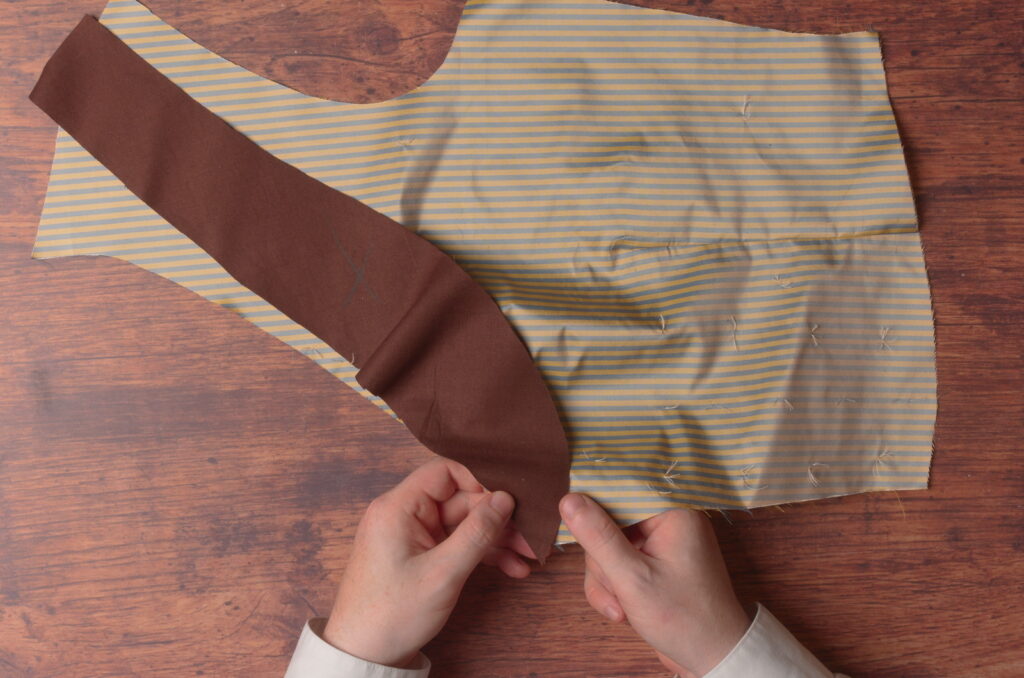
Next we’ll install the under collar onto the waistcoat forepart. Lay the collar on top of the forepart, right sides together, and ensure that the proper, shallower edge of the collar is next to the neck line.

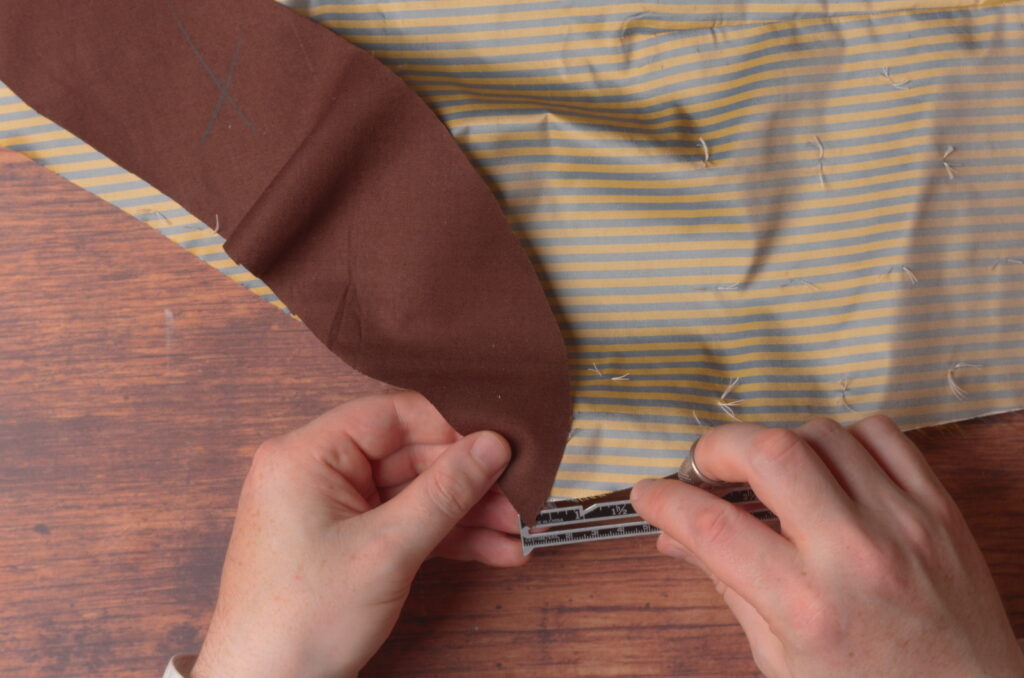
Align the bottom of the collar so that the 3/8″ seam allowance meets the edge of the forepart.
You can use a ruler here to make sure you get the correct position.
Begin basting the under collar to the forepart, beginning at the bottom of the collar. Try to keep a neutral tension between the two pieces – the collar will naturally want to fall into the correct position as you baste, though it may take a few tries before you get the hang of it.
Here’s the under collar after basting. If you look closely, I did take slightly smaller basting stitches in areas where the curve deepens, for example near the shoulder at the top of the collar, and anywhere I could feel the tension between the two pieces needing the extra support.

Here you can see the tension that is naturally built into the under collar seam, due to the opposing curves of each piece. This will help the collar and neck line stay closer to the body.
One last look at the bottom point of the collar before sewing. It’s so important to get this alignment just right.
Sew the undercollar to the forepart from the top of the shoulder the shoulder to the bottom of the collar, using a 3/8″ seam allowance. I recommend sewing with the underside of the forepart facing up, opposite from what is shown.
You can see some of the excess fabric from the under collar in this photo. While it works just fine as shown, you’ll have to manipulate the fullness with your fingers as you sew, whereas if the under collar was underneath, the presser foot would help distribute this excess.
And continue sewing right to the edge at the bottom of the collar, ensuring the pieces are still properly aligned.
Here’s the undercollar after being sewn.
The bottom of the collar showing the alignment of the two pieces in relation to the seam line.
And shown here is the top of the collar at the shoulder. Ignore the little mark I had made there – made a mistake with overthinking things and ended my stitching there instead of at the very edge of the shoulder.

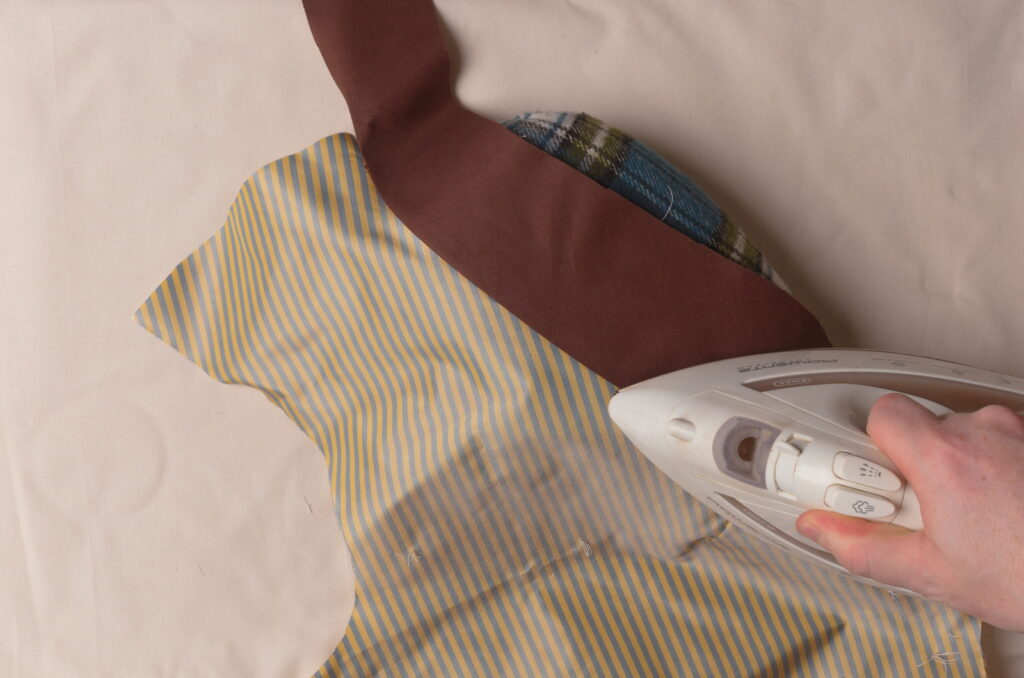
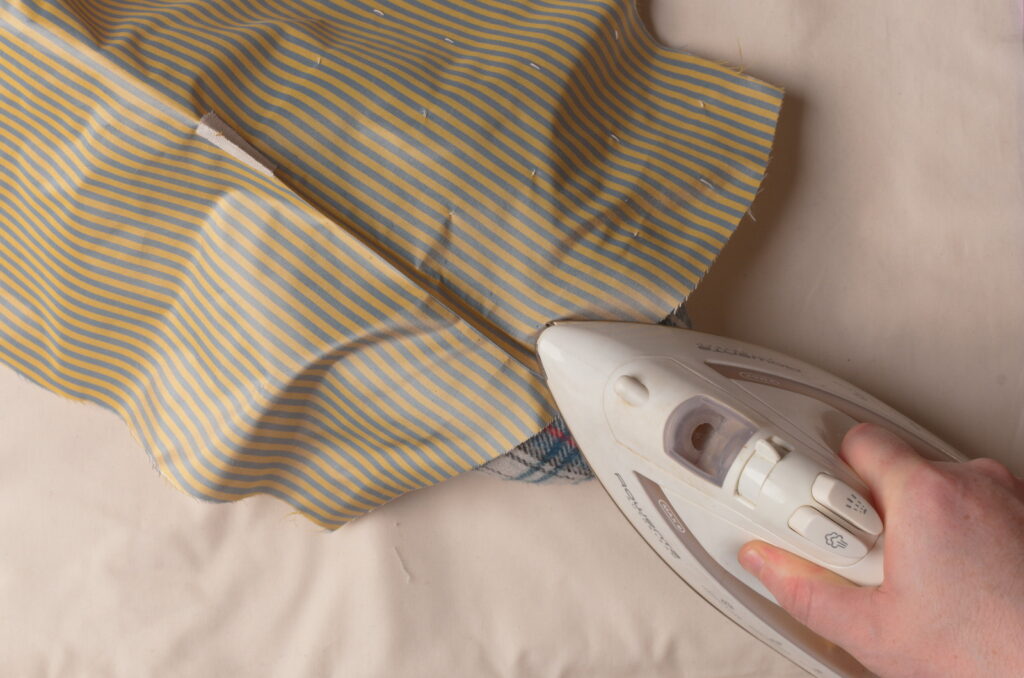
Pressing
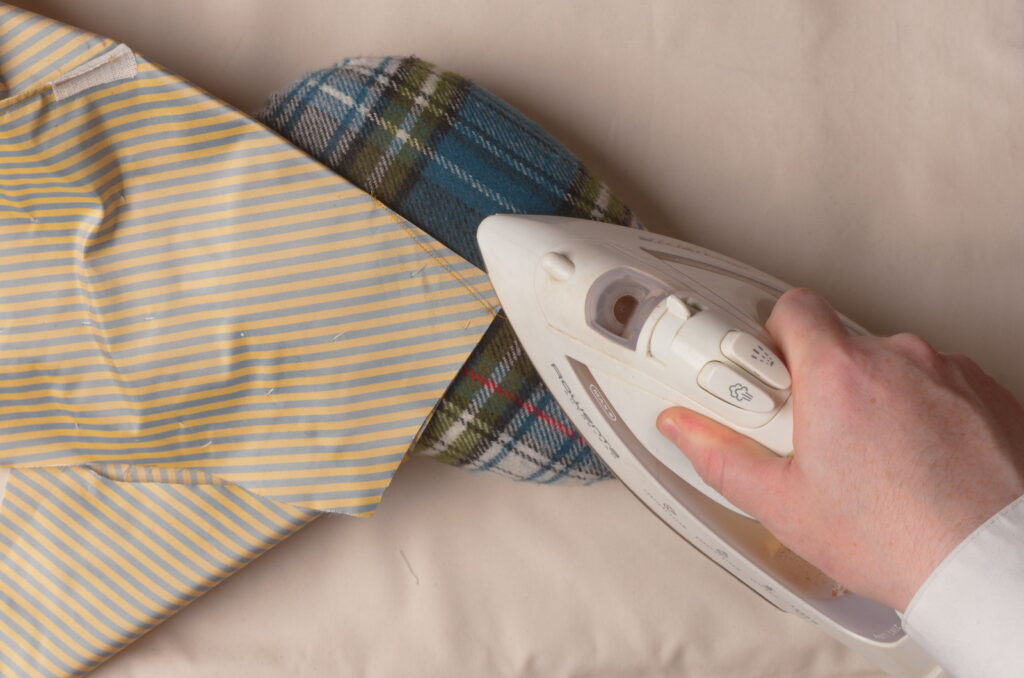
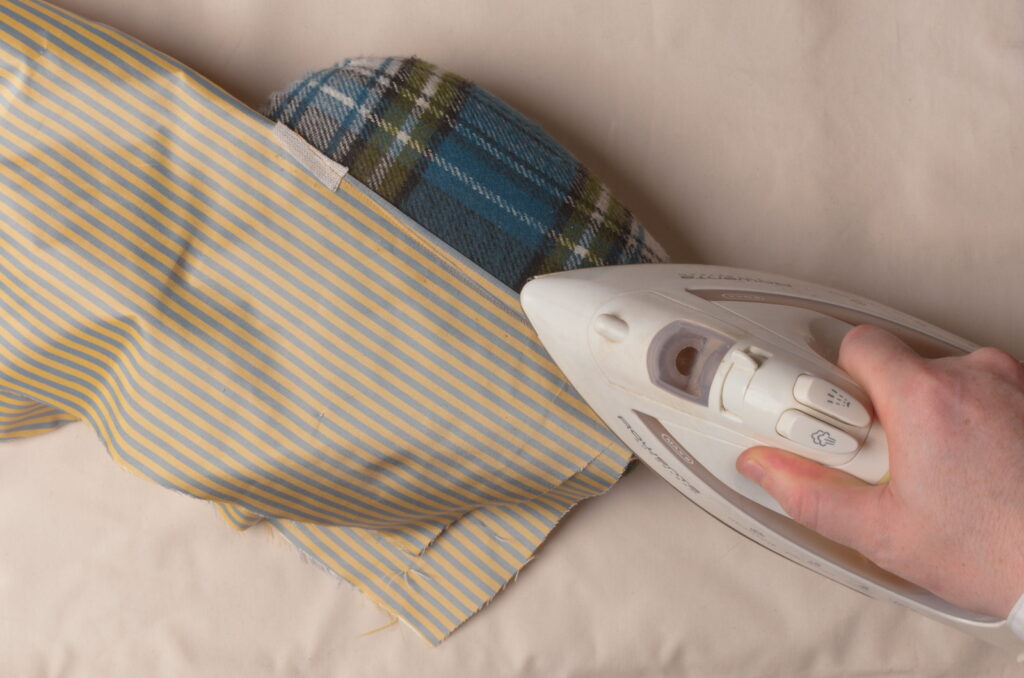
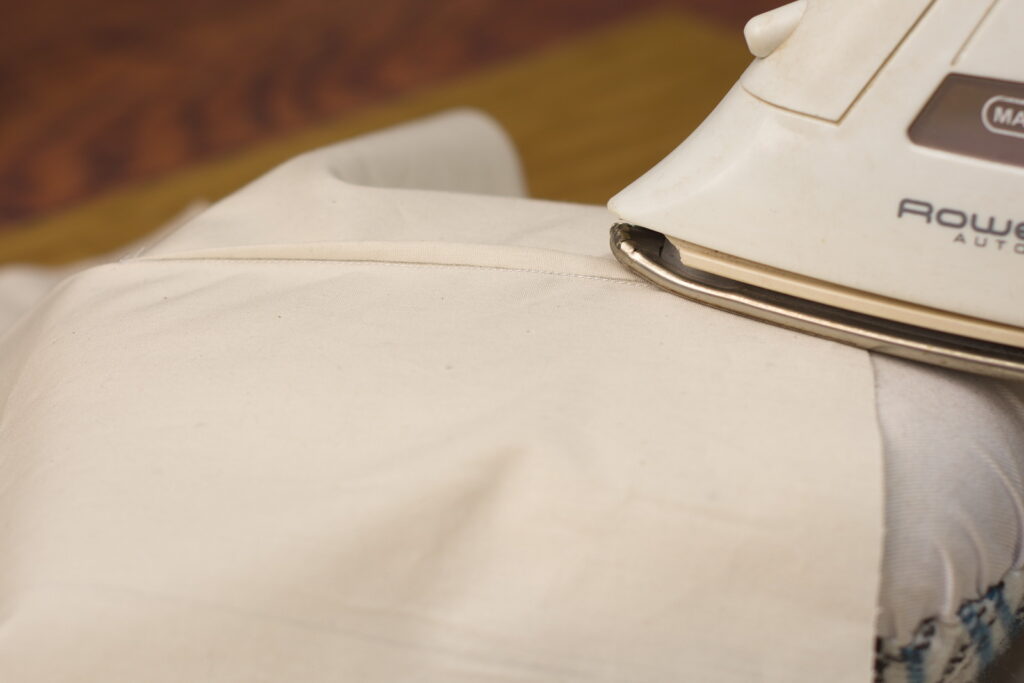
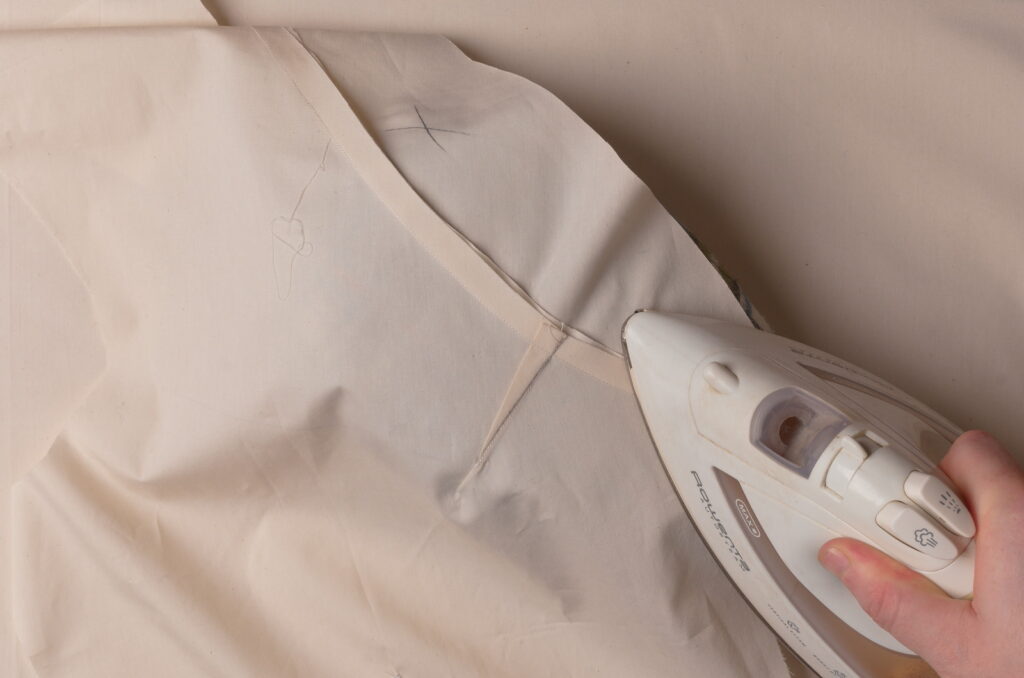
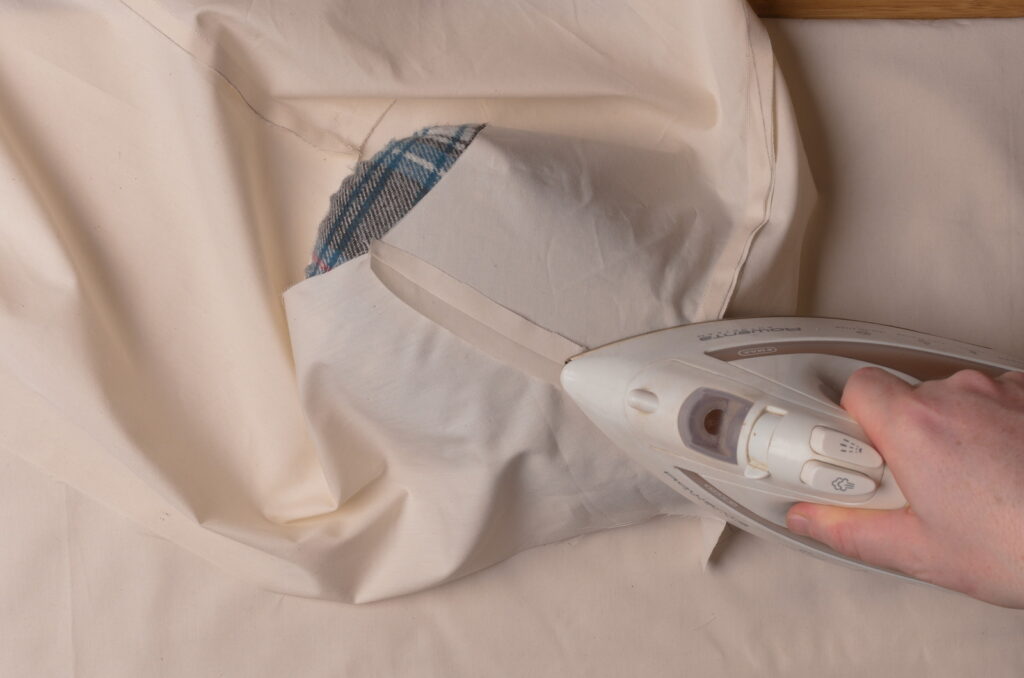
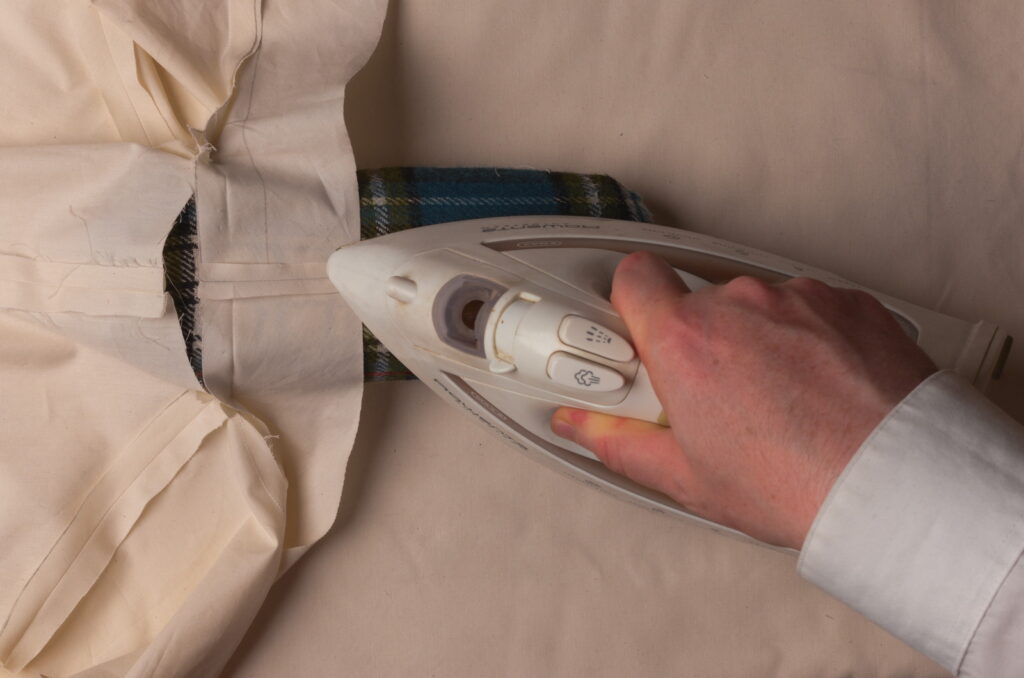
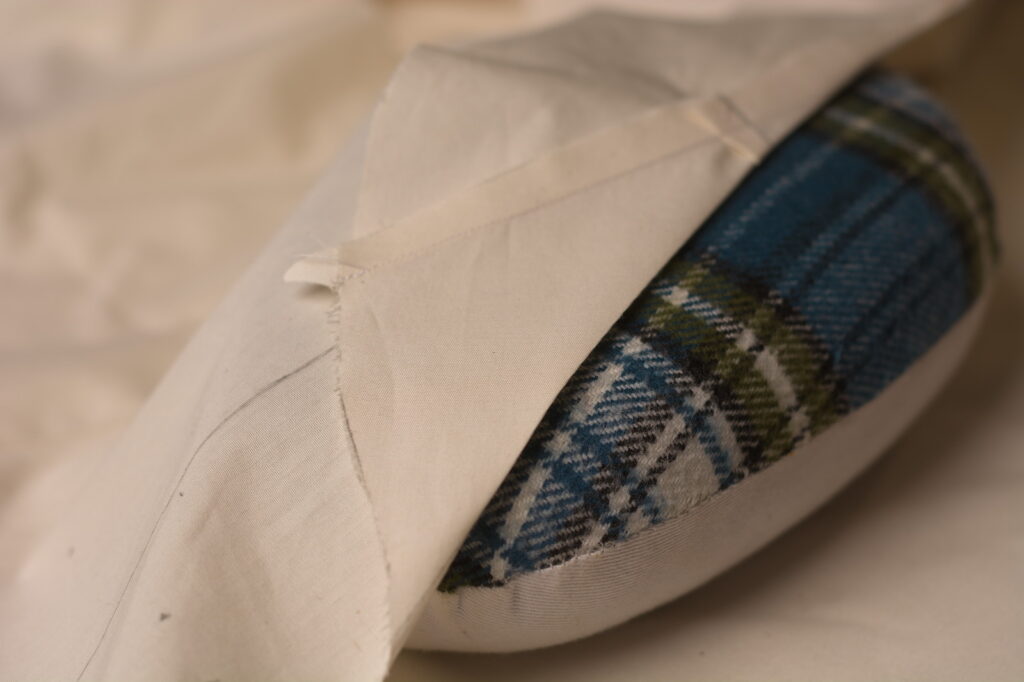
Press the collar and seams up away from the forepart, beginning from the wrong side. Definitely use a tailor’s ham here due to the curved nature of the seam.
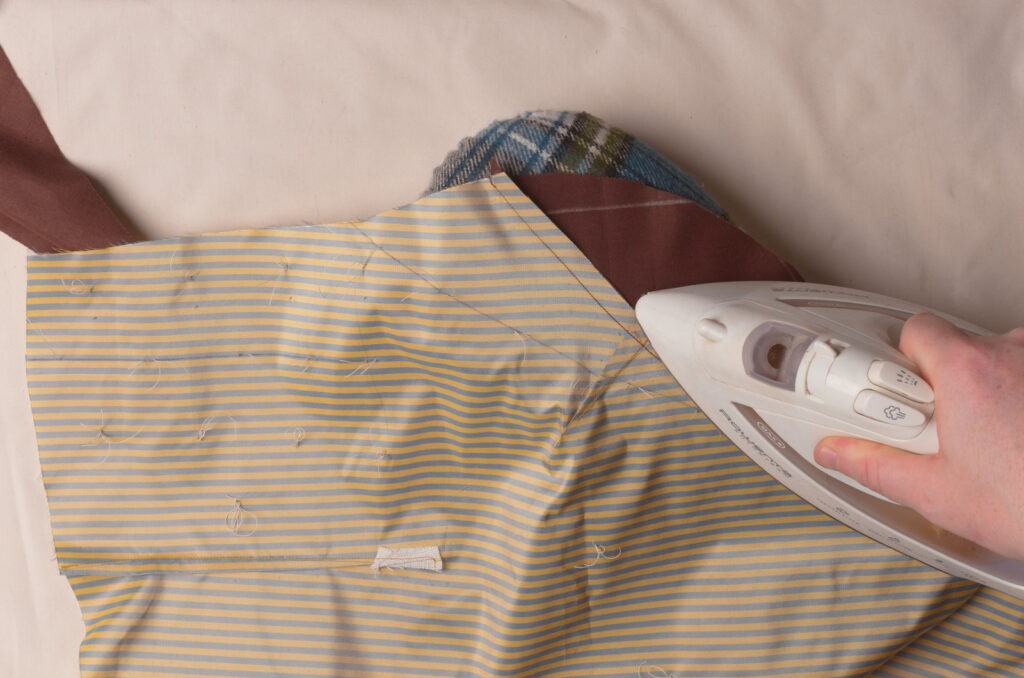
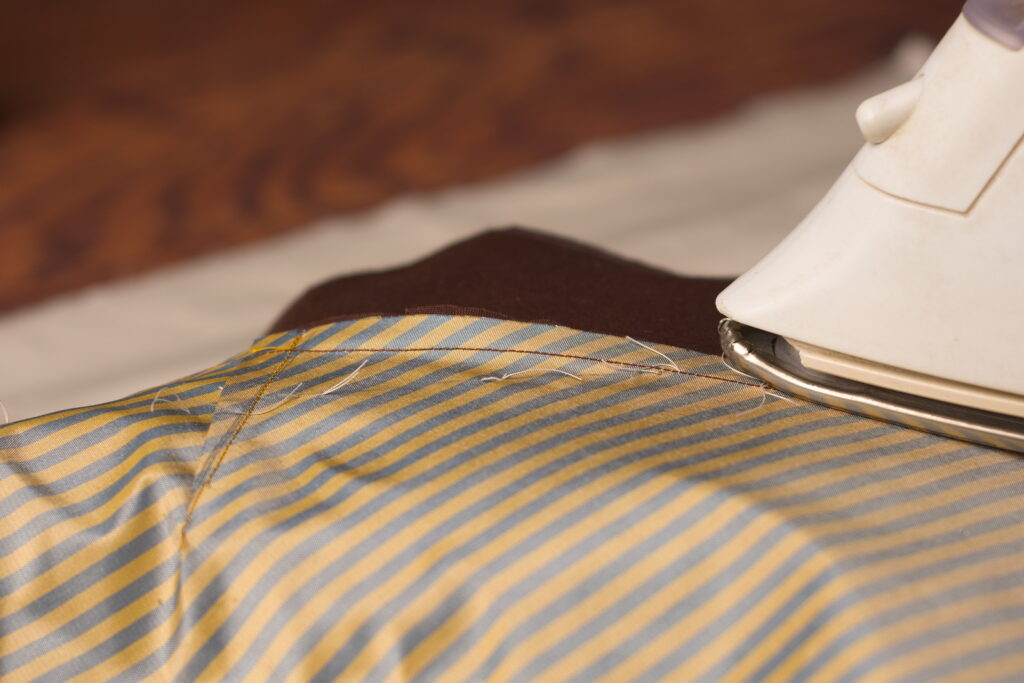
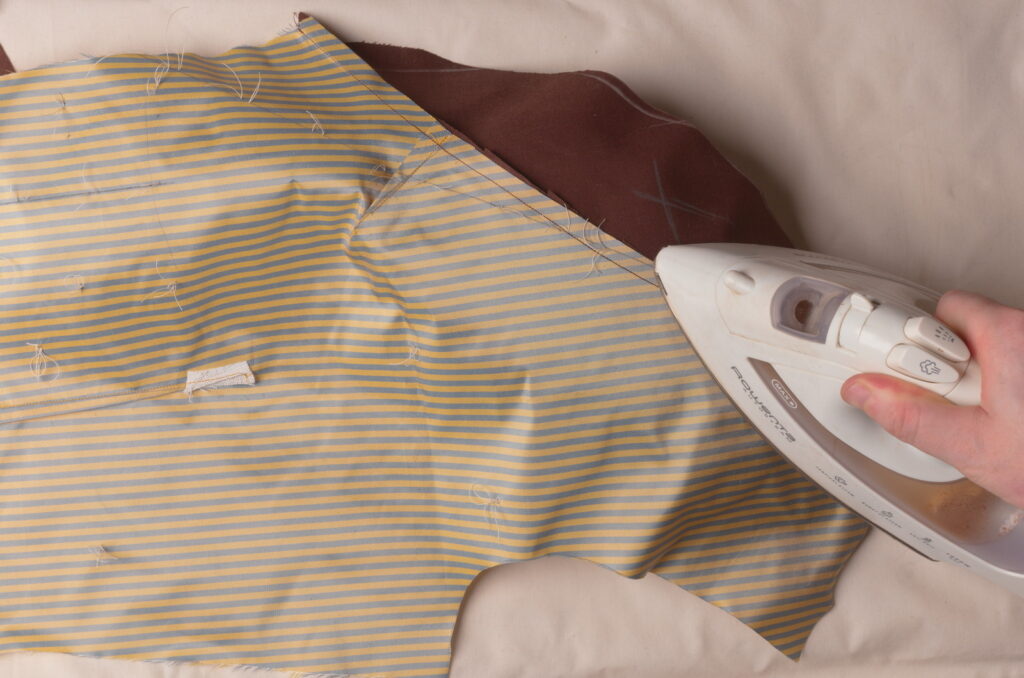
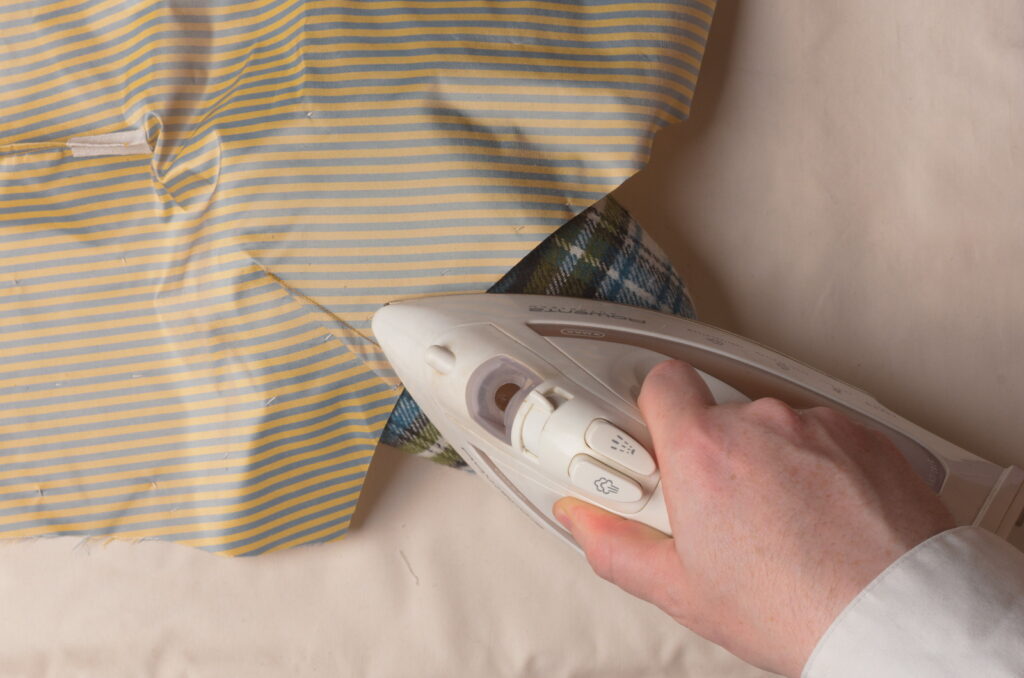
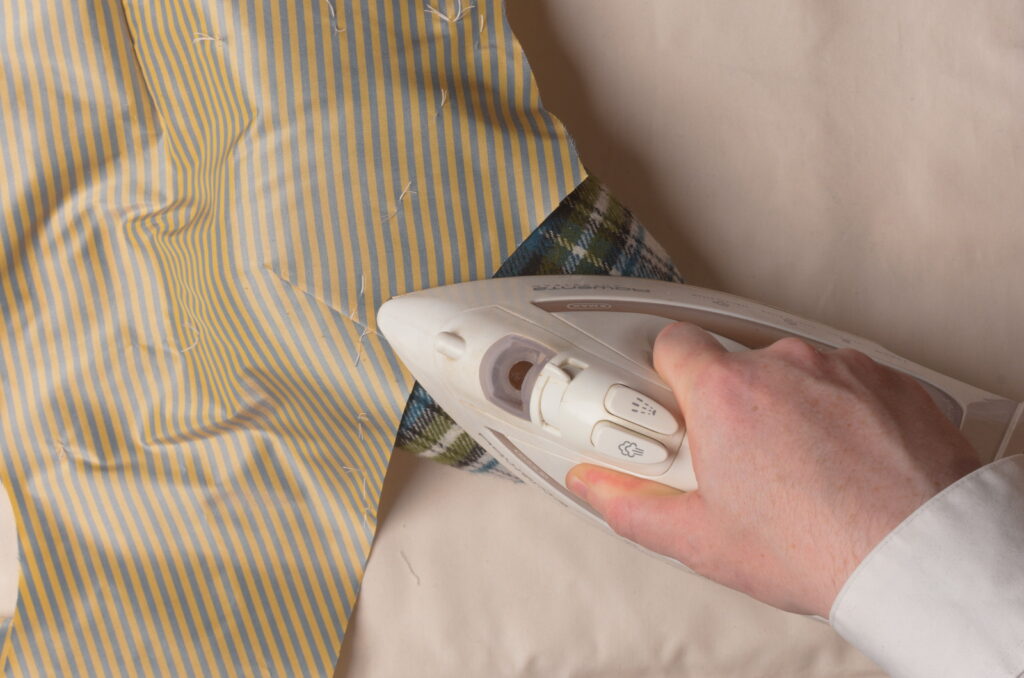
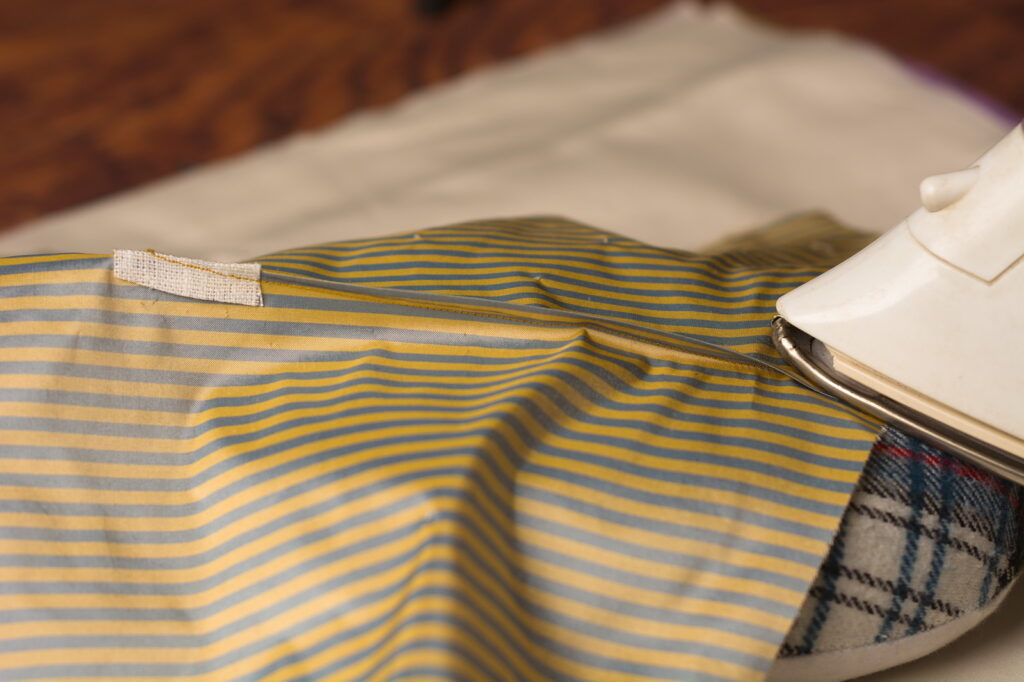
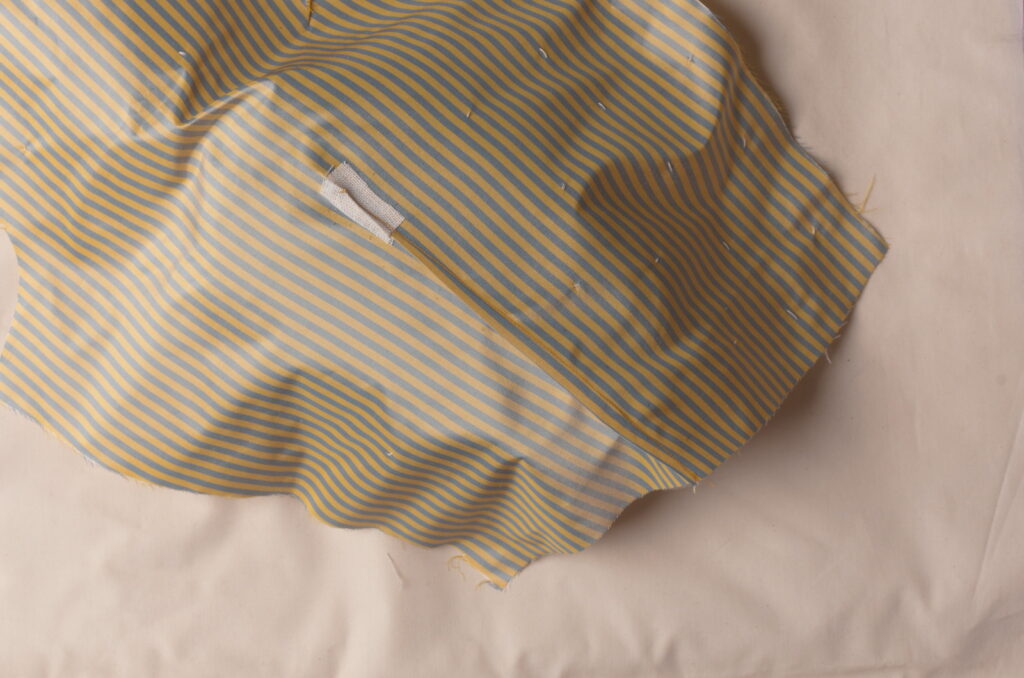
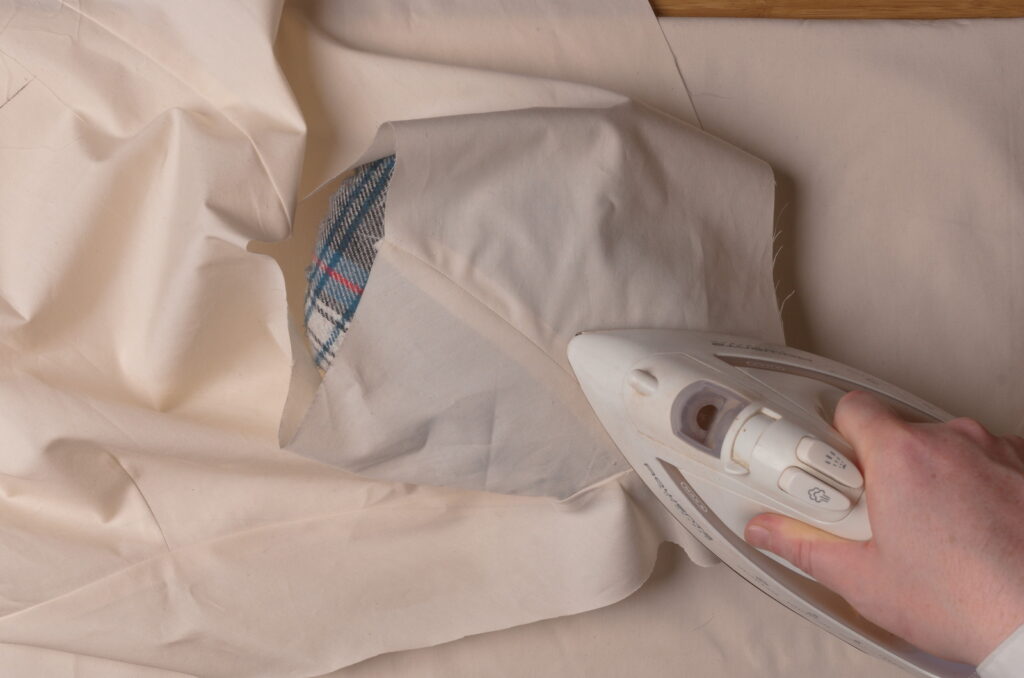
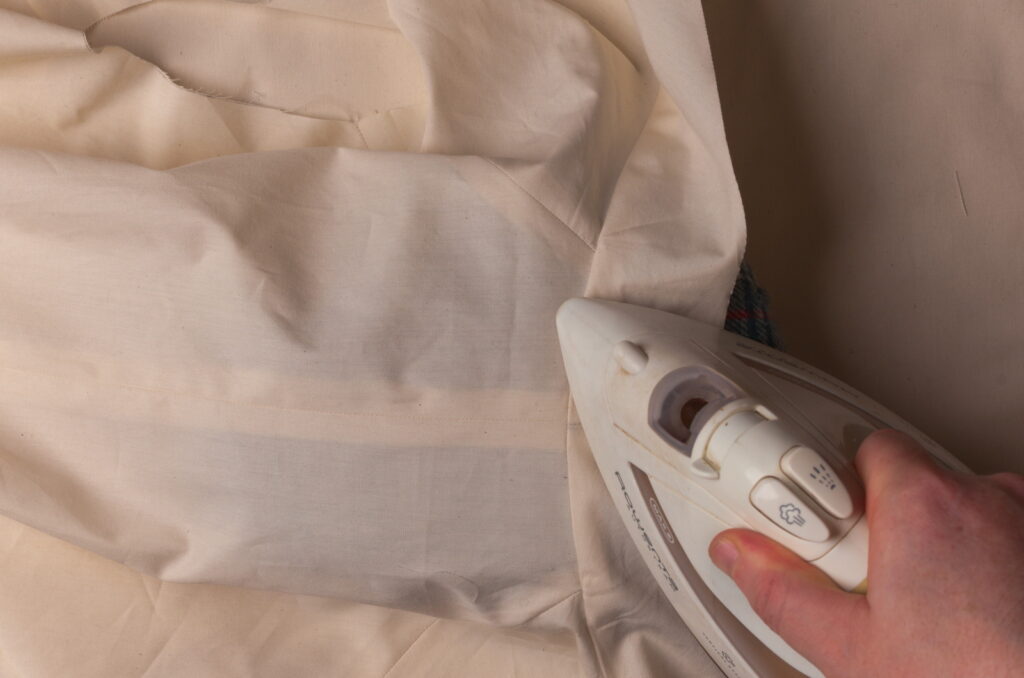
Turn the forepart over and press from the right side as well. I didn’t use any steam here because it wasn’t necessary, but also because the steam can cause the polished cotton to lose its special finish.

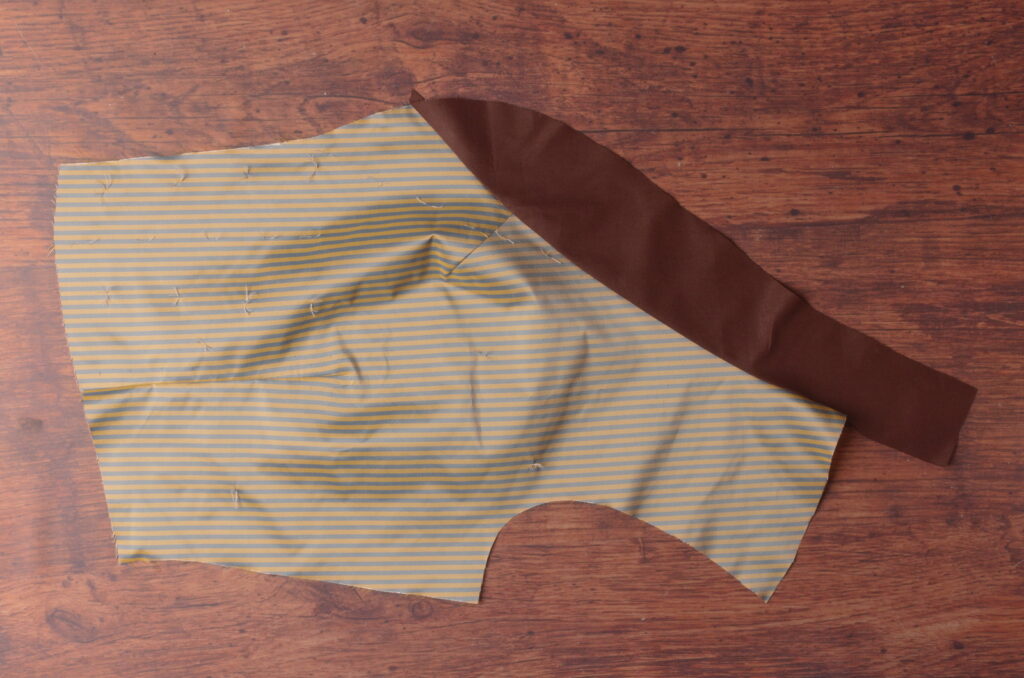
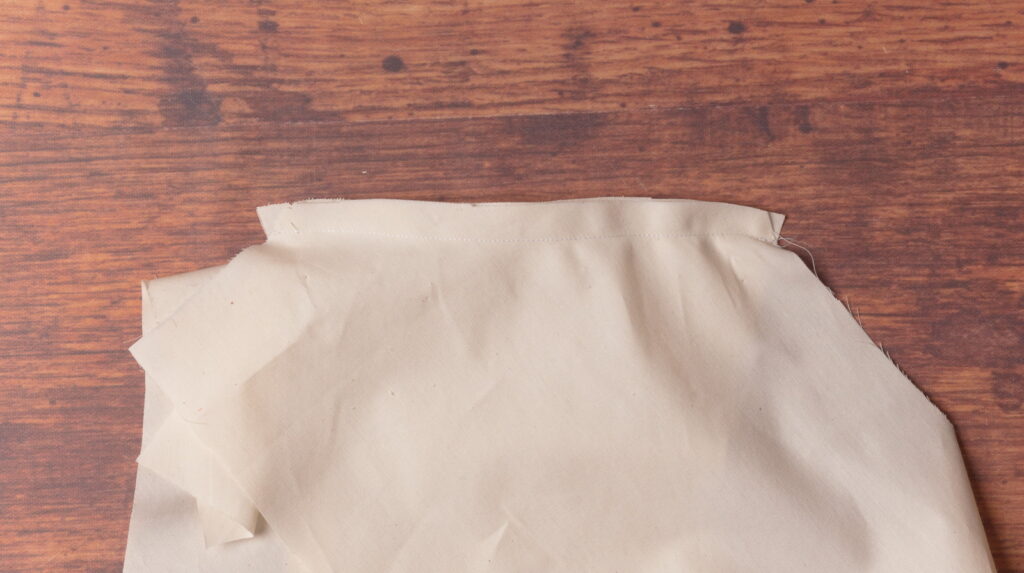
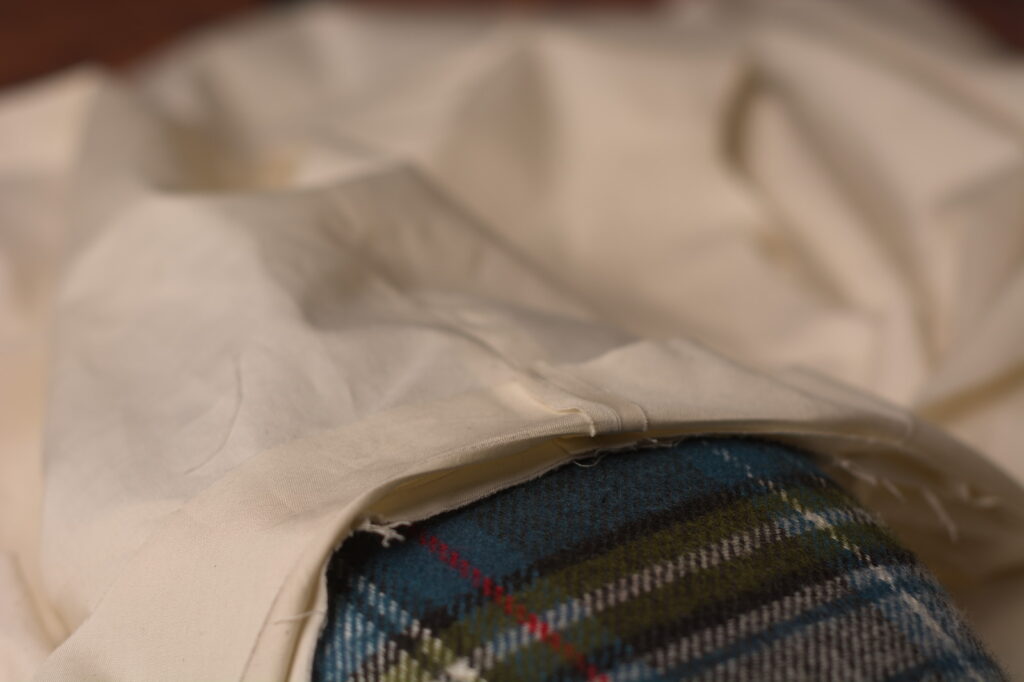
Here’s the forepart so far after attaching the under collar.

The Darts
I like to transfer the darts to the remaining side of the forepart by just tracing them with the original pattern, rather than using the tailor’s tacks. It seems to be a little more accurate, and quicker as well.
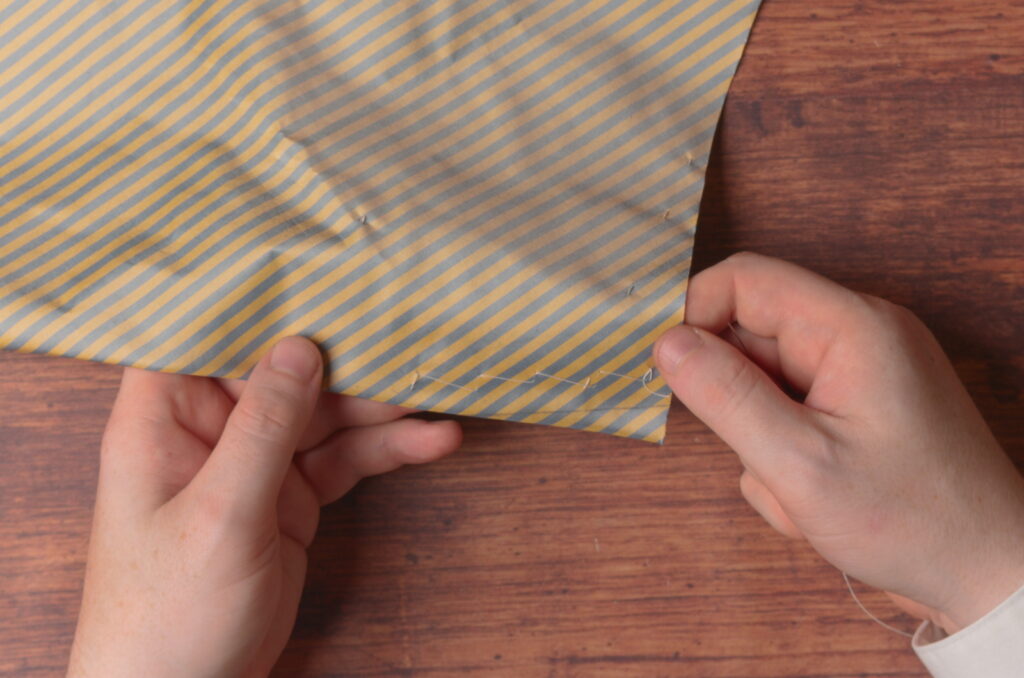
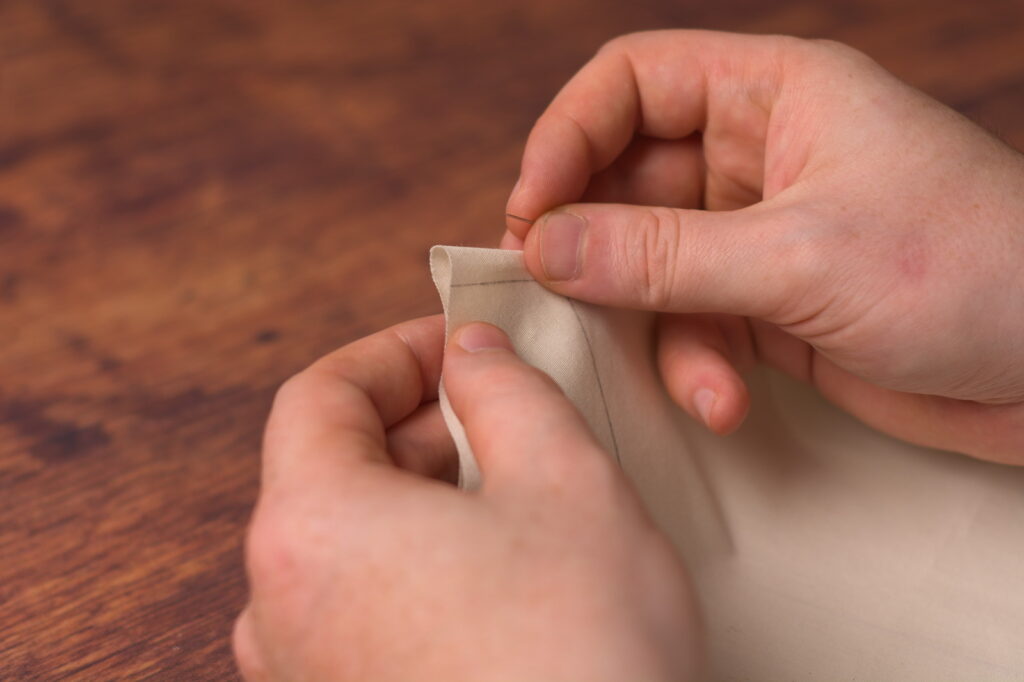
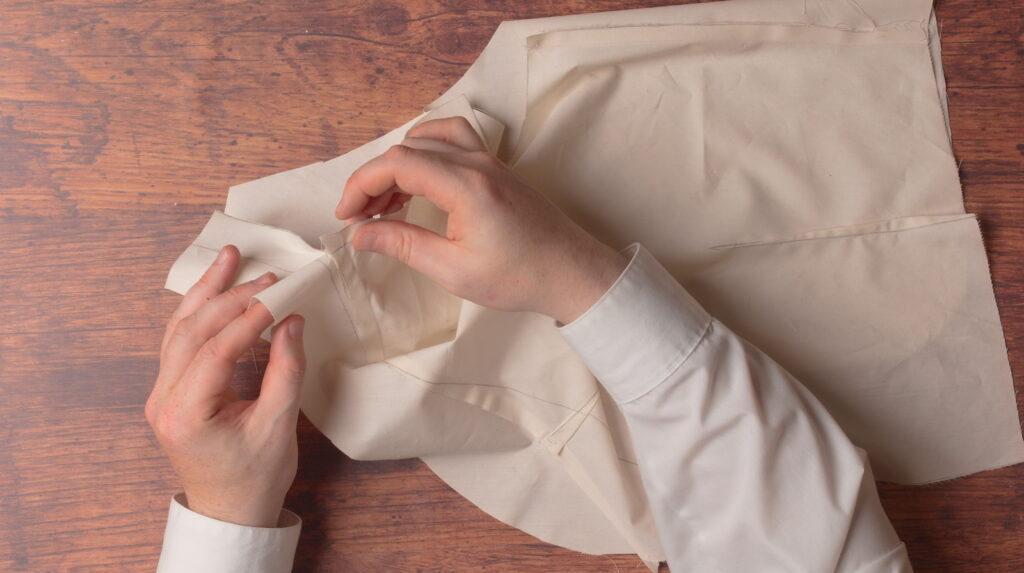
Fold each of the darts in half, aligning the sides as closely as you can. Shown here is the neck dart.
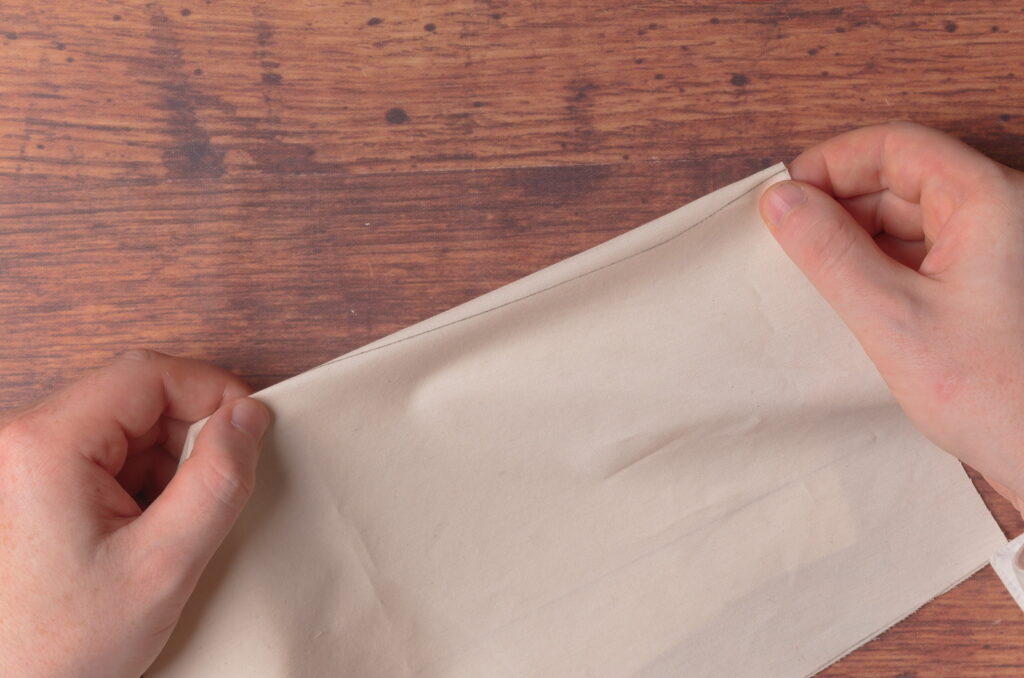
Baste the dart closed, keeping about 1/4″ away from the lines.
Do the same with the rest of the darts if you’re putting them in. Here’s my waist dart going in (again not recommended unless you have the proper figure).
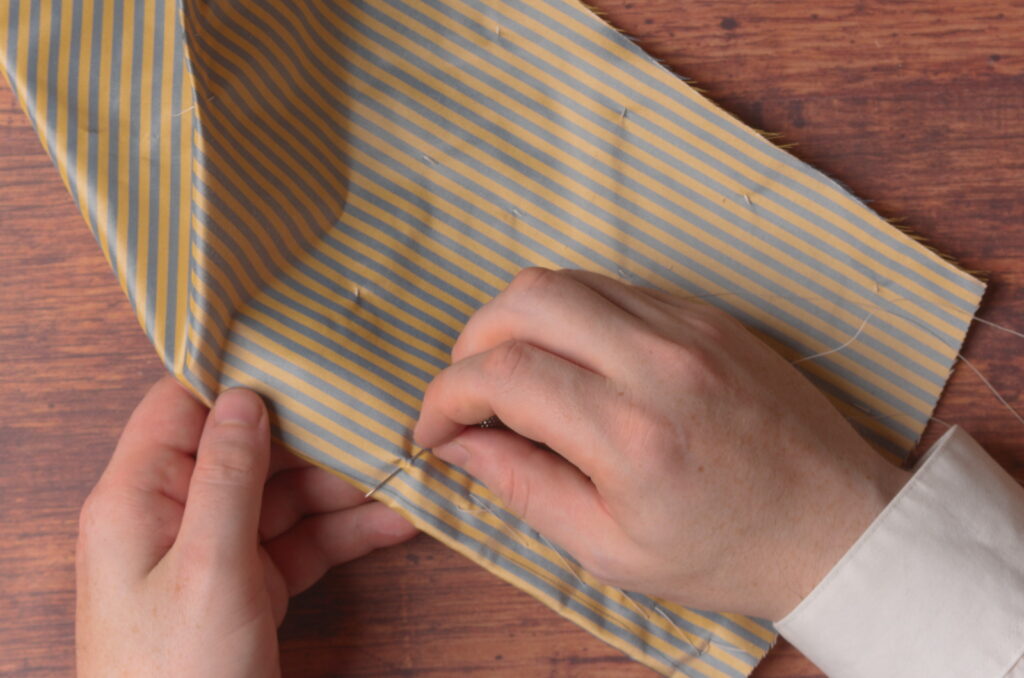
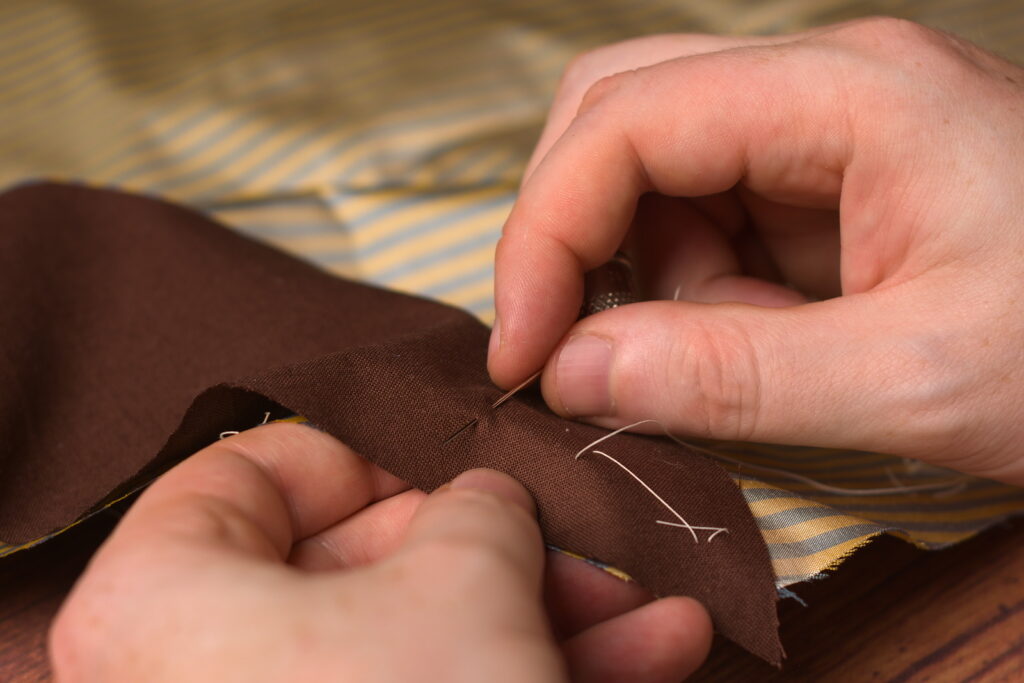
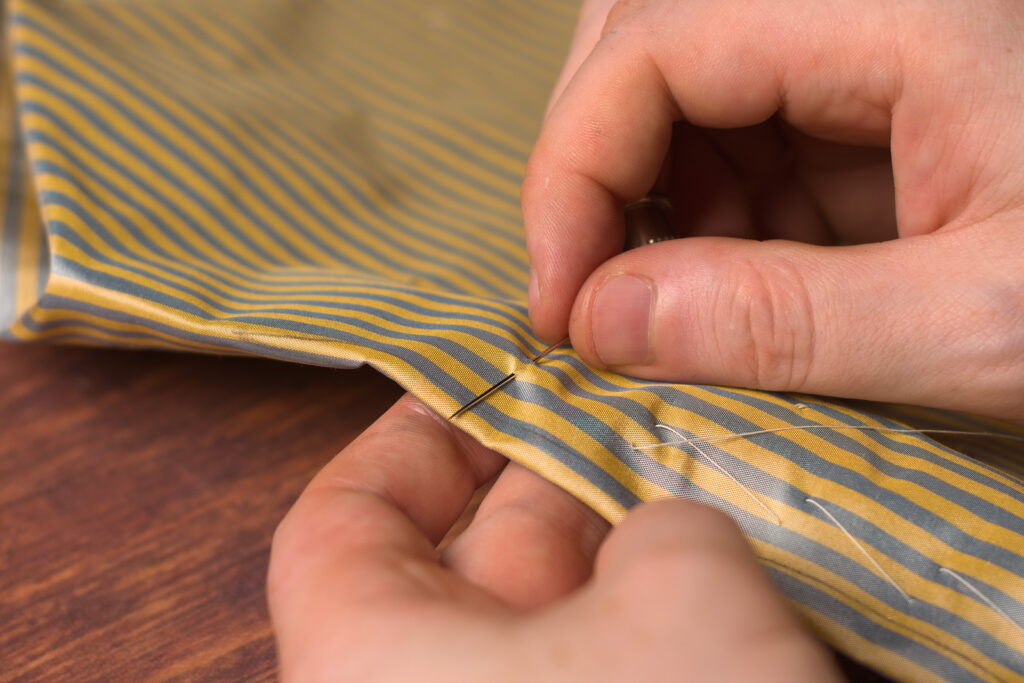
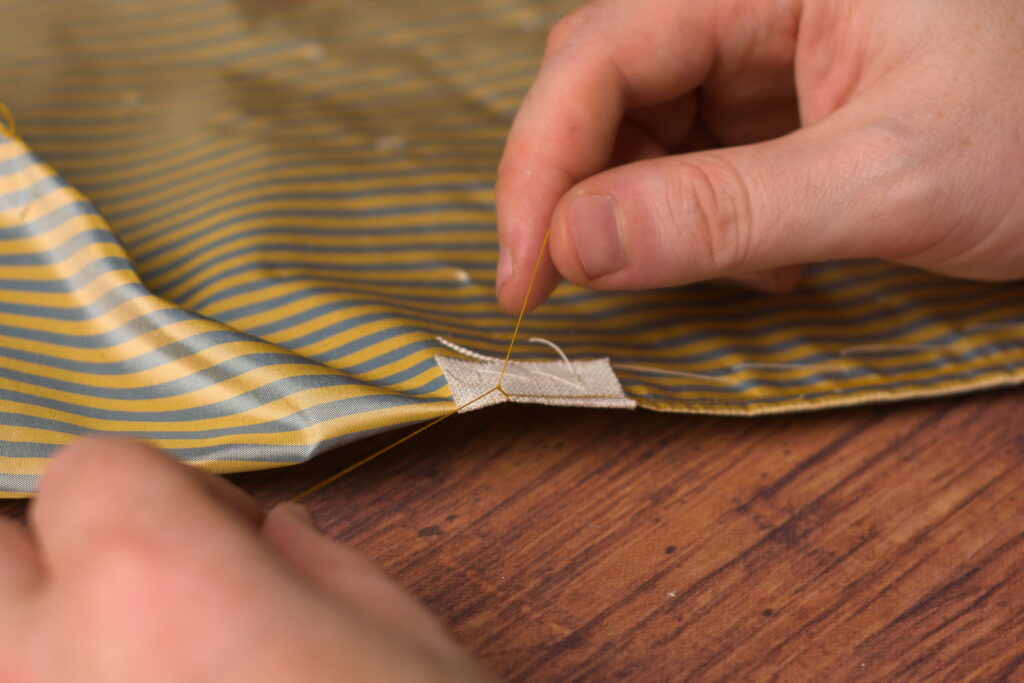
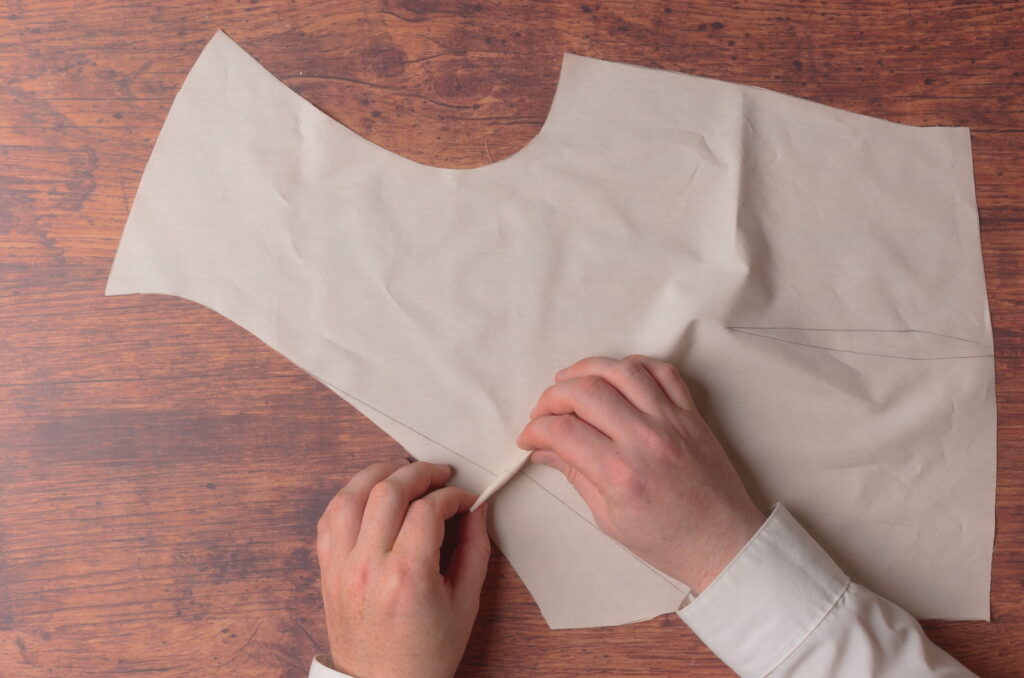
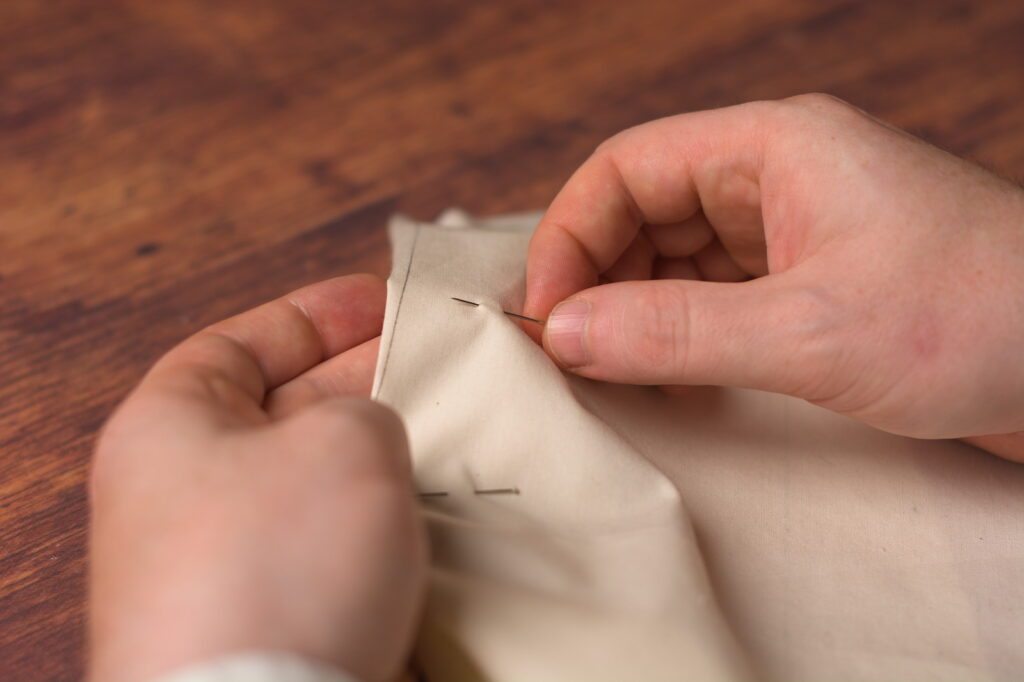
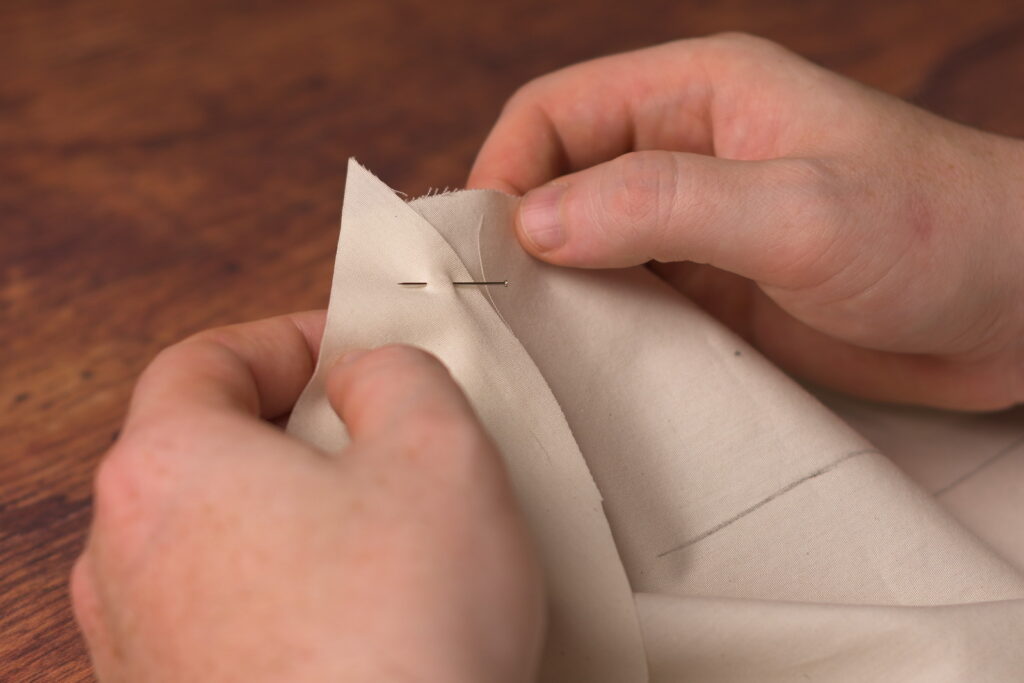
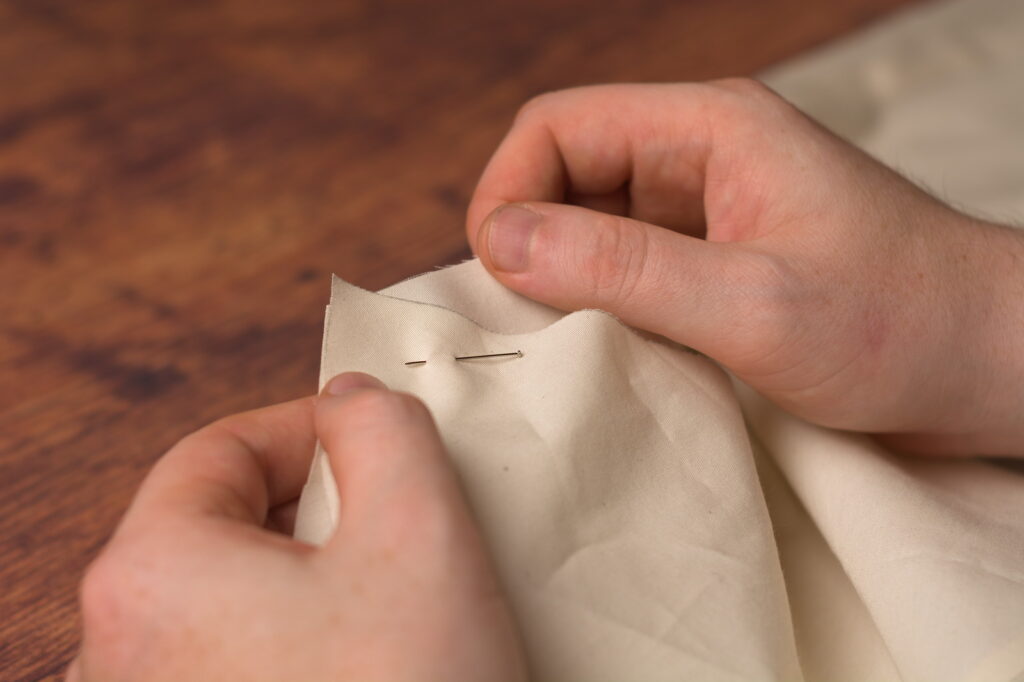
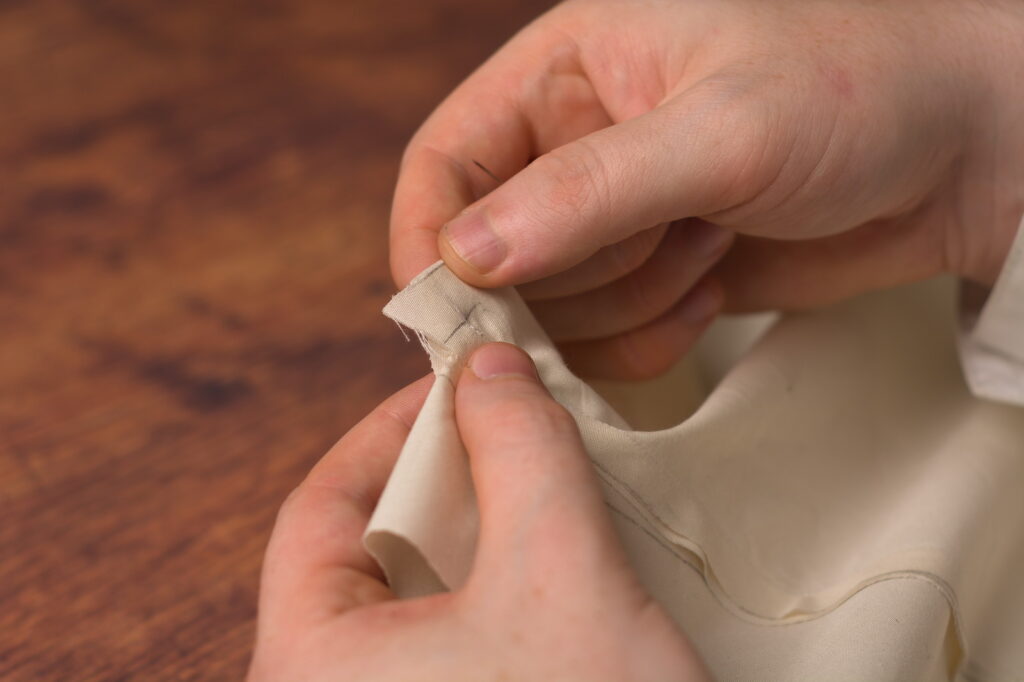
To check my alignment, I like to stick the needle directly through the dart and see how close it is to the opposite line. Then I’ll adjust accordingly.
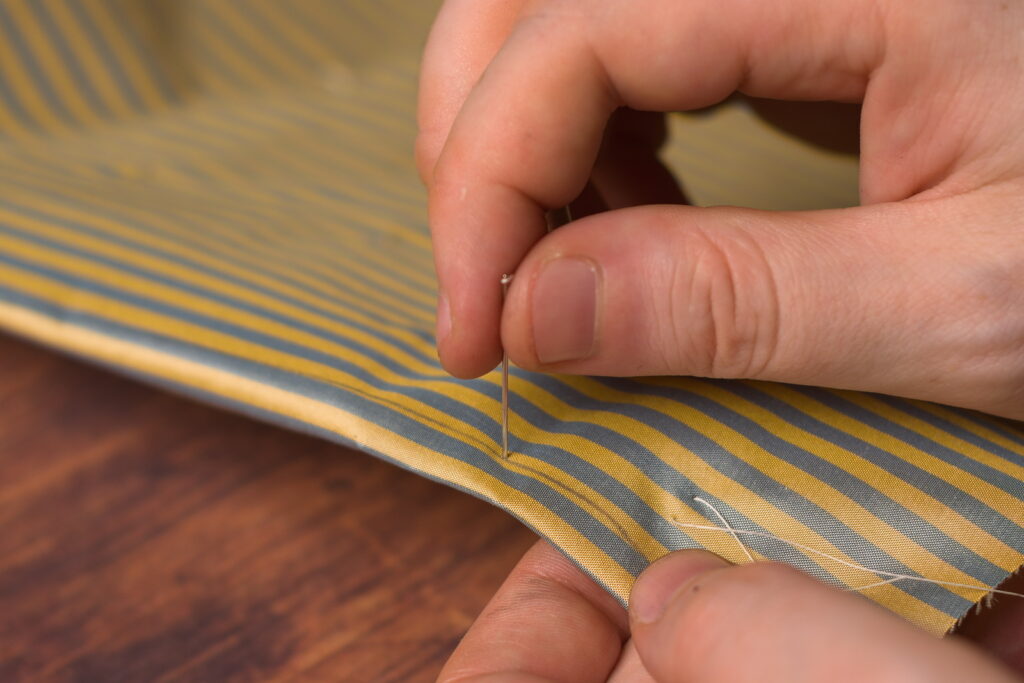
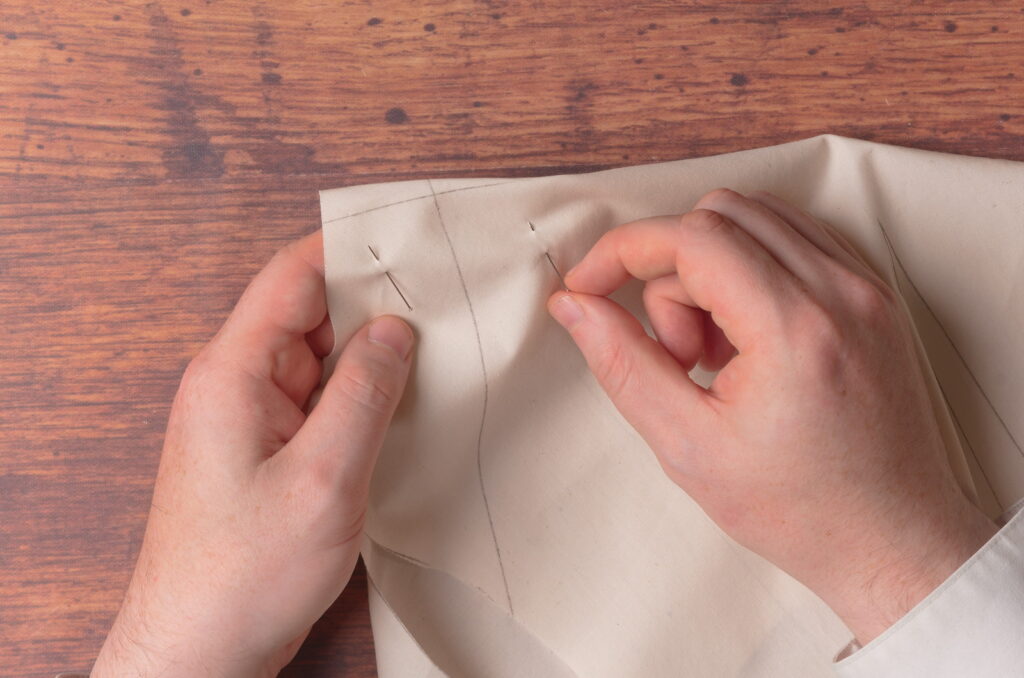
Continue basting. It’s easier to get both sides to line up, the closer you get to the end of the dart.
For any darts that take a strain, such as the waist darts or perhaps a dart in the armscye (not covered in this course), I like to reinforce them with a piece of linen to strengthen the area. I left them out of the neck dart so as to facilitate the roll of the collar and because it doesn’t take much stress.
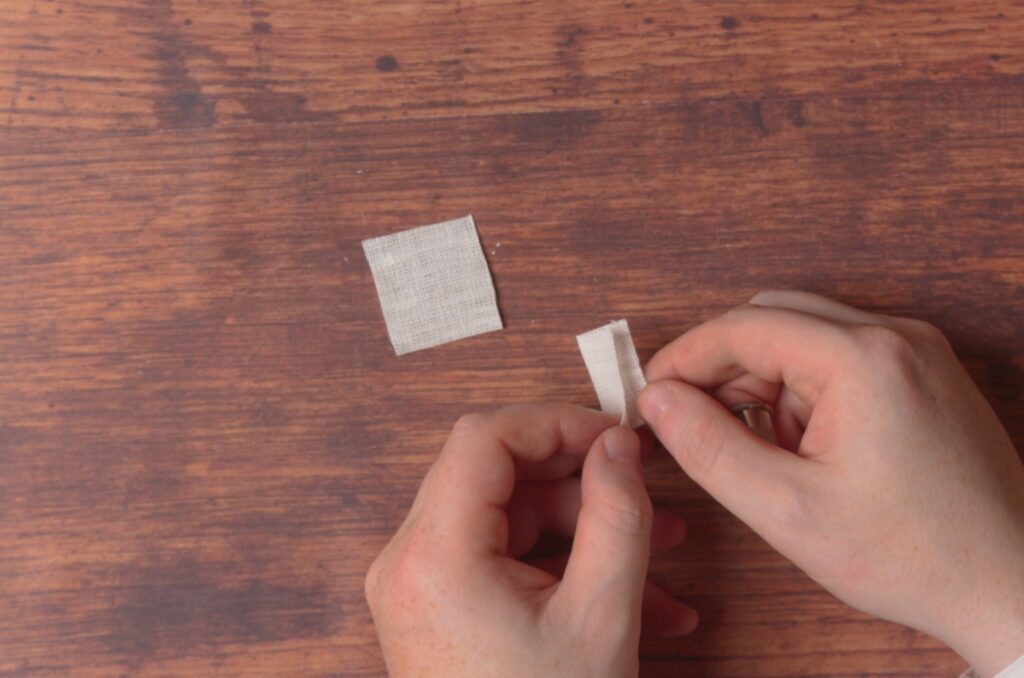
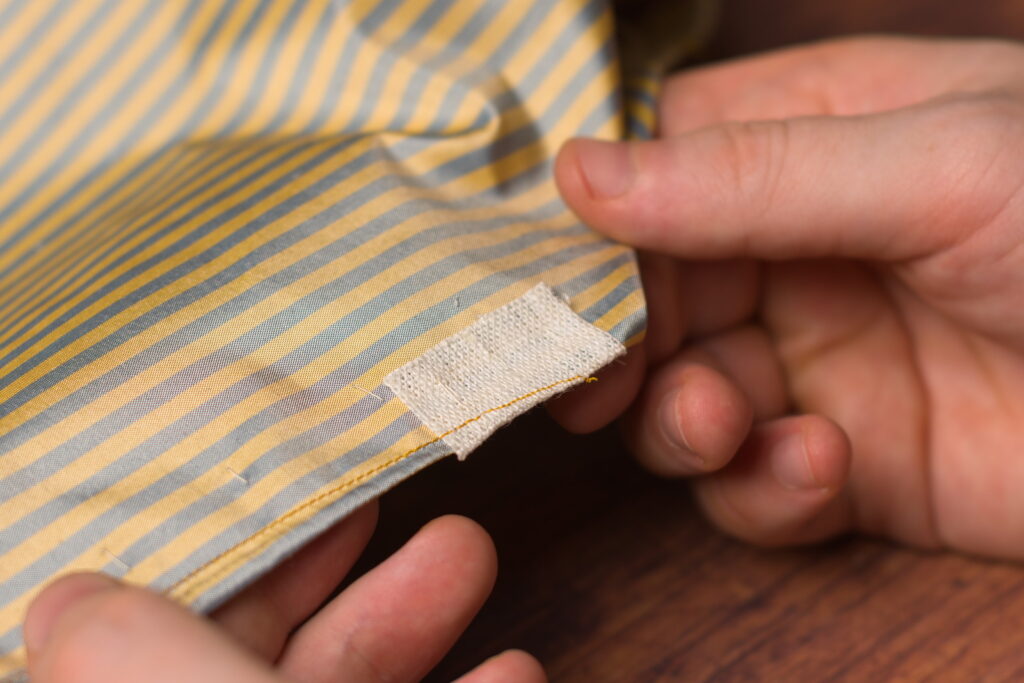
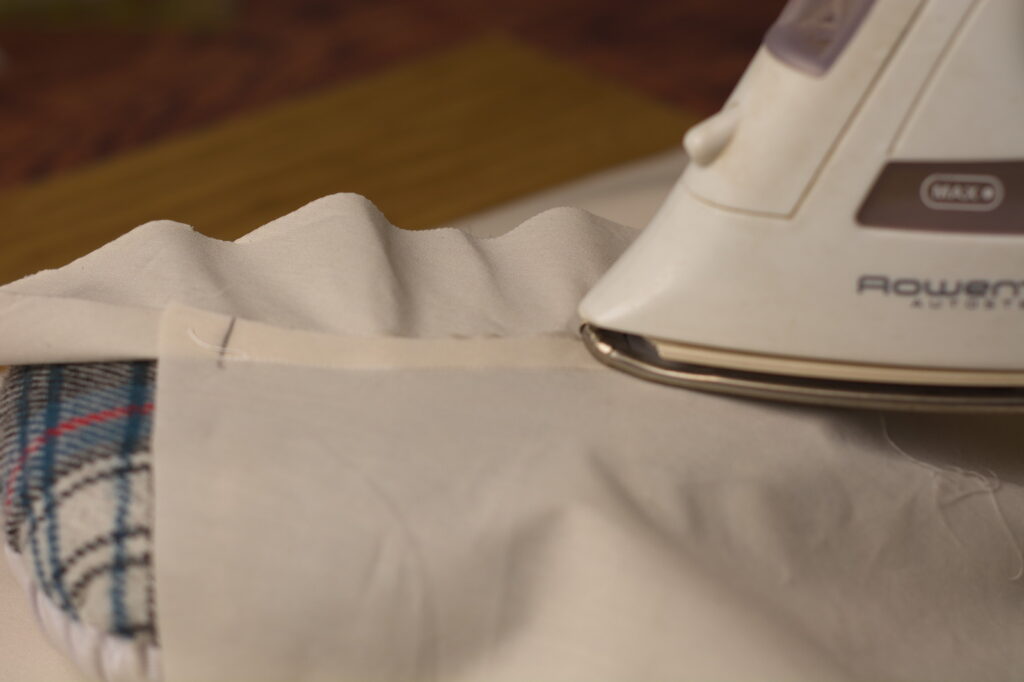
Take a square of linen, about 1″ to 1 1/2″ square, and fold and press it in half.
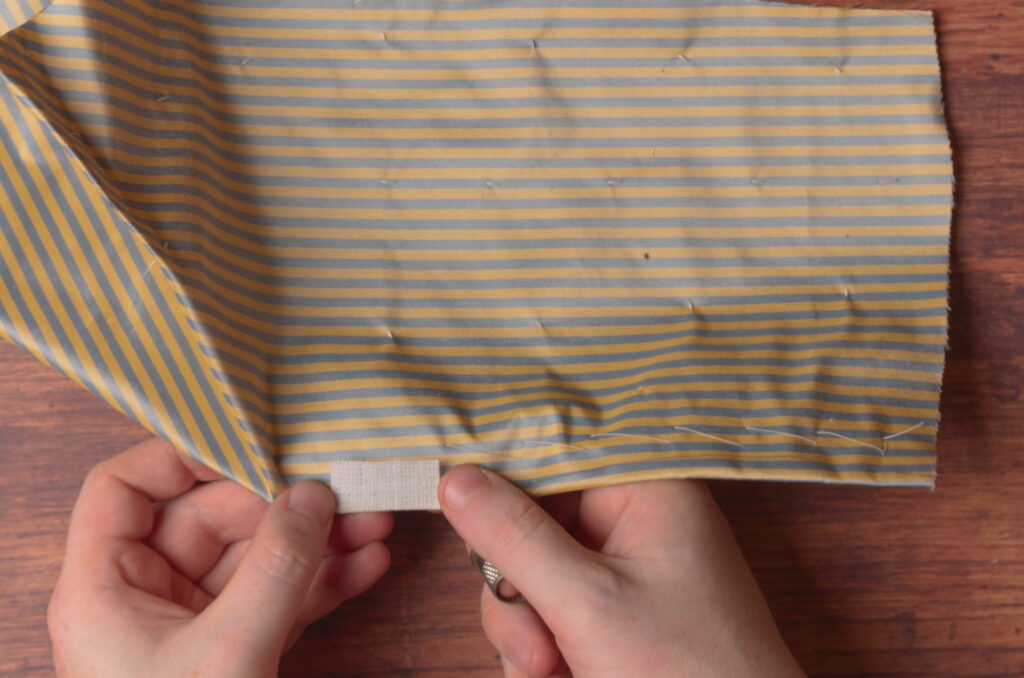
Place the linen firmly against the dart, so that the end of the dart falls in the middle of the linen.
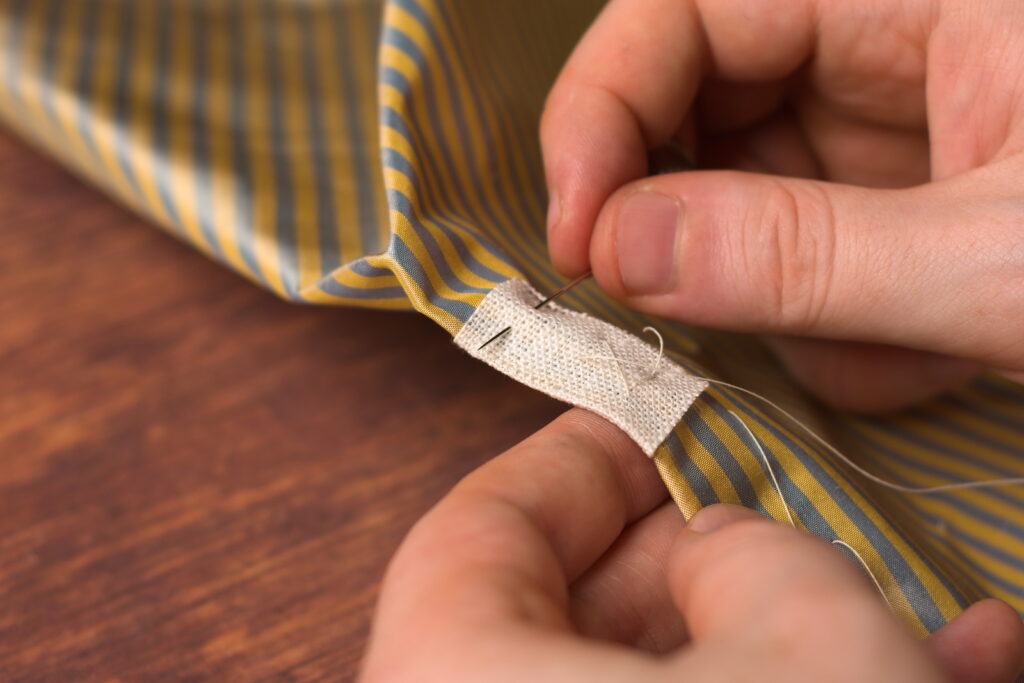
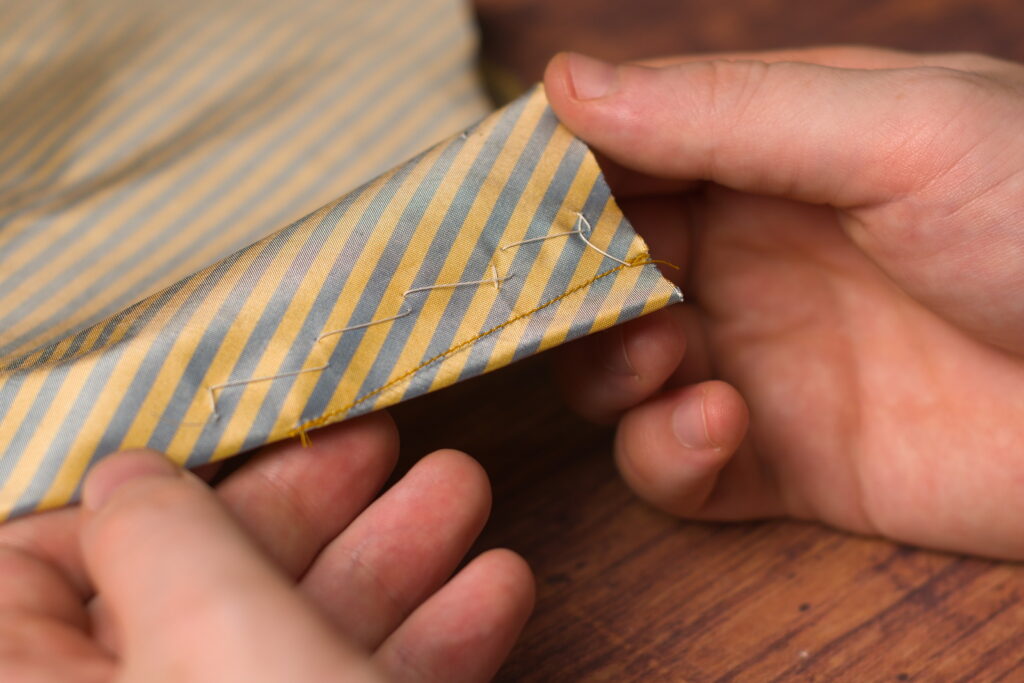
Baste the linen piece in place through all layers.
Now redraw the line at the tip of the dart over the linen as necessary using a sharp pencil (should take my own advice). Just line a ruler up with the rest of the dart and redraw.
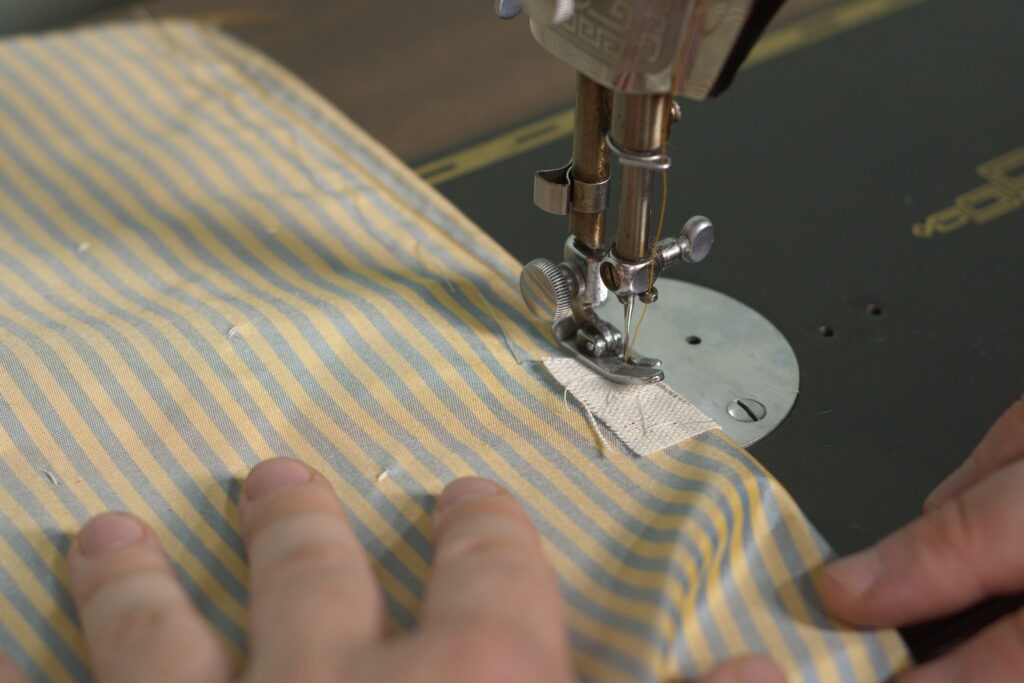
Starting at the edge of the dart, begin sewing on the outside of the chalk line towards the tip.
As you get near the tip, adjust your sewing machine to take smaller stitches, to firm up the area.
The idea is to pretty much sew right off the edge of the fabric, after tapering out very slightly at the tip.
Leave the threads long after sewing so that you can tie them off by hand, rather than trying to back stitch with the sewing machine on such a narrow area.

Here you can see how the stitching gets smaller as it approaches the tip of the darts.
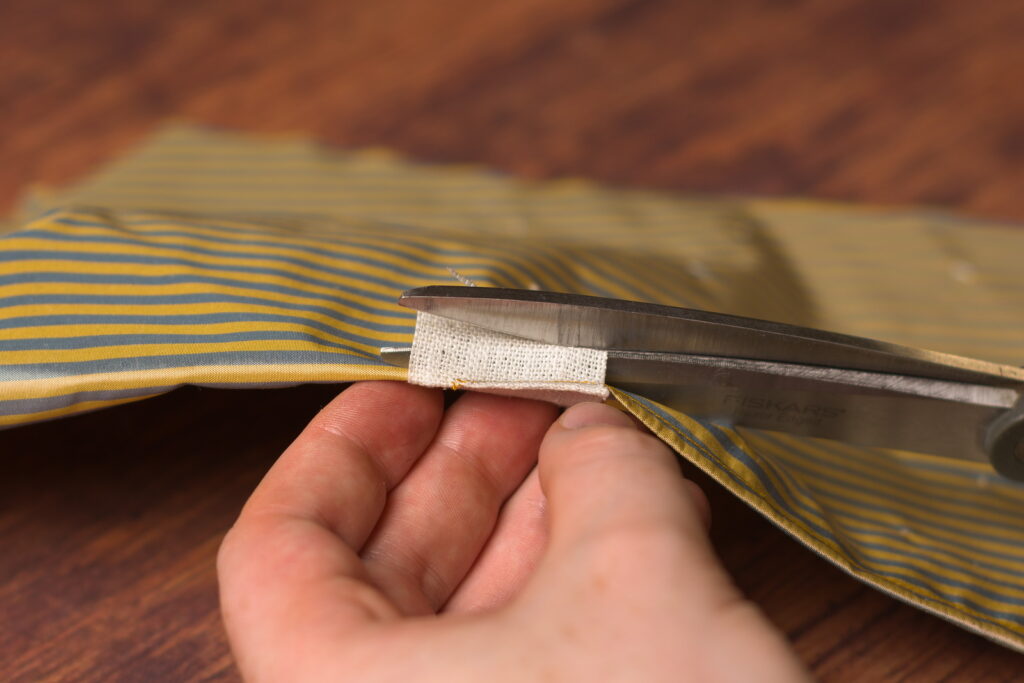
Now trim the linen on each side down to about 1/4″.
Pressing
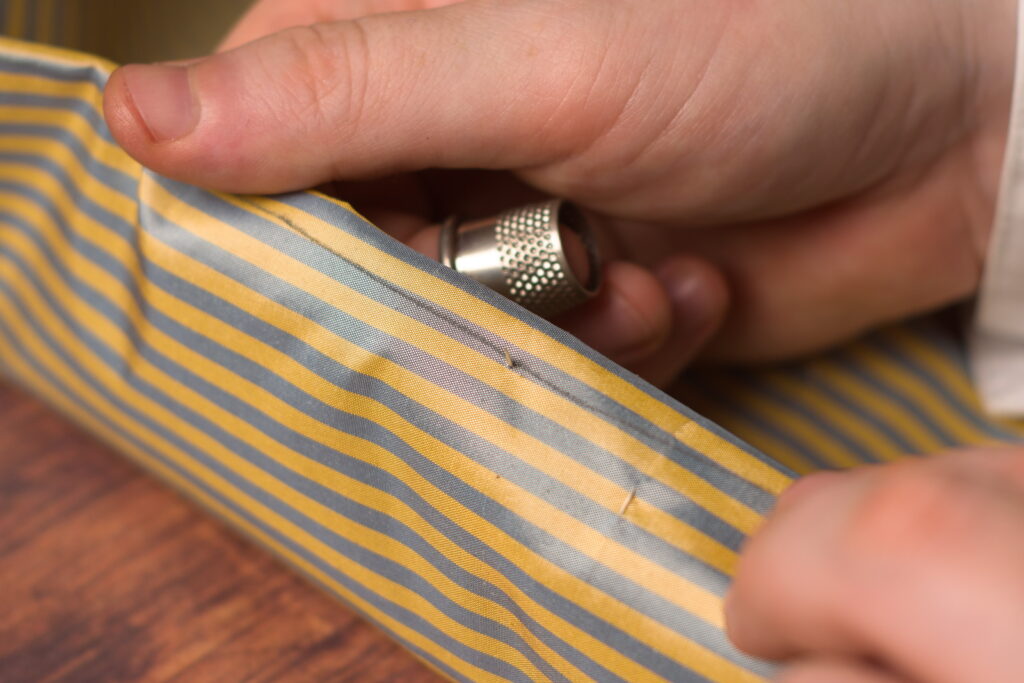
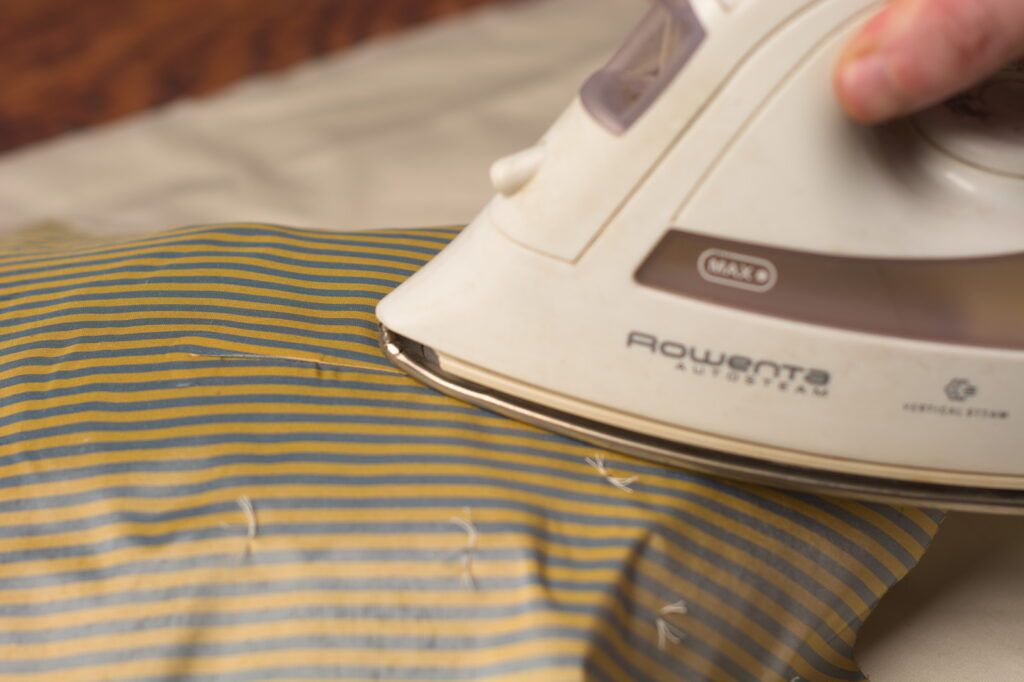
Pressing the darts is fairly straightforward. Begin by pressing the dart along its length while it is still folded in half. Don’t press beyond the tip though or you’ll begin creasing the waistcoat itself.
Using a tailor’s ham, press the dart over to one side or the other, from the wrong side. Here for the neck dart I’m pressing the dart downwards so that it won’t be fighting gravity the entire time.
Then turn to the right side and press the dart again along its length. Pay particular attention to the tip of the dart and get it smoothed out as nicely as possible.
The waist dart is a little trickier since it’s more of a compound shape. Press the dart while folded in half.
Then press the lower portion of the dart to one side, being sure it’s fully opened underneath.
Then readjust the dart over the tailor’s ham and press the remaining bit of dart in the same direction.
Flip over and press from the right side.
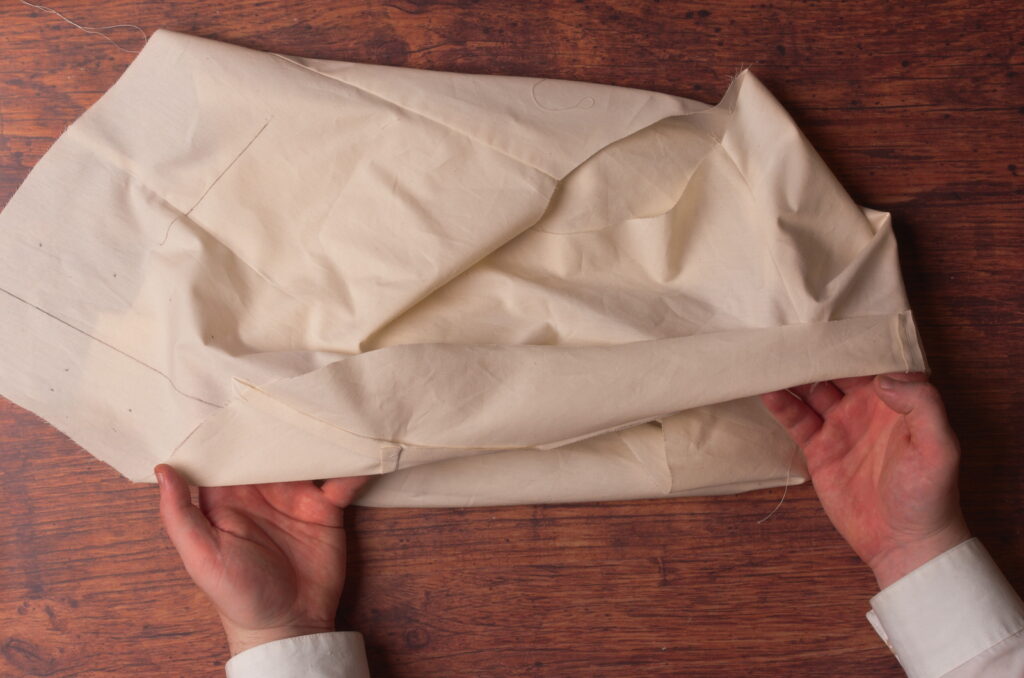
Here’s the forepart so far after installing both darts.
Cutting and Tacking
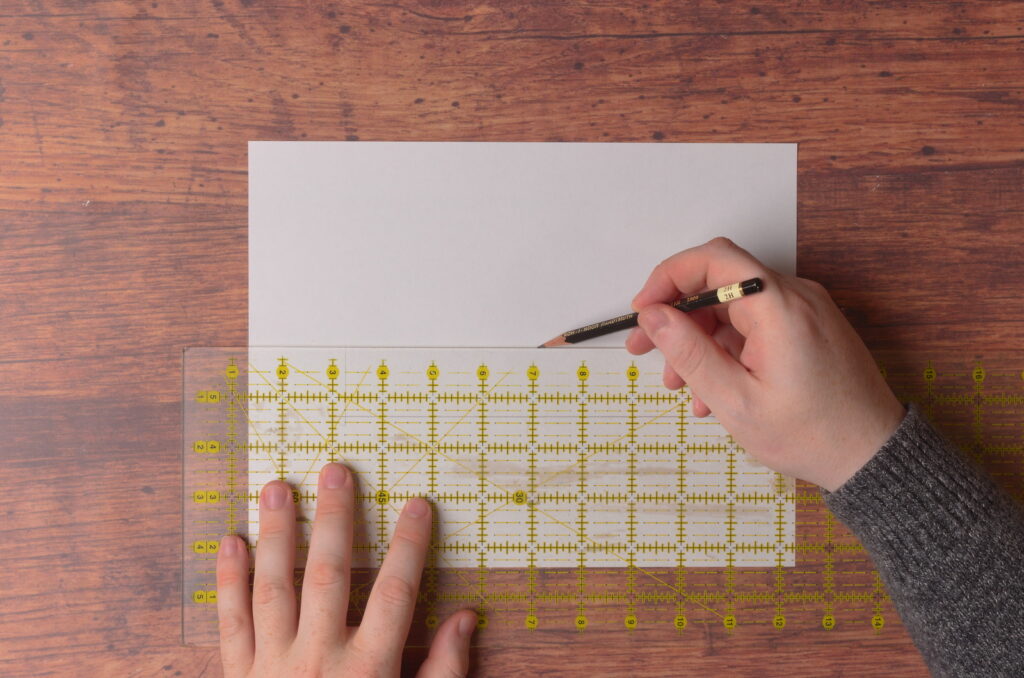
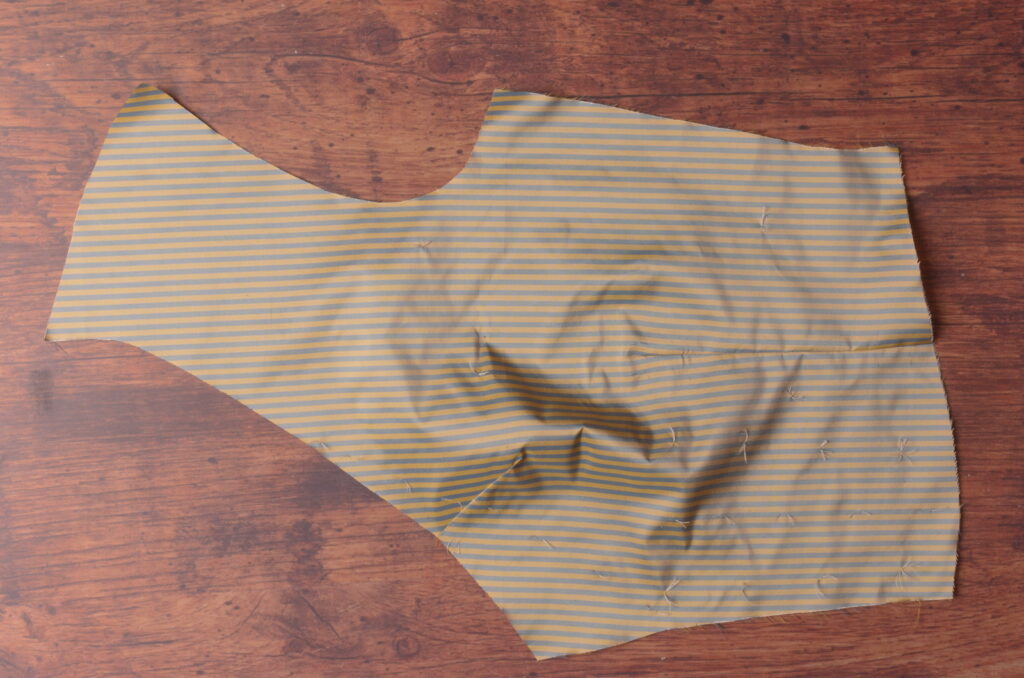
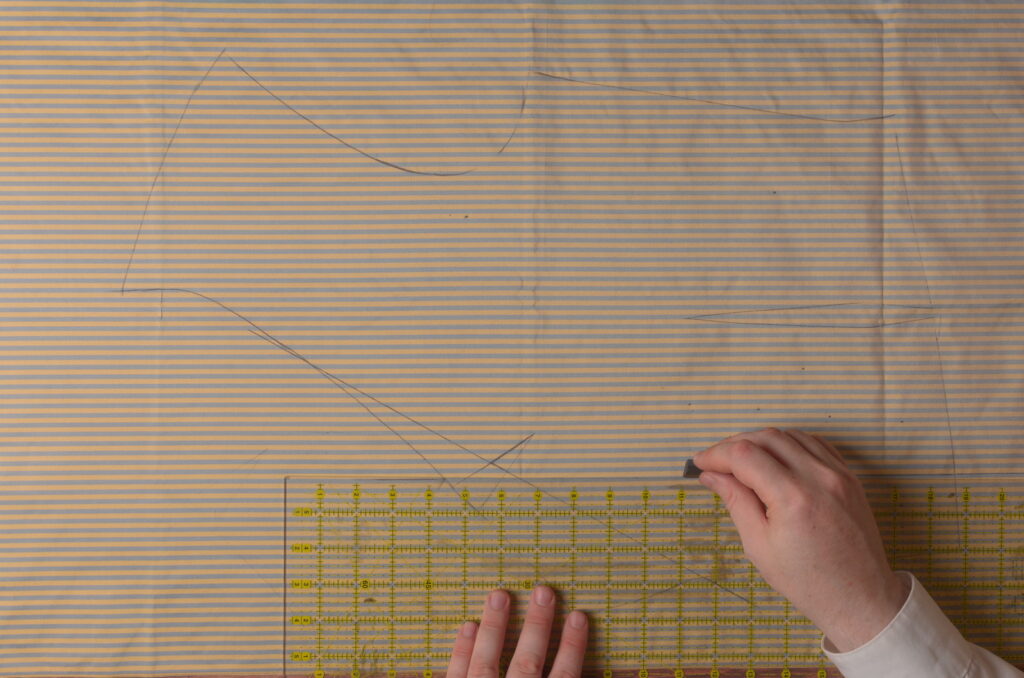
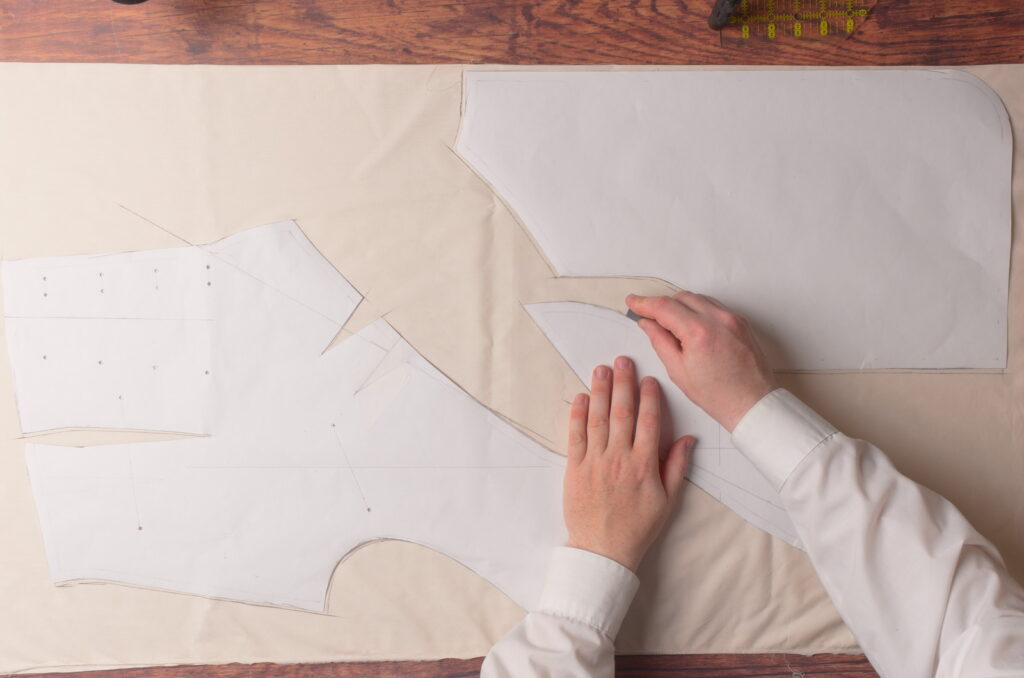
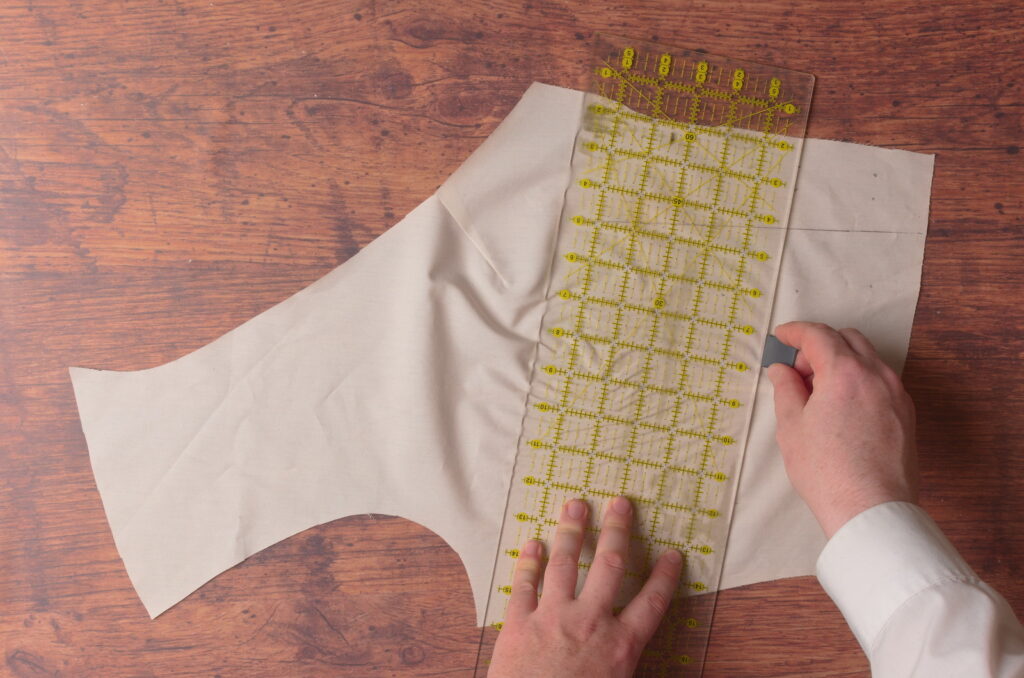
It’s time to final begin cutting and constructing the waistcoat! Lay your forepart pattern piece on the doubled fabric, aligning the grain lines with the edge of the fabric. I use a quilting ruler to aid in this. Ideally you’d have your pattern laid out closer to the edge to save fabric – I was concentrating on taking photographs and it completely slipped my mind.
Trace around the entirety of the pattern with a sharp piece of tailor’s chalk, as well as the darts. I weigh down the pattern with whatever I have handy, in this case my quilting ruler, but scissors and other objects work well too.
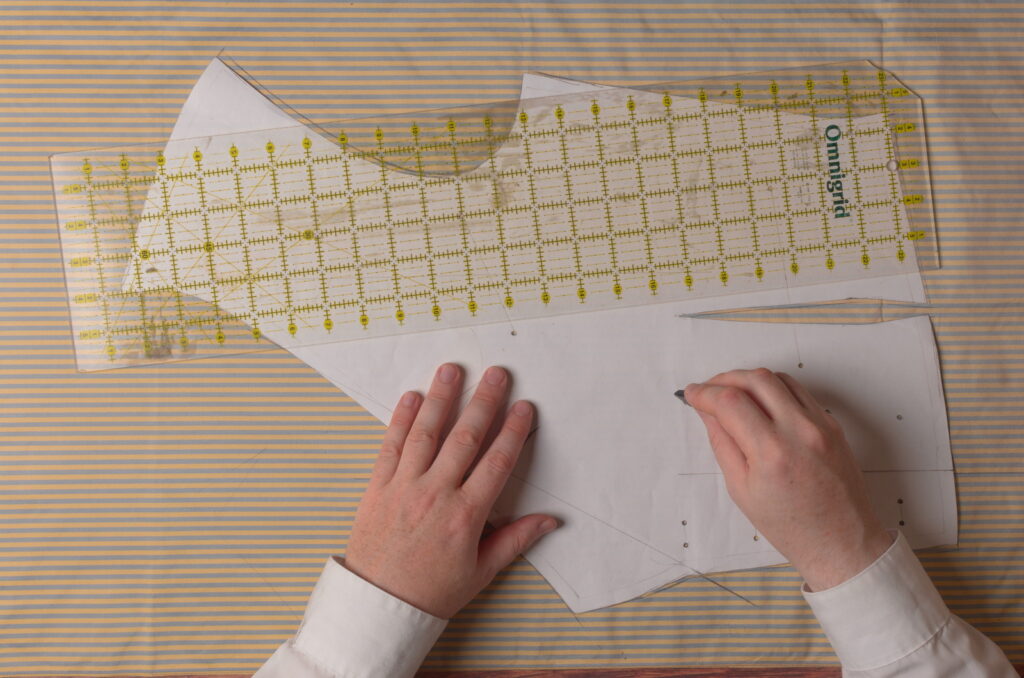
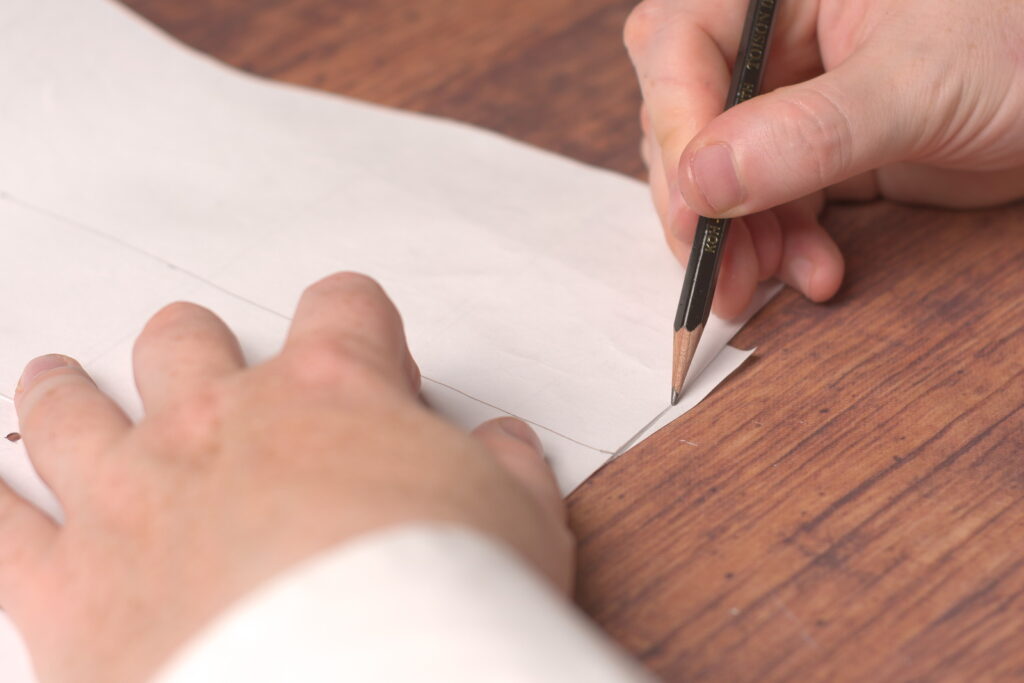
It’s a good idea to transfer the roll line and center front line to the fabric. I did so by aligning the ruler with the lines, and marking each end, just off the edge of the pattern.
Marking the top end of the center front.
Then it’s a simple matter of connecting the two marks after you remove the pattern to get the line in place.
Also be sure to mark the positions of the buttons, buttonholes, and ends of each pocket before you remove the pattern.
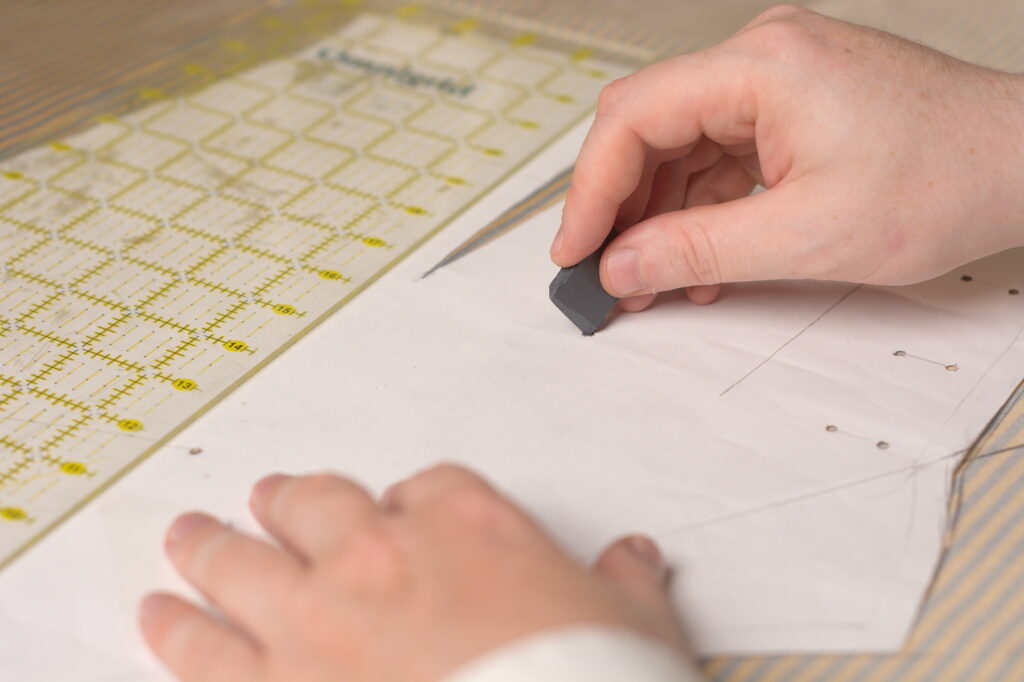
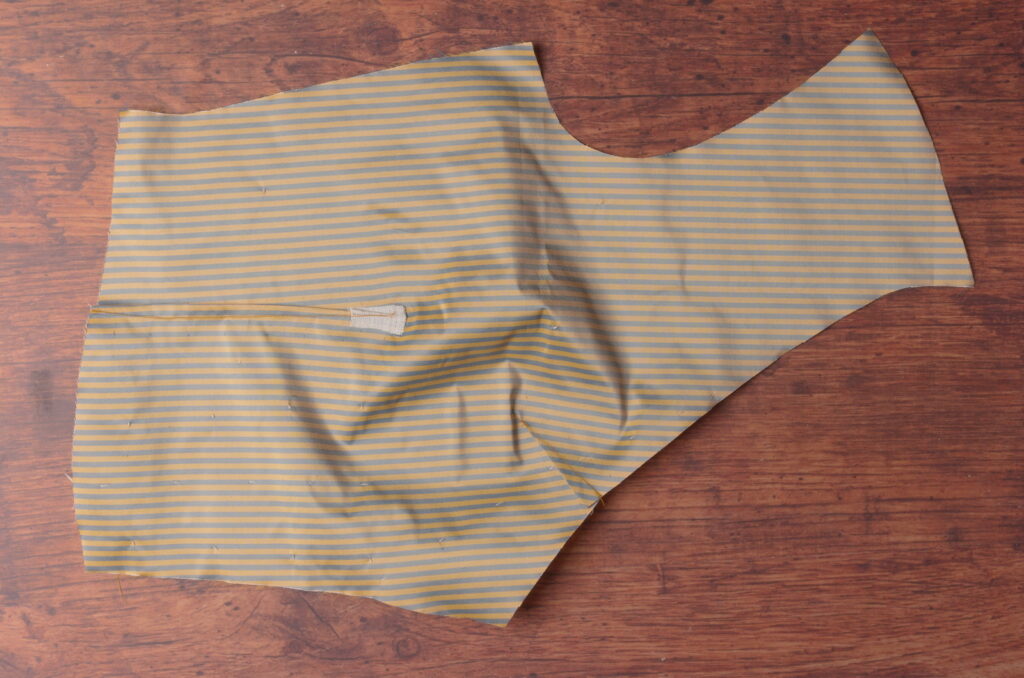
It’s a little hard to see, but here’s my pattern all marked out on the fabric, with the darts, roll line, center front, buttons, buttonholes, and pocket ends all marked out.
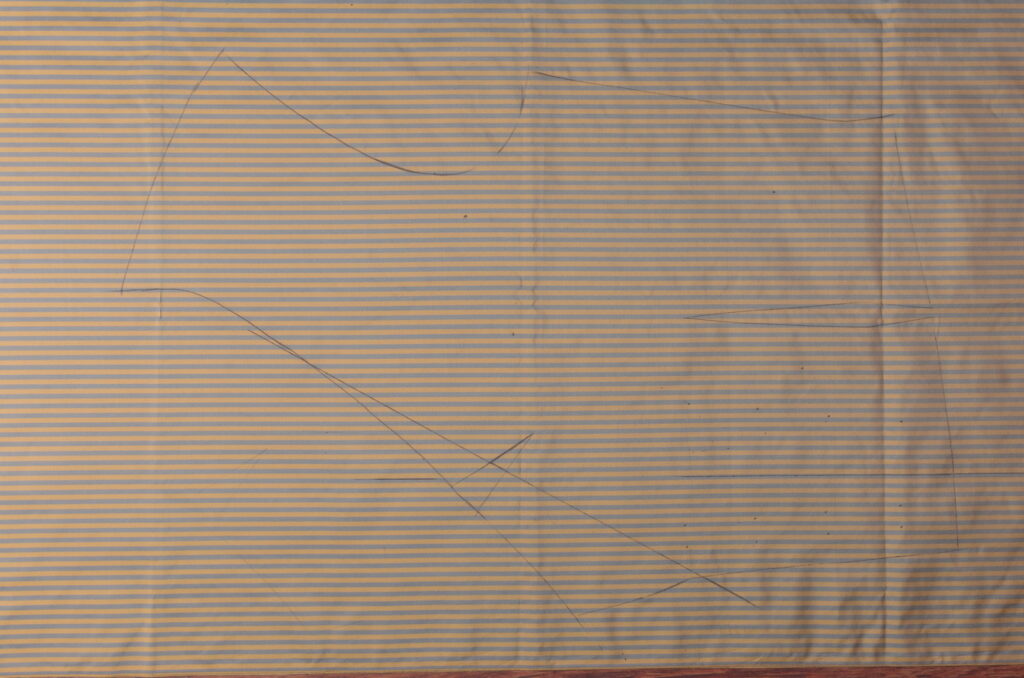
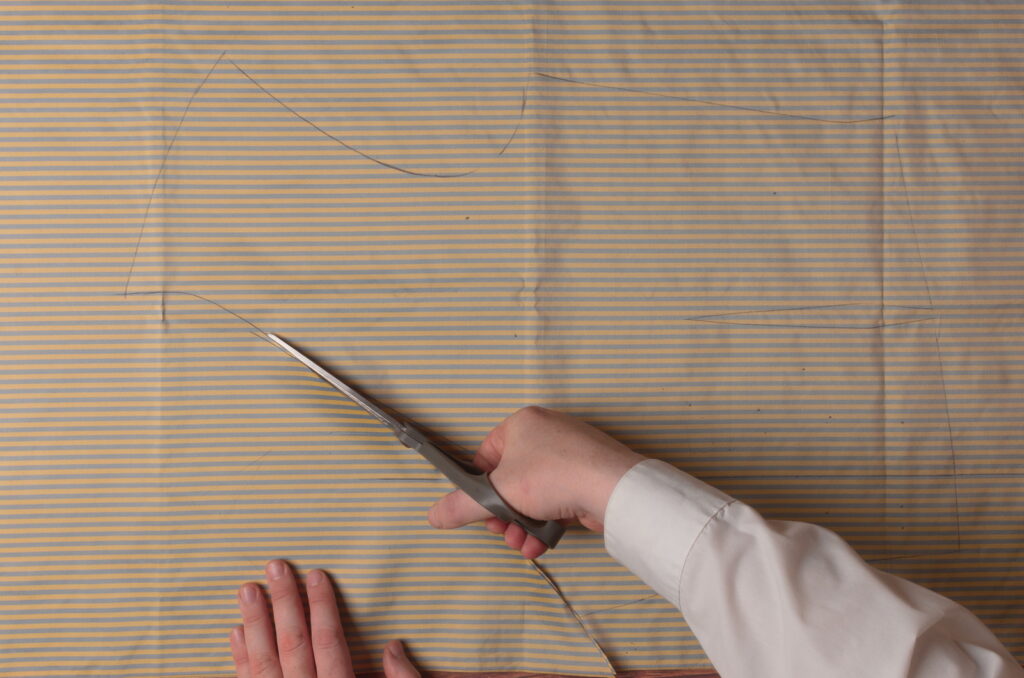
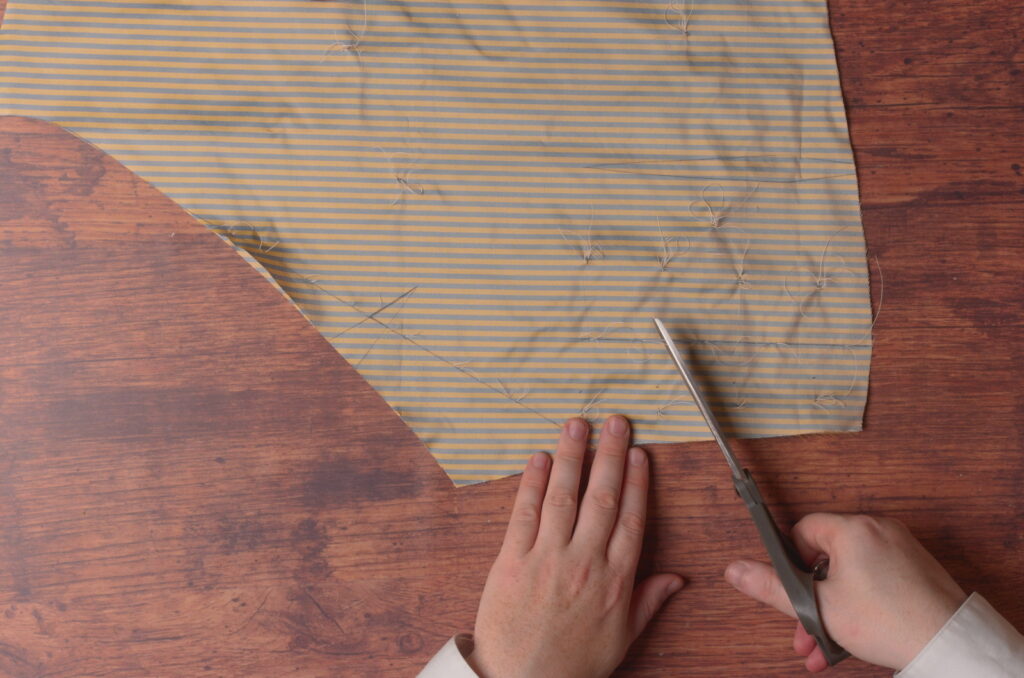
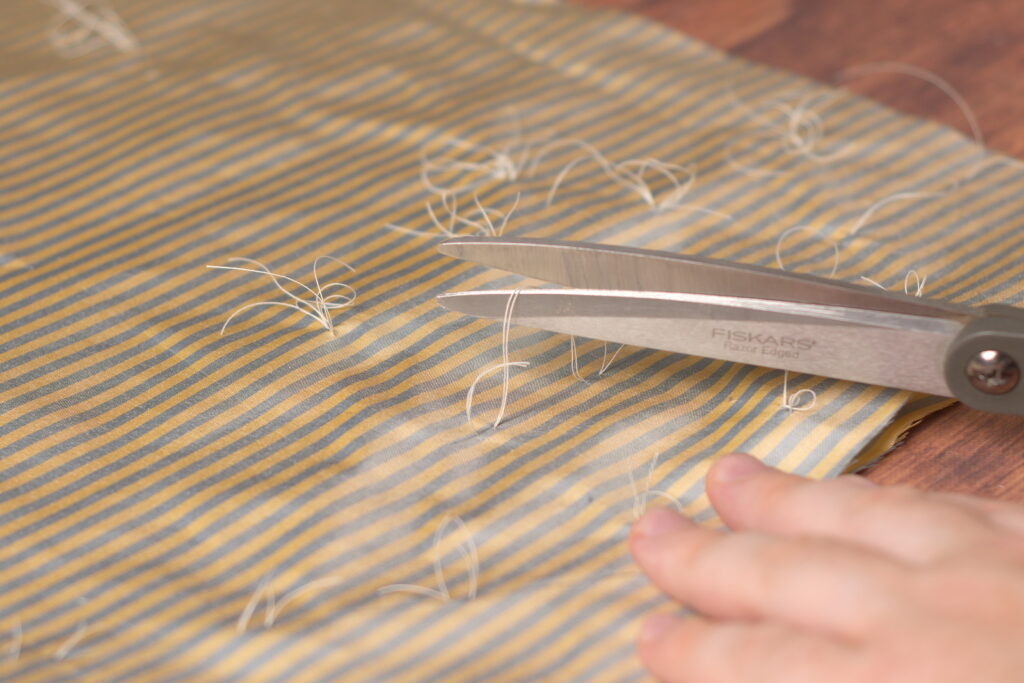
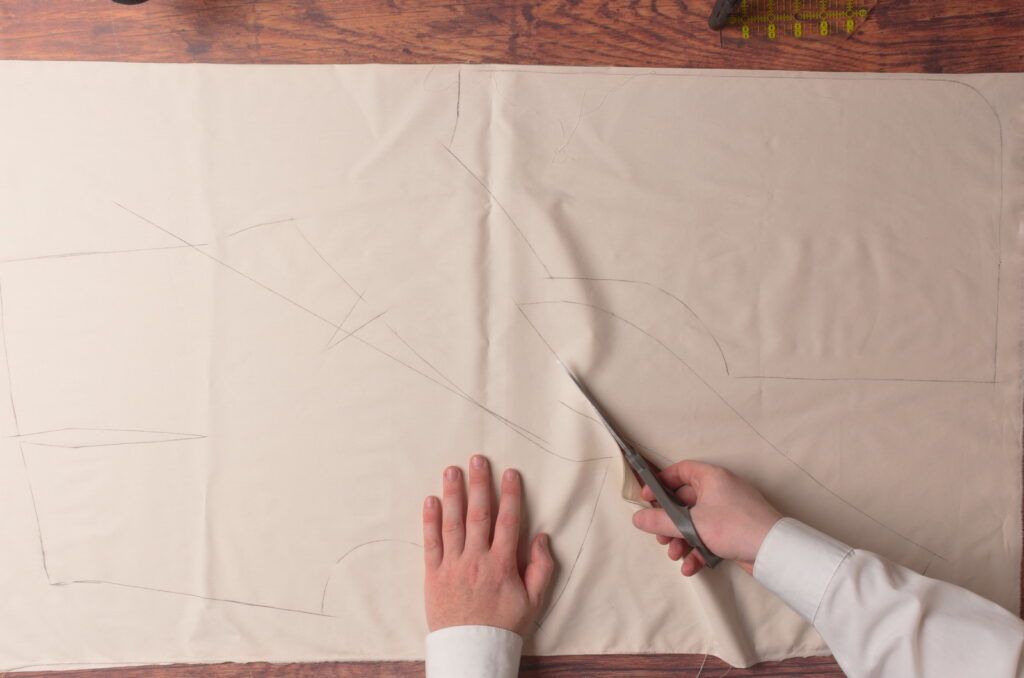
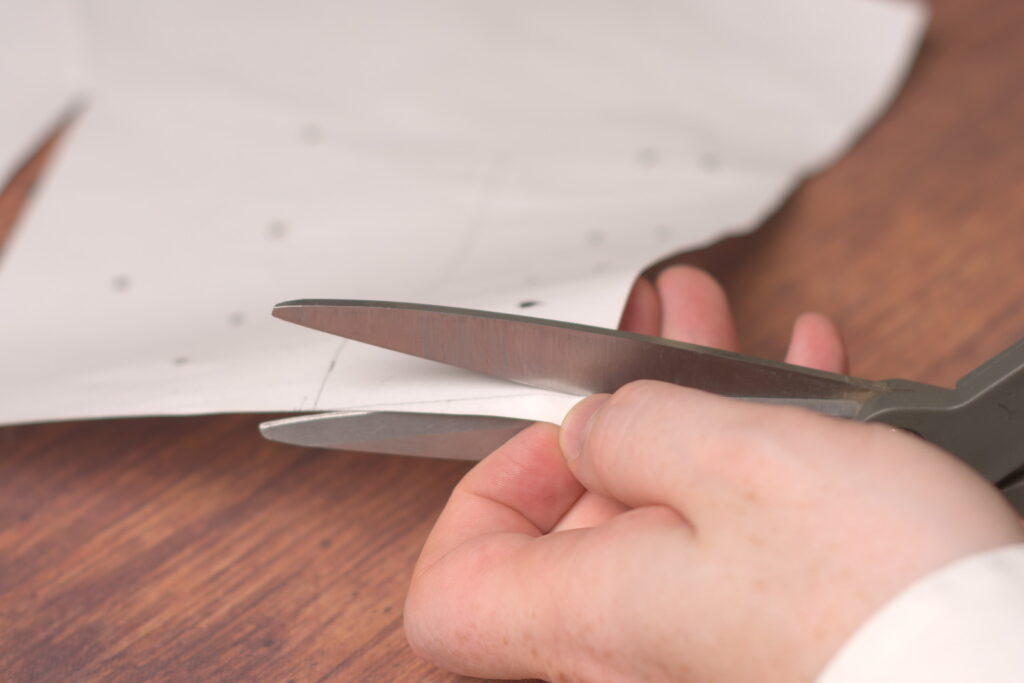
Begin cutting out the forepart. For best accuracy, keep your scissors on the table as you cut, perpendicular to the table, and cut to the inside of the chalk lines. Since the chalk line has a small width to it, cutting on the outside would give you a slightly-too-large waistcoat.
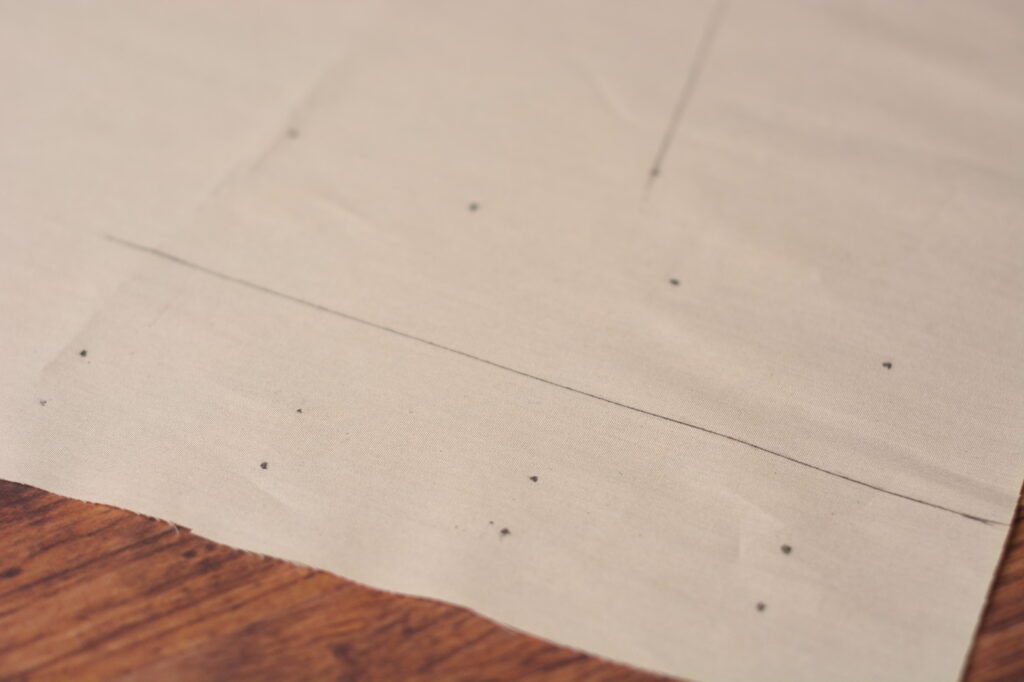
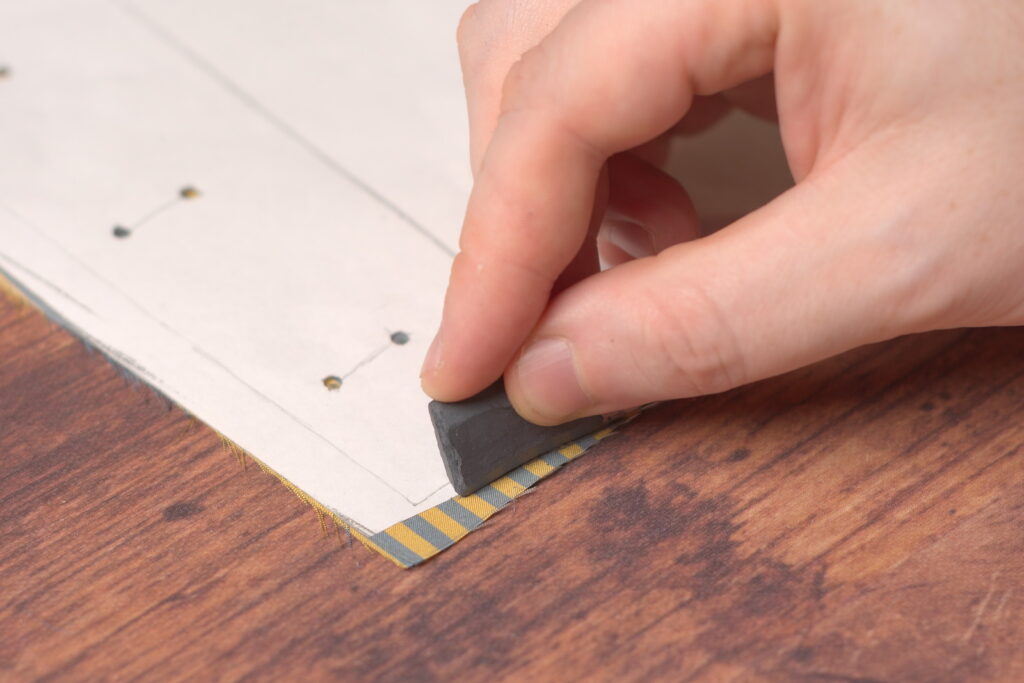
To transfer the markings to the lower piece, it’s a good idea to use tailor’s tacks, which also make the marks more durable for construction. For the roll line, center front line and pockets use the following method. Take a doubled over piece of basting thread and make about 1/4″ running stitches, two or three inches apart, along the straight lines. If you make the stitches closer together, keep a little slack in the thread.
For the buttons, buttonholes, ends of the pockets, and any other points, mark them by taking two stitches in place with the doubled basting thread, forming a loop. Be sure to keep the loop open about an inch, and the ends slightly longer than that.
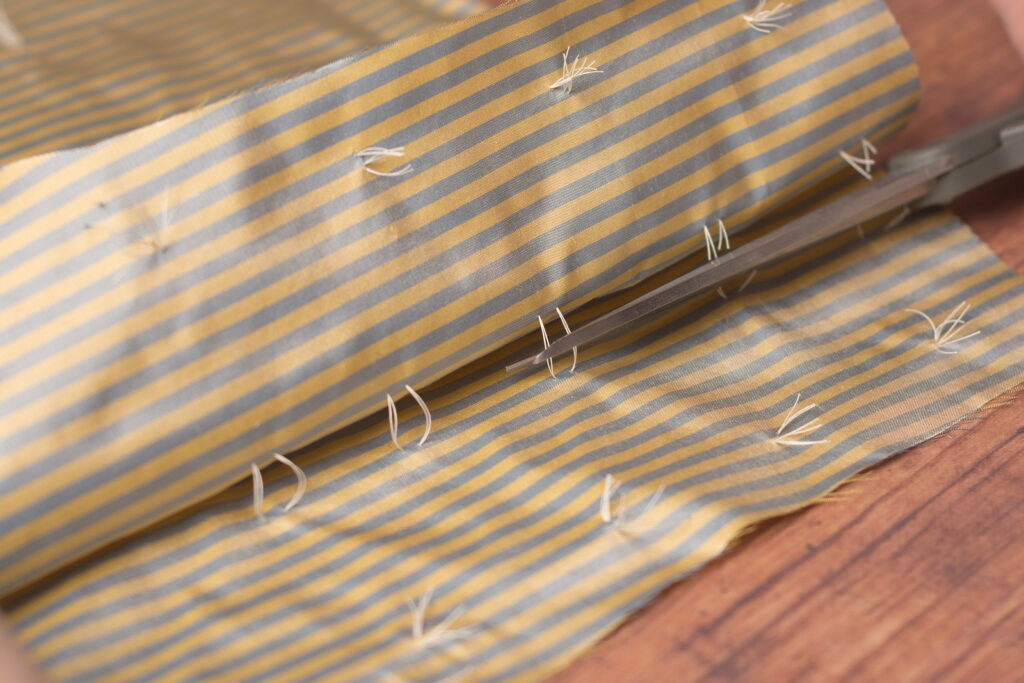
On the tailor’s tacks formed by the running stitch only, clip the threads between each stitch. The looped tacks are not cut open.
Carefully open the two layers of fabric, revealing the stitches on the inside. Don’t pull them too open or the threads may come out. Snip the threads at each tailor’s tack as you get to them, working your way across the entire forepart.
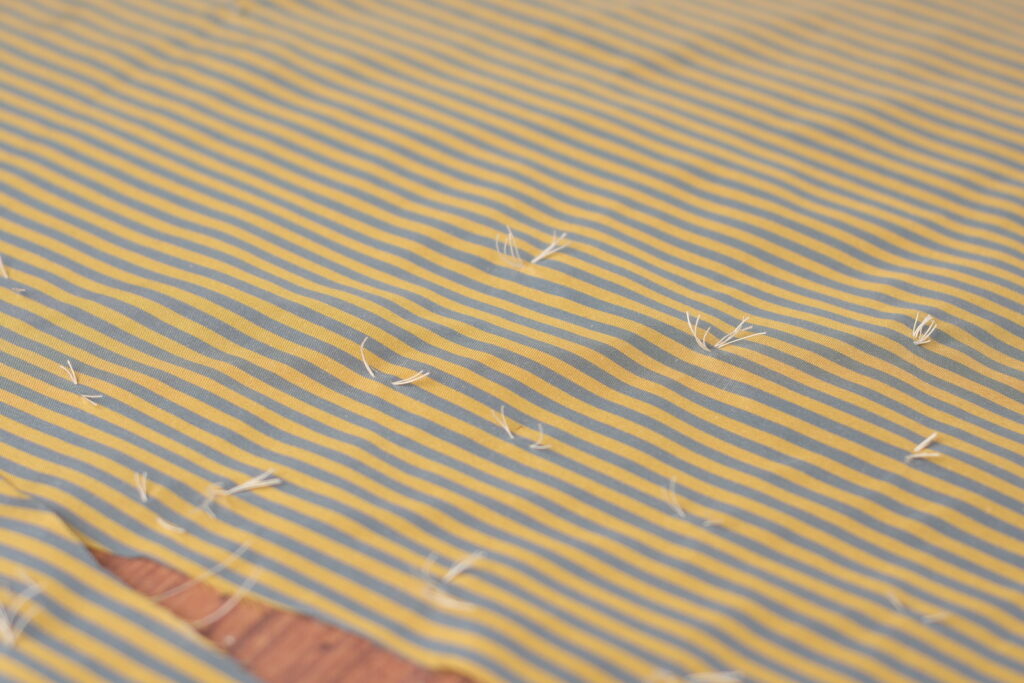
This leaves you with semi-permanent markings that will be of great use during construction.
Constructing a Toile
With the pattern finalized as best you can, it’s time to prepare a muslin toile for the first fitting. The toile is important not only to help with the fitting, but to work out any errors in the pattern you may have introduced and get you more familiar with the construction process.
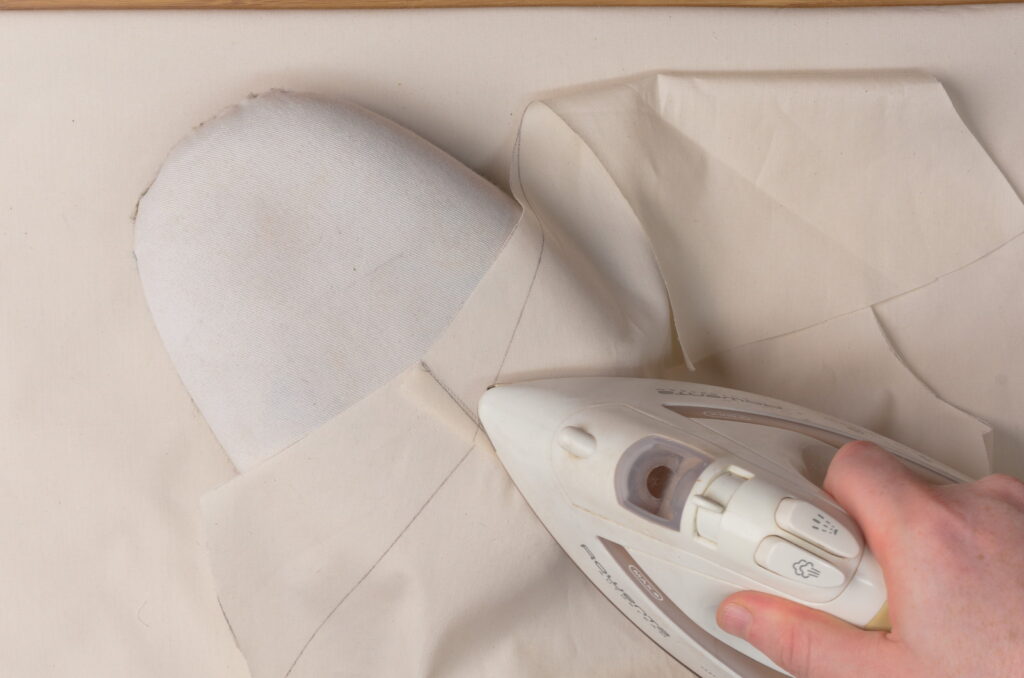
Begin by laying out all of the pieces, being sure to align the grain lines, and trace around each with some sharp tailor’s chalk. You can weigh the pattern pieces down to keep them from moving.
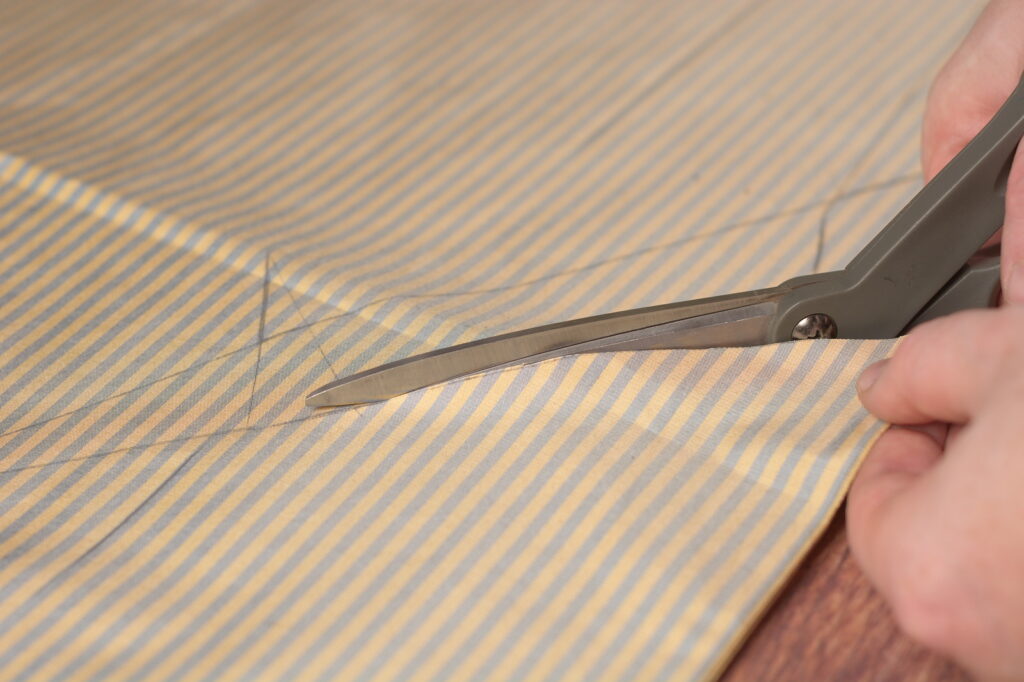
Also be sure to mark the roll lines on the front and collar pieces. Then cut out each of the pieces, keeping to the inside of the chalk lines. As you get to the darts, do not cut them out, rather, leave them in and cut across the bottom edge of each.
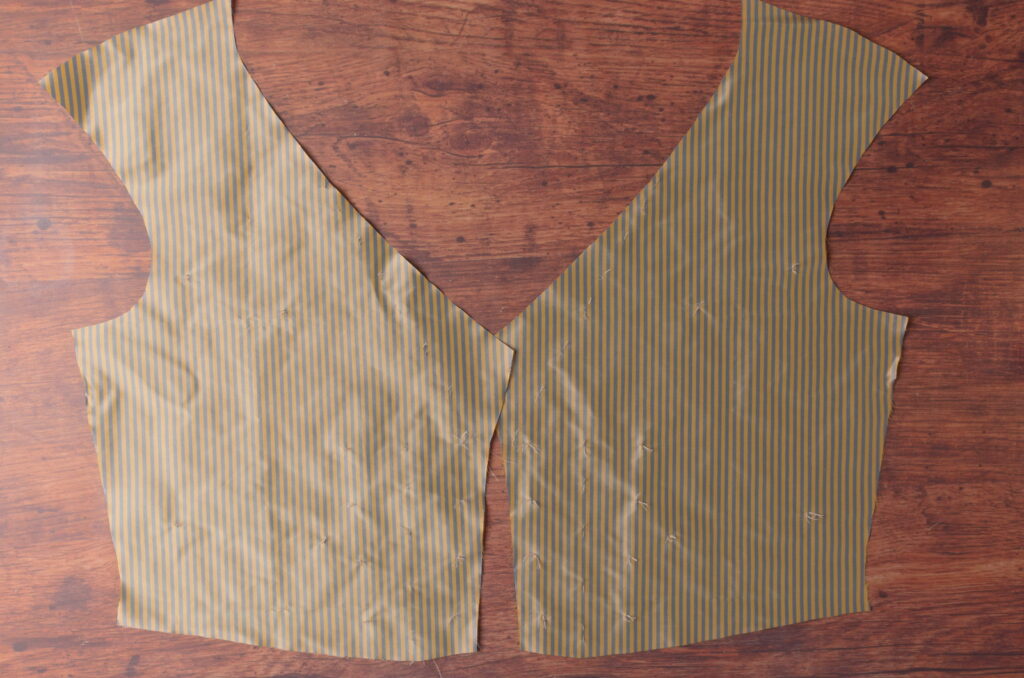
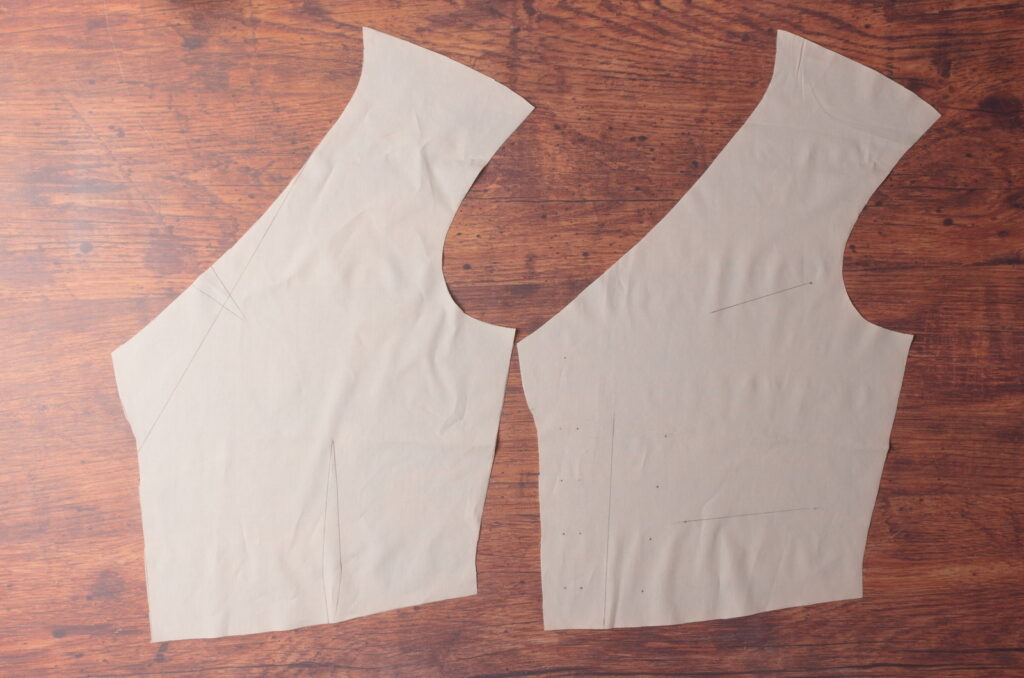
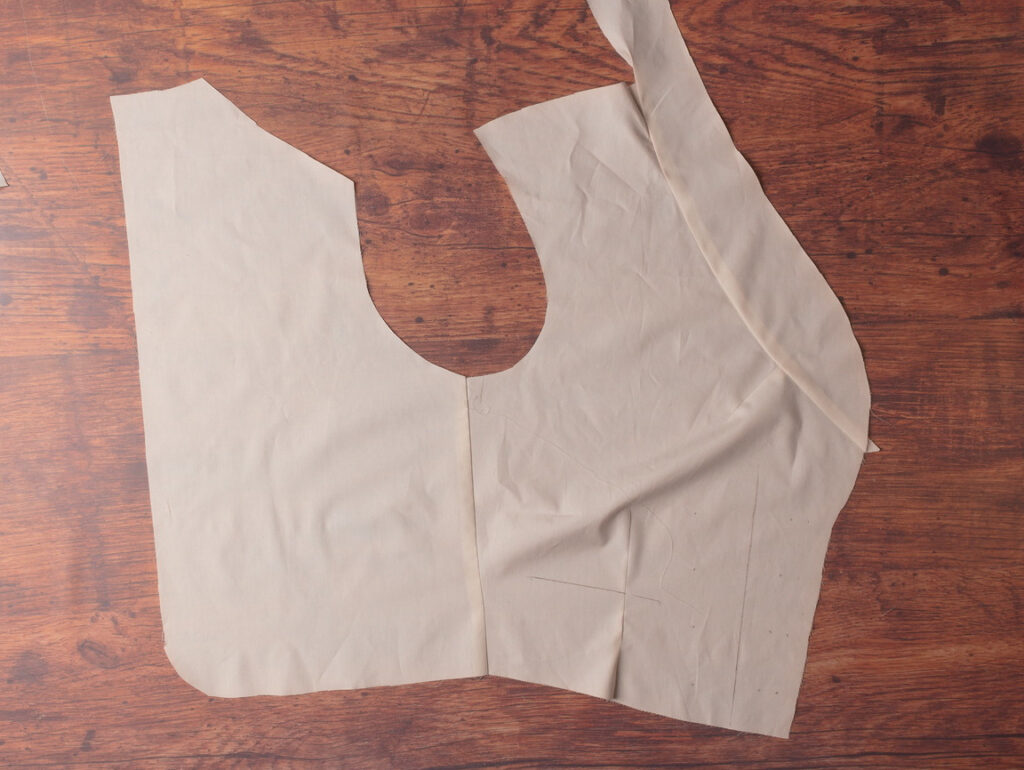
Here are the two front pieces all cut out. I marked the darts and roll lines on the wrong side, then flipped over to the right side to mark the pockets, button positions, and center front line.
The Darts
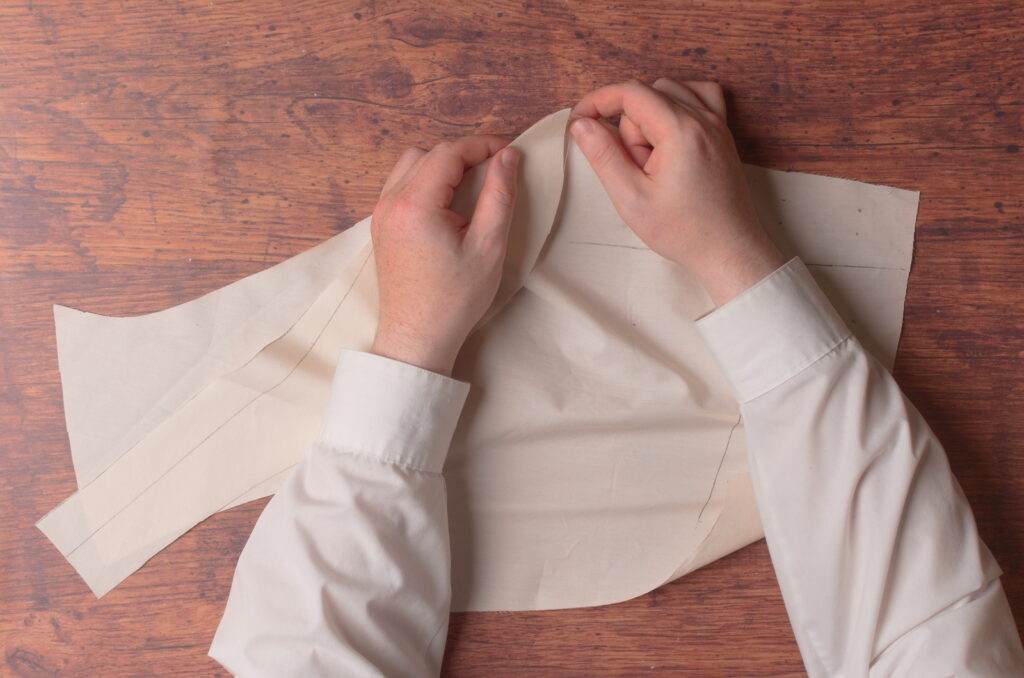
Any darts are closed in the same manner. Grasp the fabric and fold the dart in half along the middle, aligning the chalk marks as best you can.
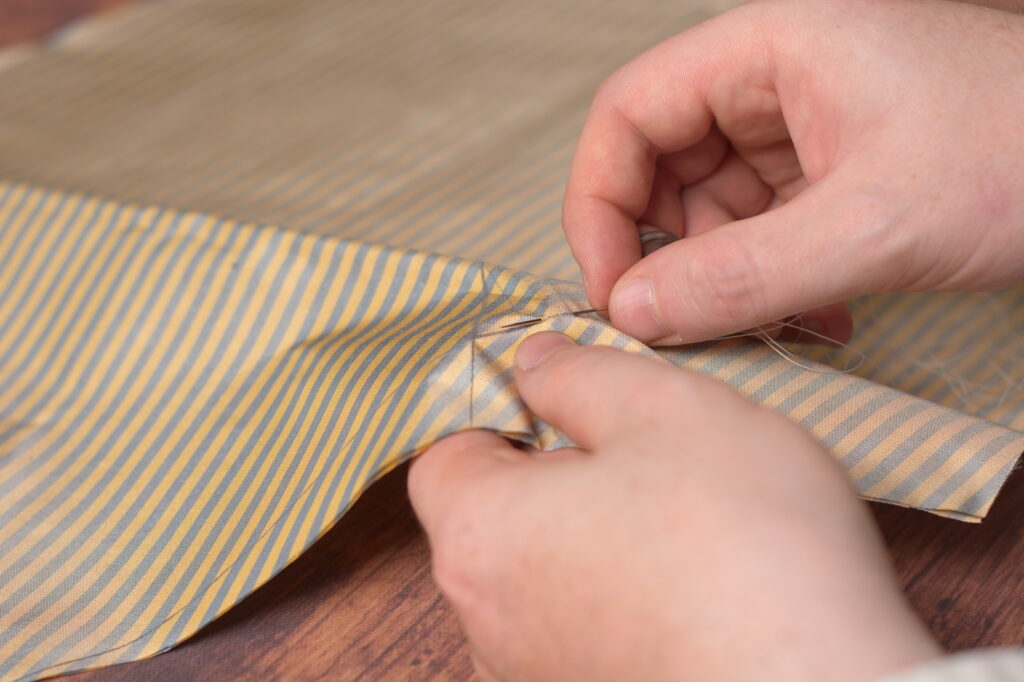
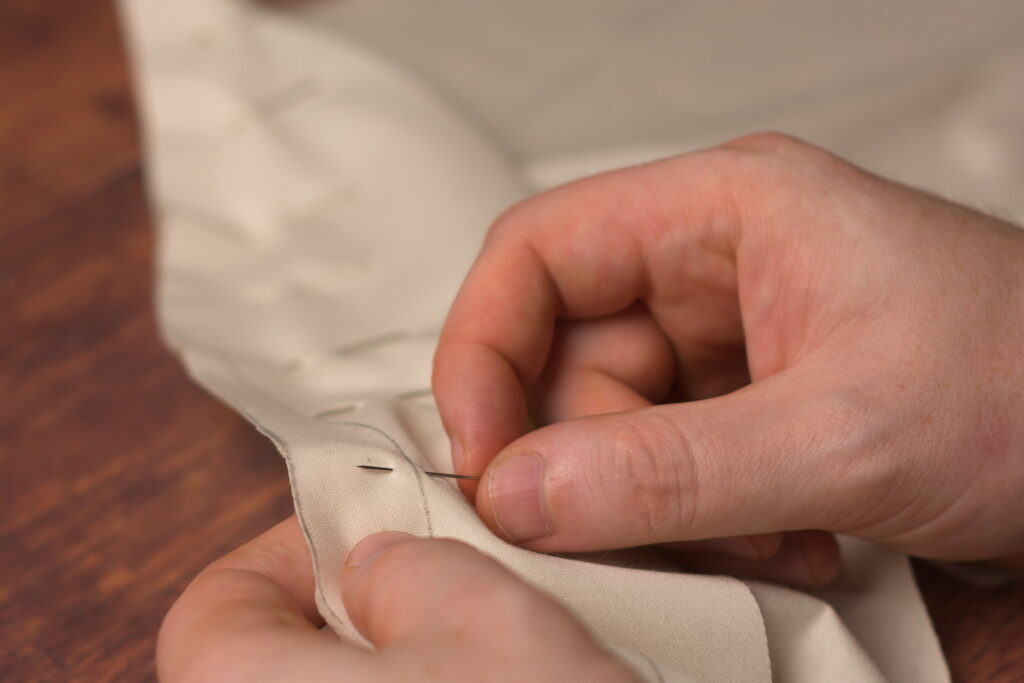
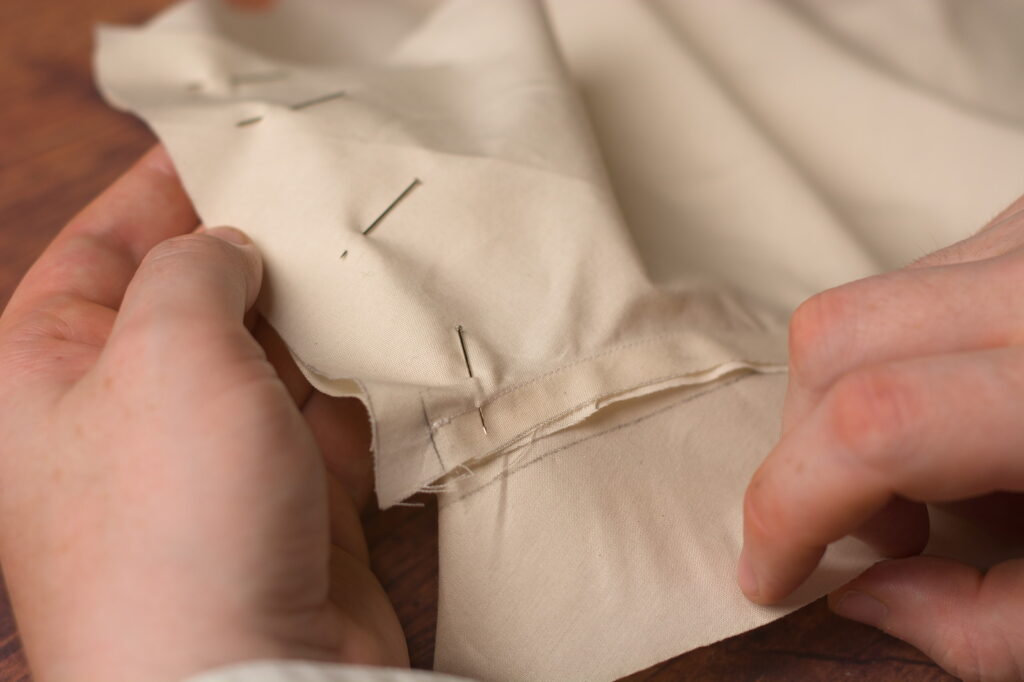
And pin the dart closed.
If you’re putting in a front waist dart, the same method is used, though it can be slightly more tricky to get everything aligned.
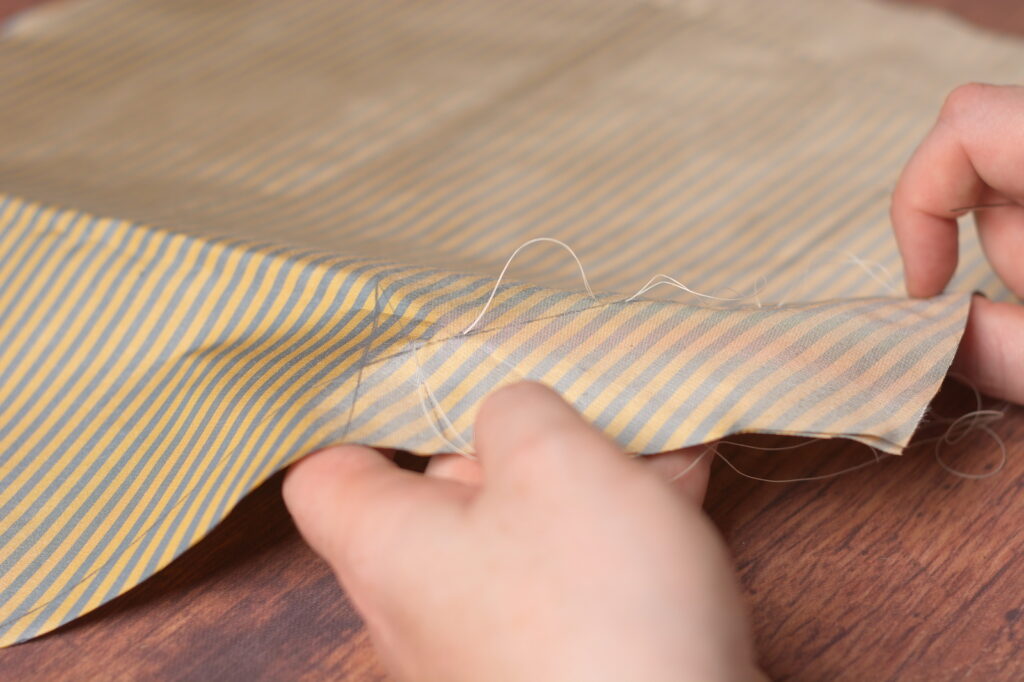
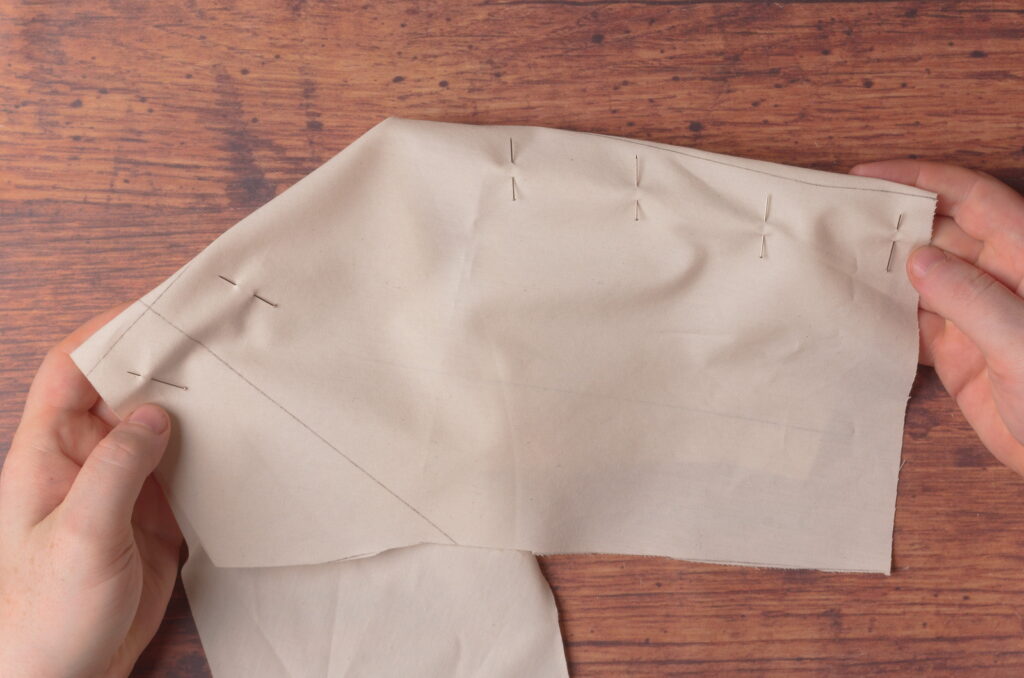
Here are both of my darts pinned and ready to sew.
Sew the darts, following along the outer edge of the chalk line. I like to start at the outside and work my way towards the point.
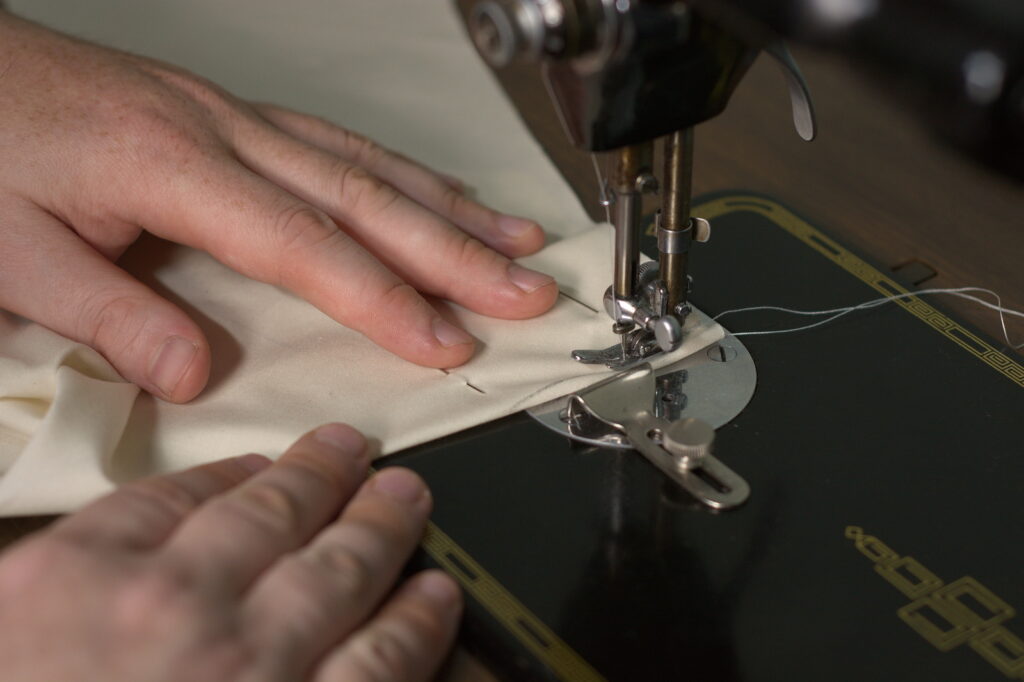
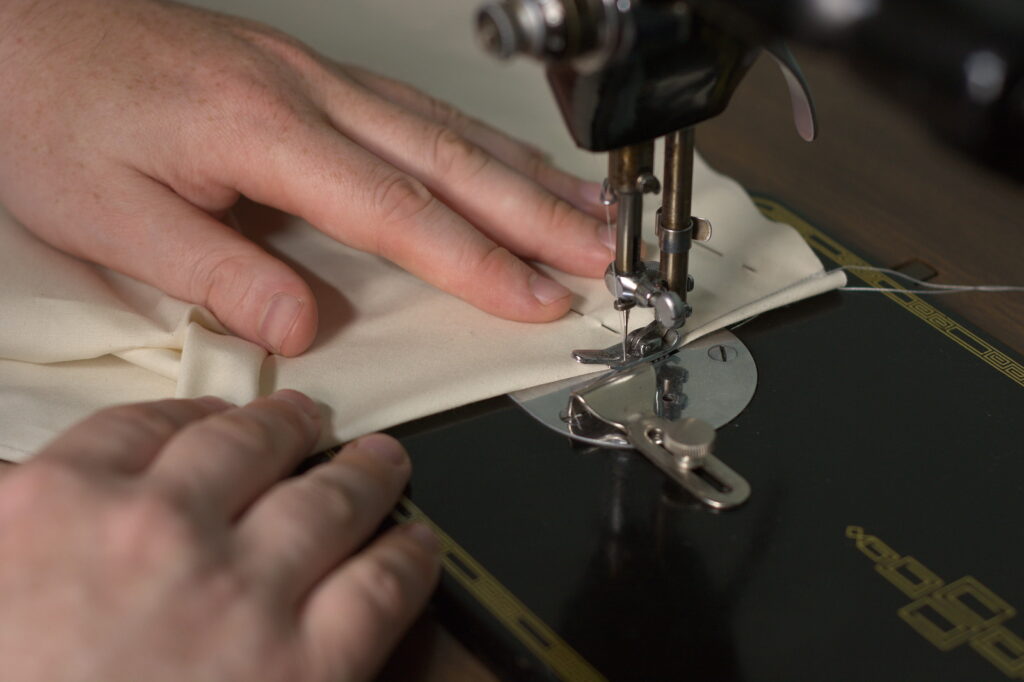
As you get to the point, gently taper the stitching into the fold, ending just as you reach the edge.
Press the darts to one side or the other (just be consistent).
I like to press the neck dart downwards to make it a little easier to press over the roll line later. You’ll notice that the roll line is no longer straight, thanks to the dart, and this is something we’ll address later on as well.
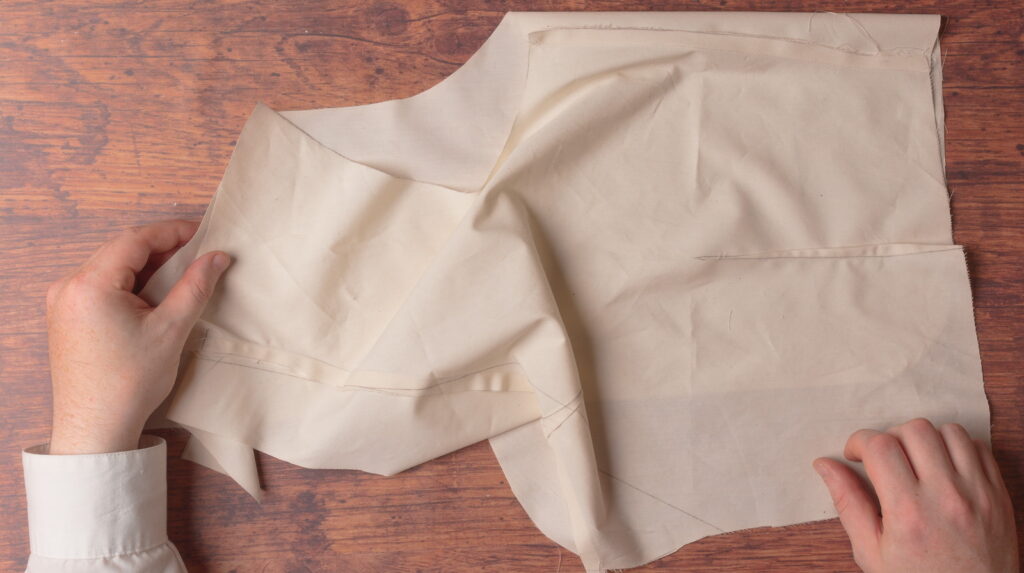
Here’s one of my waistcoat fronts after sewing the darts.
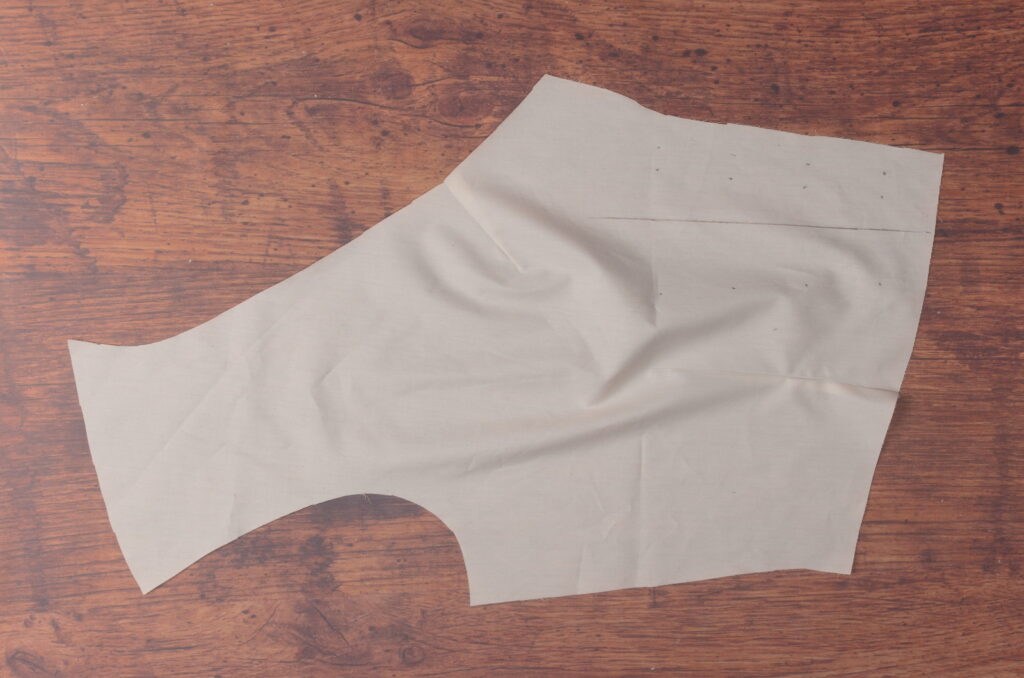
If you put in a front dart, that will mess up the pocket lines as well, so feel free to redraw them if you want.
Attaching the Collar
Lay the collar on top of the waistcoat front, right sides together. Be sure the collar edge with the roll line is laid alongside the neck seam underneath.
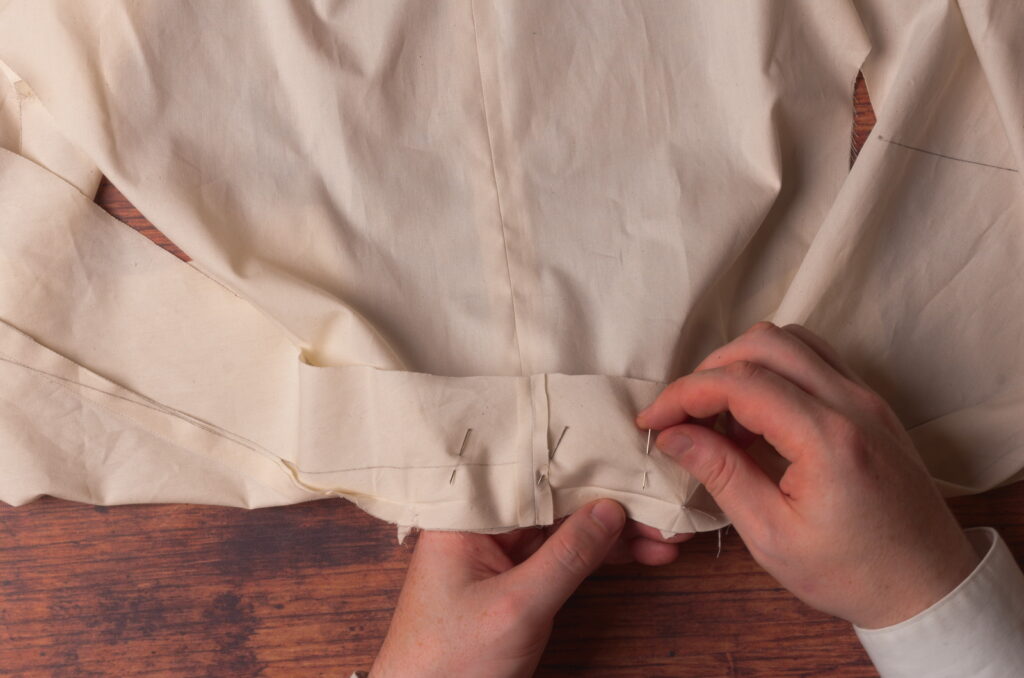
Align the bottom of the collar so that the 3/8″ seam allowance is aligned with the edge of the waistcoat front and pin in place.
Continue pinning the collar to the waistcoat front, working your way up the neck. Distribute the fabric as necessary as you go.
Do keep the pins away from the seam allowances. As you get to the top, you should have about three inches of collar (roughly) extending beyond the shoulder.
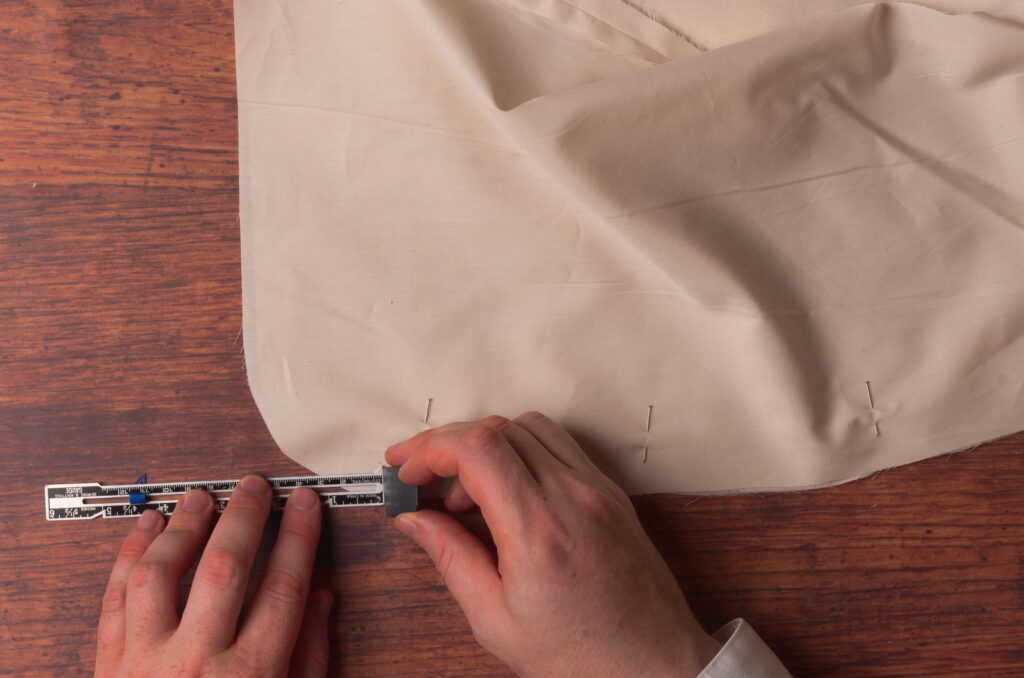
Turn the waistcoat over and mark a point along the neck seam 1/2″ below the shoulder to indicate where the stitch line stops.
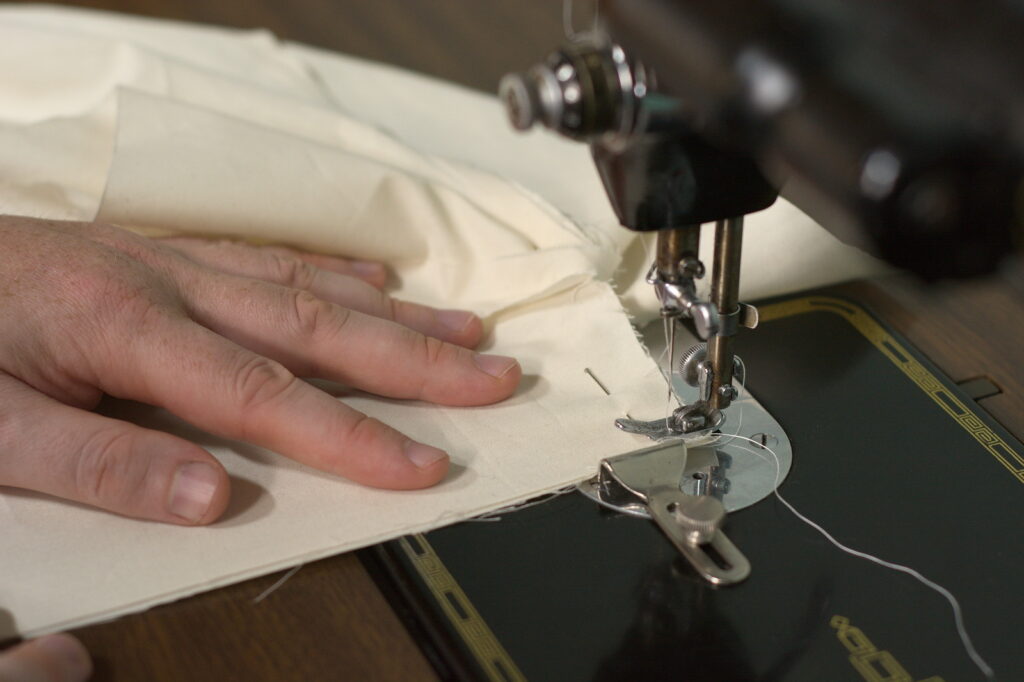
Sew the collar on from the bottom edge through to the point you marked using a 3/8″ seam allowance. I like to keep the collar on the underside while sewing, as it seems to help distribute the fabric more evenly.
Press the collar seam over towards the collar, using a tailor’s ham to support the curved areas.
Here’s the completed collar.
Side Seam
Construction gets a little easier from here on out. Lay the back piece on to the front of the waistcoat, right sides together, aligning the side seams.
Pin the side seam.
And sew the seam using a 3/8″ seam allowance.
Press the side seam open.
The Shoulders
Align the back and front shoulder seams, right sides together.
Fold the collar extension out of the way so that it doesn’t get caught in the stitching.
Carefully align the seam allowances and pin both ends of the shoulder seam. This is the armscye side:
And the neck side with the collar folded out of the way.
Sew the shoulder seam using a 3/8″ seam allowance, being sure to keep the collar out of the way.
Press open the shoulder seam using a tailor’s ham.
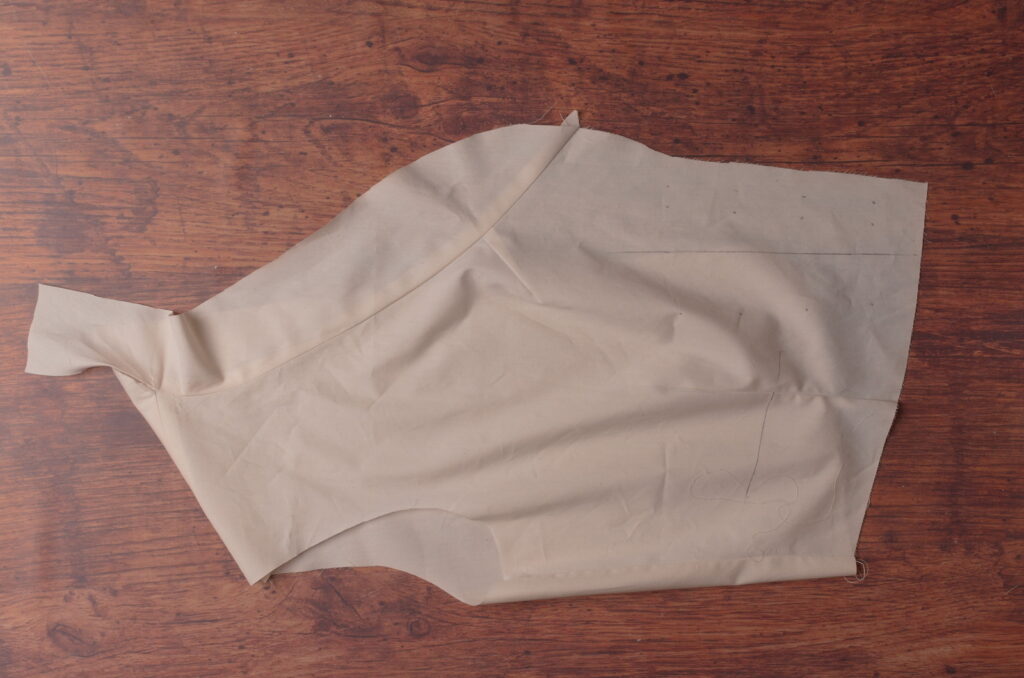
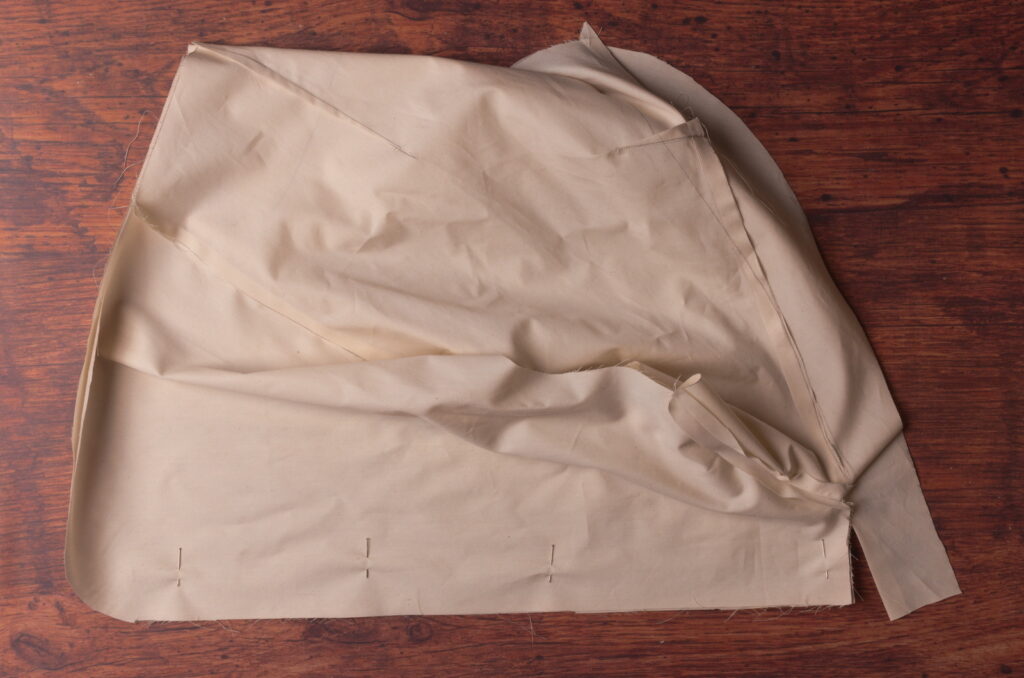
Here’s the completed half of the waistcoat. Repeat the entire process with the other half if you haven’t been keeping up with it.
Center Back Seam
Align the two halves of the waistcoat along the center back seam and pin.
Mark a point near the bottom of the center back seam just at the point where the curve straightens out to indicate the end of the stitching.
Sew the center back seam using a 3/8″ seam allowance and press open.
Securing the Collar
Lay the waistcoat on the table with the right side of the back facing you. Arrange one side of the collar along the remaining neck edge, make sure it’s neither too too nor too loose. Mark on the edge of the collar the position of the center back seam underneath.

Move that half of the collar out of the way and repeat the process with the other half.
Square across the collar at each of the points.
Now align the two collar halves right sides together along the lines. Ideally, the collar will be perfectly even at the ends, but I must have gathered on the collar slightly differently on one half while pinning it — something to be aware of.

Sew the collar halves together directly along the line.
Trim the excess collar down to 3/8″ from the stitch line.
Press the seam open.
To finish up the collar, pin the collar to the back of the waistcoat, right sides together, aligning the center back seams of each. Then pin along each side as necessary.
Sew the rest of the collar on using a 3/8″ seam allowance. Take care not to catch unwanted parts of the collar under the seam — the tension tends to draw the collar towards the needle here.
Press the collar and seam allowances up towards the top of the waistcoat.
Final Pressing
Begin pressing the roll line at the back of the waistcoat. This is best done by someone else while you’re wearing the waistcoat (not with the iron!), but you can get fairly close just by developing your eye.
Then by putting some gentle tension on the collar and neck seam area, you can get a fairly close idea of where the roll line should be (it was distorted due to the neck dart).
Press the remaining areas of the collar as necessary.
With the toile complete, go ahead and try it on to see how it fits. If you need any help or advice, please post photos from the front, side, and back along with a top down photo of your pattern, so that others can learn from your experience as well.
Trimming the Front Waist
There’s one last little detail to take care of on the pattern before moving on to the toile. The way the pattern is designed, you’ll be left with two little points at the bottom front of the waistcoat if you don’t trim them. The easiest way is to make a quick copy of your waistcoat front pattern, with the center front line drawn on the copy. Then overlap the two, trace the overlapped area, and trim off the excess, giving you a nice clean front.
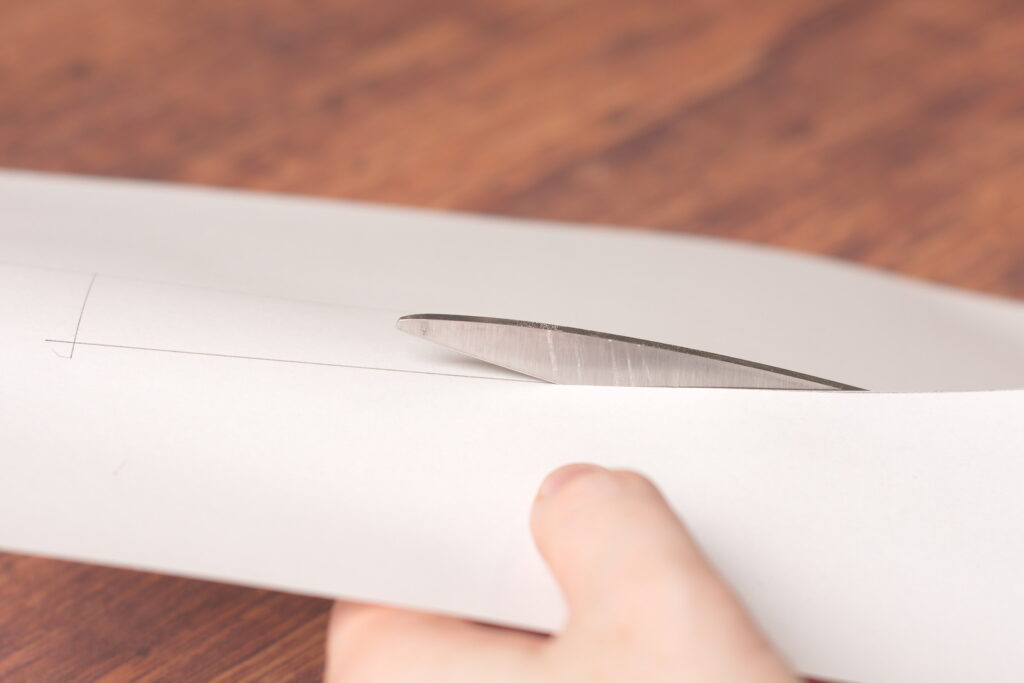
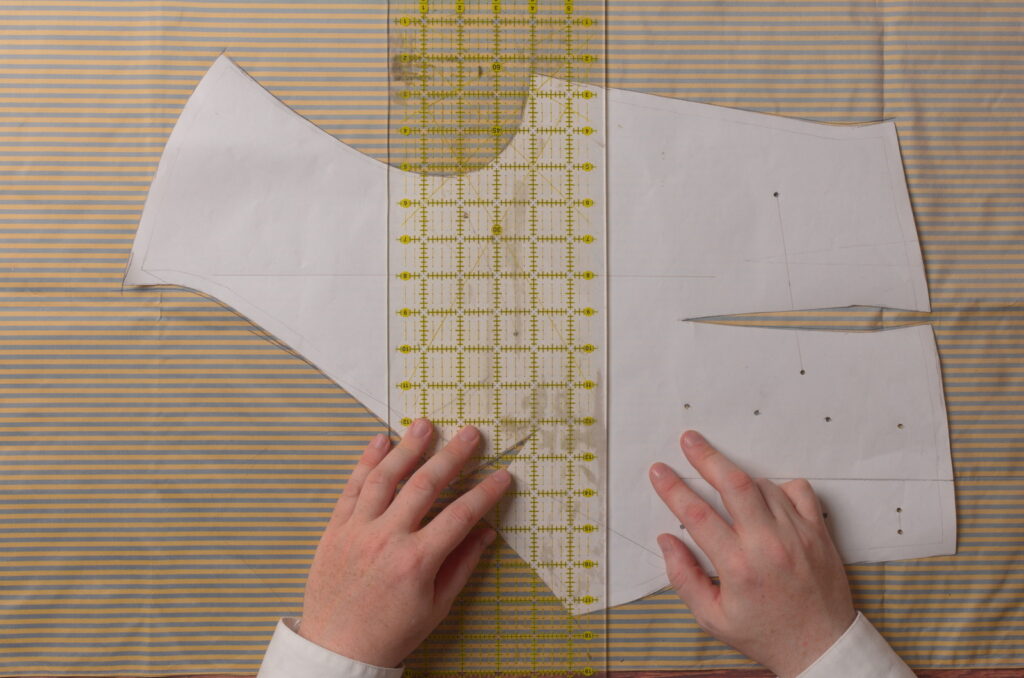
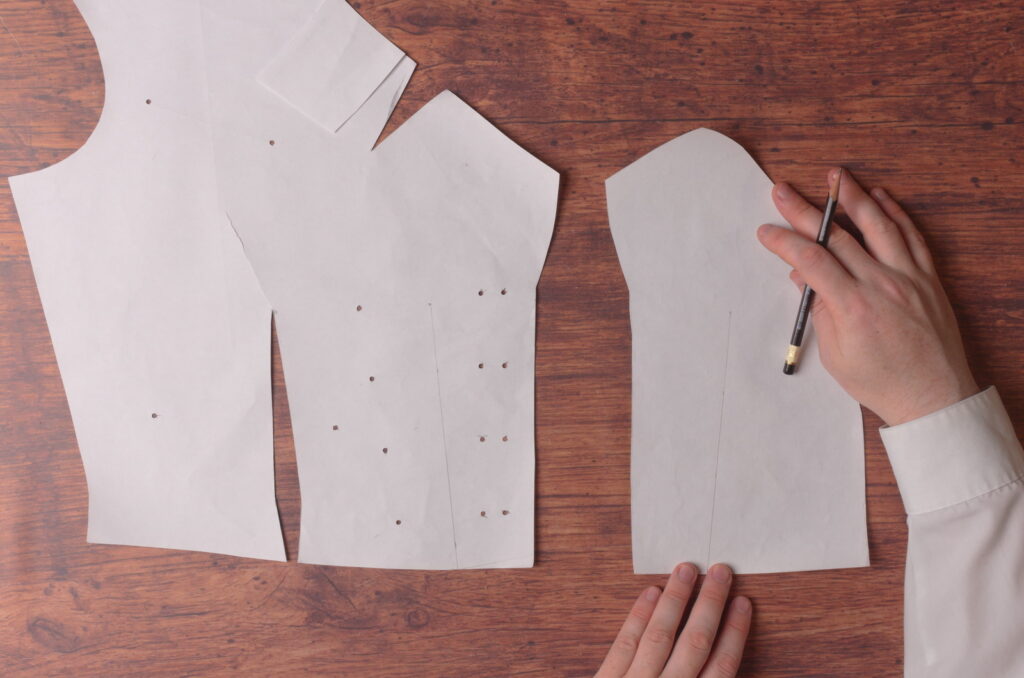
Here’s what I did in practice. First I copied a small part of the front pattern, basically from dart to dart, to a fresh sheet of paper, and copied the center line as well. You really only need a small section of the front copied, not the entire pattern.
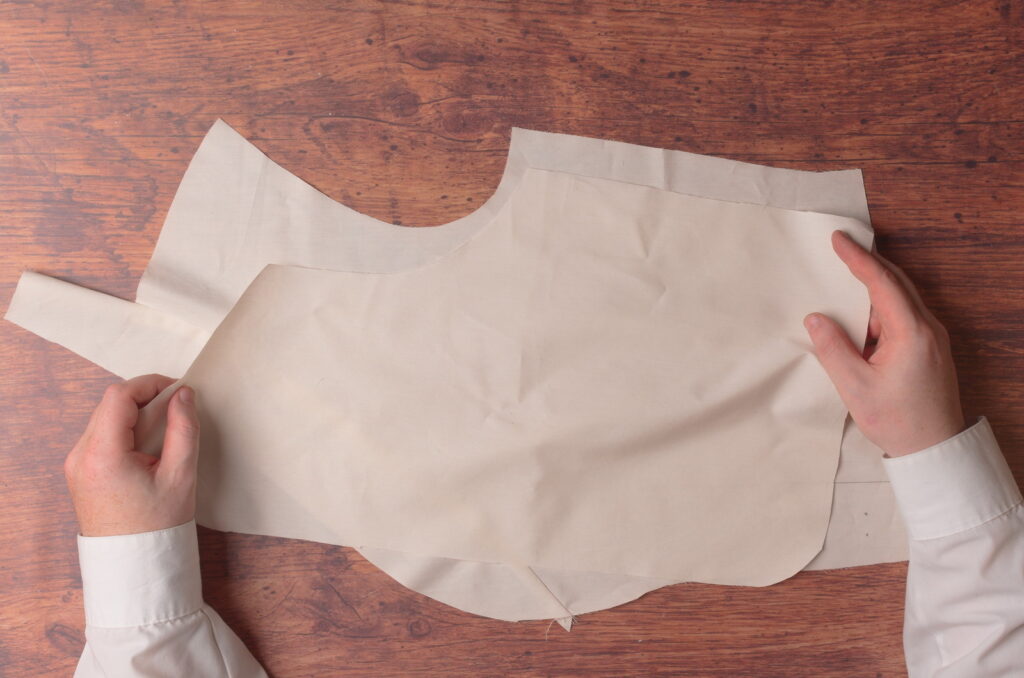
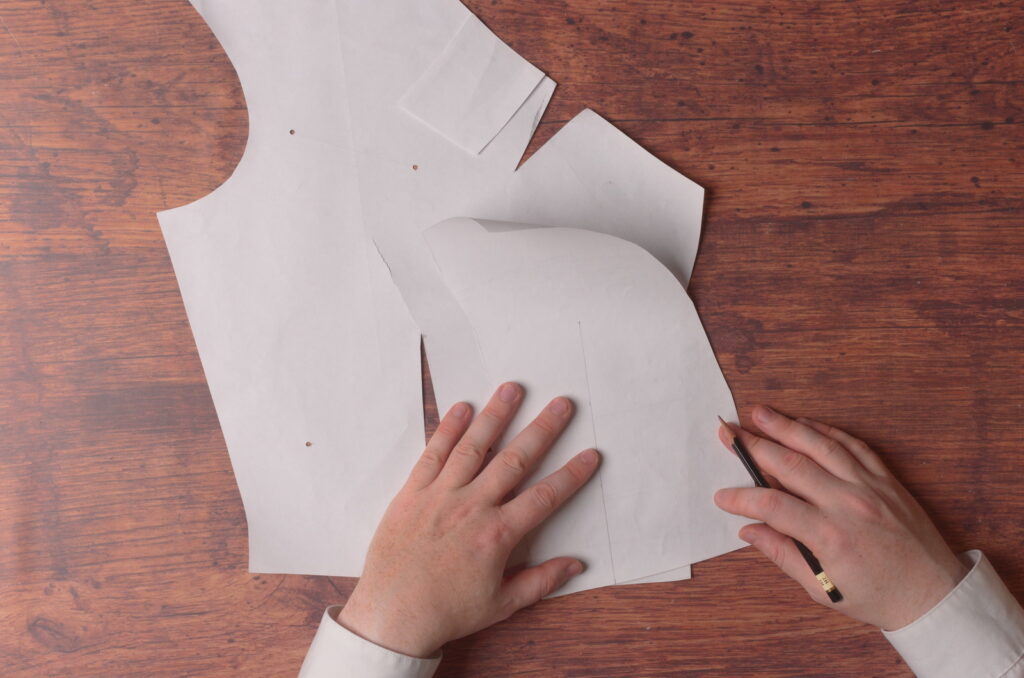
Then I placed the copy on top of the original, carefully aligning the center line, and making sure the edges of the pattern met at the bottom of the center line.
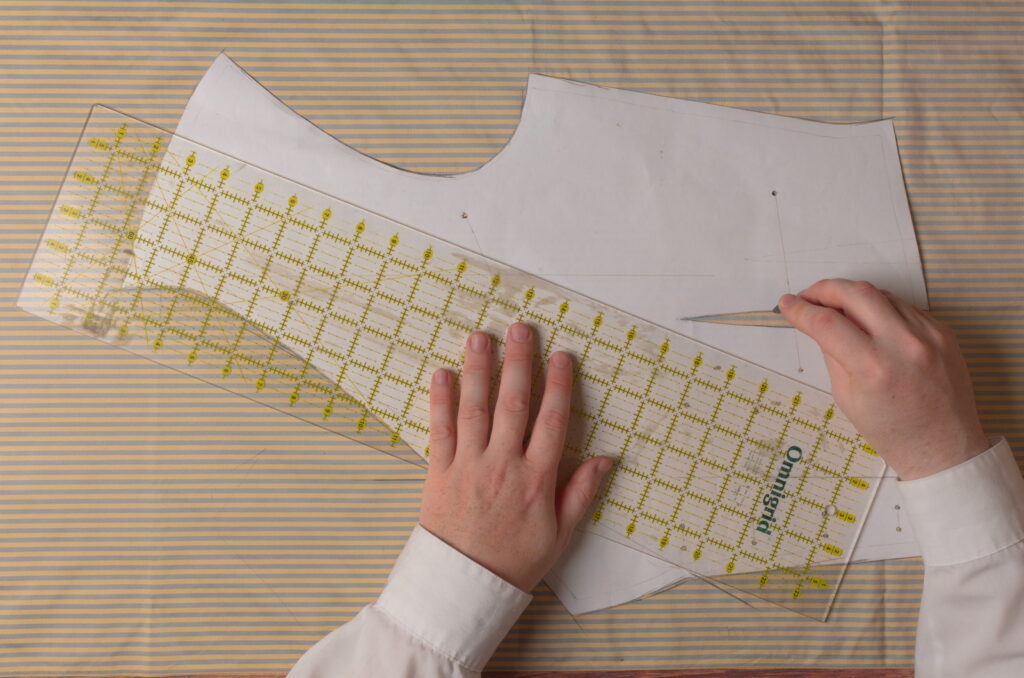
Then trace the new line onto the original pattern.
And trim off the excess section.
Then simply use your altered pattern as usual. I forgot this step and so had to do it after cutting out my waistcoat front.
Seam Allowances
When you’re happy with any alterations, trace each of the pattern pieces onto a fresh sheet of paper. This way you can maintain your original pattern for future use and alterations. Add a 1/4″ or 3/8″ seam allowance around the entire collar – I’m using 3/8″ due to how easily the silk fabric frays. Similar seam allowances are added around the front and back pieces, except for the darts, which are treated a little differently during construction.
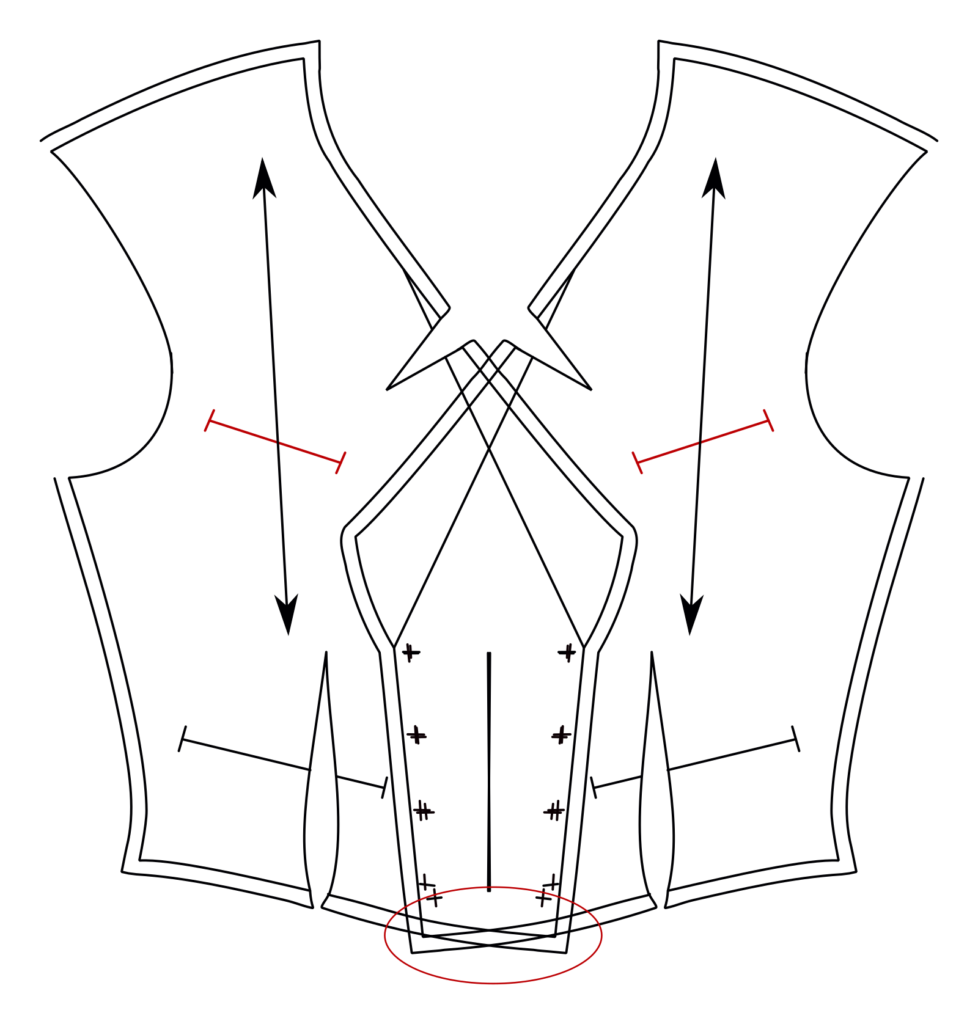
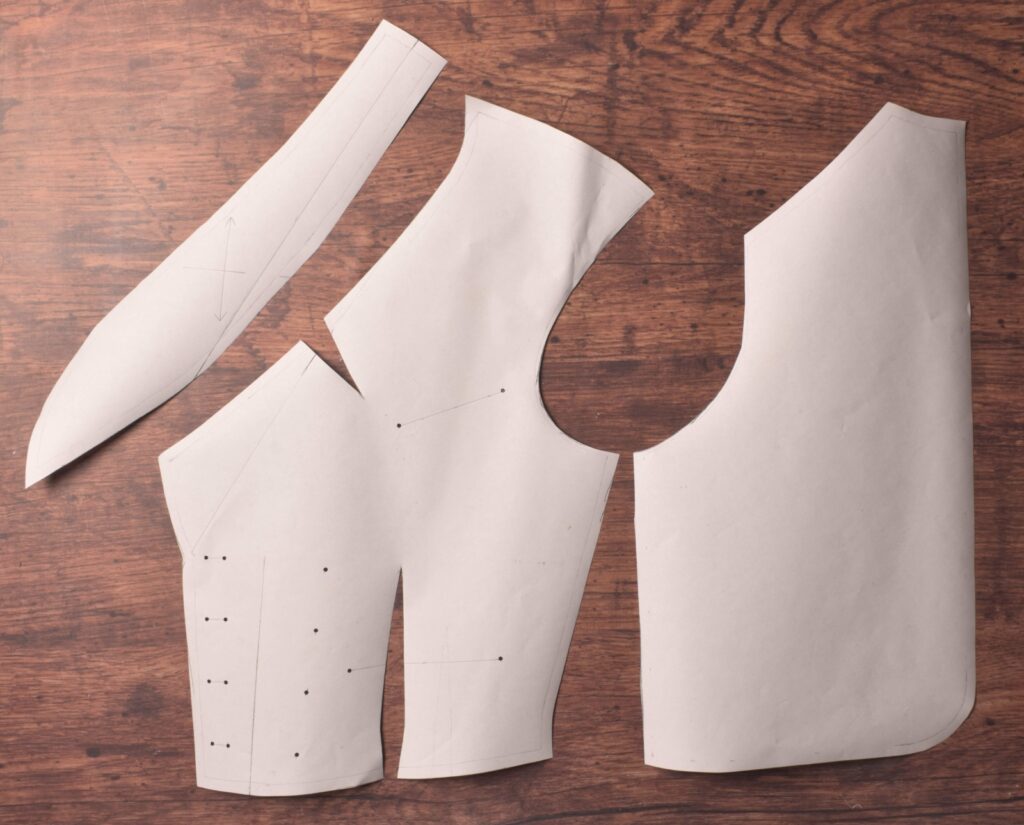
Be sure to copy over the pocket and button locations, the center line, roll line, and it’s a good idea to mark the grain line, indicated by the arrows (they’re simply parallel to the original vertical construction line). Then cut out your pattern around the entirety, including cutting out the darts.
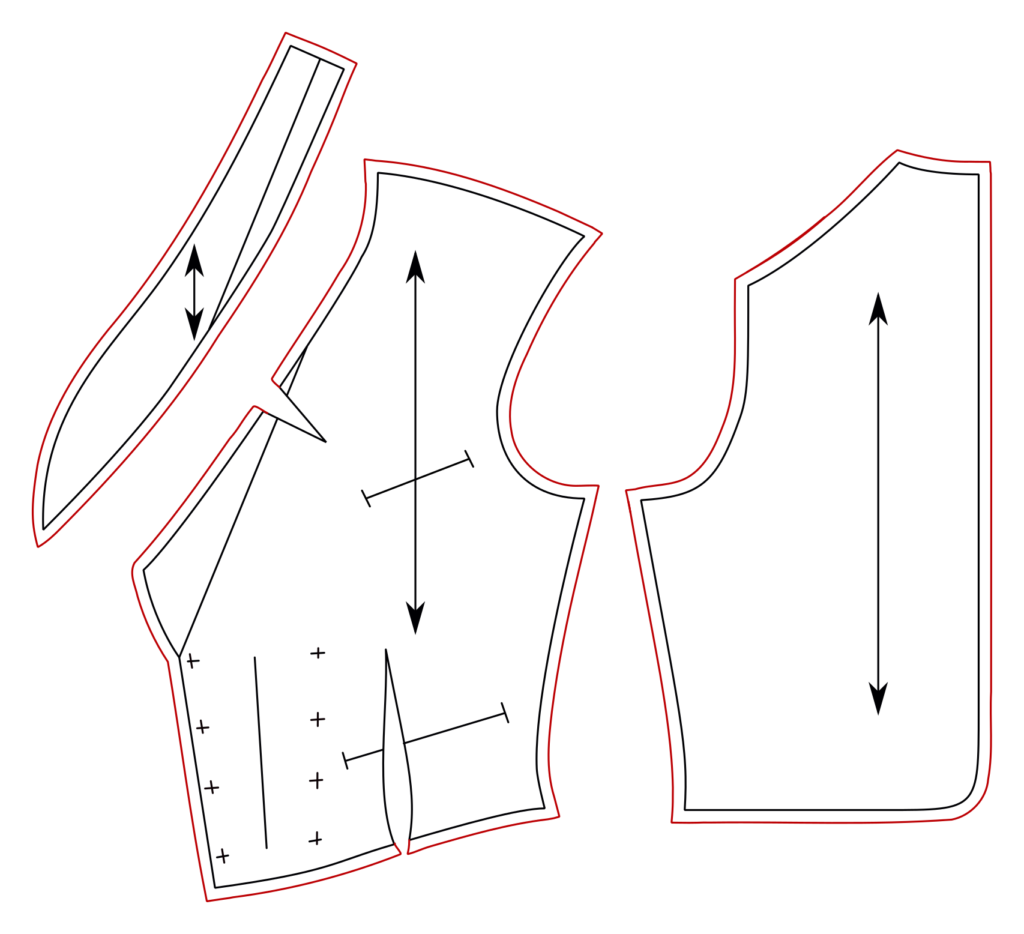
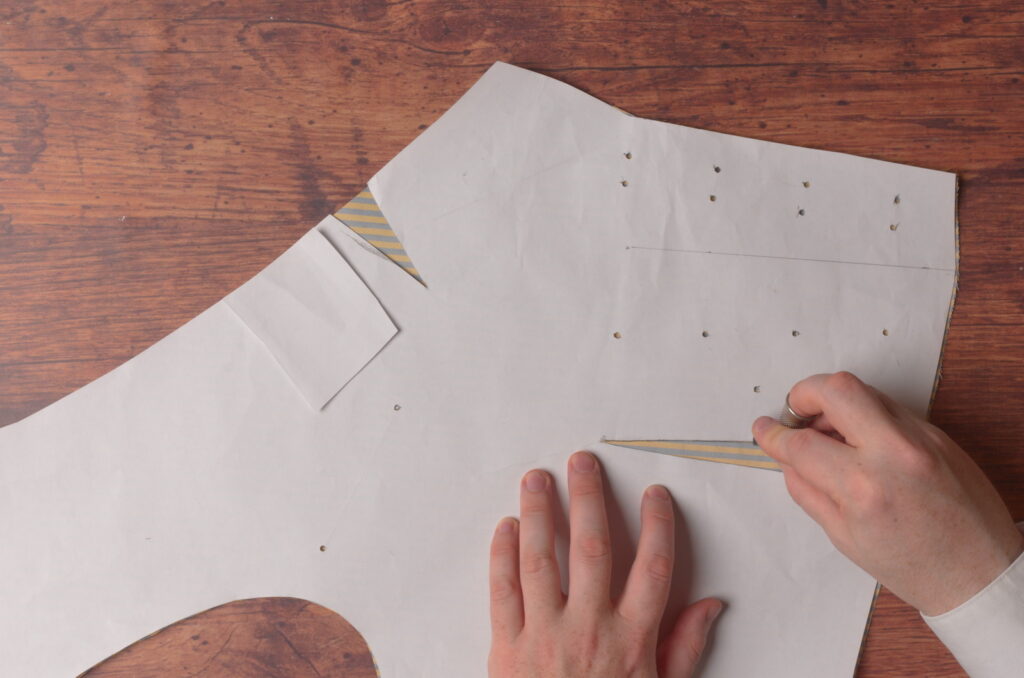
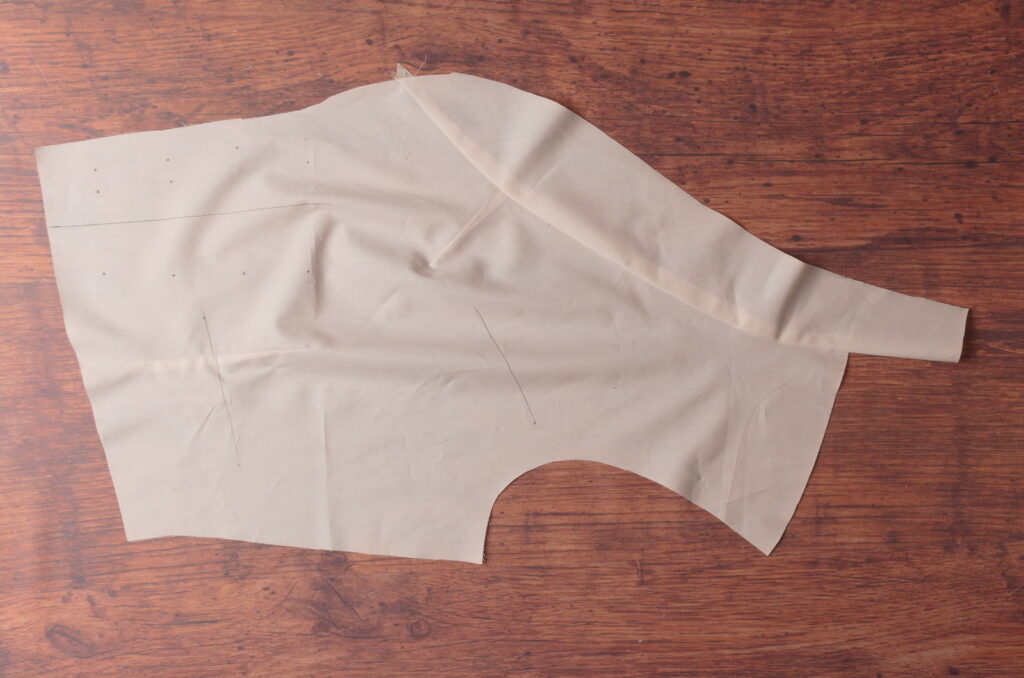
Here’s my pattern after tracing, adding the seam allowances, and cutting everything out.
To make marking the various buttonholes and other points a little easier, I punched 1/8″ holes using a hollow hole punch, the type I use for buttonholes.
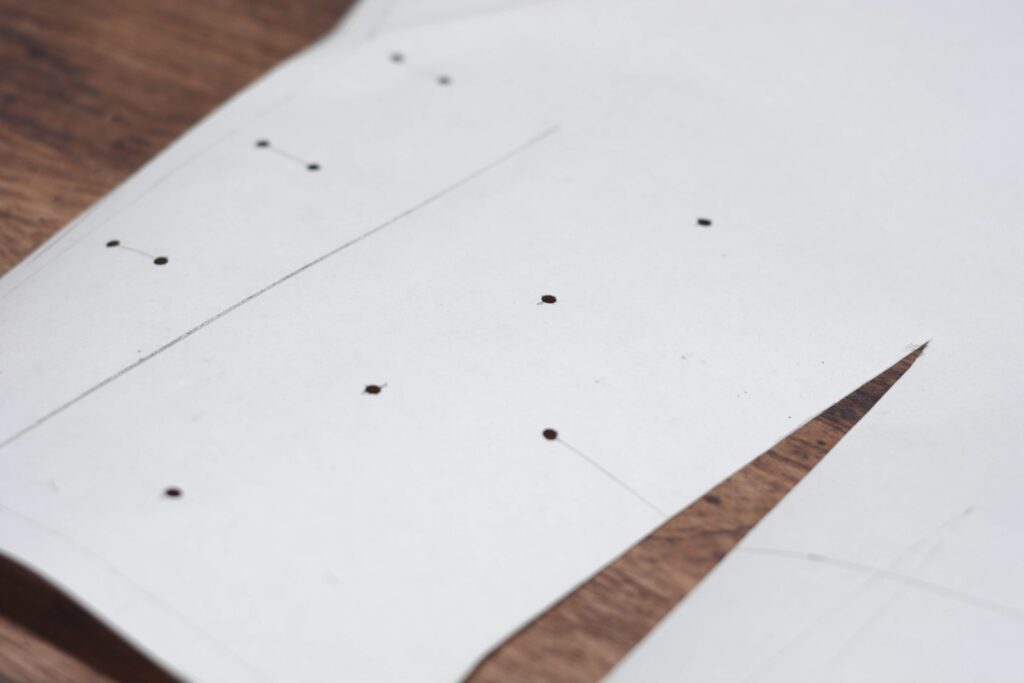
Here you can see the seam allowances added, the neck dart, and roll line.

Waistcoat Alterations
Before moving on to adding the seam allowances, it’s a good idea to check your pattern as best you can for fit, by applying your own measurements to the pattern as shown, comparing them, and then making the changes as necessary. I also like to compare the lengths of the center back, though that isn’t specifically mentioned in Devere’s manual.

Alterations
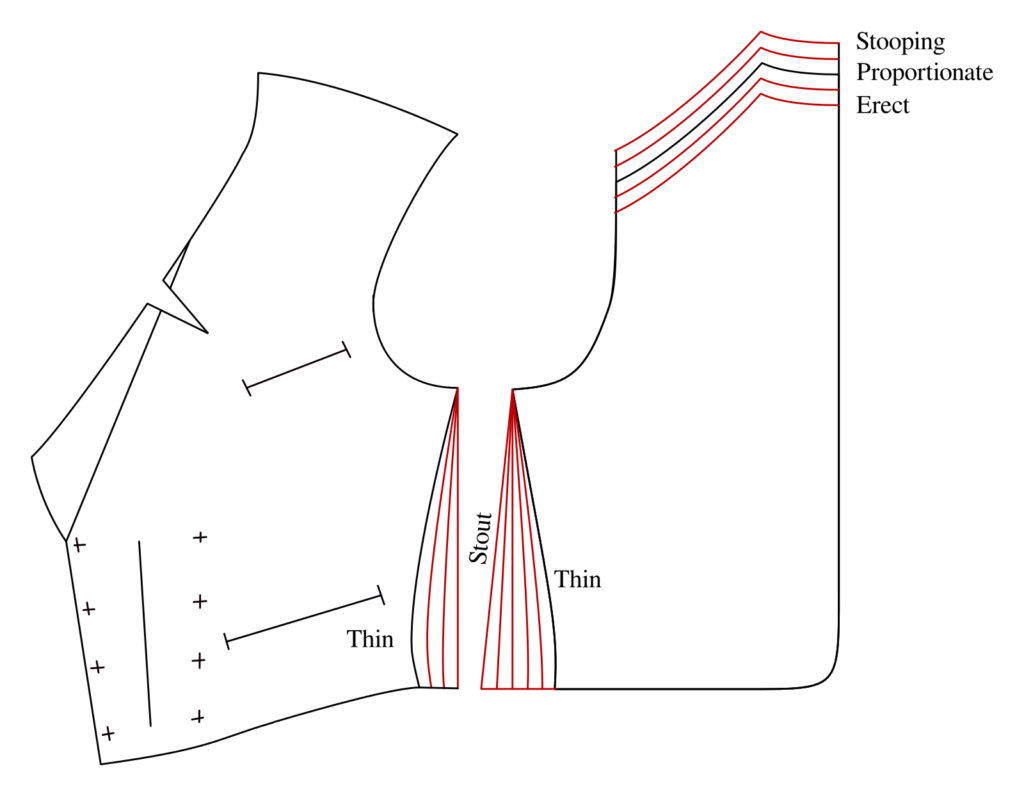
The most common and important alteration is adjusting the width of the waistcoat around the waist. If your waist is only slightly smaller than your chest measurement, an inch or two, I’d highly recommend removing the front dart. If your waist is larger than your waist, you’ll need to add some material to the front and back side seams as shown. This is such a common alteration that I actually add material to the back side seam, by making the side seam vertical, for most of the waistcoats that I make. Any excess material in the back will be taken up by the back buckle.
It’s possible, for very corpulent figures, that material will need to be added to the front of the waistcoat. This is obviously very complex, thanks to the pattern, so I’ll update this section after I work out the best way to do so. If you are making a waistcoat for such a figure, please let me know so I can help you out.
The second, less common alteration is to adjust the back balance. These days, with people staring at their phones or computers all day, we have a tendency to stand slouched over. If the waistcoat is left as is in this case, you’ll notice a gap at the back of the collar. Likewise, if someone stands extra erect, you’ll see too much fabric just below the collar. To adjust, add or subtract the appropriate amount from the shoulder and neck of the pattern. I usually adjust this measurement only after the first fitting of the toile, to see precisely what needs to be done.
Drafting the Back
I like to begin by drafting the back since it’s much simpler, and you can get the length correct right away by applying your back length measurement. You’ll be using both the graduated measure corresponding to your chest size, direct measurements that you took in the previous section, and the working scale to draft your pattern.
Draft this to the right side of your paper, leaving room for the forepart draft on the left, if you can. Having them side by side helps to make sure everything is accurately drafted between the two pieces.
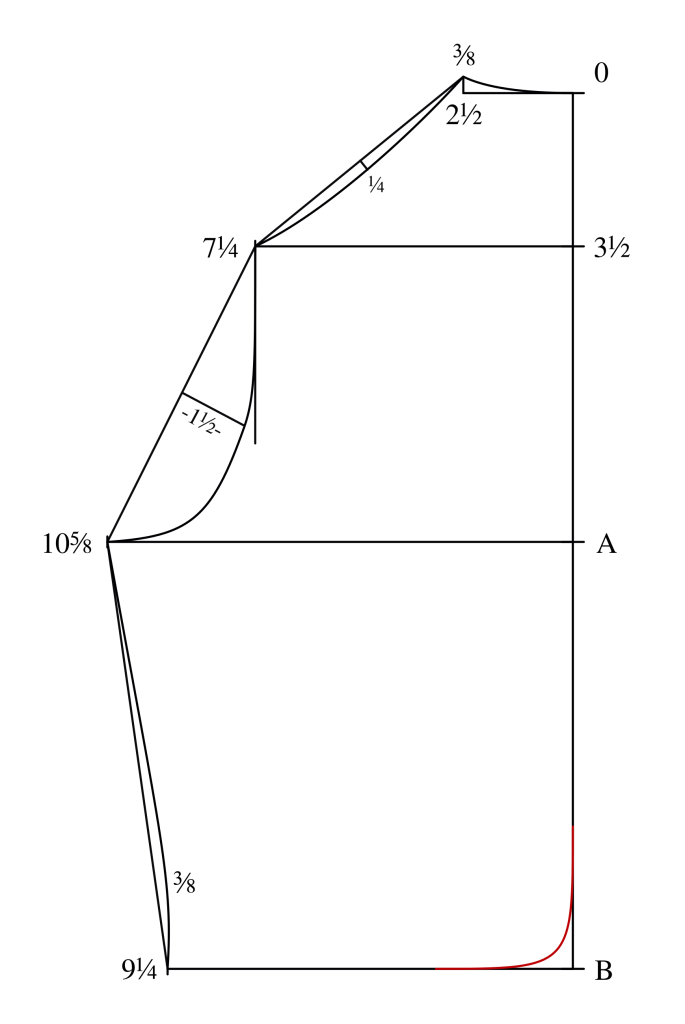
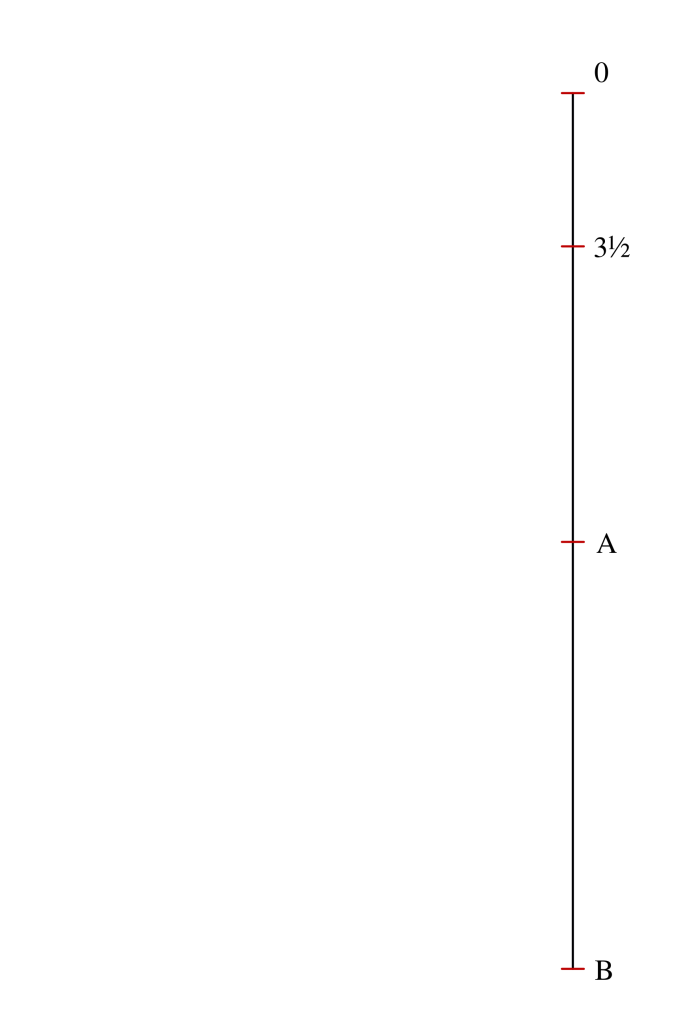
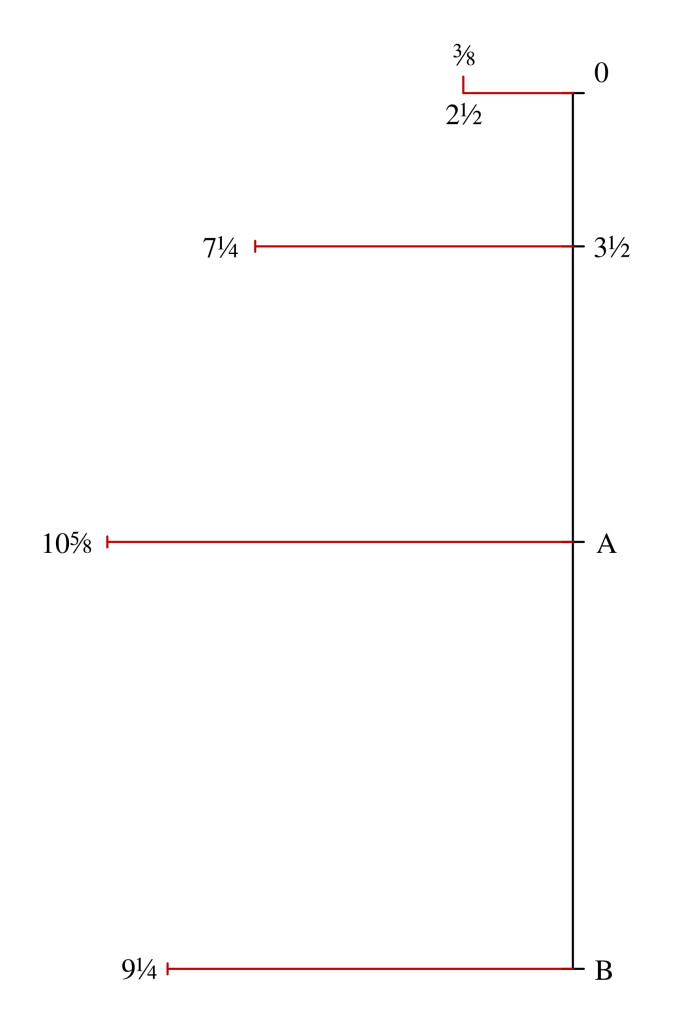
First, draw a vertical line, marking 0 at the top. Then mark the following points:
- 3 1/2 graduated inches from 0 for the shoulder point and top of the armscye.
- A from 0 is half the working scale for the bottom of the armscye and chest line.
- B from 0 is for the bottom of the waistcoat.
Now square out the following points.
- 2 1/2 graduated inches from 0 for the neck. Also square up from 2 1/2 by 3/8 for the back neck rise.
- 7 1/4 from 3 1/2 for the shoulder point and top of the armscye.
- 10 5/8 from A for the bottom of the armscye.
- 9 1/4 from B for the bottom of the side seam and width of the waist.
This is a good time to check your measurements and compare them to your pattern before you get more involved. Double check 0 to B is equal to your back length measurement. Then take the line at A and multiply by 4 – it should be slightly larger than your actual breast measurement. Do the same for the waist line at B.
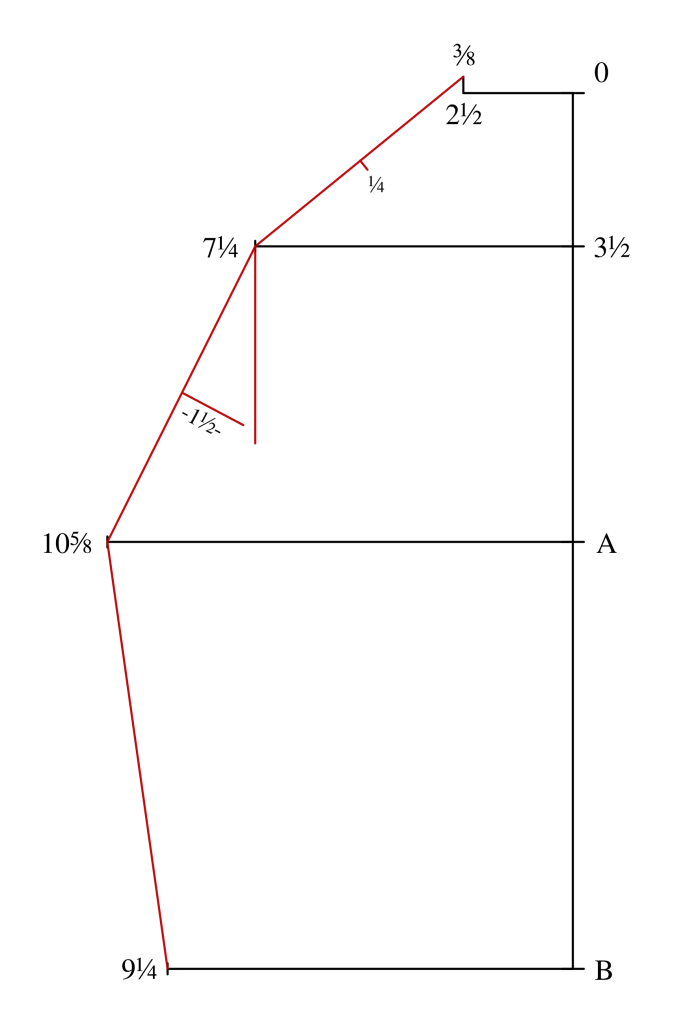
The Curves
The curves are relatively simple, especially compared to the front.
- Draw a line between 7 1/4 and 3/8 for the shoulder seam. Find the midpoint and square in 1/4 graduated inches.
- Draw a line between 7 1/4 and 10 5/8. Square inwards at the midpoint 1 1/2 graduated inches for the armscye.
- Also at 7 1/4, draw a construction line square down, about 4 or 5 inches in length. This aids in drawing the curve.
- Draw a line from 10 5/8 to 9 1/4 for the side seam.
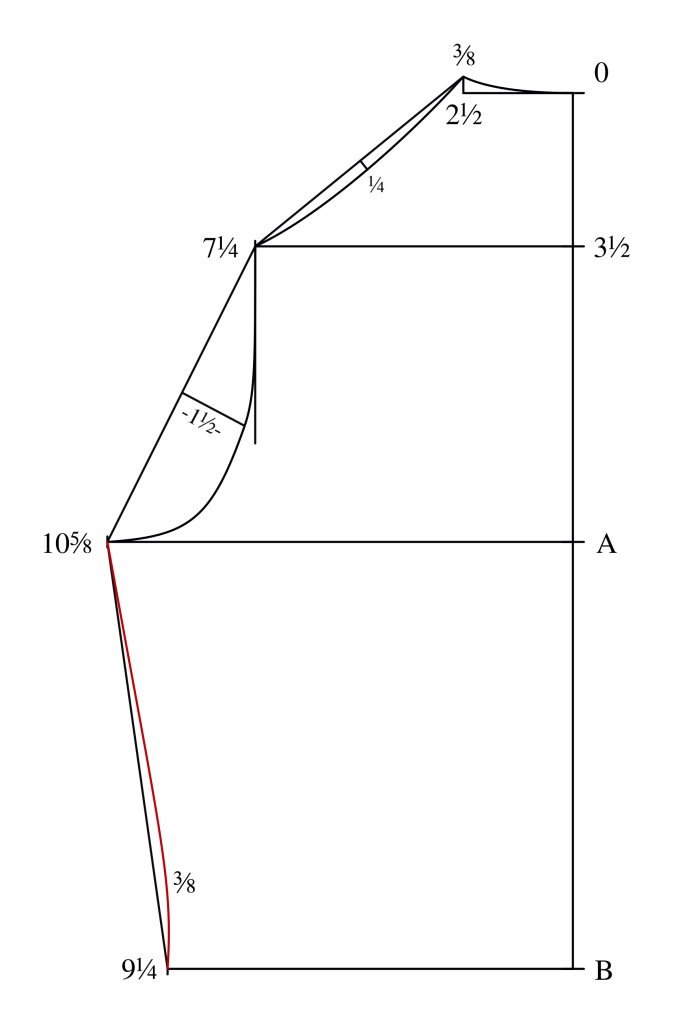
Draw the curves as shown.
- The neck curve starts at 3/8 tapering into the neck line at 0.
- The shoulder seam is drawn smoothly between the three points.
- For the armscye, keep the curve rather deep from 10 5/8, through 1 1/2, and then following the construction line straight into 7 1/4.

The side seam is mostly straight, curving in near the bottom about 3/8. The original draft doesn’t have any specific marks to help with this, just do it by eye.
Curved Center Back
If you prefer, you can curve the center back to give a more stylized back. The other alternative is to just keep the pattern as is and cut the center back on the fold (you’d leave out the center back seam allowance in that case), which does make construction a little faster.