Author: James Williams
Seam Allowances
With the pattern pieces all drafted, it’s time to separate them and add the seam allowances. Begin by copying the front leg onto a separate sheet of paper. You can also copy the back leg so as to preserve your original pattern, but I usually just draw the seam allowances right on the draft for the back piece. Remember that the yoke is a separate piece so don’t include it when adding seam allowances for the back.
Also transfer and copy the construction lines for the hem, knee, crotch, and hip lines (the diagonal line on the back comes from point four).
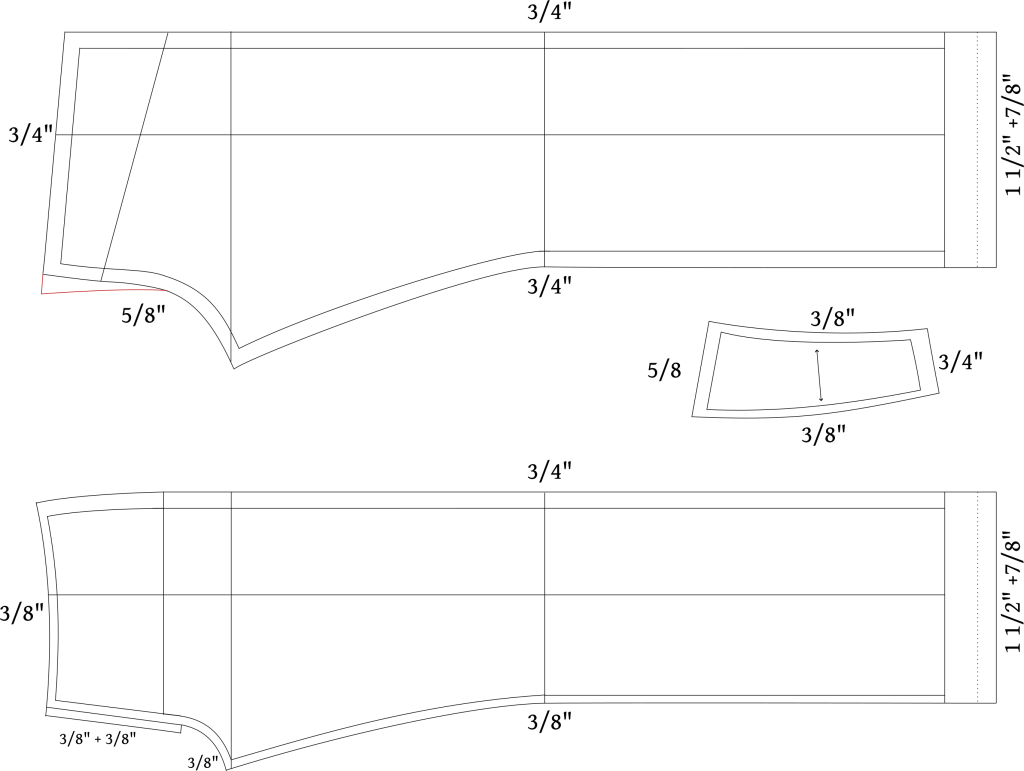
Finally, add the following seam allowances. It’s kind of tricky for jeans as all of the seam allowances are different:
Back
- 3/4″ for the side seam.
- 1 1/2″ for the turn up, plus 7/8″ for the hem (2 3/8″ total).
- 3/4″ for the inseam.
- 5/8″ for the seat seam.
- 3/4″ for the yoke seam.
Variation for 1873 Jeans: On the backs of the 1873 jeans there is evidence that the backs were gathered into the yokes. If you wish to do this, extend the yoke seam on the seat seam side by about 1/2″ to 1″ and taper that into the seat seam just above the crotch curve, as shown in red.
Front
- 3/4″ for the side seam.
- 1 1/2″ for the turn up, plus 7/8″ for the hem (2 3/8″ total).
- 3/8″ for the inseam.
- 3/8″ for the crotch and fly seam.
- Add an additional 3/8″ extension along the fly seam from the waist to just where the curve begins.
- 3/8″ for the waist seam.
Yoke
- 5/8″ along the long side / seat seam.
- 3/4″ along the short edge side seam.
- 3/8″ along the waist and yoke seams.
And that concludes the drafting for the main pieces. There are still pockets, fly and waistband to draft in the next section, though the pockets should be drafted after fitting is complete.
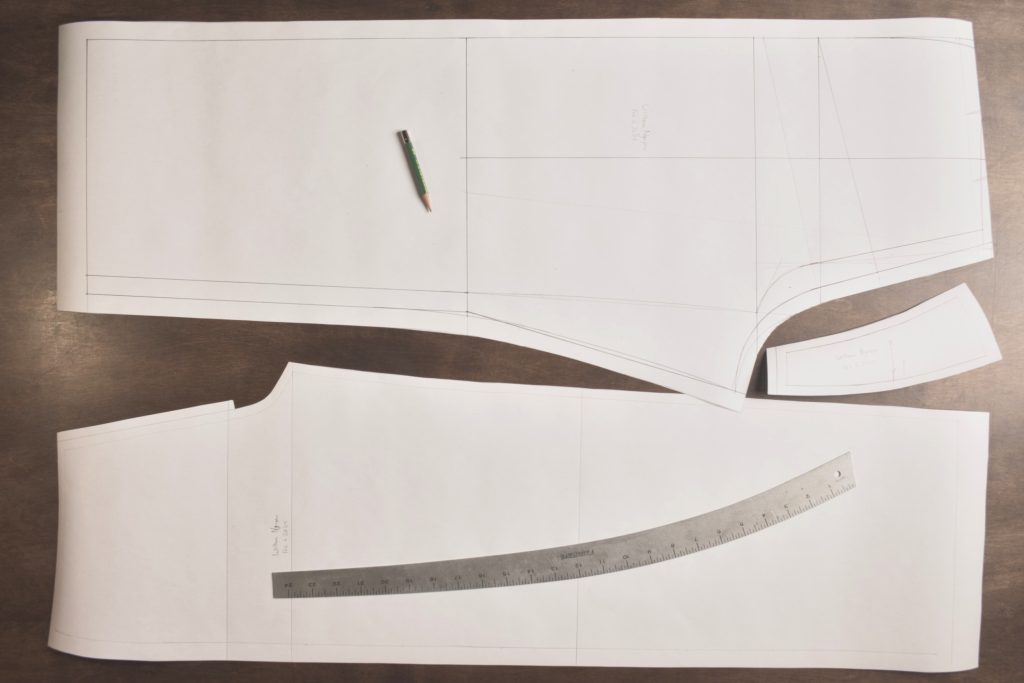
Here’s what my pattern looks like at this point.
Drafting the Yoke
With the back complete, we’ve got to draft the yoke before cutting everything out and adding seam allowances.
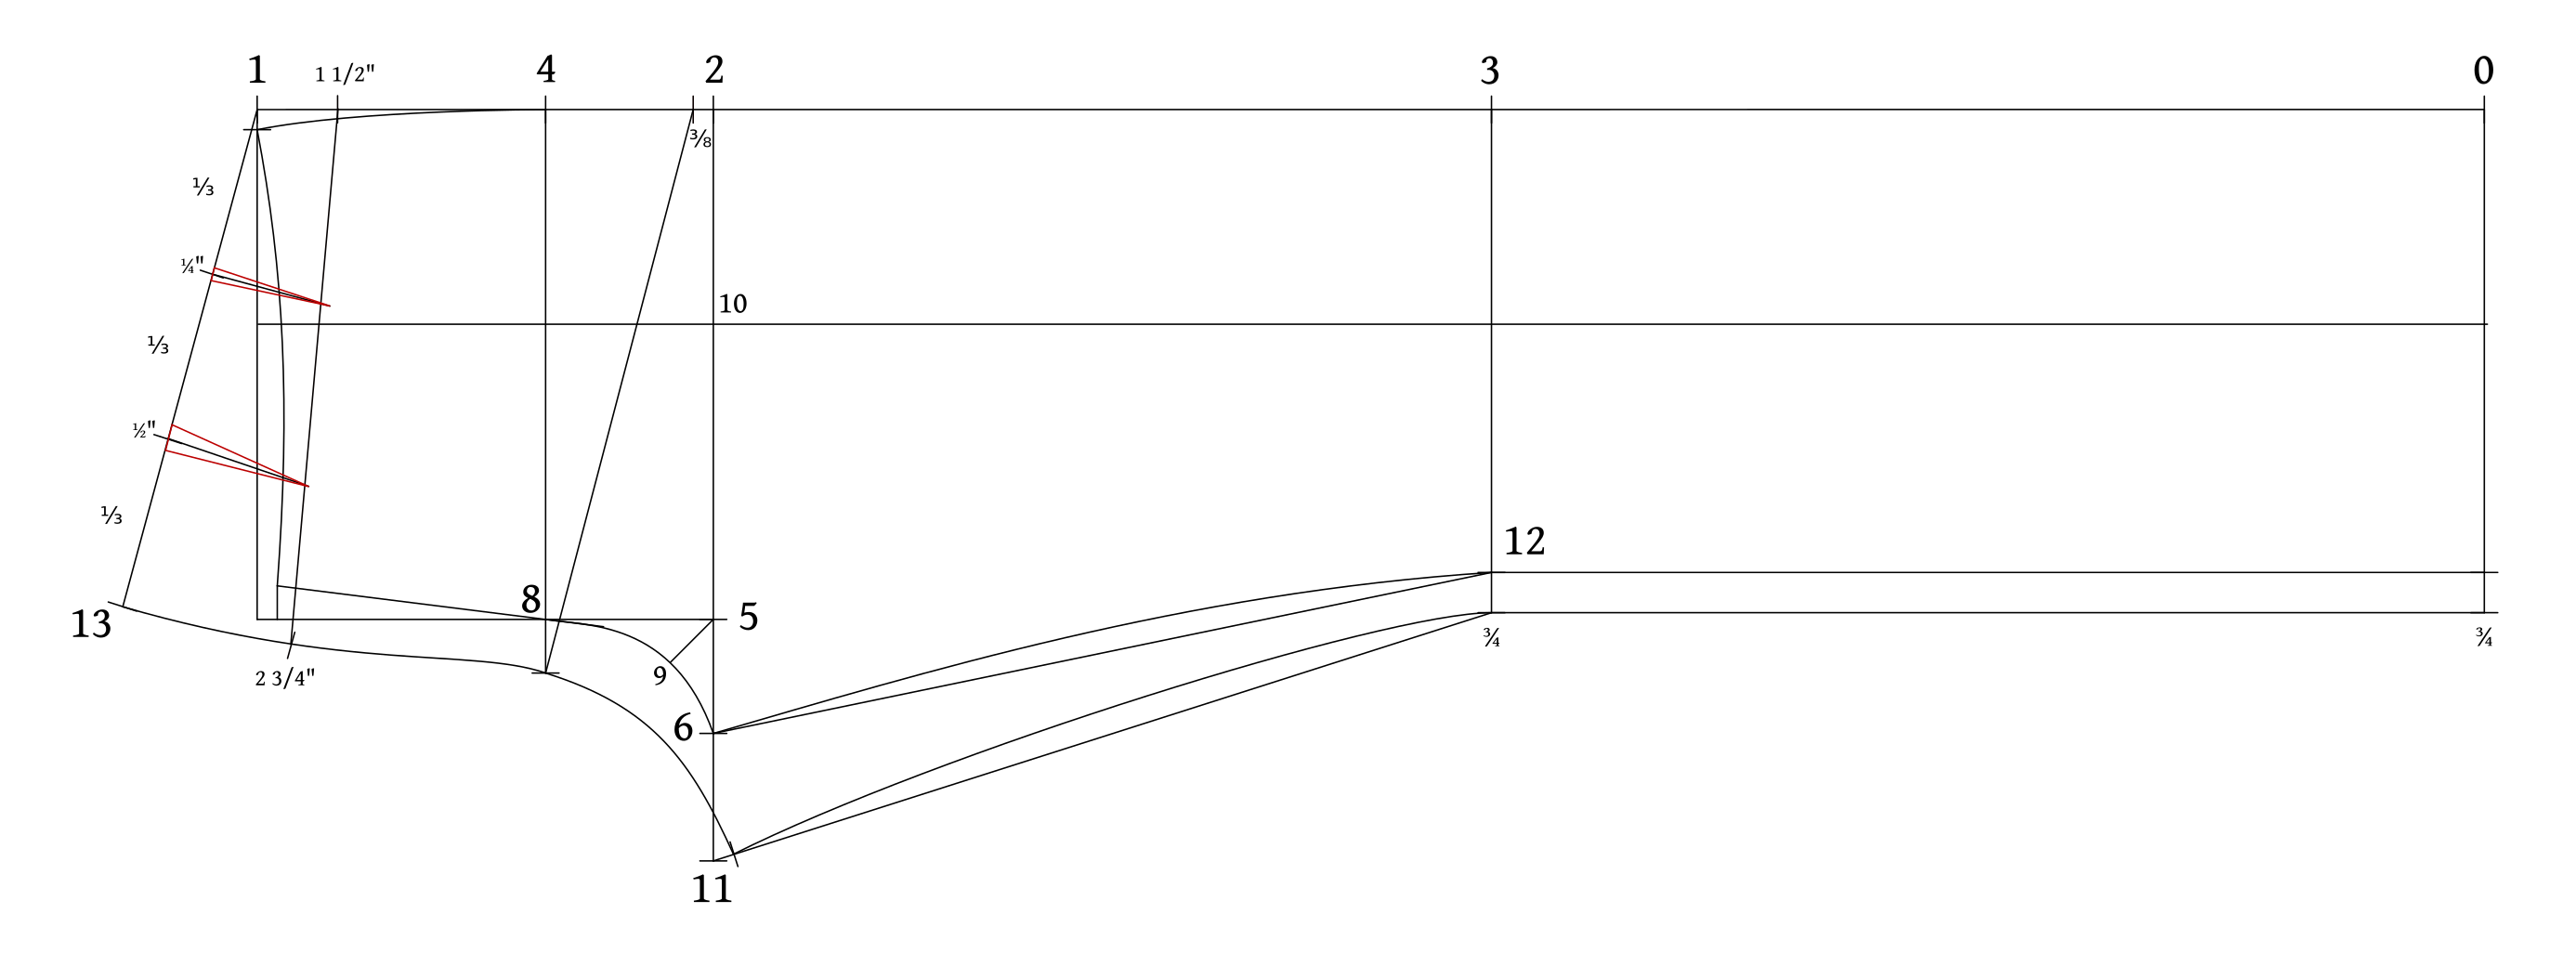
- First, measure about 1 1/2″ from 1 on the side seam and mark that.
- Mark 2 3/4″ from 13.
These widths are just a good place to start. If you have very high rise jeans, you may need to deepen the yoke for example. But this is best determined after your first fitting.
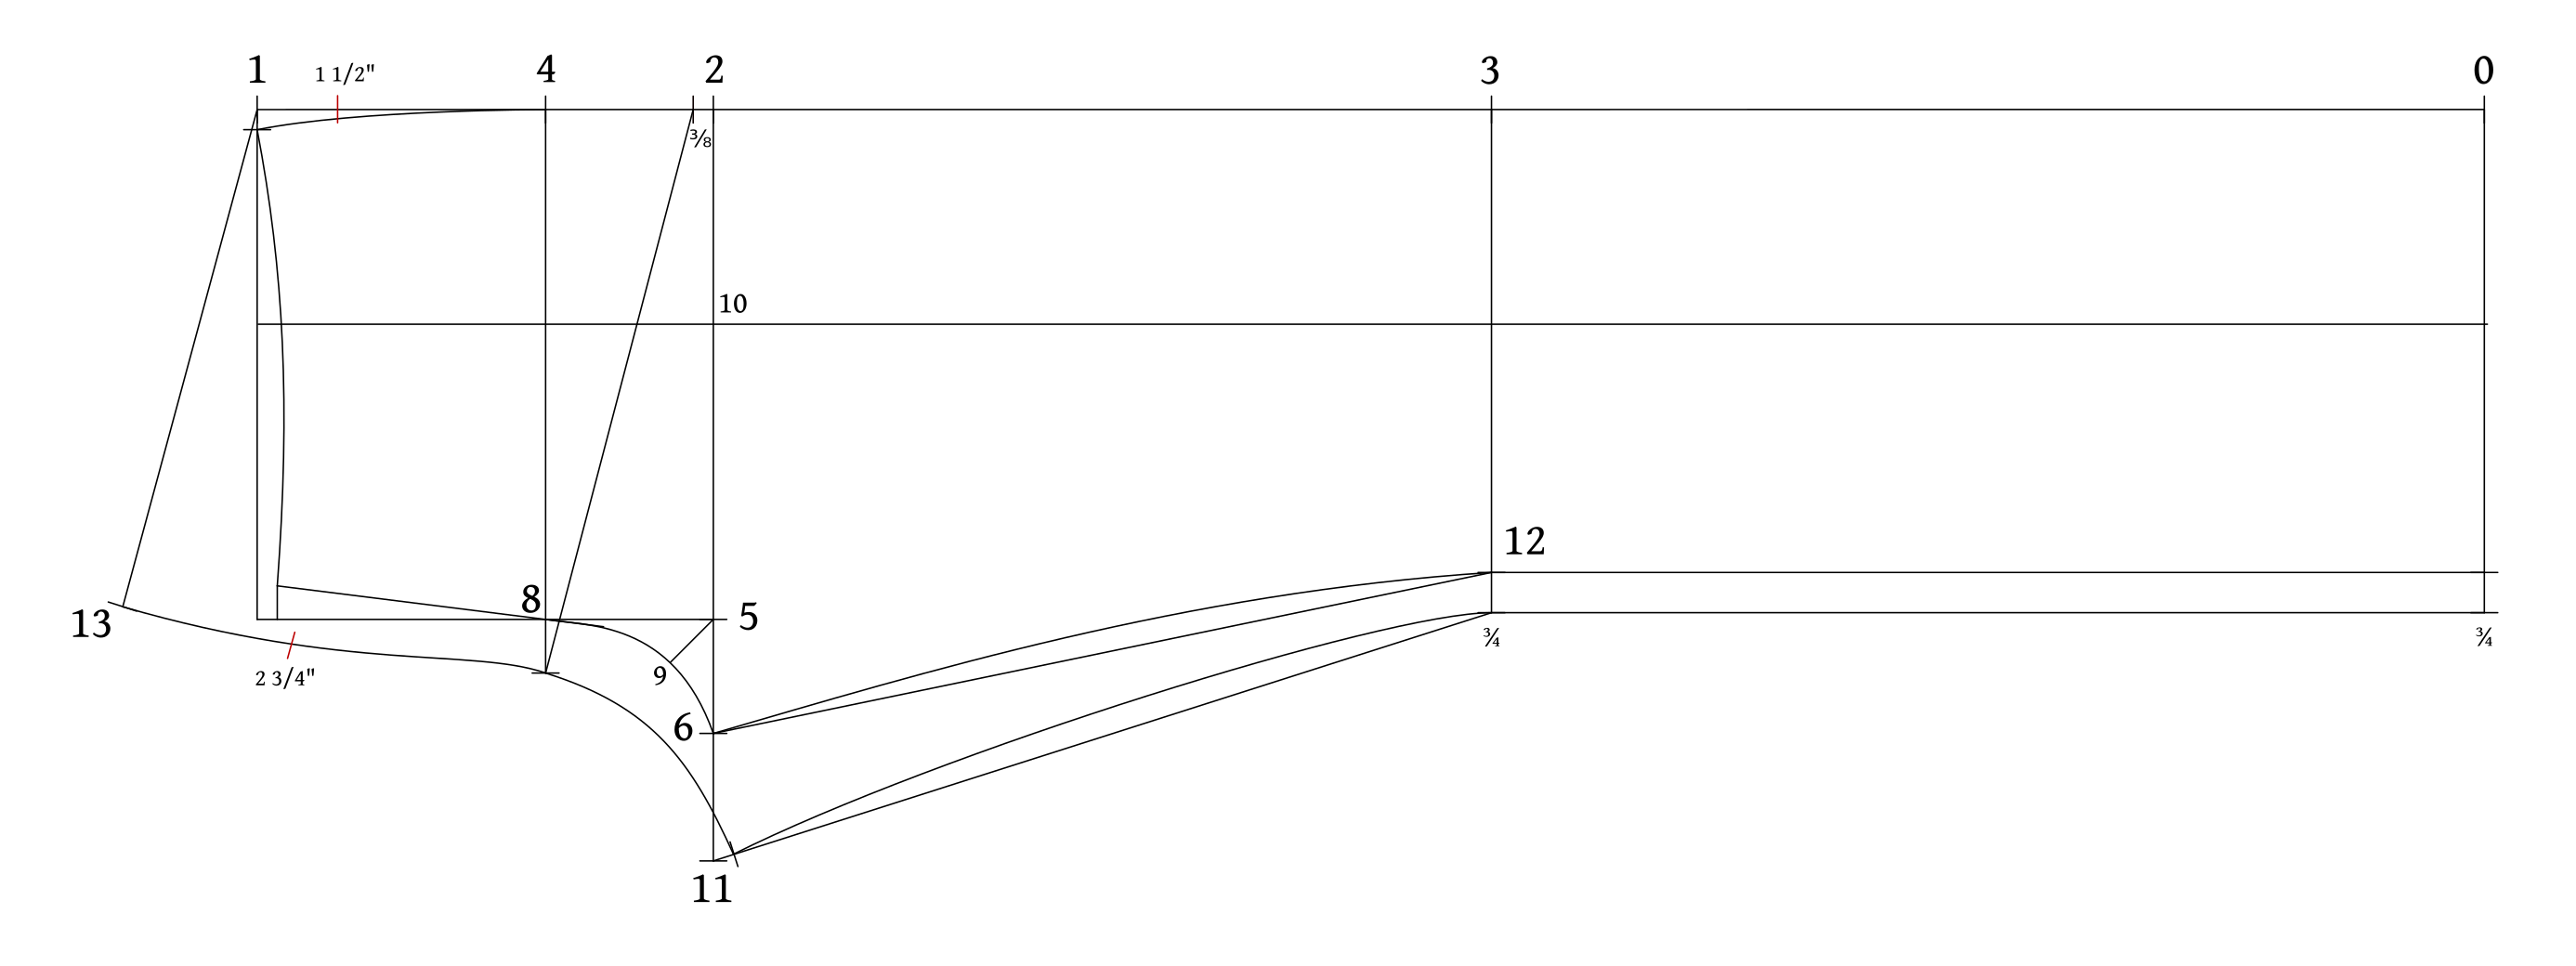
Draw a line connecting the two yoke points.
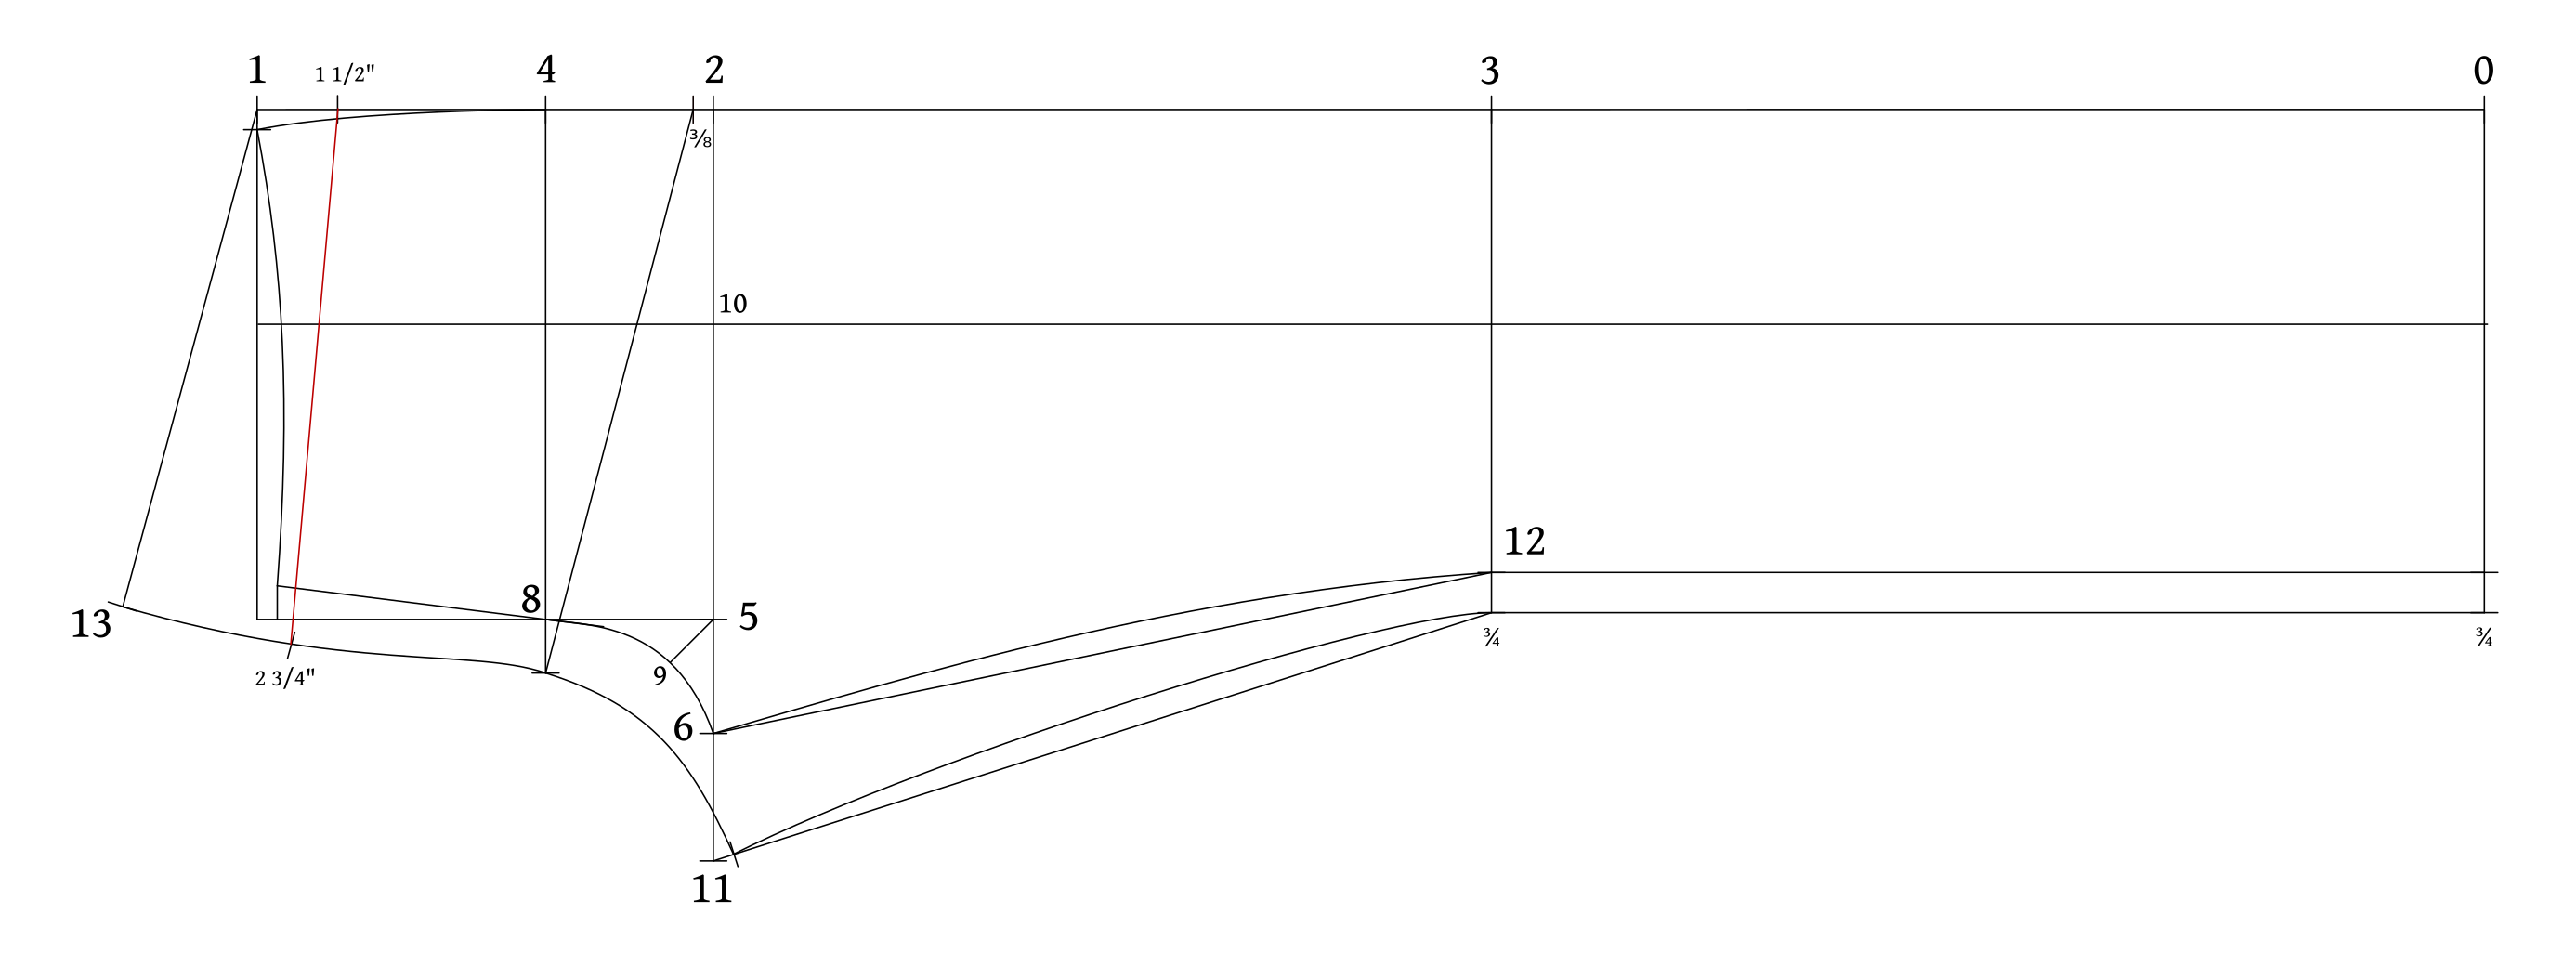
Now divide the waistband into 3 equal sections, marking the two division points as shown. These will give the position of the darts used to shape the yoke.
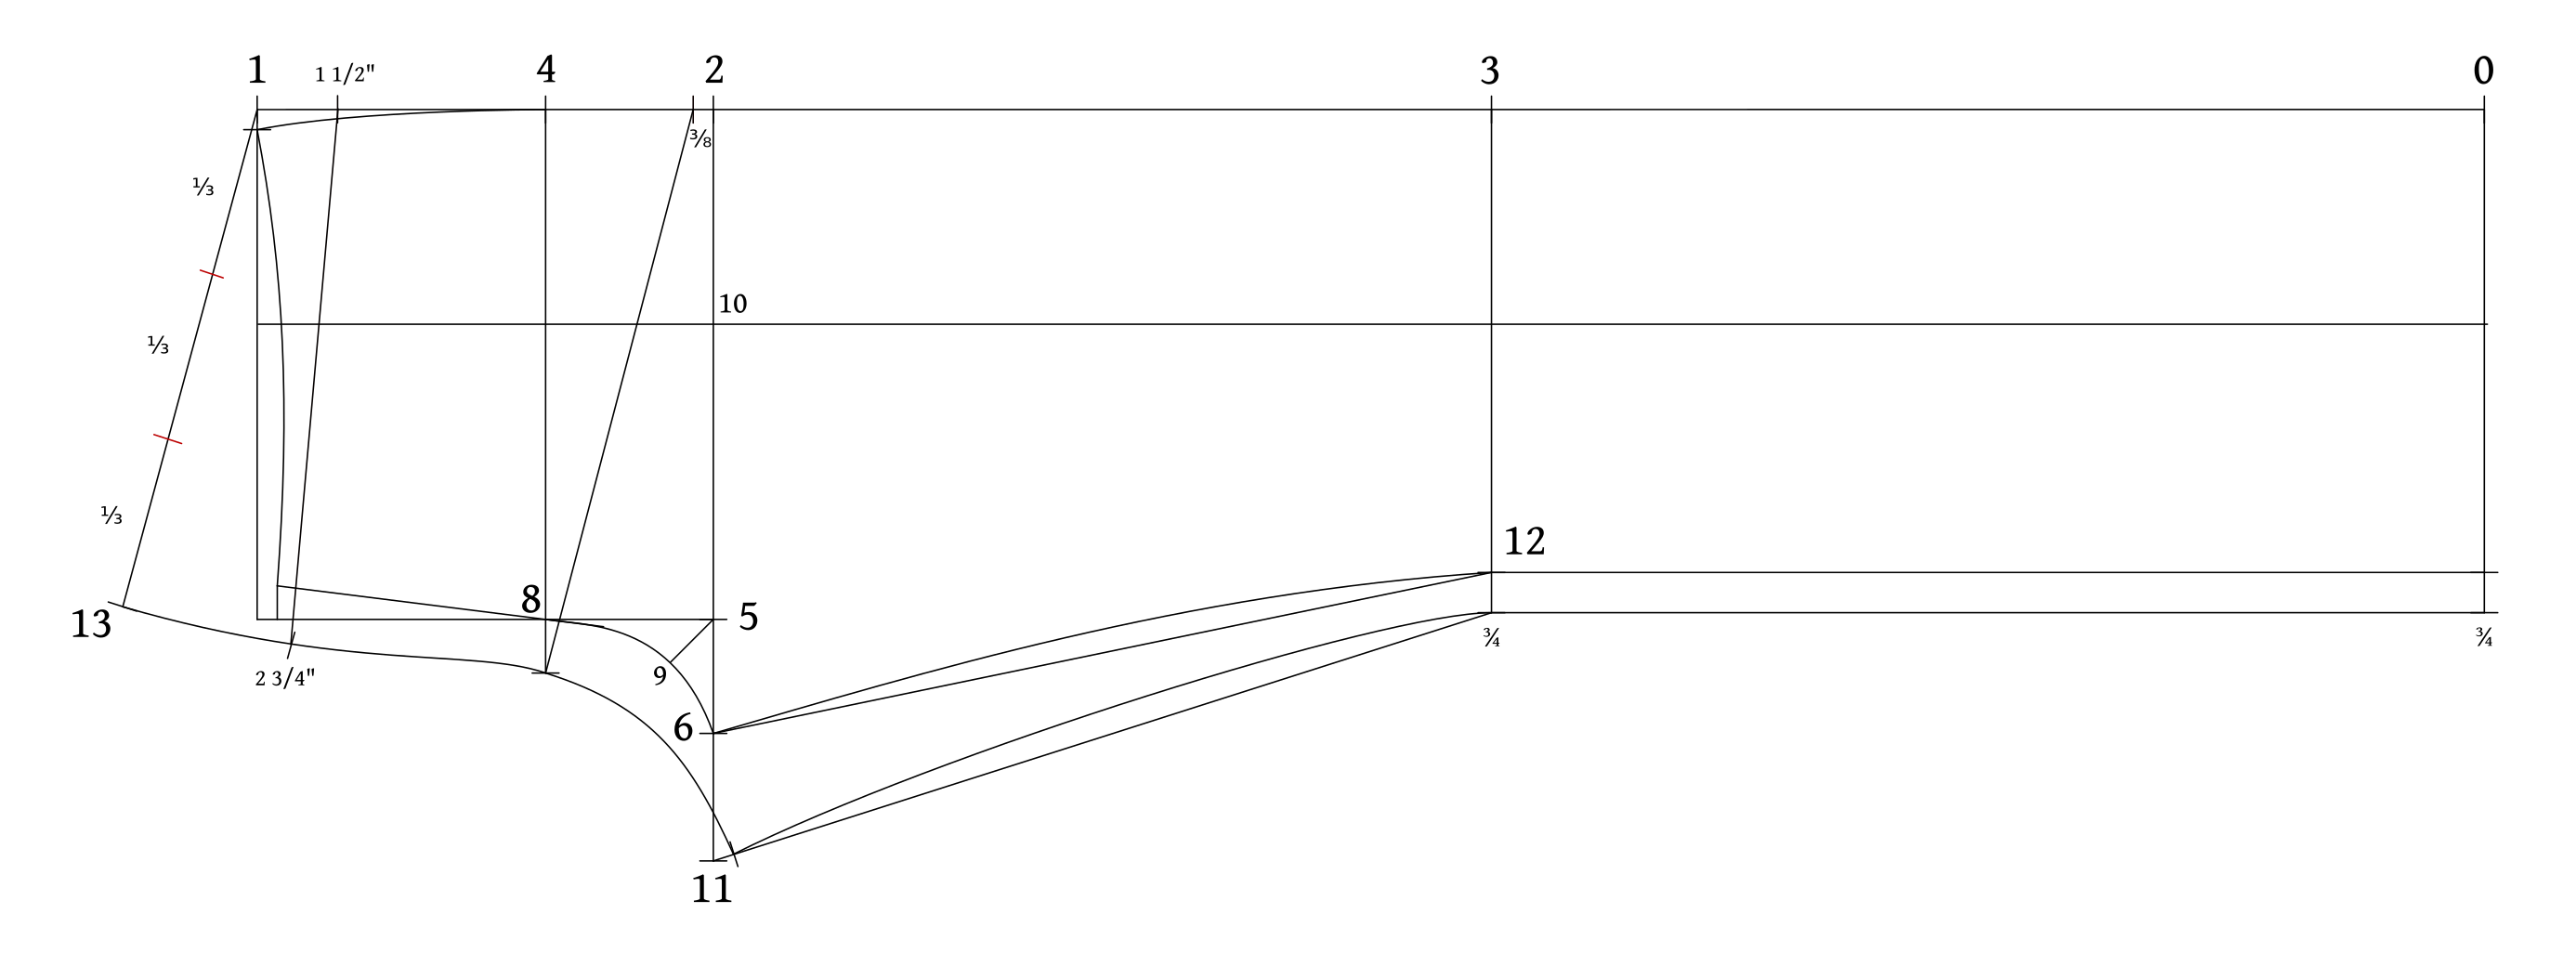
Square down from the waist points to form the center line of each dart.
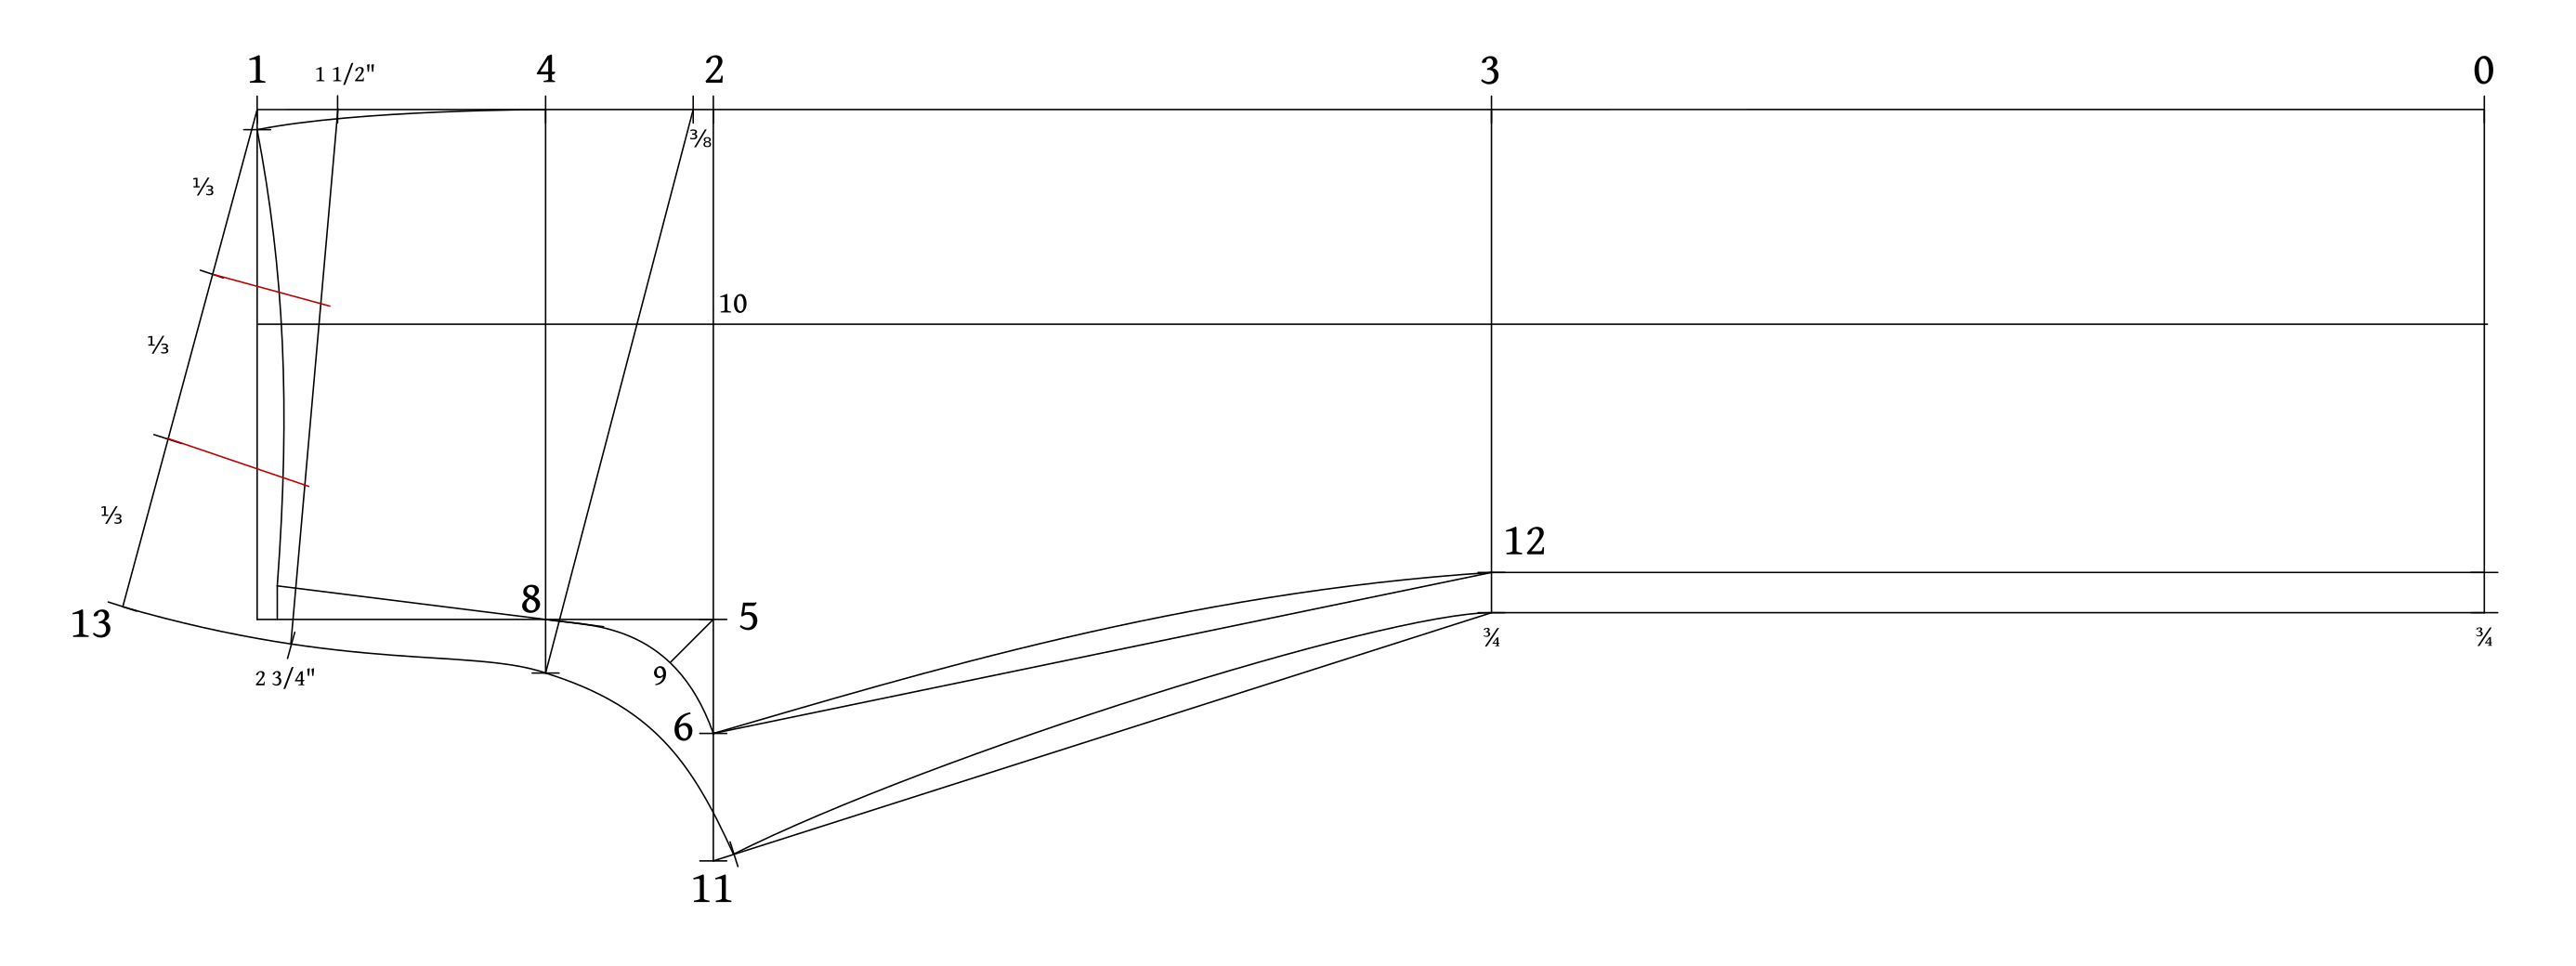
Draw in the darts from the waist line to the yoke line. The smaller dart is 1/4″ in width at the waist, 1/8″ on each side of the construction line. The larger dart is 1/2″ in width, with 1/4″ on either side.
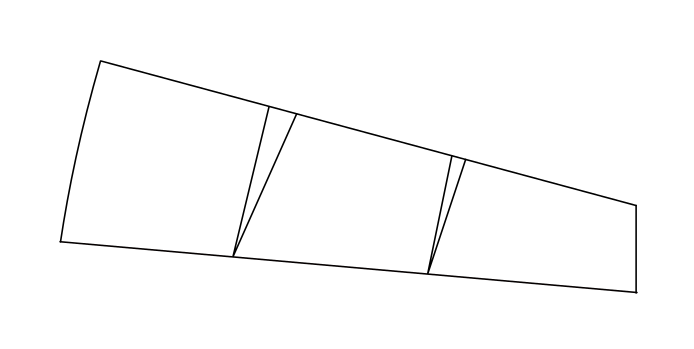
Now trace the back yoke with the darts onto a fresh piece of paper. I was planning to illustrate the next few steps digitally, but it seems much more practical to use actual photographs here.
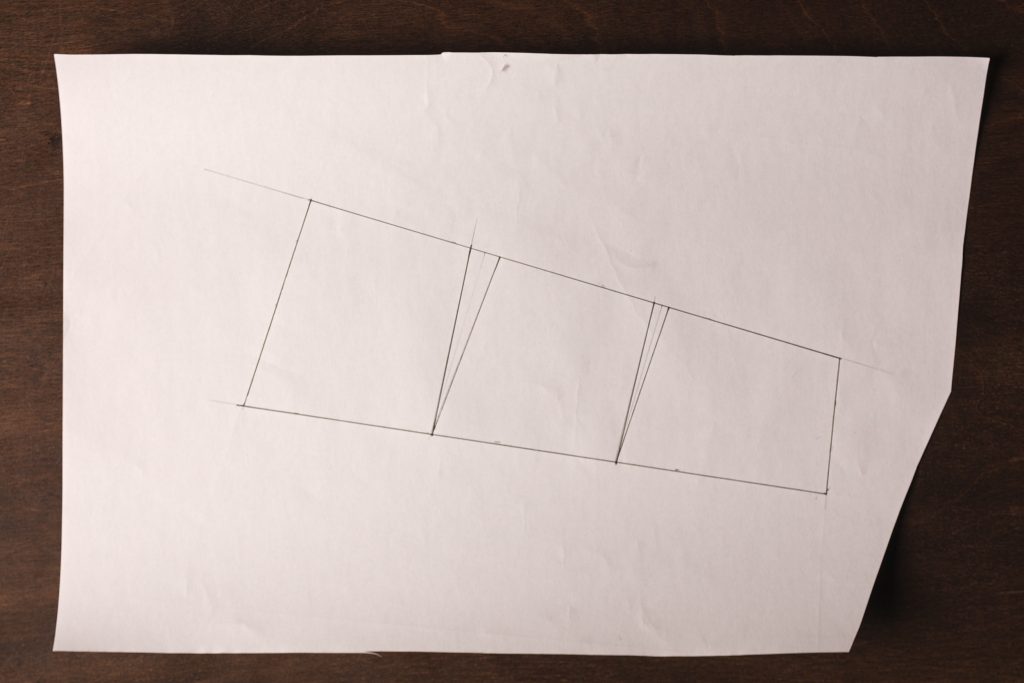
Now on one side of the wide part of the darts, mark about 1/8″ from one of the dart lines. I generally don’t measure this and just do it by rock of eye.
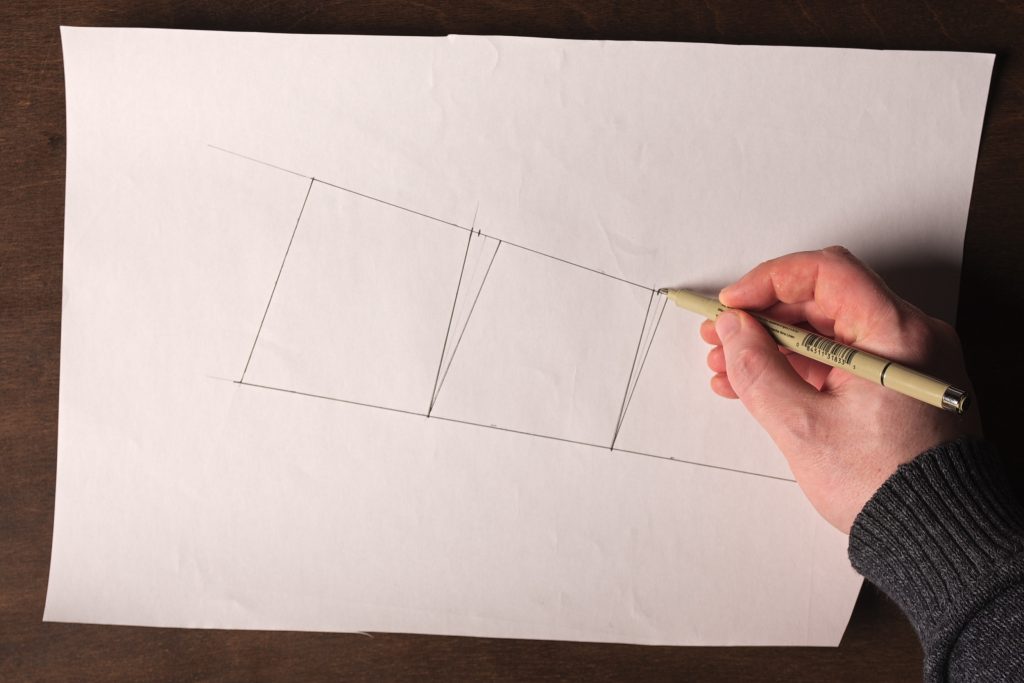
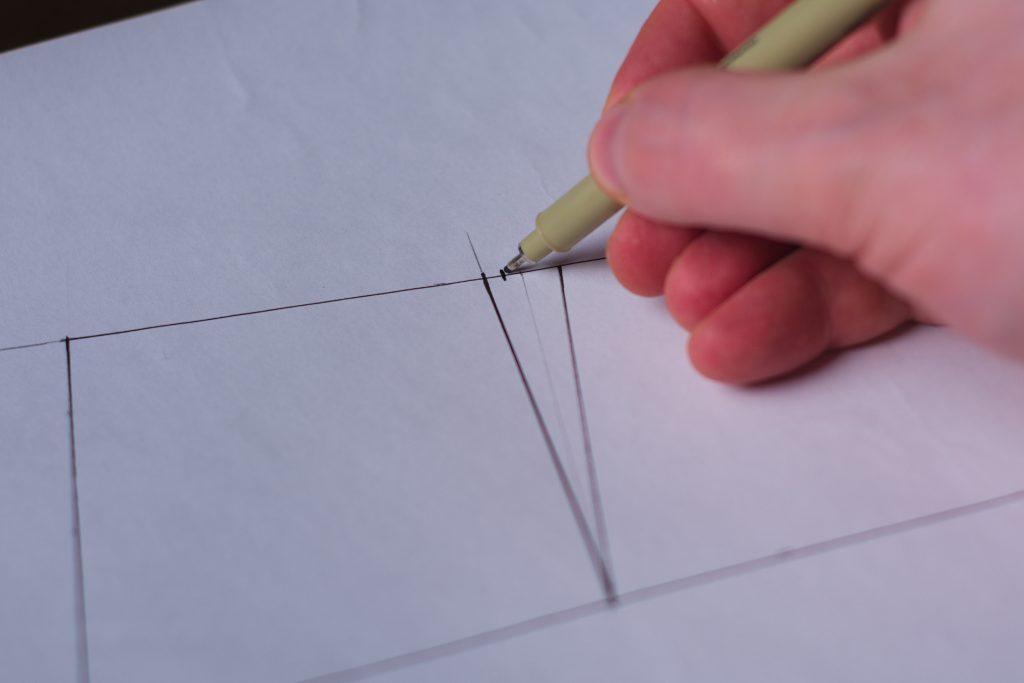
Cut out the yoke piece. Then along the opposite side of each dart from the mark you just made, cut along the dart line almost to the very tip of the dart.
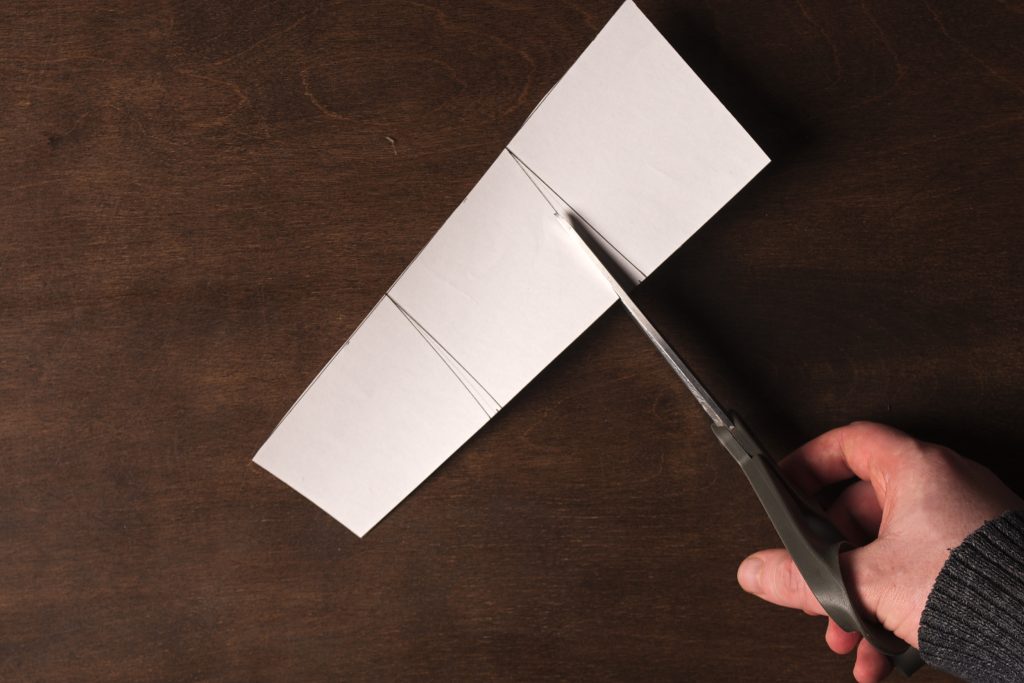
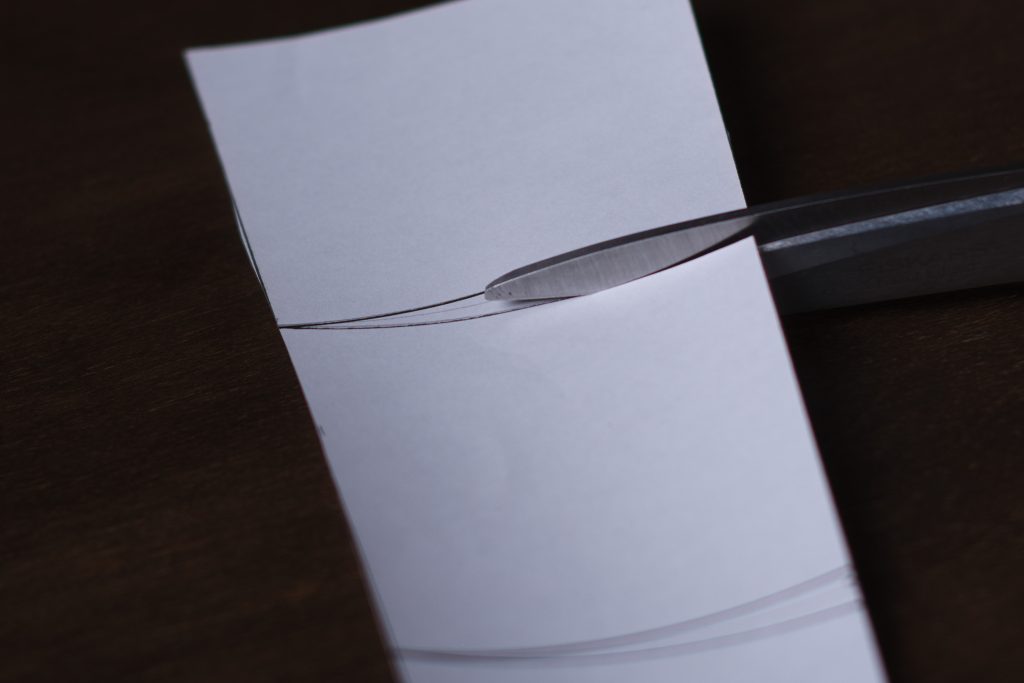
Here’s how the yoke should look after cutting.
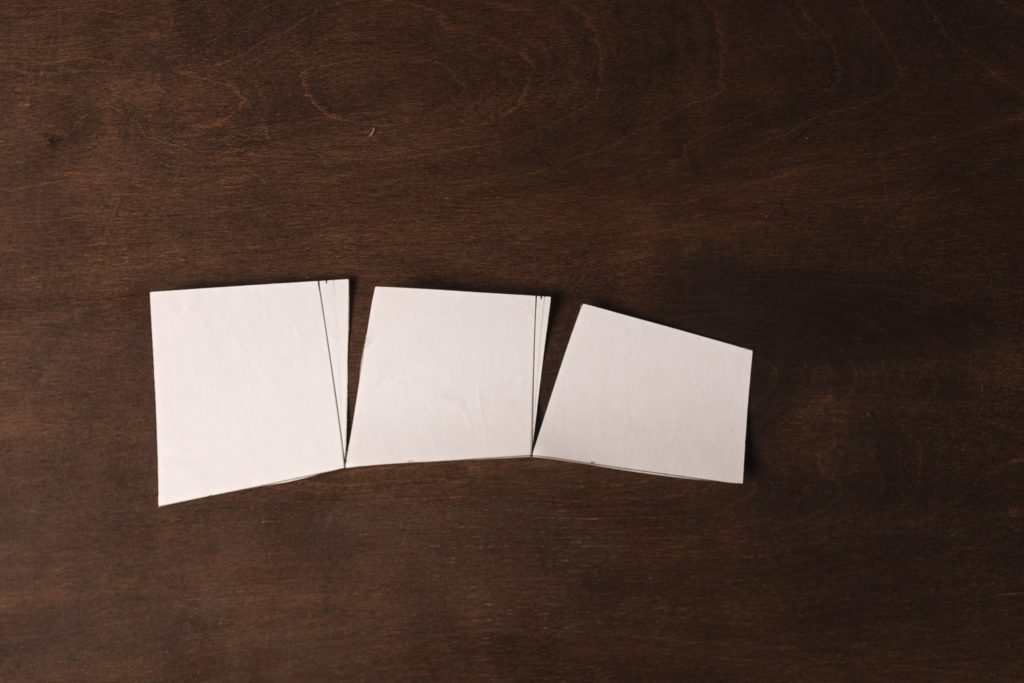
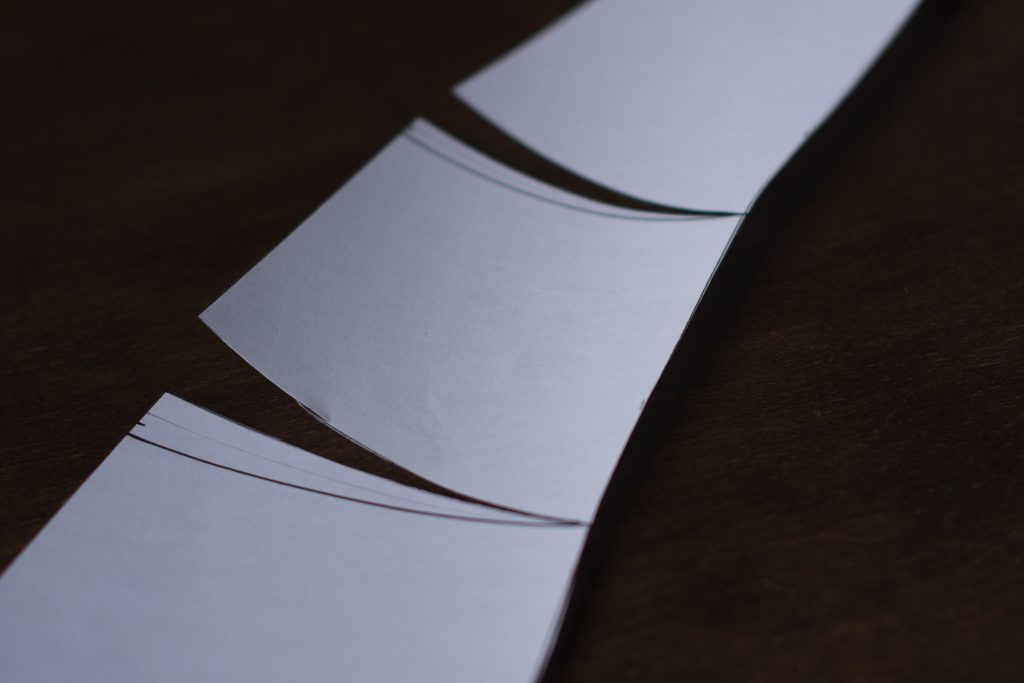
Now manipulate the pieces and overlap the cut edge of the darts on top of the uncut edges. Align the cut edge to the mark you made.
This is introducing a curve to the bottom and top of the yoke which in effect will form two darts at the bottom seam, giving more shape to the area. Feel free to experiment in the future with how much curve you want to put into the yoke by adjusting how much you overlap the darts (I’d say the 1/8″ opening is the limit though, you could go with a larger opening to experiment).
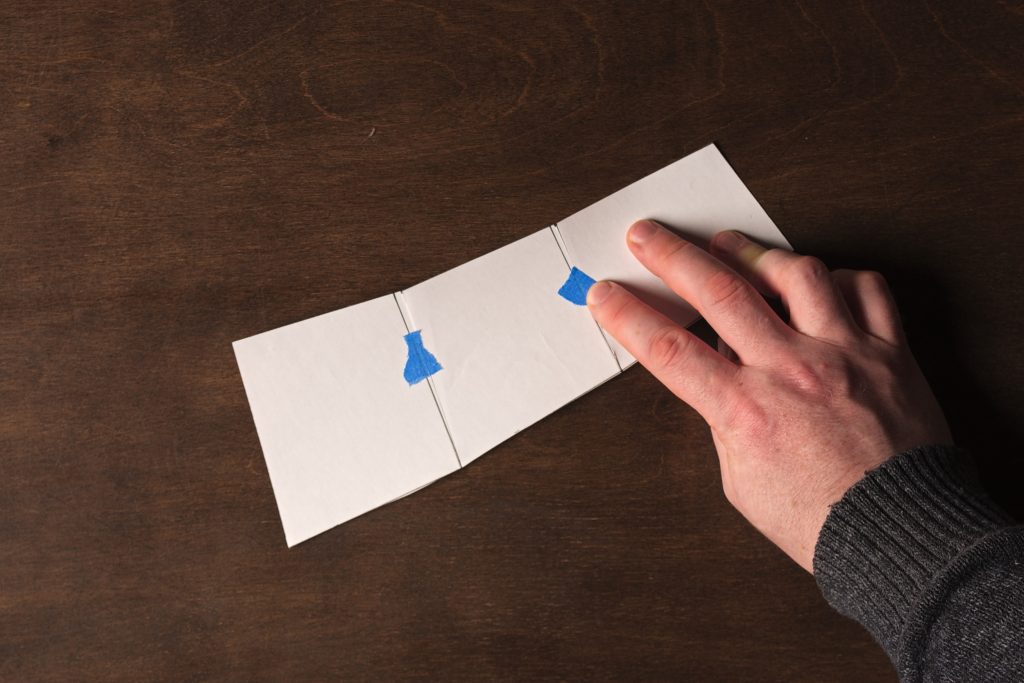
Here’s how your yoke should look so far. Now, trace the taped yoke onto a fresh sheet of paper.
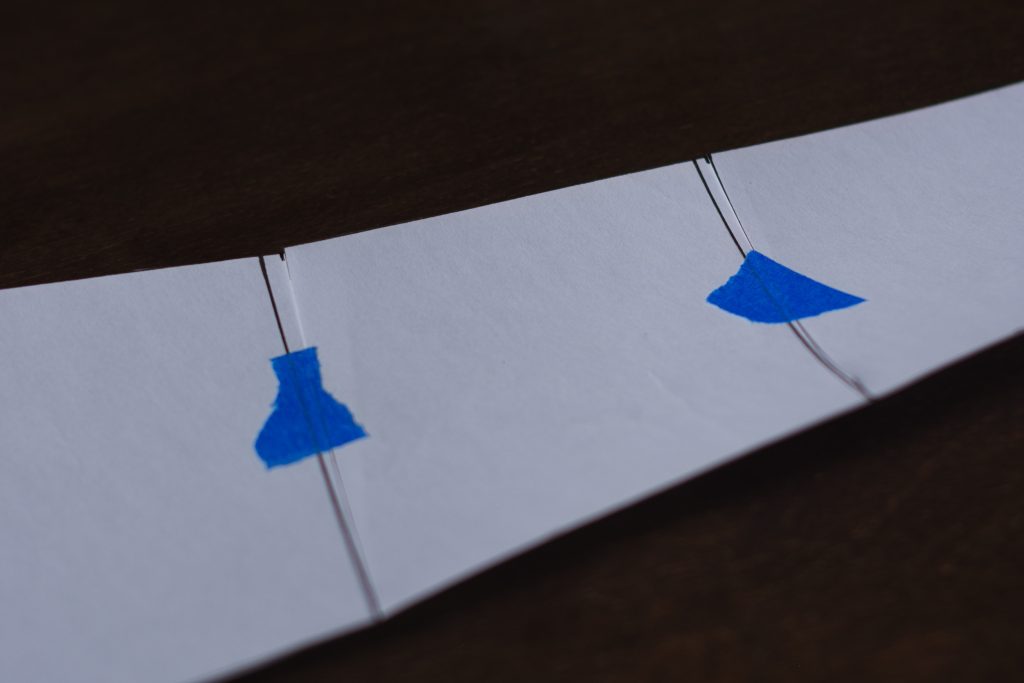
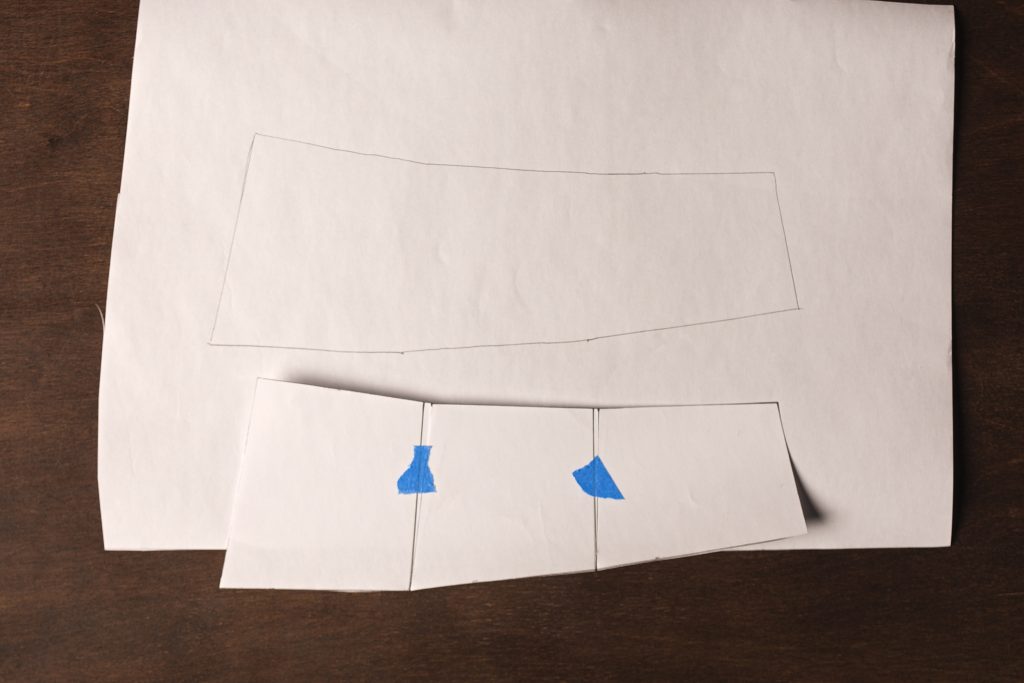
Mark the grain line perpendicular to the bottom edge of the yoke at the center segment.
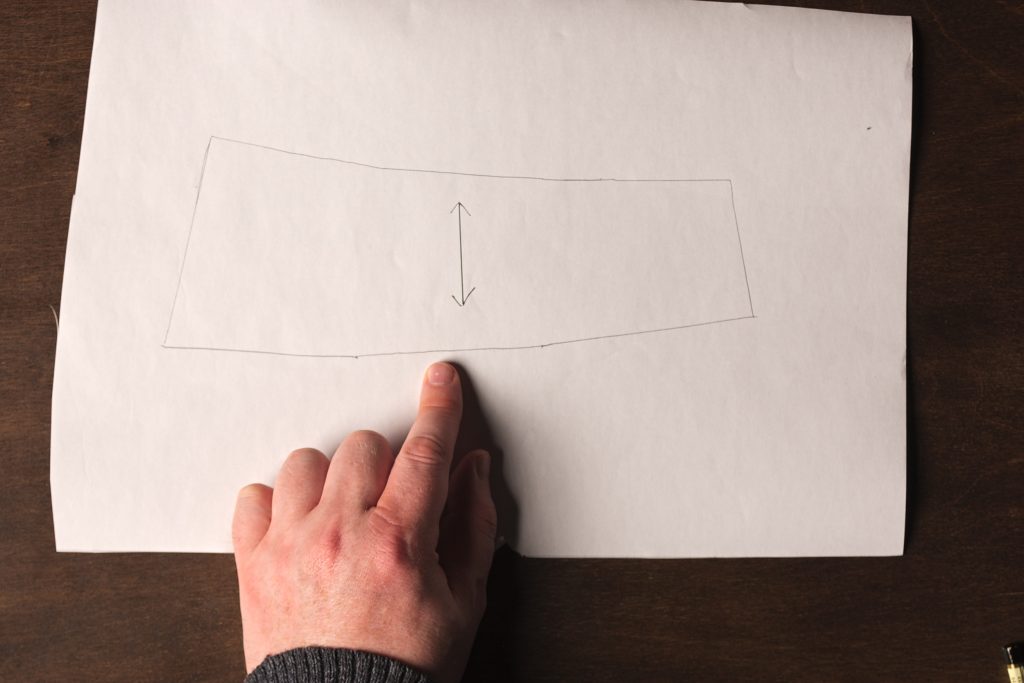
Use a hip curve or free hand to blend the bottom and top edges of the yoke into smooth curves.
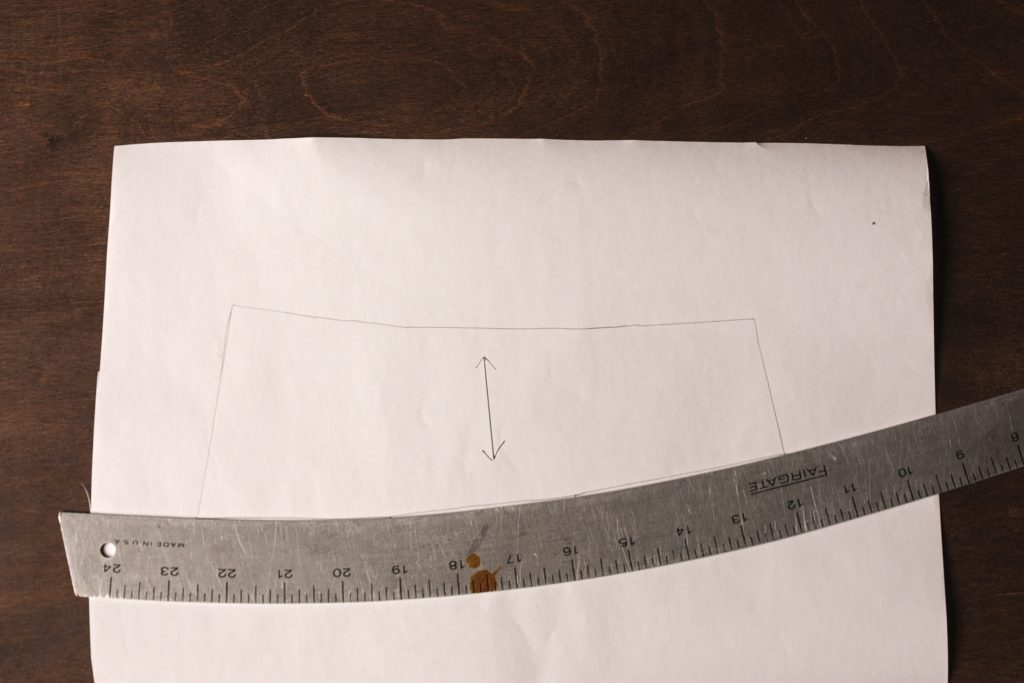
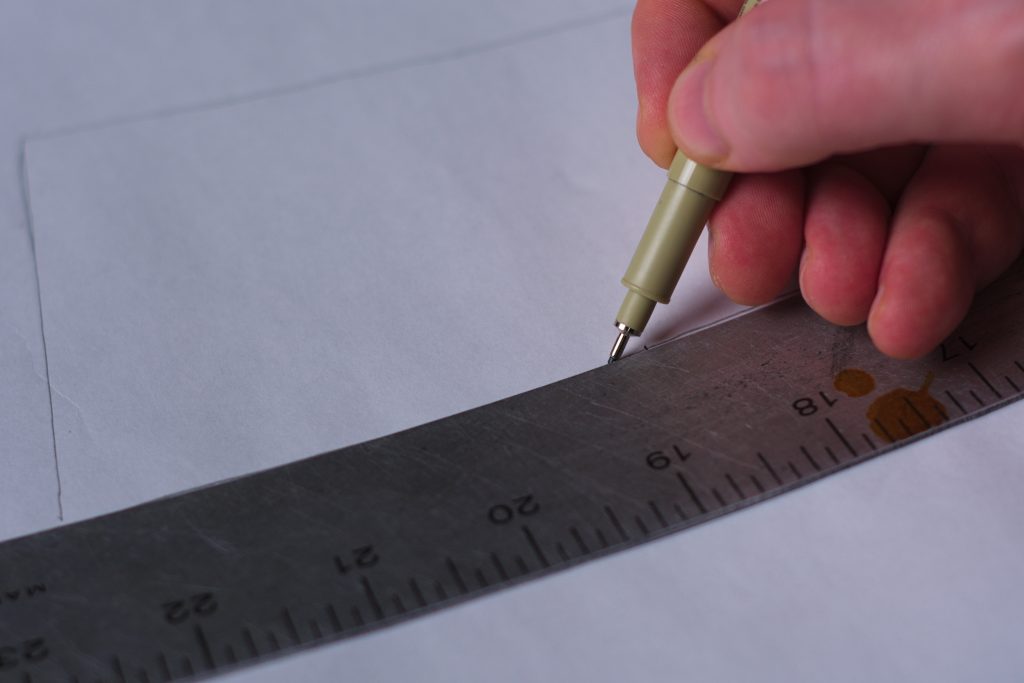
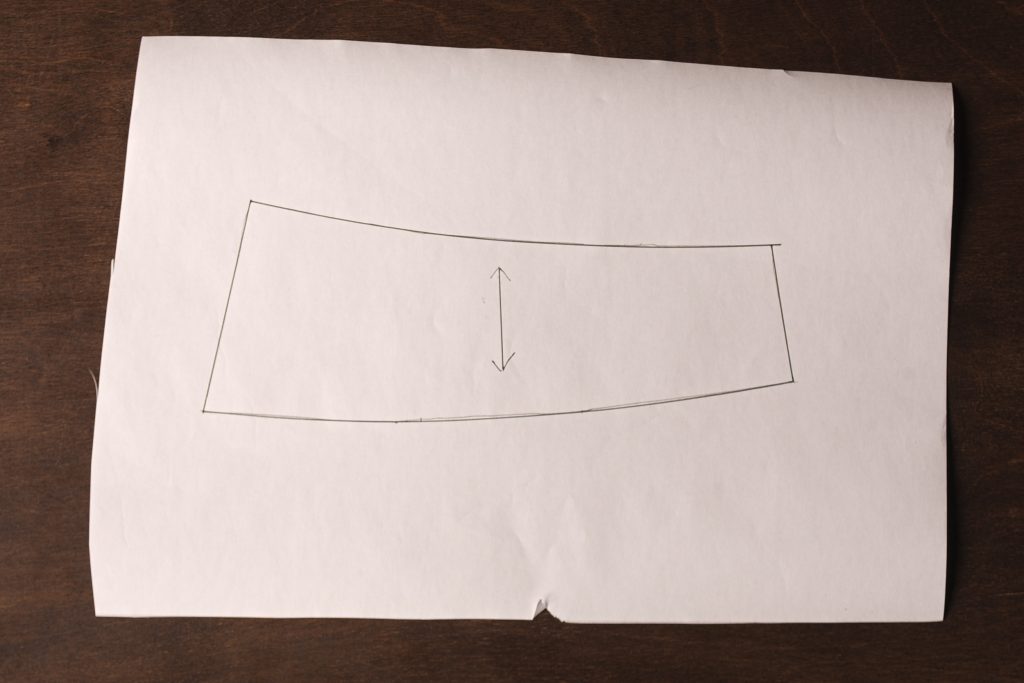
Here you would add the seam allowances (please see the next section for the amounts to add).
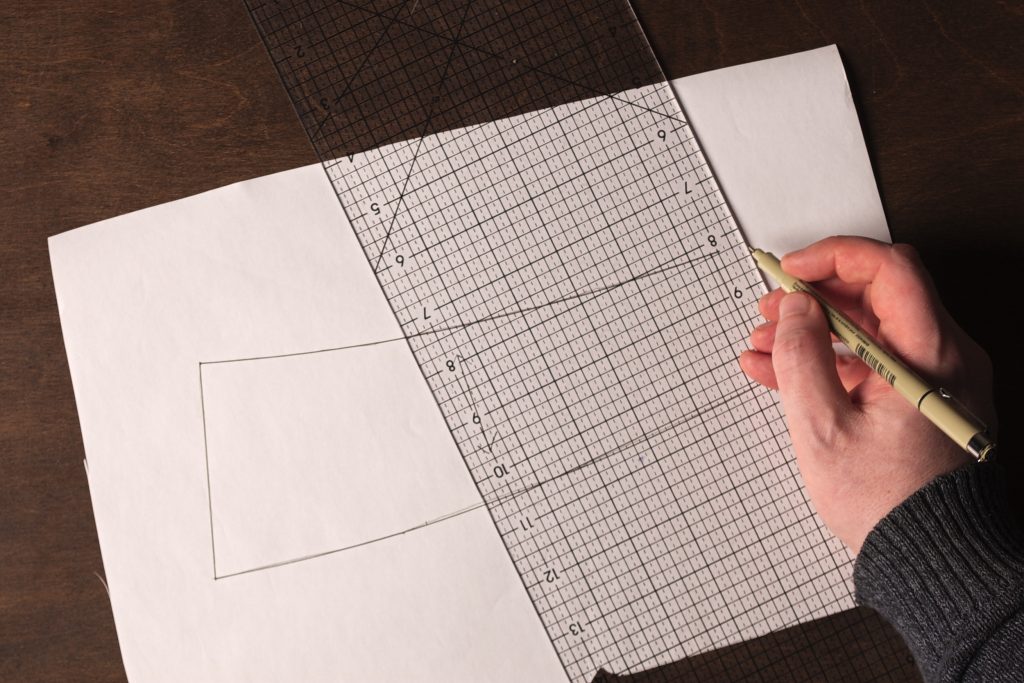
Here’s the yoke after adding the seam allowances.
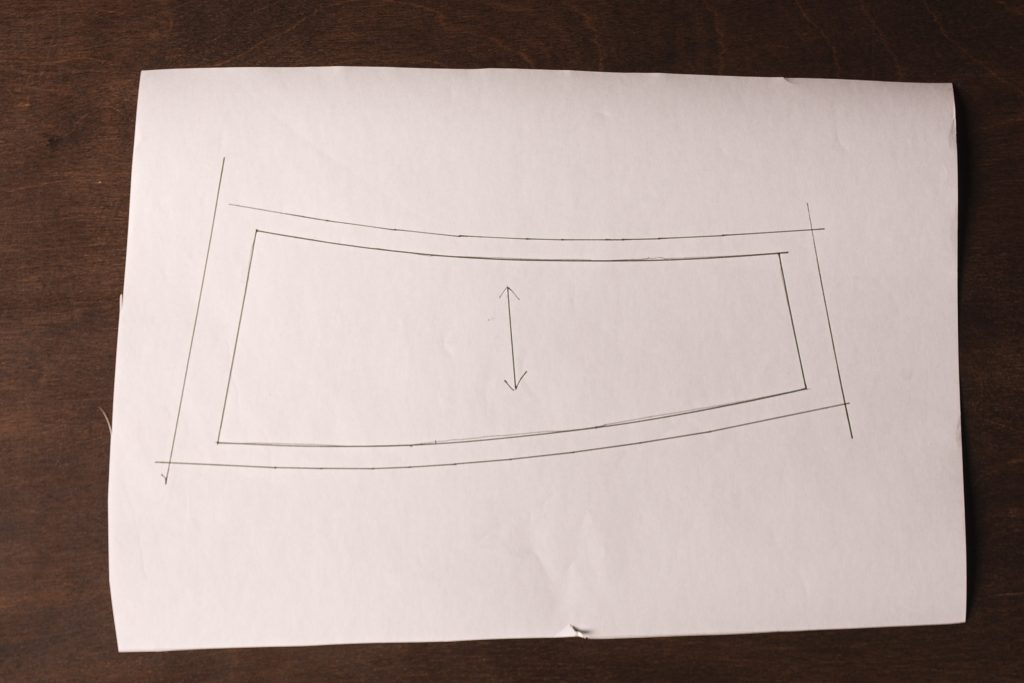
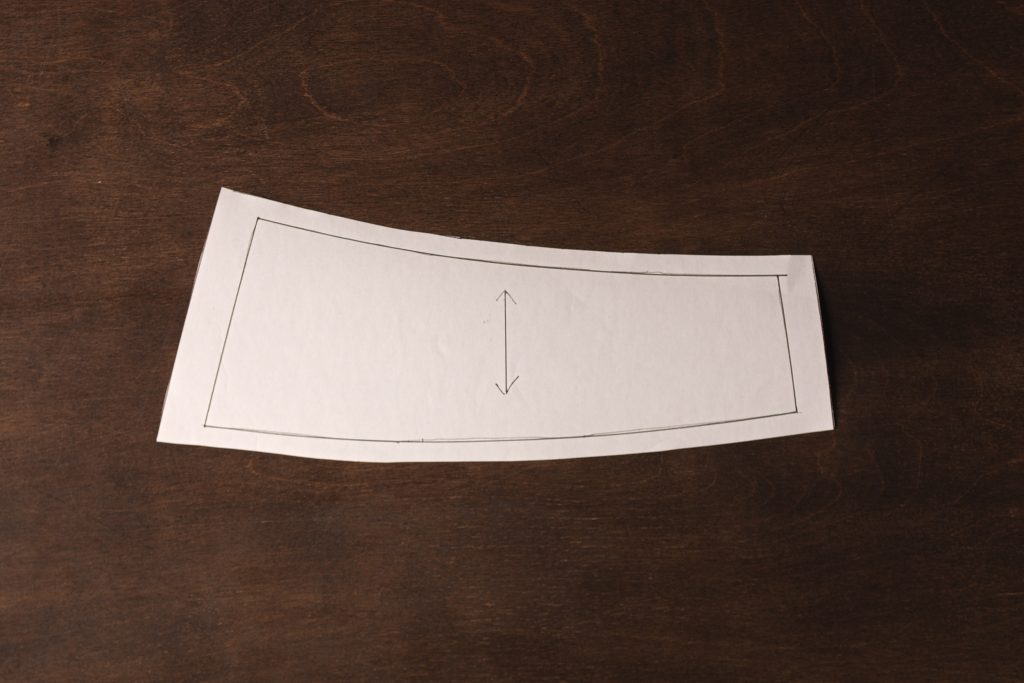
Finally, cut out the yoke and you’re ready to use the pattern piece!
Drafting the Back
I like to start with the legs when drafting the back of the jeans pattern and work my way up towards the waist.
Back Leg Widths
- Begin by extending the hem and knee lines by 3/4″. This accounts for the 3/8″ we took off the front widths and gives an additional 3/8″ ease.
- Extend the crotch line from 2. 6 – 11 is half the seat measurement divided by 8.
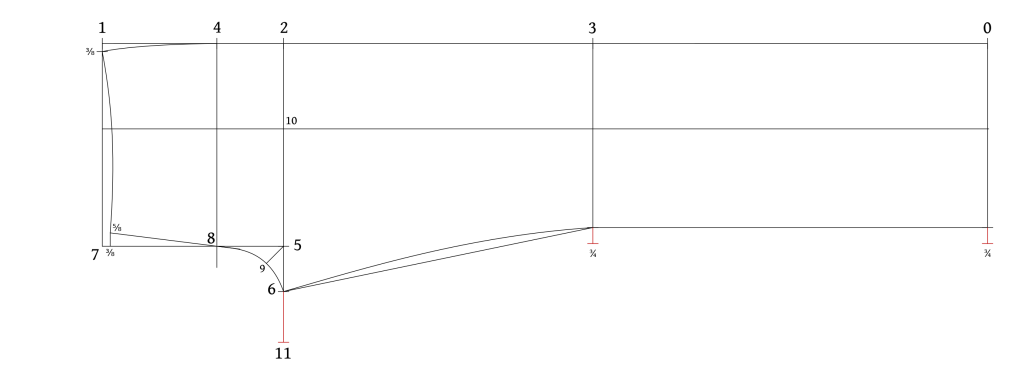
- Draw construction lines from 11 through the new knee line (which we’ll call 12 for clarity) to the hem.
- Measure from 12 to 6 on the front pattern piece.
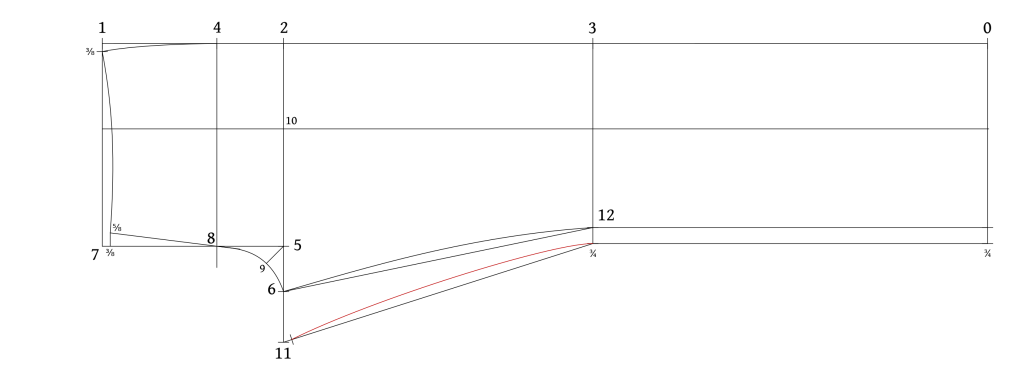
- The back leg from 12 to 11 is equal to 6 to 12 minus 1/4″.
In normal trousers there would be excess cloth here to ease in with the iron, but since this is not possible with denim the seams need to be adjusted accordingly. The 1/4″ also accounts for natural stretching of the material that will occur.
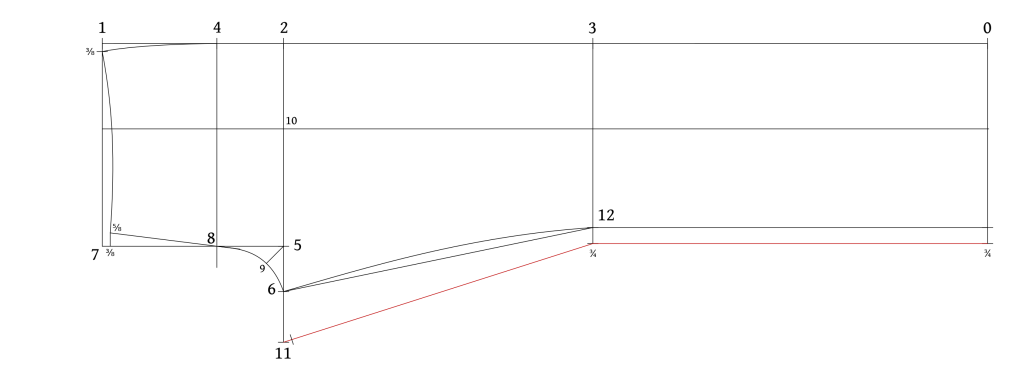
Draw the curve of the back inseam from 11 to 12.
The Seat Angle
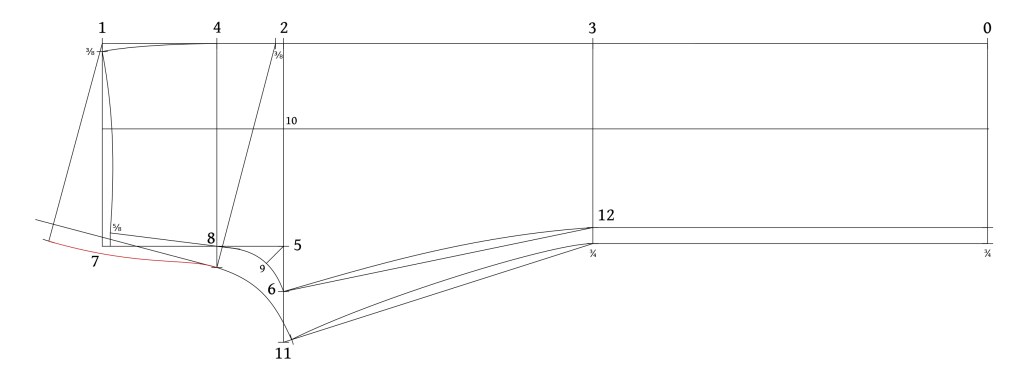
To begin finding the seat angle, first mark the following two points:
- Mark 3/8″ from point 2 on the side seam going towards point 4.
- Extend the hip line from four past 8 by 1″.
This 1″ is the amount of ease you want or need to add for the hips and would be 2″ when doubled for the full amount. You can adjust this as necessary but you may need to adjust point 11 as well if you extend 8 much further.
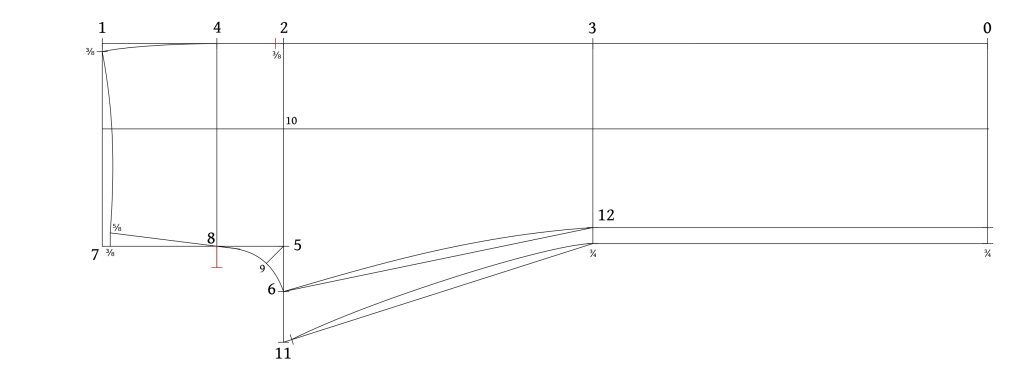
- Draw a line from the new point above 2 through the new point at 8.
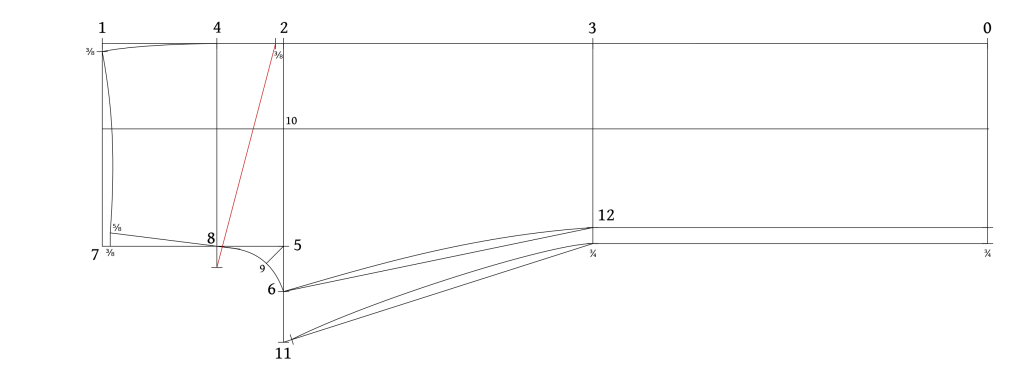
- From point 8, draw a line at right angles to the line you just drew, up towards and beyond the waist. This forms the seat angle. You may need to adjust this so I recommend drawing it lightly.
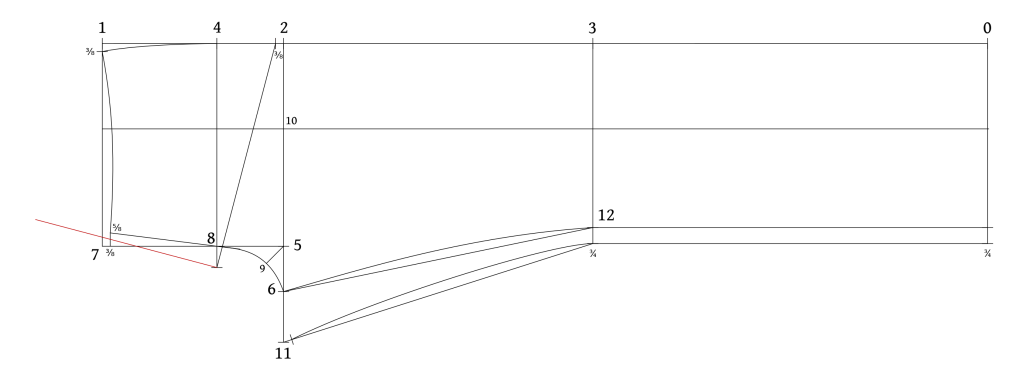
- Draw a somewhat shallow curve from the new point at 8 through 11. At 8, you want the curve to blend with the seat angle line nicely. And at 11, try to have the two lines meet at as close to 90 degrees as possible.
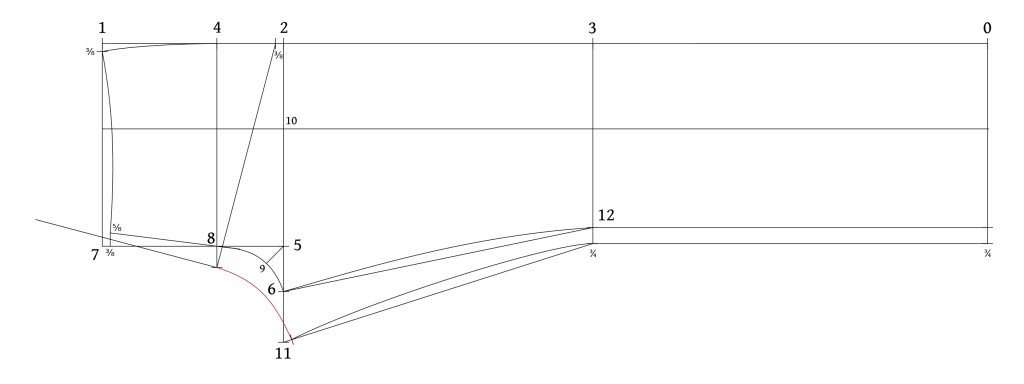
The Waist Seam
- Draw a line from point 1 on the side seam (the original mark, not the curved one) towards the seat angle line, meeting the seat angle at 90 degrees. Extend the line past the seat angle line a couple of inches for adjustment room.
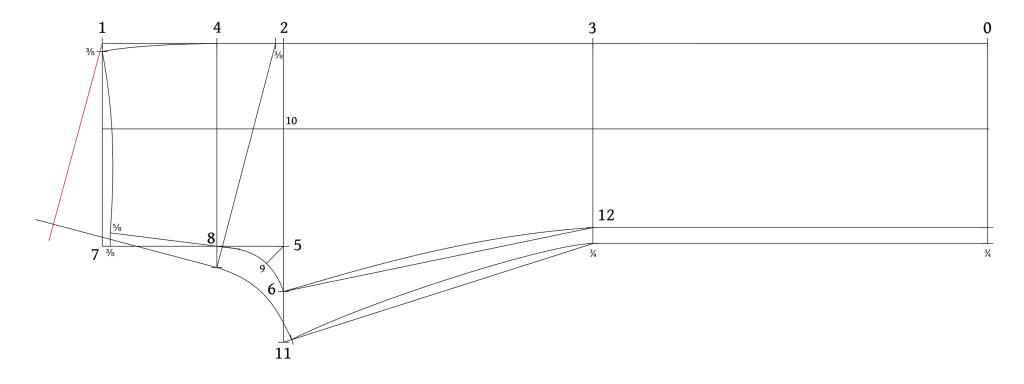
Now measure the waist seam of the front from the 3/8 mark to the 5/8 mark. Then measure the back waist from one, and add 3/4″ to half your waist measurement (see measuring diagram below). Mark on the back waist line where this ends up – it’s probably not where the back seat angle meets the waist. The additional 3/4″ makes room for adding two darts that aid in the yoke construction.
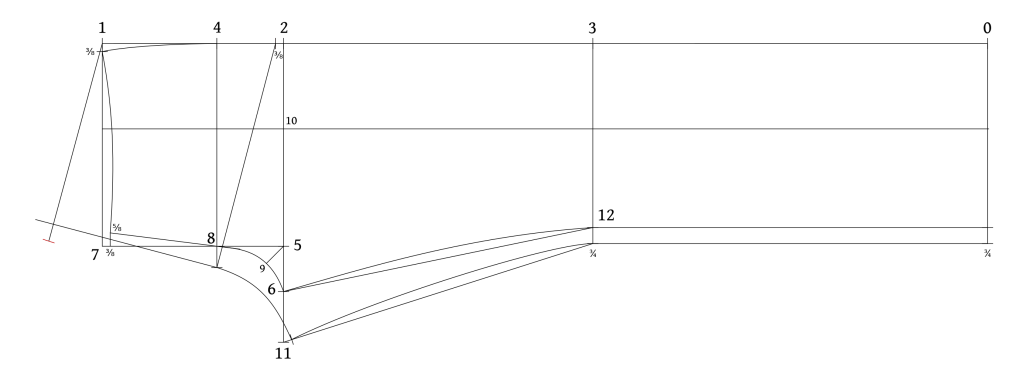
Finally, redraw the seat seam from the new back waist point, starting at 90 degrees to the waist, and gently curving into point 8 and the crotch curve. This completes the drafting of the back.
Double Checking Your Work
Before doing any more work on your draft, cutting things out, or adding seam allowances, this is the best time to double check your draft for errors by comparing the draft to your measurements.
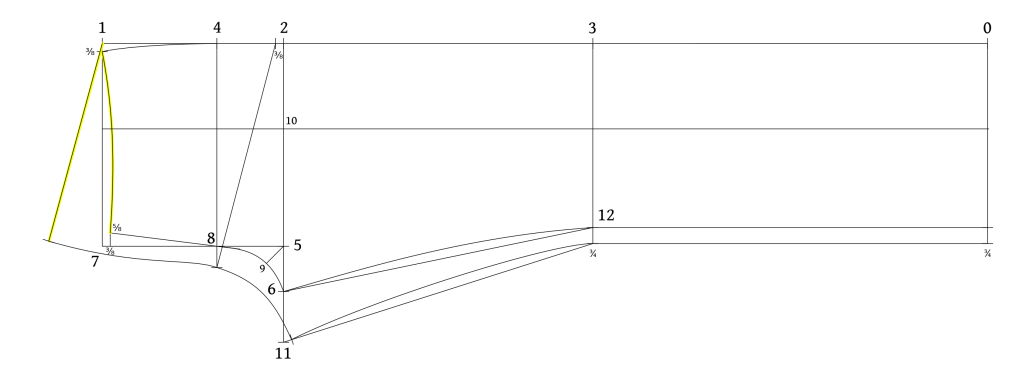
Waist
Double check the waist by measuring the waist lines and subtracting 3/4″. Double that and it should come out very close to your waist measurement if you’ve done everything correctly.
Hips
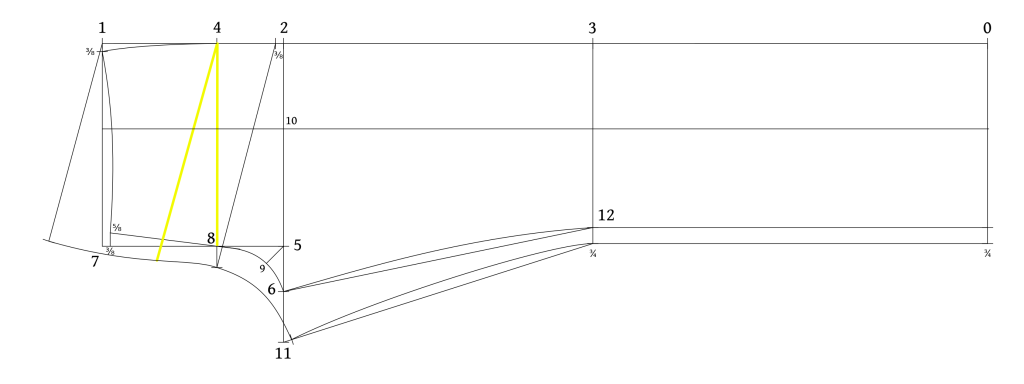
Measure the hips on your draft from 4 to 8 for the front. Then measure from 4 to the seat seam, keeping at 90 degrees (or as close as you can if it’s curved) to the seat seam, or parallel to the angled line from to through 8. Compare this to your own hip measurement. There should be a couple of inches of ease built into this measurement.
Fly and Seat Seams
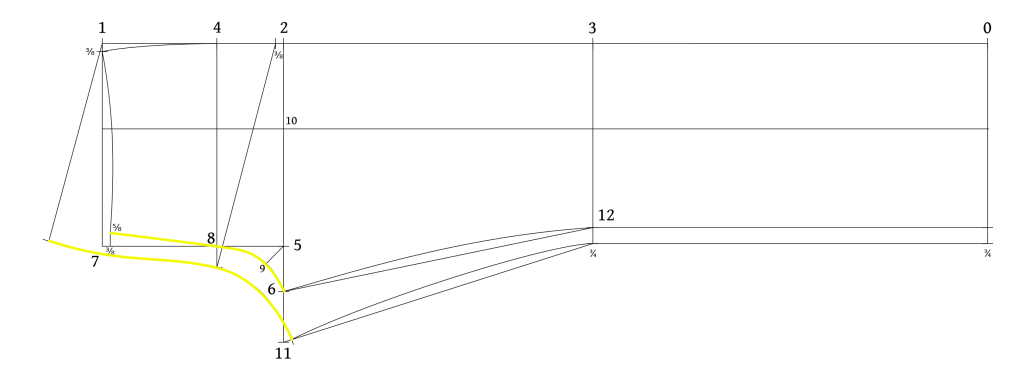
Double check the lengths of the fly and seat seams, subtracting 1 1/2″ for the width of the waistband. How do they compare to your own measurements? These may be off by a greater distance than the other measurements depending on which pair of trousers you measured, etc. If in doubt, I’d go by the drafts measurement and see how things look at the first fitting.
Lengths
Finally, double check the lengths (though I recommend doing this after the first step in drafting the front). Are the side lengths and inseam correct (minus the 1 1/2″ for the waistband)? Is the curved inseam slightly shorter by 1/4″ in the back piece compared to the front?
And are the widths for the hem and knee looking good? Just a good idea in general to give everything a good second or third look before moving on.
Drafting the Front
When drafting the pattern, keep in mind that your own pattern may look different than mine based on your measurements and the style you are going for. Plan on making a couple of versions of the pattern as you’re learning and make mistakes, especially after you’ve done your first fitting. I’ll be providing a printable version here in the near future as I know it’s a pain to try to draft from a computer screen.
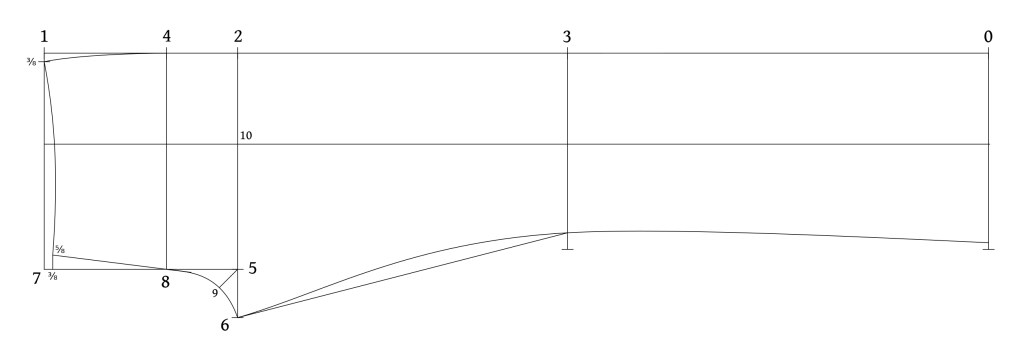
Begin drafting the front of the jeans pattern by drawing a long line parallel to the edge of your paper. Make sure there’s at least 6 – 8 inches of free paper on each end to draw in the cuffs and the back rise later on.
Marking Out the Lengths
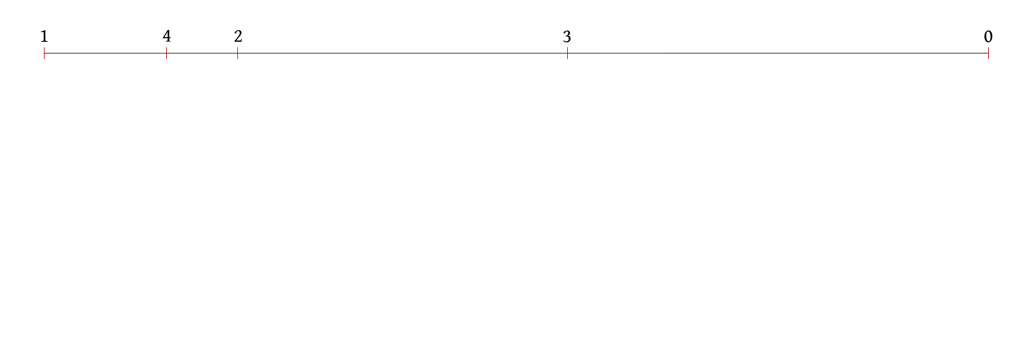
Mark 0 at the right end of the line, and then measure out the following points from 0.
- 0 – 1 Side Length to measure minus 1 1/2″ or the width of your waistband.
- 0 – 2 Inseam to measure.
- 0 – 3 Divide the length from 0 – 2 in half and add 2 inches to find 3 for the knee.
- 2 – 4 Half the seat measurement divided by 6 to find the hip location.
Marking Out the Widths
Square down from each of the points you marked the following distances.
- From 0 measure down half the hem width minus 3/8″. We’ll be moving more of the fullness to the back piece. Note that in the original example from 1873 the hem matched the knee for a very square and full cut, so you may wish to do the same.
- From 3 measure down half the width of the knee minus 3/8″.
- From 2 to 5 is the seat measurement divided by 4.
- From 5 to 6 is half the seat measurement divided by 6 minus 1″.
- Square down from 4 and 1 about the same distance as 2 – 5.
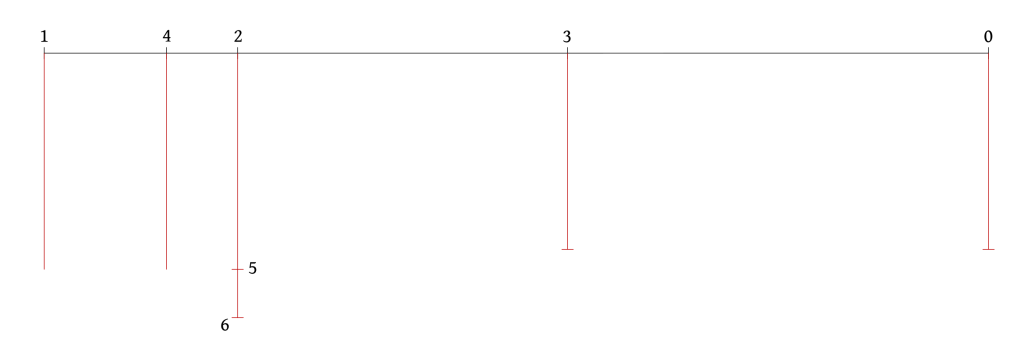
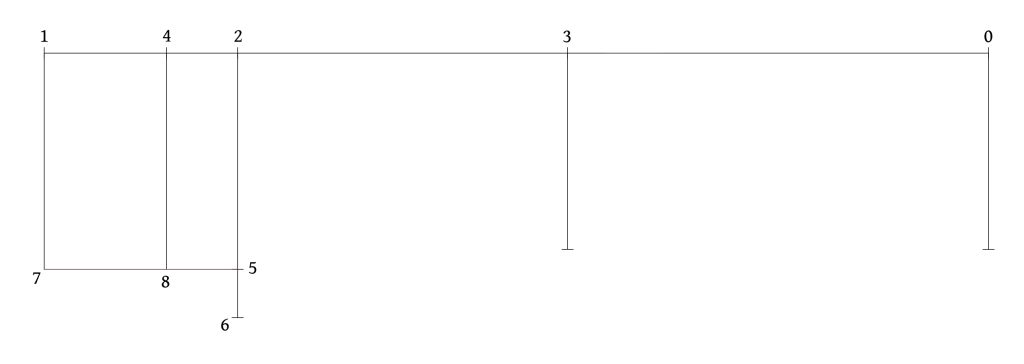
Square up from 5 to find points 8 and 9.
Point Adjustments
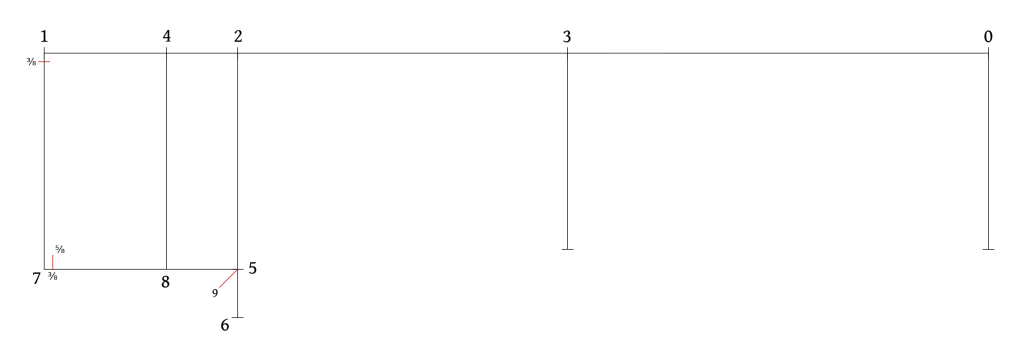
We need to fine tune a couple of points to find their actual position for the draft.
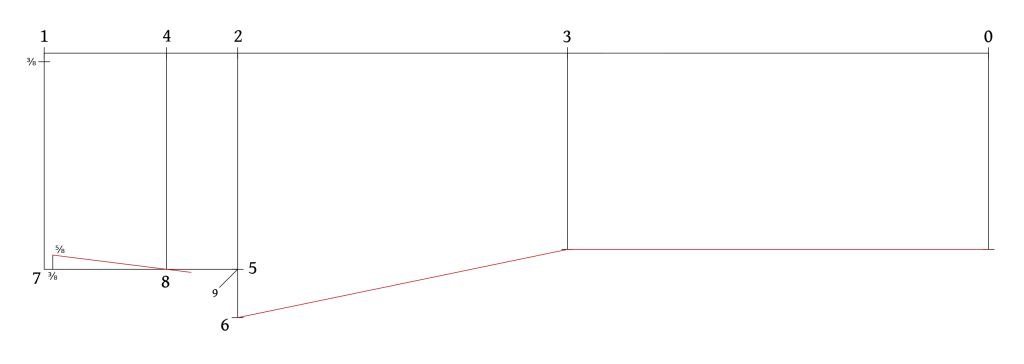
- From one, measure down 3/8″ and mark the point.
- From point 7, measure 3/8″ towards point 8. Square up 5/8″ to find the final point.
- Draw a line at 45 degrees from point 5. Point 9 is half the distance of points 5 to 6.
Construction Lines
Draw the following construction lines to aid in the drawing of the curves.
- From the point near 7, draw a line through and a little beyond point 8. This gives us the front fly line.
- Draw lines from 6 through the knee line from 3 to the hem from 0.
Curves
Draw the following curves using a hip curve, French curve, or freehanded.
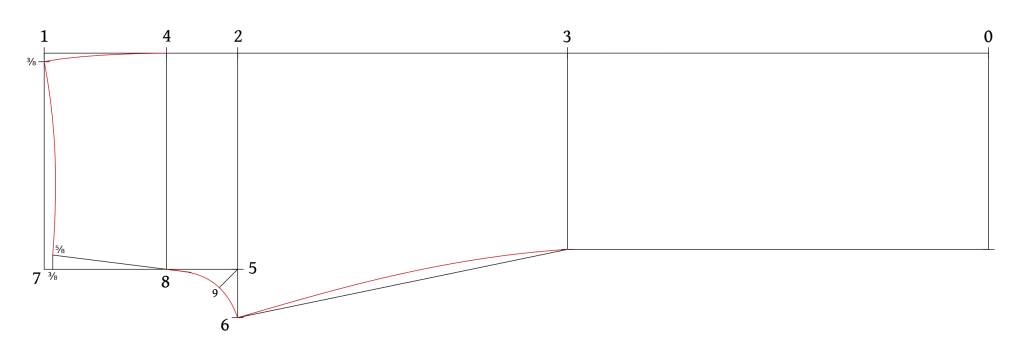
- From 1 to 4 draw a shallow curve for the hip area. It should gently taper into the side seam line a little above 4.
- From 1 to 7 (those finer points mind you), draw a shallow curve for the hip line. If you can, make the intersections at both ends as close to right angles as possible for best results.
- Make the front crotch curve from 8 through 9 to 6.
- Mark the inseam curve from 6 to 3, gradually shaping the line so it’s harmonious with the straight line below the knee. At point 6, try to get the two curves at the crotch to meet in right angles by adjusting the curves slightly as necessary.
Center Front Line
It’s helpful to mark the center front line to find the position of the brace buttons later on as well as double check our work after drafting. Find the distance between 2 and 5. Divide that by 2 and make a slight temporary mark. Measure 3/4″ towards 2 to find the center front at 10.
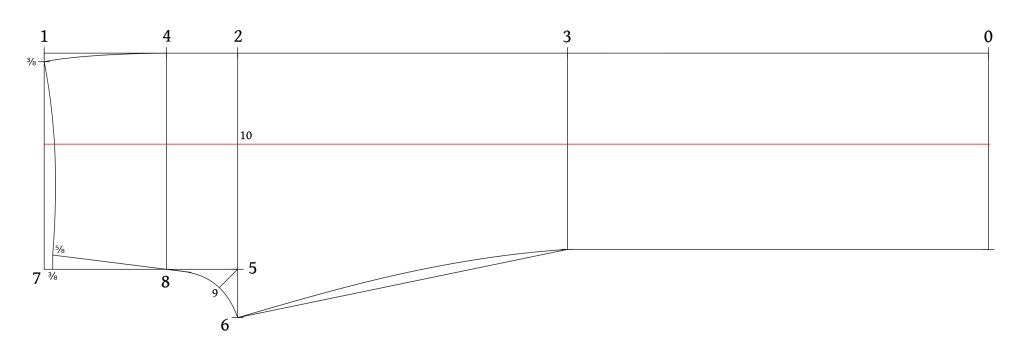
This completes the draft for the jeans front for the 1873 style of jeans. As shown above, it gives a very baggy straight-legged jean. You could easily taper the bottom by adjusting the width of the cuff, turning into a more fitted pair of jeans.
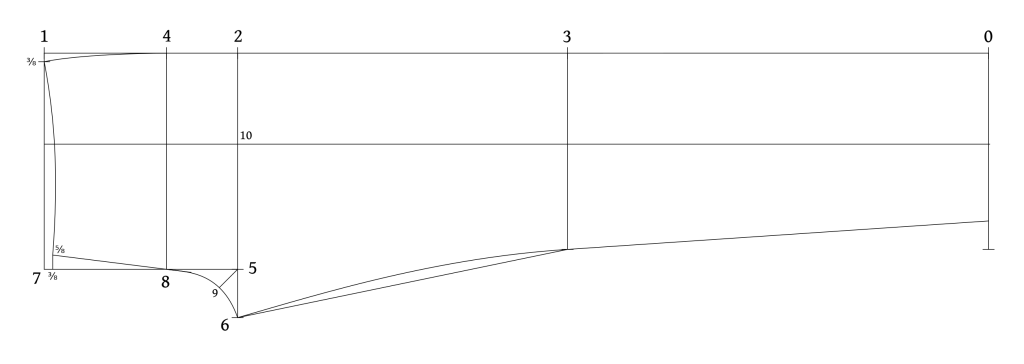
Or you could perhaps do something like a ‘boot cut’, more fitted at the knee but tapering wider at the hem to fit over a pair of boots.
I’m sure there are other styles out there you could easily replicate with a few small changes.
Measurements
Measuring for a pair of jeans is rather easy, especially compared to traditional trouser measurements, as we’ll be measuring an existing pair of trousers for most of the measurements. Choose your best fitting historical or regular pair of jeans or trousers to get the best fit.
Now the original 1873 pairs seamed to be extremely unfitted, almost block-like in appearance, and in some cases were meant to be worn over another pair of trousers as an additional layer of protection during manual labor. It’s up to you how fitted or not you want your own pair of jeans to be – I’ll be going for the more fitted look as the examples being demonstrated are all being made for clients.
You can mark down all the measurements as you go in one of the following spreadsheets.
Measured on person
The first two measurements are taken on your person.
Waist – A
The waist should be taken at the desired height of your jeans – historical trousers would have been high rise to about the level of the navel. Pull the tape as snug or loose as you’d want your jeans to be – the measurement here is directly transferred to the pattern with no additional ease.
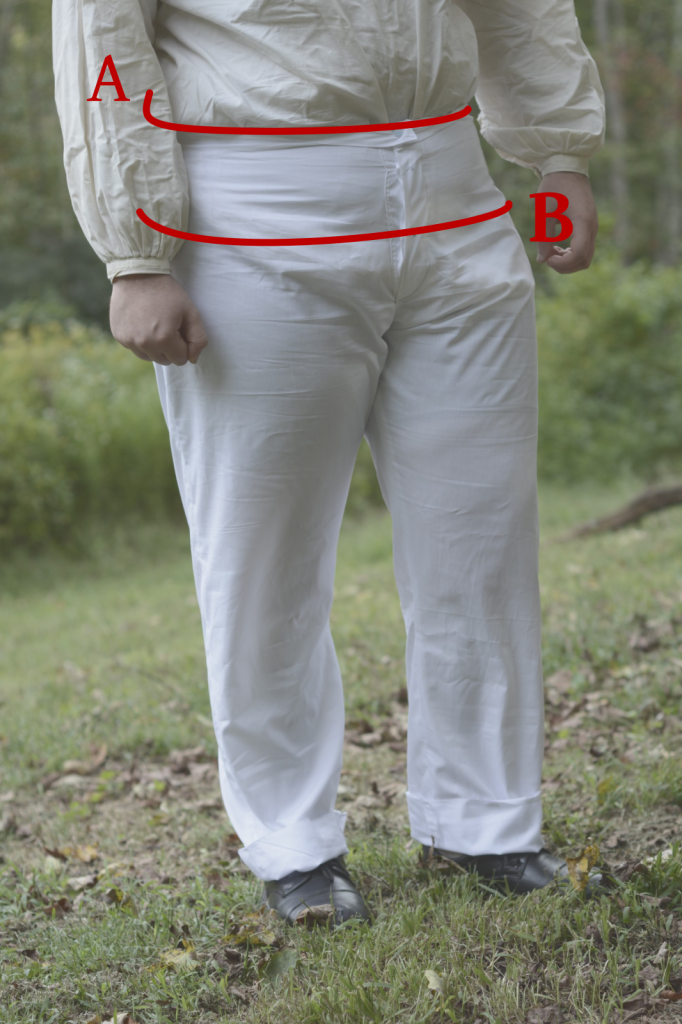
Seat – B
The seat is taken around the hips at the fullest part of the seat. We’ll be adding a little ease to the hip area, but take this measure a little loosely.
Measured from favorite pair of jeans or period trousers
The following measurements are all taken from your preferred pair of pants or jeans. Feel free to mix and match different pairs of trousers to get the look and fit you are going for.
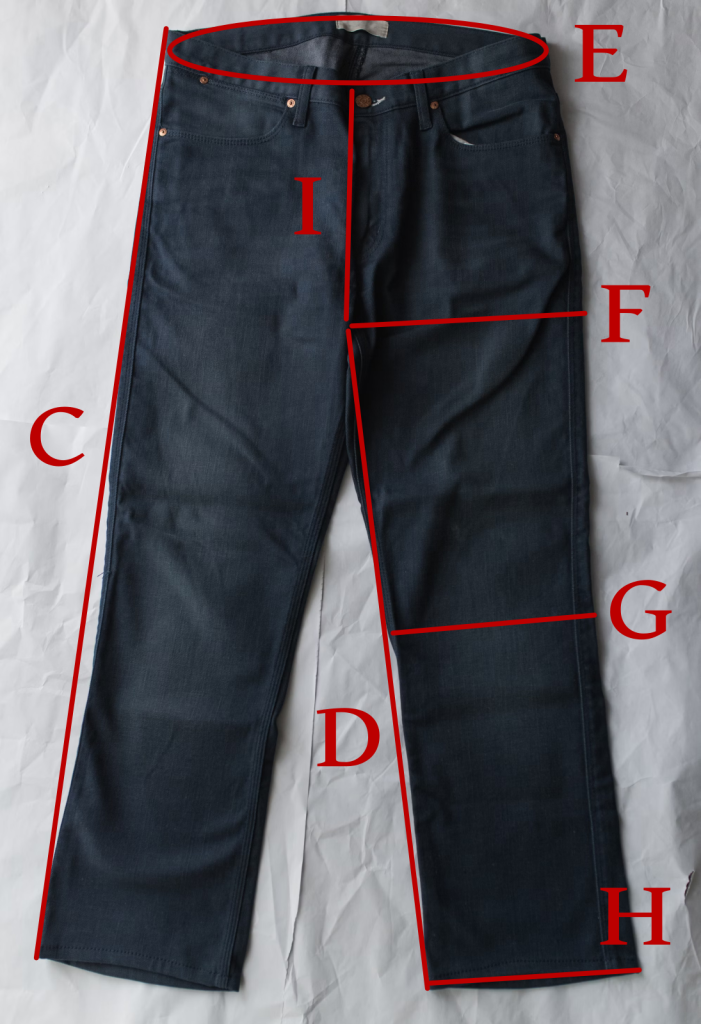
Side Length – C
Measure along the side seam of the trouser from top of waistband to hem.
Inseam – D
Measure the inseam from the middle of the seam at the crotch to the hem.
Waistband – E
Measure around the waistband in its entirety (don’t measure flat and double since the seams are angled slightly). I like to close the fly and measure from the front button, around to the front button again. Compare this to the waist measurement you took. Are they the same? If not, is it because ease was added to the trouser waistband? You’ll have to determine exactly which measurement to use for your jeans.
Thigh – F
With the trousers flat, measure across the thigh about two inches below the crotch. Try to keep the tape at right angles to the side seam if possible. Double the measurement (9 inches measured would become 18 for example).
Knee – G
To find the position of the knee, measure the inseam, find the center, and the knee should be about 1″ above that center. Measure across the knee, keeping the tape at right angles to the side seam, and double the measurement again.
Hem – H
Measure the hem flat on the table and double the measurement.
Front Rise – I
The front rise (and back rise) is more of a check measurement to compare to your draft and really isn’t used in the pattern at all – it’s more to make sure you’re on the right track. To get the front rise, measure from the center of the crotch seam, along the front fly, to the top of the waistband.
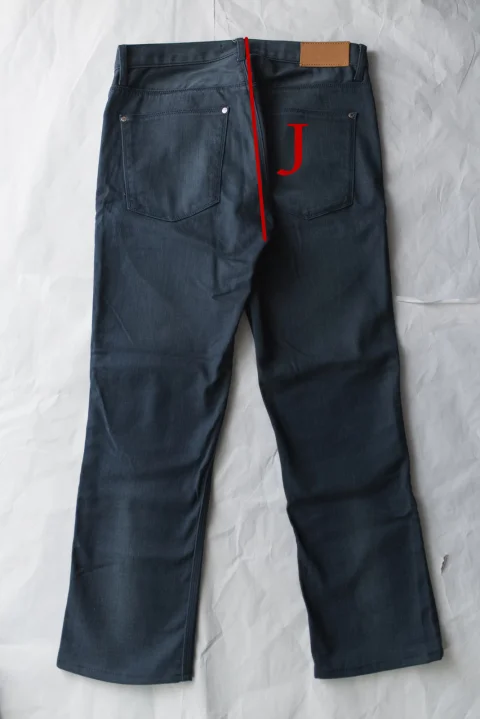
Back Rise – J
Turn the jeans over to get measure the back rise from the center of the crotch seam, along the seat seam, to the top of the waistband.
Supplies
I wanted to go over a few of the supplies specific to jeans making in more detail, since they are not commonly used with tailoring in general. If you have any questions about these or any of the other materials needed, feel free to email me at any time.
Selvedge Denim
For this project, you will need four yards of selvedge denim. You could possibly get away with only 3 yards if you are a small size, or don’t mind cutting the waistband without the selvedge. A lot of this selvedge denim is now made in Japan these days, as since the 1980s the looms in the United States have been shut down for the most part and sold to Japan.
The selvedge denim is often woven very narrow on the traditional looms, using a variety of different twill weaves. Depending on how wide your particular denim is, there can be a lot of wasted fabric (though you can use it in other projects of course!), as each of the legs must be cut on the selvedge edge to avoid needing to use surgers or overlock machines. And beyond all that, the denim used in the originals was selvedge denim.
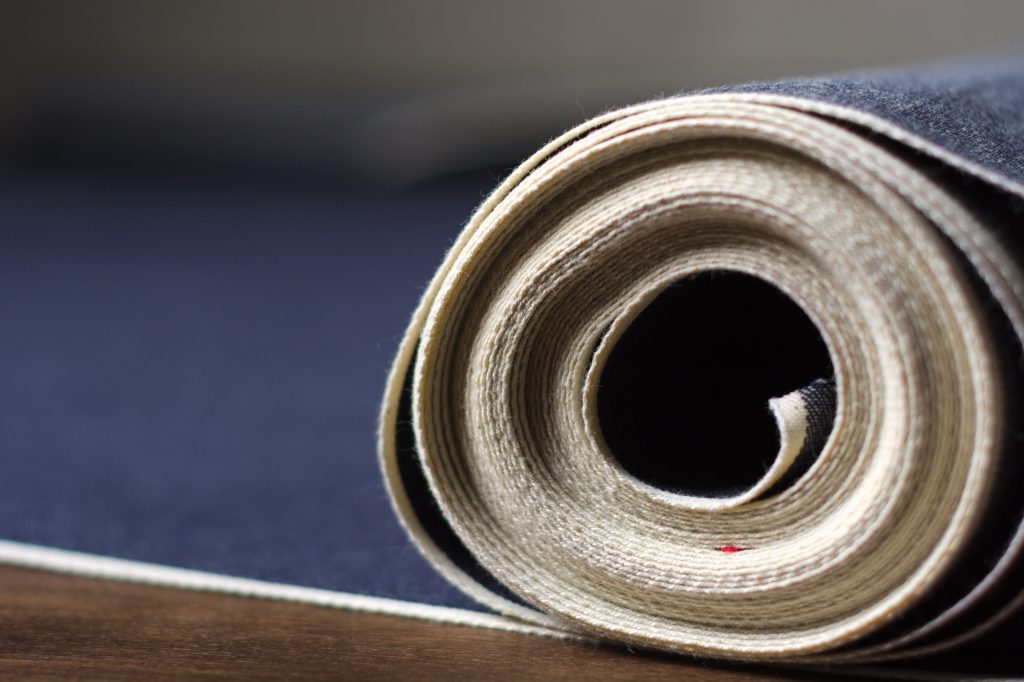
If you want to find some denim on your own, the key thing is to keep the weight at or below 12oz, especially if you are using a home sewing machine. As I found out the other day, even a powerful Singer 201 will not go through some of the most bulky seams. The seam junctions at the back of the yoke and the crotch, depending on how they’re sewn, can be as many as 16 layers thick, or at least 12 layers even with the alternatives I will show.
For those who want to find their own denim, Citron Jeans from Japan has a good assortment of various denims, and at the time of this writing a couple of 10oz denims that look good for beginners.
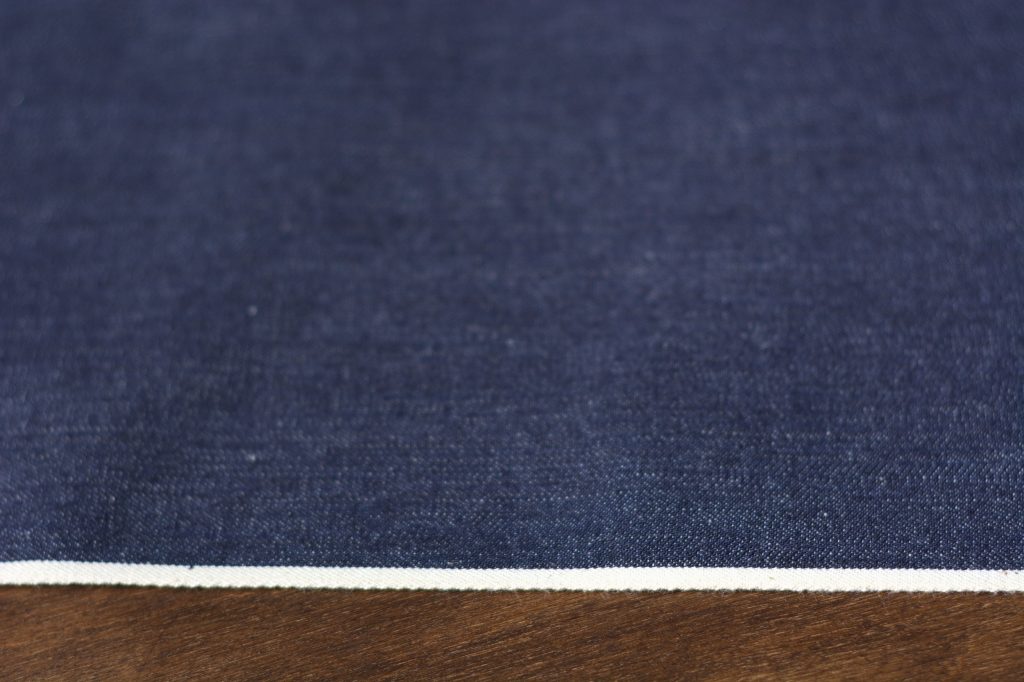
For those who want the most period correct denim, I found a beautiful reproduction selvedge denim from Denim by Collect that almost perfectly matches the 1873 jeans. Unfortunately, they only sell to businesses and the cutting fees and shipping for just a few yards is extremely expensive. So if anyone wants a few yards of this, please contact me and I can see about putting together a group buy.
Thread
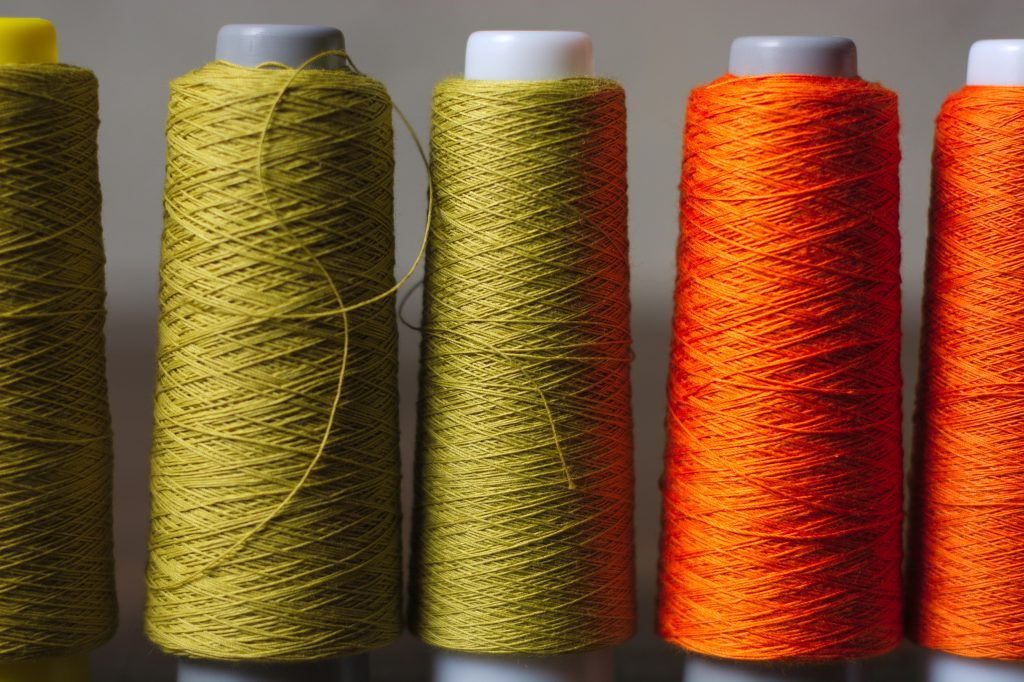
For thread, Citron Jeans has a good selection of 100% cotton jeans thread as well as some cotton wrapped polyester thread. Gutermann also has some polyester jeans thread that’s good for beginners and is a little easier to work with, easily found at most sewing stores like Joann Fabrics.
If you’re using the thread from Citron Jeans, you’ll need a thread holder to enable your home machine to work with the large spools of thread. You’ll also need to buy two spools for each pair of jeans – one sized #20 for the upper thread, and one sized #30 for the bobbin thread (may have that backwards, thinner thread for the bobbin).
Needles
Get the biggest jeans needles you can find for your machine. I use a size 110/16 which should work with the 12oz denim but much heavier than that starts to demand an industrial machine with even bigger needles. Count on going through 2 or 3 needles per project.
Doughnut Buttons and Setting Tool
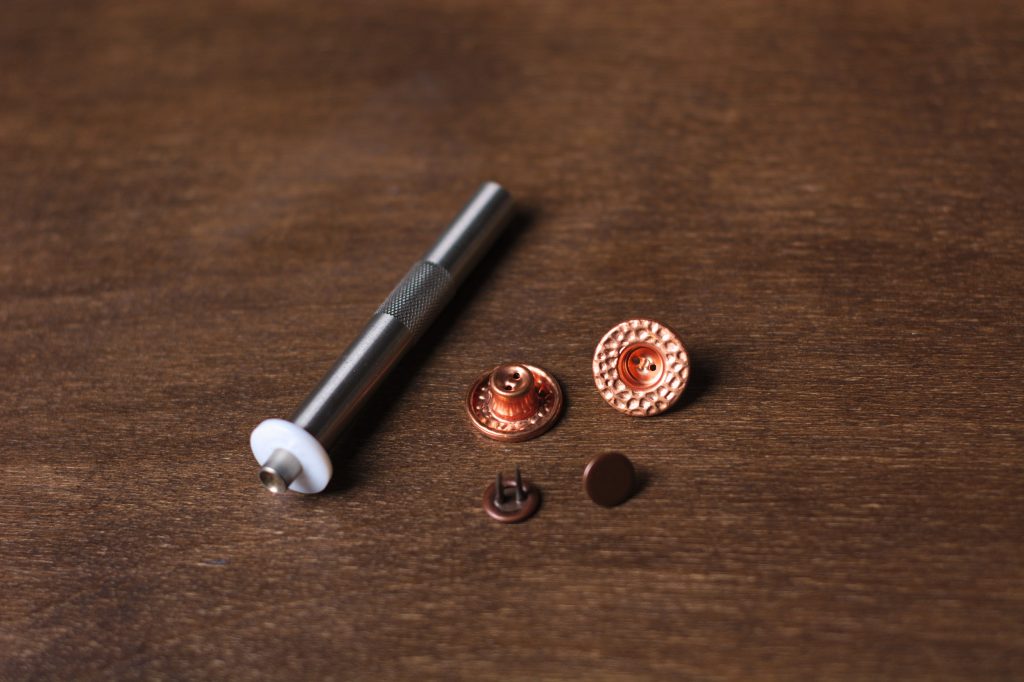
The original jeans appeared to use a doughnut button and those to this day seem to be the most professional looking and durable buttons available. These buttons come in two pieces, the button part with two holes in the indented center, and the pronged piece with two metal prongs that goes inside the trousers. The prongs are poked through the denim, the button put in place on top, and the button is hammered onto the prongs which sort of fold over each other, securing the button, using a special little tool and small metal anvil. The tools are available from Citron Jeans (look for the tool AP-3K).
And a good selection of buttons also from Citron Jeans.
Rivets
For rivets, I like the closed top rivets (not sure how to describe them), mostly for ease of use. The back of the rivet is poked through the denim, the cap placed on top, and then the rivet set using a rivet tool. Both are available from Citron Jeans.
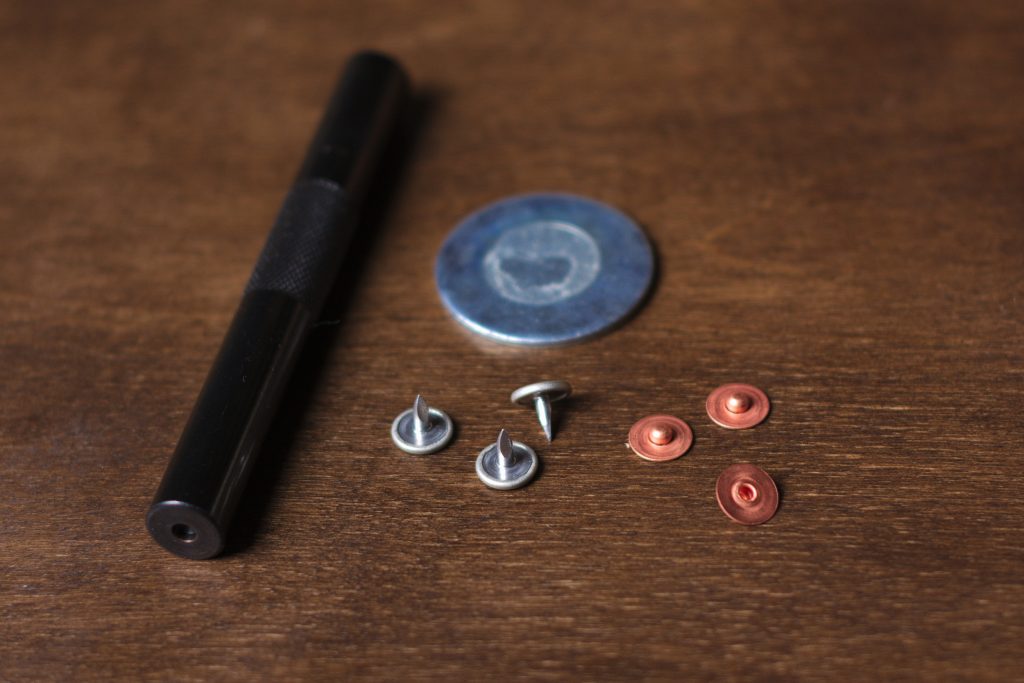
Also available are the ‘punch through rivets‘, which seem to take a little more skill to use properly.
Buckles
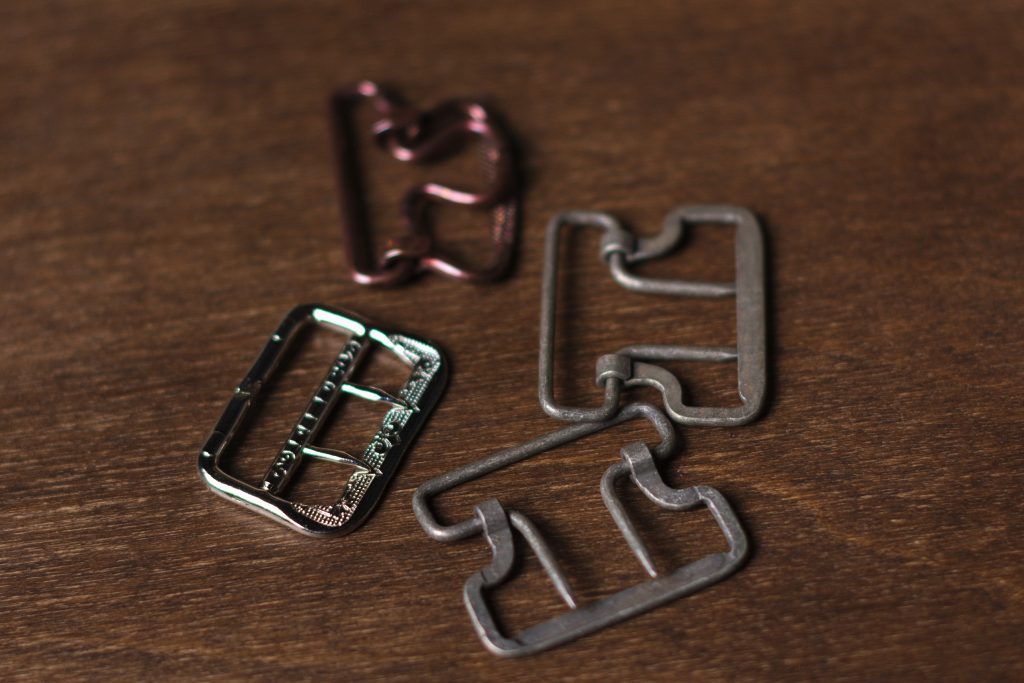
For the cinch back, you’ll need a buckle for the closure. I like the plain metal ones for the 1873 jeans but there are a bunch of good options to choose from at Citron Jeans.
Graduated Rulers
Before drafting your pattern, you’ll need to print out a set (or at least your size) of graduated ruler. You’ll want to use the ruler corresponding to your breast / chest size. So for example, a 42″ chest would use the size 42 ruler to draft the pattern.
The most important part of printing is to ensure the files are printed at 100% scale. These are 11×17″, so that means if you’re on a home printer with letter sized paper, a good deal of the rulers will just be cut off and not printed. I’ve never had a problem with that and just use the portion of the ruler that does print.
Double check that the ruler is printed out correctly by comparing the size 37 1/2 to a regular ruler – they should be exactly the same.
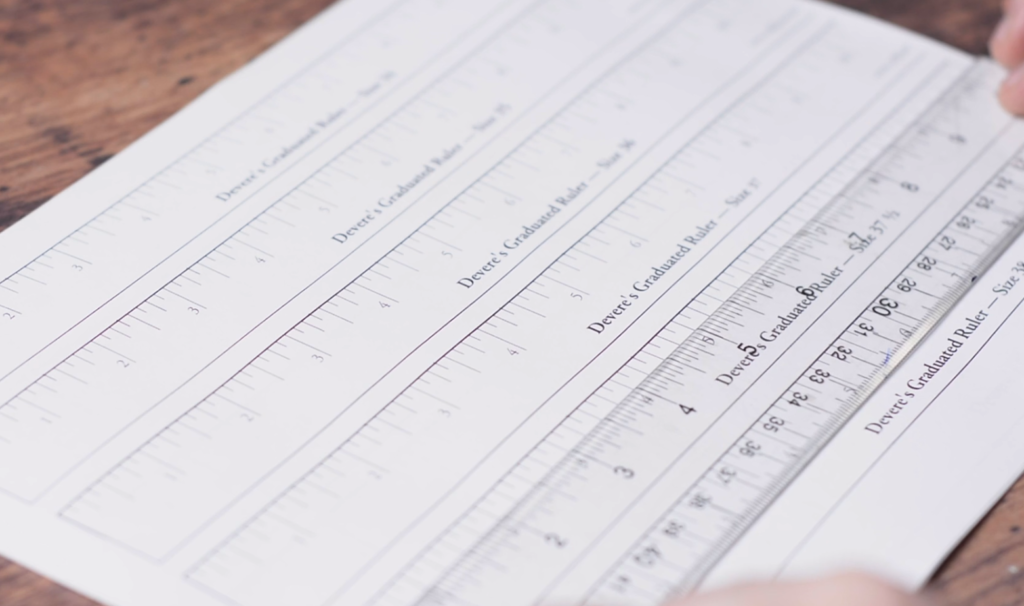
You could also bring it to a copy shop or office supply store and have them print it out for you.
Here’s a short video explaining the rulers in more depth.
Final Pressing
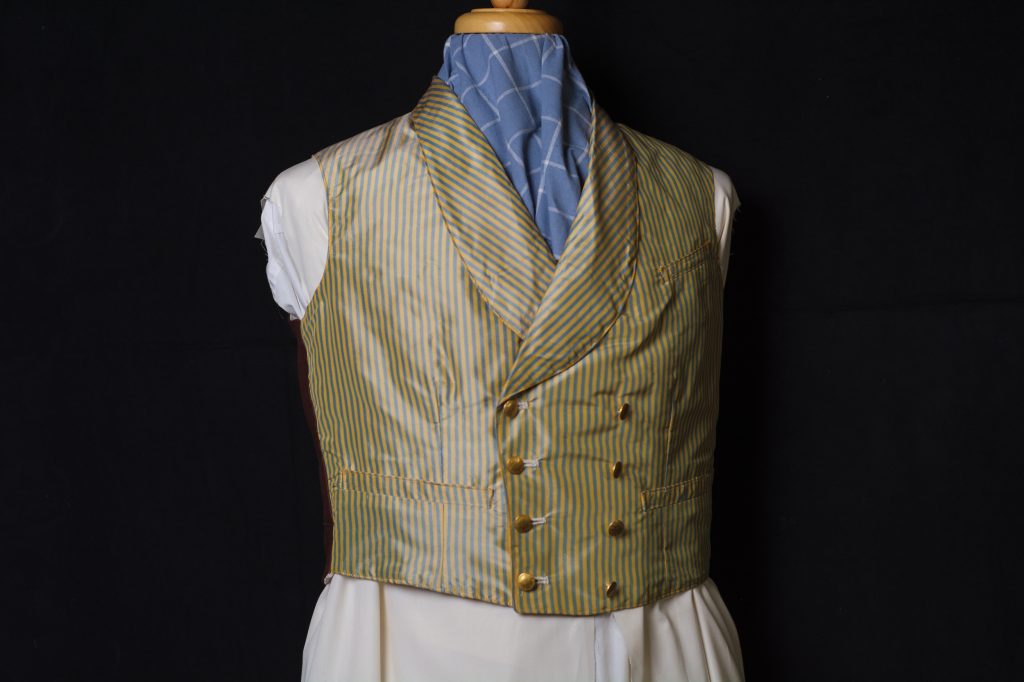
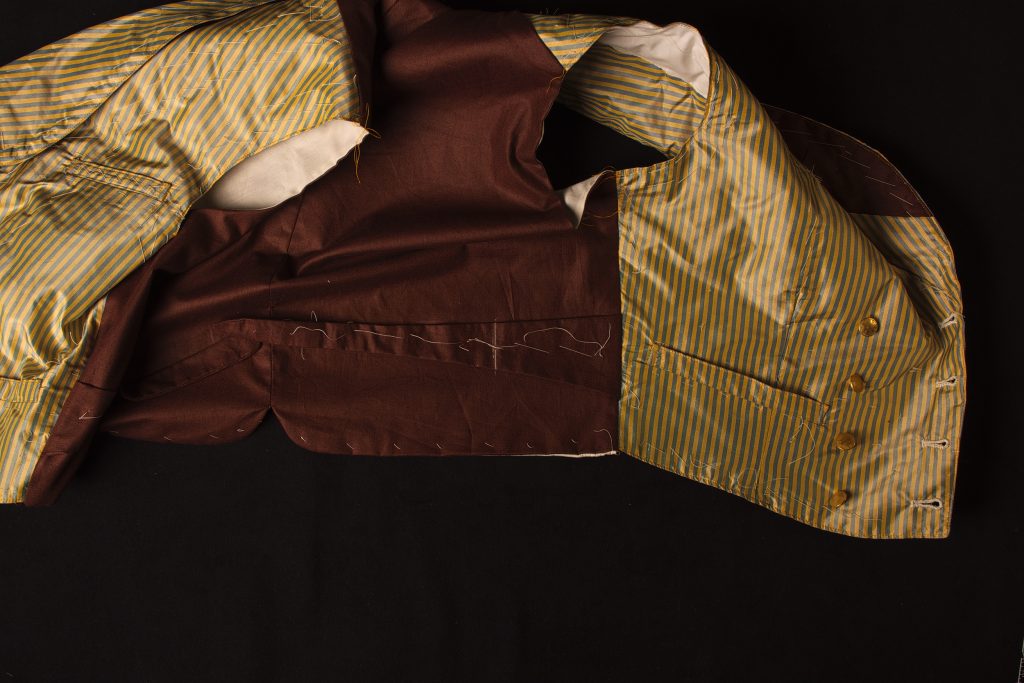
Finish up the waistcoat by carefully removing all of the basting stitches. Then give the waistcoat a final press, working first on the forepart, and collar area, the side and shoulder seams, and working your way around to the back.
Congratulations for making it this far!
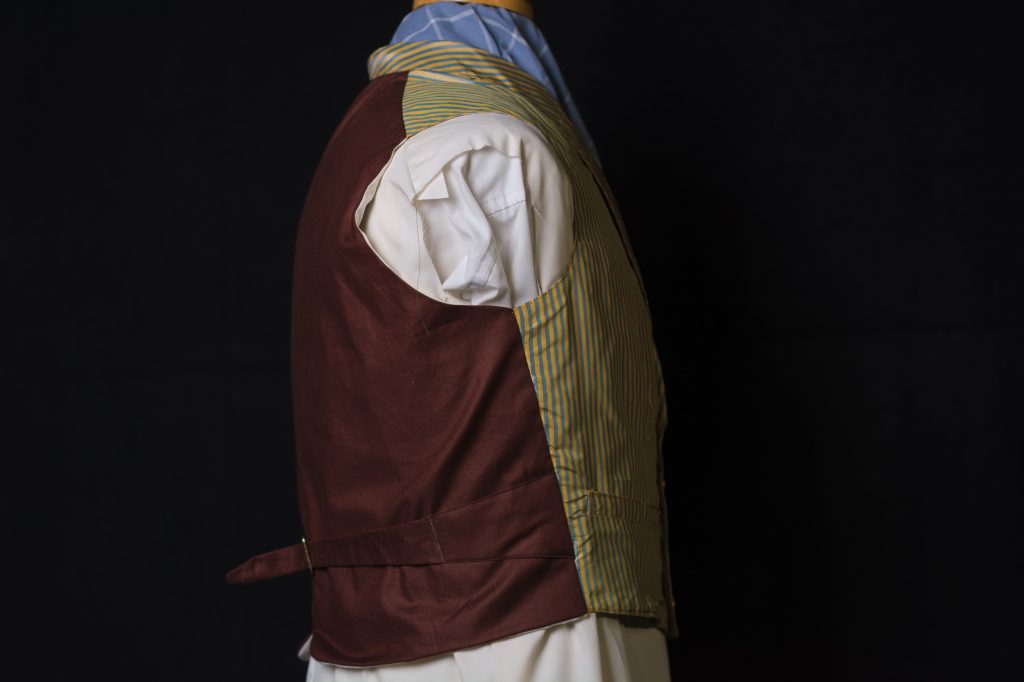
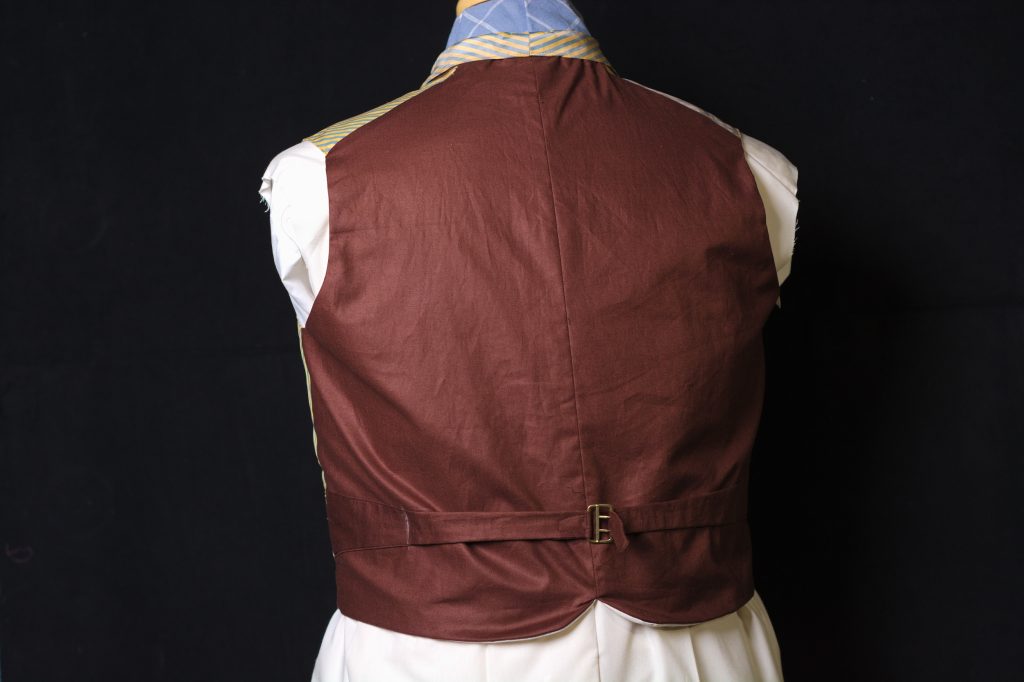
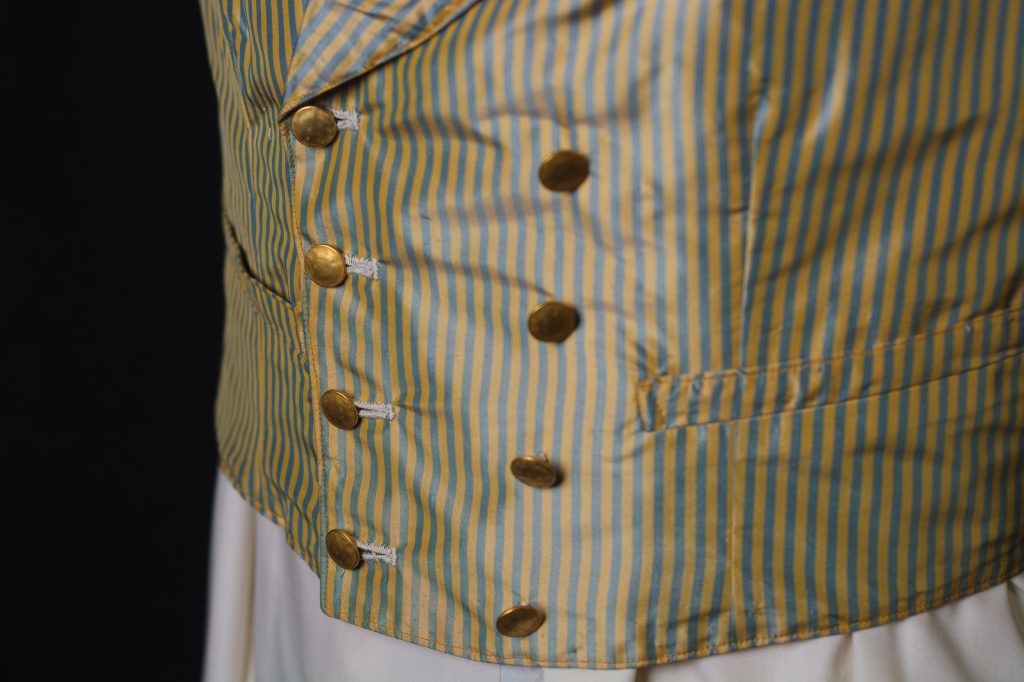
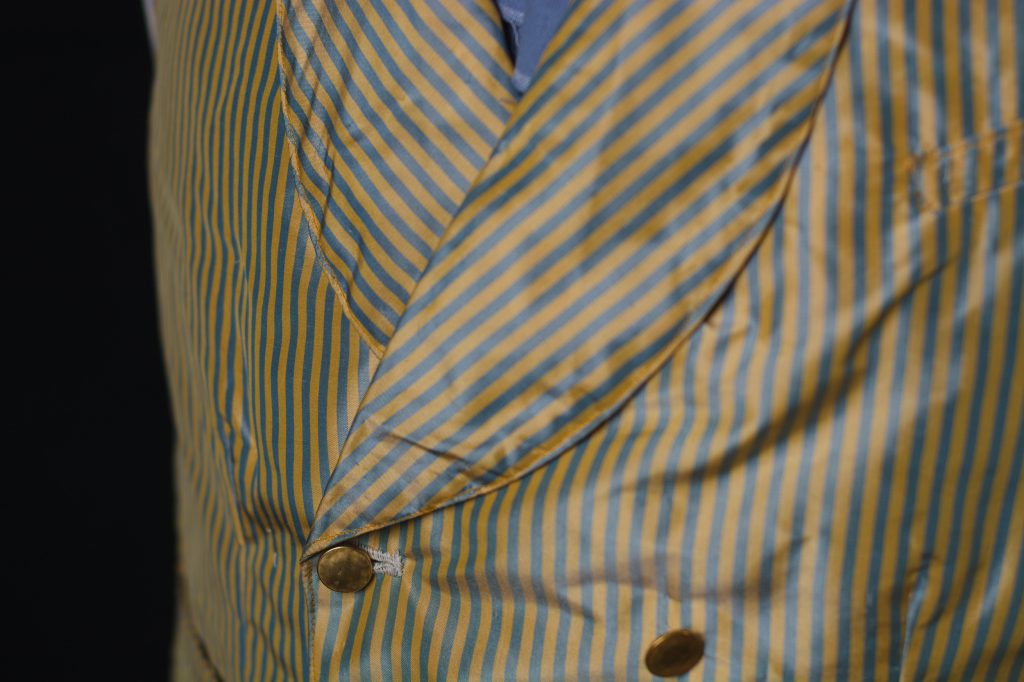
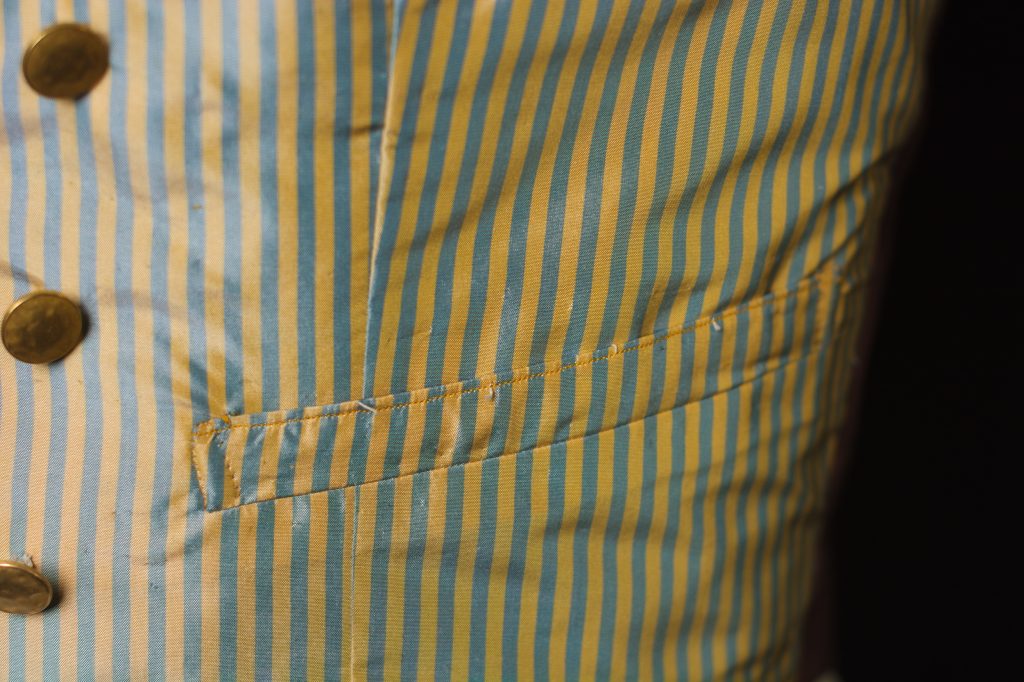
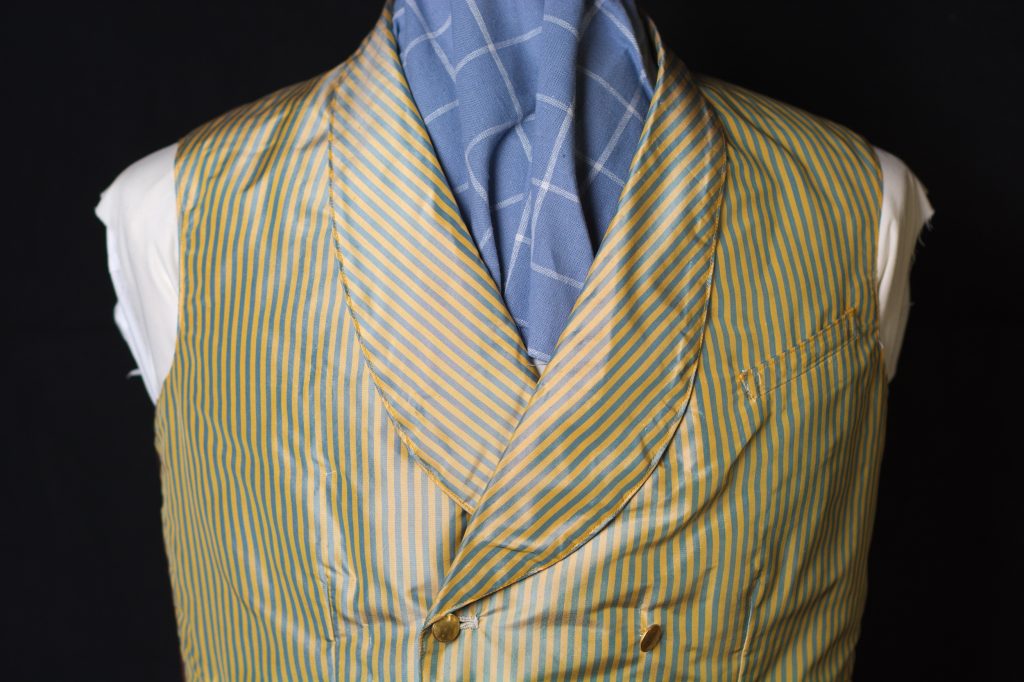
The Buckle
The last thing to do construction wise is top stitch the back belt and attach the buckly.
First, make sure the belt is basted securely in place – I had a few stitches come loose during construction that I had to redo.
Measure in from the side seam along the top of the belt about 4 inches or so (whatever looks good, this is not an exact measurement.
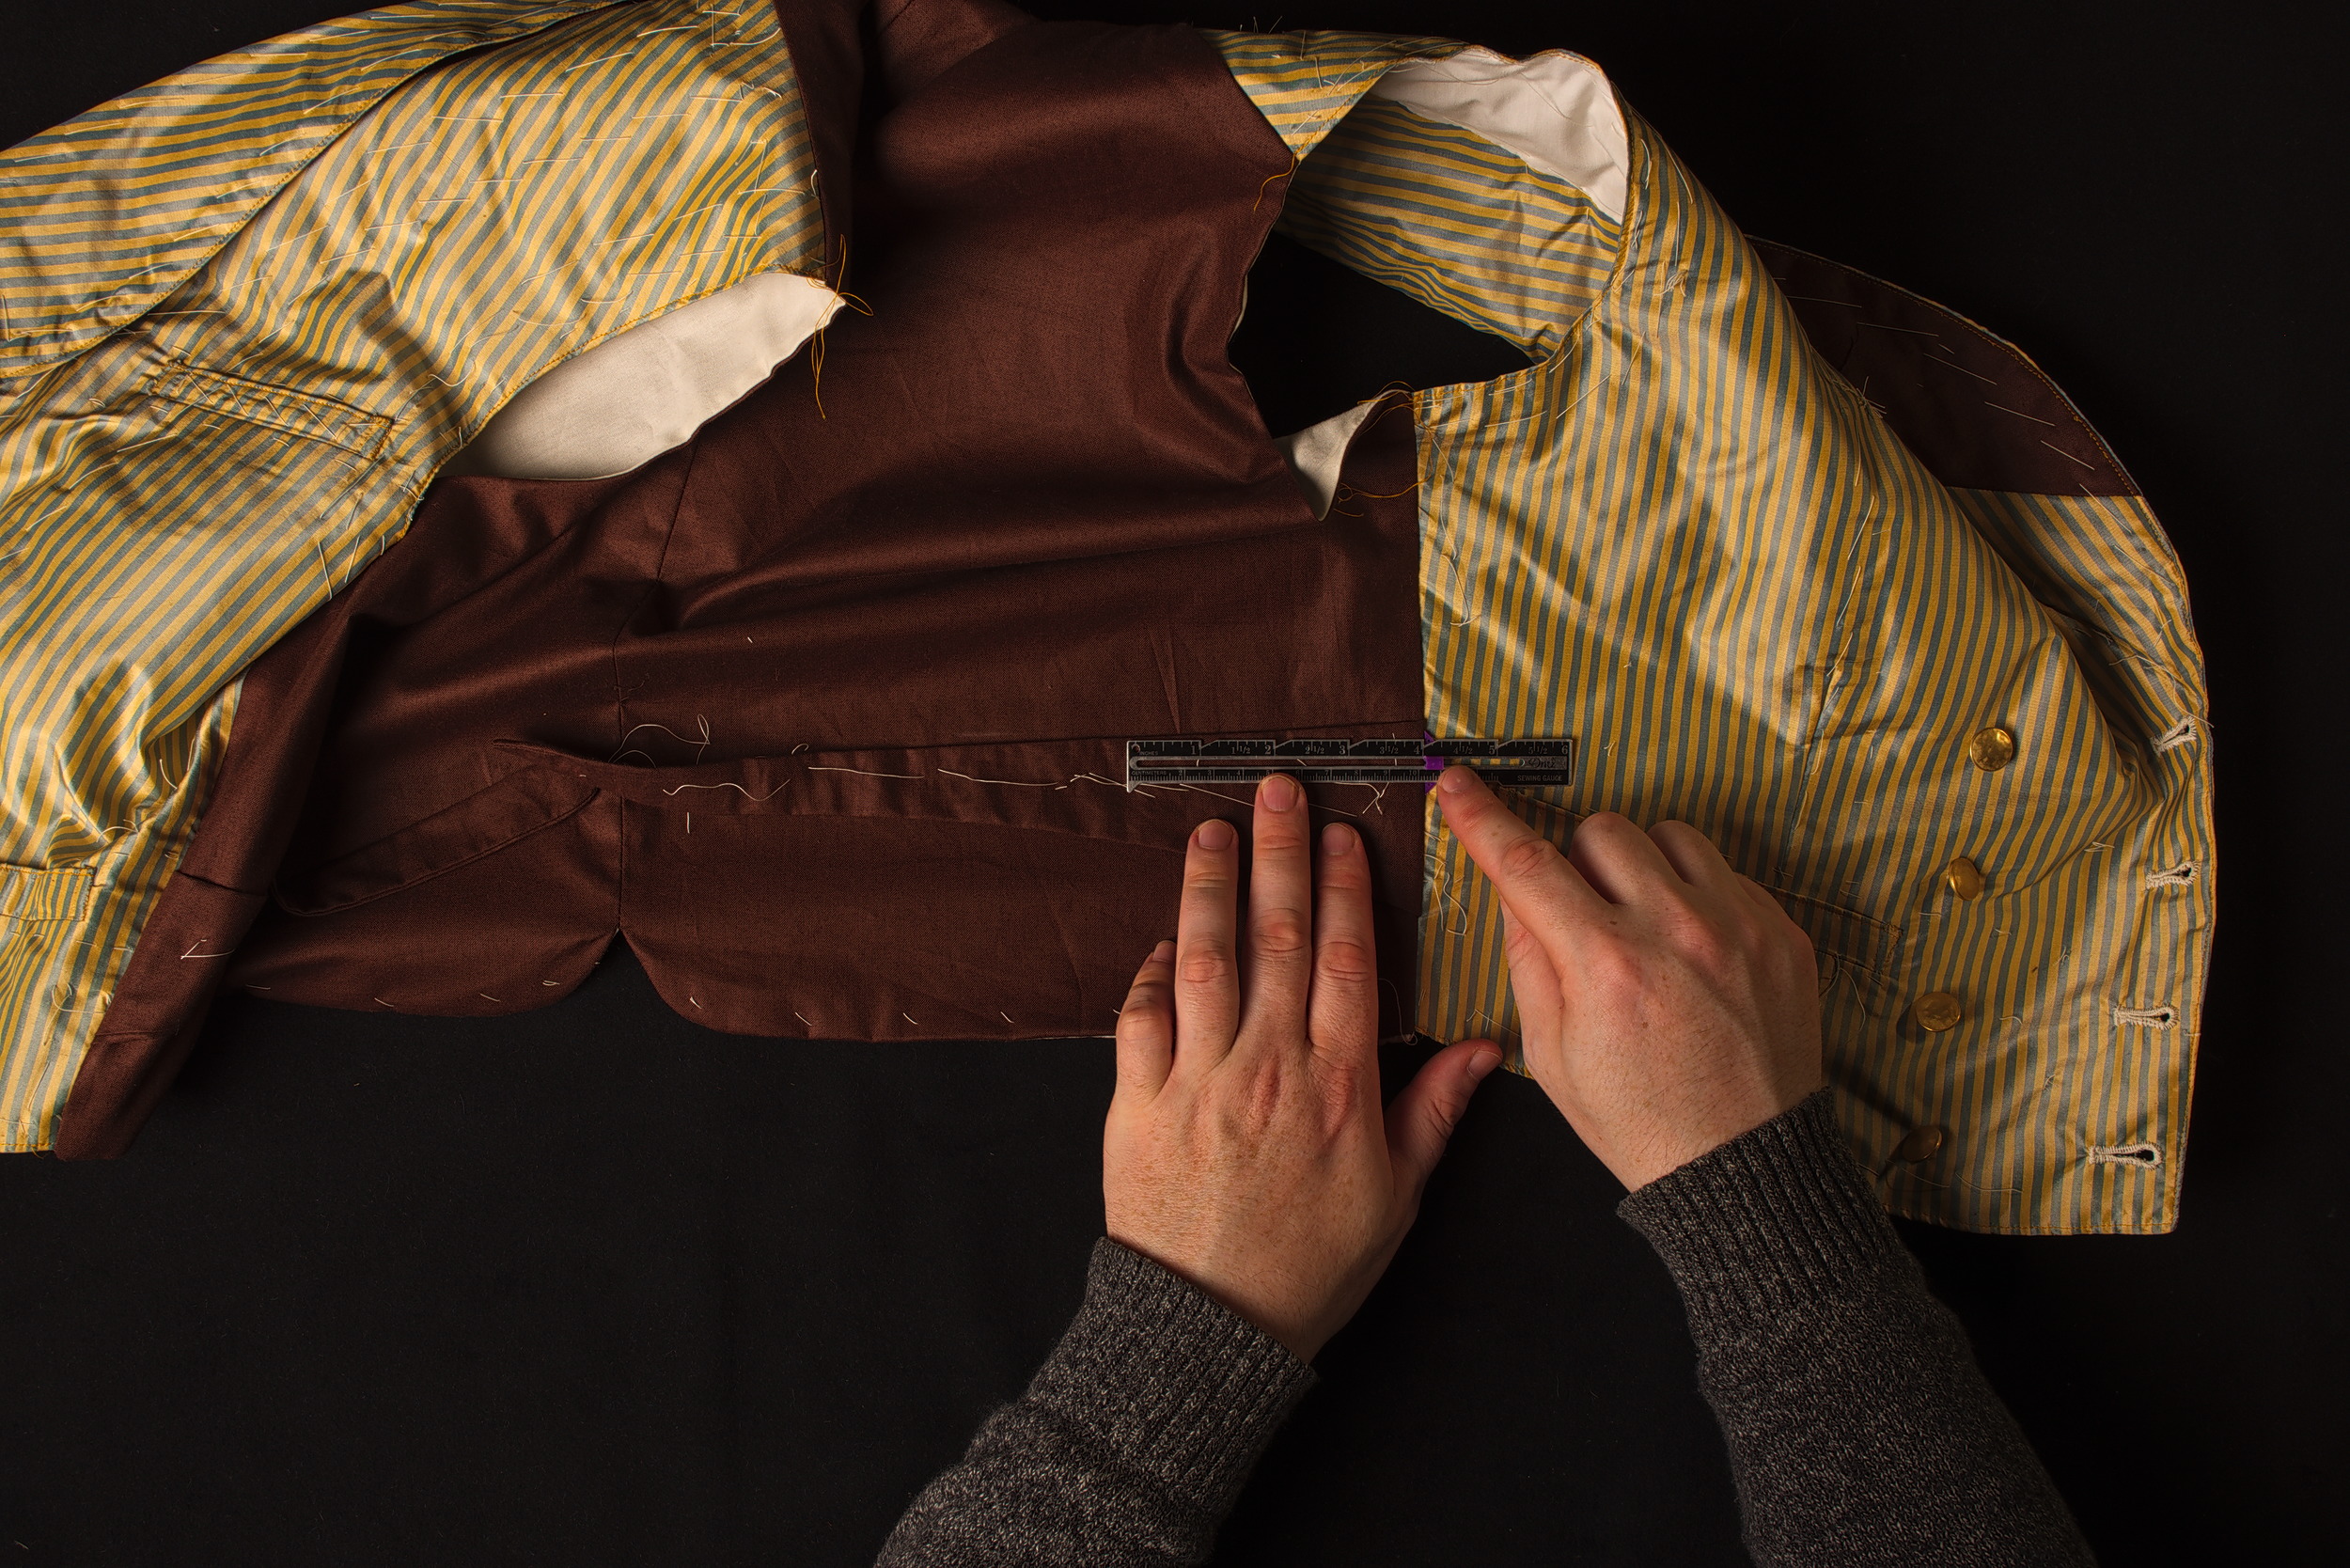
Mark that position with a vertical line, perpendicular to the top of the belt.
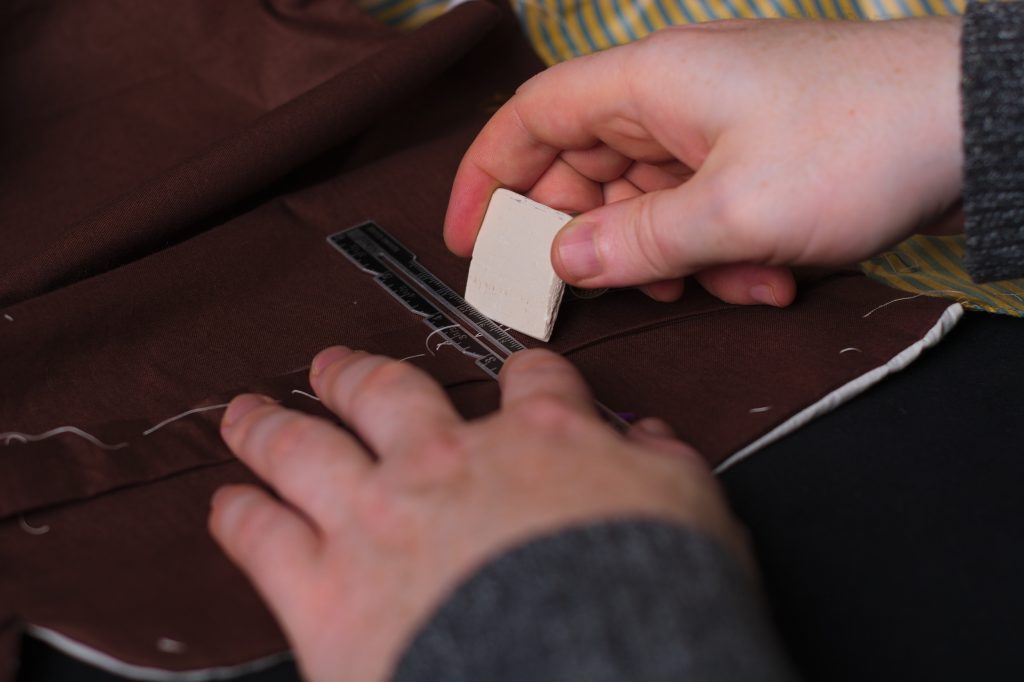
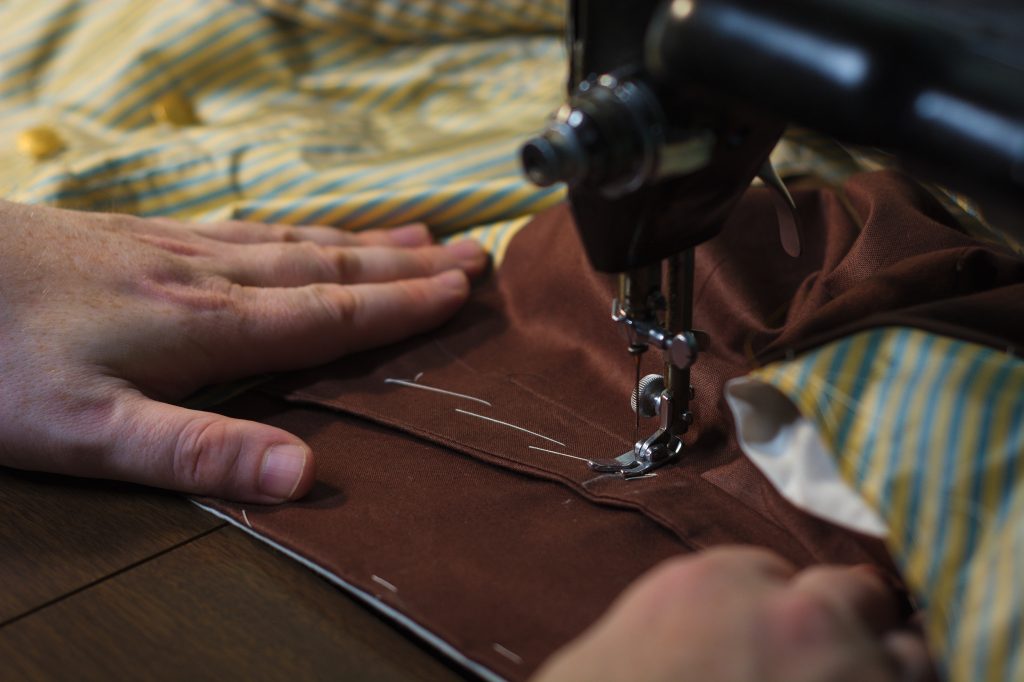
Now top stitch along the top of the belt from the side seam, along the chalk line, and along the bottom back to the side seam, through all layers. Alternatively, you could do this top stitching before bagging the waistcoat so that the stitching was not visible from the inside. I just tend to like the extra strength here.
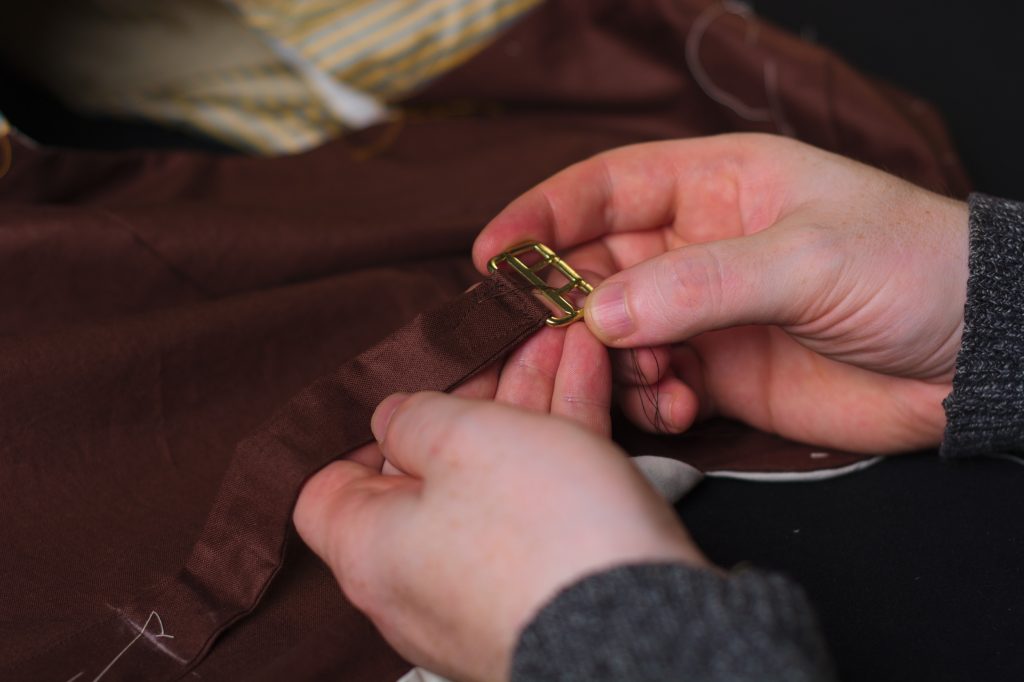
Finally, attach the back buckle to the left side of the belt, folding the end of the belt to the wrong side. Baste in place, then top stitch through all layers in sort of a rectangular shape, getting as close as you can to the buckle without stitching through it.
The Buttons
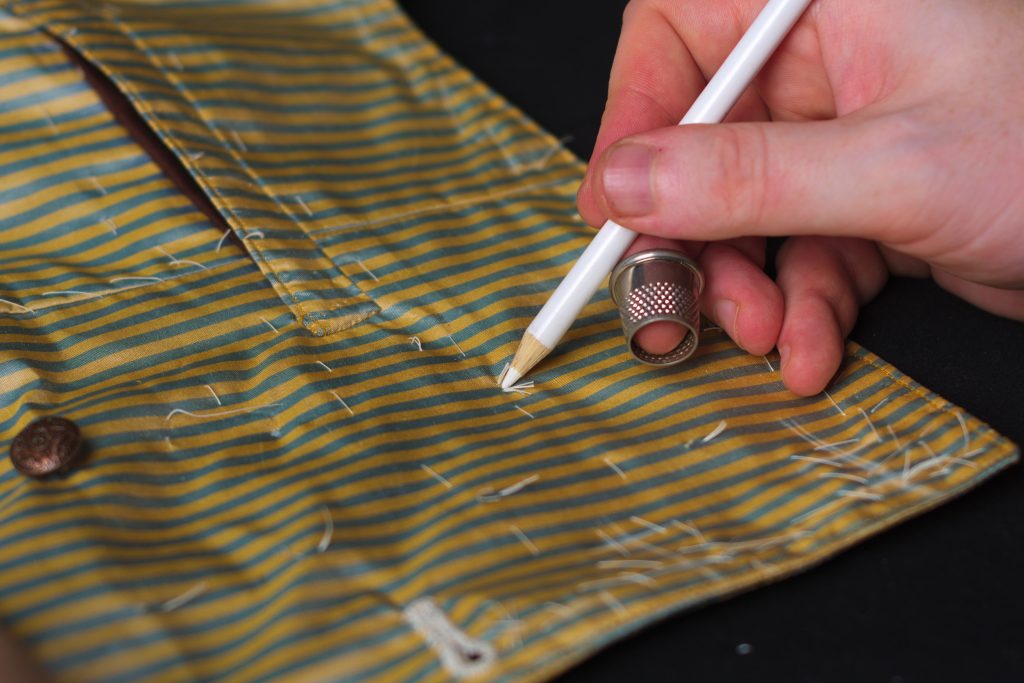
Begin attaching the buttons by first marking their position with a pencil and removing the tailors tacks.
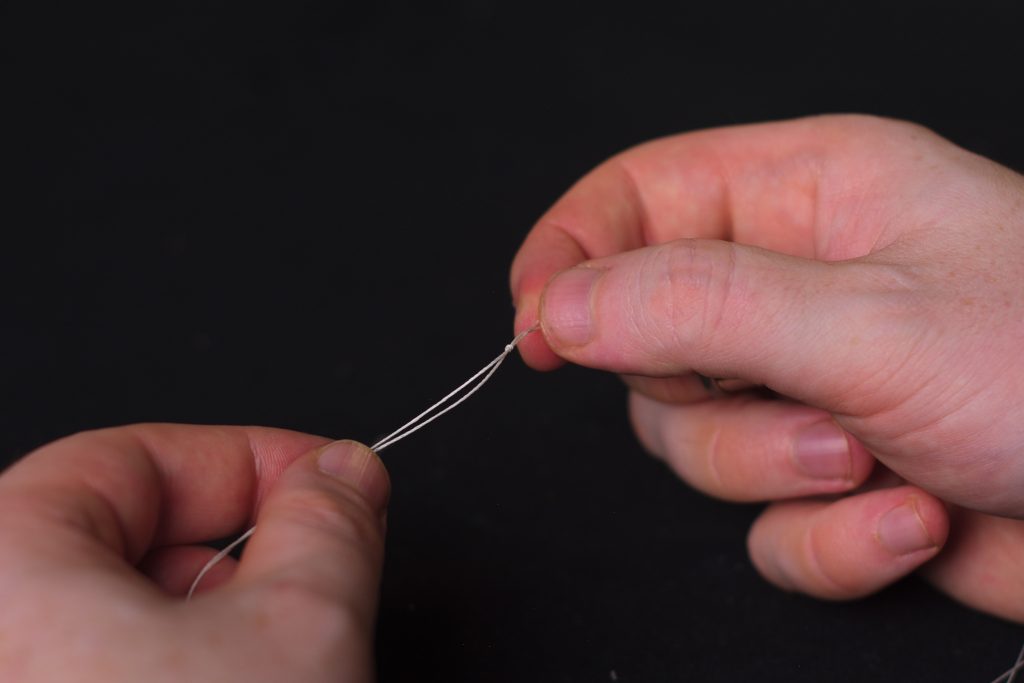
Double your buttonhole twist and knot it at the end.
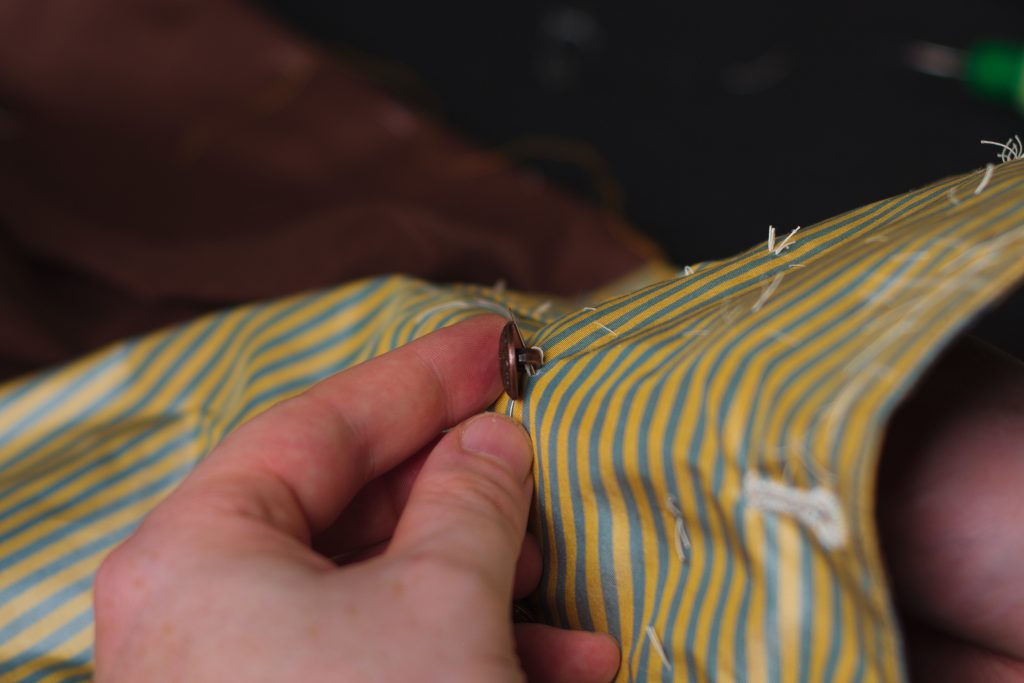
Pass the thread from the underside, through the button, and back through to the underside twice, keeping the stitches on the looser side. After the second stitch you can gently loosen or tighten the button to leave room for tying the shank underneath. Make a third and possibly fourth stitch, keeping the same tension. The number of stitches depends on your fabric, how thick the thread is, and so on.
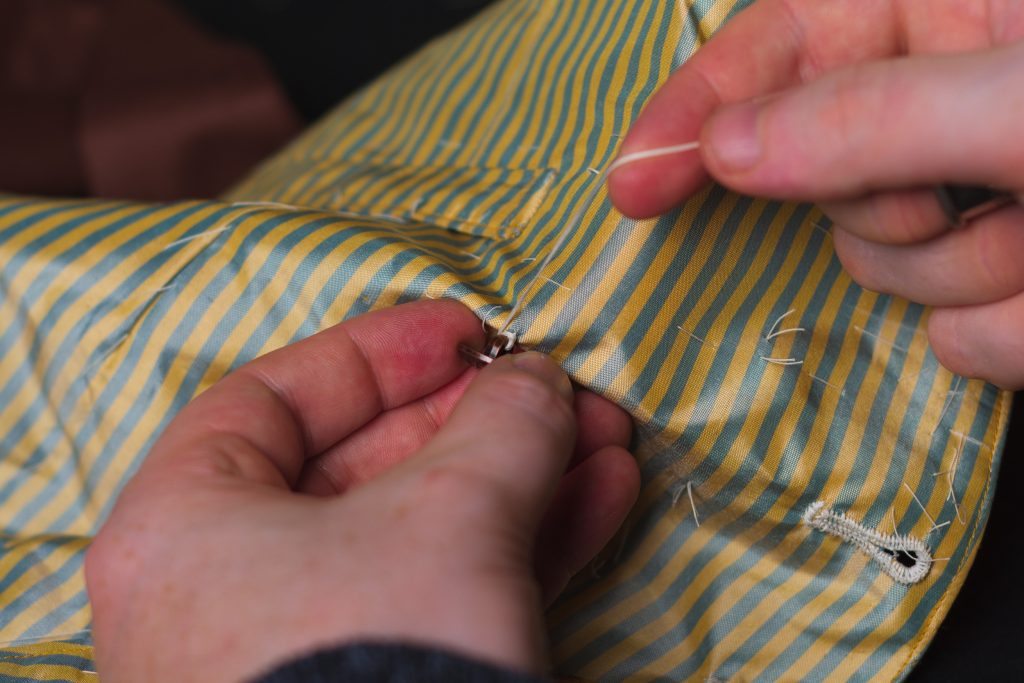
After your final stitch, wrap the thread around the button stitches 3 or 4 times and pull rather tightly to form the shank. This makes the button more durable.
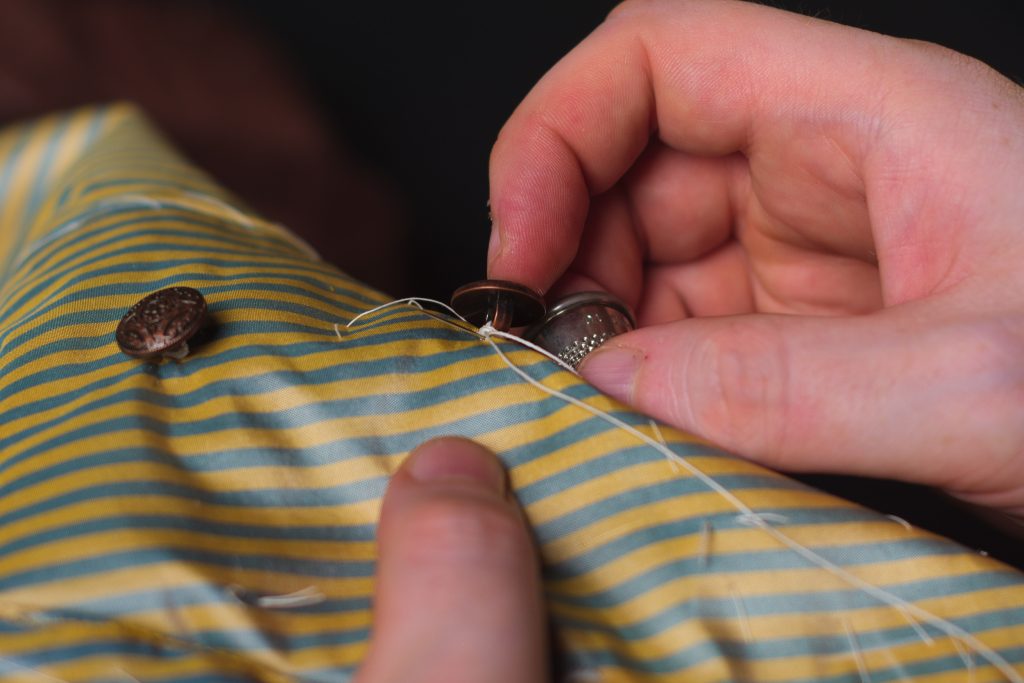
Finally, pass the needle and thread through the shank three times in alternating directions to secure the thread, and trim the thread.
Inside Button
Because the waistcoat is double-breasted, the inner layer of the front will tend to droop out of position unless it is secured in place. You could use a button, a hook and eye, or in more modern applications, even a snap to hold the inner layer in position.
The easiest way to do this is to button the entire waistcoat, pulling the buttons snug against the front of the buttonholes, and then from the inside, make a mark with a pencil through the top inner buttonhole to denote the position of the inner button.
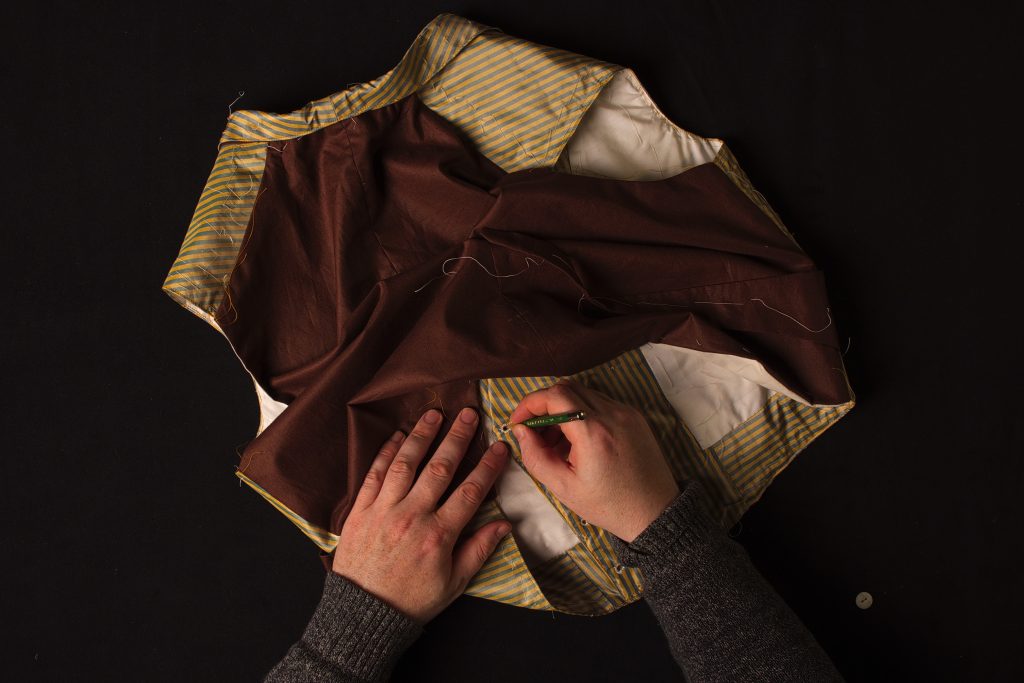
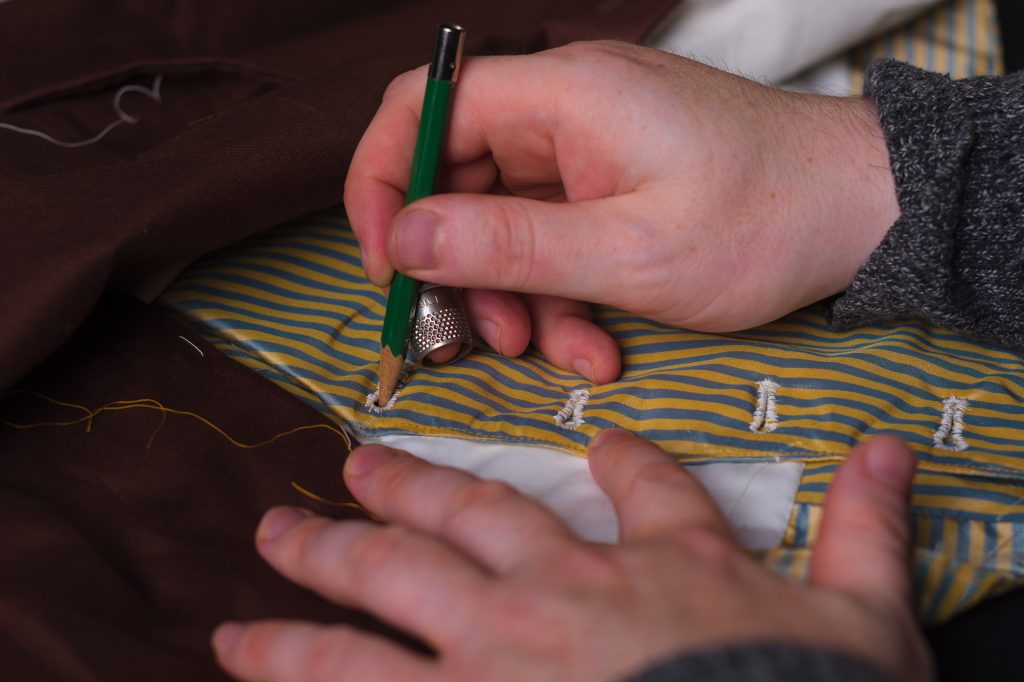
And then sew this button on in the same manner, though without letting the threads show on the right side – maybe catch just the canvas underneath for support if you can.
If you worked accurately, this should be directly behind the upper button on the front but in my case I was about 1/2″ off – not sure what happened.
