Month: November 2020
Open-Top Pocket Bags
To begin construction of the pocket bags and facings, first transfer any stripes or plaids to the rear facing pattern.
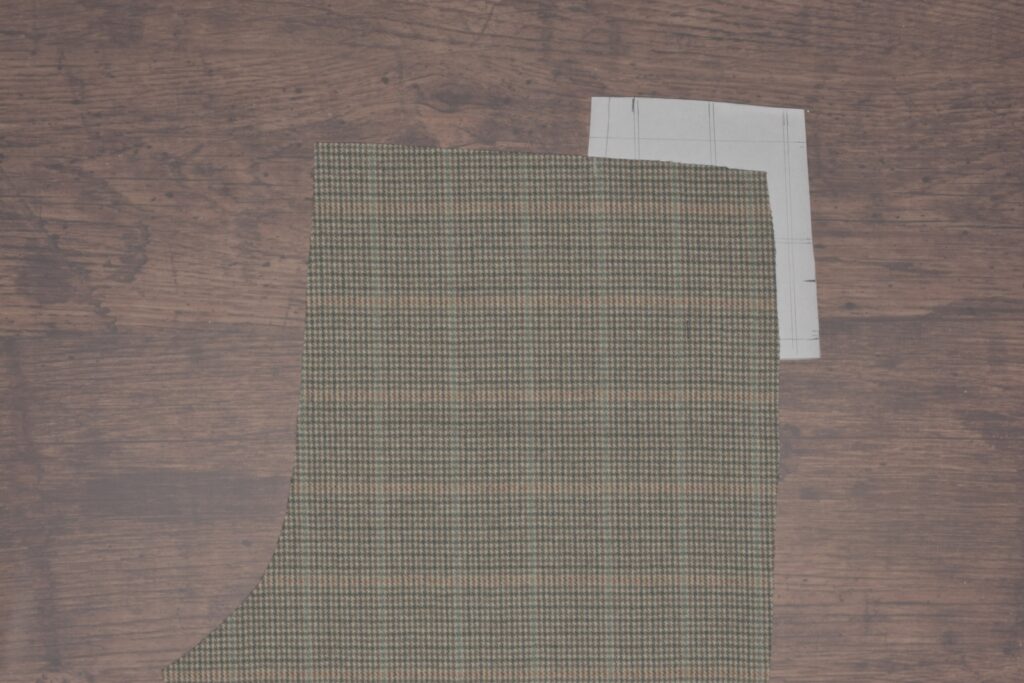
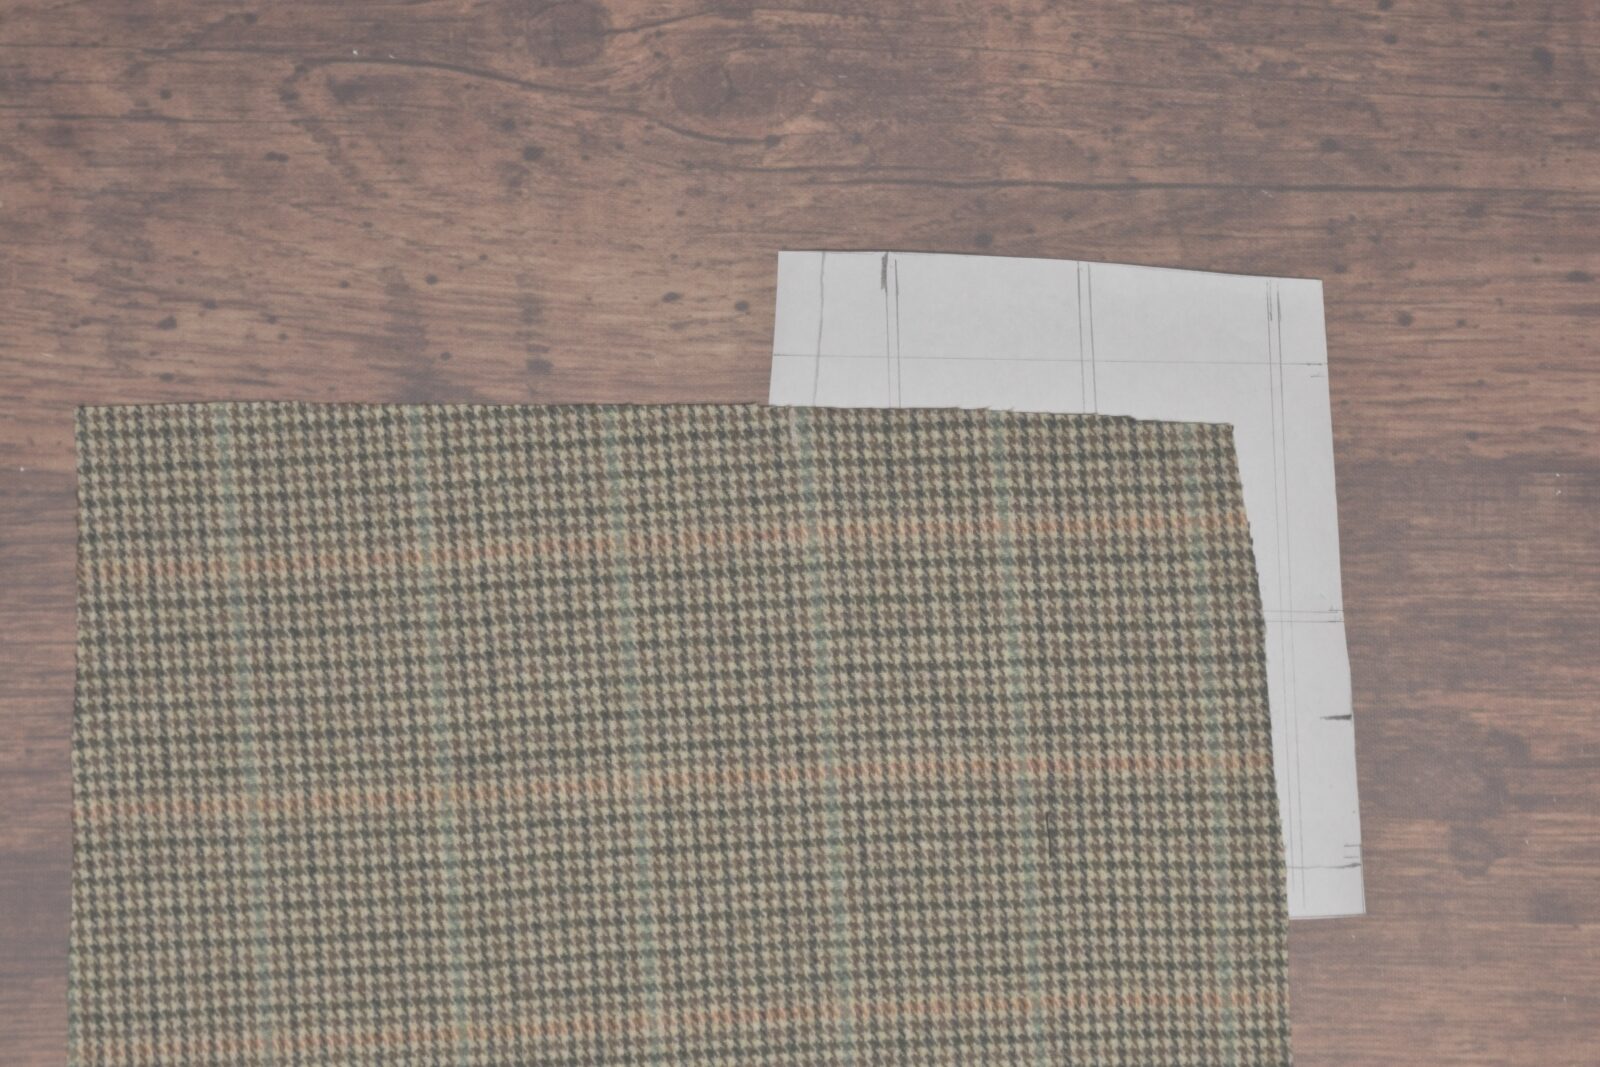
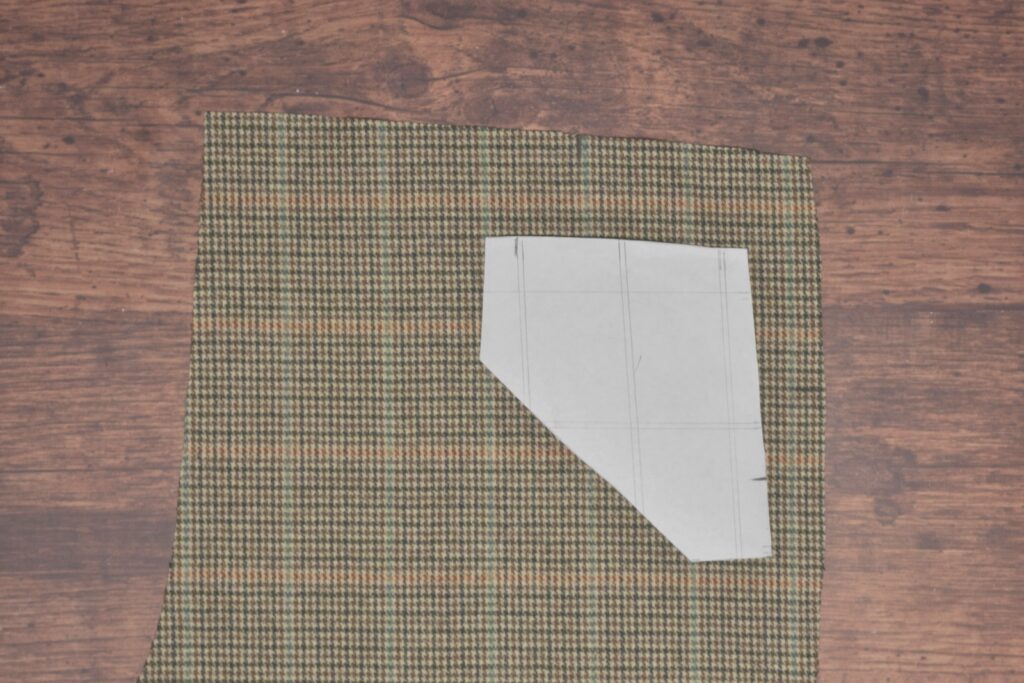
Cut out two of each type of facing and two pocket bags, on the fold.
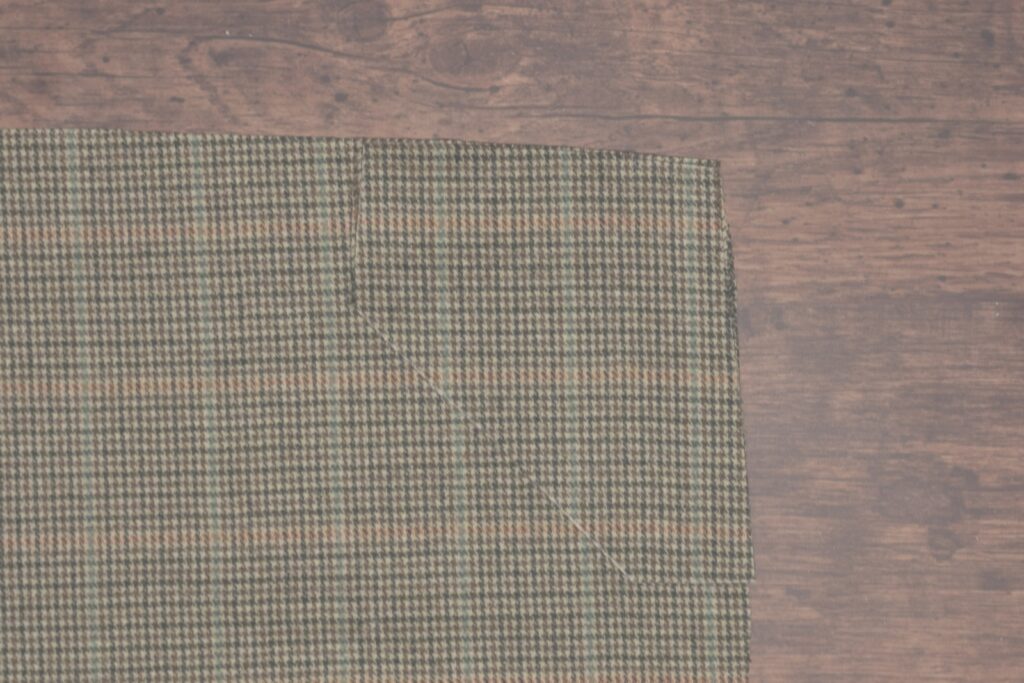
Here’s how the facing matched up after cutting it out.
Transfer the pocket open marks from the draft to each piece of the pocket and facings. I marked both sides of the fabric just to make things a little easier.
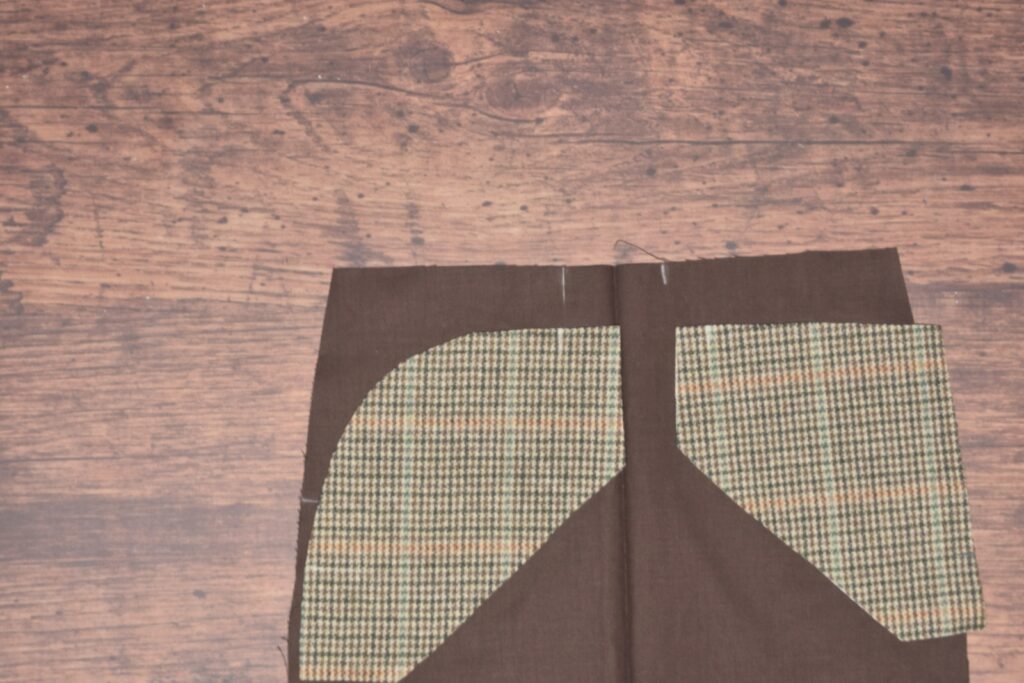

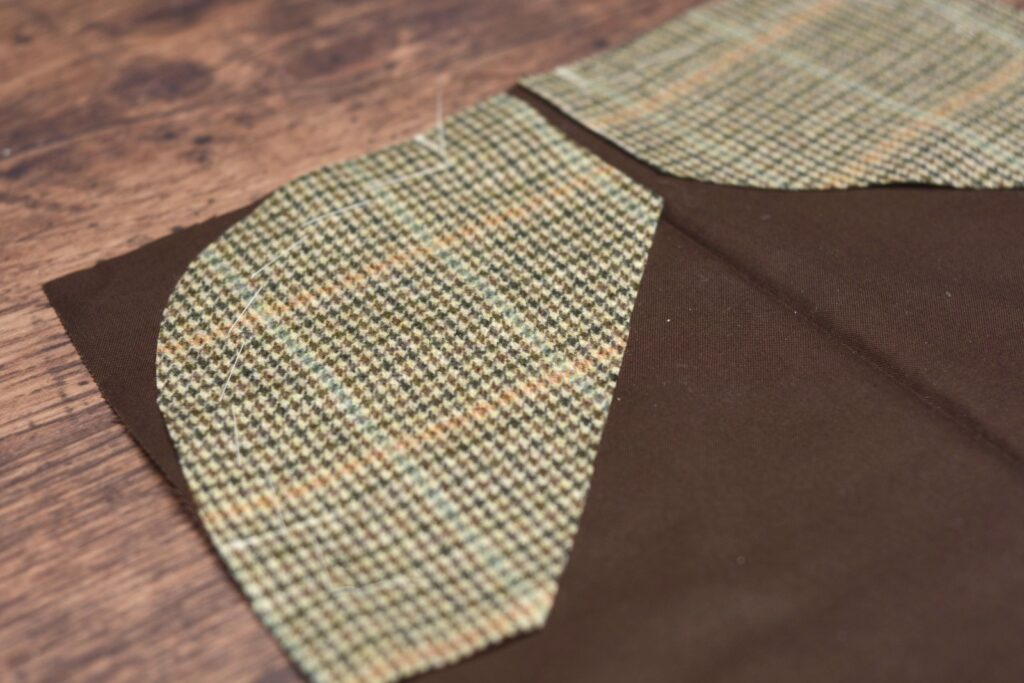
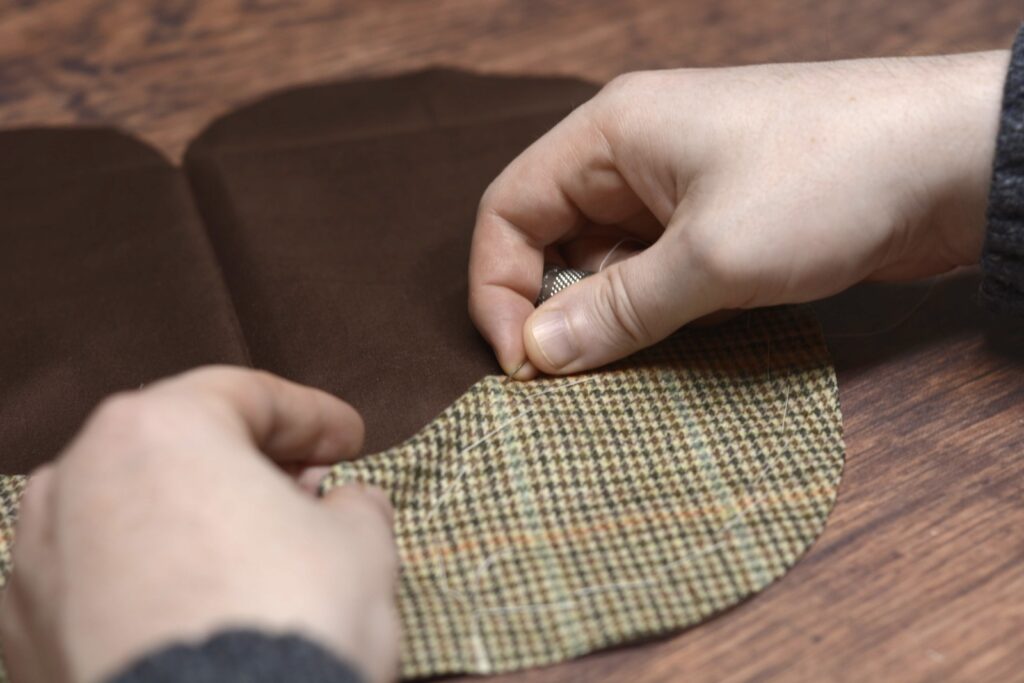
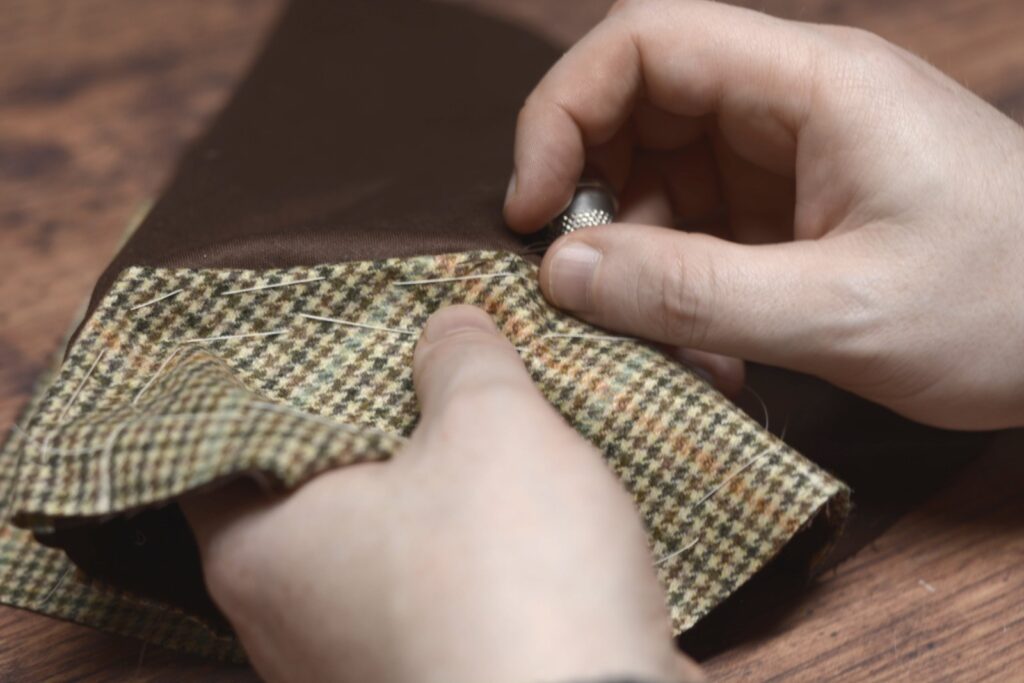
Align the facings to the pocket bags, right sides of each facing upward. Baste the facings in place along the outer edge, making sure the marks line up with each other.
Note that in the photo, the left curved facing I left with seam allowances along the inside edges for demonstration purposes, while the facing on the right I will be leaving the edges raw with no seam allowance.
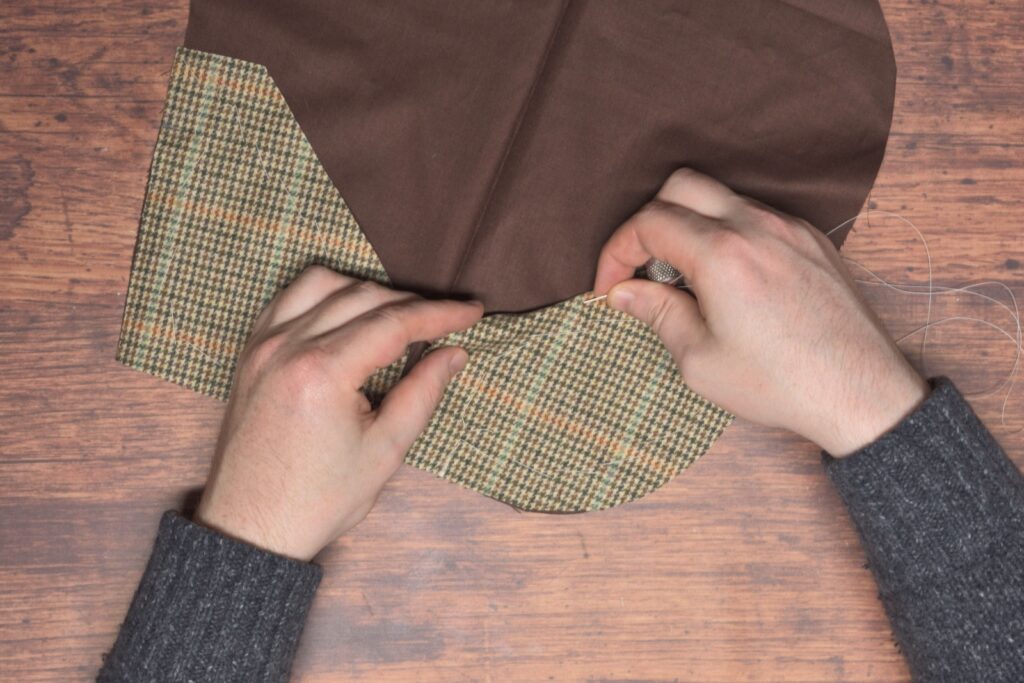
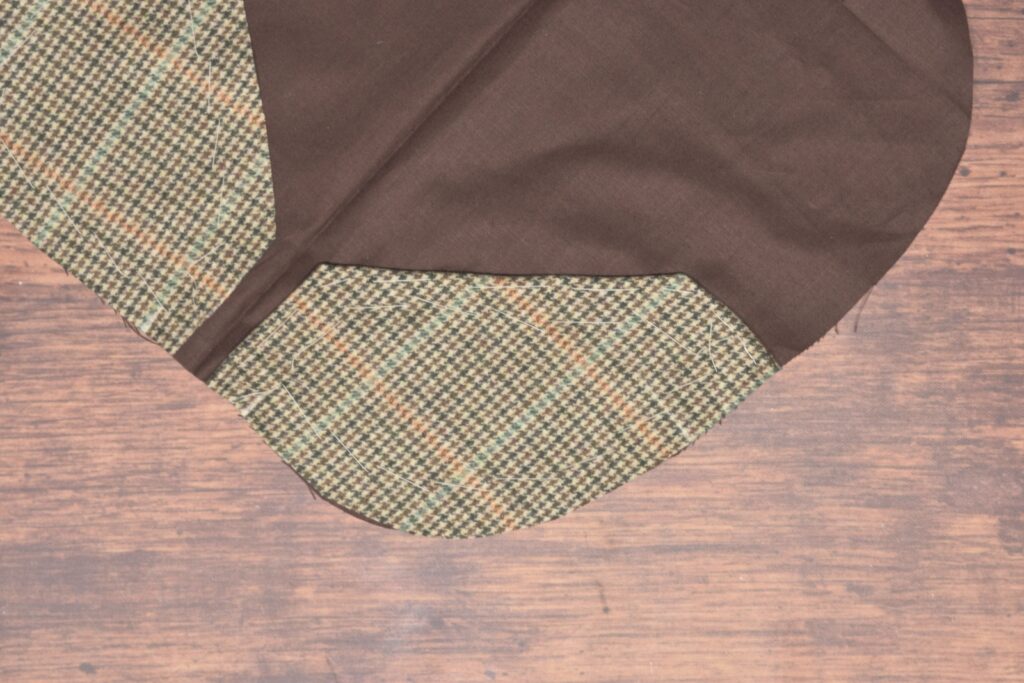
Now baste along the inside edges of the facings. If you’ll be folding under the seam allowance, keep back a little over 1″ from the edge, otherwise you can baste closer to the edge.
Repeat the process with the other pocket half, being sure to baste the facings in the opposite order.
If you left a seam allowance on the facings, turn it under 1/2″ and baste securely closed.
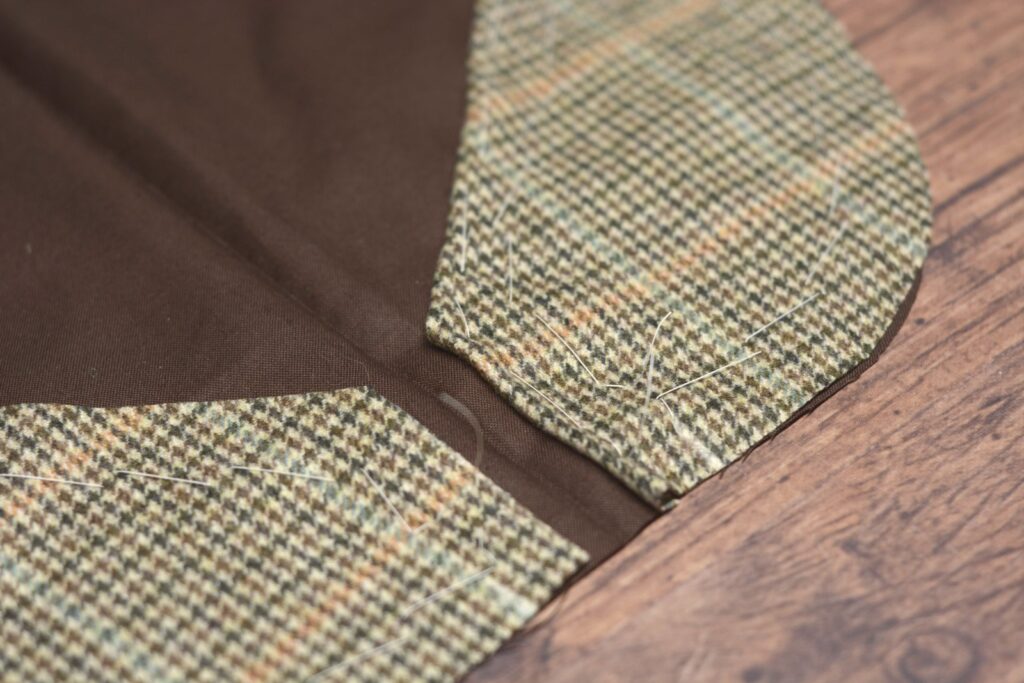
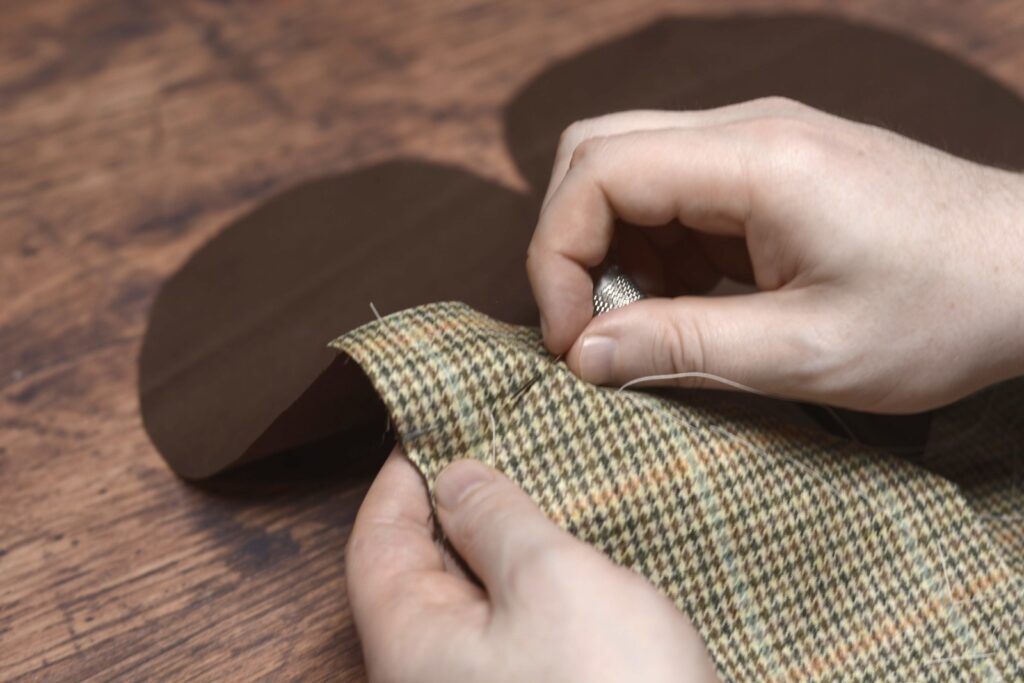
Fell the folded edge of the facings down by hand. You can also just fell the raw edges if you prefer and your fabric doesn’t fray very badly.

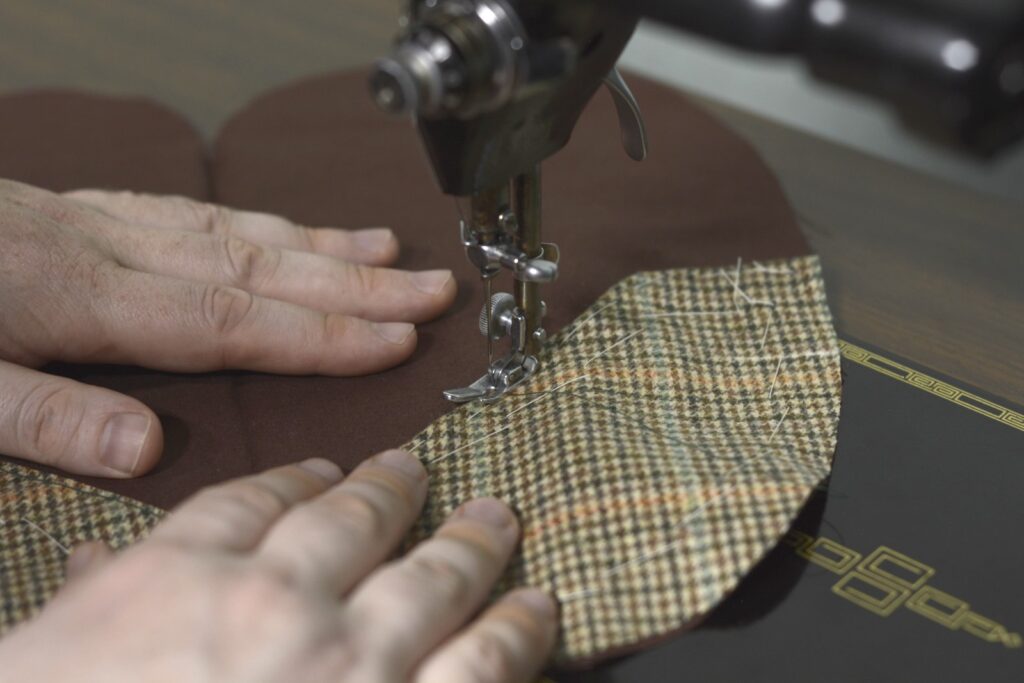
Alternatively, you could sew the facing down along the edges by machine, about 1/8″ from the edge.
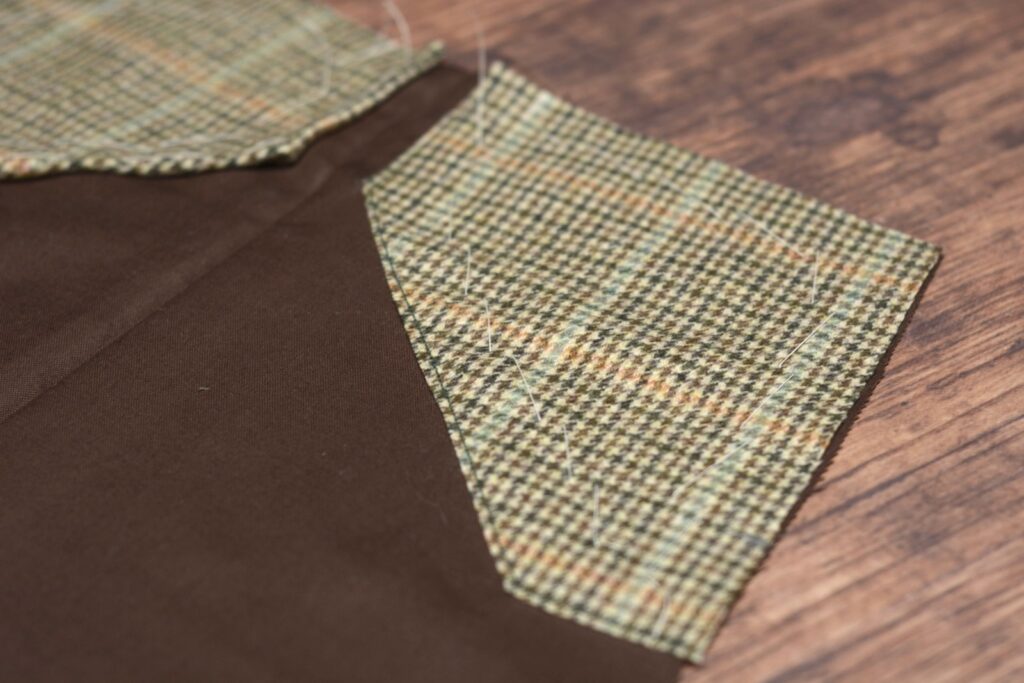
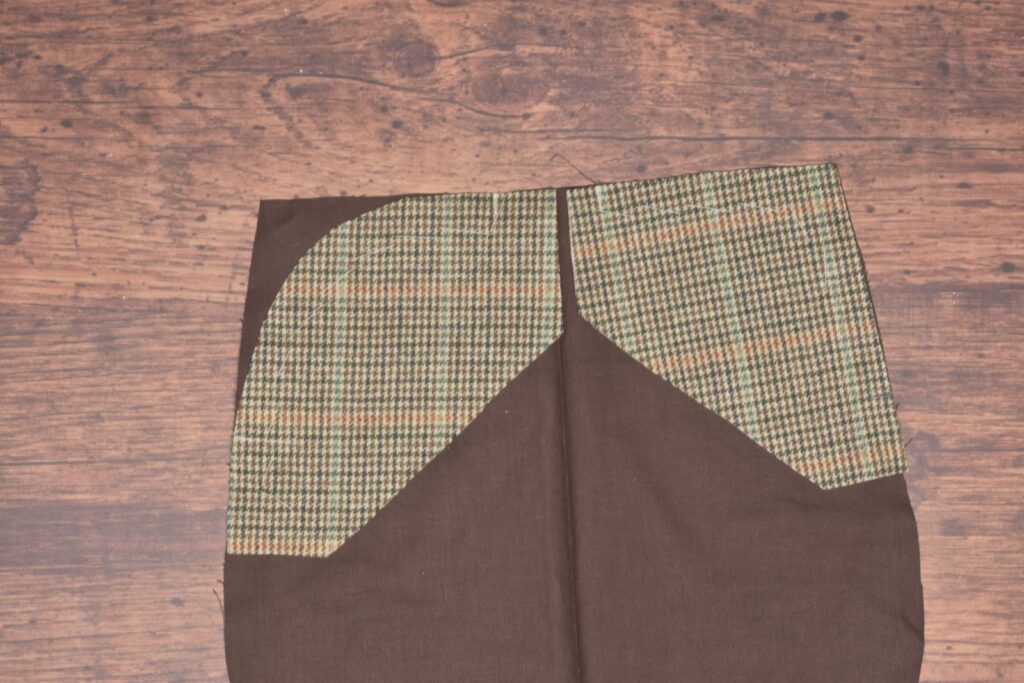
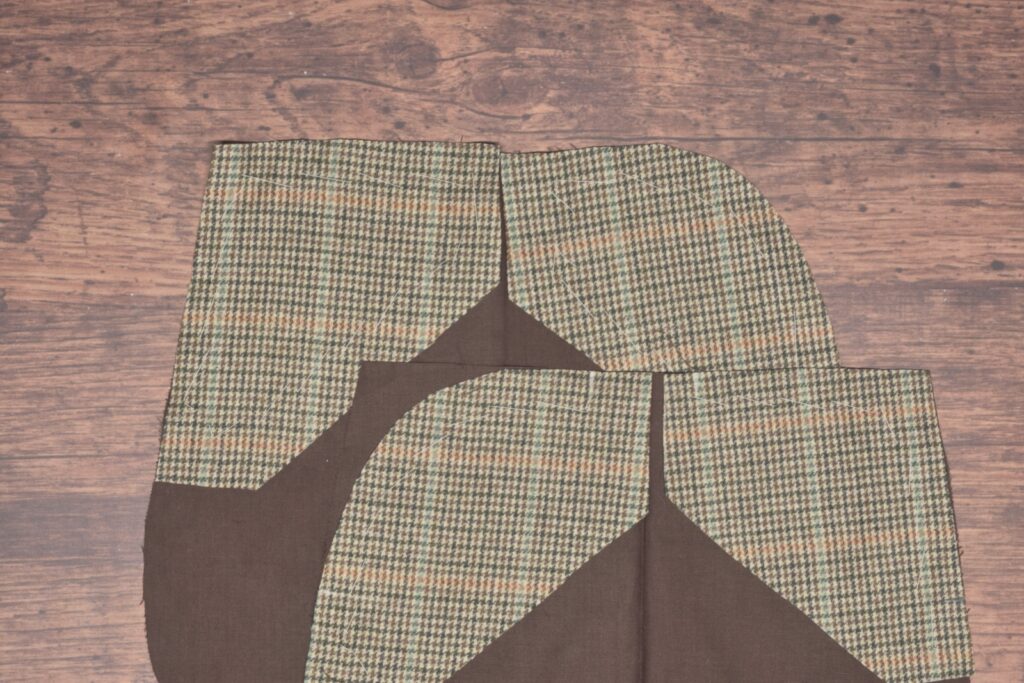
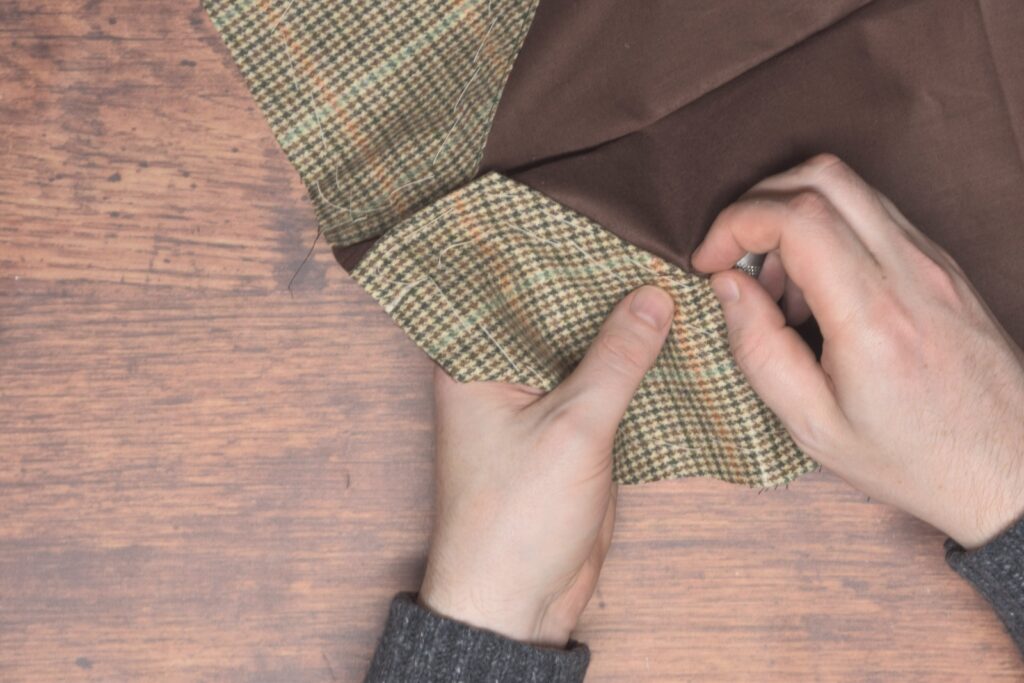
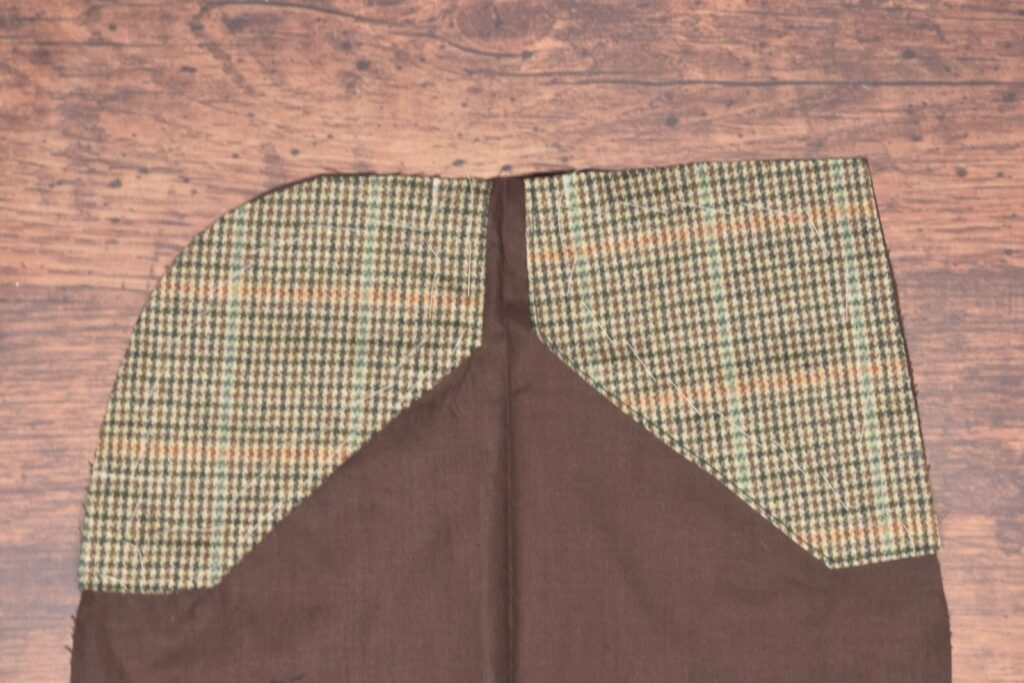
Here is the completed pocket bag. Repeat for the other pocket.
Open-Top Pocket Styles
While the basic draft and construction of open-top style pockets remains the same, there are some variations in style you can consider for your trousers. I’ll be going with a basic curved opening to my pocket, as you’ll see on the next page.
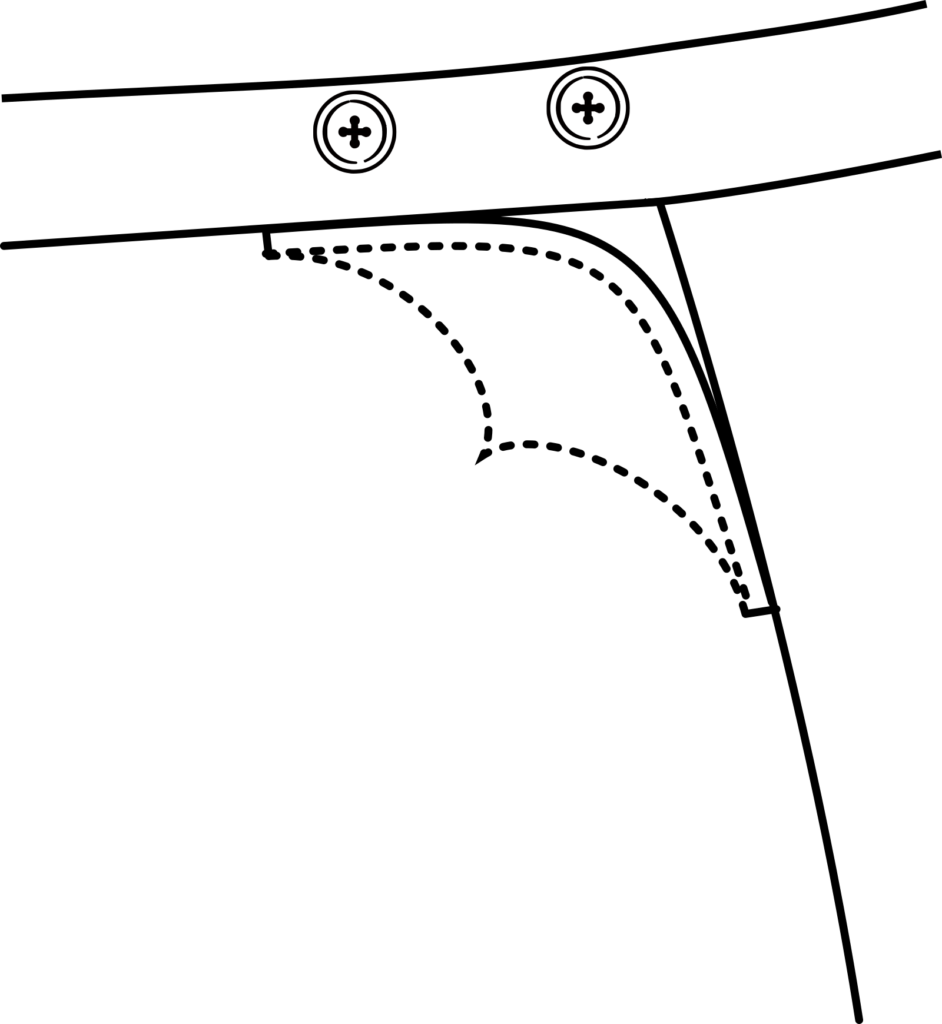
The most basic is a squared off pocket, which follows the same pattern as the trouser itself.
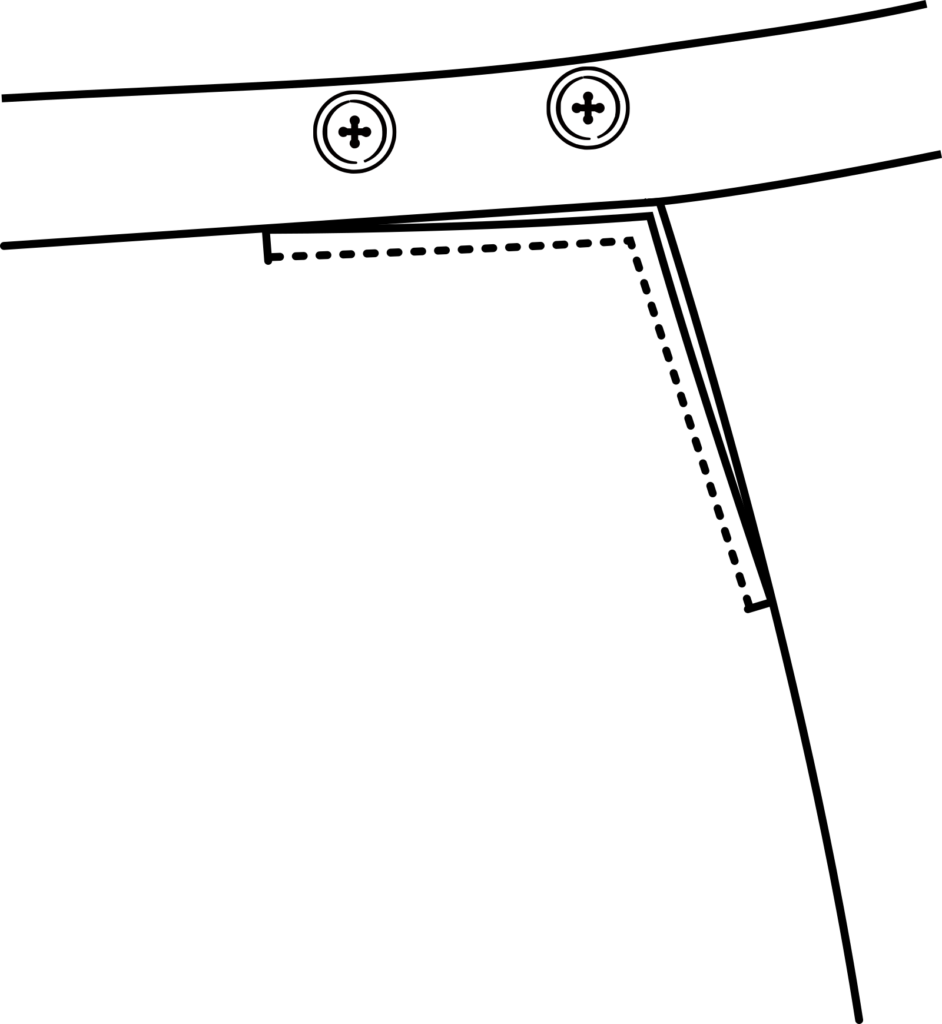
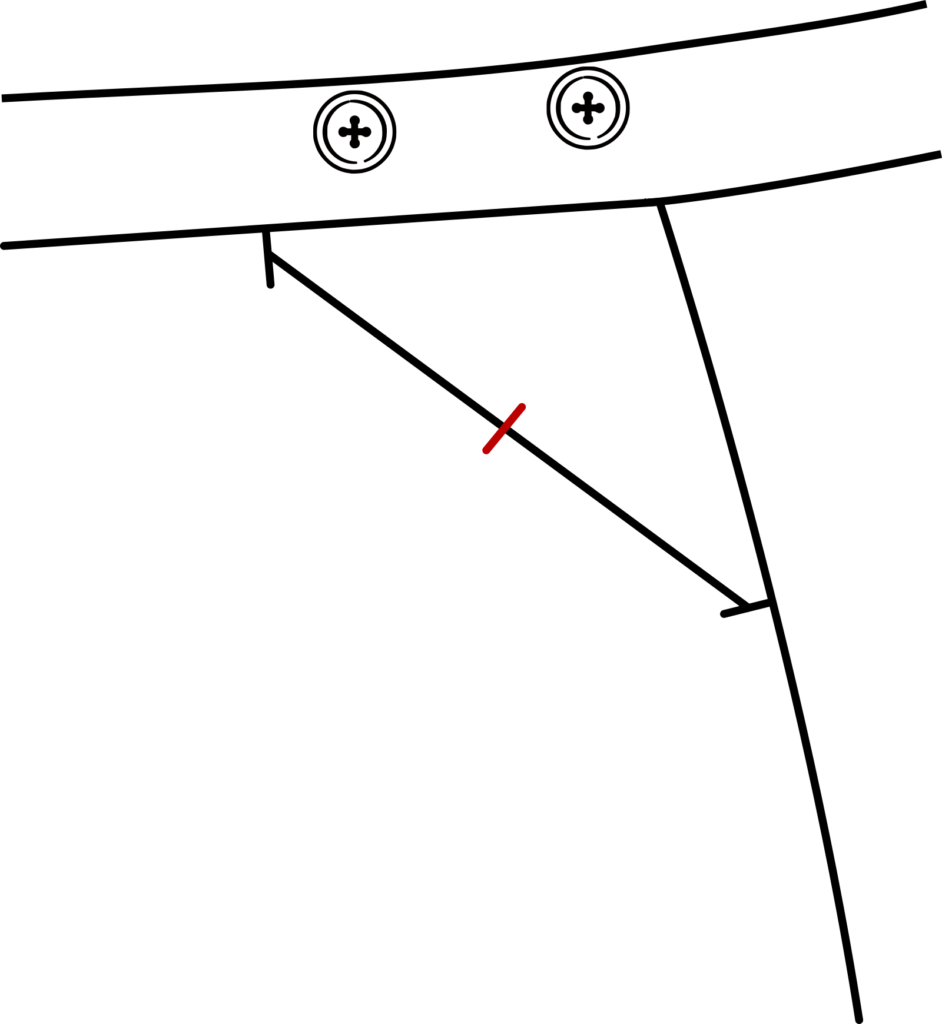
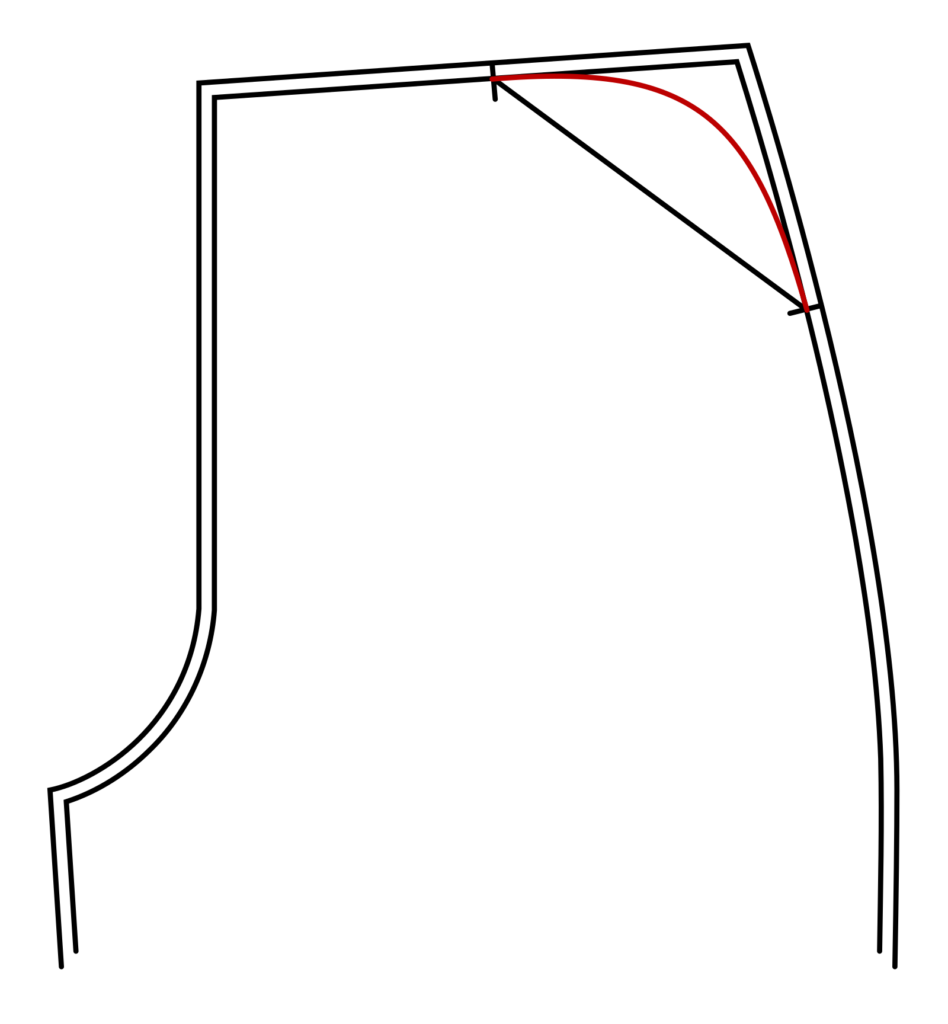
To make the other styles, I like to mark midway along the construction line first (more details in the next section). Then the various curves and points can be based off of that.
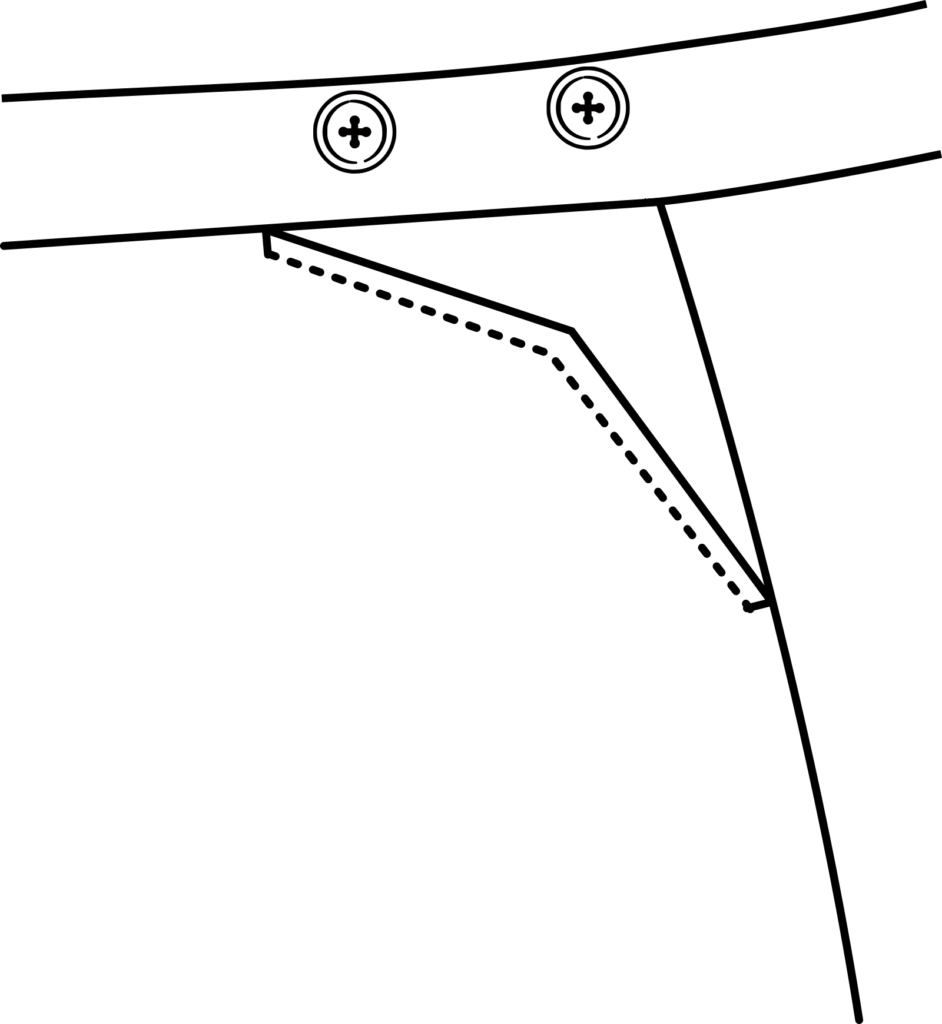
Here’s more of a ‘pointed style’.
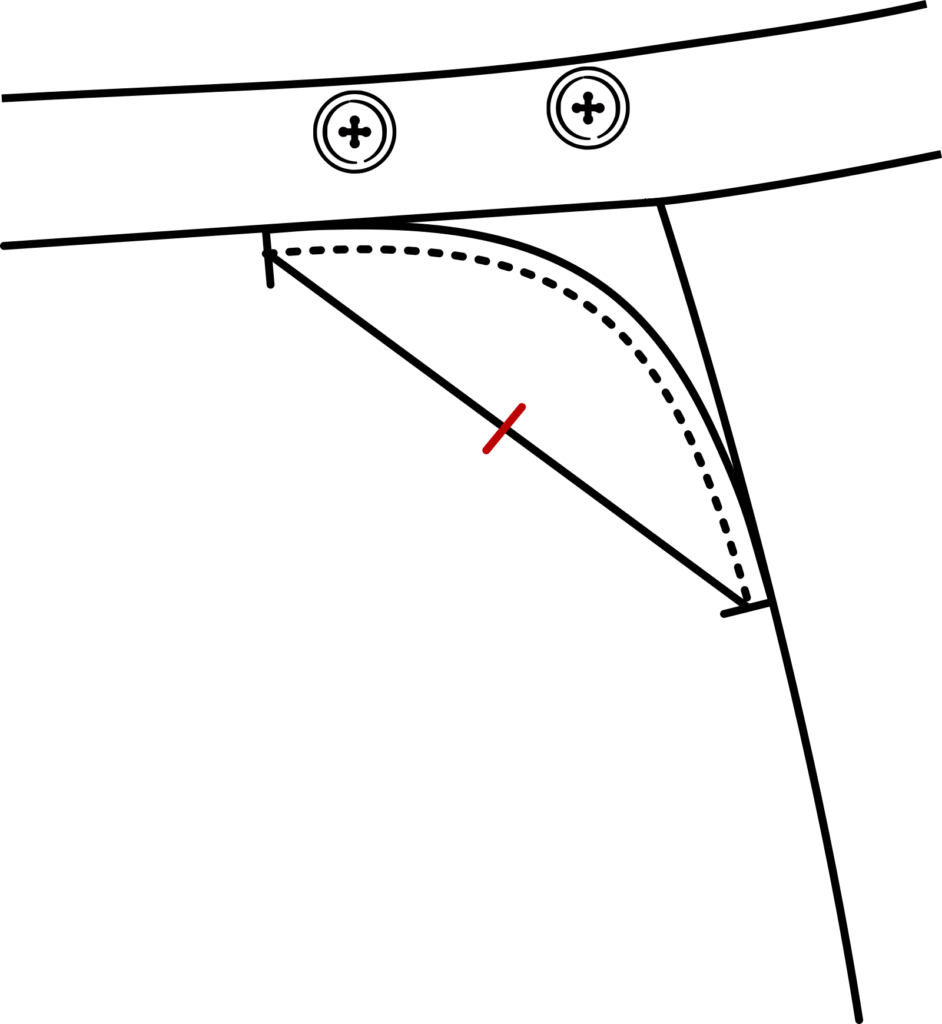
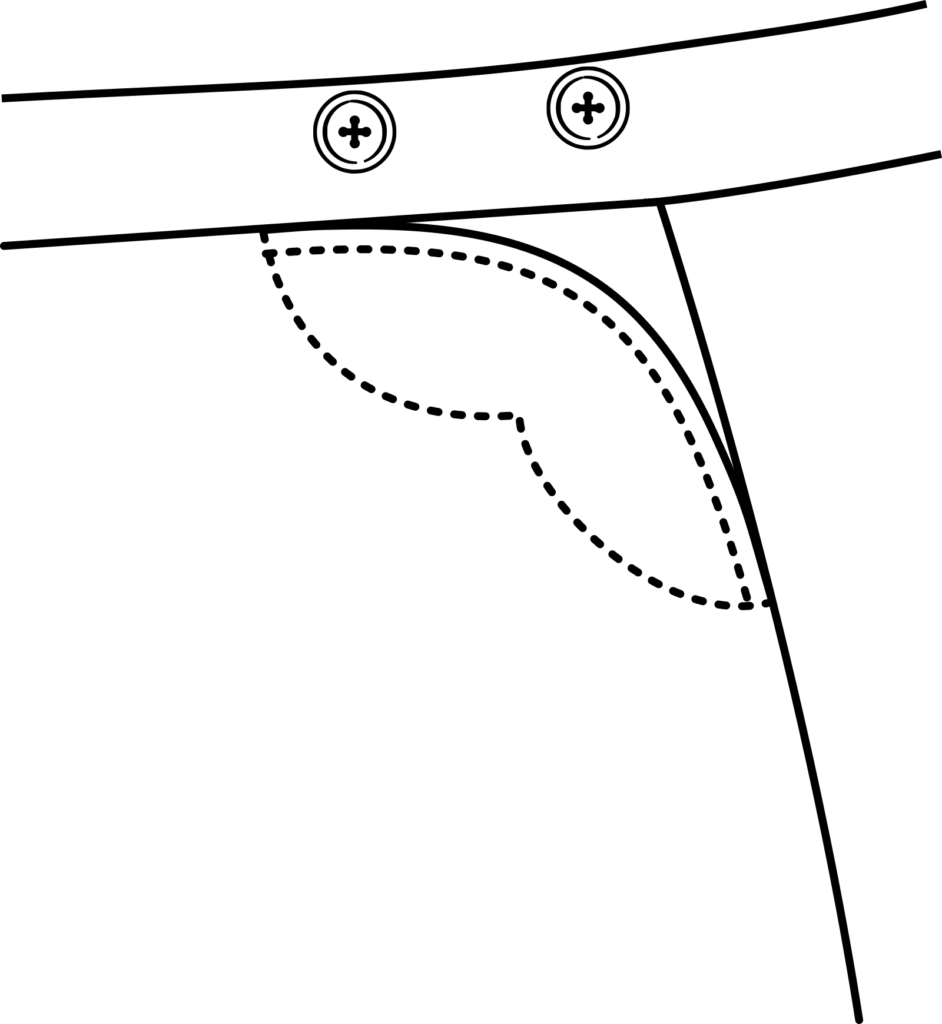
And a curved style, which is what I’ll be making.
Here’s a curved style with a tighter radius and a ‘heart’ top stitching pattern.
Here the top stitching has been inverted from the previous example.
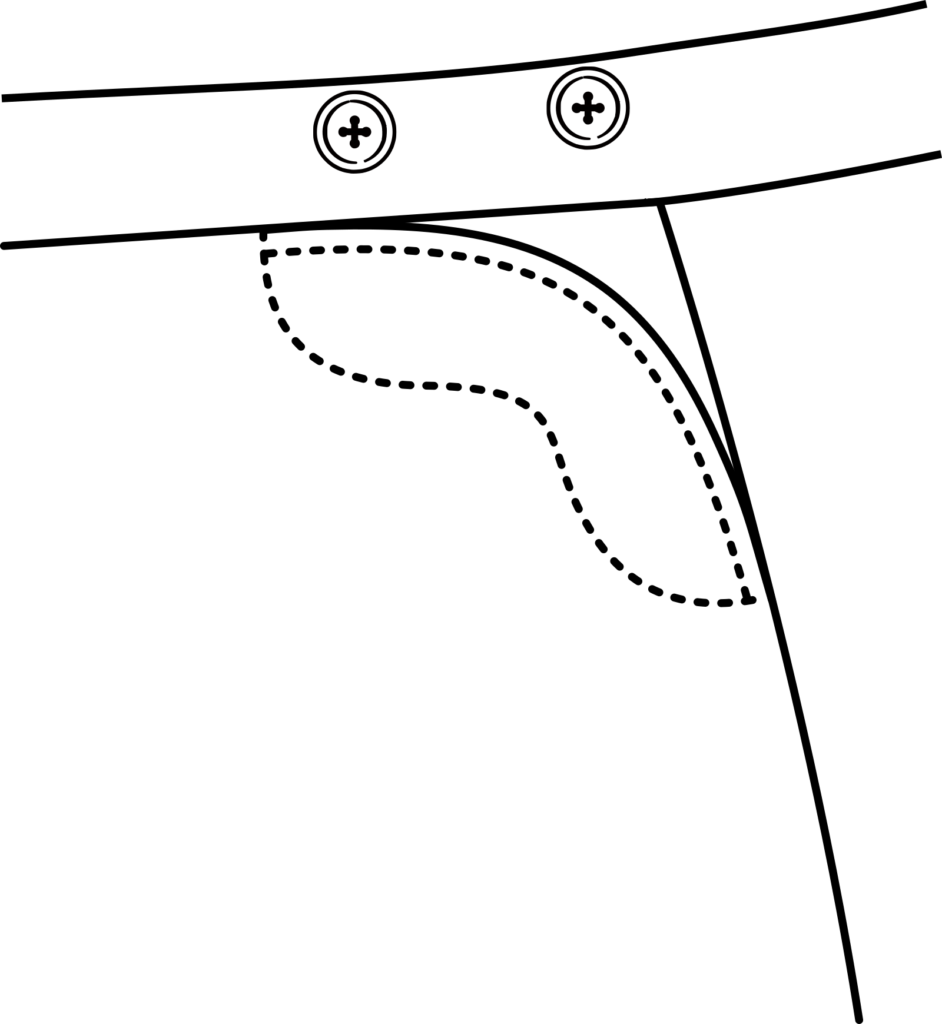
And finally, here’s a curved pocket style with more of an ‘S’ pattern of top stitching.
Buttonholes could also be added to most of these styles to keep the pocket closed. Choose a style you like and then it’s time to begin drafting!
Open-Top Pocket Draft
Drafting an open-top pocket is slightly more involved than the side-seam pocket, due to the special facings and shapes involved, but after a couple of tries you’ll get the process down.
Begin by tracing top section of the trouser front pattern on a fresh piece of paper. Add the 1/4″ seam allowances. You really only need the waist seam and a bit of the side seam.
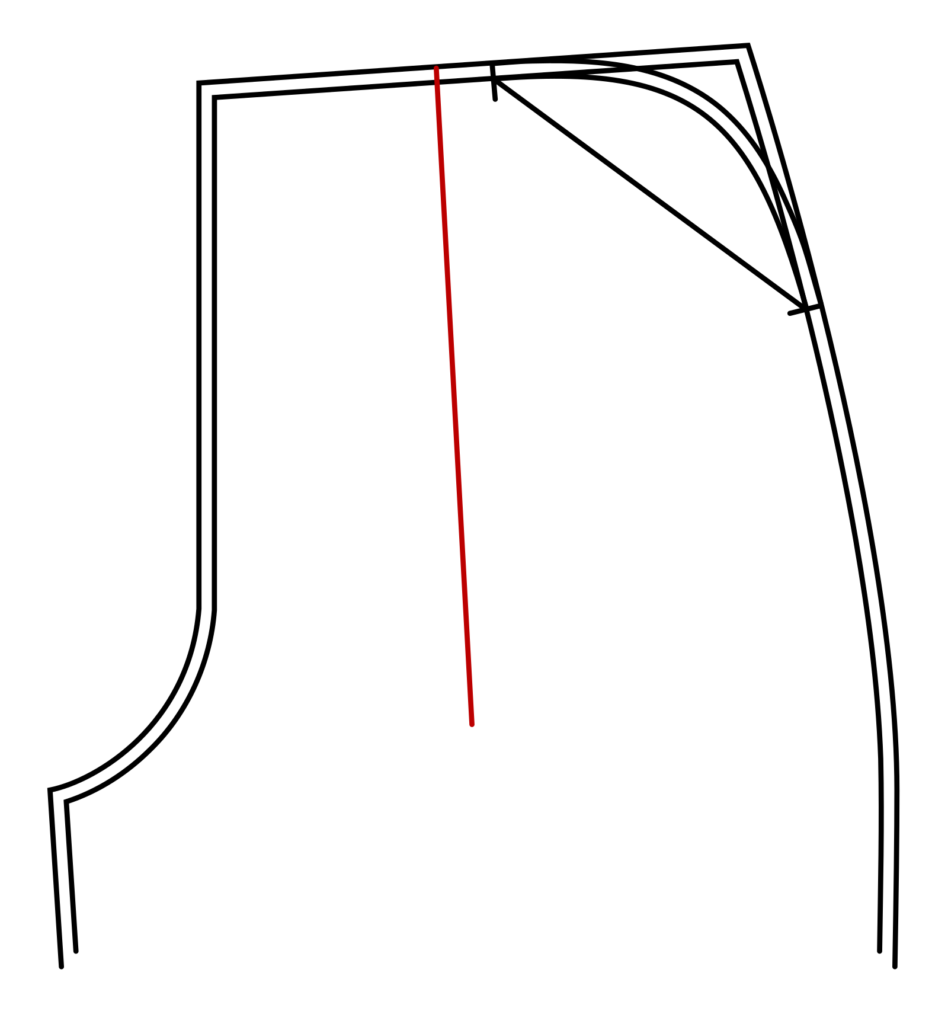
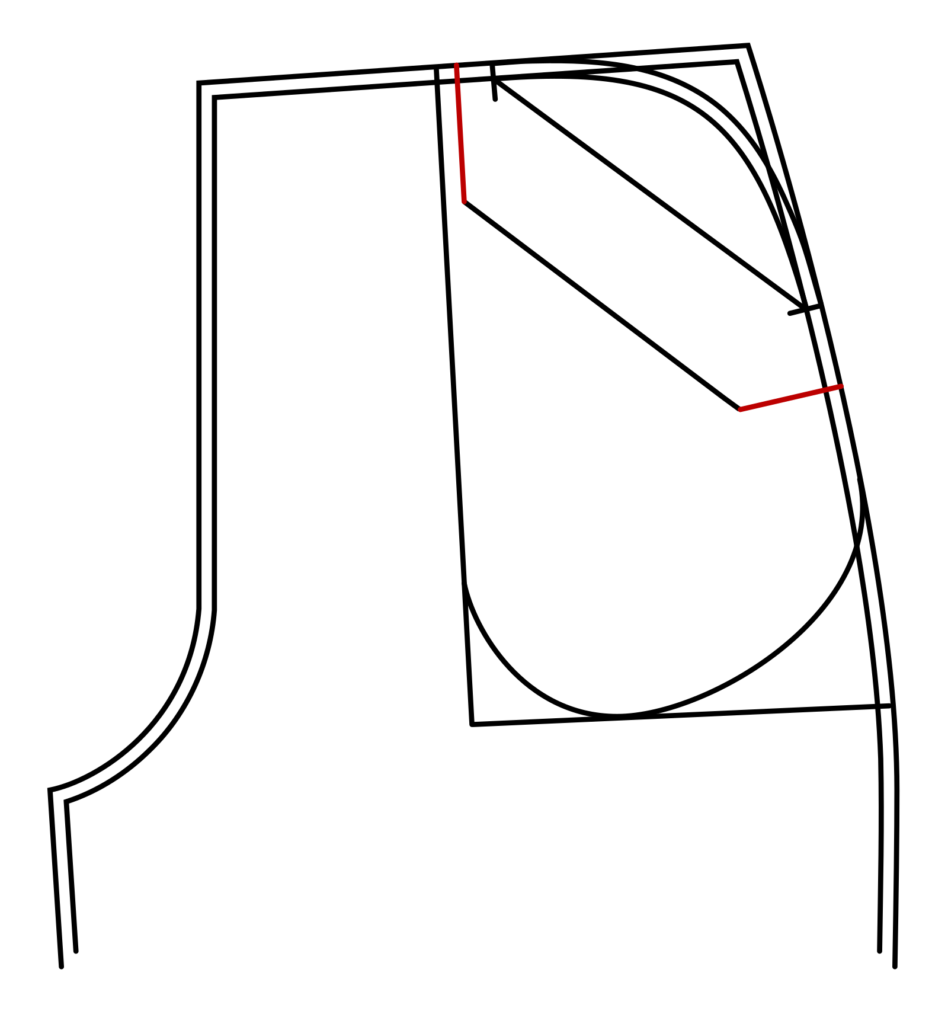
Next, draw the pocket opening marks. These are the most critical part of the pocket, and should be transferred to each piece as you go. I made mine 4 1/2″ from the top of the side seam in each direction, but you could go a little longer or shorter depending on your hand and trouser size.
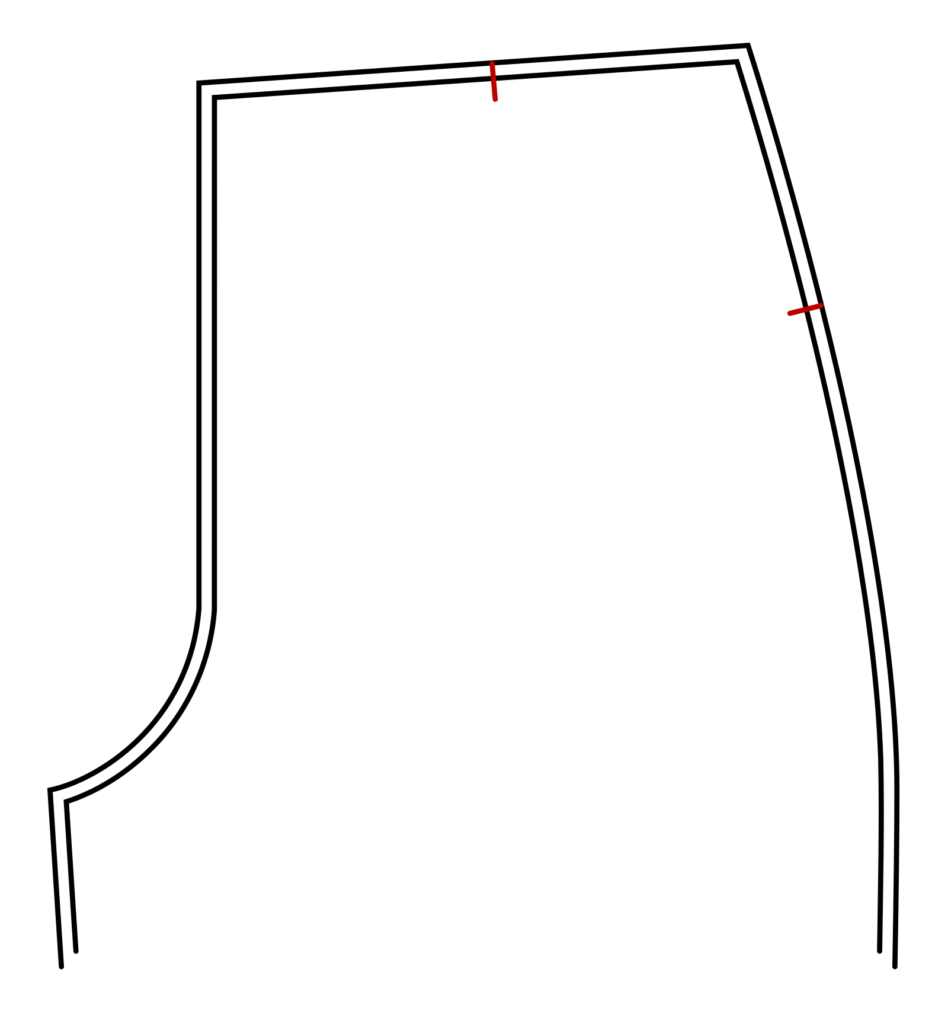
Draw a construction line between each pocket opening mark, from the seam allowance.
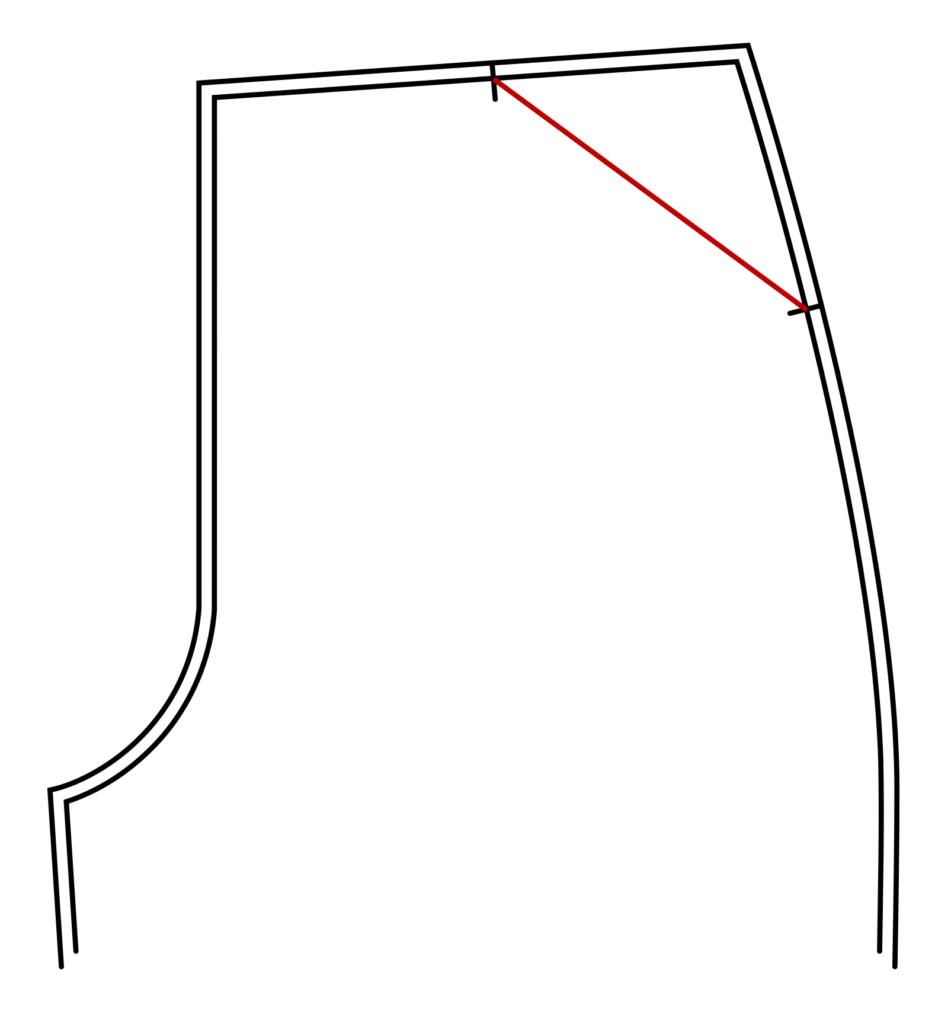
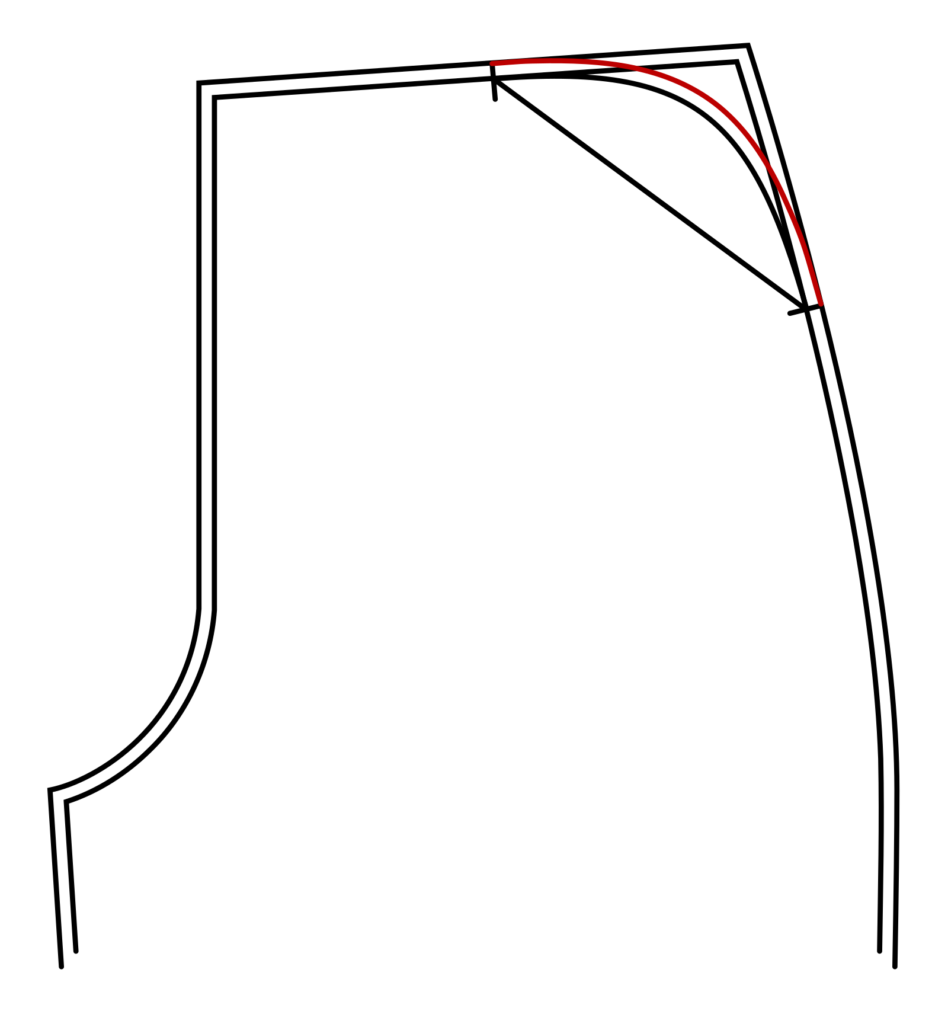
Draw the shape of the pocket, from mark to mark, as desired.
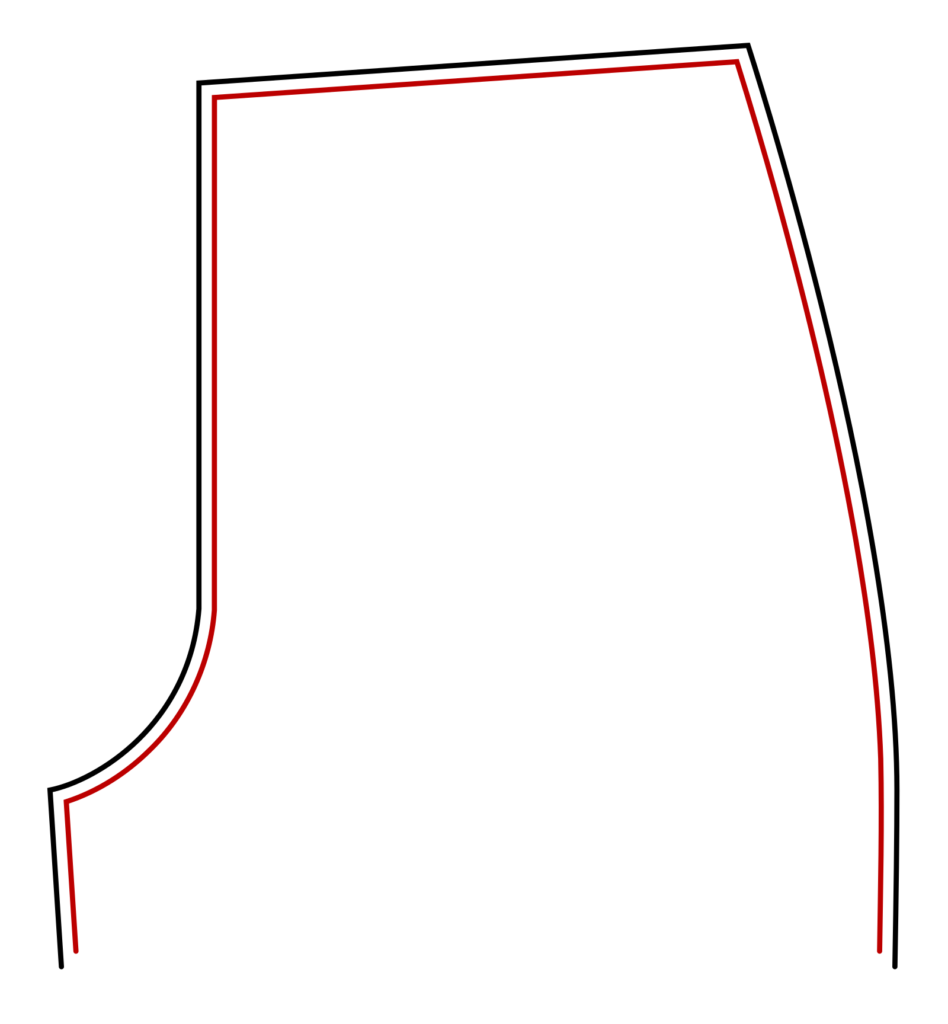
Add a 1/4″ seam allowance to the pocket opening. Adding the seam allowance separately allows you to have more exact control over the position and shape of the pocket.
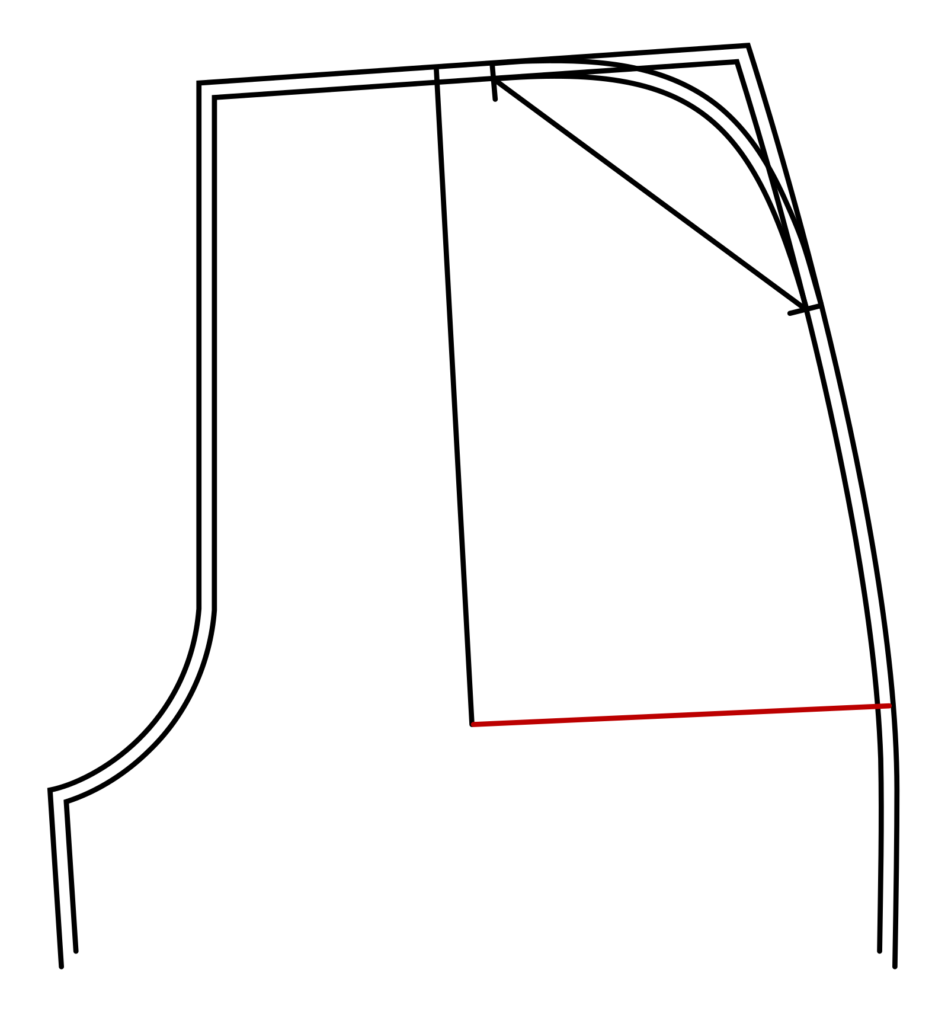
Draw the front edge of the pocket bag. This should be about 1″ or so from the pocket opening mark on the waist seam, and taper towards the trouser front to help the pocket to drape more naturally.
Draw a construction line at the bottom of the pocket bag, perpendicular to the side seam. I generally make these pockets about 1″ longer than my hands reach.
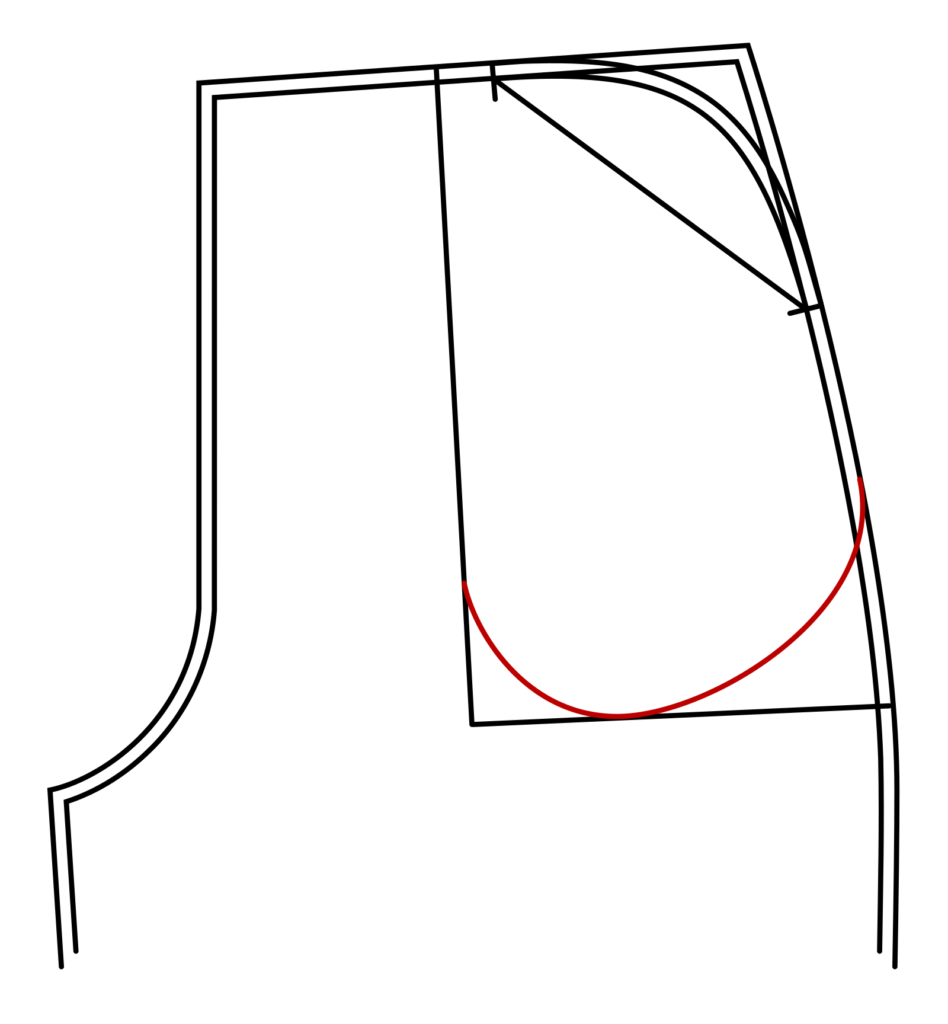
Draw the pocket curve. I like to deepen the curve near the front so that loose items will better stay in place. I include the seam allowance when drawing these curves, tapering it into the side seam as shown.
Draw the bottom of the pocket facing about 2″ below and parallel to the construction line you drew earlier.
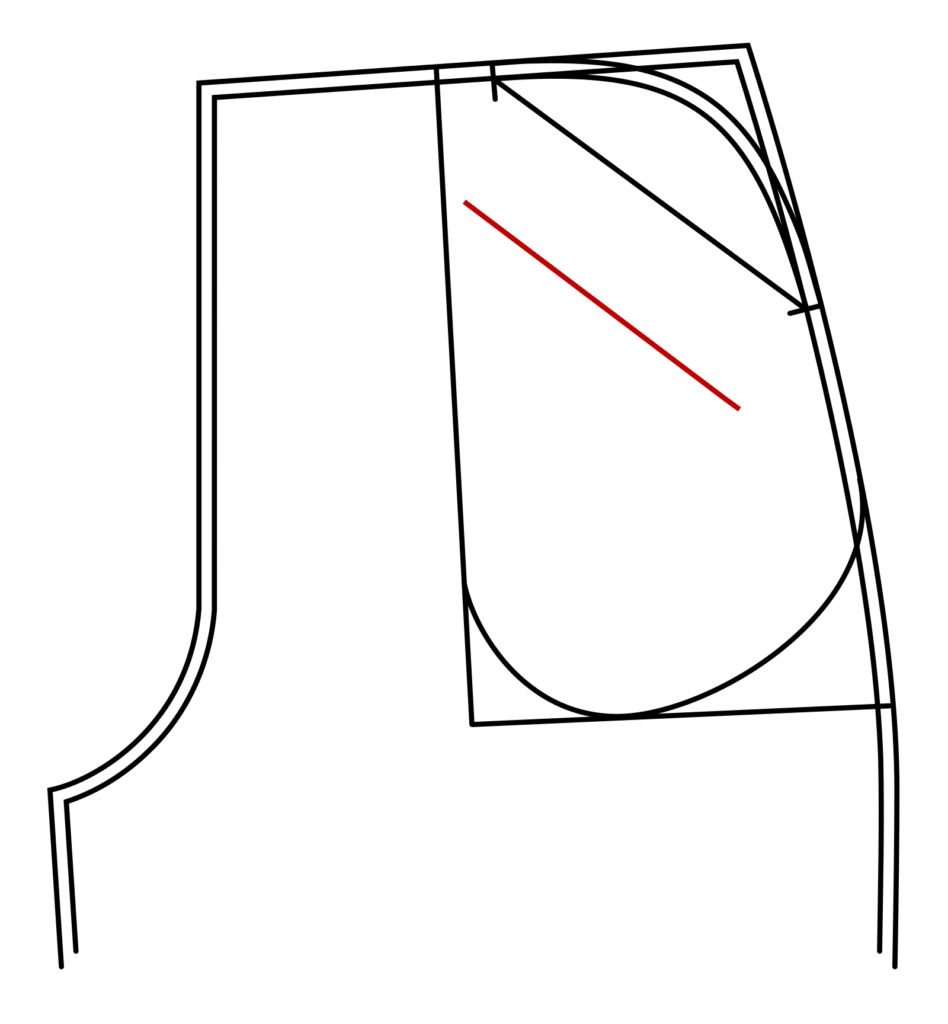
Draw lines completing the pocket facings. At the top, draw a line perpendicular to the waist seam, about 1/4″ – 1/2″ from the front edge of the pocket and at least 1/2″ from the pocket mark. At the bottom of the facing, do the same, about 1 1/2″ below the pocket mark.
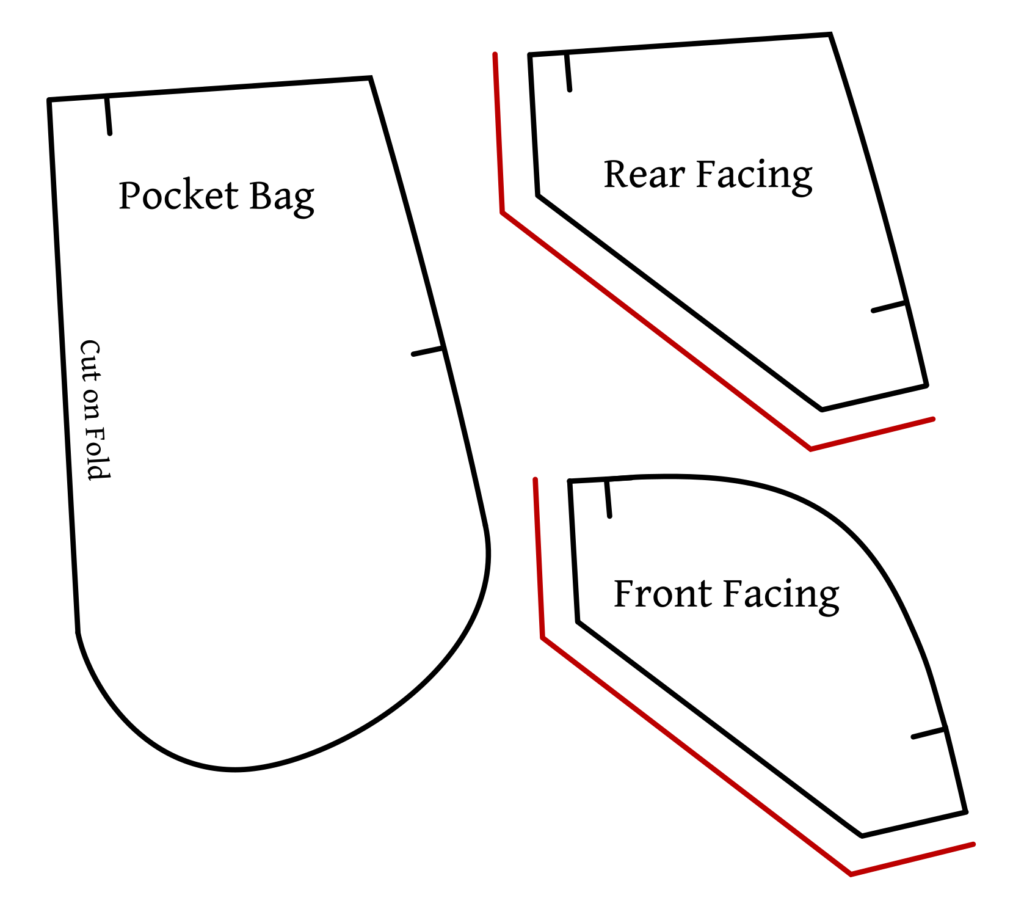
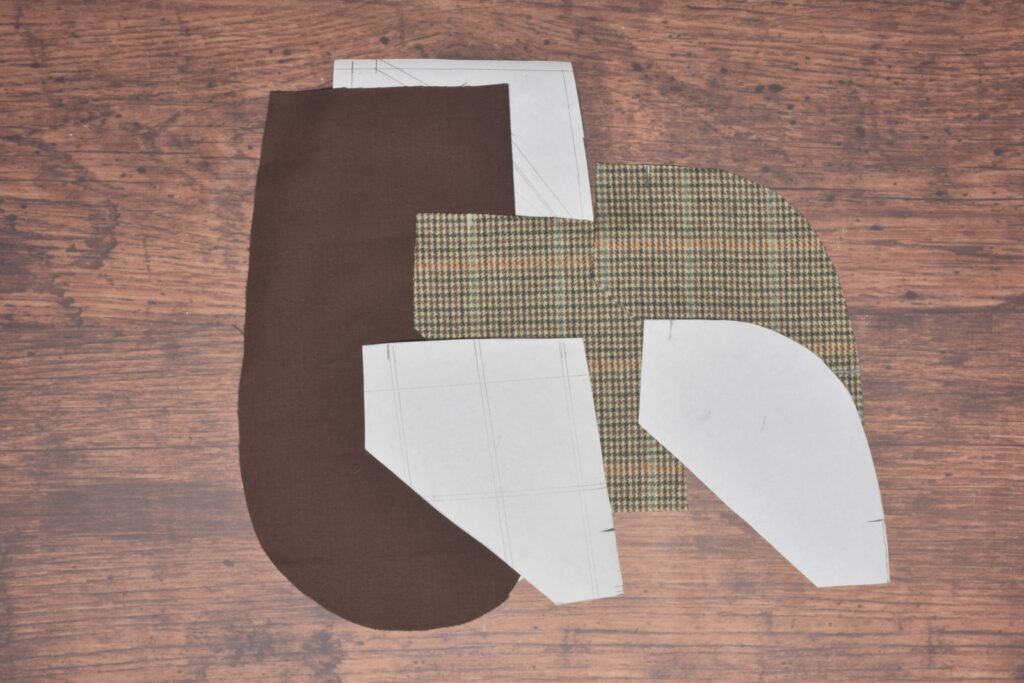
Here are all of the pieces traced and cut out for the open top pocket. The pocket bag should be cut on the fold as shown. The rear and front facings can have a seam allowance of 1/4″ to 1/2″ added along the front edges if you have a fabric that frays easily. Be sure to carefully mark the pocket openings on each piece.