Month: October 2020
Installing the Pockets – Part II
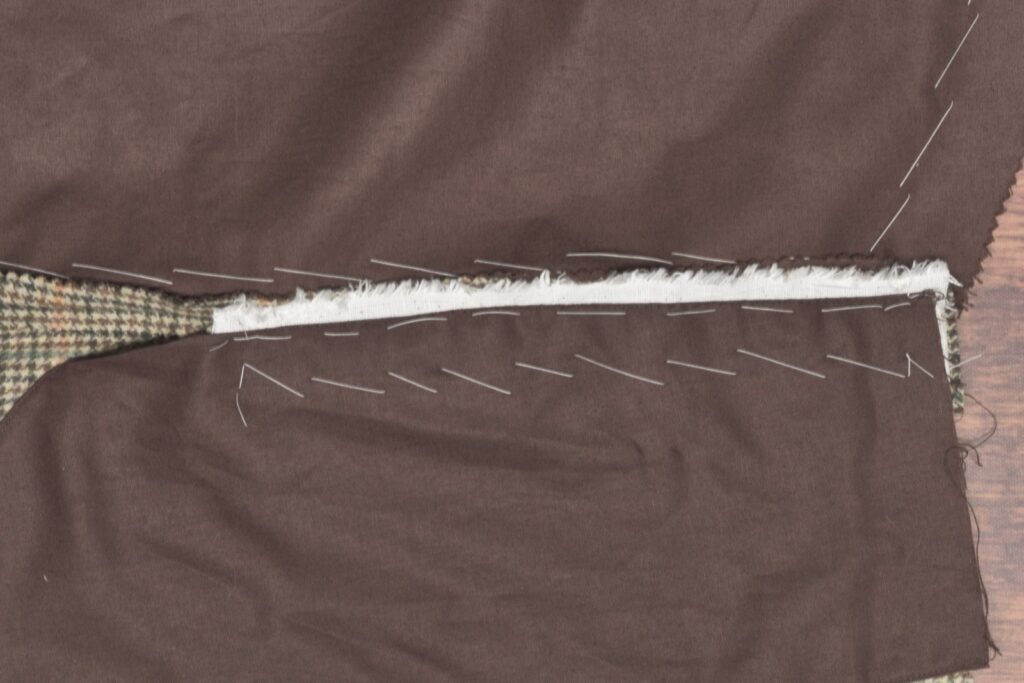
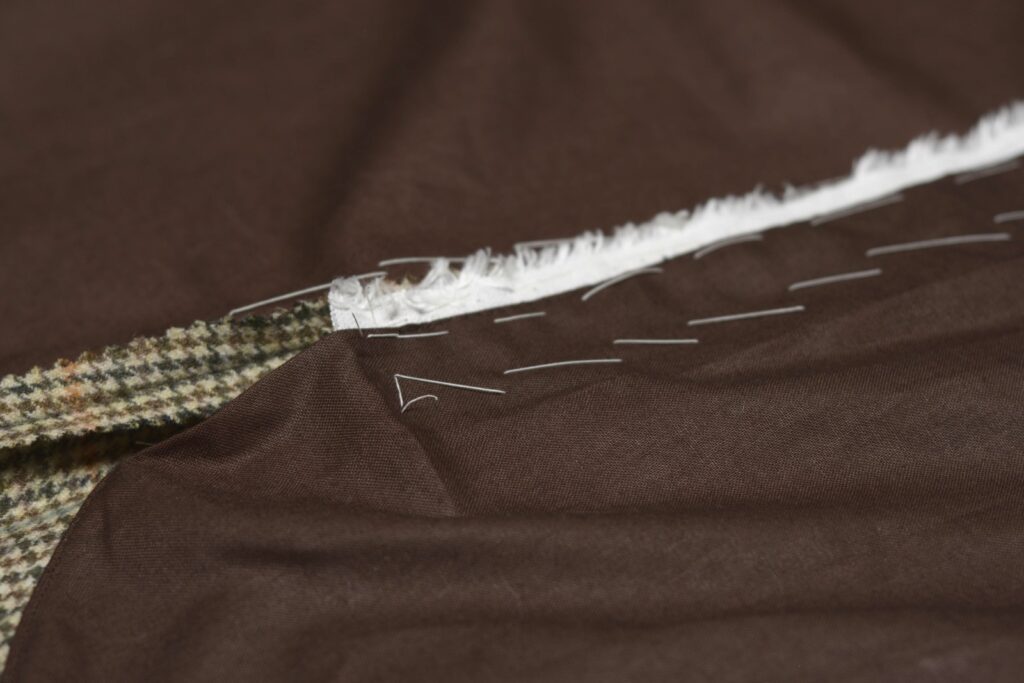
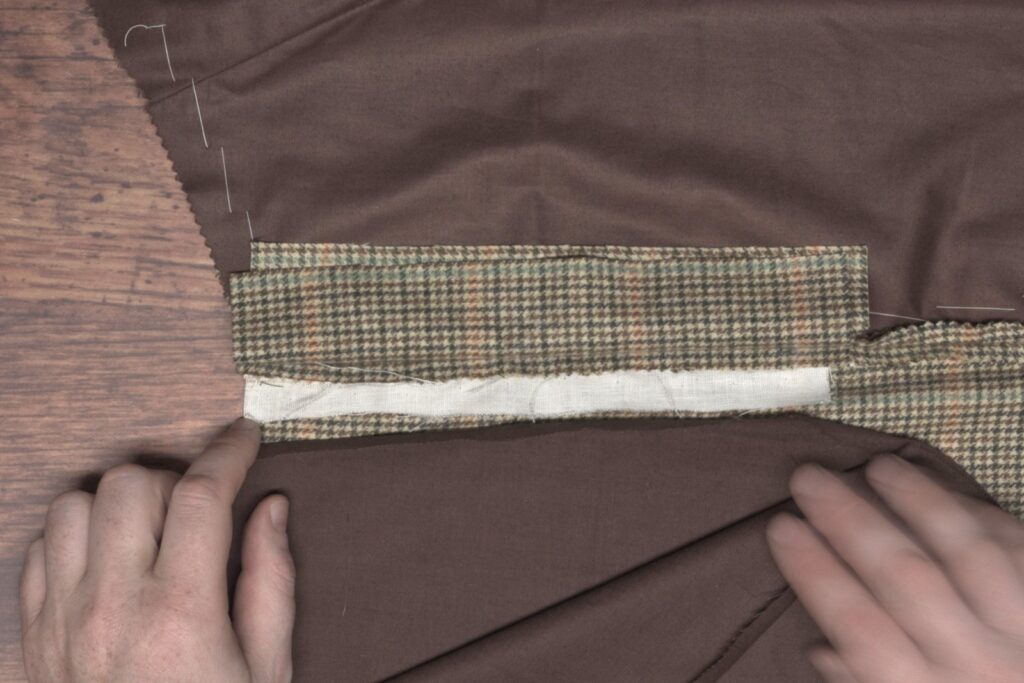
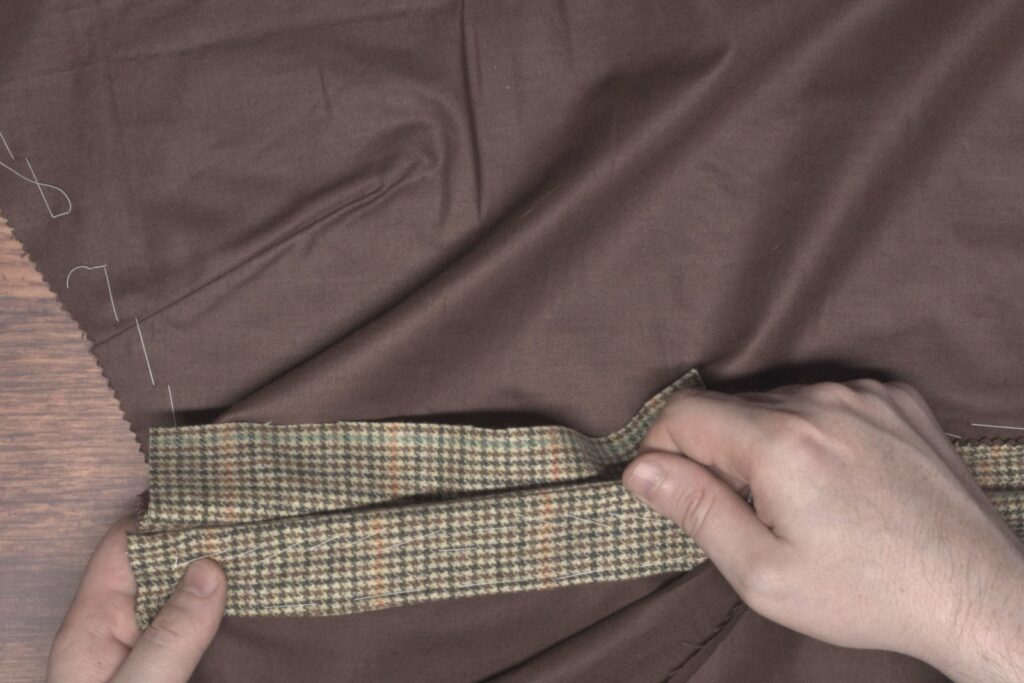
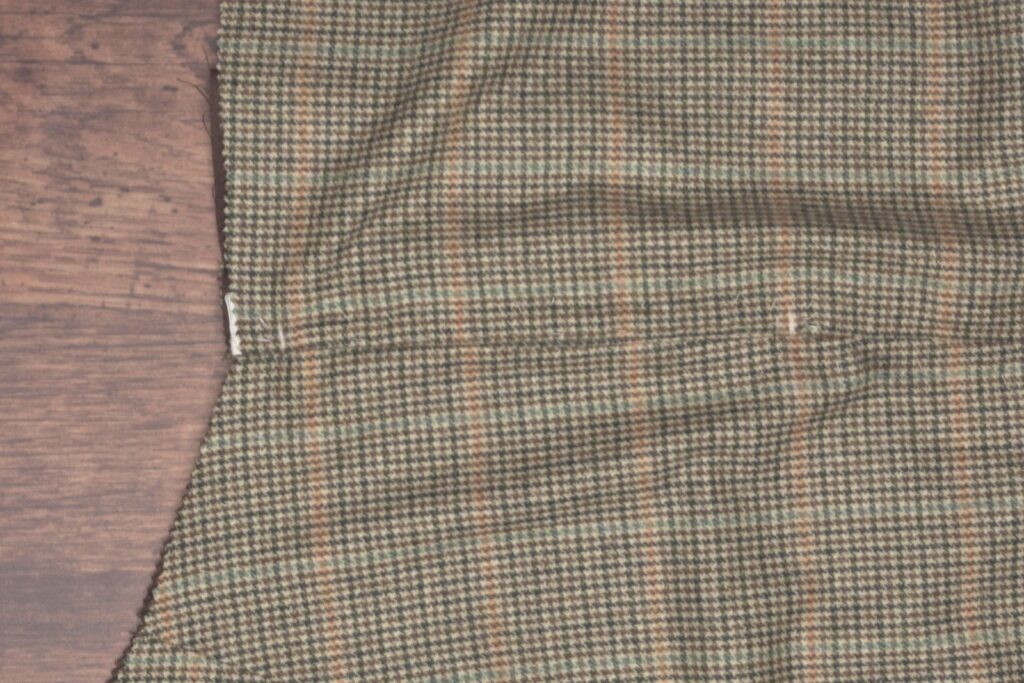
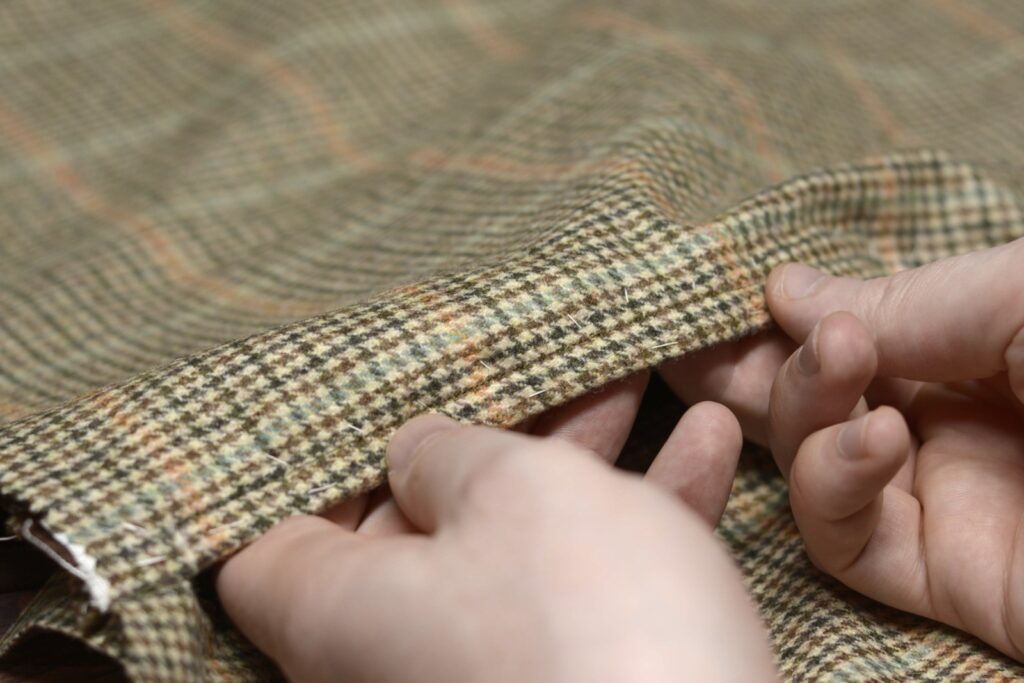
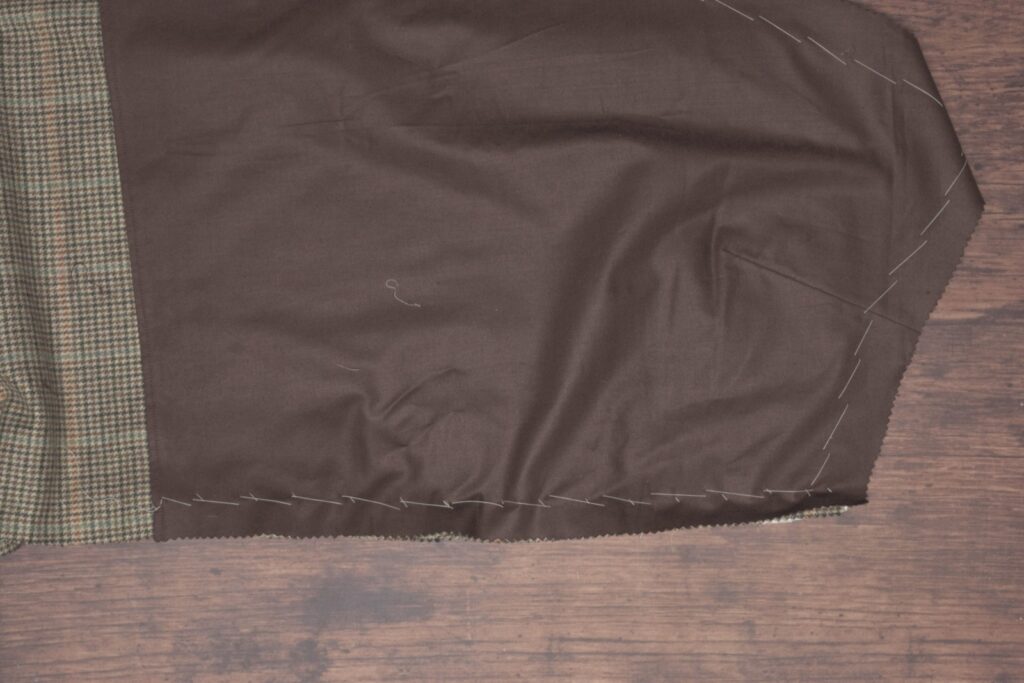
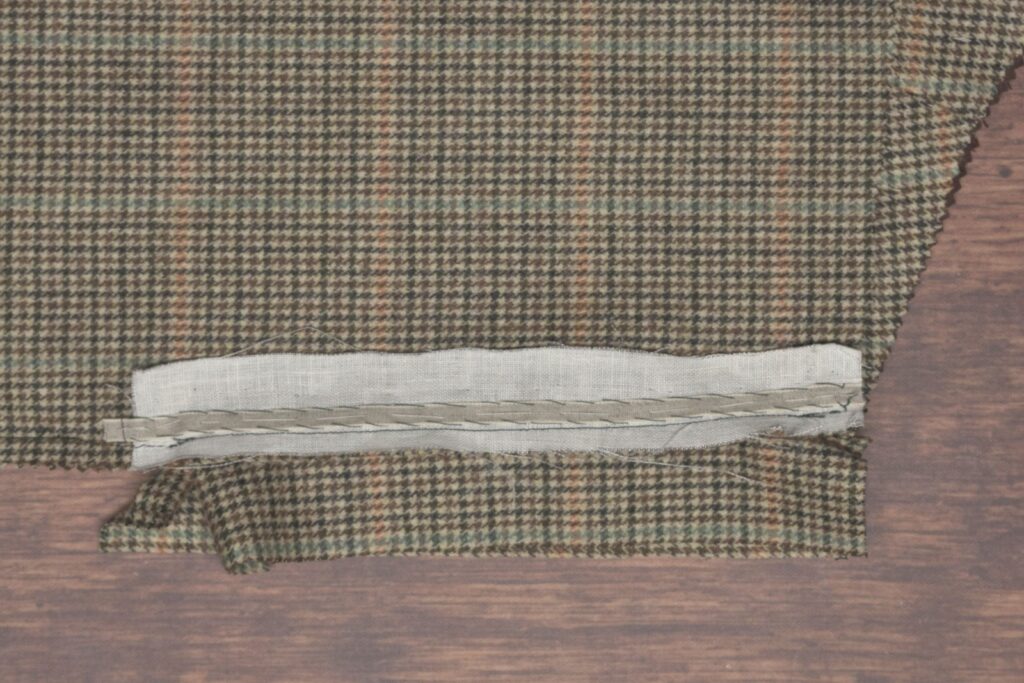
Lay the trousers wrong side up, pulling back the pocket bag to expose the rear pocket facing.
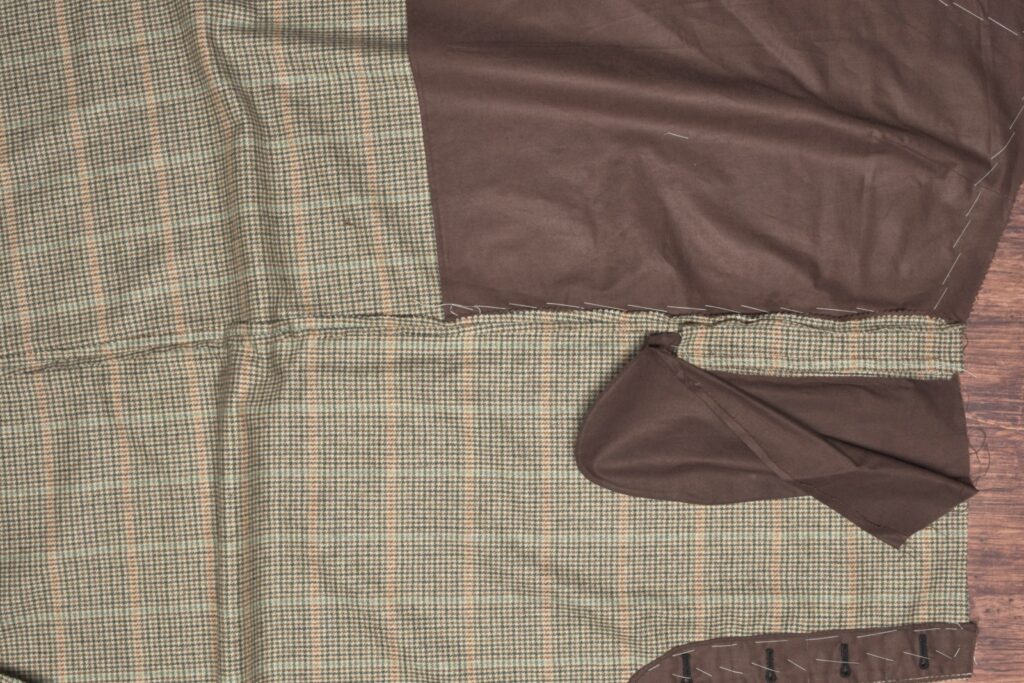
Fold over the seam allowance on the remaining long edge of the facing and baste. You can leave this edge raw if you prefer and if the fabric does not fray.

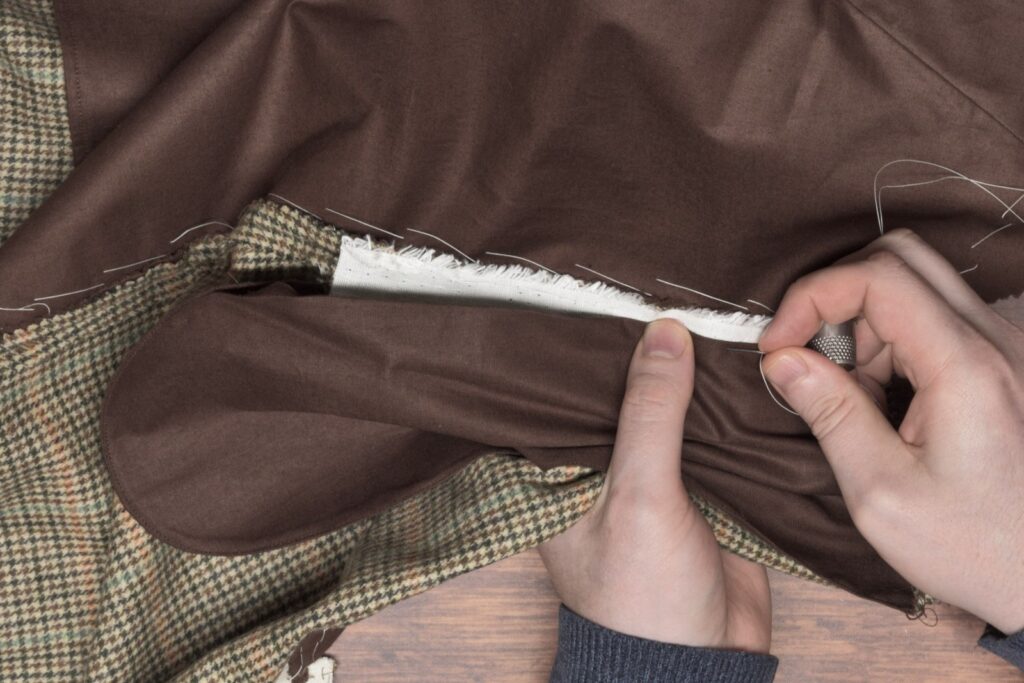
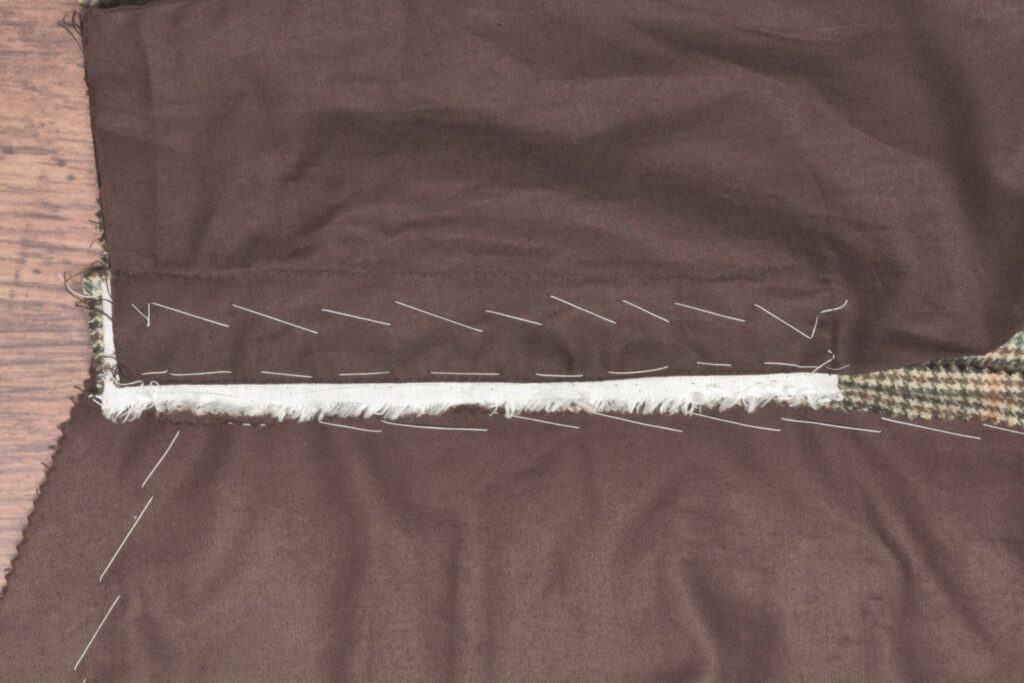
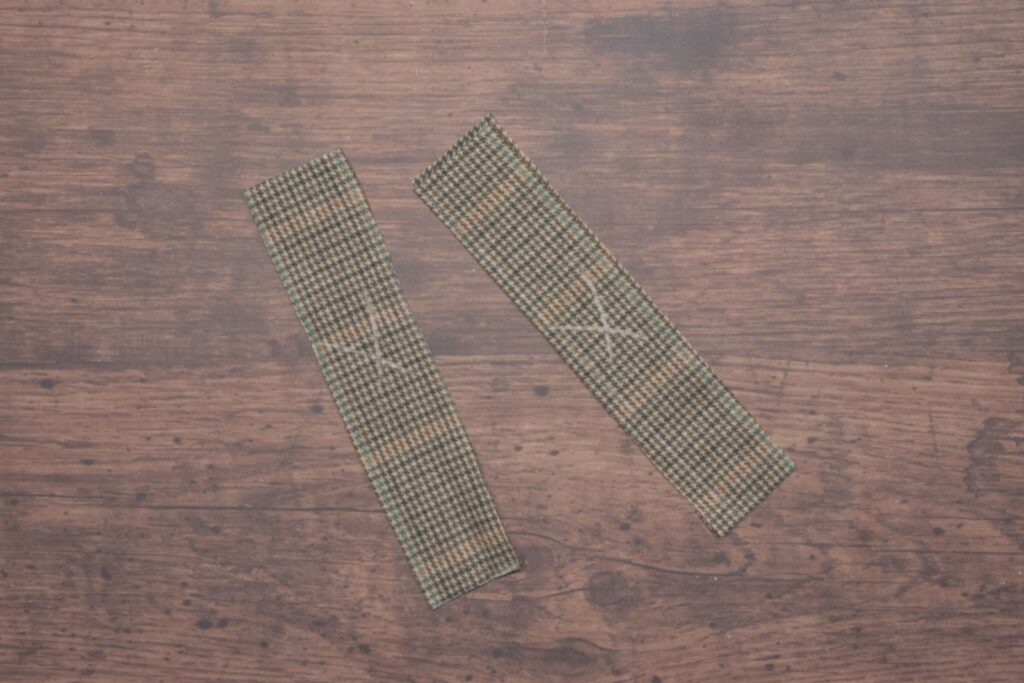
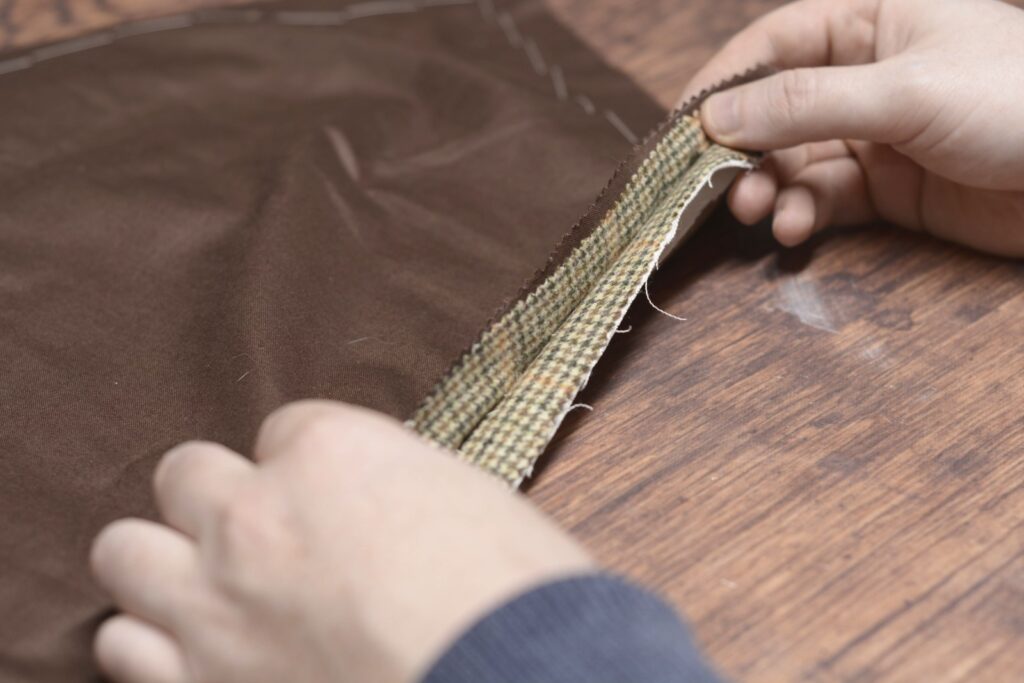
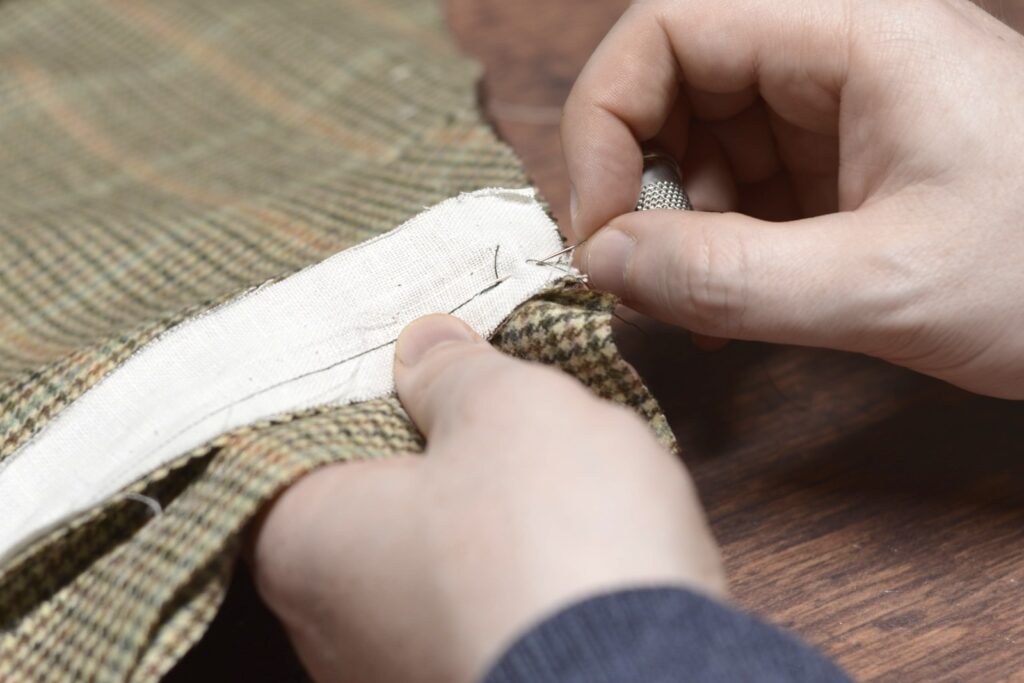
Cut a piece of linen the length of the facing and about 1 1/2″ wide, or just slightly narrower than the facing. To prevent fraying of this linen stay, I like to cut these pieces on the selvage.
This is an optional step, but I find it greatly lengthens the life of the trousers, helping to prevent the seam below the pocket from splitting open.
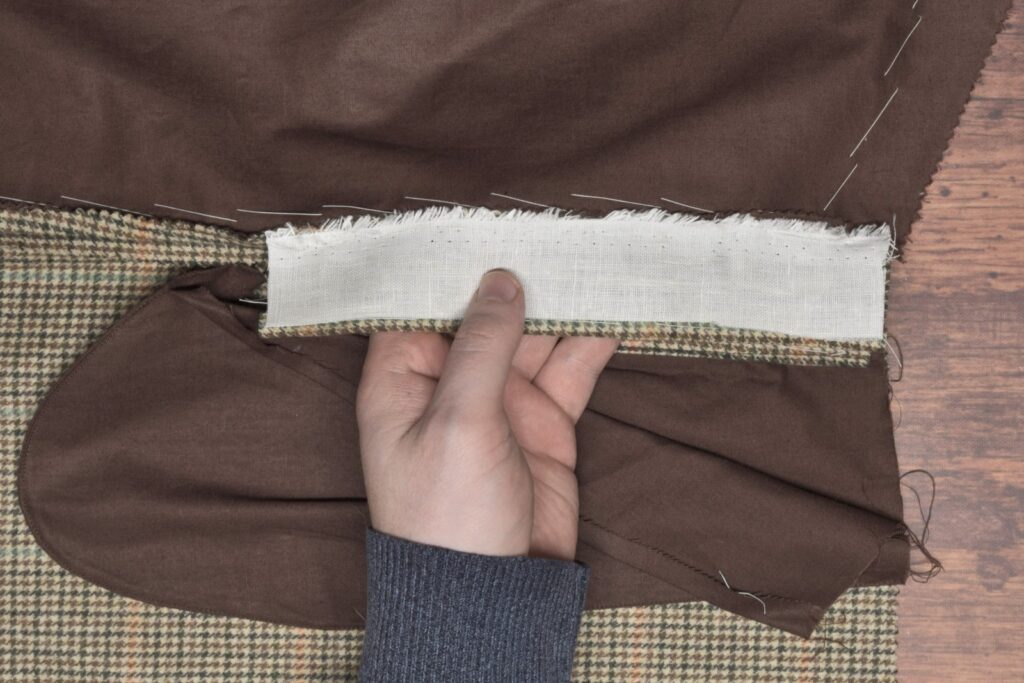
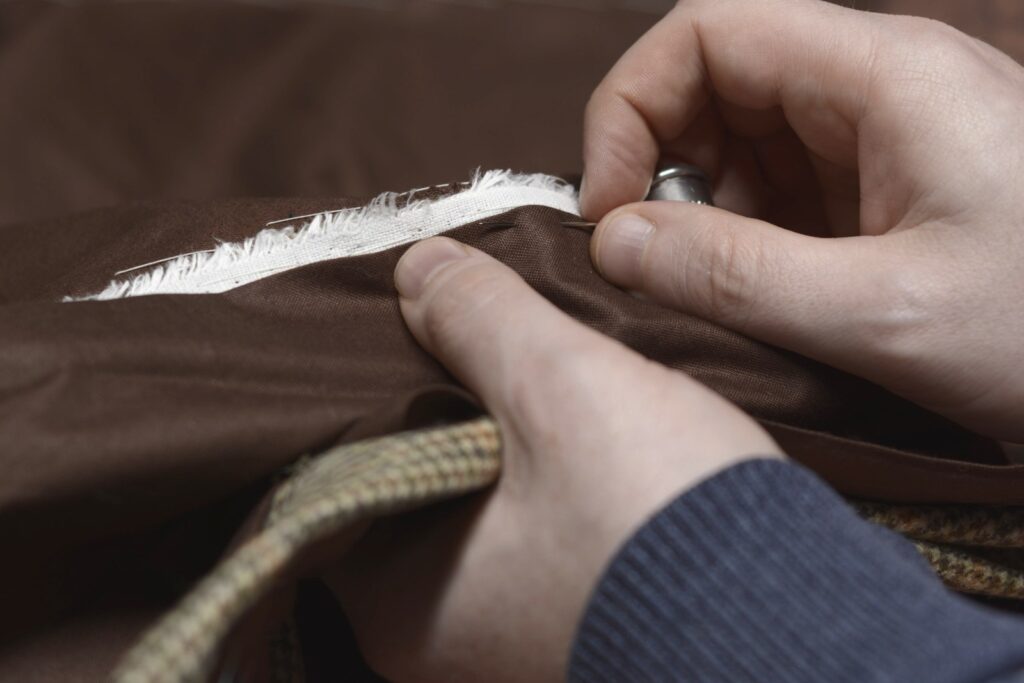
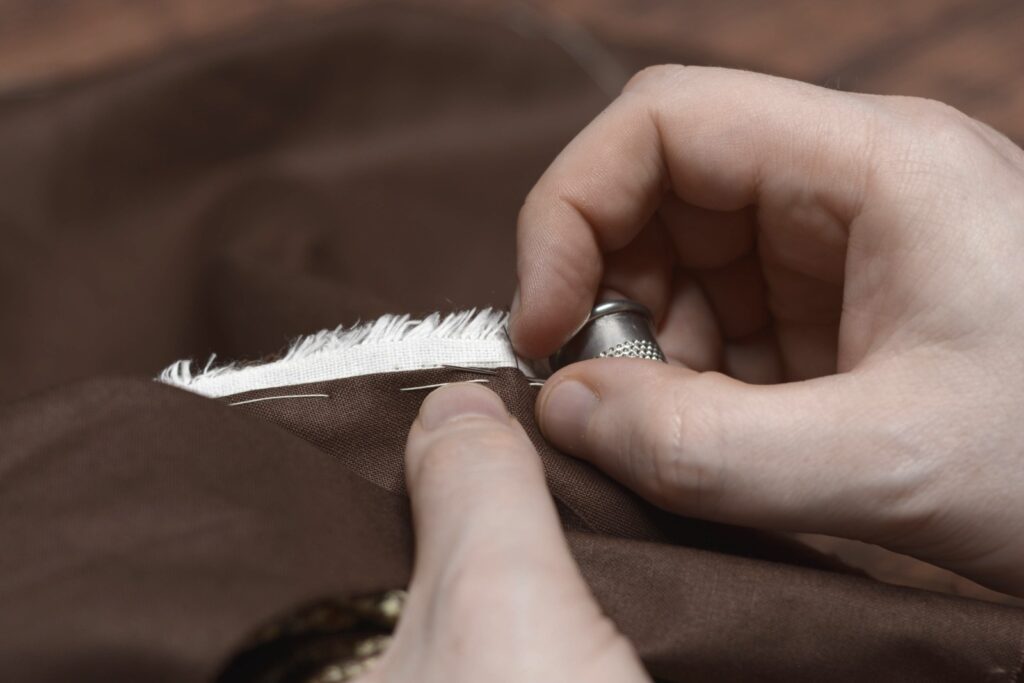
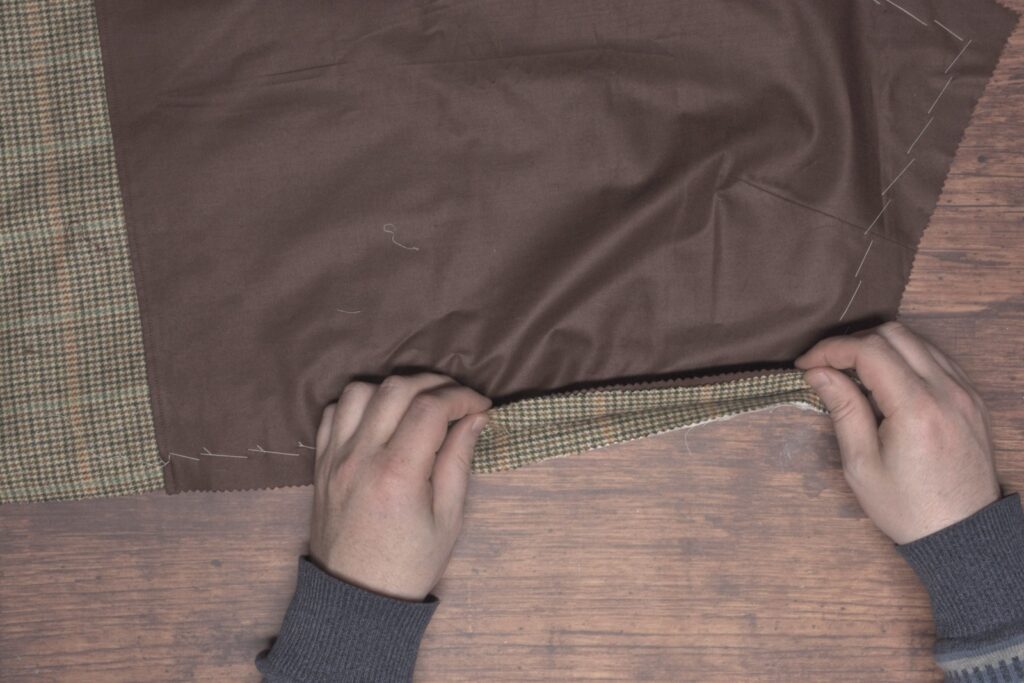
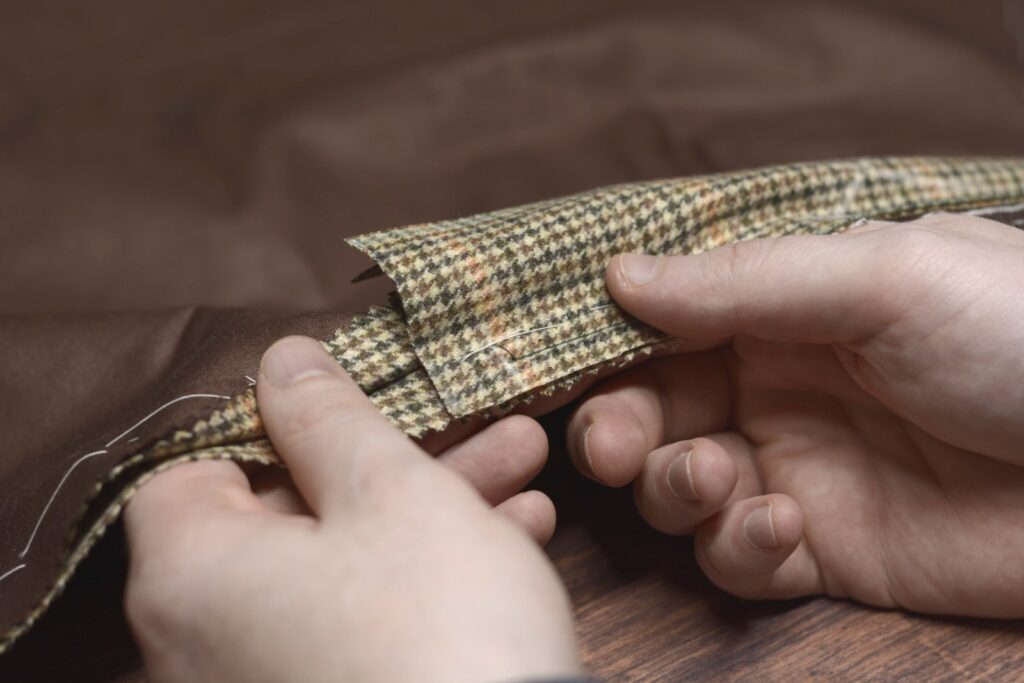
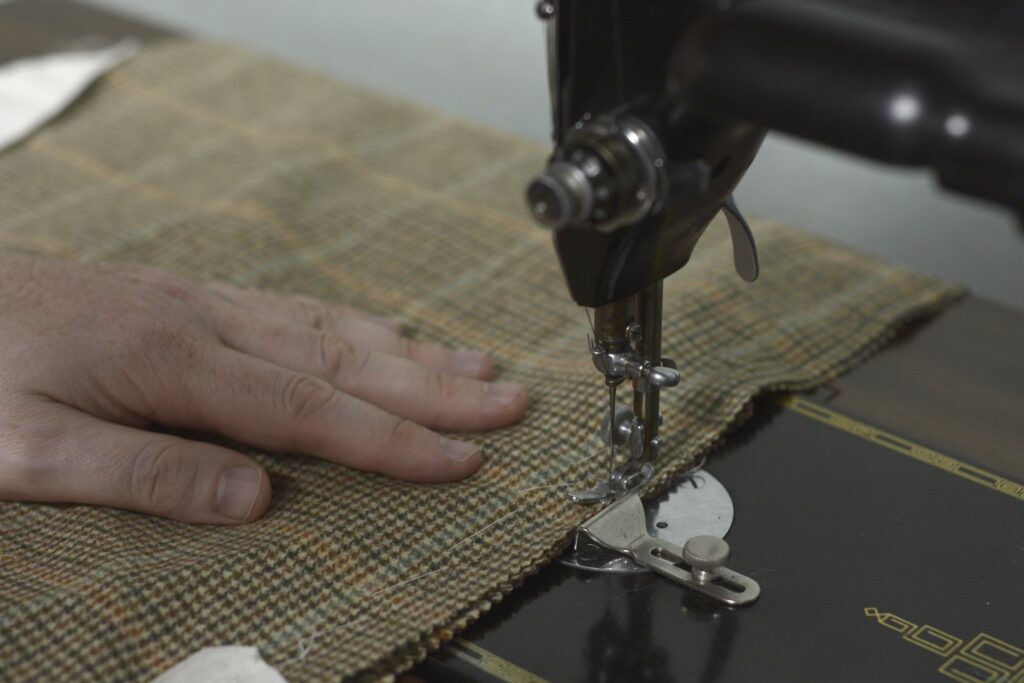
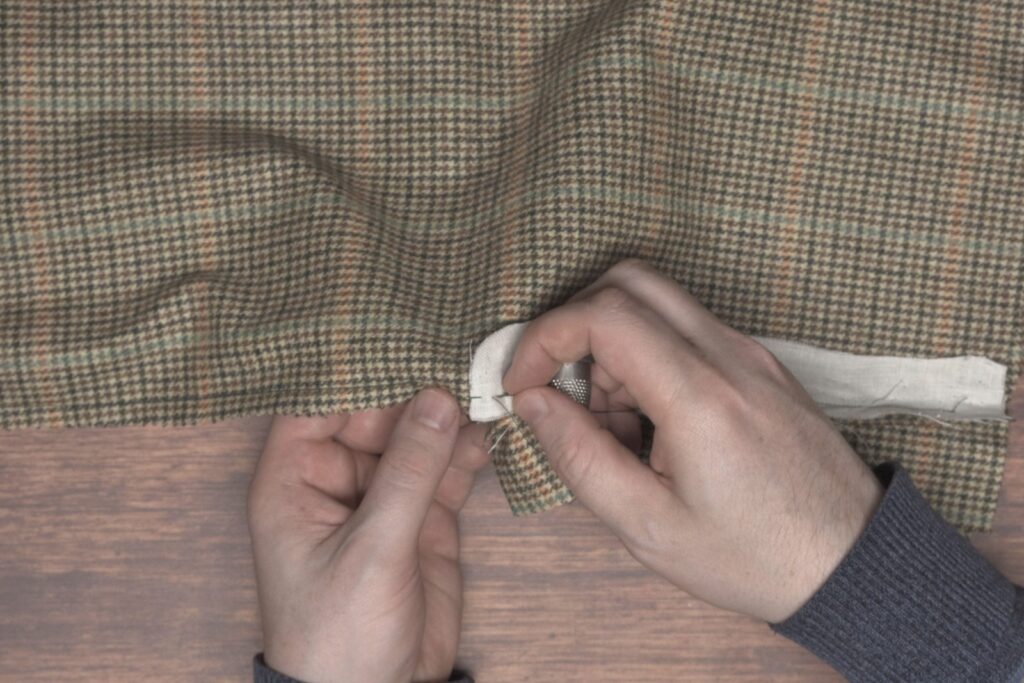
Baste the linen stay to the seam allowance of the facing and side seam, keeping your hand in the pocket opening so that the stitches do not catch the front of the trousers. The selvage should be aligned with the edge of the side seam, or a little bit further towards the rear of the trousers as desired.
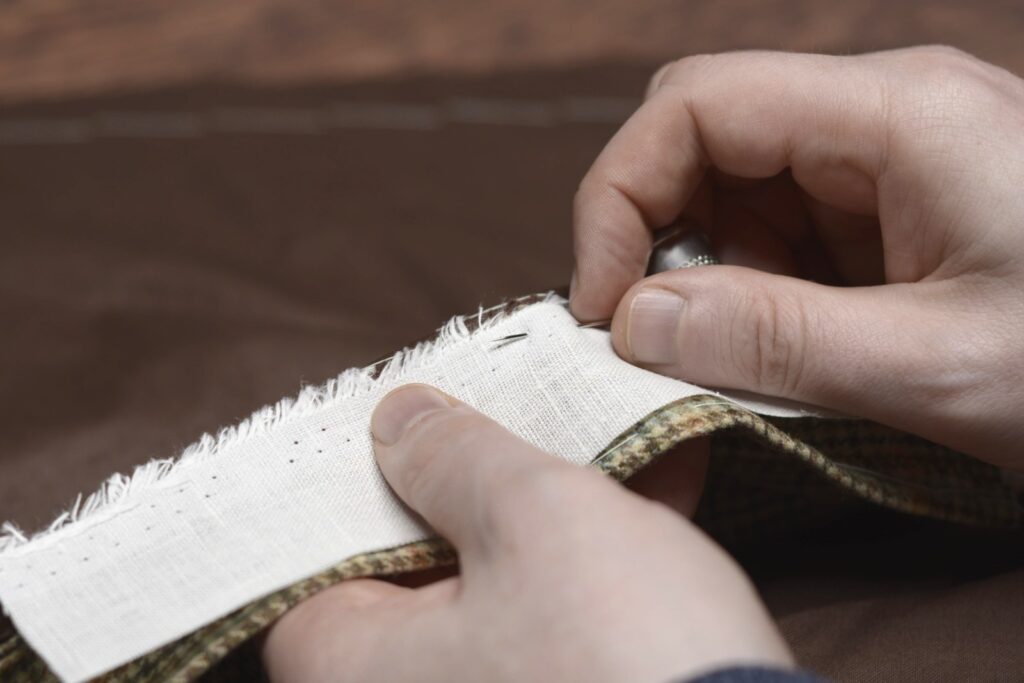
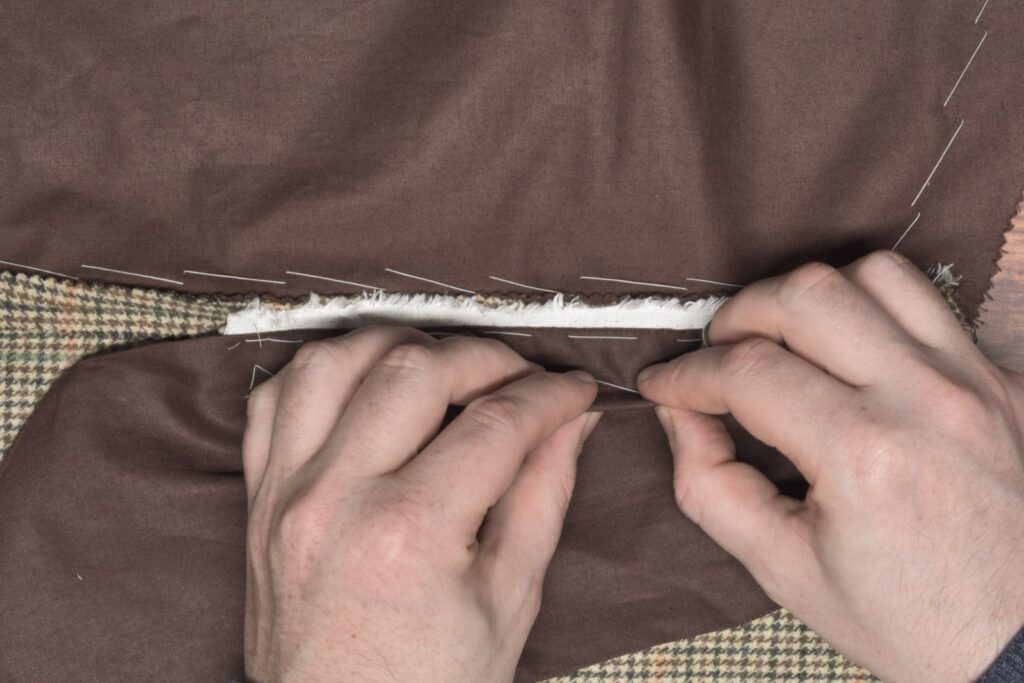
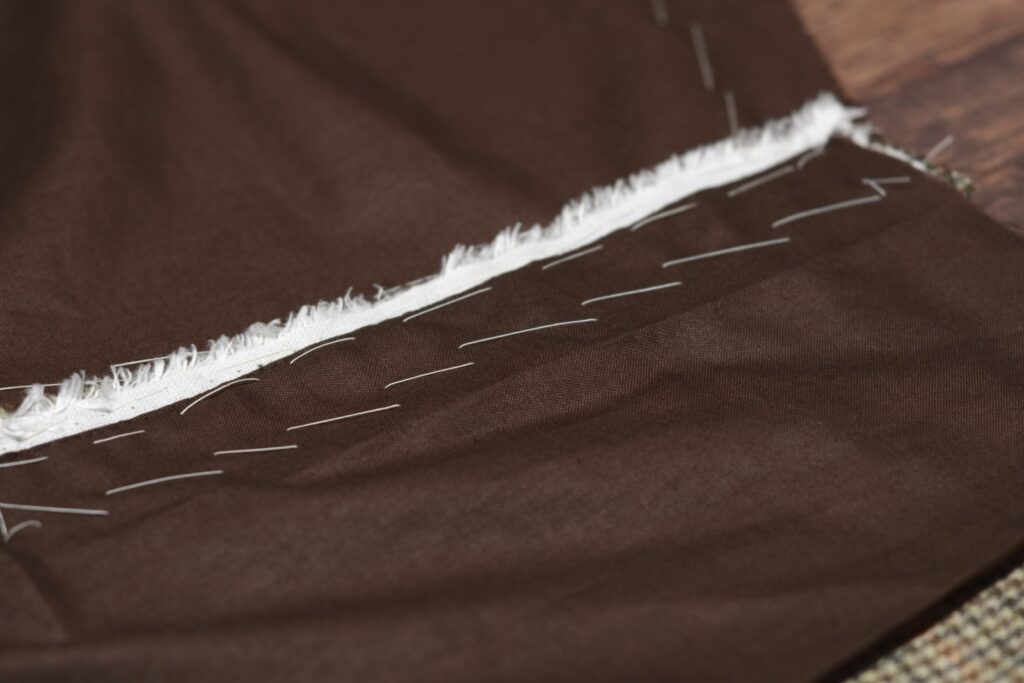
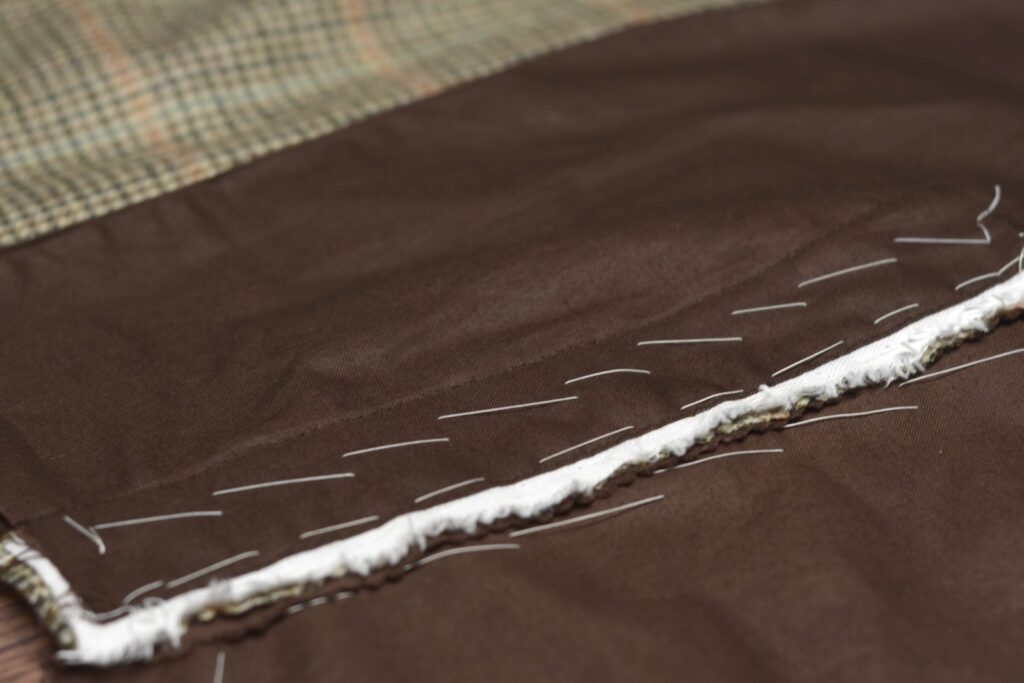
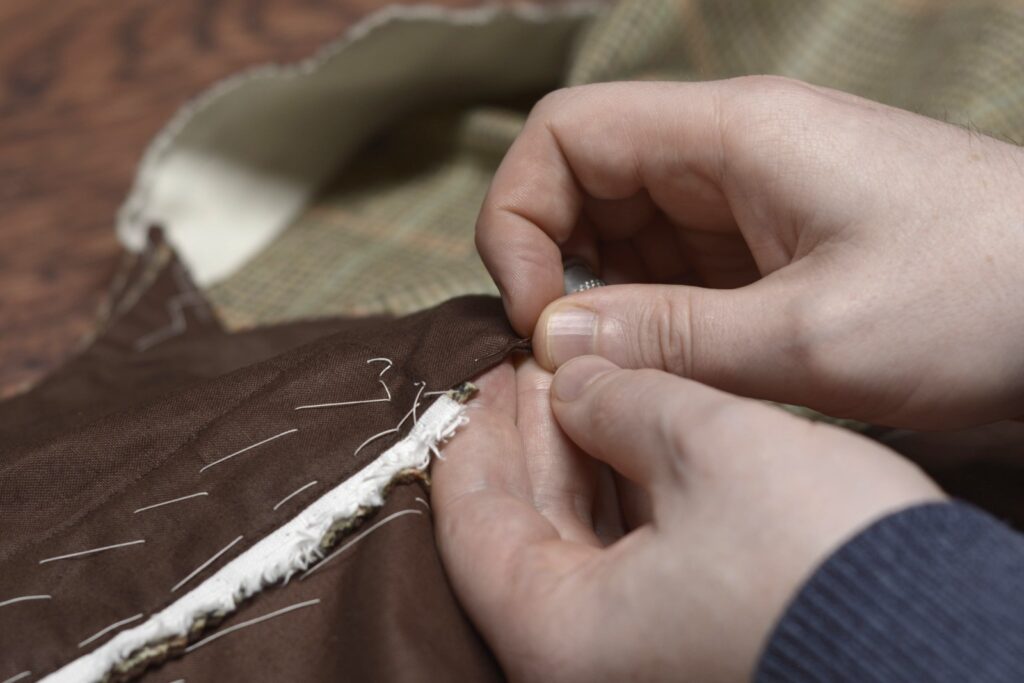
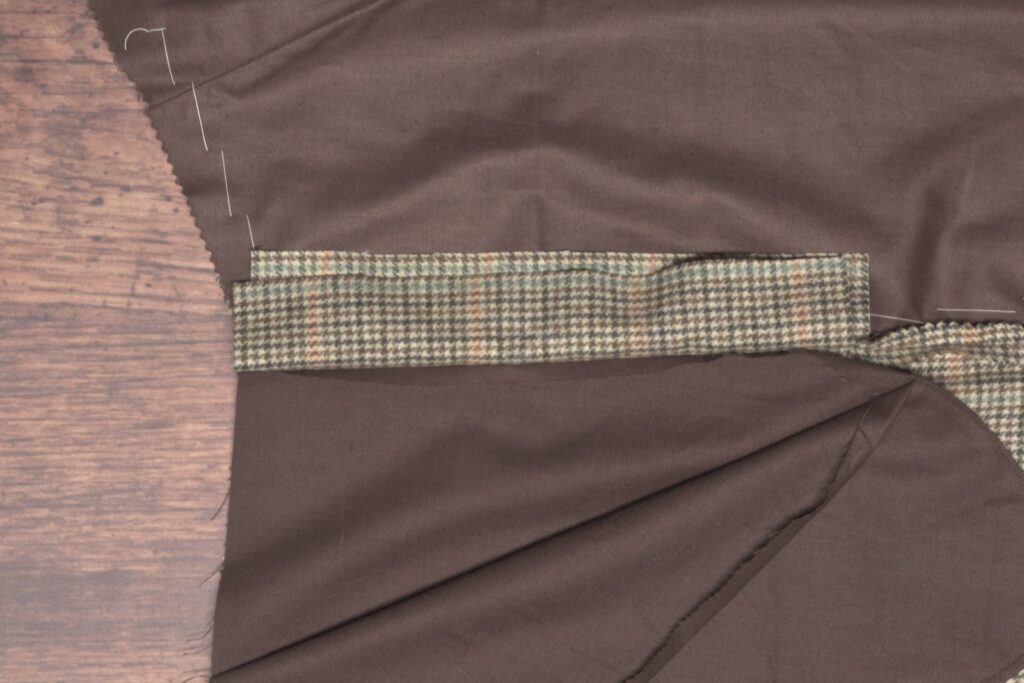
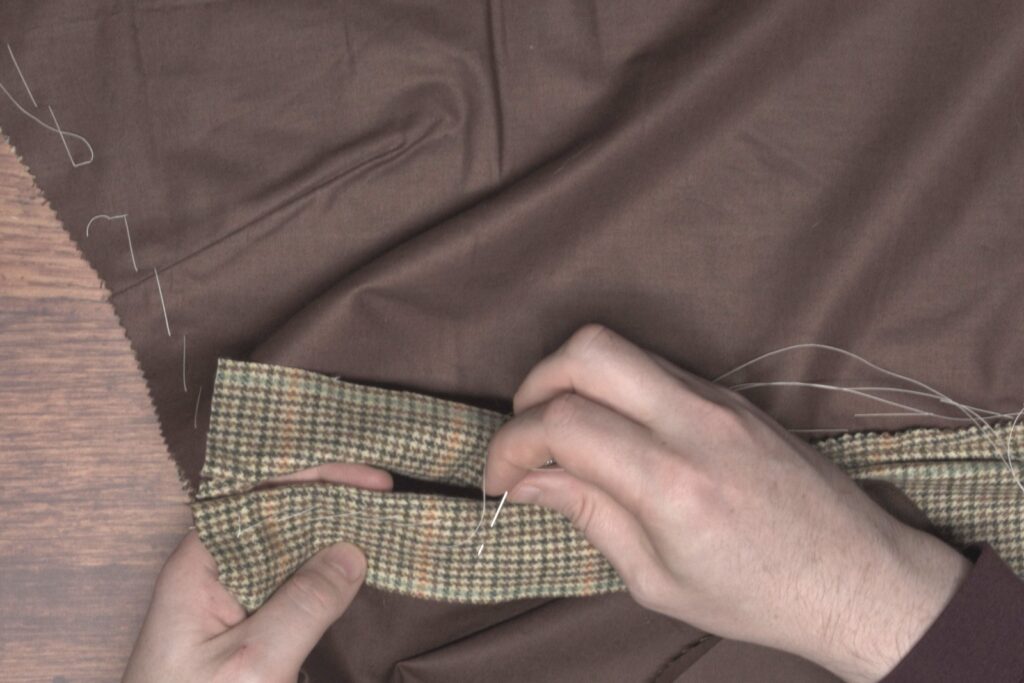
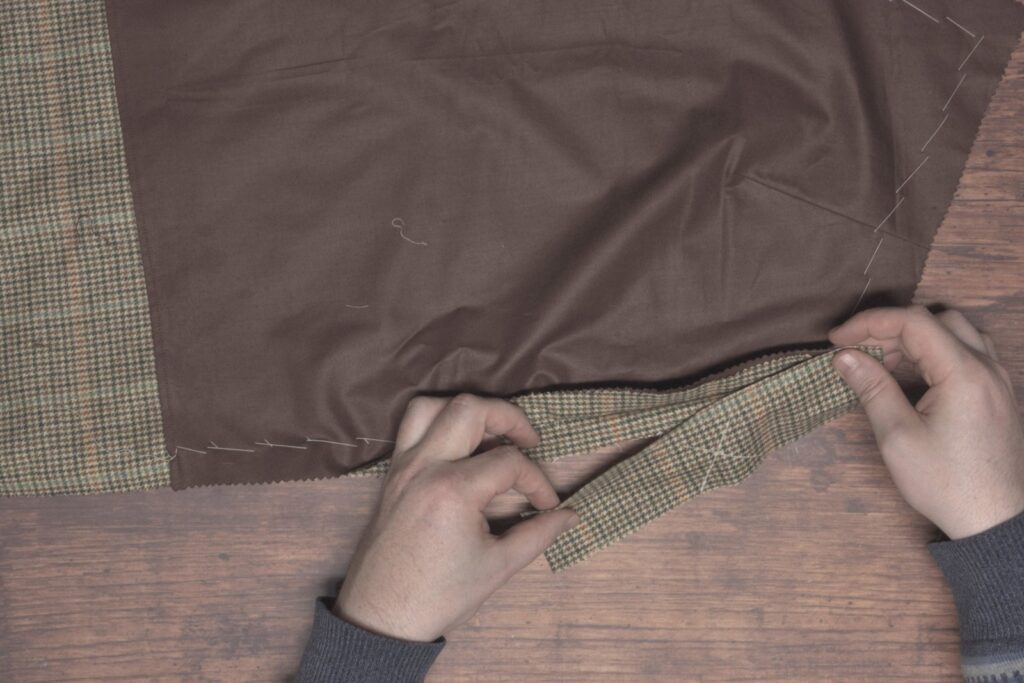
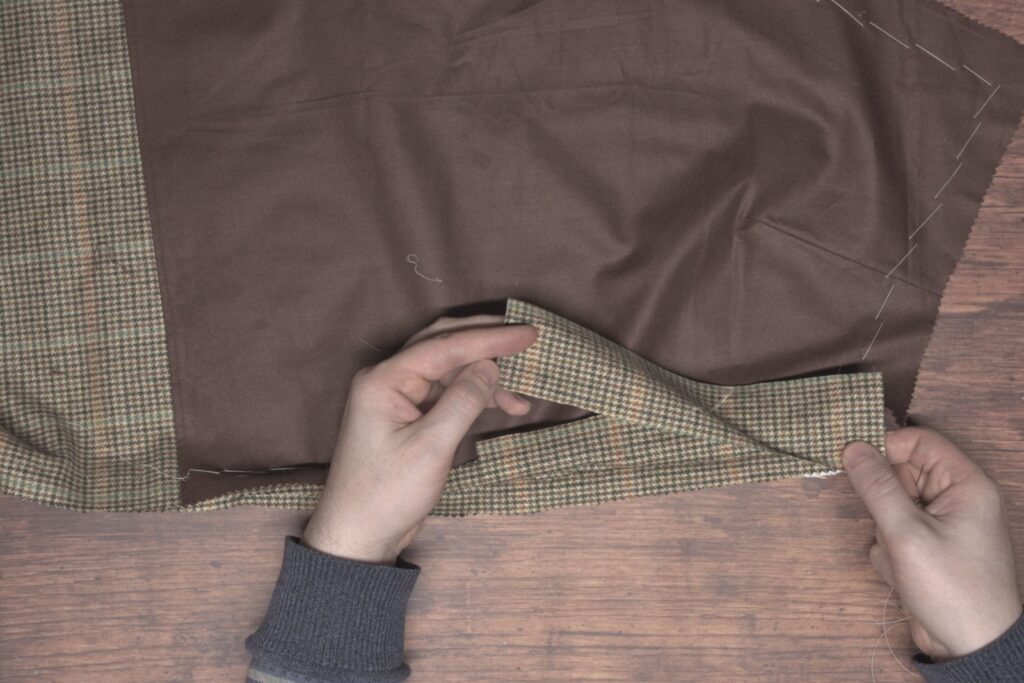
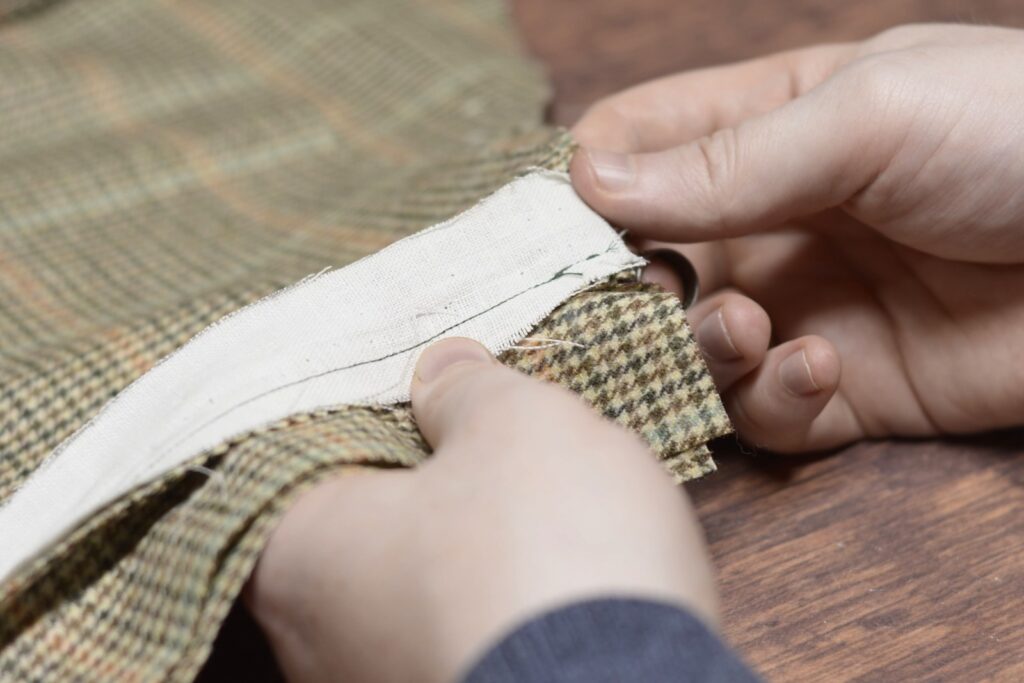
Now fold the remaining half of the pocket bag in place, aligning the folded edge with the side / facing seam underneath. You’ll have to do this mainly by feel with your hands, as both halves of the seam are hidden during this step. Again, baste only through the pocketing, stay, and facing layers.
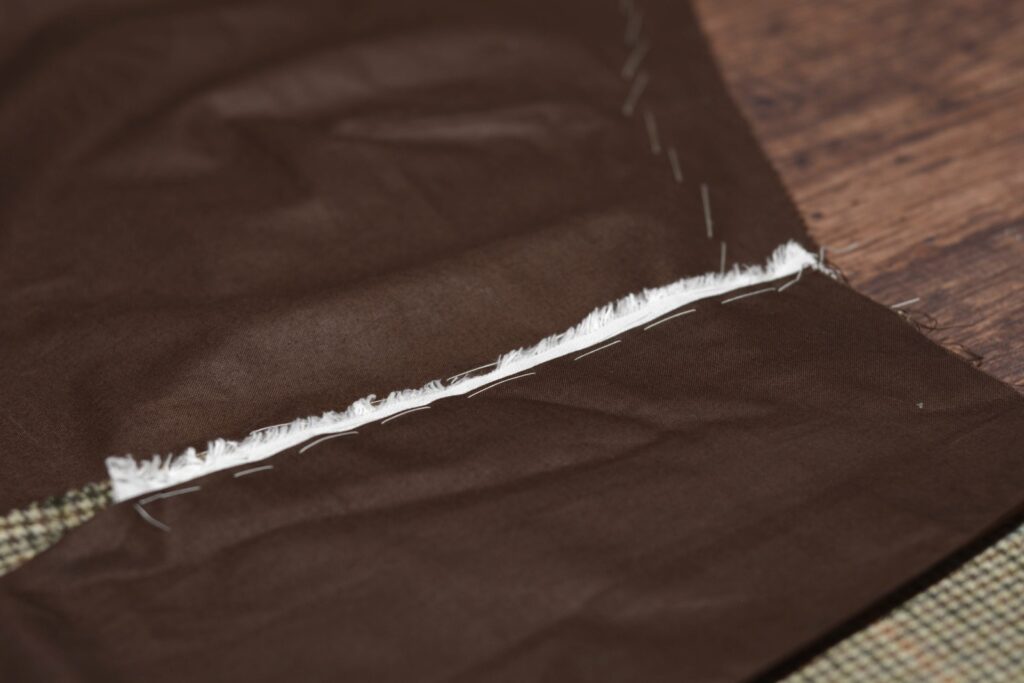
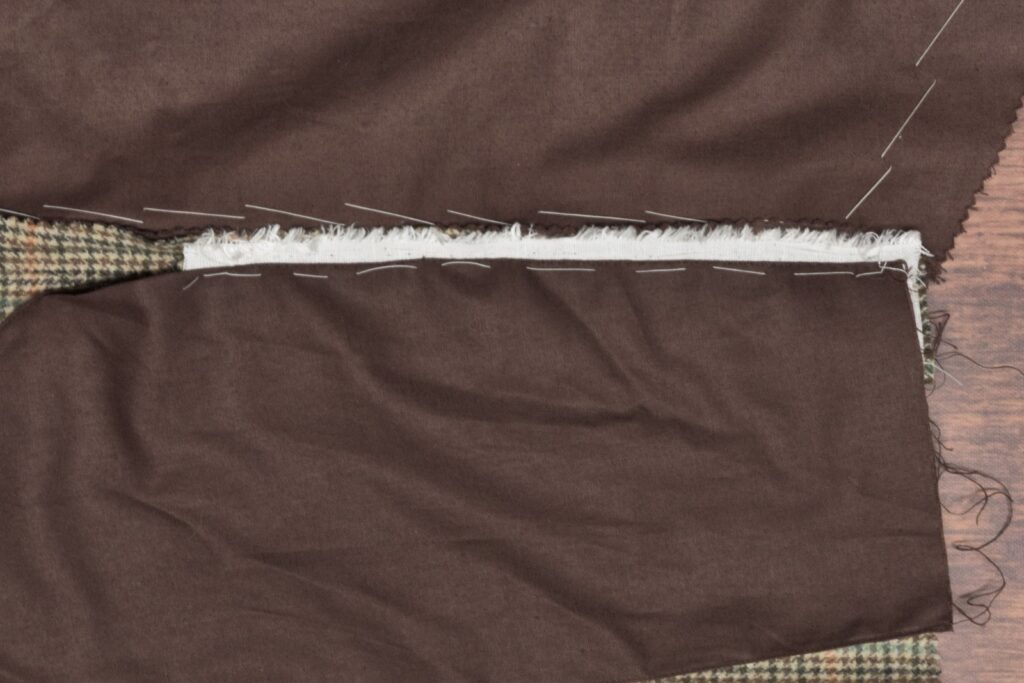
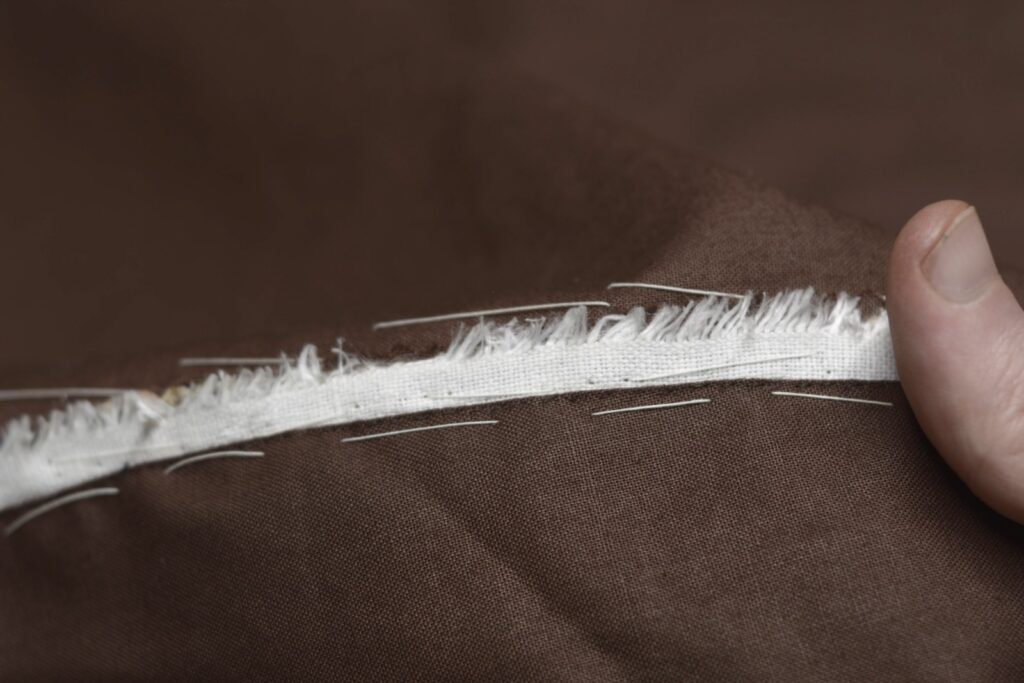
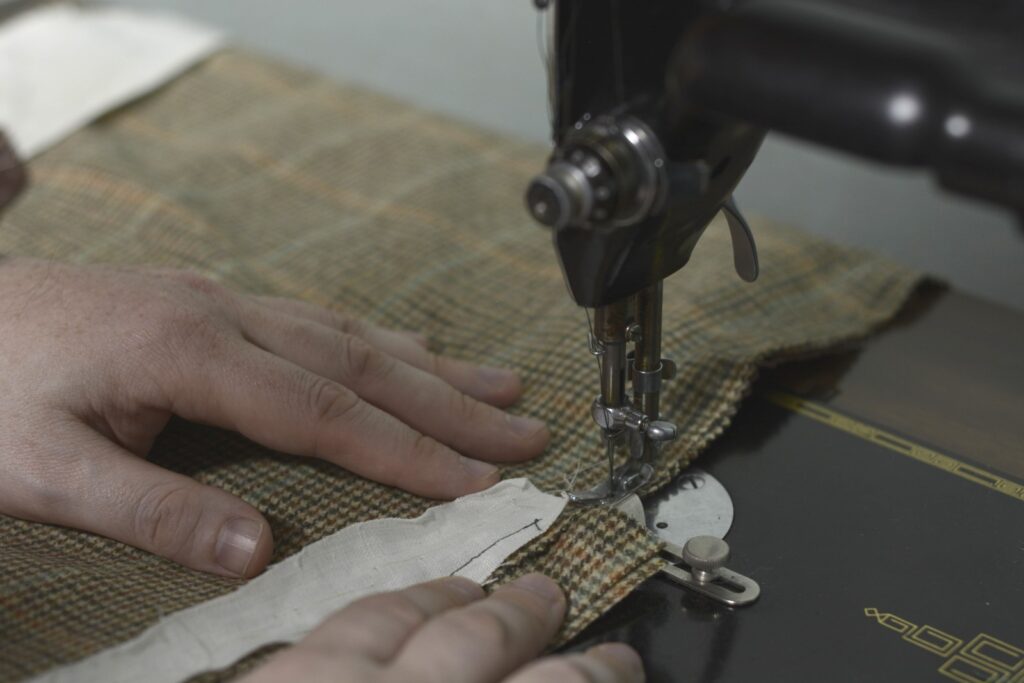
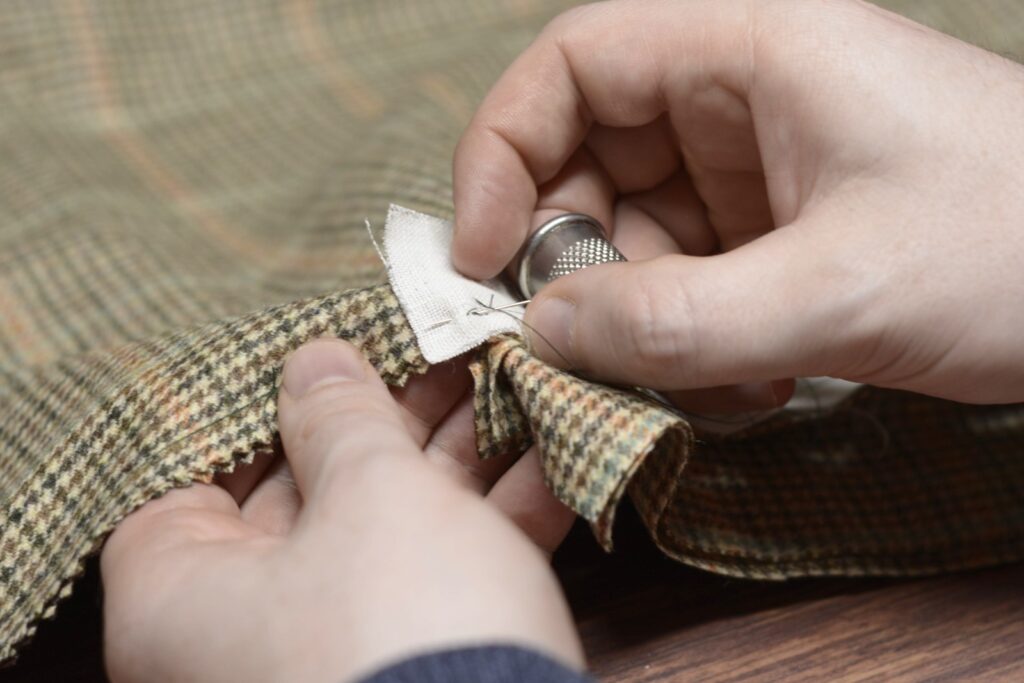
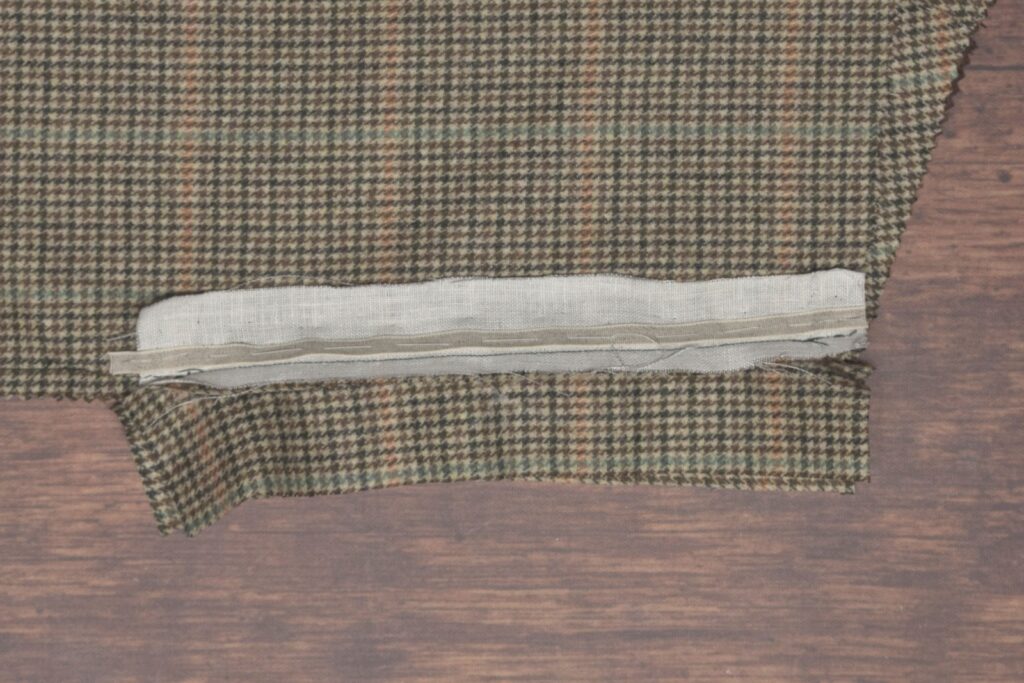
Stitch the pocket bag to the facing using a back stitch or half back stitch about 1/8 from the edge, being sure not to let the stitching show through to the right side of the facing. The stitches here are going through the pocket bag, the linen stay, and the seam of the facing underneath. Stitch from the waist down to the bottom of the pocket opening (1/2″ from the end of the facing).
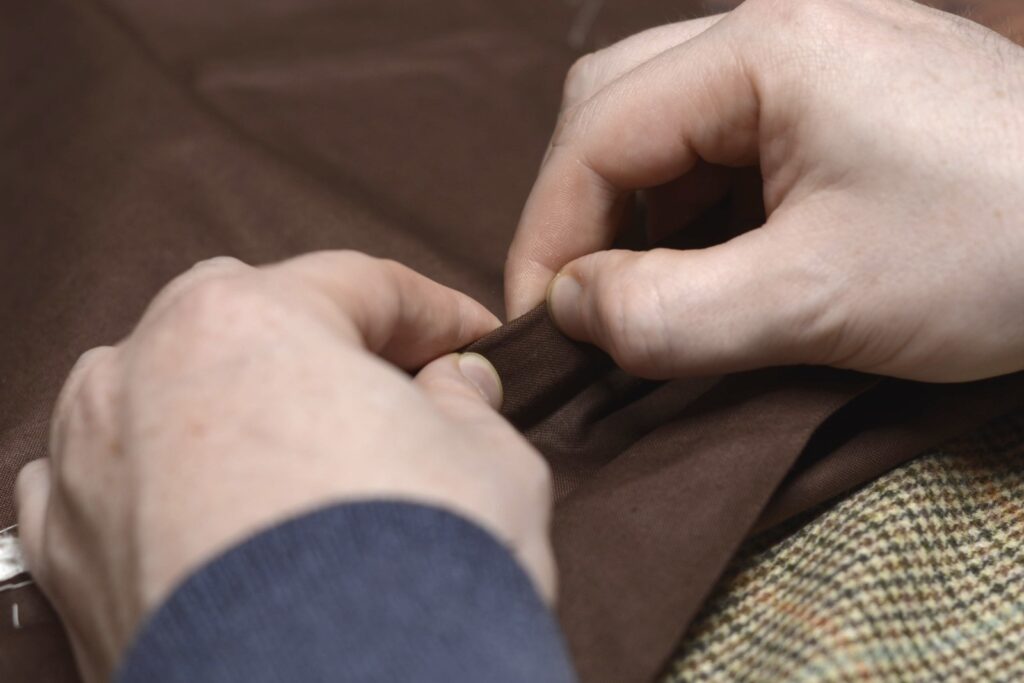
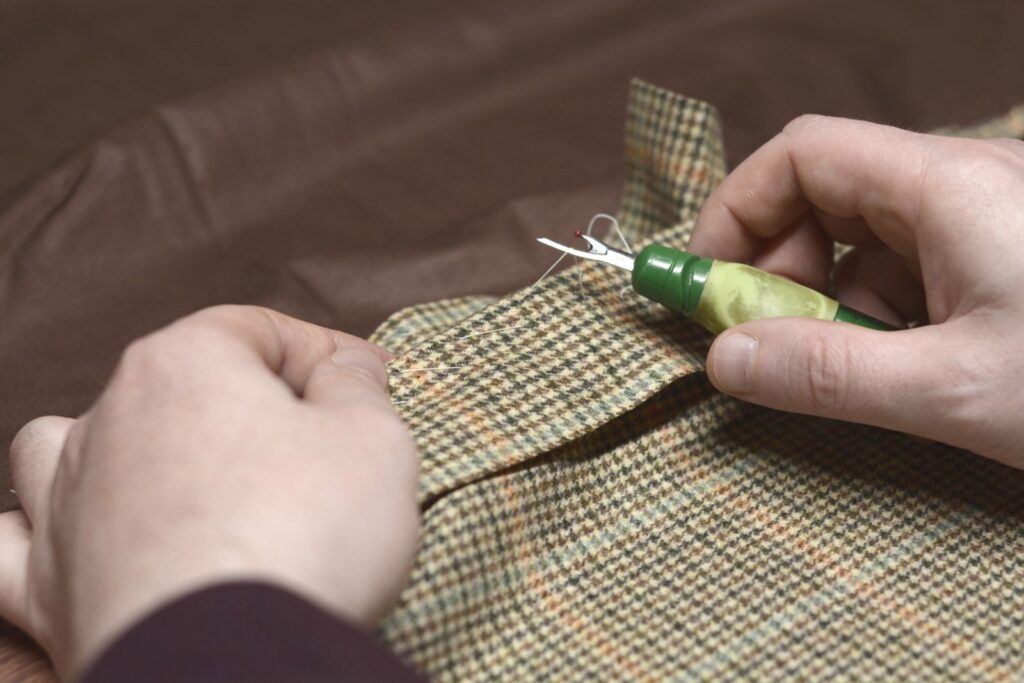
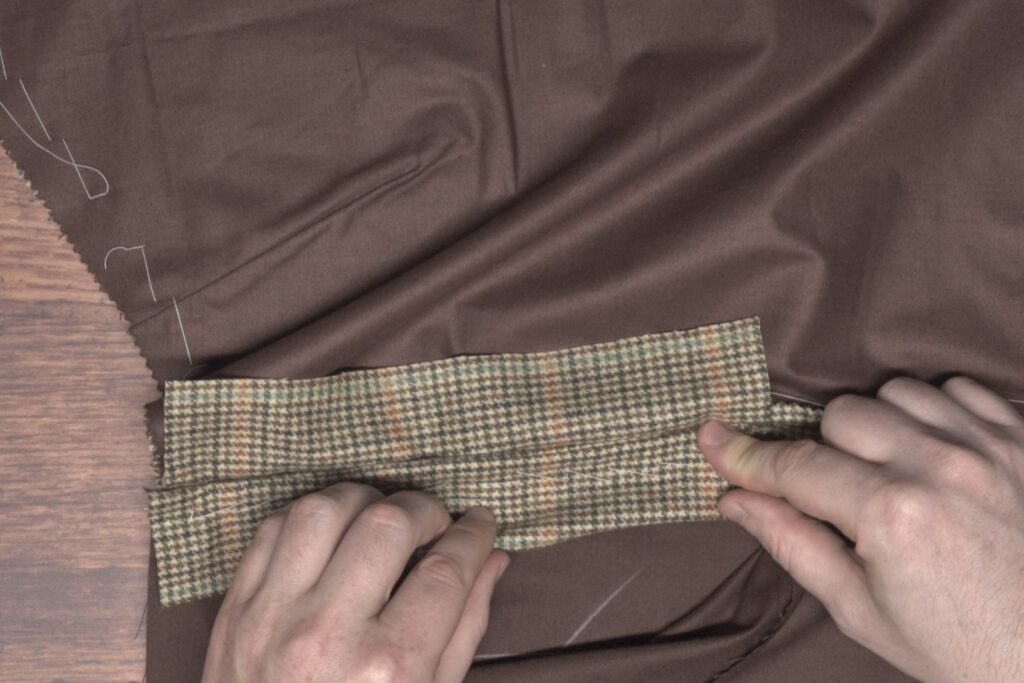
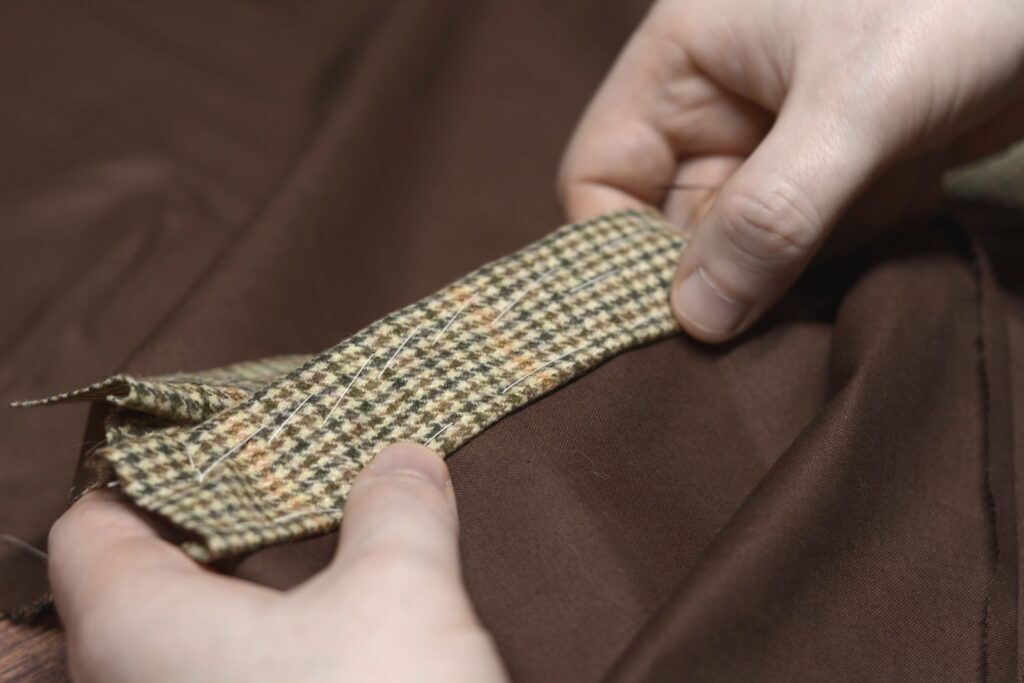
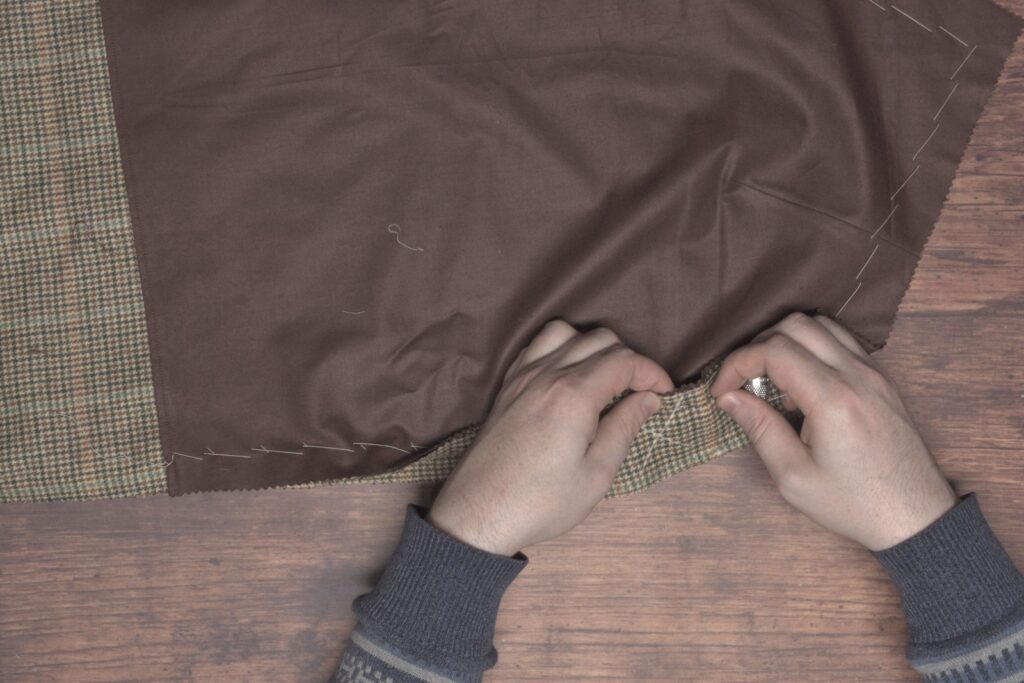
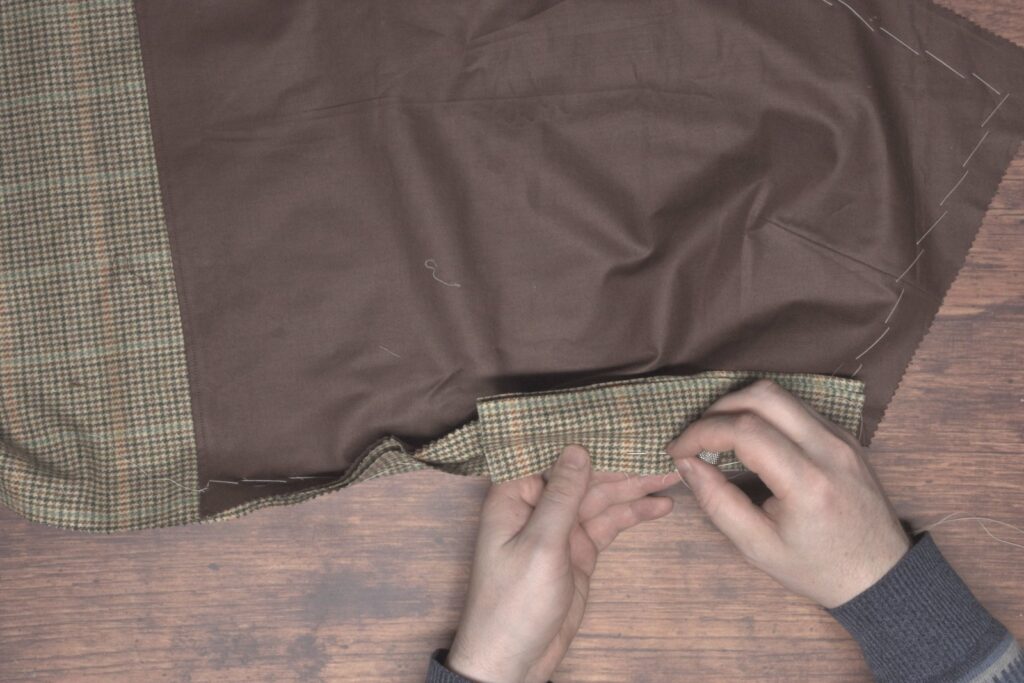
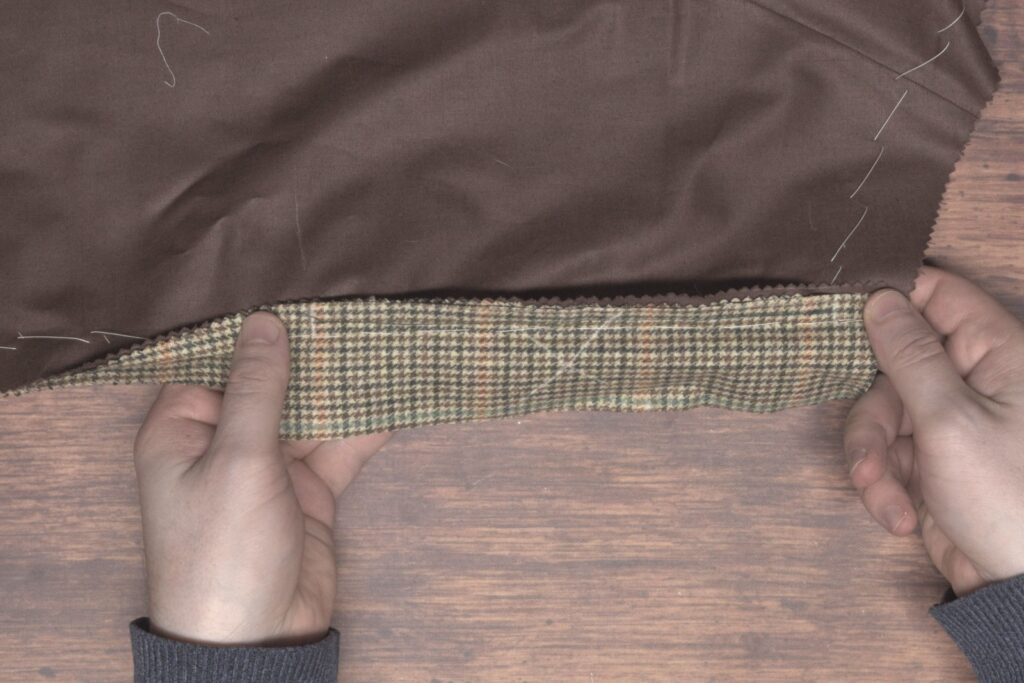
This next step can get a little tricky, as the facing has the tendency to move out of place as you’re working, and you can’t really see what you’re doing. Baste the pocket facing to the bag from the outside, using your other hand to adjust the facing so that it lays smoothly. It can take a couple of tries if you’re not used to it!
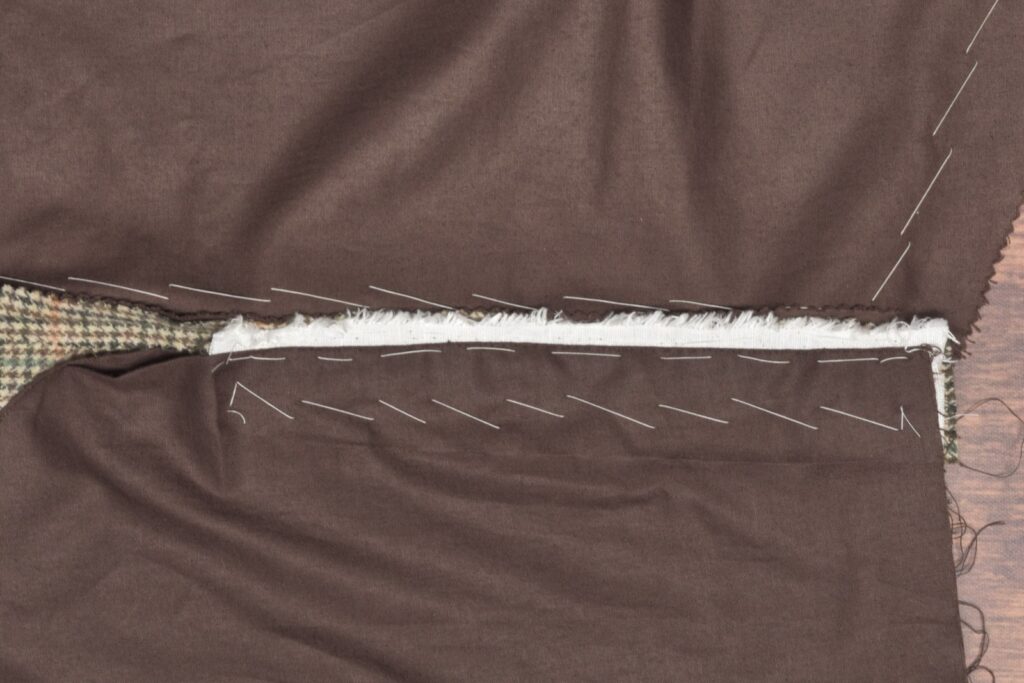
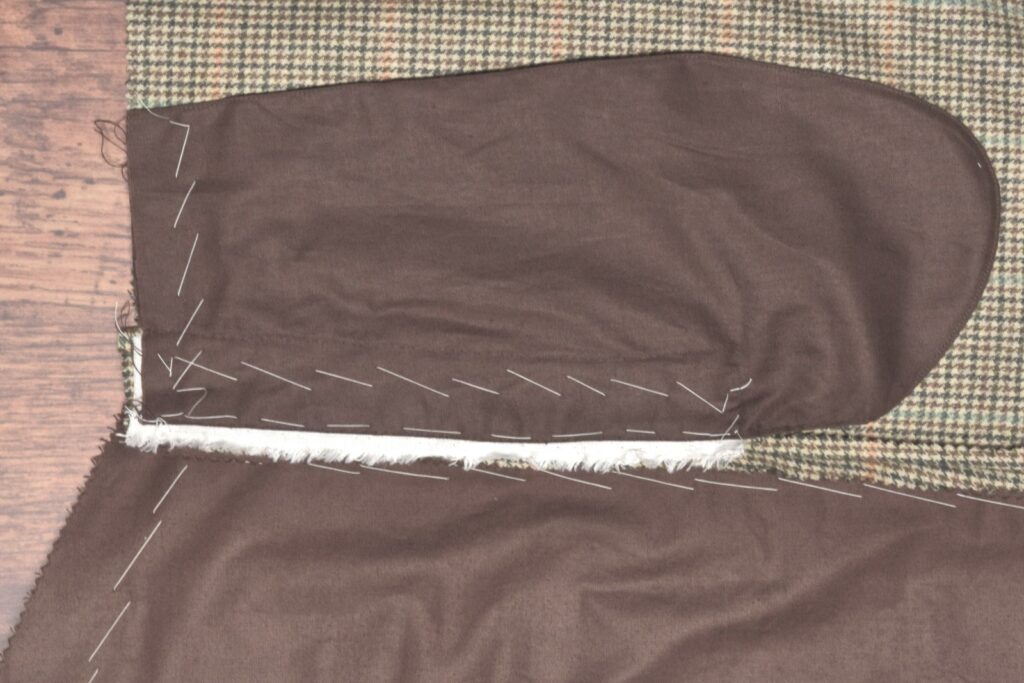
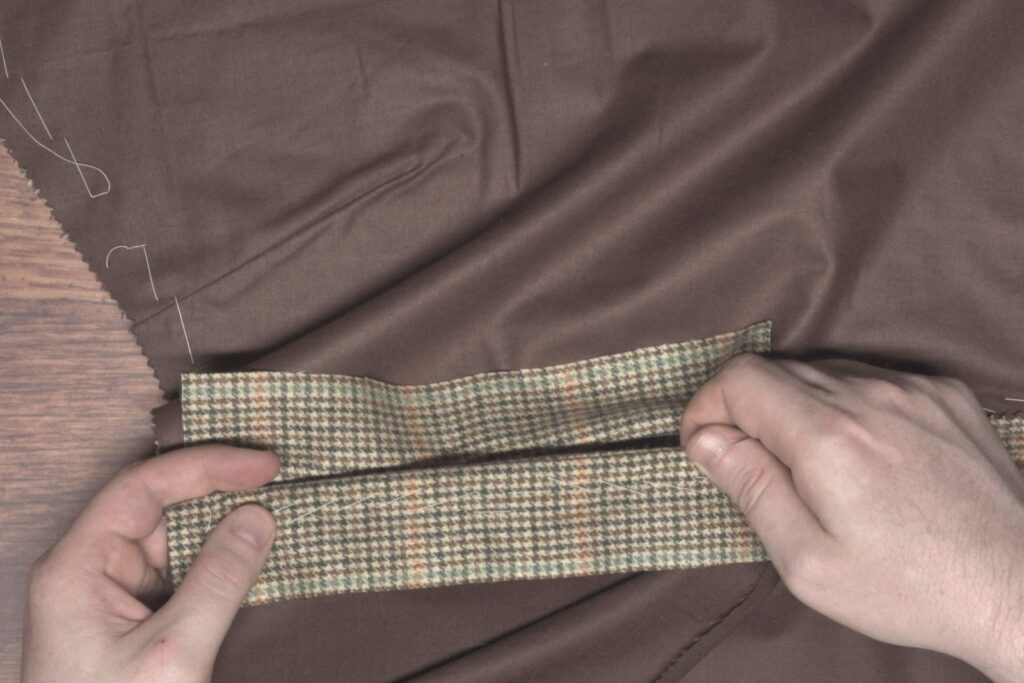
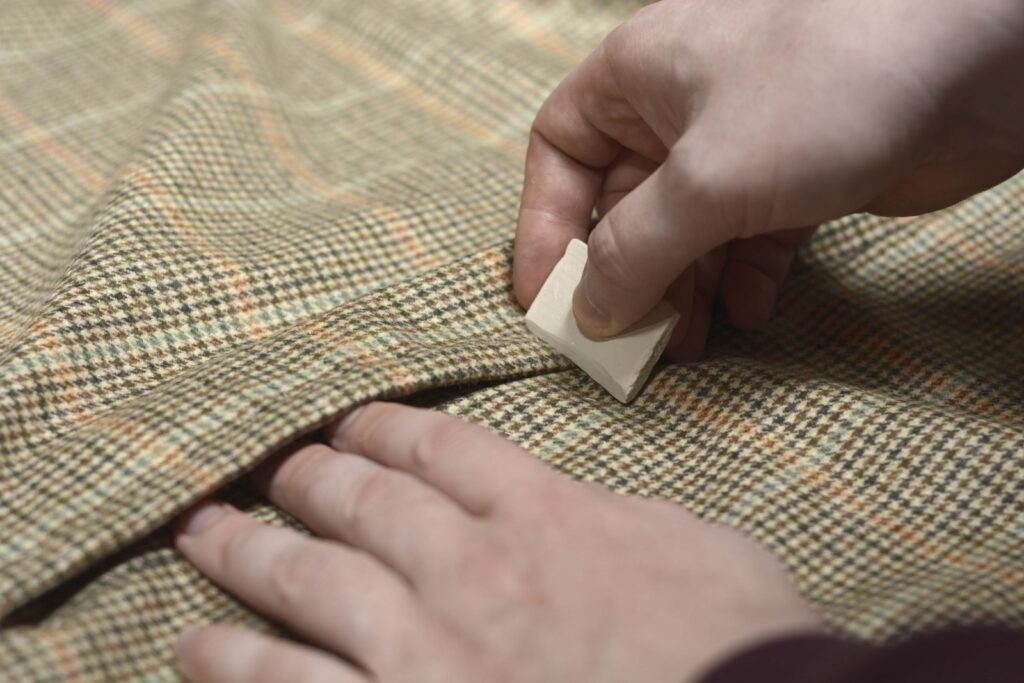
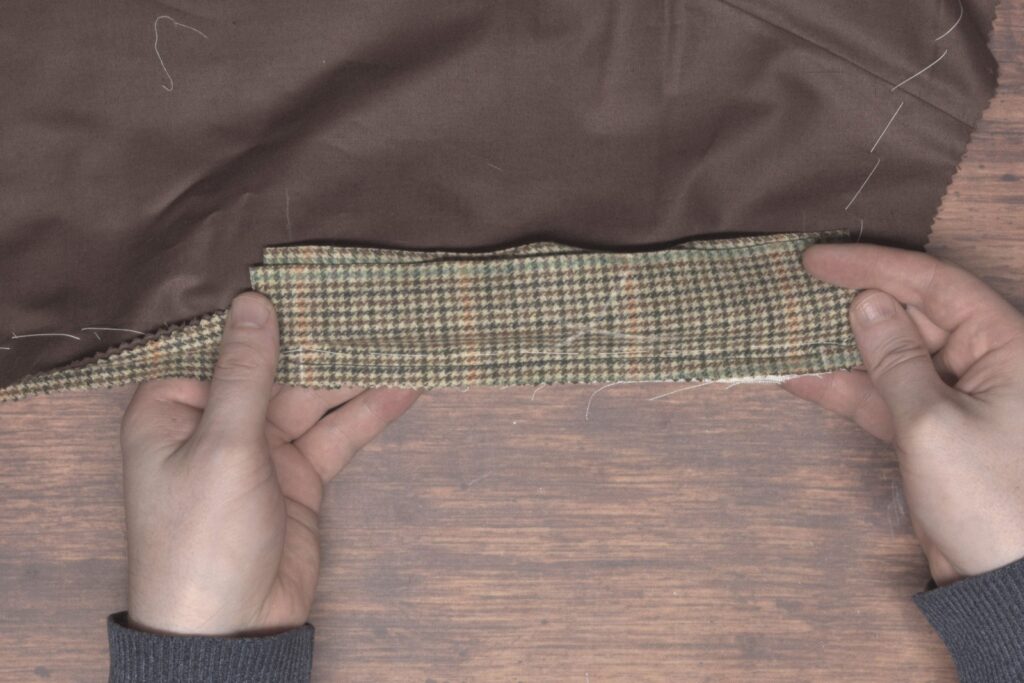
With the facing basted securely in place, we need to determine the outline of the facing and make it apparent on the pocket bag for stitching. To do this, the easiest way is to fold the pocket bag around the facing, making sure there is no excess, and creasing the fold with your finger nail.
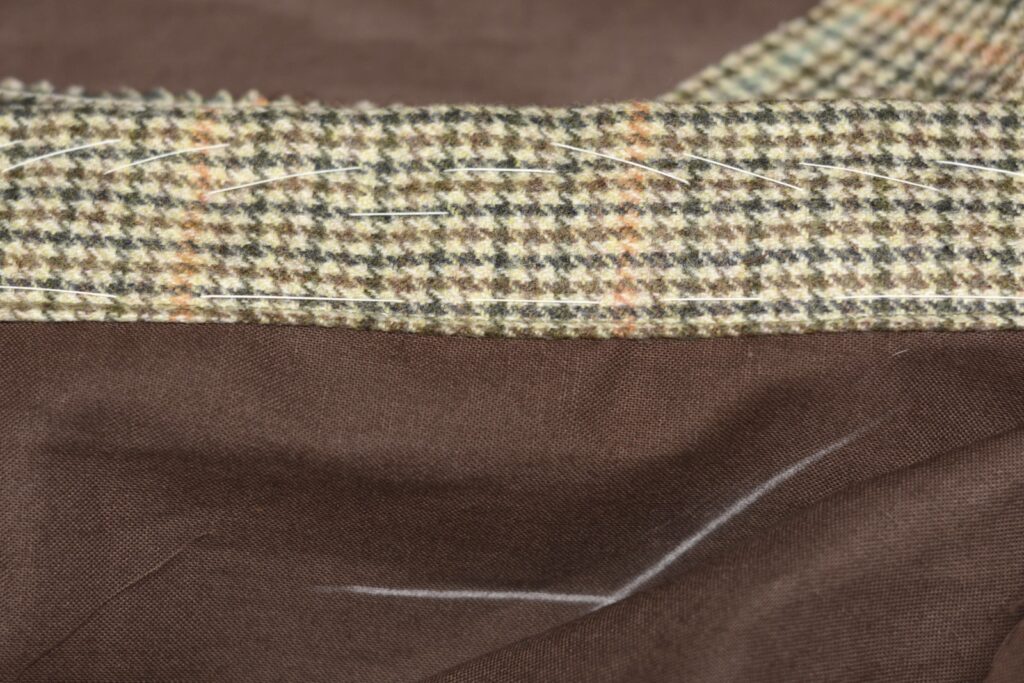
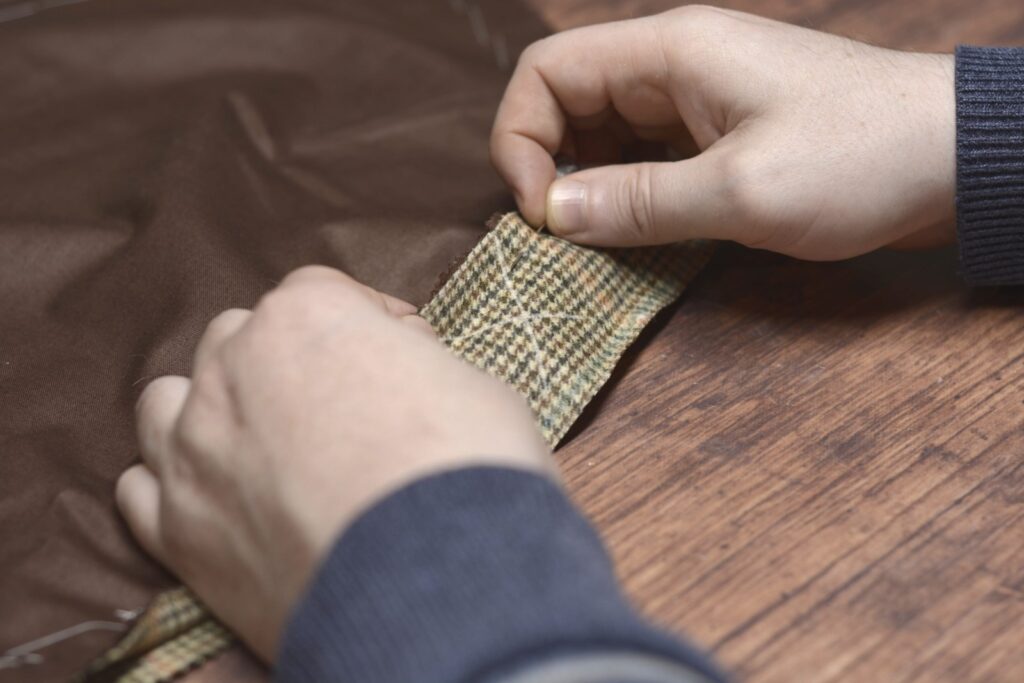
Dont’ forget to mark the short lower end of the facing as well.
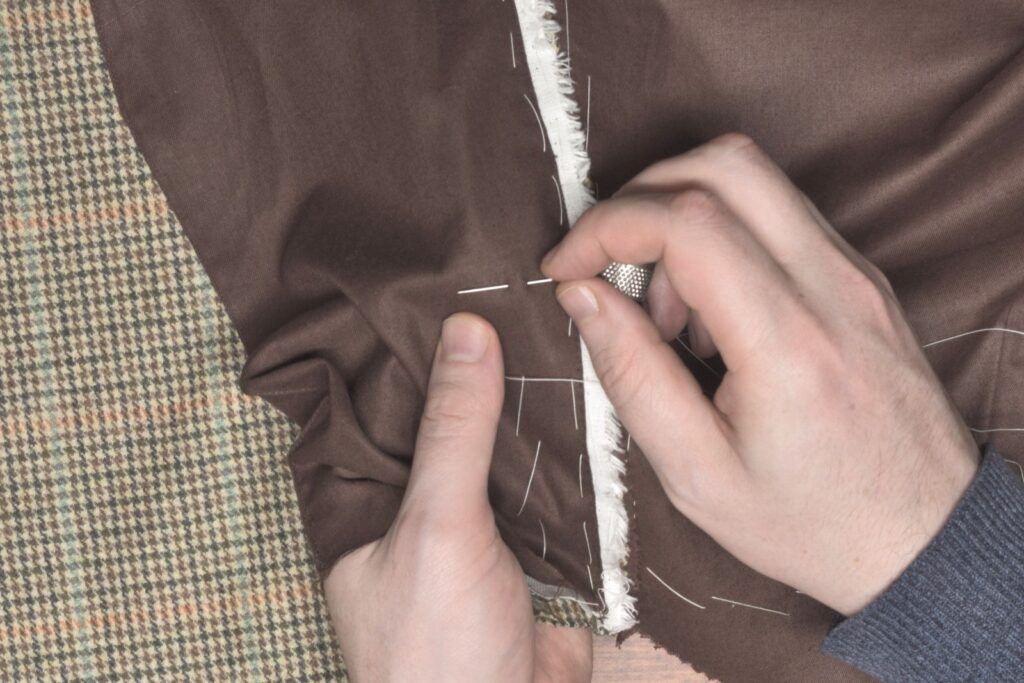
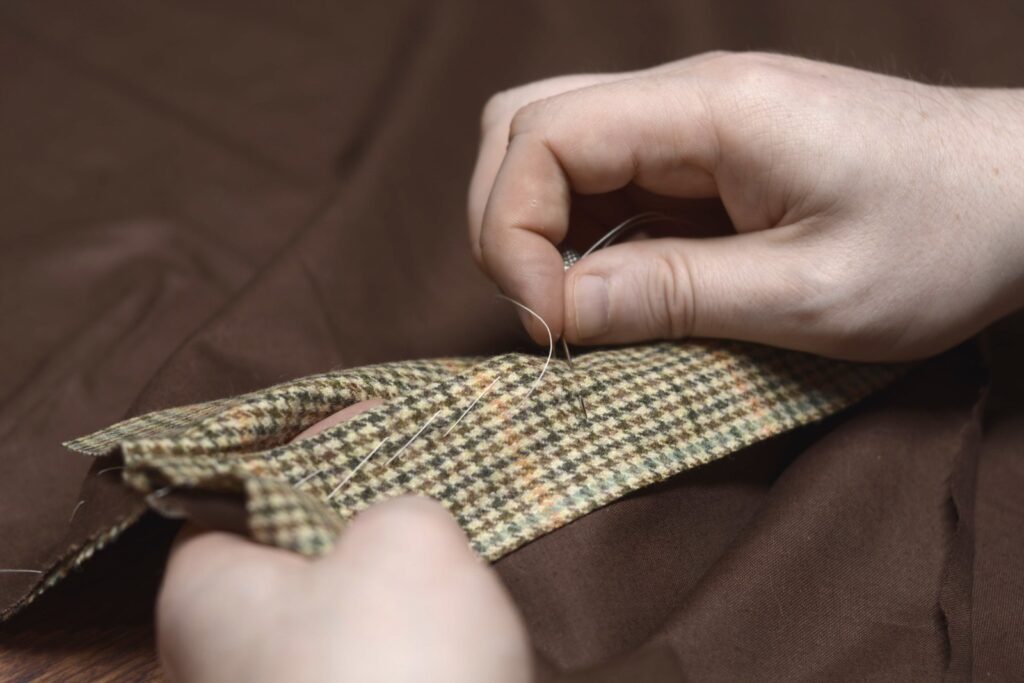
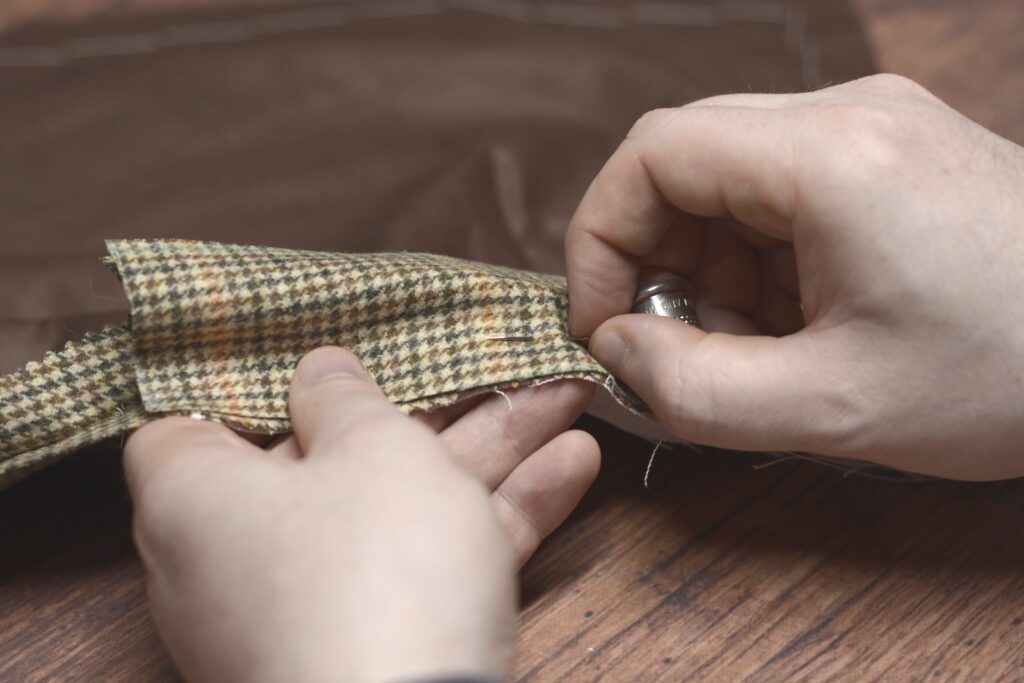
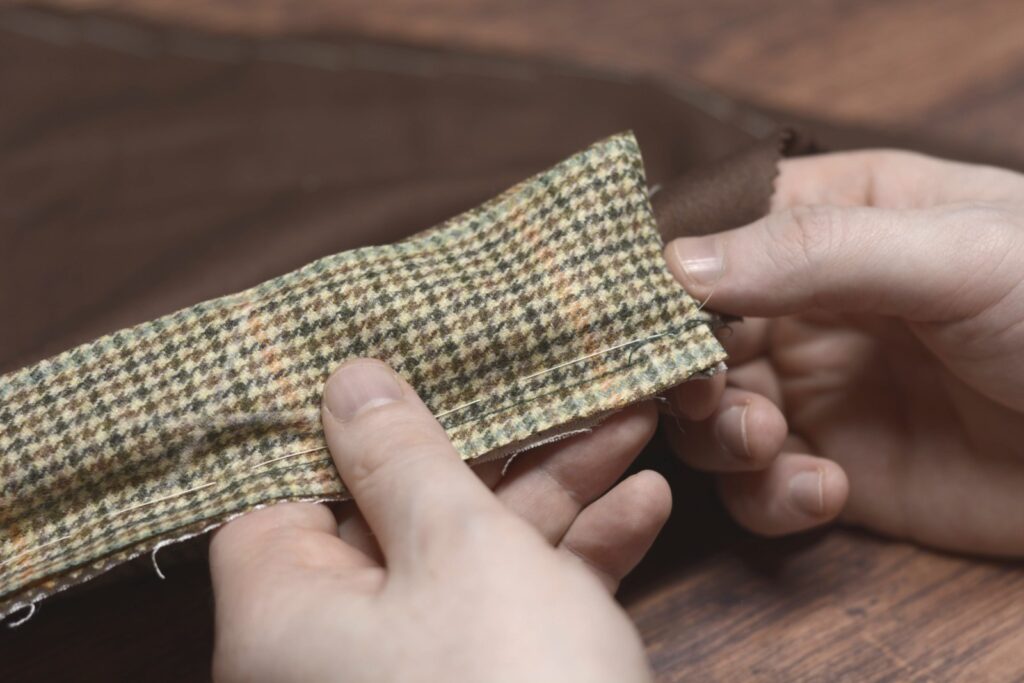
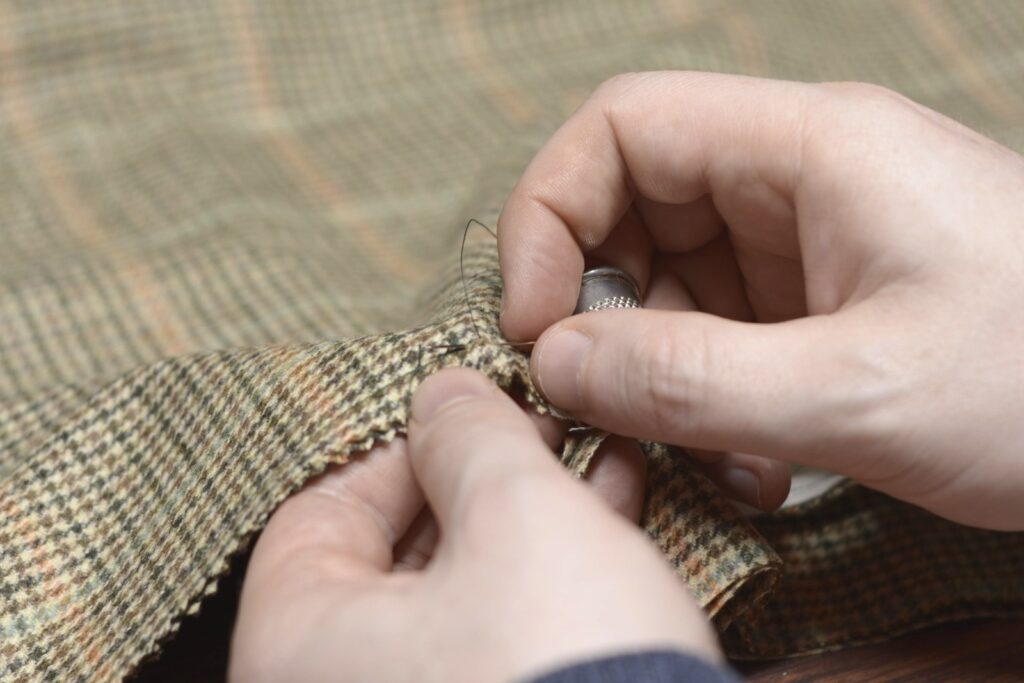
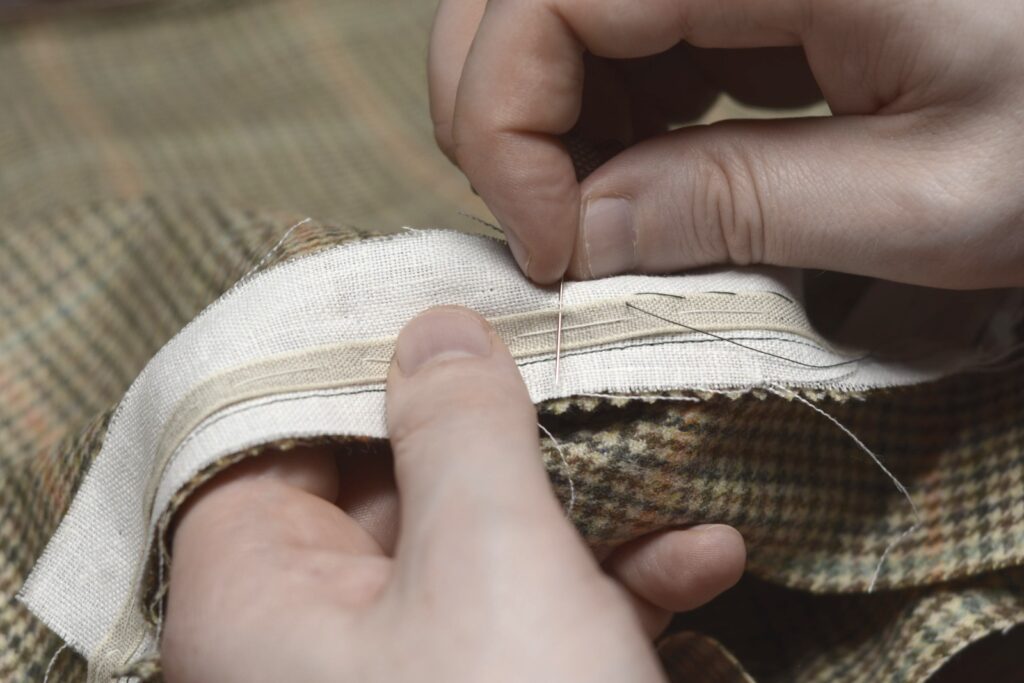
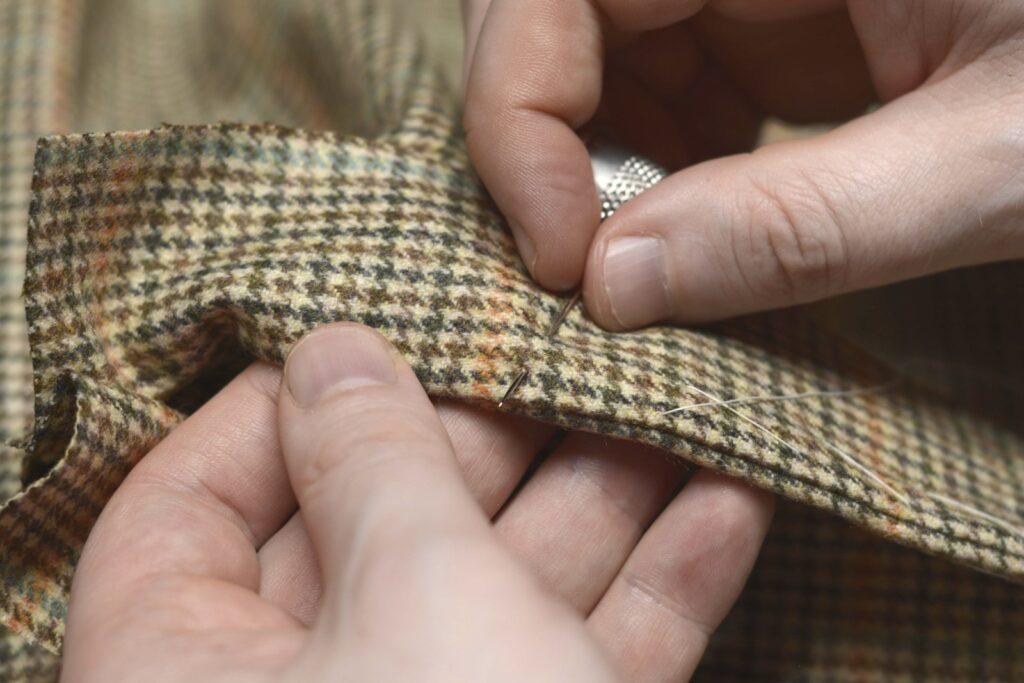
Stitch the pocket bag to the facing by hand using a back stitch or a half back stitch, from the bottom edge of the facing to the waist seam. I prefer the half back stitch as the stitches are tinier and a little neater looking. Keep your other hand underneath to help hold the facing in place and guide your stitches.
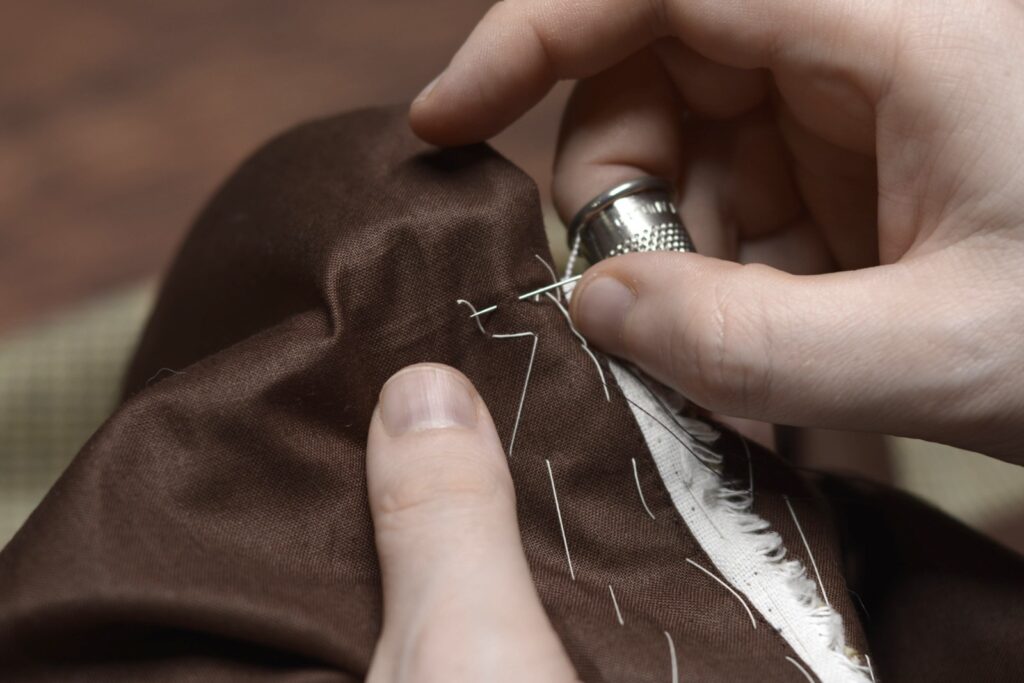
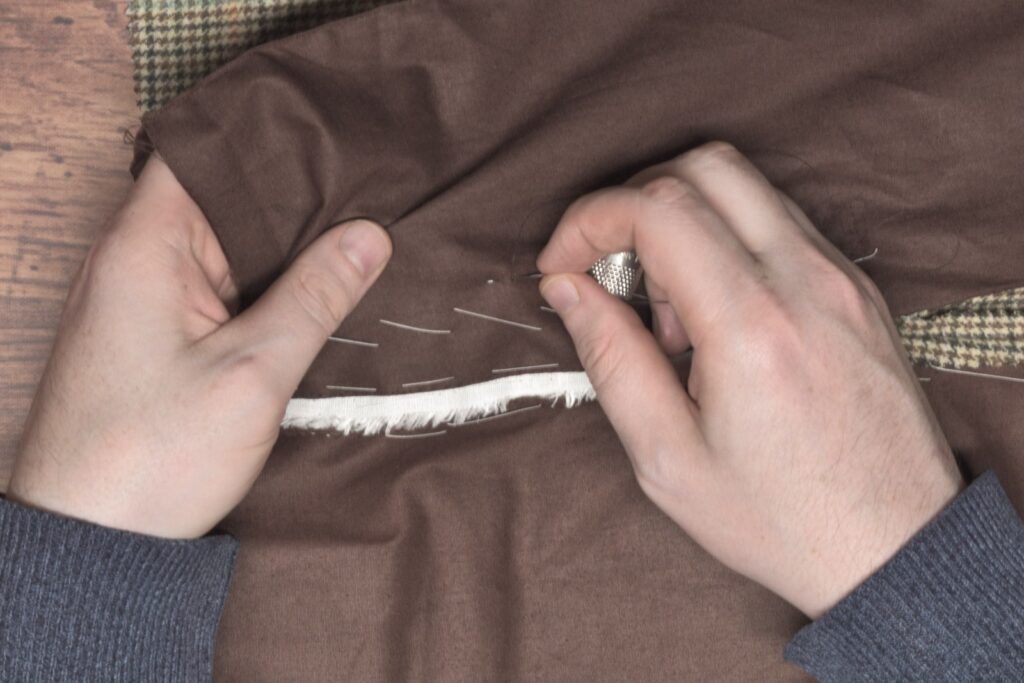
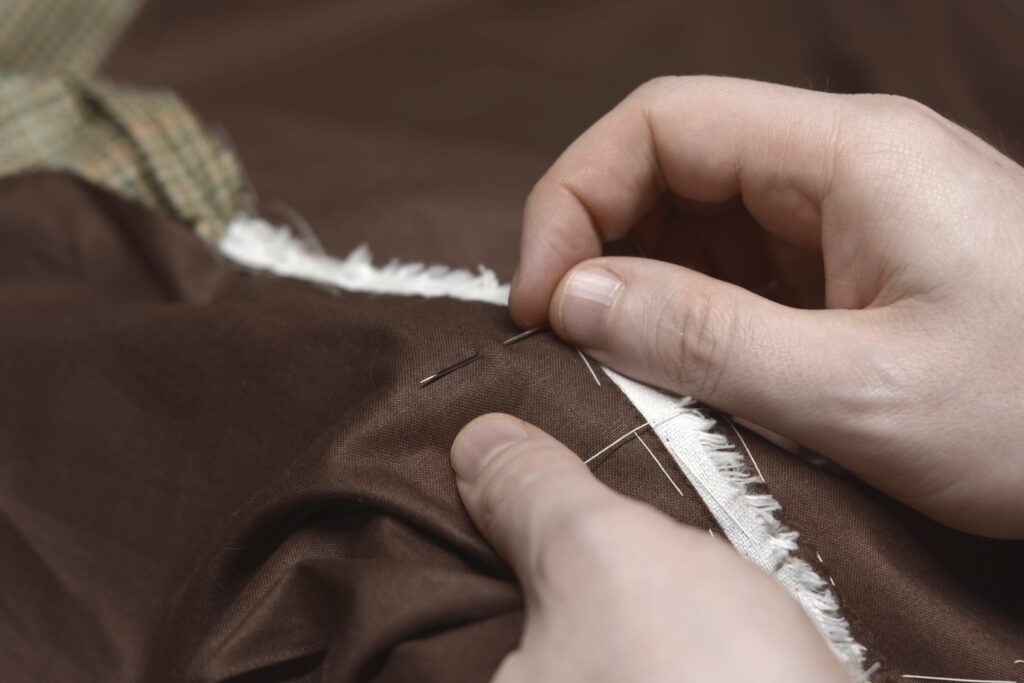
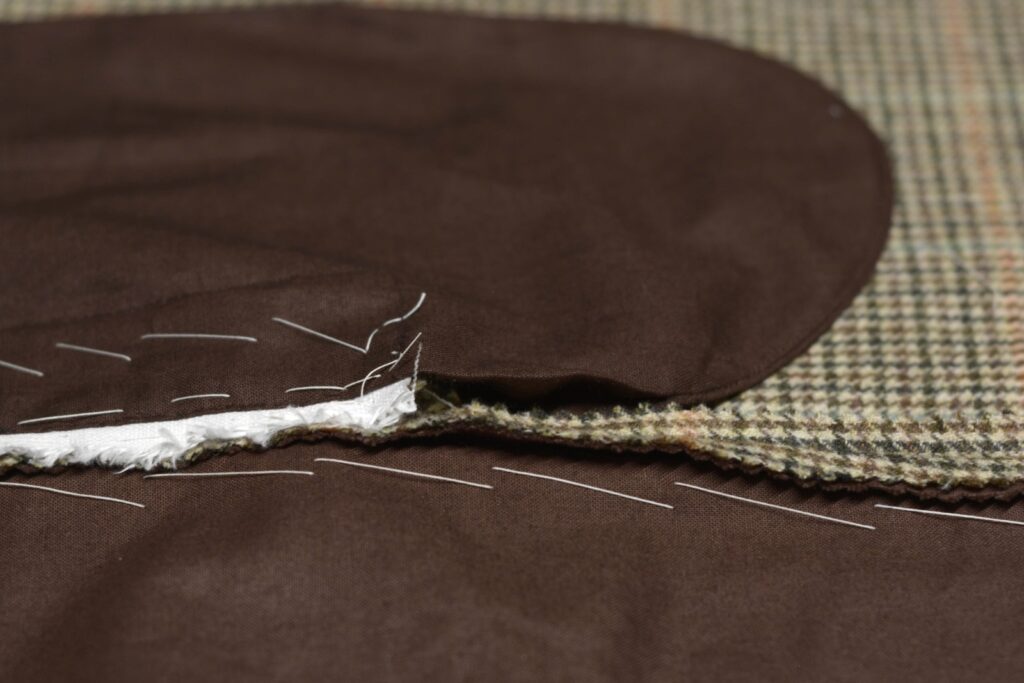
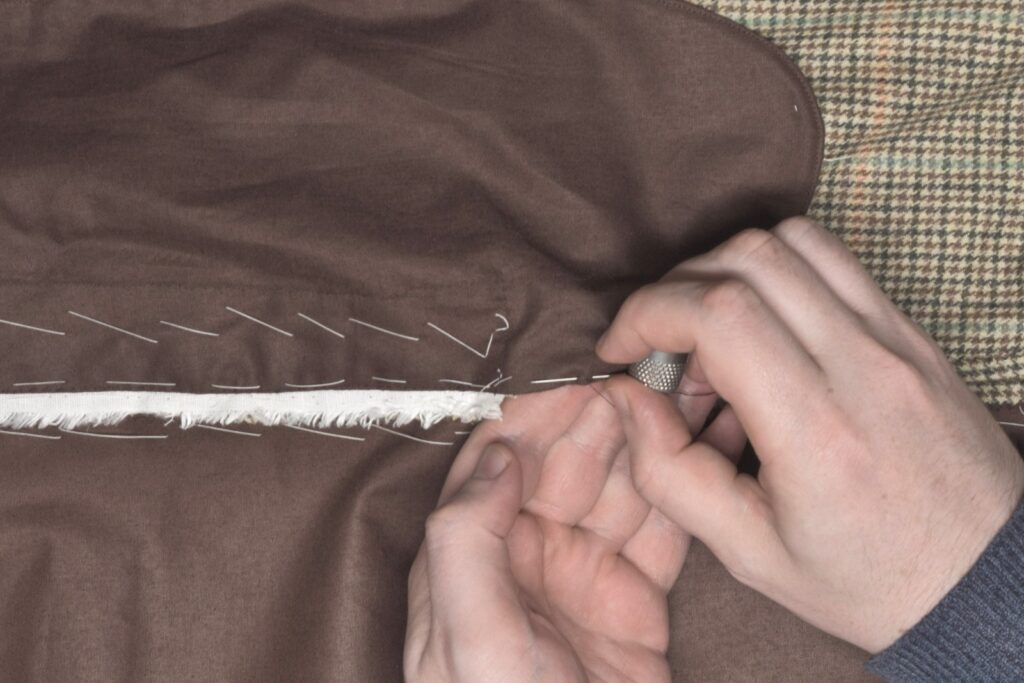
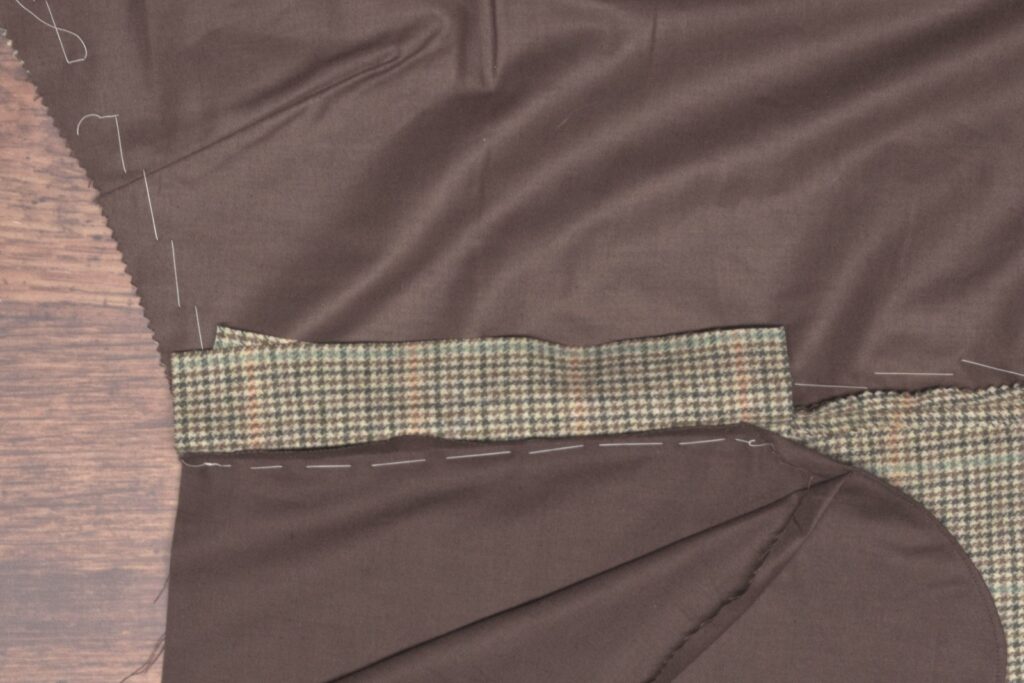
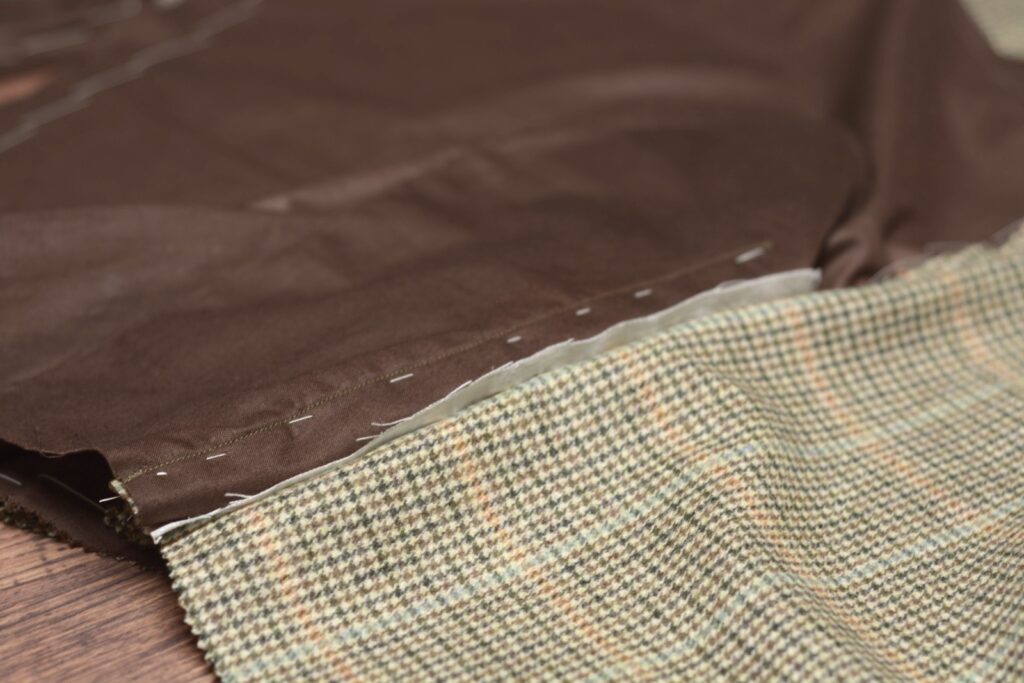
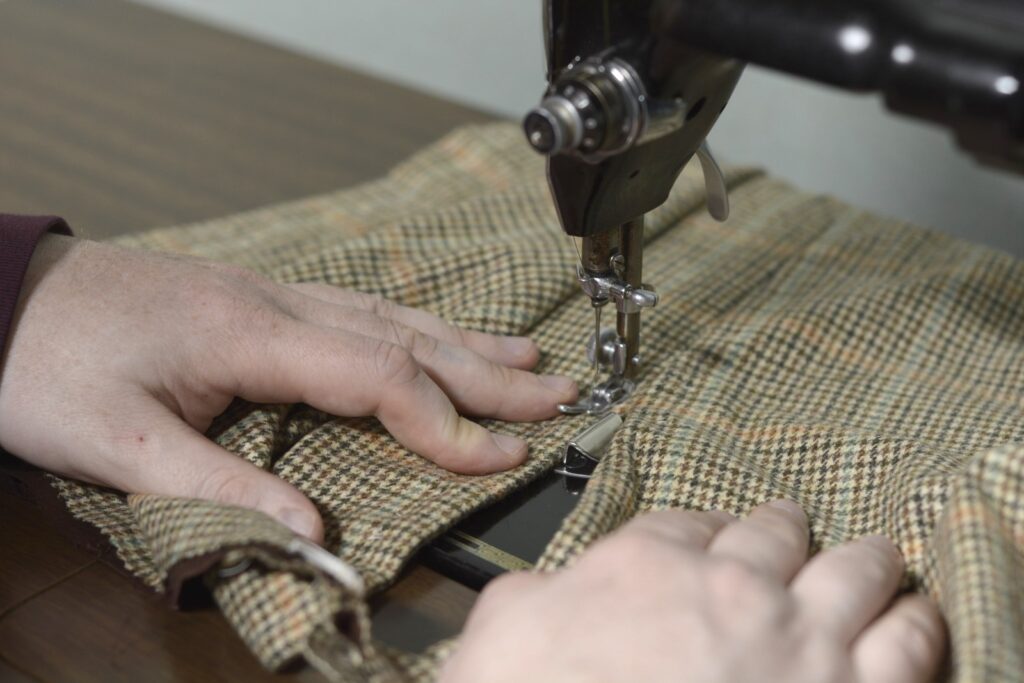
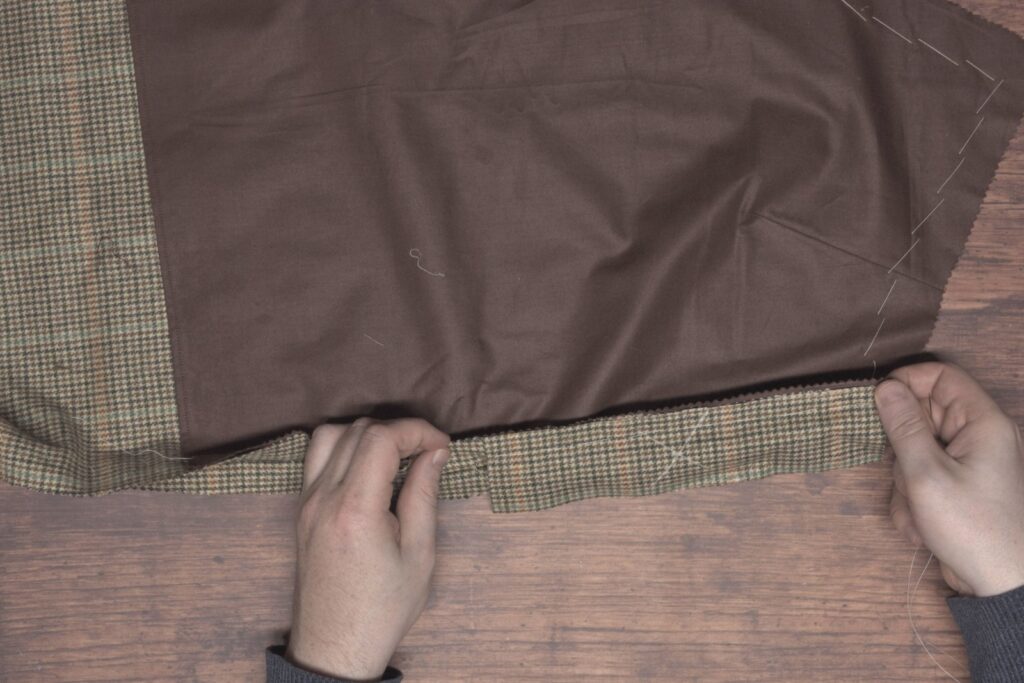
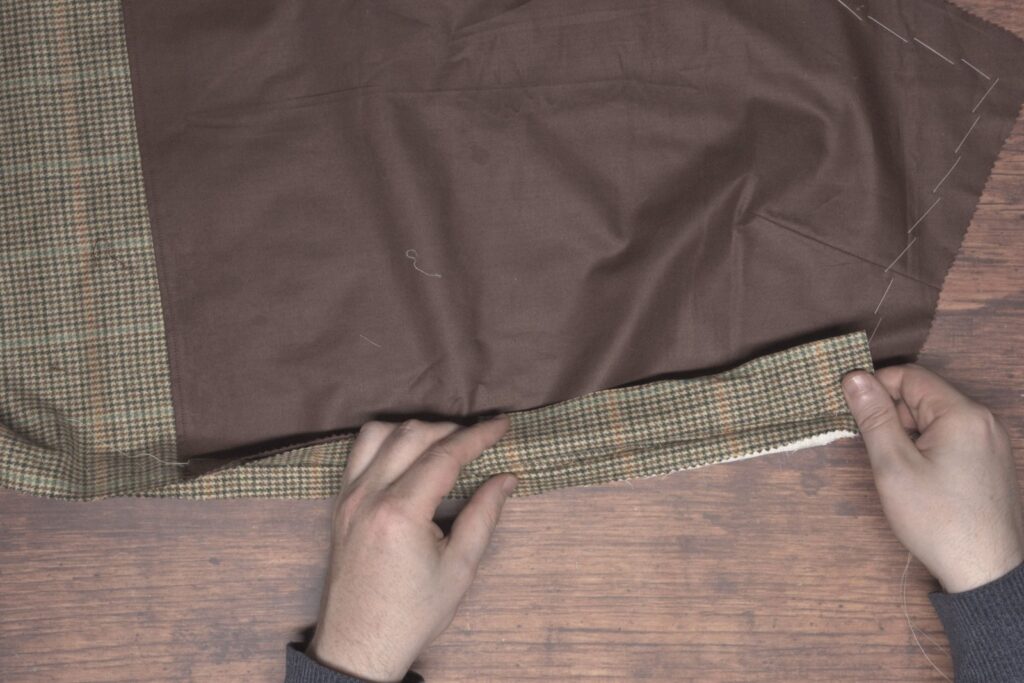
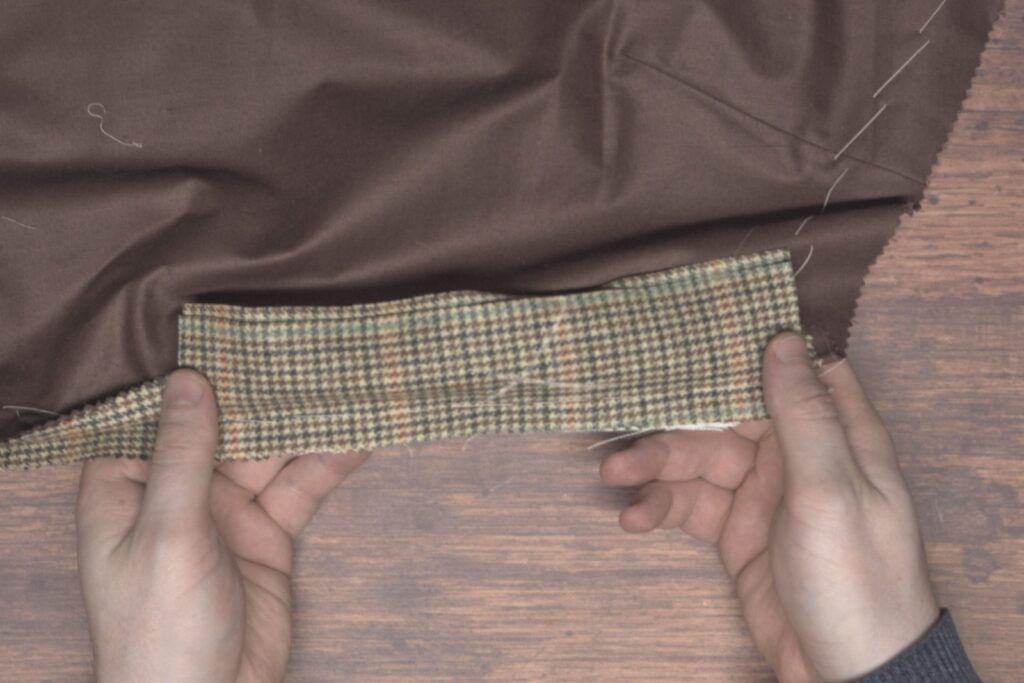
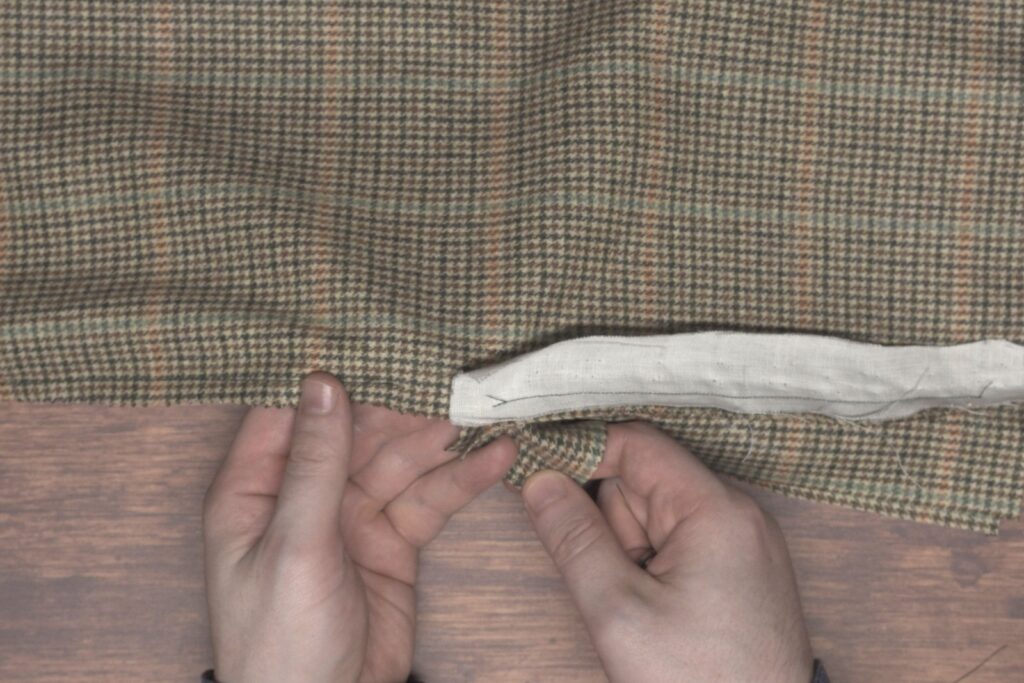
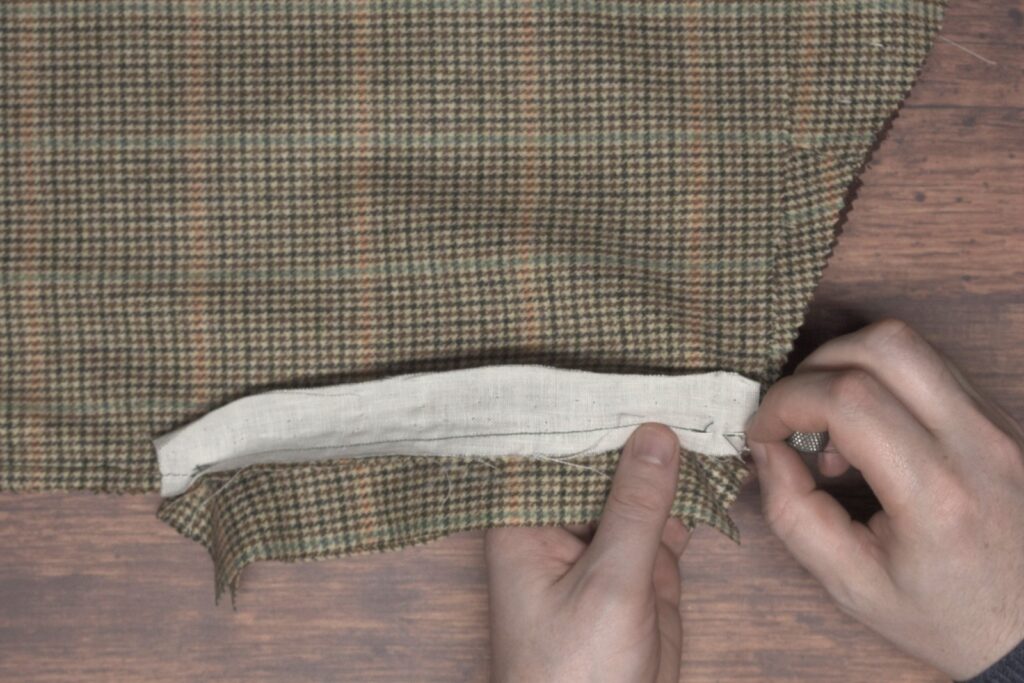
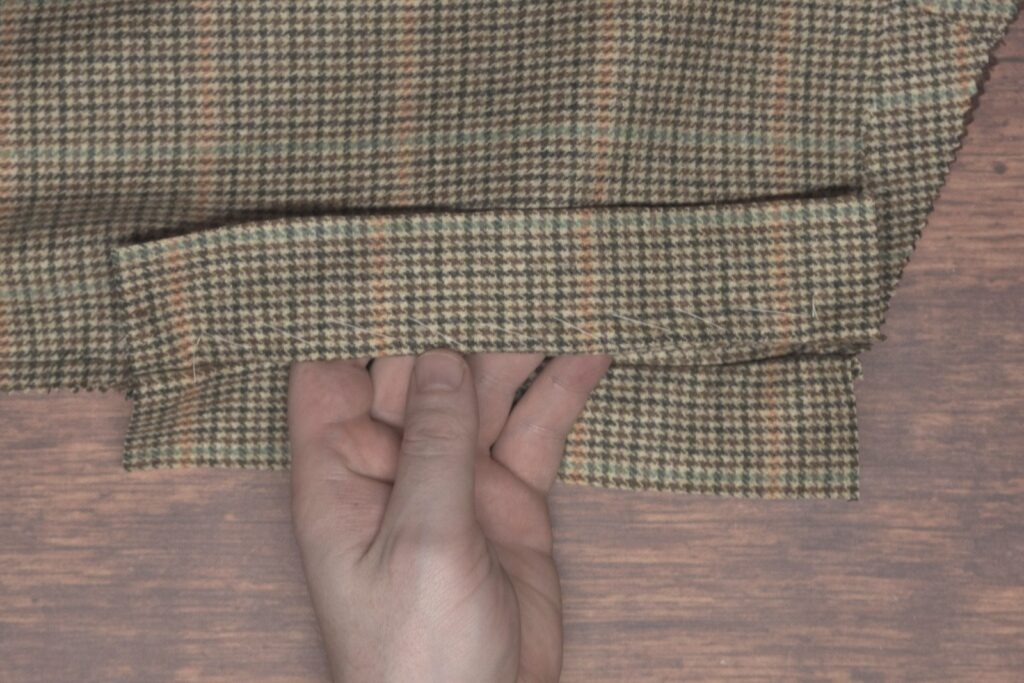
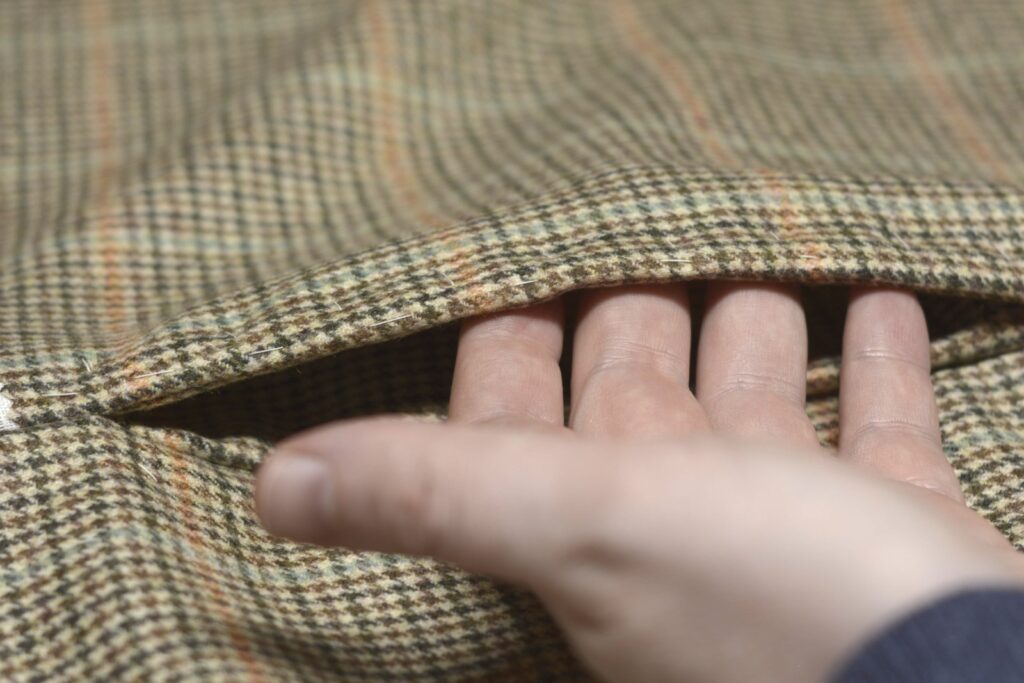
There’s just one small opening left to close on the pocket bag, the area below the facing. You can baste it closed first if you have a larger opening, but I had just an inch and a half or so. Stitch the bag closed with a back stitch or half back stitch. When you get to the lowest 1/2″ of the facing, stitch through all layers – the lower facing and seam allowance, four layers of the pocket bag, and the upper facing and seam allowance, for the strongest finish. You may have to use a prick stitch – pulling the needle all the way through for each individual stitch – if the layers are thick here.
Finally, position the pocket bag in place along the front of the trousers, and baste across the top of the pocket through all layers.
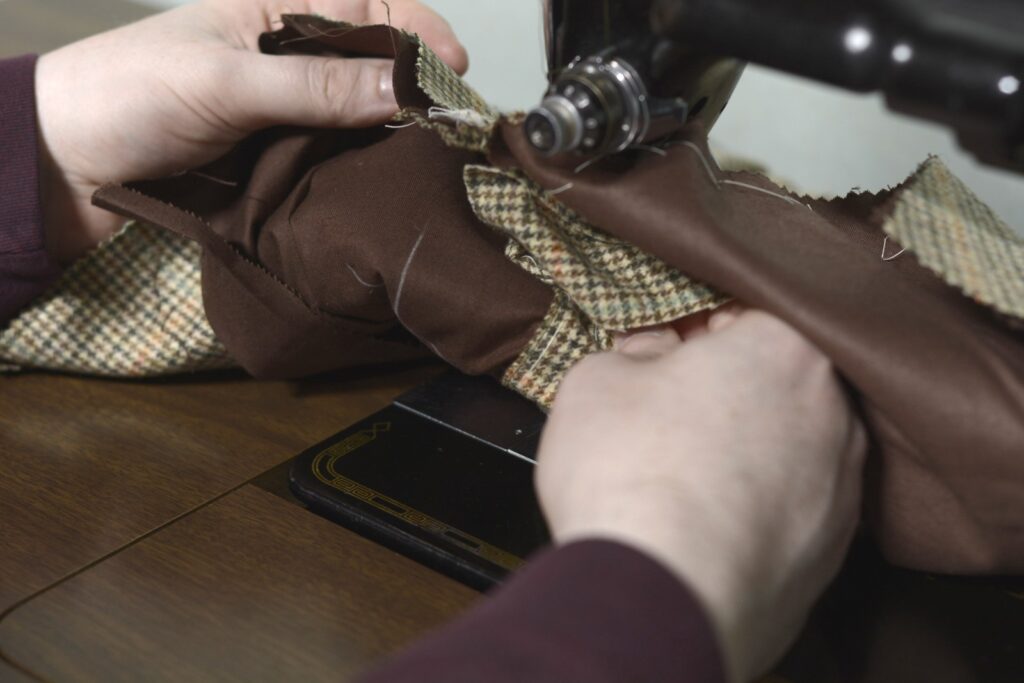
To tie everything together and strengthen the pockets considerably, tack the pockets through all layers by machine or by hand using a side stitch, at the top and bottom of the opening. I start with making a horizontal stitch line across the pocket, about 1/4″ from the seam on either side.
I’ll often make two or three passes for extra strength.
You can continue the tacking by adding decorative stitching below the tacks in a triangular or half moon shape.
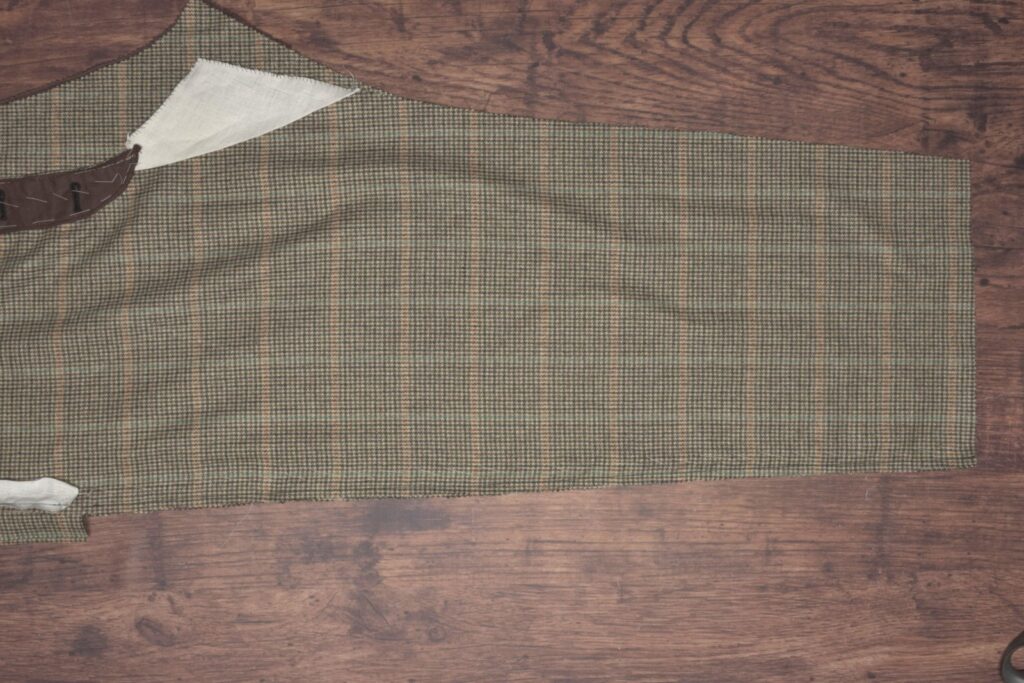
This completes the side seam pockets!
Installing the Pockets – Part I
To begin installing the pockets, lay the trousers wrong side up and move the rear pocket facing out of the way. Remove the basting stitches from the front pocket facing.
We’ll be working entirely with this front facing to begin with. Open up the facing, and then position one of the pocket bags in place so that the fold lines of each are aligned. Align the waist area as well.
Open up the seam allowance of the pocket and baste the pocket in place to the facing. Keep adjust as you go, ensuring the fold of the pocket is snug to the crease of the pocket facing. Try not to stitch all the way through the trousers – just catch the seam allowance of the facing underneath.
Fold the facing back into place and baste securely through all layers about 1/2″ from the edge. You need to keep enough of the facing free on the other long edge to stitch later on.
It was a little awkward for me to stitch and photograph at the same time so I switched directions with the basting stitches.
Turn under the remaining long edge of the facing and baste securely. If your fabric does not fray, you can leave this as a raw edge, which has the benefit of not being as bulky.
Baste the folded or raw edge down, catching only the pocket bag underneath. Don’t let the stitches catch the trouser front.
It’s very difficult to see in the photo, but fold the trousers out of the way and stitch along the inner edge of the trouser facing. This can be done by machine, or by hand with a back stitch or felling stitch. Just make sure the stitches are going through only the facing and the pocket bag beneath it.
Here’s the stitching from the underside of the pocket.
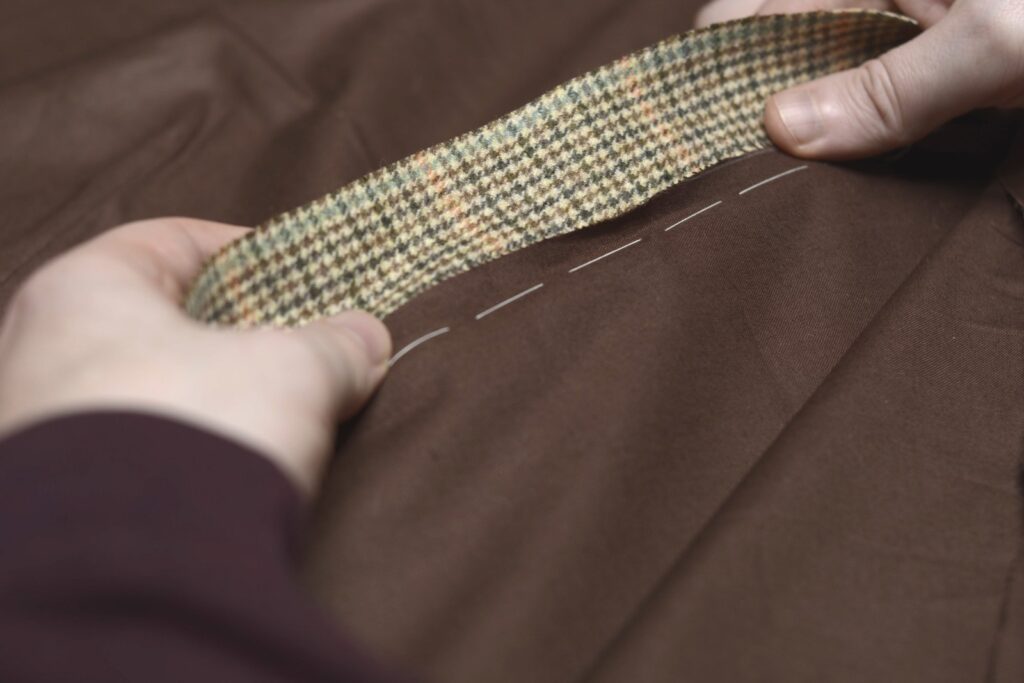
On the right sides of the trousers, mark the bottom and top of the pocket opening on the trouser front.
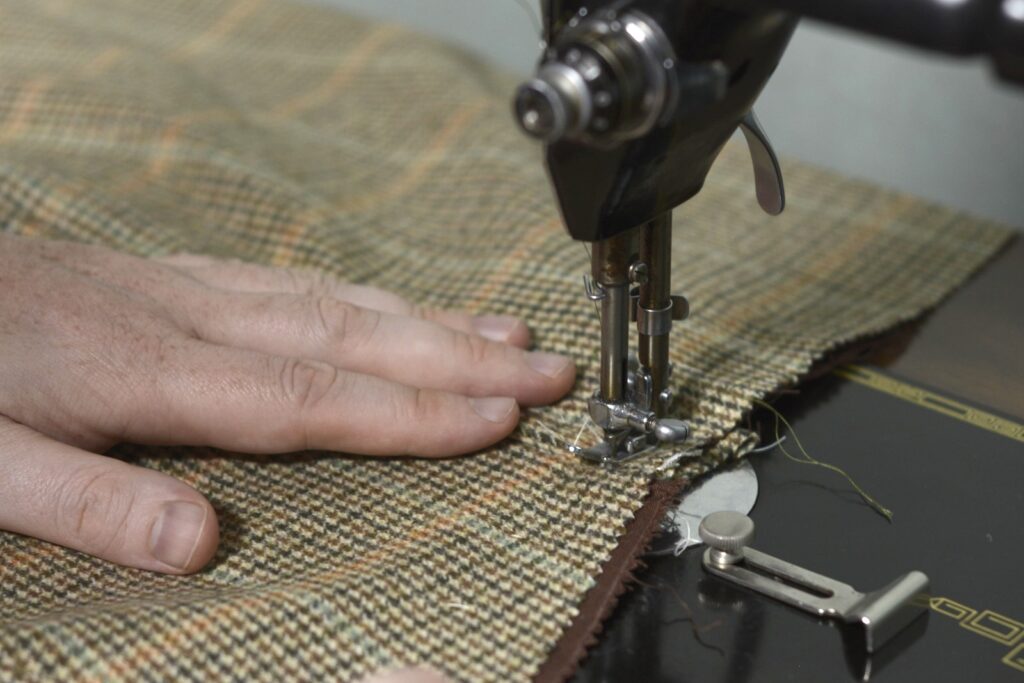
Being very careful to move the pocket bag and any stray trouser pieces out of the way, top stitch the front pocket facing through all layers from mark to mark, about 1/4″ from the edge. You can also do this by hand using a side stitch.
As you’re stitching, I’ve found that the fabric wants to gather towards the edge of the pocket. To prevent this, keep a firm pull on the fabric with your left hand as you sew.
This just looks like a mess, but shows well all of the various things you need to keep out of the way of the top stitching.
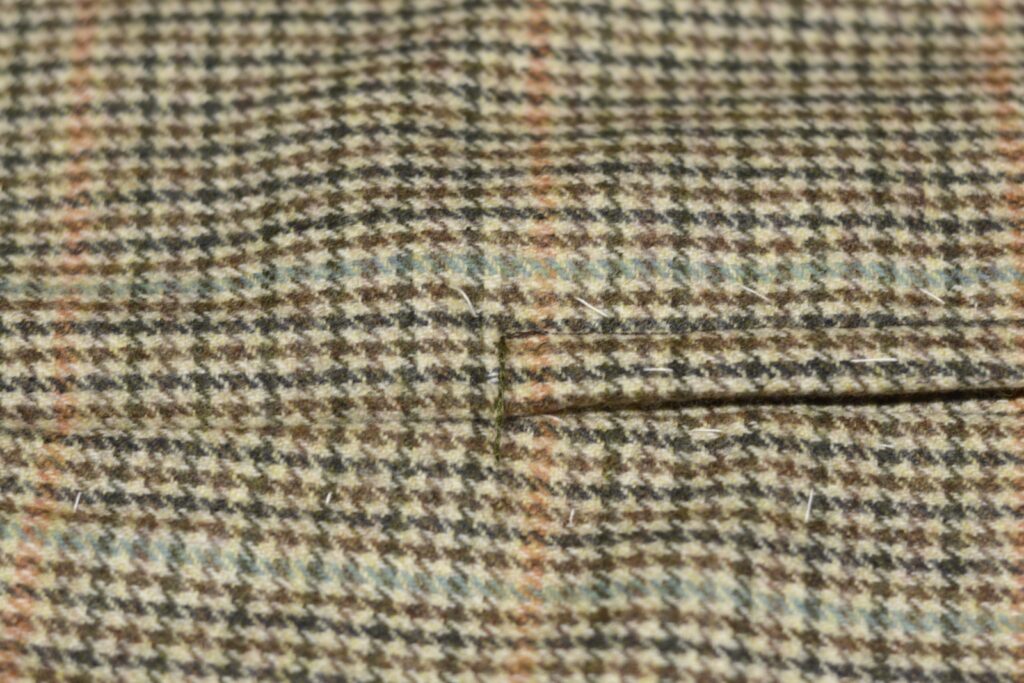
Hard to see, but here is the completed top stitching for the front pocket facing.
The Pocket Bags
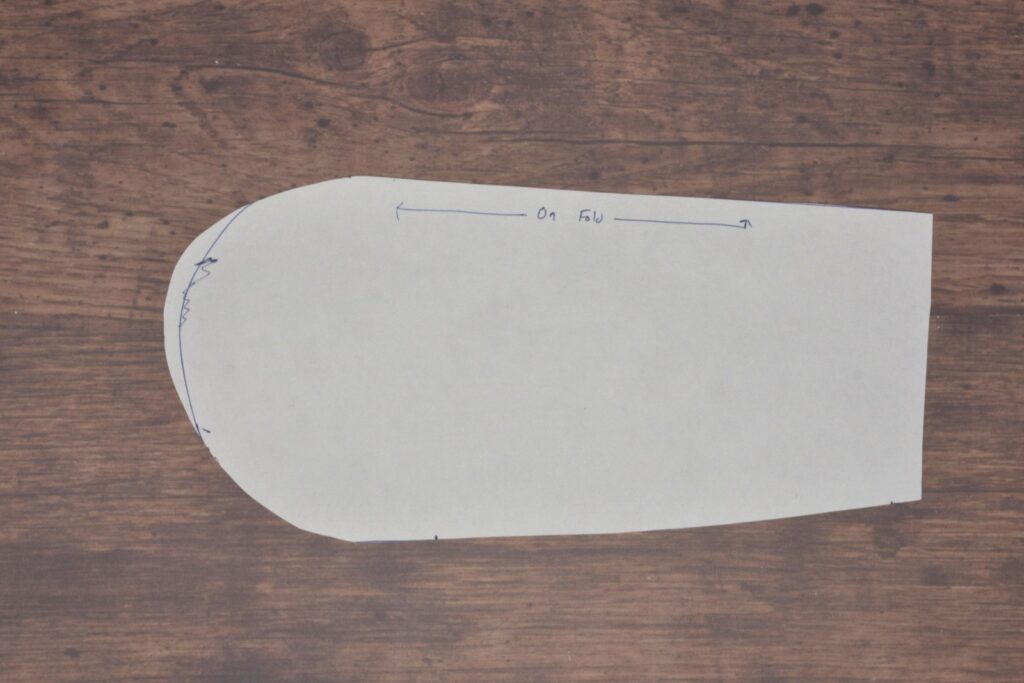
Drafting the pockets is fairly easy to do. Begin by tracing out your trouser front pattern (including the seam allowances) on a fresh piece of paper. I’ve done the complete top half, but you really only need the top of the side seam and the waist to draft the pockets.
Mark the position of the bottom of the pocket opening.

Mark a line as indicated, from the top of the waistband about 4 – 5 inches from the side seam, angled inwards towards the fork. This line determines the width of the pocket, so you may want to compare the measurements to your favorite pair of trousers if you’re unsure of the size.
The angle also helps the pockets to lay more smoothly, especially when things are placed inside. This line will be placed on the fold when cutting out the pockets.

Finally, draw a curve indicating the bottom of the pocket. I like the bottom of mine to be five or six inches below the pocket opening to give myself a lot of room, but it’s up to you, really.
Note how the pocket is deepest along the inner bottom. This helps coins and such fall inwards rather than out towards the opening.

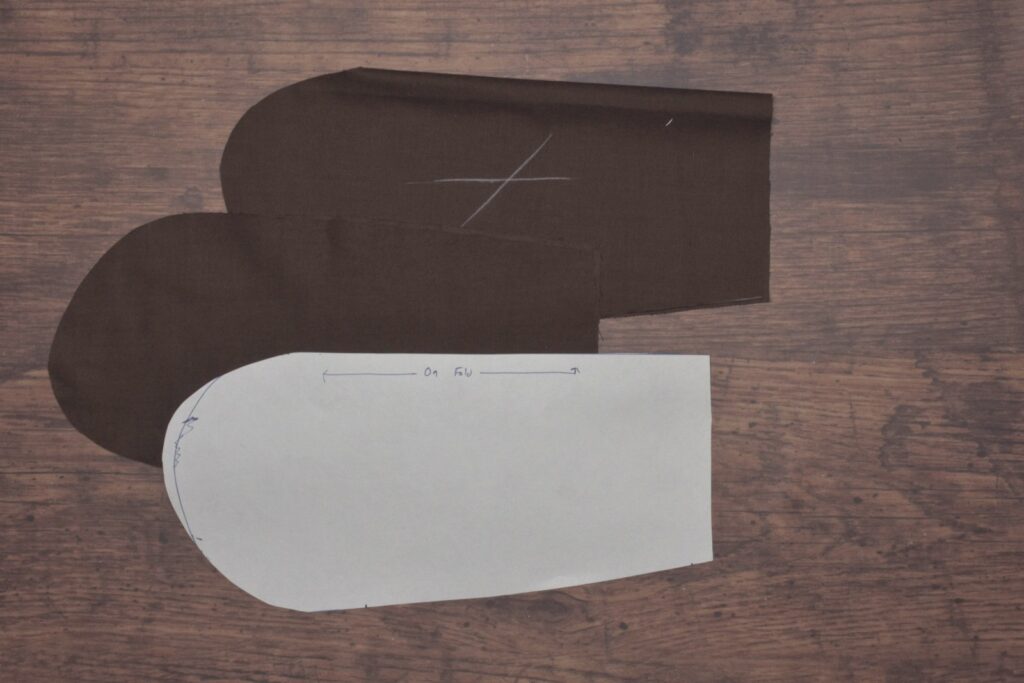
Here’s my completed pattern. Note the line marked to cut on the fold. You can also see where I adjusted the curve a little more to my liking.
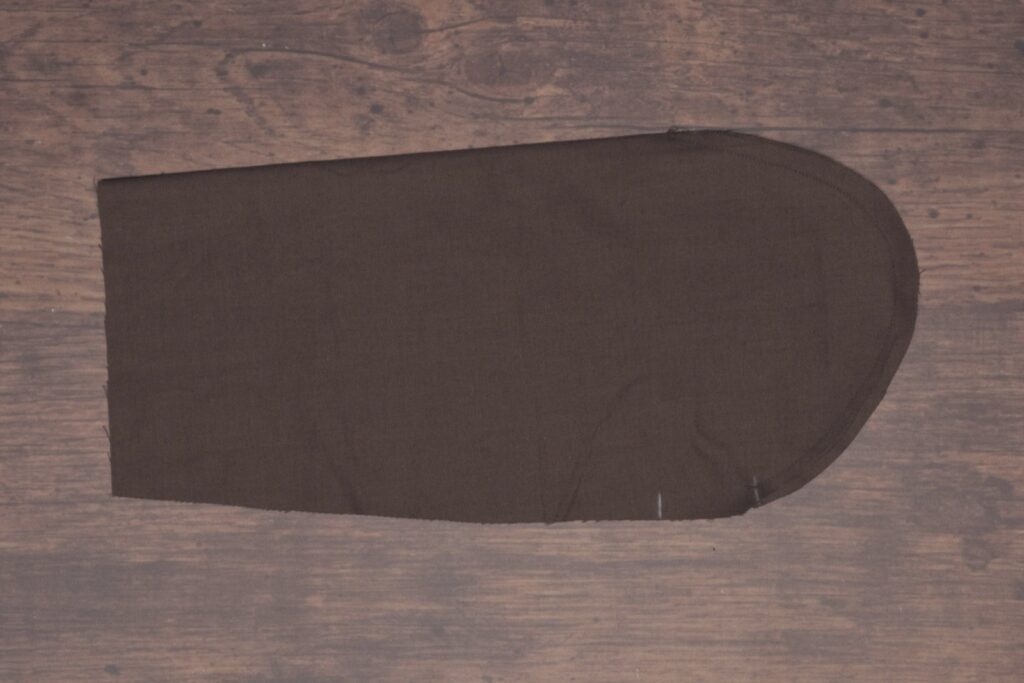
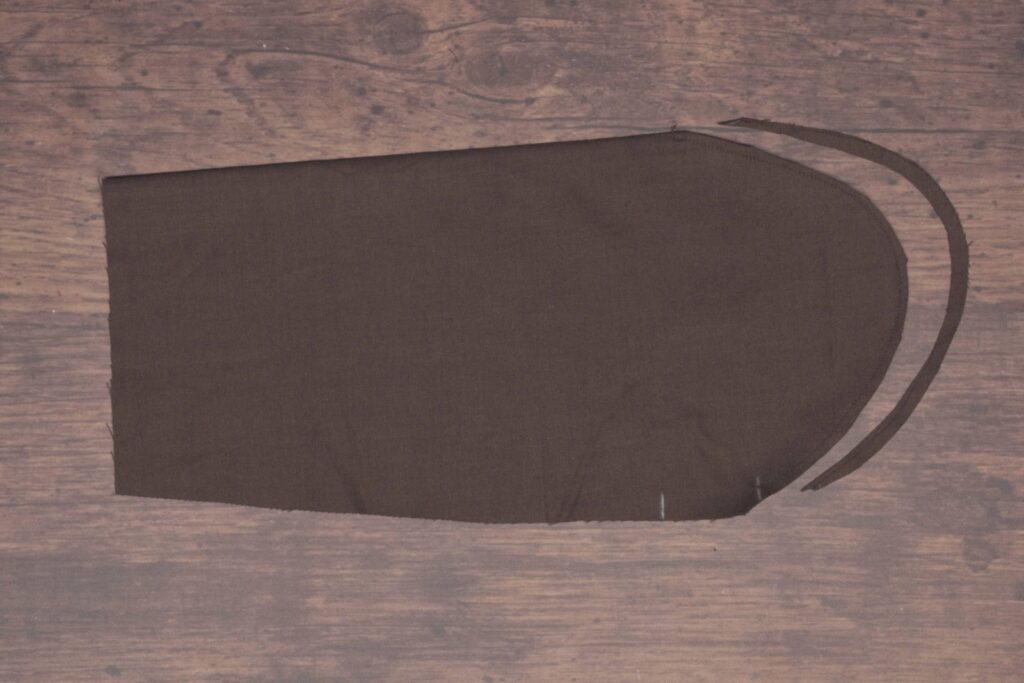
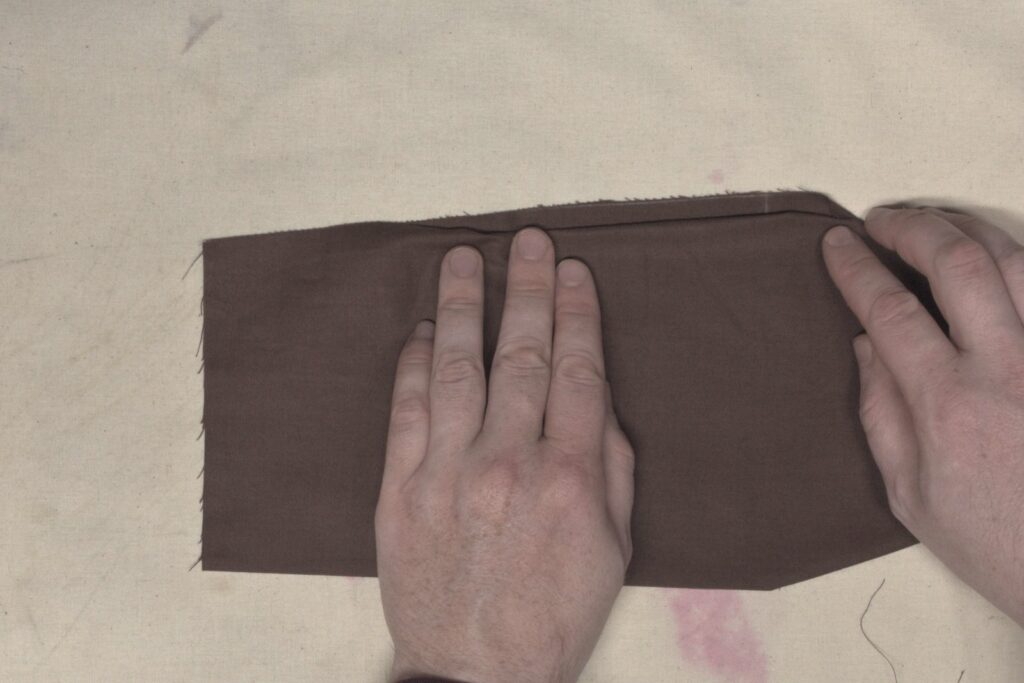
Cut two sets of pockets on the fold as shown. Mark the wrong sides for reference.
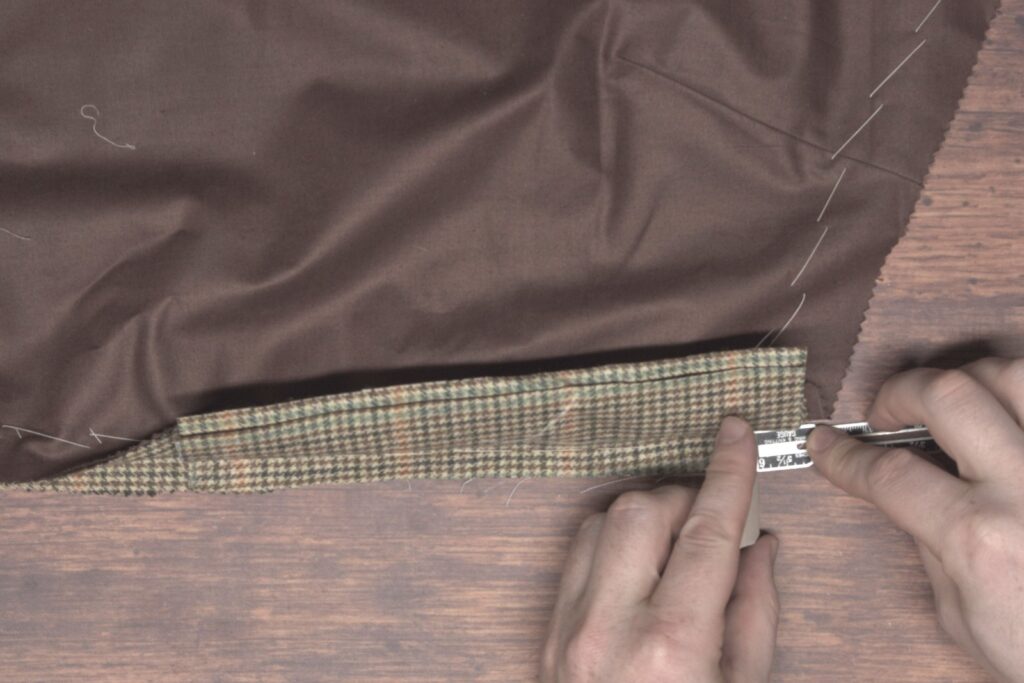
Constructing the pockets themselves is very easy and takes only a few minutes. Begin by marking the bottom of the pocket opening, followed by another mark an inch or two below that, to indicate where to stop the seam.
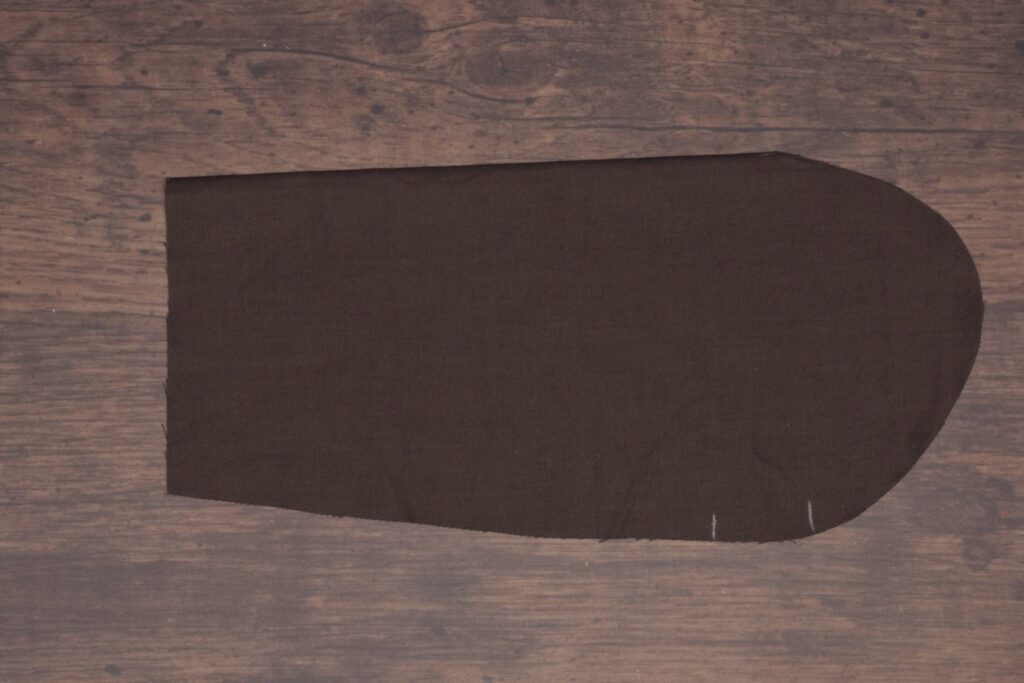
Sew from the folded edge, tapering into a 1/4″ seam allowance around the bottom of the pocket to the mark.

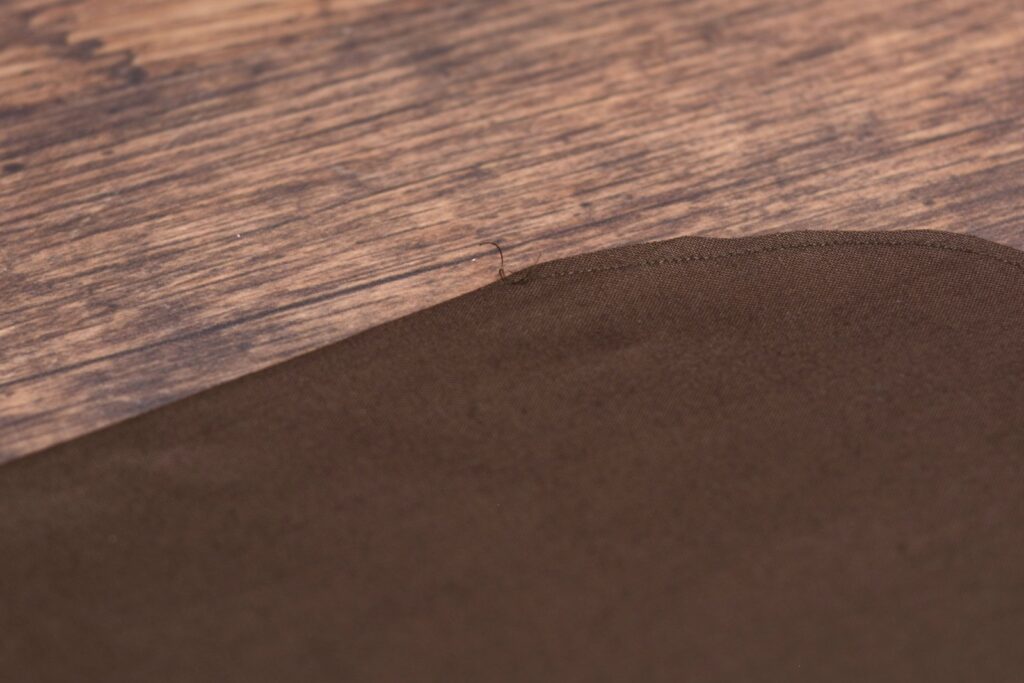
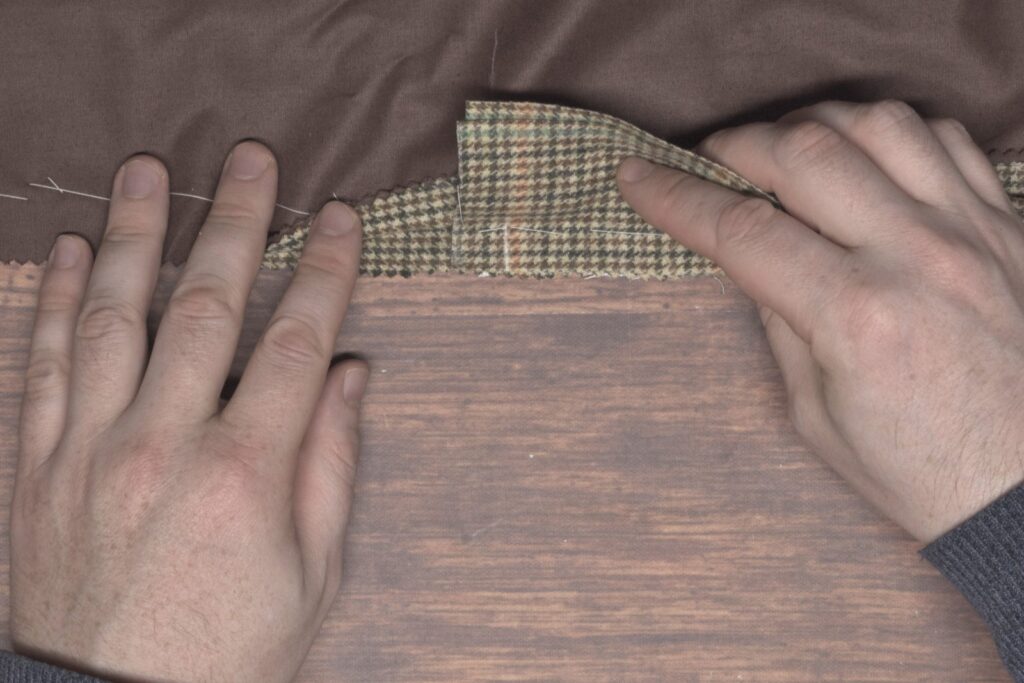
Trim the seam to 1/16″ – 1/8″.
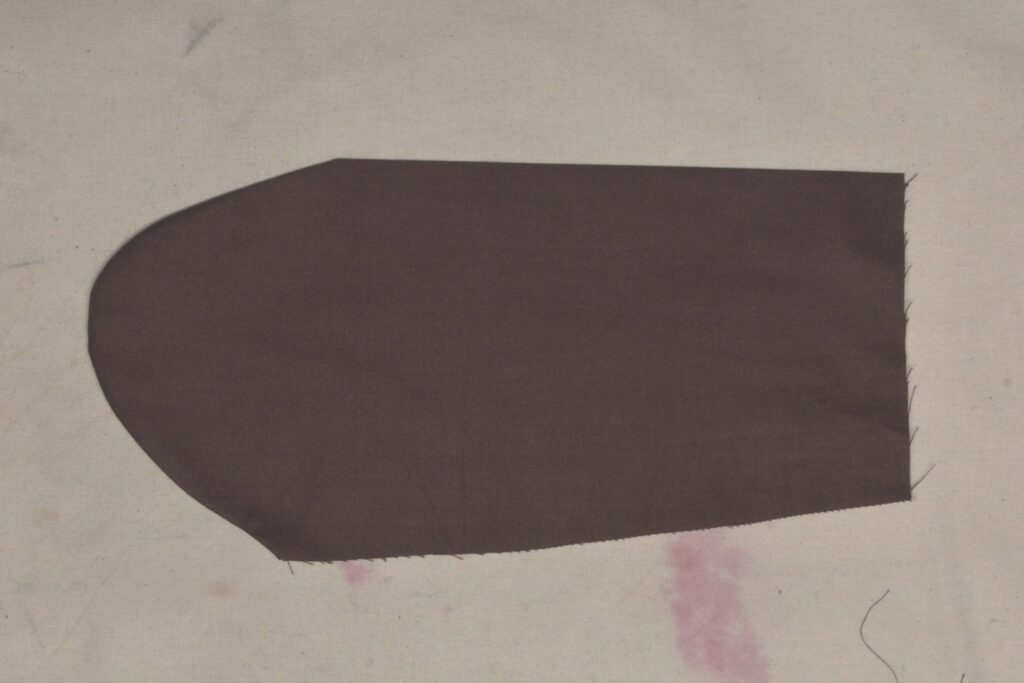
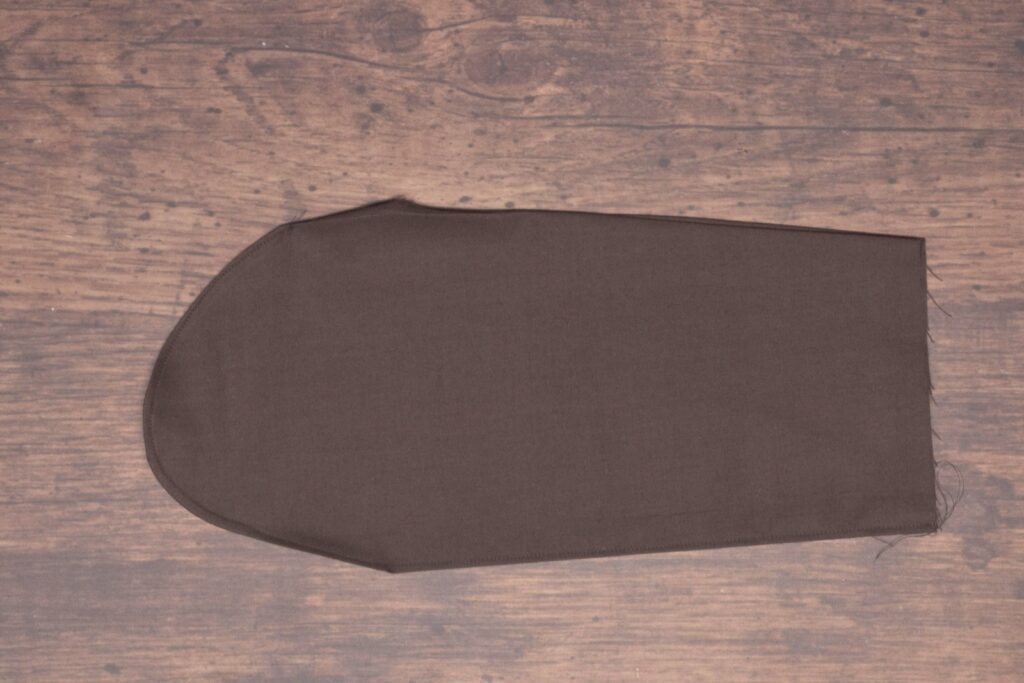
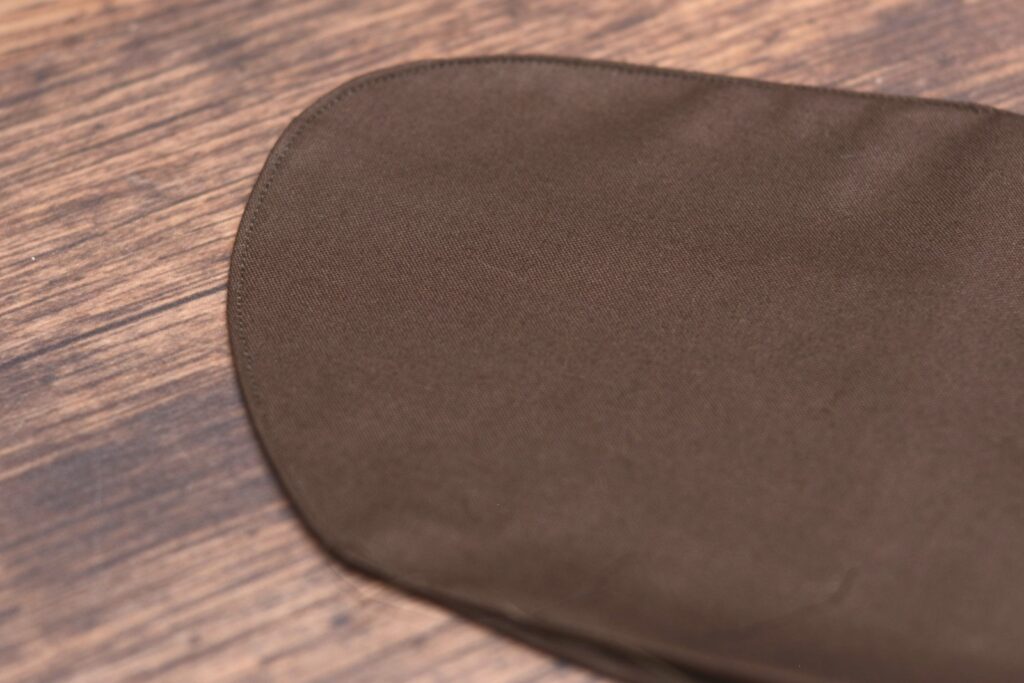
Turn the pocket right side out, smoothing out the curve area with your fingers. Press.
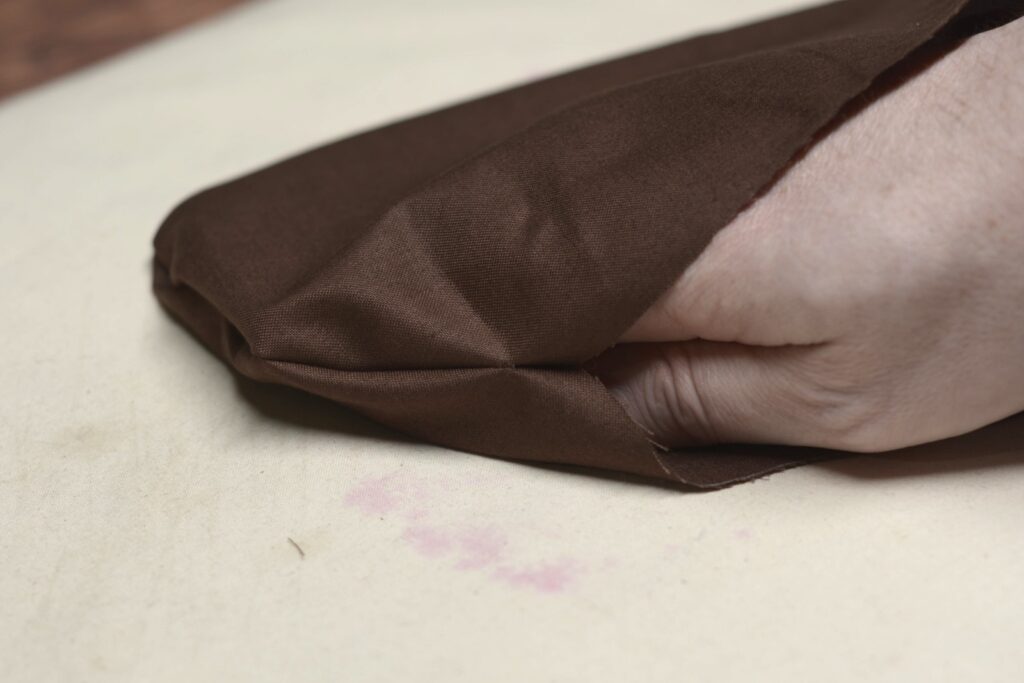
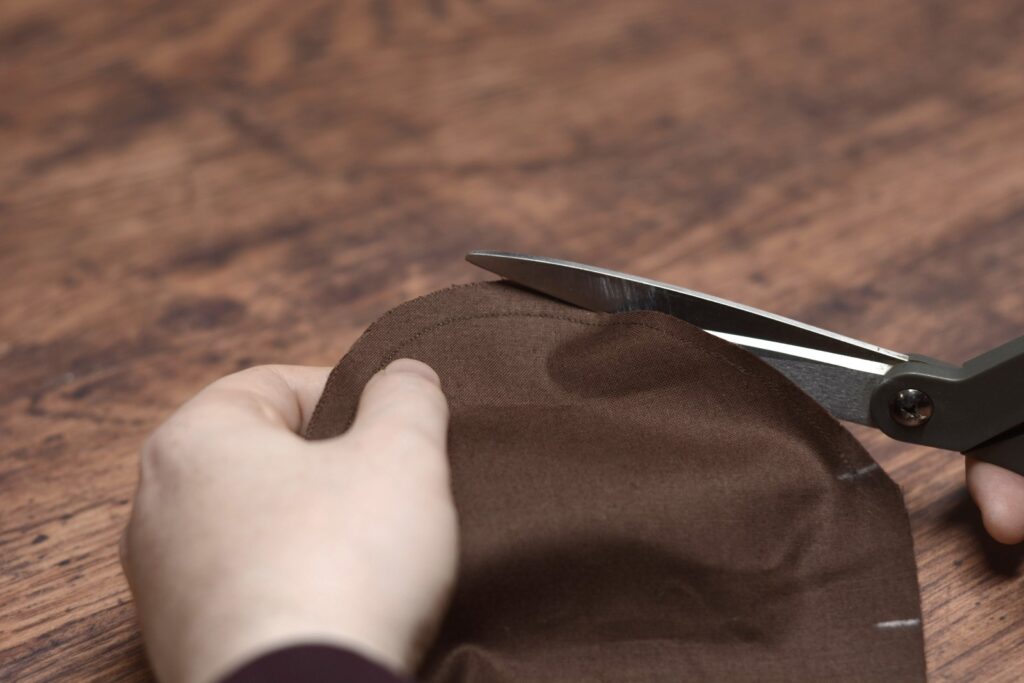
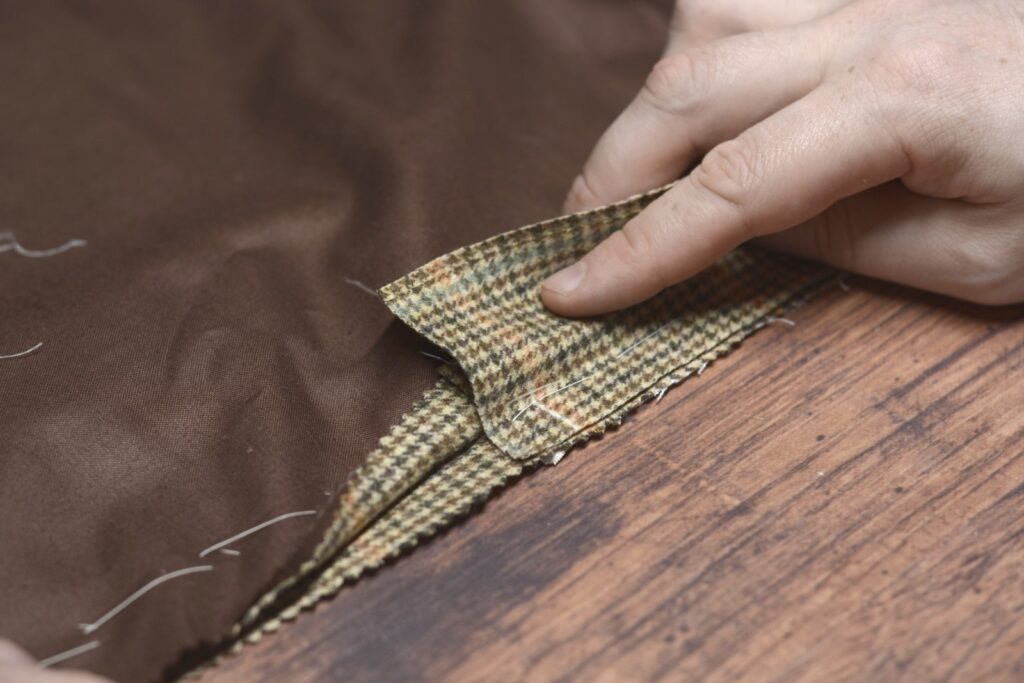
Along the remaining long edge of the pocket, turn both seams inwards 1/4″.

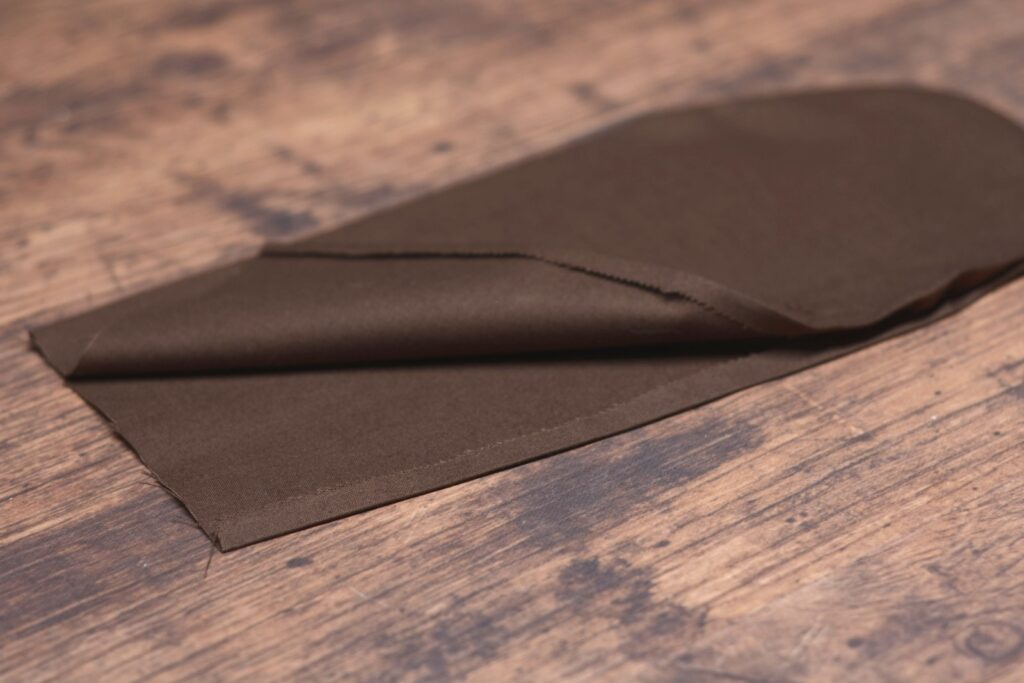
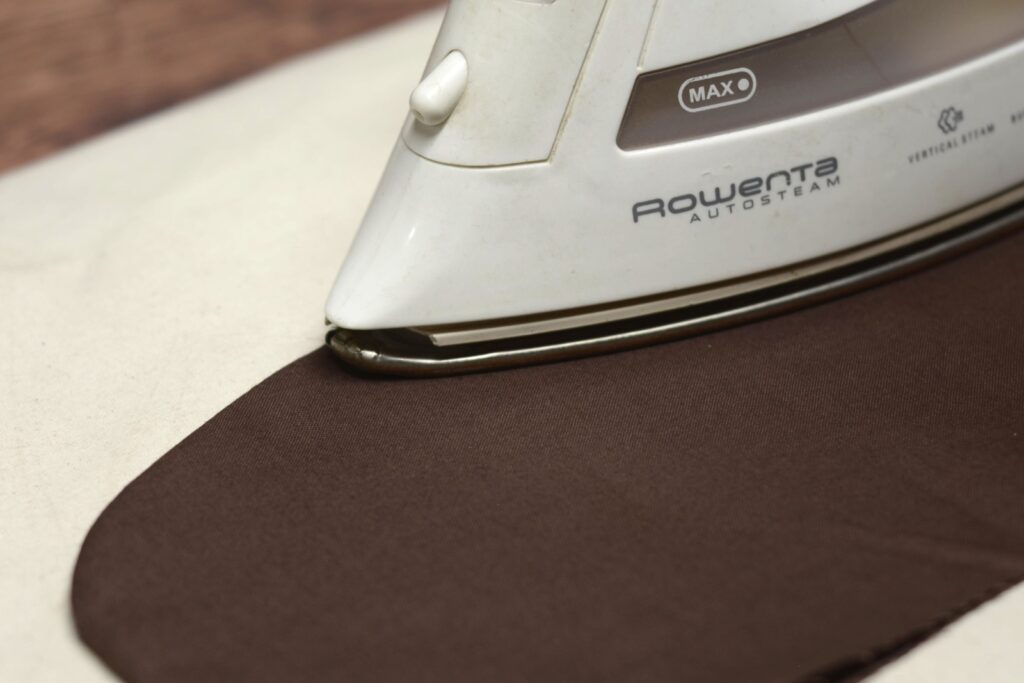
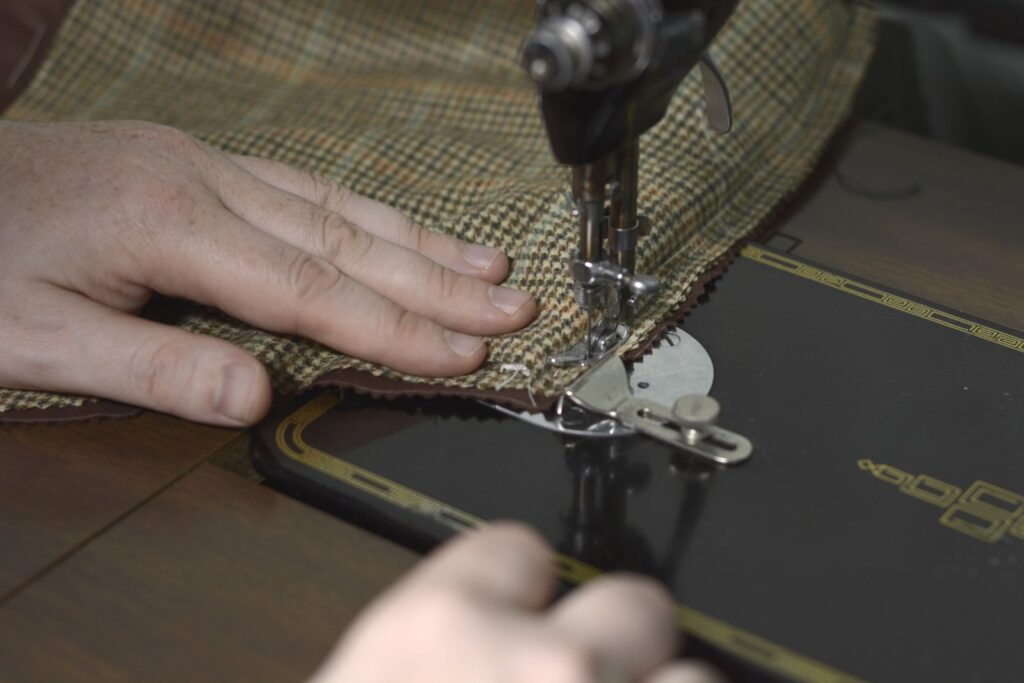
Finally, top stitch along the folded edge and the curve, stopping at the mark you made earlier. This completes the pocket bag.
Pocket Facings
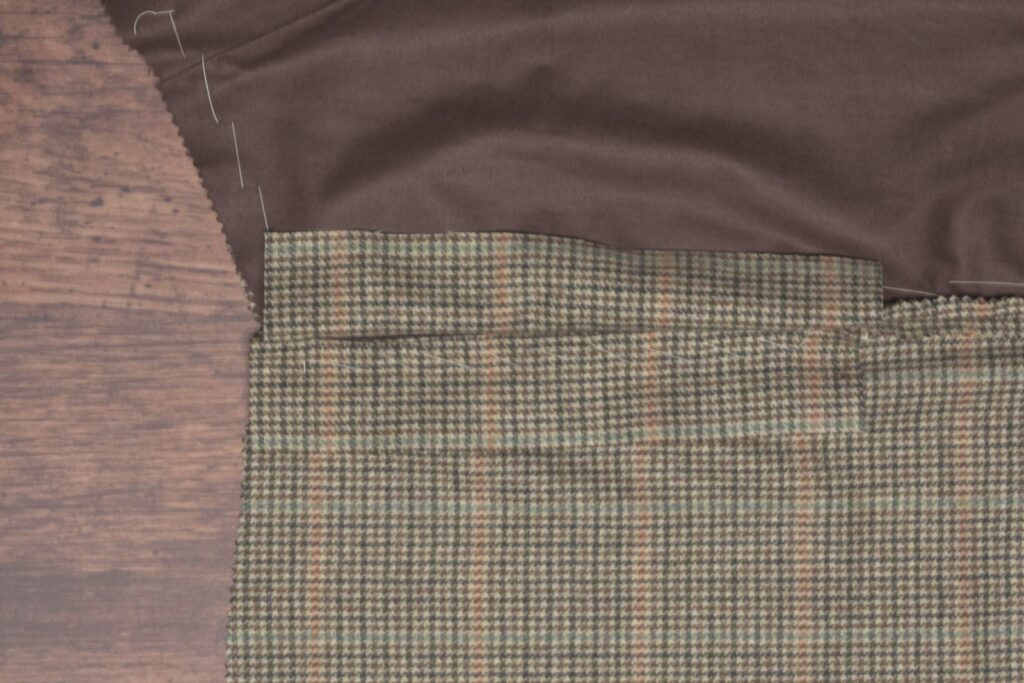
With the side seam basted, it’s time to work on the pocket facings. Cut four facings, 1″ longer than the pocket opening, and about 2 1/4″ wide or to your preference. The width is based on your desired finished facing width (in my case I went with 1 1/2″, plus a 1/4″ seam allowance to attach to the side seam, and a 1/2″ seam allowance to allow for ease of turning under the inside edge of the facing to attach to the pocket. If your fabric does not fray, you could leave off this second 1/2″ seam allowance entirely.
Arrange the trousers so that the pocket area is comfortably accessible to you – either the top or the back side can be facing up.
Now open up the side seam which you previously basted. As long as you kept the basting far enough away from the edge (at least 1/2″, 3/4″ is even easier), the following steps should go smoothly, even if they are a little confusing at first.
Just keep in mind that this opened seam leaves the right sides of the front and back exposed.
With right sides together, lay the facing onto the front or back piece, aligning the end of the facing with the waist seam – the other end of the facing should be 1/2″ beyond the end of the pocket opening.
Carefully baste the pocket facing into place.
You can use either a straight basting stitch or a diagonal basting stitch here, whichever you prefer and have room for.
Now flip this first facing out of the way, making room to attach the second facing to the other seam.
Lay the facing in place as per the first.
Baste securely, ensuring the facing is aligned with the first one.
With both facings basted into position, mark on the wrong sides of each 1/2″ from either end. This gives you the sewing start and end points of the facing seams.

Make sure the markings align with each other by flipping the pocket facings over and judging the distances with your eye. If the facings are slightly different sizes or basted on inaccurately, it’s easy to end up with misaligned markings that will affect the pockets themselves later on.
Sew each facing to the side seam from mark to mark using a 1/4″ seam allowance.
Here’s the second facing sewn on. Remove the basting stitches from each of the facings.
Sewing the Side Seam
Now sew the side seam either by machine or using a back stitch or back and fore stitch with a 1/4″ seam allowance. If sewing by machine, keep the back side underneath while sewing. Since there is fullness worked into the back, it is very useful to allow the feed dogs to help distribute that fullness.
Sew from the hem to about 1″ below the bottom of the pocket facings. Those will be finished by hand for more strength and control.
N.B. Don’t remove the basting stitches from the side seam until after you’ve finished sewing the seam by hand.
Moving the ends of the facing out of the way, finish sewing the seam by hand with small backstitches to the position of the markings / end of the facing stitches.
Do the same from the top of the side seam to the top mark of the facings.
Adding Stay Tape
An optional step for more strength in the pocket is to add a length of stay tape about 1/16″ from the edge of the front pocket facing seam line. This should be the same length as the linen and the facings, though I tend to make mine about 1/4″ longer at the bottom, though it doesn’t really do anything at that point. Baste in place.
Again, this is optional, as not all trousers of the 1860s period would have used this, and in some heavier fabrics it will make the pocket area a little too bulky.
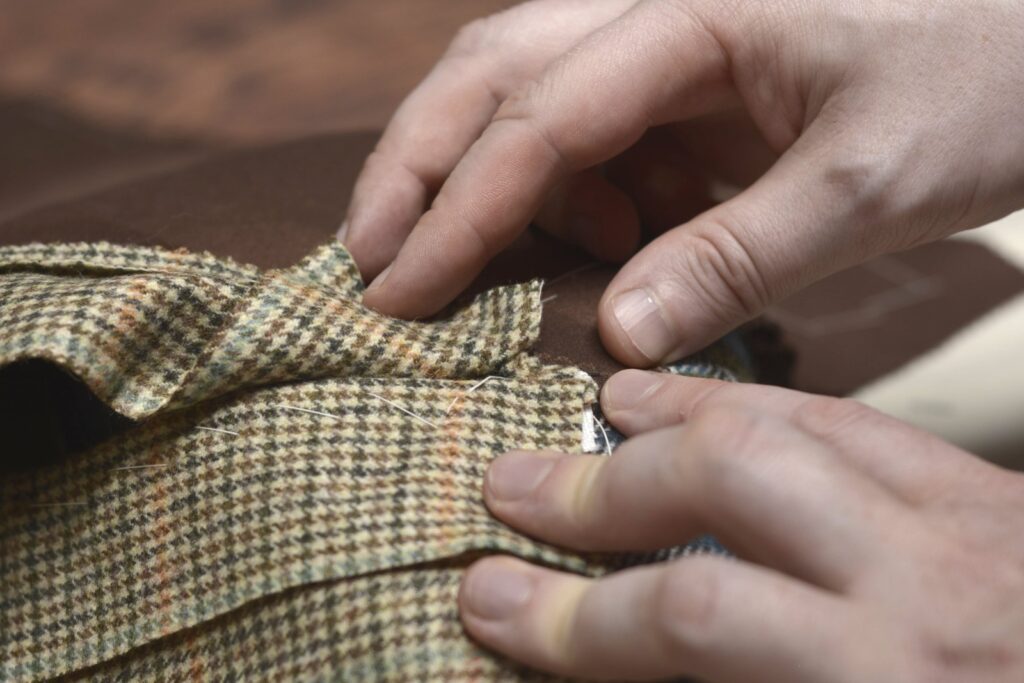
Fell or cross stitch the stay tape to the linen, being sure the stitches do not show on the right side of the trousers.
Finally, temporarily baste the front facing over the stay tape, setting the facing back about 1/16″ to 1/8″. This is just temporary to make pressing easier – the stitches will be removed before putting the pocket bag in.
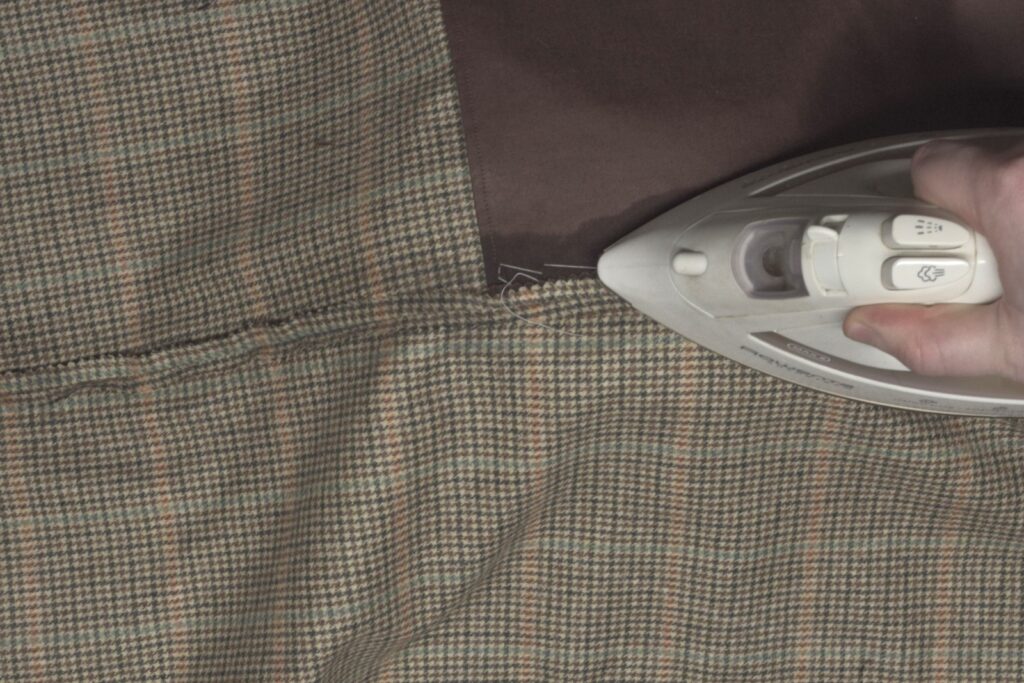
Pressing
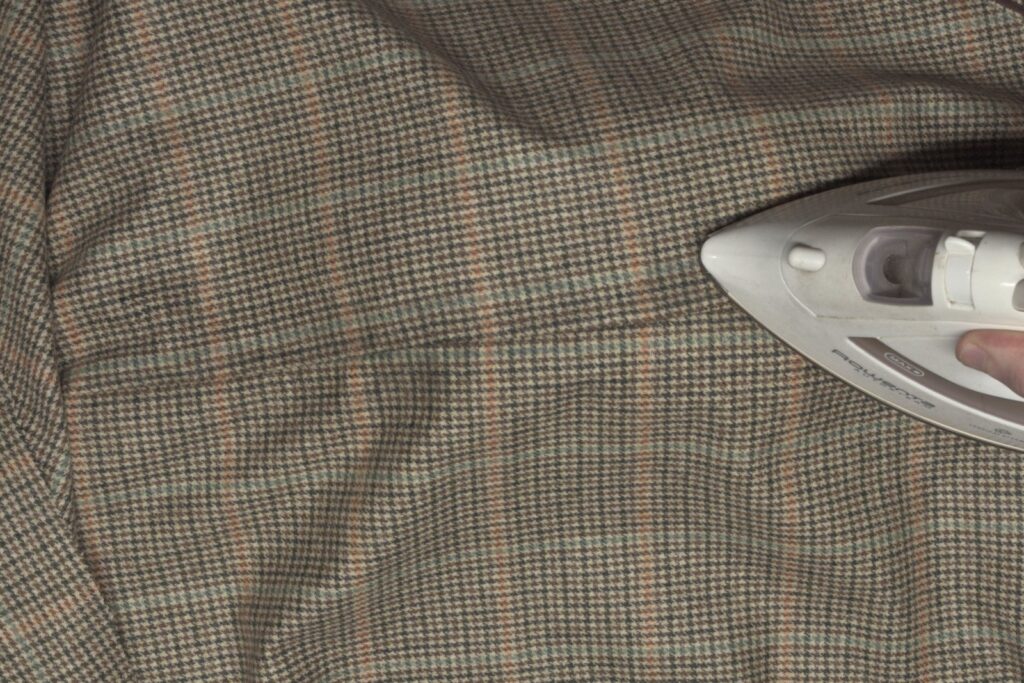
Now it’s time for a good pressing. It sometimes seems as if this seemingly easy step takes longer than the others combined, but it’s worth the effort of course.
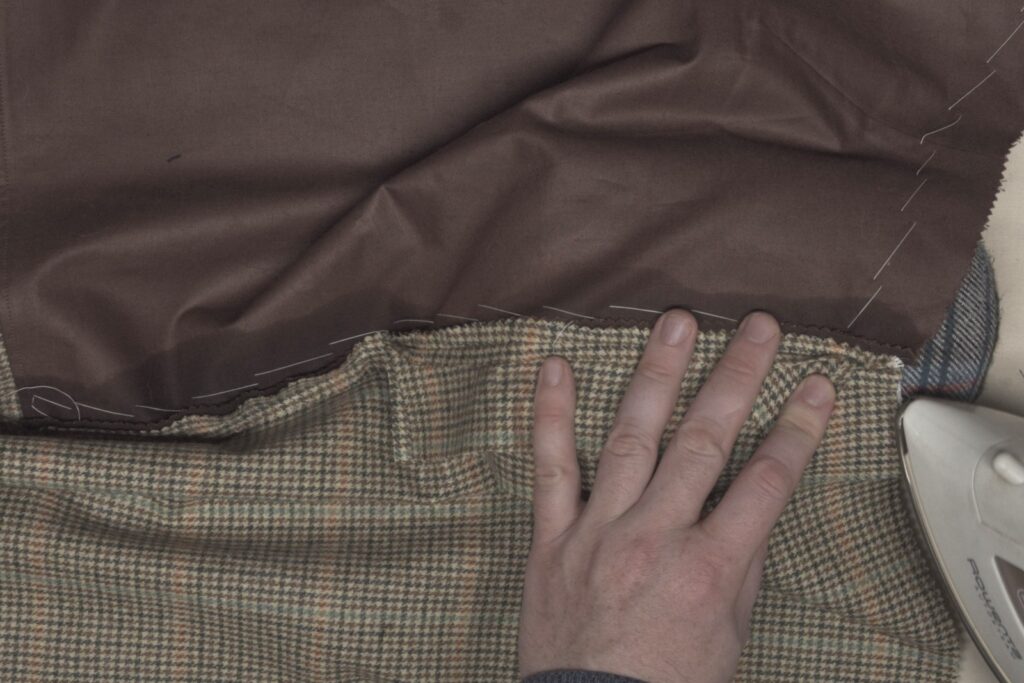
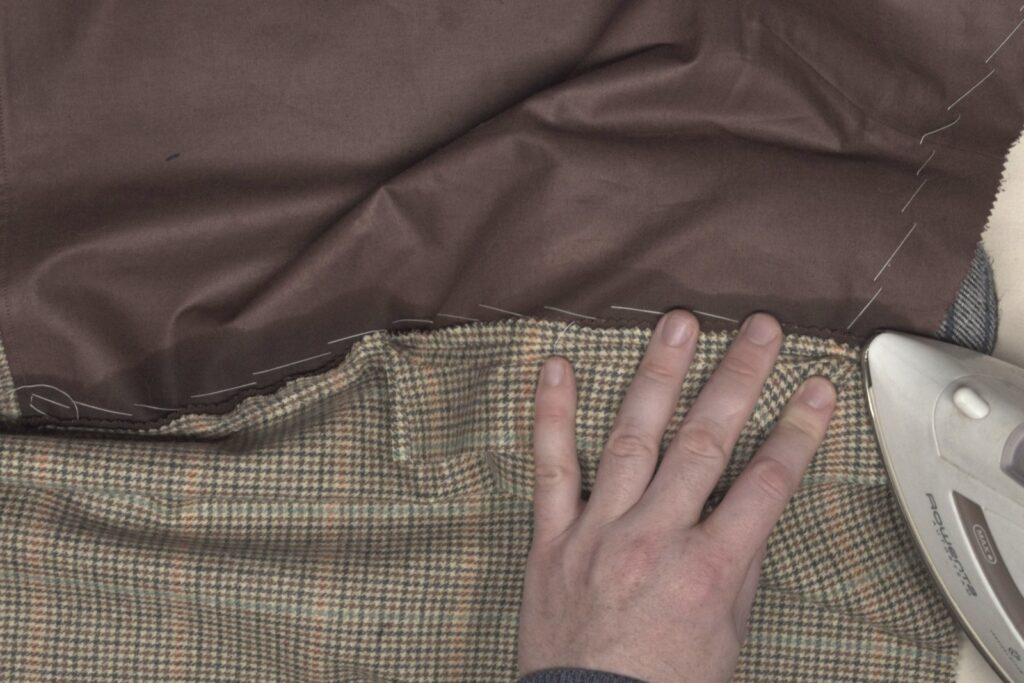
Turn the trousers wrong side up and first press the front facing which we just basted. I like to press the hip area over a tailor’s ham to make things a little easier and keep the curves of the area smooth.
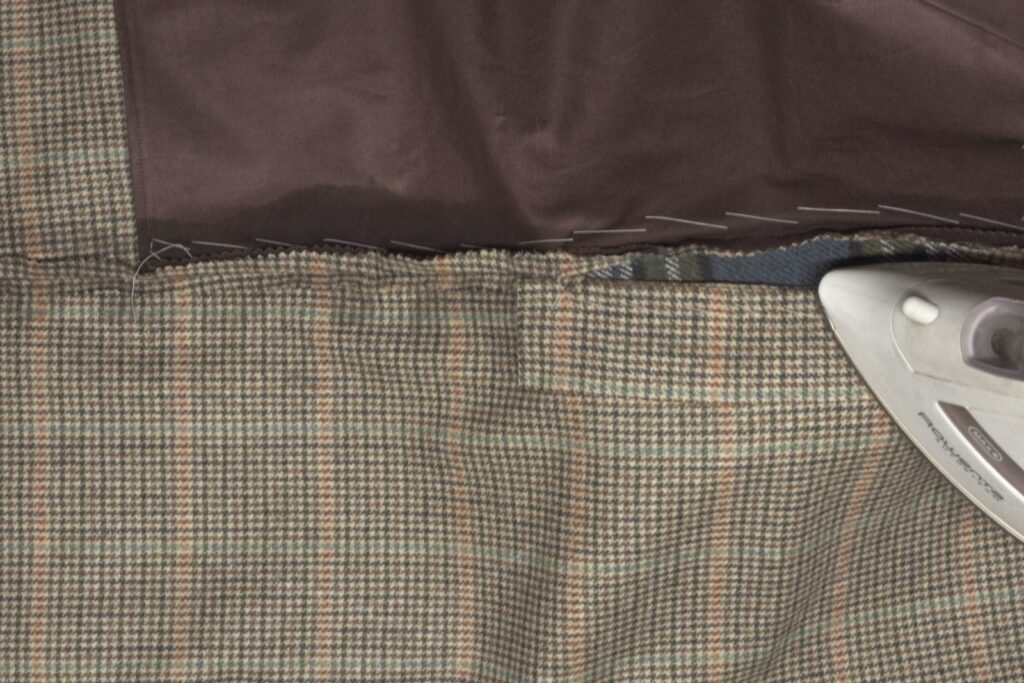
Press the back facing open.
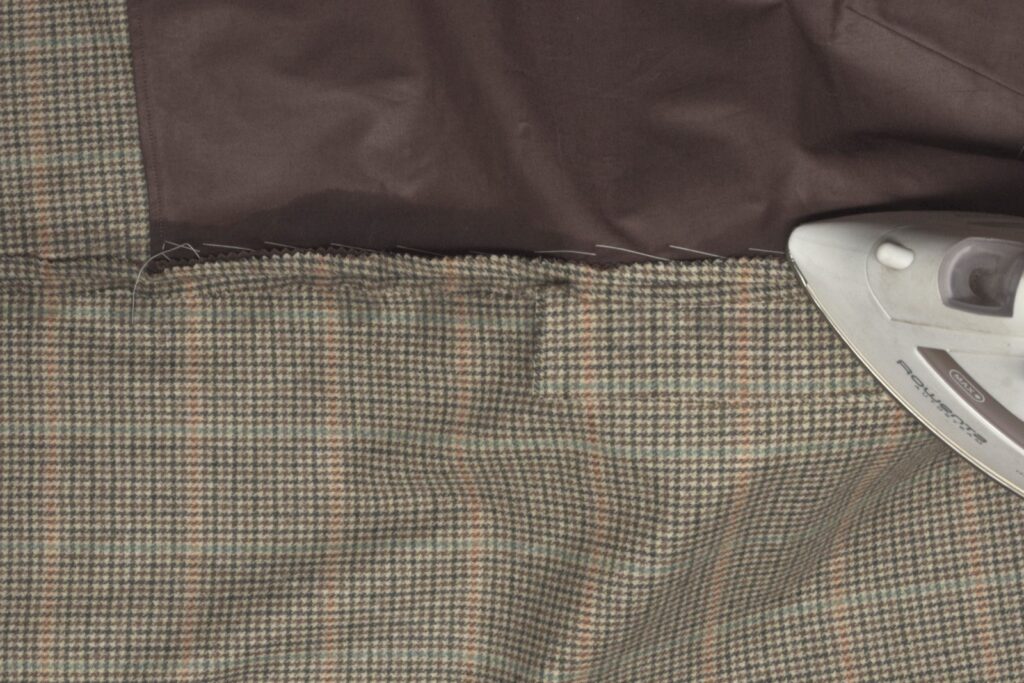
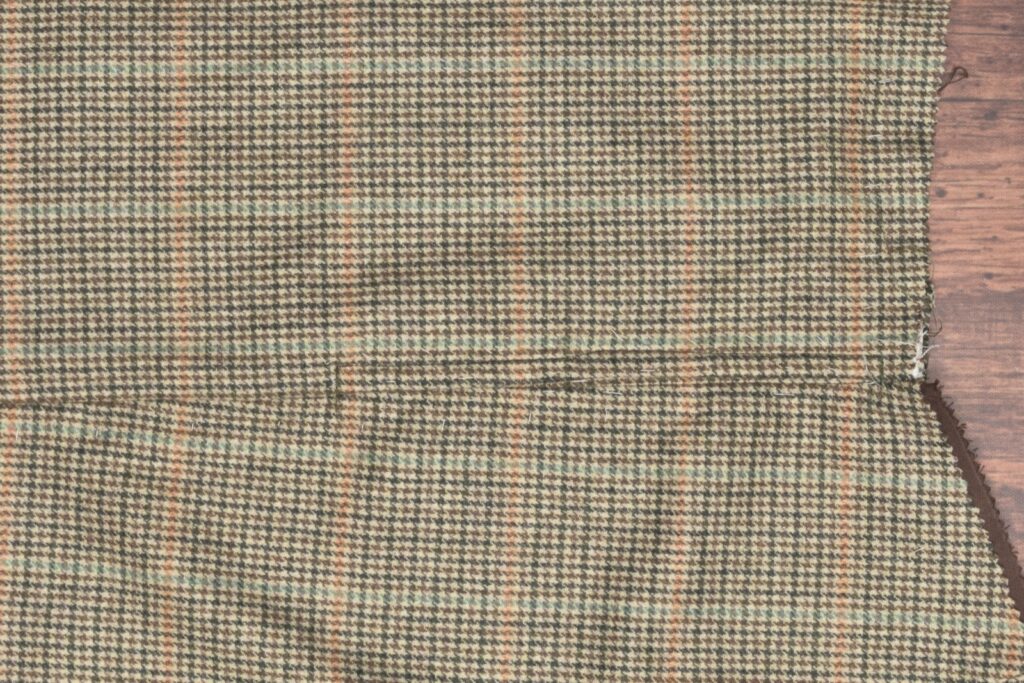
Turn the trousers right side up and press the rear facing again from the right side this time.

And press the front facing area from the right side as well.
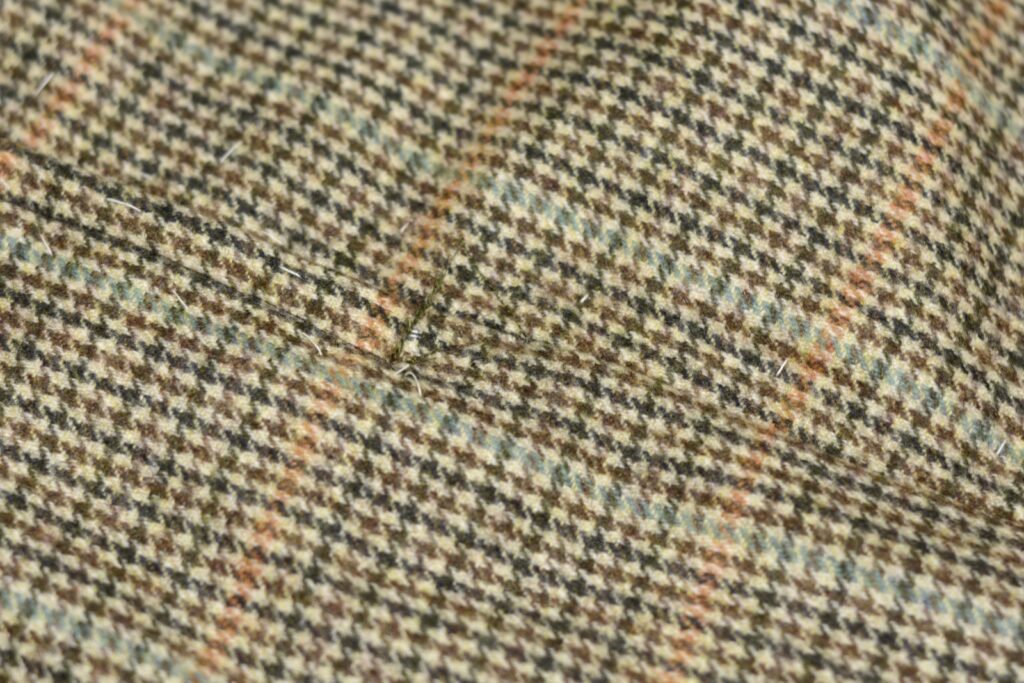
Turn the trousers back over to the wrong side to press the side seam. Beginning at the top, carefully move the facings out of the way, exposing the side seam underneath. Press.
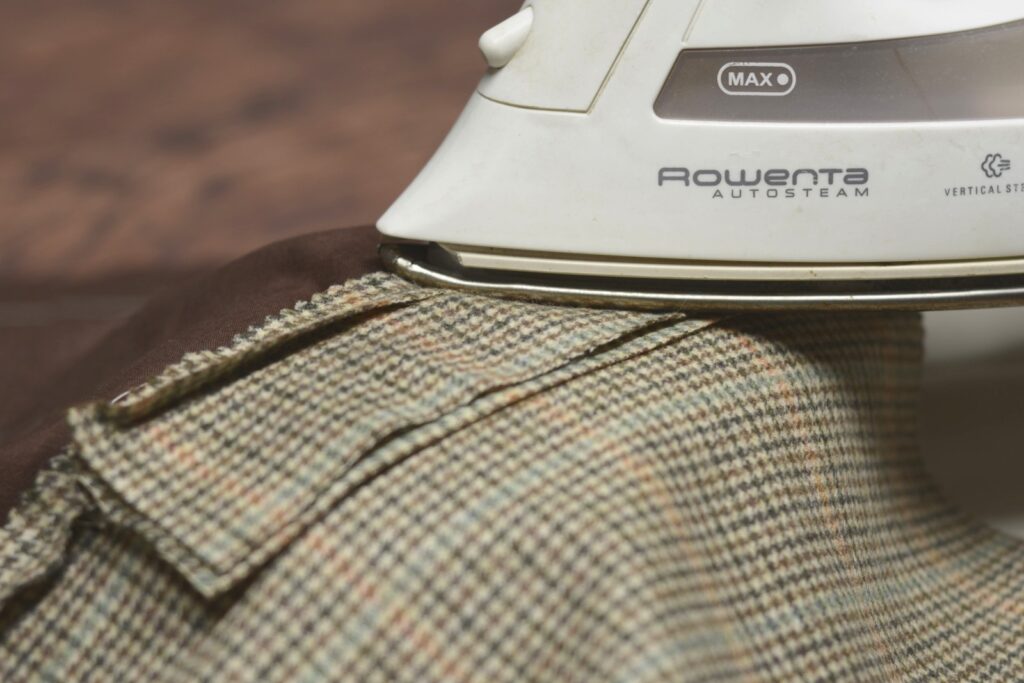
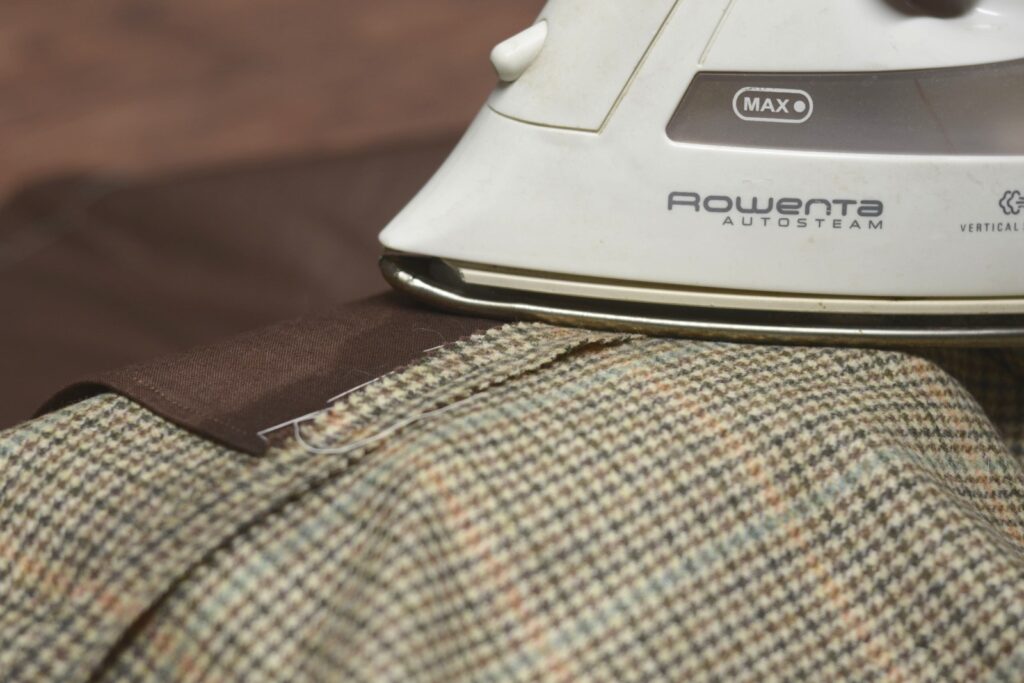
Press the rest of the side seam below the pocket mouth from the wrong side. I like to use a little sleeve roll under the leg portion to make pressing easier.
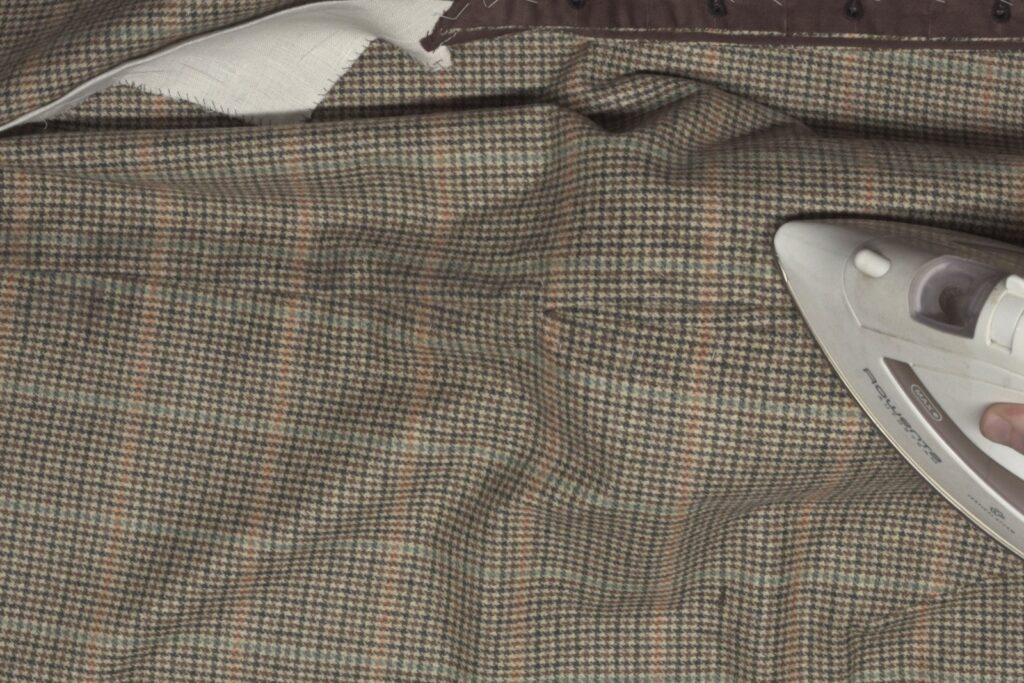
Finally, press the side seam from the right side.