Month: September 2019
Pattern Layout
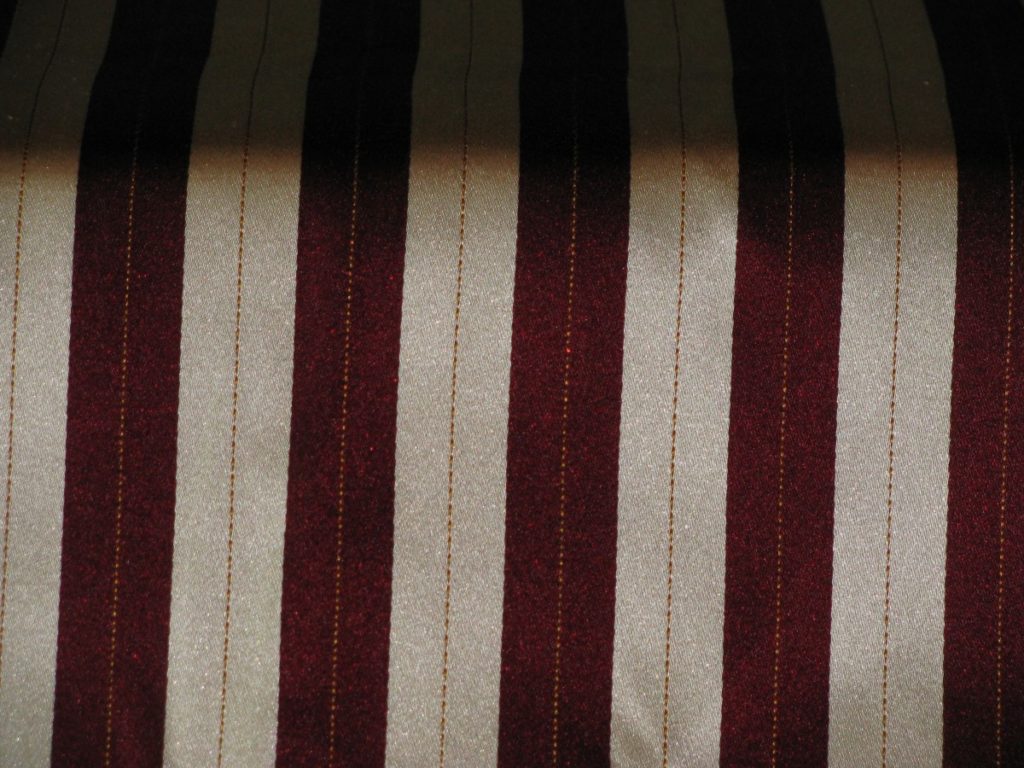
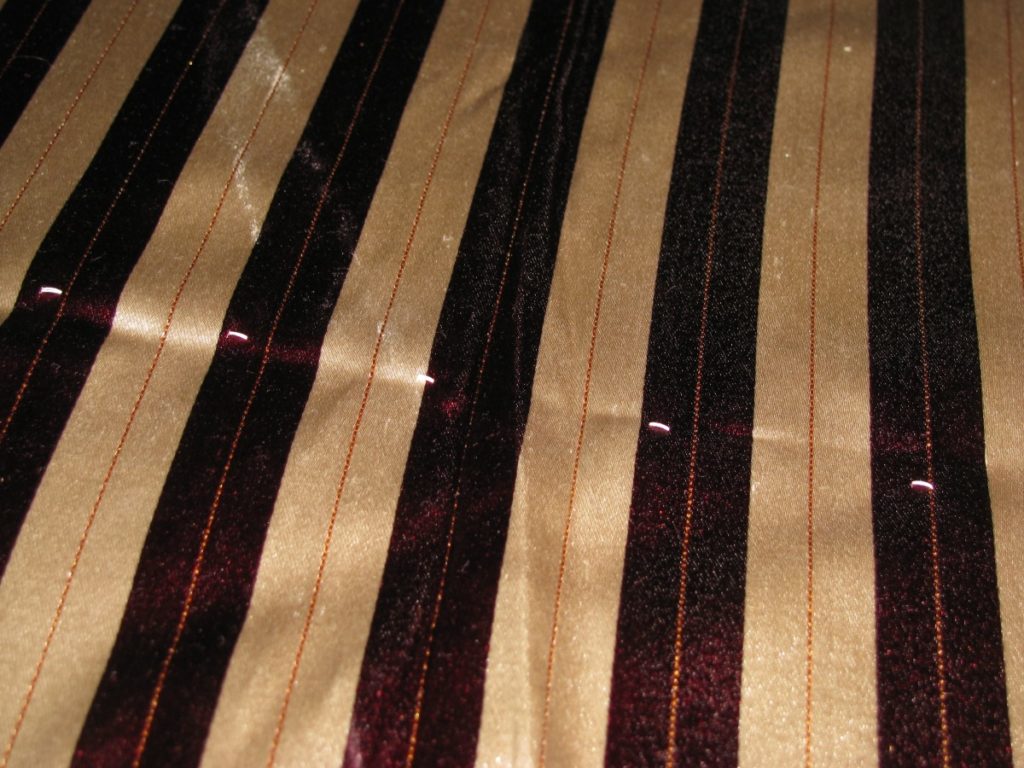
It’s now time to finally layout the pattern pieces on our fabric. I’m using a striped silk brocade here, so I’ll show how to layout patterns on striped fabrics to get things to match properly.
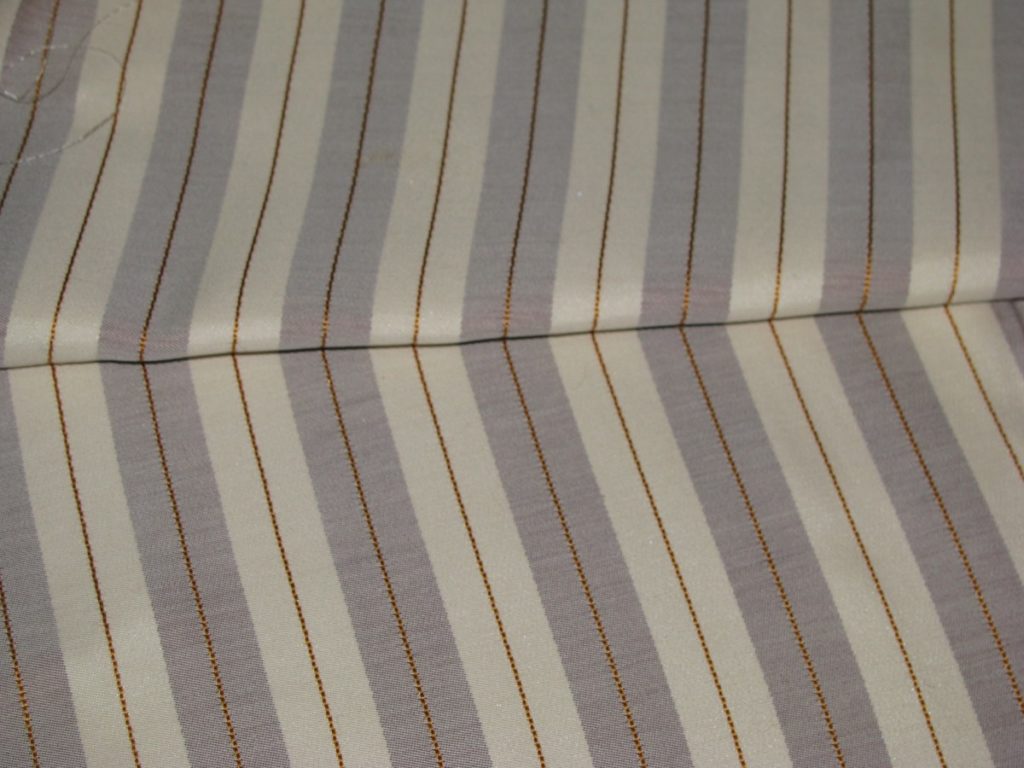
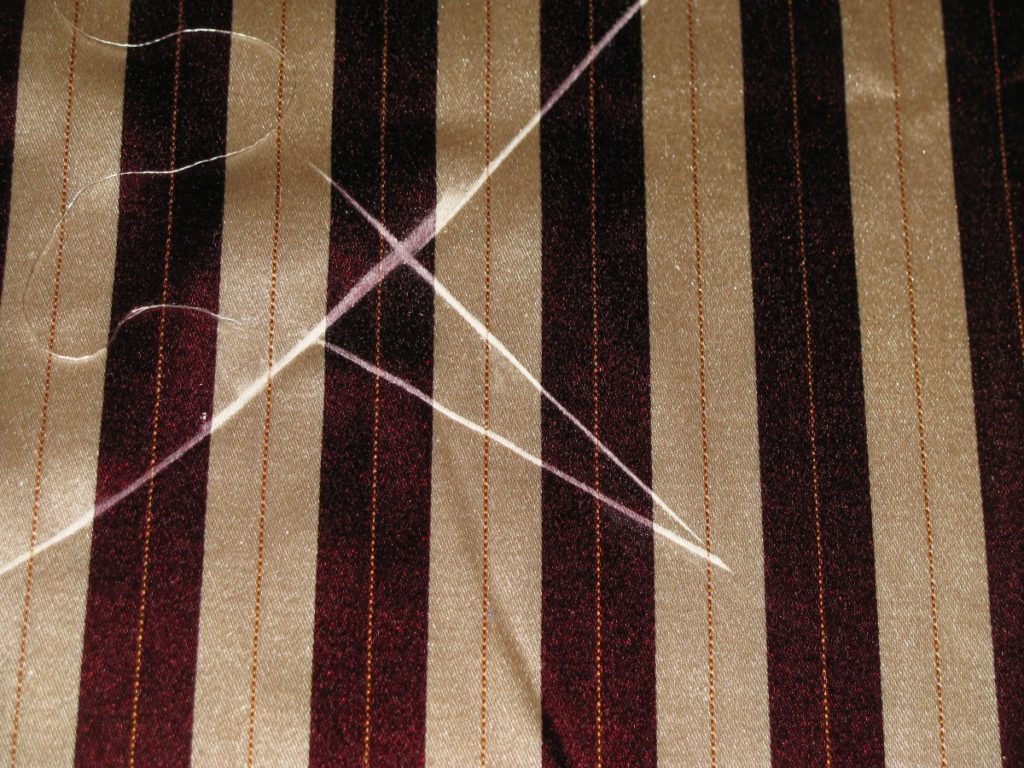
With right sides together, fold the cloth in half so that the stripes are aligned with each other all along. Pull back the top layer of fabric to check yourself for alignment.
Note: I know I said right sides together, but I was clearly not thinking when I laid out my waistcoat, and did wrong sides together. While it worked out, in that the fabric was less slippery on the wrong side, there are layout marks on the right side that I have to hope will come out!
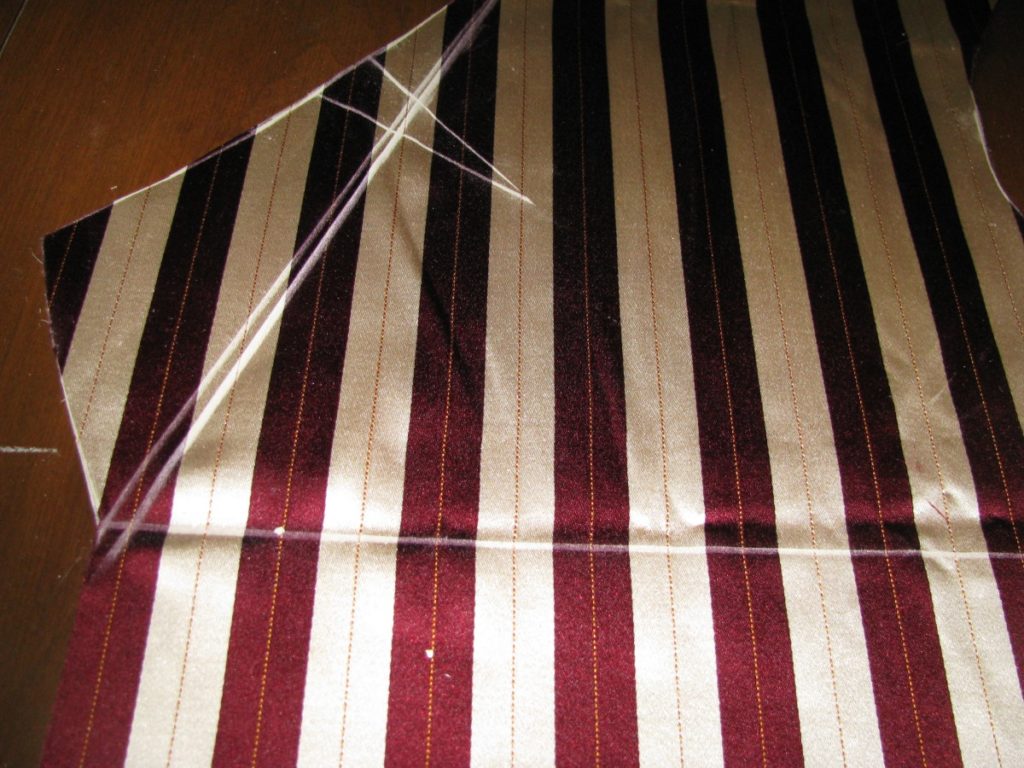
Lay your pattern pieces on the doubled fabric, making sure the layout lines are parallel to the edge, or as in my case, the chest line is perpendicular to the edge of the cloth.
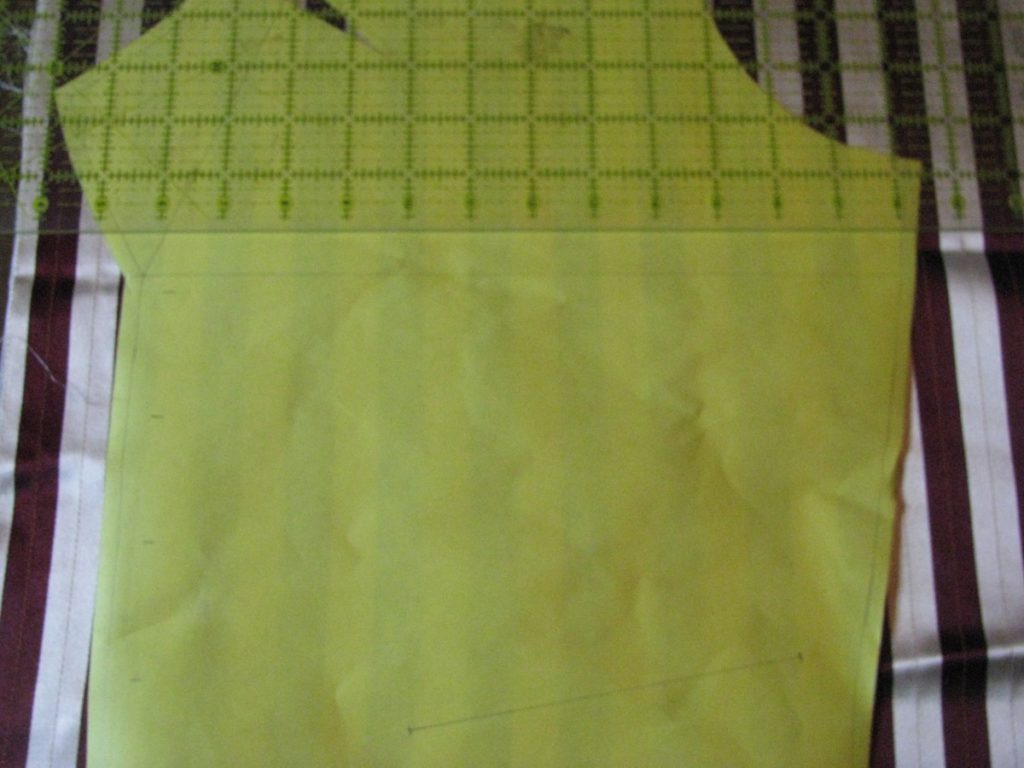
Try to get the front edge to fall entirely within a stripe if you can. If the stripes are thinner this won’t be possible, but it helps with the finished appearance.
Don’t forget to mark the location of the darts.
As well as the roll line. I initially misplaced the line by going to the edge of the fabric instead of the edge of the seam allowance, hence the two roll lines.
Finally, mark in the breast pocket, which will be on the left side of the waistcoat only.
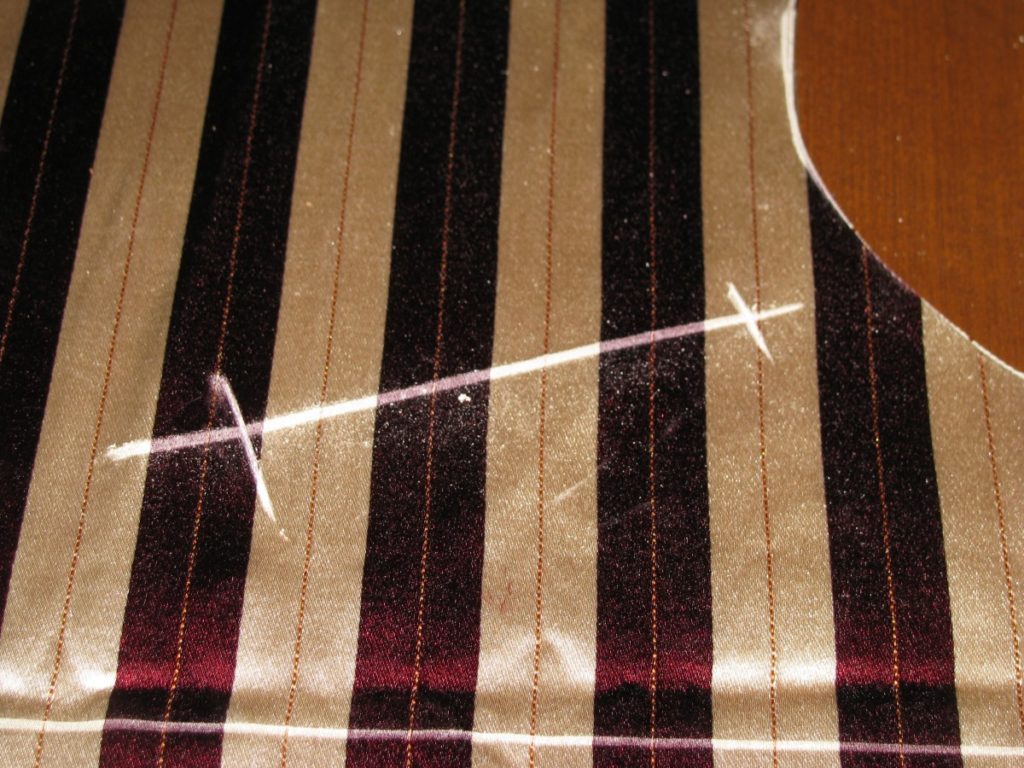
And the front pockets. I draw in a line marking the pocket, and then mark the ends according to the length I want them.
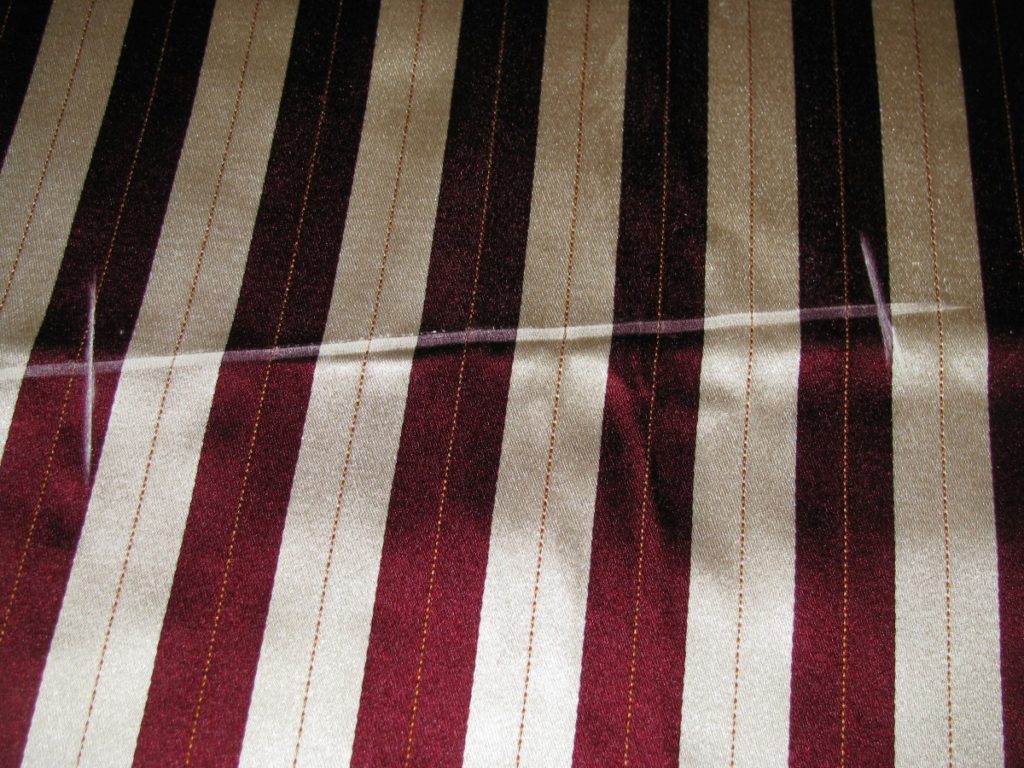
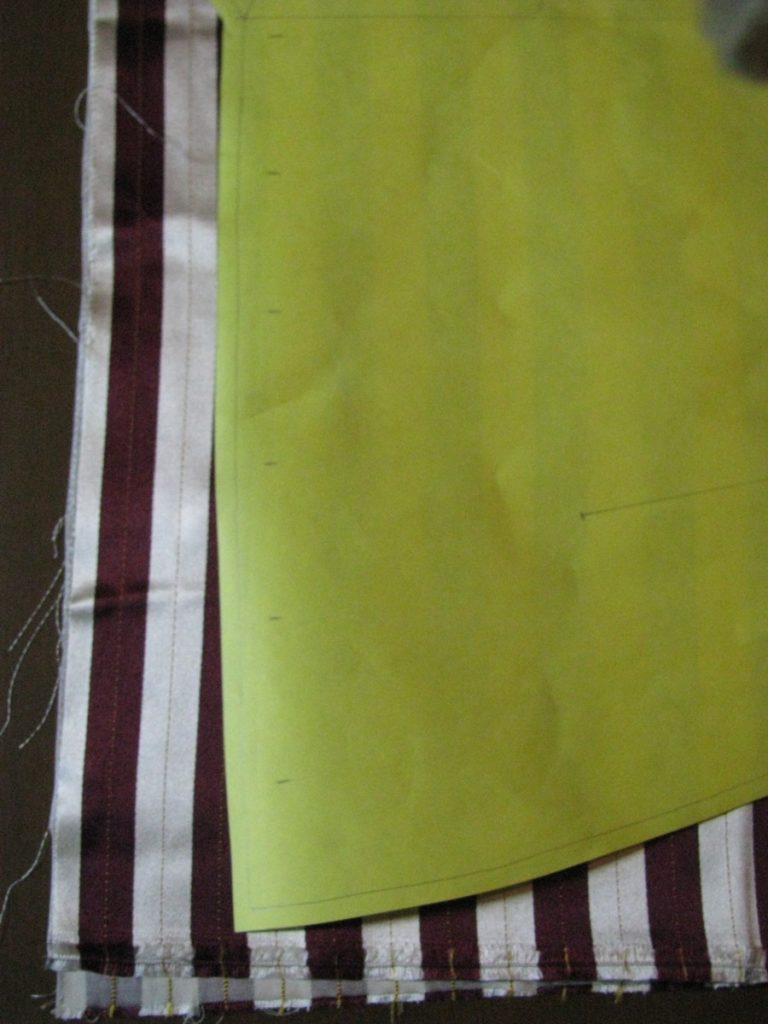
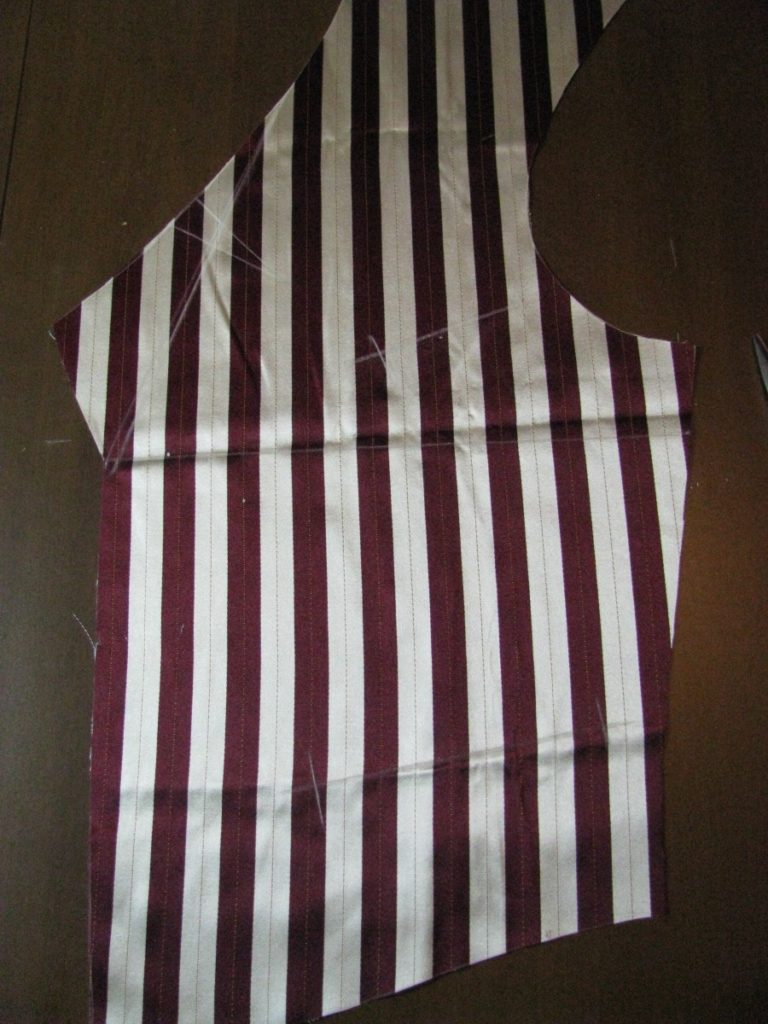
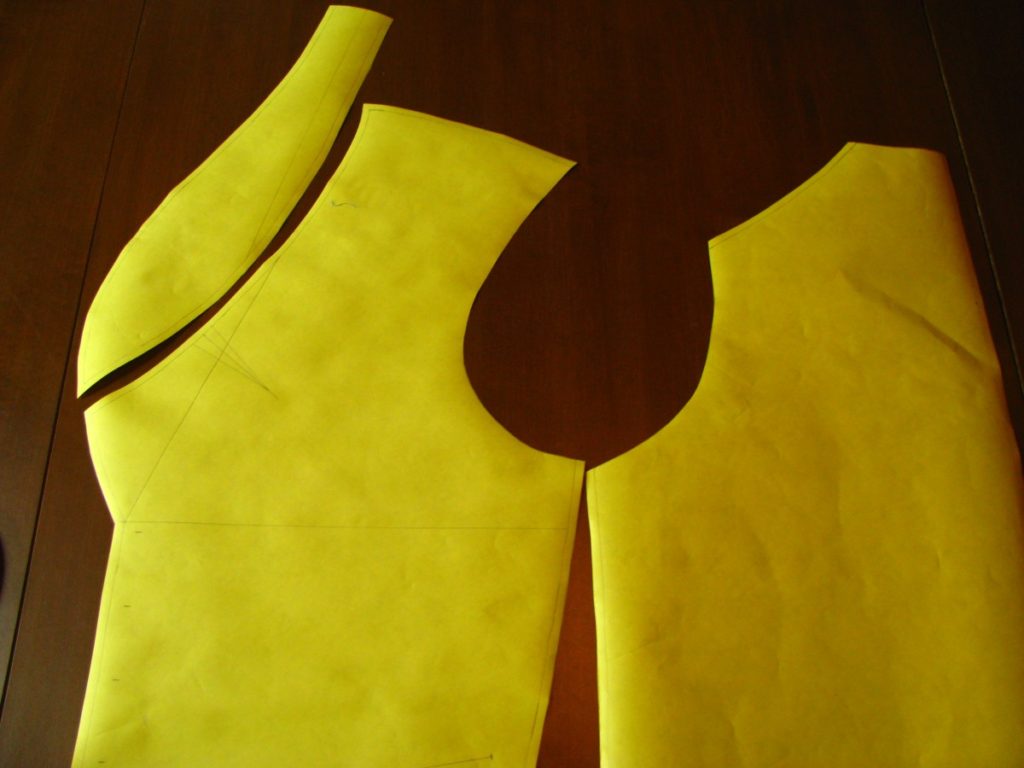
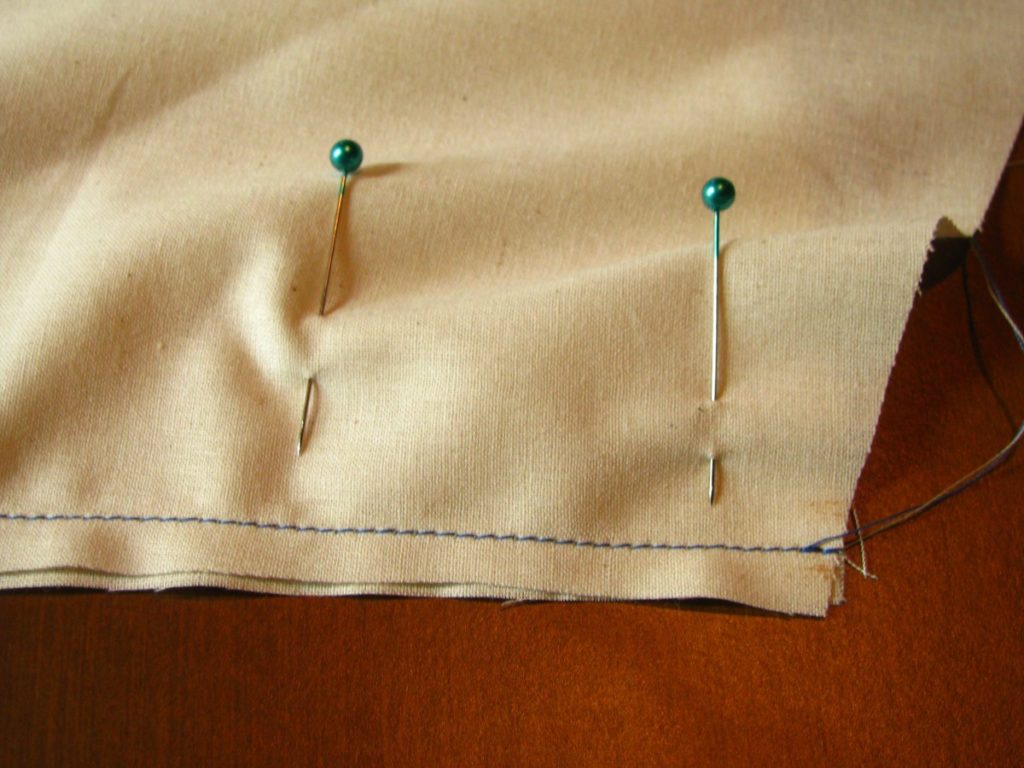
Cut out both layers of fabric at once, being careful to cut on the inside of the chalk line, since the chalk has a width to it. Here is the general idea of what you will end up with.
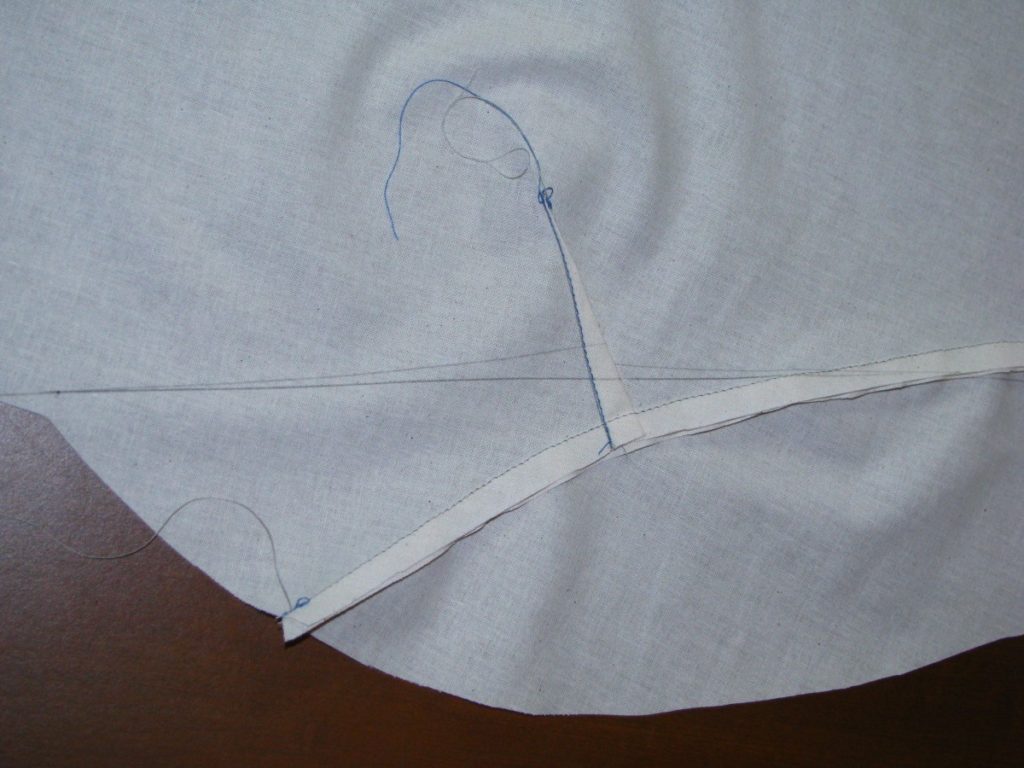
Now add tailor tacks to all of the markings – pockets, roll line, and darts, to transfer the marks to the lower piece, and to make the lines more durable.
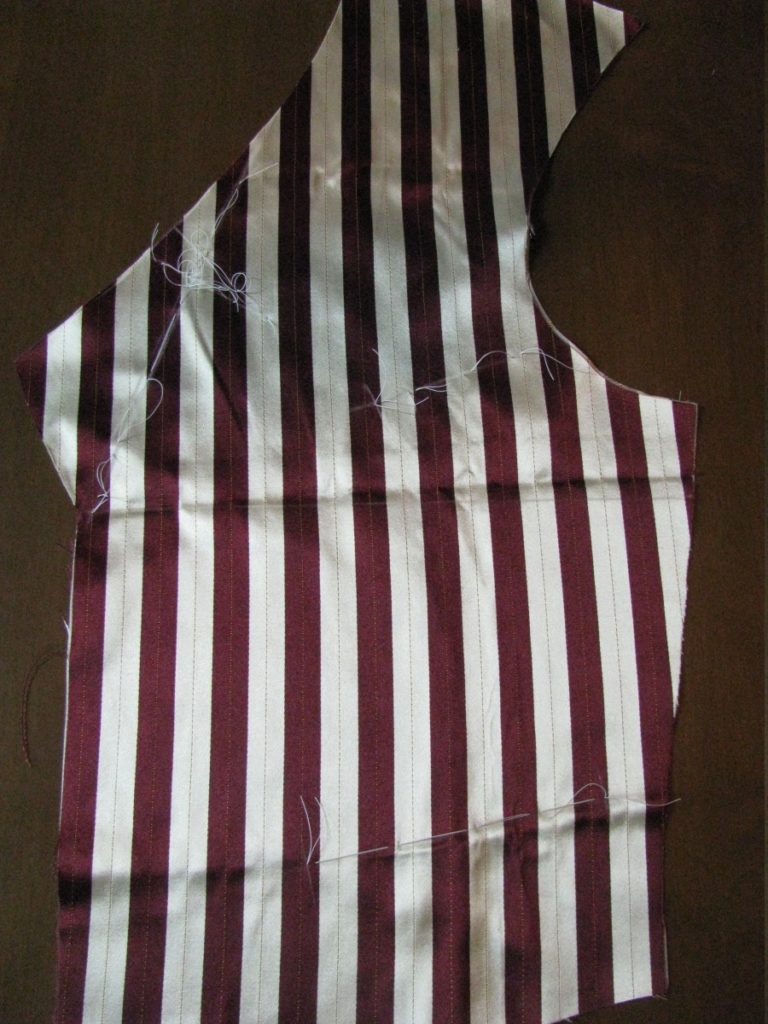
The pockets are marked with tailor tacks.
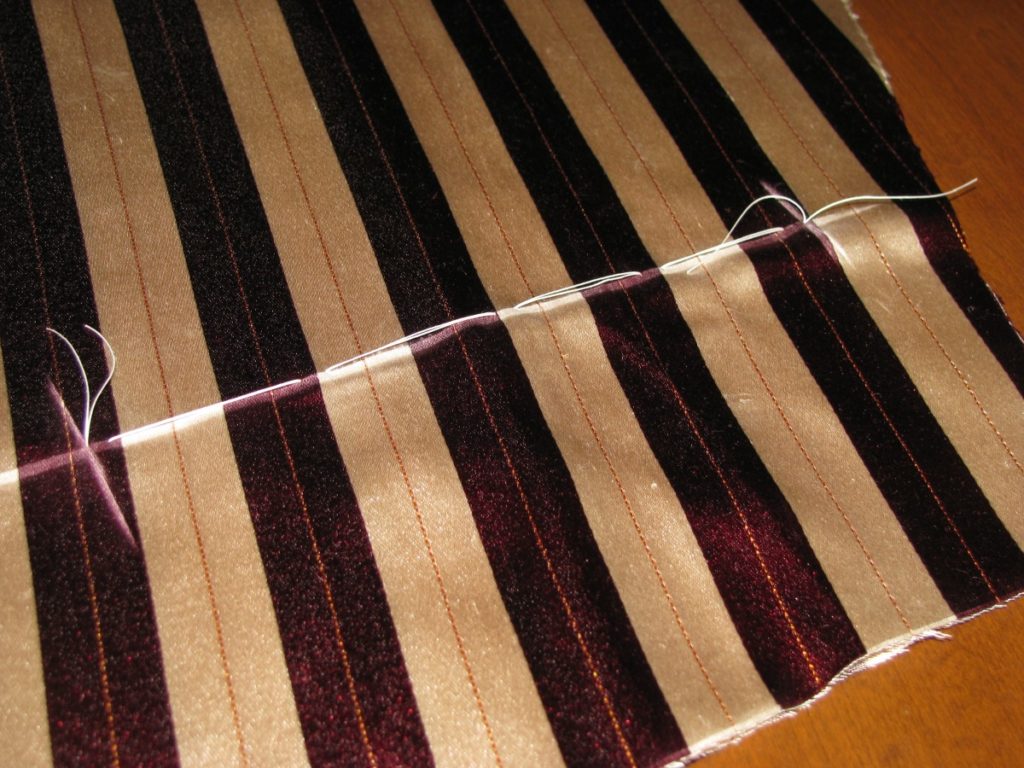
After cutting the tailor tack threads, you should be left with two identical halves of the front.
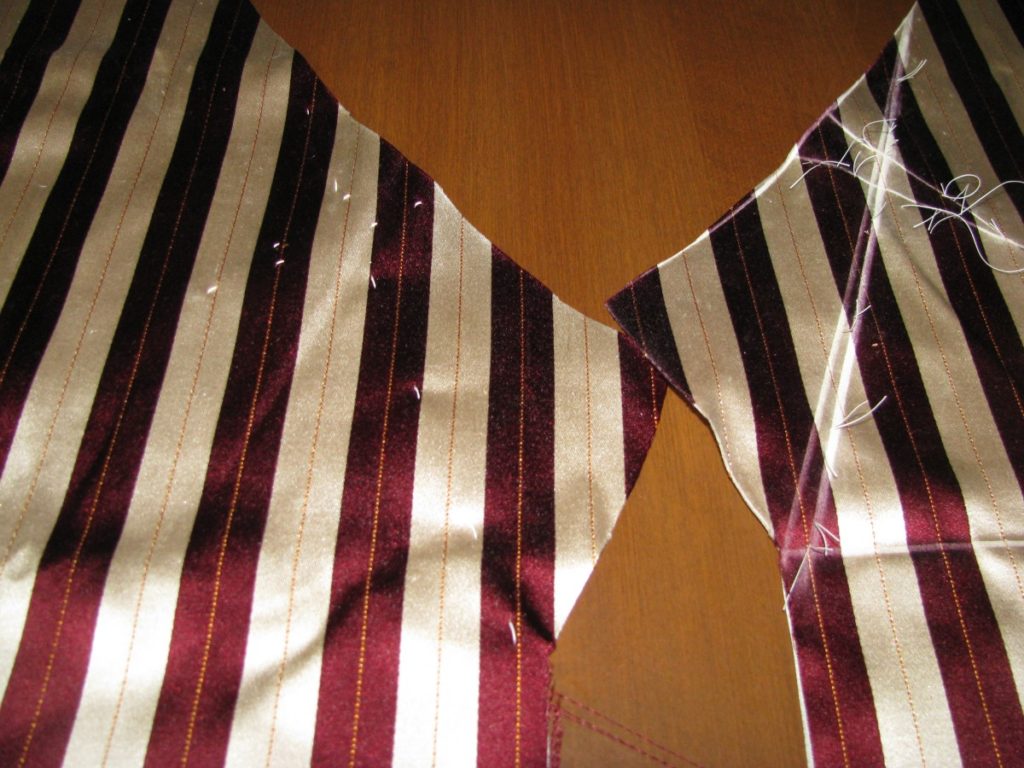
You can see how the tacks transfer the pocket markings to the other half of the forepart.
Shawl Waistcoat Toile
Now that we have the pattern updated with the styling details, it’s a good idea to make another muslin to check the fit and proportion of the collar and other details. This will also be good practice in assembling the various pieces of the waistcoat.
The first step is to transfer the pattern to the cloth, making sure to include all of the darts and collar roll line markings. Note here how I cut the dart out of the paper pattern, but not in the fabric itself.
The first thing to do is construct the darts. With right sides together, pin the darts closed so that both sides align with each other. Stitch closed.
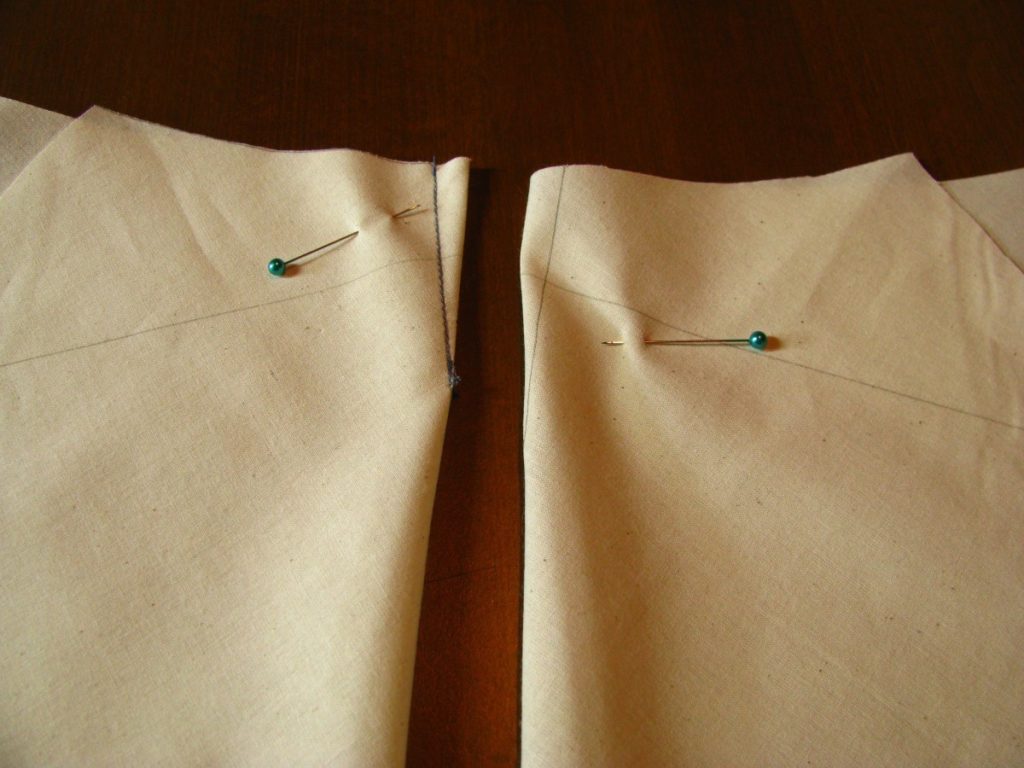
Press the darts open using a tailor’s ham. Note the shape this dart just imparted to the forepart.
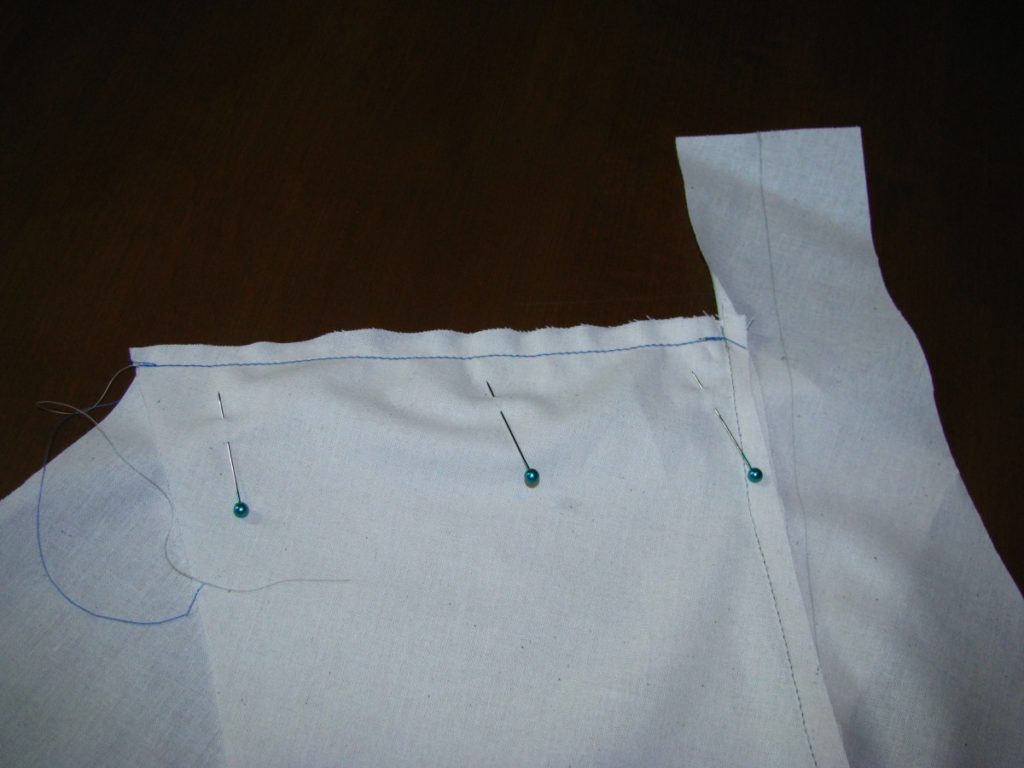
With the right sides together, pin the collar to the neckline of the forepart. It’s very easy to put the collar on upside down, so try to remember to have the roll line toward the edge that will be sewn.
It’s hard to see, but at the bottom of the collar, the collar will extend off the edge of the forepart by 1/4″, to ensure that the seam allowances line up. Also, as you are pinning, there will be some fullness worked into the collar, especially in the curved areas. This should happen naturally and isn’t something to be forced, but just be aware of it.
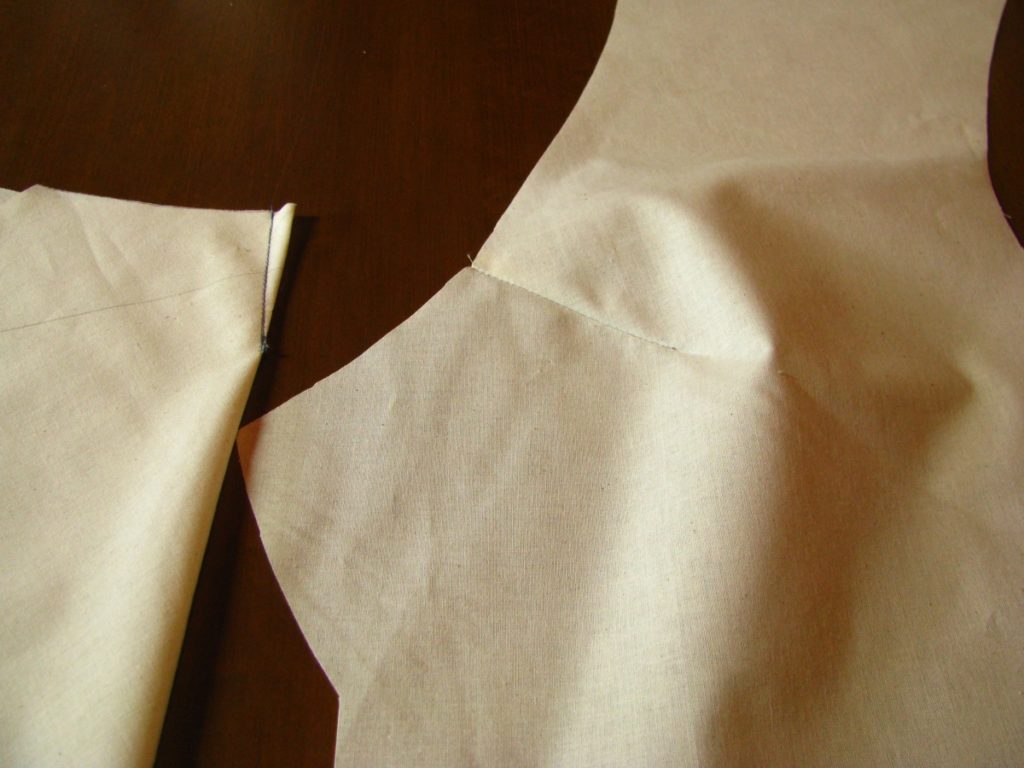
Sew the collar on with a 1/4″ seam, and press open on tailor’s ham, since it’s a shaped seam.
Note here how the roll line flows from the collar on the bottom to the forepart in one harmonious line. That tells you the collar was put on correctly. However, the dart messes up the roll line, which must be corrected.
Using a ruler, redraw the roll line. There’s some room for error here, the important thing is that it’s straight from the shoulder point to the bottom of the collar, and that both sides are done the same way.
Sew the side seams of the front and back together, as done with the original muslin.
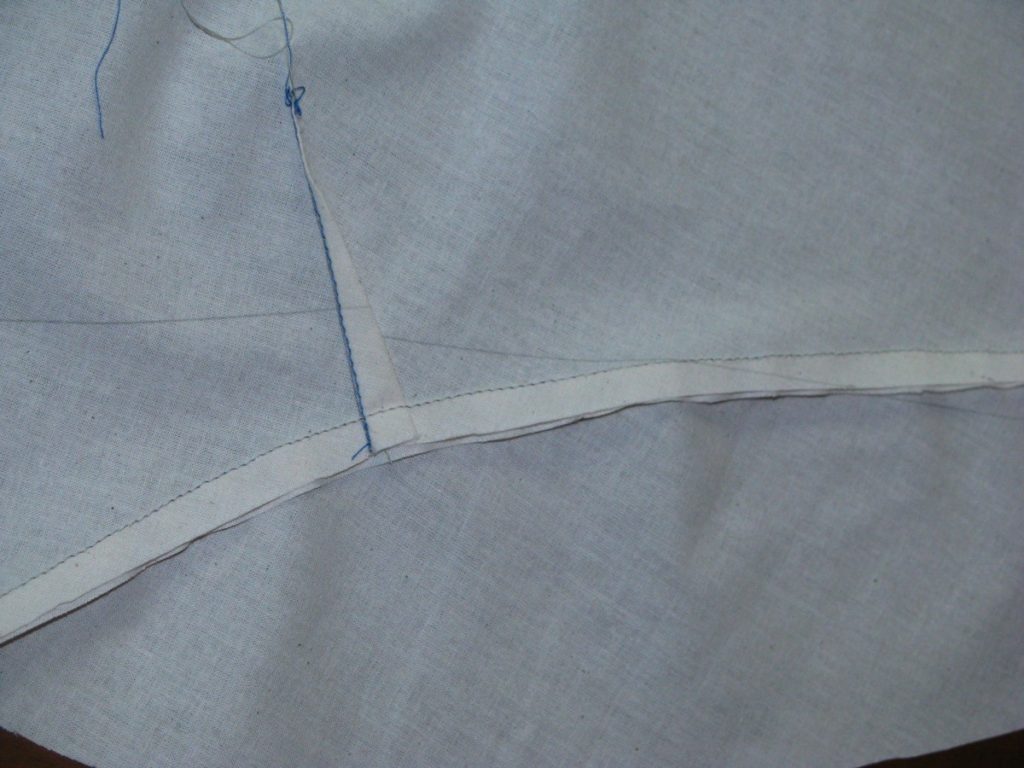
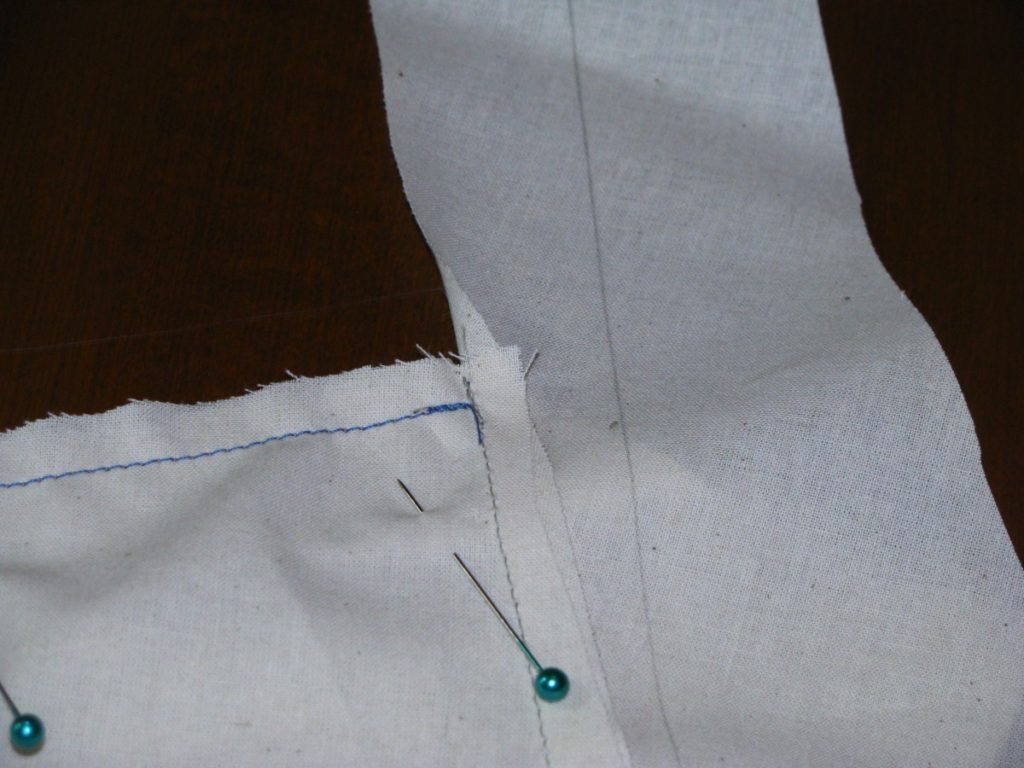
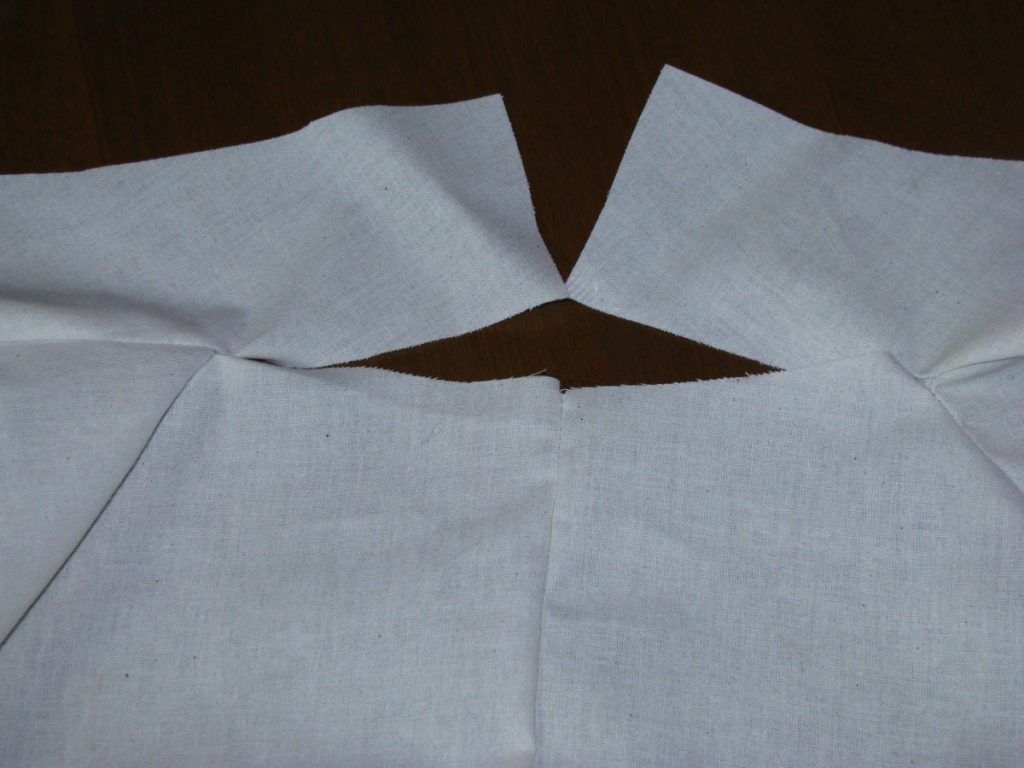
Now it’s time to sew the shoulder seams together, which are slightly different due to the added collar. Line up the seams, right sides together, and sew from the armscye to the point where the seam allowance meets the stitching for the collar. Don’t sew any farther than that or it will be visible on the finished collar.
Closer view of the shoulder seam meeting the collar, for clarity.
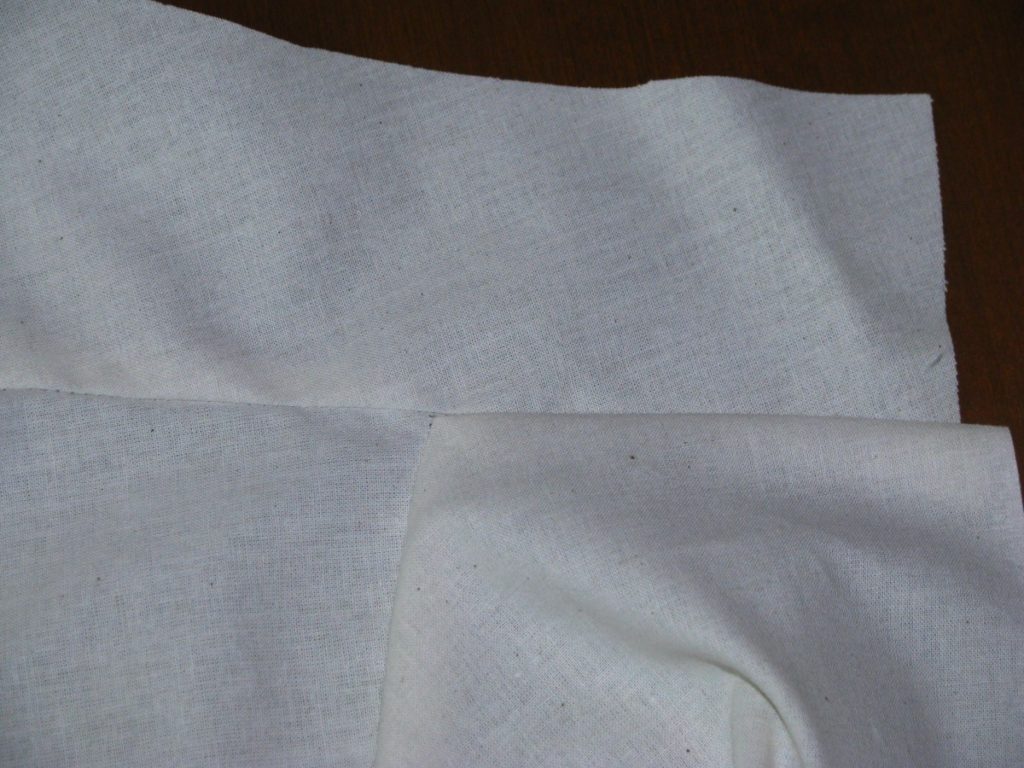
Press open the shoulder seam, and you should have a nice clean join of the three pieces. All that remains is to sew the rest of the collar to the back, right sides together.
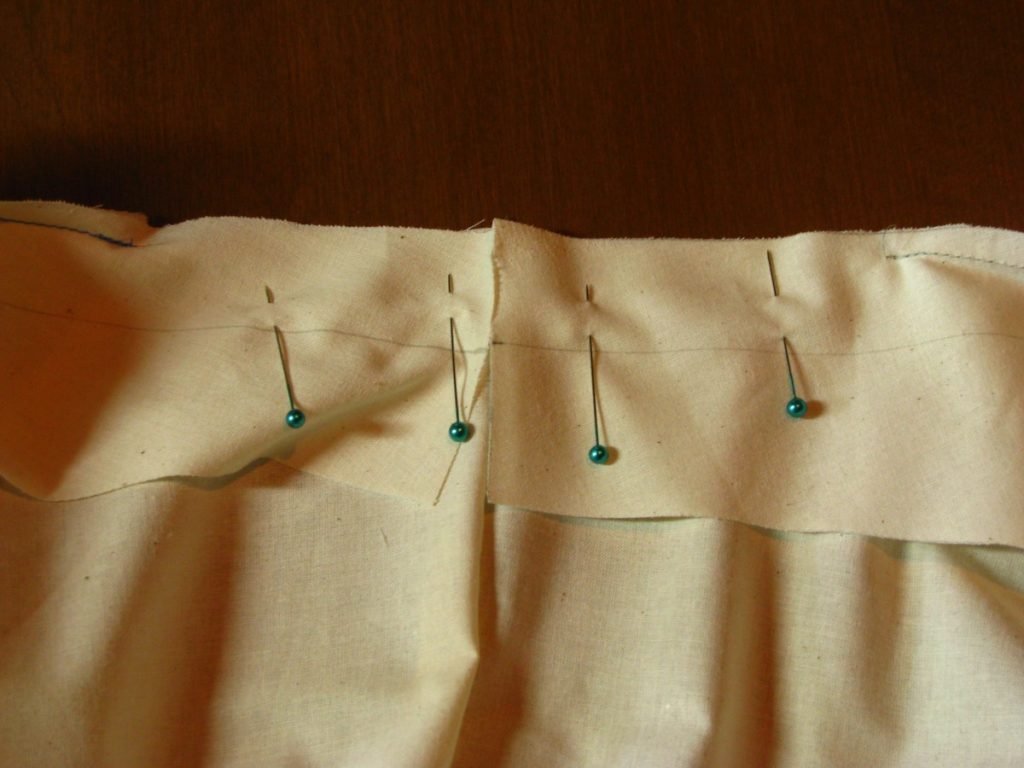
If you have a center back seam, sew that first.
Pin the back of the collar to the back itself, and sew from the stitching to the center of the collar. You can join the collar halves together first, if you are able, but in my case, I was about 1/2″ short (hence the reason for the toile).
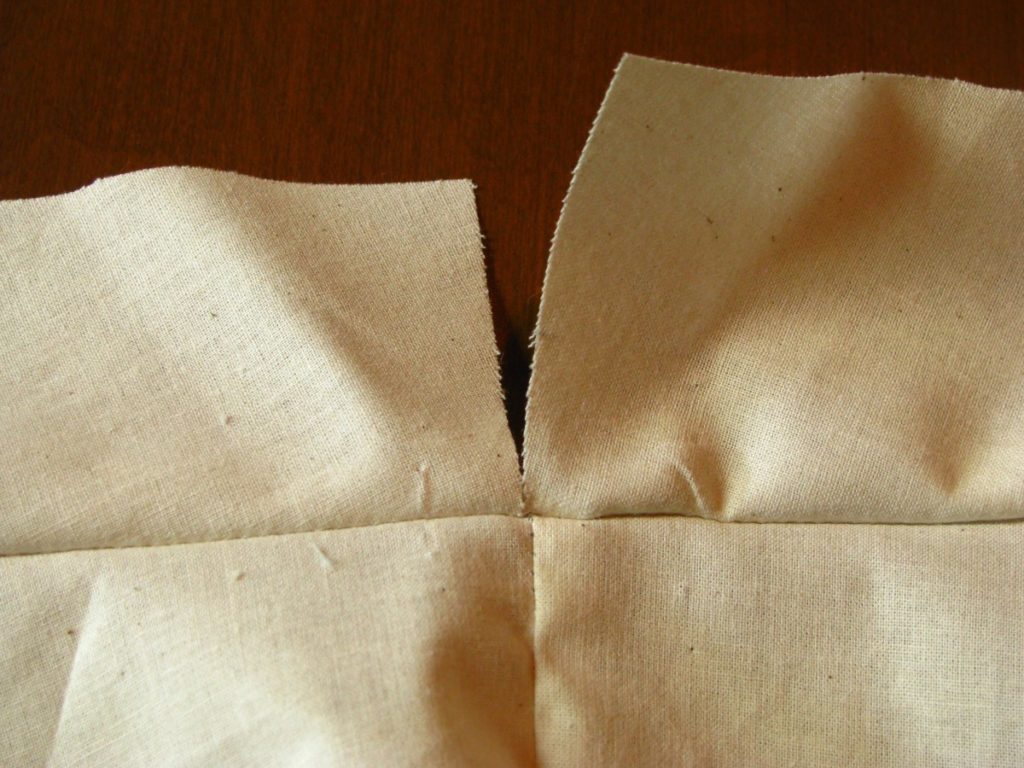
Press open the back of the waistcoat and collar, and this is approximately what you will be left with. If you need to add more to the back of the collar, like I did, make sure to do that to the pattern now, before you forget.
Now that your toile is done, try it on for a fitting, and if you’d like, take some photos and send to me either in the Facebook group or through email.
Seam Allowances
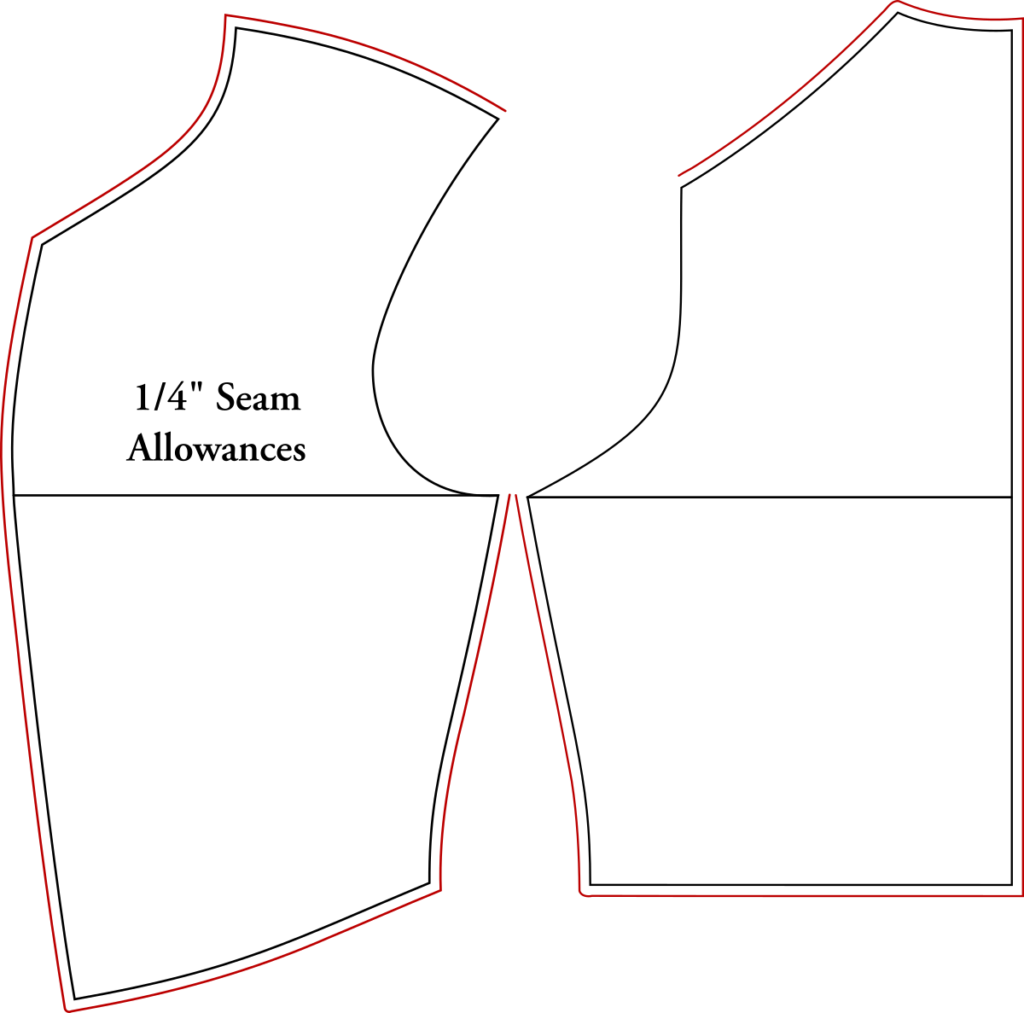
Seam allowances are drawn as shown for the forepart, back, and collar, at 1/4″ for each. Keep in mind that no seam allowances are added for the armscye, as Devere already accounts for that.
It may be helpful to draw in guidelines as shown by the arrows, to indicate pattern placement in line with the grain of the fabric. Especially on the collar, which can easily get confusing! All pockets, darts, and roll lines are also marked on the pattern.
Begin by tracing your original pattern pieces to a new sheet of paper, giving them a little space to make room for drawing in the seam allowances. Then use a ruler and draw in the 1/4″ seam allowances as shown.
[callout]Note: If you wish to use a one piece back, leave off the seam allowance of the center back, and cut this piece on the fold.[/callout]
Here’s my collar traced out with the seam allowances added, as well as the roll line drawn in.
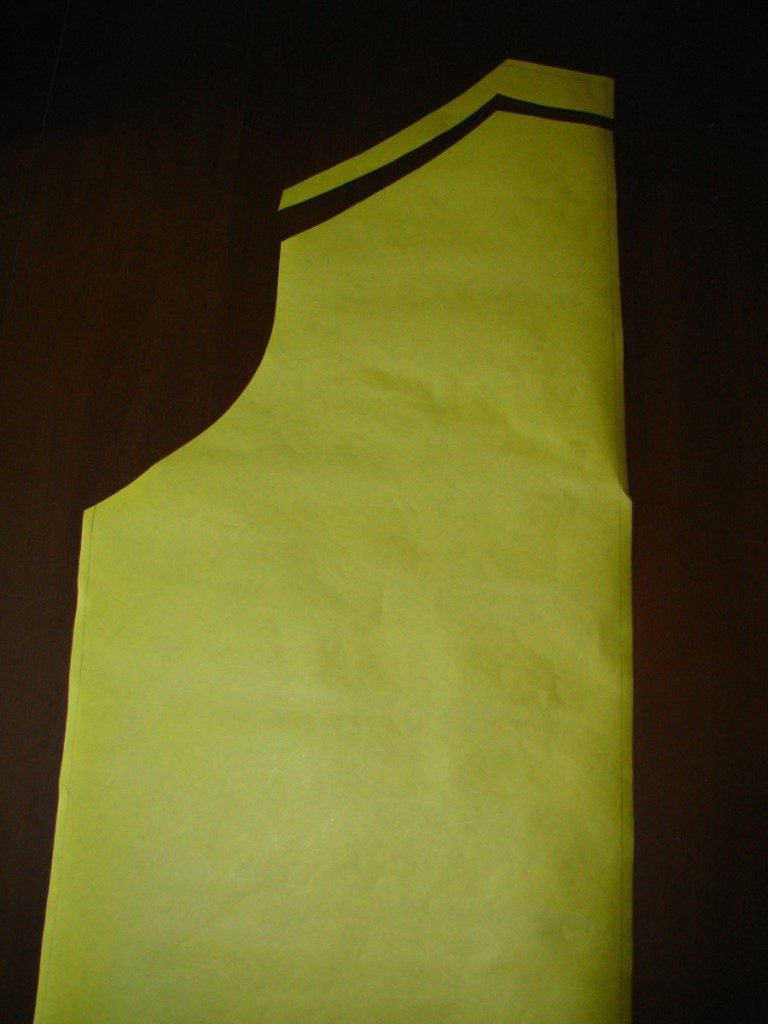
After all the seam allowances are drawn, carefully cut out each piece. Also cut out the dart in the forepart — I must have forgotten to do that before taking this photo.
Pattern Adjustments
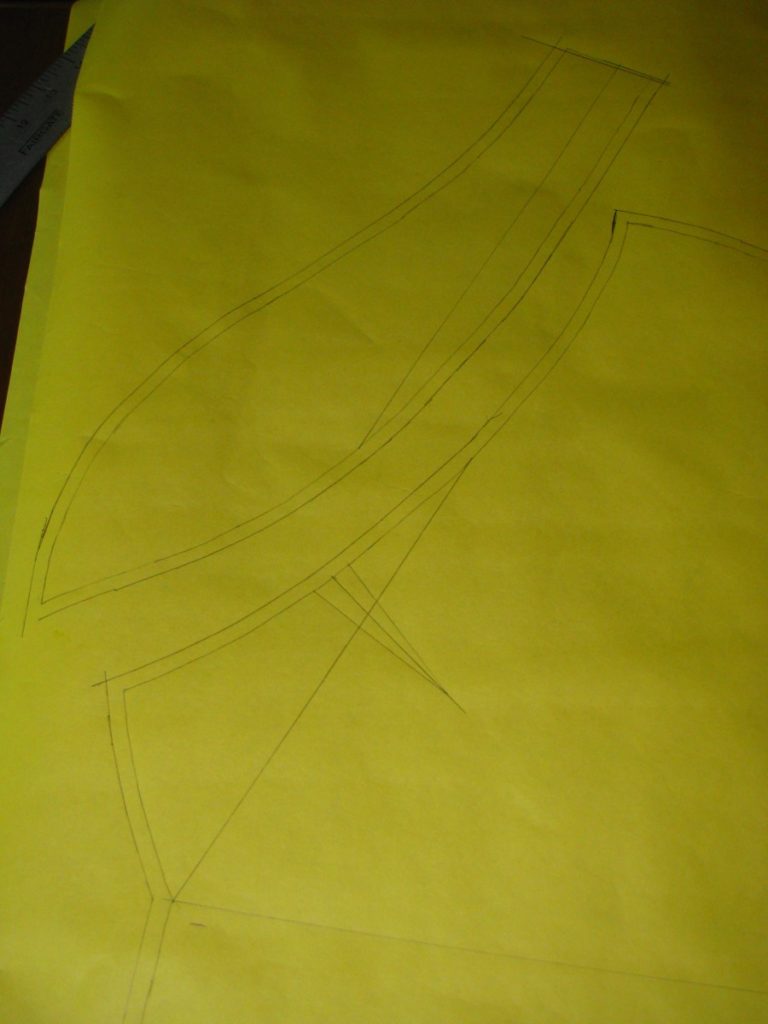
Before starting work on the waistcoat, we must make some style adjustments to the basic pattern, which you should have already drafted and fitted. Note that in the following I used dotted lines for the construction lines just to make things easier to see.
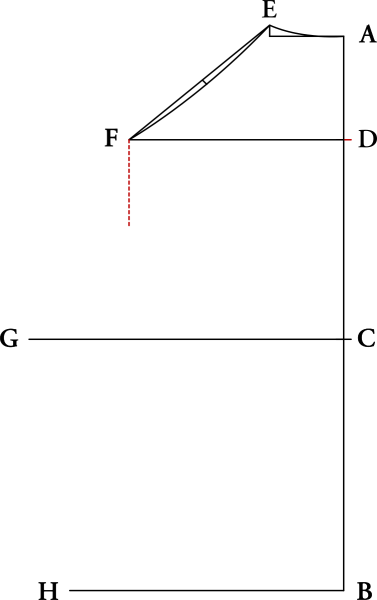
First, begin by marking the position of the front opening, using the Opening measurement if you took one. The proportional placement of this point is along the Line from D, though you can move it up or down as necessary. In my case, I have a long torso so moved this point down in order to account for that – otherwise the collars look too small on me.

Draw the roll line, from the opening point you just marked, through the shoulder point, and extending outwards a distance equal to that of the back neck.
Spring out from the opening point, any distance required, to give the width of the shawl collar. Devere springs out 7/8 graduated inches, and upwards 2 3/4 graduated inches. You could also take the measurements directly from an original vest and apply them here, or use your artistic skills and copy a fashion plate or photograph of the period.

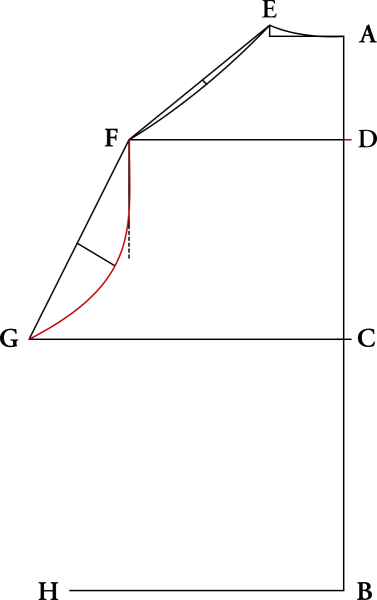
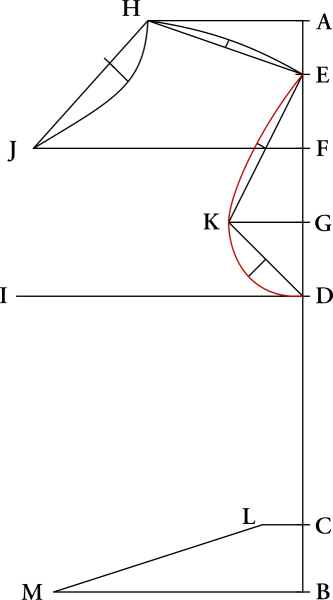
Draw the neck line, beginning at the neckpoint H, and following the original neckline to begin with. Connect with the point of the shawl that you drew in the last step.

Now at the end of the collar, draw a line perpendicular to the roll line, indicating the height of the collar. I used 7/8″ for the bottom, or stand of the collar, and 1″ for the top, or fall of the collar. The extra 1/8″ ensures that the collar will cover the neck seam properly. This line should be at a distance from the neckpoint H equal to that of the back neck.

Draw the bottom of the collar. At the top, it begins parallel to the roll line, gradually meets the neck line of the forepart, and ends at height about 3/8 to 1/2 an inch above the sprung out point of the shawl. This gives us a nice dart built into the draft, which will help the collar roll smoothly and give some tension and shape.

Draw the top of the collar. Again it begins parallel to the roll line at the top. The rest is up to you and your artistic judgement – it’s a good idea to study some original photographs to get a better idea of the shape.

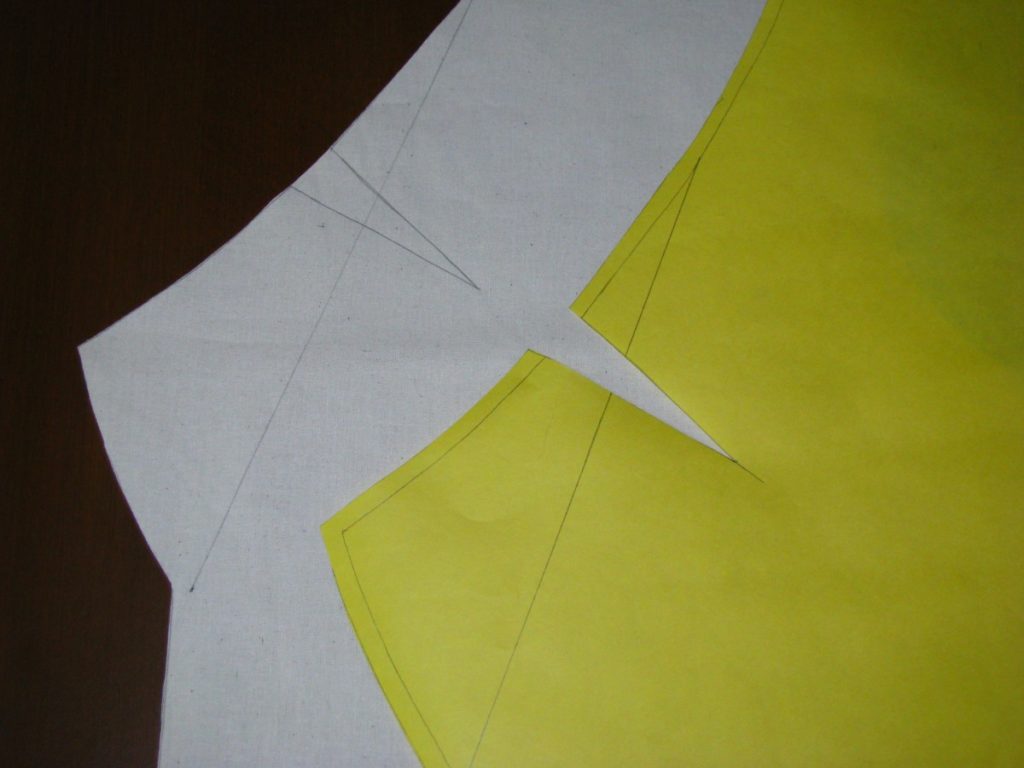
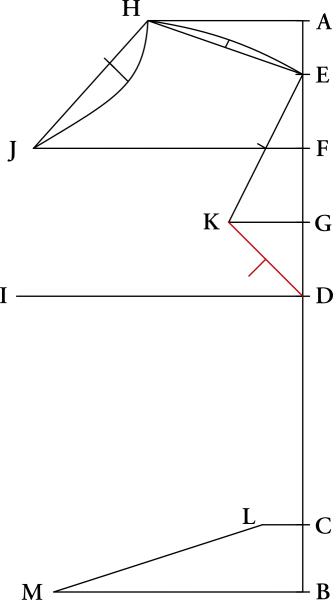
We will now add another dart, which will aid in rolling the lapel and potentially move the armscye forward, if you are using silk fabric. At the area where the collar meets the forepart, draw a construction line perpendicular to the neckline, about 2 – 3 inches in length. Ideally it should be hidden from view when the collar is folded over it.

Now, measure from each side of this line 1/4″ or 3/8″. If using wool, you want the total width to be no more than half an inch. If using silk, however, this dart needs to be a total of 3/4 in width, so as to help move the shoulder forward (since we can’t do the typical ironwork). Complete the lines of the dart as shown.

During the time of the 1860s, it was fashionable to have a longer waist. Lower each point of the waist by 1 1/4 graduated inches, springing out at the front and side seams. Don’t forget to do this to the back as well! Redraw the curved seam lines. Typically, I’ll just account for this lengthening as I do the original draft, using the Length of Front measurement, but this is how Devere explains it.
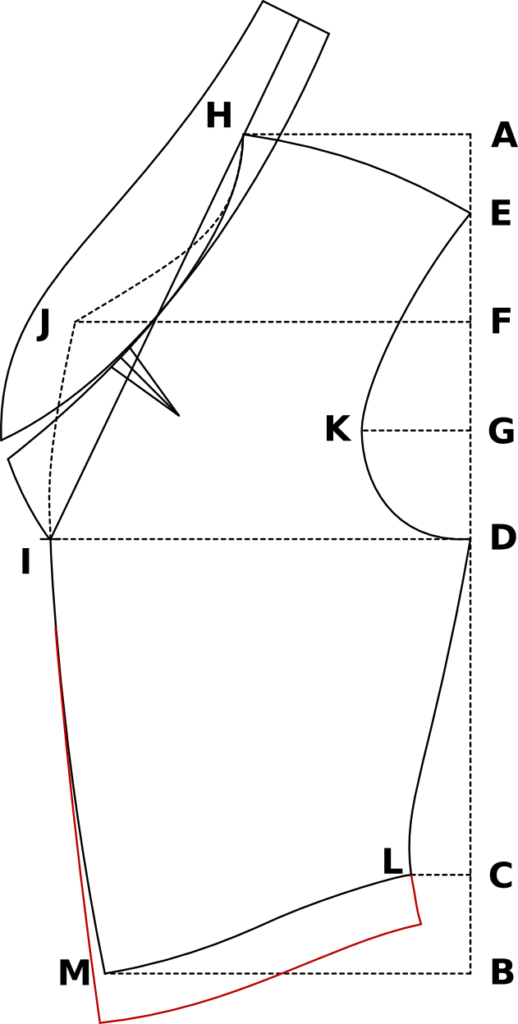
Finally, draw in the pockets using a single line (you can mark the endpoints, though). I usually make the lower pockets about 5 graduated inches in length. They’re about 3 inches from the bottom of the vest, and 1 inch from the side seam, and angled in a similar way as the bottom of the vest.
The upper pocket (made only on the left side of the waistcoat) I tend to make 3 or 3 1/2 graduated inches in length, and about one inch from the armscye. The angle should be steeper than the lower pockets, as shown. Again, exact placement will depend on your body type and the originals you are using for inspiration.
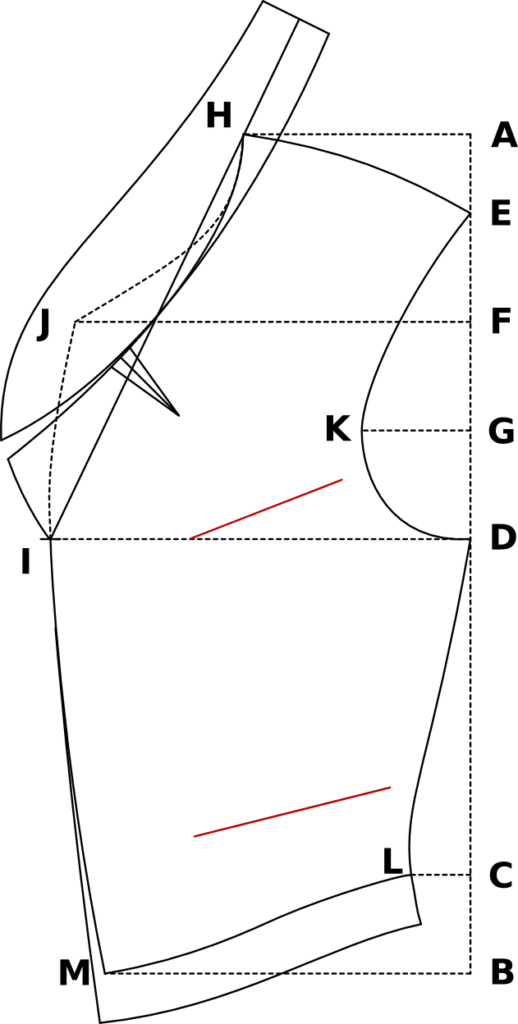
Here’s my completed pattern, showing the collar area. Note how I lowered my collar below the chest line to account for my long torso. You’ll have to do what looks best for your body type as well.
Fitting the Waistcoat
Waistcoats are probably the easiest articles of clothing to fit, as there are only a couple of seams to worry about. After you have constructed your muslin, try it on, and look for any excess fabric, or pulling. This will help you decide on the adjustments to be made on the pattern. Please post photos of you wearing the muslin waistcoat in the forum, and I will help you figure out the best solution.

Thin or Stout
This is the easiest adjustment to make. If the waistcoat does not close in the front, measure how much extra you need to add, divide that by four, and add the product to the front and back of the pattern as shown. Likewise with a waistcoat that is too large in the waist, just subtract the product.
Devere gives the following advice on the subject:
The Thin Waist requires the pattern to be sloped off at the front of waist in the forepart, and at the bottom of side seam in the back. Stout Waists, on the contrary, require extra allowances given at these places, according to the size, half being given to the front, and half to the back (Devere is speaking in terms of half of the pattern, so these are really quarters, as discussed above). It should be observed that for Stout waists, the extra allowance in the front, is sloped off to nothing at the height of the breast line, and also that the side seam of the back, is, for Stout men, drawn in a straight line.
Stooping or Extra-Erect

Check out the back of the neck area during the fitting. Devere’s draft gives us a fit good for an average man, but some of us may have a more stooped posture, or a more erect posture, which can lead to issues in this area. If you see a lot of excess fabric, then you must decrease the height of the neck as shown above. Likewise, do the opposite if there is pulling away at the back of the neck, or tension.
The back, as compared with the forepart, may be required to be made higher or lower, according as the client is Stooping or Extra-erect, and unless this alteration is correctly made, the pattern can not have the proper balance, and must fit ungracefully.
Now that you have these fitting issues sorted out, and a nicely fitted waistcoat, it’s time to move on to completing your draft with the styled aspects, for example, a shawl or stepped collar, lengthening according to fashion, etc.
Application
Here is an example of one alteration I had to make. This is the back, showing the back neck balance being shortened due to some folds I had in that area when trying on the muslin. I make the corrections on the original pattern, based on measurements I took while wearing the muslin. Tricky to do by one’s self!
I then trace the corrections on to the pattern piece (or a new piece of paper if necessary), and then cut along the new line.
Your Progress
[columns gutter=”0″]
[col]
[progressally_objectives]
[/col]
[col align_text=”center, middle”]
[progressally_progress_pie_chart size=”100″]
[/col]
[/columns]
Creating a Muslin Toile
Before moving on to stylizing your pattern, it’s a good idea to get most of the fitting out of the way while the pattern is less complicated. To do that, we’ll construct a muslin vest, using inexpensive fabric to check for fitting errors.
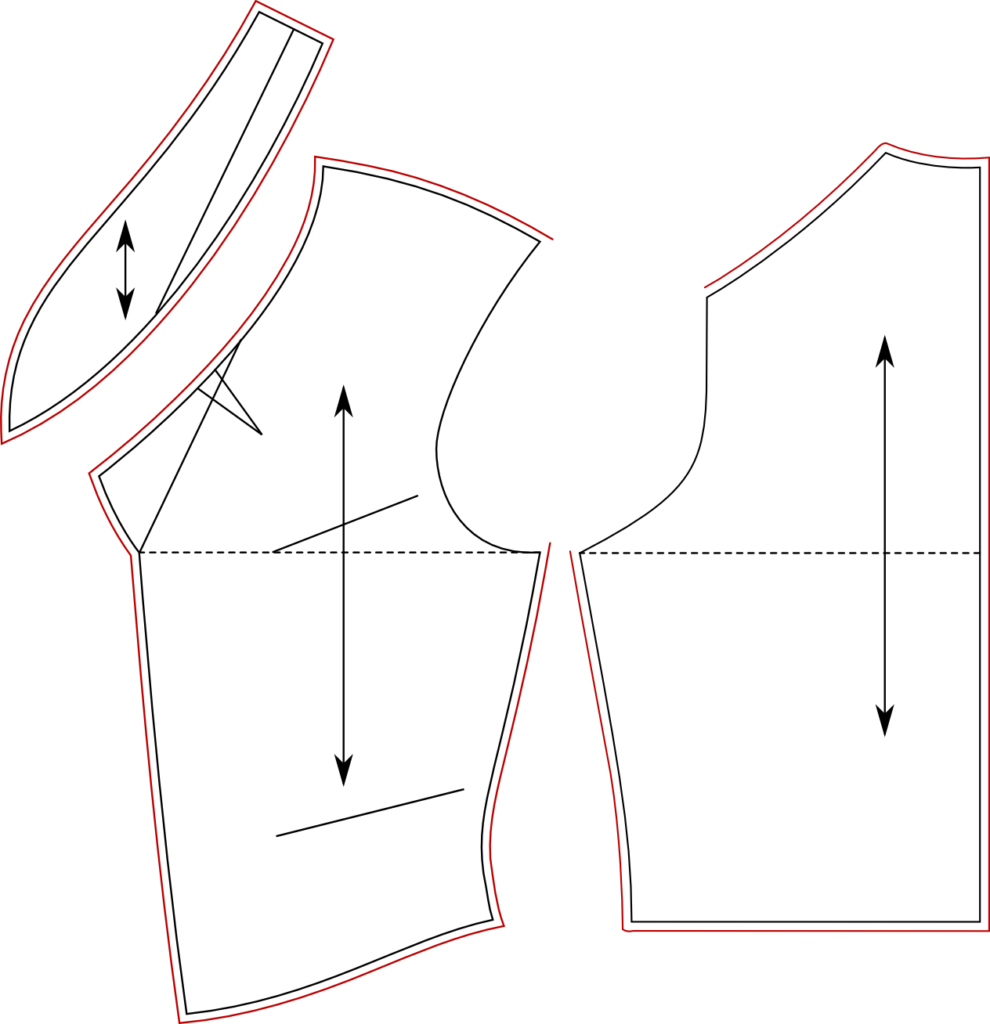
To begin, copy the front and back of your draft onto a fresh piece of paper, so that the original draft can be preserved. After you’ve copied them, seam allowances need to be added. Through a lot of research and experimentation, I’ve come to the conclusion that Devere’s draft needs 1/4″ seam allowances needed along every edge, except the armscye and shoulder seam. And while I personally do not add seam allowances to the shoulder seam, for this beginner course, we will add the 1/4″ there as well, in order to make the construction a little easier. Feel free to leave it off if you wish, though.
Here is a diagram of the pattern pieces after the seam allowances have been added. I use a small ruler to mark out the 1/4″ all the way around. Also be sure to mark out the chest line, to help you align the patterns on the fabric.
Here is my pattern after tracing to a fresh sheet of paper and adding the seam allowances.
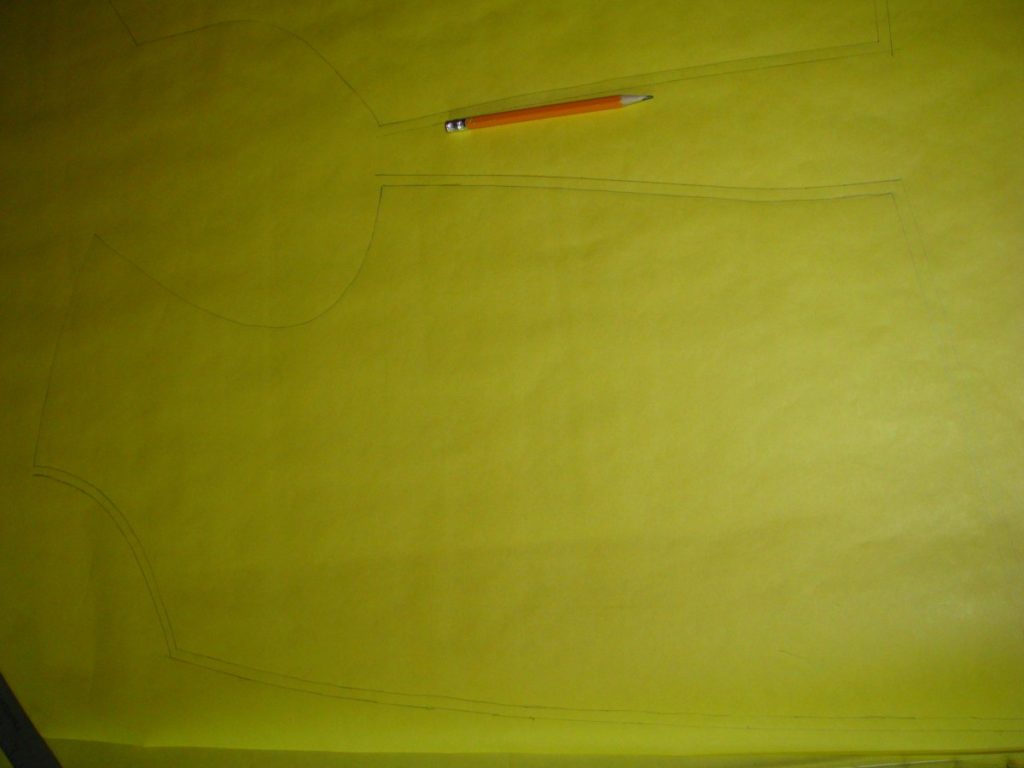
Cut out both pattern pieces along the seam lines you just drew, being as neat as possible. Lay the pieces on your doubled layers of muslin fabric, and carefully trace around each piece using sharp chalk or a pencil. Place something on the pattern to hold it in place while you trace. Make sure that the horizontal construction chest line on the pattern is perpendicular to the edge of the fabric to get a good grain alignment.
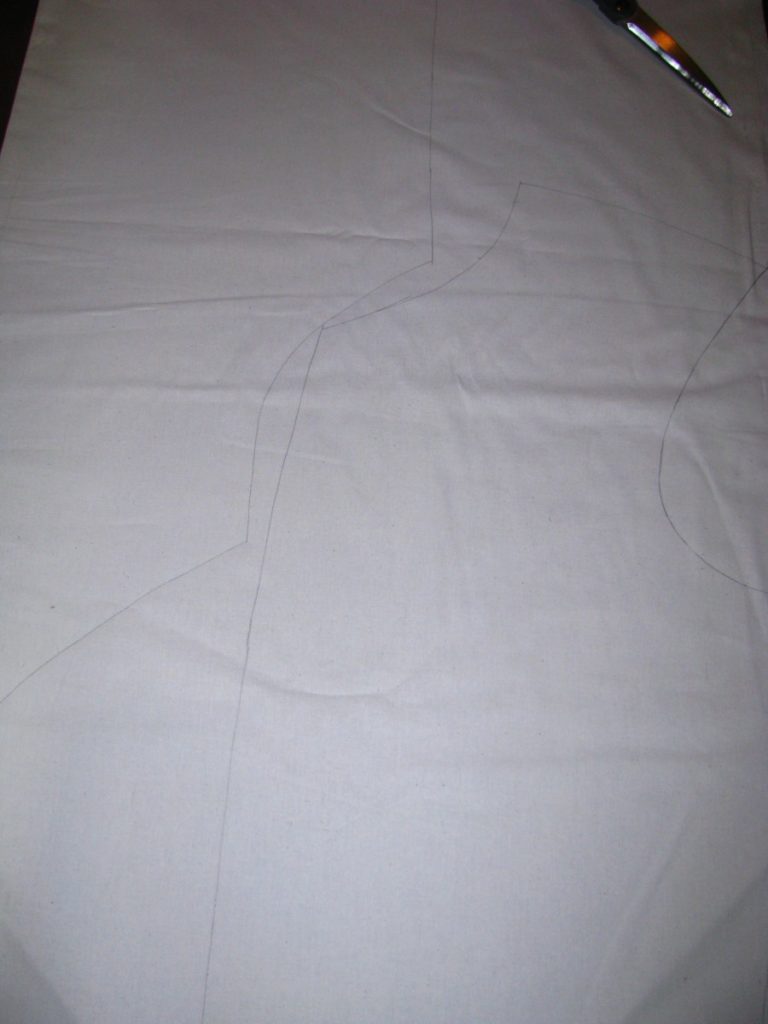
Cut out the pieces, cutting on the inside of the line to ensure a more accurate fit.
Ironwork
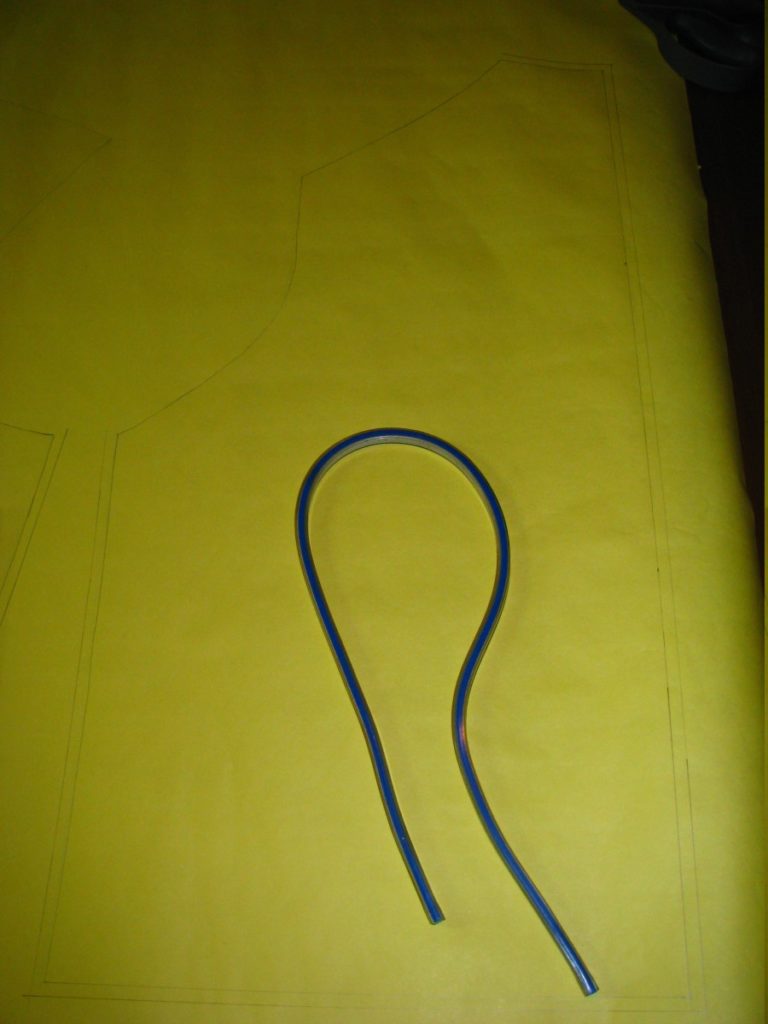
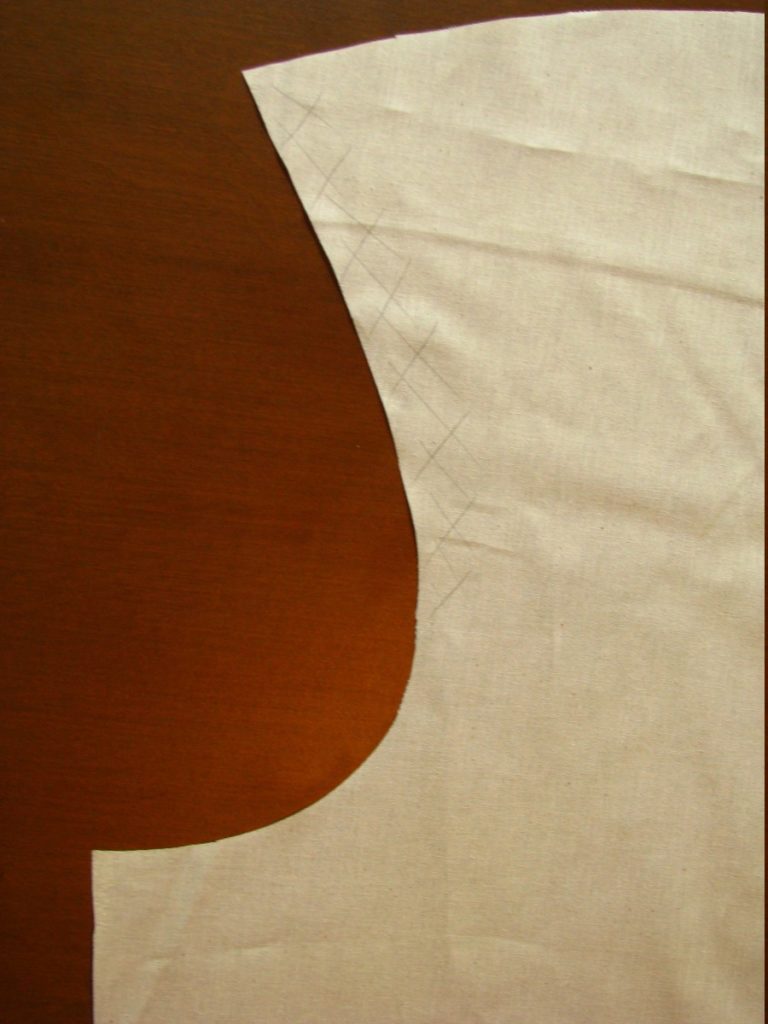
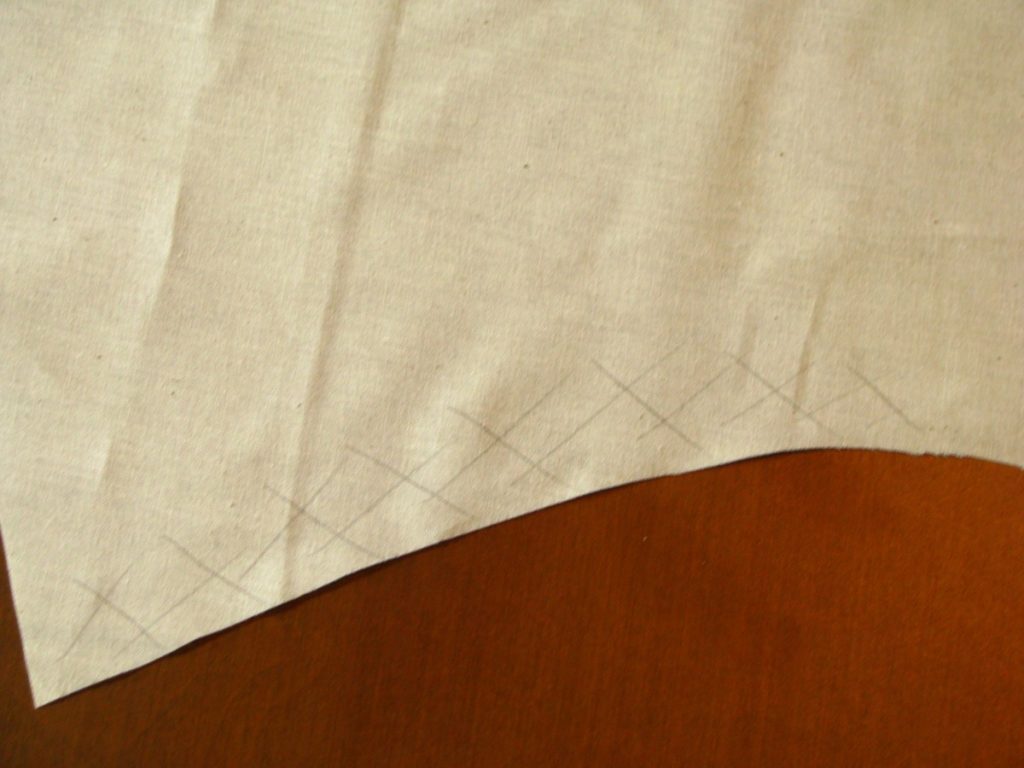
As this pattern is for a generic vest, and we have not yet decided on which fabric to use, we will assume it will be a wool vest for now. To get a good period fit, the shoulder area of the vest fronts were shaped with the iron. As this is a very lightweight muslin fabric, it’s possible to just do this using your hands. Holding the armscye in one hand at the fullest part, at the bottom of the X’s, use your other hand to stretch the material. It’s better to have a lighter touch and make more passes over the length of the armscye.
If you did not add seam allowances to the shoulder area, stretch across the top of the shoulder as well.
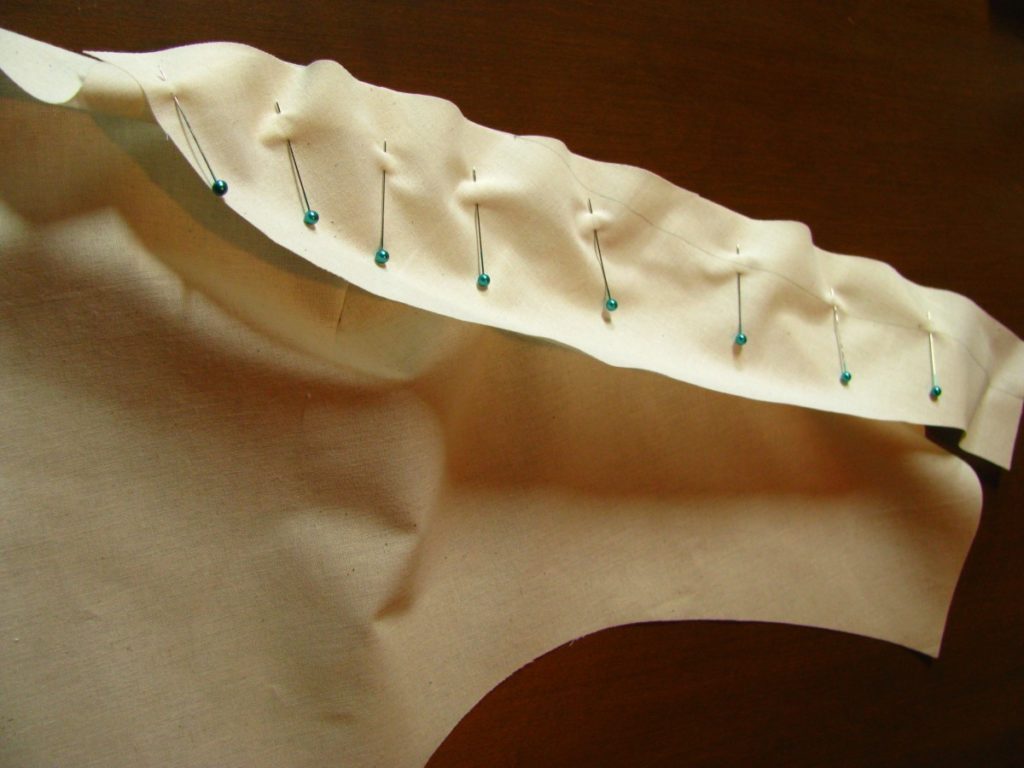
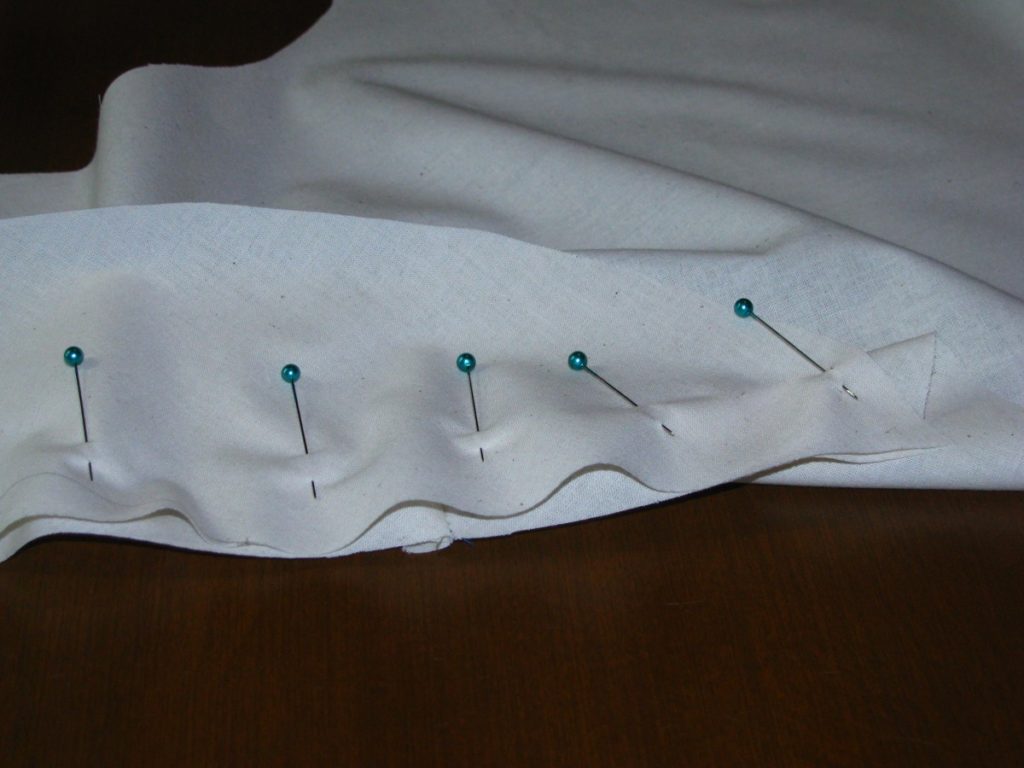
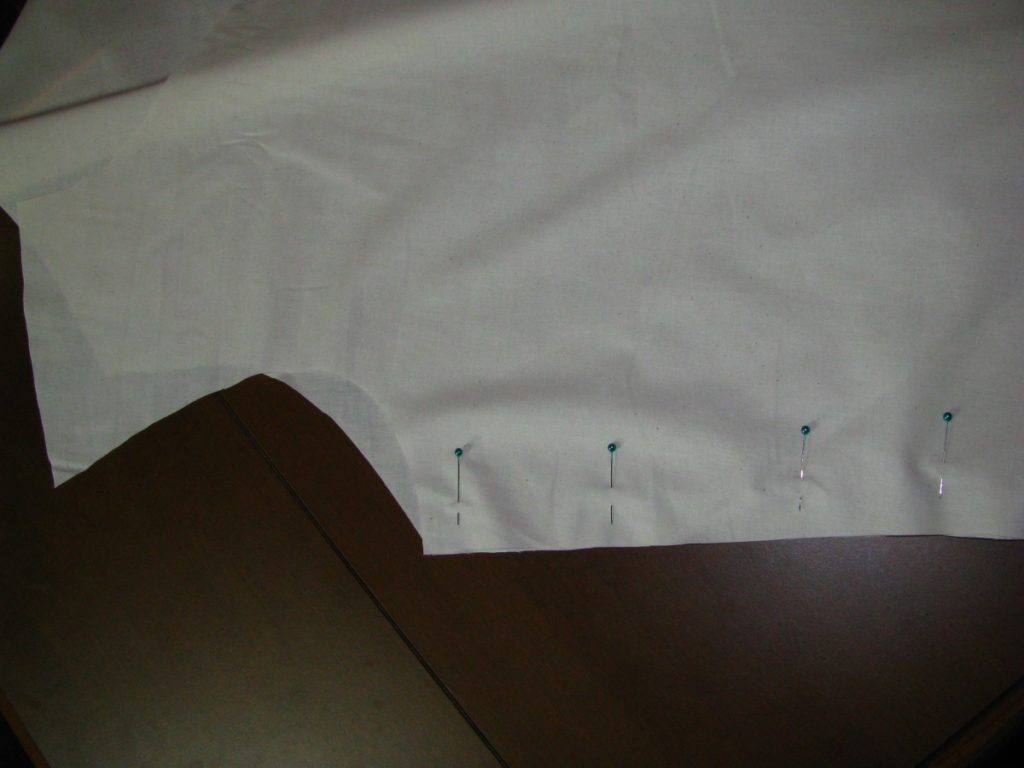
With right sides together, lay the forepart and back together, aligning the side seam, and pin at the ends. It’s likely that the forepart will be slightly longer, so place a pin in the middle, dividing the fullness in half, and repeat with another pin between, for a total of 5 pins. Sew the seam using a 1/4″ seam allowance.
Pin the ends of the shoulder seams, right sides together, and subdivide further with more pins. If you left the seam allowance in, there will be a fair amount of fullness to work in on the back. If not, the two seams will match pretty closely in length.
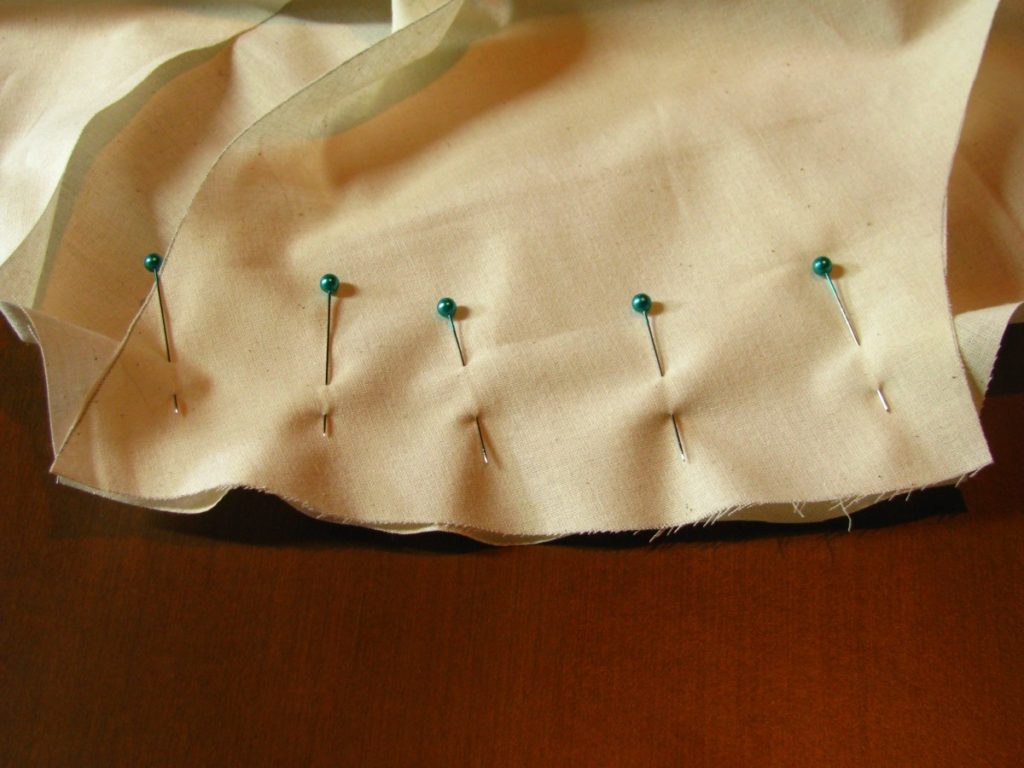
Sew, using a 1/4″ seam allowance. Press open all of the seams with your thumbnail.
Sew the two halves together along the back, right sides together. This completes your vest muslin, which you can go try on and begin to work on any fitting issues you may have. Please post in the forums with photos of your draft, and wearing the muslin, and I’ll help you as best I can through the fitting process.
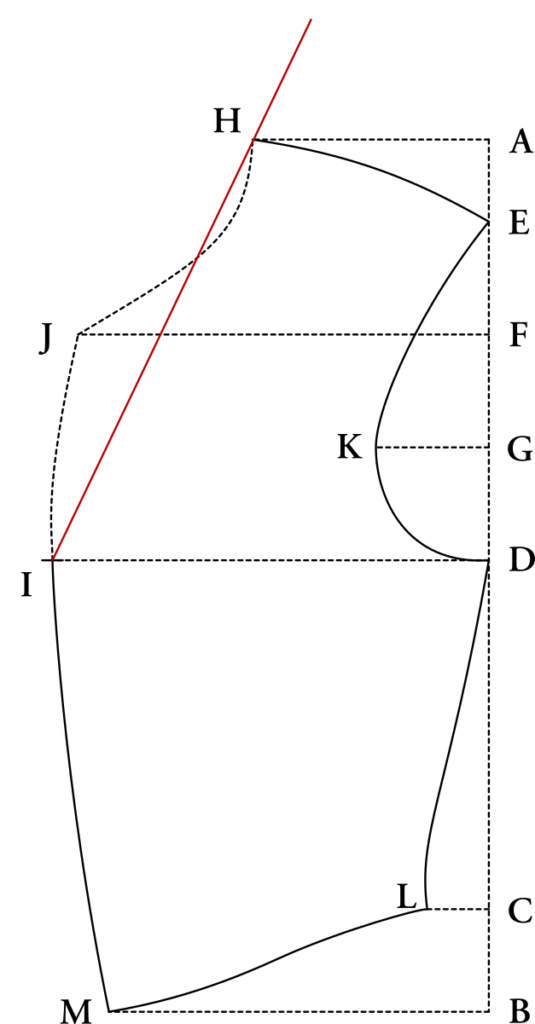
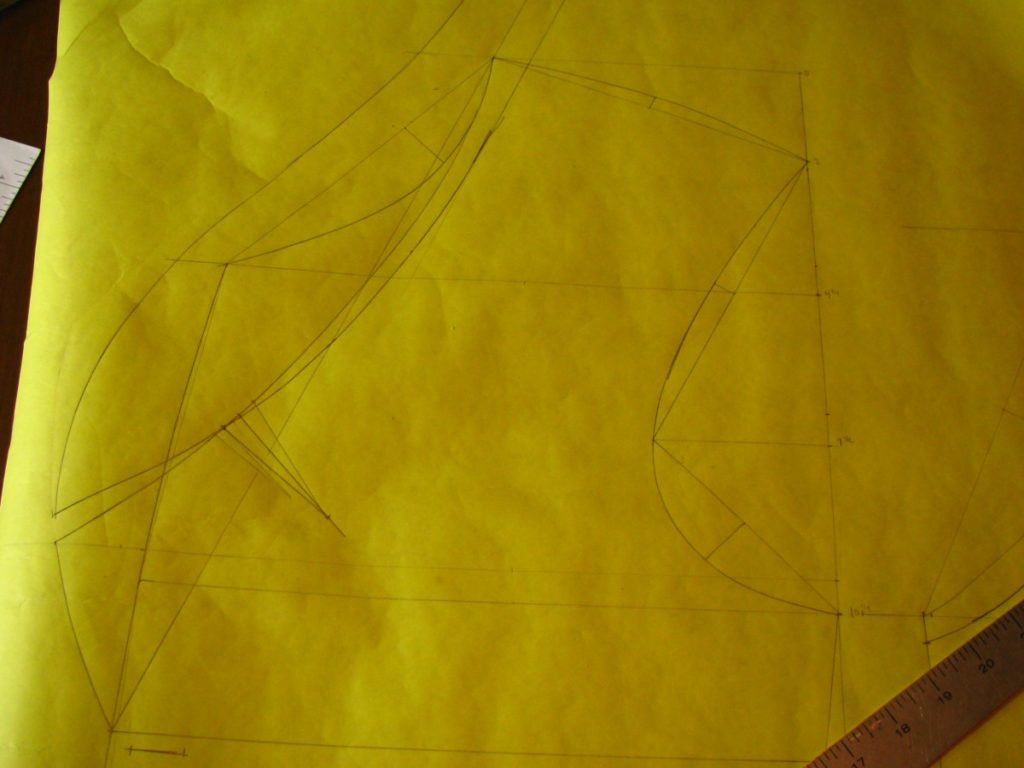
Drafting the Back
Let us now proceed with drafting the back of the waistcoat. I’d recommend doing this on the same sheet of paper as the front, and align the point A on both front and back, so you can be sure that things are properly lined up while drafting.
A – B
Draw a long straight line, and mark on it the length of Curve to measure.

B – C
Length of Side to measure.

A – D
3 1/2 graduated inches

A – E
Draw a line square across from A to E, which is 2 1/2 graduated inches.
At E, square up 3/8 graduated inches for the rise of the neck.

D – F
Square across from D to F, at 7 1/4 graduated inches.

C – G
Square across from C to G, at 10 5/8 graduated inches.

B – H
Square across from B to H, making this length equal to half the waist plus 1 1/2 graduated inches. This extra is added to give extra movement in the back, and is taken up by the strap and buckle during use.

Back Neck Curve
Using a French curve or free hand, draw a curve for the back neck from A to E as shown.

Shoulder Seam Hollowing
Draw a straight line from E to F. Find the center of this line, and draw a 1/4″ line square towards the back at this point. Then draw a curve connecting all three points as shown.

Armscye
Draw a line square down from point F. This is just a construction line to aid in drawing the armscye.
Draw a line from point G to F. Find the middle, and draw a line square at 1 1/2 graduated inches in length. Draw a curve connecting the three points. This curve should align with the construction line you drew previously down from F.
Waist Hollowing
About 2 inches above the waist line, hollow in 1/4″ for the hollow of the waist, and draw a line connecting G, H, and that point. This completes the draft of the waistcoat back.

Your Progress
[columns gutter=”0″]
[col]
[progressally_objectives]
[/col]
[col align_text=”center, middle”]
[progressally_progress_pie_chart size=”100″]
[/col]
[/columns]
Drafting the Front
Now we’ll begin the drafting process. I like to draft on ‘project paper’, found at most office supply stores. A quilters’ ruler, french curve, and a sharp pencil will help get you started.
If following the instructions below, use a normal ruler or your actual measure when the instructions say ‘to measure’. If graduated inches are specified, use the graduated ruler corresponding to your Breast measurement.
If you prefer to use the spreadsheet, just use the numbers that are calculated for you, and use the drawings here as a guide.
A – B

Draw a long straight line, and mark on it the length of Bust to measure.
B – C
Measure up from B to point C, 2 1/2 graduated inches. This marks the bottom of the side seam.

C – D
Length of Side to measure.

A – E
Mark point E at 2 graduated inches from point A.

A – F
A to F is 4 3/4 graduated inches.

F – G
F to G is halfway between F and D, or 7 1/2 graduated inches from point A.

A – H
Square across from point A to point H, which is a total of 5 3/4 graduated inches. This gives us the shoulder point.

D – I
Square across D – I, at 10 5/8 graduated inches. This gives the width of the chest.

F – J
Square out from F to J at 10 graduated inches. This gives us the position of the neck point.

G – K
Square out from G to K, at 2 3/4 graduated inches. This gives us the width of the armscye.

C – L
Square from C to L at 1 1/2 graduated inches.

L – M
Now we must find the center front of the waist. To do this, first draw an unmeasured line squared out from point B. The line just needs to be long enough for the next step.

Then measuring from point L, using 1/4″ of your full waist measurement, locate point M where the measurement intersects with the previous construction line.

The Curves
The Neck
Draw a line connecting points H and L. At one third of the way from point H, make a mark.

Square out from that mark 1 graduated inch. Connect the three points in a graceful curve as shown, giving us the line for the neck.

The Shoulder
Make a construction line from point H to E. At the midpoint, square out a line 1/4 graduated inches, and draw the curve as shown.

The Armscye
Draw a line from point E to K, and find the midpoint. Square in 3/8 graduated inches.

Do the same for the bottom of the scye, connecting point K to D. Square out from the midpoint 7/8 graduated inches.
Connect points E, K, and D in a graceful curve.
Side Seam
For the side seam, draw a straight construction line from point D to L. Then draw a slightly curved line as shown, hollowing 1/4 graduated inches a little above point L.

The Center Front
Draw to construction lines from point J to I to M. Then add a slight curve to the center front, using the construction lines as a guide.

The Waist
This is optional, but you can give additional shape to the waist as shown. If you can make the bottom front at point M be closer to a right angle, it’ll look a lot better in front rather than having a pointed look.

Your Progress
[columns gutter=”0″]
[col]
[progressally_objectives]
[/col]
[col align_text=”center, middle”]
[progressally_progress_pie_chart size=”100″]
[/col]
[/columns]
Devere’s Drafting Formula
One of the more difficult concepts to understand is how Devere varied the size of a pattern. He used a size 18 3/4 breast as the basis for all of his patterns, which is equivalent to a 37 1/2 chest. This is called the proportionate model. If you are lucky enough to have a 37 1/2 chest (and the other corresponding measurements are the same), you can draft the patterns as they are straight from the book, with a normal ruler . Unfortunately, very few people fit these measurements, so adjustments have to be made.
Let us suppose we have a gentleman with a 42 inch chest, and want to find the correct balance for a coat. On a 37 1/2 inch proportionate model, the balance is 2 1/2. But a 42 inch chest would make that larger. First, you need to find the correct ratio between the 42 inch chest, and the proportionate chest. That would look like this:
42 / 37.5 = 1.12
After getting the number of 1.12, we multiply that by the balance measurement (or whatever measurement we need to get):
1.12 * 2.5 = 2.8
Then, it’s a matter of converting that 2.8 decimal into inches. This comes out to somewhere between 2 3/4 and 2 7/8. As you can see, this method is not very accurate, and prone to mathematical errors. And it takes a long time when you have to do 20 or 30 measurements this way.
Luckily, Devere was a fairly smart guy. He devised a set of rulers, called Graduated Rulers. The graduated rulers are, “a series of measures, which are successively graduated larger and smaller than the common inch measure, and are used to draft patterns for larger or smaller sizes than the 18 3/4 breast.” What does this mean? Instead of doing those calculations above, you simply choose a correct sized ruler and then draft the pattern as it is in the book.
When drafting trousers, the ruler size is taken from your seat measurement, rather than the chest.
Devere’s Graduated Rulers
For example, you are measuring someone and they have a 48 inch chest. You would then go to your set of rulers and choose the one marked size 48 (or 24 inch breast). If you compared this to a normal inch ruler, you would see that it is a lot larger, yet it still has 12 inches to it.
Where can you get these rulers? In Devere’s time, these rulers could be obtained from Devere’s company, and came on paper, tapes, or on wooden rulers. Devere has long gone out of business, but luckily, the rulers are not too difficult to make yourself. I’ll save you that trouble though.
I have created a set of graduated rulers, sized 34 through 50, for your convenience. They are on 11 x 17 inch paper, so you’ll need to find a print shop to print these. They can usually be printed for a few dollars on nice card stock at stores with print shops such as Staples. They are in Adobe pdf format. When printing from Adobe Acrobat Reader or other readers, be absolutely sure to set Page Scaling to None. If this is not done, your whole set of rulers will be off. After they are printed, I would take a normal inch ruler and compare it to the size 37 1/2 graduated ruler. They should be exactly the same. If they are off, it was printed incorrectly, and you’ll need to check your settings and try again.
Your Progress
[columns gutter=”0″]
[col]
[progressally_objectives]
[/col]
[col align_text=”center, middle”]
[progressally_progress_pie_chart size=”100″]
[/col]
[/columns]
Waistcoat Measurements

This is an introductory course on drafting and constructing a period waistcoat circa 1860 – 1865. As it is intended as for the beginner, I’m leaving out a lot of the more technical information, which can be found in my frock coat drafting class.
Before we can begin drafting our waistcoat pattern, it is necessary to take a few measurements to ensure a good period fit. While a few of the measurements will seem familiar to you, Devere uses some special measurements based on the ‘center point’, which forms the basis for the entire system. Just take things step by step, feel free to ask questions in the forums, and I know you will get it.
To start off, here is an overview of all of the measurements Devere suggests, although the Front Opening measurement is not illustrated. Try to get someone to measure you. While it is possible to measure yourself (I do it all the time), it takes practice and skill, and it’s very difficult if you’ve never used these measurements before.
As you go, write down each measurement in the spreadsheet provided. You can either draft using the measurements that are filled out for you in the spreadsheet, or use the instructions found on the website, which use the graduated measure. You can download both below.
[callout]
- Graduated Rulers
- Measurements Spreadsheet (Libre Office)
- Measurements Spreadsheet (Microsoft Office)
[/callout]
All measurements should be taken over a well-fitted waistcoat, if possible. If you don’t have one, a period shirt will do.
Breast

This measurement determines the size of the graduated measure you should use. Hold the tape around the chest as shown, as high as possible under the arms, and over the fullest part of the chest, holding the tape with the thumb and forefinger of each hand. Draw the tape very tight, and loosen it gently as the client breathes, for the best accuracy. Write this measurement down as half in the chart, i.e. if you have a 48 inch chest, write down 24 in the spreadsheet, since we only draft half of the waistcoat.Waist
This measure it goes around the body on a level with the hollow above the hips, and it should be taken rather easy. Like the breast measure, it is only written down as half the length taken; say 15 ¾ for 31 ½ inches.
This measure, by comparison with the breast, shows if the waist is thin or stout. In the proportionate man it is 15 ¾ or 3 less than the breast.
Waist
This measure is also taken under the coat: it goes round the body on a level with the hollow above the hips, see figure blank, and it should be taken rather easy. Like the breast measure, it is only written down as half the length taken; say 15 ¾ for 31 ½ inches.
This measure, by comparison with the breast, shows if the waist is thin or stout. In the proportionate man it is 15 ¾ or 3 less than the breast.
Finding the Centre Point
The center point forms the basis of finding the next two measurements, and lays out the position of the side seam. Unless you know you have a very accurate waistcoat (which you could use the side seam as the center point), it’s best to manually find the center point.
To find the centre point, we must use the formula of taking 2/5 of the Breast or 1/5 of the full chest and using that number to find the centre point. For example, a 35 inch chest measured all the way around would be 7 inches to the centre point. So find the center of the back at the waist level and measure 7 inches around to find the Centre Point. Or just fill out the spreadsheet and find the center point position that way.
Mark this center point on the client being measured using some chalk in the form of a cross hair +.

Curve
Take the Bust and Curve part of the Tape, slip the eyelet-hole at the end of it over the head of the pin, and hold it there; the eyelet-hole must be exactly at the top of the back seam: then with the other hand carry the tape perfectly straight to the Centre Point, crossing the side seam near the middle, and not letting the tape be either very tight or too slack.

Bust
Continue to hold the end of the tape at the top of back seam, and with the other hand pass the tape over the shoulder in front of the arm, close to the front of the scye, letting the clients arm hang down in its natural position; draw the tape very tight, to flatten any creases there may be at the front of arm, and carry it direct to the Centre Point.

Side
Pass a pencil or penholder through the loop at the end of tape, and hold it tight under the arm (the arm must not be raised up, but should lay close to the body). Then measure the length to the Centre Point, so as to ascertain exactly, the distance between this point and the bottom of scye.
This measure serves to rule the depth of the bottom of scye, and shows the degree in which it must be hollowed out below the side point. In proportionate men it is 8 ½, and is usuallyabout half the length of back to natural waist. It is longer for extra erect men, and for small or high shoulders; and less for stooping men, and for large or low shoulders.
Opening
This is also known as the length of neck seam, and begins at the middle of the back neck and ends at the top of the desired opening in the front, being sure not to measure too tightly or loosely. This is a good measurement to use if you are copying a known vest or style and want the opening at a certain position.
Front Length
The Front Length is measured from the center of the back neck to the bottom of the front, and gives us a reliable way of checking that the length of the vest is correct.

Your Progress
[columns gutter=”0″]
[col]
[progressally_objectives]
[/col]
[col align_text=”center, middle”]
[progressally_progress_pie_chart size=”100″]
[/col]
[/columns]